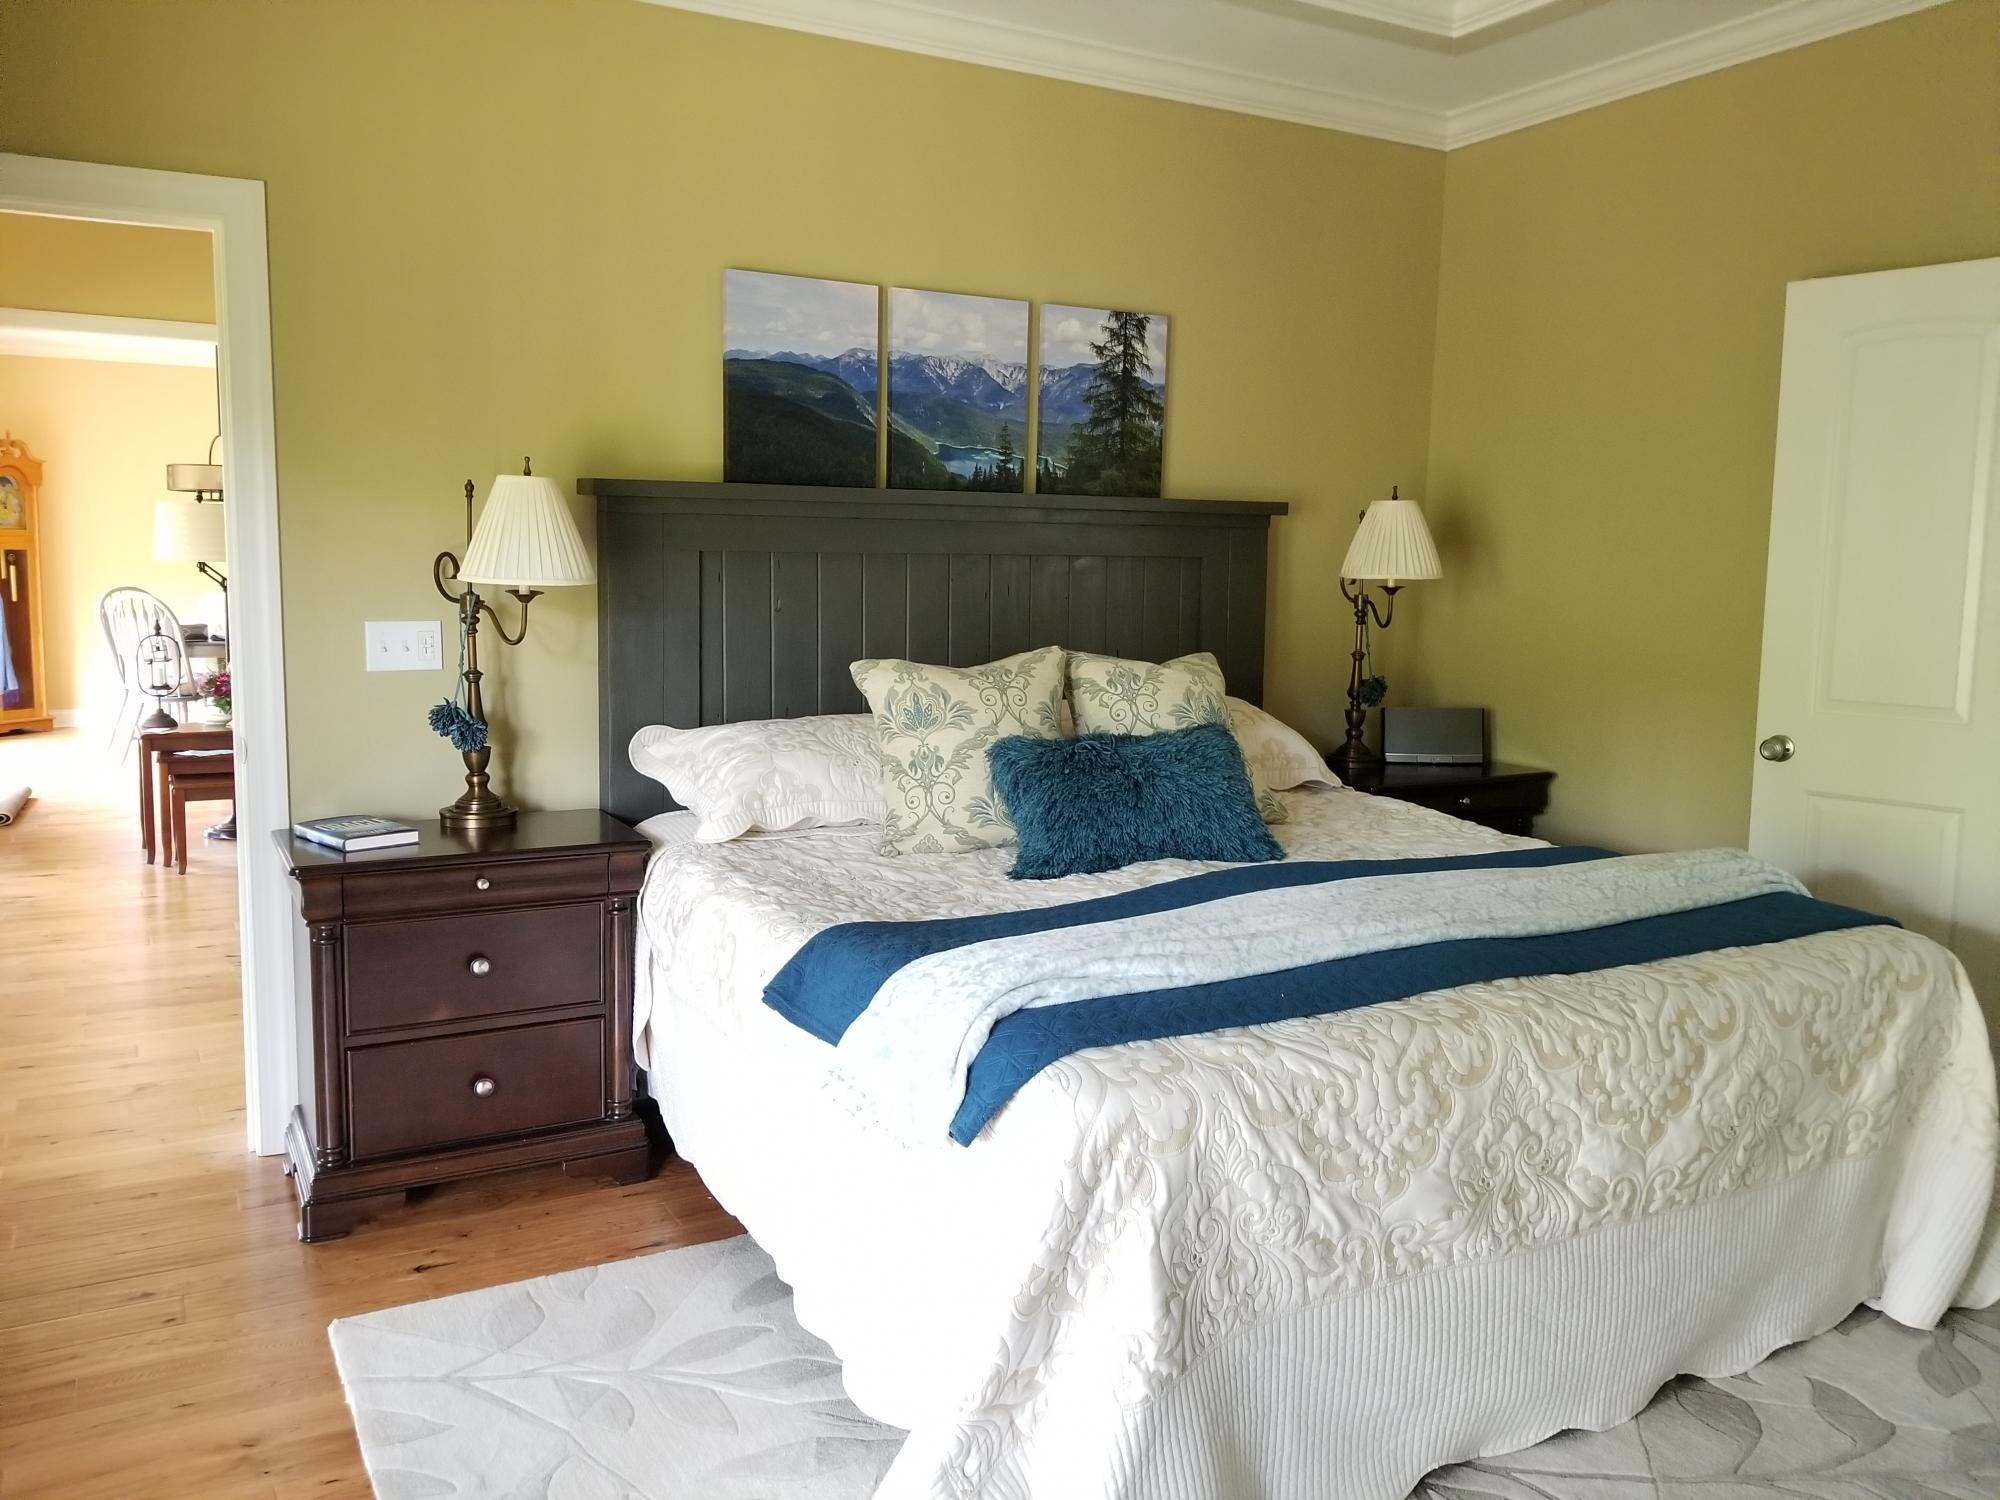
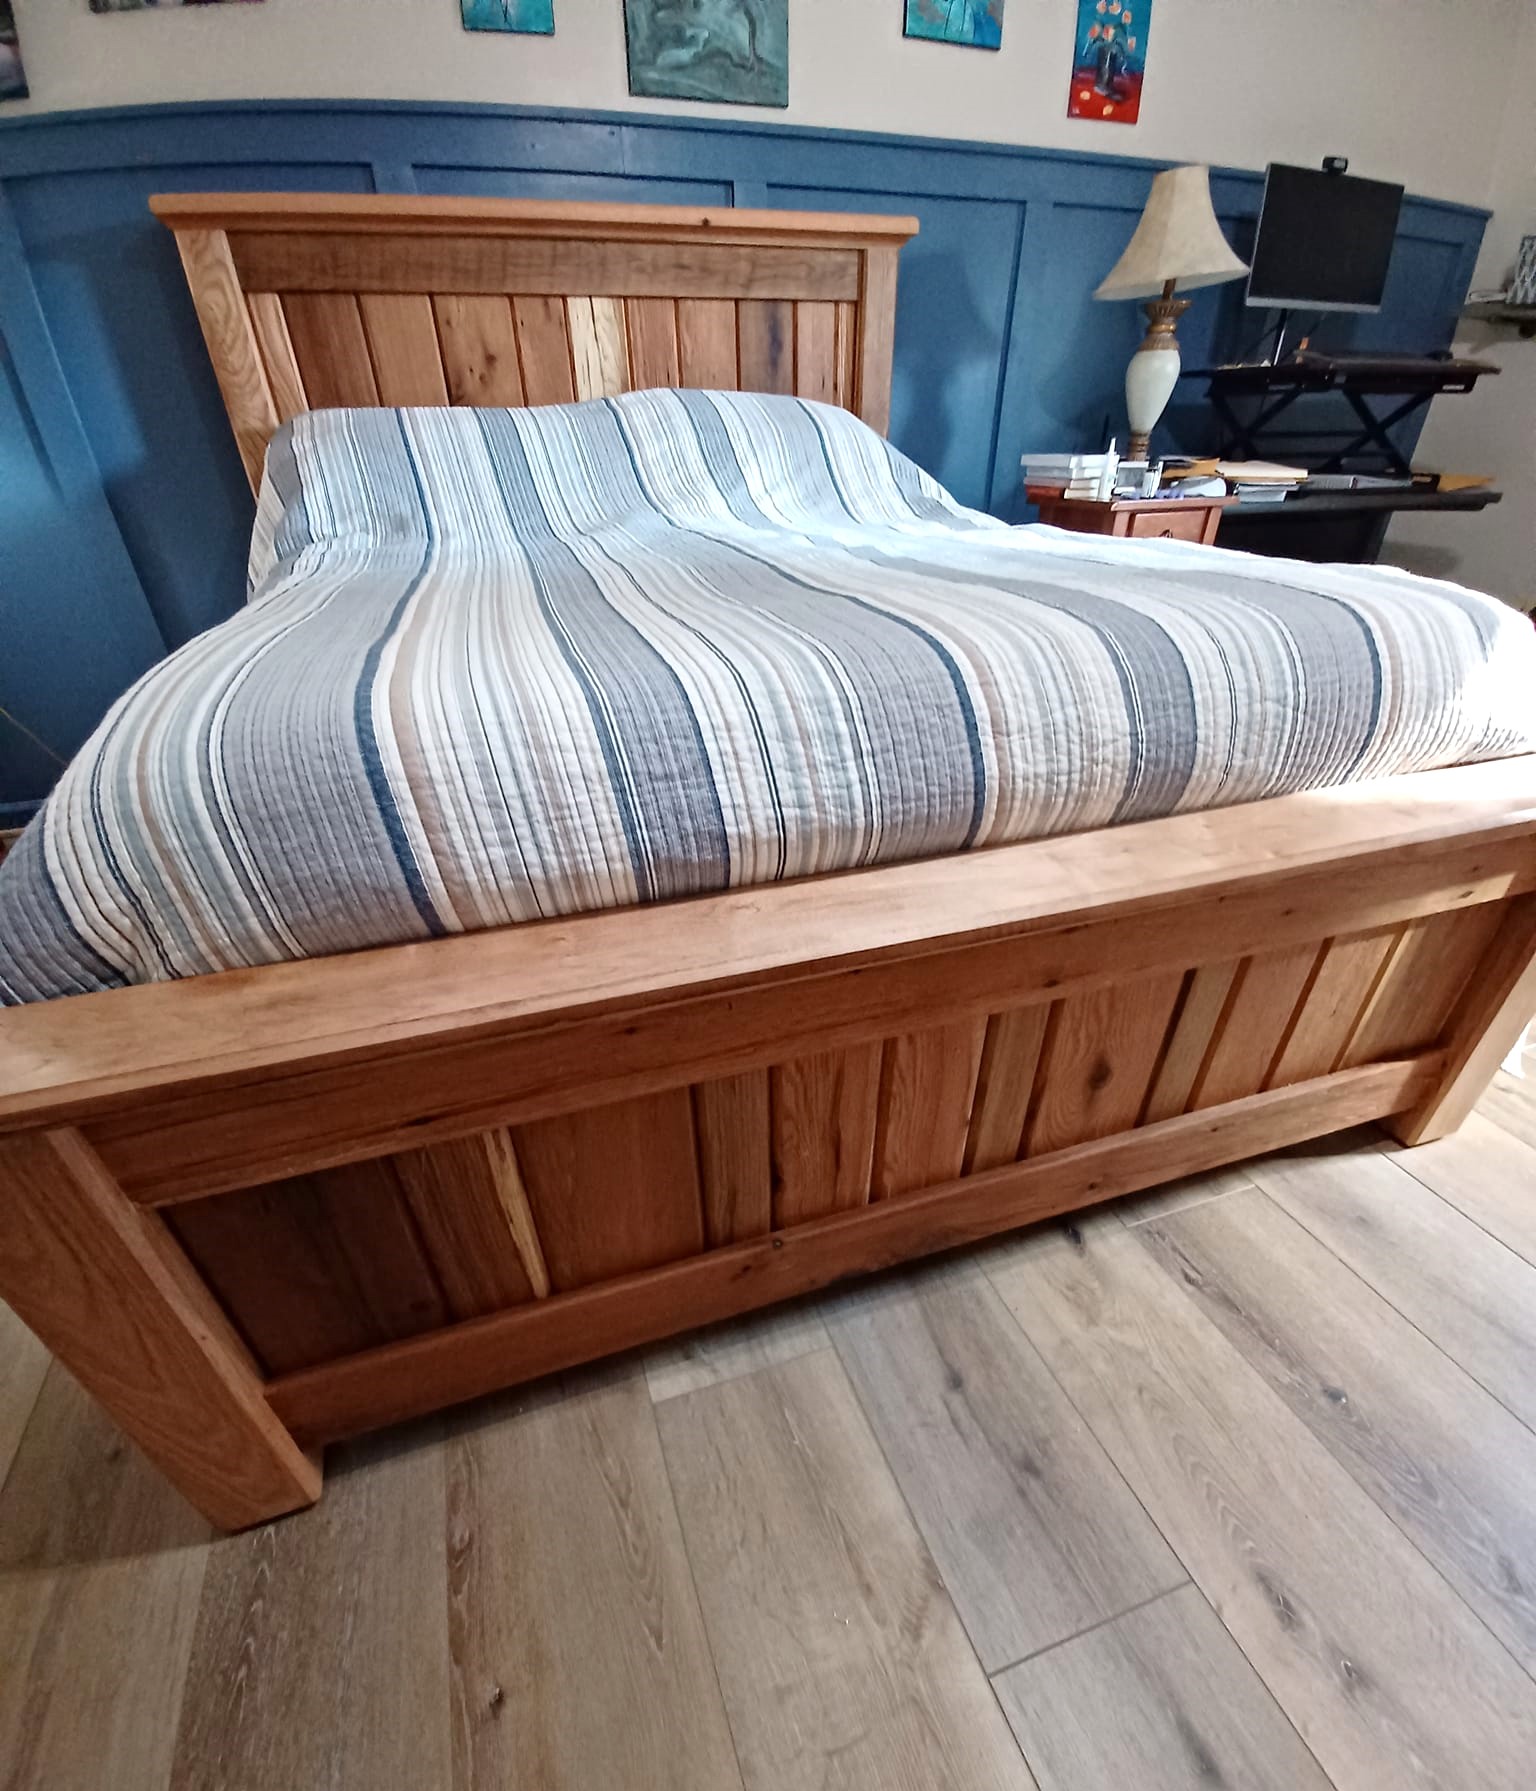
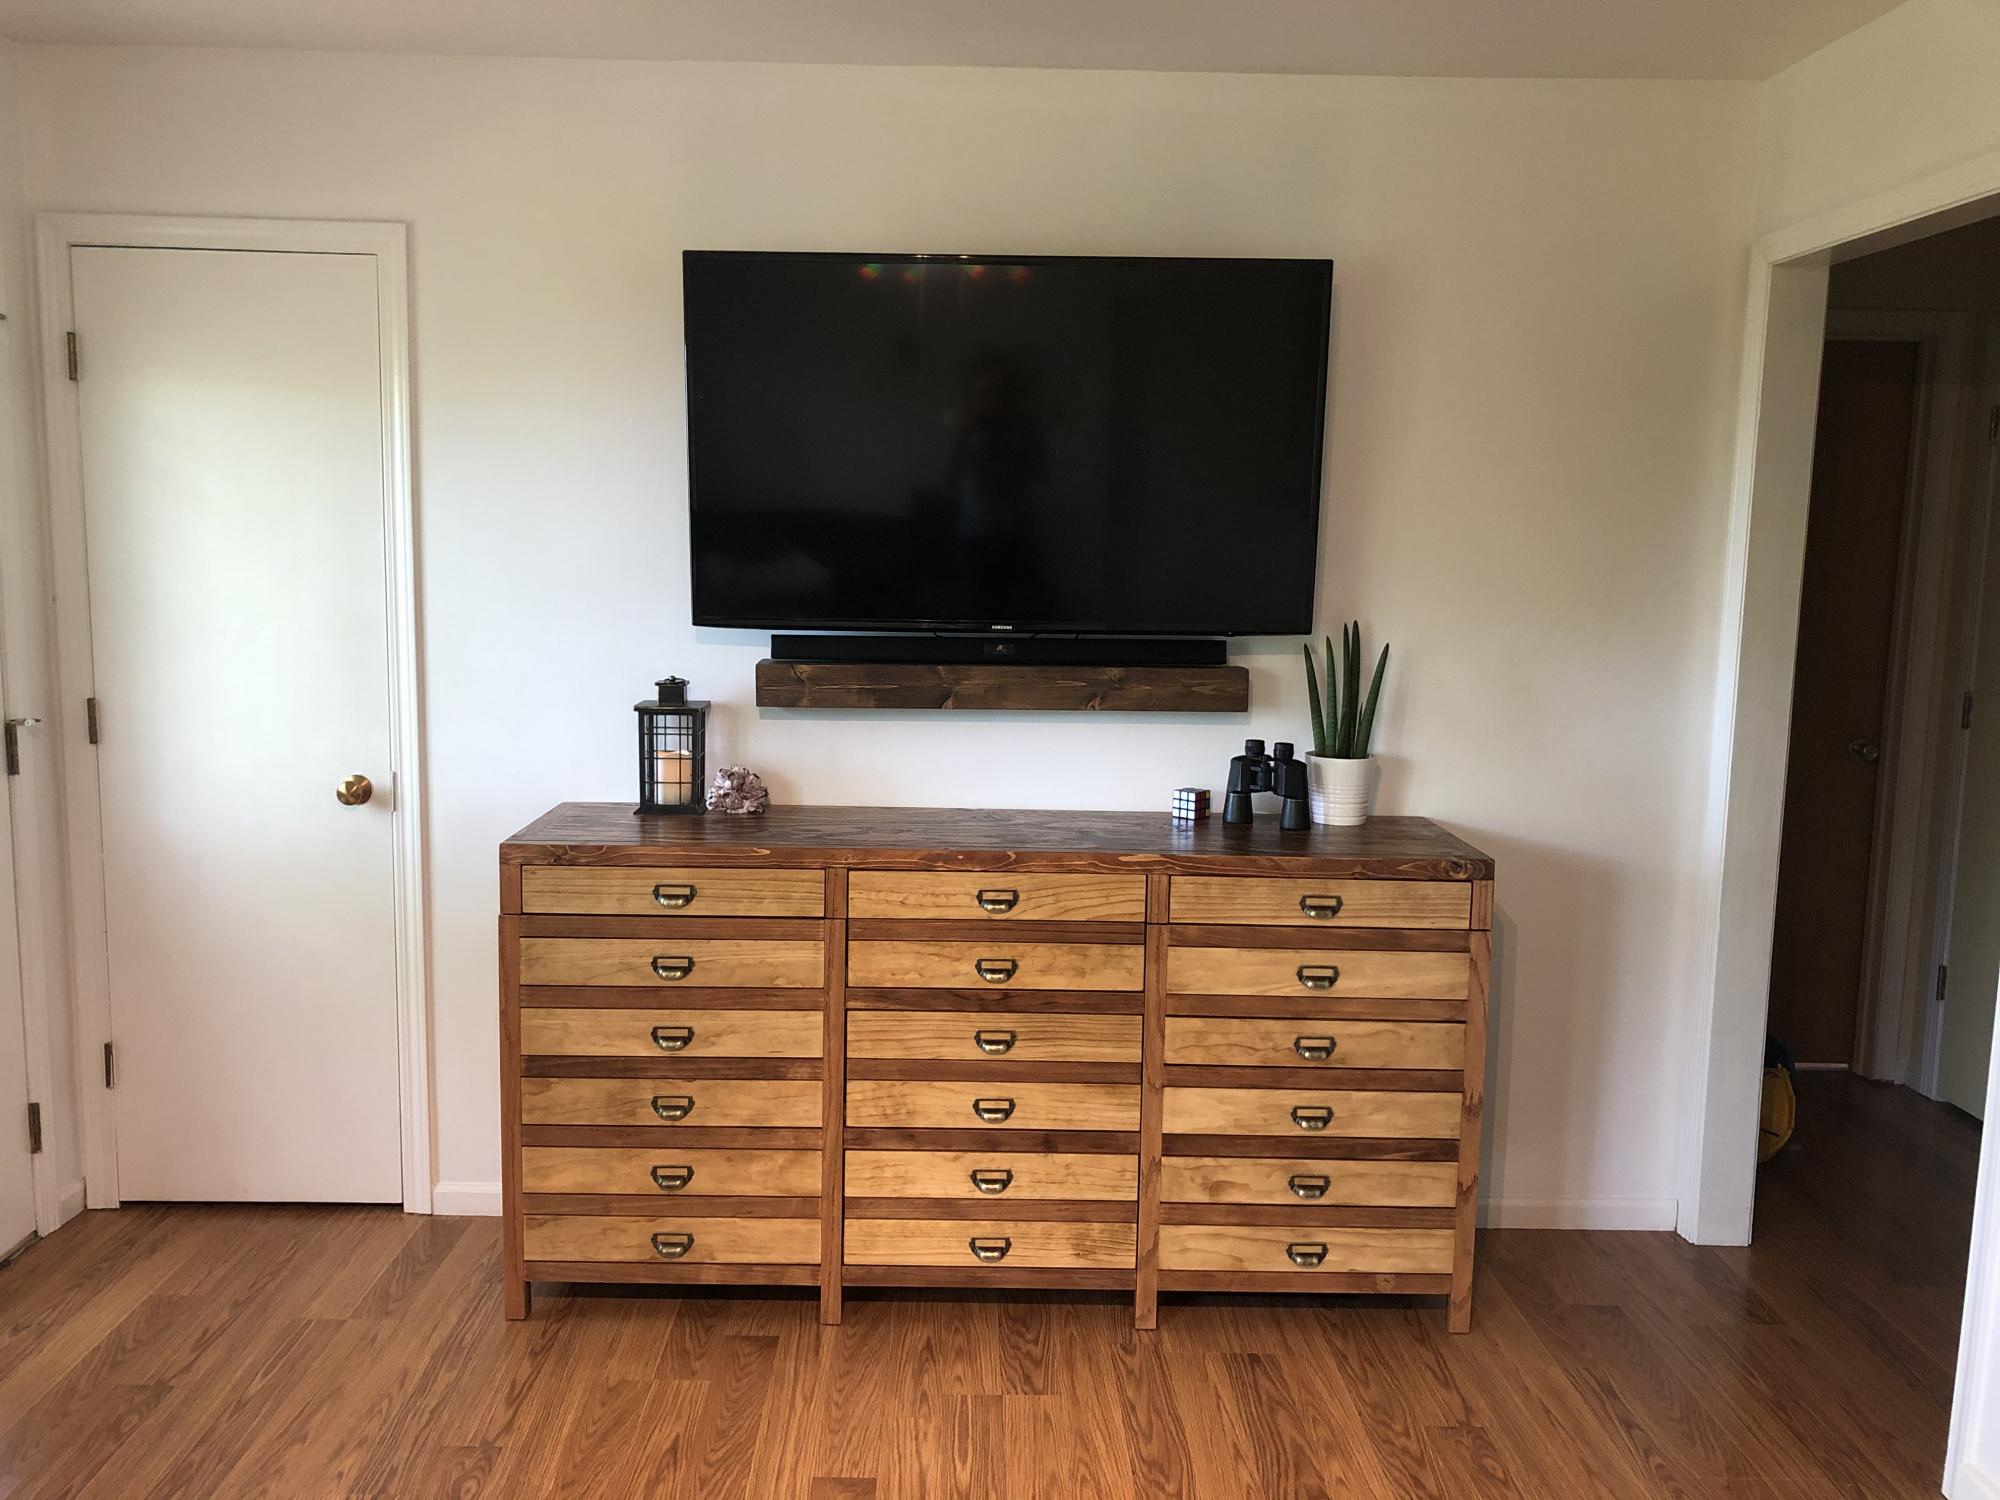
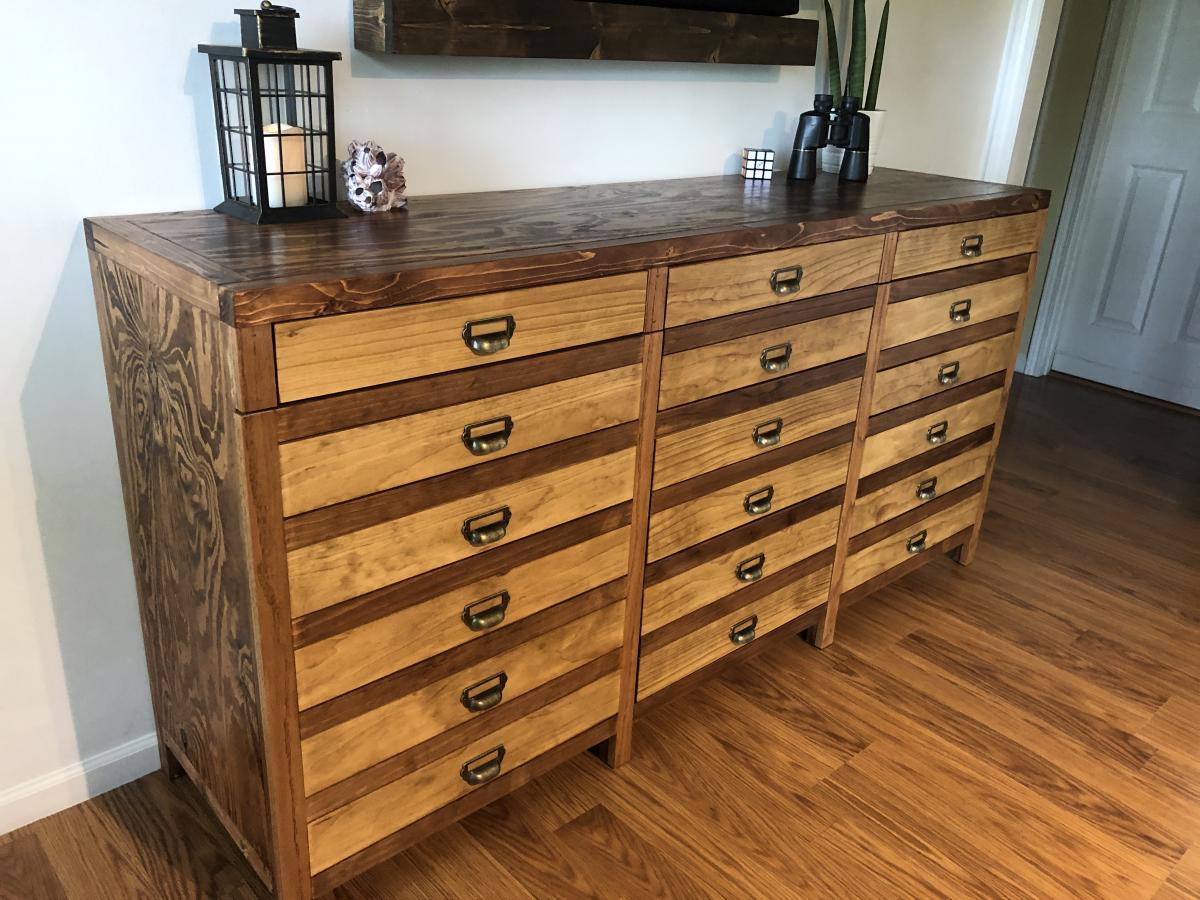
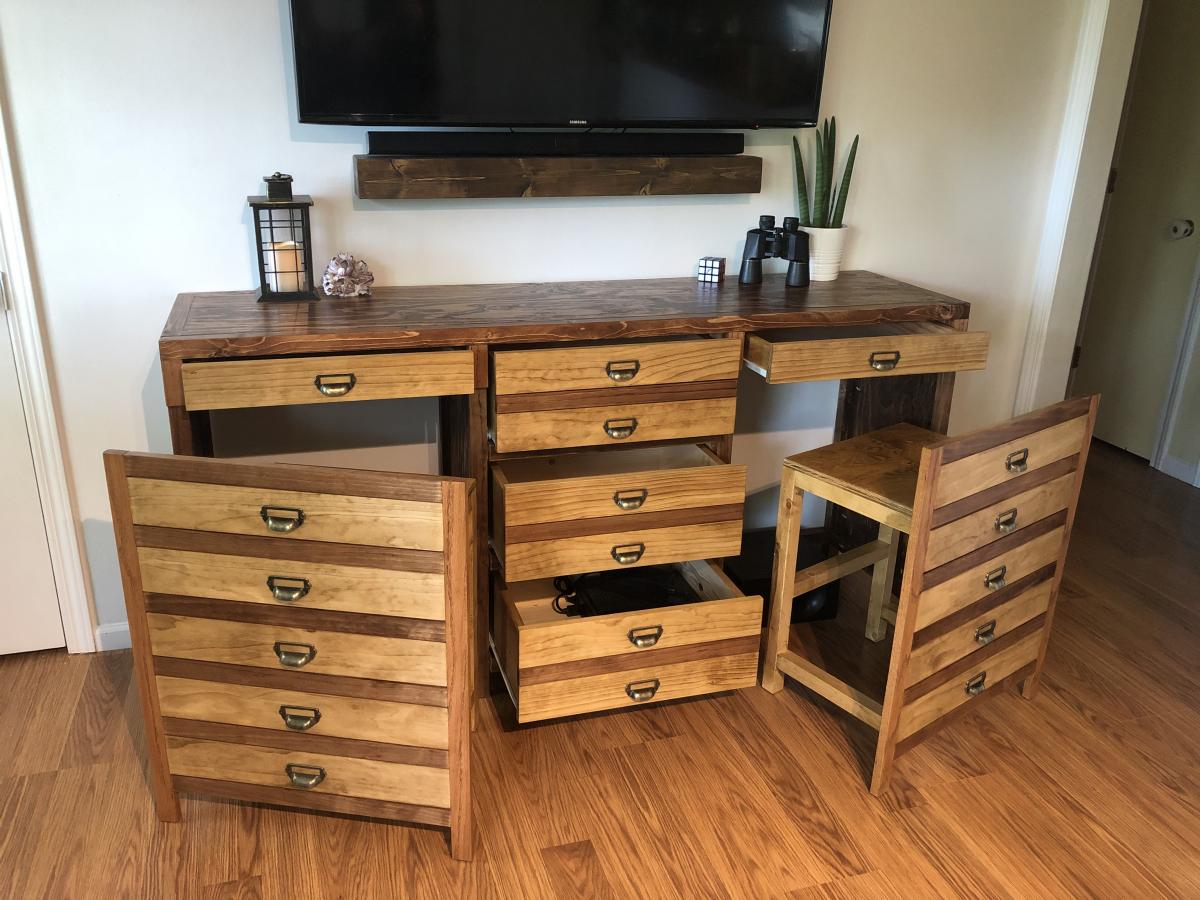
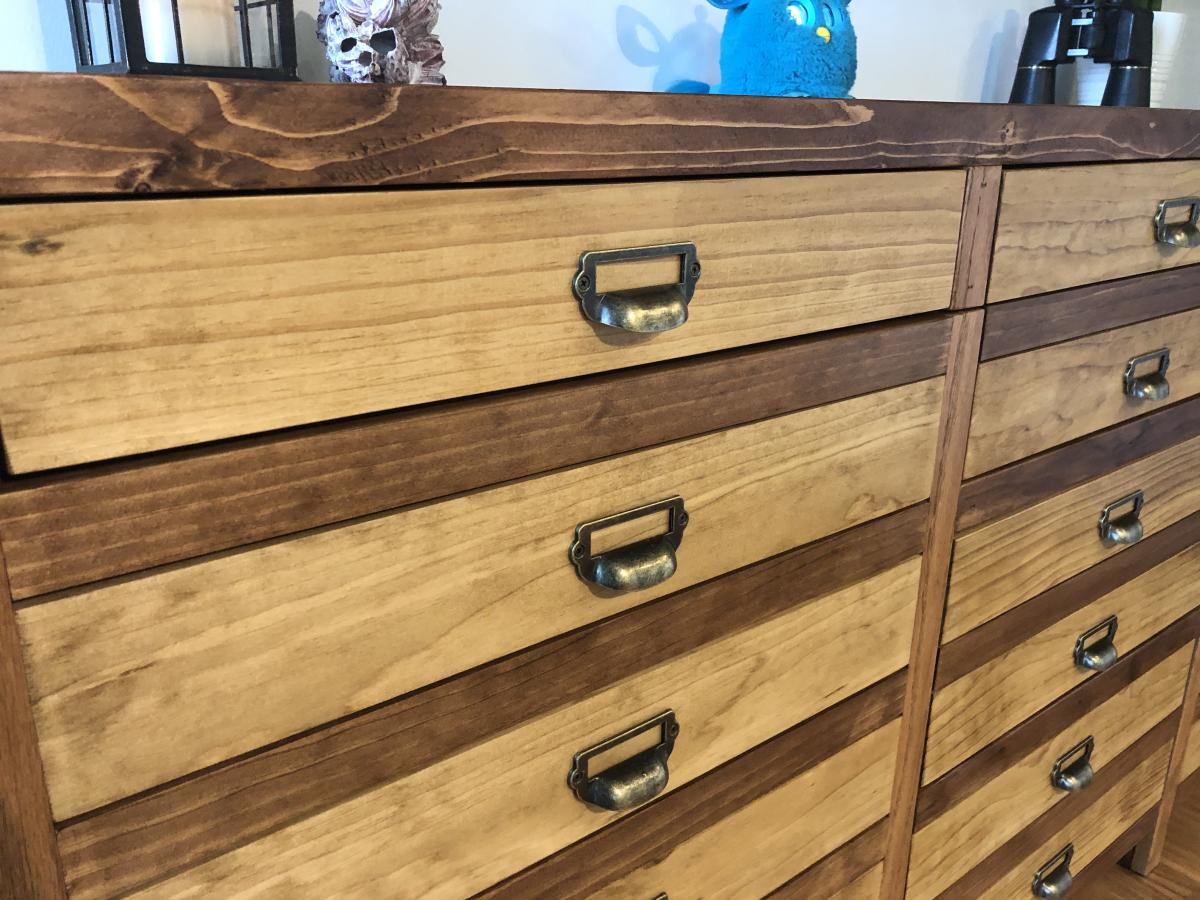
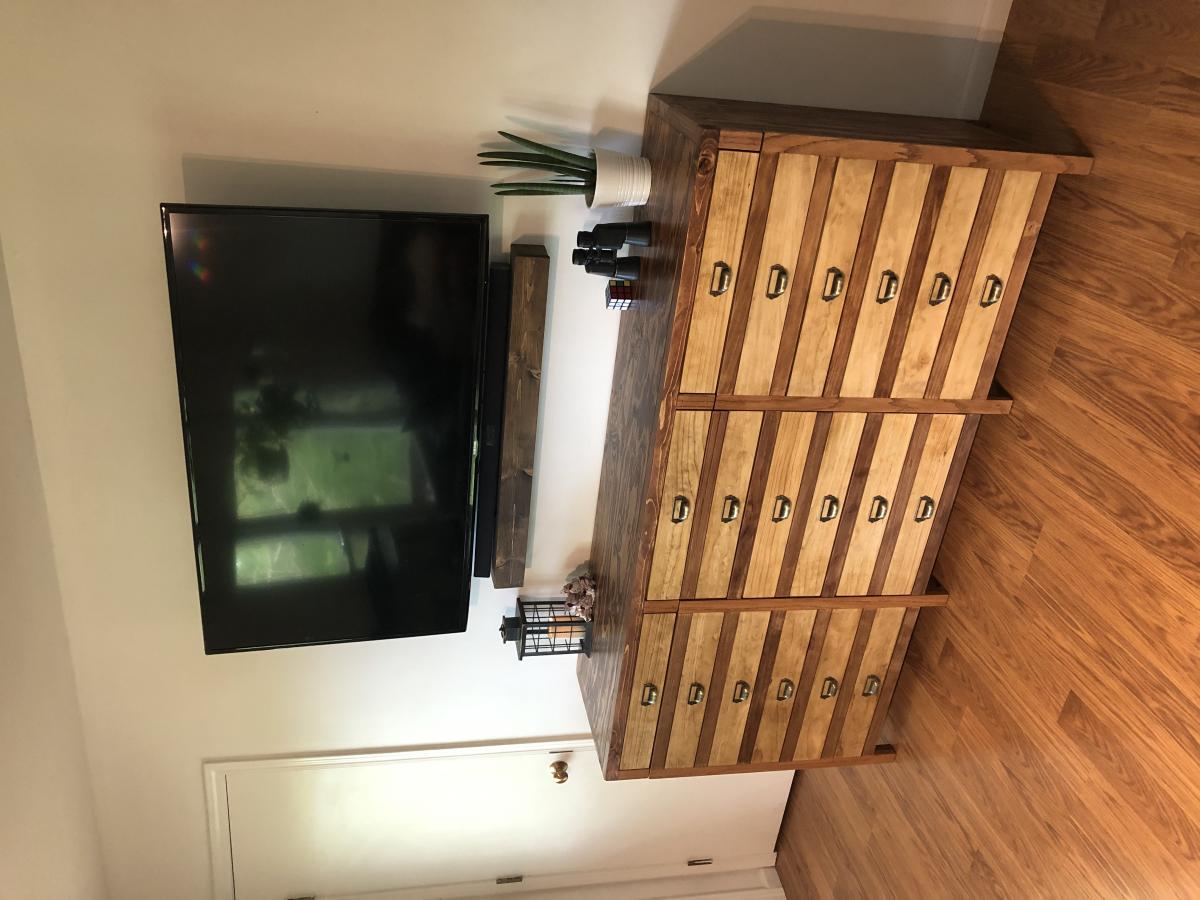
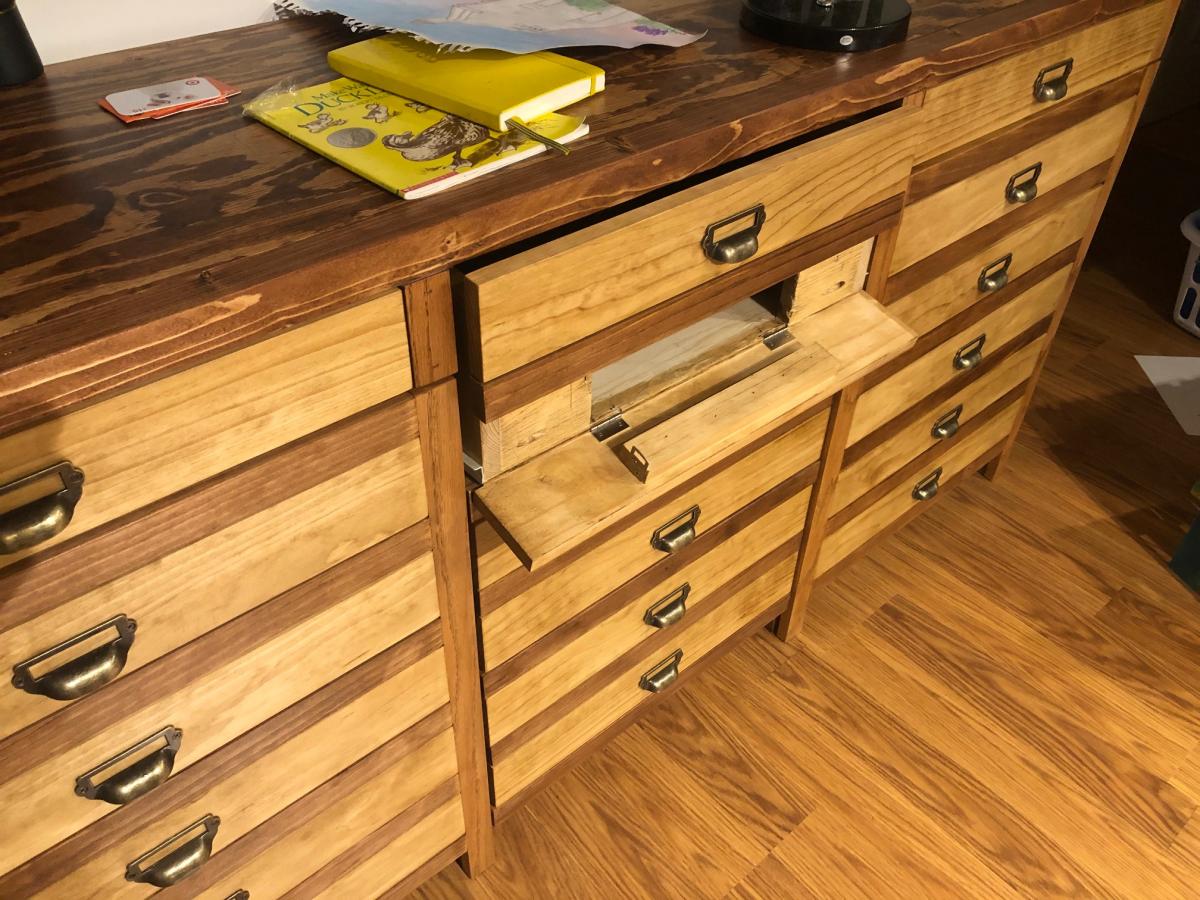
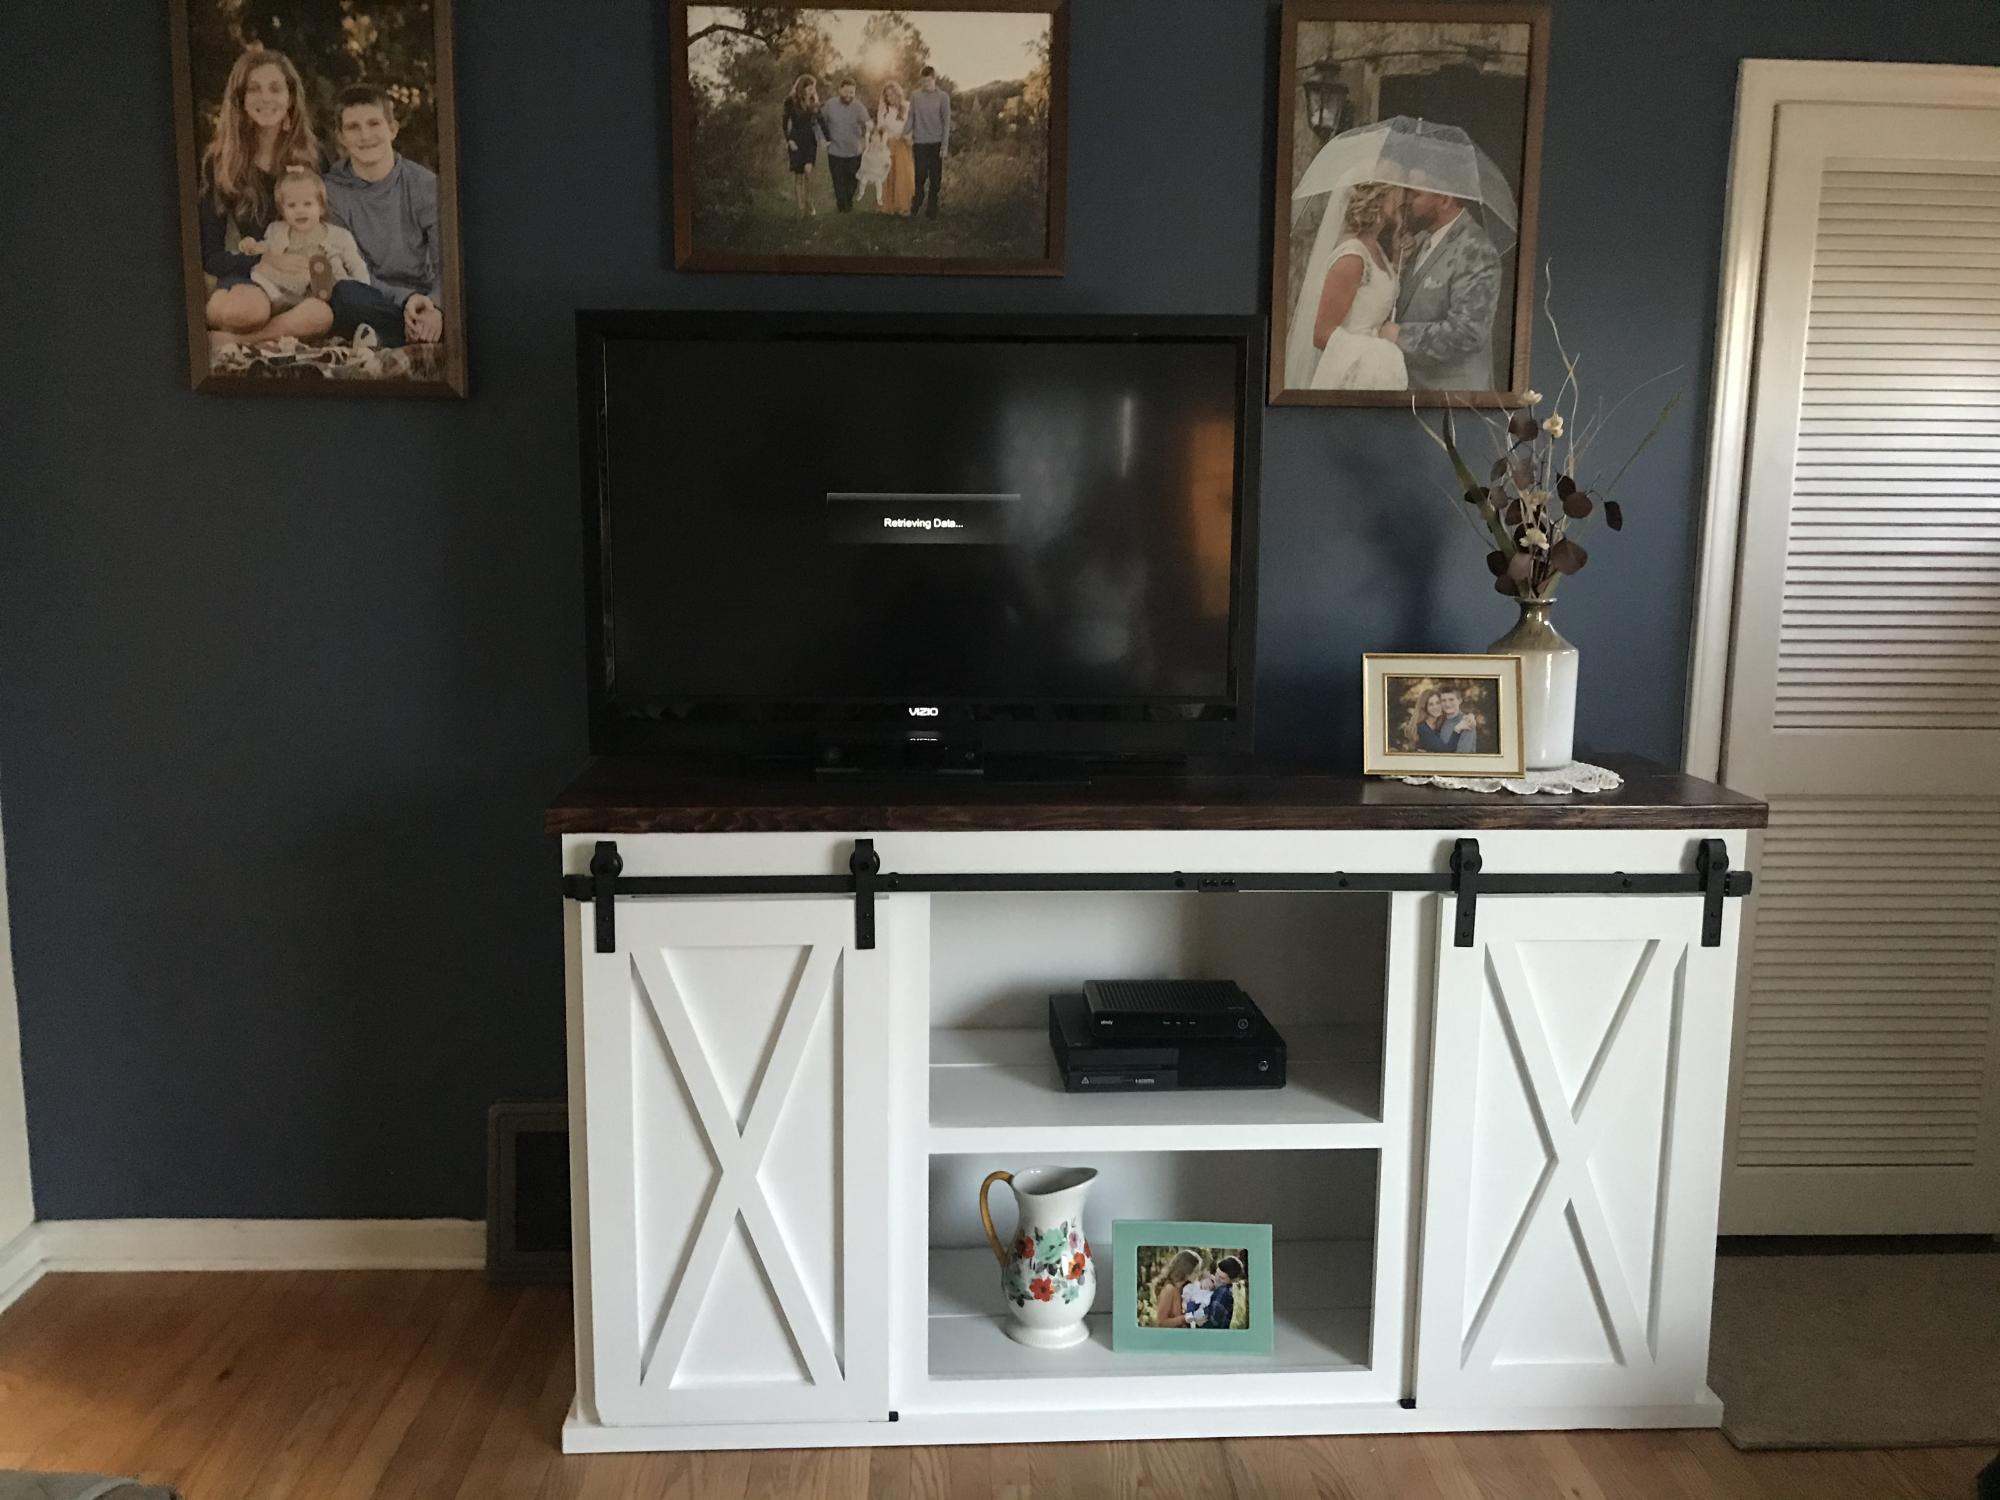
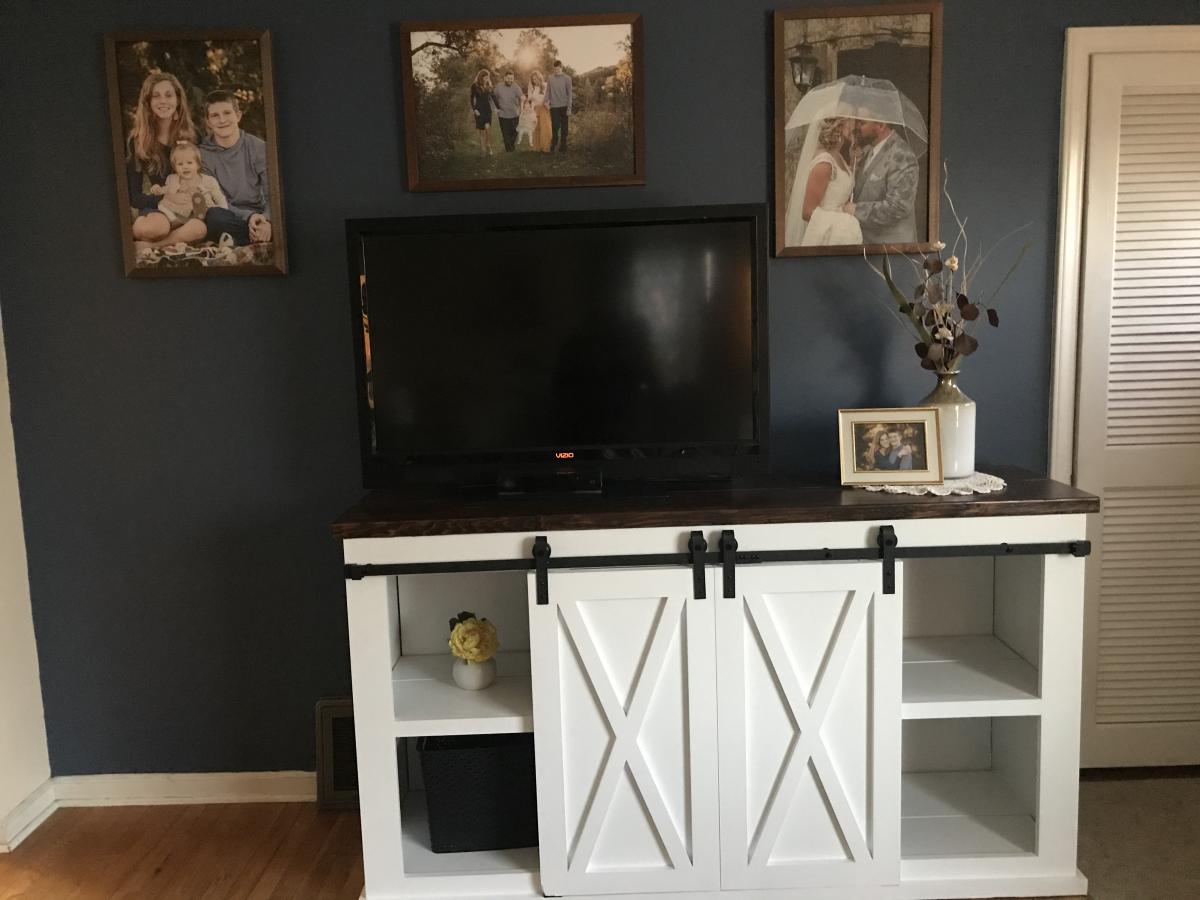
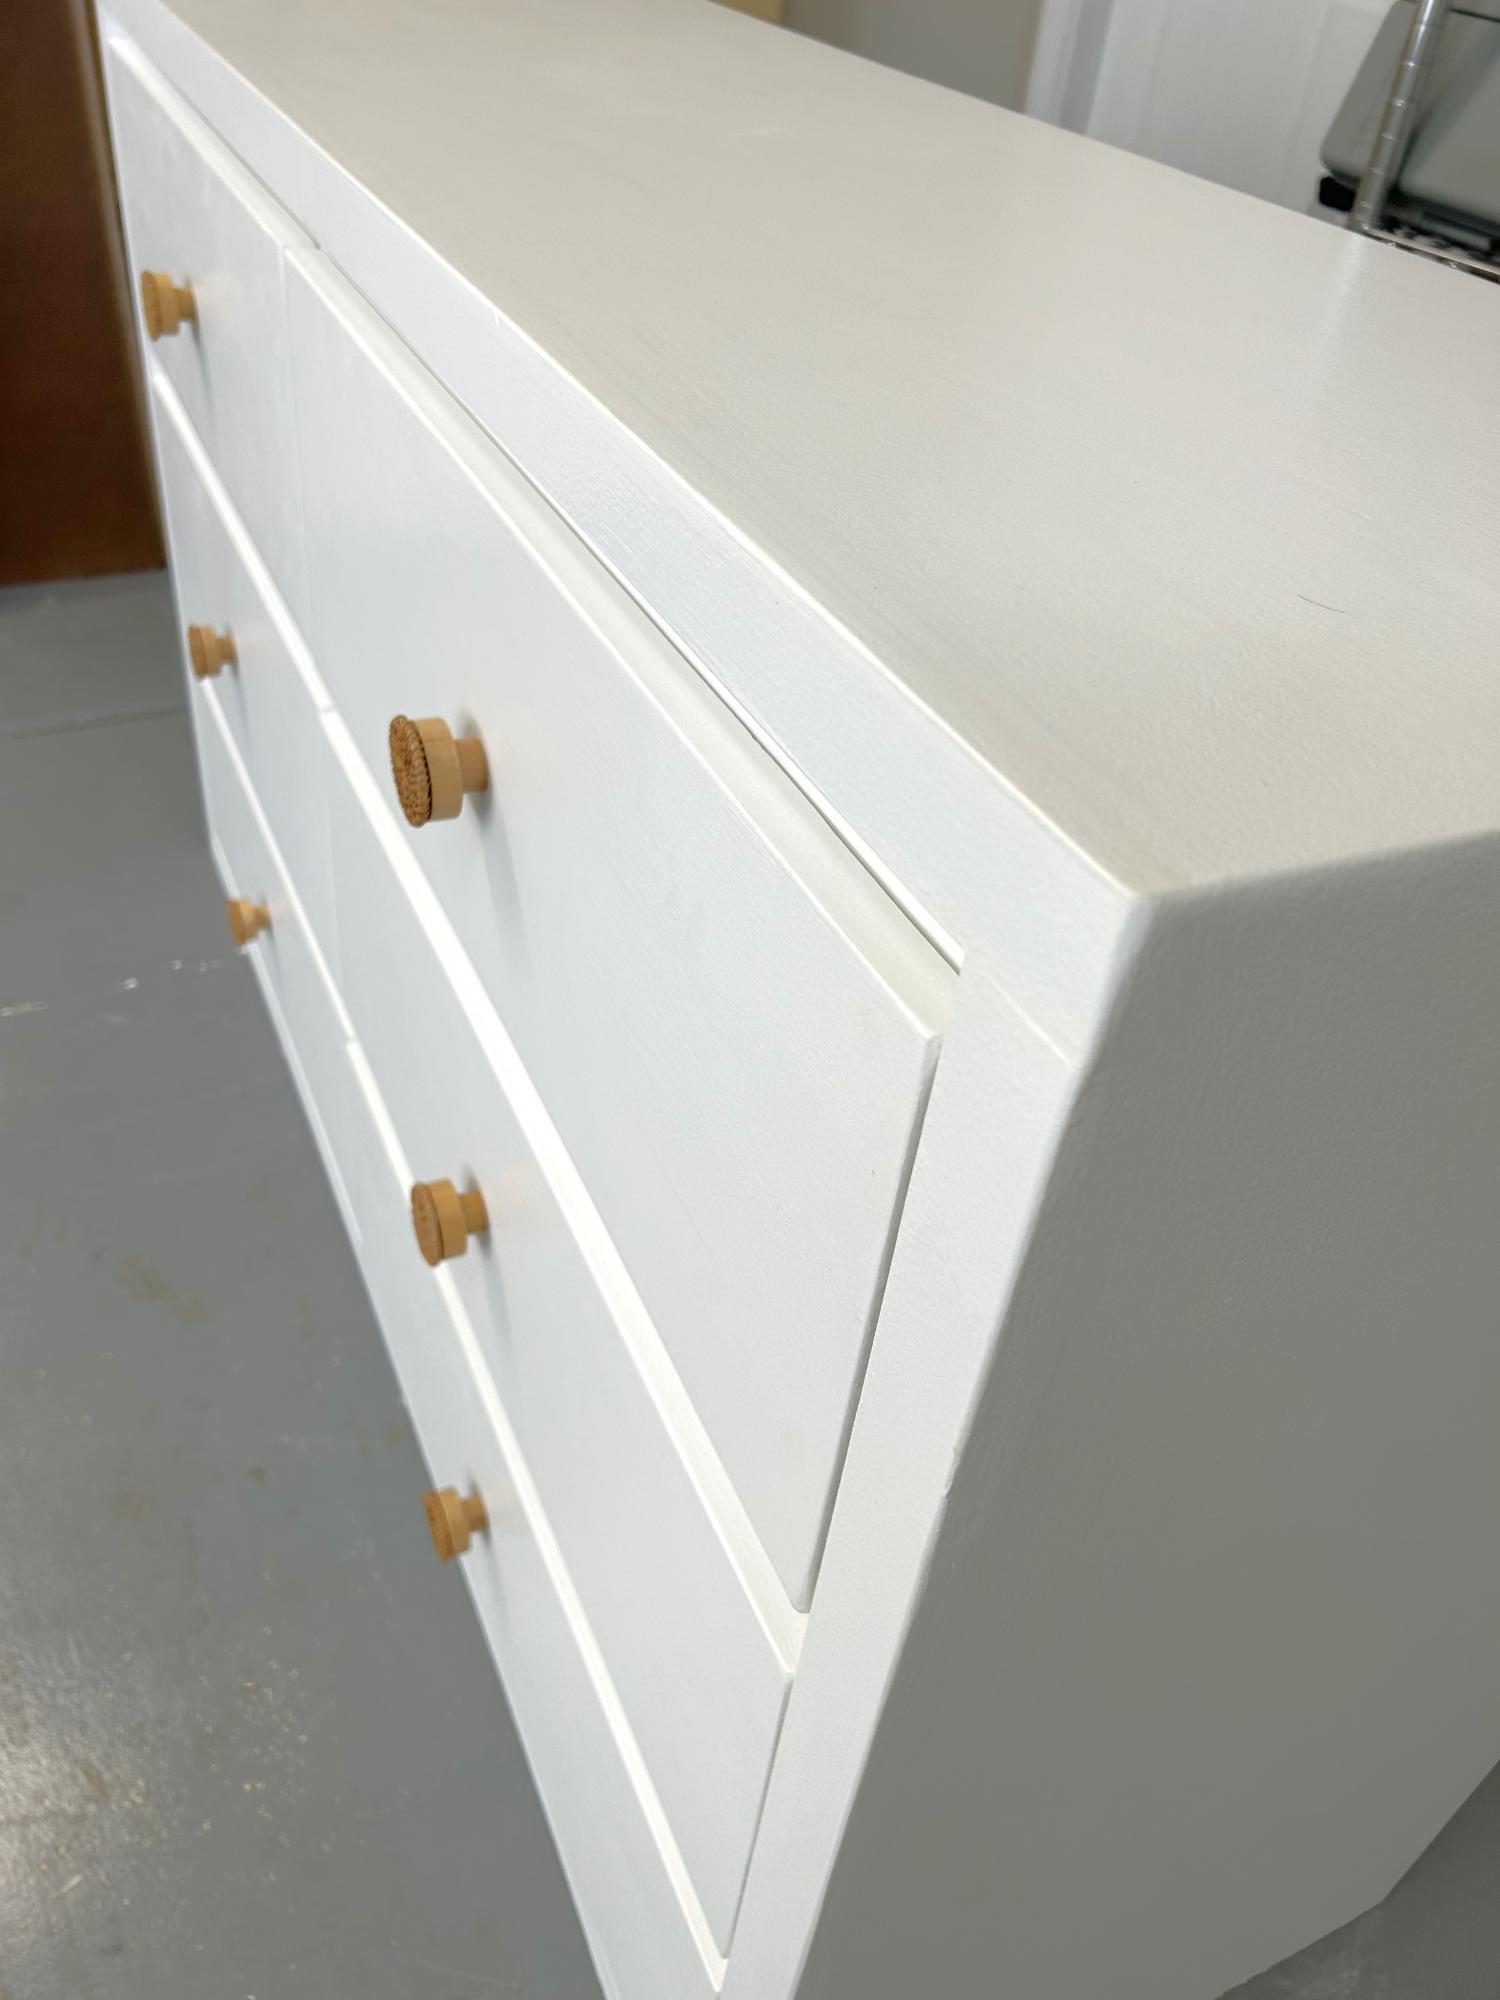
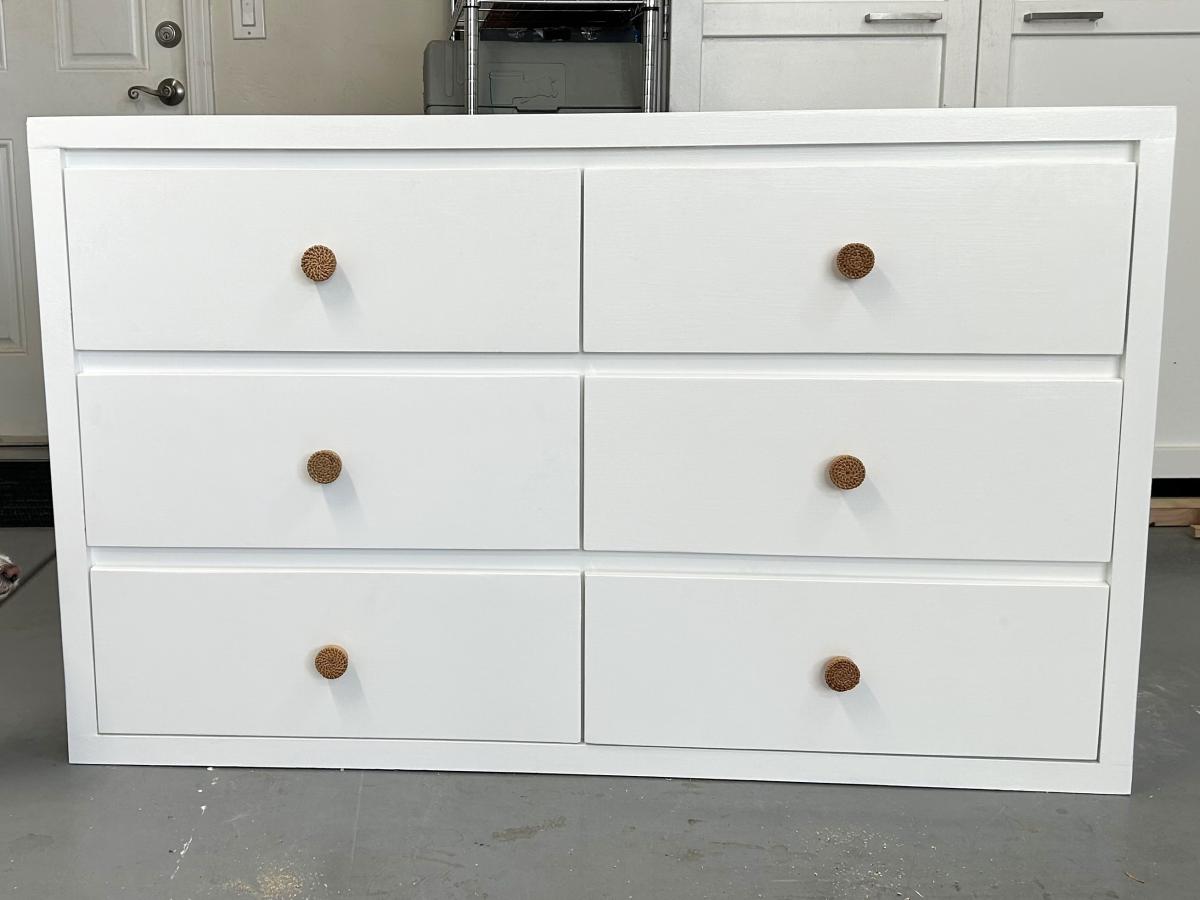
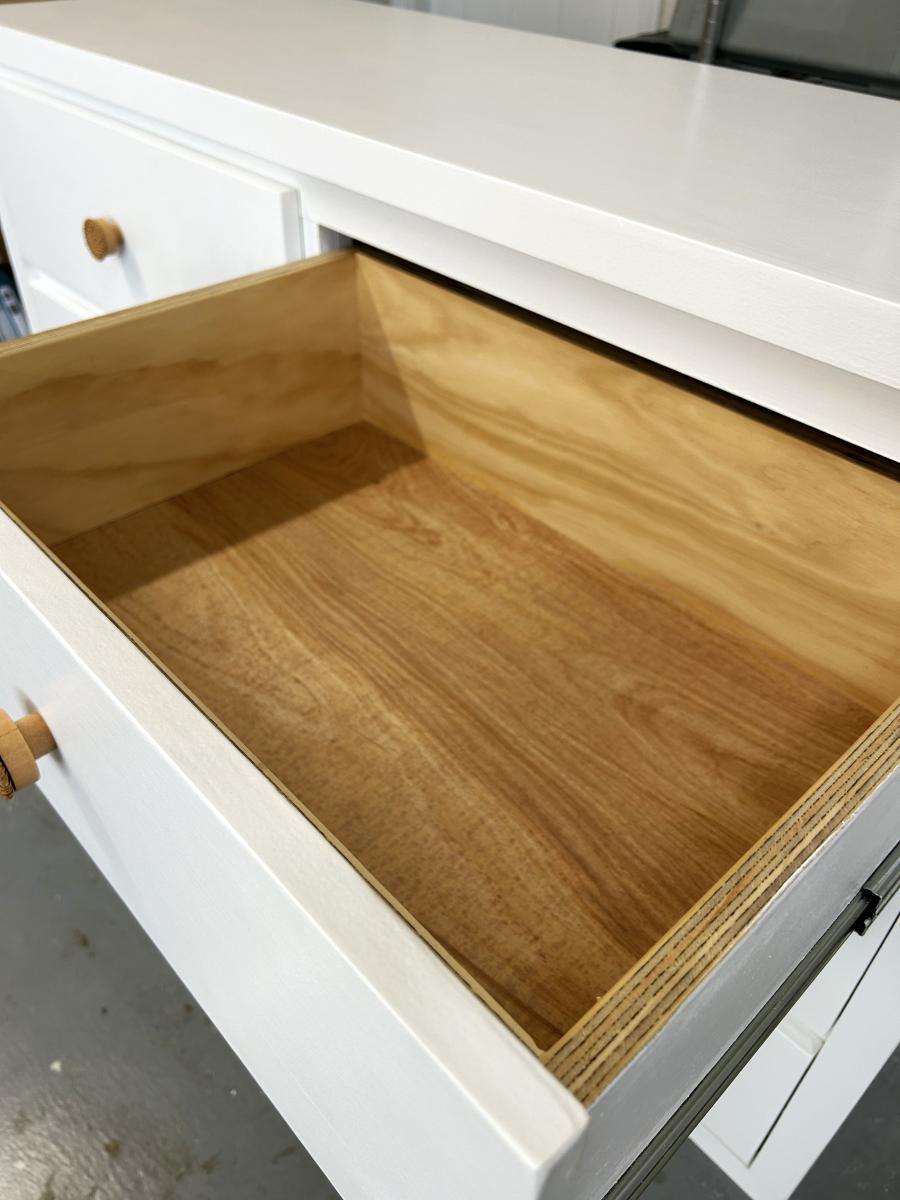
Community Brag Posts

Pallet wood Dog Bowl Stand

Submitted by zjlawlor on Thu, 09/25/2014 - 18:48

Used some cool old pallet wood to put together a dog food bowl stand I've been meaning to make. My big 10 year old lab is getting a lot slower and struggling a little bit so I thought this could help him out some and get his food and water closer to his face. Winged this one. Had a vague idea in my head that sort of evolved as it progressed. Used some left over 1x4 lumber to build a simple frame, and encased it in the pallet wood to give it the wood crate look (jigged some hand holds in the side to give this same look) . Used jig saw to cut the holes out of the 2 top boards for the bowls. 

Estimated Cost
<$10
Estimated Time Investment
Afternoon Project (3-6 Hours)
Finish Used
Weathered gray stain on top boards and frame. Wiped immediate after application and sanded after dry.

Light white wash on pallet wood slats with primer.
Recommended Skill Level
Beginner

Step Stool

Submitted by woodmd.abq on Tue, 01/10/2017 - 14:28

LOve your site for basic plans, easy to follow and modify. Used the step stool and created personalized ones for clients.

Keep the good ideas coming

John

Built from Plan(s)
Estimated Time Investment
Weekend Project (10-20 Hours)
Finish Used
polyurethane
inlays created with CNC router and filed with colored epoxy
Recommended Skill Level
Intermediate

Comments

woodmd.abq

Tue, 01/10/2017 - 14:31

Step inlays are created using a CNC router (Shapeoko 3) and filled with colored epoxy. Side medallions relief carved with CNC router. Entire stool covered with glossy polyurethane

First project, Truss table and benches

Submitted by wbengle77 on Wed, 09/23/2020 - 08:34

I followed the directions for every step but the down strut supports in the middle of the table. I reversed them purely for aesthetic reasons, I thought i looked better that way.

Built from Plan(s)
Estimated Cost
280-320 depending on finish
Estimated Time Investment
Weekend Project (10-20 Hours)
Finish Used
I used an antiquing wax, milk paint for the top and sides. Then I used butcher block oil and wax to finish.
Recommended Skill Level
Beginner

Media built-ins

Submitted by unhootchie on Wed, 12/19/2012 - 22:31

I wanted to build some cabinets to his our computer, stereo, game consoles, and seeing machines. I needed something that would allow a remote control to work through, so I used decorative metal sheeting found at the orange hardware store. They're built to be nearly flush with the fireplace. The left cabinet is made of 1x8s and measures 36"x36". There are 2 interior shelves. The shelves are slightly shorter cuts, measuring 34 1/2. The right cabinet is the same as the left, but with a 18"x36" unit kreg jigged to the front. That was to accommodate the larger media units while keeping the cabinet flush with the fireplace.

The fronts are just 2" trim frames with metal sheeting screwed to the inside. I used metal corner braces to hold the corners in place. They're mitered corners. The hinges are cheap $2 hinges and magnetic closures hold the doors closed.

I also made the mantle. It's a piece of 1x12 on top with a flat foam piece of molding and 2 corner pieces.

Estimated Time Investment
Day Project (6-9 Hours)
Finish Used
None yet. Will be white washed
Recommended Skill Level
Intermediate

Narrow table hack

Submitted by Sneezy14 on Sun, 09/28/2014 - 19:17

I combined the Narrow Farmhouse Table plan with some changes and Bluedinosaurs tutorial for making a sewing table. http://bluedinosaurs.com/diy-platform-sewing-table/  It came out beautifully!

Thanks for the great plan!!

Built from Plan(s)
Estimated Cost
$260.
Estimated Time Investment
Week Long Project (20 Hours or More)
Finish Used
Paint and polyurathane
Recommended Skill Level
Beginner

Farmhouse table

Submitted by Anonymous (not verified) on Sat, 01/14/2017 - 13:49

2x4's and 2x8's kept my cost way down! The top was finished with minwax provincial stain and a few coats of minwax polyurethane to finish it off. Joined with my Kreg jig throughout. A very fun project!

Estimated Cost
$100
Estimated Time Investment
Weekend Project (10-20 Hours)
Finish Used
minwax provincial stain and polyurethane. white satin paint
Recommended Skill Level
Intermediate

Farmhouse Keychain Holder

My niece collects keychains as I do, so I built her something to display her collection on!

Estimated Time Investment
Day Project (6-9 Hours)
Recommended Skill Level
Beginner

Wall Mount Coat Rack Tree -- Style Meets Function

This is a coat rack that I recently built for a friend of mine who was struggling with a way to organize her kiddos' coats and packs. She doesn't have a coat closet off of the entry way, so we installed this wall-mount tree design on an interior hallway as you enter the home. This would also be cute in a kid's room or a mudroom. I posted step-by-step instructions with pictures on my blog at www.momthebuilder.net. Let me know what you think!

Estimated Cost
100
Estimated Time Investment
Day Project (6-9 Hours)
Finish Used
Semi-gloss interior white paint
Recommended Skill Level
Beginner

Comments

Attic Closet Wall

Submitted by mom of 4 on Thu, 10/02/2014 - 22:06

Our attic bedroom had no closet space or storage. I designed a system with shelves and hanging space along one end wall. A freestanding vanity table was discovered at a Habitat ReStore, which fit the space perfectly. One side of shelves is for clothing, the other side is for books and display. A long shelf across the entire top serves as the closet rod as well as display space.

Estimated Cost
I think it was around $100 for the plywood, screws, etc. I purchased prefinished plywood, so I could just cut and run.
Estimated Time Investment
Weekend Project (10-20 Hours)
Recommended Skill Level
Beginner

Farmhouse king bed frame

Submitted by Anonymous (not verified) on Mon, 01/16/2017 - 16:43

Lots of pocket holes

Estimated Cost
$175
Estimated Time Investment
Weekend Project (10-20 Hours)
Finish Used
Cheap white semi gloss, still turned out nice
Recommended Skill Level
Beginner

Painted buffet and hutch

This is the largest piece I have built. I wanted a buffet and hutch to hold all my crockery. All the large pieces became the display pieces in the open shelves. Ana's plans makes it so easy to modify and build

Estimated Cost
$500
Estimated Time Investment
Week Long Project (20 Hours or More)
Finish Used
Paint
Recommended Skill Level
Advanced

Comments

HB's Armoire

Submitted by ccessna on Wed, 12/26/2012 - 12:24

Armoire for 18 inch doll. Constructed using Ana White guide, with small alterations to doors. Stars were not cut, instead small wooden knobs were used. Two stars were painted pink and attached to the doors, to give the American Girl feel. The doors were difficult to keep shut, and an attachment was installed at the bottome of the doors to aid in keeping them closed. For any future builds, we will scale down the size of the armoire. It is quite large for an 18 inch doll.

Estimated Time Investment
Day Project (6-9 Hours)
Recommended Skill Level
Intermediate

Farmhouse Table for our New Home

Submitted by Smokeydog on Tue, 10/07/2014 - 07:50

This is my second table which I built for our new home in the Olympic  Penninsula. Moved closer to our kids when we retired.  It was wonderful to have our kids, their spouses and friends gathered around the table for dinner, conversation and laughs.

Estimated Cost
275.00
Estimated Time Investment
Week Long Project (20 Hours or More)
Finish Used
Minwax wood conditioner and satin cherry stain.
Recommended Skill Level
Intermediate

Comments

Custom 9- Foot Rustic Buffet

This was a custom build for one of my clients in San Diego, CA (Encinitas). She wanted a 9 foot buffet to store all of her kid's toys in :).


We came up with the design, and I built it right before my wedding (probably my most stressful build! haha).


Estimated Cost
$300
Estimated Time Investment
Week Long Project (20 Hours or More)
Finish Used
Jacobean by Minwax, Clear Satin Poly
Recommended Skill Level
Intermediate

Entryway Mail Sort, Hutch, and Shoe Drawers

Made the hutch 1ft taller

Estimated Time Investment
Weekend Project (10-20 Hours)
Finish Used
Rustoleum weathered gray and bright white

Comments

Farmhouse Bedside table

Submitted by jleach on Sat, 12/29/2012 - 06:34

Wanted to build nightstands for our bedroom after tackling the farmhouse table plans. Followed the plans for the farmhouse bedside table. The build went really well. These were the first drawers I have made and they work great. I first tried to stain them using the vinegar and steel wool method which worked great on my trial piece. Then when applied to the nightstands...nothing. We ended up using Minwax grey. I was a scary color to start with but couldn't be happier with the results. People are loving the different color and still being able to see the grain.

Built from Plan(s)
Estimated Cost
roughly 75 dollars for the two nightstands
Estimated Time Investment
Weekend Project (10-20 Hours)
Finish Used
Minwax grey stain. I put the stain on pretty heavy and let it soak in a good 20 min. before wiping. I wanted more grey than the pine color showing through. I then applied 3 coats of Minwax satin poly.
Recommended Skill Level
Beginner

Comments

My First Project - Lukes Bed

Submitted by dabb03 on Sat, 10/11/2014 - 13:38

I made this bed for my son Luke's for 4th birthday. This project was a first for me and I loved doing it. I modified the stairs as I wasn't crazy about how shallow the steps were and how high the rise was. I have 4 stairs instead of 3 and they stick out about 4 inches from the front of the bed. The bottom step is a small toy box and the top 3 are all drawers. I also added a slide. The slide design was the biggest challenge as I couldn't find a set of plans that I liked. I ended up tracing the shape from an outdoor playset that we have. I then created a template and used a router to cut 1/4" grooves into the left and right hand sides. With help, We slid a 1/8" of wood into the grooves. The wood was from home depot, slick on one side. I think it was a Hardboard tempered panel, but I don't remember for sure. The entire project probably took 60-70 hours. The bed itself was about 30-35. The other time was the stairs with drawers and the slide. A good chunk of the remaining time was spent in planning and figuring out the slide and adjusting the drawers. This being my first project, I spent a lot of time just figuring things out. I had never used a router before. I had never drilled pocket holes before. This project opened my eyes to a whole new world.

Estimated Cost
$650
Estimated Time Investment
Week Long Project (20 Hours or More)
Finish Used
We used stain and "Candy Sticks" The Candy Sticks are giant stickers that photographers use for interesting backgrounds.
Recommended Skill Level
Beginner

Comments

New Island

Submitted by Anonymous (not verified) on Sun, 01/22/2017 - 15:34

I doubled the size of the shelves for more storage and made 2 drawers instead of one.  Loved building this and your plan.  Don't think it turned out bad at all for my first time. This looks great in my new remodeled kithcen and all who have seen it love it and are amaze I built it myself. Thanks for sharing your plan. 

Estimated Cost
$125.00
Estimated Time Investment
Week Long Project (20 Hours or More)
Finish Used
In the plans calling for 1 x 12, I just made two and joined before adding the 4x4's on other side for seating. Paint is white oil base for outside and top is Summer Oak with a matte finish poly (2 coats).
Recommended Skill Level
Beginner

Comments

Tilt-Out Kitchen Trash Can Cabinet

Submitted by Fritz Lane on Sat, 10/10/2020 - 11:32

Here's my take on Ana's 'Wood Tilt-Out Trash or Recycling Cabinet.' It's made from lumber salvaged from pallets found locally. Two changes made from the original plans:

- Raised panel on the door
- Used two stop blocks inside the cabinet to limit motion on the door (instead of chains)

The only items that were purchased were the trash can, hinges, door pull and Kreg screws.

Links for techniques and finishes used in this project:

Raised panels:
https://www.finehomebuilding.com/2006/03/01/making-raised-panel-doors-o…

Milk paint finish:
http://toolmakingart.com/2008/06/16/two-layer-milk-paint/

Topcoat on cabinet:
https://sawsonskates.com/bobs-miracle-finish/

Estimated Cost
Approximately $30
Estimated Time Investment
Week Long Project (20 Hours or More)
Finish Used
For the cabinet, a two-layer milk paint formulation. The red tint was obtained using Sakrete powdered cement color, a product made for adding color to concrete. A link is shown in the Summary section (above).

Topcoat on the cabinet is a mix of spar varnish, paint thinner and boiled linseed oil. A formulation for the finish can be found in a link in the Summary section (above).

Finish on the top was a product called "Maxithane" from Sico. It's a combination of stain and polyurethane. The color is Cedar. I happened to find a can of this product at a dollar store that specializes in closeout deals and haven't seen it in any stores since.
Recommended Skill Level
Intermediate

Spotlight / X Desk with Drawers

Submitted by Francoise on Mon, 12/31/2012 - 06:56

Strong, sturdy desk. Dressed ash for the body and a pine project panel for the top at my husband's request. I really enjoyed building this and learned a lot (meaning I also messed up a lot).

I used dressed ash for the legs and drawer front and discovered the difference between nailing in softwoods such as pine and hardwoods such as ash. I was using a nail set to get the nails flush. I ended up making holes when the nail set bounced off the nails (see picture). I learned that if the nailing was going too well, that was because the nail set was making a hole in the wood.

Built from Plan(s)
Estimated Time Investment
Week Long Project (20 Hours or More)
Finish Used
General® Water-Based Dye Stains, Cinnamon for the legs & Shellac for top
Recommended Skill Level
Intermediate

Vegetable Bin

Submitted by ctay on Tue, 10/14/2014 - 17:18

Built this vegetable bin for my sister in law. Just needs knobs, which I'm letting her pick out. Easy build finished in an afternoon. Stained and painted the next day. Could use this for other storage as well. 

Built from Plan(s)
Estimated Cost
60.00 for materials. Already had the plywood for back and paint and stain.
Estimated Time Investment
Day Project (6-9 Hours)
Finish Used
Rustoleum stain in dark walnut for top and edges. Painted in white chalk paint with brown glaze. Distressed to see the dark stain on the edges. Doors are stain with white wash over it and stenciled using stain over that.
Recommended Skill Level
Beginner

Comments

ctay

Wed, 10/15/2014 - 20:30

Thank you Joanne!  Really enjoyed building this!  This is also the first time I have shared one of my builds!  Glad I did. :)