Entryway Locker
We built this entryway locker using Hillarys plans. It turned out amazing and it gets more use than any piece of furniture in our house at the moment.
Made the standard full farmhouse bed with storage, but did a couple modifications. 1) Didn’t use drawers, but wanted closed, not open cubbies. I made the drawer fronts and then attached with full overlay hinges and magnetic catches do they open from top down like a horizontal cabinet. 2) built the slats as two, one piece slat frames which sit on the cleat so that they can easily be removed for the extra long term storage between the cubby boxes. Just lift mattress and the two pieces of slats and lots more space.
Made this for my moms caregiver for Christmas ❤
This is the Mom's Lego Table everything went according to plan until, I cut and tried to place the table tops in ... Ooops. Was not square, with the help of my father-in-law we got them to fit. So, as Ana says ..CHECK FOR SQUARE!!! The other part that took awhile was the chess board but was worth it my son loves chess!
I finally finished the bedroom set, this one the last piece (and the biggest dresser).
More info on this 1970's bedroom set here:
http://www.woodworkingfourdummies.com/blog/dresser-set-makeover
Cheers,
Ian
Tue, 05/26/2015 - 08:44
Checked out your blog. I really liked it, but I couldn't find a way to follow though. Nice job on the makeover too!
Wed, 06/03/2015 - 05:30
Glad you liked my blog!
In the top right, there are black buttons for Facebook, Pinterest and twitter where you can follow me.
thanks,
Ian
SUCH a great project for my first ever build! The plans were so simple and fun to follow. I altered them slightly to measure 50" long so it would fit perfectly in my entry way. I used the Varathane wood stain in Dark Walnut. Can't wait for my next project! Ana, thank you for giving first time builders the tools and confidence to build beautiful furniture!
A very quick, easy, and attractive Christmas project! All
Made from scraps. Thanks for another great plan. The hooks are back ordered until after Christmas- so screws will due for now. This stand will double as a swimsuit and life jacket holder in the summer! Love it!
I finally got around to building the first project on my list. I needed more storage in my room so I built the storage bench from the plans. I did tweak it a little to make it a bit wider so that it will neatly match the width of my bed. I may get around to making a cushion for it but right now it serves as a nice tray to hold my wallet and other various sundries.
I designed (in Sketchup) and built some bunk beds for my boys. They're made out of all common sized lumber, SUPER sturdy, and have no exposed nails or screws! The kids LOVE them and I'm really happy with how they turned out!
This portion of the build is just for 2 bunks, but the design allows for a third, lofted bunk to be added (I'll build that next year)
I've got the full step-by-step build at
http://www.iliketomakestuff.com/iltms-project-bunk-beds-part-1/
http://www.iliketomakestuff.com/iltms-project-bunk-beds-part-2/
i built this for my mother when she decided she wanted a new table .i used the plans that i had found on this site Thank you for such an easy plan made my mothers day
This was my third project, and the first one with doors (boy do I have some great opportunity for growth there!). I left off the bottom trim because I wanted a slightly more contemporary look. Thanks for this plan, Ana. It was the perfect size for this space. Things I learned doing this project: next time cut an extra 1x4 to tack in to do the doors, hinges require math, be sure to get the kind of wood filler that dries—not wood putty (sigh), I need a workbench.
Fri, 12/22/2017 - 09:52
Looks great, love the open bottom! Can't wait to see the workbench!
Loved how these plans were so easy to follow and certainly appreciate the accompanying video.
Tue, 12/21/2021 - 10:20
Thank you for sharing, love the raw look and the build is fantastic!
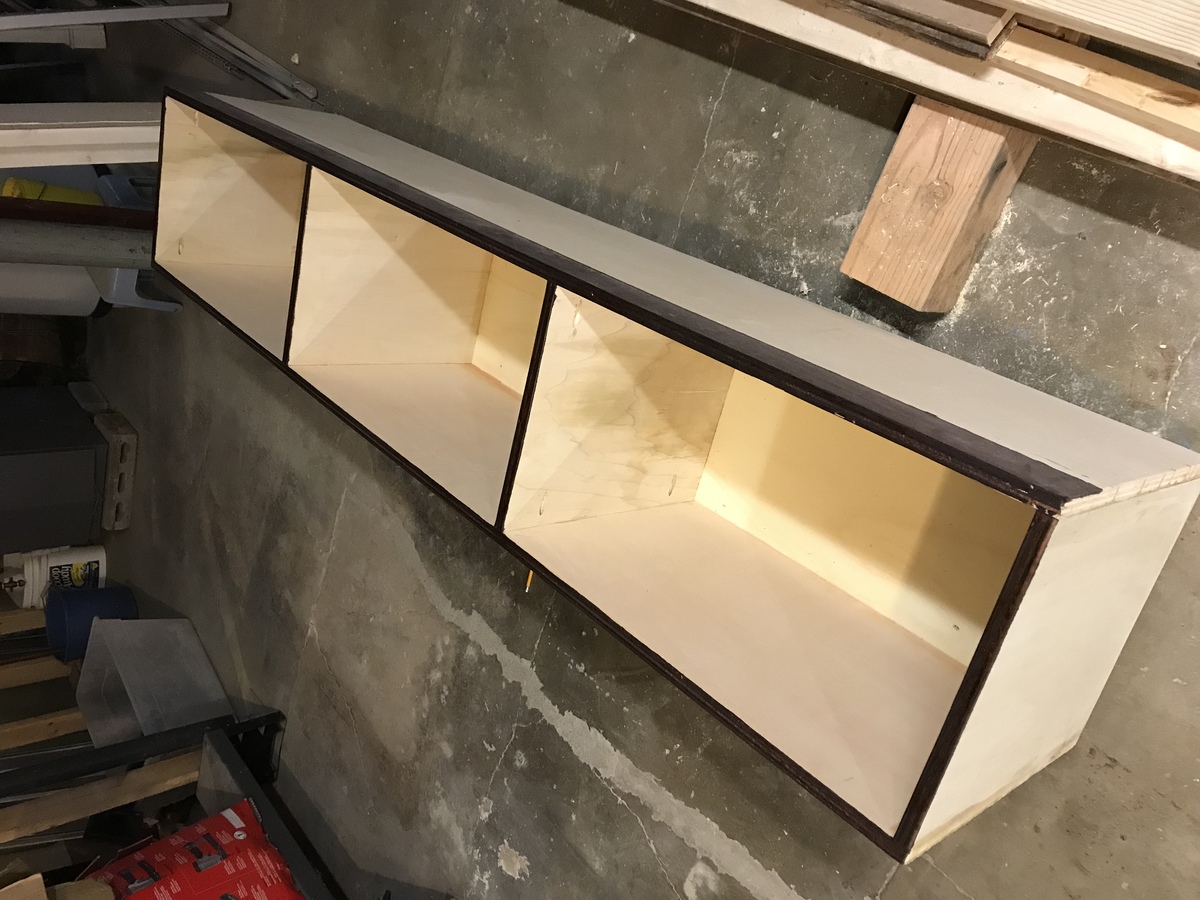
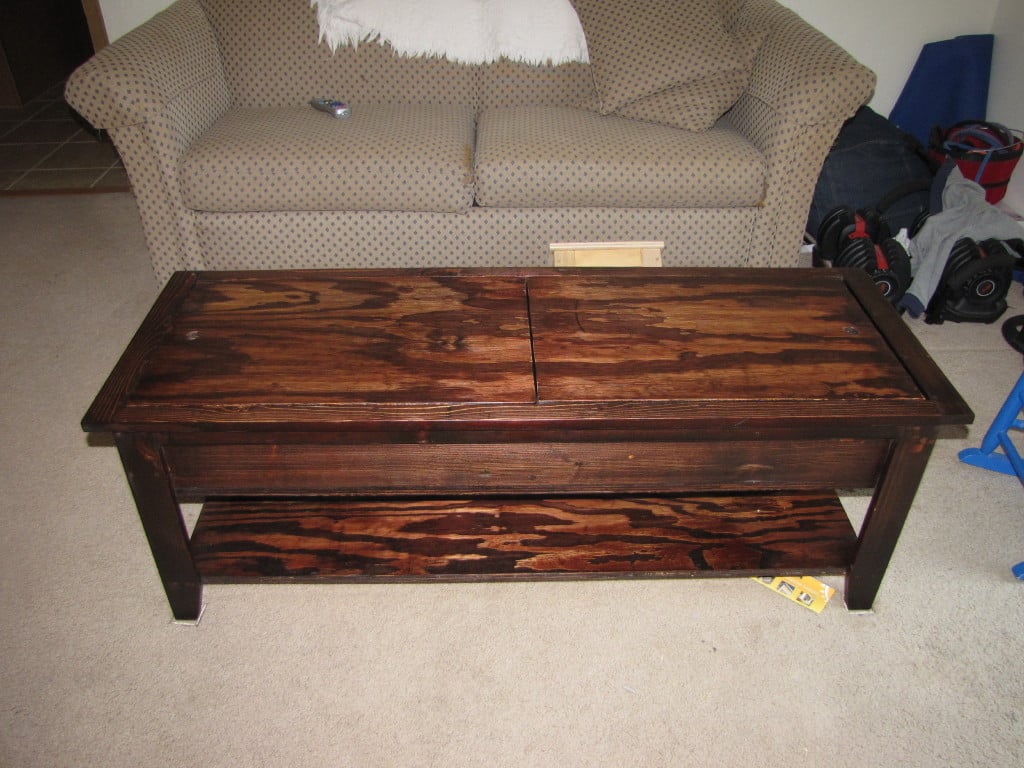
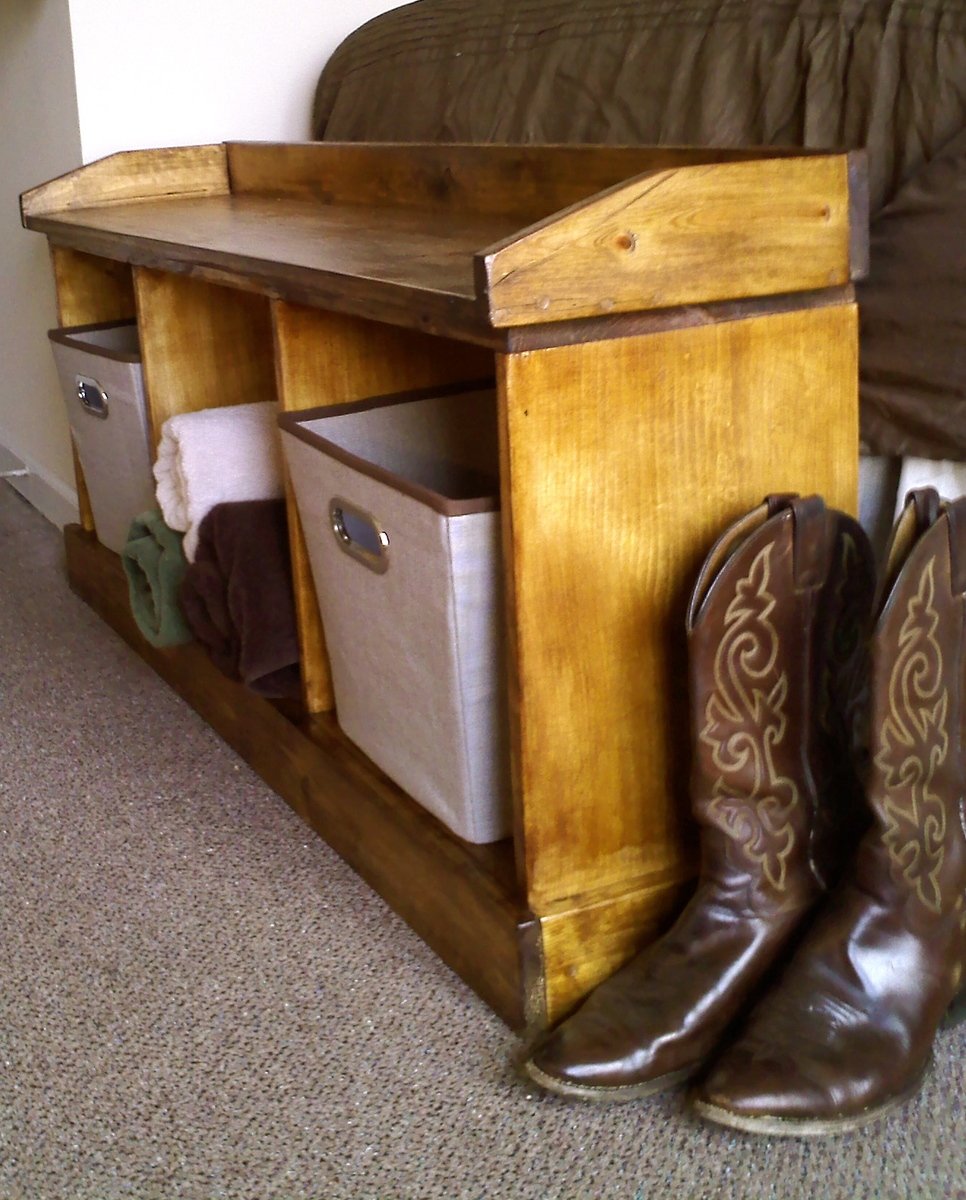
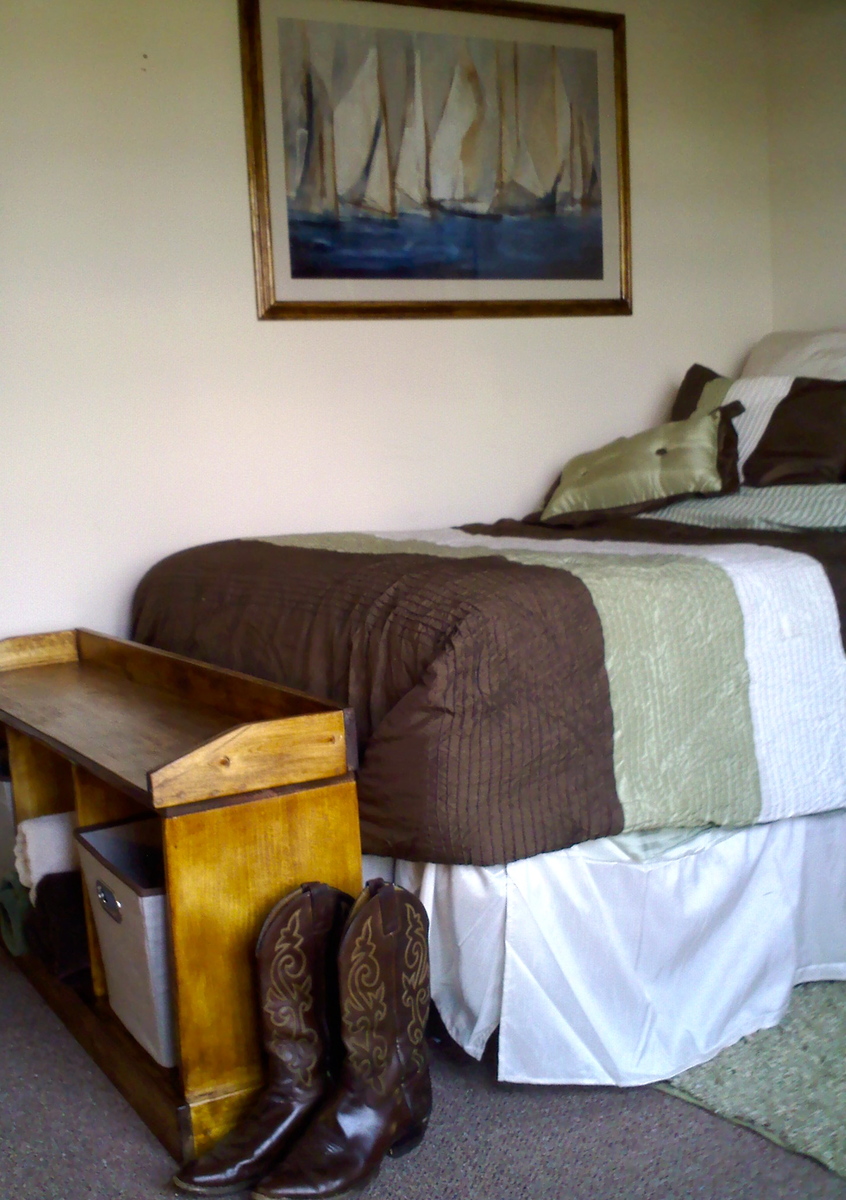
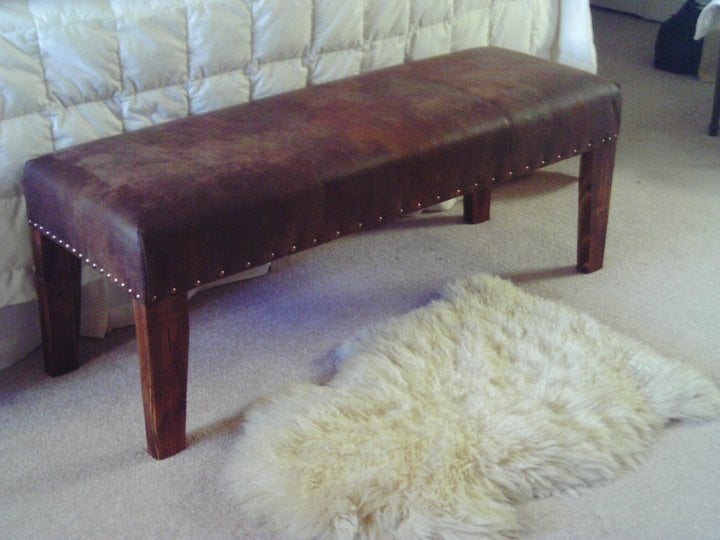
I've been wanting a bench for the foot of my bed for a long time, but could not find one I wanted at a price I wanted to pay. When I saw Ana's Upholstered Bench, it was just what I'd been looking for! I went out to the barn and scrounged some lumber, and then, because I am not comfortable using a circle cut saw, but I am comfortable using a table saw, I went online and found some videos on how to make a taper cut jig for a table saw and used that method to cut the tapers on the legs. I finished cutting out the frame and then sanded, stained and tung oiled the legs. My husband helped me assemble the frame and then I upholstered it. I am redoing my bedroom in a 'western' theme, and I used the remnant of the same faux suede fabric we used on the headboard. I added the nailheads but apparently I chose some that are only carried in one store in the area, so I'm having to wait a week for them to restock since I bought all they had! Then I'll add the rest to the front.
I am delighted with how it turned out! It not only looks good, it's really sturdy, and since I have less than $20 in out-of-pocket expenses, it sure beats those high priced benches! Thanks, Ana, you are a real inspiration to this 61-year-old grandma!
We are getting a puppy in a couple weeks and we want to crate train her. We have a small house so the only place we have to put the crate is in the living room. Needless to say, we needed a way to make the crate look good in our living room. That's when I found the plans for the rustic x-end table. The dimensions were almost the same as the dog crate. I only had to change the dimensions by a couple inches and wallah! Now the crate doesn't look out of place and I have a place to put my laptop and phone! I ended up ripping the 2x6's just a saw blade width down to get rid of the rounded edges and that made the top come together smoother. I also planed down the top a bit as well. In some spots, you can hardly tell they were 2x6's laminated together! I used two different stains on it. The first coat was a tudor stain but I wanted to warm it up a bit so I put a coat of antique walnut on it as well. I am very very happy with how this turned out. Now my husband would like me to build a coffee table to match!
Thu, 02/25/2016 - 08:59
This entire site is click bait. yet to see one actual plan. its like all stolen data from pinterist. which is equally as bad
I built this using the Kentwood bookshelf plans as a guide. I made my shelves 3 ft wide and made it aprox. 8 ft tall. I also bought the KREG shelf pin jig and built the shelves to be adjustable. I haven't chosen a finish yet because I am waiting for my son to pick a color since it is going in his room. I am considering fixing a shelf in place and building some doors for the bottom. I worked on this over a week span, however I could only do bits and pieces at a time. The sanding took longer than the build because I plugged the pocket holes and they take longer to sand down.
My daughter asked me to build this for her for Christmas but wanted it to have a gray weathered look to match some of her existing furniture that I had built. Very enjoyable build! Thanks Ana!
This came together pretty easily and the directions were spot on. These were my first 2 out of about 15 that are done now. The sage green one now has a chalkboard seat which I love!
Potting Bench.. Used an old window for the top part. Great easy plan can be modified to build for many uses. I had free wood and used a walnut stain. But I am thinking of painting it black.
Needed a place to store wood for the fireplace and firepit. This very nicely organizes what was before a huge dirty pile of wood scattered on the ground. Cedar pickets for the top, all is coated in exterior white stain. Holding up nicely so far.
I needed chairs that would fit on my narrow front porch. This plan was great because I was able to resize it to 20x20. I used 1x4s that I already had and some wood glue. They turned out solid. I made the tryde table with left over wood. That one is 17.5x17.5. Super happy with the results. We are doing the garage shelves right now. I have a list of other things I want to make thanks to Ana's wonderful website.