DIY Bunk Bed Step Dresser Based on Ana White Plans
Based on the Kendal Extra Wide Dresser but customized to work as a companion piece to the loft that I built for my son earlier this year.
Rustic Cupcake Stand!
This bed is our first build. We added 4 inches to the height of posts on headboard and footboard. We also used brackets rather than screwing directly into footboard to make the bed easier to move if we ever need to.
Sun, 07/15/2012 - 01:43
I just finished building this same bed and I'm looking for
an easy way to mount it together invade I new to move it. Where did you find brackets for the head and foot board? Could you post a picture of them?
Thanks,
Brandon
Mon, 10/01/2012 - 00:42
How tall is the bed from the ground to the bottom of the side rail? I'm wanting 14" so I don't need a box spring {we're both tall so I don't want to feel like I'm on the ground}
We decided to build these for the kids, to get the old Ikea dressers out of their rooms. The build went very easy. Now the kids have a room full of only handmade (ana-white) furniture!
Tue, 08/20/2013 - 19:55
Beautiful! =D I love the finish style you chose! I'm not typically a fan of drawer pulls, but I love the way it looks on your rolling dressers.
I really wanted to put a barn door in my husband's home office, but have you looked at the prices of the kits? No way was I going to spend that for a door. So I decided to fabricate it myself. For the rail hardware- I used a 72" steel rod, copper pipe fittings, and lag screws. For the door hardware, I used 12"ish, long pieces of steel, pulleys, and carriage bolts.
The door itself is made from plywood siding, 1 x 4's, 1 x 6's, and 1 x 3's. The entire door and hardware cost around $80 to make myself. It's functional and looks amazing! The entire tutorial is up on my blog!
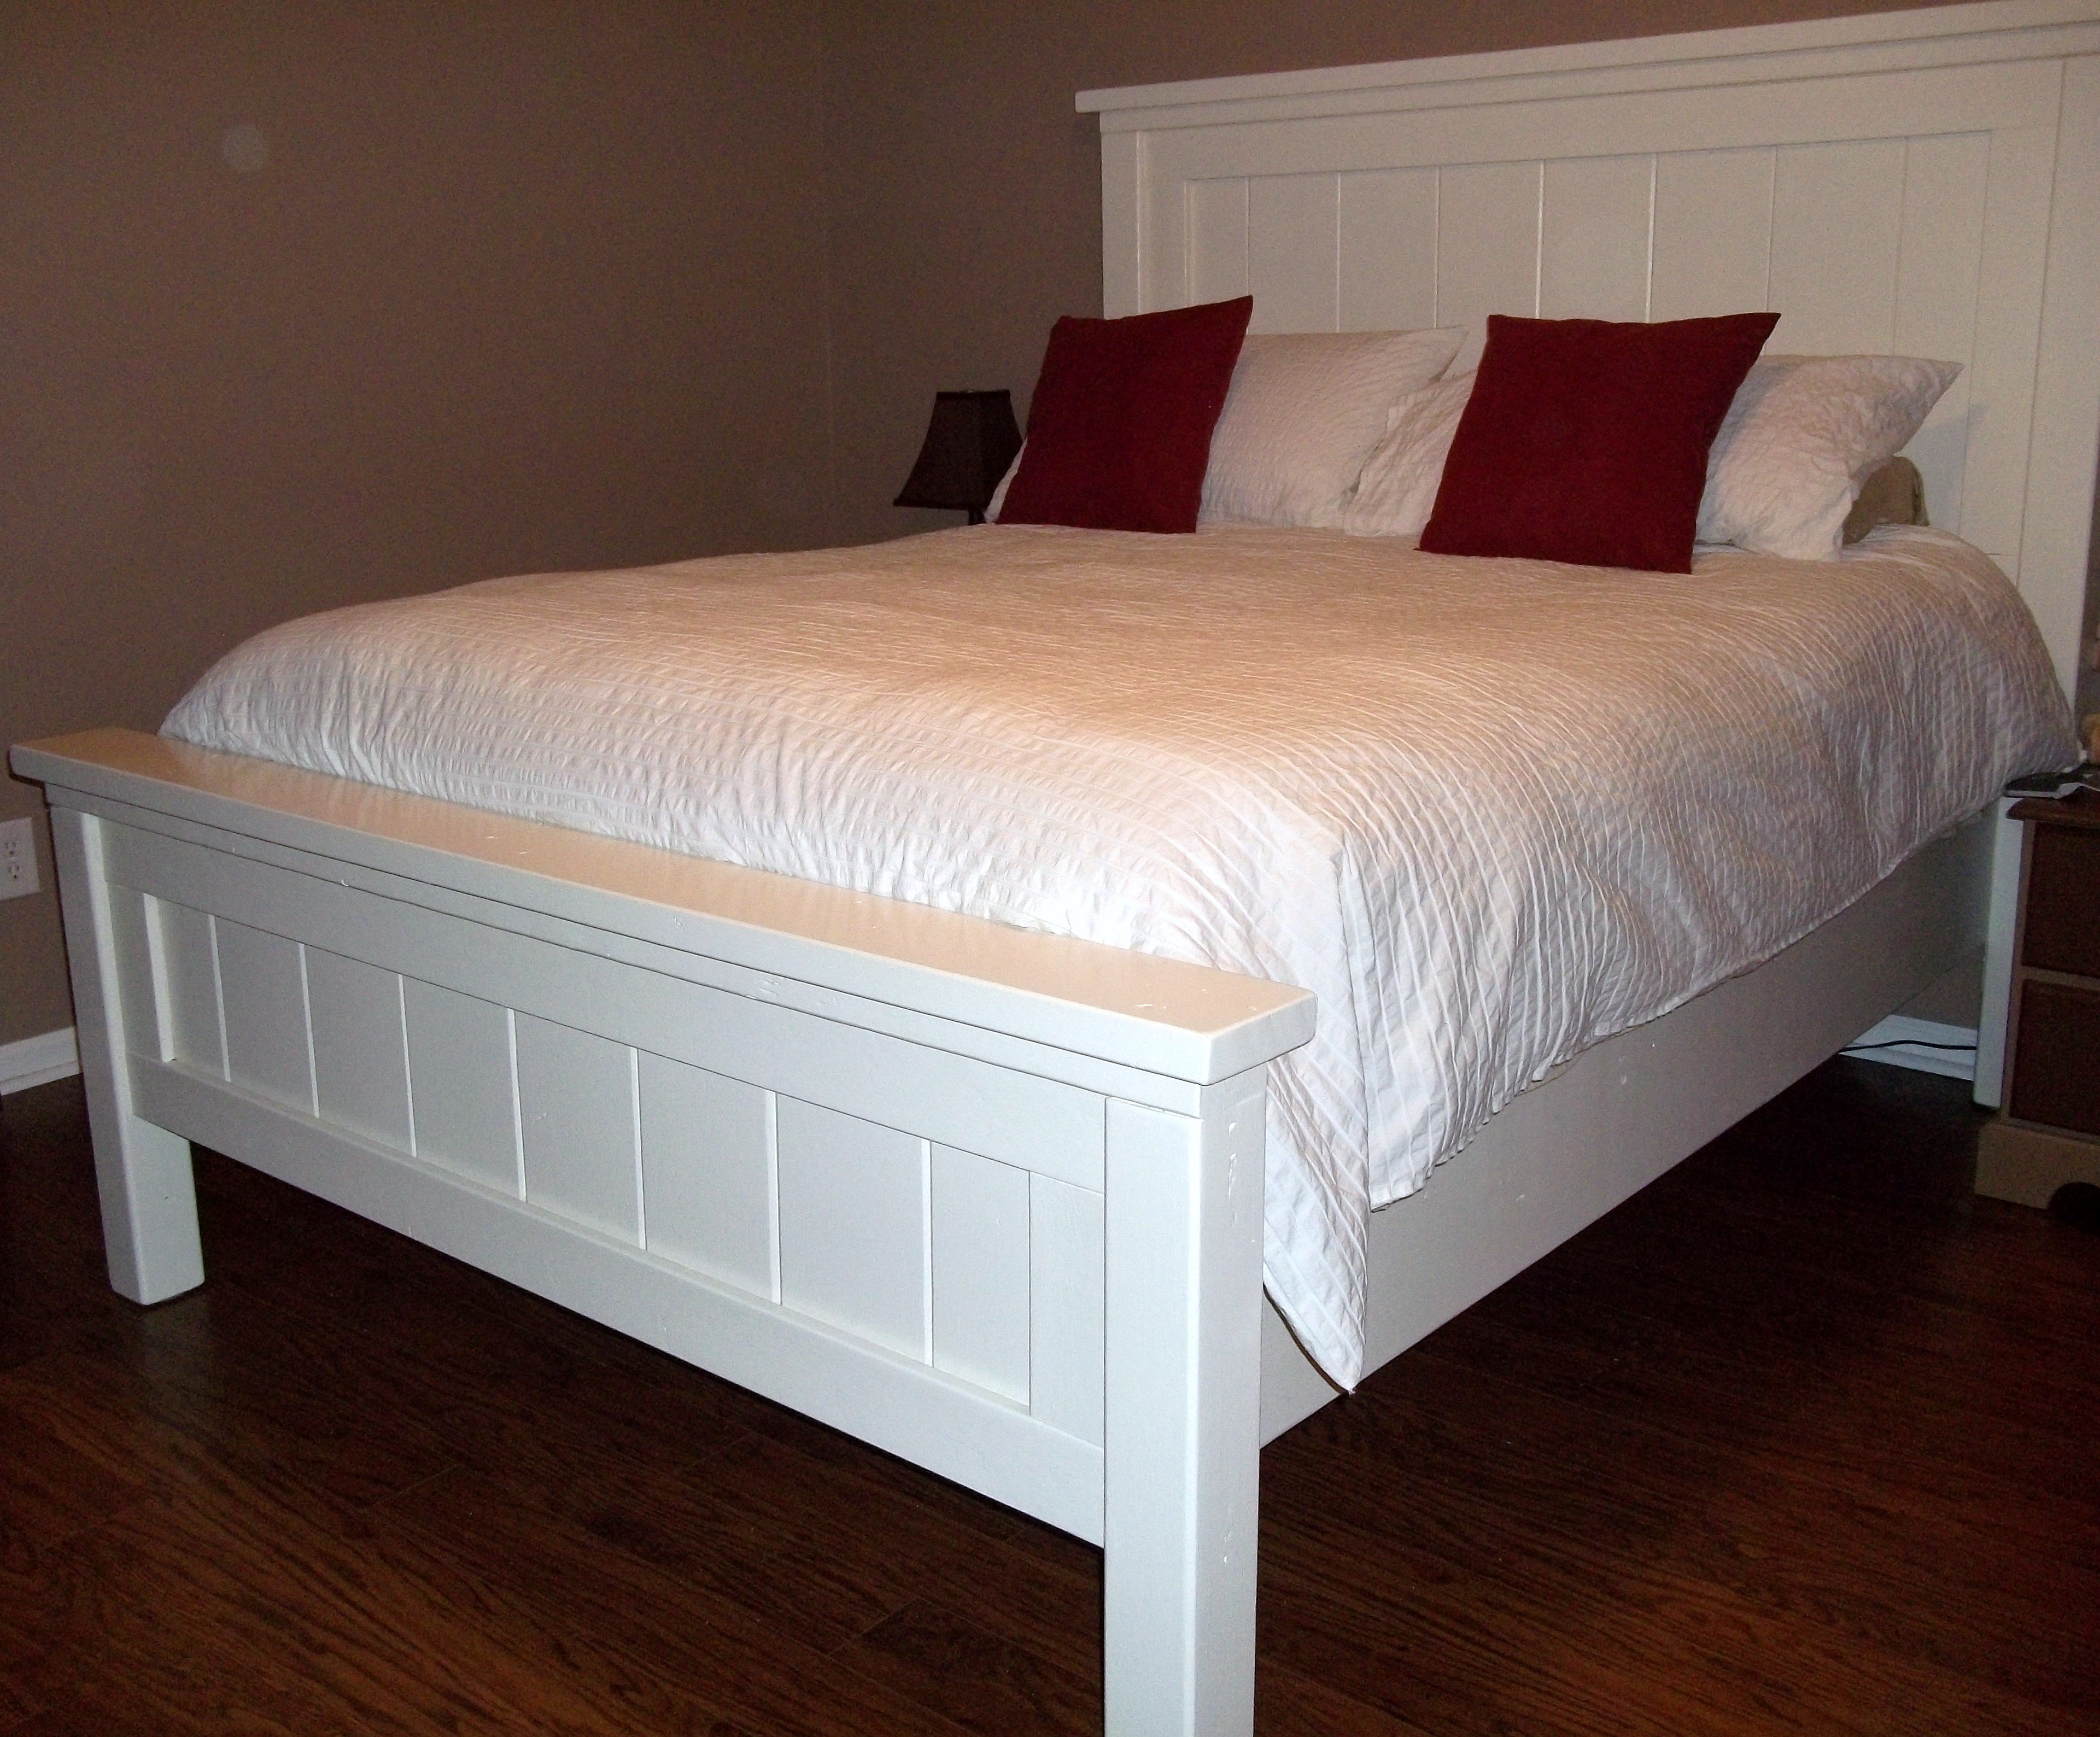
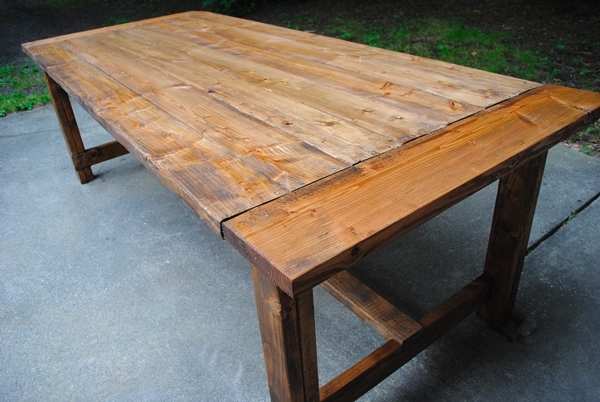
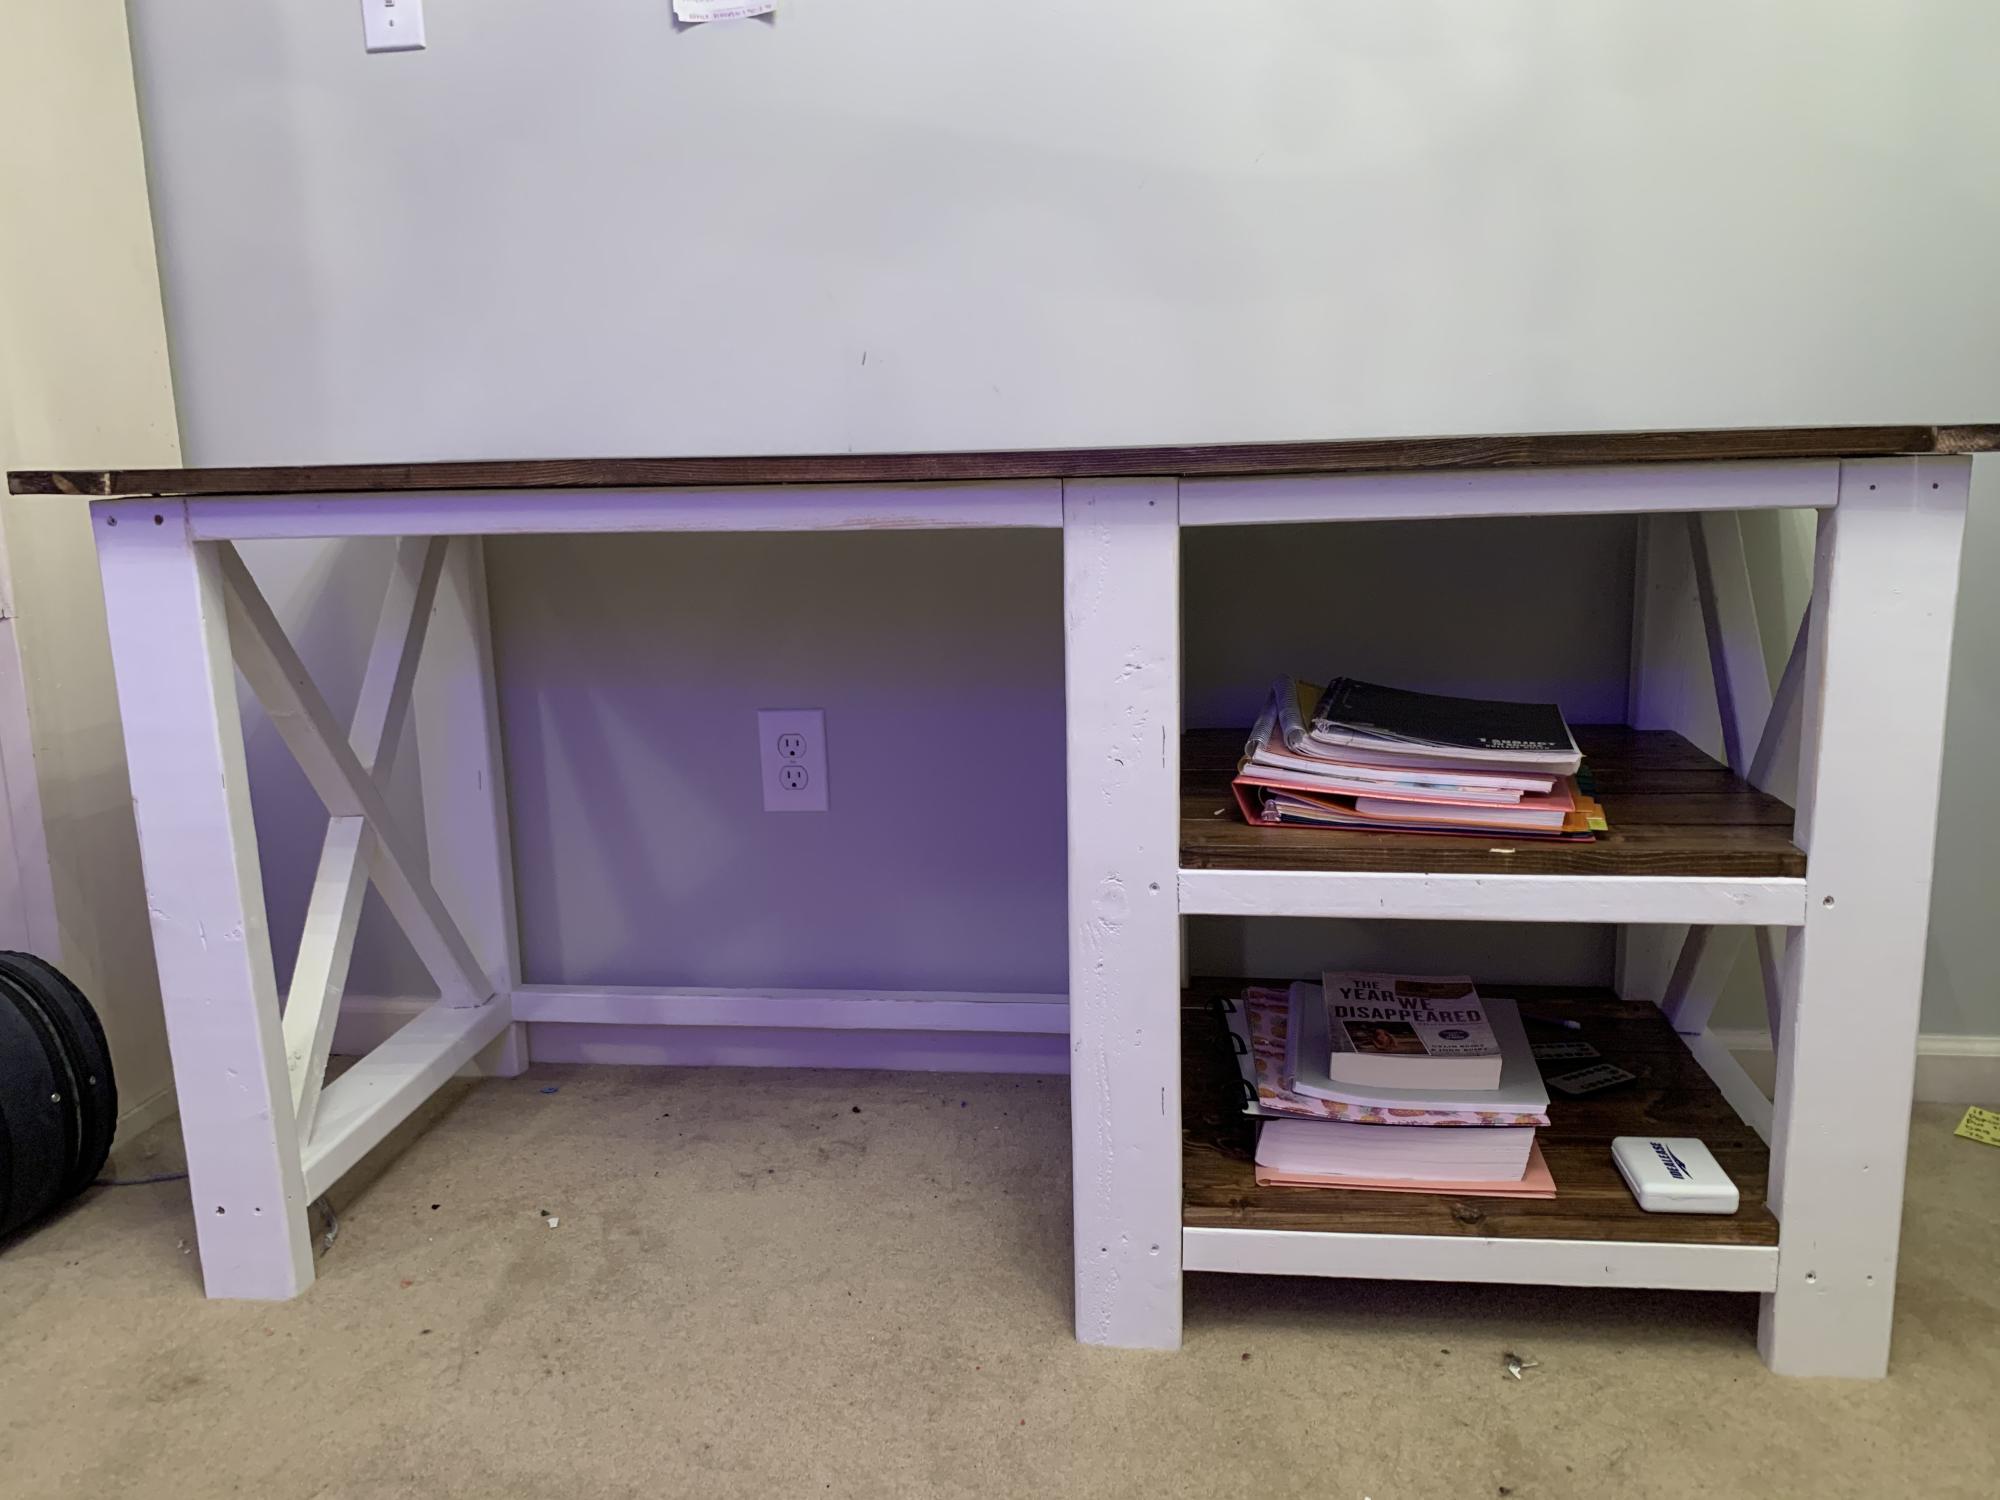
We adjusted the plans so this table top measures 84" x 48". Our chairs were also a little taller than normal, so we raised the legs to make sure the height of the table would be comfortable with the chairs.
I've lost all the math we did, so I'm sorry I can't help you make these adjustments. We made this table a couple years ago.
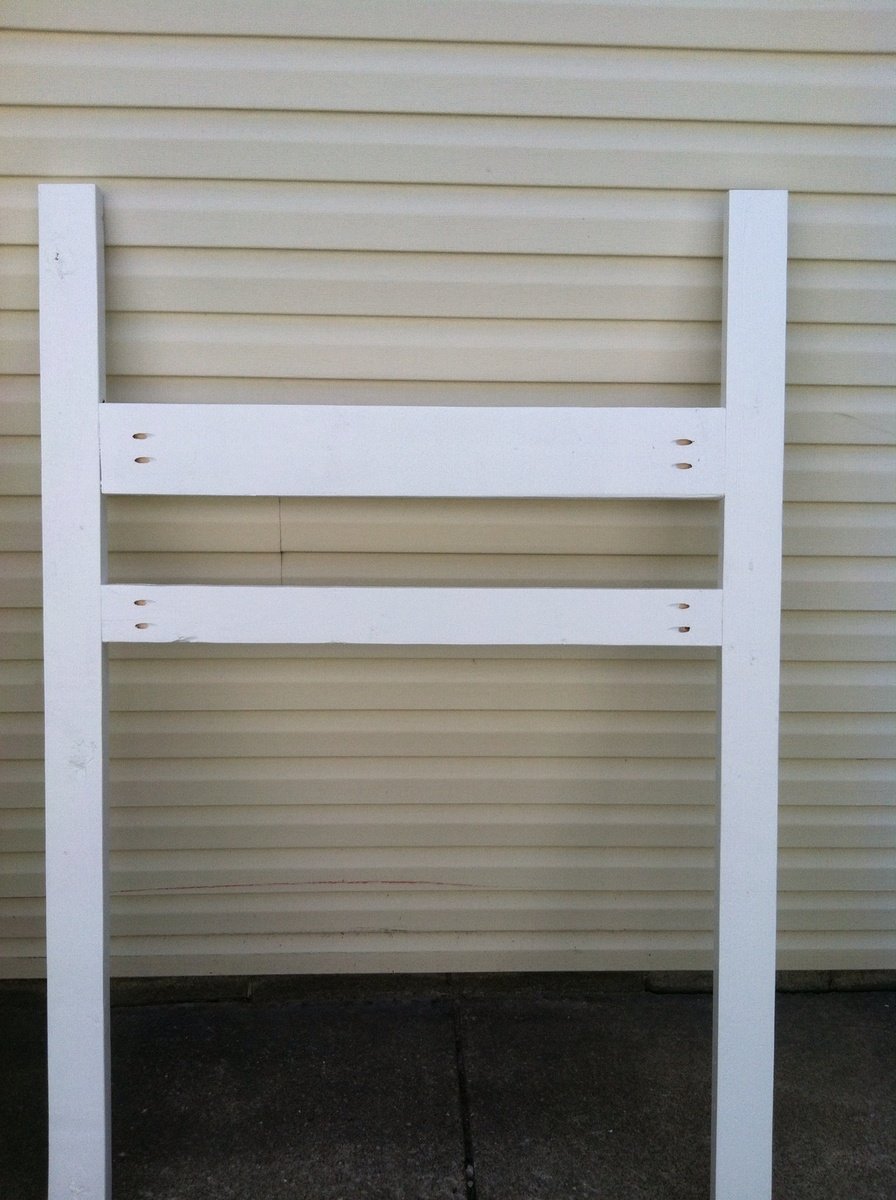
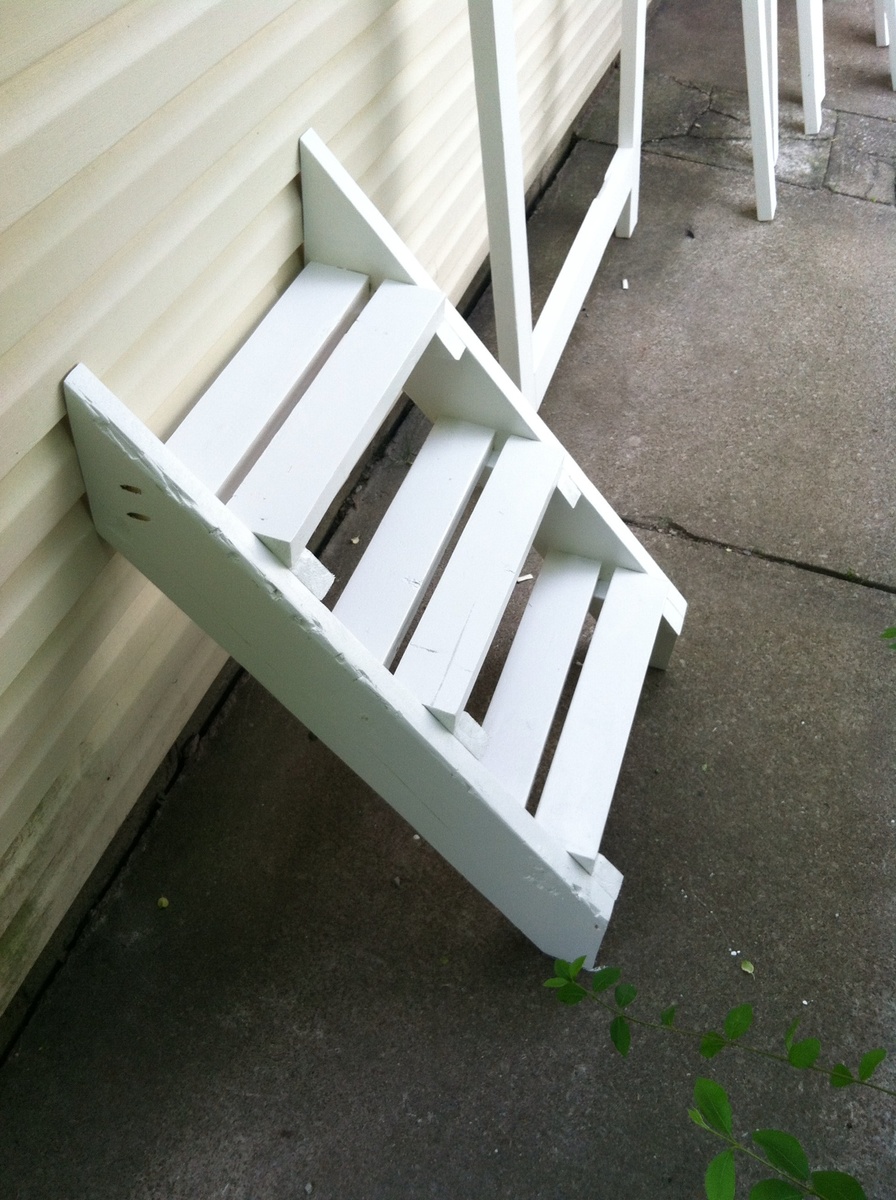
We used 4x4s for the legs and I'm really glad we did. A previous Ana White table we made, we used thinner legs and the poor thing squeaked like crazy. This table is much sturdier. We also used thicker pieces for the top which also adds to the stability.
A friend helped us plane the table top and fit it all together. It's just pine though, so we have had some warping, but it isn't bad.
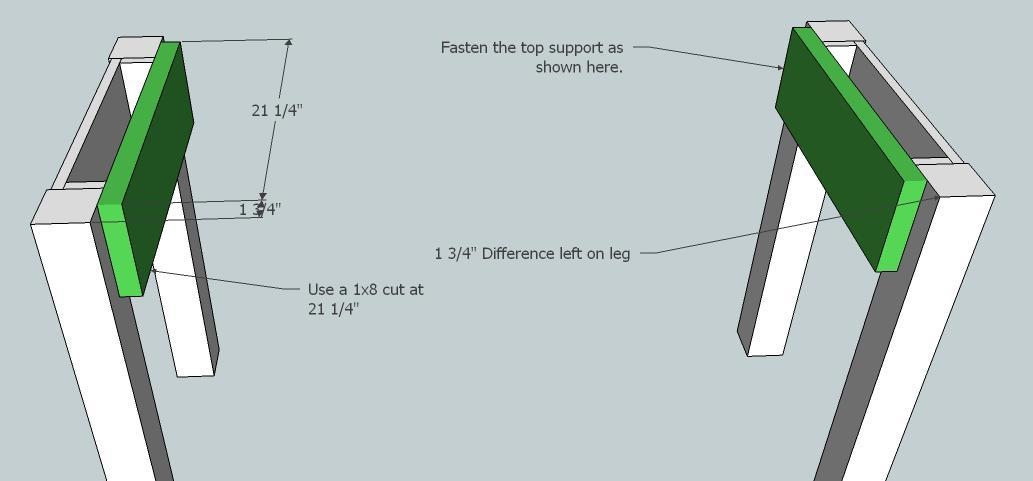
We bought a kreg drill to make the assembly smoother. Love that thing!
Thanks for the plans! We have a small backyard and I wanted something that we’d actually enjoy looking at. I skipped the planter box and will likely put some potted plants up there instead. All I need is a matching metal cap for the roof peak, and of course chickens!
This is my very first woodworking project (except for a Paper Towel Holder in High school over twenty years ago).I have always wanted a long farmhouse table, so when I saw the plans,I was excited to try building my own. Thanks so much Ana for making this doable!
In reply to Great job! I love your by Lori E (not verified)
Thu, 03/26/2015 - 20:29
Thank you Lori!
This was my first attempt at DIY - had to convert to Metric! thank goodness I calculated right - end product is awesome. I lined the back panels with textured Silver wallpaper - gives an awesome contrast.
I'm Hooked, already looking for my next project!
To date this has been my favorite and fullfilling DIY project!! Skills were learned, $$ was saved and it looks fabulous!!! It wasnt easy but it wasn't impossible. April WIlkerson provides a detailed tutorial on her website along with a fantastic youtube video on her channell. I hope this inspires someone else to take on this challenge!! If you have any any questions please feel free to ask me!! Enjoy.
Built this 8' farm table after watching your video. Its my first piece of furniture.
Sun, 10/14/2018 - 13:51
What a fantastic first piece! I love the size, it is just right for your space!
During the transition to online school, I built this for my daughter. Works great. Obviously needs some finish work, but she wanted to use it right away. lol
This was little tougher for me being new to wood working. But I like the look a lot better.
Built this from lumber from a daybed that I tore apart. Total cost was about $10 for the pieces for the top. Built in a small apartment with a Kreg jug and some clamps on the kitchen floor. The top is not completely even but close. Was fun to build and I am very happy with how it turned out, thanks Ana!
I made this twisted end table for my #oneboardchallenge project. It was a learning experience and I'm honestly surprised that it turned out as well as it did! There are so many good #oneboardchallenge projects being submitted, I don't know if mine will get lost among the crowd. Either way, it wont get lost around my house :) It is a good conversation piece!
Mon, 10/26/2020 - 01:40
Are the plans for this on your site?
As a new wood worker I am very appreciative of your site and plans. It's my go to source for ideas.
Thanks
Our small entryway was in need of some sort of bench or coat rack. Since the space is on the smaller side, I was looking for plans that were simple and would not overwhelm the area of the house. When I came searching for plans on Ana White’s website, these plans were JUST posted! It was meant to be! This was my second build ever. Very simple and straight forward. I used Special Walnut for the stain and a satin polyurethane for the top coat.
I built this chaise lounge for my daughter from your plans. She will paint it tomorrow. Thanks!!!
My first build... Not perfect but it has led me down a new path... Thank you soooo much Ana! More to come and a plan of my own in the works!
Rustic X Coffee Table Brag! Thank you so much for the plans Ana! Keep building everyone :)
Sat, 10/10/2015 - 18:59
Did you use any tea before you used the steel wool? What was your steel wool and vinegar mixture rate? I really like the color of this! Thanks!
This vanity is an amalgamation of a few ideas I found online. I used the Reclaimed Wood Console Table as a guide to pull it all together. All three drawers are functional. The plumbing falls directly between the center and right drawer, and the drawers are mounted on bottom center glides.
This sofa has been in constant use for three years. Sturdy and comfortable, we have to compete with the cats for a nap or rest. Even on the winter, when we remove the cushoins, it gets used as a bench or a kitty hiding place while they wait to come in.