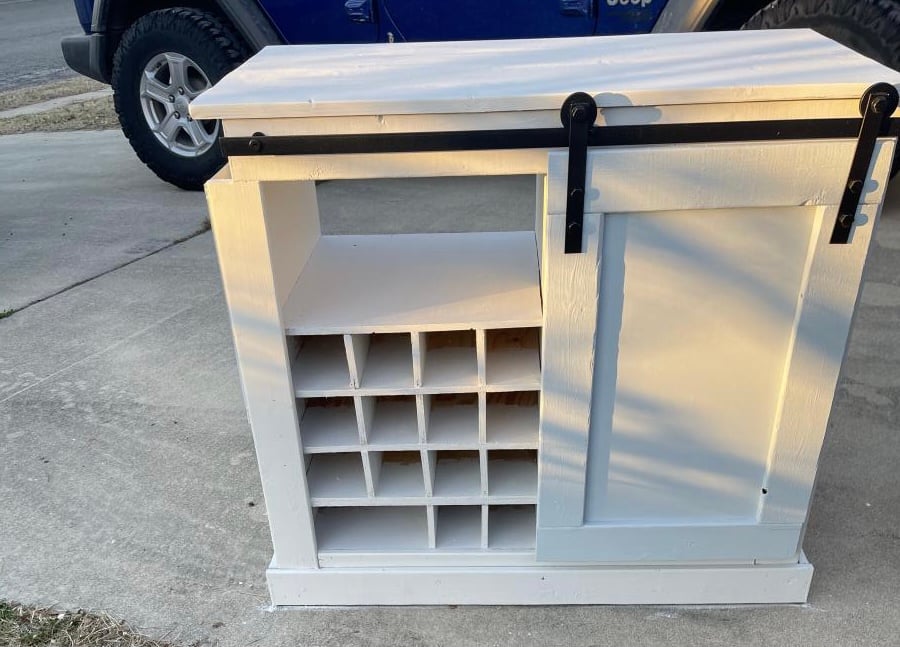
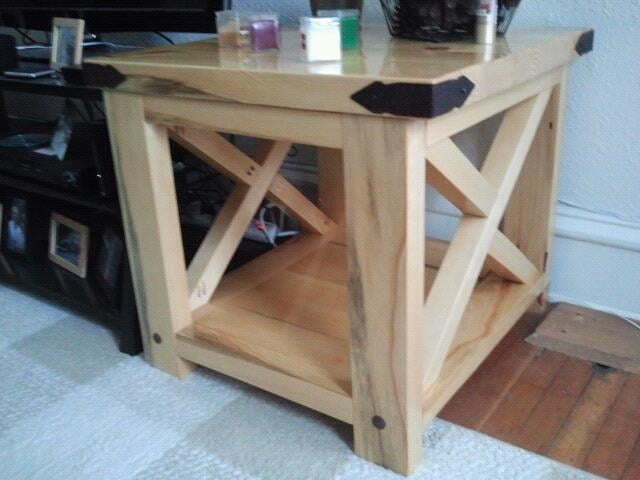
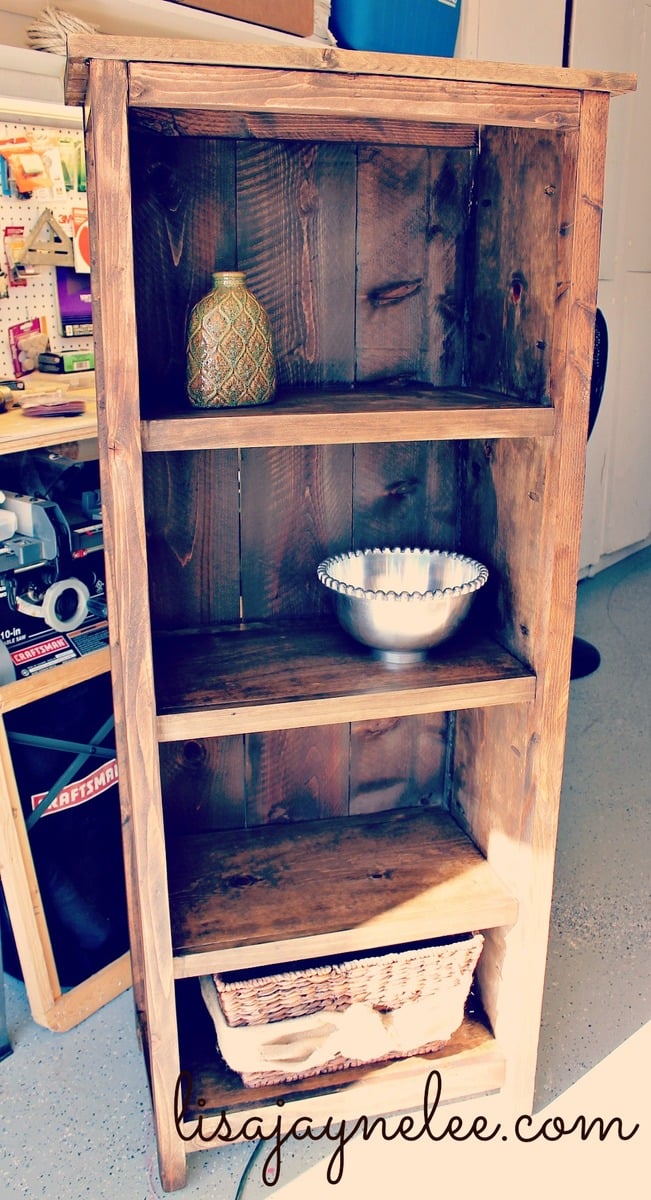
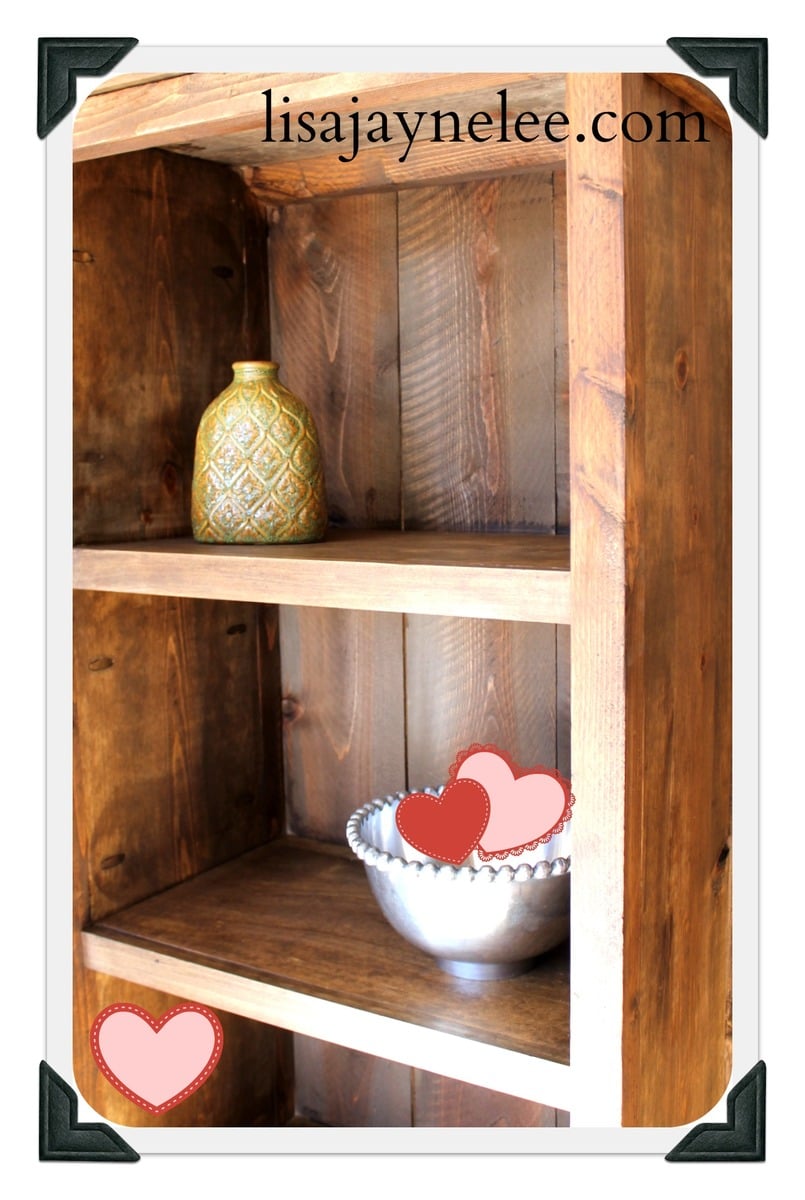
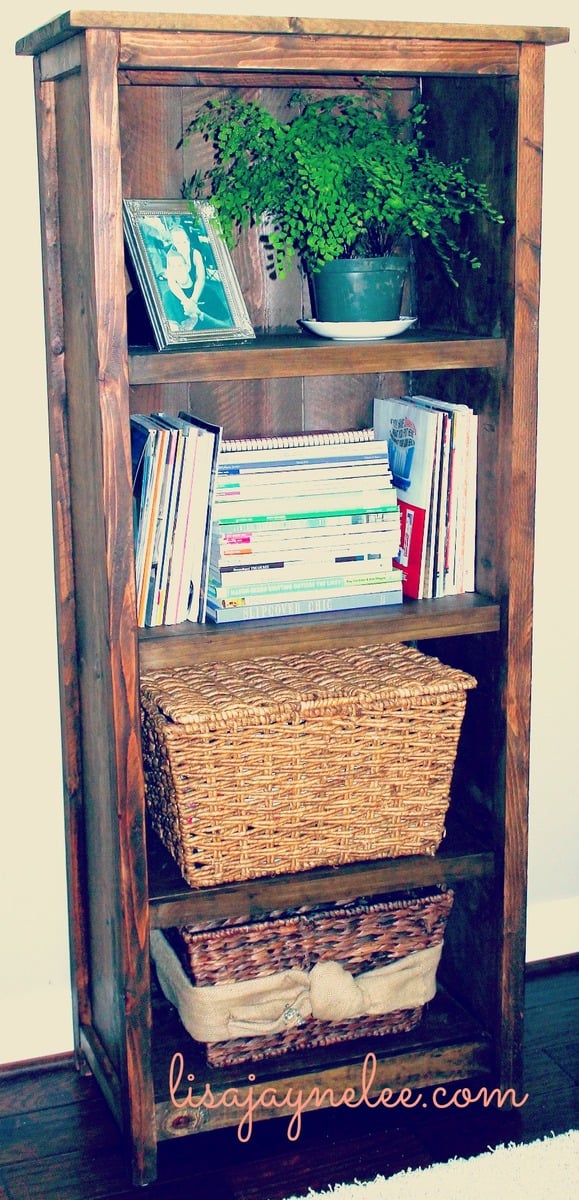
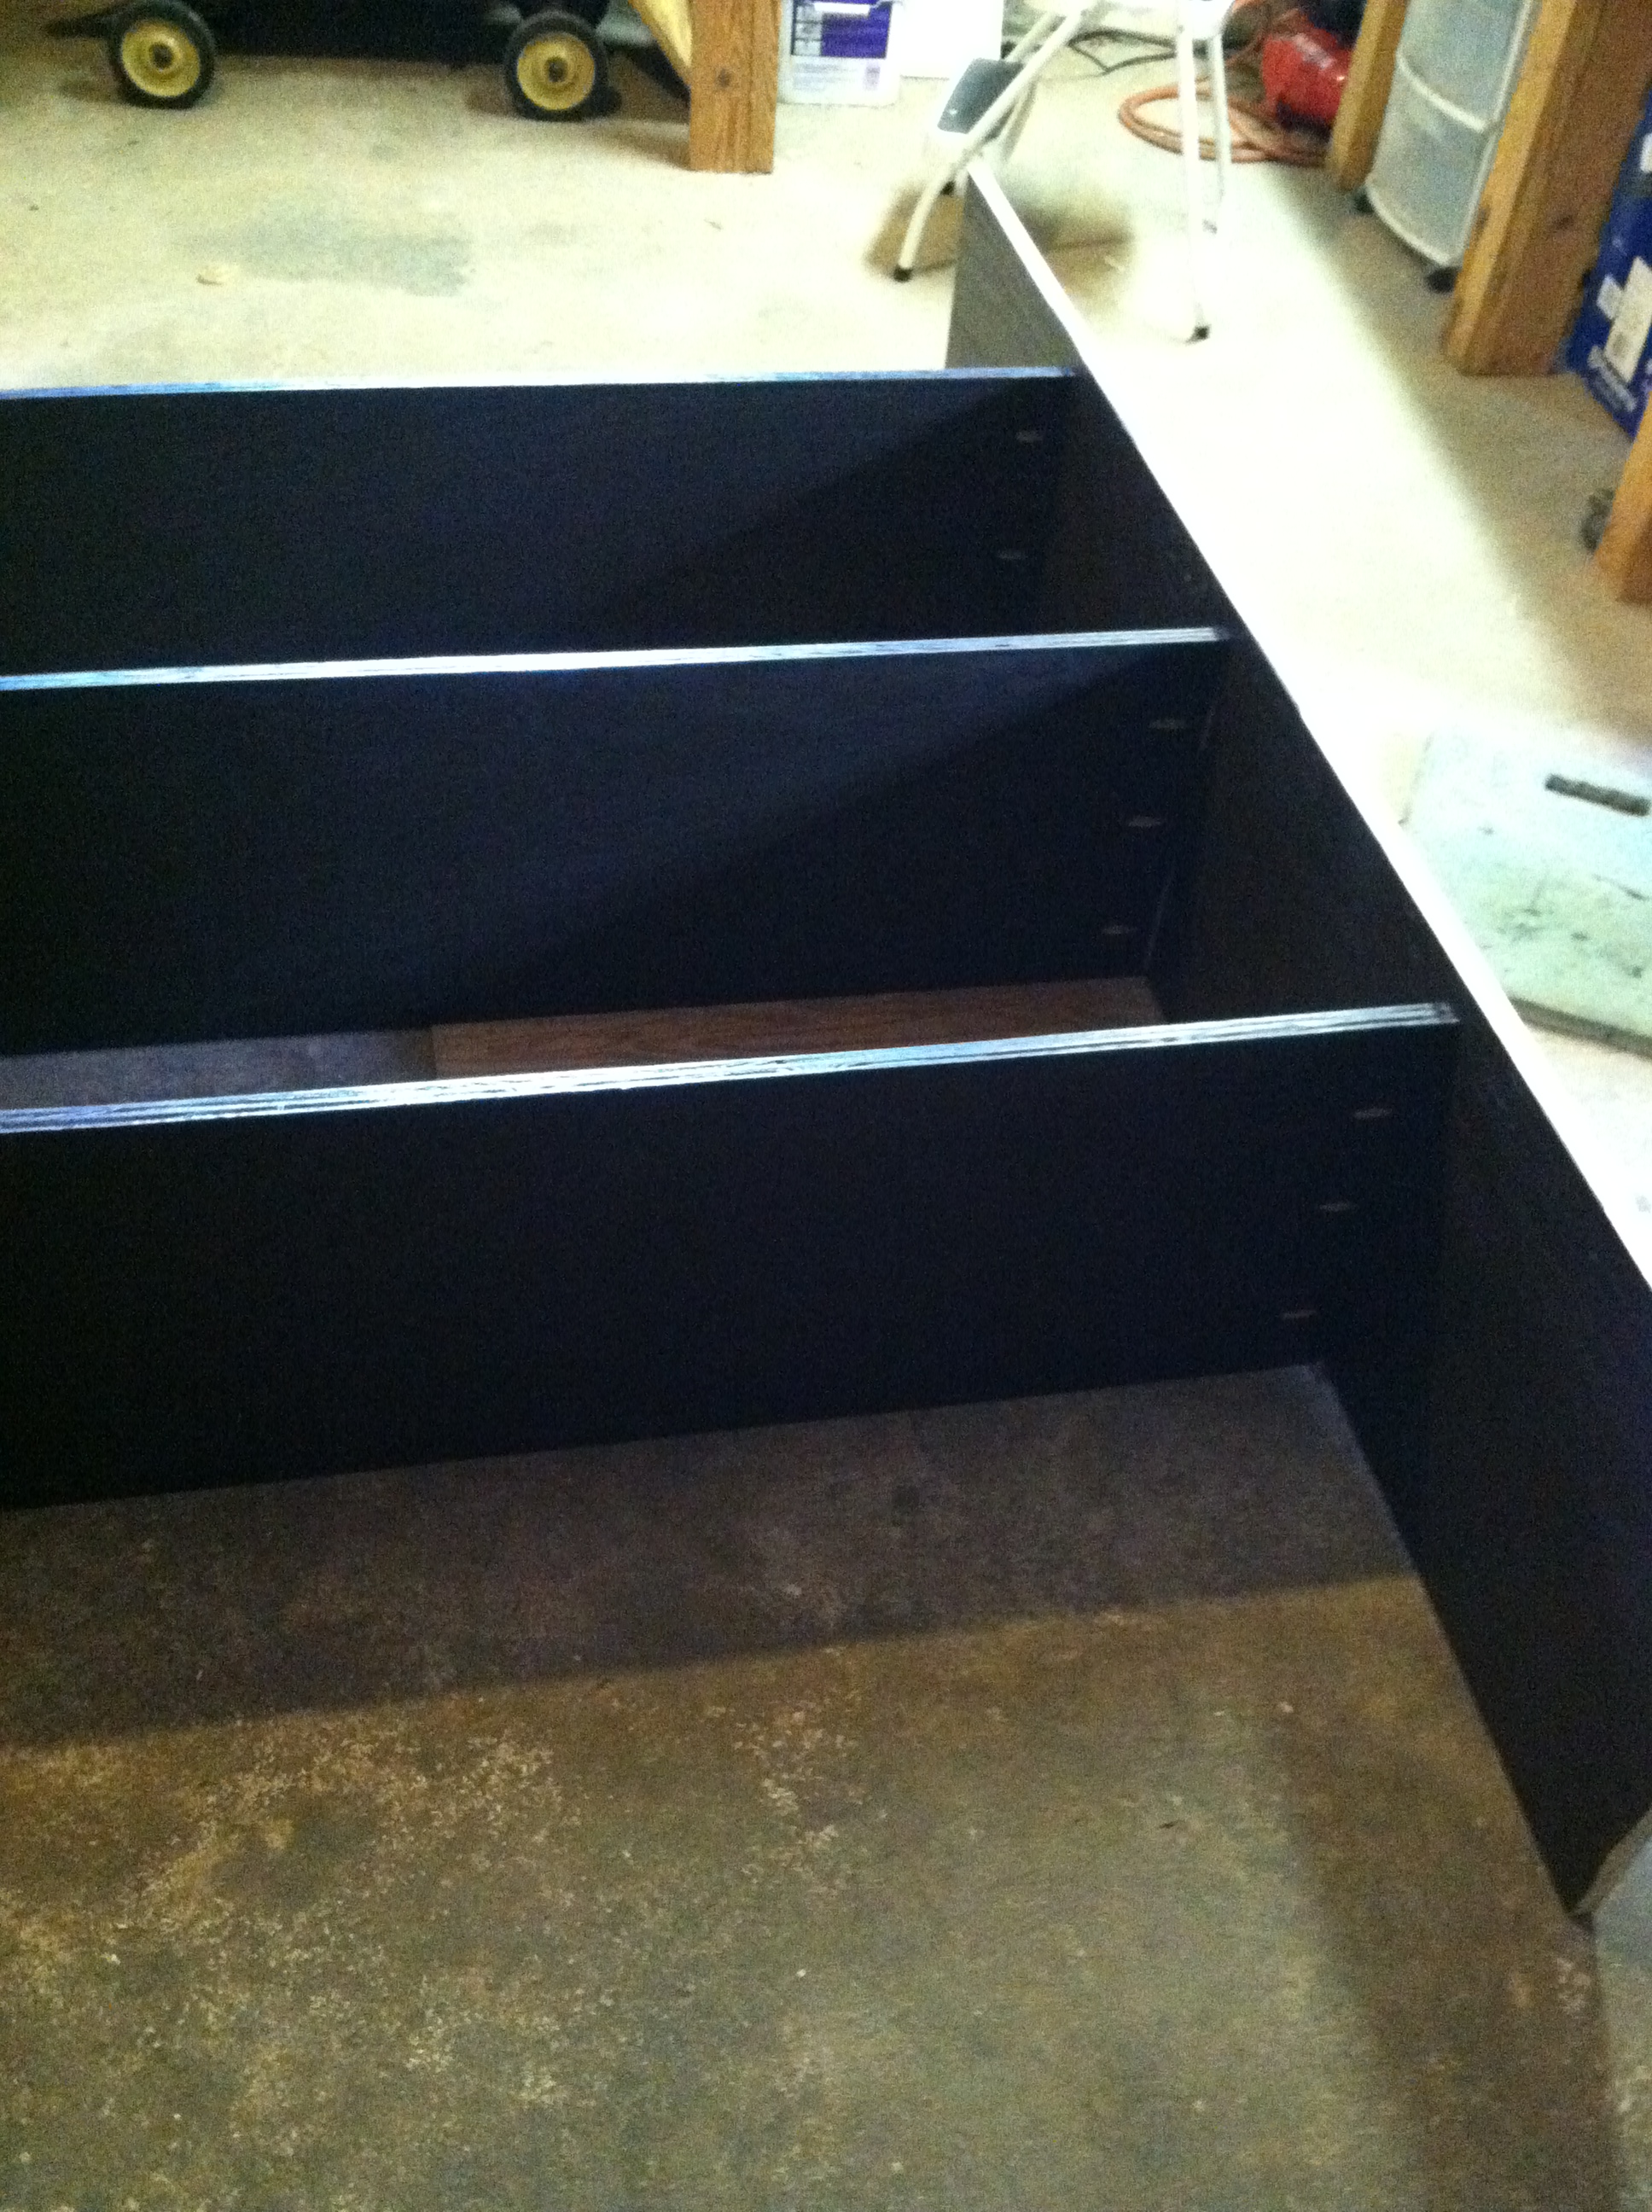
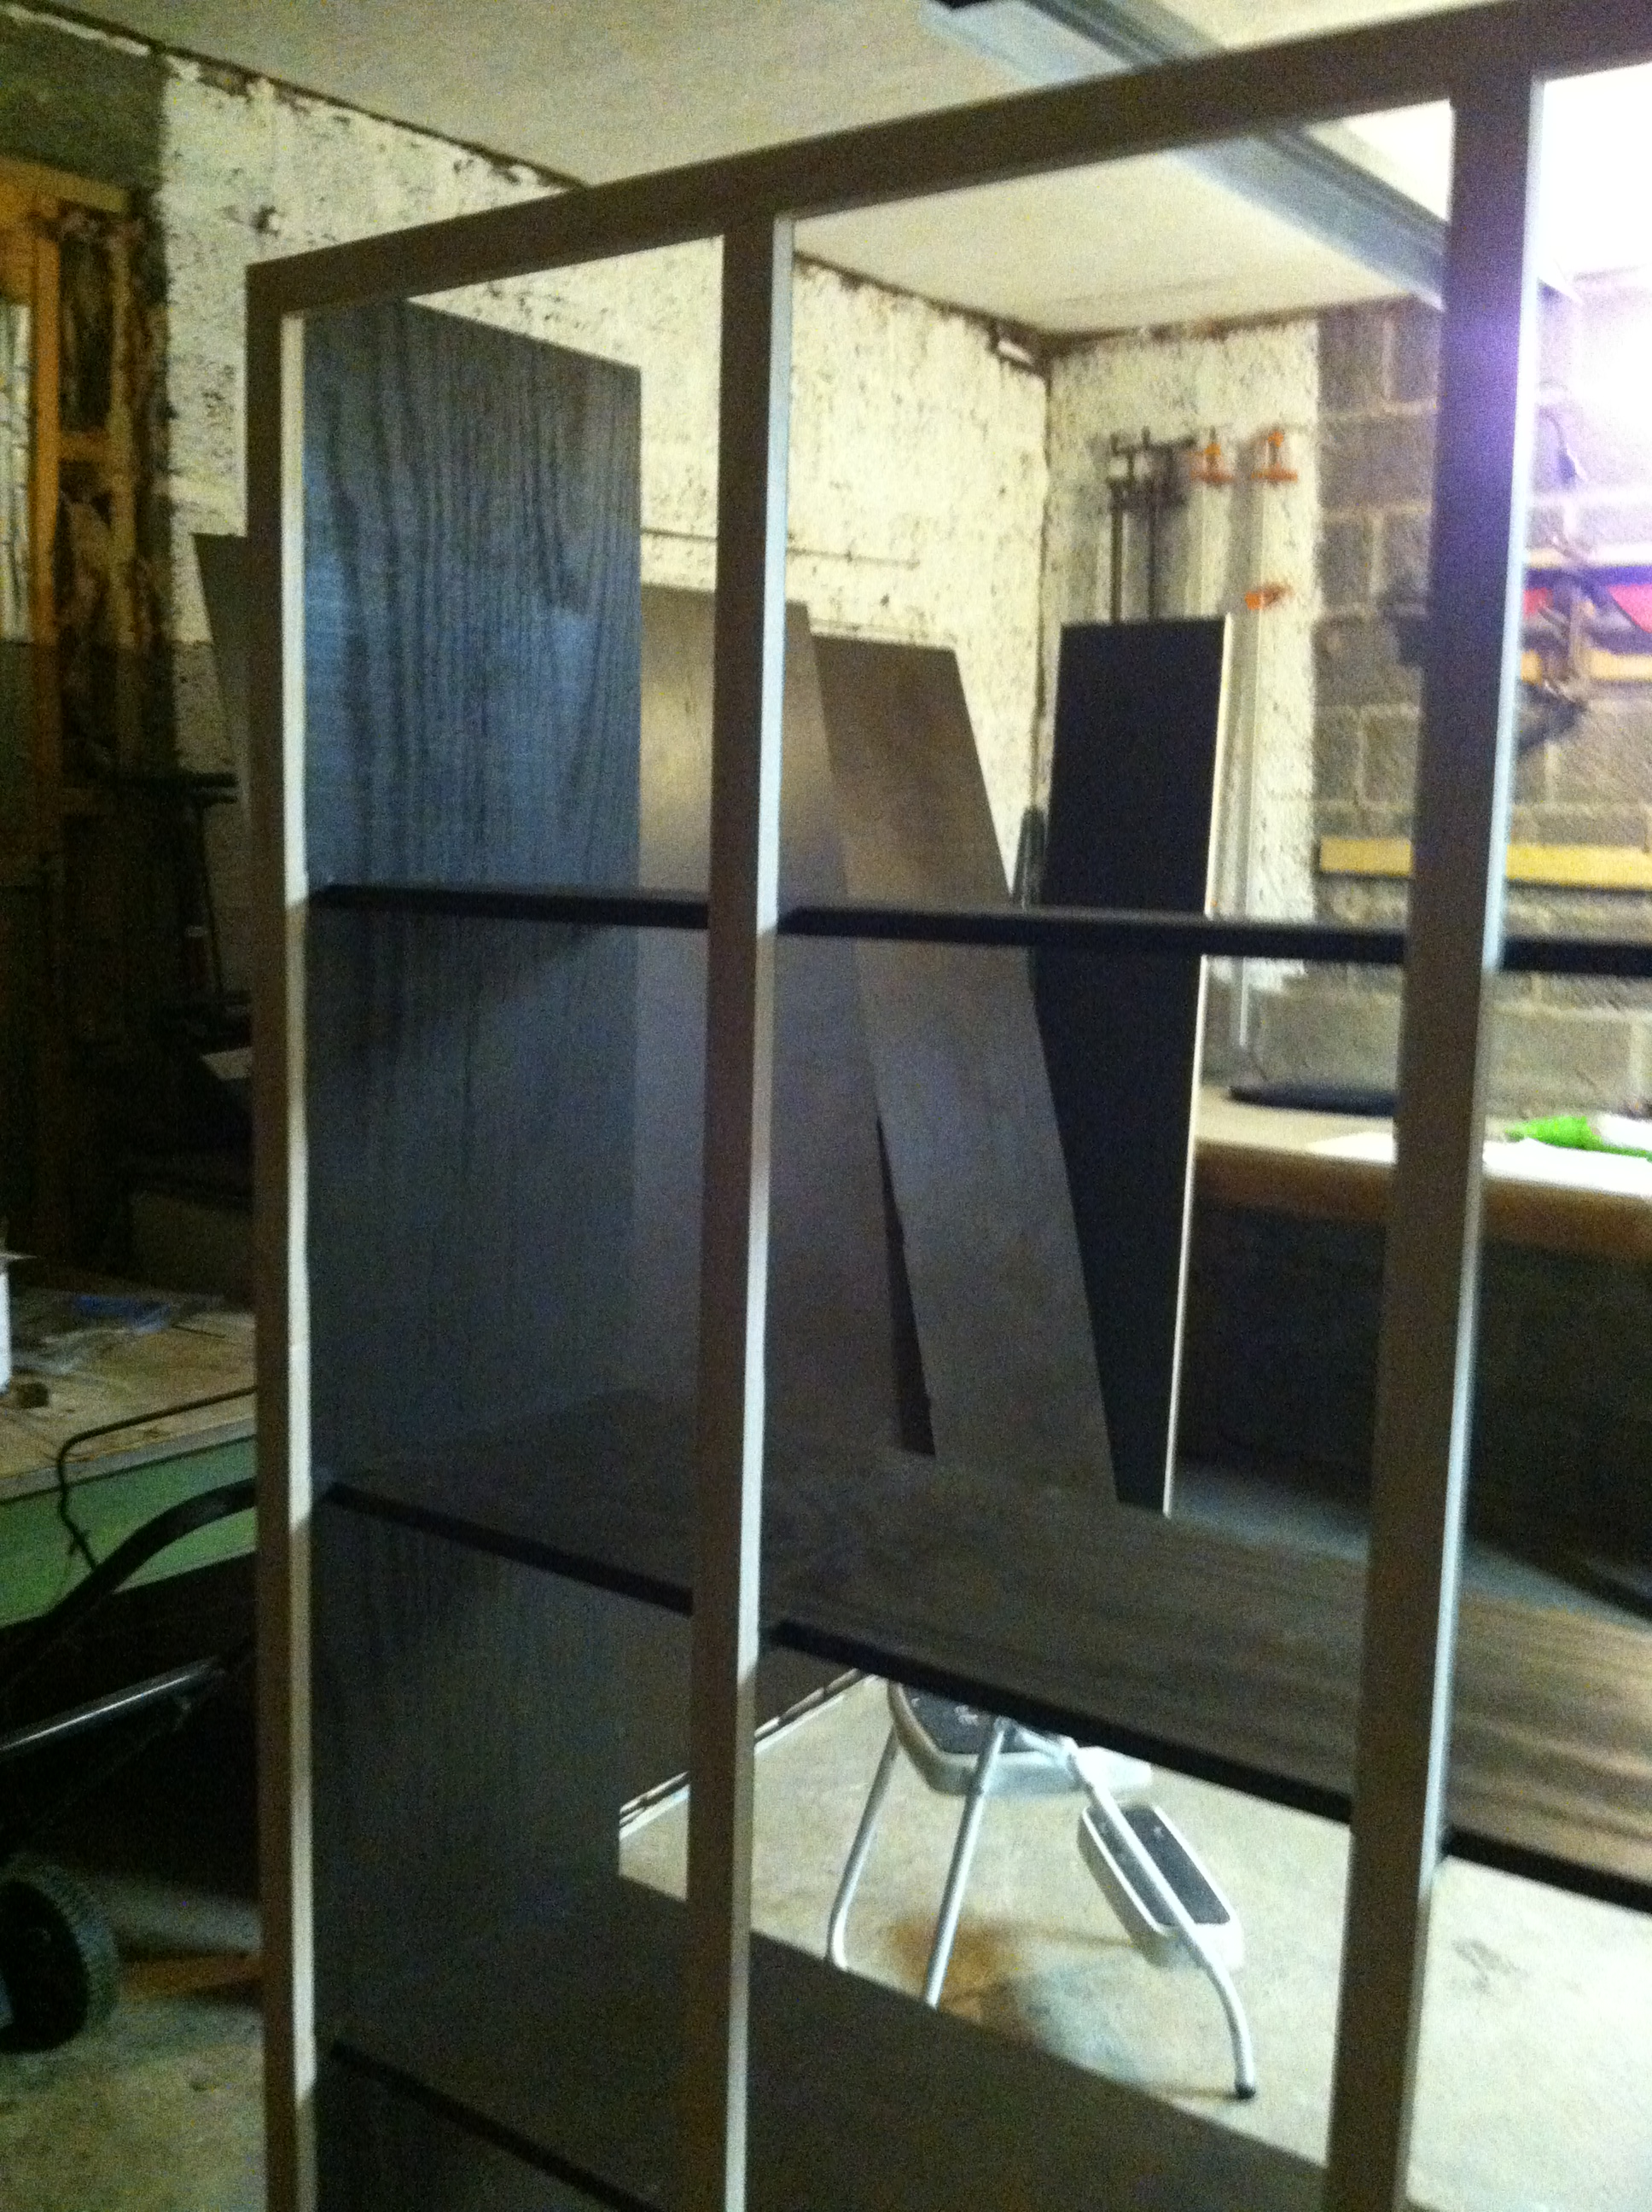
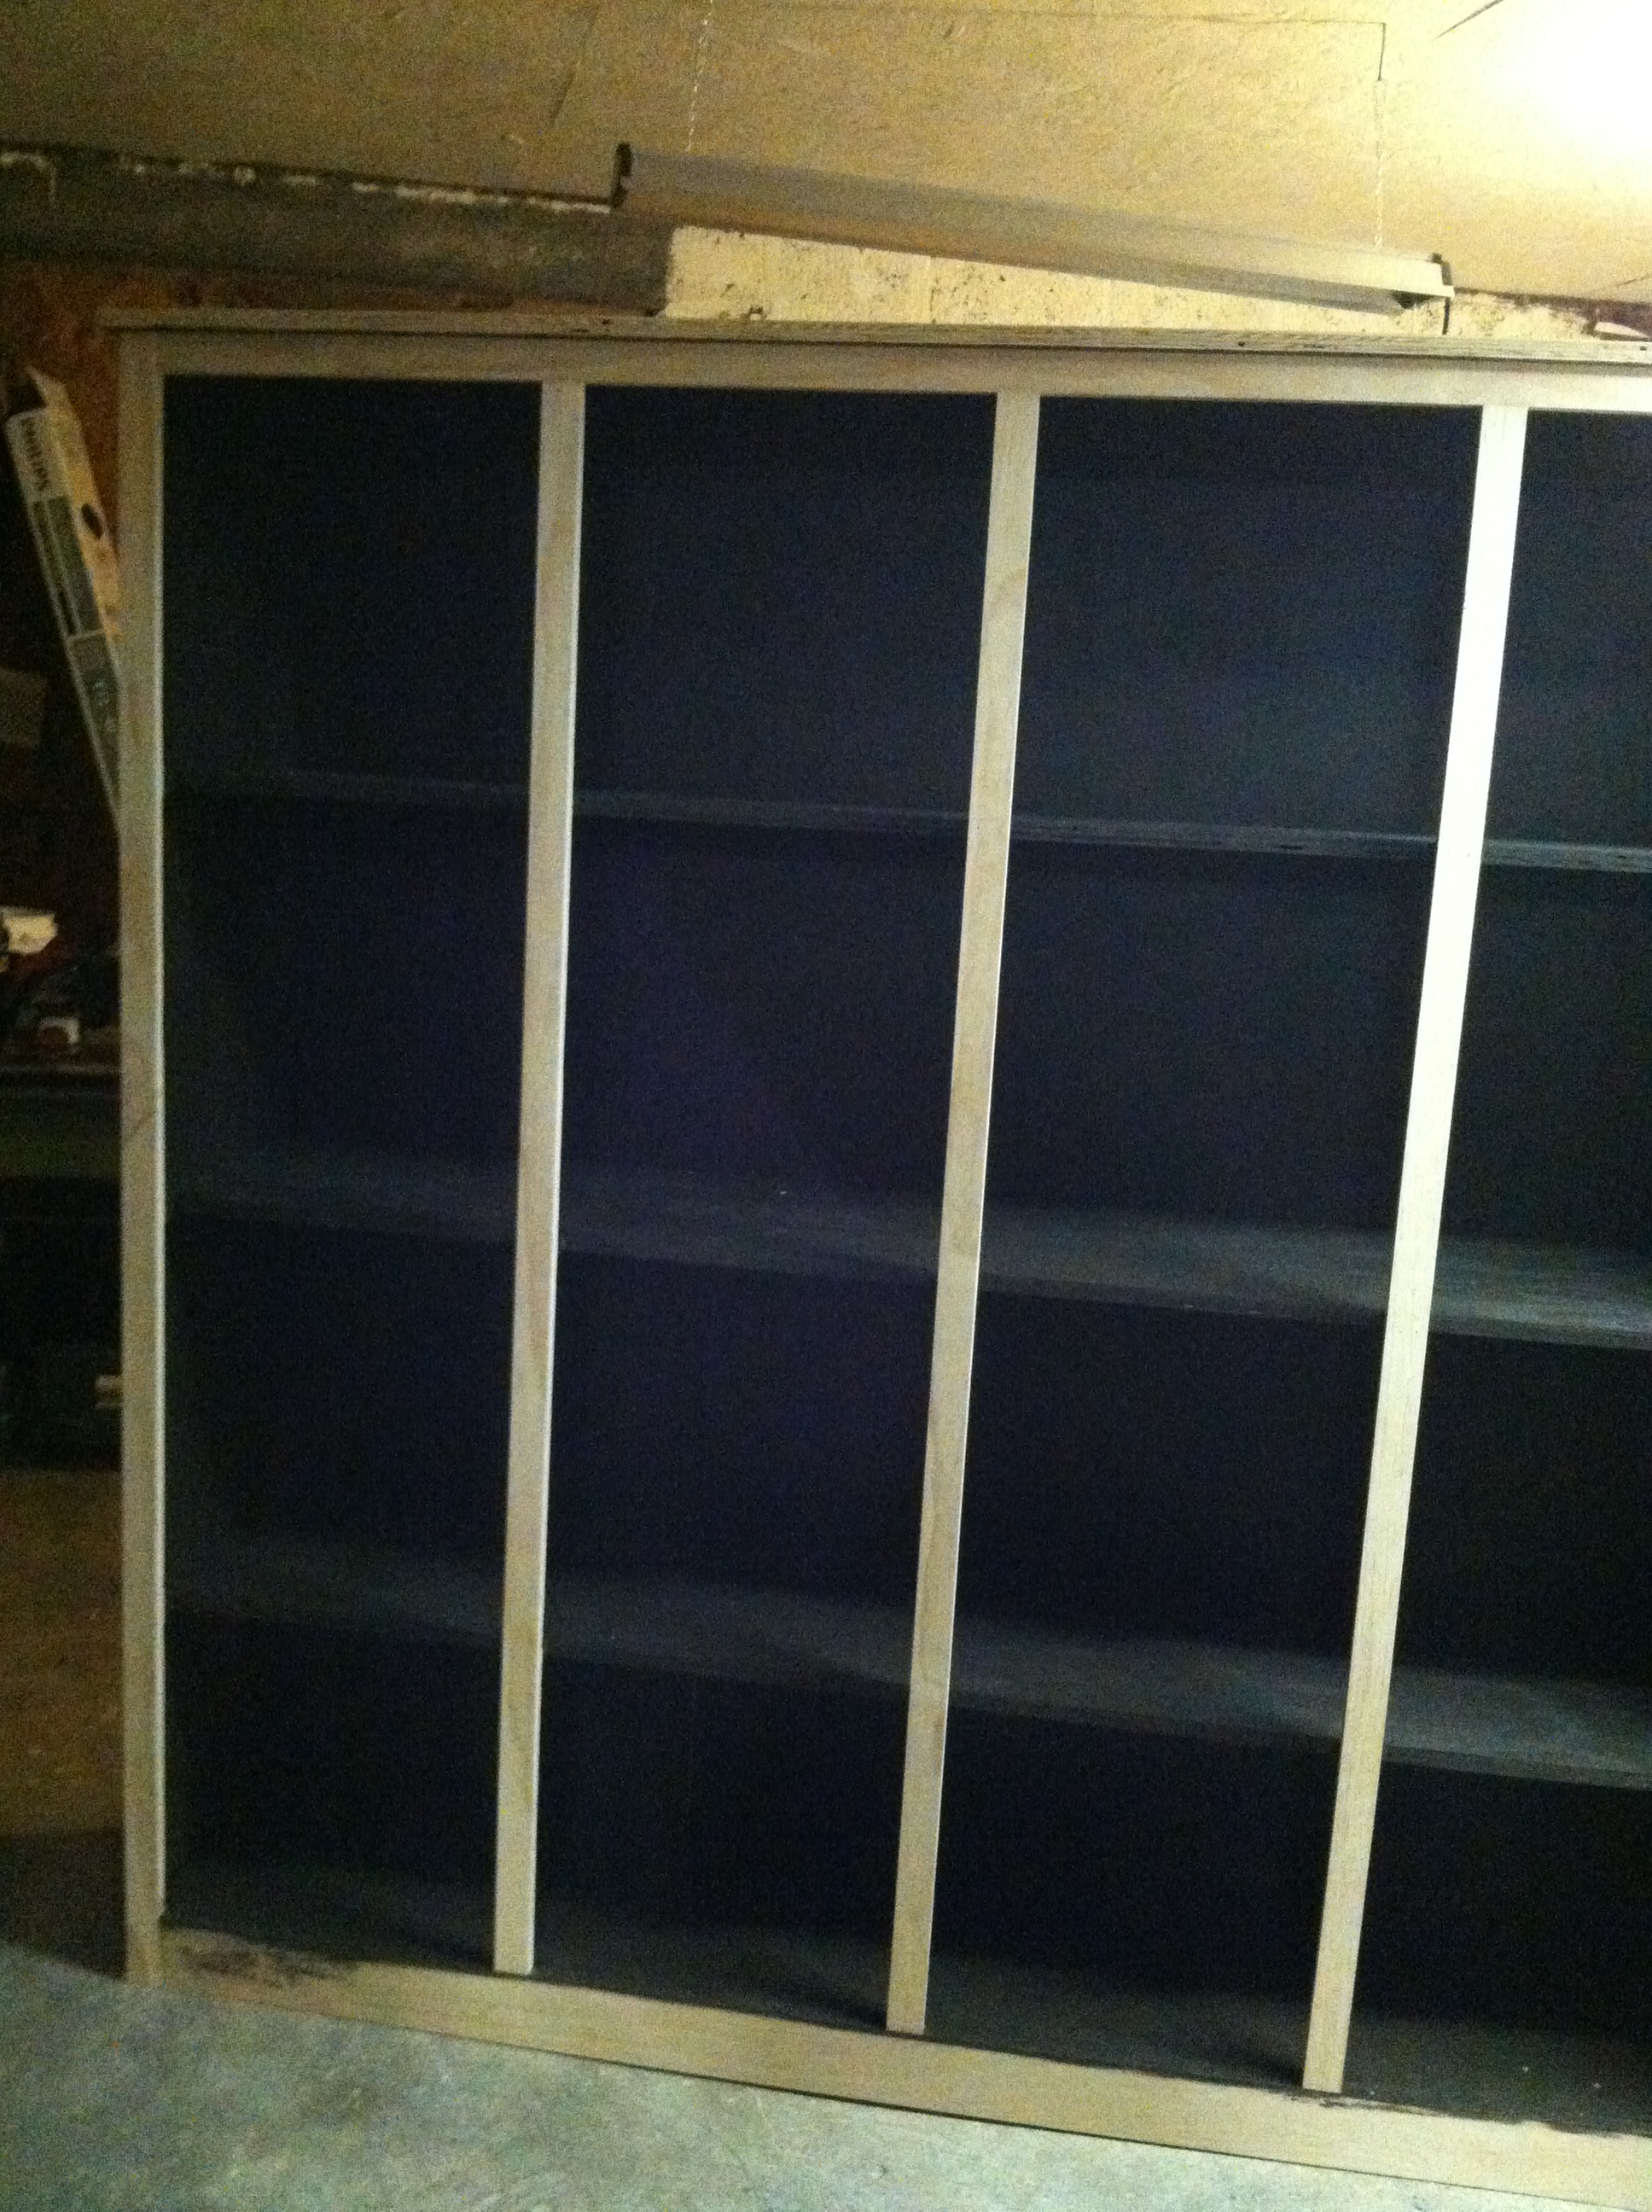
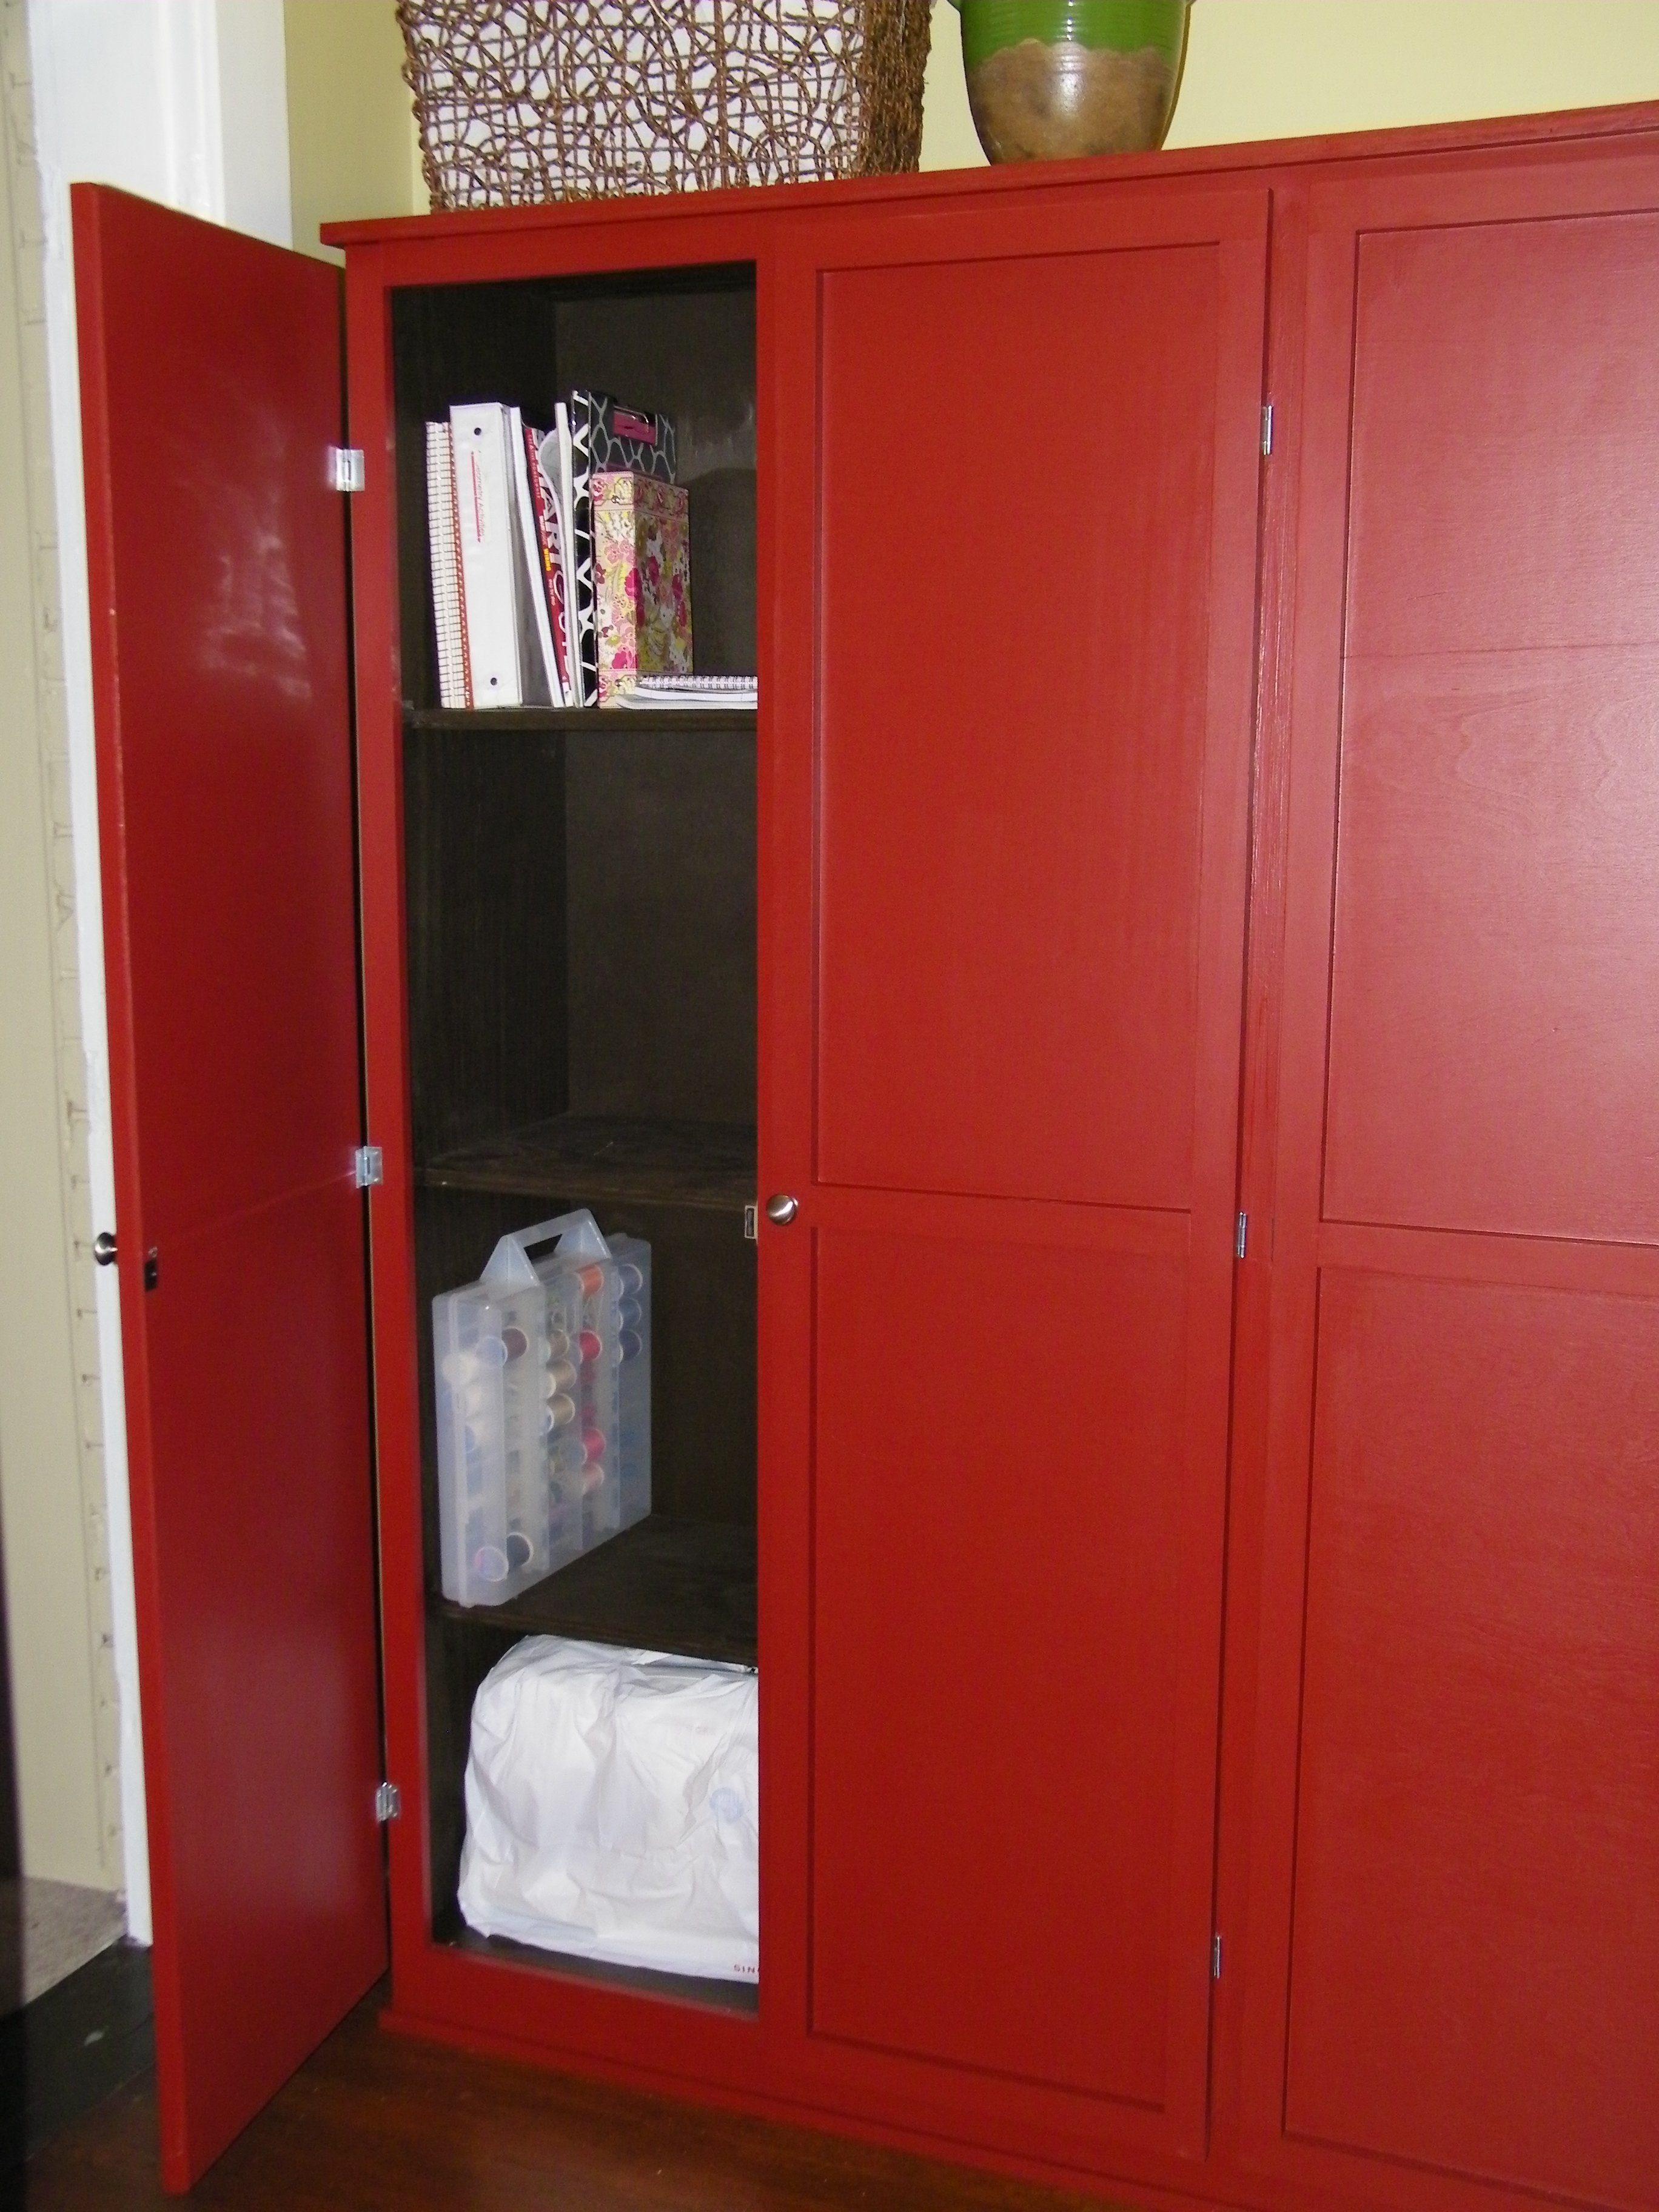
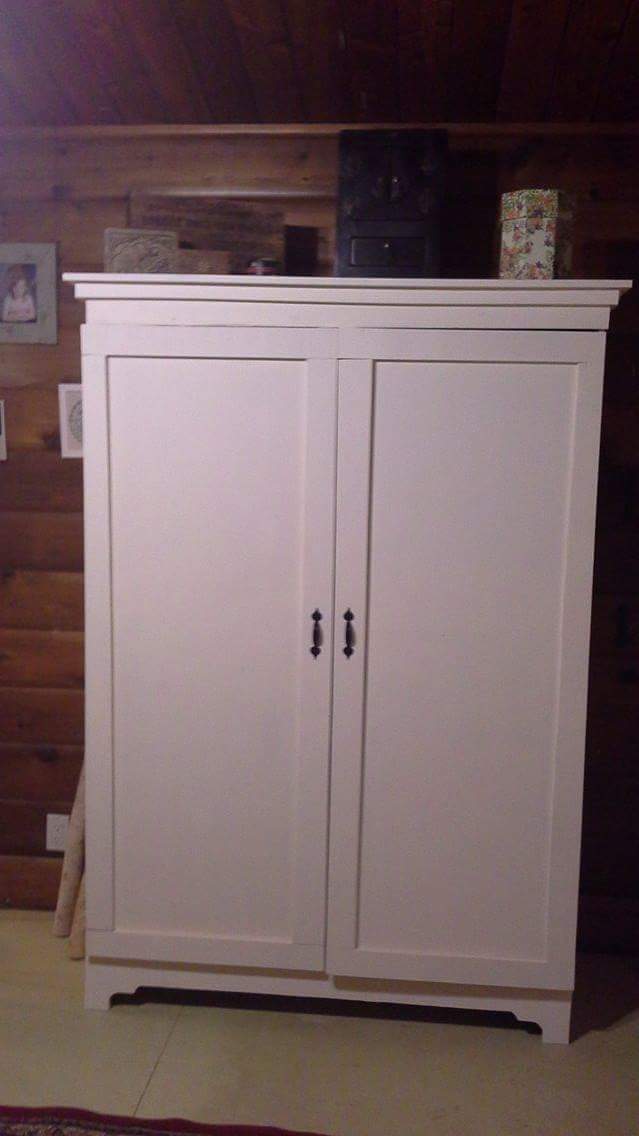
Community Brag Posts

Corner Bookshelf

Submitted by Anonymous (not verified) on Tue, 03/14/2017 - 11:41

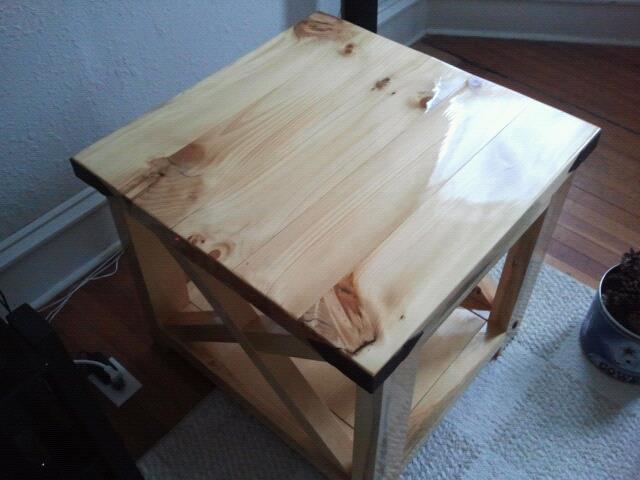
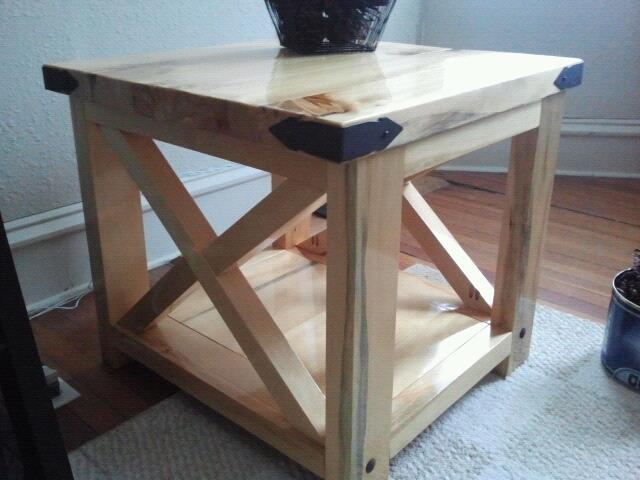
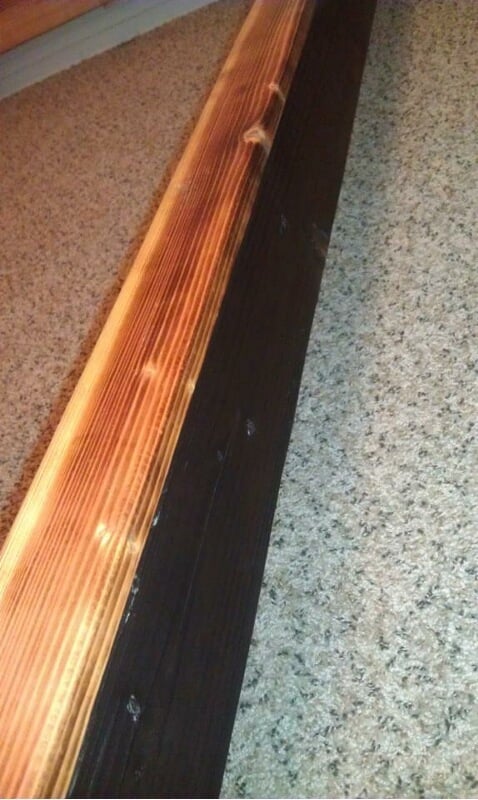
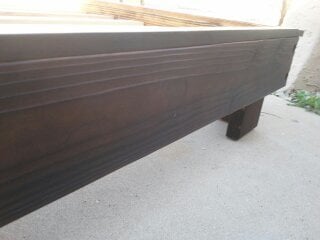
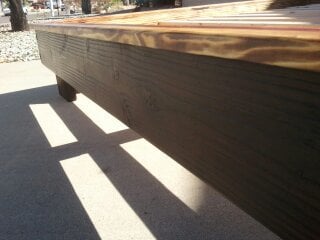
I took the plans loosely from what I saw here, but adjusted the size to fit my needs. I had a bunch of old wood that worked great for a rustic look (nail holes and all), so my only costs on this project were the hardware and some nails for my nailgun. I finished it off with some paint and stain I had laying around, to give it a little character. Great project for under $15 (for me, at least).

Built from Plan(s)
Estimated Cost
$15
Estimated Time Investment
Day Project (6-9 Hours)
Finish Used
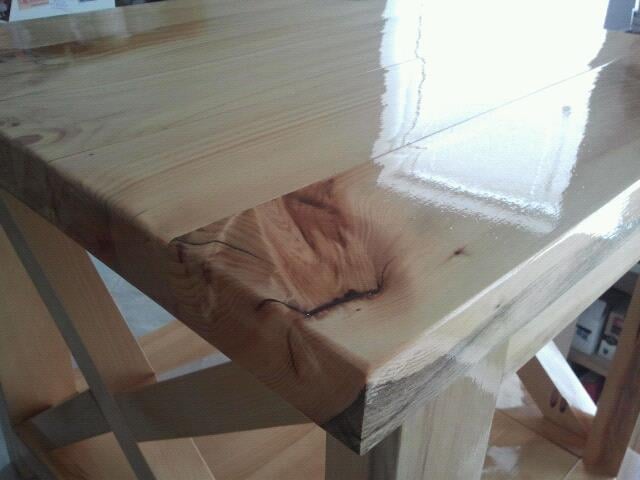
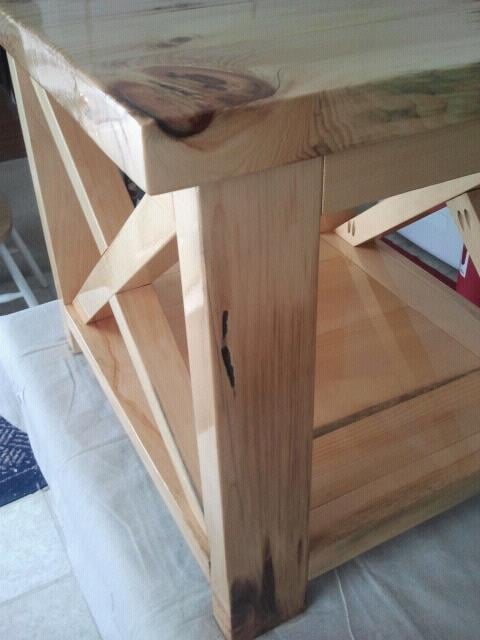
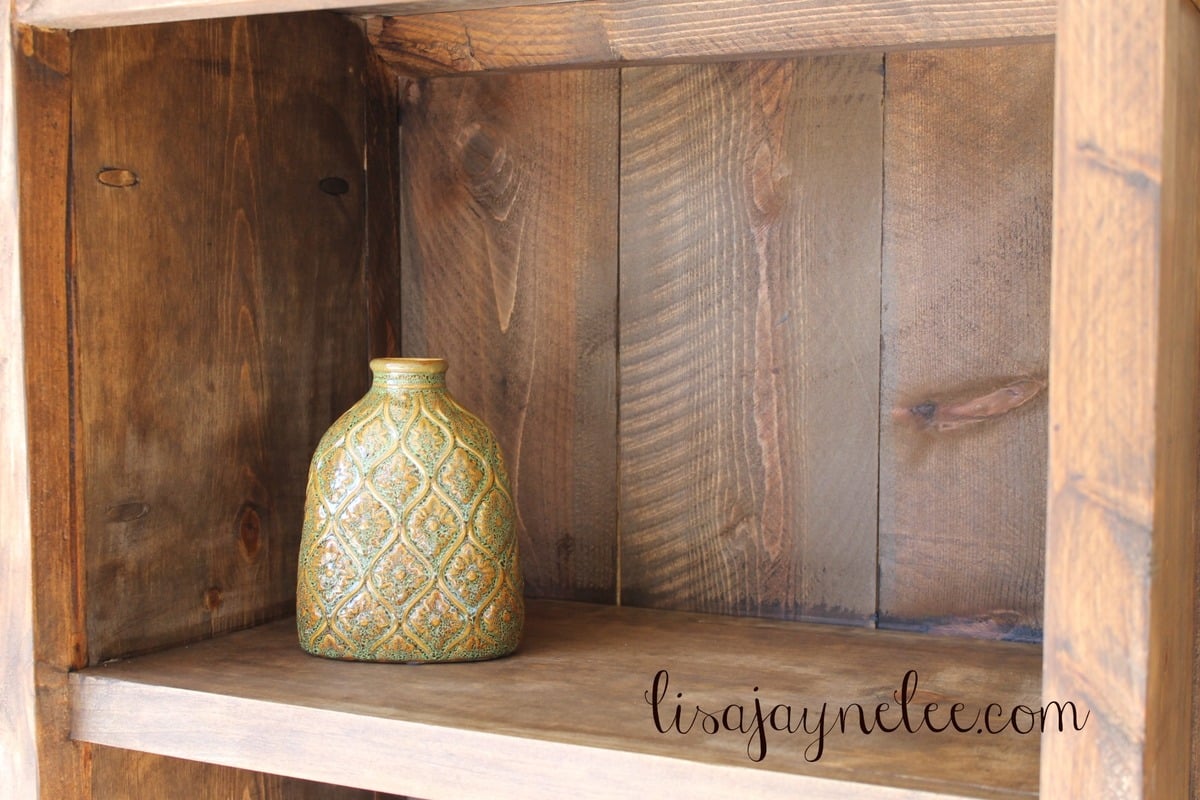
Gloss white paint (oil-based), dark walnut stain for antique effect. After the paint dried, I rough-sanded some of the edges, then followed that with the stain. I wiped into the edges that were sanded, and in most of the corners, then followed up with a dry rag to wipe away any extra. Kept the stain pretty light for the most part.
Recommended Skill Level
Beginner

Farmhouse Indoor Playhouse - I May have gone a little overboard...

Submitted by Anonymous (not verified) on Fri, 01/08/2021 - 19:38

Thanks for your amazing Farmhouse Indoor Playhouse plans!
So easy to follow your directions! I may have gone a little overboard.
I used some scrap wood from recent Renos and wood from an old boxspring my parents had.
The kitchen was originally from Ikea with some updates.
The shrubs are silk plants from Ikea and scrap wood.
The only real cost was Paint $30 ish.

Built from Plan(s)
Estimated Cost
50
Estimated Time Investment
Weekend Project (10-20 Hours)
Recommended Skill Level
Beginner

Comments

Seasonal And Holiday

Firewood shed

Submitted by Nowak on Sat, 02/09/2013 - 15:53

Build this firewood shed over one weekend and stained it the following weekend. This was my first project and I only received a little help from my boyfriend. Can't wait to start my next project.

Built from Plan(s)
Estimated Time Investment
Weekend Project (10-20 Hours)
Recommended Skill Level
Beginner

pirate ship teeter totter

Submitted by Grammi Nat on Mon, 12/15/2014 - 12:26

I have 3 Grandson's that love to be pirates so I decided to make them a pirate ship teeter totter. After searching the Web for plans and finding nothing I was looking for I decided to just go for it and see what I could come up with. This pirate ship is heavy duty. I use 2x8's, 2x10's and 2x12's for the frame and seats and 1x10's and 1x12's for the inside foot platform. It's 5ft long, 3ft wide and 3ft high. I had to put some stop blocks on it or it would of been a catapult instead of a teeter totter. (I know this because I climbed on and took it for a ride) Everything is connected using pocket holes and pocket hole screws (Thanks to my Kreg jig) I added a pole up the center and added a pirates flag and puts some swords on the sides. The kids sure have fun on it and so do I.

Estimated Cost
$200.00
Estimated Time Investment
Week Long Project (20 Hours or More)
Finish Used
Red, white and black exterior paint and poly finish
Recommended Skill Level
Beginner

Comments

Microwave stand/wine rack

Submitted by lacroix19 on Wed, 01/13/2021 - 15:29

Definitely not perfect and it took me a little while! But so glad I found these plans and was able to add my little personal touch to it!

Estimated Time Investment
Week Long Project (20 Hours or More)

Comments

Natural Rustic X End Table

Submitted by aleeman27 on Mon, 02/11/2013 - 22:15

This project was taken from the Rustic X End Table plan. This is my second big project that I have attempted and I am still learning from my mistakes made from making the Rustic X Coffee Table. Hope you enjoy!

Built from Plan(s)
Estimated Time Investment
Week Long Project (20 Hours or More)
Finish Used
I used an ebony wood filler to fill any cracks around the knots. Then I used Cabots "natural" wood stain just like I did on my Rustic X Coffee Table. Followed by 3-5 coats of Cabots glossy poly. Make sure you use a finishing sponge or sandpaper between each coat! Once it set for a day I added the wrought iron corner pieces and hammered iron clavos.
Recommended Skill Level
Intermediate

Comments

aleeman27

Mon, 02/11/2013 - 22:25

Working around my work schedule and dry times of the poly these 2 end tables took me quite sometime! But I am super happy with the result! They go so perfect with my Rustic X Coffee Table!

Wounded Marine

Tue, 02/12/2013 - 07:01

Table looks good. I like the natural wood color with the black add ons. I noticed the one "X" is a little off. You might want to check the squareness of your chop saw. If the fence is perfectly square to your blade when set at 90 degrees it will throw everything off. You are off to a good start though.

Chevron Wood Headboard

Submitted by kowalsme on Wed, 12/17/2014 - 08:27

Took the general dimensions from these reclaimed wood plans and modified them to include a chevron back. The most difficult aspect was determining the cut marks for each chevron piece and rounding the edges to bring out the details.

Finished the headboard with a satin-finish, oil-based enamel paint.

Additional pictures and information available on my website.

Estimated Cost
$80-$100
Estimated Time Investment
Weekend Project (10-20 Hours)
Finish Used
Benjamin Moore Satin Impervo color matched to Martha Stewart "Plumage"
Recommended Skill Level
Beginner

6 cube bookshelf

Submitted by Anonymous (not verified) on Sun, 03/19/2017 - 15:49

This is one of my first projects. Thanks for the great plans. My daughter loves her new toy storage.

Estimated Cost
$75
Estimated Time Investment
Weekend Project (10-20 Hours)
Finish Used
White and gray stain.
Recommended Skill Level
Beginner

Settlers of Catan board

I took an edge glued round board and chisled out the profile of a Catan game board. Then I torched it, added some polyurethane and lined the bottom with felt.

Estimated Cost
$30.00
Estimated Time Investment
Day Project (6-9 Hours)
Finish Used
Propane torched and polyurethane
Recommended Skill Level
Beginner

Comments

Kentwood Book Shelf

This was my first major build with plans from Ana. I actually found this bookcase via Shanty2Chic. It went smoothly and all in all took me a few evenings about an hour at a time. I have 3 kids so it did take me a little longer to finish. I am so impressed with myself and so is my husband. I used a 10" chopsaw for most of the cuts. I also used my KregJig. Thanks Ana!

Estimated Cost
$100
Estimated Time Investment
Day Project (6-9 Hours)
Finish Used
Minwax Special Walnut followed by Annie Sloan Chalk Paint Dark Wax Finish.
Recommended Skill Level
Intermediate

Comments

BIG Storage Cabinet

Submitted by LHeath on Sat, 12/20/2014 - 21:30

I desperately needed storage in our 1910 house that was not in the basement.  I wanted a place to keep my sewing machine and accessories, at-home school supplies, and other odds and ends.  We had an alcove in the kitchen that was about 74 inches wide and 17 inches deep, so I decided to build something to fit that space.  I really liked the Simplest Armoire plan but I also really liked the Kentwood Bookshelf, so I ended up somewhat combining the two.  Since I had a fairly large space, I made the cabinet about 6 ft X 6 ft.  The hardest part was getting it into the house.  This project was my first big DIY building project without my dad's help.  I did call him a few times during the project however, and he helped me hang the doors.  I really enjoyed using the Kreg Jig and I appreciated having all of the Kreg Jig instructions for the Kentwood Bookshelf.  It was a huge help, as I had only used the Kreg Jig a little and with my dad in the past.  My husband has been a great support as I have ventured into building furniture.  He works from home, but any time that I needed him to help hold a large sheet of plywood he was quick to help.  This was definitely a big project for a beginner, but I enjoy a challenge when it comes to fixing things and creating things. Fortunately, this one worked out in the end!  Now what should I build next summer...

Estimated Time Investment
Week Long Project (20 Hours or More)
Finish Used
paint - Behr Premium Plus Ultra Raw Cinnabar; I added conditioner. 2-3 coats
Recommended Skill Level
Beginner

Comments

TheRealMcGaughey

Sun, 05/31/2020 - 13:27

This is so great, and I can't wait to try my hand at emulating it. I'm buying a place so old there's no record of a date. Still has adobe bricks with straw sticking out stored up in the attic. Not a closet in the whole darn place, so I'll probably end up making more than one, and probably using one as a clothes closet and another as a pantry. Thanks so much for sharing this!

Craft paper holder

Submitted by Anonymous (not verified) on Tue, 03/21/2017 - 17:29

Followed simple instructions, but  added my own twist.  Do it yourself craft paper holder. 

Estimated Cost
25.00 with paper
Estimated Time Investment
An Hour or Two (0-2 Hours)
Recommended Skill Level
Beginner

Garage "Mudroom" Organizer

Submitted by leoguy09 on Thu, 01/21/2021 - 06:39

My home doesn't have a mudroom. When guests come to visit, there is no convenient place for them to take off their shoes or to hang wet coats. I saw this plan in a Family Handyman project book and thought it looked like the perfect solution.

The build was easy and straightforward. The hardest part of the entire project was mounting it on the garage wall. When I tried to use a stud finder, I realized that there was a layer of osb between the drywall and the studs, rendering the stud finder useless (even on the "Deep Scan" setting). I ended up having to carefully measure stud locations on the opposite wall (inside the house) and transfer those locations onto the garage wall. It worked out okay, but took a long time!

I carefully positioned this project so that I would have plenty of room for my next project, on the same wall - Ana's Ultimate Roll-Away Workbench and a set of shop cabinets!

Estimated Cost
$222
Estimated Time Investment
Weekend Project (10-20 Hours)
Finish Used
Valspar Pre-Tinted Canyon Brown Transparent Exterior Stain and Sealer (Lowe's)

This was the easiest finish I have ever used. No odor, one coat application. It doesn't provide a smooth or easy to clean surface, but the color is nice, and it seals the wood from moisture. This product is intended for decks and outdoor furniture.
Recommended Skill Level
Beginner

Comments

Engine 23 Fire Truck Bed

Submitted by brandon1 on Sat, 02/16/2013 - 22:54

I have always been interested in some kind of projects and just to see what I can do with my hands. I am a father of 3 and hardly have the time to sit down must less pull off a huge project but I set aside some time and worked on this late at night after the kiddos went to bed. I came across this site when my wife was on pintrest one night and have been hooked ever since. I was at work one day and saw all these different projects that I wanted to do and that's when I ran across this bed and I could not wait to start working on it. I called my wife and sent pictures of the plans and said meet me at Lowes we got a project to work on lol. I had a blast working on this and yes I did run into a few problems here and there but overall it came out great. When I went in I originally was going to follow plans to a T but decided that I would make changes here and there as I went. Due to height contstrictions in my son's room I lowered the overall height by two inches which worked out perfect. I did build the steps but I also made the back where it would come apart for east movement. I only used actual pine boards on the steps and the rest is 3/4" MDF board. I ripped everything on a table saw to exact width and length and drilled all my holes with a Kreg Jig. Alot of people are afraid to use MDF but believe me I could shake that bed as hard as I can and it doesn't even budge one bit. It is heavy duty built for a monkey child like I have. The project overall took around 30 hours from start to finish. My only suggestion would be to paint every step of the way instead of waiting to paint until the end like I did. If you have any questions about the build feel free to ask and I will help out the best I can. Thanks Ana for the plans and thanks to atouchofarkansas for the original inspiration for you guys have gave my son years worth of enjoyment. Can't wait for the next project to start.

Built from Plan(s)
Estimated Cost
375.00
Estimated Time Investment
Week Long Project (20 Hours or More)
Finish Used
Valspar Premium Paints
Recommended Skill Level
Intermediate

Comments

Adirondack chair from Pallets

Submitted by Anonymous (not verified) on Fri, 03/24/2017 - 19:42

I decided to try and use the plans on Ana's site but with a twist. I wanted to limit myself to using only pallets. I think it turned out great! I can't upload all the photos because they exceed the maximum size limit. If I was able to you could see how each chair is slightly different and has a lot of character. I finished them with a waterproofing oil which I highly recommend over other finishes. 

Estimated Cost
$10 for screws.
Estimated Time Investment
Afternoon Project (3-6 Hours)
Finish Used
Cabot oil
Recommended Skill Level
Beginner

Comments

Ladder Garden Planter

Submitted by sbenington on Sun, 01/24/2021 - 13:40

Finally! The cedar pieces for this planter have been cut for a few months, and I assembled it a couple weeks ago. Unfortunately I had to use a lot of wood filler & glue to hide imperfections so it was painted to match our house trim. My strawberry runners from last season were begging to be moved. They should love this new home. I'm learning! Next project is an outdoor coffee table. --Susan

Comments

My family loves it and so do I!

Submitted by tonypilot7 on Mon, 02/18/2013 - 18:13

Easy Peasy!

Materials & cost: Framing grade pine and 1x3 furring strips. $110 including finish materials.

I used some of the excess 2 x 6 that I had left over to make the feet square instead of just using 2x4s like in the plans. just cut them to the same length as the 2x4 feet, then butt them up against the 2x4 feet and mount them to the frame.

Also, I made the support beam removable by using face-mount 2x4 joist hangars to hold it instead of bolts.

Total build time = less than one week

Next project will be a custom headboard for it..

Built from Plan(s)
Estimated Cost
110 including finish materials
Estimated Time Investment
Weekend Project (10-20 Hours)
Finish Used
( I didn't use any stain on this project!)
.
.
I torched the surface of the pine with a propane burner. Charred the base and feet heavily then brushed off the char with nylon bristle brush. You can't see it in these photos, but it brought out a lot of bronzes and amber in the wood grain. Plus it gave the wood a texture that reminds me of heavily weathered or aged wood.

For the 1 x 3 strips on top, I routed all the edges inside and out, then I used the propane burner, but just scared it a little. I kept the torch moving so that it didn't get too dark. I then coated the whole project with boiled linseed oil (2 coats, wipe on, let soak for 20 minutes, then wipe off. 24 hours between coats, and let dry 72 hours). Then, I used a citrus and beeswax paste wax on top. 2 coats of wax and a lot of buffing later, I like the results.
Recommended Skill Level
Starter Project

Scrappy armoire

Submitted by Triskelle on Sun, 03/26/2017 - 22:13

Made this out of a ton of scrap wood I had laying around. On the downside it made the project more difficult, but on the upside all I had to buy was hinges and handles...

Built from Plan(s)
Estimated Cost
$20
Estimated Time Investment
Day Project (6-9 Hours)
Finish Used
Some off white paint I had lying around
Recommended Skill Level
Beginner

Simple Tree/Porch Swing

Submitted by jburke3424 on Sat, 01/30/2021 - 17:53

Awesome Tree Swing built in about an hour! Super easy plans to follow. Two quotes of Stain and Three coats of exterior Poly!

Built from Plan(s)
Estimated Cost
$75
Estimated Time Investment
An Hour or Two (0-2 Hours)
Finish Used
Minwax stain and exterior poly.
Recommended Skill Level
Beginner

Comments