Community Brag Posts


Square Apothecary Coffee Table with Toy Box Rrundle

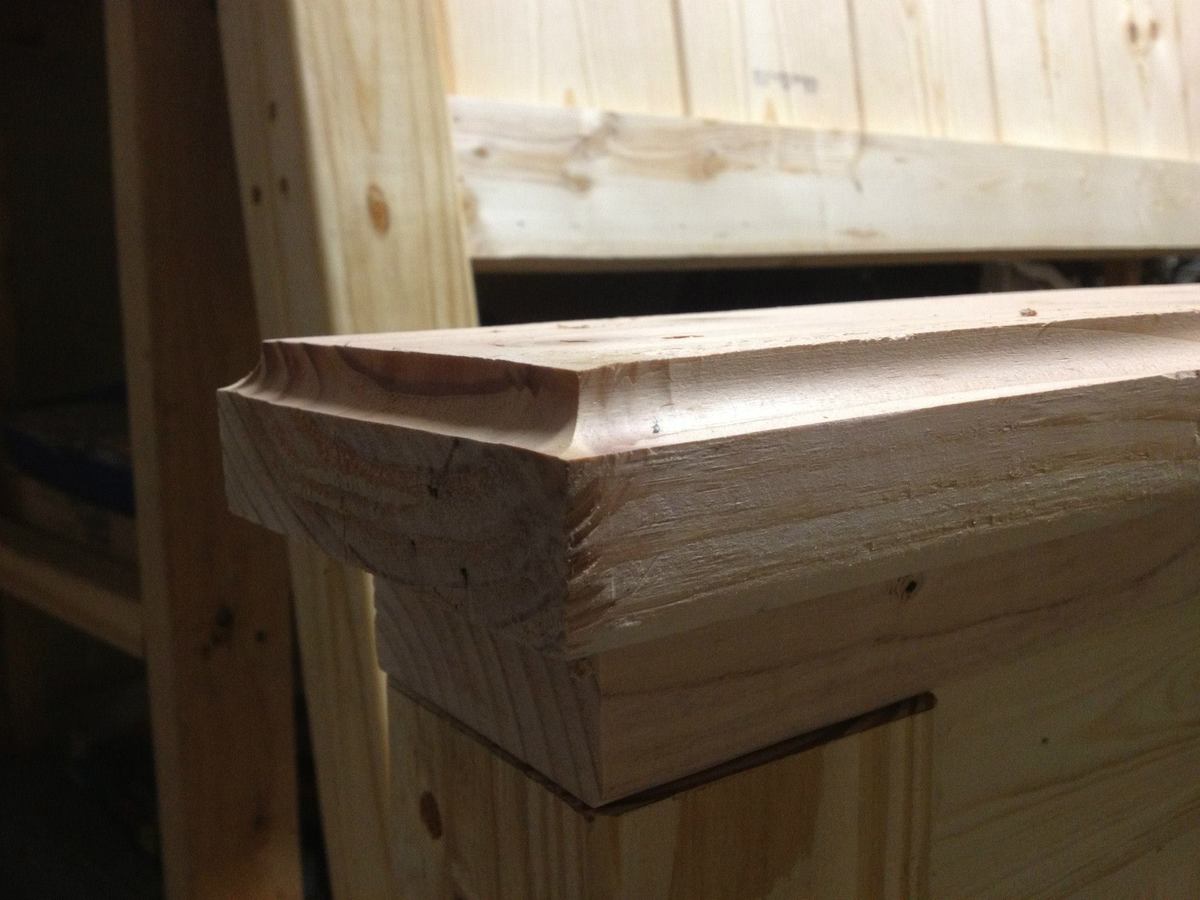
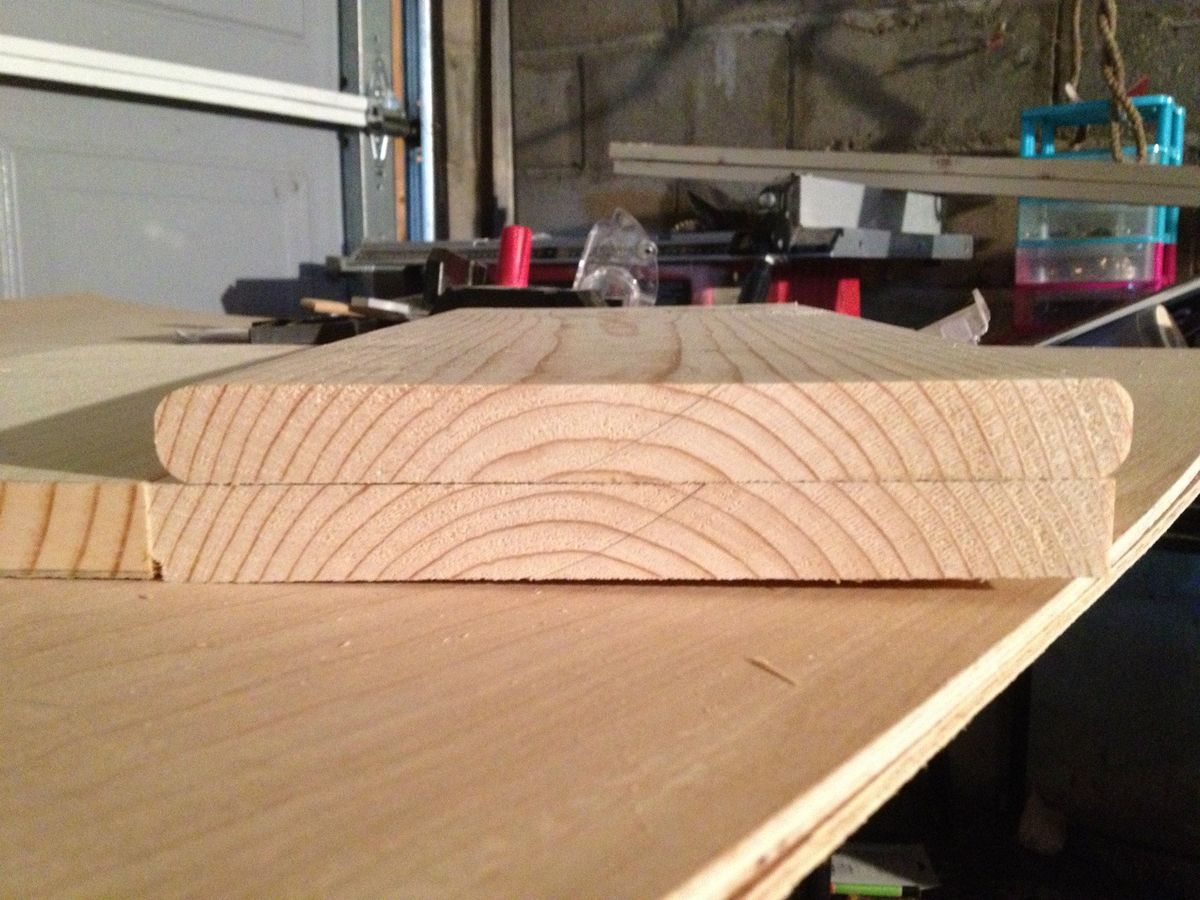
I loved the design of the apothecary coffee table, but knew a square table would look best in my space. I have a 15 month old son who's toys are always all over our living room so the toy box trundle seemed like a perfect secret storage solution for us. I combined the plans of the apothecary toy box trundle with the library coffee table. The 3 sides are built similar to the sides in the plans for the library table, as well as the table top. The toy box trundle was built according to the plans for the apothecary table except that I made it a very deep drawer 33"X34.5". The table top measures 43.5"X40" This was my first time building a piece of furniture (I've built a chicken coop) and first time using my kreg-jig to make pocket holes. I had a great time building learned a lot. It took me awhile to complete because I was only able to work on it when my son napped.

Built from Plan(s)
Estimated Time Investment
Week Long Project (20 Hours or More)
Finish Used
I used white latex paint on the base. I did 3 light coats using a foam brush and sanded lightly between coats. I distressed/aged the edges with sand paper and carefully rubbed areas with dark walnut stain. I used special walnut stain from minwax on the top and did 3 coats of spray polyurethane.
Recommended Skill Level
Beginner
Comments
Sun, 01/19/2014 - 17:57
This is so pretty and
This is so pretty and functional. I love it! I have been trying to decide on a design for a coffee table and this just might be it!
Bar Height Outdoor Table
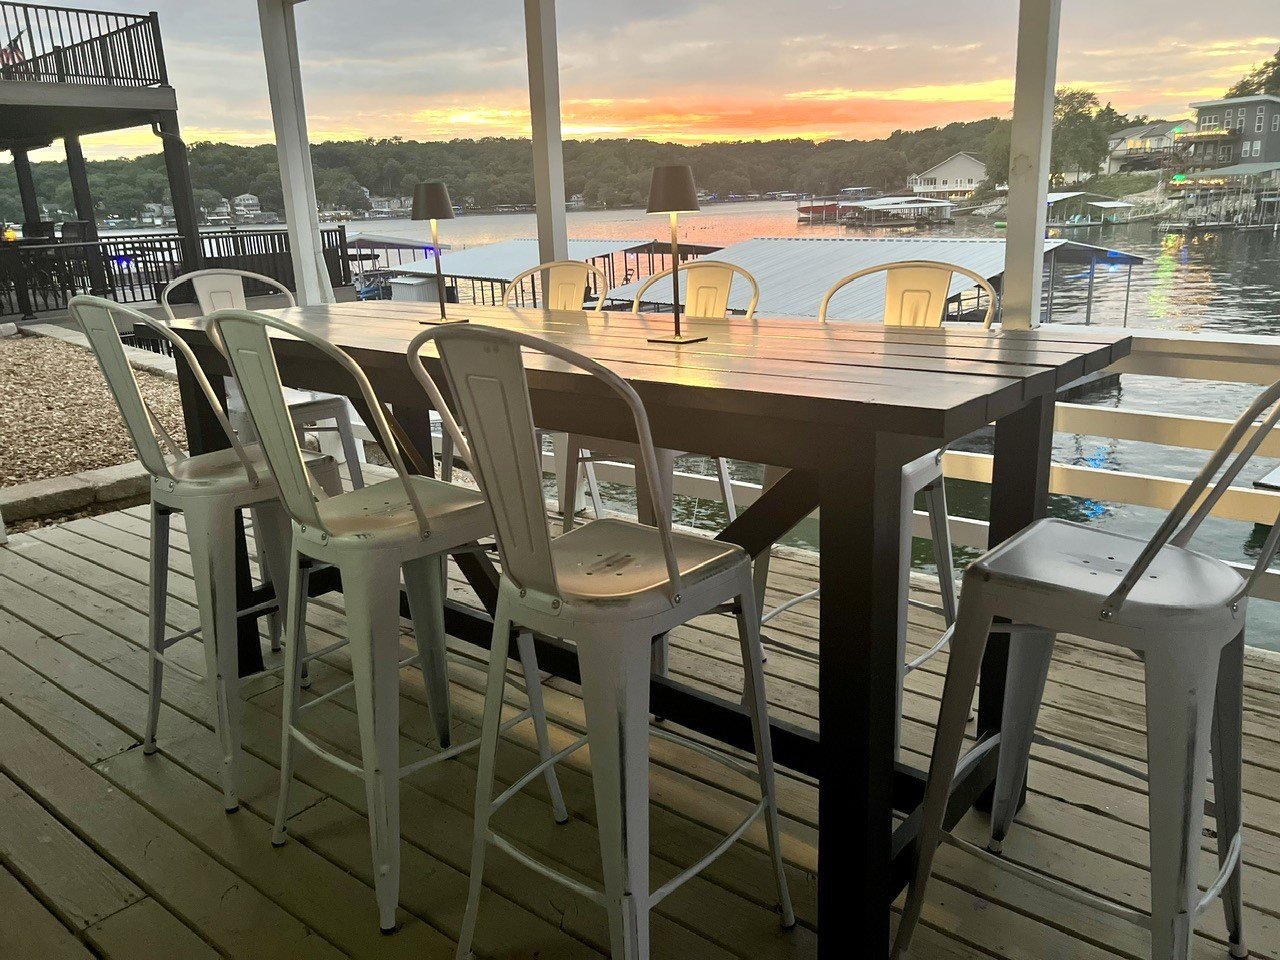
We had this unused lower deck and this bar height table was the perfect addition. We have place now to hang when too hot or it’s raining. My husband and I built it in one weekend and your plans where great.
Julie Moran


Built from Plan(s)
Comments
Sun, 08/27/2023 - 12:48
Stunning table and view!
Love this view and what a gorgeous table to go with it! Thanks for sharing.
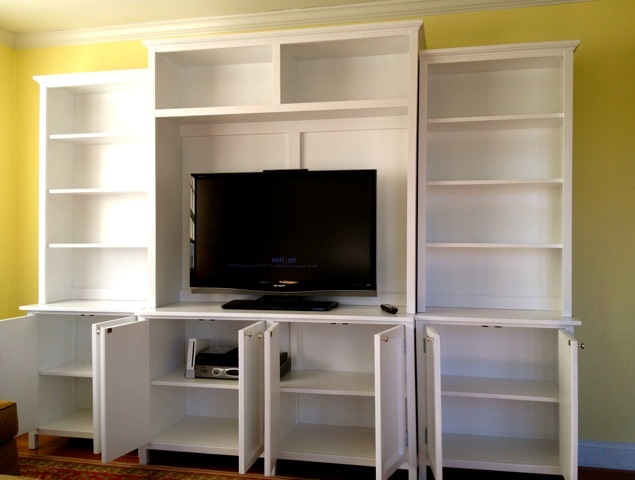
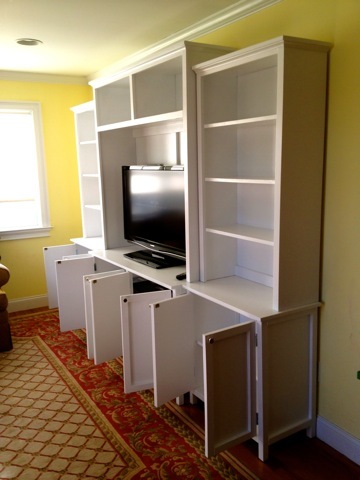
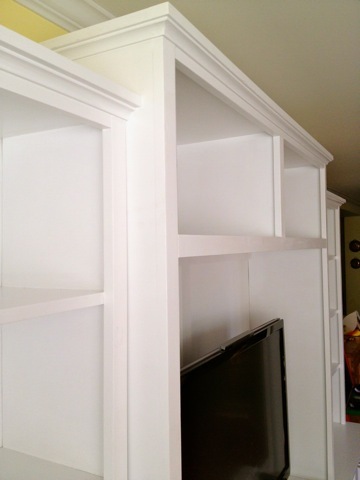
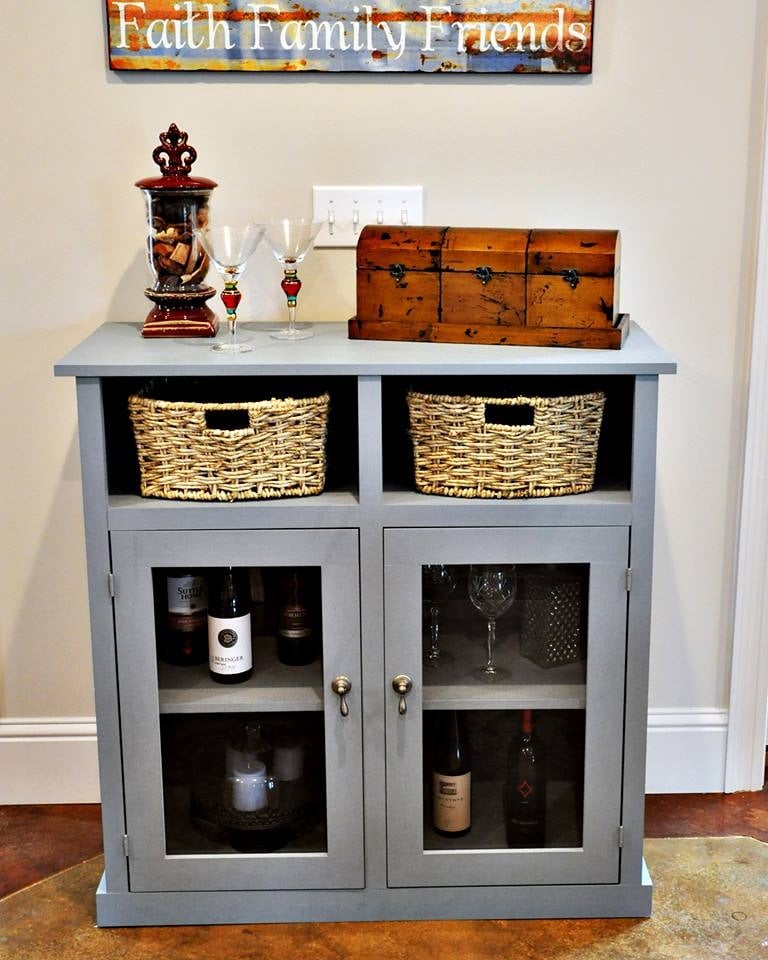
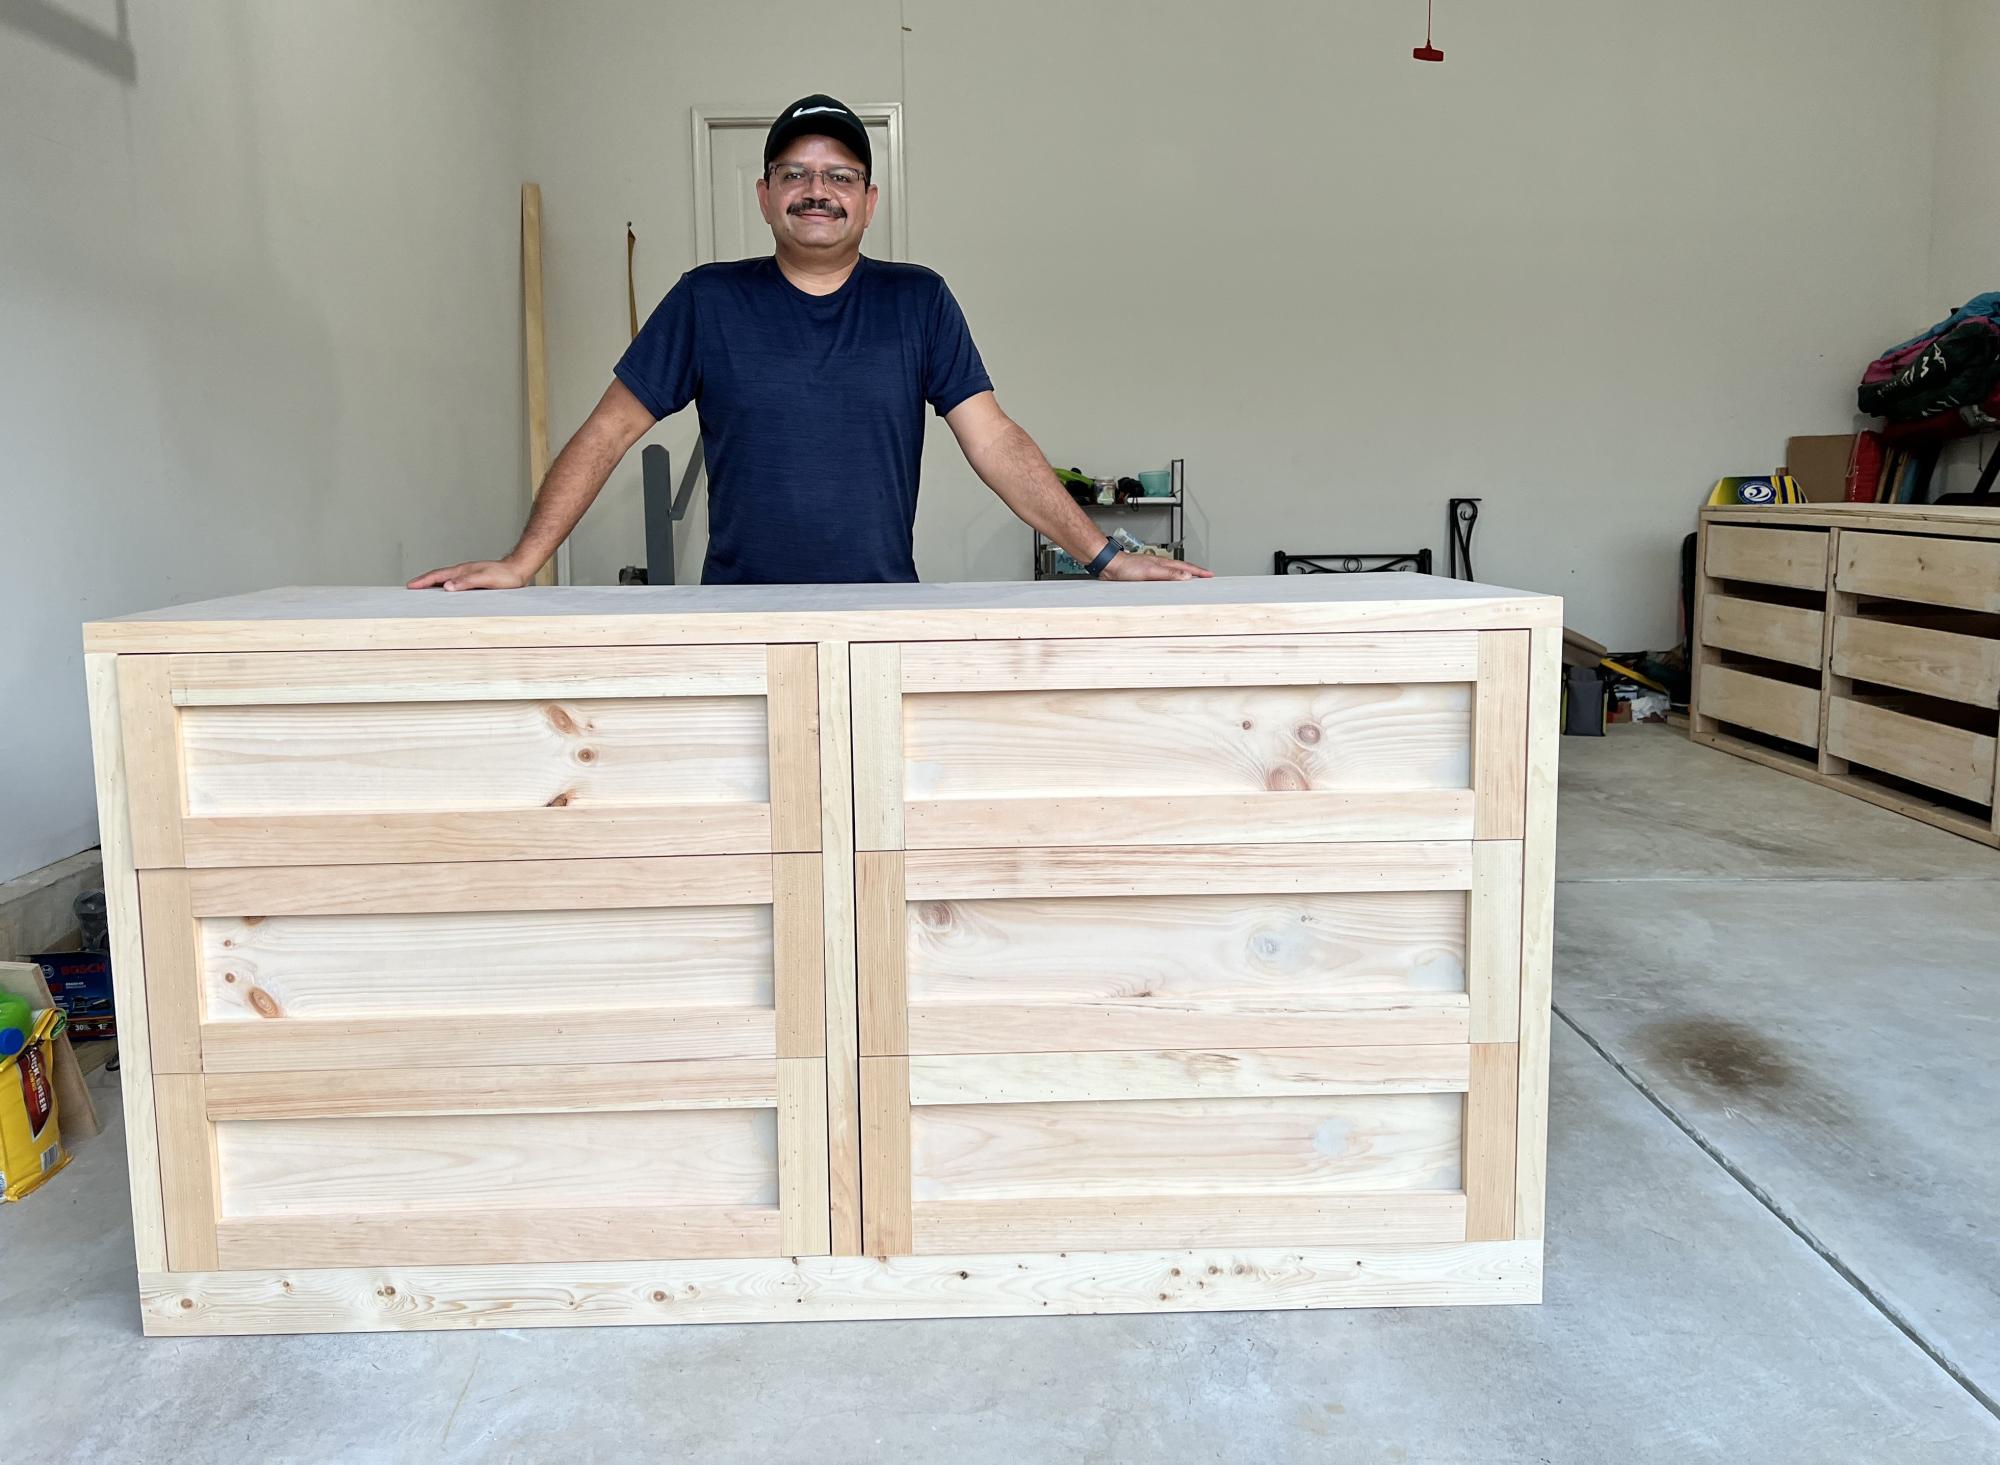
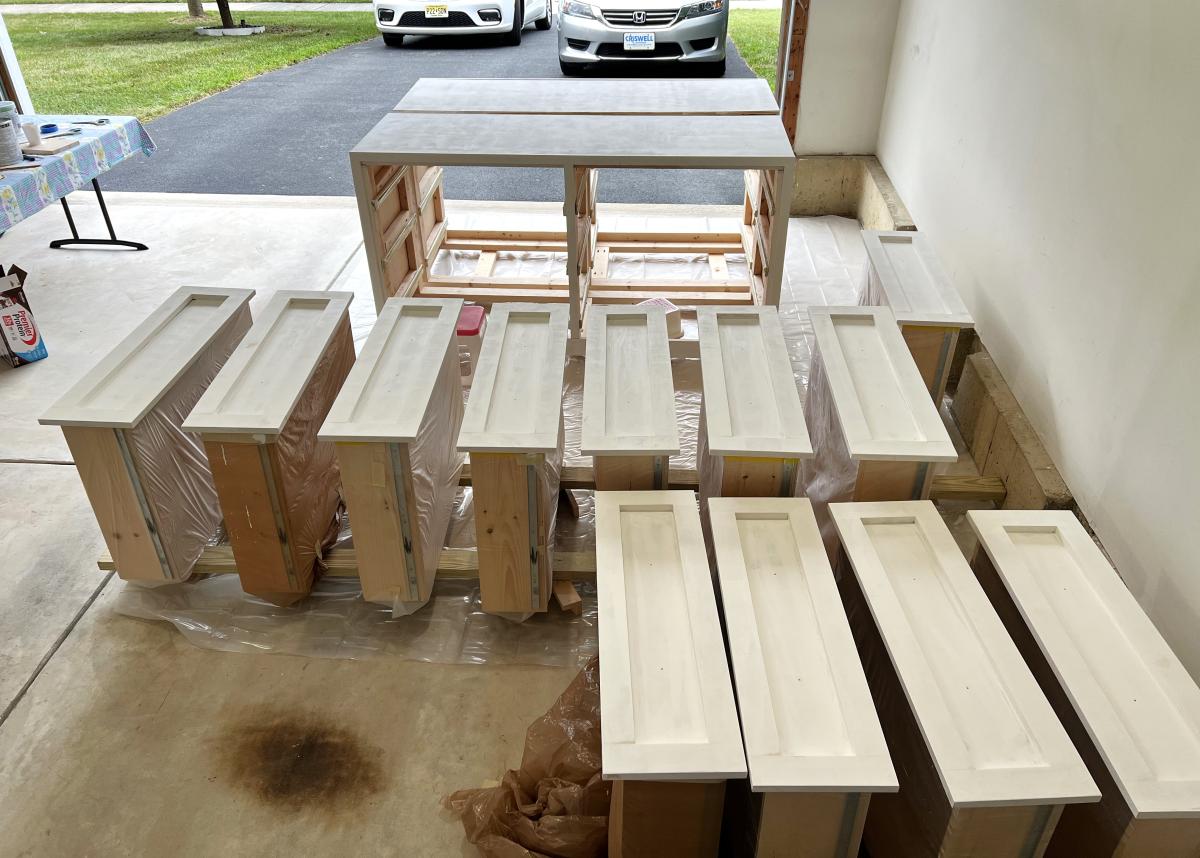
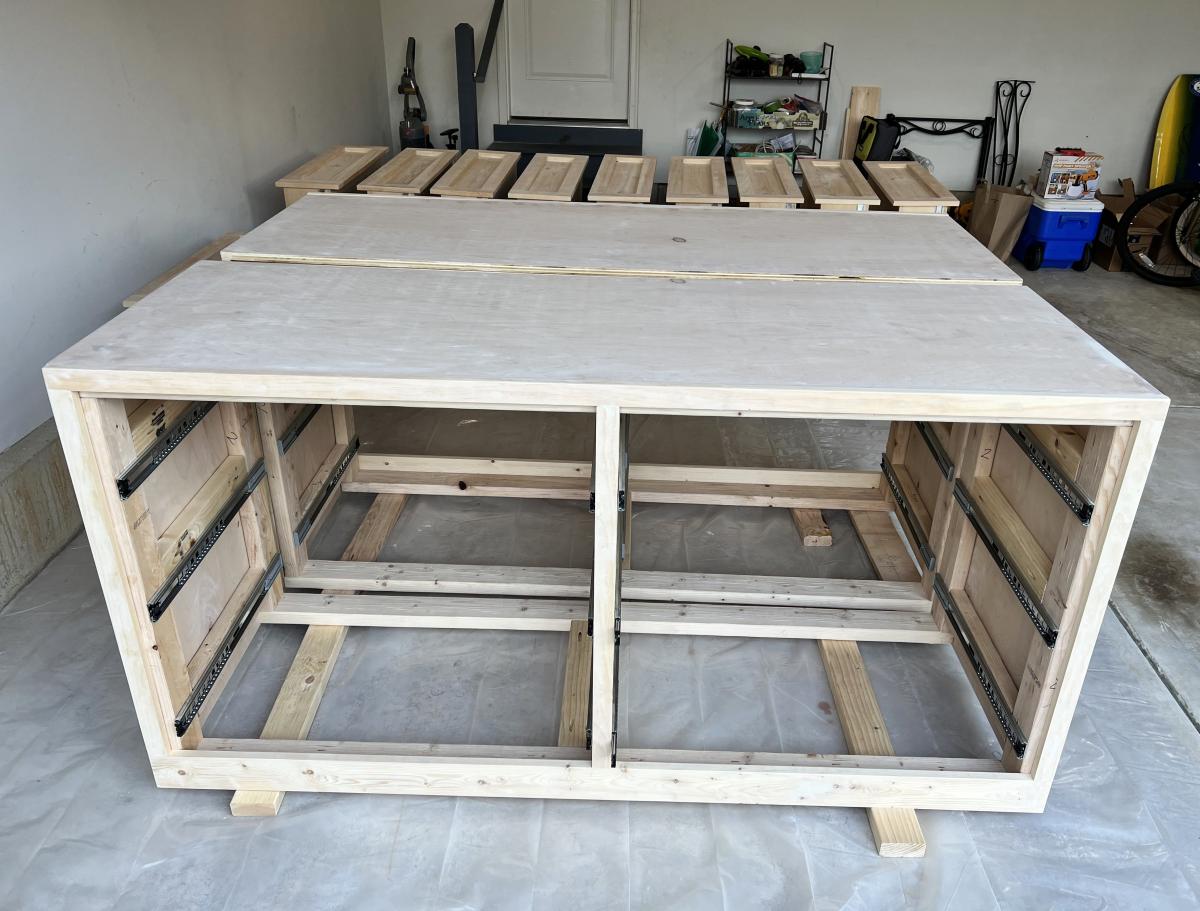
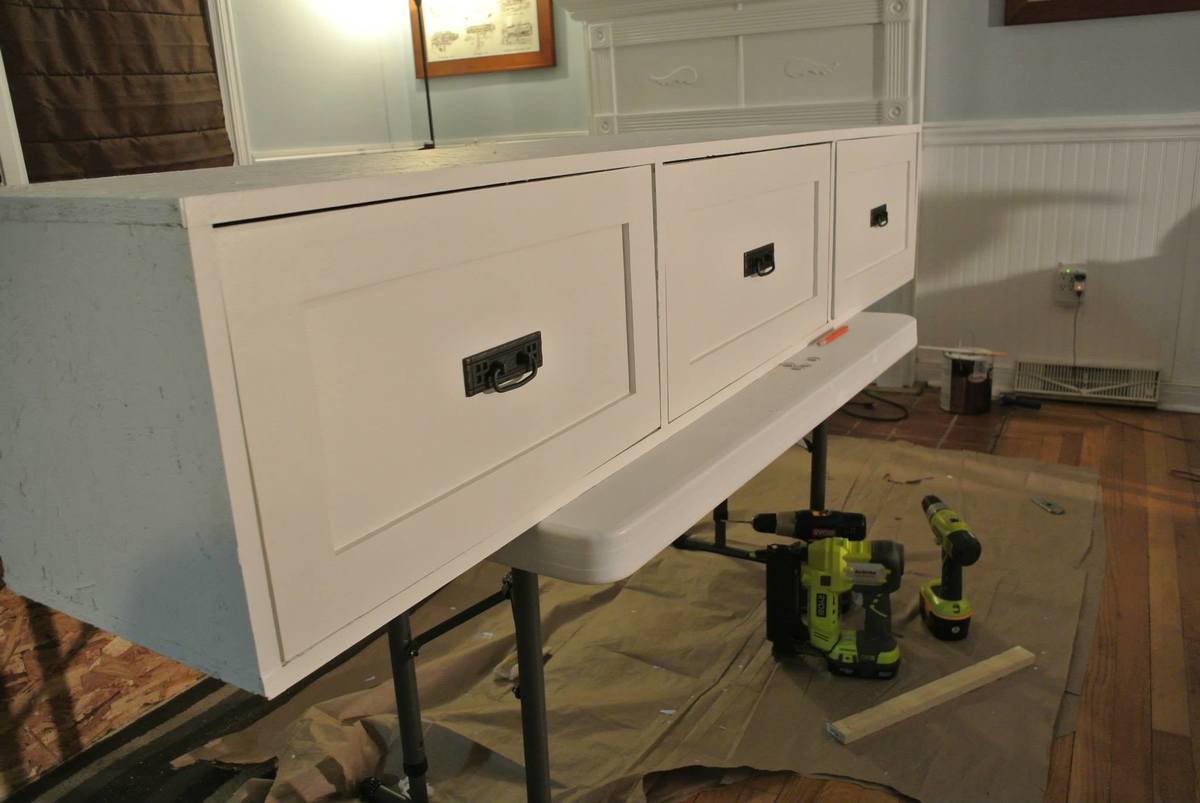
media unit

Custom size media unit using a combination of Ana's plans.
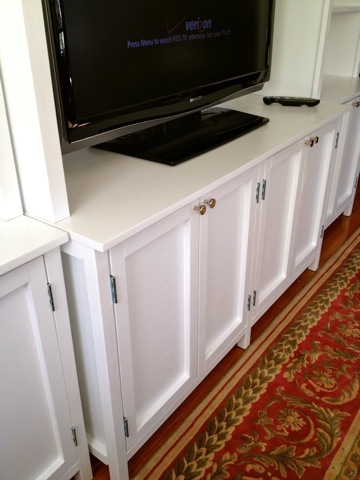
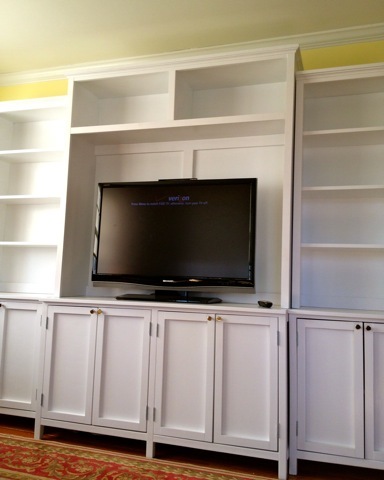
Built from Plan(s)
Estimated Cost
$600
Estimated Time Investment
Week Long Project (20 Hours or More)
Finish Used
1. Prime Zinsser Cover Stain
2. Two coats BM high gloss enamel white
2. Two coats BM high gloss enamel white
Recommended Skill Level
Intermediate
Comments


Fri, 04/20/2012 - 02:13
Thanks Handy girl
The doors are 1/4" plywood attached to the 1 x 2 frame on the back. Fairly simple to do as I don't have a router to make them inset. Good luck!
Tue, 12/04/2012 - 12:38
How did you attach together
I was wondering how you attached the bookshelf unit to the base unit on the side cabinets?
Thank you!
6-Pack Carrier
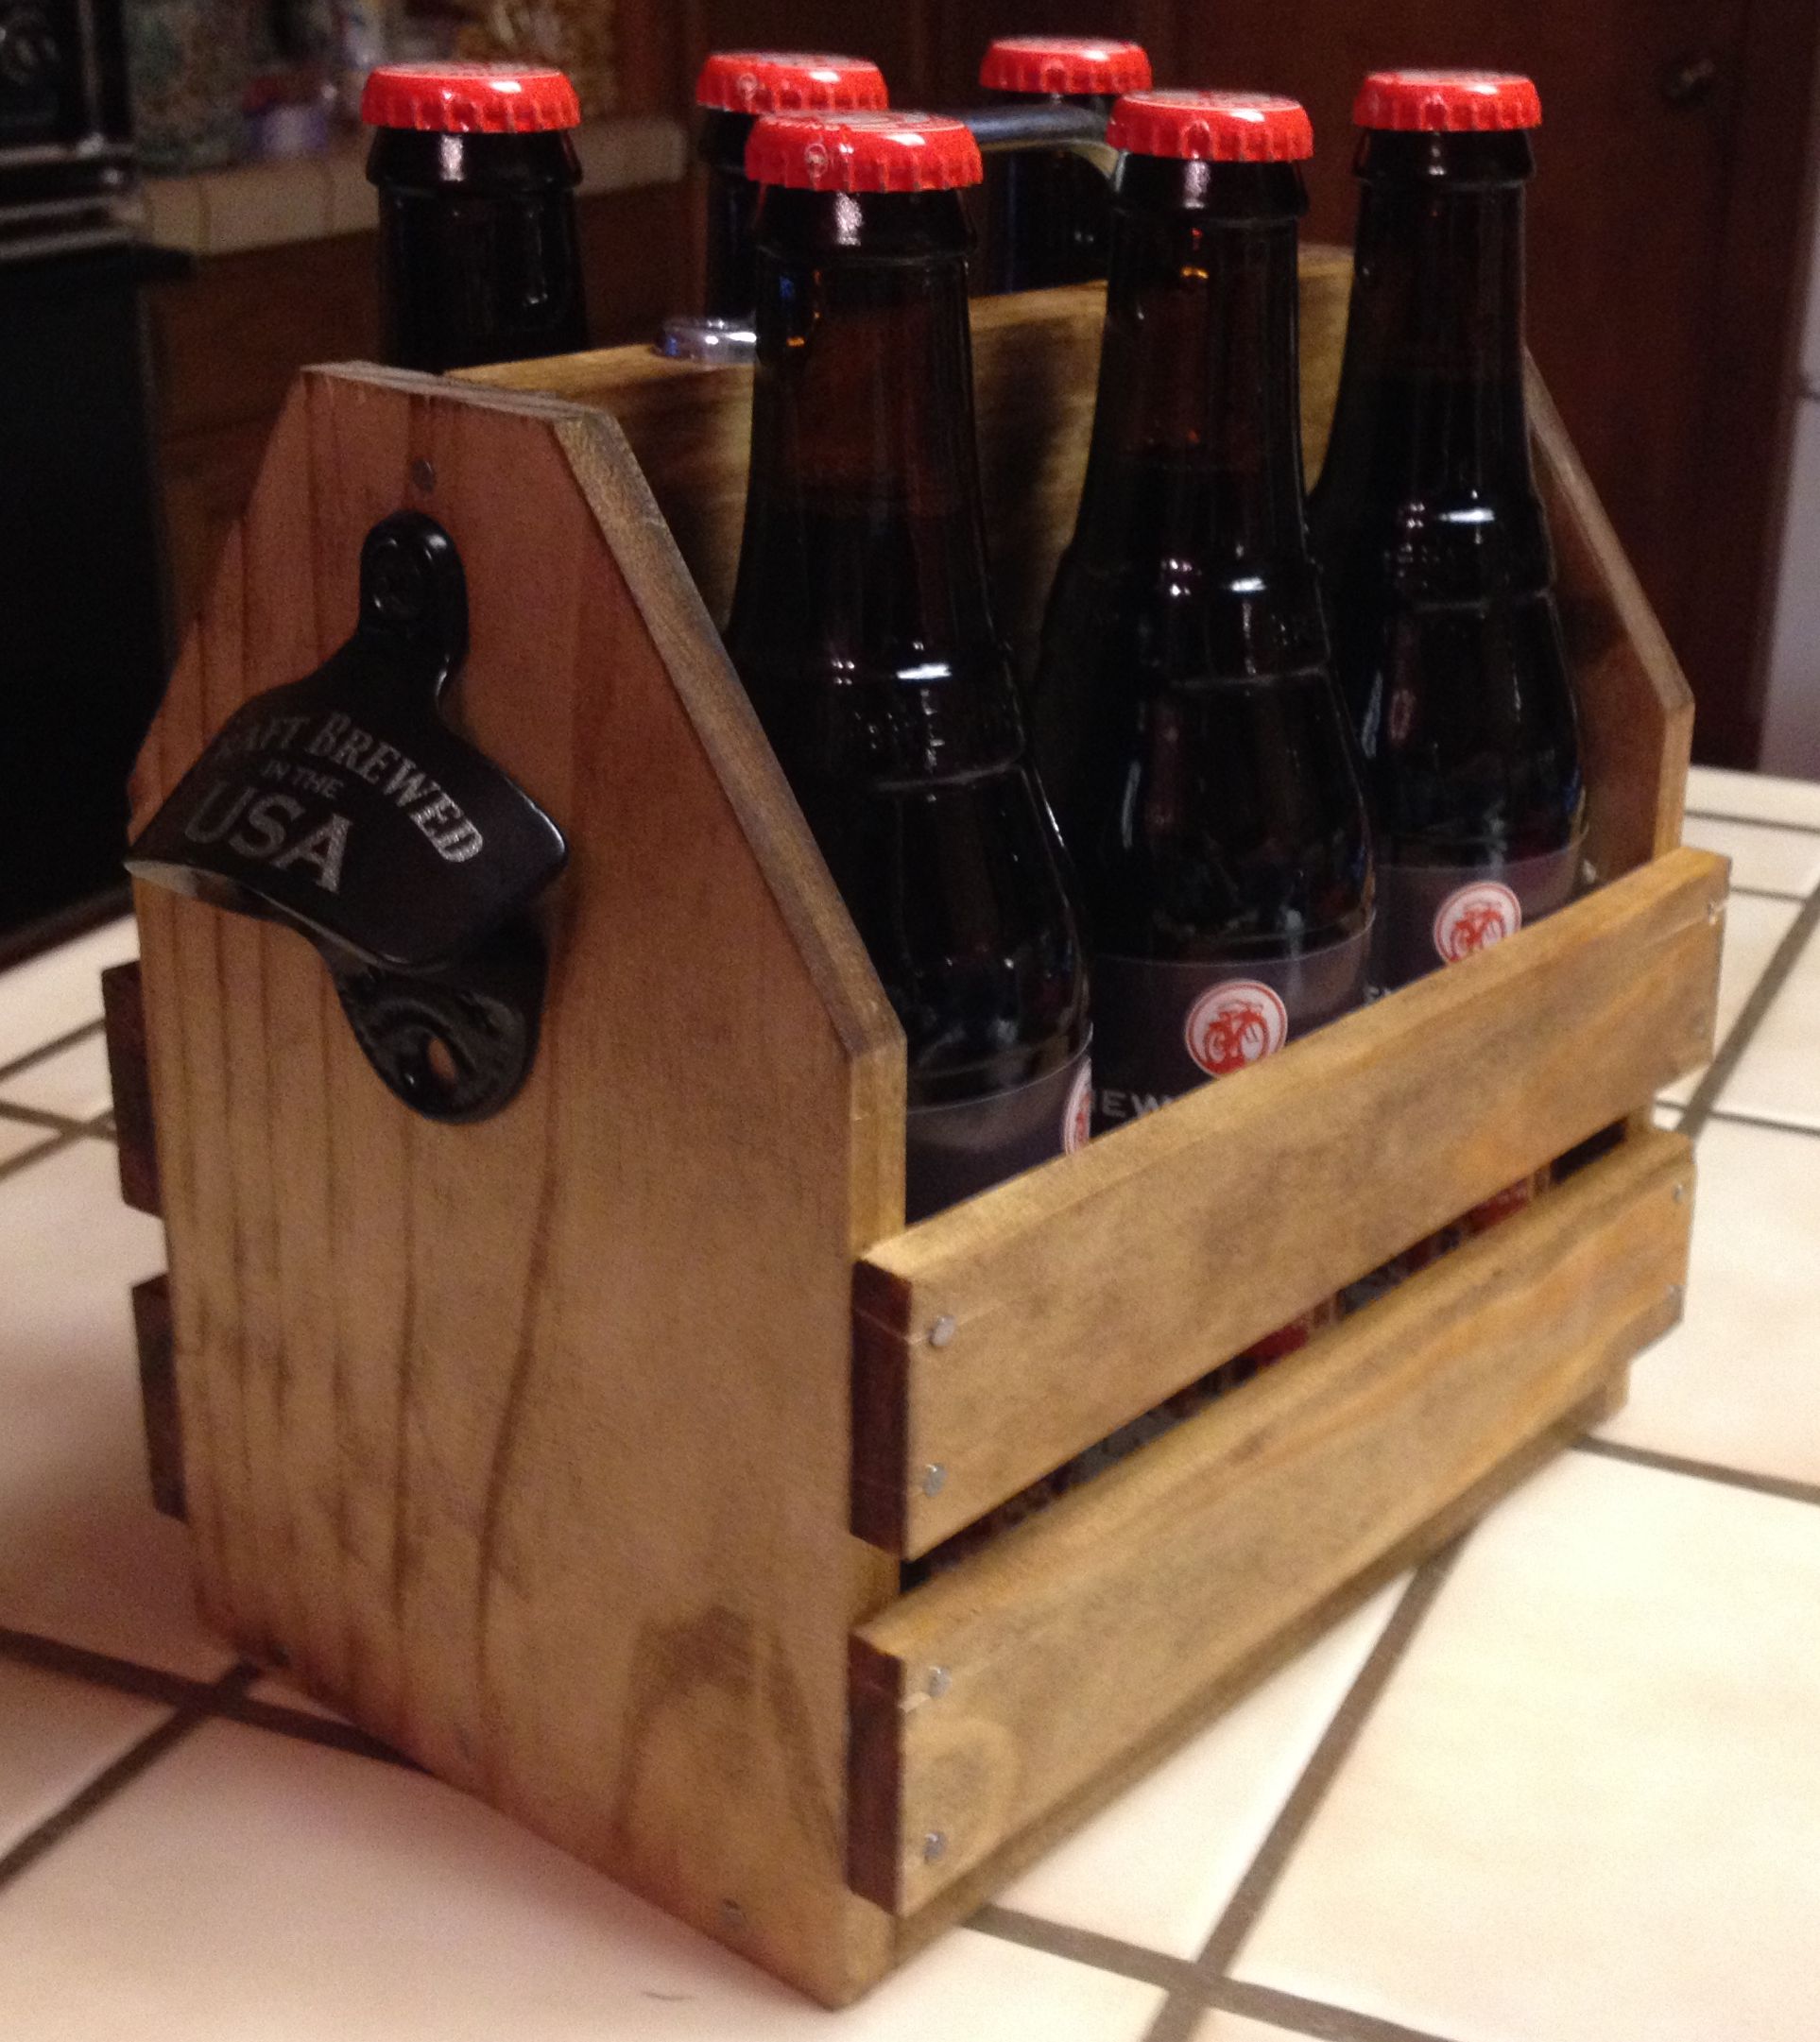
I've seen a couple of photos of "bottle caddies" for sale and I figured I could make my own. Seemed easy enough. I used 3/8" project wood from the Blue Store. I made the six-pack carrier for my neighbor who has been teaching me how to make all-grain homebrew.
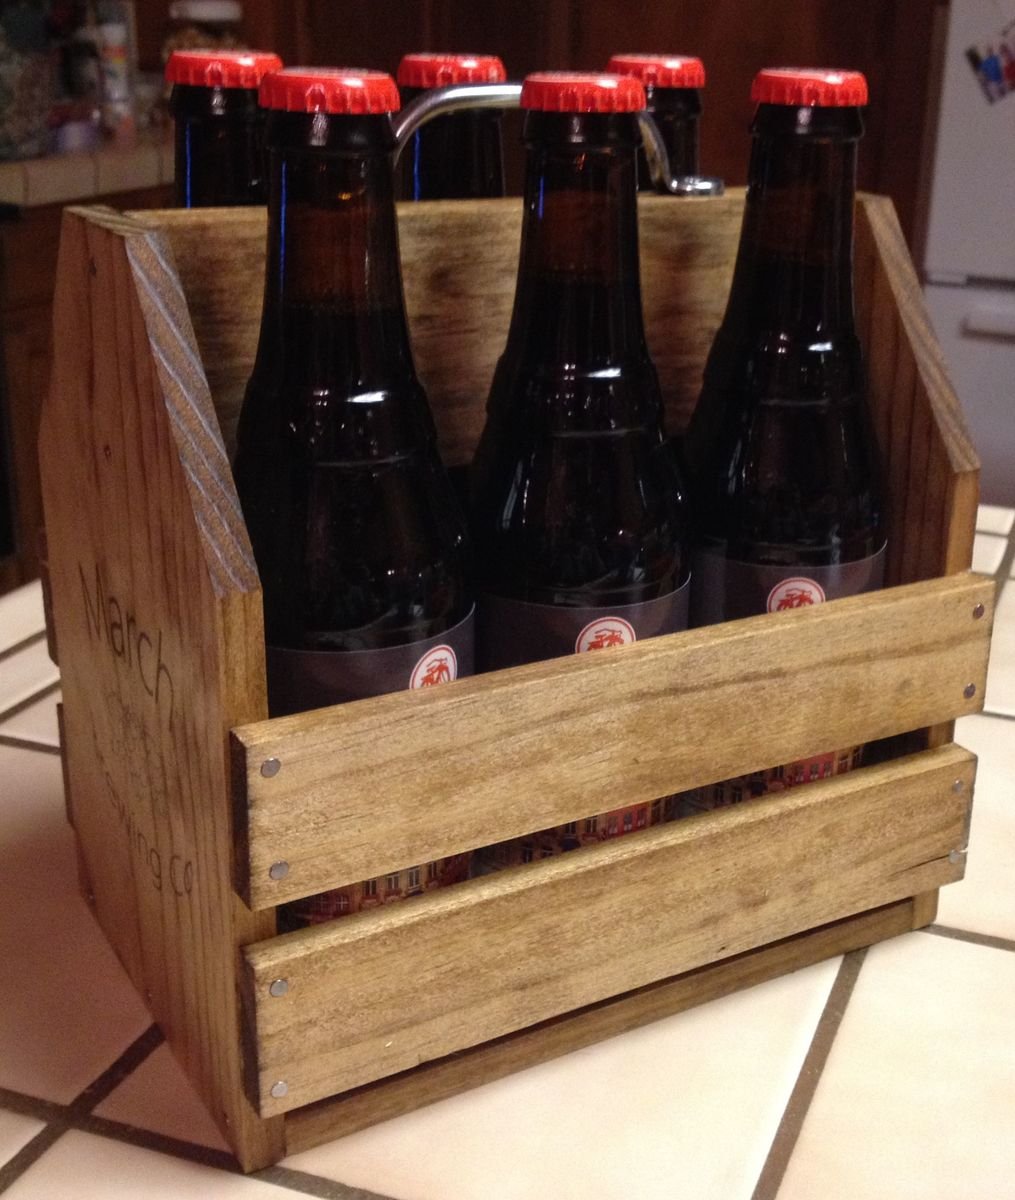
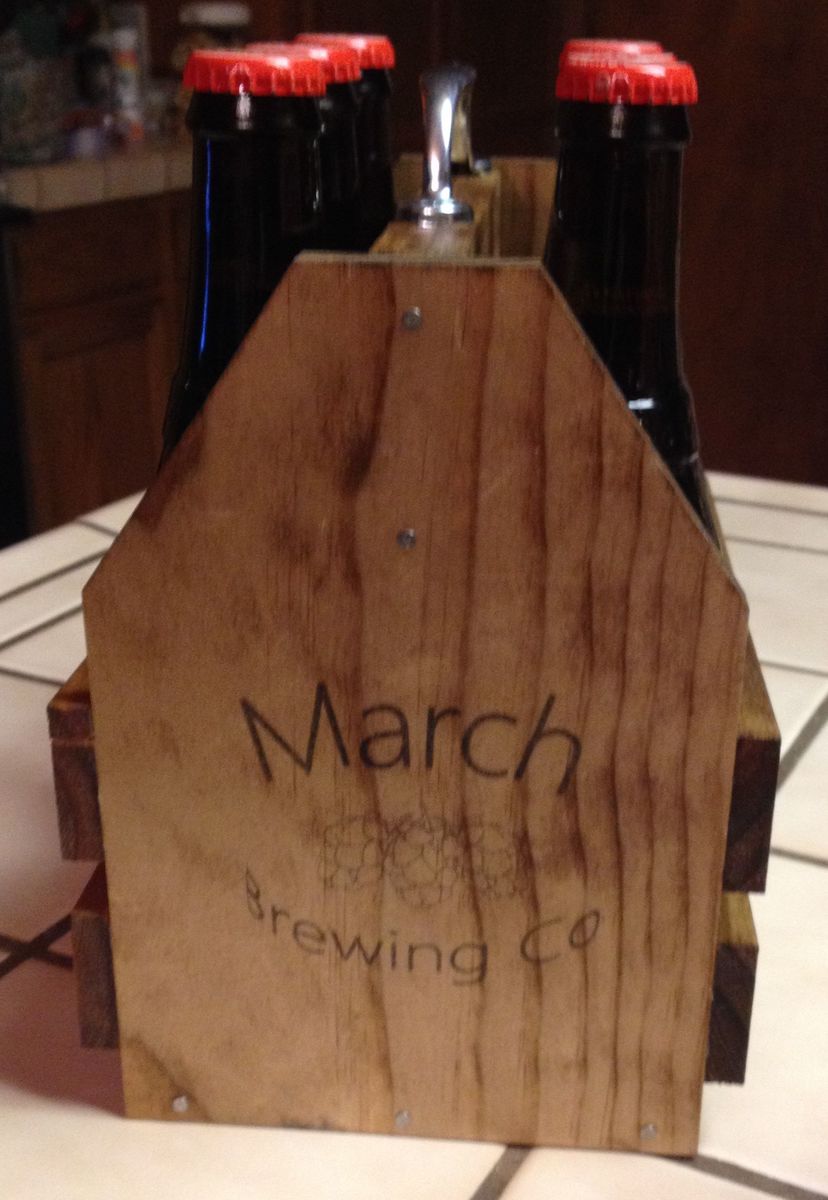
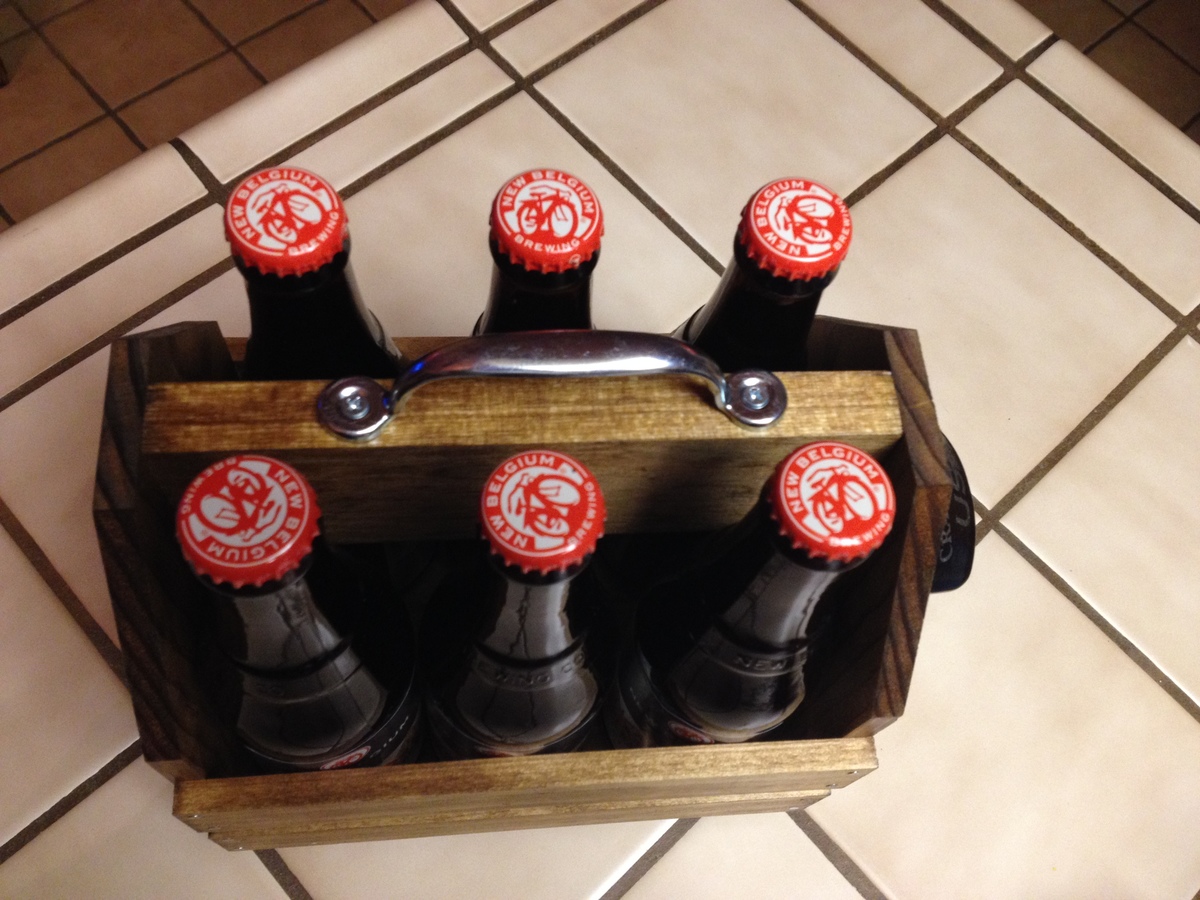
Estimated Cost
$20 (including hardware and bottle opener)
Estimated Time Investment
An Hour or Two (0-2 Hours)
Finish Used
Danish wood oil
Recommended Skill Level
Starter Project
Comments
Tue, 01/21/2014 - 14:56
Looks great!
I home brew myself and I think this is a fantastic idea! How did you go about putting the label on the side?
In reply to Looks great! by tommybo76
Tue, 01/21/2014 - 17:37
Thanks!
Actually, it was quite, quite easy. You just have to run wax paper through your inkject printer. I followed this post here:
http://www.unexpectedelegance.com/2011/09/01/wax-paper-transfer-tutoria…
I've done the transfer a couple of times. The possibilities are endless!
Thu, 01/23/2014 - 07:09
Thank you!
This will come in very handy for lots of projects. I really appreciate you sharing this with me!

Wed, 12/24/2014 - 05:03
Awesome Christmas Present Project
I just finished making some similar wooden 6-pack holders as Christmas Gifts and they are awesome. These are such a great idea for a homemade present too. Take a look at my slightly different take on this project at http://www.photowayne.com/?p=62
Faux Oars
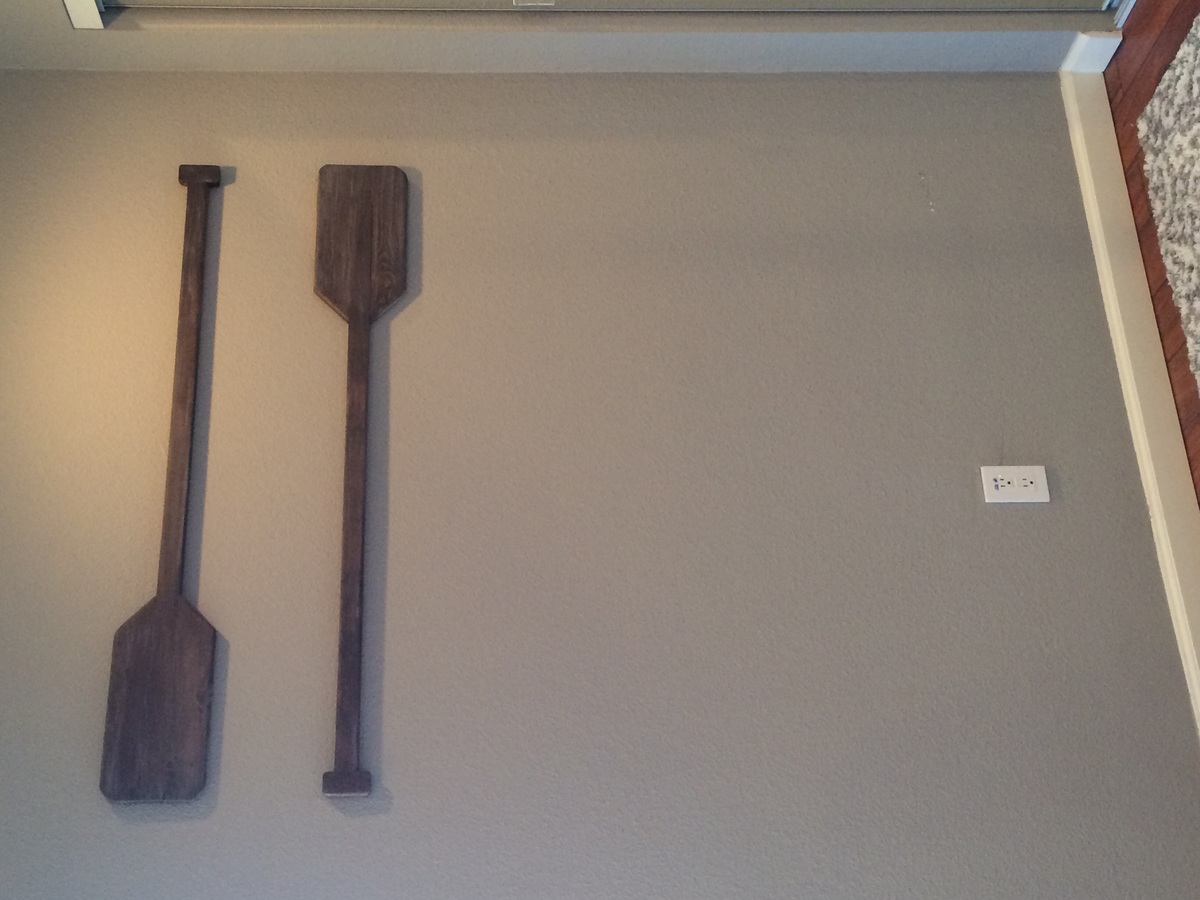
Built these Ana White Faux Oars out of scrap pine. I experimented with the finish, trying to make a more weathered look. I used Minwax Special Walnut and Jacobean and white washed. I also rounded the edges using a router and orbital sander. Easy and fun project!
Built from Plan(s)
Estimated Cost
Free
Estimated Time Investment
An Hour or Two (0-2 Hours)
Finish Used
I used Minwax Special Walnut and Jacobean and white washed. I also rounded the edges using a router and orbital sander.
Recommended Skill Level
Beginner
Industrial Bookcase for my office
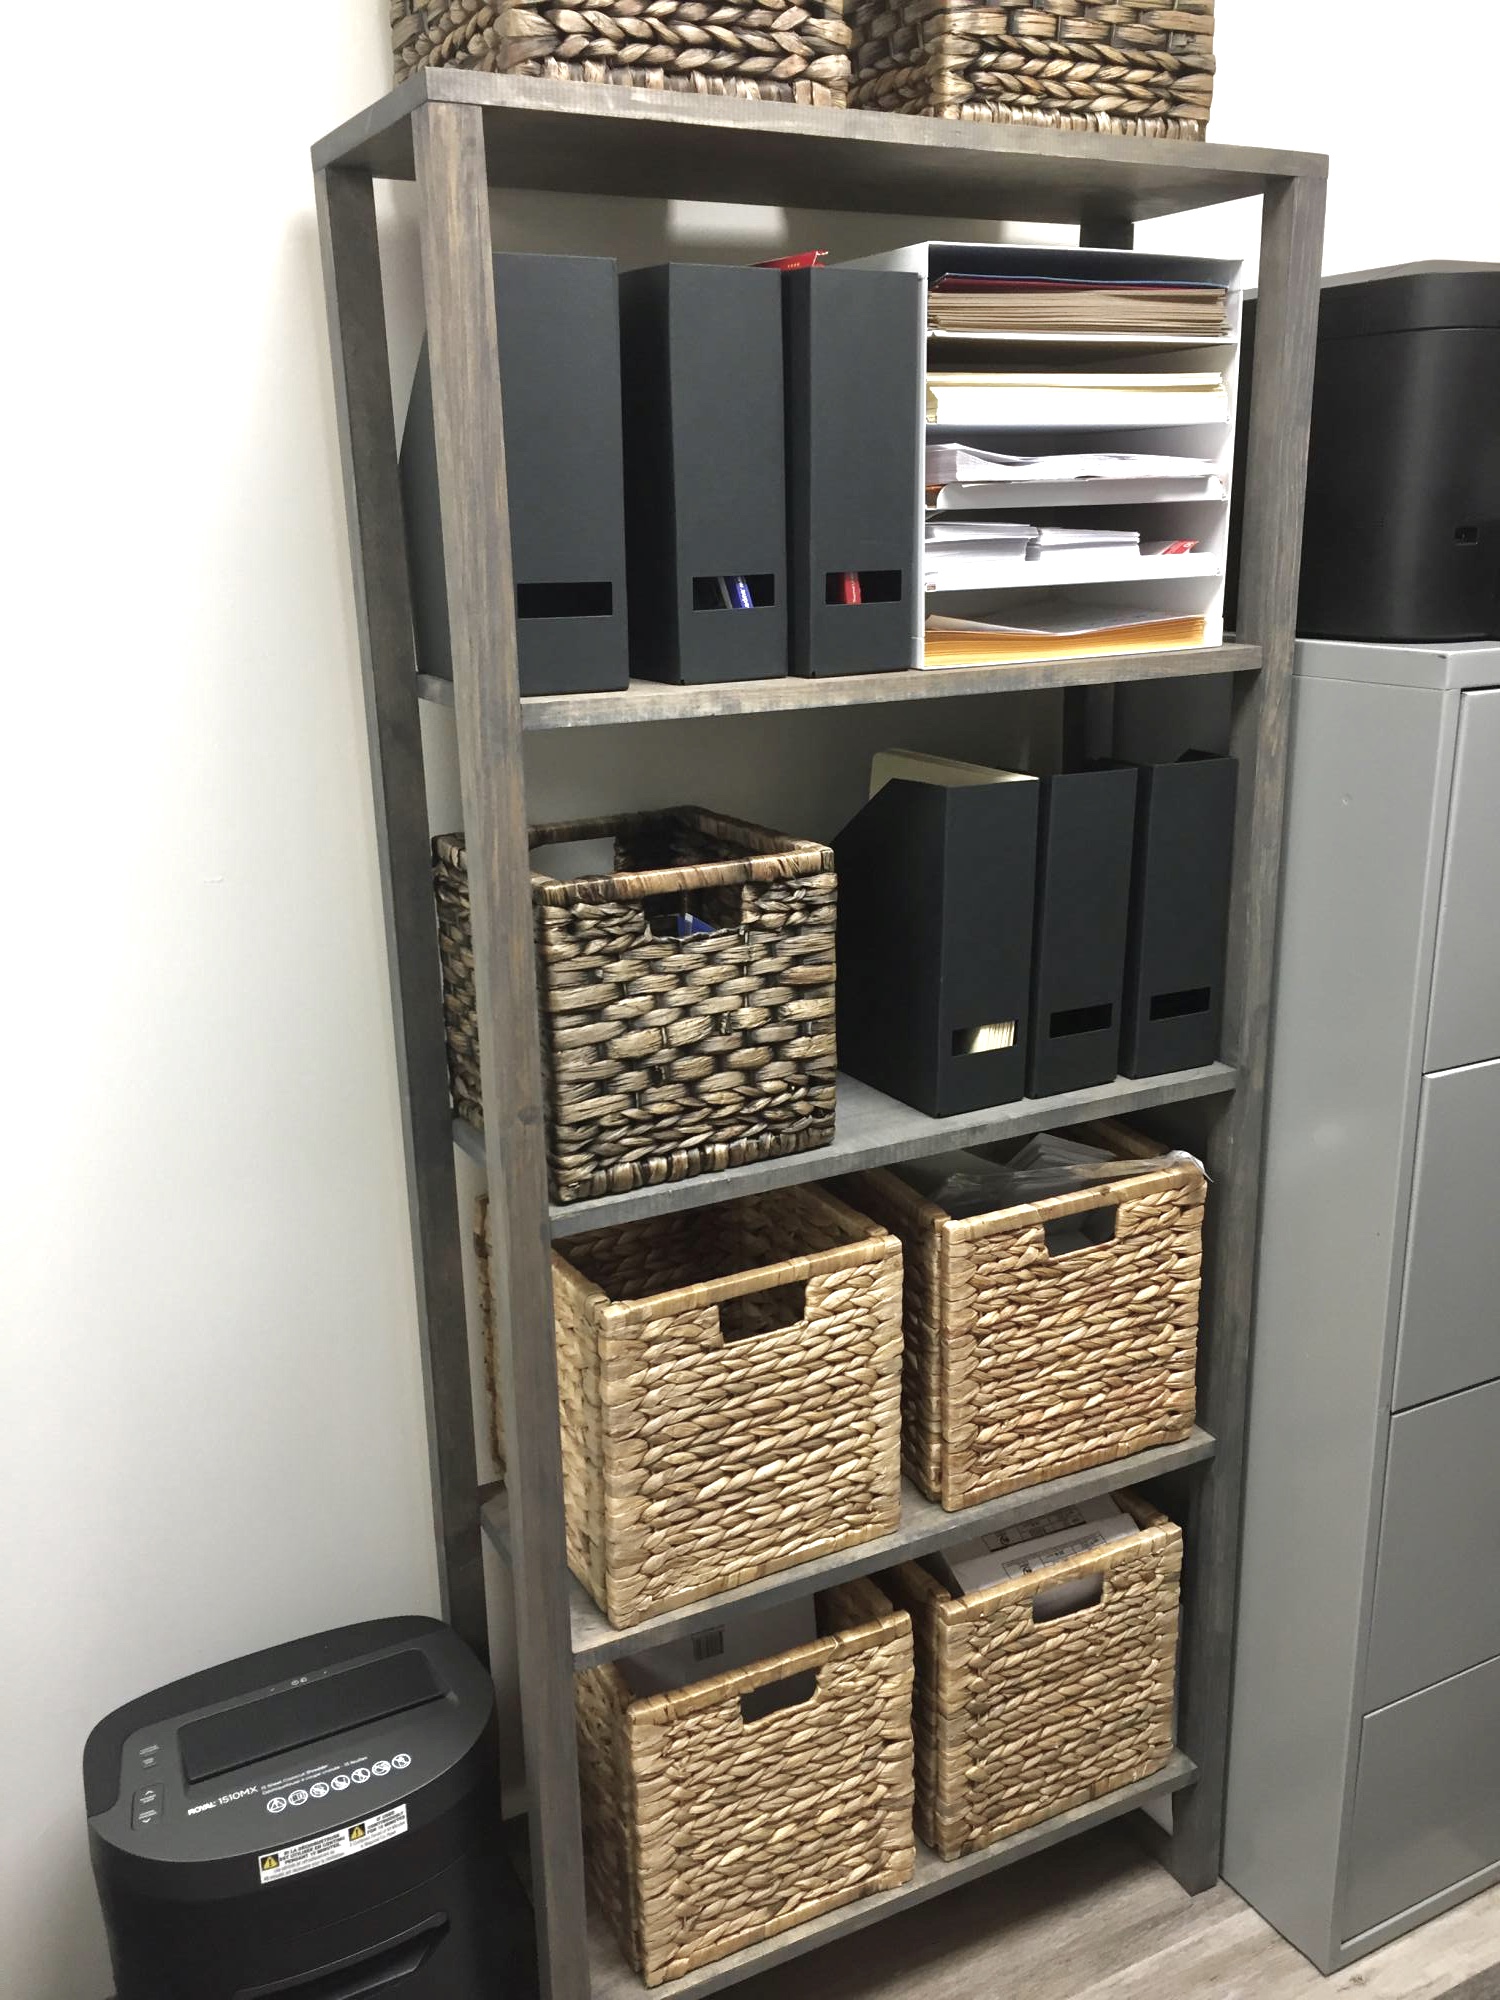
I built this bookcase for some office storage.
Built from Plan(s)
Recommended Skill Level
Beginner
Open Shelf Console with Modifications
I modified the size of the original plan to better fit the space. It is slightly deeper and taller than the plans. I also used a router to create a rabbet for the glass inserts in the doors.
The finish is a homemade chalk paint followed by multiple coats of furniture wax. The build itself was quick and straight forward, but the finish took the most time.
The console really pops in a room full of stained furniture. I love the look, shape, and versatility of it--thank you for sharing the plans!
Built from Plan(s)
Estimated Cost
$75
Finish Used
I painted it with three coats of homemade chalk paint and followed by 3-4 coats of wax.
Recommended Skill Level
Beginner
Comments

Thu, 01/23/2014 - 08:36
Beautiful!
This project looks really good. I love the glass inserts and the color you chose.
Val @ artsybuildinglady.blogspot.ca
Washer Dryer Pedestals
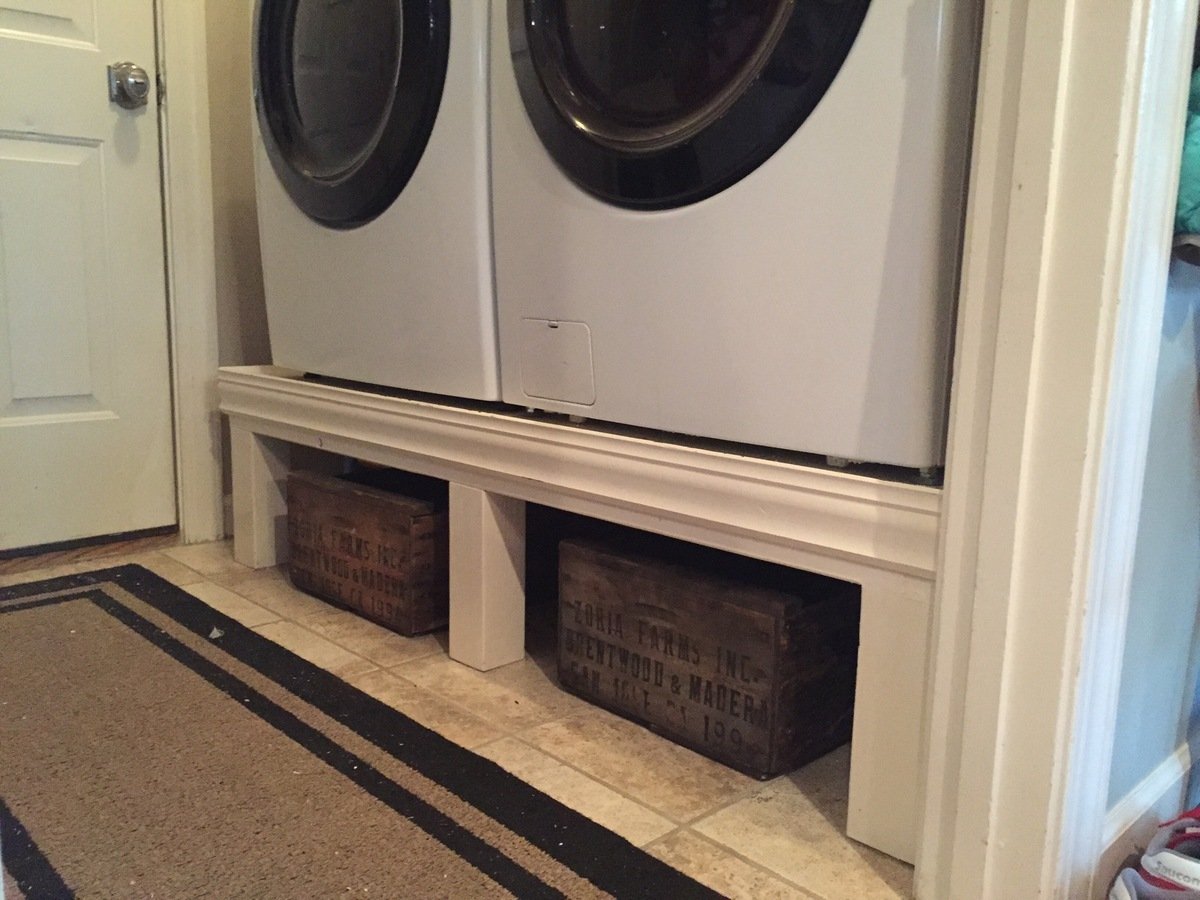
We have a very small laundry room and we wanted some additional room to put shoes when we walk in. We also couldn't have the pedestal be too tall or our washer and dryer would hit the shelves we put in over the laundry room. For this reason I modified the plans to remove the bottom and adjusted the height of the plans to just fit. I was worried about the stability, but made this super strong.
Built from Plan(s)
Estimated Time Investment
Weekend Project (10-20 Hours)
Recommended Skill Level
Intermediate
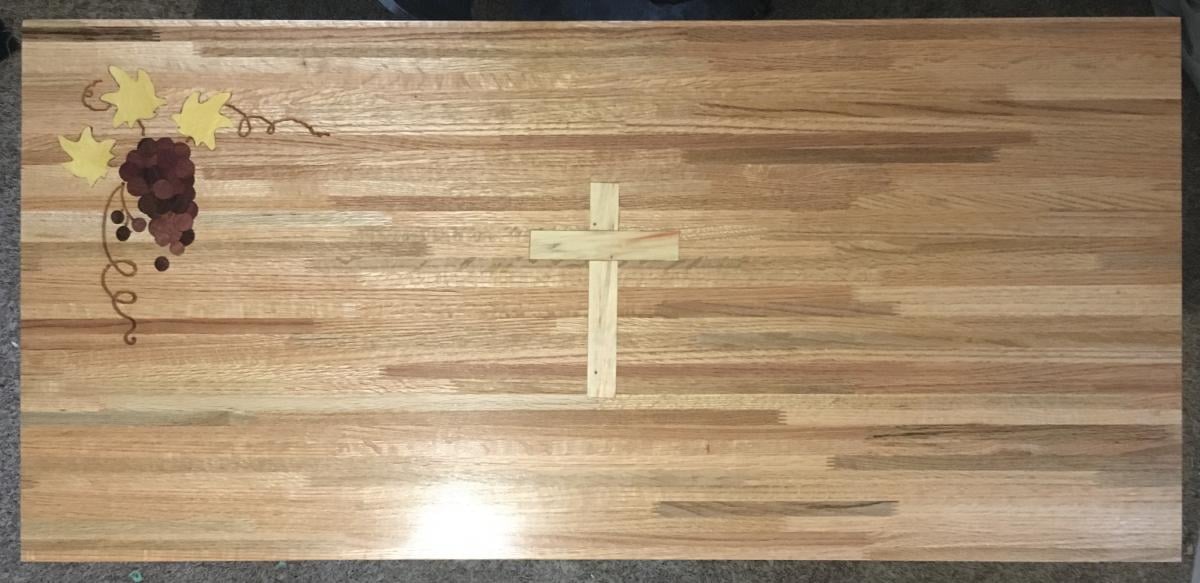
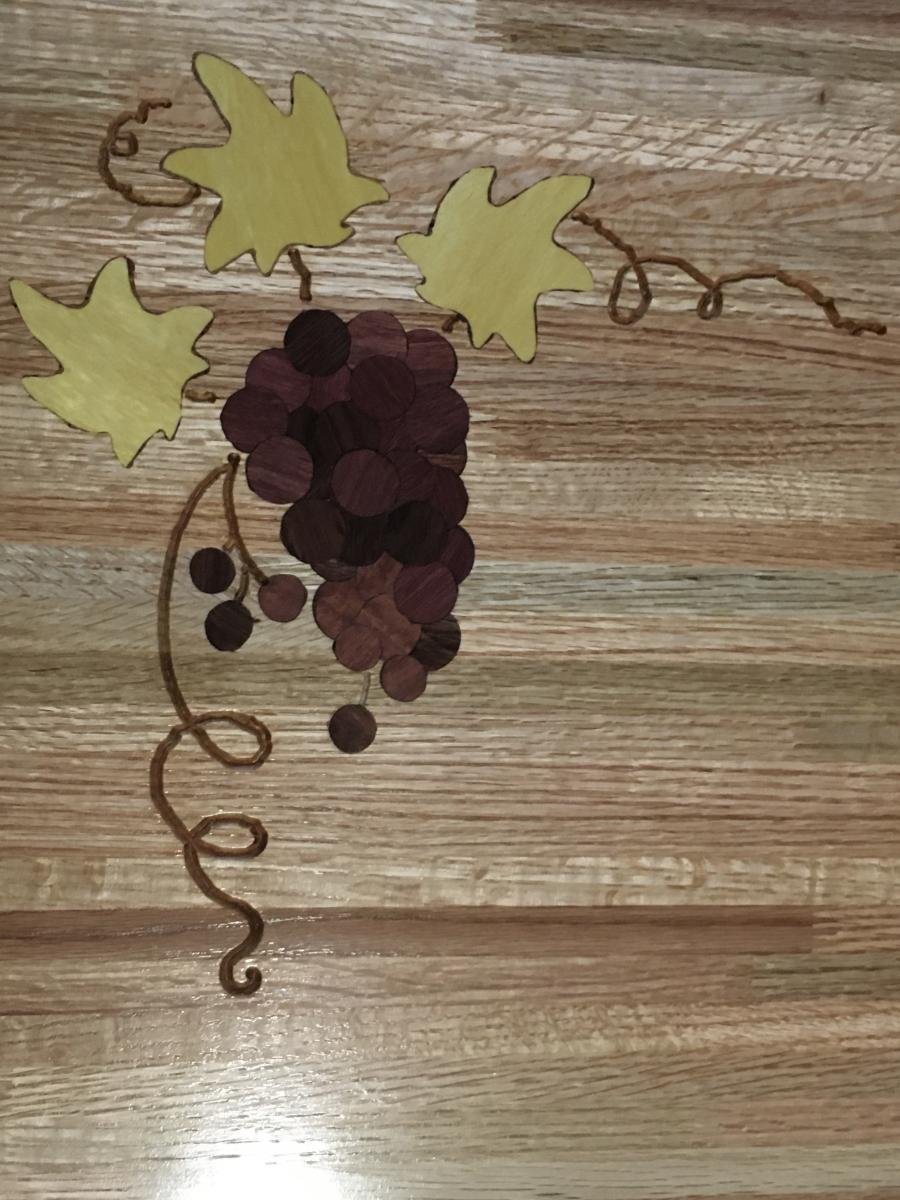
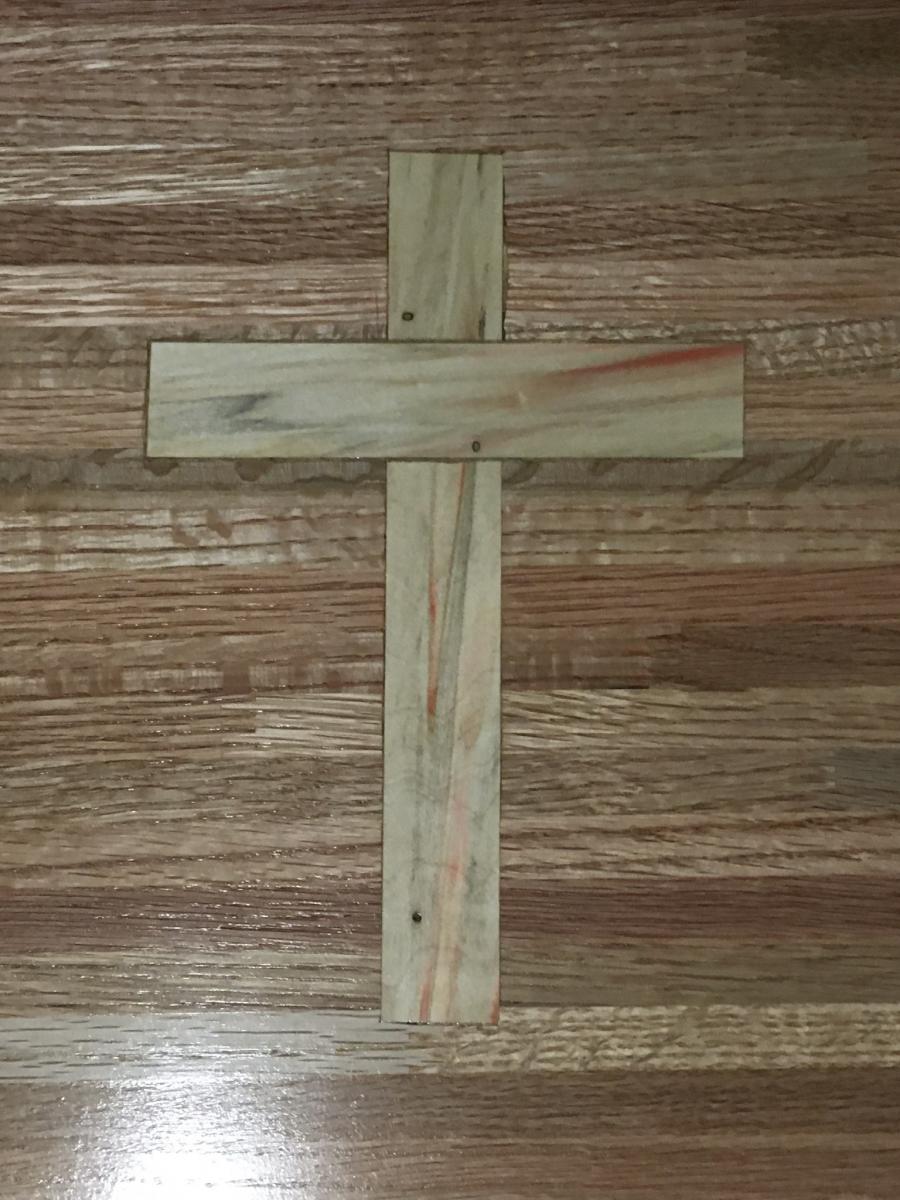
Communion Table from truss Sofa table plans

Wanted to make a Communion Table for church found these plans here on Ana White and just had to use it. I modified them to make the table 24 inches wide and only 52 inches long. I had fun making this and had help from all five of my kids with the oldest being 11 and the youngest 3. Thanks for recommending these plans they were awesome. 👍
Estimated Cost
$250
Estimated Time Investment
Week Long Project (20 Hours or More)
Finish Used
Shellac on top white paint with coffee glaze finished with polyurethane
Recommended Skill Level
Beginner
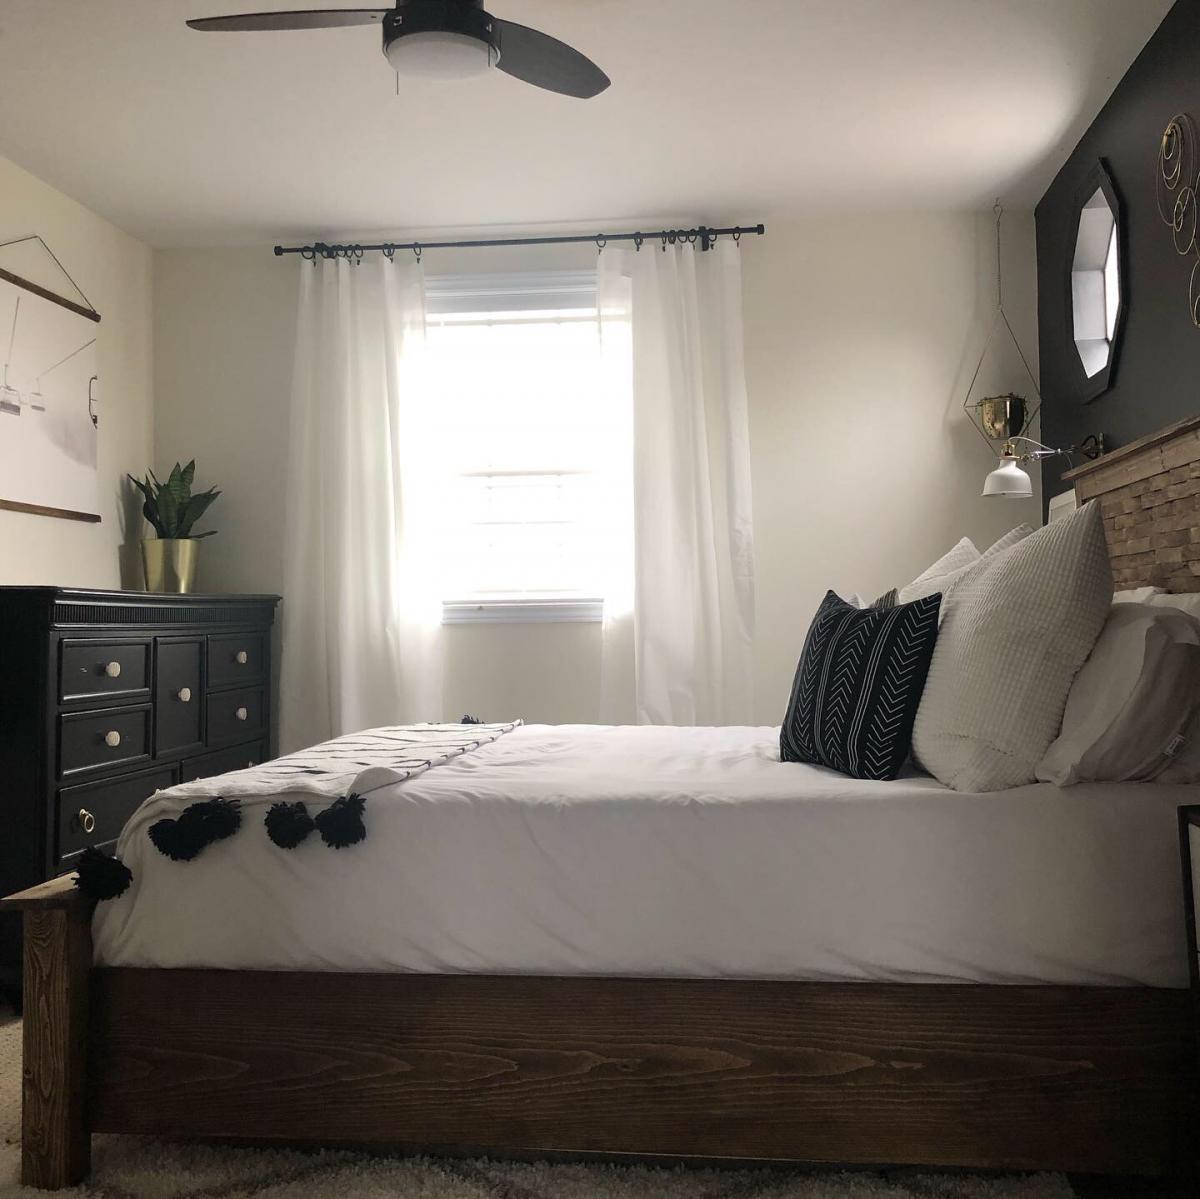
Classic Gray Nightstand
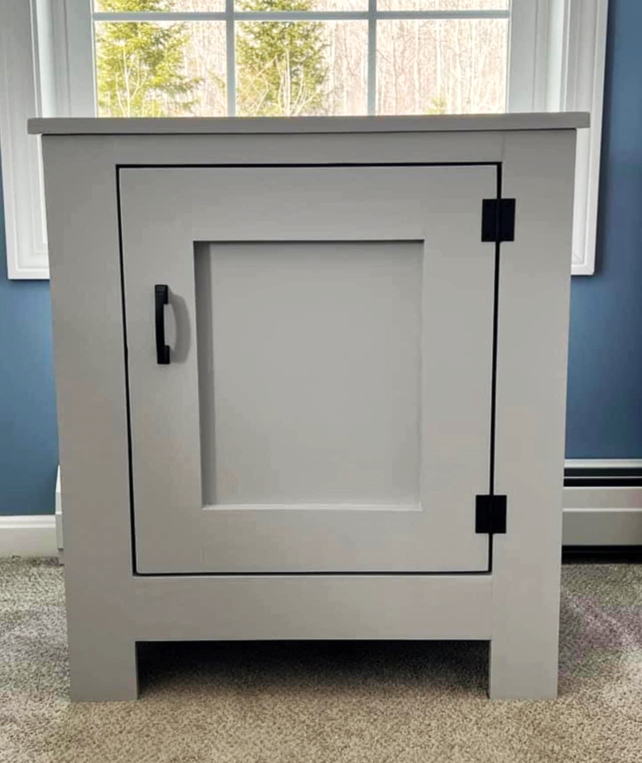
Beautiful bedside table build by Heather Kirk
Built from Plan(s)
Diaper Caddy
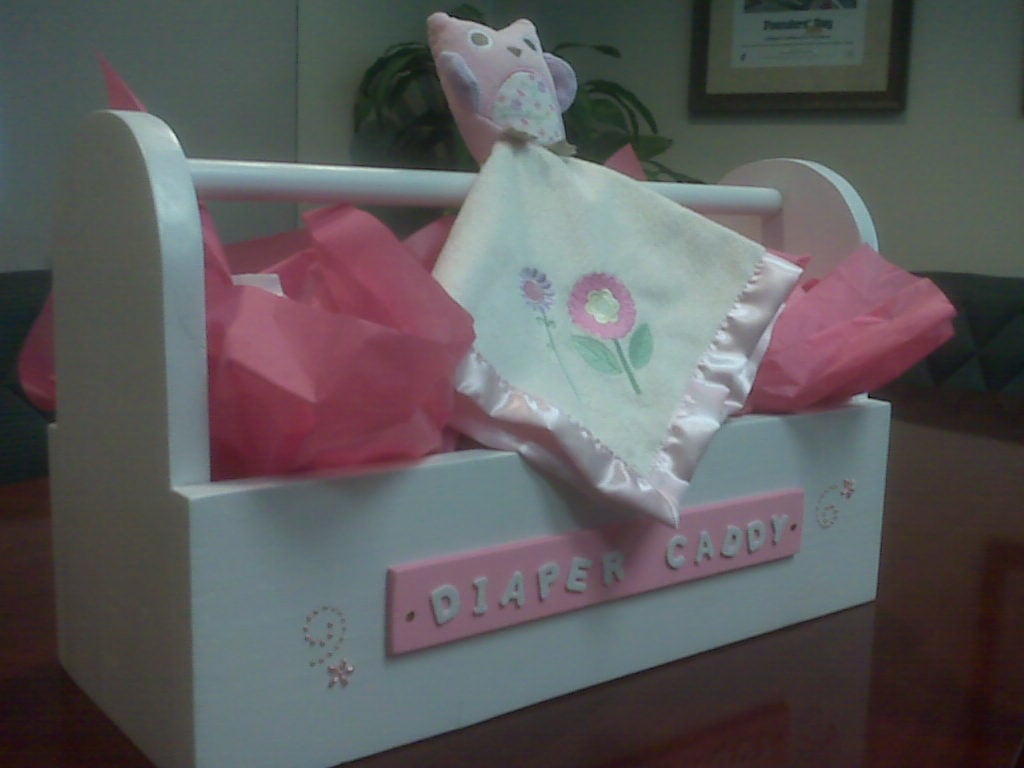
I've made these tool boxes for my grandkids, but loved the idea to use them for other things. This is the 2nd diaper caddy I've made and each one has been a hit with the new grandparent or parent. I think they're cute and practical!
Painting took longer than building it!
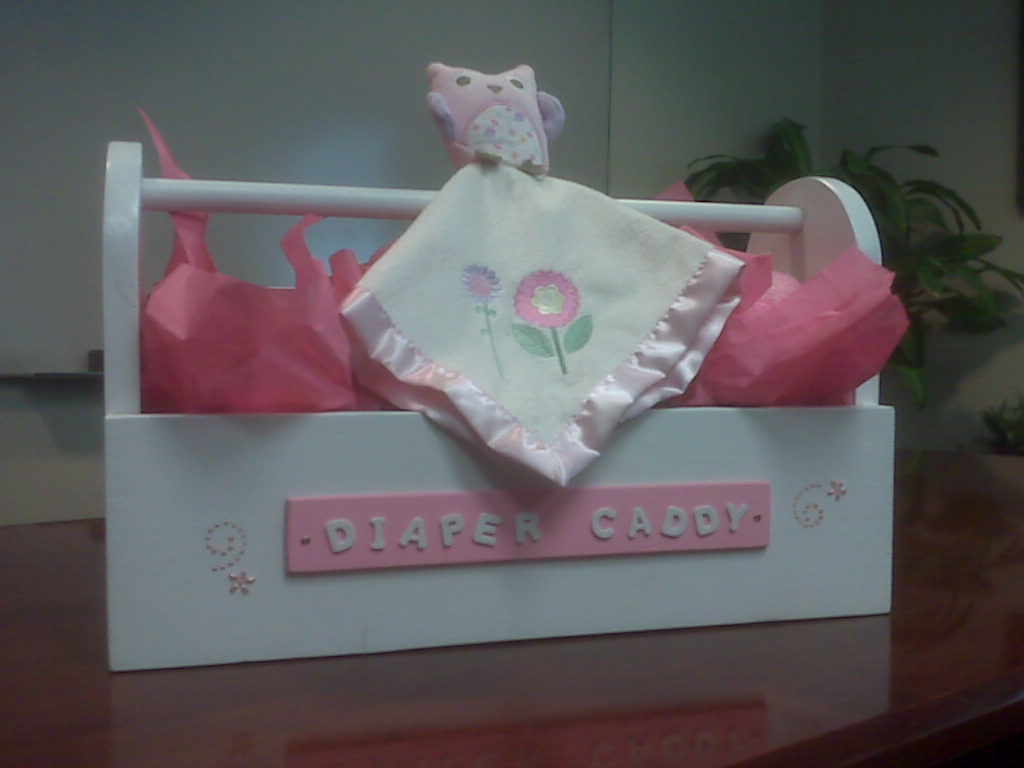
Estimated Cost
unfilled-$15, filled $40
Estimated Time Investment
An Hour or Two (0-2 Hours)
Finish Used
Because this might be used by kids later, and splinters would be painful, I made sure to sand the bottom, all sides and edges smoothly. Then I used Rustoleum White satin spray paint. 3 coats, with sanding in between.
Recommended Skill Level
Starter Project
Comments
Doll Bunk Bed

I made this for my grand-daughter for her birthday following the plan from the plan catalog using my Keg Jig and scraps from previous projects. My wife followed a link from then plan to make the pad and quilt. I spray painted it with a semi-gloss pink - her favorite color
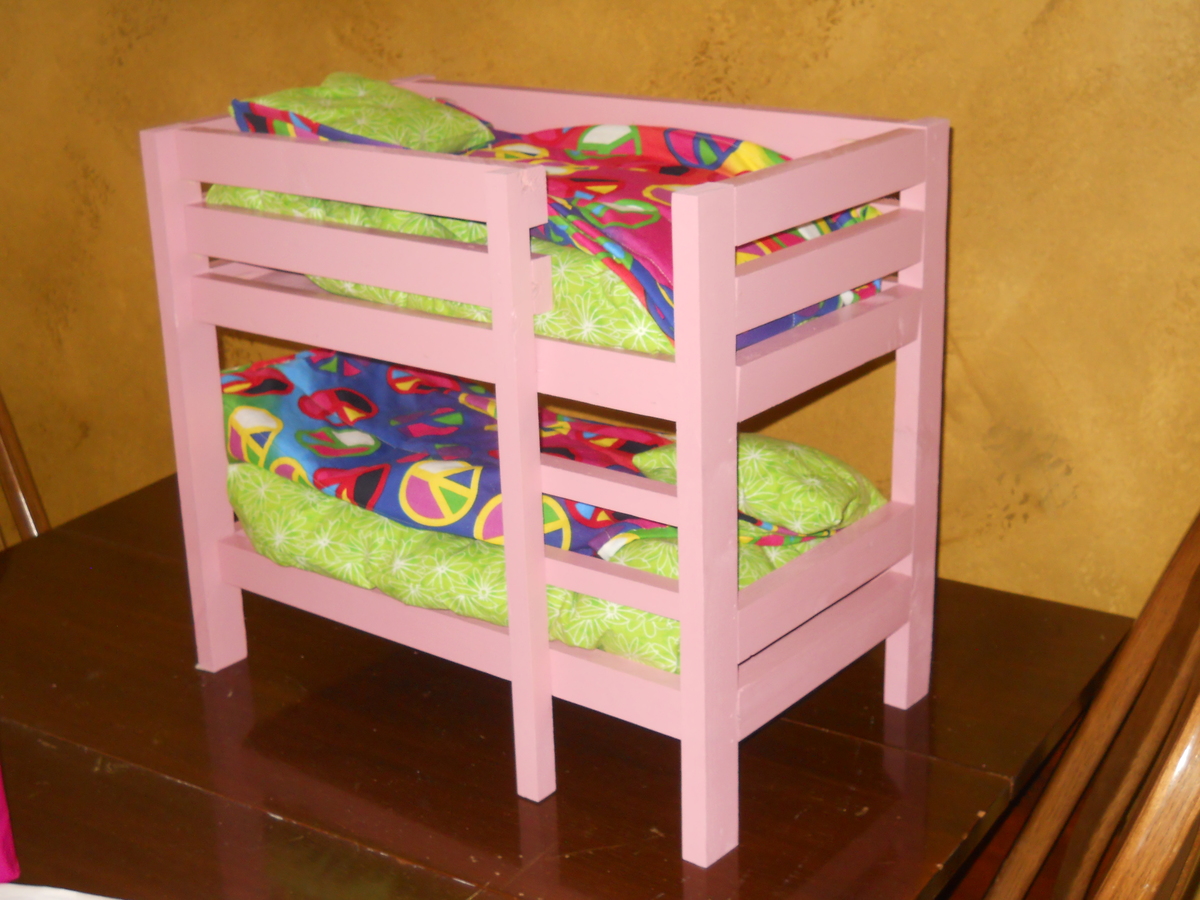
Estimated Cost
$50
Estimated Time Investment
Afternoon Project (3-6 Hours)
Finish Used
Krylon Semi-gloss Spray Paint Pink
Recommended Skill Level
Intermediate

Jumbo Wood Dressers
Built two jumbo sized dressers 72 by 36 3/4 by 24 3/4. Painting is still pending. One can see playlist here
Rasik
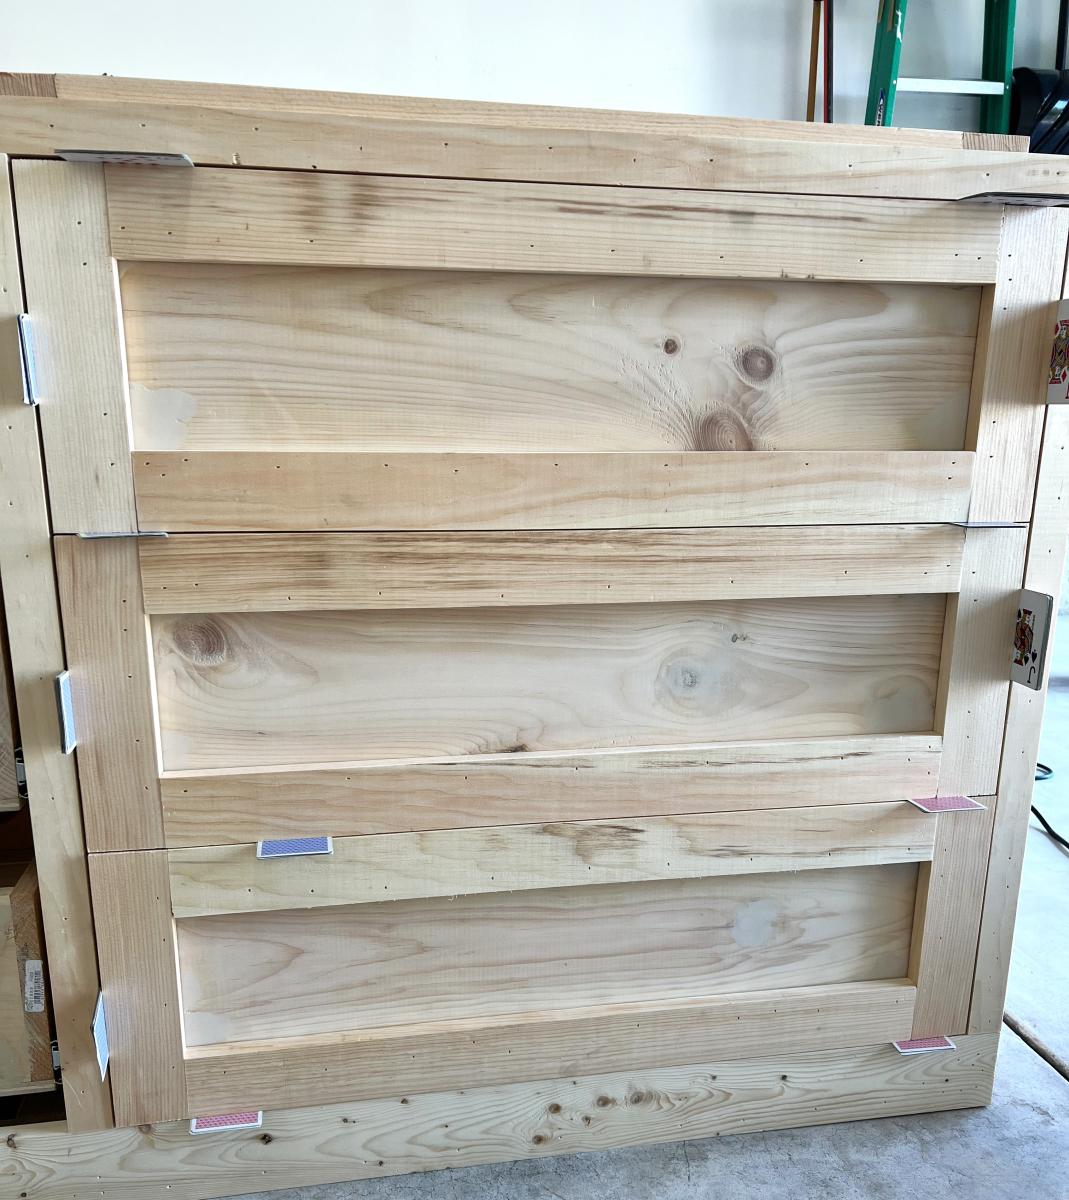
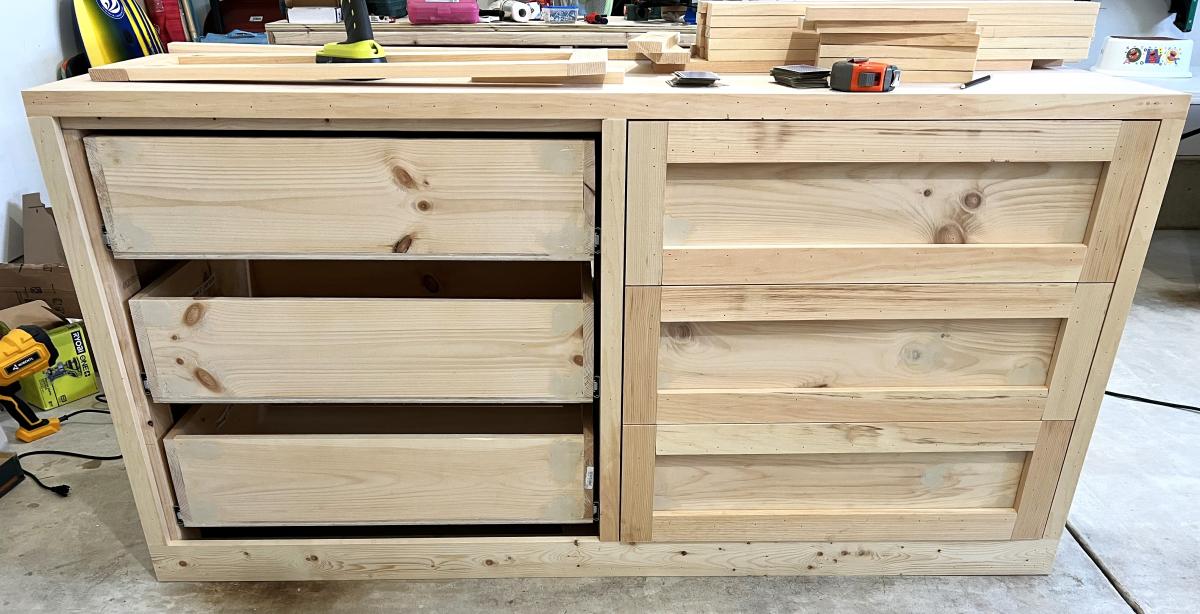
Built from Plan(s)
My Bed
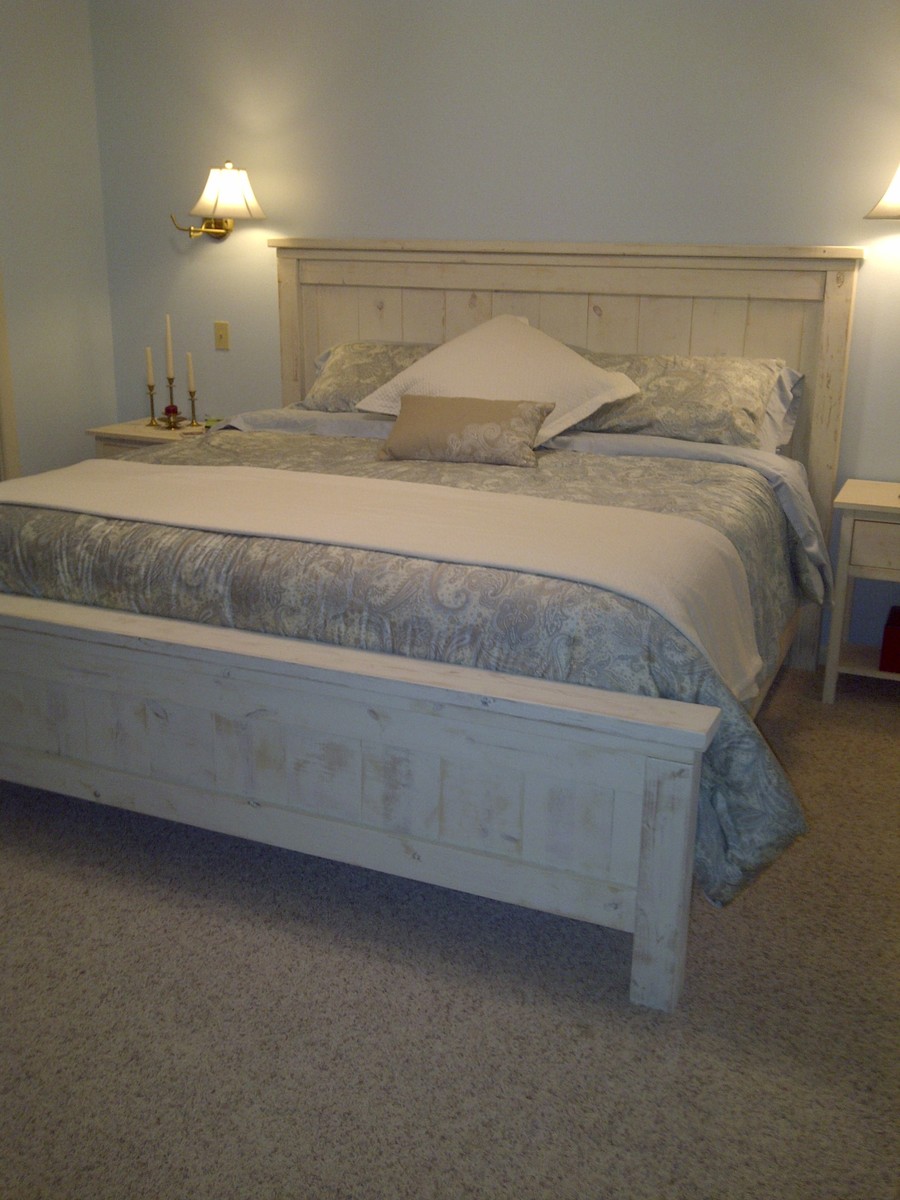
I just followed Ana's plan!
Estimated Cost
$175
Estimated Time Investment
Weekend Project (10-20 Hours)
Finish Used
One coat semi gloss interior paint and sanded.
Recommended Skill Level
Beginner
Comments

Tue, 05/01/2012 - 13:42
Lovely! Do you remember the
Lovely! Do you remember the brand/color of paint used?
Combo of Farmhouse Bed with Farmhouse Storage Bed
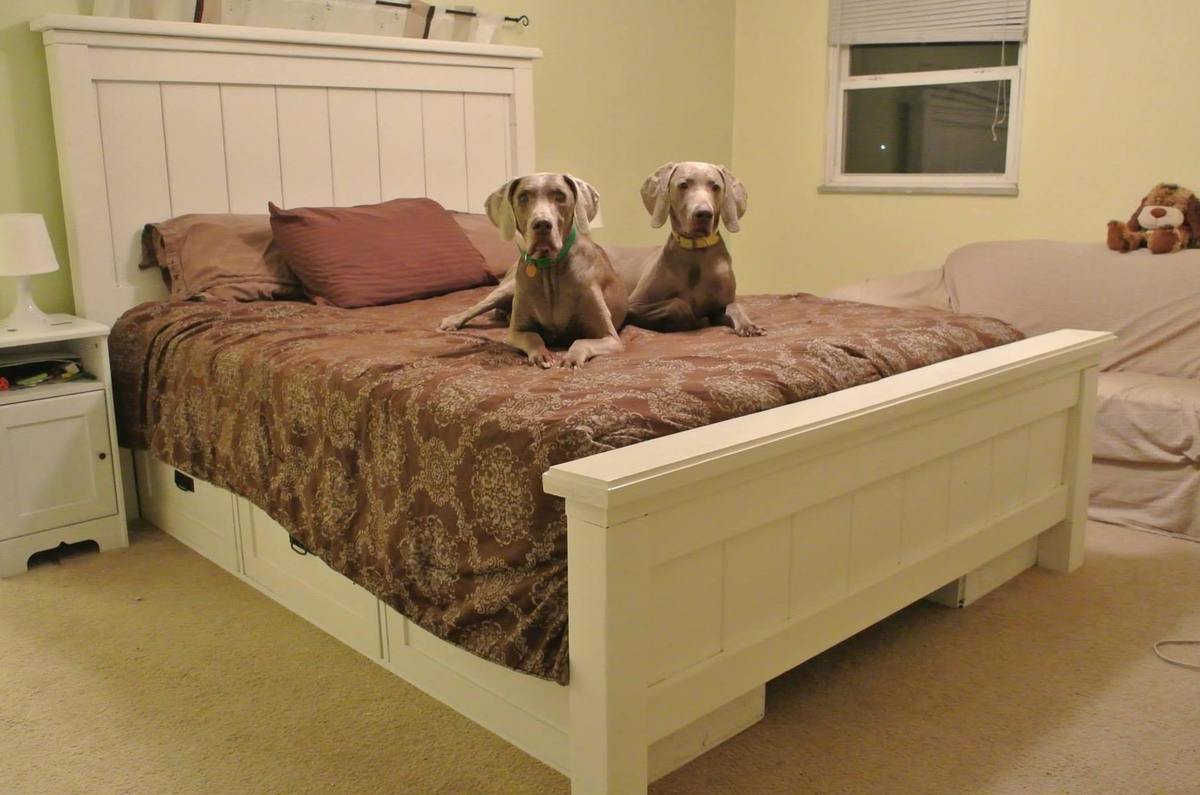
I meshed the Farmhouse Bed with the Farmhouse Storage Bed with Storage Drawers and this is the final product. Let me know if you have any questions. I learned along the way.
A few things I modified -
I knocked off the corners of the 1x8's used in the footboard and headboard as I wasn't a fan with how they butted up straight. I liked the rounded edges of the routered boards instead.
I cove routered the tops of 2x6's and loved how they turned out
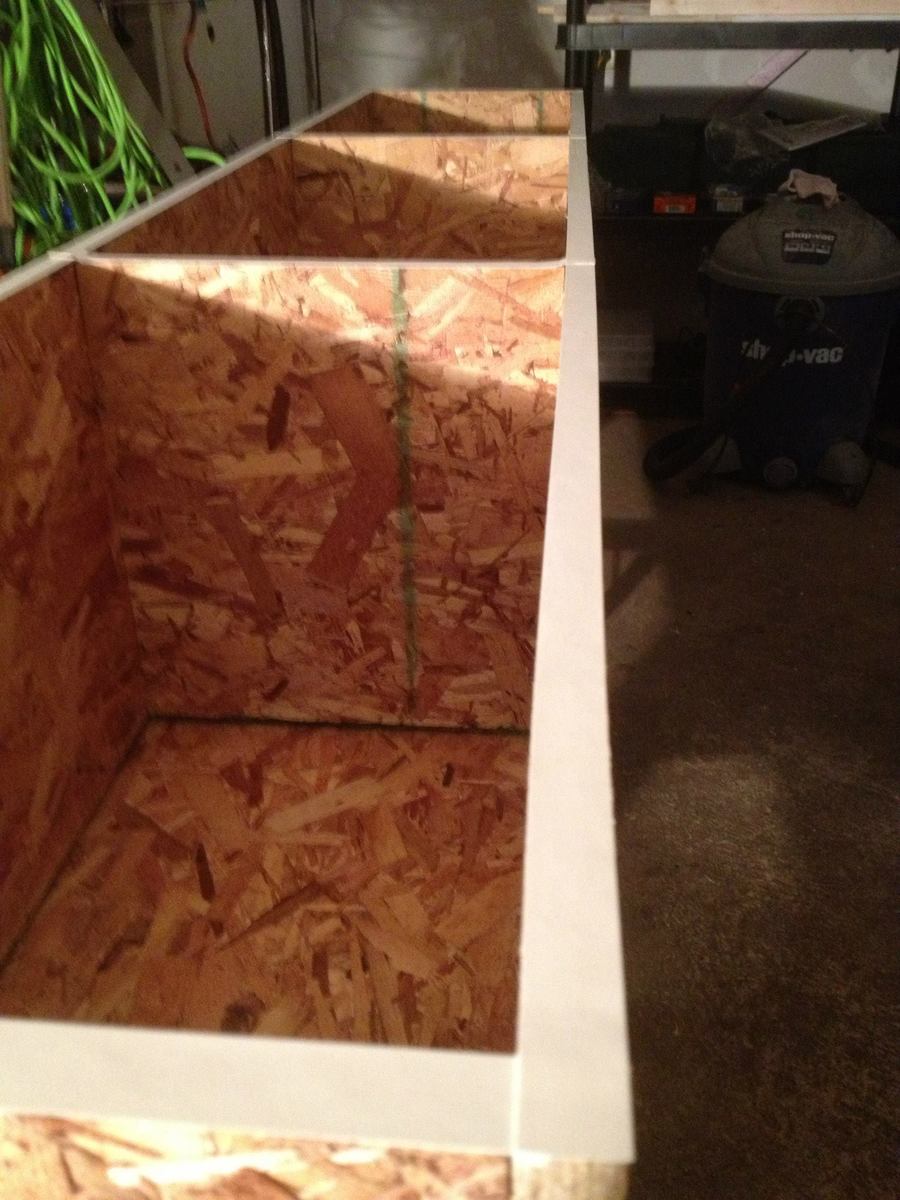
When I handed my cutlist to the kid at the big orange store, he pulled OSB instead of plywood for the storage cabinets. I realized it halfway through the cutting as I was shopping for other things and didn't have the heart to tell him halfway through the job. I had to edge band (first time) the edges and the OSB soaked up a lot of primer.

Built from Plan(s)
Estimated Cost
$400
Estimated Time Investment
Week Long Project (20 Hours or More)
Finish Used
Glidden Antique White
Recommended Skill Level
Beginner
Comments
My first shot at furniture making! I'm hooked now!
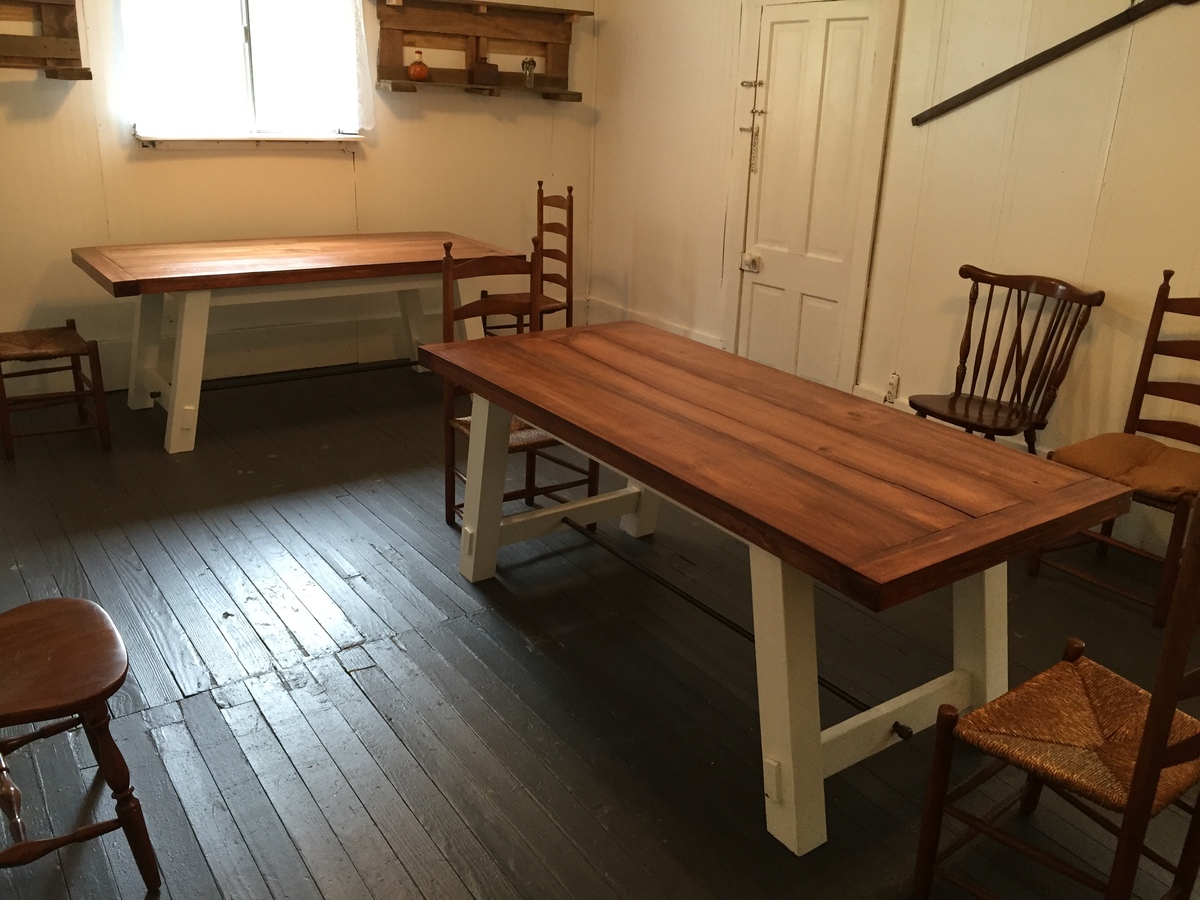
My first shot at furniture making. Two benchright farmhouse tables. Made from reclaimed lumber I found in my barn and poplar milled by Wayne my neighbor. Thanks Wayne and Anna White. These are in the dinning room of our Country Road House B&B located Clendenin WV. Look us up, stay and eat breakfast on these tables!
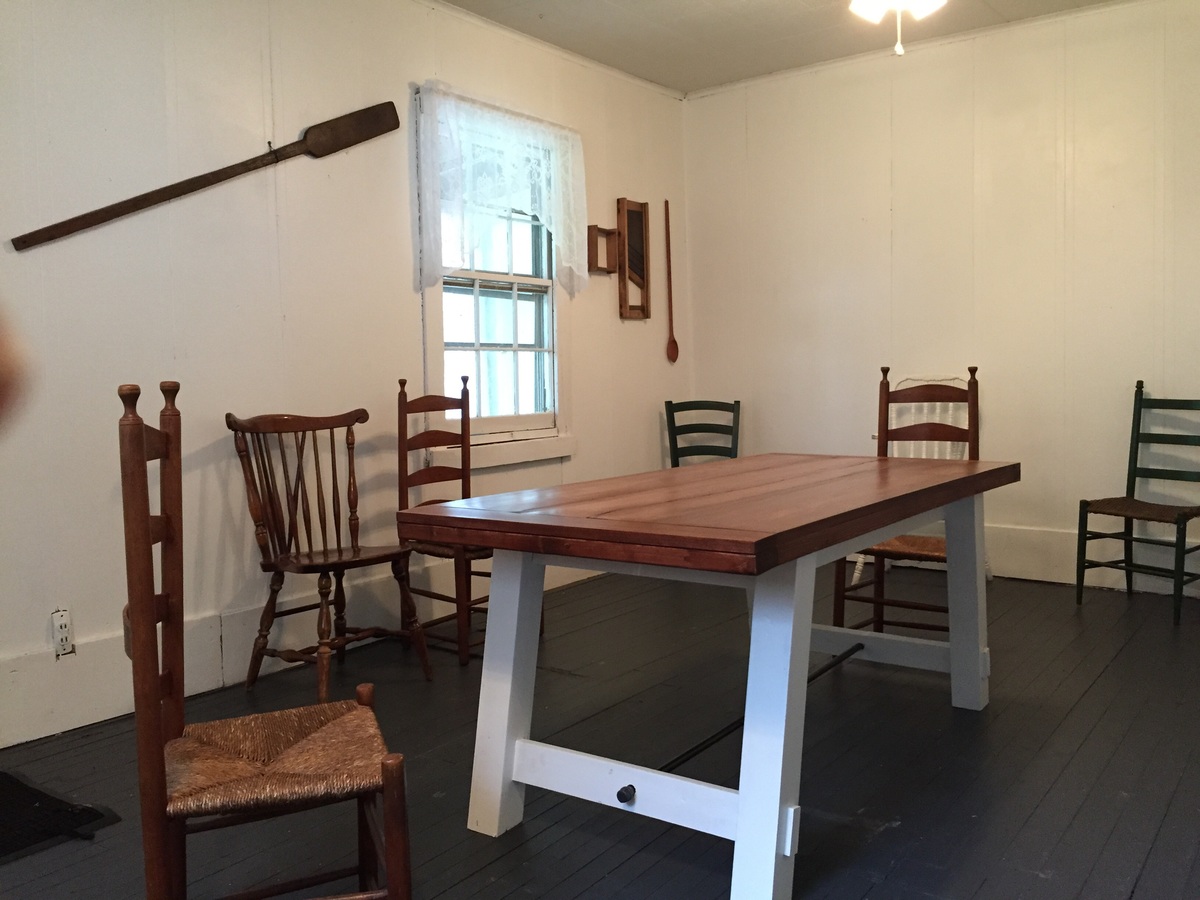
Built from Plan(s)
Estimated Cost
$25 parts. Lumber free. New tools.... Well....
Estimated Time Investment
Week Long Project (20 Hours or More)
Finish Used
Mahogany gel stain by minwax. Water based poly also minwax. Exterior house paint for legs and sides.
Recommended Skill Level
Beginner
Comments

Tue, 04/26/2016 - 19:45
this table looks gorgeous!
this table looks gorgeous! Very impress job on your first shot at furniture making.
Shim Queen bed
My husband and created this bed using a plan we found on the website. We were doing the One room Challenge and wanted to redo our room on a budget. It was our first major build and it turned out really well. When my husband said we were going to use wood shims I was skeptical but the end result was awesome! We made the headboard and footboard and all the other pieces in our basement shop and then moved them up to our second floor and assembled them in the room. If you have any questions check us out on Instagram @ home_on_the_bluff
Built from Plan(s)
Estimated Cost
$300 CAD
Estimated Time Investment
Weekend Project (10-20 Hours)
Finish Used
Minwax Dark Walnut
Minwax Poly in Clear Matte
Minwax Poly in Clear Matte
Recommended Skill Level
Intermediate
Rustic Countertop Organizer
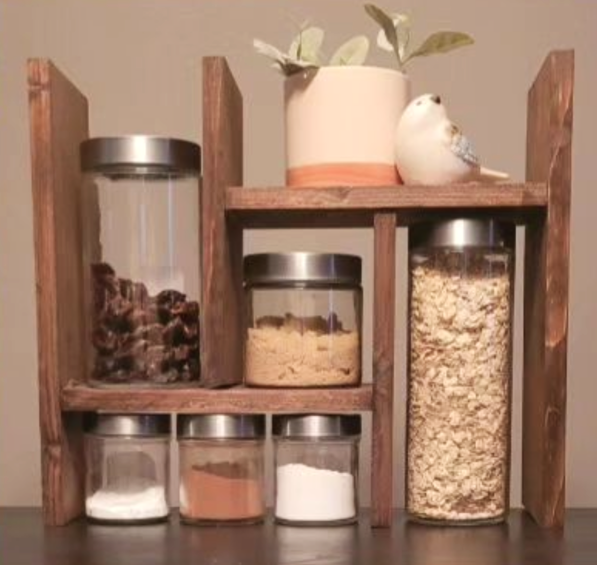
This is such a cute countertop organizer ! The possibilities for this are endless - maybe a tea / coffee bar or a hot chocolate bar - a breakfast bar or a snack bar ..... I may need to make another one...and definitely one for the bathroom !
.
The shelves slide to change the width or turn one and it becomes a corner piece!
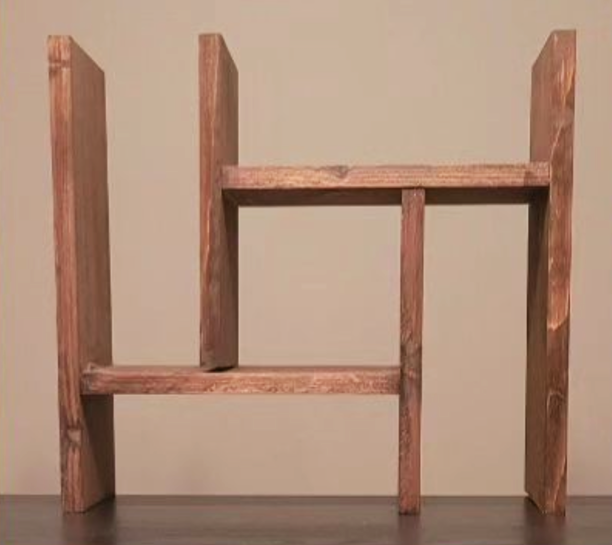
Built from Plan(s)
Comments

Tue, 09/12/2023 - 12:30
So great to see you made…
So great to see you made this and it turned out awesome! Thank you so much for taking time to share photos.
Comments
louiety
Thu, 04/12/2012 - 23:45
easy to follow directions
easy to follow directions
herzo1852
Tue, 04/09/2013 - 19:19
Just saw this, it's really nice!
I don't think I'm ever going to buy from anyone again - making stuff is so much fun, don't you think? I might have to try your farm table, once I finish the loveseats and coffee table for outside!