Address marker/planter
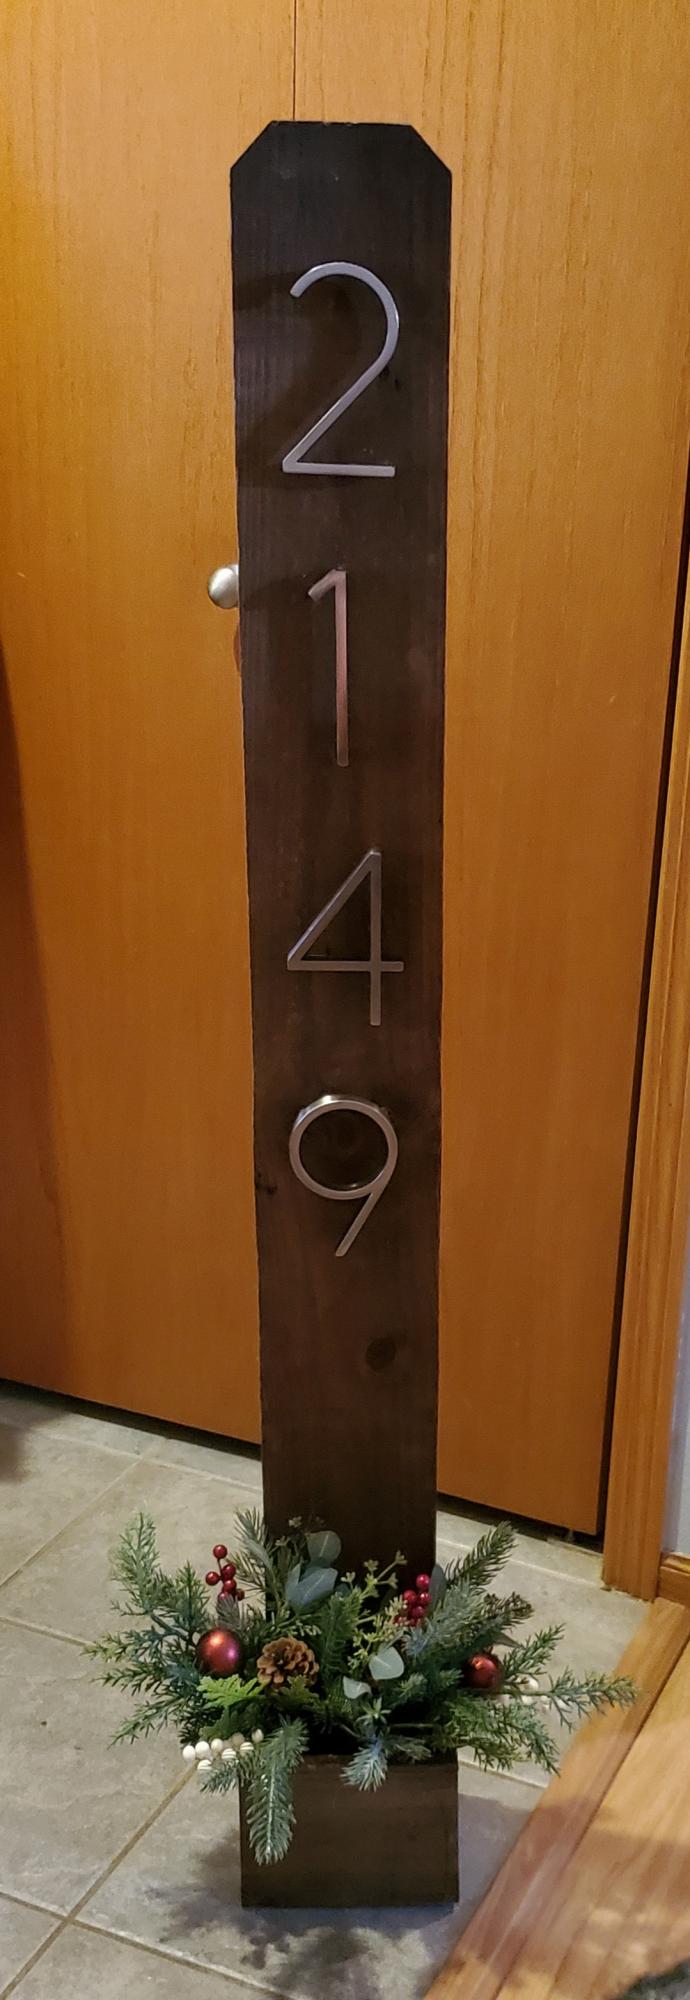
I made this simple but elegant projects for a last minute Christmas gift.
Built from Plan(s)
I made this simple but elegant projects for a last minute Christmas gift.

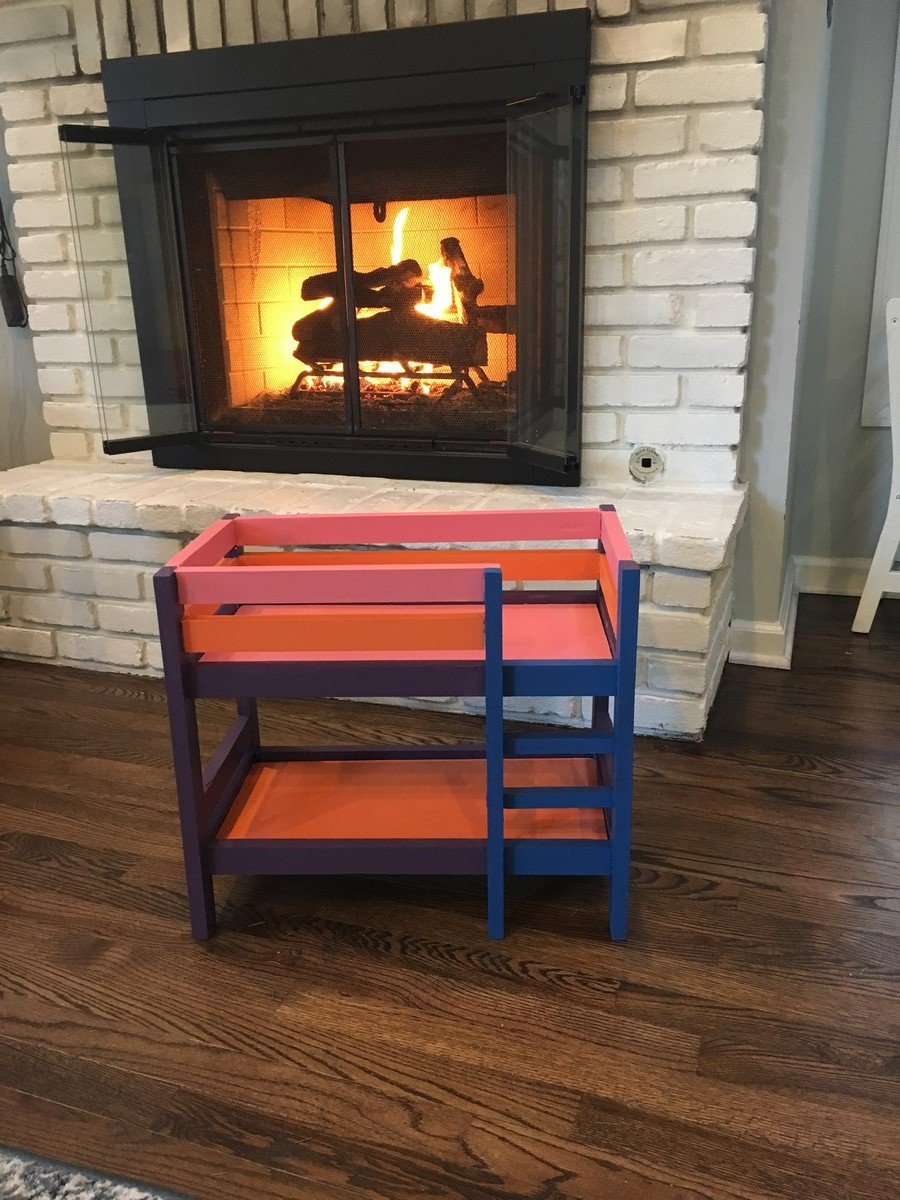
I loved the idea of the magnet wall, but I knew that something smaller would be perfect for this 12 year old girl's room redo- so we just framed it out in painted 1x2's.

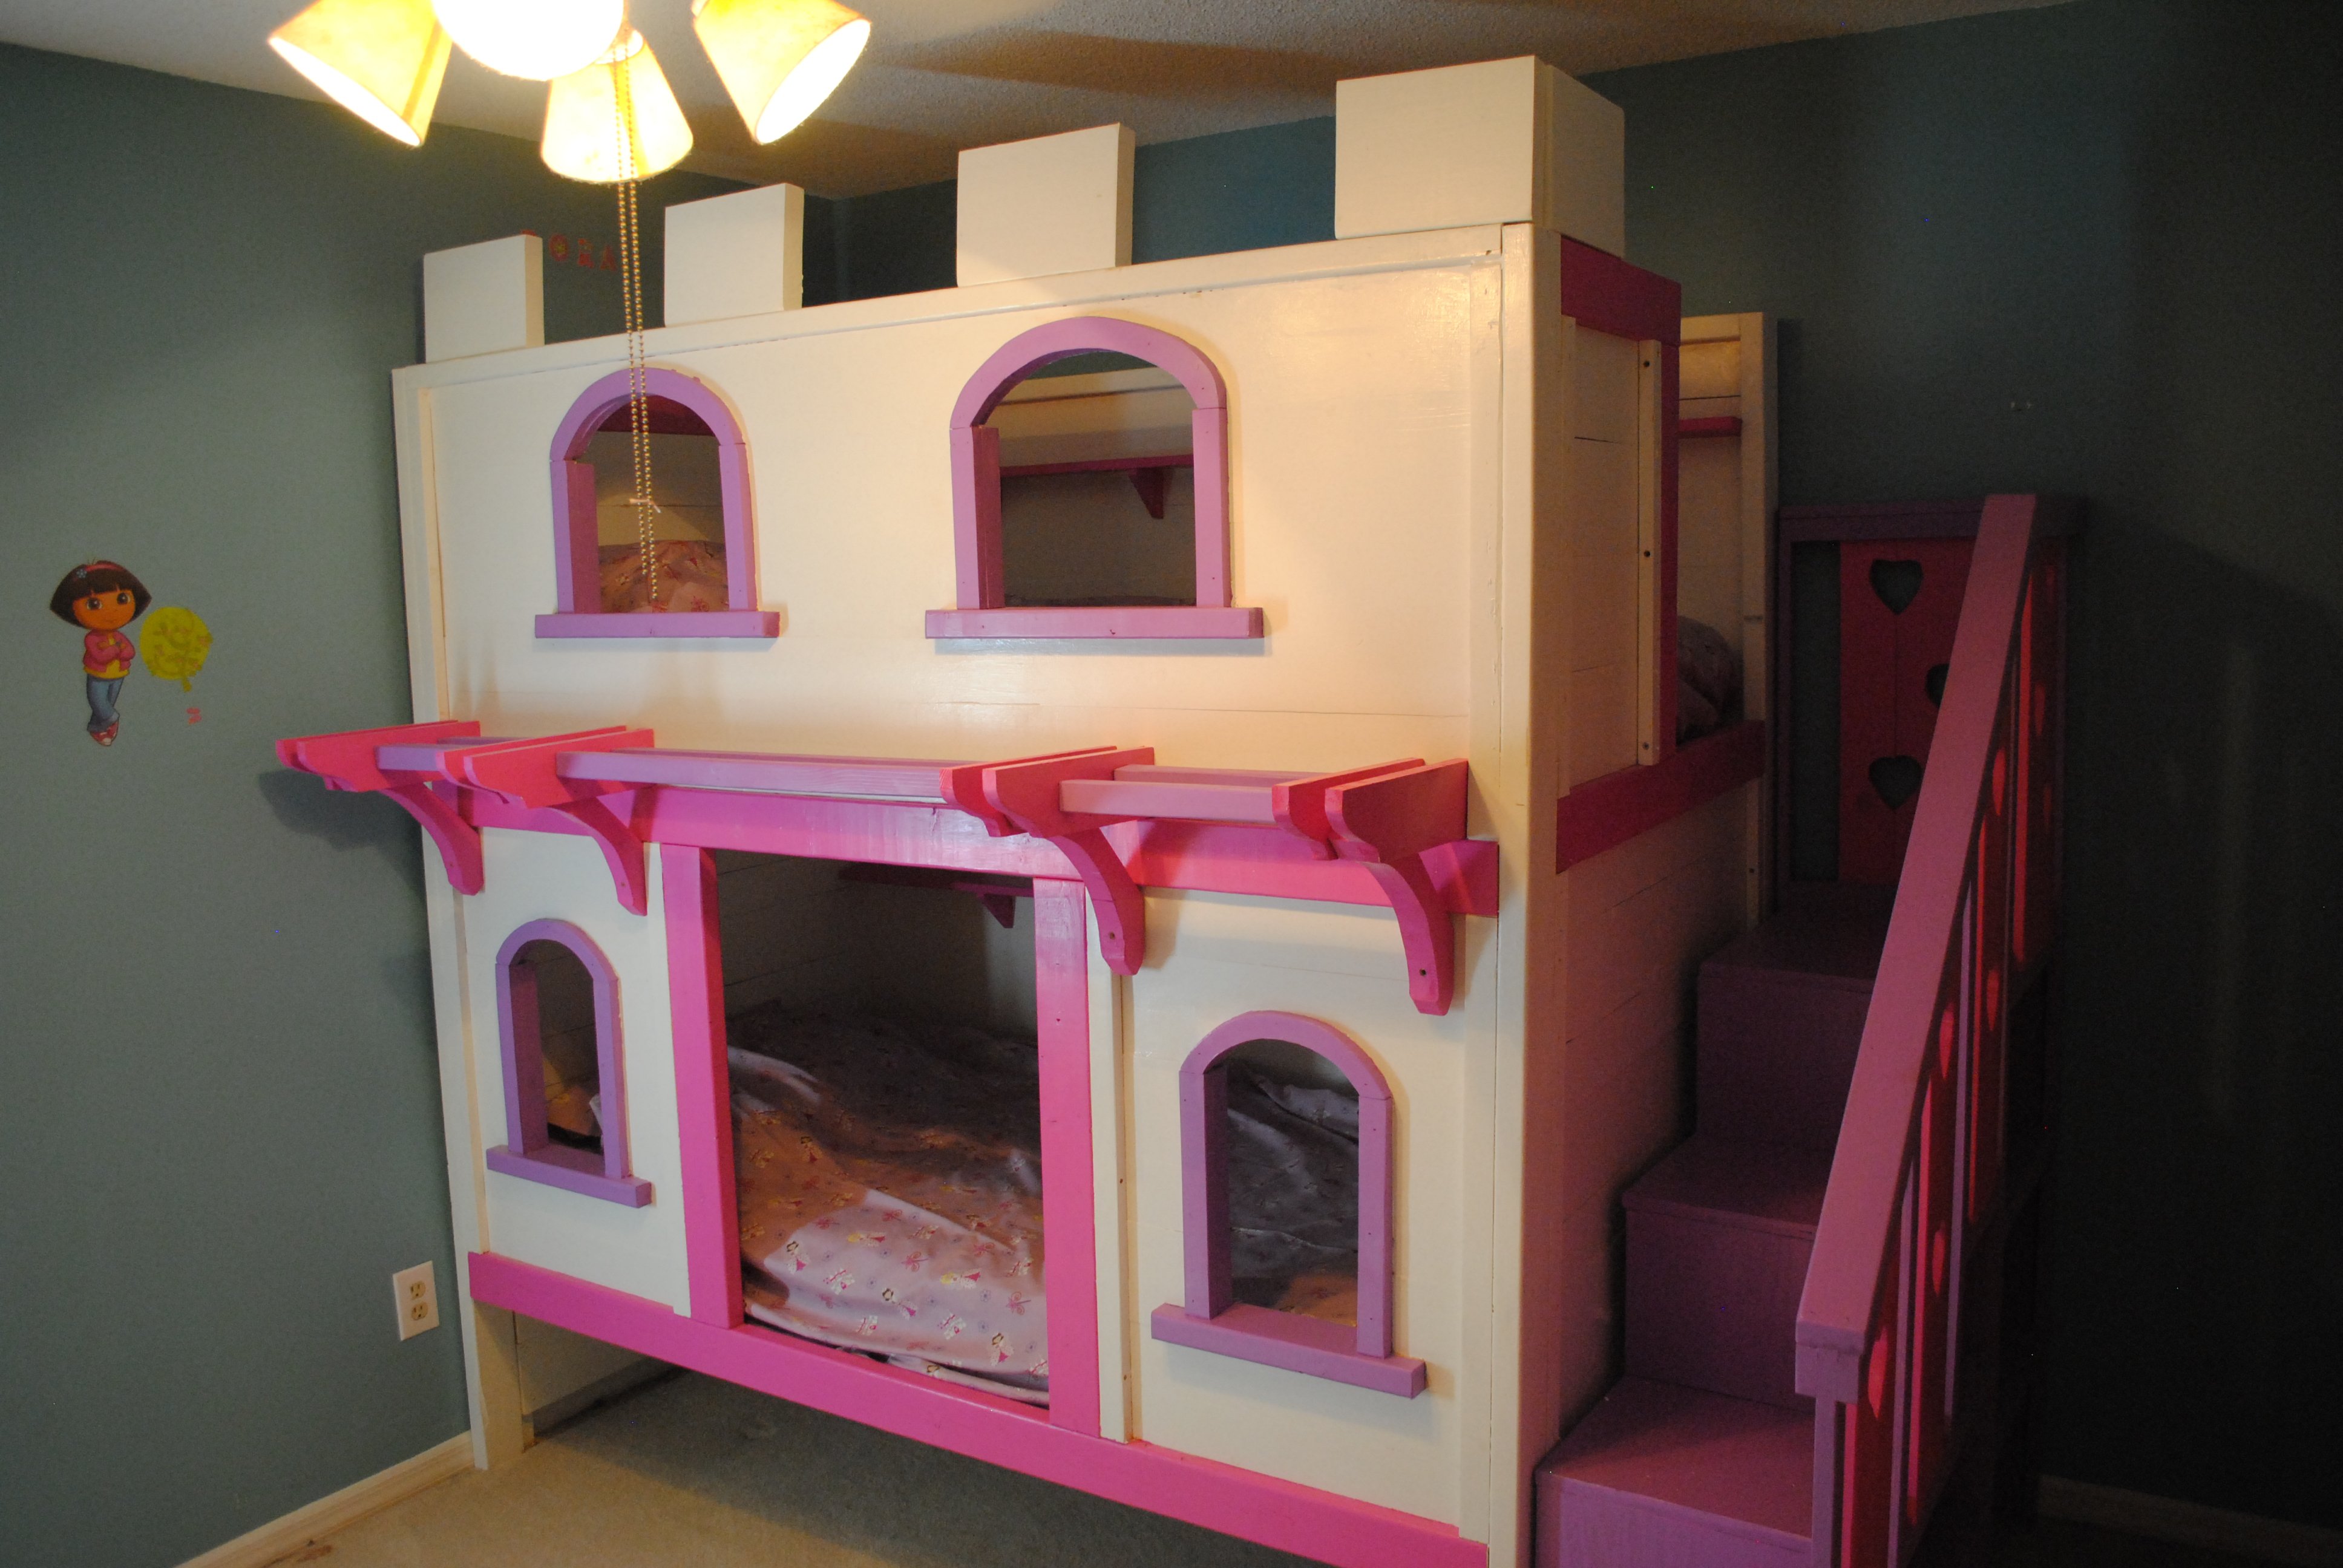
I was searching online for plans for Bunk Beds and came across Ana-White.com. I found the Sweet Pea Bunk Bed and my wife and I both fell in love. My daughters are very "into" princesses right now, so I took the elements of the Sweet Pea Bunk Bed and modified it slightly to create a castle look, so that my oldest could "climb to the highest tower of the castle". They both love playing with their beds!

Sat, 07/06/2013 - 09:32
I love the castle twist! When the neighbor kids come over, they say the same thing about the top bunk- it is amazing what stairs can do! Your little castle is truly fit for a princess!

I could not find a big enough, awesome enough trellis in stores, so I built my own out of cull lumber [the stuff on super-clearance no one else wants] for about $12 and a left-over post pocket. Thanks for the inspiration!!
I wanted to do something special for Christmas for my 4 year old daughter. I have no real experience so this was one big lesson. The site and the photos from others made it feel so doable... I got it done in time and we finally painted it. My daughter picked all the colors and we painted it together the last few cold weekend days. What a great experience. Thank you for making DIY feel so doable... now I’m completely hooked and her twin brother told me he wants to build a chair with me.. but a big one ... uh oh.
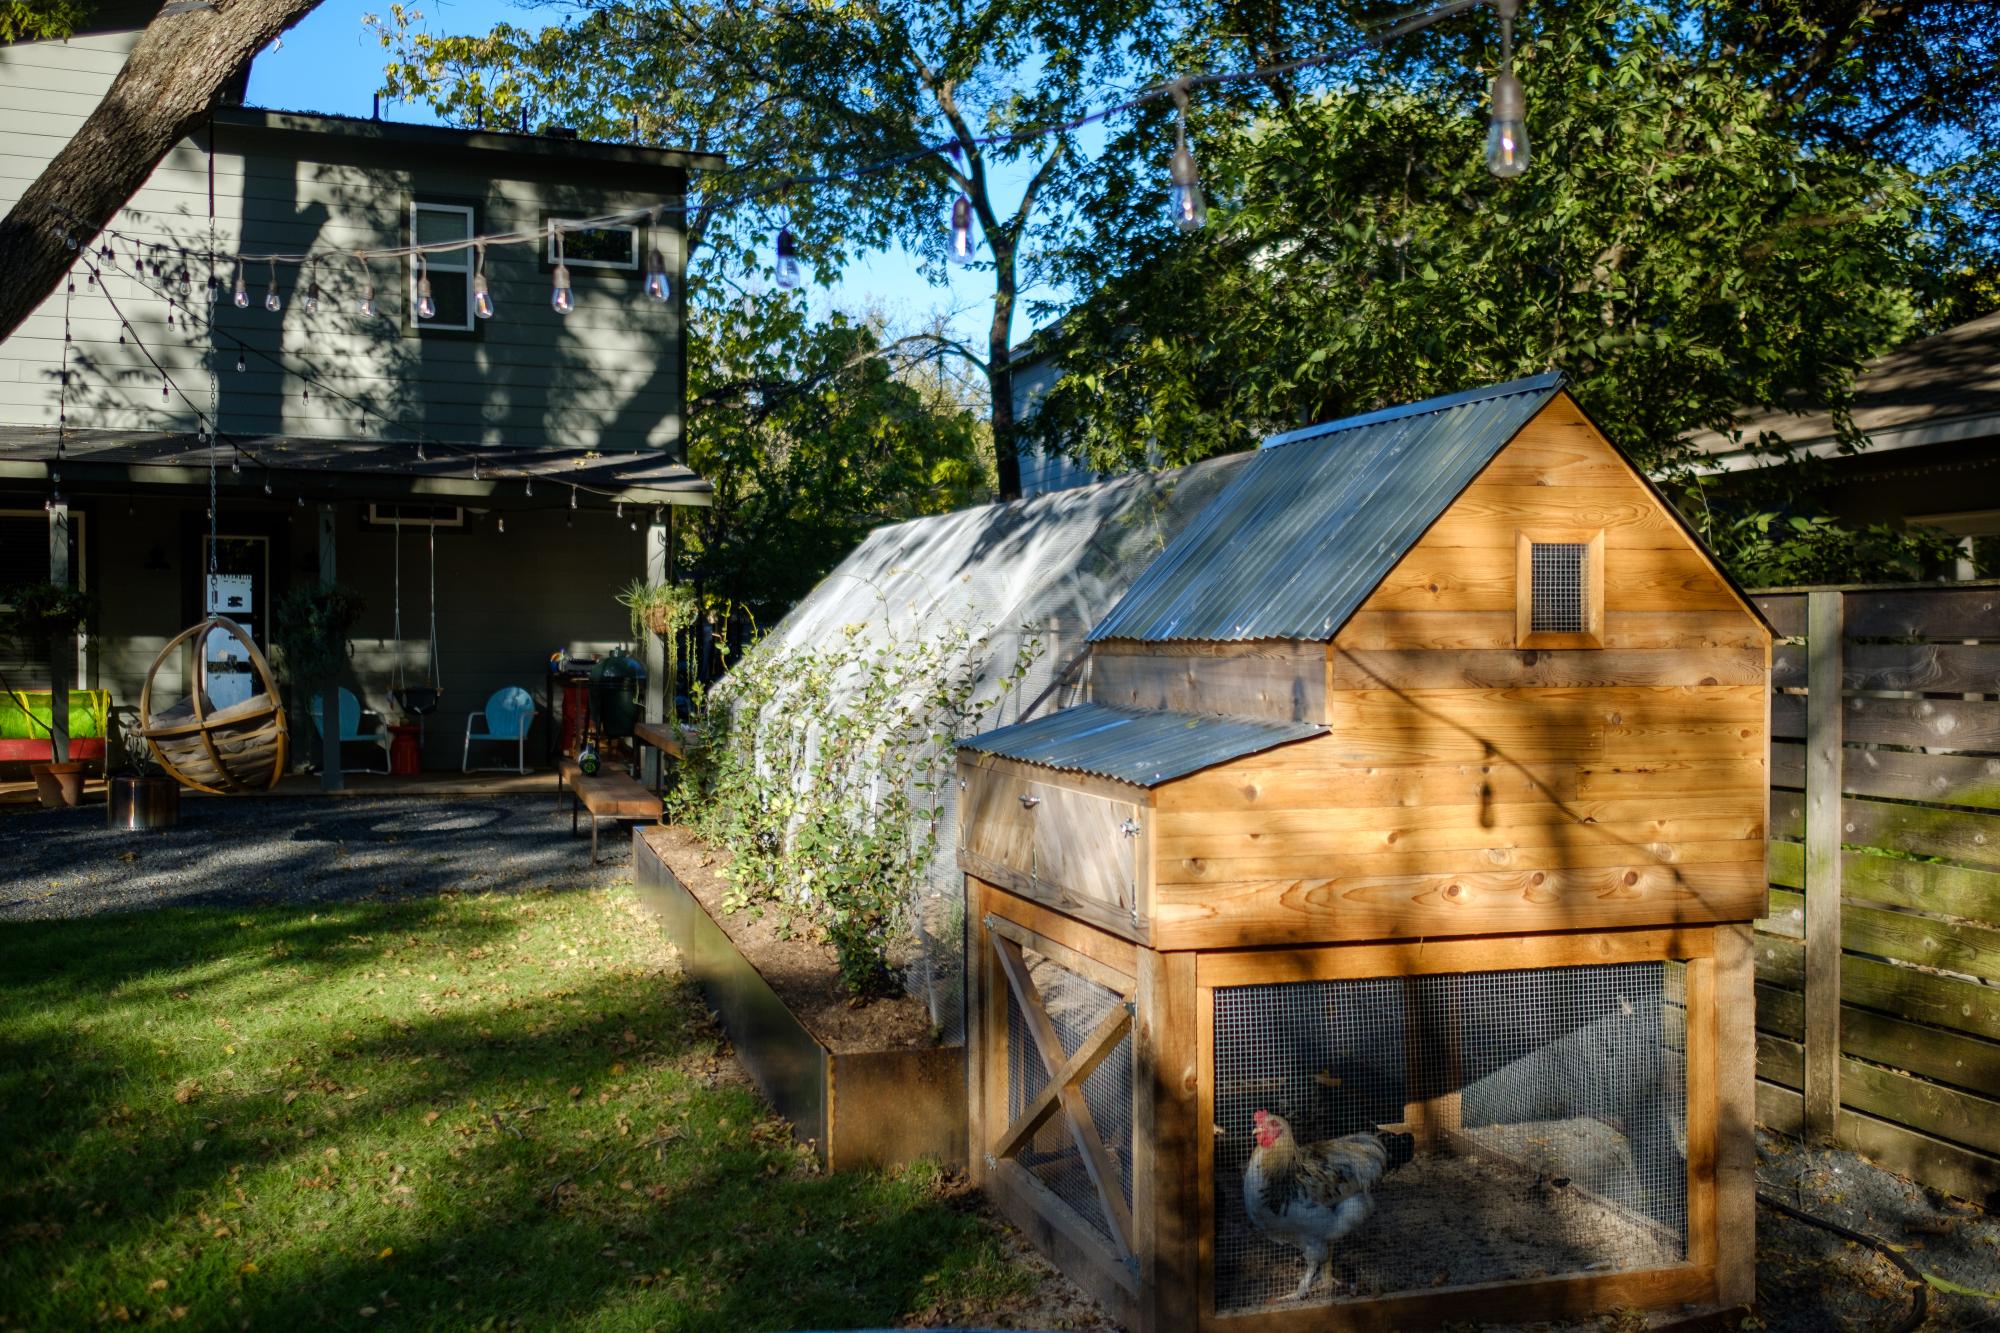
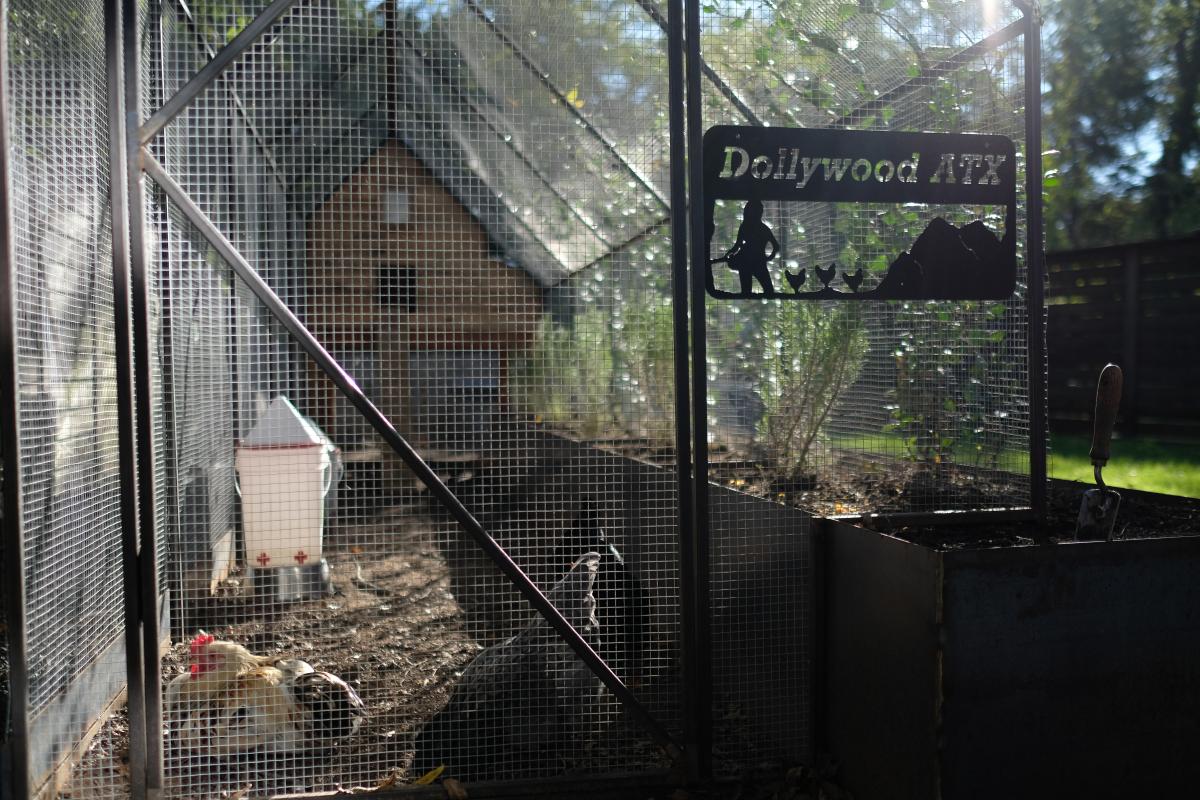
When we became accidental chicken owners, we had to build a coop fast. I found the plans for Ana’s replica of the Williams Sonoma chicken coop and got to work. They were very easy to follow and easy to modify to fit our own needs and aesthetic. We decided to enlarge the coop and remove the planter in the original plans do we could accommodate more chickens while keeping the original footprint. Instead of plywood, we used cedar reclaimed from an old fence we had recently replaced. We also enlarged the rear door to make clean out as easy as possible. I cut pieces of corrugated plastic that fit inside the door and windows to winterize the coop when temps drop below freezing. The run is designed to follow the shape of the coop and is large enough to give our 5 chickens plenty of space. The planter box runs the length of the chicken run, providing some plants to munch on inside and shady vines that will eventually cover the outside. Thanks for the awesome plans!

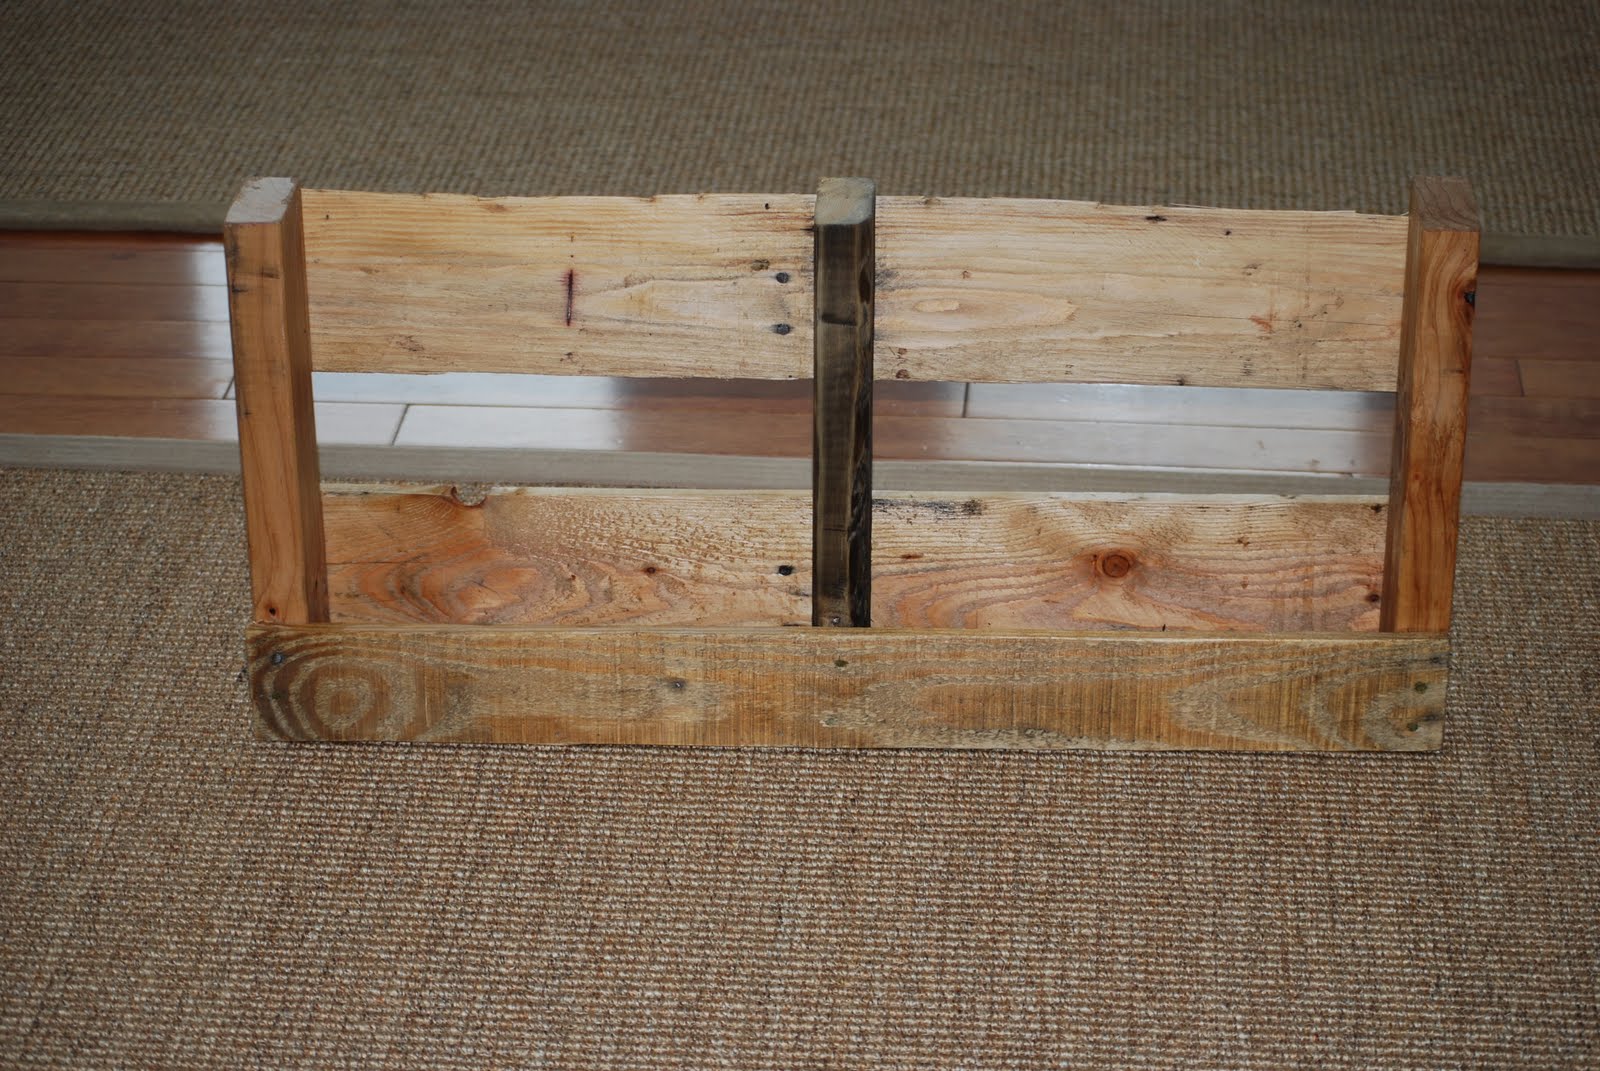
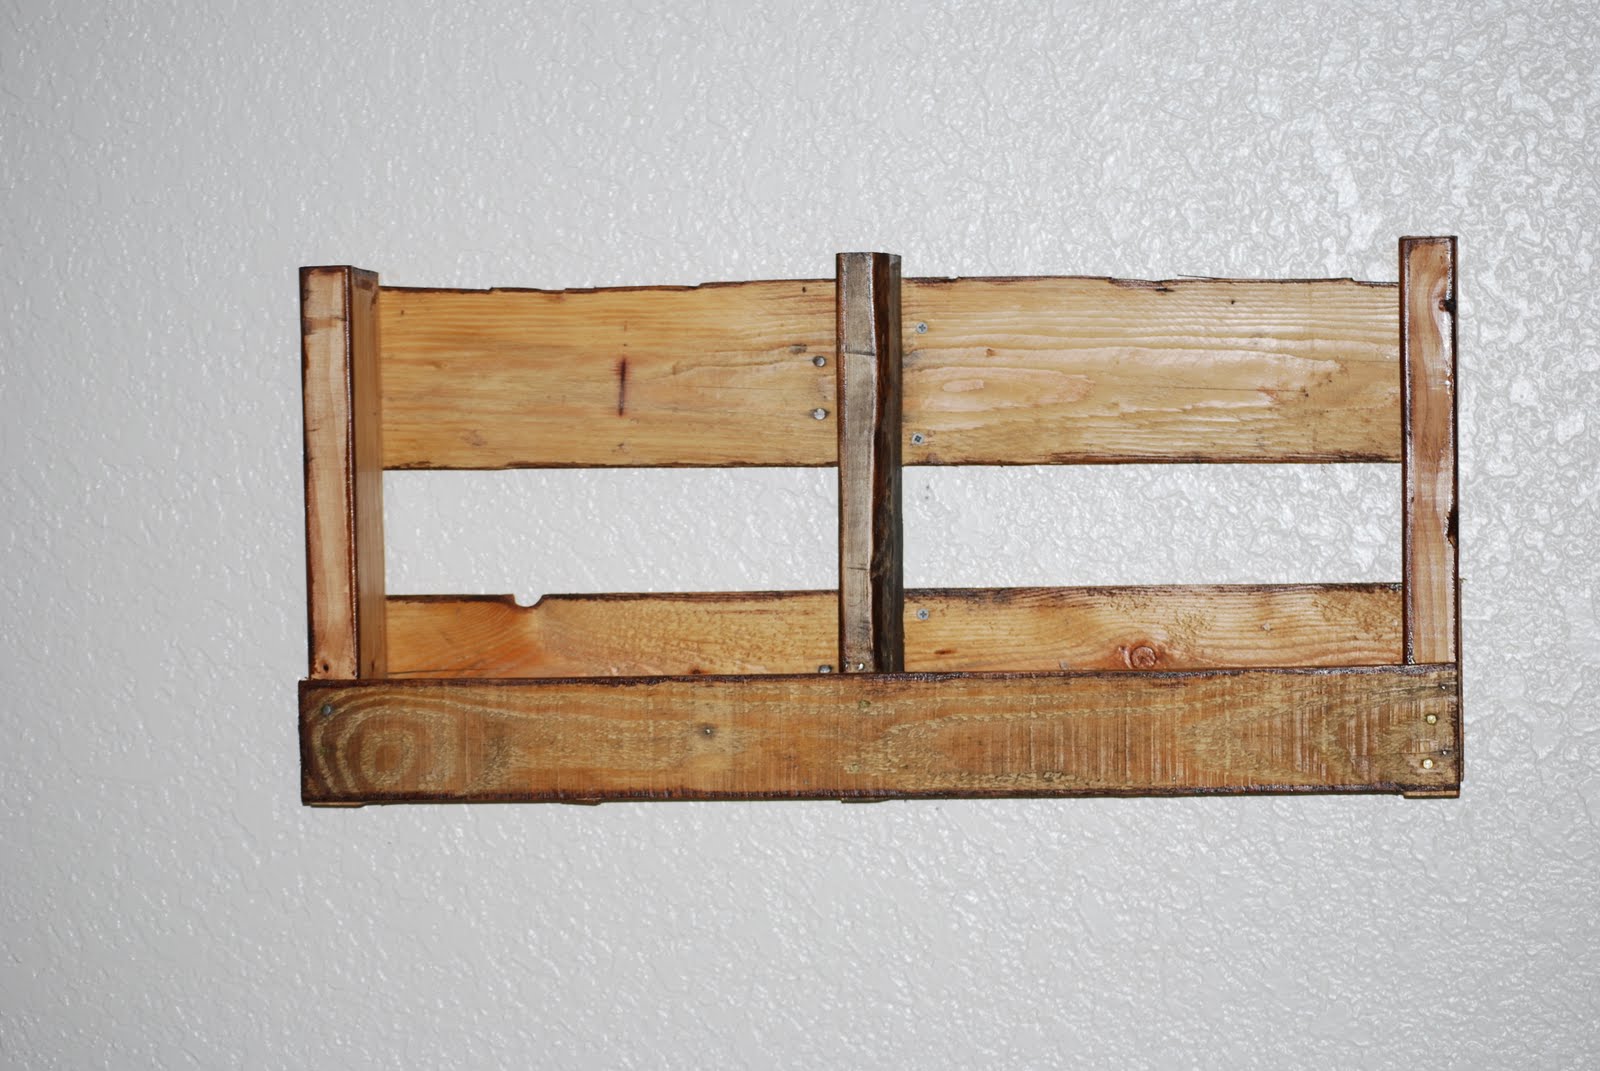
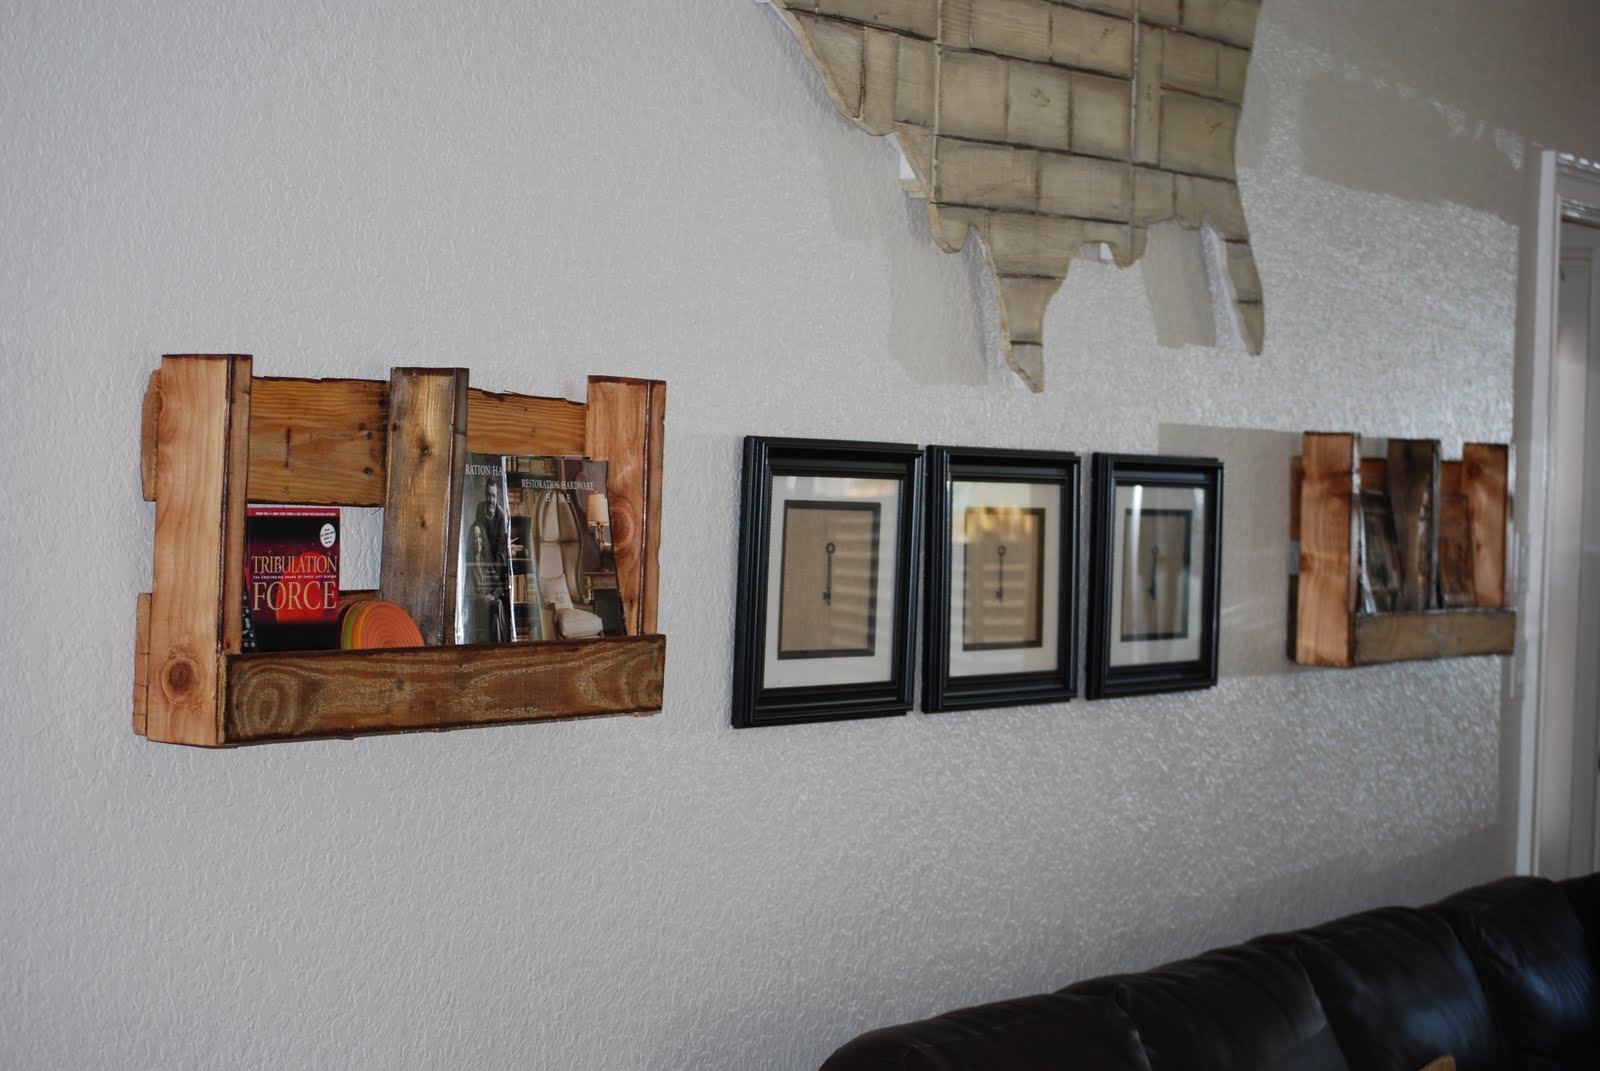
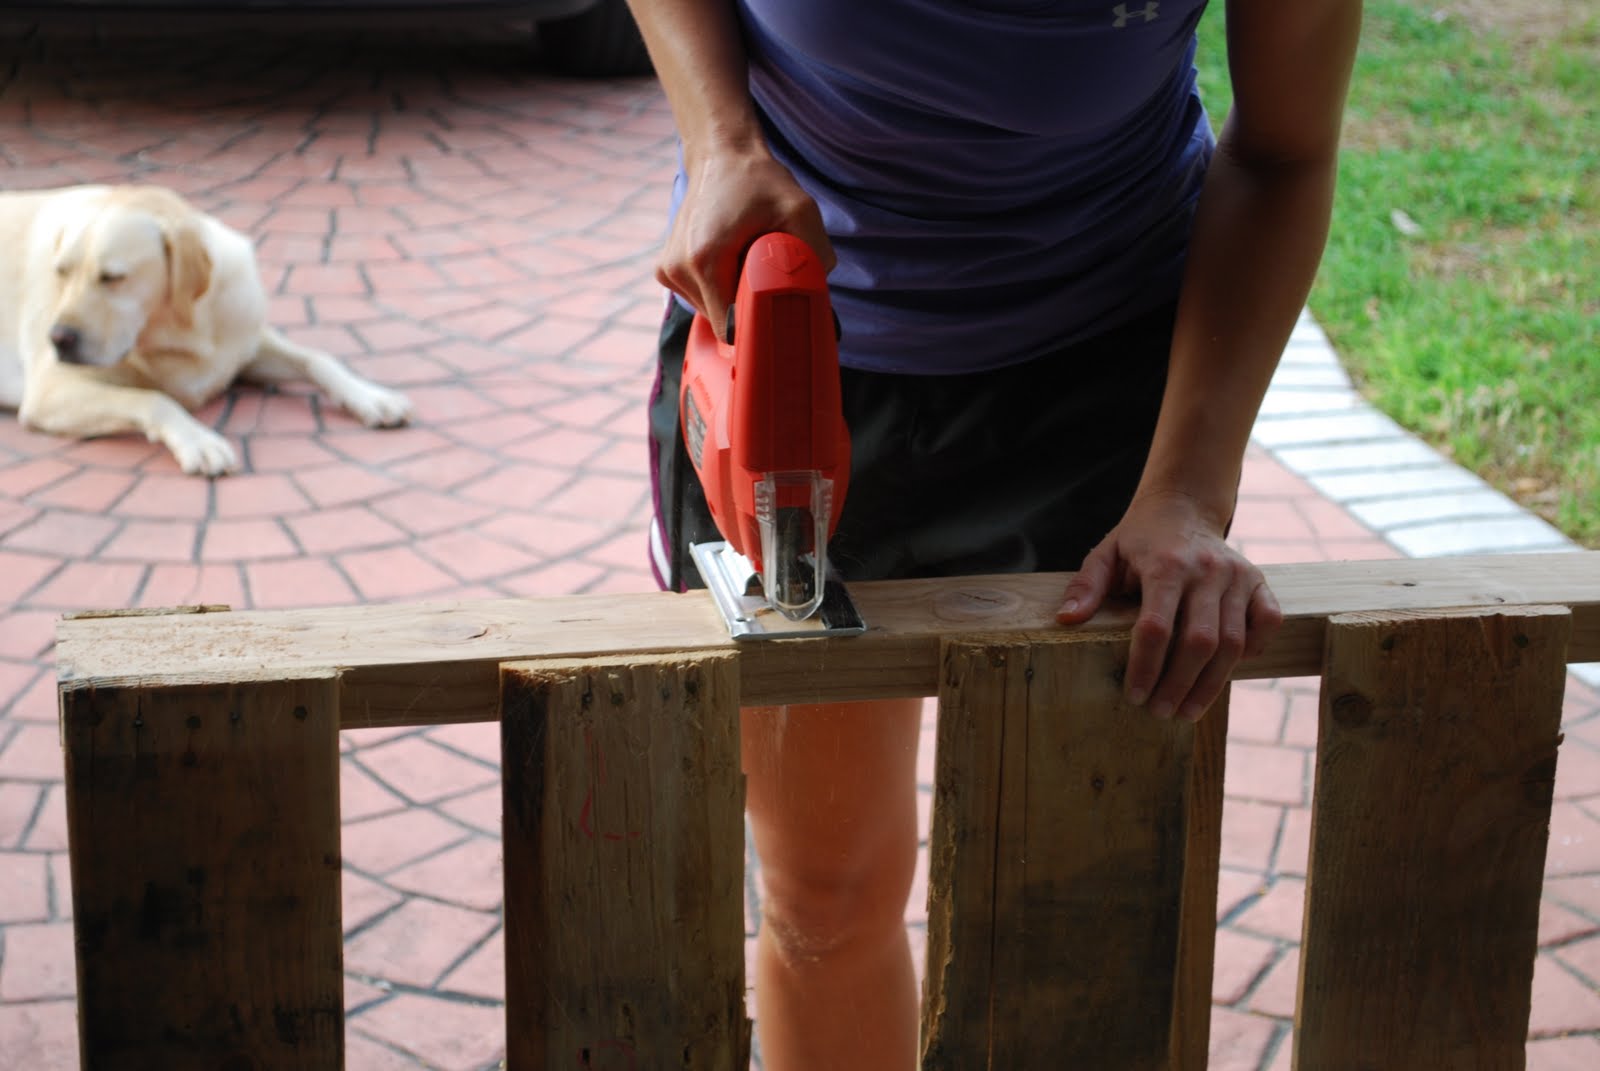
I made these two pallet shelves to go in my living room to hold all of our magazines, coasters, and remote controls that were constantly getting left all over the place. They've been there for almost a year now, and they work so well!
I did this project as a Father's Day gift for my dad who is a photographer and has lots of pictures! I plan on making another one for my house because I like it so much. Mine took longer than it should have because I made a few mistakes, like not making sure the pocket holes were facing the right way before I screwed the main frame together. I also accidentally measured and drilled in the twine screws on the wrong side and had to fix that. So if i had done everything right the first time, this project would have only taken a few hours to complete. Fun and easy to do!


This was a lot of fun to build. Took a few hours while kids napped plus a few more after bedtime.
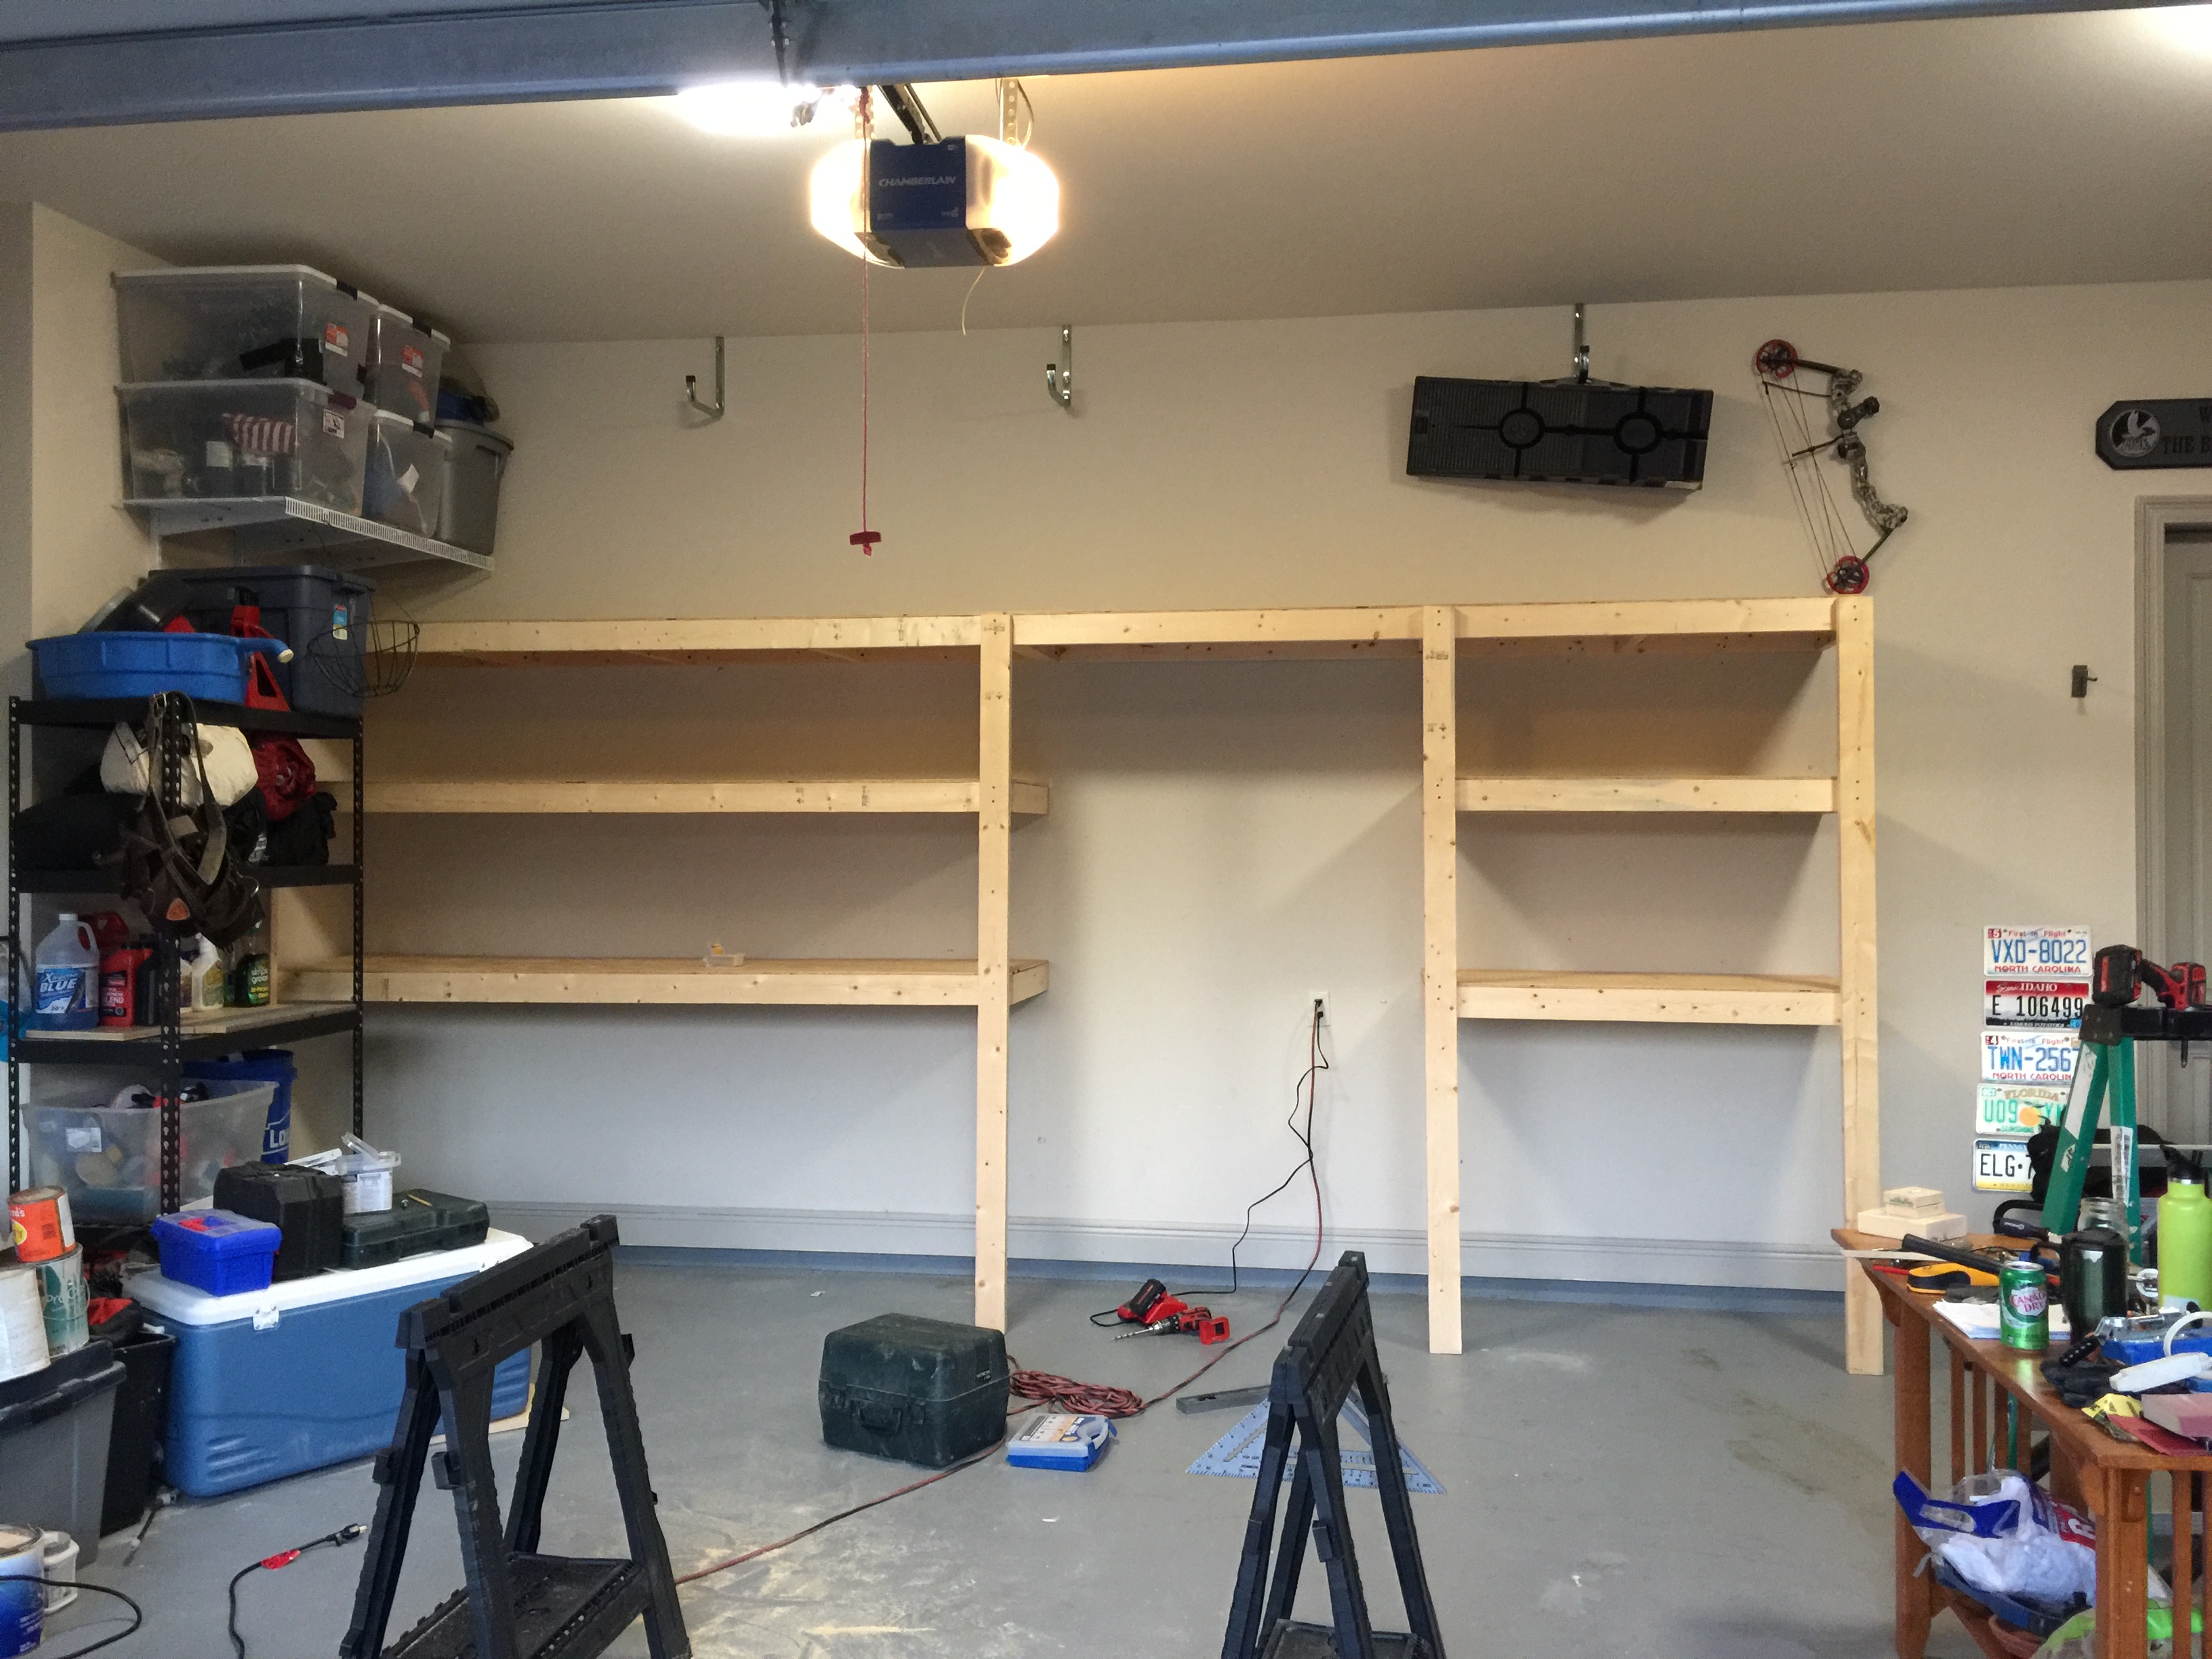
Inspired by the ryobi dream workshop. Shelving unit and the feed carts are complete. Still working on the the organization of all our stuff!

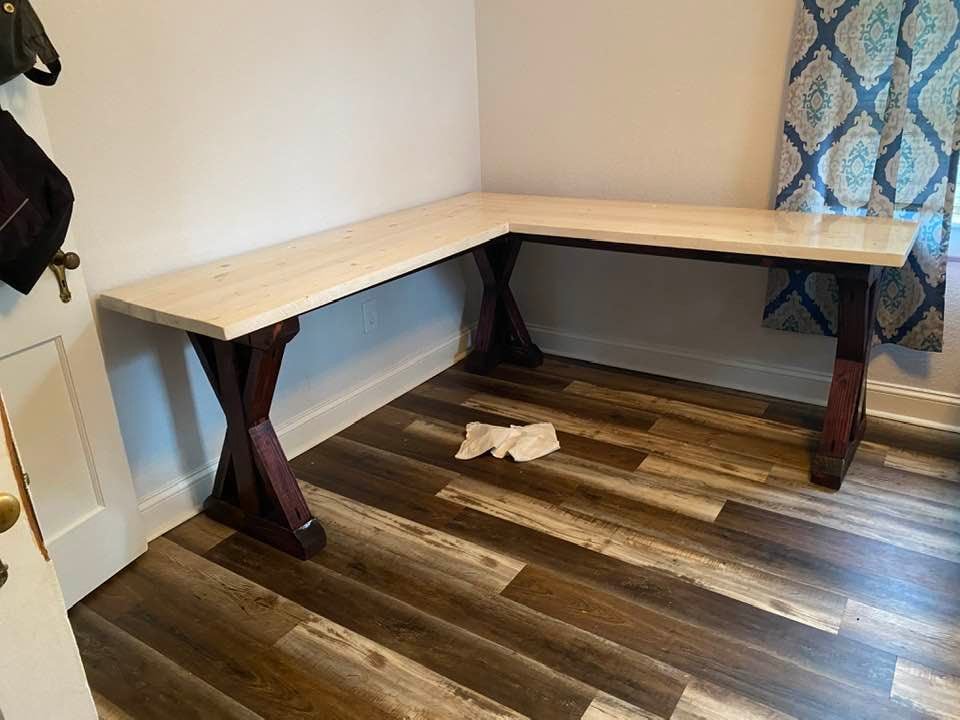
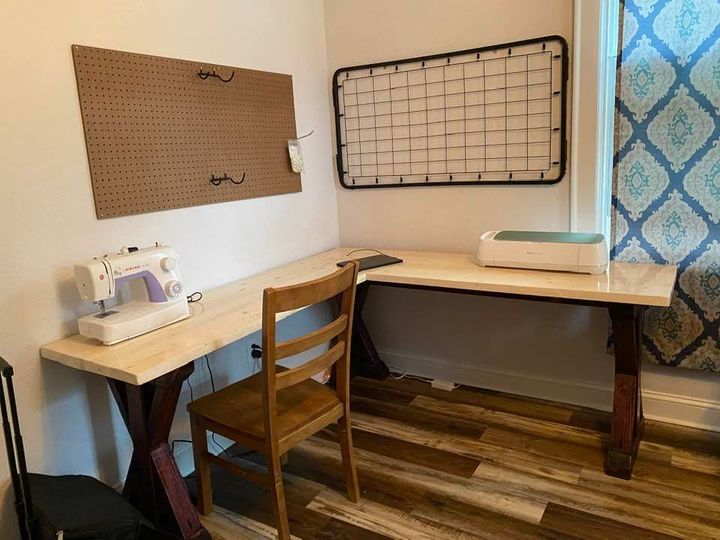
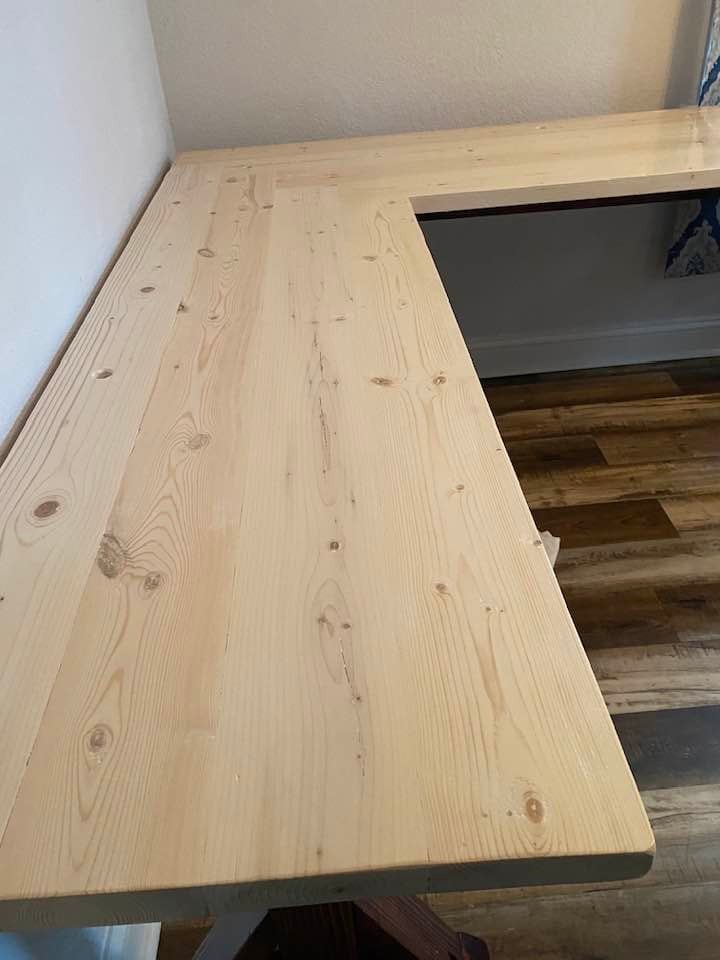
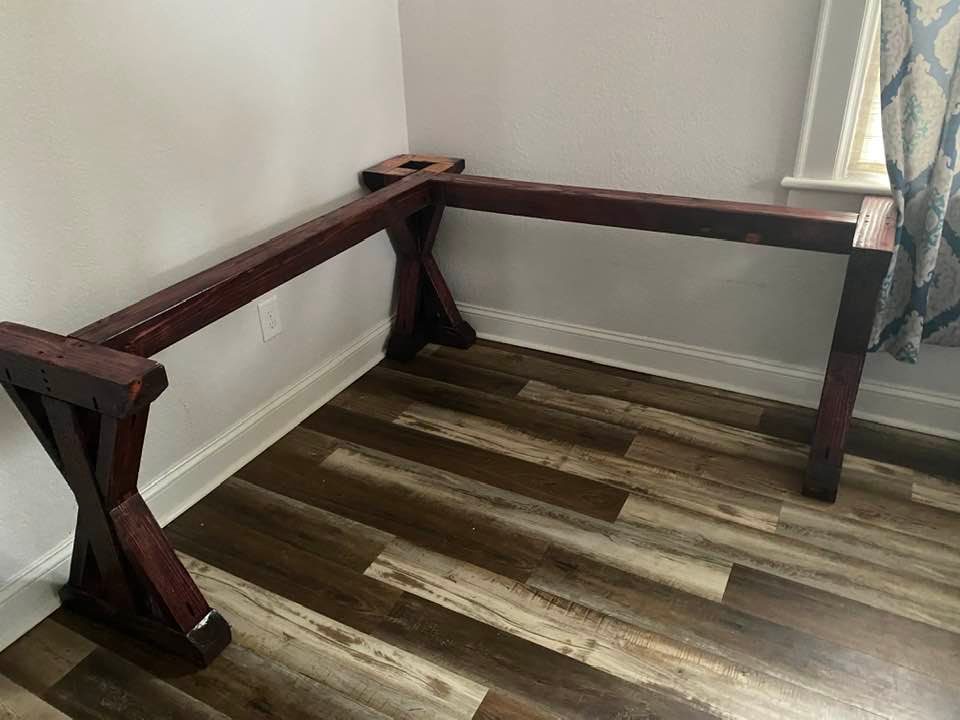
This was my second project. My Wife asked me for a desk and gave me a pintrest link, except that they had no dimensions, cut list or even material list. I found some youtube vids that covered same type desk and made my own plans.
Again, the whole thing was made with table saw and battery powered drill. Well, not counting the sander and hand plane.
I was initially going to provide the plans, material list, cut list etc but a lot of the cuts were done by eyeball and I don't wish the pain of doing this project without a miter saw on my worst enemy...
Overall it came out a lot better then I thought it would considering my lack of experience and "know how". Table top is held together using pocket holes and wood glue, the article on Ana's website about table tops helped me a ton!
As for stains its cherry on the bottom and aged white on the top. The 4x4's that I used for the base were of some red hued wood so the cherry color blended them with the white wood 2x4's that make up the decoration supports.
If you have any questions feel free to ask, this was my second project and I learned a lot of do's and dont's.
Total cost ~$200.
Total time, for me it was about 30 hours over two weeks, if you know what you doing and got the right tools probably half of that.
This was my first project and it come out beautifully. I did learn a valuable lesson - if you are going to build something in the basement, make sure it fits up the stairs. Not sure if you can tell from the picture but this ended up 6 inches shorter than the plans. Can wait to find my next project!
I made this for my son's second birthday last year.
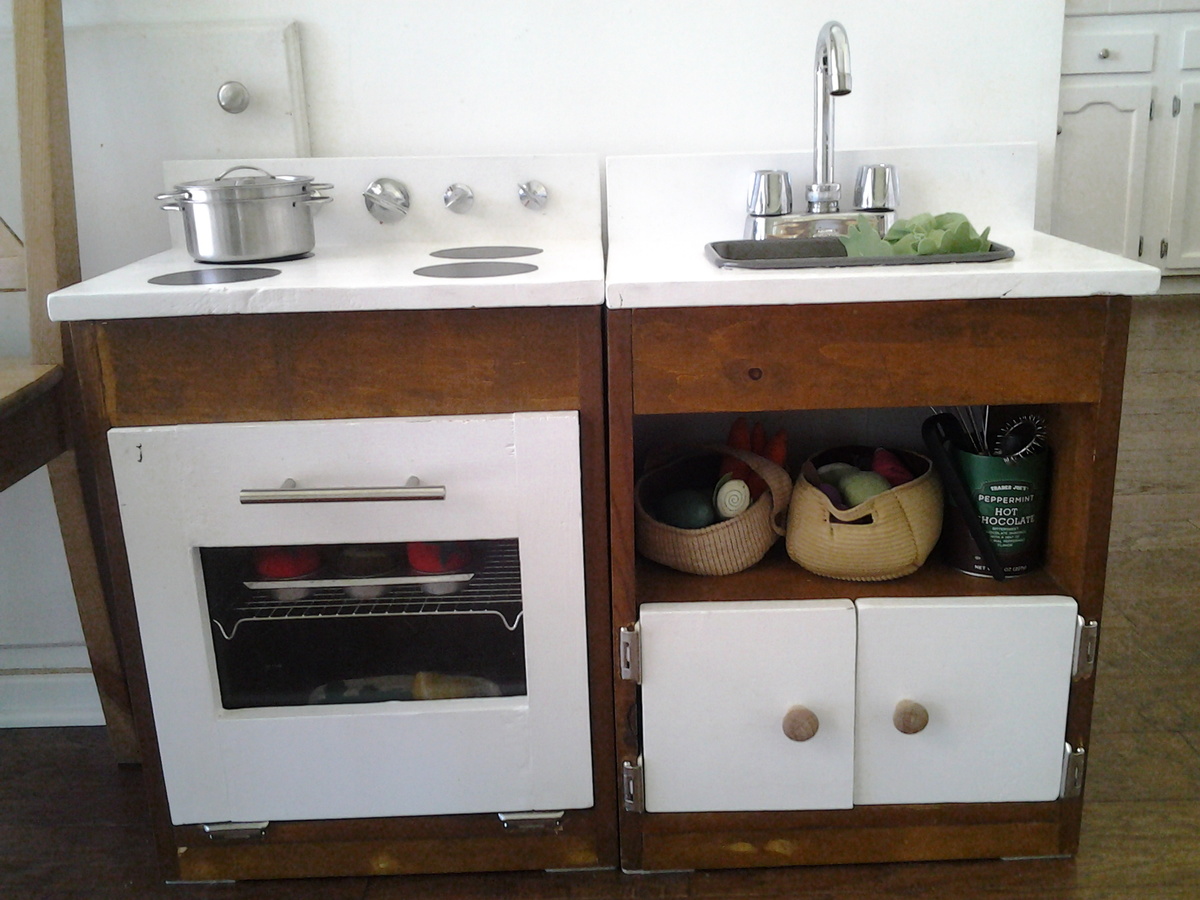
I made a few changes to the plans. Instead of a shelf in the oven, I put in a wire cooling rack to resemble a oven rack. I put knobs on the back of the stovetop instead of the lower front. I added doors to the lower half on the sink.
The sink is a 9" loaf pan. The stove knobs and faucet were salvaged.
Toy food and realistic pots and pans are from IKEA.
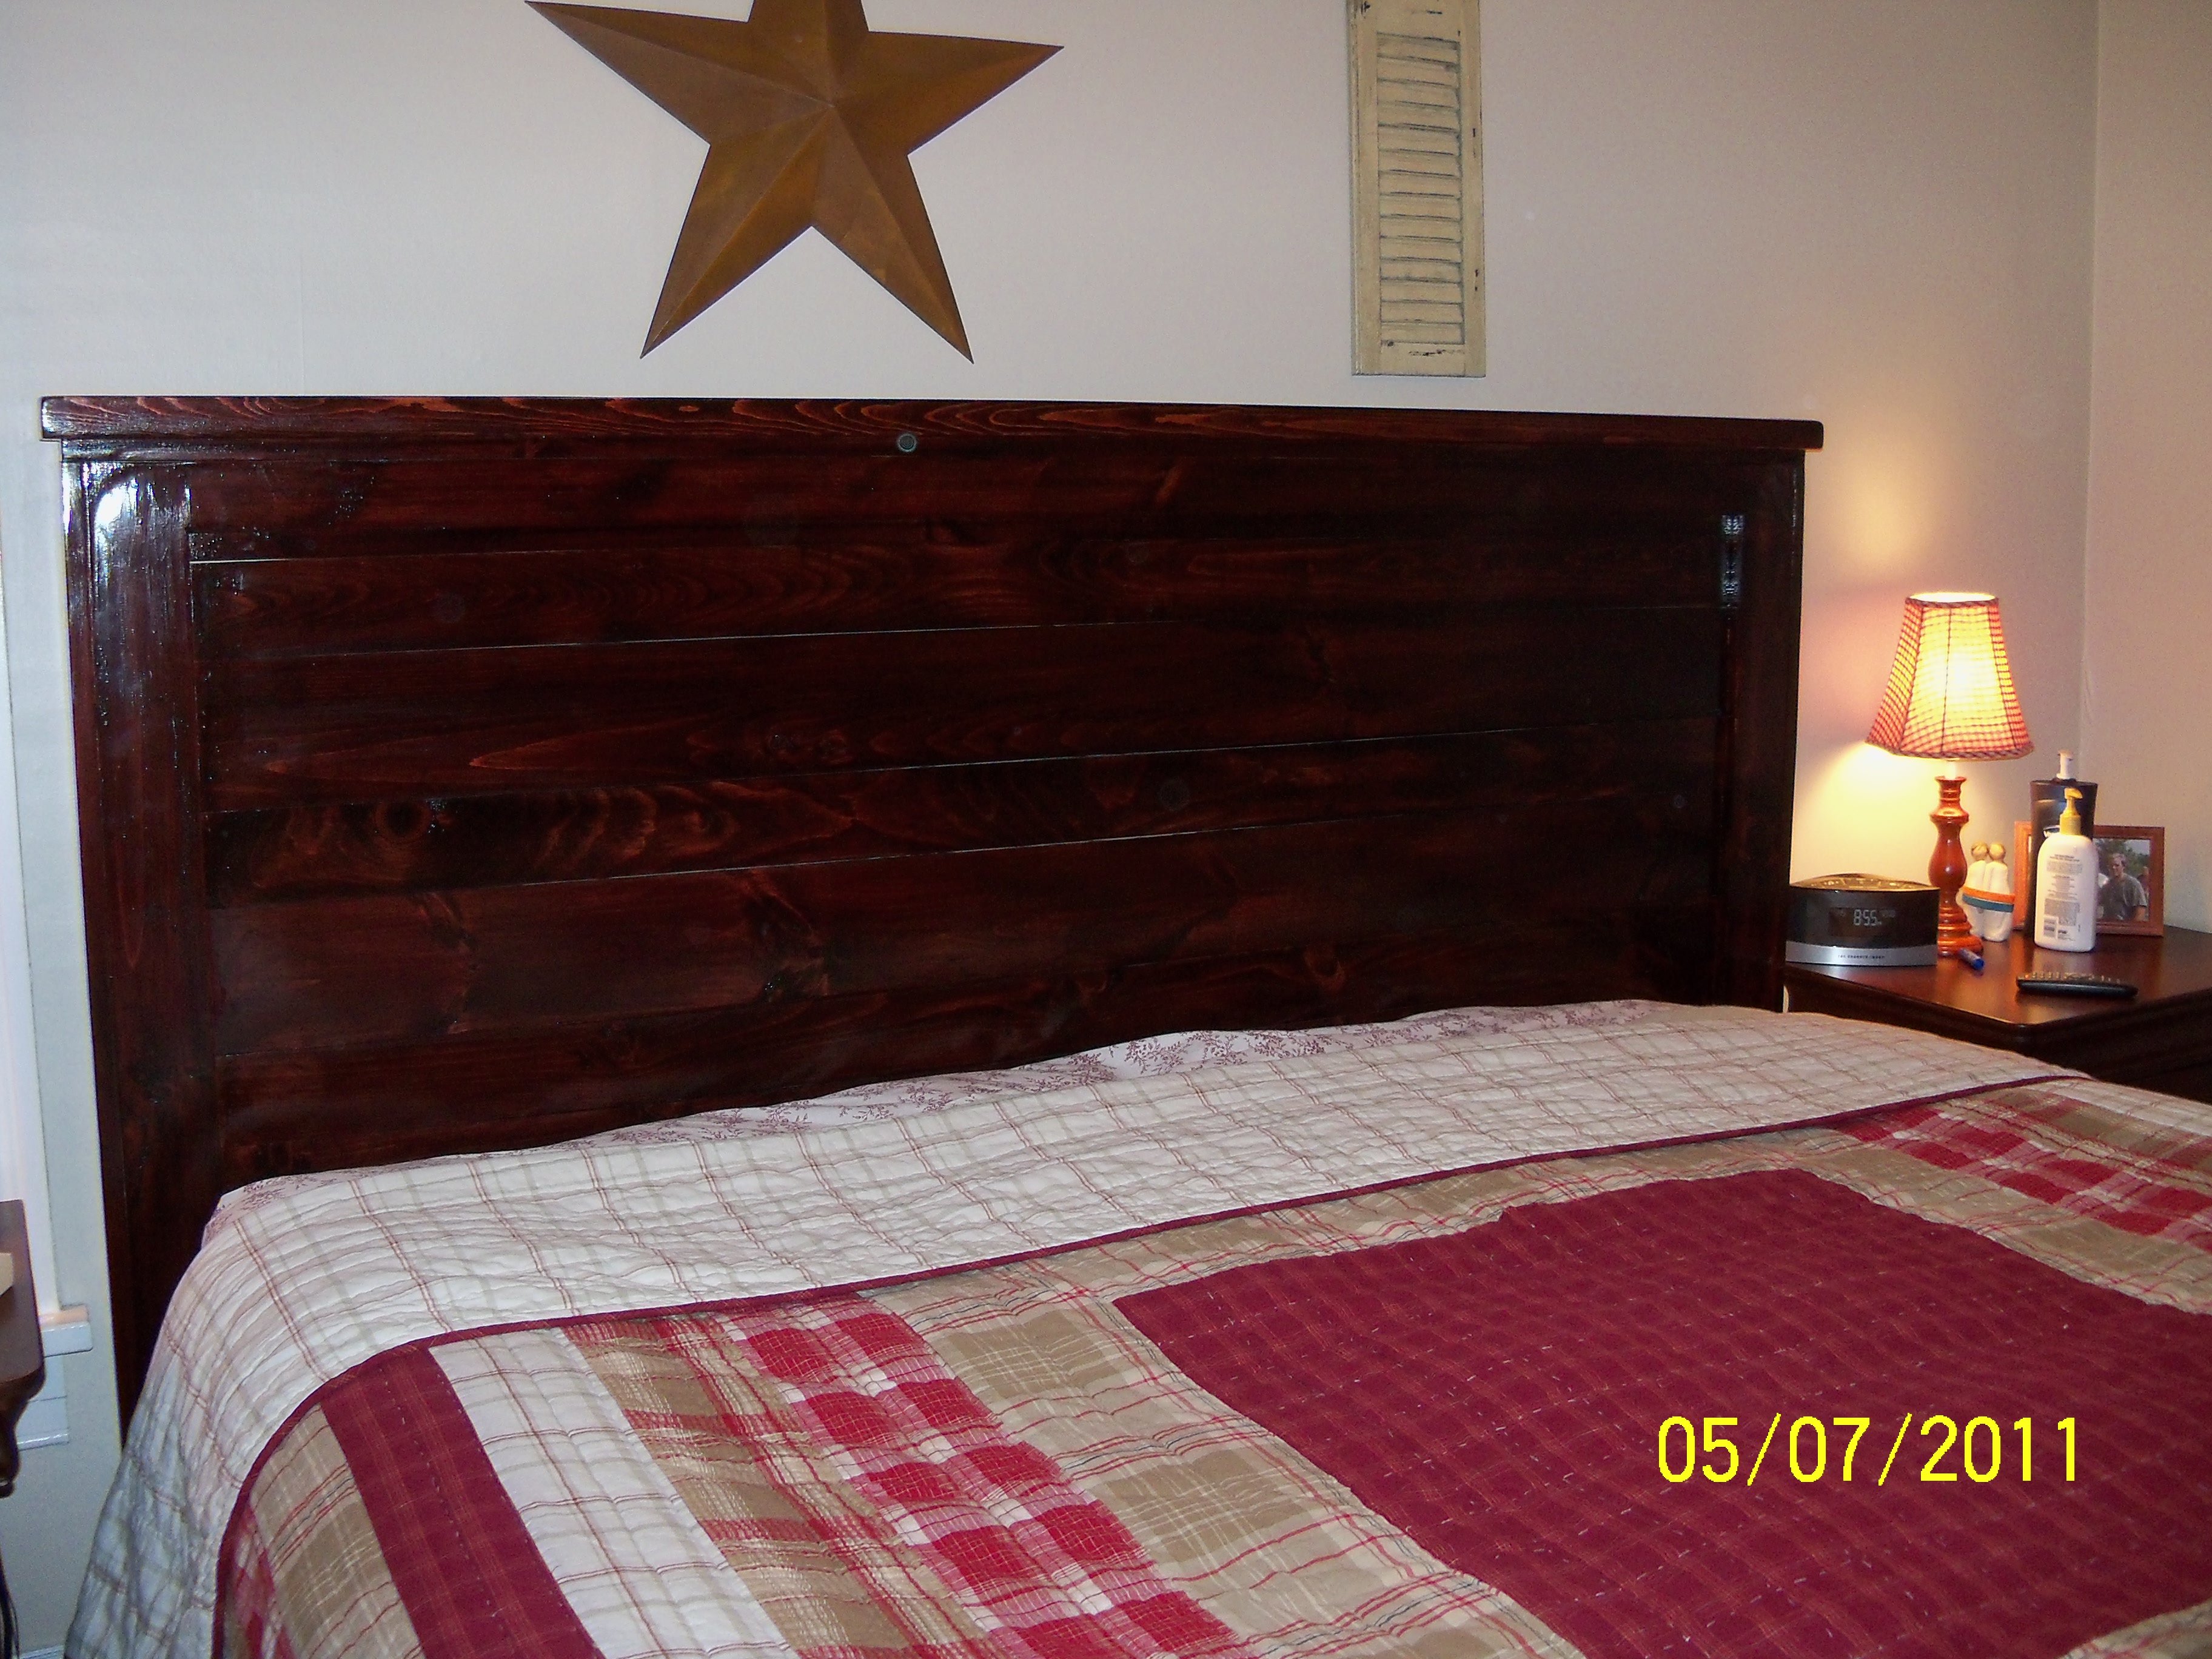
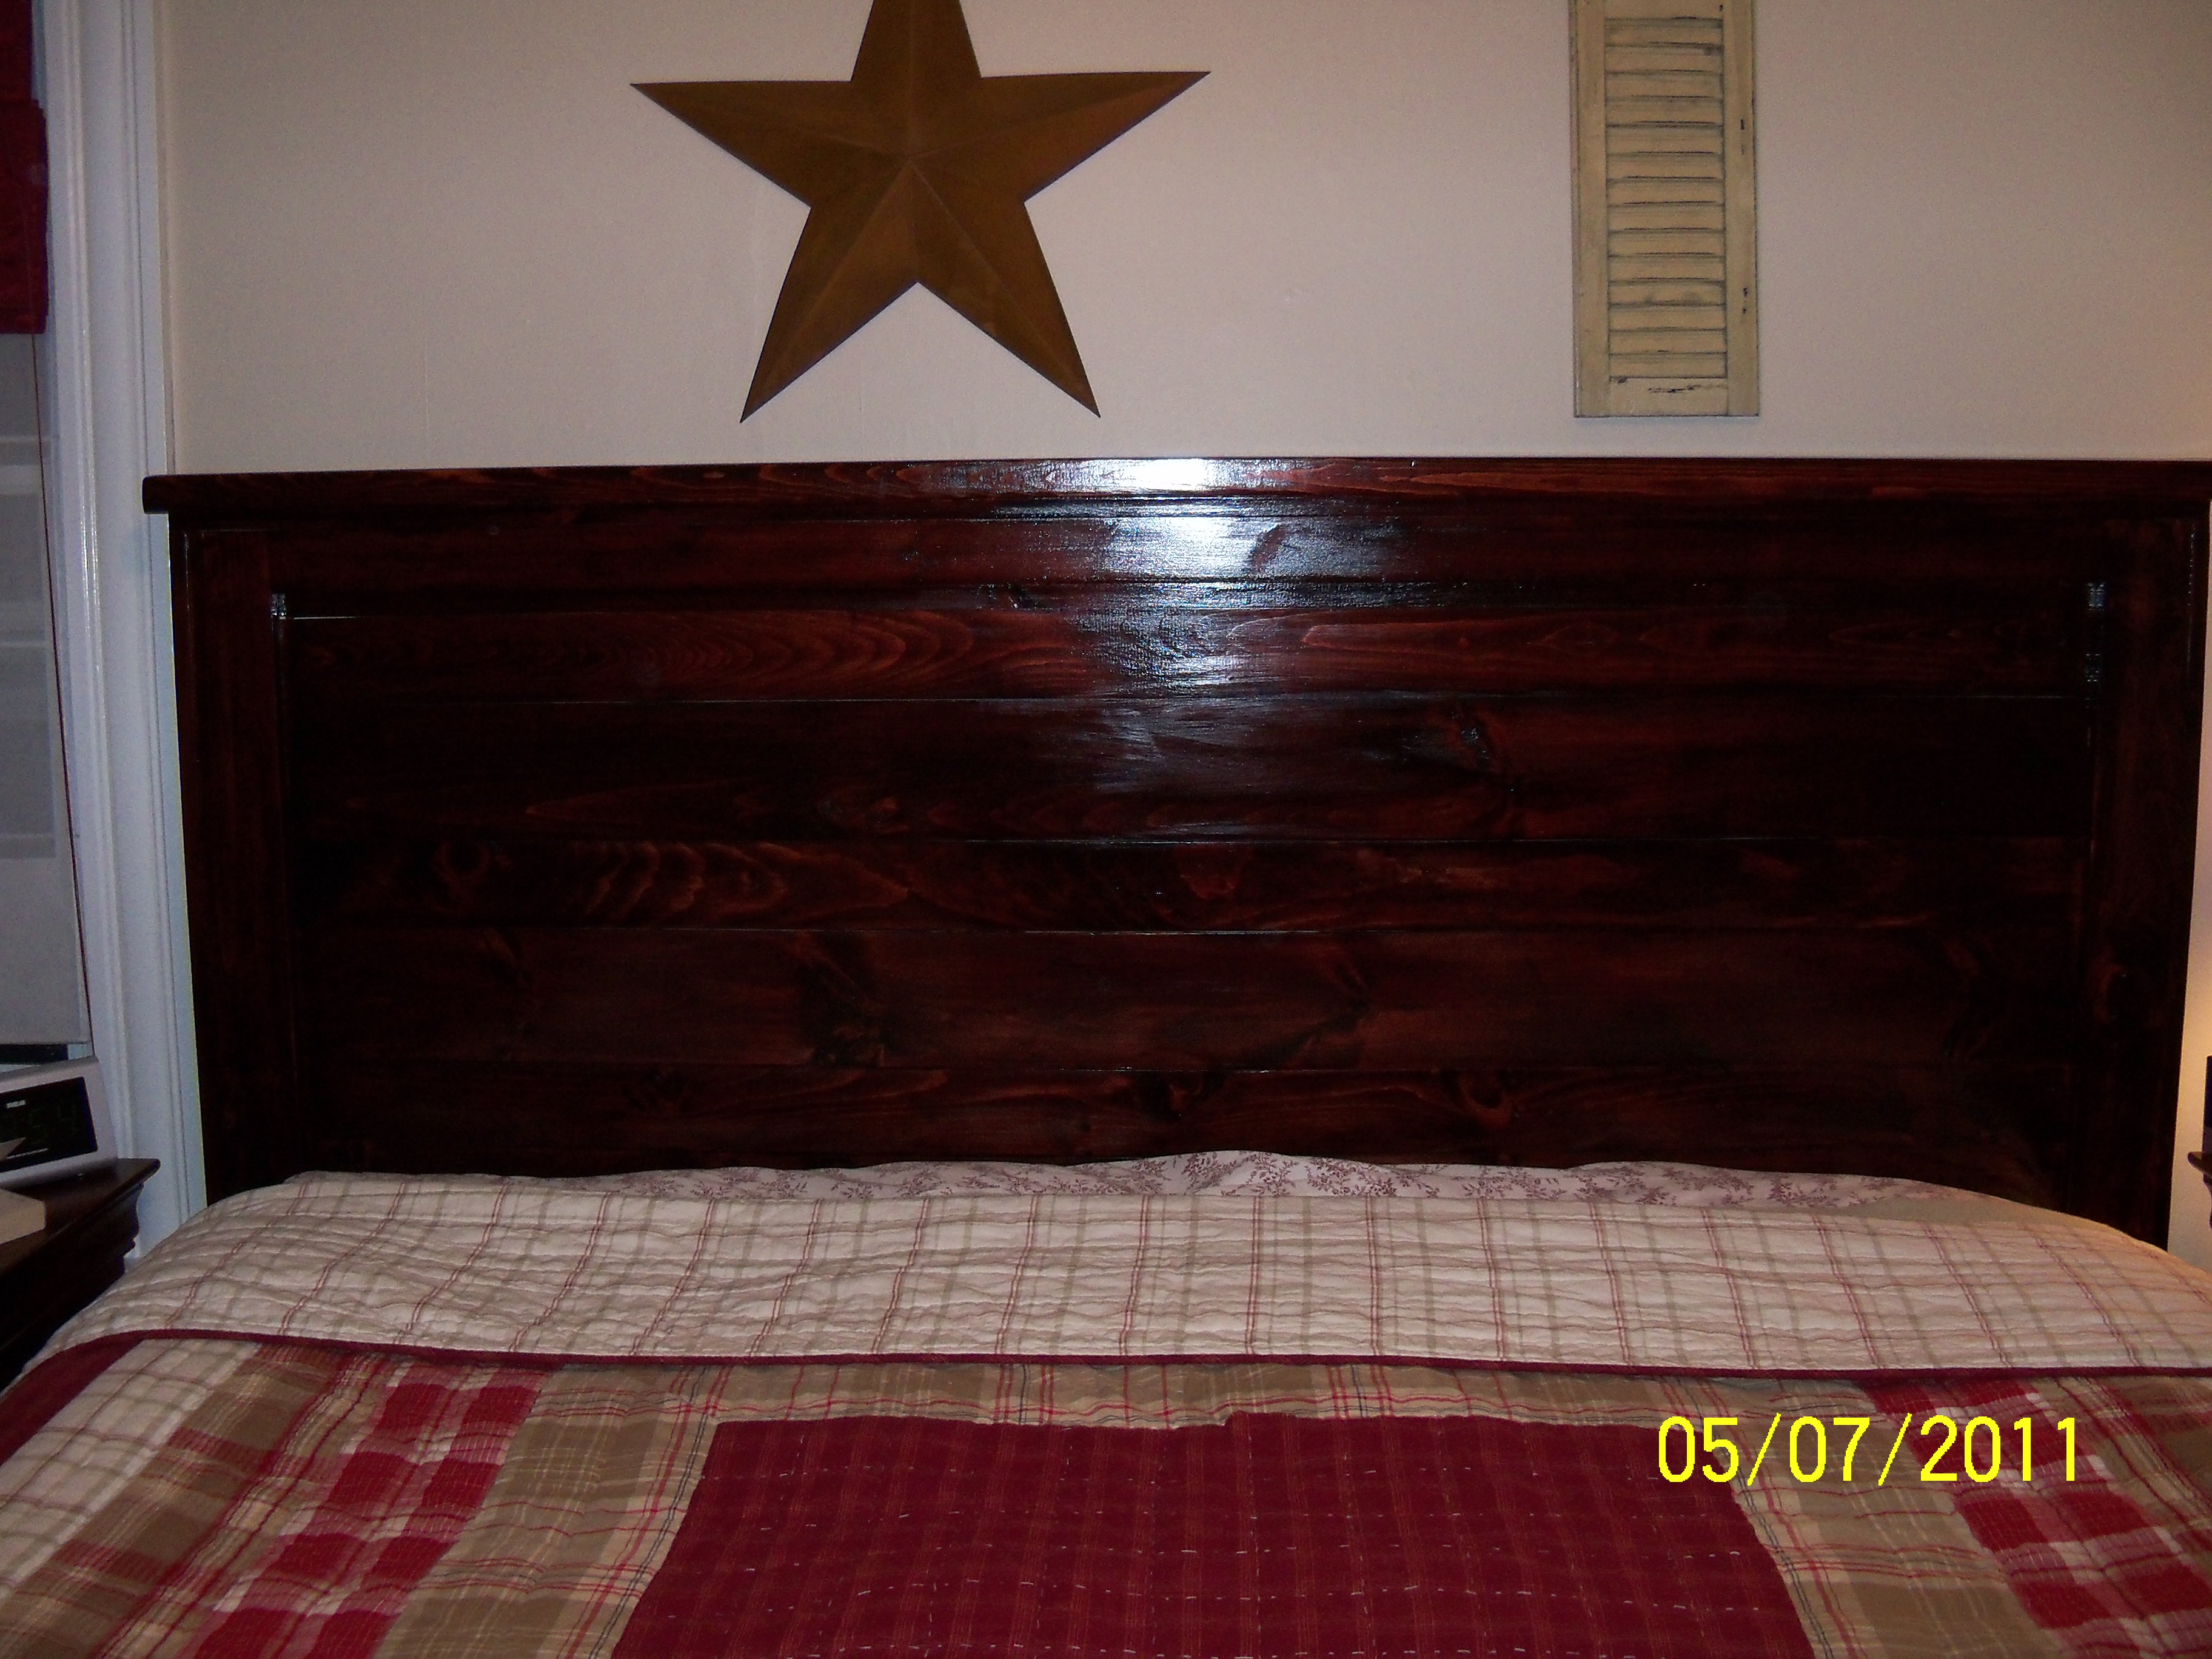
After moving to Miami from a Log Cabin in Western Pennsylvania, I wanted to have a bedroom that was decorated very "Miami." The best option was to build a bed and finish it myself. The body of the headboard is whitewashed and the trim is a cactus gel stain. Thanks Ana!

My wife wanted me to make this. The frame was meant to be coated in polyurethane but as the wood did not look the best, i painted it. I think the colours work quite well.
The stairs are different, i wanted something unique for those.
My daughter loved it as it was a birthday present for her.
The project took about 3 weeks in the evenings after work for a couple of hours most days.


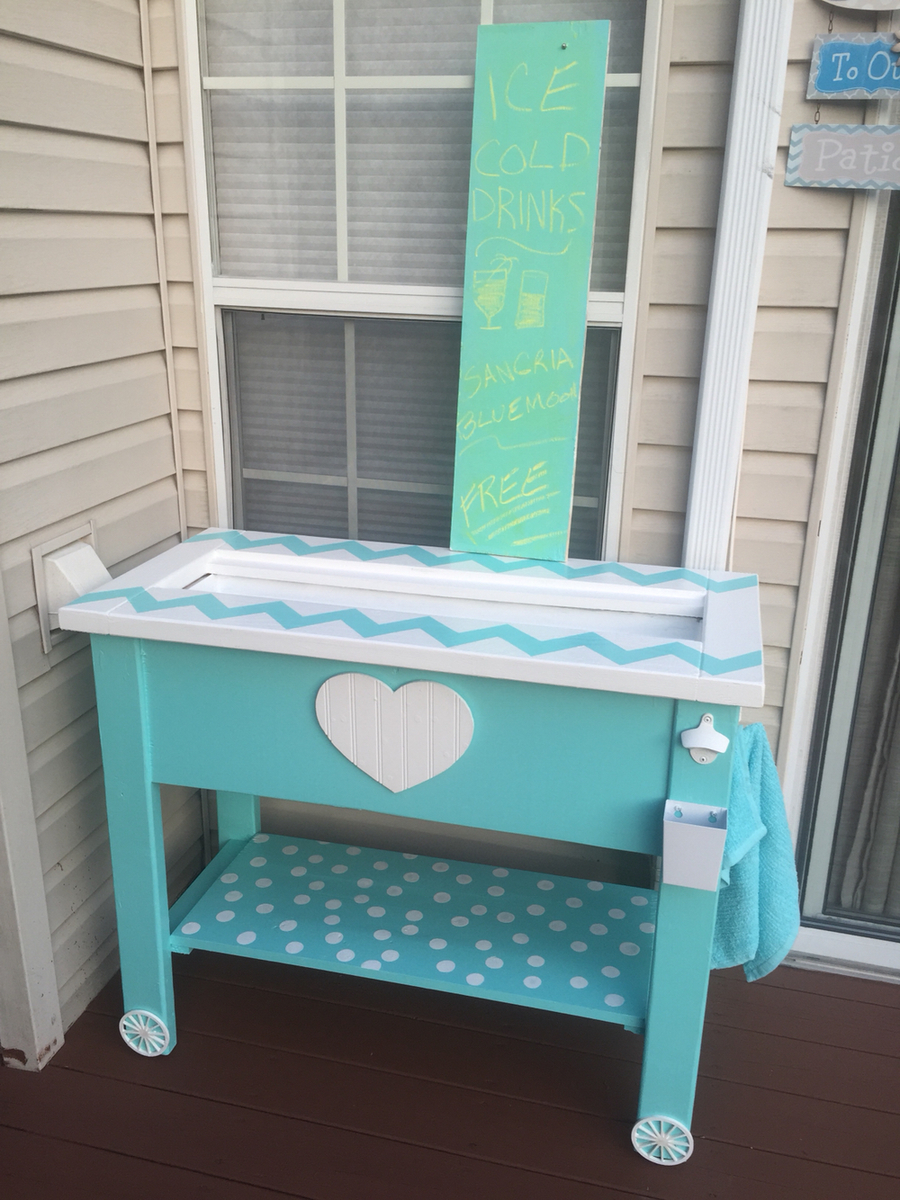
My wife wanted an outdoor server for our back deck. I did so, but decided to add some flare. I built it so the top comes off and a cooler is exposed for our drinks. And to not waste any wood, you turn the top around and I painted with Chalkboard paint so she could write up a menu. Added some color she would like, found a tutorial on chevron, add a few accessories, and viola!
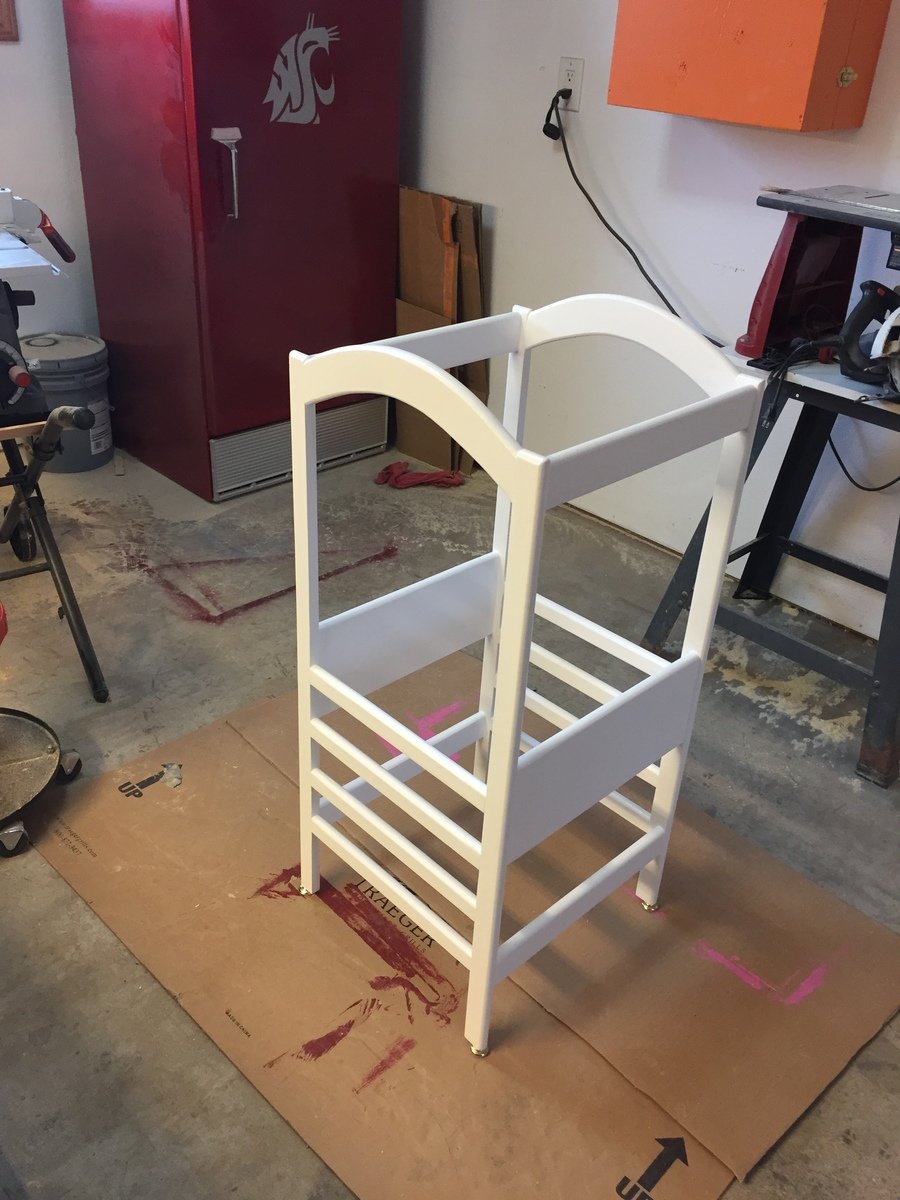
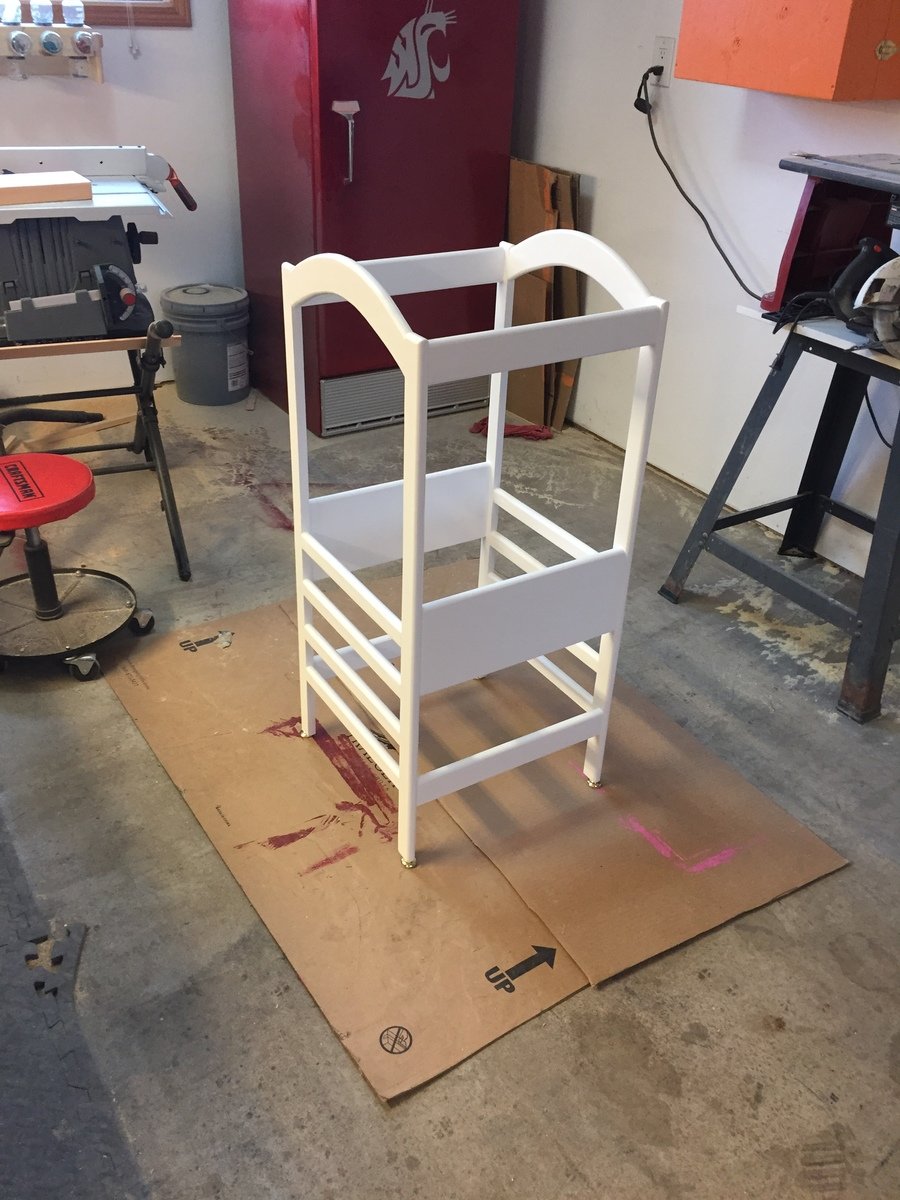
Our daughter loves using this kitchen helper and is a great way to keep her safe in the kitchen.
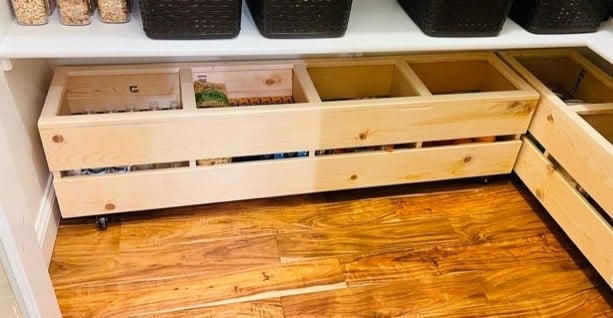
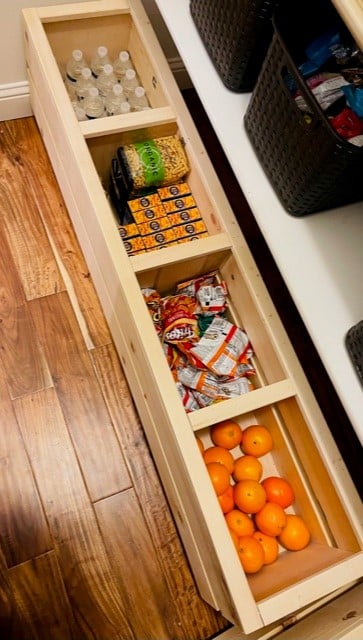
I used Shelf Help for the plywood pieces, then planked the sides with some 1x's, and added a face frame for the top edge. Casters allow for it to be moved easily and cleaned under. This is a great way to add extra storage under the pantry shelves and this design is super easy to modify for any size and height!

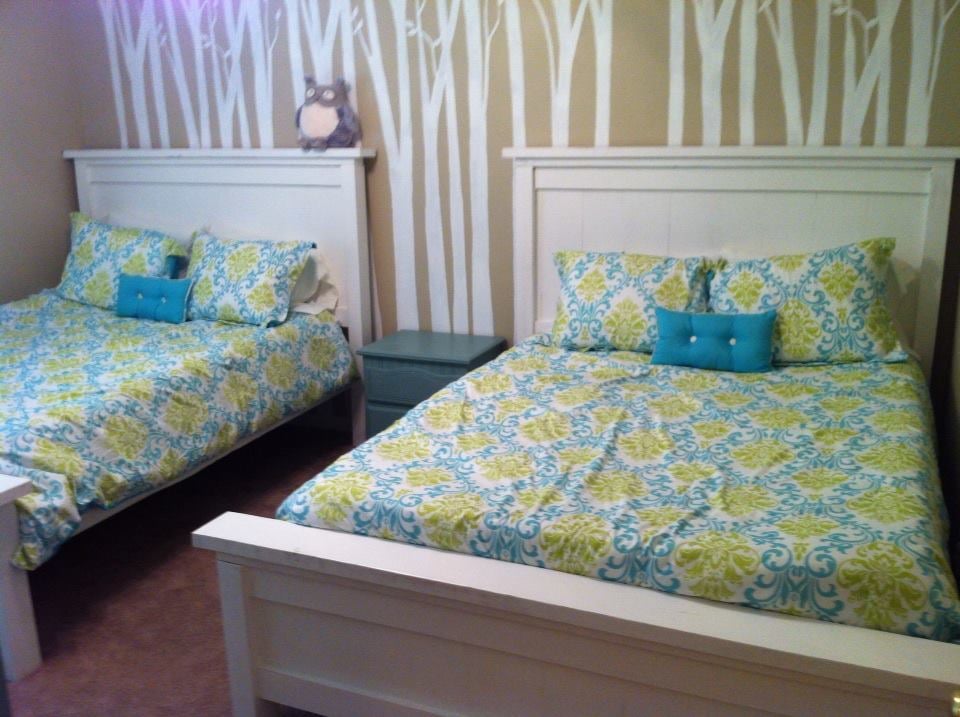
Decided to build beds for my two daughters. We went with two queen sized farmhouse beds that I hope they can keep with them for a very long time. I used joist hangers and attached the head board and foot board so that they could be disassembled easily for moves. The beds came out great and I painted them using Chalk Paint. The project took about three weekends to complete.
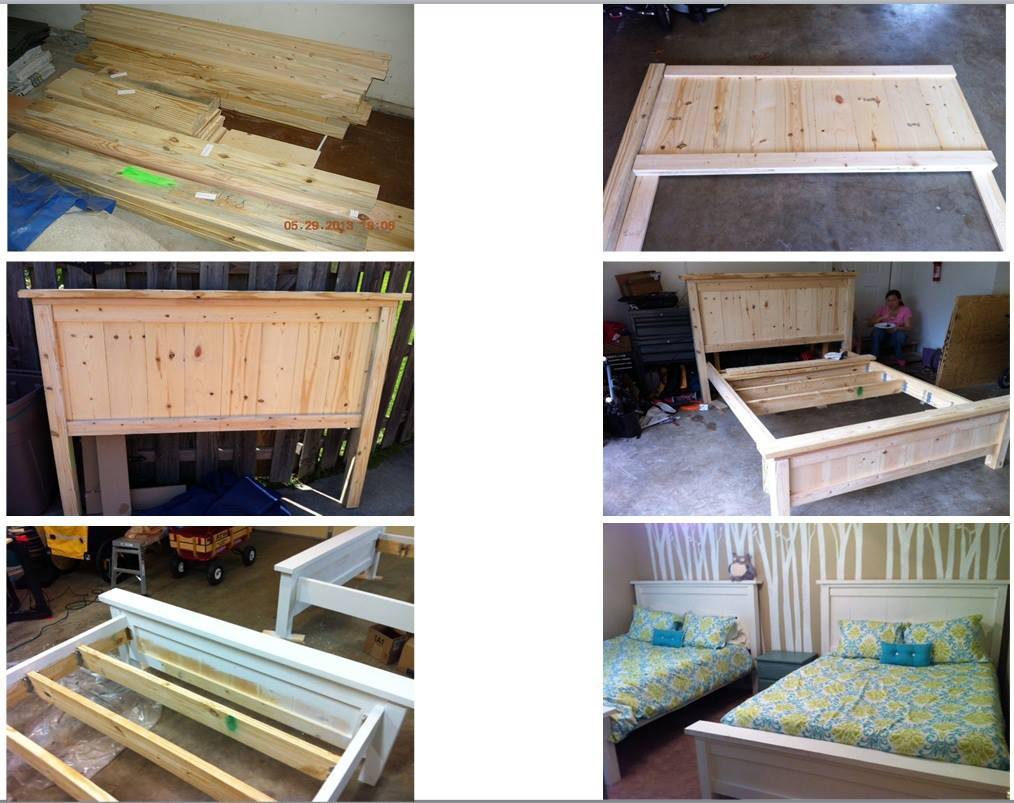

Sun, 07/14/2013 - 01:37
What a lovely room you are making for your daughters. Love the tree background, love Totoro, love your builds. =D

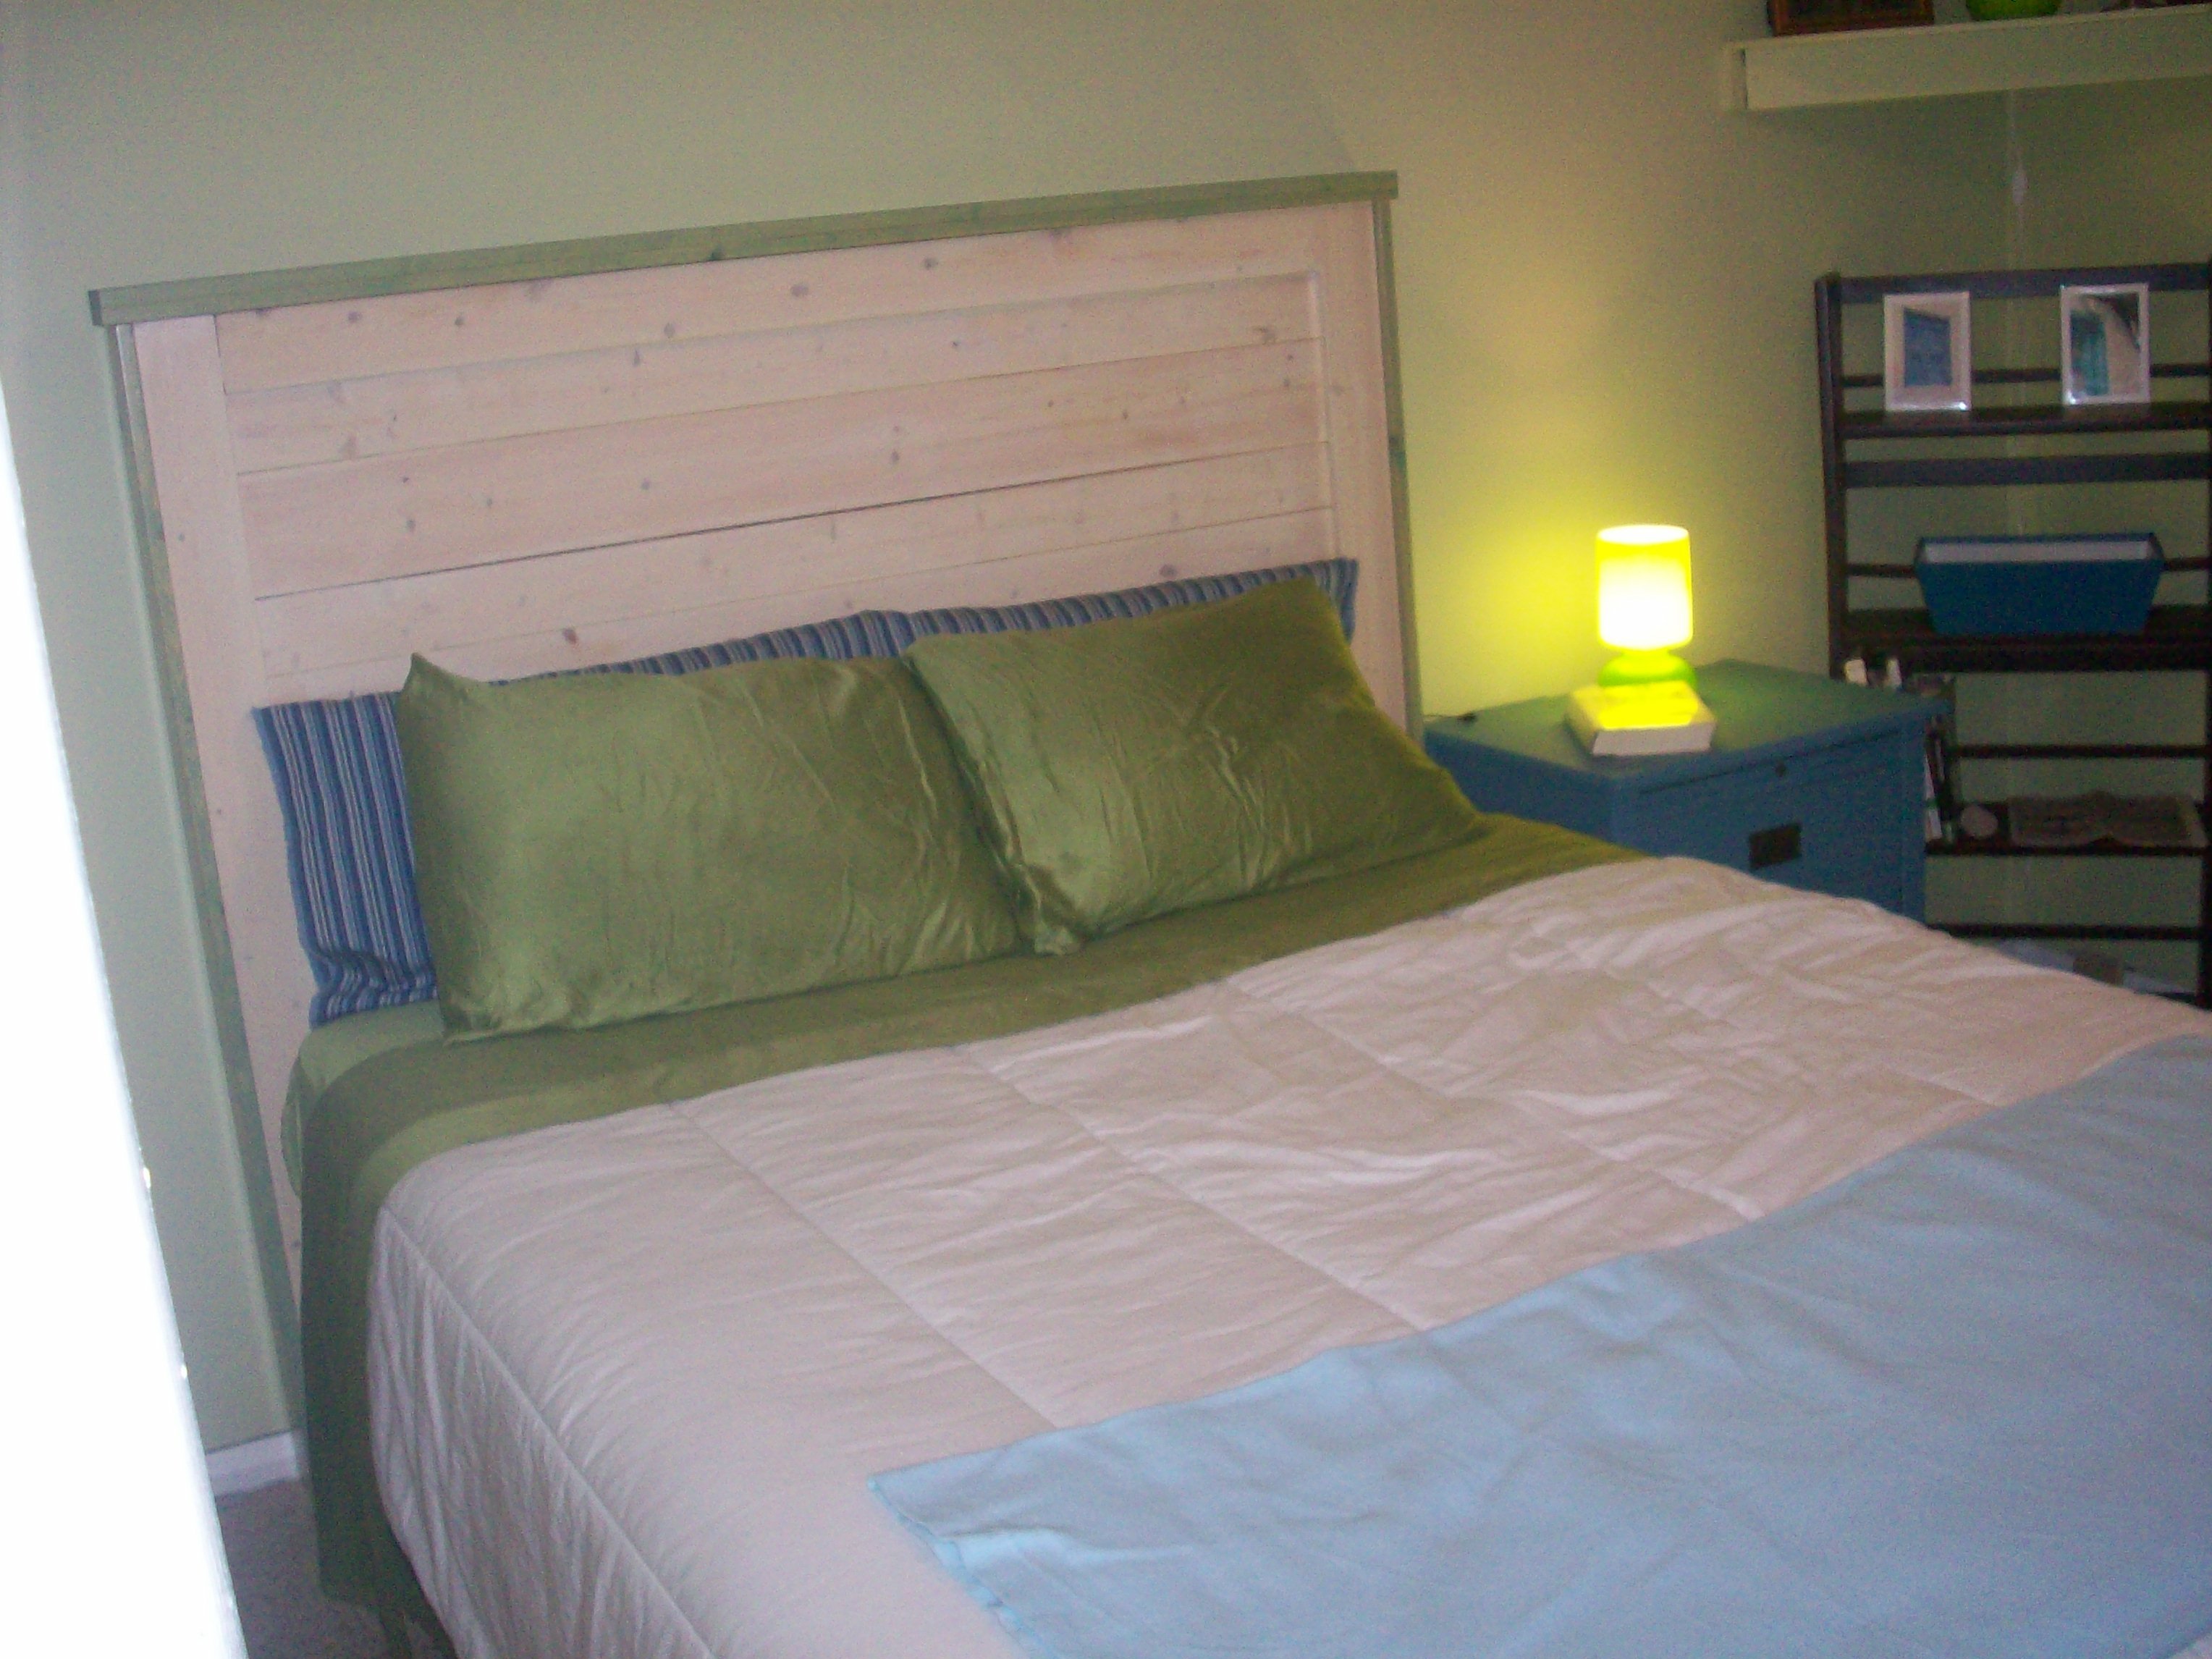
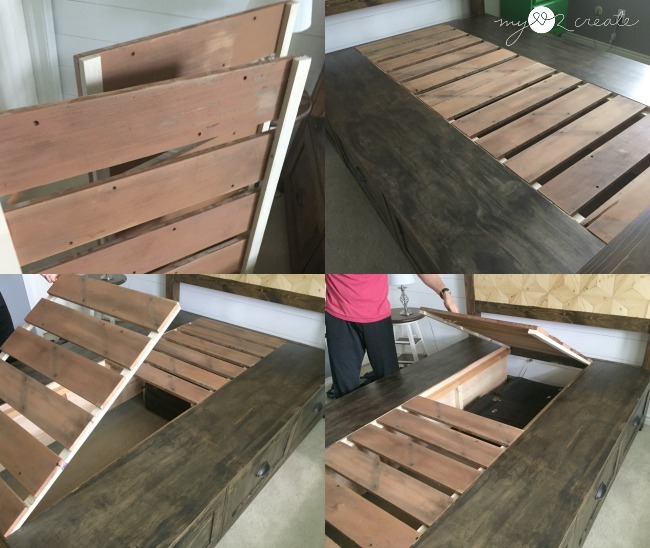
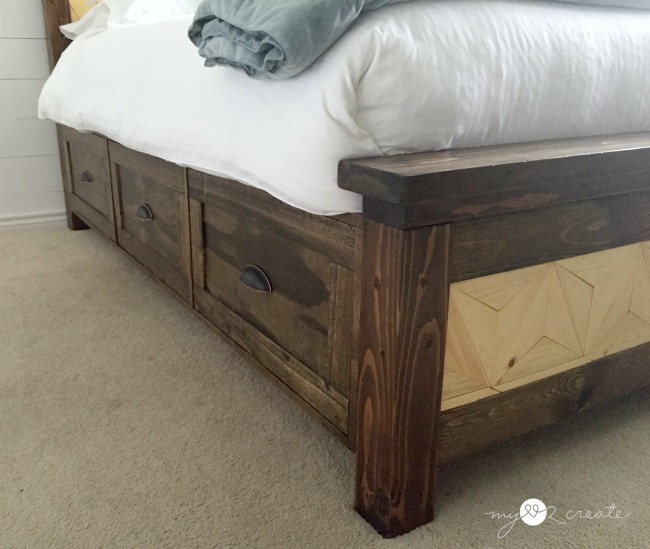
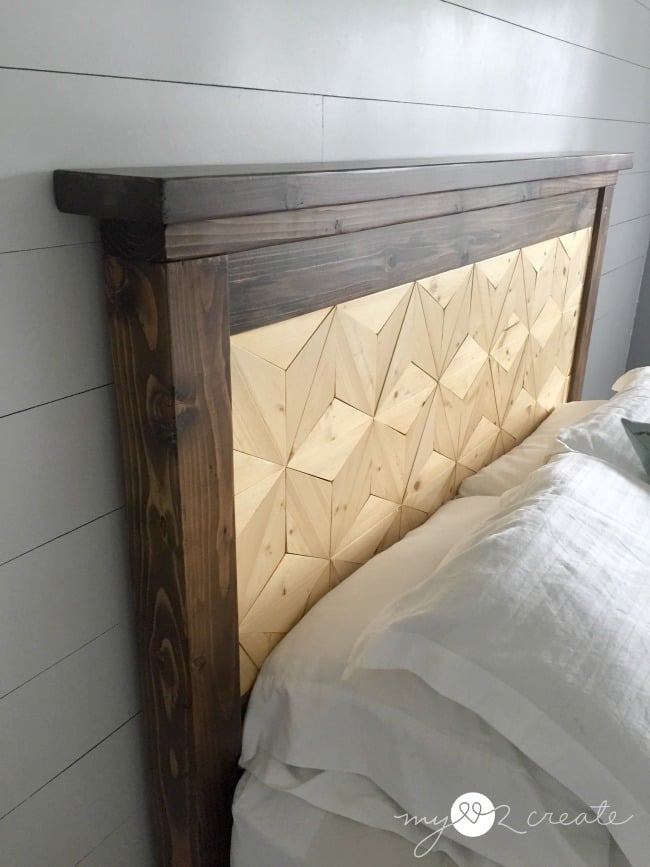
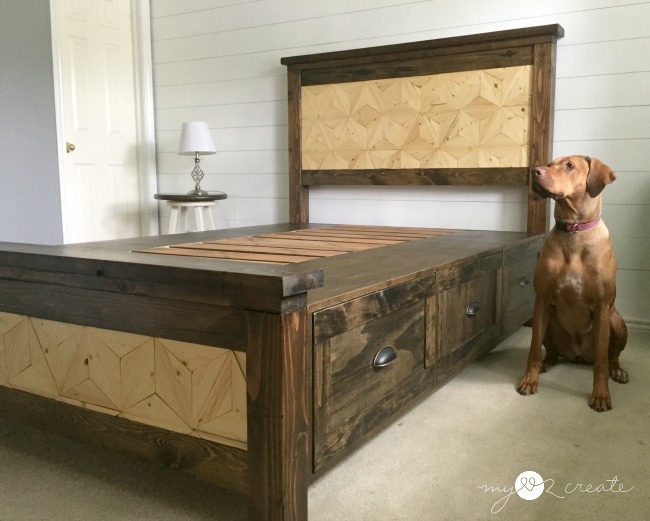
I have always loved Ana's Farmhouse bed, so when she came out with the Farmhouse bed with storage drawers I knew it was the perfect solution for our small master bedroom. Ana's plans were awesome and made this an easy build. I wanted my bed to be a little unique so I tried a geometric pattern for the head board and foot board and I LOVE it! I also decided to make my slats removable for easy access to under the bed storage and this is one of my favorite features of the bed! I think my husband and I just found a new spot for hiding christmas presents! :) Check out my blog post for all the details and loads of photos!


Comments
Ana White Admin
Mon, 12/27/2021 - 15:58
Awesome last minute gift!
Looks great, I'm sure the recipient loved it! Thank you for sharing:)