Community Brag Posts
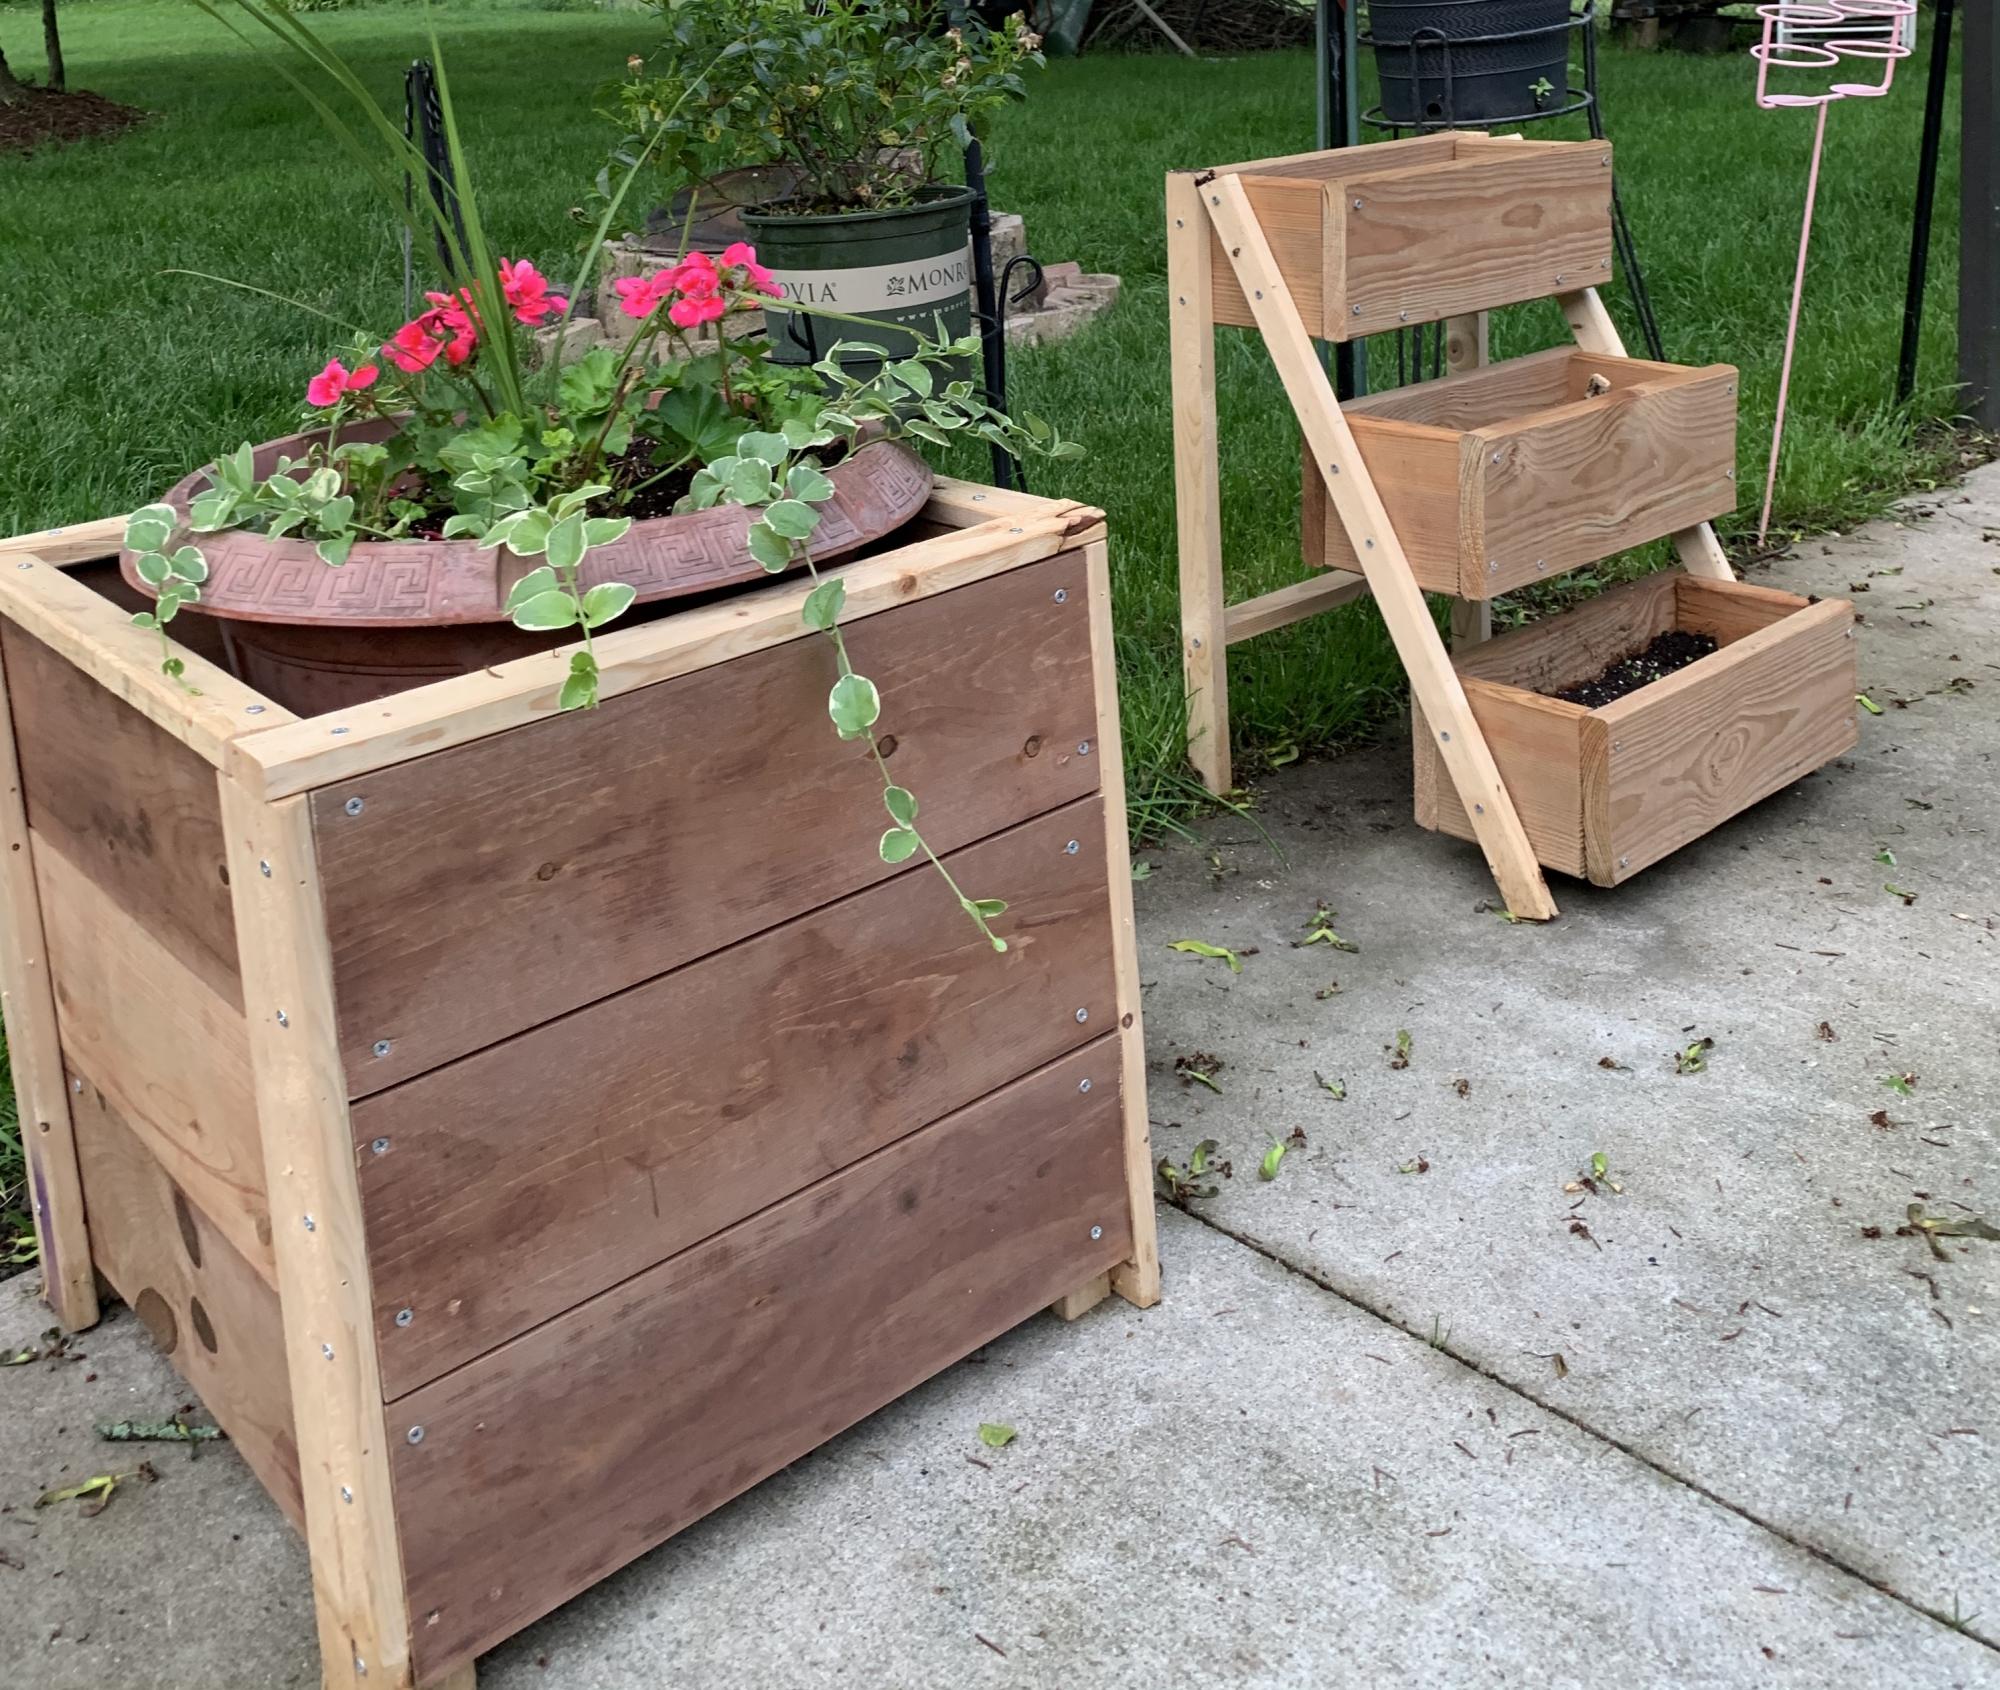
Stained Planter Box
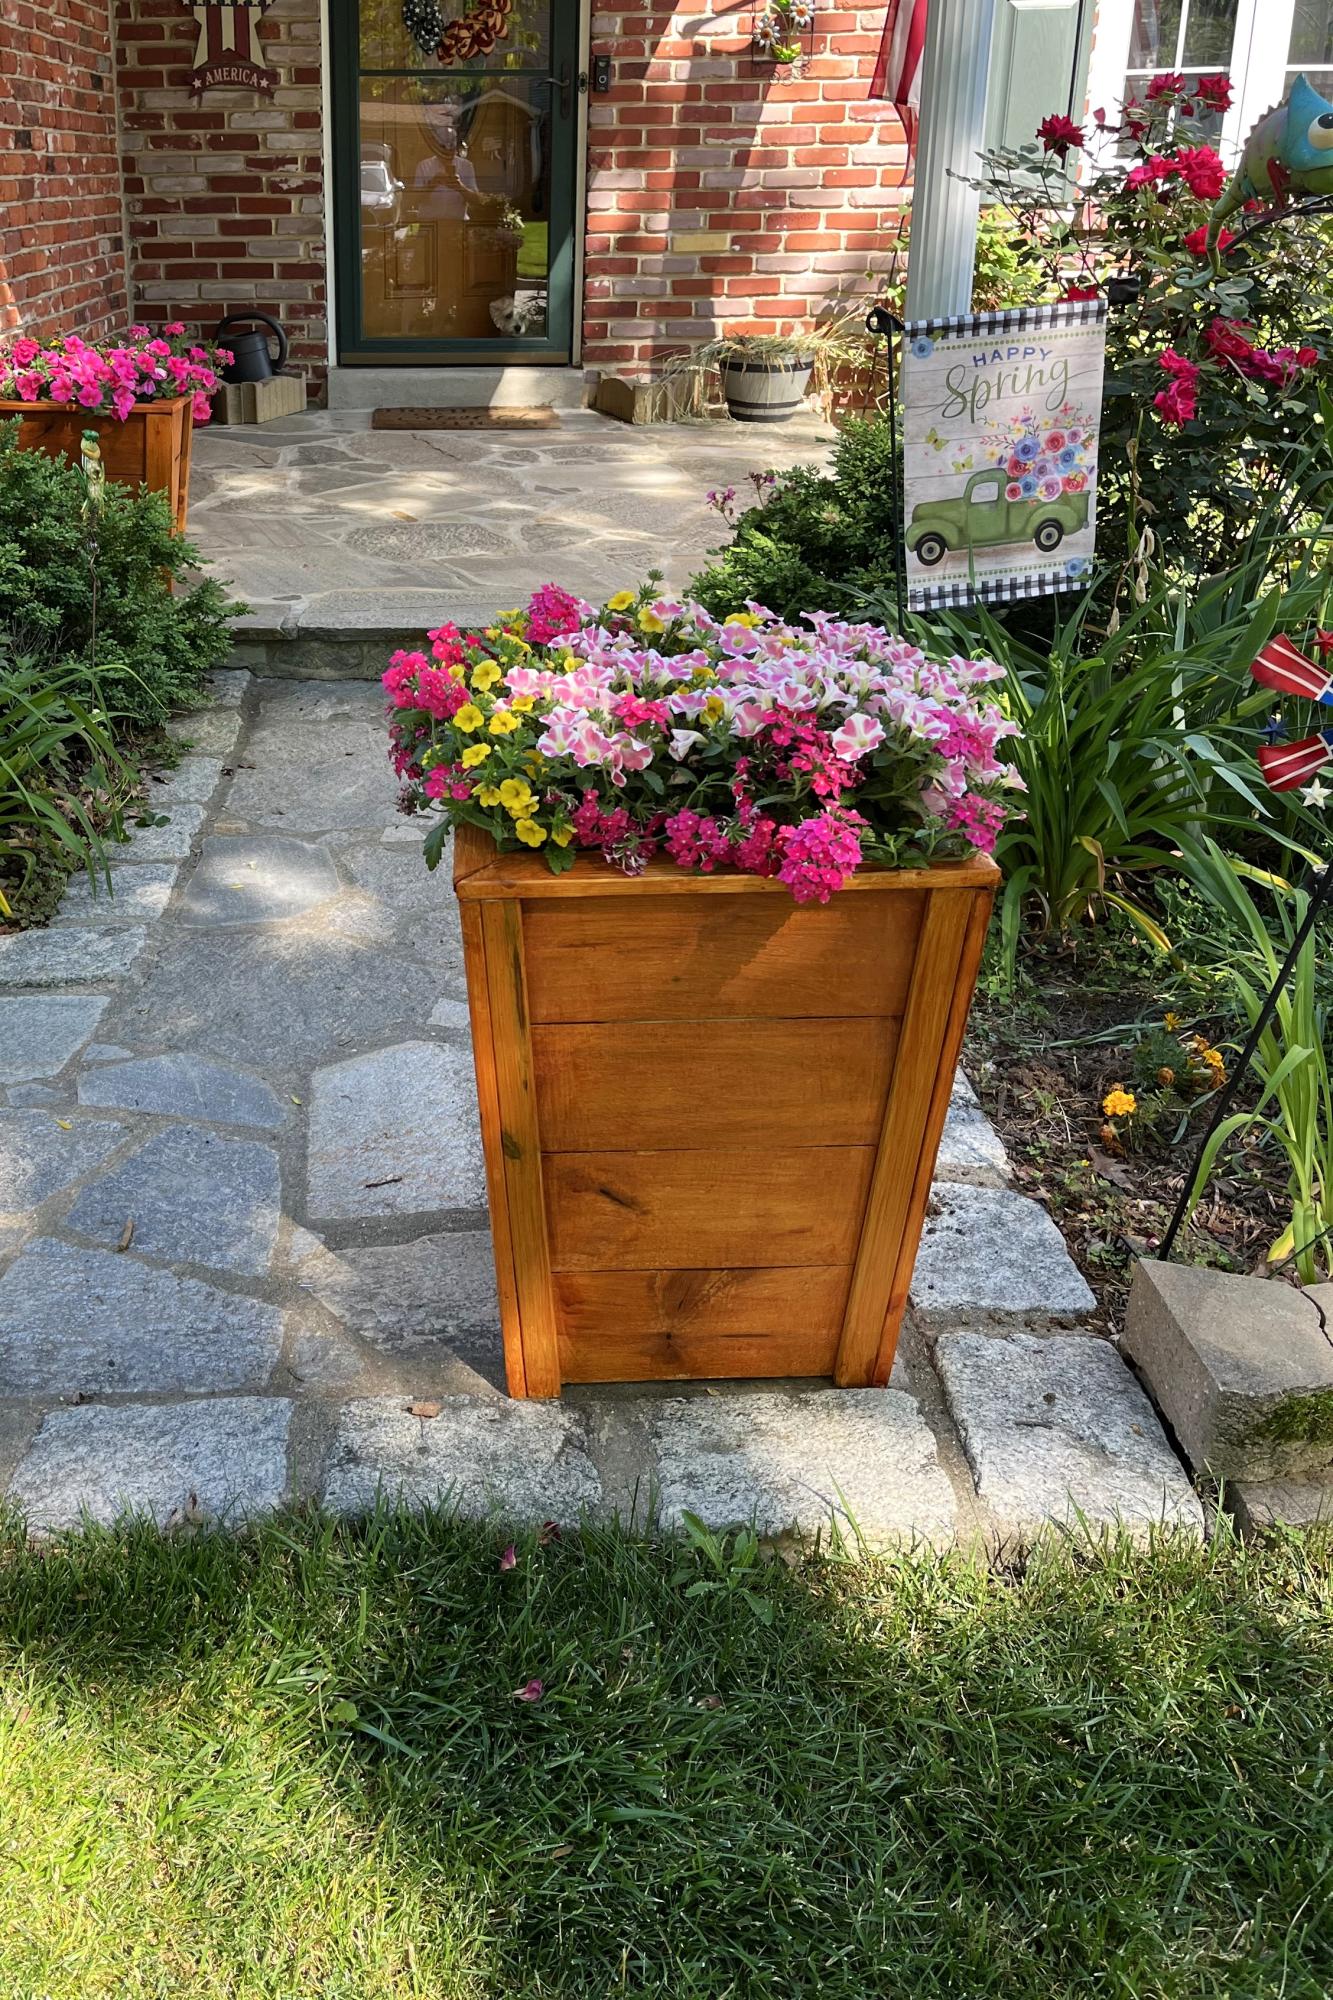
Made the planter boxes. Very easy and the stain makes them look great.
Bruce Gay
Built from Plan(s)
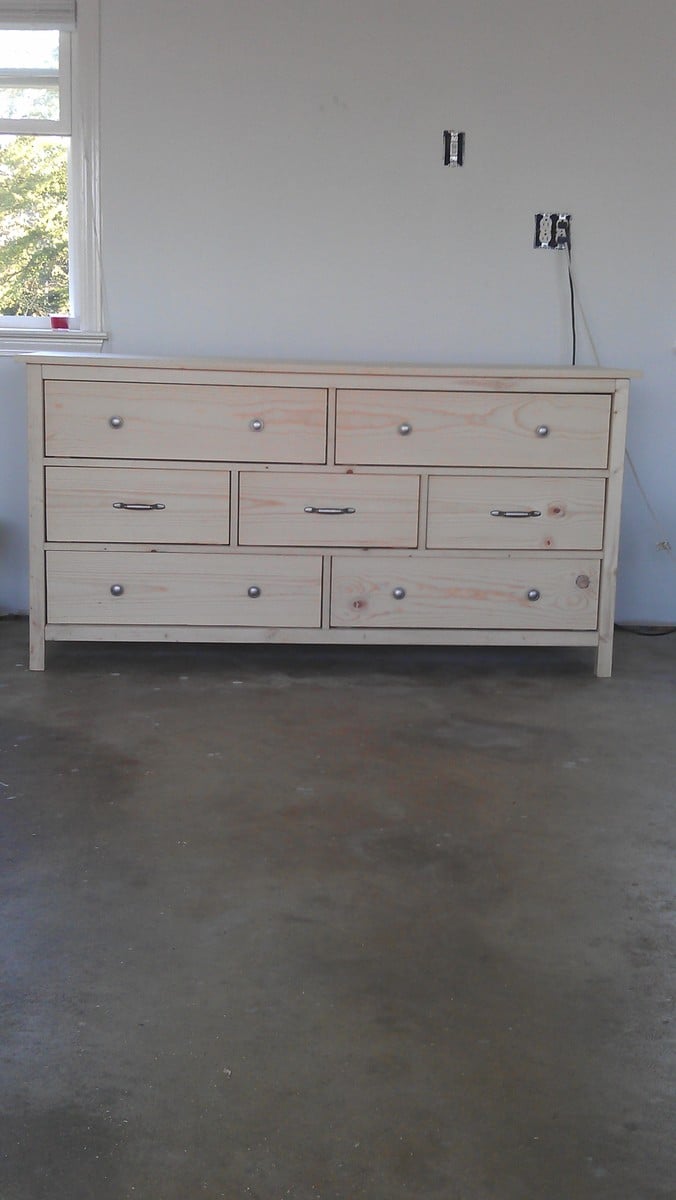
Wide Cabin Dresser
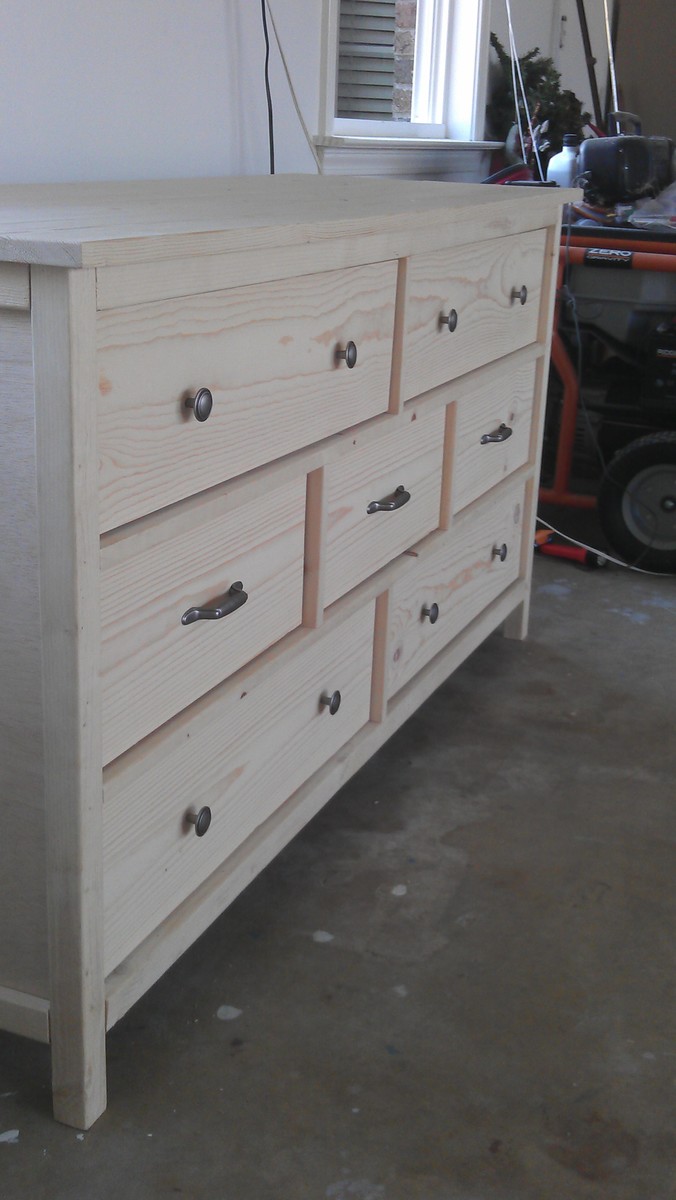
Modified wide cabin dresser with metal full extension drawer slides on the bottom of the drawers. The extra set of drawers on the bottom were added to give more space for storage.
Built from Plan(s)
Estimated Cost
200-250
Estimated Time Investment
Week Long Project (20 Hours or More)
Finish Used
Any advice for a finish with a linen covered bed?
Recommended Skill Level
Intermediate
Comments

Fri, 10/19/2012 - 18:42
dark walnut stain
This looks stunning. i think a dark stain would look great with linen.
Thu, 01/31/2013 - 14:04
Beautiful! I was wondering
Beautiful! I was wondering if it would look pretty with the extra drawers on the bottom. I'm building this plan for my son right now, but I might build another with extra drawers for myself!
Sun, 11/23/2014 - 05:29
Question about modification
Your build looks awesome! I'm going to be doing this for my twin daughters room very soon. I was just wondering how you modified the dimensions on the left and right sides. What were the measurements and dimensions of all the pieces since it had to cover all the way to the bottom?
Mon, 01/24/2022 - 18:04
Wide cabin dresser
I as well would like the plans to the modified dresser with the drawers on the bottom.
Fri, 02/04/2022 - 11:11
Wide cabin dresser
This looks amazing!! Would also love the plans for the extra drawers!! If you don't mind.
Full size Brookstone Headboard
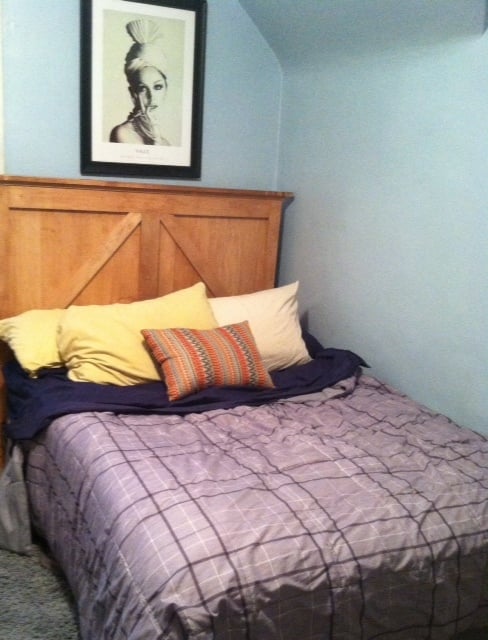
We built this out of solid Maple for my son's 30th birthday. He has a full-size bed, so we had to adapt the queen size plans. It turned out great....he was thrilled...but it was heavy to carry upstairs to his apartment!
Built from Plan(s)
Estimated Time Investment
Afternoon Project (3-6 Hours)
Finish Used
Colonial Maple - two coats of stain and two coats of ply
Recommended Skill Level
Beginner
Grey console table
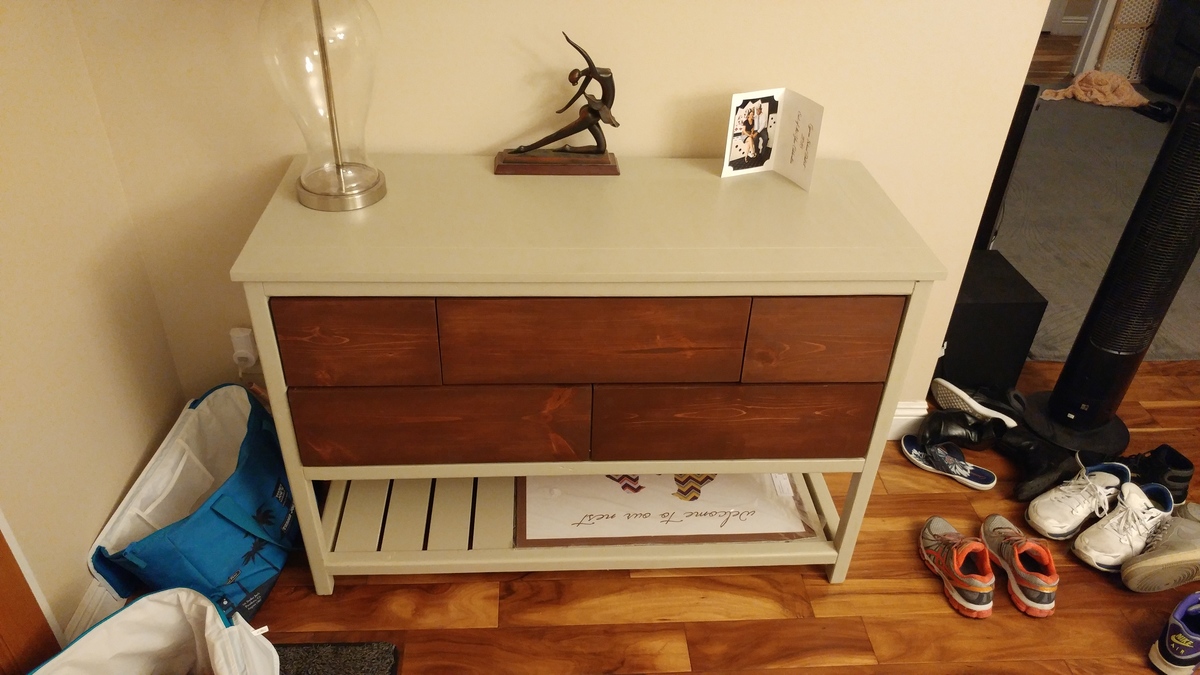
This was my first attempt at furnature. I didnt use the best quality wood, and had a hard time finding straight boards at my local Lowes.

Built from Plan(s)
Estimated Cost
$110
Estimated Time Investment
Weekend Project (10-20 Hours)
Finish Used
Grey paint and Minwax dark walnut stain.
Recommended Skill Level
Beginner
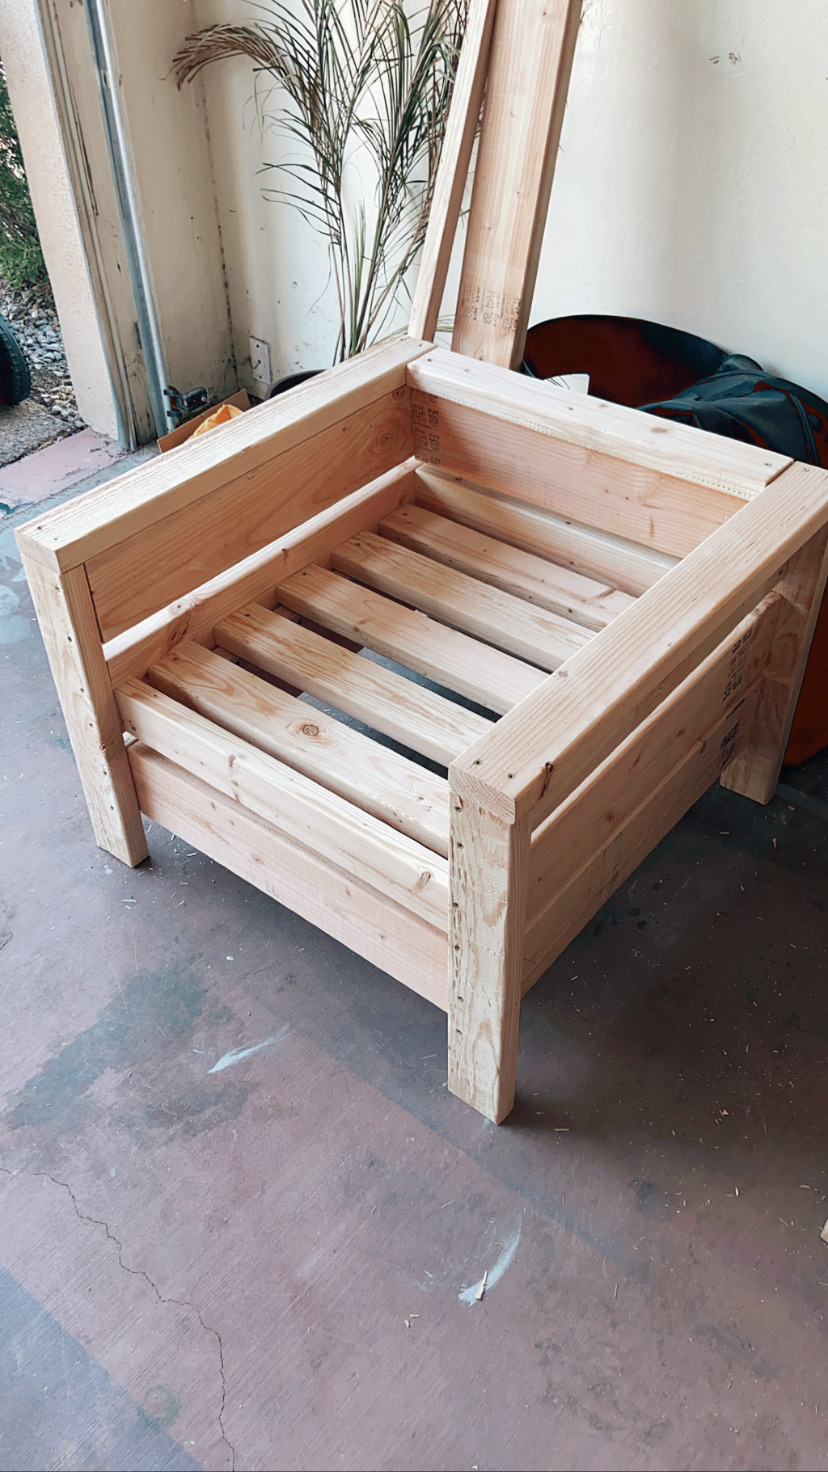
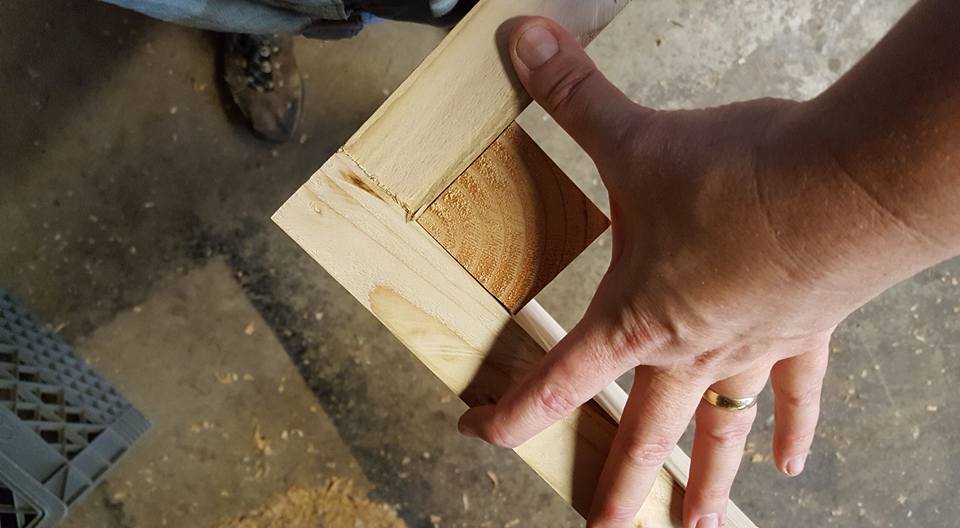
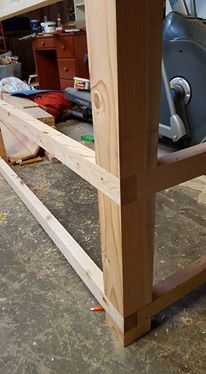
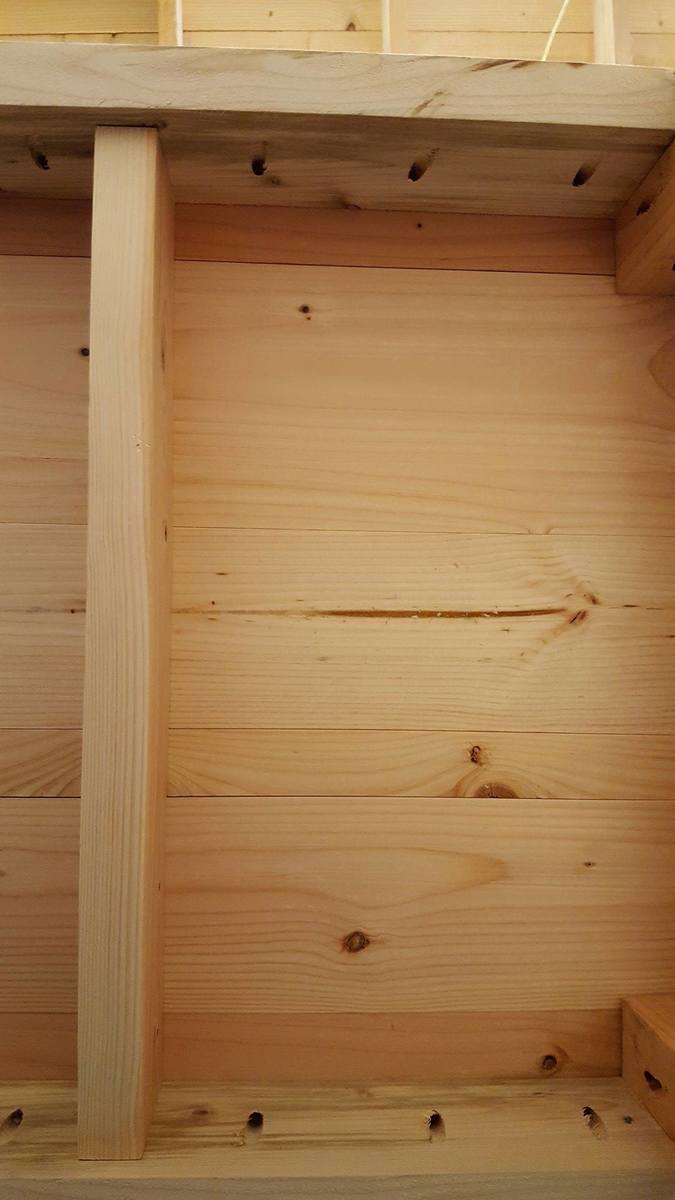
Mediocre man makes an the outdoor sofa!
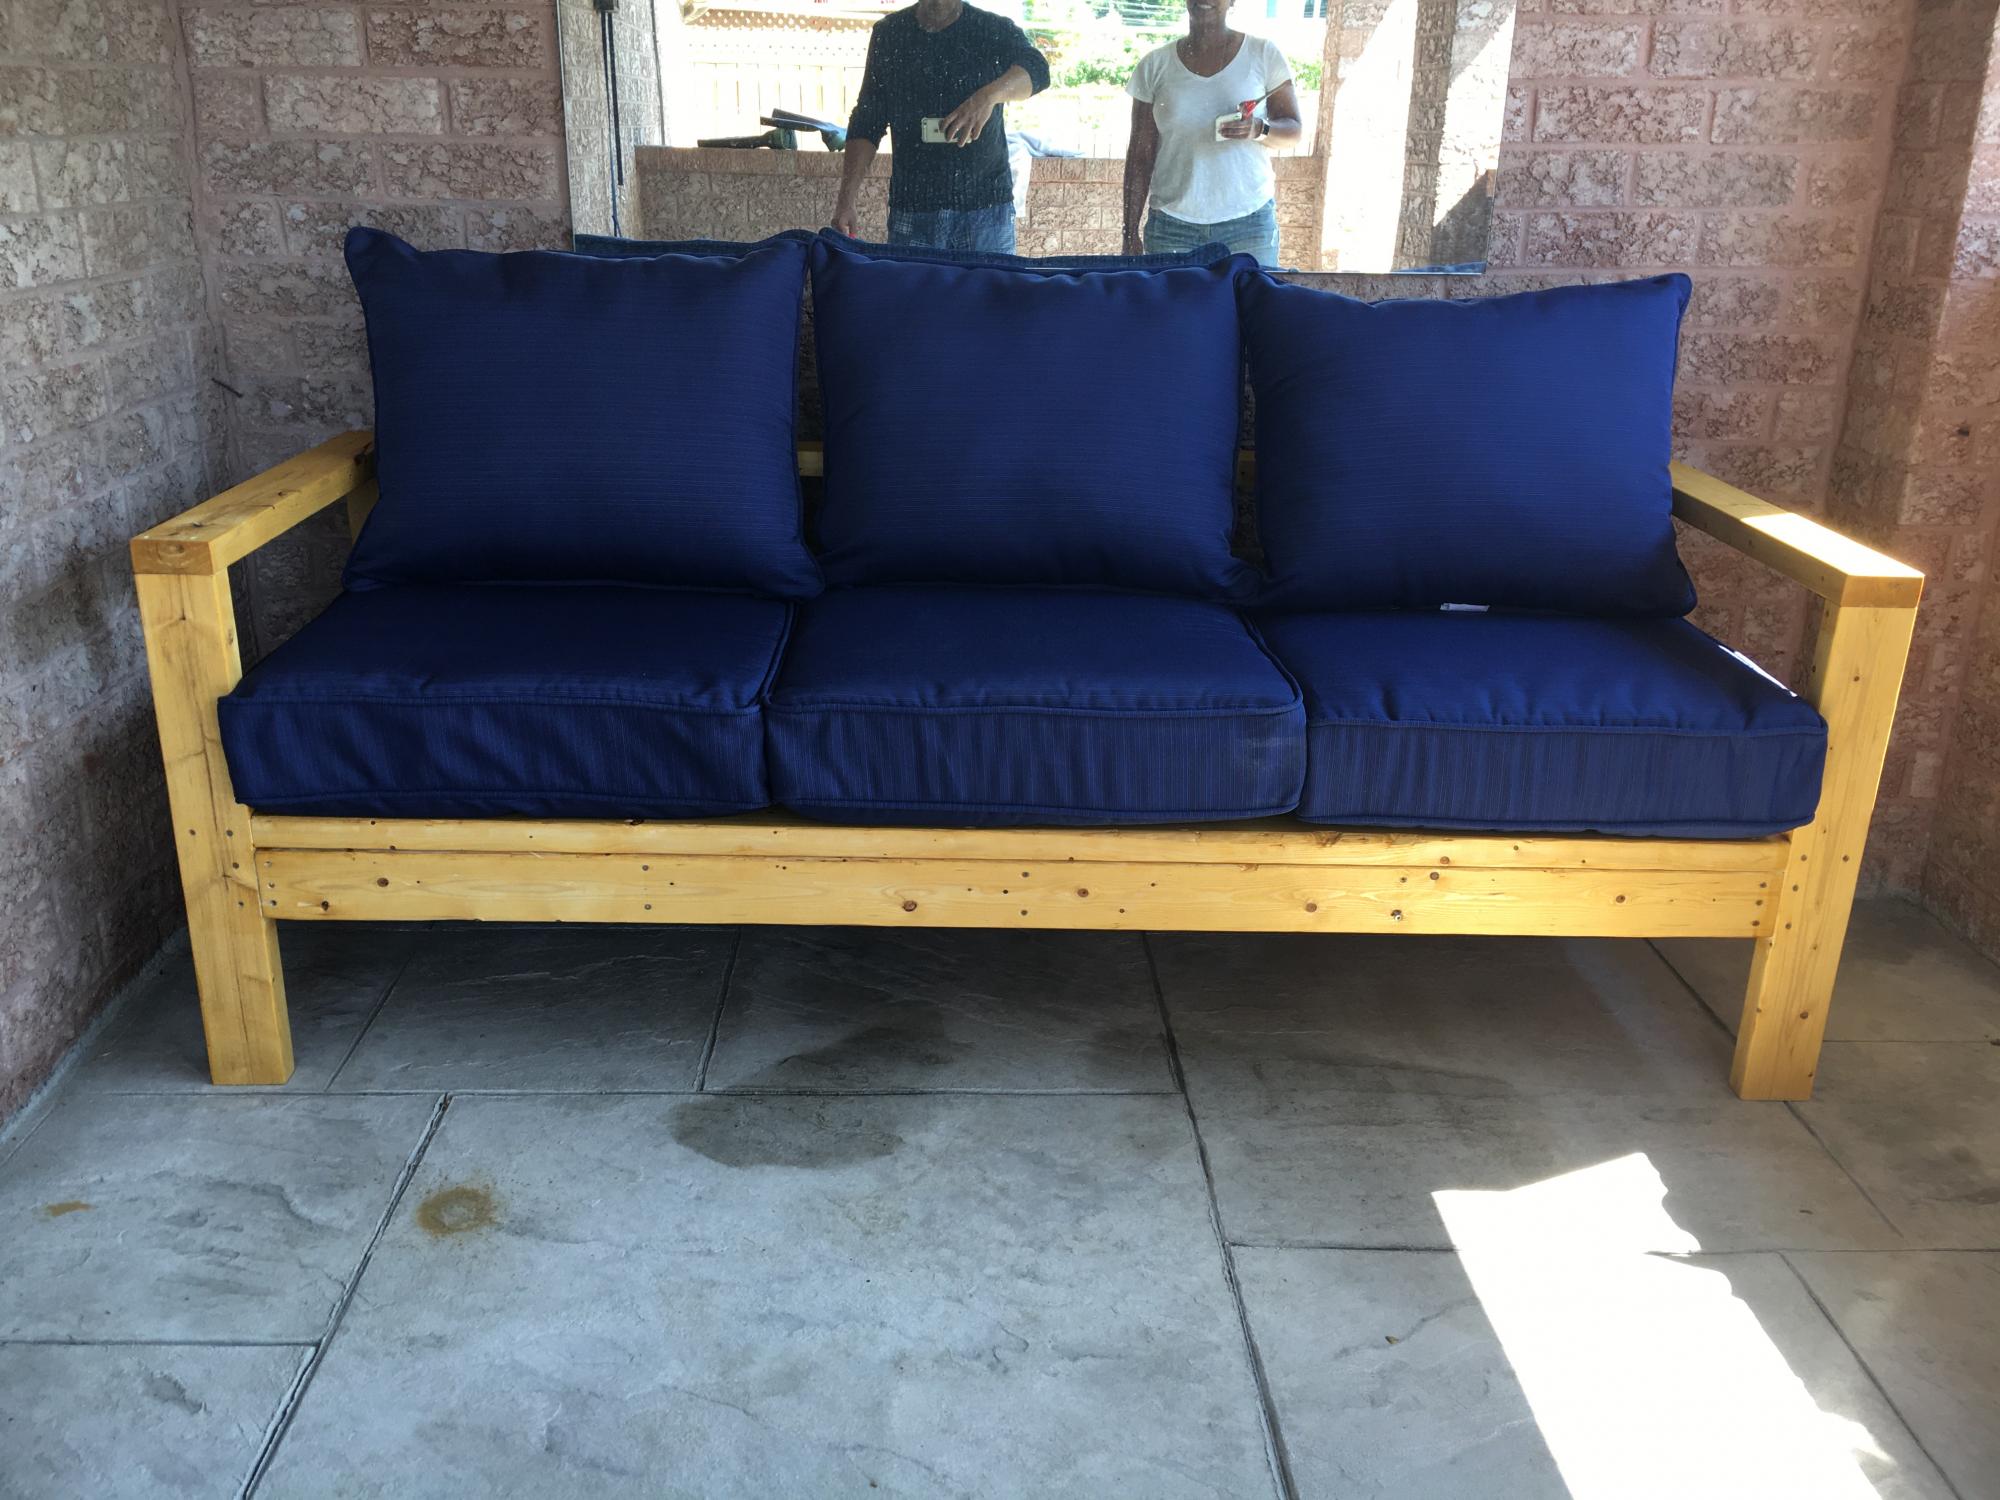
I made this awesome sofa based on the plan. I'm not very good at this stuff however, these plans were great. Easy to follow and gave me a great excuse to buy a mitre saw.
It looks great with the blue cushions. It's quite comfy and a great size.
Now complete - a mod I will make is to add a second 2x4 in front of the back brace as I find it too deep.
I really appreciate you sharing these plans!
Built from Plan(s)
Estimated Cost
$90 CAD
Estimated Time Investment
Afternoon Project (3-6 Hours)
Finish Used
Cabot Stain (I need to get better.
Recommended Skill Level
Beginner
Library Console Table

My husband and I are doing a bit of remodeling in our 150+ year old farmhouse - over time we have amassed a not so small pile of old lumber. We hated to see it go to waste so it has been our hobby to try to find ways to reuse. Small projects. Finding this website was a dream. My husband and I are NOT natural carpenters but the plans we found here were perfect for us. Clear, simple, un-intimidating. I've been meaning to make the Library Console Table for a while and before the weather got too yucky to work outside I knew I had to get to it. It cost us zero to make, however, since it is all old barnwood - no two pieces were alike, the wood was a bit warped, dinged and splintery. But with enough sanding and the right paint I think this will be adorable. Husband does not want me to paint it and I might not have but we were forced to use some plywood (we also had a small sheet on hand) and I hate plywood too much to leave it exposed. We'll see.

Built from Plan(s)
Estimated Cost
FREE
Estimated Time Investment
Day Project (6-9 Hours)
Finish Used
So far no finish used.
Recommended Skill Level
Intermediate
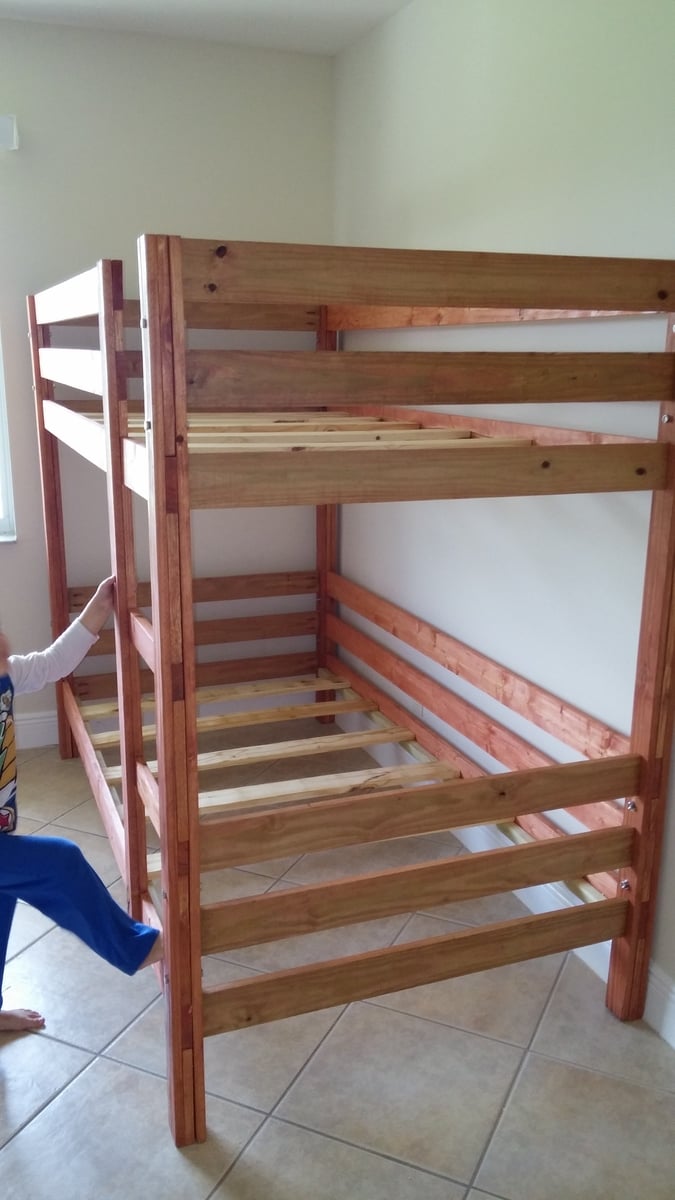
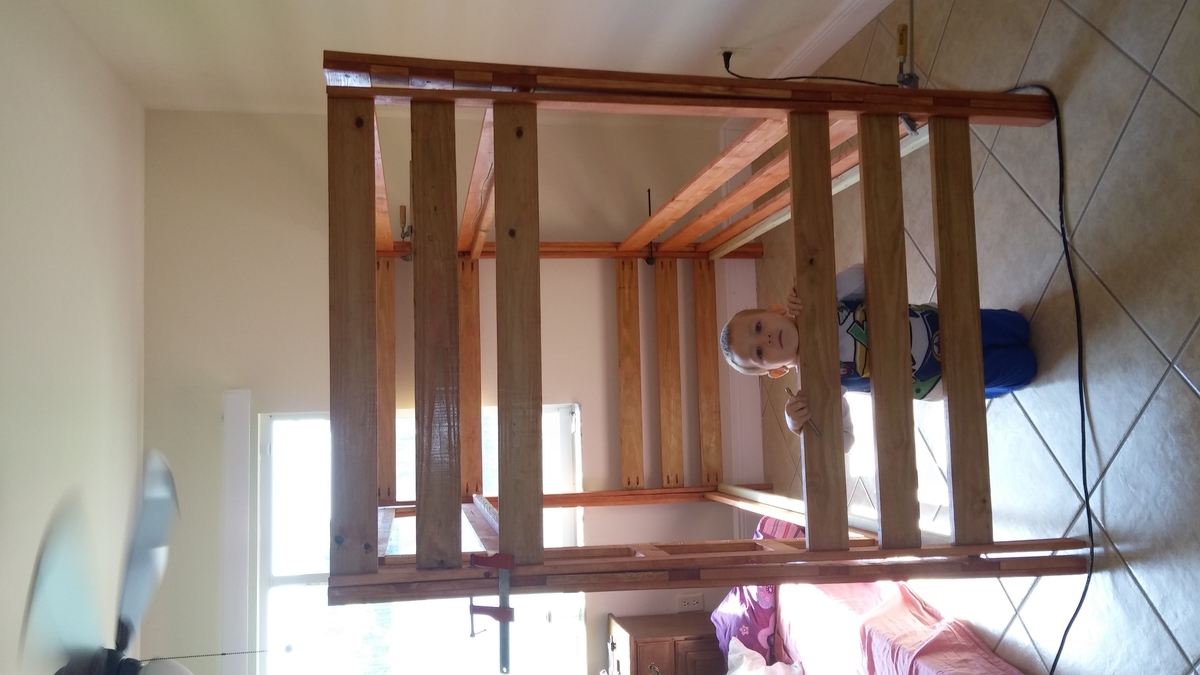
Classic bunk bed

We recently moved to across country and couldn't fit all our belongings in our moving van so I am on a slow but steady quest to my own "hand built home"! While my husband works with his computer genius types, I am pulling out my tools......rather basic and simple tools because none of my good ones fit in the truck either!
Built from Plan(s)
Estimated Cost
$85
Estimated Time Investment
Weekend Project (10-20 Hours)
Finish Used
Cherry stain
Recommended Skill Level
Beginner
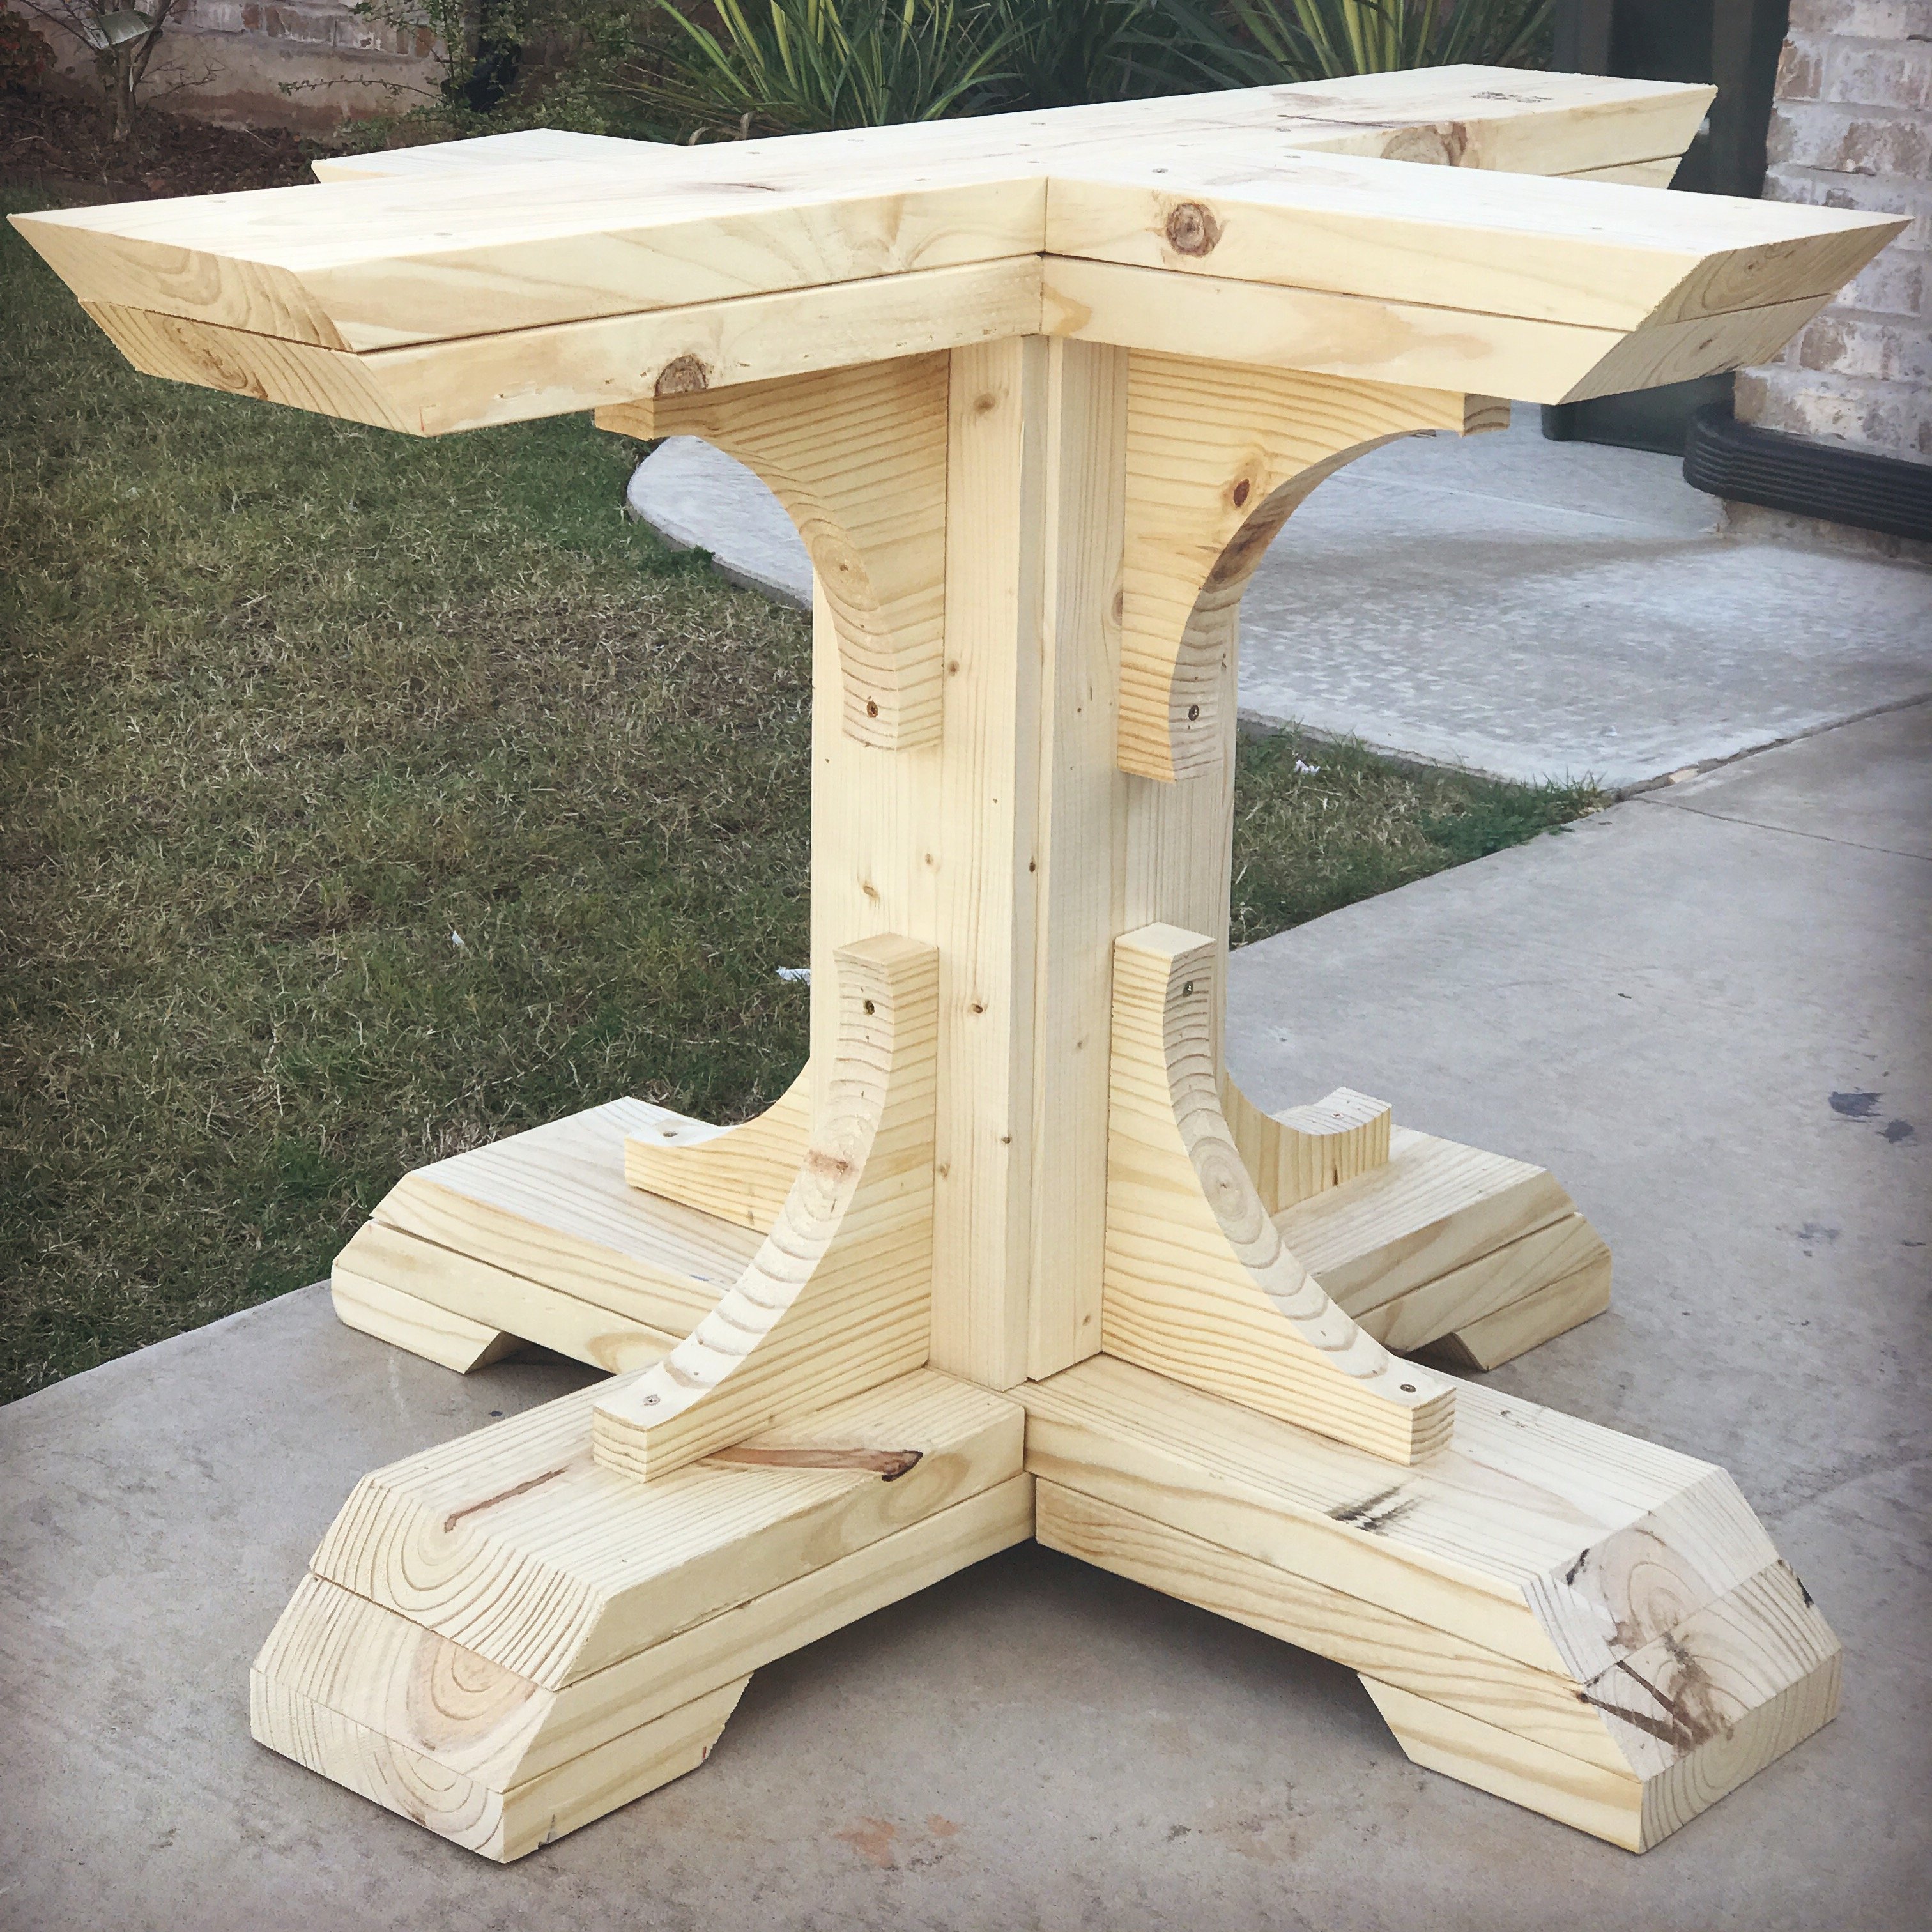
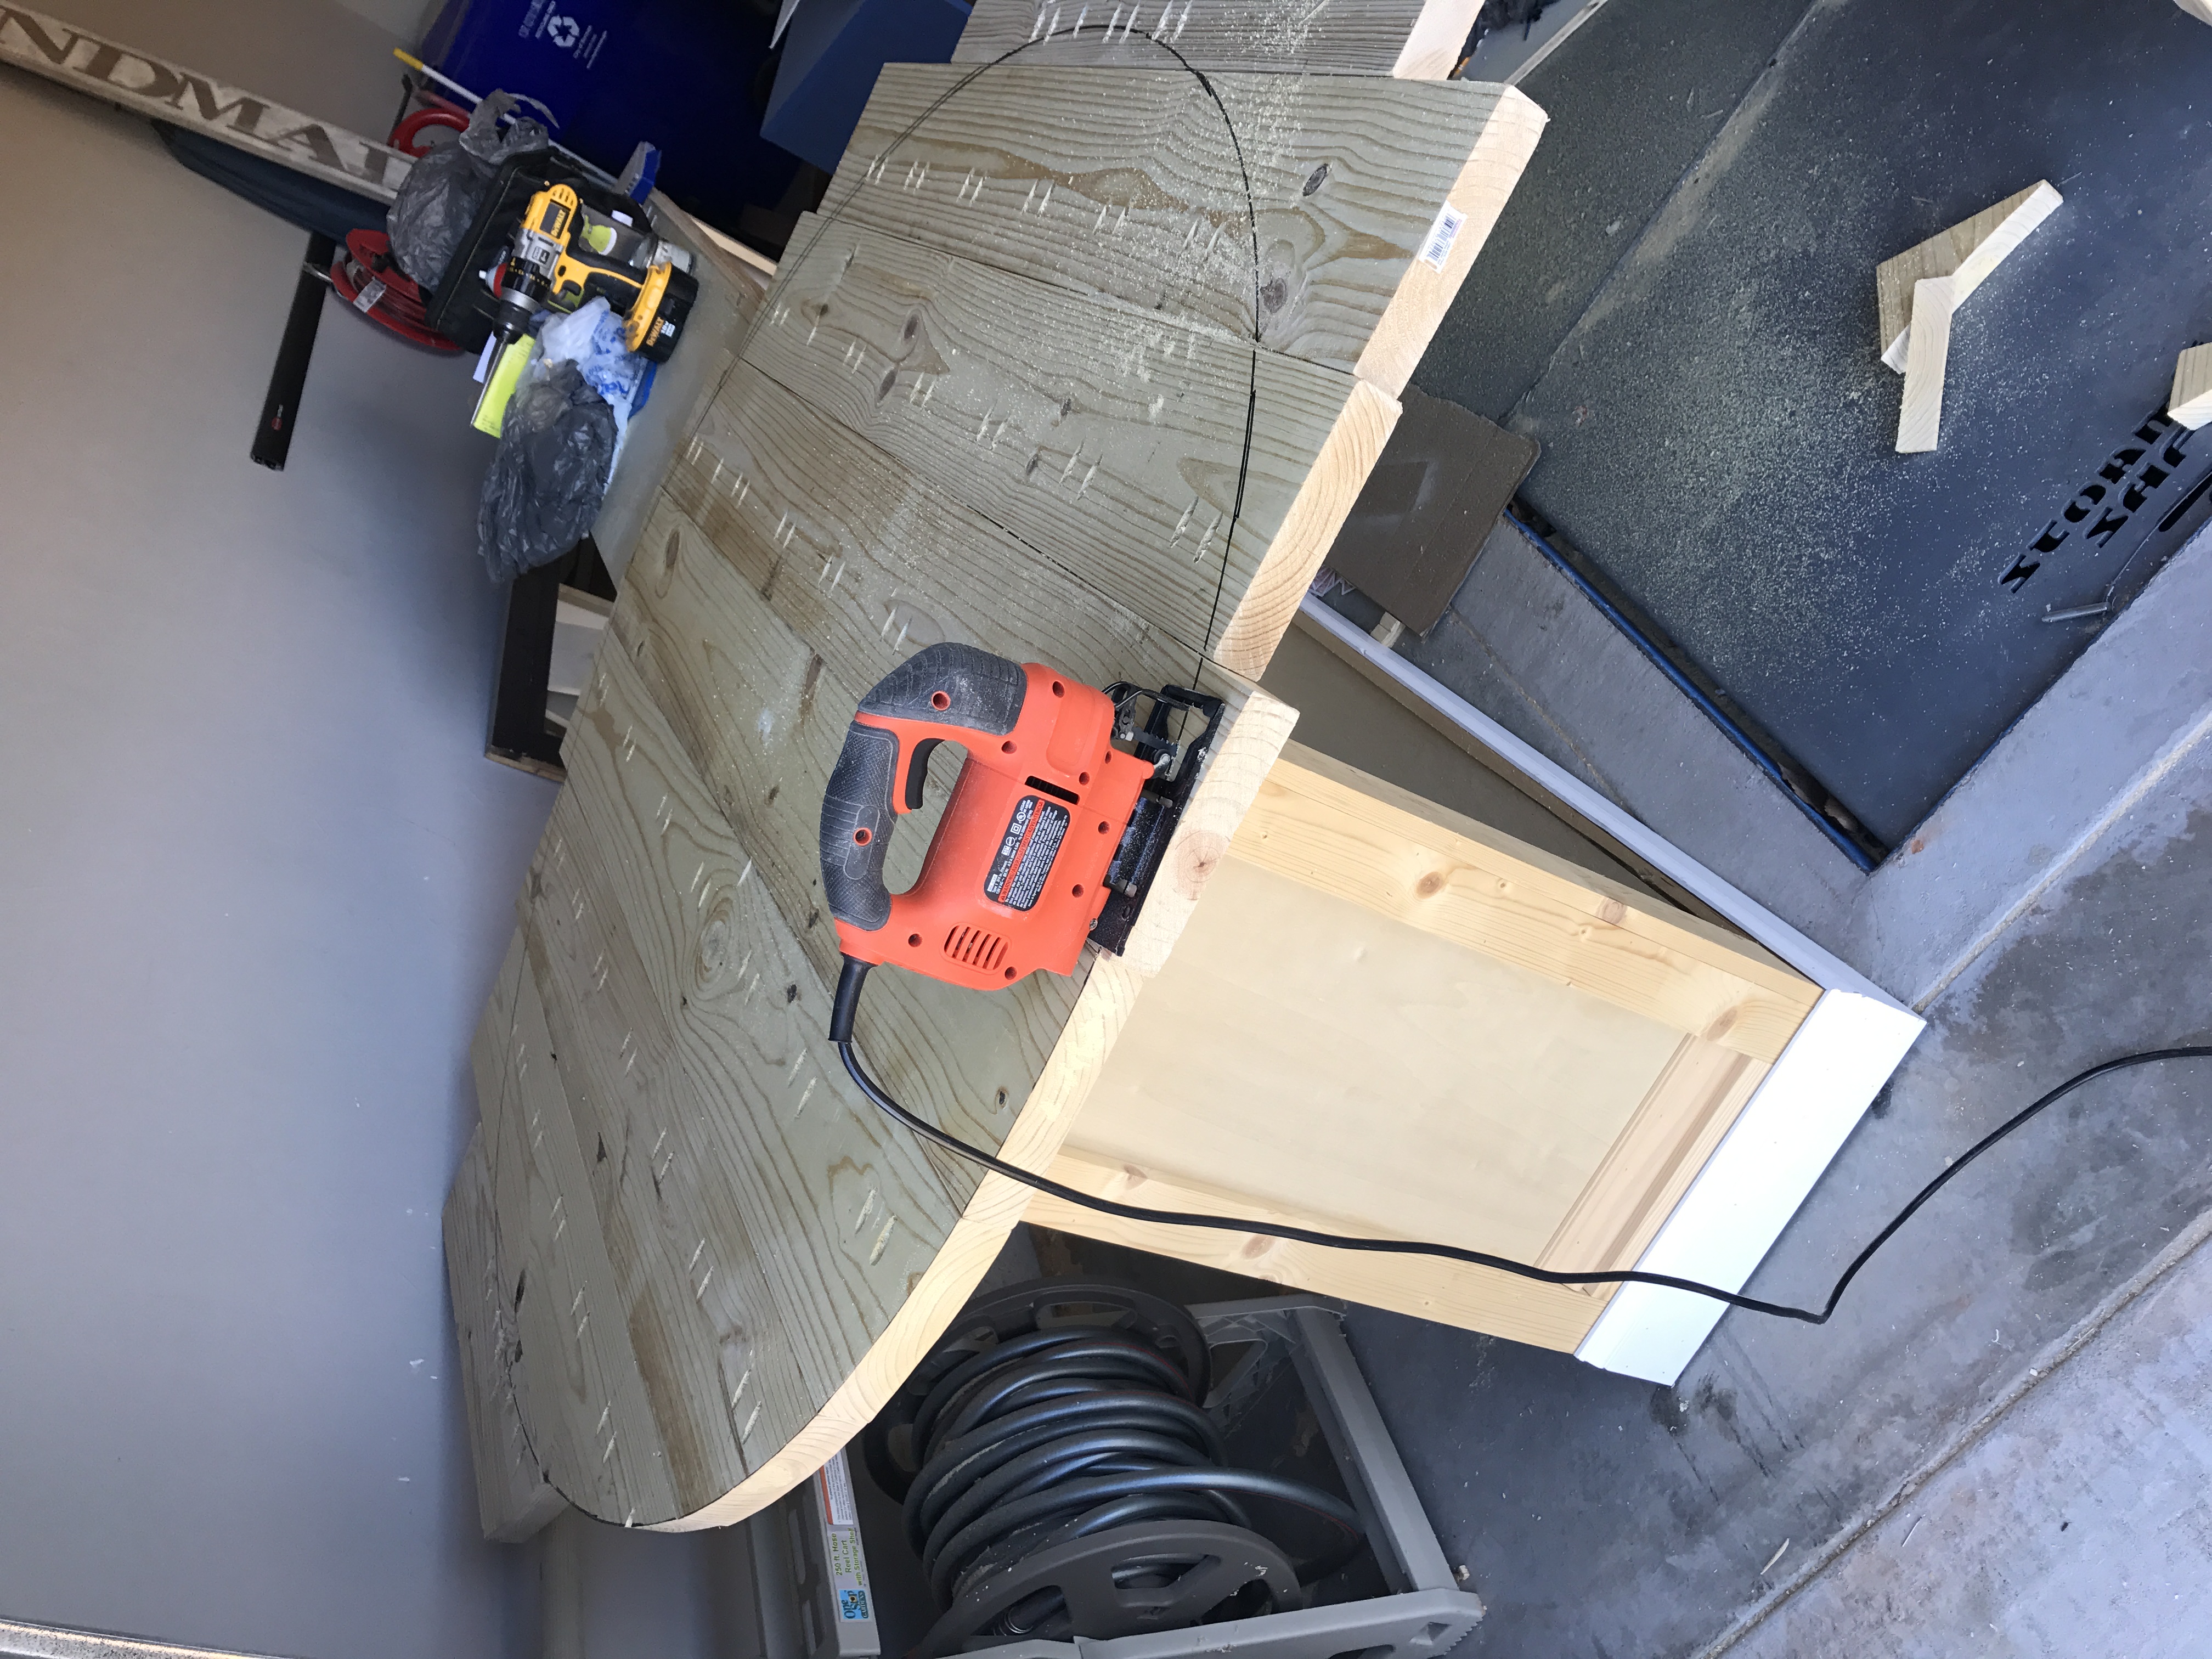
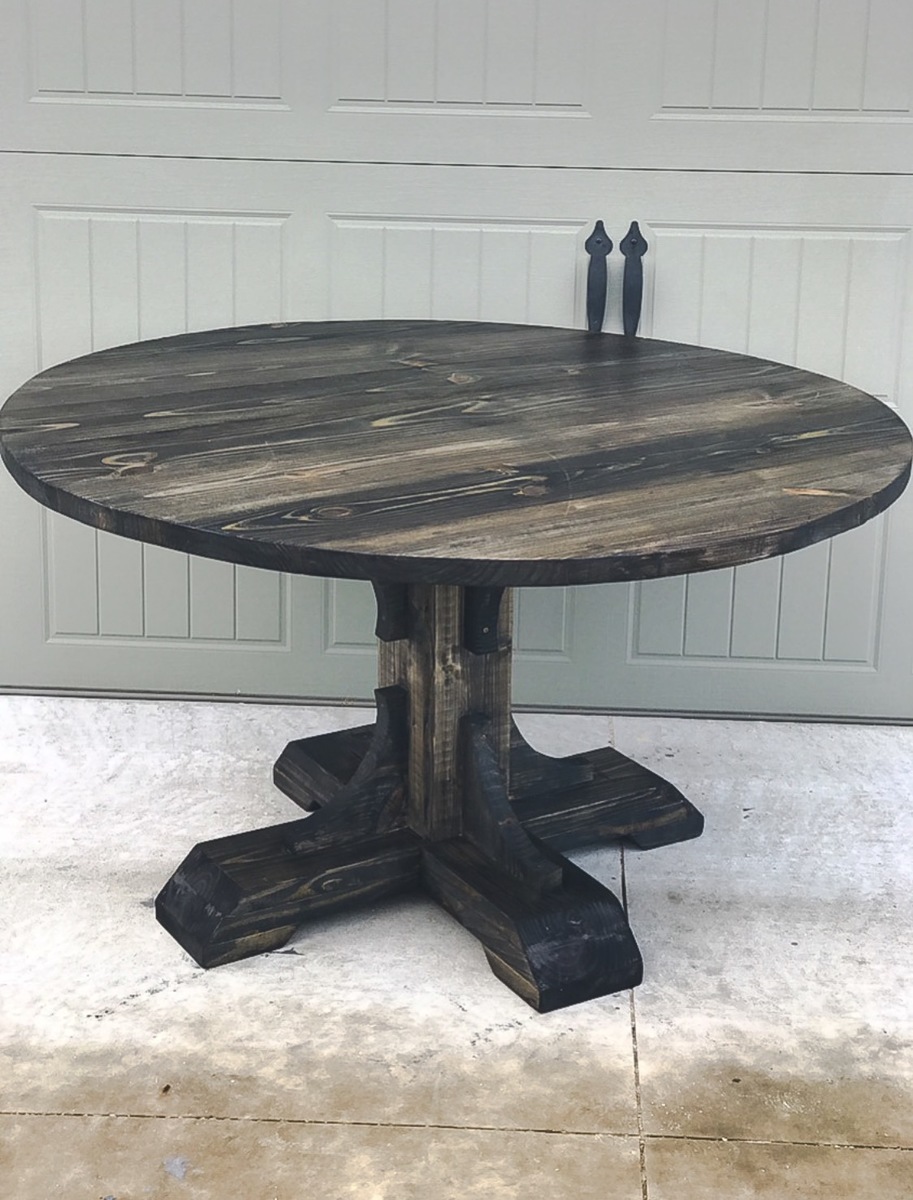
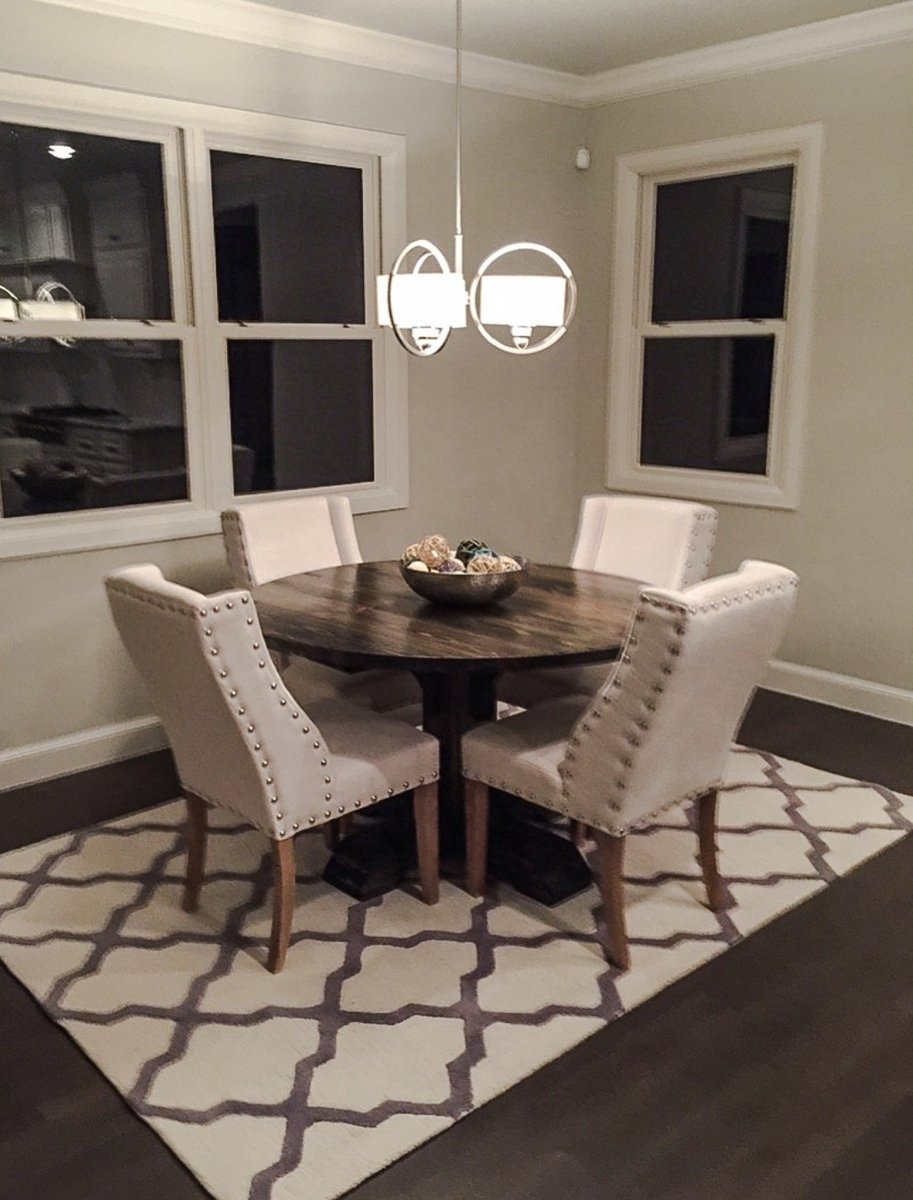
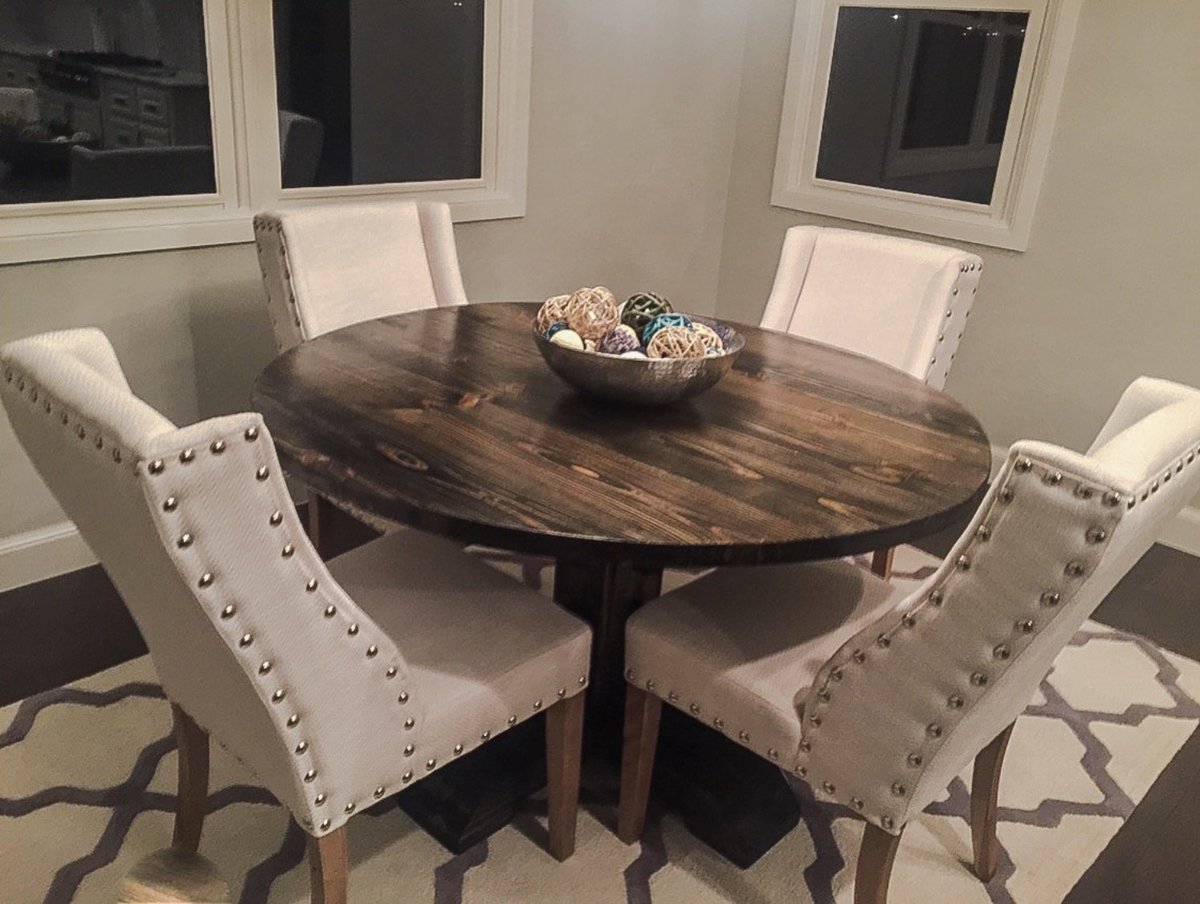
54" Round Pedestal Table
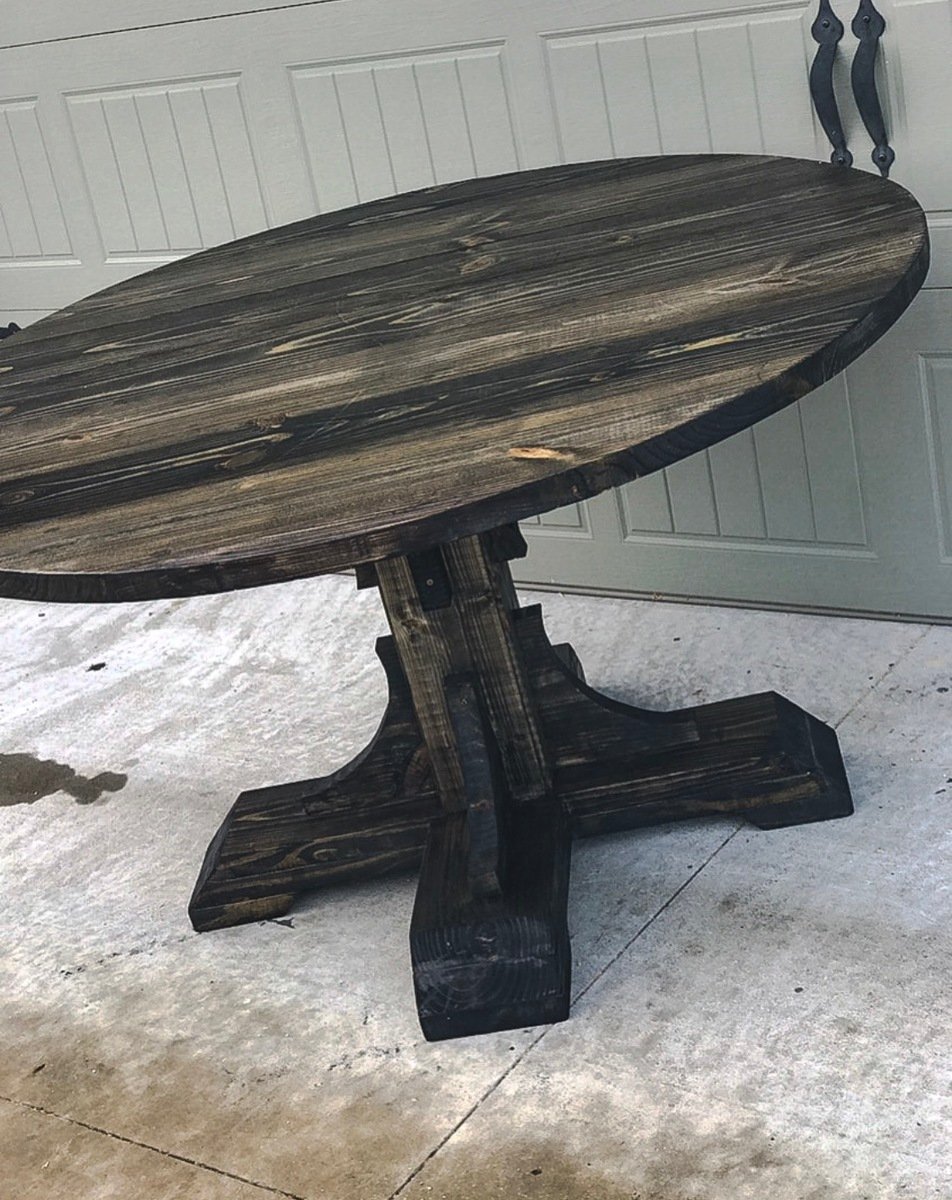
This was such a fun build. Instead of the square table top I opted for a 54" round table top and I also altered the plans for the base. I upped the size for each board used to give it a chunkier look ( Ex: instead of 2x4s, I used 2x6s and so on)
Built from Plan(s)
Estimated Cost
$110
Estimated Time Investment
Weekend Project (10-20 Hours)
Finish Used
1 Coat Minwax - Wood Conditioner
1 Coat Minwax - Ebony
3 Coats Minwax - Polycrylic
1 Coat Minwax - Ebony
3 Coats Minwax - Polycrylic
Recommended Skill Level
Intermediate
Comments
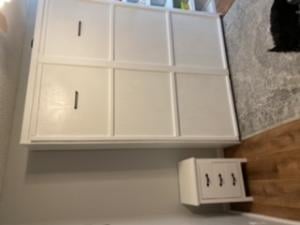
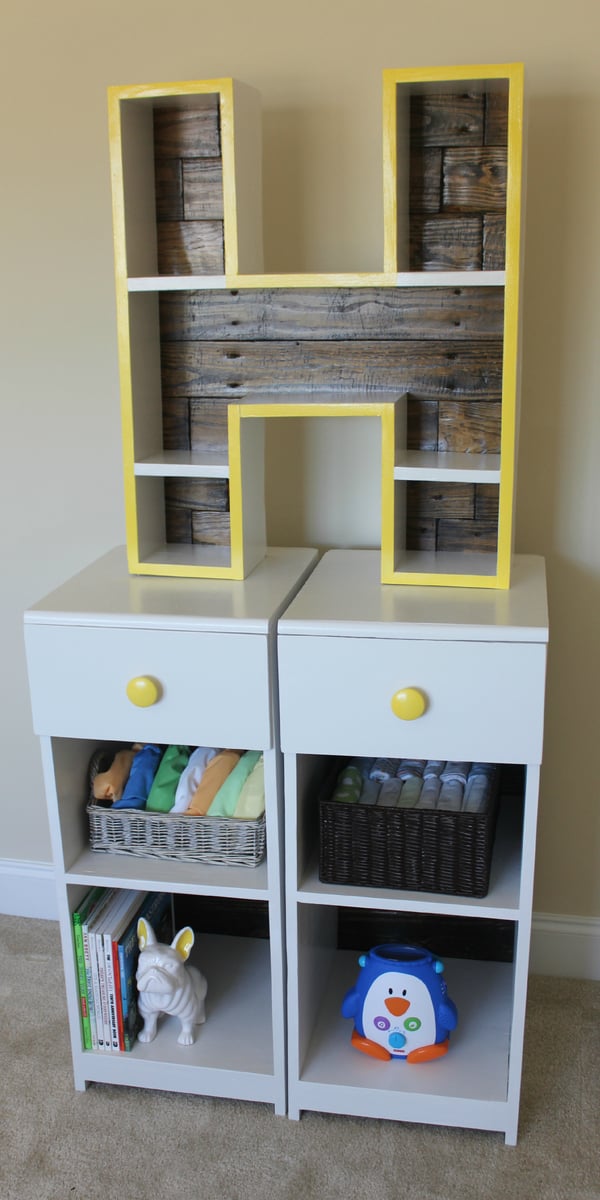
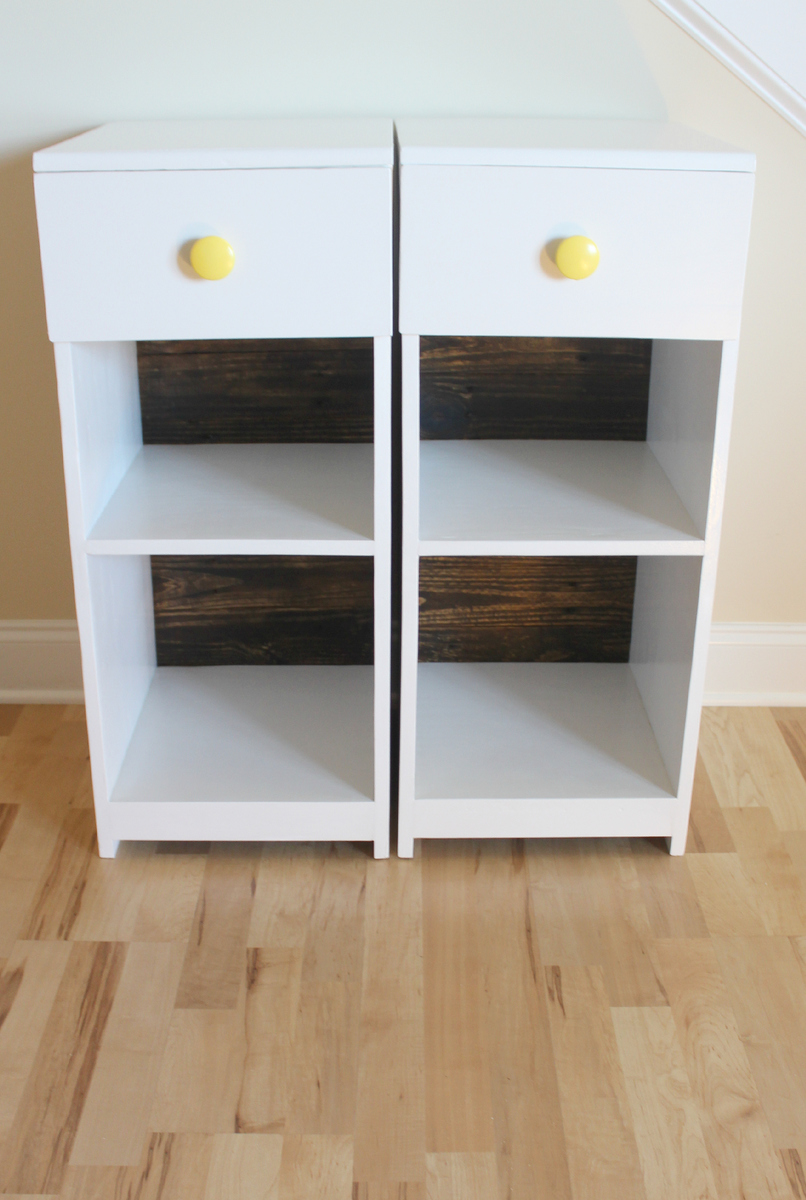
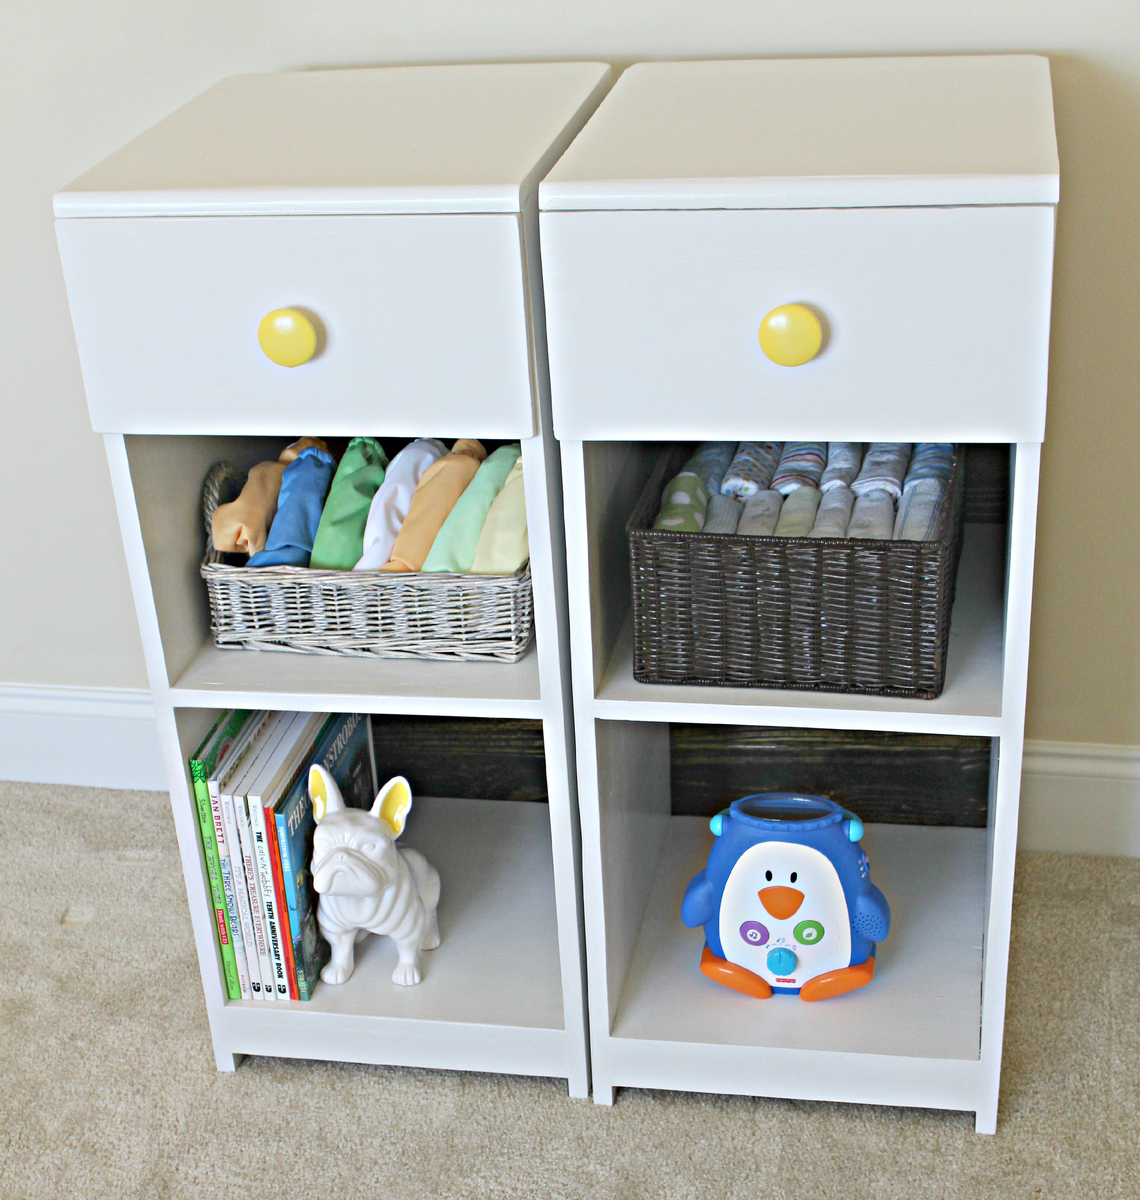
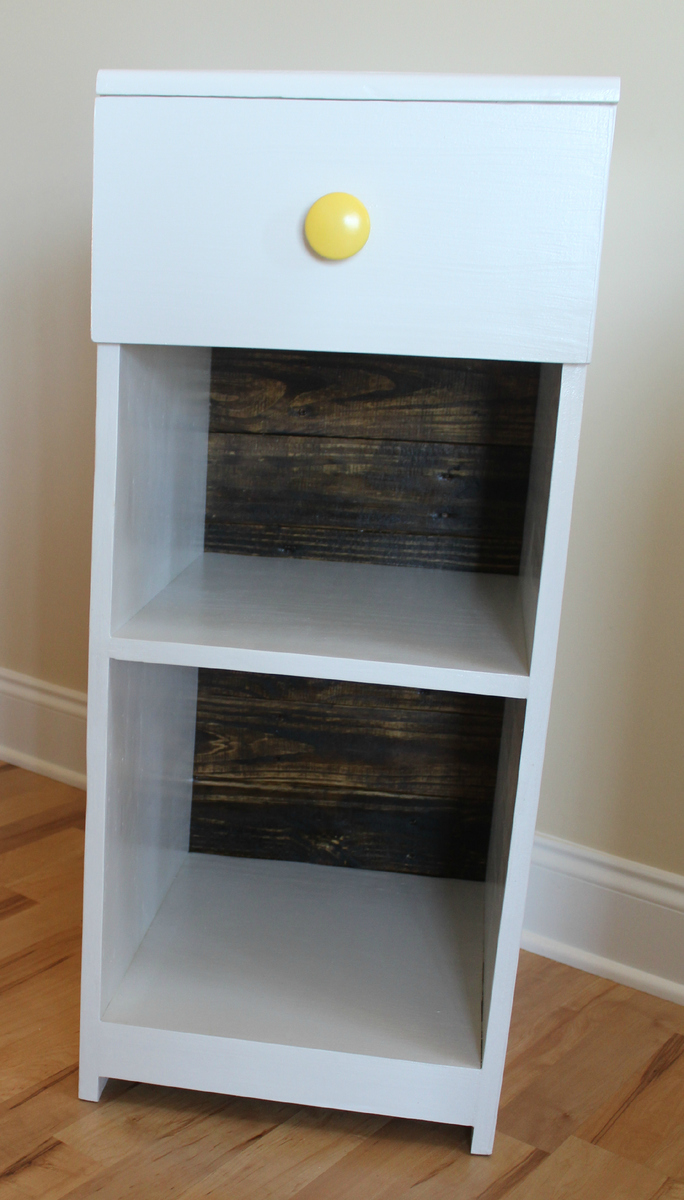
Madison Changing Table: Part 1 (Side Bases)
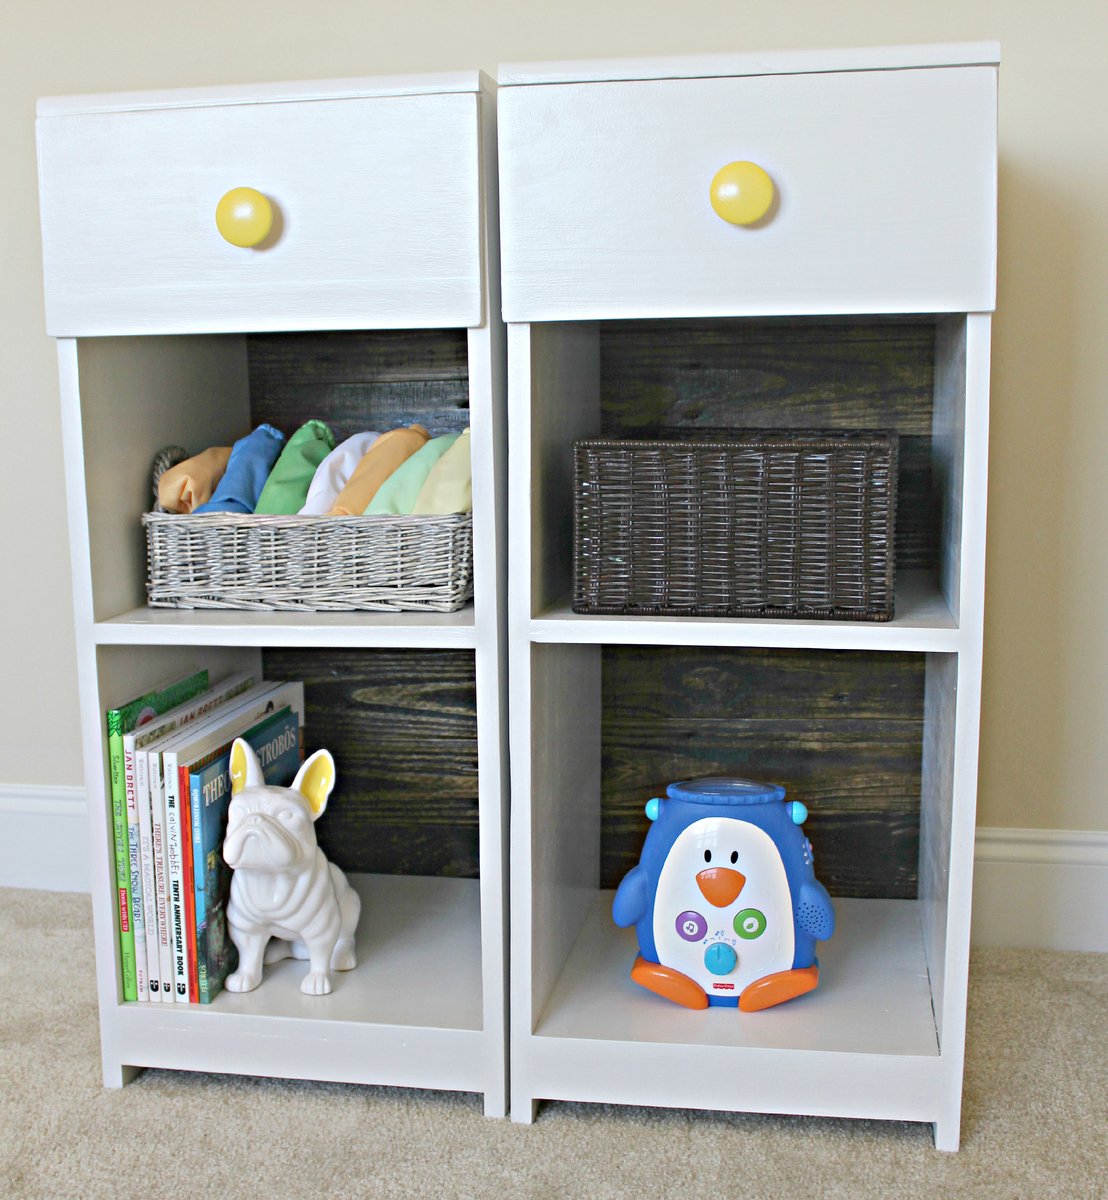
Still working on part 2 and part 3 of this project. We've been eyeballing this project for awhile and are so excited with the results! We love that we can potentially use these as bedside tables in the future.
We wrote out how we did everything on the blog: http://thehuth.blogspot.com/2012/10/madison-changing-table-part-1-side-…
Built from Plan(s)
Estimated Cost
$60 (for both tables)
Estimated Time Investment
Weekend Project (10-20 Hours)
Finish Used
Behr Irish Mist Paint and Minwax Satin Polycrylic
Recommended Skill Level
Beginner
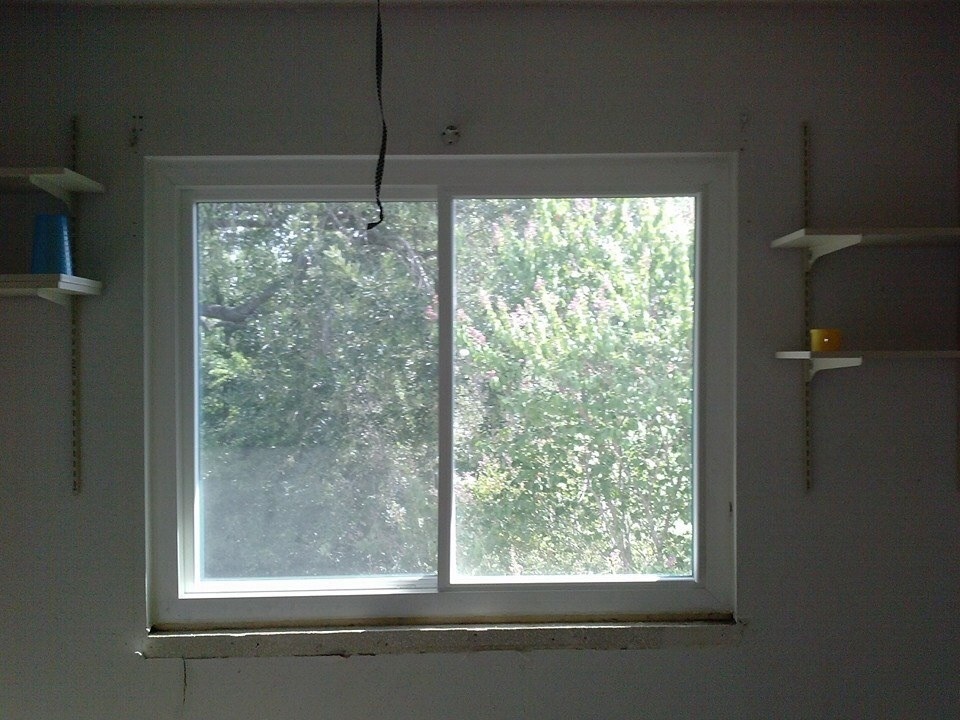
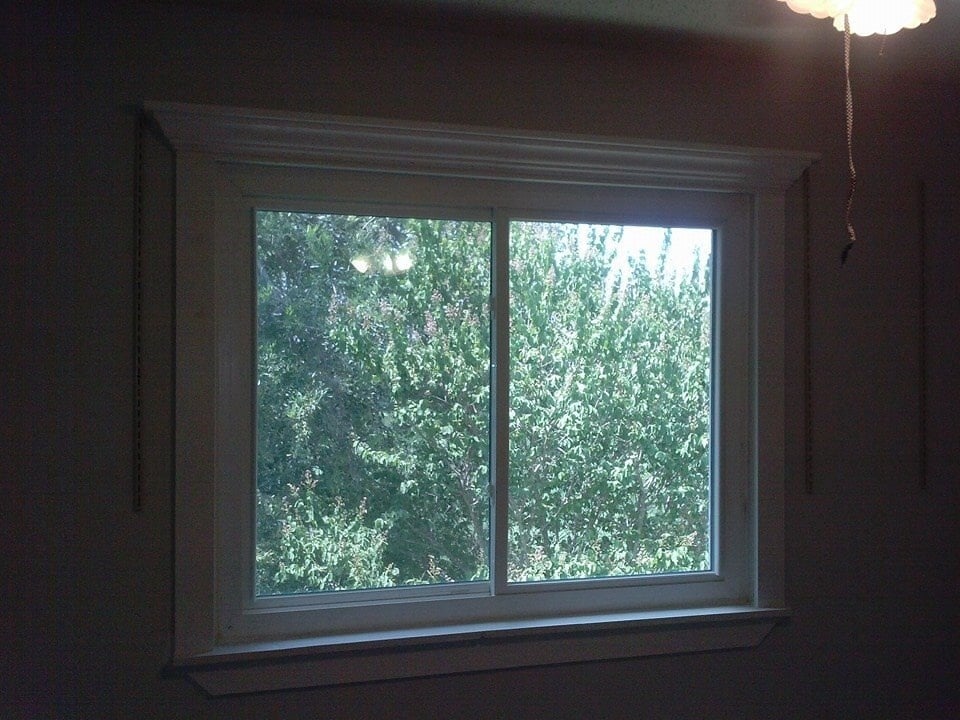
Crown ledges used as trim for window!
I took the plan for the crown ledges and put it above the window then added pre primed 1x4s as the trim also.

Built from Plan(s)
Estimated Time Investment
Afternoon Project (3-6 Hours)
Recommended Skill Level
Intermediate
First Project

First try at building something. Start up cost in tools is not reflected in the estimated cost. Learned a couple of valuable lessons in cut accuracy and order of work. For us, we will buy/cut/sand/paint/assemble. Dont let Home Depot cut your plywood. They did a terrible job.
Estimated Cost
$30
Estimated Time Investment
Day Project (6-9 Hours)
Finish Used
Valspar Furniture Paint
Recommended Skill Level
Beginner
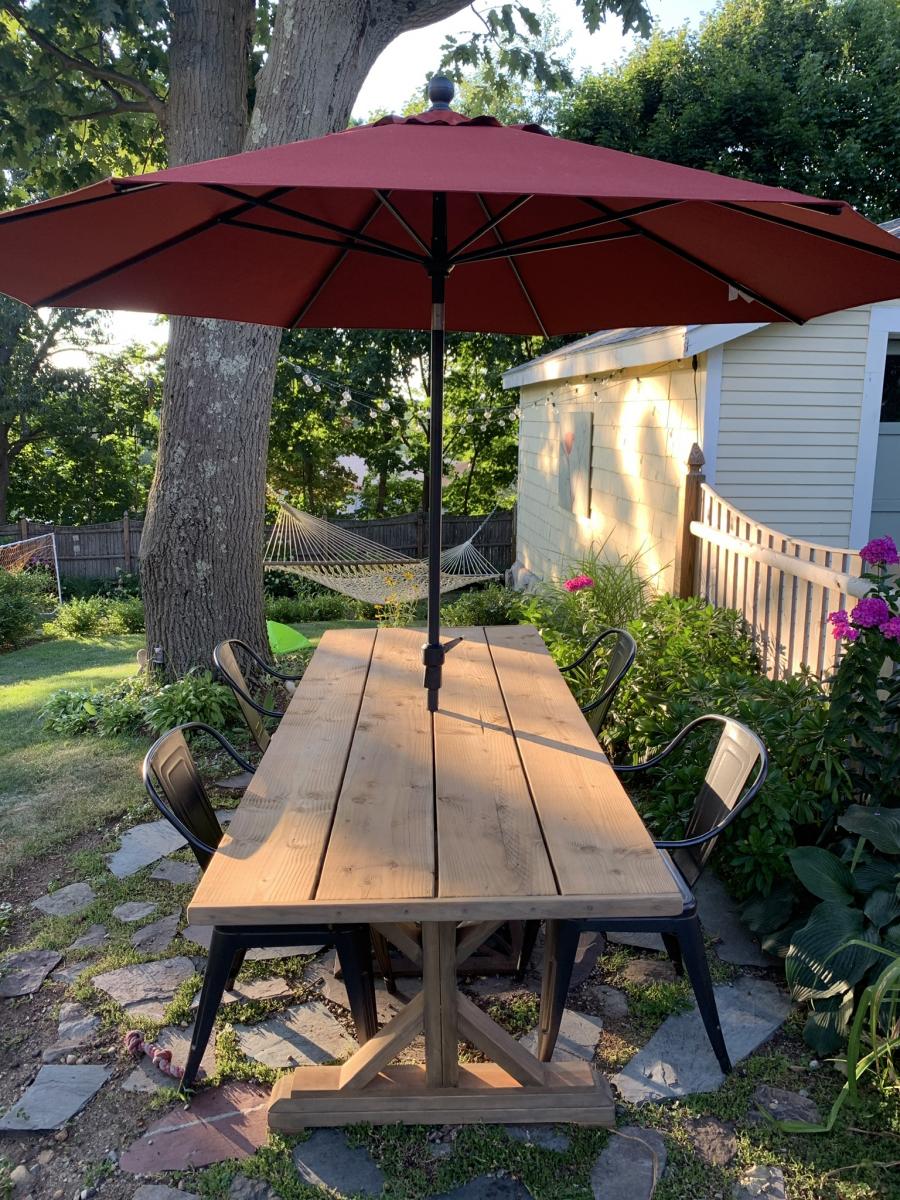
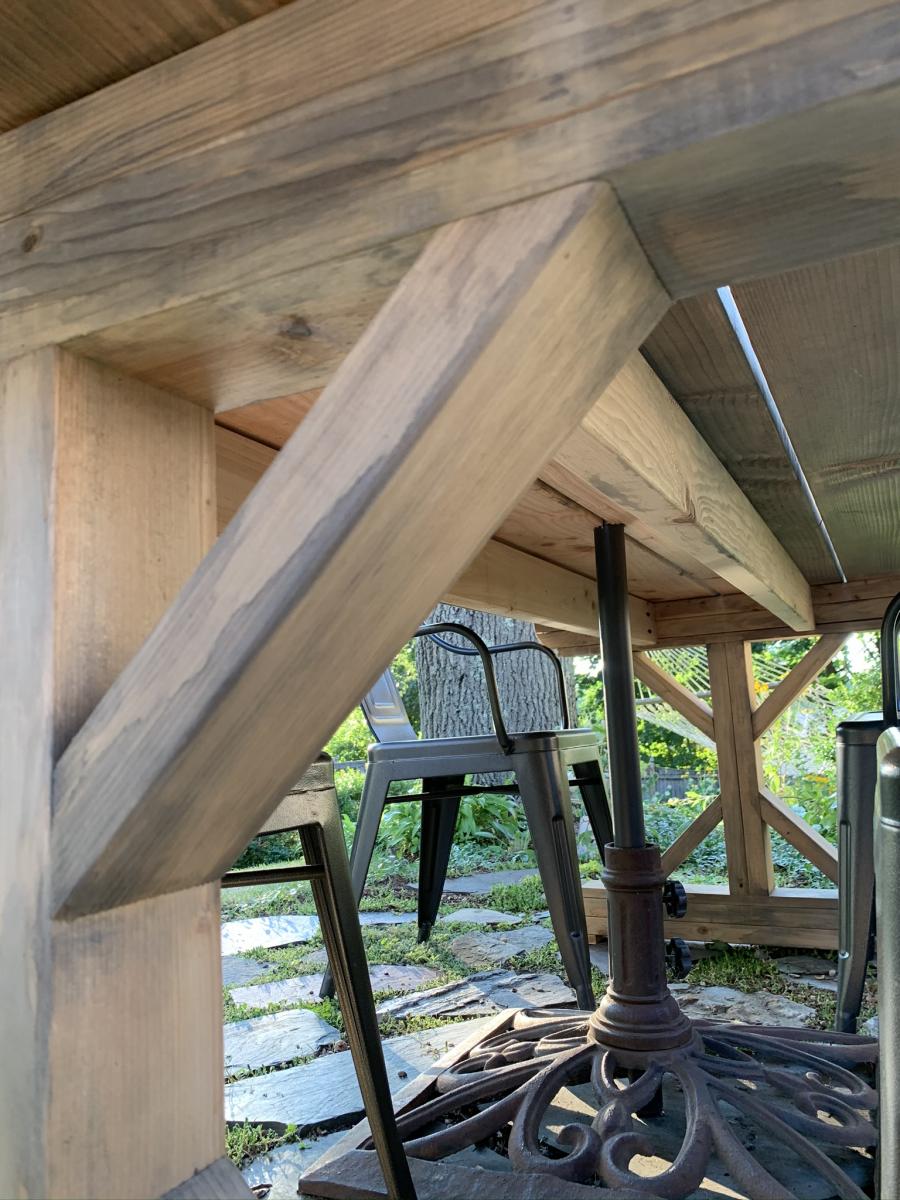
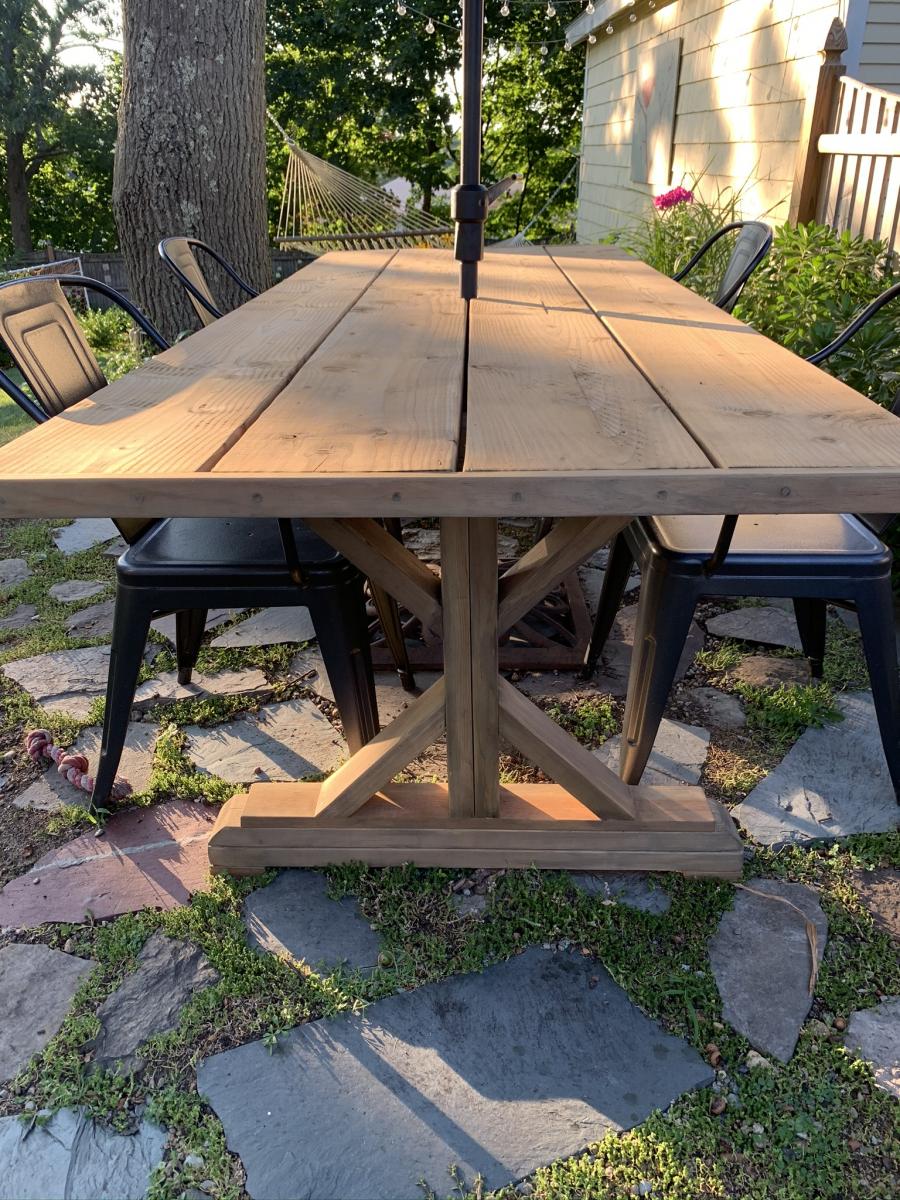
Fancy X Farmhouse with umbrella

I built this for use as an outdoor patio table suitable for an umbrella by eliminating the center truss below the table. Instead, I used my Kreg Jig to join the two sets of legs with 2 2x4s each set about 6 inches off center directly under table top. (See picture). I used Douglas Fir for most of this build. I also added a 1x2 cap to the bread board ends of the table top to help stabilize it against warping. I secured the table top to the frame with countersunk screws under glued wood plugs since I needed to allow a gap between boards for water drainage. I used the Varathane wood weathering product to soften the “new wood” look. I helped preserve the wood with a coat of Benjamin Moore’s clear Arborcoat. This acrylic product will allow the wood to continue to gray naturally. I recommend this as an intermediate project due to the awkwardness of joining the 45 degree angle cuts. Having a second set of hands here would have been very helpful.

Built from Plan(s)
Estimated Cost
$150
Estimated Time Investment
Day Project (6-9 Hours)
Finish Used
Varathane wood weathering
Benjamin Moore Arborcoat clear
Applied with foam brushes.
Benjamin Moore Arborcoat clear
Applied with foam brushes.
Recommended Skill Level
Intermediate
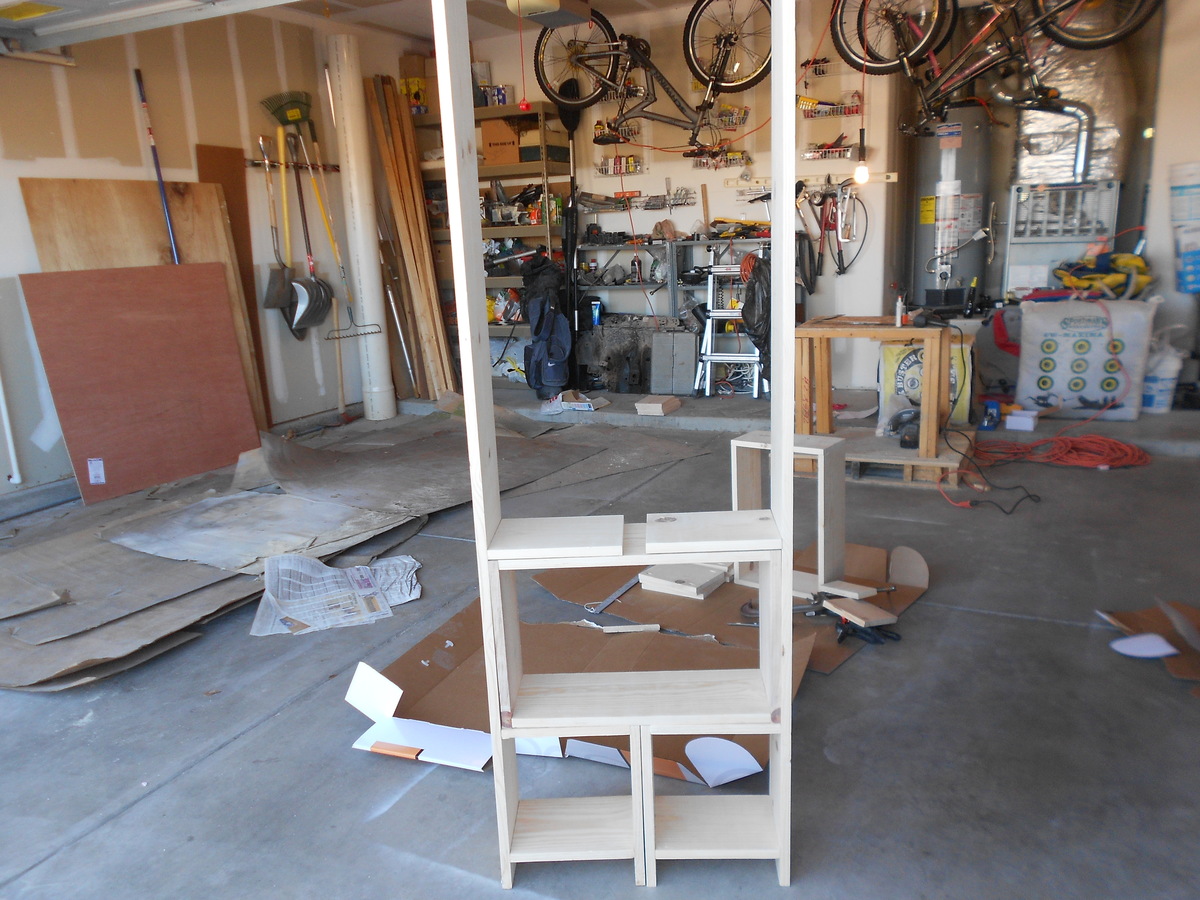
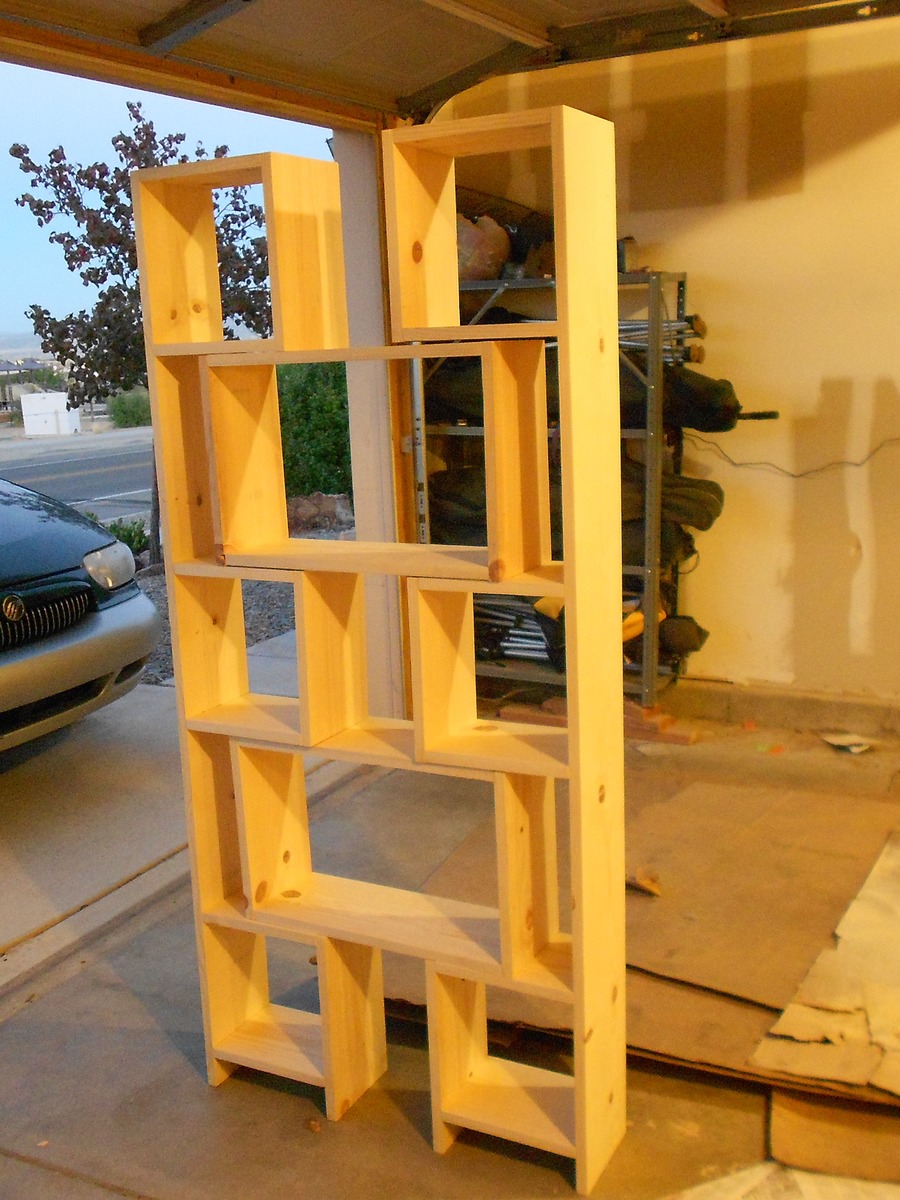
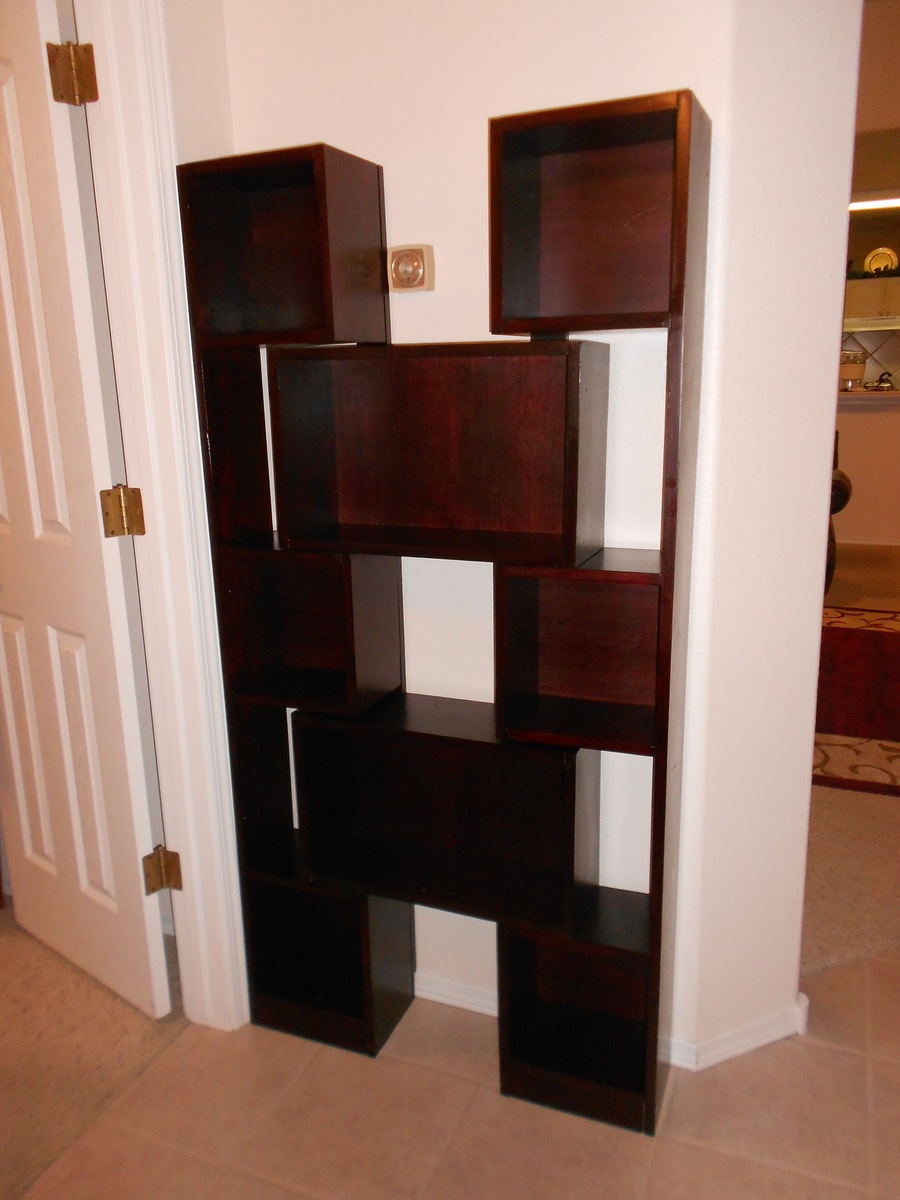
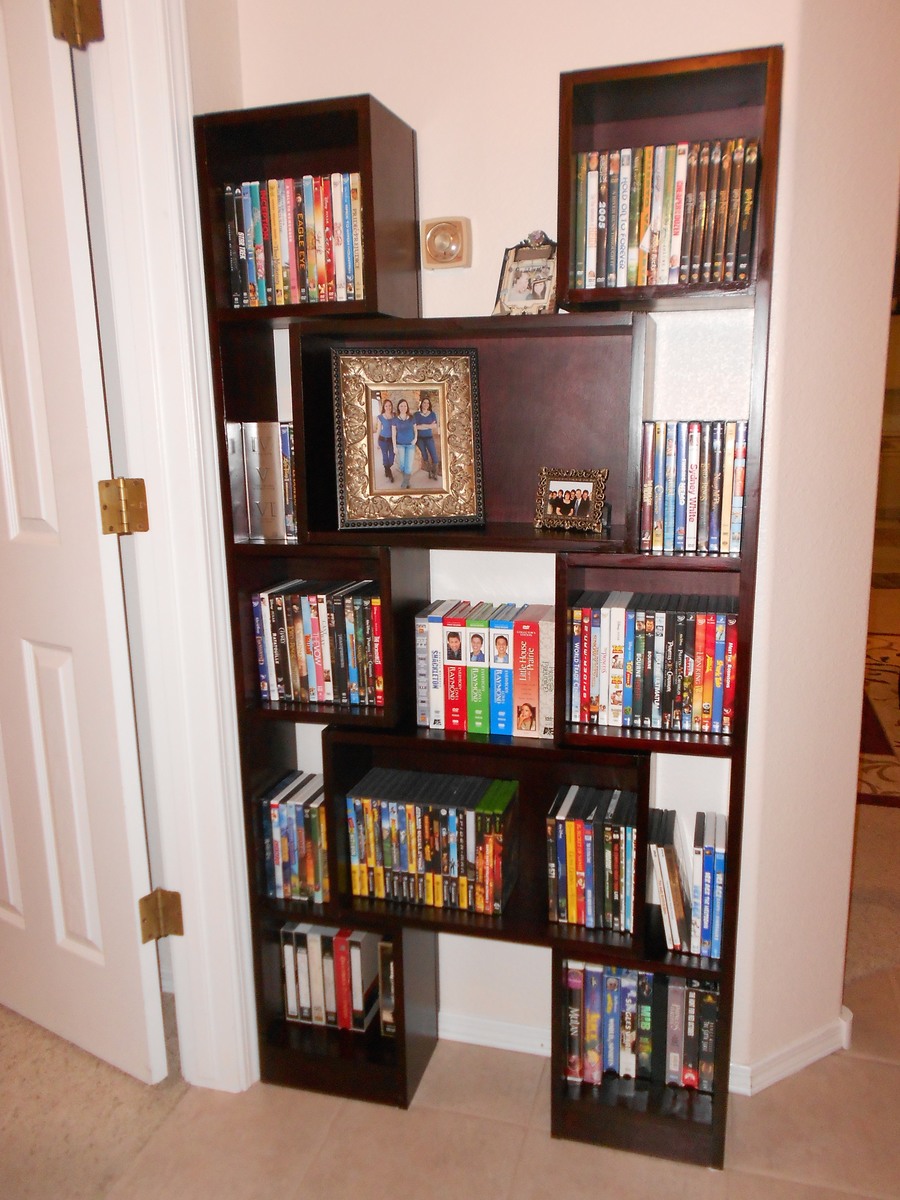
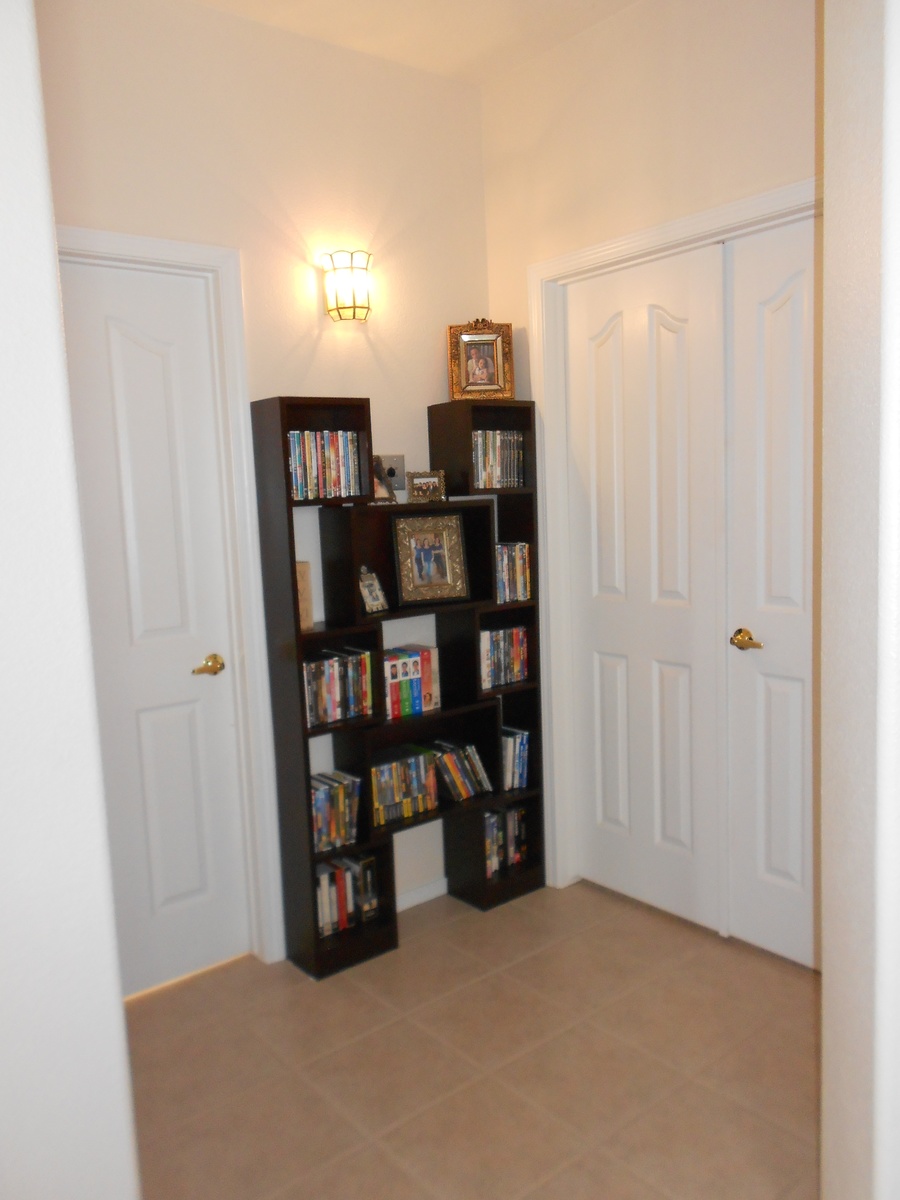
Fits around my thermostat!!! Downsized Puzzle Bookcase for DVD Storage
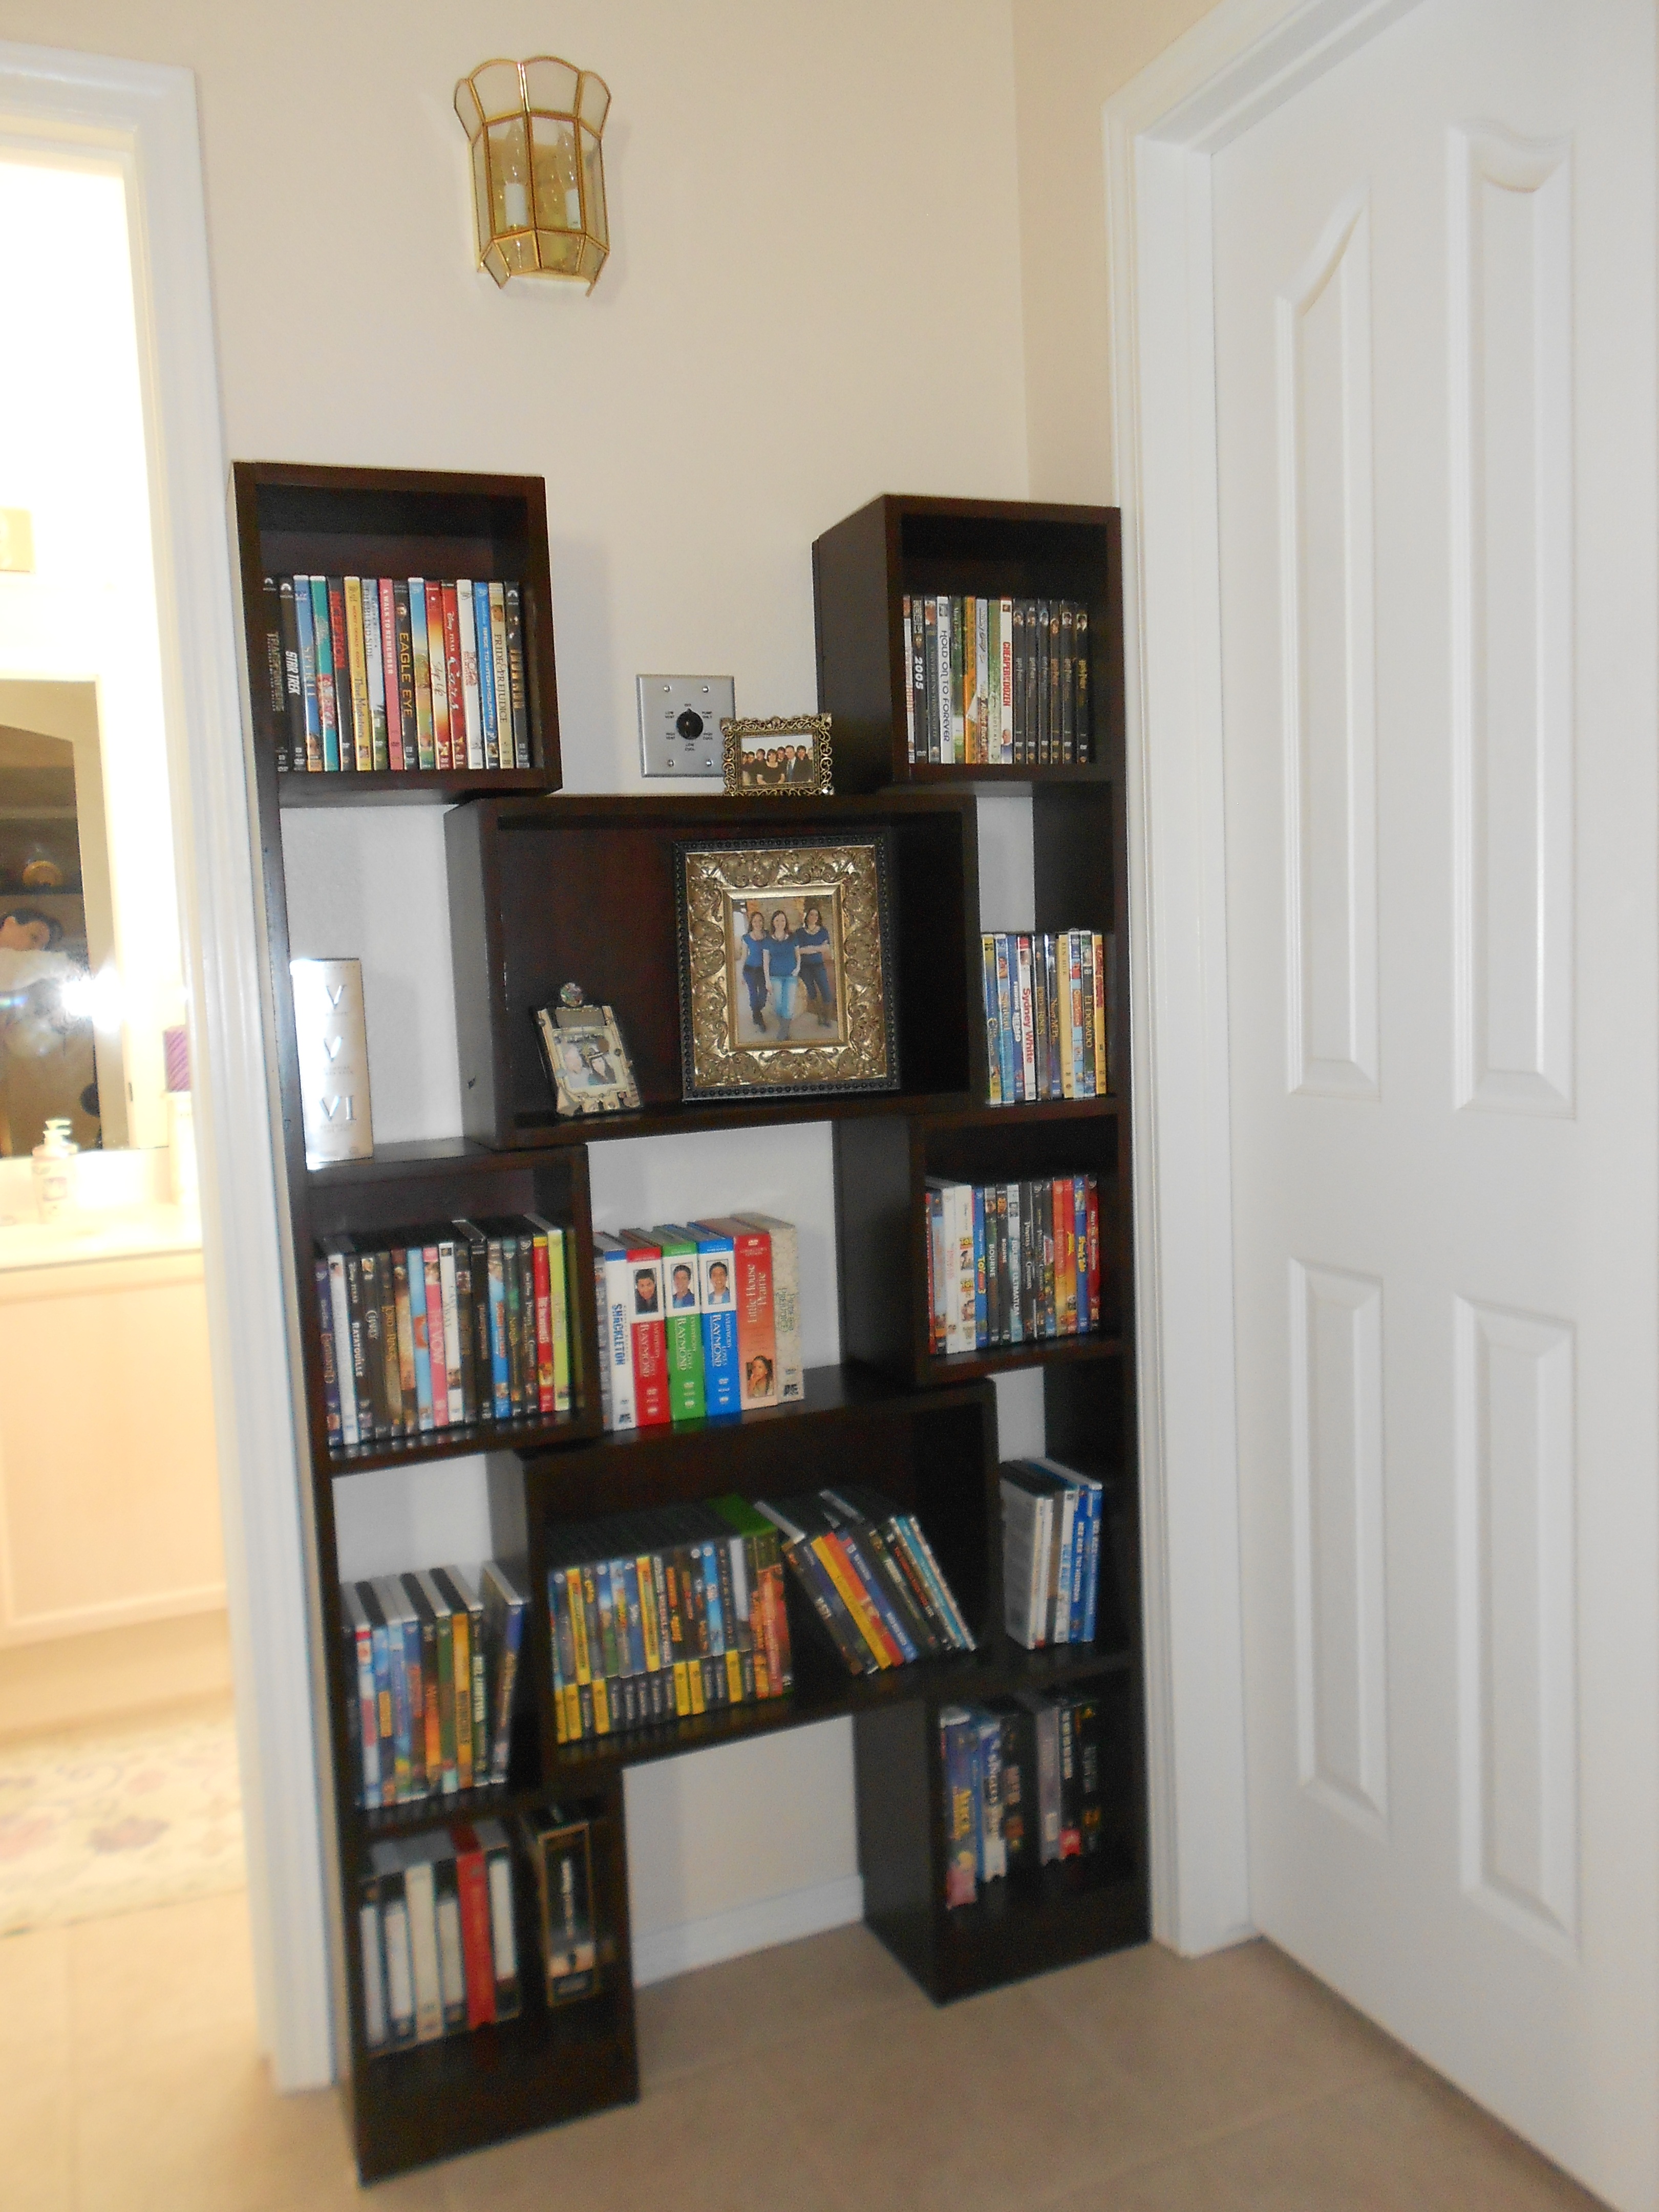
This was my first build and I learned a lot, like it’s better to just invest in some decent clamps at the beginning of the project rather than waiting until near completion. Anyone with any experience at all and with more than 2 clamps could have finished this project in a fraction of the time. However, I enjoyed every minute of it. This project took a week to complete only because of the wait time between finishes. The bookcase itself went together surprisingly fast, especially once I got more clamps. The hardest part was making it square. This plan was the perfect solution for my thermostat placement problem. I had been searching high and low for DVD storage to fit within the confines of my space. It had to be low profile to leave the doorway clear and it had to allow the thermostat on the wall to be accessible, yet big enough and wide enough to fit all our DVDs. This puzzle design couldn’t have been any more perfect. I was so excited to find it. I just made a smaller version. It expands to exactly the space I need. Many thanks to Ana and this wonderful website! I have spent countless hours studying and reading on this website. I am now thinking about building in every spare minute I have!
Built from Plan(s)
Estimated Cost
$60
Estimated Time Investment
Week Long Project (20 Hours or More)
Finish Used
Minwax Red Elm Gel Stain and 2 coats Minwax Bombay Mahogany Poly Shades
Recommended Skill Level
Starter Project
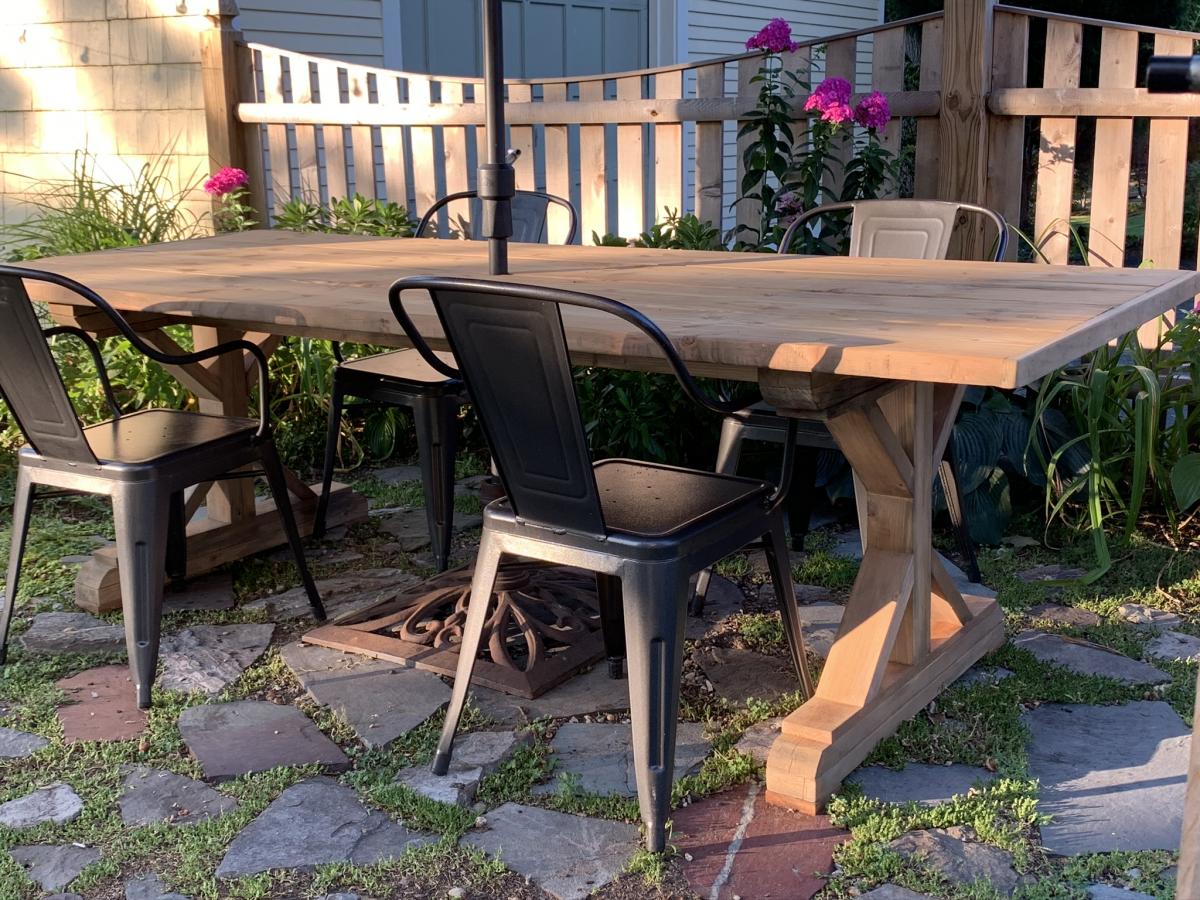
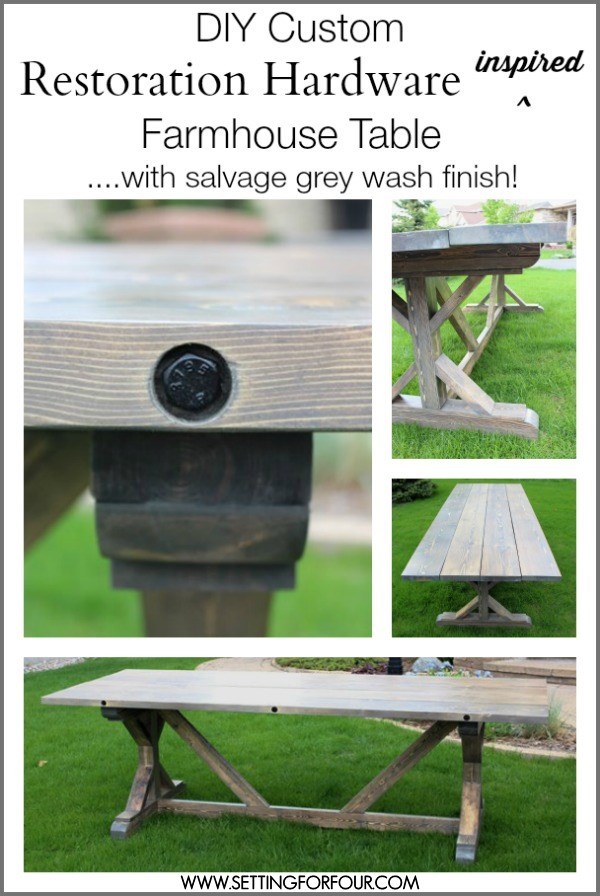
$157 Custom Farmhouse Table with Bolted Plank Top - Restoration Hardware Inspired with Salvage Grey Wash Finish
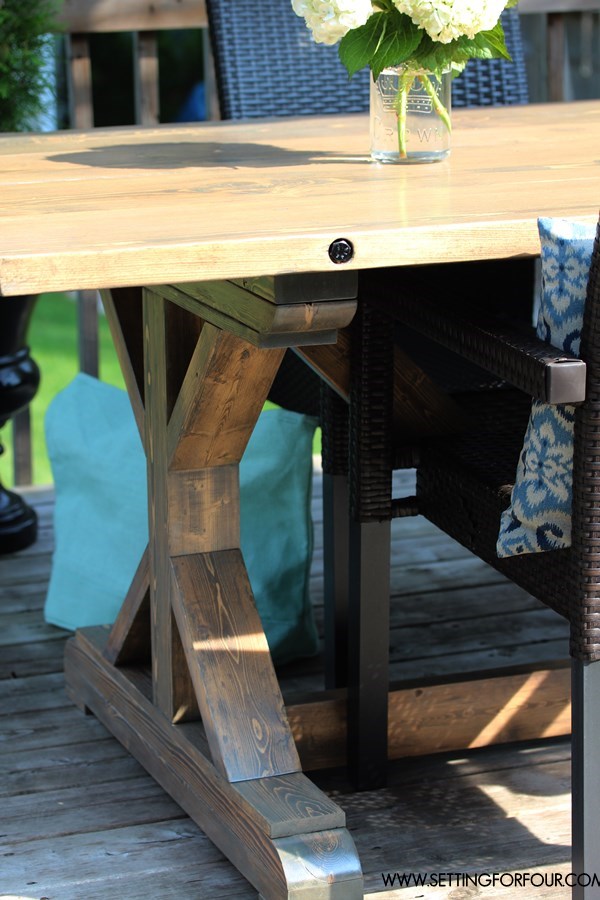
My family needed a new outdoor dining table so my husband and I made this DIY Restoration Hardware Inspired Farmhouse table with Salvage Grey Wash Finish! I combined two popular RH table styles, the rectangular X-base Table and the Brickmaker’s Table, to come up with this distinctive innovative design: an X-base bottom with an industrial bolted plank table top! This will blow your mind....this table cost us only $157.00 to make, just a small fraction of the the RH $4690.00 price tag for their tables! We started with Ana White's Farmhouse Table plans, added inset lag bolts to the planked top and then gave our table a customized salvage grey wash finish to add a touch of gorgeous grey to a dark walnut base layer. We've had many fun dinners on our large farmhouse table with family and friends! See my blog post for all of the steps and materials!

Built from Plan(s)
Estimated Cost
$157.00
Estimated Time Investment
Week Long Project (20 Hours or More)
Finish Used
Customized Salvage Grey Wash Finish.
Recommended Skill Level
Intermediate
Corner cubby unit
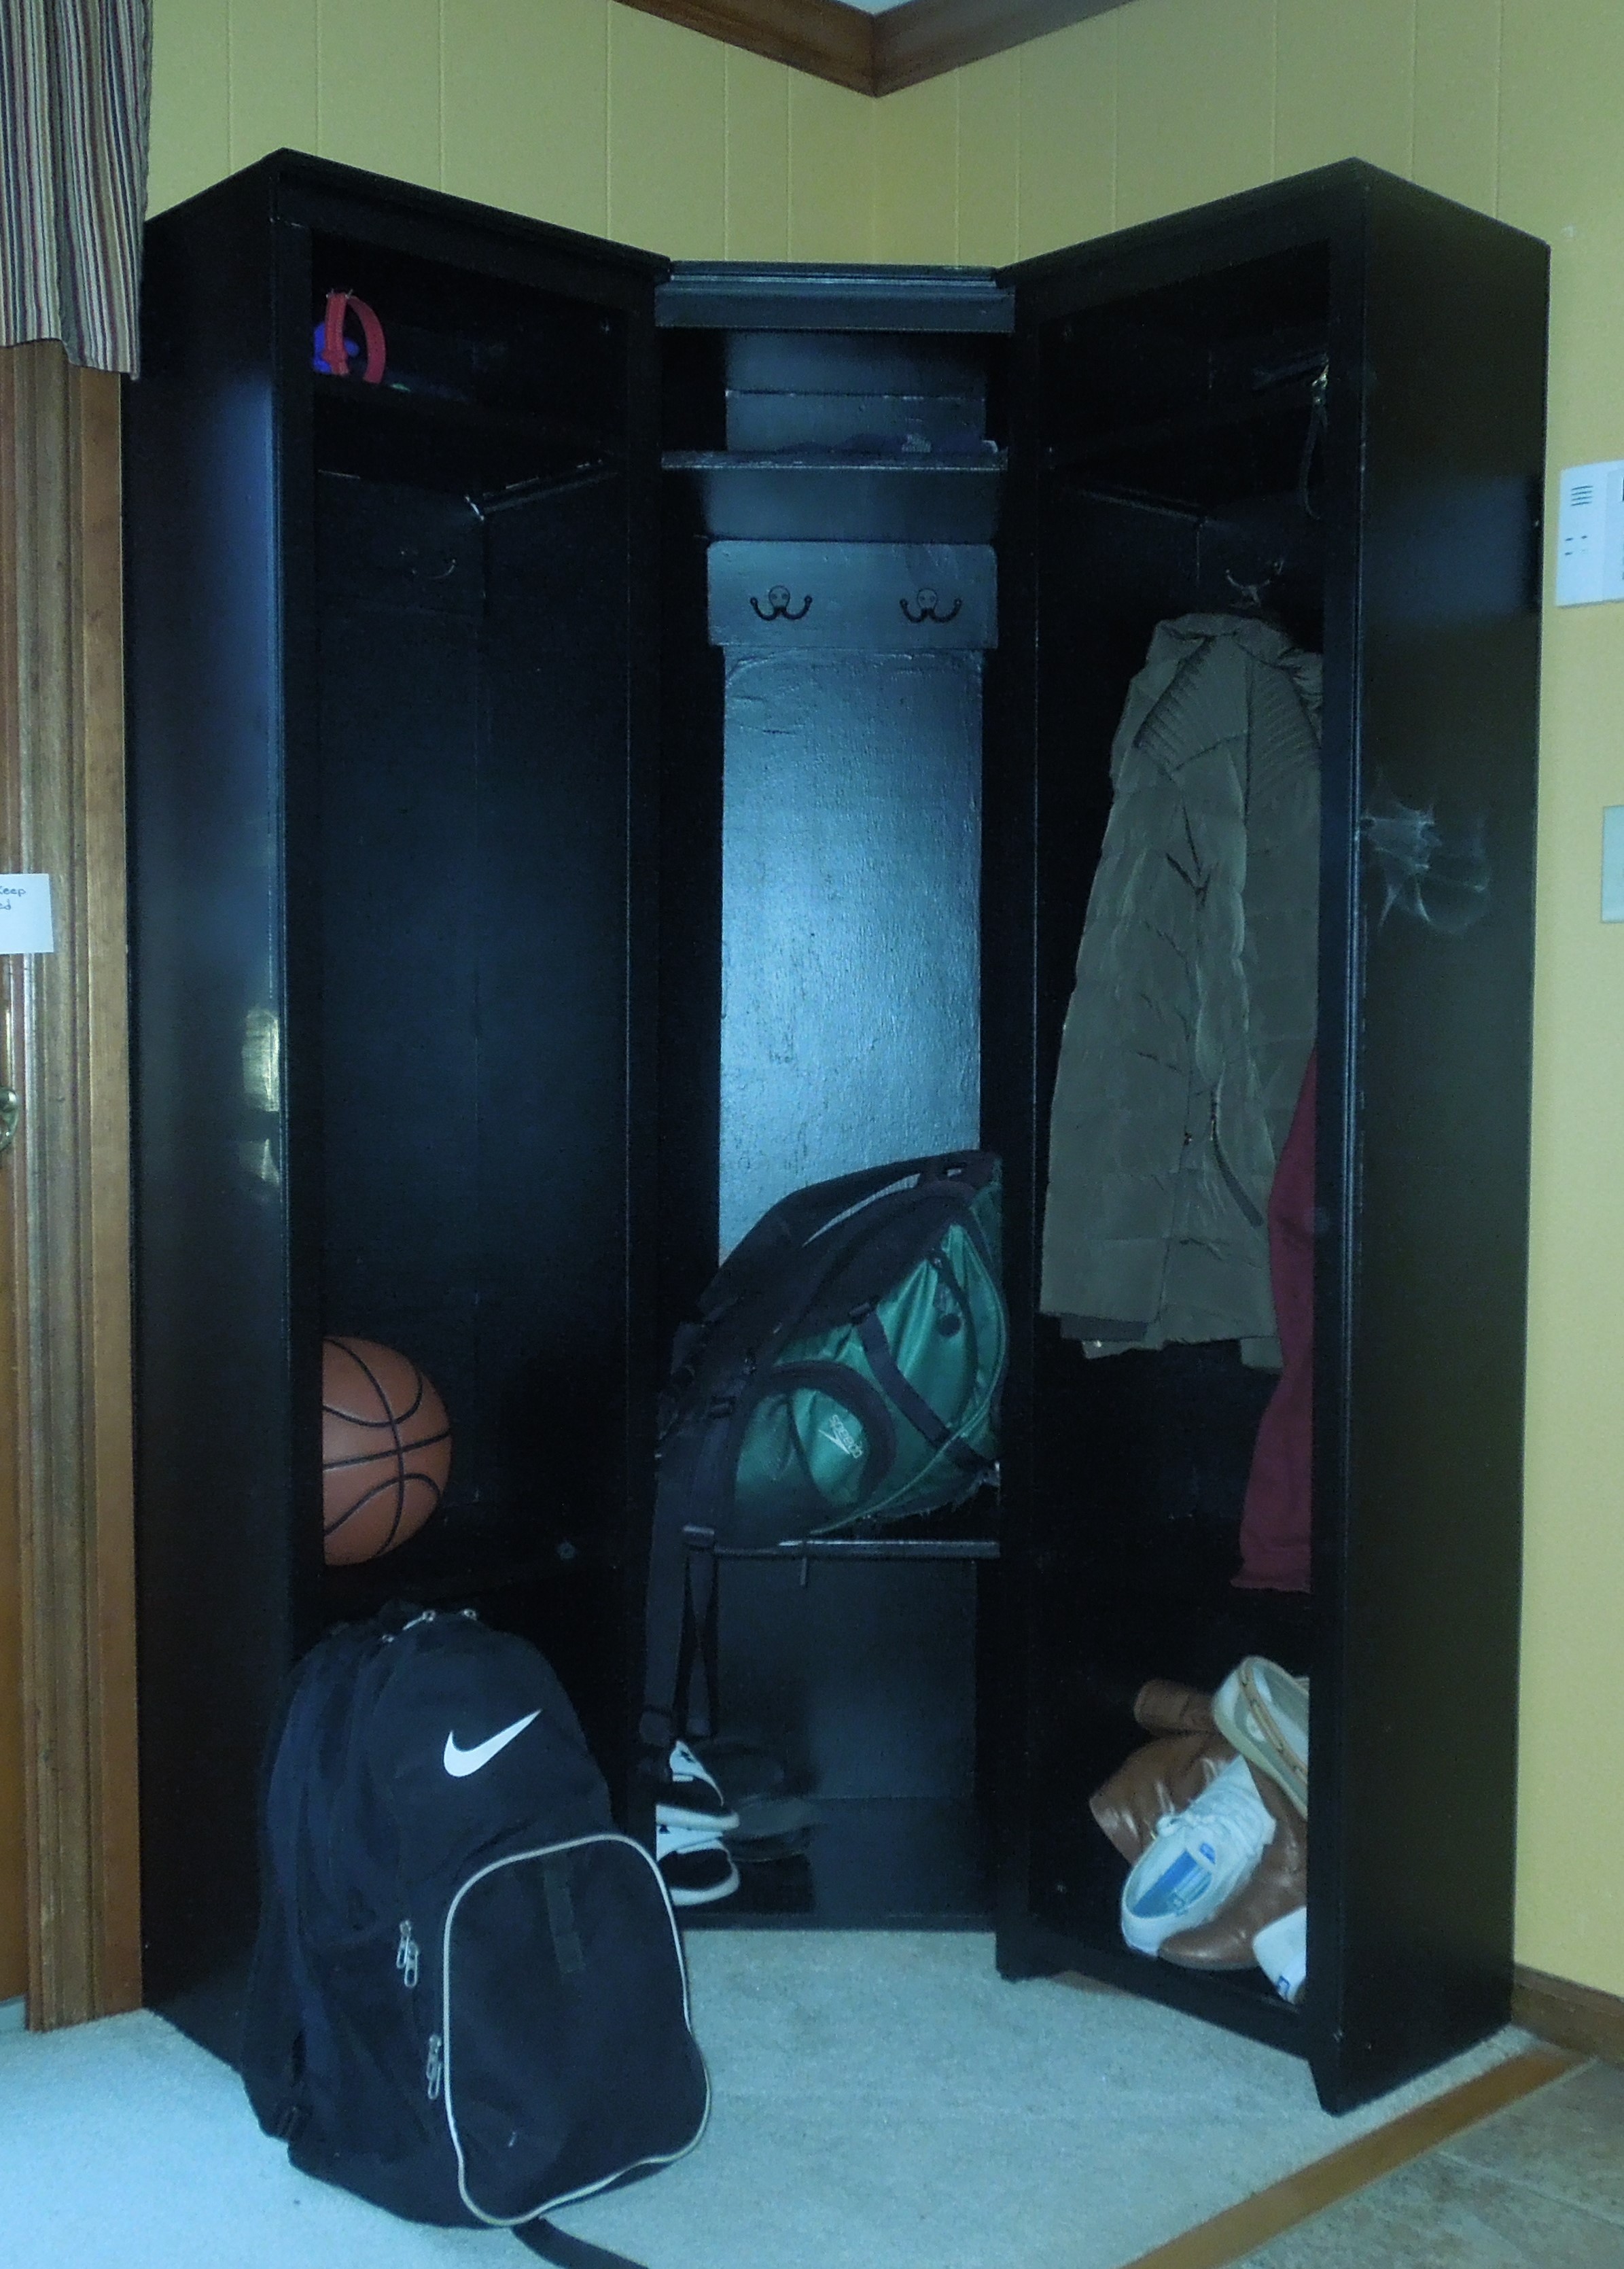
My daughter asked of I could make cubbies for three grandchildren, and the single unit on this site seemed perfect. After I made the first two we could see that there was not a good way to fit three into the designated space, so I decided to make a corner unit and bolt them together. They love it!
Built from Plan(s)
Estimated Cost
I spent about $300.
Estimated Time Investment
Week Long Project (20 Hours or More)
Finish Used
black enamel
Recommended Skill Level
Intermediate
Farmhouse King Size Bed
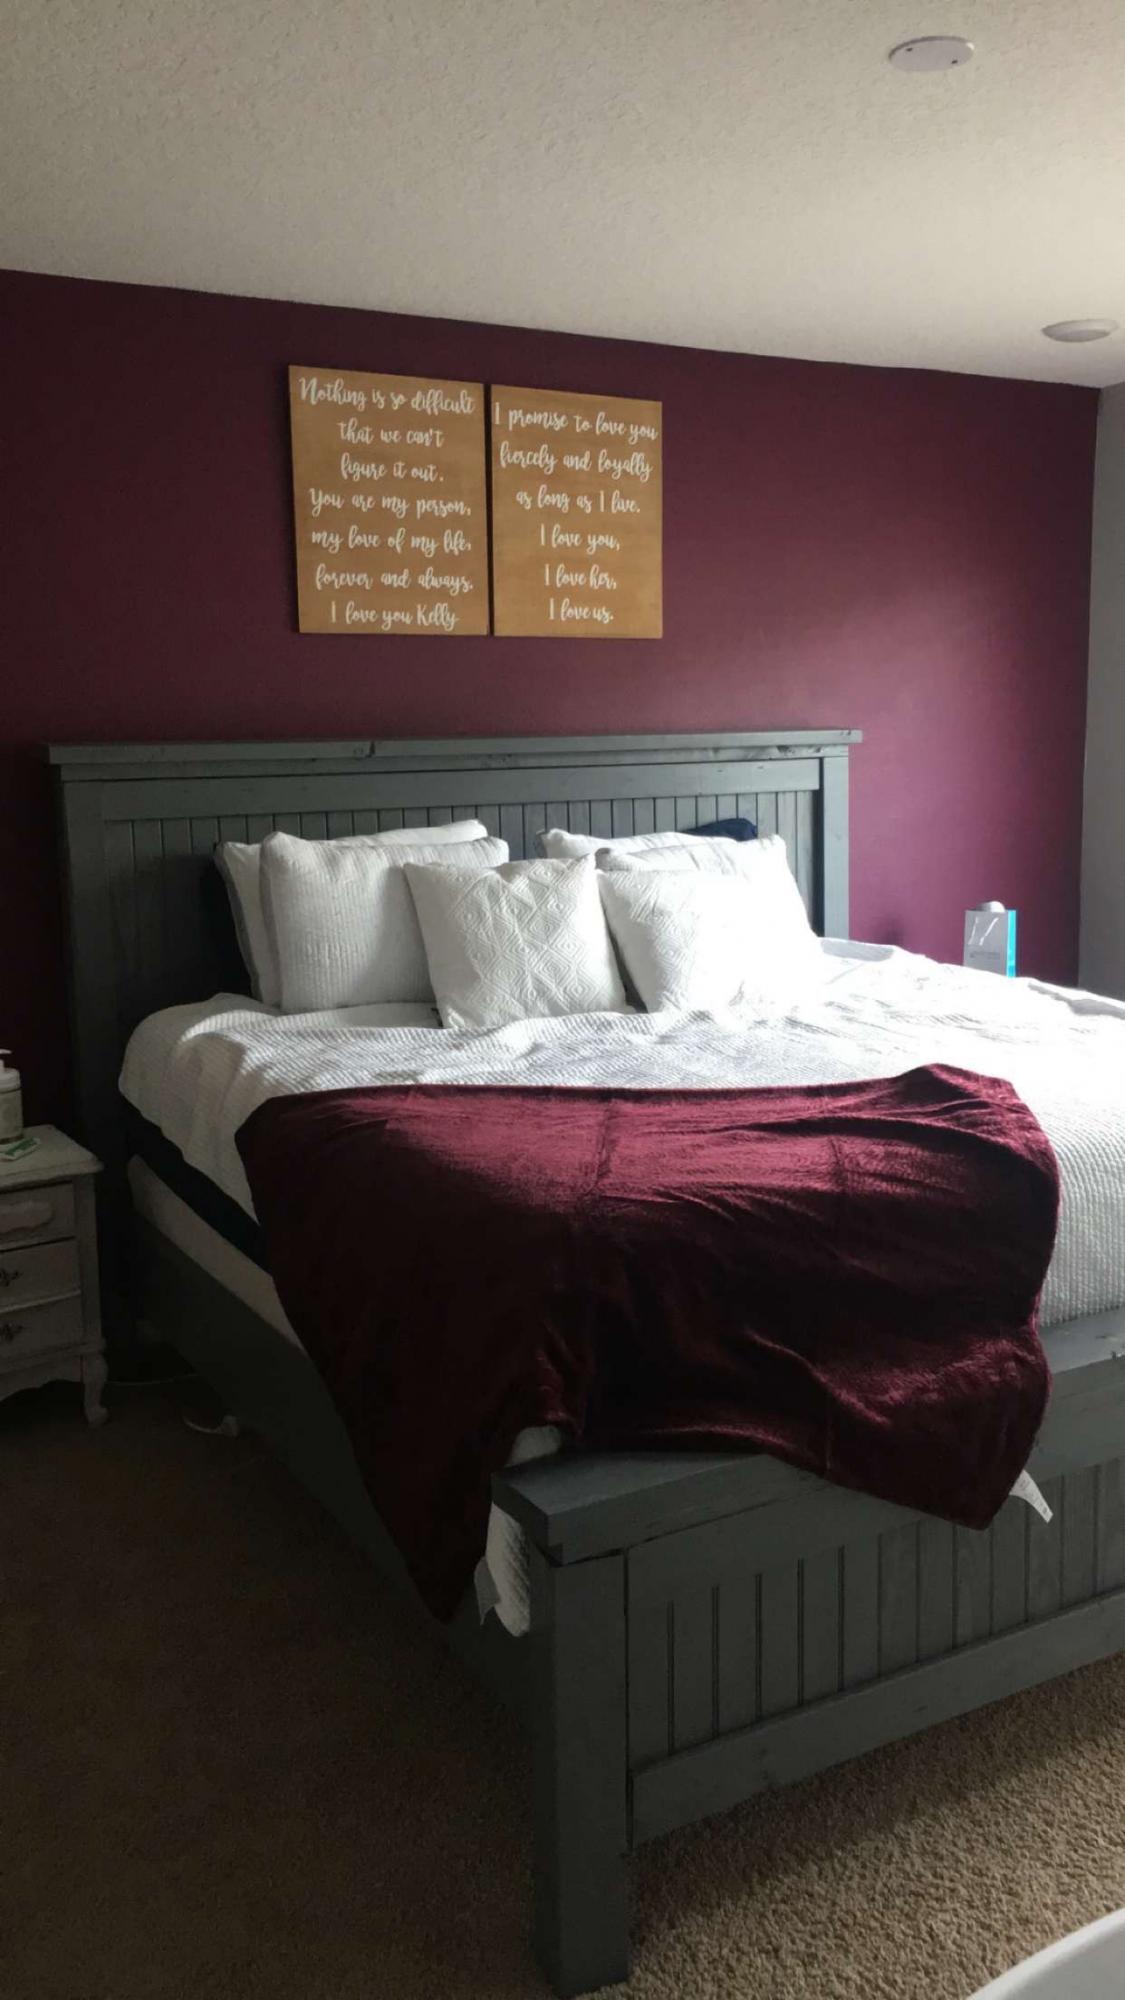
Made from the plans
Built from Plan(s)
Pallet Shelf Spice Rack
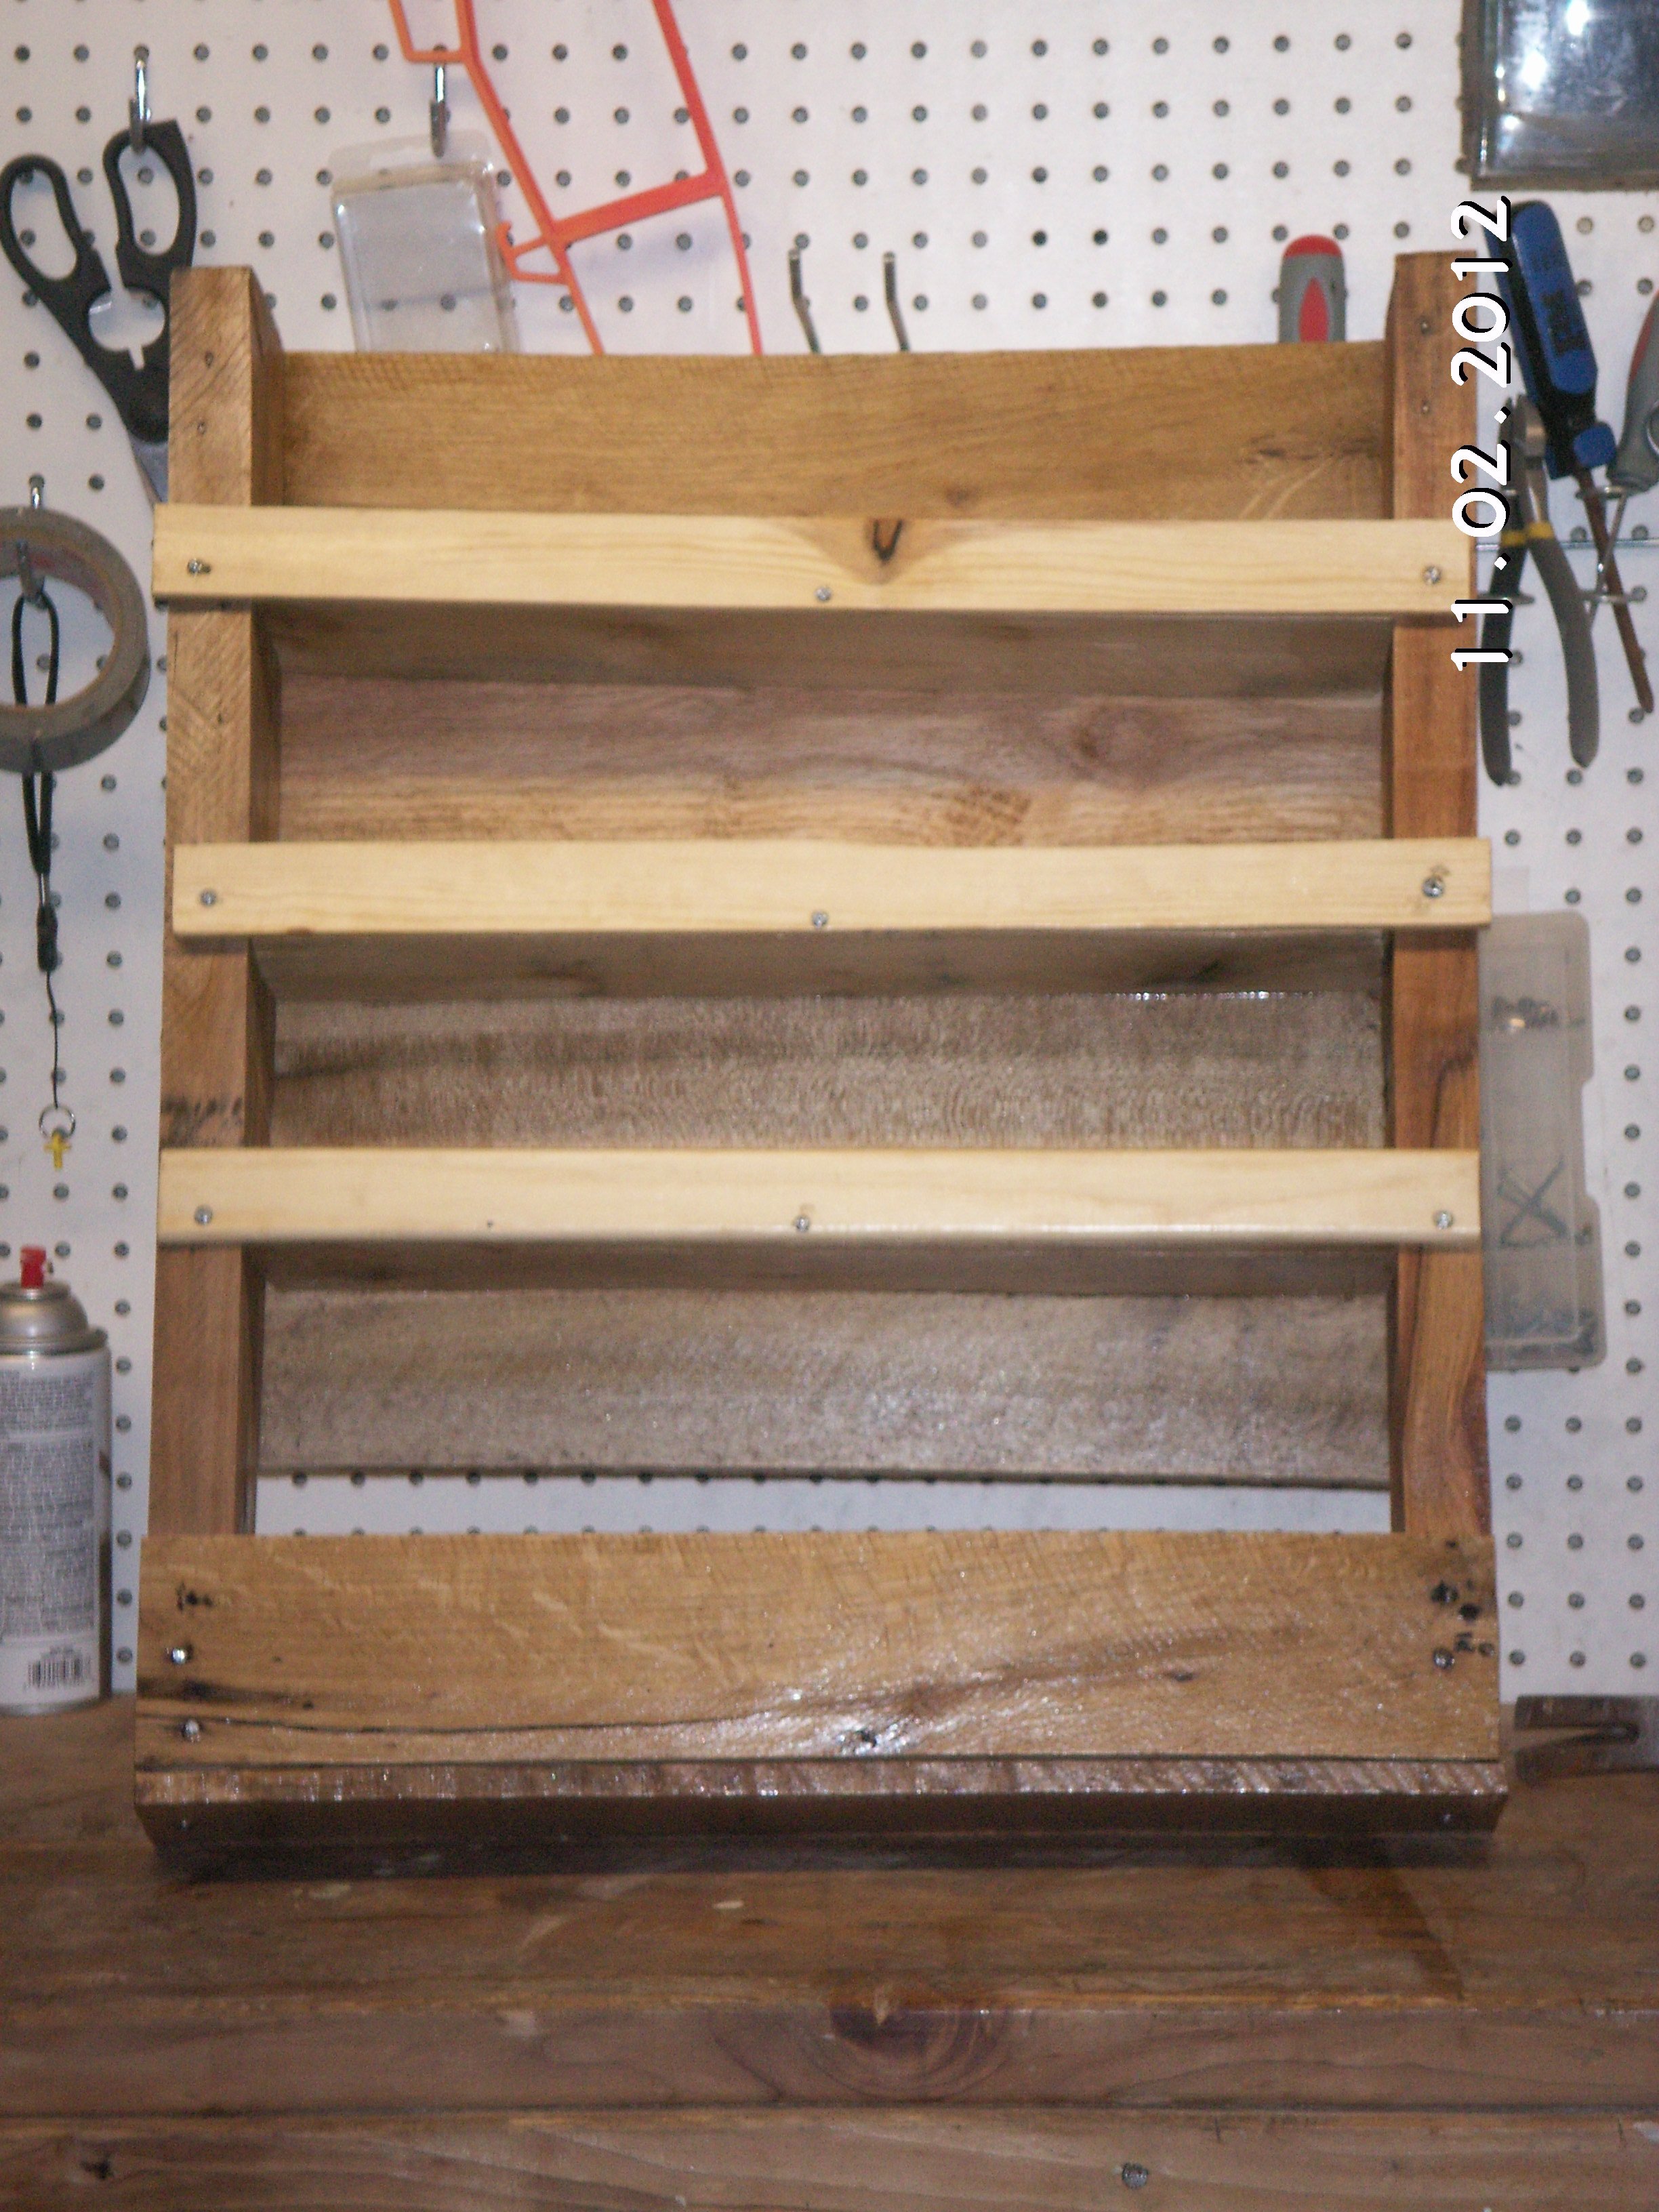
My mother lives with me and we loved the Pallet Shelf Project and made a back door shelf/coat rack. Then, task maker that she is, she decided we need a spice rack in the kitchen, and viola. Still needs another coat of minwax, but should be ready to hang tomorrow! Thanks Ana!
Finish Used
Minwax
Recommended Skill Level
Beginner
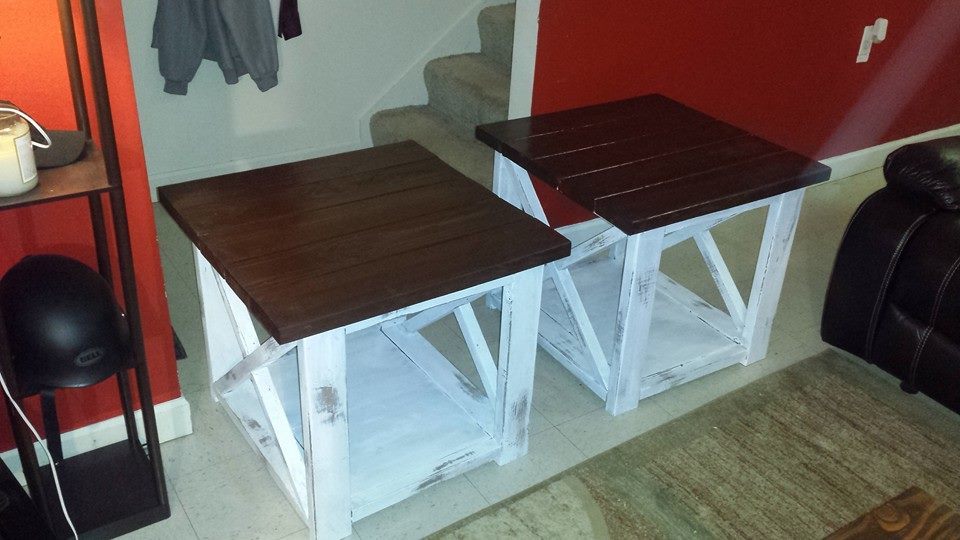
Rustic X Tables

I stained the top with american walnut and used chalk paint on the bottoms.
Built from Plan(s)
Estimated Cost
120
Estimated Time Investment
Weekend Project (10-20 Hours)
Finish Used
Walnut and chalk paint
Recommended Skill Level
Beginner
My version "Michaela's Kitchen Island"
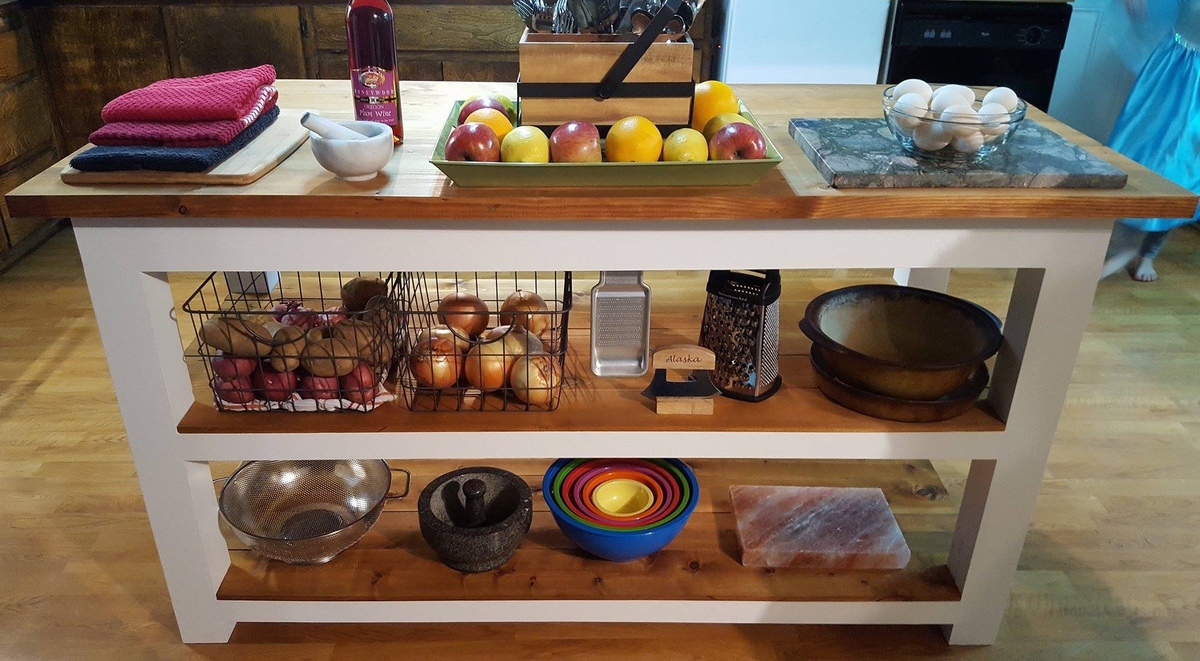
Built from discount 70% off lumber from Home Depot. I planed and cut down to size with a Ridged planer and table saw, then screwed together with kreg pocket screws. Since I will be kneading bread on it, I used a natural coffee stain and then butcher block finish..
Built from Plan(s)
Estimated Cost
$120
Estimated Time Investment
Week Long Project (20 Hours or More)
Finish Used
Coffee stain with butcher block mineral oil and bee's wax.
Recommended Skill Level
Intermediate