Community Brag Posts

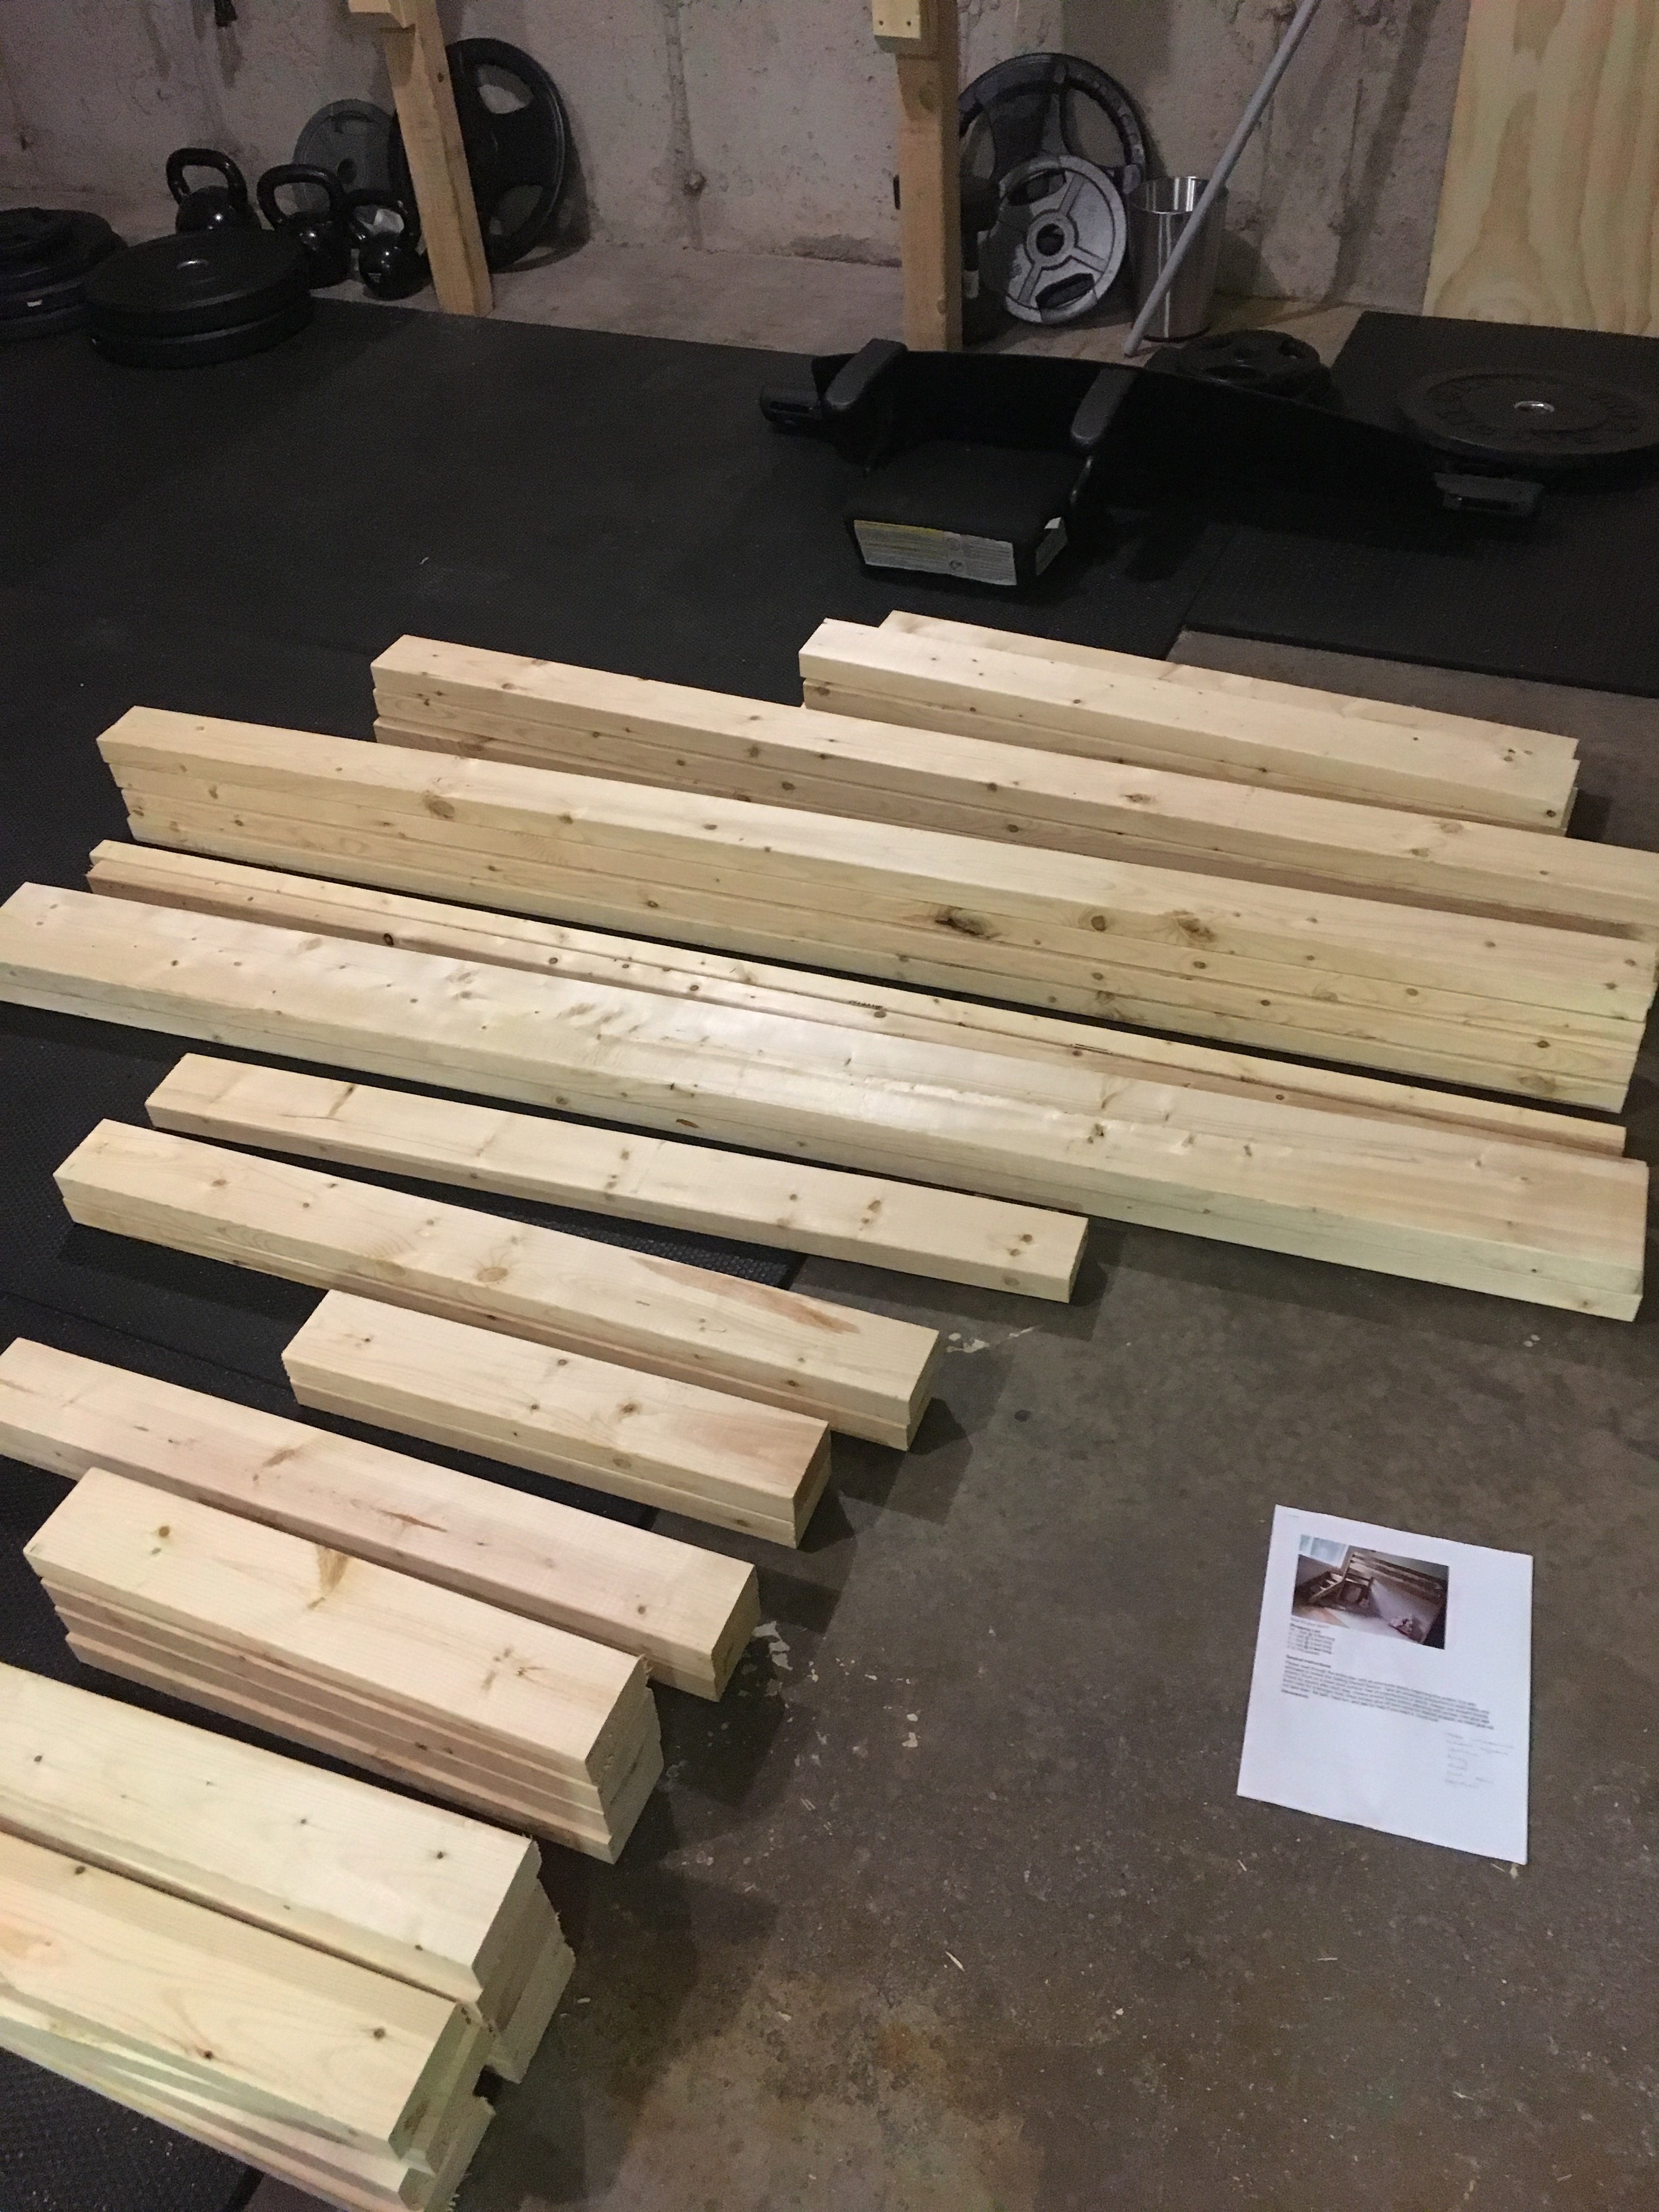
Basement Storage Shelves

Submitted by Eddie A on Sun, 08/30/2020 - 22:59

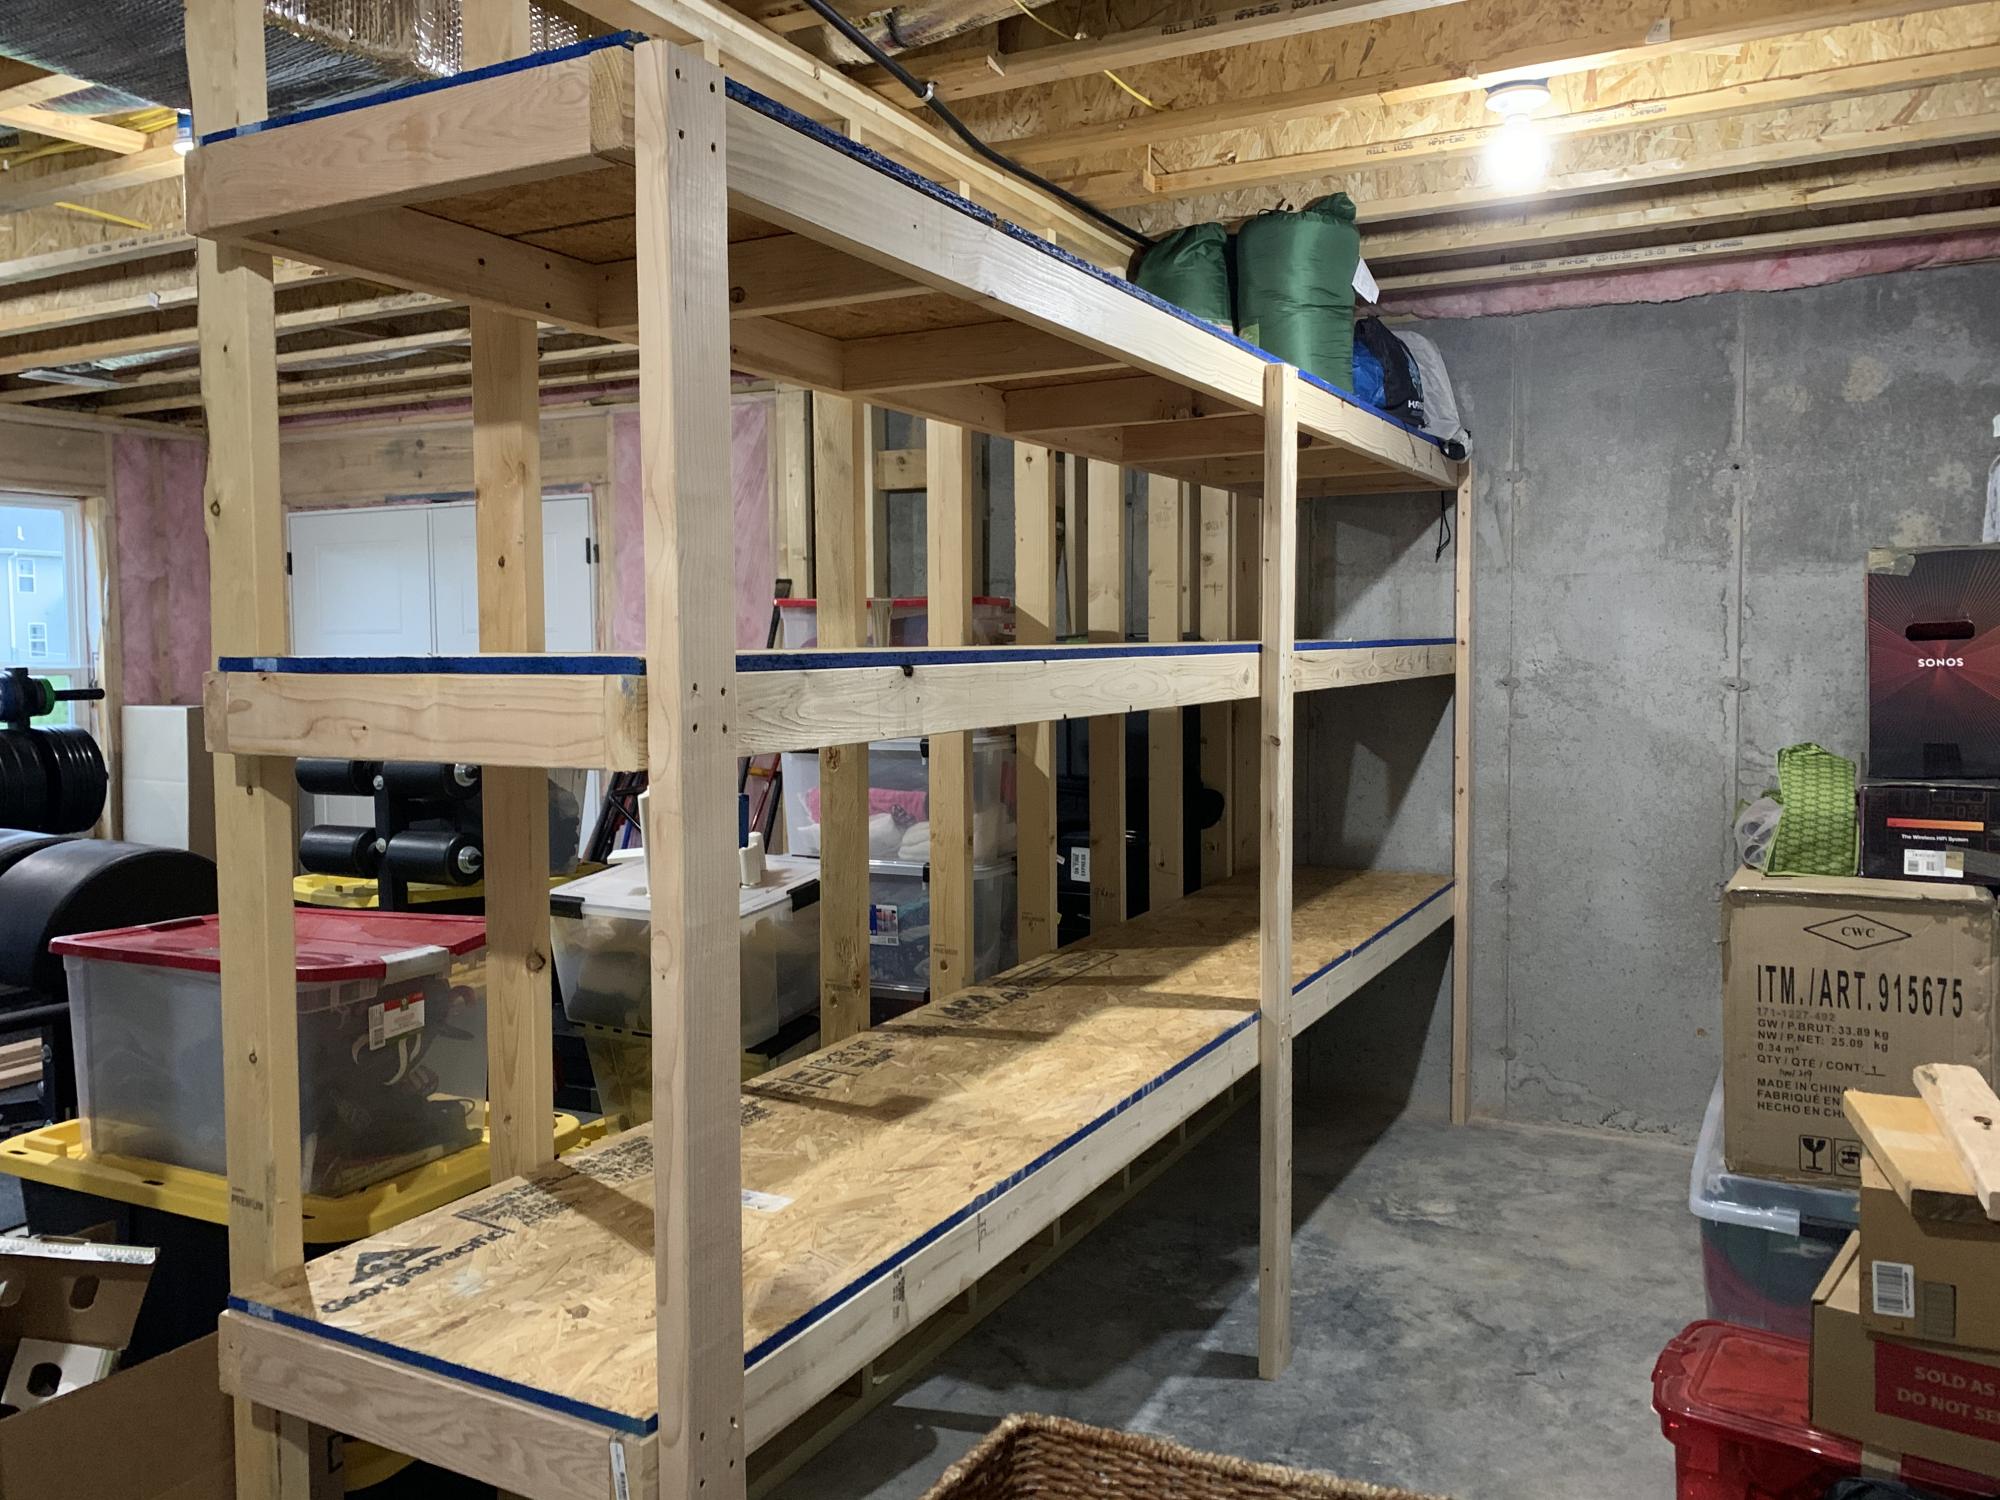
We just moved into a new home and had a huge open storage area in the unfinished portion of our basement and we’ve got a lot of stuff so we needed to make the best use of that space and these shelves deliver big time. This shelf is 12’ long by 2’ deep with 2 each 24” and 18” tall shelves. Really simple construction and I got to use my Kreg HD jig for the first time on the cleats so these bad boys are SOLID! My wife love this one so much I’m building another one in the opposite side of the wall with all 4 shelves at 18” tall.

Estimated Cost
150
Estimated Time Investment
Afternoon Project (3-6 Hours)
Recommended Skill Level
Beginner

Welcome Post

Submitted by TamarasJoy on Thu, 02/02/2017 - 18:05

Full Instructions HERE

What you will need to build this DIY Welcome Post:

  1. 4 x4 Fence Post Cut: 30 inches long 1×6 down to make 2 5 1/2″x5 1/2″ squares and 2 4 1/2″x 4 1/2″ square.
  2. Different Widths of wood cut into squares. For the three tear welcome post I have 3 different sized squares. They measure: SMALL: 5 1/2 by 5 1/2 inches MEDIUM: 7 1/2 by 7 1/2 inches LARGE: 9 1/2 by 9 1/2 inches.
  3. Single Hook
  4. Long wood screws & Drill
  5. Stain
  6. Rust-Oleum Varathane Outdoor Classic Clear Water Based Spray, Gloss Finish
  7. Wood Glue
  8. Orbital Sander or some muscle & some sand paper
  9. Wood filler (not required)

Full instructions on how I put this together on my blog.

Estimated Cost
This is a project that I built from all scraps and left overs.

If I had to guess it shouldn't be more then $25 if you can do some scrounging :)
Estimated Time Investment
An Hour or Two (0-2 Hours)
Finish Used
Dark Stain & three coats of the spray can polyurethane
Recommended Skill Level
Starter Project

Ana's Loft bed w/o the stairs

Submitted by Anonymous (not verified) on Tue, 04/18/2017 - 12:38

I fell in love with the loft bed but thought the stairs stuck out too far for my daughter's room so I revampd the plan just a bit to add three 'stairs' in the platform rather than the standard stairs in the plan.

I got started on the project on a Friday night, got my cuts made, my pocket holes drilled and pieces sanded for an early start Saturday morning, everything went together like a dream - though it would have gone MUCH faster if I had had a second set of hands; I had to balance all of the long peices on other peices to try and get them attached and it took much longer than it had too! 

It was all together, the holes filled and first coat of primer on by Saturday afternoon - I used Zinsser primer so the knot's did not bleed through. Sunday morning I was painting and it was in place and decorated by Sunday night!

Great, easy to follow plans (as always) Ana - thank you, I have one VERY happy daughter!

Estimated Cost
Approx $150
Estimated Time Investment
Weekend Project (10-20 Hours)
Finish Used
paint
Recommended Skill Level
Beginner

Outhouse Plan for Camping Property

Submitted by UncleMike on Wed, 04/28/2021 - 10:50

I built an an outhouse for my camping property in the PNW. The plans were great and easy to follow.

I did take the liberty of extending the the front wall to 8' still using the 15 degree roof line. I also wanted the option to shower during extending camping trips so I extended the floor and added one more back and side wall to create a shower house. With this design, I basically duplicated the side and back wall. Since I am in the middle of the woods, the Dutch doors were a last minute embellishment that I'm glad that I implemented in order to take advantage of the view!

For the shower, I used composite decking with 1/2" gaps for drainage and lined the inside with 6' lengths of corrugated metal roofing.

One additional note: I did build this on my back patio over a couple of weekends since my property is a fairly long drive from my home and about 2 hours round trip from the nearest hardware store. It broke down easily in about 30 minutes with 2 people and fit perfectly in the back of a full size pick up truck for the trip.

In summary, great plans and I love this site. Much appreciated and happy building!

Built from Plan(s)
Estimated Cost
1200.00
Estimated Time Investment
Week Long Project (20 Hours or More)
Finish Used
I used primed T-111 siding and finished with PPG "Cabin in the Woods" base (PPG1021-7) with "Mountain Forest" trim (PPG1130-7). For the redwood decking, I just used a Behr clear protectant and hit it with 2 coats.
Recommended Skill Level
Intermediate

Comments

Custom Dog Bath

Submitted by dananicb on Thu, 07/22/2021 - 07:21

Tego needed a raised dog bath. No, I needed a raised dog bath. Specifically, my knees needed a raised dog bath for Tego. So, after looking at Pinterest and Ana's plans, I decided what I really wanted to do was customize something to fit my needs (and knees) and build it myself. Overly ambitious for a first-time woodworking project, but hey, raise the bar.

I started by reading and rereading Ana's beginner's woodworking guide (very informative). I also learned so many other things along the way. There's a reason, besides looks, you need flat boards (they need to screw together tightly). Unfinished basement floors are so not level (especially near the walls). Screw lengths matter (need shorter ones for thinner boards). The big-box store doesn't make precise cuts (but they can make a lot). Planning for the finishes will save you time (know your basket sizes). Just to name a few.

It's going in an unfinished basement, so I wasn't going to tile and add glass doors. I wanted to keep it relatively simple, basic.

The stairs were the hardest to measure and build (math matters) - and I might re-do. I made the steps smaller, dog-sized, but she finds them awkward. I'd stick with typical riser heights, but it depends on the size of your dog.

Plumbing to link the tub drain to the utility sink drain was the most expensive. Probably I could have done it myself, but I decided not to learn both plumbing and woodworking for one project.

Overall, I'm pleased with the result - and Tego is learning to love it.

Estimated Cost
$250 in supplies (plus plumbing)
Estimated Time Investment
Week Long Project (20 Hours or More)
Finish Used
Exterior paint in semi gloss
Recommended Skill Level
Beginner

Comments

Not quite the same

Submitted by cyfry77 on Sun, 04/10/2011 - 14:45

This was something I build a couple years ago, it's not the same as this plan, but very similar. When we moved in to the house, the slab was already poured, with 4x4s already in place, I just used what was there and my imagination for the rest.

Built from Plan(s)
Estimated Cost
$200
Estimated Time Investment
Weekend Project (10-20 Hours)
Finish Used
Purple outdoor deck stain. (Behr?)
Recommended Skill Level
Intermediate

King Farmhouse Bed

Submitted by boxermum on Wed, 04/13/2011 - 14:17

Classic king farmhouse bed build

Estimated Cost
$150
Estimated Time Investment
Day Project (6-9 Hours)
Finish Used
Antique White Finish:
*Primed with white primer
*Painted with Behr Silk Pillow - Satin finish
*Sanded edges to expose wood (rotary palm sander and palm block sander)
*Applied Minwax English Chestnut Stain over whole surface using foam brush being sure to saturate exposed wood areas
*Used old T-shirts to wipe away excess stain
*Sprayed with matte clear sealer (Krylon)
Recommended Skill Level
Beginner

Deluxe A frame chicken coop

This project was based on the A frame chicken coop. I changed the dimensions  to metric with the main frame being 3m long and each side of the frame being 1.7m. The 2x4 was from reclaimed decking with new 2x2 for shorter pieces.

I added a chicken door (with a rope to open and close) and an egg door (with a tower bolt)  at each end of the enclosed chicken house section at the top. The chicken house has a removable roosting bar and space for the nesting boxes.  One of the bottom sections has a hinged frame to allow easy access to the run.
The hardest part was fixing wire netting to the inside as there wasn't much room to swing a hammer to put the fixings into the wood. I used a mix of 13mm and 25mm mesh and welded 50mm framing. There is wire mesh all the way round the outside to stop foxes digging into the run.


Built from Plan(s)
Estimated Cost
£150
Estimated Time Investment
Week Long Project (20 Hours or More)
Finish Used
Water based preservative
Recommended Skill Level
Beginner

Kids Outdoor Double Lounge Chair

Hi friends!
 

Jen Woodhouse here, sharing this adorable summer project with you! I'm in the mood for all things outdoor, so I thought I'd share this build I created last year. This Kids Outdoor Double Lounge Chair made my kiddos so happy. They spend a ton of time at the pool and this Lounge Chair offers them a little bit of shade, and cup holders too for their drinks! 


Be sure to tag me @jenwoodhouse if you share photos of your build on social media.

You can get all the details and the plans for this build on JenWoodhouse.com!


Estimated Cost
$155 including cushions and canopy.
Estimated Time Investment
Day Project (6-9 Hours)
Finish Used
Exterior-grade polyurethane
Recommended Skill Level
Beginner

Farmhouse Bed Mod

Submitted by adck9d on Thu, 05/12/2022 - 14:01

Took the Farmhouse bed model and incorporated a geometric headboard. This thing is heavy!

Comments

Two Sizes from One Set of Plans

Submitted by Anonymous (not verified) on Wed, 08/10/2022 - 19:45

We followed Ana's plans for the large project bench. We altered the plans to make a bench for our compound miter saw with the saw platform level with the project bench.

Built from Plan(s)

Comments

Classroom wall coat/backpack/lunch rack with shelf

Submitted by jendon on Sat, 08/20/2022 - 20:13

Dear Ana,
I was able to change classrooms and needed a place for my students to hang their backpack, lunch, coat, and snow gear. I used a combination of your ideas and created this. Each shelf is 8ft. Long with cast iron supports and coat hooks. The zinc hooks were too thin and we could bend them. The wood was sanded, stained with golden oak, and routed out the edges. I pocket holed every 8 inches and joined wall board to the shelf. The coat hooks are 6 inches apart. I cannot wait for the class to see it on Monday. Thank you Ana for all the ideas and making me feel comfortable to create on my own.
Blessings,
Jennifer

Comments

Ana White Admin

Sat, 08/20/2022 - 21:01

Thank you for sharing your projects, no doubt everybody is going to appreciate what you've built and use it everyday!

Patio Furniture

Submitted by Anonymous (not verified) on Thu, 09/22/2022 - 13:05

Based on Ana's 2x4 patio furniture blog and plan wirh some modifications.

Built all in cedar.

Seats are 1x6.
Seat back height is at 36"
Backs are 1x6 .

Cushions are from Home Depot:
Bozanto Sunbrella Deep Seating Cushions
24" x 24" seats with 6" thickness
Back cushions are at least 6" thick.
2200 UV hour fade life.
Aceent cushion are from Lowes.

Stain is Cabot Gold Sunlit Walnut put on with 2 coats.

Covers are custom ordered from Covers and all. Www.coversandall.ca

Estimated all in cost lumber, supplies, stain, covers - $2,500.

Much cheaper less than half than the retail cost for similar quality patio furniture.

Comments

Redwood Shower Bench

Submitted by lwarteman on Sun, 10/20/2013 - 08:33

I wanted to build a small shower bench. I used the Providence Bench Plans and just made it a bit smaller with a few adjustments. This bench is 35" long and 18" tall. I did not use the cross supports on the bottom because it was so short. Also, you will see that I turned the bottom stretcher and side supports flat/horizontal. I put the screws for the seat boards through the top down just because this was the easiest way for me to do it. The plans did not show in detail how to attach the seat boards from the underside. It just said "finally, the seat boards." I guess they probably used a pocket jig. I bought a pocket jig and used it in the couple of places, but this was my first time using it. I used brown, coated decking screws in the places I did not use the pocket screws. This was my first attempt at building anything and my first time to use a pocket jig. I used a natural wood stain and Behr Weather-Proofing since it will be in a wet area.

Built from Plan(s)
Estimated Cost
$20
Estimated Time Investment
An Hour or Two (0-2 Hours)
Finish Used
Behr All-in-One Stain and Weatherproofing in Cedar Naturaltone (No. 5533). Because this is going to be in a wet area, I put 2 coats on and let each one dry 12-24 hours in between and before getting wet.
Recommended Skill Level
Beginner

Farmhouse King Bed

Submitted by gahan22 on Tue, 02/02/2016 - 10:36

This was our first ana white build. Bed build took one Saturday - to finish up took another week or so working nights - most of our time spent on getting the color we wanted and sanding and finishing. Building the 2x4 frame took more time than anticipated as well. We are super happy with how it turned out.

Estimated Cost
$250 for lumber, stain and lumber for bed frame. We used lag screws on the side and 2x4 hangers for the frame which increased costs.
Estimated Time Investment
Week Long Project (20 Hours or More)
Finish Used
Stain is two coats minwax dark mahogany plus classic grey over the top - wiped off and finished with minwax satin poly.
Recommended Skill Level
Starter Project

Patio Furniture in Progress

Submitted by lbrown on Thu, 01/05/2012 - 13:08

I built six armless and two corner sections of the outdoor sectional but now I need to paint it and make cushions. For more details: http://www.homeandawaywithlisa.com/blog/2012/1/5/patio-furniture-in-pro…

Estimated Time Investment
Weekend Project (10-20 Hours)
Recommended Skill Level
Intermediate

Built In Storage Bench

I wanted to make a built in storage bench for the breakfast nook in our eat-in kitchen, but wasn't entirely sure how to go about the process. After seeing Ana's "Mimi's Storage Bench" I thought the plan could be modified to fit our space, so I convinced my husband to give it a shot. We've done a fair amount of carpentry in our house, but this is the first piece of furniture that we have ever built. Thanks to Ana's plans and our new Kreg jig, it turned out better than I ever imagined. We absolutely love the new bench, where my toddler spends every morning eating his breakfast while staring out the window and giggling at the squirrels in our backyard.

Estimated Cost
$300
Estimated Time Investment
Weekend Project (10-20 Hours)
Finish Used
Benjamin Moore's Satin Aura paint in White Dove
Recommended Skill Level
Intermediate

Comments

Simple Modern Outdoor Double Lounger.

Submitted by omahattan on Wed, 06/13/2012 - 11:52

Finished it in about two weeks, but that was during my sons daily two hour nap window and two days of staining. Had to make a few adjustments so the pillow from West Elm would fit, because the plan calls for 11 slats on the deck when it should be 12. I added some wheels to the back and will add pull out drink tables soon. It was a fun project and my wife is thrilled.

Estimated Cost
$175
Estimated Time Investment
Day Project (6-9 Hours)
Finish Used
Cabot Semi-Solid Stain (Cordovan Brown).
Recommended Skill Level
Intermediate