Community Brag Posts

Outdoor 2x4 Sofas

Submitted by Anonymous (not verified) on Mon, 04/24/2017 - 07:11

Super simple build! Thanks for the plans!

Built from Plan(s)
Estimated Cost
$120 for wood (per sofa), $12 for screws, $25 for water seal, $150 for cushions (per sofa)
Estimated Time Investment
Day Project (6-9 Hours)
Finish Used
Sanded with 120-grit sandpaper, two coats of Thompson's Water Seal (transparent).
Recommended Skill Level
Beginner

Comments

Farmhouse Dining Set

Submitted by Nor7 on Wed, 03/18/2015 - 10:22

This was a bit more work than I anticipated but I think it turned out great. The quoted buy list was a little off so I had to make an additional trip to the hardware store.

I used the Fancy X Table plan and the Fancy X Bench plan to make this set. Since I wanted it only 6' long I had to do some modification to the plan but not much.

I also designed the table top into two pieces that fastened together through the center piece so I could take it apart easily and fit it though a standard door.

Estimated Cost
$120 (since there were two benches and the table). I found the wood in my area to be a little more expensive than quoted on the plan. Particularly the 2x10's.
Estimated Time Investment
Week Long Project (20 Hours or More)
Finish Used
MinWax - Dark Walnut. To get the finish even I had to invest ALOT of time into sanding. I had to use 60 grit in some spots to even out the factory cuts but most of it I was able to go over with just 220 grit. DON'T FORGET TO SAND THE ENDS!
Recommended Skill Level
Intermediate

Comments

MrCoffee

Wed, 03/18/2015 - 13:35

Wow, this table and bench set came out awesome. I love the finish. What you ended up creating having only spent $120 is incredible when you think about how much these things cost in a furniture store. Good work.

Wine oak barrel Adirondack chair

Submitted by Medickep on Thu, 05/30/2013 - 12:11

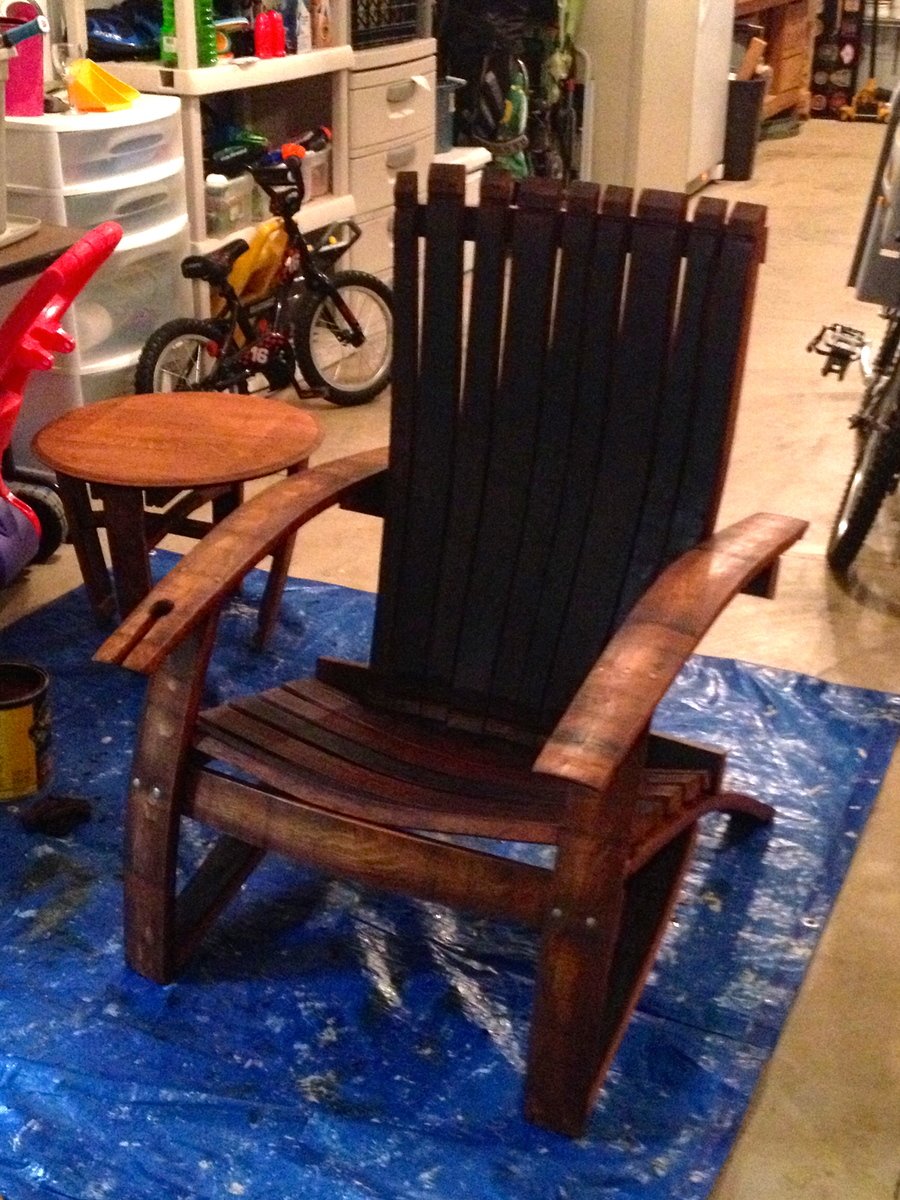
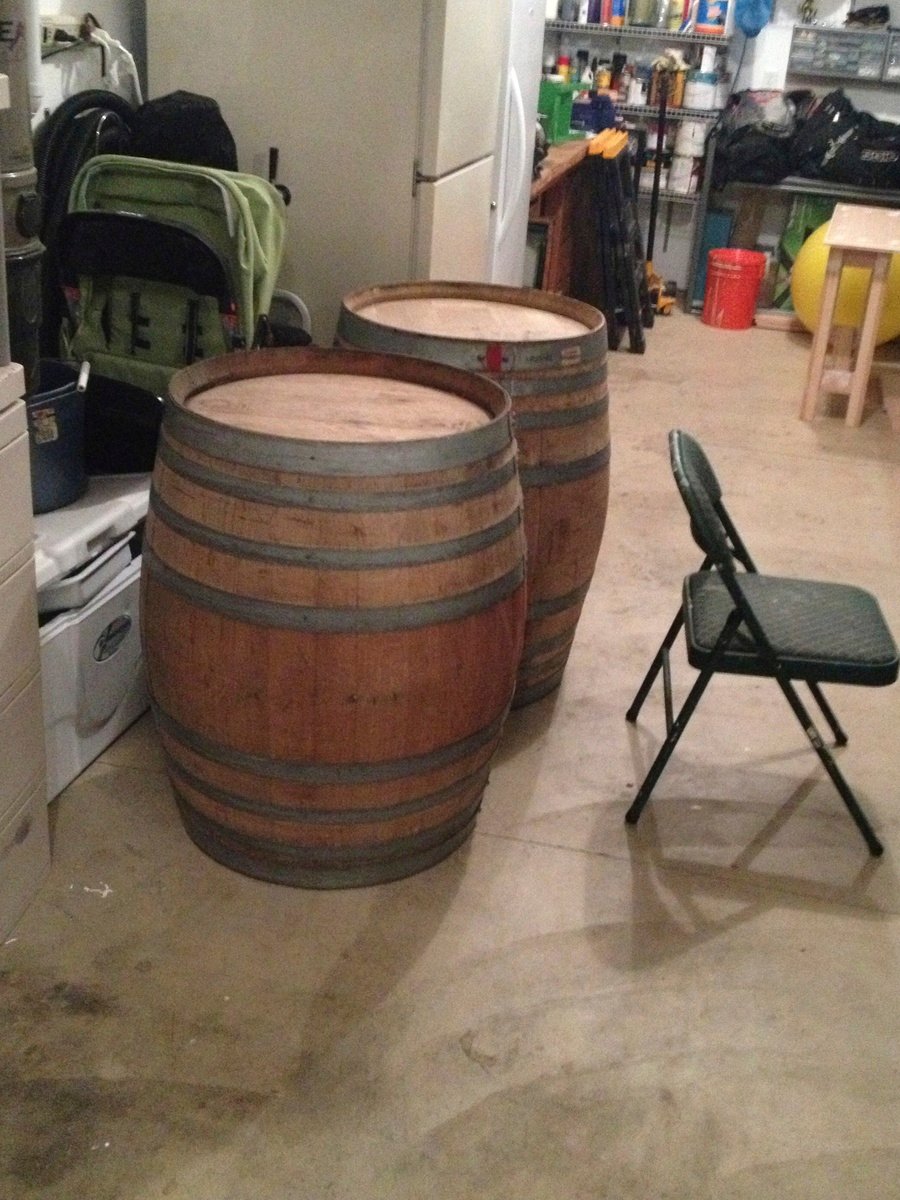
I got some oak barrels from a local vineyard and decided to try making some adirondack chairs. It was harder than I thought it would be, but well worth it!! The stain was a little darker than I thought it be, but it's rubbing off on me!

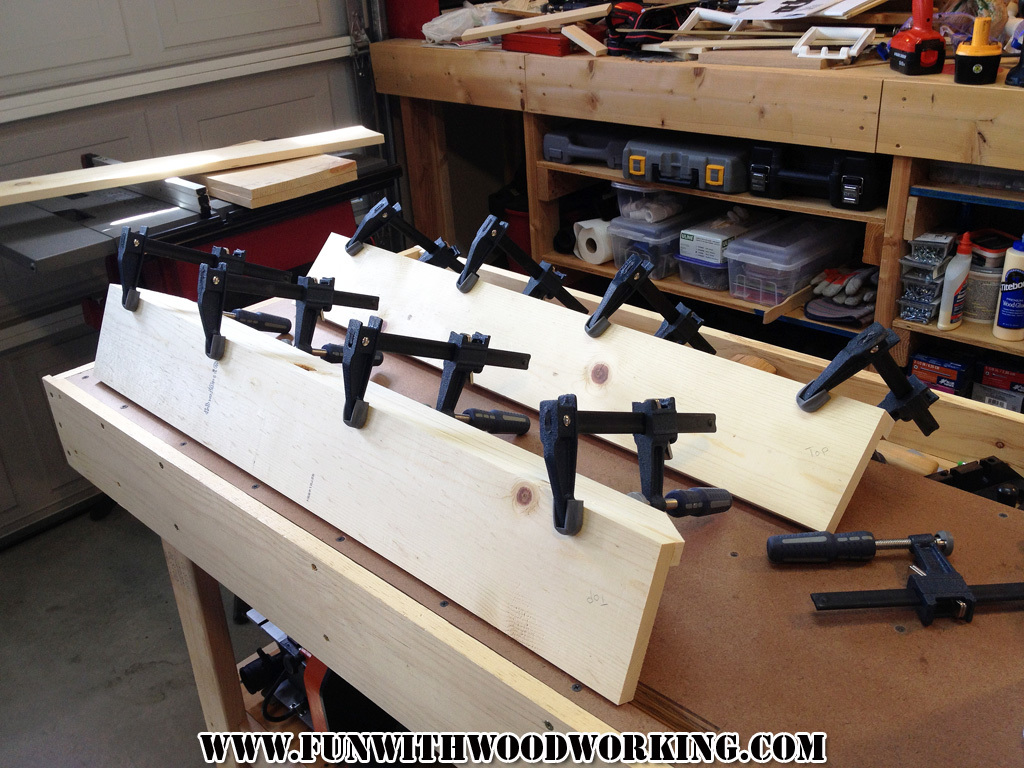
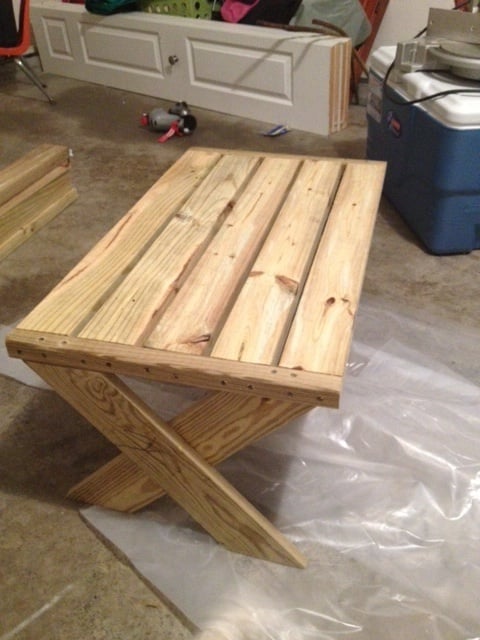
predrill, predrill, predrill, and learned a valuable lesson in predrilling, as solid wood under strain cracks easy when using 2 1/2" deck screws!

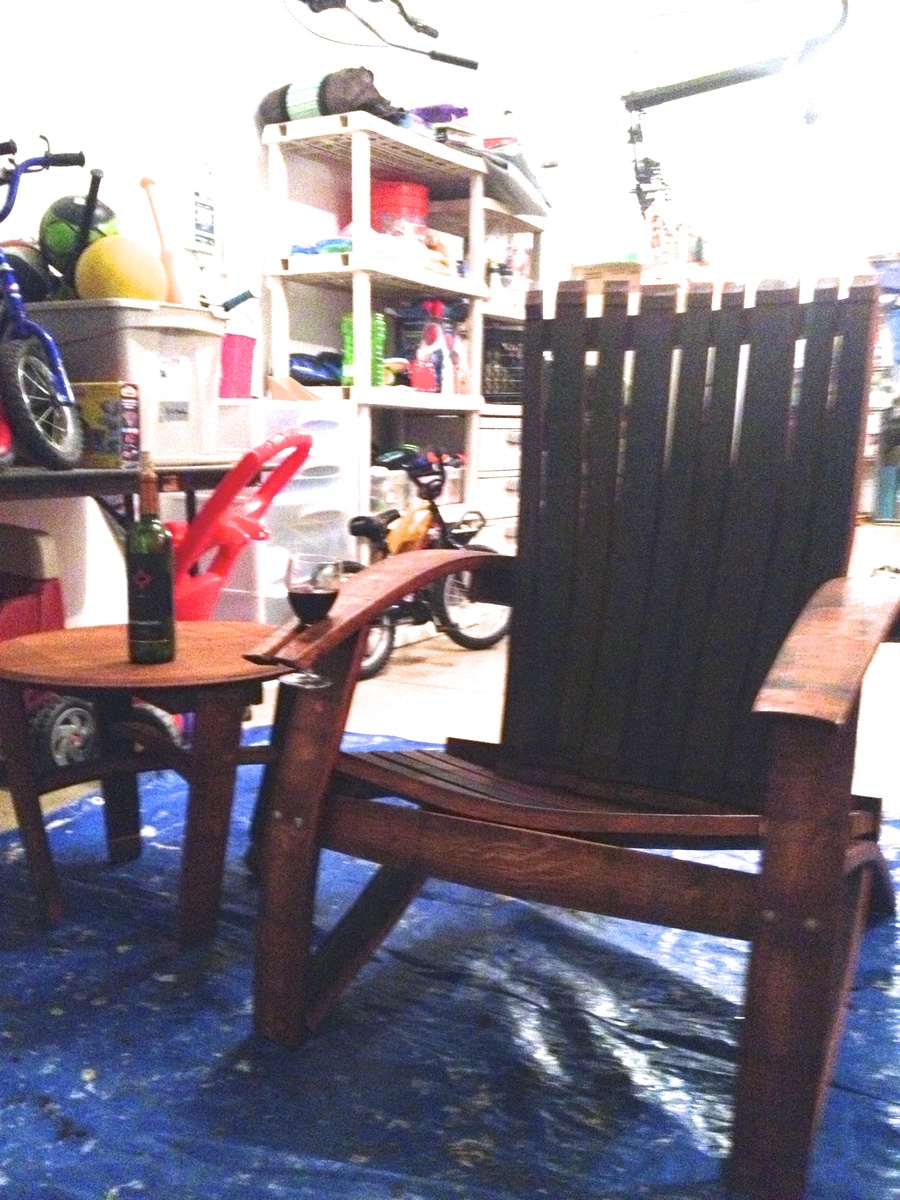
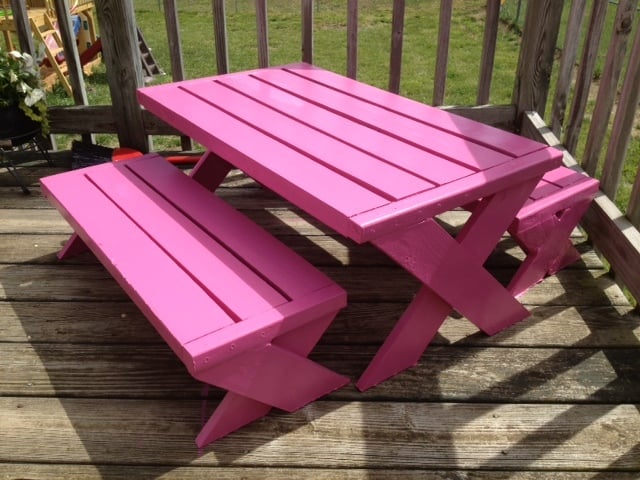
I need to whip out the nice camera and stop using my cell phone for finished products!

Estimated Cost
Around 100.00 dollars per chair (depends on cost of barrel!)
Estimated Time Investment
Weekend Project (10-20 Hours)
Finish Used
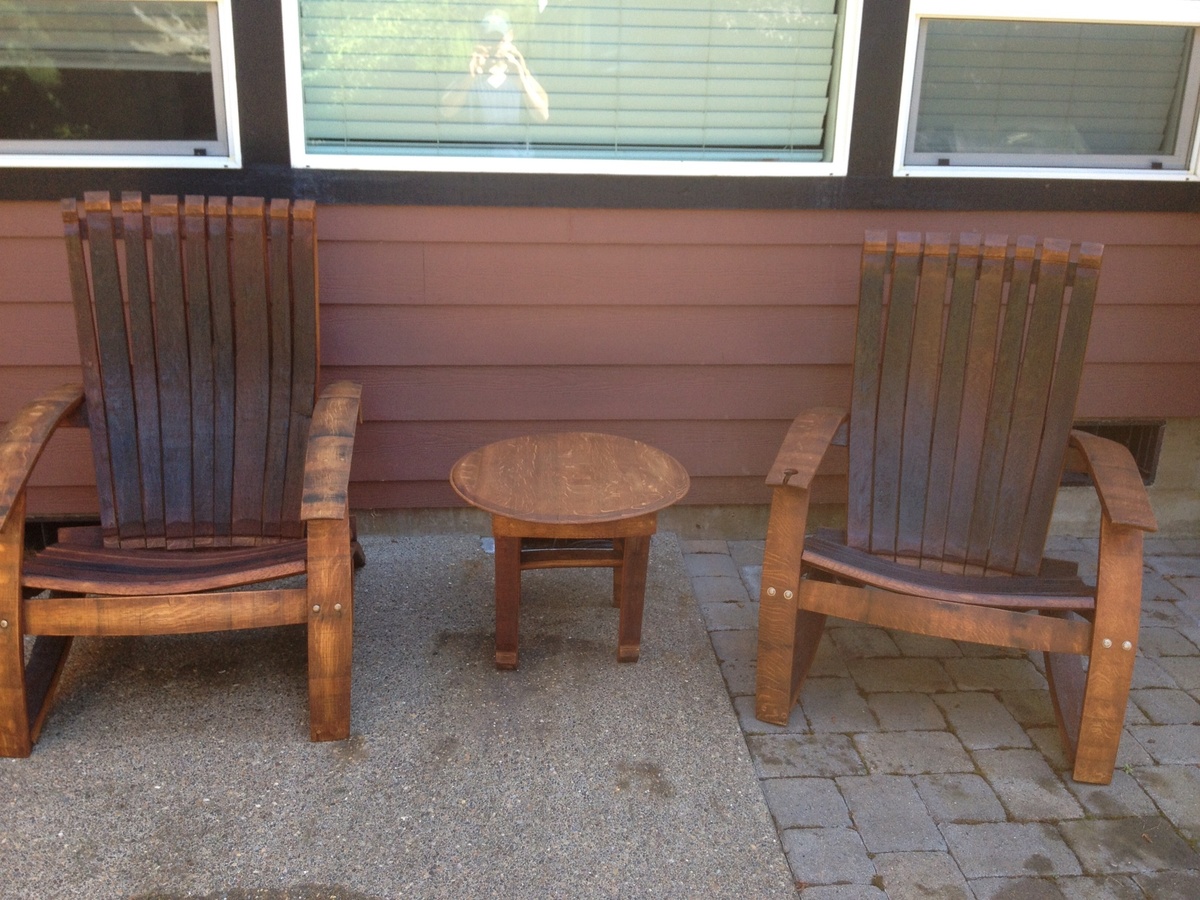
I used Cabot's Australian timber oil. Not the cheapest product out there, but they actually recommend one coat only and no sanding necessary for future coats. Once it stops beading water, just clean the chair and than reapply! It penetrates deep and forms a wax protective layer that repels water! This is why I chose not to varnish the item!!
Recommended Skill Level
Intermediate

Comments

spiceylg

Fri, 05/31/2013 - 05:16

I never heard of using wine barrels in this way! I love it. It came out fabulous!

Medickep

Fri, 05/31/2013 - 05:34

Thanks you. People make a lot of stuff out of wine barrels. Chairs, stools, Tables, candle holders, and even serving platters!

Joni

Fri, 05/31/2013 - 06:57

This is awesome! Very cool design. It looks very comfortable! Thanks for the tip on the Australian timber oil; I never knew what would be the best finish for an outdoor piece.

Joni

Fri, 05/31/2013 - 07:03

This is awesome! Very cool design. It looks very comfortable! Thanks for the tip on the Australian timber oil; I never knew what would be the best finish for an outdoor piece.

Medickep

Sat, 06/01/2013 - 11:38

It is very comfortable, especially with a glass of wine. I chose the finisher I did because I live in Oregon with a lot of rain!!

Why does everyone's post, including my own show up as duplicate?

Medickep

Sat, 06/01/2013 - 11:38

It is very comfortable, especially with a glass of wine. I chose the finisher I did because I live in Oregon with a lot of rain!!

Why does everyone's post, including my own show up as duplicate?

acd4476

Sun, 07/21/2013 - 17:05

Awesome chairs! Beginning to think I need to make some as well. Did you have plans for this project or follow a generic adirondack chair plan?

Foldable Farmhouse Rustic Dining Table

My wife wanted a portable farmhouse style rustic dining table that she could take to photoshoots and other events. I started with a top made with 2x6s and make the legs with 4x4s and the rest with 2x4s. Stain is dark walnut with a clear coat on top.

The legs are attached with door hinges and can fold into the top for more portable use. There is also a board that can be inserted in the bottom slots so that when in use the legs can not fold in.

So far the rustic dining table is working out great, although this table is VERY HEAVY and needs 2-3 strong people to carry it around. I have also made a lighter version using 1x6 tops and all 2x4 frame and legs.

Photos courtesy of Jennifer Blair Photography Designed by Amber Veatch Designs

Estimated Cost
150.00
Estimated Time Investment
Weekend Project (10-20 Hours)
Finish Used
Miniwax Dark Walnut
Recommended Skill Level
Intermediate

Comments

Juanita_r

Wed, 06/12/2013 - 04:15

Oh I really hope that you are able to put these modified plans up!!! A foldable farmhouse table.... what will they think of next!

Unicorn1960

Sat, 10/22/2016 - 17:21

I cannot find the plans for the tiny house drawers any where.  Can someone please point me in the right direction.  Thank you! 

Channing Bookcase

Submitted by FrankJr on Sun, 06/28/2015 - 13:42

We needed a bookcase to fill a void in our living room and this was it. I altered the dimensions to increase the height to 72.5". I also added crown molding to the top which turned out nice. I used the same Bombay mahogany stain suggested by a previous post.

Built from Plan(s)
Estimated Cost
$150
Estimated Time Investment
Weekend Project (10-20 Hours)
Recommended Skill Level
Beginner

Super Hero House

Submitted by carongirls on Sun, 08/11/2013 - 13:48

This was hard for me because I am horrible at using the jigsaw. If I do another one I'll probably not do as many door openings.
It took longer than expected due to filling in all the pocket holes an waiting for the wood filler to dry.
My grandson loves it, he didn't care about my mistakes on it.

Built from Plan(s)
Estimated Time Investment
Weekend Project (10-20 Hours)
Finish Used
None
Recommended Skill Level
Beginner

5 Board Bench

Submitted by truckrun on Tue, 09/17/2013 - 20:50

I was looking for a plan for a 5 board bench so naturally I came to your site. I made your basic design but made it a little bit smaller in all dimensions and I put a half inch split down the middle of the top. I built it out of pine and painted it flat black. I gave the legs and underneath 3 coats of satin polyurethane and the top and sides received 5.

You can follow the build on my blog at :
http://funwithwoodworkingtoo.blogspot.com/2013/09/project-how-to-build-…

You can also watch a video of the build on my YouTube page at:
http://youtu.be/1_hz2n7v9ss

Thanks for the free plans!

Estimated Time Investment
Day Project (6-9 Hours)
Finish Used
MINWAX water based satin polyurethane
Recommended Skill Level
Beginner

Kids table and chairs

Great little project. Finished just in time for Thanksgiving.

Andy

Estimated Cost
50
Estimated Time Investment
Day Project (6-9 Hours)
Finish Used
Mirrowax, polyurethane semi gloss
Recommended Skill Level
Beginner

Comments

JoanneS

Thu, 11/26/2015 - 07:14

You did a super job!  These are absolutely adorable!  Happy Thanksgiving!

Built in bookcase with lights

Submitted by AndyH on Sat, 12/12/2015 - 14:19

Built in bookcase with lighting and power outlets in cupboards for audio and DVD equipment to feed to the wall mounted tv (to the left).

The photo with the lights is when it was unfinished and I also decided that I didn't like the inset doors and so made new overlay ones. Now I have four doors I need to use on another project...

Estimated Cost
$1000
Estimated Time Investment
Week Long Project (20 Hours or More)
Finish Used
Sherwin Williams Pro Classic Extra White Satin.
Recommended Skill Level
Intermediate

Comments

Ana White

Mon, 12/14/2015 - 05:43

Inspiring to see such amazing work!  Love the attention to detail and precision.  Ana

Bown

Sun, 09/10/2017 - 18:45

Did you go by a plan? I'd like to do this but I definitely need a step by step plan.

Farmhouse Table - Thanks Ana!!

I tackled the Farmhouse Table over a long weekend while my boyfriend was away - he was surprised needless to say!
I have not attempted any woodwork projects since grade 8, but this was alot of fun - I did not find it very difficult and loove using power tools :)
I made the matching bench, however I guess I did not stir the bottom of the can well enough and my bench is now red :/ soo I am going to either stain it dark or paint it white and use it as a mudroom seat!

*I also made mine shorter - 7ft long to fit in our dining room and adjusted the bench to fit.

Estimated Cost
$160 for table & bench inc. wood, screws, stain, sand paper
Estimated Time Investment
Weekend Project (10-20 Hours)
Finish Used
I sanded it until I was pretty sure the risk of splinters was eliminated. After pre-stain conditioner, it got a coat of Minwax 'Ipswitch Pine'. The result was perfect on the table (two coats), however I must not have stirred the can well enough as my bench turned out dark red :/ I wanted it to look like it's 100 years old.
Recommended Skill Level
Beginner

Comments

Maggie Jaye

Fri, 10/07/2011 - 17:15

Thank you so much Ana! We are in the process of renovating our house and your website has inspired me to take on so many more projects now!! :)

Margaret Kubiszyn (not verified)

Sat, 10/08/2011 - 19:46

I love your choice of stain - it is beautiful!

Guest (not verified)

Wed, 11/02/2011 - 04:52

I built a similar table and I am having problems with my kids getting food in between the pieces of wood. Do you have this same problem, is anyone having this same problem? Does anyone have any suggestion as to how to fix it, how to keep food and other particles from getting trapped between the cracks? Thanks! You did a great job!!

Guest (not verified)

Wed, 11/23/2011 - 15:00

I am building this table as we speak. The thought occurred to me as well concerning the cracks attracting crumbs. I believe using clamps to make the fit as tight as possible will help. Also some poly finishes may be appropriate with children which may even seal the cracks... if sanded and clamped well.

Maggie Jaye

Wed, 11/23/2011 - 15:11

I did try my best to clamp the wood together as tight as possible - due to the pieces of wood not being completely straight, they are there.

I haven't had this problem yet. I do use place mats when eating at the table, that generally stops any crumbs etc.That's probably the easiest way to avoid it :)

Thank you for your comments!

Fireplace with recessed TV mount

Submitted by medicscott on Thu, 02/16/2023 - 07:46

This is a very custom fireplace that I built for my wife as a 40th wedding anniversary gift. It is built around a Samsung 55” Frame TV and a Vivo motorized mount. The motorized mount allows the TV to be lowered to a better viewing height than the standard above mantle position which is usually too high for comfortable viewing.

In order to maintain the flush mount effect with the TV in art mode, I recessed the mount into the fireplace. That required building a “back” frame for the TV mount then the outer frame for the surround. I covered the outer frame with ½” OSB then ship lap. The mantle and hearth is made from Poplar with walnut stain and Polyurethane satin top coat. The hearth opens for storage.

This was sourced from several different plan sets with a lot of customization and input from the Technical Support Staff at Vizo-US.

Comments

Ana White

Thu, 02/16/2023 - 09:46

Happy Anniversary!
This is a beautiful, well thought out project.
I was hoping someone would do the recessed mount, and you nailed it! It's so much better with the tv flush like yours.
Also love the motorized mount.
Thank you very much for sharing photos.
Ana

Farmhouse Table

Submitted by upsidedown on Fri, 02/05/2016 - 07:21

This version of the Farmhouse Table was made with fir and finished with Varathane Early American stain. It is by far my favorite item in the house! Love it!

Estimated Cost
$250
Estimated Time Investment
Weekend Project (10-20 Hours)
Finish Used
I stained the table with Varathane Early American, and then finished it up with 3 coats of Minwax Polycrylic (gloss).
Recommended Skill Level
Intermediate

Comments

Shaunnyp

Sat, 02/06/2016 - 08:25

I absolutely love this table.  I have a small kitchen and would like to build it counter height (36 inches...including the casters) measuring 30x54 inches. This will allow me to move the table as needed to get it out of the way or move closer to my stove and use as additional prep space as needed. Any recommendations or suggestions to make a safe, sturdy, movable table would be greatly appreciated.  Also any warnings if you see any potential pitfalls I should be concerned with. Thanks in advance.

DIY Bathroom Fan Vent Cover

Submitted by lbrown on Tue, 02/28/2012 - 04:56

The plastic cover that came with the fan looked cheap and flimsy and really didn't fit in with the vintage style of my bathroom. I searched around to try and find something else that would work but was unsuccessful so I decided that I needed to make something myself.

For details on how to build it: http://www.homeandawaywithlisa.com/blog/2012/2/28/diy-bathroom-fan-vent…

Estimated Cost
$5
Estimated Time Investment
An Hour or Two (0-2 Hours)
Finish Used
Spray paint primer followed by two coats of my ceiling paint
Recommended Skill Level
Starter Project

Comments

Steven (not verified)

Tue, 02/28/2012 - 06:38

Thanks lbrown, you just gave me an idea. We are painting our entire upstairs and hate those industrial looking air return vents. This would be a great replacement for them. Thanks for the inspiration.

Kids Modern Picnic Table

Submitted by abbpim on Mon, 04/16/2012 - 09:52

This is my very first wood working project! I know its not perfect and I learned from my mistakes. I found a miter saw at a garage sale and after three hours of plugging it in and unplugging it, I finally worked up the courage to make it make a noise! Then I eventually worked up the courage to cut wood lol! I'm pretty proud of myself for building something and I am going to continue practicing until I can make really cool stuff!

Estimated Cost
$20
Estimated Time Investment
Afternoon Project (3-6 Hours)
Finish Used
Valspar, Quart Size, LA218, Fuchsia, Duramax, Exterior Semigloss, Base 4 214-4.75, 113-31.75, 105-3.63, 115-2Y7

I used 2 coats
Recommended Skill Level
Starter Project

DIY Wood Shed

Submitted by Anonymous (not verified) on Sun, 10/29/2023 - 19:18

I am a mathematics teacher in Central IL. I teach a class called Geometry in Construction. I had my math students build this wood shed in pieces at the school, then I brought it home and put it together with a few of my son's friends. The students enjoy a math class that gets to go to the wood shop to apply their math skills to a wood working project. I am proud of my students hard work and dedication.

Shari Bruyn (I'm old, so I do not have Instagram or a blog page. lol)

Built from Plan(s)

"Thomas" Train Bunk Bed

We wanted a short bunk bed for our sons, age 4 and 1. Our 4-year-old insisted on a Thomas Train bed. We modified the fort bed plans slightly to add stronger barriers on the top bunk and add a barrier on the bottom for the little guy. We also used solid plywood rather than MDF. We used 2x4's and steel angle to hold up the top bunk. It should be sturdy enough for them to use into teenage years. Because we beefed up the strength, the cost increased as well.

We tried staining it and it didn't come out as nicely as we had hoped, but the boys added their own stickers to it and now they have a Thomas bed that they love. When the 1-year-old gets older, we will probably remove the barrier on the bottom bunk to make getting in and out easier.

Built from Plan(s)
Estimated Cost
$200
Estimated Time Investment
Weekend Project (10-20 Hours)
Recommended Skill Level
Beginner

Built in closet

Submitted by AndyH on Mon, 06/13/2016 - 19:14

Built in closet to replace builder grade wire wracking.  Closet is approximately 11 feet by 5 feet.  consists of two shoe racks with 7 shelves each.  6 large drawers and 4 small drawers.  Two hanger sections with storage  above them.  End wall has hanger for longer items and storage above and a cabinet with shelves.

Yet to finish the floor.

Estimated Cost
$1000
Estimated Time Investment
Week Long Project (20 Hours or More)
Finish Used
Sherwin Williams Extra White satin paint.
Recommended Skill Level
Intermediate

modified bench swing

Luv your site. Took your bench swing plan and modified it a bit (shortened depth) and then created a small pergola to hang it from. Just need to stain/poly to finish it off. Thanks for your plan and website it is very inspiring.

Estimated Time Investment
Weekend Project (10-20 Hours)
Recommended Skill Level
Beginner

Small kitchen island with slide out double trash cans

This was a mommy do during work furlough. Wasn't too hard. I have minimal experience with saws, but with hubby help, we got it done. Some of the instructions didn't make sense, but but we were able to figure them out or change them to work. I used bead board on the front and sides that we added over the existing sides. I used a manufactured butcher block that had to be cut down. Looks great and now my trashcans don't walk around the kitchen when the dogs play. The downside, the dog bowls slide under the island. If you have to cut down butcher block, make sure you have the proper blade.

Estimated Cost
$200.00 because of the manufactured butcher block.
Estimated Time Investment
Weekend Project (10-20 Hours)
Finish Used
Black cabinet paint
Recommended Skill Level
Beginner
Back