Community Brag Posts

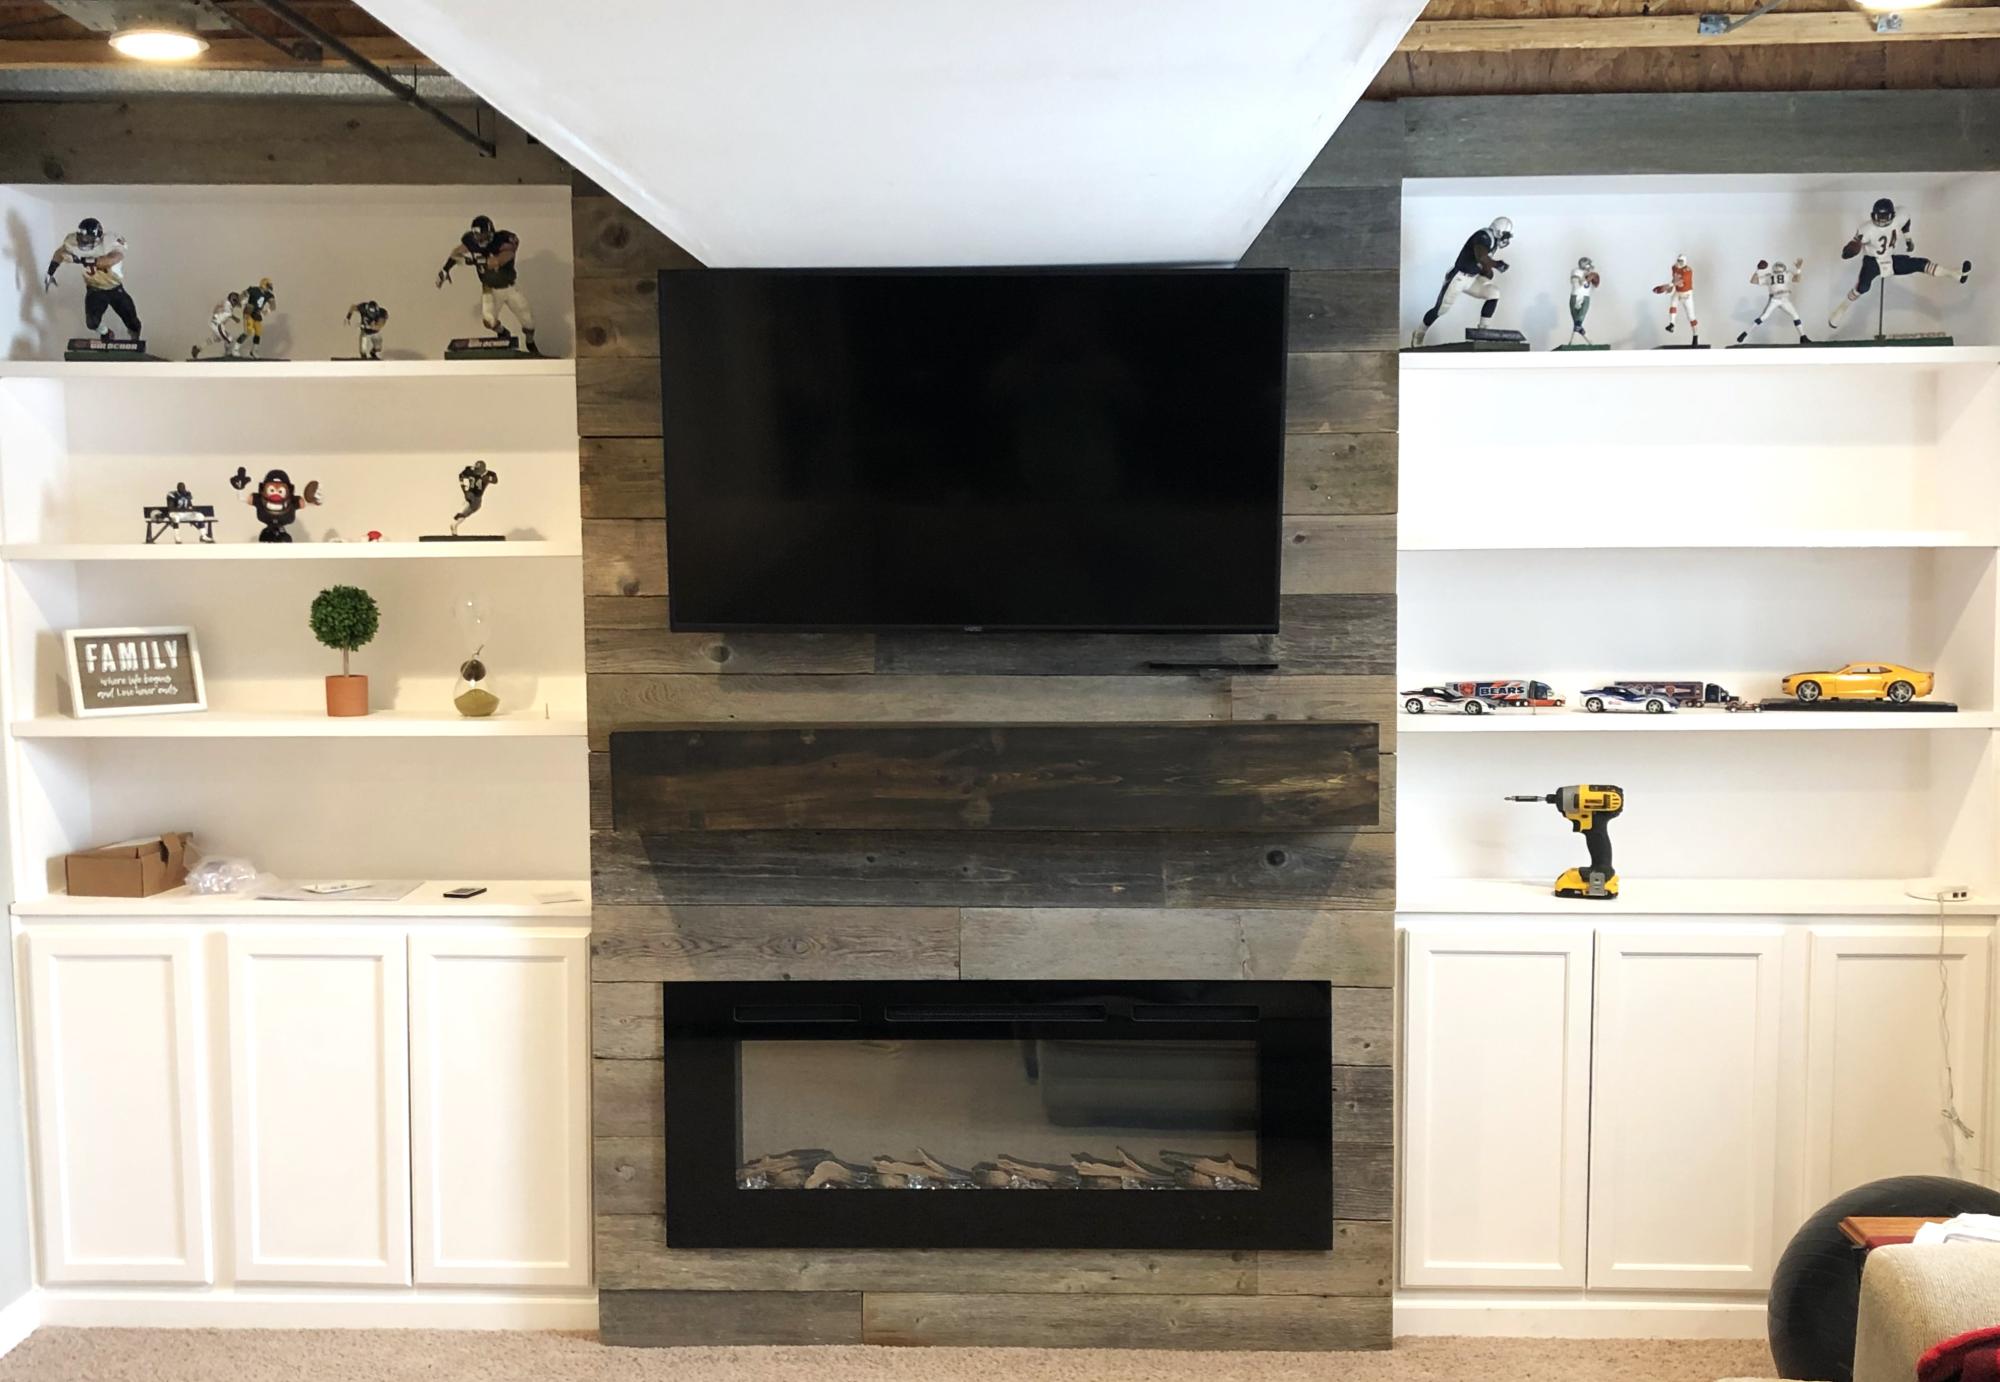
Shiplap Fireplace

Submitted by Anonymous (not verified) on Tue, 12/20/2022 - 19:10

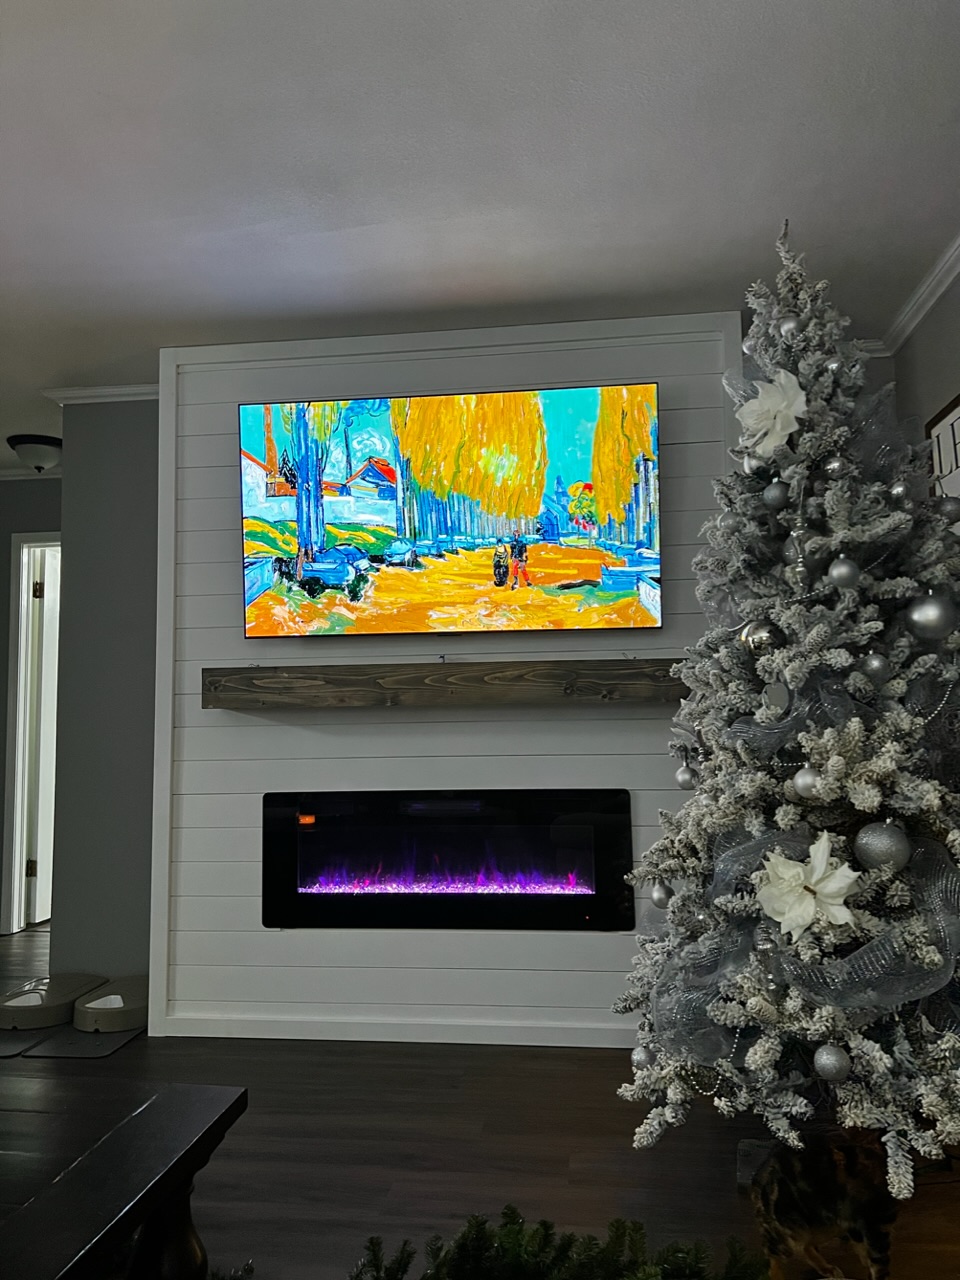
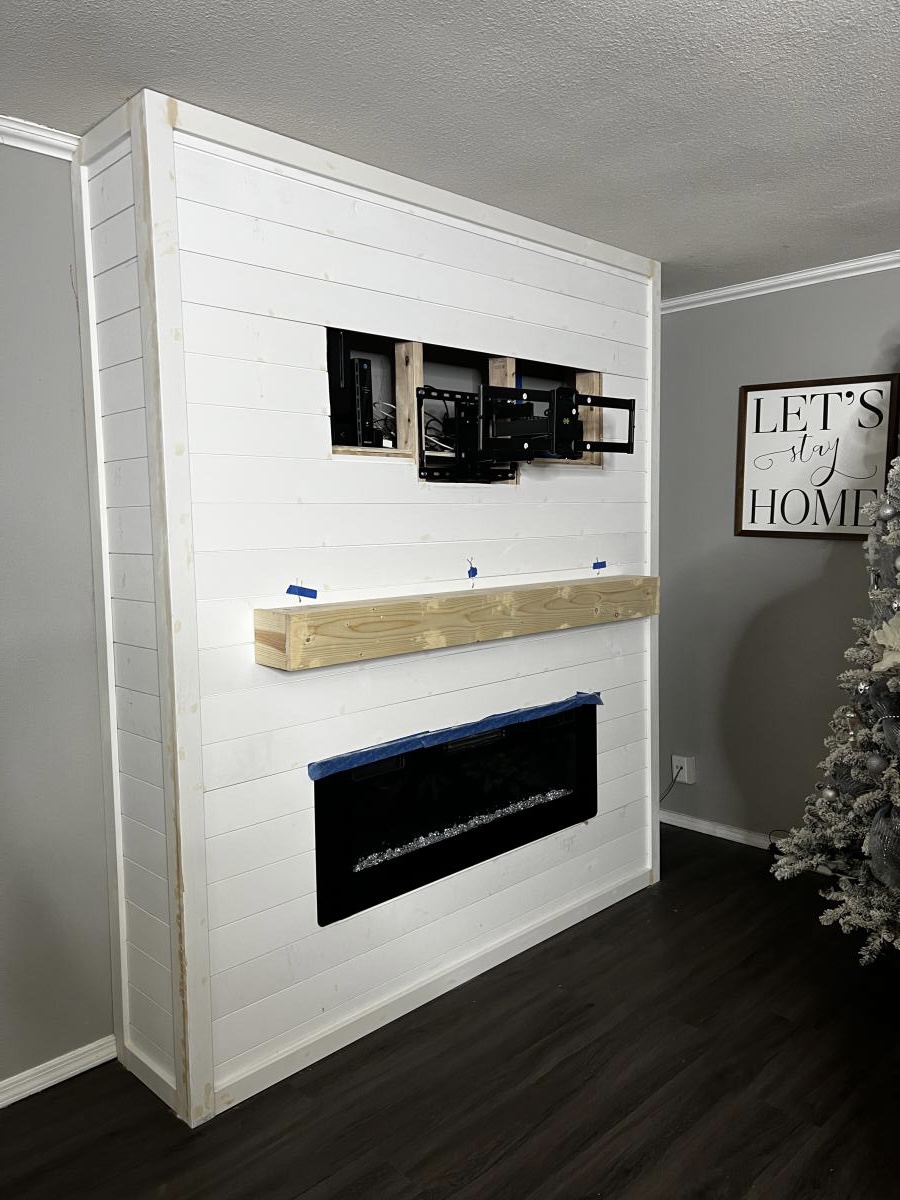
We did the Easiest Shiplap Fireplace in a weekend, thanks to Ana’s plans. I convinced my husband to help me build this by upgrading to a 65” tv and adjusting the dimensions. We also built a shelf behind the tv to hold our receiver and Xbox that is hidden when the tv is in place. Ana’s tutorial was amazingly and gave us the confidence to finally build something that’s been on our list for 2 years!

Comments

French Country Sideboard

Submitted by Anonymous (not verified) on Mon, 12/21/2015 - 19:10

We added additional trim to the top and also a thin trim across the front of the shelves to hide the raw edge.  For paint, I used a grey chalk paint and then wiped an antique white chalk paint over it. I had stained the edges before painting and lightly sanded the paint off of the sharp edges so you see minor amounts of exposed stained wood. 

Built from Plan(s)
Estimated Time Investment
Weekend Project (10-20 Hours)
Recommended Skill Level
Intermediate

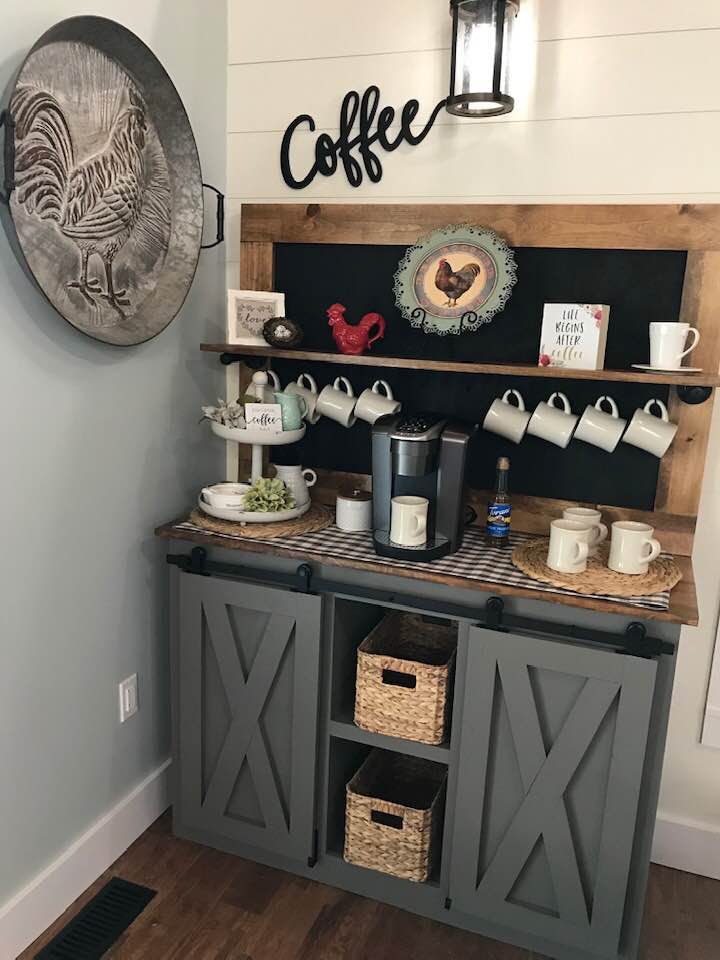
Coffee Bar barn door console

Submitted by Anonymous (not verified) on Wed, 10/02/2019 - 12:15

Modified Grady barndoor console into a coffee bar with chalkboard upper piece

Built from Plan(s)
Estimated Cost
200
Estimated Time Investment
Weekend Project (10-20 Hours)
Finish Used
Sherwin Williams Gauntlet Grey paint
Minwax dark oak stain
Chalkboard paint valspar
Recommended Skill Level
Intermediate

Comments

ruggedcrosscus…

Wed, 11/18/2020 - 19:01

This piece was built by my hisband Mo Coomer. Our little shop is called Rugged Cross Custom Designs. It states submitted by anonymous.

scraps come to life!!

Submitted by sueslager on Mon, 03/26/2012 - 06:15

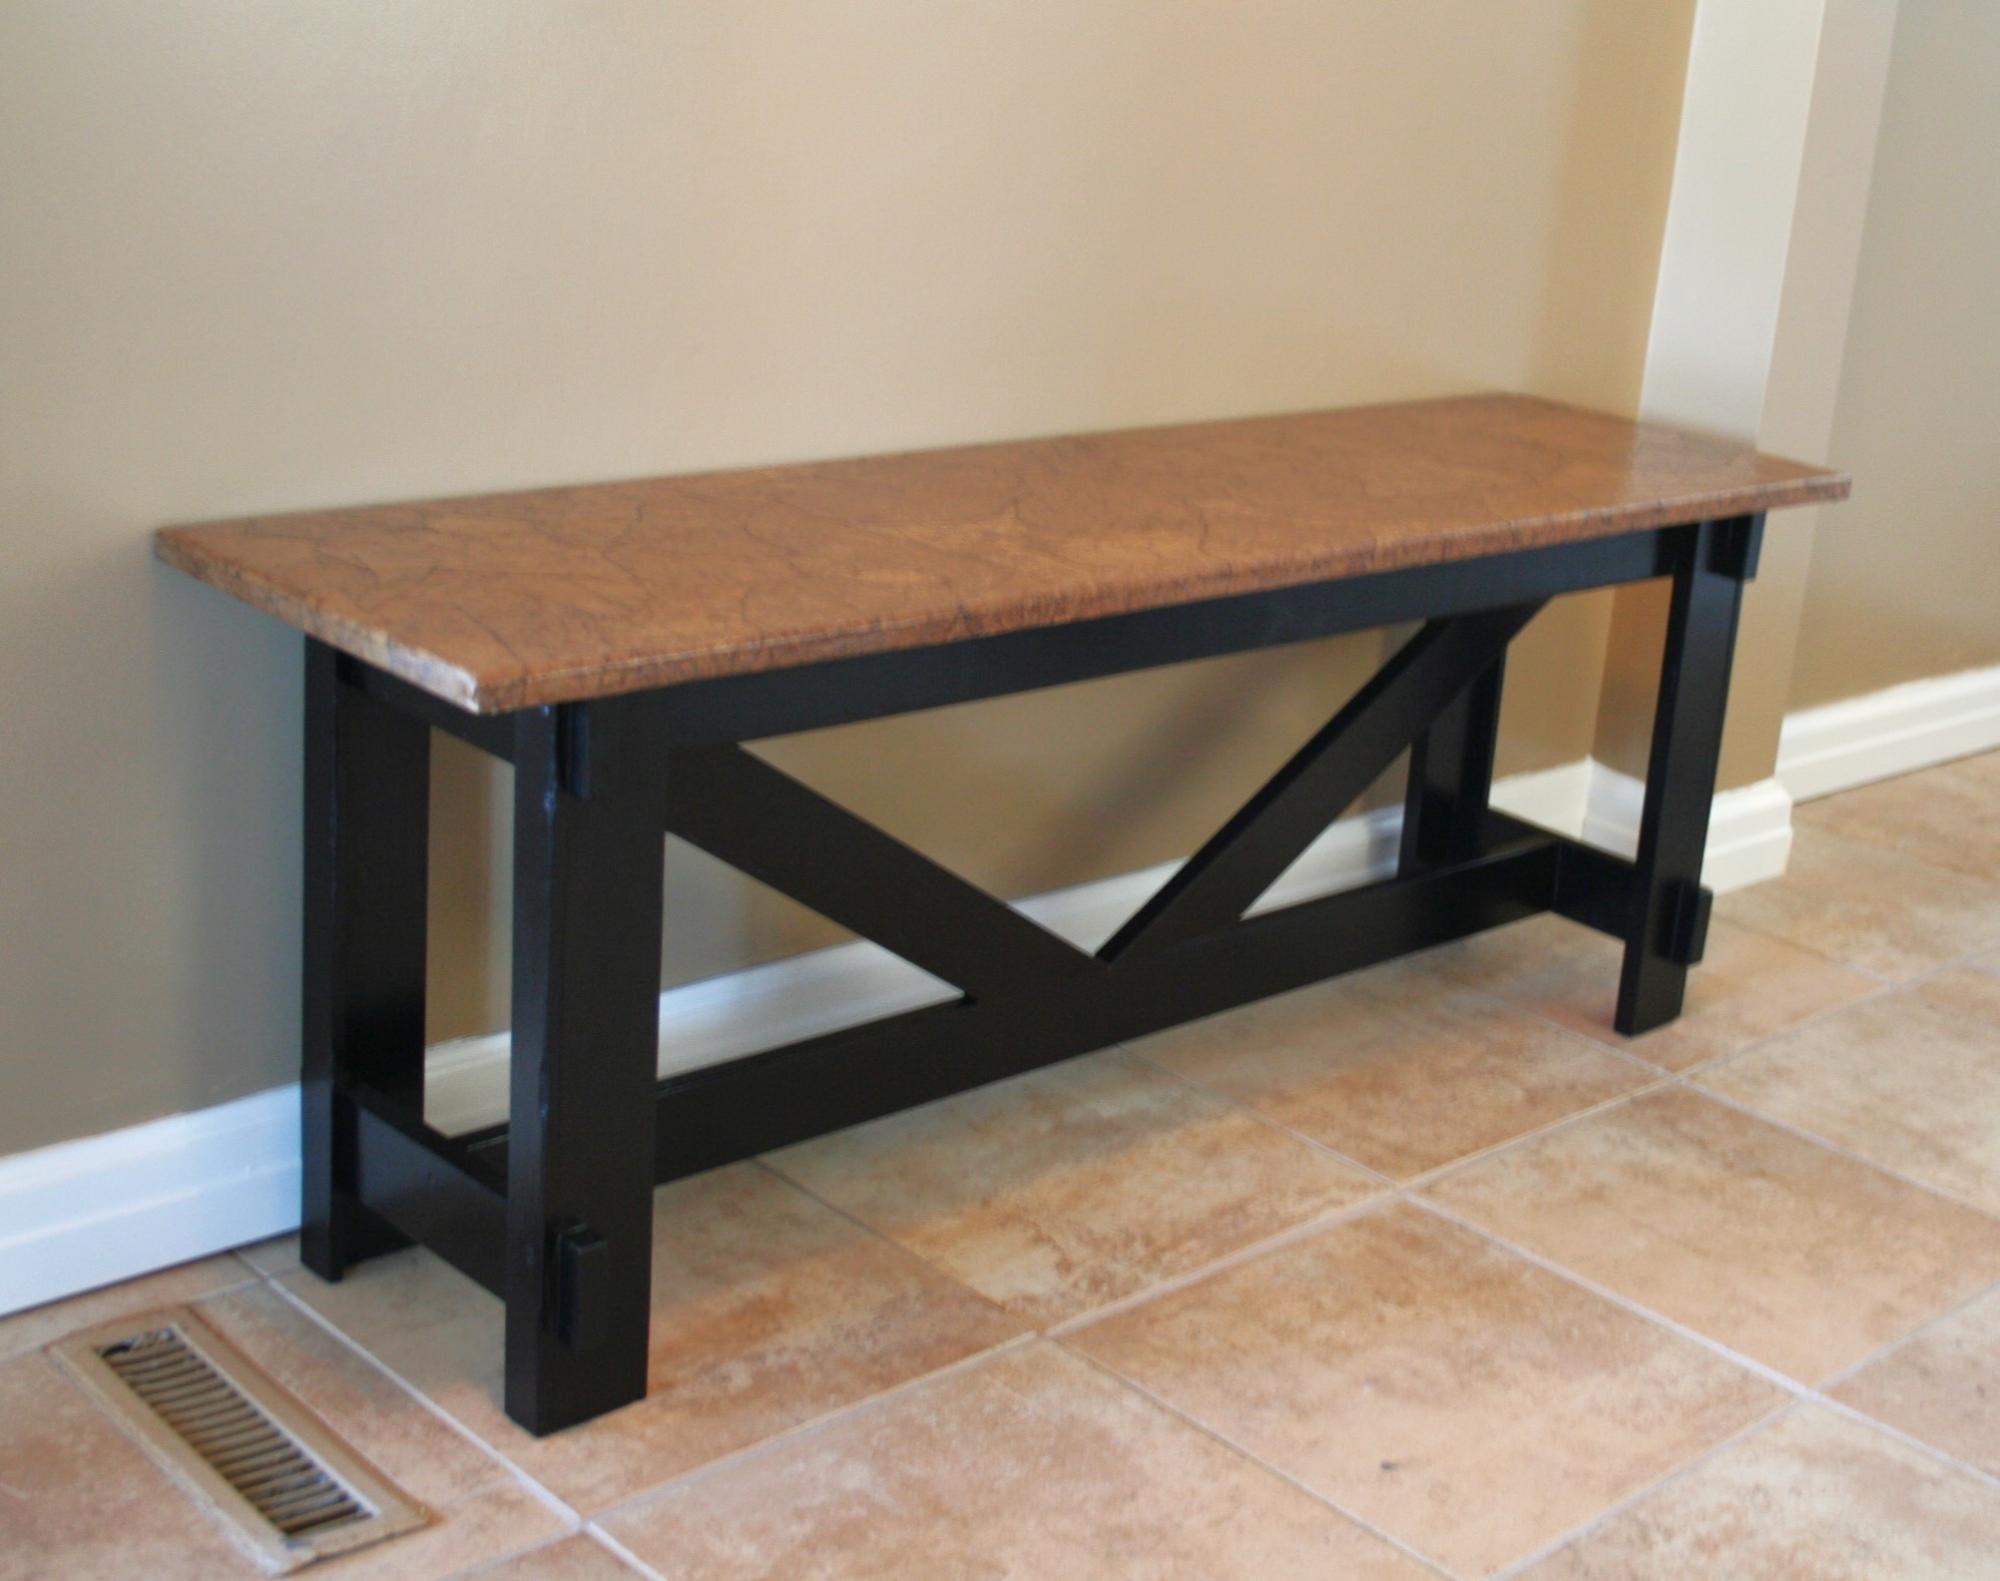
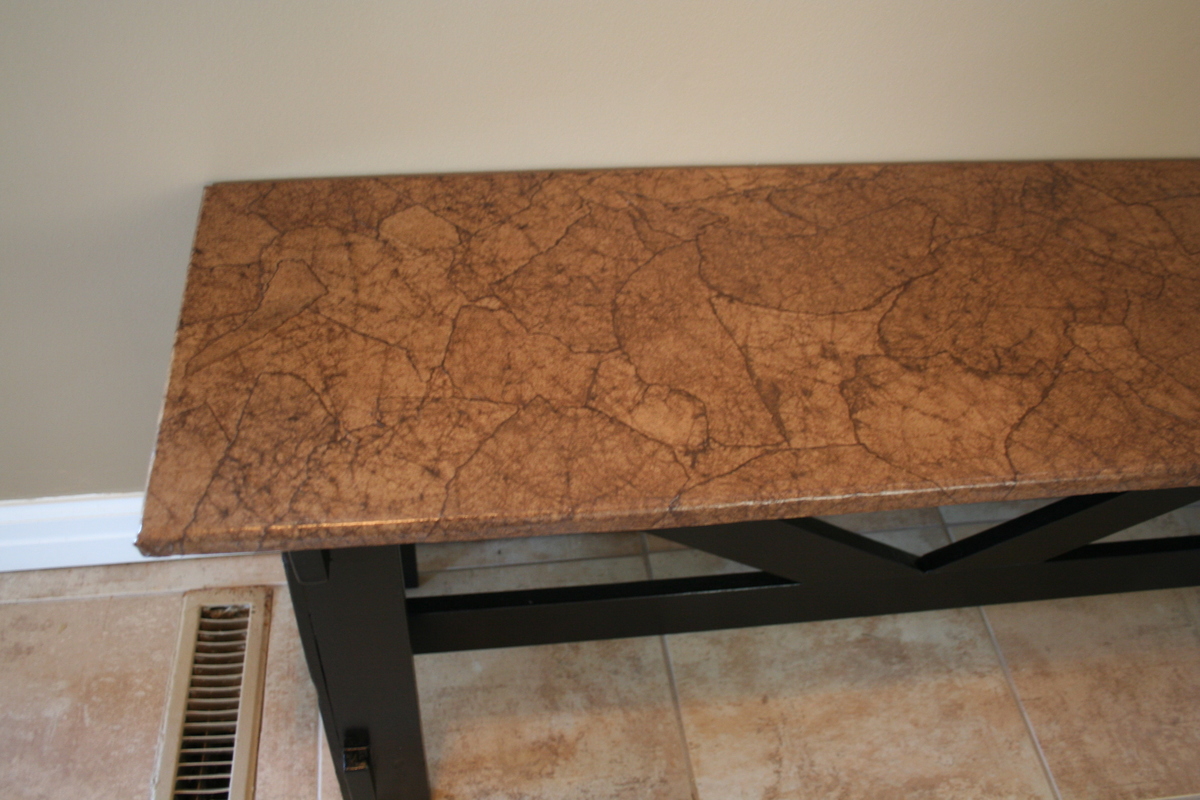
Thank you ana ... and all of you "braggers" ... I have a huge list of projects now, but this is the first one from your ideas. I had an old piece of 3/4 plywood left over from something else so that became the top .. and other sizes were adjusted as needed. I realize now that i should have taken pictures along the way ... it was pretty ugly before finish :) The top is brown paper bagged ... the best instructions out there are at http://lovelycraftyhome.com/2011/11/09/the-ultimate-brown-paper-floorin… ... it is truly almost magic how beautiful such simple ingredients and technique become (and cheap) Thanks again!

Estimated Cost
free - from leftovers and scraps
Estimated Time Investment
Afternoon Project (3-6 Hours)
Finish Used
satin black oil enamel
Recommended Skill Level
Beginner

Comments

Bunnie1978

Mon, 03/26/2012 - 07:20

I love the texture. I have never heard of paper bagging. LOL. It is very unique, and I'm sure it can be just as durable as anything else with the right finishing. Nice job! I am very impressed.

sueslager

Mon, 03/26/2012 - 10:20

my finished dimensions ended up being 13 (W) x 48 (L) x 18 (H) ... found Ana's dimensions were very adjustable though ... the only trick was the cross braces ... and those i ended up having to hold in place and draw the cut lines .. my geometry failed me :)

from what i hear the "paper bagging" is quite durable .. there are reports all over the web of people who have had it in place on their floors for years with only occasional touchups with poly ... definitely time consuming with needing so many poly coats .. but they go quickly. i'm putting it on my stairs next ... have tile below, will be wood above .. and i'm too cheap to pay for hard wood stair tread!!

kaytrishjr

Wed, 03/28/2012 - 13:25

You did a wonderful job!!!! Mine is holding up just fine, my son practically does cartwheels on it everyday, no problem! Now, I'm about to start on my floors this week, cant' wait to see how it turns out!

sueslager

Wed, 03/28/2012 - 17:52

i already tore out the carpet on my steps ... if we still like it the bedroom will be next ... hope your project goes smoothly!

Rustic X Coffee Table

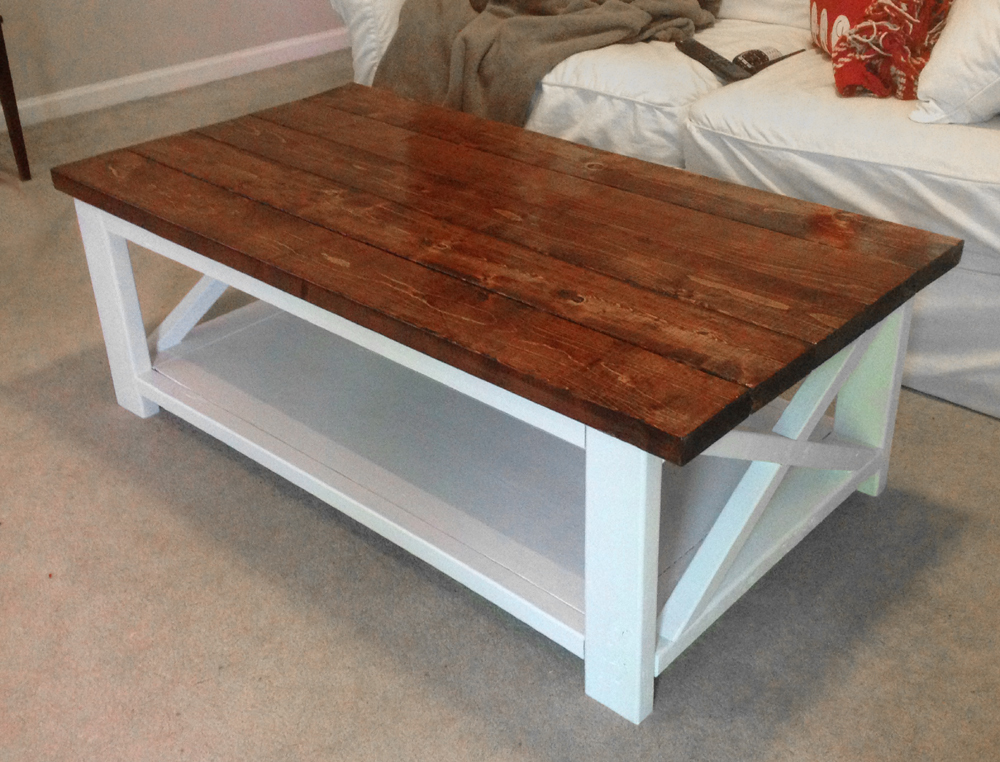
We moved into a new house with exposed dark beams and white railings. Plus, we were gifted a new white couch, so the wife wanted a new coffee table. I loved this project and decided to do it a little different and try the dual finish look to go with our furnishings and house. We love the finished product. Assembly was a snap. As always, the staining and clear coat step took the longest.

Built from Plan(s)
Estimated Time Investment
Weekend Project (10-20 Hours)
Finish Used
Red Oak Stain with clear gloss finish for the top. Plain white gloss paint for bottom frame.
Recommended Skill Level
Beginner

Cedar Ladder Planter

Submitted by Anonymous (not verified) on Wed, 07/13/2016 - 10:51

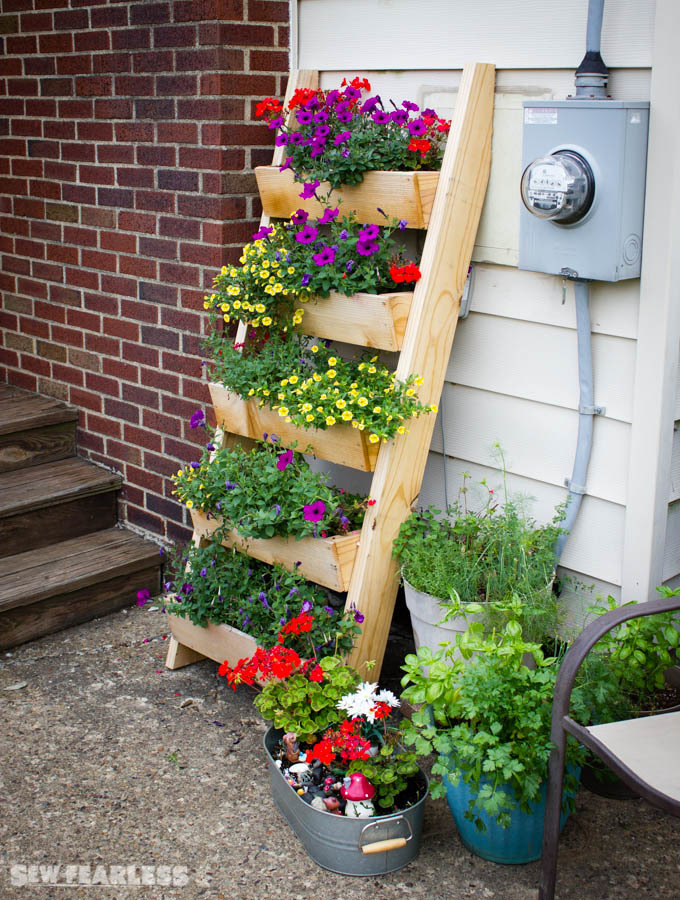
I followed the plan directions to a "T" and it worked out so well! This projects gives me joy everytime I walk up my front steps. Thanks!

Estimated Cost
$30
Estimated Time Investment
Weekend Project (10-20 Hours)
Recommended Skill Level
Beginner
Seasonal And Holiday

Bookcase Dollhouse

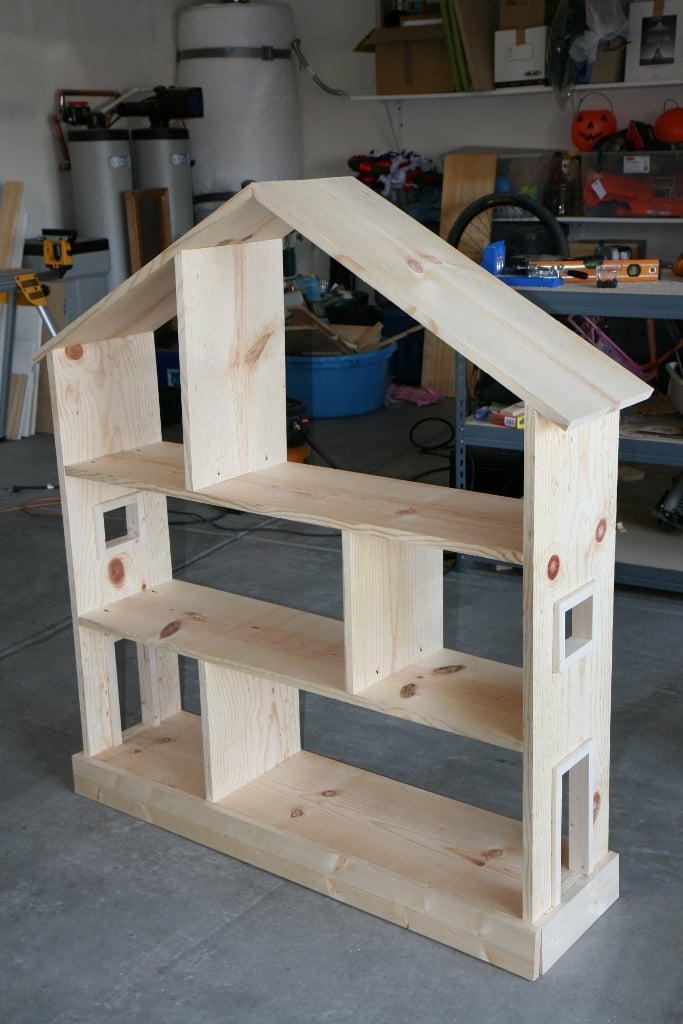
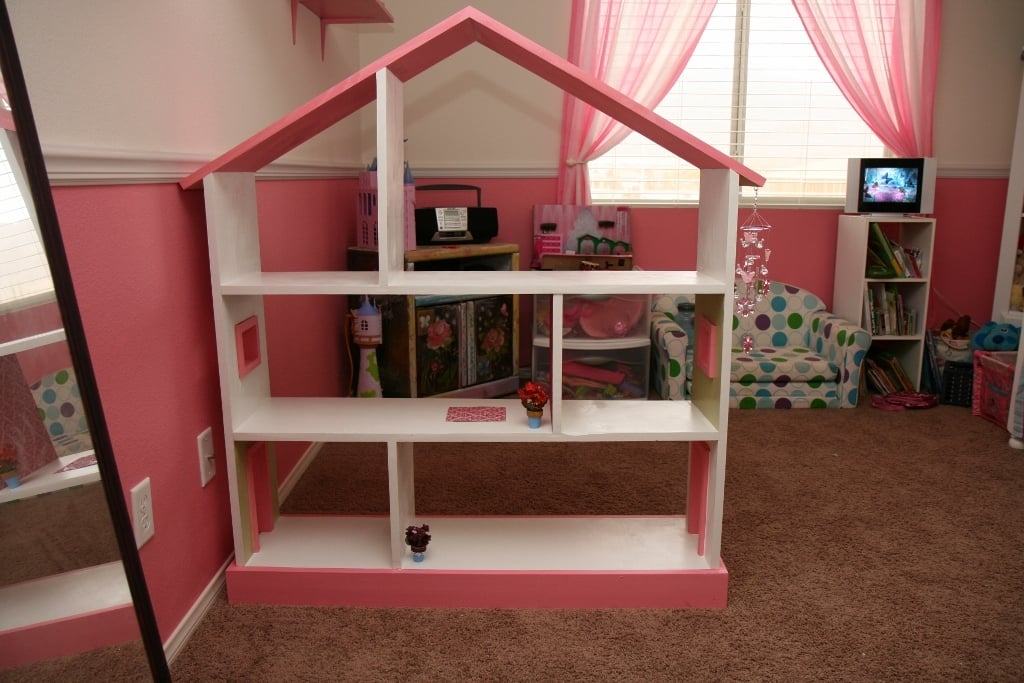
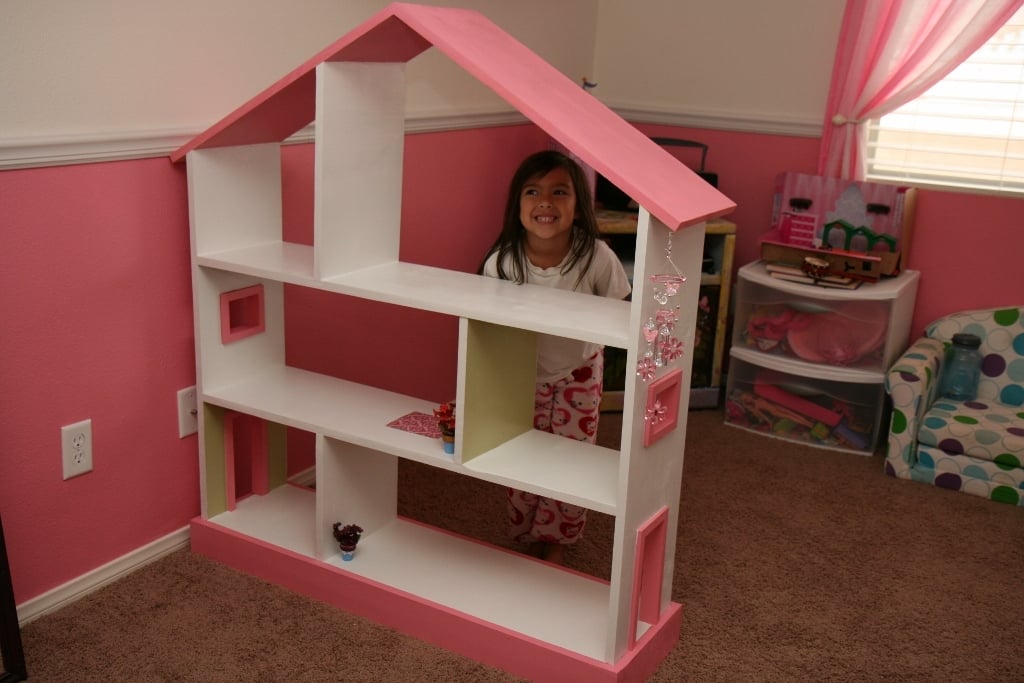
We built this for our daughter's 6th birthday! Love how it turned out :D  As you can see we opted to leave the plywood backing off for the time being so she can use it as a doll house and play on both sides. When she grows out of the doll house phase we will either convert it to a book shelf, donate, or sell in a yard sale ... so many options!

Built from Plan(s)
Estimated Cost
$74 wood & white paint
Estimated Time Investment
Afternoon Project (3-6 Hours)
Finish Used
One quart semi-gloss white paint (2 coats) bought at Walmart. Pink and green colors were left over paints from when we painted the walls in our home.
Recommended Skill Level
Beginner

Comments

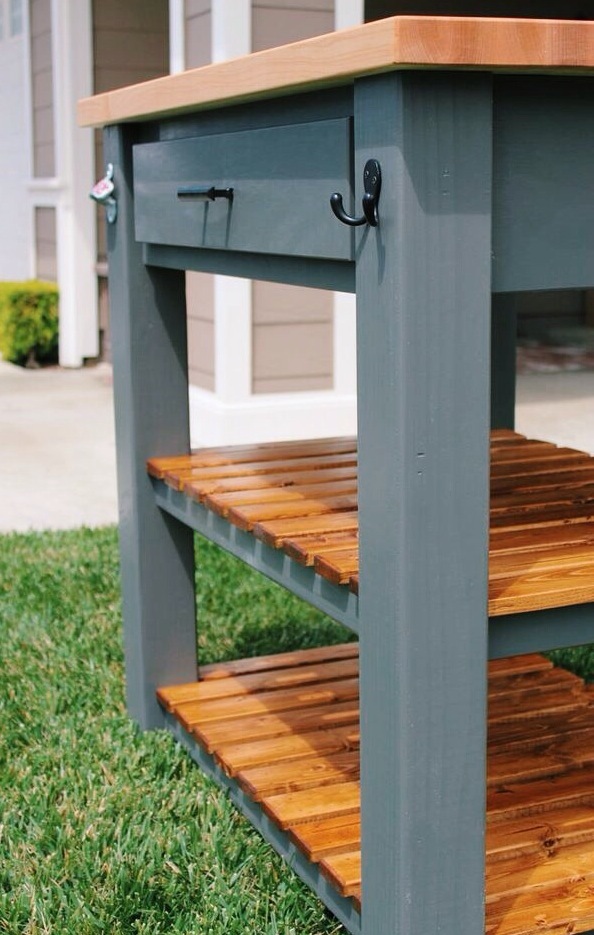
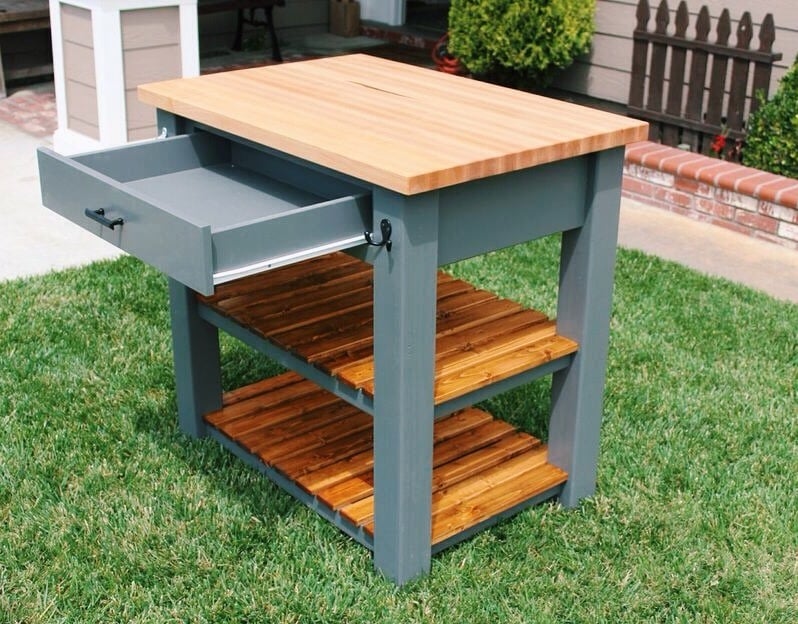
Butcher Block Kitchen Island

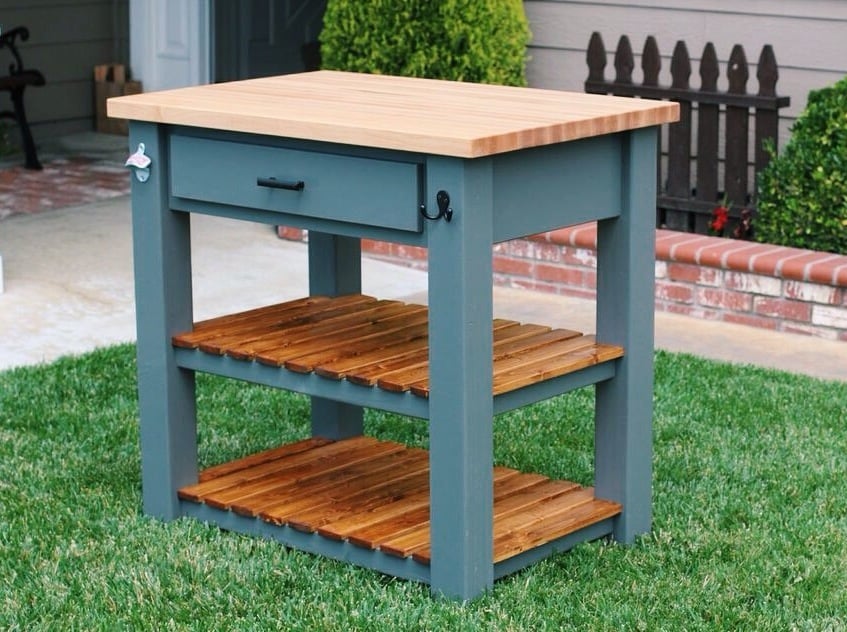
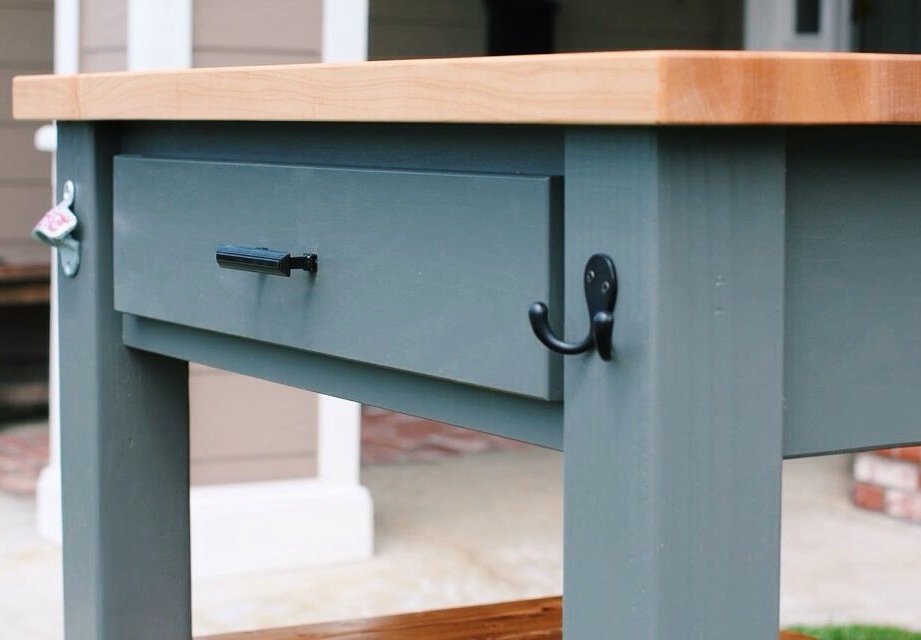
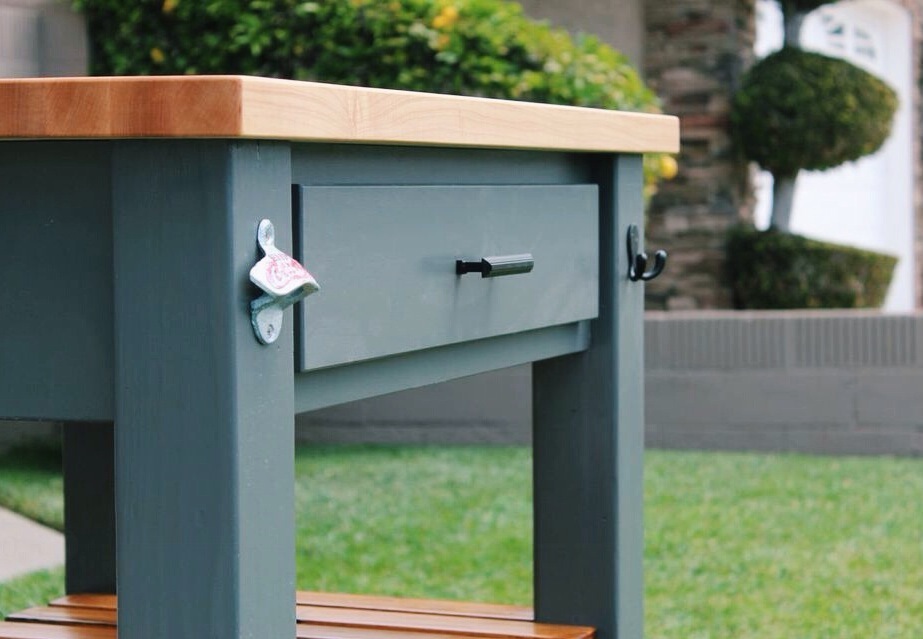
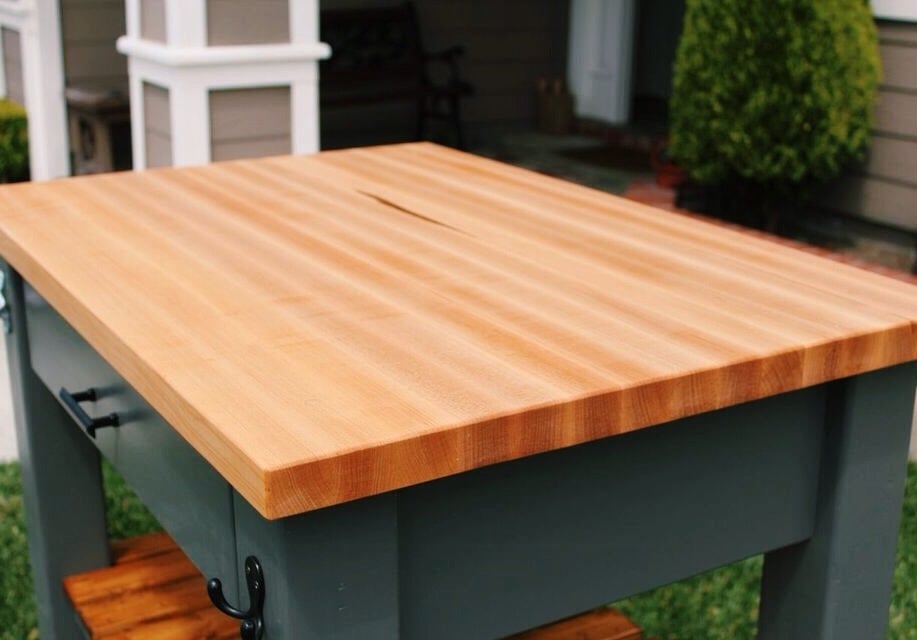
This is a modified butcher block kitchen island built from ana white's plan. Instead of using doug fir (2x4) material for the top, I used hard maple to build an edge grain butcher block top that if knife friendly and food safe. I also altered the dimensions to fit my space.

Built from Plan(s)
Estimated Time Investment
Week Long Project (20 Hours or More)
Finish Used
Mineral oil was used for the butcher block top. The paint is kendall grey by behr and early American stain by minwax for the shelves.
Recommended Skill Level
Advanced

Comments

jbuilder712

Wed, 06/04/2014 - 08:49

Wow, what a stunning piece! That looks like it'd fit my space more than the original plans. Would you mind posting your dimensions and cut list? Thanks!

Rolling Cart for Home

Submitted by Pskov on Tue, 08/30/2016 - 01:50

Thanks for the plans!  My wife and cat love that cart, and I'm not sure who will win )))

This is my first build from Anna's plans.

Estimated Cost
20$
Estimated Time Investment
Afternoon Project (3-6 Hours)
Recommended Skill Level
Beginner

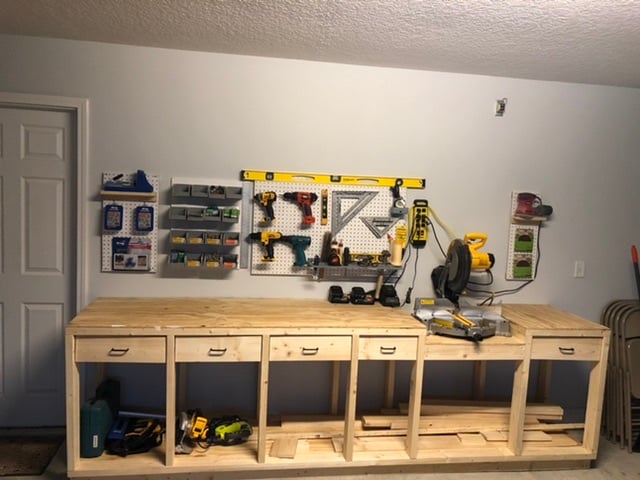
Pony Wall Workbench

Submitted by jboliver09 on Wed, 06/10/2020 - 19:22

Had to size the project done to fit my garage wall.
Left the sides open to use as storage for wood.
Overall Everything worked out, love it!

Built from Plan(s)
Estimated Cost
150.00
Estimated Time Investment
Weekend Project (10-20 Hours)
Recommended Skill Level
Intermediate

Comments

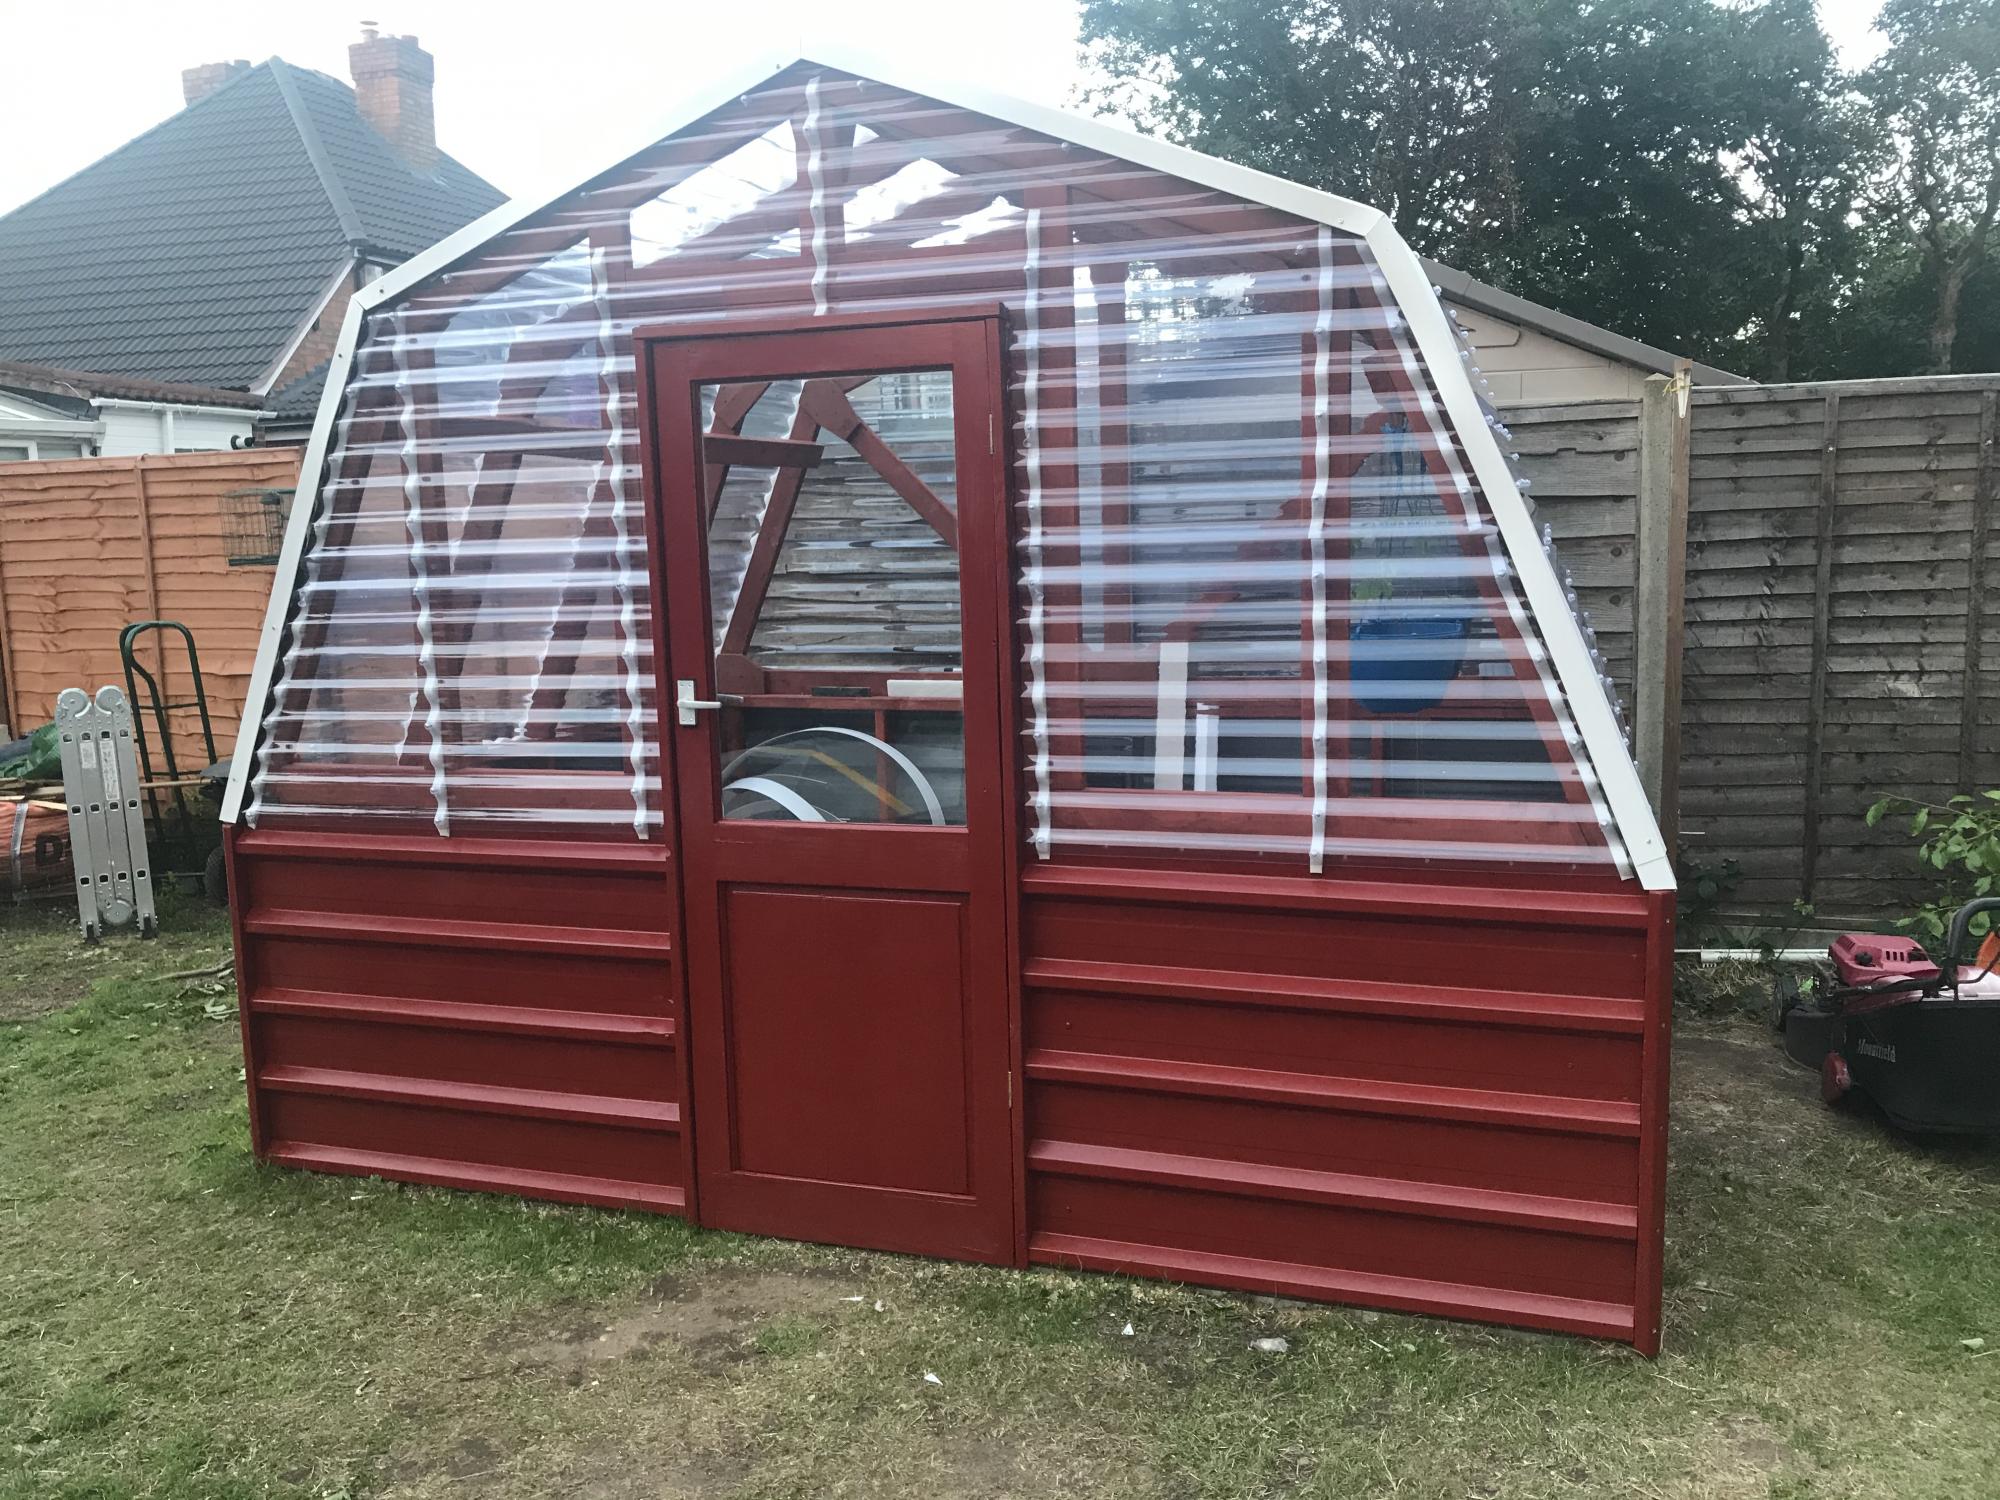
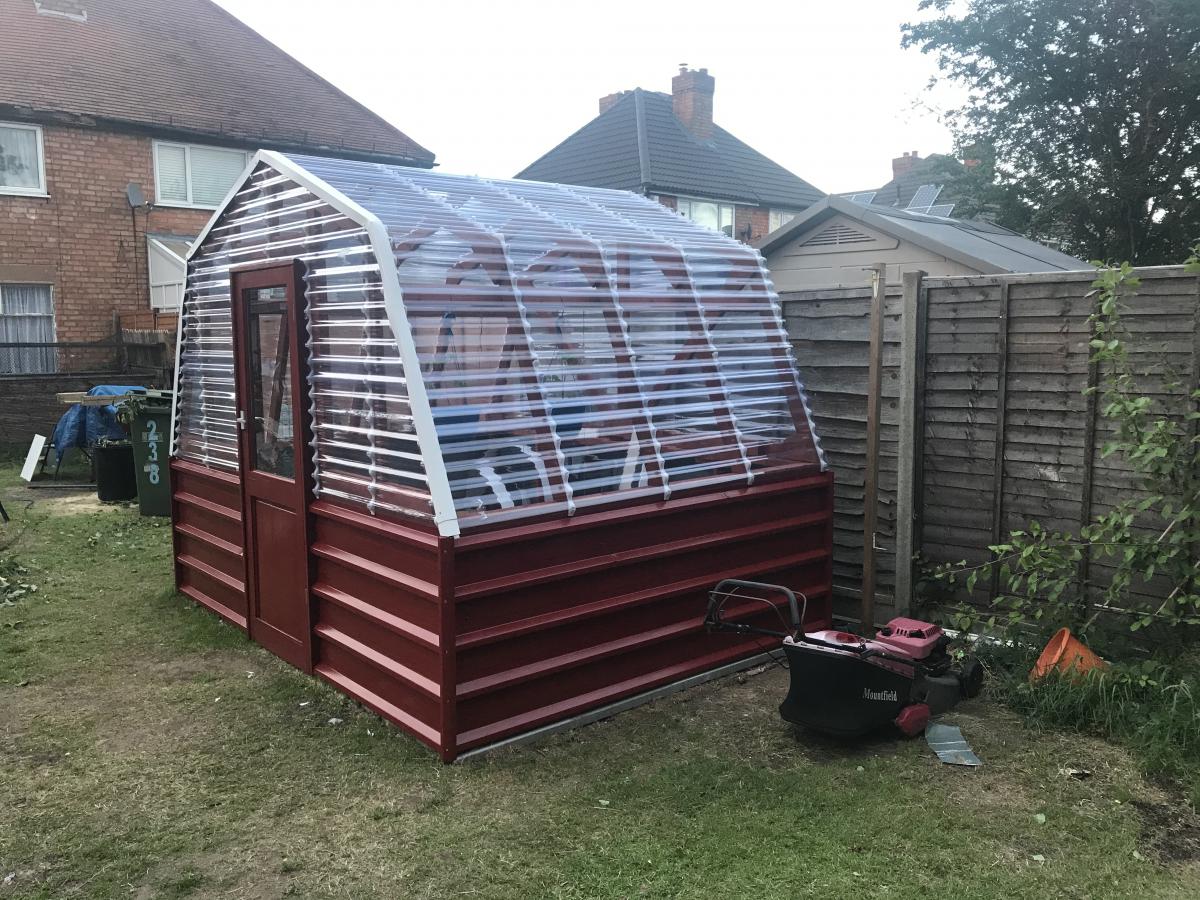
Barn Style Greenhouse

Followed your excellent plans, thank you.
Adapted to make smaller...approximately 10ft X 8ft.
It gave me a very enjoyable project to complete during 'lock-down ' and with Greenhouse.

Built from Plan(s)
Estimated Cost
£800
Estimated Time Investment
Week Long Project (20 Hours or More)
Finish Used
Treated all wood with preservative.
Steel panels (old roofing) were obtain from a kind neighbour for free and all external metal/wood was given several coats of 'Red Oxide' gloss Barn/agricultural paint.
Adaptions made by myself were :-

I put self adhesive 'Flashing' on the bottom wood of the vertical sides...to attempt to protect the wood in contact with the floor from getting over wet......time will tell if it works.

I made additional gussets to support the top piece of wood (attached to each end).

I had trouble with keeping the corrugated roof running parrallel....but the reason for this was that it was not manufactured with straight@right angle ends (when I held a level/straight edge along end - there was a quarter of an inch gap in the centre).
Recommended Skill Level
Intermediate

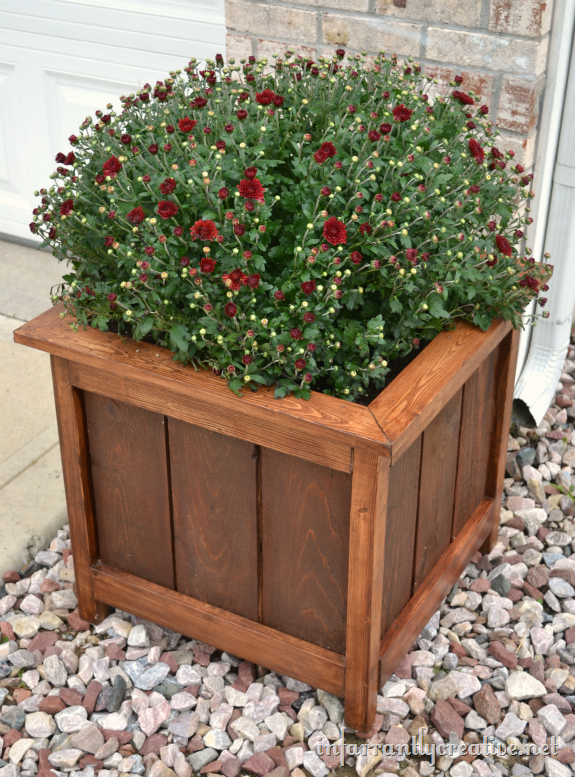
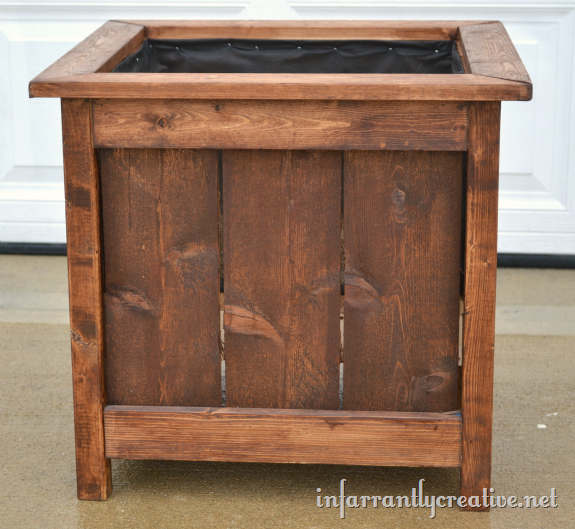
Cedar Planter with Mitered Top

This was by far the easiest project. This planter is HUGE as well and makes a great focal point for your curb appeal. I didn't extend the sides but rather created a mitered edge for the top creating a nice clean finish.

Built from Plan(s)
Estimated Cost
$20
Estimated Time Investment
An Hour or Two (0-2 Hours)
Finish Used
Minwax English Chestnut with a Spar Varathane protective coat
Recommended Skill Level
Beginner

Comments

adkgirl

Sun, 09/22/2013 - 20:25

how exactly did you attach the mitered top?? Finish nails or is there a way to use the kreg jig to hide joinery? These are beautiful, BTW. Thanks :)

Custom Shed Coop

Submitted by Anonymous (not verified) on Sat, 10/12/2024 - 09:59

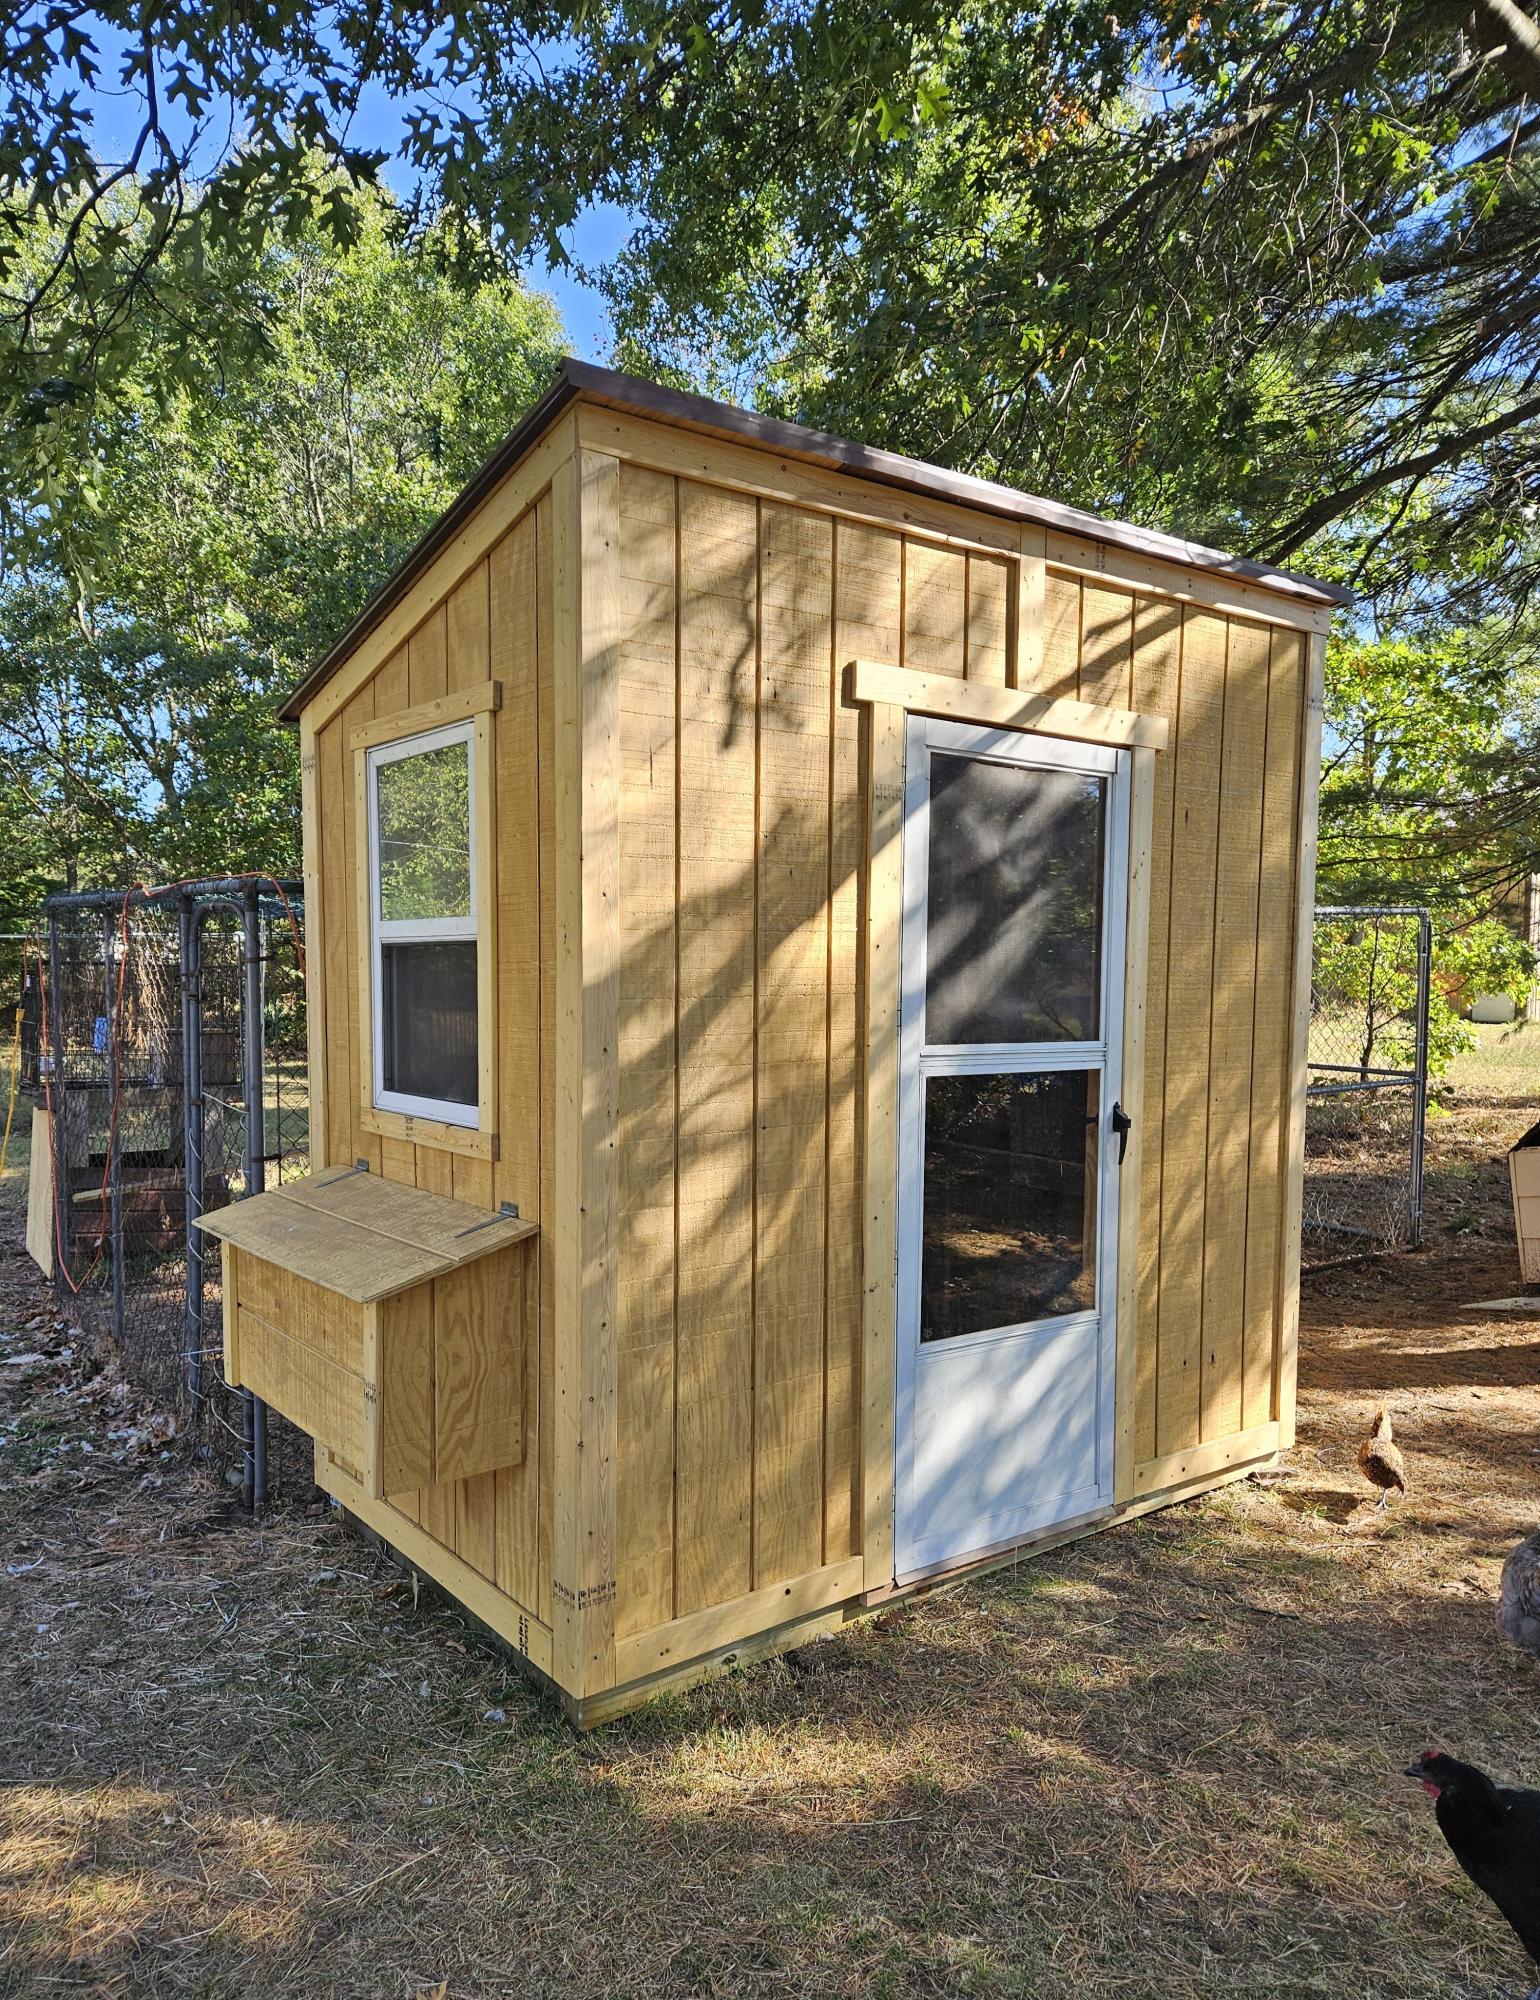
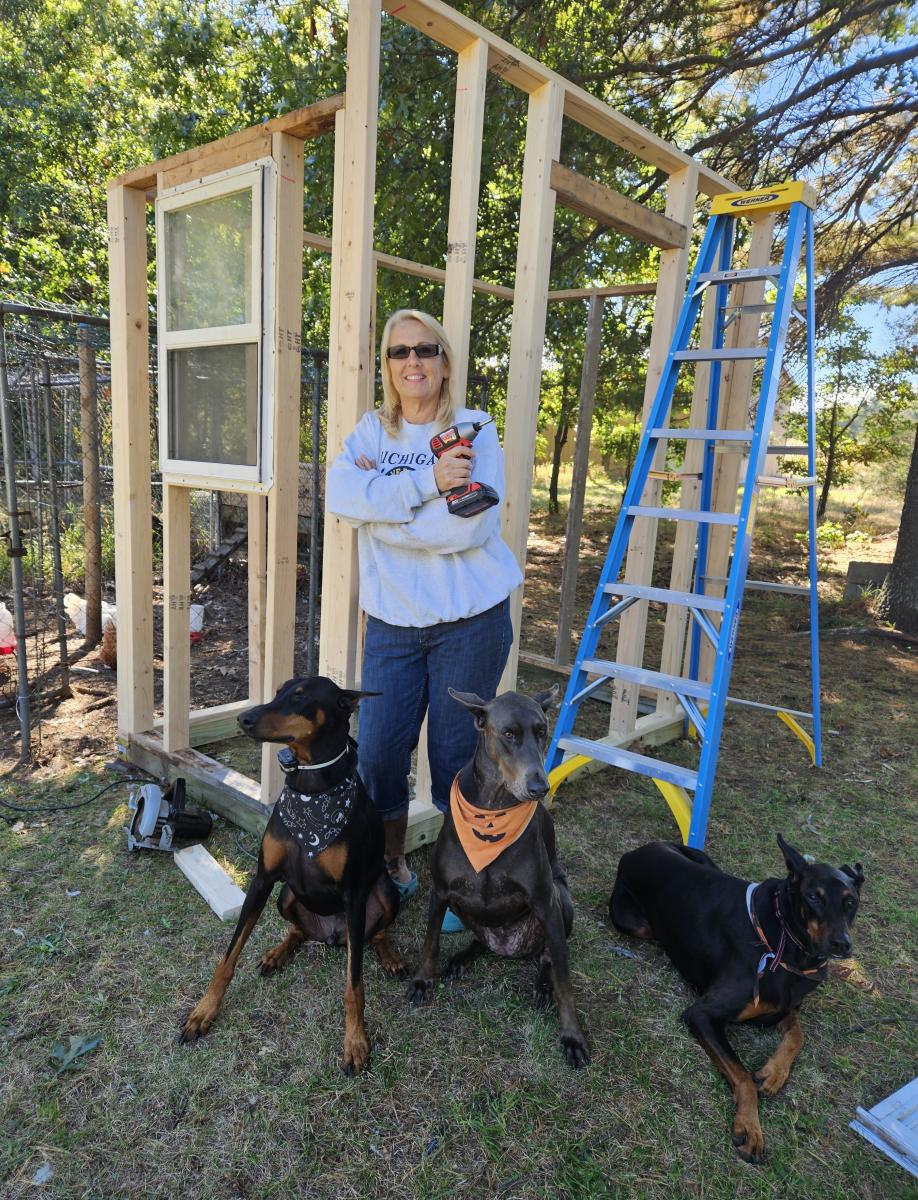
We modified the plan and added 8 inches vertically and widened the foot print to 55 inches. This was to cut down on lumber waste and pressure treated 4x4s on hand for the base. A used window and storm door was recycled for this build. We also moved the storm door to the high side wall due to the storm door's 80 inch height. Sealed in clear Acryllic. Our hens love their new home and reward us with fresh eggs everyday. - Shelley

Built from Plan(s)
Seasonal And Holiday

Sturdy DIY Farmhouse Bed

Submitted by Anonymous (not verified) on Mon, 10/21/2024 - 11:40

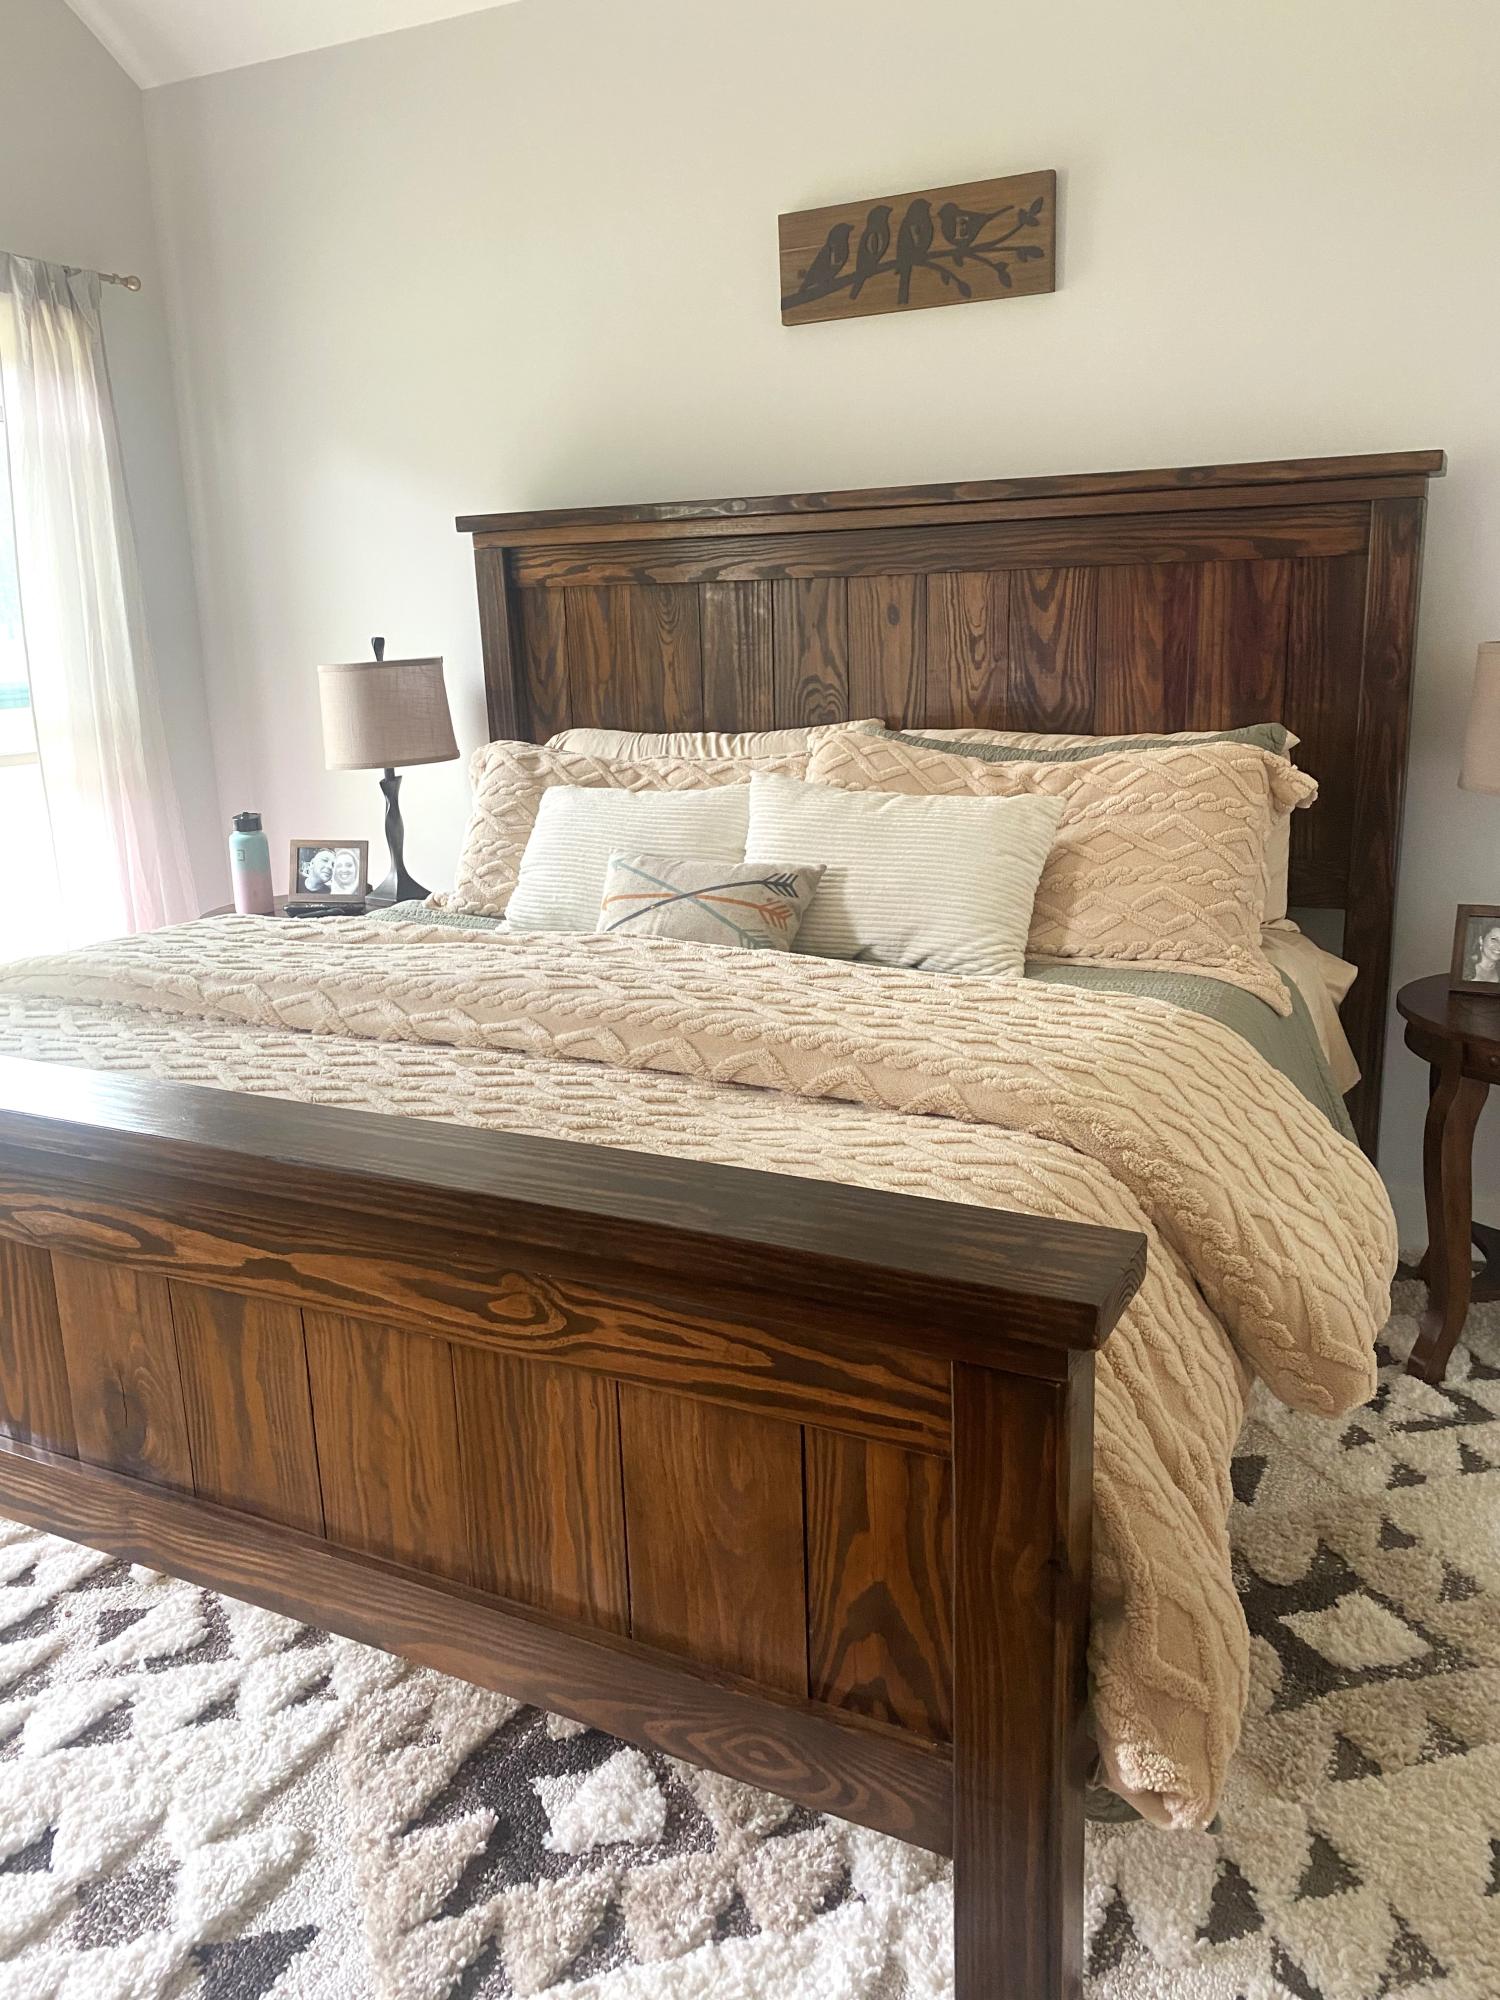
My husband slightly modified the height of the footboard of the farmhouse bed plans. We truly love this bed. It’s extremely sturdy and we have friends and family lined up to have him build them one!

Built from Plan(s)
Seasonal And Holiday

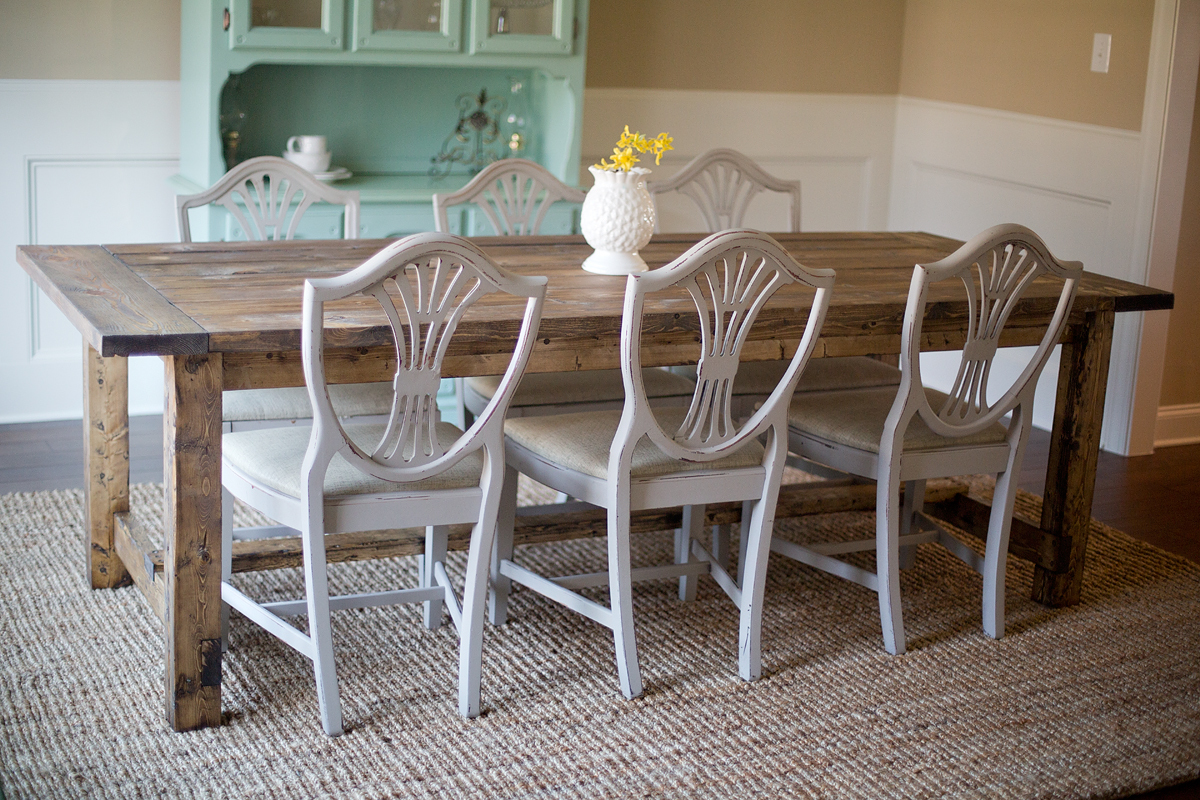
Farmhouse Table

Submitted by ssshindler on Fri, 11/07/2014 - 05:39

This is my first project and I am thrilled with how it turned out. Thank you Ana, you have empowered this stay at home mom! 

Finish Used
minwax dark walnut stain, polyvore wax varnish
Recommended Skill Level
Starter Project

Comments

sagey

Sun, 11/09/2014 - 18:41

I  love this table sooooooo much .

please explain exactly how you achieved the finish on it > is the wood reclaimed!!!!

sagey

Sun, 11/09/2014 - 18:42

I  love this table sooooooo much .

please explain exactly how you achieved the finish on it > is the wood reclaimed!!!!

Sewing Table for Small Spaces

Submitted by Linda7 on Sun, 02/03/2013 - 16:51

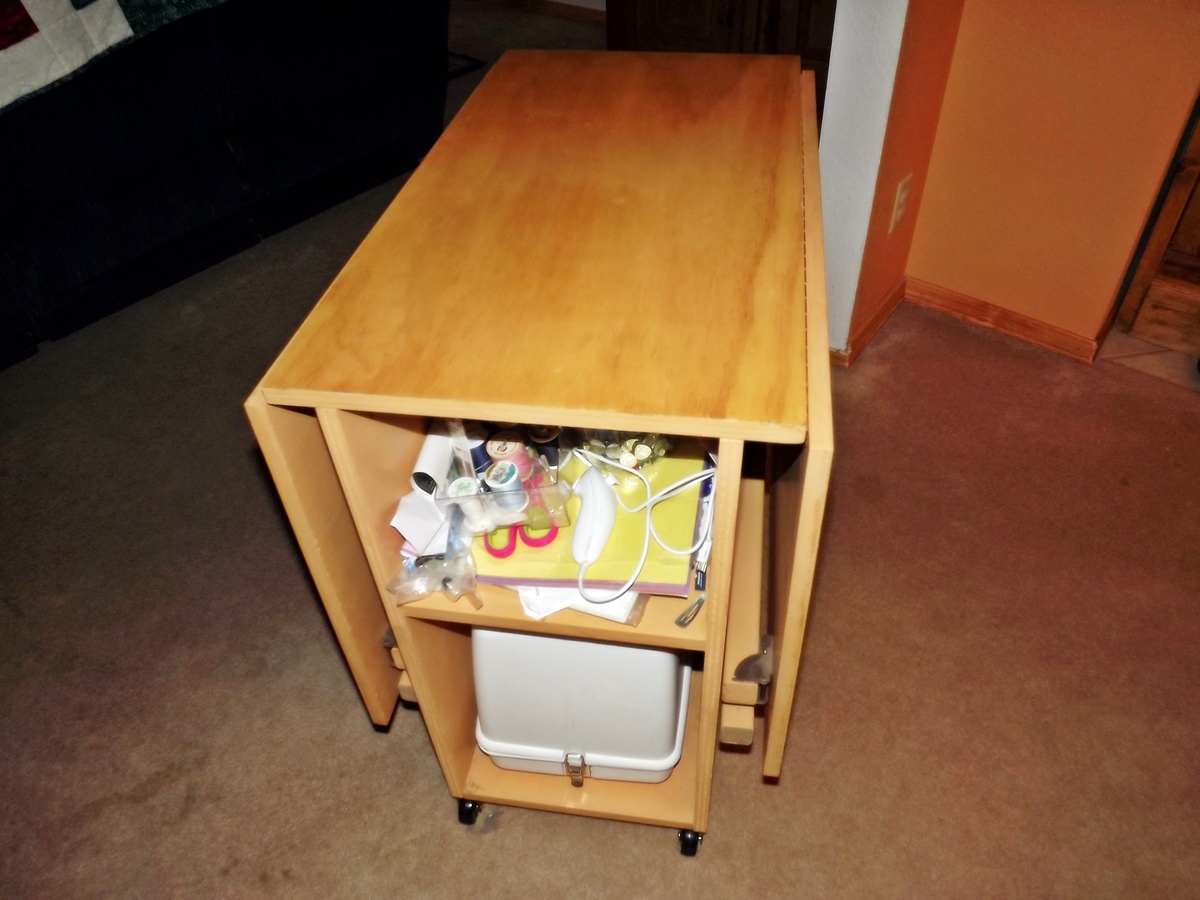
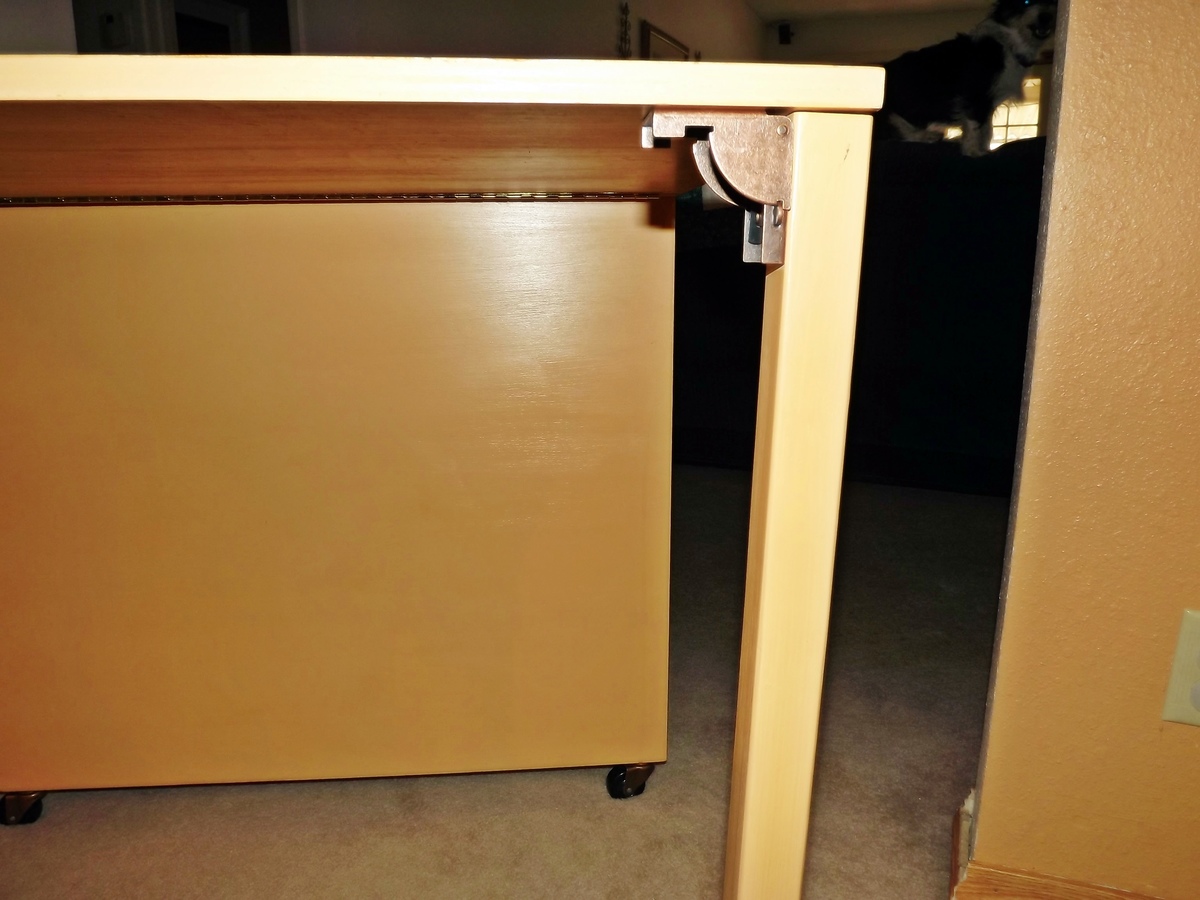
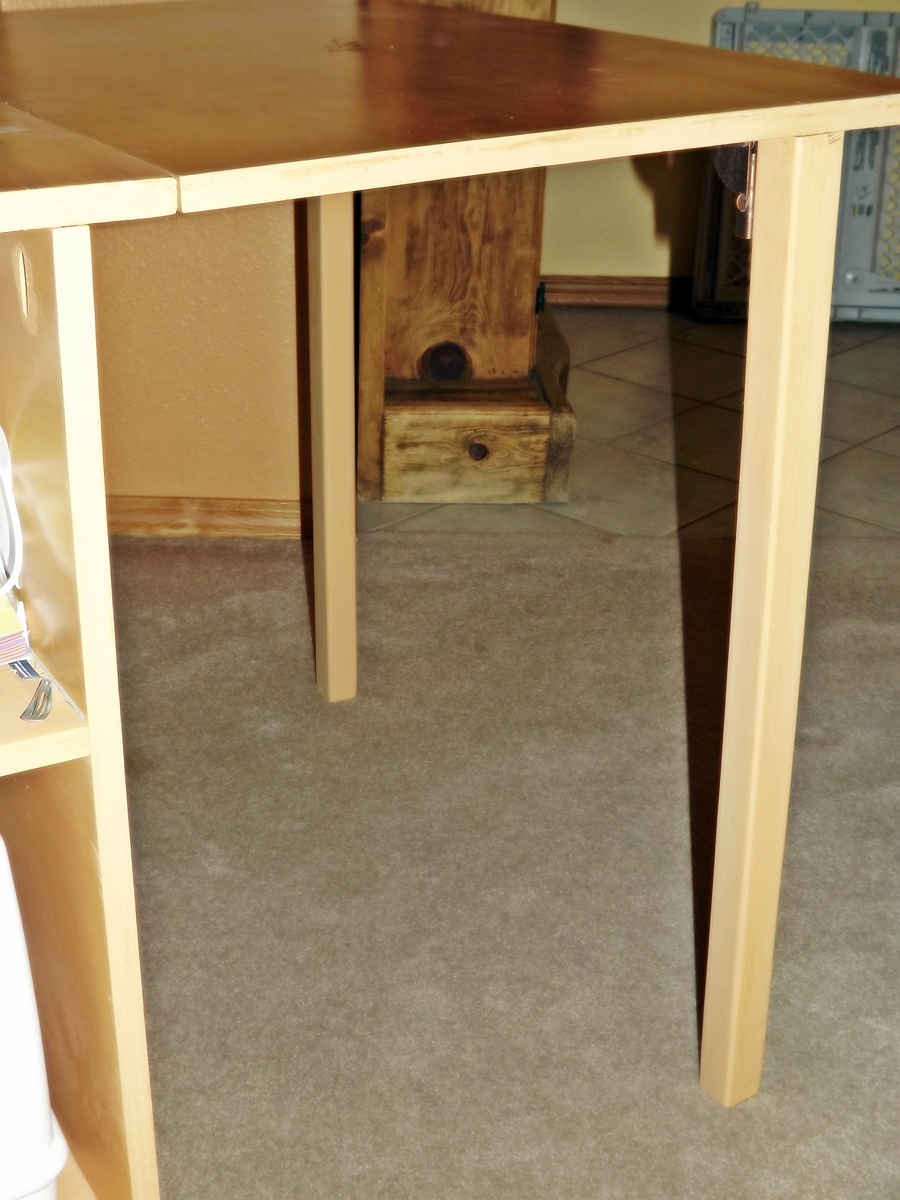
My daughter-in-law needed a compact sewing table, and this plan fit the bill perfectly! I did use 2 x 2 legs instead of 1 x 2s. This makes the table considerably more stable if you plan to use this table with your machine. If you do use the 2 x 2s for legs, you will need to widen your table top dimensions from 15 1/2" to 17" to accommodate the larger diameter of the legs. I also used a piano hinge for each drop leaf. They weren't much more expensive than the hinges listed in the plans, but again, they provide more stability (imho).

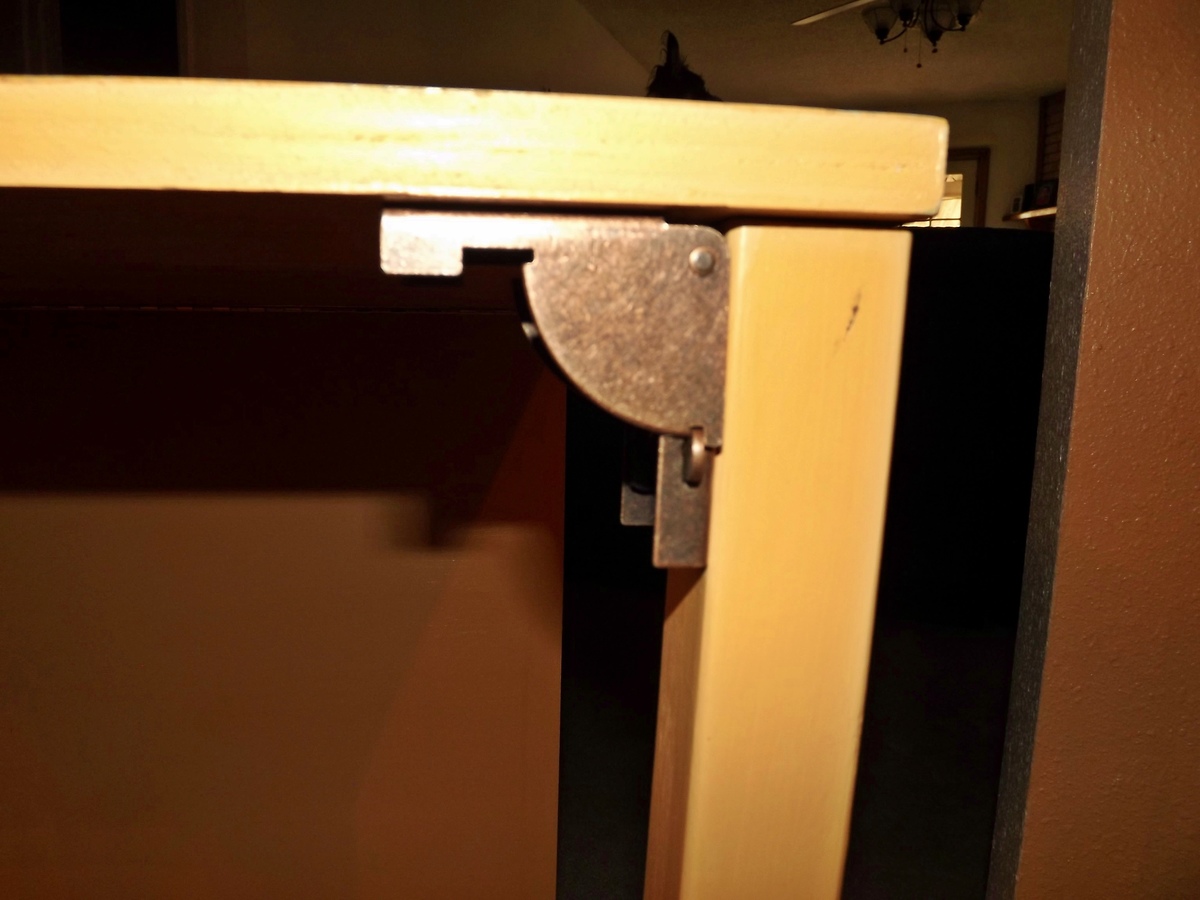
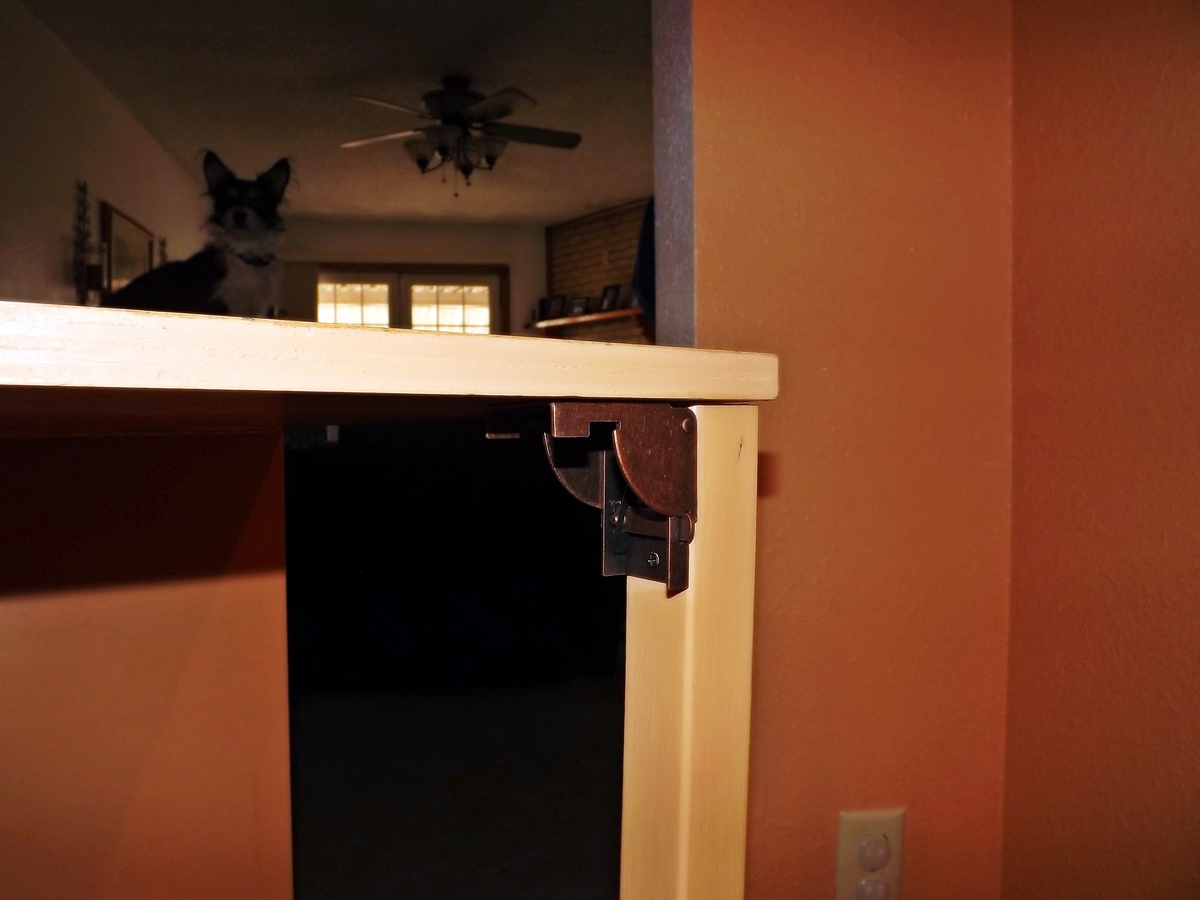
I wanted to show the locking mechanism for the legs in detail. I love these as they hold the legs in place when the drop leaf is down, and they pop into place when the leaf is in use. Called "folding leg fitting" it is part S-149L at $3.65 each at the following link:

http://www.hardwaretree.com/proddetail.php?prod=S-149L

When my daughter-in-law received her gift on Christmas Eve, she wouldn't even let me keep it for another day or two so I could touch-uppaint some spots...she loves it.

Thank you, Ana, for the wonderful plans!!

Built from Plan(s)
Estimated Cost
Around $75.00 not including stain and paint, which I had on hand.
Estimated Time Investment
Weekend Project (10-20 Hours)
Finish Used
Top and leaves stained with pine; box and legs painted w/ semi-gloss wall paint from my daughter-in-law's house (can't tell you the color, but it's from the terracotta color family). Three coats of poly on stained top.
Recommended Skill Level
Beginner
Comments

ACM

Mon, 02/04/2013 - 07:49

The table for my sewing machine costs almost as much as the machine did! This is a wonderful build. You have a very luck daughter-in-law.

sksan

Mon, 02/23/2015 - 14:33

The hinges that hold the leaves look like they run the width of the table as opposed to separate hinges. What did you use? Thanks!

Linda7

Fri, 04/17/2015 - 18:58

I'm sorry. Just now seeing your question. Yes, I used piano hinges so that they would run the entire length. The worked well.

Espresso Farmhouse Console Table

Submitted by MacandFab on Mon, 03/29/2021 - 04:28

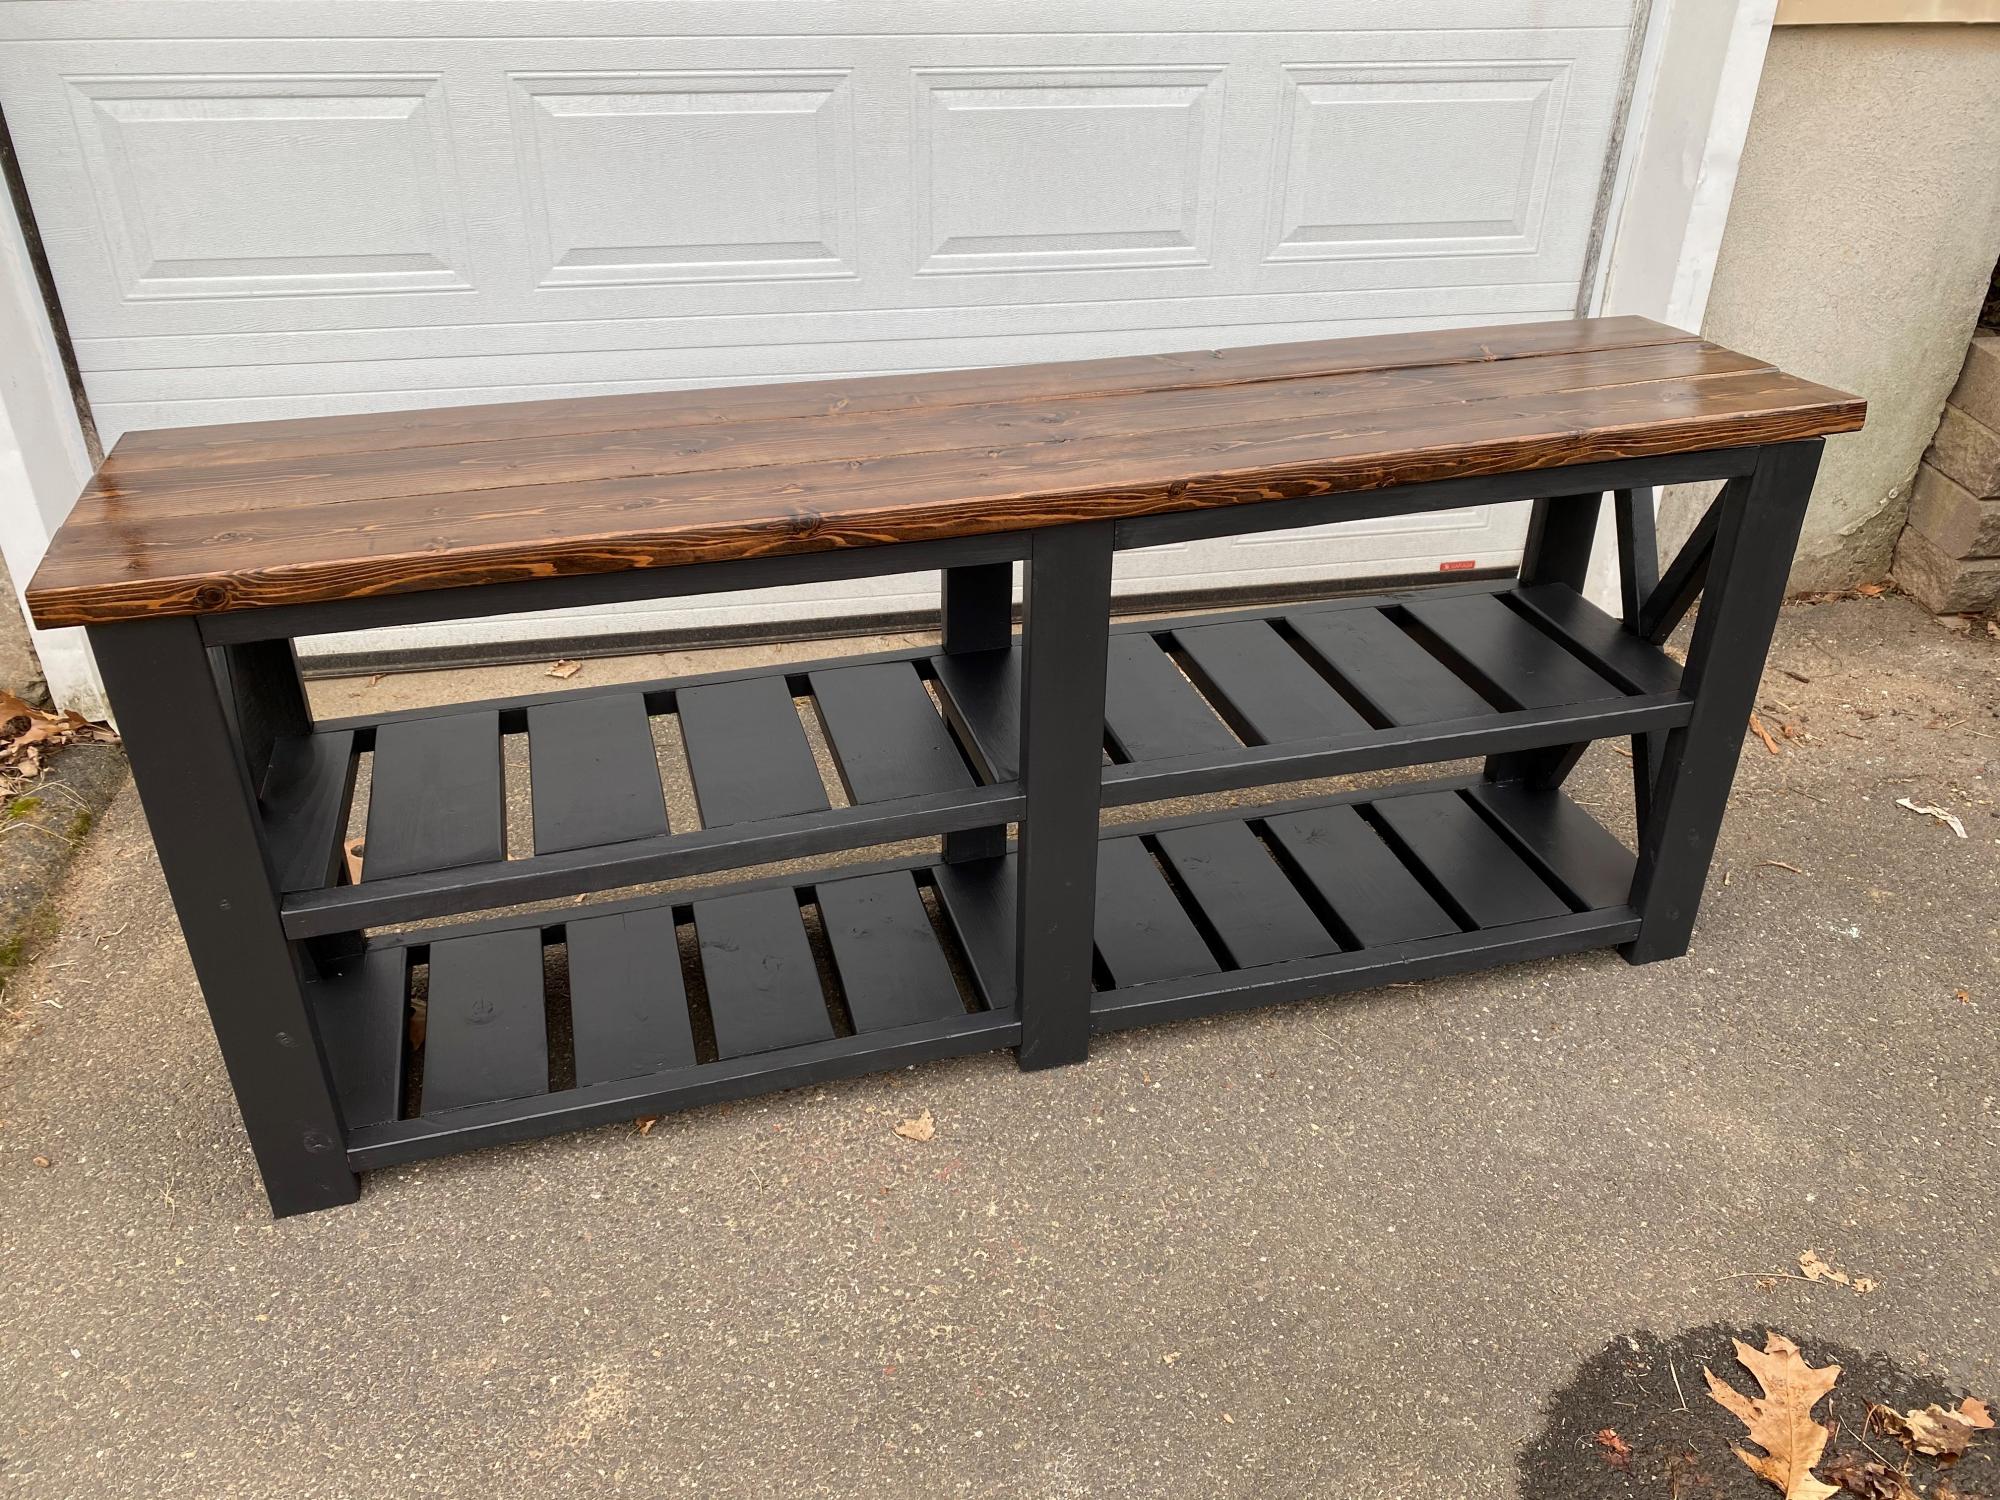
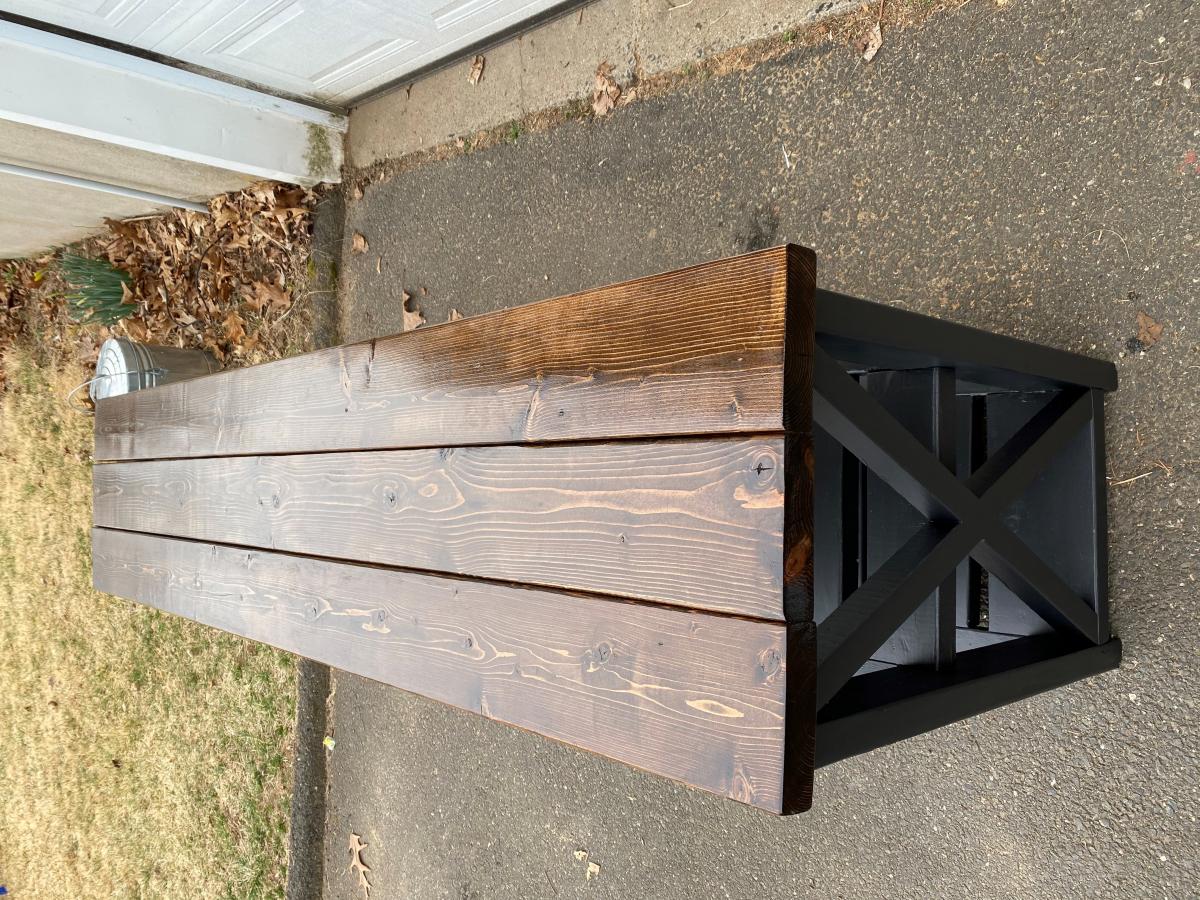
I built the farmhouse console table over the course of 3 weekends. A relatively easy build, the pocket hole were the most time consuming. Its made mostly of Douglas Fir, and pine for the 2x2's. It's a heavy piece, it weighs about 250 lbs - ish. But the wife loves it, as it will be going in our kitchen.

Built from Plan(s)
Estimated Cost
$125
Estimated Time Investment
Weekend Project (10-20 Hours)
Finish Used
Minwax Espresso top with 3 coats of poly and a solid black stain on the bottom.
Recommended Skill Level
Beginner

Comments

Kitty Outhouse

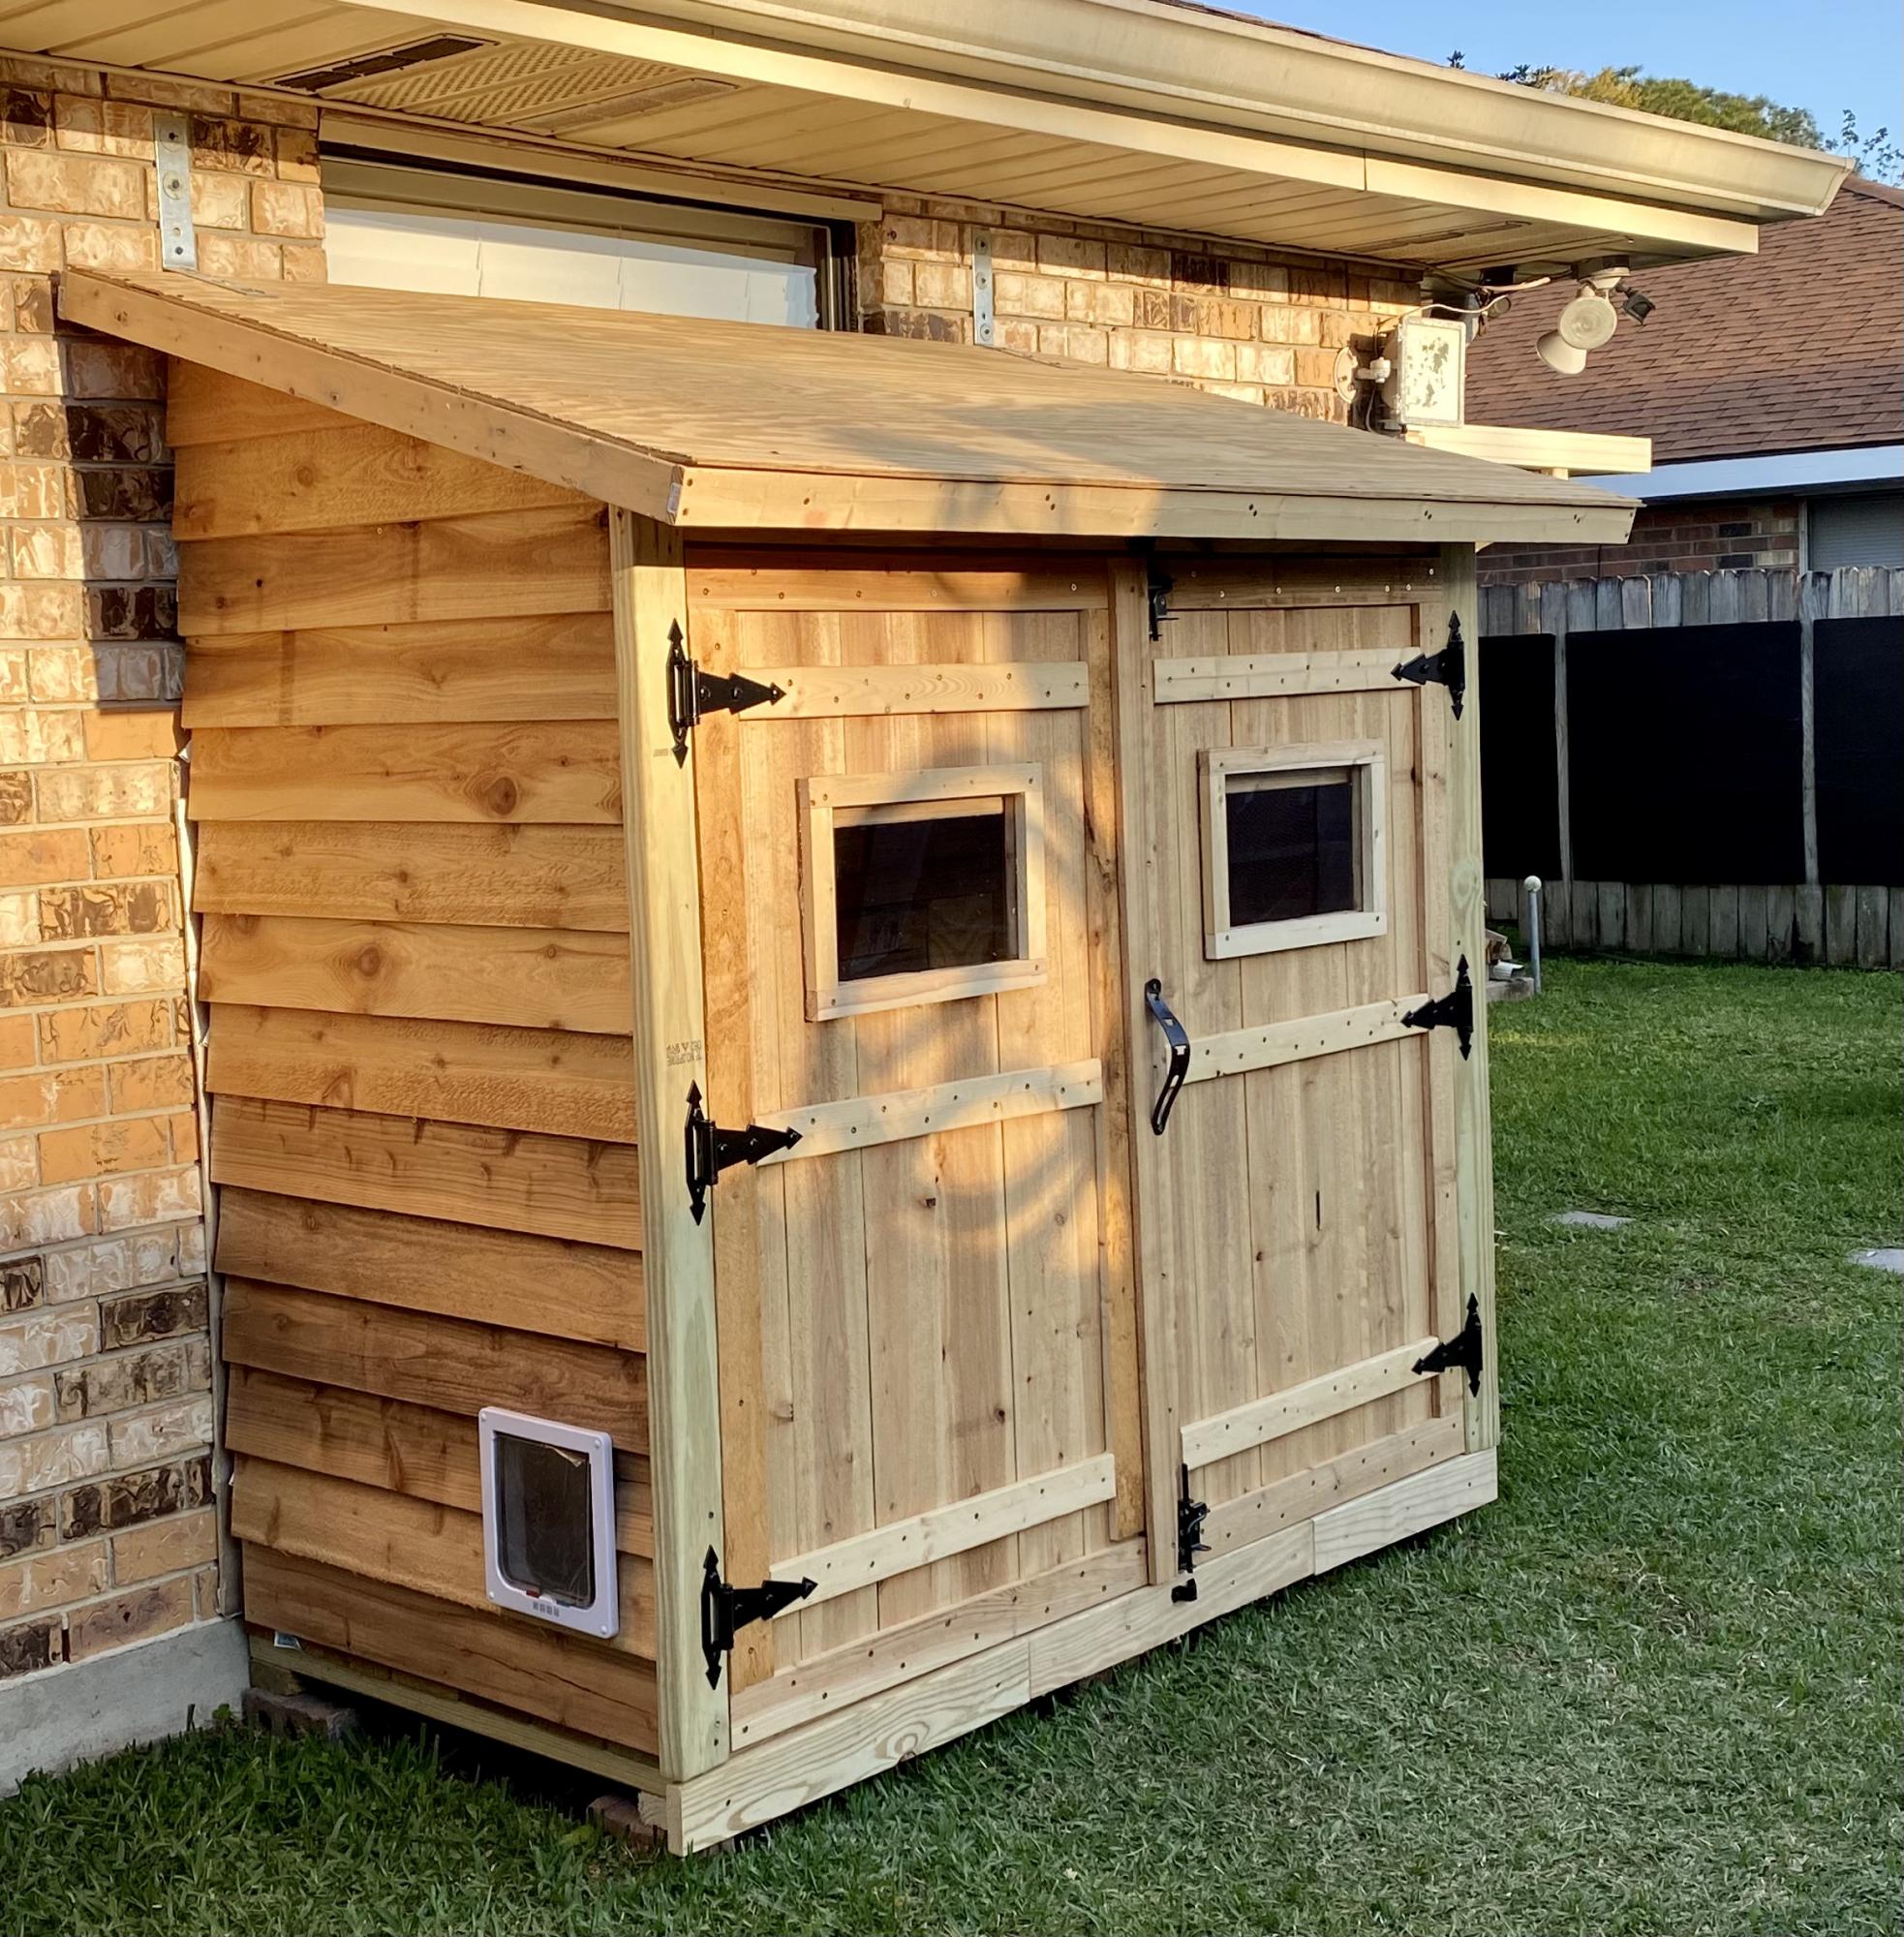
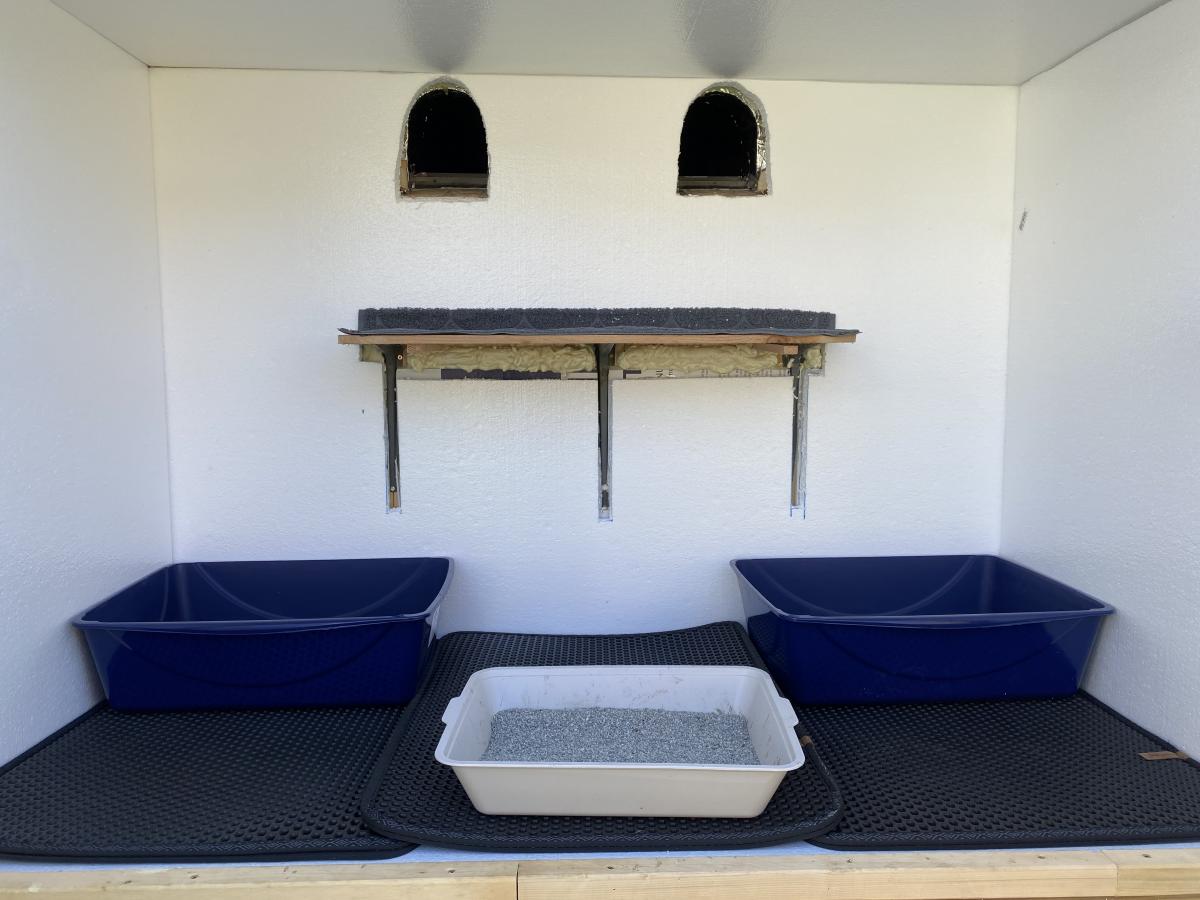
My first Ana White project. Built Ana’s awesome small cedar shed as an outhouse for our many cats. The have access to it from inside the house. Great way to keep litter boxes and the mess out of the house. It is stand alone, and attached to the house, in front of a bedroom window. There are two ‘entrances’ as well as two, one-way, escape hatches, if a cat in the outhouse is interrupted by another cat (I.e. a male cat comes in and the female feels trapped) they can exit to the outside (one way so no critters can come inside!). Ana has easy to build plans, great site! I plan on making the square table just posted today for my newly refurbished deck. Keep in mind, my estimated costs and time reflect a LOT of additional features on the inside. The shed itself, very easy, simple, inexpensive. Very little waste with Ana’s projects as well.
Built from Plan(s)
Estimated Cost
$500
Estimated Time Investment
Week Long Project (20 Hours or More)
Finish Used
No finish, at least not yet.
Recommended Skill Level
Intermediate

Comments

Back