Community Brag Posts

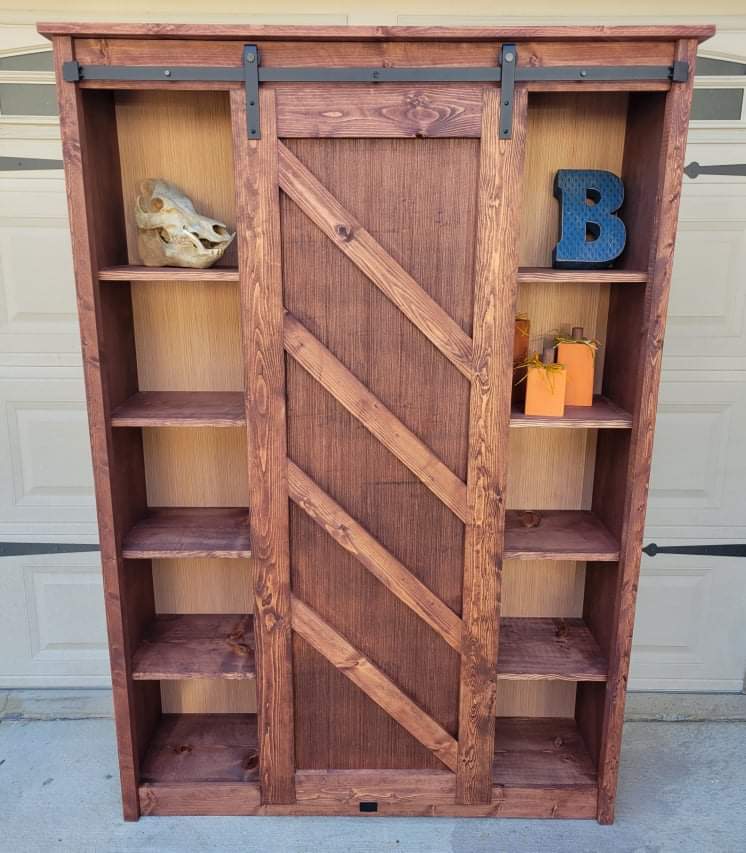
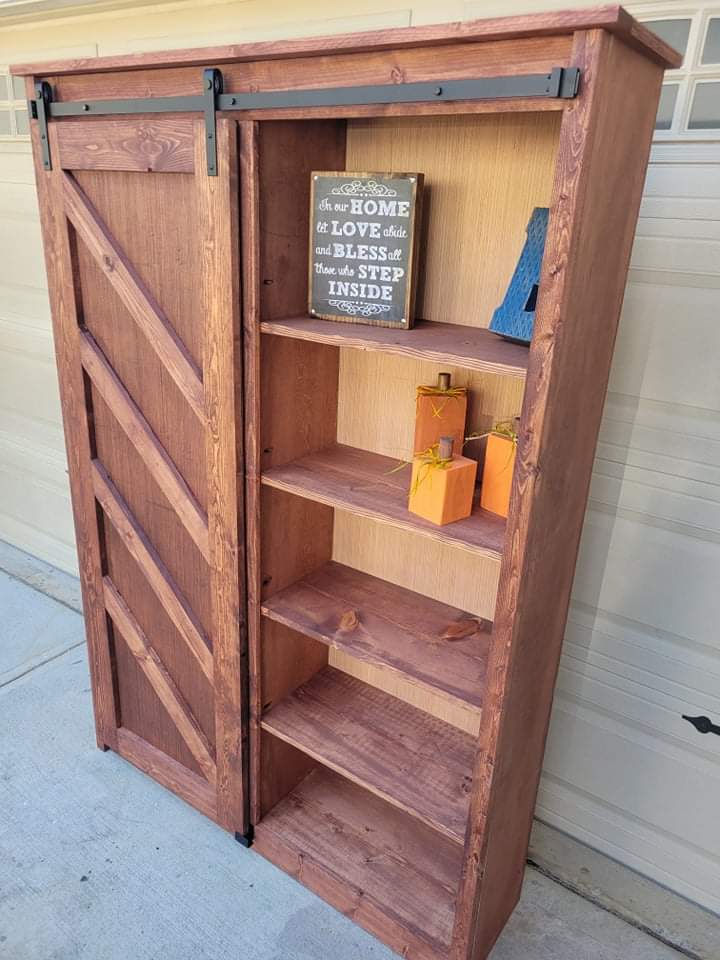
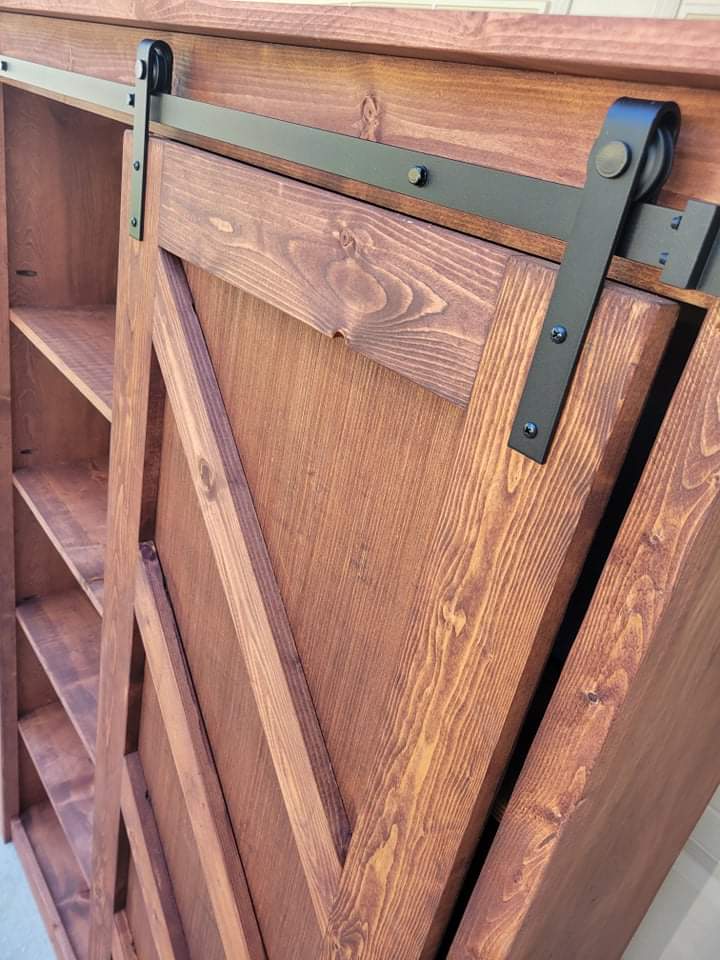
Barn door pantry
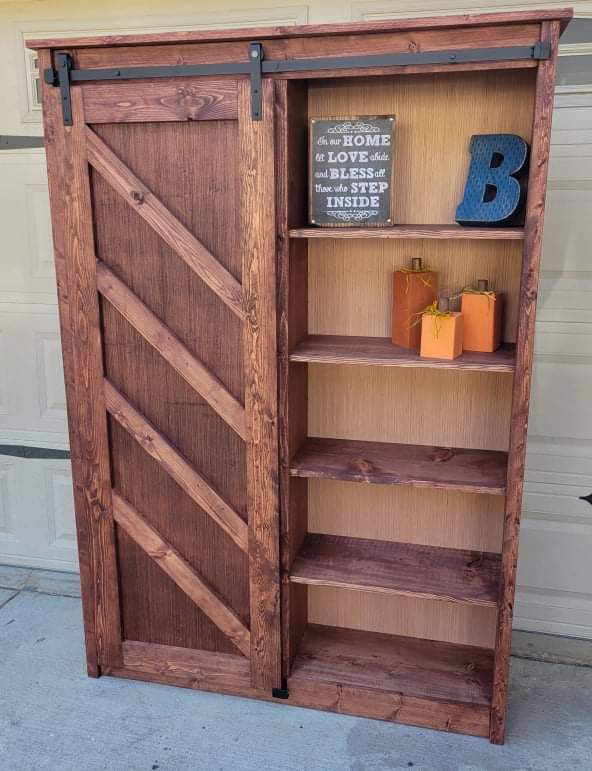
My wife and I built a TV stand for ourselves with double barn doors a few months ago..
in the process,, we accidentally ordered a 4 foot single barndoor hardware kit.. we saved it hoping to use it for something in the future..
We saw this build, and just had to go for it. We made a couple modifications. Instead of buying all those 1x12s (lumber prices are through the roof here) we got a sheet of birch plywood for $60. We had it ripped down to 11.25" and made the sides, middle wall, and top out of those. (All of those pieces are faced out, so you can't see the plywood lines). This saved us about $100. If you do this, you will still need 2-1x12x10s for your shelves. We used this savings and bought an extra sheet of 1/4 plywood to put backs on both sides of the cabinet. (Suggestions on how to do that are in the comments of the original build plans posted by Ana.)
Lastly we had leftover 1x4s from a previous project to make everything except the diagonal slats on the doors. So, we used leftover 1x3s for those.
Varathane honey stain used on finish
All in all, we absolutely love this piece. And now, our neighbors are already eyeballing it and want to know if we can make them one.

Built from Plan(s)
Comments
Sun, 09/05/2021 - 11:05
Beautiful!
Gorgeous piece, love the finish and you process to save some money!
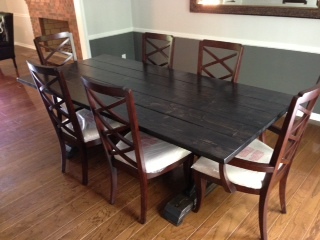
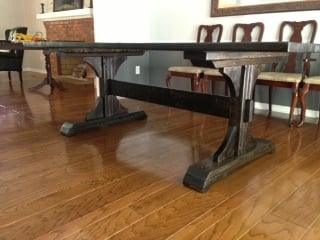
Double Pedestal Table (Modified from Triple Pedestal and Farmhouse Table Plans)
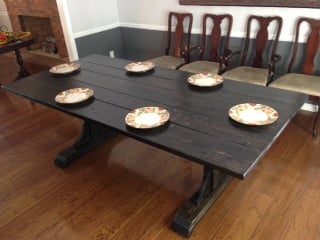
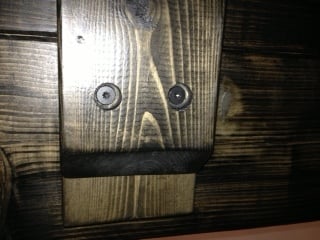
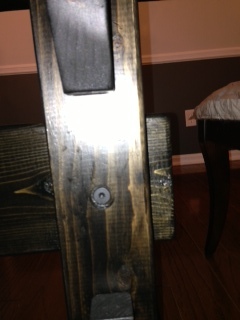
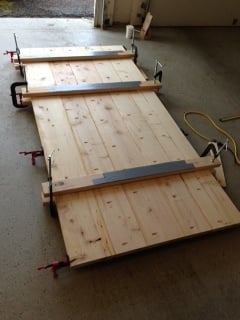
This was my first build and I had a blast! Let me say at the outset that if I can build this table with limited tools and expertise, then so can you! What I lack in know-how, I made up for by not being afraid to try something new. If you do the same, you can sure build this table. This table combines Ana's Triple Pedestal Dining Room Table (pedestals from this plan) and her Farmhouse Table (tabletop modified from this plan). Because Ana's plans are so great and thorough, I will only make note of a few key areas where I either tried something different or where I recommend paying extra close attention. First, on the tabletop, I reduced the length to 90 inches to accommodate our space, and therefore eliminated the center pedestal. As you can see, I alternated 2x10's and 2x8's. I also eliminated the breadboards simply because my wife and I preferred the rustic plank style. I also moved the pedestals in to allow a full 15 inches for a chair to slide underneath. When constructing the tabletop, I used both glue (clamped) and pocket holes on the underside. Don't overdo the glue, as it will tend to drip down (which is the top of the table...I had some drip issues). I also strongly recommend buying/borrowing clamps to keep the top flush or making them from 2x4's as I did. I worked hard on this part, and I'm glad that I did. It was still hard to keep it flush. On the pedestals, I used slightly bulkier decorative pieces (I started the arcs 1.25" from the edge on both ends of the arc). I also attached the top plank directly to the underside of the tabletop rather than to the top of the pedestal in order to both bolster the tabletop and to more easily attach the pedestals precisely where I wanted them. Finally, I drilled shallow flat-bottom holes and used wood bolts to fasten both the pedestals and the crossbeam. This created a nice-looking, low-profile fastener that still enables disassembly should we ever need to move the table (it is HEAVY fully assembled!). The finish is two coats of Minwax Ebony Wood Finish (pre-treated with Minwax Wood Conditioner) and three coats of Minwax Fast-Drying Polyurethane (two coats on pedestals). Thank you, Ana, for the inspiration! Our family has a new table because of it! Thanks to all of you for sharing in our excitement, and I'm happy to share dimensions/details/etc should it be helpful to anyone.
Built from Plan(s)
Estimated Cost
$200
Estimated Time Investment
Week Long Project (20 Hours or More)
Finish Used
Minwax Ebony Wood Finish - 2 coats (pre-treated with Minwax Wood Conditioner); Minwax Polyurethane Satin Clear Coat - 3 coats on tabletop, 2 coats elsewhere
Recommended Skill Level
Intermediate
Comments
Wed, 05/01/2013 - 09:16
Nice job! I really like all
Nice job! I really like all your modifications. I'm bookmarking this!

Wed, 05/01/2013 - 12:56
That looks awesome!
I love what you did with the "arcs" (gotta be careful with words synonymous with this - the word "arches" makes me cringe since I had to rip arches out of nearly all the doorways in my house ;-))! Not sure that I'll ever get around to using this idea, but I must say that I love it!
Thu, 07/18/2013 - 05:17
Excellent Job!
Beautifully done, I like the modifications. Could you please share the dimensions and any detail info please…much appreciated.
Mon, 08/19/2013 - 10:41
Reply to Pabs
Thanks for the kind words. I think I included all of the measurements that differed from the two plans used, but is there a specific measurement(s) that you are looking for? If so, I'd be happy to provide it. Good luck!
Sun, 03/09/2014 - 17:23
Sizes and cuts
Could you give me some sizes on the bottom posts? Cuts of 2x4's for the posts etc..
How far apart did you mount the 2 pedestals? We will be putting it in front of a corner bench.
Thanks
Sun, 03/09/2014 - 18:47
Cuts
The uprights for the pedestals are 22". When you add in the tabletop, the four lateral pieces, and the feet, the table is 30 1/4" tall. As for the spacing of the pedestals, I chose to allow 15" from each end for the chairs to slide all the way under. But it's plenty stable and you really have plenty of freedom here, depending on how many chairs you want to use and how long your table will be.


Mon, 08/03/2020 - 07:25
Love this plan!
I have used this plan to build 2 tables and they are both awesome!
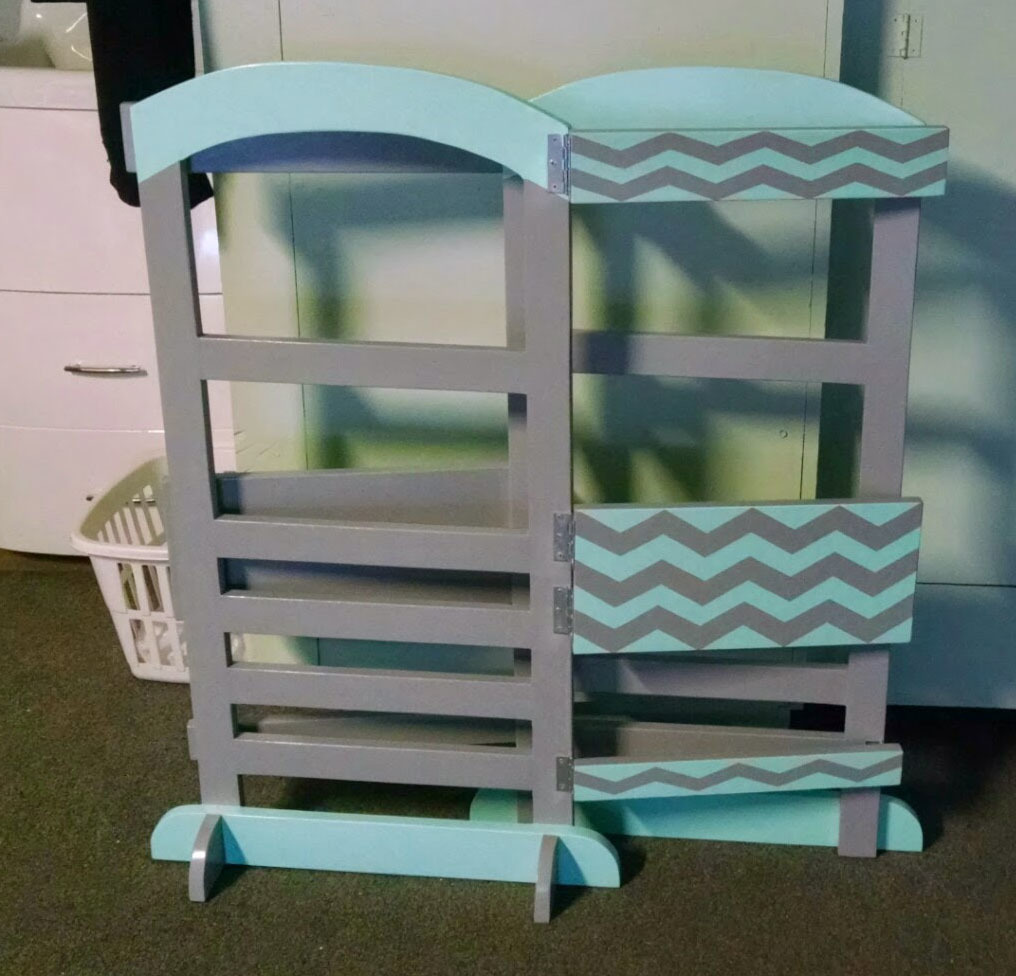
Little Helper
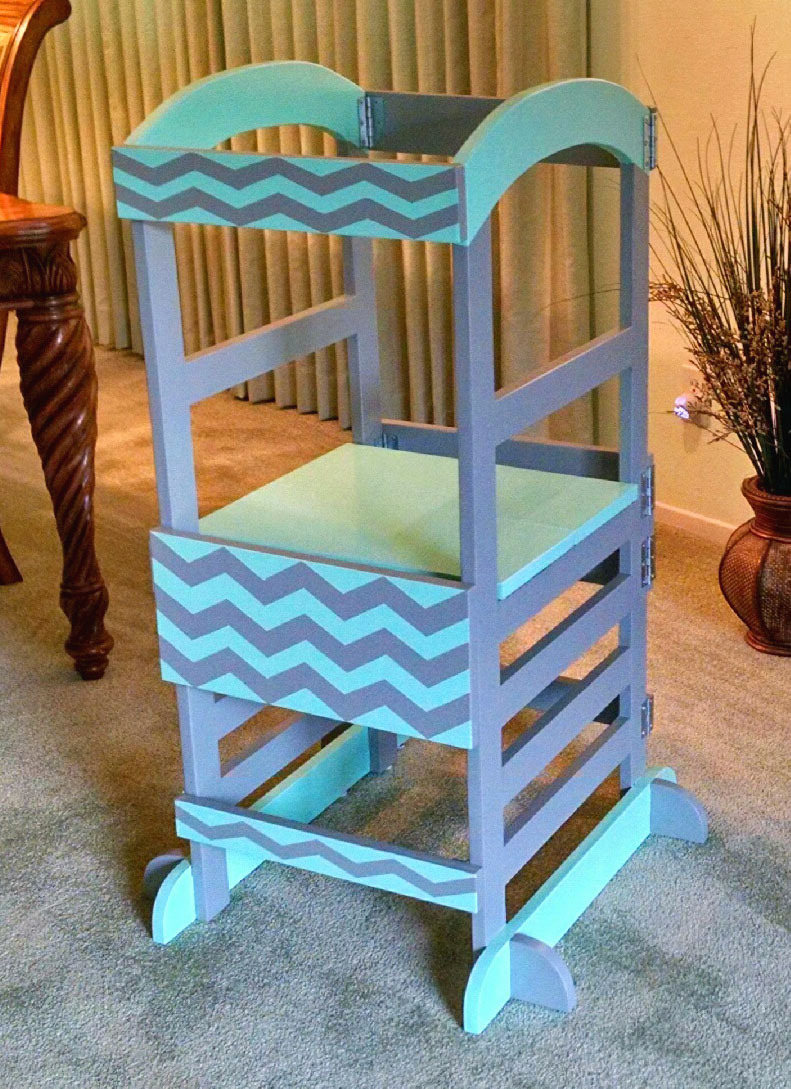
Granddaughter Little Helper!
Recommended Skill Level
Beginner
Comments

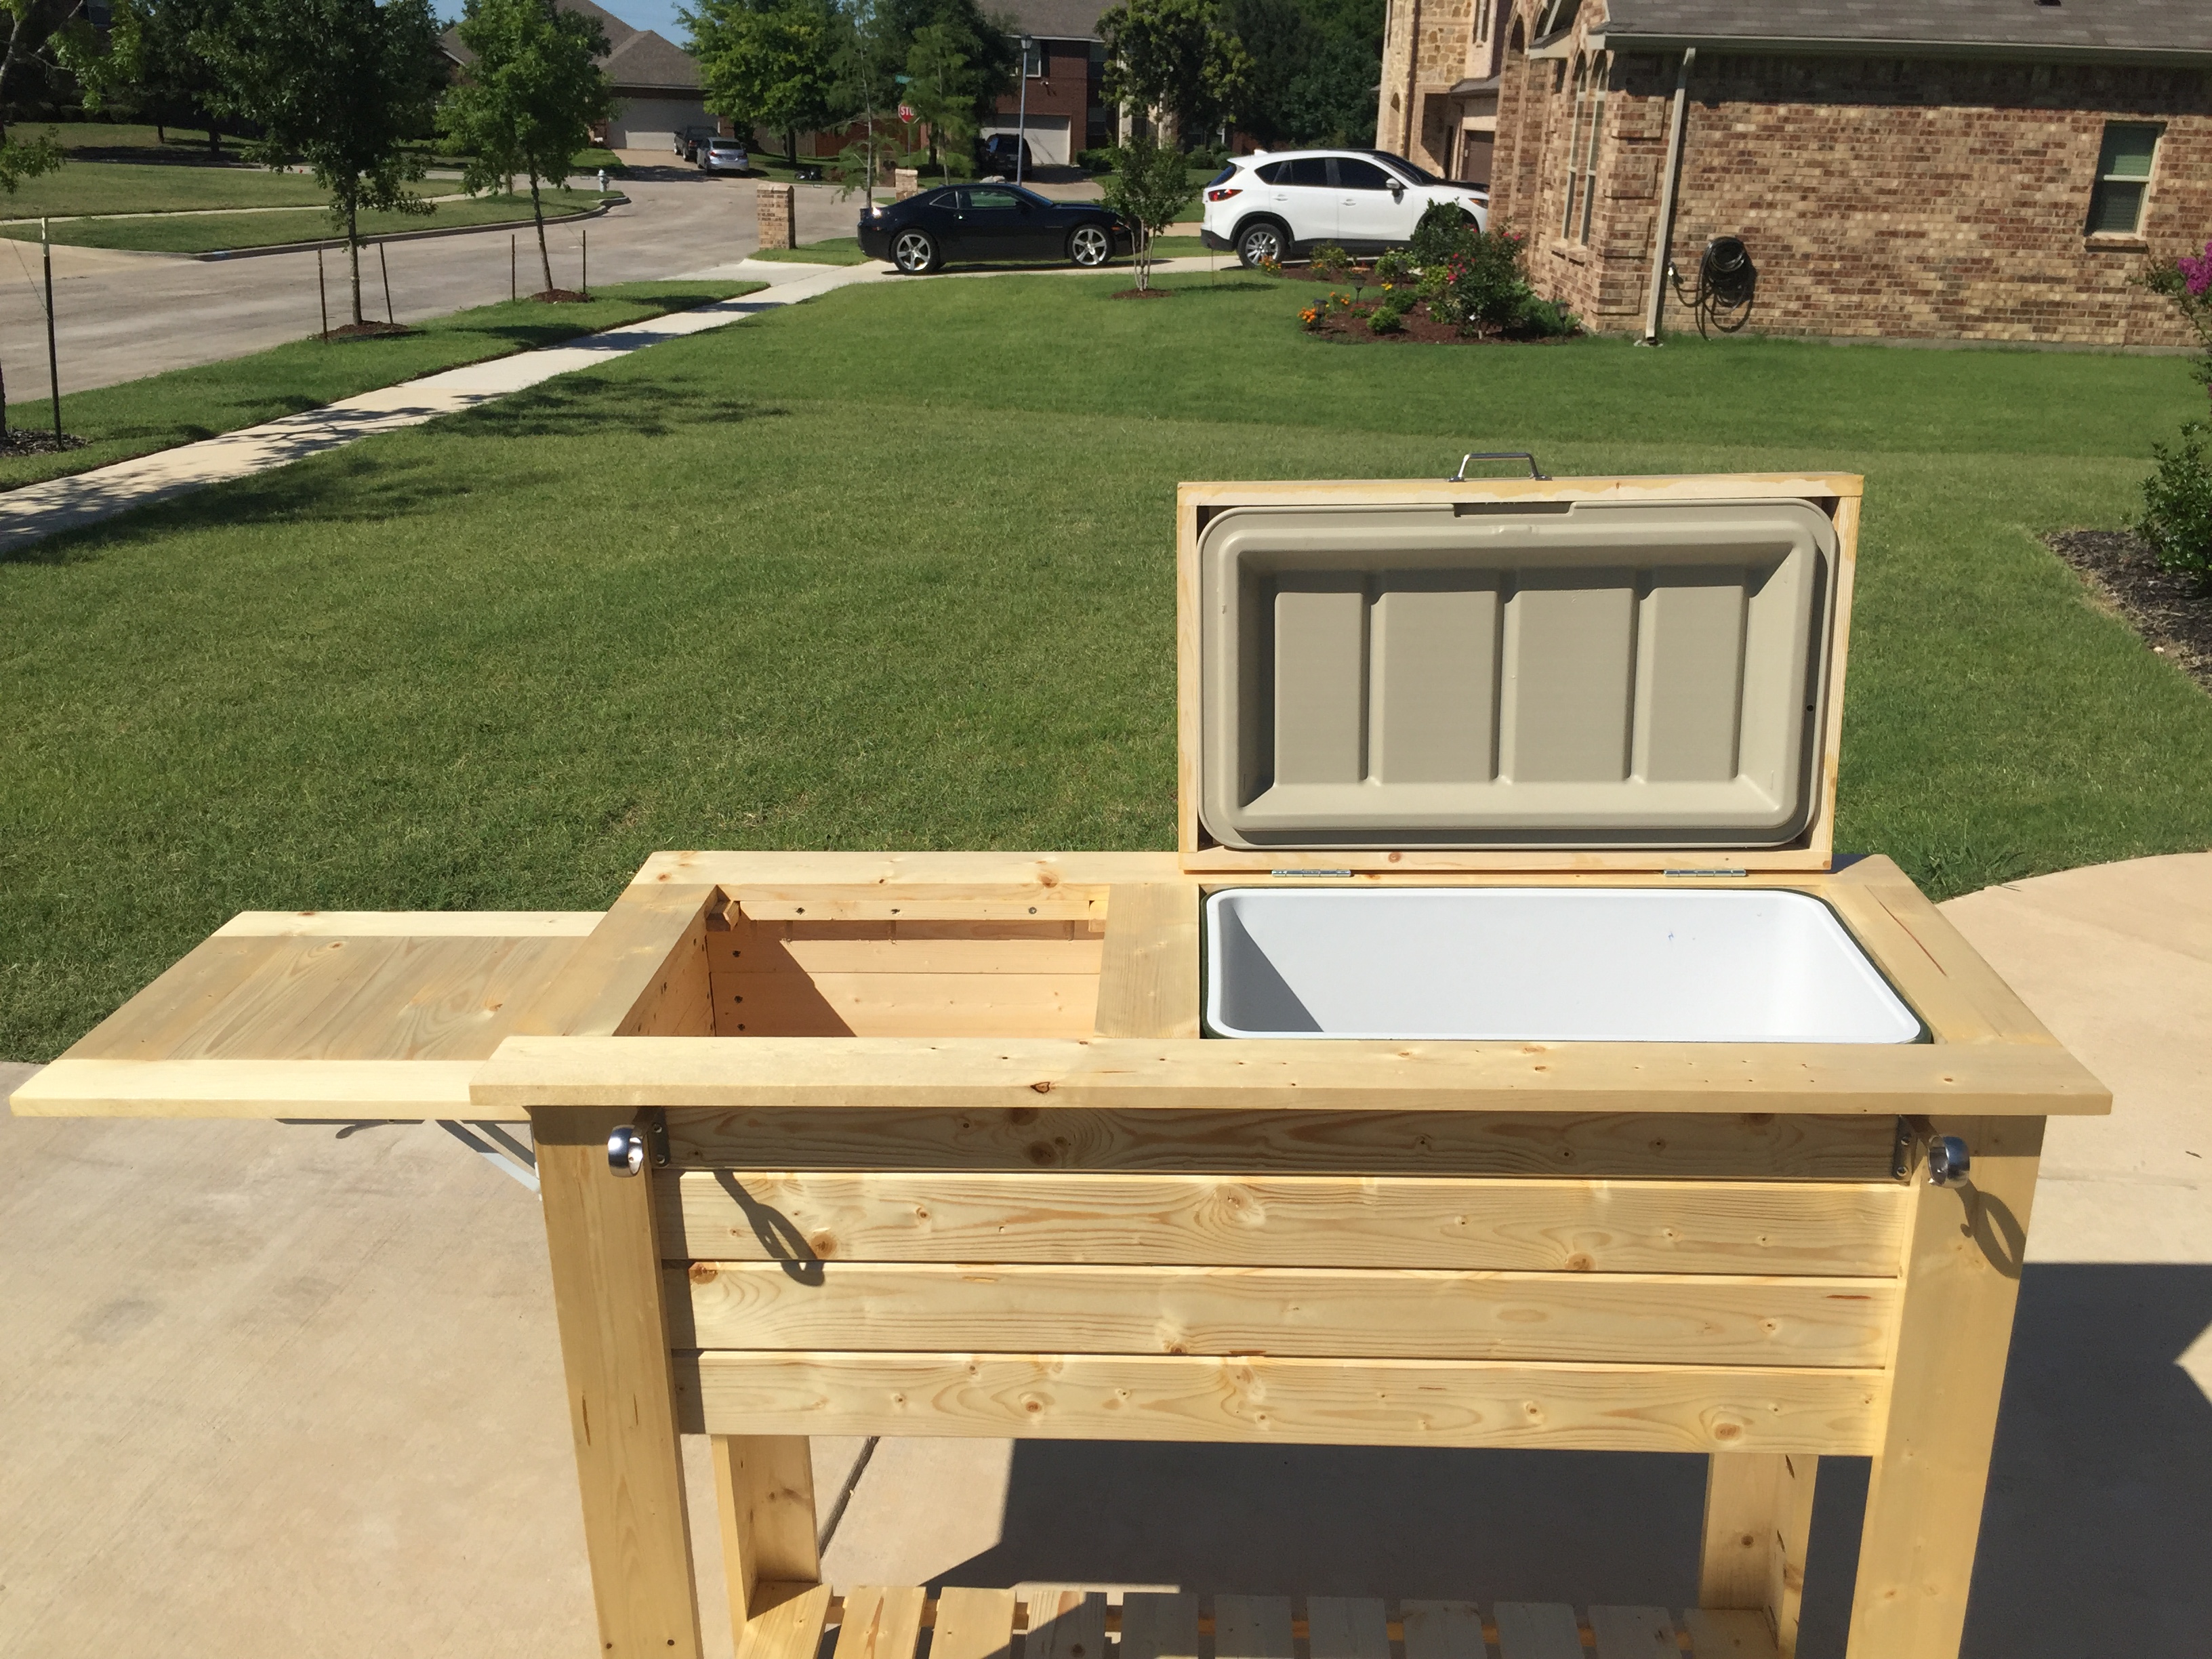
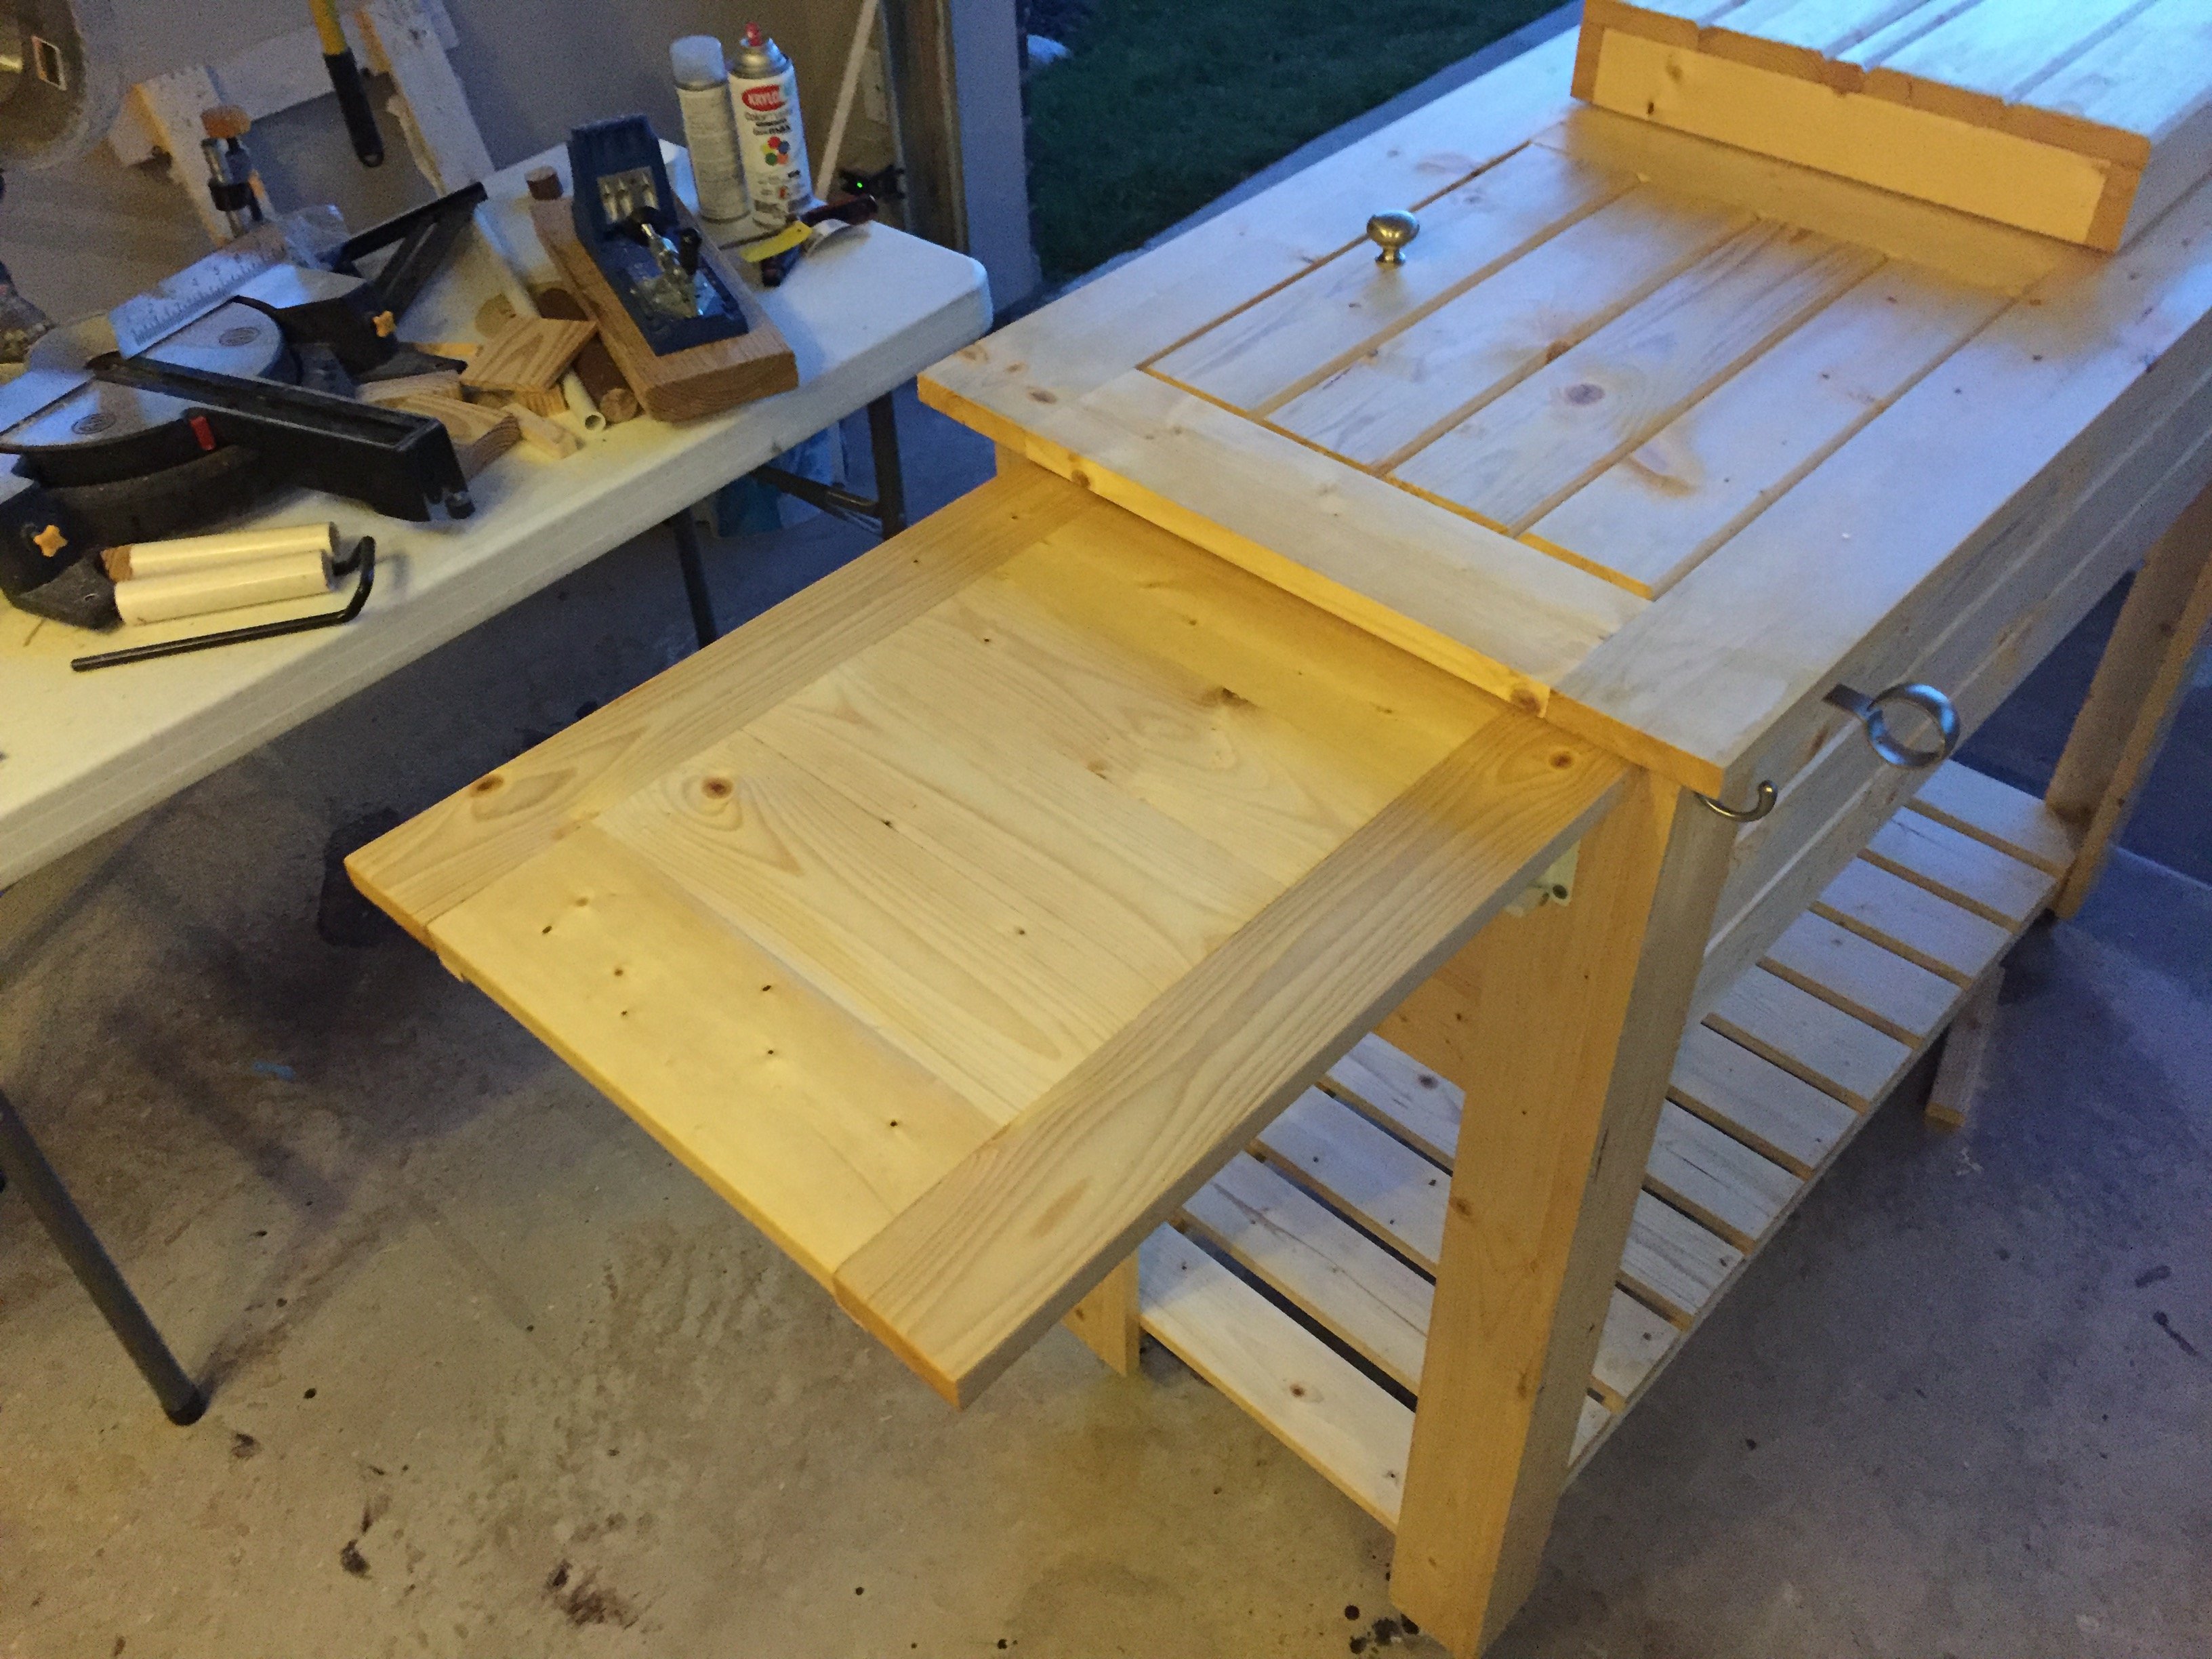
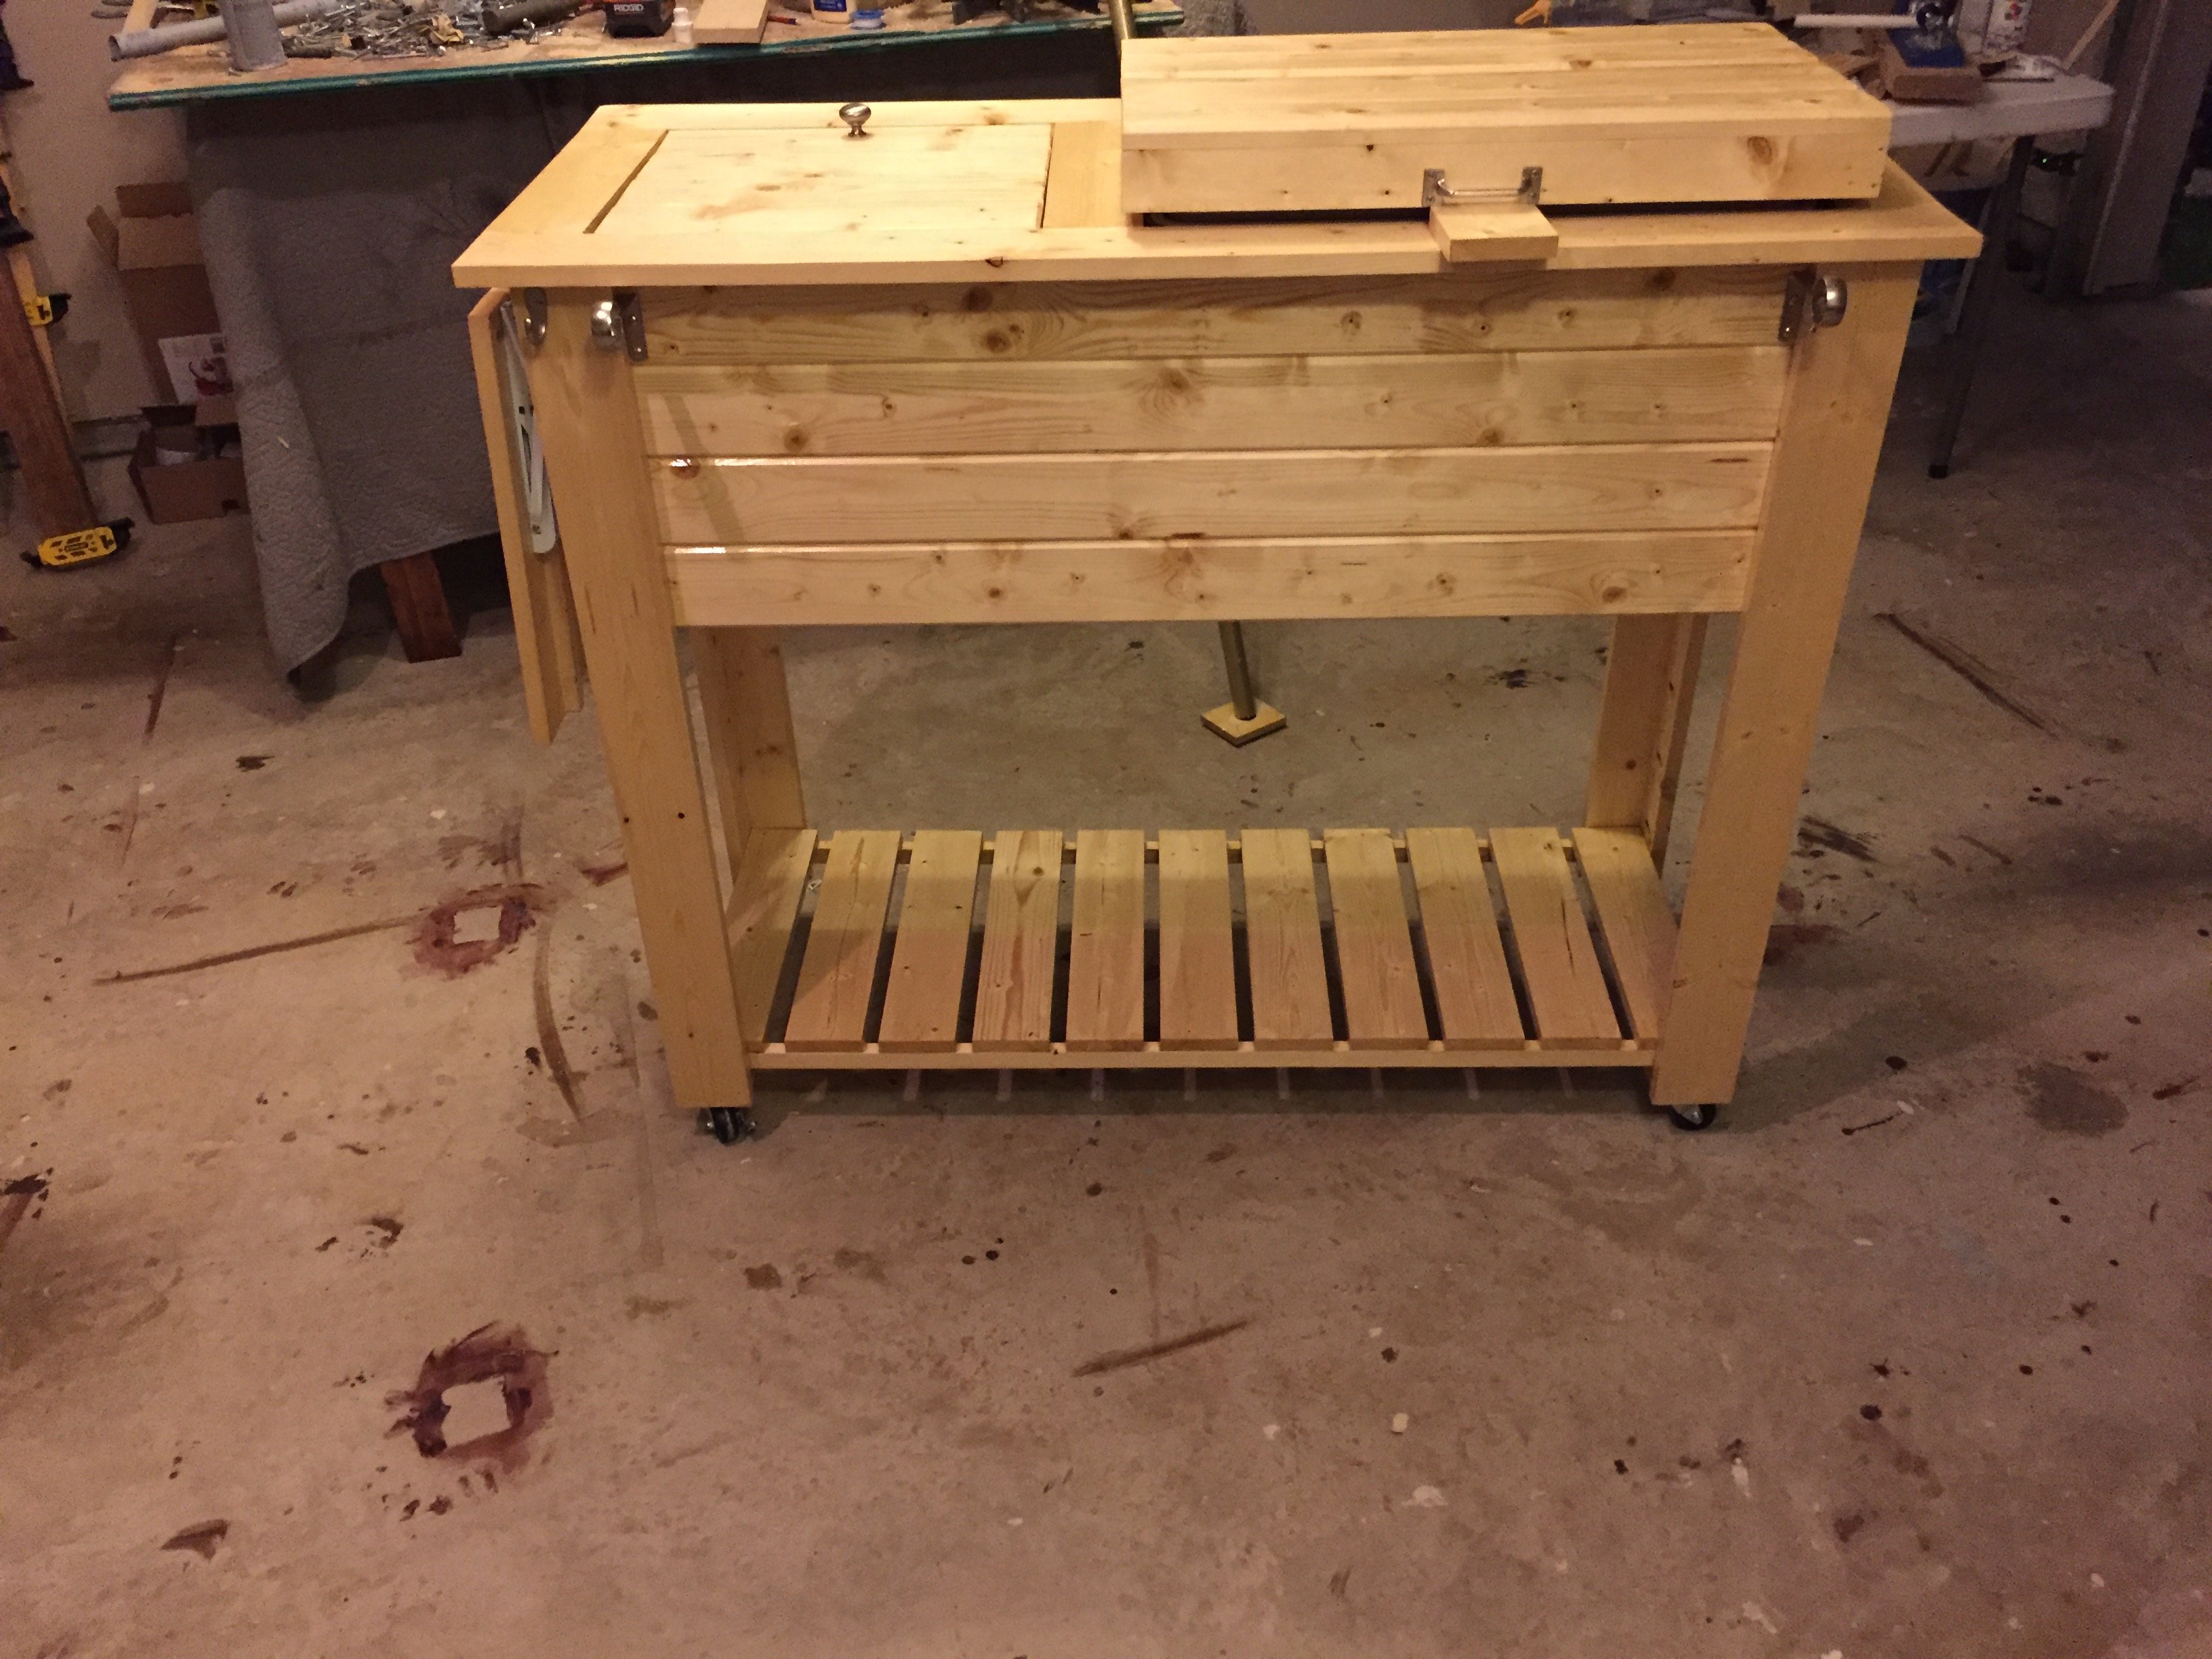
Patio cooler/Grill cart!
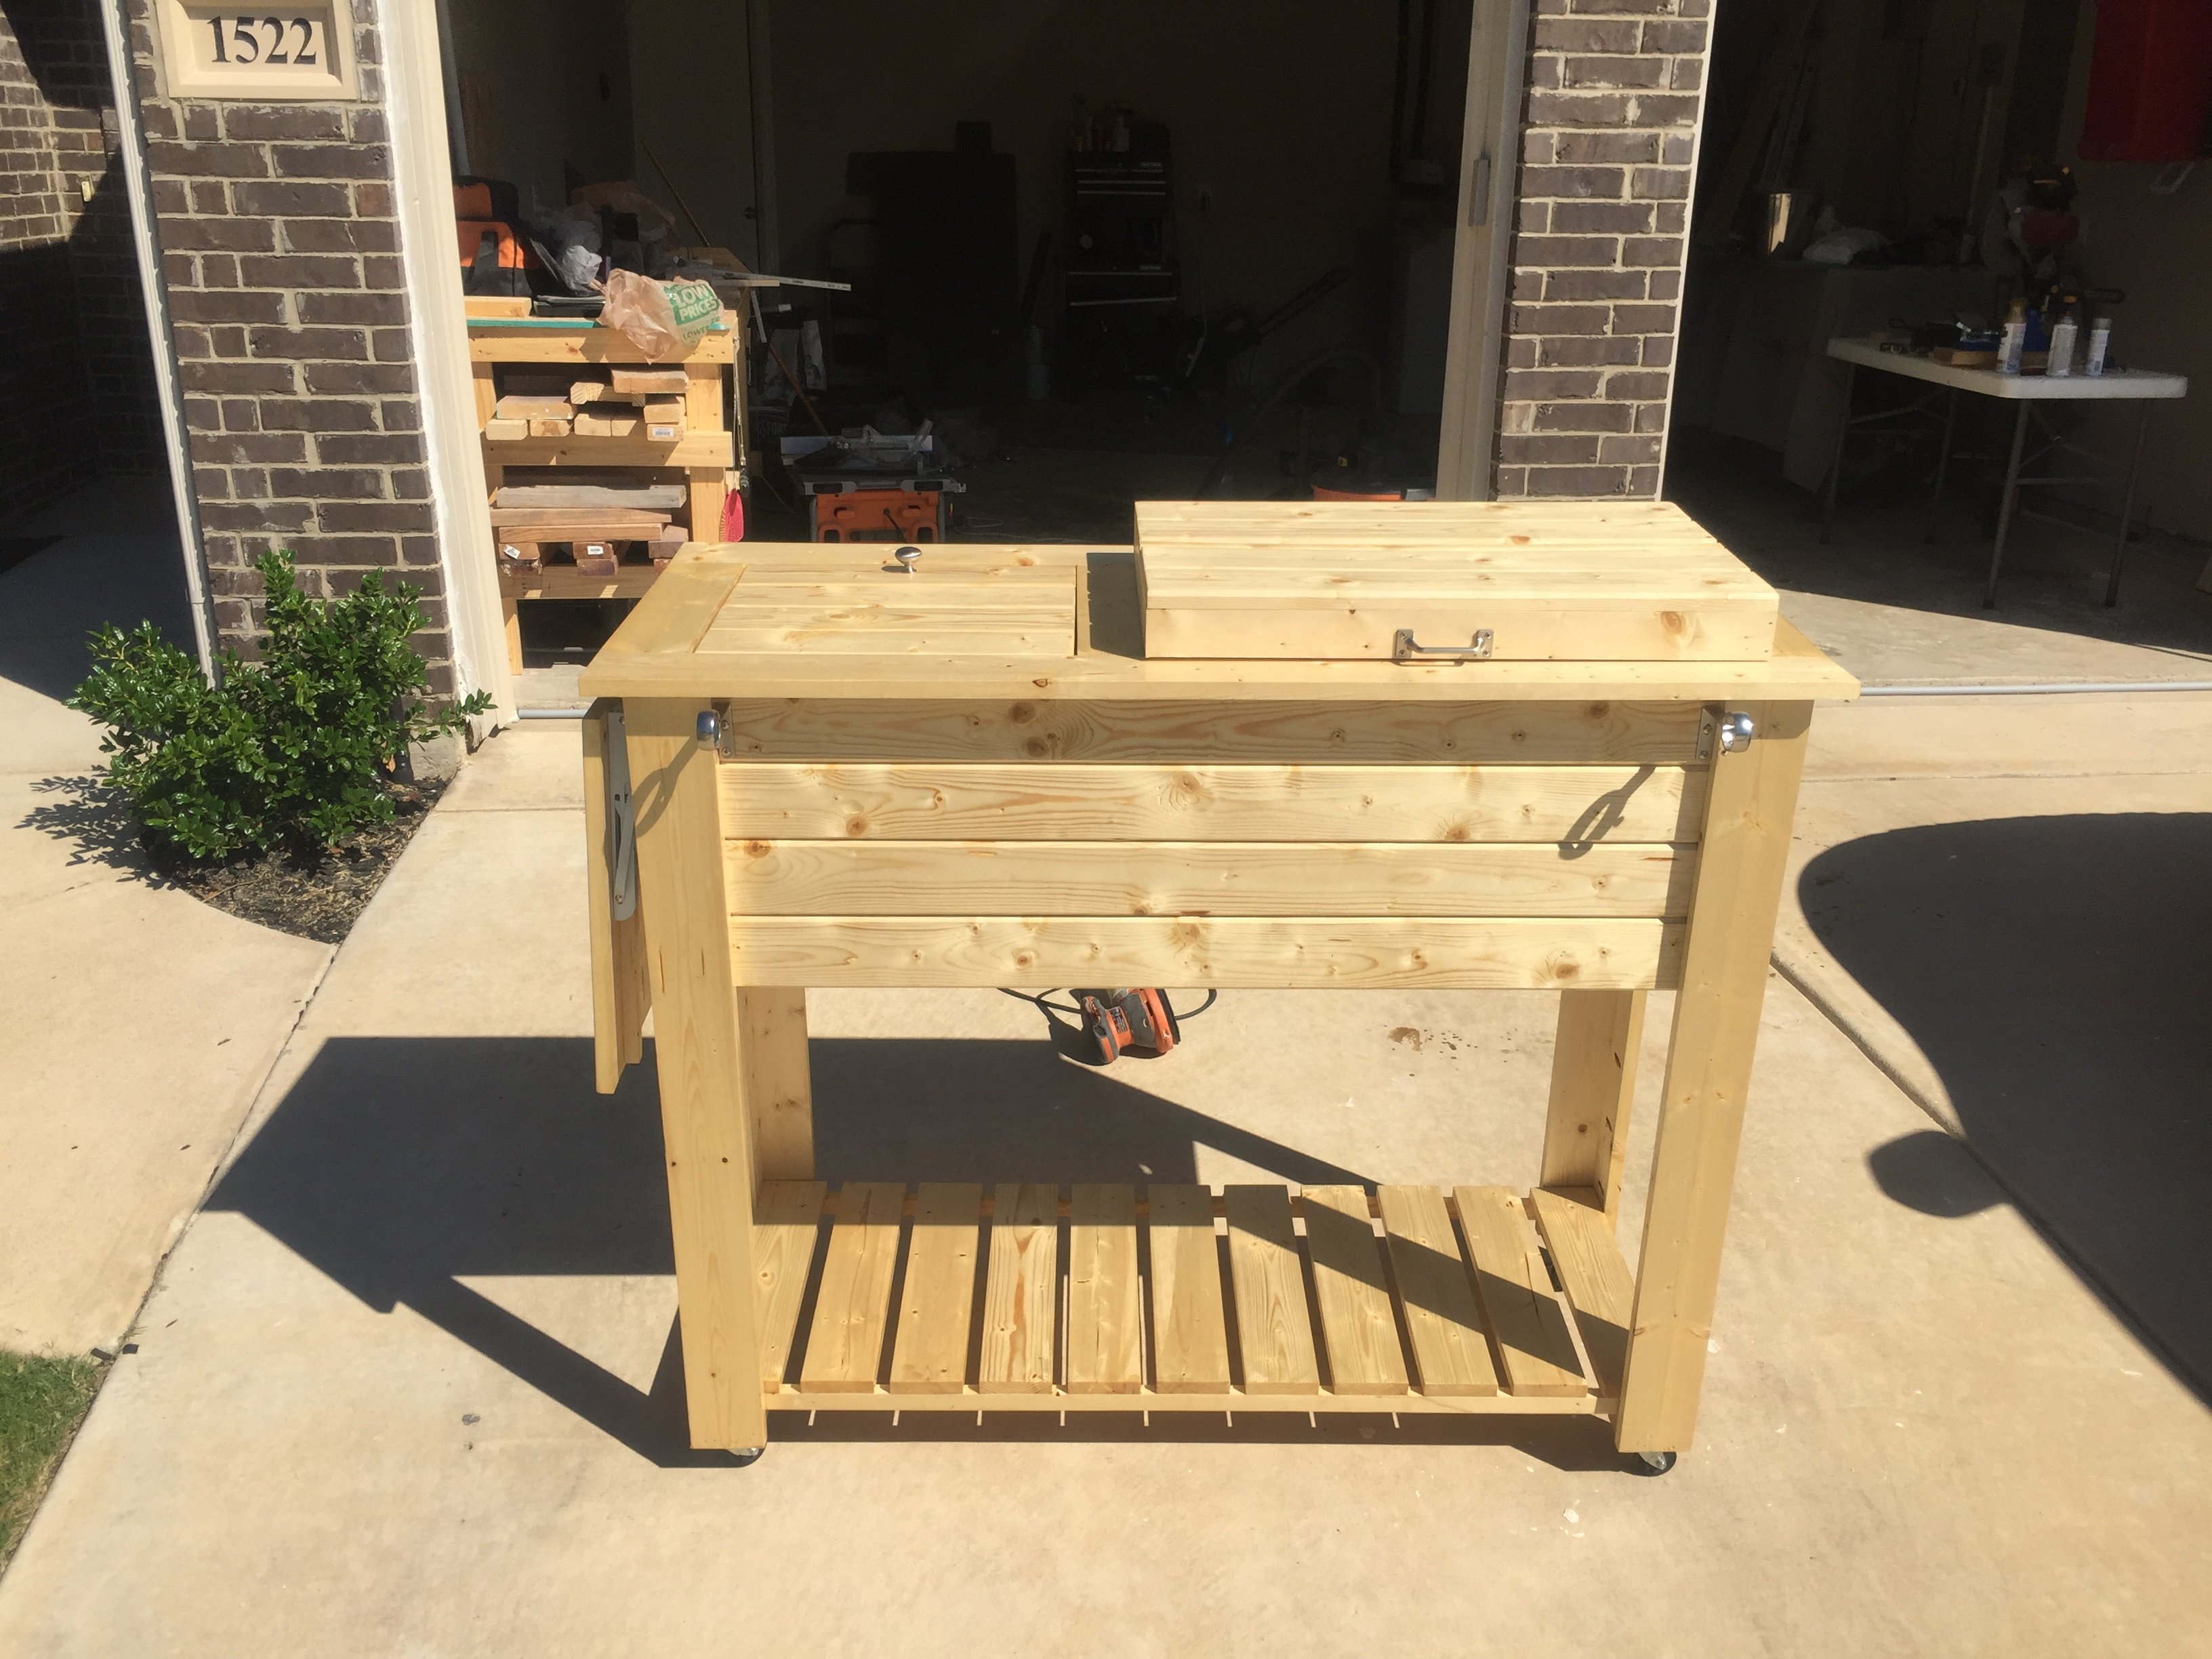
Great project! I'm new to wood working and have been looking for simple but challenging builds. Needless to say this fit the bill... This grill cart was a great starter build and ultimately became a Father's Day gift! My Pops loved it!
I did add a couple of custom pieces: a foldable table top extension and towel bar... things Dad will undoubtedly need as he's an outdoorsman who loves to BBQ!
Thanks for the idea/design plans!

Estimated Cost
$150
Estimated Time Investment
Weekend Project (10-20 Hours)
Finish Used
Semi-gloss spar urethane (3 coats)
Recommended Skill Level
Beginner
Comments
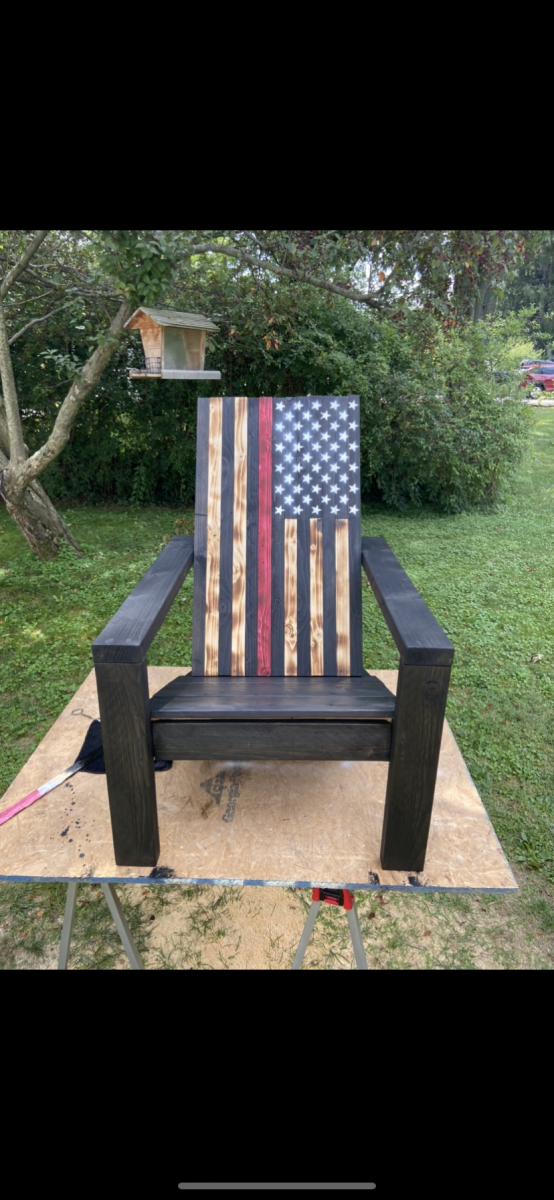
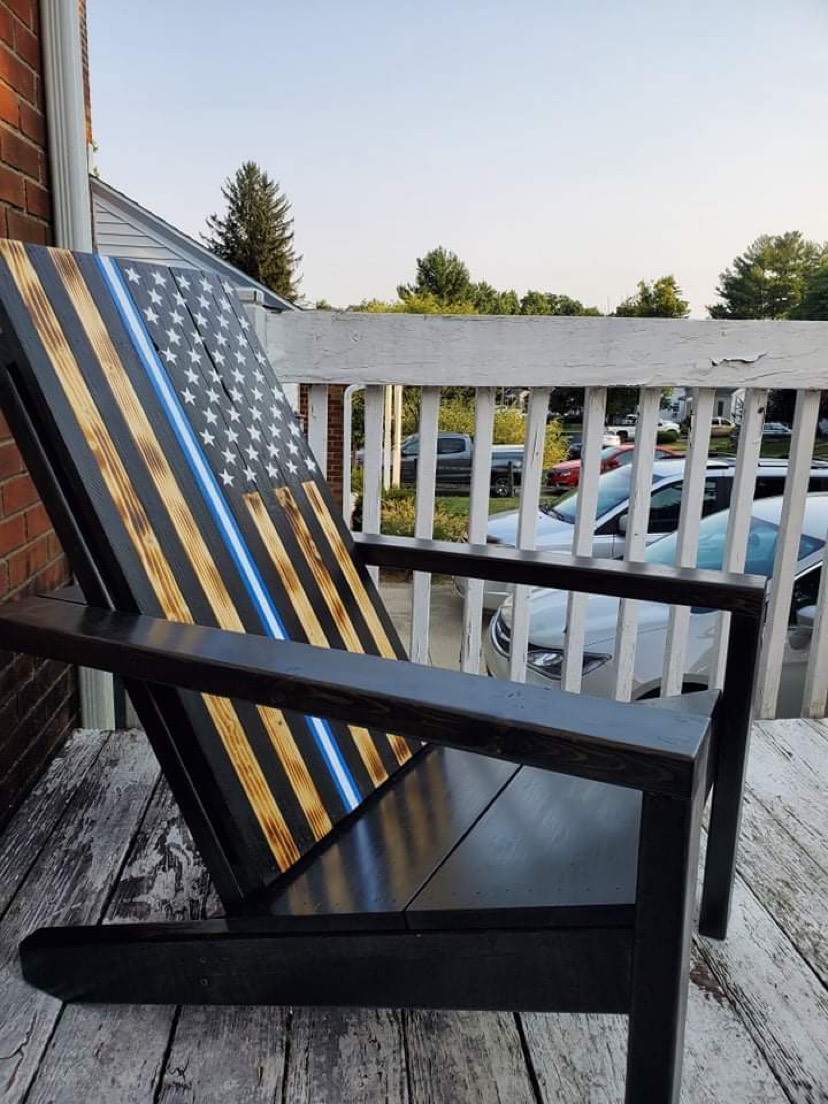
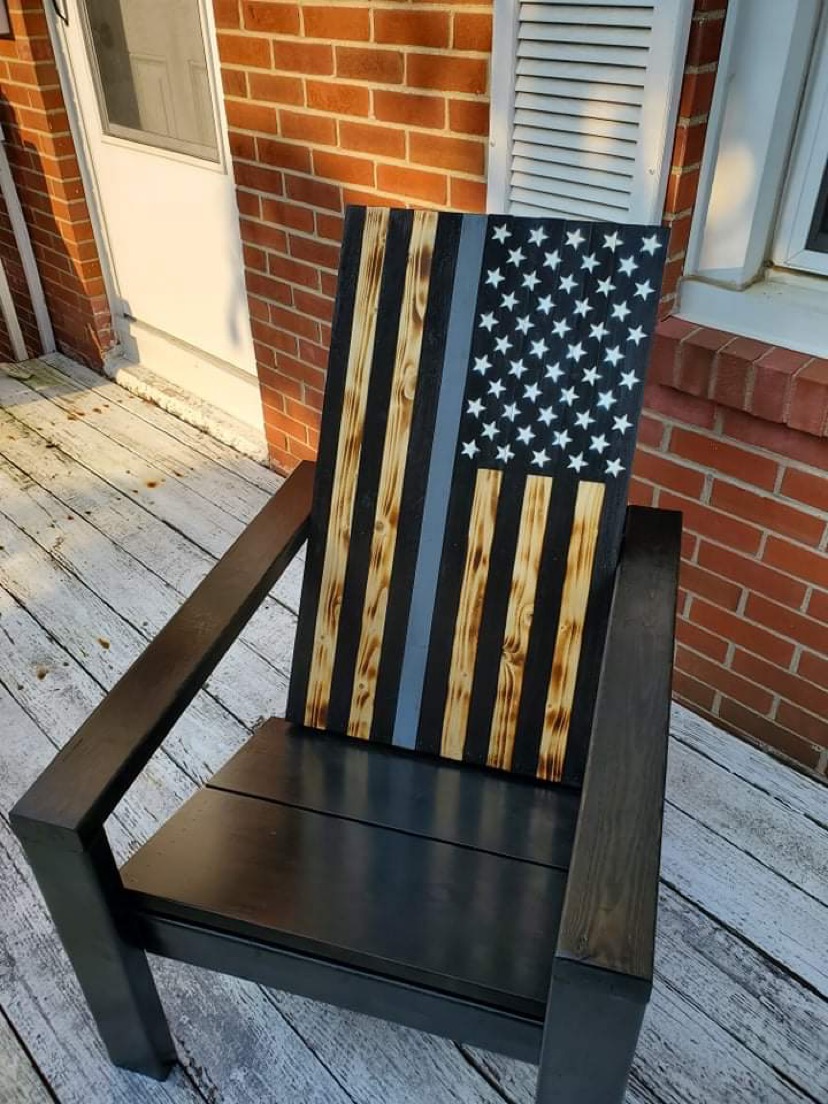
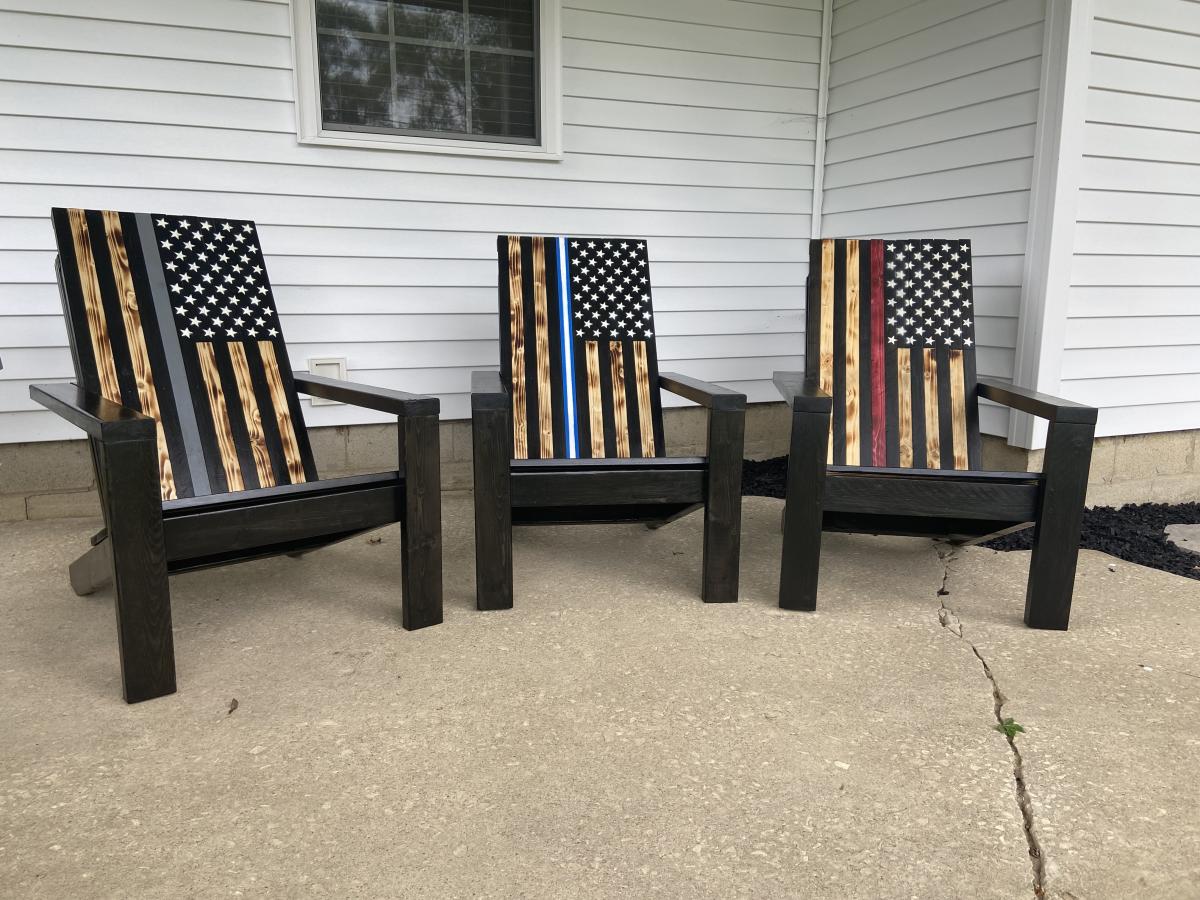
Modern Adirondack Chair
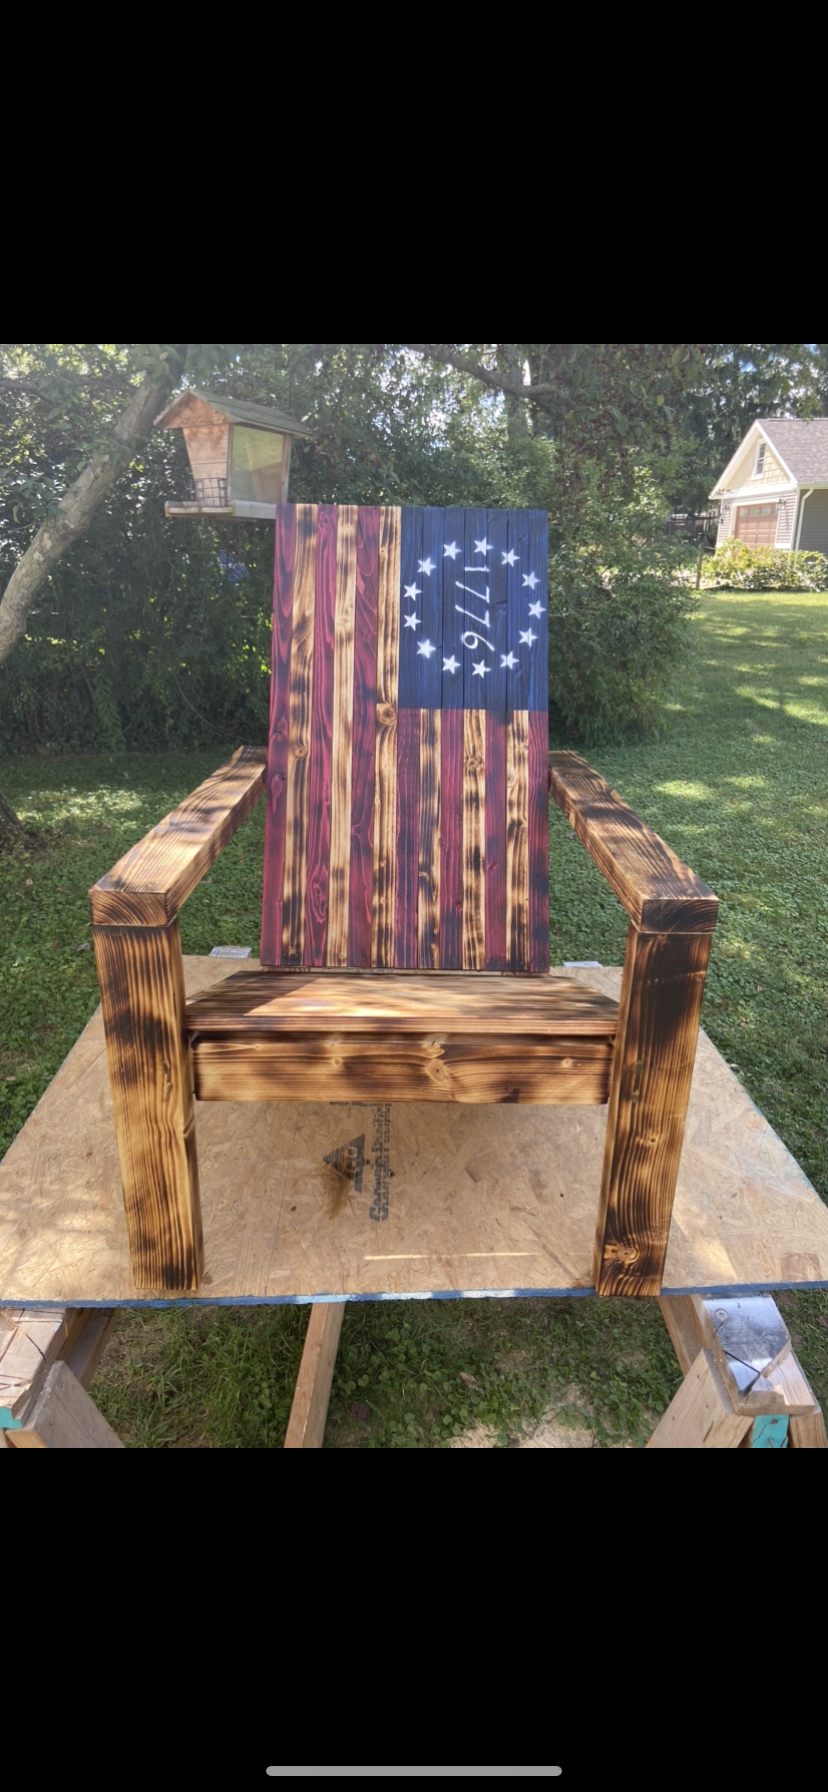
First time making this type of chair. Your plan made it really easy to cut and assemble the frame. I just changed the back to different types of flags. I’ve made them for my friends in the fire department, police department, ems, military, and a corrections Officer. They are an absolute hit.
Built from Plan(s)
Comments
Mon, 09/13/2021 - 20:40
Those are fantastic!
Great way to honor our service men and women, kudos to you! Thank you for sharing:)
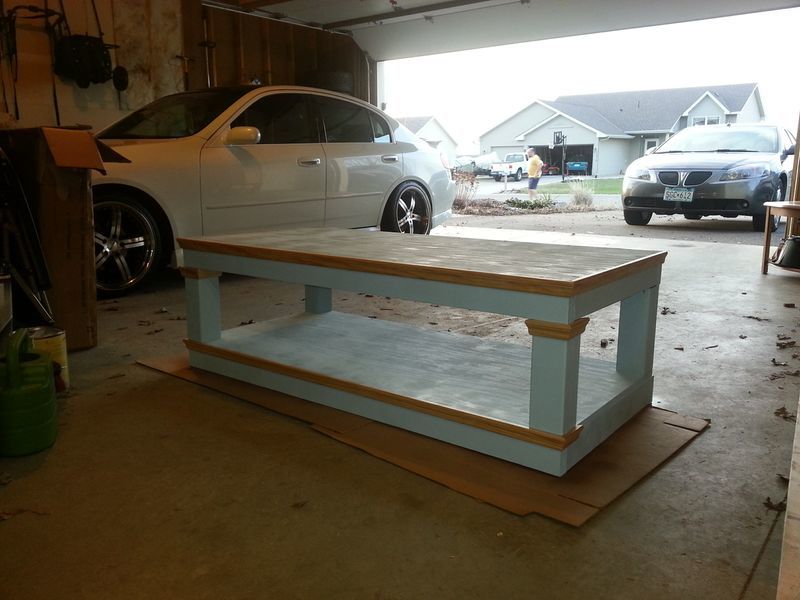
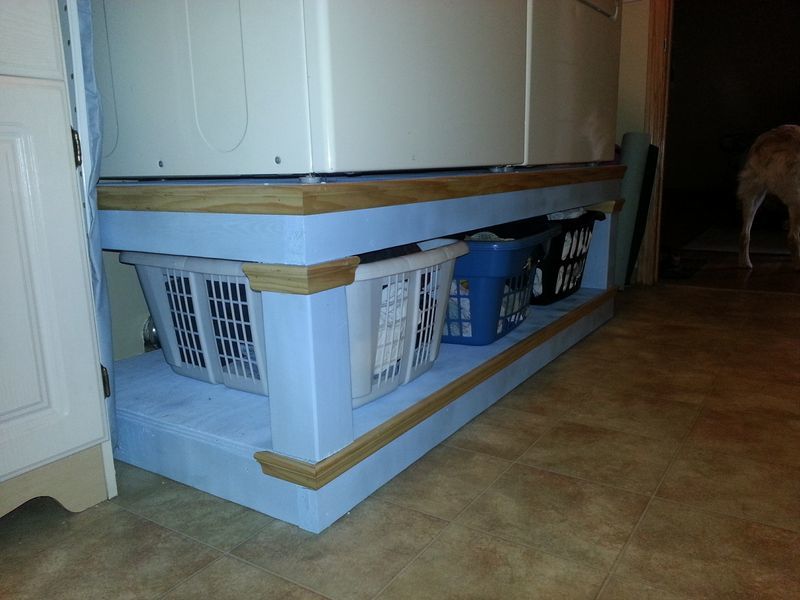
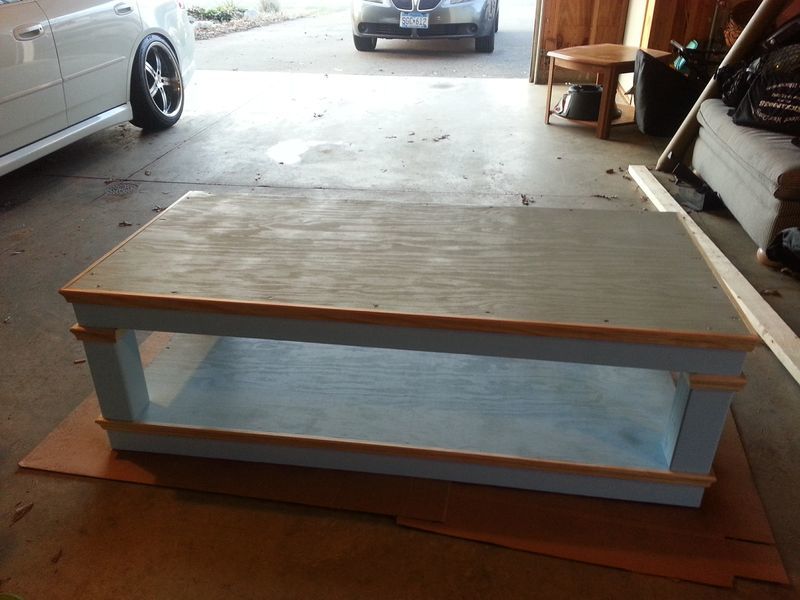
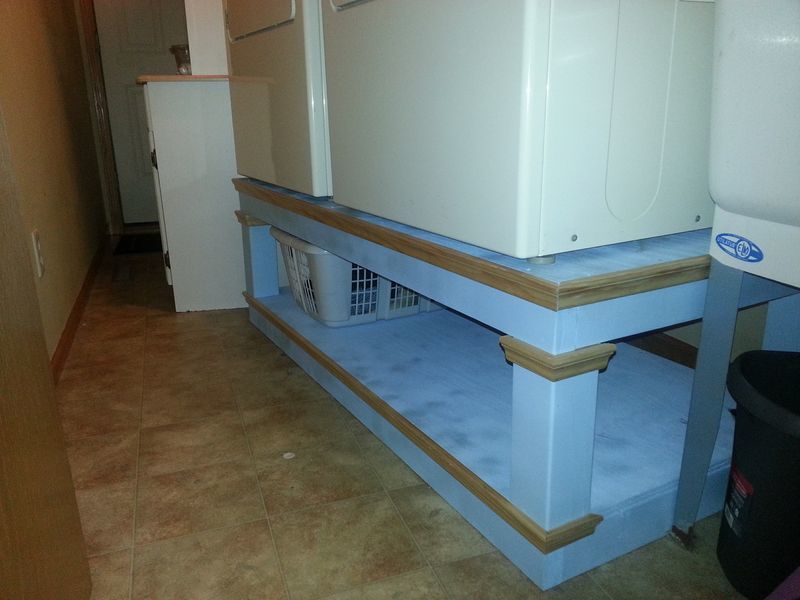
Pretty Blue Laundry Pedestal
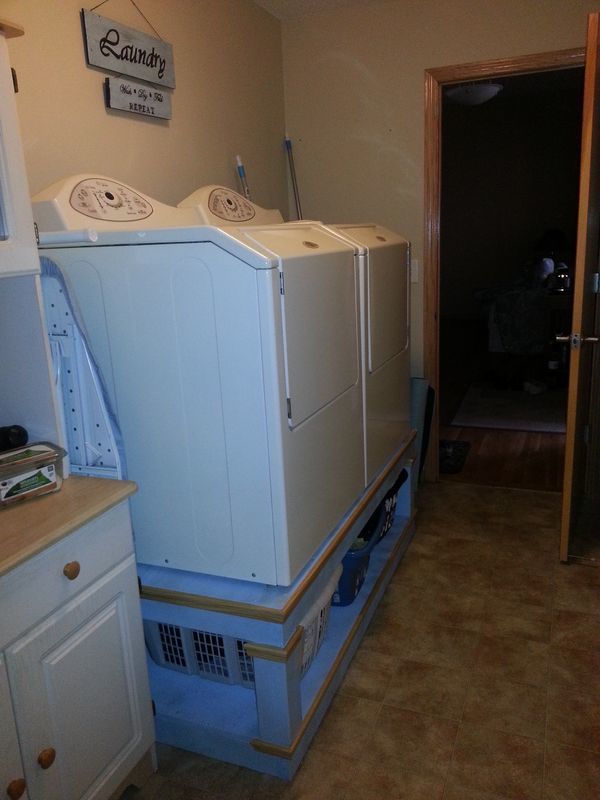
This was my first Ana White project and I couldn't be happier with the way it turned out! I didn't change any measurements. I did add trim along the top and bottom.
I was going to paint it white with blue trim but my white paint didn't look usable anymore. So I went all blue and I'm happy the way it turned out. I decided to leave the trim natural. I really like the blue pop in the laundry room!
Built from Plan(s)
Estimated Cost
$110
Estimated Time Investment
Afternoon Project (3-6 Hours)
Finish Used
A mistint paint I picked up at Home Depot. I painted with roller and brush. I sprayed with clear coat.
Recommended Skill Level
Beginner
Comments
Wed, 05/27/2015 - 06:47
Total Height
Hi, I am looking to build this and have the same washer/dryer set and wanted to know if you could tell me how tall this is from the ground to the top of the controls for the units. We currently have a closet these are in with shelving about the units so I don't have a lot of extra room. Thanks
Wed, 05/27/2015 - 22:32
Custom
That is the wonderful thing about building custom. You can build it to suit your space, machines and what you might want to store underneath. Machines can vary quite a bit so I'd suggest measuring your space, then you machines and find out how big you can build a pedestal.
Sun, 10/29/2023 - 14:18
Yes it's a nice job but i…
Yes it's a nice job but i will tell you something ....... As appliance technician this kind of pedestal is a nightmare for us ..lol
I suggest put some wheels under the pedestal in order to move it around if need
Just an idea
But is a beautiful work anyways
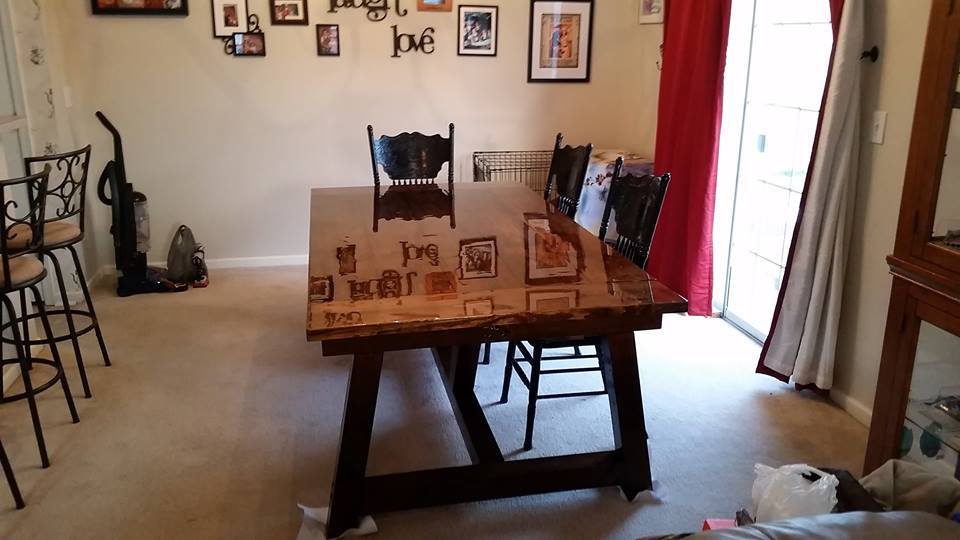
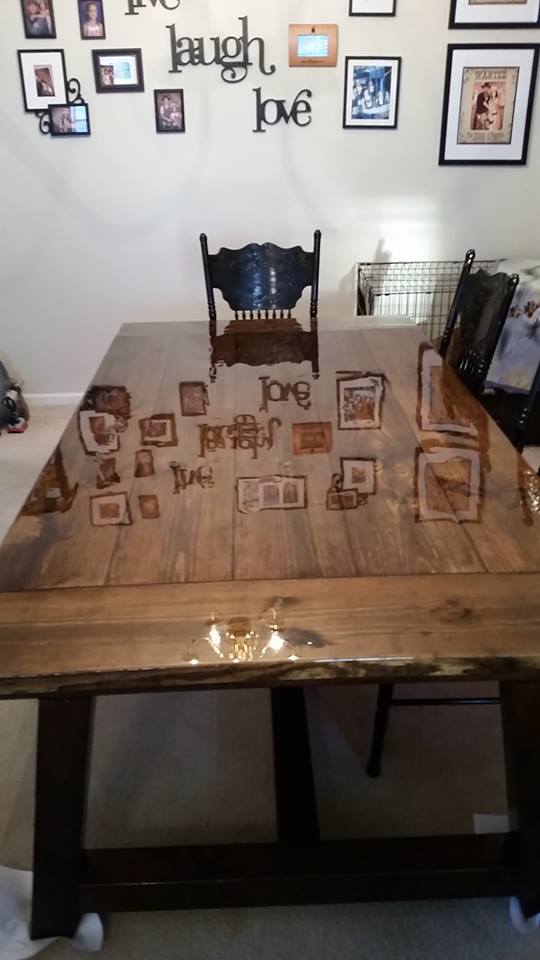
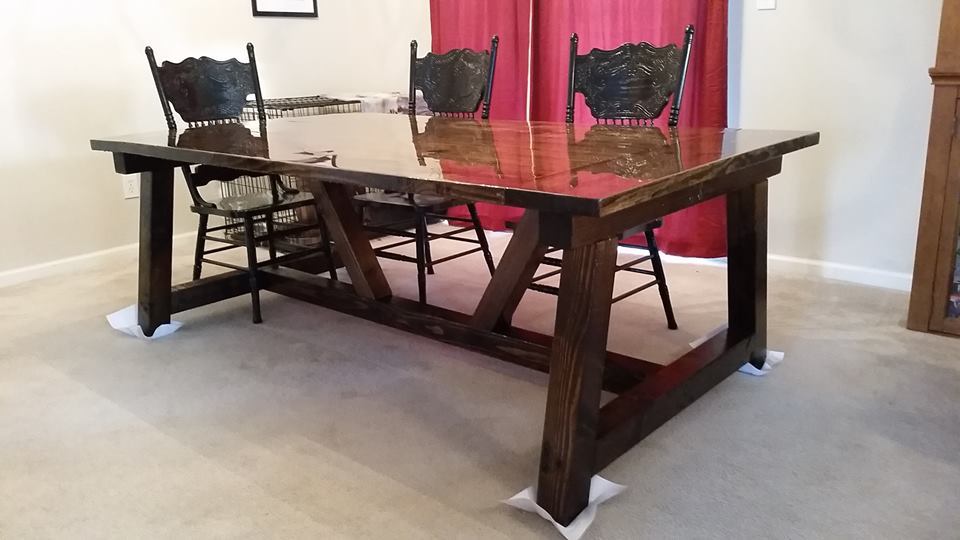
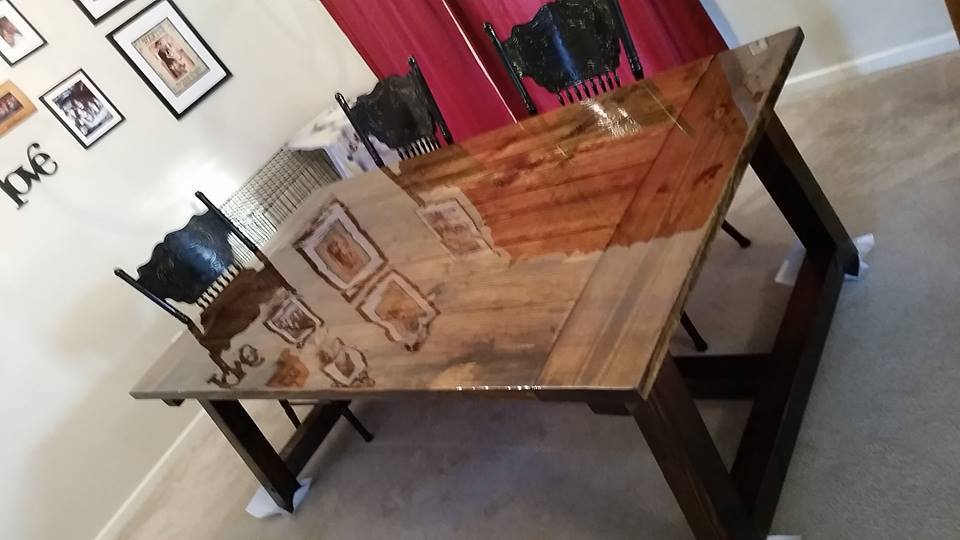
Truss Beam Table

I built this farmhouse table from your plans. It turned out great, I had to modify the plans and make it bigger to fit my needs. But we love the outcome and it was well worth it to do this project.
Built from Plan(s)
Estimated Cost
$300
Estimated Time Investment
Weekend Project (10-20 Hours)
Finish Used
Stain: Dark Walnut. Table Top Finish: Famowood Kit 1 Gal Size Glaze Coat Gloss Polyurethane.
Bottom and Benches Finish: Glossy Polyurethane.
Bottom and Benches Finish: Glossy Polyurethane.
Recommended Skill Level
Beginner
Comments

Side street bunk beds

We just finished 2 sets of bunk beds using the side street bunk bed plans. The end result was gorgeous. We stained these in min wax classic gray. We also countersunk the bed slats on top and bottom.
Estimated Time Investment
Weekend Project (10-20 Hours)
Finish Used
Yellow pine and spruce. We stained the bed with min wax classic gray.
Recommended Skill Level
Intermediate
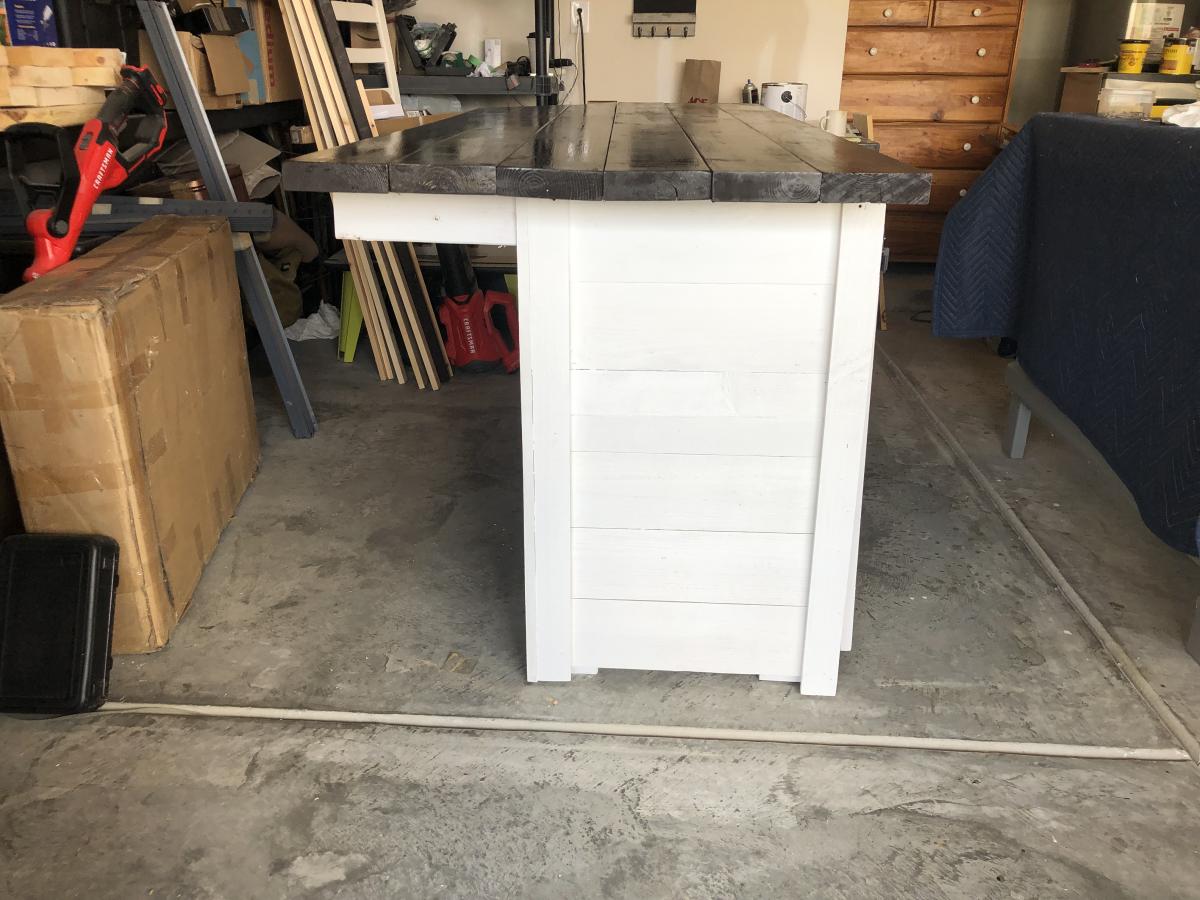
Kitchen islan
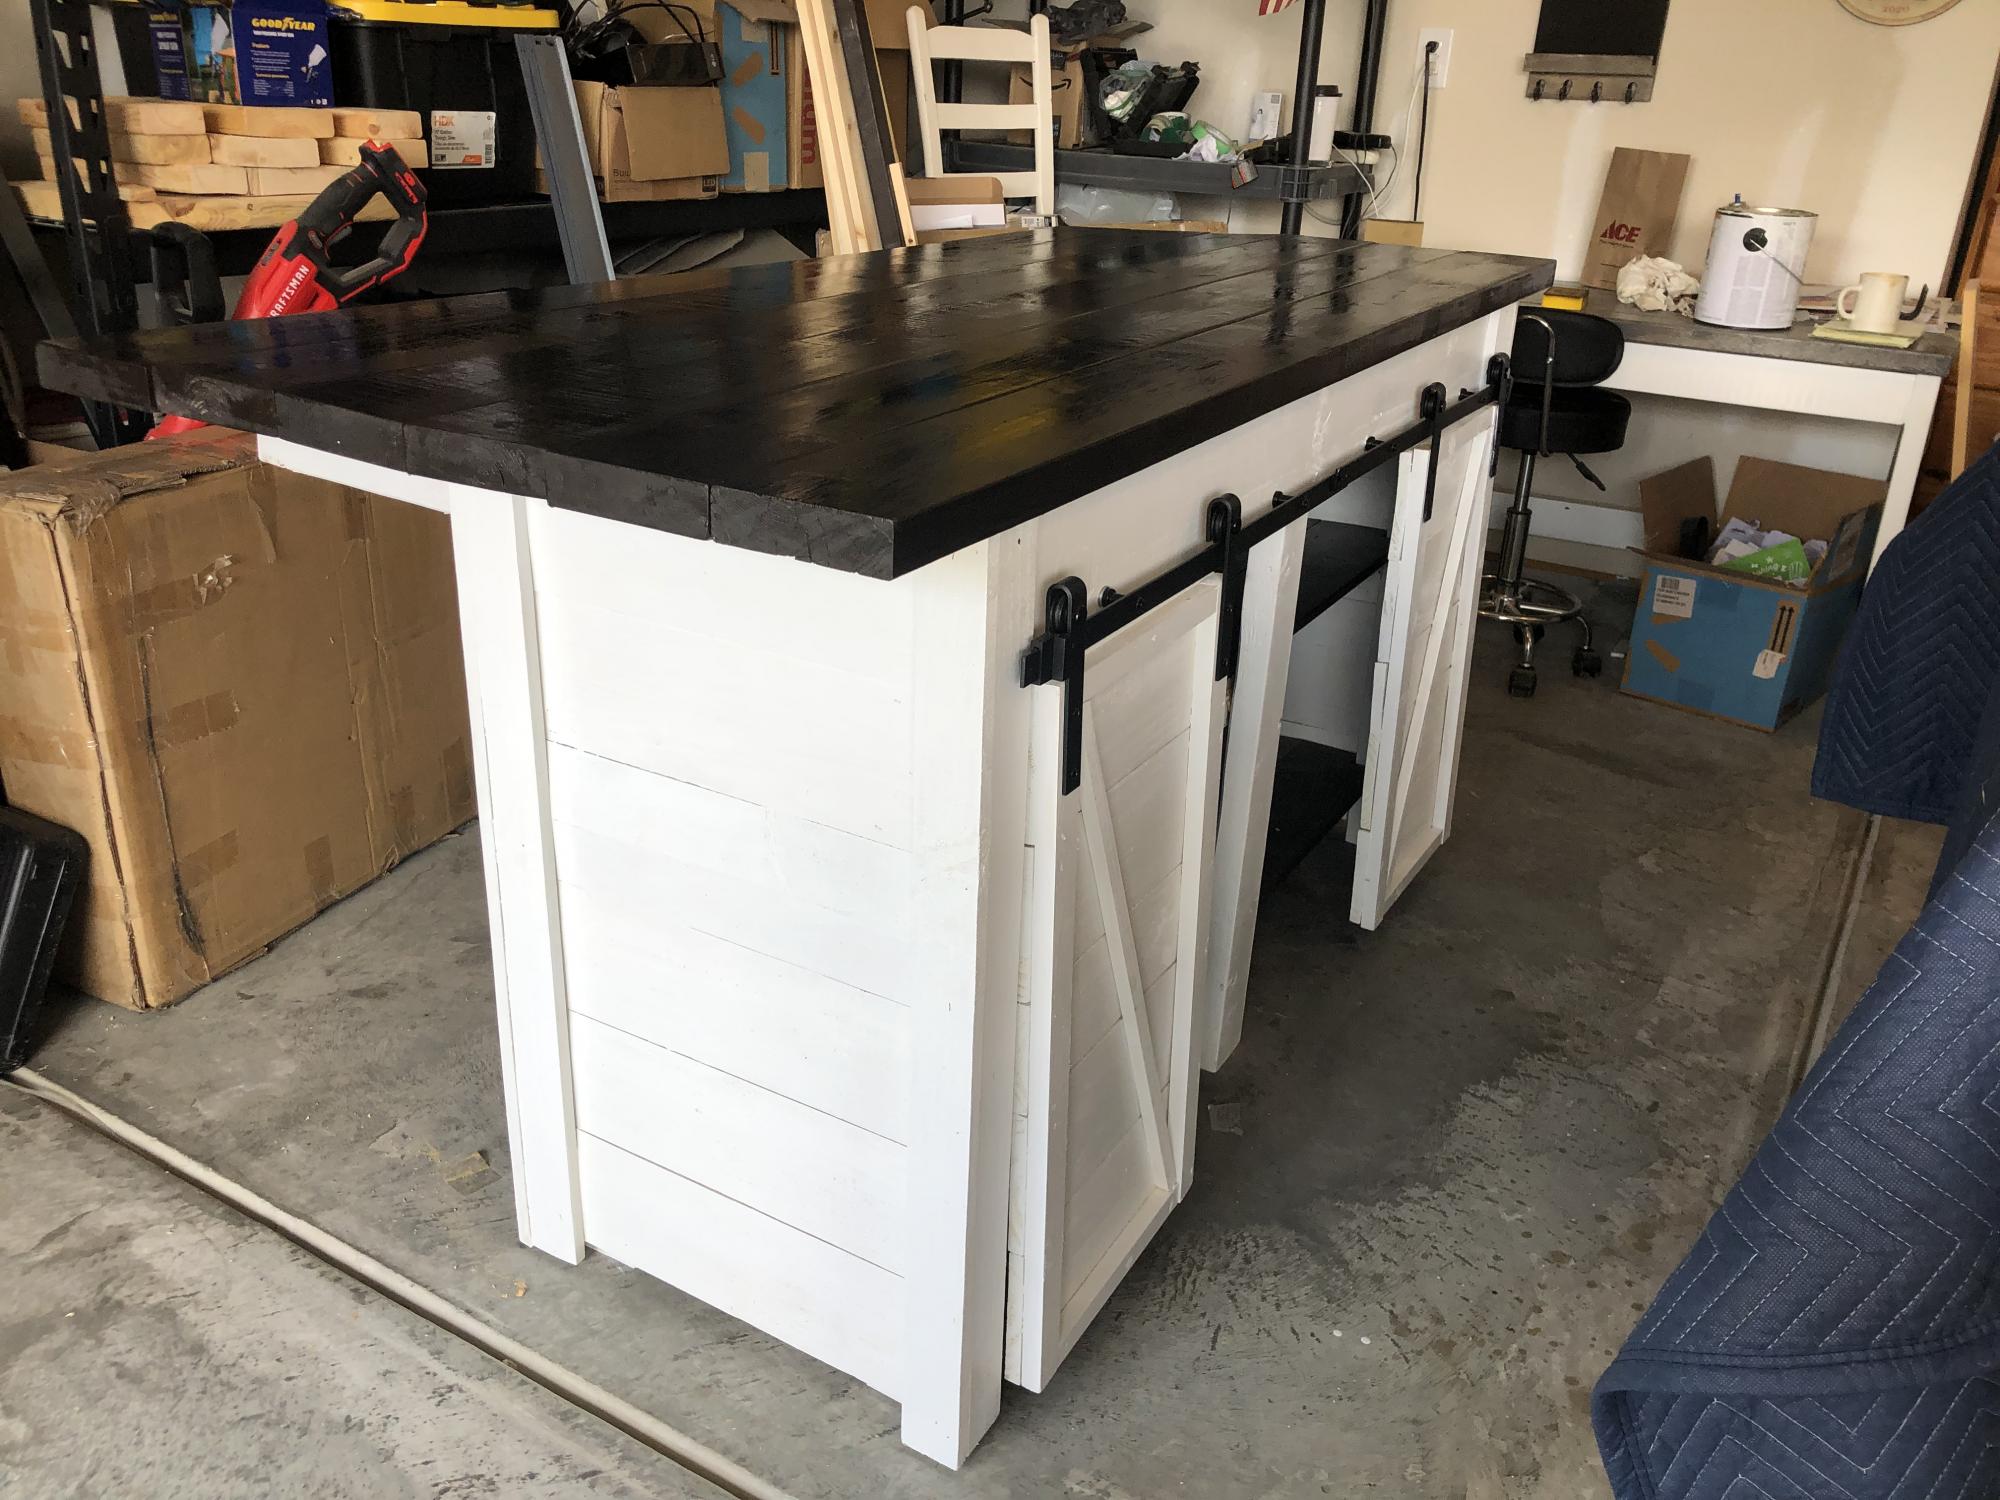
Used several plans to put this on together. Individual wood slats to build siding. 36”h. 32” d 72”l.
Built from Plan(s)
Comments
Teenage Mutant Ninja Turtle Bed
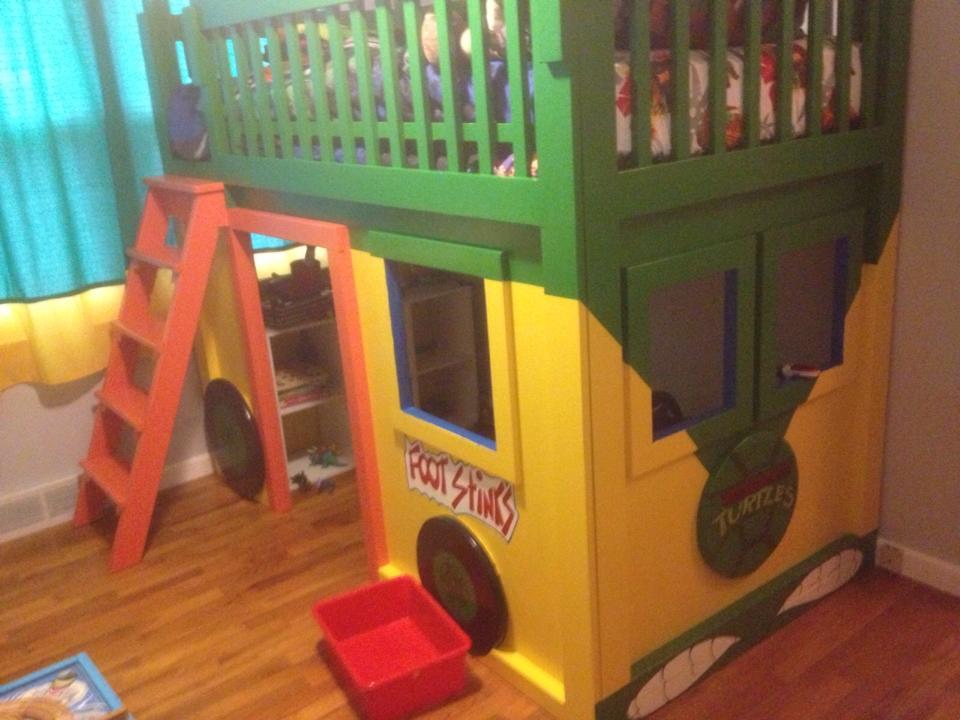
For this project, we followed the plans for the Firetruck Bed and also modified them a bit to fit our needs in the room. From start to finish, this project took two weeks to complete and cost us roughly $200 to build and $100 to paint. We were lucky though in that nearly everything we needed to purchase was on special or sale.
Built from Plan(s)
Estimated Cost
$300
Estimated Time Investment
Week Long Project (20 Hours or More)
Finish Used
Clark & Kensington latex paint & Minwax polycrylic clear coat (semi-gloss)
Recommended Skill Level
Intermediate
Comments
Ninja turtle loft bed

Made this bed using the Fire truck bed plane.. Thanks to the simple easy plan from you, made this build sure easy. About 9 hours tine to build and paint. Appox. Cost was about $280.
Estimated Cost
$280
Estimated Time Investment
Day Project (6-9 Hours)
Recommended Skill Level
Intermediate
Comments

5-Tier Wood Planter
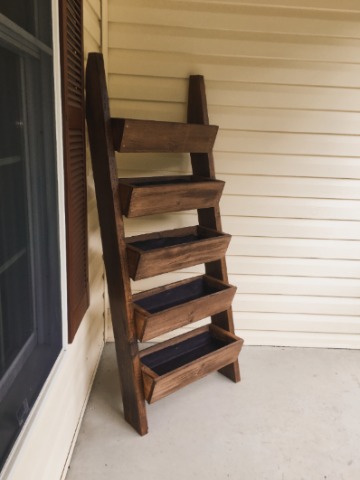
This plan was easy to follow, accurate and came together in just a few hours. I used some reclaimed barn wood for the 2x6s and dog-ear pickets for the remainder.
I made it harder for myself than it had to be. I didn't follow the directions closely enough and cut the box ends at 5 1/2" instead of 5 1/4". That meant that the bottoms had nothing to press-fit against. So, I had to do a little workaround to fix that. I made a 1" shelf at each end of each box so that the bottom could sit on these little shelves. The upside to this mistake is that there was now a drainage slot all along the front and all along the back of each planter box.
I stained and sealed it. Finally, I lined each planter box with weed matting that I'd cut to size and cut drain slits in. The matting doubles as a way to keep the planting mix from falling out of the long drainage slots while allowing water to drain through the little slits I poked in the fabric. (I poked drain slits only along the front edge so that water would drain into the planter box below instead of onto the ground.)
I'm happy with the plan and the finished planter!
Built from Plan(s)
Estimated Cost
$35
Estimated Time Investment
Afternoon Project (3-6 Hours)
Finish Used
One coat of Cabots Premium Stain and Sealer in Gingersnap. One coat of Minwax Helmsman Spar Urethane.
Recommended Skill Level
Beginner
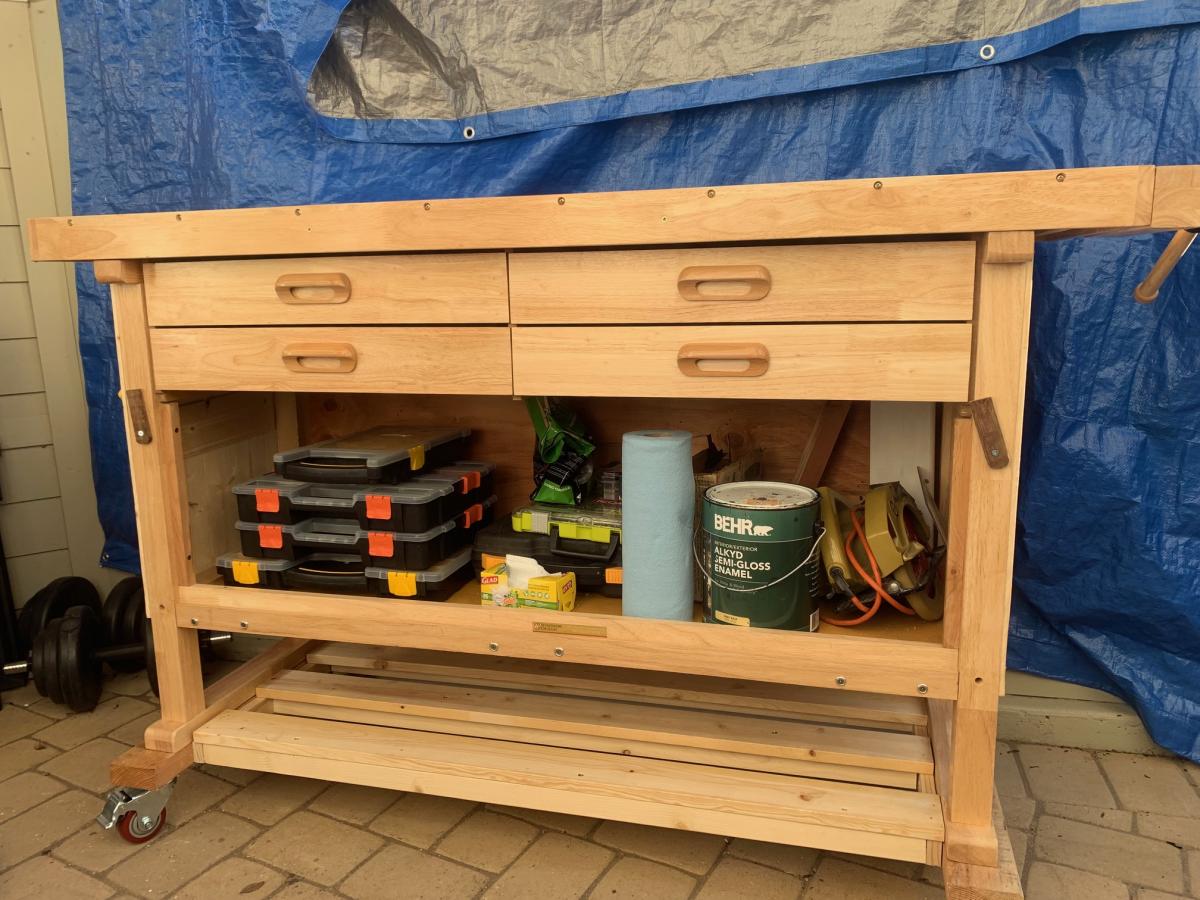
Work Table
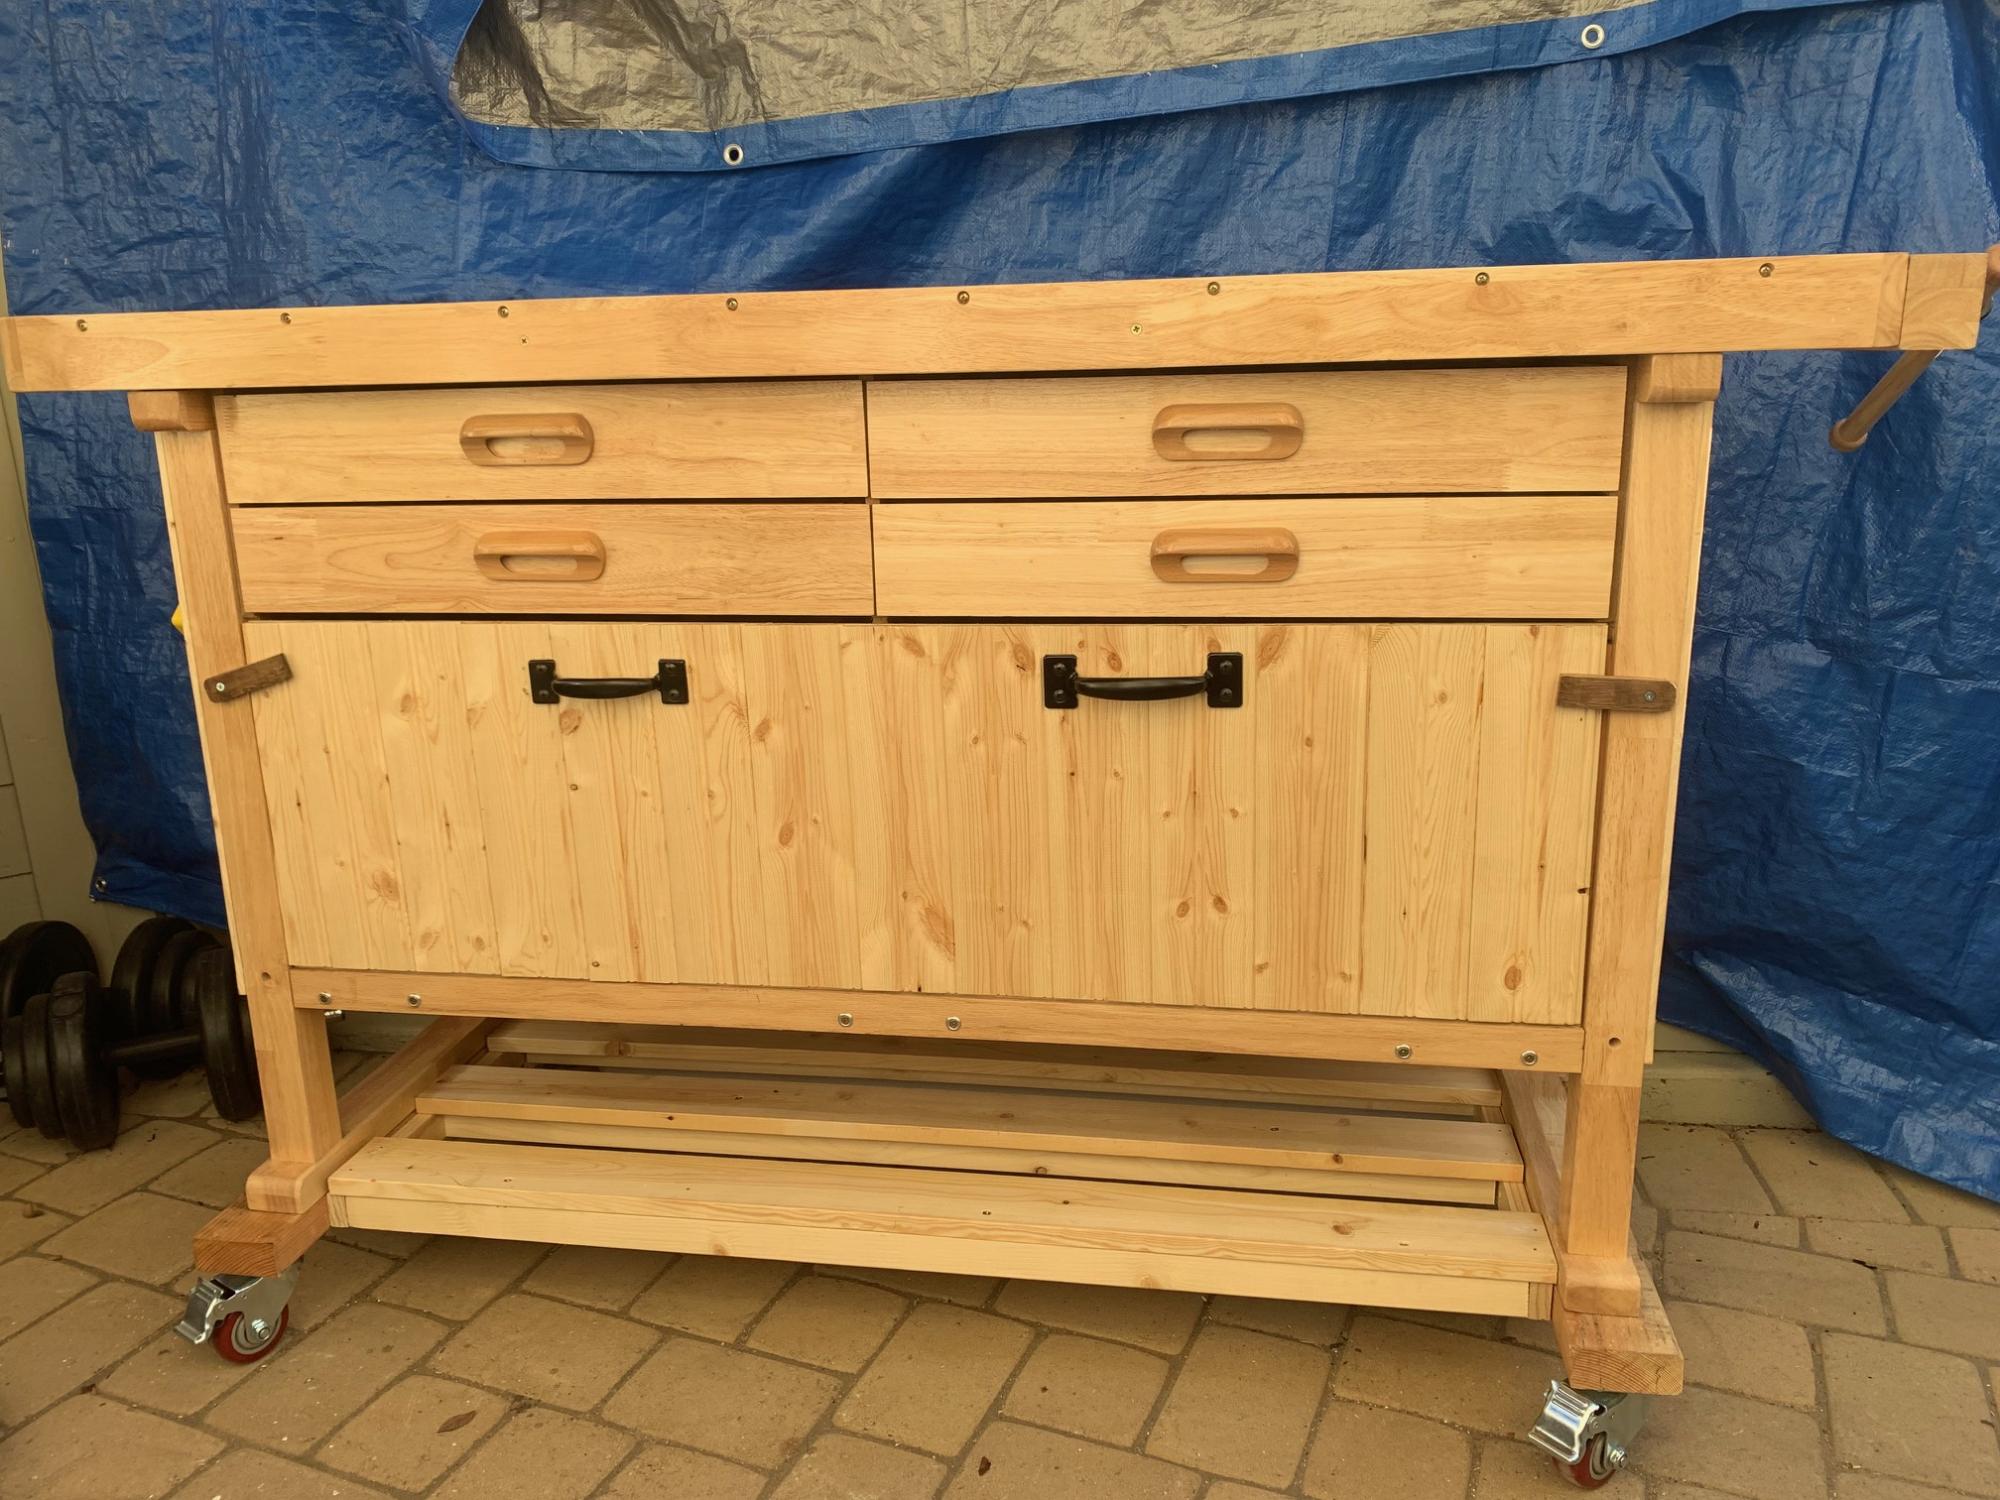
I started with a table bought at Harbor Freight and added the lift off front door, lower wood rack, and added wheels. It has worked so great for me.
Comments
My Little Princesses Playhouse
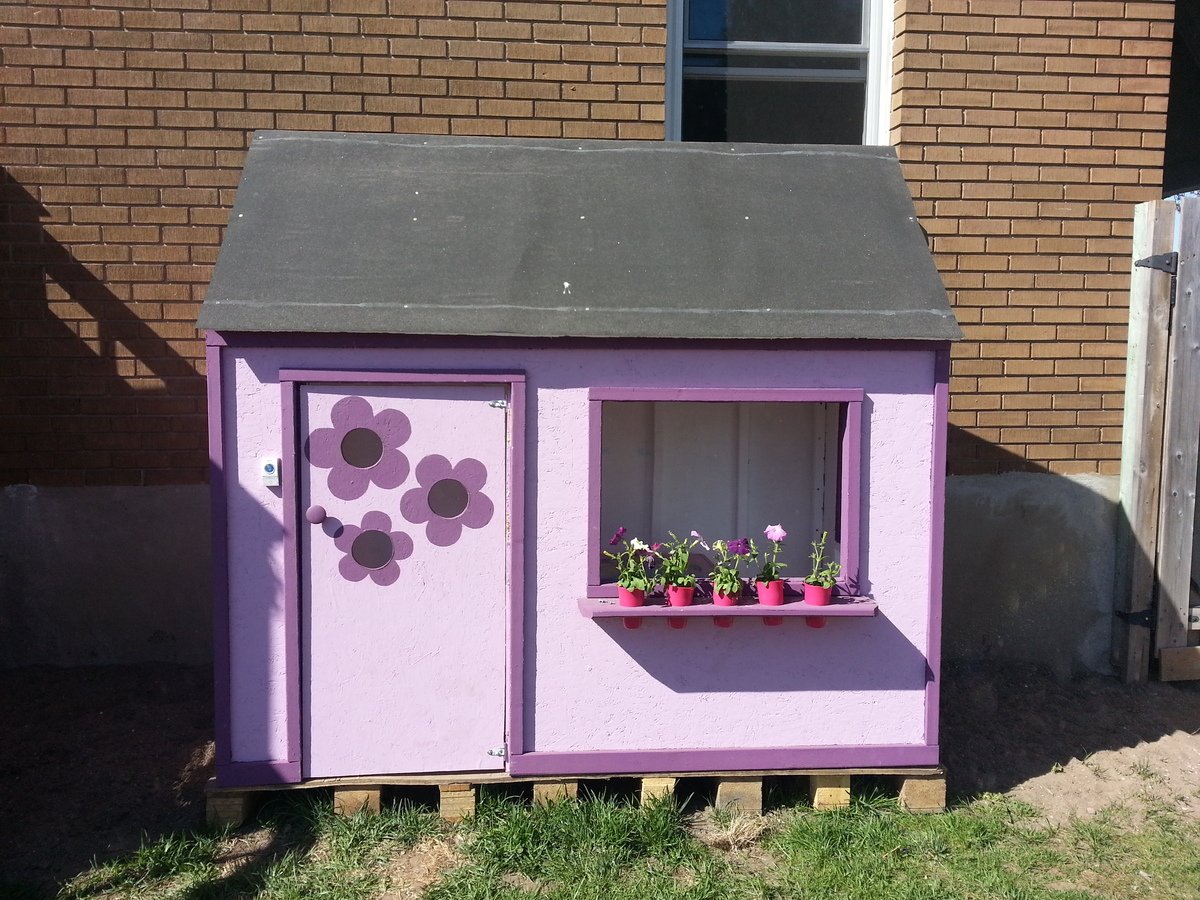
This was the first thing I have ever built, and I loved making the playhouse! I took pictures of every step I did! It was very rewarding to see the look on my girls faces with it was done!! They absolutely love it!!! Thank you for posting the plans.
Built from Plan(s)
Estimated Time Investment
Week Long Project (20 Hours or More)
Recommended Skill Level
Starter Project
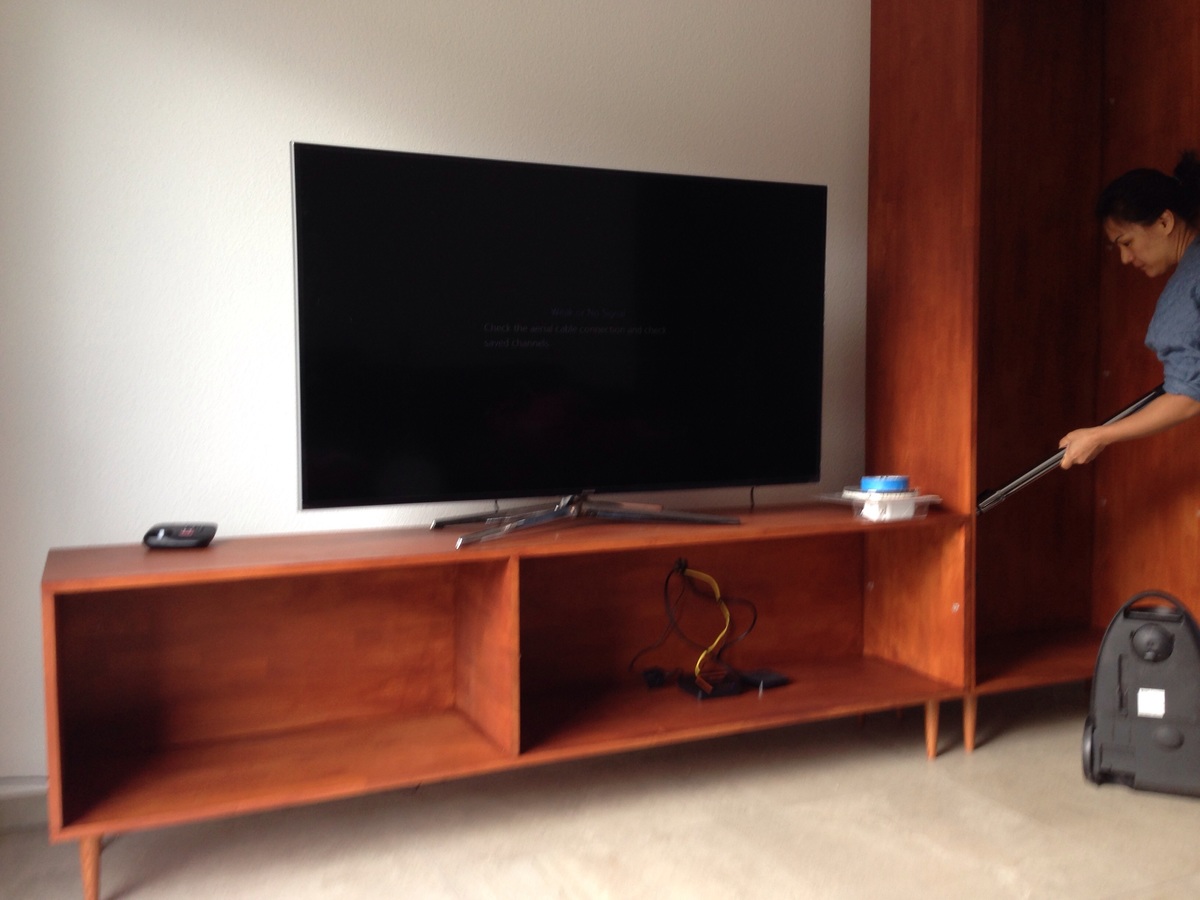
Lowboard Entertainment Center

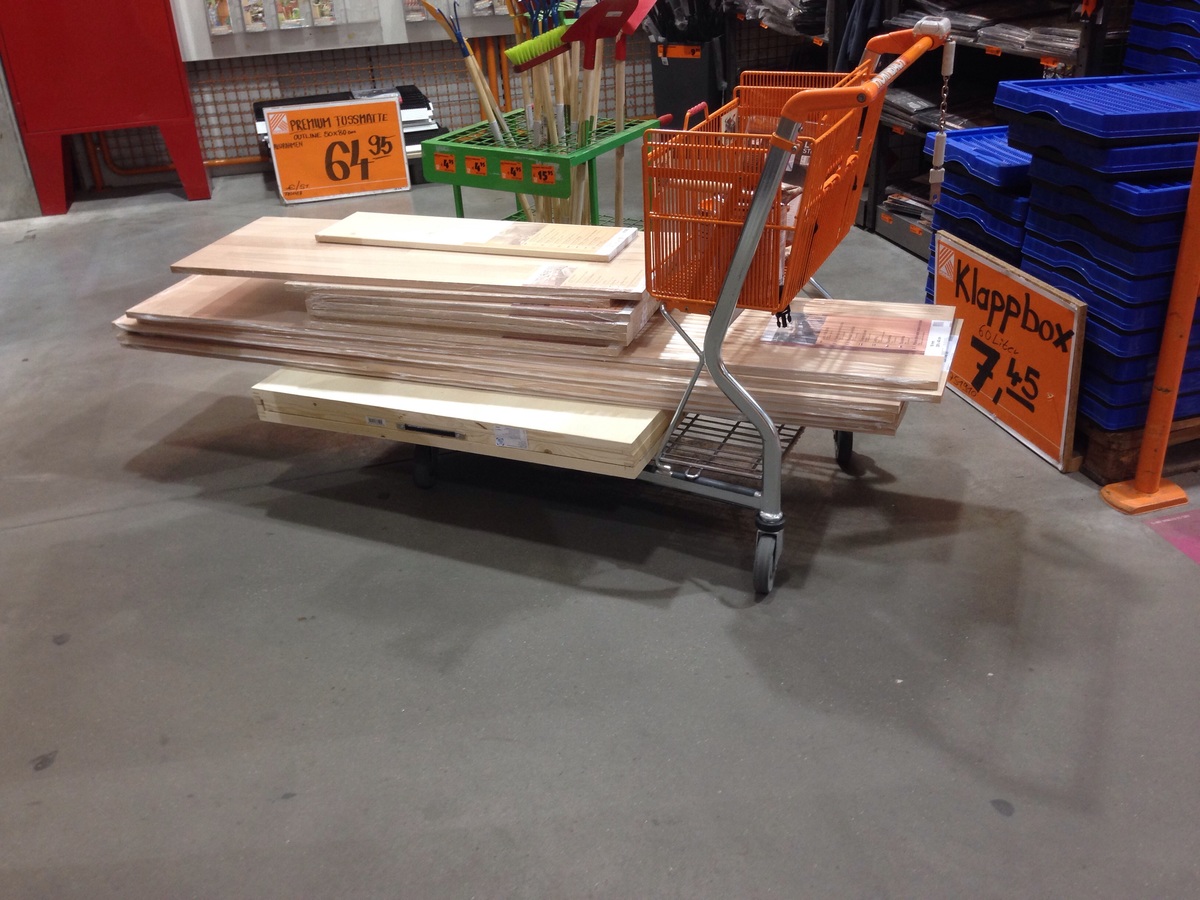
Just moved to Germany and needed an entertainment center. Looked at furniture stores and everything was either extremely expensive or IKEA particle board junk.
My husband and I found out about Hornbach, basically Home Depot or Lowes of Germany.
Found all the materials and some tools with the help of the English speaking staff.
Used some pretty cool looking butcher block type wood they had that was reasonably priced. Didn't recognize any of the stain brands so picked a color and crossed our fingers.
Overall one of my easiest projects and a fun experience here in Europe.


Estimated Cost
$200
Estimated Time Investment
Weekend Project (10-20 Hours)
Finish Used
No idea but cherry finish.
Recommended Skill Level
Beginner
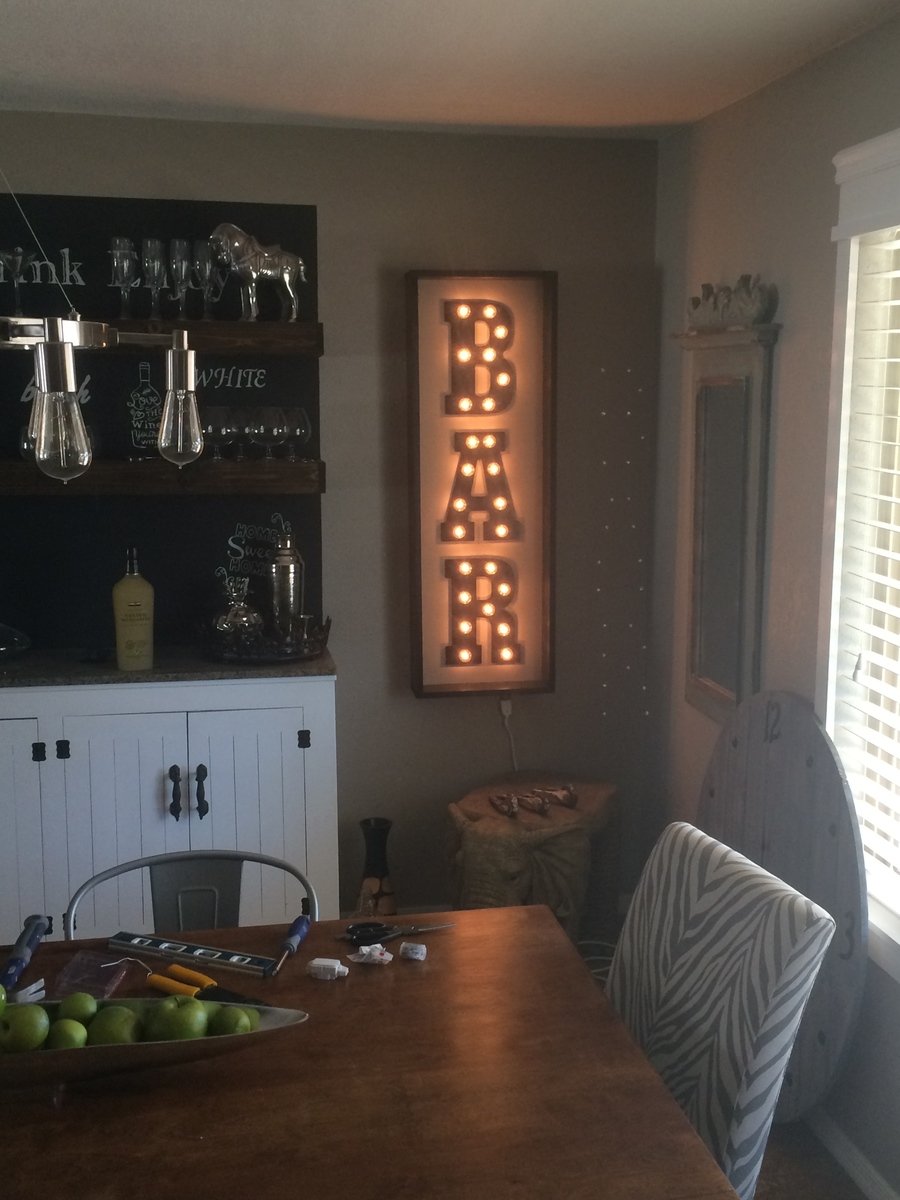
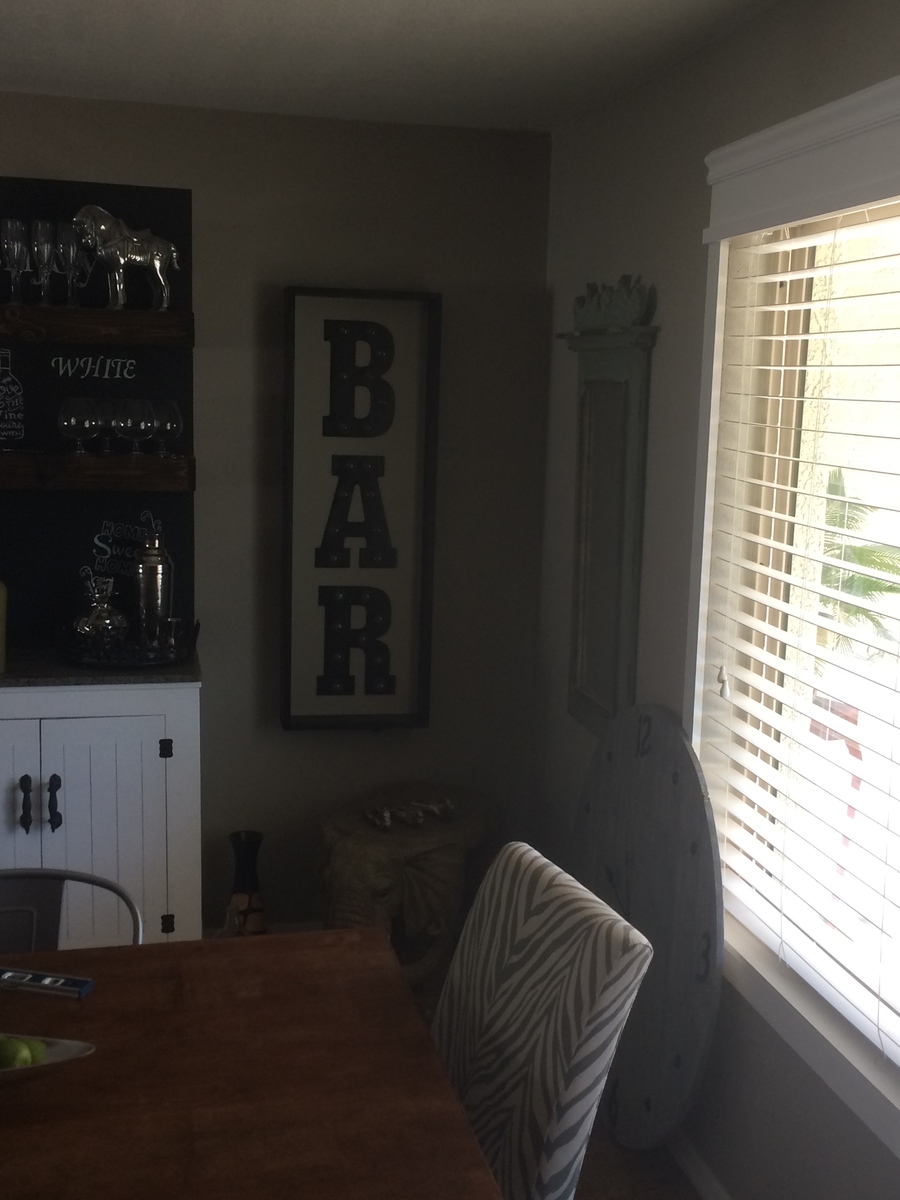
one wall project
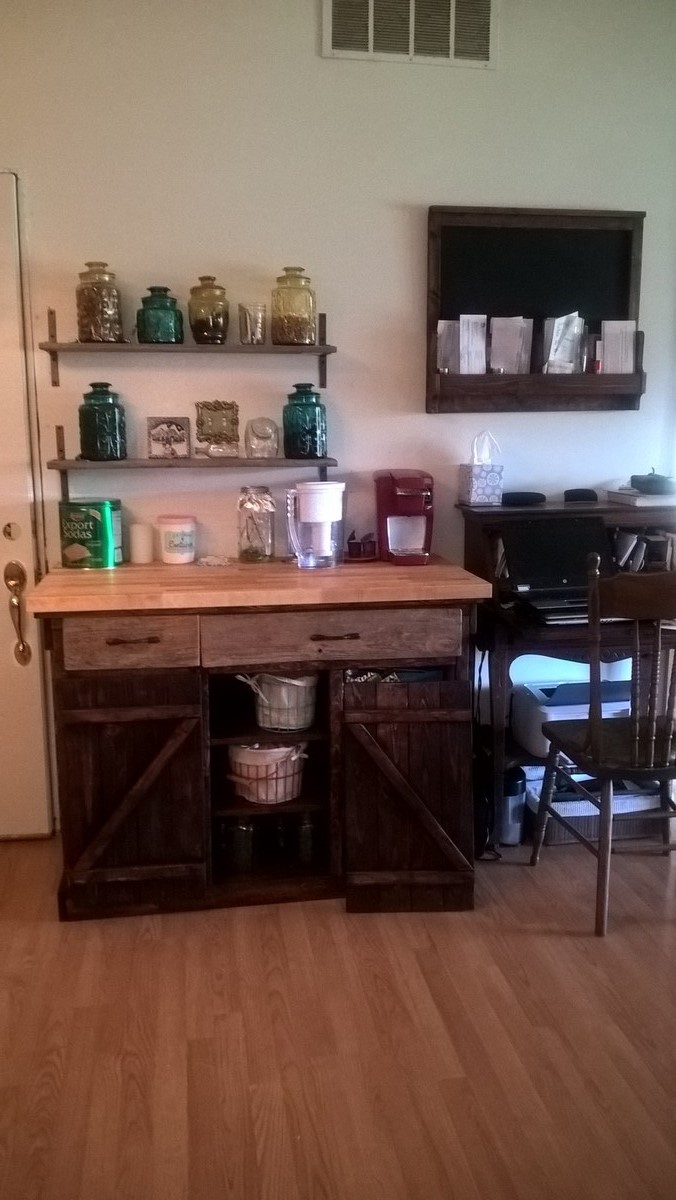
My kitchen is huge but has little counter space since I pulled out two oversized peninsula(6'x3') island things in my kitchen that had no storage. I also found out there was an outlet behind each one. The only outlet on the wall I am showing was covered. I was relieved to find it. I decided to build the Farmhouse Kitchen Island & Bar Plans and put a few shelves over it for coffee and tea. I made one drawer and one flip down drawer face. I put a large bowl in the cabinet below the drawer to catch coffee grounds. I alos made the cabinet 4 feet instead of 6 due to the space. I also trimmed a 1x3 down to cover the bottom foot plate so stuff doens't collect under it. I also added wheels so I can move it out if we have a lot of company for extra seating. The drawer faces are recycled barn wood from my sisters property. They are clearing out what was a 100+ year old barn that had fallen over. The shelves are from the same wood (I used bronze spray paint to paint the brakets on the shelves). I sanded it down just enough to get the splinters off. I used 4x4's for the bar side and bought a pre-made butcher block from Menards for the top. I stained it with carrignton stain from rustoleum except the barn wood I just clear coated. Oh, I added 12 in drawer slides to the drawer. The mail sorter plan is from http://www.shanty-2-chic.com/2016/02/rustic-chalkboard-mail-organizer.h… I made it bigger to fit the space. The organizer took a day the shelves to a couple hours and the Island took a week off and on. The secretary is an antique passed down to me along with the chair. I am planning on making the full size Island later on, with a few adaptations.
Built from Plan(s)
Estimated Cost
5-6 hundred
Butcher block was $80, wood was around $350 and hardware was another $50-60.
Butcher block was $80, wood was around $350 and hardware was another $50-60.
Estimated Time Investment
Week Long Project (20 Hours or More)
Finish Used
Carrignton stain from Rustoleum, clear coat, Bronze spray paint, Butcher block oil
Recommended Skill Level
Intermediate
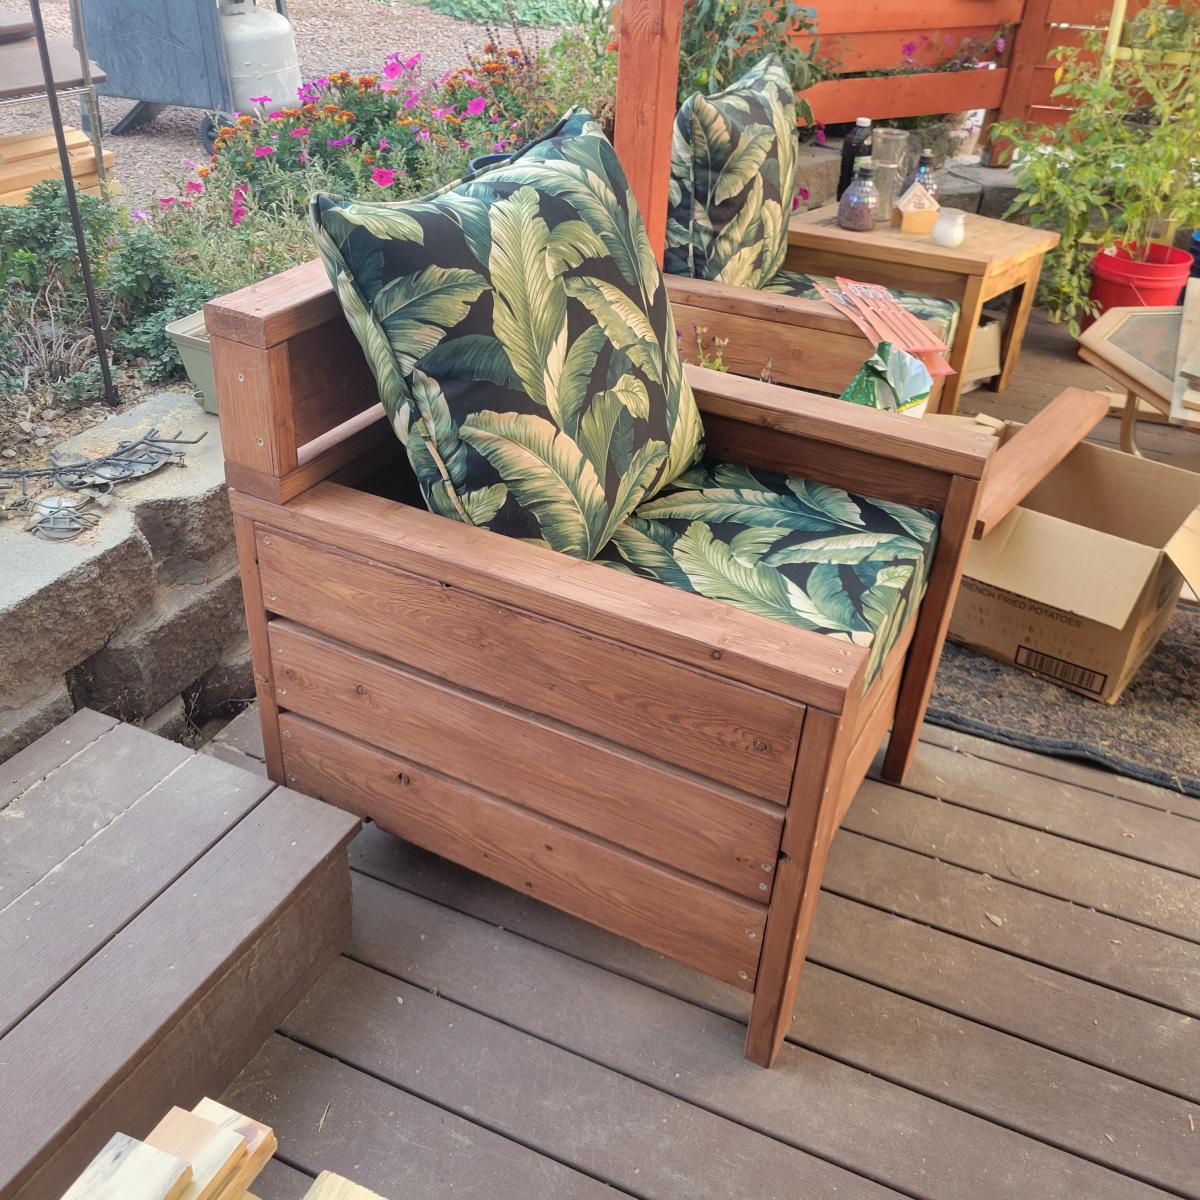
Modern Deck Chairs and Loveseat

Love, love, love your projects and plans! I have made 3 of the Modern Outdoor Chairs so far, as well as the Modern Outdoor Loveseat and they are amazing. I purchased both the seat and back cushions for my chairs before realizing that the back cushion had nothing to lean against, so I modified the design and gave the chairs alittle more personality. Keep those plans coming, I can't wait to try more.
Comments
Sarah's Perfect Bookshelves
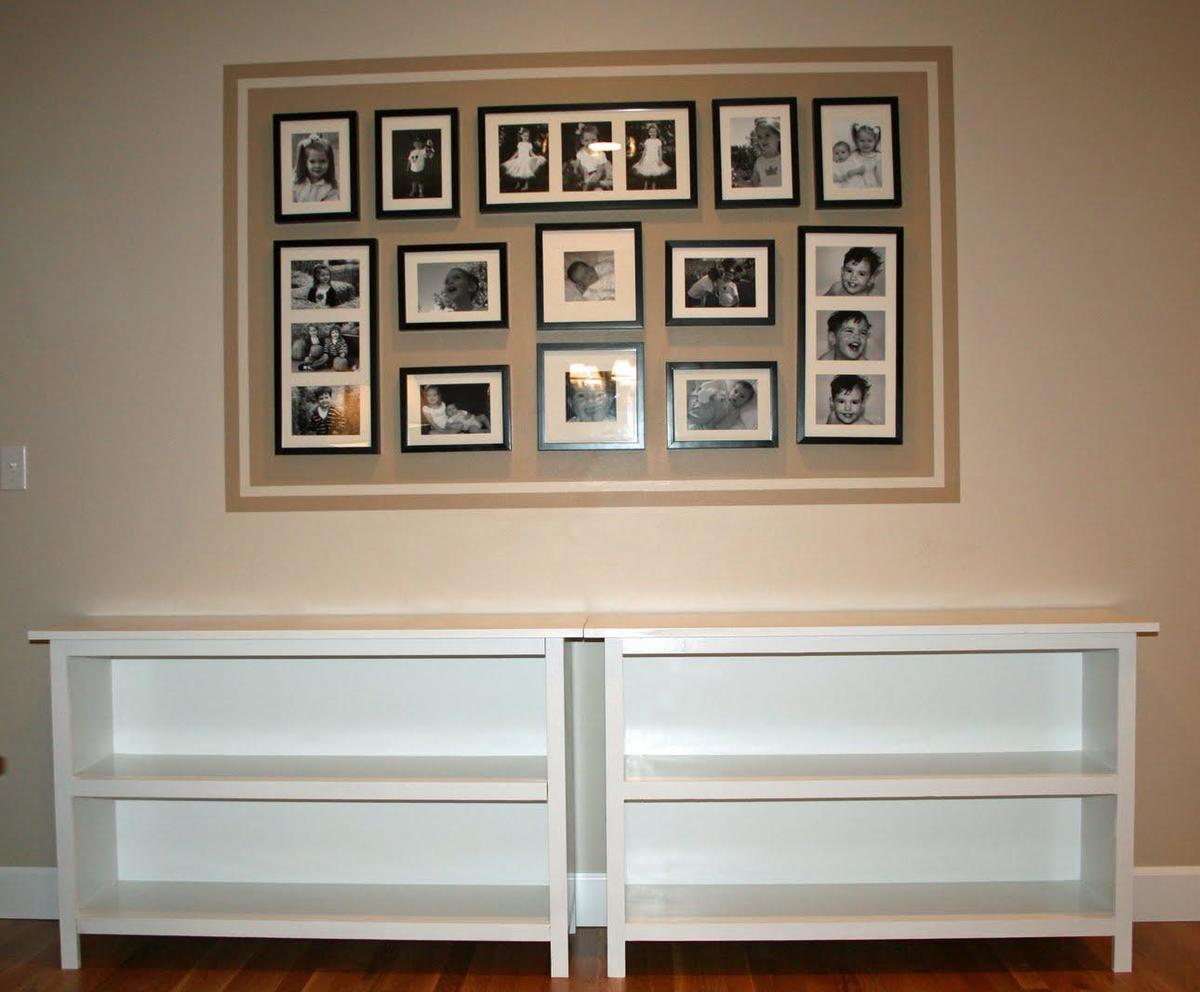
My husband is an aeronautical engineer and reads plans all day as a part of his job–even he thought your plans were fantastic. Great job! He did the building and I did the painting of the shelves. I did request that he add a back onto the shelves, so he left the trim off the backs of the shelves and fit in a piece of 3/4 MDF. It worked beautifully! We spent $75 on these two shelves–it would have been more like $50, except the additional MDF (for the shelf backs) added to the cost. Our only suggestion after doing this project is to go to a lumber yard for the pine. Ours is from one of the big box stores and, even though my husband went through a lot of wood, all of the choices were pretty bad. We went ahead and used this subpar wood, but I think our end result would be even better with better quality wood.
Thank you SO much for designing these plans for us. We’ve been planning on bookcases for quite awhile, but my husband hadn’t had time to come up with plans. When I found these plans on your site, I informed him that this was our weekend project! Soon he’ll be building a bed and trundle for our little boy–using your plans, of course!
Built from Plan(s)
Estimated Cost
$50 without backs
Estimated Time Investment
Afternoon Project (3-6 Hours)
Finish Used
White paint
Recommended Skill Level
Beginner
Santa is a cool guy... (Modified Train Table)
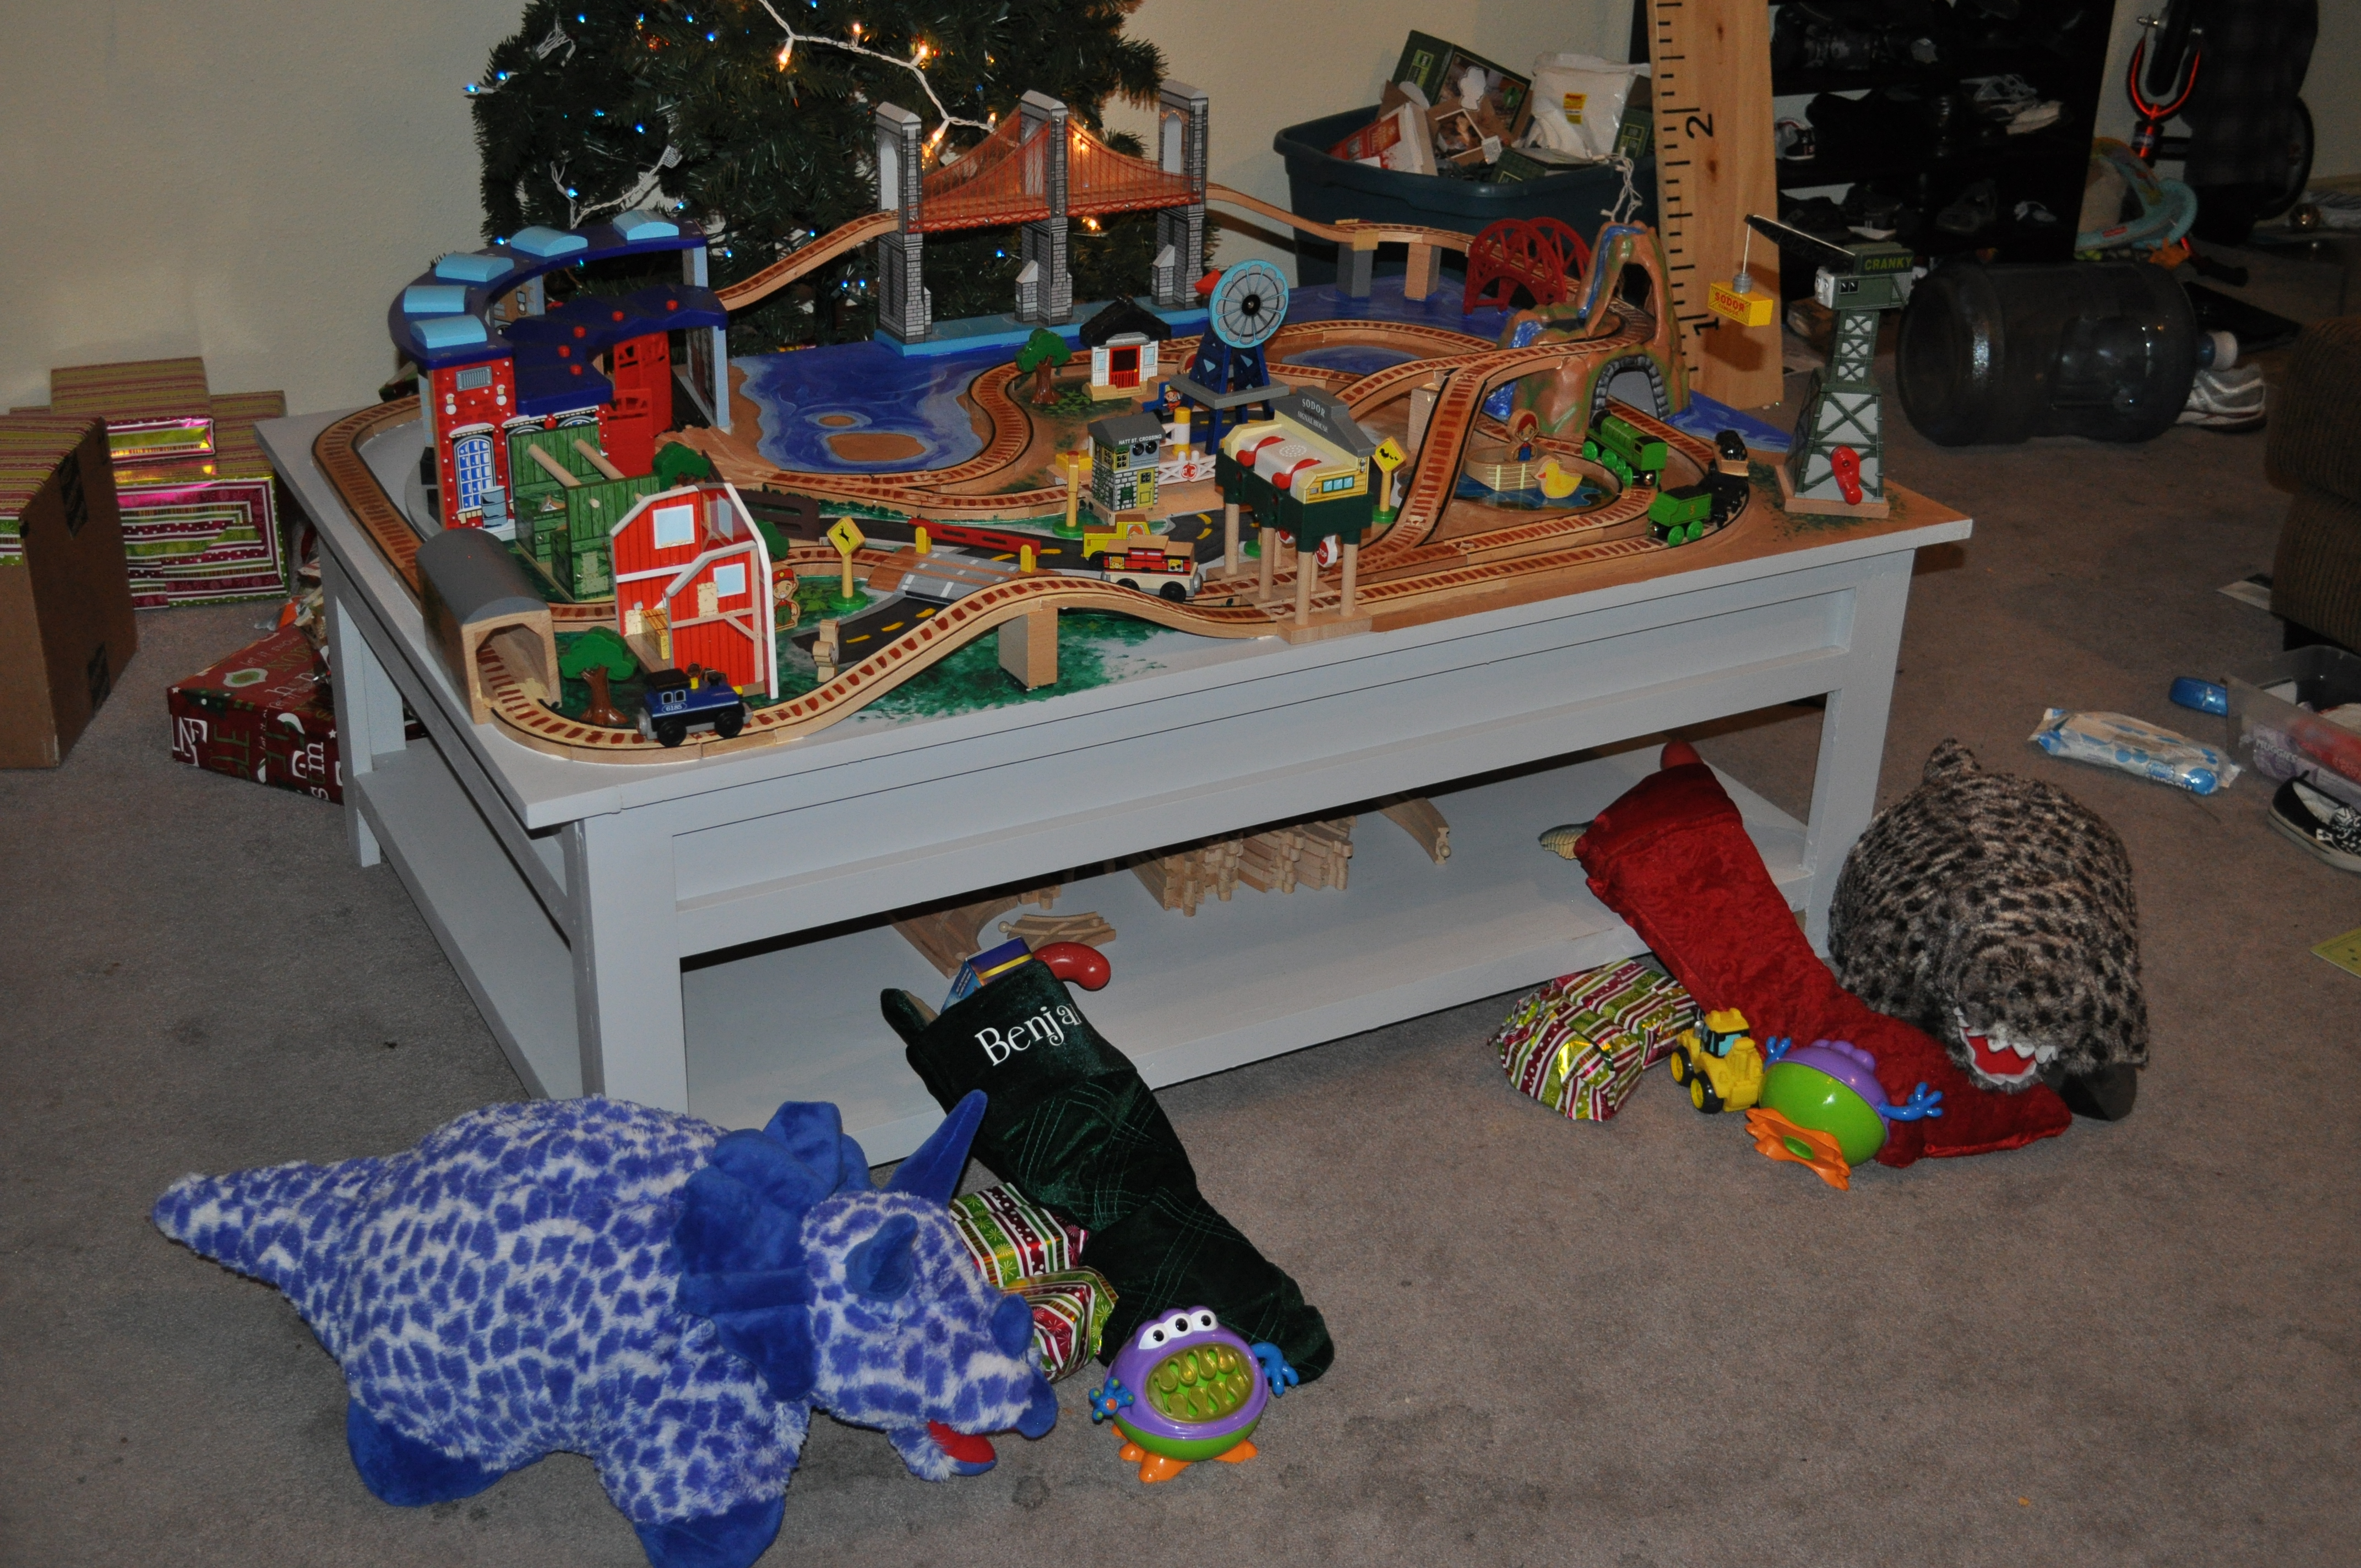
Santa decided to get come to Ana this year for some help with a train table instead of getting one from (insert big box toy store here). It ended up being pretty easy and a lot of fun, and our boys loved it! Santa decided he needed as much room on top as possible to put train and didn't need it to hide away so we skipped the cutting the top piece of plywood in half and left out the middle peice. We then added a track set and a few extras and painted the top. Thanks for the plans Ana! -(Santa)

Built from Plan(s)
Estimated Time Investment
Weekend Project (10-20 Hours)
Finish Used
Brush on primer and some Oops Valspar from the store, forgot which color!
Recommended Skill Level
Beginner
Comments
Cross35
Thu, 03/19/2015 - 05:55
This is very cool!
I'd love to know how you built it.