Community Brag Posts

Simple Adirondack Chair
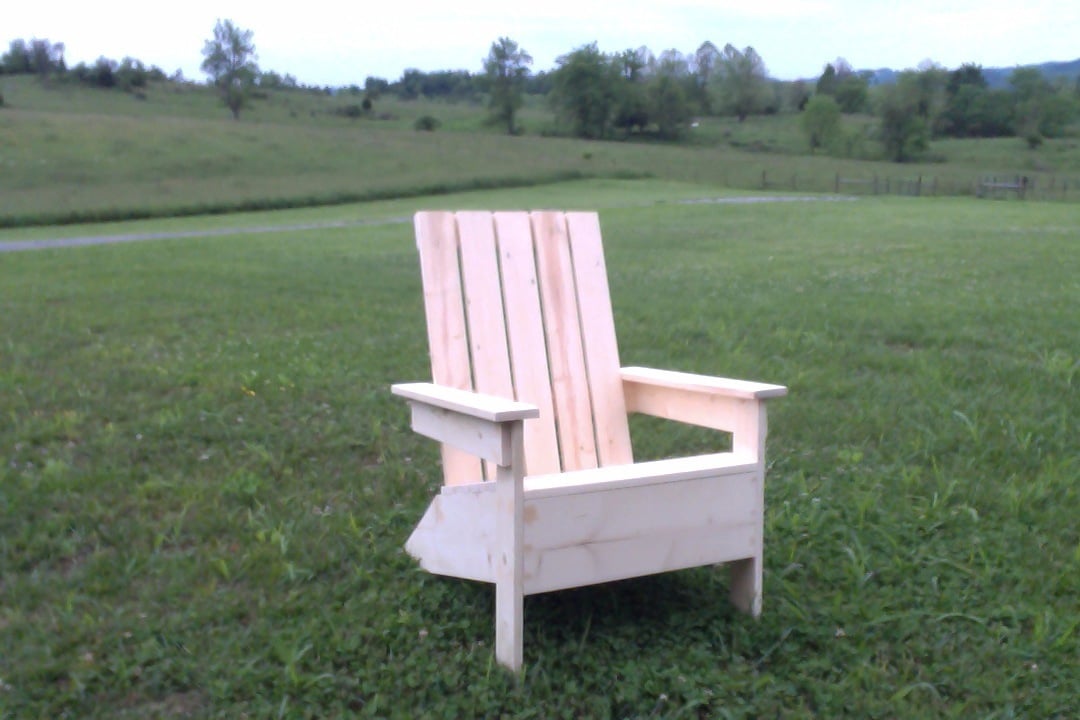
This was the second (larger) type project my husband has completed and I got to help this time! We made this for the loving ladies in our lives for Mother's Day. This one is his mom's and we didn't finish it because we don't know if she'll want to stain or just paint it. It was relatively easy!
Built from Plan(s)
Estimated Cost
25-30
Estimated Time Investment
Afternoon Project (3-6 Hours)
Finish Used
Not completed yet! We are making two for ourselves so I will upload those when we get them finished.
Recommended Skill Level
Beginner
Doll Farmhouse Bed

Santa Claus made our lucky girl a farmhouse bed for her new doll that was an exact mini-me of Mommy and Daddy's king farmhouse bed. Not just that, her grandmother was genererous enough to sew a new blanket and pillow for both our daughter and her dolls using some quilting materials left by her late-great grandmother. She also created a doll mattress some padding material that was used by our daughter's late-great grandfather.

Built from Plan(s)
Estimated Cost
50
Estimated Time Investment
Afternoon Project (3-6 Hours)
Finish Used
Behr off-white #1873 paint distressed with Minwax Special Walnut stain
Recommended Skill Level
Beginner
Farmhouse bed
Not a hard project.
Built from Plan(s)
Estimated Cost
150-200
Estimated Time Investment
An Hour or Two (0-2 Hours)
Finish Used
Minwax Special Walnut
Recommended Skill Level
Beginner
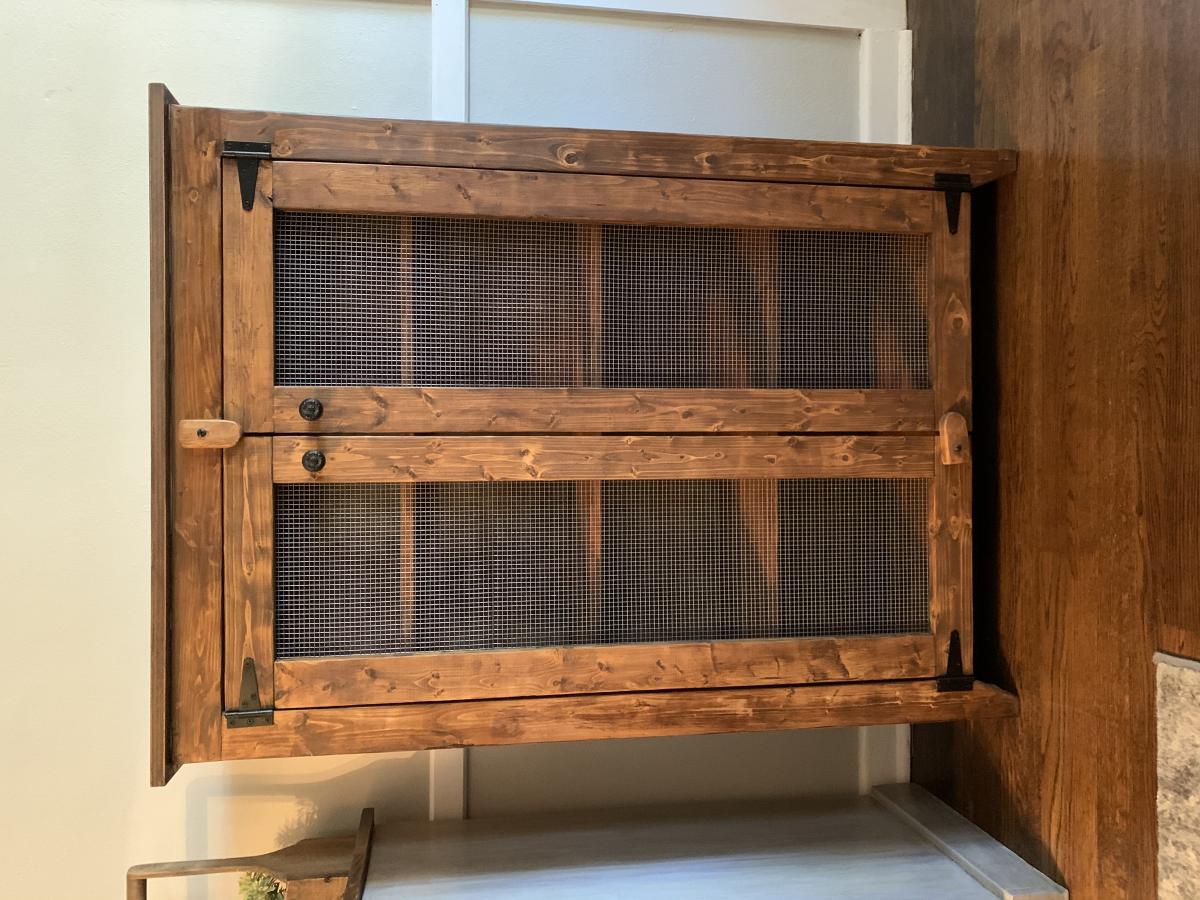
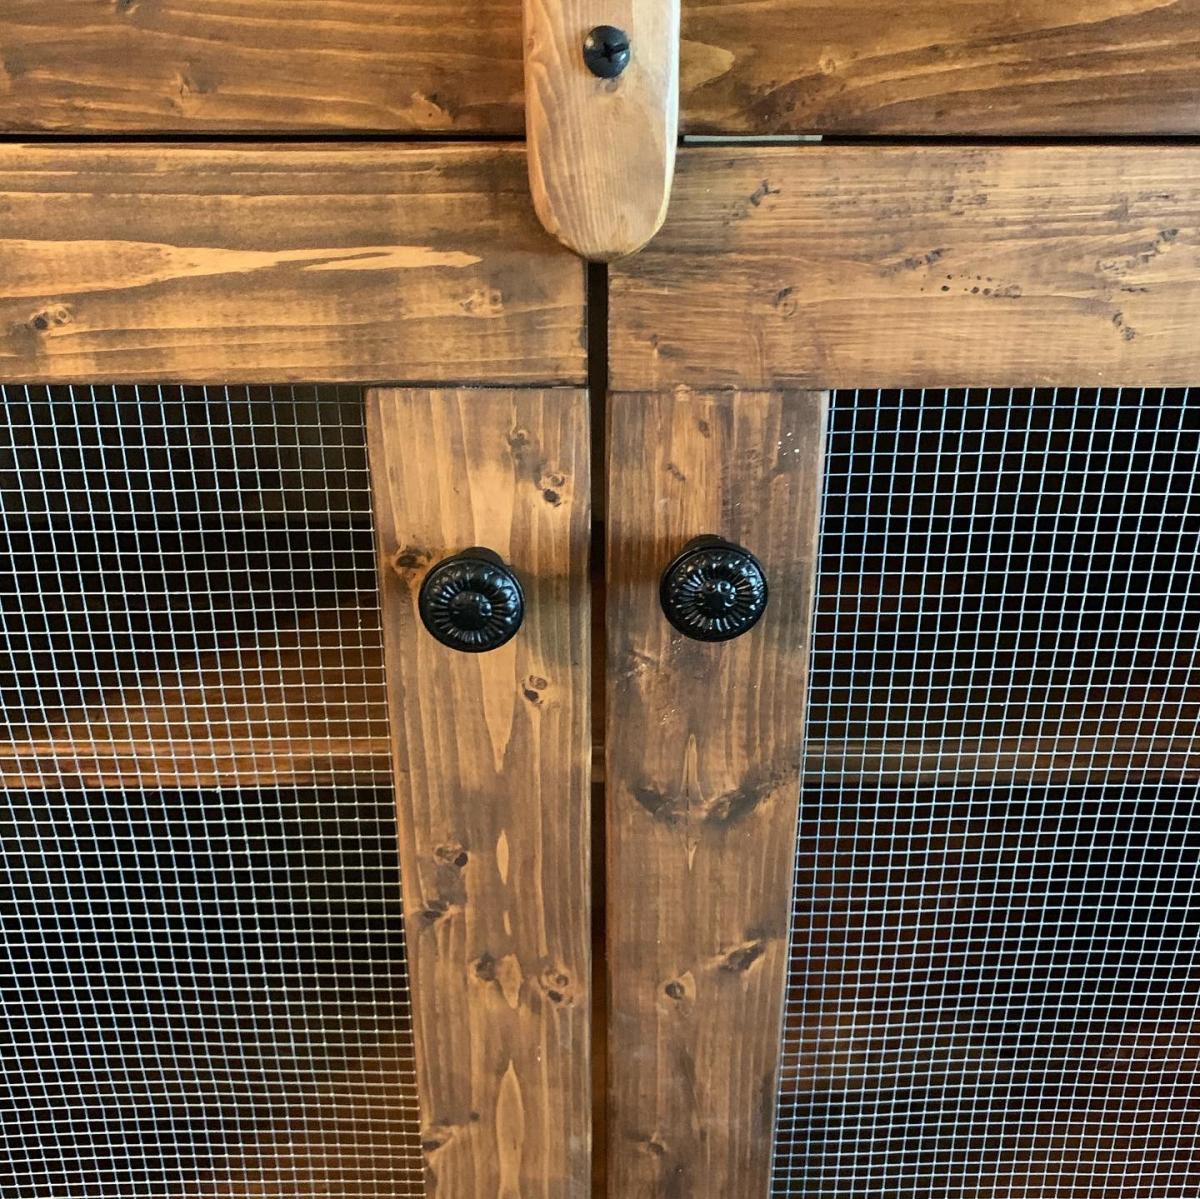
Patrick’s Jelly Cupboard
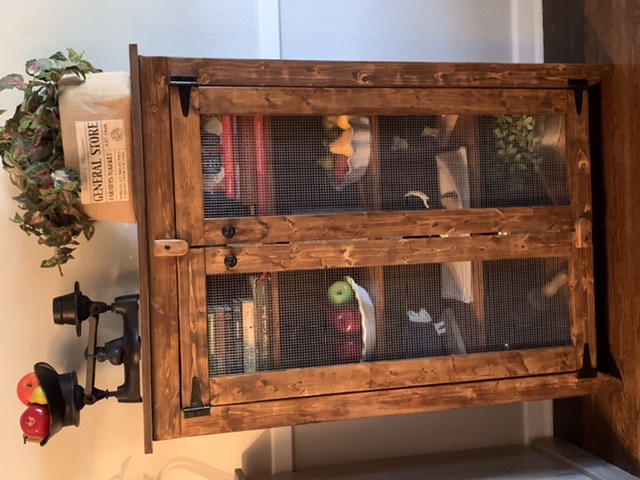
My husband and I loved this plan and created a few original touches. Like many other of Ana’s plans, we enjoyed making it.
Estimated Cost
$70
Estimated Time Investment
Week Long Project (20 Hours or More)
Finish Used
General Finishes Antique Walnut Gel Stain and General Finishes Gel Topcoat
Recommended Skill Level
Intermediate
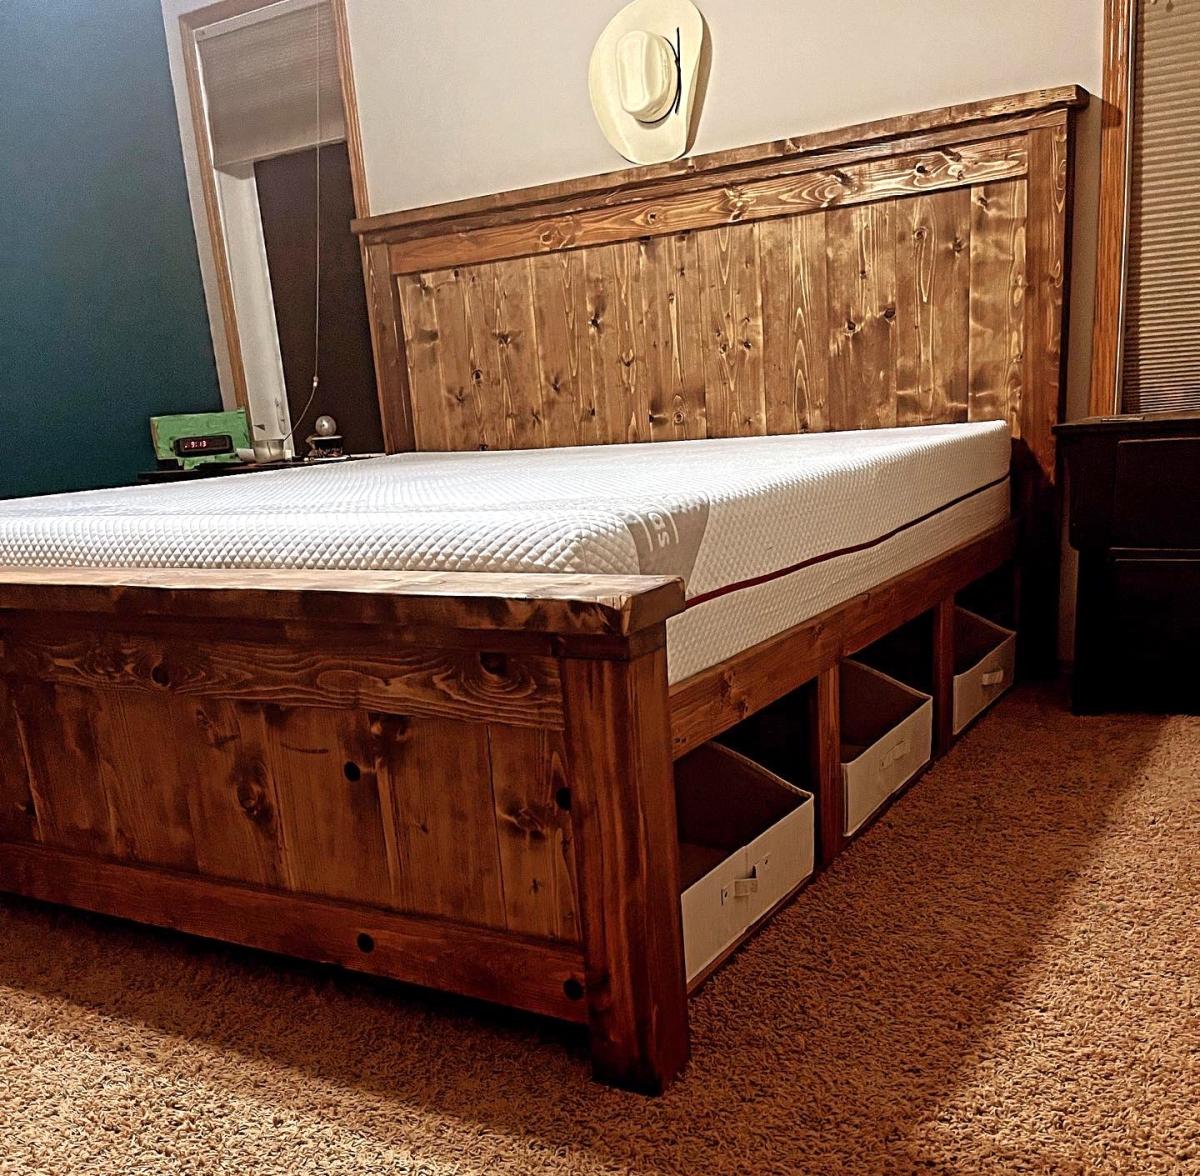
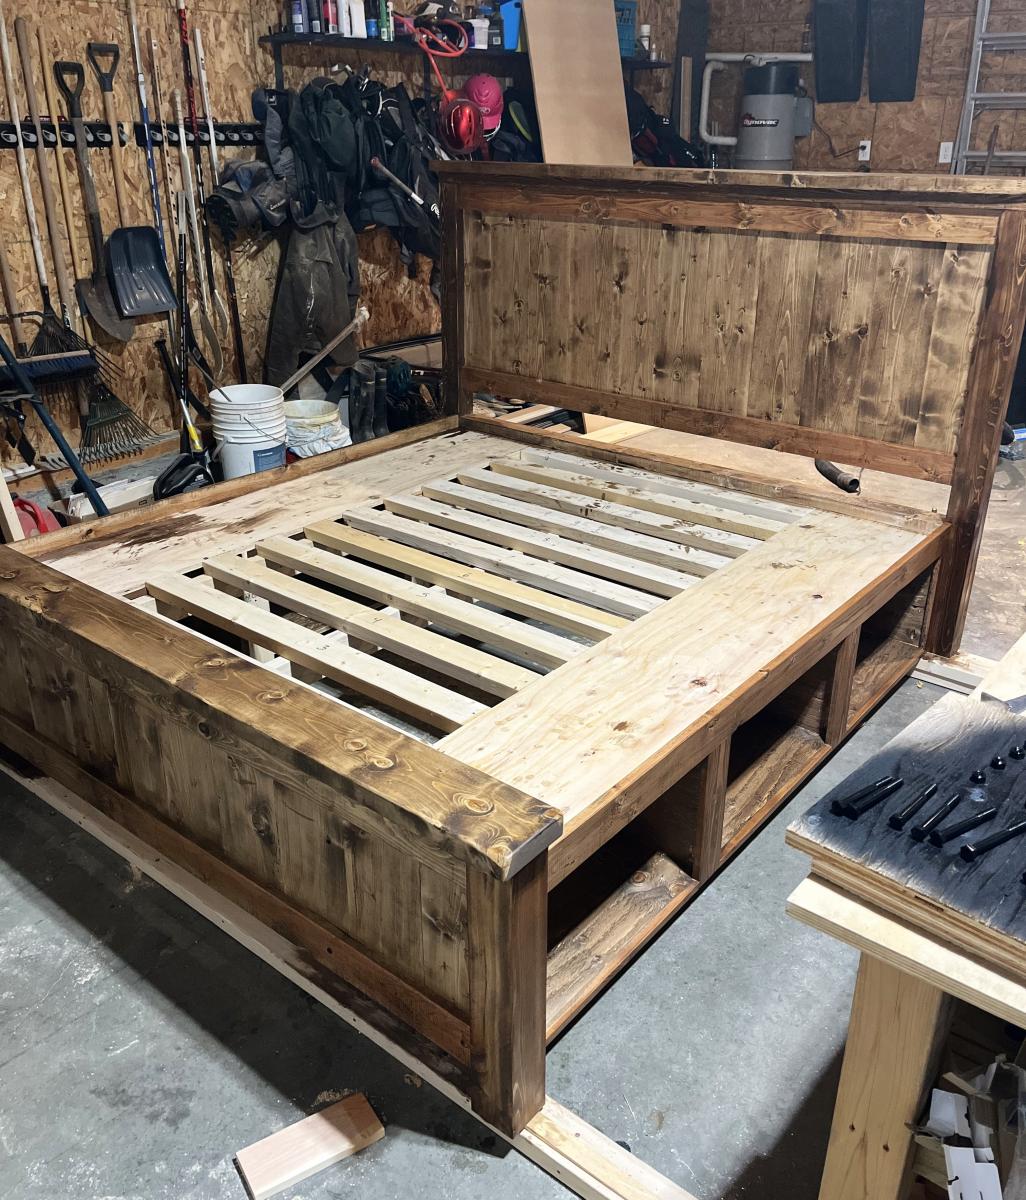
Storage Farmhouse Bed
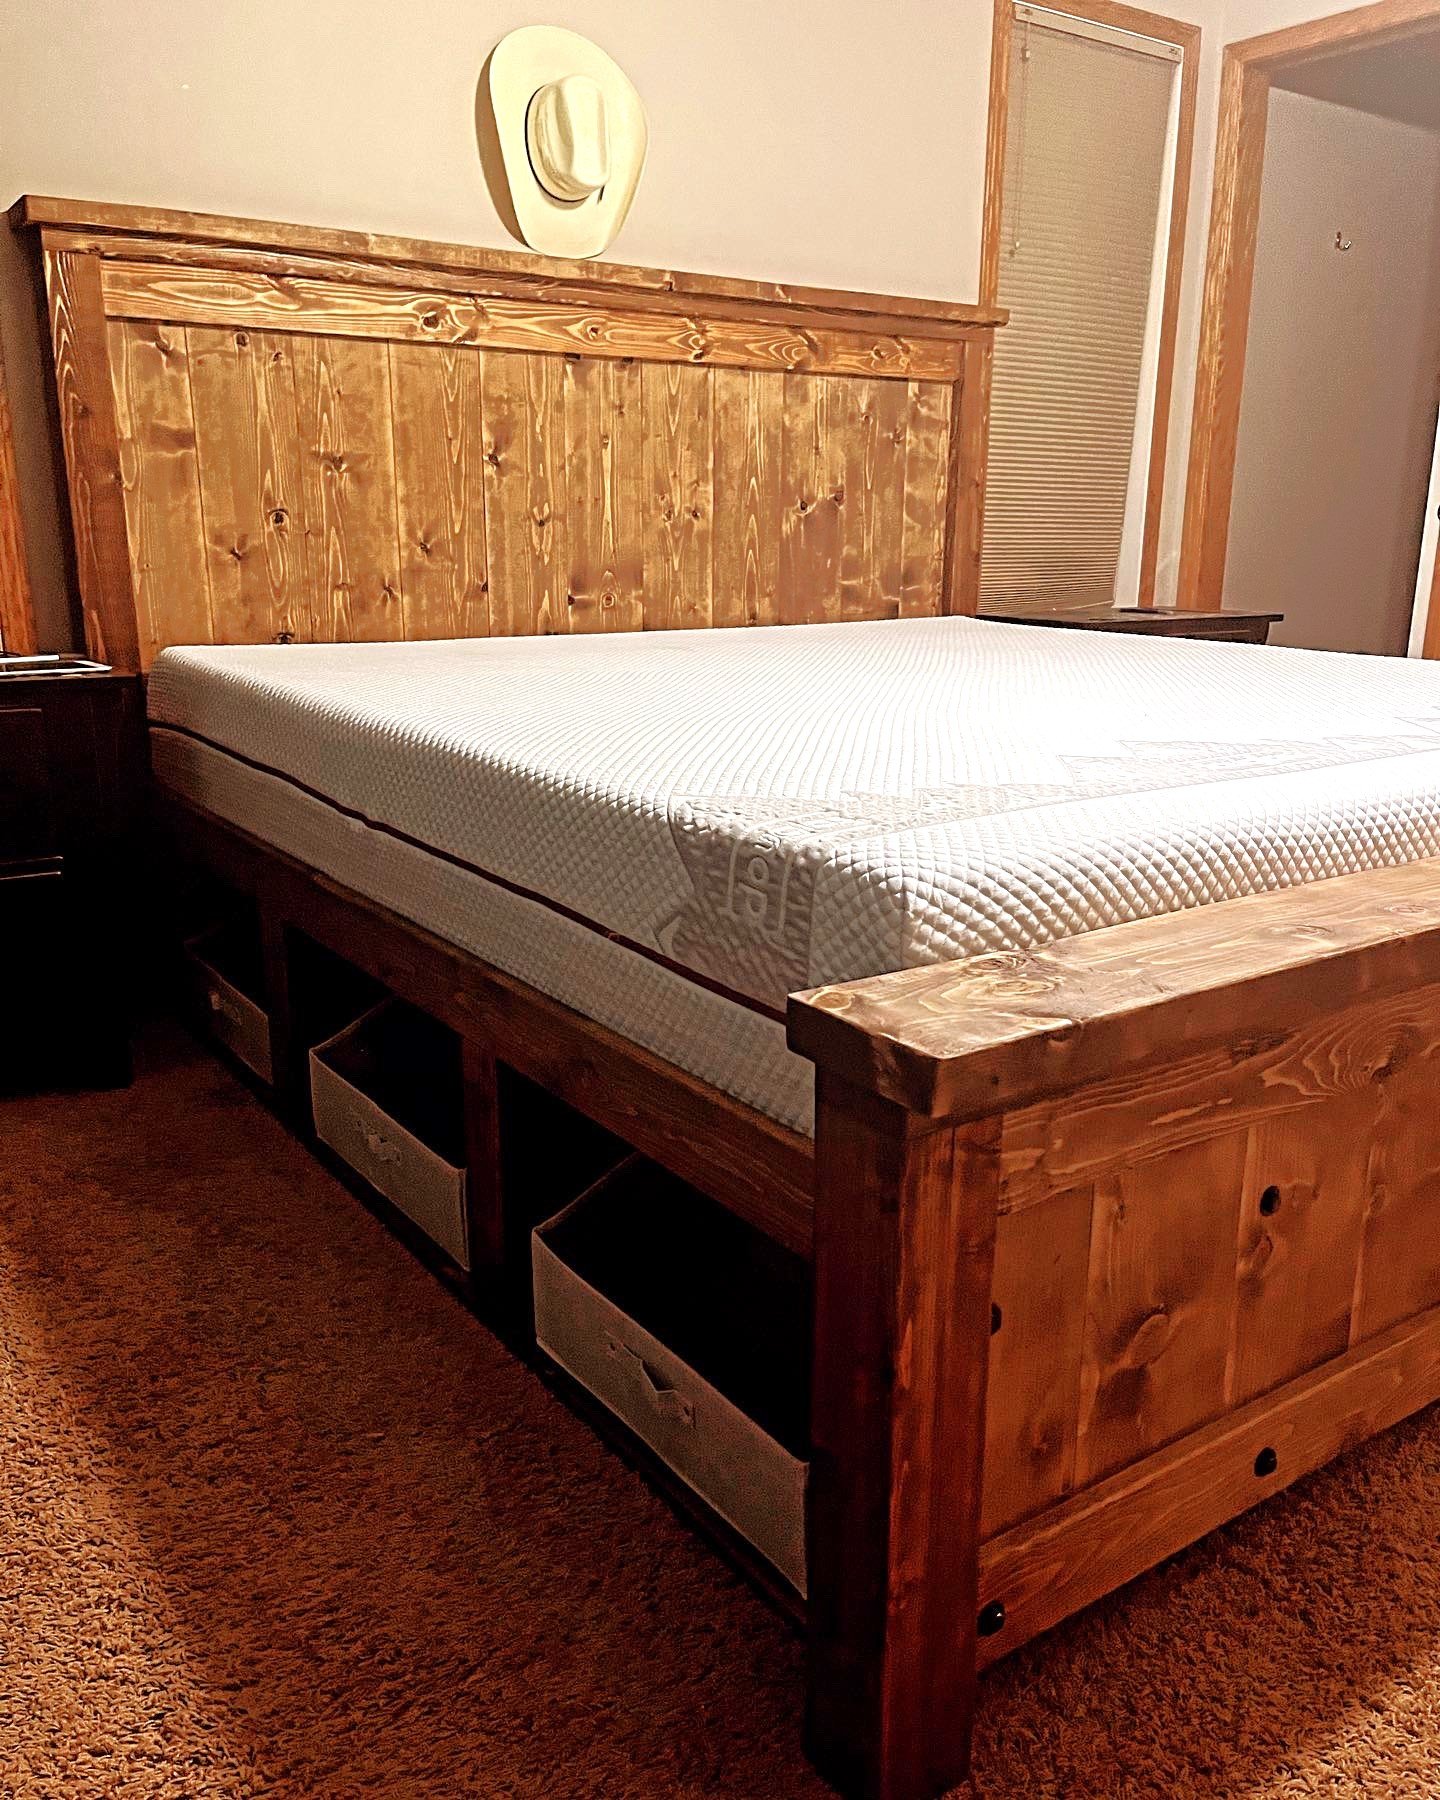
I made these for a friend and just loved how they turned out. I liked the stained and black combo it turned out pretty good. I will be making some more for my son and and friend of his along with the sofa as an addition.
@kurt_lansing
Simple Outdoor Dining

I'm SUPREMELY impressed with how well these came out. And just to beat the dead horse.... paint your stuff before you put it together. I didn't and it is a MAJOR pain painting between the slats, man. Major. I'm a little impatient. And impulsive.
Built from Plan(s)
Estimated Cost
$120
Estimated Time Investment
Weekend Project (10-20 Hours)
Finish Used
Sanded everything down, linseed oil on cedar boards. Primer and Valspar Bistro White in semi.
Recommended Skill Level
Beginner
Comments

Thu, 05/17/2012 - 04:59
I bow down to your awesomeness...
Ana, thank you so much for the plans, this site, everything. You're an incredible part of this universe.

Mon, 04/01/2013 - 19:13
love the way you finished the table
did you install the legs on the inside of the table top? from the pictures it looks like you did, I like the way it looks and how you finished the top with stain the rest with paint.
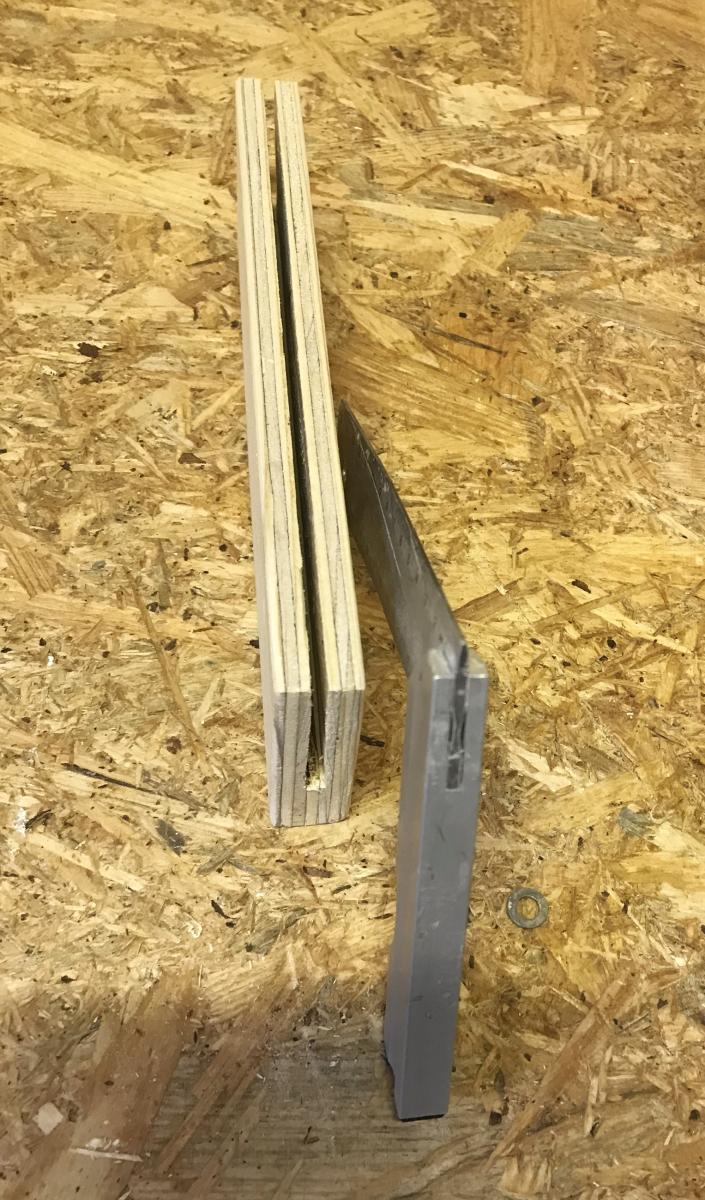
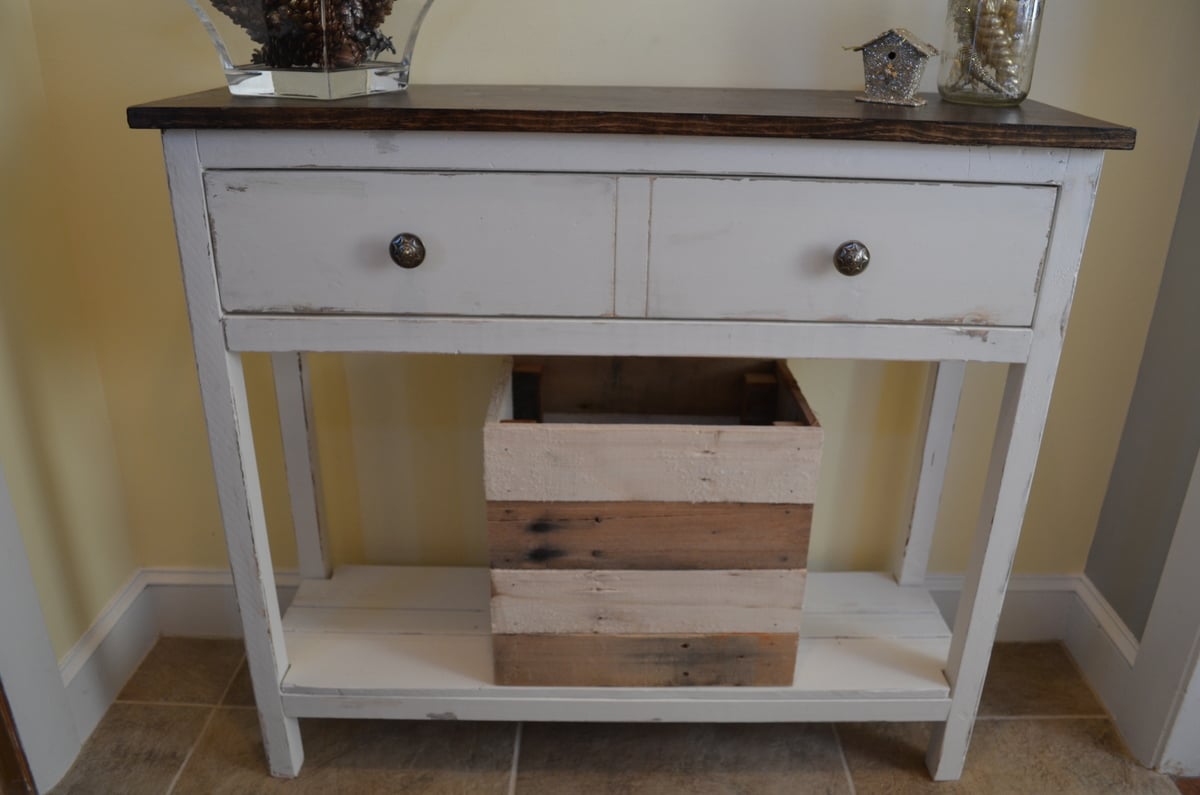
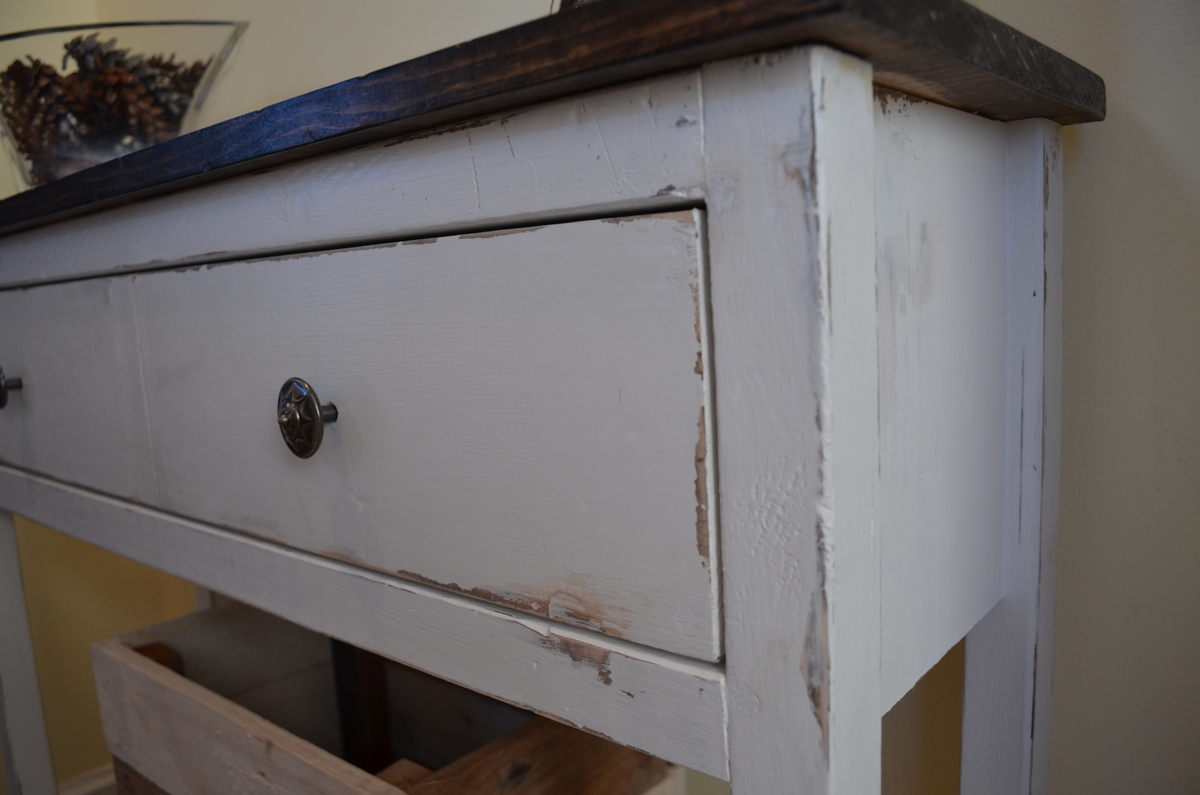
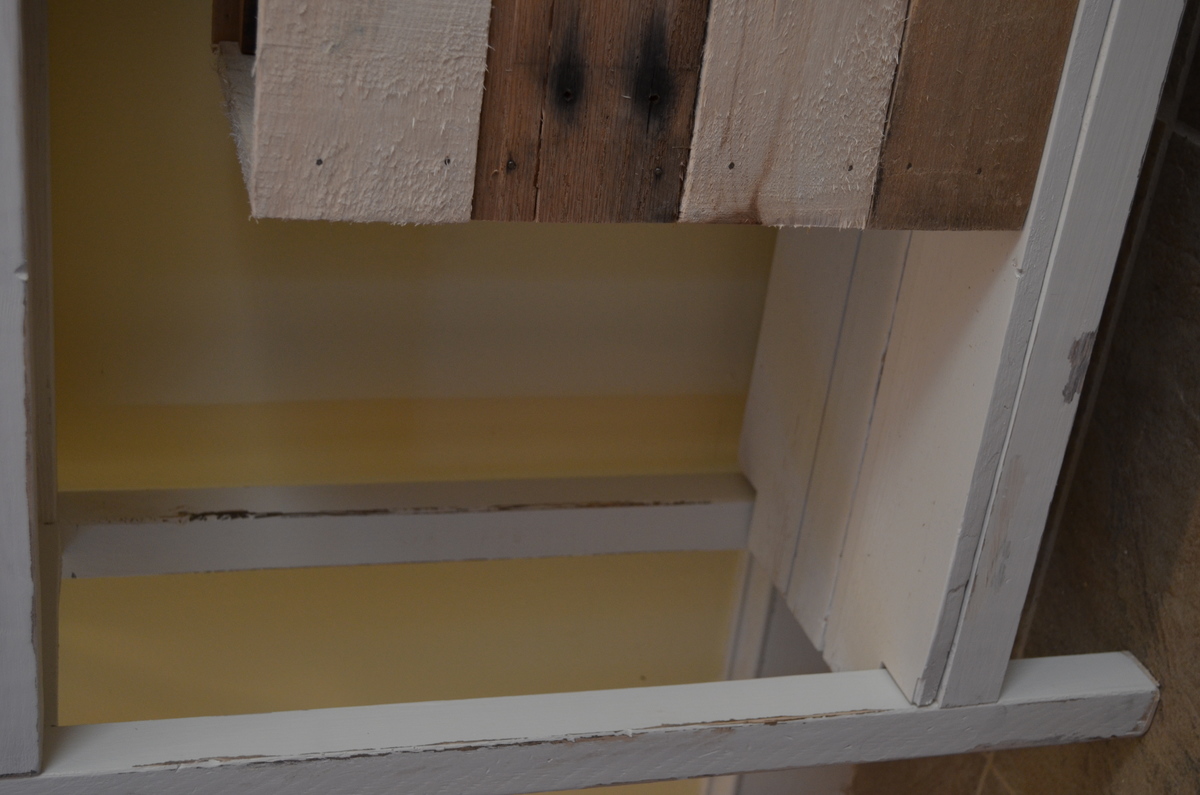
Entryway Table
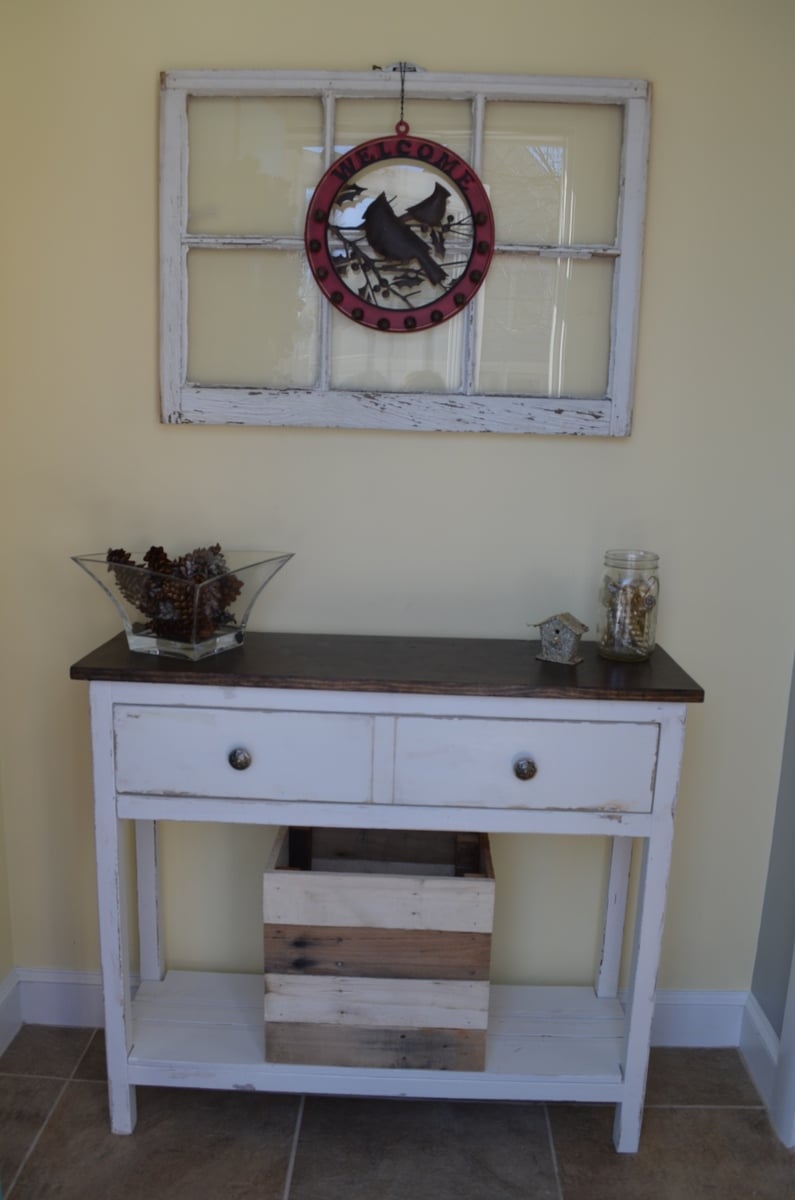
This was my first real project where I did everything on my own, start to finish! No help from my husband. I needed a very small and narrow table for my entryway which is very small. This is the first thing you see when you open the front door. The top board is a 12" board, it fits perfectly in the space. I distressed it to give it a nice rustic look and it looks pretty authentic. The crate below is made of recycled pallet wood and will be used for shoes or umbrellas... I'm very happy with the way it turned out for being my first project (it's a tiny bit wobbly..the leg's aren't perfect, oh well!). And it only cost about $30 for the lumber (not including the stain, paint or finishing wax which I already had). Definitely beats trying to find something in the store!
Built from Plan(s)
Estimated Time Investment
Day Project (6-9 Hours)
Finish Used
White ben moore paint which was then distressed, dark walnut minwax stain on top, minwax paste finishing wax over the entire thing (first time I used it and I love it!)
Recommended Skill Level
Beginner
Comments
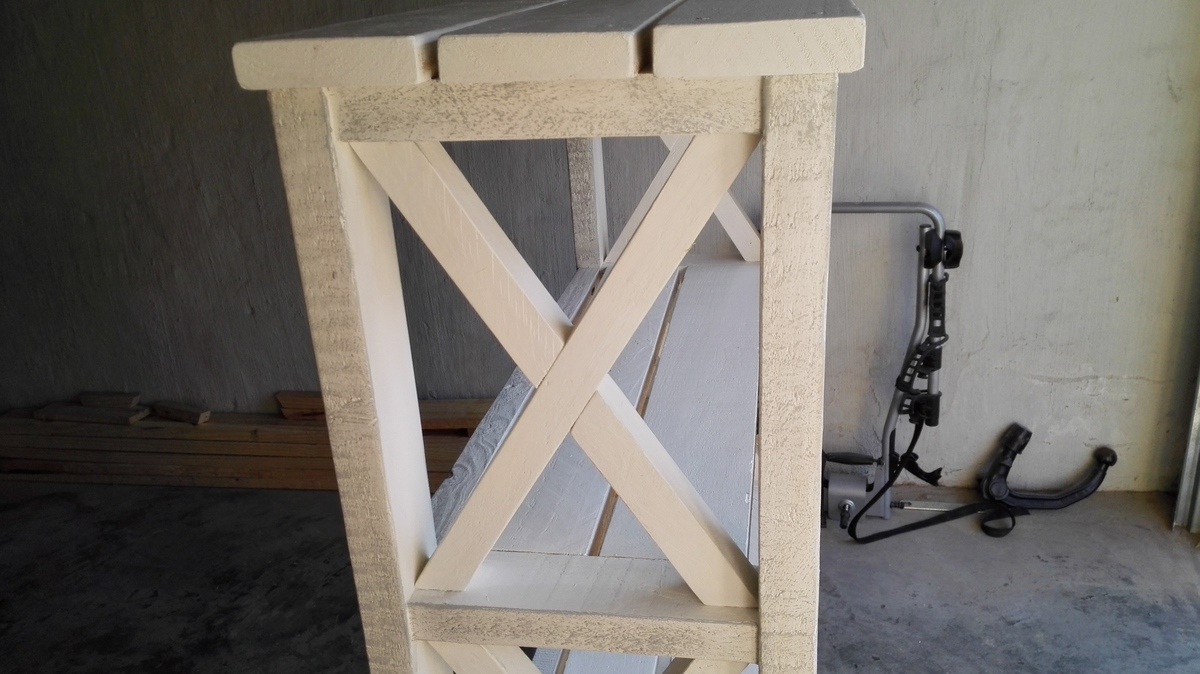
Rustic X Bookshelf
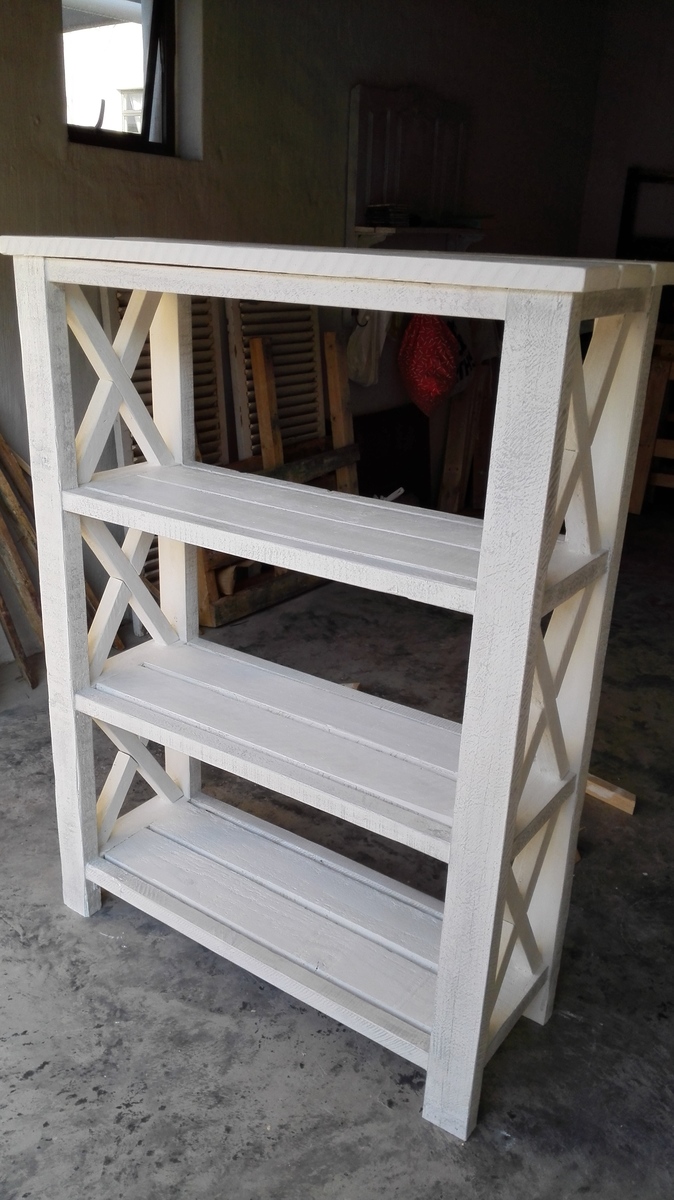
I love the look of this bookshelf, thank you so much for the idea.
I definitely recommend to cut the crossing boards each at a time as they differ even if in milimiters.
Built from Plan(s)
Estimated Cost
$60
Estimated Time Investment
Day Project (6-9 Hours)
Finish Used
Chalk paint
Recommended Skill Level
Beginner
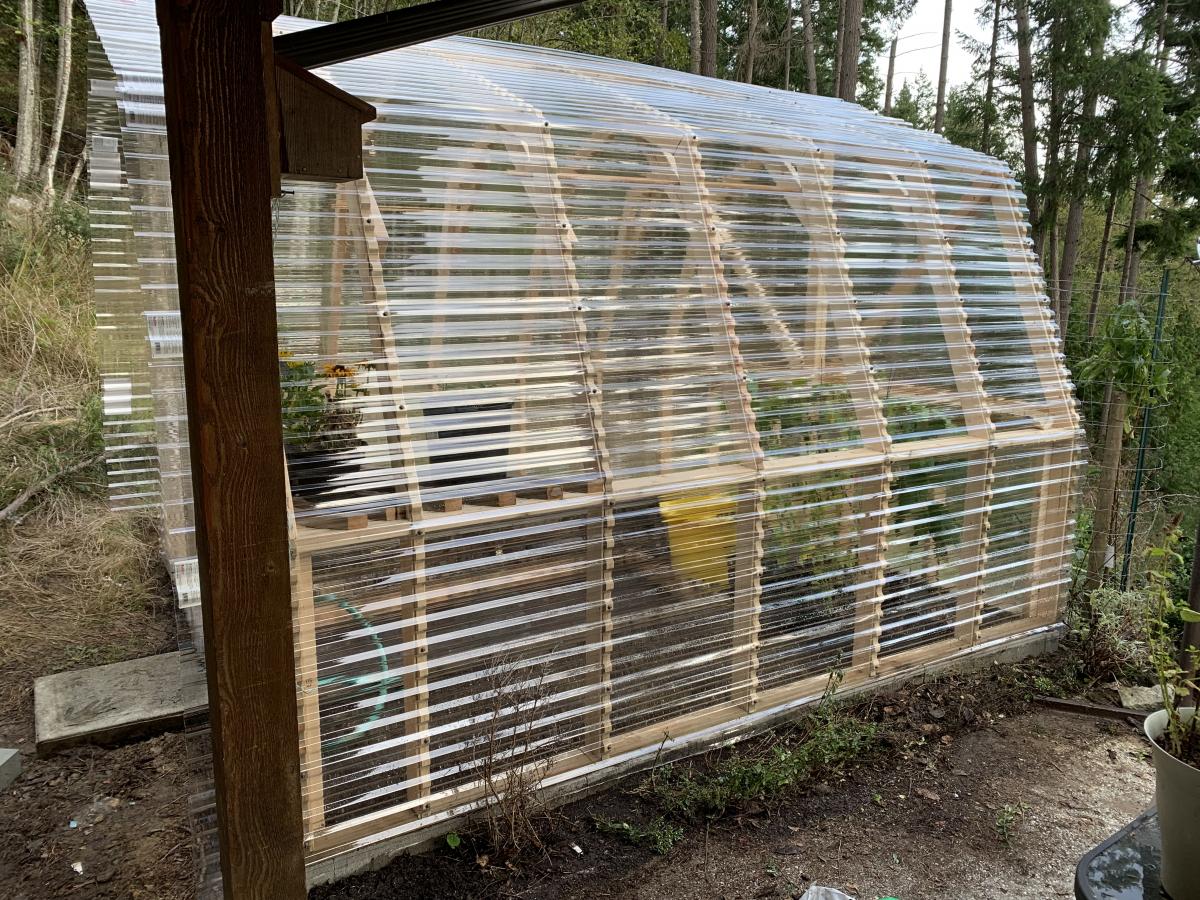
Green House
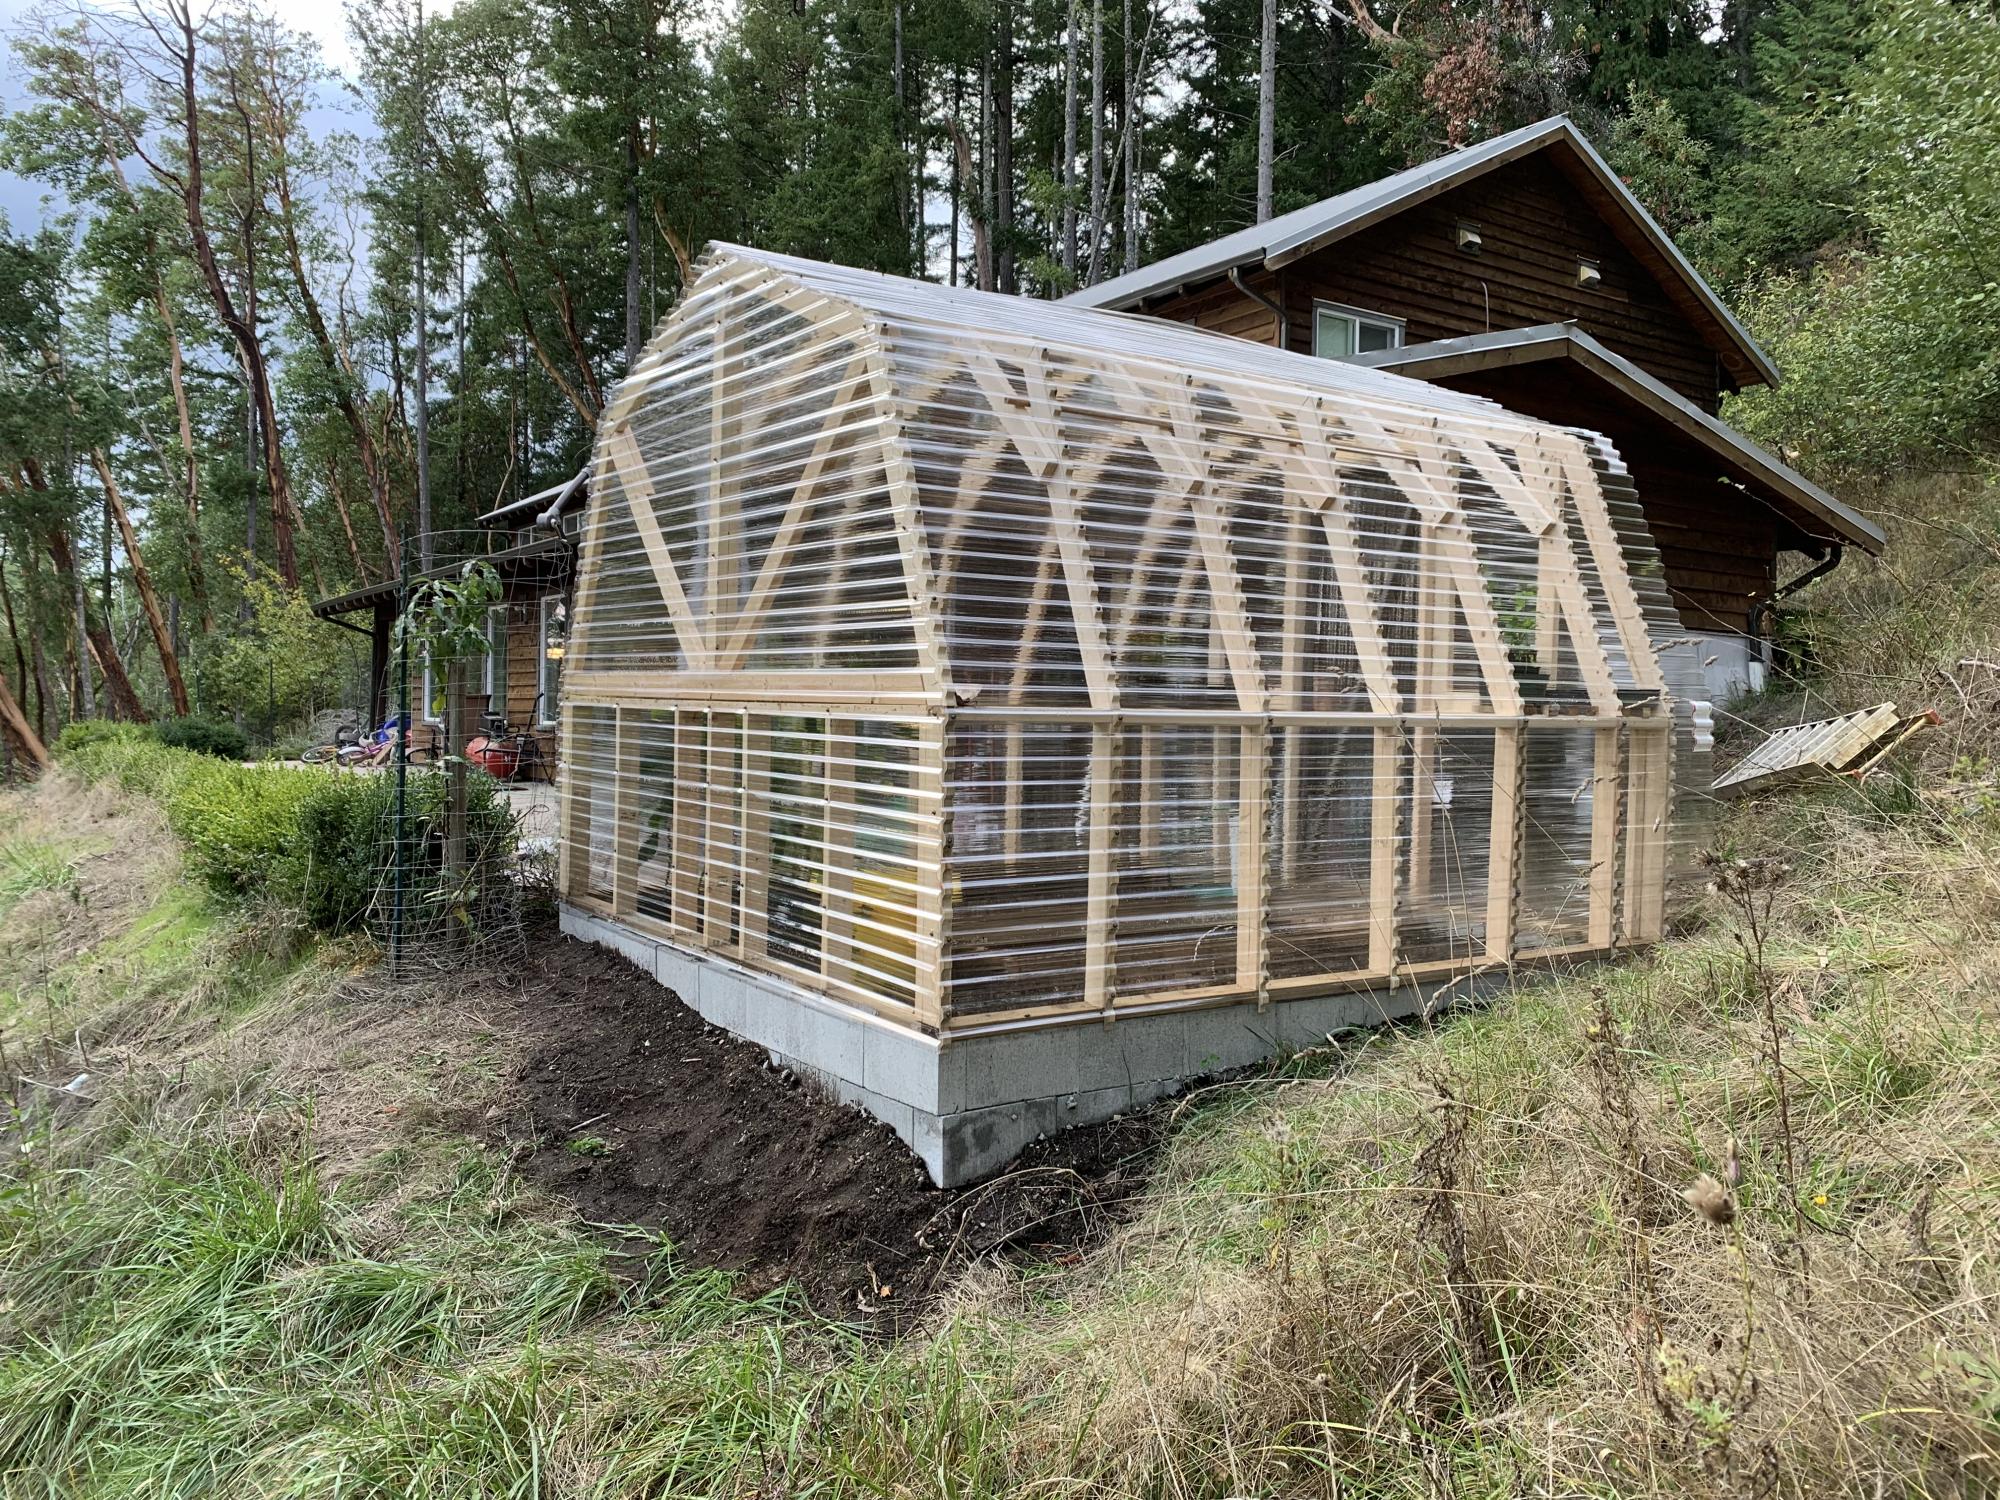
Great little project from your site!
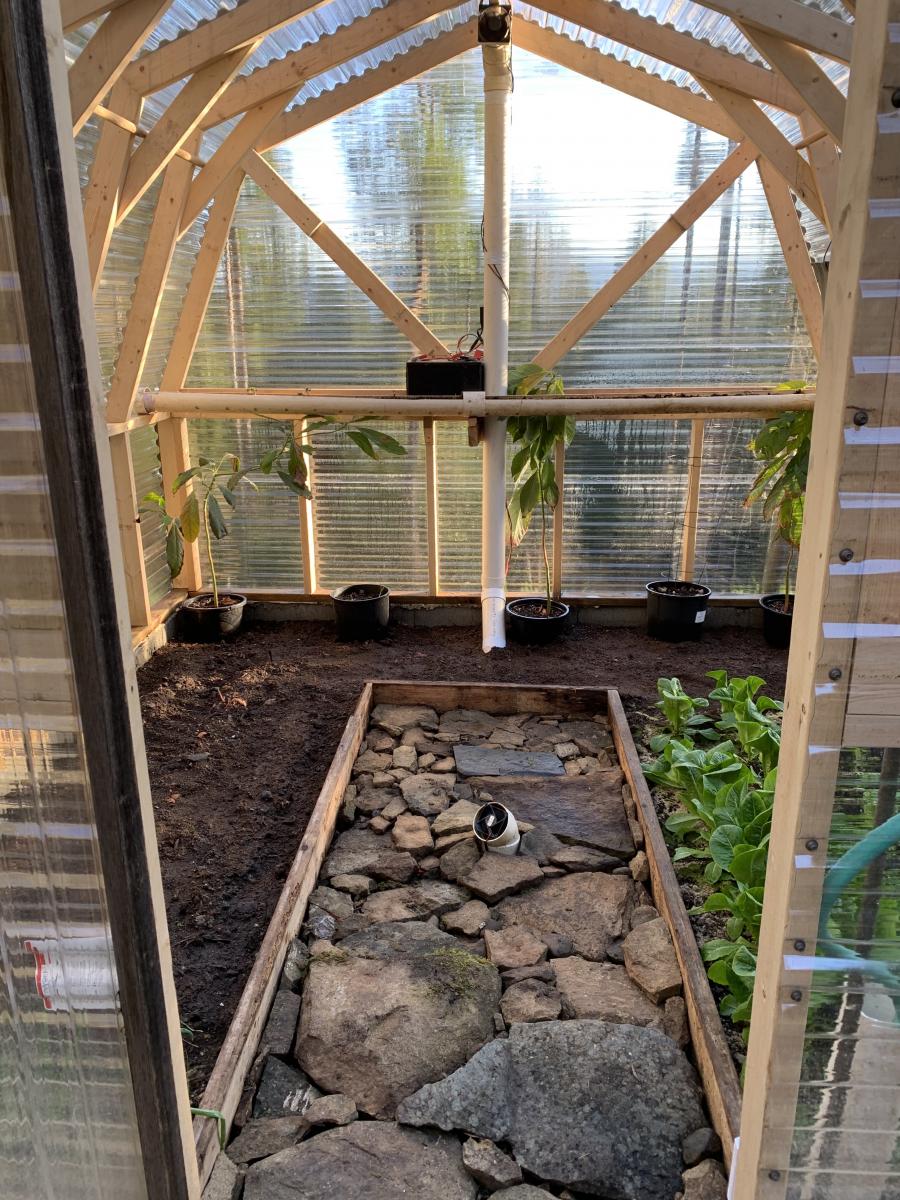
I put PVC to the ground vs the metal siding and added a heat sink in the middle with some old computer fans.
Built from Plan(s)
Estimated Cost
$1,300
Estimated Time Investment
Weekend Project (10-20 Hours)
Finish Used
PVC
Recommended Skill Level
Intermediate
Comments
Sat, 05/23/2020 - 17:23
That PVC heat pipe intrigues…
That PVC heat pipe intrigues me. Can you share a little more about it? I'm assuming it pulls hot air from the upper vent, and cools it down via the section of pipe below ground, sort of like a natural A/C. Keeps things from gettting too hot during the summer months?
Kinda looks like you'd frequently trip over it though. I'd probably have run the lower exhaust right up by the edge of the door frame, or a corner.
Collapsible Christmas Tree Collar with Storage

All from pallet wood! Hides and protects gifts from toddlers, puppies, & curious adults!
It is a collapsible build to go around a plastic fold up table. 4 sides come apart for easy storage in attic. Great for parties on the go for catering!
Molly Preato
Seasonal And Holiday
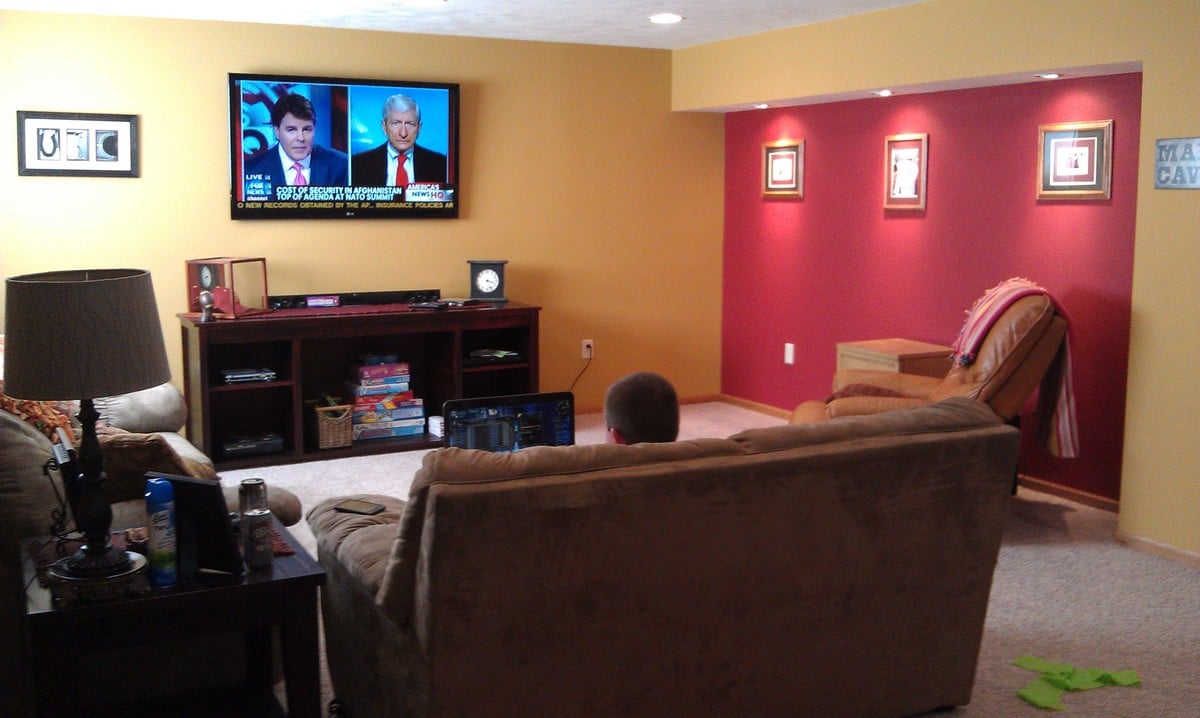
Entertainment Console
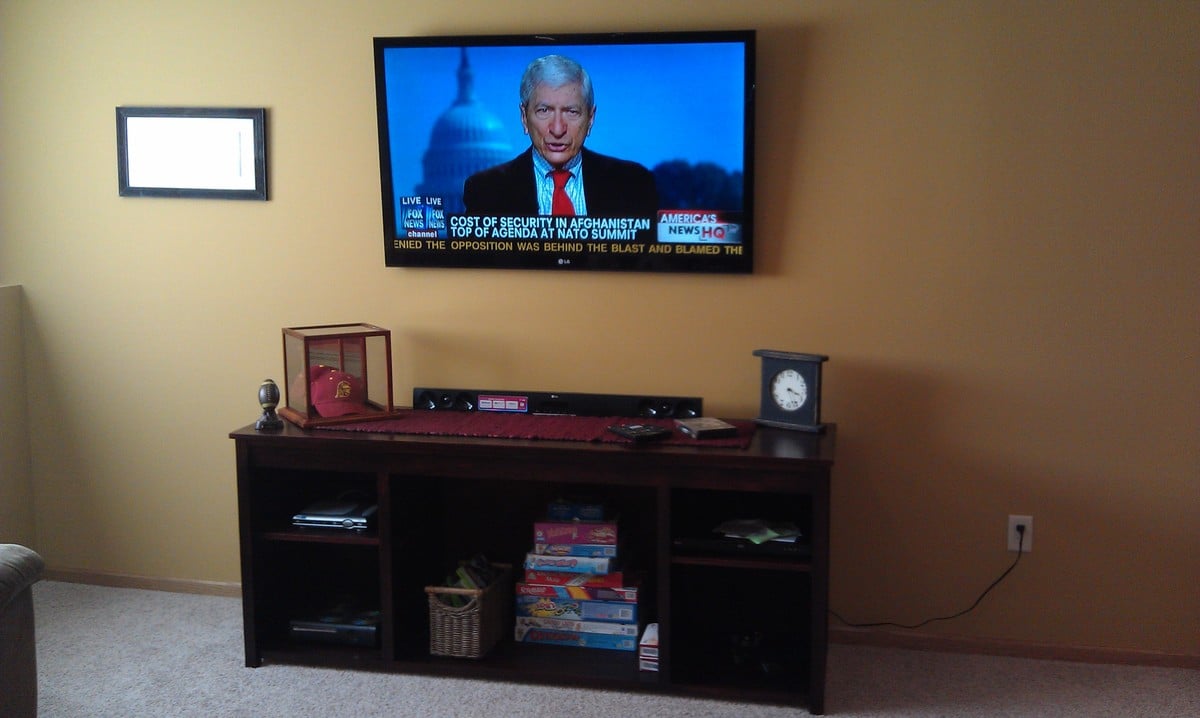
My husband made this from ordinary pine, modifying it slightly. Eventually he will add doors to the middle. It was spray stained with Minwax polyshades. He took a couple of months on it cause he got busy doing other things but finally finished it!
Built from Plan(s)
Estimated Cost
100.00
Estimated Time Investment
Week Long Project (20 Hours or More)
Finish Used
Bombay Mahogany
Recommended Skill Level
Intermediate
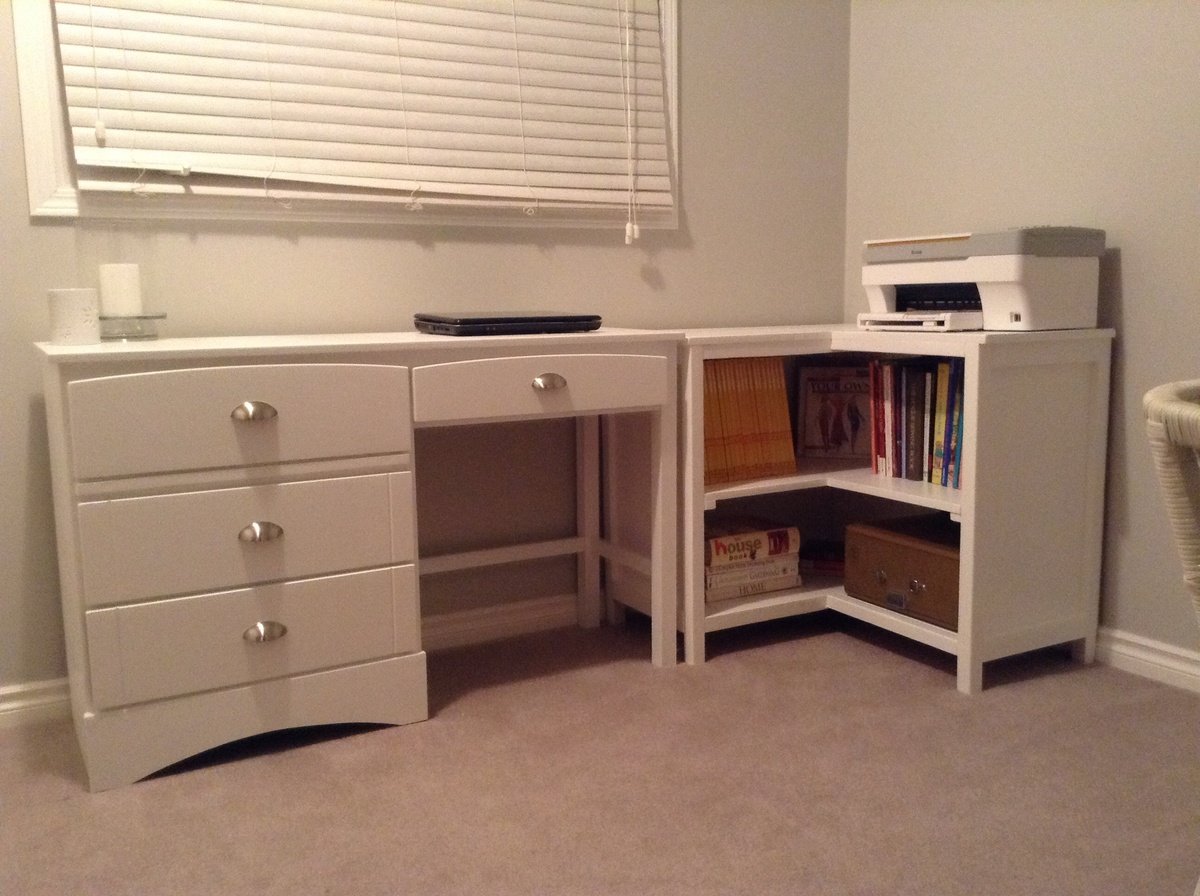
Corner Bookshelf
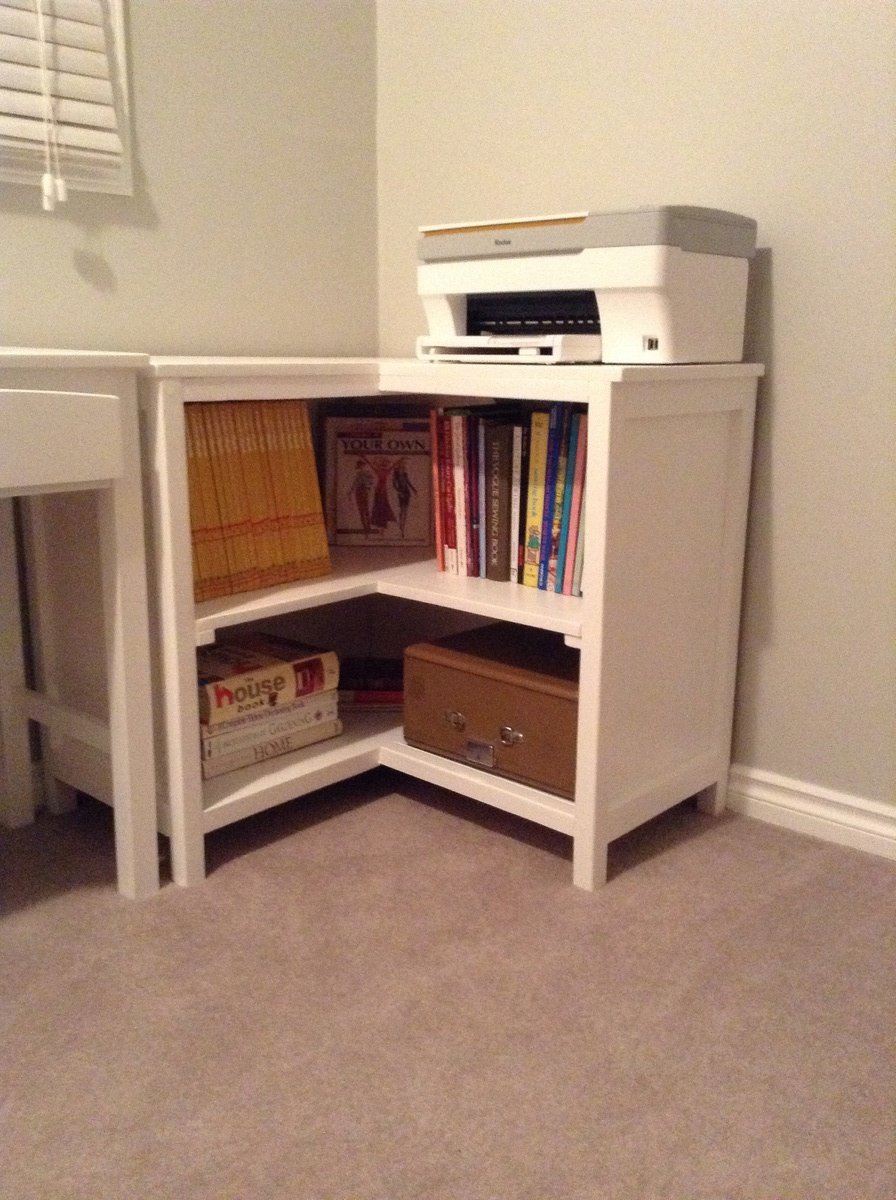
Recently, I wanted a redo of my mismatched furniture in my sewing room. When I was planning what to do, I decided I needed storage for my sewing books and a place to put my printer. I searched your site for plans (as usual). I found the corner bookshelf that was almost perfect. I had my boyfriend build it for me, but it needed to be just a little taller and a little wider to work with my desk. It turned out fabulous! Thanks for all the great plans you have. They are great inspirations!
Built from Plan(s)
Estimated Cost
Unknown - we used some pieces we had and had to get some supplies
Estimated Time Investment
Weekend Project (10-20 Hours)
Finish Used
I finished it with whited paint
Recommended Skill Level
Intermediate
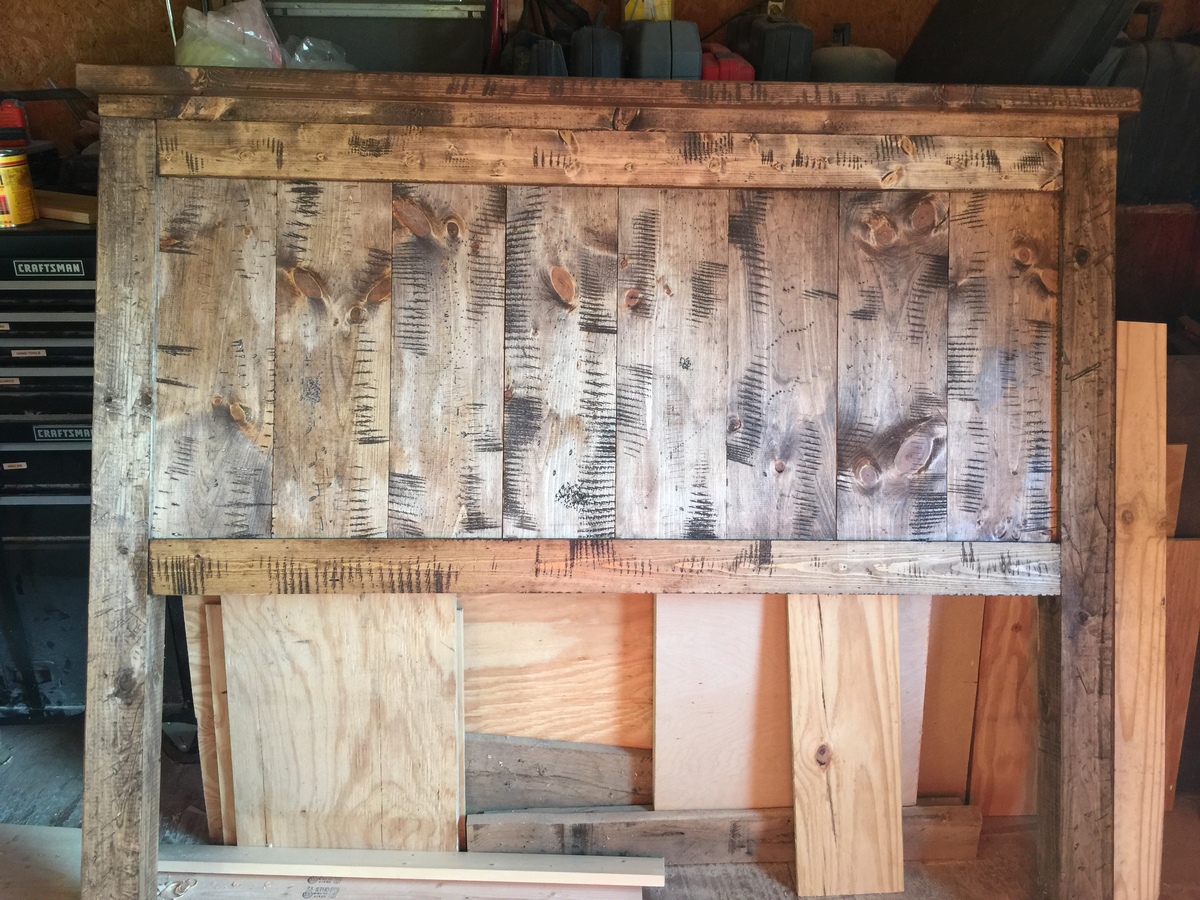
3 weekend project

I asked my daughter what see wanted for her birthday. I offered to make her anything from Ana's website. I was thinking coffee table, maybe side tables, maybe even a cute bench for her entryway. No. In true fashion she chose the King Storage Bed. But that wasn't good enough. She wanted the FarmHouse Headboard to go with it. Made some modifications and VIOLA....here it is. I added a couple of different pictures. I just didn't care for the grey comforter. The White one makes the Headboard POP!


Estimated Time Investment
Week Long Project (20 Hours or More)
Recommended Skill Level
Intermediate
ATV Bench
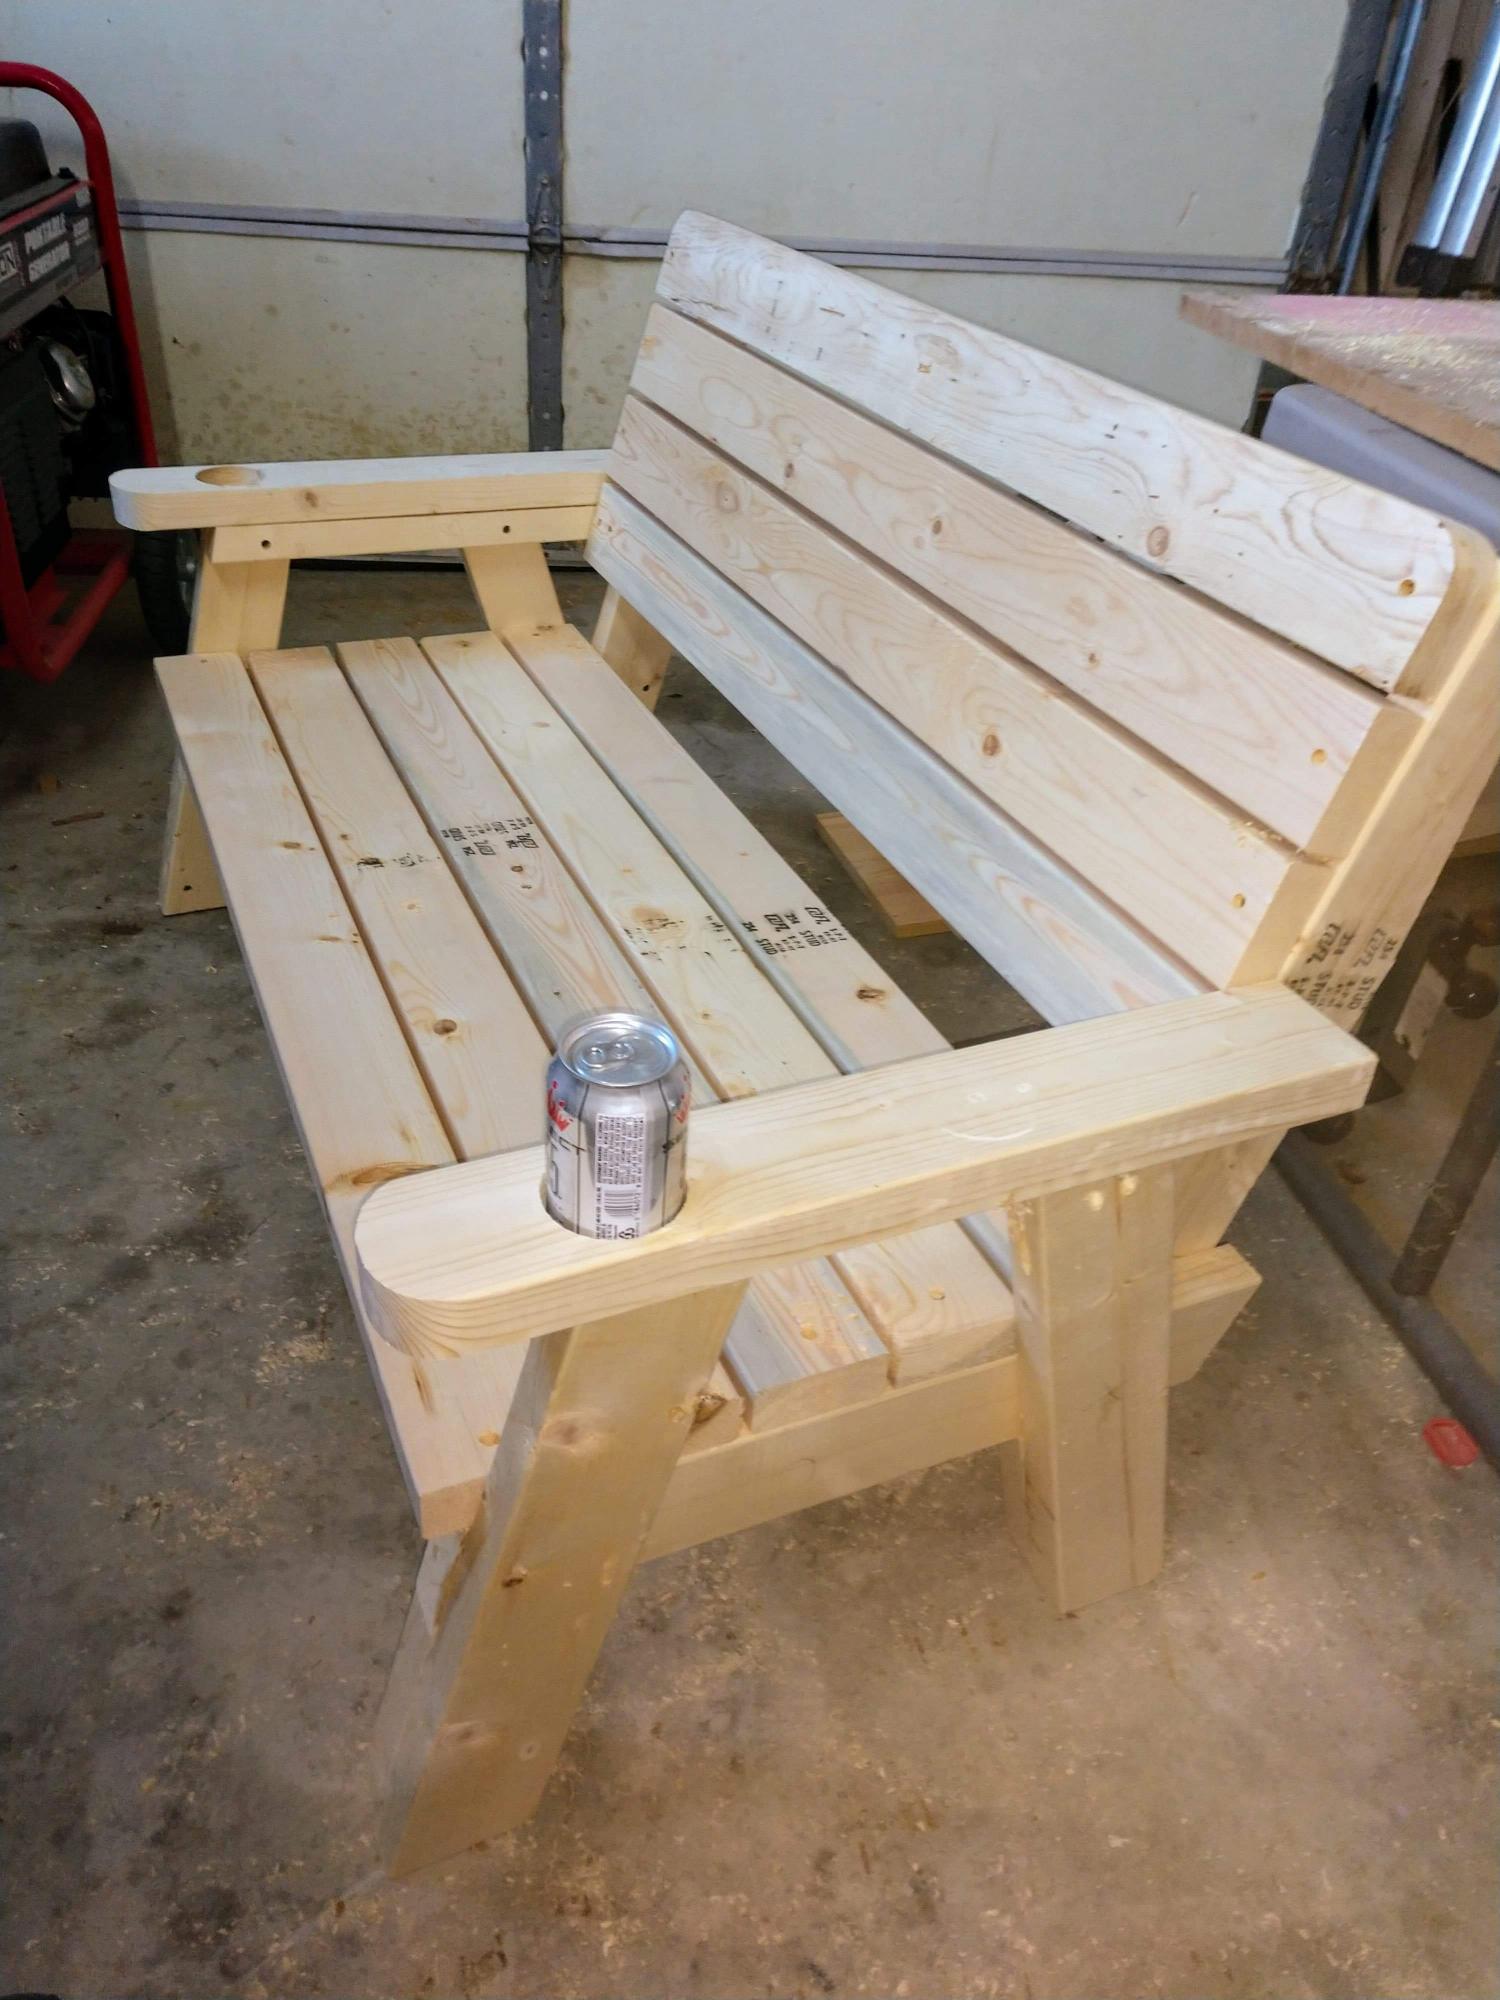
Got this idea while driving on the interstate and was able to snap a quick picture (I wasn't driving). Used plans for 2x4 garden benches and made them the dimensions of my dad and Grandpa's mule. Now we more can go for a trail ride! That's why I added cupholders!

Built from Plan(s)
Estimated Cost
$45
Estimated Time Investment
Day Project (6-9 Hours)
Finish Used
Stain (eventually)
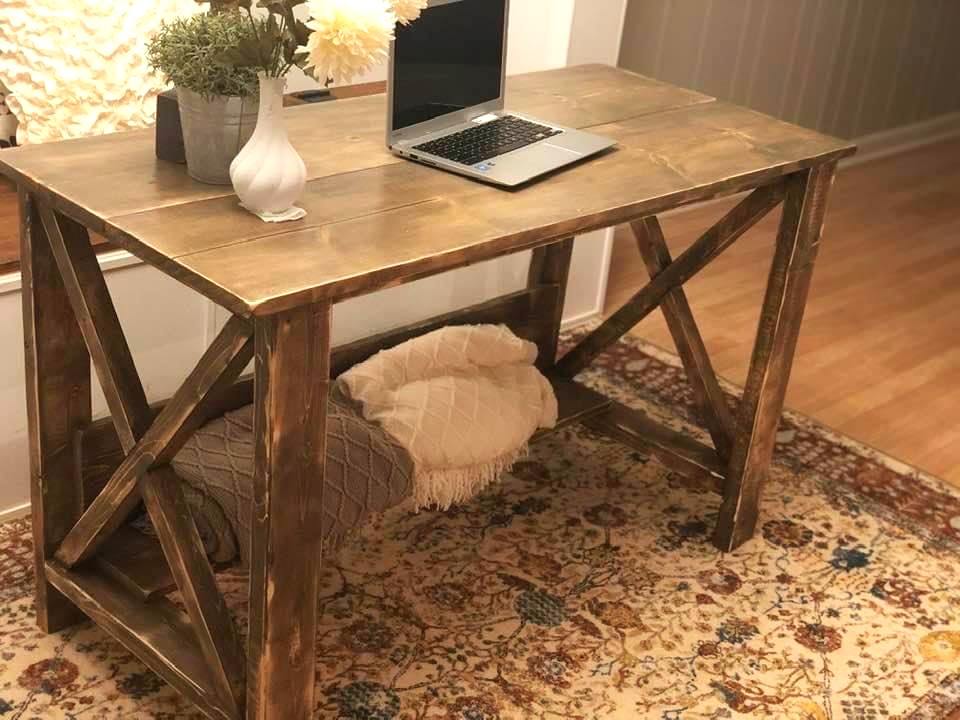
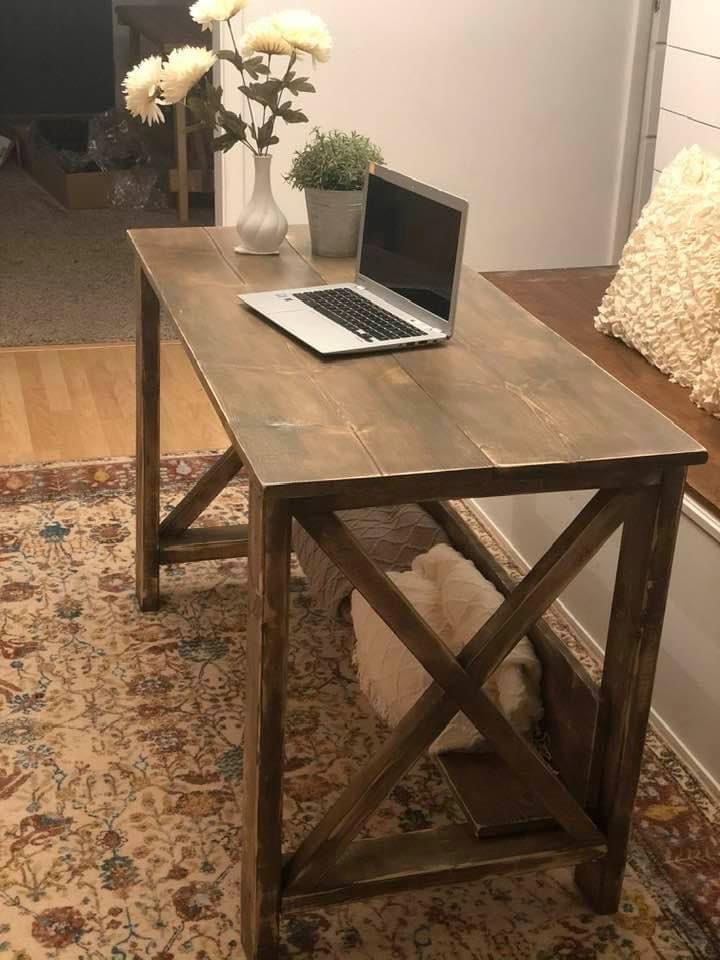
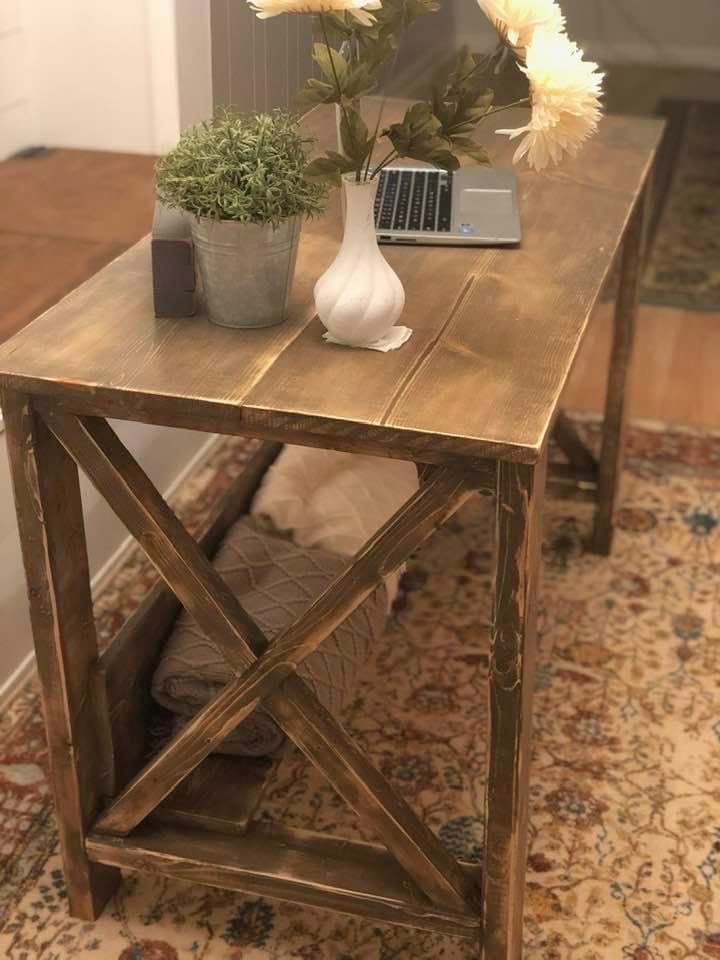
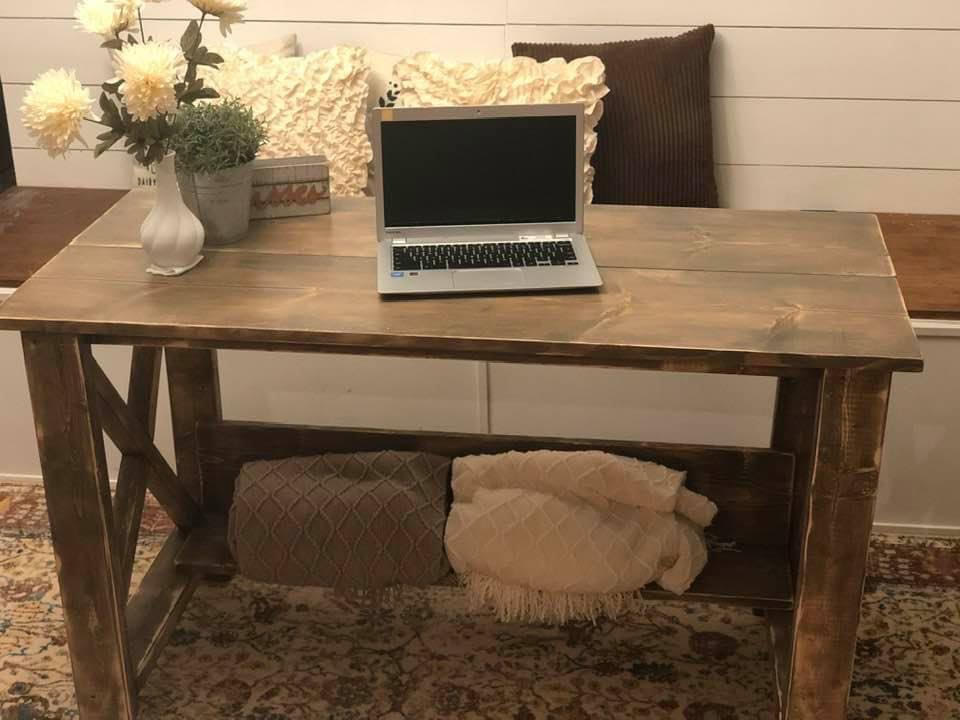
Rustic X Desk
Beautiful Farmhouse Desk by Leila Adams
Built from Plan(s)
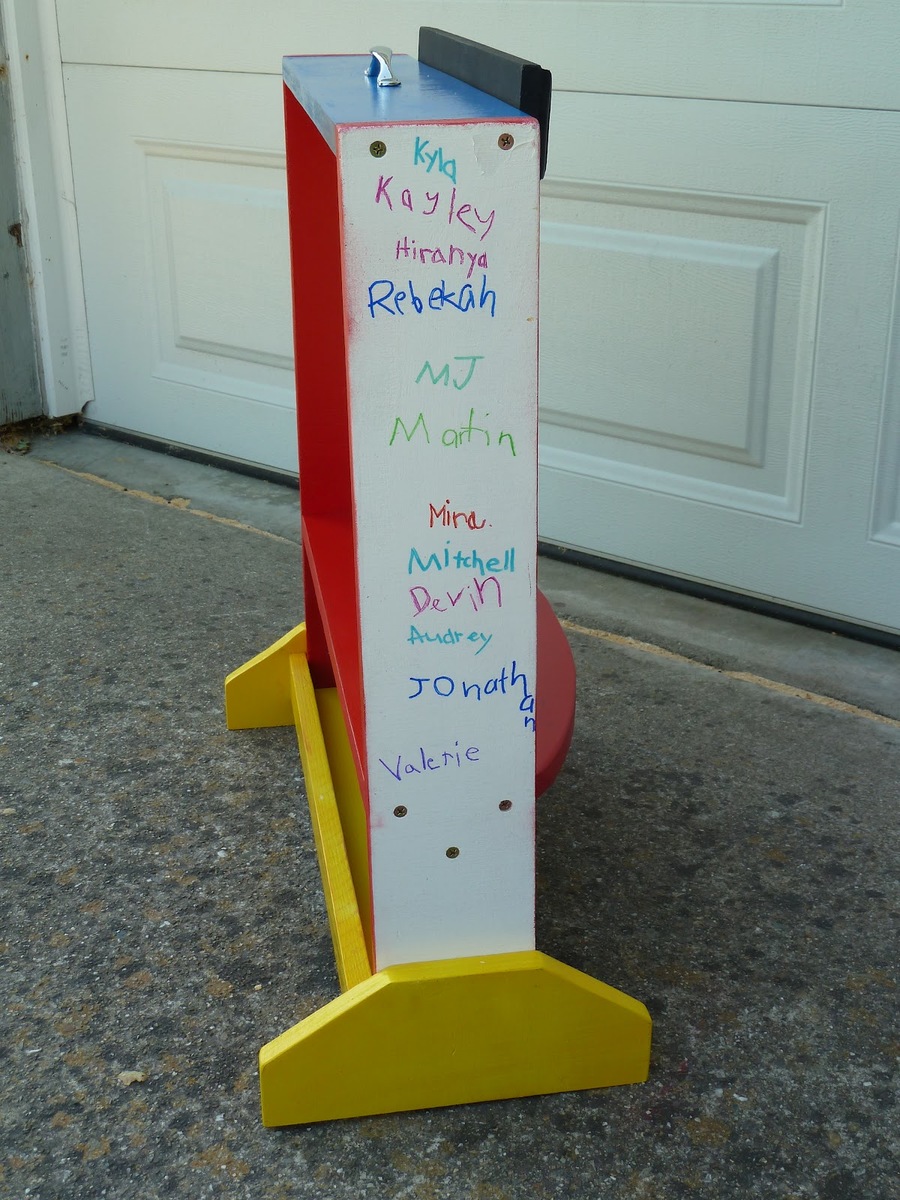
Table Top Puppet Theater
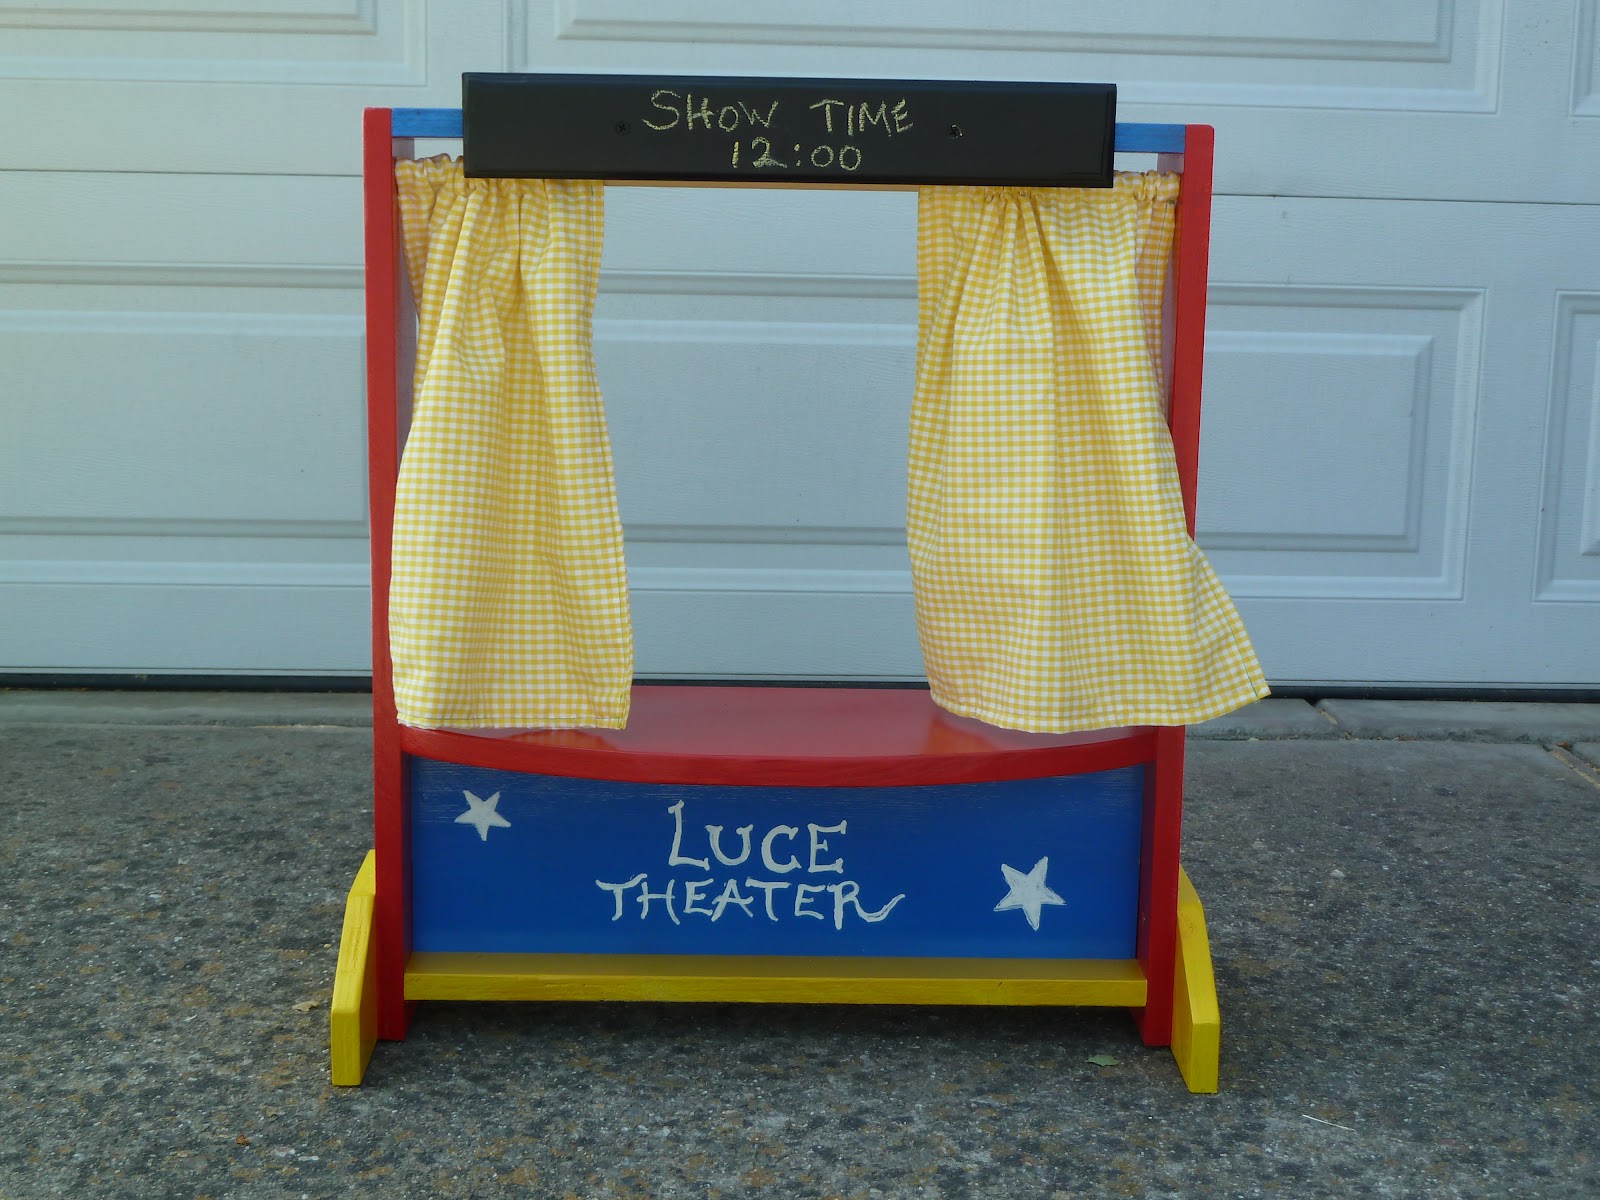
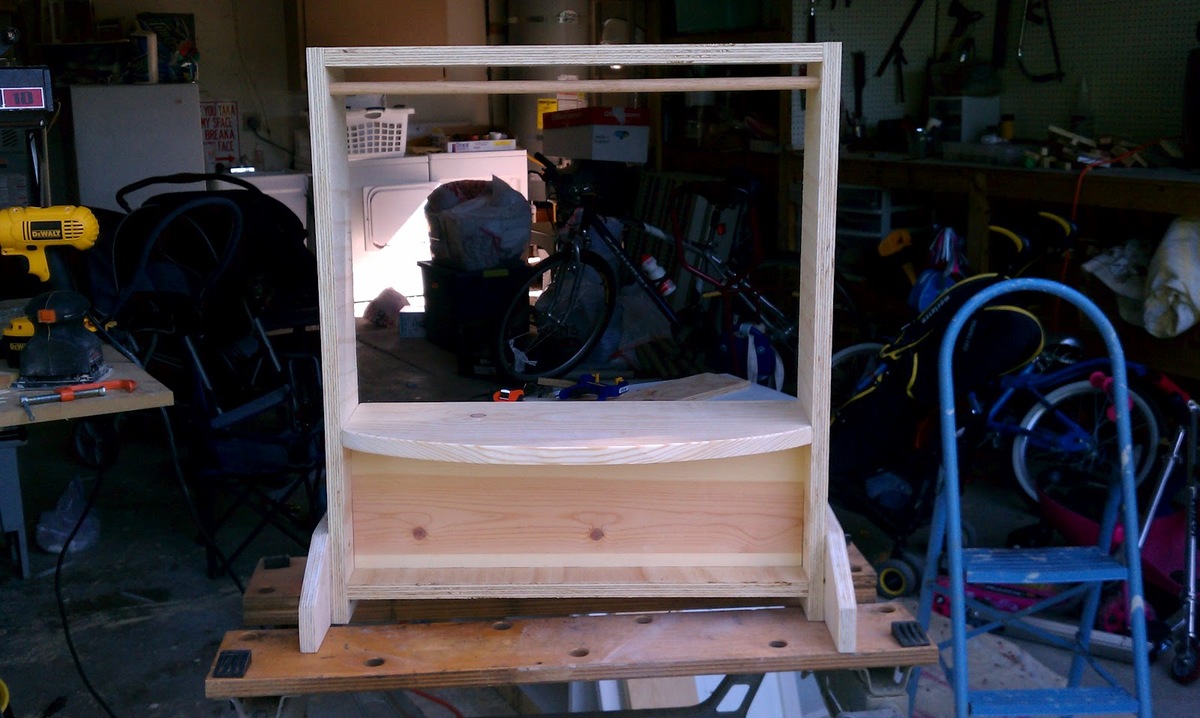
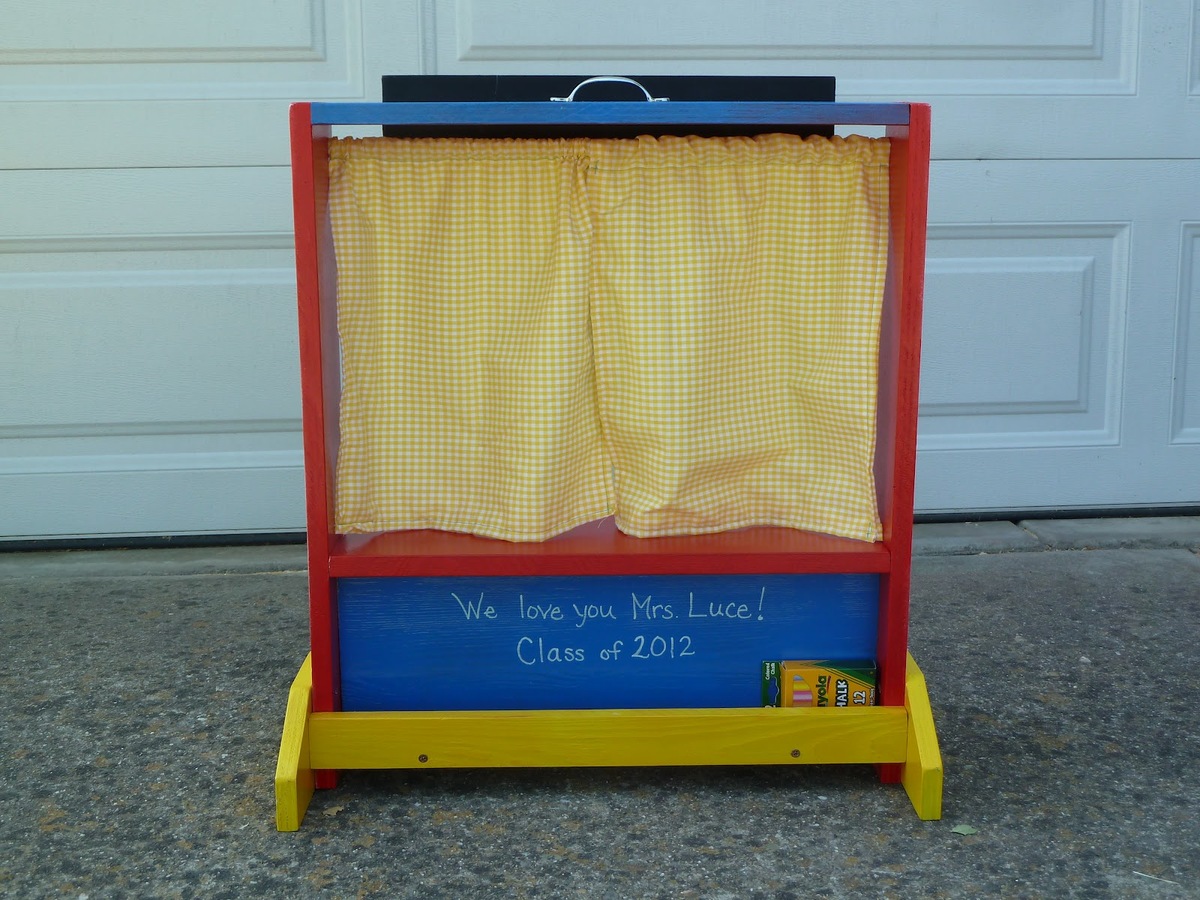
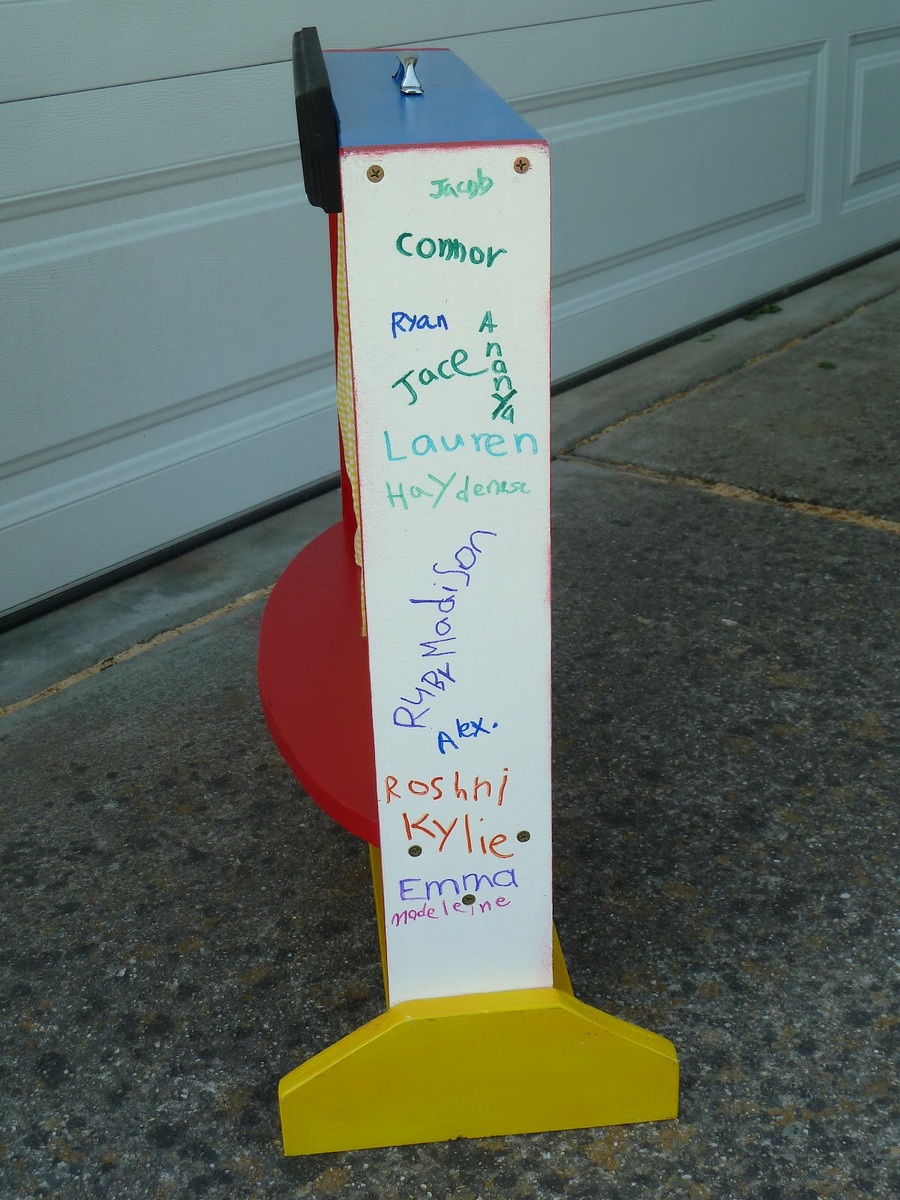
My son's kindergarten teacher had a table top puppet theater on her "wish list" from an online store - but it cost $70 and I knew there's no way i could buy that. But just one look at it made me realize I could build my own. My son and I built it in just a couple hours and then took some extra time for sanding and spray painting. I had all the kids in the class sign their names on the sides and I used chalk board paint on the top sign so the kids can write their own show title or time, etc. There's a place to keep the chalk in the back. We presented this gift to my son's teacher at the end of Teacher Appreciation week, and it was a huge hit!
Estimated Cost
$0-$15 (I only paid for spray paint because I had the wood scraps)
Estimated Time Investment
An Hour or Two (0-2 Hours)
Finish Used
Spray painted all the boards separately before assembling. Use different colors to give it a fun look.
Recommended Skill Level
Starter Project
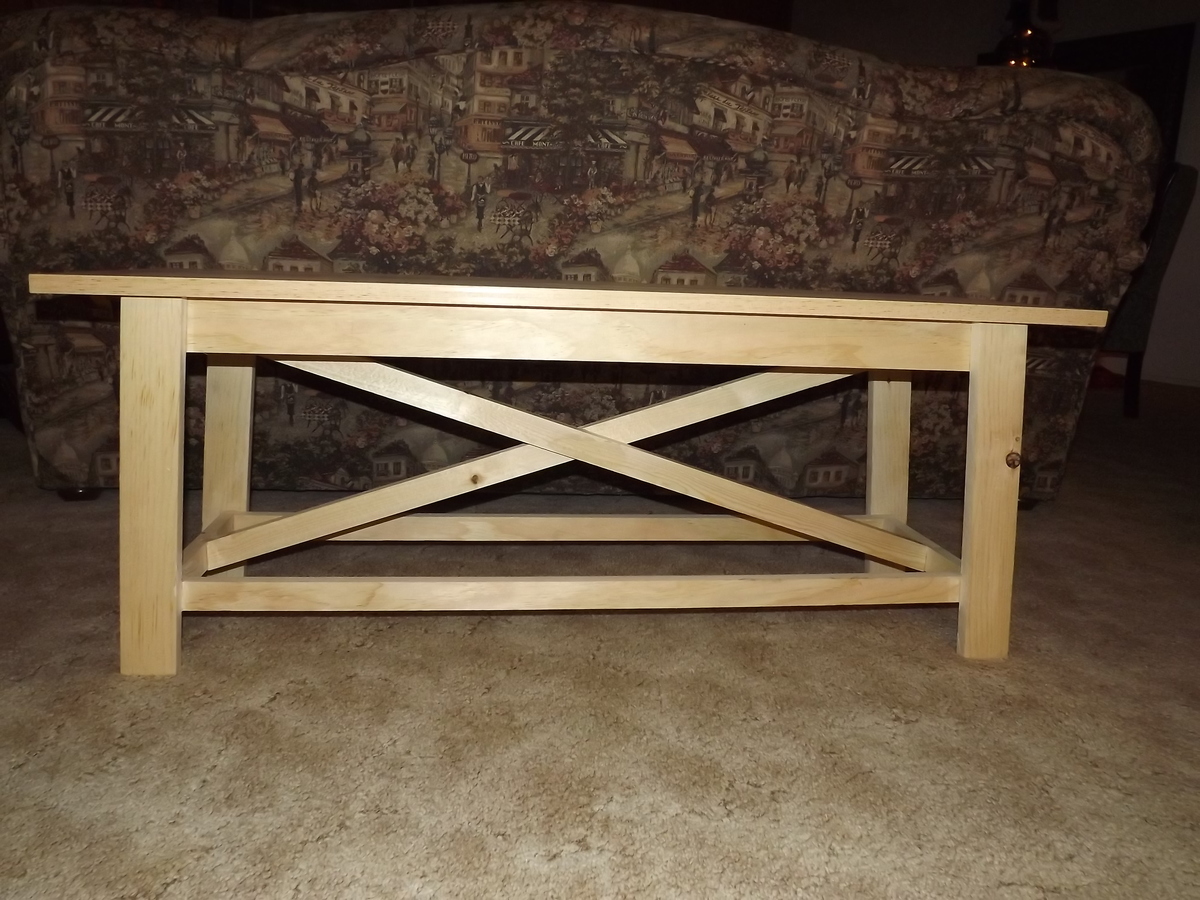
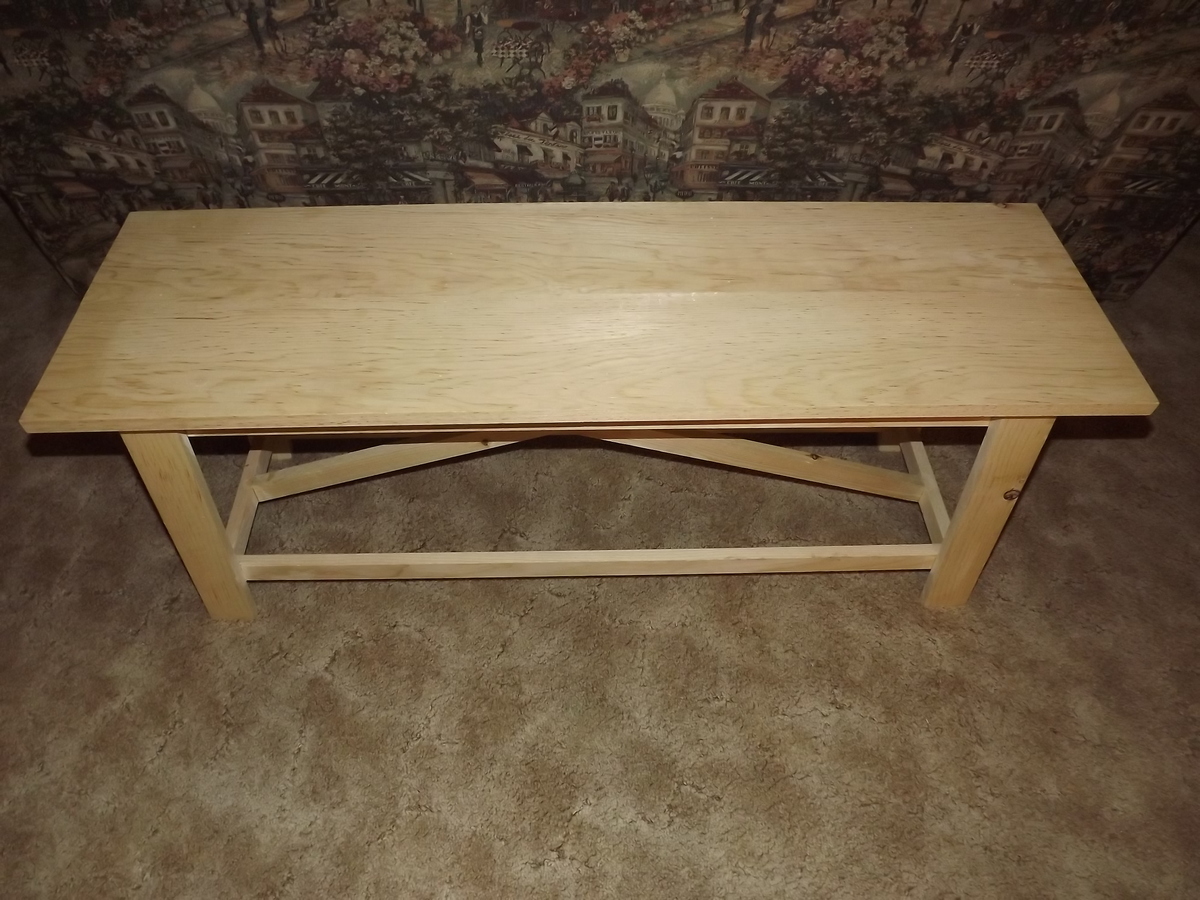
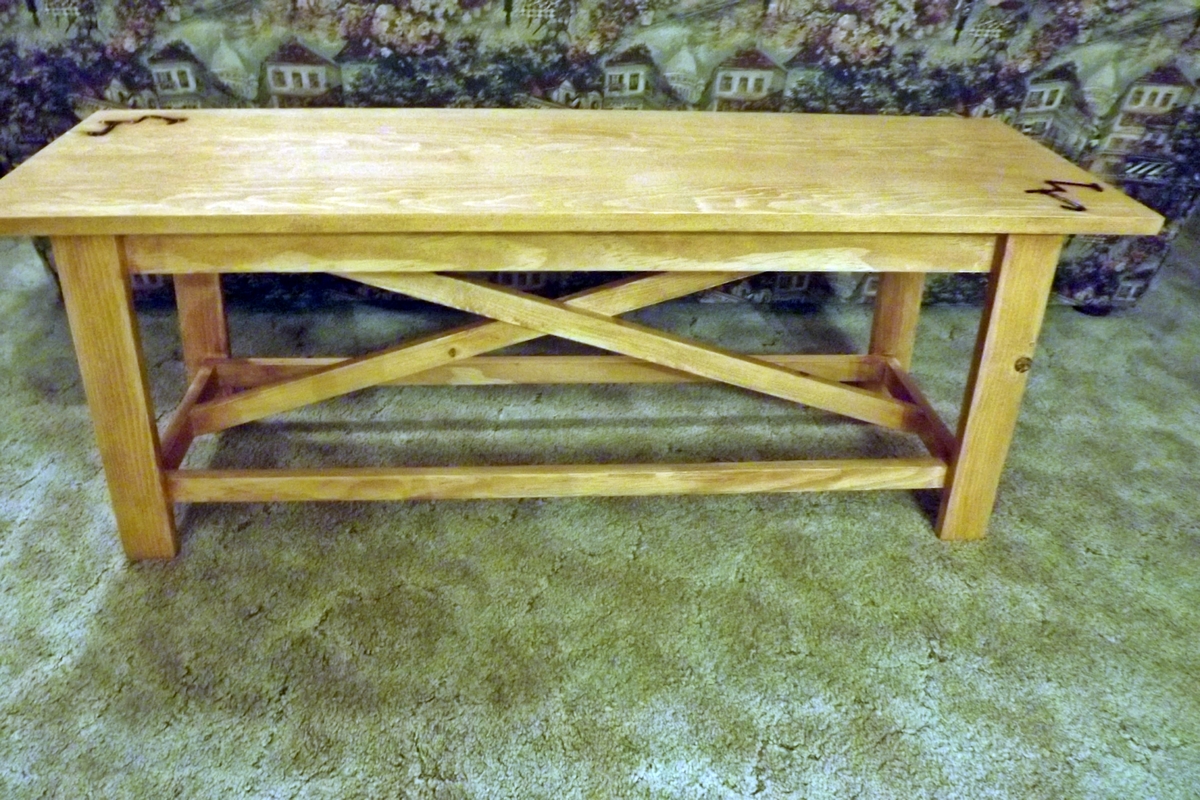
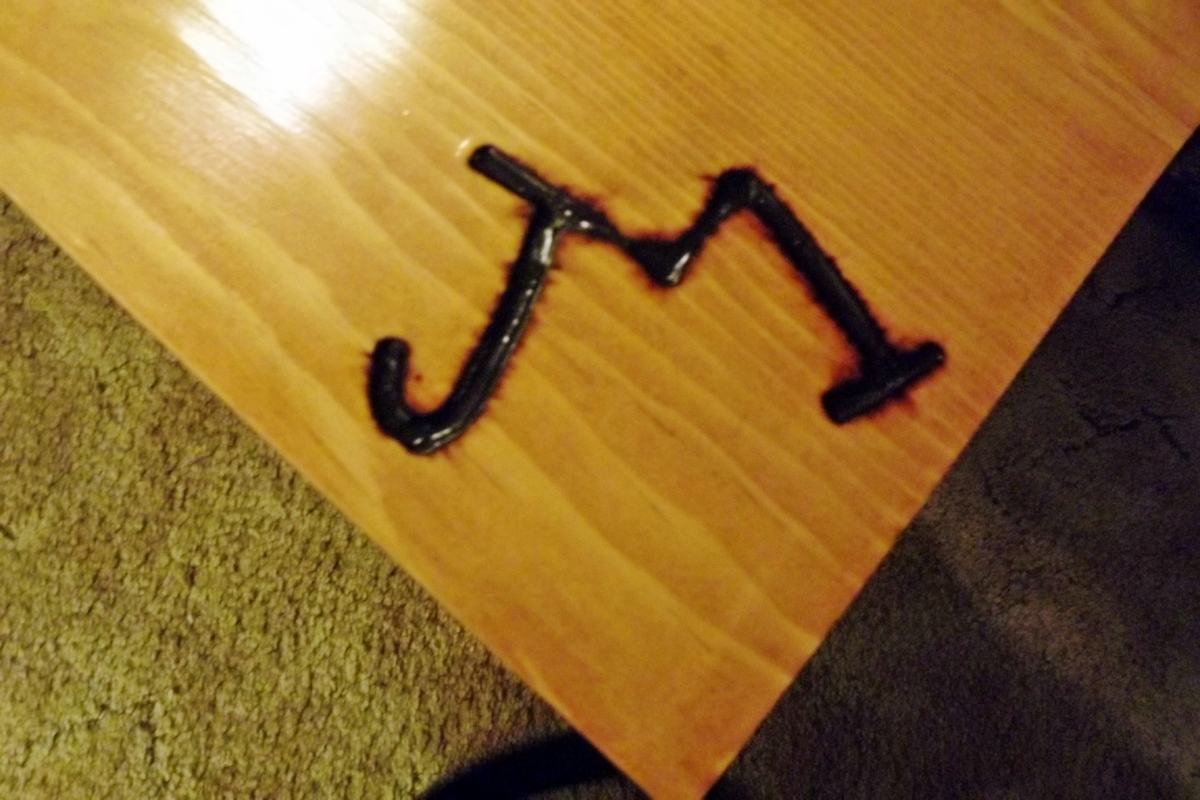
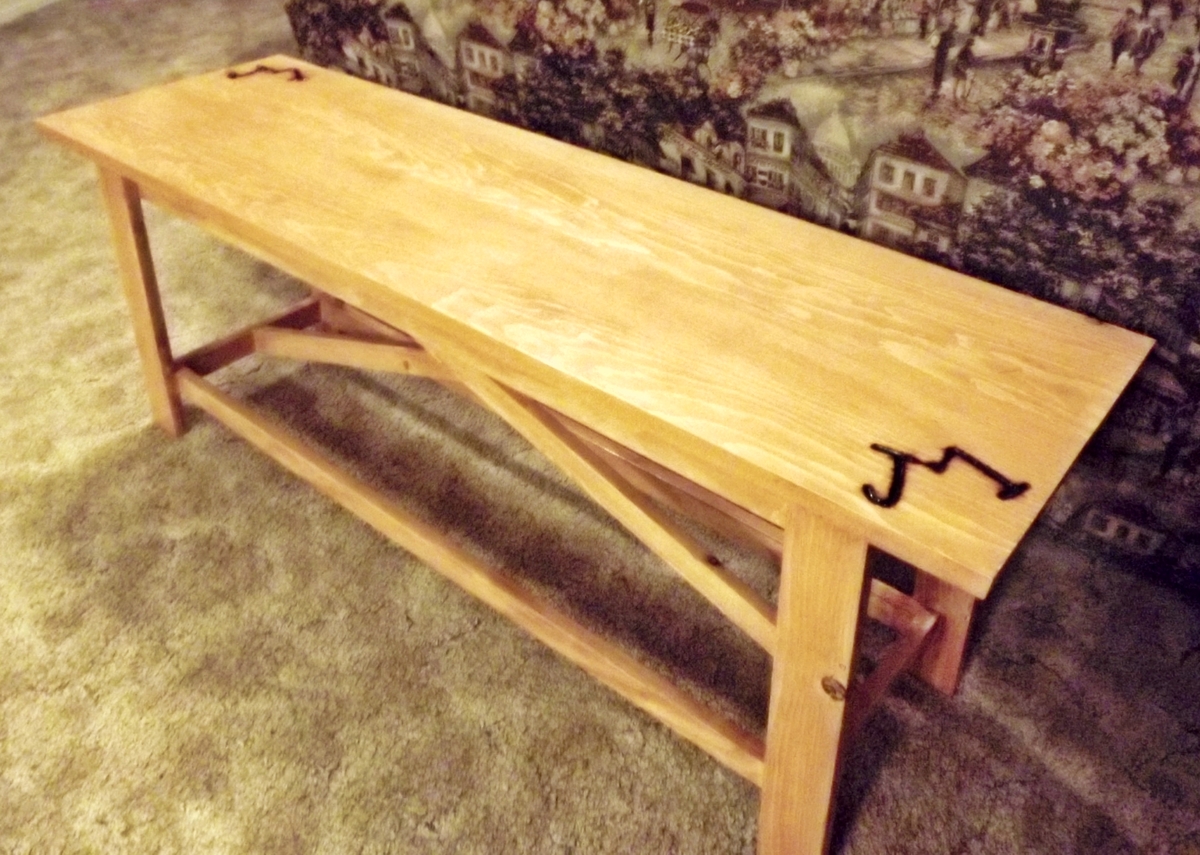
Rustic X Bench
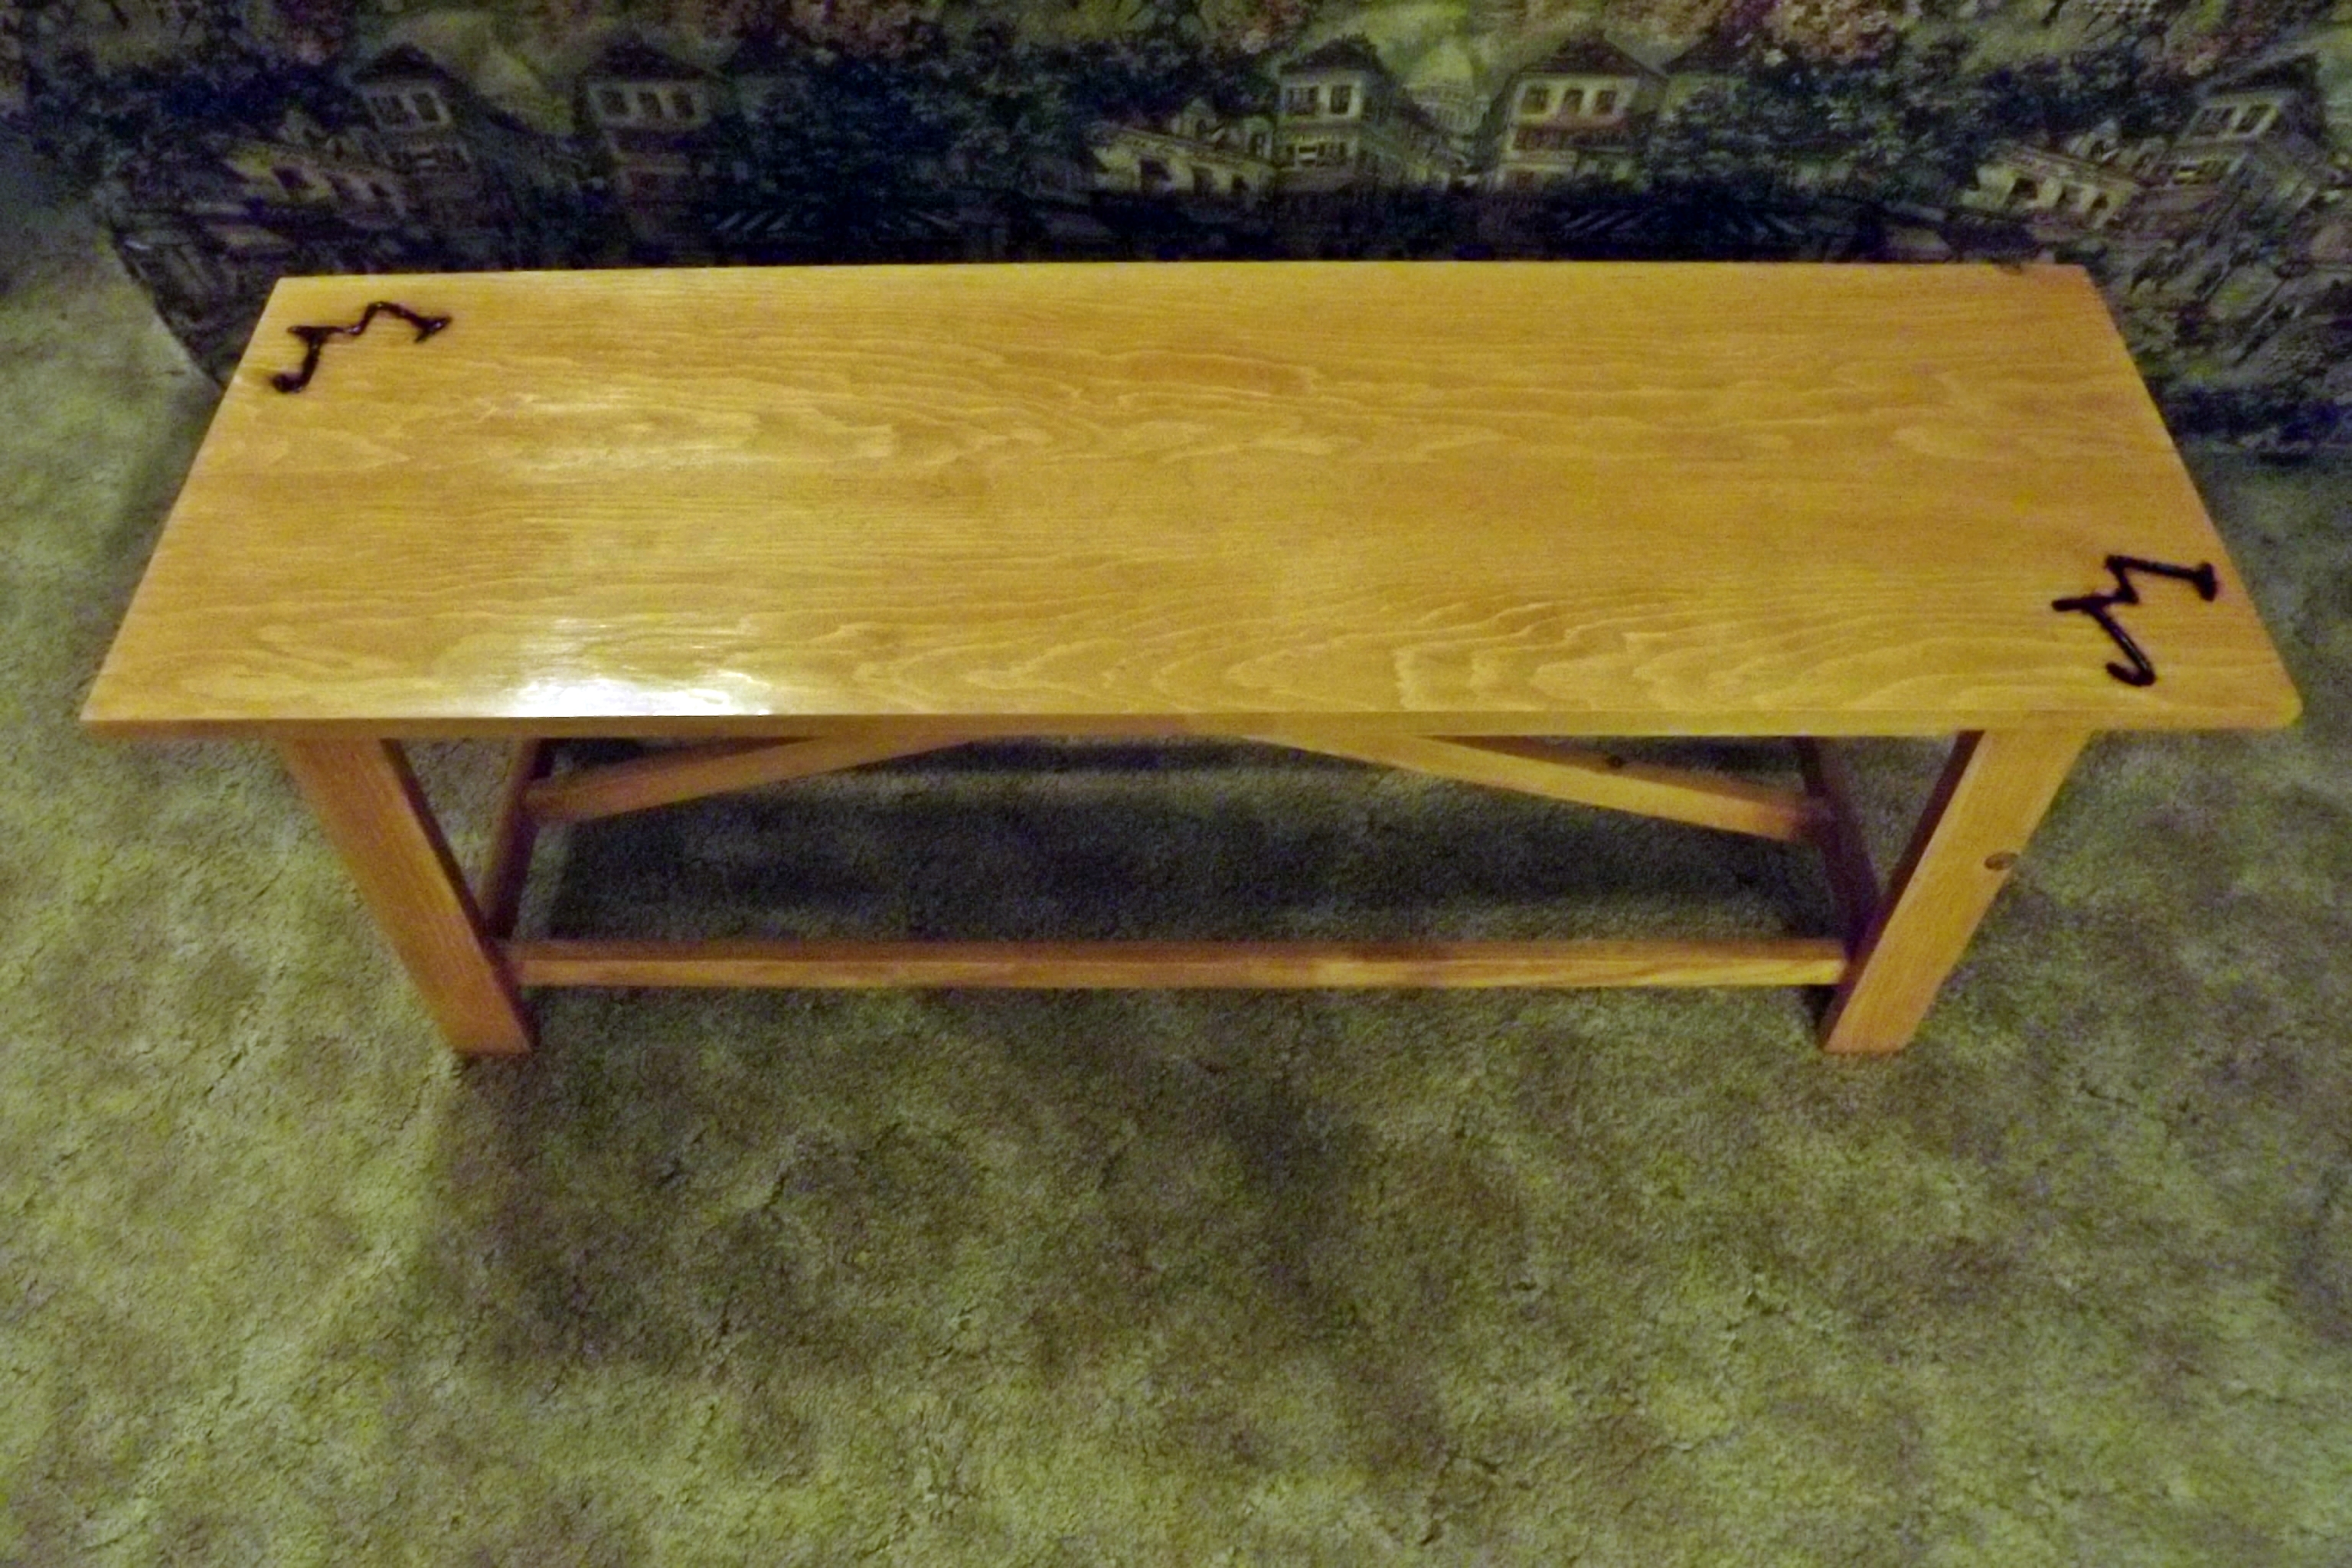
I built this bench for my son and daughter-in-law for their front porch. The plans came from The Handbuilt Home, and I followed them exactly. My daughter-in-law thought it would be cool to burn their brand onto the seat, which added a very personal touch, I think. Very happy with the way it turned out. Thanks for the easy-to-follow plans, Ana!
Estimated Cost
Can't remember; maybe $35
Estimated Time Investment
Day Project (6-9 Hours)
Finish Used
Miniwax conditioner followed by two coats of Minwax "Ipswich Pine" stain. Used three coats of spar varnish, sanding lightly between coats.
Recommended Skill Level
Beginner
Outdoor Furniture Project

I wanted some outdoor furniture and after seeing the video, I felt that this was something I could so myself. I am very pleased with the outcome. It wasn't difficult and it looks great. Thank you! I had some 2 x 4's leftover so I decided to build a chair in the same style as the sofa. It looks like a set.
Built from Plan(s)
Estimated Cost
about $250 with lumber, stain and sealant.
Estimated Time Investment
Afternoon Project (3-6 Hours)
Finish Used
Minwax Summer Oak and Minwax Helmsman Polyurethane
Recommended Skill Level
Beginner
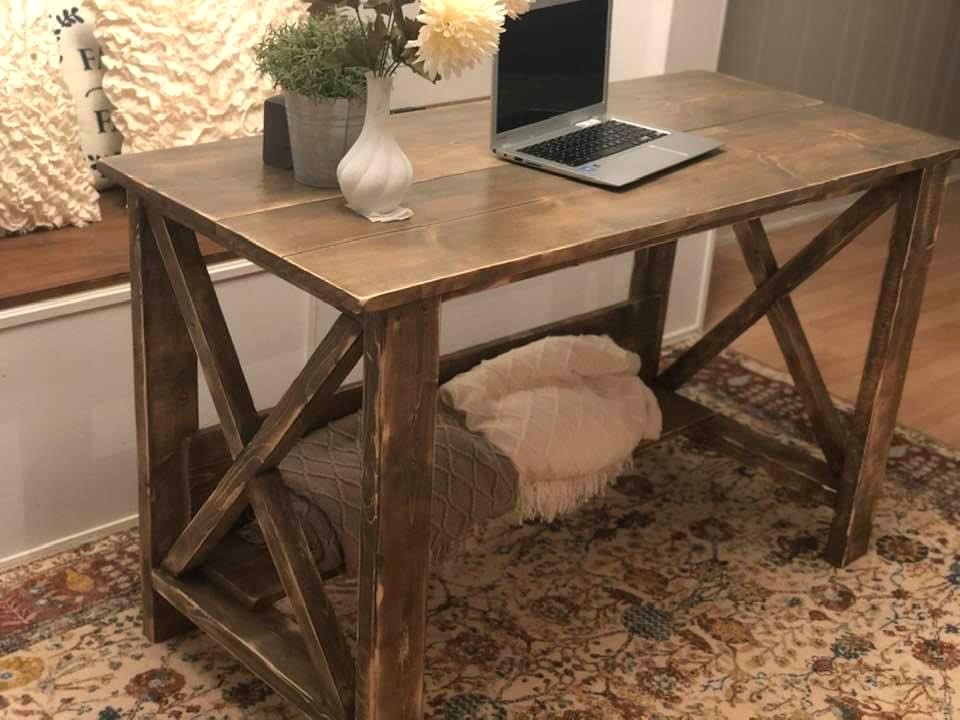
Rustic X Desk
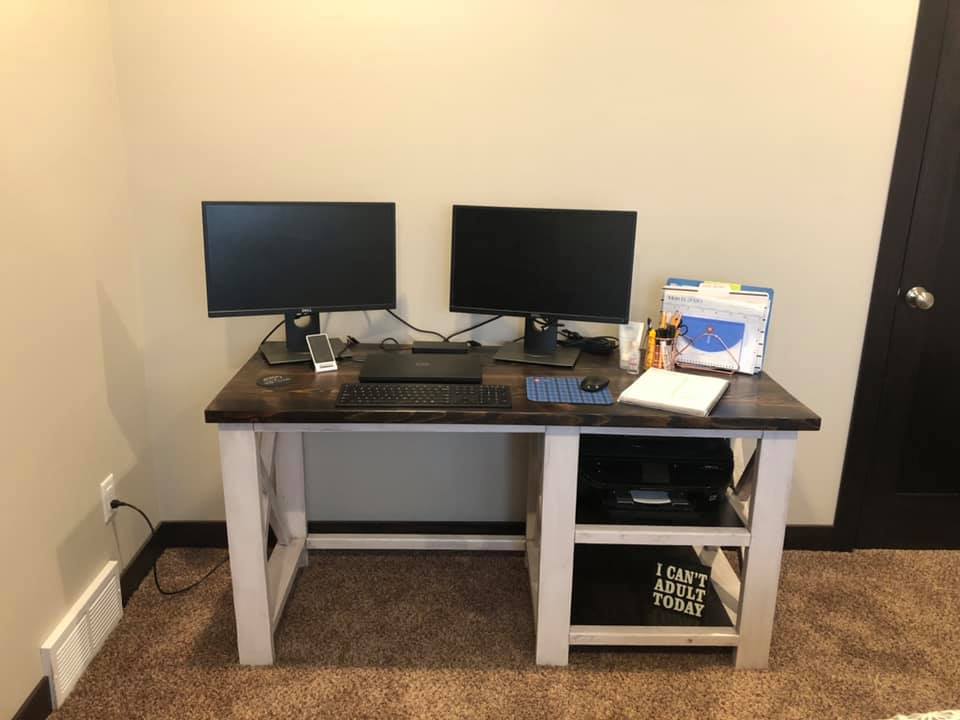
This was my first attempt at this desk and all things considered it turned out pretty well. I glued the top and shelves together instead of using pocket screws. I then stained the top and shelves expresso and used the expresso stain over the white paint on the base and then wiped it off to give it an aged look.
Built from Plan(s)
Estimated Cost
50
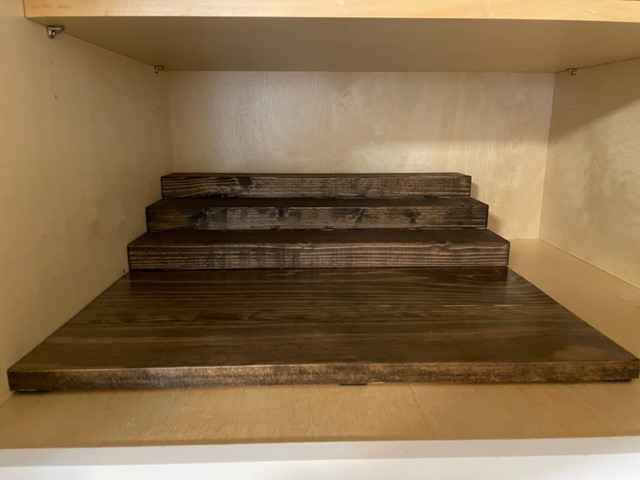
In Cabinet Can Organizer
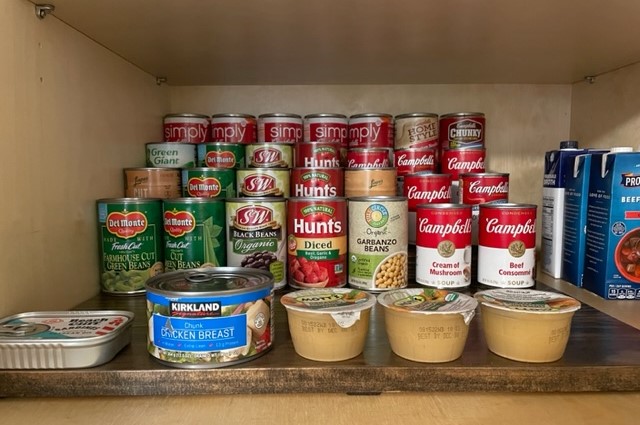
We were looking for a way to better utilize our cabinet space. Previously, our cans were all pushed in and we couldn't see what we had without moving things around. I Found Ana's tier can organizer and knew it was exactly what we needed. We repurposed a piece of stained plywood we already had and a couple of 2x4 pieces from previous projects. We did buy a 2x4x8 because we wanted to make it a 4-tier shelf. We stained it dark walnut and added felt pads to the bottom. Measures 22" D x 21.5" W. We love it and it makes our space so much more effective.
J Daughenbaugh
Built from Plan(s)