Community Brag Posts

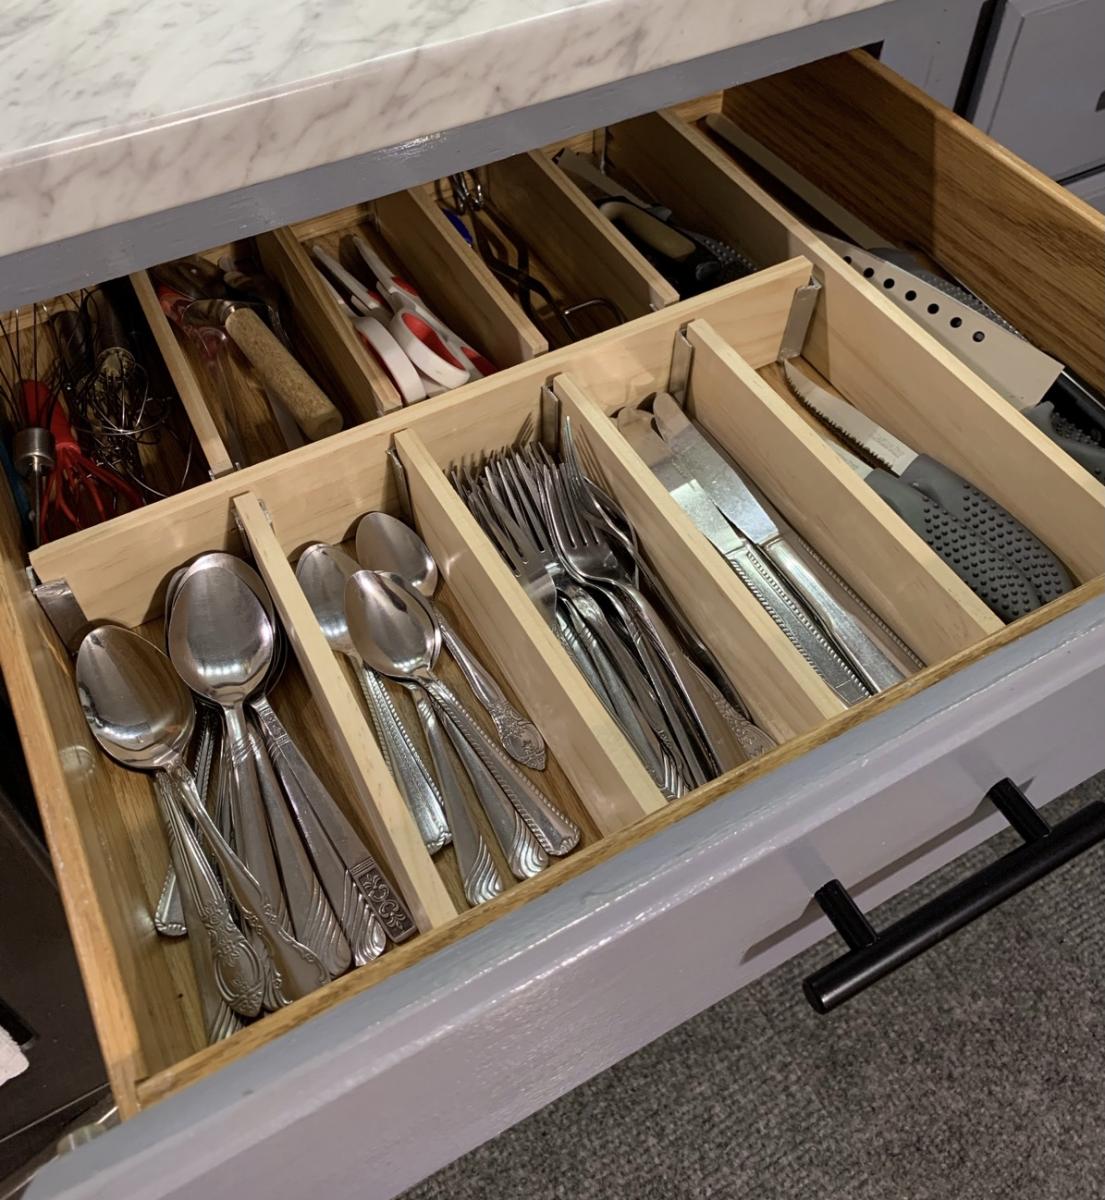
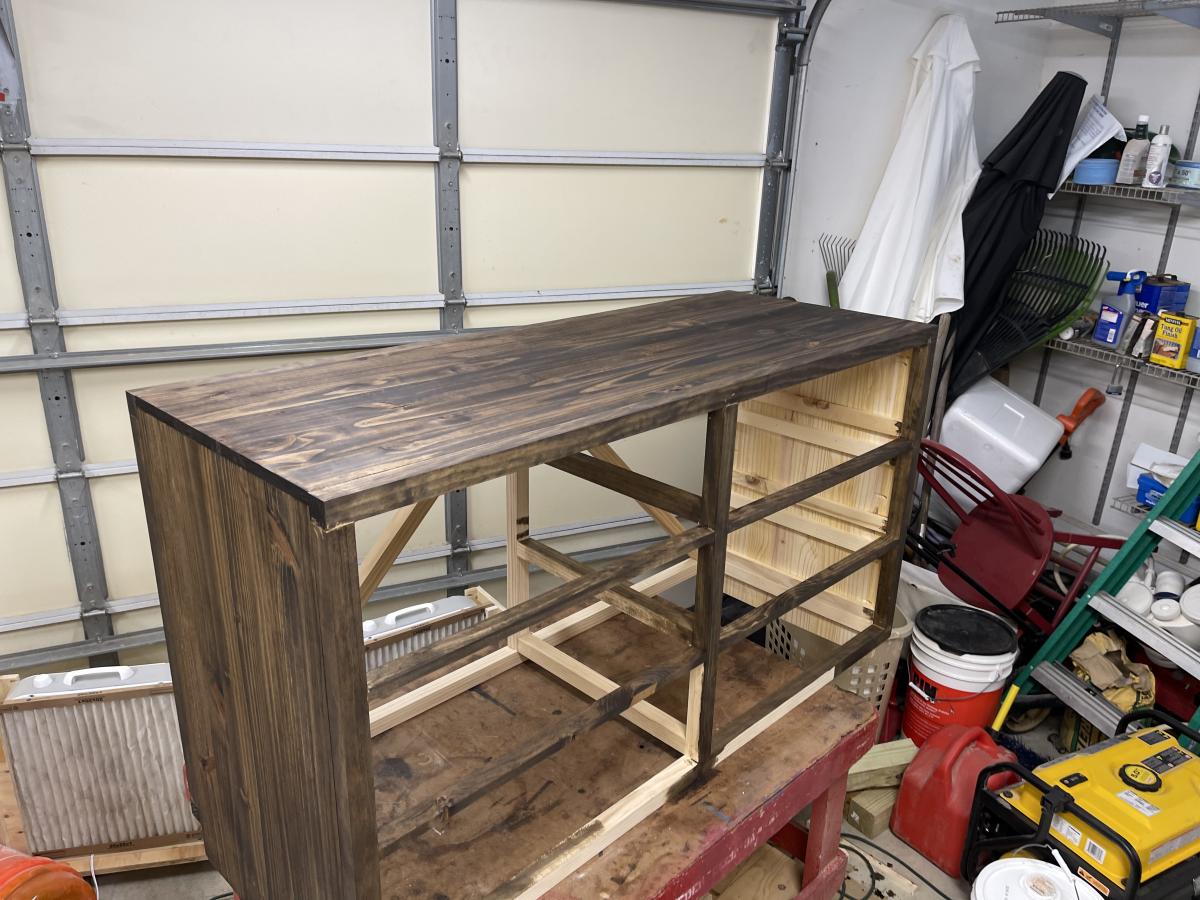
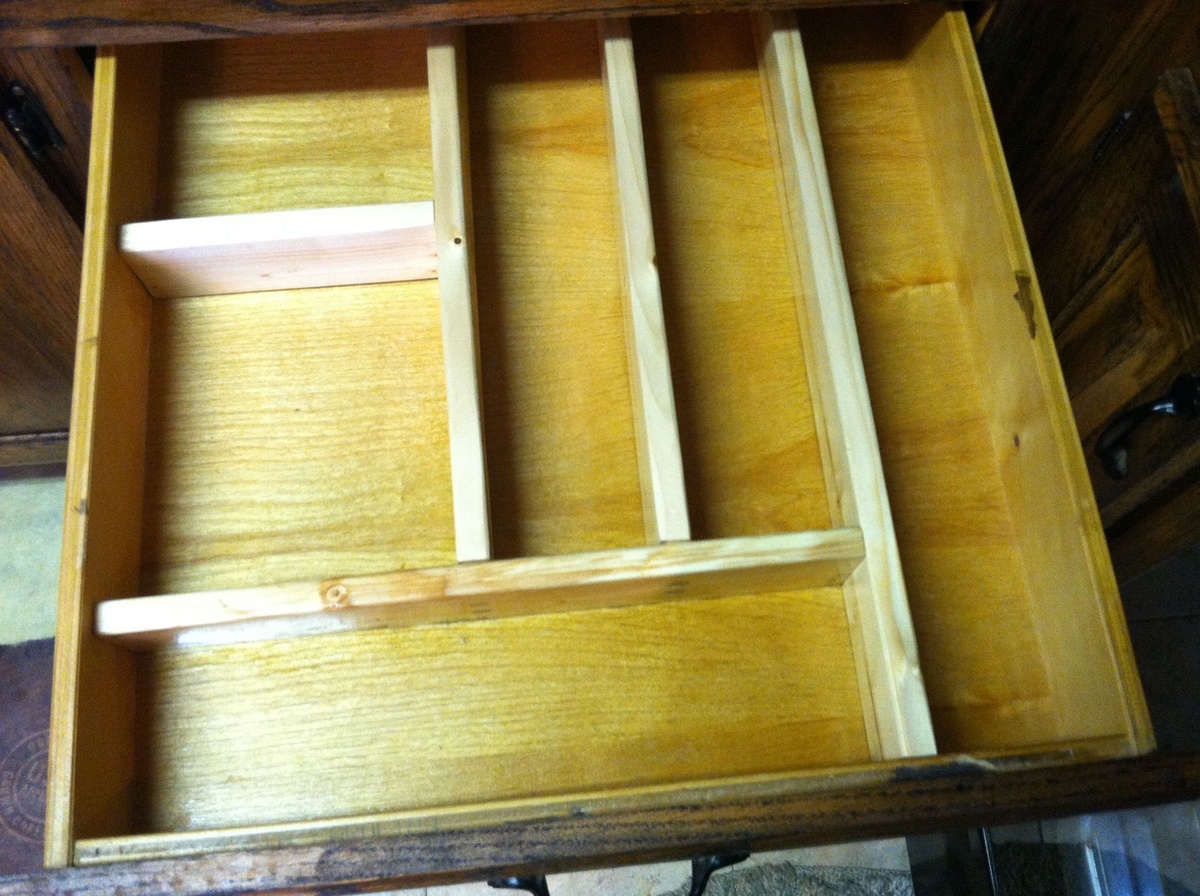
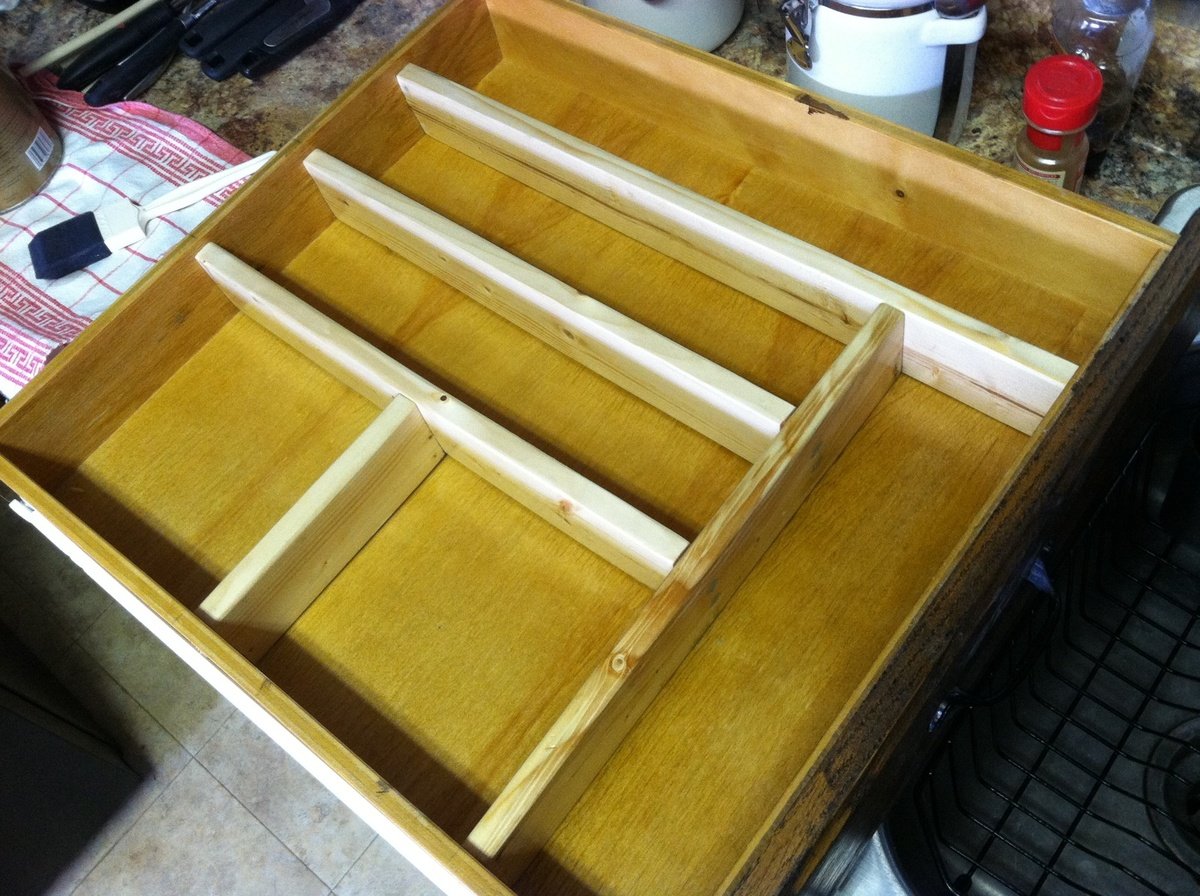
Lovin the Drawer dividers

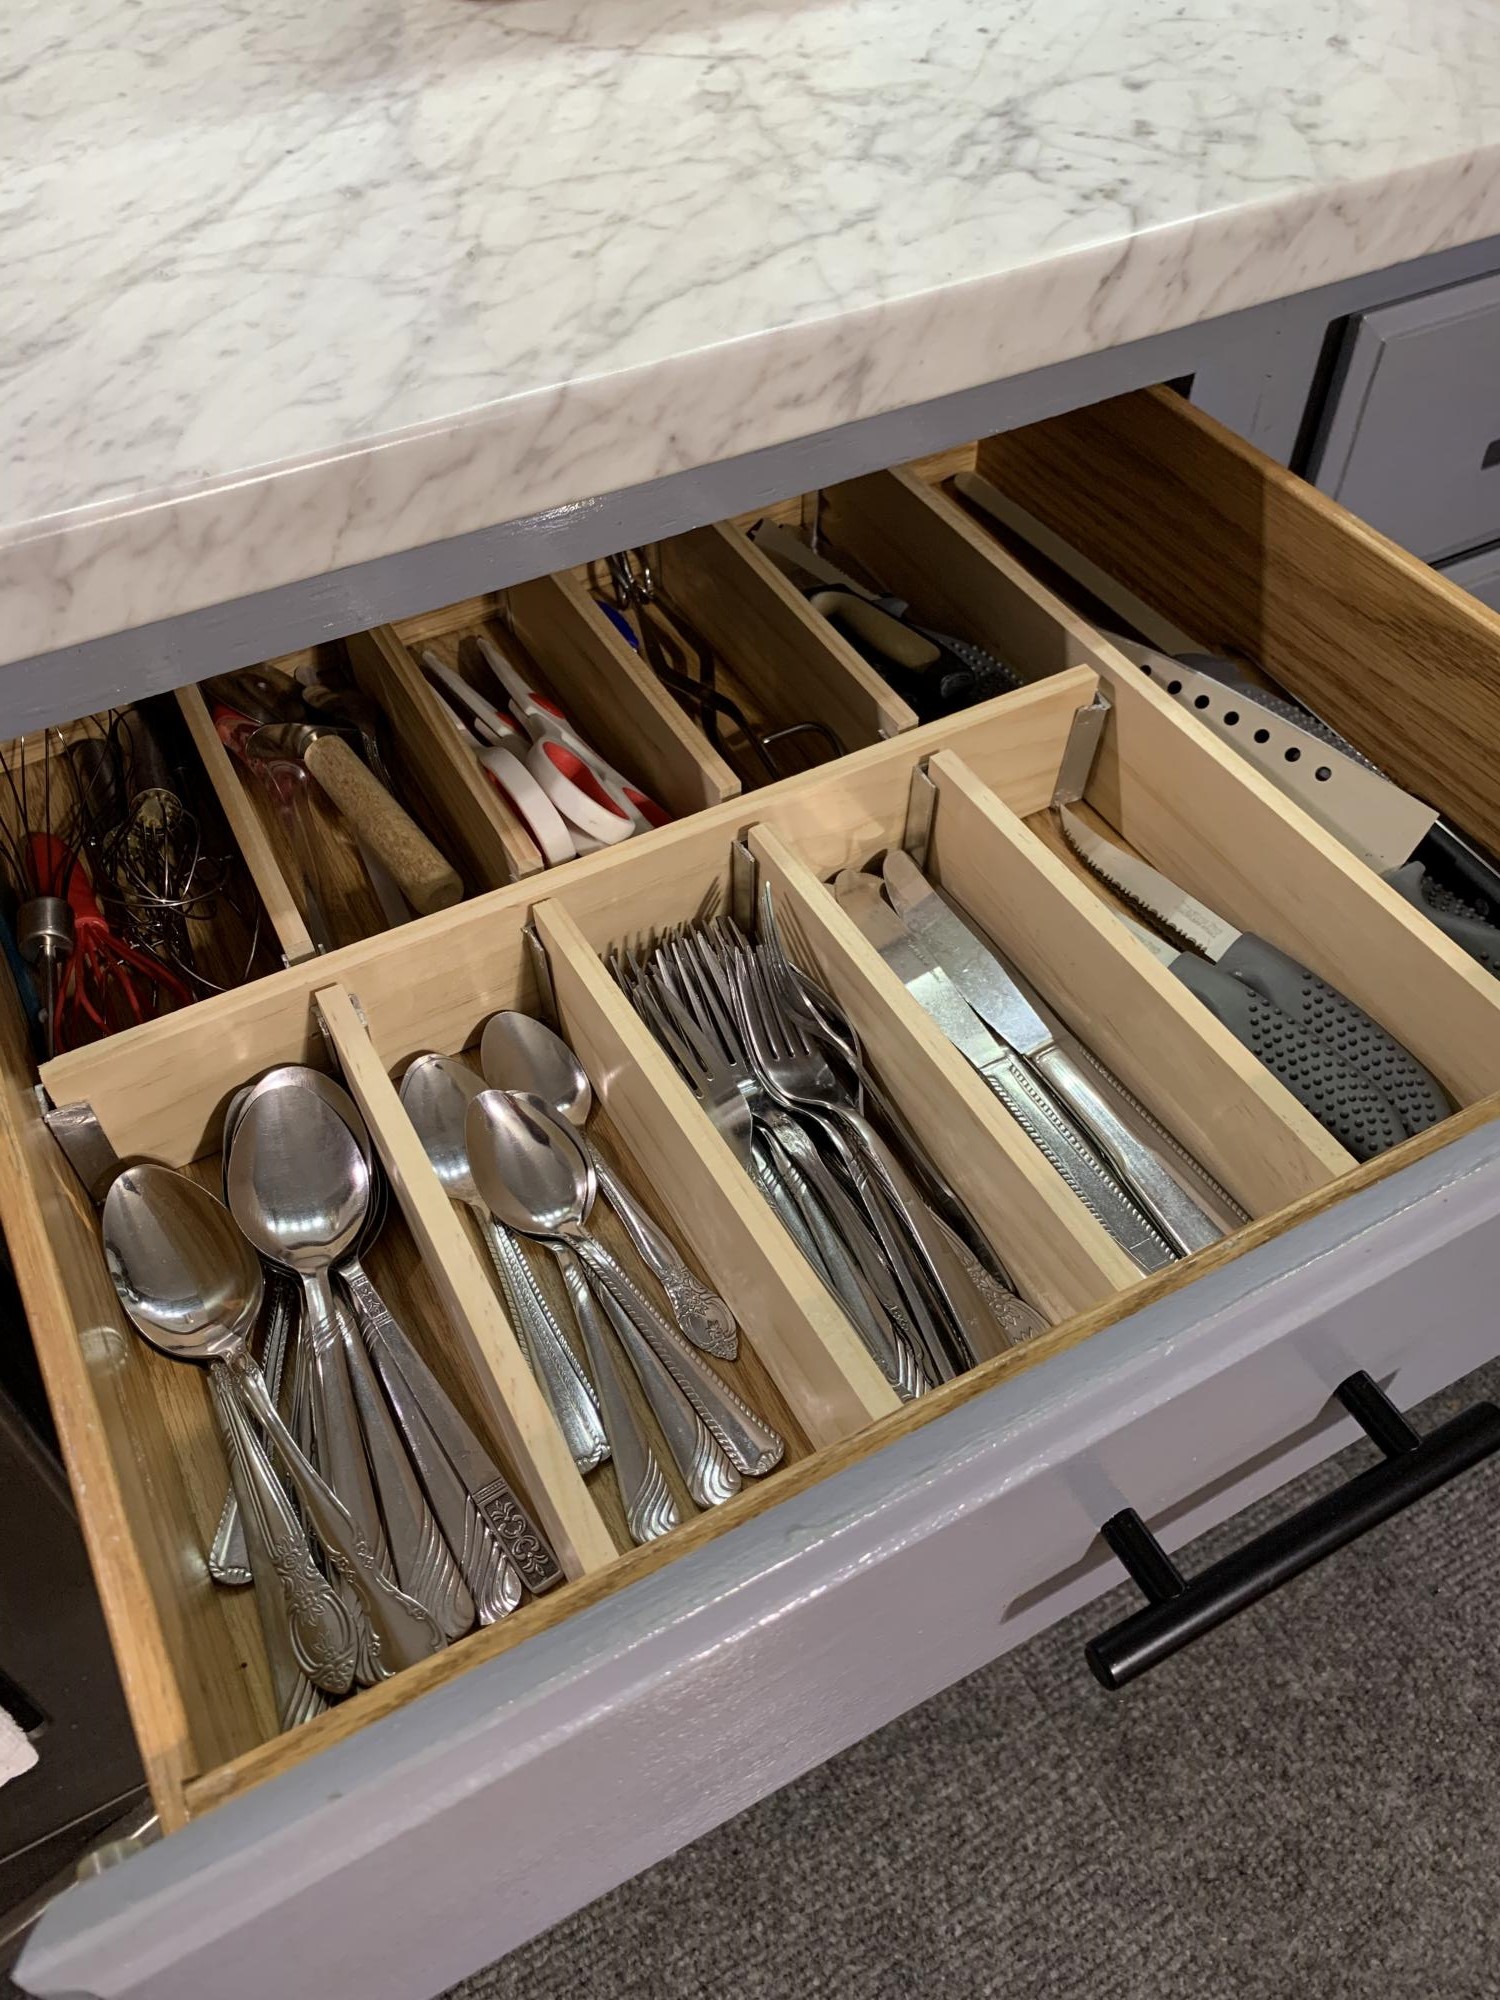
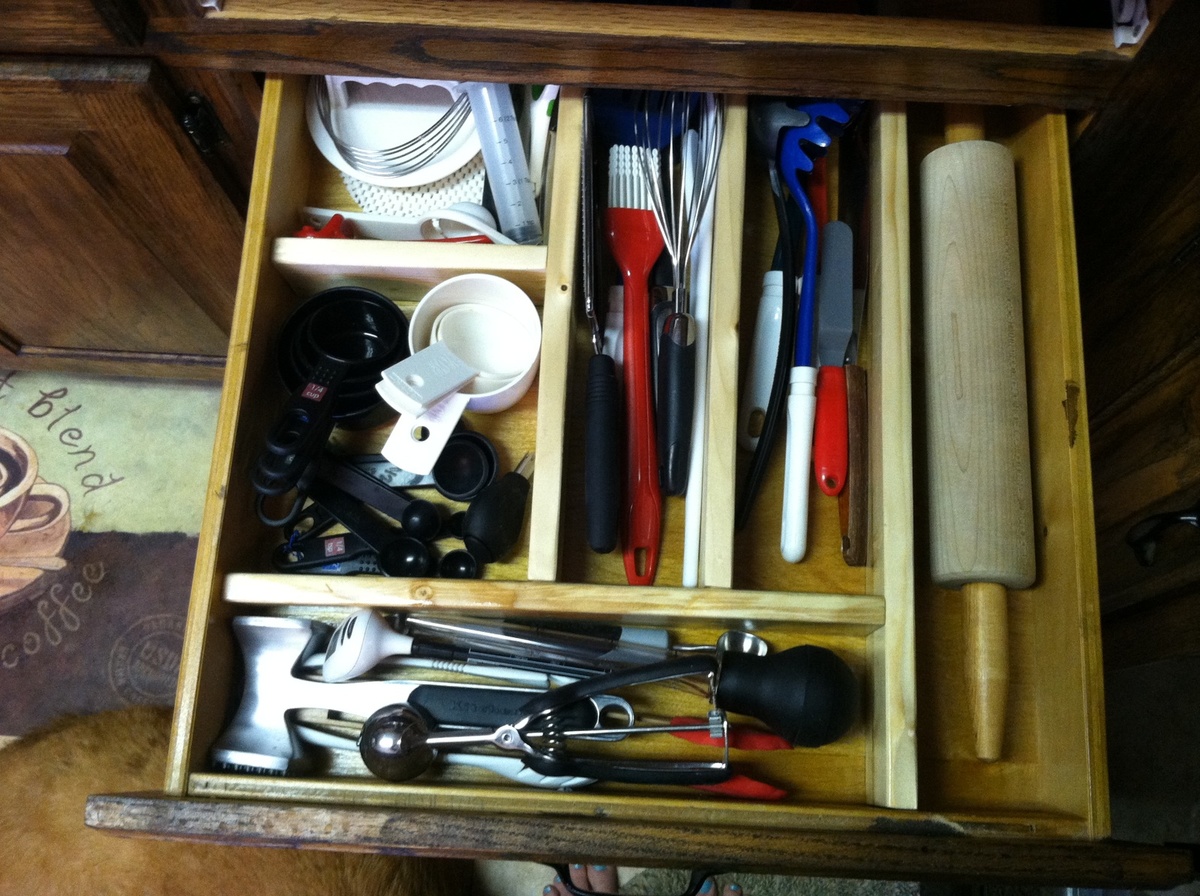
Finished this in no time and wow did it create a lot of space. I was able to get rid of my knife block because there’s now room for my knives in my drawer. Thank you Ana for sharing your wood work with us! This was well worth the $25 I spent!
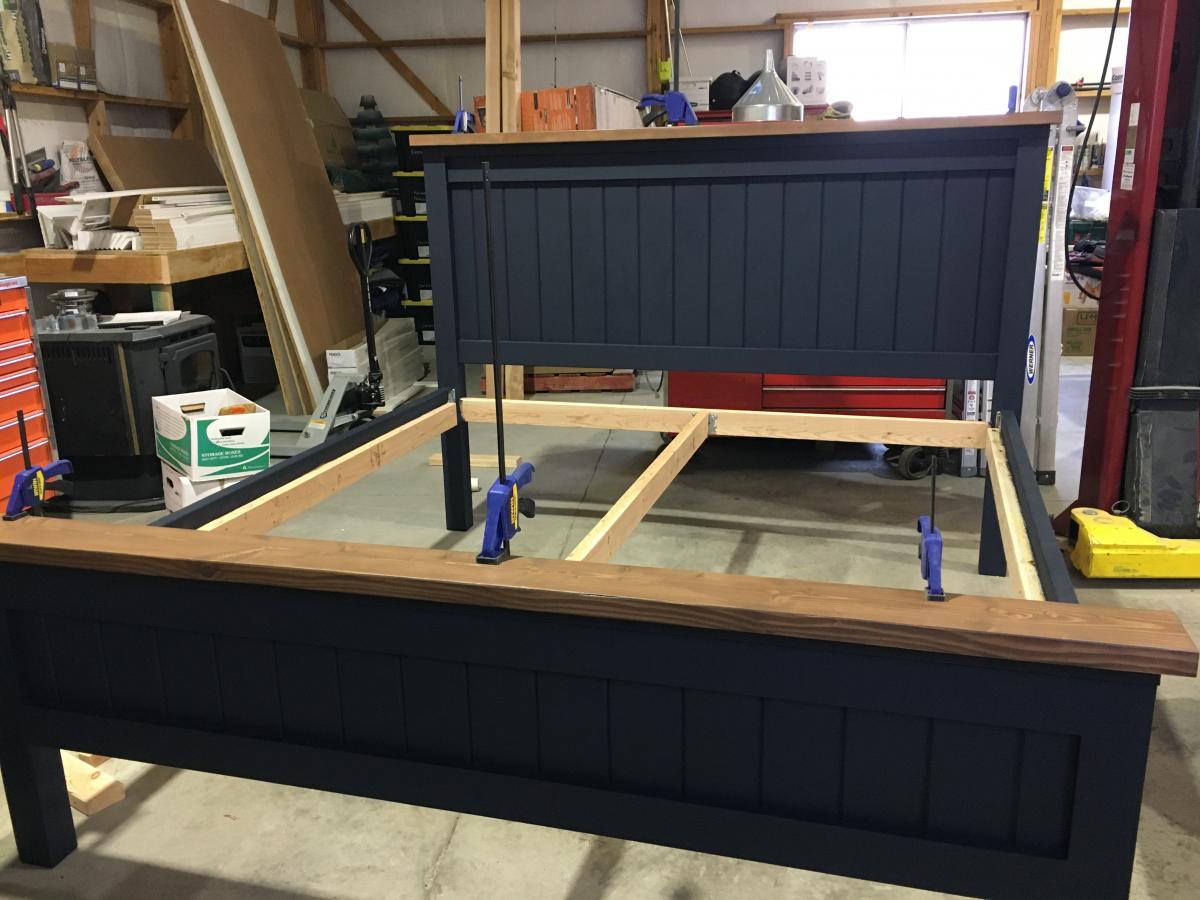
Estimated Cost
$25
Estimated Time Investment
Afternoon Project (3-6 Hours)
Recommended Skill Level
Beginner

Comments

Red Hen Home Farmhouse Table

This is my first furniture build! I modified the Farmhouse Table mainly by removing the stretcher, so that someone could sit comfortably at the ends of the table. I used all pocket-hole construction, so the top is one piece, made out of alternating 2x8s and 2x10s. Overall size of this table was 78" long x 40" wide, to comfortably accommodate 8 people.

Estimated Cost
$80
Estimated Time Investment
Weekend Project (10-20 Hours)
Finish Used
Two layers of Minwax Antique Oak, followed by an Antique Oak/Dark Walnut mix. Followed by 3 coats of Minwax hand-rubbed polyurethane, then one coat of Minwax Dark Wax.
Recommended Skill Level
Beginner

Comments

smitty22

Thu, 03/21/2013 - 17:46

I love this table! You did a wonderful job! Can you explain a little more about your modifications? Did you add any other support when you took away the stretcher? I want to make a table just like yours. I need to get rid of the stretcher too so that I can seat people on the ends.

Entry closet organizer

This was my first project using Ana's plans. It's a combination between the smiling mudroom and the shoe shrine altered to fit sneakers and boots. I was very happy with how it turned out and couldn't wait to get on with my second project which was the planked sideboard. We were doing renos at the time and I was able to build the closet organizer before enclosing the closet. That thing is never moving.

Estimated Time Investment
Weekend Project (10-20 Hours)
Finish Used
I sanded,painted,sanded,painted,sanded and topped it with minwax paste wax. The paint is Sherwin Williams "Tidewater" eg-shel.
Recommended Skill Level
Beginner

Comments

Ridge Media Console

Submitted by Kingspiper on Fri, 03/31/2017 - 12:25

Made media center for new TV / speaker from Jen Woodhouse design I found on Ana White.  Turned out well. Changed some aspects to fit my situation.  I changed some of the joinery, and used a 12 inch piece of pine on the back to allow for stability and ample space for cord management. I used three hinges due to weight of the front and put some corner cushions for grandson's sake (toddler).  Most items bought at local home improvement store but index card holders bought on ebay for very reasonable price.  

Built from Plan(s)
Estimated Cost
Wood / hinges and accoutrements around 150.00 dollars
Estimated Time Investment
Weekend Project (10-20 Hours)
Finish Used
Minwax pre-stain / Varathane Light Walnut stain / Varathane satin Polyurethane
Recommended Skill Level
Intermediate

Comments

Farmhouse Table

Submitted by sarah1122 on Mon, 02/25/2013 - 18:33

This was our second project from Ana's site. There were some bumps in the road (oh, the perils of getting warped 2 by 8 boards to line up perfectly side by side with the Kreg jig). All in all, this table isn't perfect, but it is ours and we love it.

The size of the table in the plans is quite perfect, I'd say. It is long, but fairly narrow. We can sit across from each other as a family of four and still feel cozy, but the table will seat ten if need be.

It is also very, very sturdy....which as a mother to two young boys I appreciate.

This was a 10-20 hour project for us, but we had two children under the age of 5 "helping" and are new to building furniture. I'm certain someone else could build the entire table in an afternoon.

Estimated Cost
$125.00 (not really sure)
Estimated Time Investment
Weekend Project (10-20 Hours)
Finish Used
One heavy coat of Minwax Gunstock (frightfully orangey on its own). Two lighter coats of Cabot Early American (thank heavens I had some of this laying around in the shop). Two coats Polycrylic semi-gloss on the base and three on the table surface.

Recommended Skill Level
Beginner

Build Michaela's Kitchen Island

Submitted by Anonymous (not verified) on Mon, 04/03/2017 - 04:47

I really liked the look of the kitchen island in the plans, but we needed something longer, so I added 2' to the length, an extra drawer, and some supports in the center (worried the shelves might sag otherwise). We also wanted an overhang for stools, so I added a foot to the width and some decorative corbels. For the top we used reclaimed bowling alley wood. A really fun project and were really happy with it. Thanks for the plans!

Built from Plan(s)
Estimated Cost
$800
Estimated Time Investment
Week Long Project (20 Hours or More)
Finish Used
paint/faux distress, stain, and water lock
Recommended Skill Level
Intermediate

Birds and Soap cooler with a twist

Submitted by Anonymous (not verified) on Mon, 02/22/2021 - 05:30

My dad has been looking to buy an outdoor soda cooler for the summer, and when I came across this plan I knew I had to make it! The design is so pretty, and the plans are very easy to follow. It is time consuming to complete but the end result is worth it! The biggest challenge I found was getting the spigot to attach to the cooler. Make sure your cooler lid is glued in level too because I learned the hard way it is a pain to fix after the fact! I personalized it to my dad's favorite soda and photo shopped him into a vintage moxie ad because it's something he would get a kick out of! He loved it! Thanks for the plans!

Estimated Cost
$150-175
Estimated Time Investment
Weekend Project (10-20 Hours)
Finish Used
I used a dark stain with polyurethane finish. I wanted it to look rustic so the stain was applied a little messier for an uneven look.
Recommended Skill Level
Beginner

Comments

Ana White Admin

Mon, 02/22/2021 - 11:30

The sweet build and customization is what building is all about! Thank you for sharing, he is a proud father indeed.

Mini Farmhouse Bedside Table

Submitted by jleakey on Thu, 02/28/2013 - 13:47

This is my first time attempt at building a piece of furniture. There are definitely some mistakes but, think it still came out okay. Guess it is a learning experience.

Built from Plan(s)
Estimated Cost
$80.00
Estimated Time Investment
Weekend Project (10-20 Hours)
Finish Used
Varathane golden oak stain with 3 coats of Varathane water based Polyurethane.
Recommended Skill Level
Beginner

Comments

Double Pedestal Farmhouse Table - Modified from Triple Pedestal

Submitted by BDreffs on Mon, 01/05/2015 - 15:32

I decided to go with Oak boards for the table top for a little more durability.  Simply fastened together with dowels and glue and clamped to dry.  Then I added extra supports to the bottom.  The top looked a little thin compared to the base so I added the accents pieces out of 1x2 for a table skirting of sorts.    

Built from Plan(s)
Estimated Time Investment
Weekend Project (10-20 Hours)
Recommended Skill Level
Intermediate

Comments

Iowa cabinet Spring fix up!

Submitted by Anonymous (not verified) on Wed, 04/05/2017 - 18:51

Loved the design when I saw it and jumped on it the minute my husband said we needed something under the wall mounted tv! Took us 5 or 6 hours on a Sunday to put the cabinet together and another day for my husband to build the doors which turned out exceptionally well!! Used pine with a dark stain followed by Annie Solon old white chalk paint and clear wax giving it a nice aged look. Will be looking for 16 x16 bins for some grandkid toys and a few spots for pretties. Ordered hardware on Amazon and had to re-order additional set of wheels as the kit comes with only 1. Thank goodness I have prime 2 day delivery!

Estimated Cost
$250-$300 all in.
Estimated Time Investment
Weekend Project (10-20 Hours)
Recommended Skill Level
Intermediate

Coffee Table [Modern Farmhouse Collection]

Submitted by vcollin2 on Fri, 02/26/2021 - 13:43

This coffee table was my second woodworking project. I changed the dimensions for a square instead of a rectangle. New dimensions are approximately 40in x 40in. I had to use 1x8x8 kiln dryed boards instead of 1x10x8. As I am new to wood working , it was a learning curve that the 45 degree angles were a beveled cut and not mitered. Overall I thought the plans were easy to follow.

Estimated Cost
$120
Estimated Time Investment
Week Long Project (20 Hours or More)
Finish Used
Briarsmoke
This stain turned out much darker than Ana’s table. It is a much darker grey.
Recommended Skill Level
Intermediate

Matt's Gallery Shelves

Submitted by Kenndfan on Sat, 03/02/2013 - 15:11

6 feet long gallery shelves using Ana's plans! They were built in 10 minutes! Total cost was about $30 for all three.

Estimated Time Investment
An Hour or Two (0-2 Hours)
Finish Used
A combination of Red Oak and Early American
Recommended Skill Level
Starter Project

Vegetable Cupboard Bin

Addition of chalkboard paint to the doors to label contents. My mother-in-law loved this for X-mas. 

Built from Plan(s)
Estimated Time Investment
An Hour or Two (0-2 Hours)
Finish Used
Minwax Natural with a tsp of Varathan Chestnut added (my mother-in-law's choice)
Recommended Skill Level
Beginner

Rustic Rolling Wooden Dresser Variation

This is my take on the Rolling Rustic Wooden Dresser. I did not use the wheel and extended the sides to increase the height.

Used the edge glued project panels from Lowe’s for the Top, Side and Drawer Faces.

Biggest cost increase is the inclusion of the much more expensive drawer hardware. My wife likes the self closing under drawer mounts that run $25-$30 a pop.

Built from Plan(s)
Estimated Cost
$350
Estimated Time Investment
Week Long Project (20 Hours or More)

Cooking Tools Drawer Organizer

This is for my cooking tools drawer. It's still a bit cramped, but it's much easier to find things now (and I don't have room in my tiny kitchen to expand)! I used a pine 1x3, which was sanded and sealed with a Minwax stain/poly blend. I used a countersink bit to drill the pieces together and used Elmer's stainable wood filler, but it didn't take the stain well. I'm not sure if it was the wood filler or the sealant. Next time I might try a stain and then a poly coating instead of a combination. This was my very first project so I'm pretty excited about it. I will post pictures of my utensil drawer soon.

Estimated Cost
$5
Estimated Time Investment
An Hour or Two (0-2 Hours)
Finish Used
Minwax Stain/Poly blend in honey oak
Recommended Skill Level
Beginner

Comments

I-beam

My wife loves this shelf. Thank you so much for the plans! I made mine using Aspen and an Early American stain. Now I need  to make 2 more. 

Estimated Cost
$10-15
Estimated Time Investment
Afternoon Project (3-6 Hours)
Finish Used
Pre-stain conditioner, wait one hour, then Early American stain. Let sit overnight, very light sand ( I used 600 grain) and stain again. Let dry and I put two coats of semi-gloss urethane to give slight shine.
Recommended Skill Level
Starter Project

Katie’s King Size Farmhouse Bed

I built this with the Ana White king size farmhouse bed plans. All pine boards from Home Depot.
Finished with Dixie Belle’s Silk Mineral Paint in Deep Sea, and Voodoo Gel Stain in Tobacco Road, with a satin clear coat.
I used Zibra paint brushes to apply the paint.
We’re in love with how it turned out! Complete transformation from our old queen bed on a cheap metal platform.

Estimated Cost
$500
Estimated Time Investment
Week Long Project (20 Hours or More)
Finish Used
Dixie Belle Silk Paint in Deep Sea
Dixie Belle Voodoo Gel Stain in Tobacco Road
Recommended Skill Level
Intermediate

Comments

Cold Frame

Submitted by erik99703 on Thu, 03/07/2013 - 20:44

This is not my first project, but it is my first brag. I installed new windows in my house this fall and took out some double-pane windows. I can't yet afford to build Ana's greenhouse, so I made this. I removed the old frame around the glass and took some old 2x6 green-treat, ripped them down to 2 1/2" and made new frames around the glass. I then purchased some treated pickets to make the box. The top is slanted at 15 degrees and I put a shelf in the back for a few extra six packs. The overall size at the base is roughly 36" by 46", so I can fit 6 flats there. Since I didn't have to make sure it was really square nor did I have to sand, it was my favorite project yet. I can't wait for the snow to melt and the hard frosts to disappear.

Estimated Cost
Hardware and pickets were about $50
Estimated Time Investment
Afternoon Project (3-6 Hours)
Recommended Skill Level
Starter Project