Awesome Farmhouse Style Table!
Plans used from Ana-White.Com's awesome recreation of a commercially available table. Ran through this construction in no time and it came out like a charm. Thanks!
Someone on my street had thrown out 2 couches. The cushions were in perfect condition. So I built chairs and fit the cushions! I built a matching coffee table to fit a glass I had. To finish the space, I added a table to have my morning breakfast.
Mon, 11/01/2021 - 10:09
That's a steal! It looks like a very relaxing spot to hang out, thank you for sharing~
Potting bench I made for my daughter as a housewarming gift to her newly built home. Easy plans! It was a great build.
Kmw
This is our version of the factor cart. I used 12 inch boards on the sides to make the table have a little more height.
Simply copy of Ana's post. Used American Walnut stain and acrylic paint. Measures 40" x 40".
It took us awhile but we built these white cabinets from scratch. It turned out great and looks better in person. Thank you for your articles!
Modern Comfort Outdoor Sofa and Loveseat to go with the Simple Outdoor Dining Table and Benches that I made 2 years ago. I love that the "Modern Comfort" plans don't require angles or a miter saw. I used a circular saw for all of it!
I used 2x4 instead of the 4x4 to create this bench for my entry way. I left off the stretcher so my shoe baskets could fit underneath.
Loved this desk, for my first project I was extremely pleased how it turned out.
This is my first try at one of your projects. I made the console table 48 inches long to fit the space of our entry way. I thank you for all of your amazing content, and still having informative and wholesome things to watch.
I built these two outdoor chaise lounges last year
Over the winter, I stored them on the deck, turning them into a huge outdoor sofa!
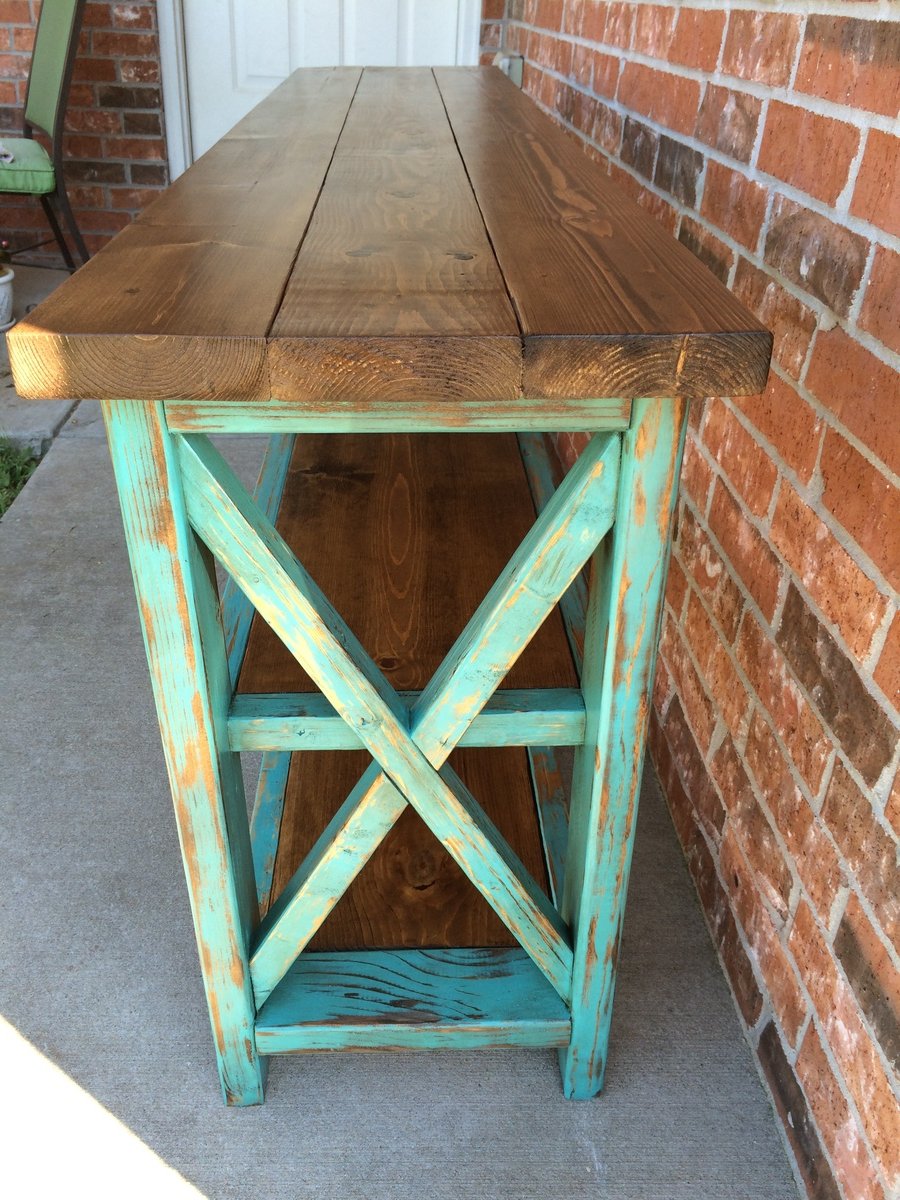
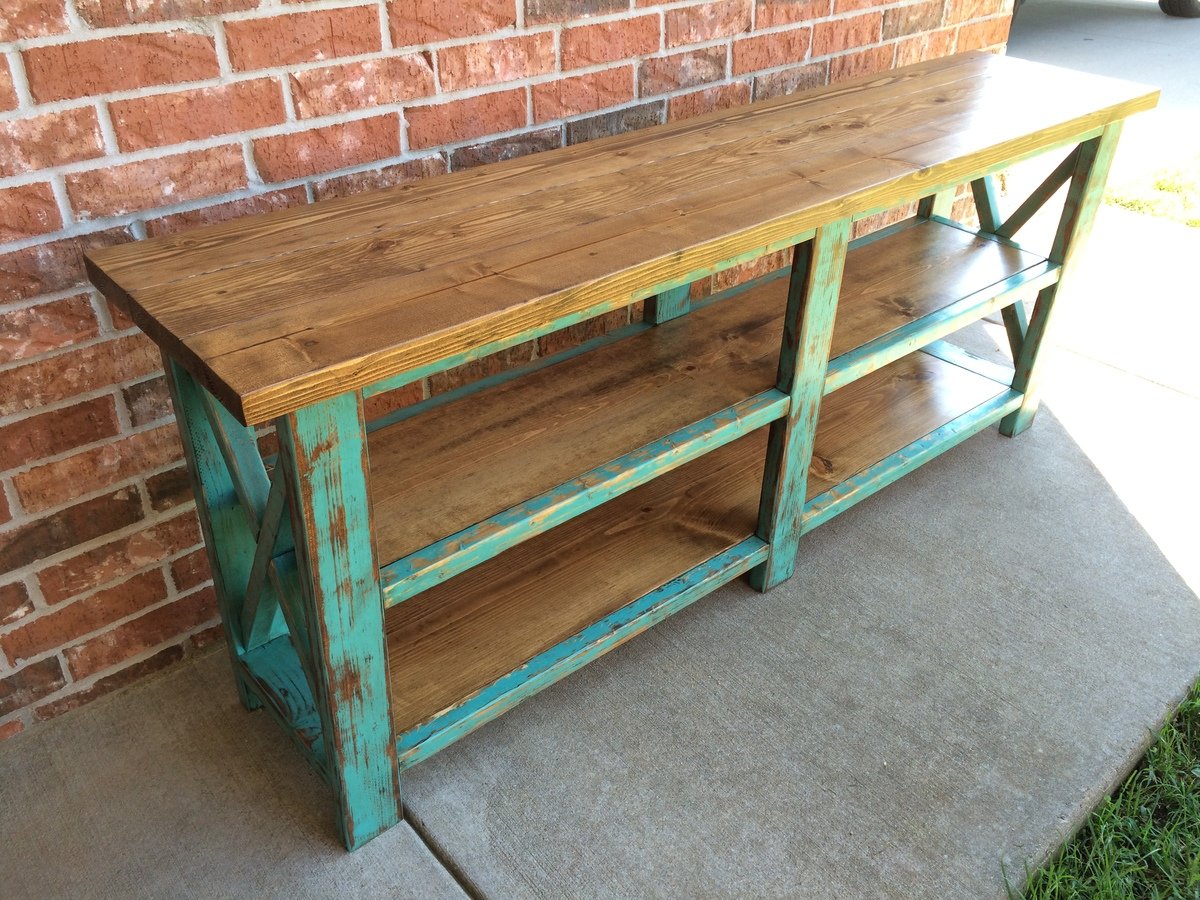
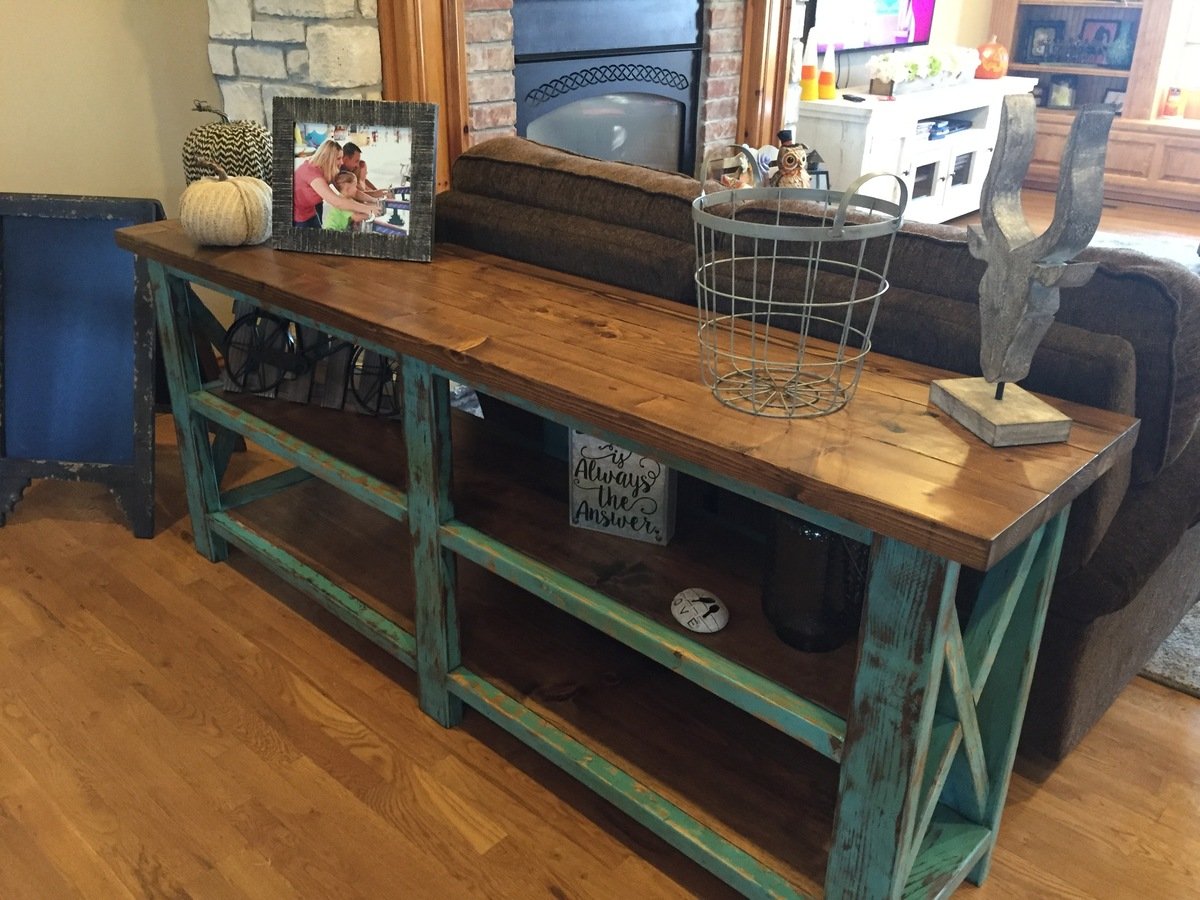
I needed to add some cabinet space in the bathroom and saw this medicine cabinet on DesignConfidential. It turned out great. It is big and heavy so if you build it make sure you use substantial fasteners when you place it on a wall. I spent more than necessary because I wanted certain drawer pulls and glass. In a small town they are just not available. I got the drawer pulls on-line from Kennedy Hardware and the glass at a local glass company. Big Blue and Big Orange just do not carry much. The door is probably backward but I am tall enough that it doesn't make much difference. Now my big old Lab and I don't have to share the same cabinet. I will redo the drawers so the ends of the plywood bottom doesn't show. The design is such that you have a lot of flexibility in how you use the interior.
Changed the look of my medicine cabinet with the help of photographer Sonja Caldwell whom I ran across on ETSY.com. She had a wonderful pic of a medicine cabinet she found in a medieval French charity hospital. She worked with me to get the image to fit into my cabinet window. I really like the result. It almost looks 3D. I changed the drawer labels to the best French I could come up with and still fit in the little slots. The words are Mortel (Deadly), Plus Mortel (Deadlier) and Le Plus Mortel (Deadliest). I understand that there are not comparative endings in French but i hope these translations will do. Here is a link to Sonja's site:
http://www.etsy.com/shop/SonjaCaldwell?ref=seller_info
Using the counter height planter plans from Janettx. Thanks!
Mon, 09/20/2021 - 13:24
Nice job!!! I'm still using mine. I ended up putting 12"x12" pavers under each leg to extend their life. After the 2nd year now we get bumper crop out of ours each season.
This is my second project. It went really well. I wanted to do something different with the handles so I used an old bicycle chain that I took it apart to make the handles.
I built this table for a friend. It was fairly easy! The only problem I encounted was getting the 2x2 trim pieces flush with the legs while building the frames. When I just laid them on the floor they would sink in further than the legs. So I made sure to check their positioning and hold them in place with one hand while drilling in the screw with the other hand. It was a fun build and I would definitely build it again!
Sat, 09/24/2016 - 10:37
This finish is absolutely amazing! Great job, what a lucky friend!
I LOVE how these turned out. So simple...but a huge statement in our room!
I used the other half of the 8ft pieces I used to make the book ledges in our daughter's room.
Now I am starting on some for the living room!!