Benchright coffee table
Love building a beautiful table for a fraction of the cost!
![](/sites/default/files/IMG_5665_0.jpg)
poly
Love building a beautiful table for a fraction of the cost!
Built this loft bed for my tween girl who needed/wanted a hangout area and has always dreamed of having a loft. It may look daunting but it's actually quite simple. 2x8"s built to size in the shape of the bed, screwed into the studs in the wall with lag bolts. A 4x4" holds the frame up where it is not supported by the wall. I considered a pole or chain or other suspension method from the ceiling but decided that a nicely trimmed 4x4" would look nicer and it really doesn't get in the way since the ladder is there anyways. I built the bed frame bigger than I needed for the twin mattress to accommodate free space for clutter, e.g. books, pillows, etc. Once the frame is up I added supports for the mattress, with 2x2"s spanning length and width, then plywood. 2x4"s are screwed in vertically and then topped with a flat 1x3" and spanned with a 1x2" to protect her from falling. Since she's older I didn't feel that I needed to add as much support around both open sides. It has not been an issue at all and I am fully comfortable with it. I installed small LED color changing lights in the underside of the bed. The headboard was made from standard 5" t&g boards and has a small shelf to hold "stuff." A custom in-wall shelf holds more of her "stuff." The wood color is just a dark walnut Danish oil that I love working with.
Finally, I built the base for the couch with 1x3". The couch itself is two separate futon style chairs that open up into single beds, perfect for sleepovers! They are meant to just lay on the floor but I wanted to make it look more like a couch. We bought those from Walmart. I recommend! Hope you like. Let me know if you have any questions. I don't have formal plans but can try an answer all questions best I can! Cheers!
My great niece was turning 1 and I wanted to make something original for her. I wanted to make sure she could use it and keep it to show her kids, hopefully. It took a few weeks of working and waiting for finishes to dry and working out the finer details to make it solid and sturdy.
I used the plan for the simple potting bench, but because I had a lot of reclaimed wood, I used well supported 1x4's instead of 2x4's, simply because I had an abundance.
I saw this on Pinterest and loved it. It looked simple enough for my first project. I made it from barn board that my uncle gave me.
Modified the Cherished Bliss plan a bit to include Carriage bolts instead of pocket holes and I notched the top of the legs to make a shelf for the top.
Legs were cut at 18" and the top is 40". The two center 4x4's are connected with two internal (and smaller diameter) carriage bolts and glued together. The end 4x4's are glued and then a 1/2 x 6" carriage bolt with a pre-drilled "Head" hole (using 1" paddle bit).
Very easy to make but this baby is heavy!!!
My wife loves the farmhouse style, so this was my first build based on the X console plans for sofa tables. Its very "rustic" to say the least, but is very functional and was a great project to get started.
My mom and I made these together as our first Ana White project! So much fun making both these chairs and memories! Next up is the three pedestal farm table and bench!
This was something I build a couple years ago, it's not the same as this plan, but very similar. When we moved in to the house, the slab was already poured, with 4x4s already in place, I just used what was there and my imagination for the rest.
This was such a fun build! When I found out my youngest sister Lindsay was expecting her first baby, I wanted to make her something special and when I saw the plans for this scooter I knew it was perfect as both of us love scooters. I made a few adjustments to the plan (thicker hardwood for the main body, cross supports attached to inside of rails with pocket hole etc.). I also added a bell on the handle bars and a mirror. I can't wait to give it to her. My 2 1/2 year old daughter isn't sure she wants to share it. May need to make one (slightly bigger) for her!
Wed, 03/04/2015 - 07:42
I know this is an old post but this scooter is adorable! Where on earth did you find that cute little mirror? And did you cut out the 2x10 out with a jigsaw or a bandsaw?
Thu, 12/03/2015 - 20:49
What an adorable little build! I would love to know how you created the "wheels" and like the above poster, how you cut out the 2x10. :)
Made with 1X6 pine. Stained with Minwax Classic Grey, tree is latex white paint I had, and birds are chalk paint that I already had in my supplies.
Just love your site so many great ideas
The Vanity was my first attempt ever at building any type of furniture. Then the console table w/ matching end tables. It was not hard at all I’m not even a carpenter. Just a guy who enjoys working with wood. I Just follow Ana White’s plans. This will not be my last builds bc my wife keeps finding things she wants me to build. Happy wife, Happy life.
Thu, 12/16/2021 - 13:39
Thank you so much for sharing, those are all lovely!
Classic king farmhouse bed build
Super simple and great looking shelves! Because of my set up, I chose not to do the key-holes on the back and instead drilled directly through the back lip. I also adapted the shelves to be 6" deep vs. 4". In order to make it easier to lift my jars from the shelves, I trimmed the front lip a 1/2". The color is "Ebony". It goes on jet black, but ends up looking like old barn wood--with out the splinters! They turned out perfect!
Modified corner cupboard to use as corner bookshelf in boys room. Omitted the lower doors otherwise shelf cut to specs. Painted with bold blue to match boys colors.
Added front to the drawers using the scrap 12x1 and feet on the bottom for maximum leveling
This was a great project. My son and I took your design from "Barn Door Cabinet with Mini Fridge and Microwave" and changed it up a bit. Let me start off I needed something small to a mini fridge in my "man cave". When I saw you design I used the plans to make the frame but then I took old fence slats and gave it a twist. All we need now is the mini fridge.
A big thanks to Ana for the original plan and to Kelly Hurt's brag post. Between the two, I got up the courage to repurpose my old table with Ana's farmhouse table. All was done with the Kreg jig so no holes to fill!
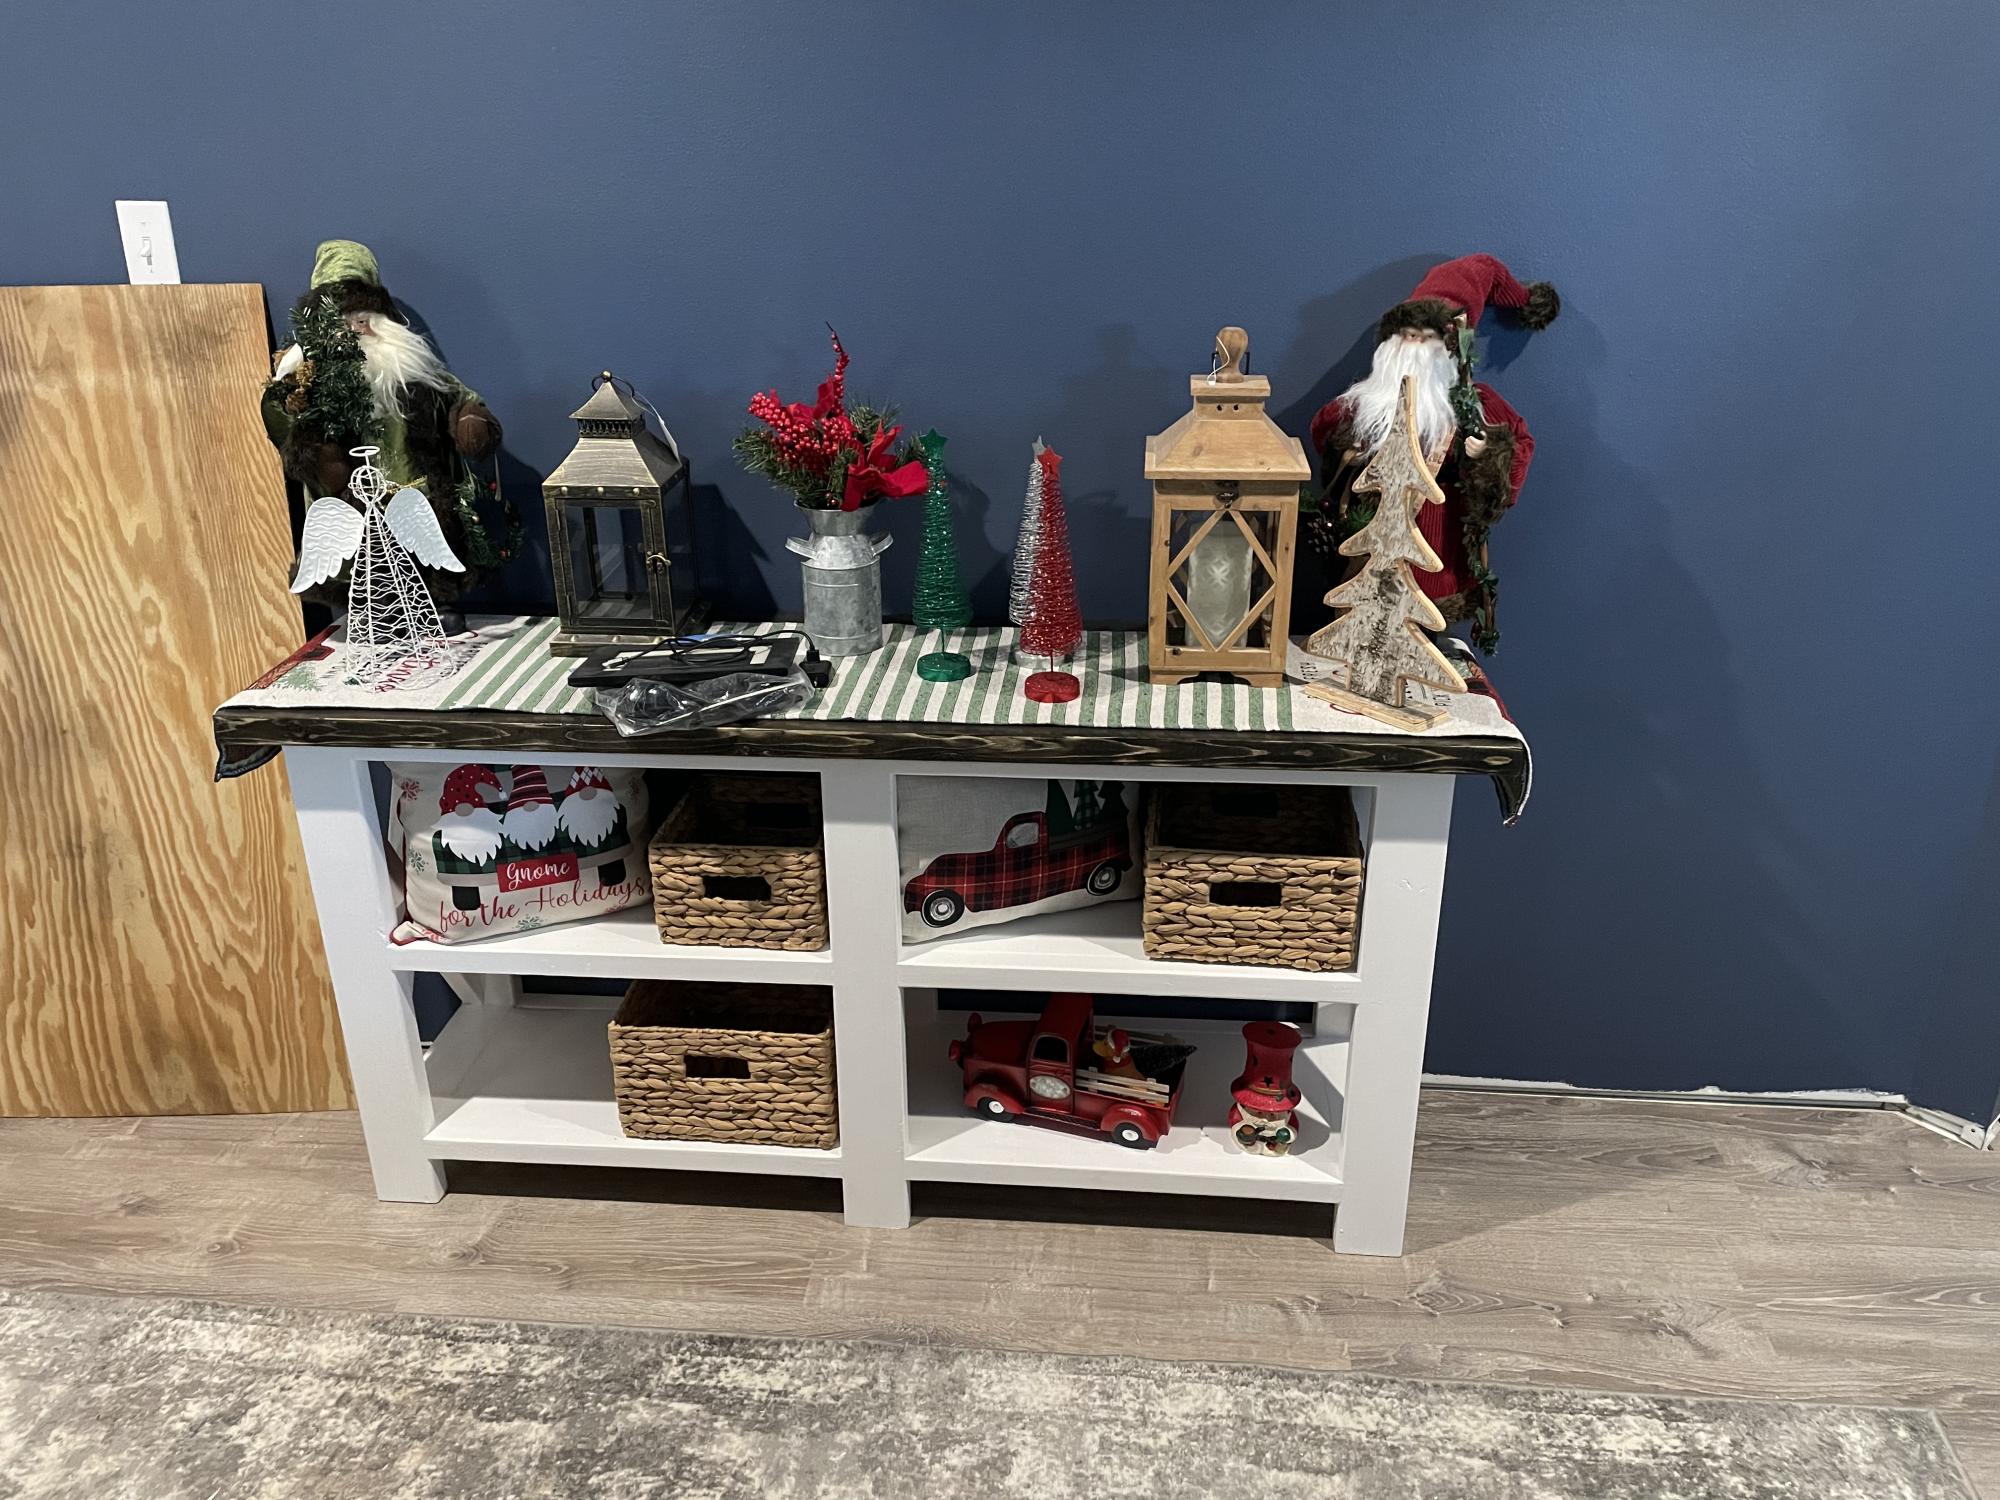
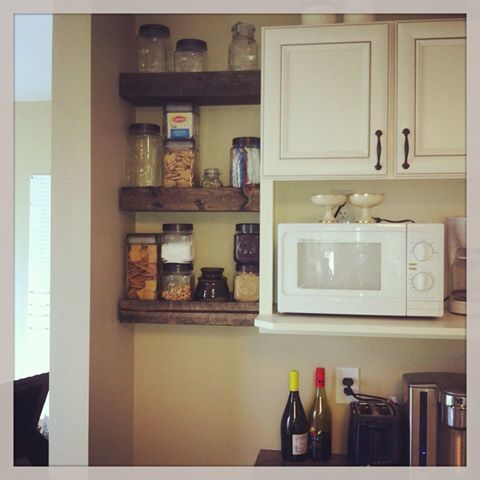
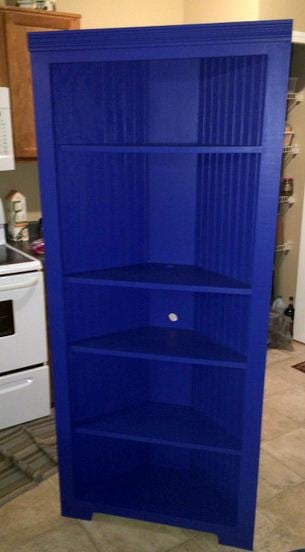
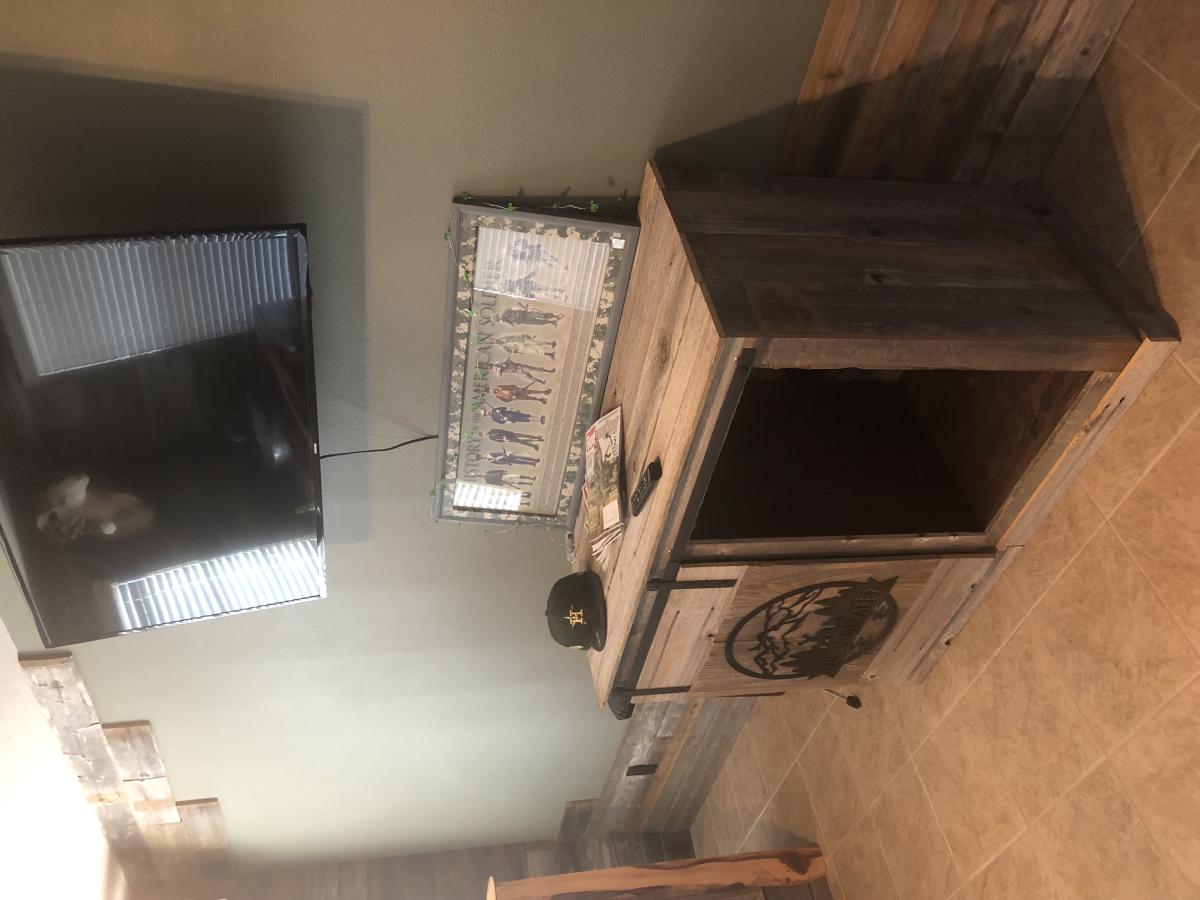
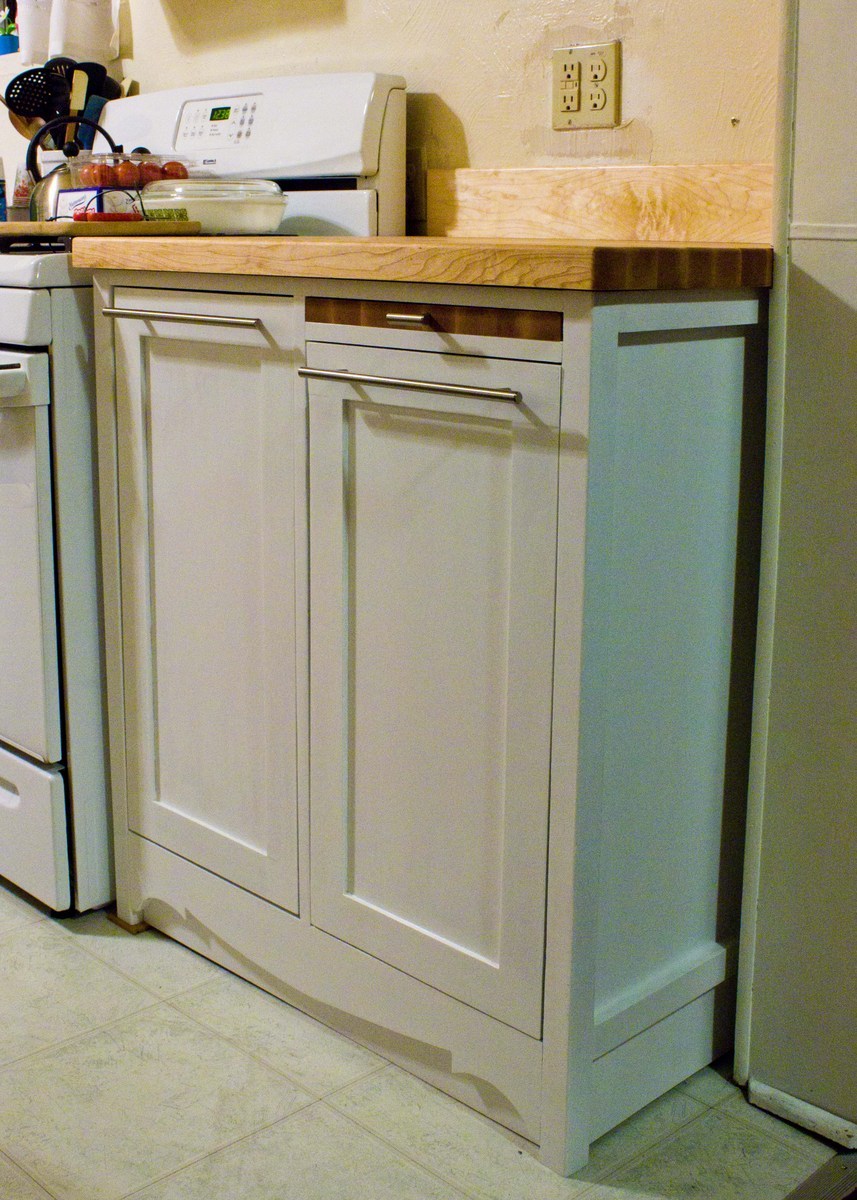
This is the very best thing about DIY: the ability to fill the gaps beautifully. This cabinet filled what was once a big, weird gap in my mother-in-law's kitchen (as in, hey why'd you take that cabinet out?? Oh, there never was one? Um, weird.). Of course the dimensions of the gap weren't standard...even if we'd wanted to buy a flat-pack cab, it wouldn't have fit. So I borrowed some elements of Ana's cabinets, some dresser plans, and some internet inspiration and came up with this.
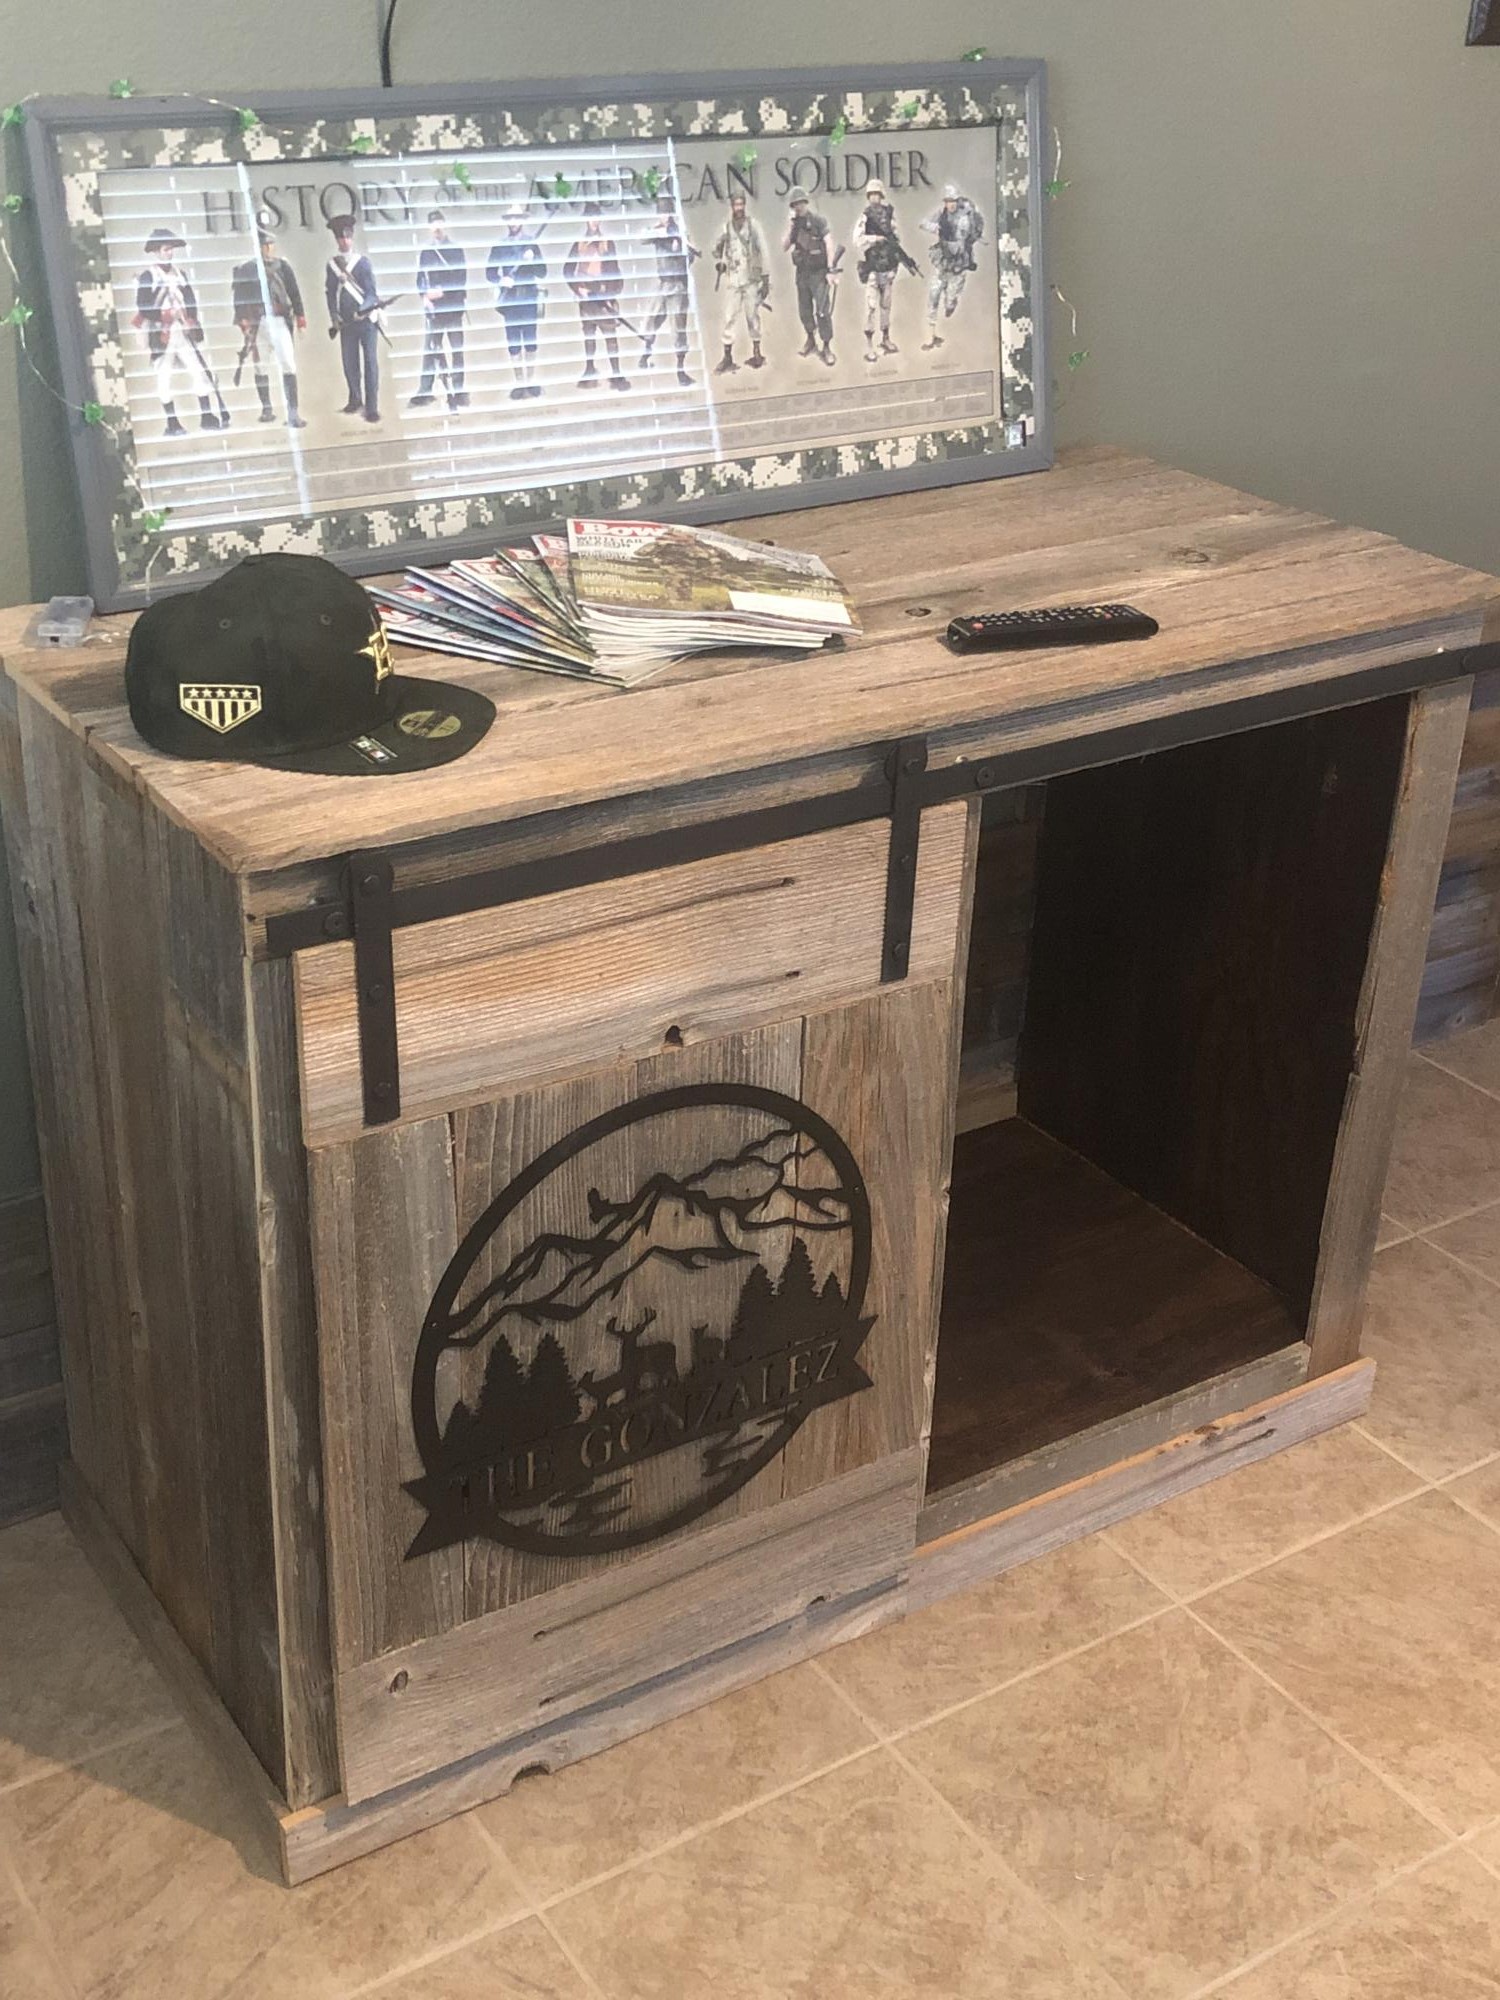
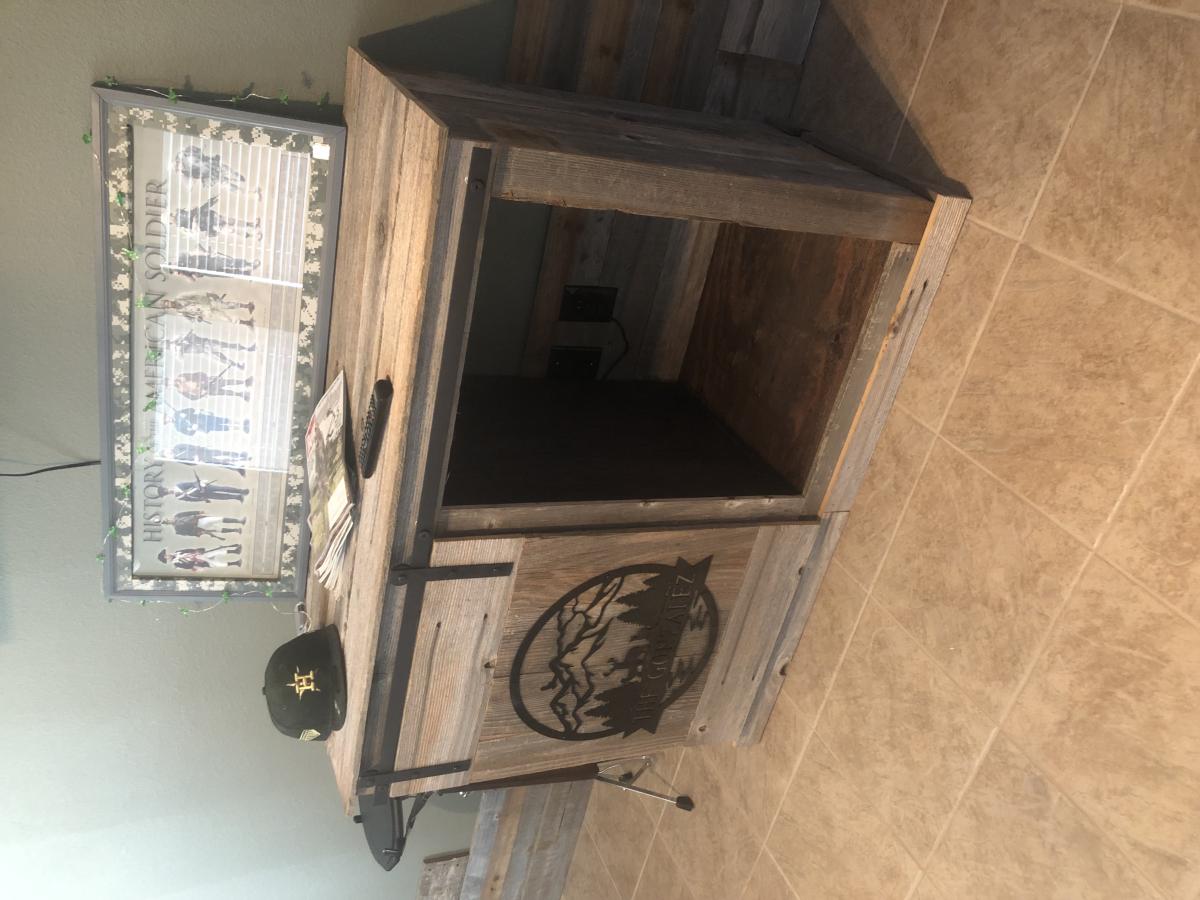
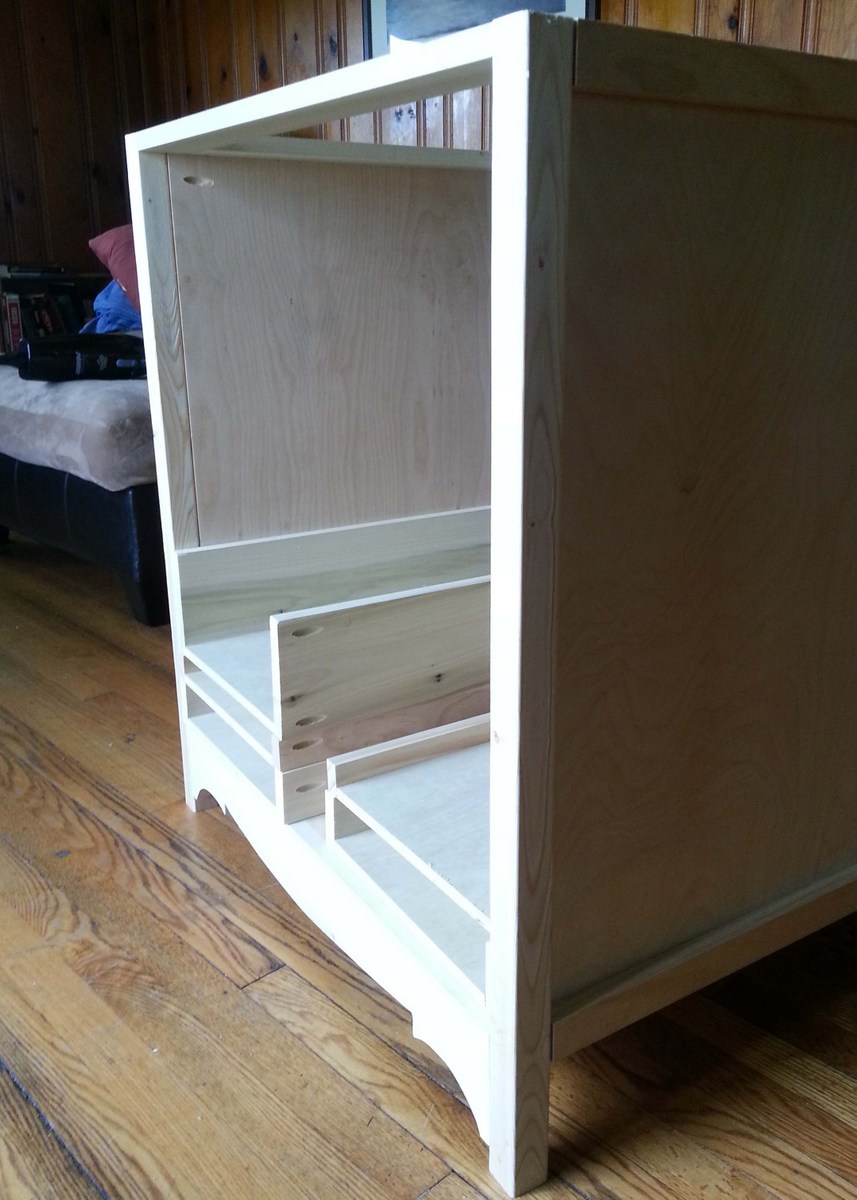
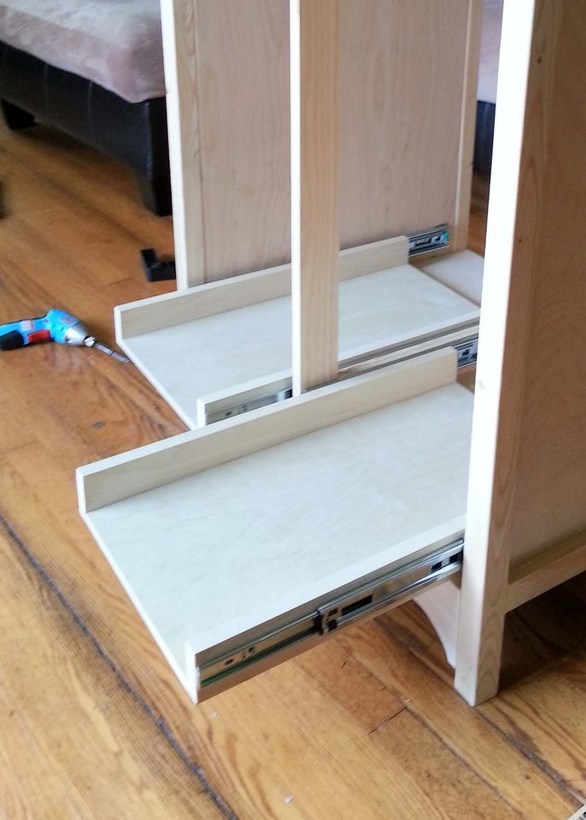
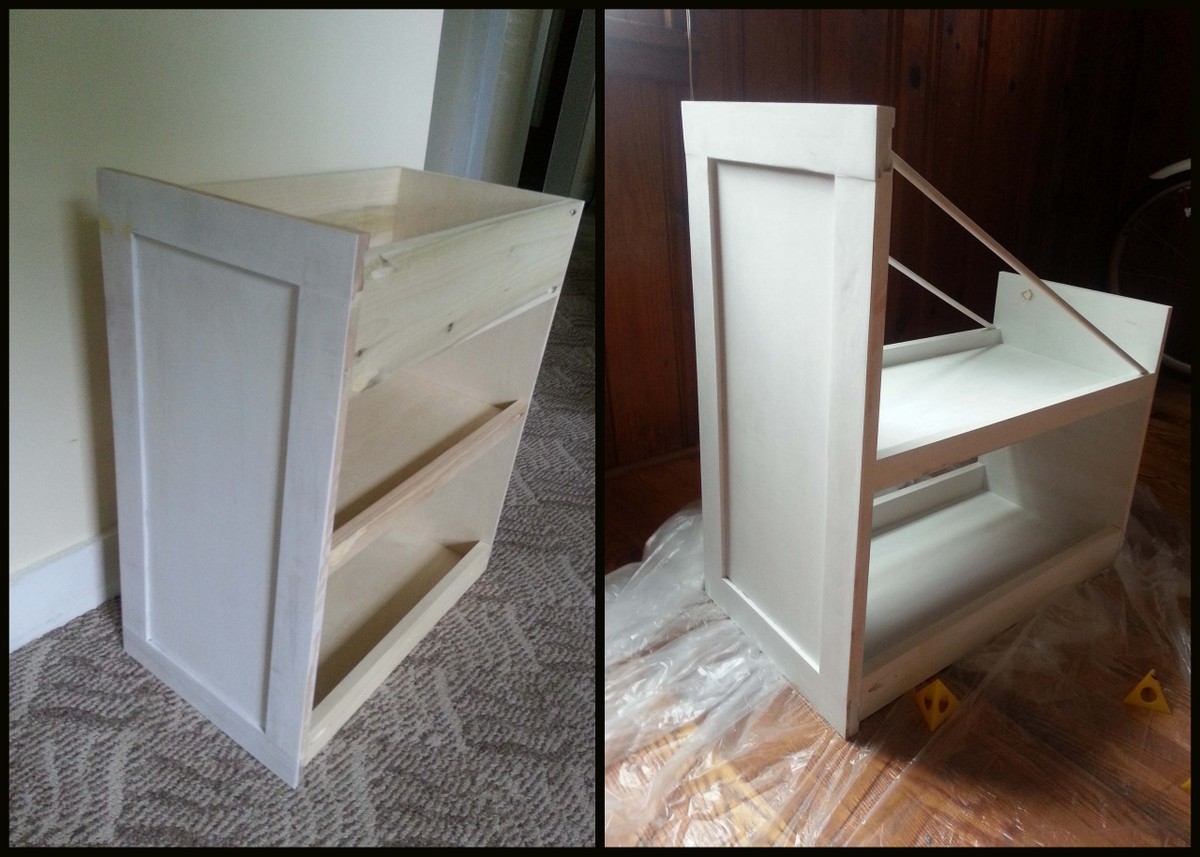
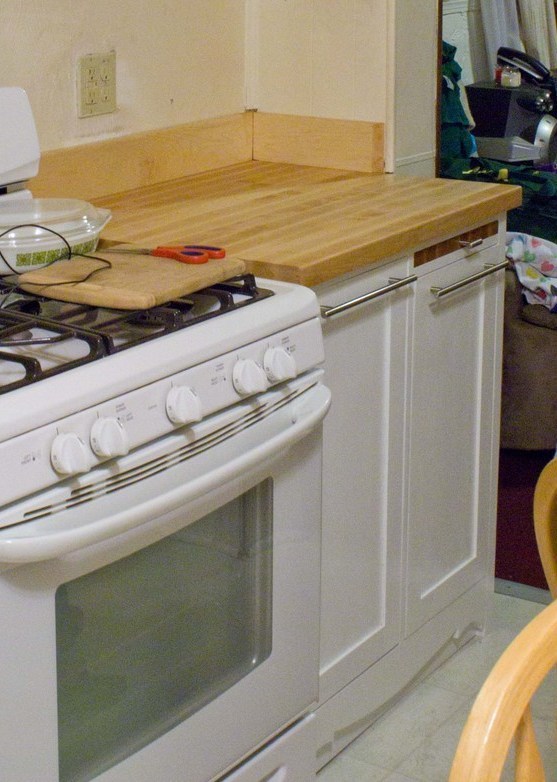
I'm disappointed I never took any photos with the drawers open...they are pictured in the third "more" picture. The one on the left has a drawer box on top (holds silverware now) with two storage shelves below for flour and sugar and the George Foreman grill. The right drawer (the one with the angled strut things) is kind of odd, I know, and I'm sure there's a more elegant way I could have accomplished it, but this is what I ended up doing (it felt like I was making it up as I went along, and I'm just glad it works!). It has that first very low shelf to accommodate the stand mixer in order to get the mixer off the counter, but not so low that my aging MIL can't lift it onto the counter to use it. All she has to do is lift it about a foot and slide it back onto the counter to make her some cookies! The pull-out cutting board is the same maple butcher block as the counter (but the counter is 1.5", and the board is only 1"). It is 22" long, so she can pull it out for added prep space, then pull it ALL the way out to wash it in the sink.
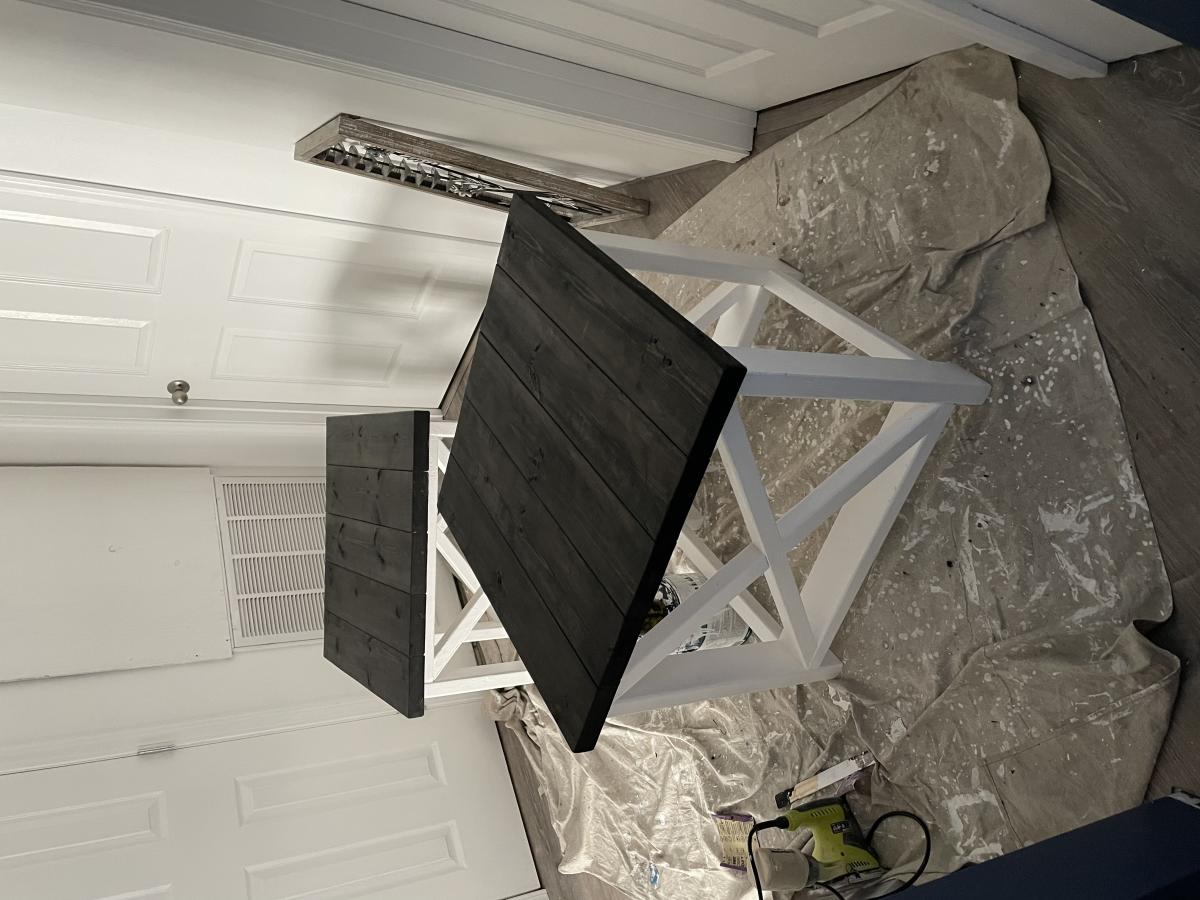
The carcass is 3/4" ply with 1x2 pine trim and 2x2 pine legs. If I did it over again, I'd use the more expensive 2x2 poplar posts for the legs, simply because they had better edges. The counter supports are poplar, as is the middle divider, the cutting board supports, and the fancy footer. There are two strips of 1/4" ply backing the footer to keep bits and pieces from escaping under the cabinet. The "drawers" are a mix of 1/2" ply, poplar, and pine mounted on full-extension glides. The faces are made of 1/2" ply panels framed in cast-off maple floor boards. I took the floor boards, cut off the tongue, and cut off half the groove wall to make one single ~1/4" lip on each board so that the ply would nest nicely behind. You might have to see it up close to understand.
The butcher block is not DIY...after an extensive internet research session, I determined I would need to purchase planing and jointing tools and specialty glue to do this project correctly; so I purchased the top and the cutting board from a local cabinetmaker instead. The counter is sealed on the bottom, back, and sides with marine spar varnish, and given seven solid dosings of plain mineral oil (sold at the pharmacy, apparently it's a natural laxative). Once the block is very well seasoned, I may come over and wax it for added protection, but from what I've read, this should do it pretty well for now.
Sat, 06/22/2013 - 07:13
Love this cabinet! It looks like it was done by a professional cabinet maker!
In reply to Beautiful! by JoanneS
Sat, 06/22/2013 - 13:14
I think the countertop is what really makes it...but I am super proud! Last year at this time, I was doing well just to get a straight cut on a board that wasn't 1/4" too long or short!
Recycled raised herb garden. Simply removed all the innards of an old grill I was going to throw away. Once it was gutted I pressured washed it and touch up the paint. Then I built a simple cedar box and placed it inside. Wa-la added basil, parsley and oregano.