Community Brag Posts

Tommy Bookcase
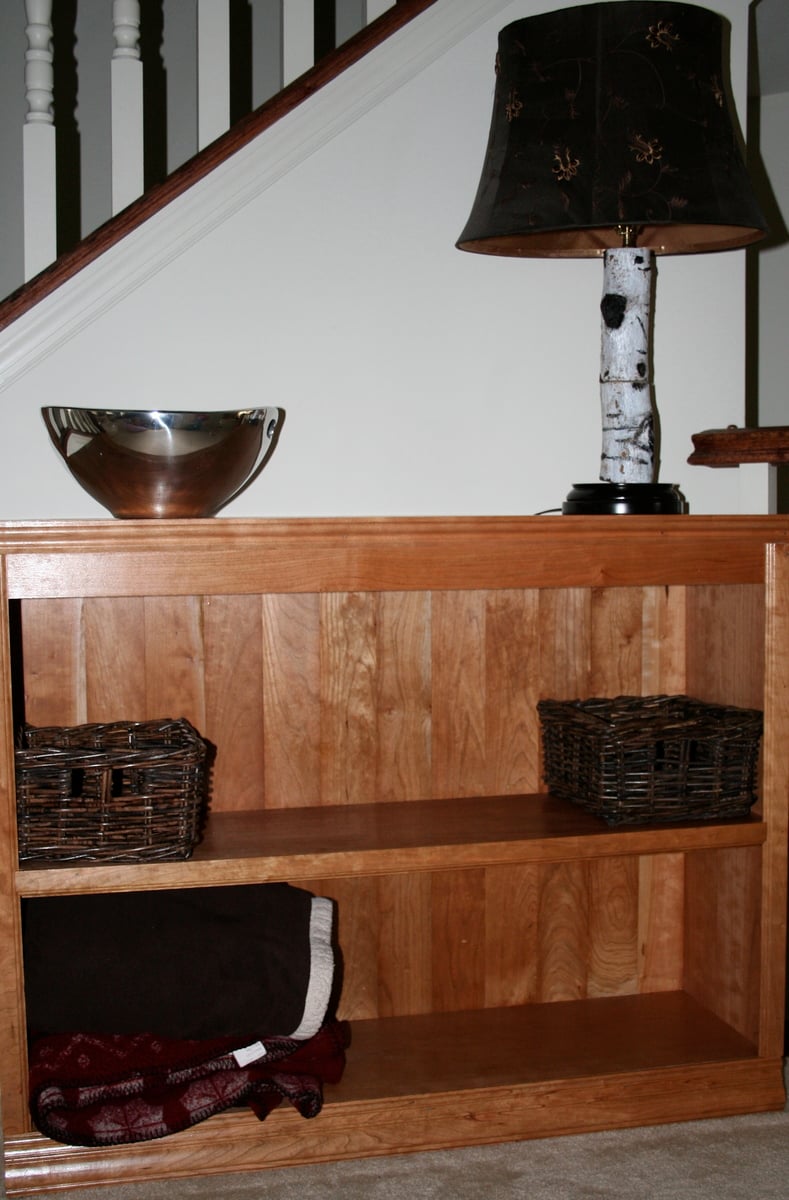
This is my second project I've done with Ana White's plans. I wanted something to fill this space in the town home I live in. It was empty and kind of dull. A lot of crap would collect on the floor and it drove me nuts!! So, I built this bookcase and I absolutely love it!! Thank you so much Ana White for the plan and inspiration.
Built from Plan(s)
Estimated Cost
$75
Estimated Time Investment
Afternoon Project (3-6 Hours)
Finish Used
I sanded the wood down and I used 1 coat of polyurethane. I used a semi-goss poly on this. The reddish color is the natural red in cherry wood.
Recommended Skill Level
Intermediate
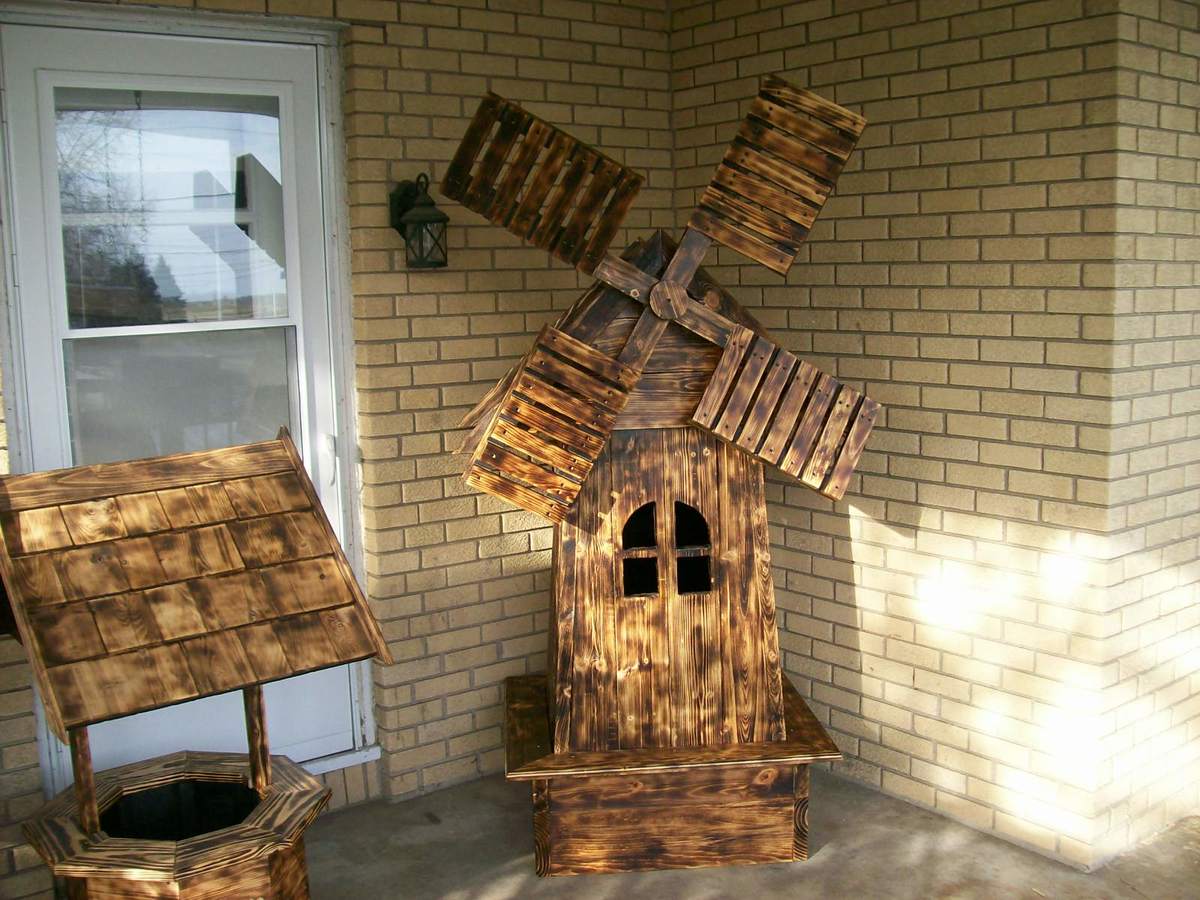
Windmill
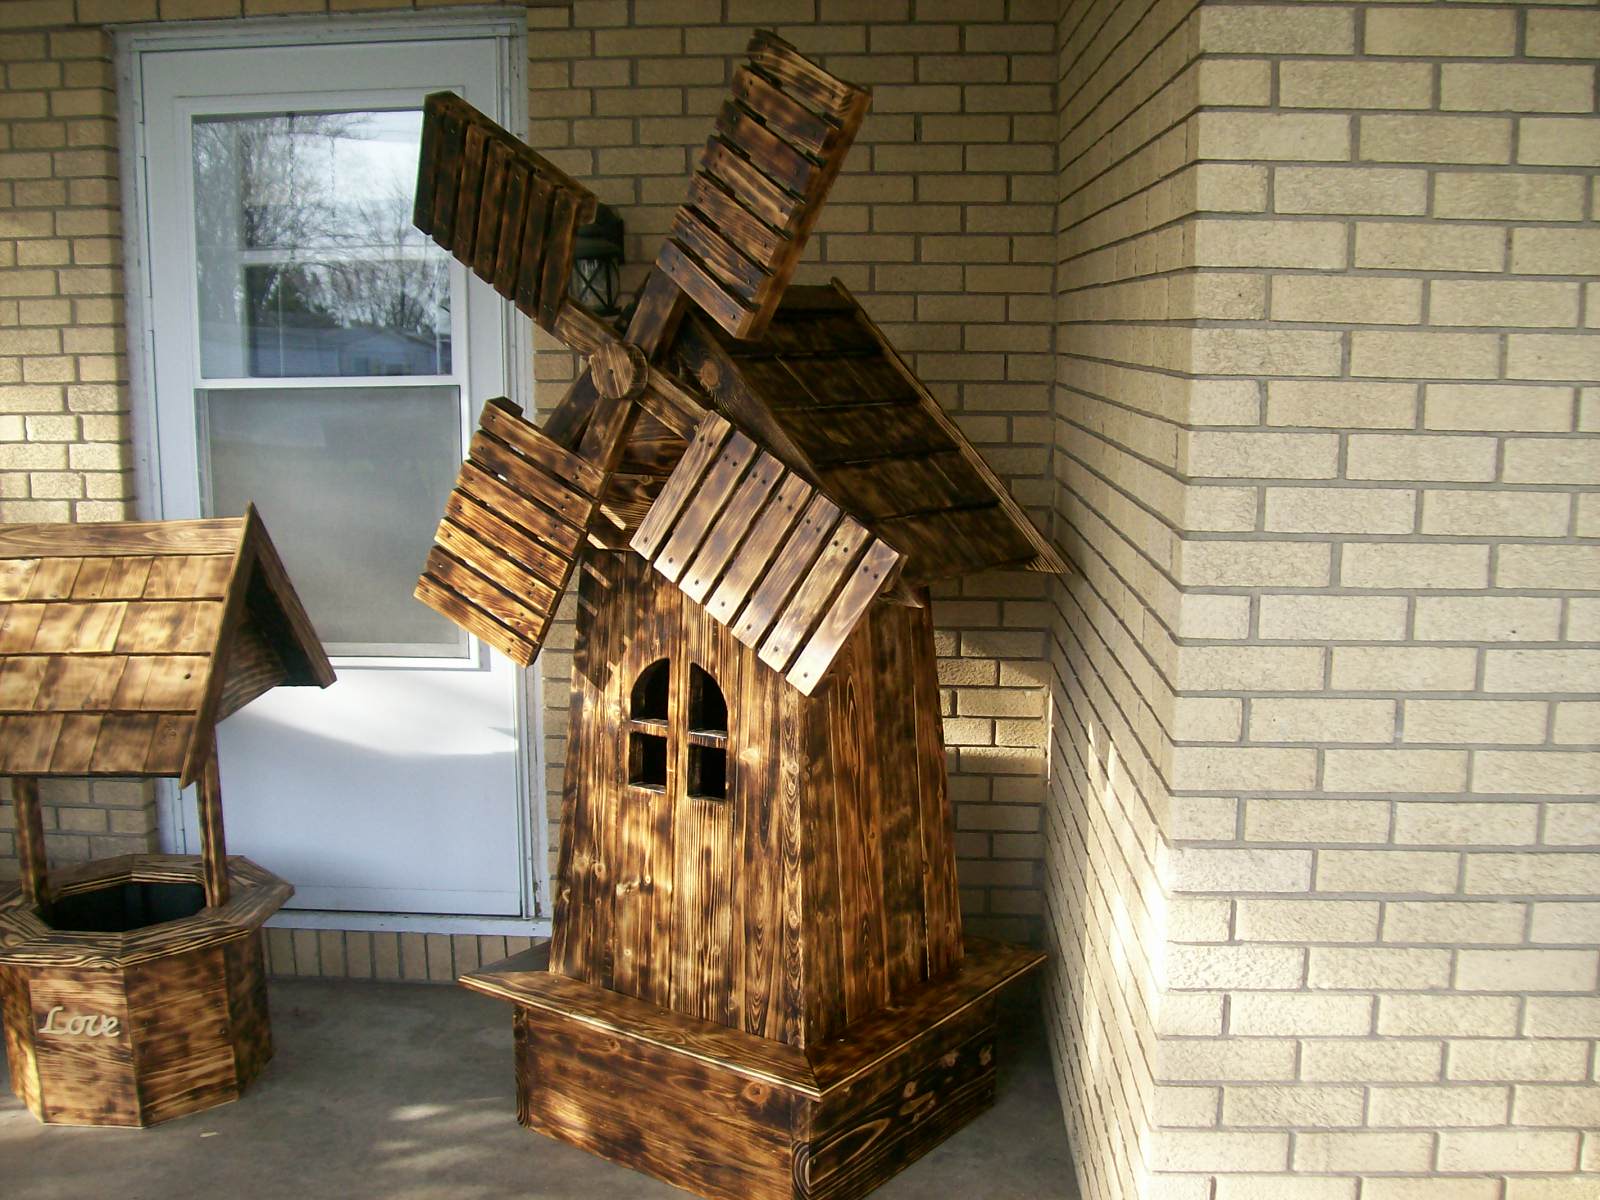
Made from a picture on the internet and made a few changes so it would more complete
Estimated Cost
231.00
Estimated Time Investment
Week Long Project (20 Hours or More)
Recommended Skill Level
Intermediate
Comments

Mon, 04/26/2021 - 07:34
Windmill plans
I really like the way this windmill looks and would love to make one. Are there plans somewhere?
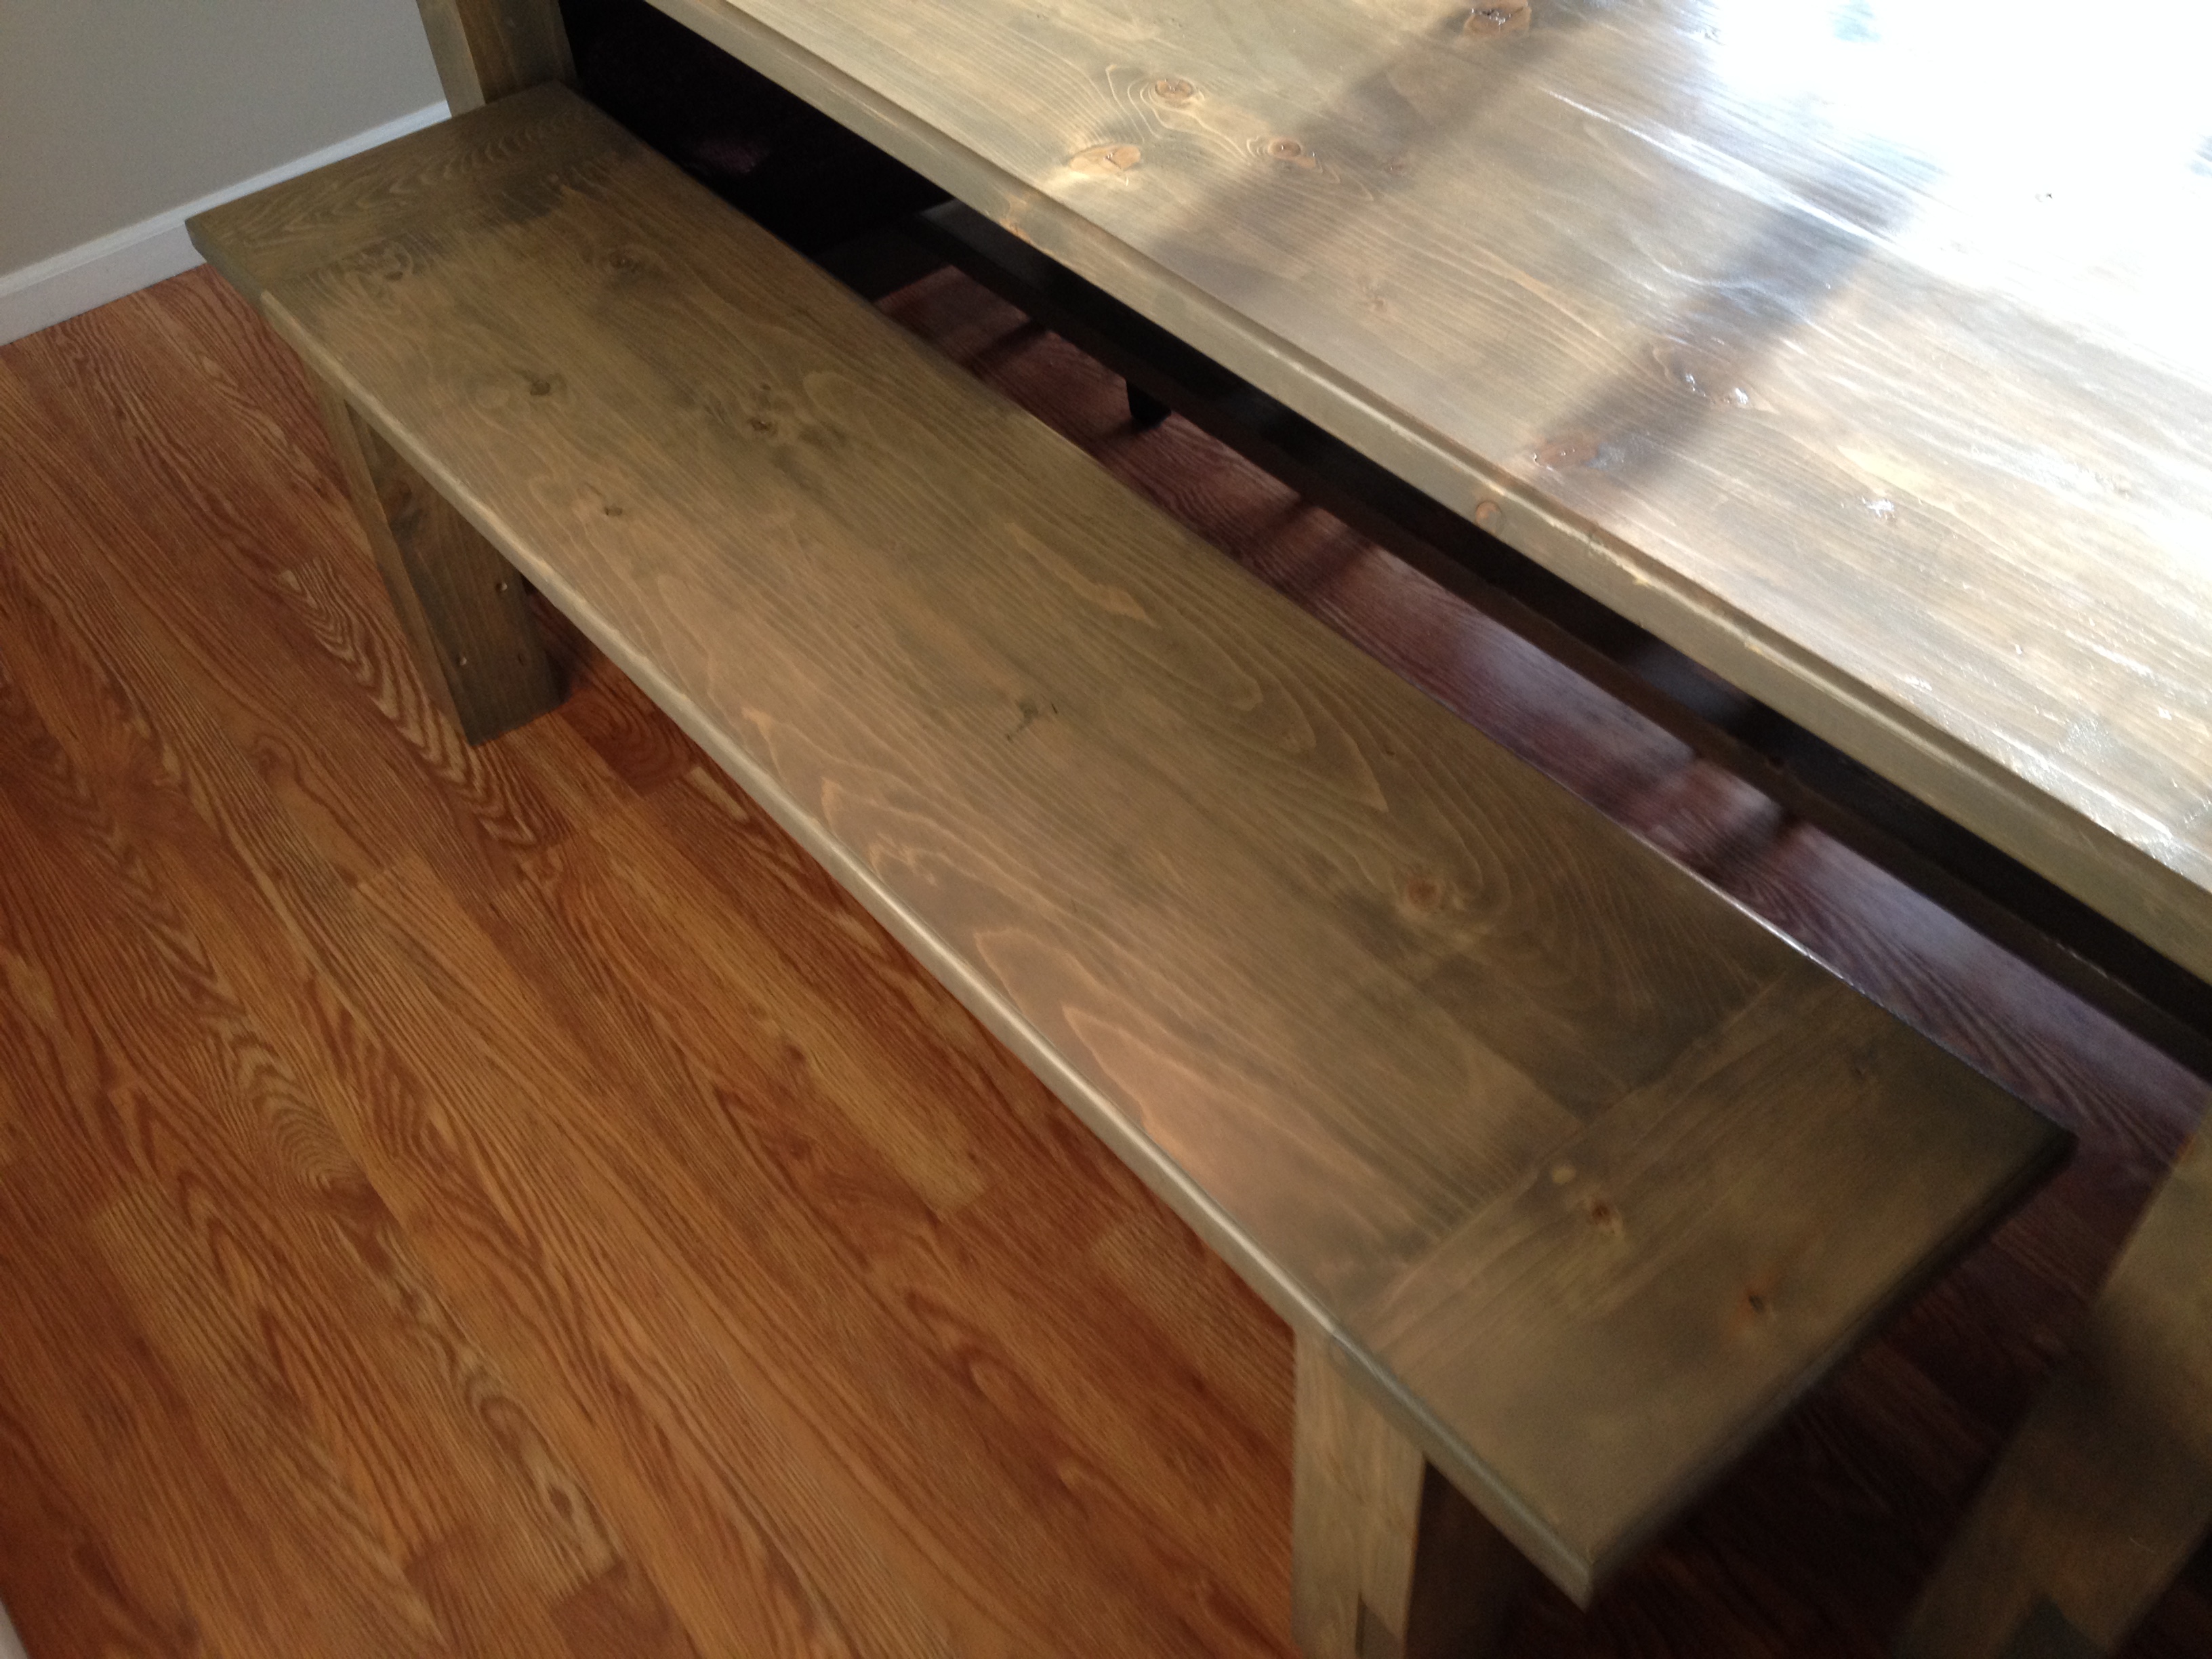
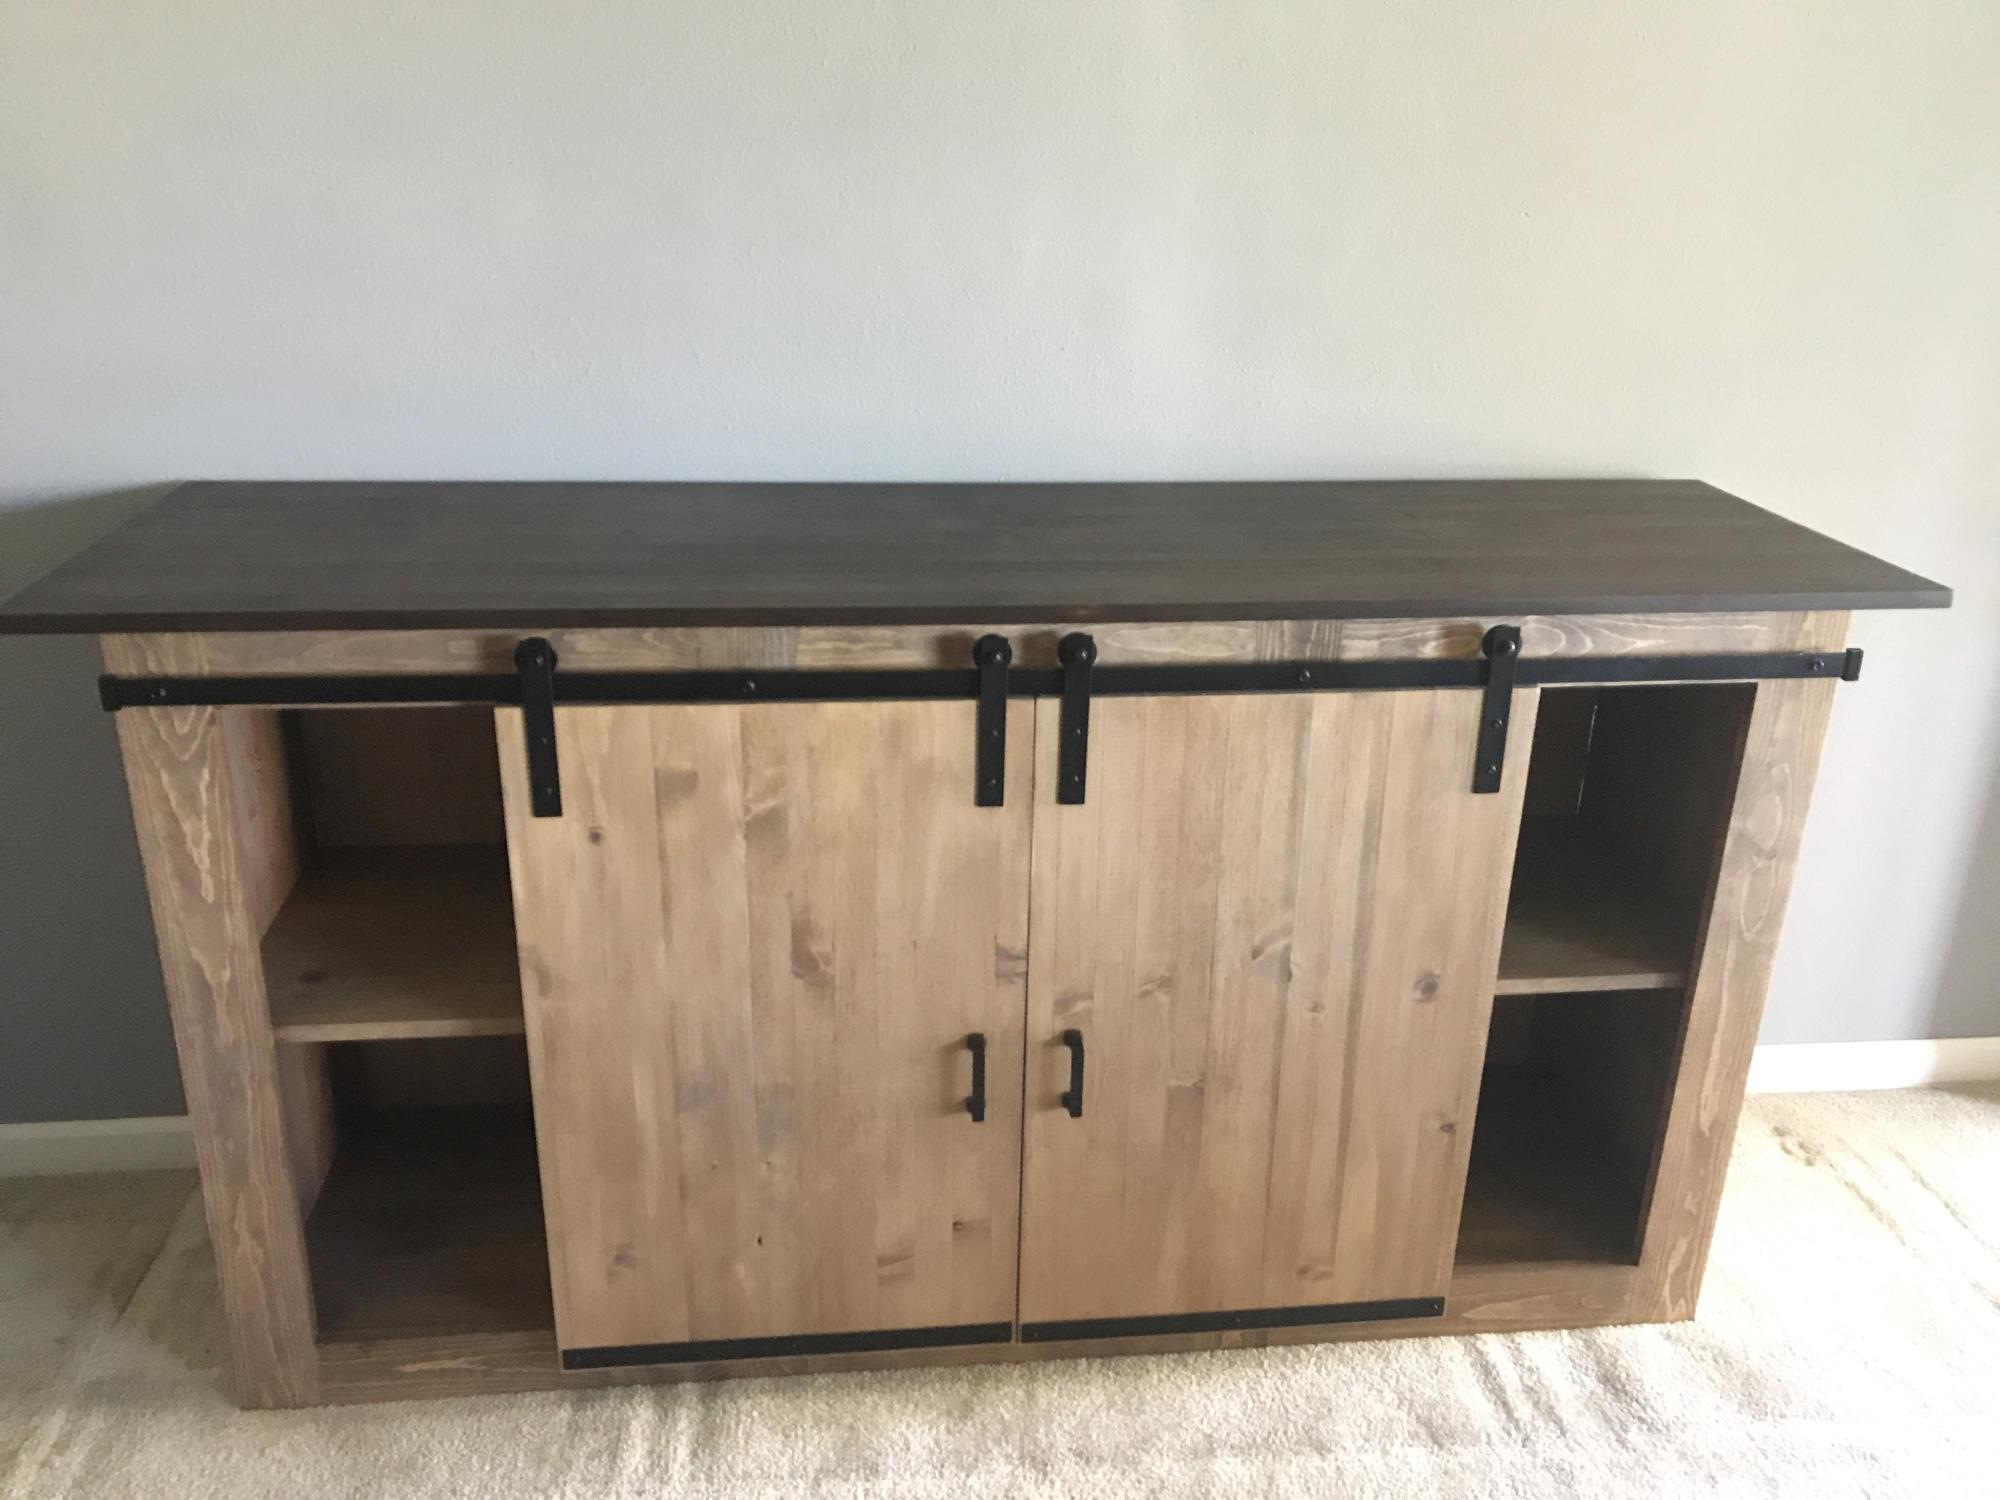
TV console
It took me two months to build as I only worked few hours over weekends. The most challenging part was the hardware. After a lot of trial and error figured out something that works.
Built from Plan(s)
Estimated Cost
$350
Estimated Time Investment
Week Long Project (20 Hours or More)
Finish Used
Minwax preconditioner, stain and polyurathene (semi gloss finish)
Recommended Skill Level
Intermediate
2x4 Adirondack Chairs
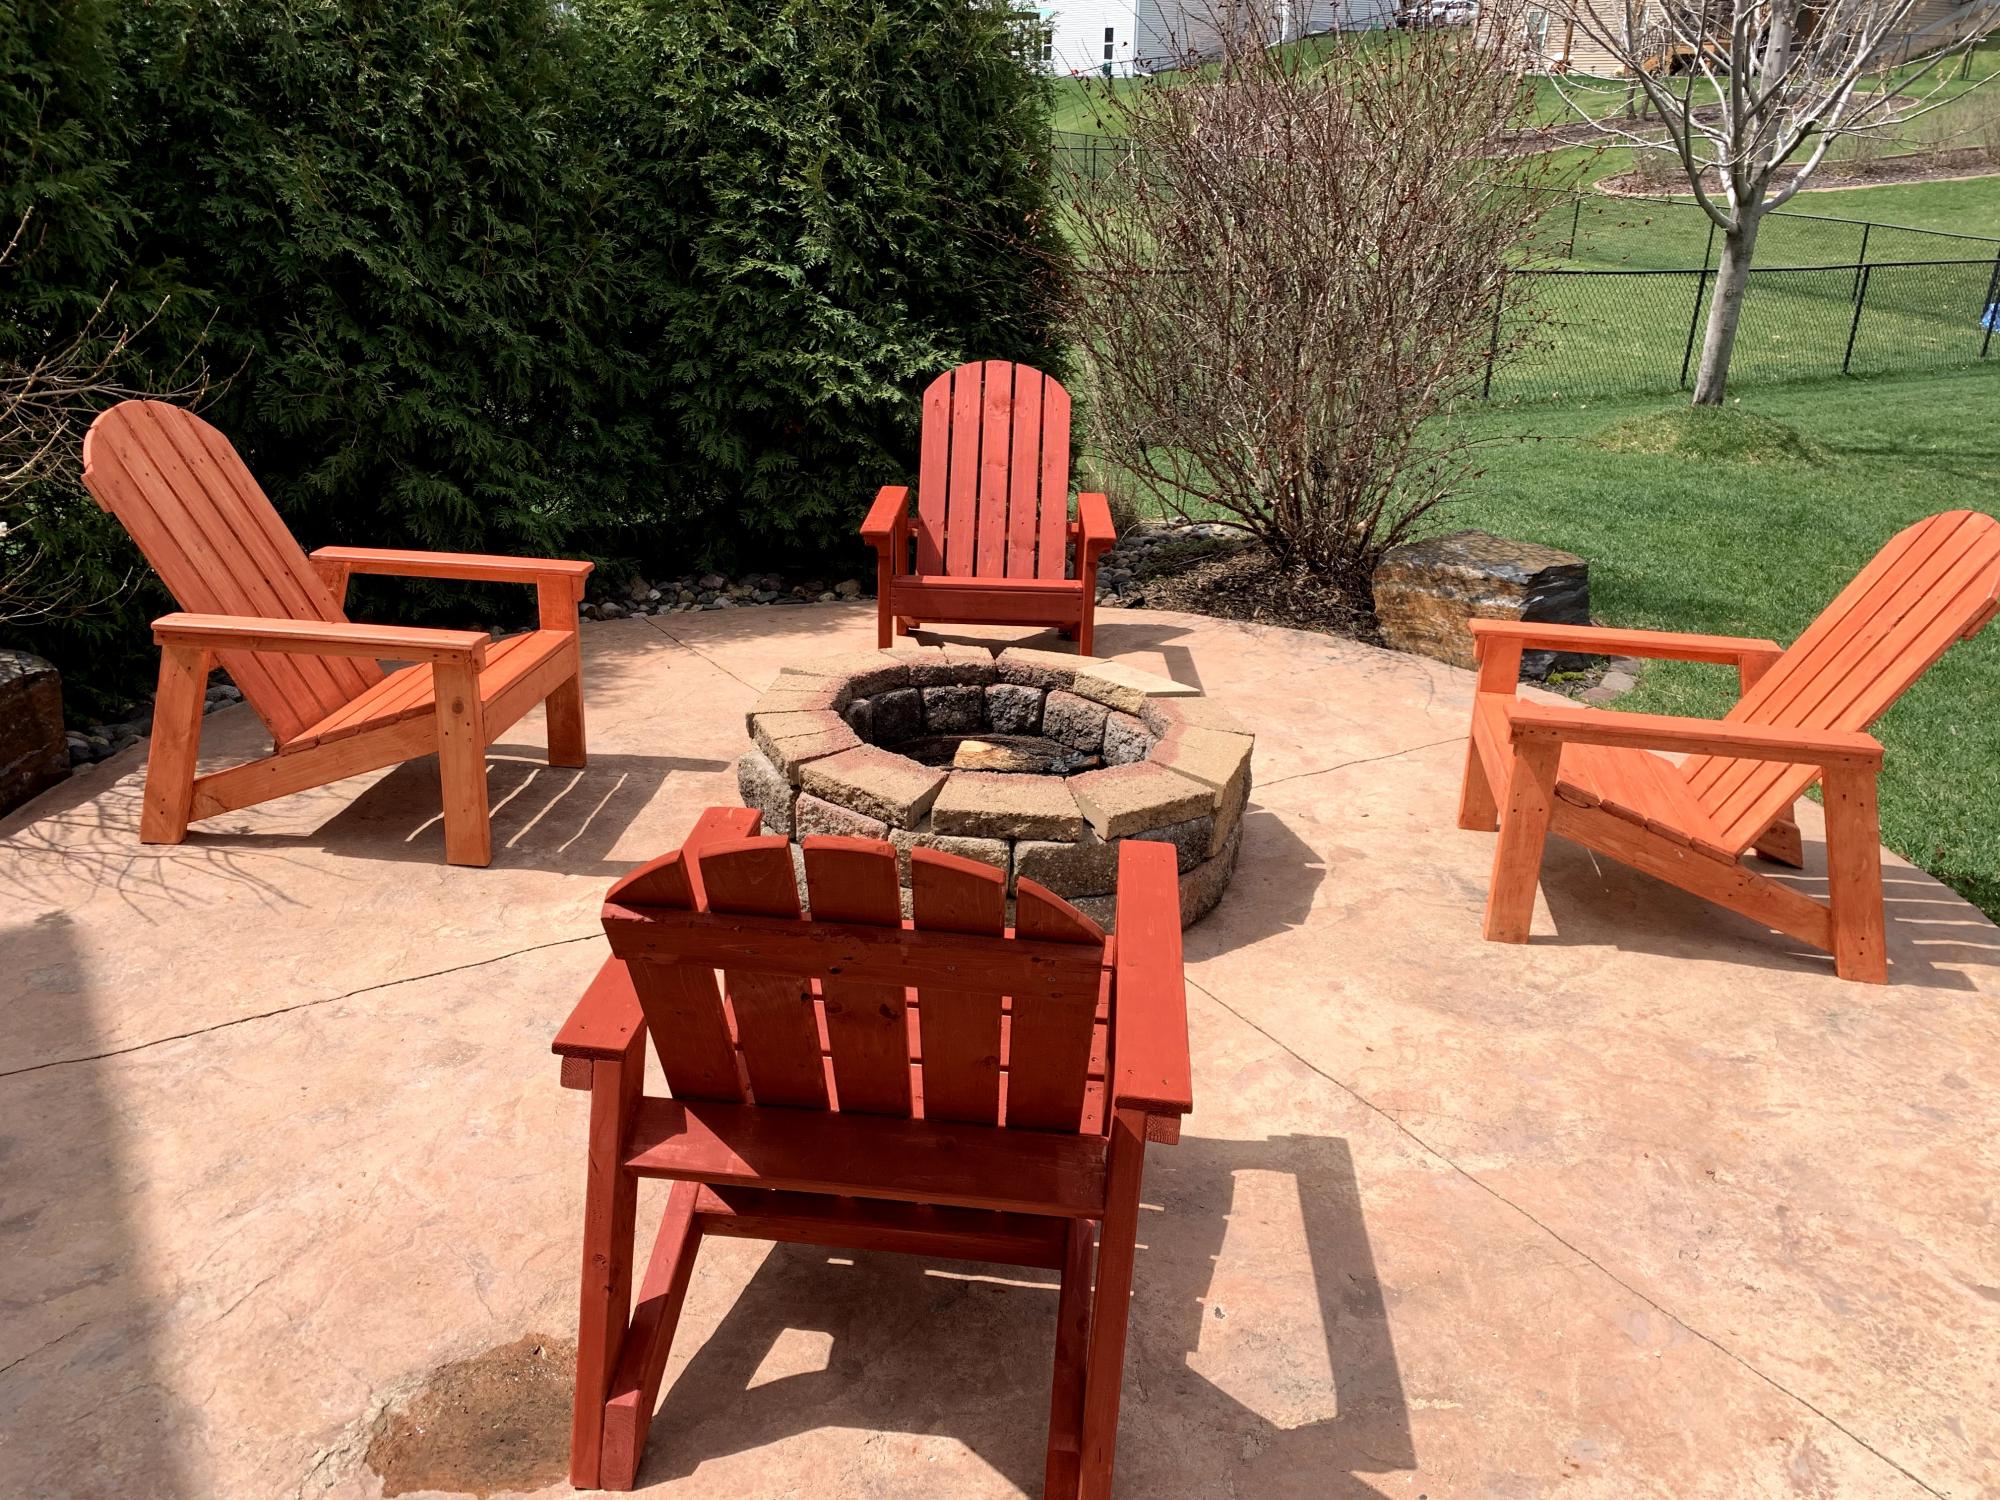
Great plans! Made 4 of these. Only modification was I added a little piece under the arm rests to help cover the front of the arm supports
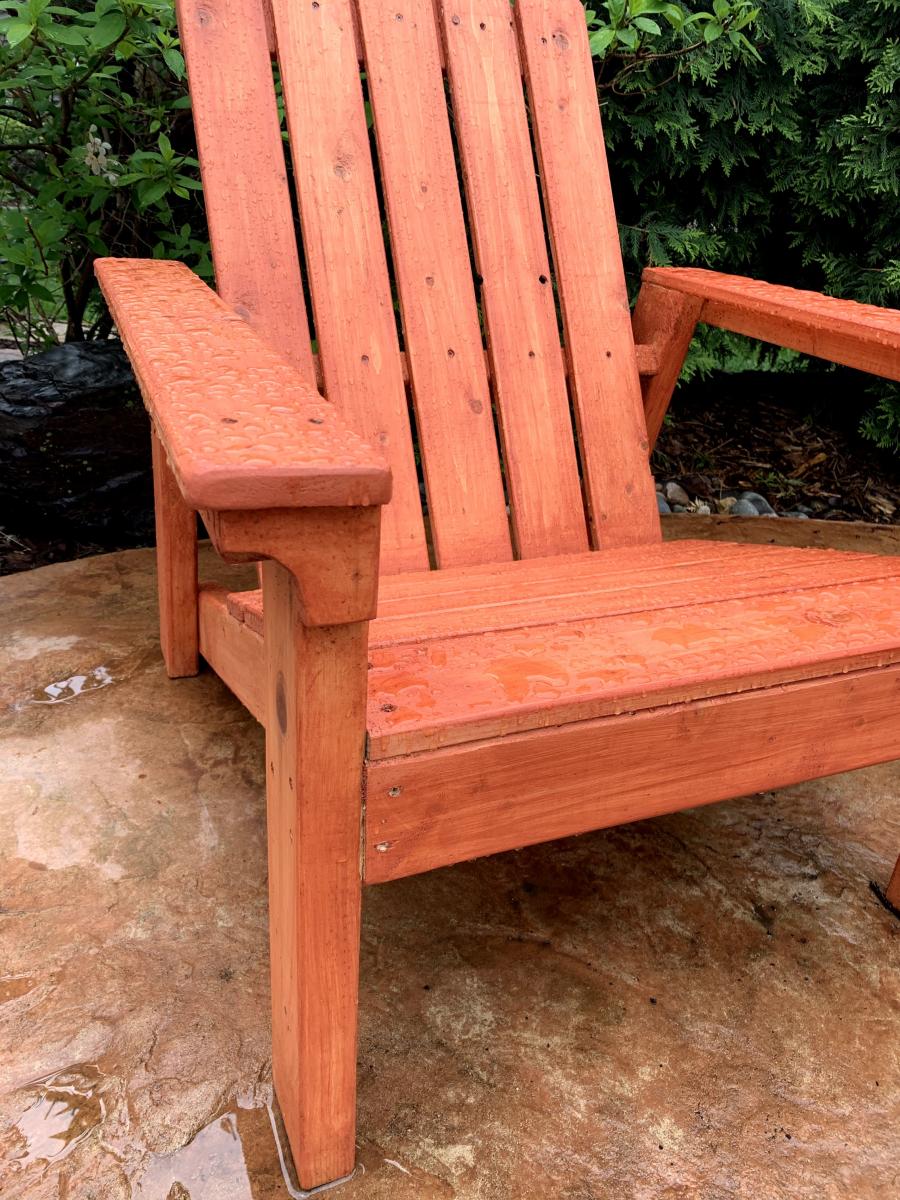
Built from Plan(s)
Estimated Cost
$125 for all 4
Estimated Time Investment
Day Project (6-9 Hours)
Recommended Skill Level
Intermediate
Little Adirondack Chair
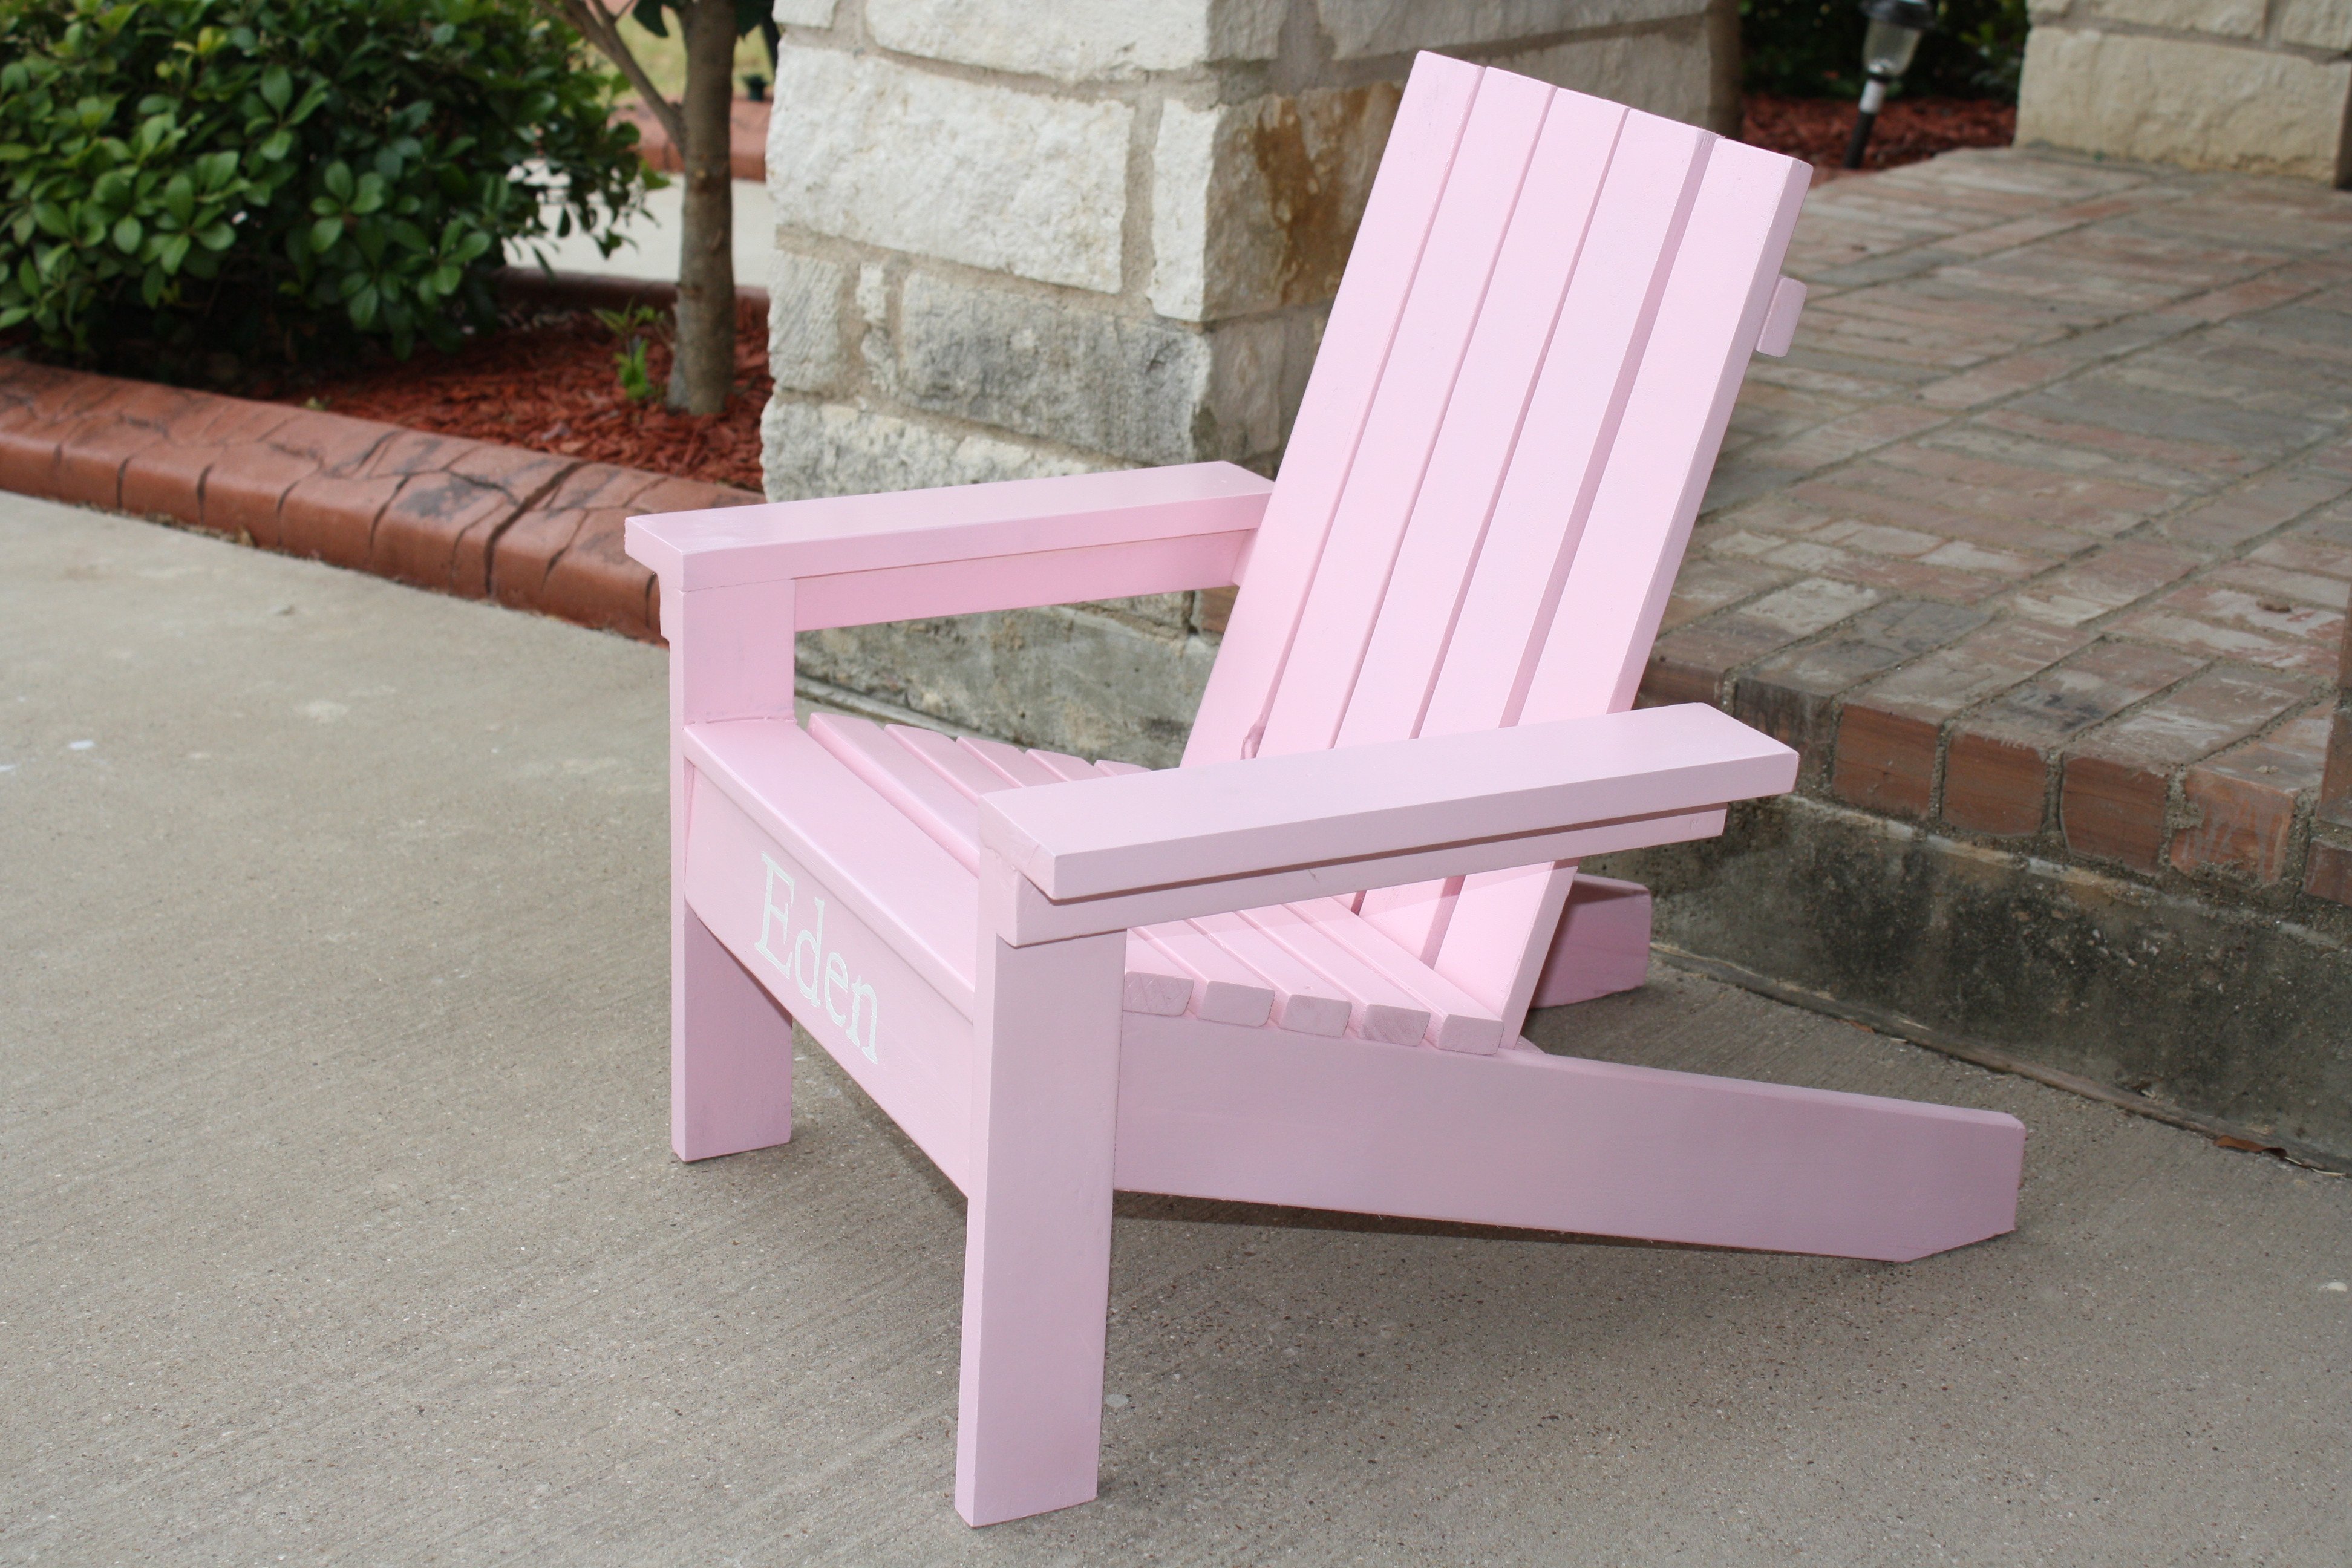
I built this sweet adirondack chair for a friend's 1st birthday. The plans are simple and easy to follow and we already have added at least two more of these to our to-do list! The angled cuts on the stringers were intimidating, but I just took my time with a hand saw and am happy with the results.
The use of furring strips meant tons of sanding and wood filler which added a lot of time to the project. All of the screws were countersunk and filled. I sprayed the sides of the boards before assembly for good coverage, but not the face of the boards because I had planned on using the wood filler. If leaving your screws exposed (or if you aren't as sloppy with filler as I am - seriously I have a love/hate relationship with the stuff!), painting first would make things much simpler.
To paint her name, I printed it out then pressed the paper over the apron of the chair and used a pen to write over the outline of the name. This left an indent which I was able to brush inside of with a white glossy interior/exterior paint we had on hand.
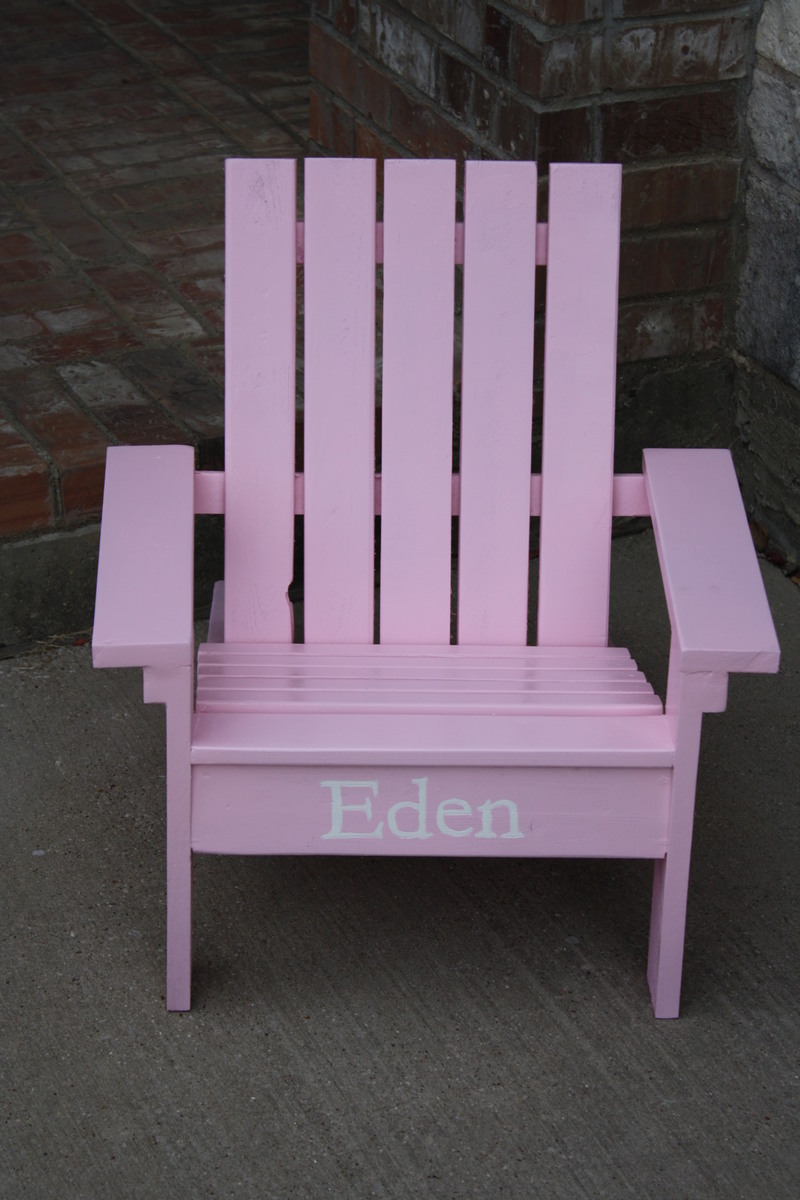
Estimated Time Investment
Afternoon Project (3-6 Hours)
Finish Used
I used Rustoleum sprays paints - Primer, Candy Pink Gloss, and Clear Gloss.
Recommended Skill Level
Beginner
Doll House

My hubby followed the plans. He made the stairs a bit different. The plans were excellent. It is so sturdy. We had these magnetic mirrors designed for a school locker, so we put those on both sides of the house. The monogram, we picked up an oval wooden piece and the letter P for a buck each and painted them. Looks awesome! Giving this to my niece as she turns today! Thank you! Thank you! Thank you!
Estimated Cost
Around 80
Estimated Time Investment
Day Project (6-9 Hours)
Recommended Skill Level
Beginner
Comments

Sat, 05/10/2014 - 18:17
You did a great job...I had a
You did a great job...I had a hard time with the roof.
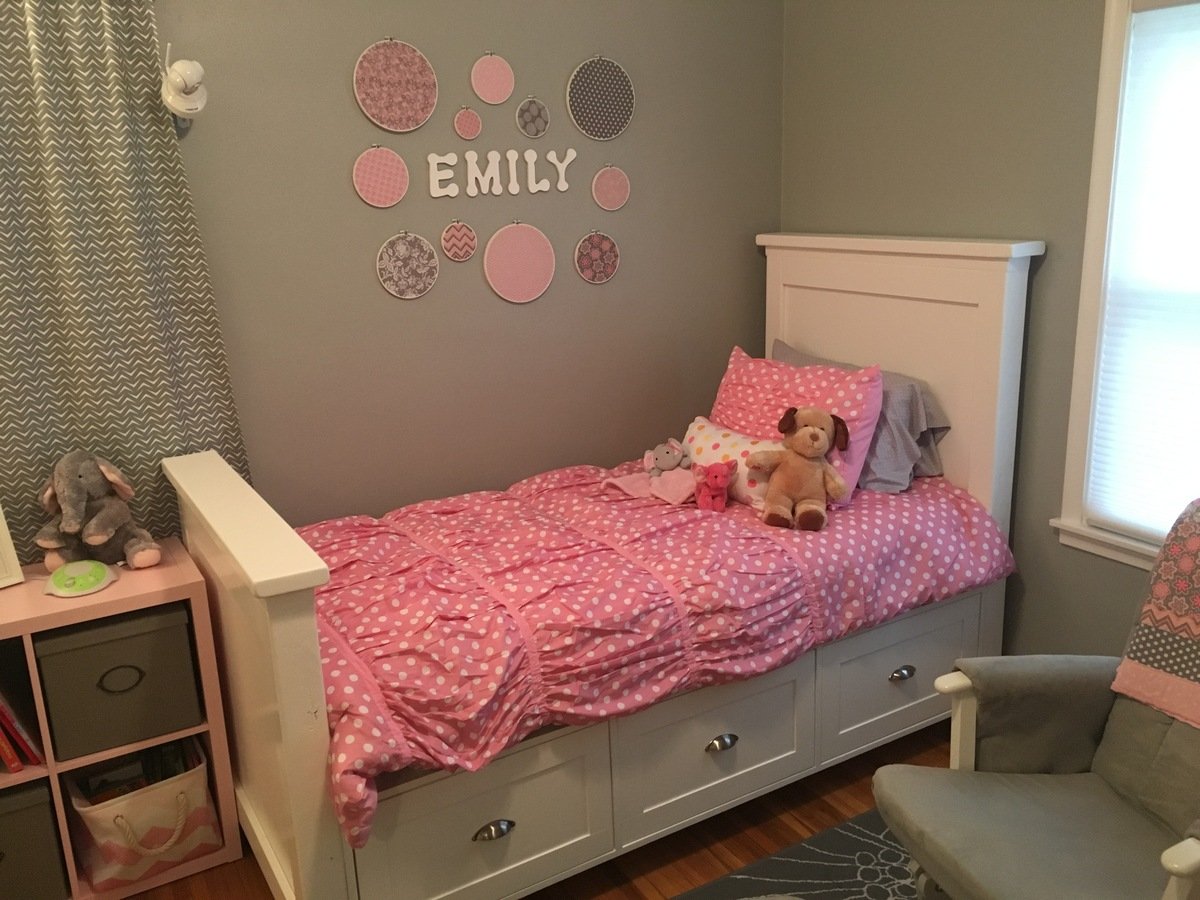
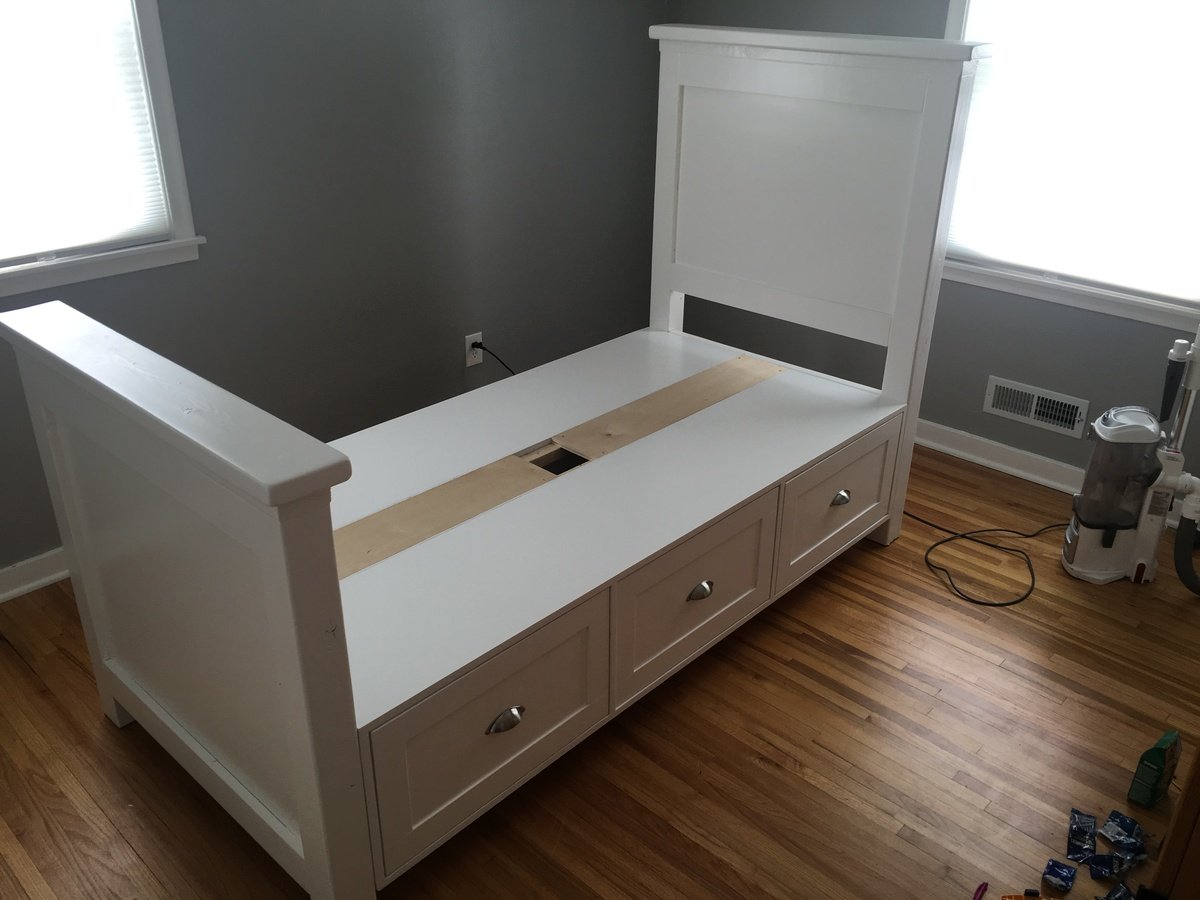
Twin size Farmhouse bed with storage drawers!
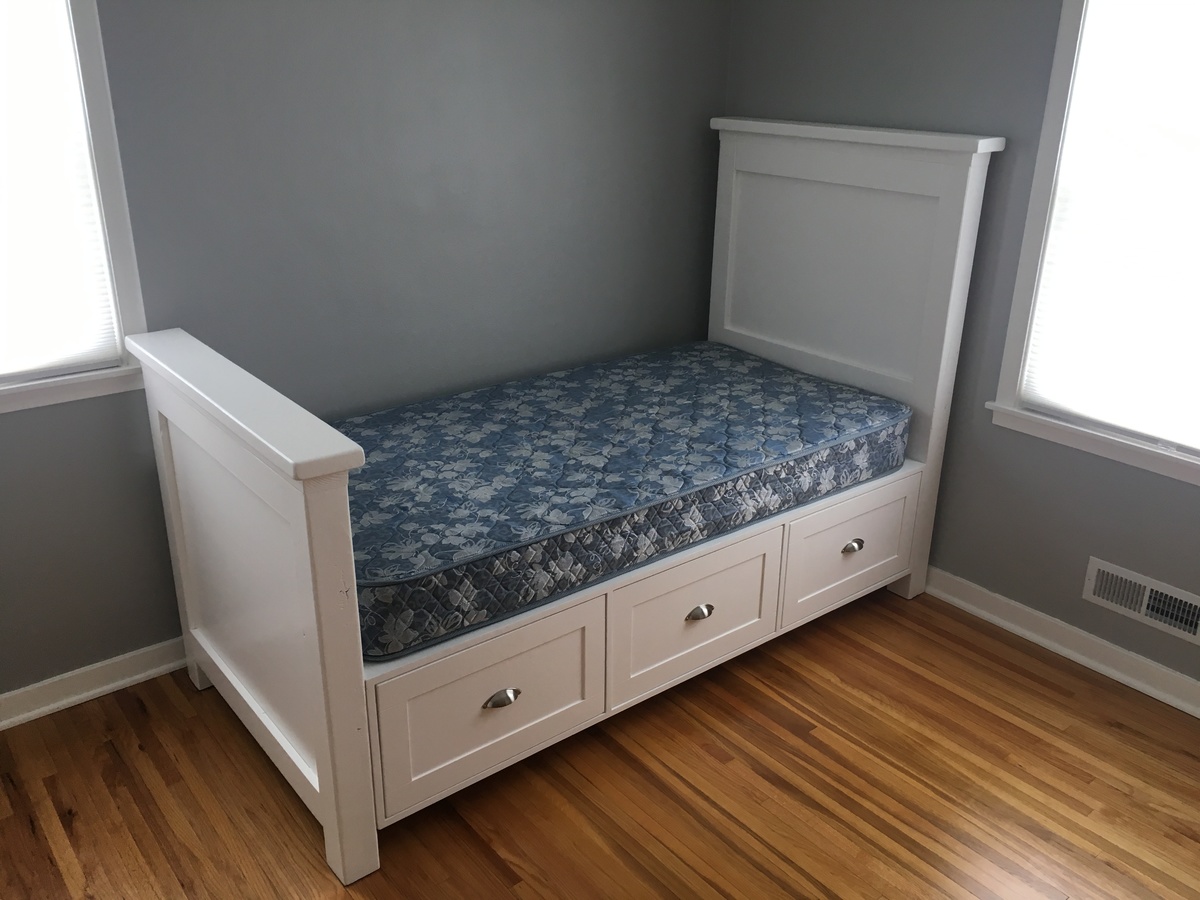
This bed was made from Ana White's plan for the farmhouse bed with storage drawers (twin size). I made this bed for my daughter as her first "big girl" bed. I did modify the plan somewhat to make the footboard taller and act as a bed rail on the end of the bed. This bed came together really well! Plans were great!
Built from Plan(s)
Estimated Cost
$350
Estimated Time Investment
Week Long Project (20 Hours or More)
Finish Used
Paint
Recommended Skill Level
Intermediate
Comments

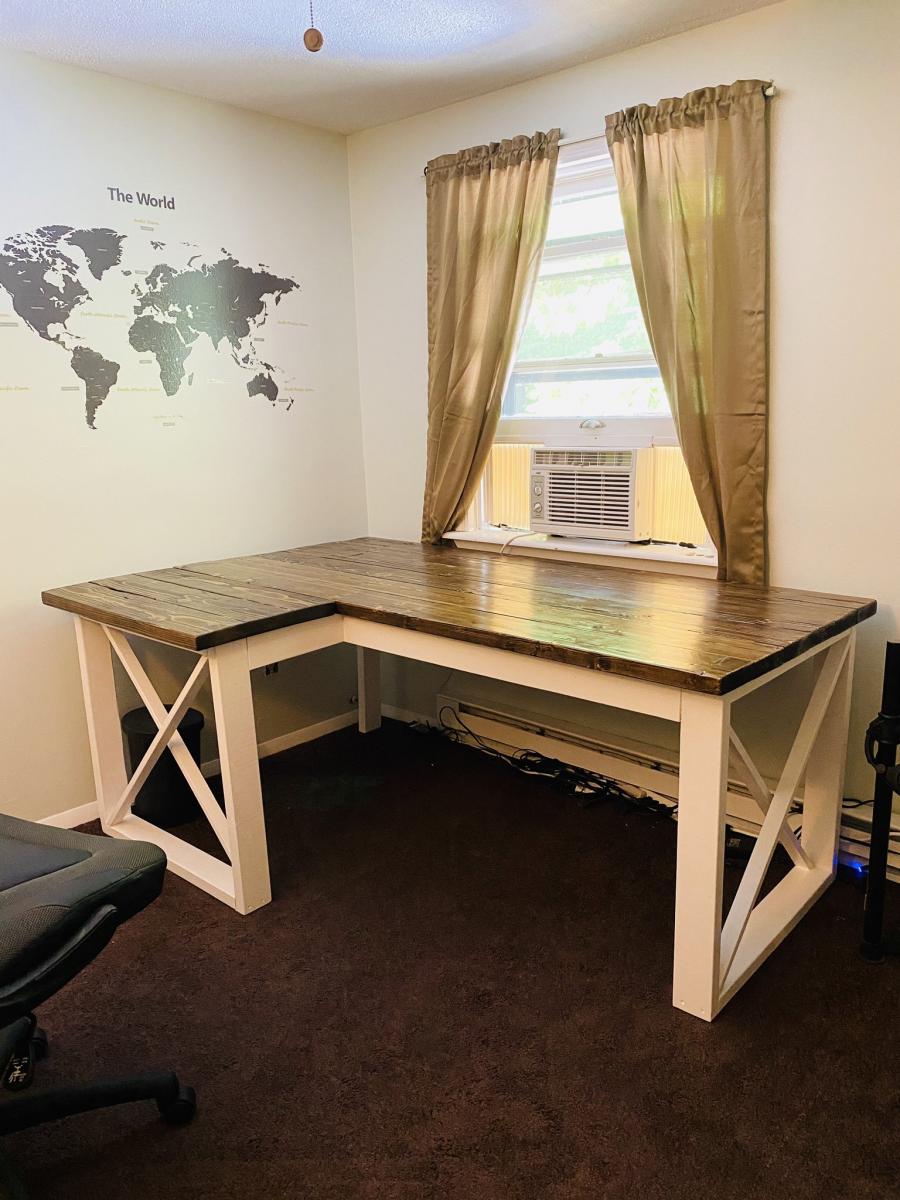
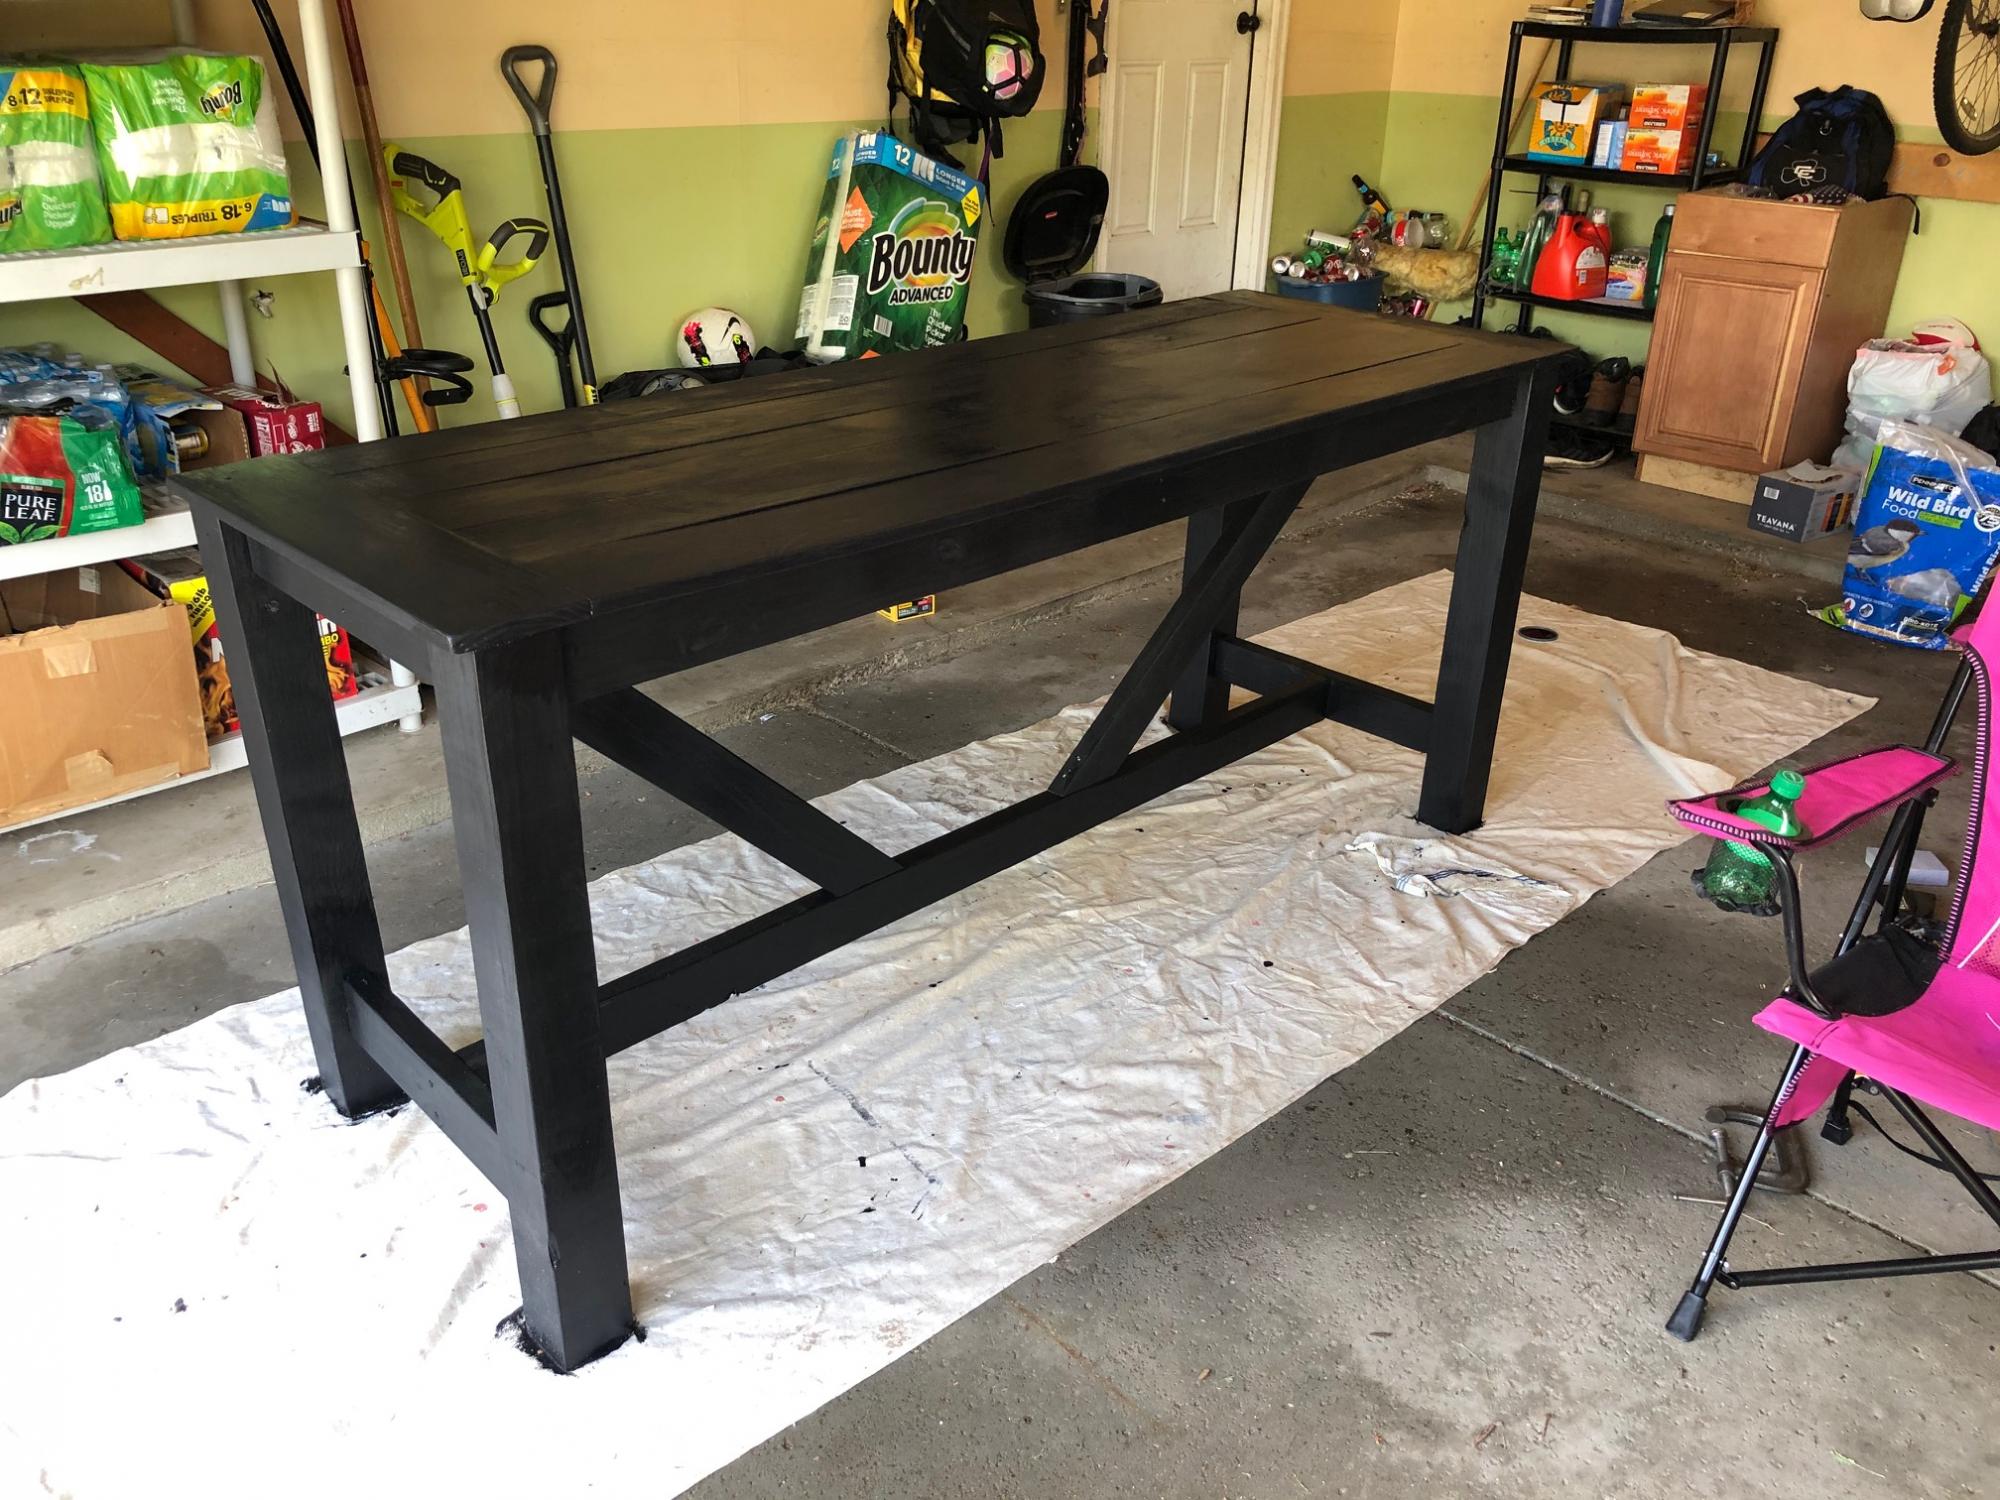
L Shaped Double X Desk
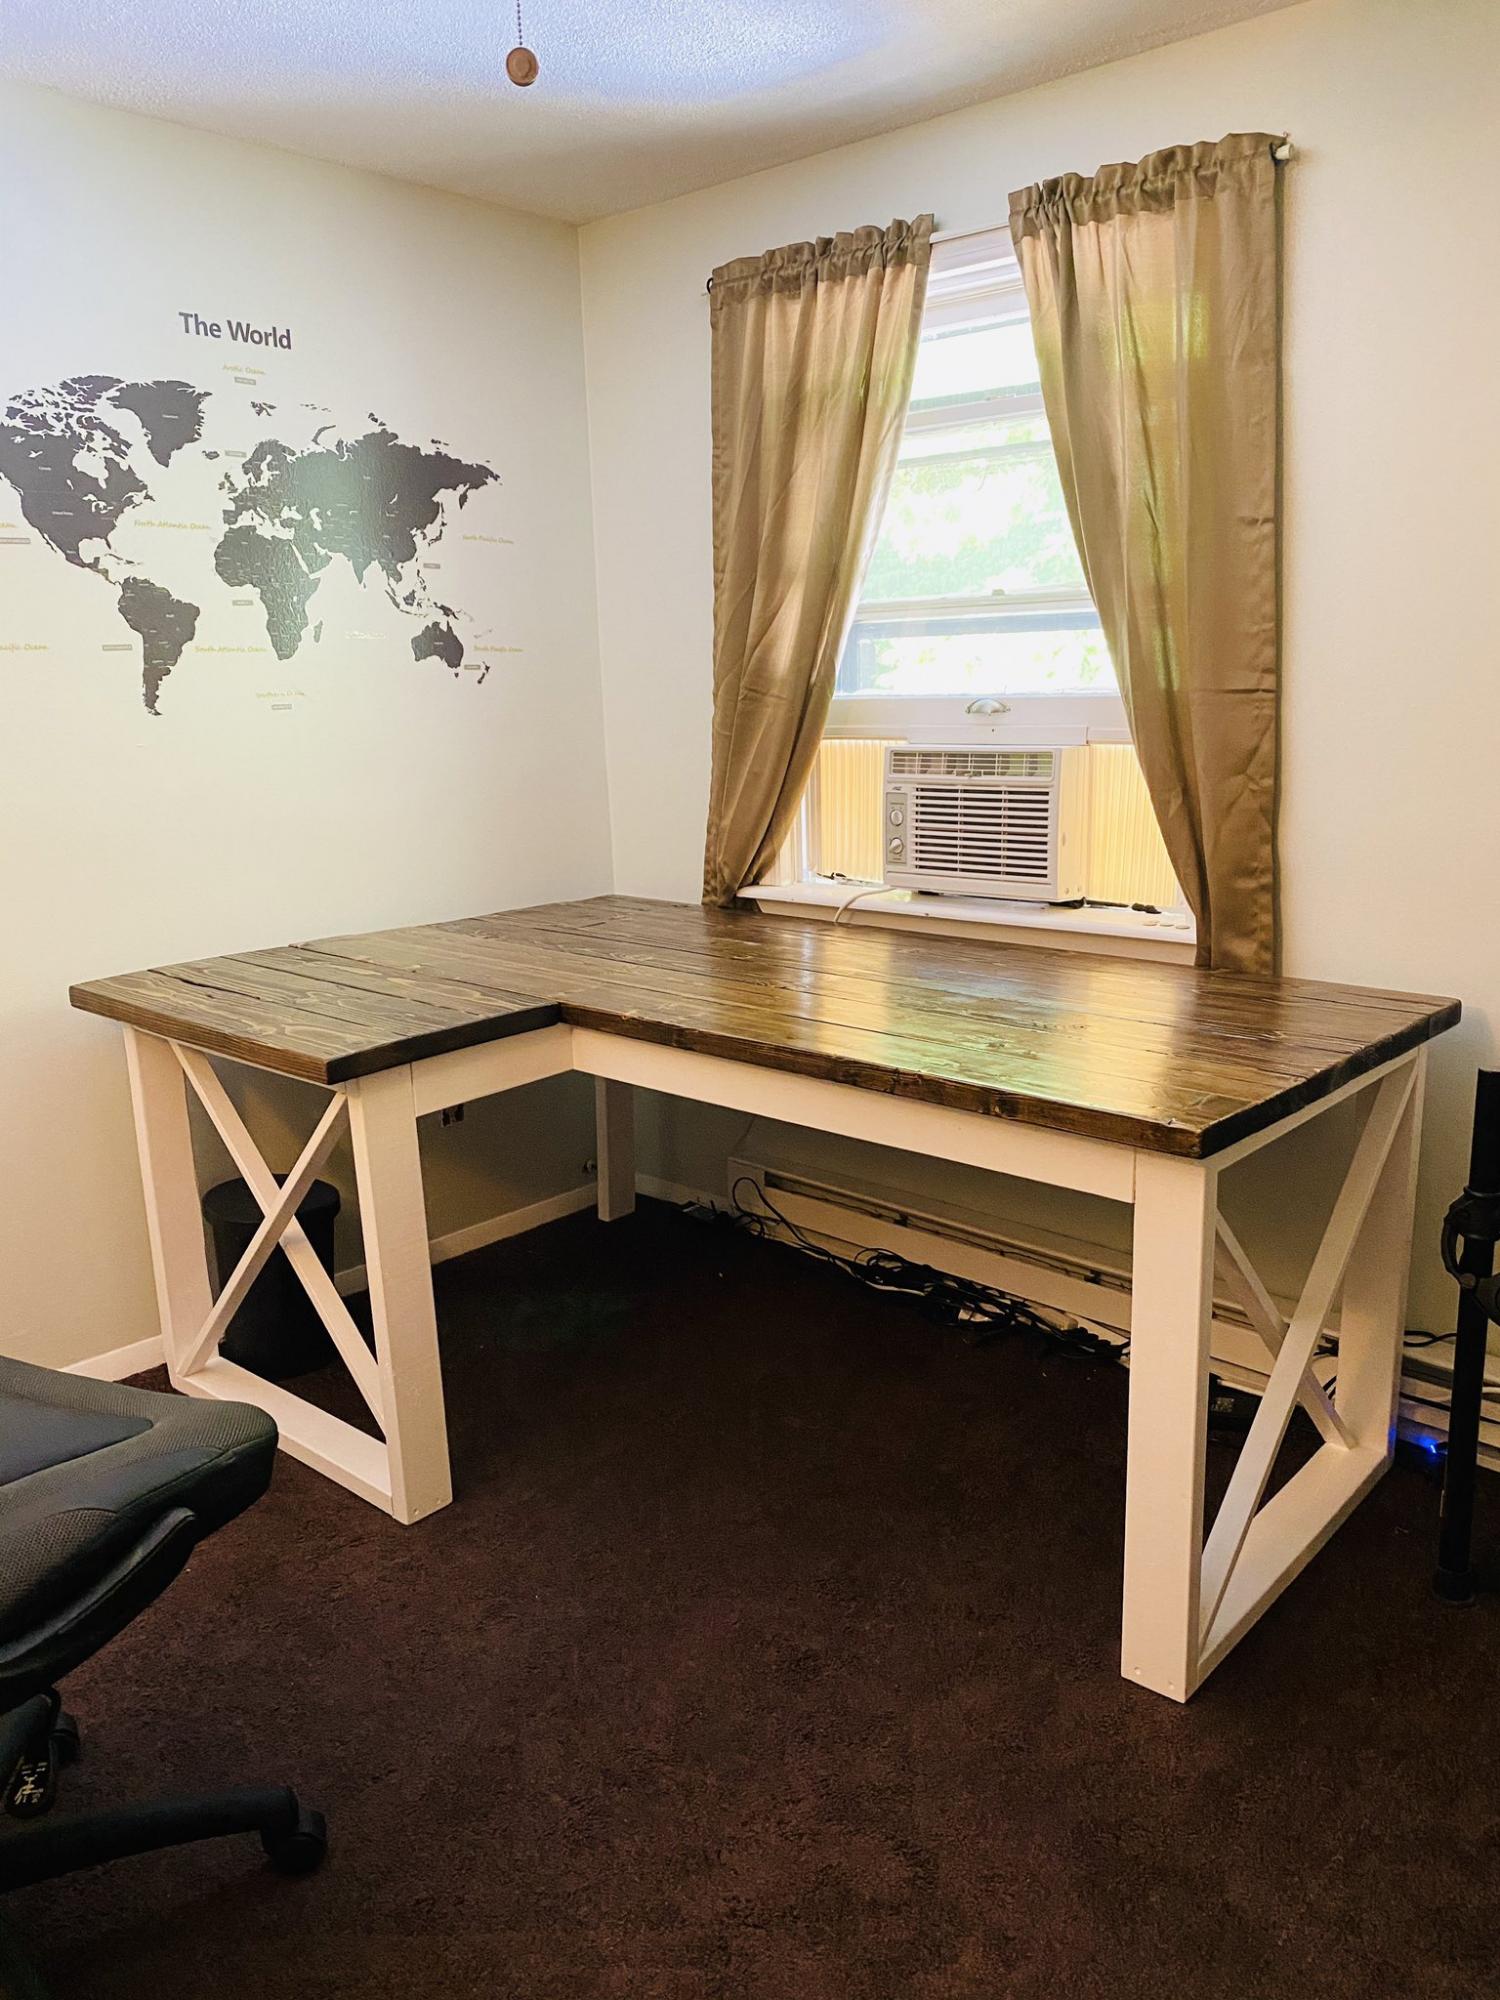
Made the move to working from home because of the pandemic. After 2 months and no end in sight, I decided I needed a better workstation. Built this in about 5 days. Really nice sturdy desk but make sure you measure how big it is first, I think I could have shrank this down by one less 2x6 on the top. It's a very large desk from the plans.
Built from Plan(s)
Estimated Cost
$40
Estimated Time Investment
Weekend Project (10-20 Hours)
Finish Used
Jacobean stain
Recommended Skill Level
Beginner

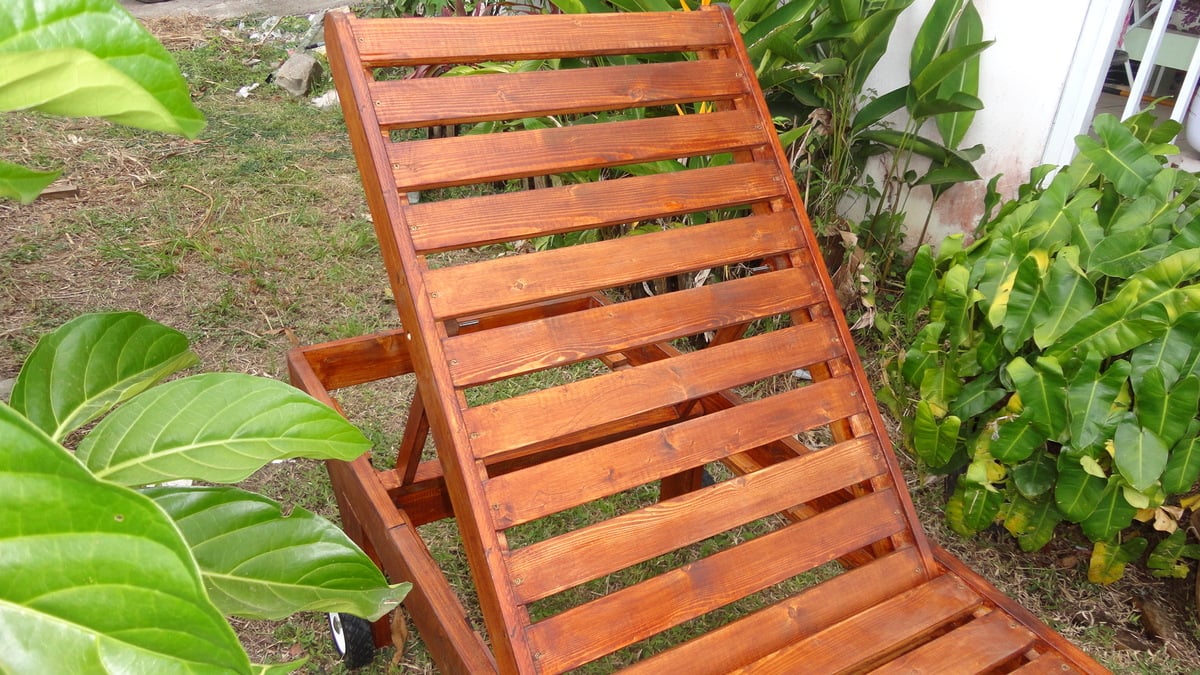
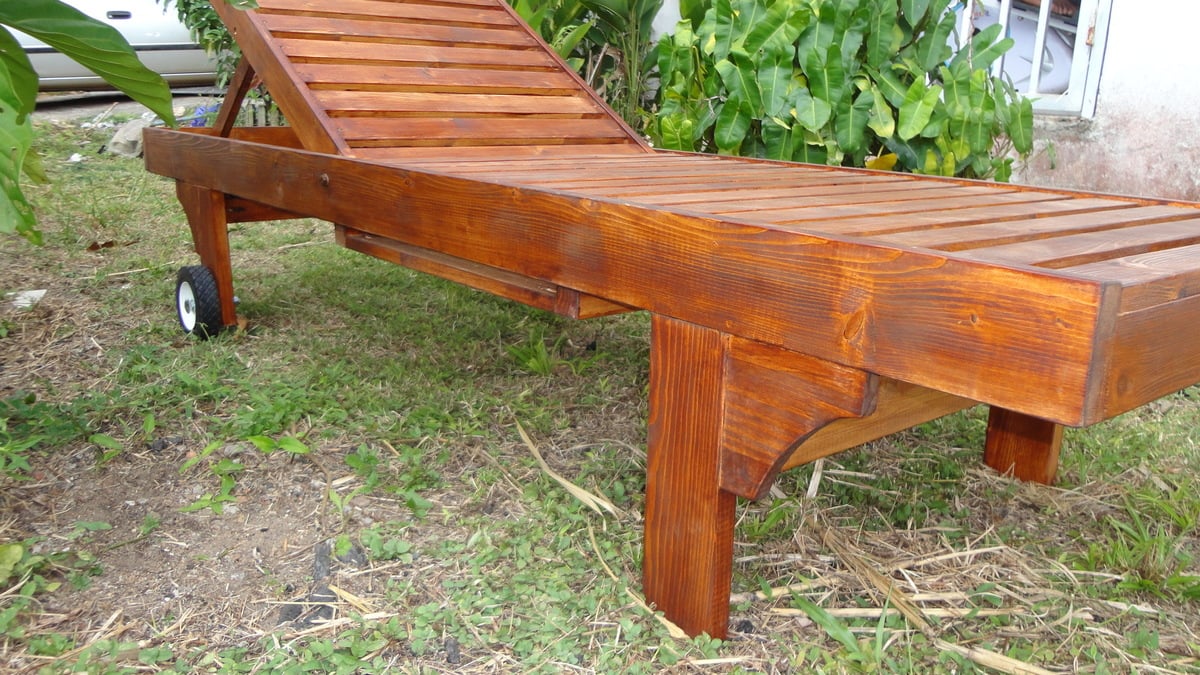
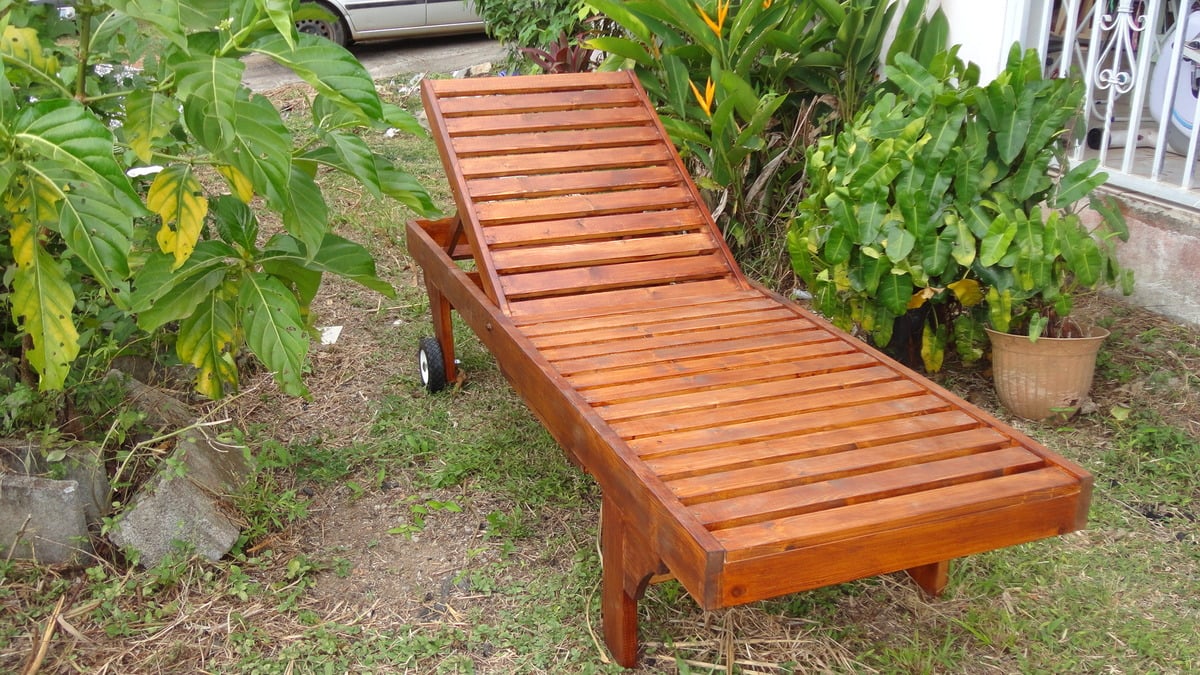
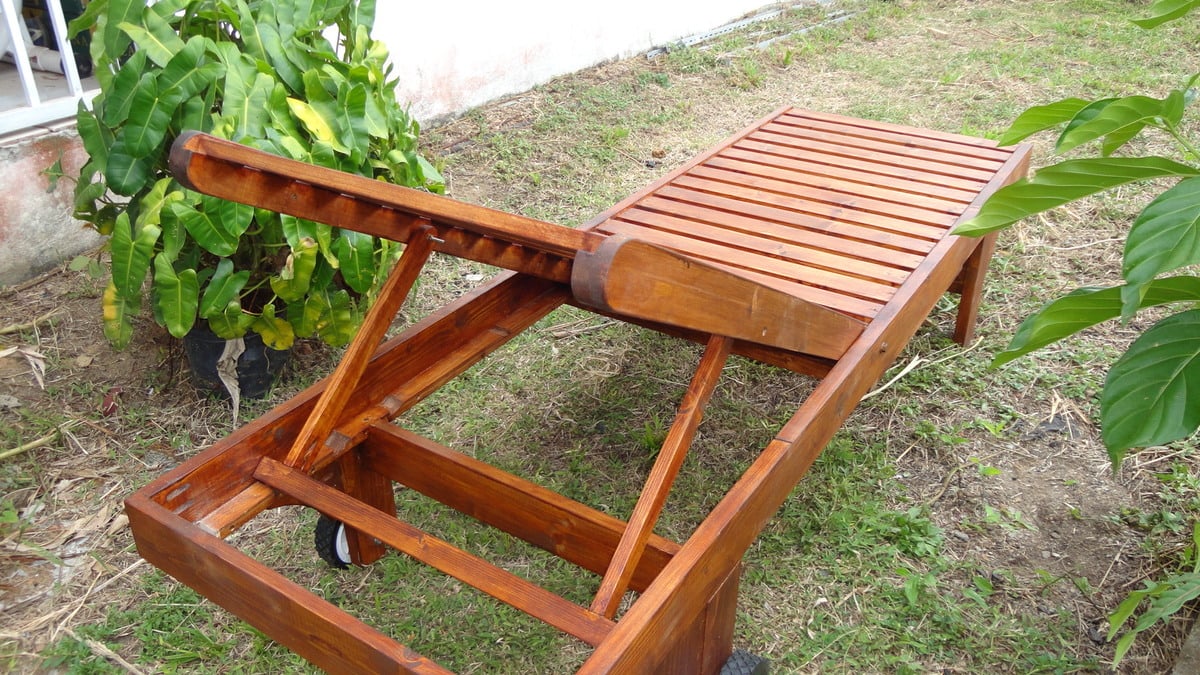
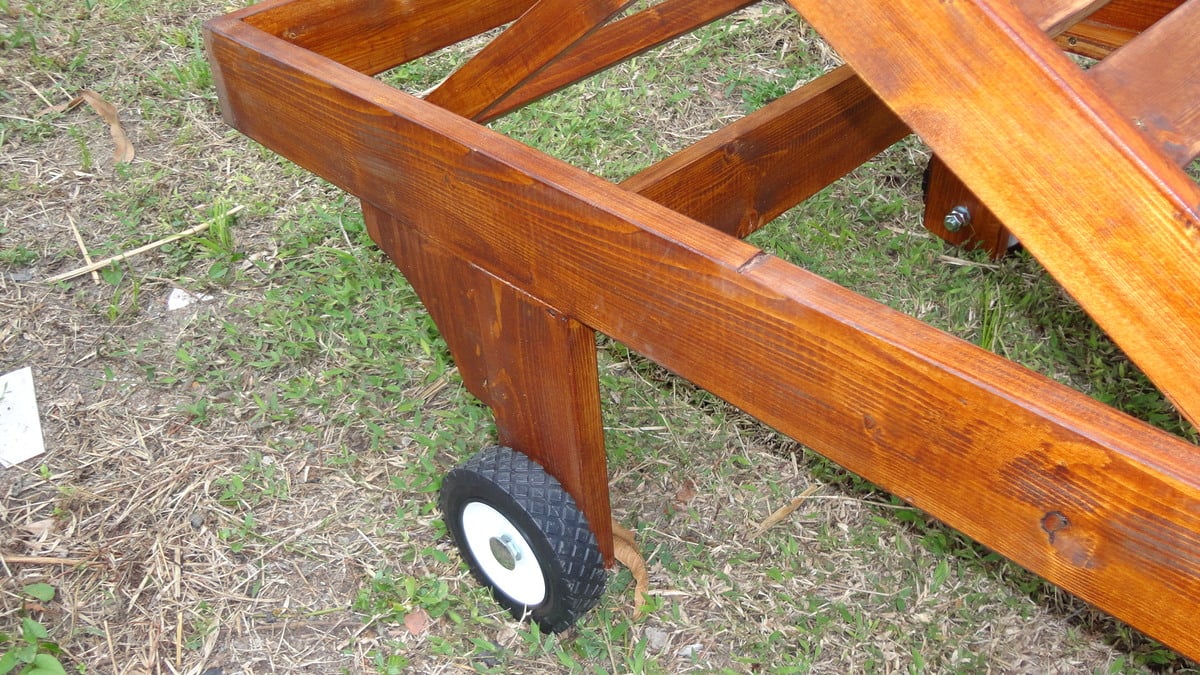
Lounge Chair
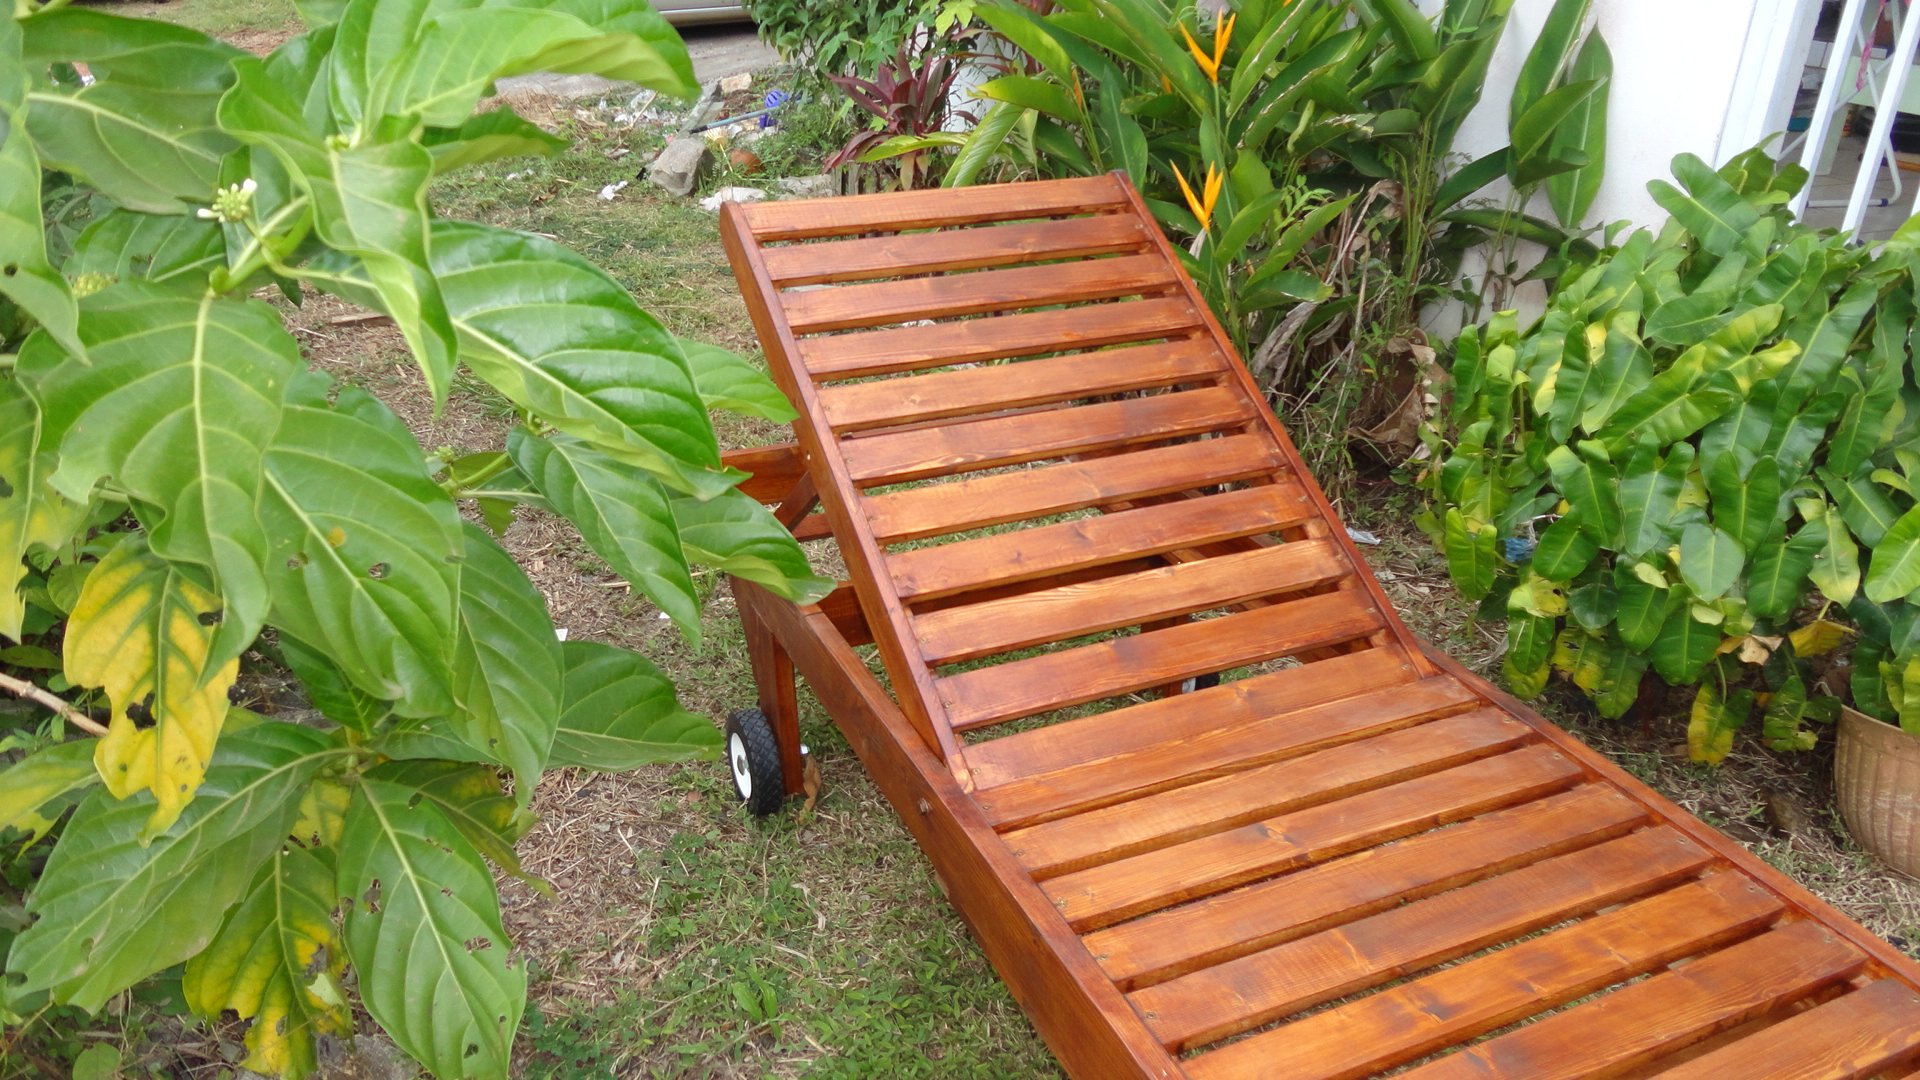
I made this lounge chair from a sketchup file which I found on the Internet; thanks to Ana White site, I discovered the Sketchup software and I learnt to use it. I measured all the elements and thanks to the plans of lounge chairs of the site, I was able to build that.I have to buy some plywood to make the tray and put it under the chair.
It is a present for my mother. I am very happy of the result.
.
Estimated Time Investment
Weekend Project (10-20 Hours)
Finish Used
Teck color lasure, 3 coats
Recommended Skill Level
Beginner
Comments
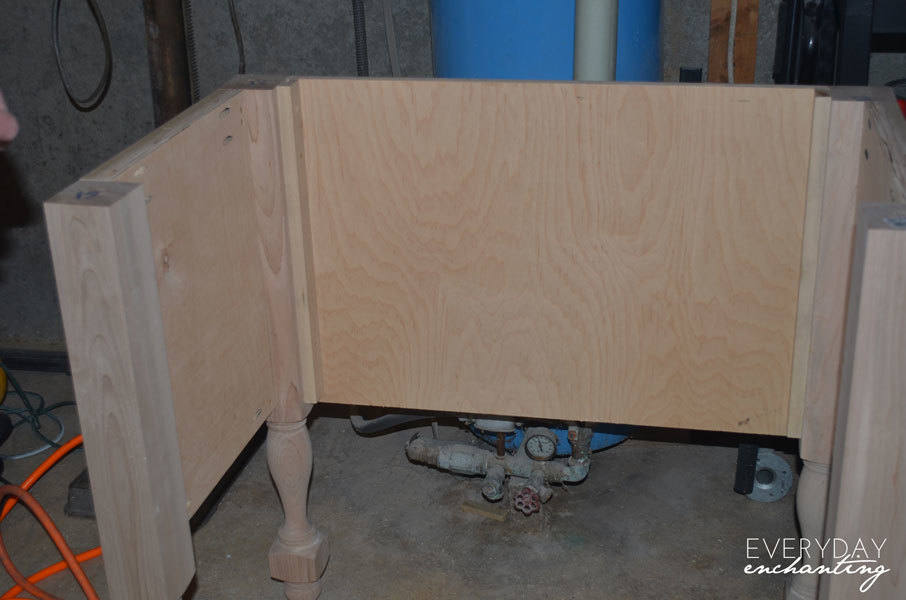
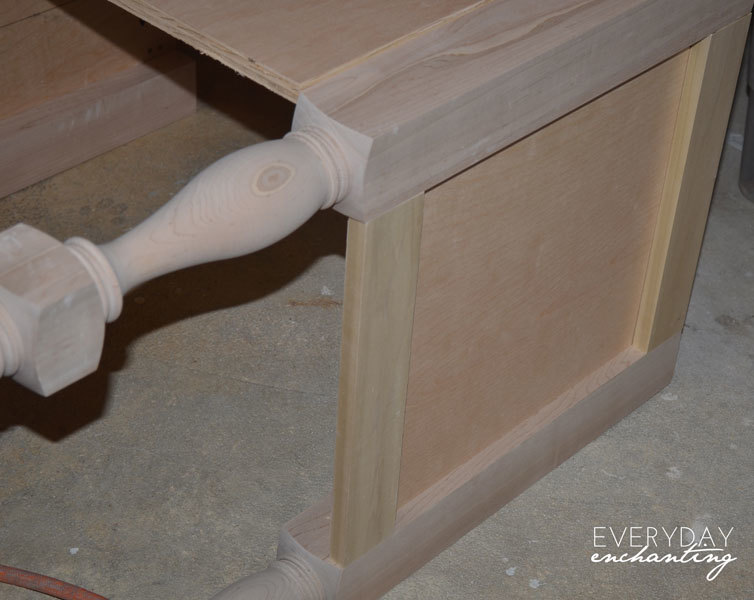
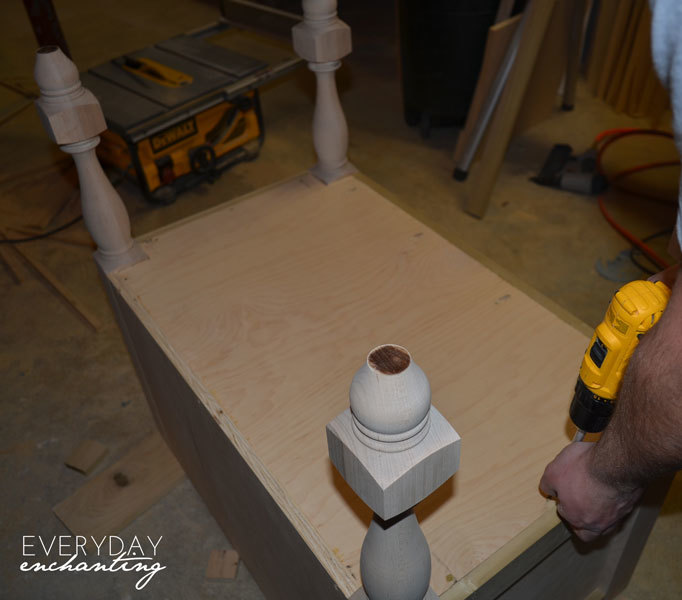
Modified Turned Leg Vanity
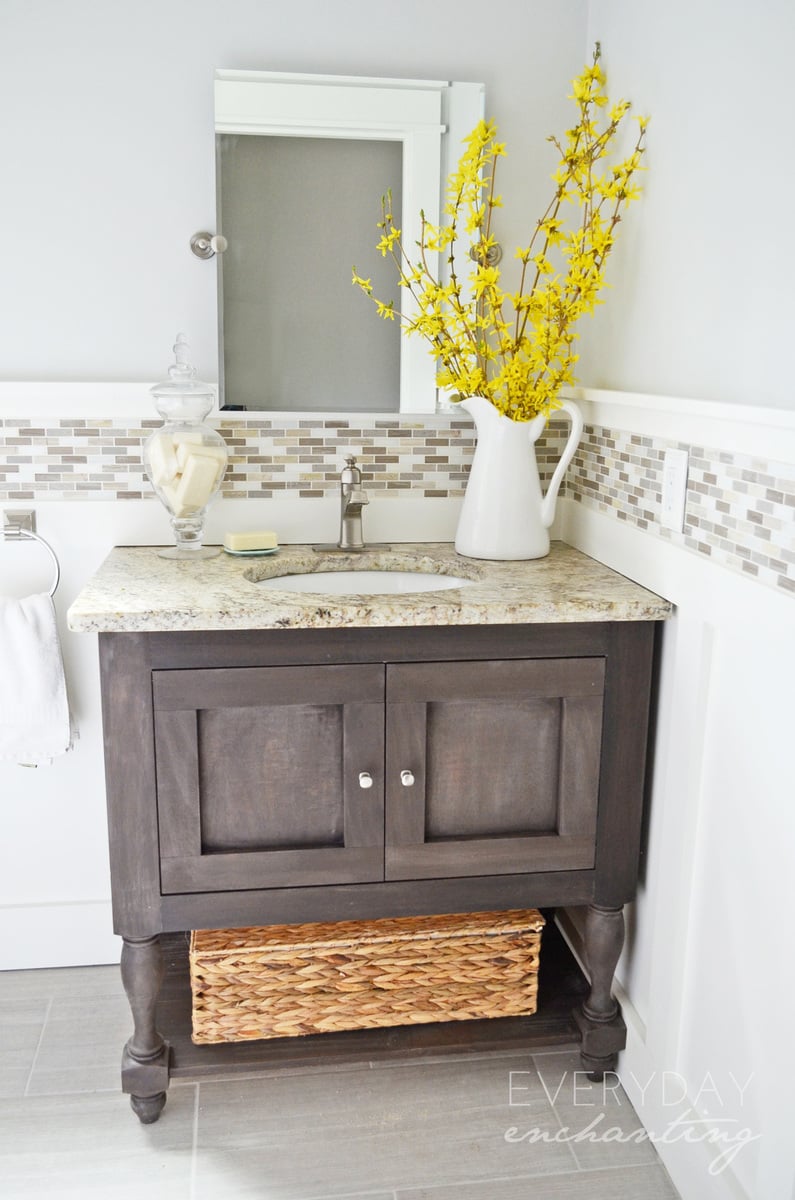
After falling in love with the Newport Vanity from Pottery Barn, I knew we would have to DIY it, since the original was not in our budget. I came across the plans from Ana, and off we went! We modified the plans a bit to fit our existing granite countertop- we didn't have space for the drawers, unfortunately. However, we used our Kreg Jig whenever possible, and it made the project very easy!
http://www.everydayenchanting.com/diy-pottery-barn-inspired-sink-consol…
Built from Plan(s)
Estimated Cost
$100
Estimated Time Investment
Afternoon Project (3-6 Hours)
Finish Used
Minwax Waterbased Wood Stain White Base (tinted Slate at the paint counter) wiped away quickly- a coat of Kona by Rustoleum applied while the slate stain was still wet. Kona was allowed to sit longer.
Recommended Skill Level
Intermediate
Comments


Wed, 11/08/2017 - 05:25
Fair question. Especially
Fair question. Especially when it costs over $25 for Osborne to ship the legs to me via UPS ground.
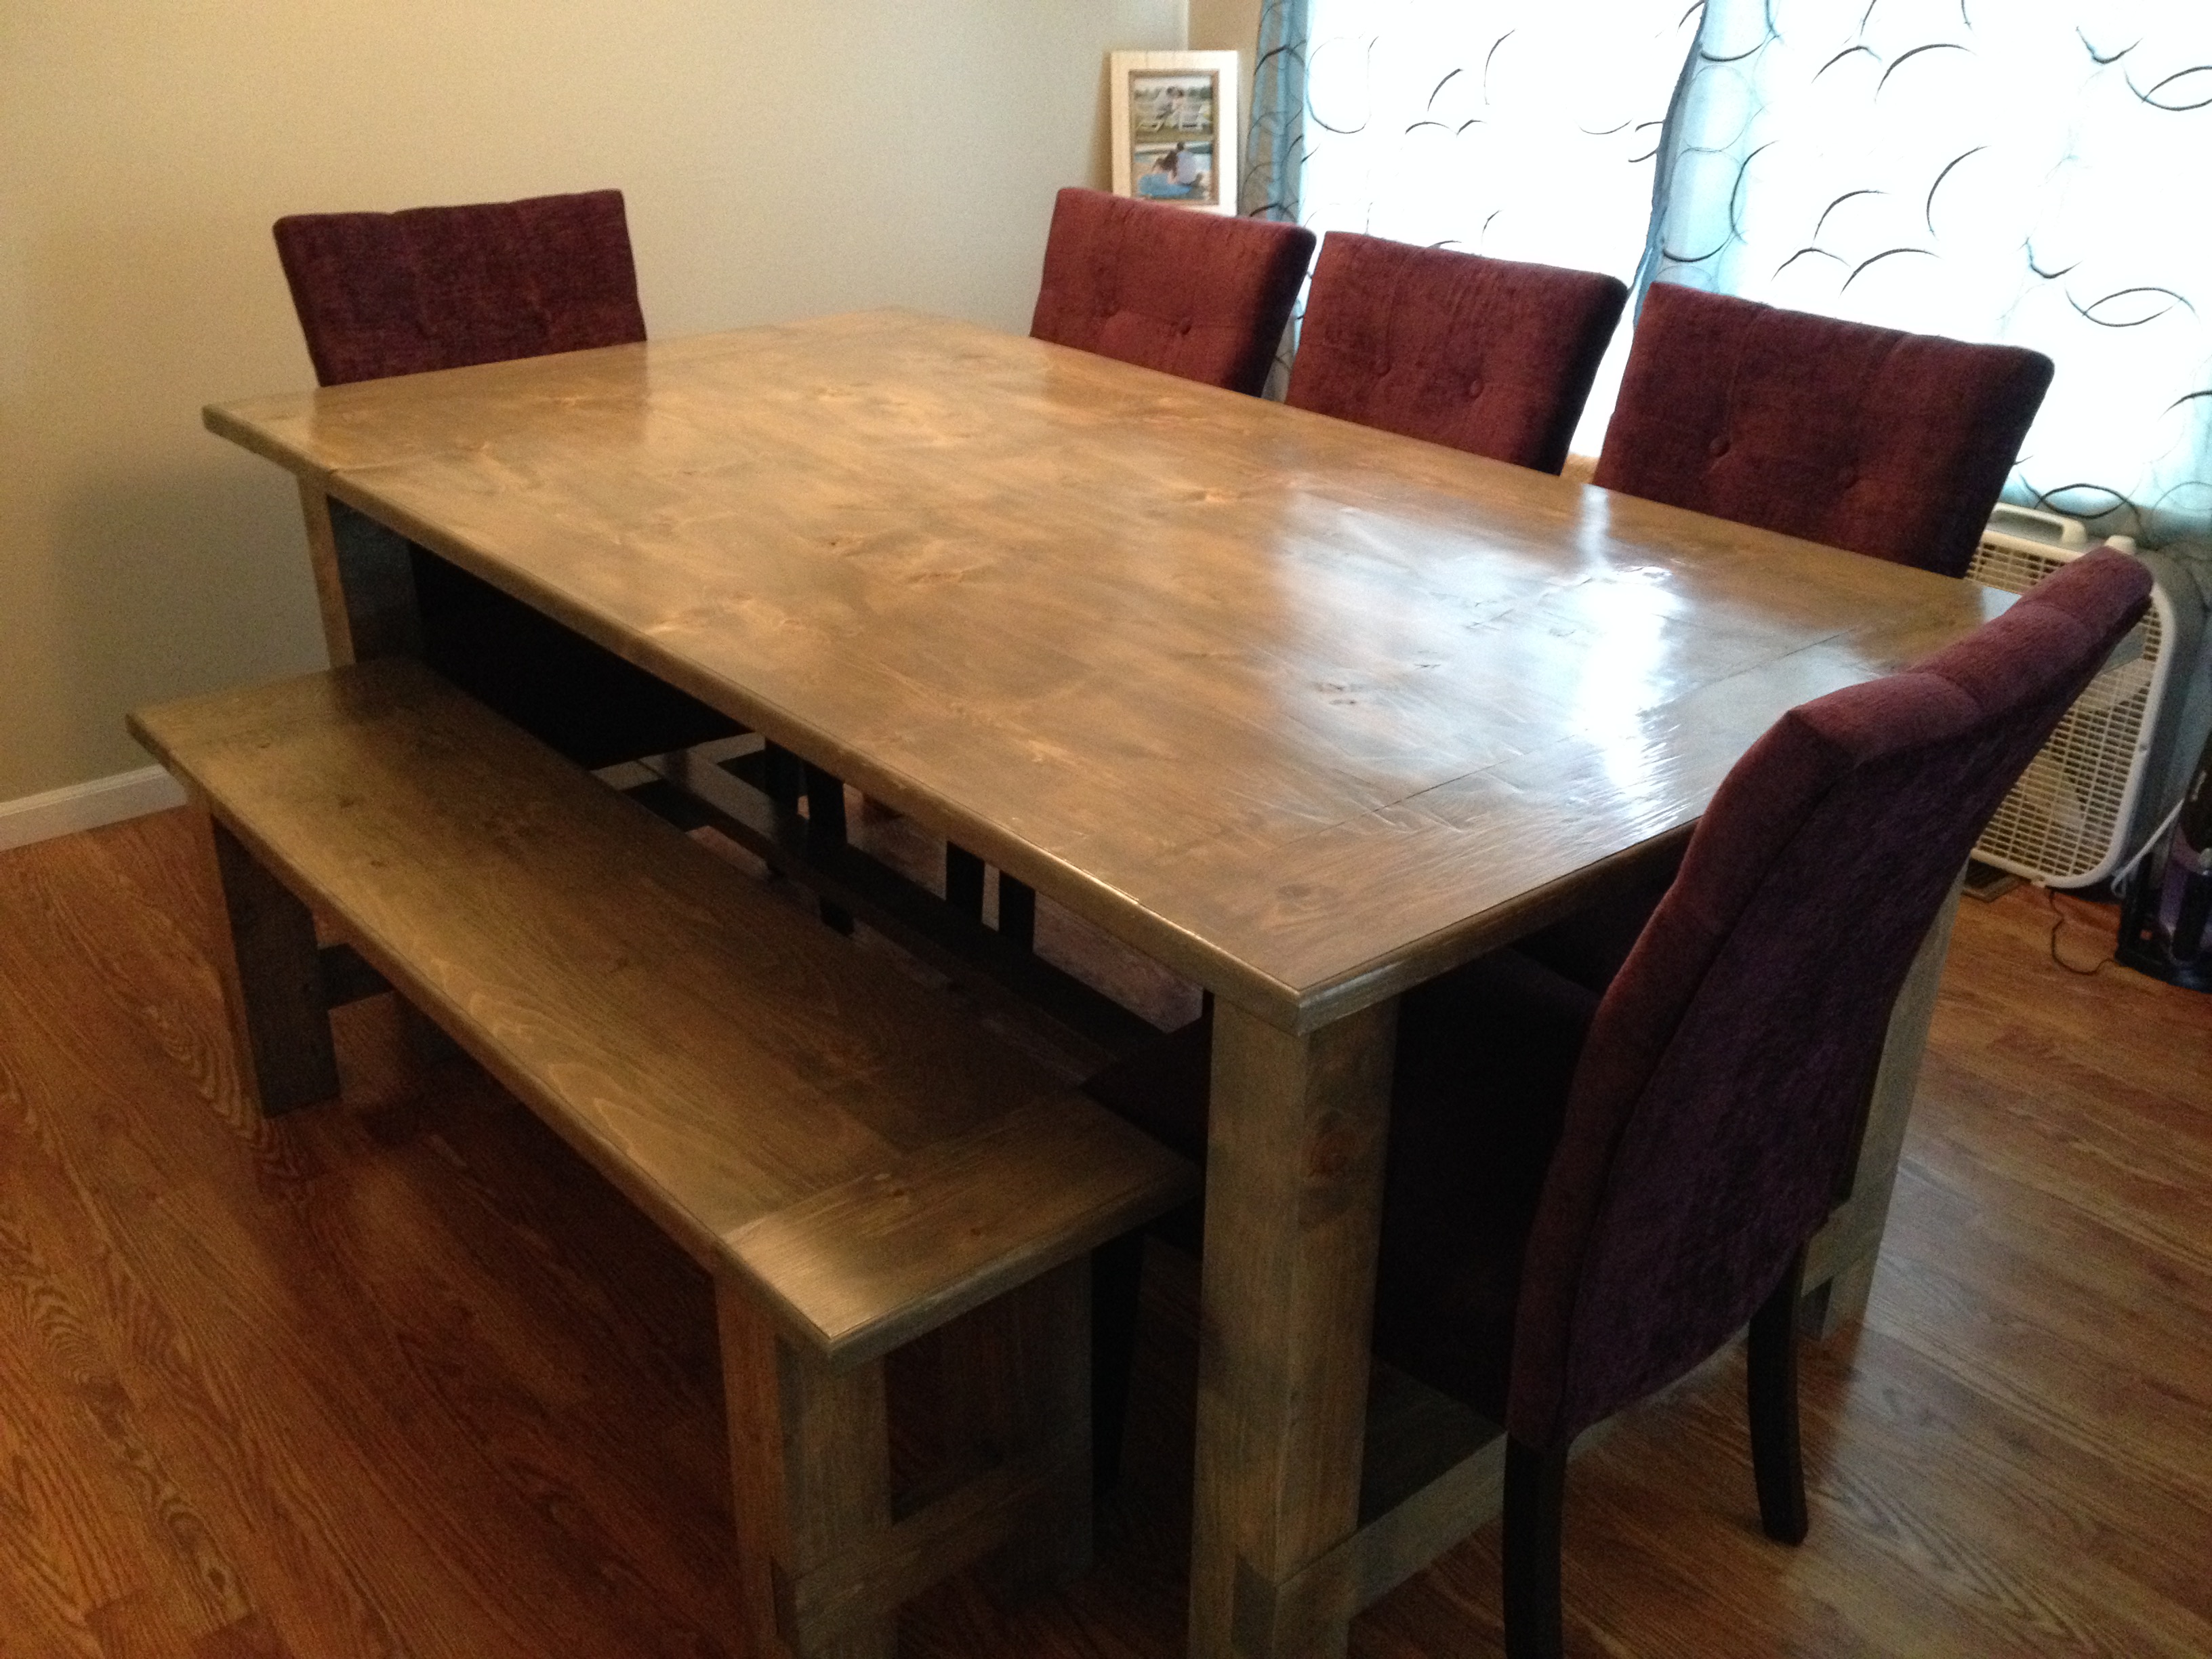
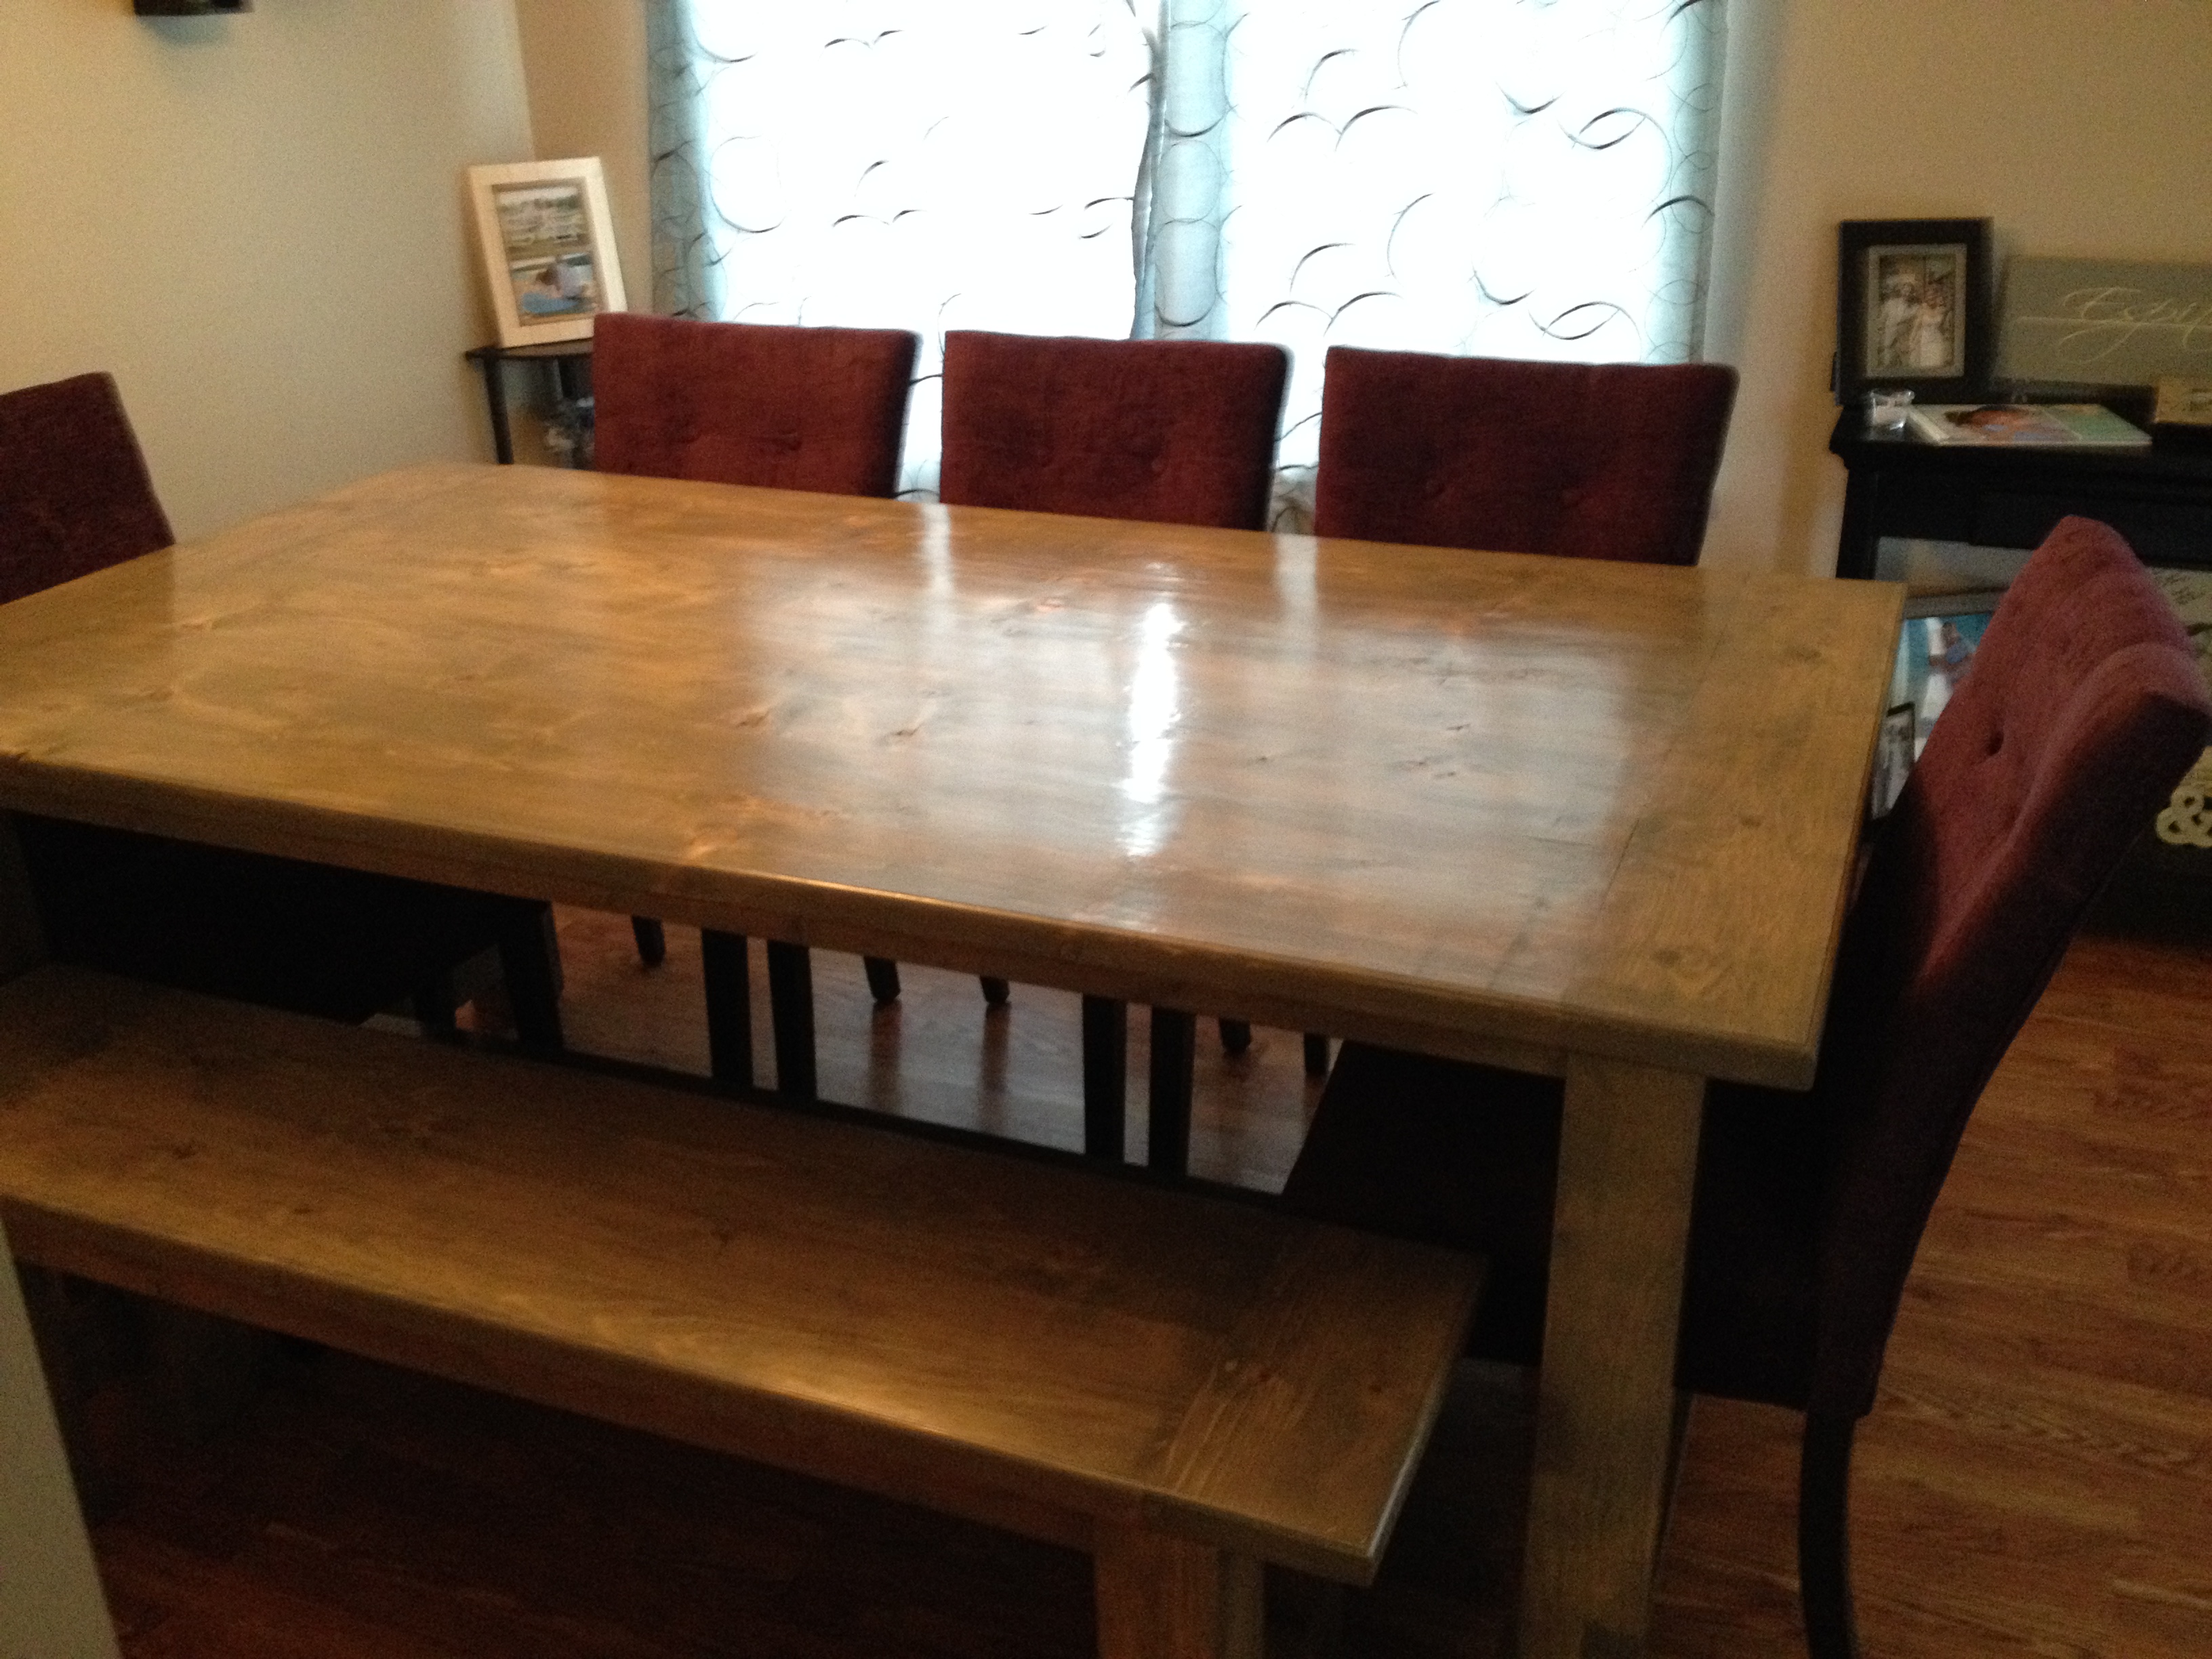
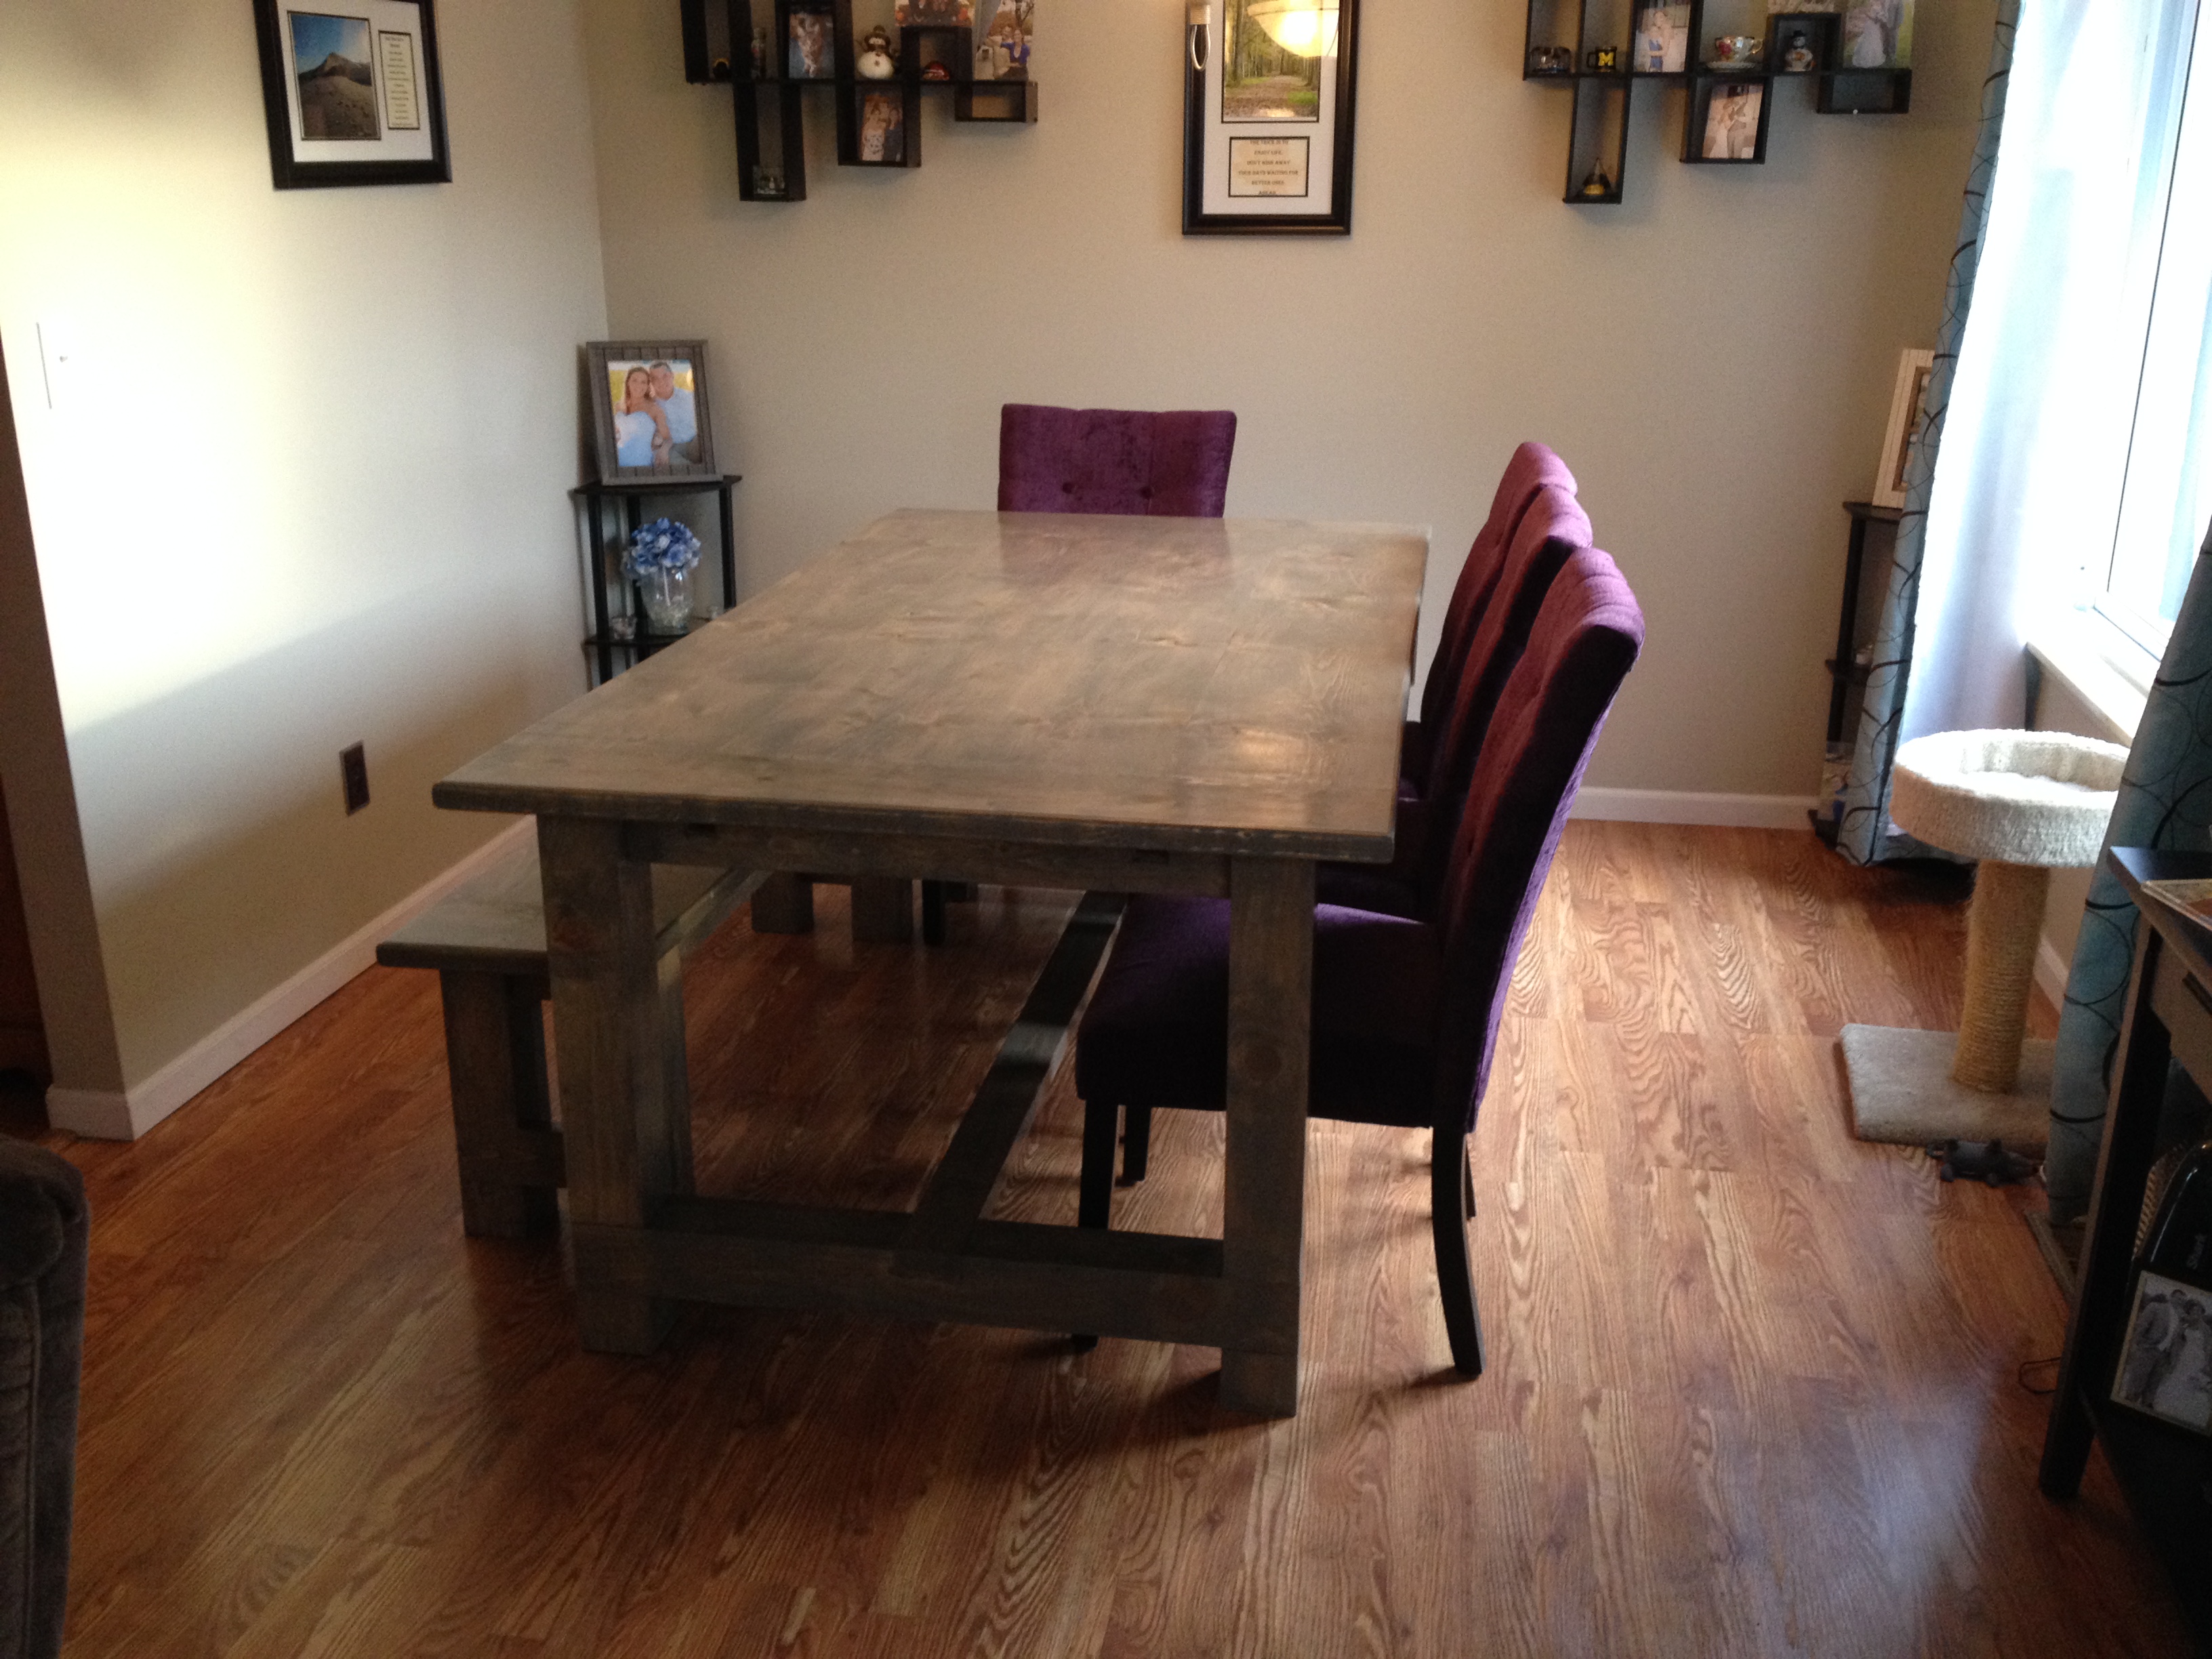
Farmhouse table, table extension, and bench
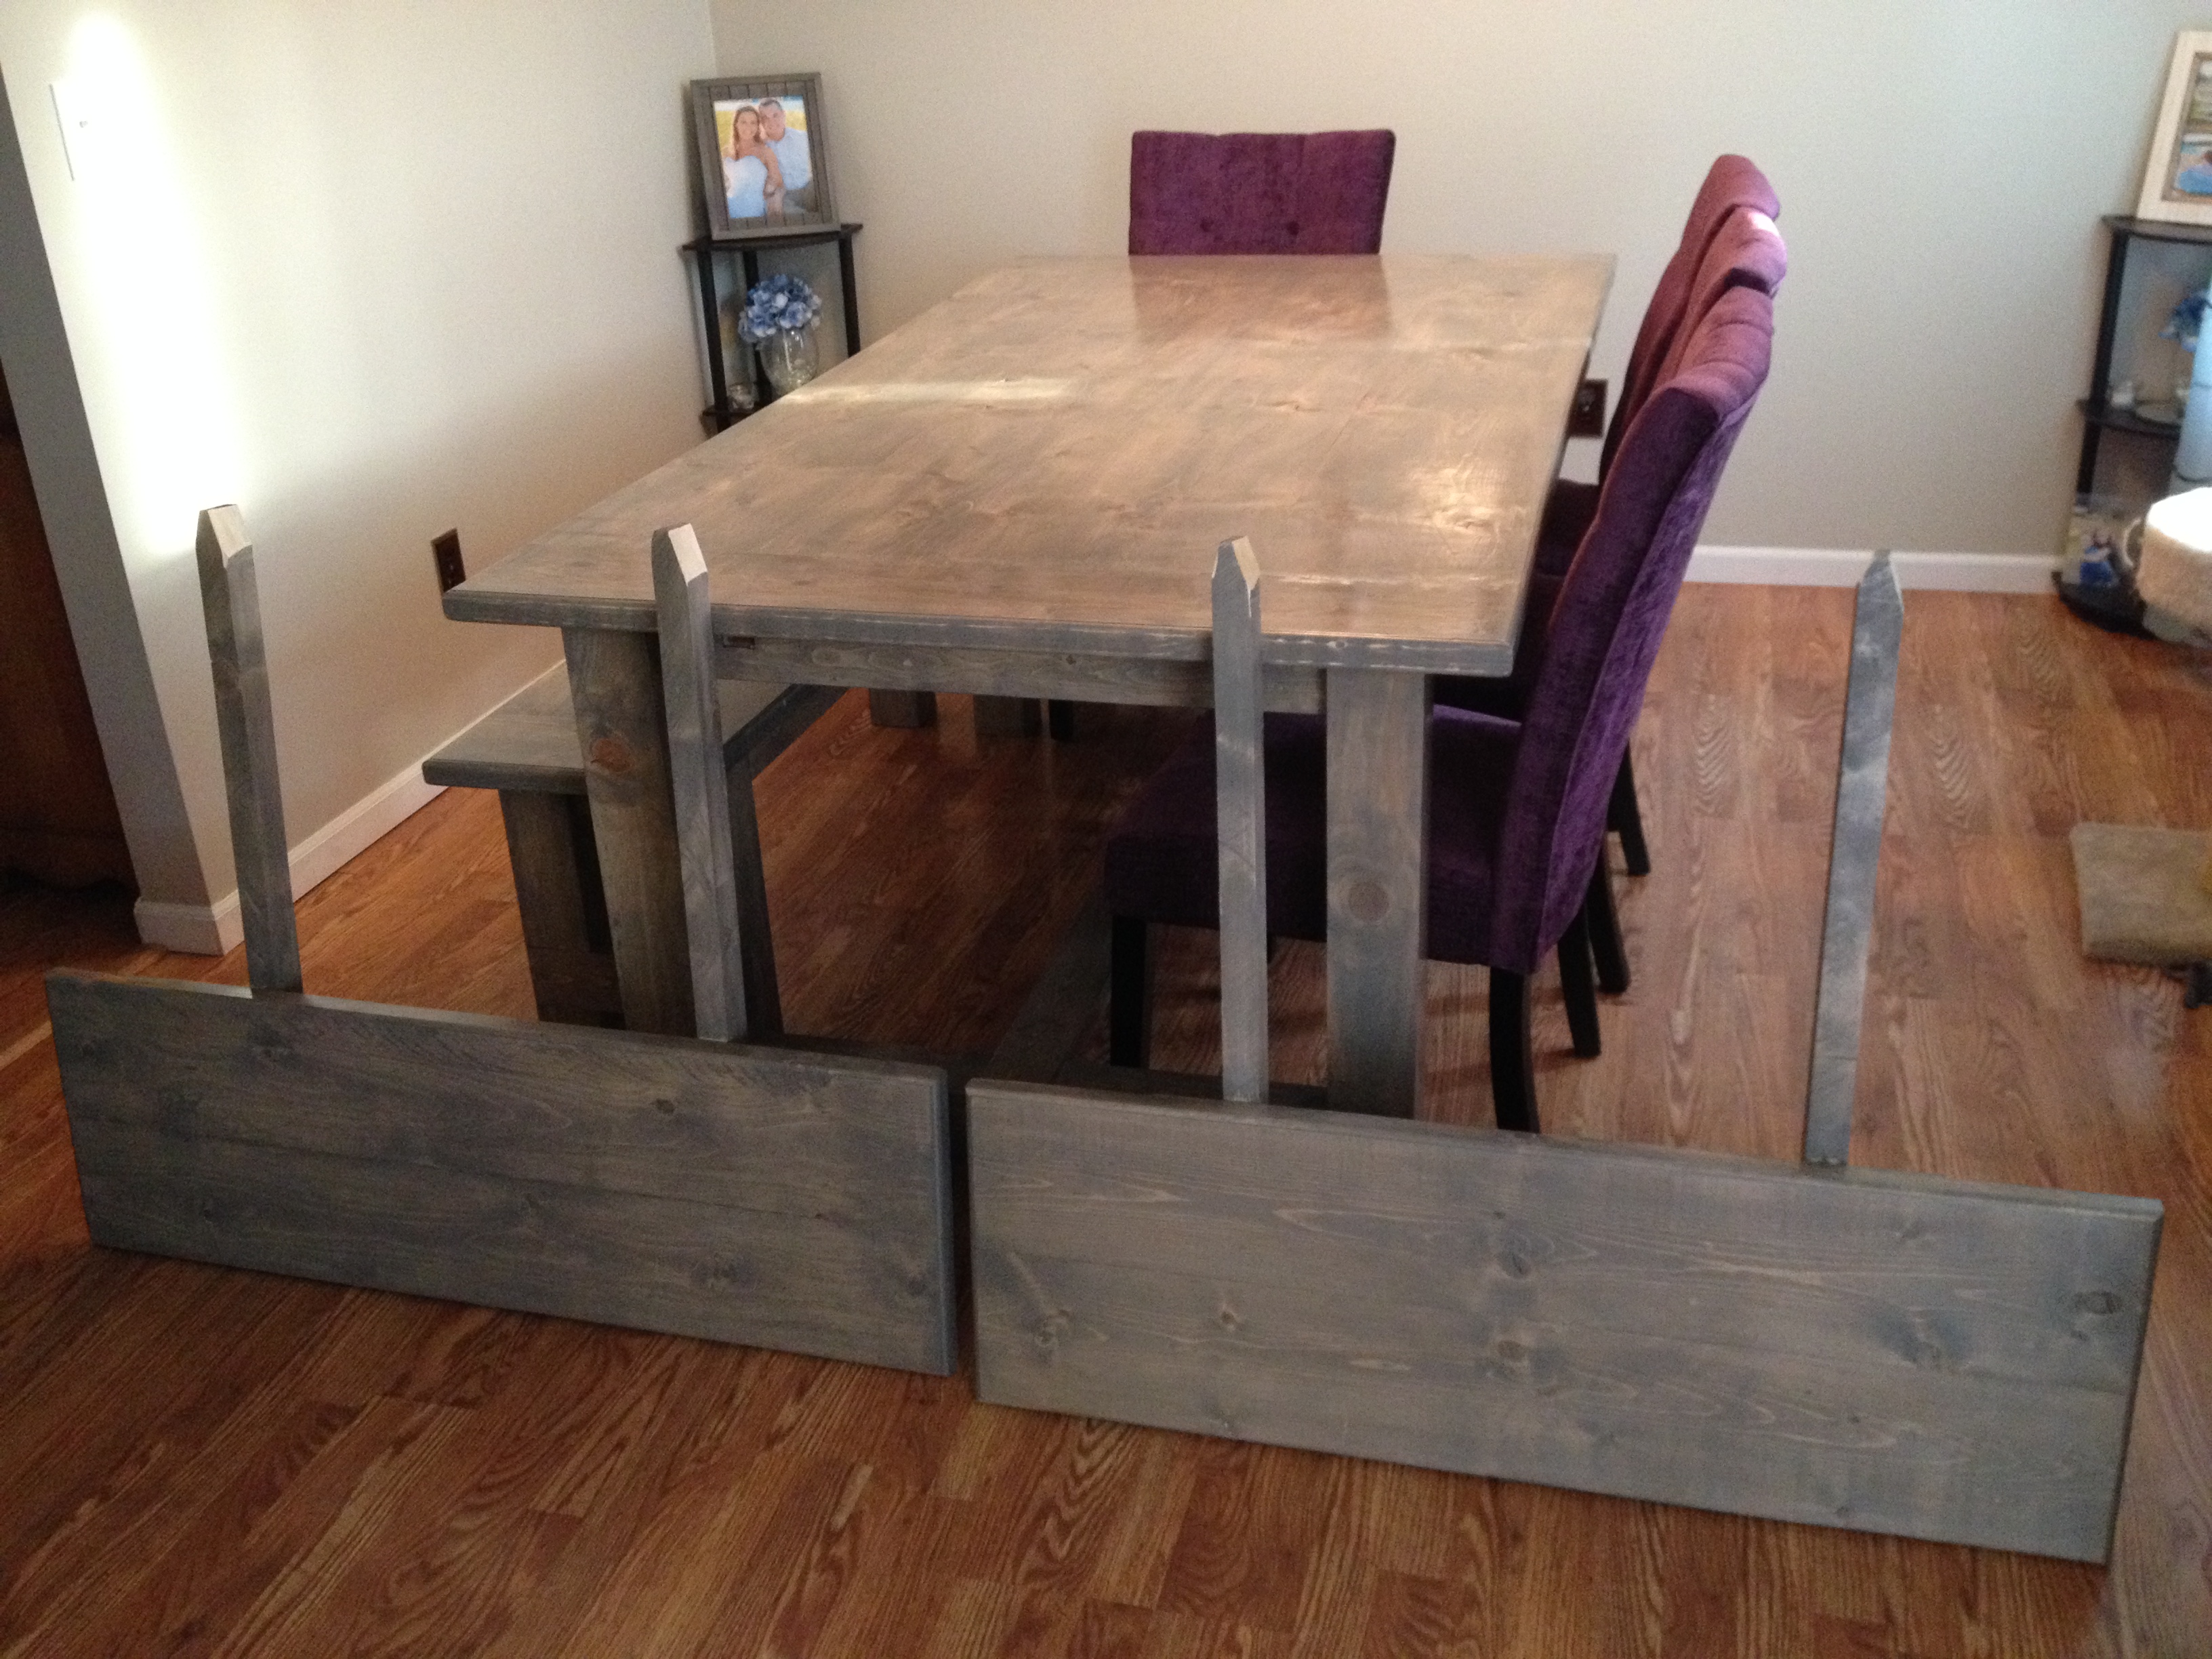
My wife and I recently built this farmhouse table with her grandpa. It was a lot of fun and we are really happy with how it turned out. The table is 80 inches long, 43 1/2 inches wide, and 31 inches tall. The extensions are 15 inches long and 43/1/2 inches wide, and the bench is 61 inches long, 15 inches wide, and 19 1/2 inches tall.
It tooks us about 4 weekends (around 32 hours) to finish the project and the included rebuilding the base of the table after our first one cracked.
We modified the plans a bit. We used 4x4s instead of glued together 2x4s for the legs on the table and bench.
We also used the plans on this blog (http://tommyandellie.com/?p=2582) as a guide.
This was the first time my wife and I have tired a DIY project and we had a ton of fun. Her grandpa had some experience with wood working and had all of the tools we needed but you can certainly do this without any extensive wood working experience.
Sorry for the duplicate post. This is my first time on the website and the first time I posted it came across as 'guest'

Built from Plan(s)
Estimated Cost
$350
Estimated Time Investment
Week Long Project (20 Hours or More)
Finish Used
We put on one coat of minwax pre-stain wood conditioner. Then we added two coats of stain of a custom mixed stain from Sherman Williams. We started with the Wood Classic Rustic Gray. The store then tinted the stain until we found the color that we liked. Note - the table looks grayer in person than it does in some of the photos. Finally we applied 3 coats of minwax water based oil modified semi-gloss polyurethane.
Recommended Skill Level
Starter Project
Comments
Tue, 08/16/2016 - 13:34
A few things I forgot...
I forgot to mention that with the extensions the table expands to 110 inches.
Loft bed and camp bed
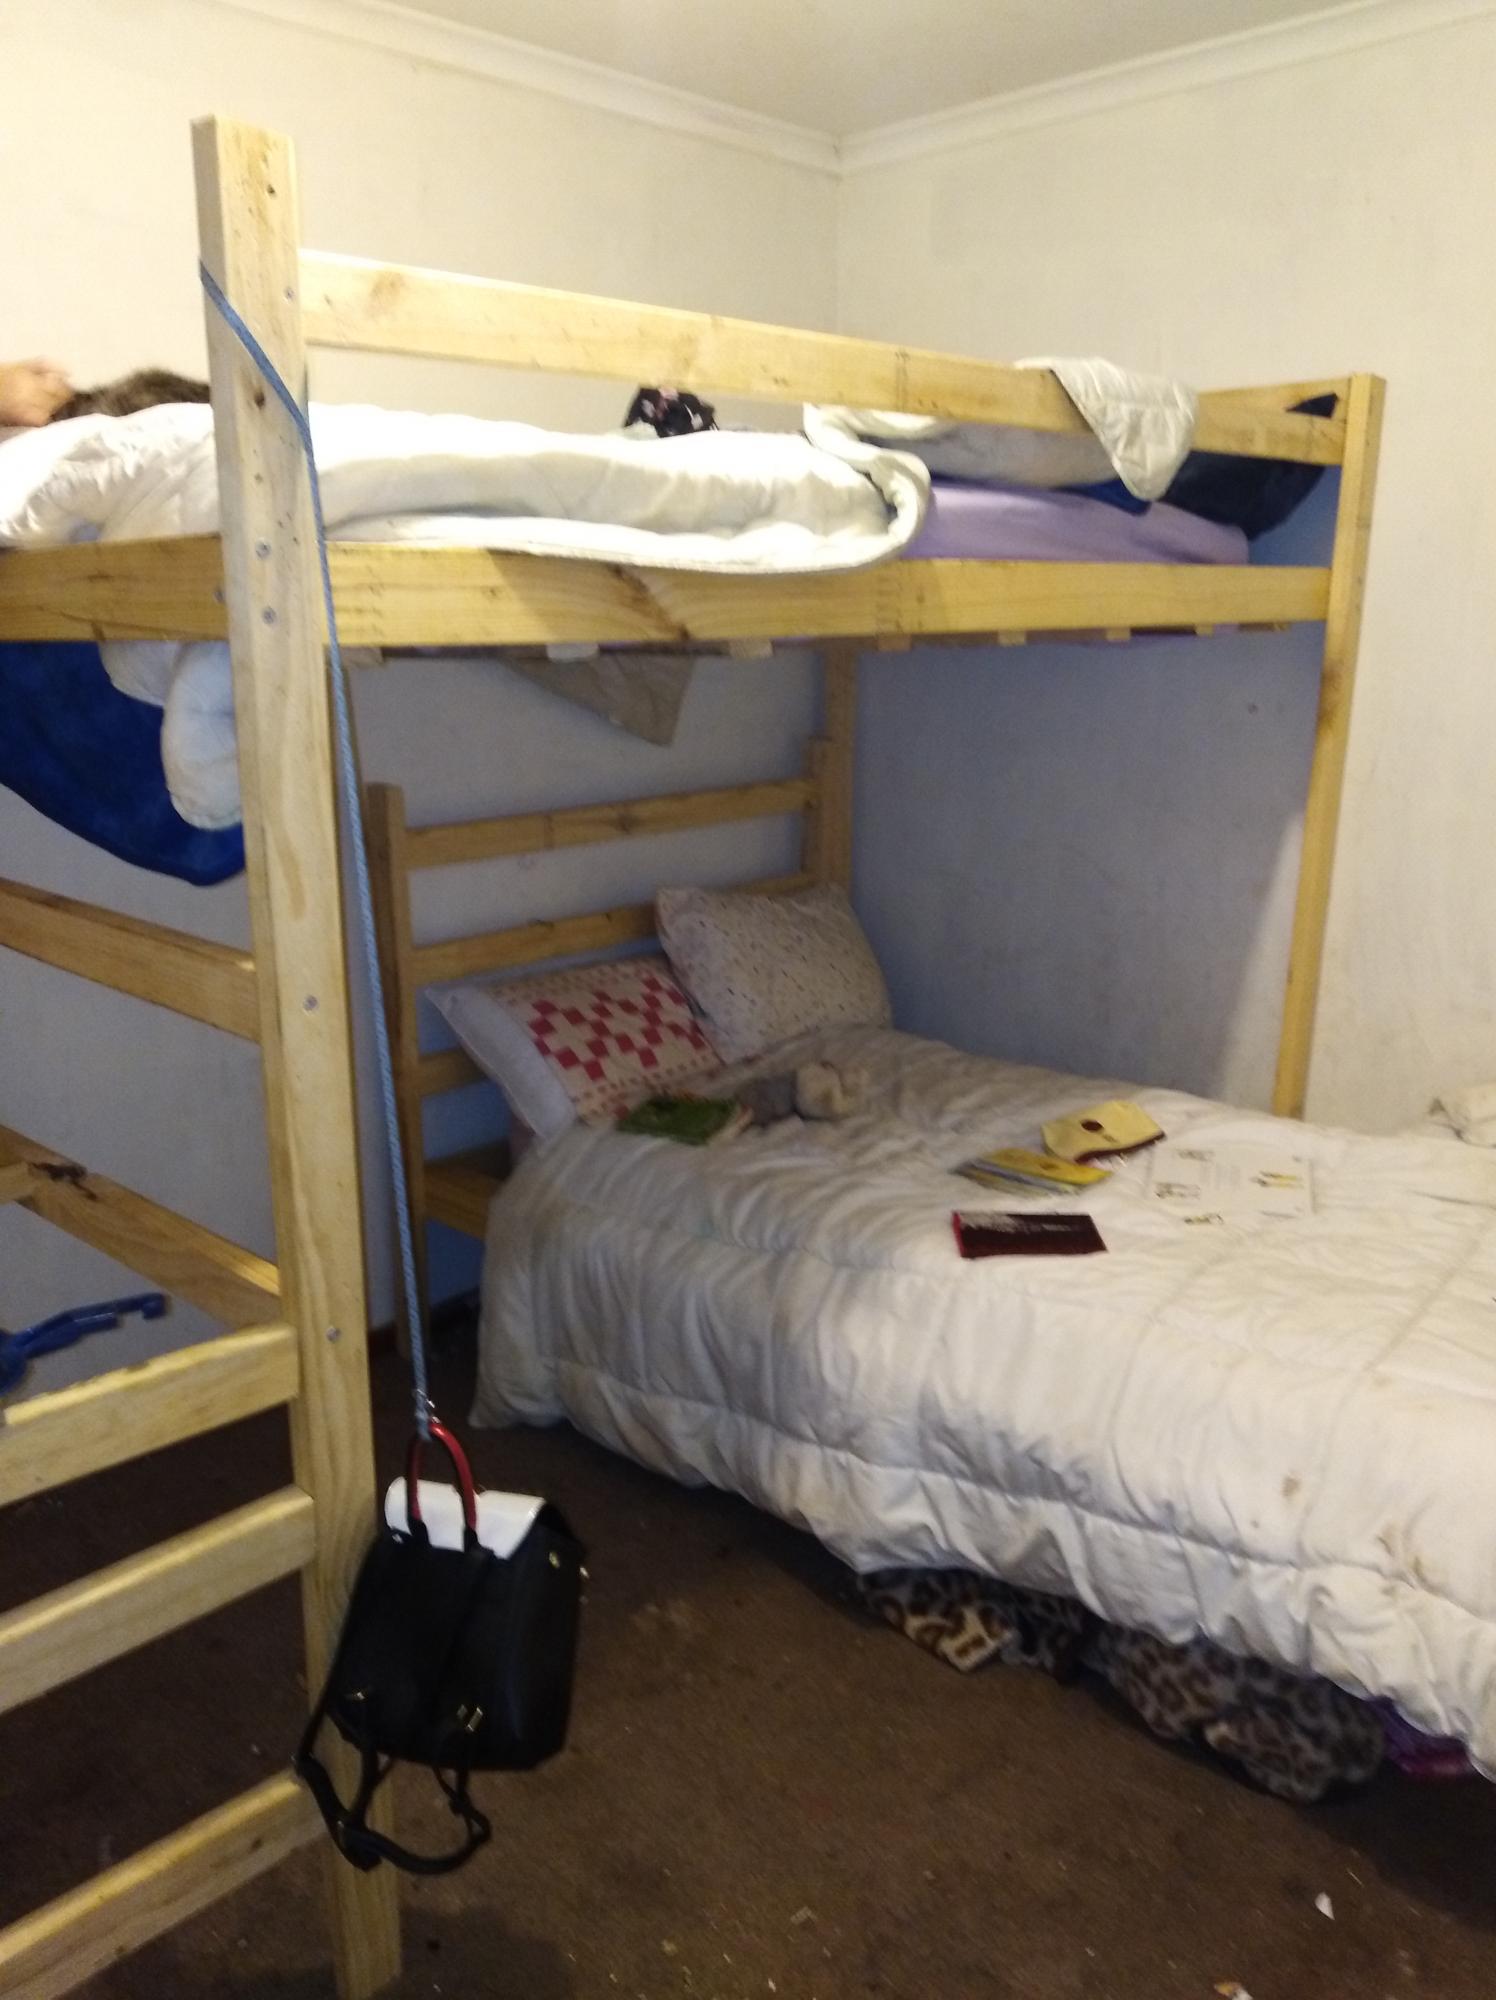
We changed the bed sizes and the height but my 14 yo built these for his sister
Built from Plan(s)
Estimated Cost
$250 aud
Estimated Time Investment
Weekend Project (10-20 Hours)
Recommended Skill Level
Beginner

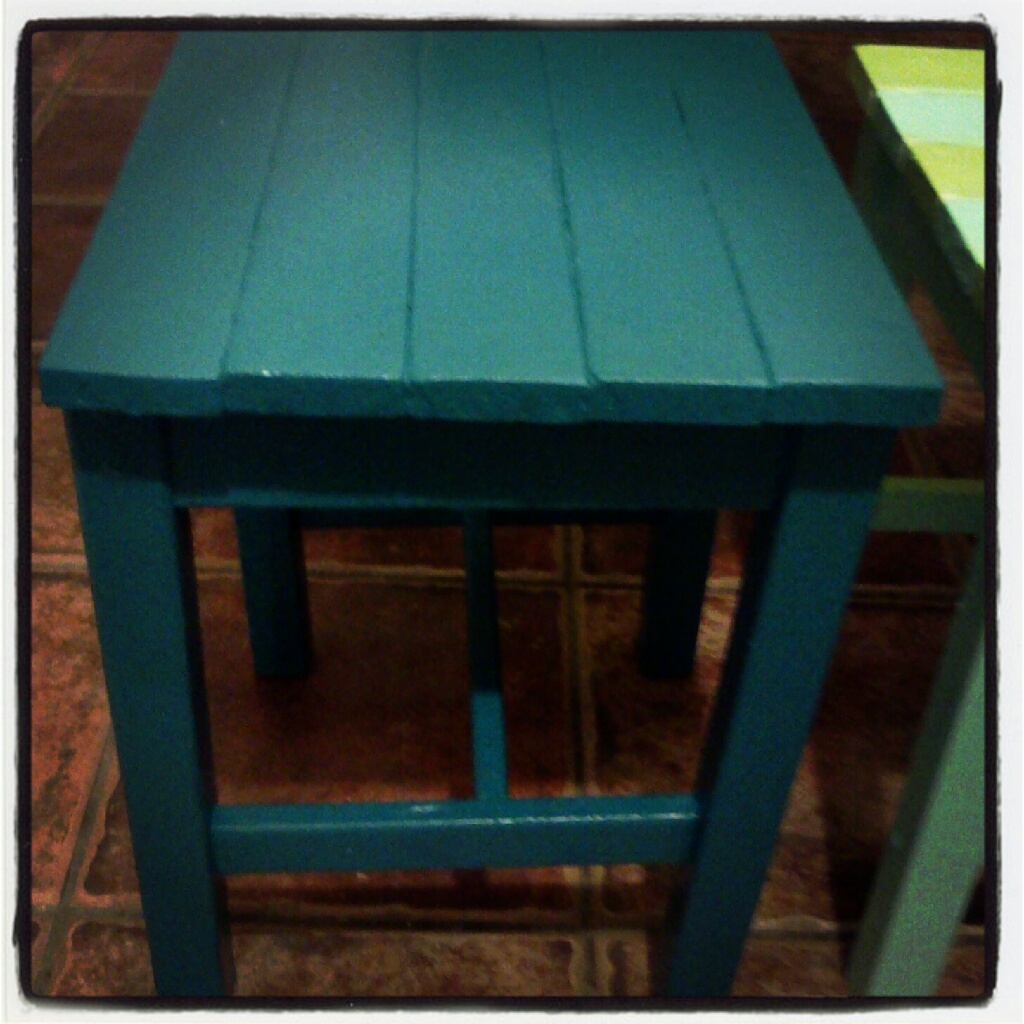
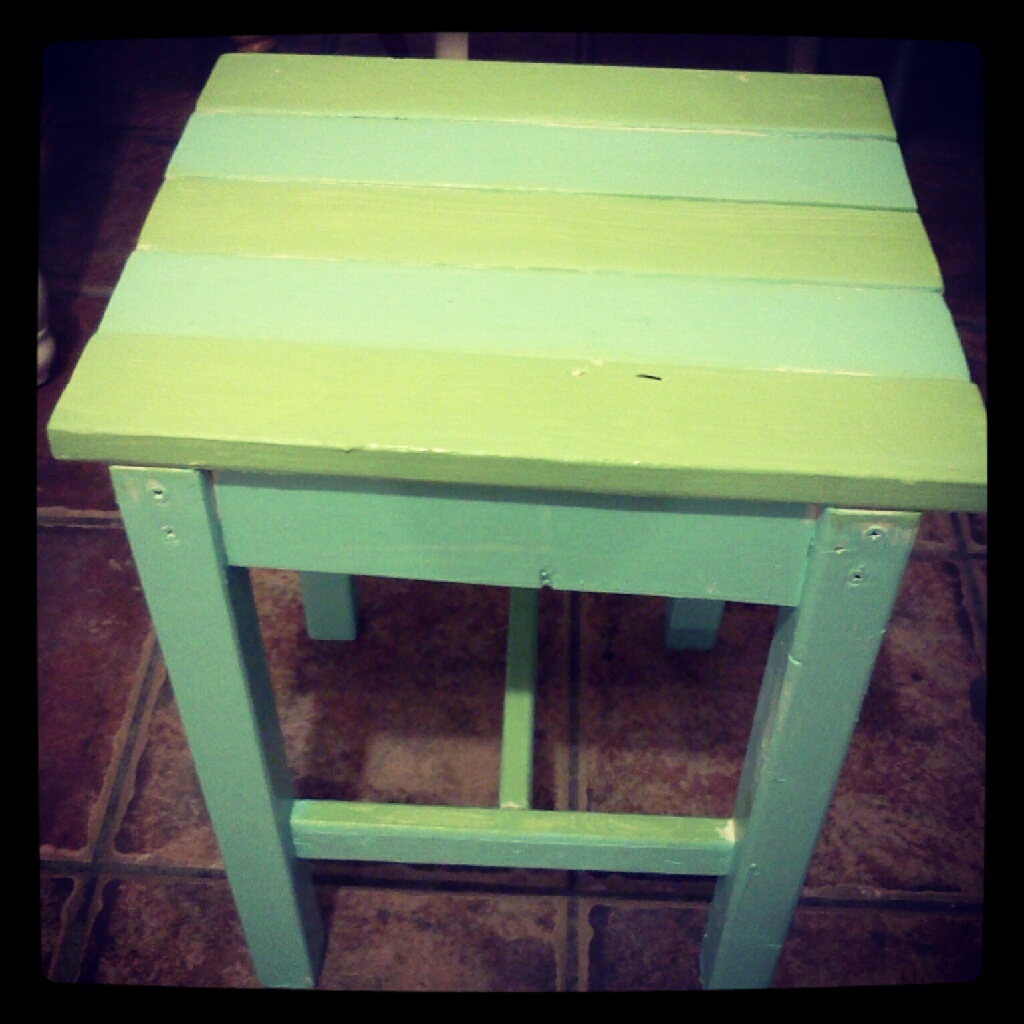
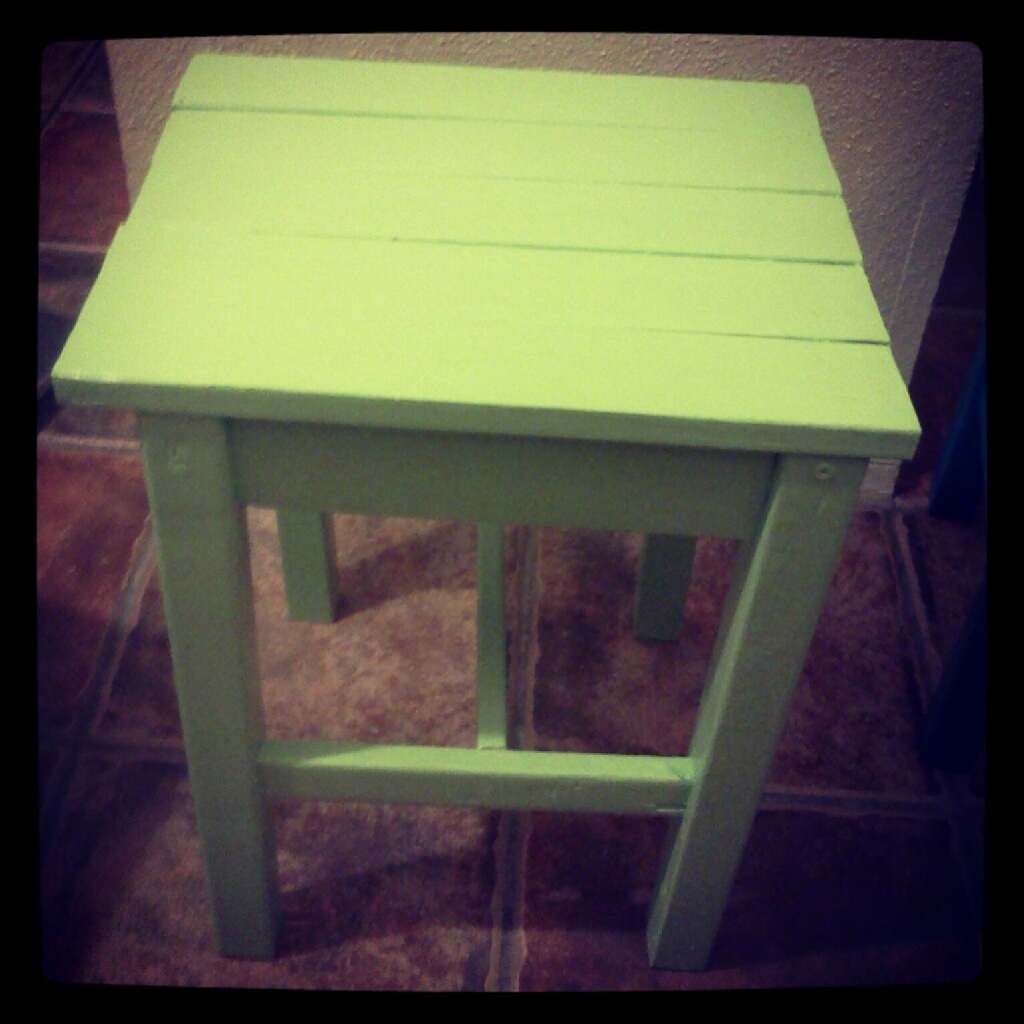
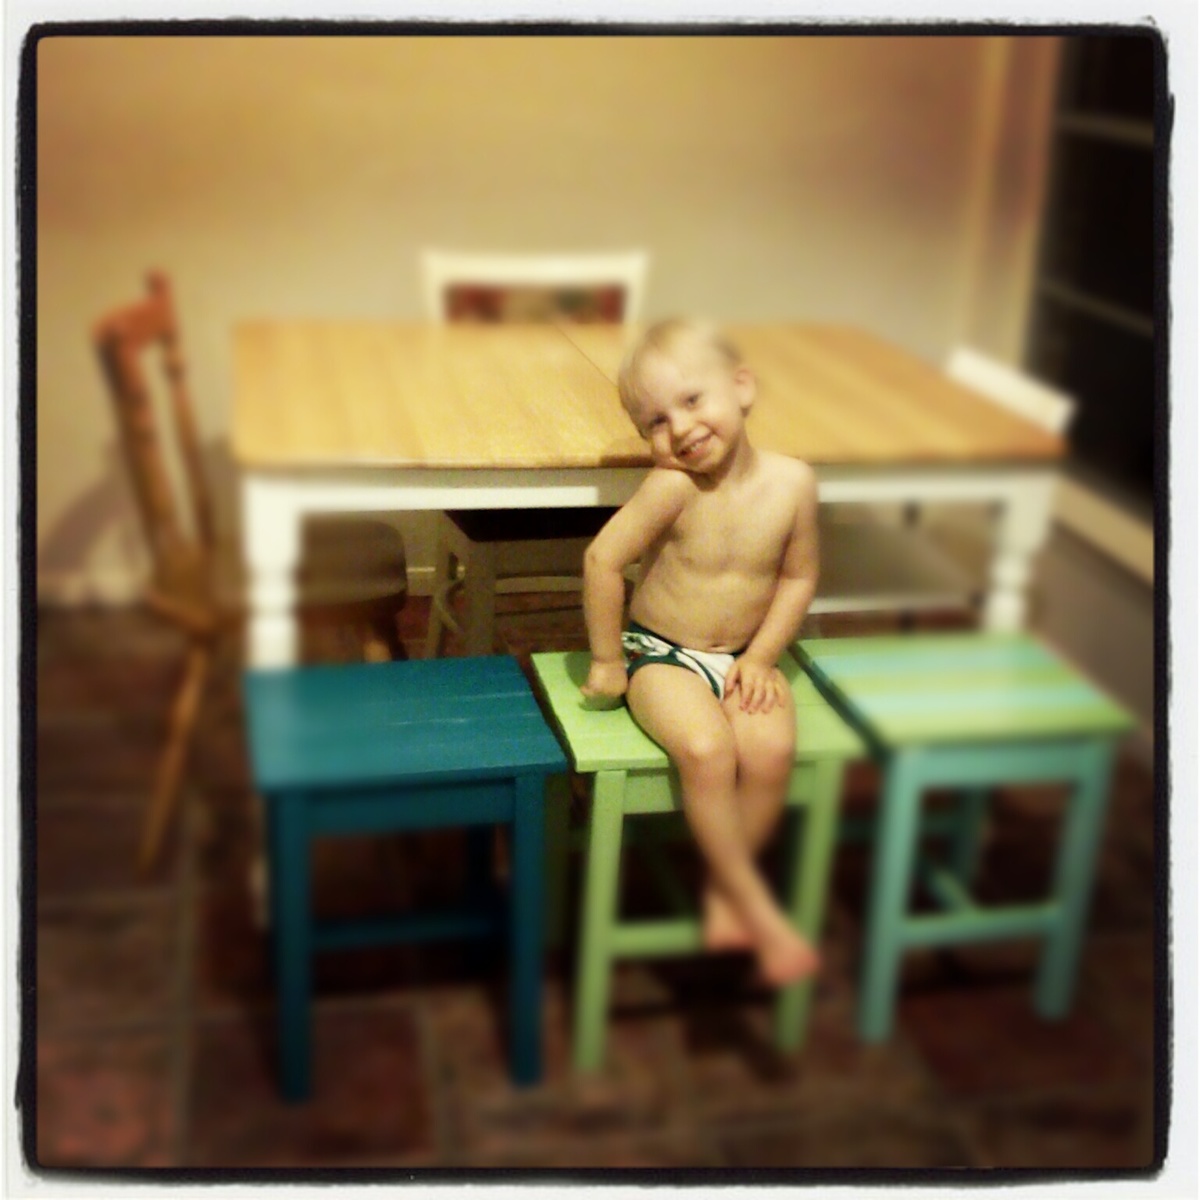
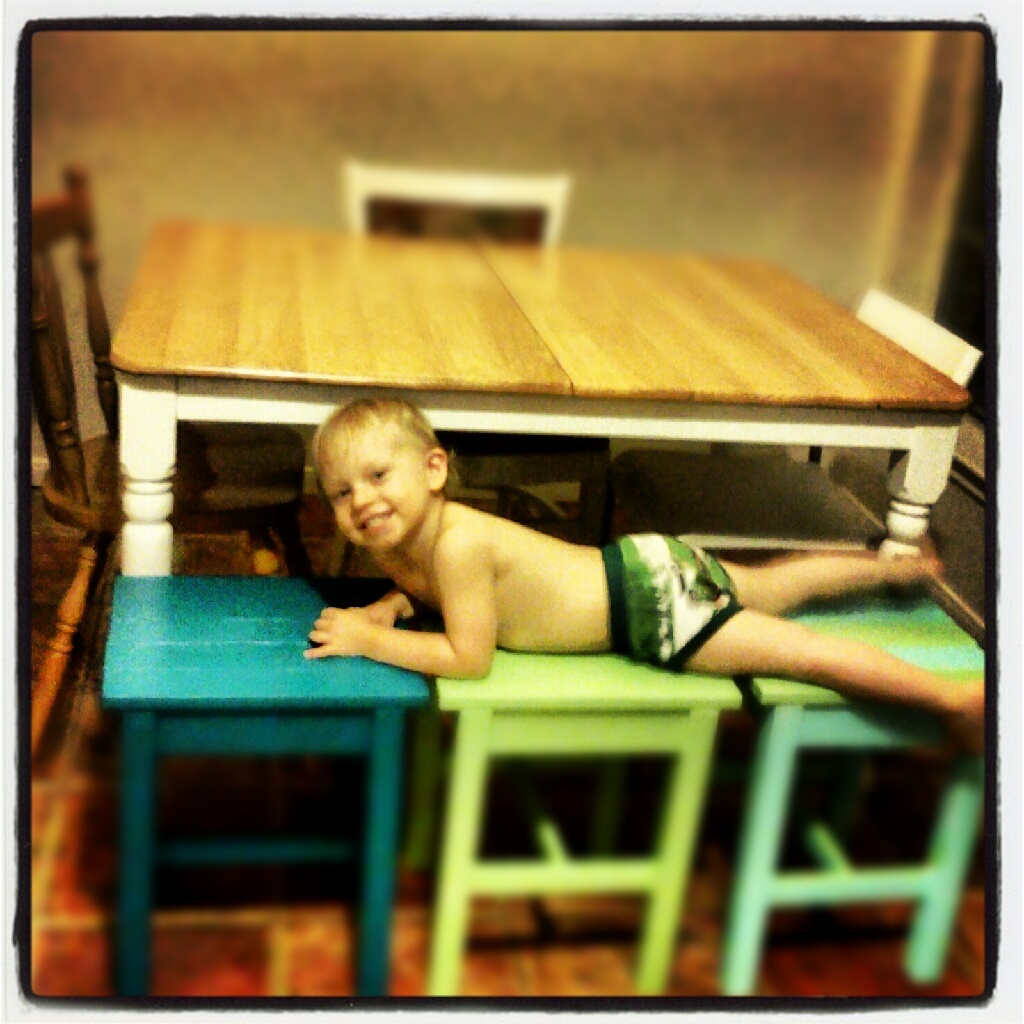
3 Adirondack Stools!
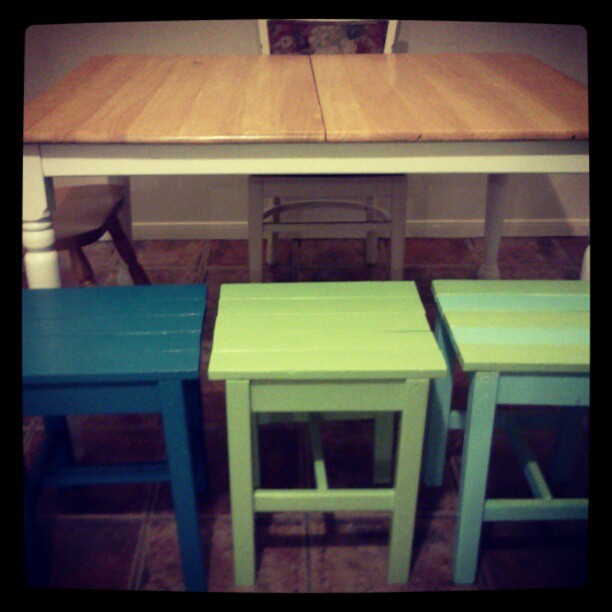
I chose this project as my children's first wood-working project. They are 2,7 and 8 years old. I didn't have a kreg jig. I just pre-drilled holes and used 2 1/2" screws and nails to put it all together. We had a hard time keeping everything square. I wasn't sure if the apron boards lined up in the center or against the edges of the legs. But we finally got it all built Then we primed and painted them.
It cost around $10 for the wood for all 3 stools, $5 for a gallon of oops paint (the light blue paint) and we already had the other 2 colors from previous projects. $7 for a box of screws but we only used a quarter of the box.
Built from Plan(s)
Estimated Cost
$15-20 for 3 stools
Estimated Time Investment
Afternoon Project (3-6 Hours)
Finish Used
paint and kilz (primer), My daughter did a distressed look on hers and multi-colored.
Recommended Skill Level
Beginner
Brookstone Storage twin bed
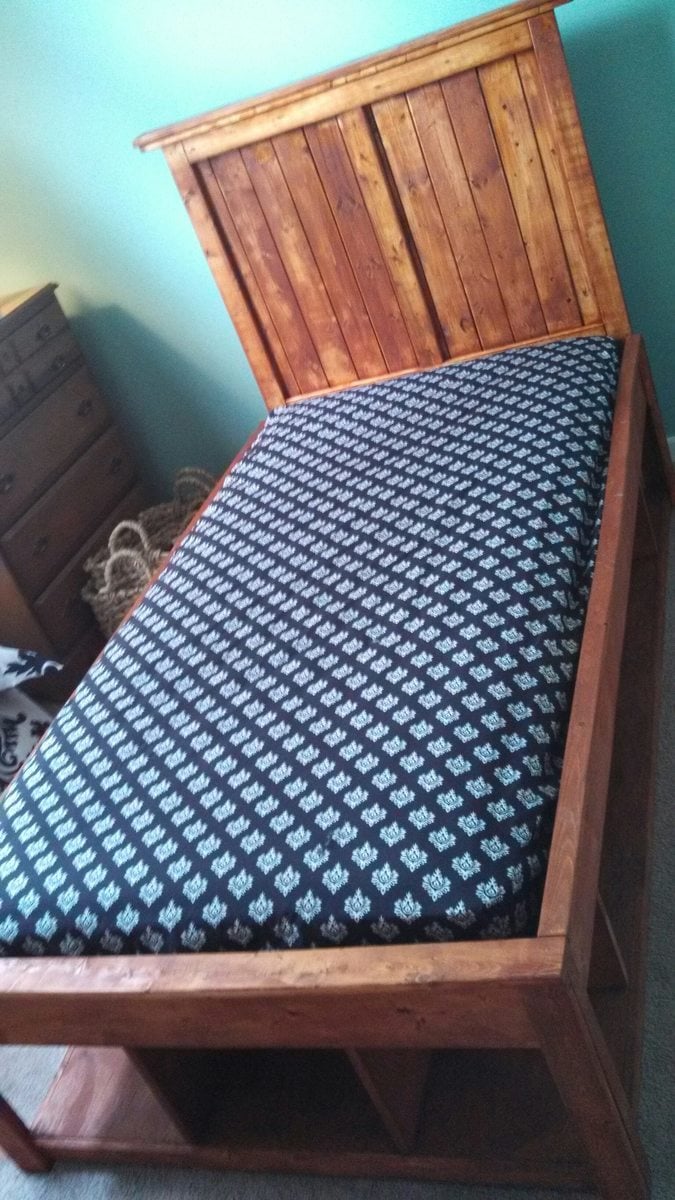
Needed a bed but not a lot of space Pretty simple build. Directions said to use Brad Nailer. Didn't have one at the time, but after the number of small finishing nails I bought one.
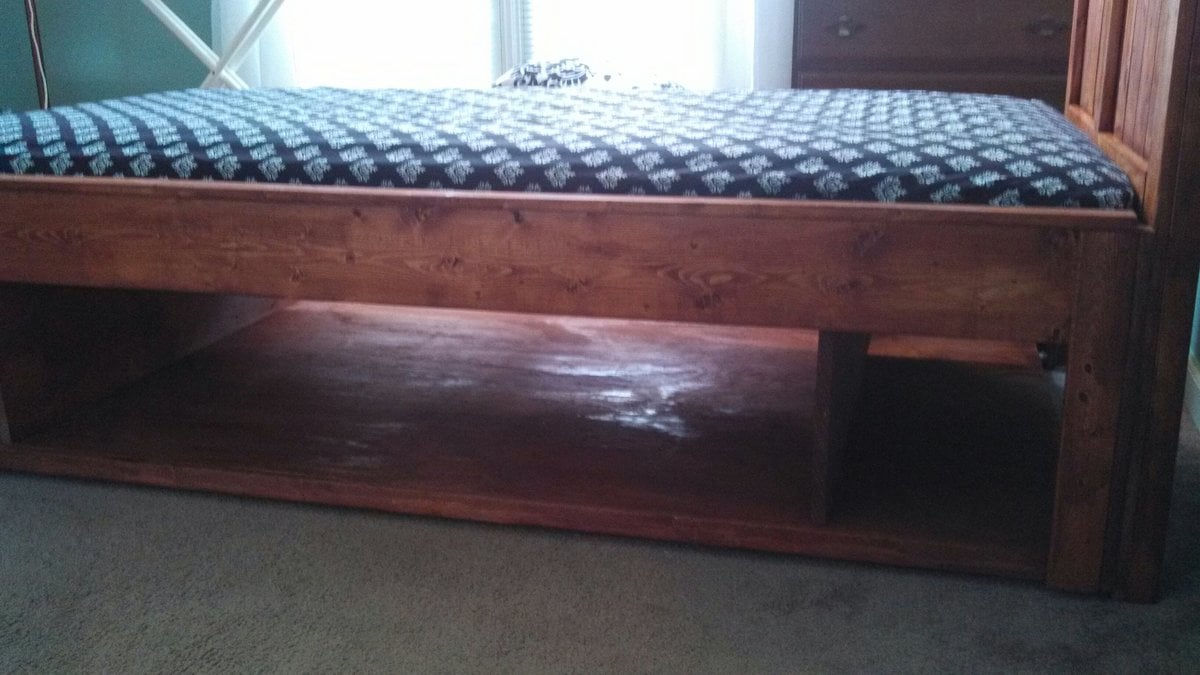
Built from Plan(s)
Estimated Cost
75 - 100
Estimated Time Investment
Day Project (6-9 Hours)
Finish Used
Gunstock stain by Minwax
Recommended Skill Level
Beginner
My Outdoor Bar Table
This is my first project, based on your outdoor bar table plan. Great design. I changed the top a little, still needs a little work.
Built from Plan(s)
Estimated Cost
$150
Estimated Time Investment
Weekend Project (10-20 Hours)
Finish Used
Painted with the Limousine Black in the plans.
Recommended Skill Level
Beginner
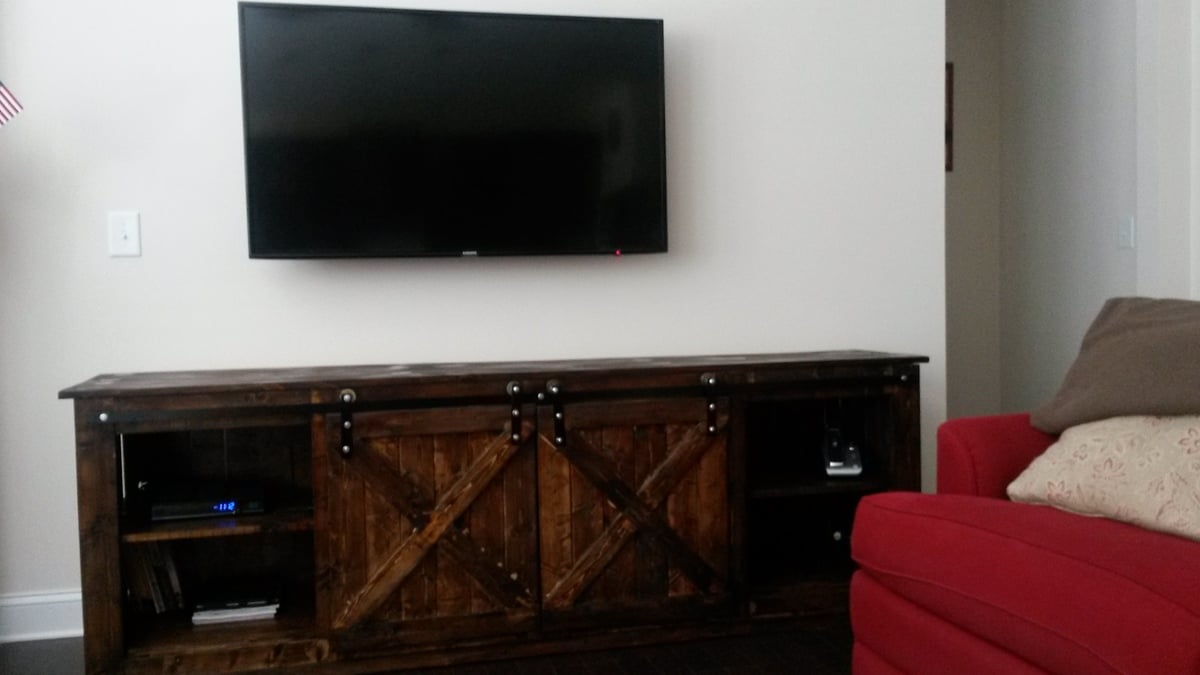
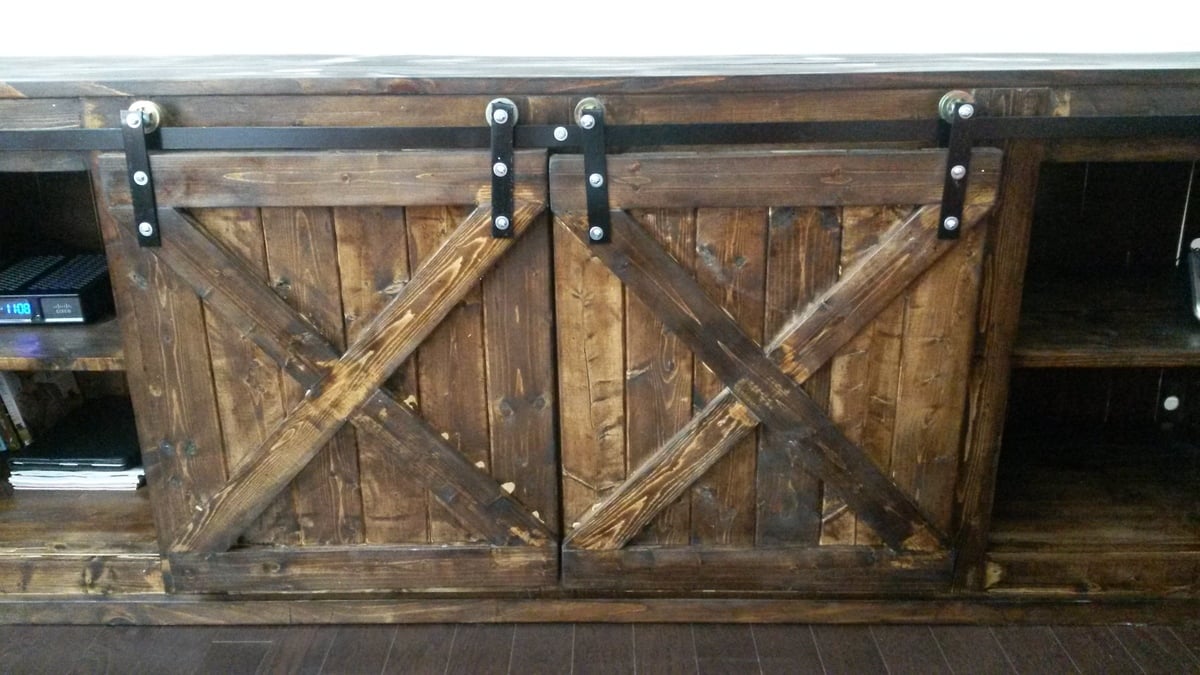
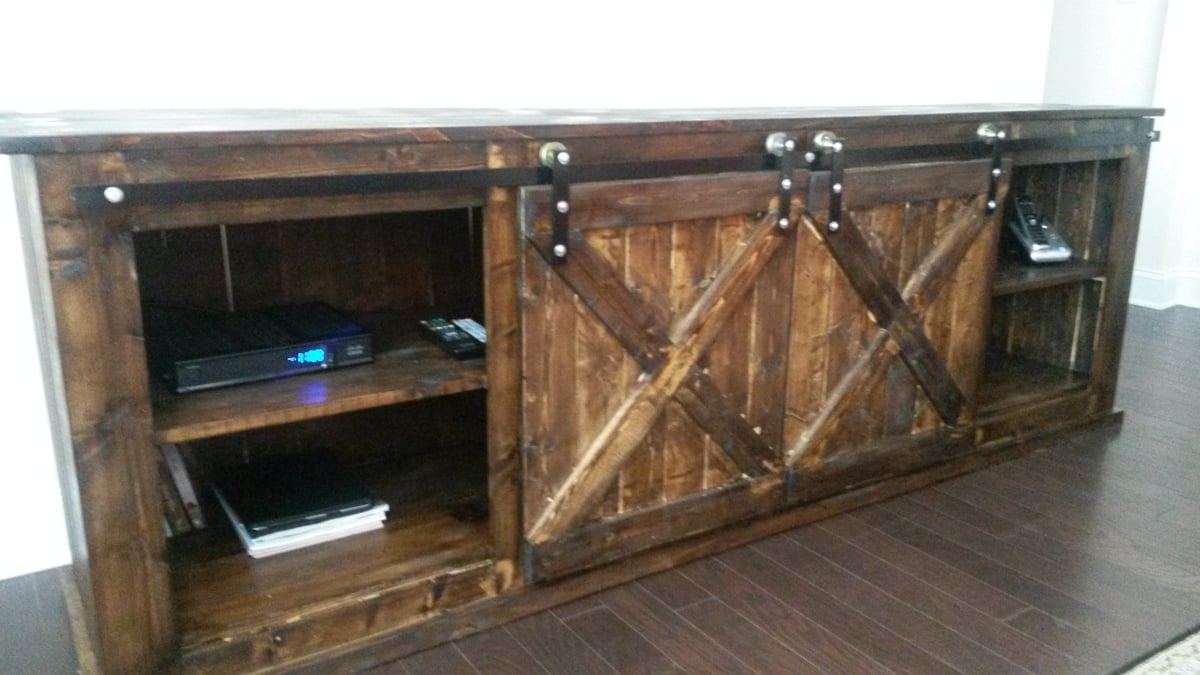
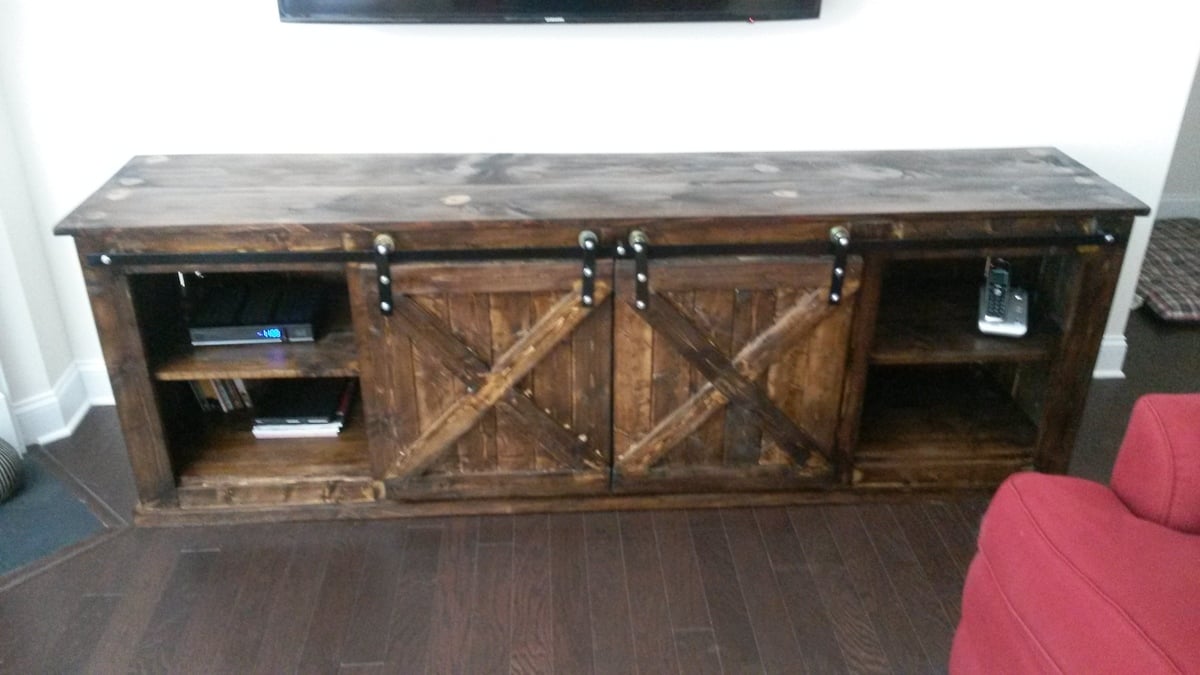
Sliding Door Console
I retired from law enforcement and took up a new hobby. Your plans have helped me learn to build. This is a tv console I built for my sister’s new house.
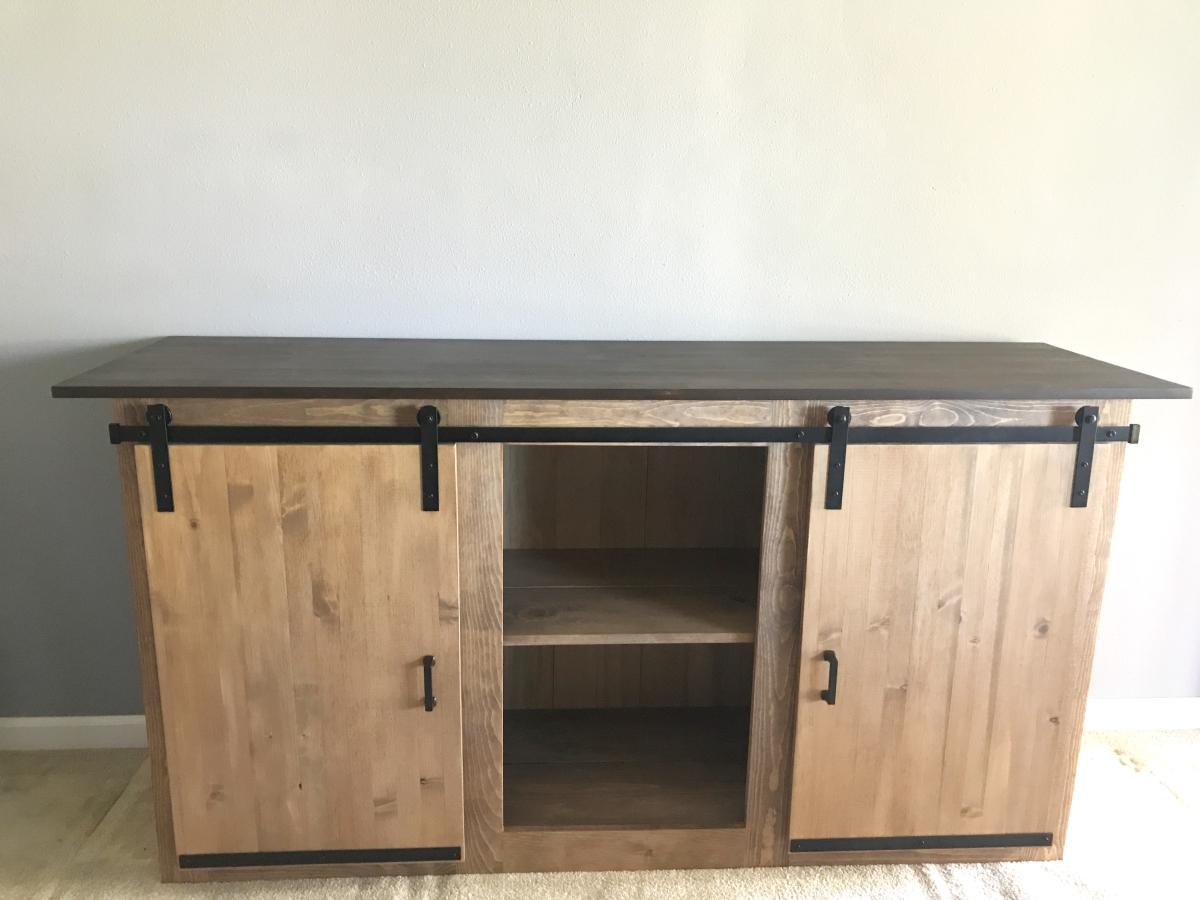
Built from Plan(s)