Community Brag Posts
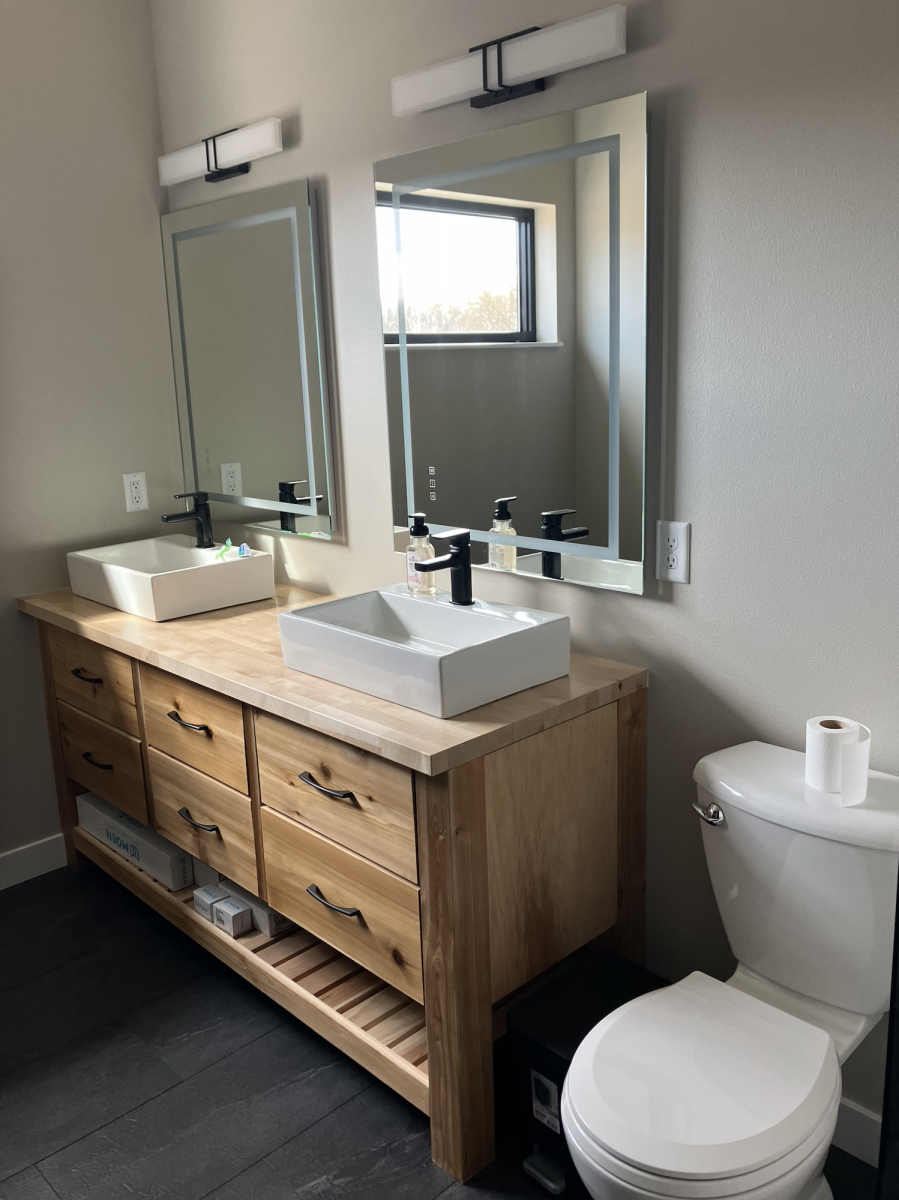
Mostly Cedar Vanity for the New House
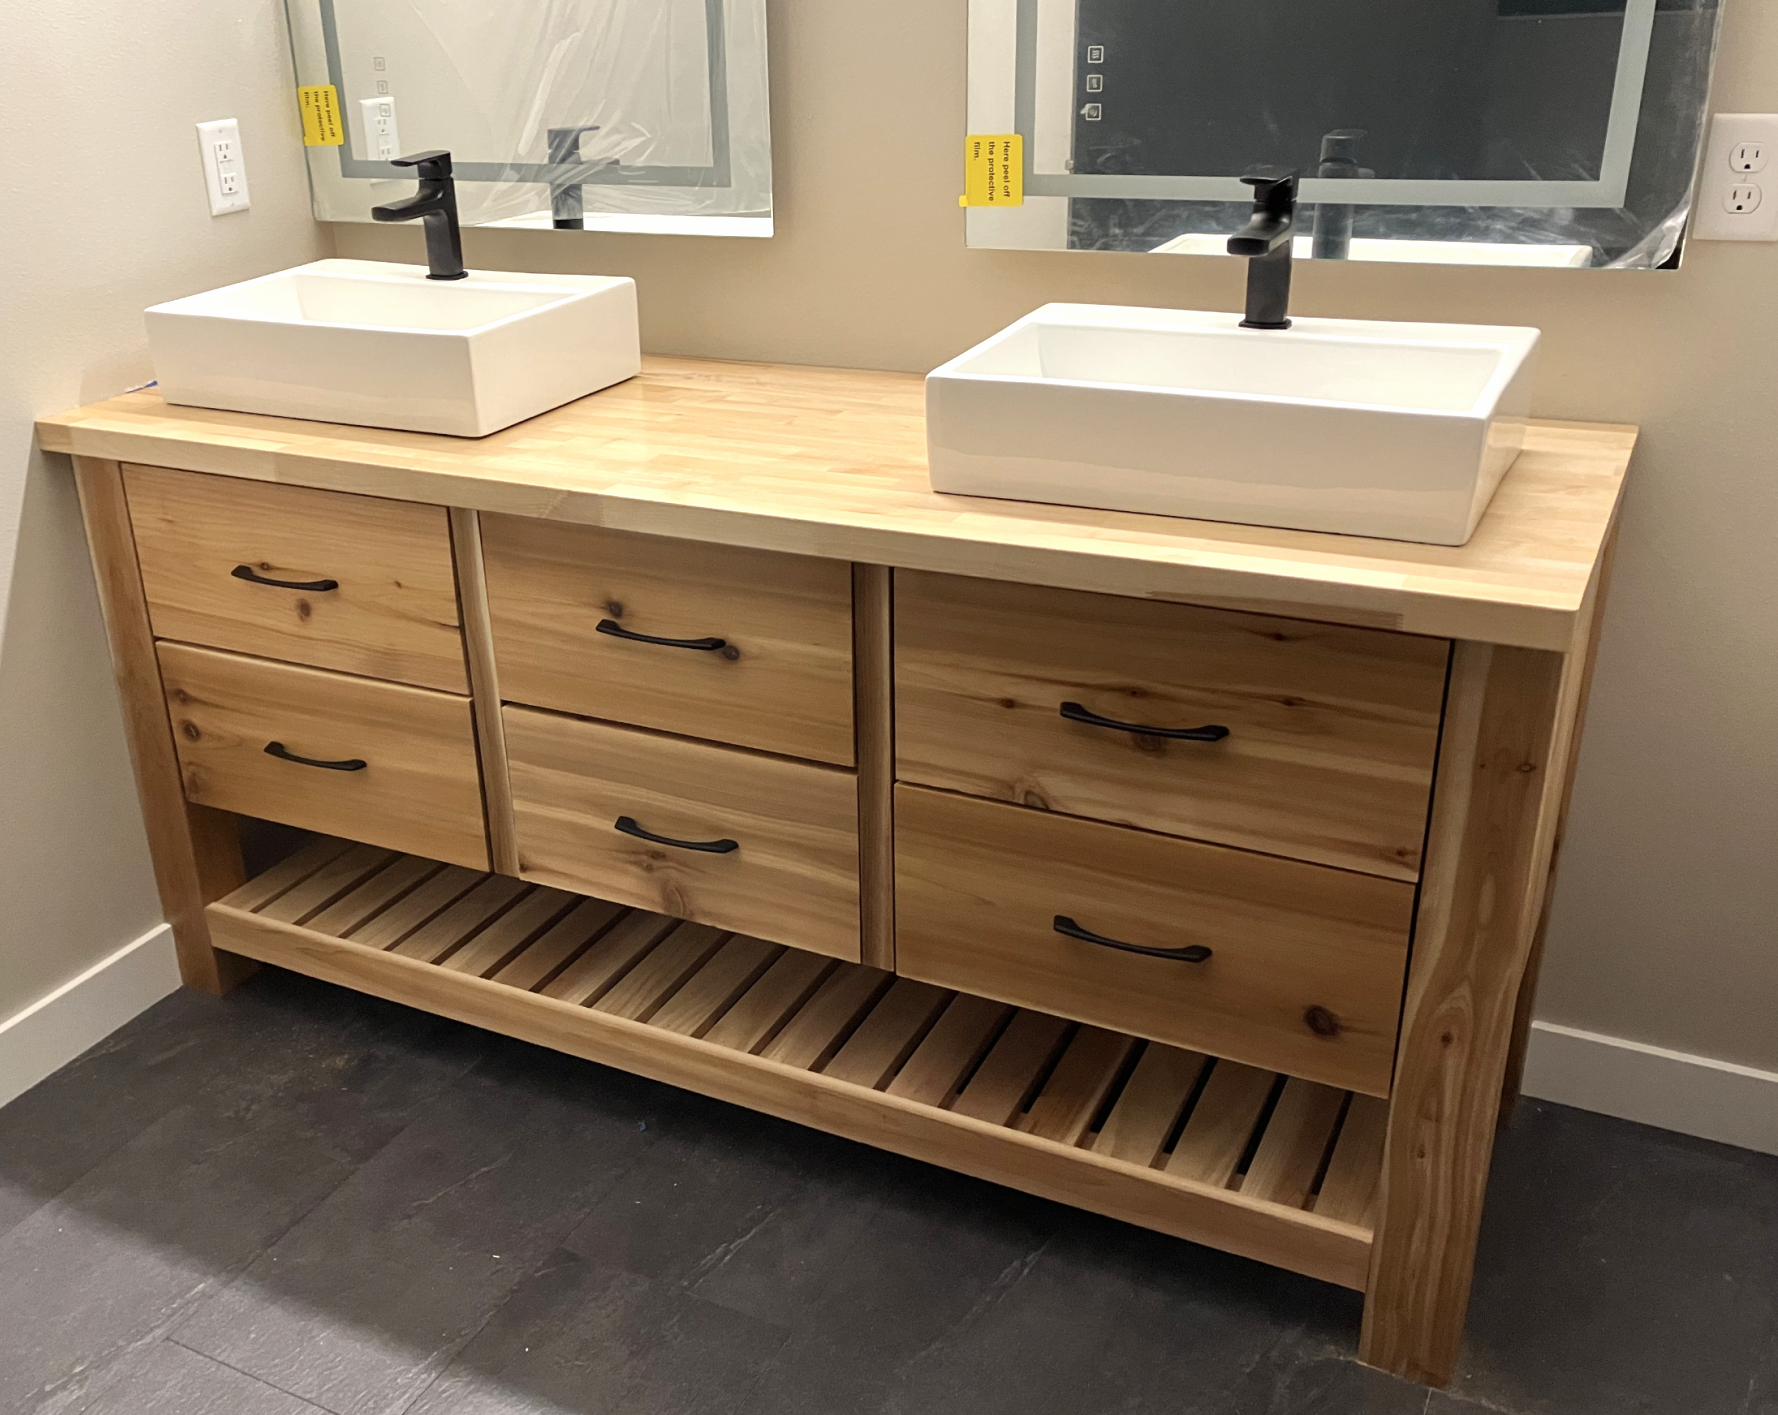
After looking at some terribly overpriced particle board vanities, I found the lovely Rustic Farmhouse Double Bath Vanity plans and decided to go for it. I think this vanity turned out much better than anything I could have bought with the same amount of money, and it will last much longer too!! Thanks Ana!!
Built from Plan(s)
Comments
Thu, 05/04/2023 - 10:26
WOW, what a vanity!
Absolutely stunning, thank you for sharing your beautiful createion!
Barnwood Frame with Glass and Removable Backing

I'm building the farmhouse bed for my guest room and have a picture I wanted to put above the bed. The black frame it was in originally totally clashed with the new decor so I decided to make a frame that somewhat matched the finish on the bed.
I used a 1x3 for the inside pieces and 1x2 for the outside boarder. I used Minwax English Chestnut on the frame to match the distressed part of the bed and finished it with Minwax finishing wax.
The picture I framed is 24X36. I wanted to use glass and have the frame function like a normal frame so I made the inside dimensions of the frame roughly ½-¾ of an inch smaller than the picture. (this was after completely assembling it and realizing the glass and picture fell right through the opening, OOPS!)
I had some leftover scrap that I had to cut off of a 1x2 for my headboard (If you notice the small slats on either end of the bed, these had to be trimmed slightly to fit) that I nailed to the back of the frame to surround the picture, I used the glass as a template for where to nail these in to allow the picture to fit.
The “glass” and backing I used were from a cheap old poster frame that I am no longer using.
I wanted the back to be removable so I took a 1x2 and cut 10 slivers off of it to be the movable tabs on the back that hold it all in. It was great fun looking for these after I cut them as they will fly all over the place when you cut them! I screwed them on so that you can turn them like on a store bought frame to change out the picture.


Built from Plan(s)
Estimated Cost
Under $10
Estimated Time Investment
An Hour or Two (0-2 Hours)
Finish Used
Minwax English Chestnut and Minwax Finishing Wax
Recommended Skill Level
Starter Project
Comments
Mon, 10/22/2012 - 09:35
Little Gir's Loft bed plans
that is so nice. the price for construction much lighter on the pocket than Pottery Barn and the pride and satisfaction invaluable.
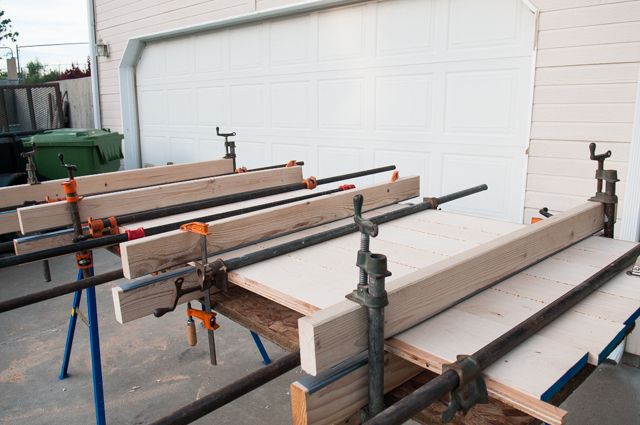
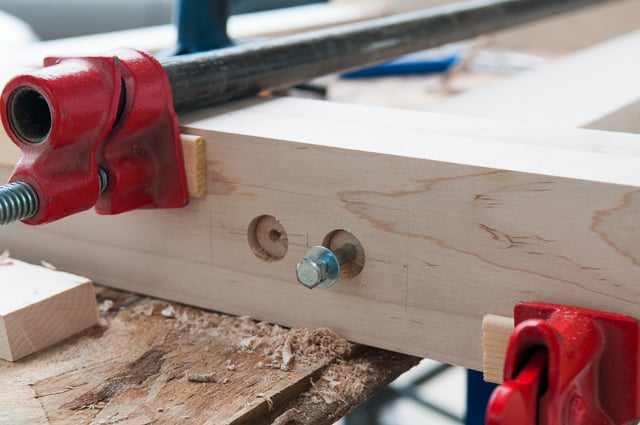
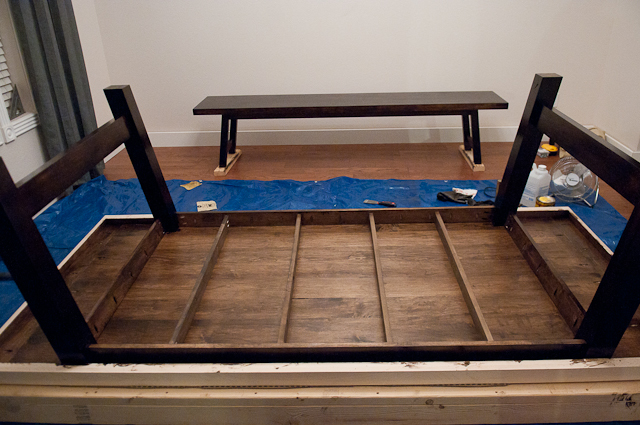
DIY Benchwright Table and Bench
My husband says I have impeccable timing with all of my projects – I say there’s never a bad time to start a project! Case in point – my farmhouse table. I was five months pregnant visiting my parents in Idaho (I live in Arizona) and I decided that it was a good time to finally build the table I had talked of for two years. There’s no time like the present, right? My dad questioned my ability to get the table back to AZ safely, but I threw caution to the wind and would figure it out later! I built the table and matching bench out of hard maple and followed plans based on the Pottery Barn Benchwright series. I had never worked with hardwood before and there was definitely a learning curve. Luckily my dad had some experience with hardwood and he was able to lead me in the right direction. I pieced together the table top and bench top, and then assembled the legs, but kept them unattached from the table top. I built a wooden frame to transport the table to Arizona and attached it to the top of my car. In the heat of an Arizona summer, I proceeded to finish the table by staining it with an espresso stain from Minwax and then attaching the legs. Finishing projects like this always take more time than I anticipate and this table was no exception. After days and days of staining and days and days of drying, I sealed it with a wipe on poly. I lost count of how many coats I applied, but I know it was more than 15. Yes, 15. Wiping it on doesn’t apply a thick layer, so I did a lot of layers. I had to protect it from my 4 kids! I finished just a few weeks before I had the baby. Timing is everything. :) To see more details on the project check out my blog at lifewithfingerprints.com


Built from Plan(s)
Estimated Cost
$600
Estimated Time Investment
Week Long Project (20 Hours or More)
Finish Used
Minwax espresso stain with satin wipe-on poly
Recommended Skill Level
Advanced
Comments

Mon, 12/02/2013 - 07:33
Looks Great! I've built a
Looks Great! I've built a few of tables of this same style and love them. What thickness did your top end up being?
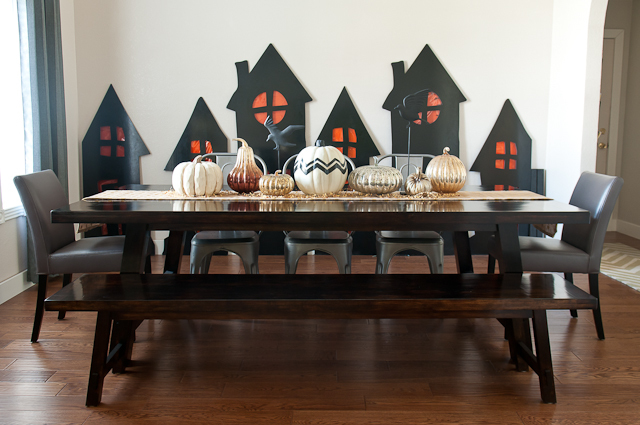
Seasonal And Holiday
Thank you!
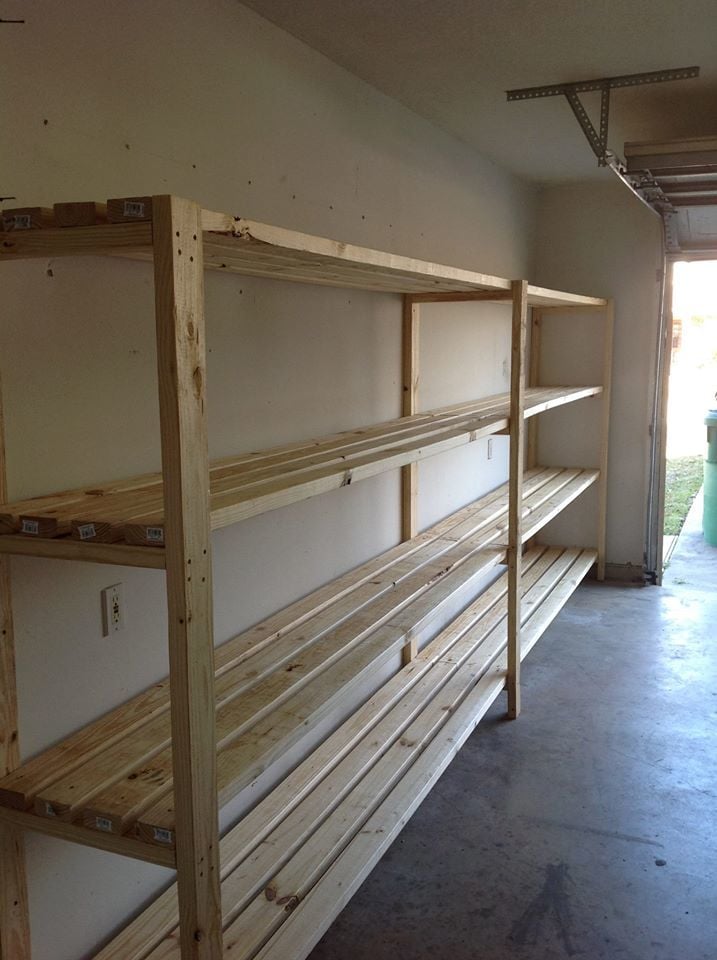
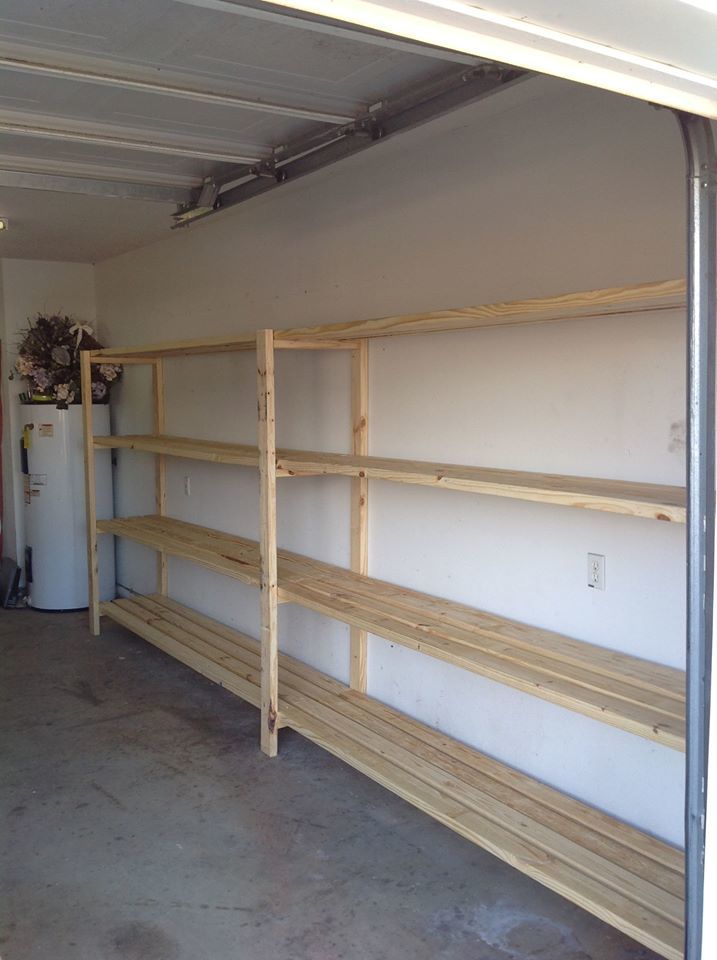
Thank you for the plans! Love the shelves!
Built from Plan(s)
Estimated Cost
$150
Estimated Time Investment
An Hour or Two (0-2 Hours)
Recommended Skill Level
Starter Project
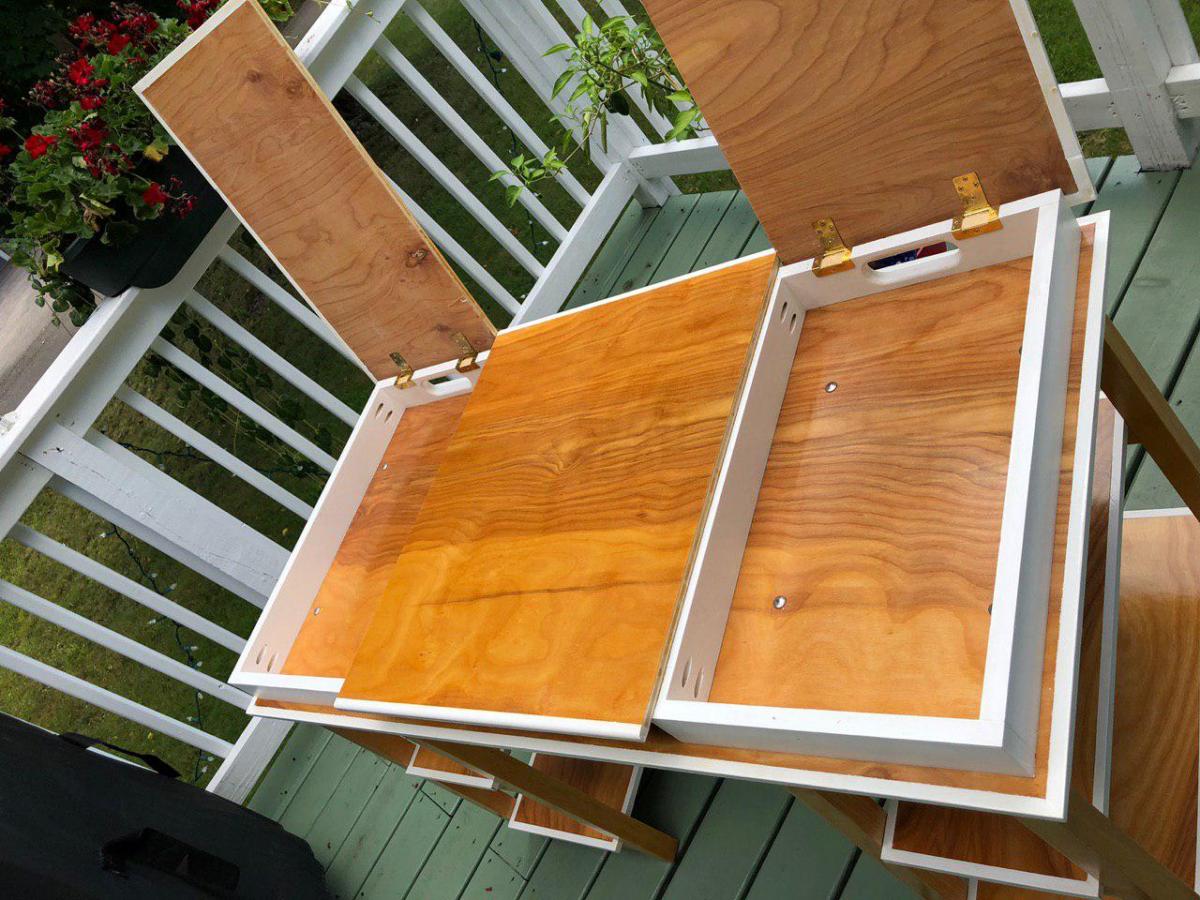
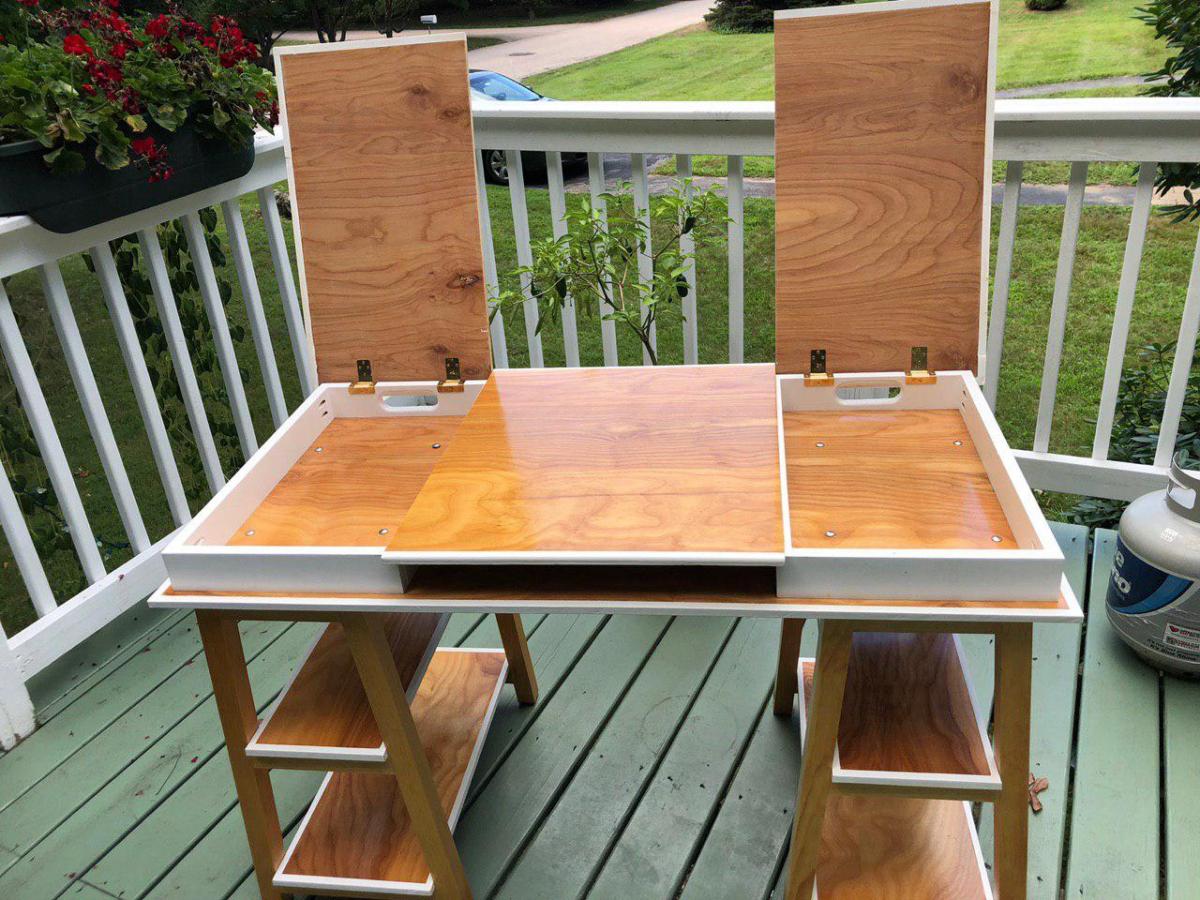
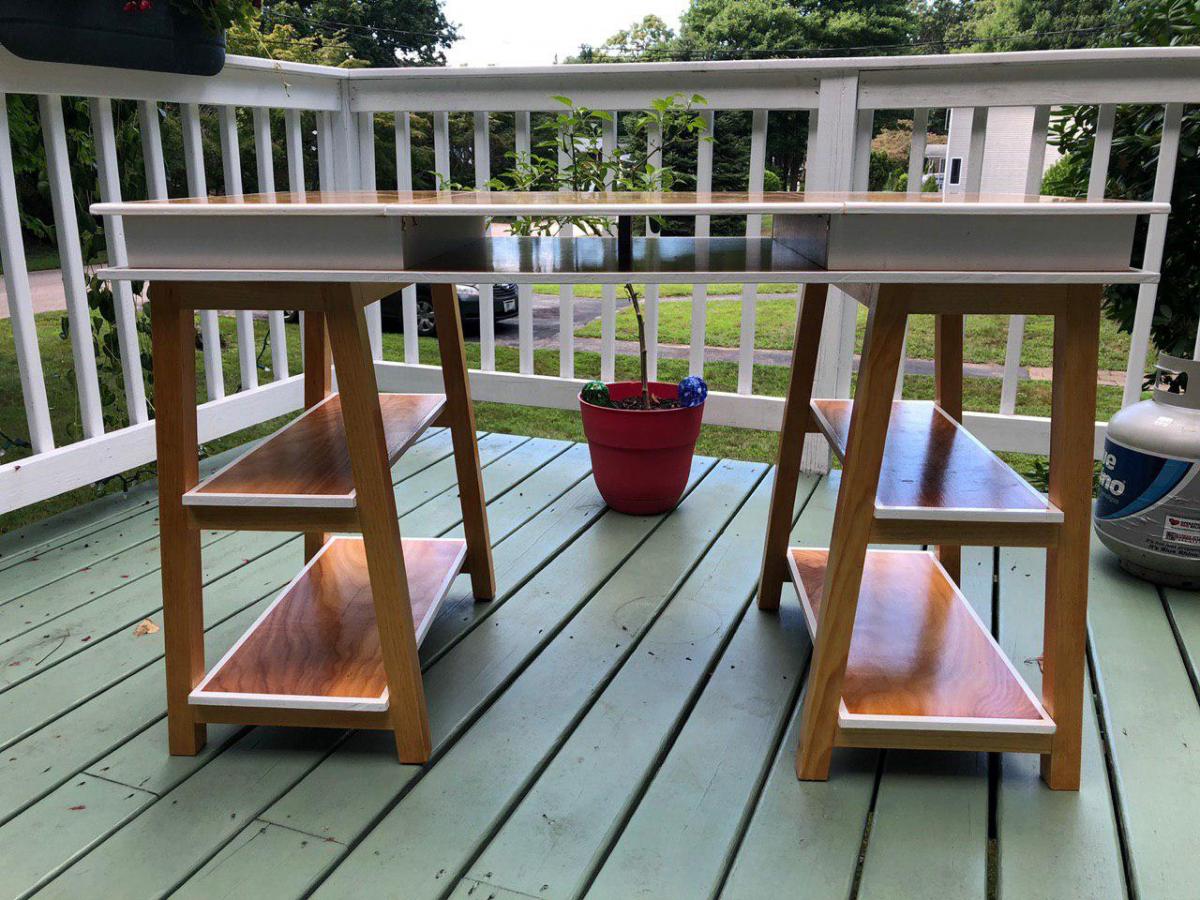
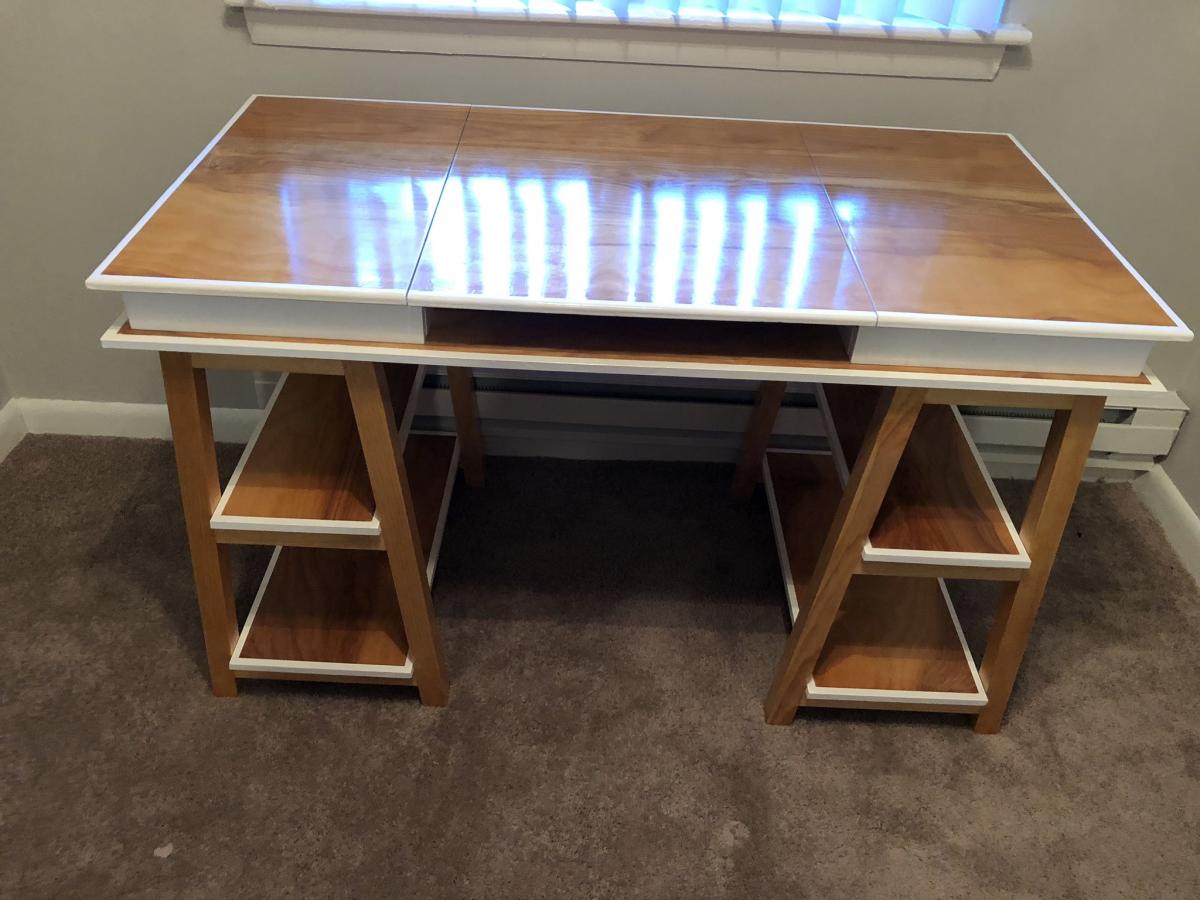
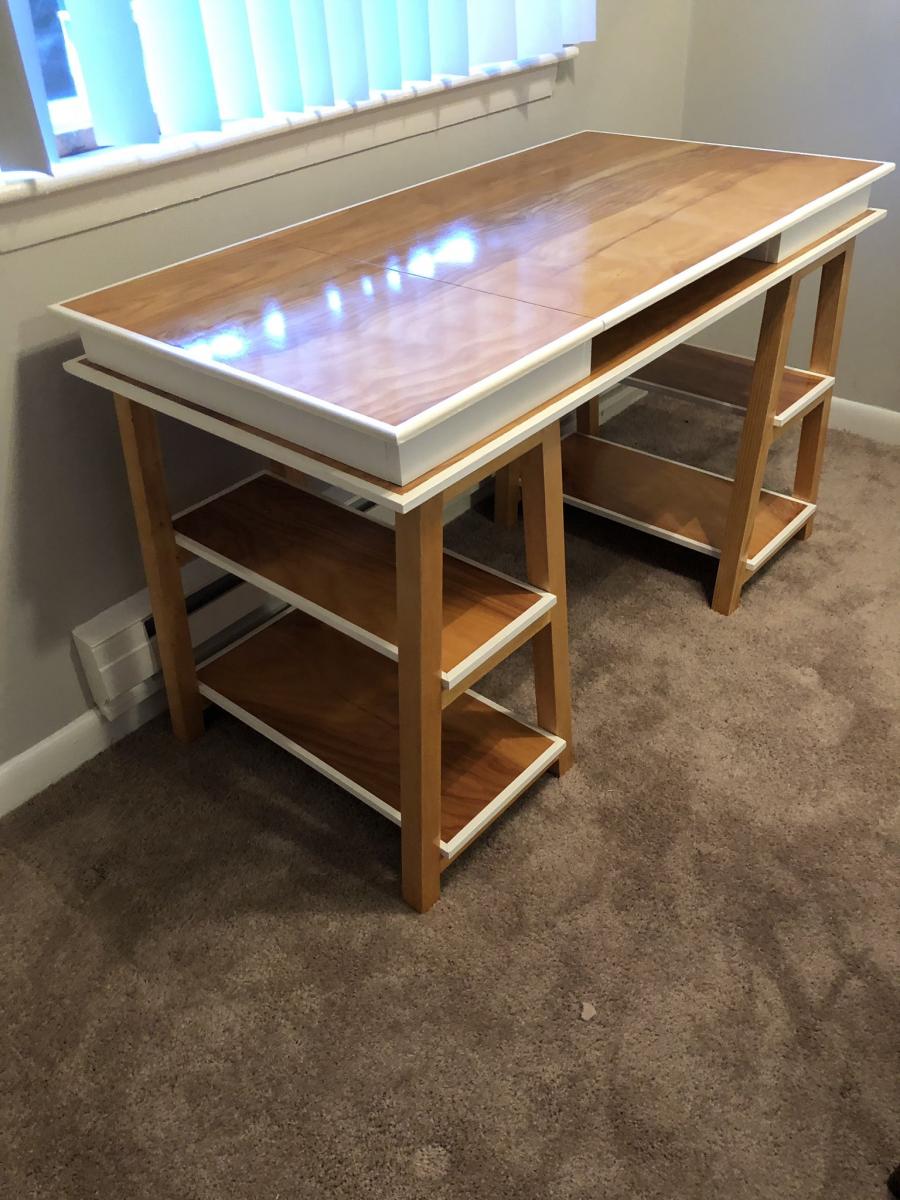
Sawhorse Storage Leg Desk
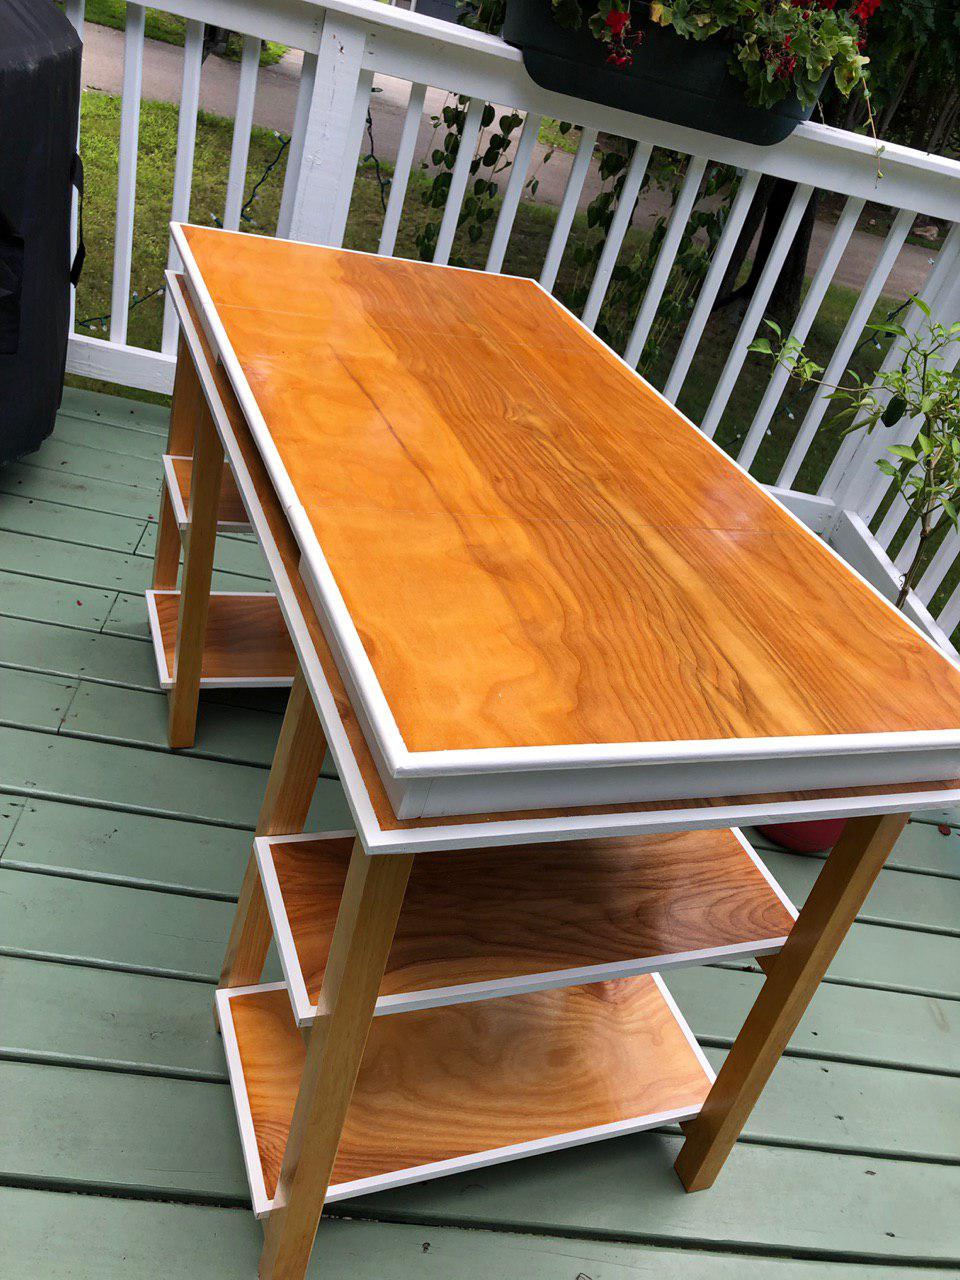
Based on the plans for the sawhorse storage leg desk.
I added some trim around the edges with a roundover on the top for comfort when leaning against it. Plus a few coats of poly for protection.
Built from Plan(s)
Estimated Cost
$125
Estimated Time Investment
Week Long Project (20 Hours or More)
Finish Used
White paint
Varathan Ultimate Polyurethane - water based
Varathan Ultimate Polyurethane - water based
Recommended Skill Level
Intermediate
Nightstands
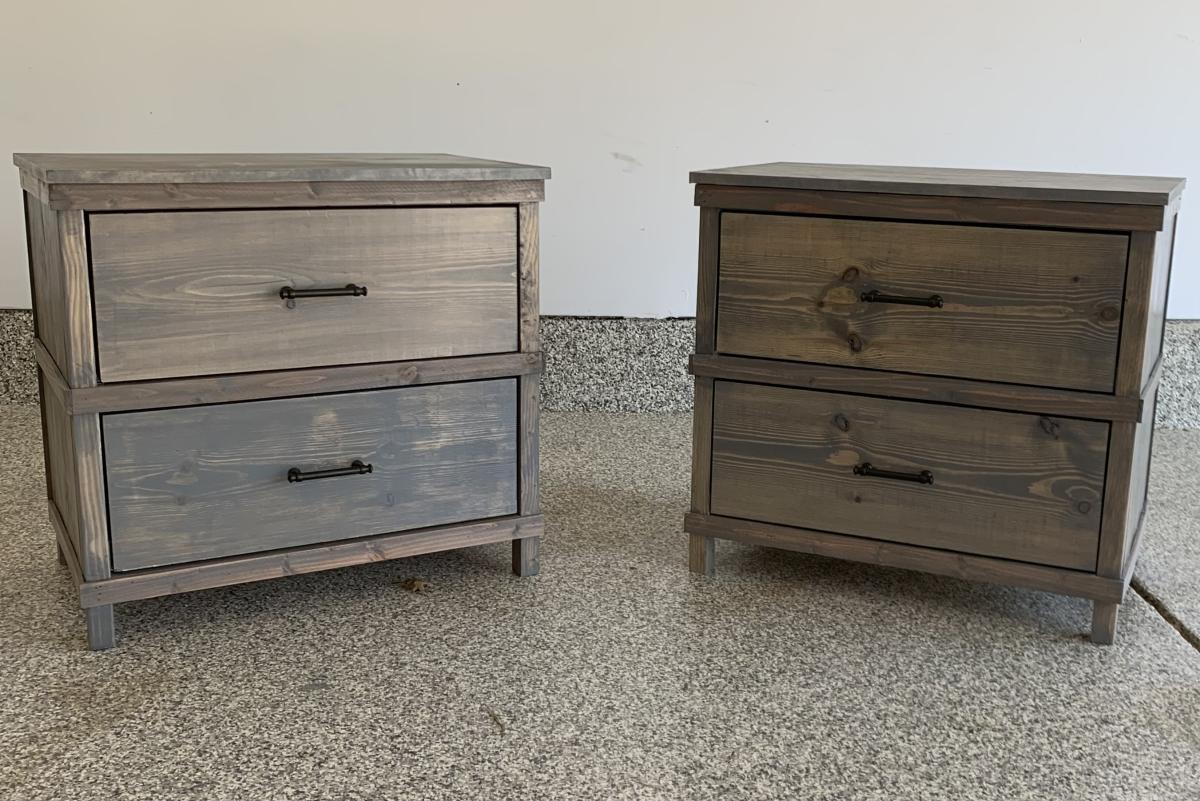
Fun and rewarding projects to finish. Took me way too long to finish, but 2 sever TBIs will do that to a person. Made a few modifications to the original King and nightstand plans but worked out fine. Thanks for these plans Ana!
Built from Plan(s)
Comments
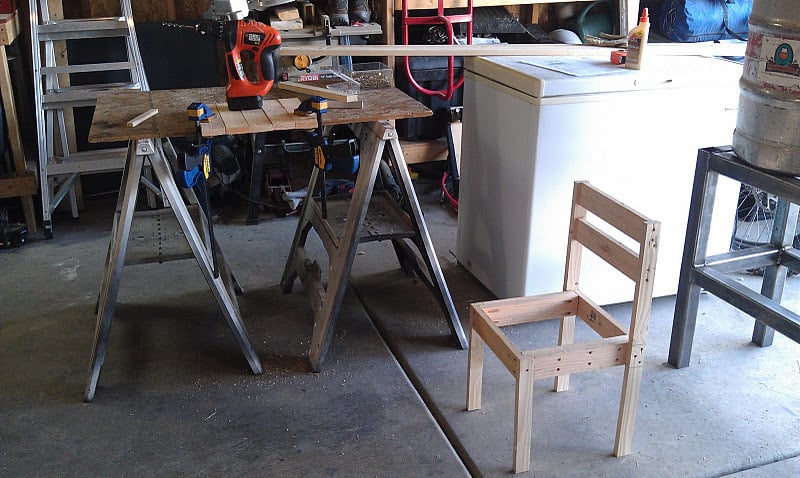
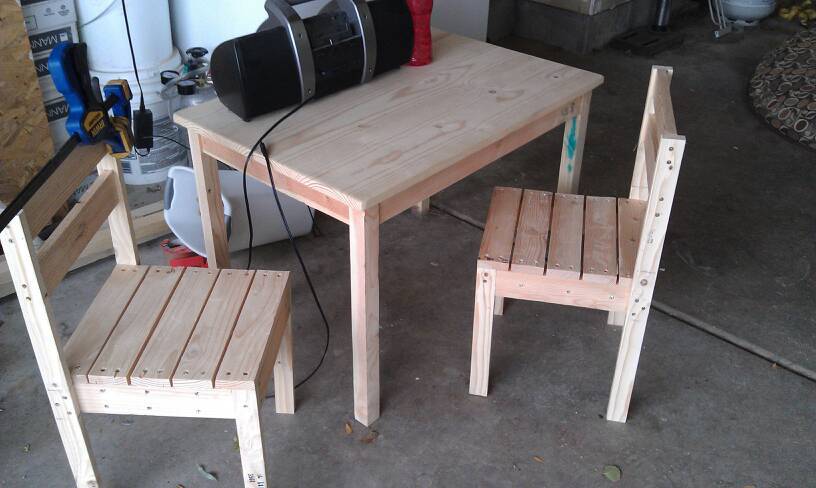
Amelia's Table and Chairs
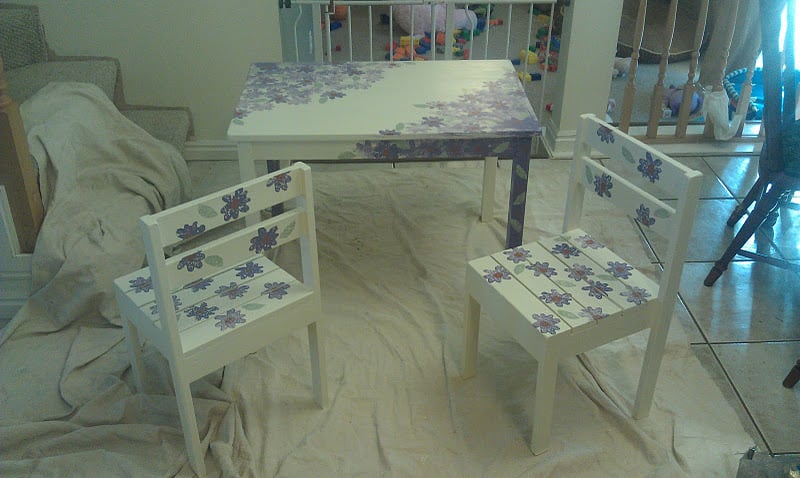
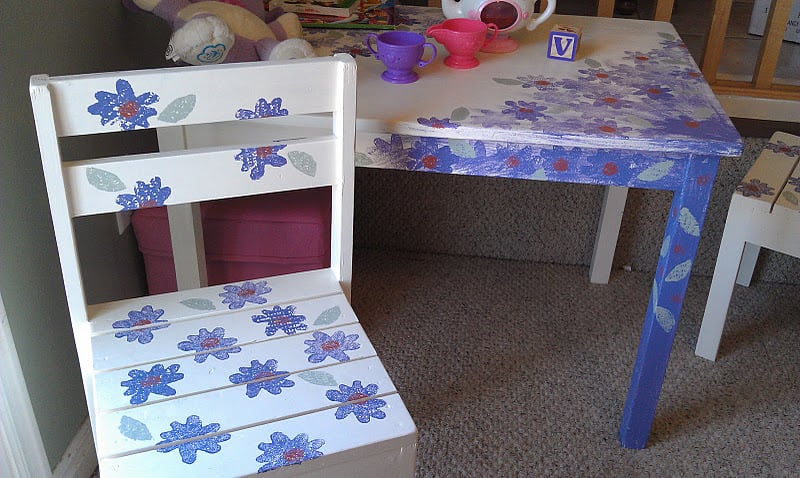
This is my first build! It took a lot longer than I hoped, since I could only work during nap-times. I probably used way more screw than necessary, and I didn't have the straightest pieces of wood. I'm especially happy with the paint job. I used some leftover interior house paint and cut up an old dish sponge to sponge on the flowers and accents. But I got it done by Christmas and now I can't wait to use my brand new Kreg Jig on a new twin sized bed for Amelia, or maybe some raised garden beds!! :)
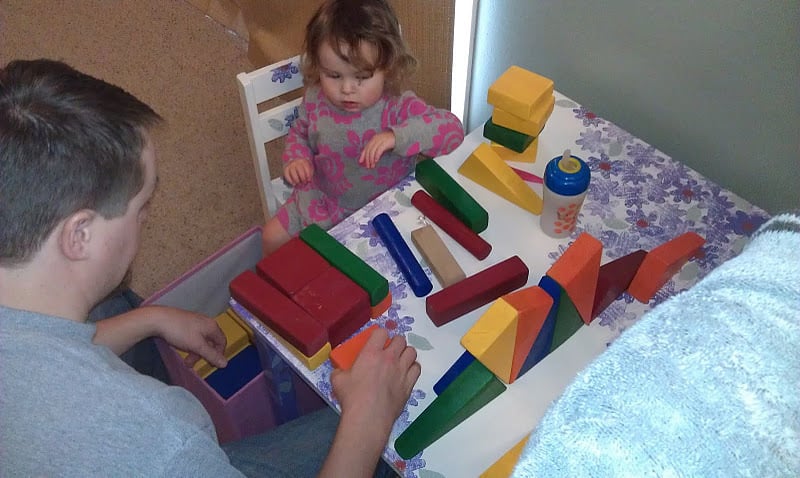
Amelia LOVES her new table. She loves to hide underneath it. She loves to dance on top of it. She loves to pile all of her blocks on top of it. And she practically demands that Mommy and Daddy go over to "Sheet Down" and "Culor" with her. (I apologize for all the camera phone pictures.)
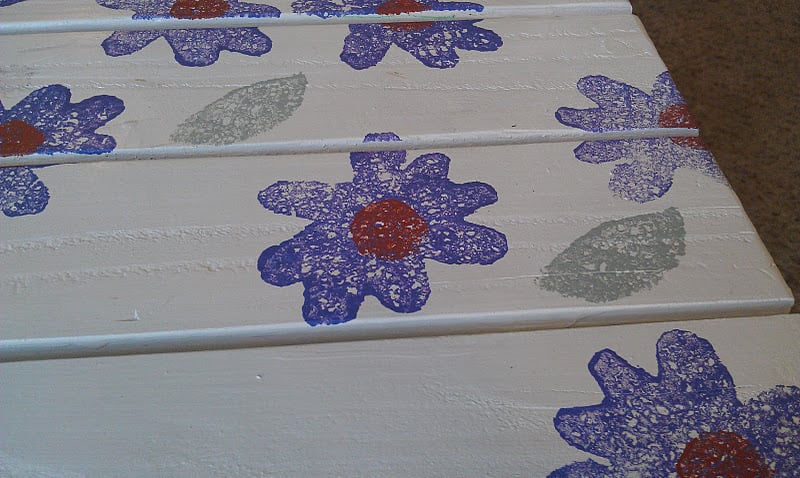
*Edit: I added two more pictures to show more detail on my first ever paint a'la Scotch Brite attempt. :)
Built from Plan(s)
Estimated Cost
$25 - $125 If you include the Kreg Jig.
Estimated Time Investment
Week Long Project (20 Hours or More)
Finish Used
Interior Latex Semi-Gloss Paints
Recommended Skill Level
Beginner
Comments

Fri, 01/06/2012 - 04:50
So pretty!
Great job! That paint job is amazing. Actually the photos are great, but wish you had a close up of the flowers.

Fri, 01/06/2012 - 07:18
Spiceylg, if you click on the
Spiceylg, if you click on the top picture it should open in a separate window in an enlarged form so you can see more detail on the flowers.
UtahBeth, I love the flower paint job, too! Very cute.
Fri, 01/06/2012 - 08:31
Bigger picture
Thanx Pam the Goatherd! I feel silly, I never even tried that before. So adorable UtahBeth! Love how the flowers are all over!
Sat, 01/07/2012 - 10:20
You're welcome. Don't feel
You're welcome. Don't feel silly. I didn't know it would work until I tried it myself!
Fri, 01/13/2012 - 10:56
Thank you!
Thank you! I'm still a little surprised at how well the painting came out. I added a couple more pictures for your perusal. Now I need to get started on Amelia Captain's Bed.! :)
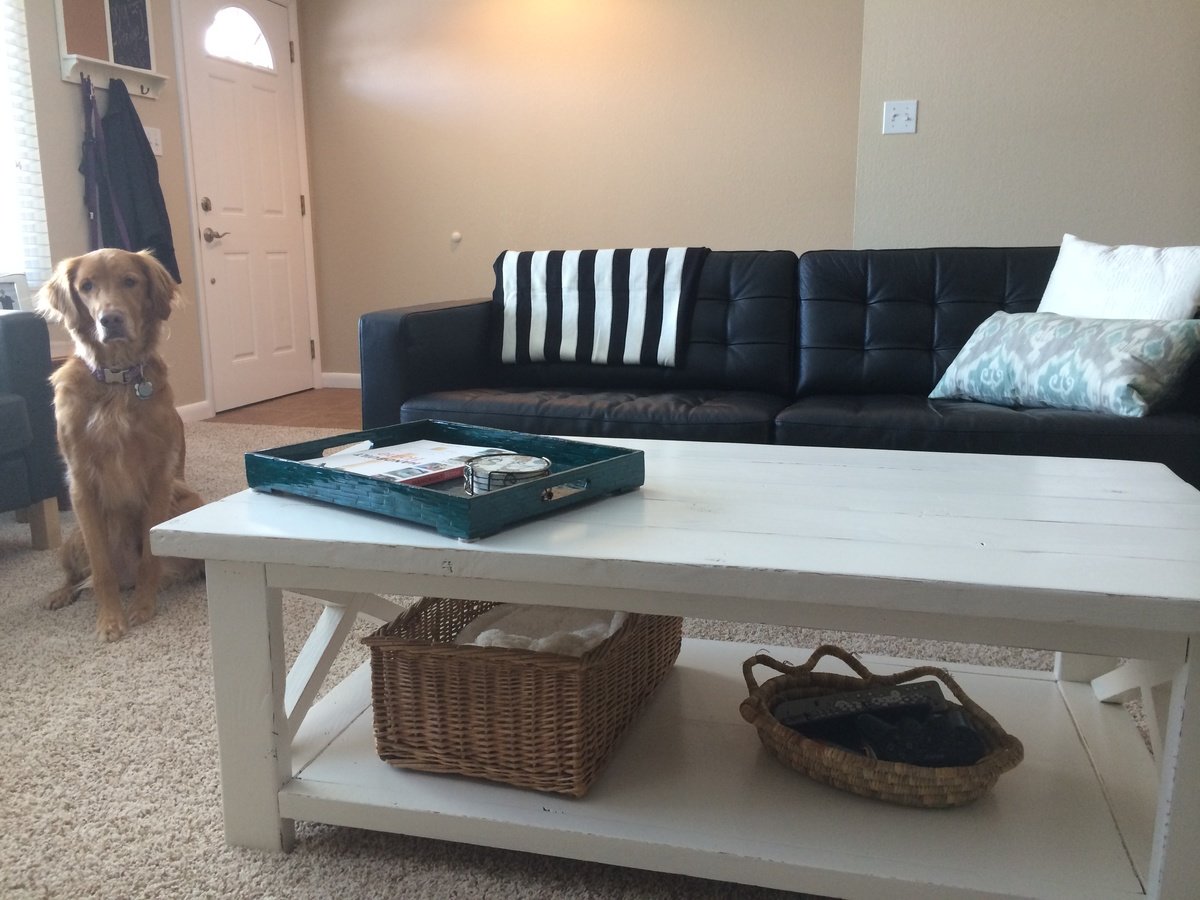
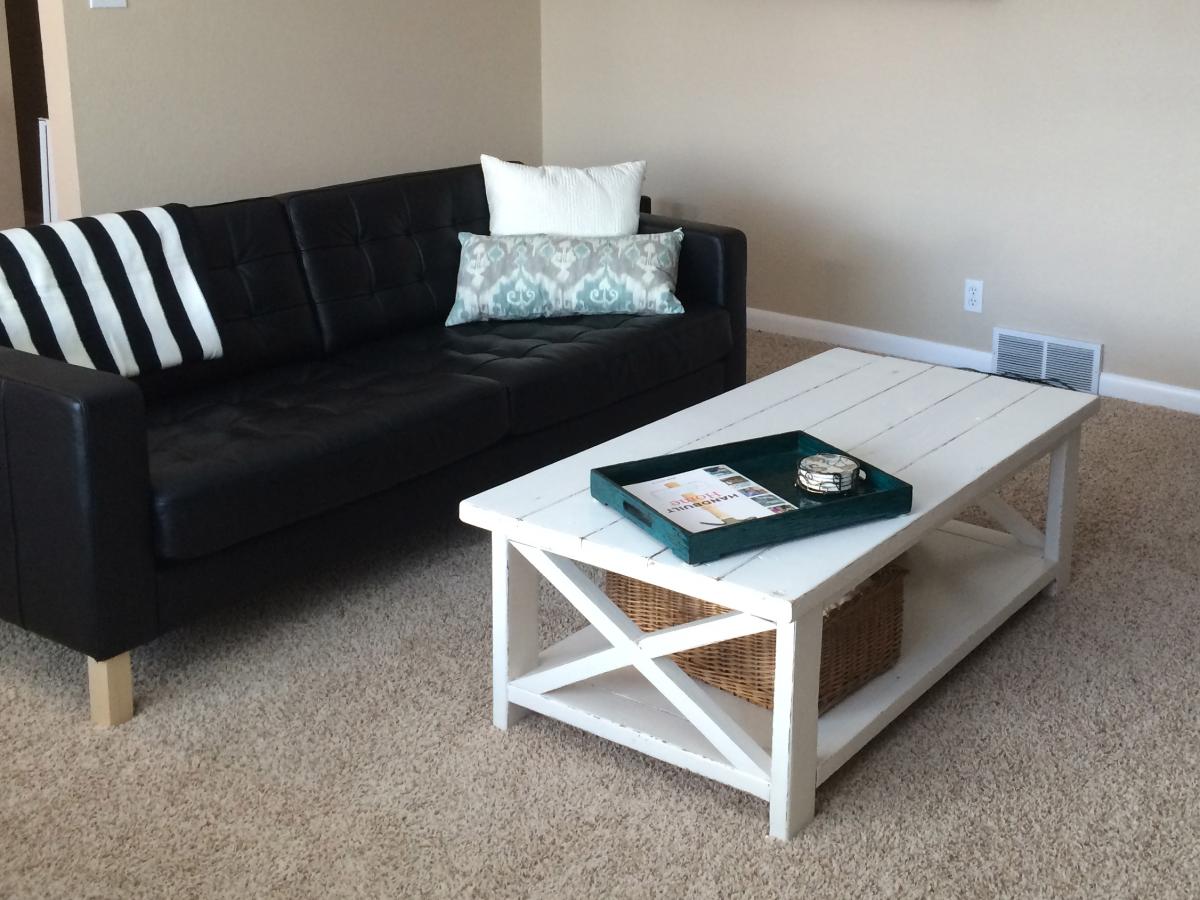
Rustic X Coffee Table

This was my first build and I am so happy with how it turned out! The instructions were easy to follow and I learned a ton throughout the process. I had a little bit of trouble getting the angles right for the X's. I ended up just placing the boards against the wood at the angles they needed to go, scribing with a pencil and then angling the wood/blade to match the cut as someone described in the comments. It's not perfect, but pretty close. I originally planned on staining the table, but thought it looked a little to dark so I ended up painting it white. I can't wait to make the end tables now!

Built from Plan(s)
Estimated Cost
$50
Estimated Time Investment
Weekend Project (10-20 Hours)
Finish Used
I started out by staining the table with Minwax Special Walnut. It looked beautiful but just wasn't right for the room, so I painted two coats of Glidden Antique White paint on top of the stain. I then hand sanded the edges to give it a distressed look (and let some of the stain show through) and applied two coats of Minwax Polycryclic in satin.
Recommended Skill Level
Starter Project
Comments

Sat, 11/23/2013 - 19:39
Great job! I've also had
Great job! I've also had problems getting angles cut right.
My First Sideboard
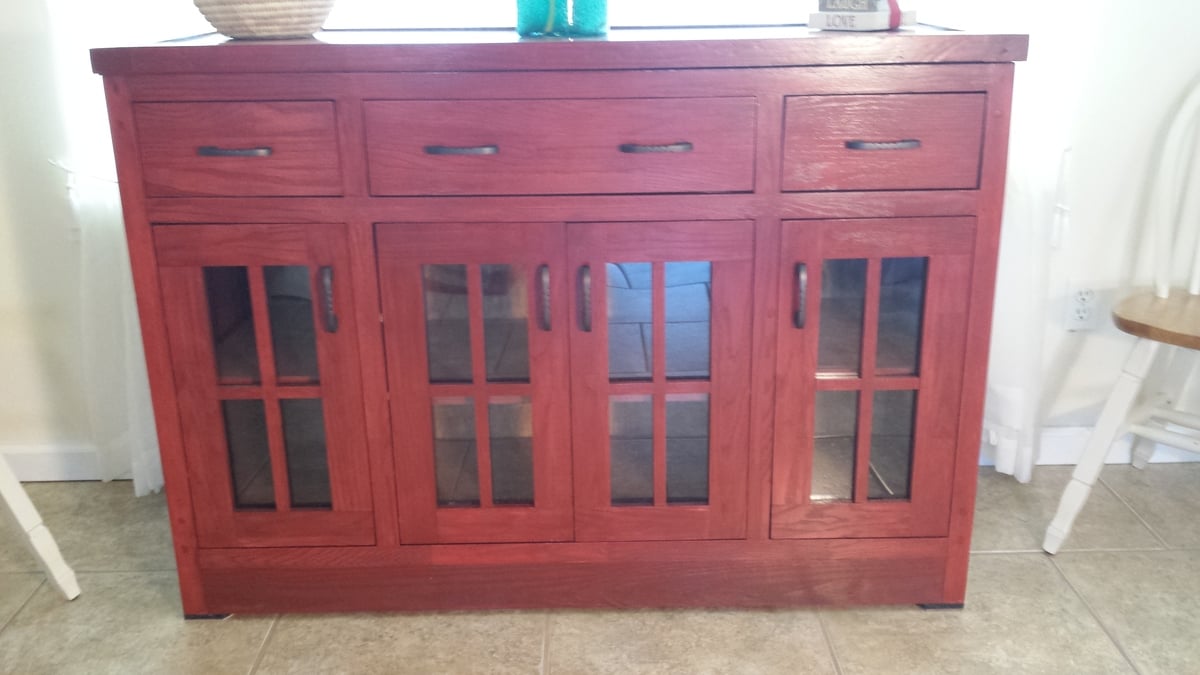
Modified the plans to shorten the sideboard. Inset the back into dadoes. Added four light windows. Lightened top by making 3/4" oak in 1-1/2" frame. Turned out not bad for a first furniture attempt.
Built from Plan(s)
Estimated Cost
$400
Finish Used
Satin polyurethane over red penetrating stain.
Recommended Skill Level
Starter Project
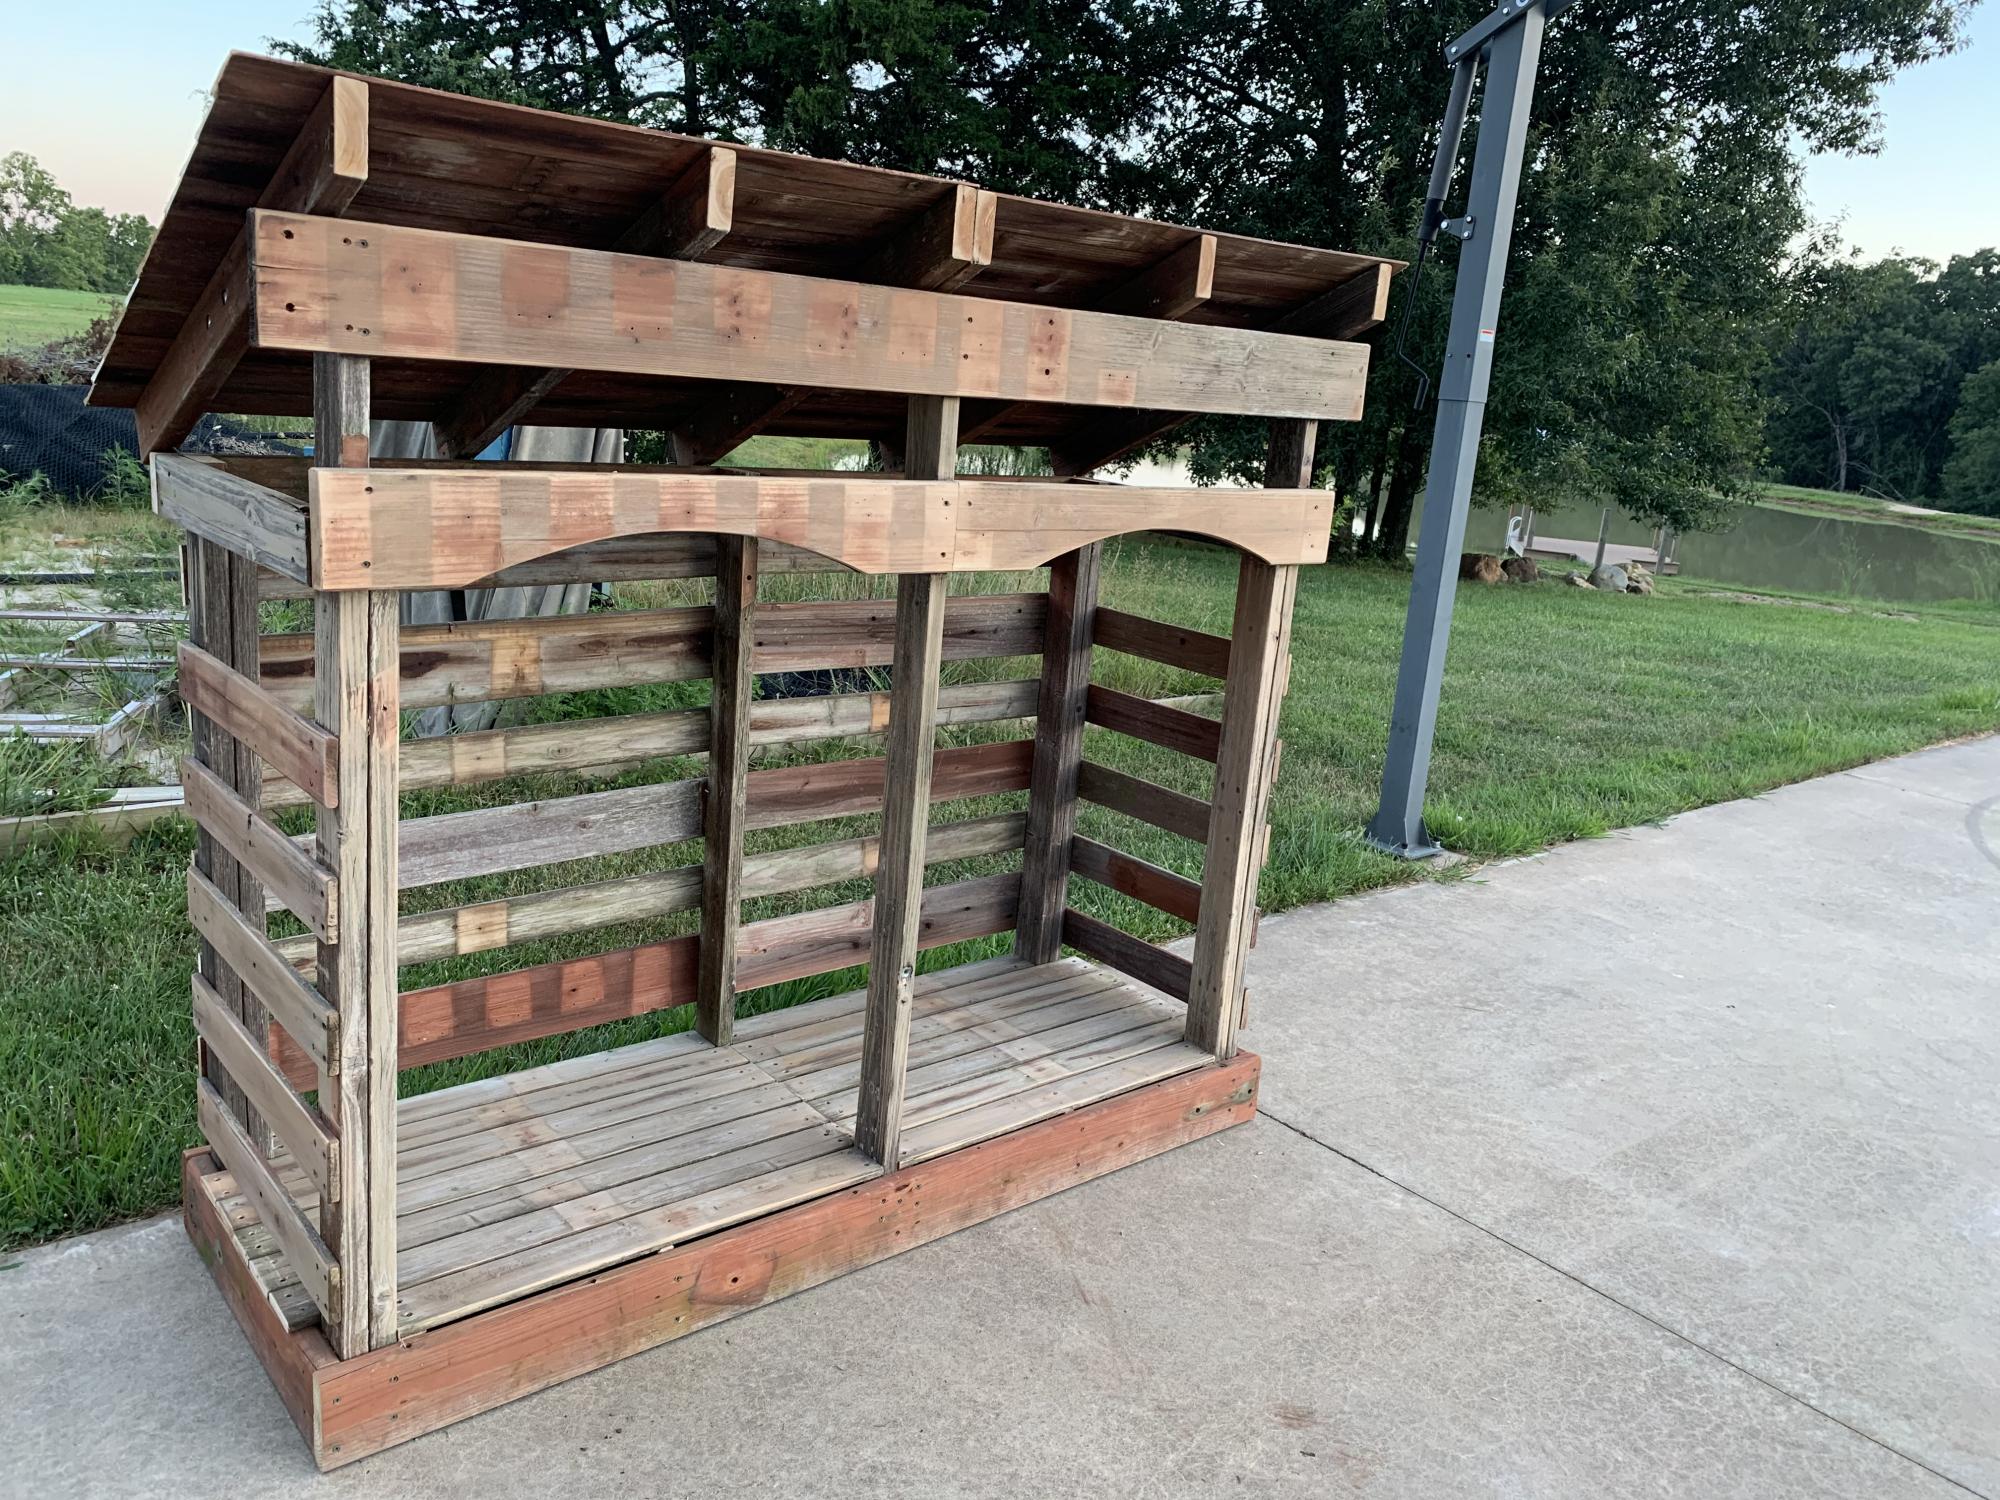
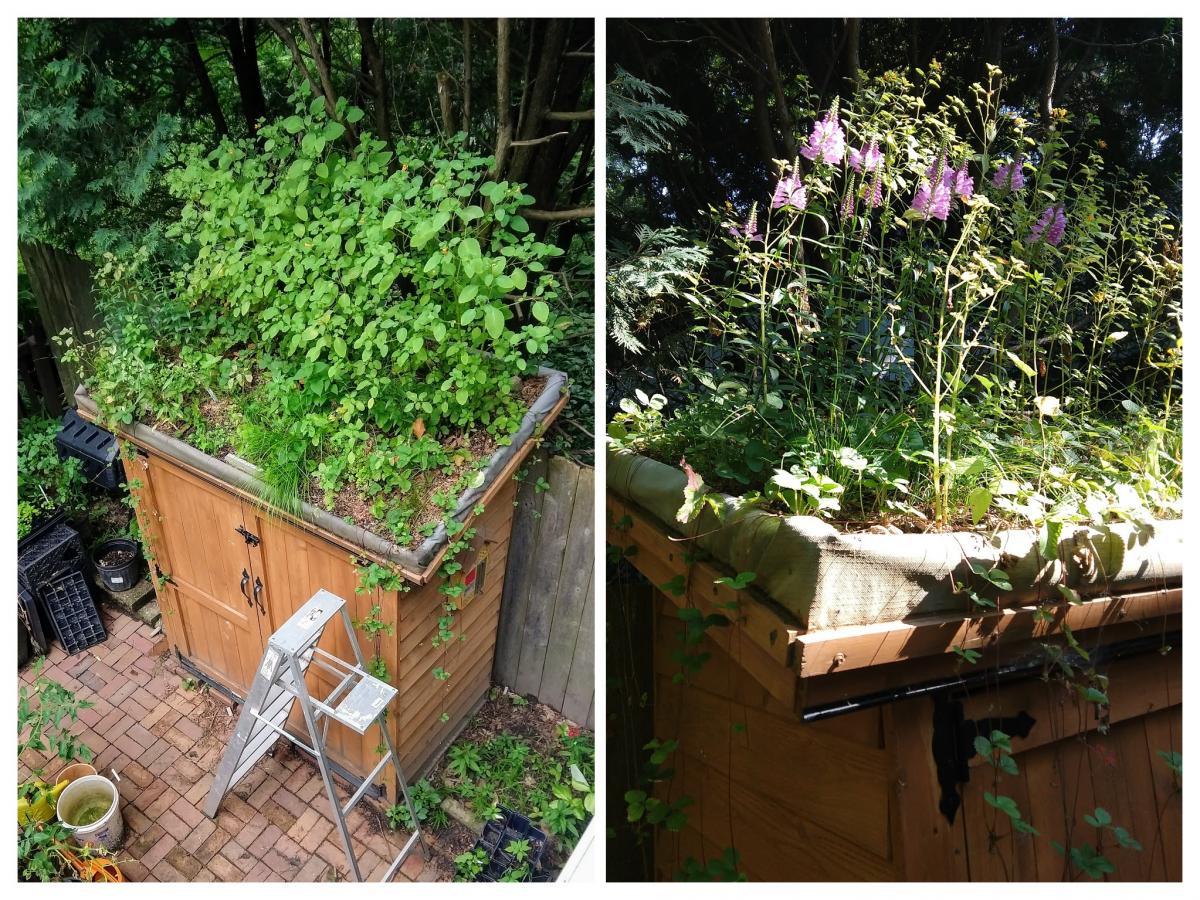
Small Cedar Shed with Living Roof

I built the shed during the summer of 2018, following Ana's plans but with the addition of a green roof. After almost a year the vegetation -- a variety of native plants from the upper Midwest -- has started to fill in pretty well. My carpentry skills are rudimentary so the project took a long time but was worth the effort.
Built from Plan(s)
Estimated Time Investment
Week Long Project (20 Hours or More)
Finish Used
Wolman™ F&P Cedar Finish and Preservative, if I remember correctly.
Recommended Skill Level
Intermediate
Comments

Thu, 09/02/2021 - 19:03
Small generator enclosure
Absolutely love this. Are plans available so I can make this as a generator enclosure???
Team Chairs
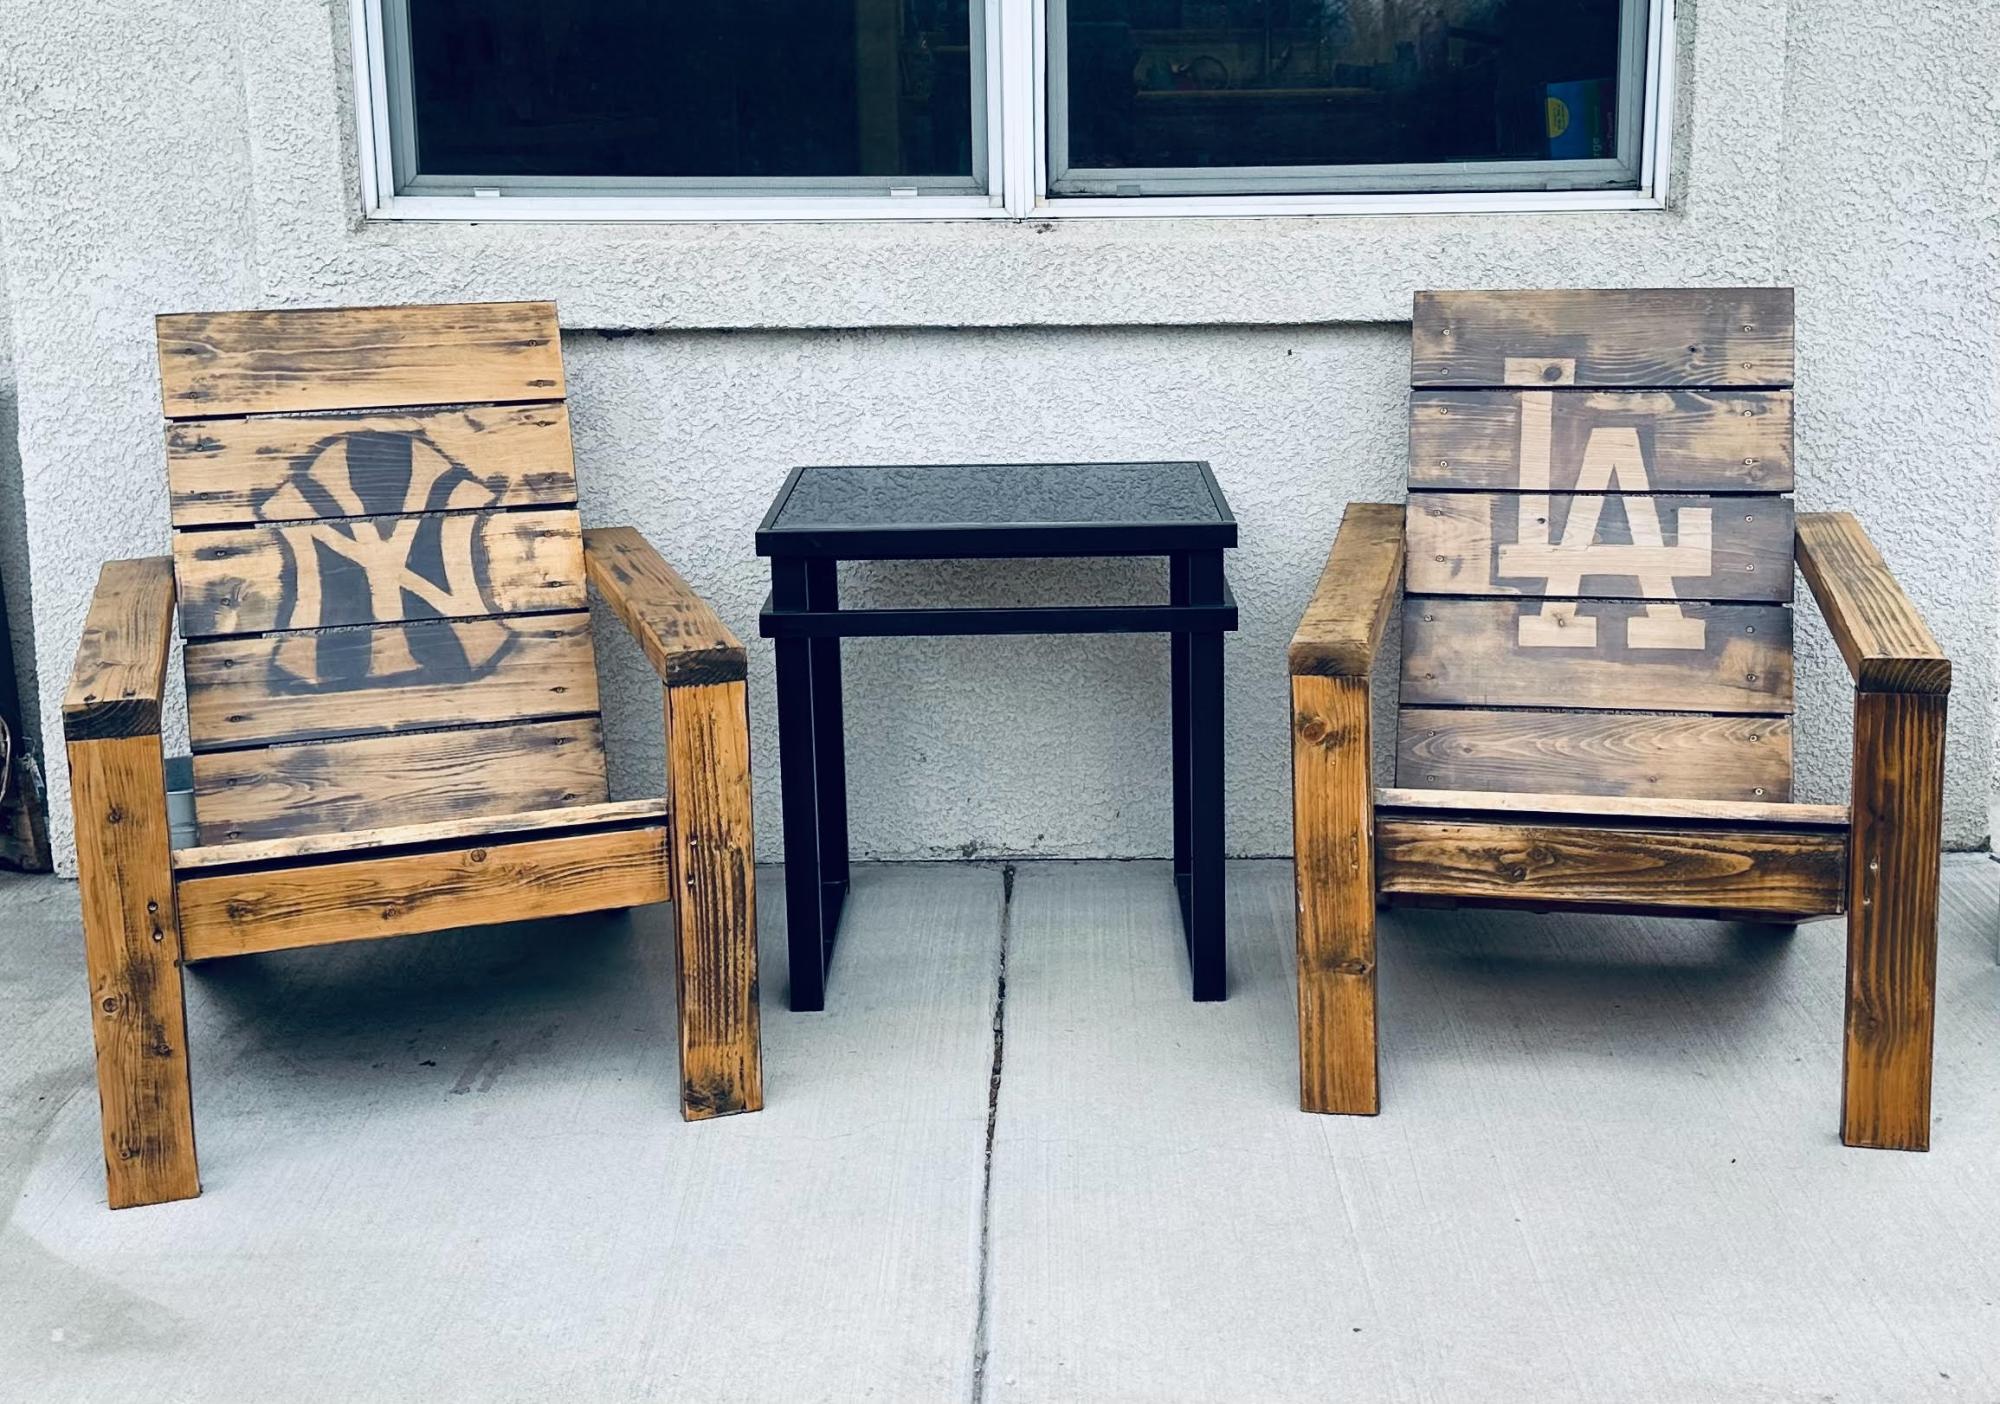
I’ve always had a passion for creating simple, yet functional, wood projects…but definitely not a lot knowledge on how to do it. That’s why I so appreciate all of the plans that you share and you’re kindness of making them so freely available. Thank you!!
Here are the chairs I created from your “Essential Adirondack Chair” plans. I added a design when staining them to highlight my husband and I’s favorite teams (Go Yankees )!
)!
Thanks again so much,
Karen
Built from Plan(s)
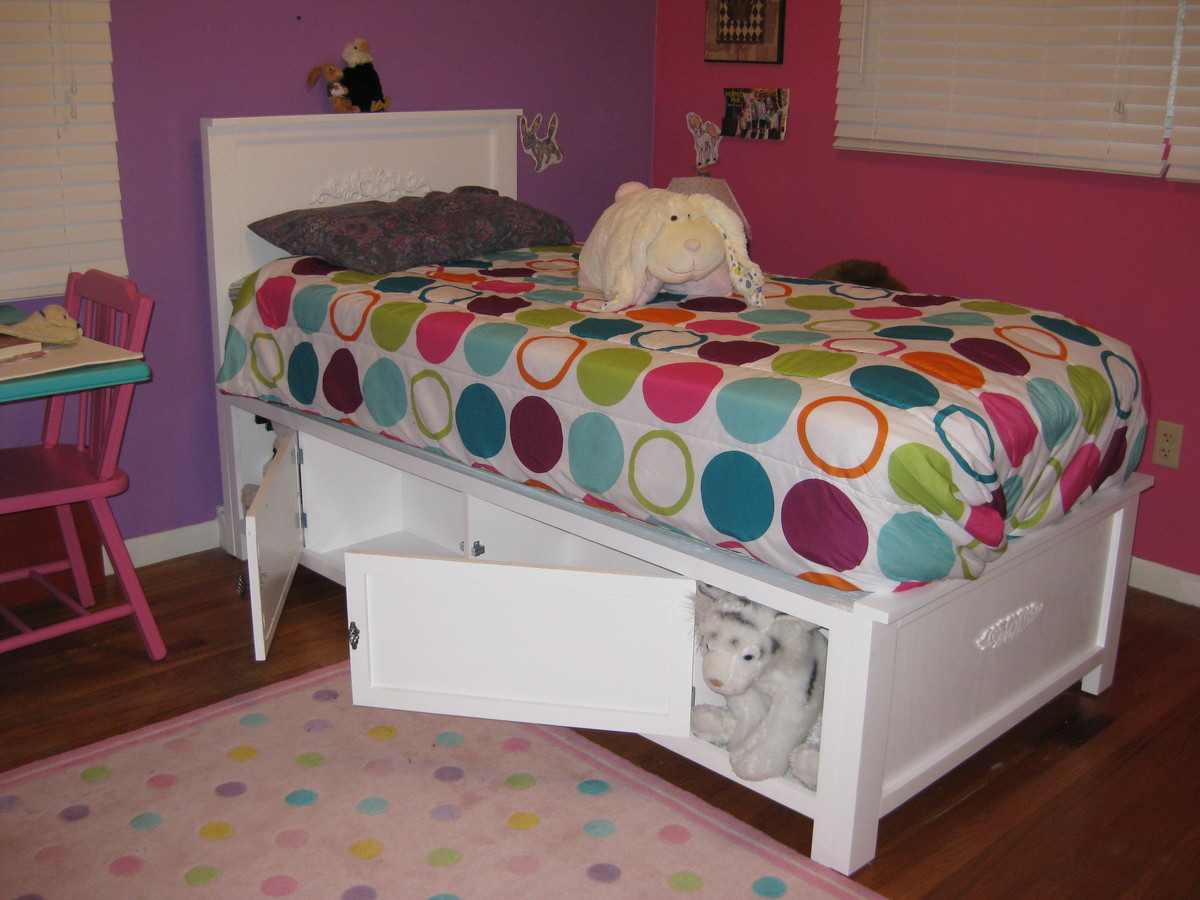
Emma's Storage Bed
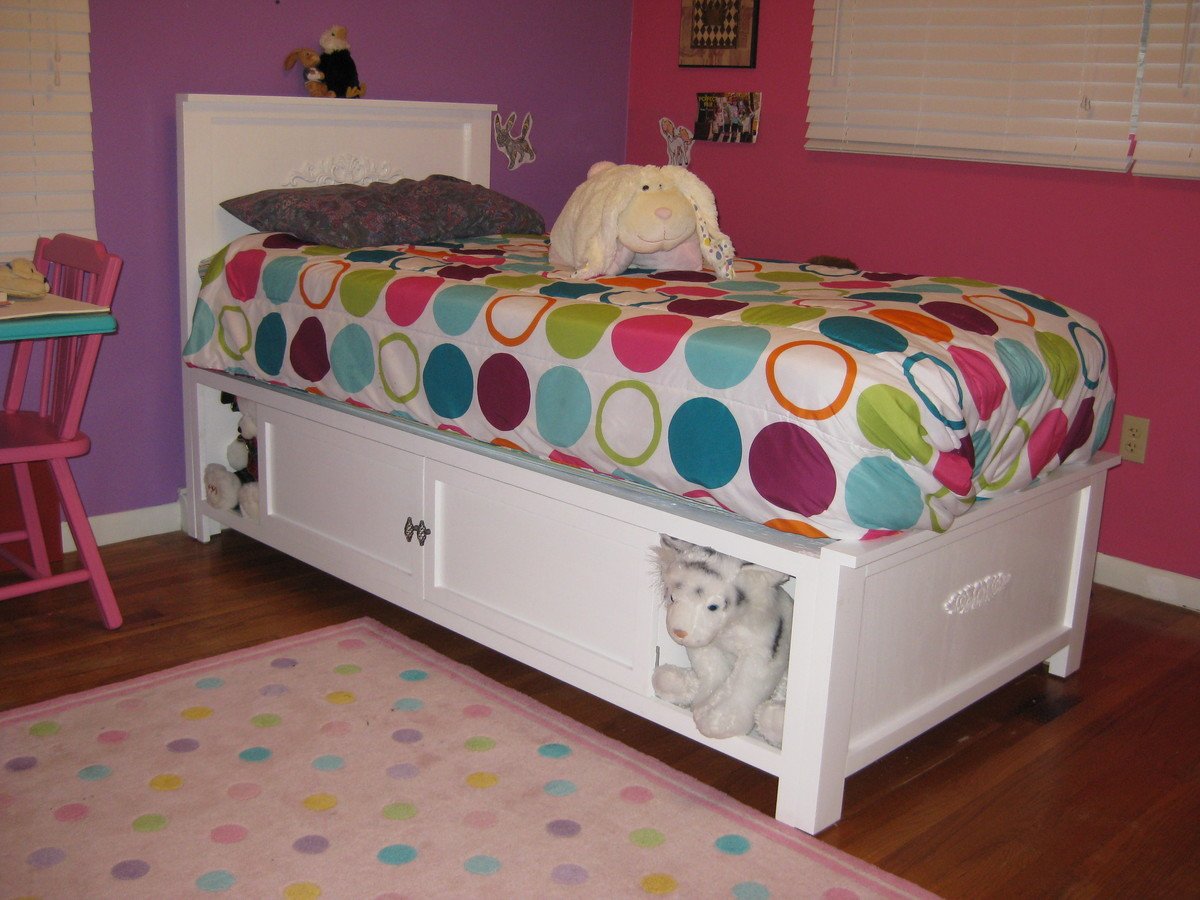
I built this bed for my daughter as a X-mas gift. The build didn't take long at all to make. I followed the plan pretty close. I did a few things differently, but it turned out much the same. I used sanded plywood instead of the particle board for the headboards and foot boards. I was able to remove the feet that show up at the footboard of the bed by putting a long cleat on the back sides of the storage units that sat about 12 inches back from both ends of the head and foot of the bed. I finished the bed in gloss white latex paint. The finishing of the bed took the longest part, followed by sanding.
The Most difficult part of this bed for me was the hinges. I wish that I would have done them a little differently, but they work. Easy fun project.
Built from Plan(s)
Estimated Cost
$150.00
Estimated Time Investment
Week Long Project (20 Hours or More)
Finish Used
Gloss White latex paint
Recommended Skill Level
Intermediate
Comments
Wed, 05/09/2012 - 17:33
I dont understand how the
I dont understand how the headboard goes together. Did you use a Kreg Jig to assemble the headboard? If so, how does the Kreg Jig work?
Is it the same for the footboard?
Any advice you can share with me would be great!
Thanks! :)
Fri, 02/05/2016 - 21:22
Removing the Little Feet
I would like to remove the little feet like you did on the Emma's Storage Bed. If possible could you provide more details on how you did this? Thank you so much - I like your bed!
A small twist on the legs
This was a fun project that I made for my wife. I saw a Crate & Barrel table with legs that alternated directions. The plans were easily adapted to match. I stained the standard pine boards with Minwax Prestain, Minwax Red Mahogany stain (2 coats) and sealed with a matte polyeurathane. The matte finish cut down any shine and should prevent any fingerprints from showing up, though witha 2-year and 6-year old this is inevitable. I may still add some small 3-4" triangular braces on the ends of the table at the legs to add stability, but it seems quite stable as it is. The bench is next on the list, but this will have to wait until after Thanksgiving.
Built from Plan(s)
Estimated Cost
$80
Estimated Time Investment
Day Project (6-9 Hours)
Finish Used
Minwax Prestain, Minwax Red Mahogany, Polyeurathane matte
Recommended Skill Level
Beginner
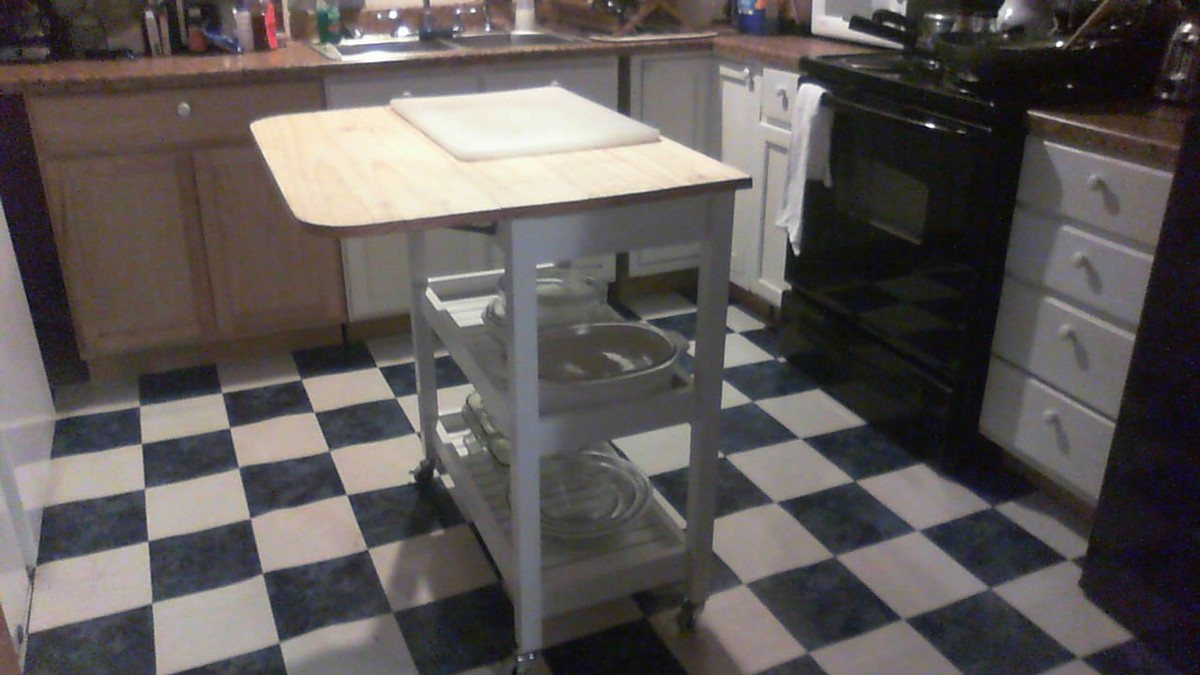
Kitchen Island Victory
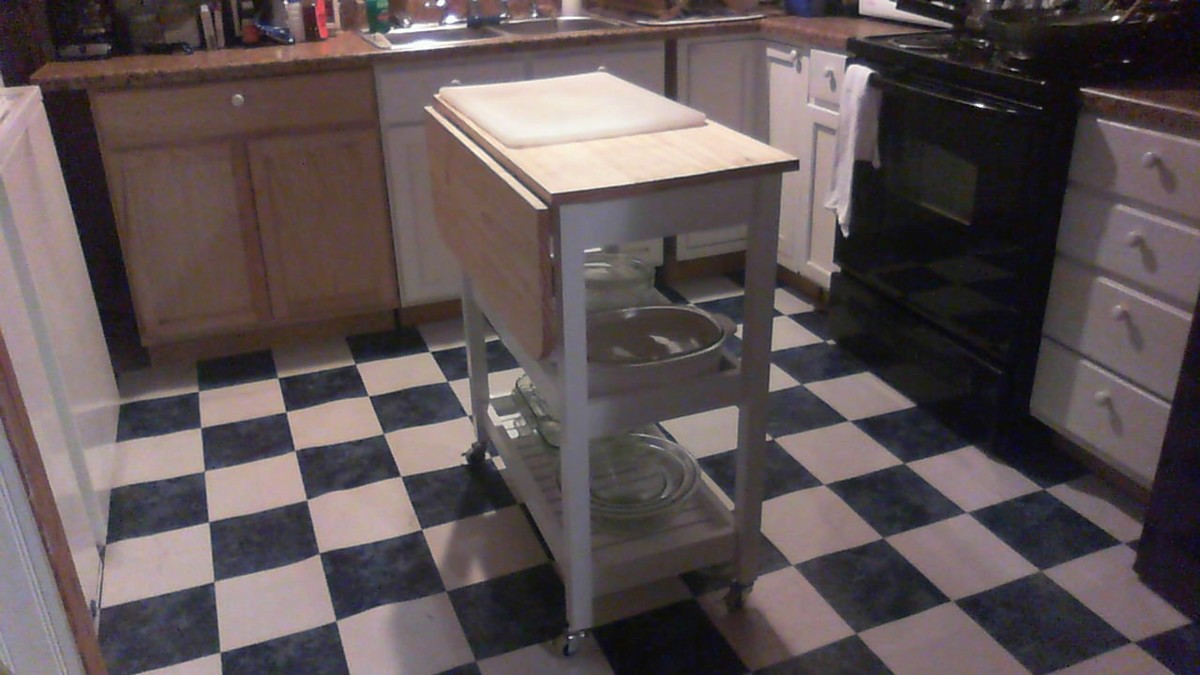
We needed a smaller kitchen island since my husband started using a wheelchair. The old one was just a little bit too big for him to maneuver in our small kitchen. I modified Ana's plans for the drop-leaf kitchen storage table making the base smaller (15" x 30") and taller (36") and only putting a leaf on one side. I also substituted slats (1" x 2"s) instead of plywood for the shelves. I love using pocket hole construction and ended up using almost 200 for this project! It turned out very solid and stable in spite of the increased height. We love it!!
Estimated Cost
$80
Estimated Time Investment
Weekend Project (10-20 Hours)
Finish Used
After assembly and before installing the top, I used an all surface bonding primer. After another light sanding I finished with one coat of latex enamel. No second coat needed. I then attached the top and finished it with butcher block wax/sealer.
Recommended Skill Level
Intermediate
Comments
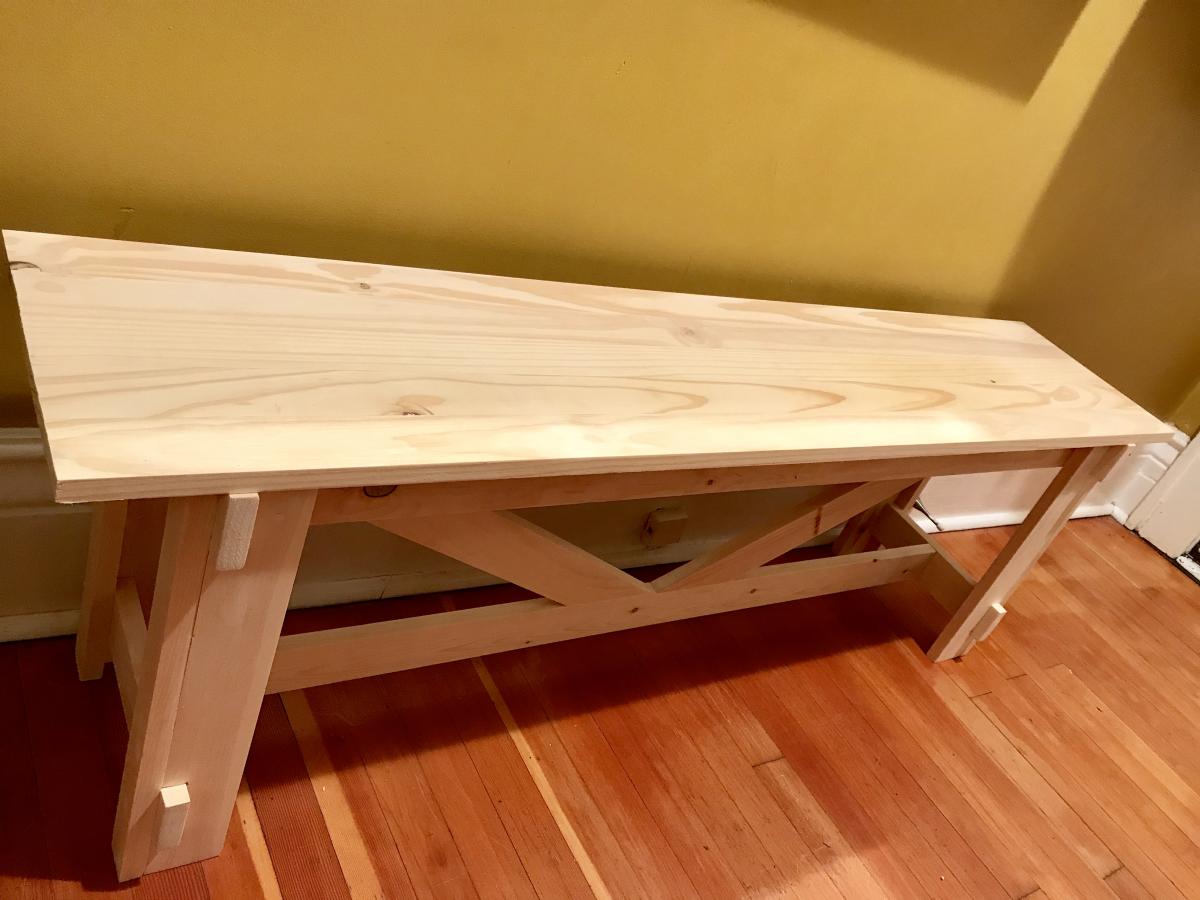
Bench with cross bracing
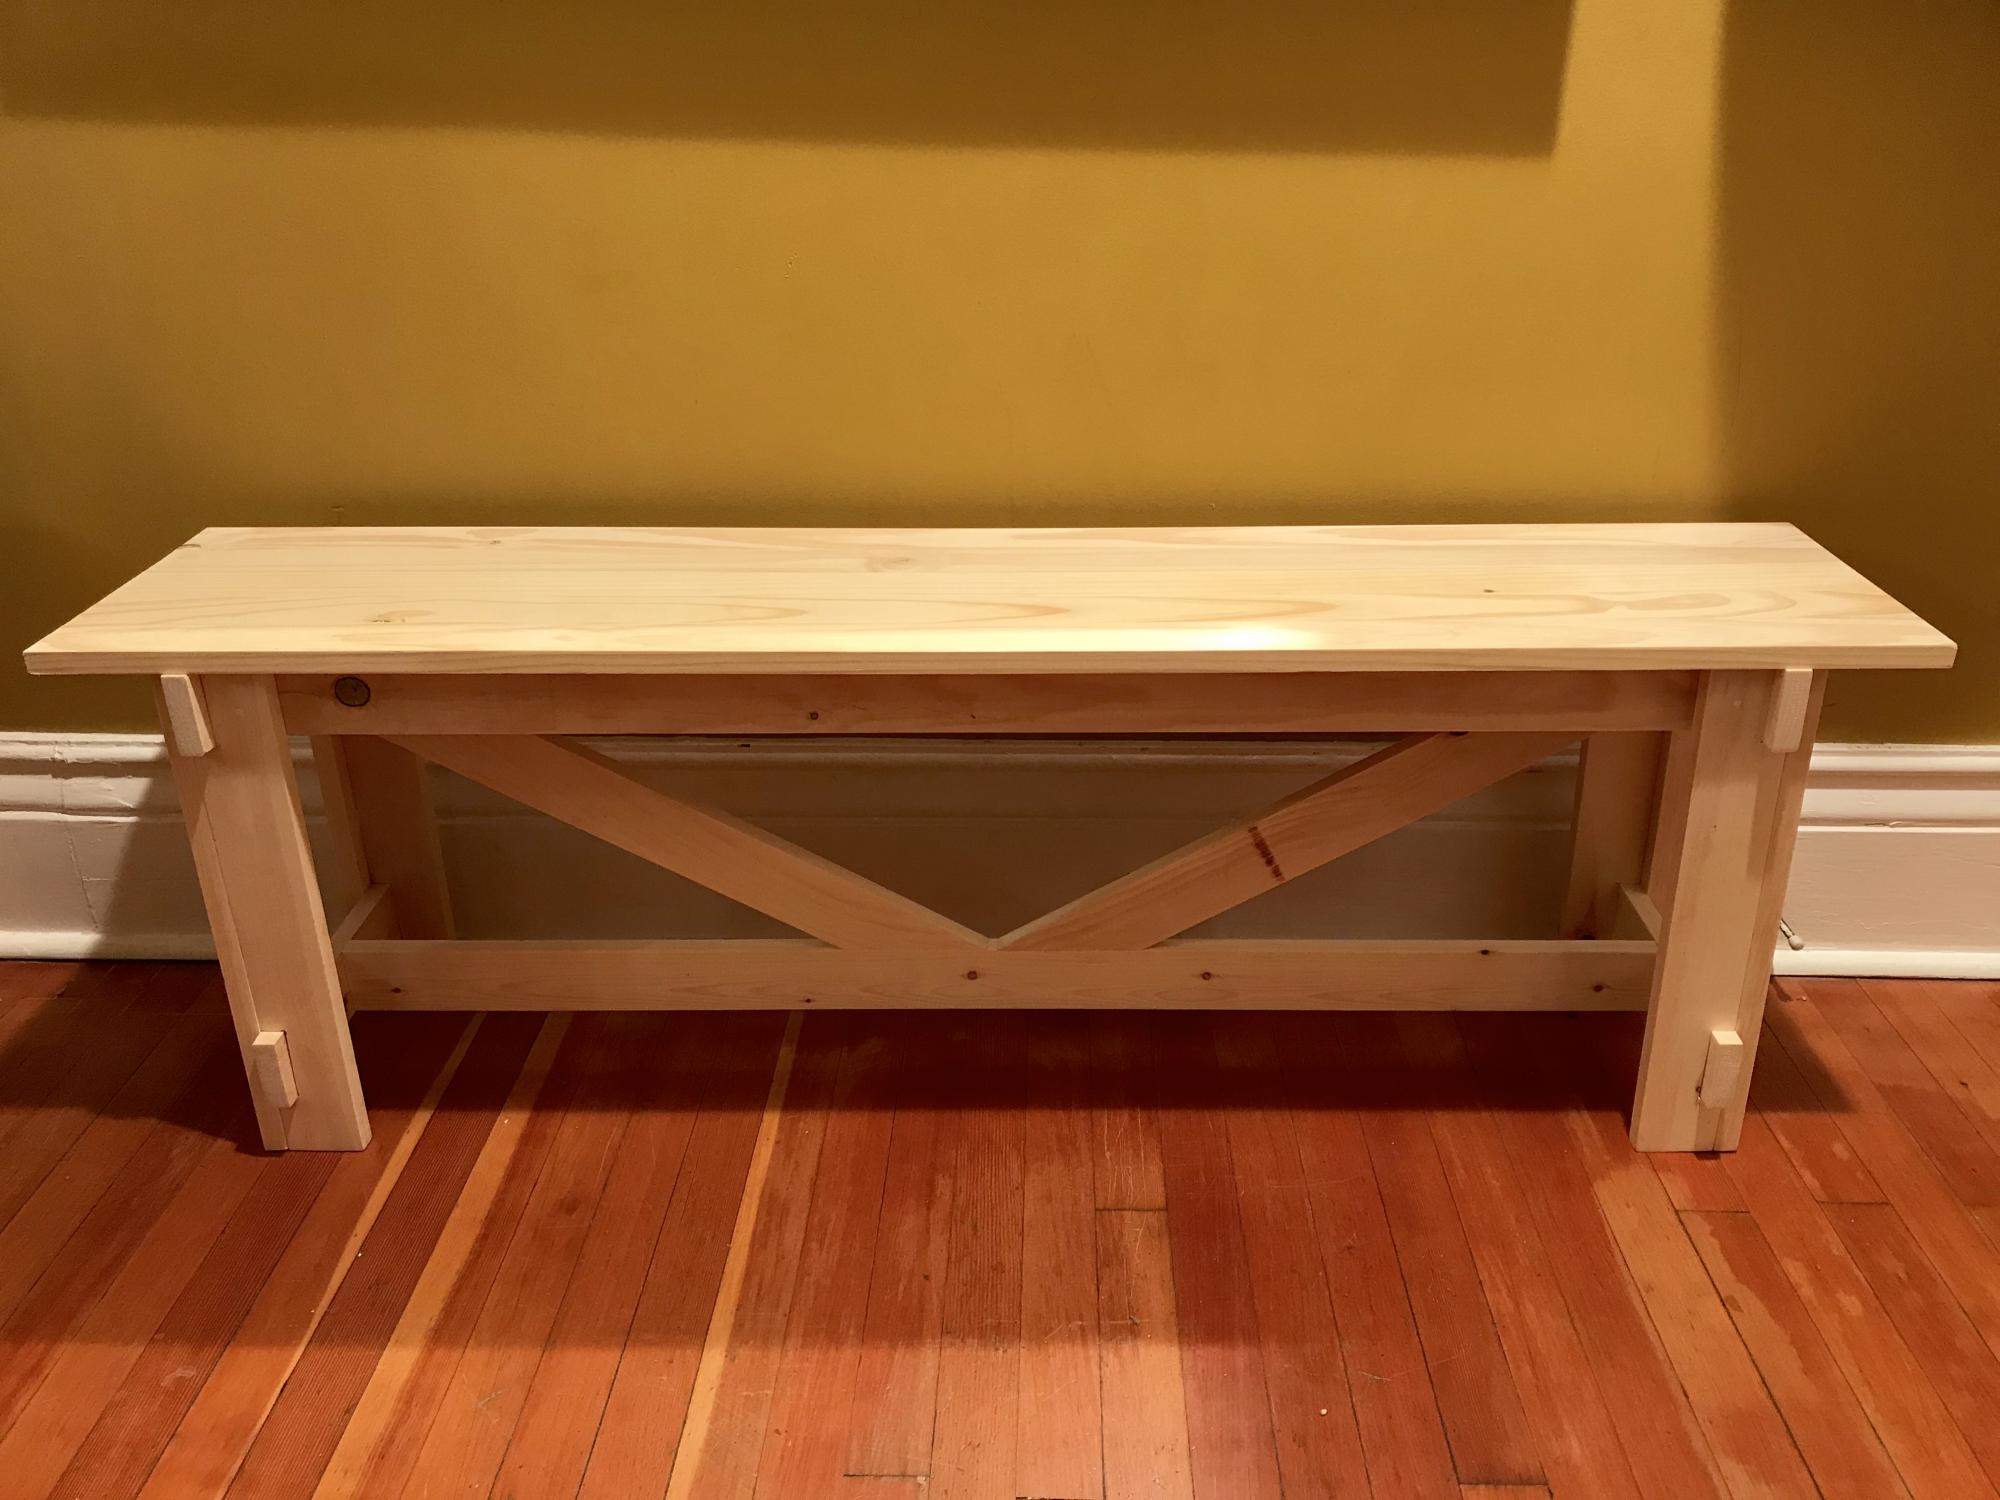
My friend asked me to make two benches for her dining room table. She mentioned the plans from your website. I followed your plans/ instructions.
She loves them!.
Thank you & big hello from Canada.
Estimated Cost
$60
Estimated Time Investment
Weekend Project (10-20 Hours)
Finish Used
Paint
Recommended Skill Level
Beginner
Dining Room Table
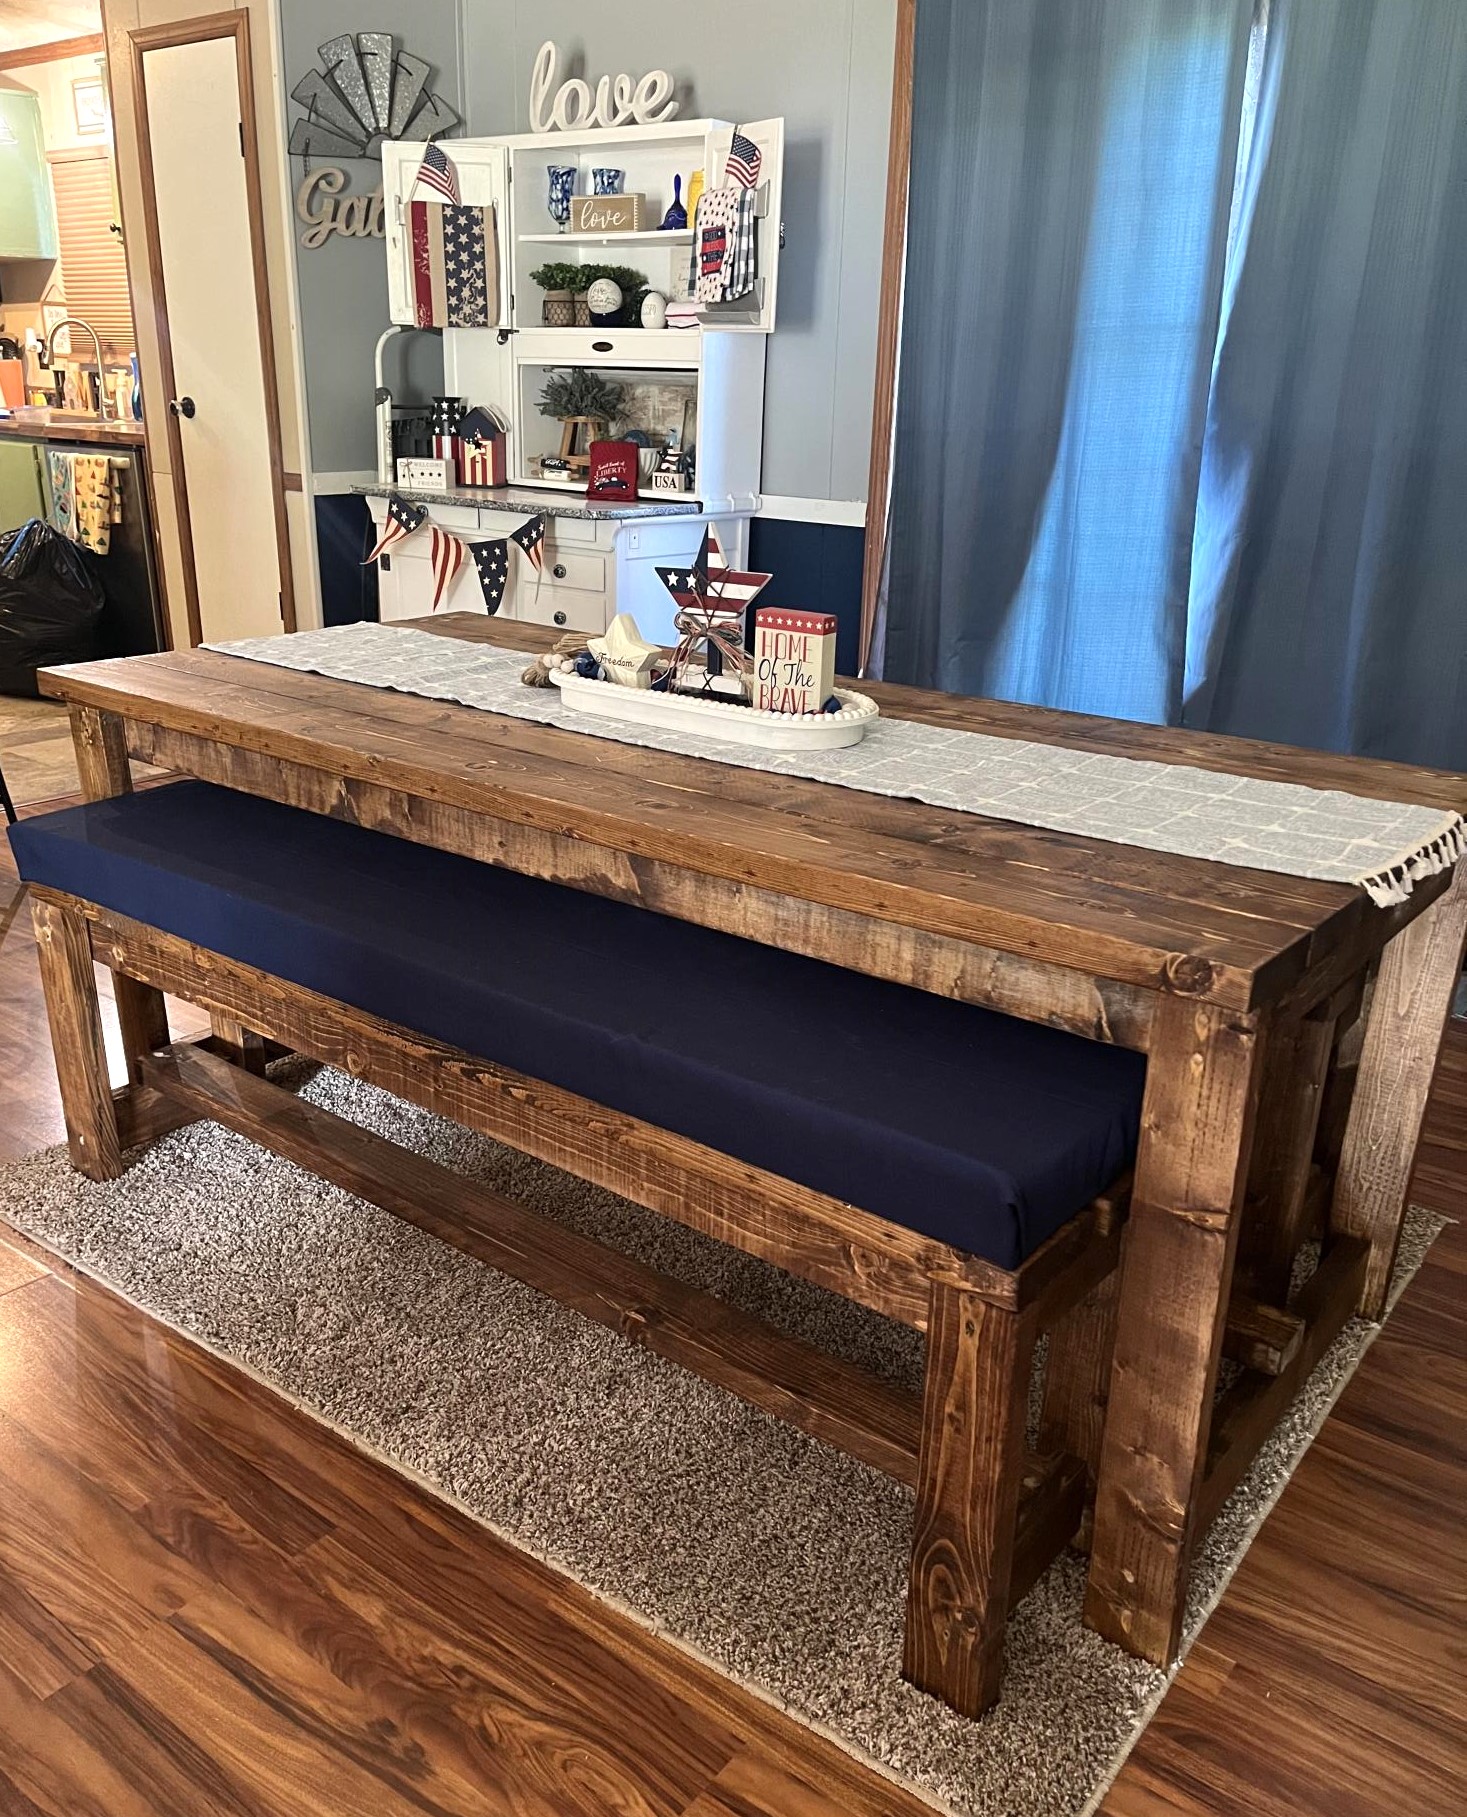
I fell in love with the simplicity of this table. I had been wanting a new table for a good while and when I stumbled on Ana’s YouTube video of this table, I knew this one was easy enough for my husband and I to tackle! Thank you, Ana!!!!
Built from Plan(s)
Comments
Mon, 05/22/2023 - 15:32
Beautiful table and bench!
Way to go, it looks amazing in your space! Thanks for sharing.
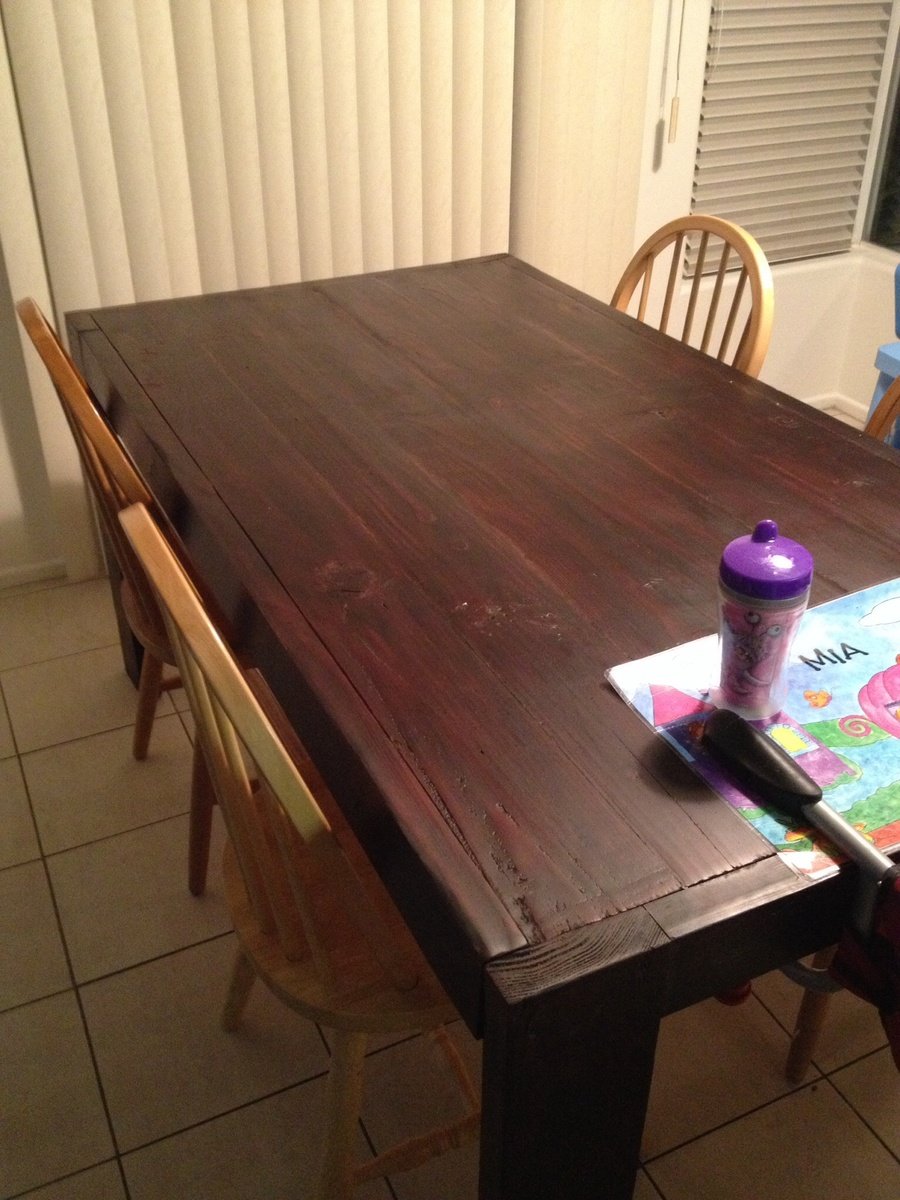
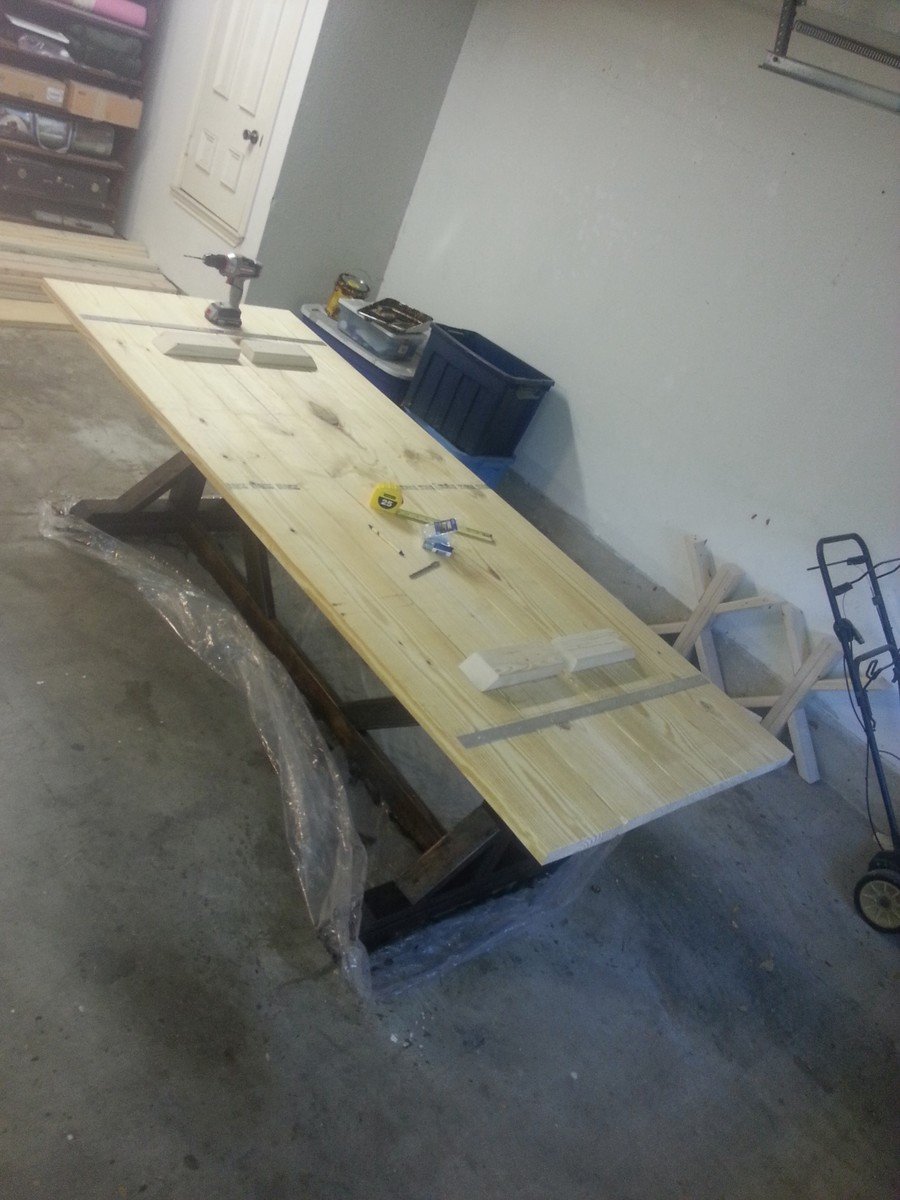
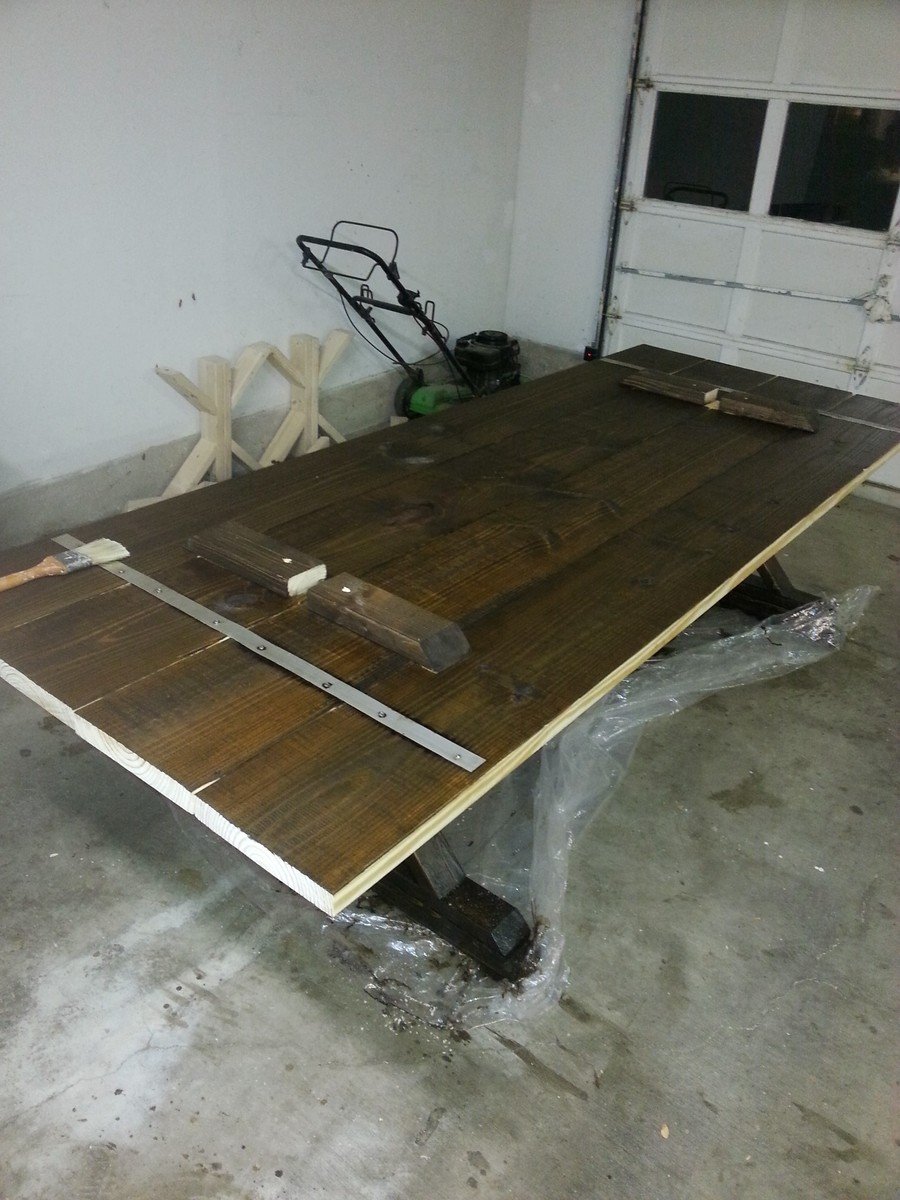
Farmhouse Table
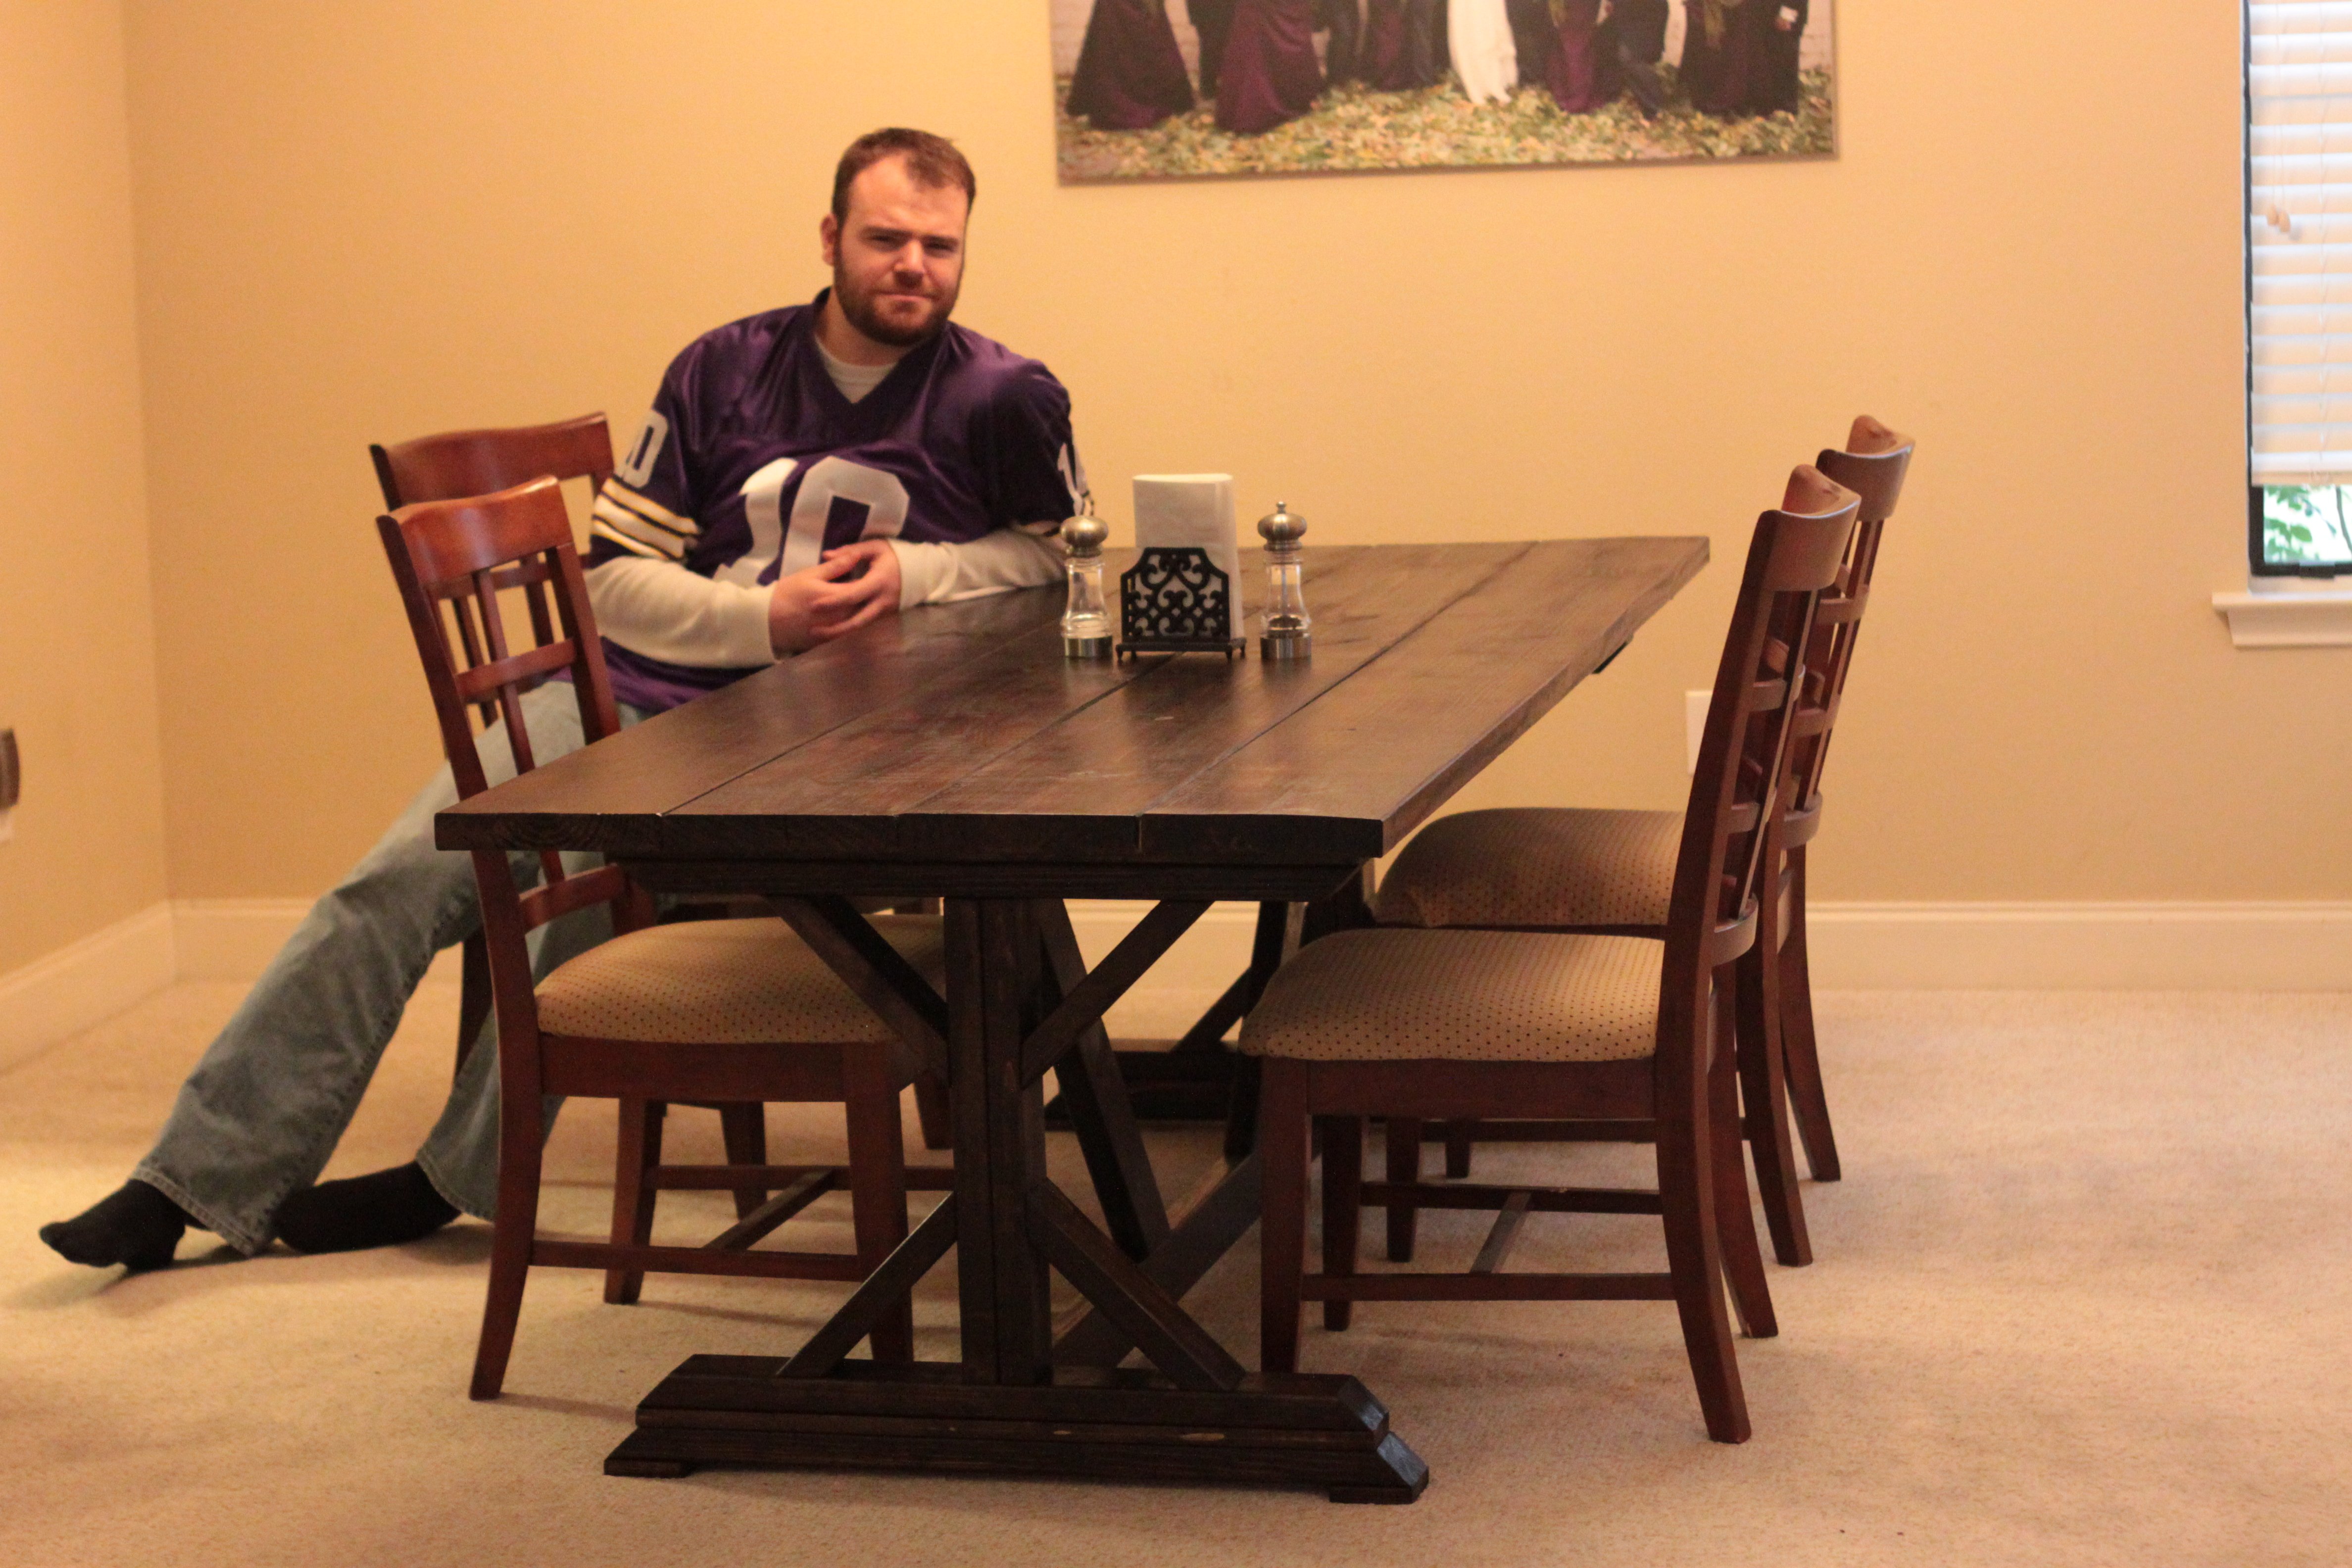
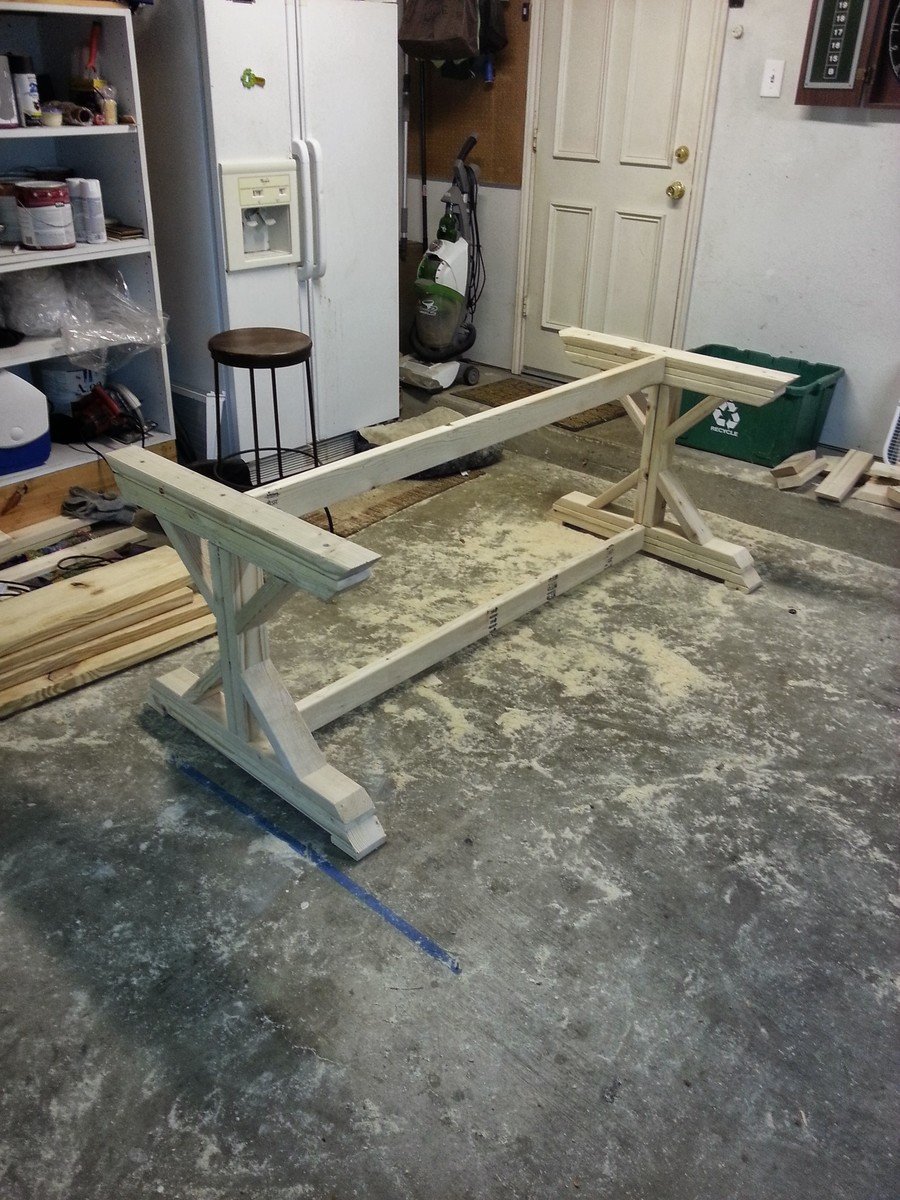
I had a few hiccups in the early stages building those X shaped bases. I relied a lot on eyeballing it and firmly holding things into place by hand. Very touch-and-go. I took them apart multiple times and rebuilt them.
I wasn't quite sure how to go about attaching the table top, and I finally decided that NOT attaching it was the way to go. I built some braces that firmly held the top onto the base without actually being attached permanently. This helped to move it into the house and will help in the future if we ever want to move it, as it's two very separate pieces.
After that it was pretty much smooth sailing. I had some issues with the staining, but that was largely due to the humidity in the area at the time. Once the temp cooled, the stain dried and all was fine.
From start to finish this project took me about two months, but I only worked on it once or twice per week for a few hours at a time. I'd say I spent 20-25 hours of actual time working on this.
I received 94 likes on Facebook for my project which I consider a win.
Built from Plan(s)
Estimated Time Investment
Week Long Project (20 Hours or More)
Finish Used
Minwax
Recommended Skill Level
Intermediate
Comments

Fri, 12/06/2013 - 13:54
Kid Friendly?
Hi,
I was wondering now that you have used the table- do you think the top is secure enough to be unattached with kids around? Like does it move or tilt at all- what if you put heavy items on the side?
Thanks!

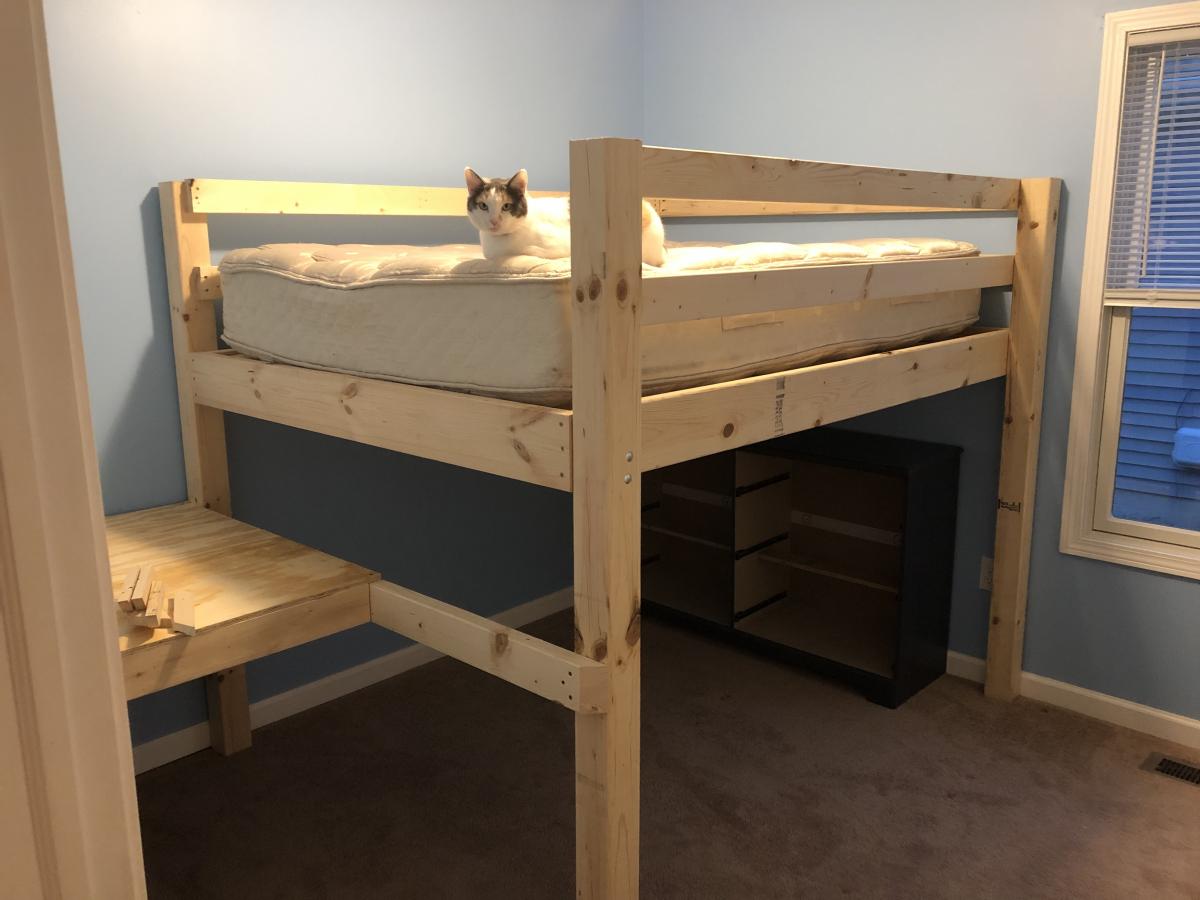
Full size loft
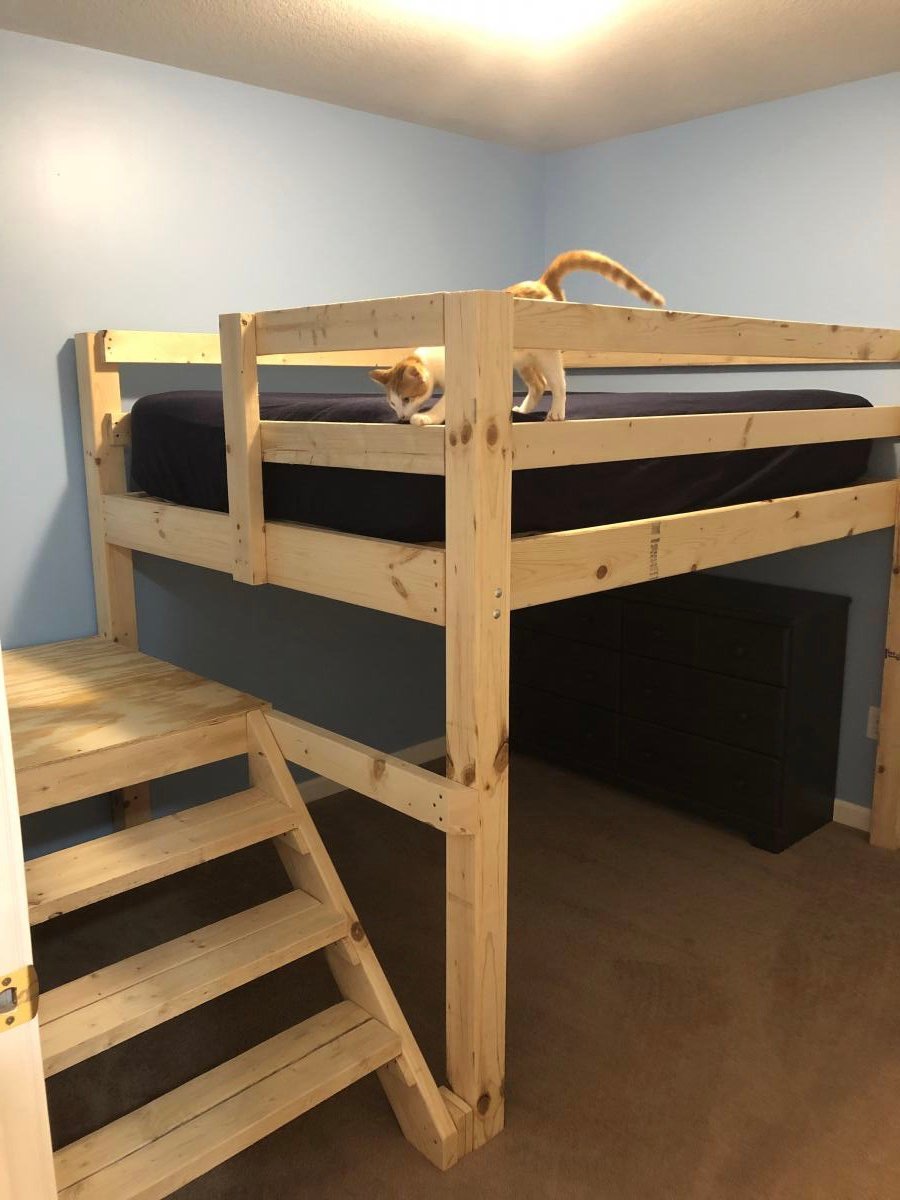
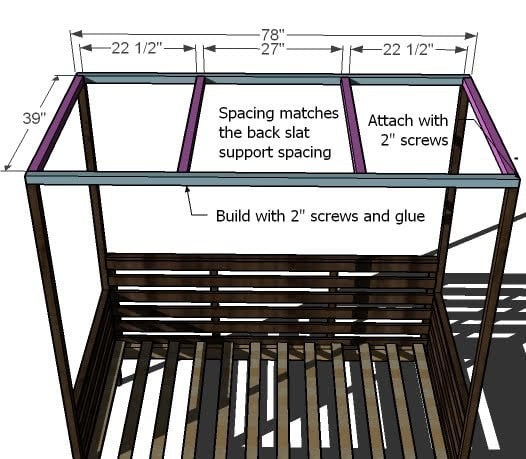
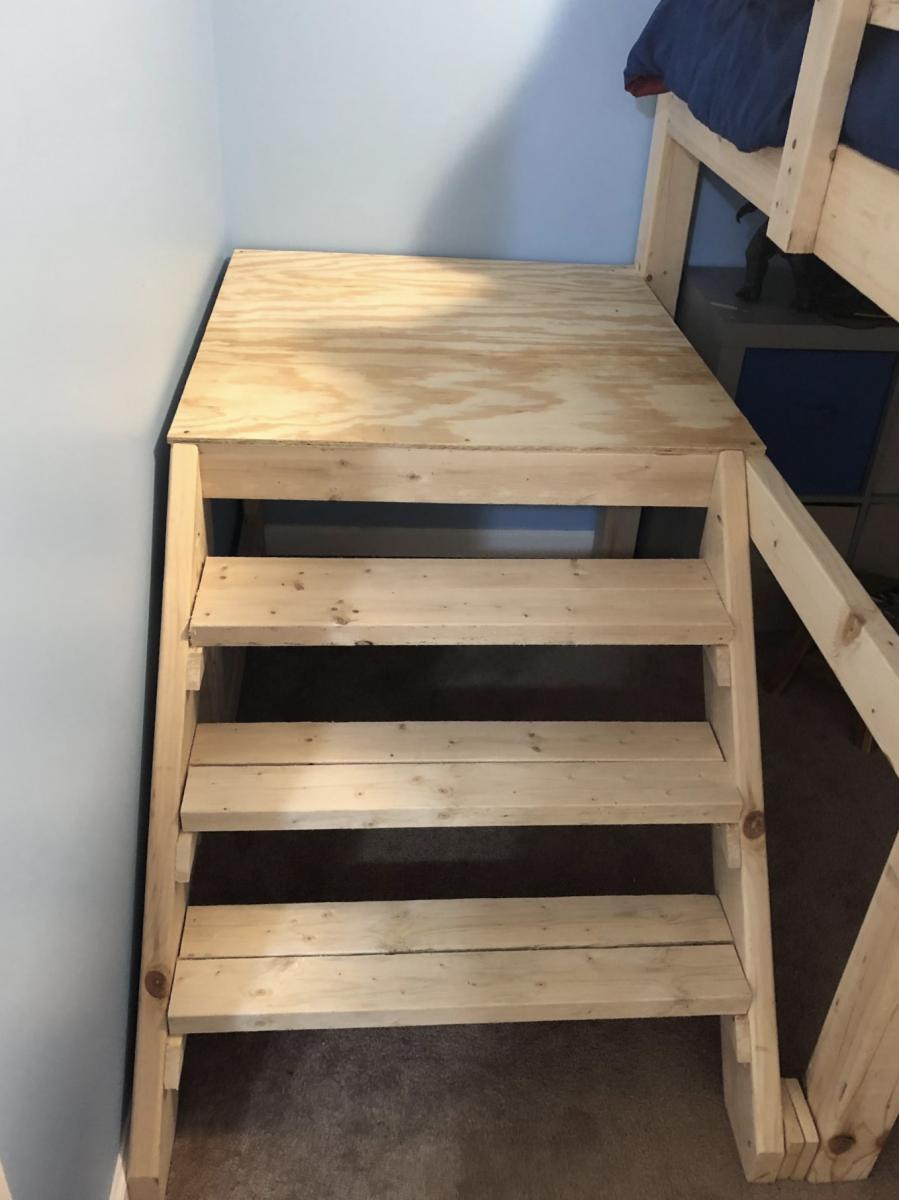
Built a full size loft bed for my kids but wanted something safer than having them climb up and down a ladder so used the Camp Loft Bed plans to add the platform and stairs. It is much easier for the kids. Going to finish by covering the platform and stairs with carpet.
Built from Plan(s)
Estimated Cost
180
Estimated Time Investment
Day Project (6-9 Hours)
Comments

Wed, 10/02/2019 - 09:51
I really like how the…
I really like how the platform is only half way so the stairs are inset, this is very smart and good use of space.
Corn Hole Boards
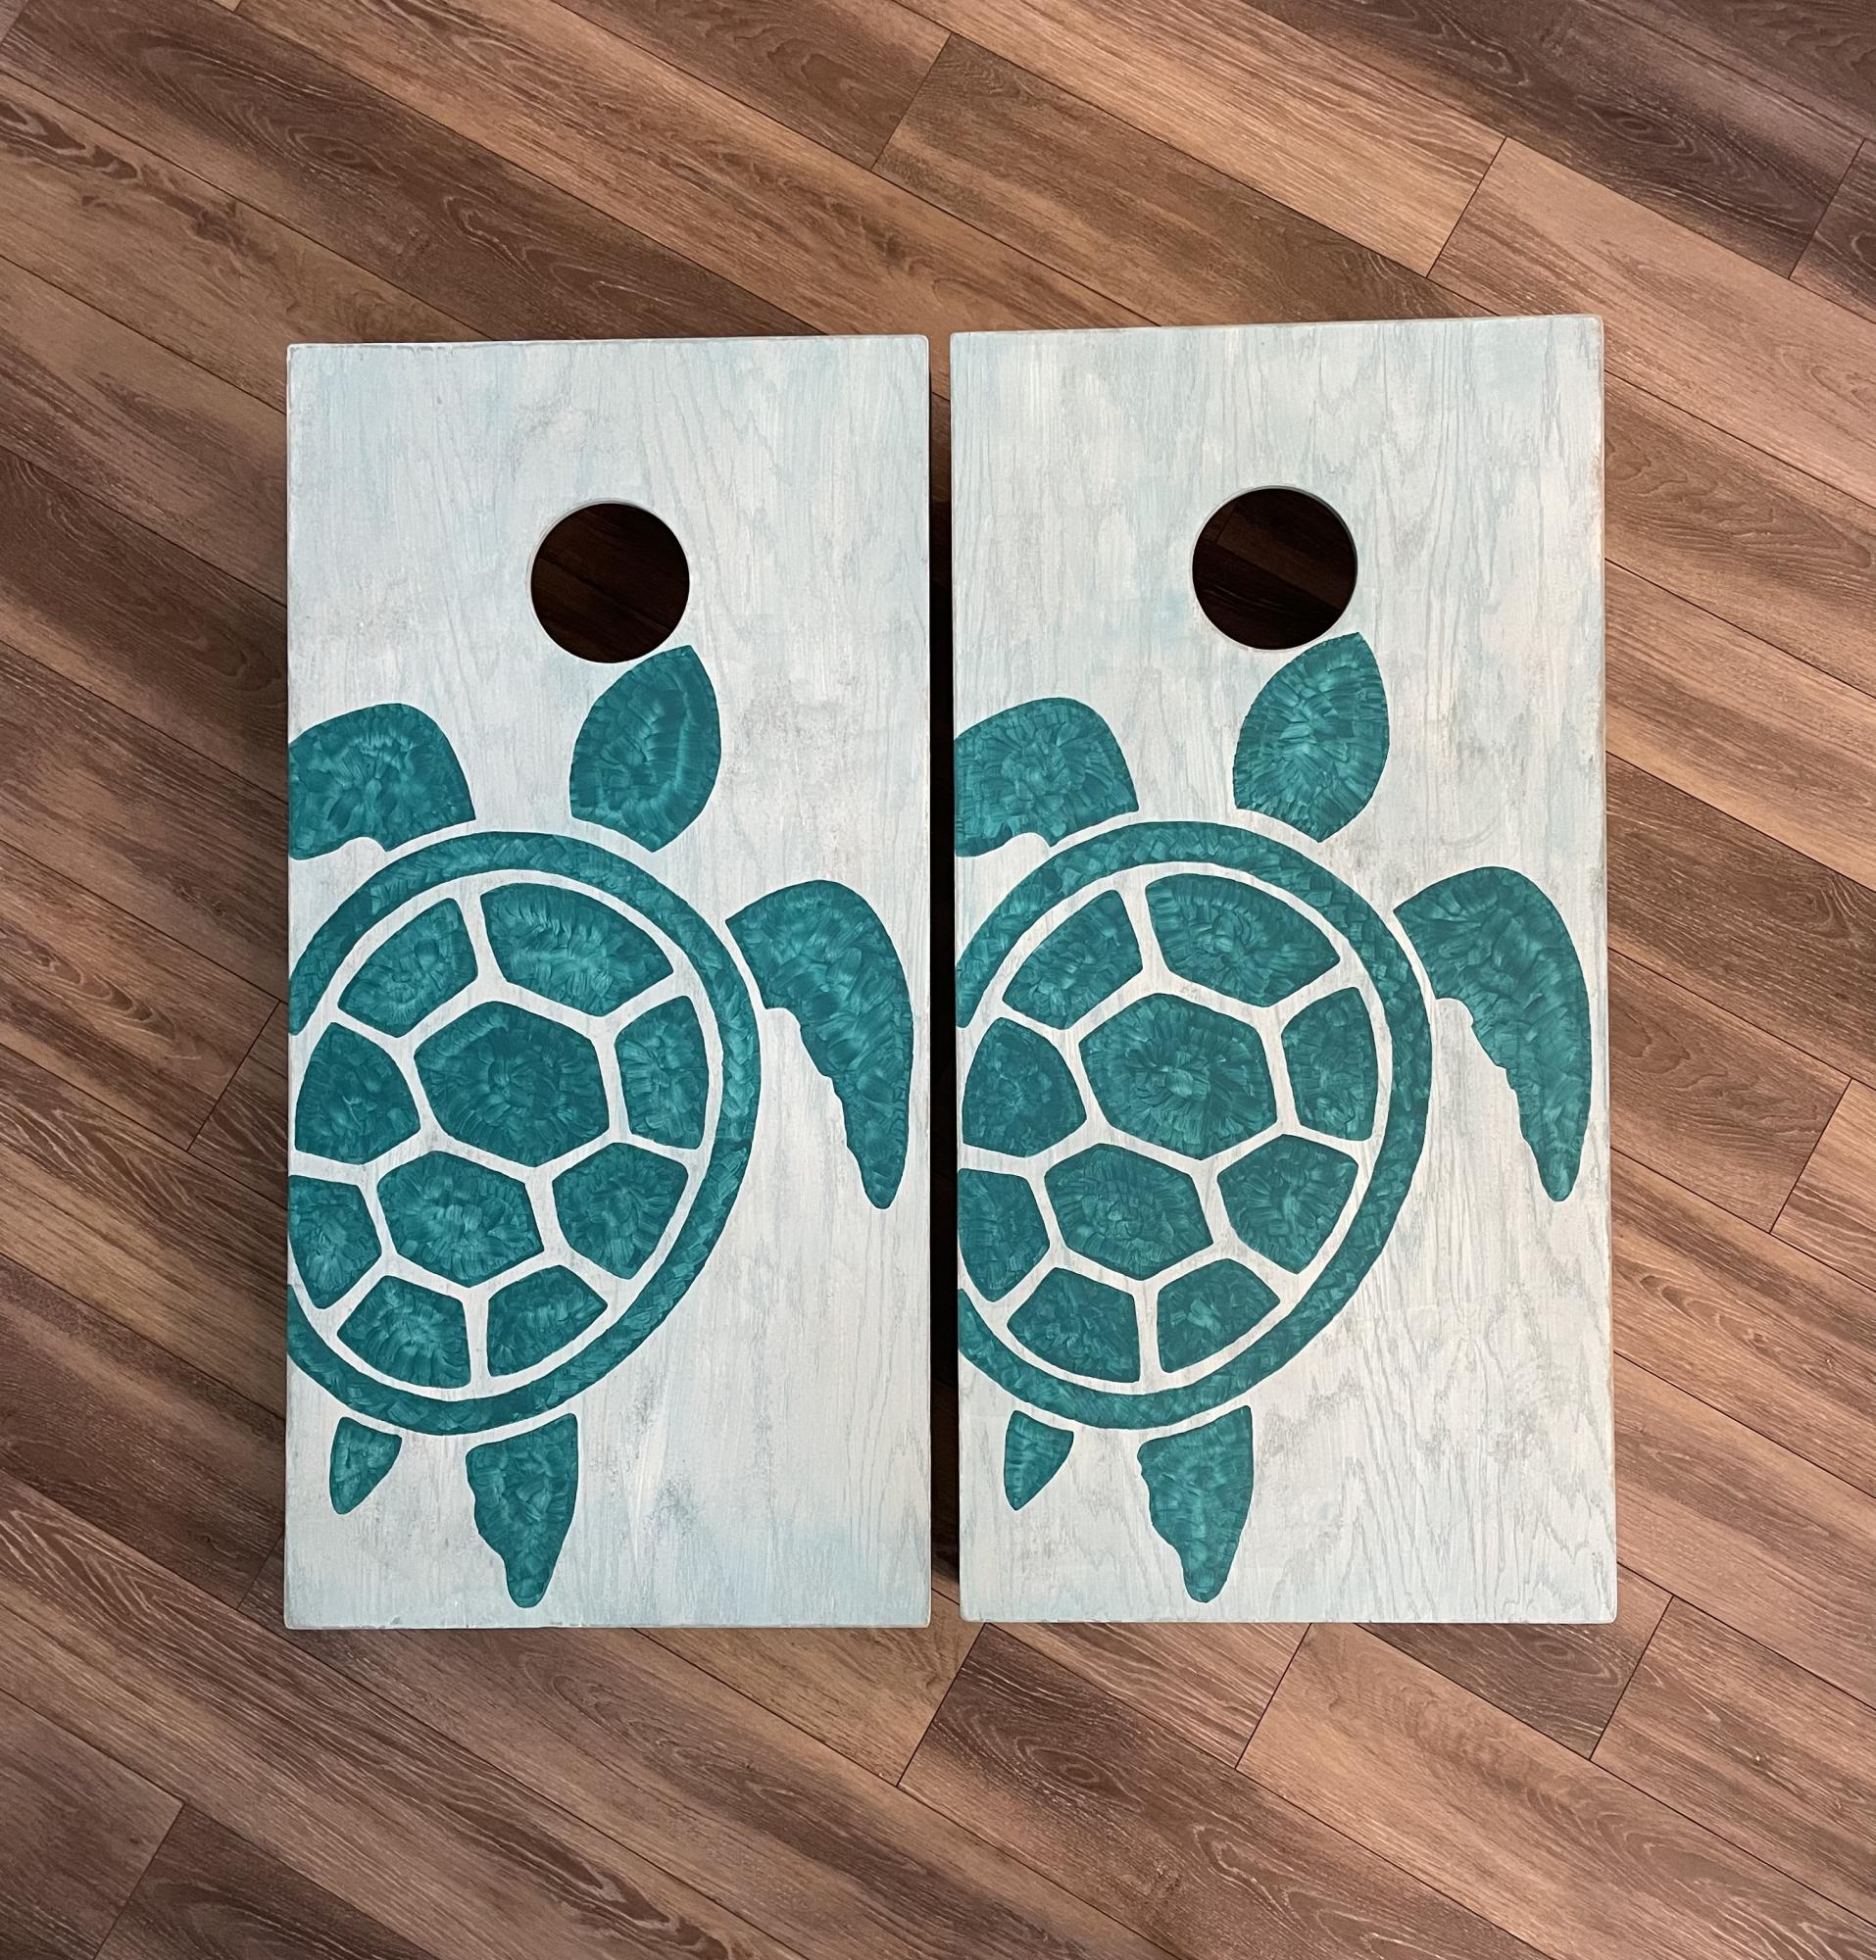
The Ana White corn hole board plans were straightforward and easy to understand. Building was a breeze. Our boards turned out great!
Built from Plan(s)
Comments
Ana White
Mon, 08/05/2019 - 10:43
It is super cute! Smart to…
It is super cute! Smart to reuse the swing set!
thanks for sharing a brag post we appreciate it!