Community Brag Posts
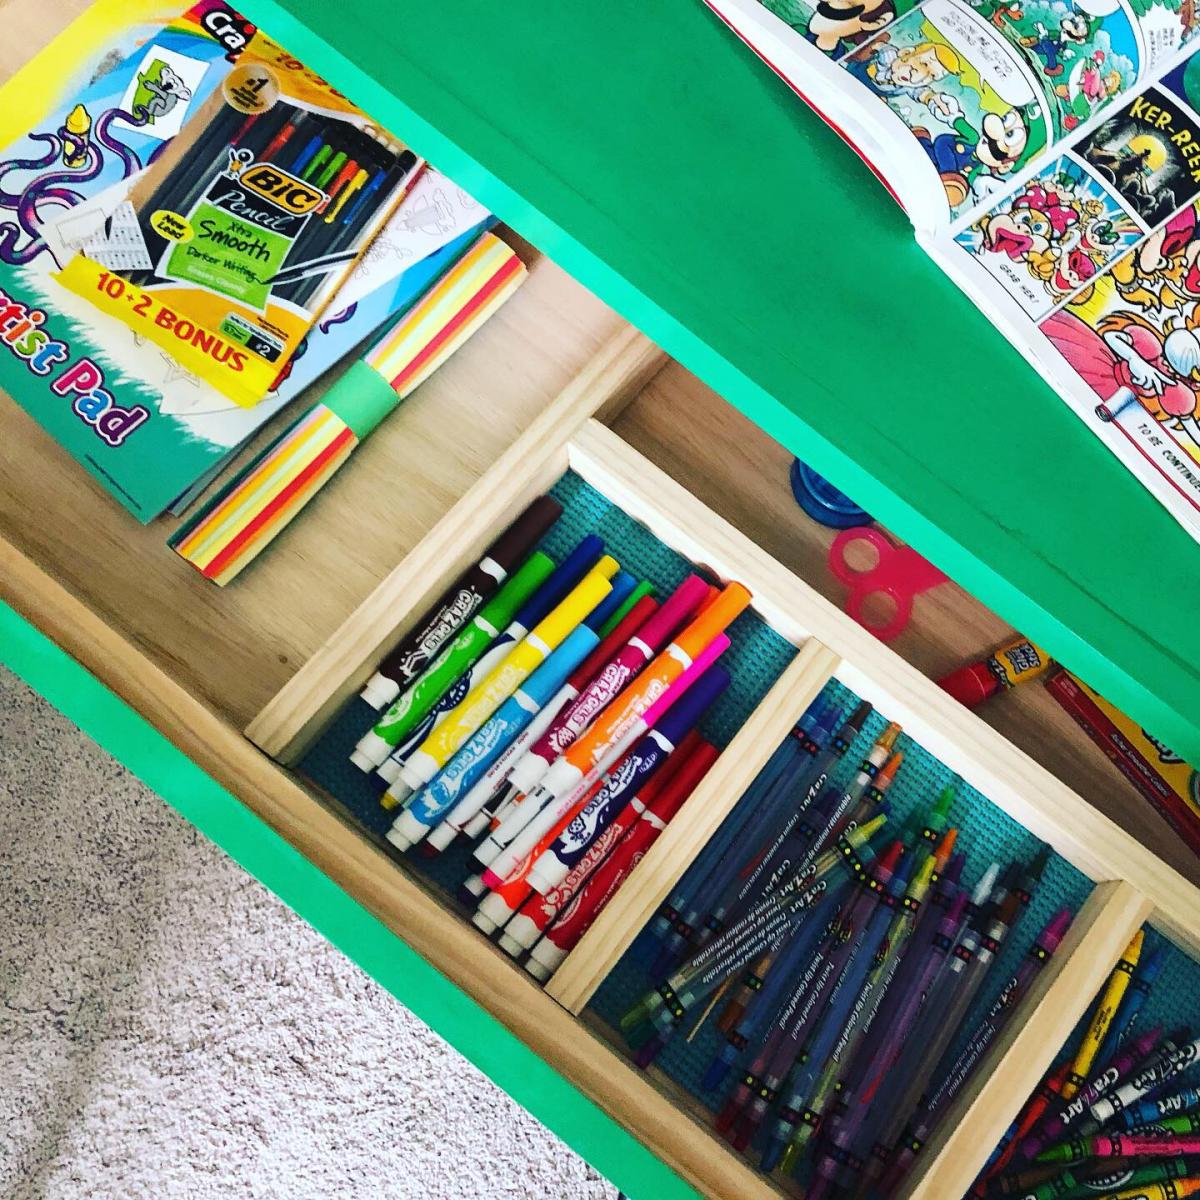
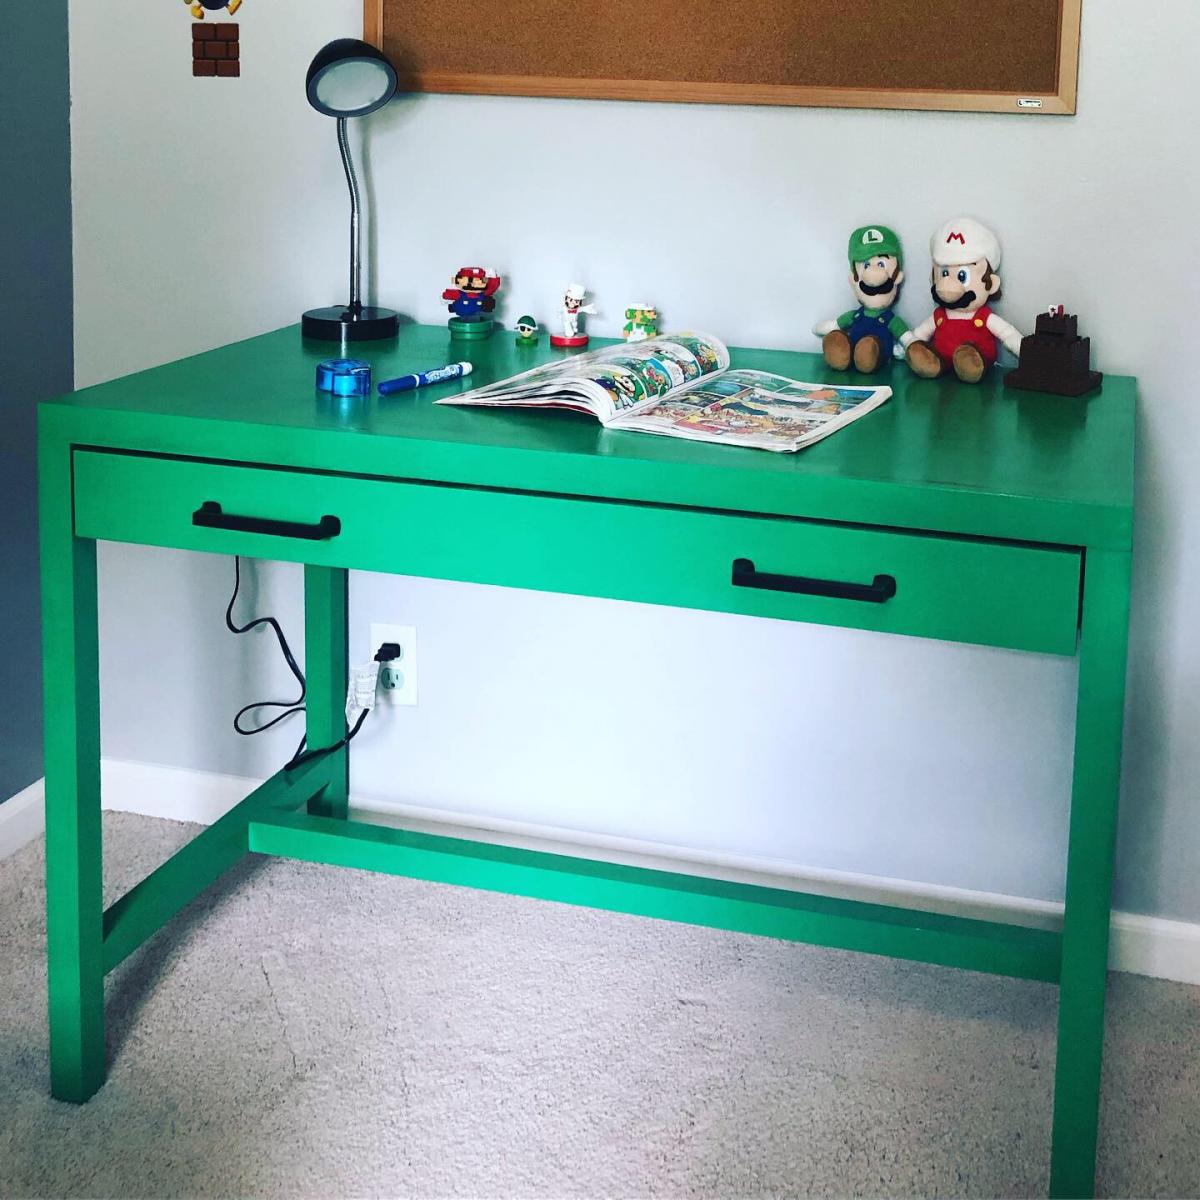
Super Mario Themed Simple Desk
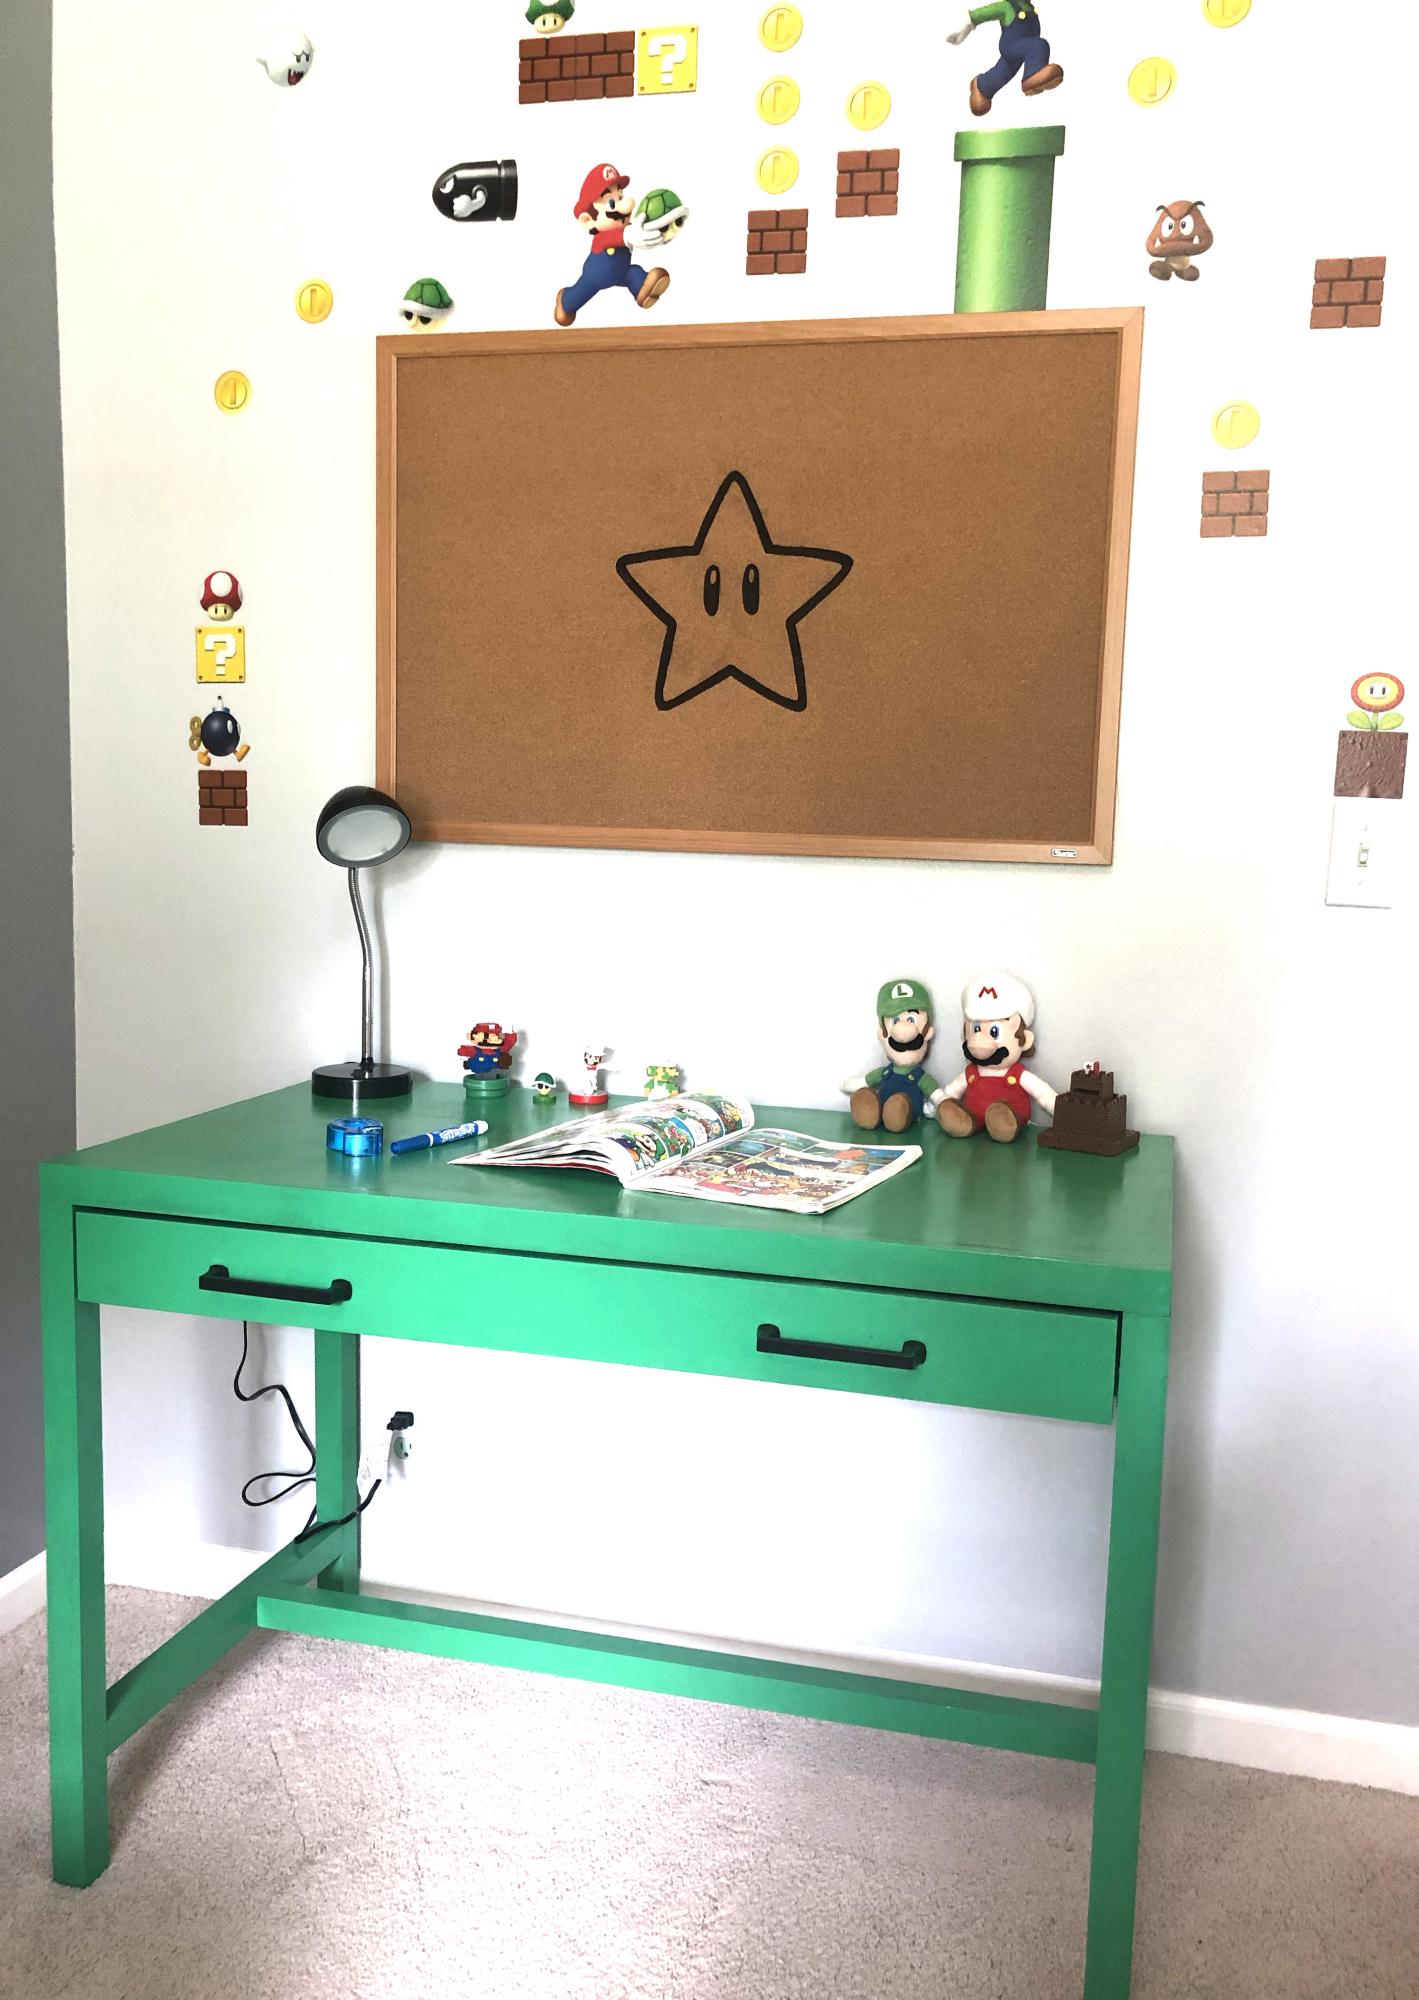
My youngest son is 6yo and he loves Mario! He is such as little artist so I thought it would be fun to surprise him with a Mario desk! I did not want to paint it red as he already has a ton of red Mario themed items in his room, so I chose pipe green instead! My little guy LOVED it! I even made some dividers to separate his crayons, markers, and other odds and ends in his desk. You will notice, I customized a normal bulletin board with a sharpie marker to make it go with the Mario theme :)
Built from Plan(s)
Estimated Cost
$100
Estimated Time Investment
Weekend Project (10-20 Hours)
Finish Used
Green Spray Paint and Polyurethane
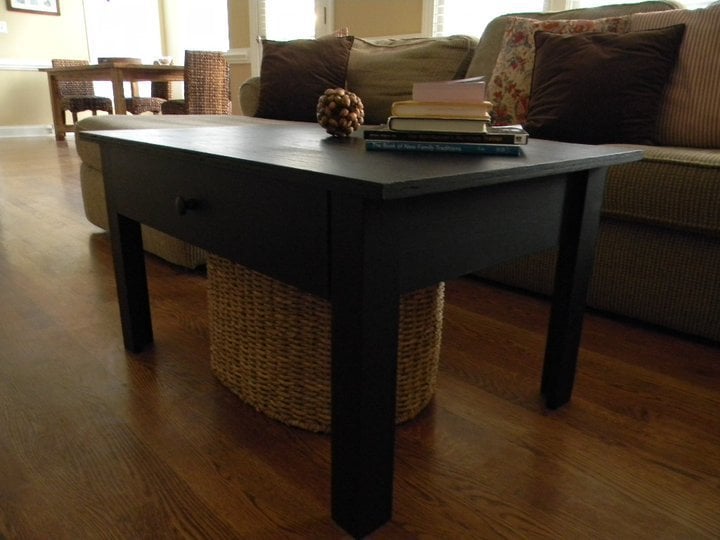
Floating Wood Table Runner

I made one of these for my dining room table and my family liked it so much I made 2 more. The last one I made from a live edge piece of black locust and made the base out of black limba. The second one my daughter wanted a little wider so I used a 1X10 instead of a 1X8. A lot of fun to make and everyone really likes them.
Keith Ullrich of Windsor Woodworks


Built from Plan(s)
Seasonal And Holiday
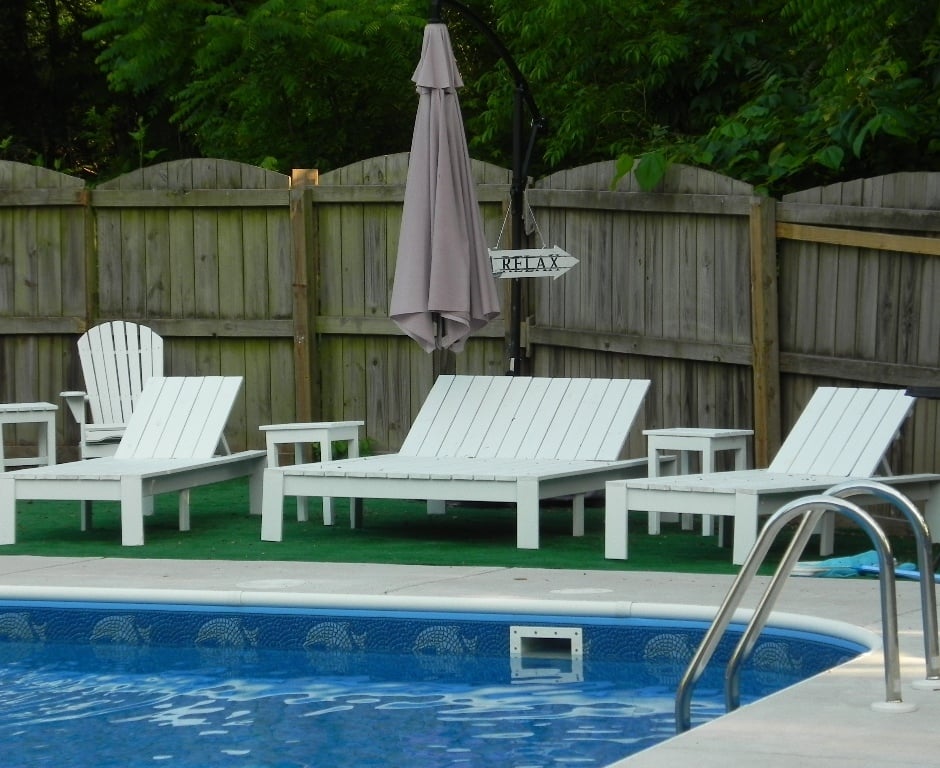
Simple Modern Outdoor Double Lounger
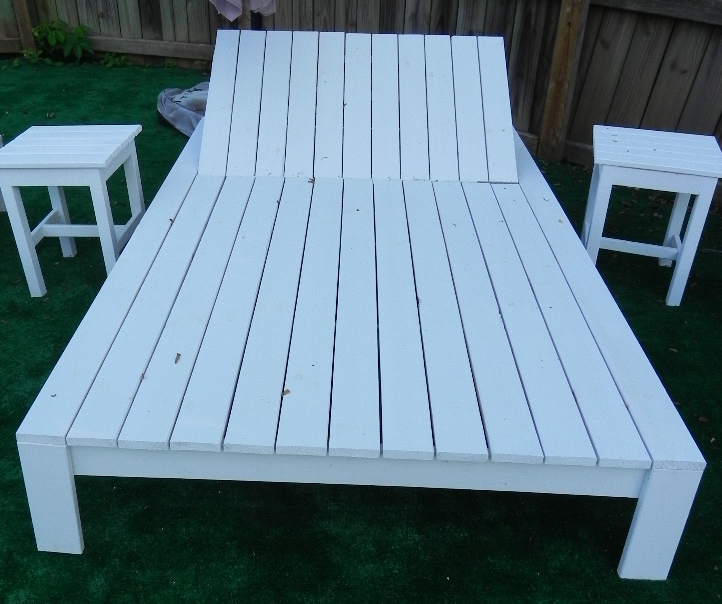
It took about 2 hours to build it. We have a large family, so we put 2 extra legs on each, just in case. We had problems with the hinges. I think we bought 3 or 4 different hinges before we found something that worked for us. But the end result was wonderful!
Built from Plan(s)
Estimated Time Investment
An Hour or Two (0-2 Hours)
Finish Used
painted white
Recommended Skill Level
Intermediate
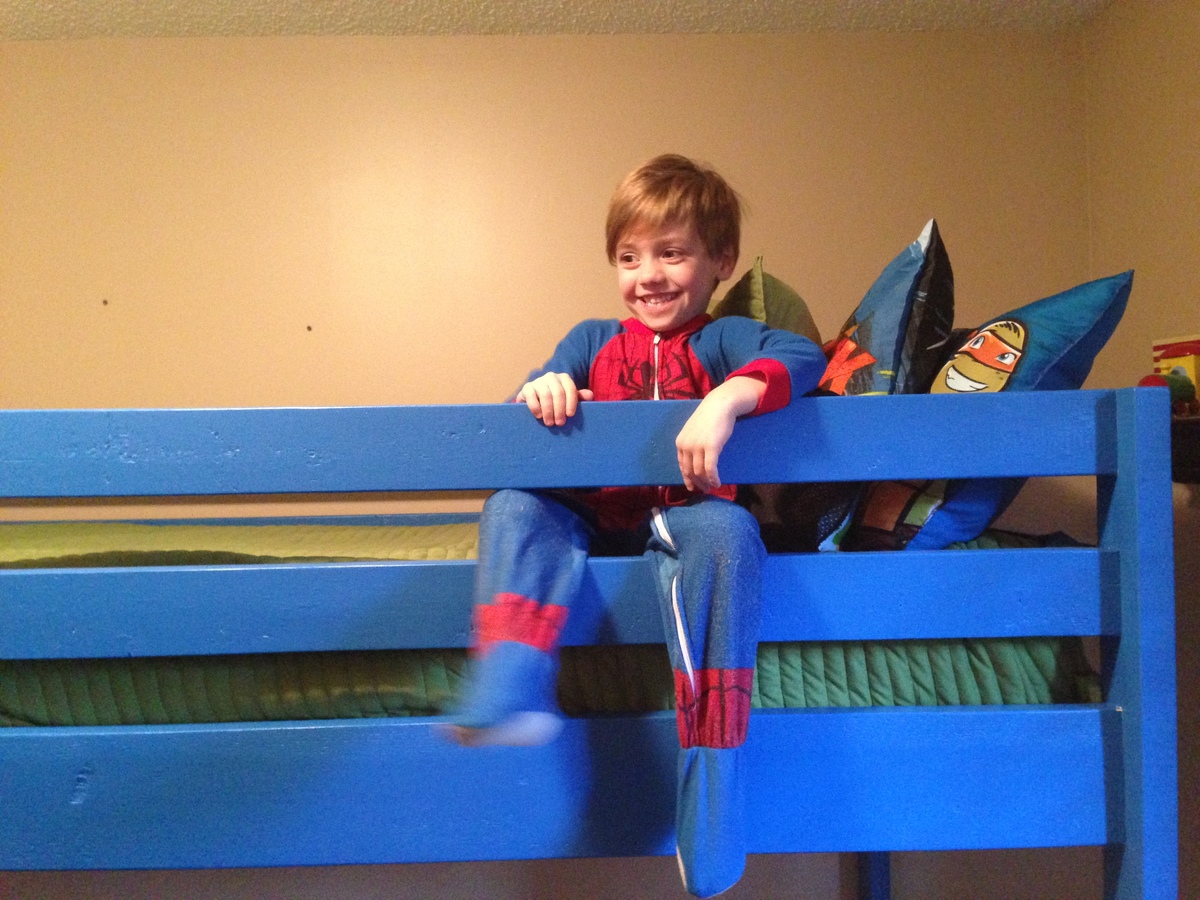
Pastors Kids
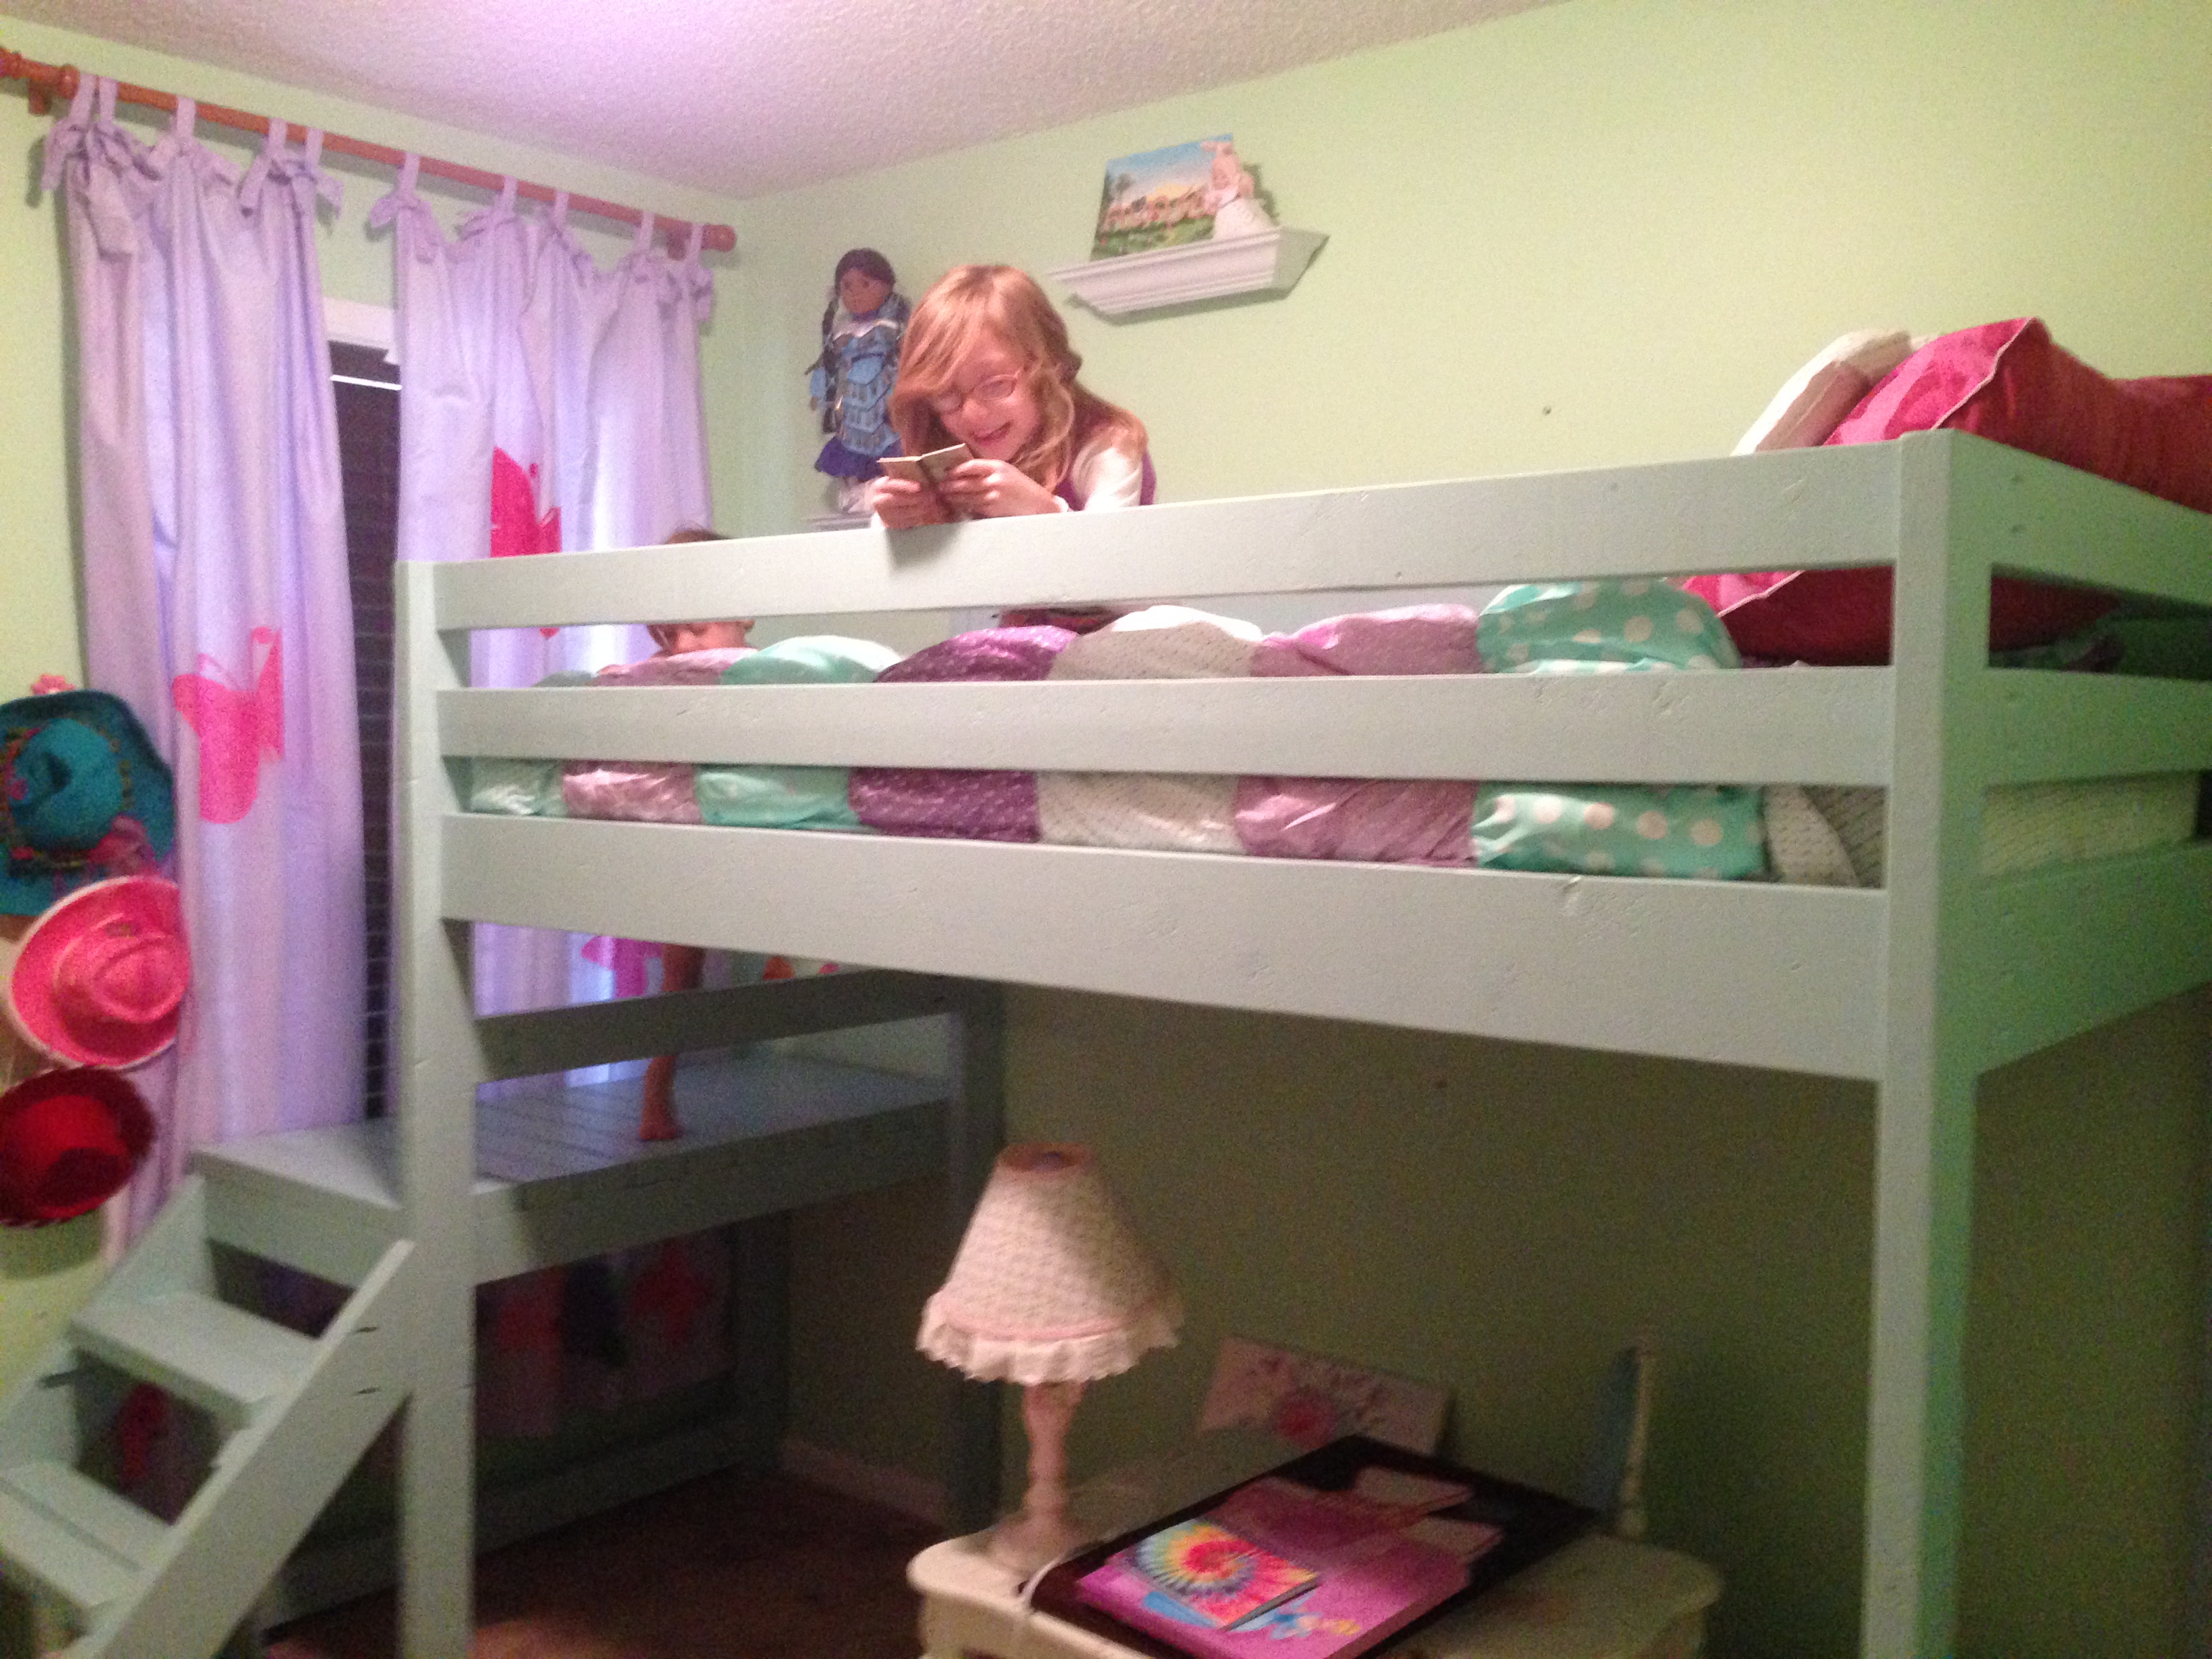
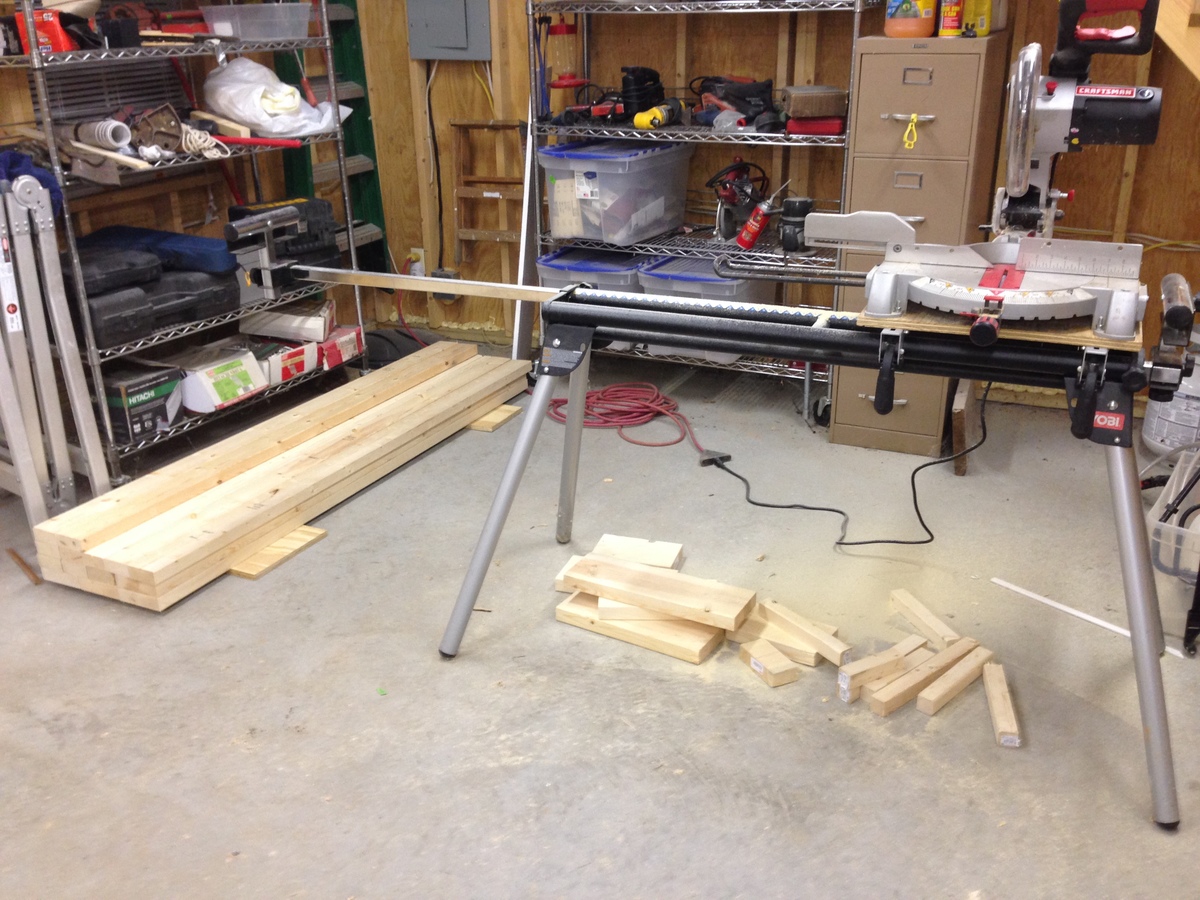
I built 2 beds by doubling the purchase list, then cutting 2 of everything. The hardest part was figuring out what to cut from each piece of wood. It would have been nice to have a detailed cut list so it would be easier to not waste any wood. As it turned out, I needed to purchase one extra 2x4 to finish the job. Not too much trouble. To cut cost, I bought 2x4 studs and had to dig through a half of a pallet of them at Lowes to find the straight ones, and even then some still had a bit of a twist. It's hard to find straight 2x4's.
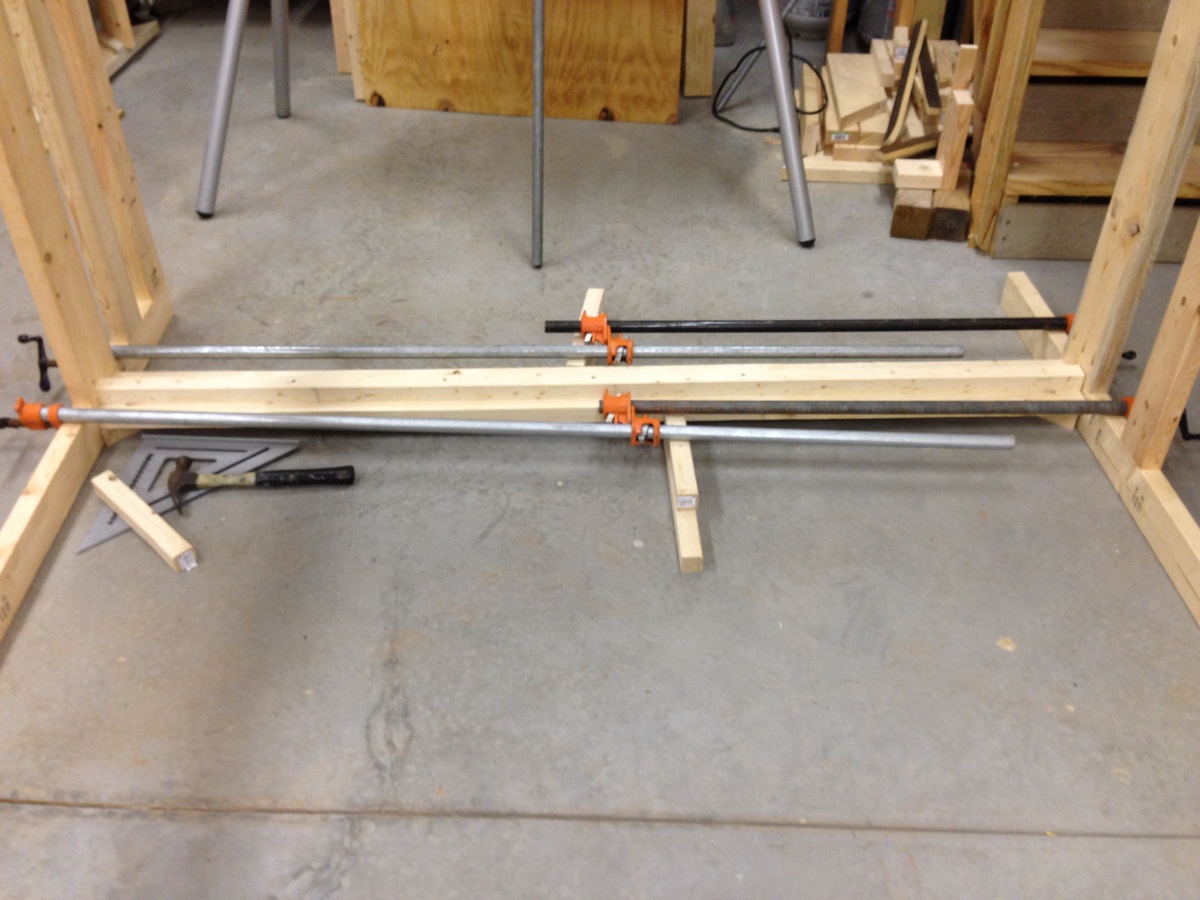
On the landing, I predrilled countersunk screw holes about 3/4" deep, then after attaching them, I cut plugs, glued them in and sanded it down to a smooth finish. After paint, you can't tell how they are attached.
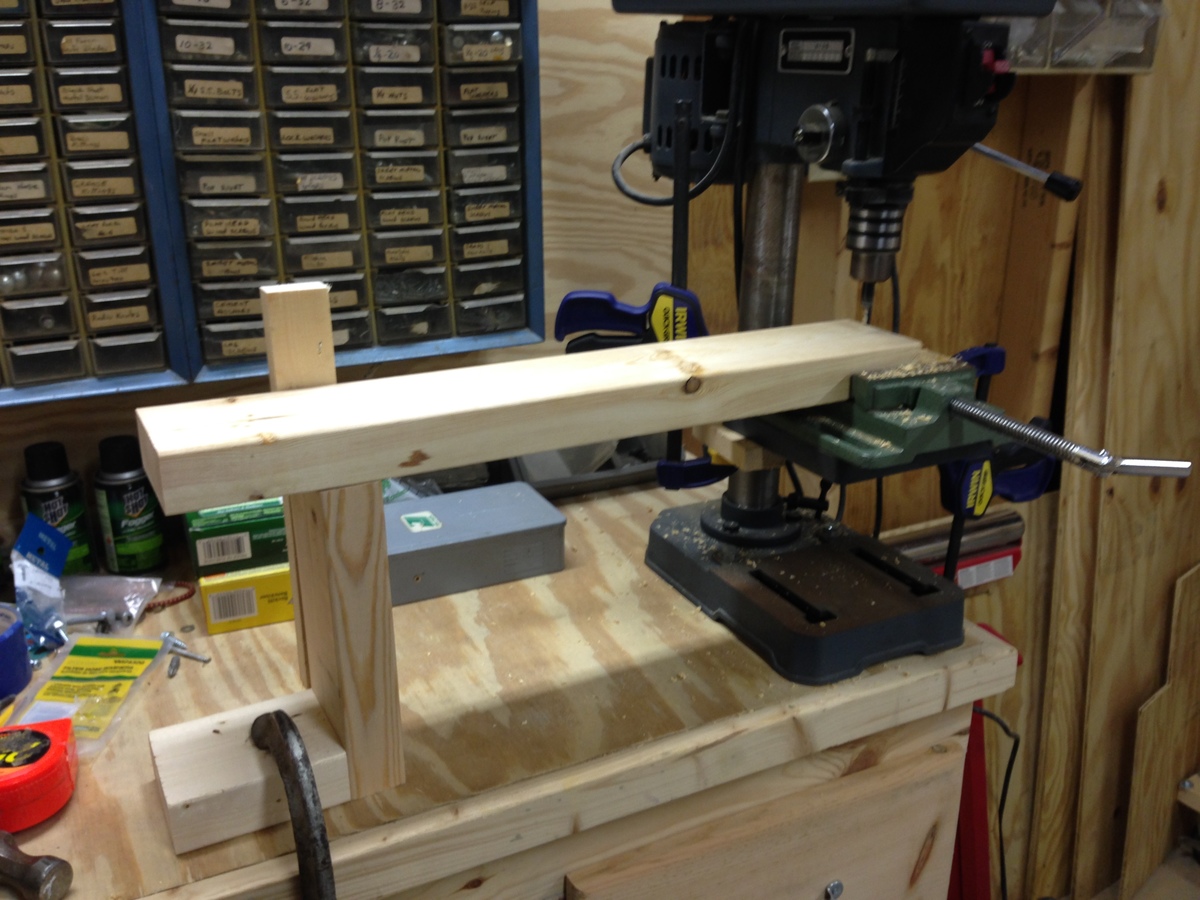
Having a chop saw stand was great because I could set up a cut length and then quickly cut all the boards I needed for that length. I also used a jig for my drill press and set up to drill all the holes at one time for the landing boards.
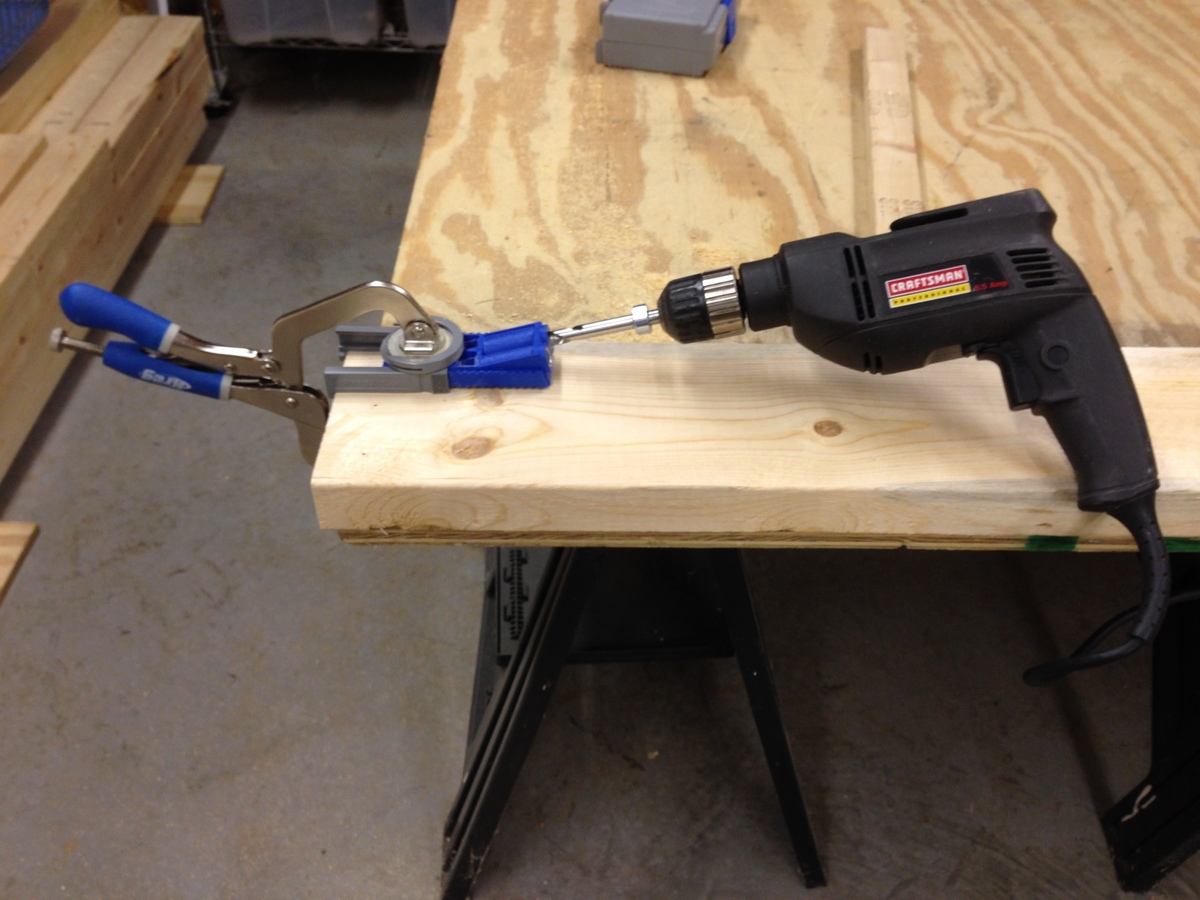
The KREG pocket hole joint works wonderfully well in this application. Just make sure you get the right length and diameter screws. The first box of screws I bought were too big around to fit the hole drilled.
As you can see, there are two happy kids that never want to get down off of their beds.
Thanks for the plans, it was a great experience.
Andy
Built from Plan(s)
Estimated Cost
$300-$350 for two beds.
Estimated Time Investment
Week Long Project (20 Hours or More)
Finish Used
Kilz oil based primer followed up with semi-gloss water based paint. Light mint green for the girl's bed and Superman/Spiderman blue for the boy's. The boys bed took 2 coats due to the dark color over the wite primer.
Recommended Skill Level
Intermediate
Comments
Tue, 03/11/2014 - 12:23
Cut Optimizer Tool
I found this free cut optimizer tool online, it can break down optimal combination of cuts per board. Just make sure you put it some kind of "Width allowance cutting a kerf", so that it includes what you lose at each cut. You also just have to do one type of board at a time (like 1x2s) but you can put in different board lengths so that it'll tell you how to best use scrap. It's a nice tool.
In reply to Cut Optimizer Tool by balloongal247
Wed, 03/12/2014 - 08:27
Cut Optimizer Tool
Thanks so much. I should have thought about that as there are so many tools available on the web. I'm going to be building more of these so that will come in handy.
Sliding Door Console
I modified the plans to have three compartments instead of four. Also, the hardware was a challenge. Tip: use a wheel that has an internal bearing.

Built from Plan(s)
Estimated Cost
$200.00
Estimated Time Investment
Weekend Project (10-20 Hours)
Finish Used
pre-stain and golden oak by minwax
Recommended Skill Level
Intermediate
A Place for the Christmas Stockings
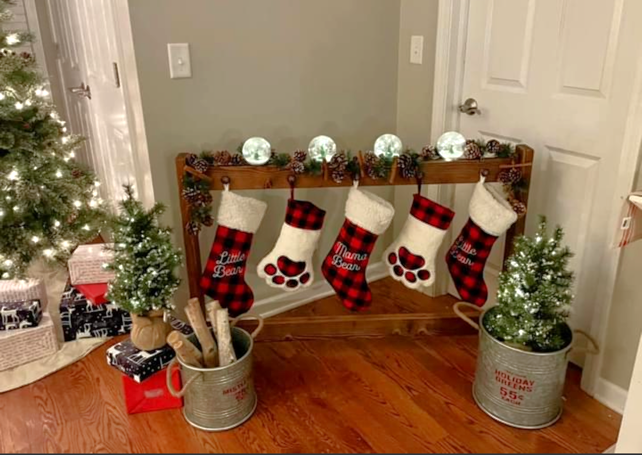
Christmas Stocking Stand by Julie Latham on Facebook.
Built from Plan(s)
Comments
Seasonal And Holiday
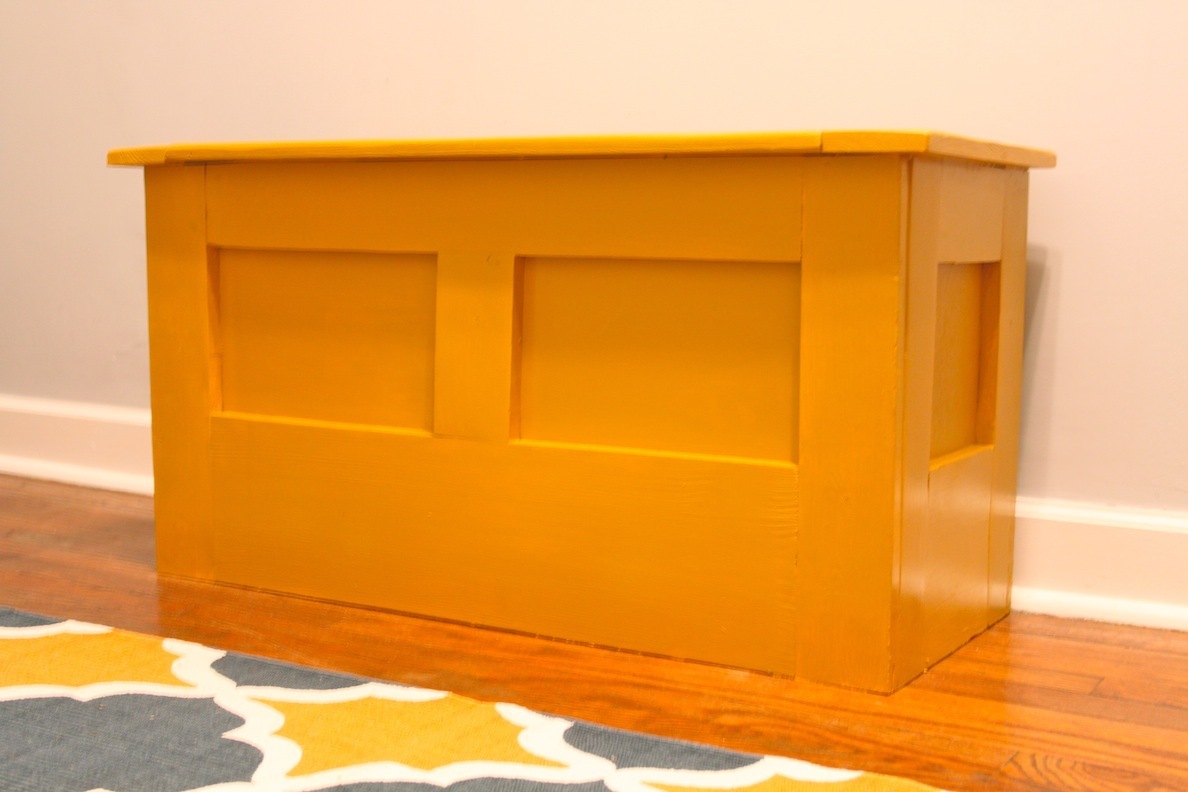
Mimi's (Free!) Storage Bench
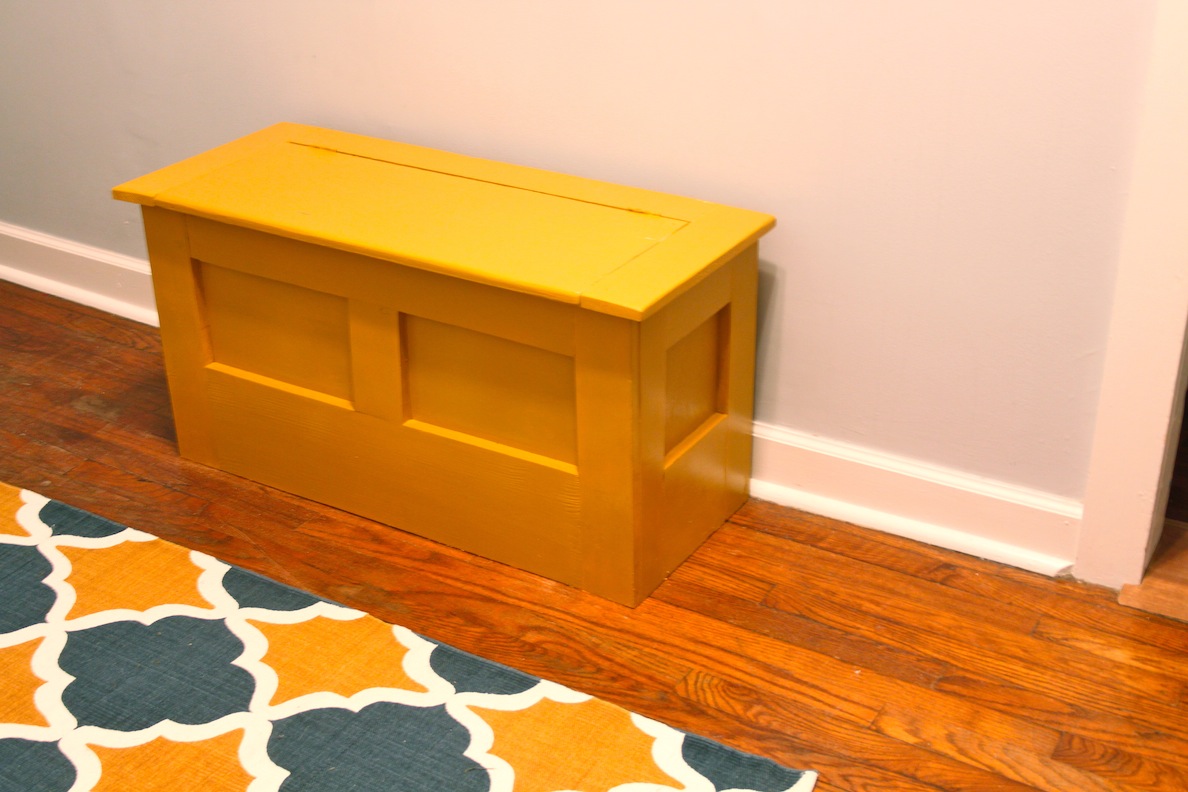
I've been looking for a bench for our hallway for months and have yet to find one I love, but I did fall in love with Mimi's Storage Bench and Hall Tree.
I was determined to make this bench for free. My husband scavenged construction sites for salvage and brought me home quite a bit of scrap. Once I had a nice assortment of boards, I began the job of making them fit the specs. This was much more time consuming than purchasing boards that were the right size to start with. I got quite familiar with the planer (I had to plane down 2x's to 1x's) and even faced the terrifying table saw to rip a few boards down to size.
The lid was made from an old shelf and the inside panels are an old painting from art school--on masonite--that I finally brought myself to part (with). I already had the paint left over from a table I made over, so that was also free!
It didn't take much convincing to get my husband to pick up a pockethole jig. He's been wanting one himself. It was actually a lot more fun and much easier to use than I expected.
Overall, I'm very pleased with the way it turned out. It's made out of some pretty rough wood, so there are a few holes I'll go back and fill in the future--or maybe not. There are also some rough spots and less-than-true boards, but not bad for a free piece of furniture.
This was my first big woodworking project. It was a lot of fun and I gained a lot of knowledge and confidence that I'll use to build more ambitious projects in the future. I think woodworking is actually easier than sewing because boards generally don't stretch, shift, snag, and unravel while you're working.
I plan to scale this plan down, add some safety hinges, and notch the board under the front of the lid to make a bench/toy box for my little girl's room.
Built from Plan(s)
Estimated Cost
0.00
Estimated Time Investment
Weekend Project (10-20 Hours)
Finish Used
Sherwin Williams Enamel in "Cut The Mustard."
Recommended Skill Level
Intermediate
Comments

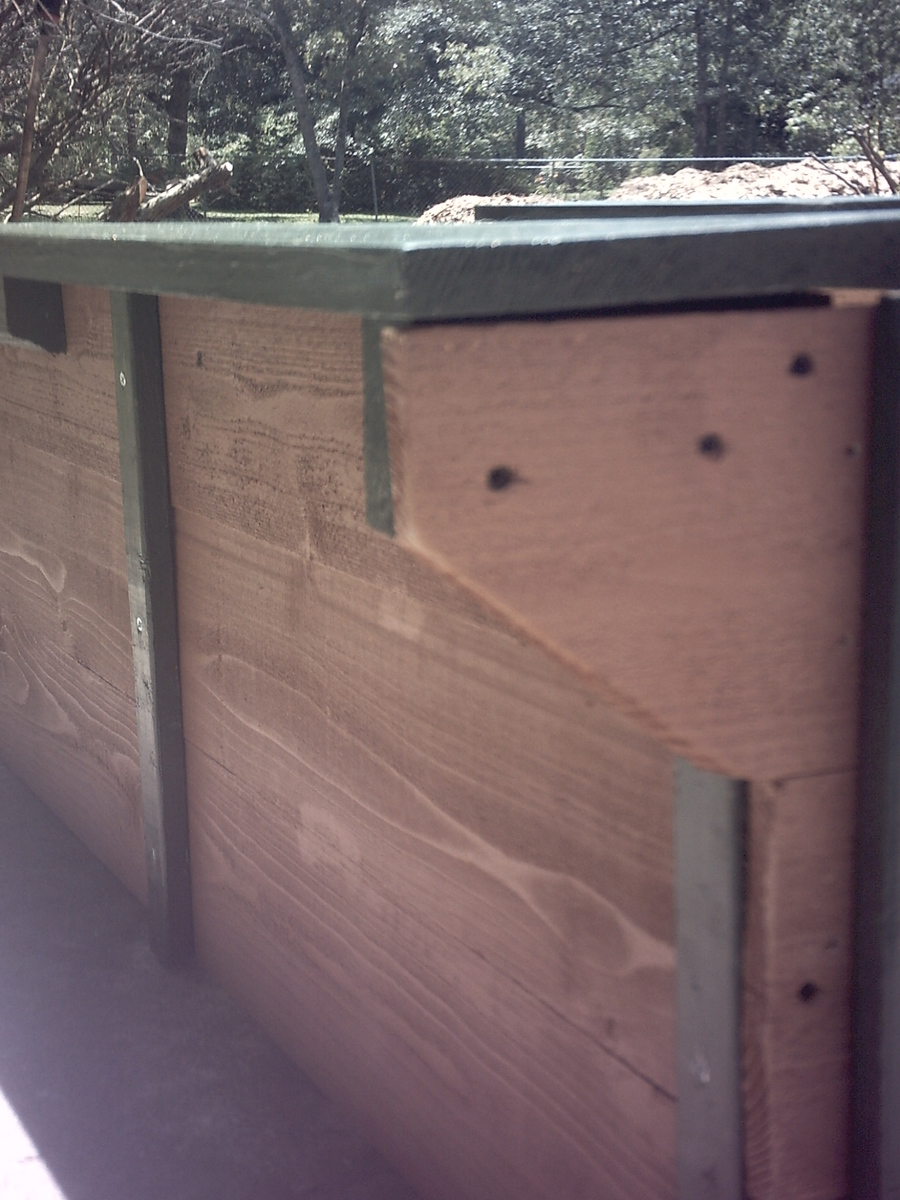
Cedar Fence Board Planter Box
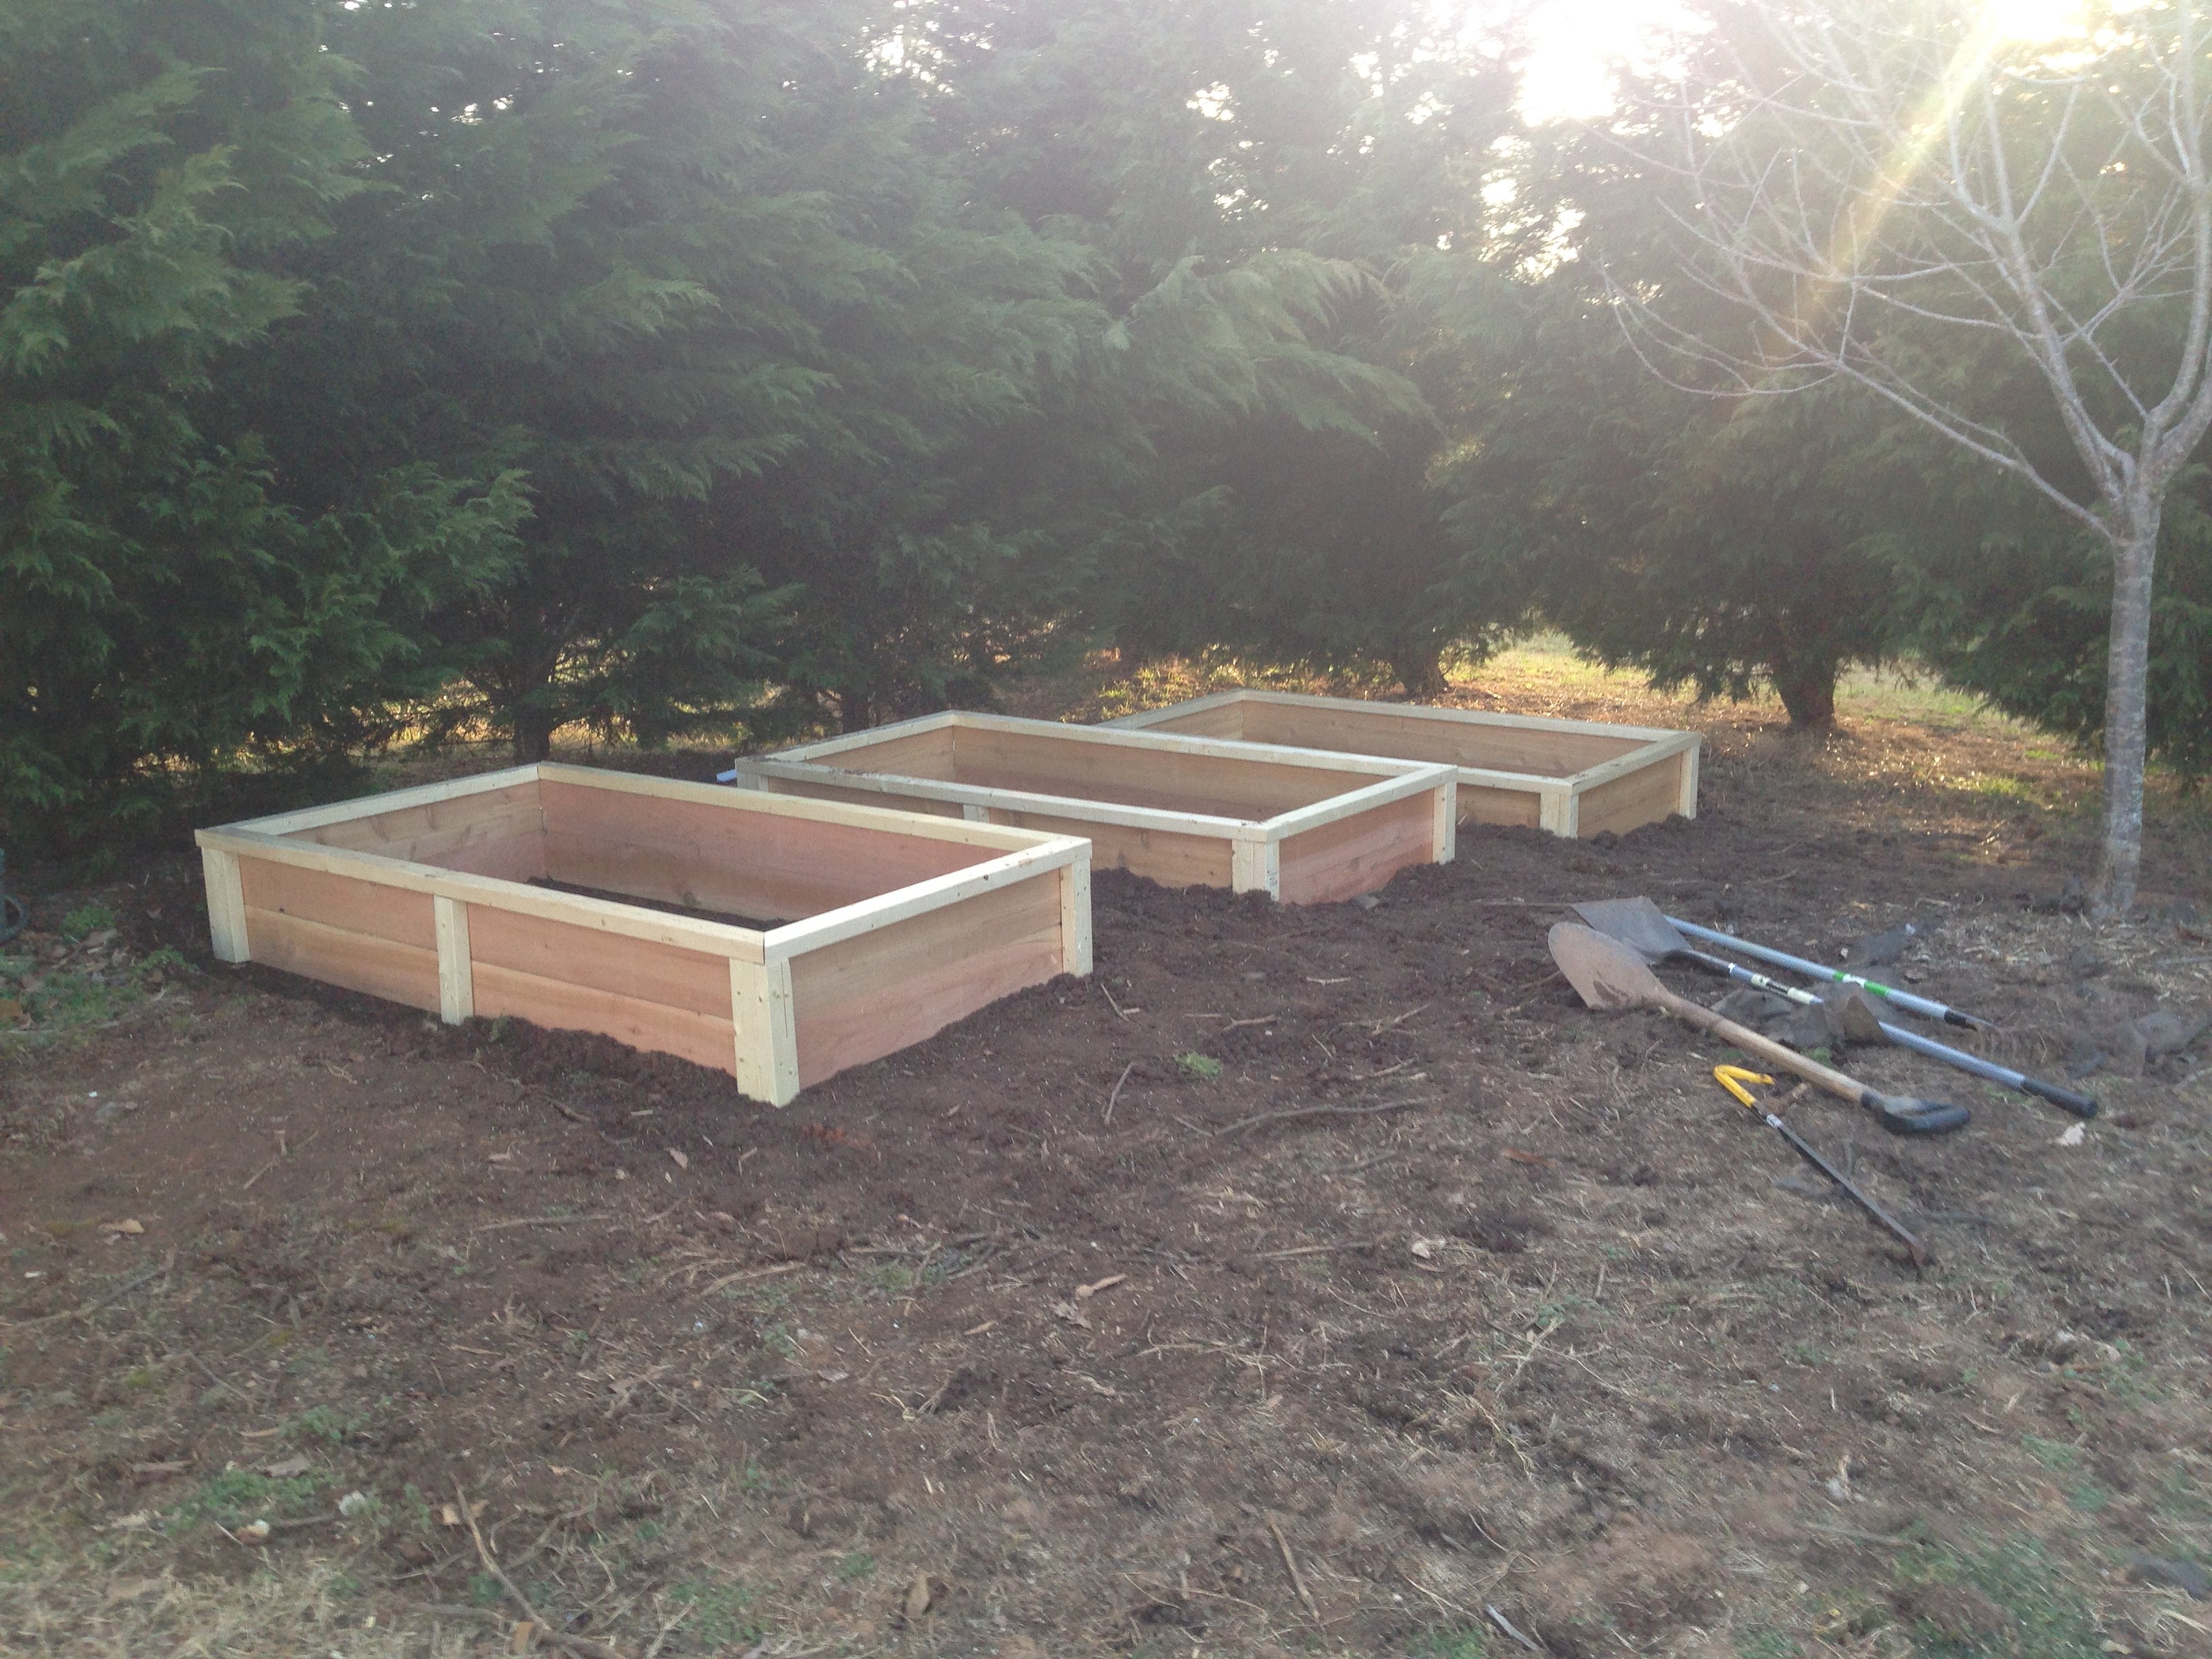
Using Ana's 10 dollar raised garden planter box idea, I made my own using the cedar fence boards and then used 2 x 3 x 8 studs for the L corner supports and mid center support along with top rail. This photo is the first 3, I will have a total of 6 boxes. Will post more as I progress.
Built from Plan(s)
Estimated Cost
20 to 25 dollars per box
Estimated Time Investment
Afternoon Project (3-6 Hours)
Finish Used
I used 6 fence boards, 2 for each side of the 6' long runs, and 1 for each short 3' section cut in half.
I got the 6' x 5 1/2 " x 5/8 " cedar fence boards at the orange box
I used 2 x 3 x 8 boards for the corners the middle support and the top rail. I got these at the blue box
I used 2 " and 2 1/2" exterior star bit screws.
NOTE: I pre drilled holes in the fence boards and screwed all the boards to the L corner sections from the inside out, so the screws are on the inside of the box, they did not poke through the 2 x 3 boards.
Instead of trying to measure how far off the side of the board I needed to go to match the vertical 2 x 3 boards, I just cut 10 11 inch long 2 x3 sections, and then used the 2 1/2" screws and made 4 L corner pieces the shorter side I screwed the short 3 foot length fence boards too, once I had both my short sections screwed to the L corner sections, I then stood one up and screwed 2 of the 6' length boards to the L corner section. Then the other side.
Once all 4 walls were done, I would then measure 3' in the middle of the 6' long side runs, and put in an additional 2 x 3 x 11" again screwed from the inside of the box out.
Now that all the 2 x 3 x 11" L corners and side support sections were connected to the fence boards I then cut 76 1/4" 2 x3 boards one for each length run, and then 2 26" 2 x 3 sections that were all cut on 45 degree angle to complete the top rail.
Recommended Skill Level
Starter Project
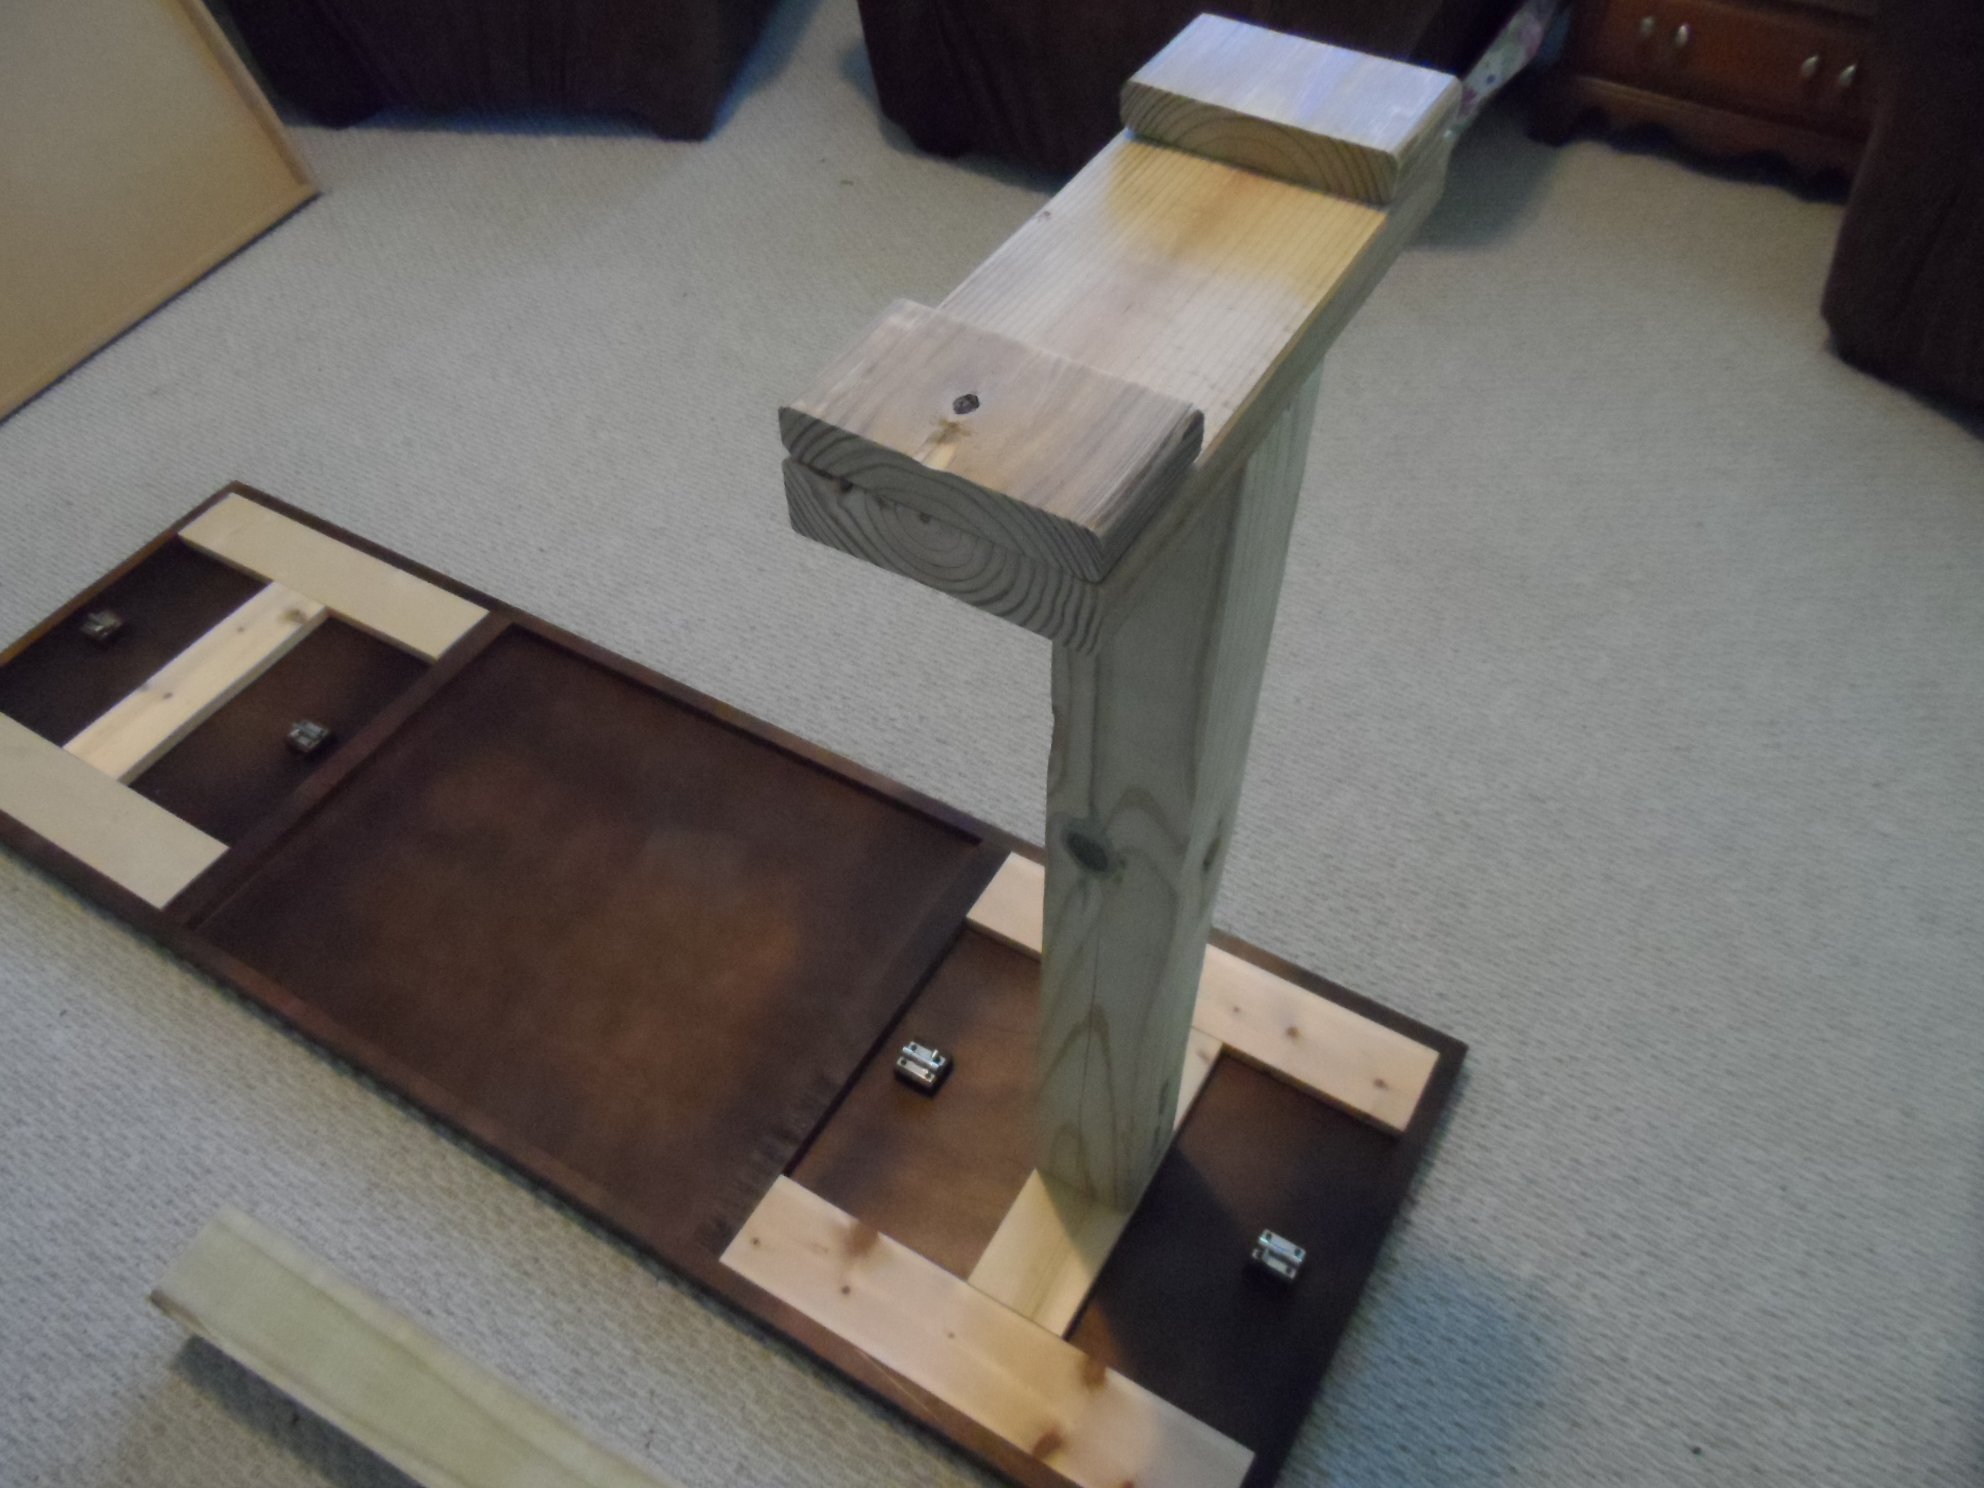
Modified X-base Table
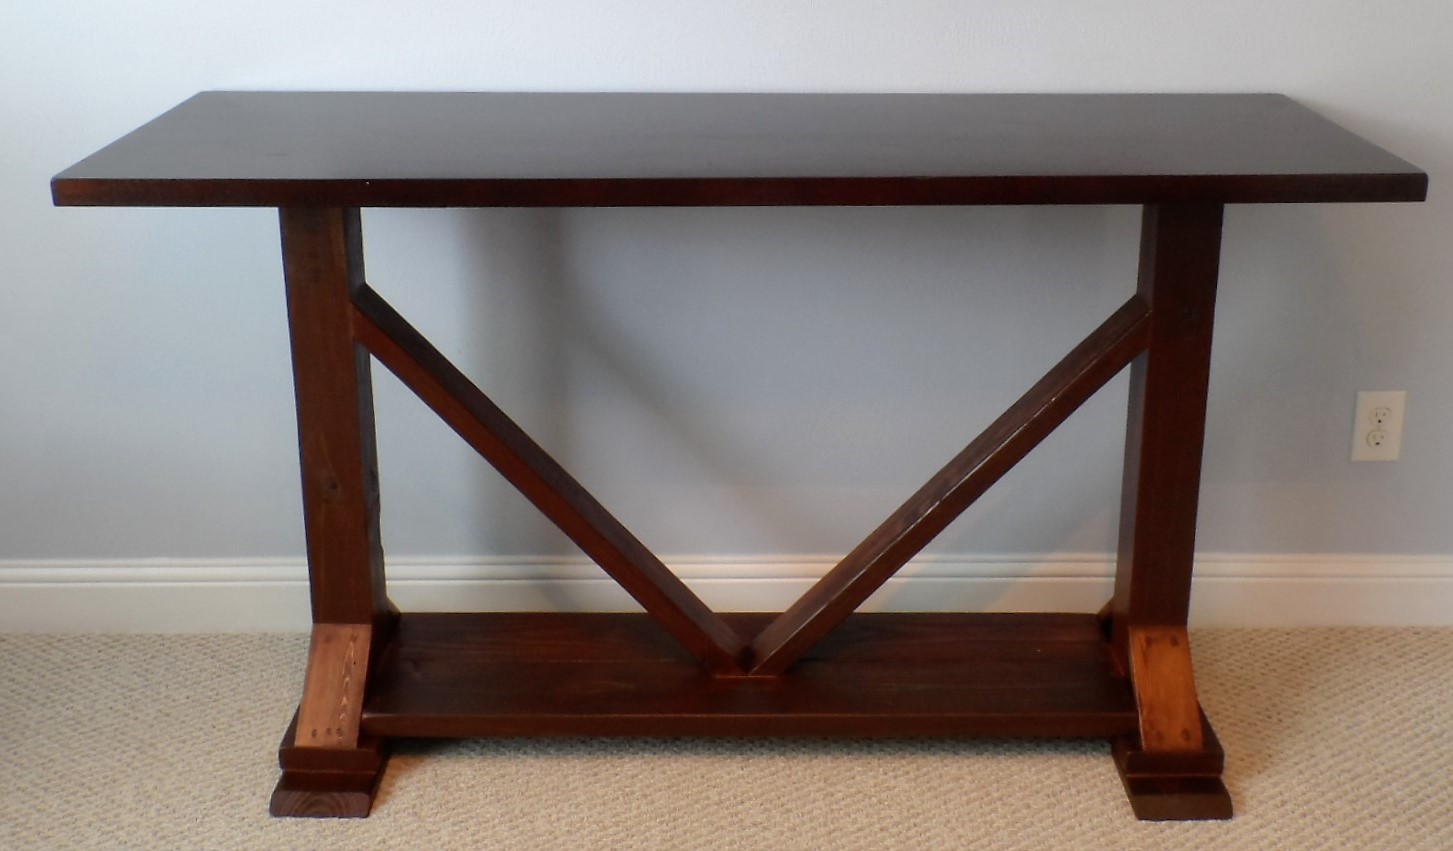
I had been looking for a console table that would compliment my dining table for months. Nothing I found was really working out, but these plans are perfect. The only problem was that I couldn't get the stacked look to work well with the tabletop I had because of the way the apron is made.
Still I love the way it turned out and am glad I found these plans. I also made it taller than a normal console table so it can be multi-purpose for us.
Built from Plan(s)
Estimated Cost
I fully believe that the $55 is probably accurate if I had to purchase all the wood for this project. Since I reused wood and had all the materials already, it cost me a whopping $20 for the tabletop I found at a liquidation sale.
Estimated Time Investment
Weekend Project (10-20 Hours)
Finish Used
Minwax English Chestnut 233 & Oil-modified Polyurethane
Recommended Skill Level
Beginner
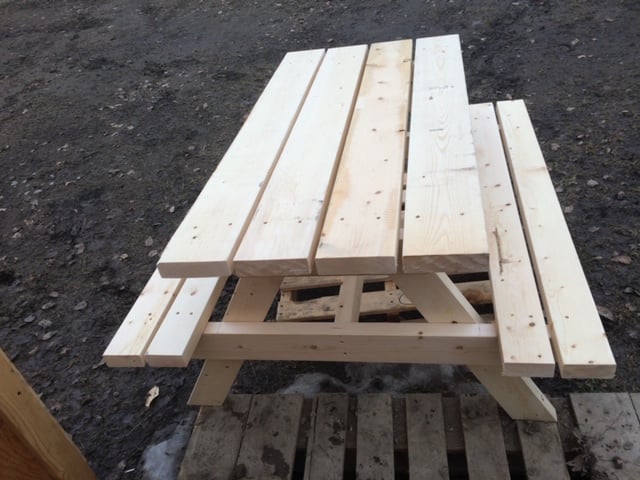
Kids Picnic Table
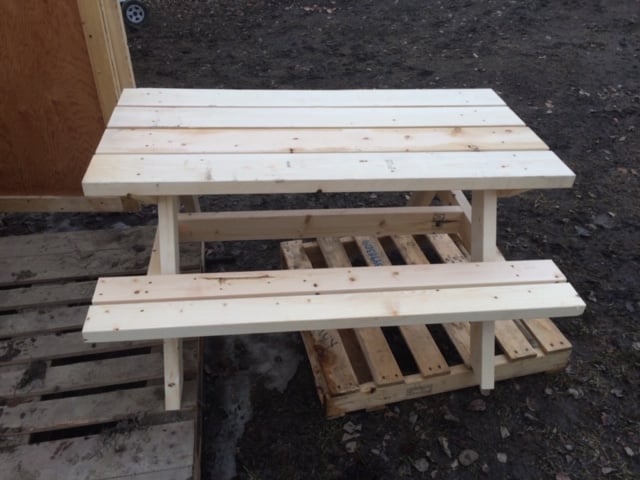
When my kids were stuck between that "baby" picnic table, and the "real" picnic table, we found the plan for this! It was the perfect size, and was a great addition to our backyard!
Built from Plan(s)
Estimated Cost
$30 CAD
Estimated Time Investment
Afternoon Project (3-6 Hours)
Finish Used
Minwax 2-in-1 in Natural
Recommended Skill Level
Starter Project
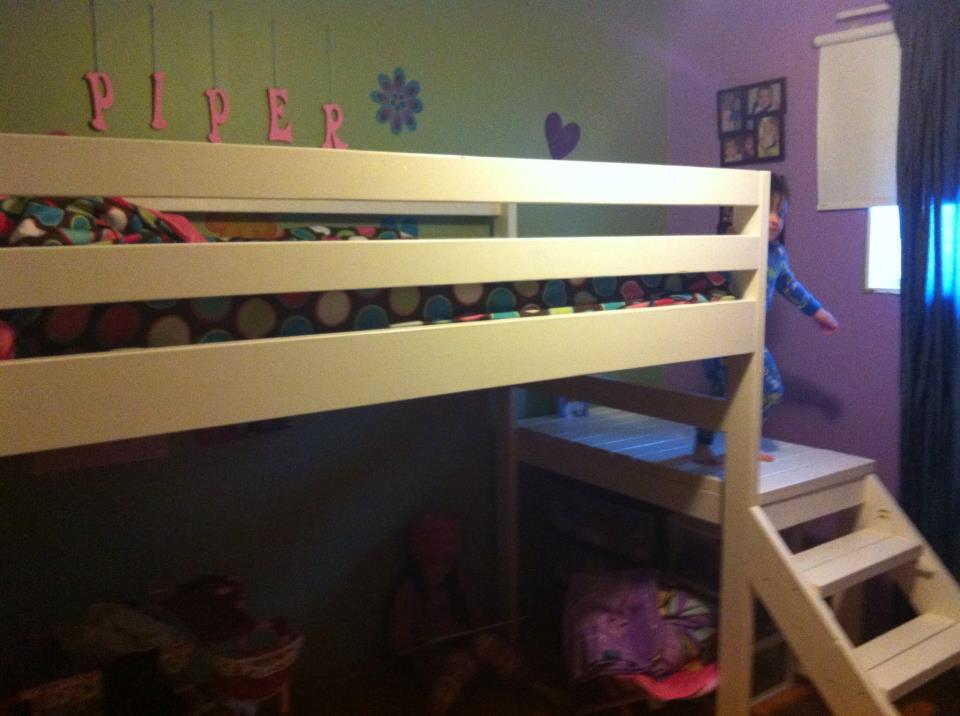
Henry's Bus Loft Bed
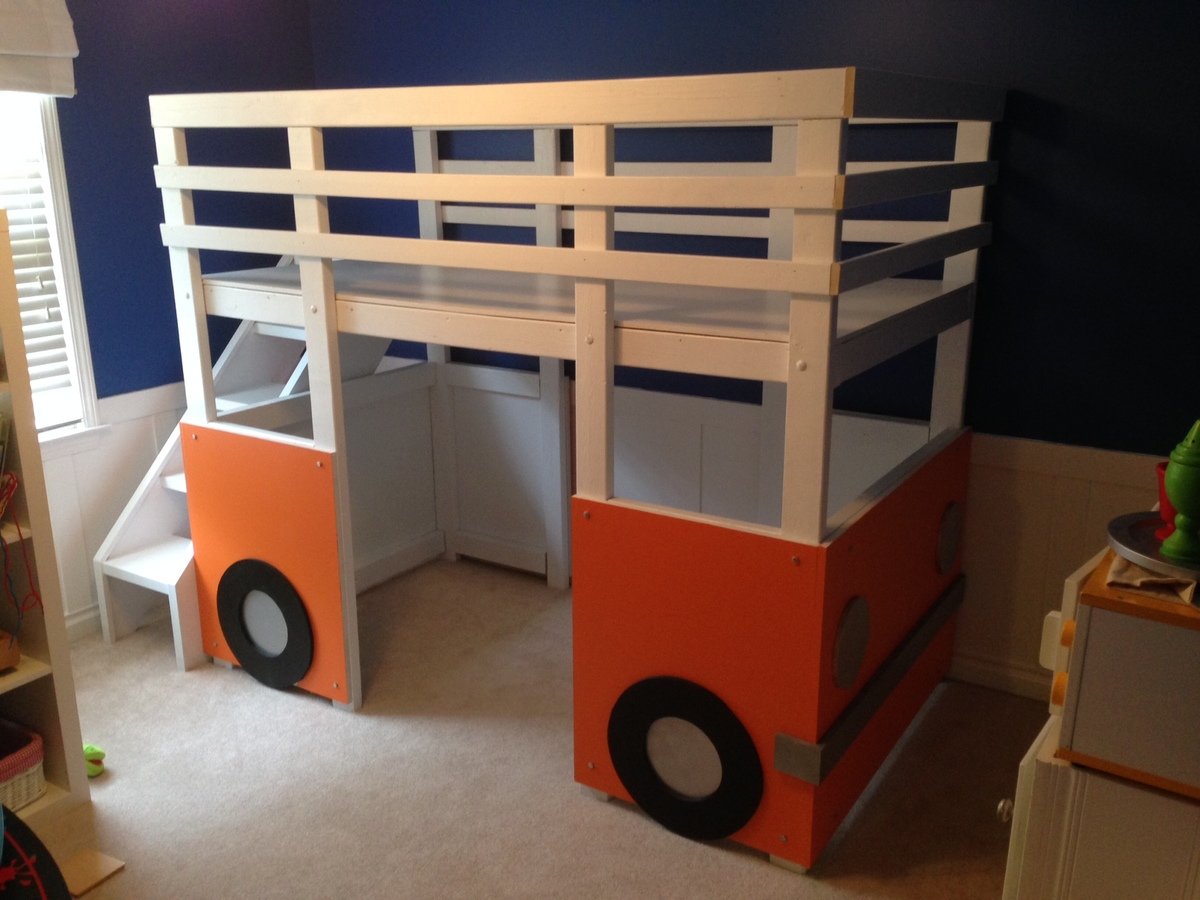
Although not taken directly from your plans, it was highly inspired by ideas from this great website. Thanks Ana for putting such a great DIY resource together.
This is a simple, great looking loft bed.
Made with basic tools -> circular saw, drill, jig saw, and pocket hole jig. Lumber was all standard MDF sheet, 2x4s, 1x2s and 2x2s.
I would estimate total cost around $225 or so including all hardware, lumber, paint, etc.
My son is 3, so I designed a set of stairs. They can easily be removed in a year or so and replaced with a ladder.
Next up is a cottage style loft bed for his twin sister!
Built from Plan(s)
Estimated Cost
225
Estimated Time Investment
Weekend Project (10-20 Hours)
Finish Used
Painted finish
Recommended Skill Level
Intermediate
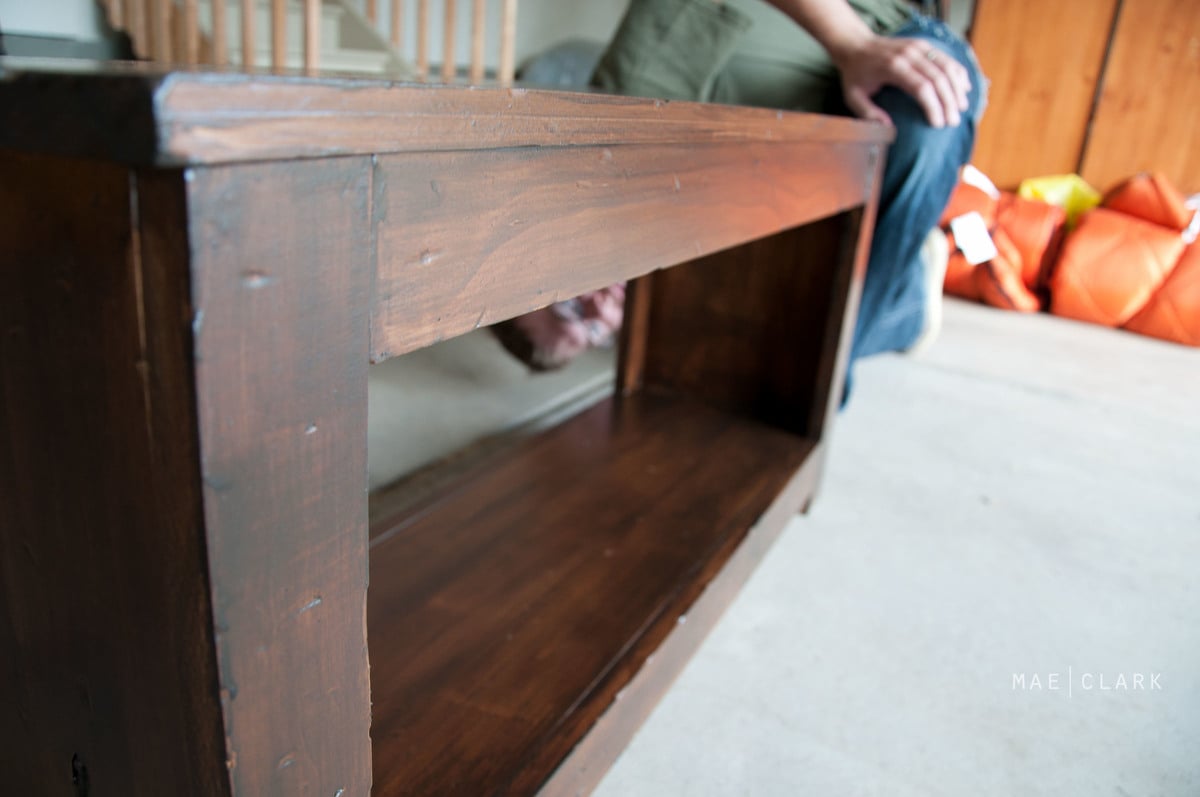
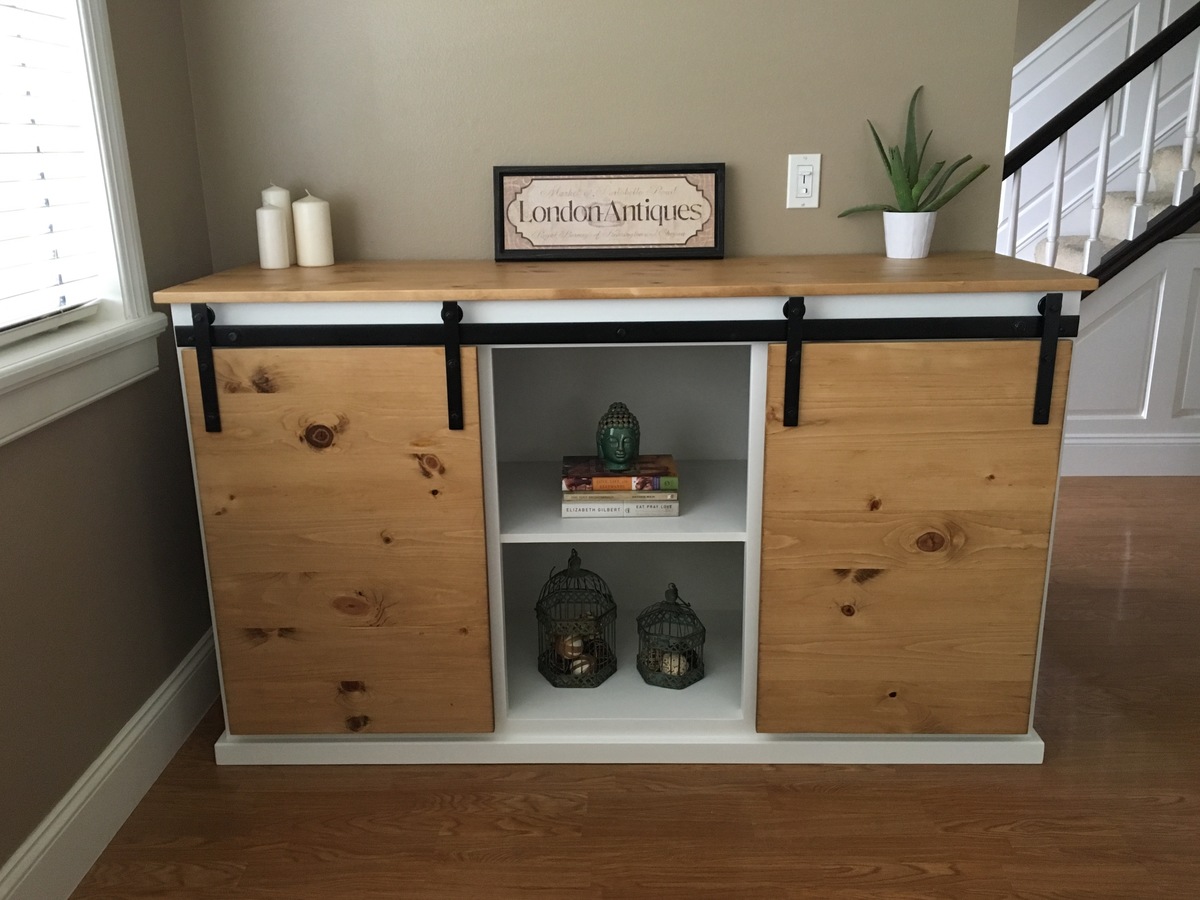
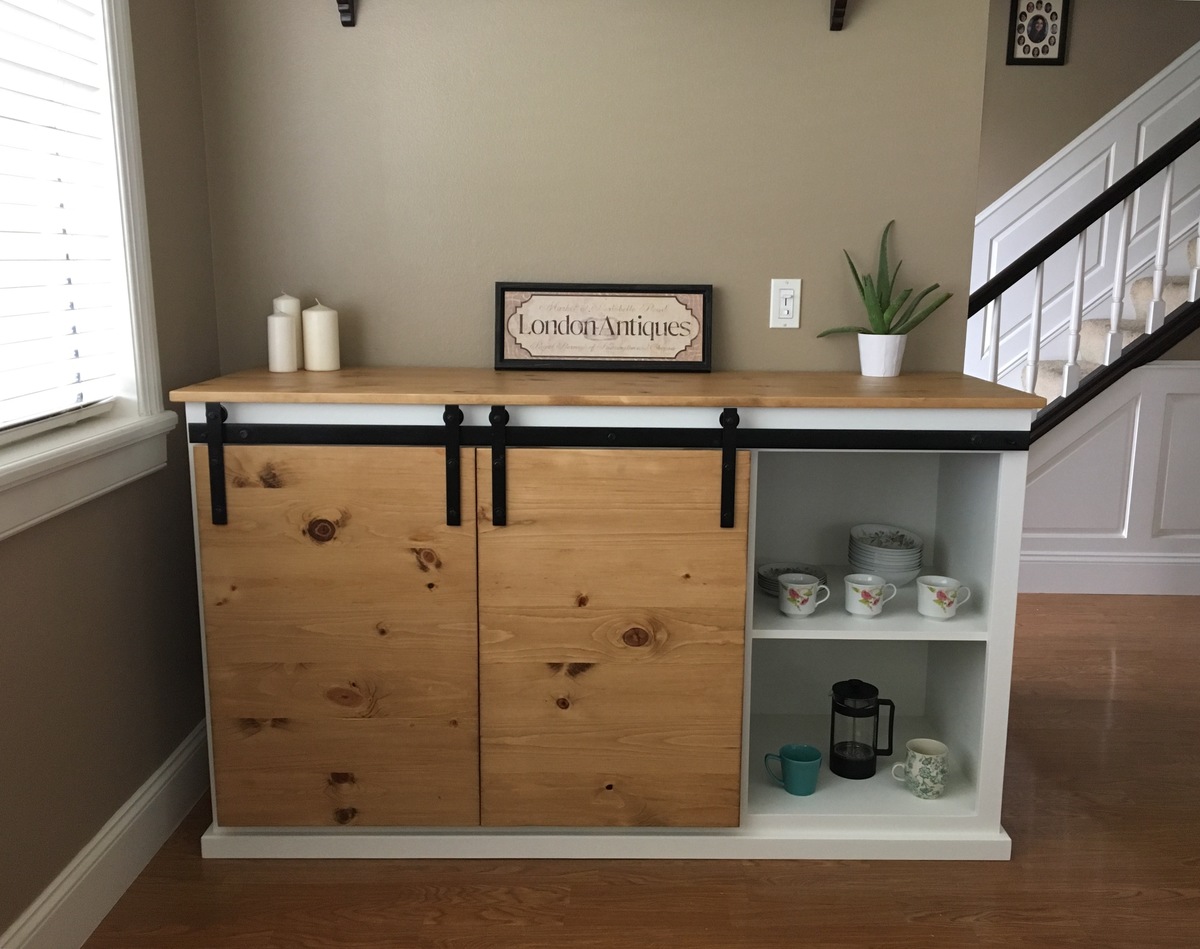
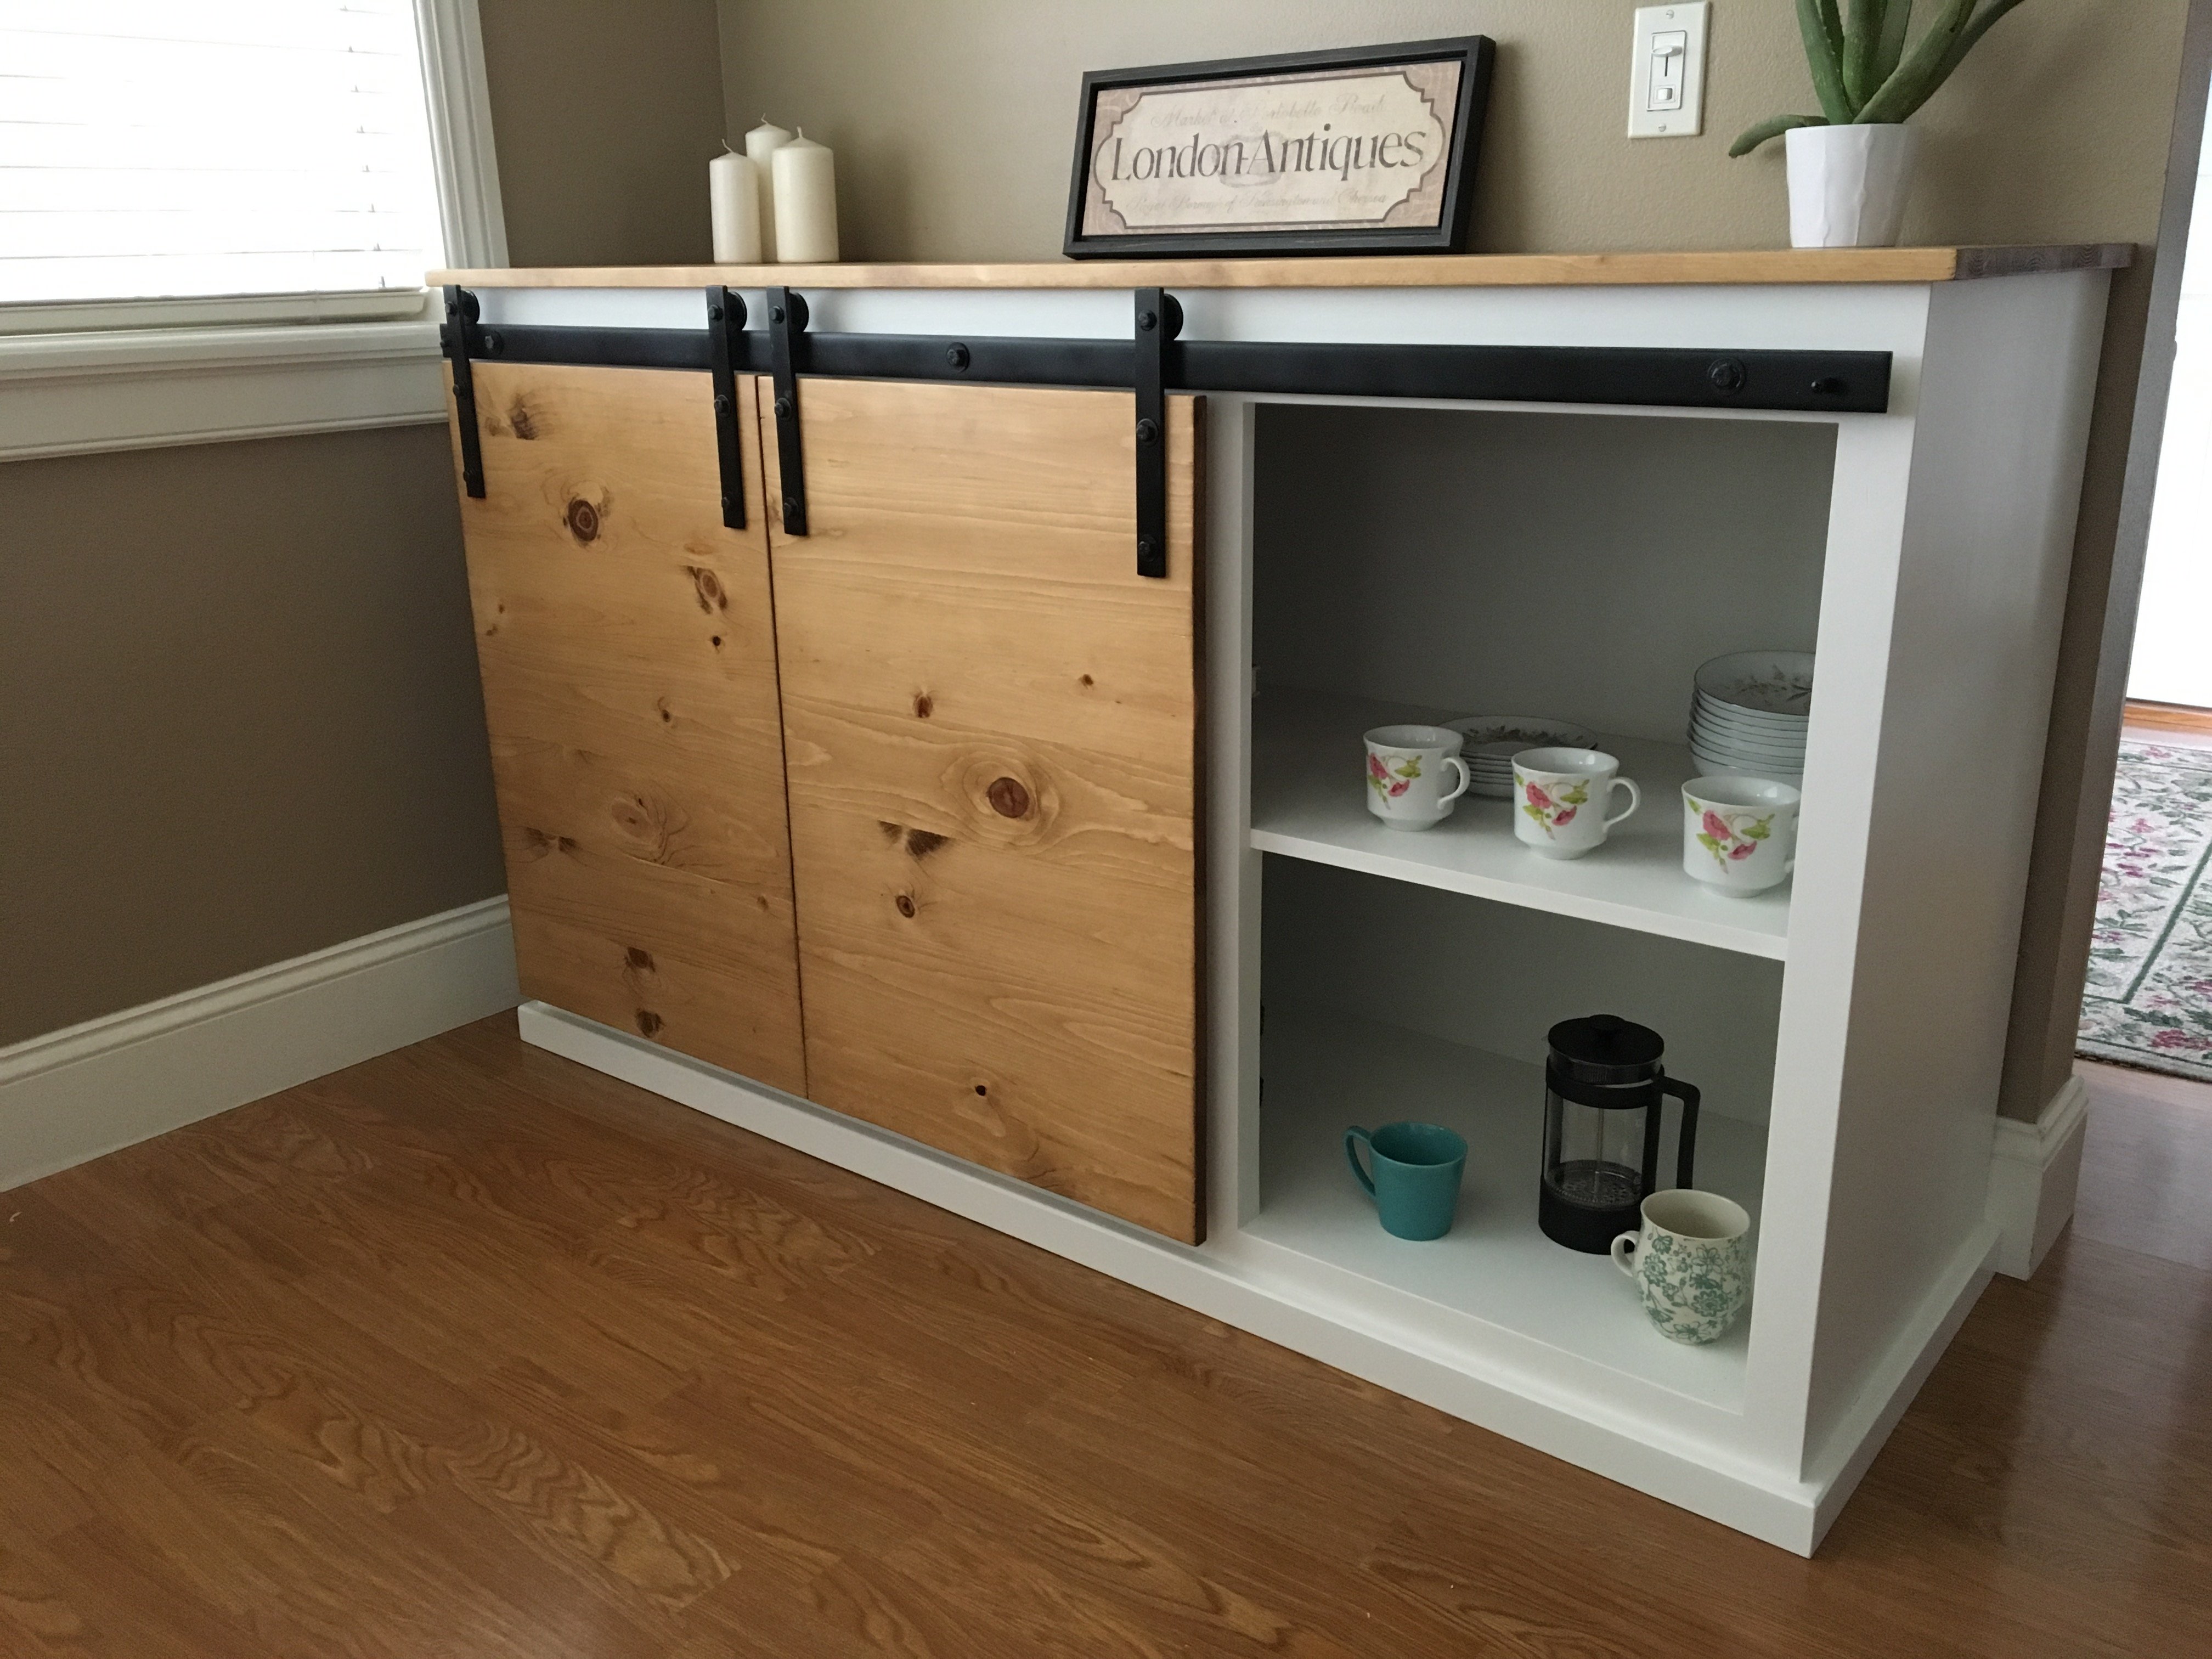
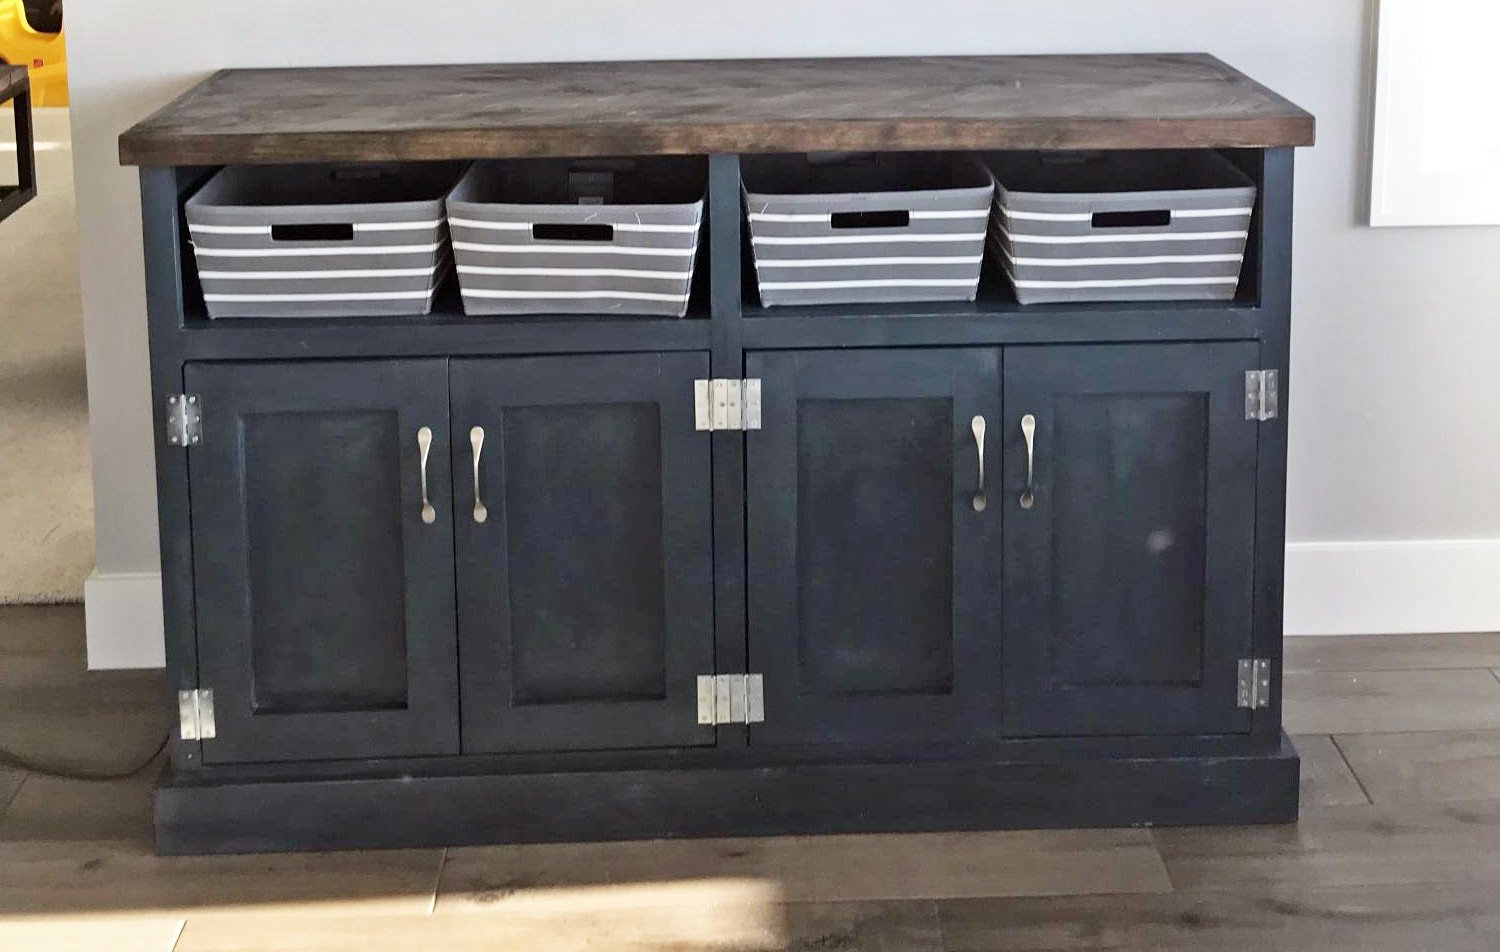
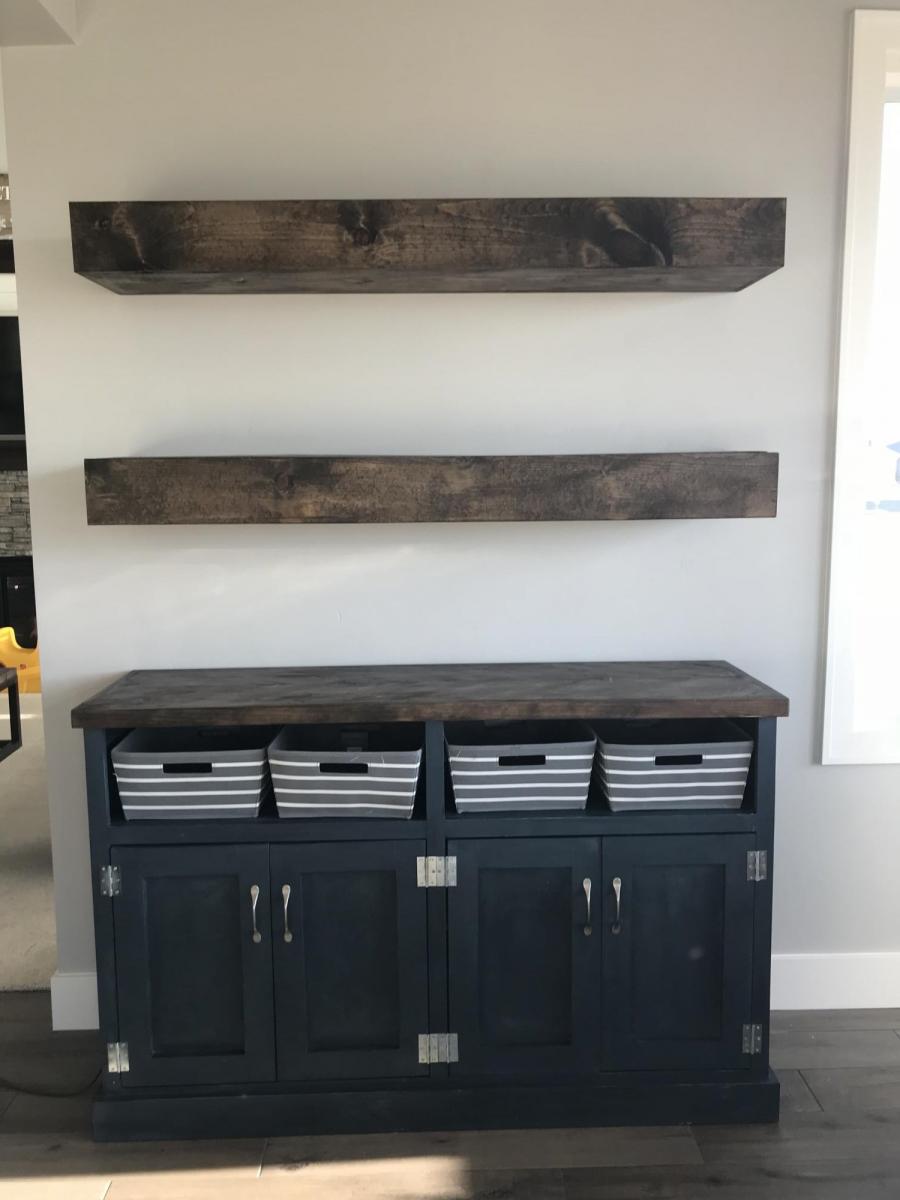
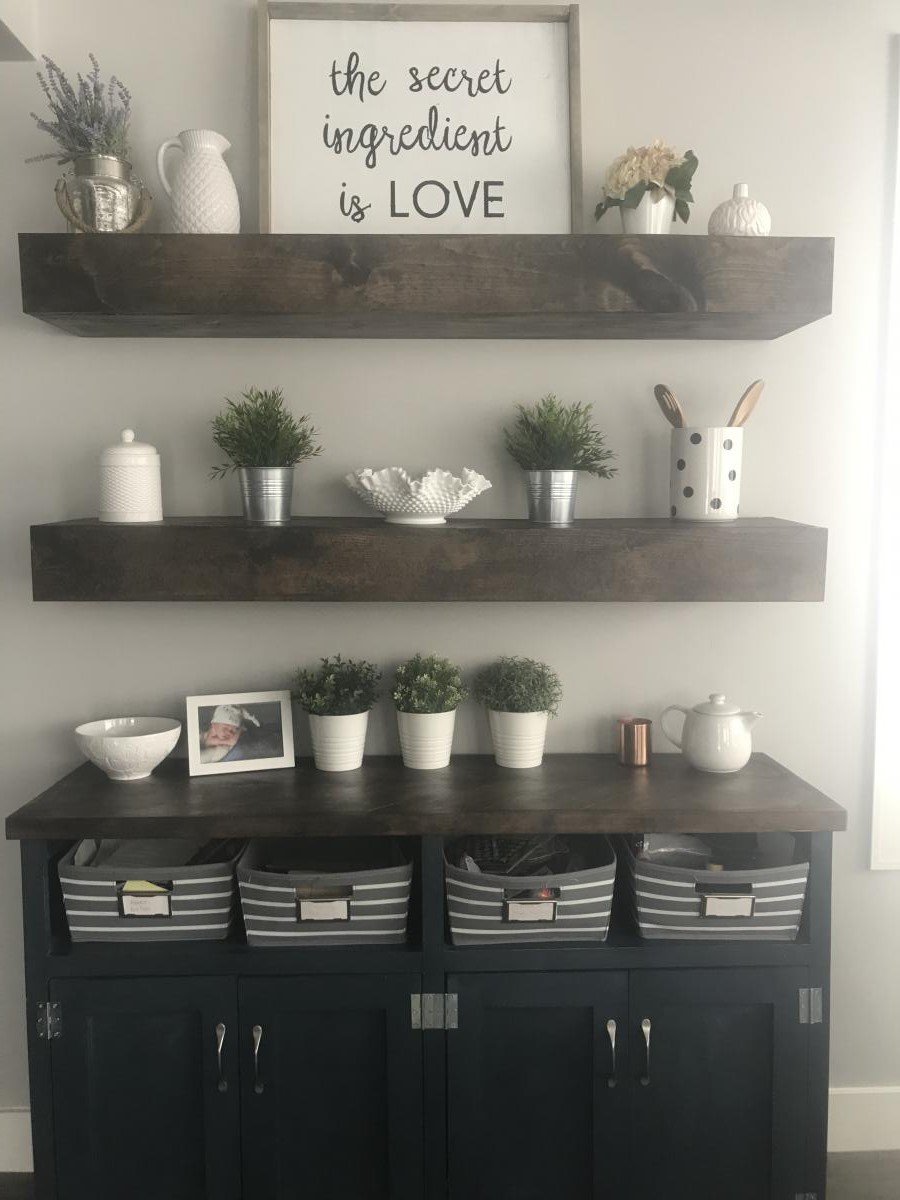
Coffee bar
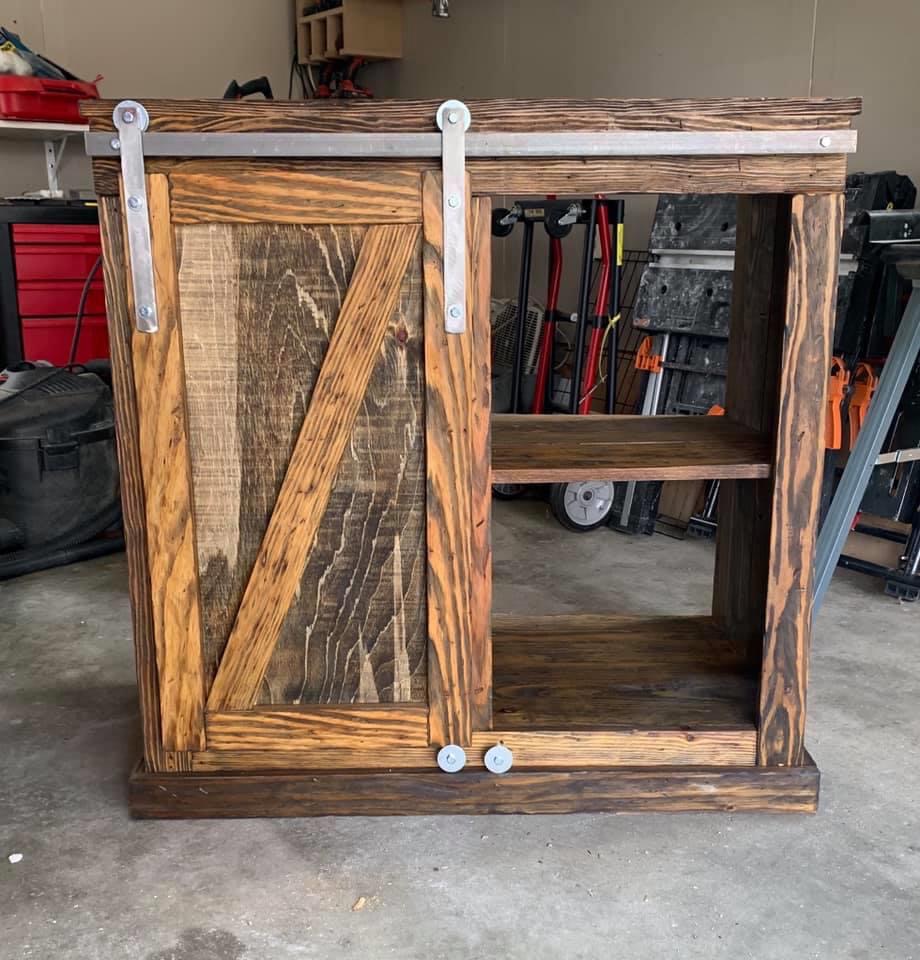
I used the plans for the mini frig/microwave cabinet. I modify the length and width because of the scrap wood I used. The wood I used was from our basement stairs that we retreaded. I used a cup wire brush on the wood to give it the rustic look. The barn door hardware was from Ana’s tutorial video (turned out great). First coat of stain was honey oak, I left it on for a couple of minute then wiped it off. Second coat was ebony, same technique as the first coat. Once the stained dried used a spray matte poly on the top, did 4 coats, sanding with a 800 grit between coats. Hope you’ll like it
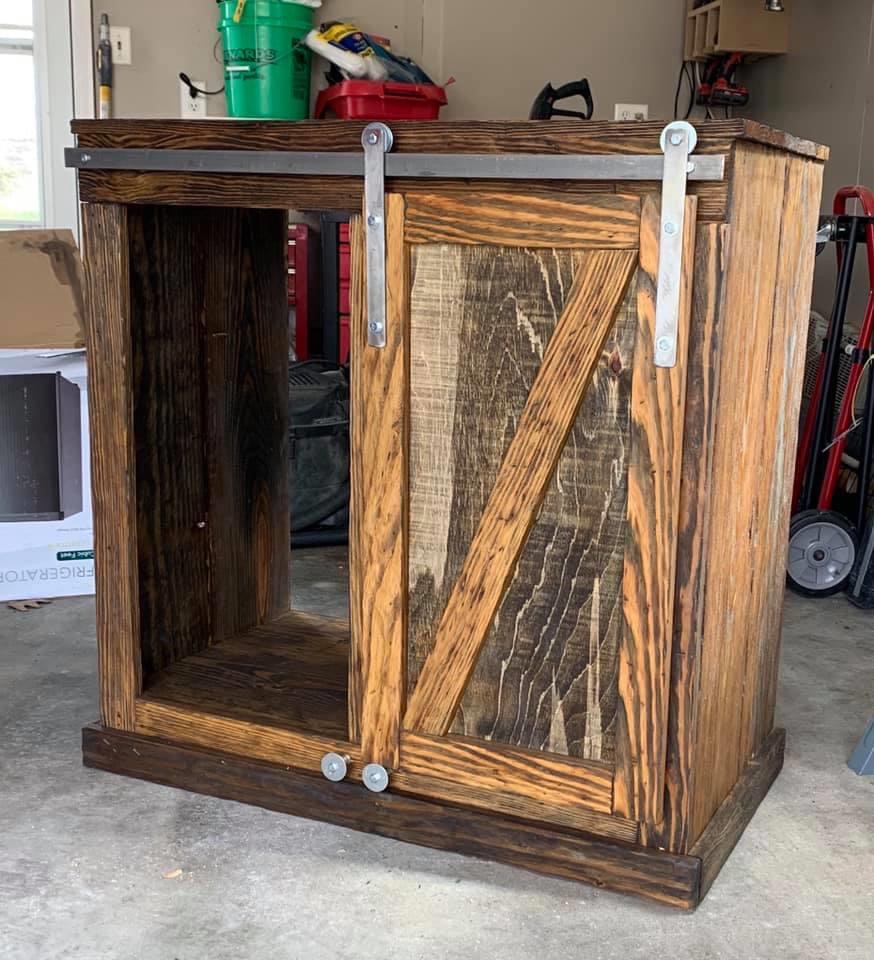
Estimated Time Investment
Weekend Project (10-20 Hours)
Recommended Skill Level
Intermediate
Shiplap Built-in for Electric Fireplace
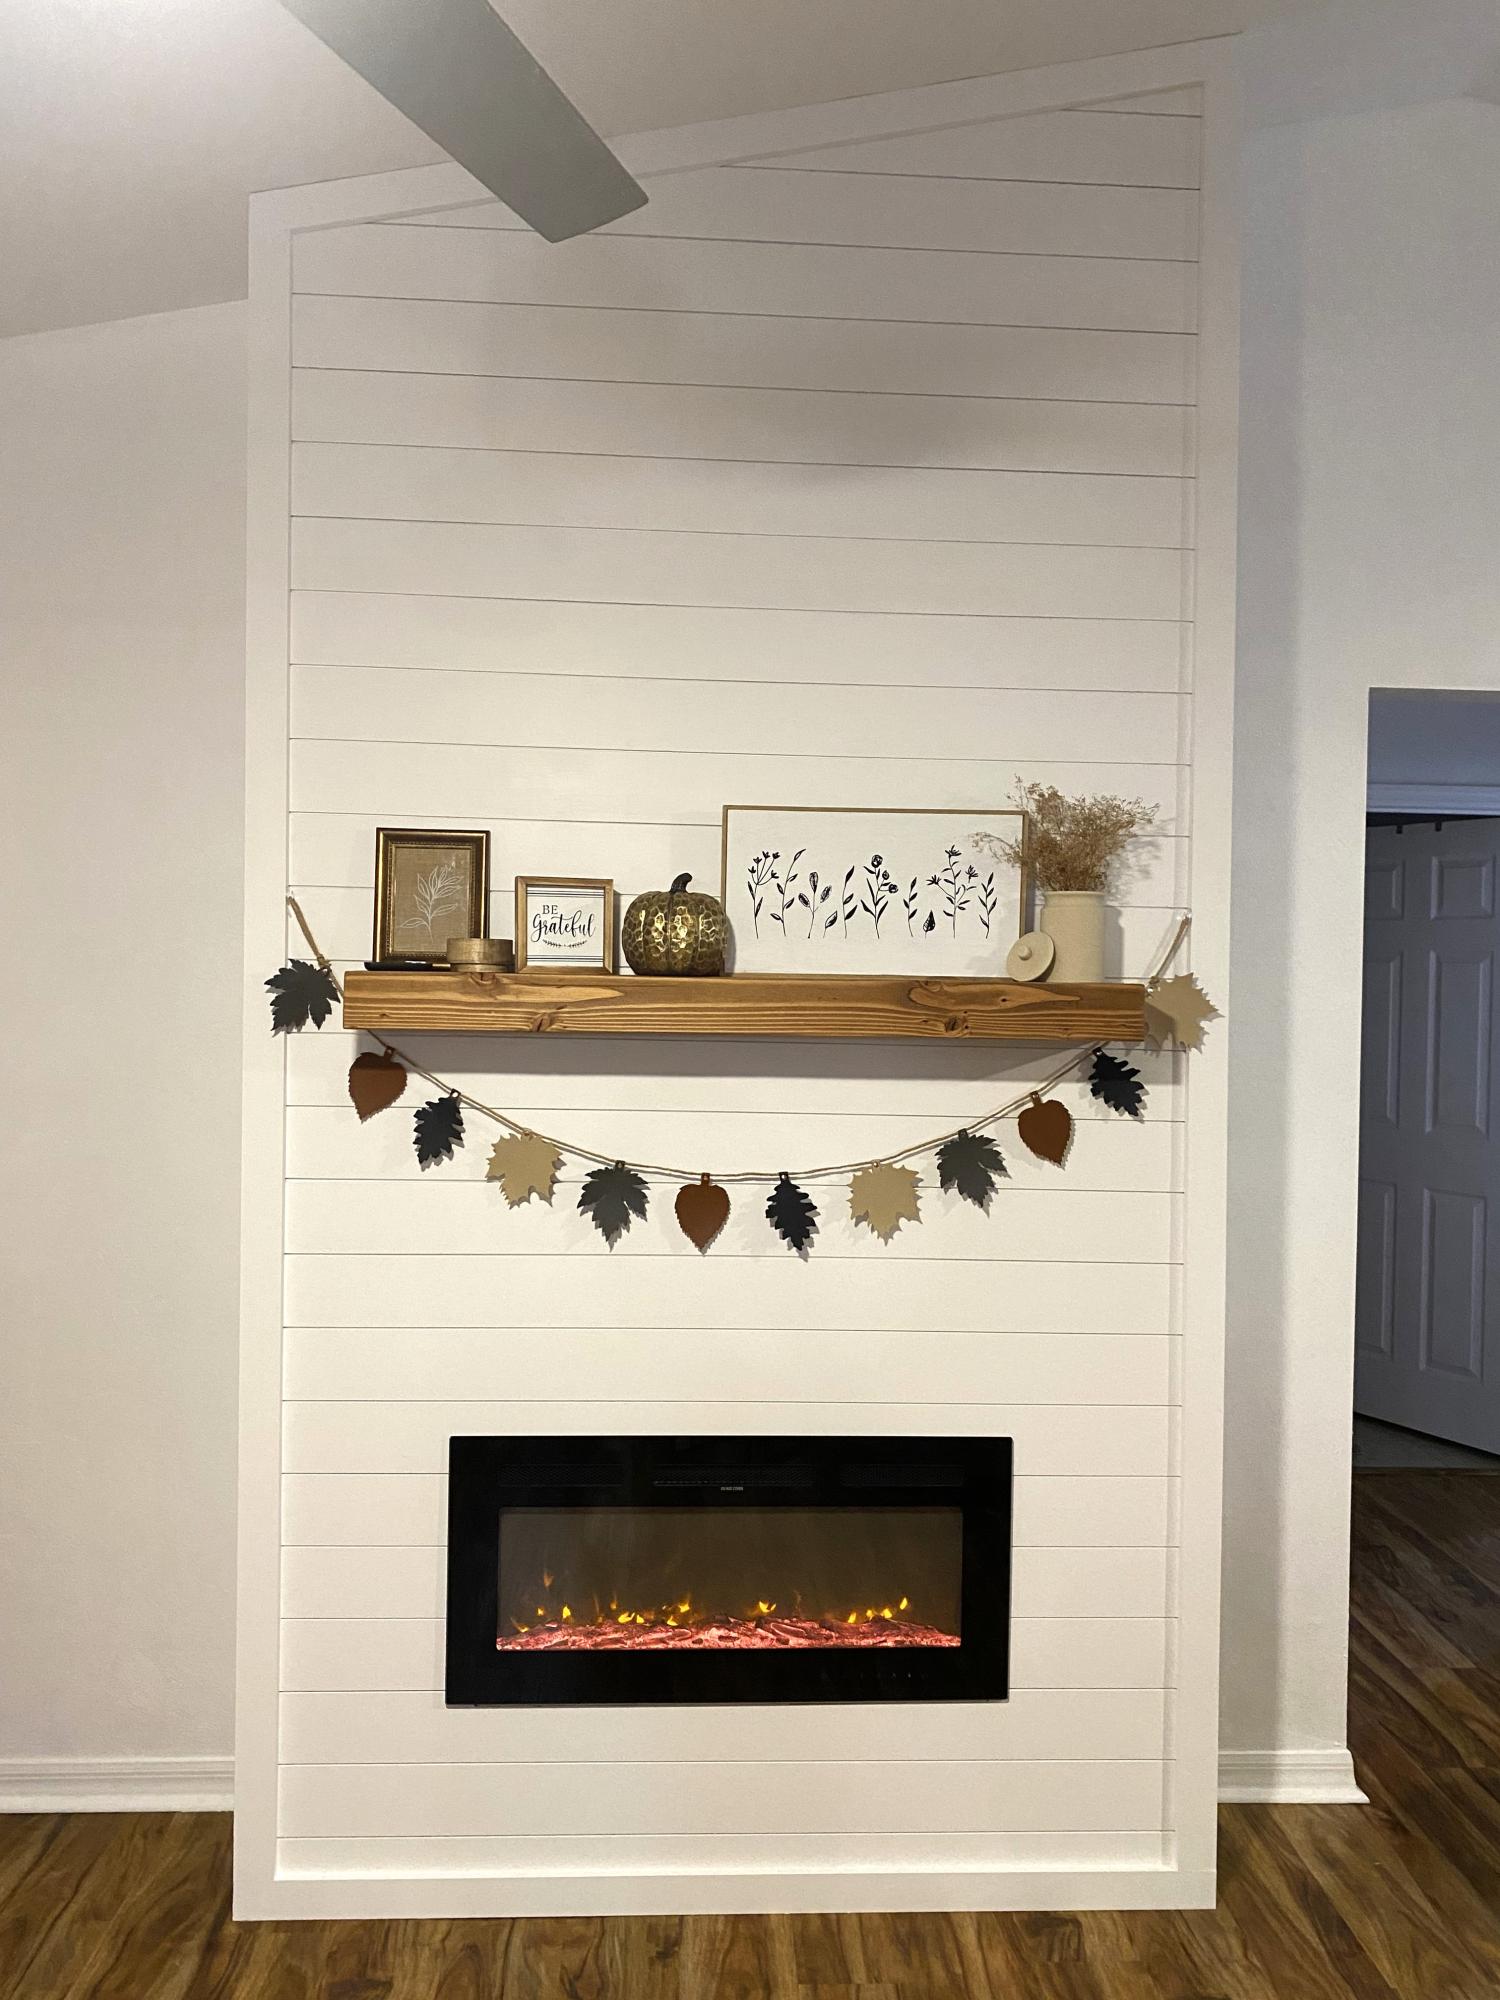
Some parts were challenging, but well worth the effort. My wife loves her early Christmas present. Thank you Ana for such useable plans.
Angel
Built from Plan(s)
Seasonal And Holiday
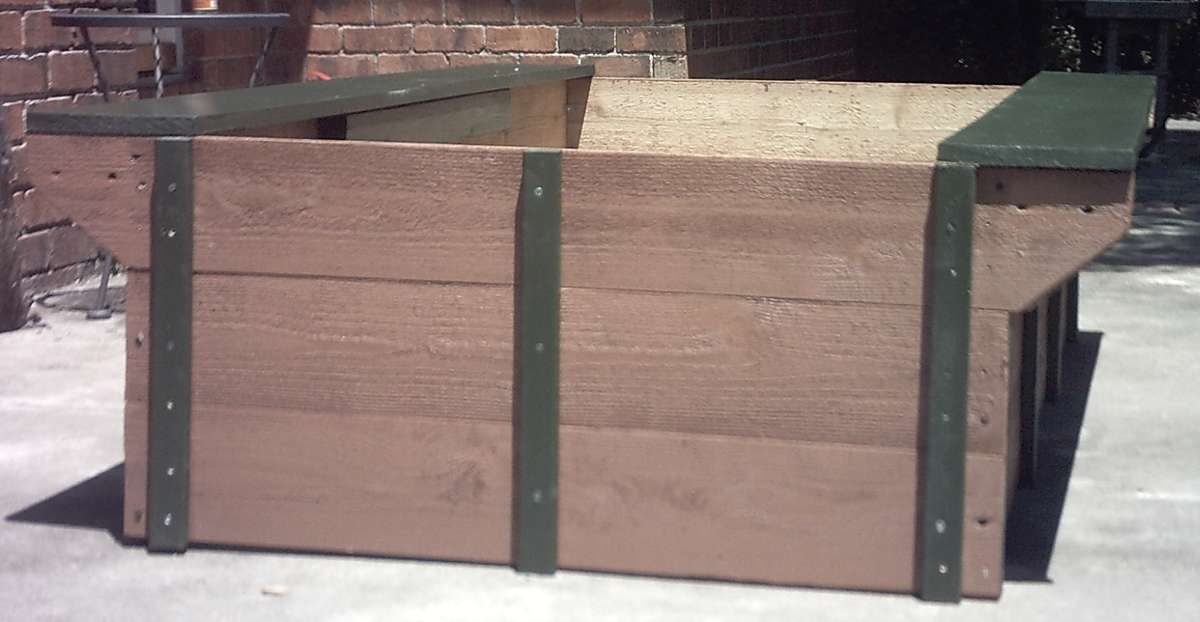
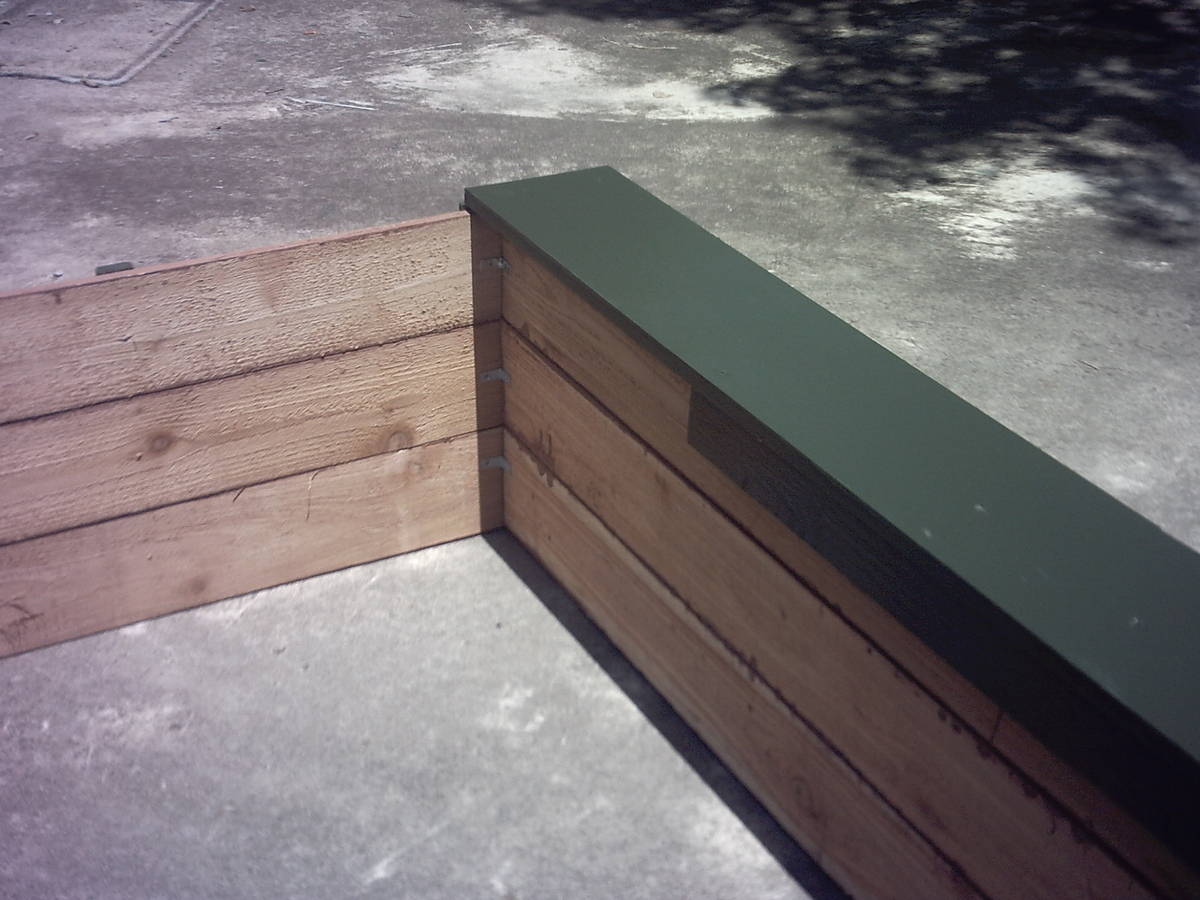
Raised Bed With Added Bench Shelves
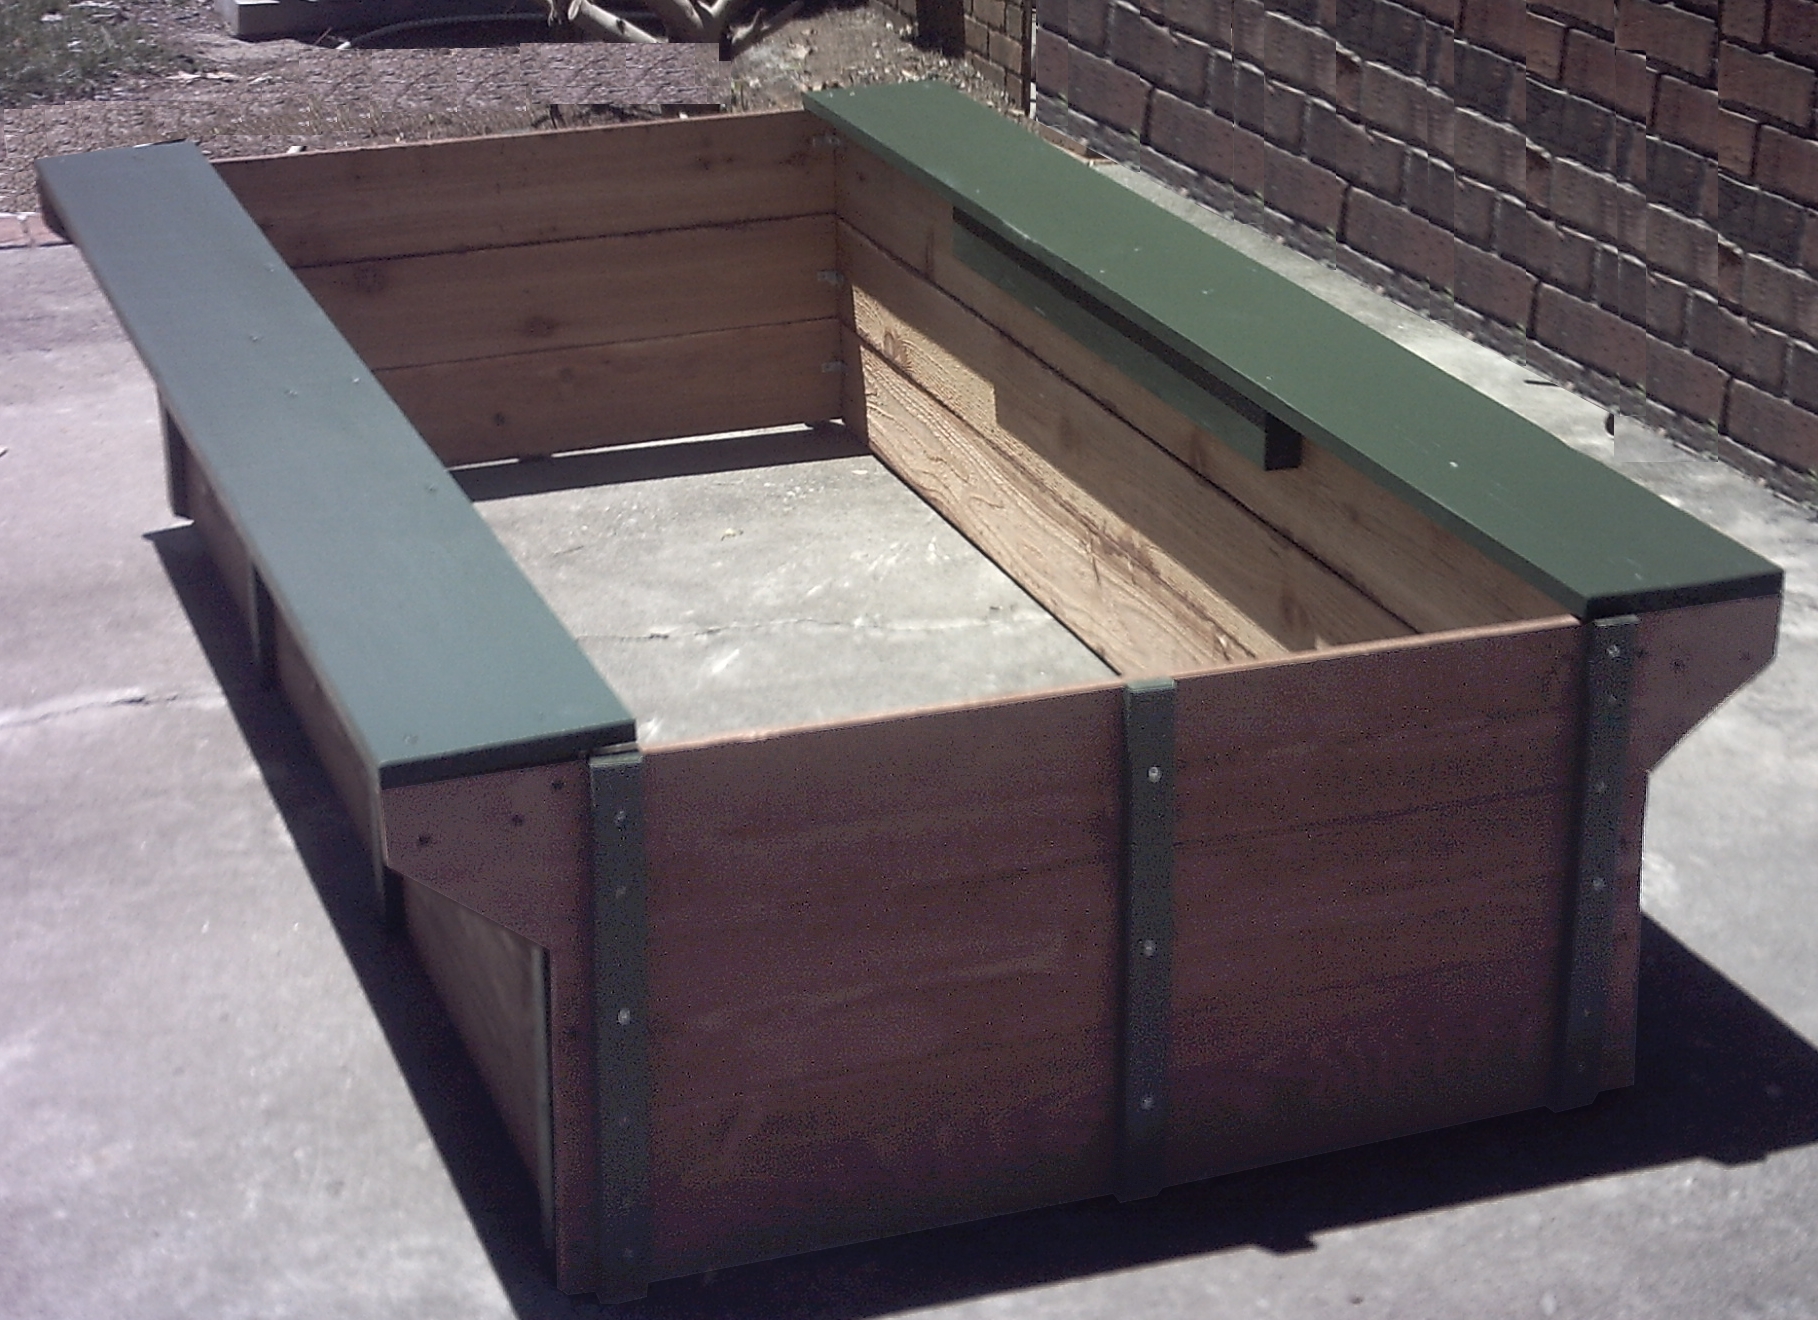
This box is 3 boards high (cedar dog-eared fence pickets), using the full length of the pickets for the sides and 1/2 the length of the boards for the ends. The dog ears were removed with a pull saw before painting and construction.
A 12ft, 8 inch wide, pressure treated pine plank was used to create a bench shelf along the sides. The plank was halved to create 2 benches. Small, 1 x 2s hold all three boards flush to form the sides. Segments of 2 x 4's were secured to create braces that hold the benches. The upper level of the end boards are longer than the bottom two and serve as additional support for the ends of the pine bench boards.
Wood screws were used for assembly. Corner brackets reinforce the interior corners for added stability. All exterior boards were painted before assembly.
The bed interior is 17" deep 33" wide x 71" long.
Built from Plan(s)
Estimated Cost
$20
Estimated Time Investment
Afternoon Project (3-6 Hours)
Finish Used
Indoor/outdoor latex ($5 surplus).
Recommended Skill Level
Beginner
Comments

Mon, 06/04/2012 - 12:10
Love it! As I get older I am
Love it! As I get older I am looking more and more at switching my garden space over to raised beds. The added bench is a great idea.
In reply to Love it! As I get older I am by Pam the Goatherd
Mon, 06/04/2012 - 16:14
Same here!
This one is a gift, but left me wishing it were mine. It looks so inviting that one of my sons asked for his own gardening space and started drawing up plans.
Thankfully, it's easy enough to put together with interruptions. I have lots of interruptions. I did the cutting in one session, the painting in another, the assembly third and then some final touch ups with the paint.
The cedar smells WONDERFUL. The benches are narrow but sturdy enough to handle my dangerous curves *cough* *smile*
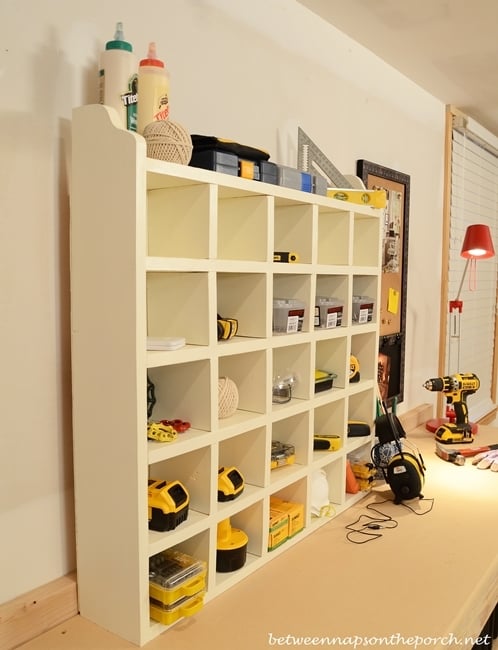
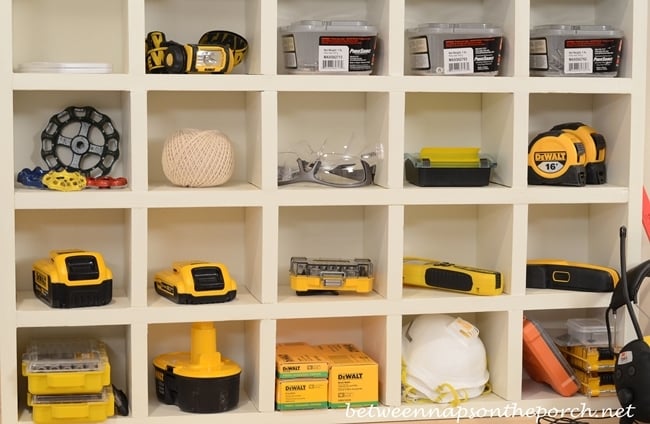
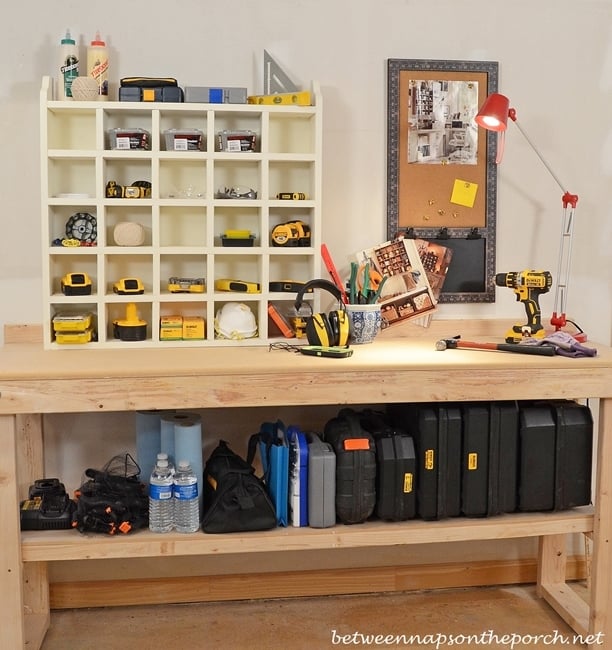
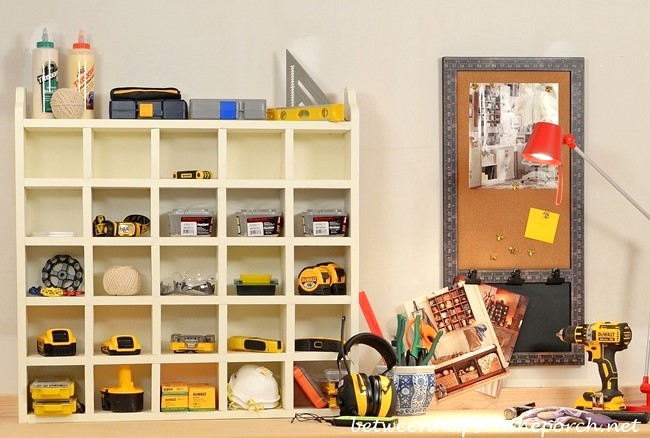
Cubby Organizer (Pottery Barn Inspired)
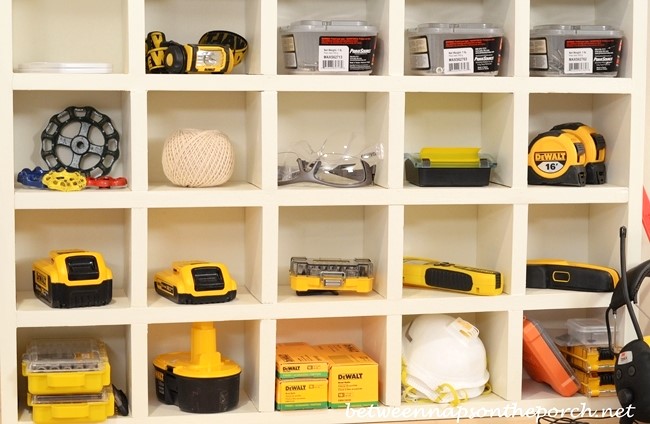
This cubby organizer is great for storage, displaying collectibles or as an advent calendar. I'm using mine in my mini-workshop for storing tools and supplies I use frequently when woodworking. Tutorial can be found at my blog here: http://betweennapsontheporch.net/build-a-cubby-organizer-pottery-barn-i… Thanks Ana for supplying the plans!
Built from Plan(s)
Estimated Cost
$40
Estimated Time Investment
Day Project (6-9 Hours)
Finish Used
I used Sherwin Williams Dover White paint for a soft white. Stain would work great for this piece, too.
Recommended Skill Level
Beginner
Loft Bed
This took me 4 days to sand (by hand), prime and paint so daddy and papa to put together the bed she's always wanted.
Built from Plan(s)
Estimated Cost
approx. $150, for wood, screws, paint, and Kreg Jig.
Estimated Time Investment
Weekend Project (10-20 Hours)
Recommended Skill Level
Beginner
Entryway console with open shelves
Console used as art center with modified chevron top. To make the top I use 1/2” plywood cut to the desired size of the top (minus 1.5” in width and length), nailed chevron pieces (made from 1 x 4 boards) to the top and trimmed the edges with 1x2 boards.

Built from Plan(s)
Estimated Cost
100
Estimated Time Investment
Weekend Project (10-20 Hours)
Finish Used
Base is Rustoleum chalk paint in coastal blue. Top is Varathane Fast dry in Dark Walnut.
Recommended Skill Level
Intermediate
Comments

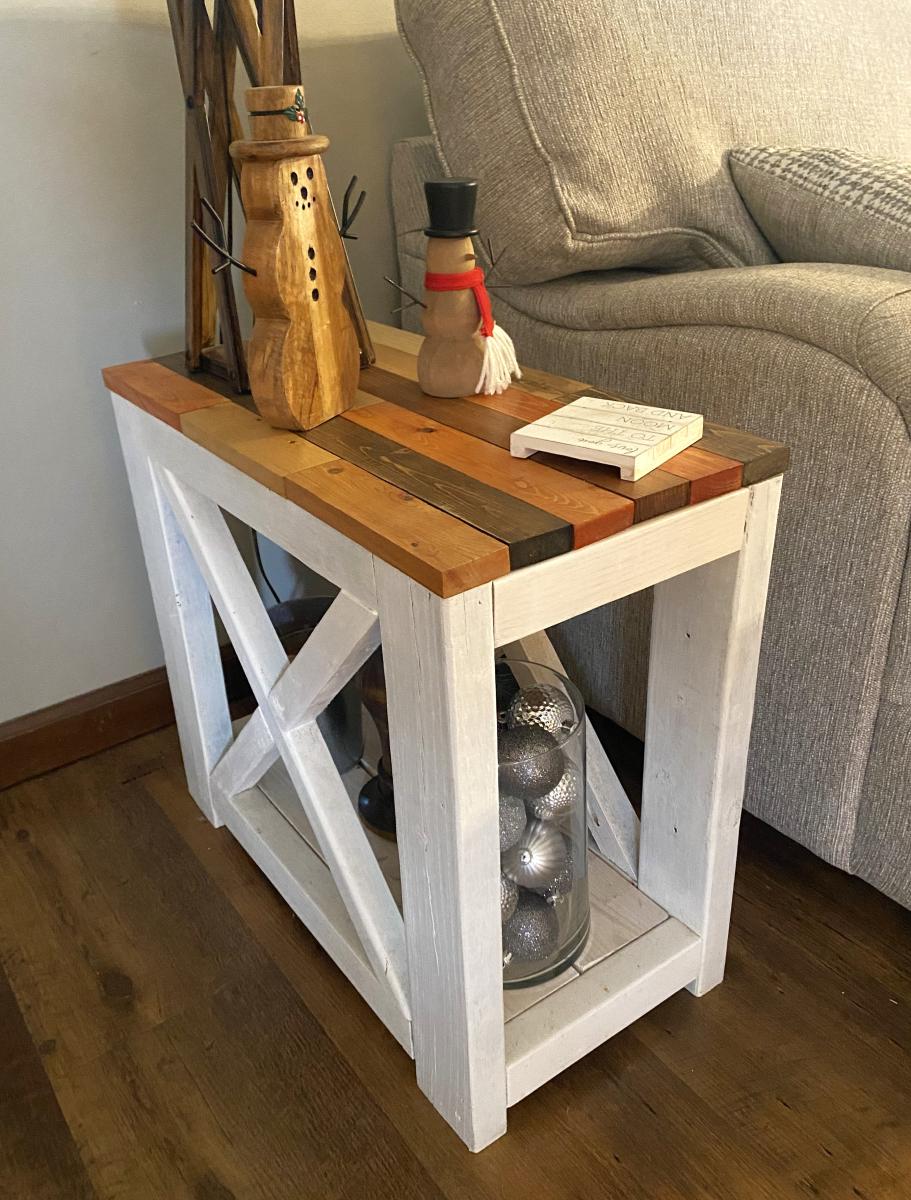
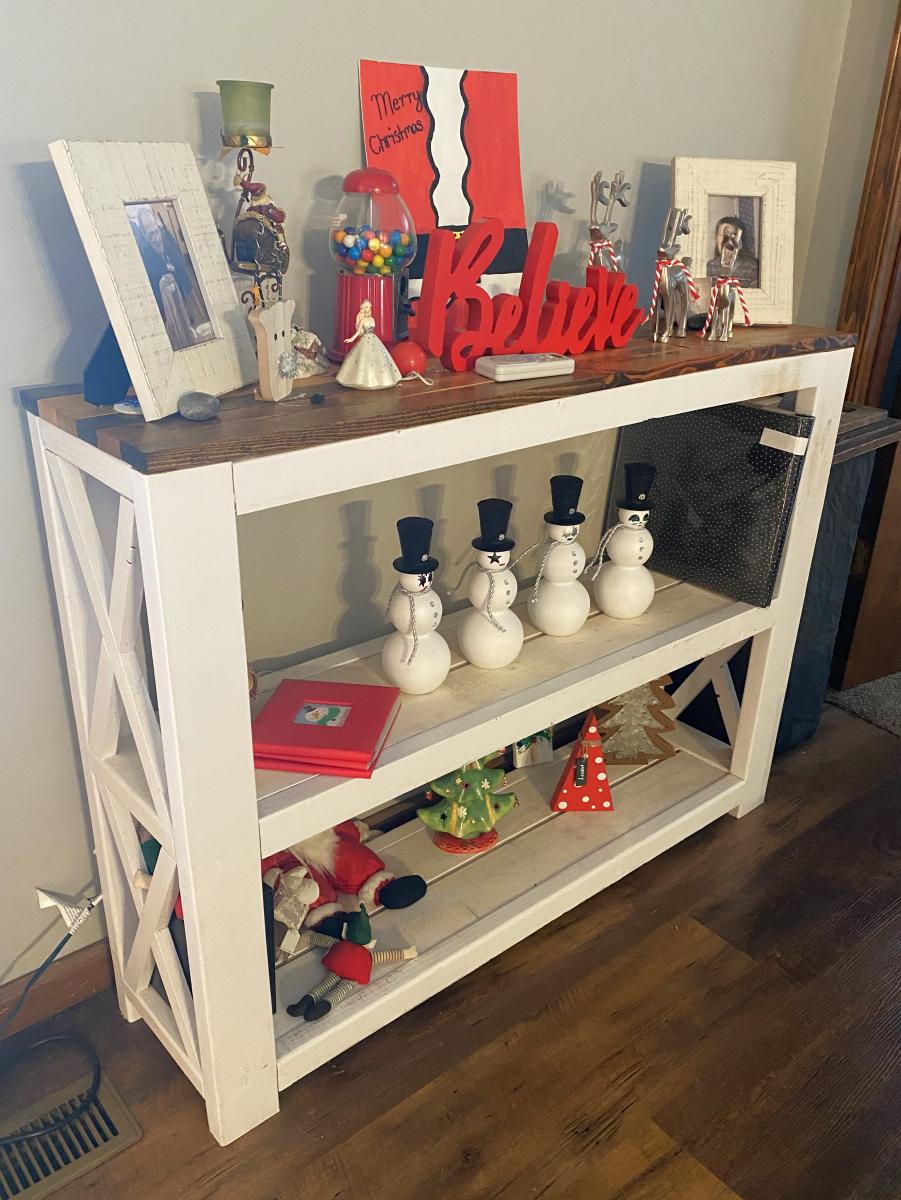
Rustic X Furniture
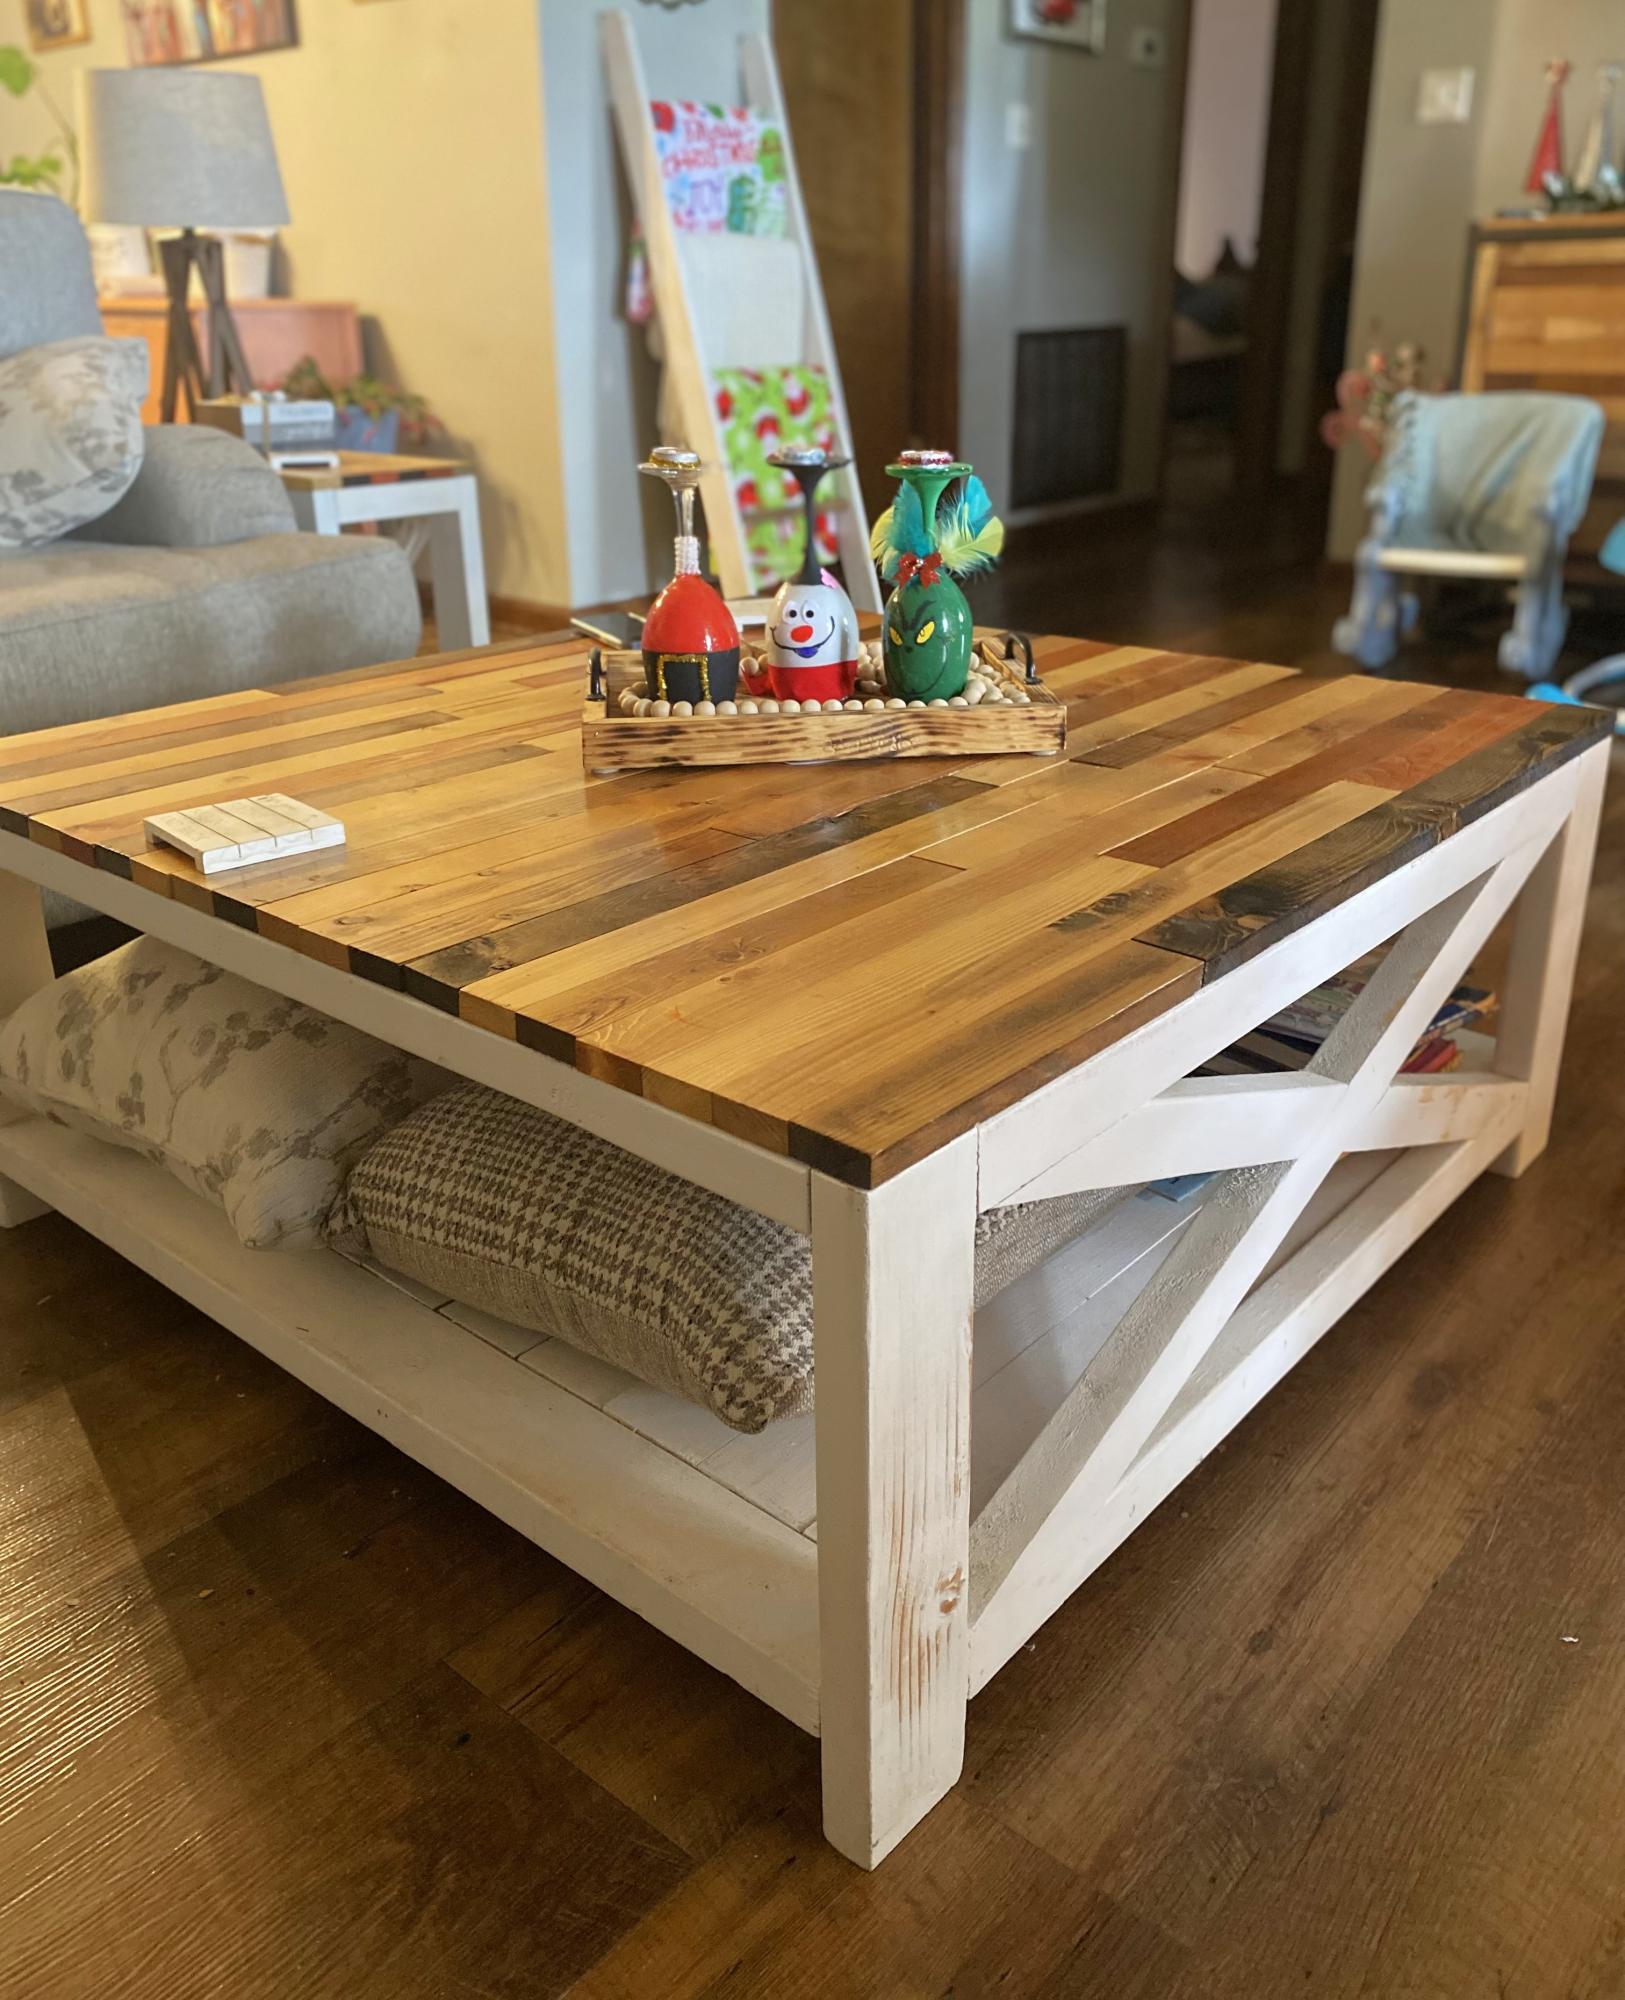
Farmhouse end tables, sofa table, and coffee table from farmhouse table plans, made tops flush with the sides no overhangs, tops made with scrap split 1x4’s in the scrap piles from Lowe’s and Home Depot, cut down to 2” wide strips, 5 different color stains.
Dale & Connie Putman
Built from Plan(s)
Comments
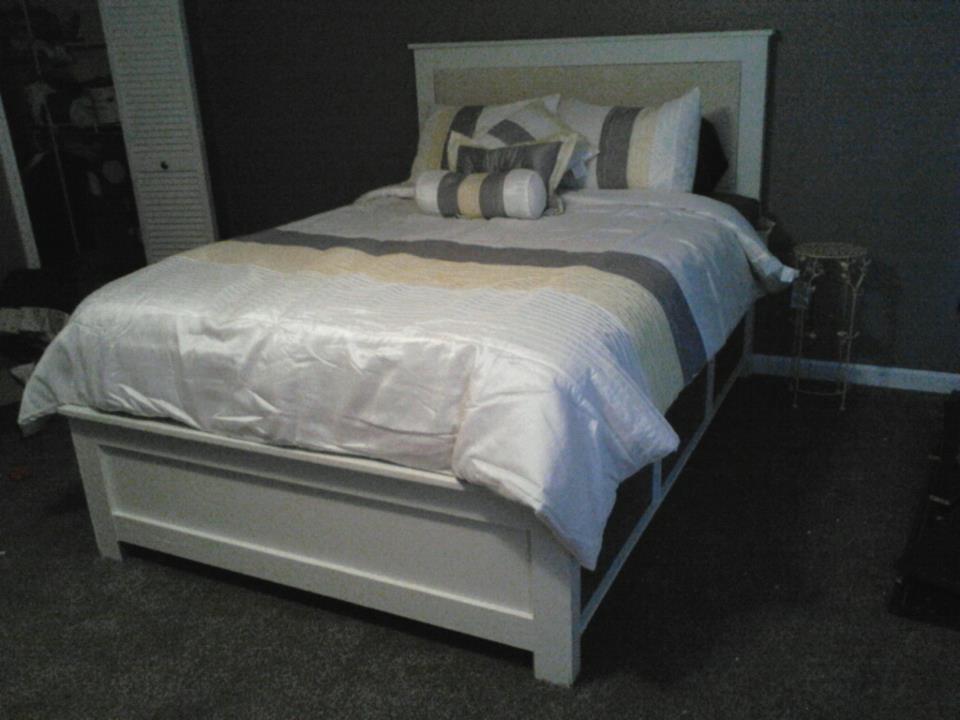
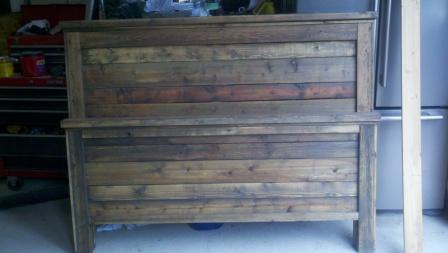
Handmade from this plan

I decided to make the headboard from this pan for the bed in one of my two guest room. After making the first one out of knotty alder and to full specs, I was so happy with it, that I decided to make it again for my second guest room, this time out of reclaimed and weathered pine and fir, but I needed the full bed frame too. Also due to the height of the headboard and window placement in the room, I lowered the height of the headboard by about a foot and then fashioned a foot board from the original headboard design. Bed rails were made from 2X6 fir and attached with rail hangers which costs about $15.00 I used a driftwood stain and it really brought out the grain of the wood. Thanks for the plans guys this worked out awesome.
Estimated Cost
$30.00
Estimated Time Investment
Weekend Project (10-20 Hours)
Finish Used
Driftwood stain
Recommended Skill Level
Beginner