DIY Greenhouse with Reclaimed Material
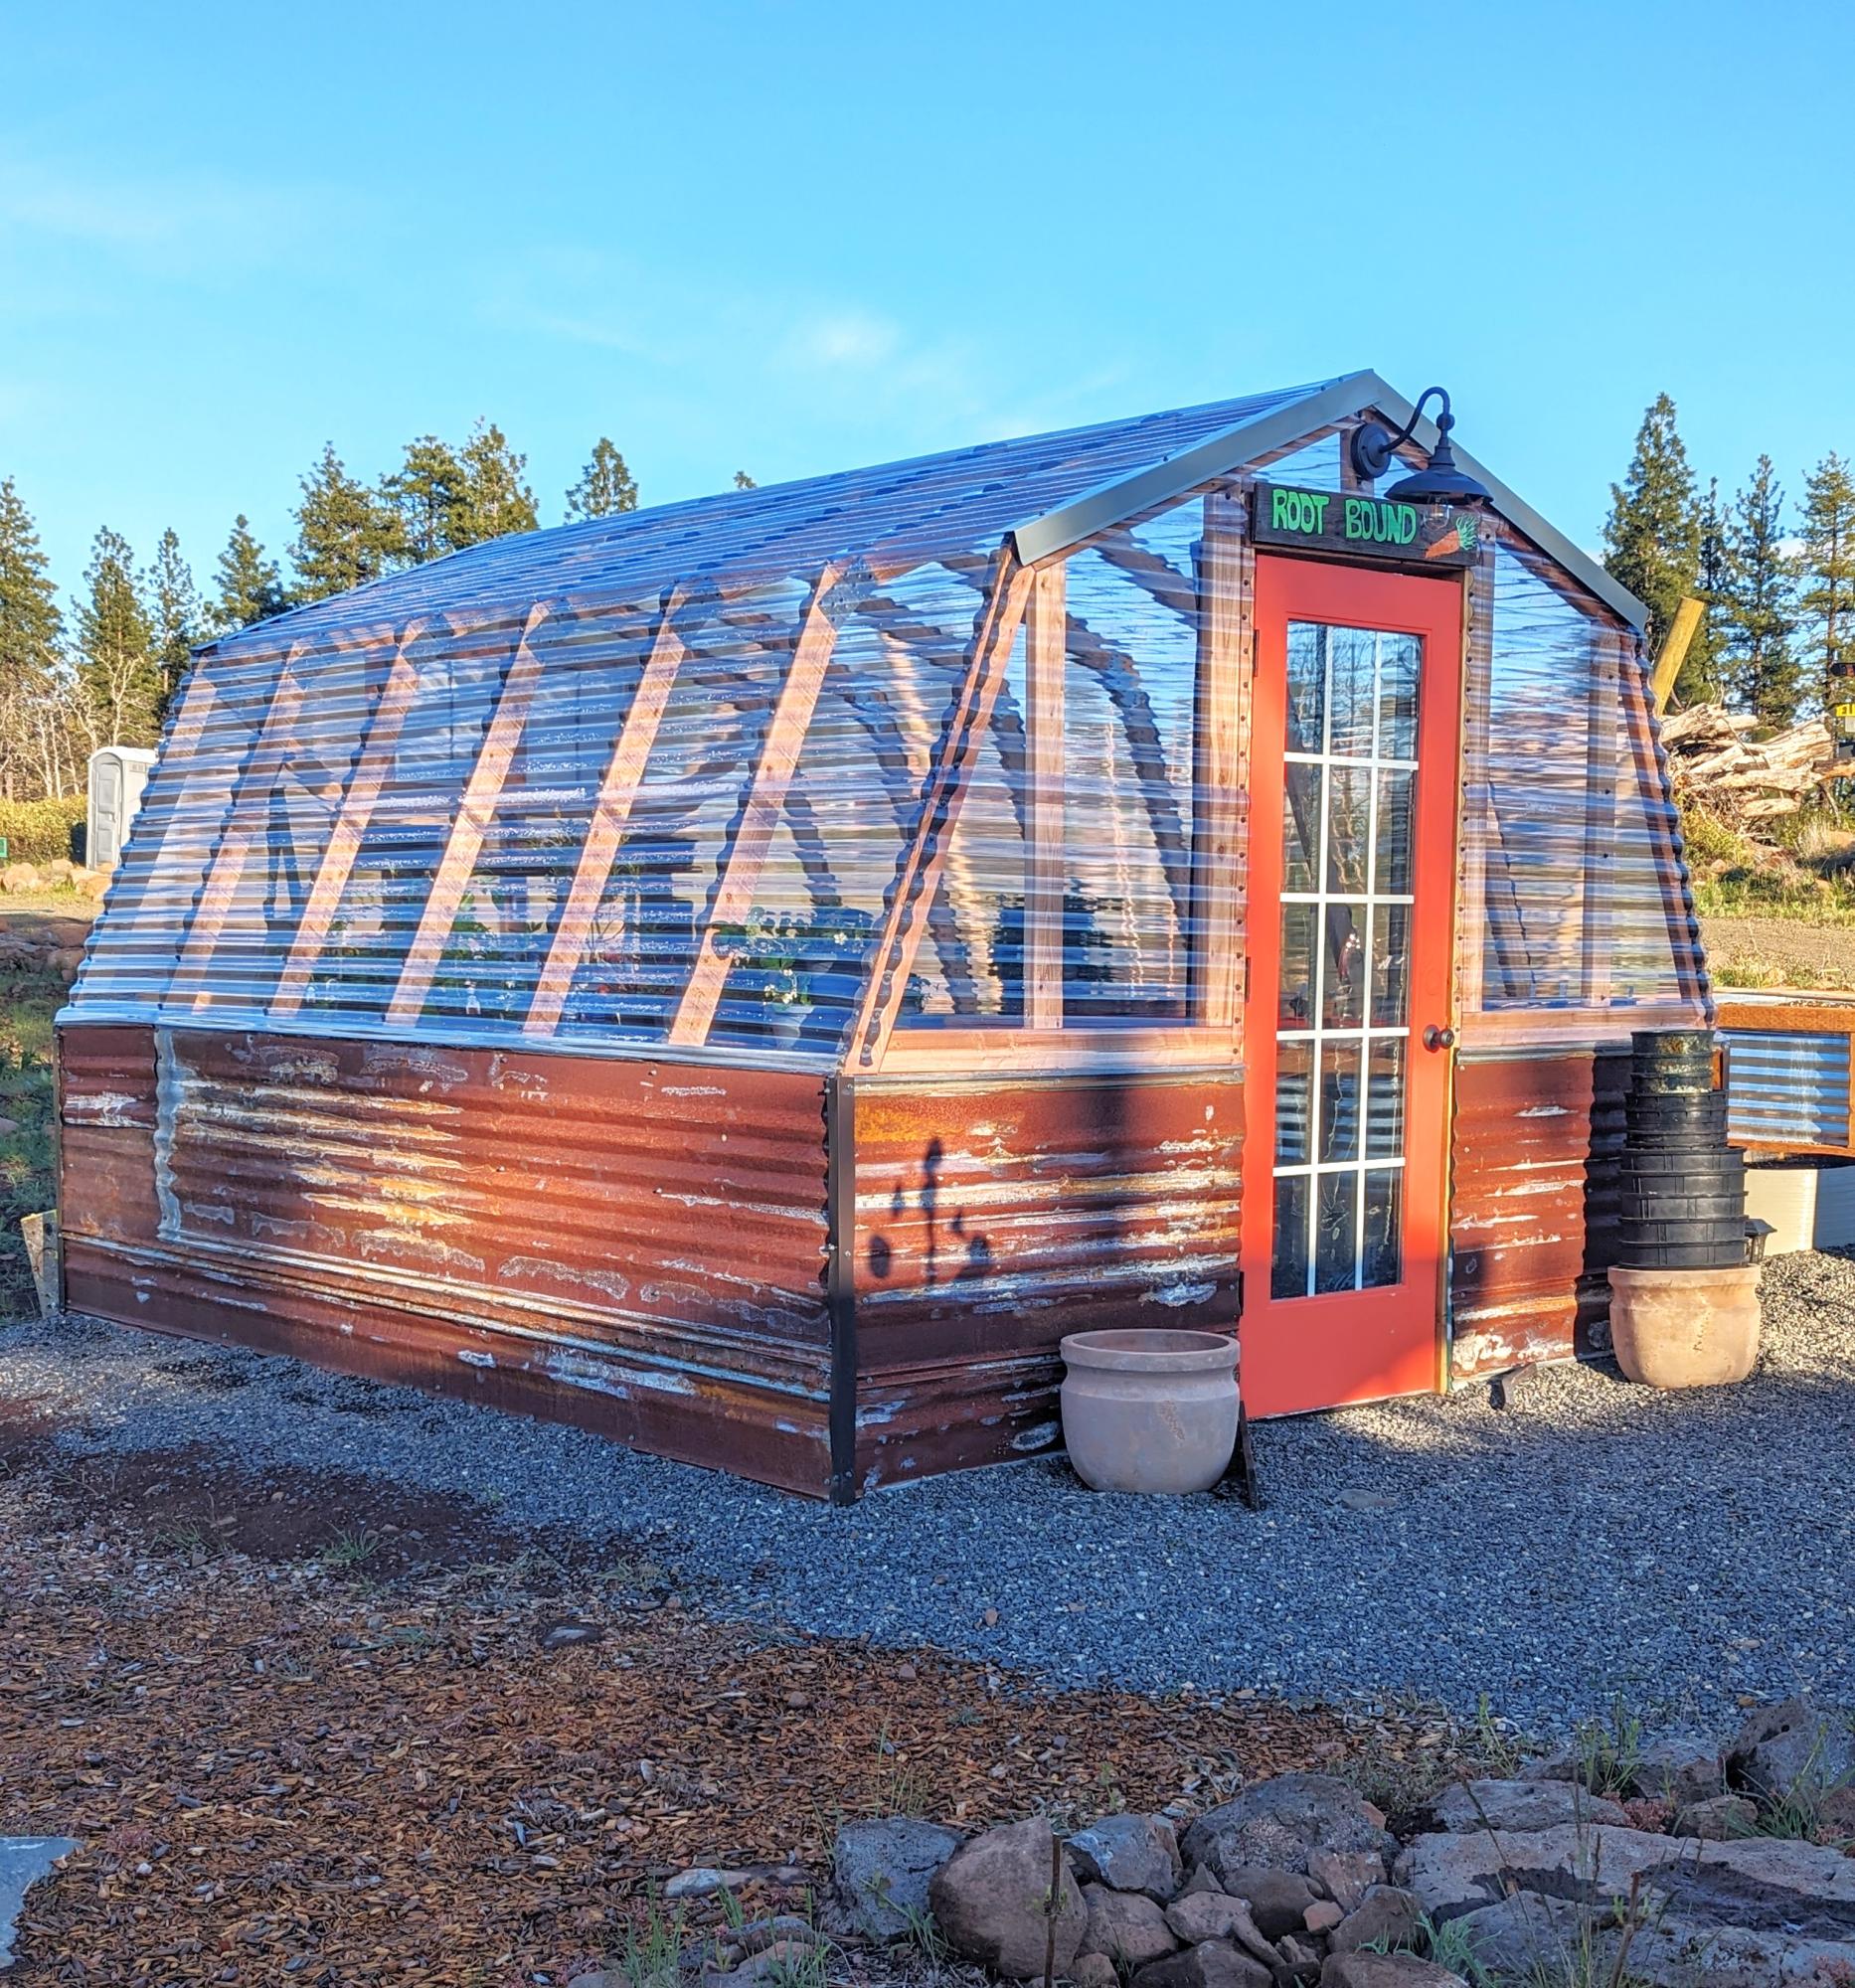
My wife & I did this in two weekends, we're not that handy but your plans were easy to follow. Mostly reclaimed material. So fun & we love it!
Thanks!!
Tammie & Scott
Built from Plan(s)
My wife & I did this in two weekends, we're not that handy but your plans were easy to follow. Mostly reclaimed material. So fun & we love it!
Thanks!!
Tammie & Scott
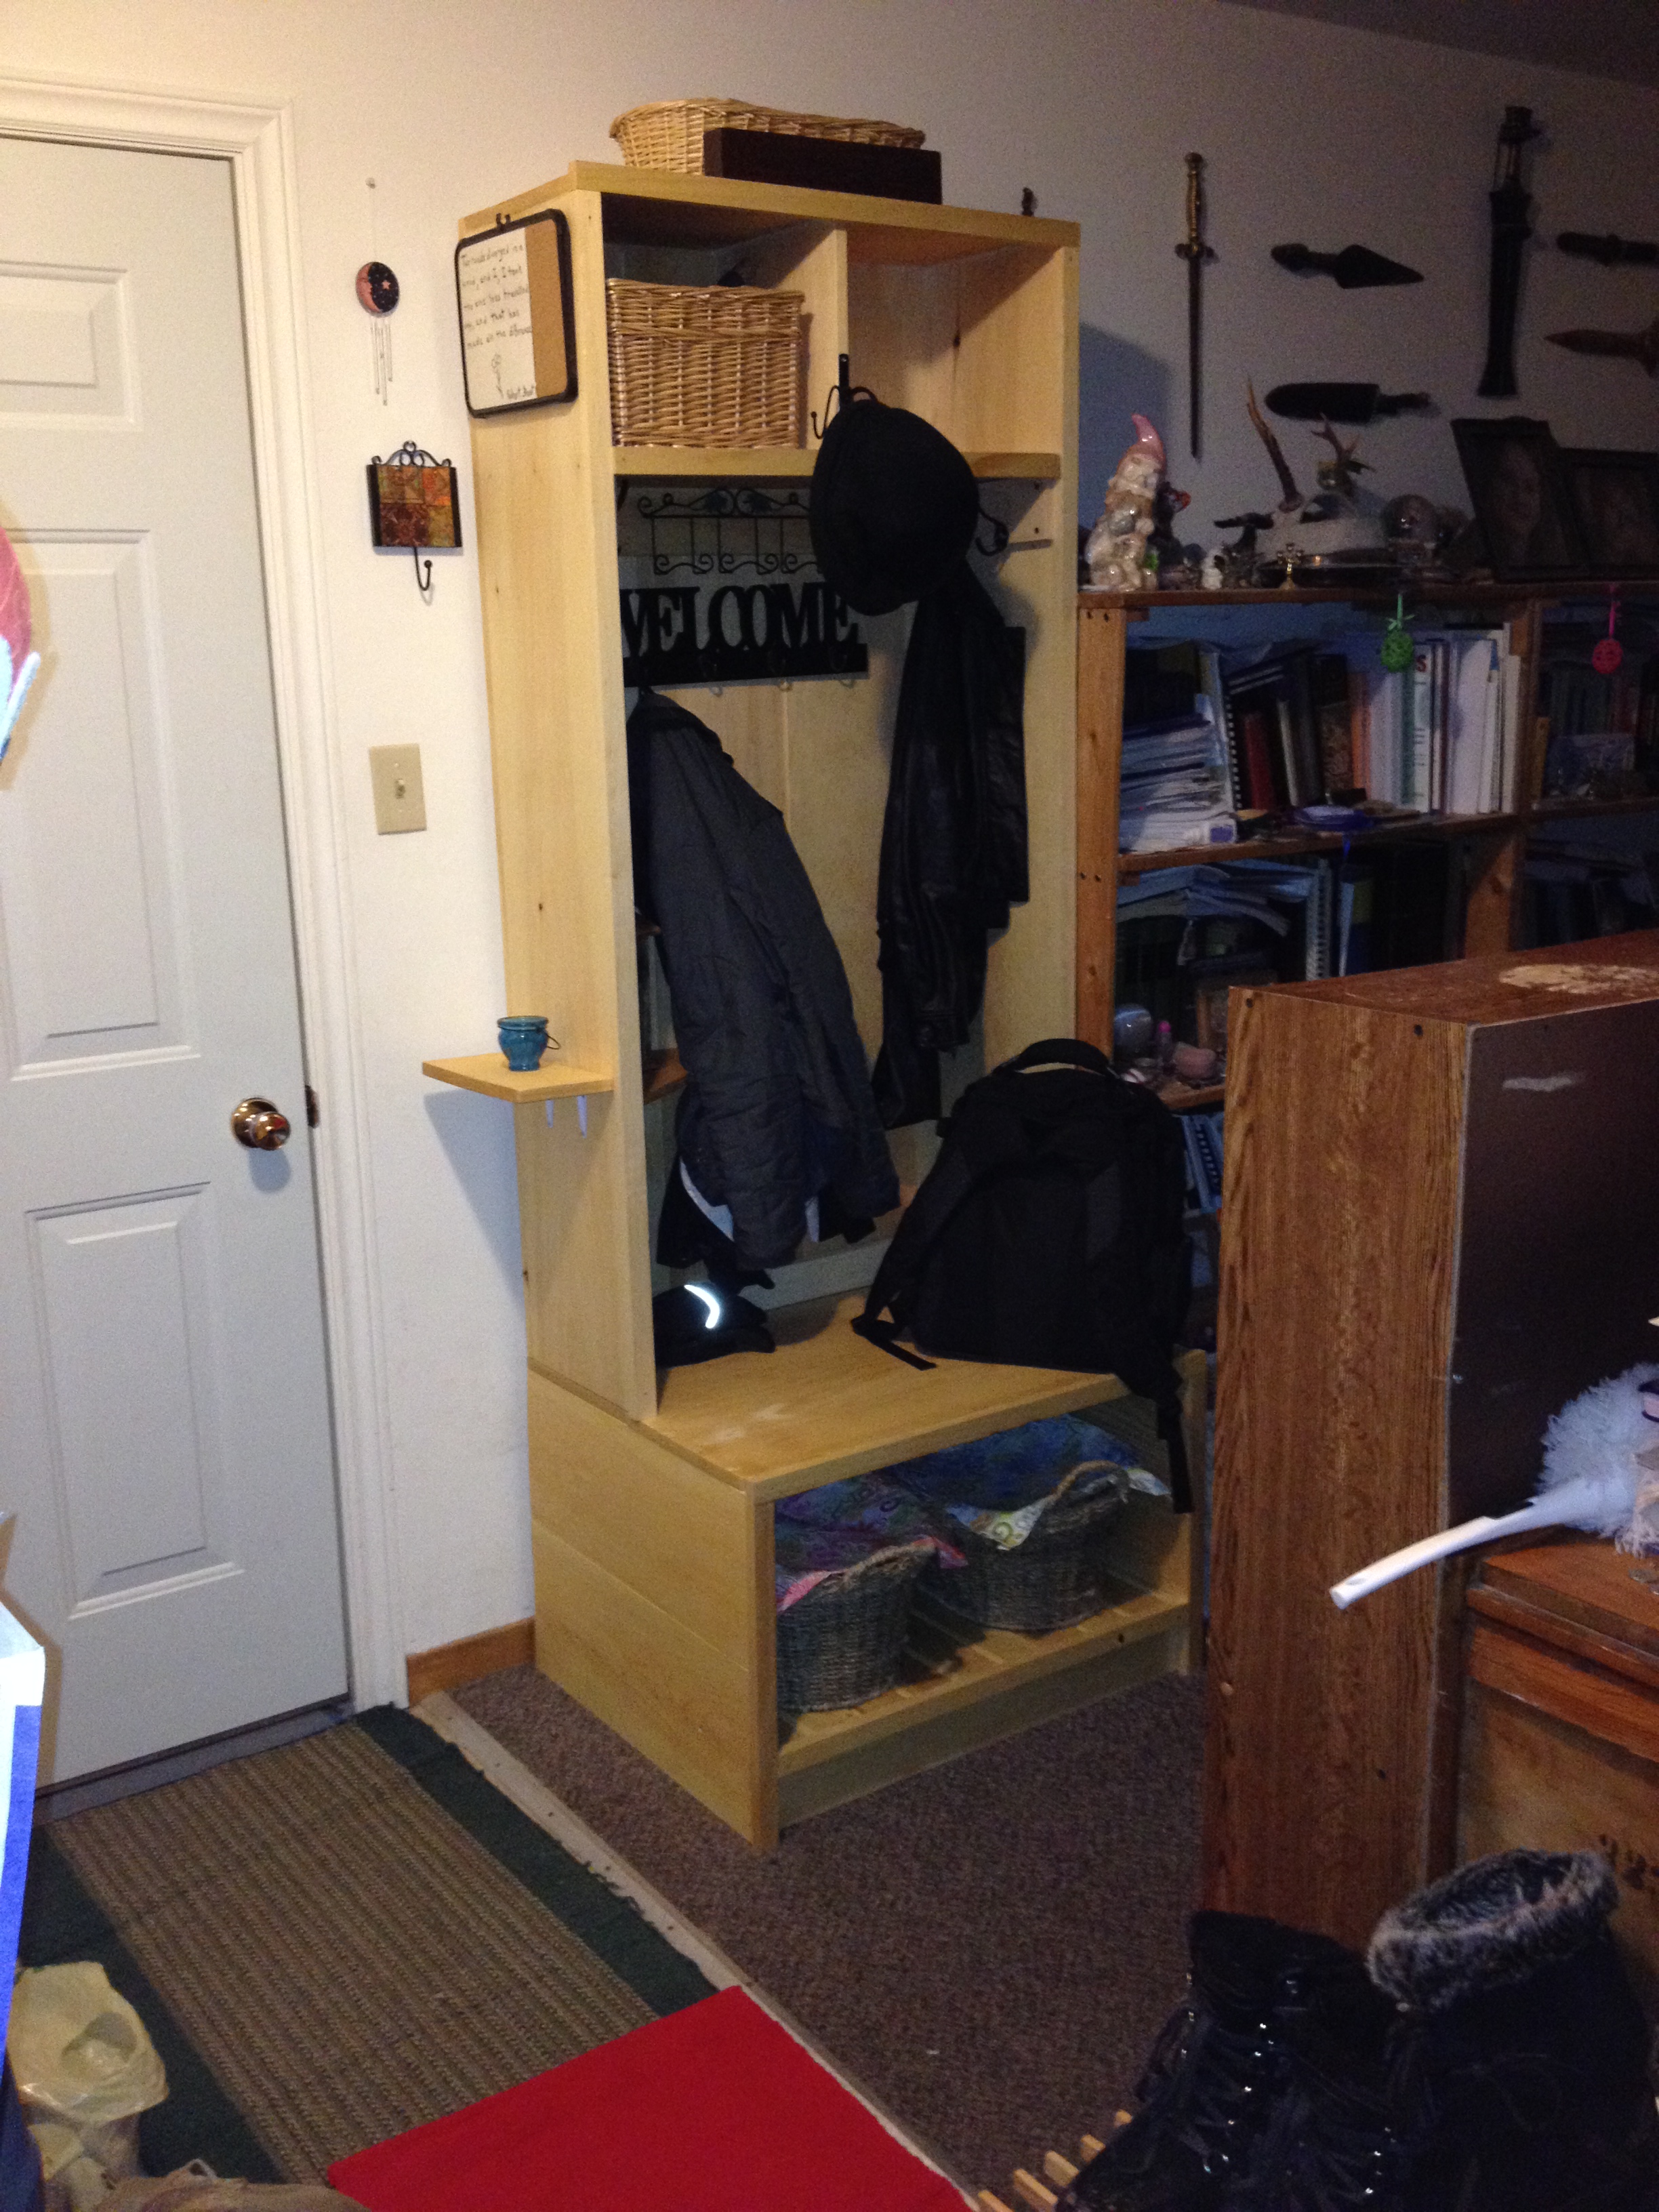
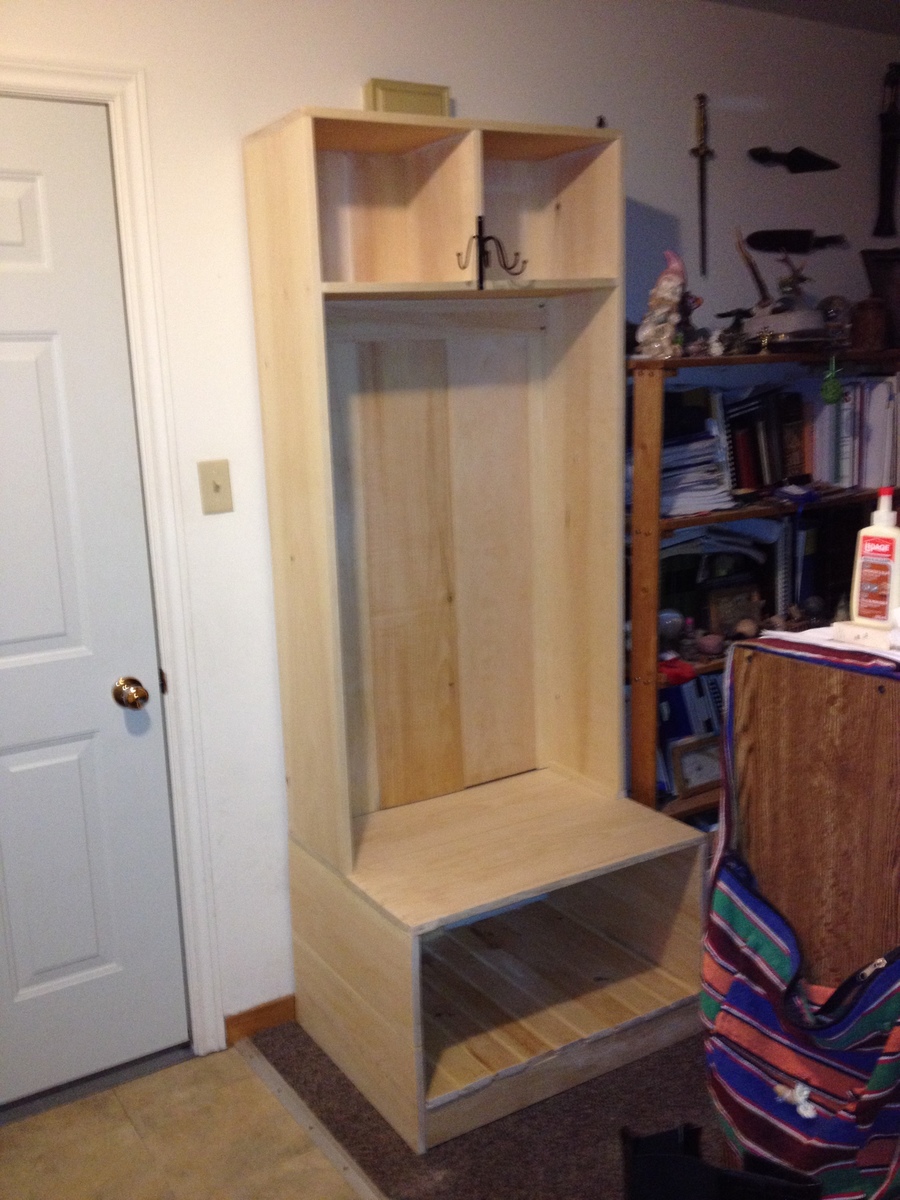
This was the first piece of wood work that I have worked on since I was 19; however, your site is so filled with such beautiful work, that I just had to make something.
Luckily we were in need of an entryway--a place to sit and tie shoes, hang coats, and have cubbies to store hats, mitts, scarves, as well as my gardening tools!
I modified your Braden Entryway Collection to fit the space I had, but I hope you agree that it turned out quite nicely, despite my novice alterations.
I'm very fond of the look and smell of bare pine, so the piece is only finished with Tung oil.
Thank you so much for such a rich site, and for an incredibly detailed 'how to,' I don't think I could have managed without it. I also couldn't have managed this without prednisone. I have Lupus, and normally I can't move very much without very severe pain, fortunately the middle to weeks of this prednisone journey left me feeling like superman! Lupus is degenerative so this may be the last piece I make, so I am inordinately fond of it!
The only drawback was that i had to borrow (and purchase) bar clamps, which I found indispnsible.
Many thanks again,
Jennifer
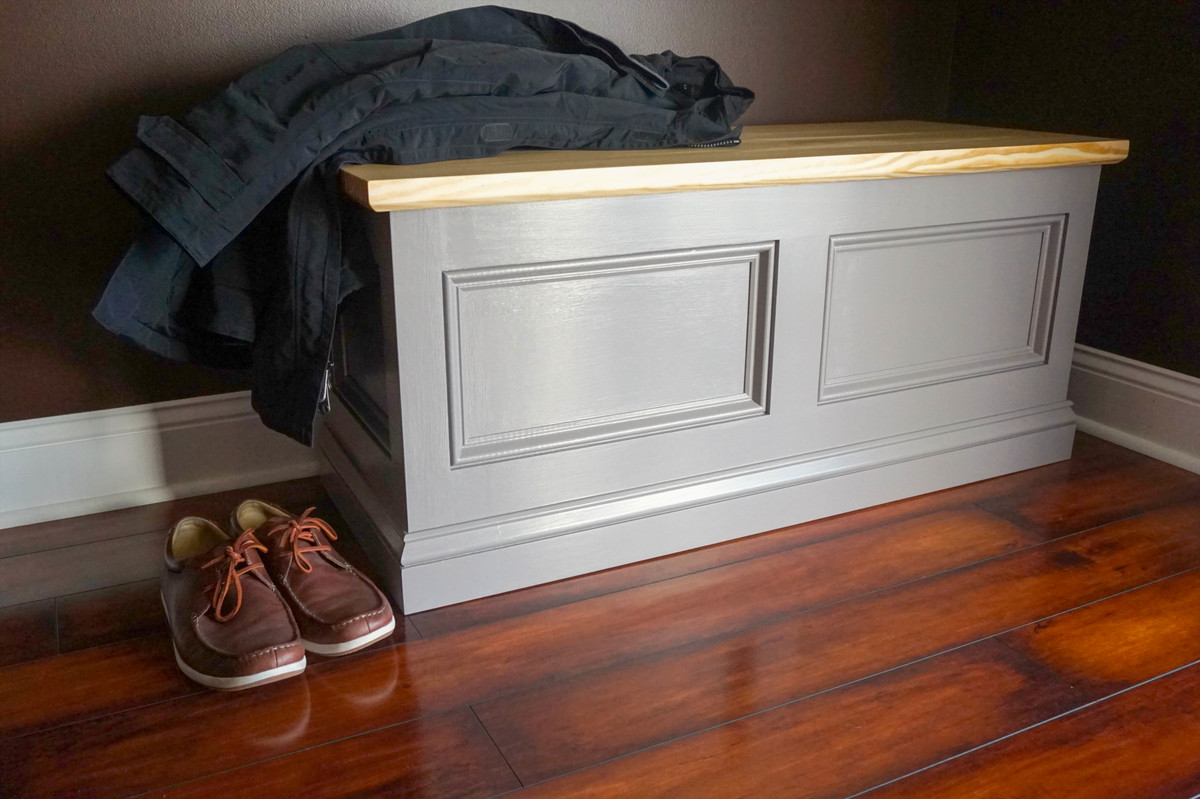
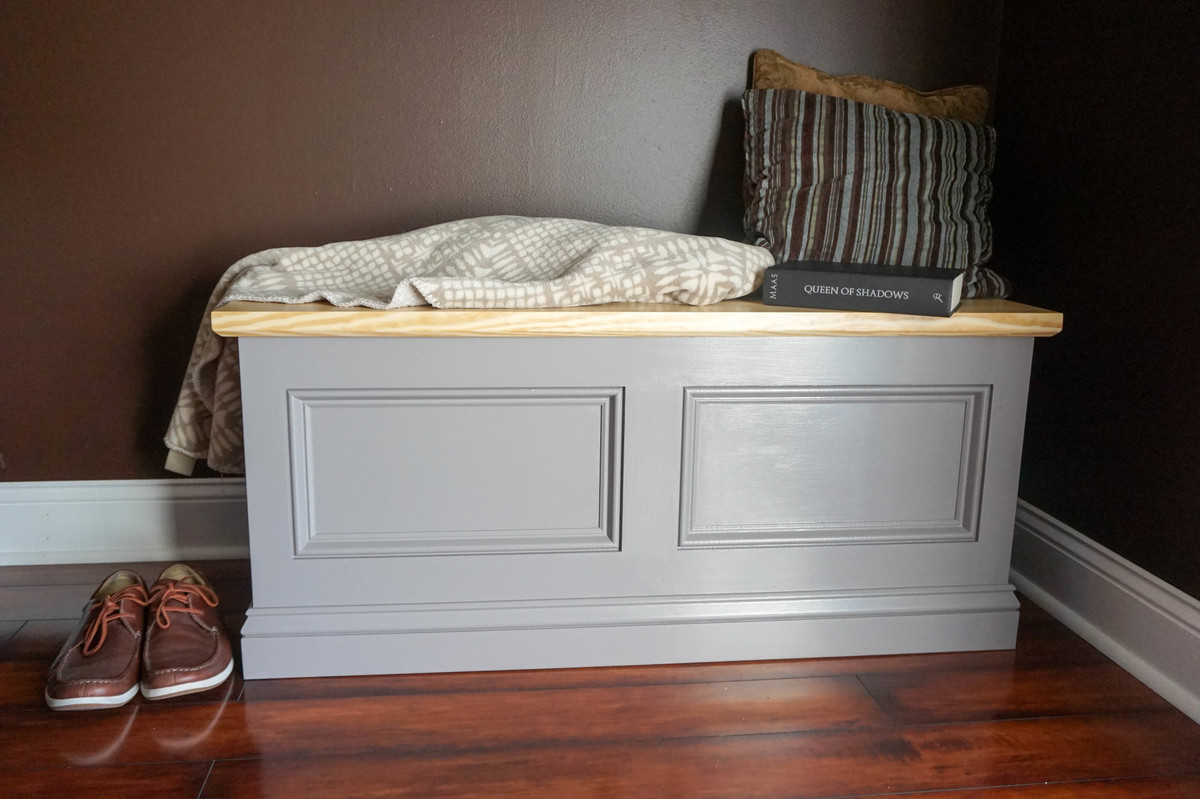
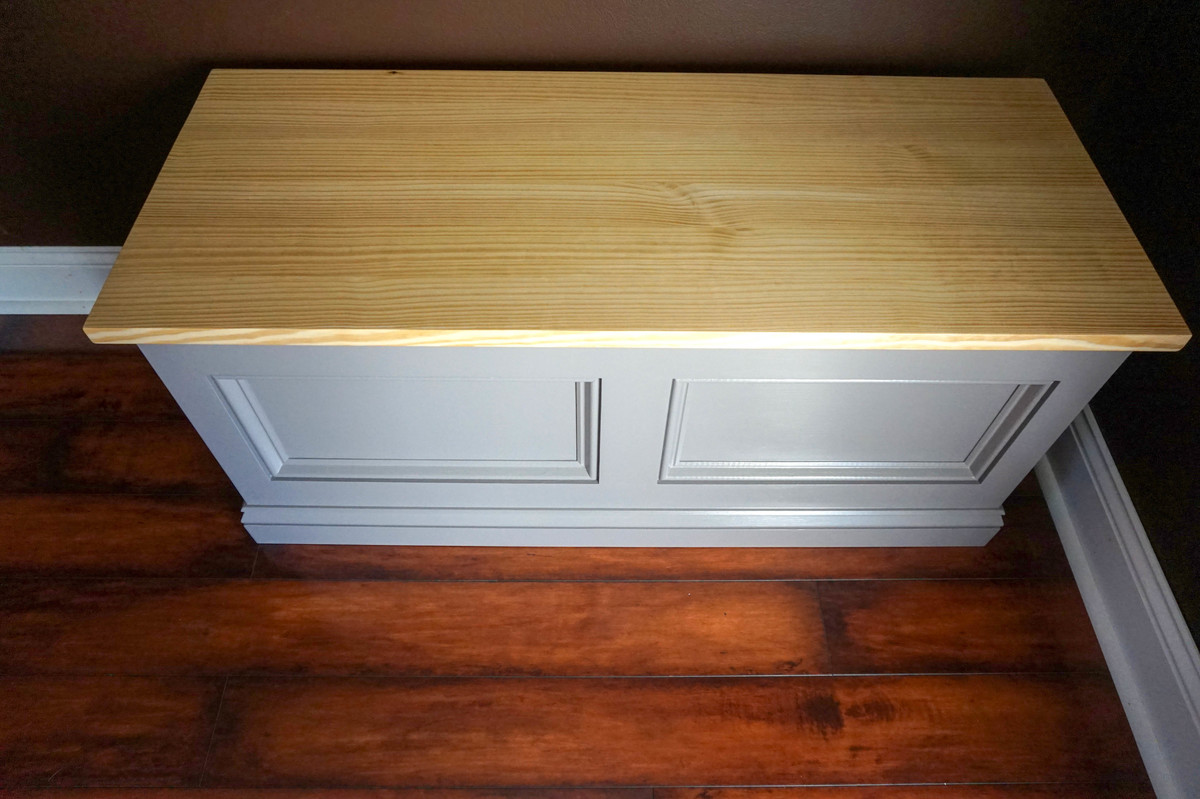
I've had this idea to build some sort of storage bench or blanket chest for quite a while now. I knew I wanted a classic look with detailed moldings and a solid wood top.
I have plans for this build avaliable HERE.
You can check out my detailed video tutorial :

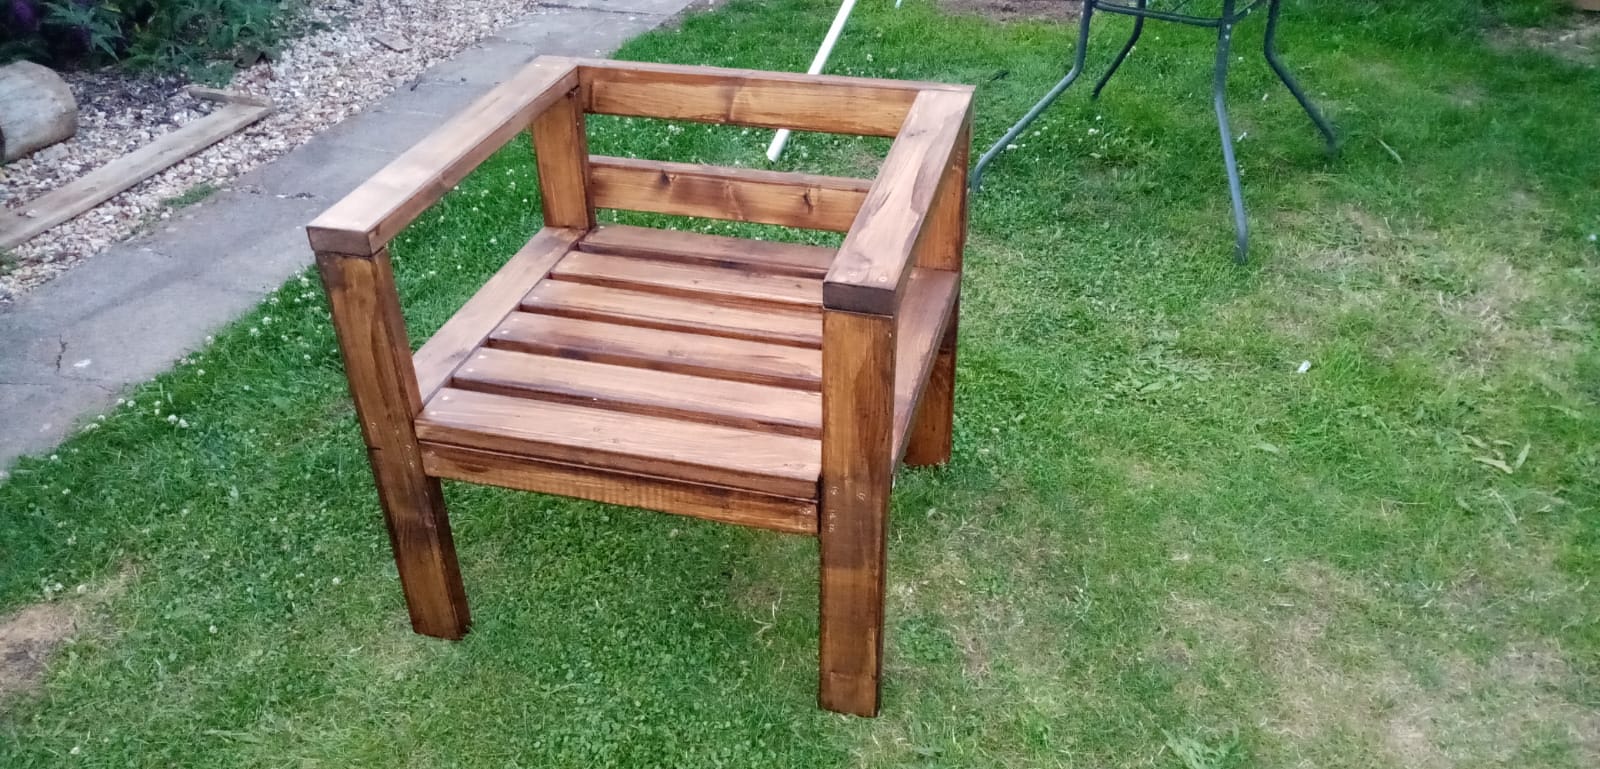
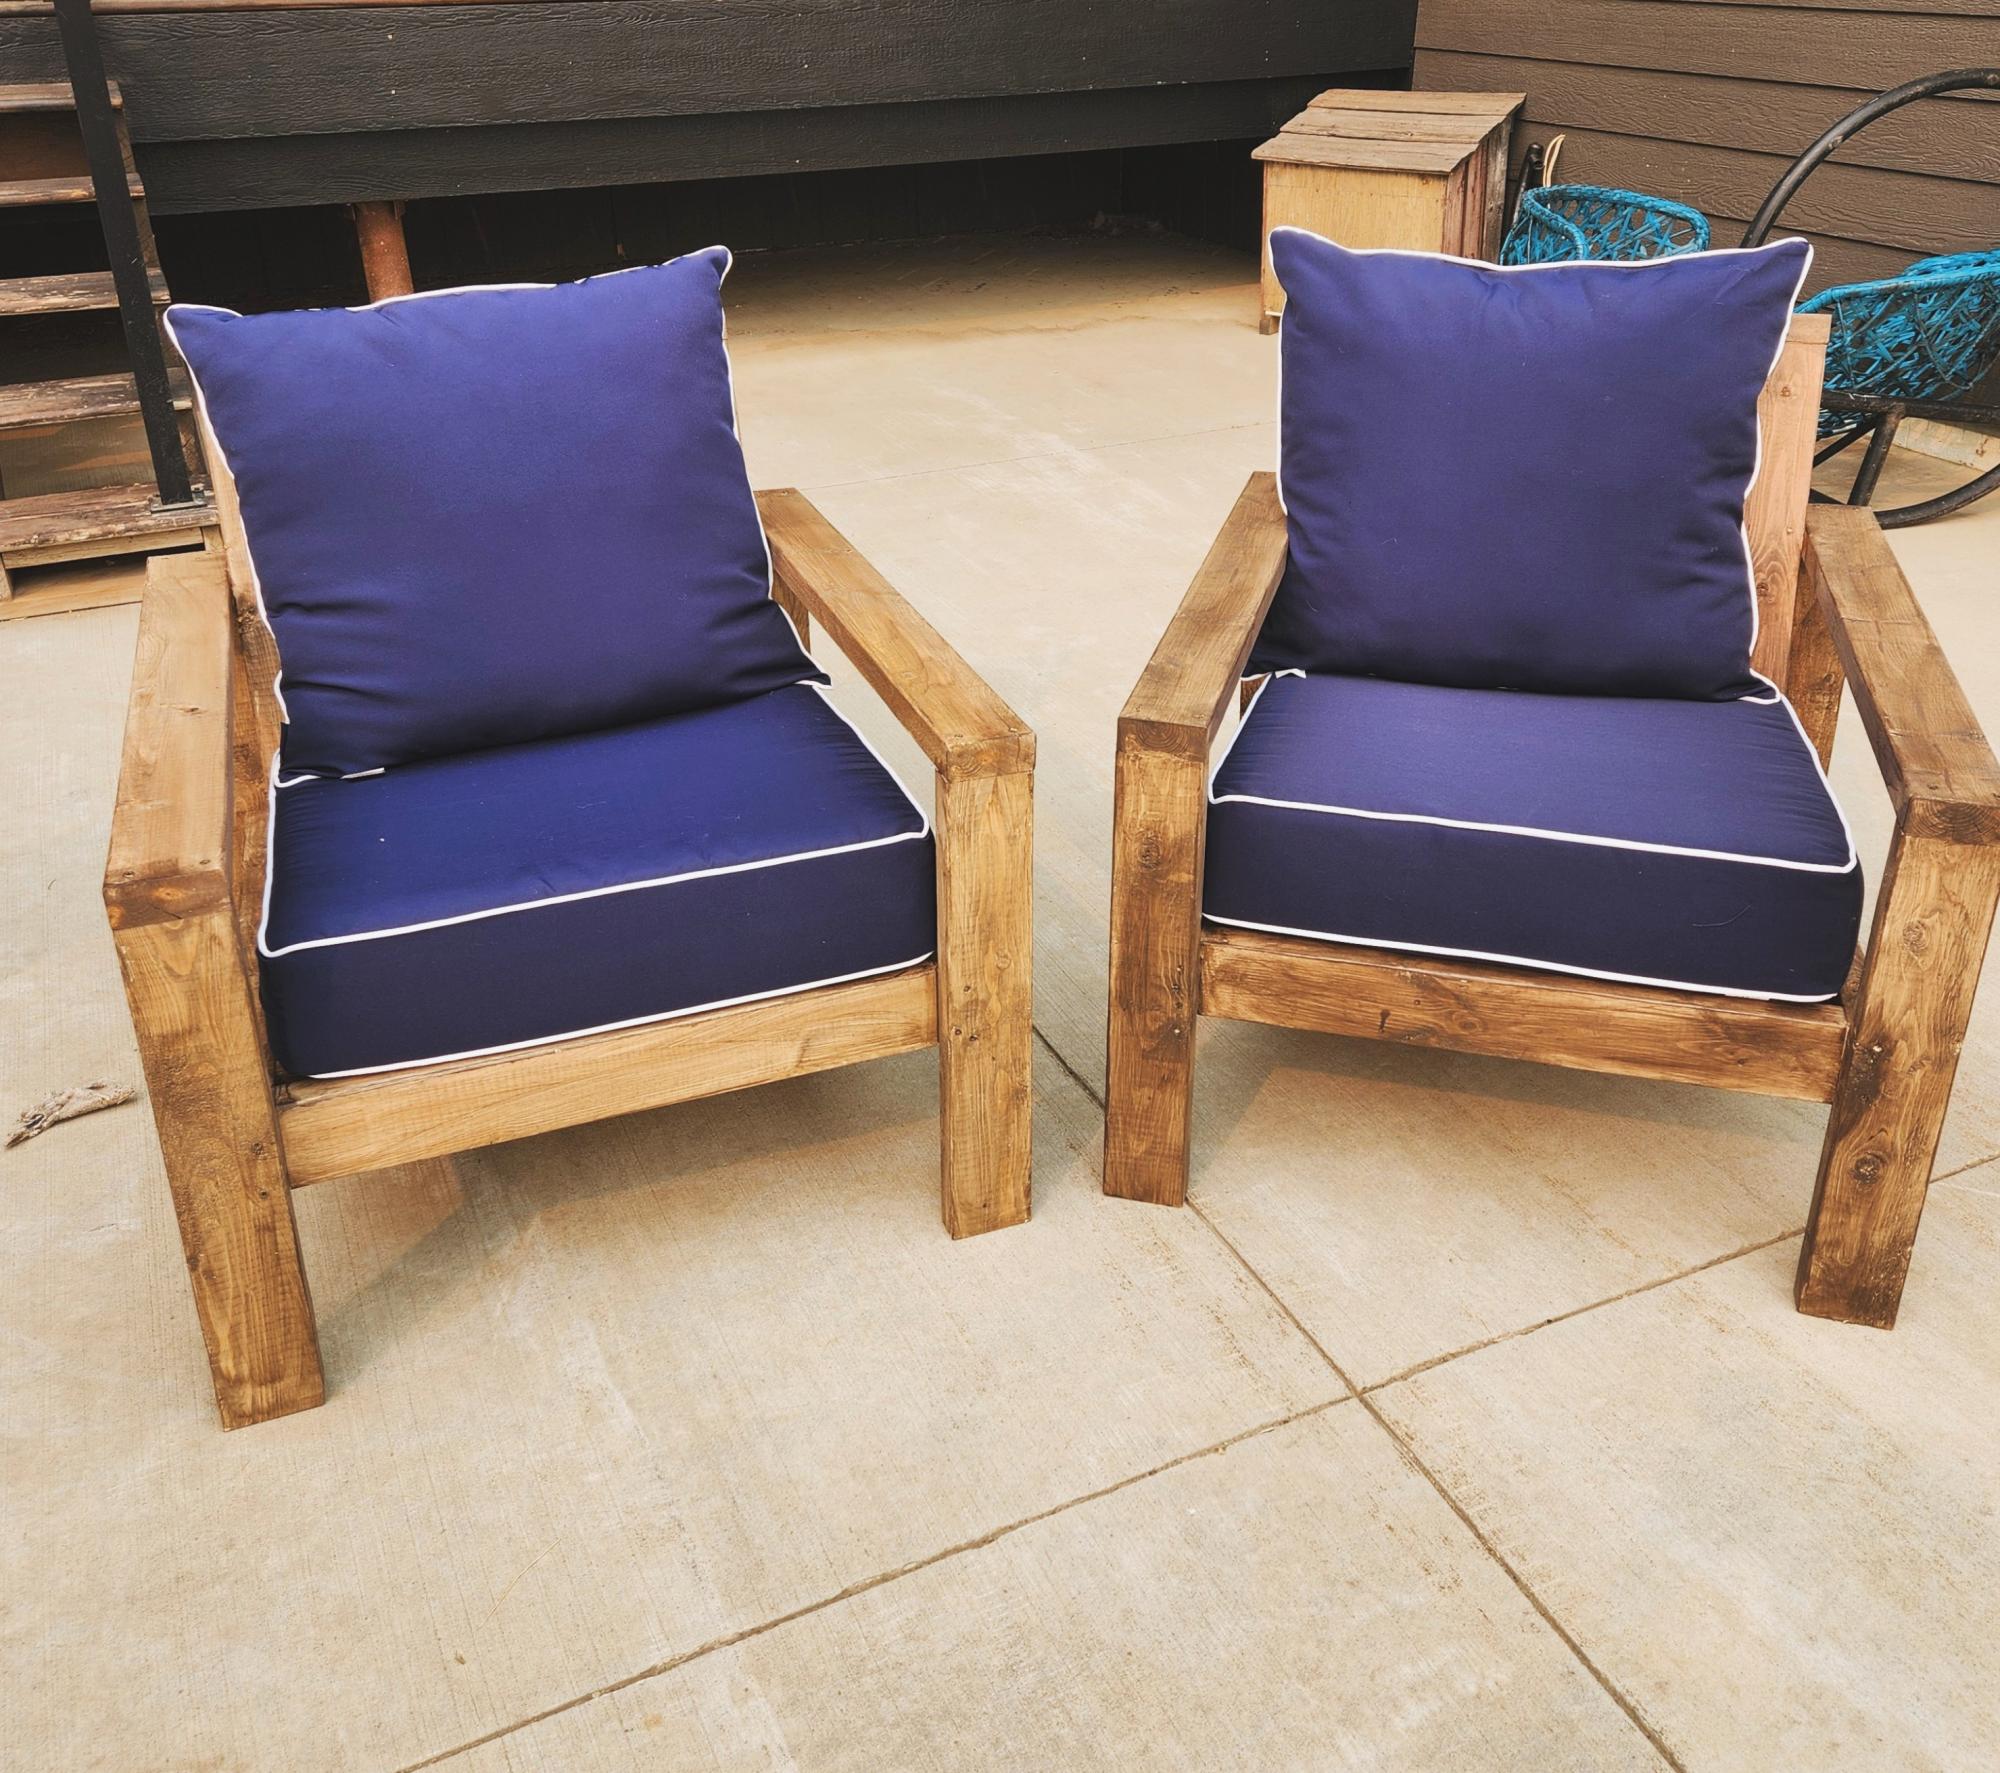
Single seater chair to match the sofa
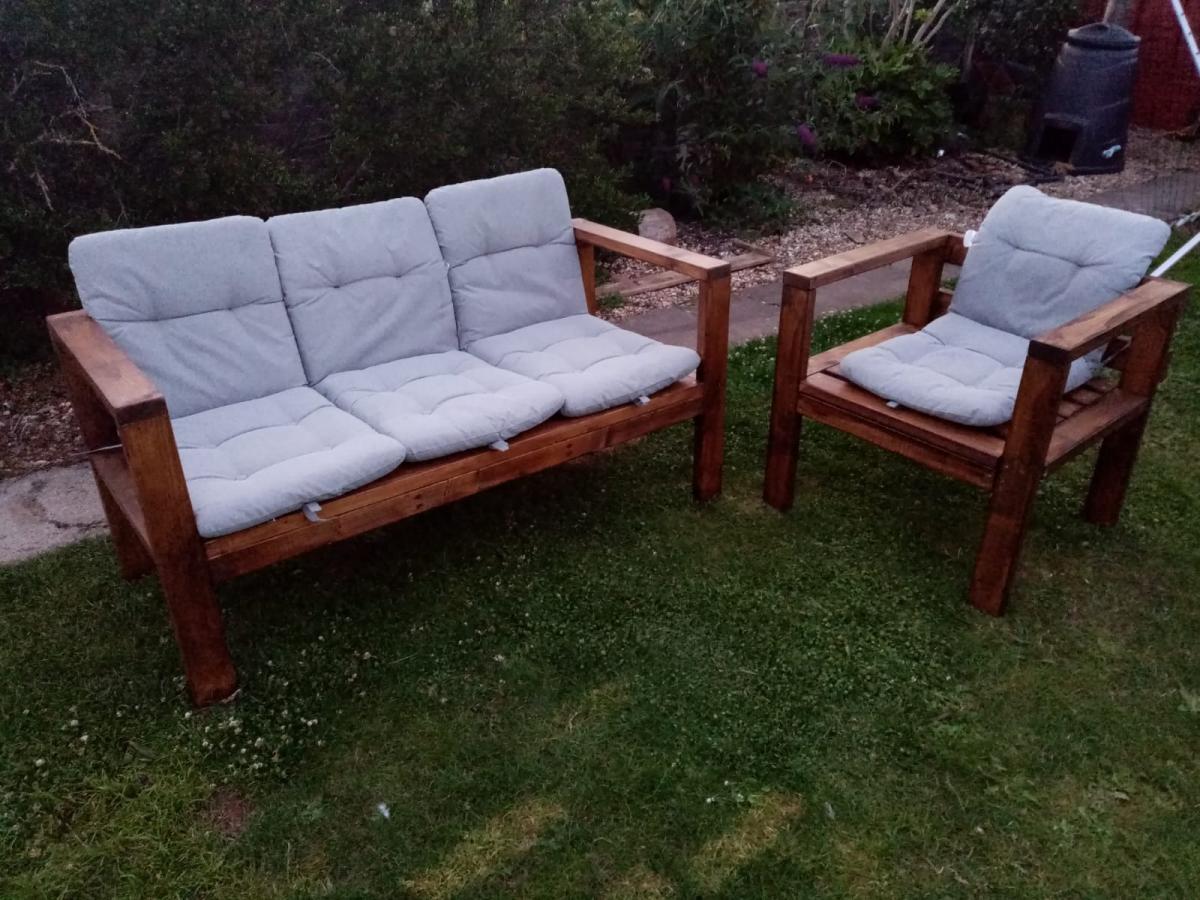
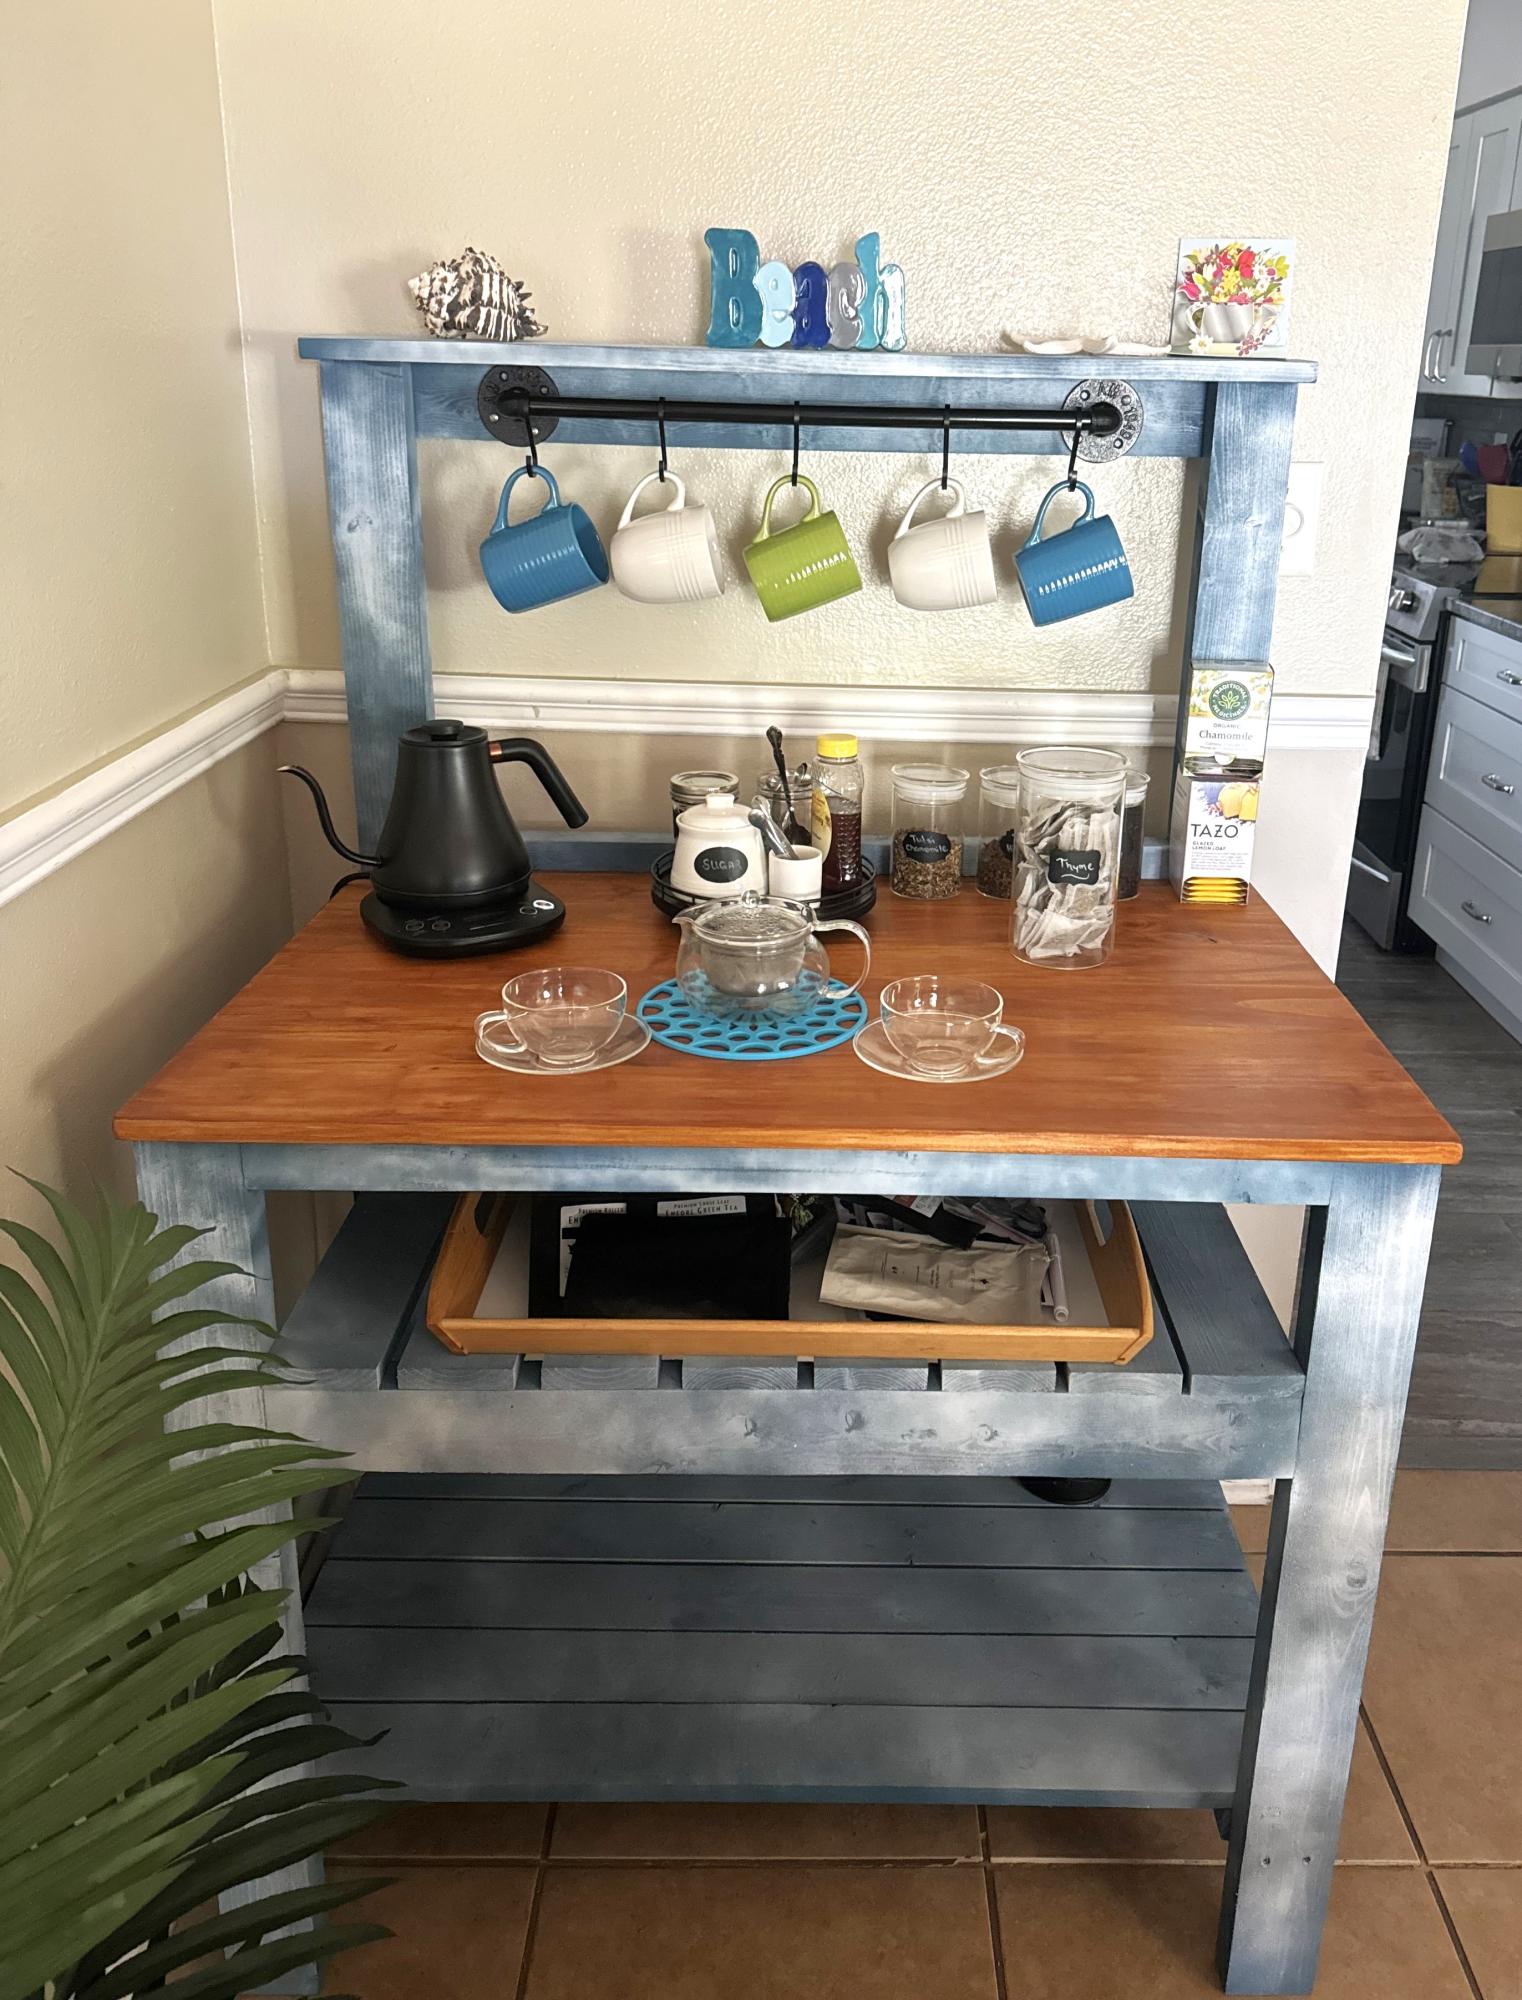
Two projects that I recently built for my wife and my daughter. My wife wanted a tea bar and a beach vibe, my daughter wanted an outdoor couch so it is made out of cedar. They both loved them.
Todd Springer

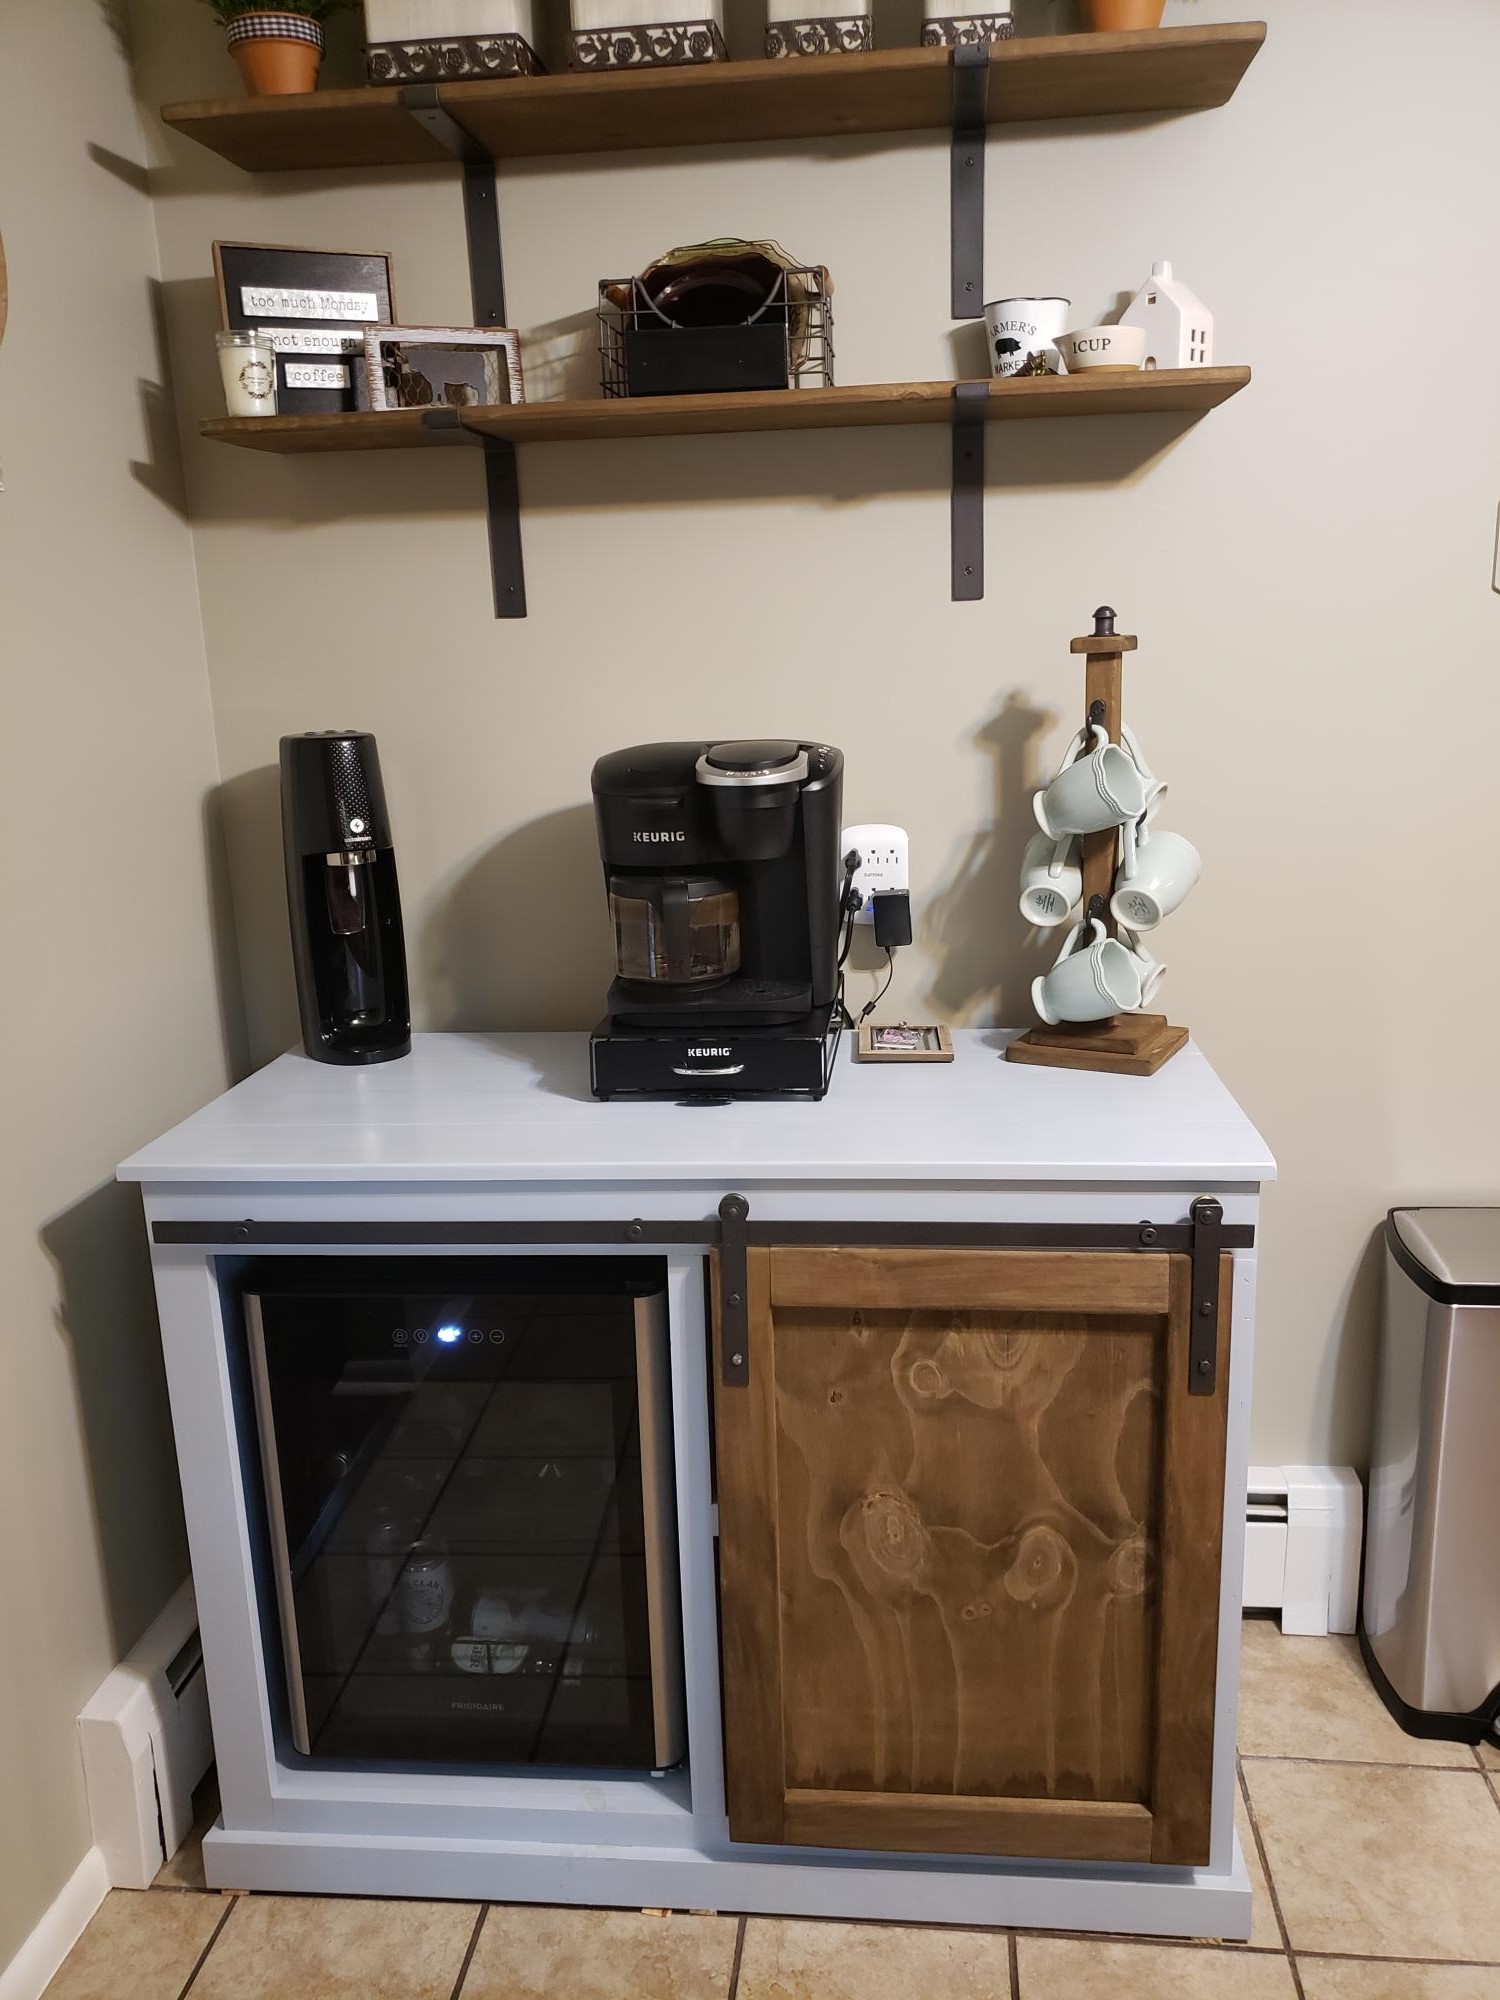
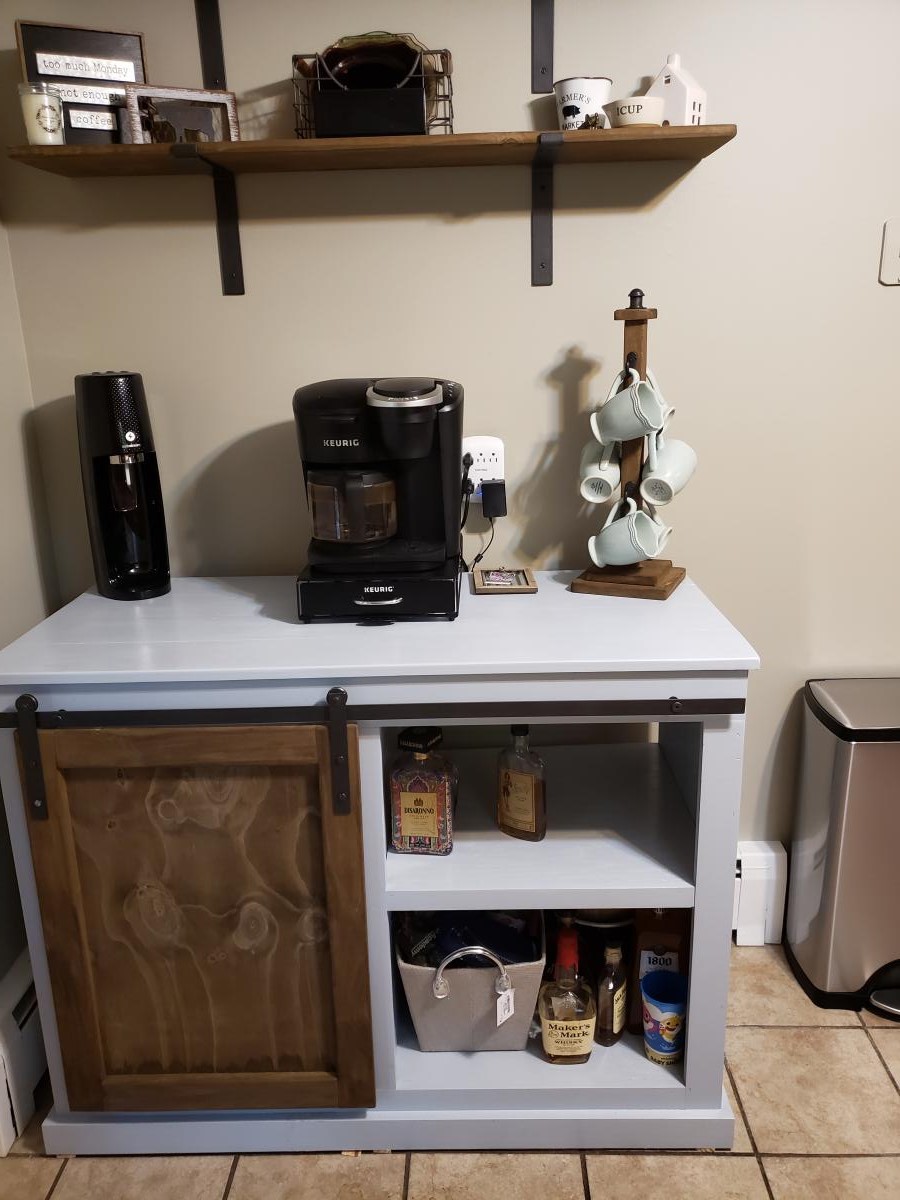
Work table for our laundry area

I loved he Hannah canopy bed for my daughter but felt like it was missing something. I decided to tuft the headboard and I used rhinestone buttons to give it that girly look with a small pop of glam. The tufting took probably 12 hours in total but totally worth it. We then followed all the instructions on how to build the bed with the exception of having any screws go in through the sides of the fabric on the headboard. We used plates to hold the headboard in place and screwed around the edges. It was time consuming but we love how it came together.
My first larger build. Had a lot of fun with it.
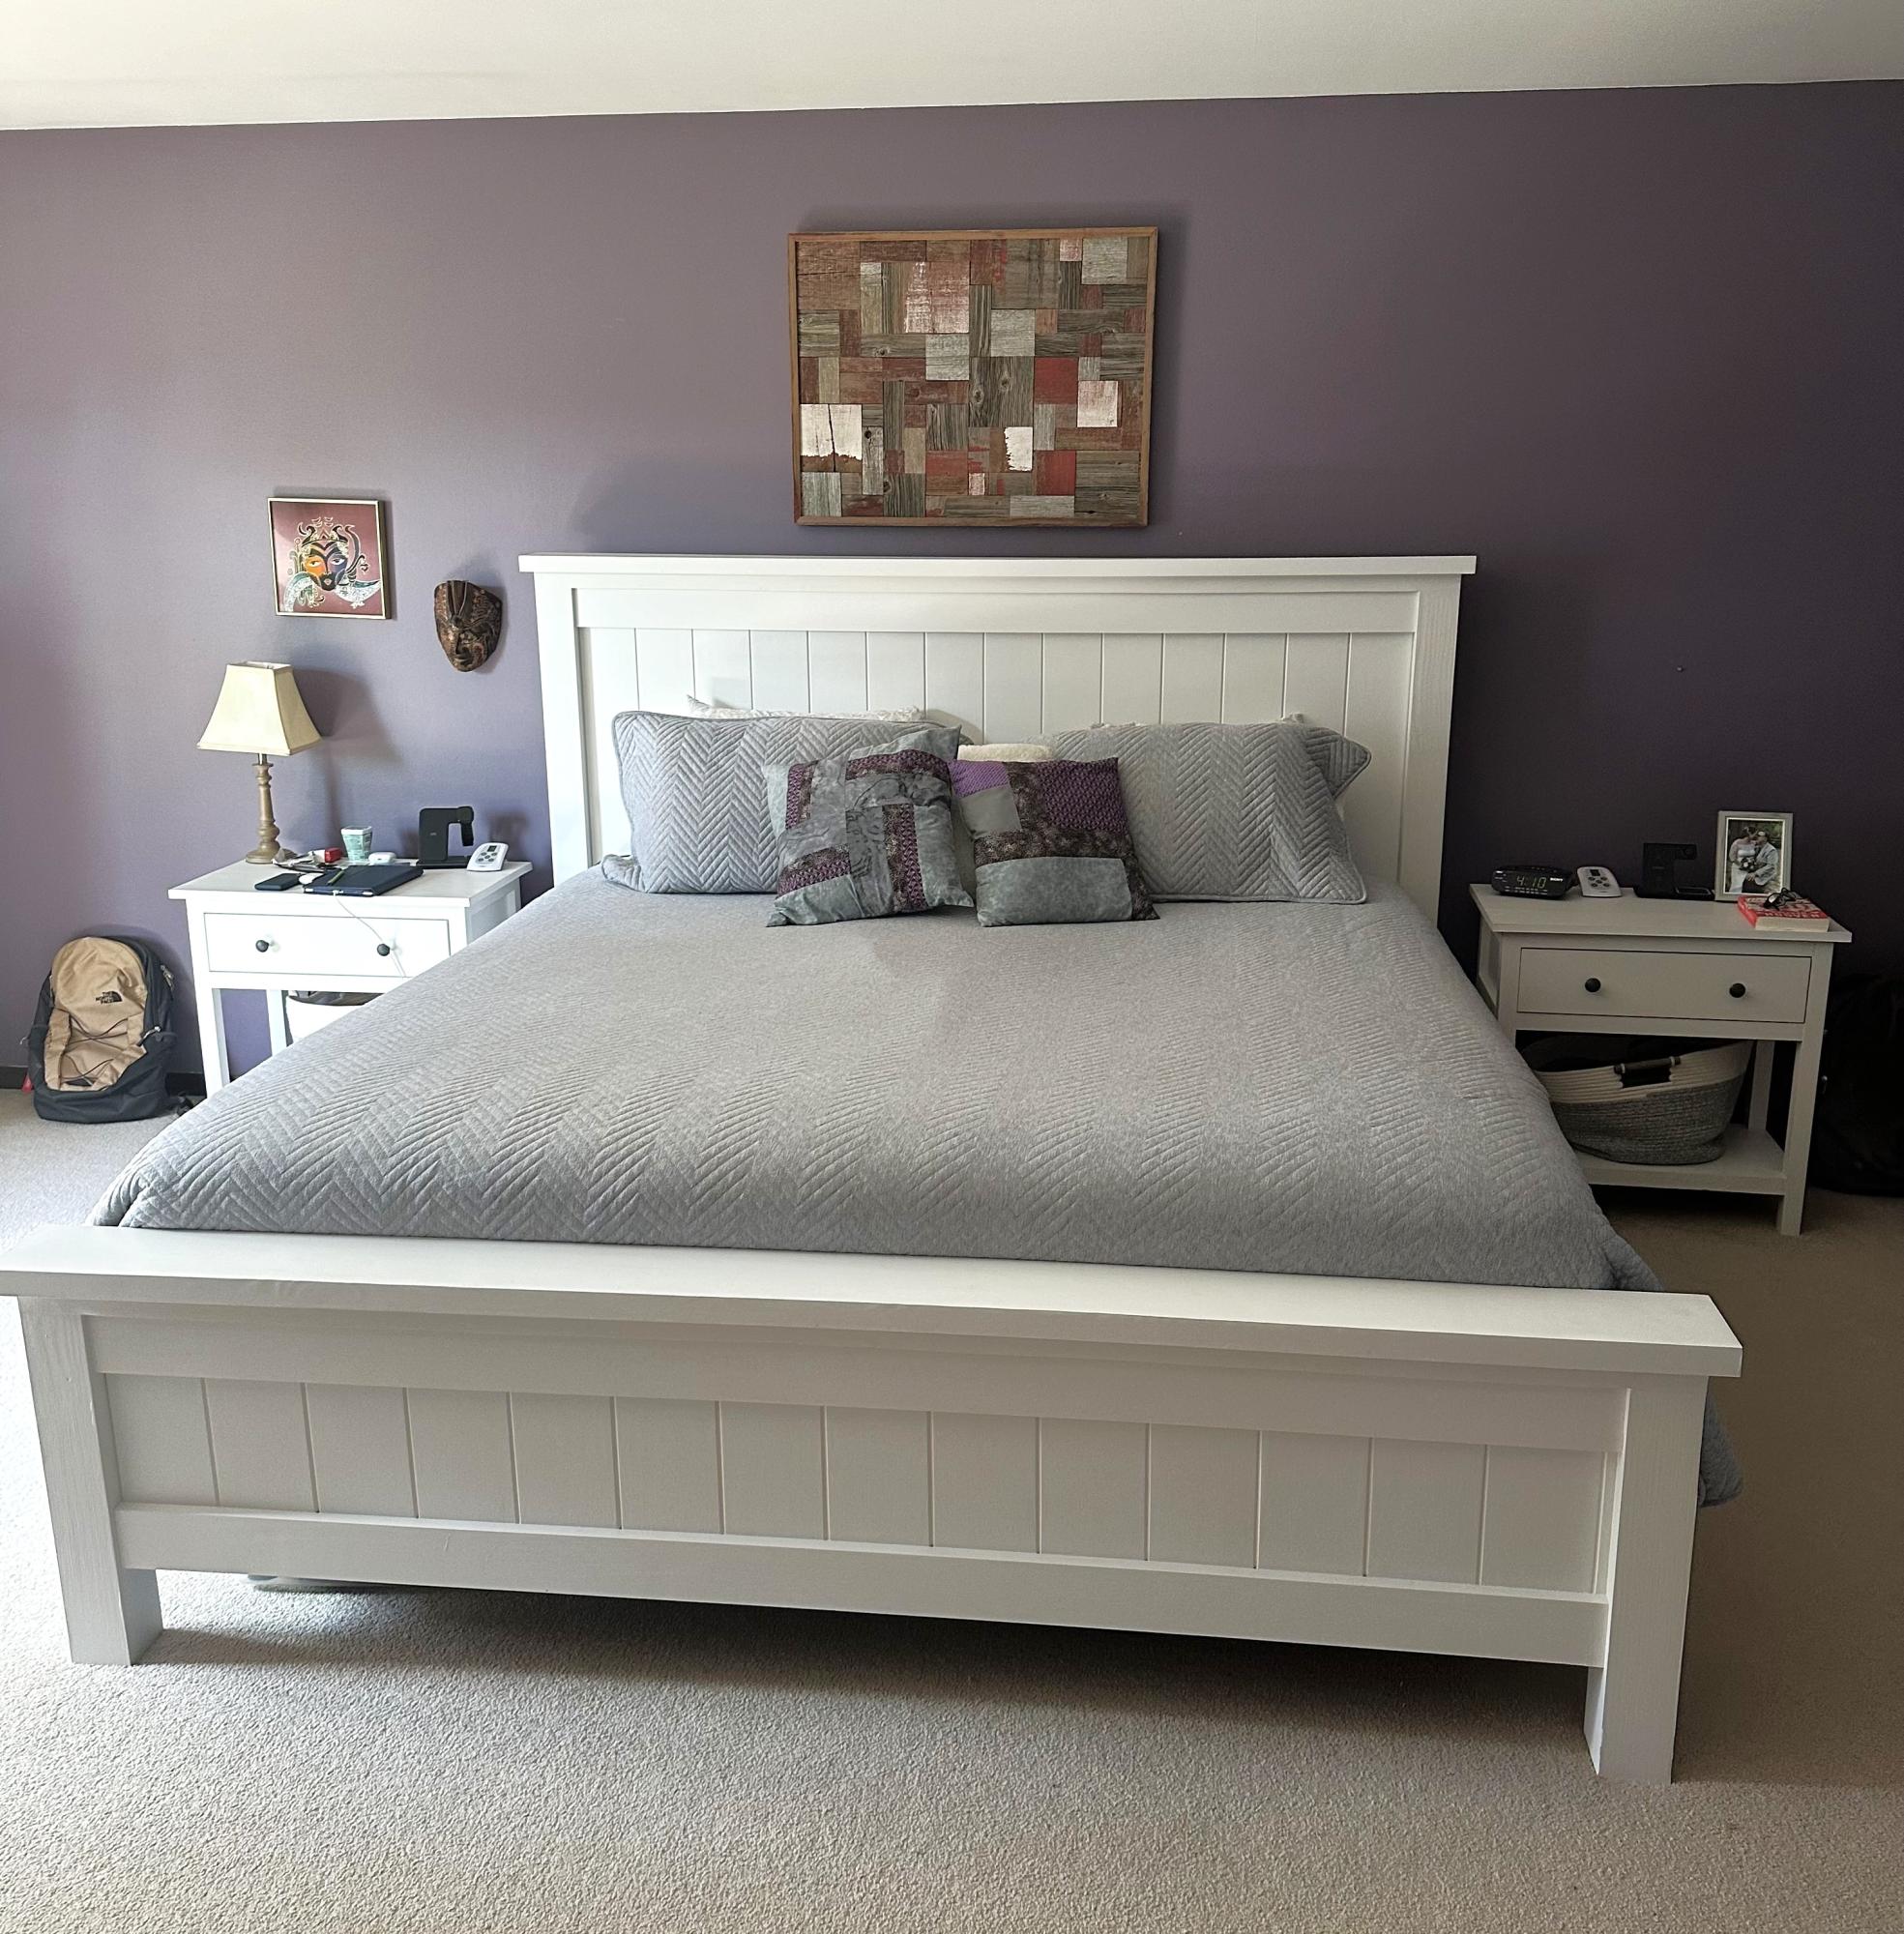
DIY Farmhouse Bed

Similar to: http://ana-white.com/2011/01/sausha%E2%80%99s-washerdryer-pedestals.
Dimensions and finish were unique to my needs.


I followed the plans exactly. The only difference is I used my Ryobi Airstrike brad nailer instead of stapler. Lowes was slightly higher in price than the $10.00 on Ana's post but at $11.97 it wasn't too far off!
Ana Whites site is always my first stop for inspiration, she always has good designs and diagrams. I usually use her plans as a rough guide, and then tweak them as needed.
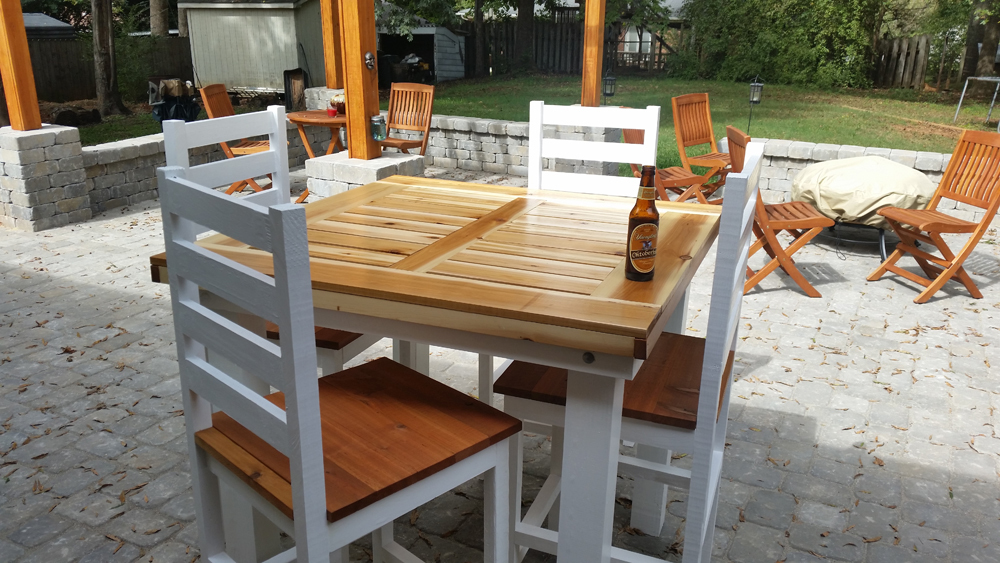
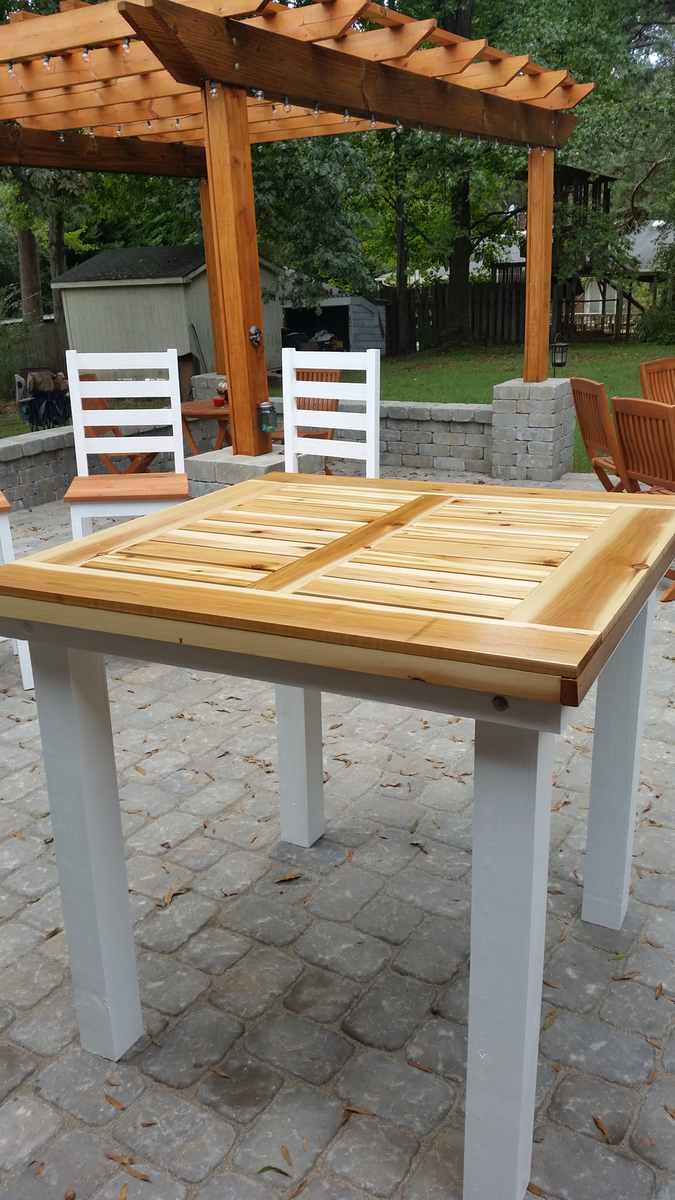
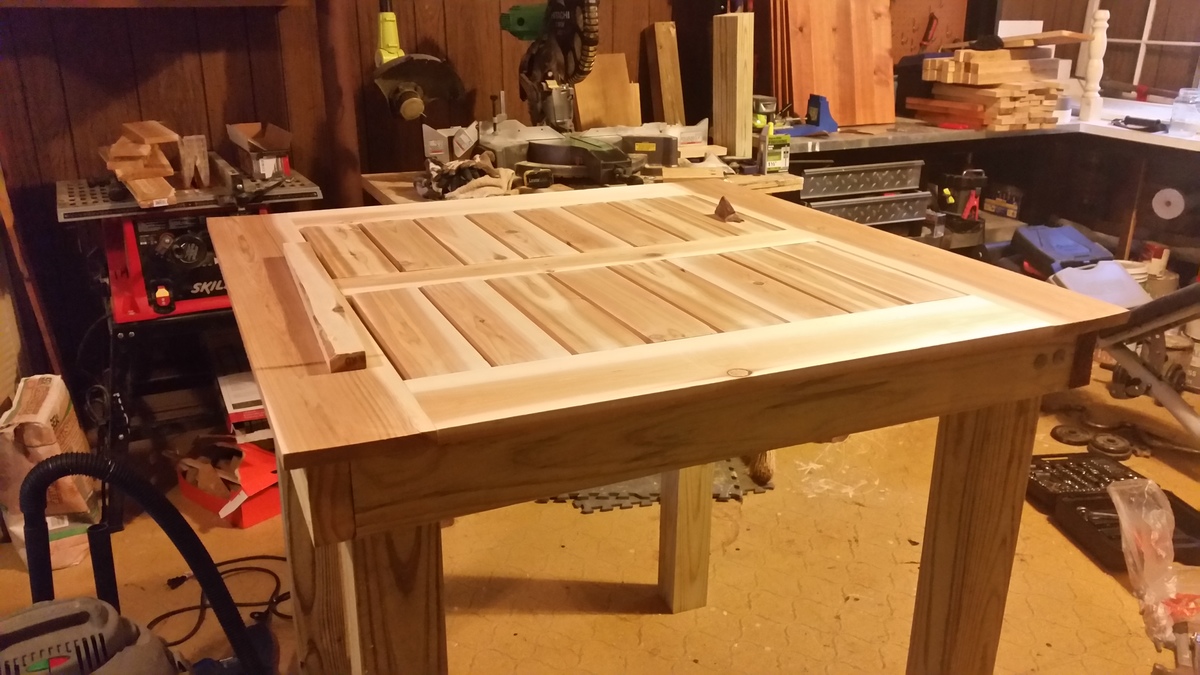
For this table, I made it 42" square, and adjusted the height.
The main difference is I built this from PT pine, and cedar as this is going to be an outdoor table, and I would like it to last. I painted the frame with 3 coats of exterior semi gloss paint, and used Helmsman spar urethane for the top. I did not stain the wood, as I love the color variations of natural cedar.
I also used galvanized carriage bolts to connect the legs. This increased the costt, but I wanted to be able to remove the legs. For more in depth connection details see my blog.
The table turned out quite well, is very sturdy and has gotten quite a few compliments, thanks Ana for the inspiration to build cool stuf! I love building STUFF!
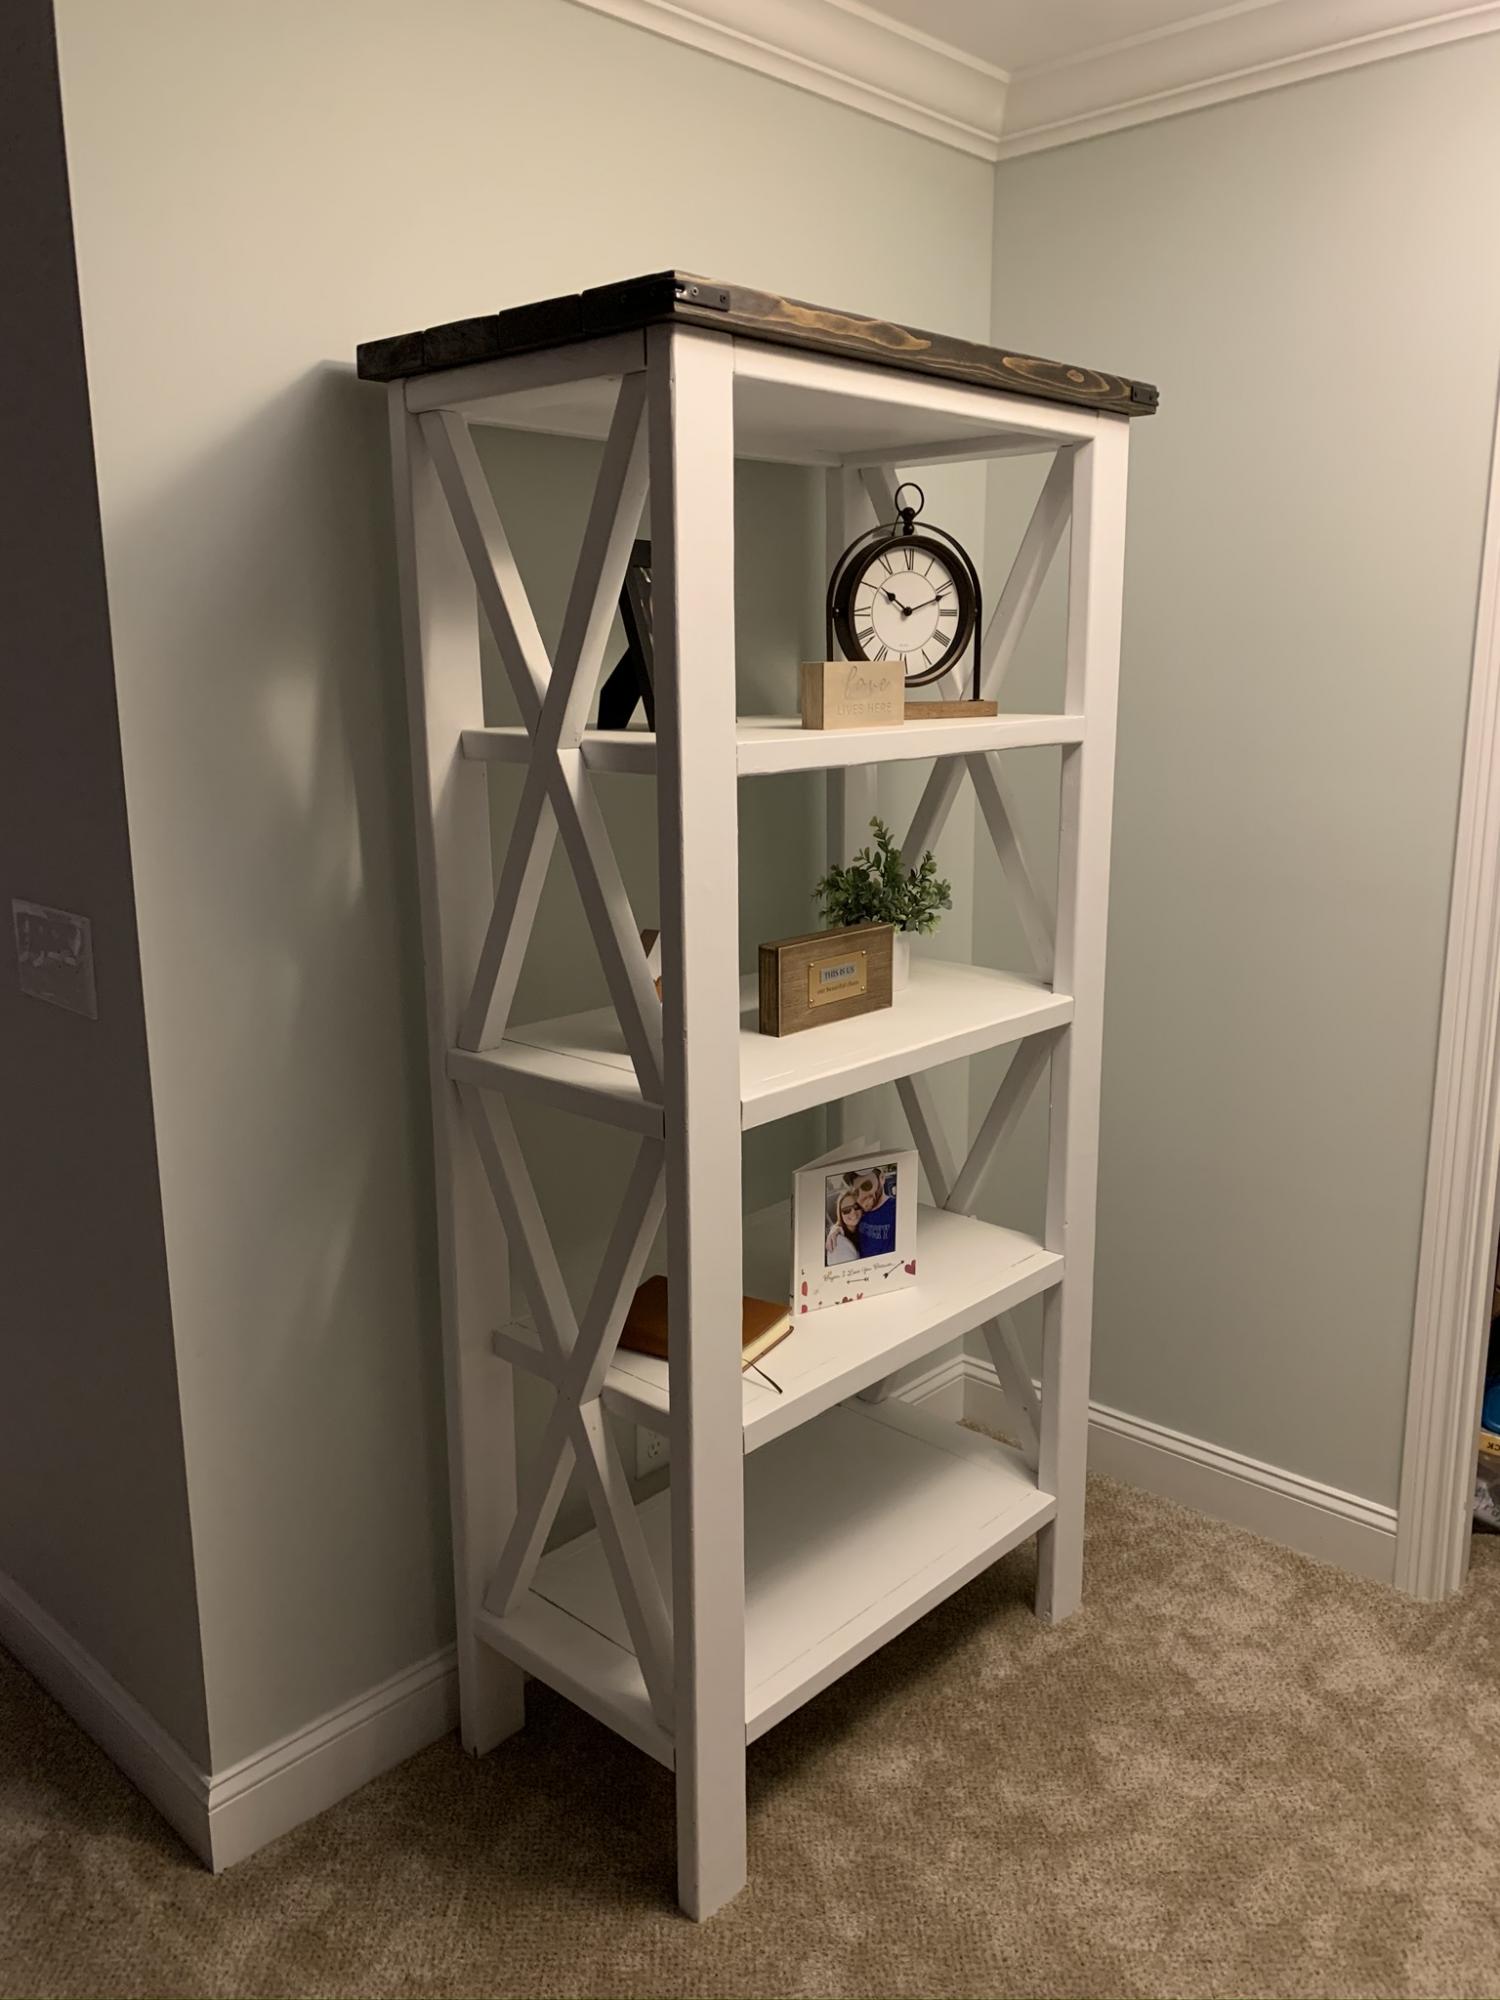
Added a 2x6 stained top to the bookshelf to add accent .
Loved how easy to follow along the instructions were for my first ever project.
Christina
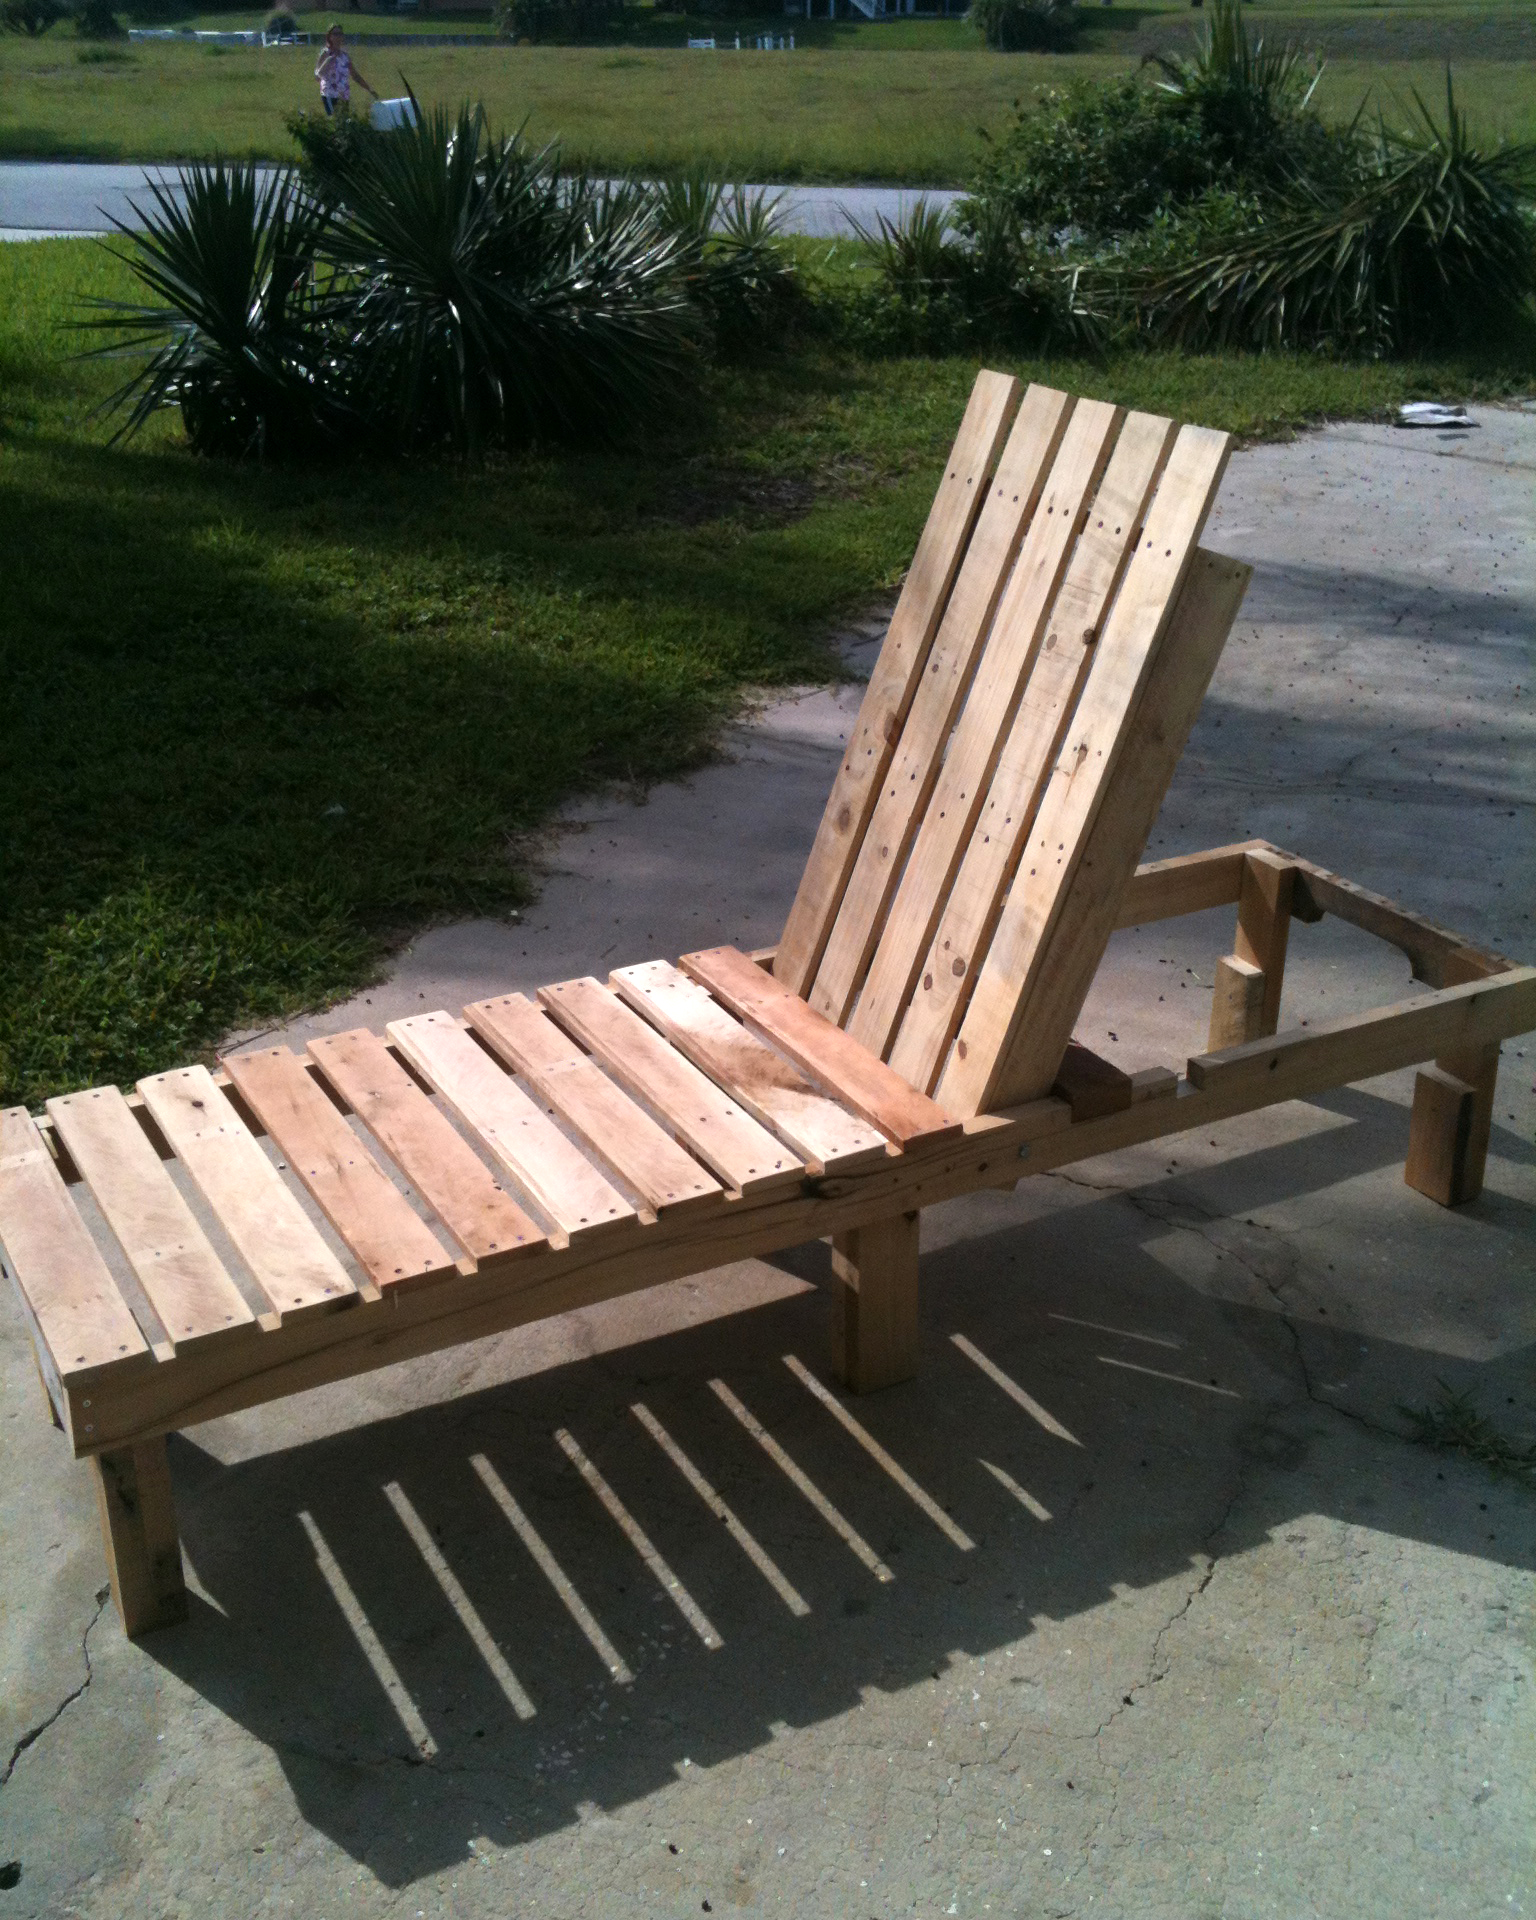
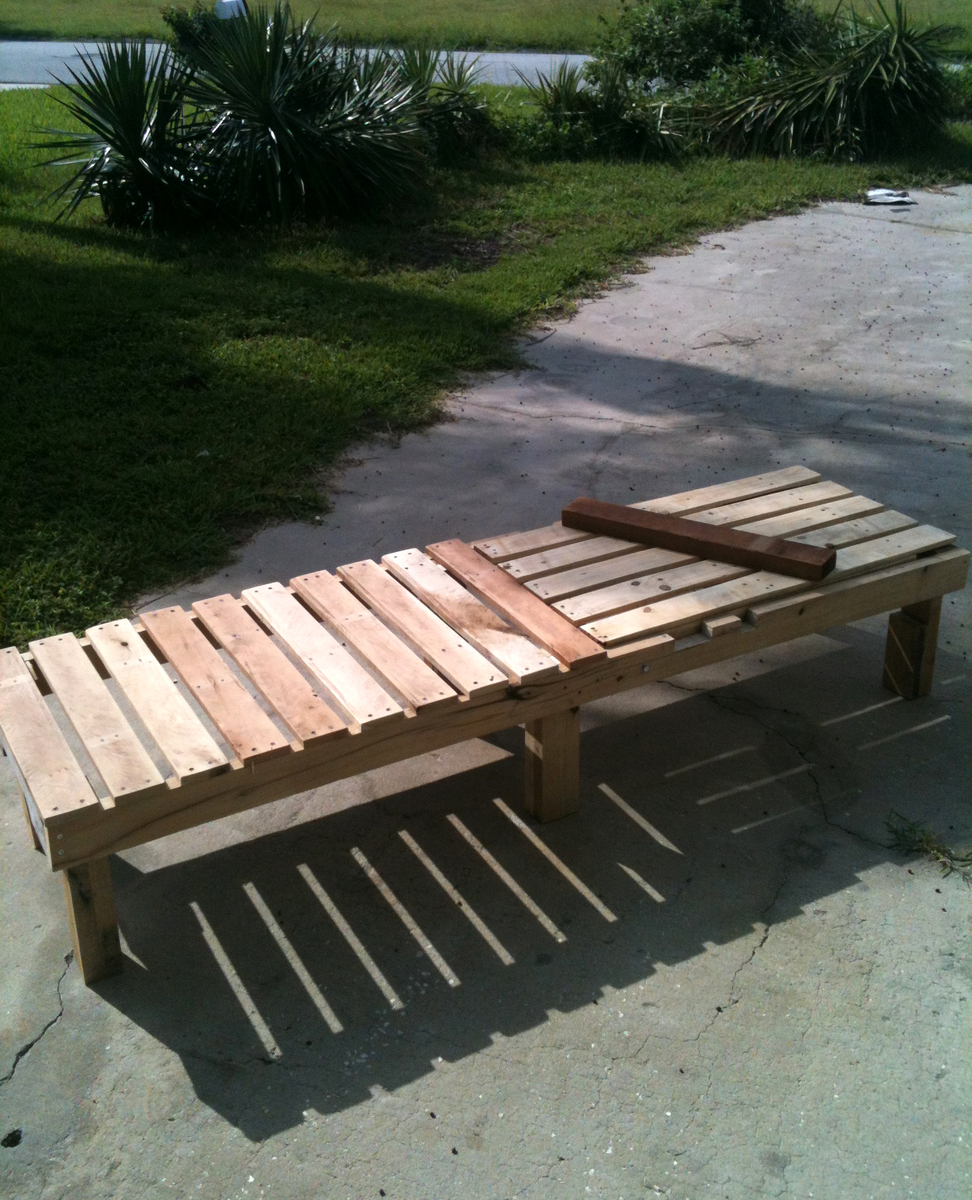
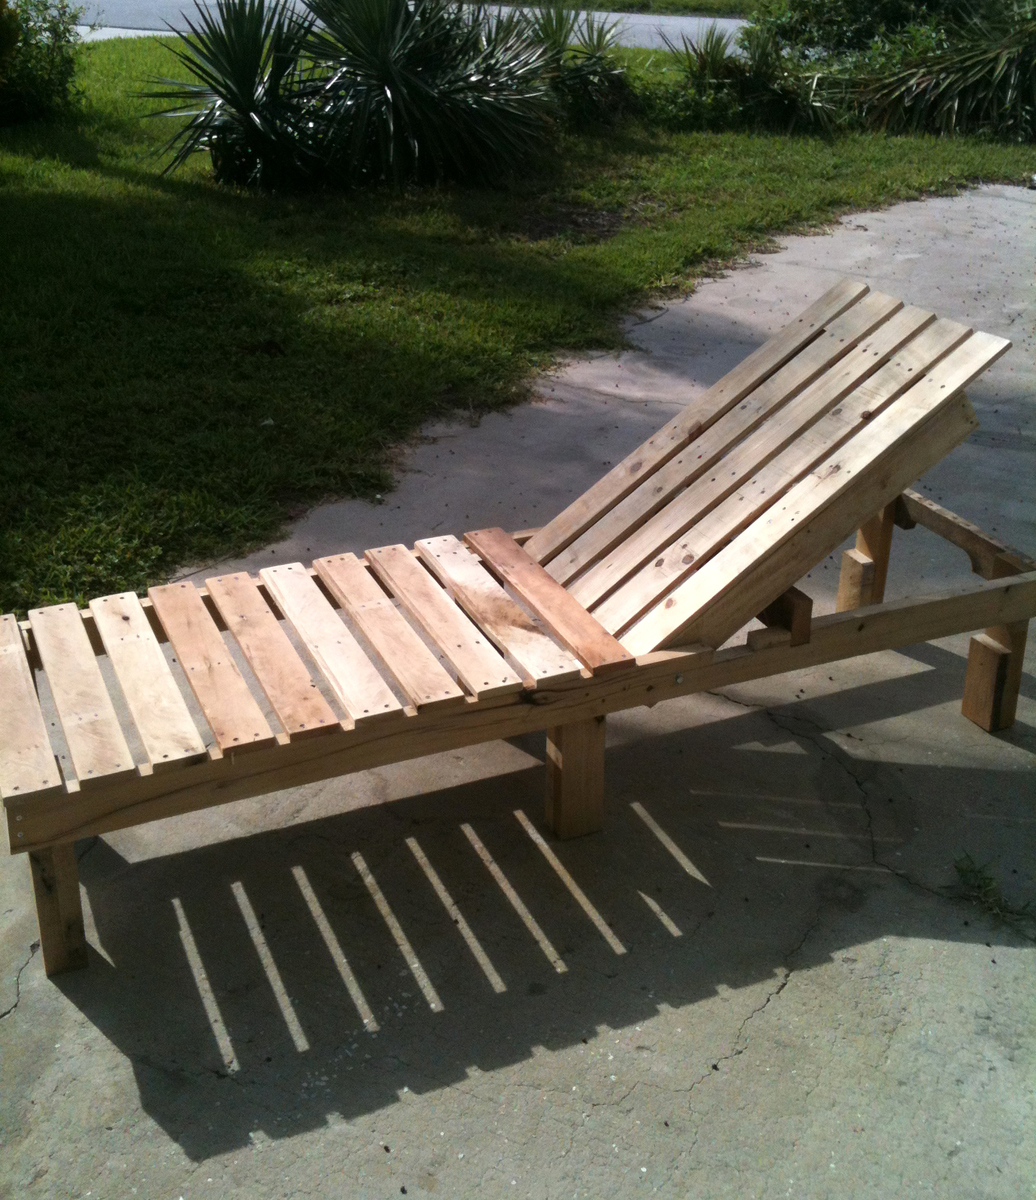
I saw these plans on Ana White's website, so I figured I would try to make one with recycled wooden pallets. It was a fun and easy project. I added a third set of legs in the center of the chair to provide extra support. Using the pallet wood offered a few challenges, mostly relating to the size of 2x4s you buy versus the ones used to build pallets.
The end user of this chaise lounge chair is going to seal it with a cedar colored stain/sealer so that is matches the Pallirondack Double Settee (one of my other projects) I made for them earlier this year.
Great plans, great fun.
This project took a long time since it was my first and I had a baby boy in the middle of completing it. But finally it is finished. I had help with the construction and the plan was modified a little bit (83x38 inches) mostly since it needed to fit in the back of my father-in-law's van for transport to our new home. The finished product came out pretty well for my first foray into woodworking!
Sun, 07/06/2014 - 14:59
Your finish is beautifully smooth! How did you get squared edges on your tabletop boards? Did you run them through a table saw?
Sun, 07/06/2014 - 18:26
Yes, we used the table saw to square all of the edges. This ensures a tight fit on the table top with no room for crumbs to get in!
Sat, 11/12/2016 - 09:41
Did you use wood filler or sand the top to show the wood edges less?
This was one of my first builds ever! I'm hooked!
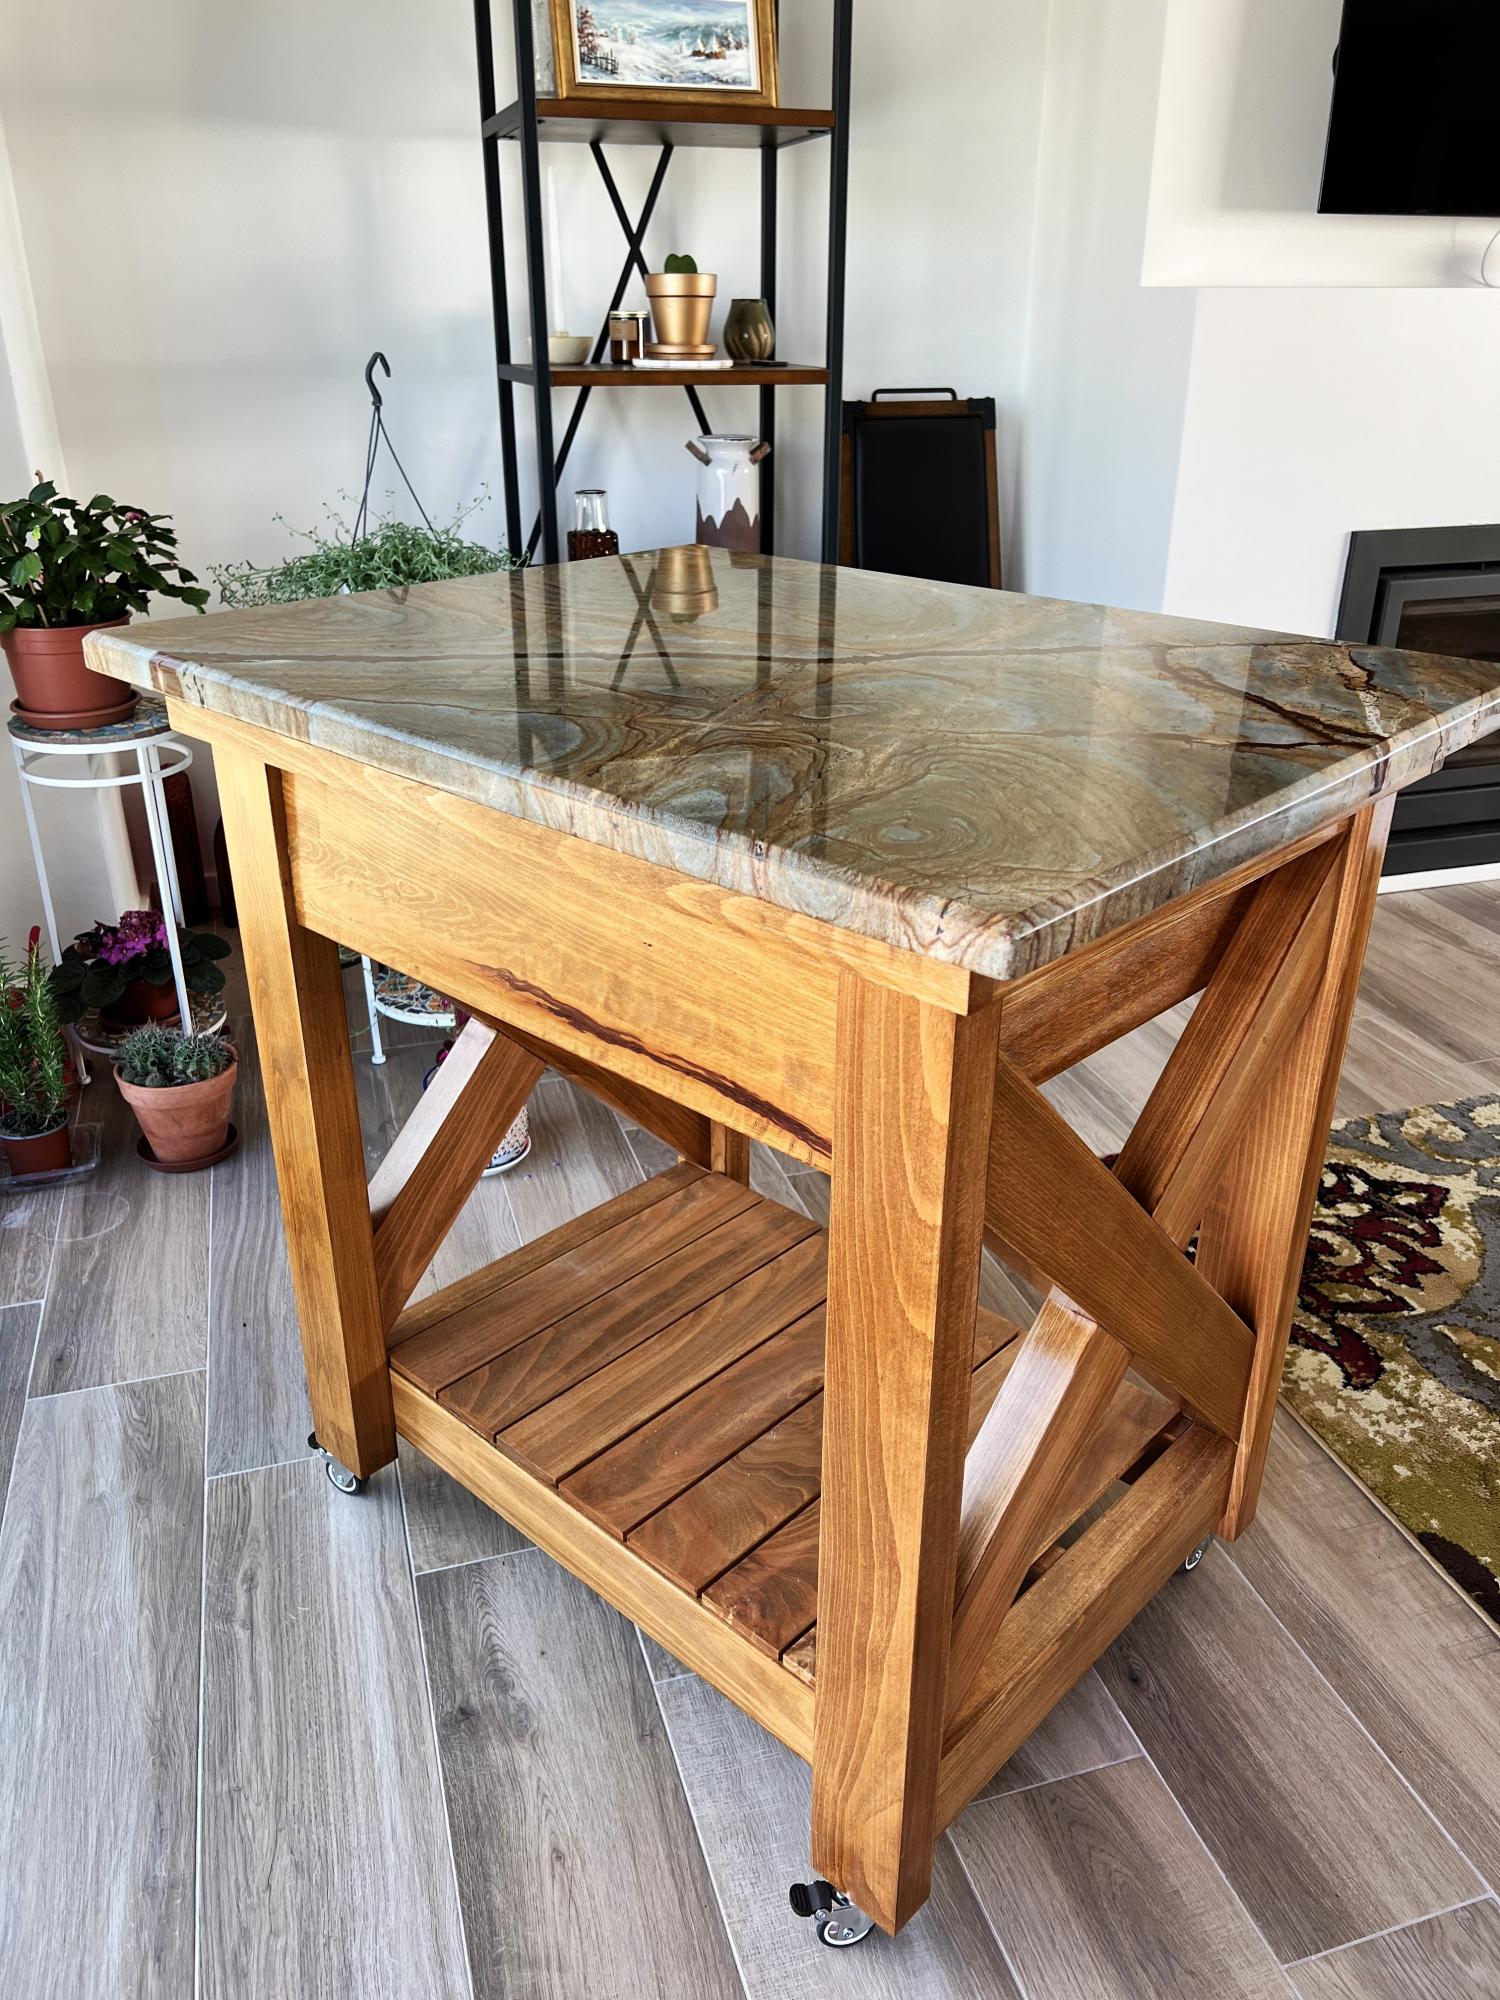
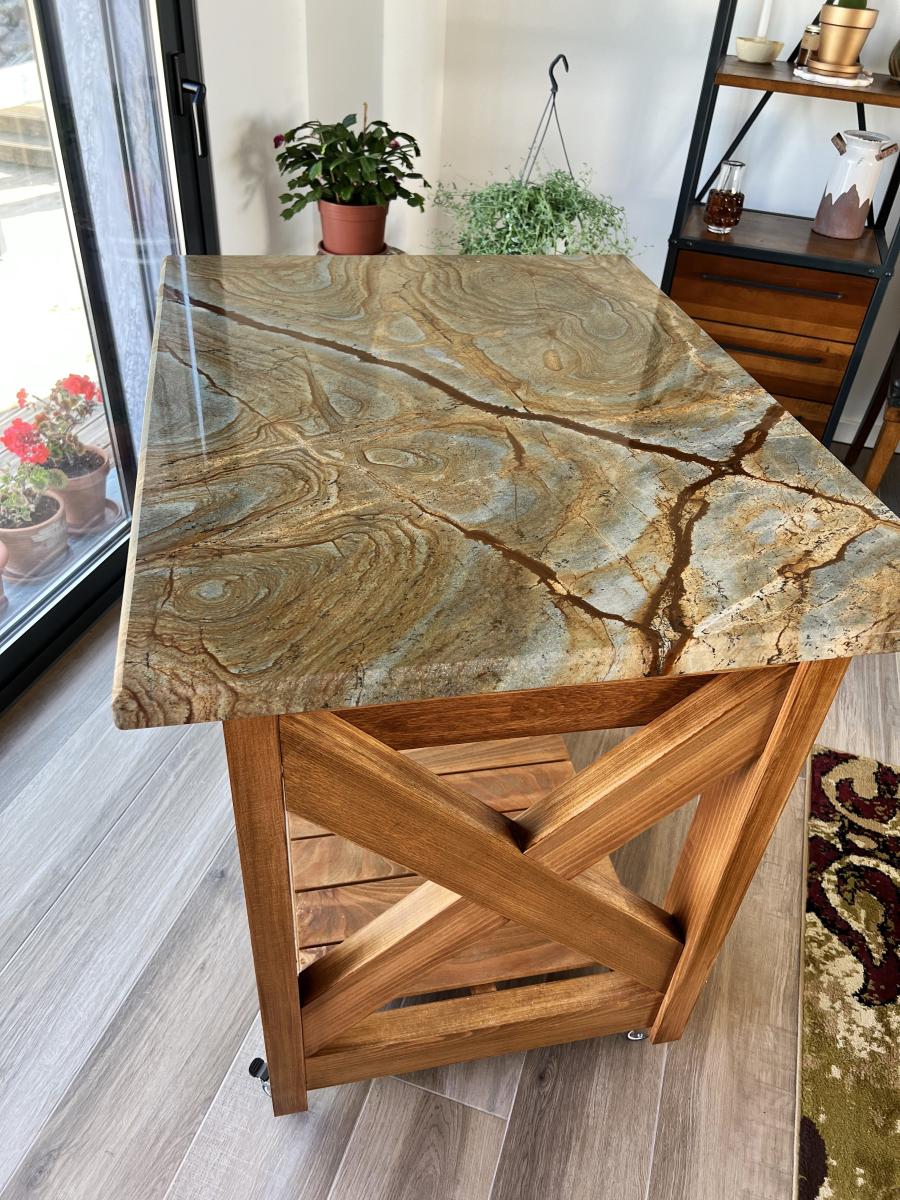
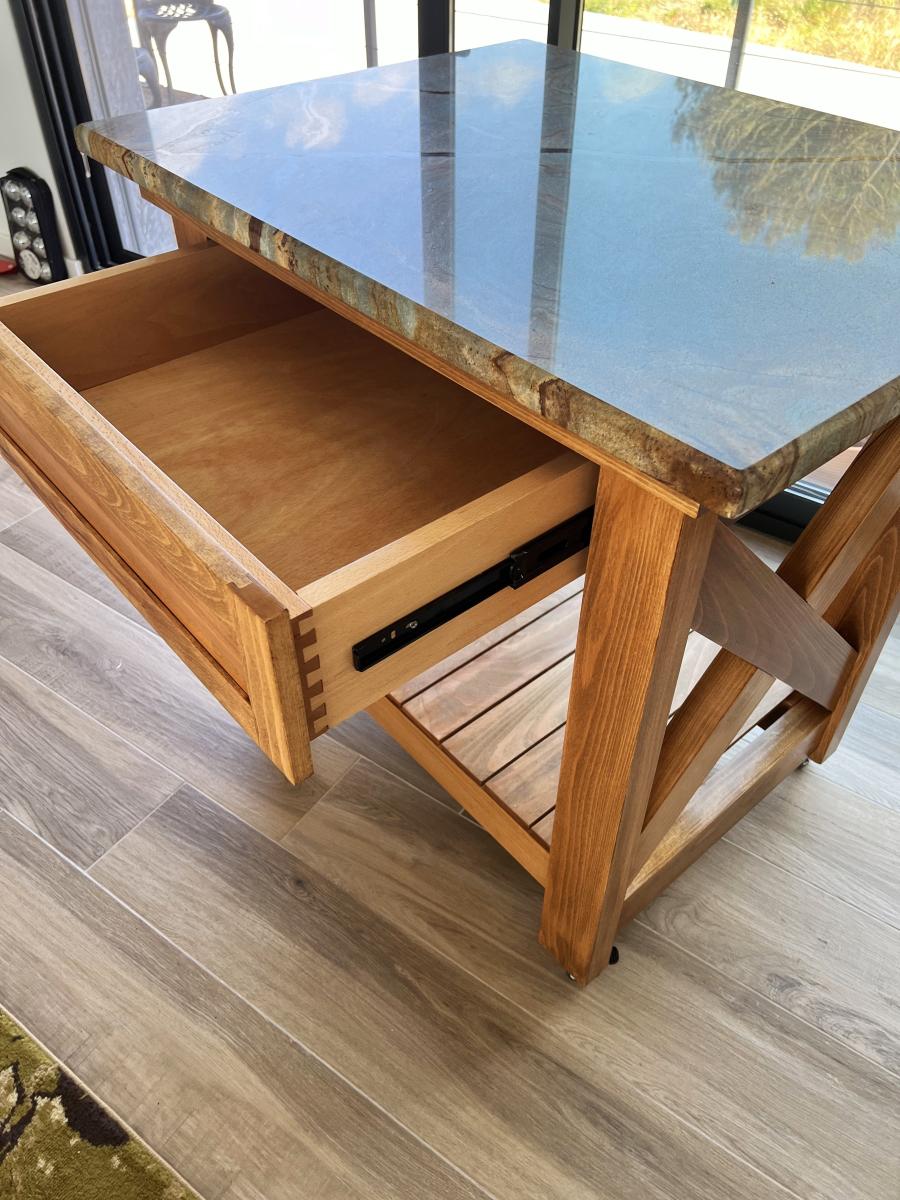
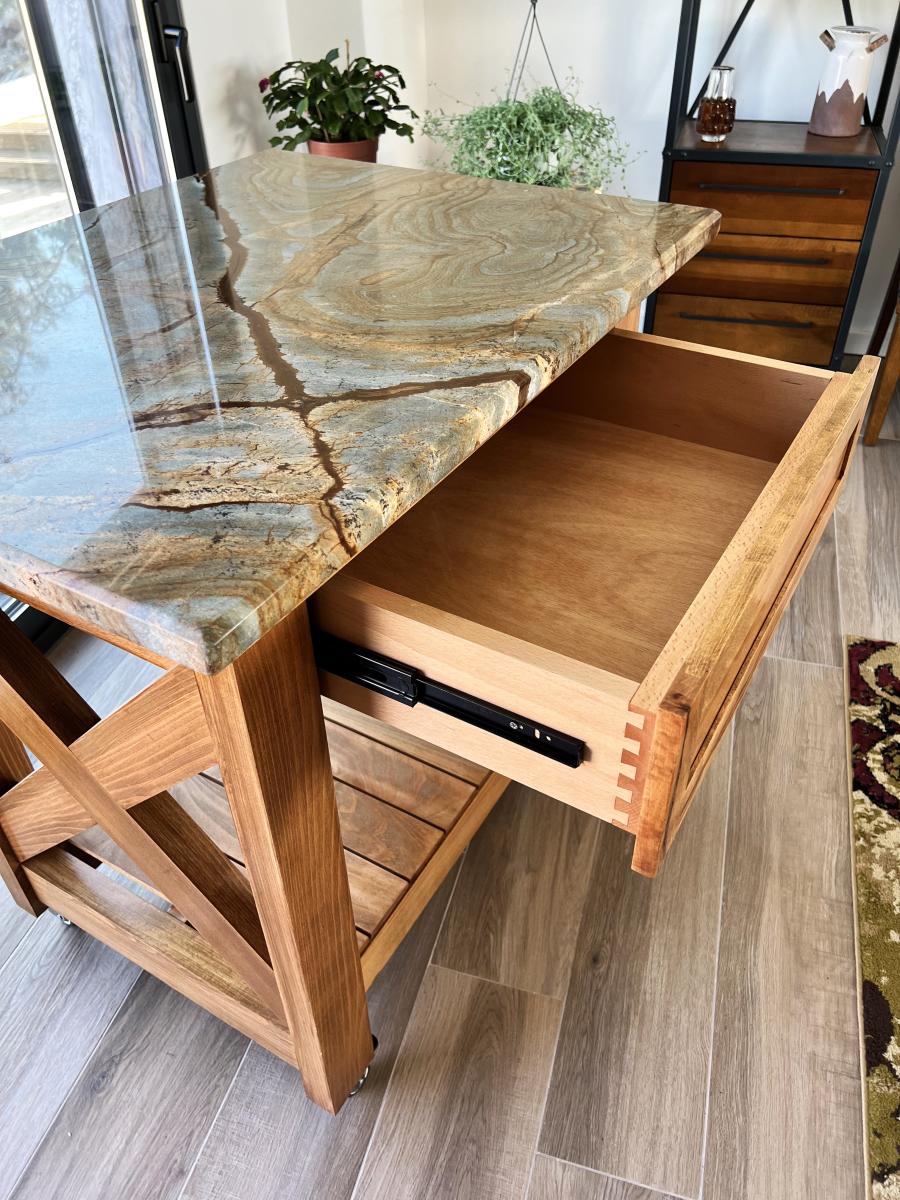
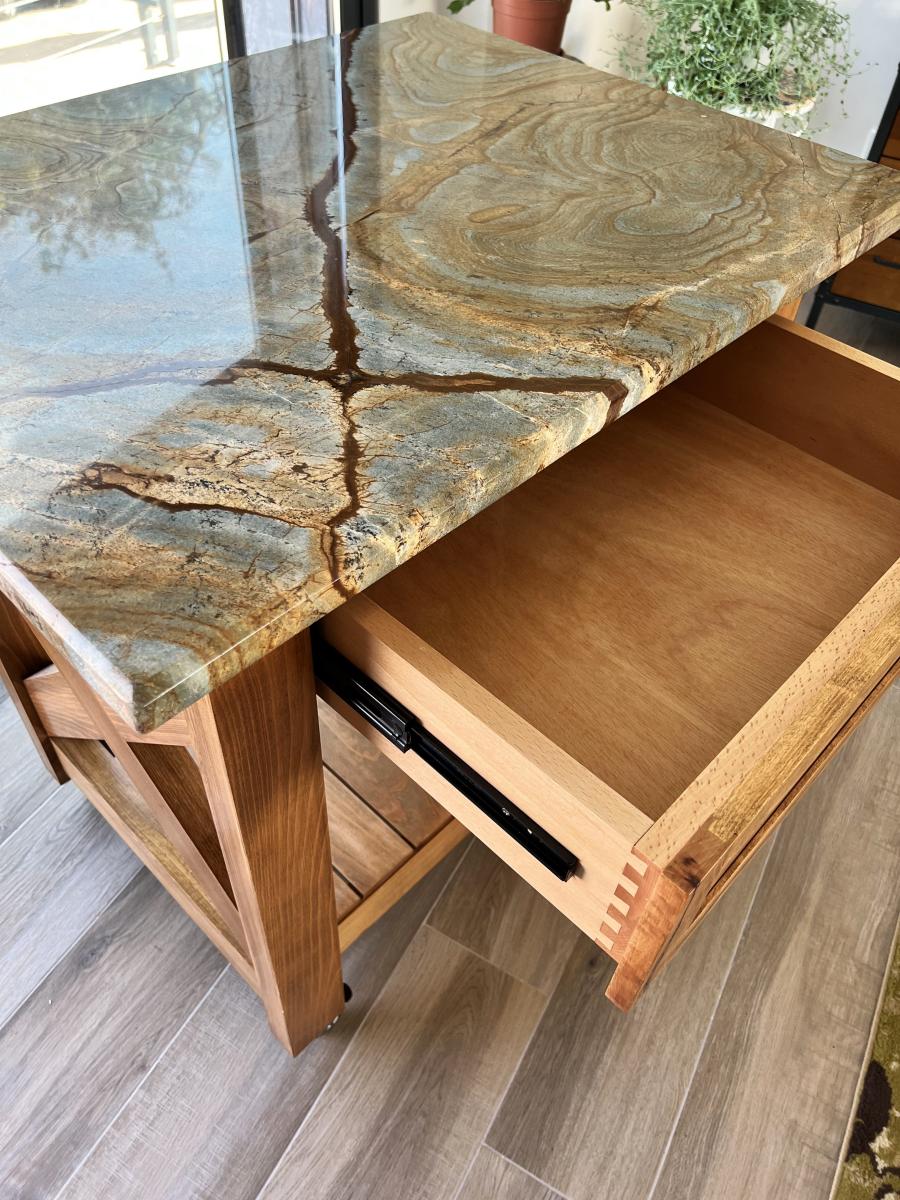
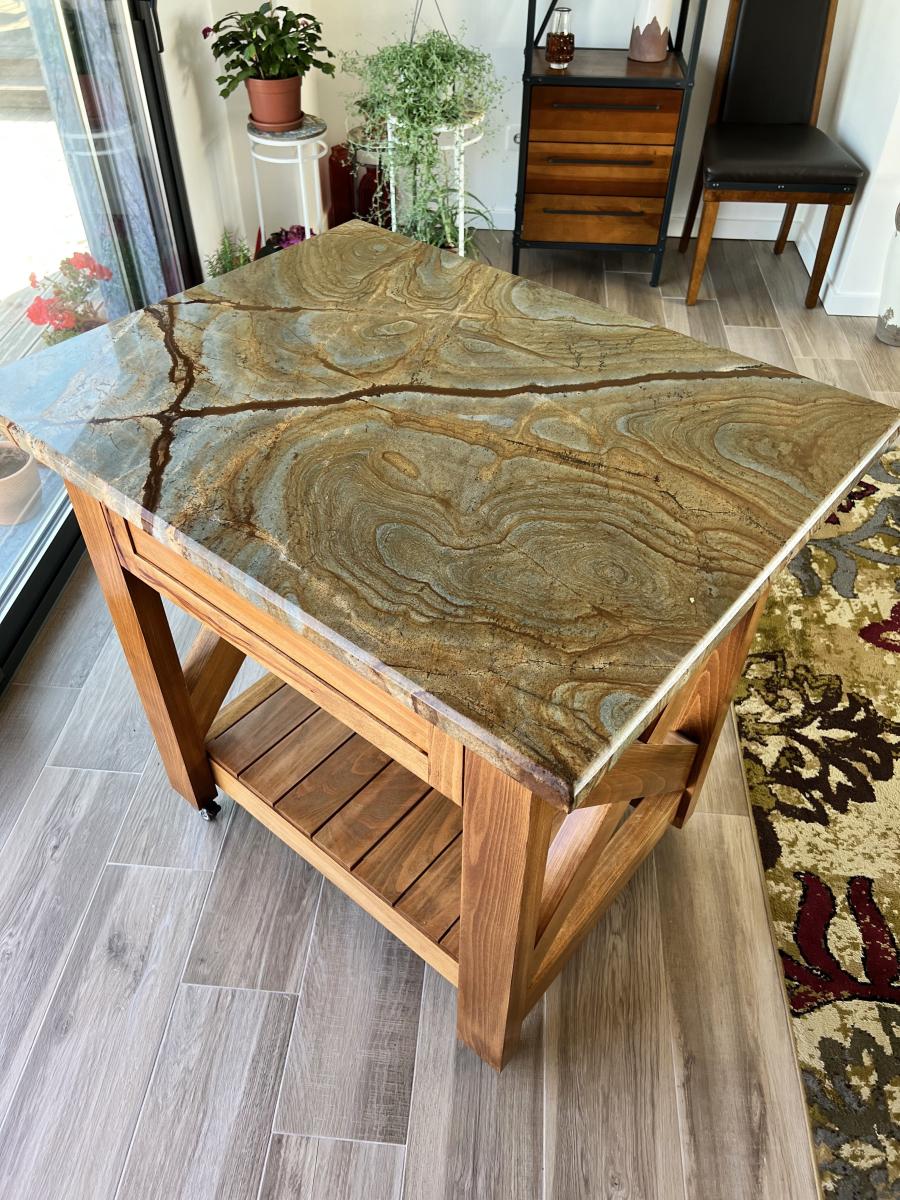
I made a few changes to the original plans for this island. I had to convert all measurements to metric to begin with. I live in Portugal and standard size woods, such as 2x4s are simply not available. I found a lumber yard that had some extremely nice German Oak which was a pleasure to work with. Although, this did add some weight to the finished project. All wood needed to be jointed and planed to ensure straightness. The "X" cross braces are full length. I used my router to remove half the thickness where they intersect so that they interlock with each other.
The granite top was a remnant we brought with us when we moved here and was sized and shaped previously. Instead of using pocket screws to join pieces together I opted for doweling all pieces and did not use screws at all, except when attaching the tracks for the drawer.
Fortunately, the overall plans did not require much alteration to accommodate the granite.
I would have liked larger wheels but these allowed for the island to match the countertop height in our kitchen.
Christopher Mathrusse
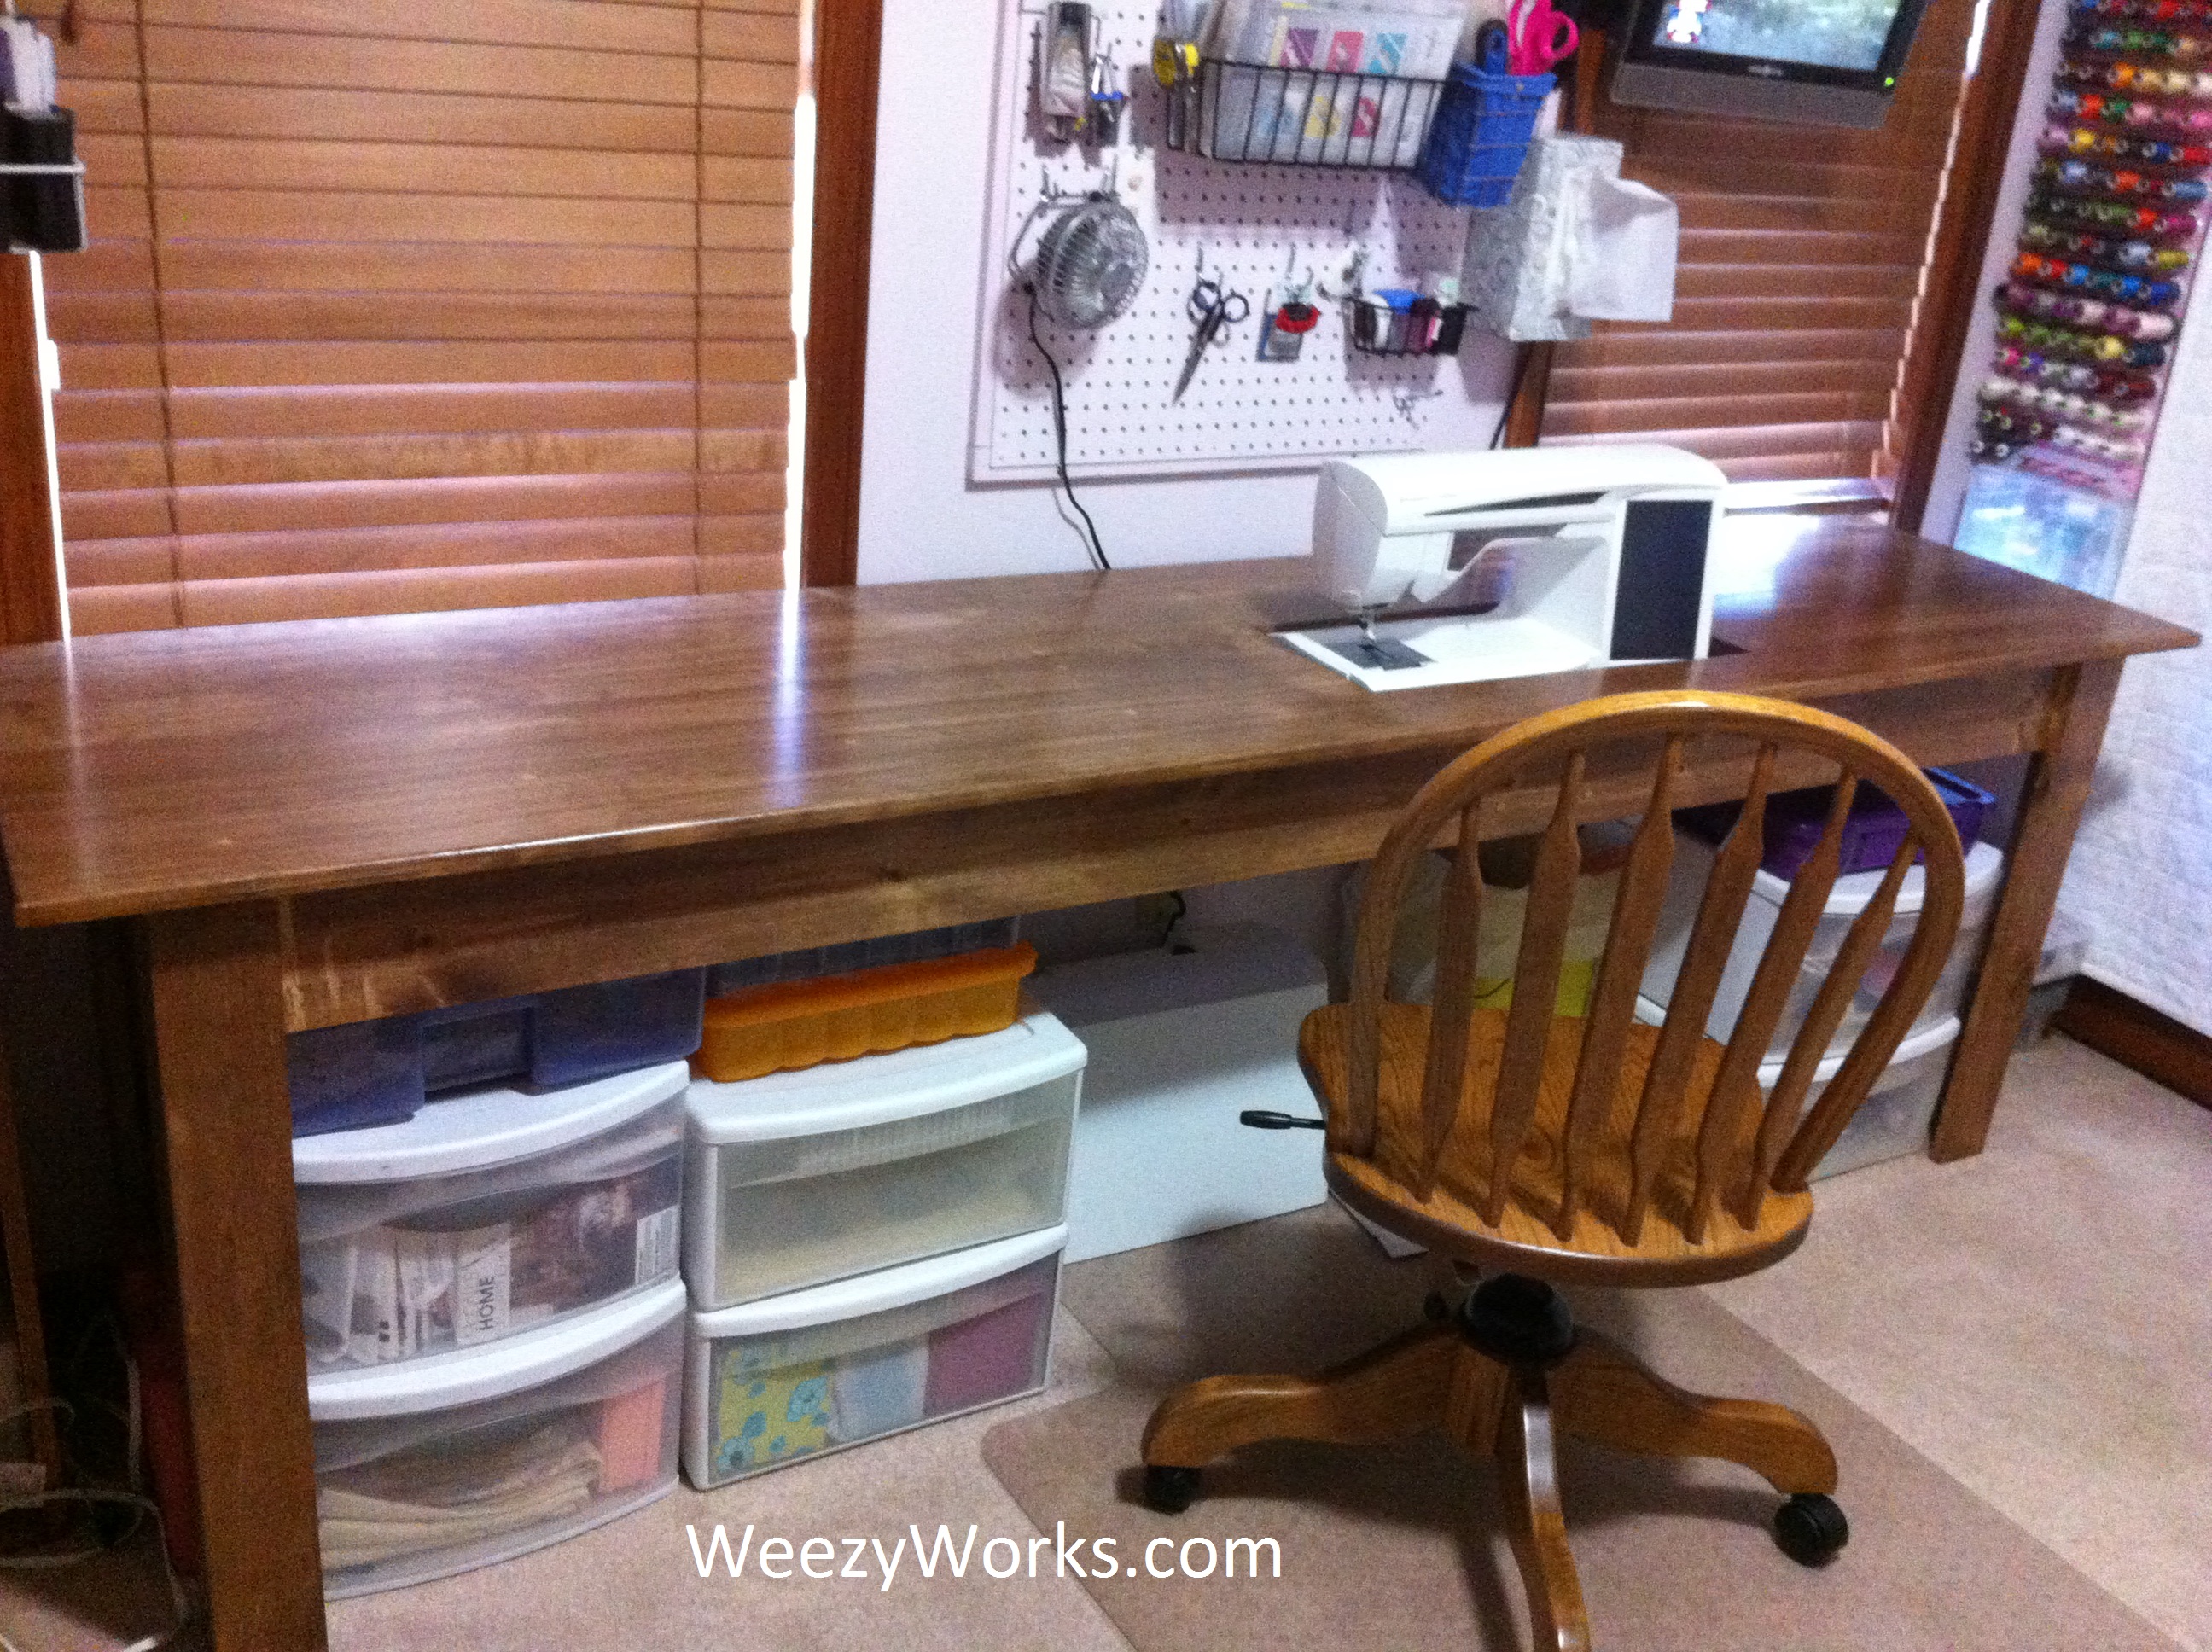
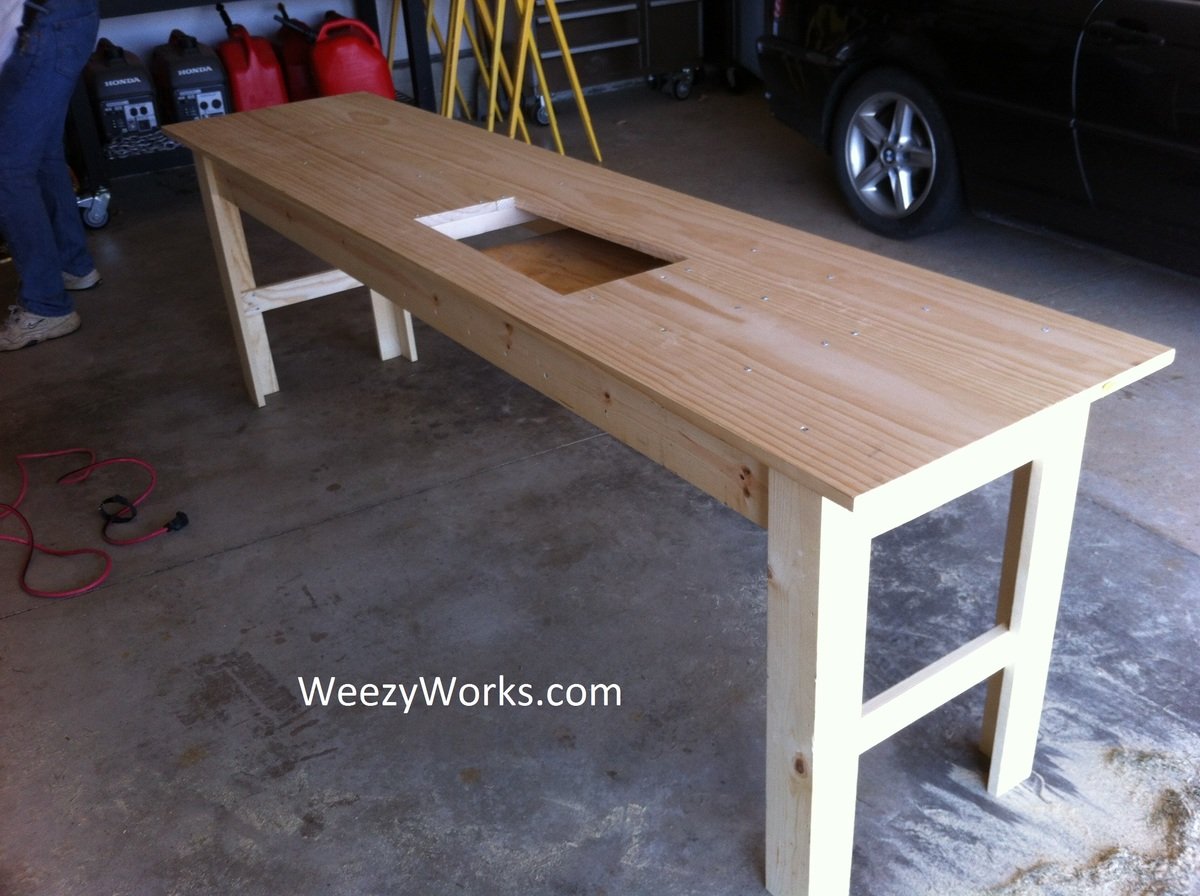
Ive been looking for a sewing table to fit my space. but found none for less than $500 and they were quite small. I found a post at quiltedcupcake.com that linked me to another blog, linking me here. I modified the plan to be about 2 feet wide and cut a hole to fit my sewing machine. There is a support in the bottom to hold my machine level with the tabletop. When I make this in the future, I will splurge on a fine hardwood. This plan was easy to build and looks great! Just what I was looking for :D
Sat, 09/15/2012 - 16:38
Thank you! This project was very easy to build and would be very easy to make in a smaller size. I'm so glad I did it, free motion quilting is so much easier with this table.
Wed, 08/26/2020 - 07:13
Good morning Ana,
Where can i get the plans for this table.
Sun, 09/16/2012 - 10:11
Now, I've just got to make it! I love to free motion quilt and that would make it easier. With each baby I've had my quilting space has diminished (of course it's worth it) but now I think I will reclaim some space ;)
Tue, 02/26/2013 - 14:14
Cannot seem to find the plans for this project. Please post them.
In reply to Plans Please by SinKitty71
Tue, 02/26/2013 - 17:40
I used the plans for the narrow farmhouse table (search in the plans tab) and made a few modifications for my sewing machine.
Thu, 06/20/2013 - 12:27
What size boards did you use for the top of the table?
This was my first project from Ana White and it turned out so well I made more. Very easy and inexpensive. Used Red Oak for the tabletop and California Redwood for the legs.

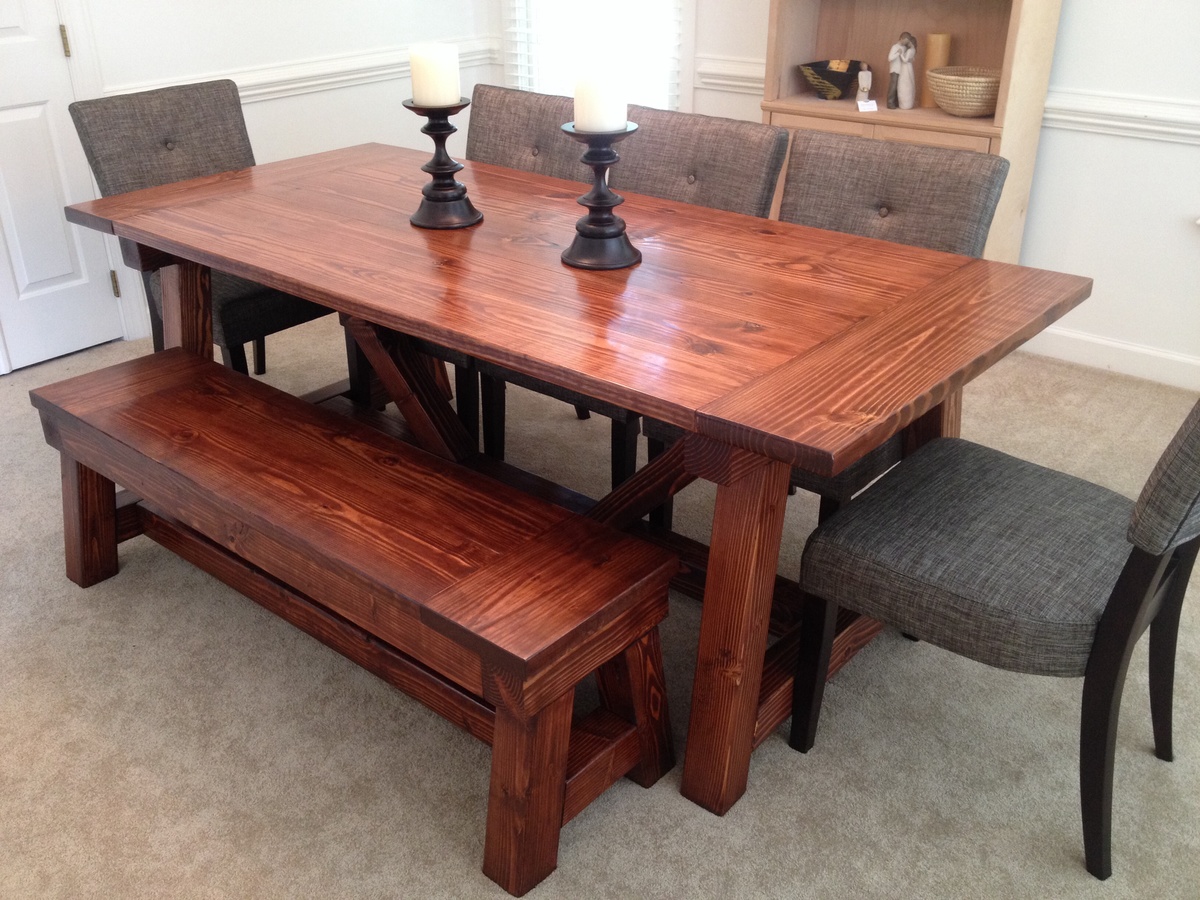
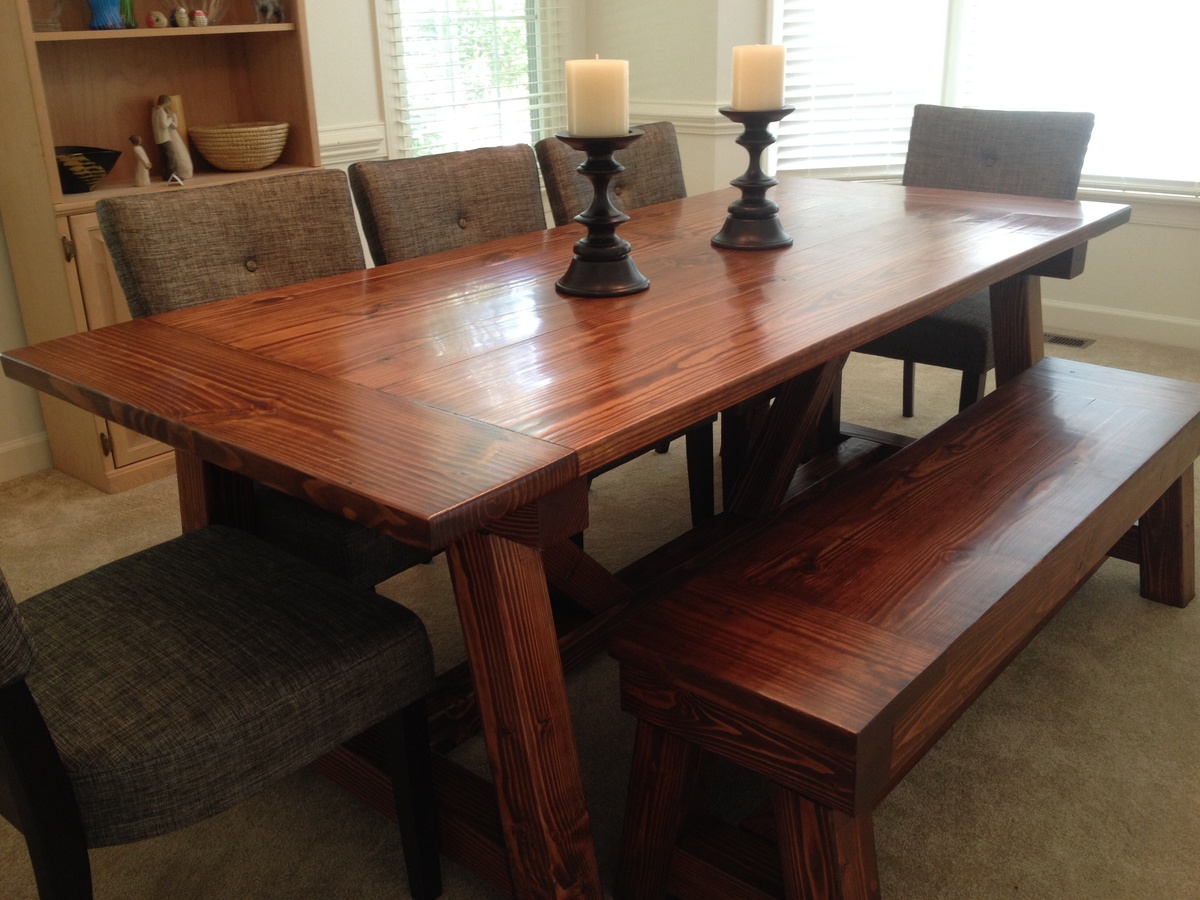
Barnwood fancy x farmhouse table.
