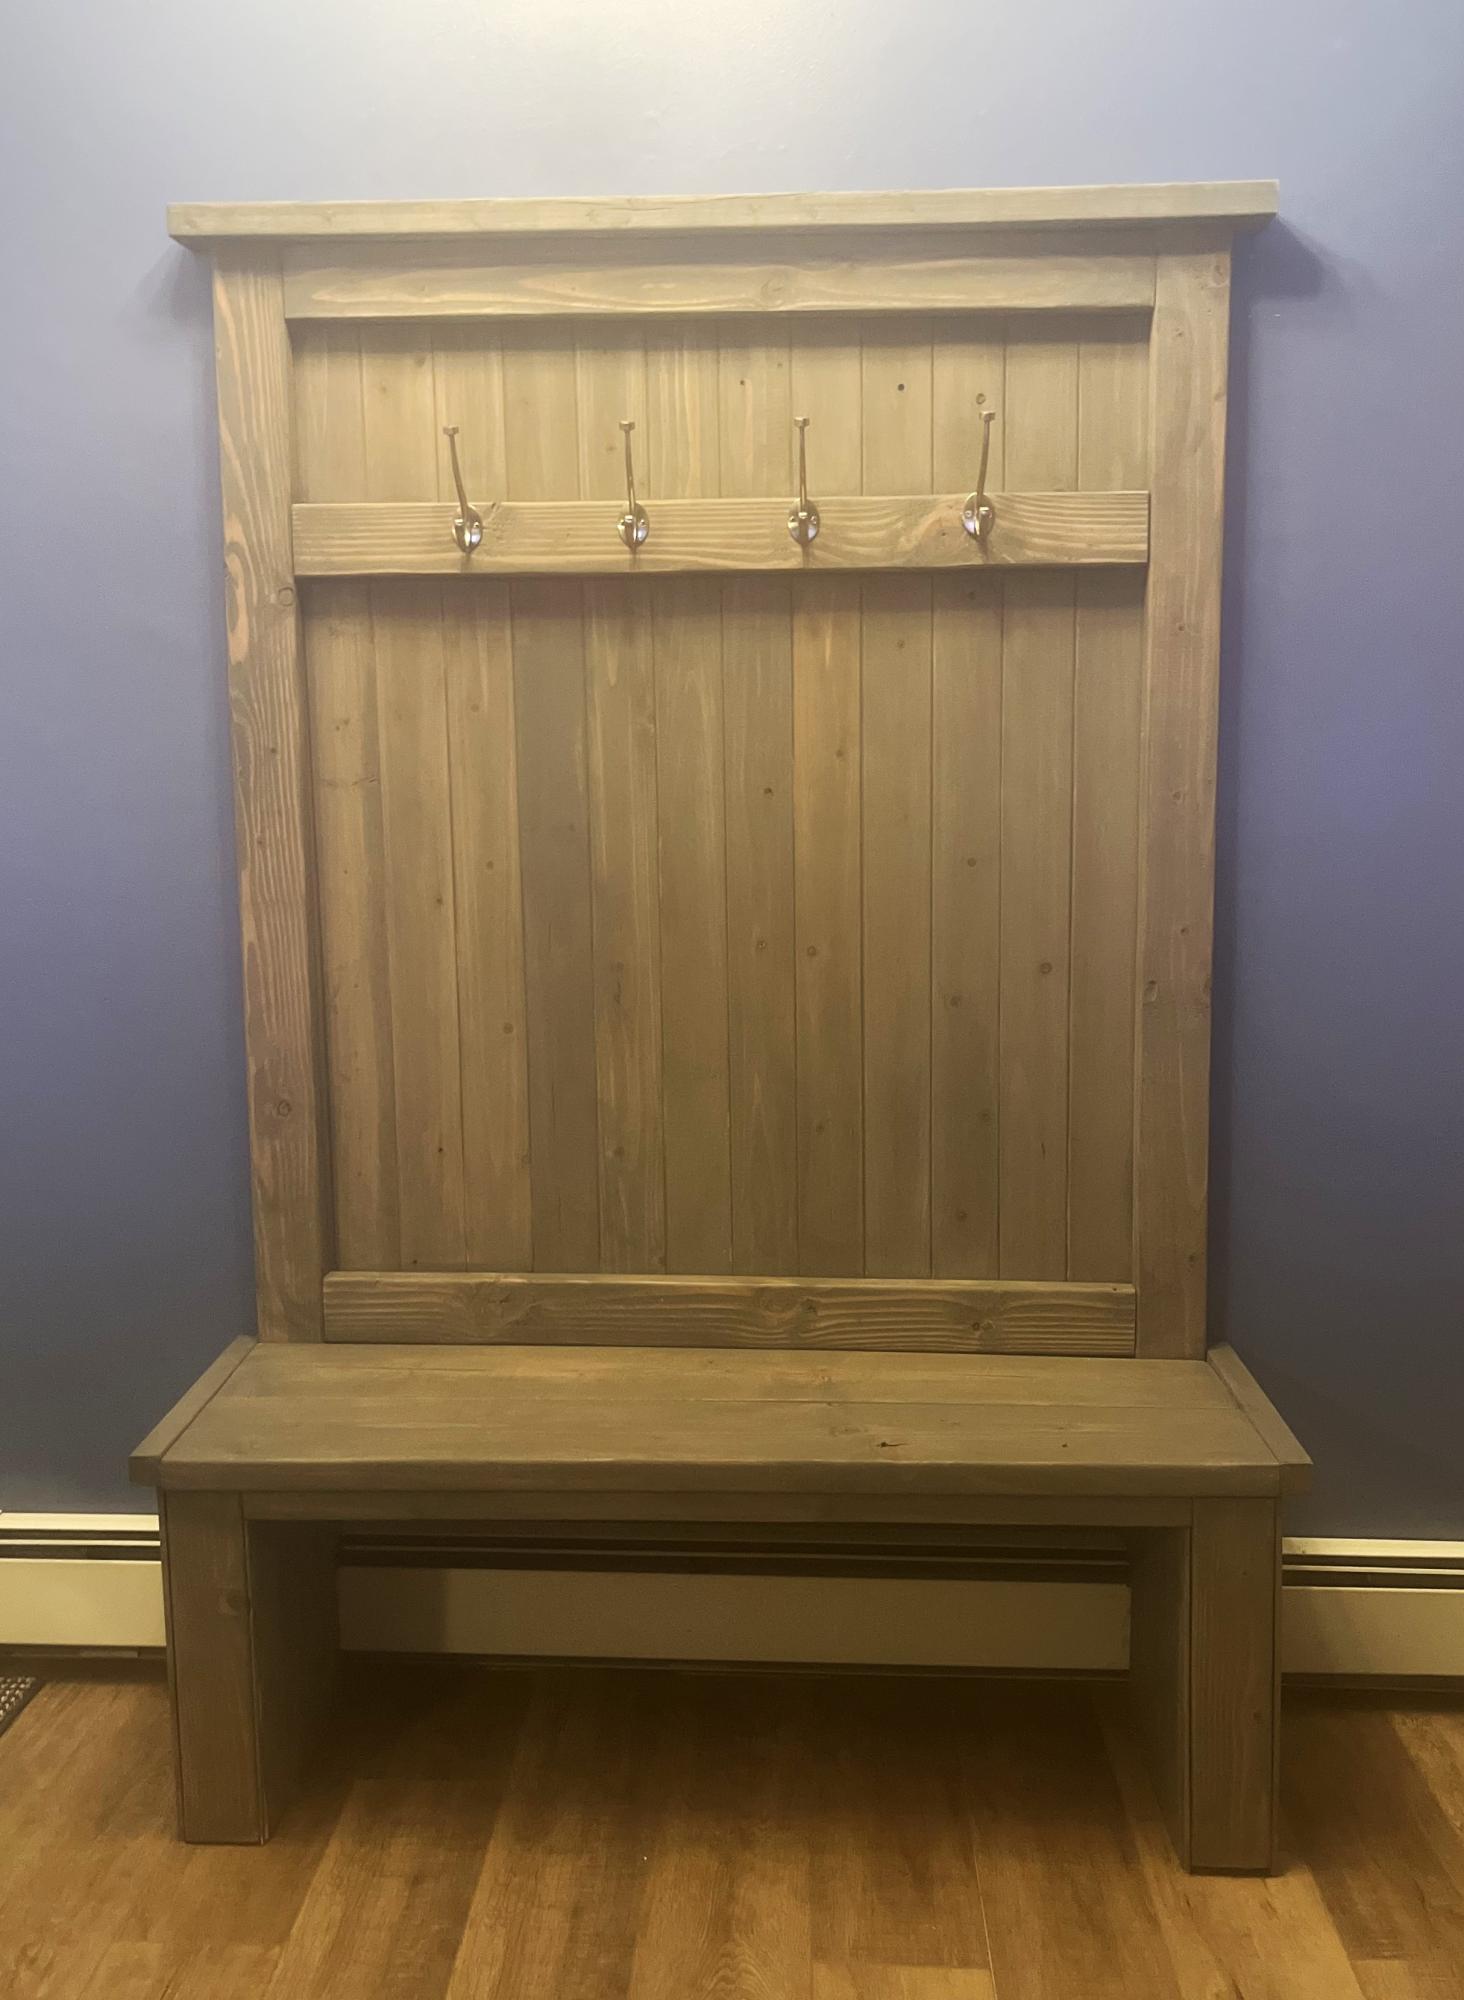
Shelf with Hooks
![](/sites/default/files/3154811399_1339869829.jpg)
A shelf with space up top for decor or storage, and hooks for robes, towels, coats, etc. See more on my blog!
This was my first real project, and I am quite happy with how it turned out. I wanted a side table that would look good with the sawhorse dining table and bench (which makes an appearance in the background) that I am building, so this is what I came up with.
The legs are, for each side, 2 X 2x4 X 22.5"(vertical), and 2 X 2x4 X 14.5" (horizontal)
The bottom shelf is 5 X 2x4 X 10.5"
The table top is 5 X 2x4 X 17.5"
The trim is 2 X 1x4 X 17.5", and 2 X 1x4 X 19"
A table that I made out of a slab of rough wood, end cut from a mill. The rounded sides of the coffee table legs were made out of round fence posts cut down the centre & placed on the sides of cedar boards. I painted my wife & I on the legs "2 old crows". I had sufficient wood left over to build a side table.
I wanted to give handmade presents this year. My brother likes to entertain at his house, so I made him a charcuterie boad. I added felt pads to the bottom and a handle to each end. He loved it!
This was my first project and I had SO MUCH FUN doing it! Can't wait to make nightstands to match. The only reason it took me so long and that I'm not sure of the final cost is because it took me a while to finish it due to work/life getting in the way. Plus we have no garage, basement or any indoor work space so were dependent on the weather to behave. I went back and forth to the store so many times for little incidentals I really couldn't tell you what the final cost was however, I can tell you that the wood came out to be about $50.
Hi
I am still working on my portico furnitures..but as we have changed the colour of our Home, I have decided to change the colour of sofa ( terrible decision) and than to build the adirondack chair for Home depot of Ana to be part of the ensemble.
Thanks Ana. I love it.
I used the same project just changing two small things ( a small support under the arms and making the arms more similar to the original adirondack chair. I used the oxydizing solution to paint and it is a great stuff!
ciao patty
p.s. I already posted the sofa is always Ana's project.
I used the Modern Park Bench plans. I made it a little narrower and taller to accommodate who I made it for as he is tall. I also used oak ply for the backing in order to showcase the skull art that he requested. The design was taken from his favorite shirt. Ply was ok since it is on a covered porch. Thank you Ana White for providing plans to use. Very much appreciated!
Just bought a compound miter saw and saw the plans for the Adirondacks Chairs on your channel. Showed them to my wife and she lived them and so became my first project with the new saw. I finished them with leftover deck stain (PPG Cedar 077). I'm sure they will be around for years to come.
I followed the plan directions to a "T" and it worked out so well! This projects gives me joy everytime I walk up my front steps. Thanks!
This is for my daughter’s 3rd birthday. I decopaged the walls and floor with patterned paper before assembling. I thought it would be easier.
I also didn’t bother with the middle ‘front’ door. The dollhouse in the example photos look beautiful from the outside, but kids don’t really play with the outside of the houses. So I made the windows a little bit bigger.
The windows and doors both looked terrible. My first time using a jigsaw was not a success. So I used tiny dowels for the trim around the door and craft sticks on the inside.
The last thing I need to do is put some lights in it. I ordered some fairy lights on amazon. I plan to use another dowel that I’m hoping I can wrap with the fairy lights and then wedge in the back on the ‘ceiling’ on the first floor and then Velcro the switch to the side of the house. It won’t look professional or anything, but being able to turn the lights on and off will be very fun.
Casey
I'm really happy with how these chairs came out. I did go through several failed attempts at first. I've put all the details on my blog.
A friend of mine pinned this on Pinterest and gave me the dimensions she wanted. The wood I used is Birch. The cabinet she pinned is actually a cabinet full of drawers. She wanted the same look, but doors instead, for storage.
Almost done :)
Wanted to make shelves to put on both sides of our fireplace but had to alter the dimensions. So I added another shelf and made it shorter in length. I was a bit nervous because I’ve always just built per the instructions. It turned out perfect! Just don’t look too closely at the X’s!
Loved making this. I added a top rail for a shelf.
R Chase
This was actually the second changing table I made based off this set of plans. The first one was a painted pine piece that went to the church nursery. I made the shelves deeper and the wider to accommodate the changing pad and have extra room for a wipe warmer and a lamp.
Neither of the big box stores had oak trim (I guess it's a regional thing?), so I had to spend some extra money on a nice piece of trim from a custom shop. I had quite a bit of oak plywood left over from a previous project, so the cost of the project all evened out in the end (kind of).
I also didn't make the top "removable." I figured if I want a book shelf in the future, I'll make a bookshelf instead of having an old changing table with holes on the top from screws.
Just like all of my projects, there a few blemishes, but all in all I was pretty pleased with the way this one turned out. Thanks for the plans, Ana!
I adapted the Emerson console plans pretty extensively. I constructed the cabinet out of low grade playwood, and then clad it on all surfaces with faux painted cheap furring strip lumber of various widths. I changed the base and made it sit completely on the floor so that I would not be chasing dog fur dust bunnies that seem to accumulate under everything! I made the open storage wider to fit my componenets and added holes to pass the wires through the back.
It was very helpful to have the plans as a jumping off point. It takes me forever in the planning stage. I try to figure out my dimensions to hide as many raw edges as possible in every project. I also want to work with the widths of lumber avaialble to me since I have a fear of a tablesaw (which is still in the box after 3 years). Give me a chop saw and a circular saw and I'm your girl!
Very proud of this project. Thanks Ana!
Quick and easy closet to add anywhere.