Breakfast bar
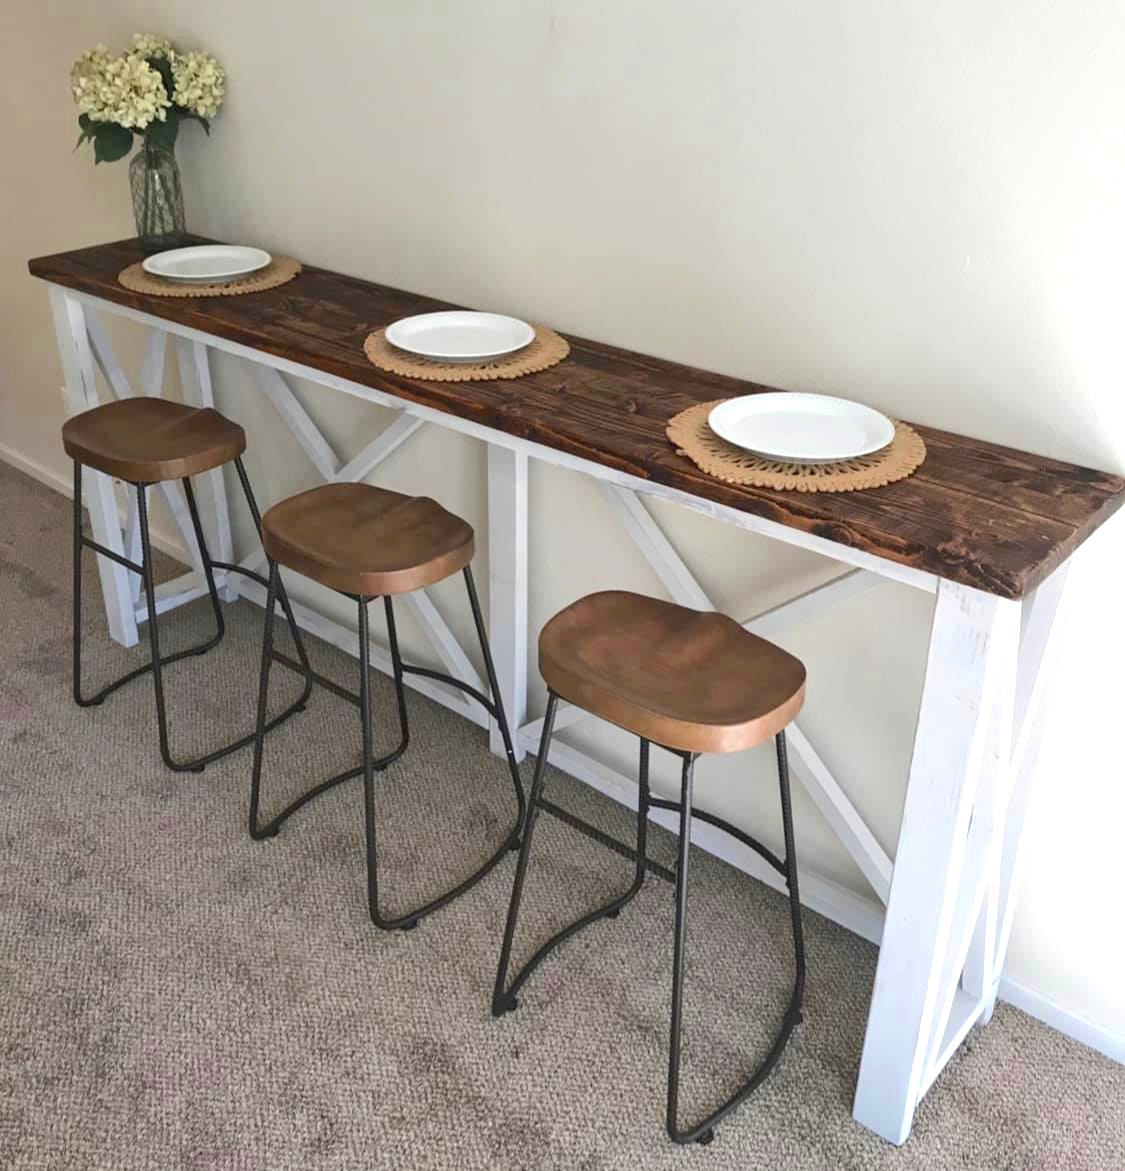
Hand made breakfast bar check us out on Facebook marney Marie
Built from Plan(s)
Hand made breakfast bar check us out on Facebook marney Marie

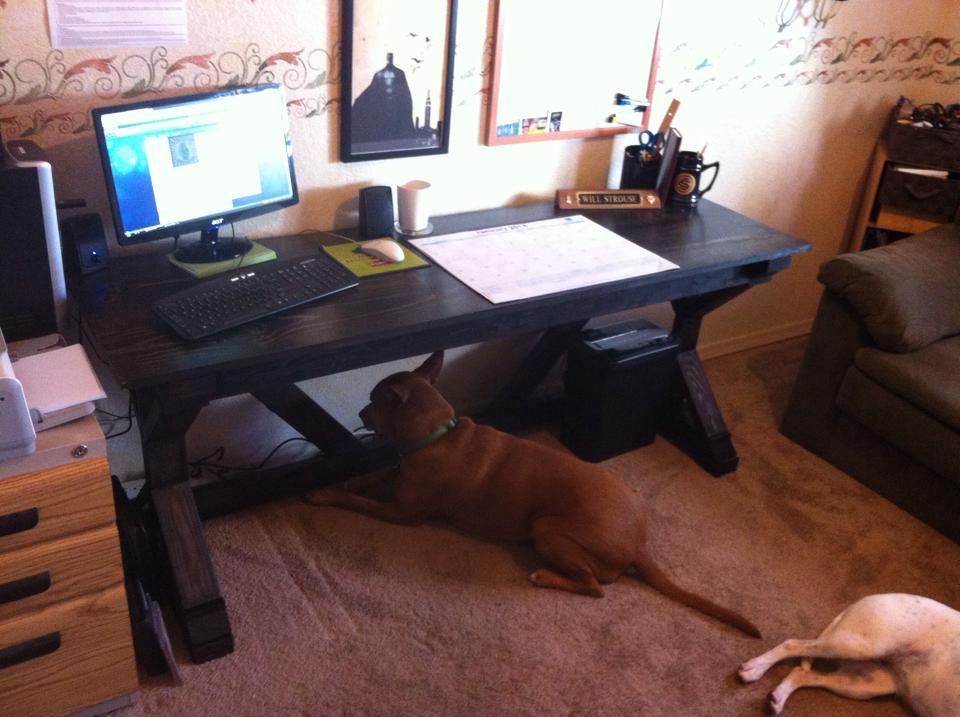
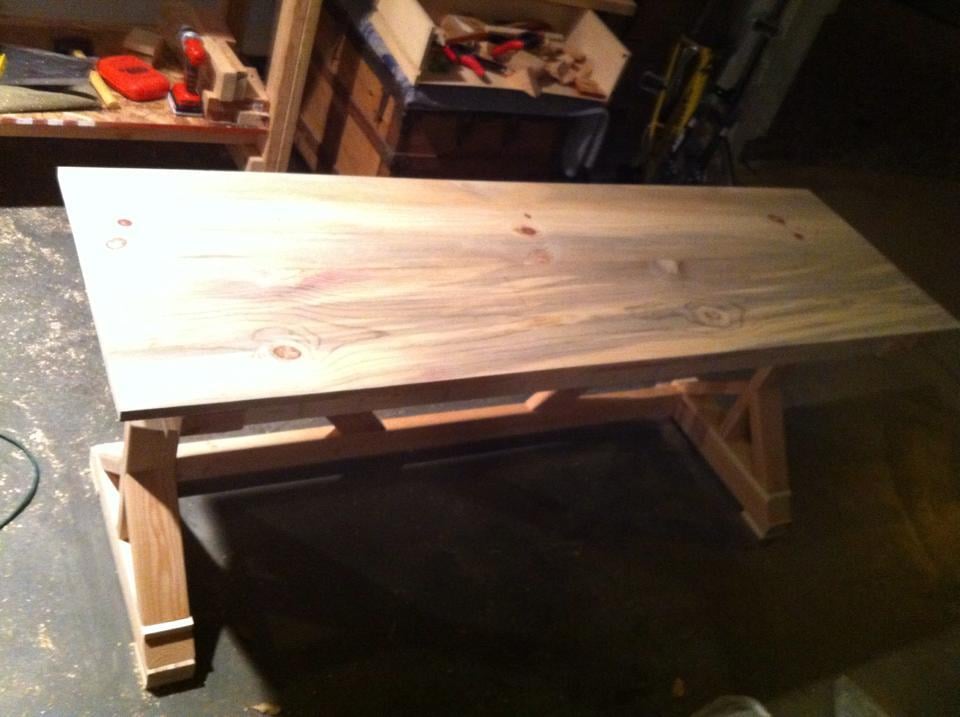
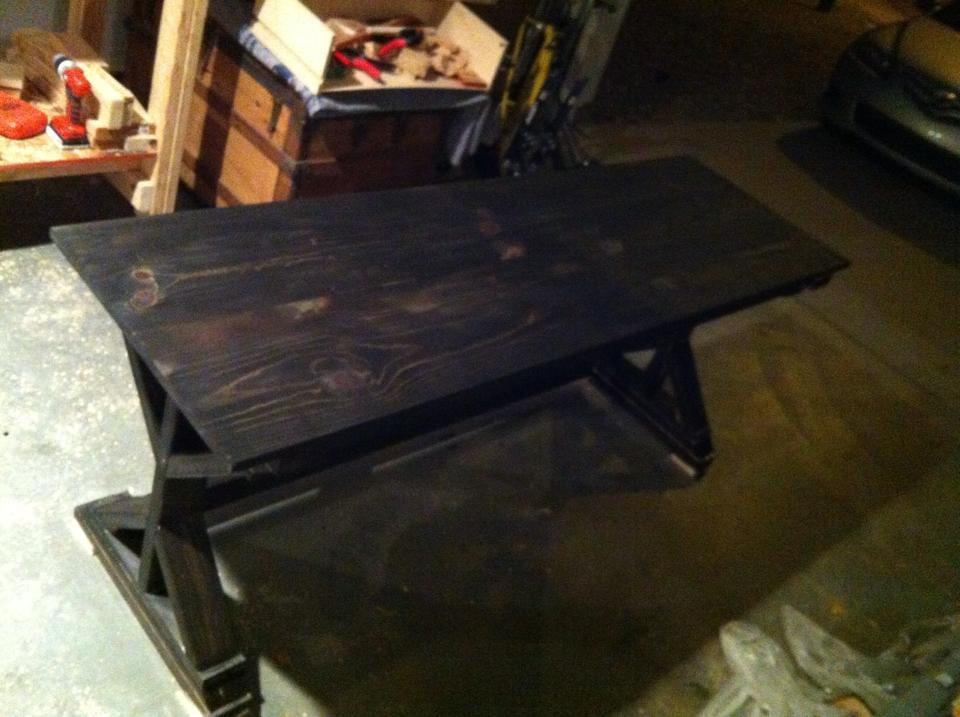
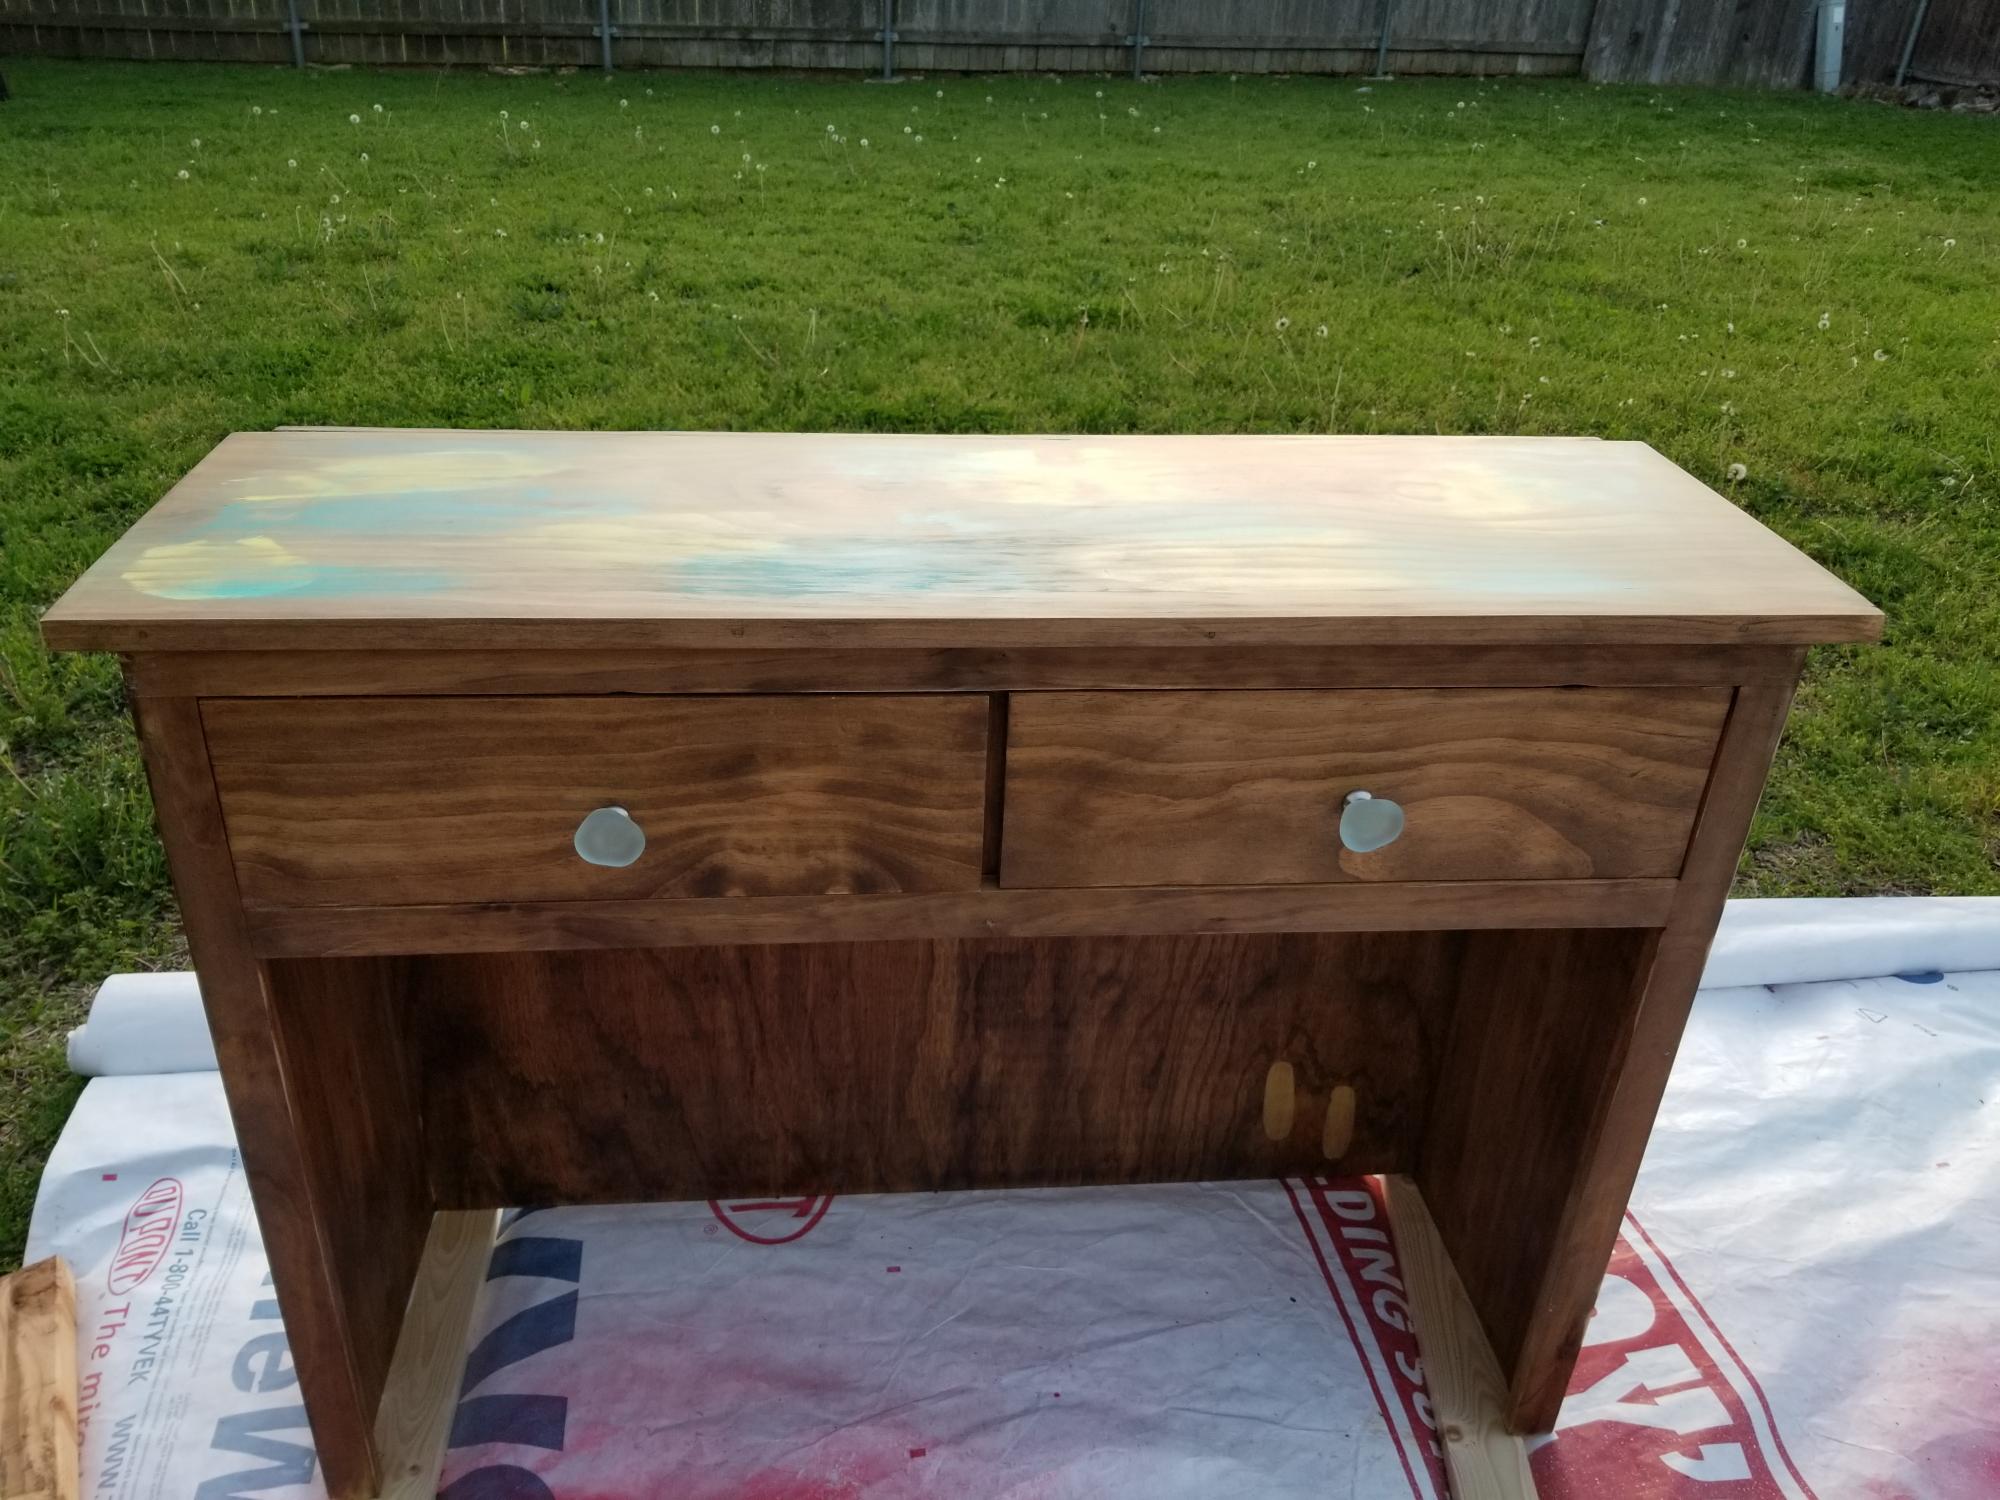
Needed a small desk for the vacation home - modified Ana’s plans slightly to use some wood I had sitting around. I am so happy with how this turned out!
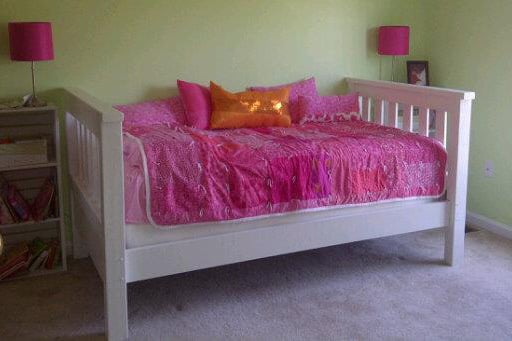
My dad used the plans for the Simple Bed - twin size and built two. Then he took the headboards from both to build the bed for our daughter's room. It sets against a wall, so it looks like a daybed since both ends are the same height. She loves it! The other bed will have both foot boards and will be used in our son's room when he is old enough for a twin bed. Our daughter loves the bed and our son can't wait to get his....and we all love that Pap made it just for them! :)
Great first project I used to justify the purchase of a miter saw to the wife. She promptly provided a list of additional items to build for her. This was a great beginner's project and confidence builder for follow on builds. Thanks Ana, Home Depot and Lowe's should be thankful for your site also.
Tue, 02/18/2014 - 07:12
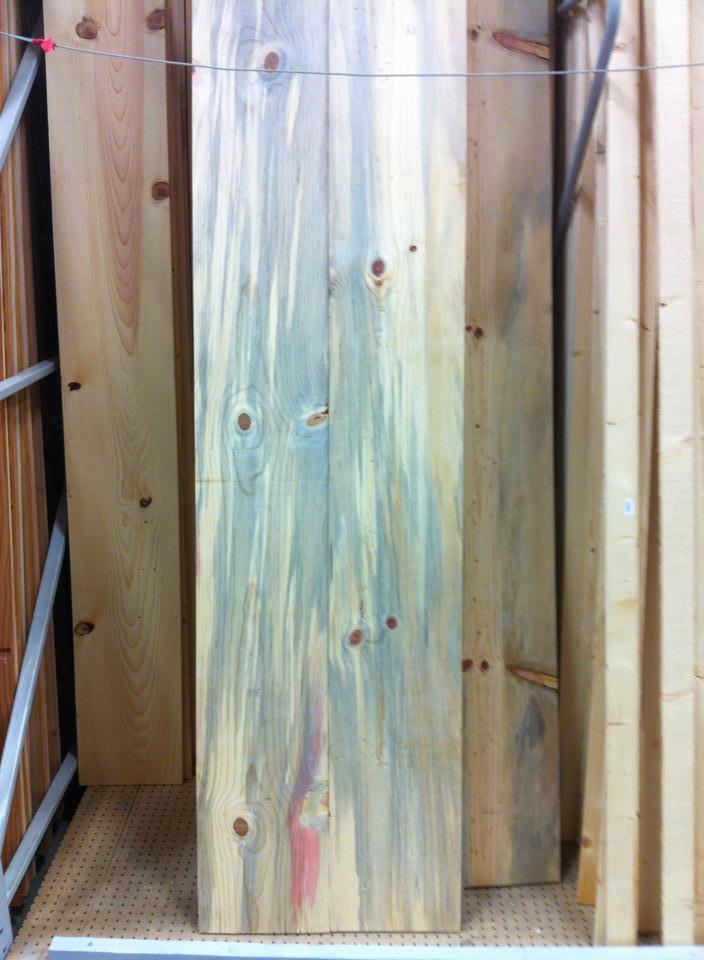
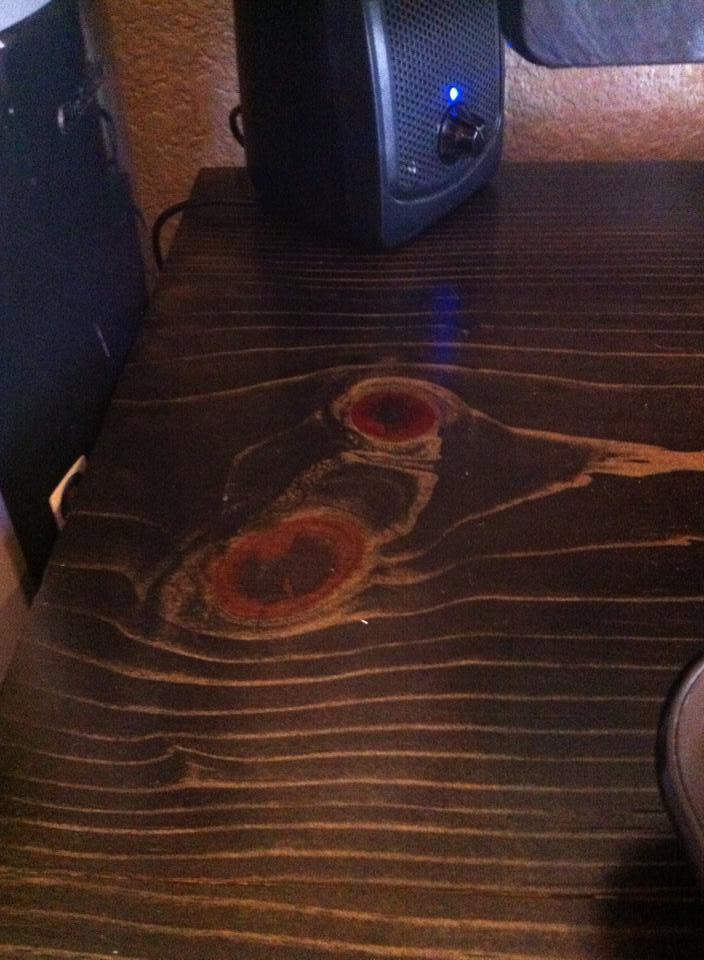
The dark staining in the pine you purchased is most likely the result of the pine beetle. This is the appearance of the wood infected with the beetle. It does not affect the quality of the wood but adds some beautiful colors and patterns!!
Very nice desk!
Wed, 02/19/2014 - 20:36
I managed to snag another pine board with similar coloring for the top of a bookshelf I'm building. Thanks for the info - can't imagine why these haven't all been snatched up - are they less desirable? The wife insisted on the dark stain but in the future these will get poly or a light stain to show it off.
Thu, 02/20/2014 - 10:06
I personally love the beetle stain. Apparently you either love it or hate it. For interest sake google a company called Azure wood. They are a company that harvests pine beetle infected wood and they make amazing and beautiful one of a kind furniture.
We altered Ana's plans and made a little bit smaller version of it. :)
Built by Holli Peterson
Fri, 04/17/2020 - 09:30
Can someone post plans for this? Materials? Cost?
I love it!!!
Thanks!!
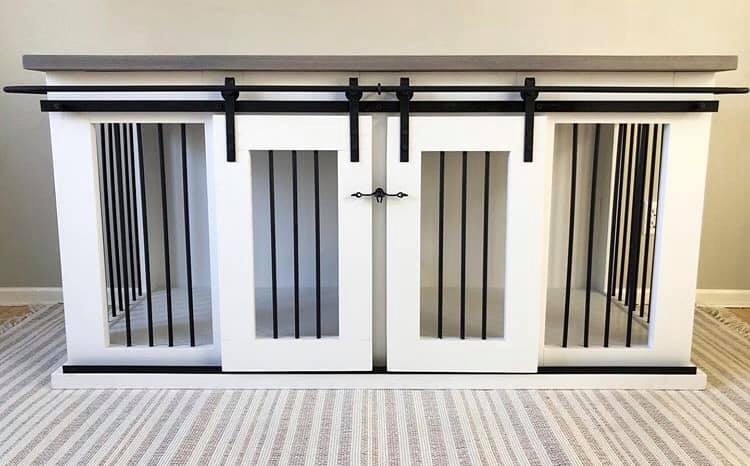
Thu, 08/31/2023 - 21:23
I’m looking to make one similar to this but looking to make it a little bigger for two Great Danes. Do you still have the plans and or cut list for this project to help me out. I’d greatly appreciate it if so.
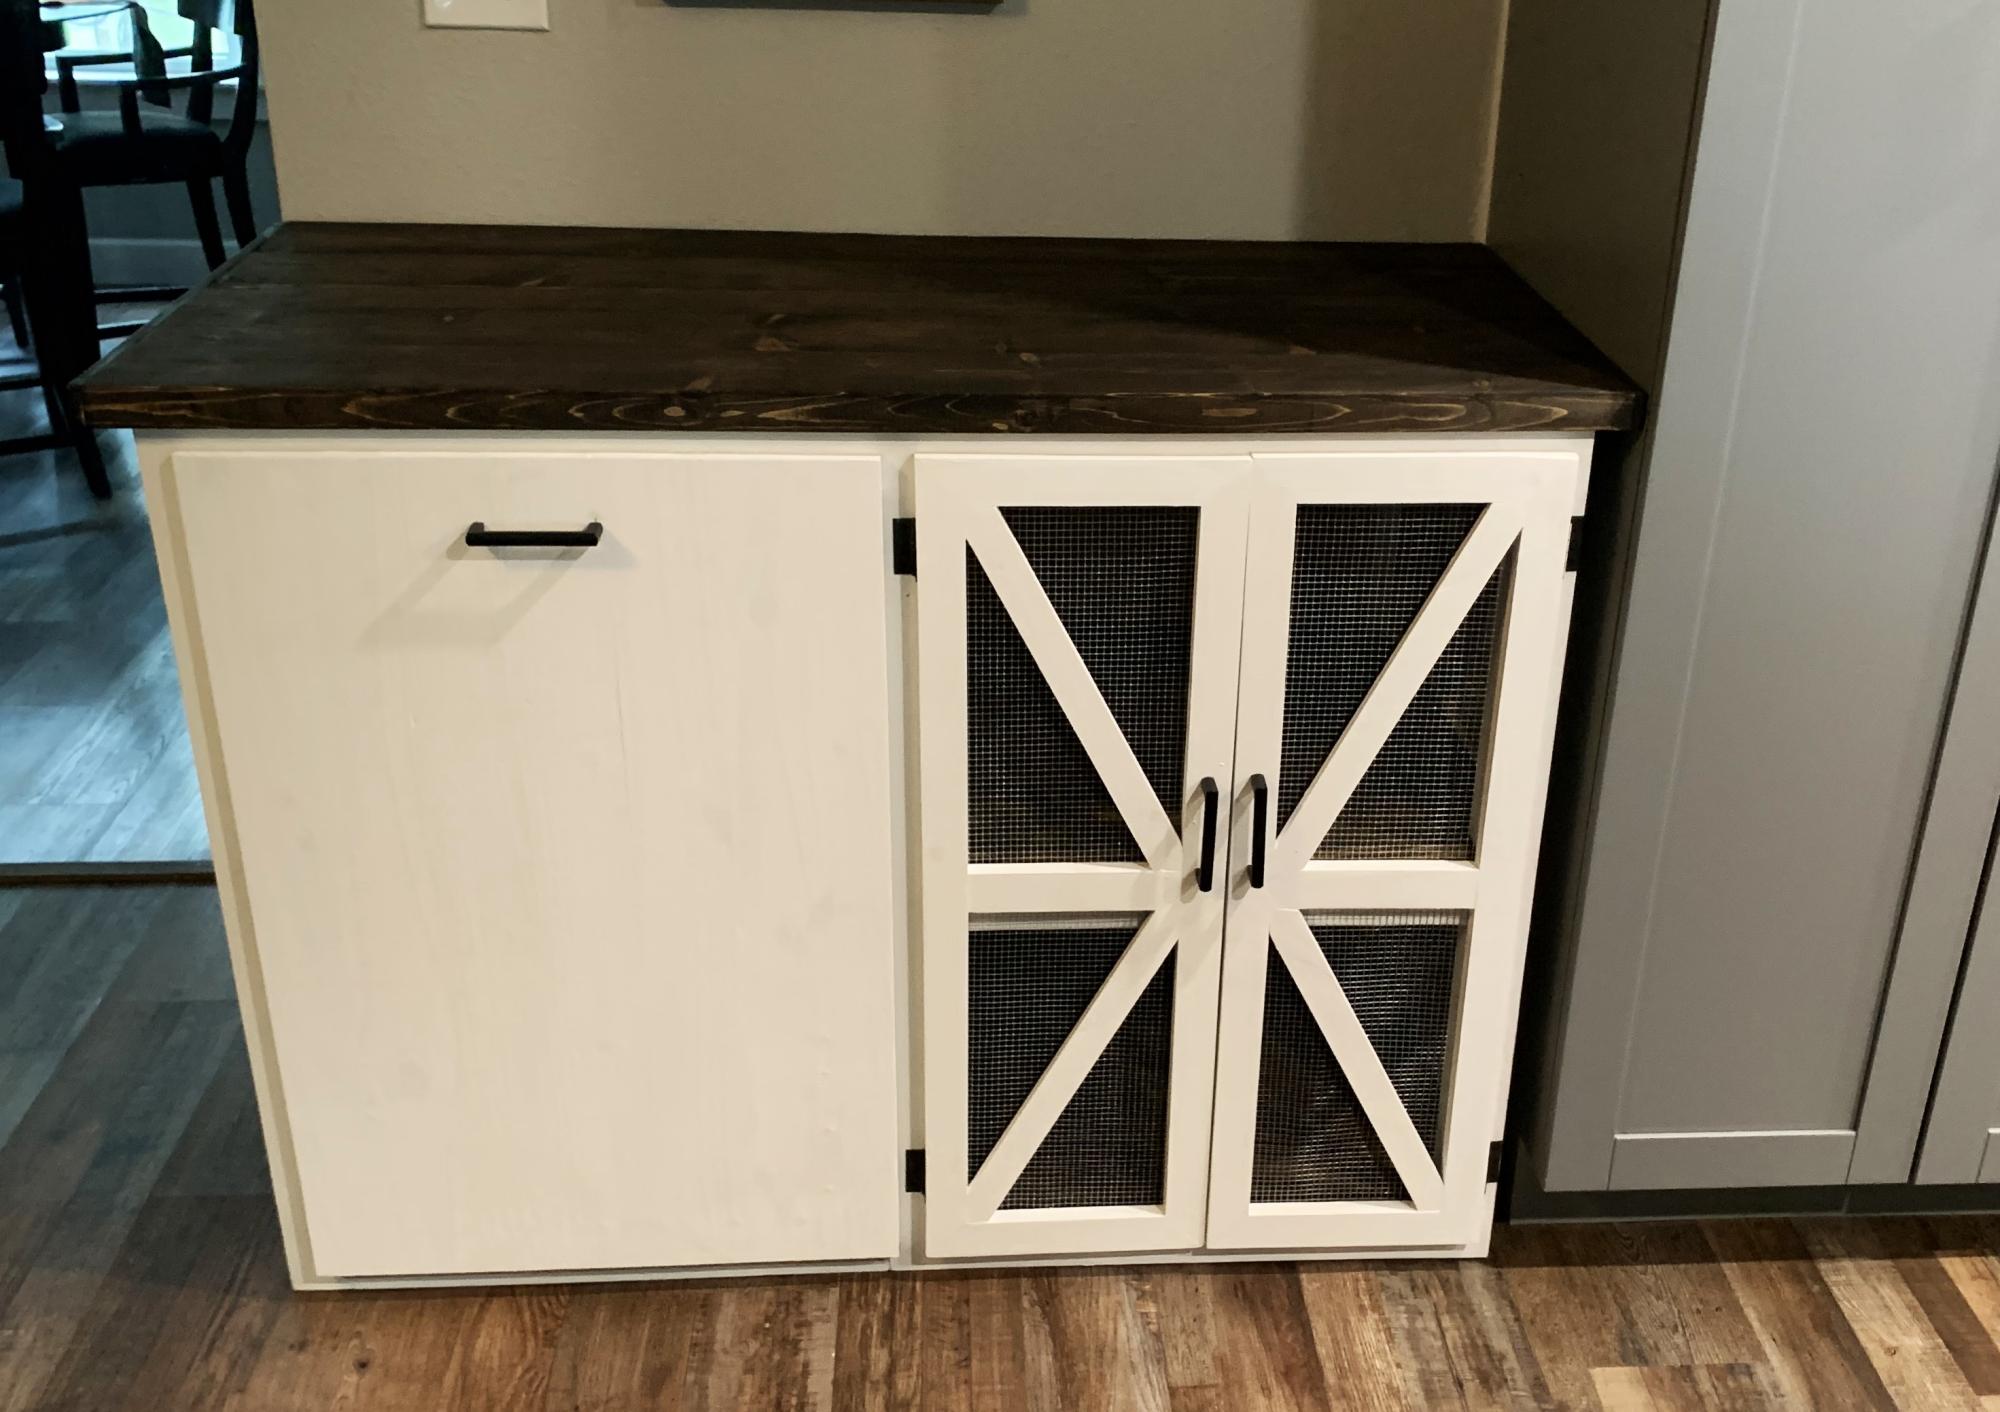
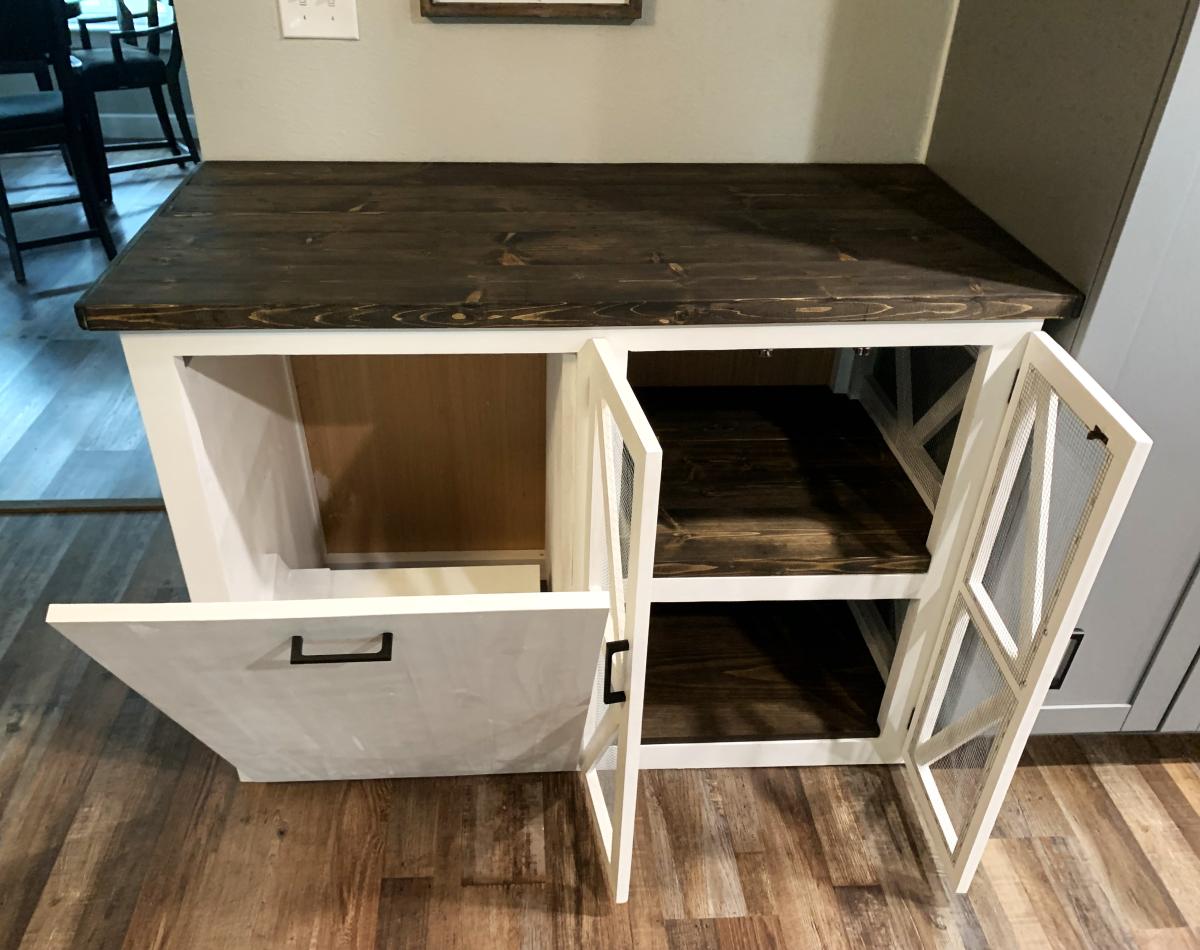
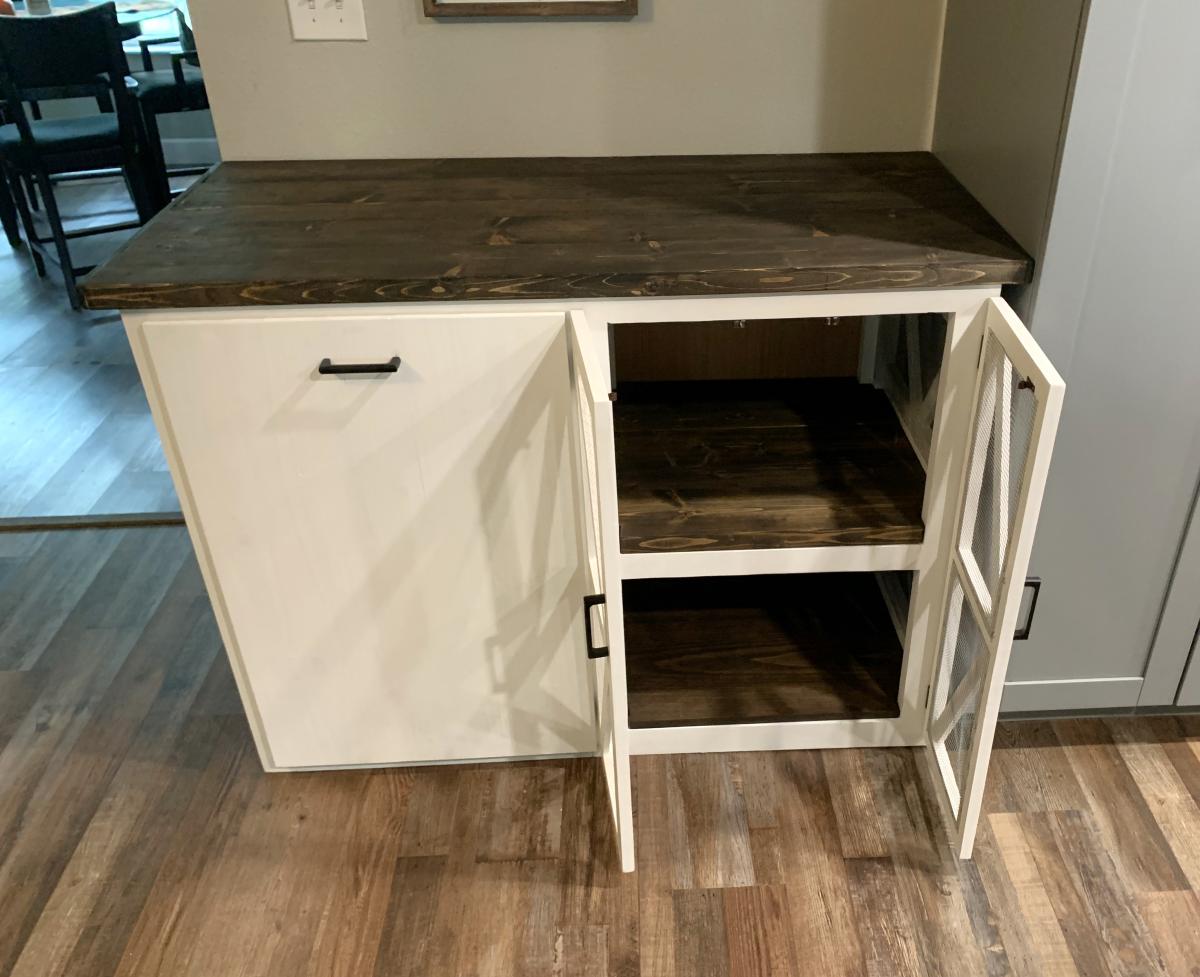
Coffee station with trash can holder and storage.
Royce and Lynn Ledford
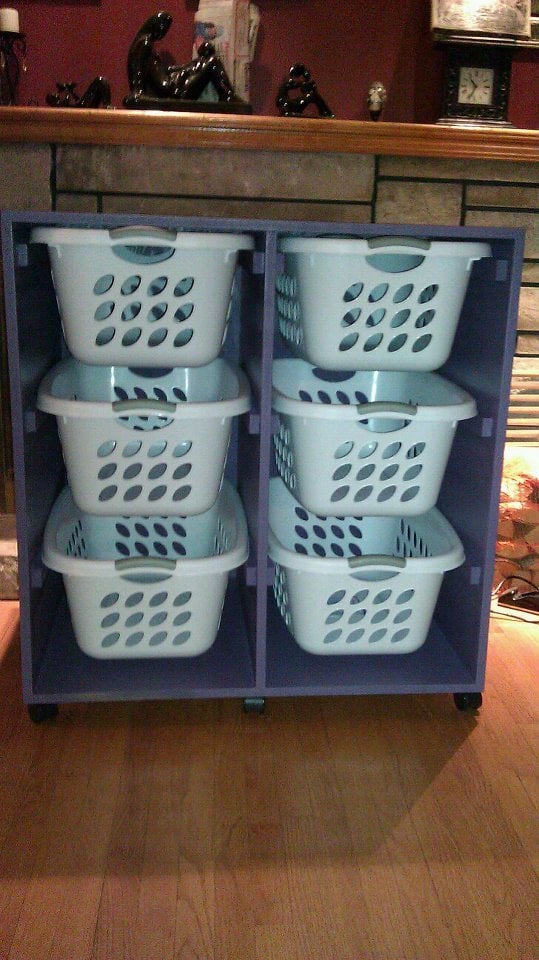
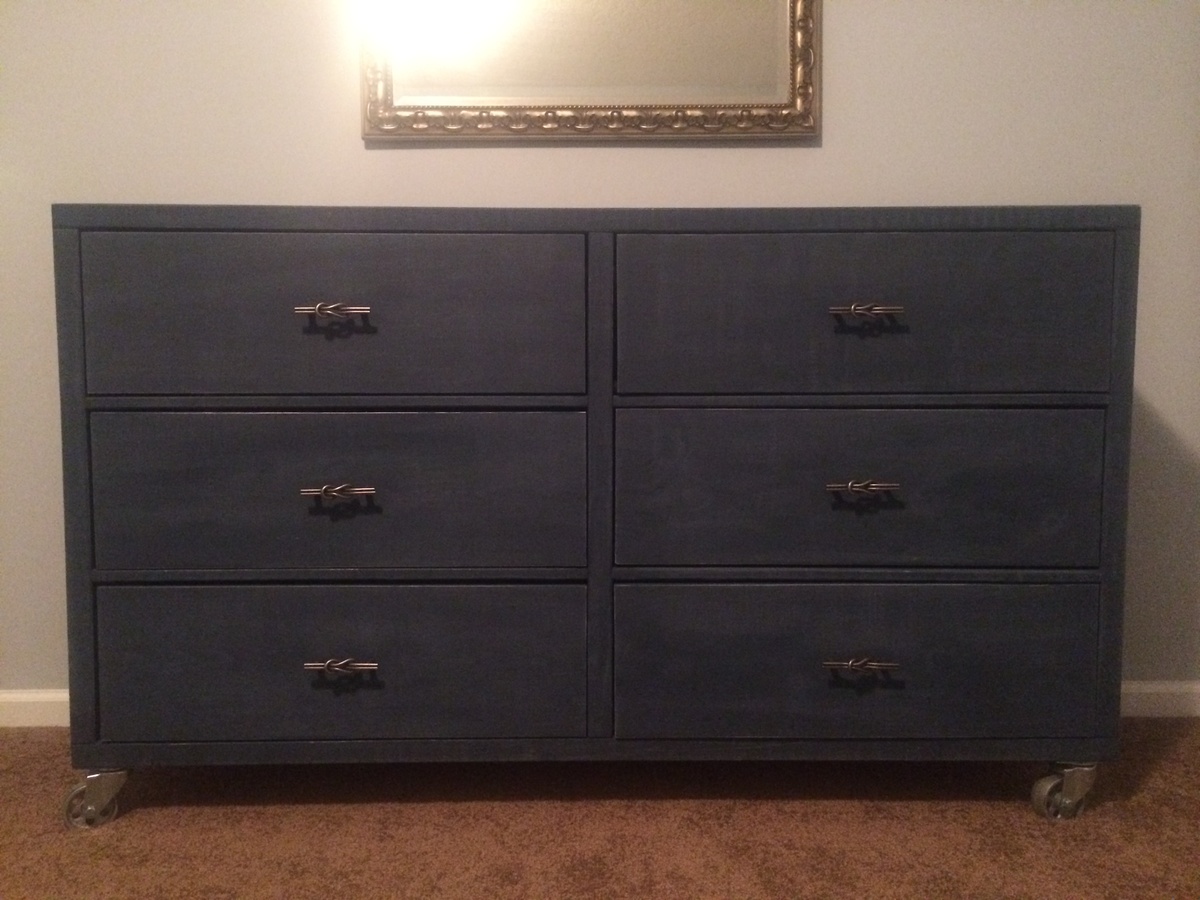
I modified the tall and lengthwise laundry basket dresser a bit to make this shorter version. I also combined it into a single dresser instead of it being two separate dressers side by side. I put the dresser on casters so that I can roll it around my laundry room. I can tuck it away in the closet area or roll it out and use it as a folding counter.
Sun, 05/13/2012 - 09:02
I would love to do this modified version! Can you share your dimensions?
Sun, 05/13/2012 - 19:35
Jenna, I used 3/4" MDF and these are the dimensions:
1 Back piece - 37 1/4" x 37 1/4"
2 pieces for top & bottom - 37 1/4" x 25"
3 pieces for sides and middle - 35 3/4" x 25"
I used the same dimensions for the 1x2's as are in the original project and pretty much assembled it following the steps as she has written. Just remember to add 1x2's on both sides of the center divider and you're good to go! Hope that helps and if you have any questions, I'll be happy to try to help. :)
Tue, 08/07/2012 - 09:41
Do you know what kind of laundry basket you used & where you got them? Based on the pictures they look like the sterilite 2 bushel ultra however the dimensions look too big. Did you have to modify the plans to make them wider?
Thanks!
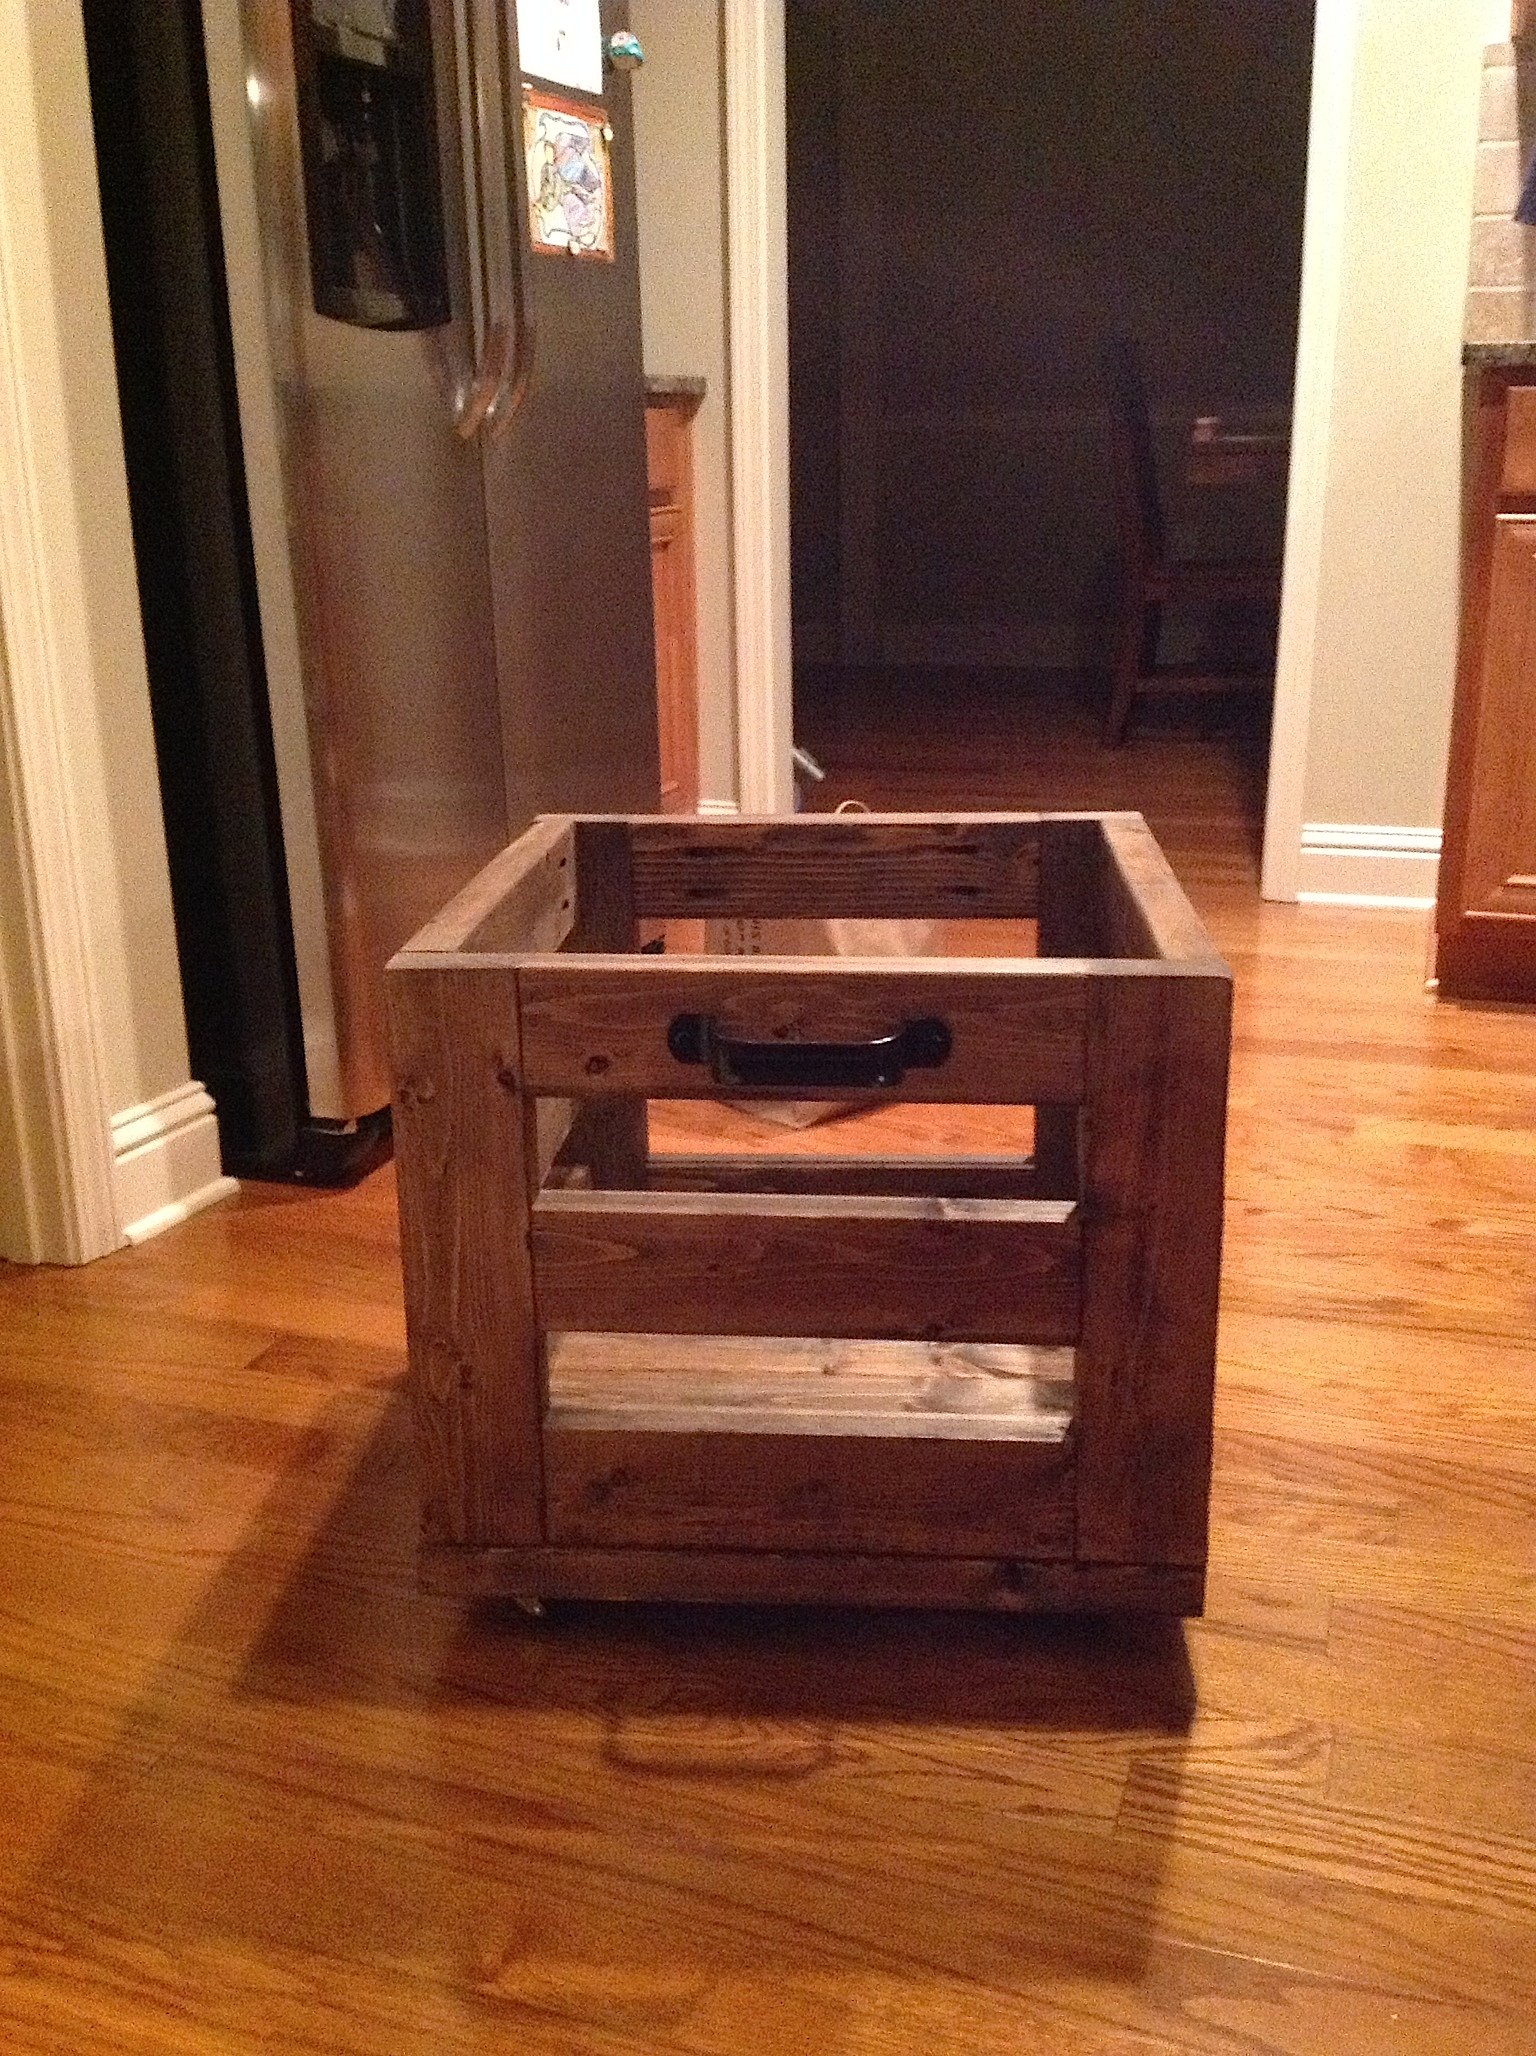
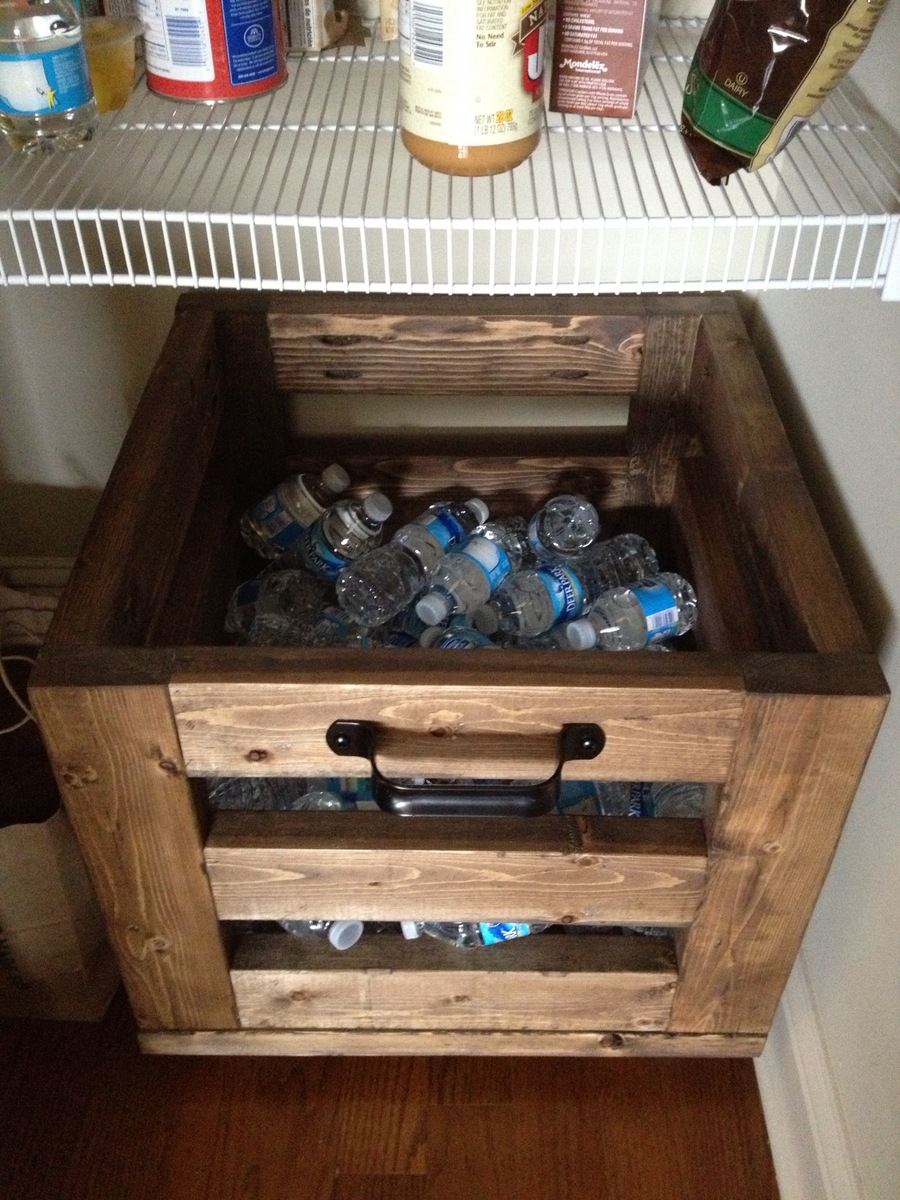
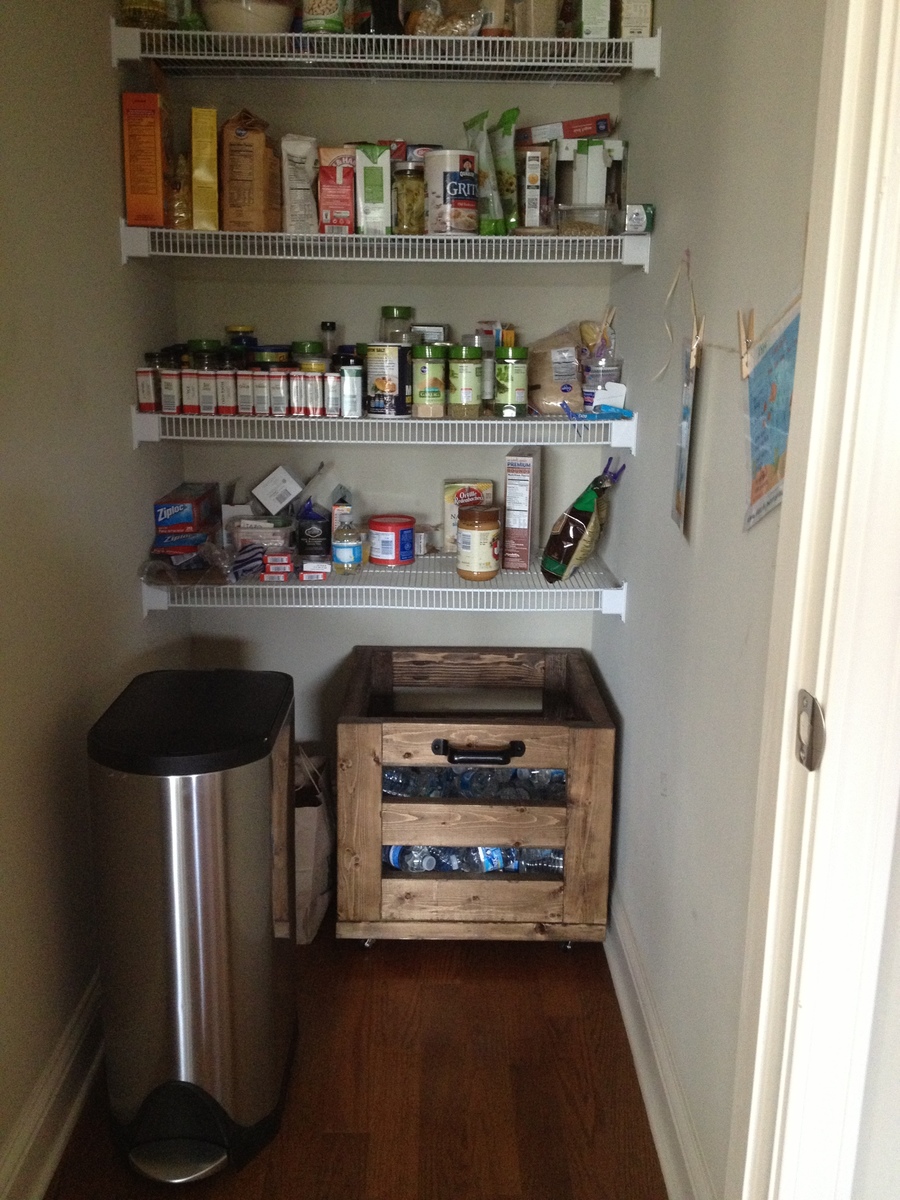
I am re-doing my walk in pantry, and this was the first step. I desperately needed a place for the hundreds of water bottles we keep. I put all those water bottles that were previously rolling all over the place and put them in this beautiful Industrial-style crate. I will admit before doing that my kids enjoyed going on a few laps around the house in it first!! Very pretty, very versatile.

Tue, 02/25/2014 - 22:27
I built this crate too! I love how roomy it is, and what a good way to store water bottles. You did a great job!
Val @ artsybuildinglady.blogspot.ca

This is the murphy bed I made using ana's plans and making the bed legs when it's down and a shelf when it's up! This was to keep the bed off the floor. Thanks again Ana

Sun, 02/12/2017 - 06:05
Hi Ana! I love the Murphy bed and feel like it is just what I need for my new home. I have sold my family home of 30 years and am moving closer to the grandchildren. Looking at buying a 1905 home that is less than 1/2 the size of my old home. I am 63 and most of my friends are in the same age range. If they come to visit, I need a bed that's a little higher off the floor. I don't really want to hang the bed off the floor as shown in some of these, but instead like the look of a cabinet. However, I was thinking of putting doors on it so we could pull the bed down with fold out legs of some sort. Any suggestions?
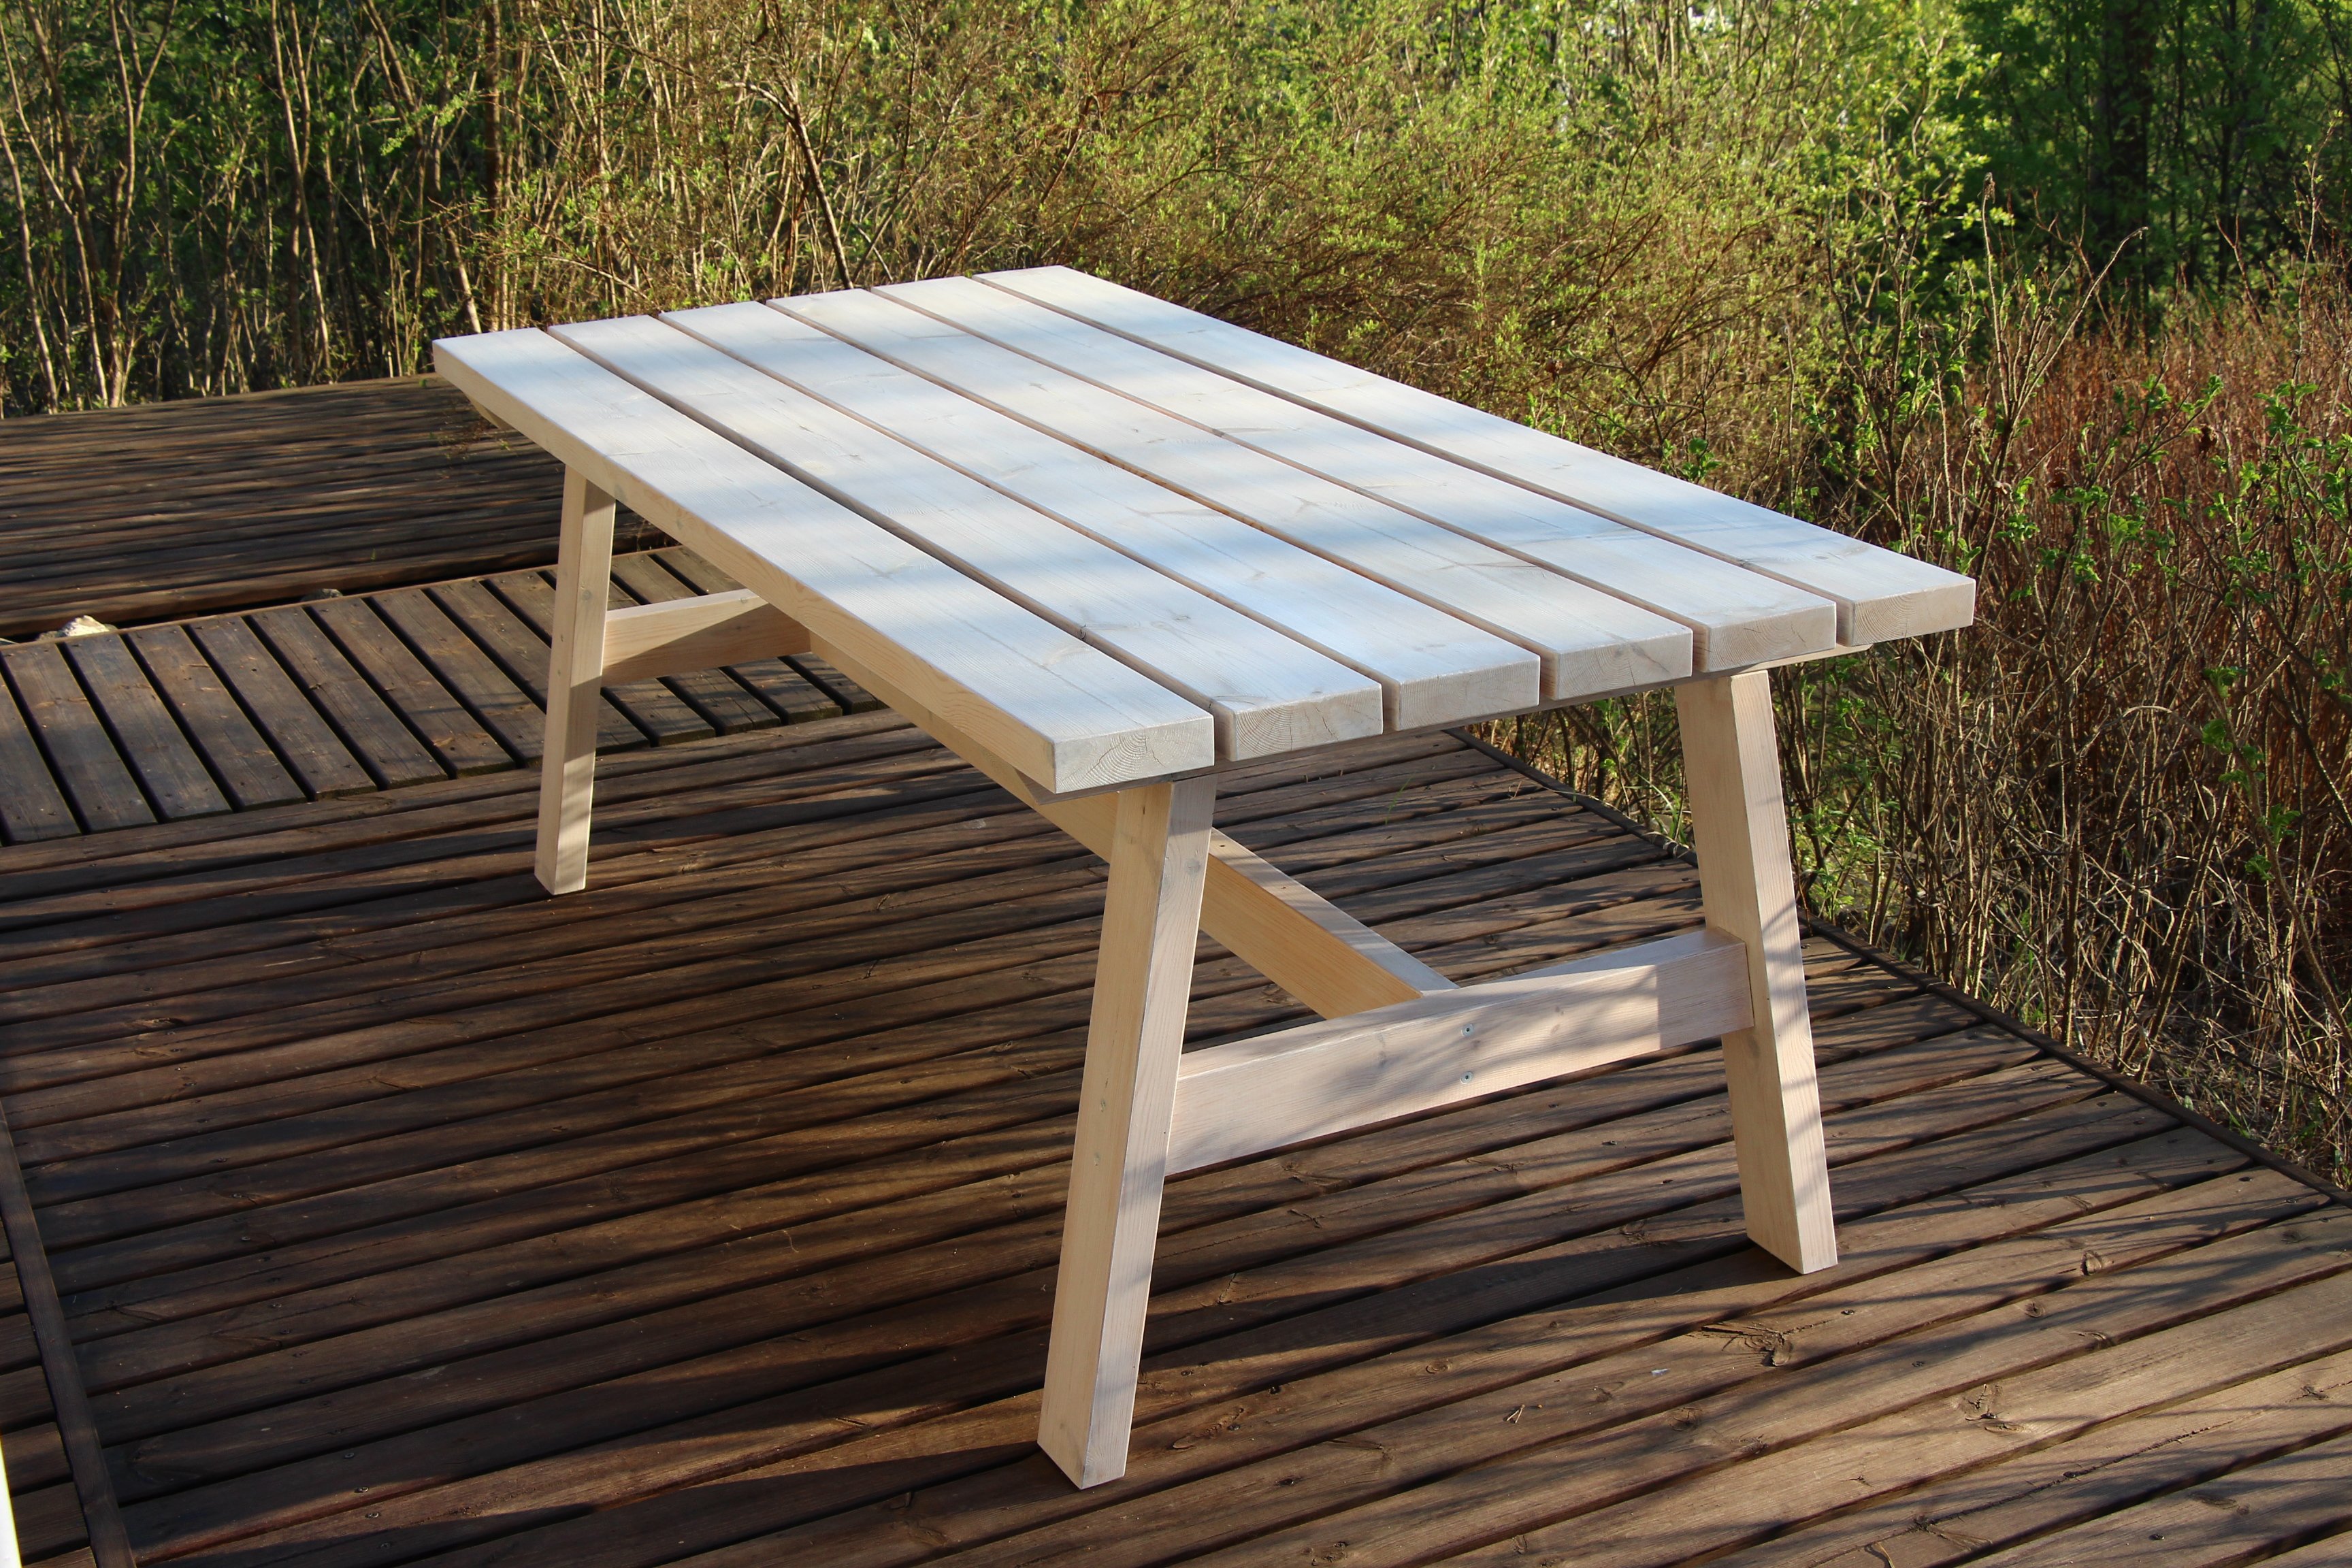
Simple Rustic X inspired entry way table. I was able to build this project in a Sunday afternoon completely from 70% off lumber from a local big box store. All together it came in under $10 without my time or supplies.
Dimensions are 44x12.5x33.
(2) 2x4x96
(3) 1x4 furring strips
(2) 2x2x96
Brad Nails, Glue and a few screws.
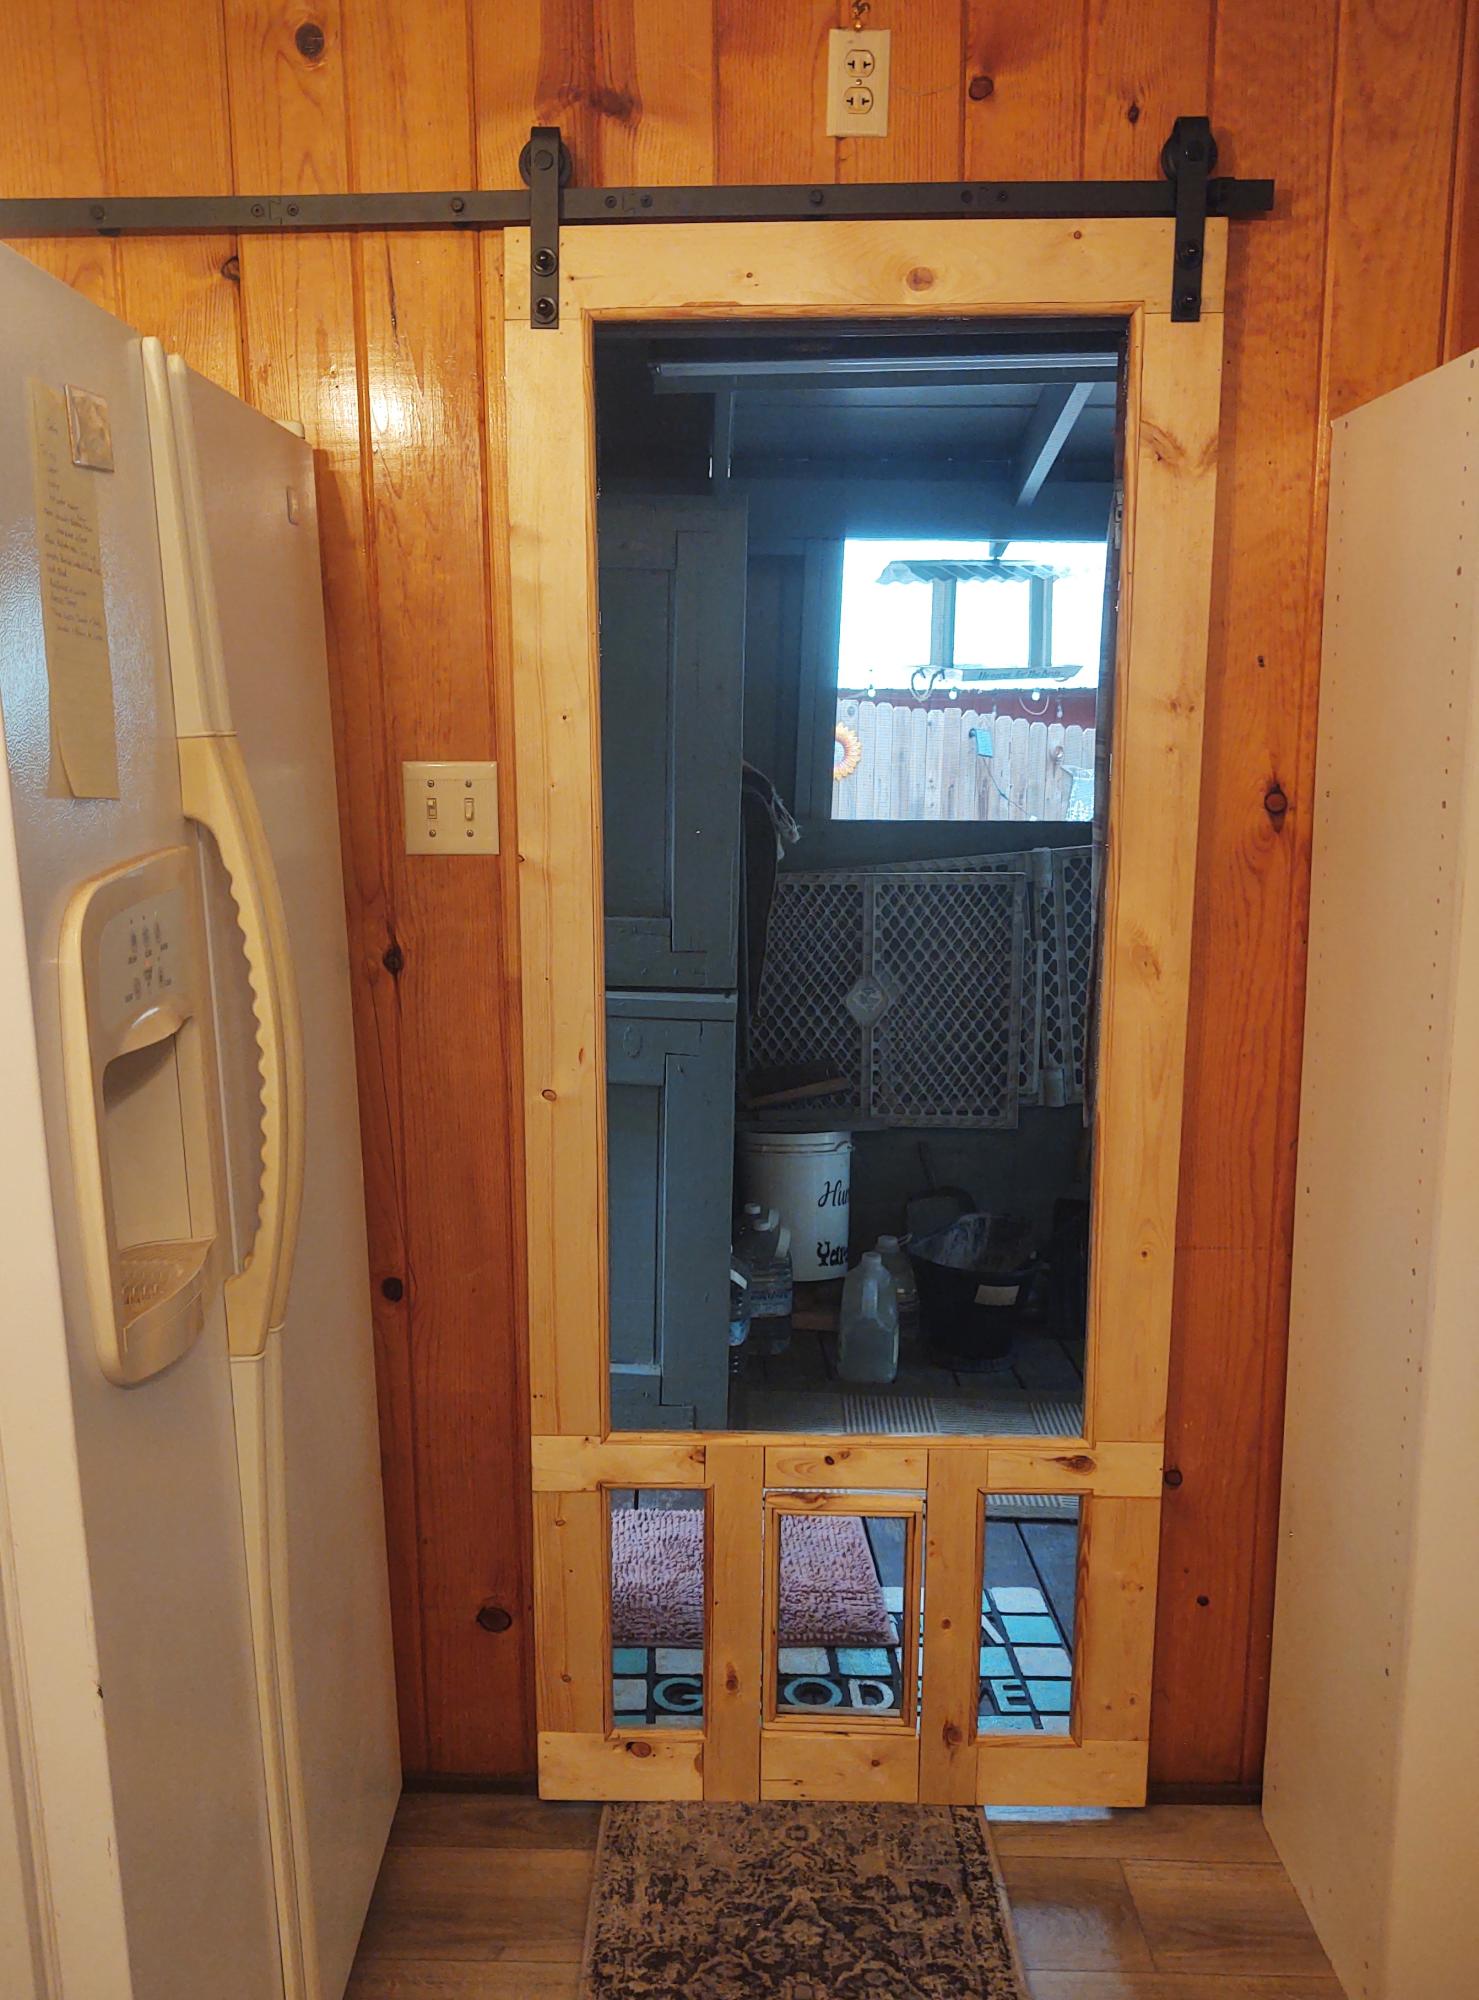
I needed a screen door but one on hinges wasn't a option. So I built one as a barn door. The center bottom panel is a doggie door. Lynda Westbrook
Fri, 10/20/2023 - 06:47
Do you have a problem with insects coming around the edges? Or is this an interior door and you just needed good air flow?
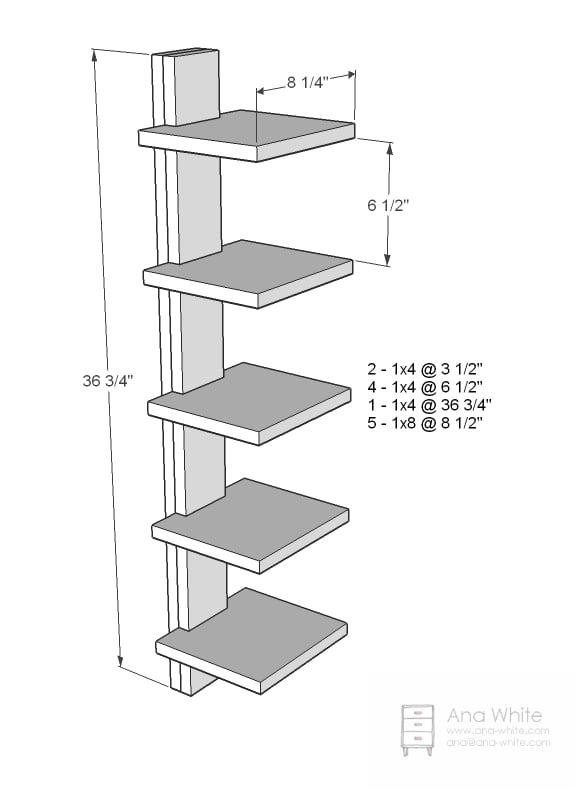
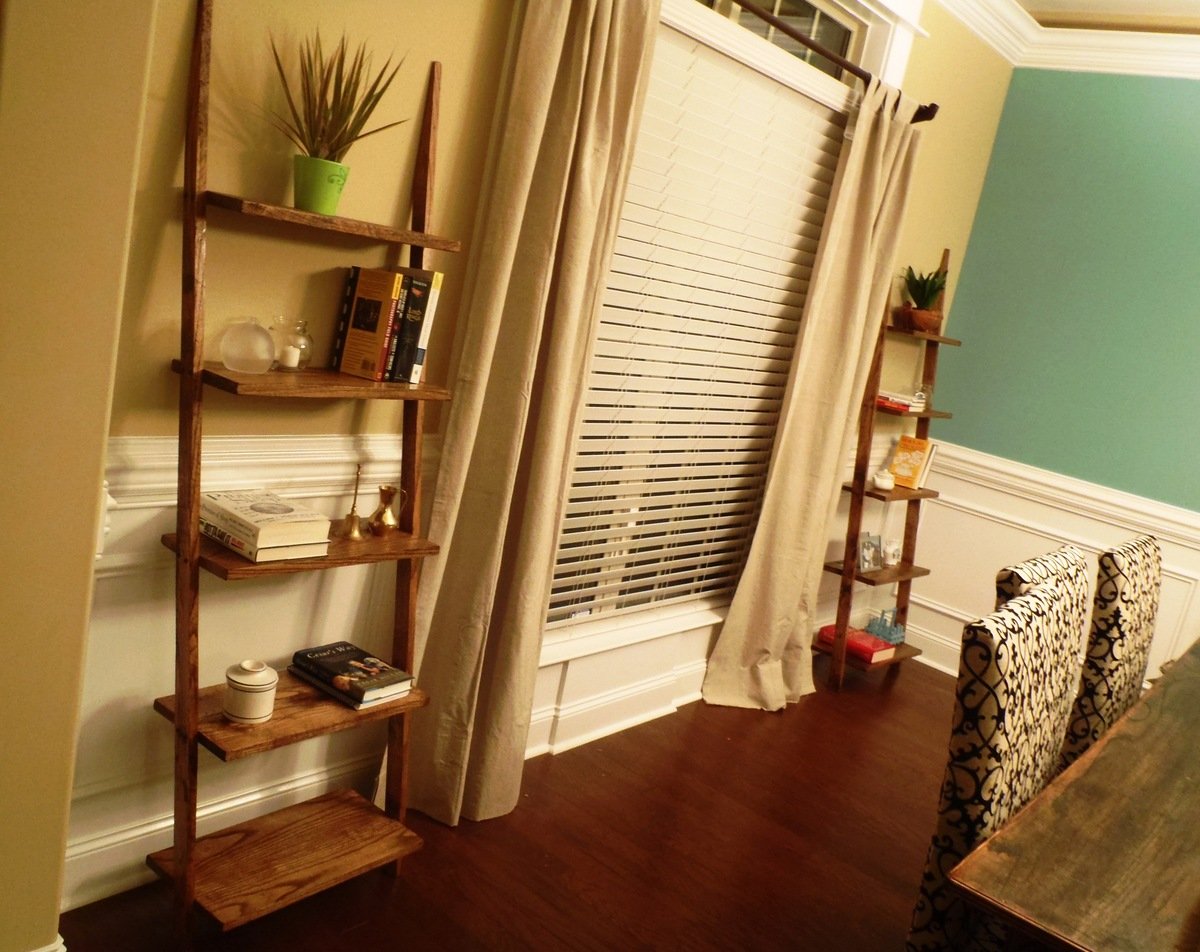
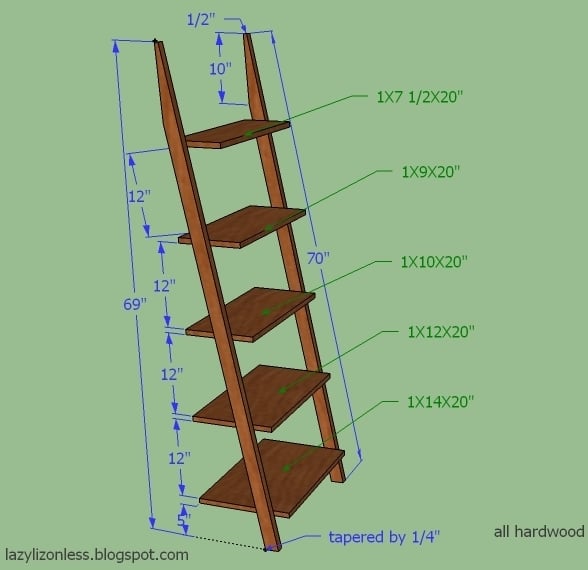
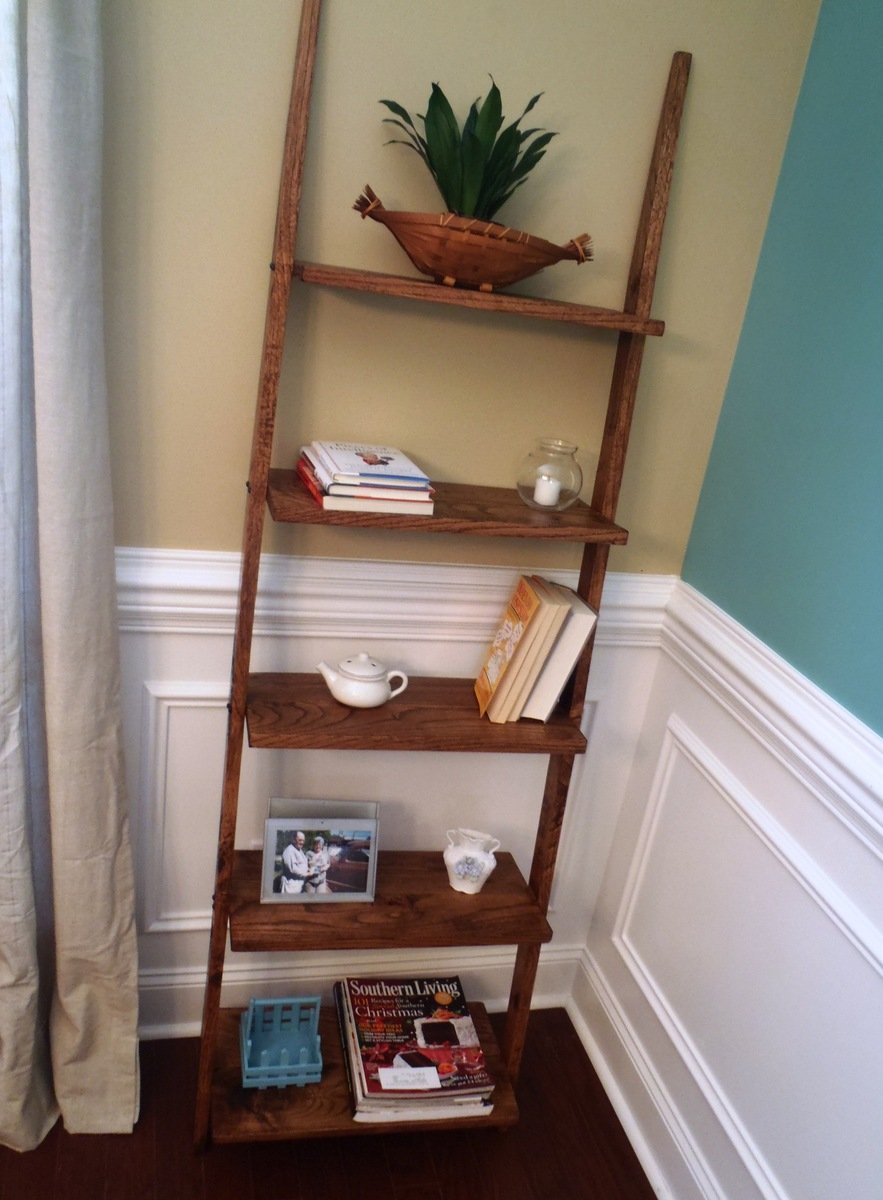
Since I used hardwood (red oak) I have to modify the plan and eliminate the sides of the shelves. Modifications and measurement is on the additional photo. Thanks again Ana, you're the best!


In reply to Well, those are just by birdsandsoap
Fri, 05/11/2012 - 08:22
..and very very easy to build:)
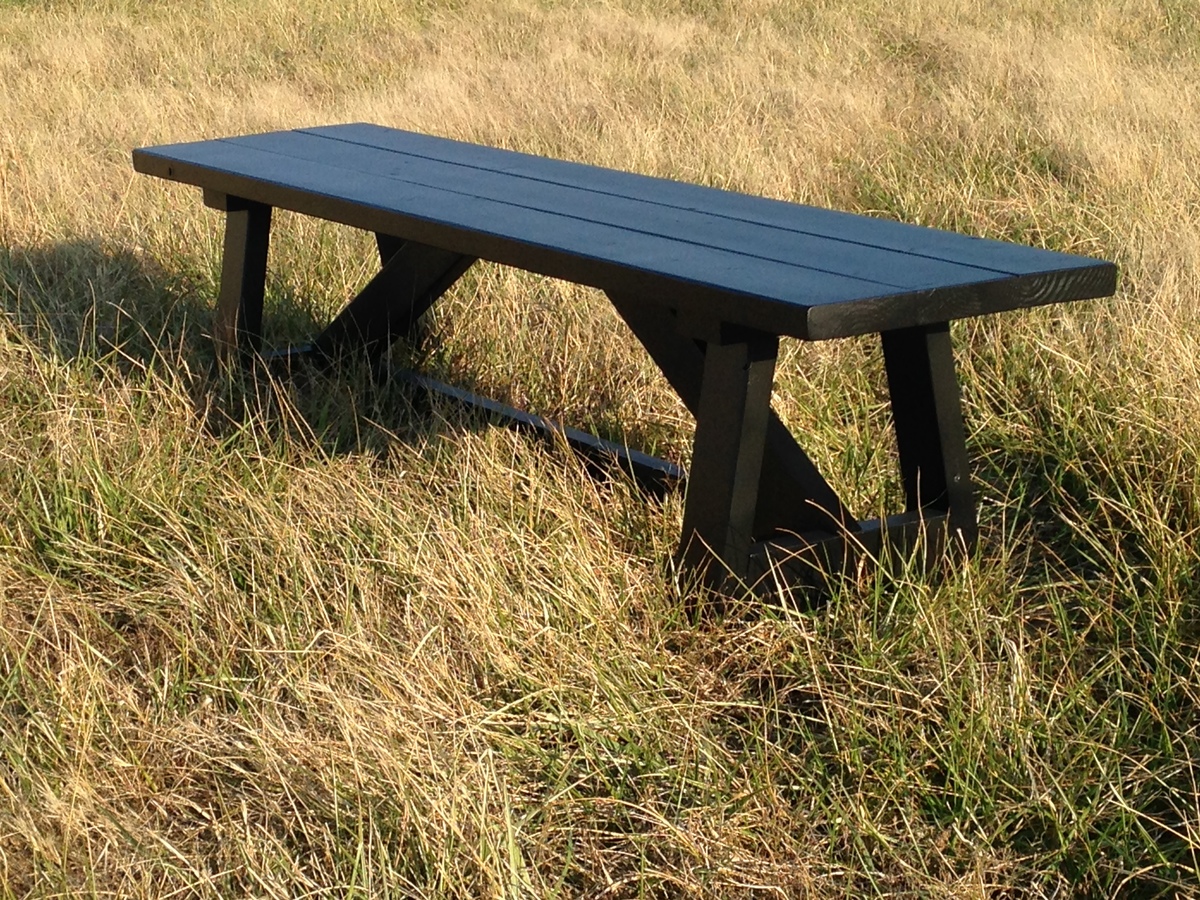
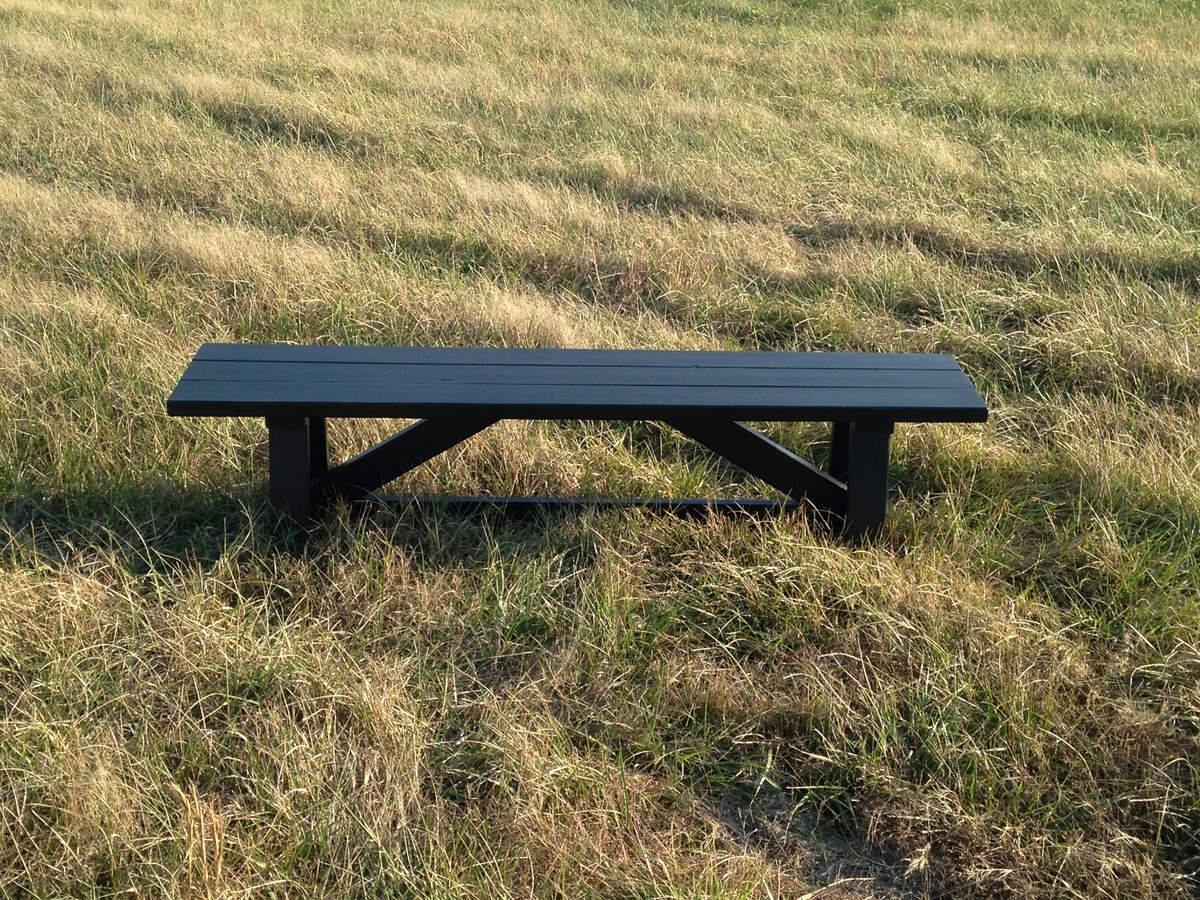
I loved the look of this bench. I made this for some of our friends that have a large family staying with them. I think one is in the future for us as well! I followed the plan as a guide, but made a couple modifications to meet the needs. It turned out great and the plans were easy to follow. 1) I used 3 - 2x6 boards for the top instead of 4 - 2x4's 2) the bench length was increased to 72" long 3) I reversed the angled cross braces to give support in the middle of the bench due to its increased length. 4) the angle on the cross braces was change to allow the braces to intersect with the top closer to the middle of the bench.
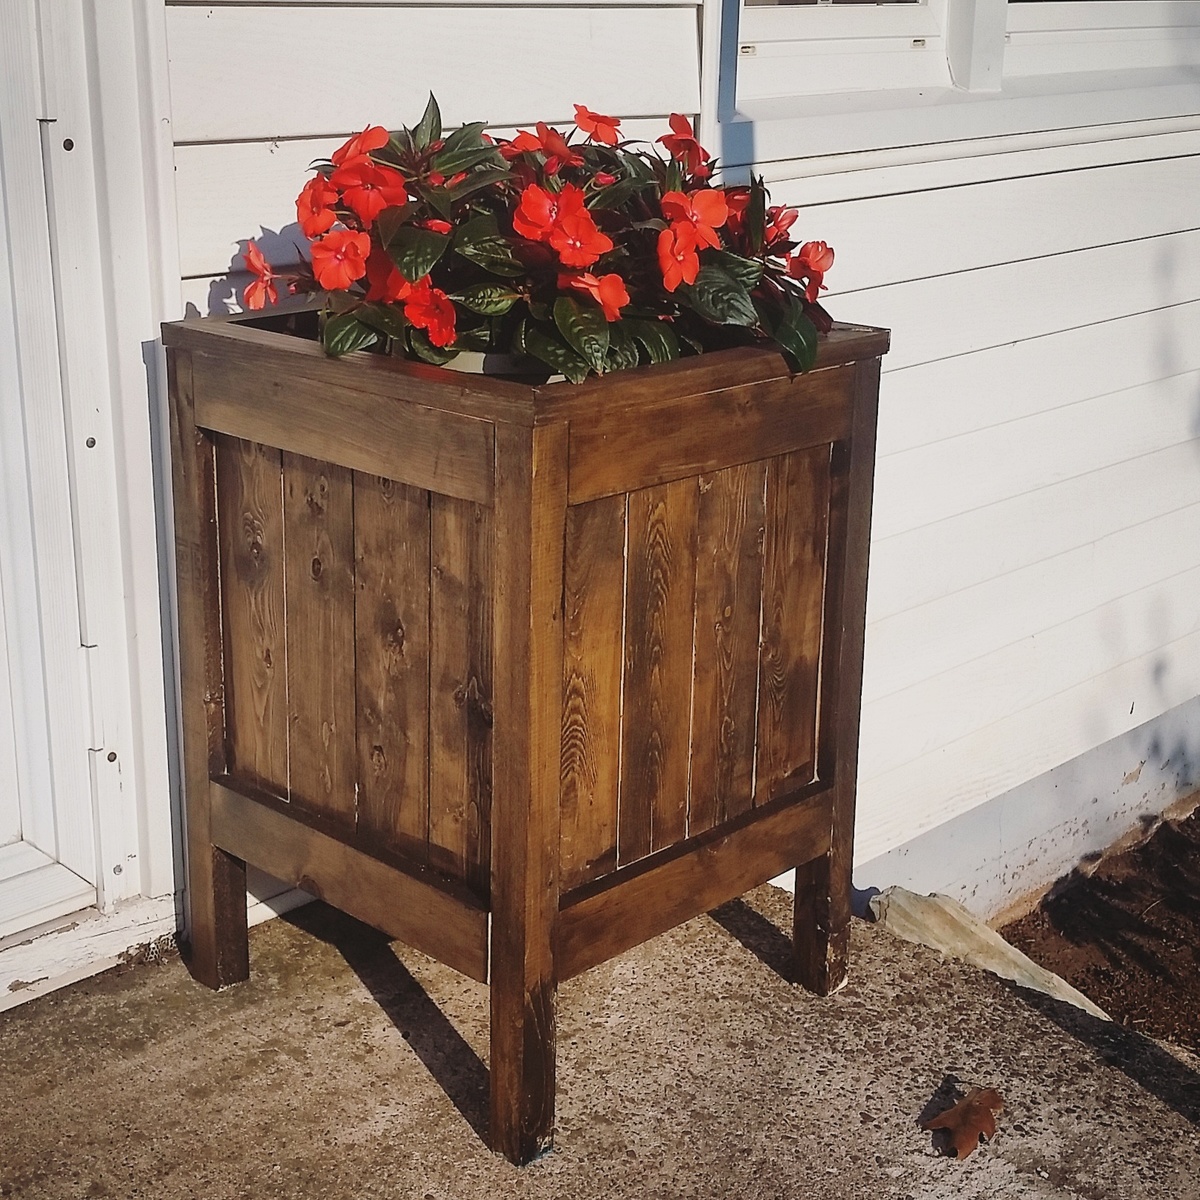
I created this wood planter using Ana's "Cedar Planter for under $20!" plans. They were so easy to follow, this project took me about 2 hours (having no clue what I was doing) and it turned out beautifully!!! I will be making more after discovering how easy it was and inexpensive. Thanks Ana for letting us in on your secrets!
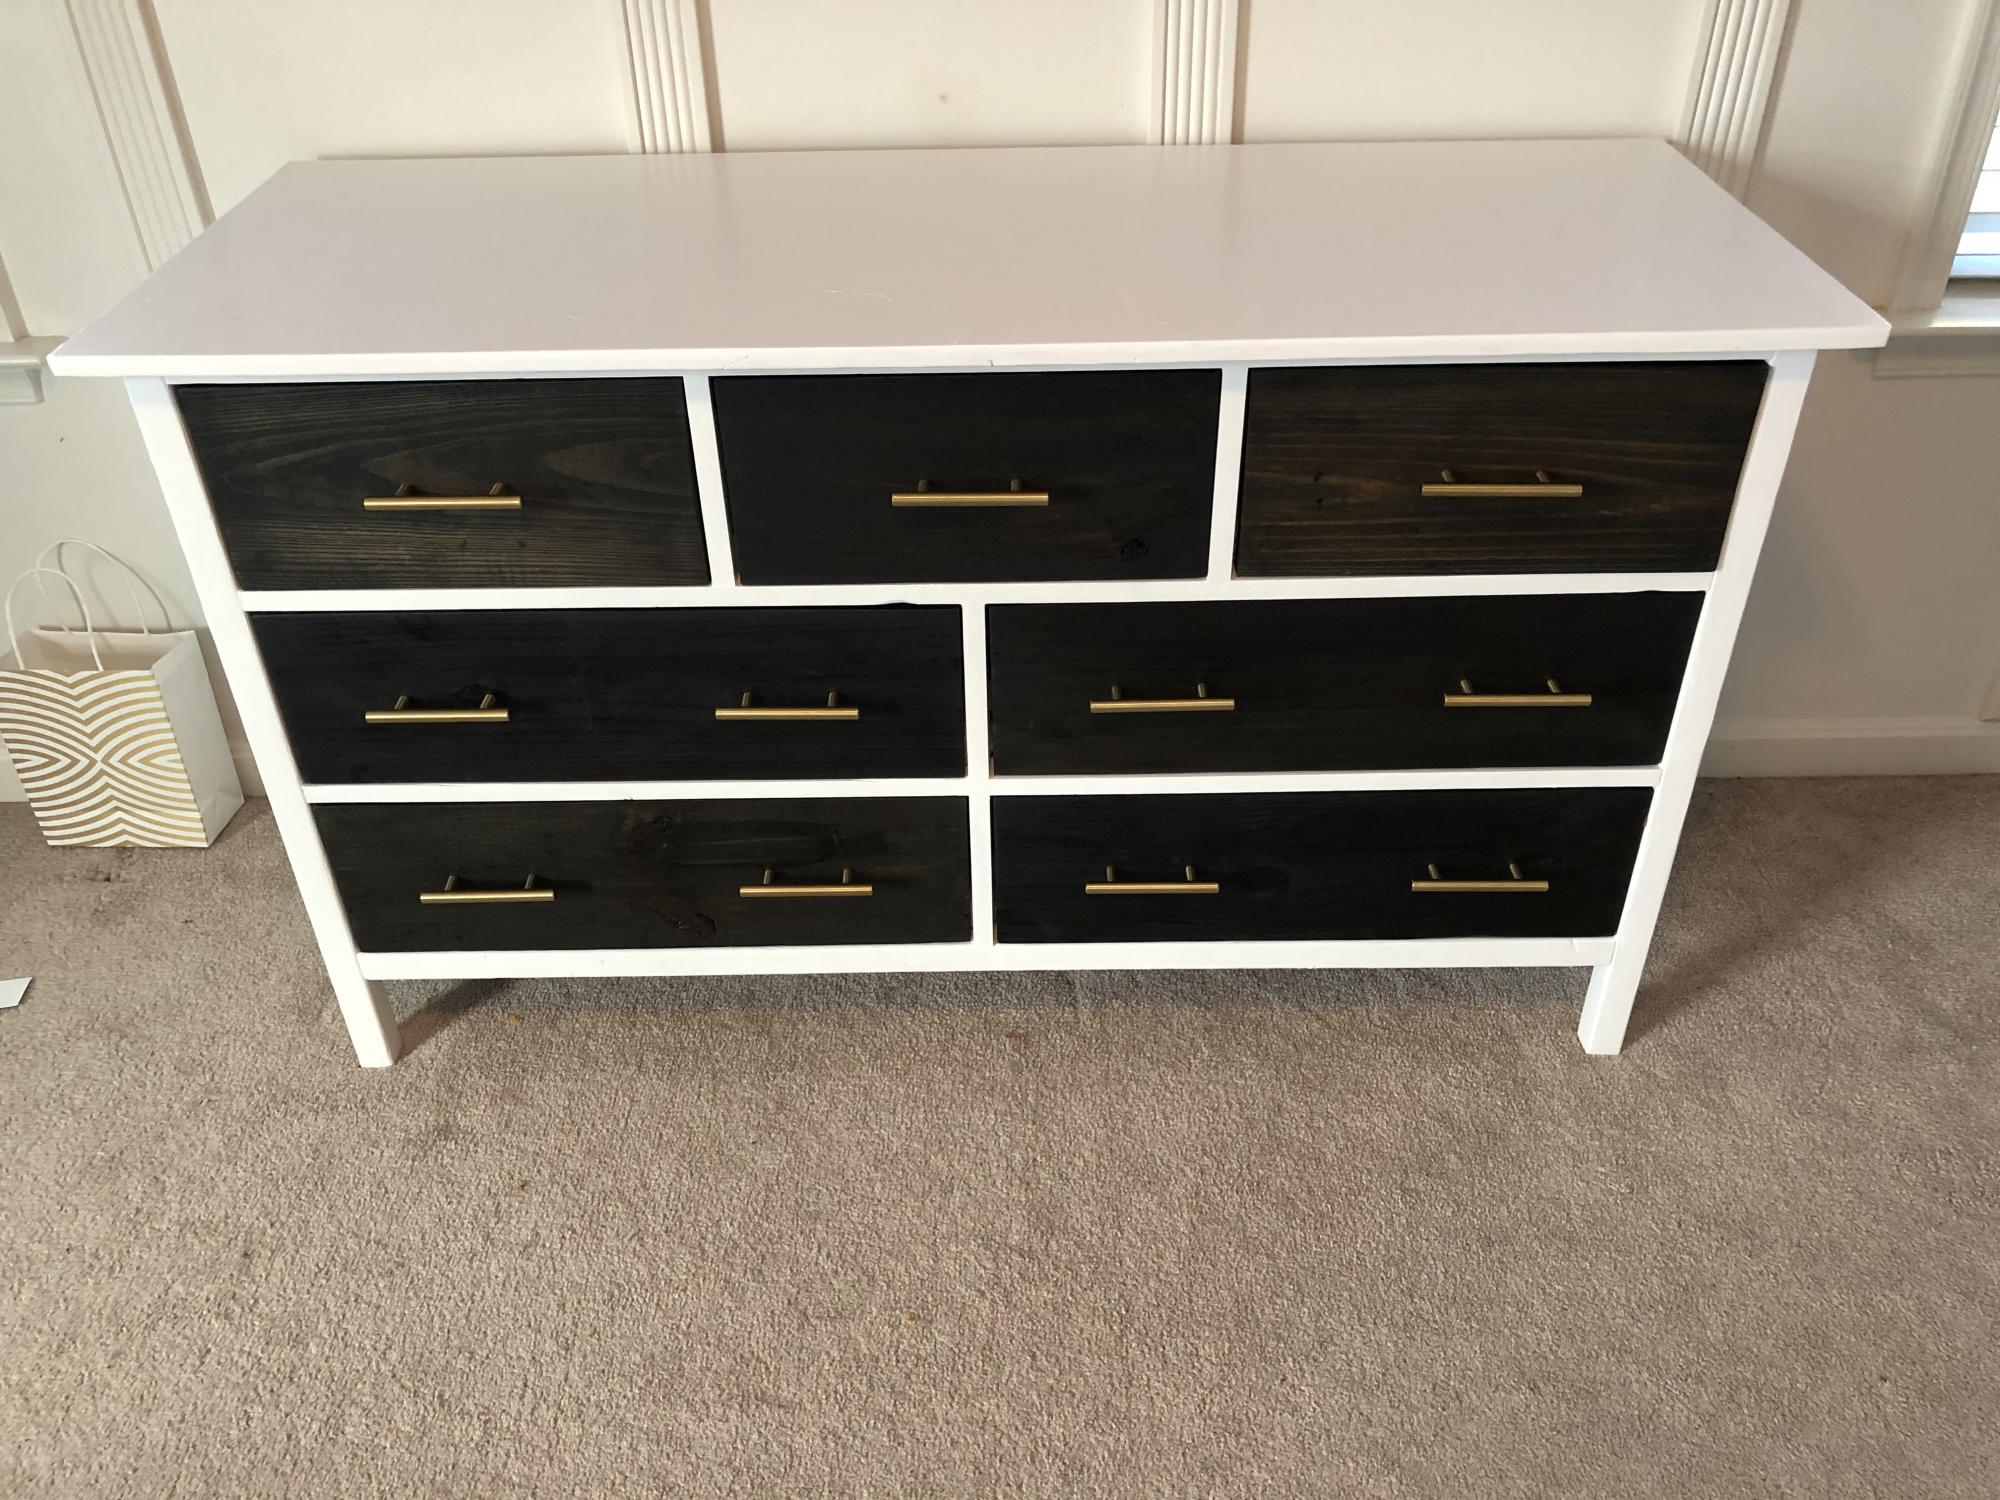
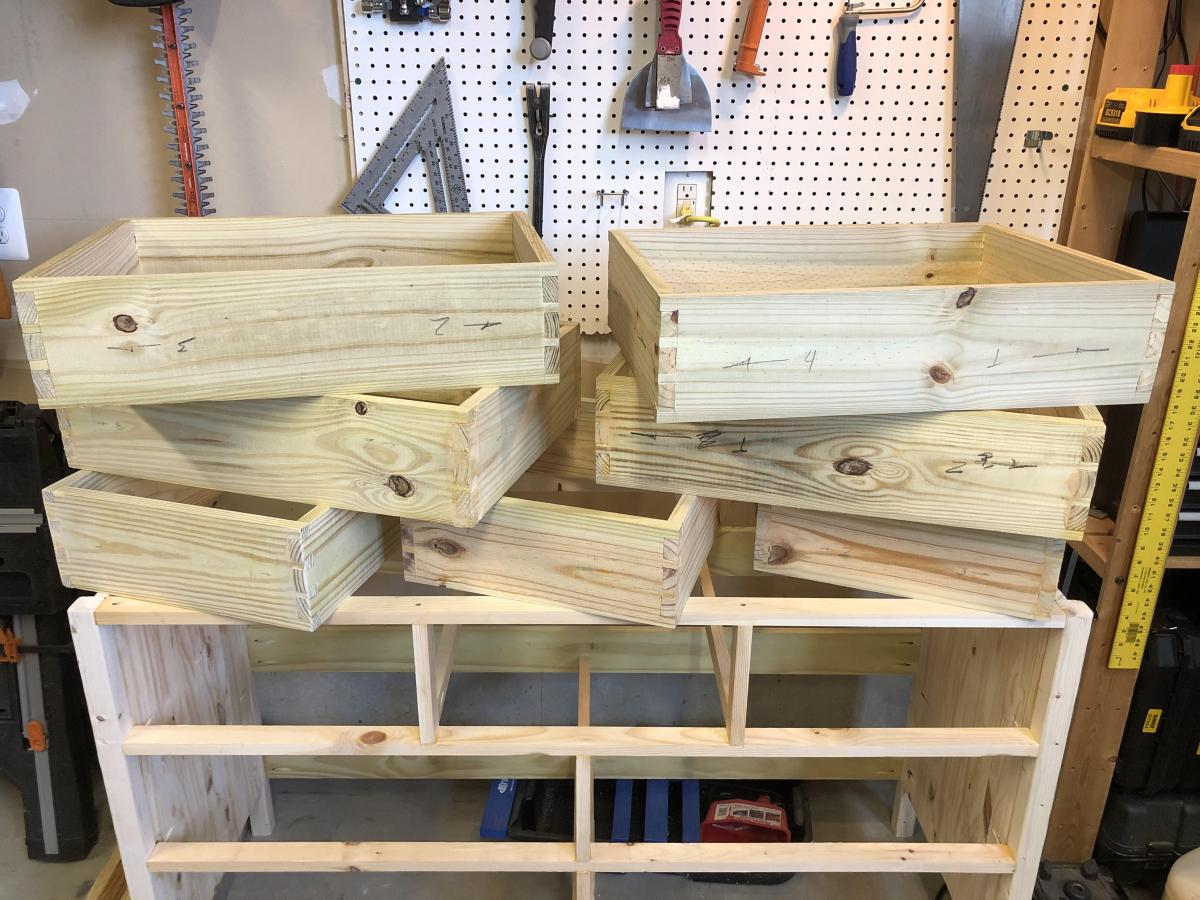
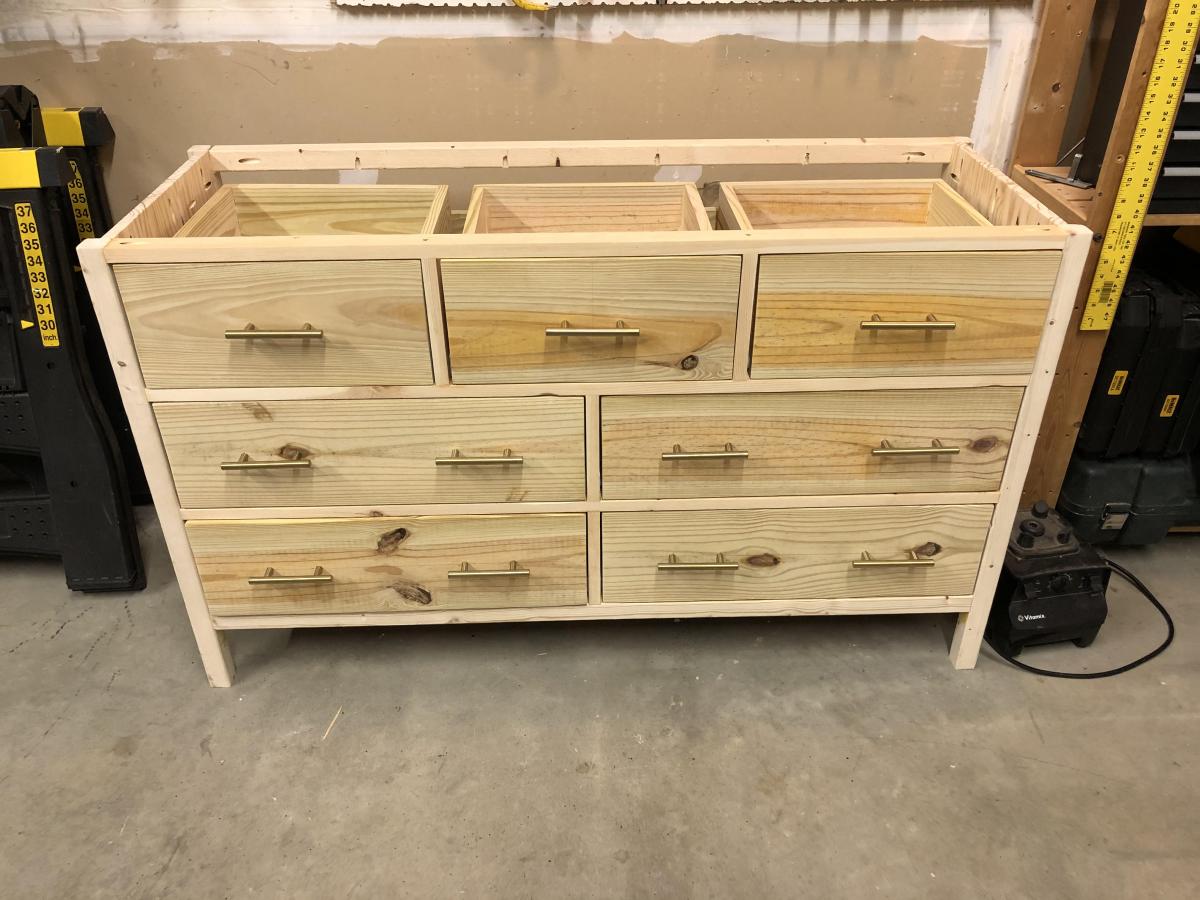
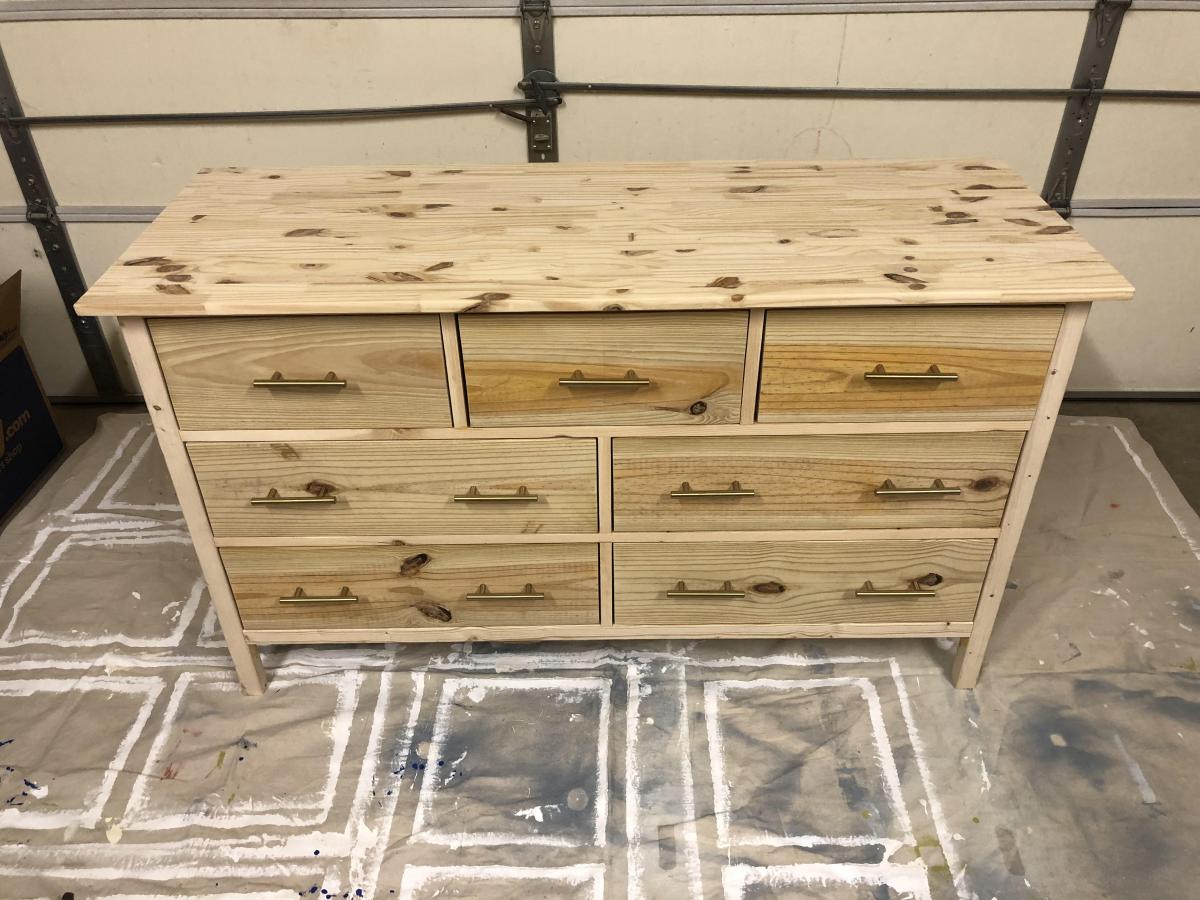
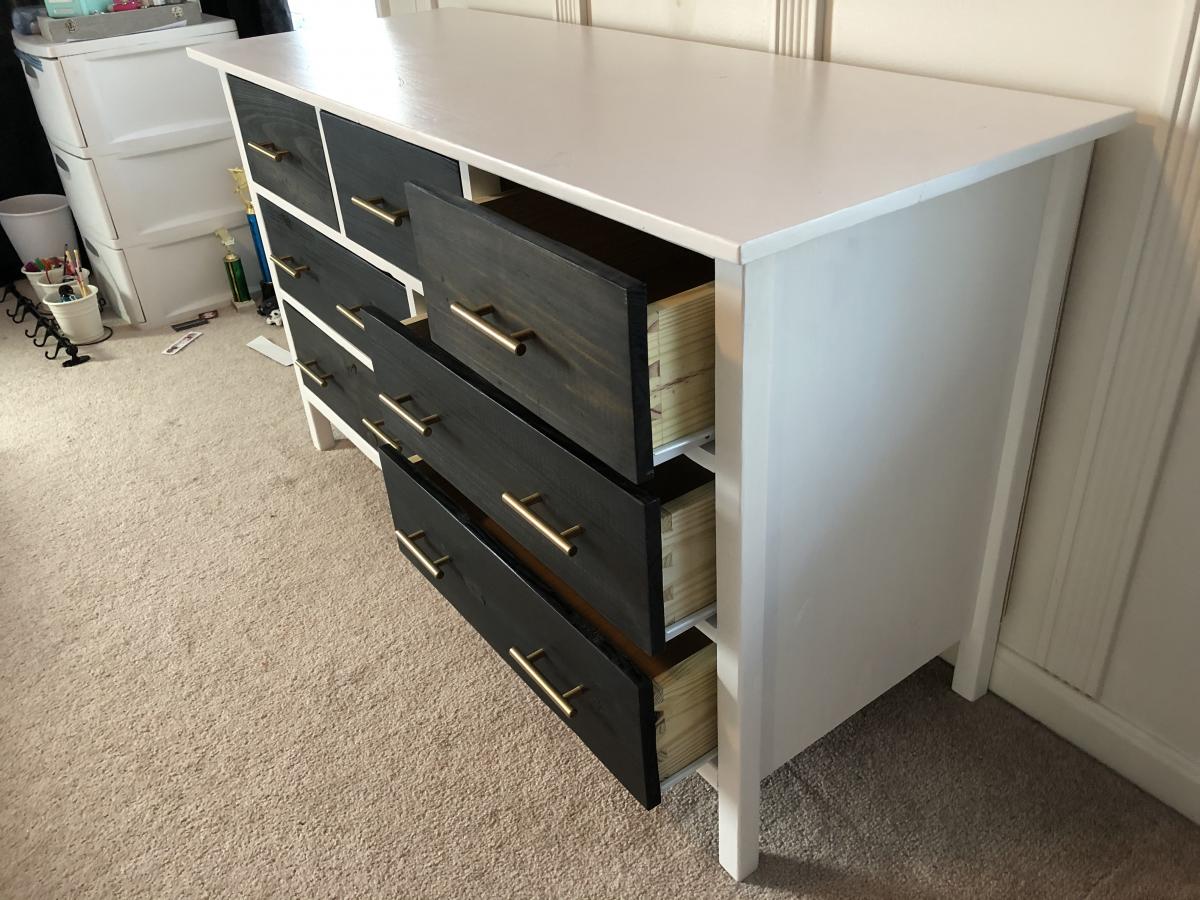
My daughter recently threw out a lot of her things because she wanted to have a grown up room and not a kids room. So she asked if I could make her furniture and wanted a dresser as her first piece. So I couldn't say no!
This was my second project from this web site and my first dresser. Boy was it tough, but I loved every minute of it! Even though the plans were marked Advanced, I made it even more so by trying out dovetailing for all the drawers. By hand. With just a Japanese pull saw and chisels. That added about 10 hours onto the total build, but it was for my daughter, so it was worth it!
This is how it turned out.

Definitely one of my favorite rooms in the house. Not shiplap but reclaimed wood. Had to deal with lowering everything because of the trunk lines but overall we love it.
Leslie Webber
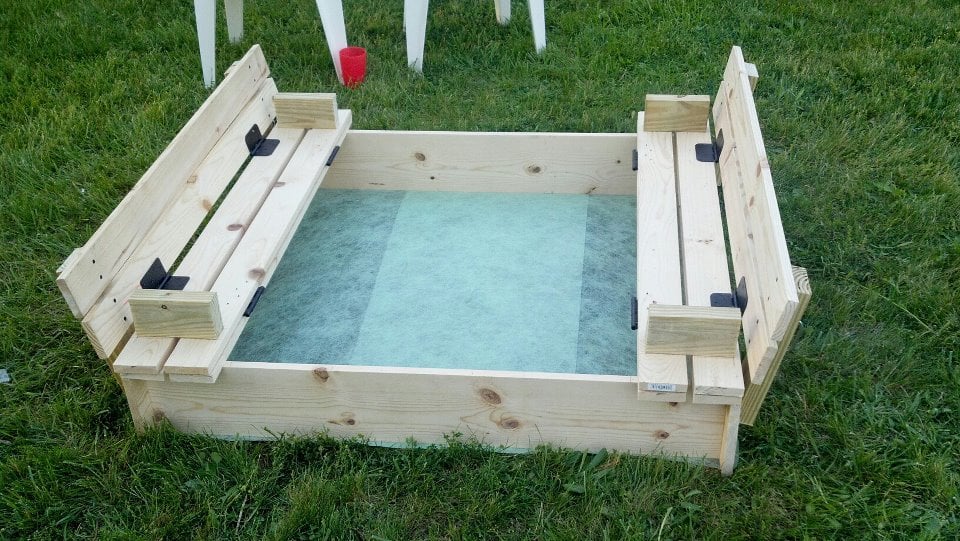
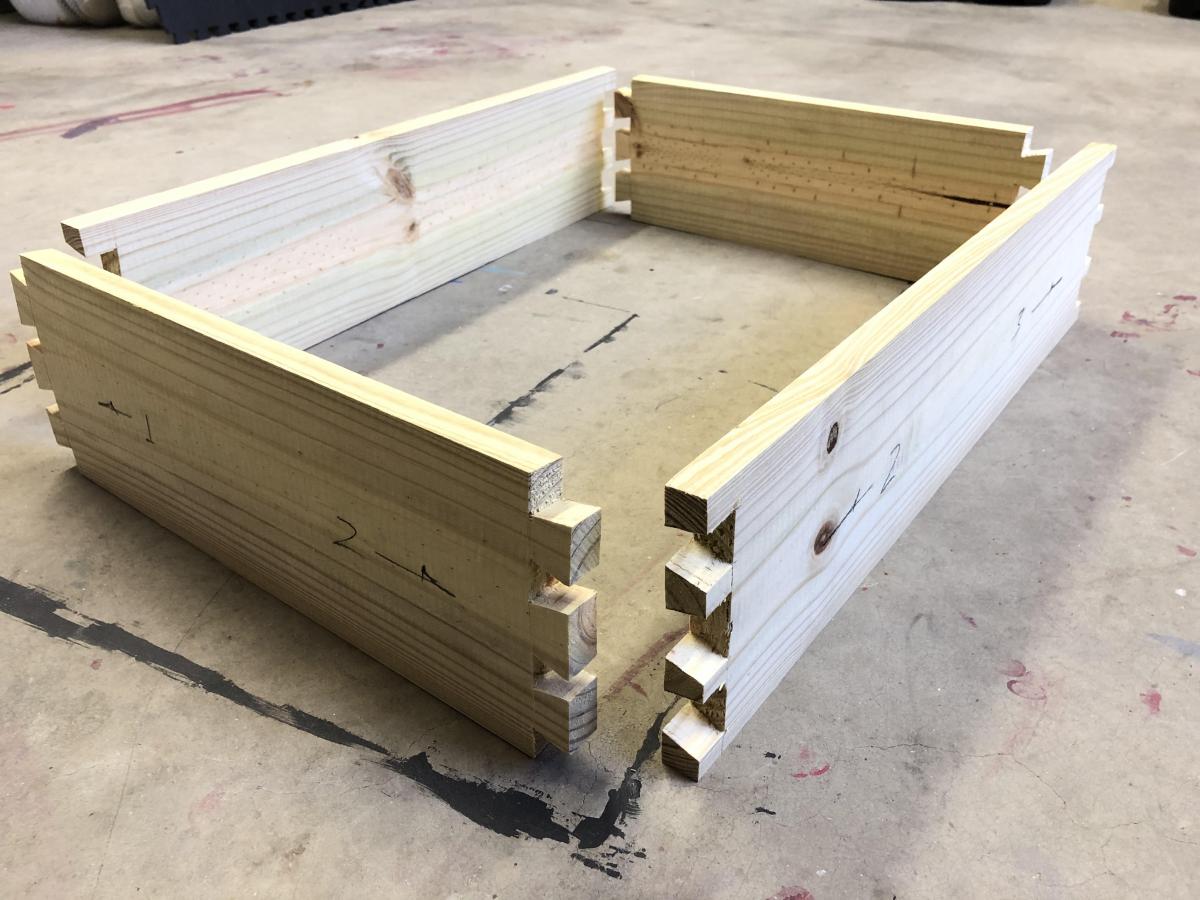
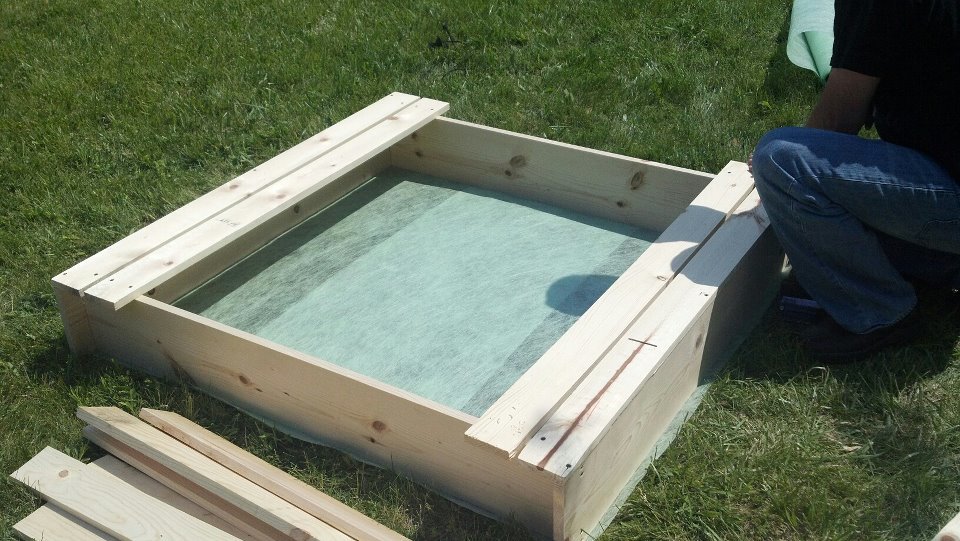
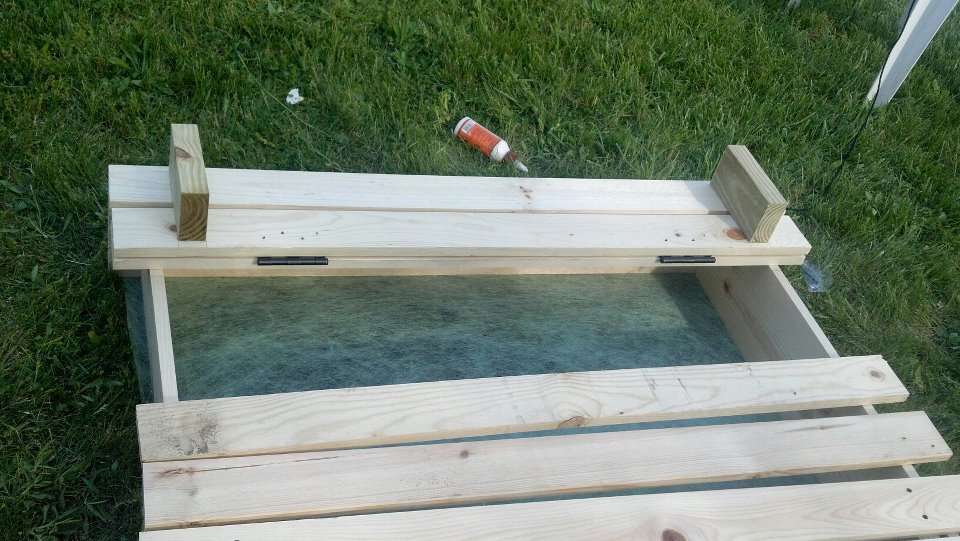
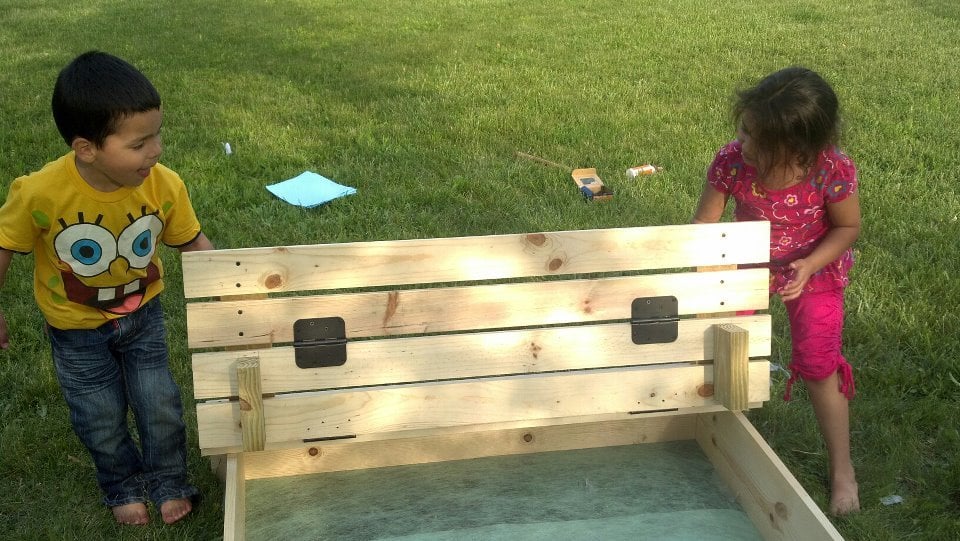
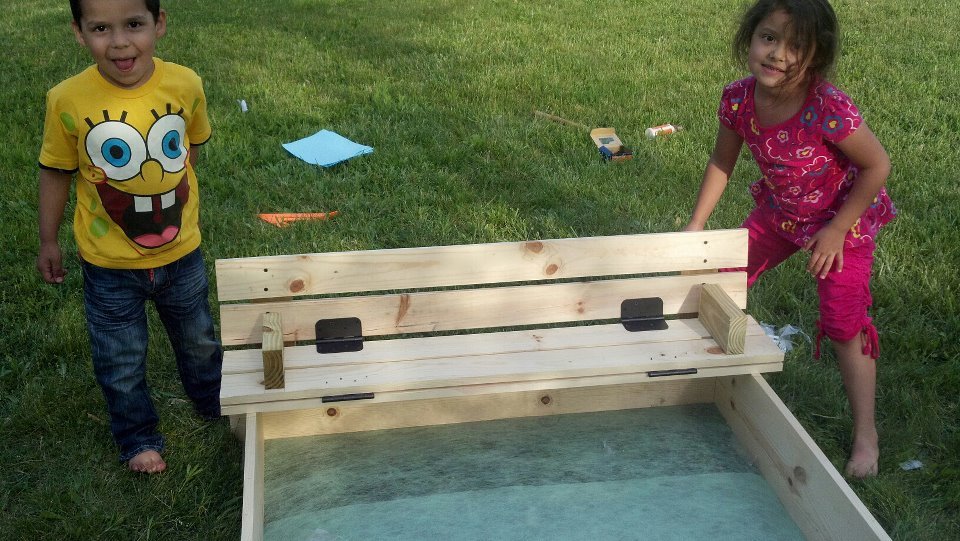
Once we hade the frame of it built, we stapled landscaping fabric and chicken wire to the bottom to keep weeds and moles/gophers from coming up through the bottom.
Other than that... We followed the plans as given.
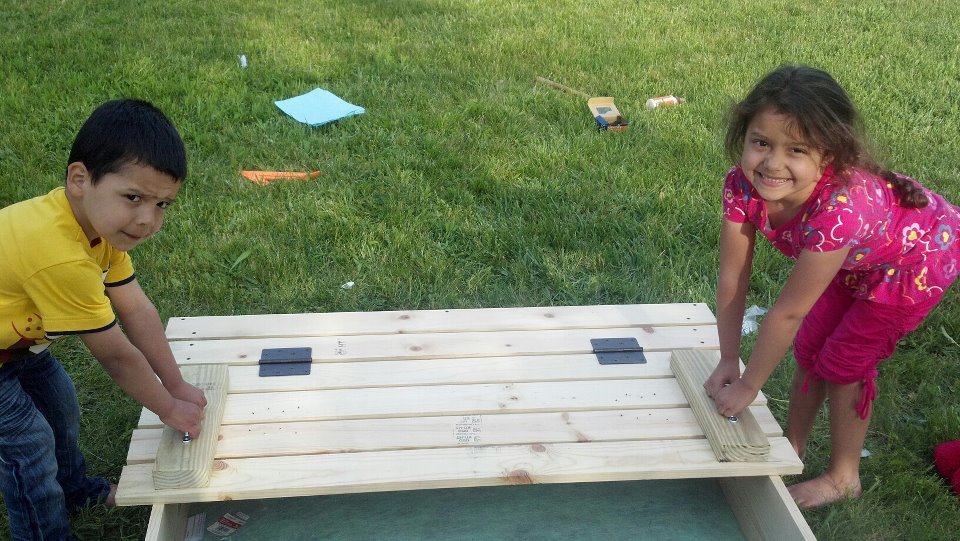
The kids LOVE it!
We need bedroom furniture desperately! So, I decided, for my second build I would start in our bedroom! The dresser first, because I was going crazy without a place to put my clothes!
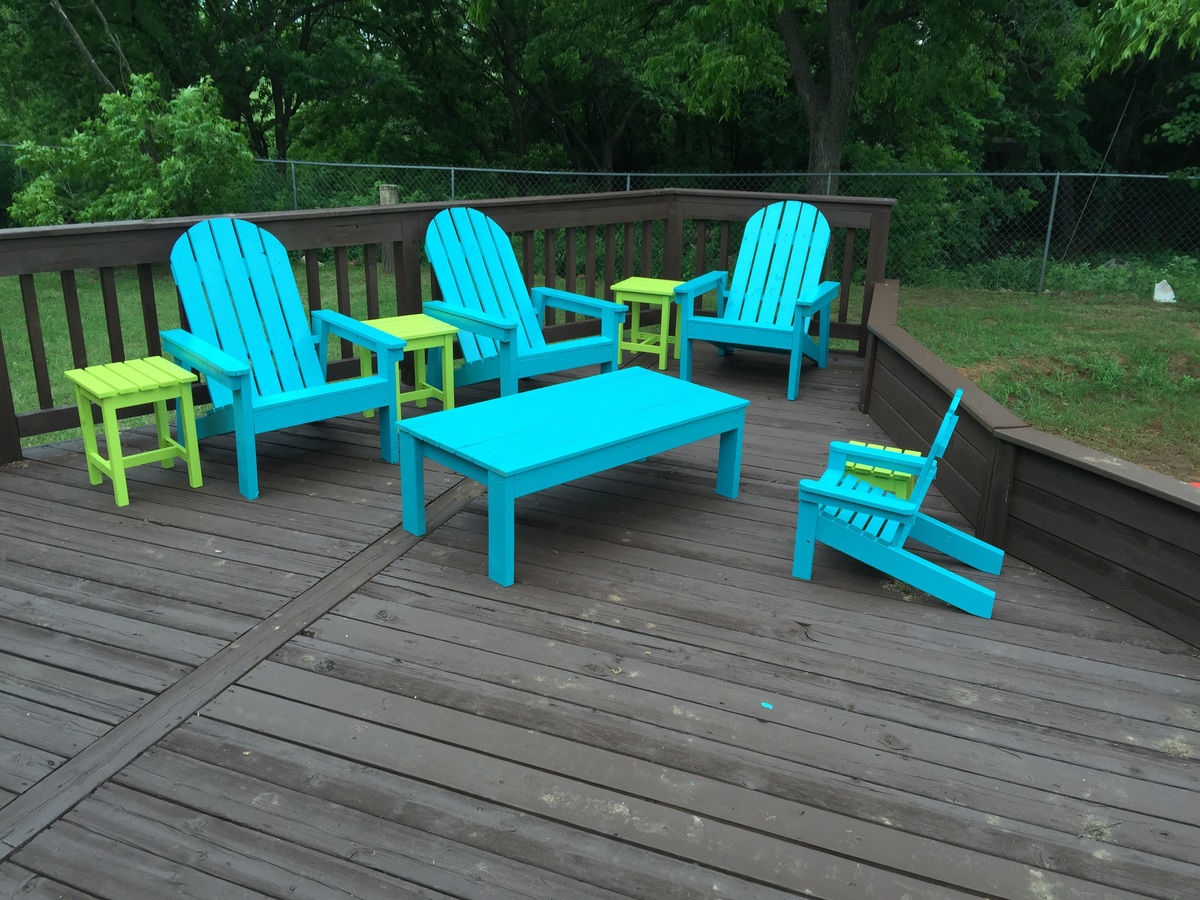
these chairs are so comfortable!
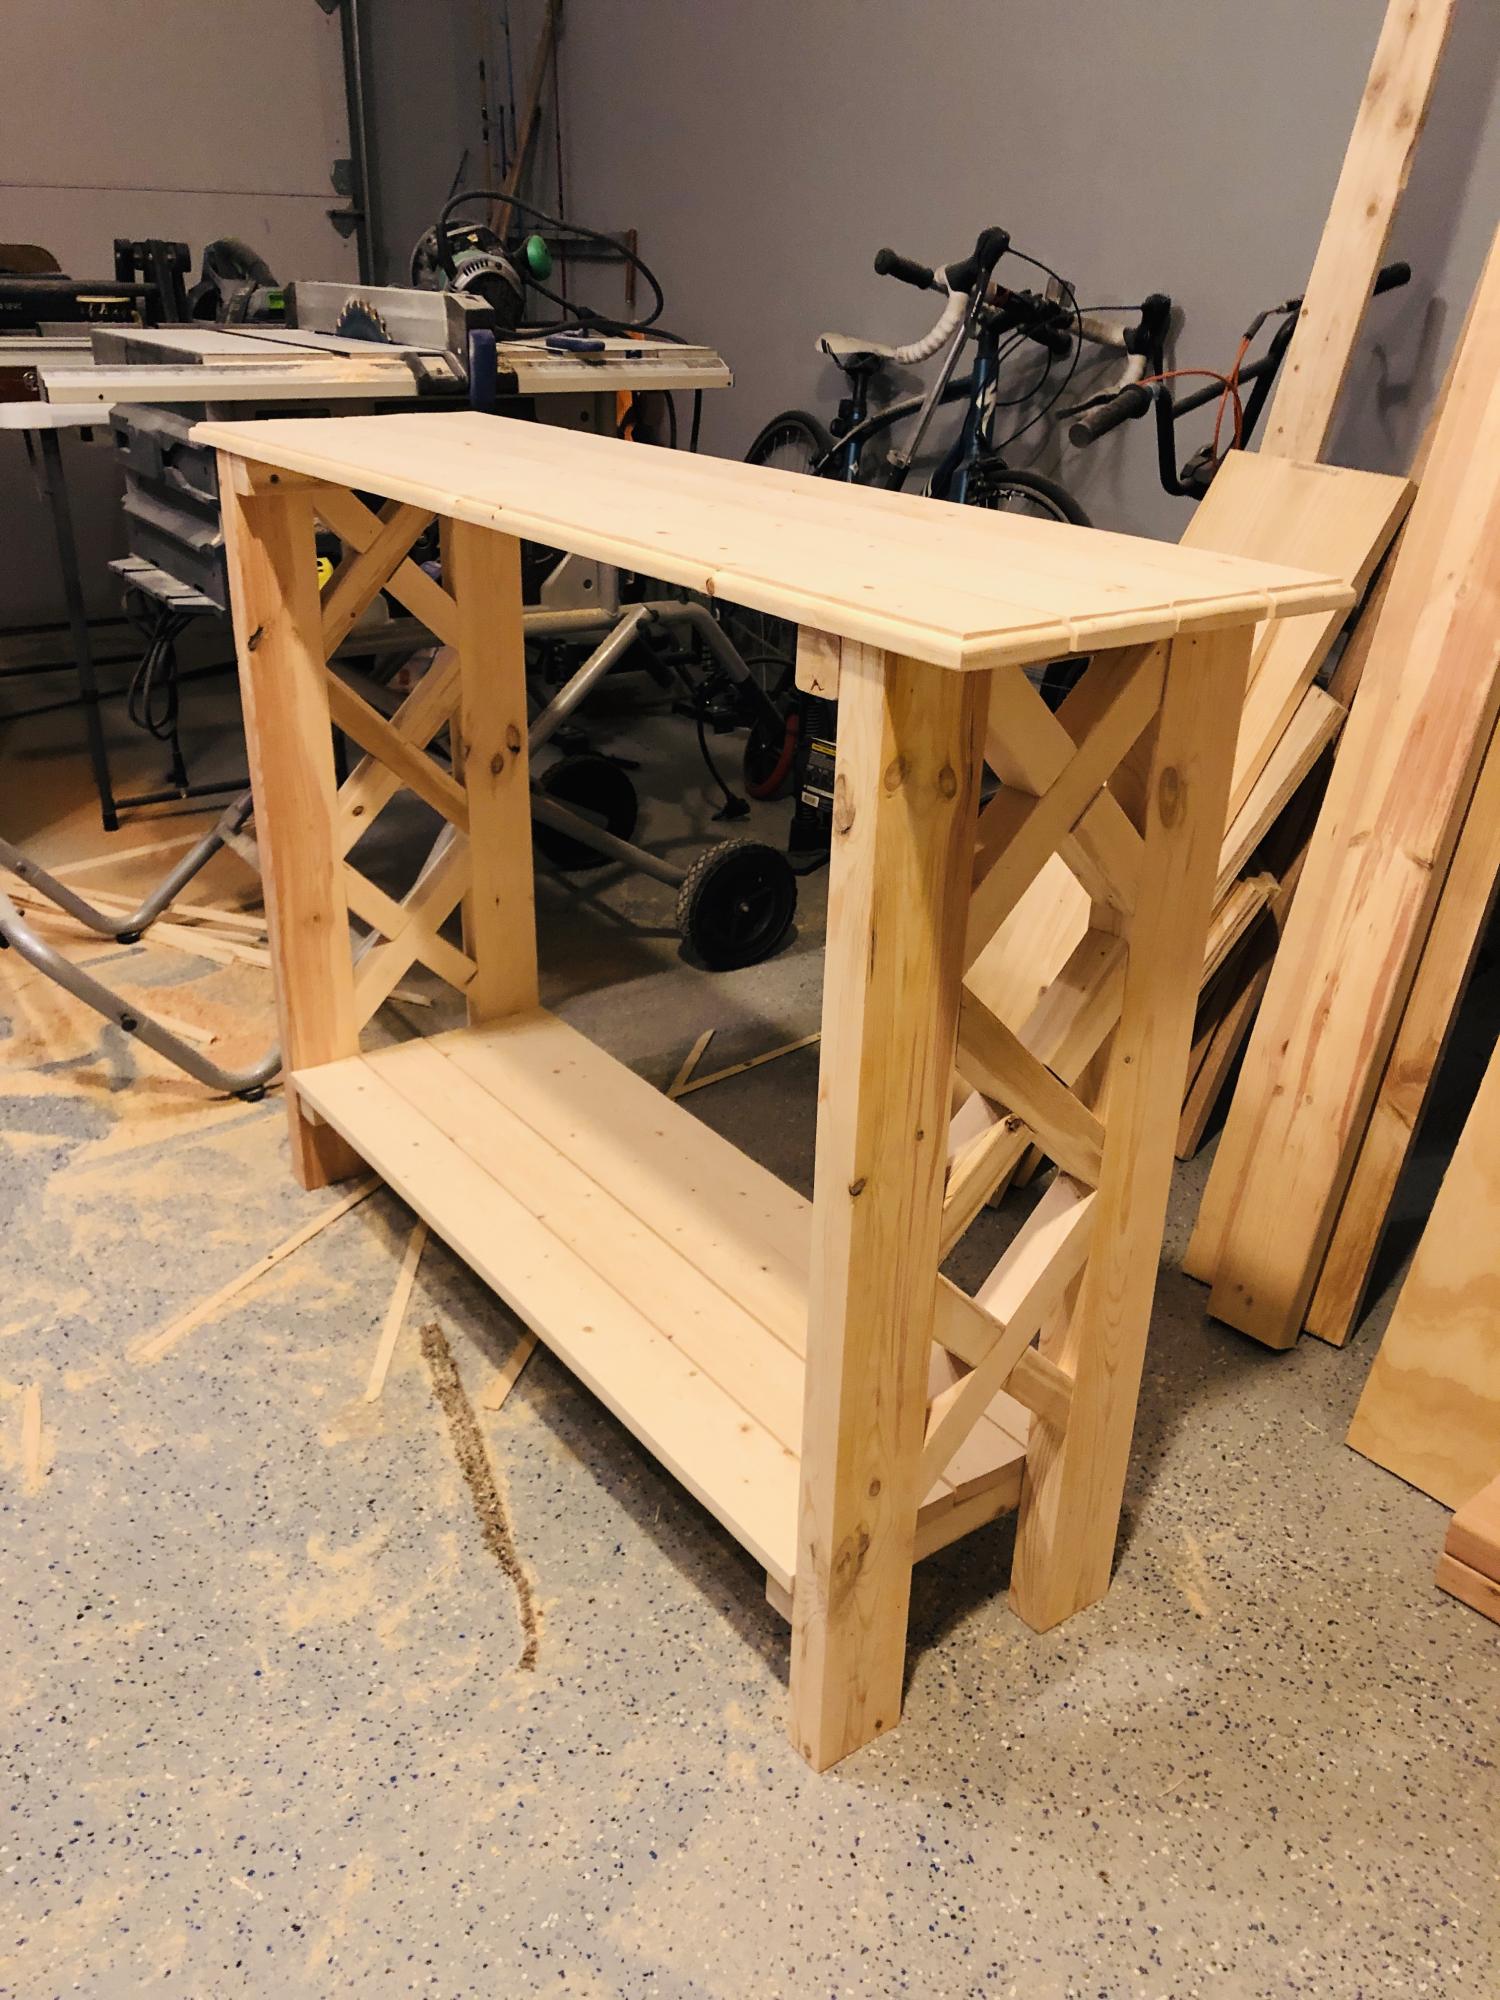
I started with the Cindy Wood Console Table and made some modifications. A friend wanted a desk that had colors added to the top.