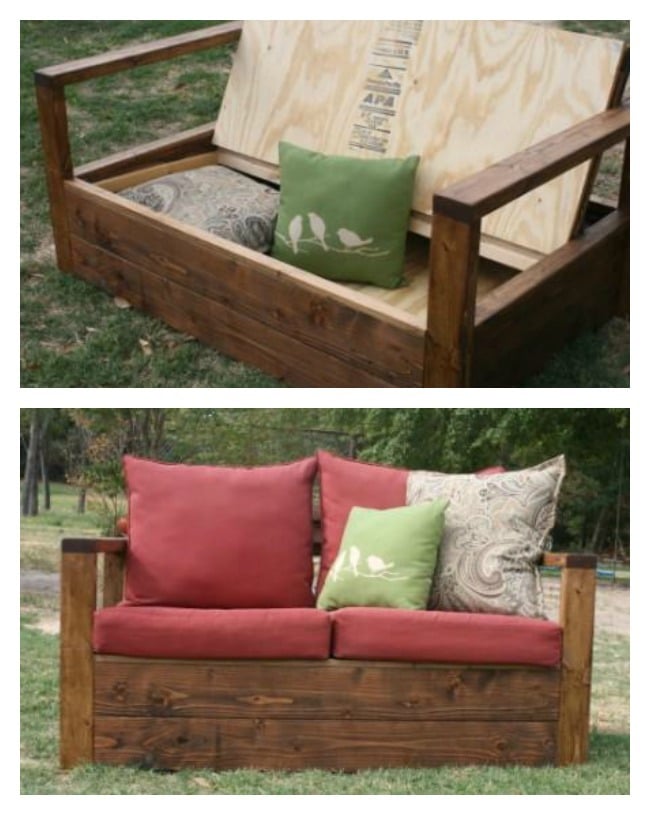
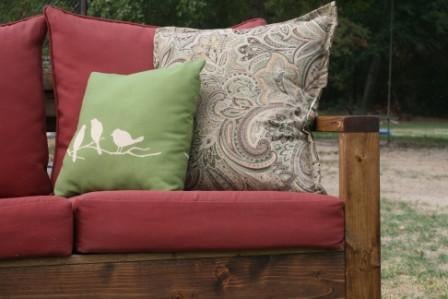
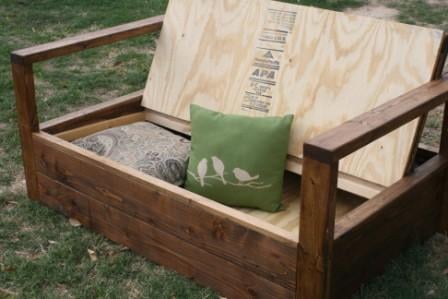
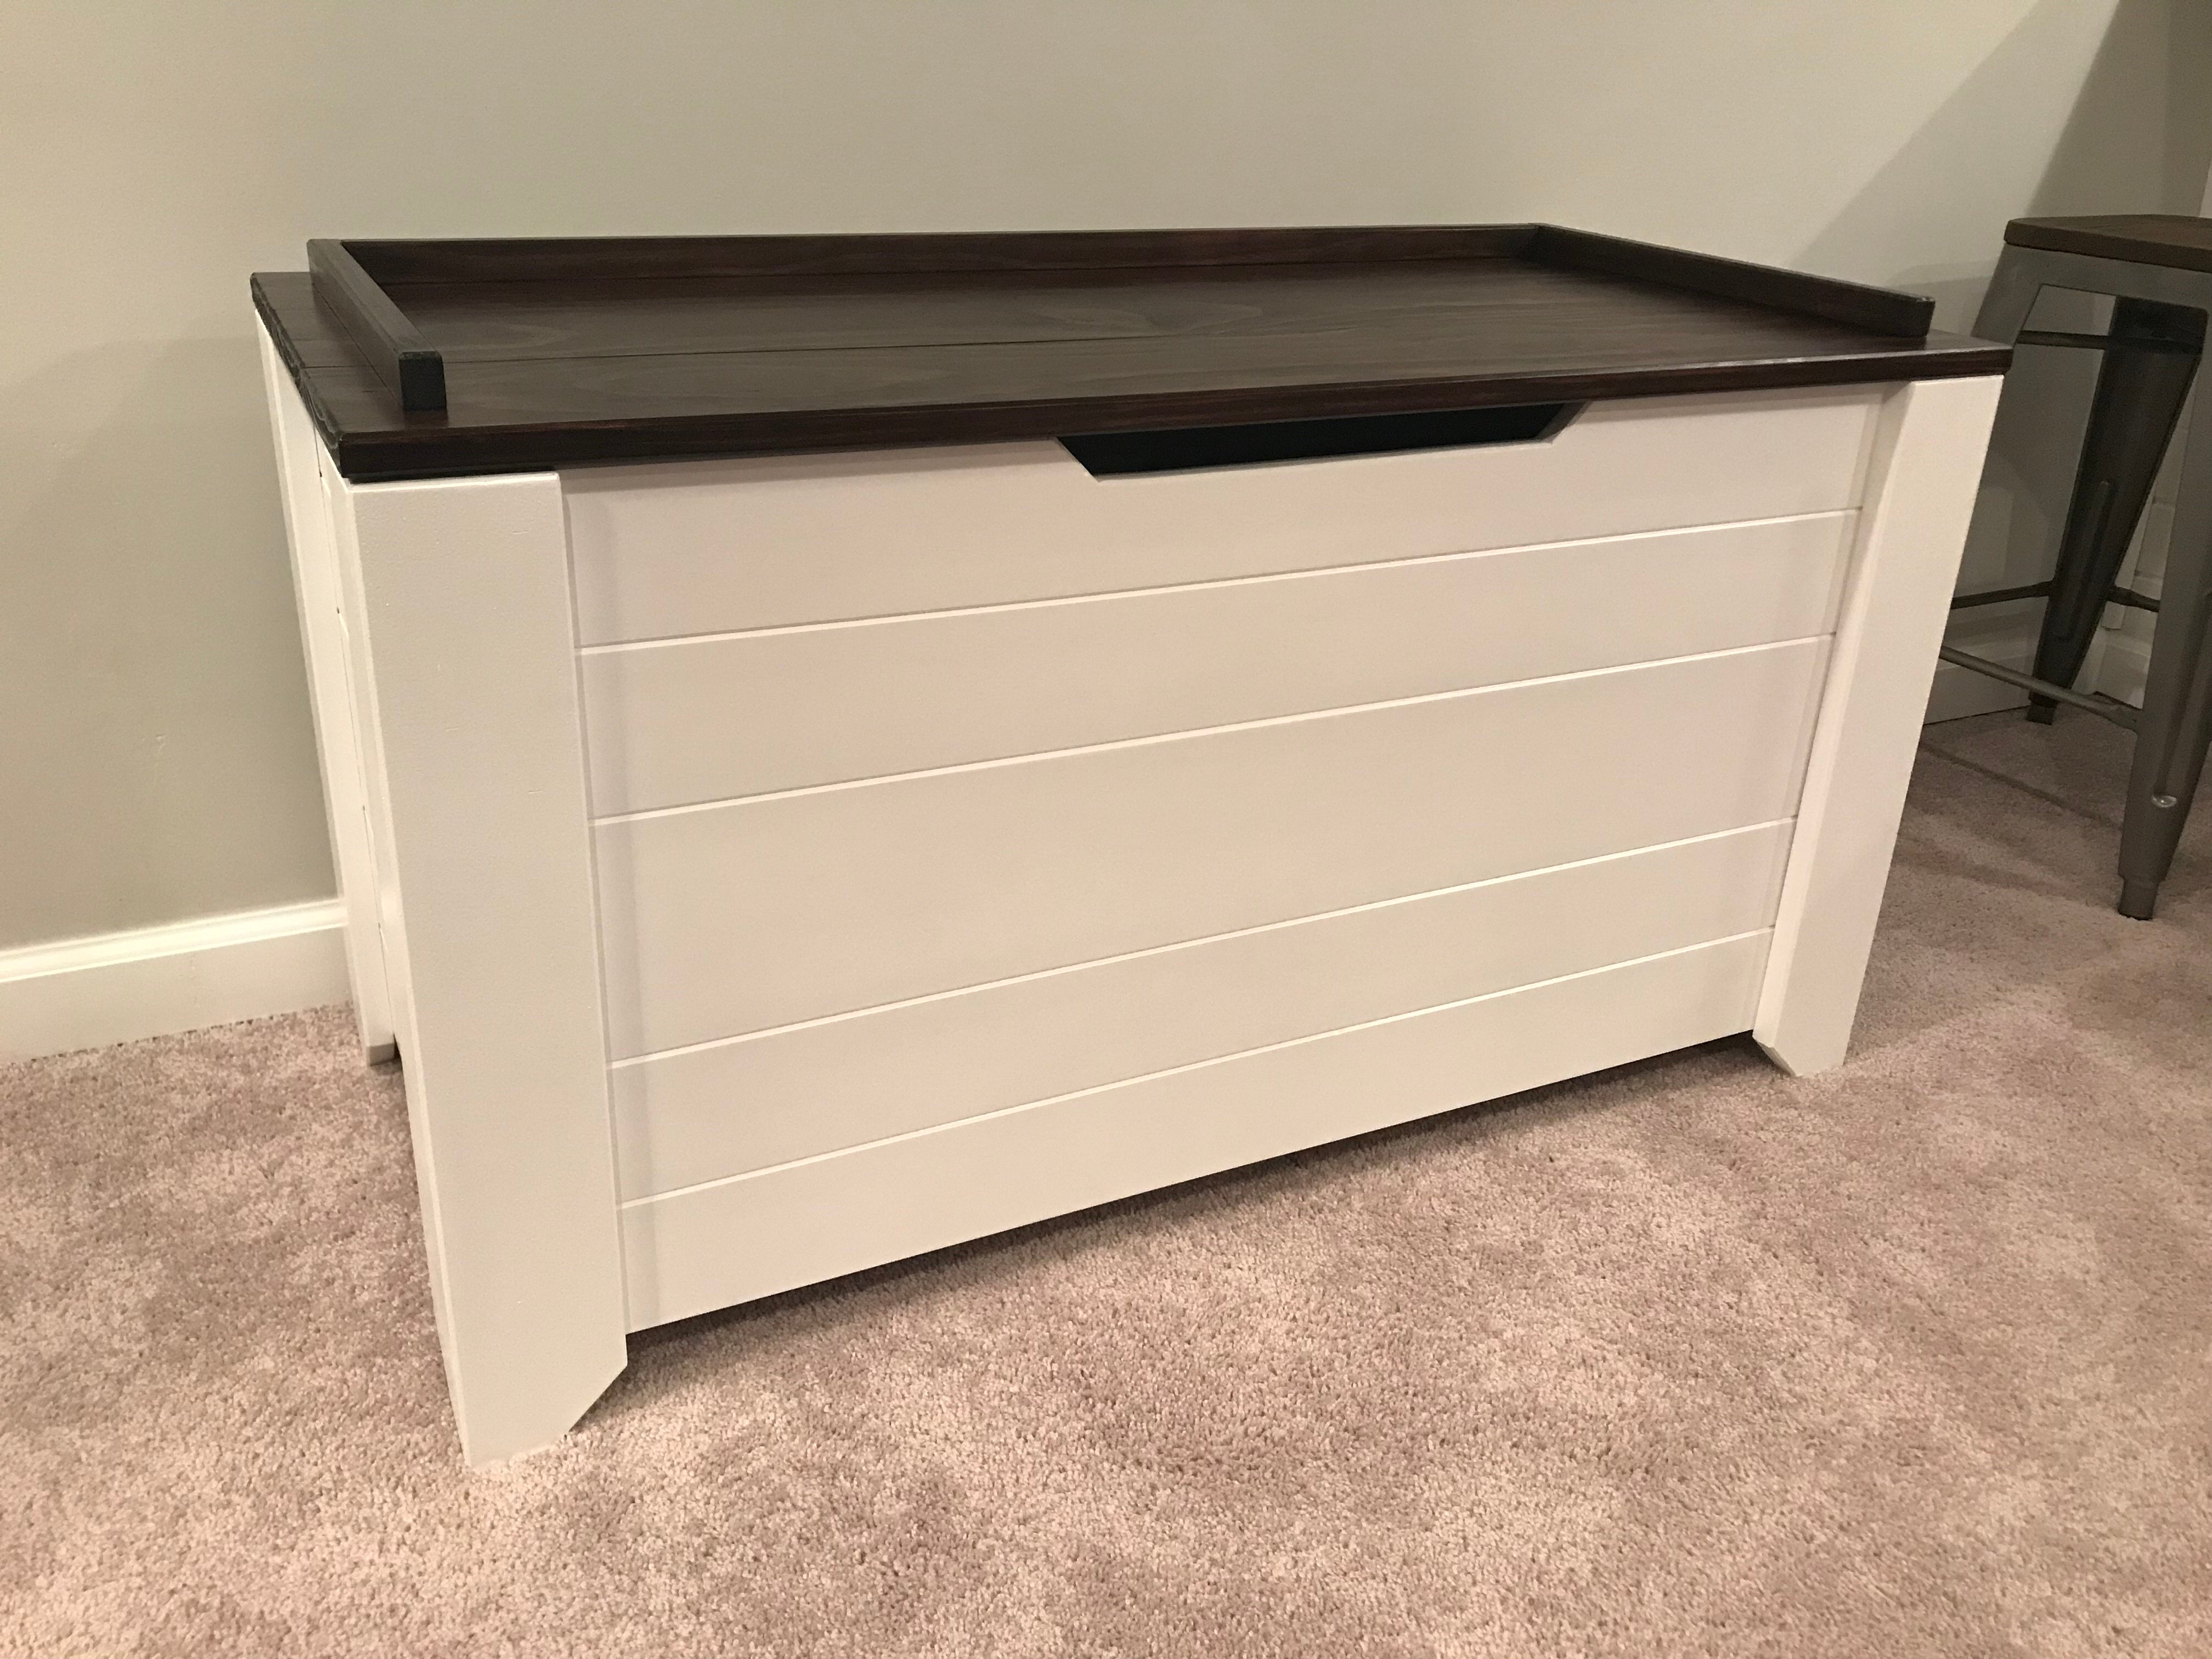
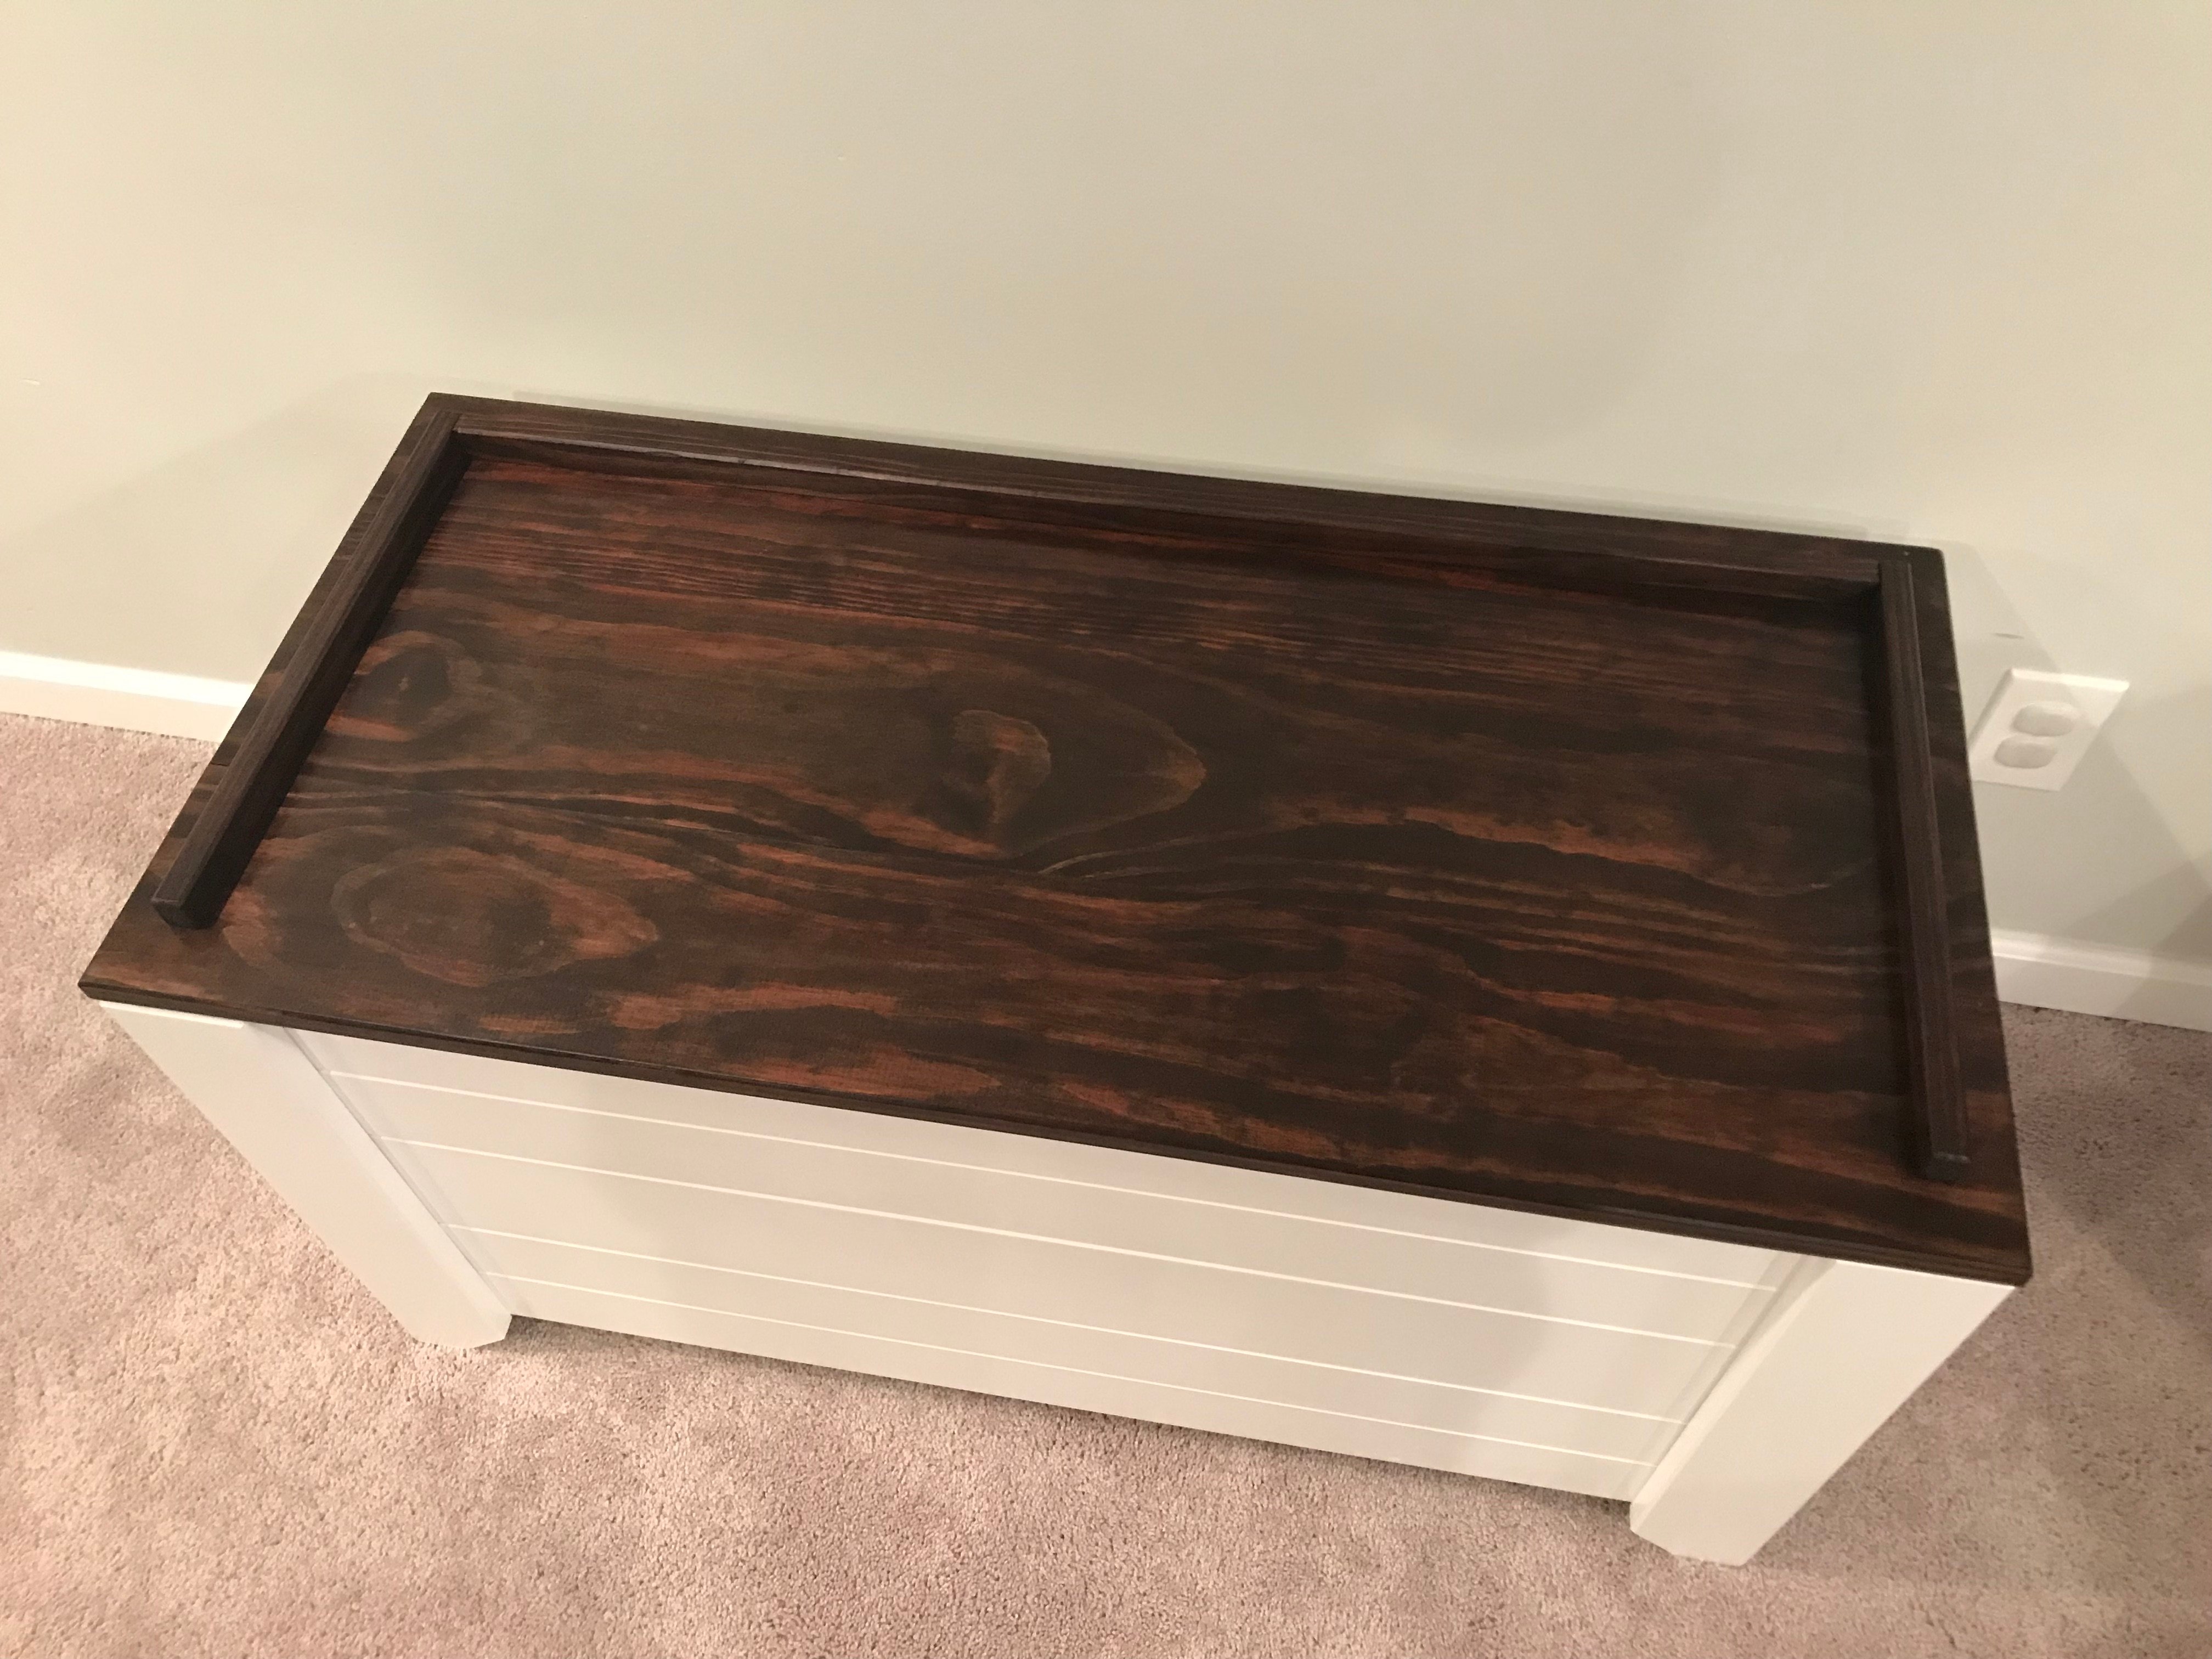
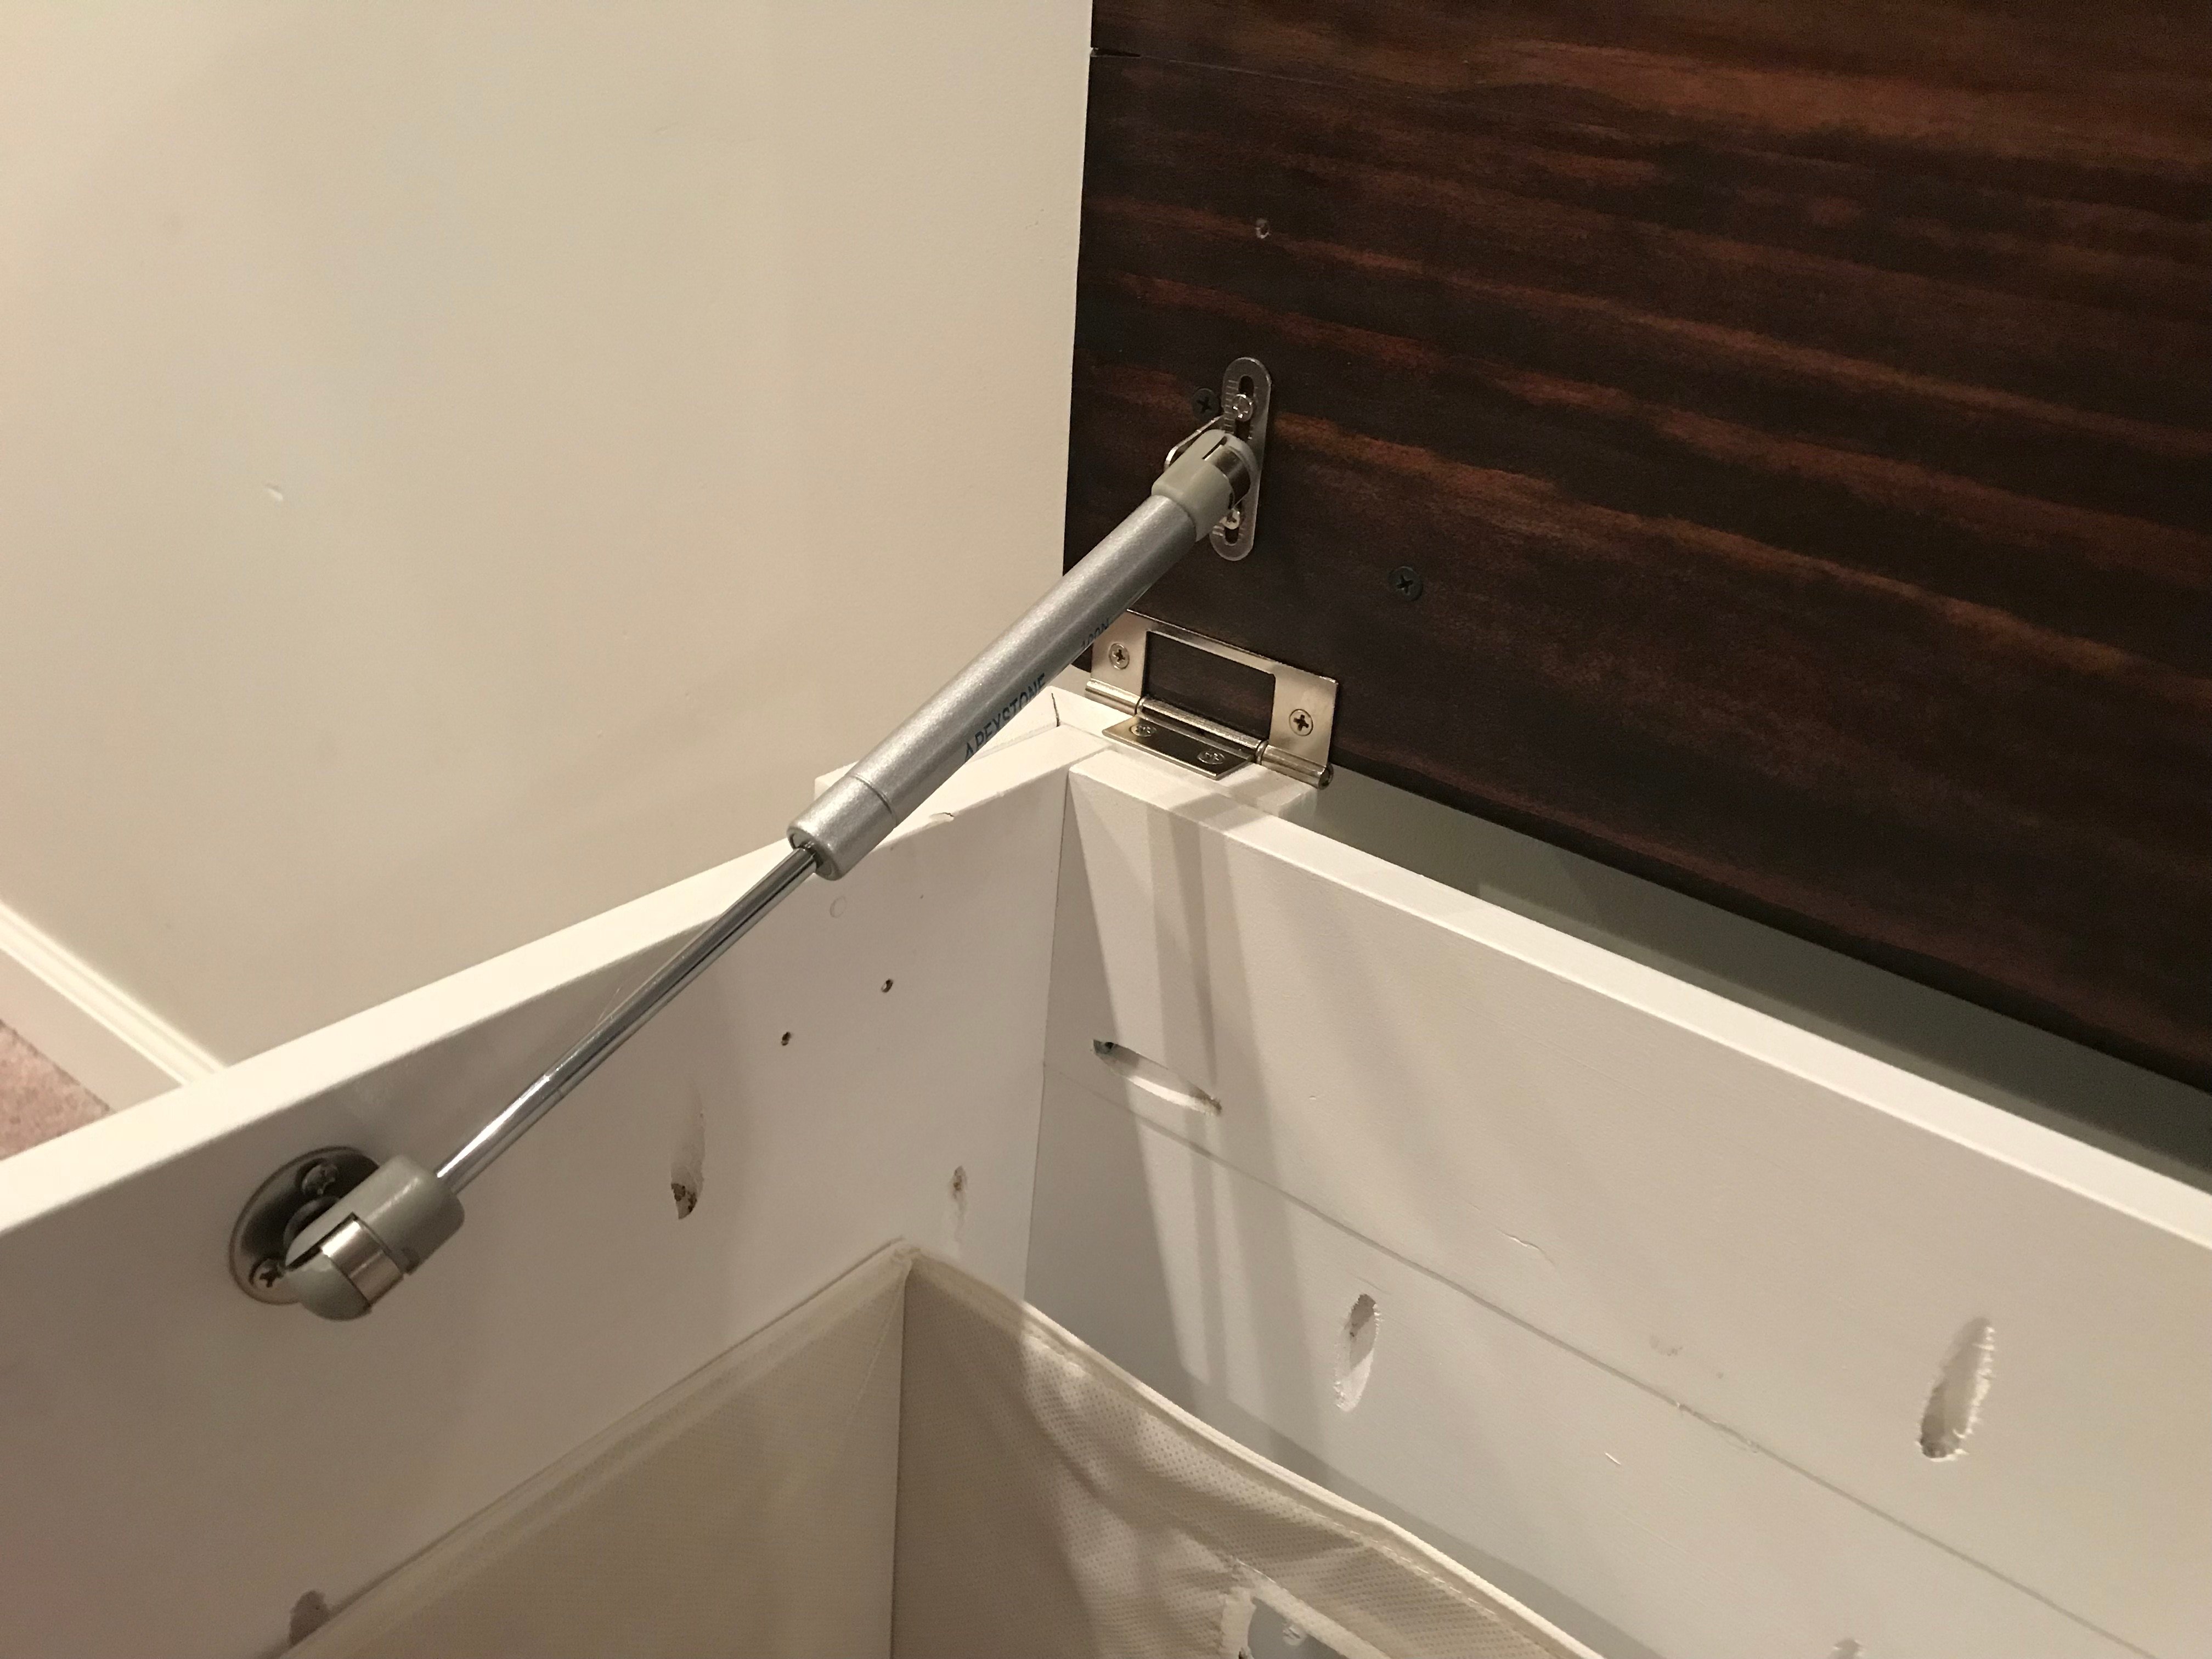
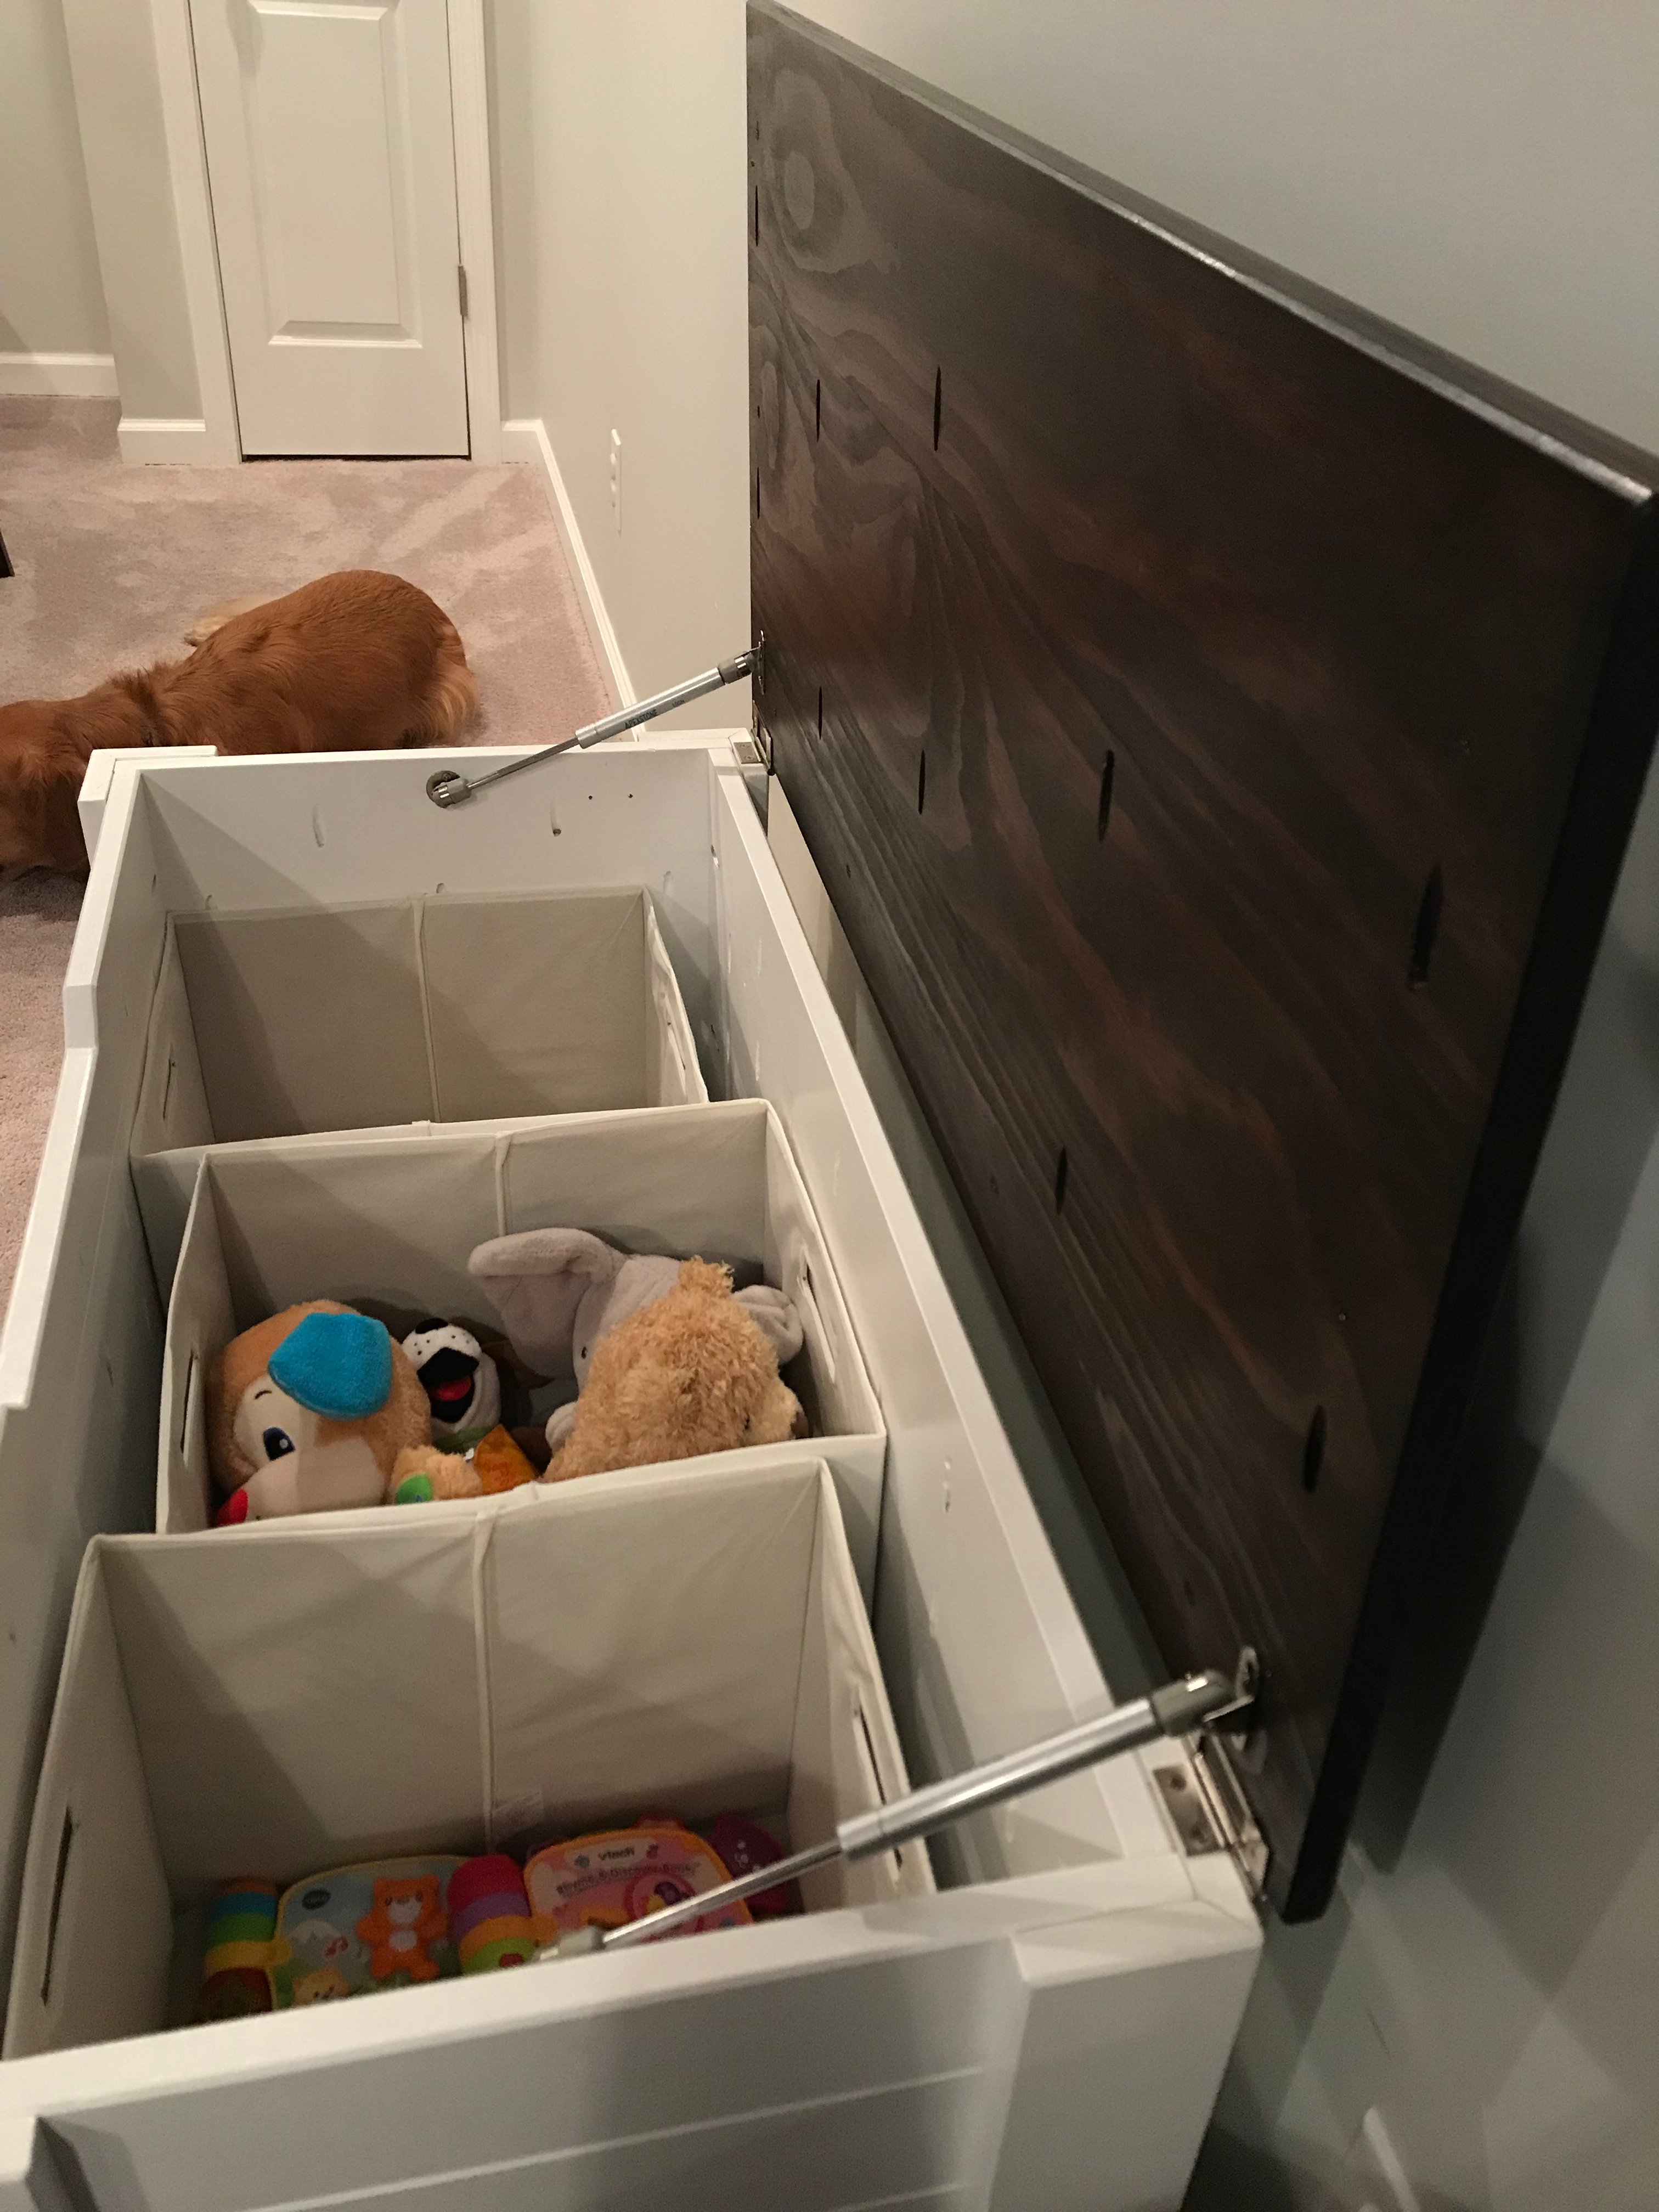
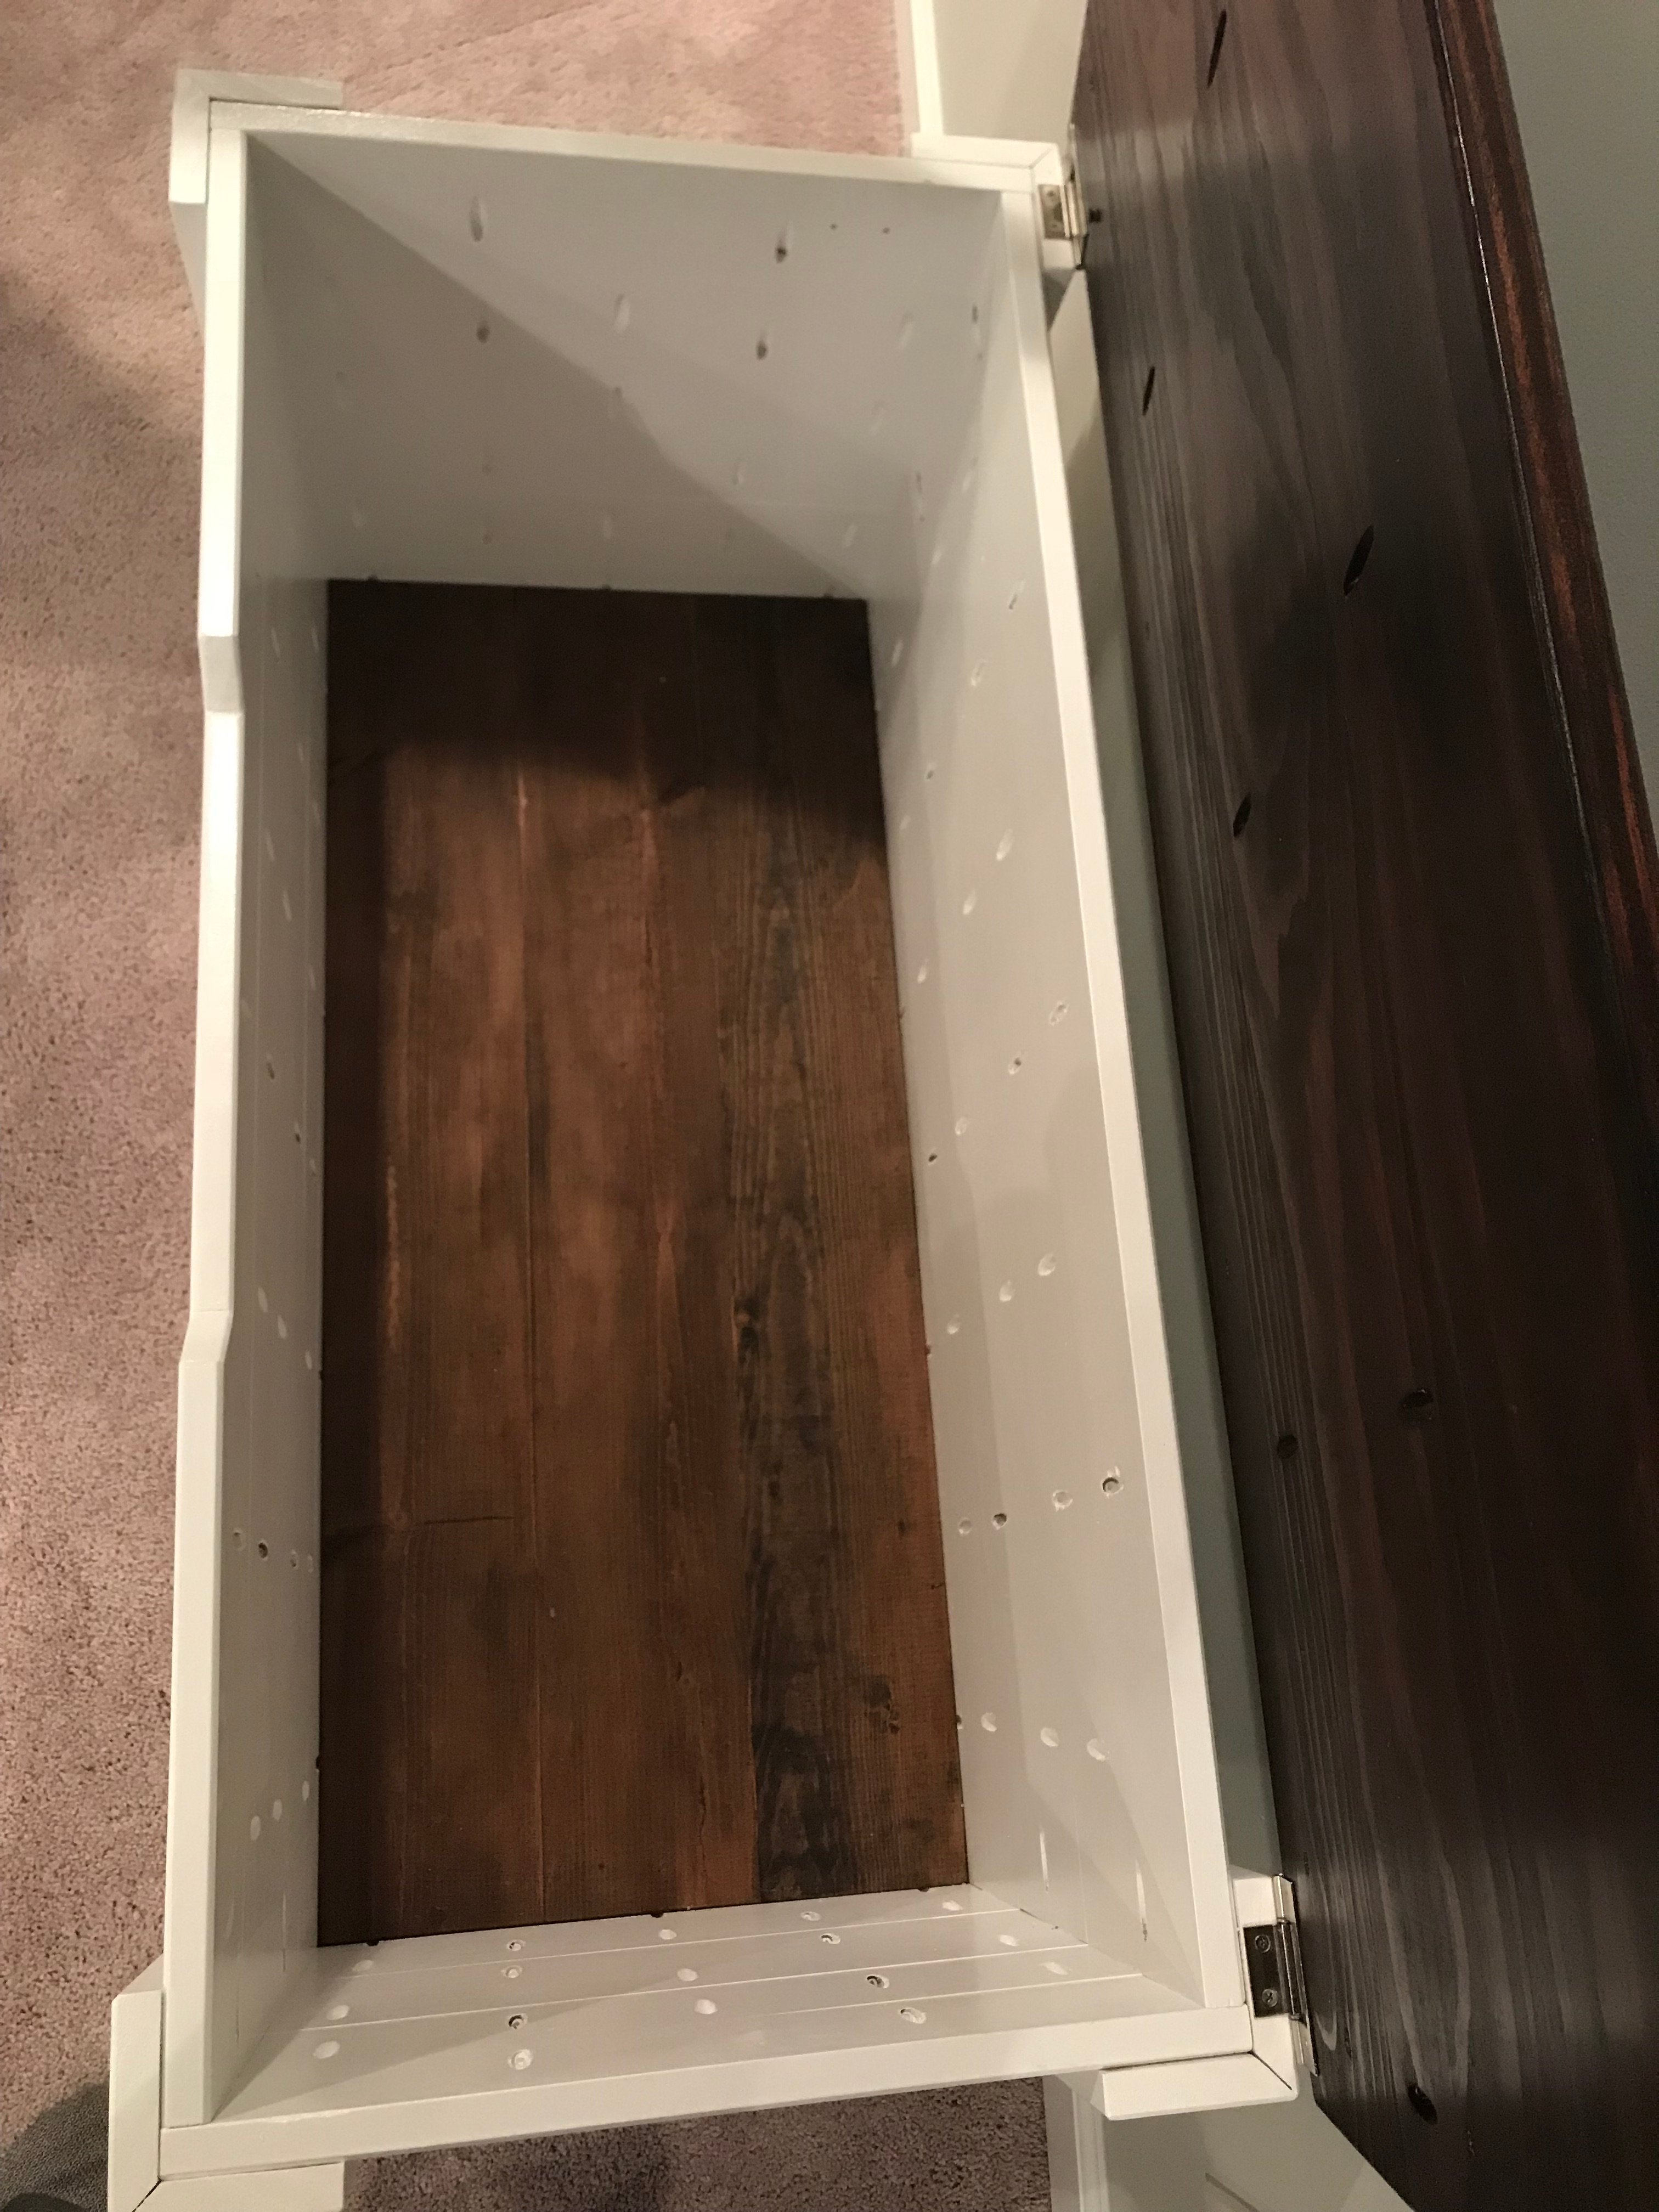
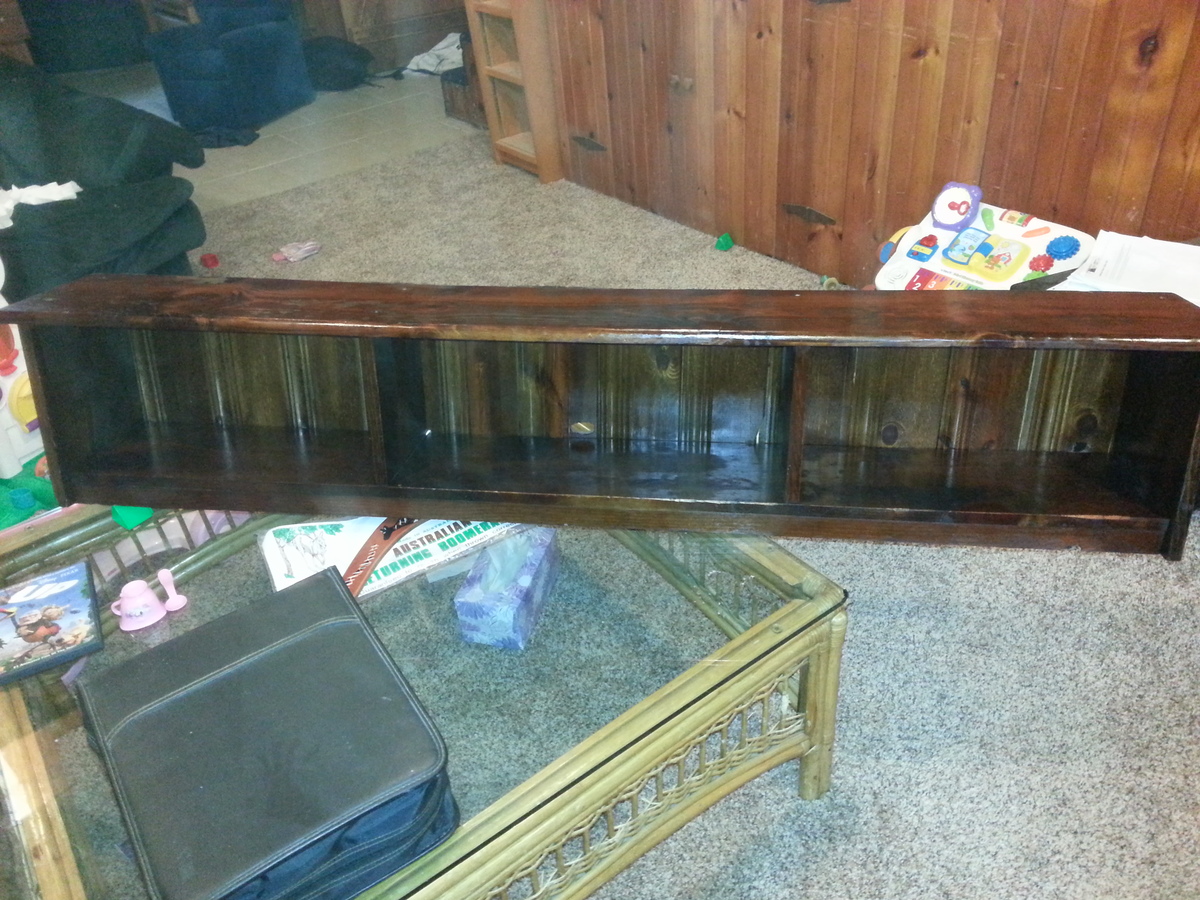
Community Brag Posts

Toy Box

Submitted by taurusbia on Mon, 10/07/2013 - 09:42

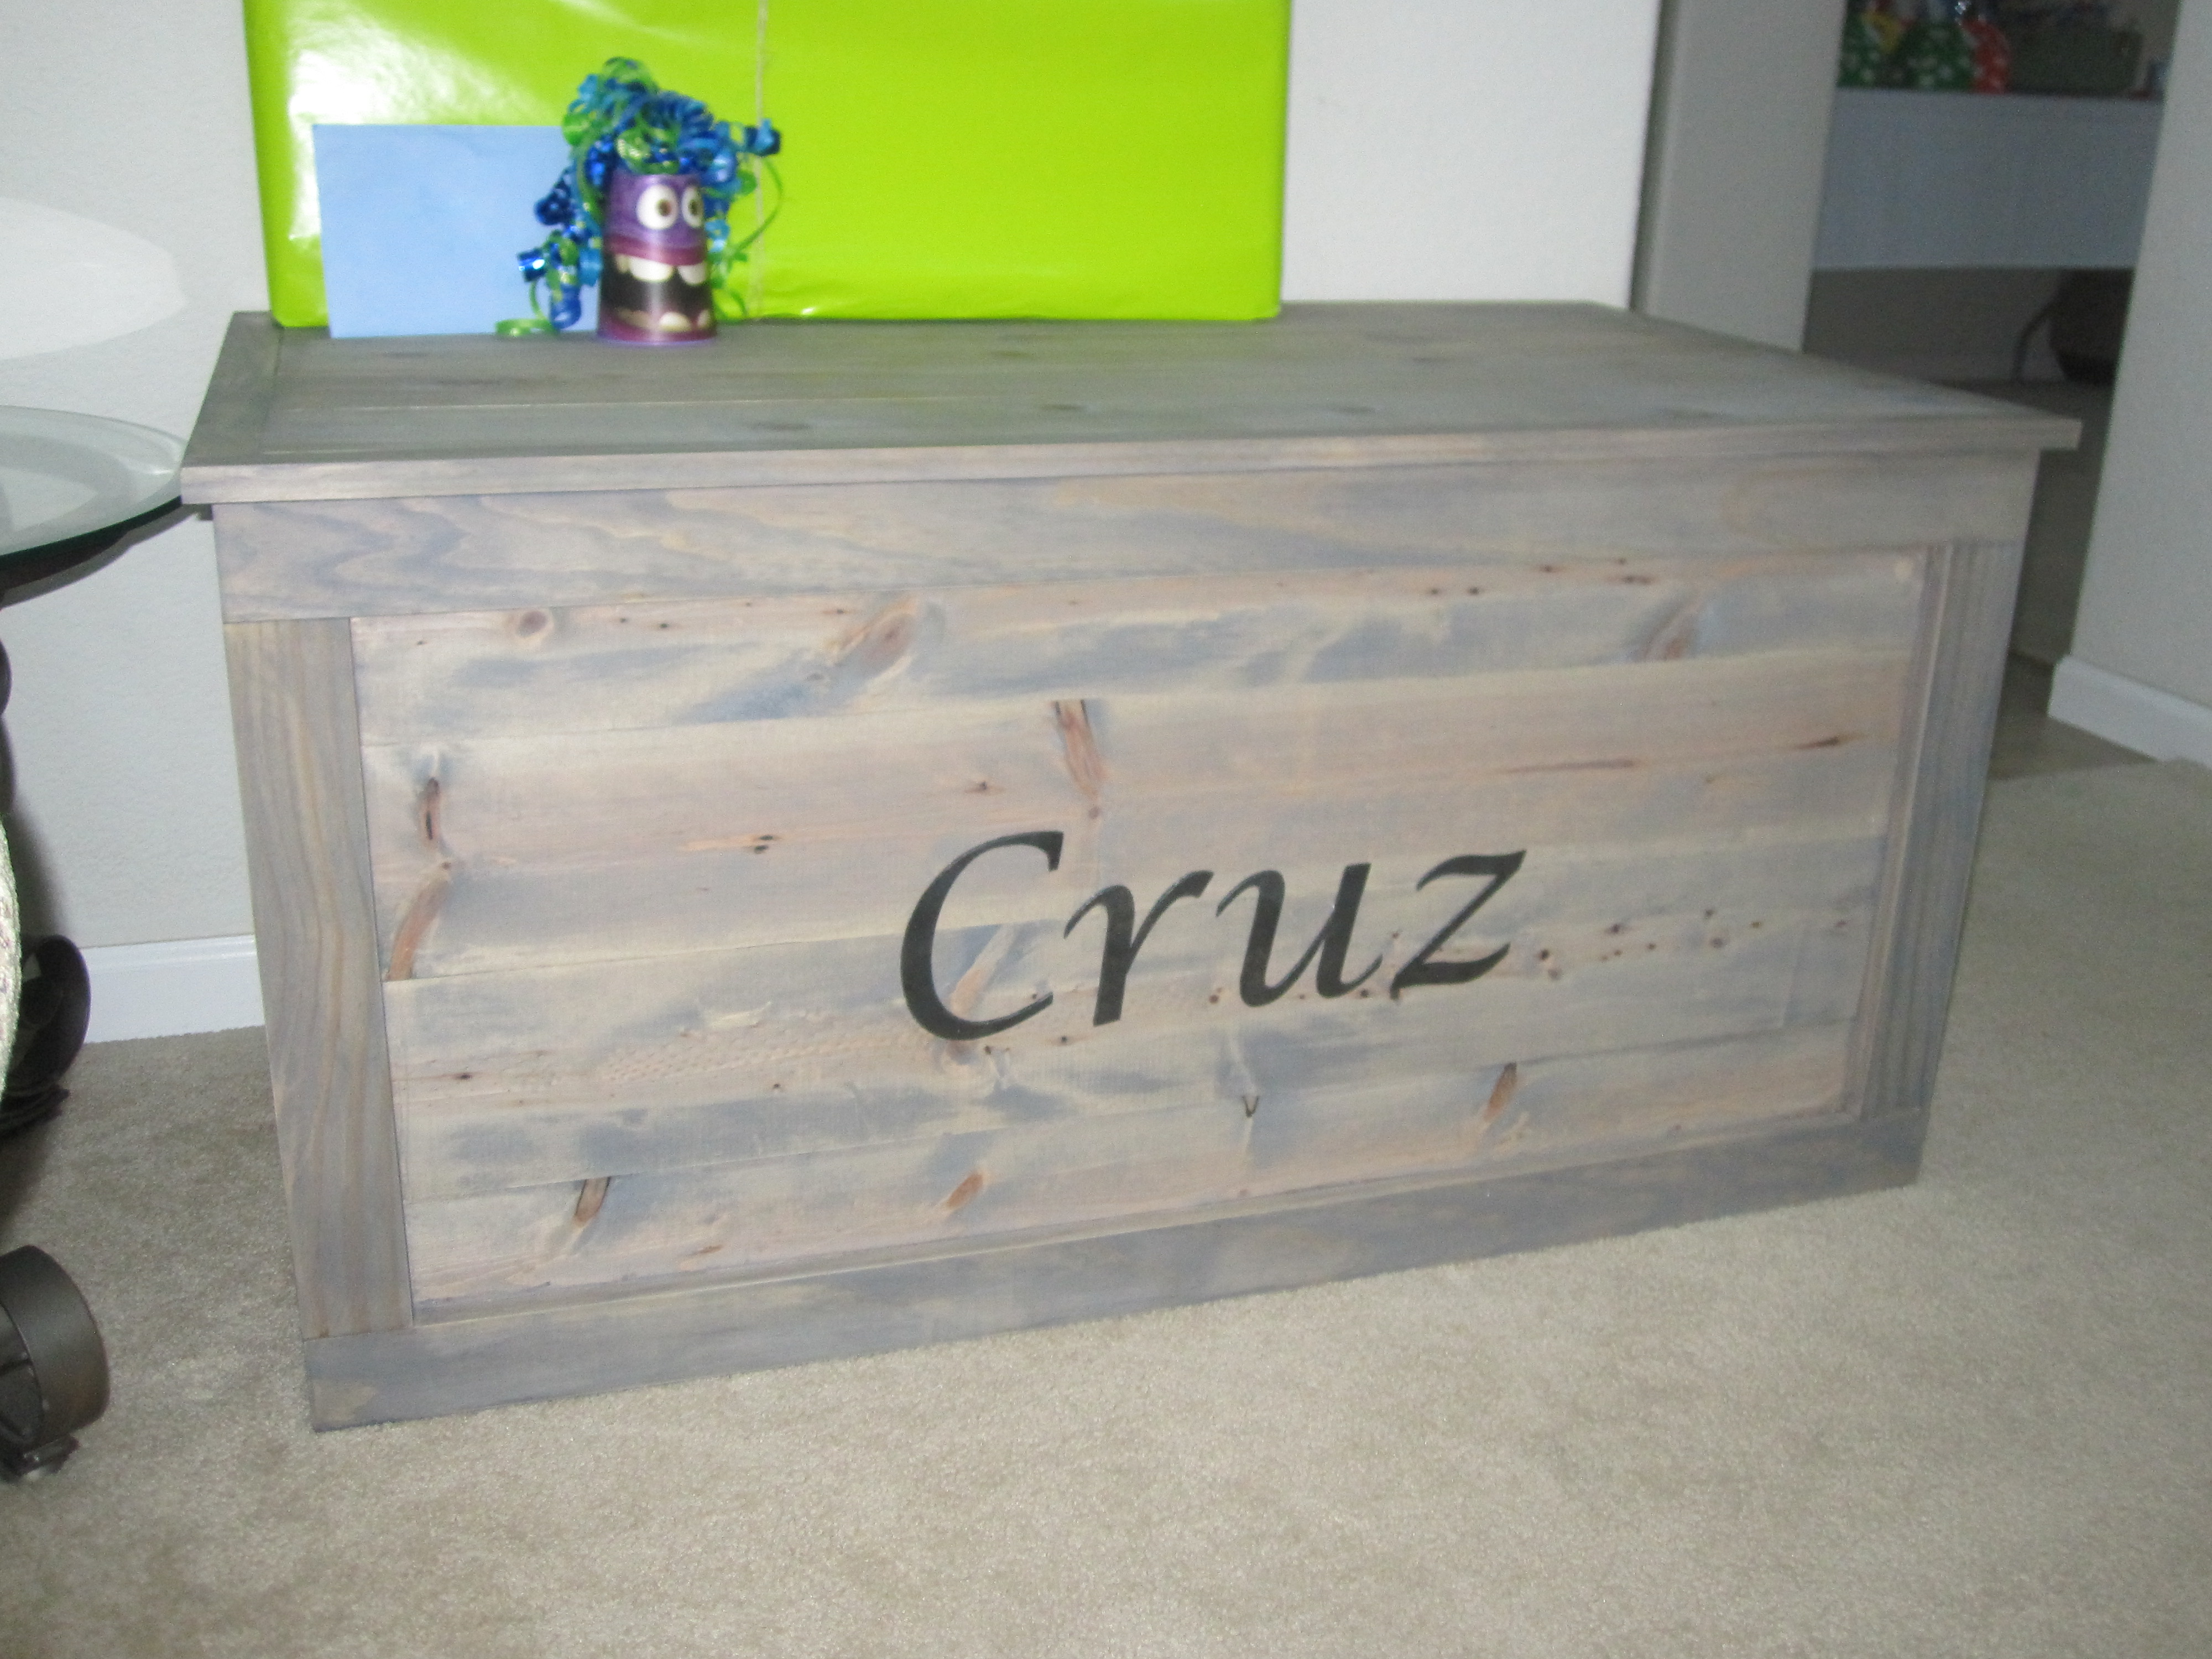
I made this toy box for my nephew for his first birthday.

Built from Plan(s)
Estimated Cost
$125
Estimated Time Investment
Weekend Project (10-20 Hours)
Finish Used
Classic Grey from Minwax
Recommended Skill Level
Intermediate

Comments

Our Kitchen Plan Set

Submitted by Anonymous (not verified) on Mon, 12/28/2015 - 07:19

Plans were fantastic for this build and our kids love it! Thanks!

Estimated Time Investment
Weekend Project (10-20 Hours)
Recommended Skill Level
Beginner

Comments

Shelf

Submitted by Anonymous (not verified) on Sat, 03/02/2019 - 12:29

My garage has the concret lip so I chopped the legs running along the wall to sit on top of the lip.  Additionally, the garage floor is at a slight incline so I took more time to cut each leg to ensure the shelf was level and didn't slant with the floor incline.

Estimated Cost
can't remember...been 3 years.
Estimated Time Investment
Weekend Project (10-20 Hours)
Finish Used
Sanded & Stained
Recommended Skill Level
Beginner

Fancy Jewelry Box

Submitted by Anonymous (not verified) on Fri, 01/27/2023 - 11:53

Made from white and red oak with laser engraved top

Built from Plan(s)

Comments

Drawer Organization

Submitted by takahler on Sun, 10/09/2011 - 17:16

I got this idea from another poster. I already have a custom built silverware drawer divider, but decided that this would be a very nice thing to have for my two messy utensil drawers. I built for both drawers yesterday. Love them! I made one for my brother's tiny silverware drawer this morning and now my mom has requested them for 3 of her drawers. :-) It is so nice to be able to do something like this for them.

Estimated Cost
$5 For both drawers--free for my brother's, because I just used scraps
Estimated Time Investment
An Hour or Two (0-2 Hours)
Recommended Skill Level
Starter Project

Country Style Wall Mount for Bedroom TV

I hated wall mounts sold at stores and have been looking at a way to kind of make my TV look like it was in a picture frame. So with some help from my head designer (wife) I came up with this. I wanted some little shelves on the sides so my wife could put little knickknacks or pictures in. Hope ya'll like it. I will take better pictures soon.

Estimated Cost
$100
Estimated Time Investment
Weekend Project (10-20 Hours)
Finish Used
Rust-Oleum kona satin paint.
Recommended Skill Level
Starter Project

loft bed with side stairs.

Submitted by Anonymous (not verified) on Tue, 12/29/2015 - 16:46

This took about 10 hours total. I actually built 2 versions. Both in about 20 hours total. One taller with stairs going away from the bed and this one shorter with stairs beside the bed. Had to make a lot of modifications durle to the dimensions of the room being so small and square. Overall though the plans really helped. Thanks Ana for having these plans available to use.

Estimated Cost
$130.
Estimated Time Investment
Weekend Project (10-20 Hours)
Finish Used
White high gloss spray paint...horrible idea. Use paint and a roller. It took forever and a dozen cans. Dumbest idea I have had in a while to use spray paint.
Recommended Skill Level
Intermediate

Farmhouse Entryway Table

Submitted by Anonymous (not verified) on Fri, 03/08/2019 - 19:22

This week we made a farmhouse entryway table out of only 5 2x4's for about $15! It was super easy and only took half a day. We used plans we found on this site. We love the look of the new rustic console table. It adds a lot of pop to the foyer and a great place to drop your keys and mail.

Estimated Cost
$15
Estimated Time Investment
Afternoon Project (3-6 Hours)
Finish Used
Stain
Recommended Skill Level
Beginner

Ana White's Plans... Adirondack Chairs with center table

Submitted by Anonymous (not verified) on Tue, 01/31/2023 - 16:52

Ana is Awesome! I built these from her plans. It was super easy, lots of fun, and the compliments are non-stop.

Thank you Ana.

Comments

Mud Room - Inspired by Braden Entryway Collection

Submitted by flicker237 on Thu, 10/13/2011 - 09:19

We had a small mud room off our back door that was in need of serious help! We started from scratch in this room - framing, drywall, floor, molding, etc. To complete the room, we modified the Braden Entryway Hutch and shoe bench plans to fit the dimensions of our space, and add a third cubby. It has worked wonderfully!

Estimated Time Investment
Weekend Project (10-20 Hours)
Finish Used
White paint (2 coats)
Recommended Skill Level
Beginner

Comments

John Deere Storage Beds

My wife and I have twin 2 1/2 year olds. We needed to get them out of their cribs and into a real bed. At the same time we needed a larger area to store their clothes, shoes, etc. I reviewed and followed Hailey Storage Bed Plan. The only alterations that I made to the plan is that I changed the color, added some decorative touches, and added 6 draws. The bed has a John Deere theme. I attached a John Deere sign on the headboard and then added trim around the sign.

Built from Plan(s)
Estimated Cost
275-400
Estimated Time Investment
Weekend Project (10-20 Hours)
Finish Used
Paint
Recommended Skill Level
Beginner

Loft/bunk bed remix

Submitted by Anonymous (not verified) on Fri, 01/01/2016 - 17:15

I reworked the Camp loft bed and the classic bunk bed plans to work better in this narrow room.  Our kids love it!

Estimated Cost
$125
Estimated Time Investment
Weekend Project (10-20 Hours)
Finish Used
White satin interior paint
Recommended Skill Level
Intermediate

Love how it turned out

Submitted by Anonymous (not verified) on Wed, 03/13/2019 - 22:38

farm house bed frame. Easy fun project 

Recommended Skill Level
Intermediate

Comments

Corner Desk Build

Submitted by eahodges on Mon, 02/06/2023 - 12:15

This was all my husband - he did a great job using the modular desk plans to customize (its a bit larger) this desk for our office. He finished it this past weekend so not much on it yet!

Comments

Simple Outdoor Loveseat with Storage

Submitted by kareylynn on Wed, 10/19/2011 - 10:20

I added storage to the bottom of the simple outdoor loveseat by creating one big board from 2 2x6 boards for each of the front, back, and side aprons using my KregJig. Then I added cleats around the bottom for a sheet of plywood, extra cleats around the top edge for the seat, and put the hinge on the original seat support board.

Estimated Cost
$120 for the lumber and $300 for the cushions.
Estimated Time Investment
Week Long Project (20 Hours or More)
Finish Used
Provencial stain with two light coats of Poly.
Recommended Skill Level
Advanced

Comments

Seasonal And Holiday

Pottery Barn Inspired Console Table

Submitted by katie0910 on Tue, 10/15/2013 - 12:03

Our very first build! I love how it turned out and I am so excited to have a great piece of furniture for a fraction of the price!

Built from Plan(s)
Estimated Cost
$70
Estimated Time Investment
Weekend Project (10-20 Hours)
Finish Used
Minwax Polyshades and Minwax Polycrylic
Recommended Skill Level
Beginner

Comments

Reclaimed Wood Bar Ensemble

Submitted by JoanneS on Sun, 01/03/2016 - 06:03

This bar ensemble for our family room was made mostly from reclaimed materials. Inspired by Ana’s plans, and modified to fit spaces and materials available. The 36” tall bar and 30” tall fridge cabinet are made from frames of 2x4, with the tops/shelves/outsides covered in ¼” plywood, and outside edges covered with corner moulding. The bar and fridge cabinet tops are edged in lattice. The frames for the counter height bench and stool are from 2x4. The padded seat for the bench is the back from another bench, re-purposed. The foam for the bar stool is scraps pieced together. Reclaimed materials used (mostly from a room we disassembled): 2x4 – formerly studs ¼” Plywood – painted plywood was formerly used as wall paneling Lattice –was used as trim to cover the wall paneling “seams” Bar stool seat – ¾” plywood from the closet, foam scraps pieced together Bar bench seat – foam and vinyl covered plywood (re-purposed back from another bench)

Estimated Cost
Cost: The total ensemble was super inexpensive (only about $50 in total) since most of it is reclaimed materials. The corner moulding, 1 quart gloss gray paint, a box of screws, and vinyl for the stool were the only things purchased for this build. The first partial quart of gray paint was left over from another project. The paint flakes were left over from the floor project and the poly was left over from my holiday gift builds. Glue, filler, sandpaper and other fasteners were already on hand.
Estimated Time Investment
Weekend Project (10-20 Hours)
Finish Used
All pieces received 2 coats of Clark & Kensington paint + primer in Smooth Slate, gloss. The tops for the bar and fridge cabinet then received a coat of gloss polycrylic, and a sprinkling of some Behr paint flakes (brown mix) over the wet poly. After drying, the tops received 3 additional coats of gloss poly. The bar and cabinet corners and stool legs have some scraps of self-adhesive felt applied to the bottoms to protect the floor.
Recommended Skill Level
Beginner

Farmhouse Toy Box

Submitted by Anonymous (not verified) on Thu, 03/21/2019 - 11:28

Picture of my own version of the Ana White Design linked here
http://www.ana-white.com/2017/01/DIY_furniture/farmhouse-style-toy-box-…

Added Gas Shocks from Amazon 100N/18lbs.

Estimated Time Investment
Week Long Project (20 Hours or More)
Finish Used
White Paint
Minwax Espresso
Minwax Red Mahogany
Recommended Skill Level
Intermediate

Fireplace

Submitted by Anonymous (not verified) on Sun, 02/12/2023 - 07:05

Built this fire place using Ana’s plans and bought the same insert she had. Loved the way it turned out! I added the cabinets and shelving to each side.

Comments

XMass is coming... 4 different styled Doll Farmhouse Beds for my nieces...

Submitted by cyber7 on Mon, 10/24/2011 - 05:24

Christmas is coming and instead of spending huge amounts on plastic toys I decided, with the help from my wife, to create some presents for my nieces (3). I realize that all girls, young or old, have some kind of keep-sake toy and I thought this will be perfect. I made them on size for (I think it is called) 1st born babies. Thank you Ana, your project was not only easy to follow, but a real reward, once completed. I did, however, make some changes to the head-boards so the nieces don't fight over who's-who :)

Estimated Cost
ZAR150.00 (+/- $18) per bed
Estimated Time Investment
Day Project (6-9 Hours)
Finish Used
Filled the holes, sanded and painted with 2 coats of PVA.
Recommended Skill Level
Beginner

Comments

dingdong (not verified)

Mon, 11/21/2011 - 04:51

Great build, Cyber-7
You are going to make some kid very happy.

Captains Bed

Submitted by ndetermann on Fri, 10/18/2013 - 02:17

My little girl needed a bed and her room is really small so I wanted to make her a bed that had a lot of storage for her and that she could grow into. I decided to make her a captains bed. My wife and I used pool noodles on each side of the bed under the covers. MacKenzie (my little girl 18 month old) absolutely loved the "big kid" bed.

Estimated Time Investment
Weekend Project (10-20 Hours)
Recommended Skill Level
Advanced