Community Brag Posts

Scooters!

Submitted by Anonymous (not verified) on Tue, 12/13/2016 - 07:17

I was excited to make these for my 2 nieces.  It was new for me to cut at degree angles but it came together well.  I did them over time but I'd estimate about 2.5 hours for each scooter (I'm a newbie). I ended up putting a 5th wheel in the front to stabilize it more.  Since it's a gift I thought better to be on the safe side.  Casters were much cheaper on amazon than at Home Depot.  

Thanks for the plans Ana! 

Estimated Cost
mostly scrap on hand. with casters and paint $20
Estimated Time Investment
Afternoon Project (3-6 Hours)
Recommended Skill Level
Beginner

Shelf/Desk Organizer

Submitted by Anonymous (not verified) on Wed, 08/26/2020 - 08:31

I loved the cubby storage idea from Ana. It was the perfect solution to help my family stay organized during virtual learning at home. I tweaked it a bit to match my more modern decor, but love it! Thanks for the inspiration!

Estimated Cost
$35 (2) 47" long organizers
Estimated Time Investment
Afternoon Project (3-6 Hours)
Finish Used
Paint
Recommended Skill Level
Beginner

New Farmhouse Dining Room Table

Submitted by searcyb on Sun, 11/11/2012 - 13:34

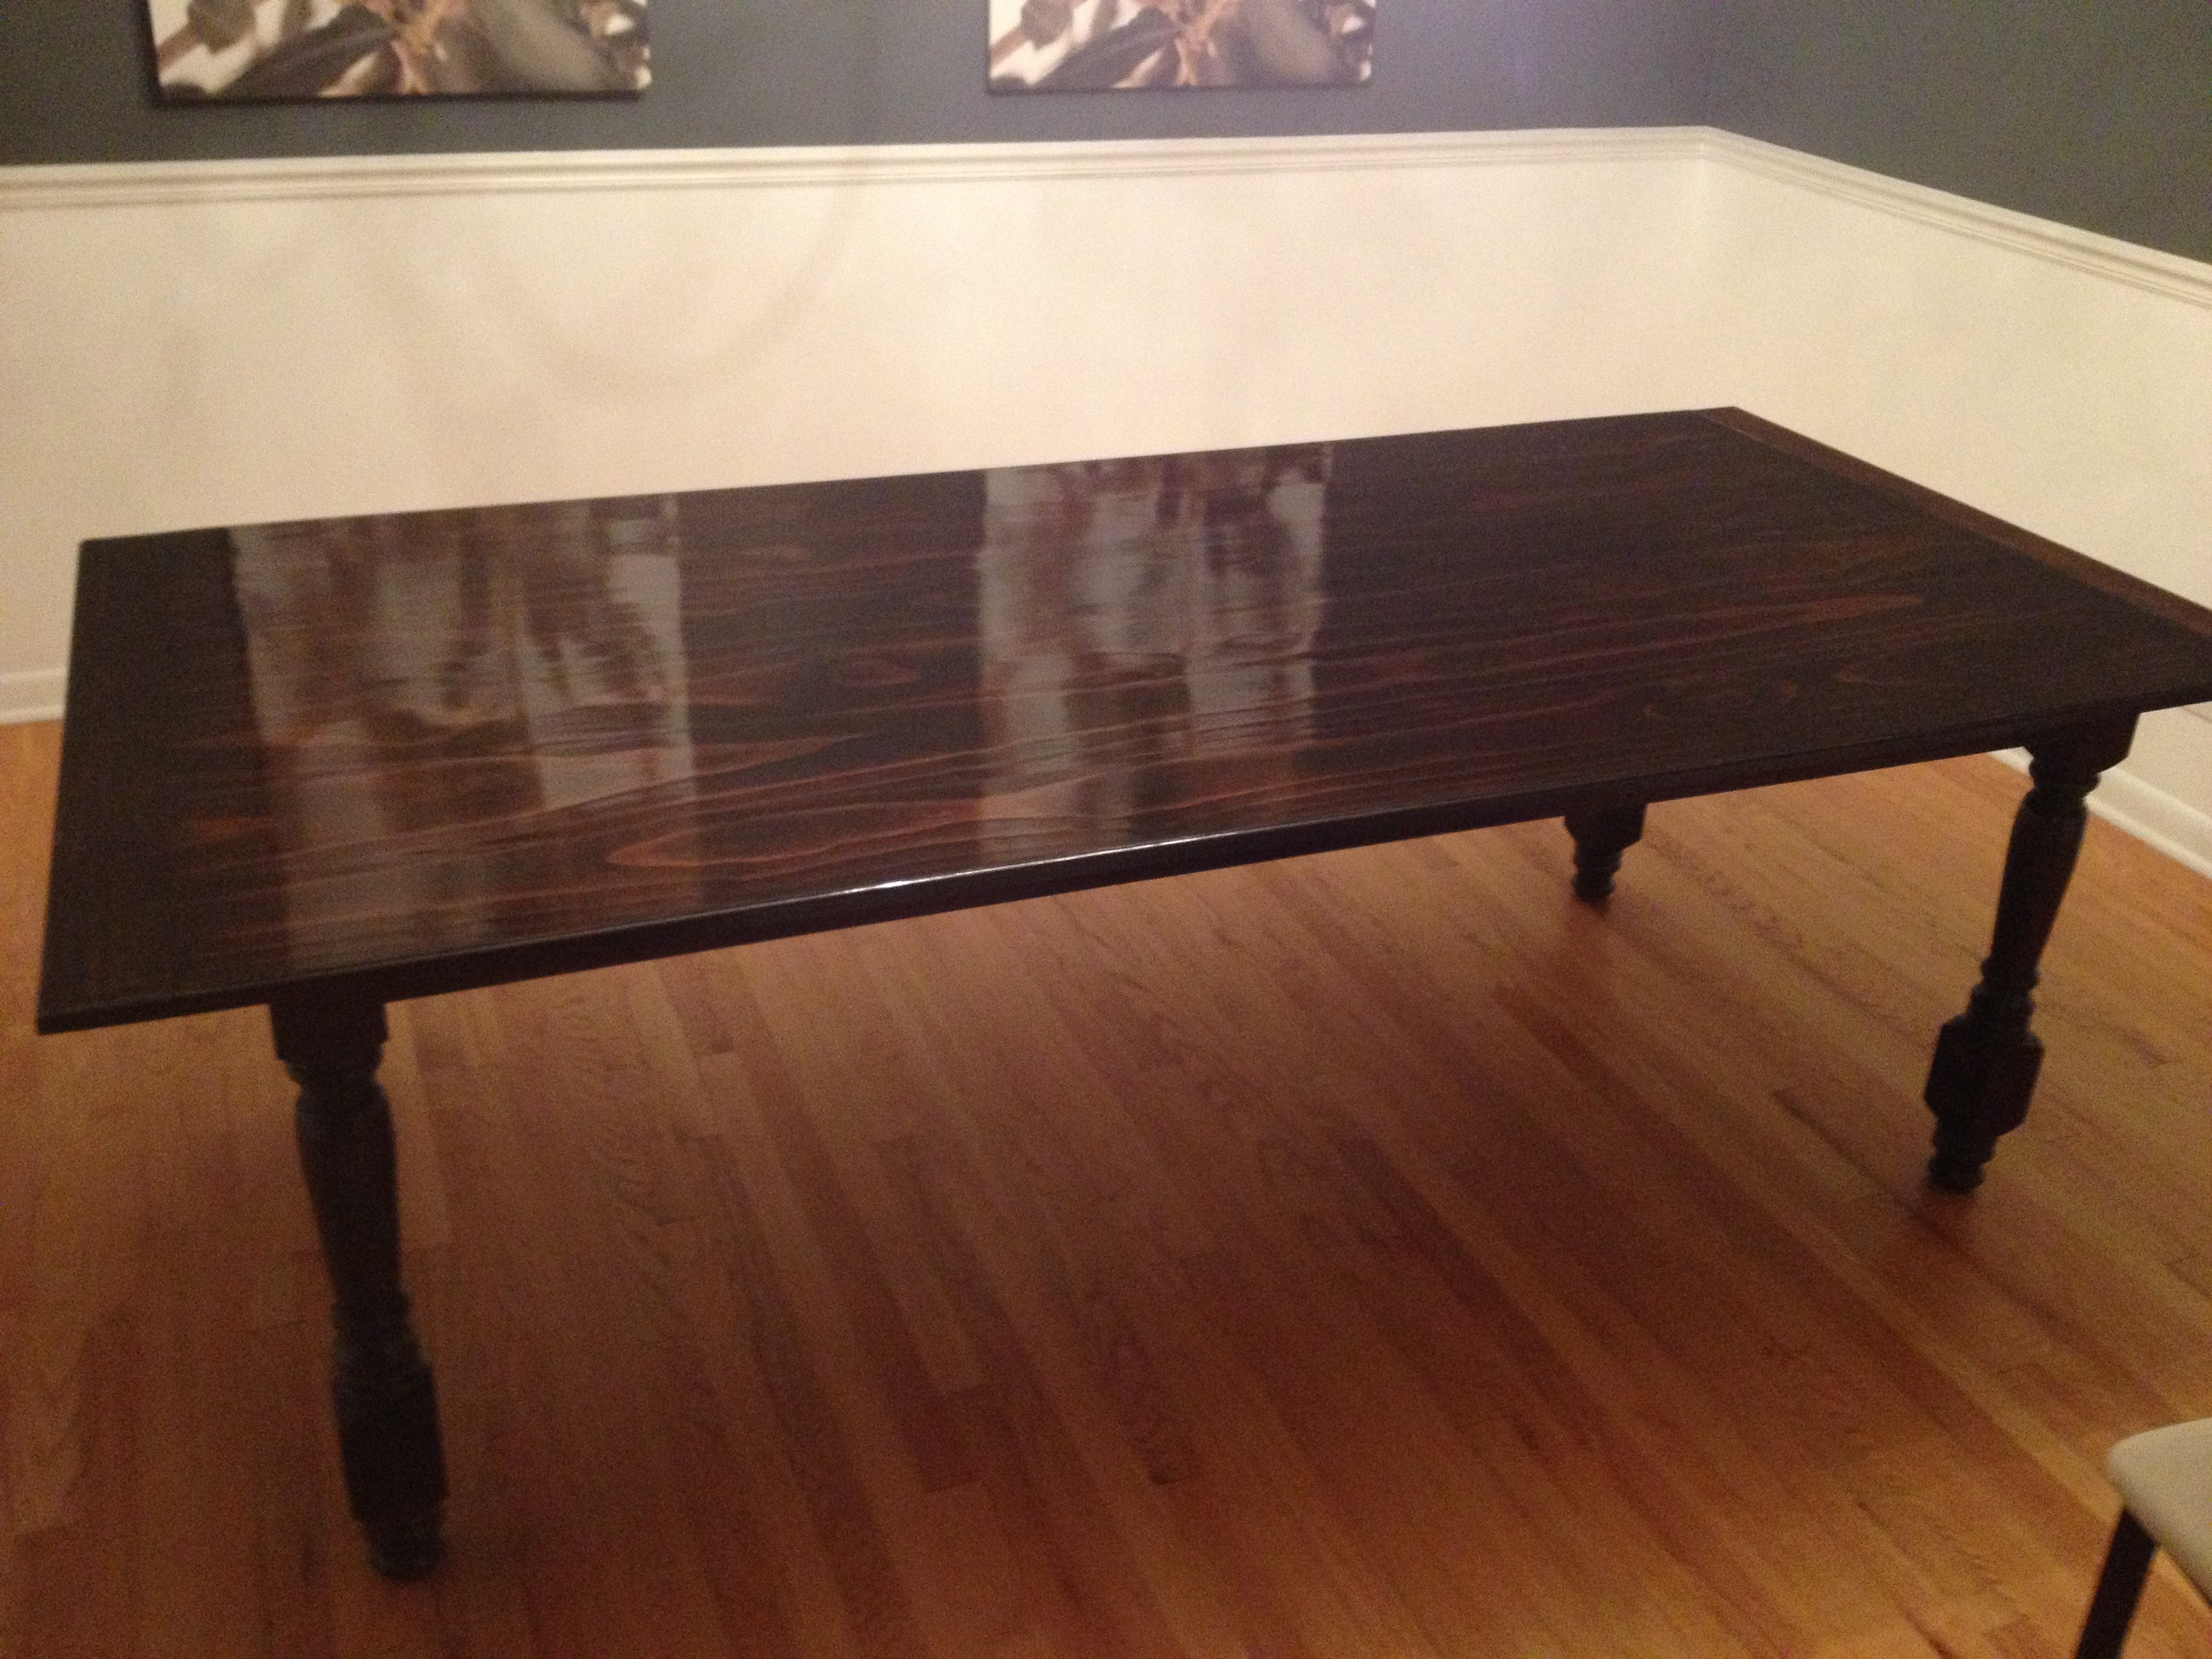
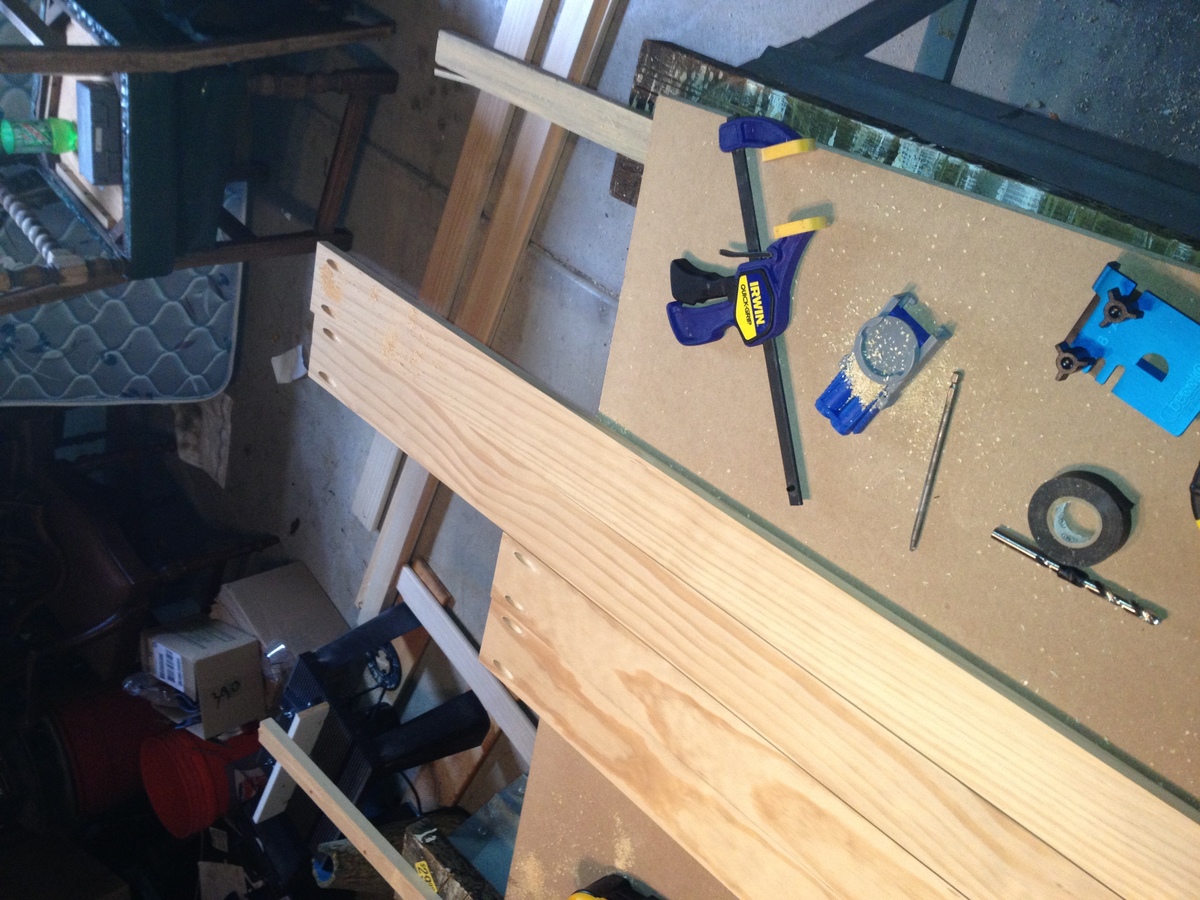
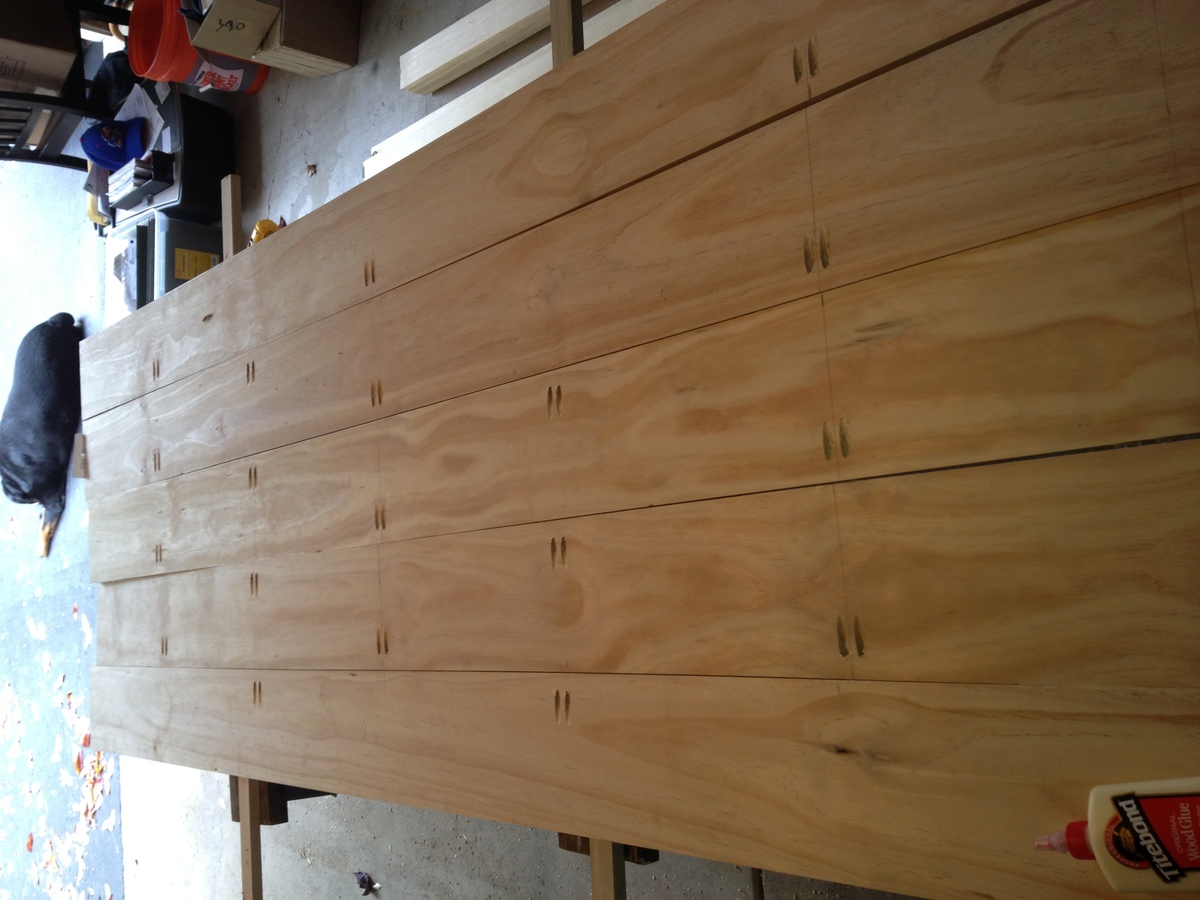
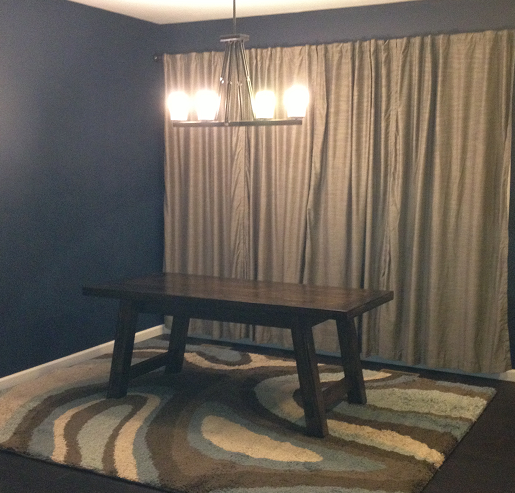
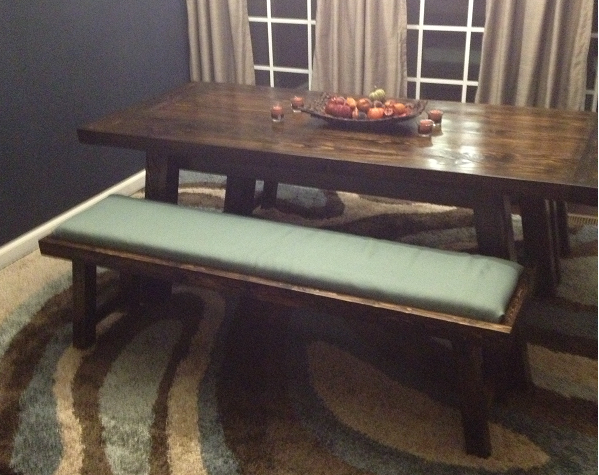
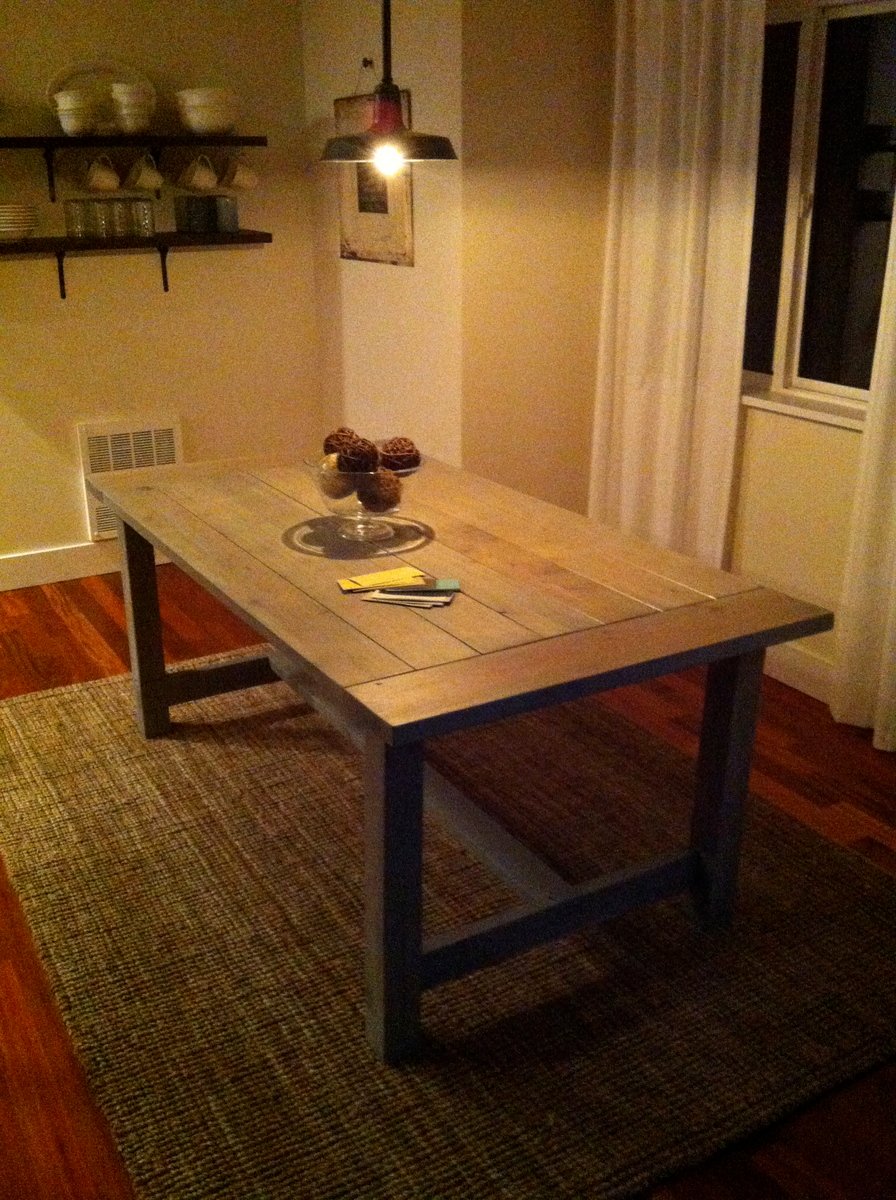
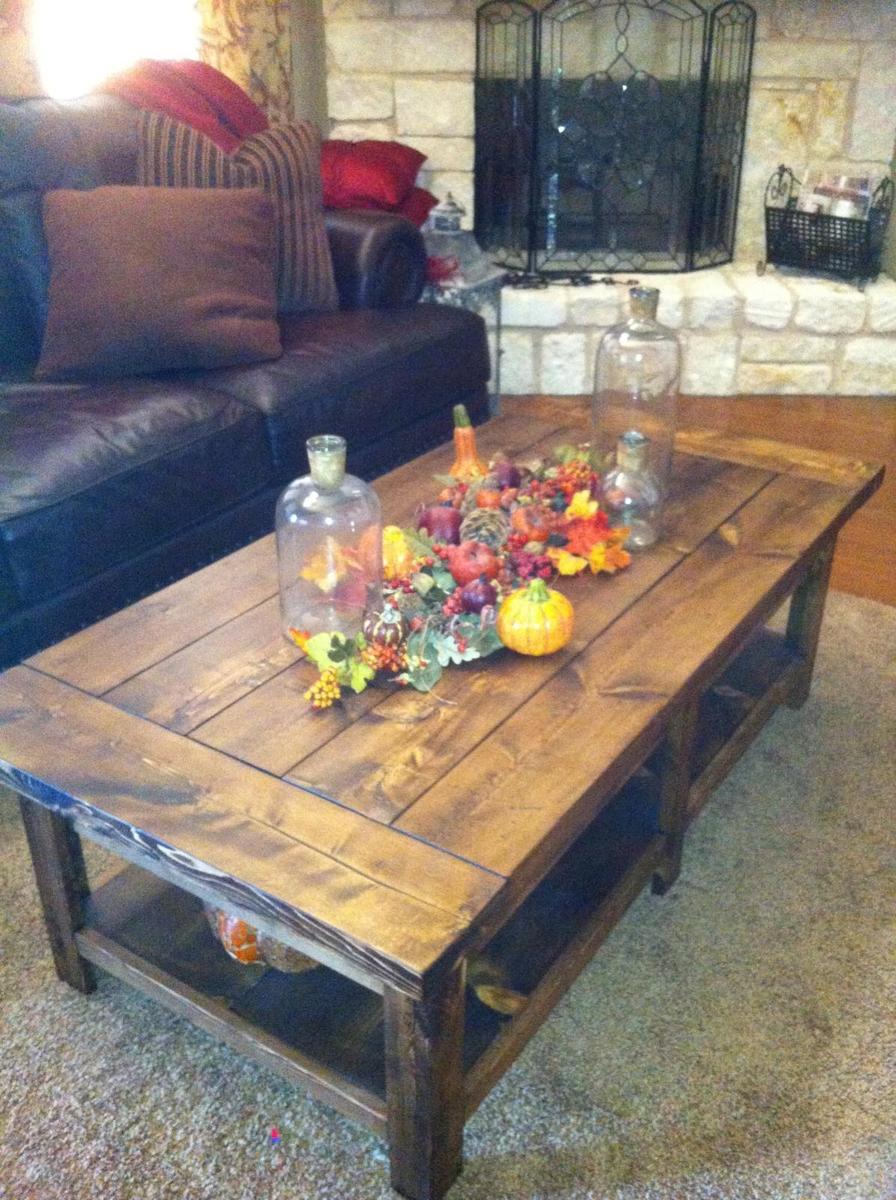
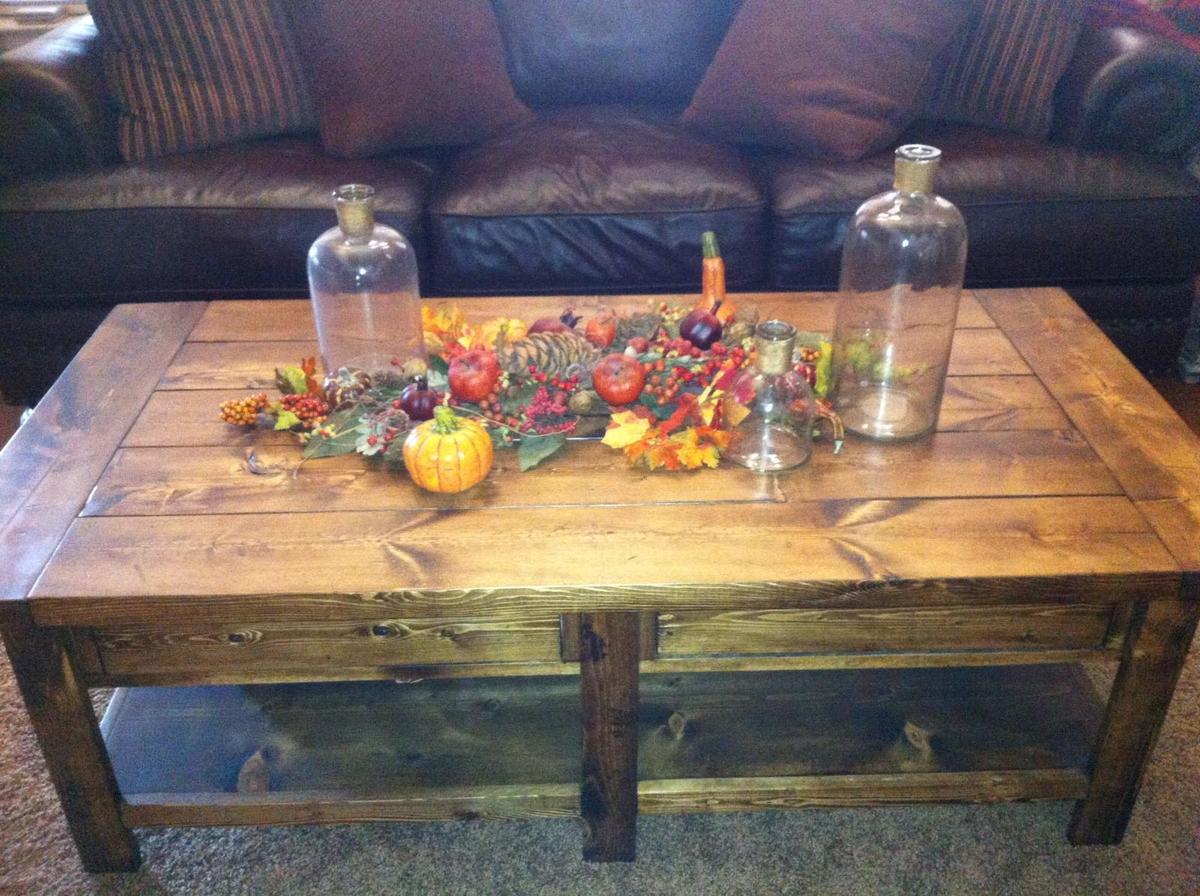
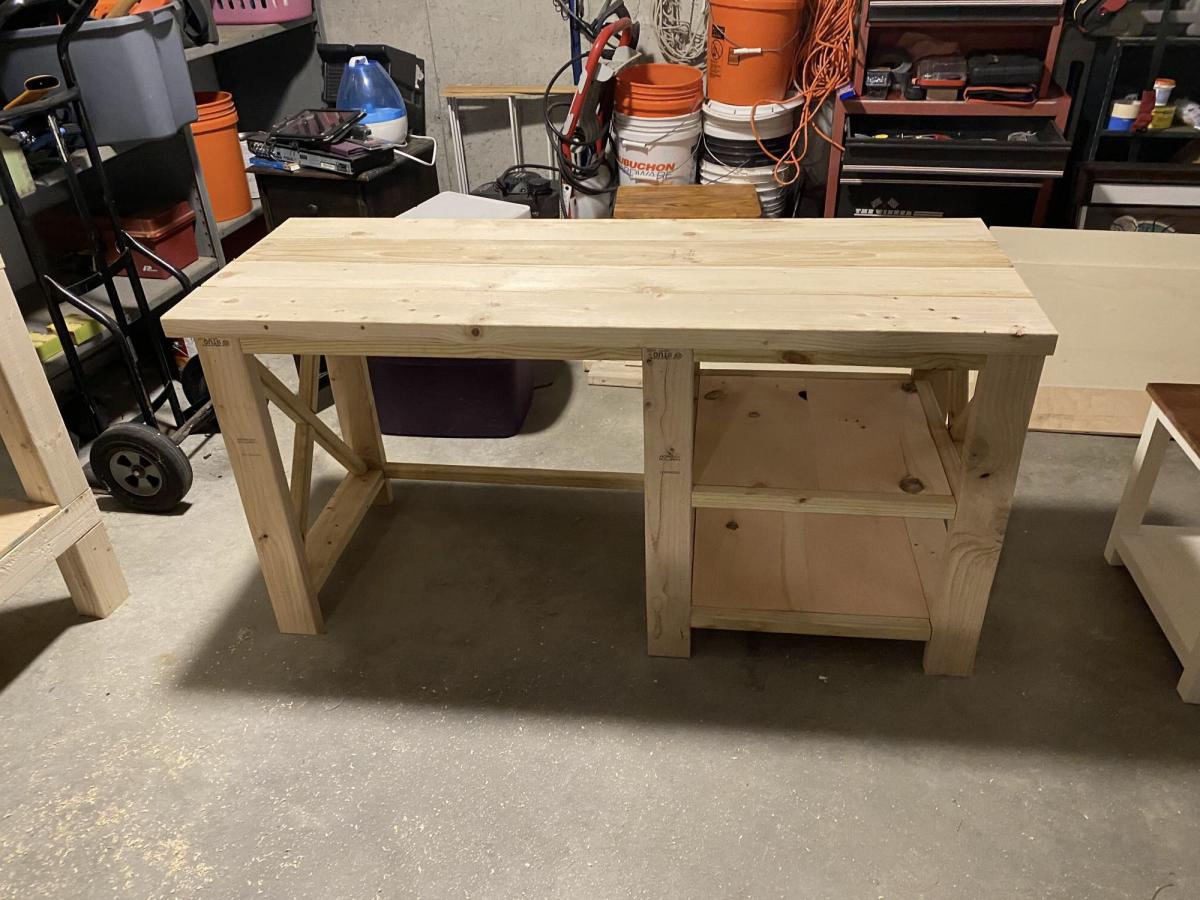
My family has been in need of a new place to sit and have dinner. As a homeowner with little experience in making furniture I decided "I can build one of the tables on Ana's website." I never thought I would learn as much in the long process. I watched Patrick Hosey's video on the Farmhouse table close to 15x to learn tips and tricks. Made a plan. Then went to Lowes to execute my plan. Got home, realized I needed more material than I originally thought and went back to Lowes. Unfortunately, that step happened more than I would like to report.

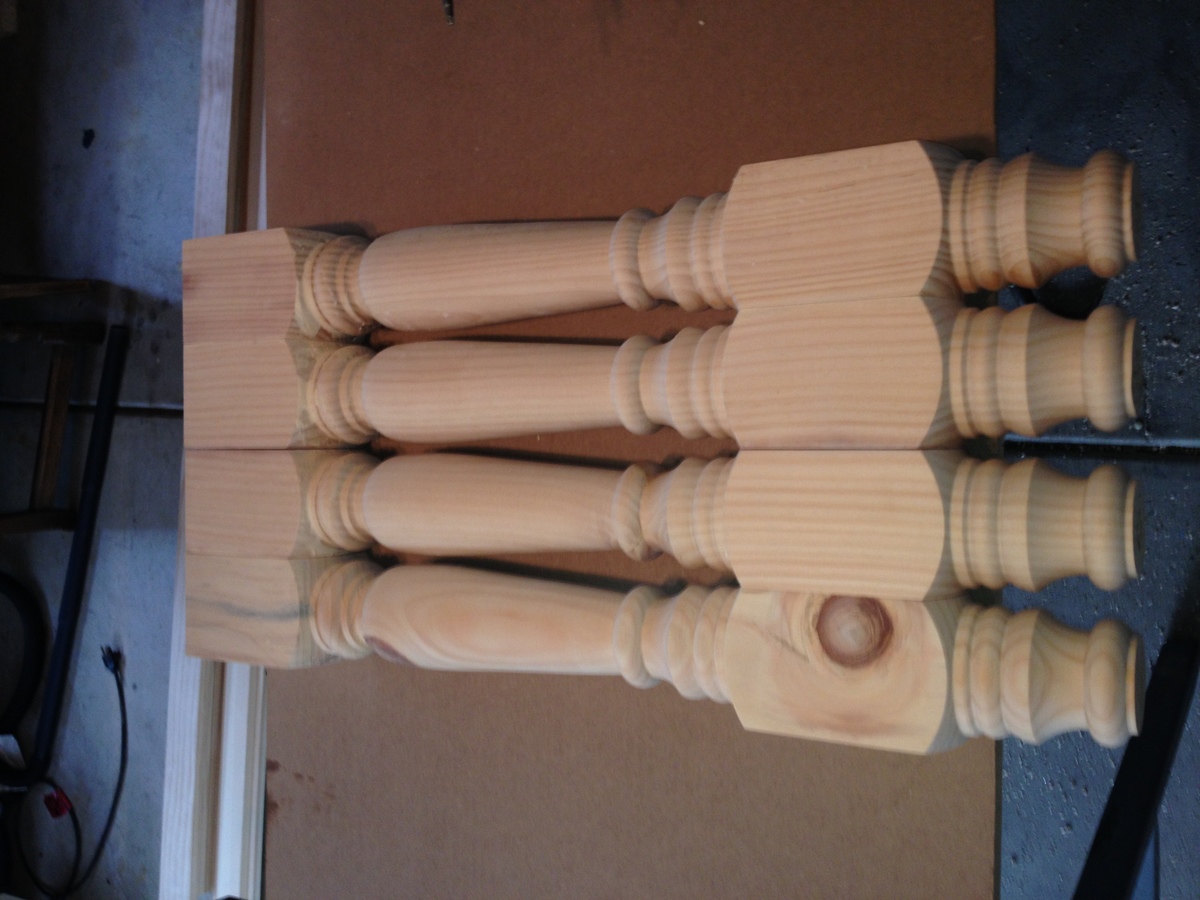
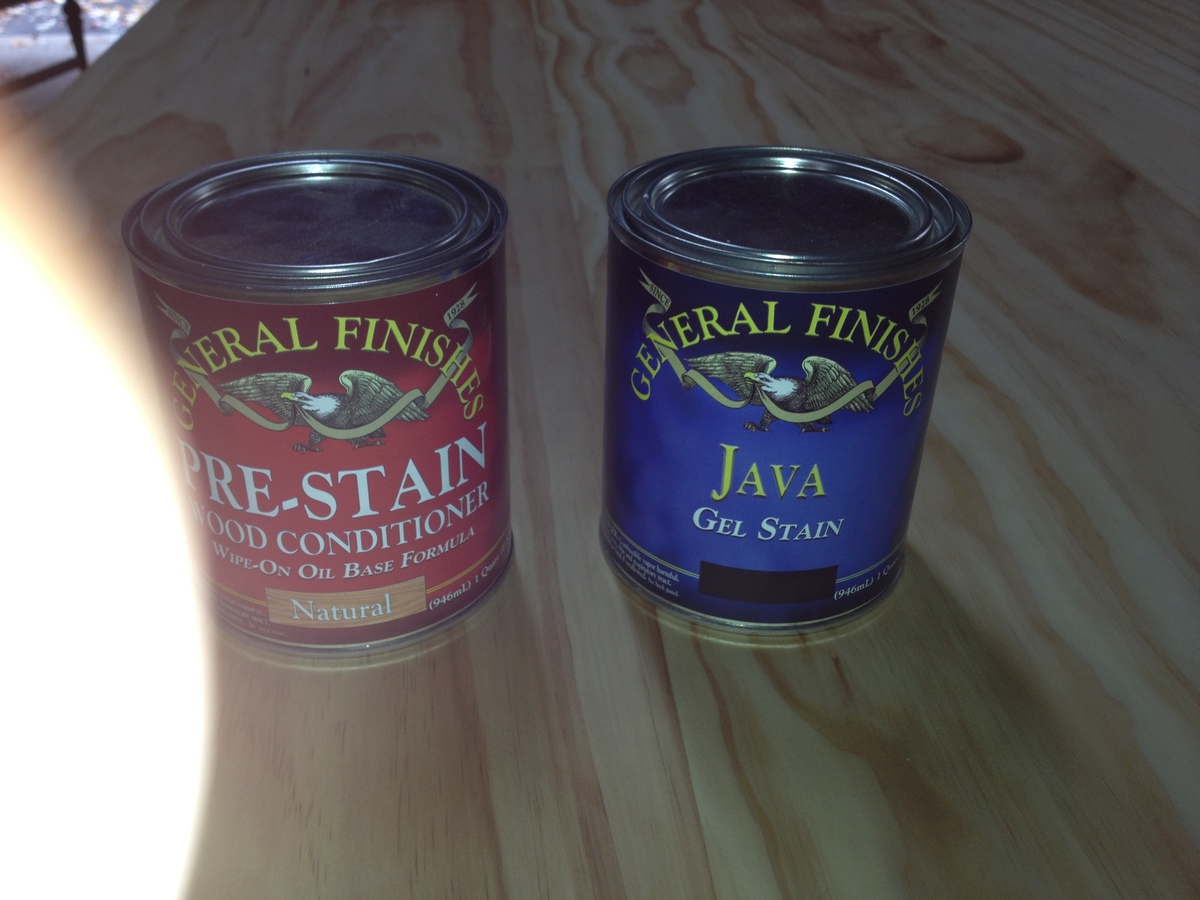
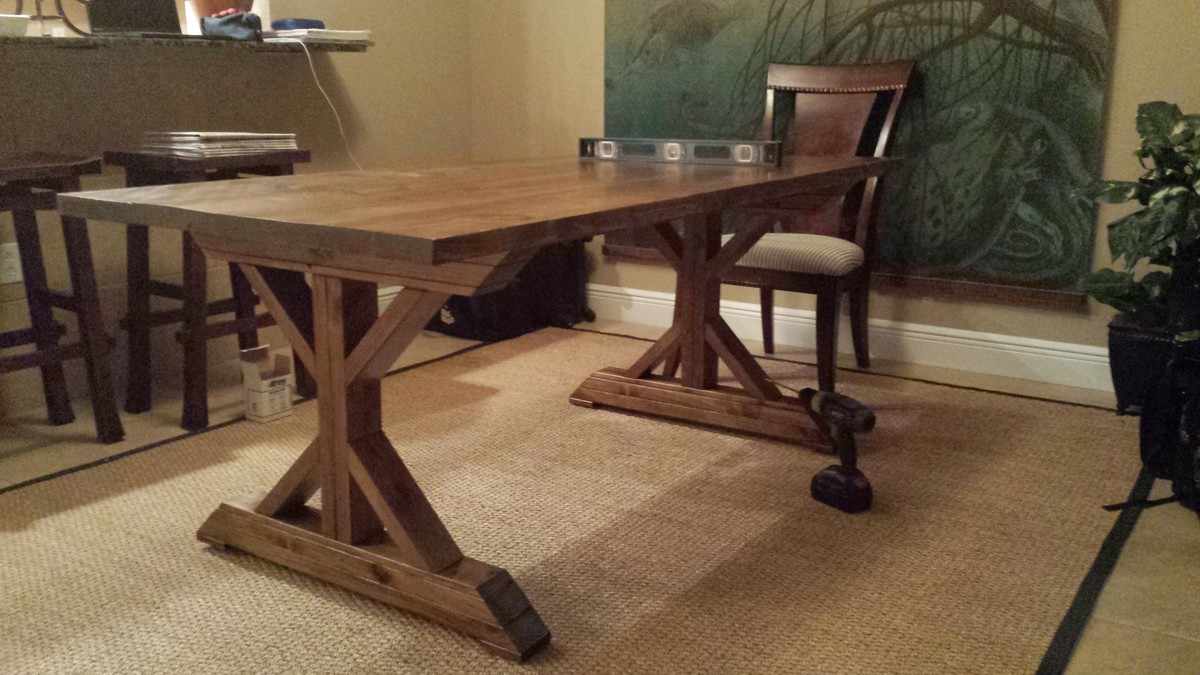
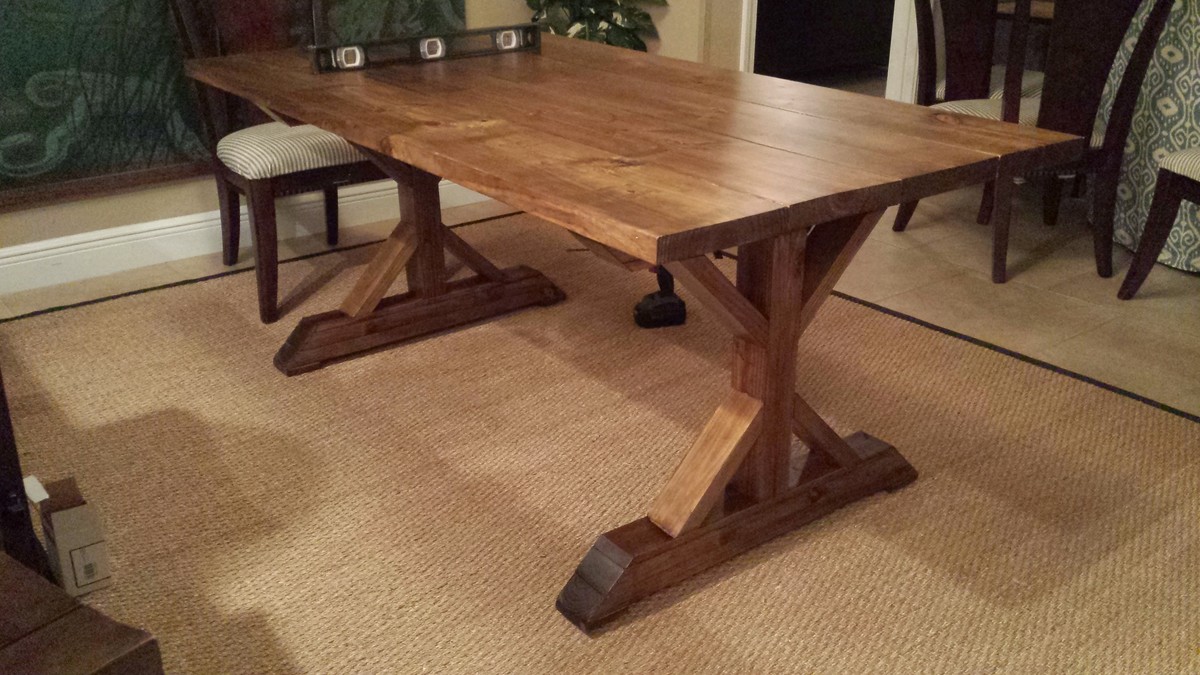
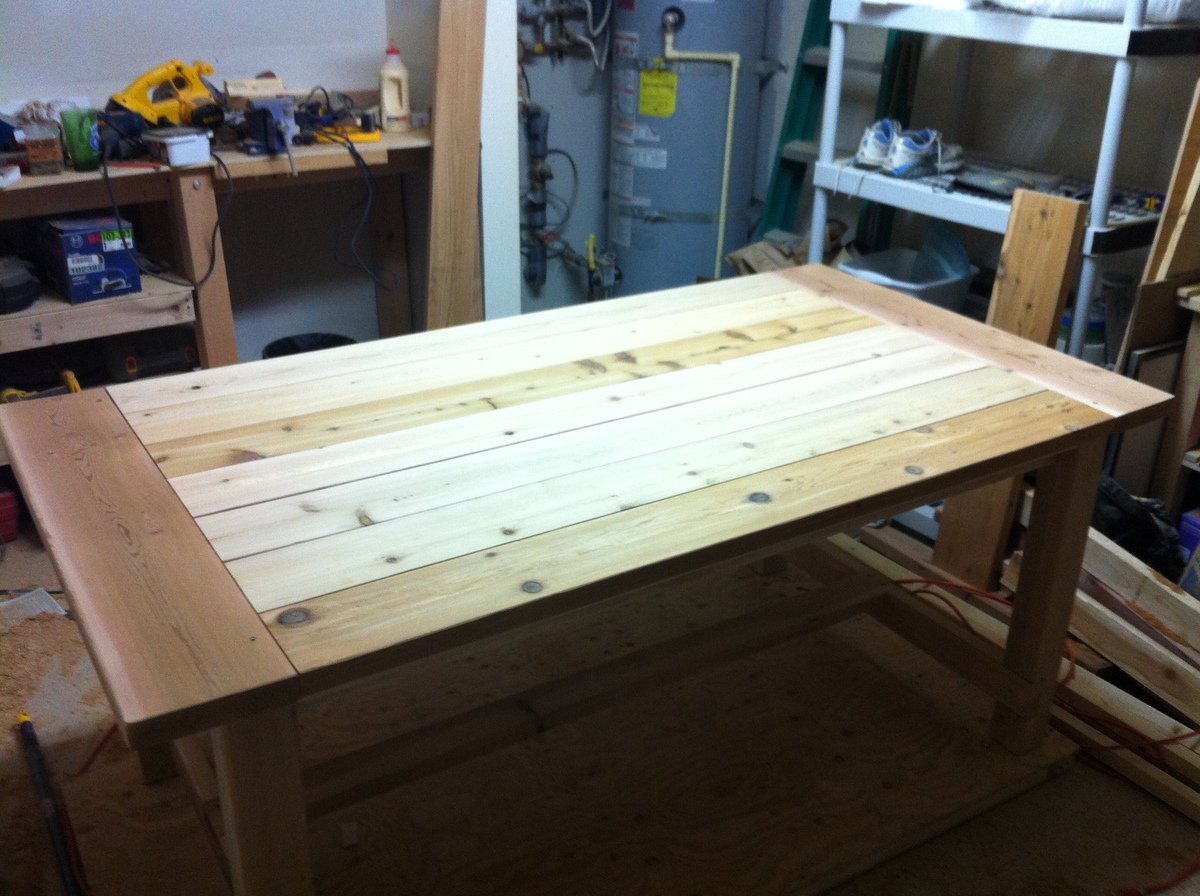
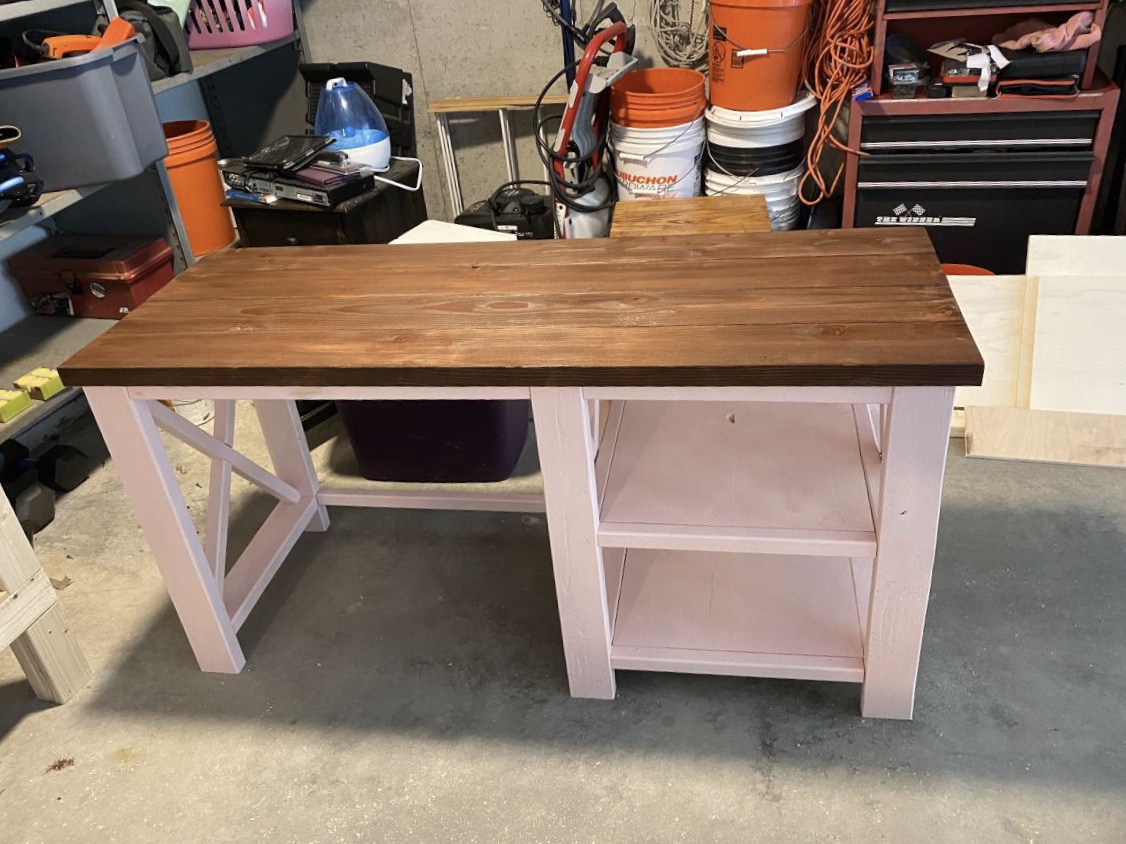
First lesson learned for me pine is a difficult wood to make perfect. Some of you might have had luck with using pine but in my hands it was very difficult. I had a hard time sanding with my Dewalt palm sander and not making the dreaded squiggles or curly q's. I, of course, didn't see them until after the first coat of gel stain was on. So I had to sand the table back down to the starting point.

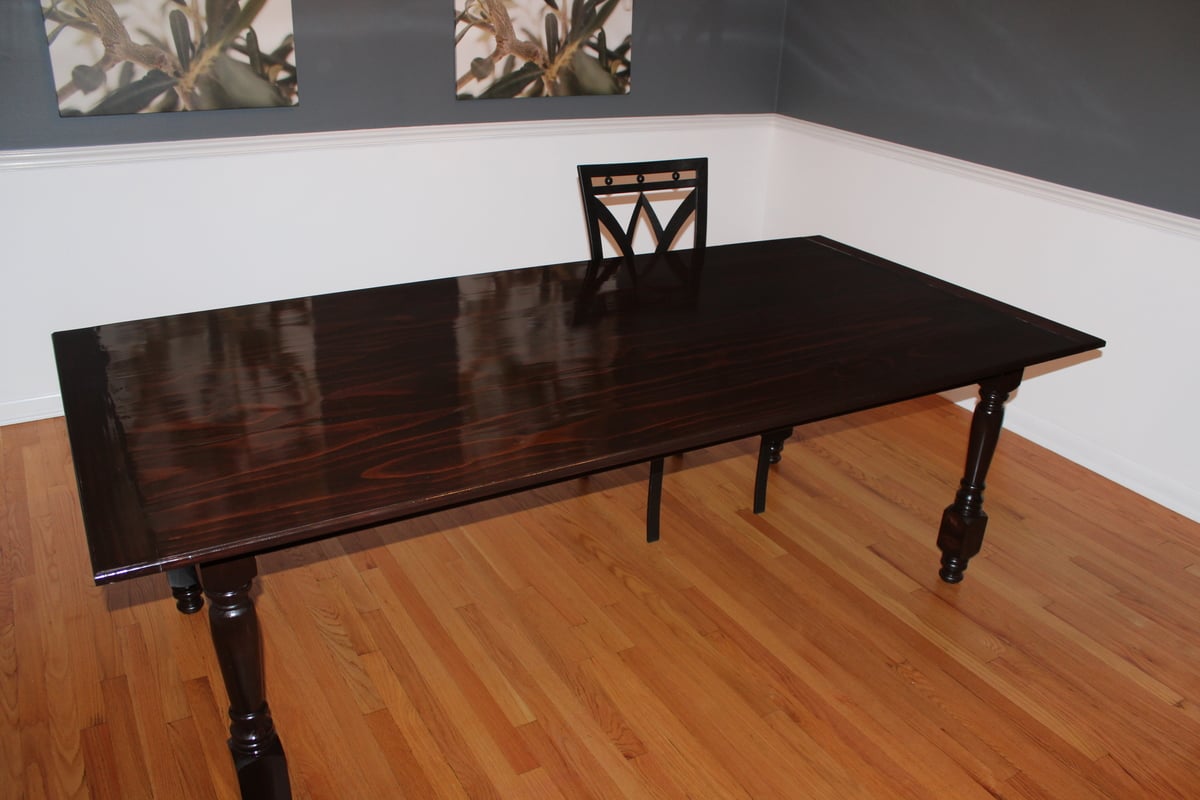
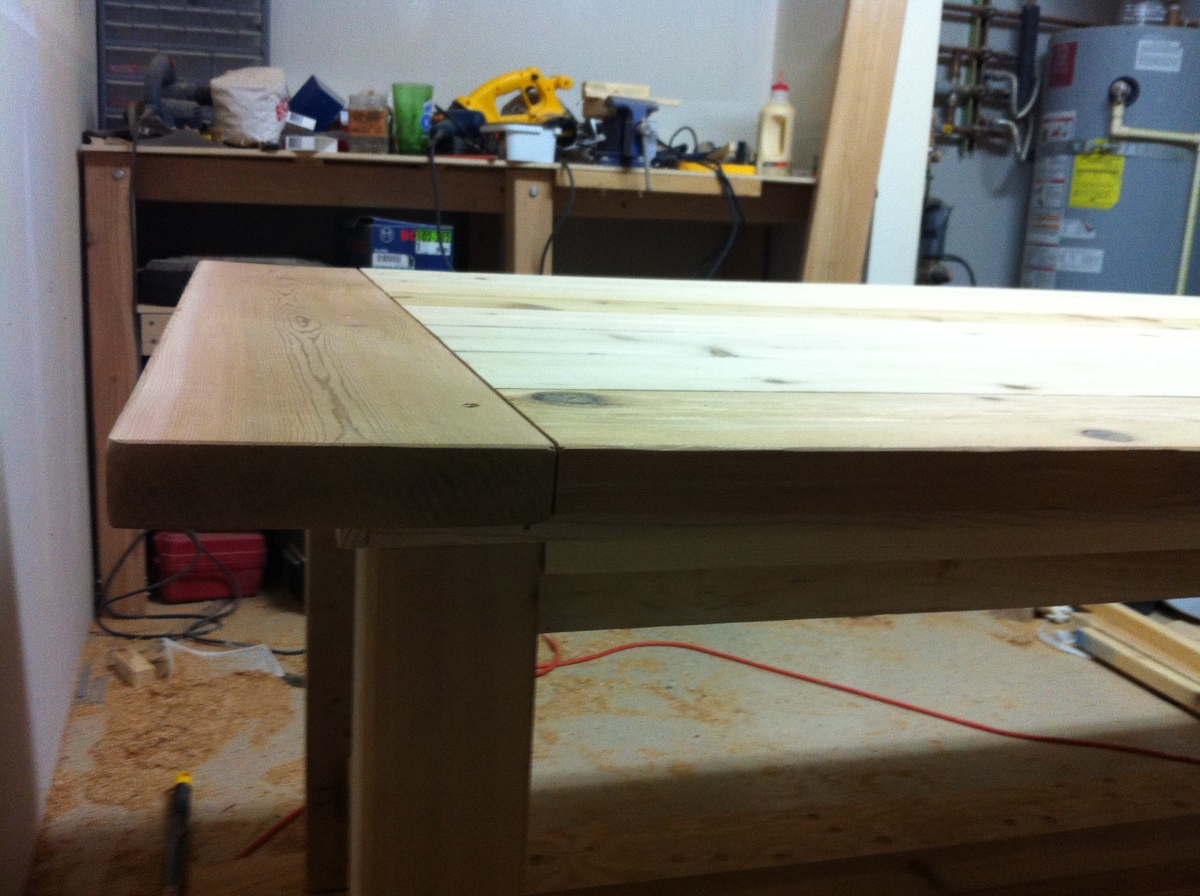
Second lesson learned for me was do not get ahead of yourself when applying the lacquer. I used a Deft Premium Gloss spray for my lacquer. I used Mineral Spirits to clean off any dust on the surface from lightly sanding . However, I made the mistake of putting on a second coat when I thought the mineral spirits were dry. This led to cracking and bubbling of the lacquer and a lot of swearing/drinking. I had to sand, very carefully, back down to the first layer and then start over.

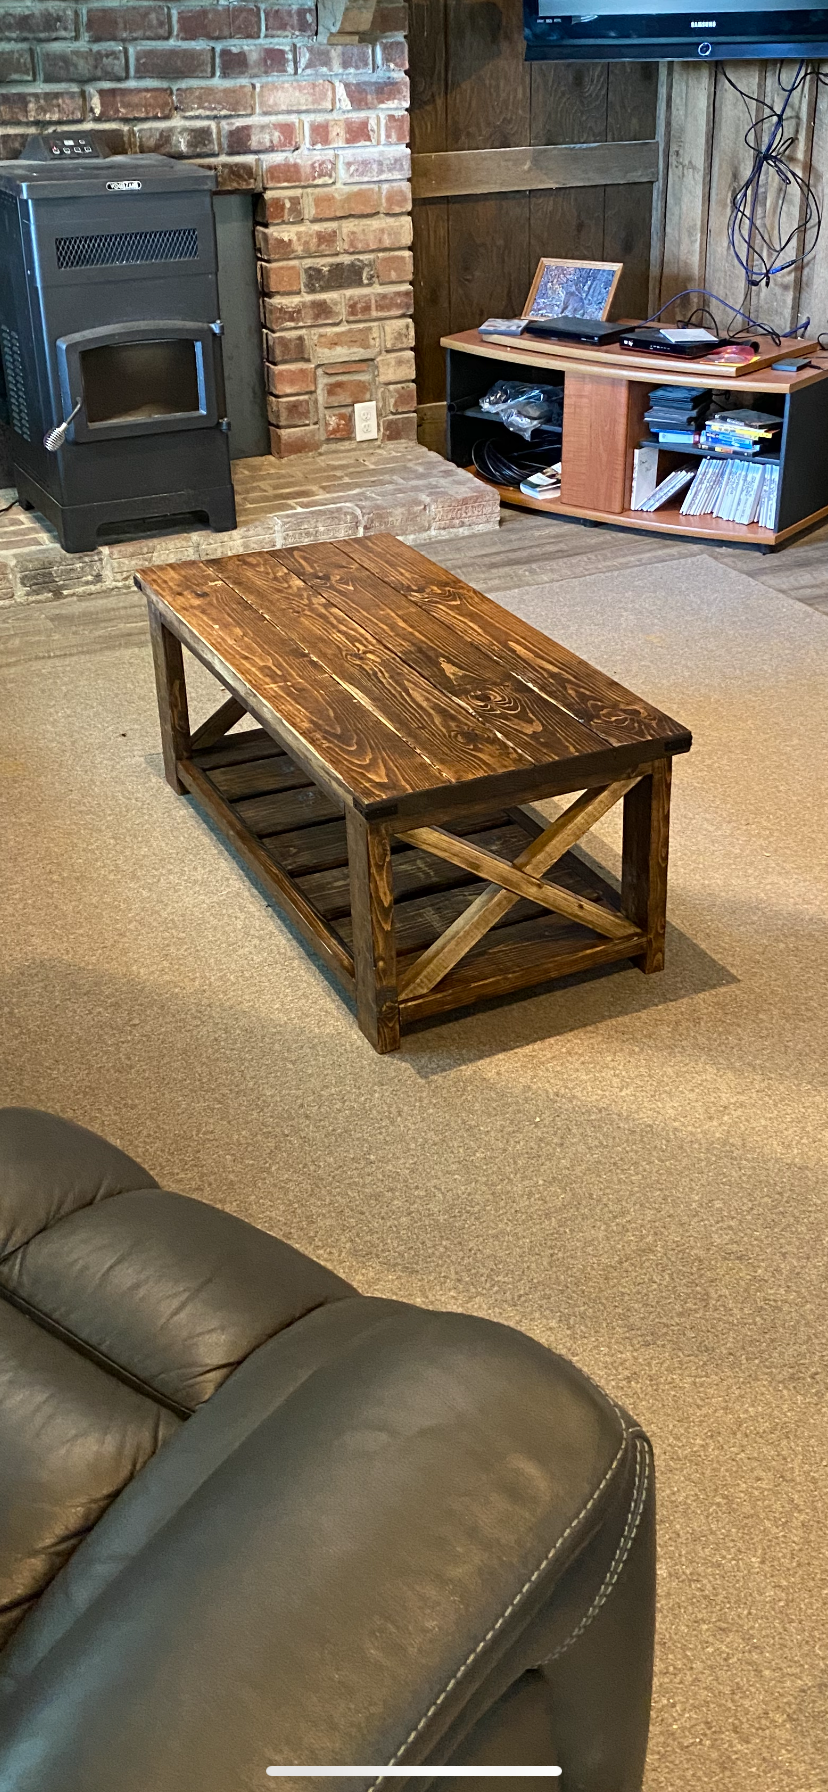
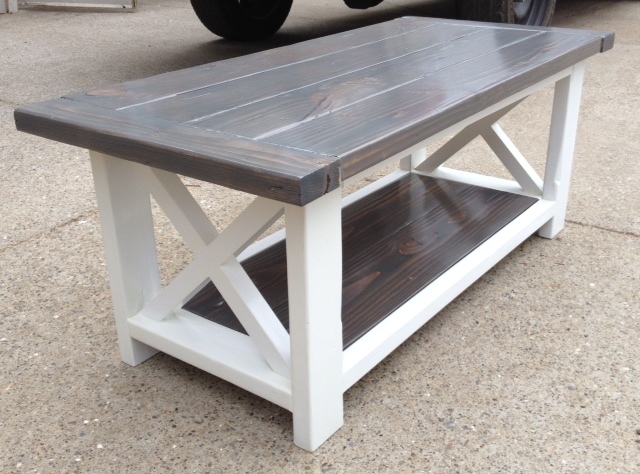
Third lesson I learned was overall I love making furniture no matter how frustrated I can get at points in making it. There is something very fulfilling knowing that my family will now sit around something and share fun special meals and experiences over my table.

Please let me know how you think I did and feel free to offer tips and tricks for working with Pine. Thank you Ana and Patrick for the inspiration!

Bryan

Built from Plan(s)
Estimated Cost
250-300
Estimated Time Investment
Week Long Project (20 Hours or More)
Finish Used
Java Gel Stain by General Finishes
Recommended Skill Level
Intermediate

Comments

tracysmith

Thu, 03/28/2013 - 22:12

I had to laugh a little when reading this... I do the same thing...although less now. When I first started building, the folks at Home Depot, knew to ask if I needed help and I'd make trip after trip "forgetting" something. Now, I don't forget as much, have better plans and a more thorough shopping list! Hehehe

You did a great job and once I get my dining room back in order, I'll be making a table for my family to sit around too!!! Oh, and about the pine... I strongly feel that the better grade of ANY wood, the better your project will be. At my local HD, I can get a premium pine. It's more money, but the end result is a much better one and always remember with any project, take your time, get it right the first time. :-) And swear as much as you want = as long as no one else is listening! ;-)

Homeschool Room

Submitted by kdhennings on Fri, 08/29/2014 - 17:40

My wife and I decided to renovate our office and turn it into our homeschool room. Built a farmhouse table for the kids (4) to use instead of individual desk along with a cubby bookshelf to use for storage. I love the way it turned out and so does the wife.

Estimated Cost
$100
Estimated Time Investment
Week Long Project (20 Hours or More)
Finish Used
Rust-Oleum Ultimate Wood Stain in Kona
Recommended Skill Level
Intermediate

Faux Mantle

Submitted by Anonymous (not verified) on Sat, 12/17/2016 - 09:44

Super easy project. Was able to have it in my house in 3 days. I used a LED RGB light strip inside to be able to light it up. It came with a remote control which is very handy. I drilled a small hole near the bottom for the IR sensor to stick into. I modified the plans only slightly to be able to make a attachement point for the light strip.

Estimated Cost
$111.20 if you buy the materials and use them once.
$95.49 if you price out the materials on amounts actually used.
Estimated Time Investment
Weekend Project (10-20 Hours)
Finish Used
Gray base paint primer and a topcoat of Linen White Chalked Paint. Sanded to show some of the under gray.
Recommended Skill Level
Beginner

Farmhouse Nightstands

Submitted by idotaz on Mon, 08/31/2020 - 07:27

This was fairly easy to make. It's a lot easier when you have the right tools. It took a little while to understand how to figure the degree angle for the X braces. I also did a half lap joint for the X braces instead of 3 separate pieces. I also used drawer slides and added a drawer face to cover the drawer opening. I just think it looks cleaner. Thank you for these plans I am very happy with my new pieces of furniture!

Estimated Cost
$75 for two
Estimated Time Investment
Week Long Project (20 Hours or More)
Finish Used
Dark Walnut Stain and Pixel White paint
Recommended Skill Level
Beginner

Benchwright Farmhouse Table & Benches

Submitted by cengleman on Tue, 11/13/2012 - 12:18

This is my second project from plans on the site. My first build was in taking the rustic x table and modifying it coffee table size. After having success with that I decided to build the dining table. It took me a bit of time, mainly because I hate sanding and finishing. The 1x6's on the top were a bit uneven, so I took a hand plane to the seams. This didn't completely sand out, but it gave the top an older worn look that I really like. I did not add the iron pipe. I had a hard time finding any of the decorative embellishments for the ends and I also decided that being 6'2", I might enjoy the extra leg room.

I built both benches according to plan, except that I increase the outside 2x2s of the top to 2x3s and made an upholstered bench to serve as a cushion. I liked the look of the wood top for the benches, but wanted something a little bit more comfy.

I would strongly encourage anyone to build items from any of these plans. I've always been good at building, but just needed something to serve as a guide. There are times when your own modifications come in to play. I think that reflects you taste and in some cases the material you have available to you. But all in all, everything I've tried has worked well.

Estimated Cost
200-250
Estimated Time Investment
Weekend Project (10-20 Hours)
Finish Used
Minwax jacobean stain, with 2 coats of Minwax fast drying satin polyurethane.
Recommended Skill Level
Intermediate

Counter Height Garden Boxes 2 feet x 4 feet

Submitted by crazedyak on Mon, 09/01/2014 - 08:09

I used the Counter Height Garden Boxes 2 feet x 4 feet plan (http://ana-white.com/2012/11/plans/counter-height-garden-boxes-2-feet-x…) but decided to make the sides 12 inches high versus the 8 inch in the plan.

I decided to use two layers of weed control cloth on the bottom which I used a staple gun to attach. I then used 7 evenly spaced 1x4's for support. I then layered old newspaper on top of the weed control fabric. Filled the planter with 2 large bags of Garden Soil from Home Depot, and finally put down a 2-3 inch layer of mulch to help with moisture control as I am in Florida and the sun dries plants out quickly. I do plan on running a timed drip line irrigation to the planter this winter.

Since Cedar is very hard to find here, I opted for pressure treated wood. For those concerned about using pressure treated wood in gardens I offer this for you to read (http://www.thesurvivalistblog.net/is-treated-lumber-safe-for-building-r…).

When all else was done I planted Basil, and 2 types of Tomatoes (Roma & Cherry). The planter has been such a success I am planning to build several more this winter.

Estimated Cost
Total cost was less than $50.
Estimated Time Investment
Afternoon Project (3-6 Hours)
Finish Used
None
Recommended Skill Level
Beginner

Fancy X Farmhouse Table

Submitted by jesskb on Wed, 12/21/2016 - 07:51

Made the table 6 feet long to better fit the space. Made it 2 years ago, just now getting around to post it, but it has held up well in our vacation rental.

Built from Plan(s)
Estimated Cost
$50
Estimated Time Investment
Day Project (6-9 Hours)
Finish Used
Oxidation stain and 5 coats of poly
Recommended Skill Level
Beginner

Rustic X Farmhouse Coffee Table

Submitted by Anonymous (not verified) on Tue, 09/01/2020 - 16:57

Rustic X Farmhouse coffee table, built for a true rustic farmhouse!

Built from Plan(s)
Estimated Cost
$60
Estimated Time Investment
Afternoon Project (3-6 Hours)
Finish Used
Light coat of Varathane Dark Walnut woodstain on each X, heavy coat everywhere else.
Minwax Polyurethane (5 coats, lightly sanded between each)
Recommended Skill Level
Beginner

Farmhouse Table

Submitted by bphi1060 on Tue, 11/20/2012 - 11:09

My wife came to me with a ad for a table and told me it would look great in our kitchen. I agreed it would except we can't spend 900+ on a table. Then I offered to build her a table without EVER having done this before.

Though this website I came across the easy to follow Farmhouse Table plans that for me took a lot of the guesswork out of this project. The material list that comes with every plan here was a huge help. In the end I think we ended up with a great table that will last for years to come.

There is a great feeling of accomplishment sitting down at a table you built with your own two hands. My wife hopes this will become my new hobby as she is searching the site for project #2.

Trust me when I say if I can do it anyone can.

Estimated Cost
400
Estimated Time Investment
Weekend Project (10-20 Hours)
Finish Used
Varathane Sunbleached oil based stain and the tabletop has a clear coat.
Recommended Skill Level
Beginner

Comments

wjc129

Tue, 04/16/2013 - 09:05

Very nice job on this table, I have no experience in woodworking but want to tackle something like this. Hopefully I can get the same result. Any reason you chose cedar over pine?

Providence bench in crimson red

This is my second build of the Providence Bench...finished in Annie Sloan emperor's silk and General Finishes burnt umber glaze.  So much easier the second time around that I included a tutorial at www.ourhomemadefamily.com.

Built from Plan(s)
Estimated Cost
$20
Estimated Time Investment
Afternoon Project (3-6 Hours)
Finish Used
General Finishes, Annie Sloan emperor's silk, general finishes burnt umber glaze
Recommended Skill Level
Intermediate

Comments

Extra Wide Console Bookcase

I started woodworking about 4 months ago and the first few things I made was a bit wonky. I didn't mind because it's solid wood and I was proud of myself for doing it.
I am 59 yrs old and I love building things! I now do better and made this shelving unit, and it's the best I've done so far.

Built from Plan(s)
Estimated Cost
About $60
Estimated Time Investment
Afternoon Project (3-6 Hours)

Benchwright Coffee Table

Submitted by jam05a on Thu, 11/22/2012 - 12:34

Benchwright Coffee Table built from Ana's plan. Minwax Dark Walnut stain & Satin Polyurethane

Estimated Cost
140
Estimated Time Investment
Week Long Project (20 Hours or More)
Finish Used
Minwax Pre-stain conditioner, let sit for 10-15 minutes and wiped off excess. Let sit for another 5-10 minutes, then applied Minwax Dark Walnut with foam brush, wiped off after 15 minutes. Only used 1 coat. Finished with 2 coats of Minwax Polyurethane Satin, light sanding between coats with 220 grit (used foam brushes to apply poly), then due to visible brush marks/streaks, used a few coats of polyurethane spray for smooth finish.
Recommended Skill Level
Intermediate

Adirondak Chairs

Submitted by Lynne19160 on Sun, 09/07/2014 - 12:54

My first attempt at Ana White plans!  Love th chairs

Estimated Time Investment
Weekend Project (10-20 Hours)
Recommended Skill Level
Beginner

Mini Bedside Table

Submitted by Anonymous (not verified) on Tue, 12/27/2016 - 08:59

I've never built furniture before but had leftover wood from other projects and was in need of a nightstand for my daughter's room. The plans were very easy to follow. I did add a little trim to the drawer. I love the end result and can't wait to build something else!

Built from Plan(s)
Estimated Cost
$30
Estimated Time Investment
Afternoon Project (3-6 Hours)
Finish Used
Black, latex, semi-gloss paint
Recommended Skill Level
Beginner

Rustic X Desk

Submitted by dheald on Mon, 09/07/2020 - 06:31

Built this for my daughter’a remote learning space. She chose the color of the base (ballet slipper pink). Minwax dark walnut for the top and 3 coats of poly.

Built from Plan(s)

Queen Storage Bed

Submitted by nrs250 on Mon, 11/26/2012 - 05:41

Queen Storage Bed with Drawers.

Estimated Cost
200
Estimated Time Investment
Week Long Project (20 Hours or More)
Recommended Skill Level
Intermediate

Rustic X Coffee Table

Submitted by OWJ3 on Mon, 09/08/2014 - 20:10

New to woodworking, first Ana-White plan.  Changed the dimensions a little to fit our living room decor.  Bottom shelf is 2x8's.  Ground through the learning curve but pretty happy with the end result.  Hand distressed the project.  Kreg jig made it much easier.  Love this site and looking forward to building new projects!

Built from Plan(s)
Estimated Cost
$51 of wood
$15 of additional materials
Estimated Time Investment
Weekend Project (10-20 Hours)
Finish Used
White - 3 coats of Rust-Oleum Gloss White,
Minwax Pre-Stain,
Stain - 2 coats of Minwax Classic Gray,
Sealed in with 2 coats of Minwax Polyurethane,
Sanded with 220 grit in between coats
Recommended Skill Level
Beginner

Comments

michele098

Tue, 09/09/2014 - 07:32

Hello!


I'm looking to scale this project down for my living room as well - do you mind sharing your final dimensions?

Thanks!


OWJ3

Tue, 09/09/2014 - 08:37

Top surface:  (4) 2x6's cut 42" long - which will be 22" wide;

Breadboards:  (2) 2x4's cut 22" long - Top surface becomes just shy of 49" in overall length;

Bottom surface:  (2) 2x8's cut 36" long;

White frame: 18" wide to the very outside edges,

                      43" long to the very outside edges,

Hope that helps.

First Bed

After making the farmhouse table and bench I was excited to try a bed for my next build. I wanted something simple for my 5 year old son that wouldn't necessarily be outgrown in a year or two. I truly like the simplicity of this bed and the price point for making it was even more attractive. His entire bedroom is white furniture but I did not want to completely cover the grain of the wood. At the same time, I wanted to ensure this bed was going to match with the rest of his room. I decided to do a white wash finish and then a clear coat. It turned out perfect; matches his other furniture and still displays the wood grain. The bed was beyond simple to construct. I had two worries prior to starting the bed: the curve on the headboard/footboard and how sturdy the bed would be given how the rails attached to the headboard/footboard. For the curve on the footboard and headboard, I used a scrap piece of cardboard to trace a curve for half of the piece. Once I was happy with the curve I cut out the cardboard and transferred the curve to the headboard and footboard. I did half of the curve so I could guarantee each side would be identical and made it easy to have matching headboard and footboard. I intended on buying some hardware to make the bed more sturdy based solely on the plans. However, once I had the entire thing put together and I (6 foot, 200 pounds) got on the bed and moved around rather violently without any movement. since this bed is for my 5 year old, I have no worries about the structural integrity. For the whitewash finish, I simply mixed a couple ounces of spare white paint I had with water (1:1 ratio). I used a rag to rub the whitewash into the wood and ensure even coating. I completed the project with a satin polyurethane.

Built from Plan(s)
Estimated Cost
I already had the screws, paint, and polyurethane. The wood was $54.88 before taxes in my area. Out the door for under $60 is a steal in my opinion!
Estimated Time Investment
Day Project (6-9 Hours)
Finish Used
I had some spare white paint and made some white wash with it. Simply mix water and paint (1:1) and wipe onto the wood with a rag. One coat of white wash was all that was needed. I did add a layer of satin polyurethane to ensure it was protected.
Recommended Skill Level
Starter Project