Community Brag Posts
Wood Patio Chair with Deep Seat Cushions

Loved building these chairs they were really easy and look amazing, couldn't be happier.
Built from Plan(s)
My first cabinet build

I always wanted to try building something and wanted to actually build some cabinets for the dining room to use basically for china and a buffet. I found the plans on here and went to town. I made the smaller cabinet first just to see if i can make it and well it worked fine. So I took the plan and made a second cabinet but made it slightly bigger because I decided to place the cabinets together and put them in our kitchen. It was also an anniversary present for the wife since we cant redo the kitchen and we need some more counter space I made these to fit under a window and replace a set of metal shelves. The doors I just made them no real plan just tried something and it worked. So happy wife, happy wife and I had a good time. As a firefighter/emt this is a nice get away from the stresses of my life and as long as the wife is happy then she will let me continue to work on this stuff. Thanks Ana for the plans I have a few more planned for the future.


Built from Plan(s)
Estimated Cost
less then $200
Estimated Time Investment
Weekend Project (10-20 Hours)
Finish Used
I learned the hard way no spray paint lol I tried to use paint in primer in one but then switched to spray primer and gloss whit paint.
Recommended Skill Level
Beginner
Under Fort Sandbox Cover
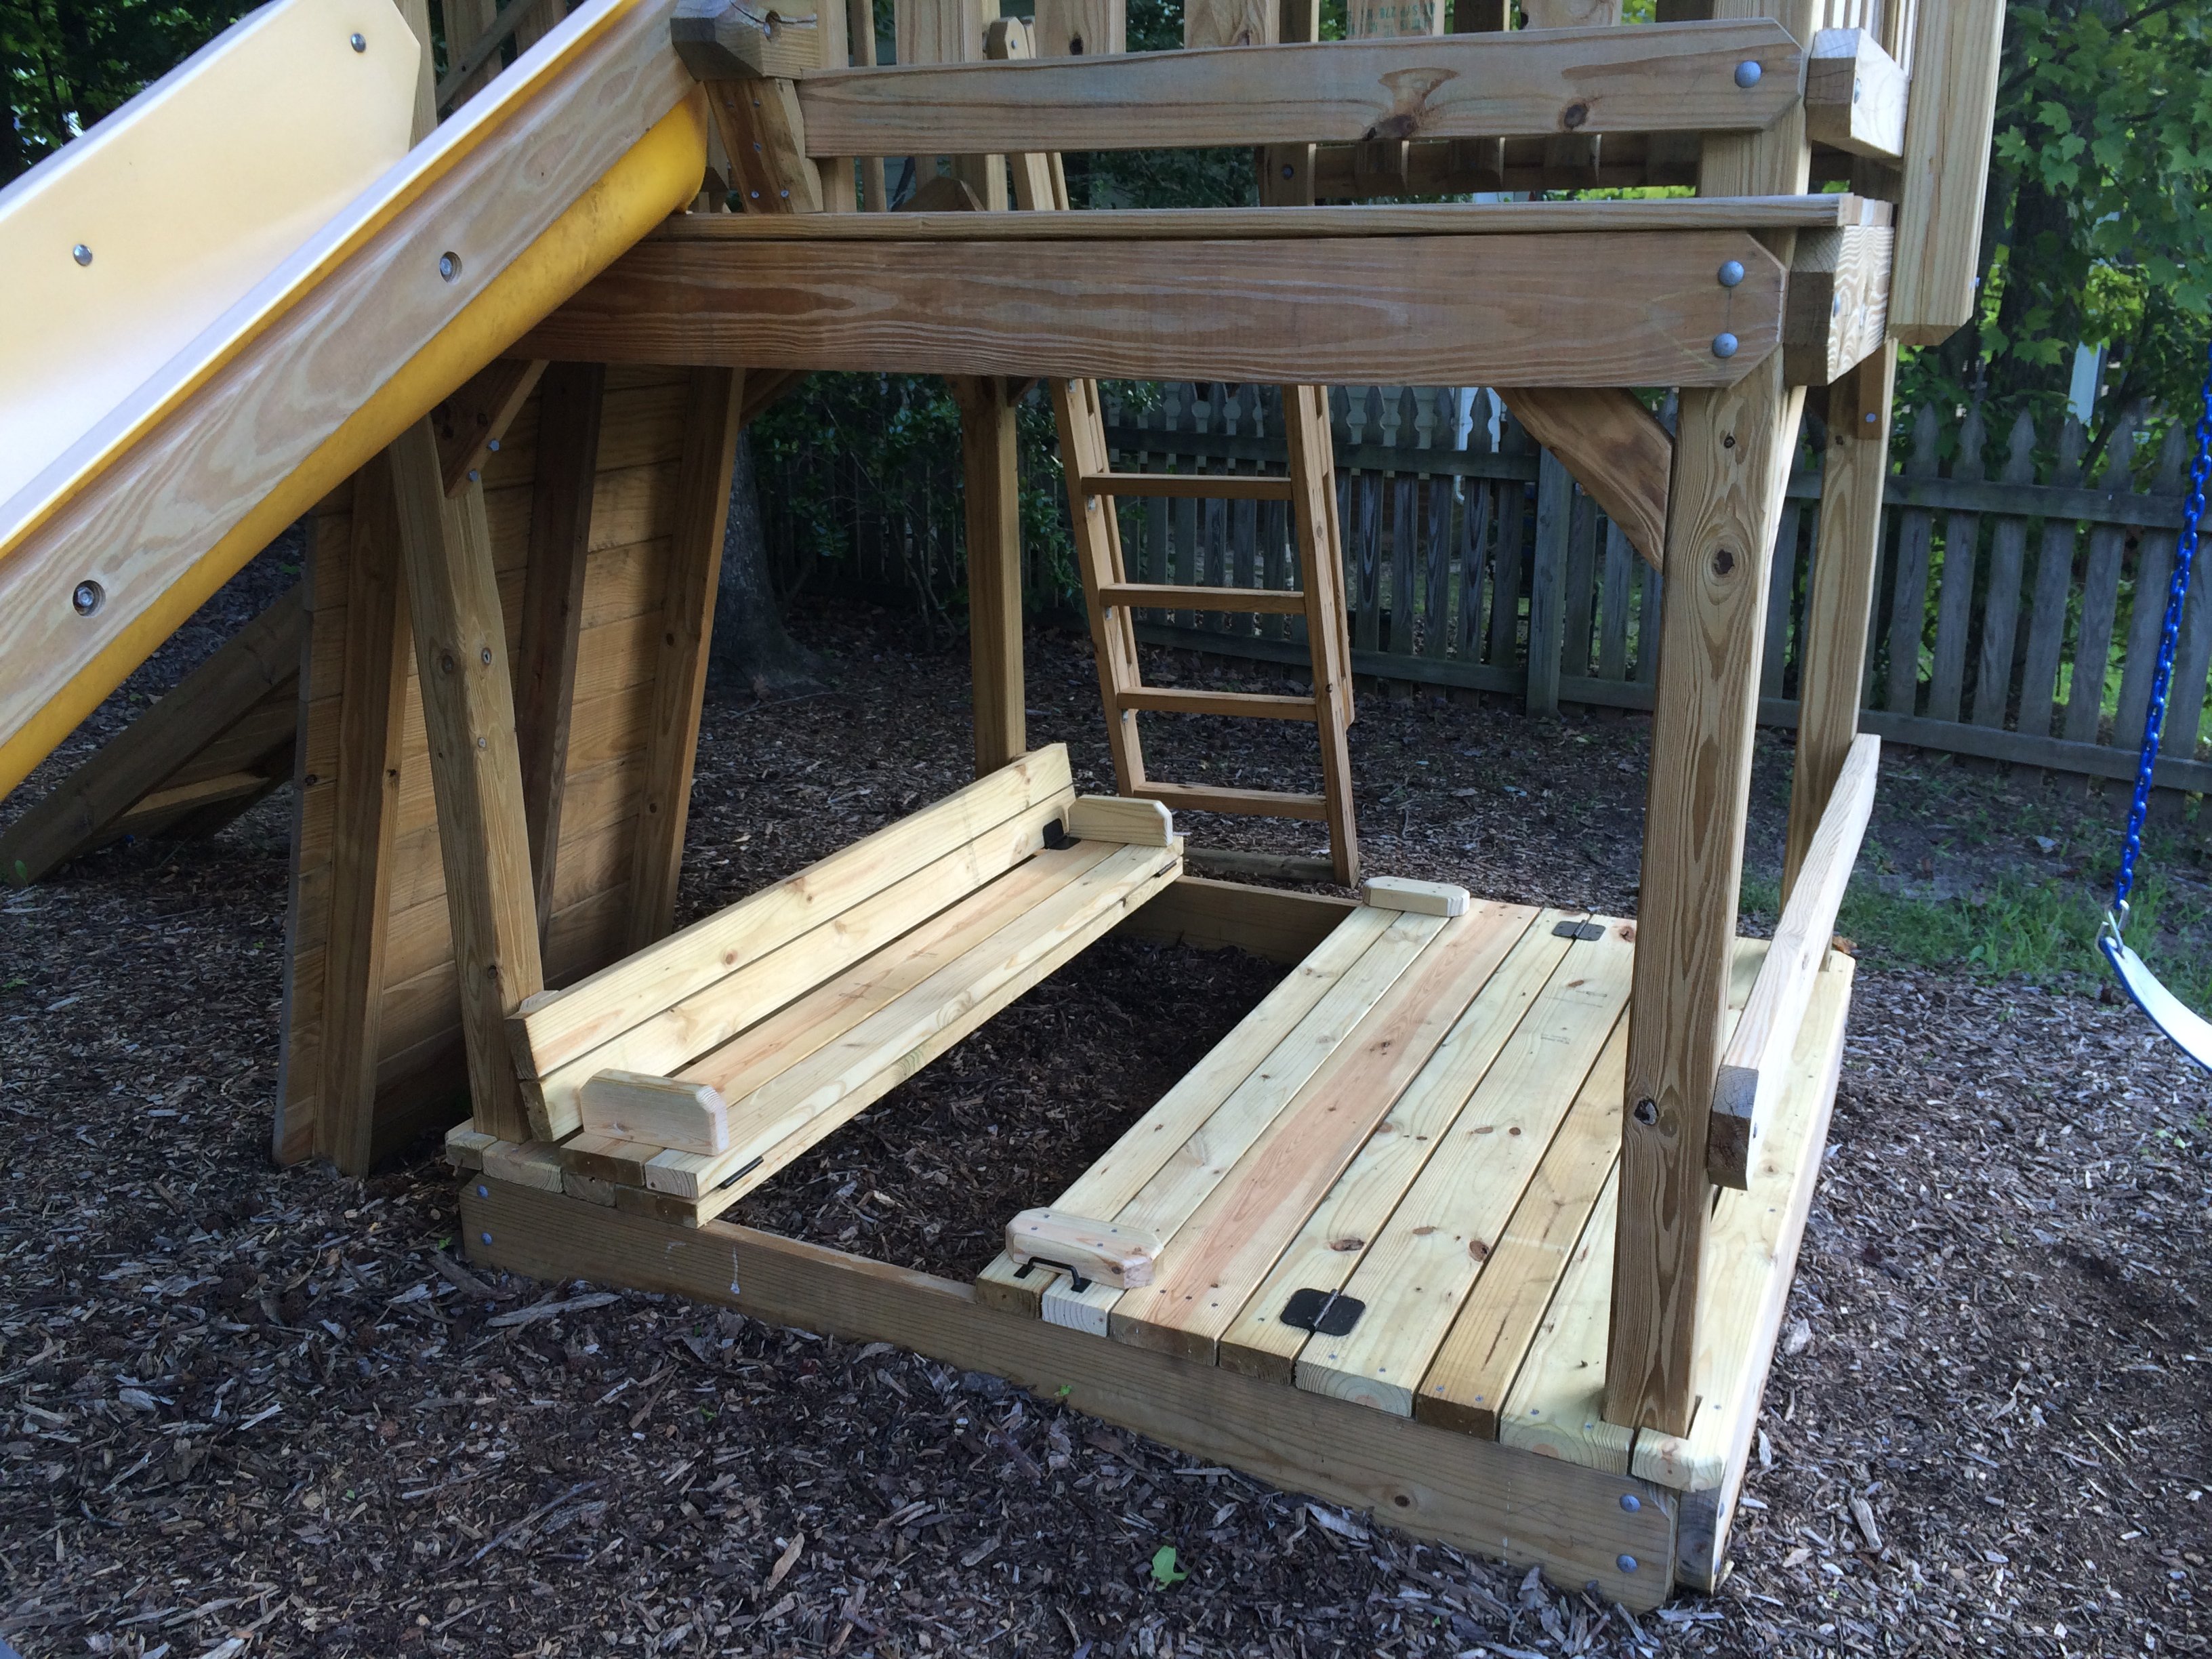
Thanks to inspiration from Ana's post on the Sand Box with Built-in seats, I've retrofit our Jungle Fort (http://www.detailedplay.com/Jungle-Fort-Swingset.htm) with the sandbox cover/bench system. I've upgraded the lumber dimensions to 2x4s and 2x6 to accommodate the increased 67.5" span.
Built from Plan(s)
Estimated Time Investment
Day Project (6-9 Hours)
Recommended Skill Level
Beginner
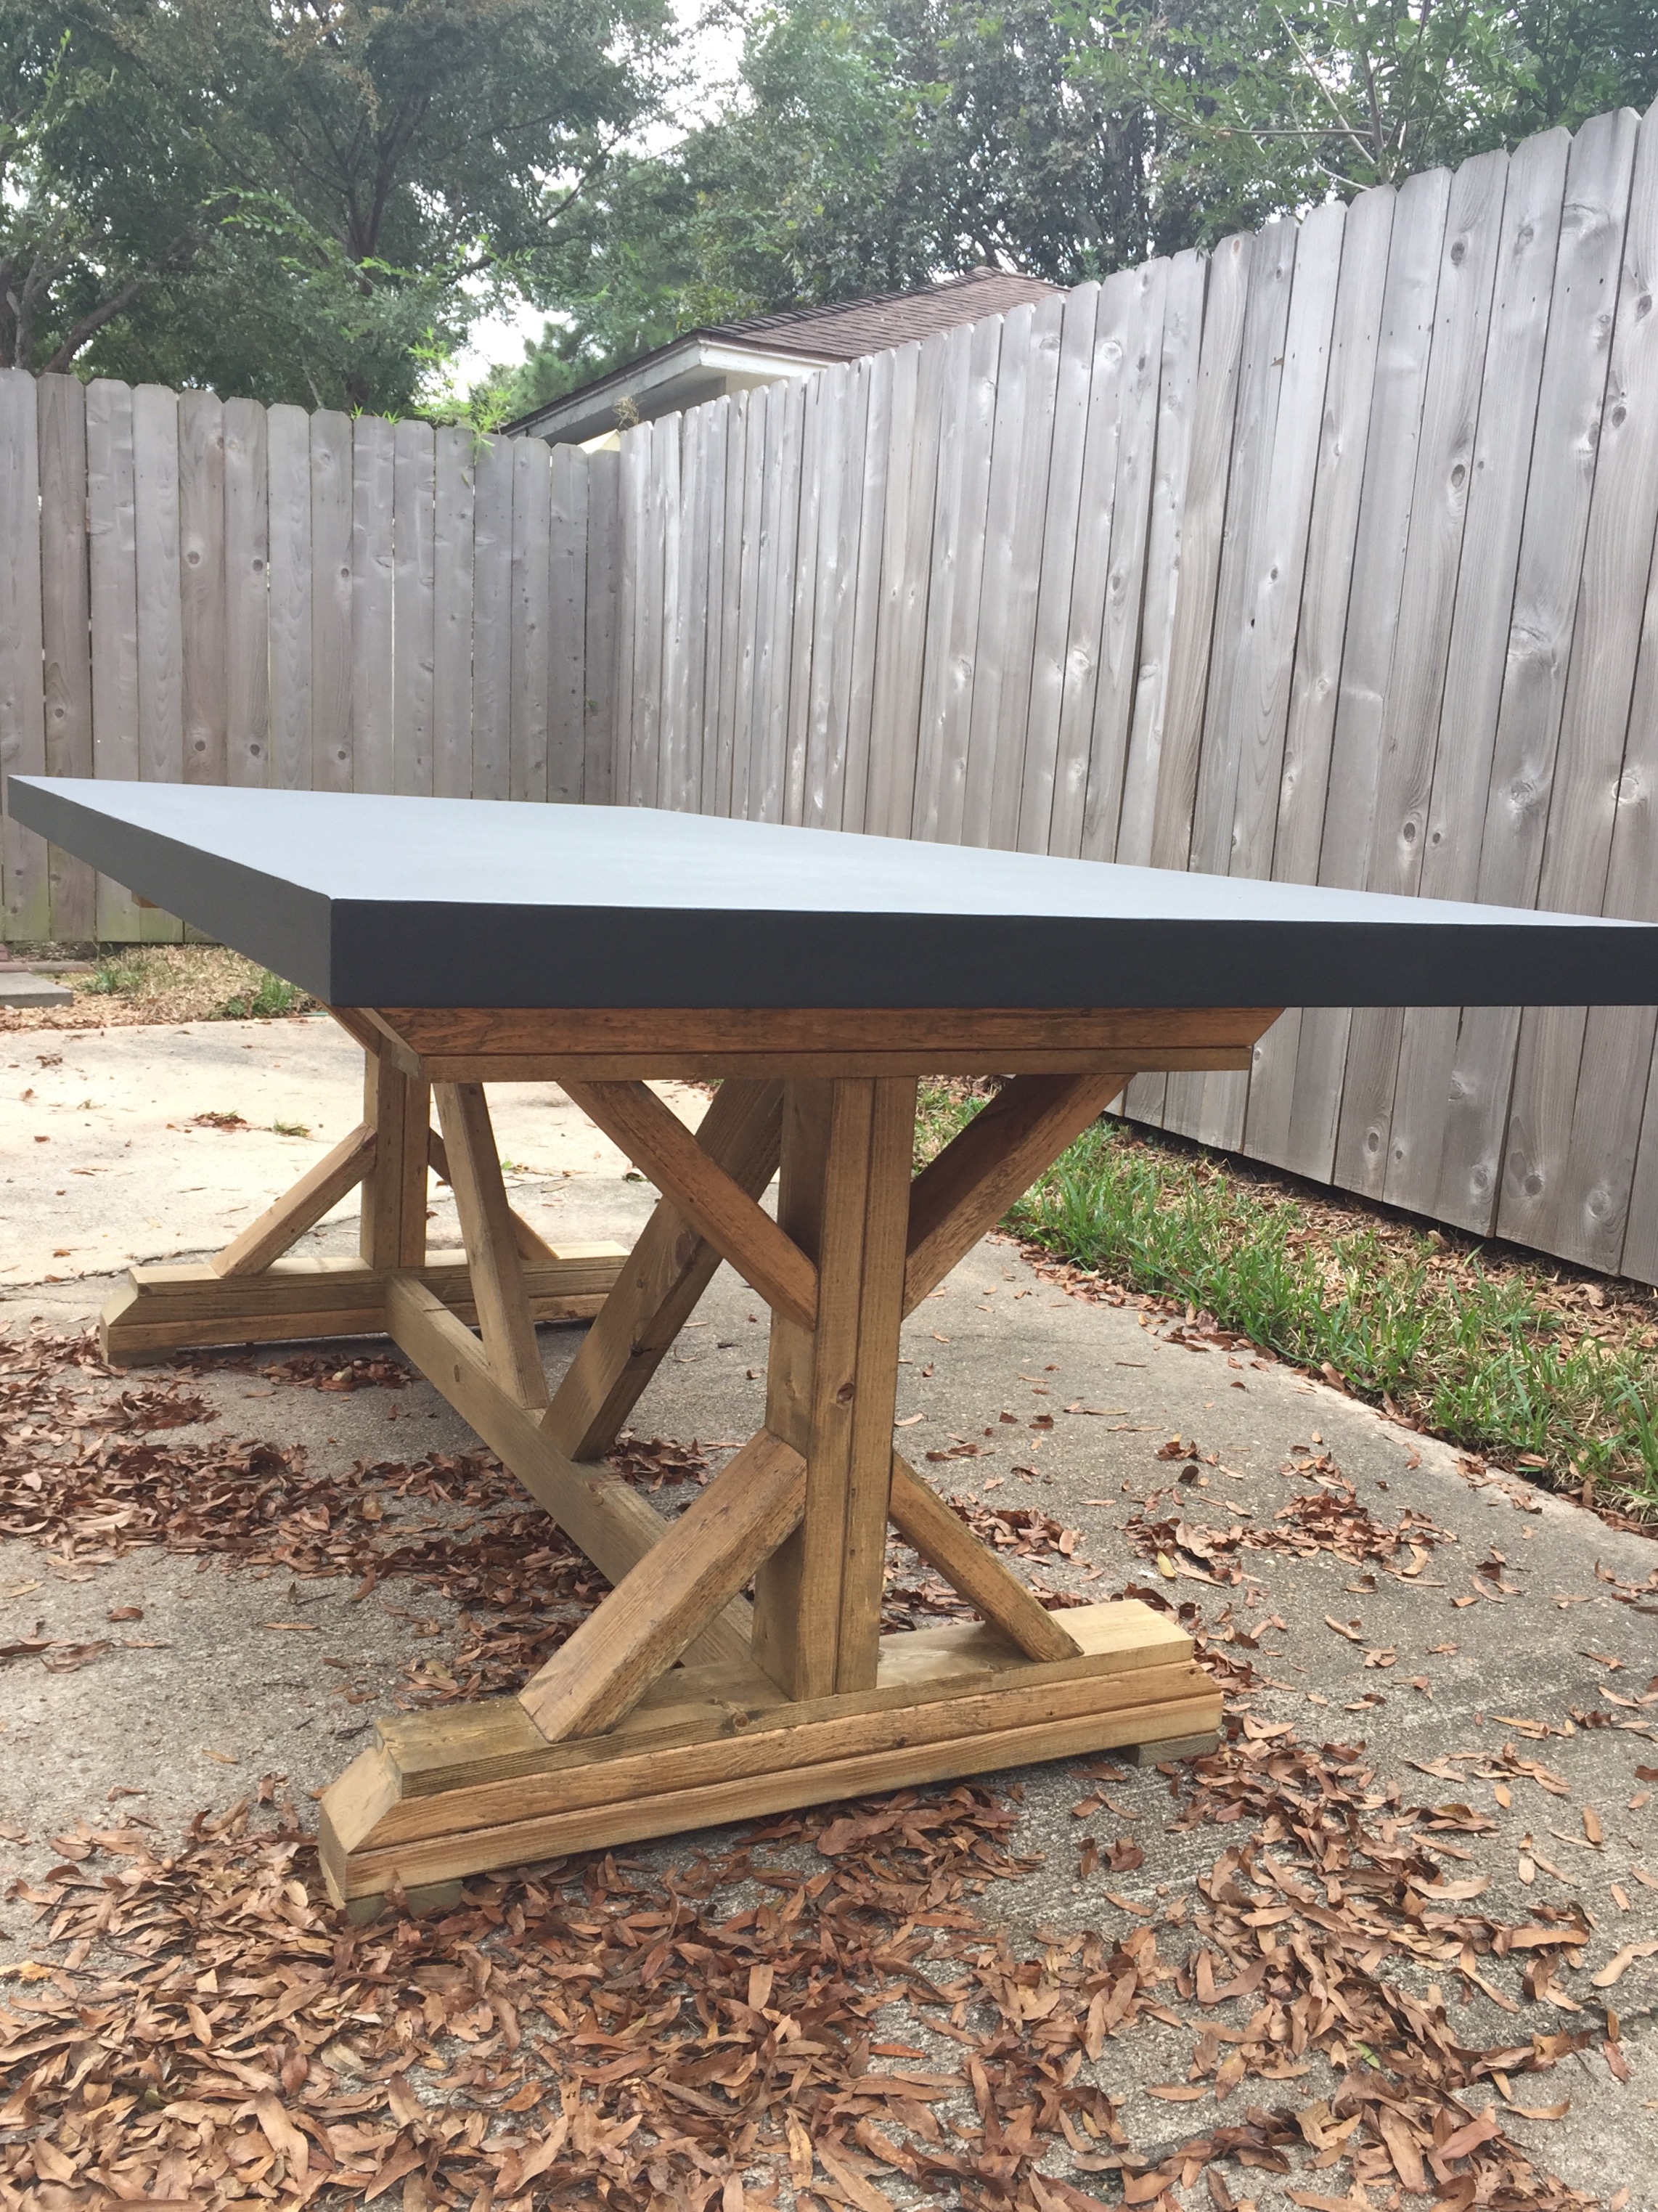
Restoration Hardware Inspired
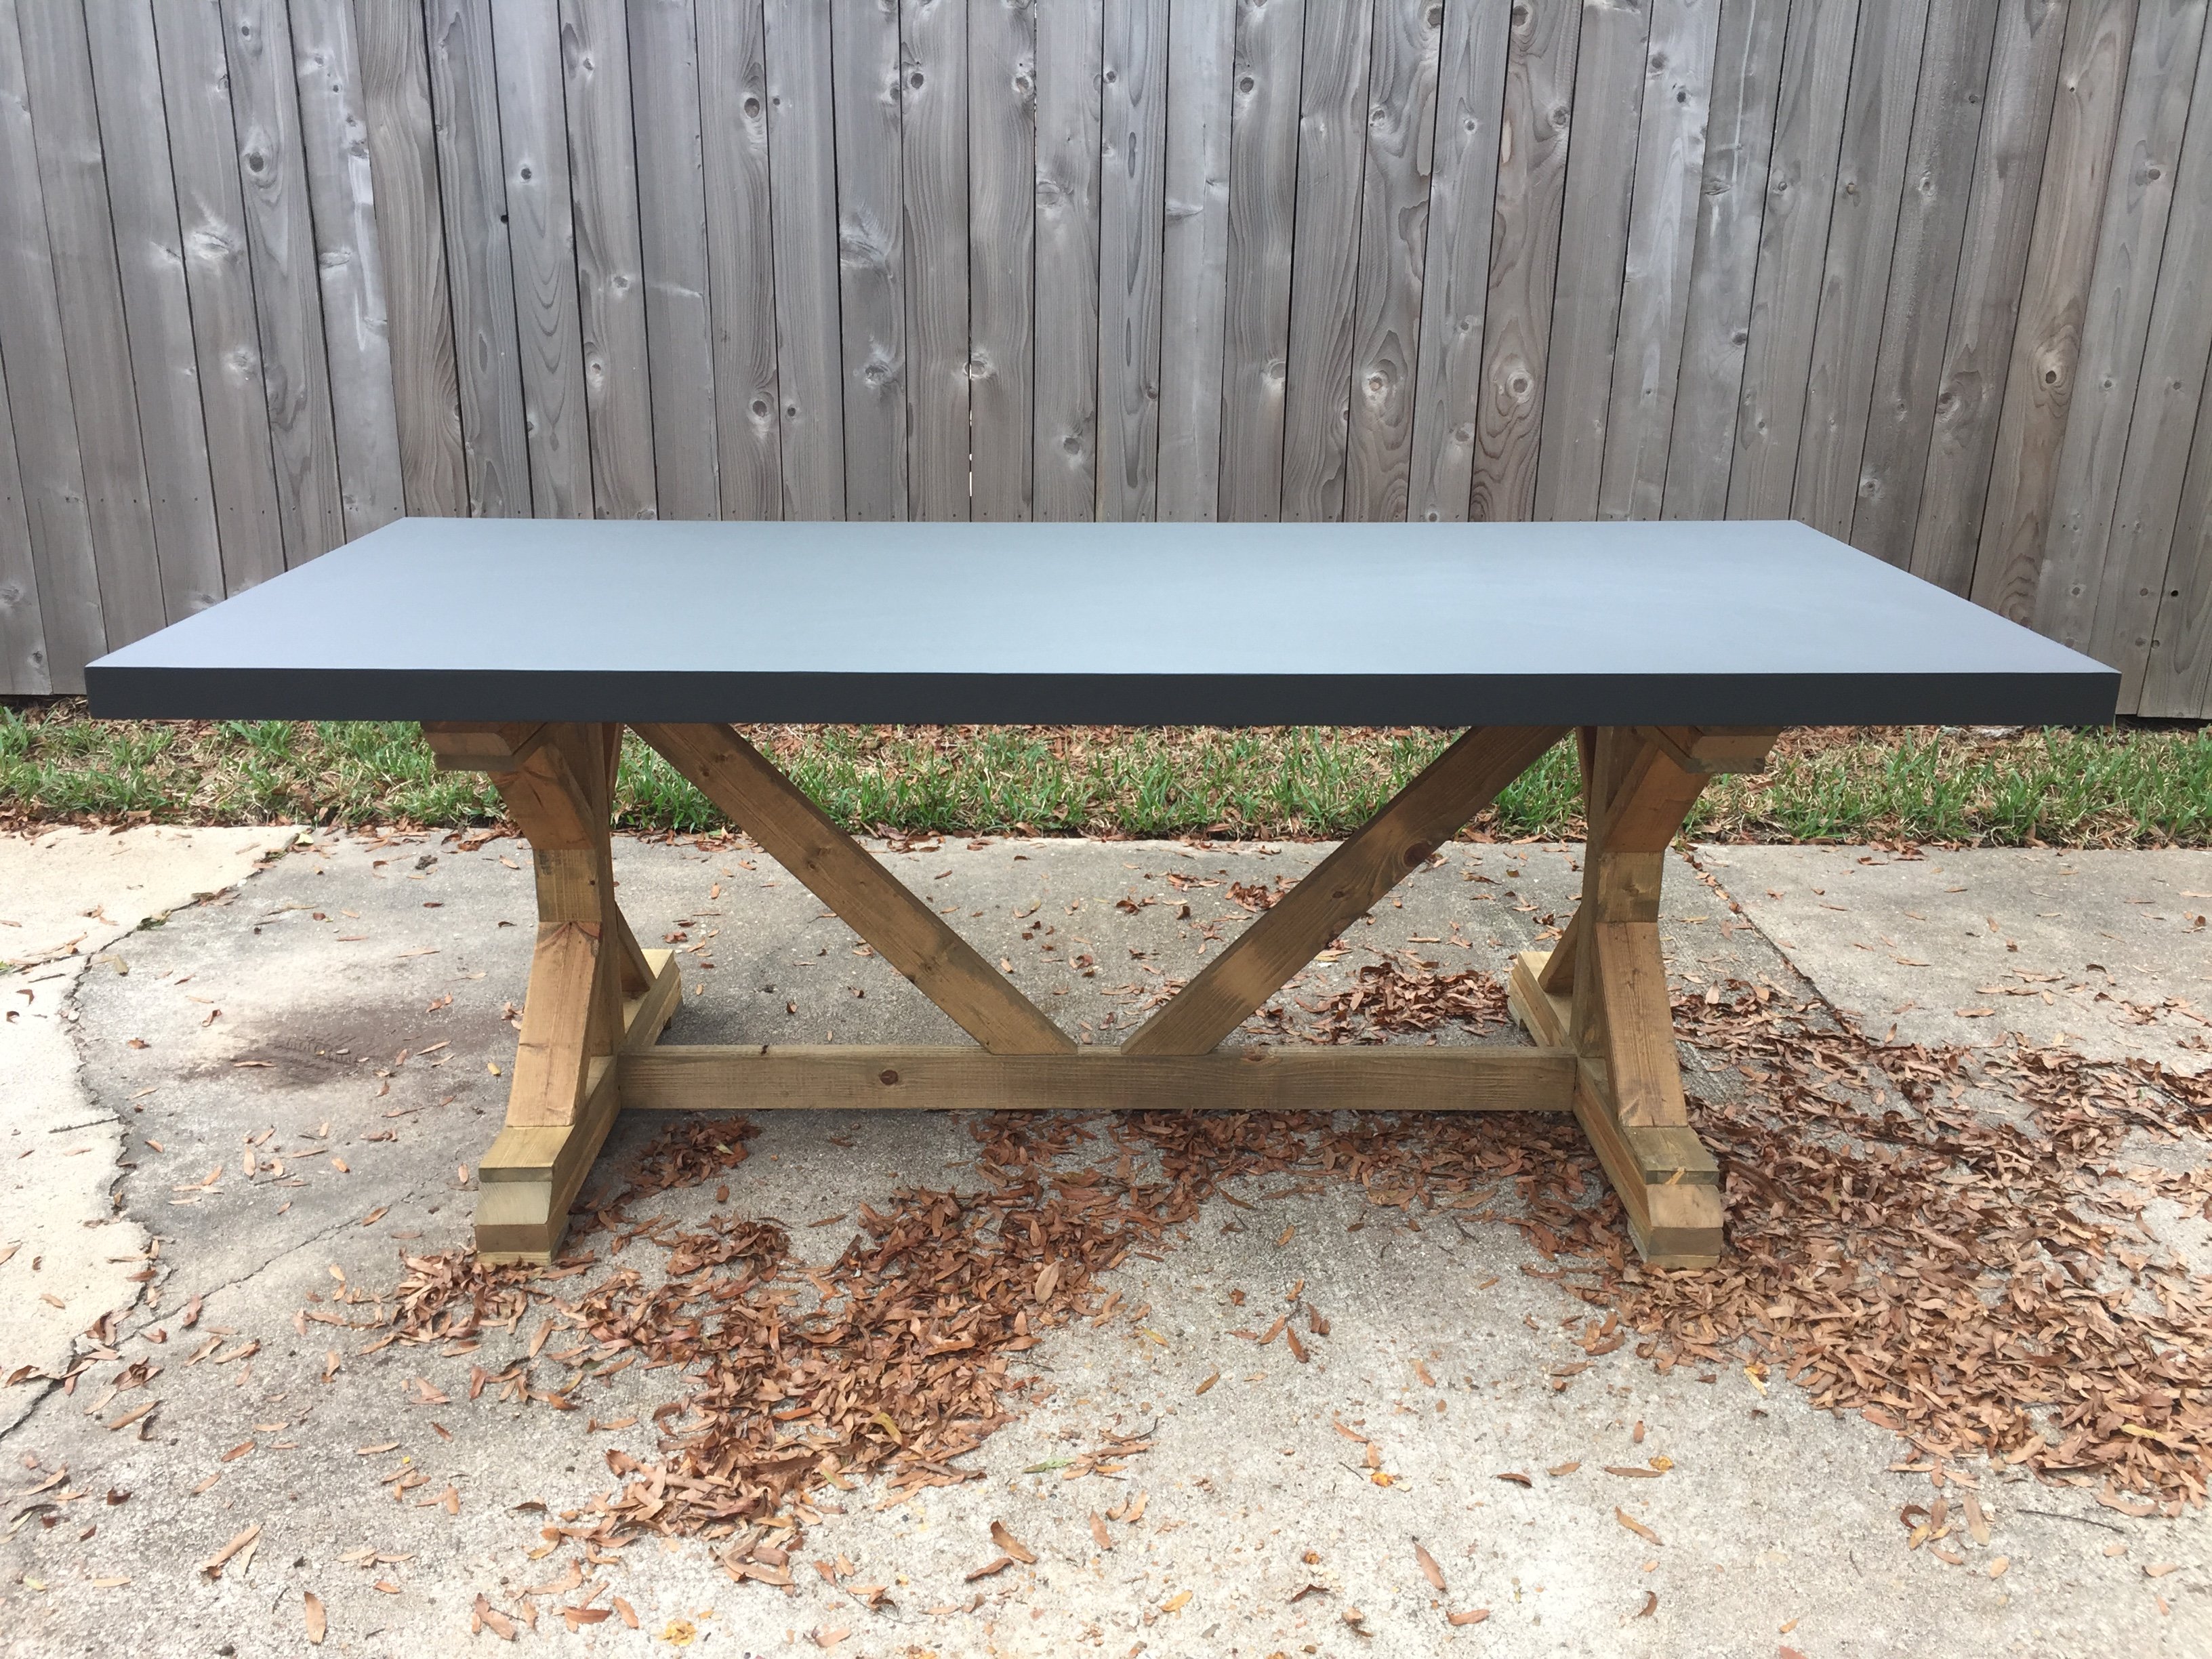
I was in the process of making the fancy farmhouse x dining table to spec based on the plans provided. Then I came across a restoration Hardware table that had a similar base but a concrete top and decided to mimic the concrete top with plywood.
Built from Plan(s)
Estimated Cost
150-200
Estimated Time Investment
Weekend Project (10-20 Hours)
Finish Used
Minwax Driftwood stain with The Home Depot's Behr Ultra Premium Plus interior Matte Broadway color.
Recommended Skill Level
Intermediate
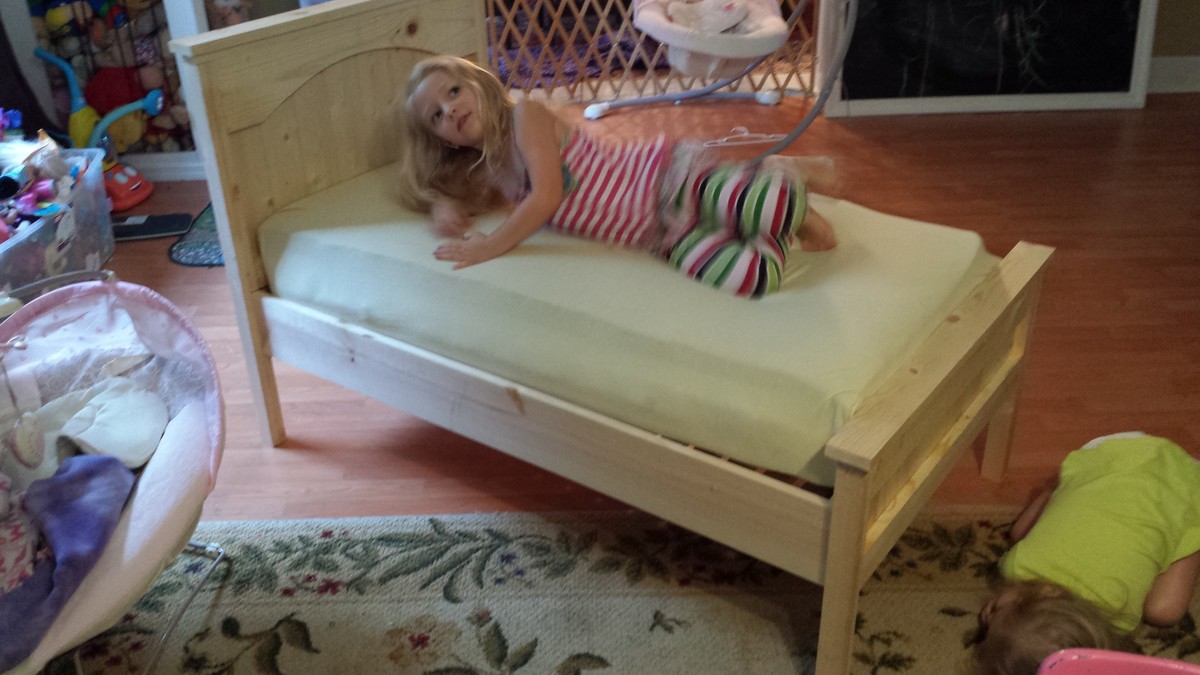
Farmhouse Toddler Bed
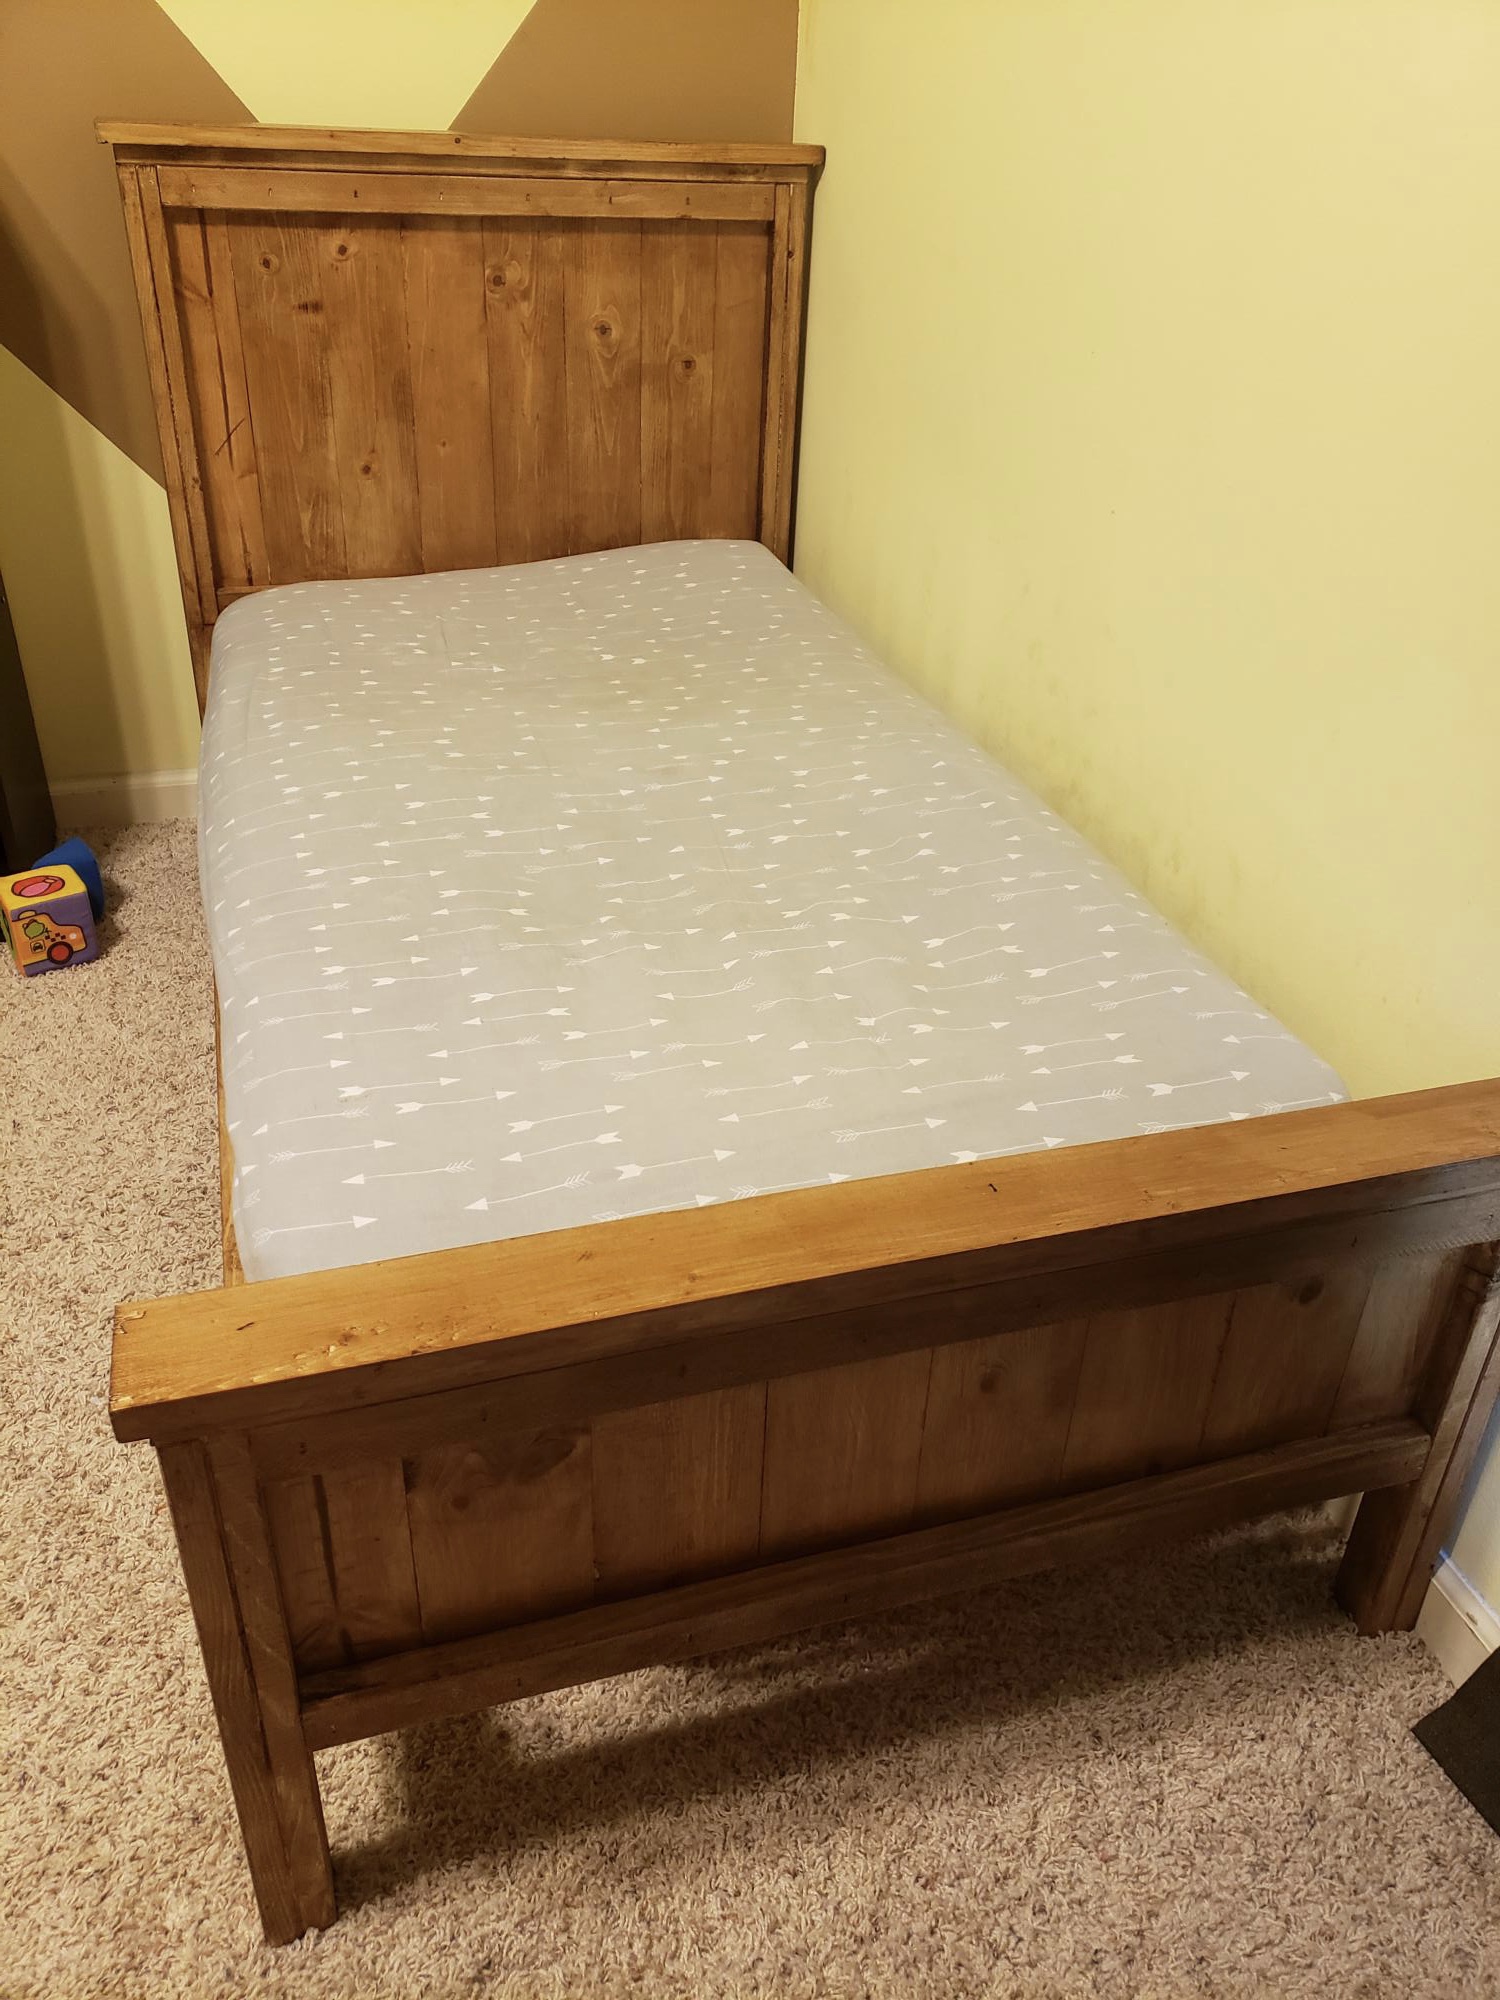
Fun easy toddler bed for my son! Love how it turned out! Stained with an American Walnut stain.
Built from Plan(s)
X Detail Bench
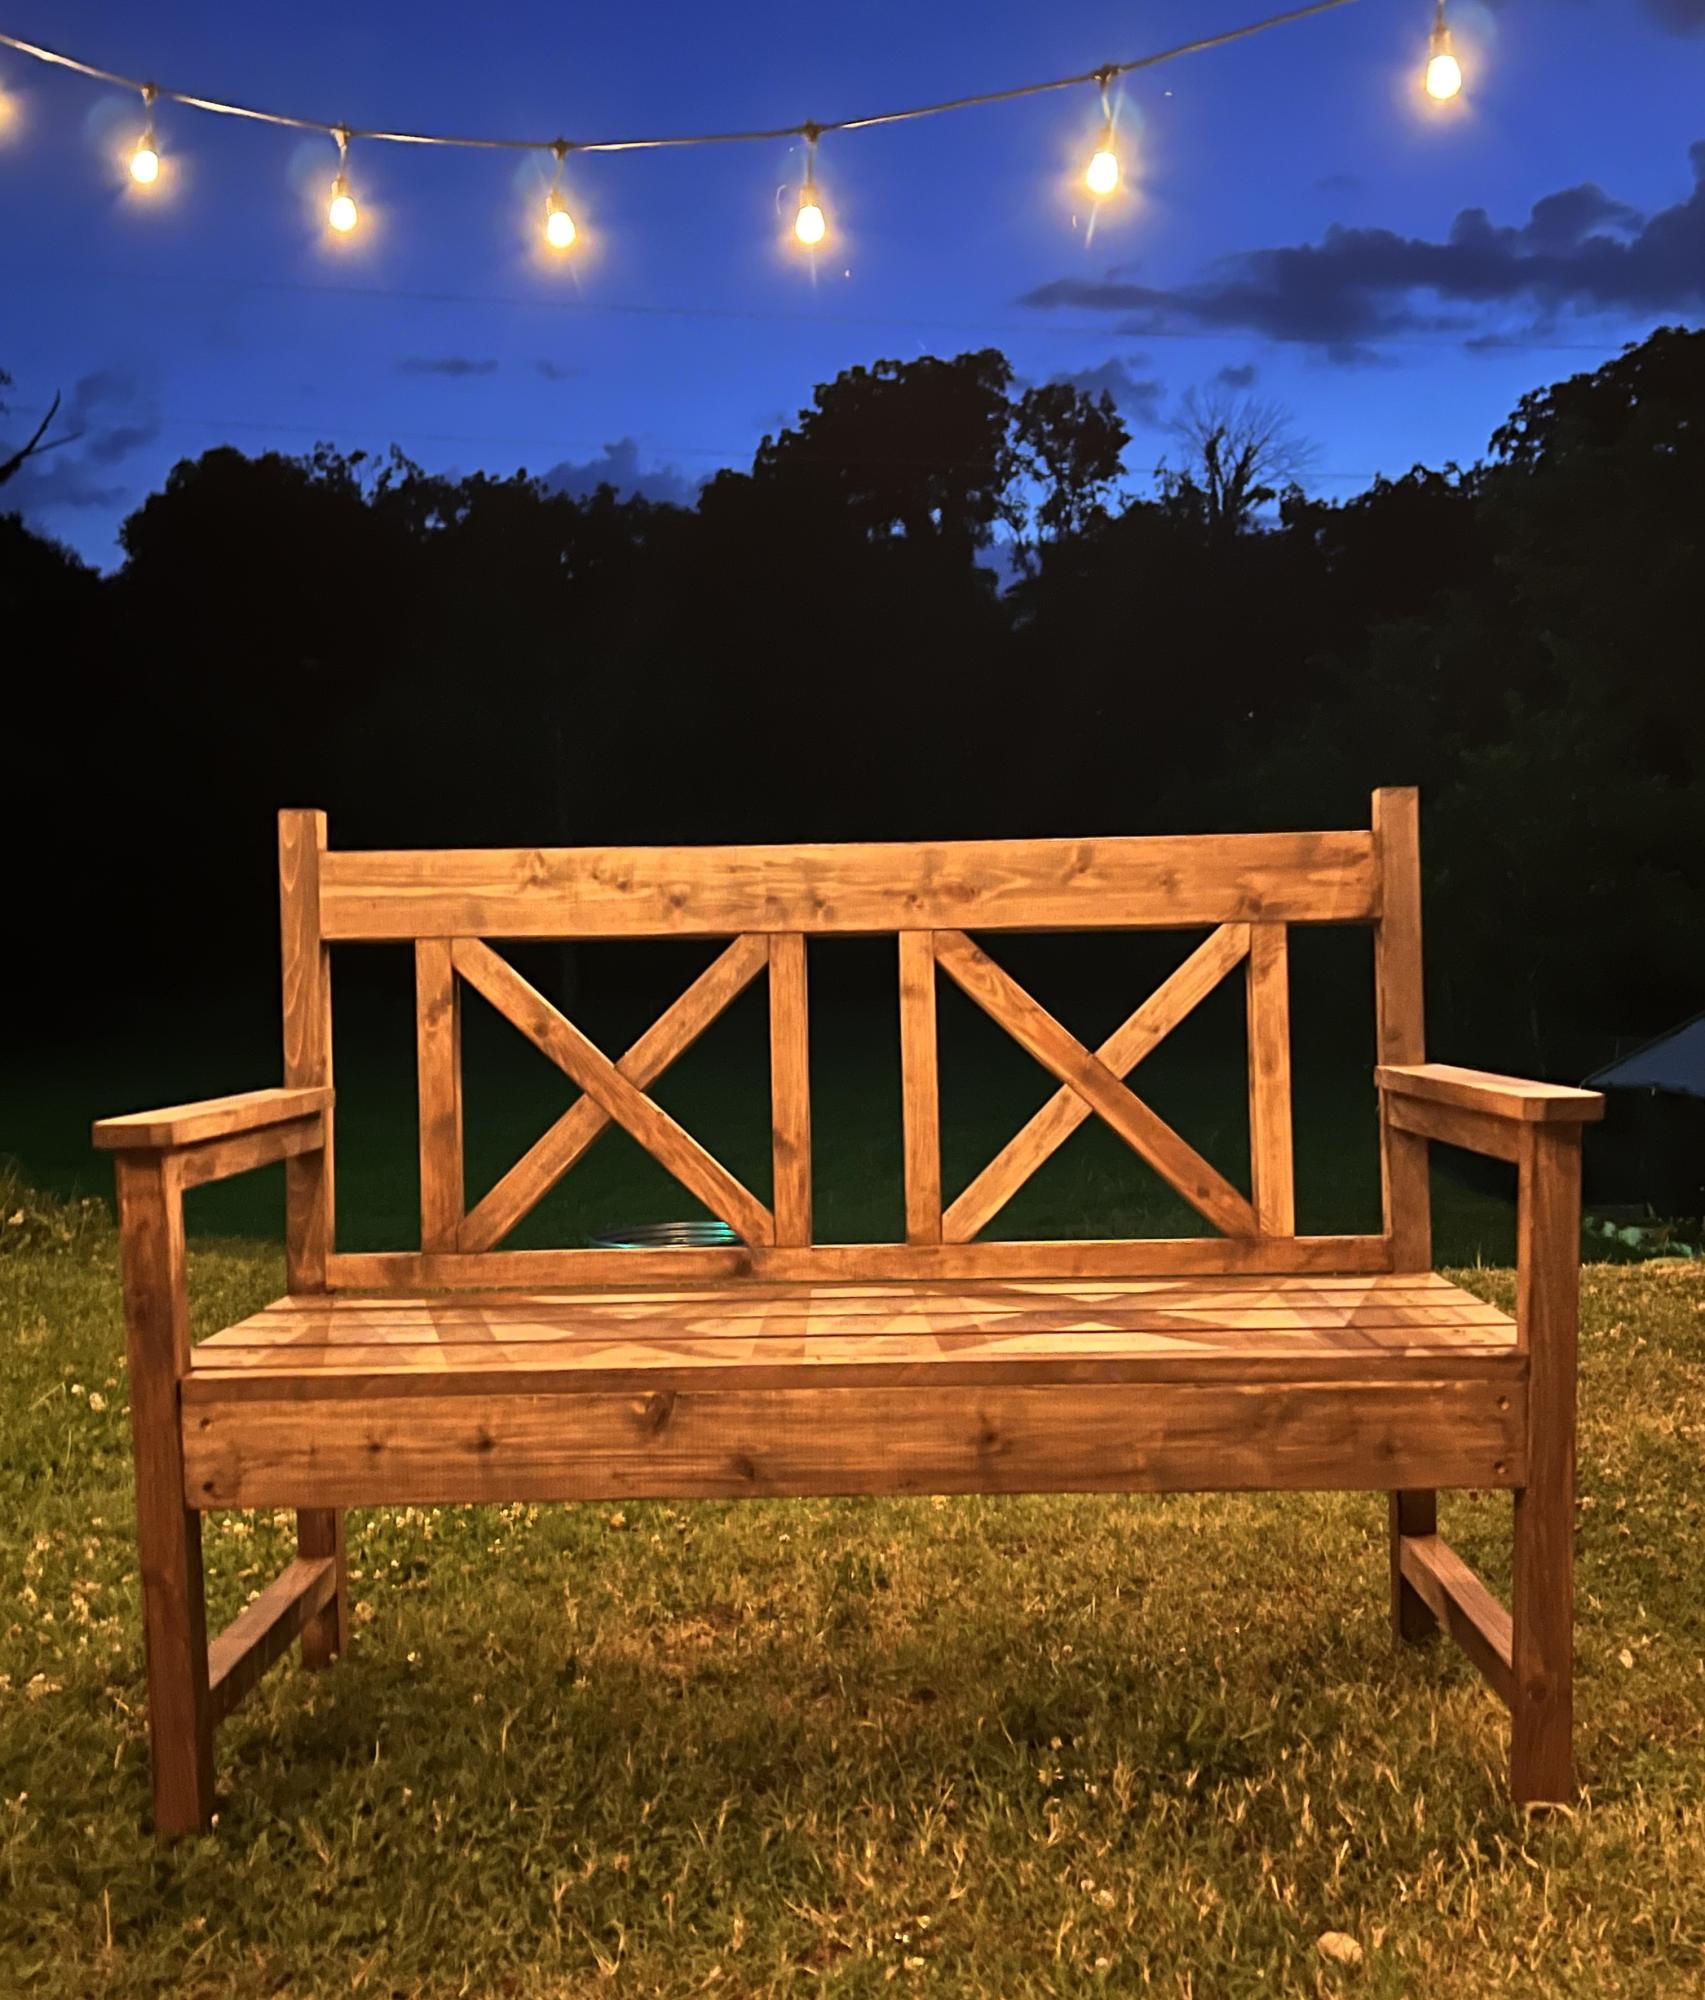
Wood bench with x back detail.
Built from Plan(s)
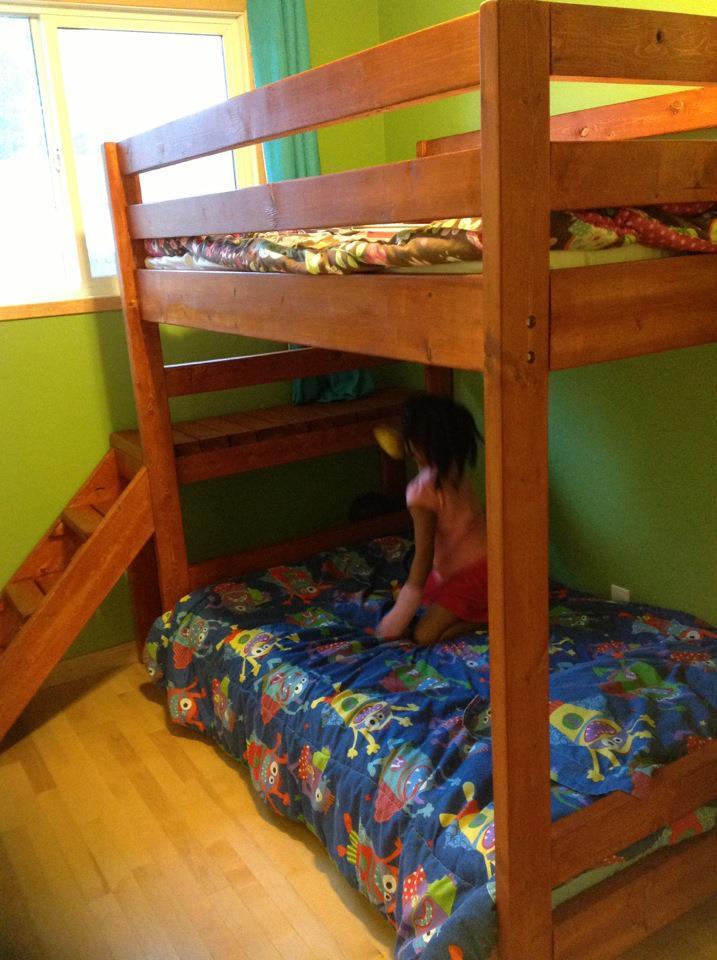
Camp Loft Bed
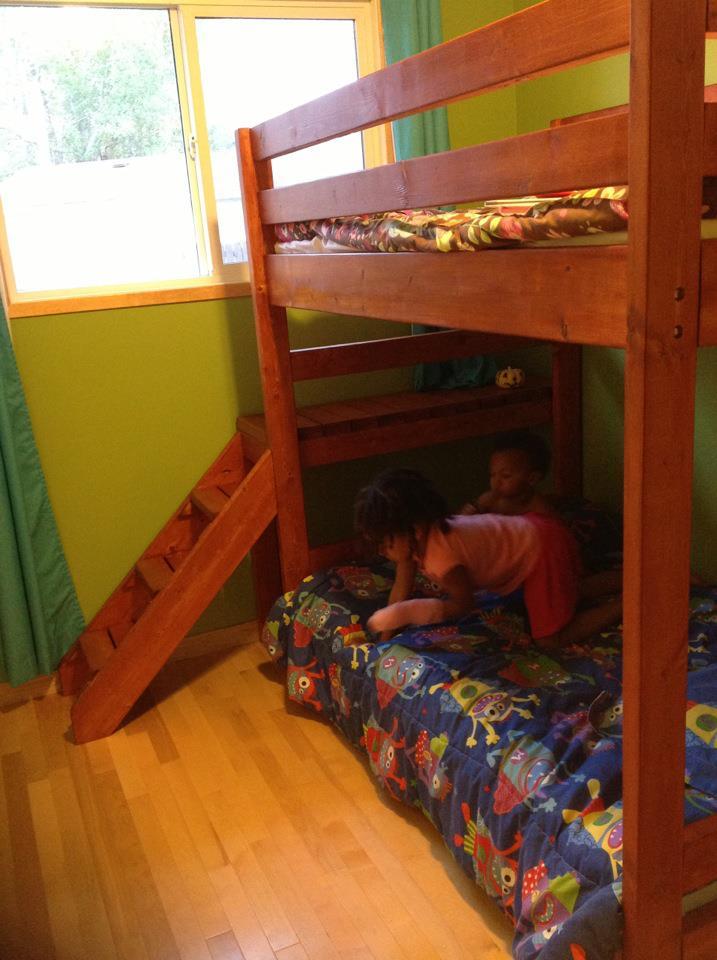
I decided to make the camp loft bed into a bunk bed for the kids. The room is really small so I had to make it toddler length (about 62") and the stairs are only about 13.5" wide. It turned out great and the kids love it!
Built from Plan(s)
Estimated Cost
$150 for wood and hardware
Estimated Time Investment
Week Long Project (20 Hours or More)
Finish Used
2 coats of Ipswich pine and one coat of a poly/stain mix in provincial.
Recommended Skill Level
Intermediate
The Farmhouse Toddler Bed
This bed was picked out by my daughter. Built straight from the plans and she loves it. Now if I can get her to pick a color.
Built from Plan(s)
Estimated Time Investment
Afternoon Project (3-6 Hours)
Finish Used
Unfinshed. Daughter cant pick a color.
Recommended Skill Level
Beginner
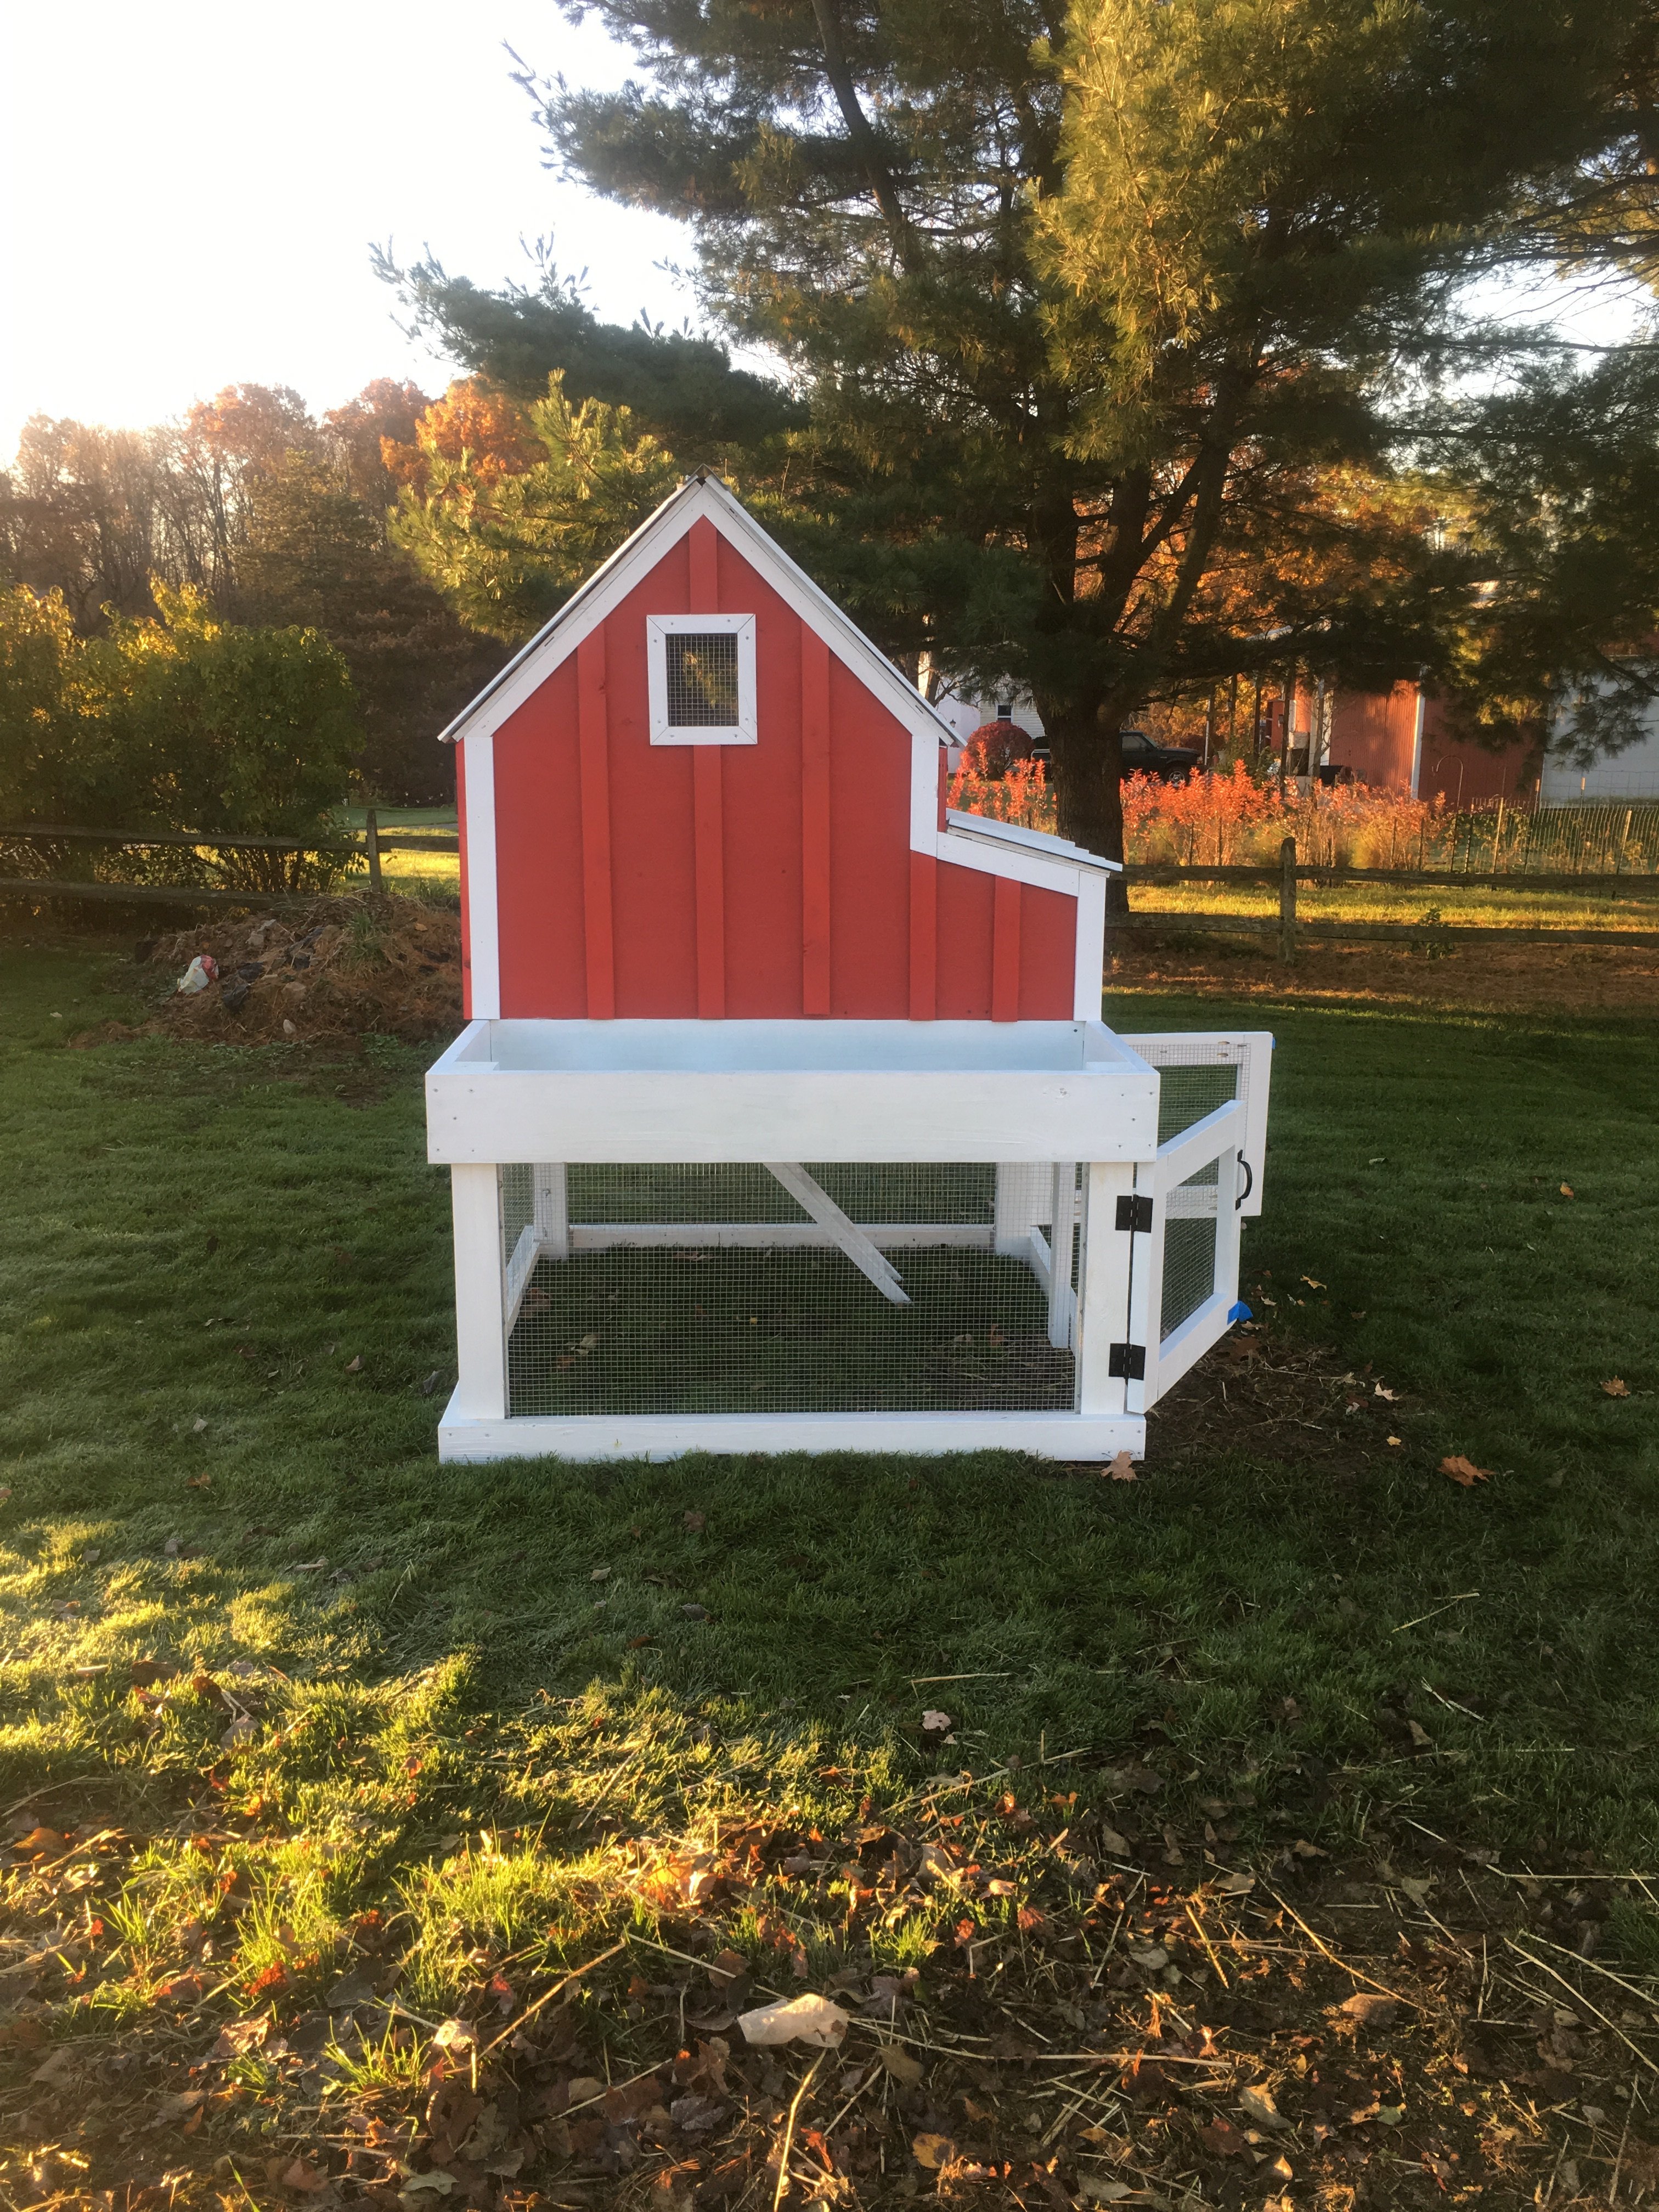
Baby Ray's New Closet!
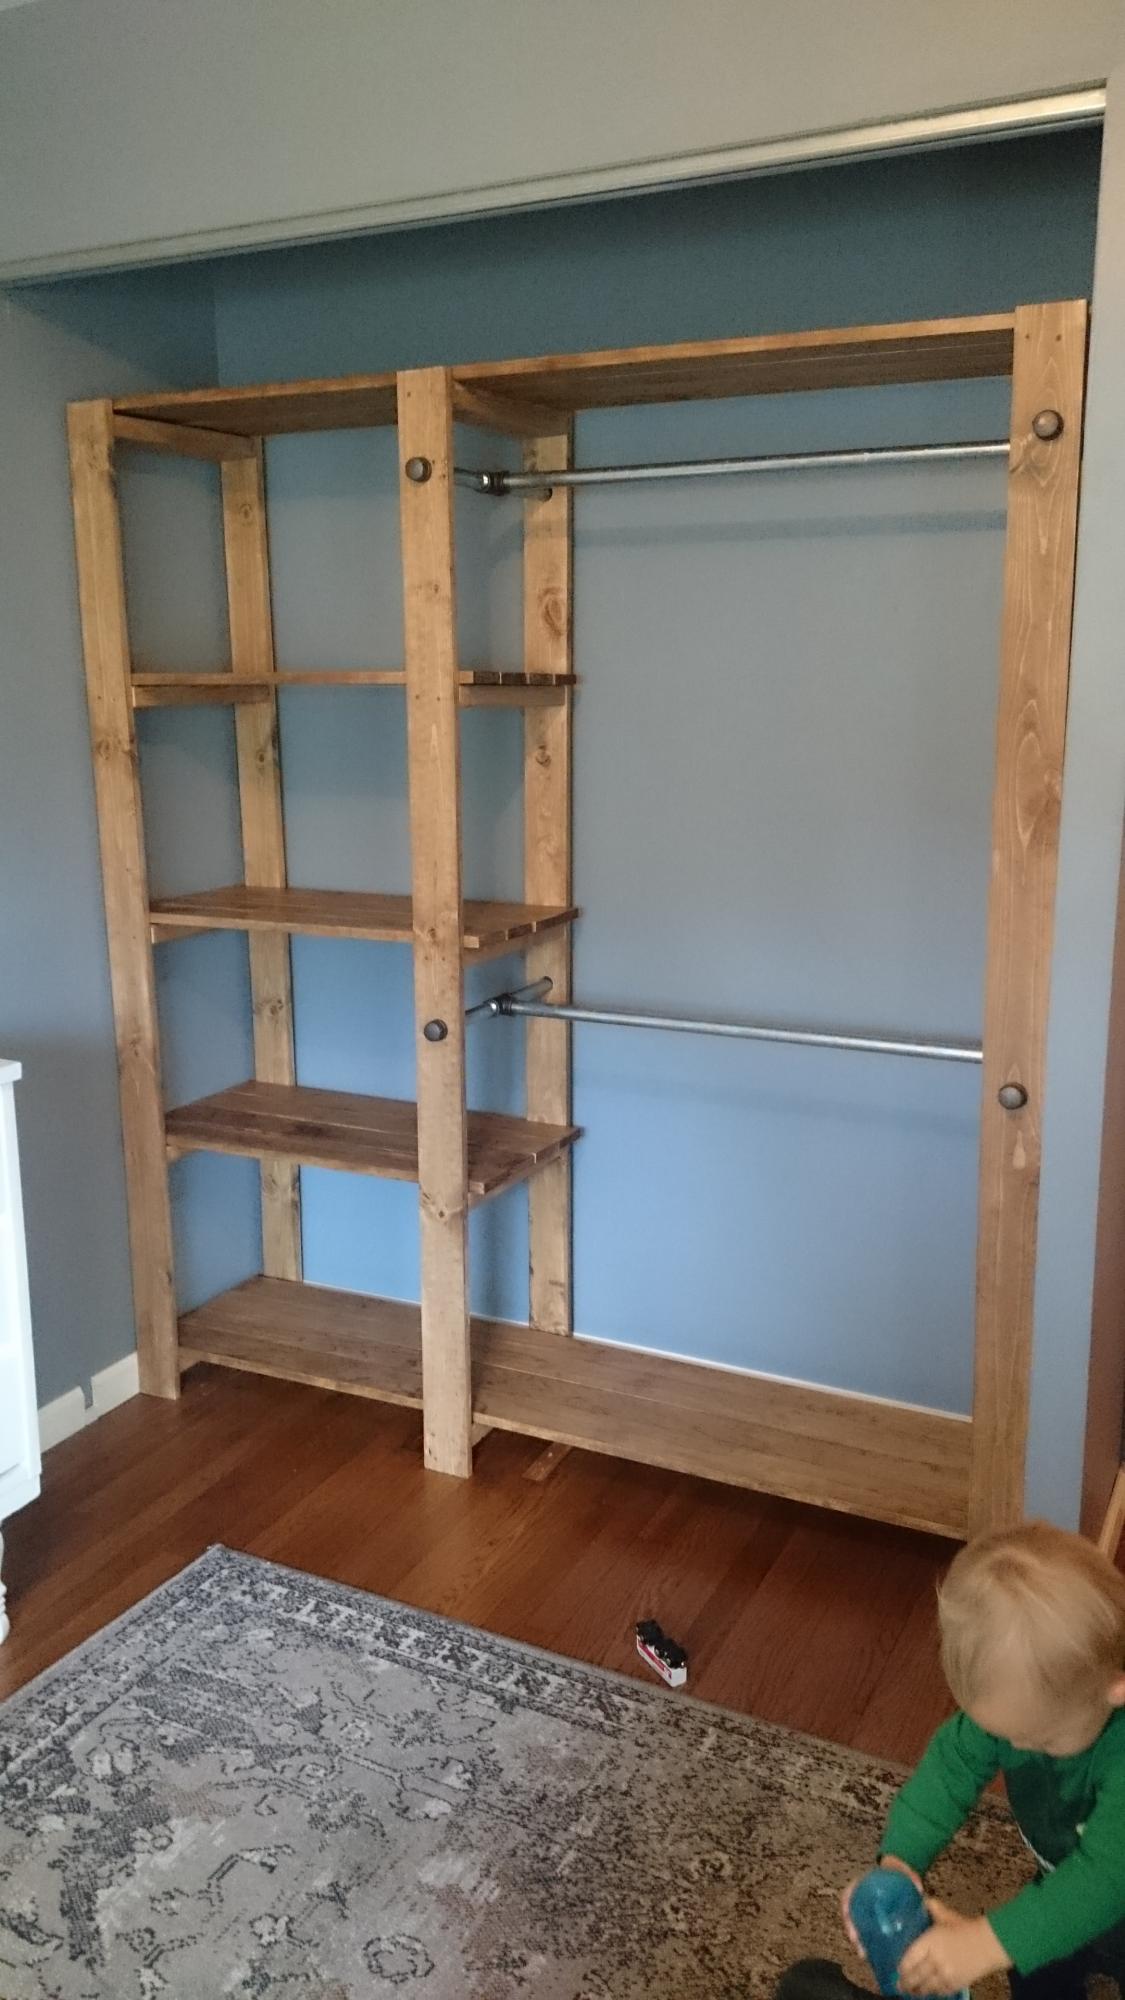
This was the second building project I've ever completed. I had to make a few adjustments to make it fit the size of ray's closet, but it was totally worth it. most of the work was in the measuring, sanding, and sealing of the wood. Ftting the frames can be a little tricky if your planks aren't perfectly straight. Otherwise, this project was pretty straight forward and can be done in just a few days depending on how much time you have to dedicate to it. Thanks Ana!
Built from Plan(s)
Estimated Cost
About $150
Estimated Time Investment
Week Long Project (20 Hours or More)
Finish Used
Early American stain and polyurethane
Recommended Skill Level
Beginner
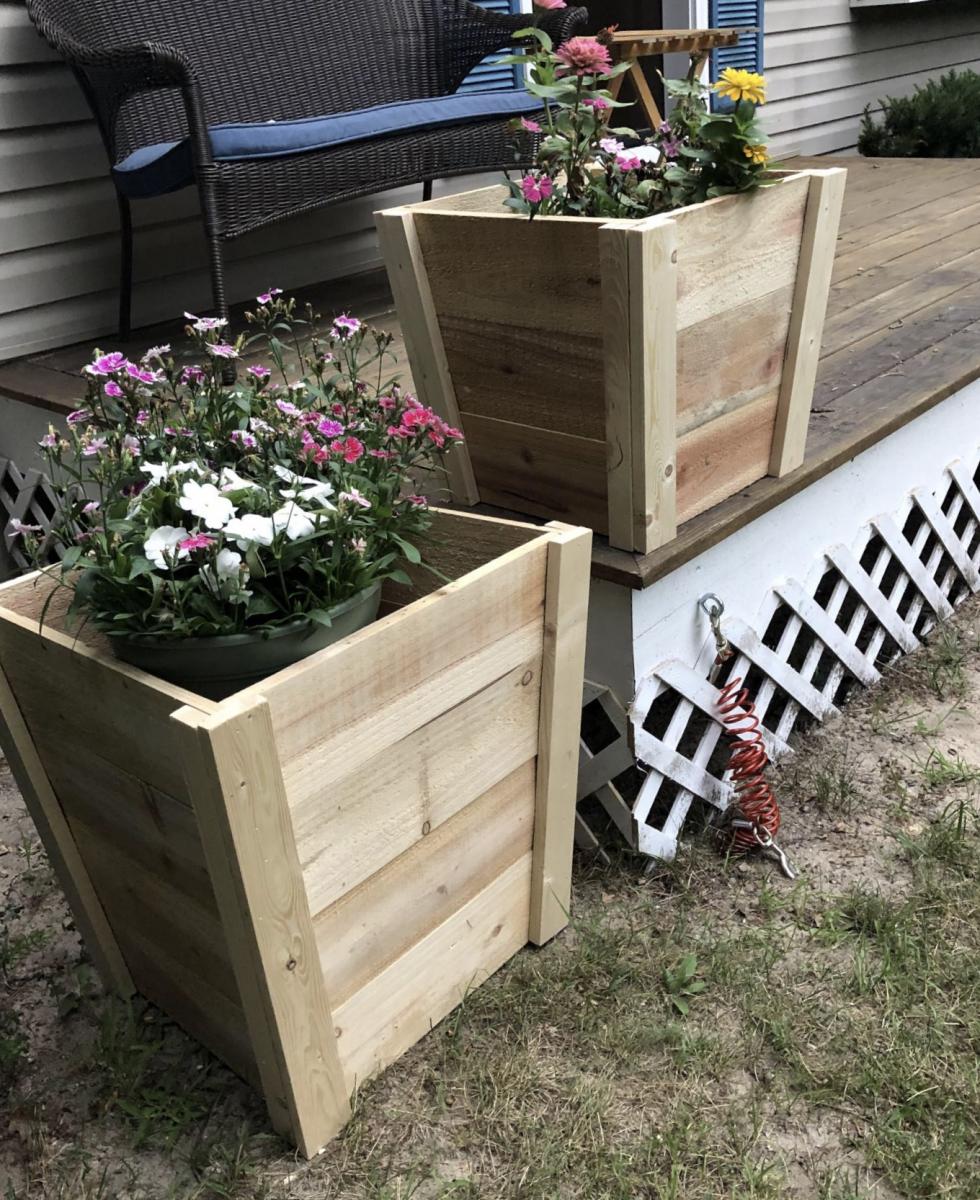
Matt’s Cedar Planters
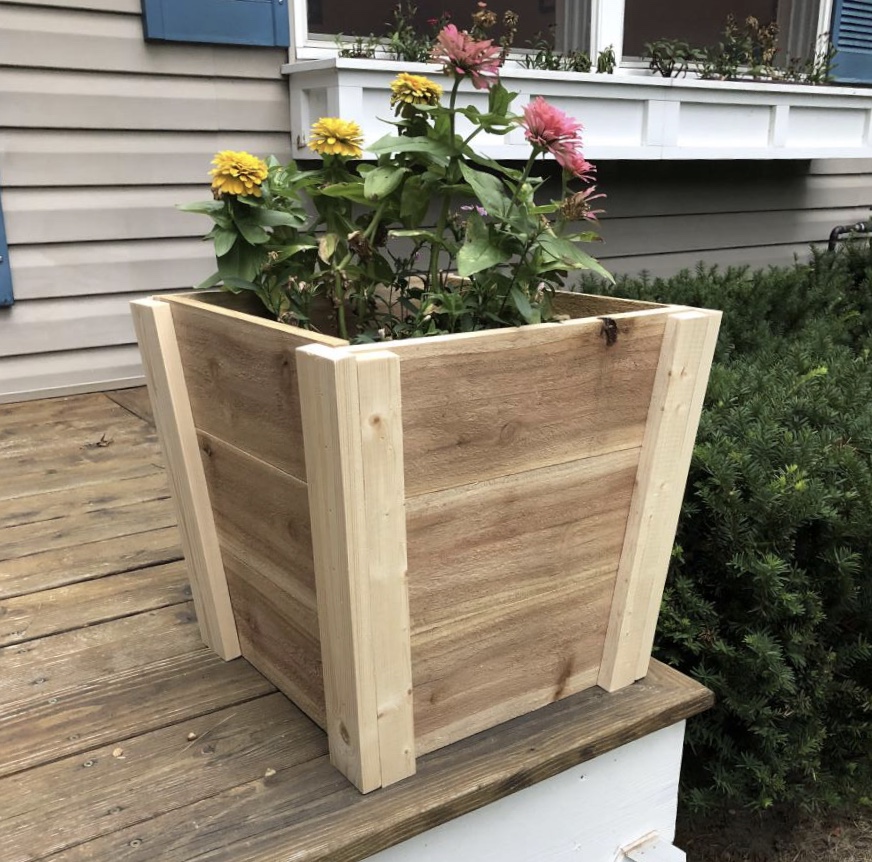
As a beginner this was a pretty fun and easy project. I did use wood screws to hold the edges together since the fence boards are typically curved and brad nails didn’t seem to hold on my first try. Ultimately I really enjoyed the results!
Built from Plan(s)
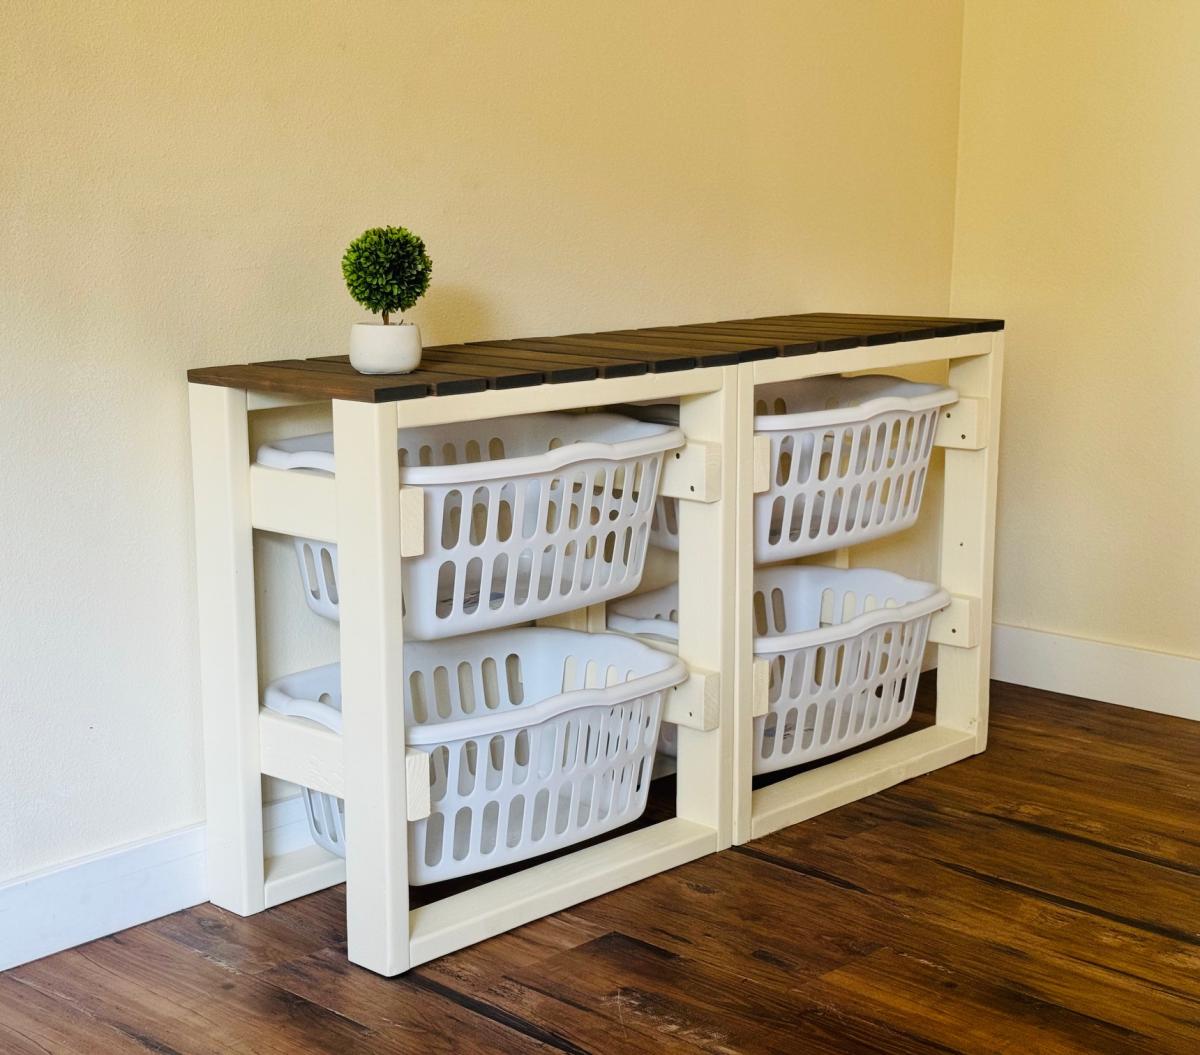
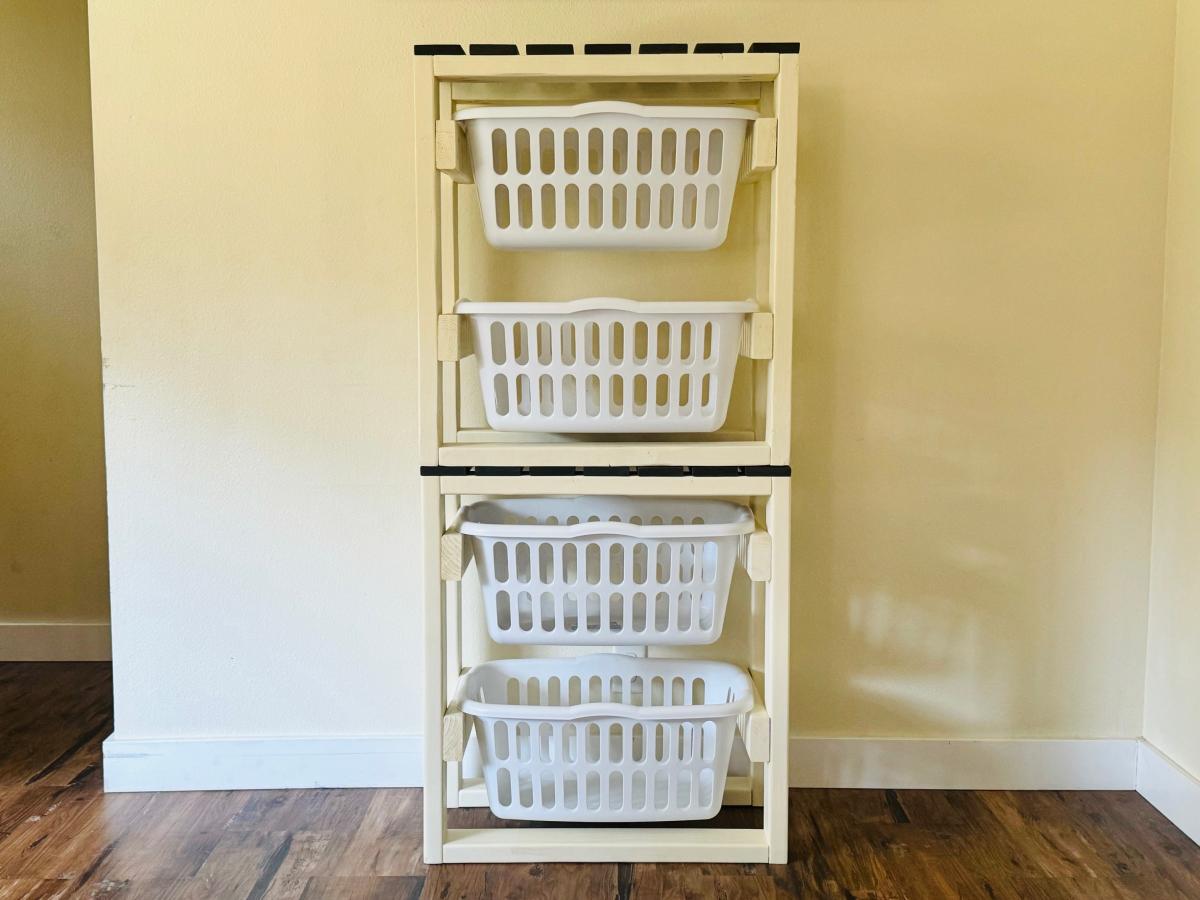
Easy 2x4 Laundry Basket Holder
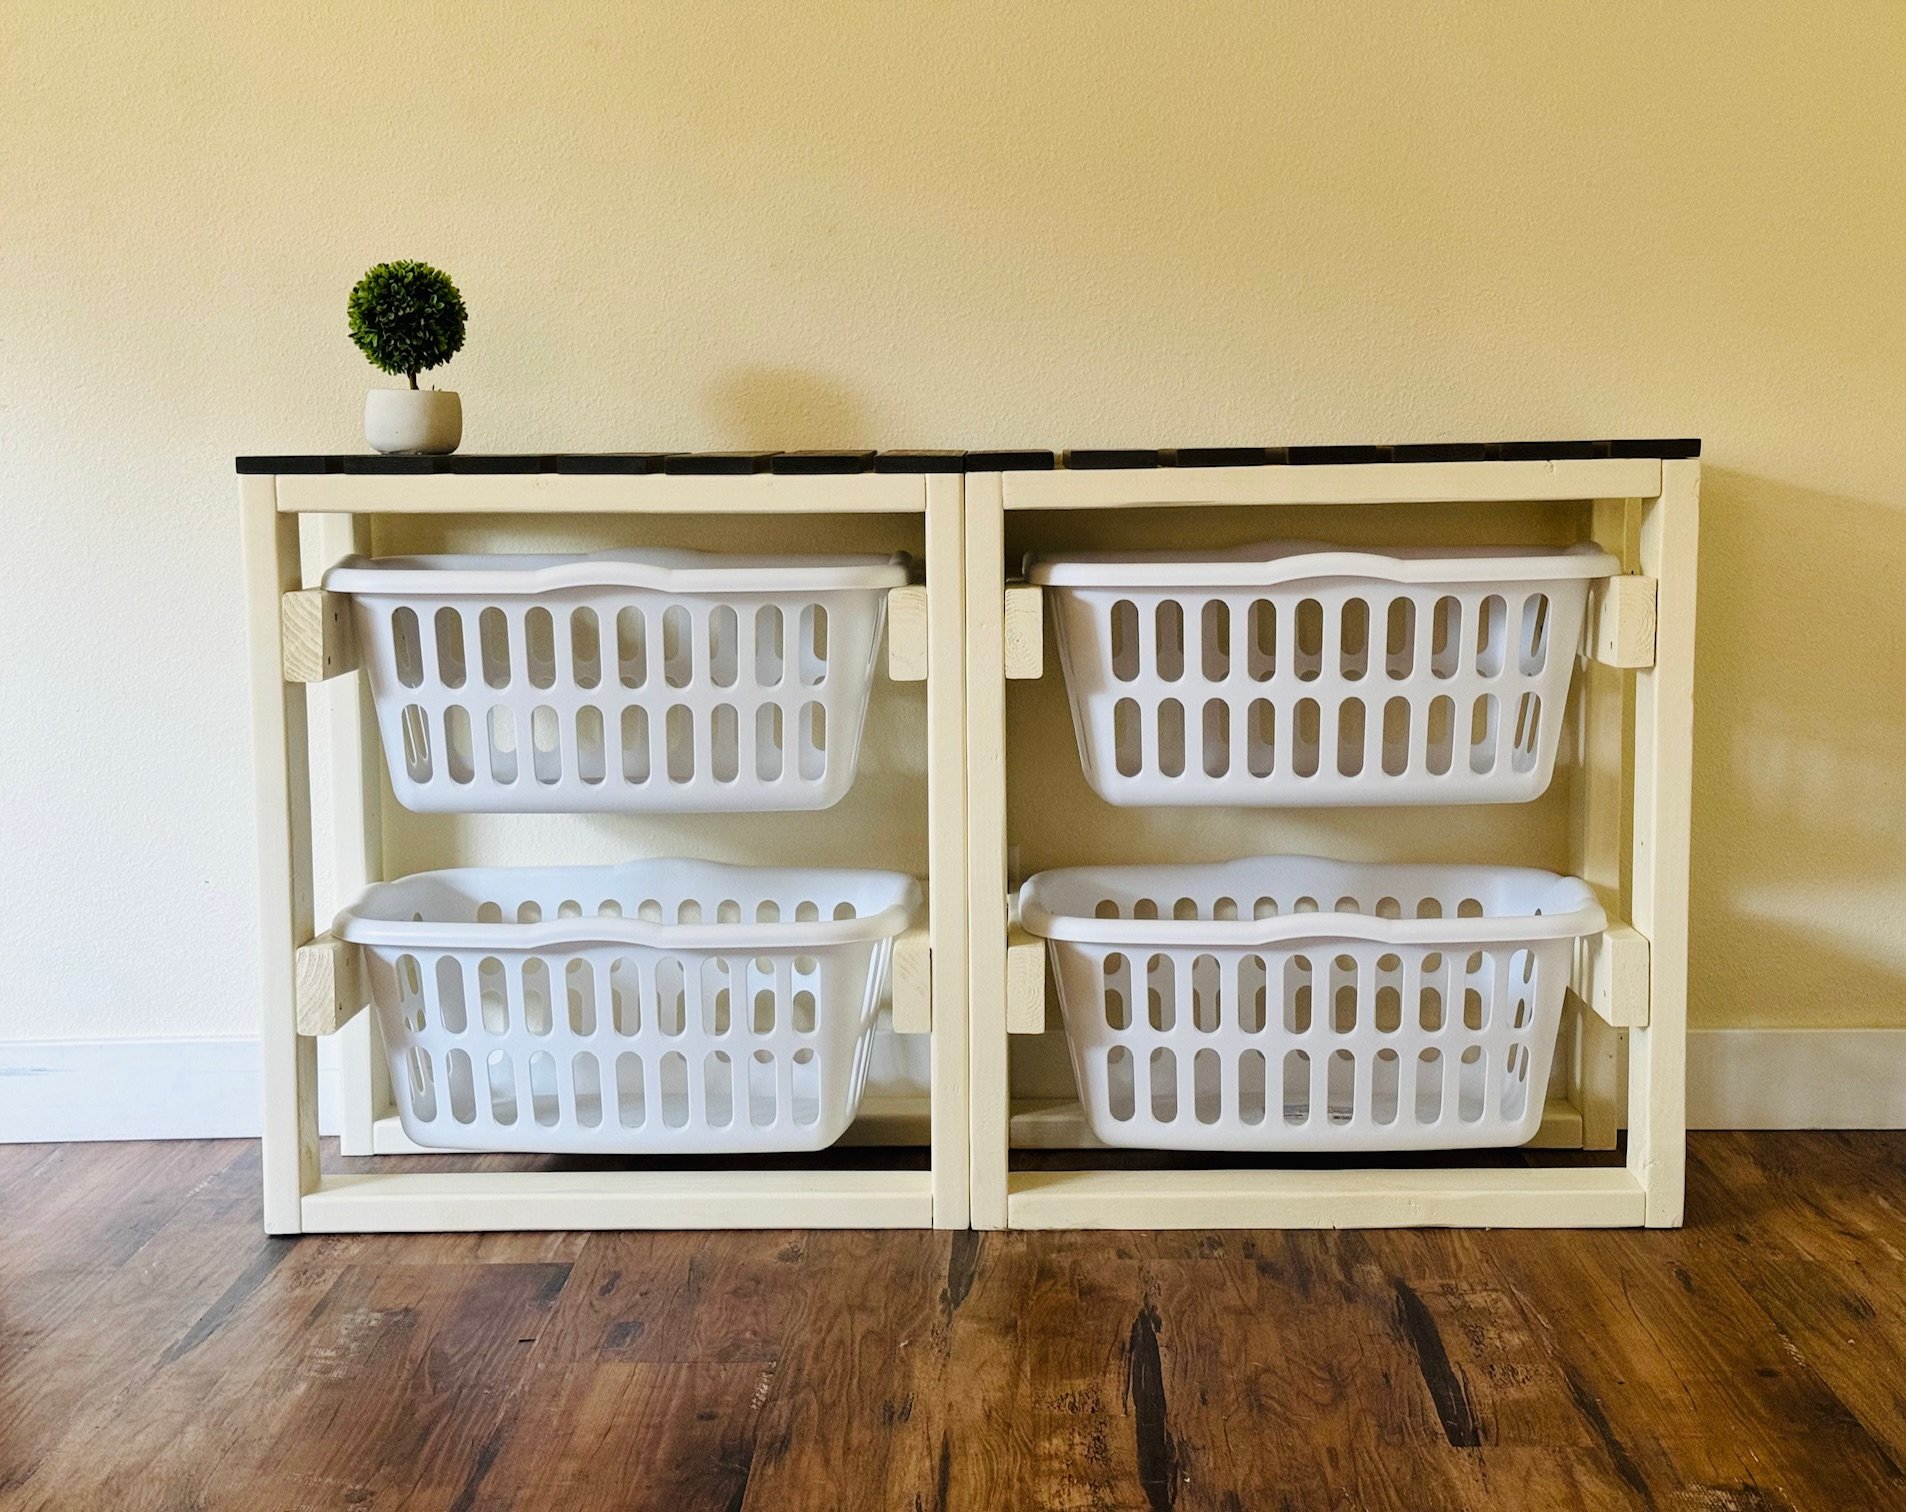
This is an easy build to get laundry baskets organized. I like that you can build multiple and stack them or put them side by side. The plan is easy to modify for different baskets or make it taller for a folding station.
Built from Plan(s)
Rooftop Patio Sectional
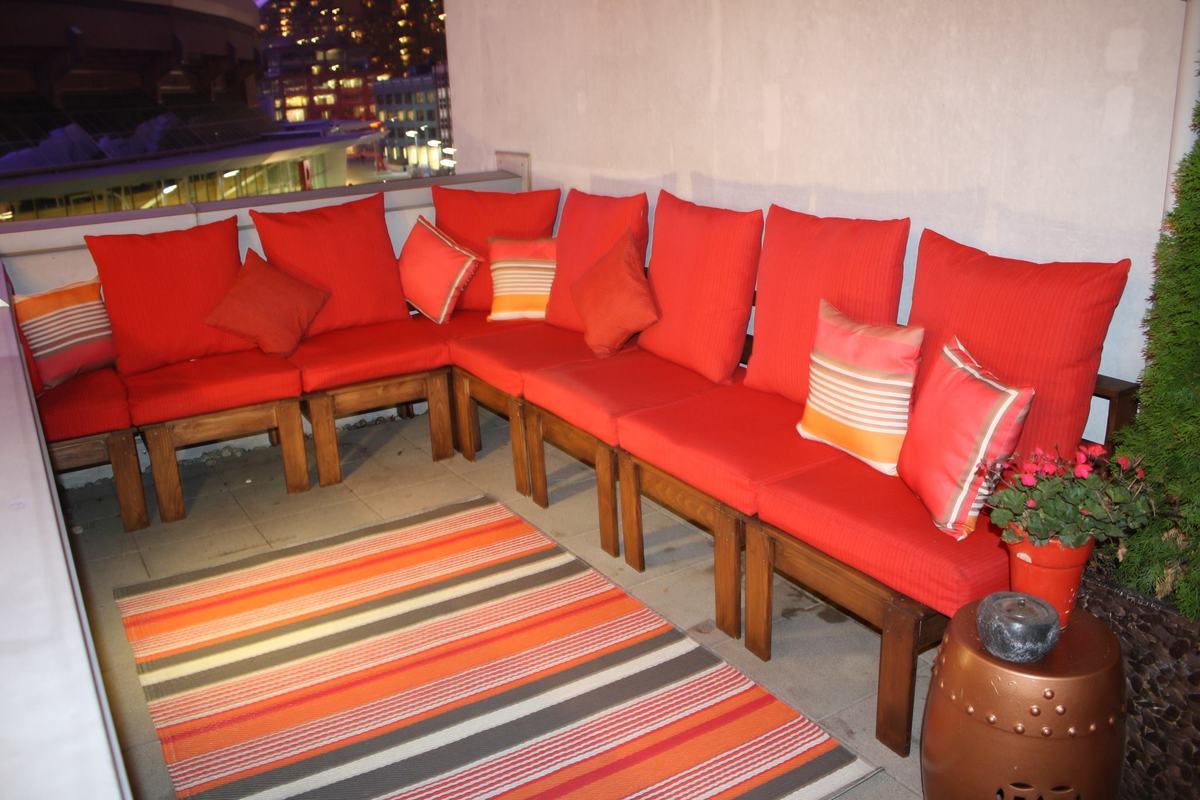
I was in love with the West Elm slat collection but knew I could never afford it let alone live in a spot that would have the outdoor space for it. Luckily as fate would have it, I stumbled across the perfect townhouse with a huge rooftop patio in downtown Vancouver last year right at the same time I discovered Ana White - with no experience in this kind of project, but a love for DIY and alot of determination I'm proud to say I finally finished my dream patio set, and it looks even better than I could have imagined! Thanks Ana :)
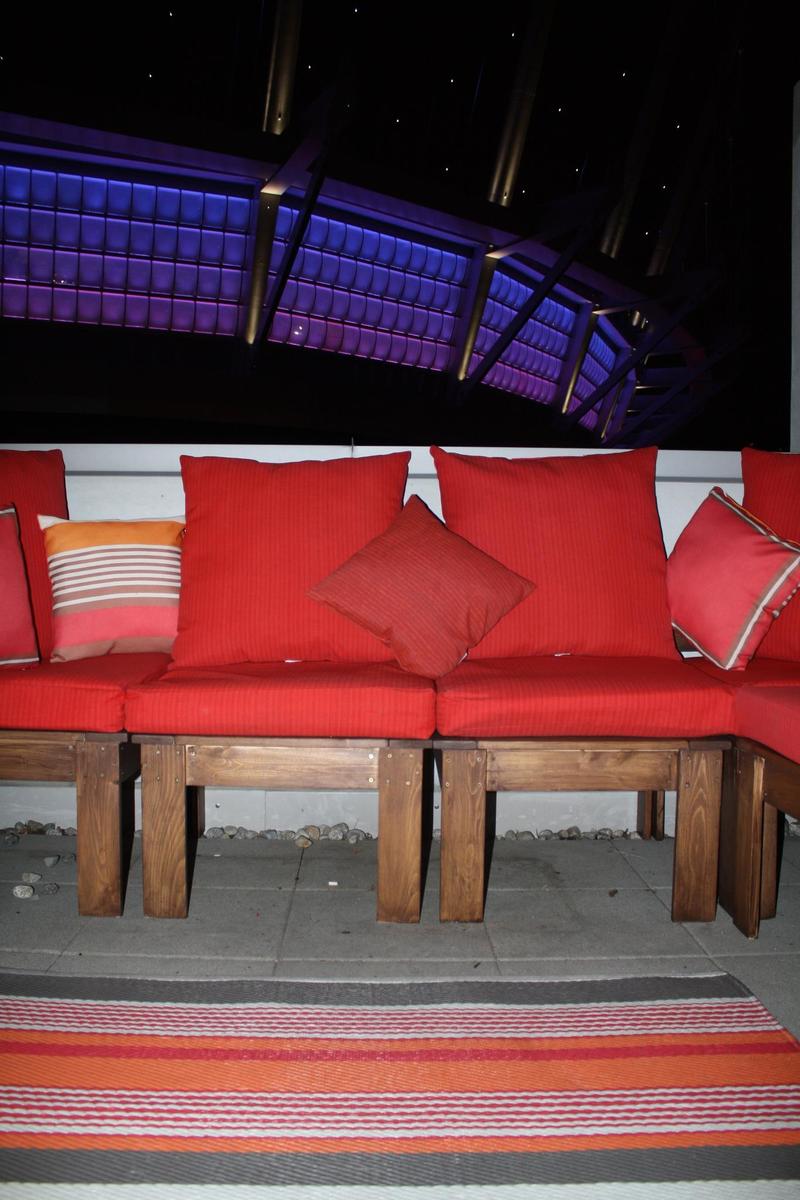
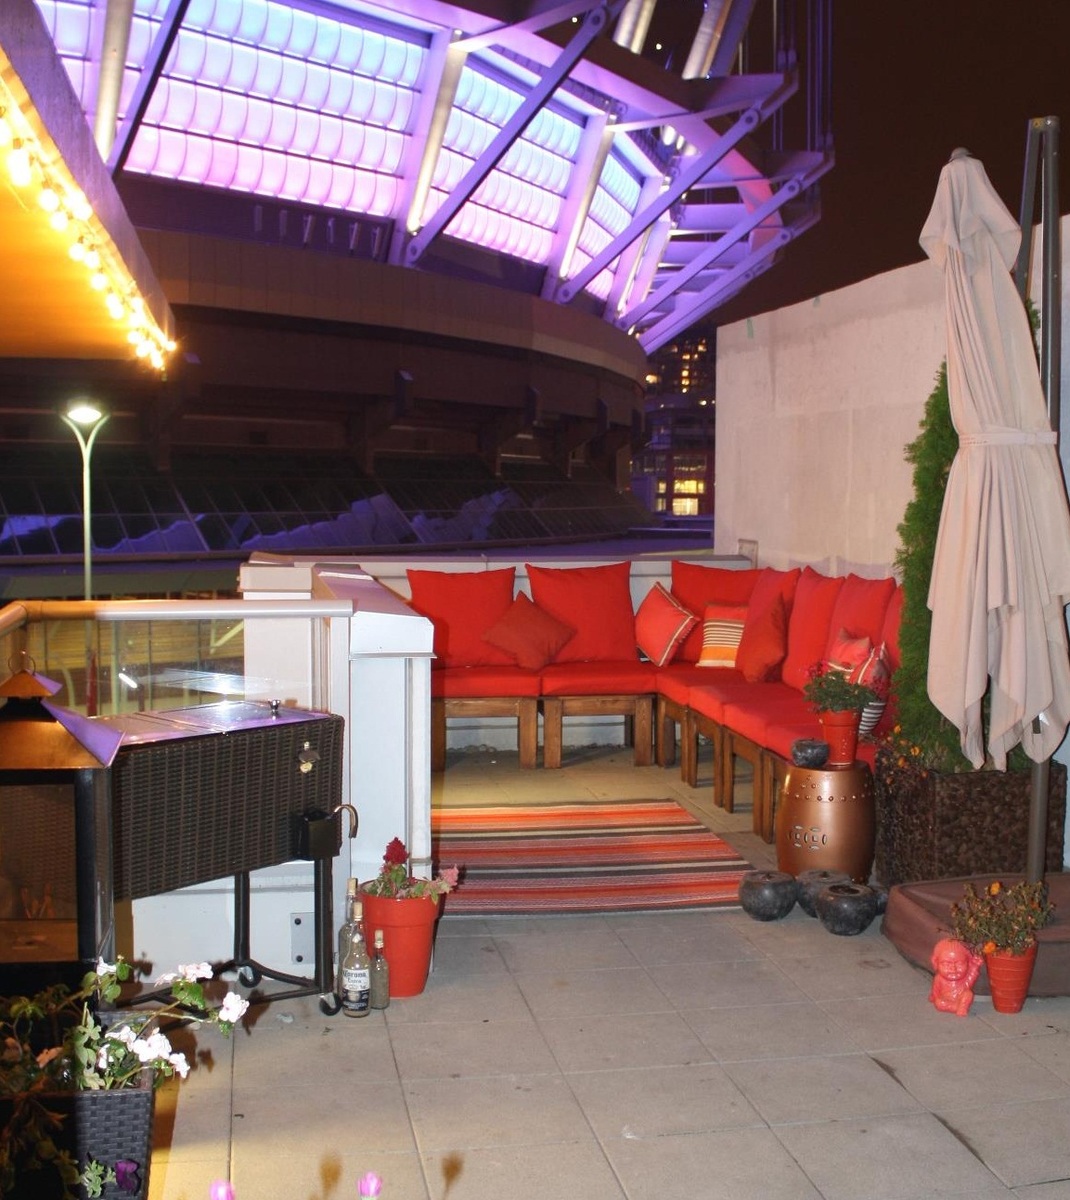
Built from Plan(s)
Estimated Cost
Under $500 including cushions
Estimated Time Investment
Weekend Project (10-20 Hours)
Recommended Skill Level
Beginner
Comments
Wine Cabinet

One day I was considering buying a wine cabinet for a friend. However, once I did a little bit of research, I found that the cabinets that were reasonably priced, were made of low grade material. That is when I took to the internet and immediately searched Ana's site. I have been on the site in the past and hadn't made anything yet. Once, I found the plan on here to make it, I grabbed a little bit of graph paper and worked it to the proportions I needed and added a few extras. It took me a while to finish the project as I only had weekends and occasionally weeknights to work on it. Also, the staining and finishing obviously took some time.
P.S. This project allowed me to use a Kreg Jig for the first time. I can't believe that I haven't used one before and have since built a few other projects using it.


Estimated Cost
$200
Estimated Time Investment
Week Long Project (20 Hours or More)
Finish Used
Minwax Pre-stain Wood Conditioner,
2 coats Minwax Wood Finish Ebony 2718,
2 coats Minwax Polycrylic Protective Finish Semi-gloss
2 coats Minwax Wood Finish Ebony 2718,
2 coats Minwax Polycrylic Protective Finish Semi-gloss
Recommended Skill Level
Intermediate
Comments

Wed, 08/20/2014 - 20:31
Blown away
your friend must've been thrilled! Amazing build and finish!
P.s. Will you be my friend? ;-)
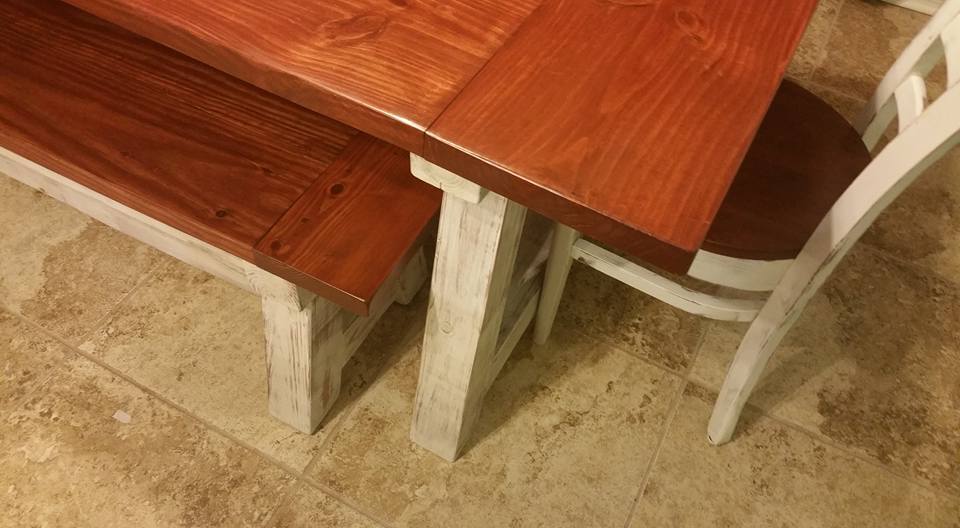
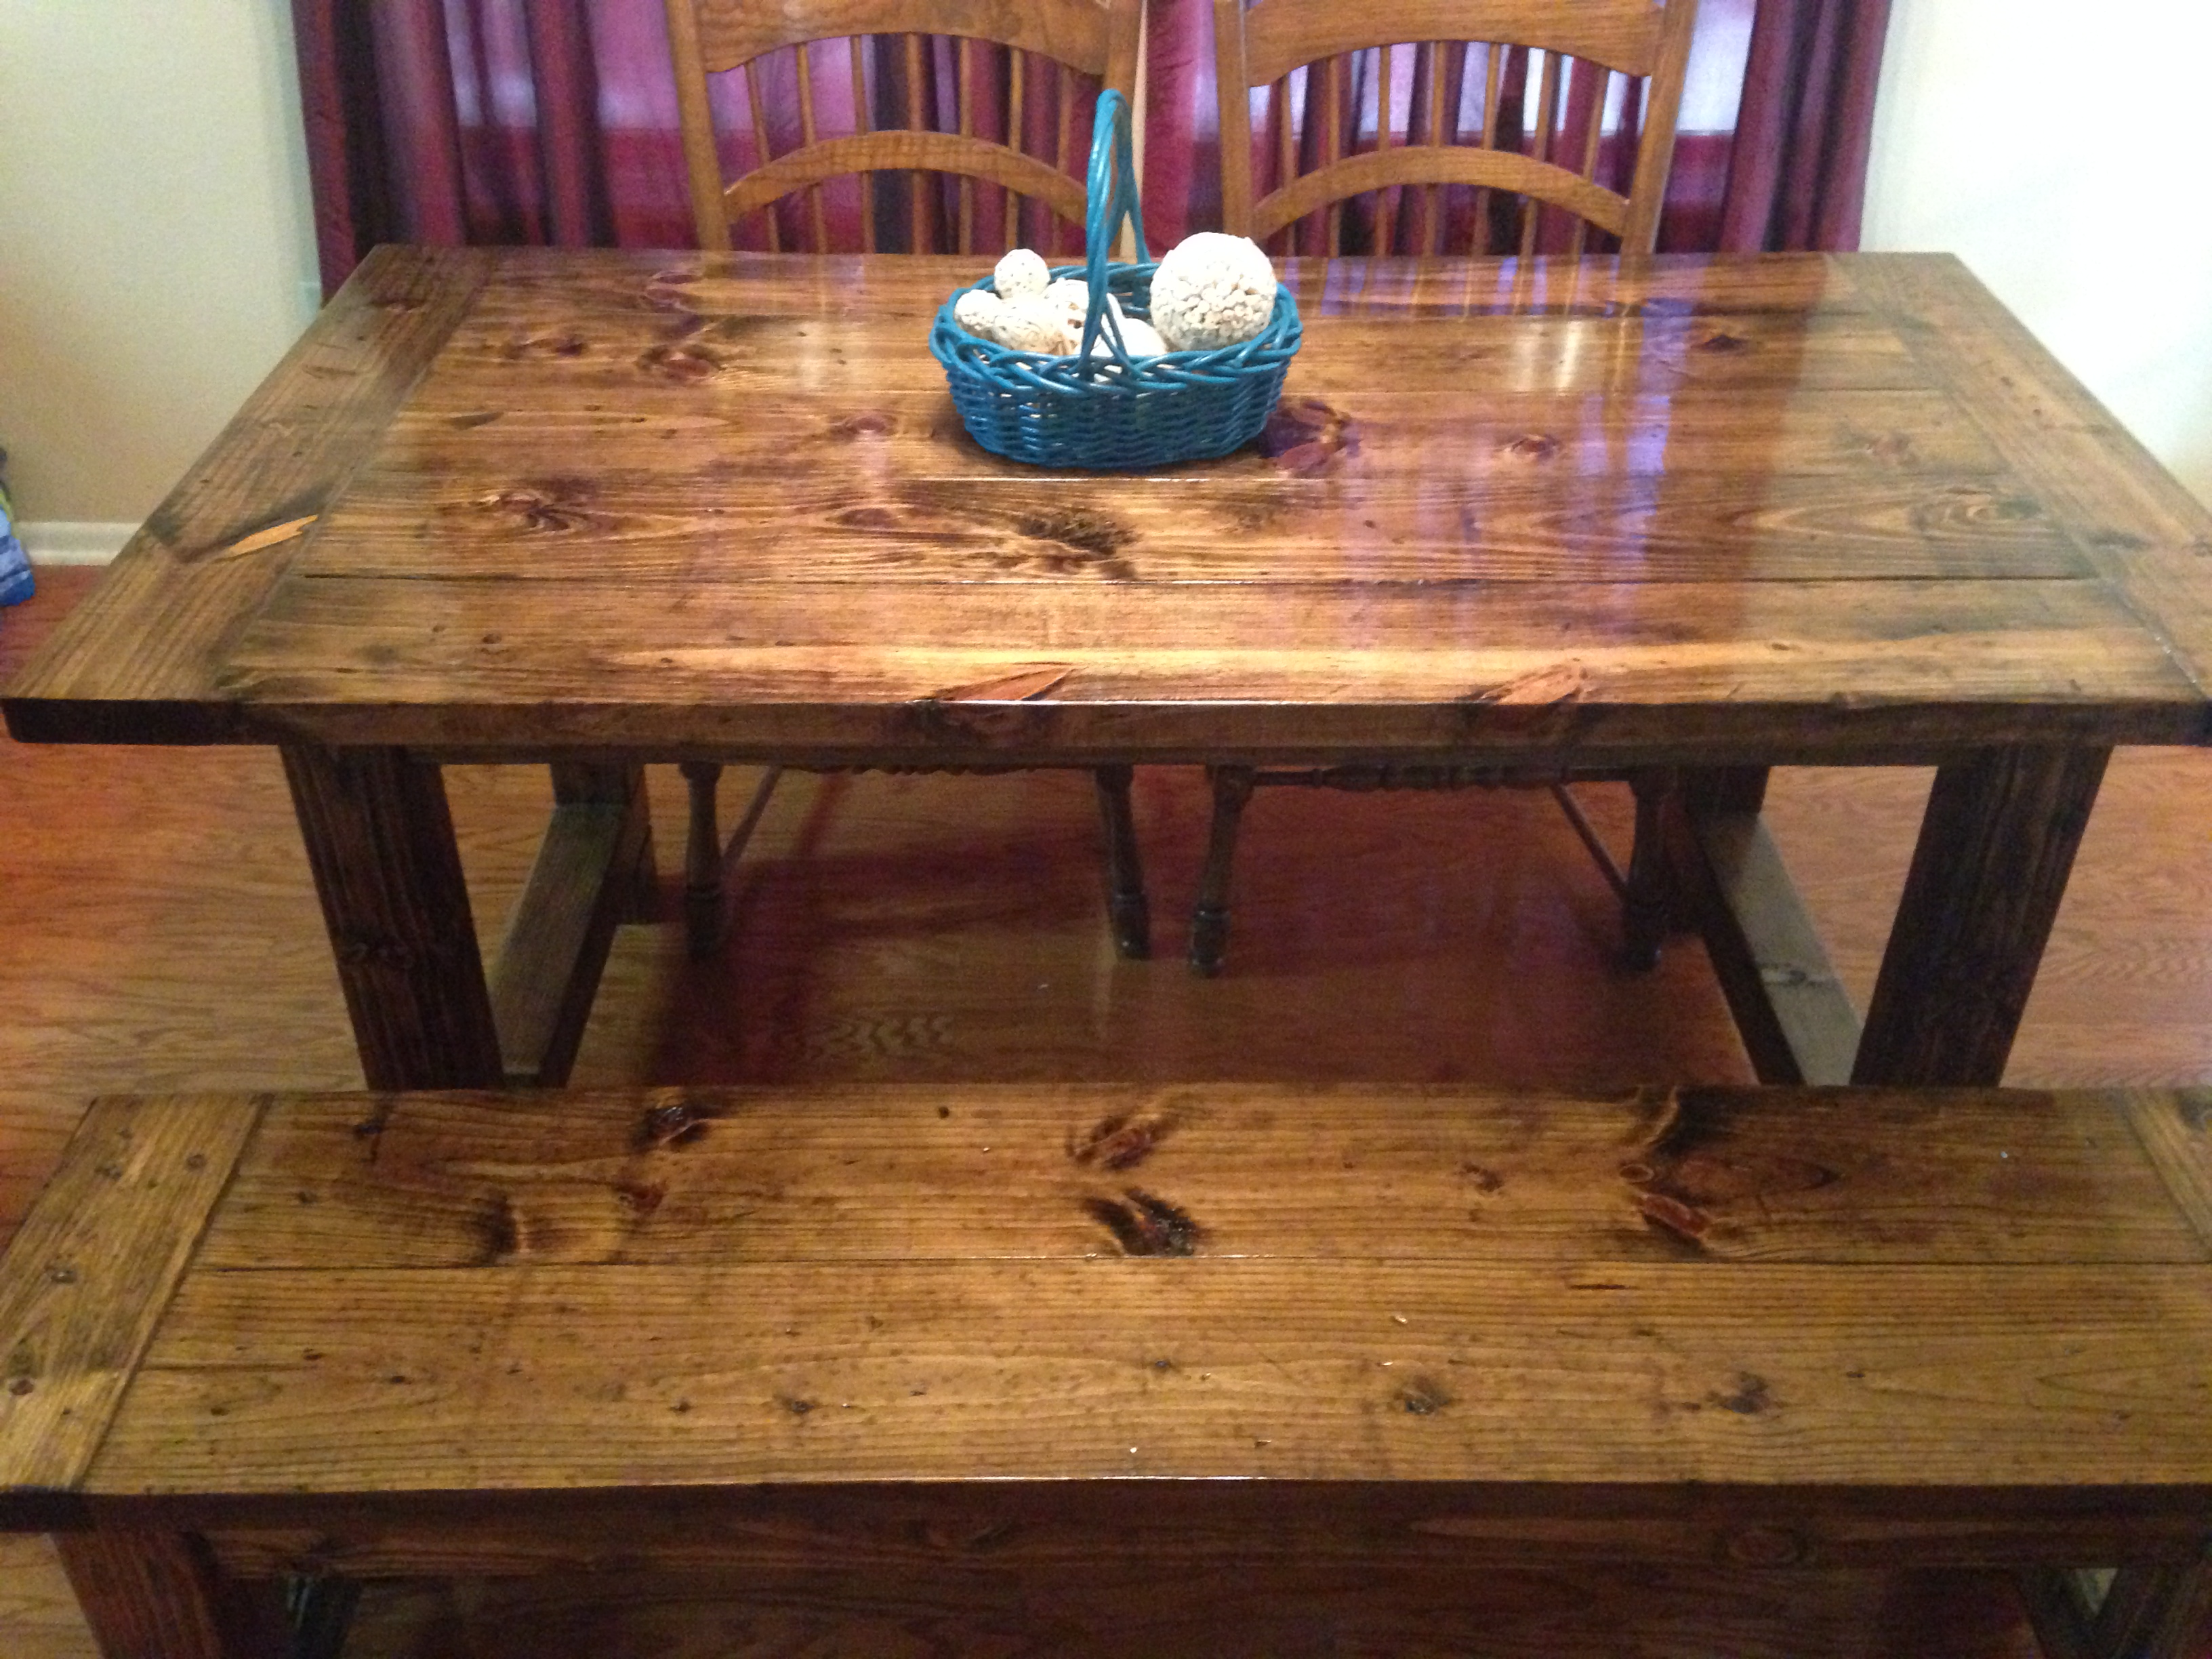
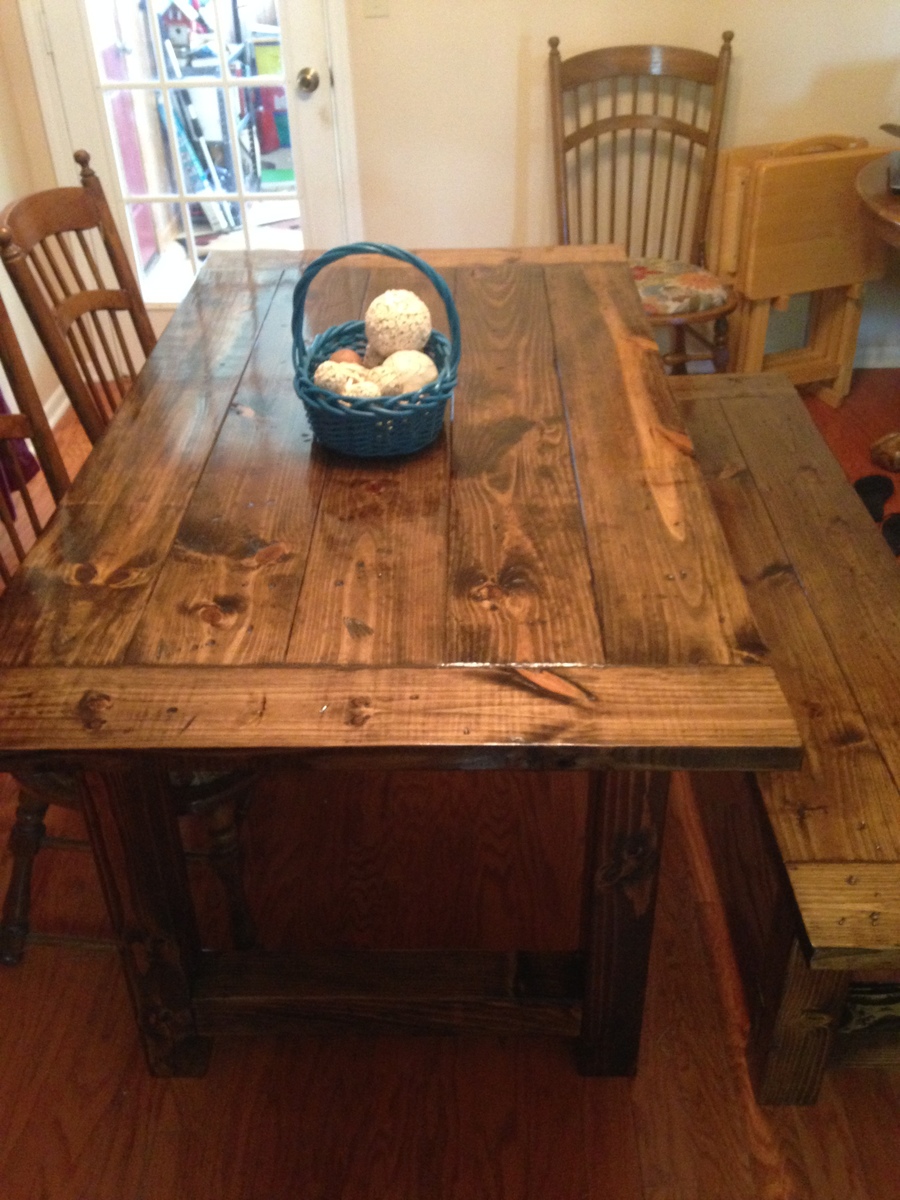
Farmhouse Table
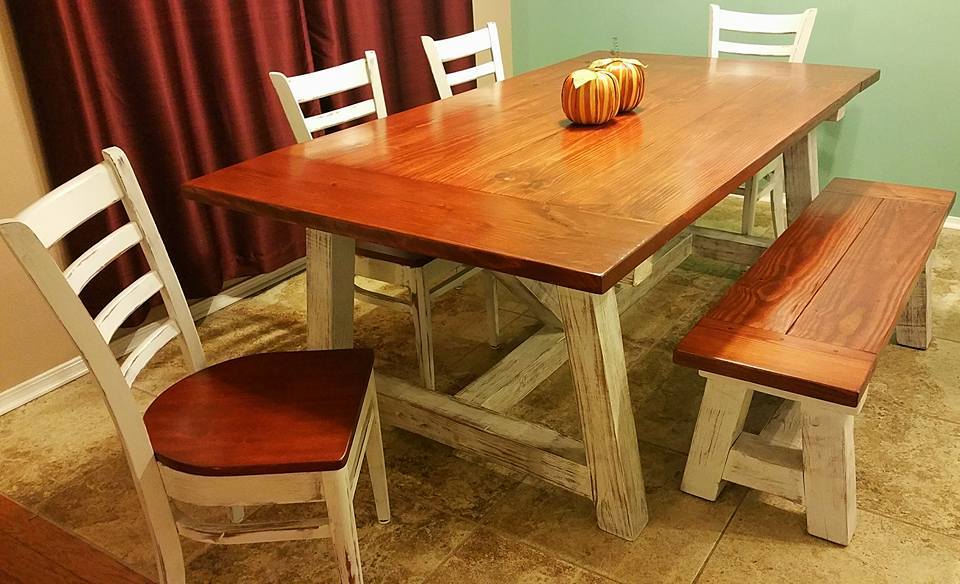
We love this table. It's great for big meals, board games, and family gatherings. I enjoyed the work and finished result. Learned a lot. Thanks for the plans!
Estimated Cost
$200+
Estimated Time Investment
Week Long Project (20 Hours or More)
Finish Used
Chalk paint base and Red Chestnut stain for the top.
Recommended Skill Level
Intermediate
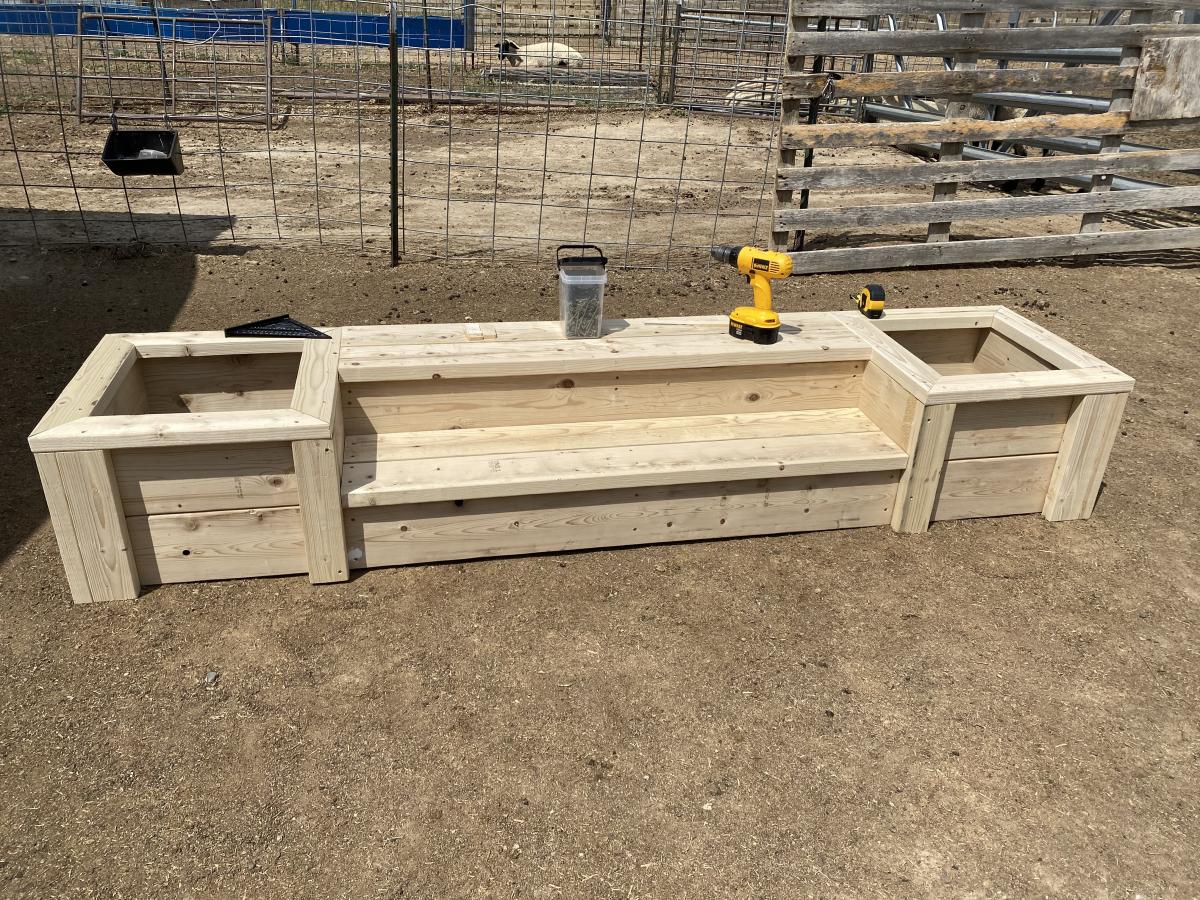
Planter steps
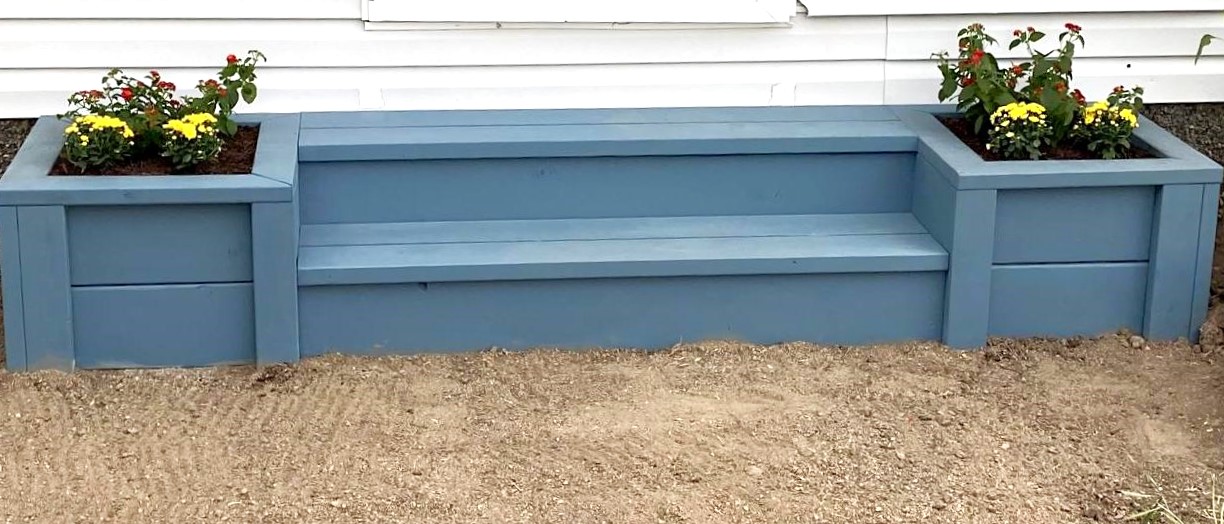
These steps turned out great!!! My in-laws were using some busted up pallets as a front porch so I knocked these out in a few hours. The blue stain looks really good and matches the other blue on various out-buildings. Very easy project and the plans available were spot on. Thanks Ana!!
Built from Plan(s)
Estimated Cost
$175
Estimated Time Investment
Day Project (6-9 Hours)
Finish Used
Stain
Recommended Skill Level
Starter Project
Mudroom Bliss
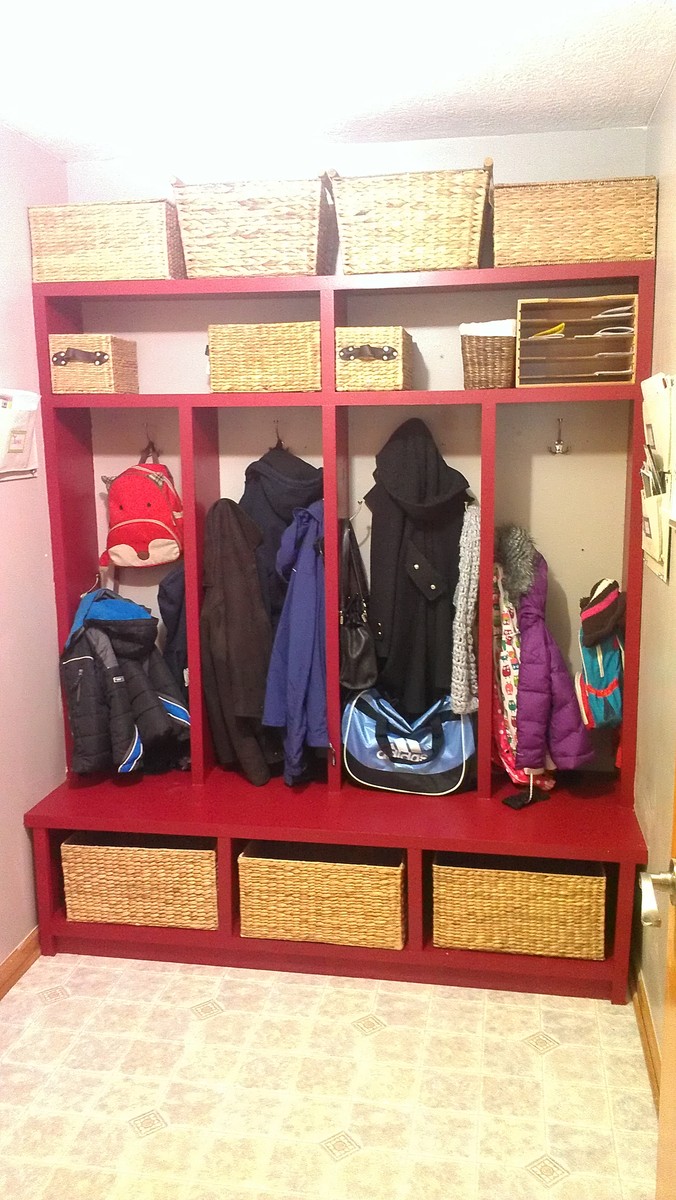
I adapted the Braden Bench plan to make it more of a built-in feature of our mudroom. It's added wonderful organization to our busiest room.
Built from Plan(s)
Estimated Cost
$200
Estimated Time Investment
Weekend Project (10-20 Hours)
Finish Used
Paint & Primer in one
Recommended Skill Level
Intermediate
rustic farm table
rustic farm table.
Plans are easy to follow.
Motified the legs a bit. I use a 4x4 cross members rather than a 2x4.
Dark walnut stain with semi gloss poly finish.
Built from Plan(s)
Estimated Cost
$100
Estimated Time Investment
Weekend Project (10-20 Hours)
Finish Used
Minwax Dark Walnut, Semi Gloss Poly
Recommended Skill Level
Beginner
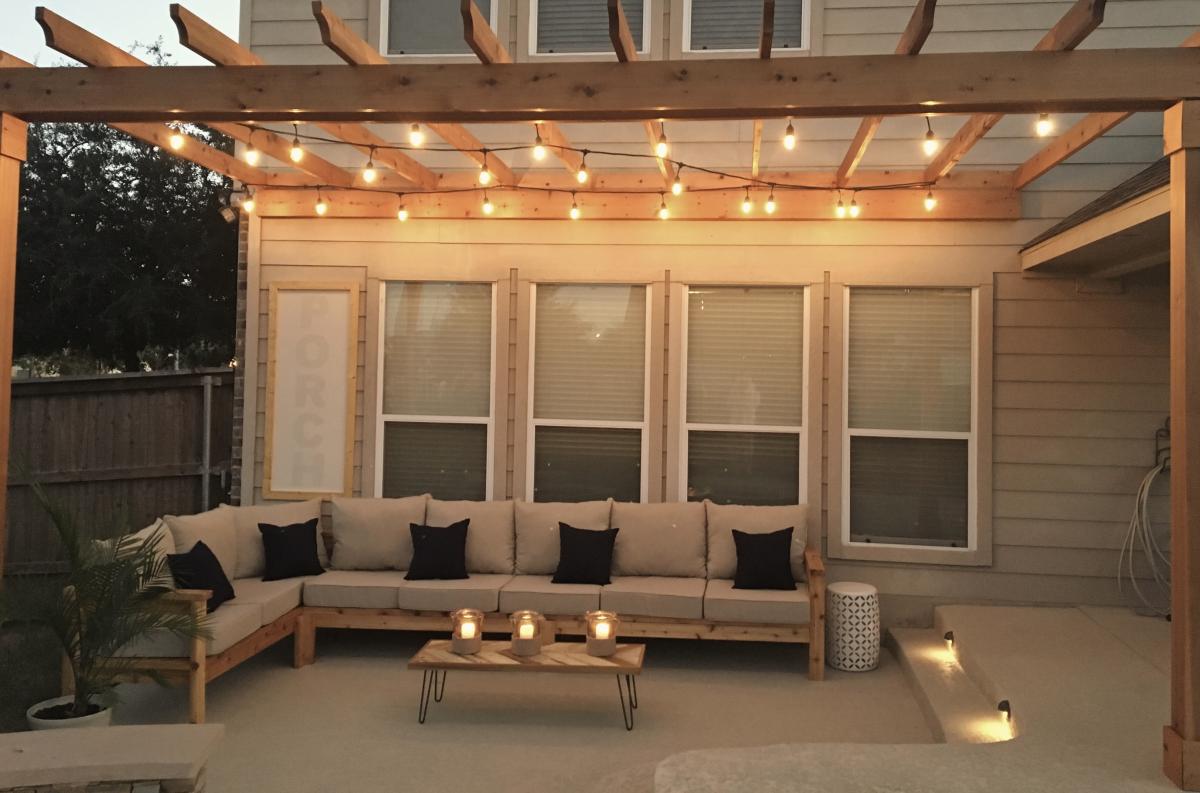
Outdoor Sectional and Pallet Coffee Table
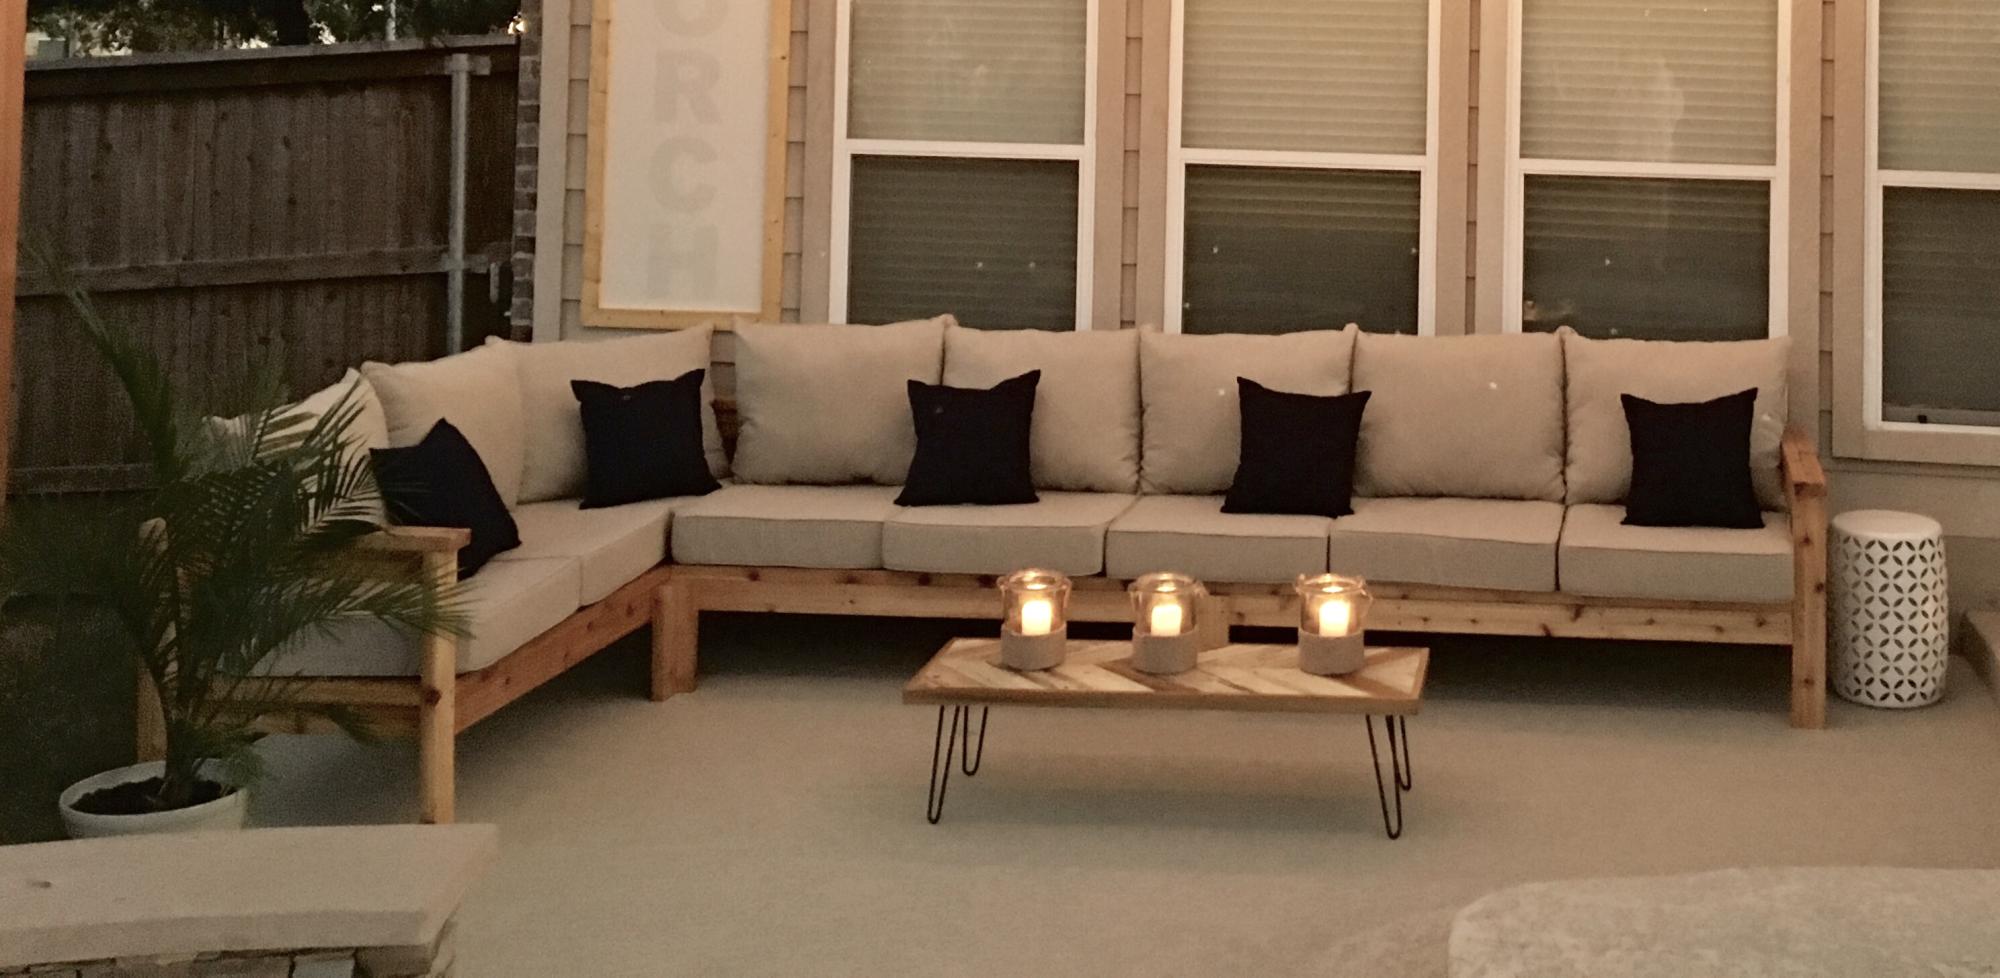
Hi Ana!
My husband used your plans to build the 2x4 outdoor cedar sectional :) He did it in 1 day and it couldn't have been easier! He even tried first time working with pallets to make a small table and it came out perfectly too! Can't wait to enjoy family time on our new back porch.
Thanks Again & Love From Austin ❤️
Kathleen
Built from Plan(s)
Estimated Cost
$350
Estimated Time Investment
Day Project (6-9 Hours)
Finish Used
Stain
Recommended Skill Level
Beginner
Comments
Thu, 10/24/2019 - 16:35
Stain and cushions?
Hi, your furniture is beautiful. May I ask: Where did you find your cushions? And what color/ brand stain did you use? Lovely job.
Garden table
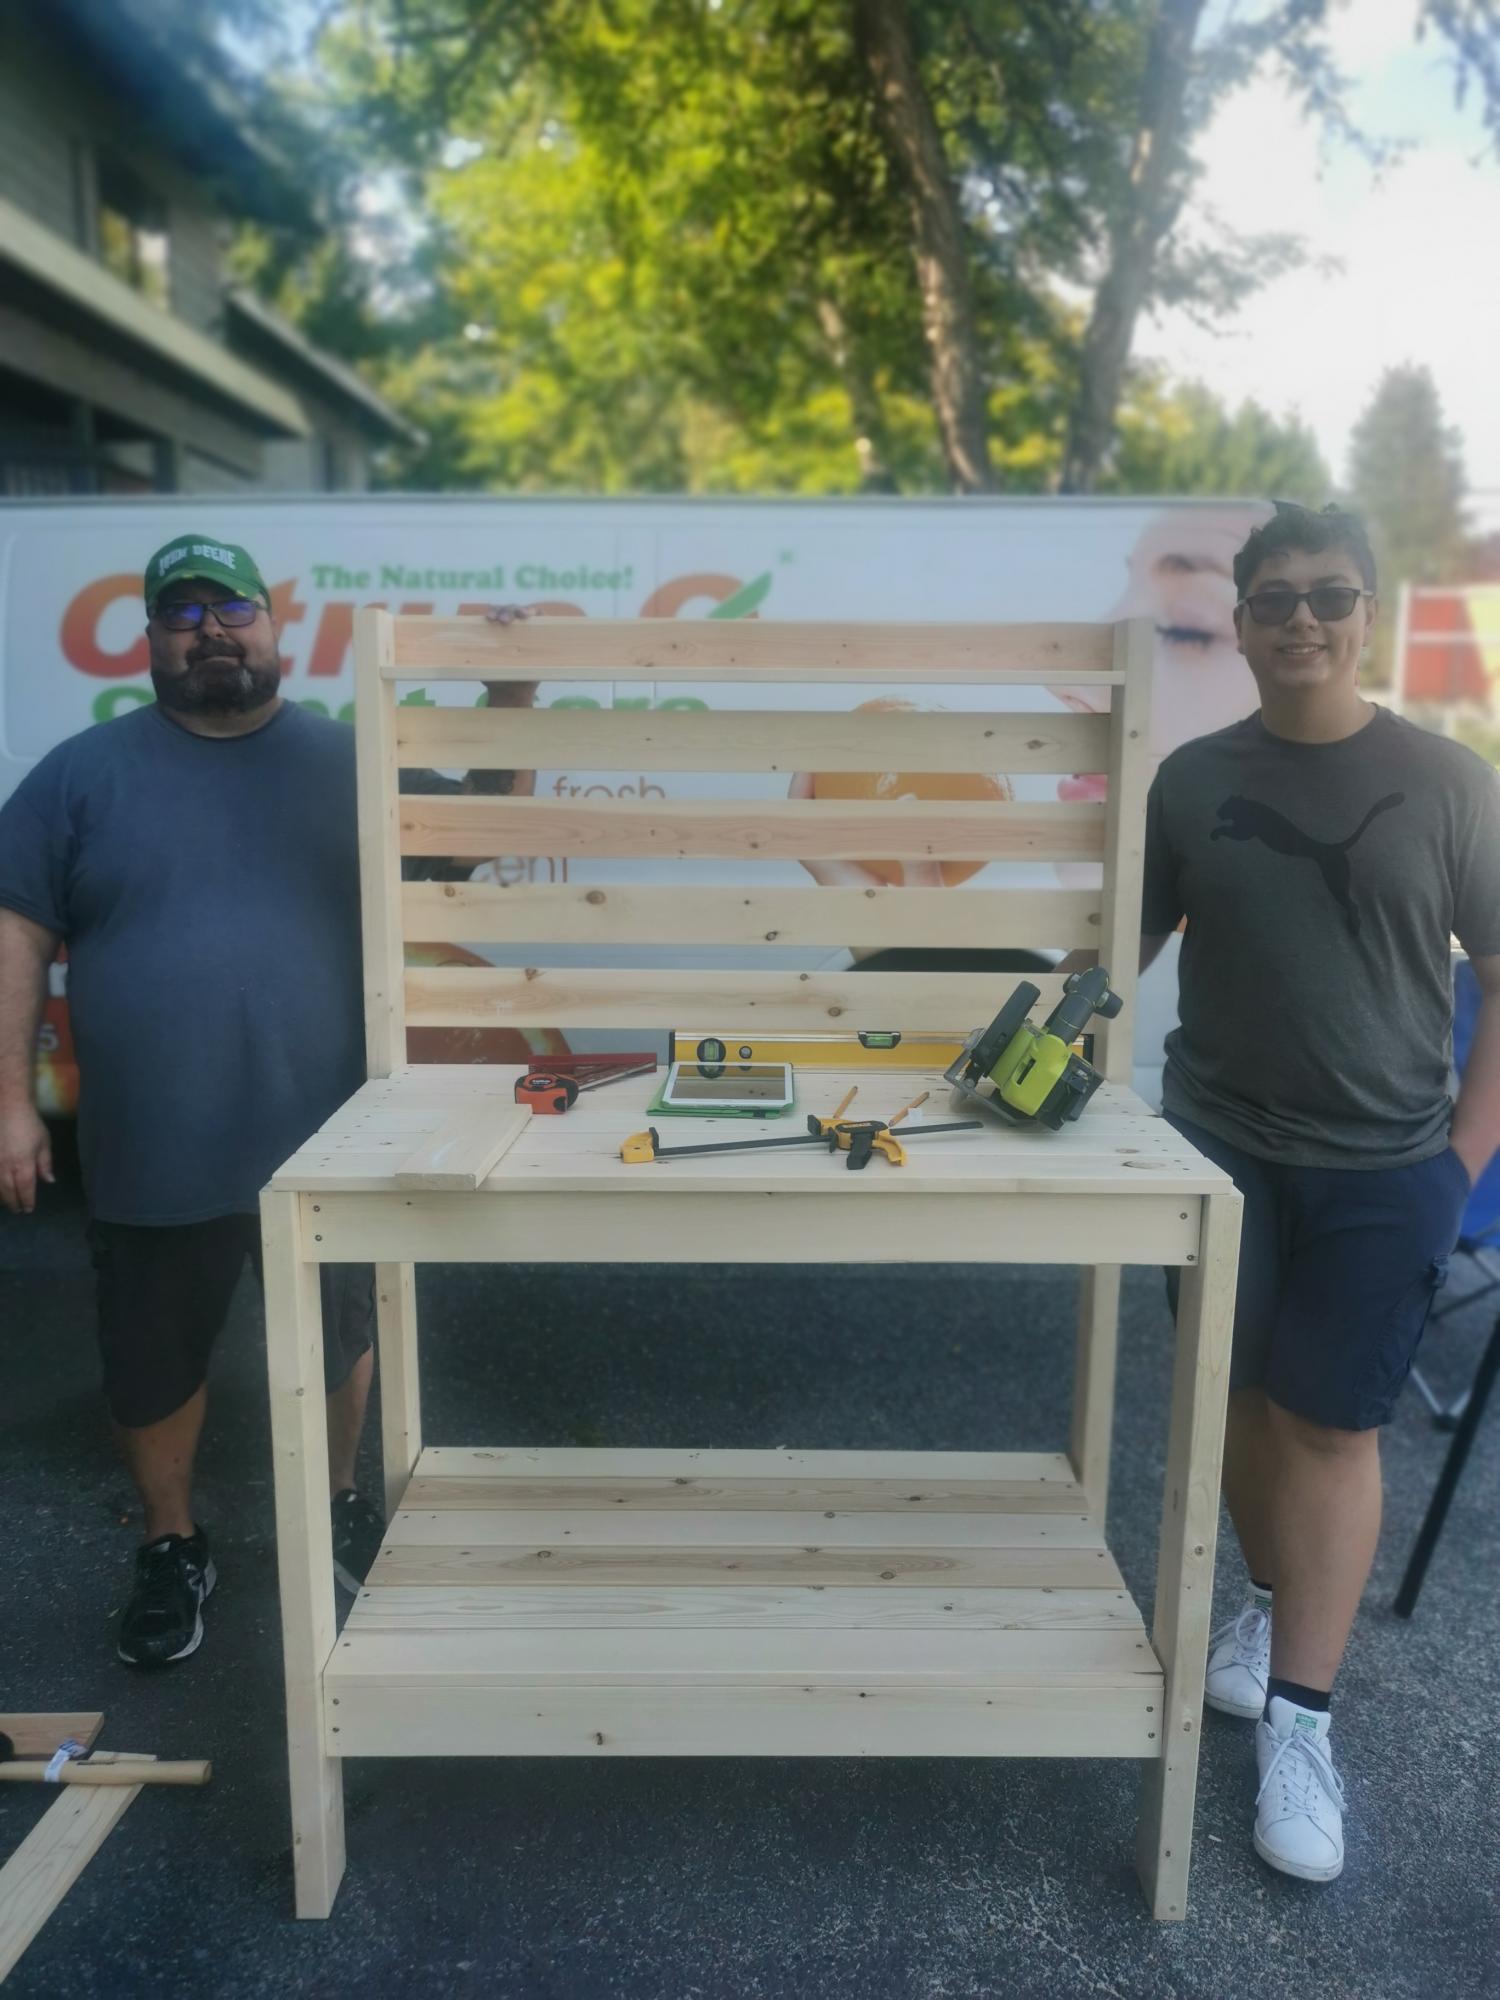
This was an amazing first project for us. Thank you for the plans and the step by step instructions
Built from Plan(s)
Estimated Cost
100.00
Estimated Time Investment
Afternoon Project (3-6 Hours)
Recommended Skill Level
Starter Project
T's Rustic X End Table
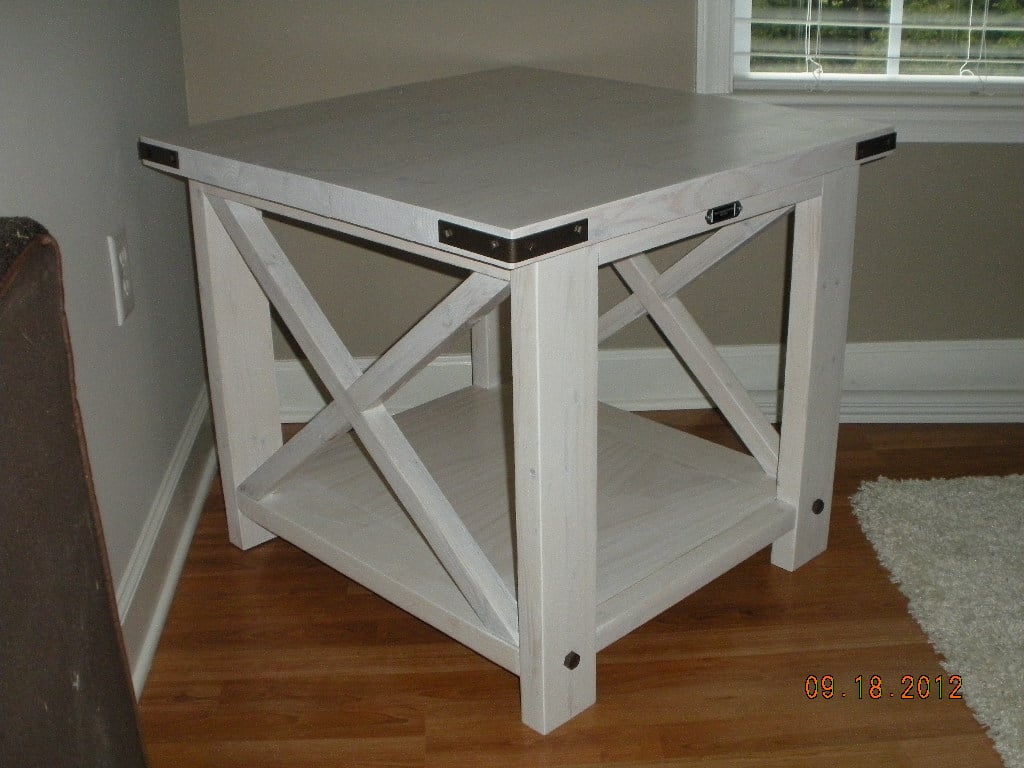
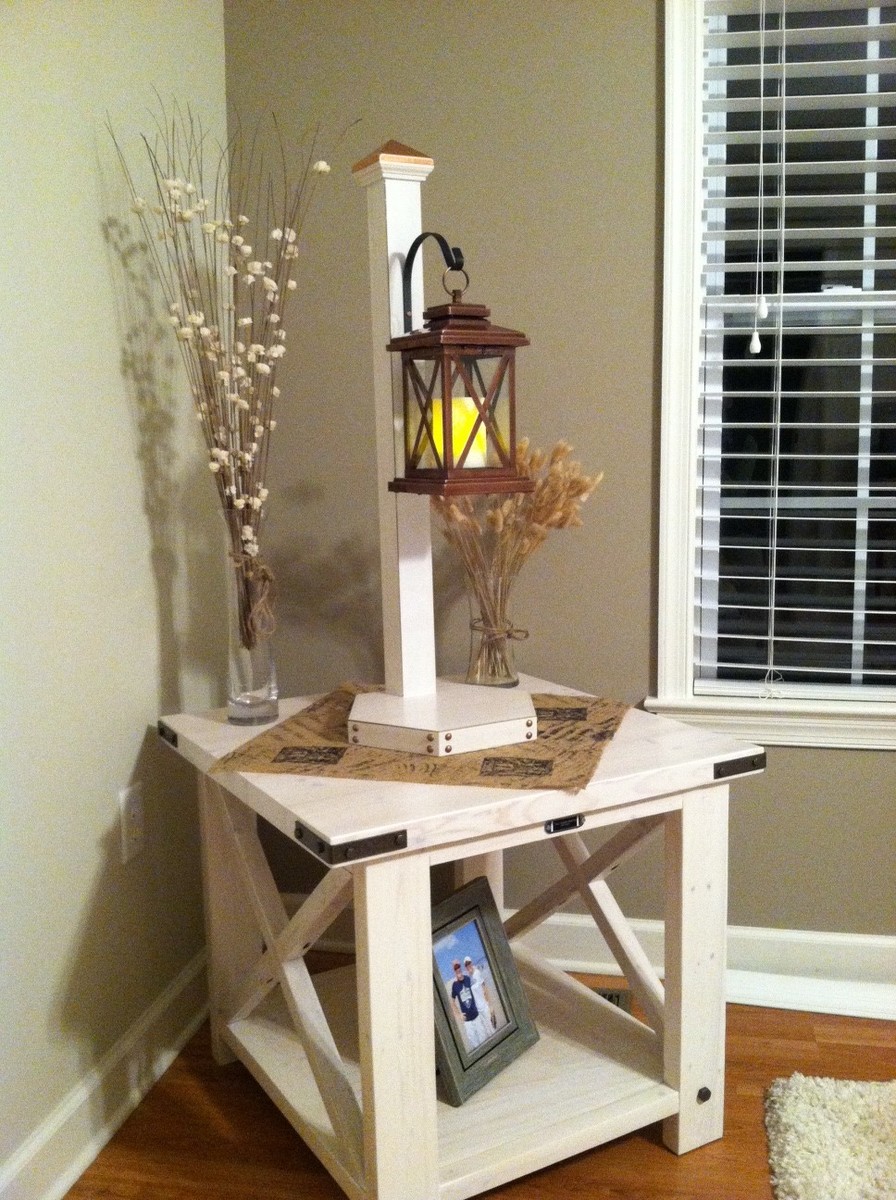
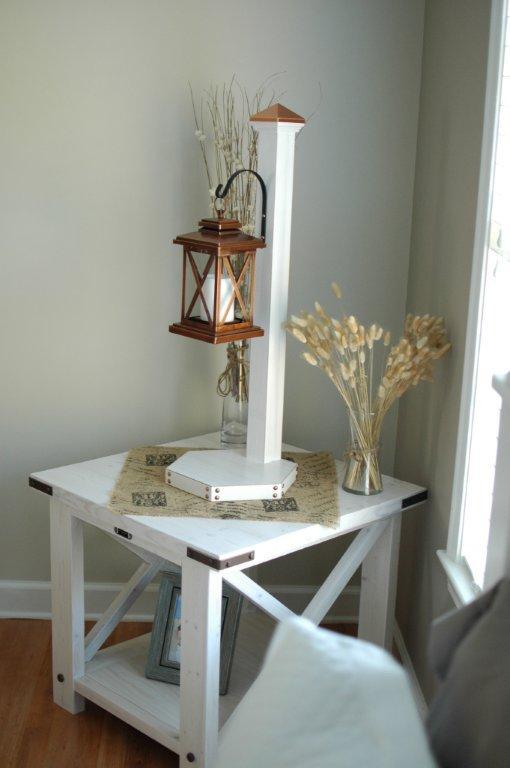
Thank you Hilary for the wonderful design and thank you Anna for the plans. I tend to spend my fall and winter months on woodworking and sewing so this is my first project for the season. We had some left over 2.4's and I saw this table and thought, what a good way to use some of that leftover lumber. I didn't really know where I was going to put the table but once it was finished it made itself a home in our spare bedroom. I then saw a battery operated candle lantern that had the "X" pattern and I thought that would go perfectly with the table. Well, that then led me into another project. I wanted to do something different with the lantern instead sitting in on the table top so with some of the leftover wood from the table shelf, I made a post to hang the lantern from. I also used Anna's technique of distressing the edges with Minwax stain marker. It added just enough detail, what a great use of the stain marker.
The end table was my first project of the rustic "X" family. The second was the "X" console which also sits in the spare room. I'm now working on the Farmhouse Bed and am thinking of incorporating the some "X's" maybe on the headboard and also incorporate the hardware onto the headboard/footboard corners. It's not a traditional set that you would find in a bedroom, but it's a guest room and we don't really feel we need a dresser of drawers for our visitors so this works perfectly. It fits right into our decor and is very welcoming.
I love the stain that Hilary used, thank you for the advise. I have a jar of vinegar and steel wool sitting now. Can't wait to try that stain!
Built from Plan(s)
Estimated Cost
$60
Estimated Time Investment
Weekend Project (10-20 Hours)
Finish Used
I used Minwax water based pre-conditioner, followed by two coats Minwax water based white wash pickled stain, followed by two coats Minwax water based satin poly.
For the hardware I used 4" L-brackets and 1-1/2" bolts sprayed with Rustoleum Hammer spray paint. I like the larger head on the bolts but could only find them in 1-1/2 lengh. I wasn't sure if these would be too long and collide with the screws from the pocket holes, so to be on the safe side, my husband cut the bolt threads down to make it a shorter bolt, then I pre-drilled and screwed the cut bolt in.
For the hardware I used 4" L-brackets and 1-1/2" bolts sprayed with Rustoleum Hammer spray paint. I like the larger head on the bolts but could only find them in 1-1/2 lengh. I wasn't sure if these would be too long and collide with the screws from the pocket holes, so to be on the safe side, my husband cut the bolt threads down to make it a shorter bolt, then I pre-drilled and screwed the cut bolt in.
Recommended Skill Level
Beginner
Comments
Mon, 10/22/2012 - 07:57
looks great!
wow this looks really good! your cuts on the X's look perfect too
