Community Brag Posts


4x4 Truss Beam Table and Bench
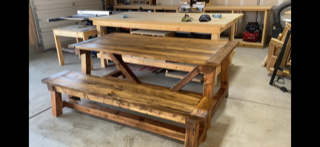
I built the 4x4 Truss Beam table and bench and followed Ana White's instructions along with Shanty2Chic.
Instructions and design were easy to follow and was a lot of fun to create.
Built from Plan(s)
Comments
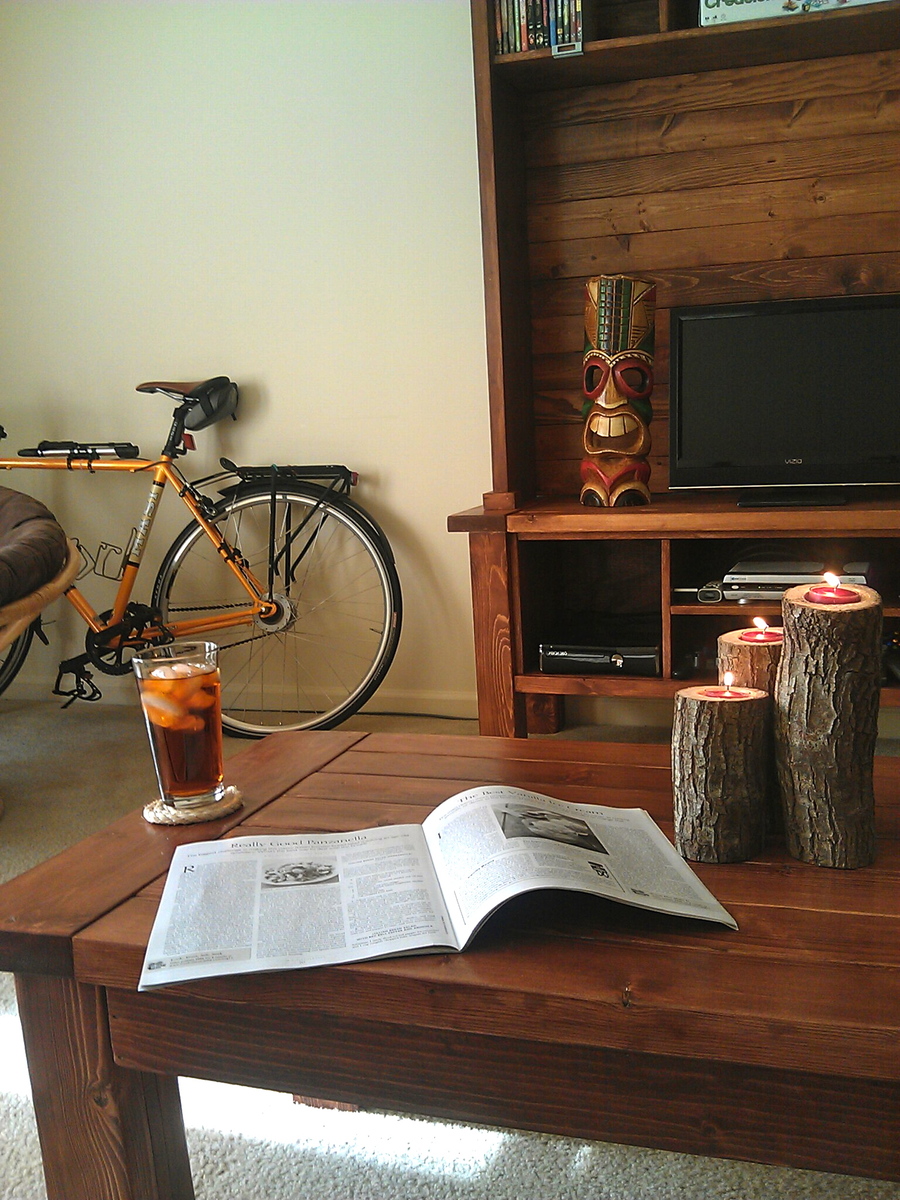
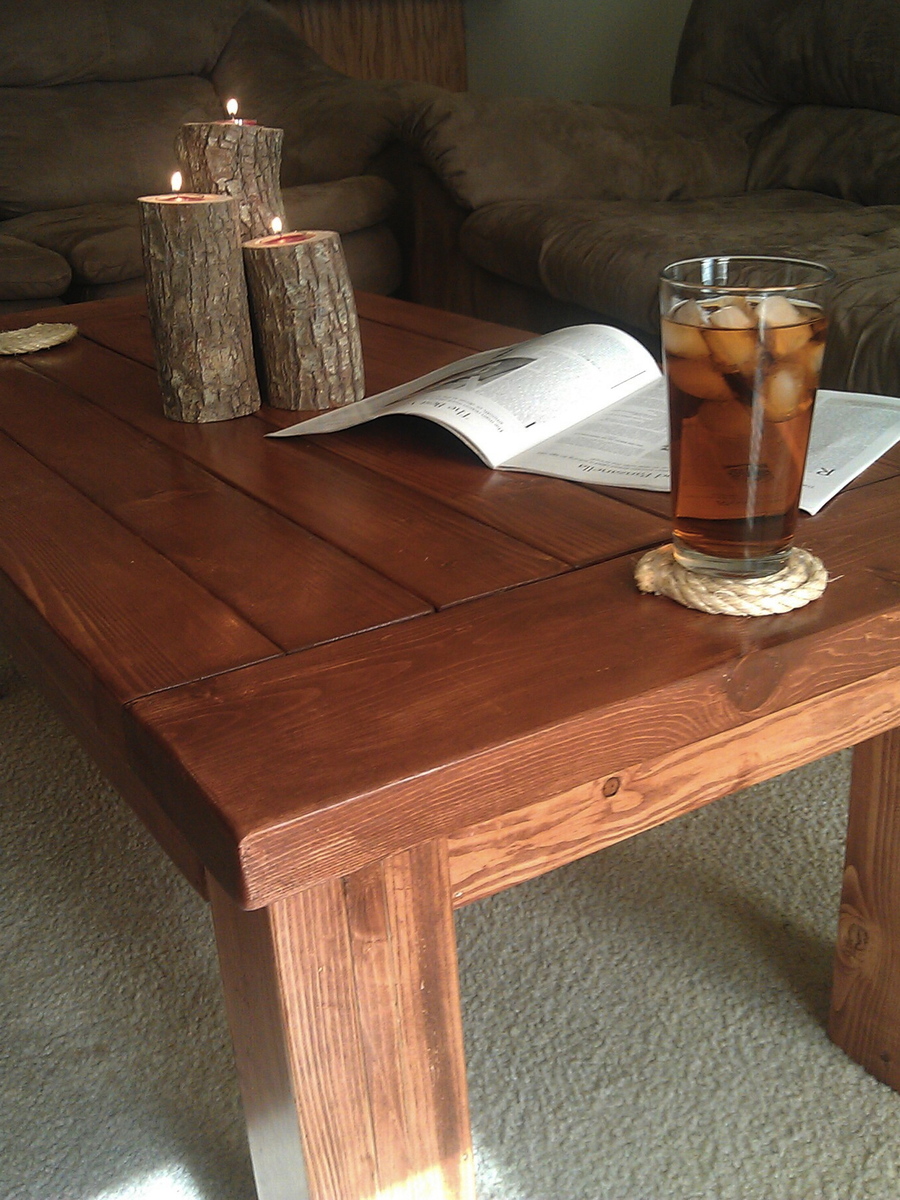
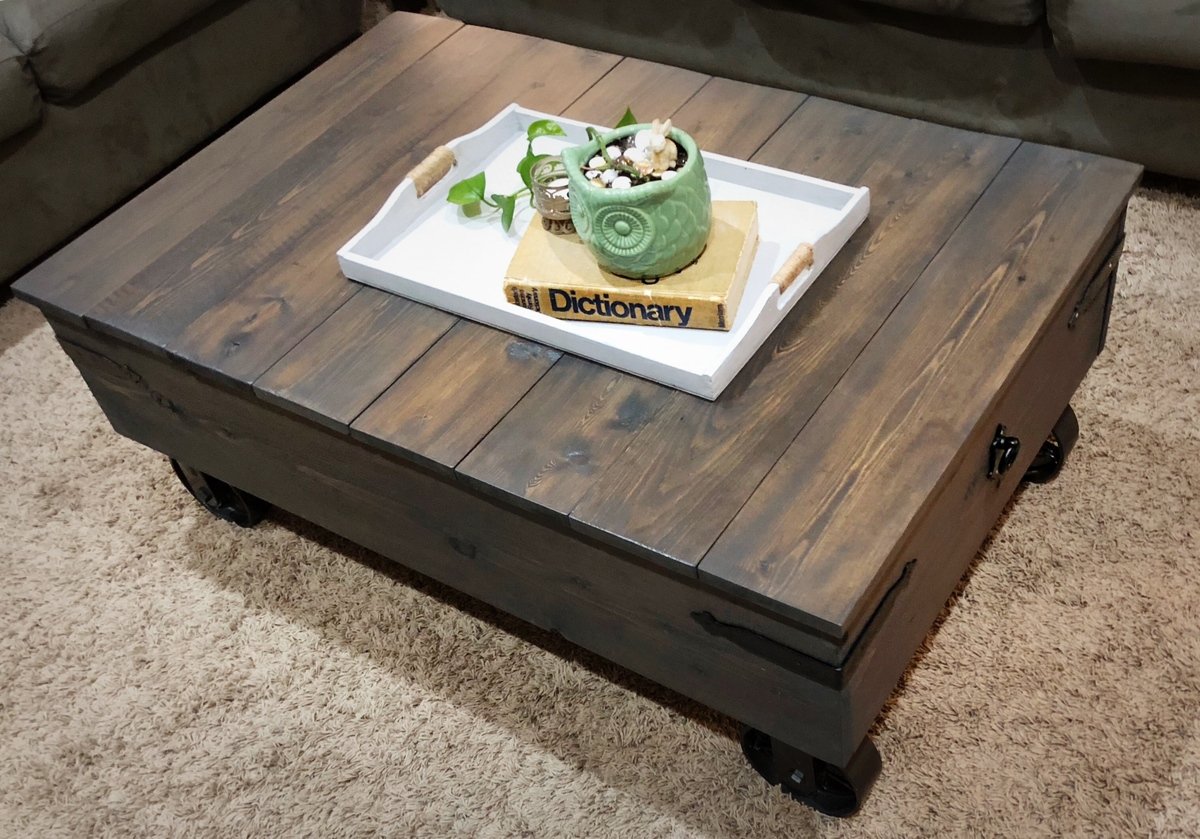
Tryde Coffee Table
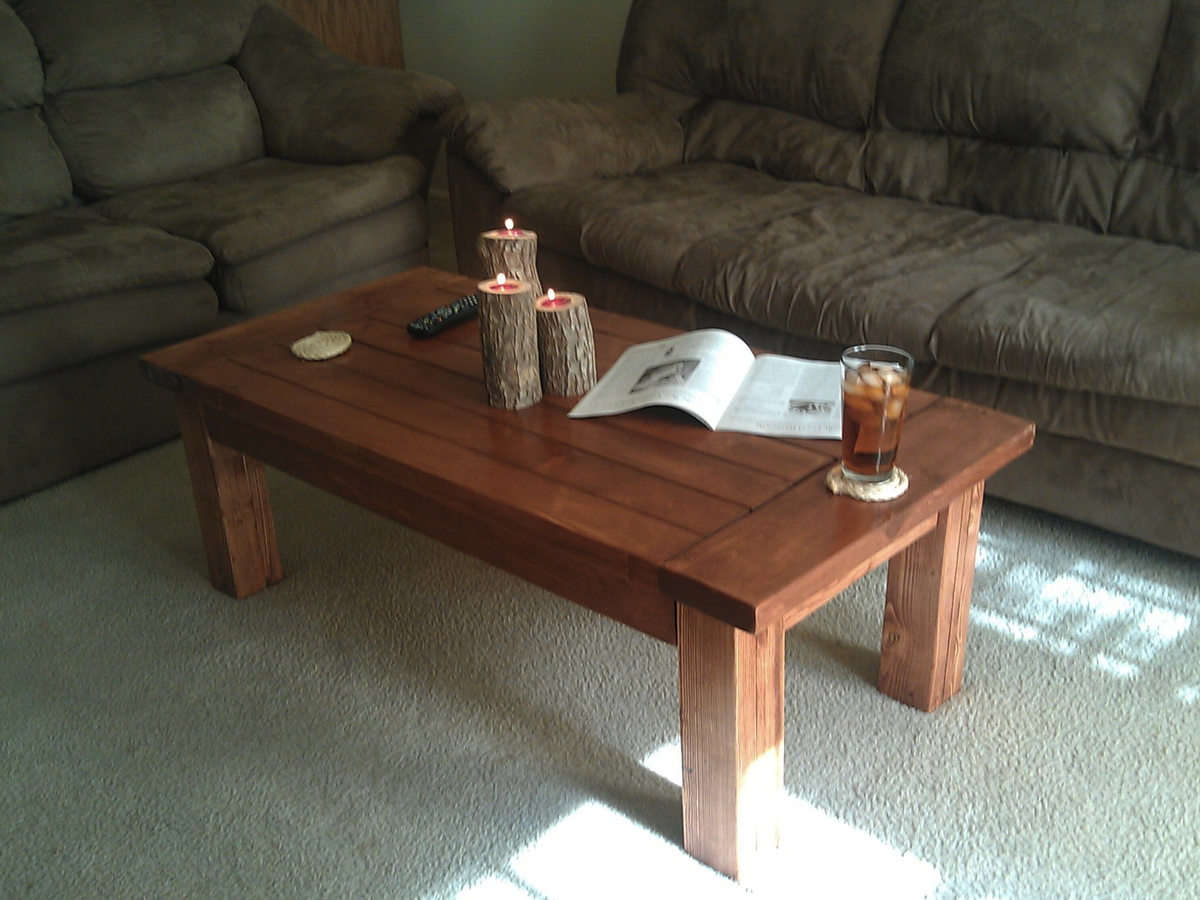
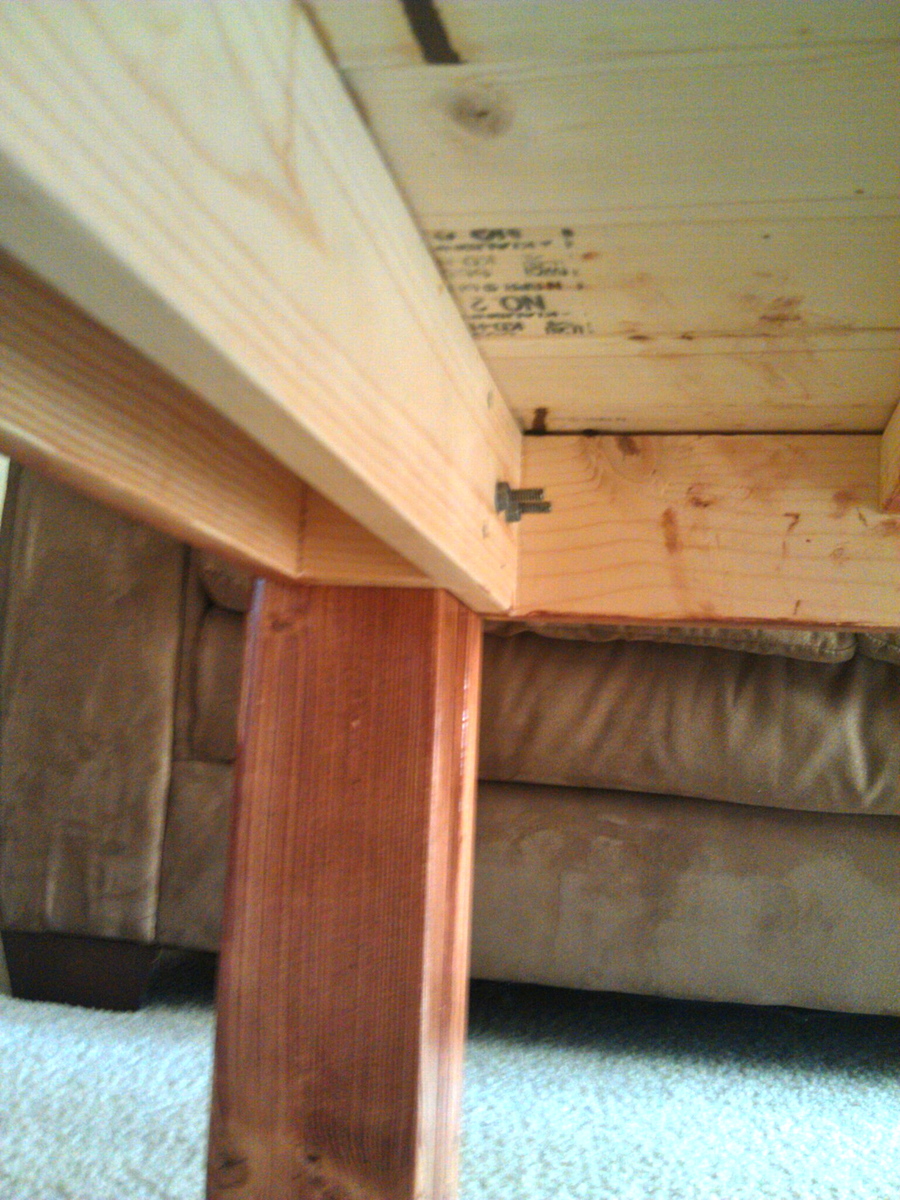
Here's my take on the Tryde Coffee Table. The only modification that I made was in the legs. Instead of untreated 4x4s, I used a 2x4, 1x4, 2x4 sandwich.
I also made the legs detachable for easy transport. This was done by drilling holes in the side piece and then screwing in these magic "screw/bolt" things [picture 5] into the leg. To assemble, I just pushed the legs through the holes, and then put a washer and nut on the bolts [picture 4].
[Candlesticks are made from logs with a hole bored in them and the coasters are coiled sisal rope held together with hot glue]


Built from Plan(s)
Estimated Cost
50
Estimated Time Investment
Afternoon Project (3-6 Hours)
Finish Used
I sanded with 80, 120 and 220 grit sandpaper. Then I used Minwax Pre-Conditioner, followed by a coat of Cabot "English Leather" and then two coats of semi-gloss polyurethane [with a light sanding at 220 between the coats].
Recommended Skill Level
Intermediate
Comments
Tue, 04/17/2012 - 06:17
Love the coffee table!
I remade all the trim work on my old house (it was tiny :) ) using pine, a router, and a stain very close to what you used there. Love the color!
And great job on the candles! Very original, might have to borrow the idea for my woodworking brother when he gets his own place. Great work!
Open Toy Box
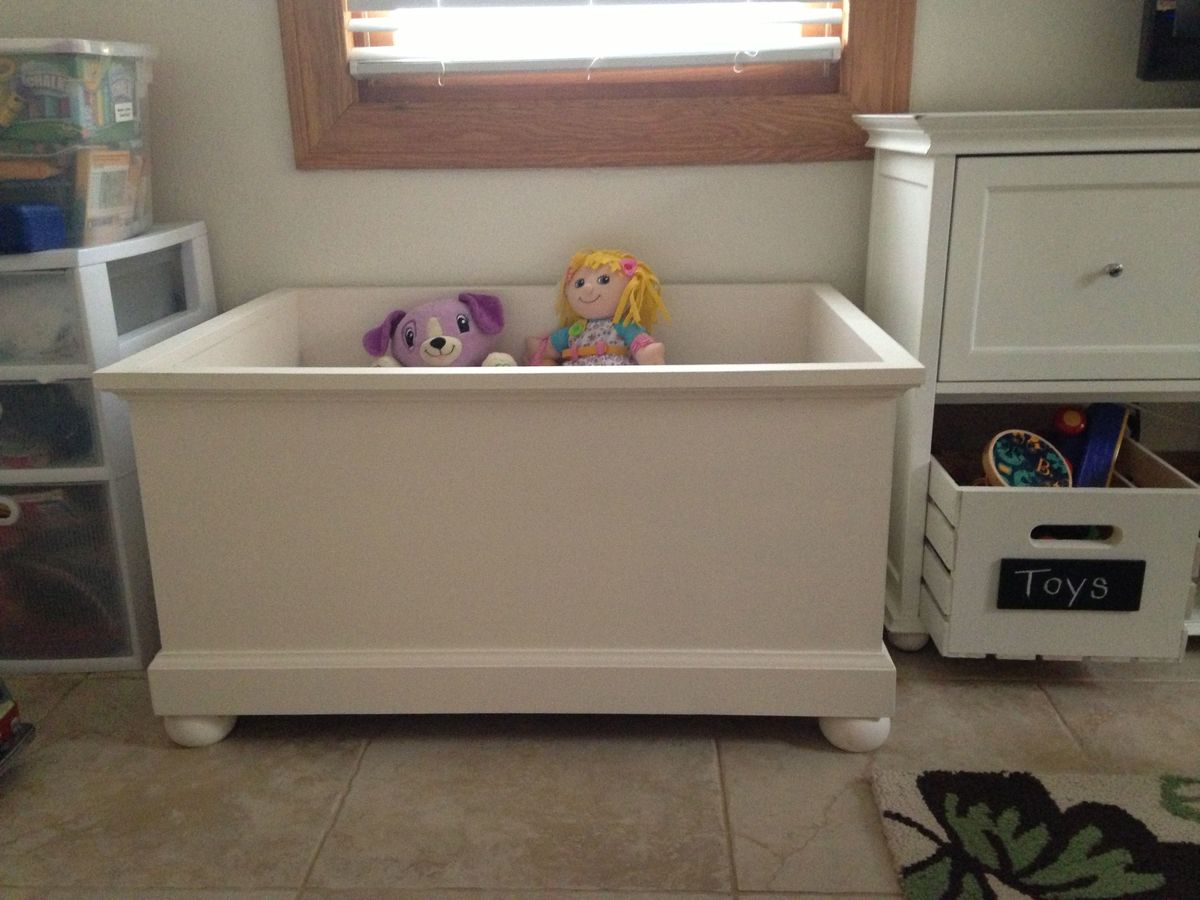
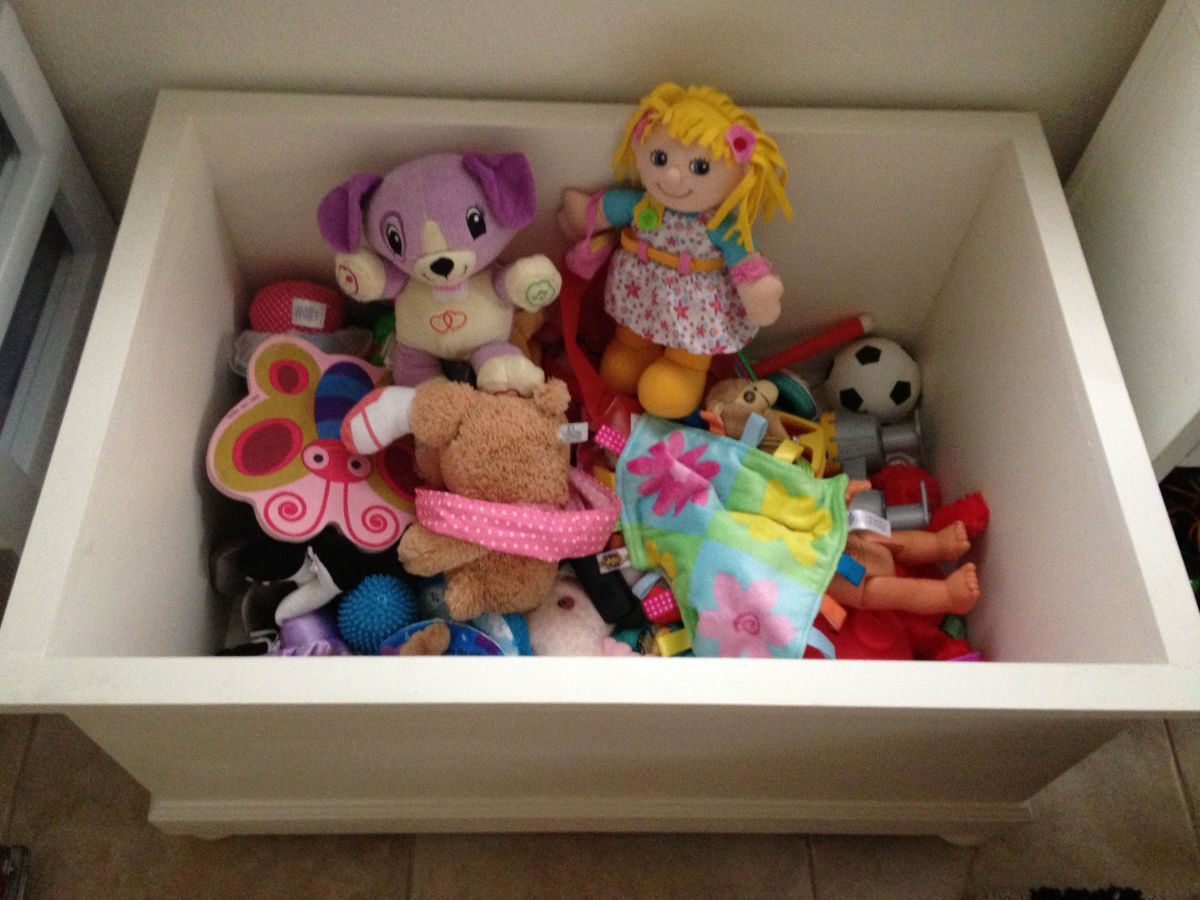
I needed a place to store larger toys, but was nervous about having a toy box with a lid. This project was fun to make and did not take long to complete. I love the finished product!
I added a base moulding and mitered the edges, using wood filler to fill any gaps. I also added bun feet to match other furniture in the room. I love the stability (and forgiving nature!) of the bun feet. I'm really pleased with this project - it was my first time to use Ana White plans, and I will definitely be back for more! So much easier than my typical "start from scratch" project!
Built from Plan(s)
Estimated Time Investment
Afternoon Project (3-6 Hours)
Finish Used
leftover antique white paint/primer in eggshell. I intended to do a gel faux finish over the top to antique it a bit, but we had friends coming over and I wanted it finished so I left it white. I may add the gel in the future but for now I enjoy it as is.
Recommended Skill Level
Beginner
Wooden Cooler Box
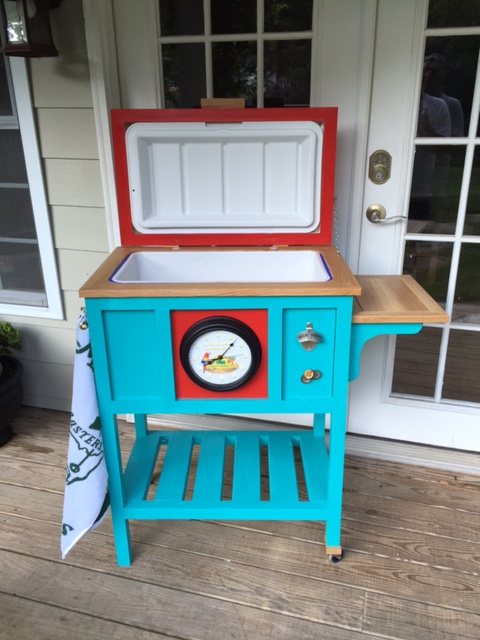
I built this cooler box using the plans posted here by "Jenny from Birds and Soap". Great plans, easy to follow. Thanks Jenny. As you can see, I made some cosmetic changes. The clock and "rare earth" magnets behind the front panel to catch the bottle caps. I also added a hook for a towel on the side. Turned out pretty cool looking.
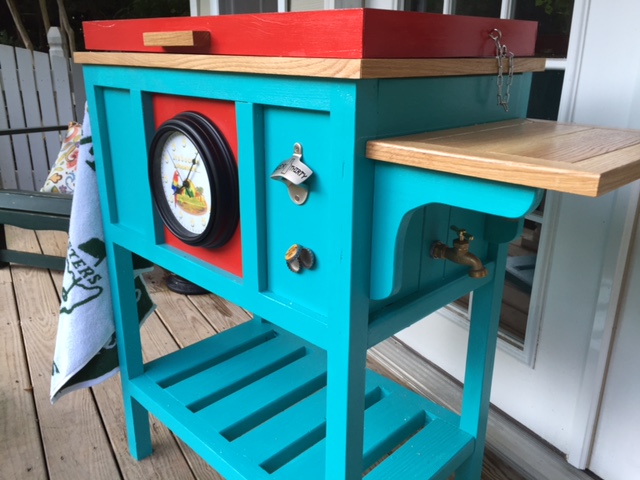
Estimated Cost
100.00
Estimated Time Investment
Week Long Project (20 Hours or More)
Recommended Skill Level
Intermediate
farm house bed

plans and instruction were perfect. I made it for my son and daughter-in-law.
Thank you
Built from Plan(s)
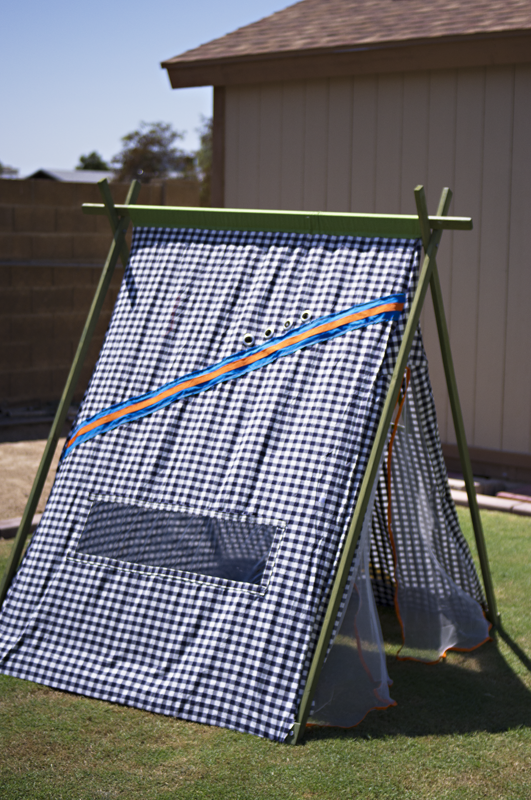
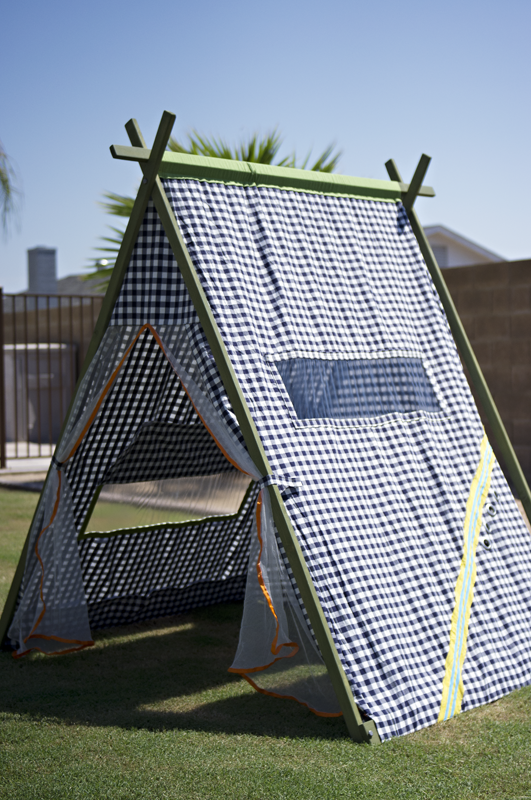
Reading Nook turned Tent!
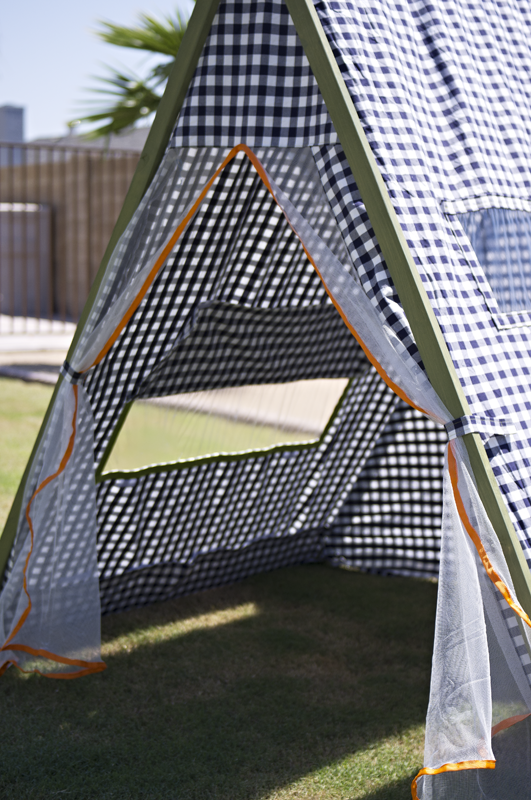
I made this for my boy who's turning four tomorrow! (Sep 1st) He loves building forts and I don't mind rearranging the furniture, but set up and clean up is so time consuming, we'd both rather spend more time playing. This is an indoor tent, but I took it outside for pictures. Aside from the obvious difference of adding doors and a back, the changes I made from the original plans are: using an 8 foot 1x3 so the tent is 4 feet deep instead of 3. Instead of stapling the fabric on the 1x3s at the bottom, I wrapped the fabric around and used velcro so I could remove it for washing. I sewed a tube of fabric and attached it at the top to make removal easier. Time Investment is so long because of the sewing involved for the tent. If you have an Ikea near you, they've got this stuff called glaze paint (more of a stain, I think) in all different colors - it doesn't need a top coat (unless you want it shiny), it's solvent free and, are you ready? $6 for 12.something ounces, MORE than enough for this project. To make it even easier if you're using fabric instead of curtains like me and you've got the room, cut a 8ft 1x3 in half so you've got two 4ft pieces. Most quilting cotton at fabric stores is 44-45 inches wide selvedge to selvedge (the ends that don't fray) and if you follow the plan according to where to drill for the top bolt, you'll need 4-4.25 yards of fabric, depending on whether you are going to use velcro or staple. I would use 4.25 if using velcro, the fabric can go right over the top bar and over the other side if you don't want to sew a tube like I did. If you don't want to sew at all, use iron-on hem tape on the cut edges and iron on velcro. Make sure of placement of the velcro before ironing on. More pictures on my blog =)
Built from Plan(s)
Estimated Cost
$50 - wood, bolts, stain, material for tent (everything)
Estimated Time Investment
Weekend Project (10-20 Hours)
Finish Used
Green Ikea glaze paint
Recommended Skill Level
Intermediate
Comments

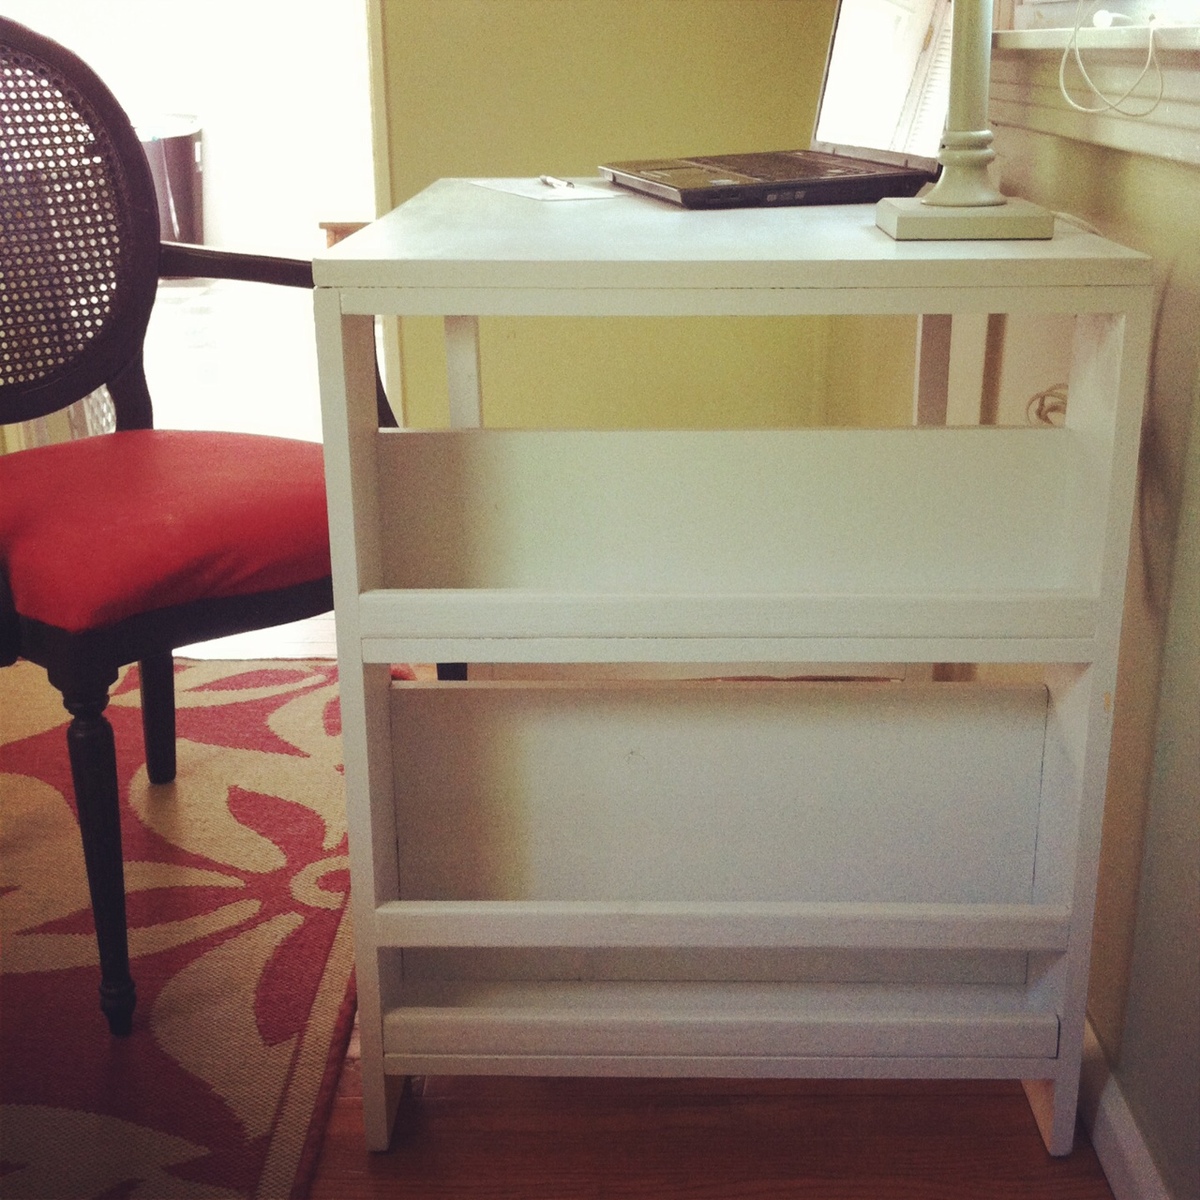
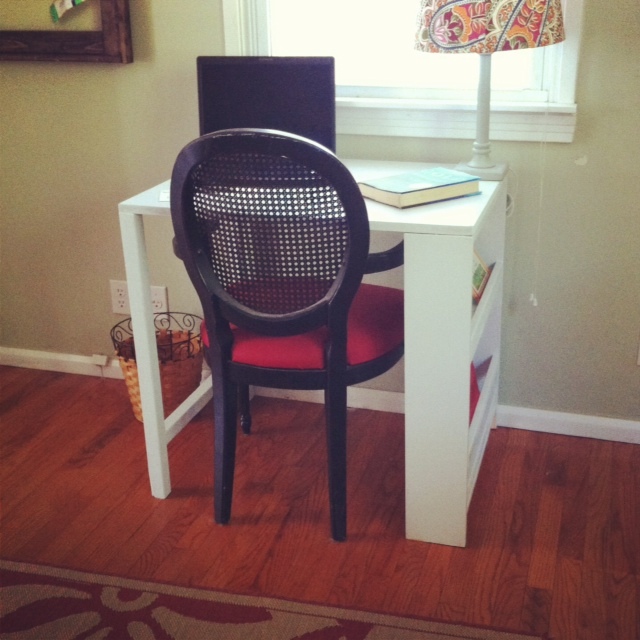
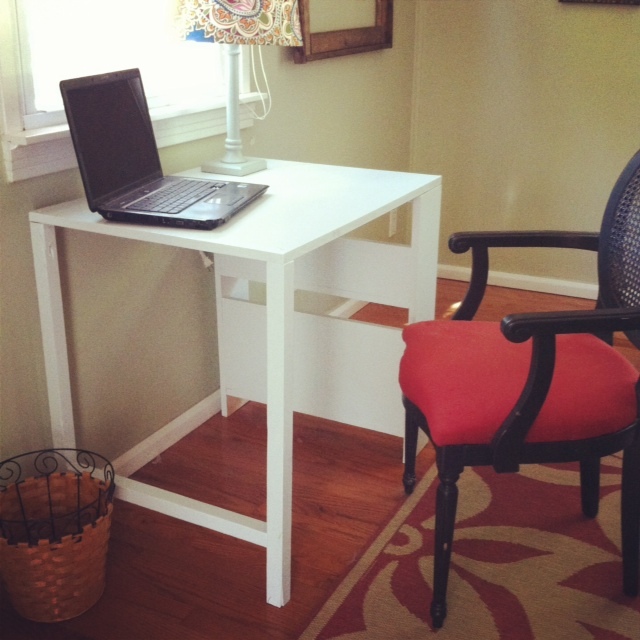
modified small desk for my niece
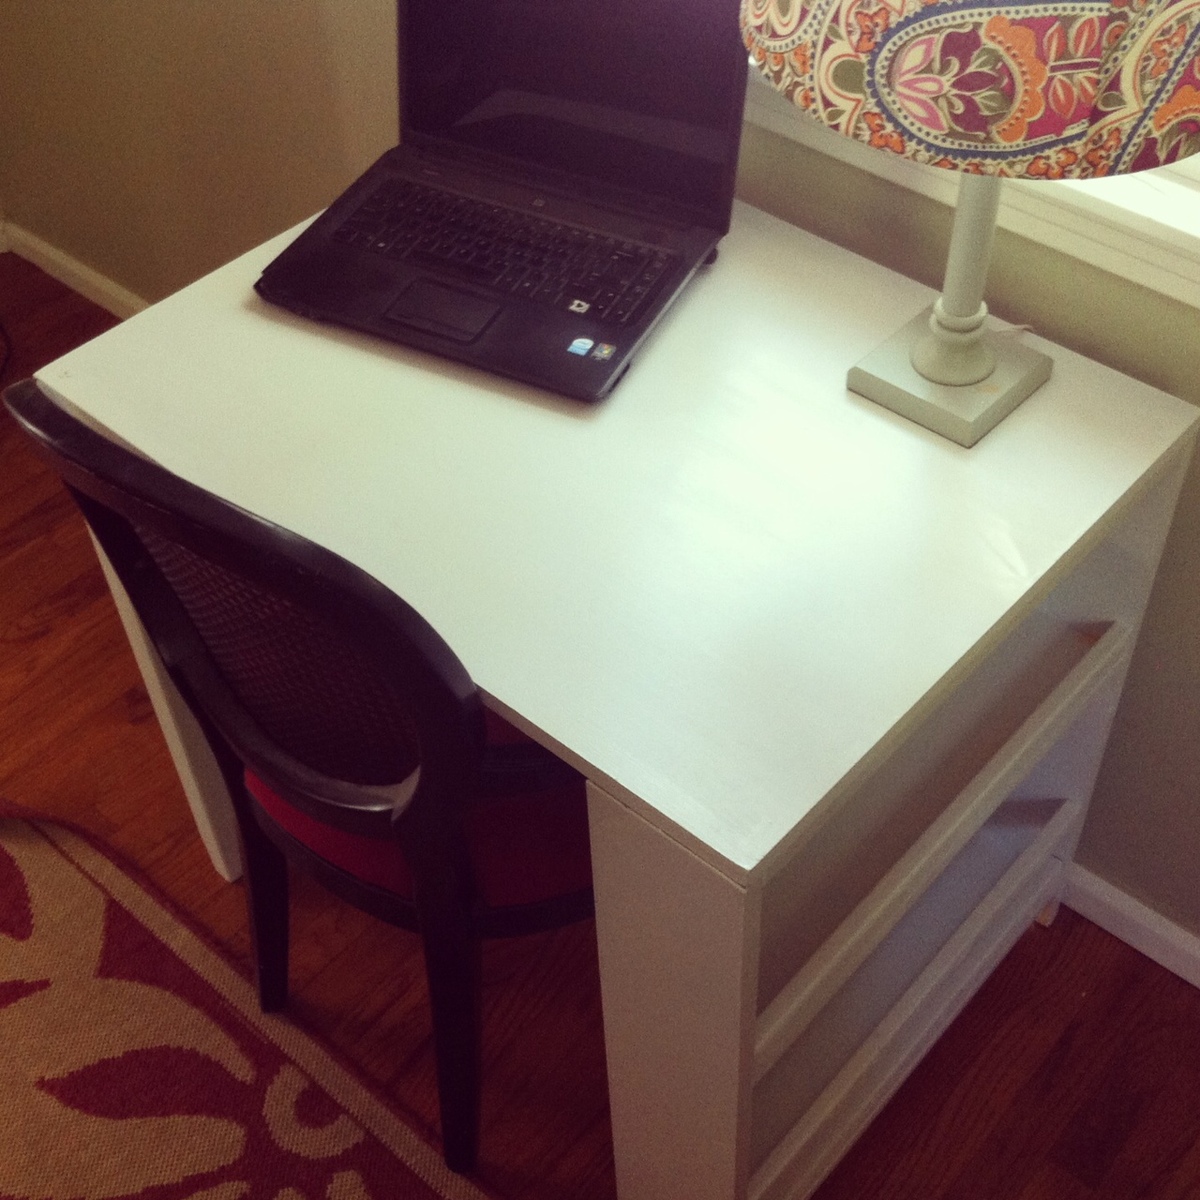
I made this desk for my niece, and I am really happy with how it turned out. The bookshelf was really easy to make and came together well. My sister wanted a smaller sized desk, so I shortened the top and decided to make one of the sides a bookshelf instead of both sides. I think that made it a little less stable than it would have been if both sides were bookshelves but it still holds up well.
Built from Plan(s)
Estimated Cost
$25
Estimated Time Investment
Day Project (6-9 Hours)
Finish Used
white paint
Recommended Skill Level
Beginner
Comments
Mon, 01/06/2014 - 20:34
Final dimensions
Hi this looks about the length I want for my four year old son. Can you provide the dimensions for this desk. I know I will have to alter the height as well.
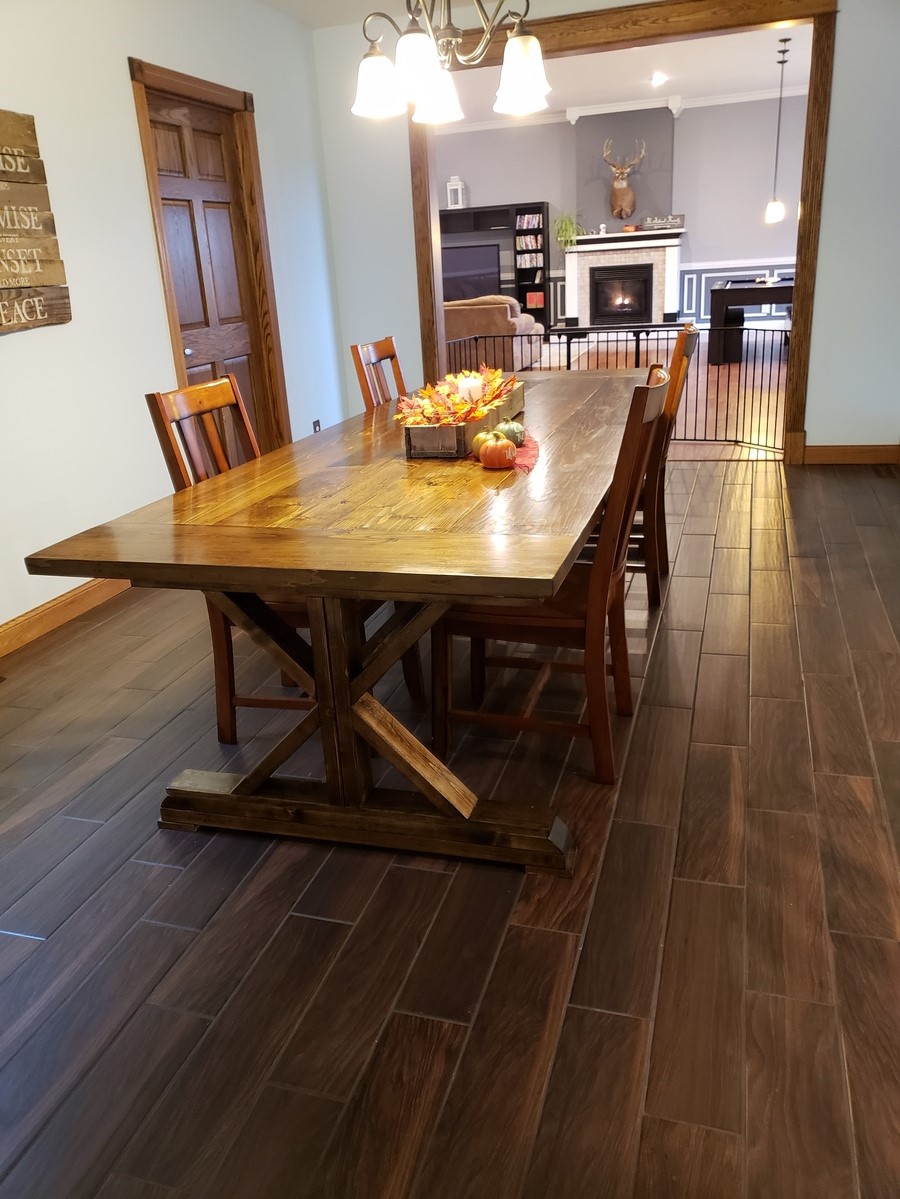
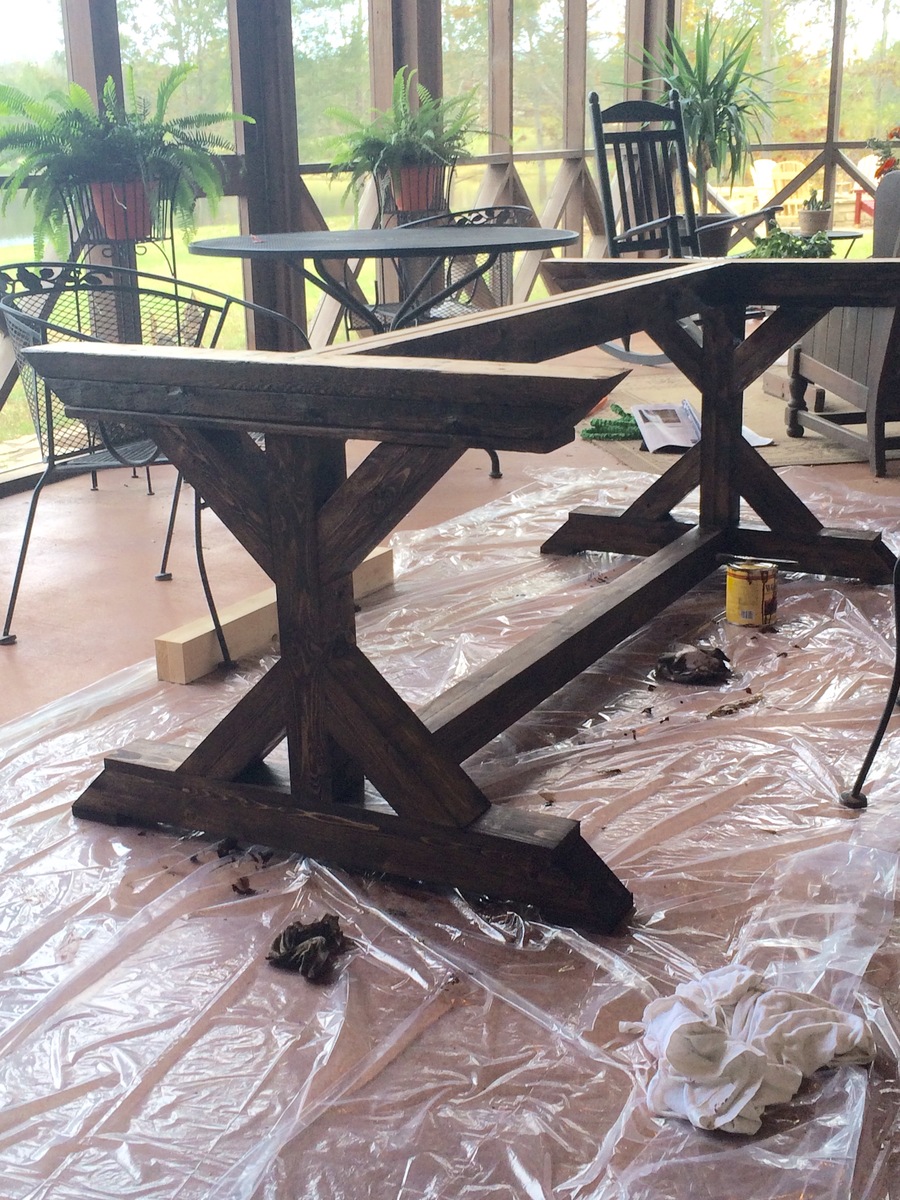
Fancy X farmhouse table and benches
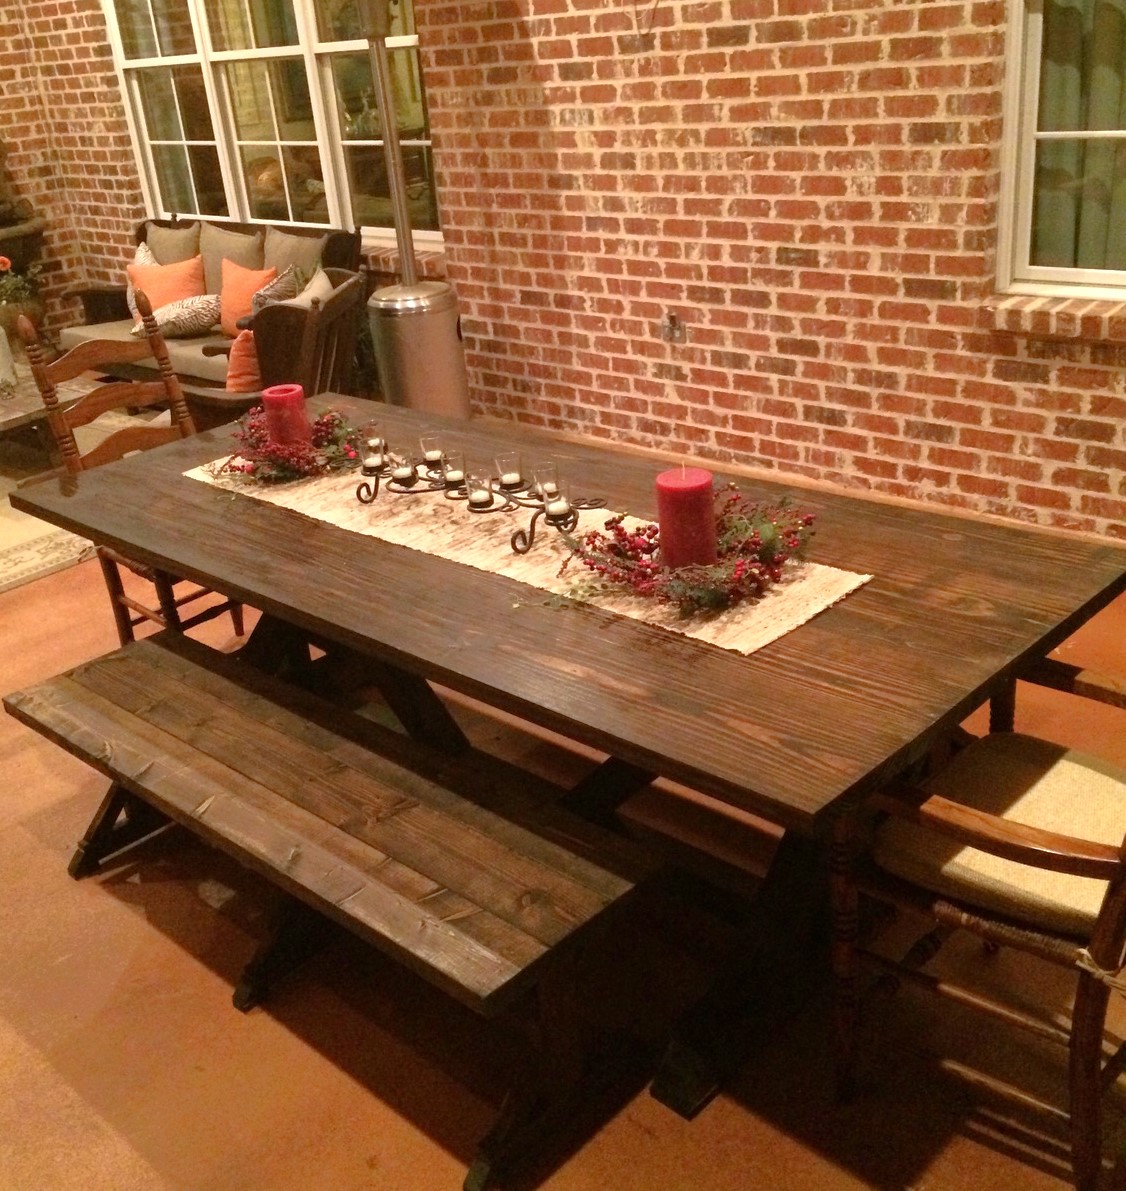
This was my first project and I think it came out pretty nice. I changed the plans slightly as I wanted the base to be made out of 4x4. However, the only 4x4 you can by locally is treated, so I combined 2 2x4's and ran them through a jointer to get the look I wanted. I also ran the table top pieces through a jointer so that the edges would not show. This however made the top too narrow so I added a 2x4 to the top. So, the top is 4 2x19 with 1 2x4 in the middle.
i can't wait to start my next project!
Estimated Cost
$125 for table and two benches
Estimated Time Investment
Week Long Project (20 Hours or More)
Finish Used
Min wax dark walnut
Recommended Skill Level
Beginner
Sliding Barn Door Console
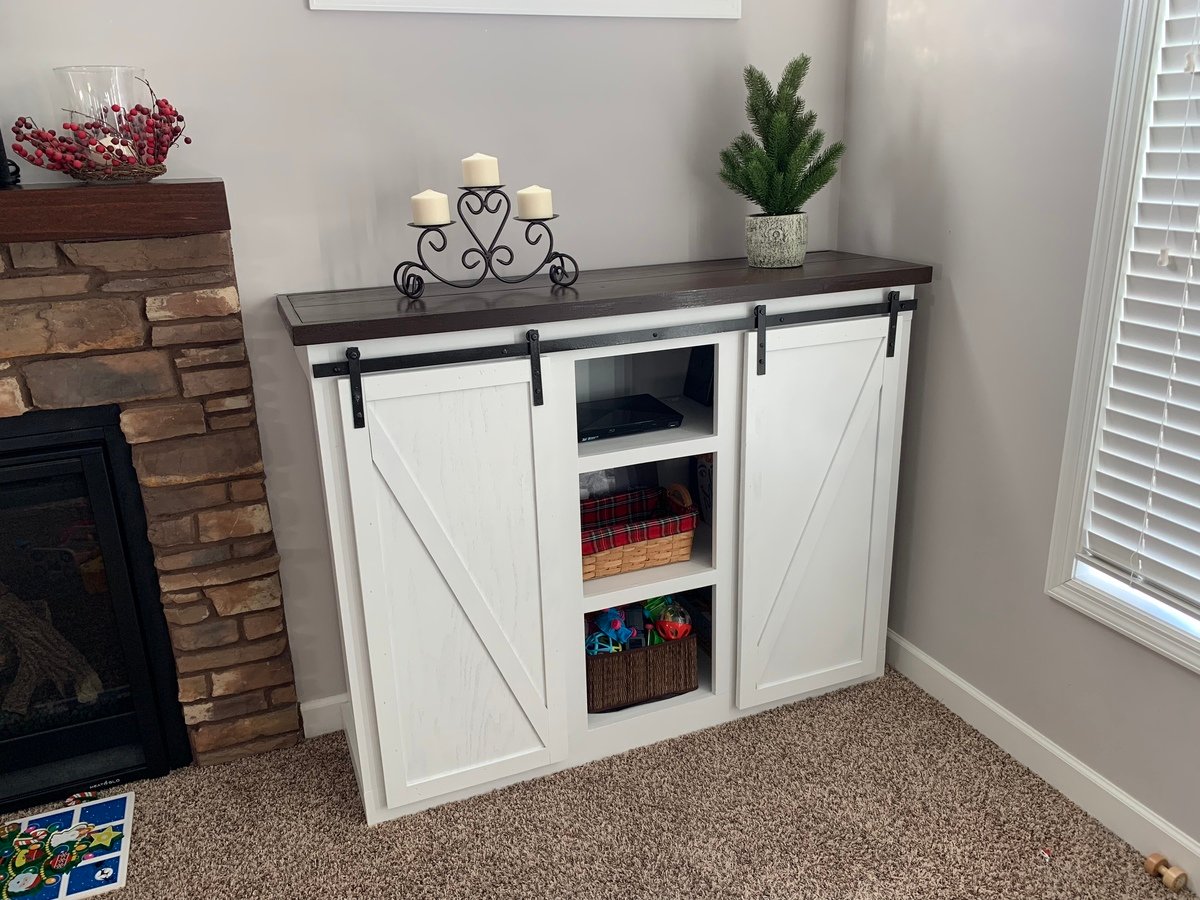
Couldn’t find any barn door hardware that would fit the console, at least for a reasonable price. Made my own with aluminum strips and steel rollers, spray painted with a textured black paint.
Built from Plan(s)
Estimated Cost
$200
Finish Used
Blossom white paint for cabinet, Dark walnut stain for top, with tung oil finish.
Recommended Skill Level
Intermediate
Garage Shelves
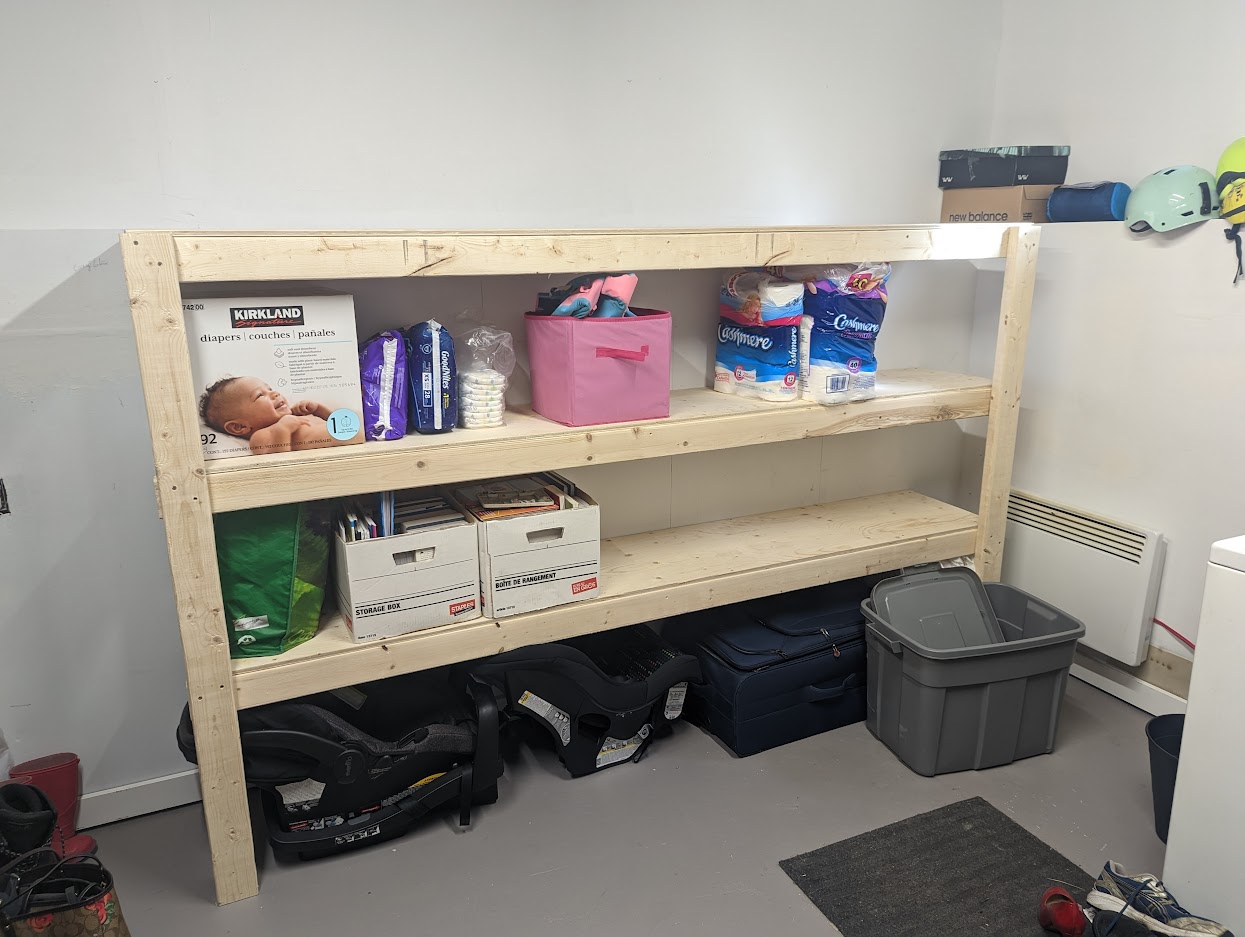
Not my first project but this time, I took picture to add a brag post.
Not in a garage but in a washing room kind of.
Length: 8 feet
depth: 16 inches
I was alone to do it and it is not so easy... better to ask someone to help you
cost: don't remember exactly but there is 8 2*4 @8feet + one complete prenium plywood sheet 1/2. Should be around 75 CAD $
Built from Plan(s)
Comments
Fri, 11/25/2022 - 12:37
Fantastic Storage!
This looks amazing, thank you for posting to the brag board!
Back to School Teacher Feature!
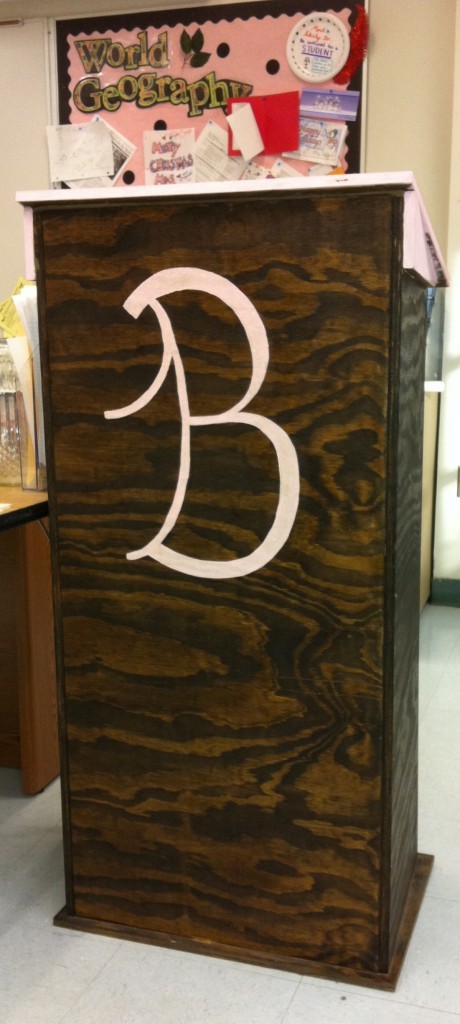
I desperately needed a podium to help me stay organized while I lectured in the classroom. After learning that none where available at my school or even in the county, I decided to "give it a go" and tried making one myself. This is what I came up with! You can access a step-by-step tutorial at http://sawgrasshome.com/
Estimated Cost
$20-$50
Estimated Time Investment
Afternoon Project (3-6 Hours)
Recommended Skill Level
Starter Project
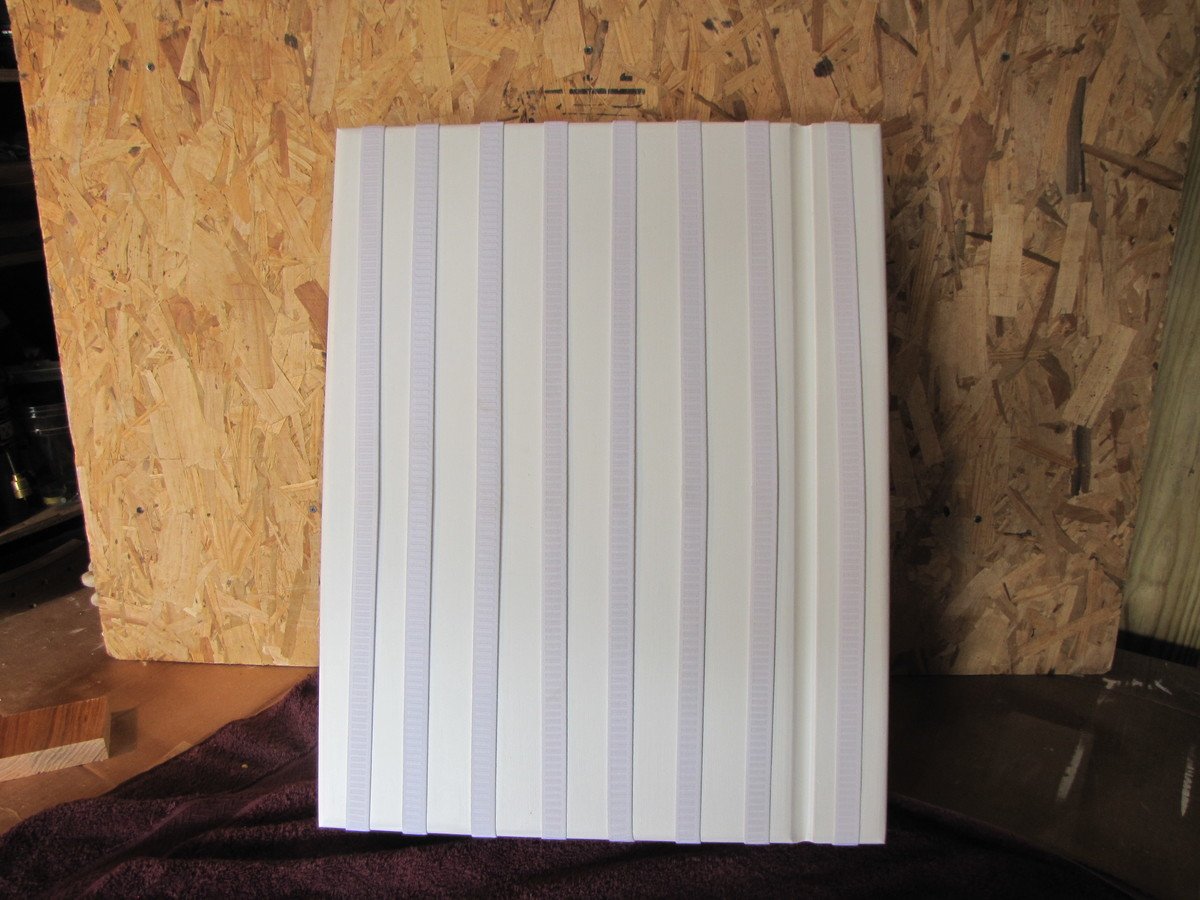
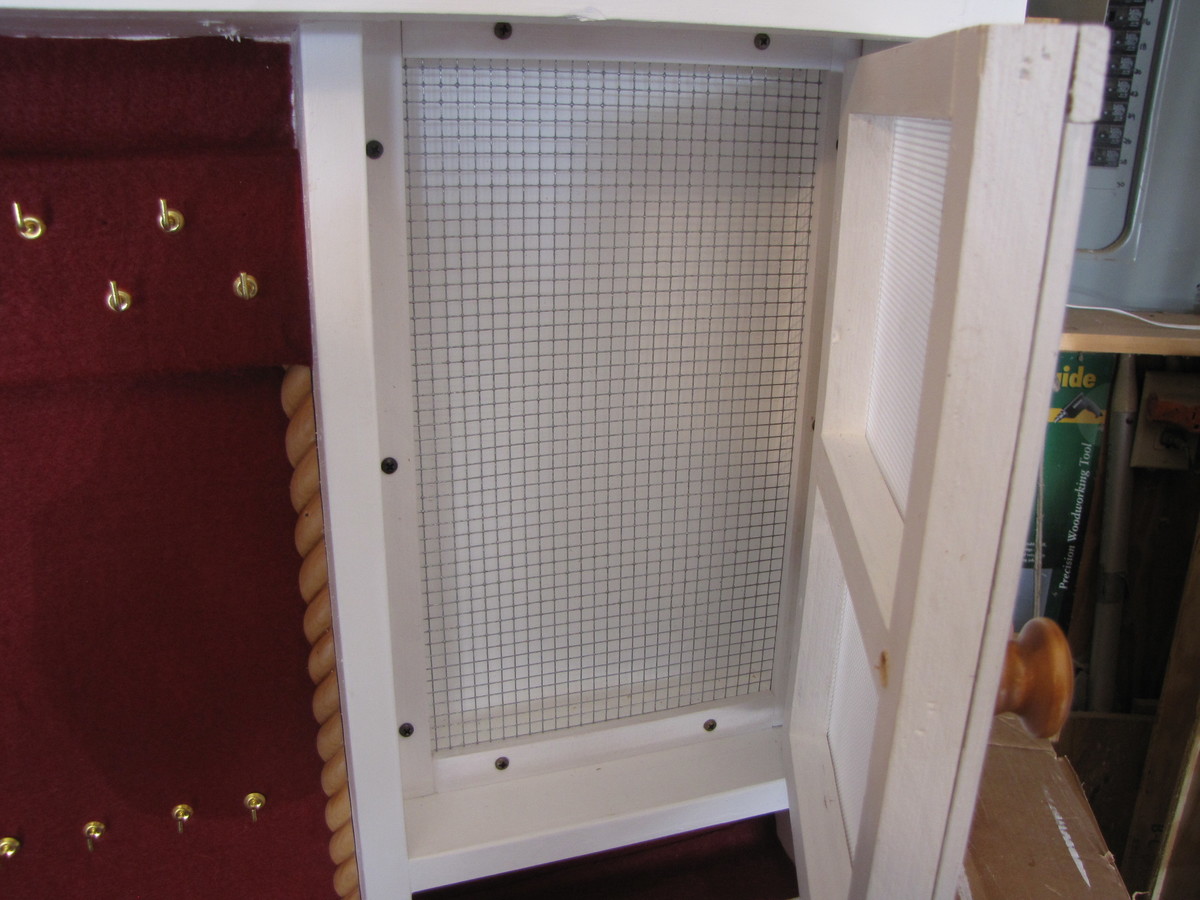
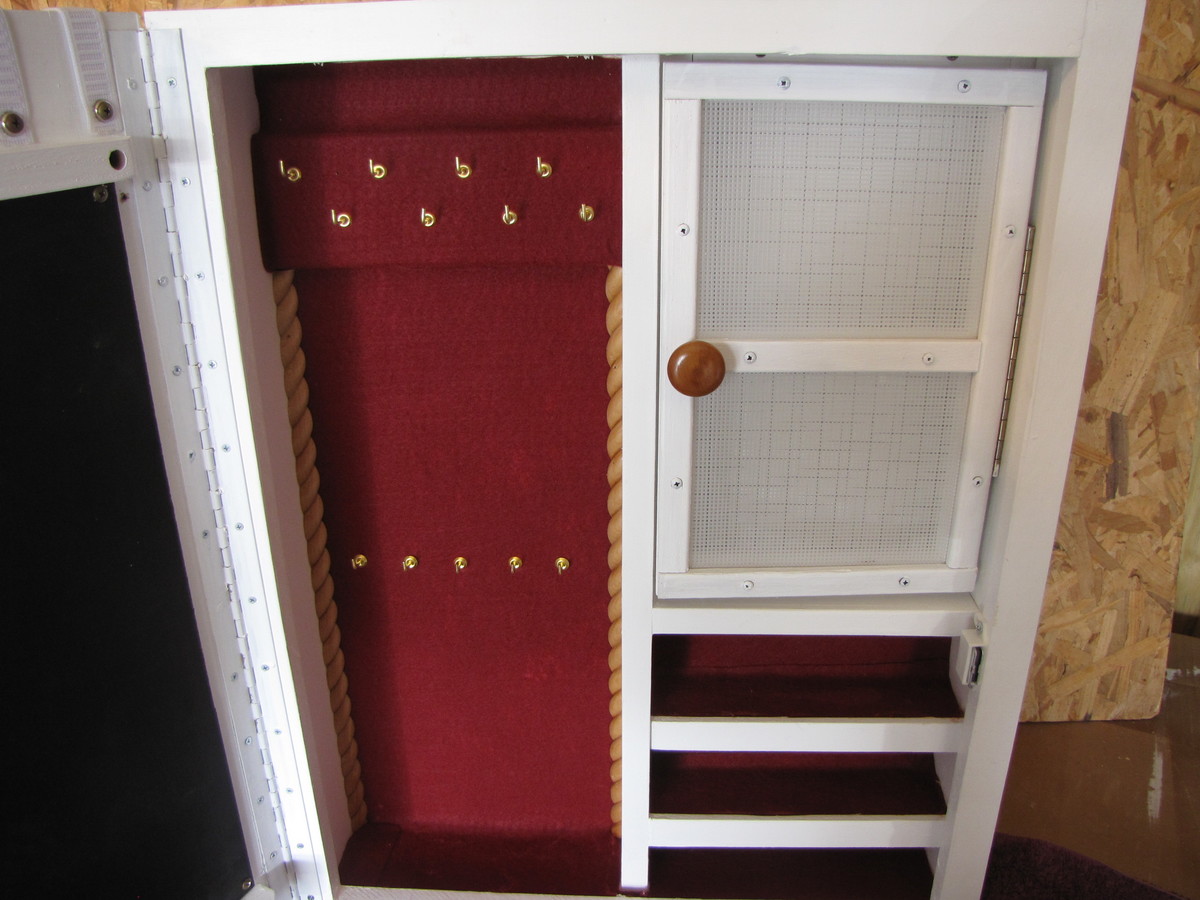
Bows & Ribbon Holder with Jewelry Cabinet
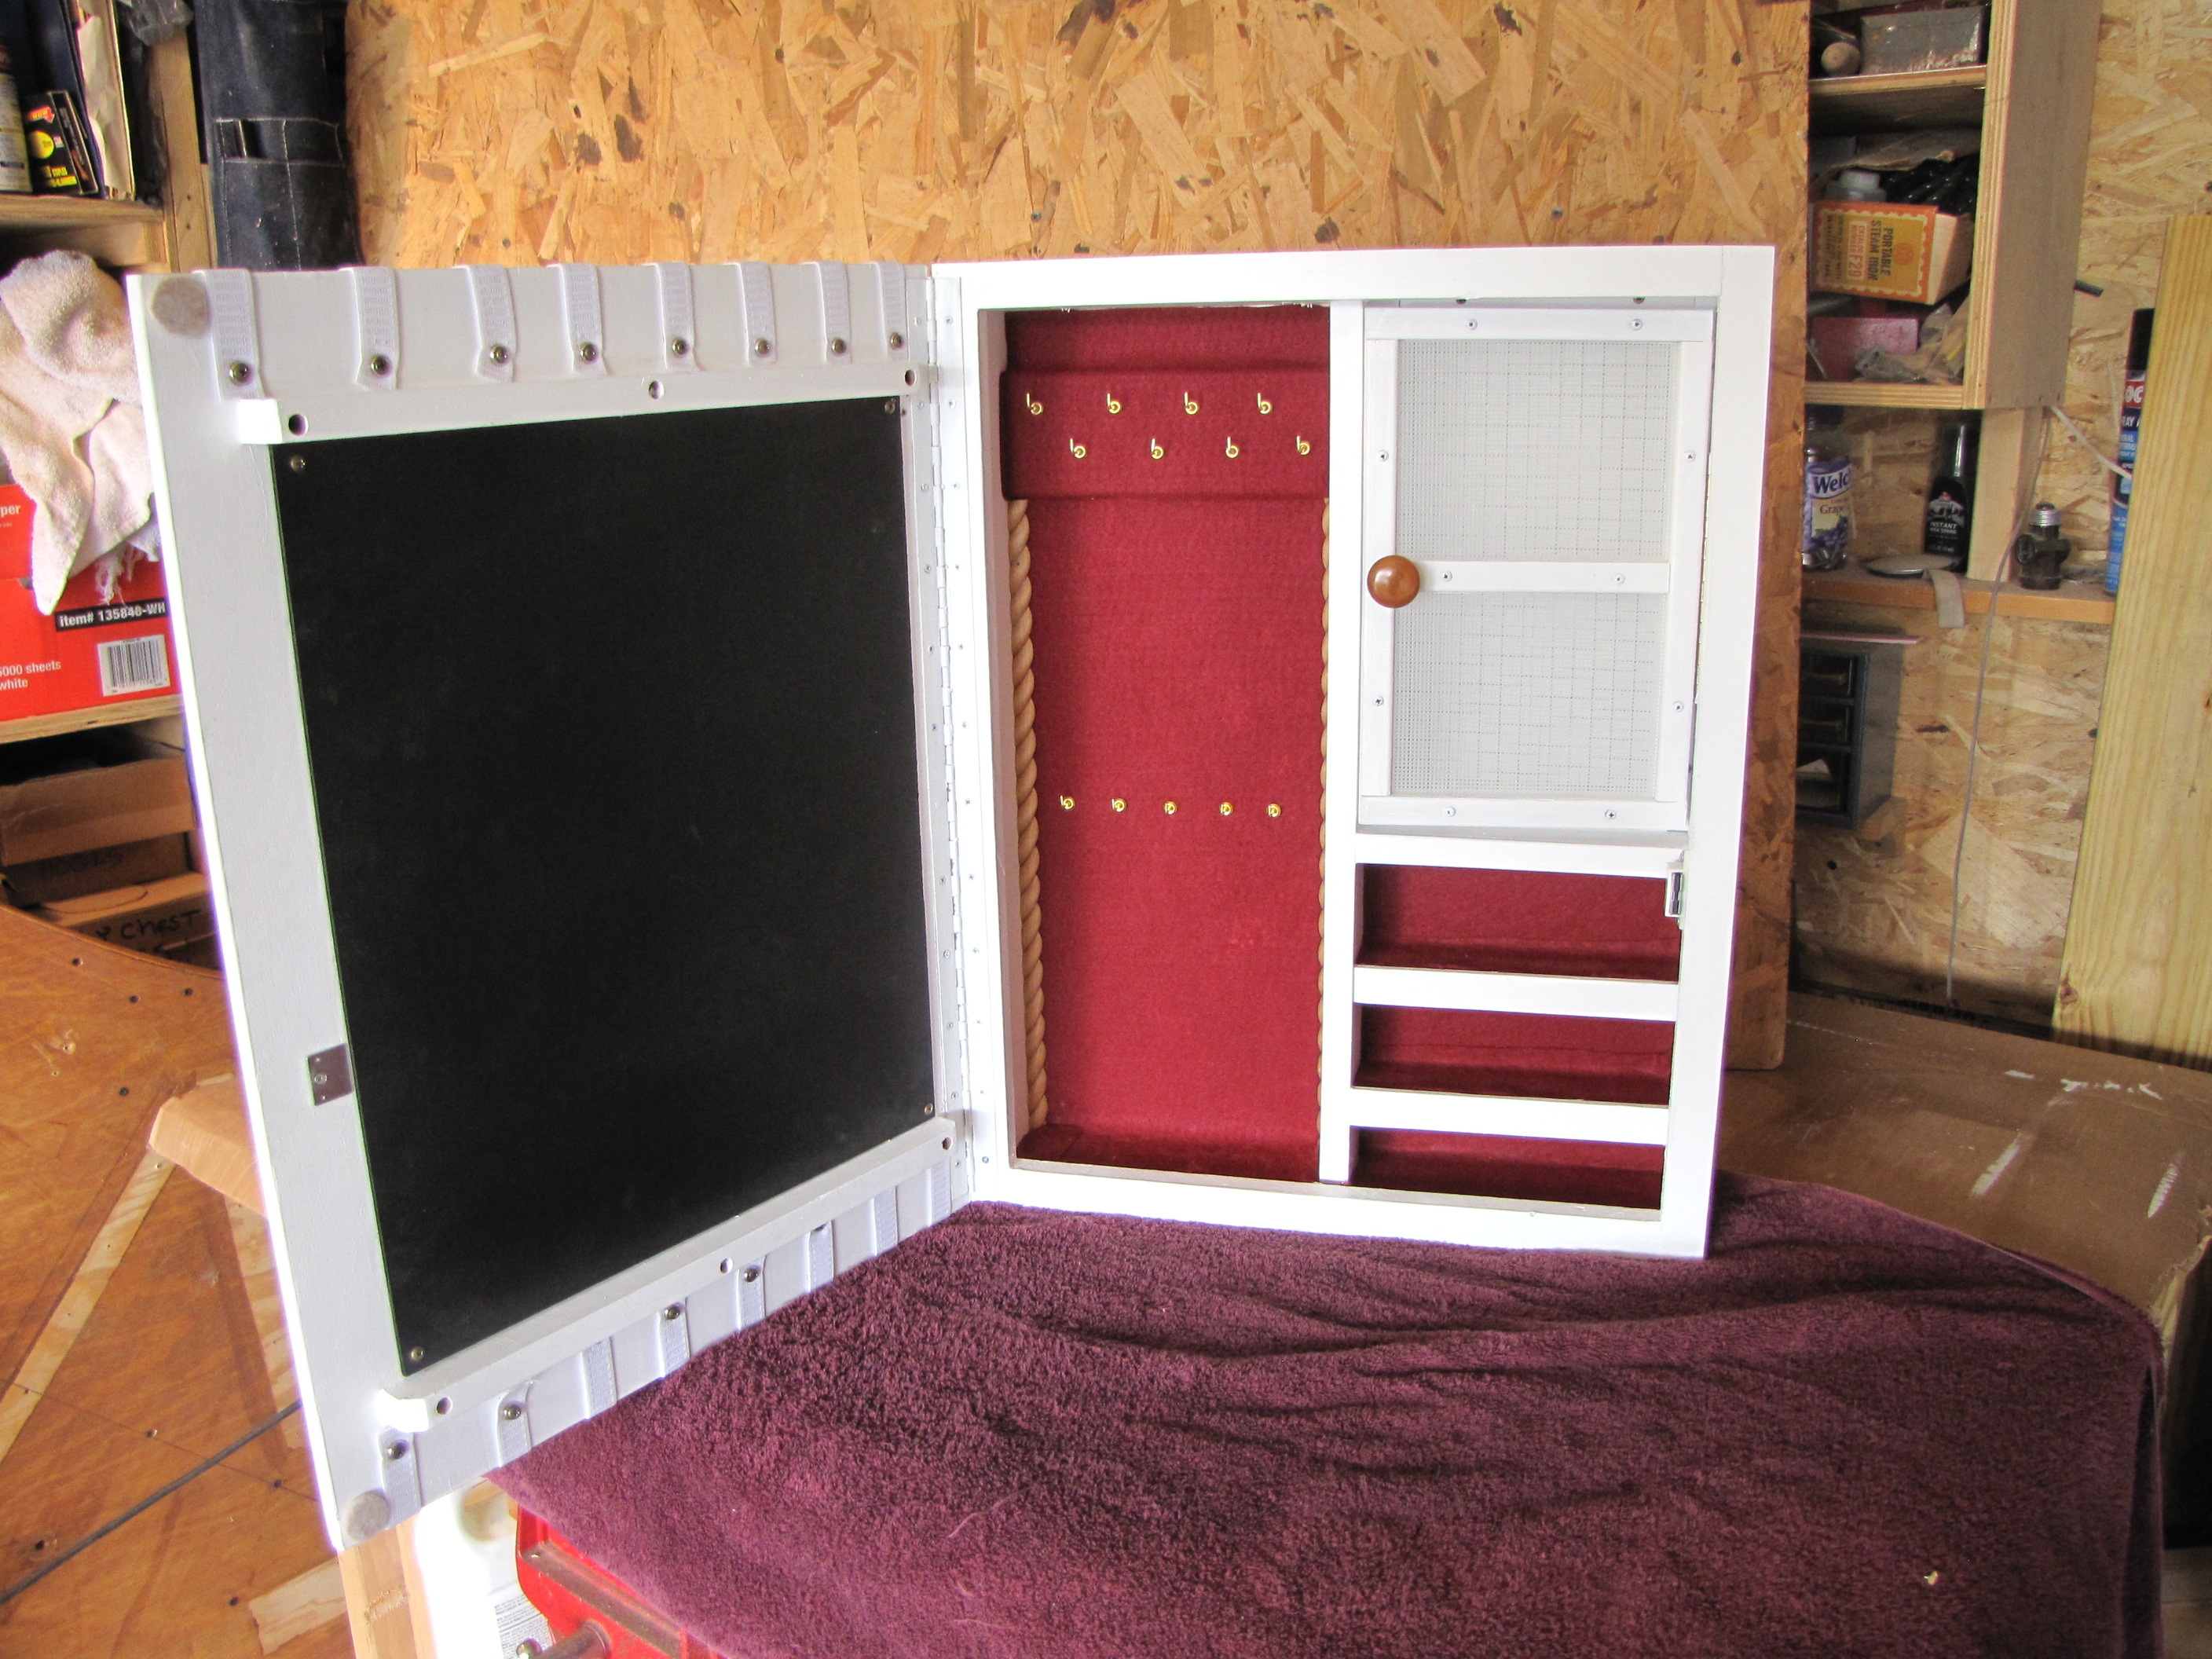
My Niece is 13 and into homemade hair bows, ribbons and jewelry. When I asked her mom what I could make for Colleen for her birthday? We settled upon three of Anna's $10 buck shelves and as a surprise a Jewelry cabinet with Elastic ribbons across front for her bows to be place on.
It was a big hit!
Thank you for your inspiration!
Best Regards,
Work Safely
Bob C.

Estimated Cost
$25.00
Estimated Time Investment
Weekend Project (10-20 Hours)
Finish Used
Valspar Ultra white paint
Recommended Skill Level
Intermediate
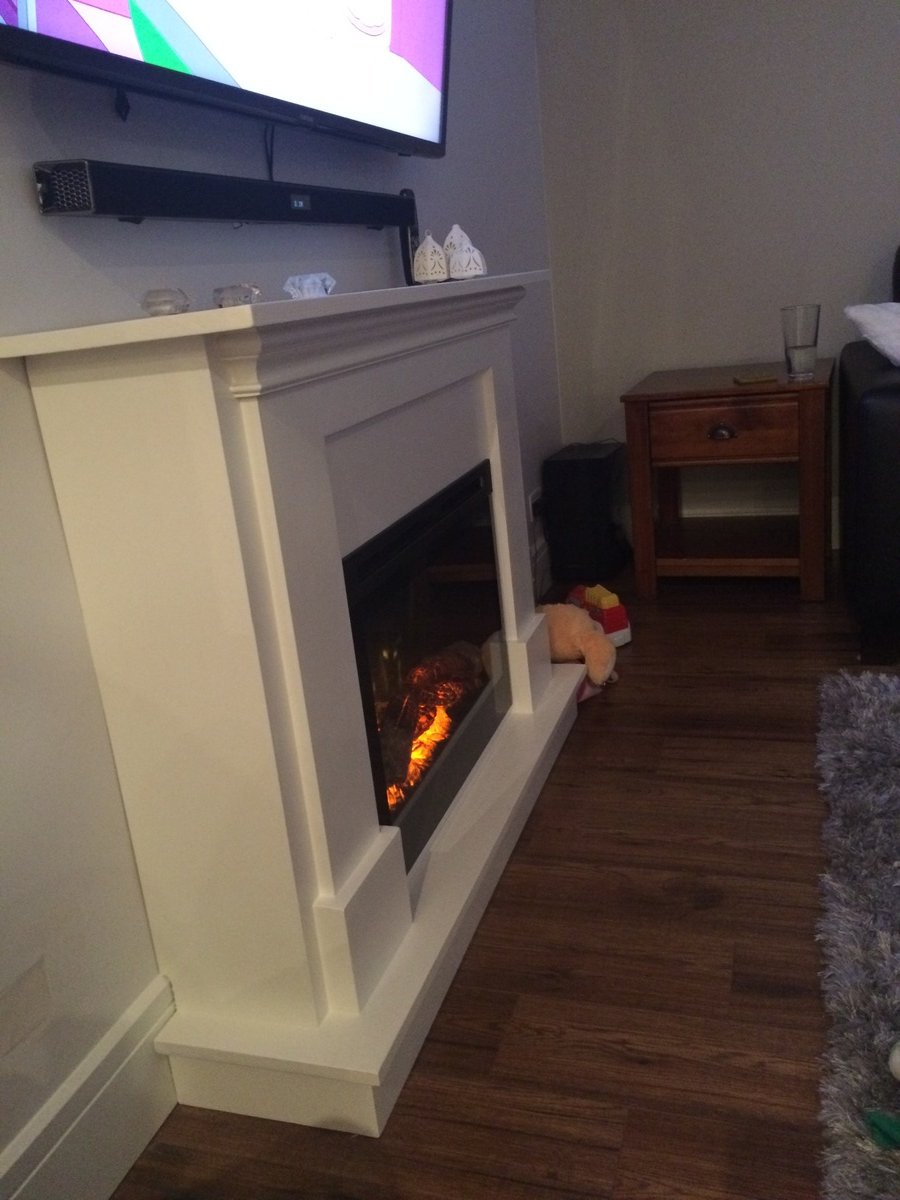
electric fireplace surround and mantel
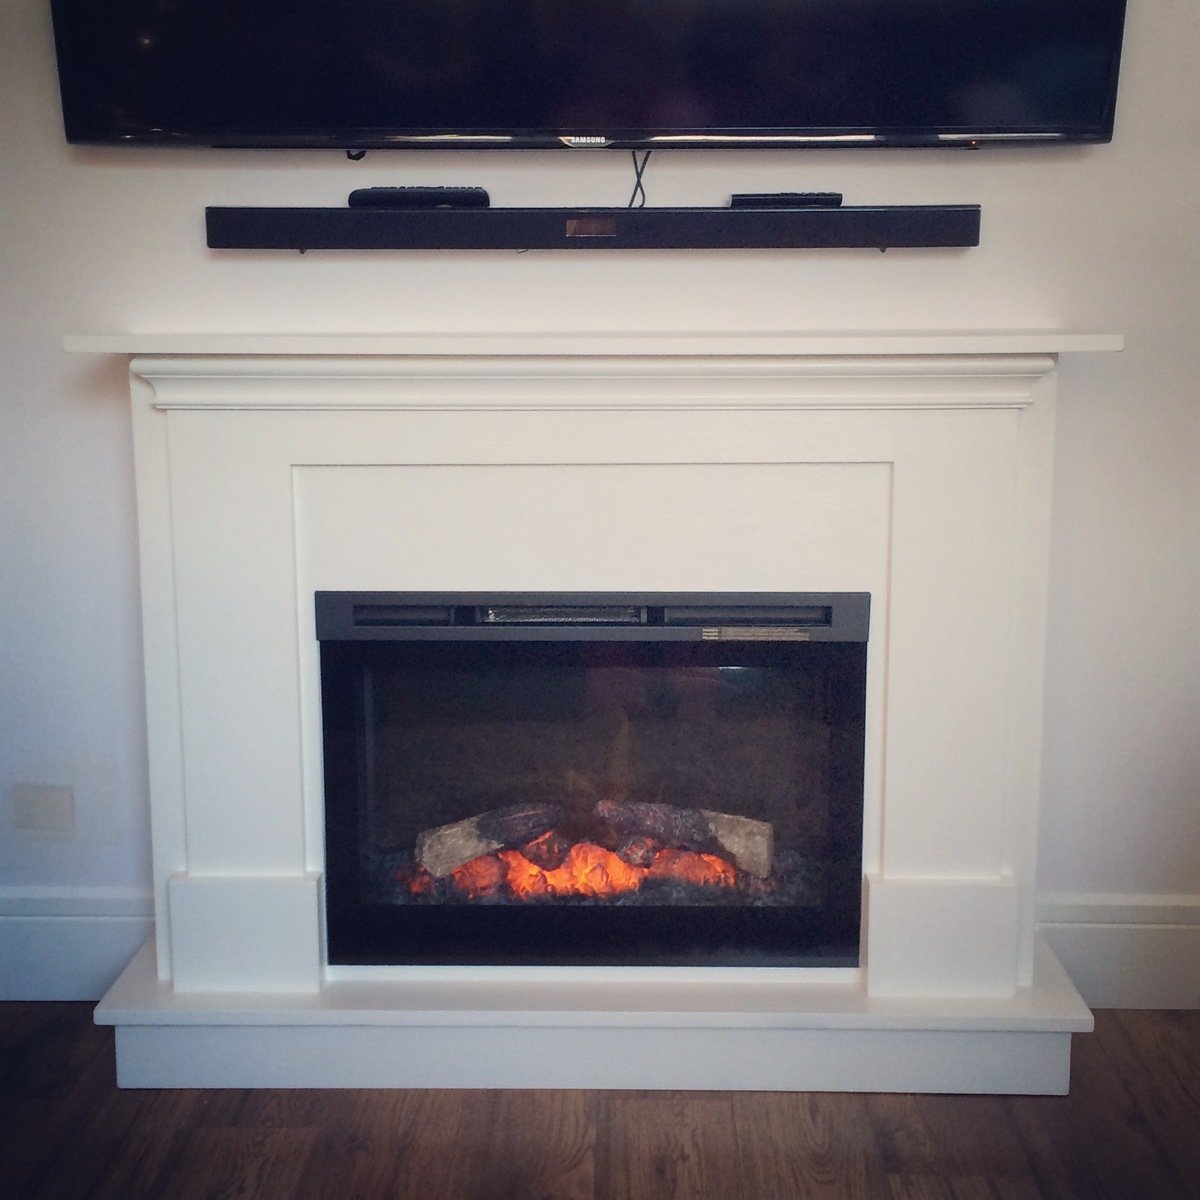
I am an extreme beginner, this is my very first woodworking project ever. The hardest part was modifying the plans to accommodate the electric fireplace insert that I bought and our space. I wanted a fireplace surround with mantle but I wanted it significantly shorter than most traditional mantles. I used 1x8's for blocking to give the fireplace it's depth. I originally was painting it white with leftover paint we had from our baseboards, but I wanted to make sure it was durable so I went to go paint crystal clear polycrylic over top and it started to turn in the project yellow. I had to sand the project down and start painting again, I purchased a durable paint from dulux called melamine which I was told it does not require a topcoat and is extremely resistant ( we will see). Considering I have never used a drill,nail gun or power saws of any sort I'm really happy with how it turned out.

Built from Plan(s)
Estimated Cost
$500
Estimated Time Investment
Week Long Project (20 Hours or More)
Finish Used
Dulux melamine paint in Benjamin moors simply white
Recommended Skill Level
Beginner
Coffee table
Fun project
Built from Plan(s)
Recommended Skill Level
Beginner
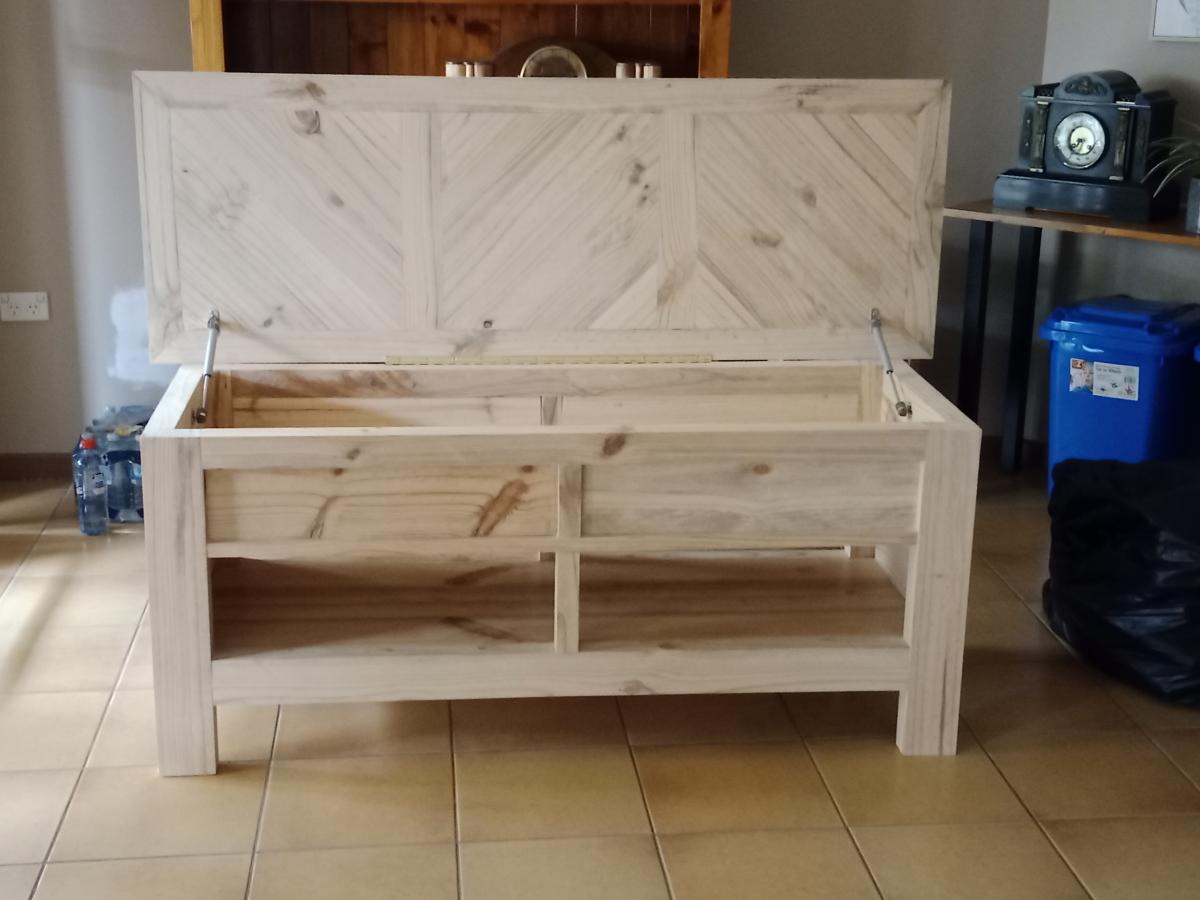
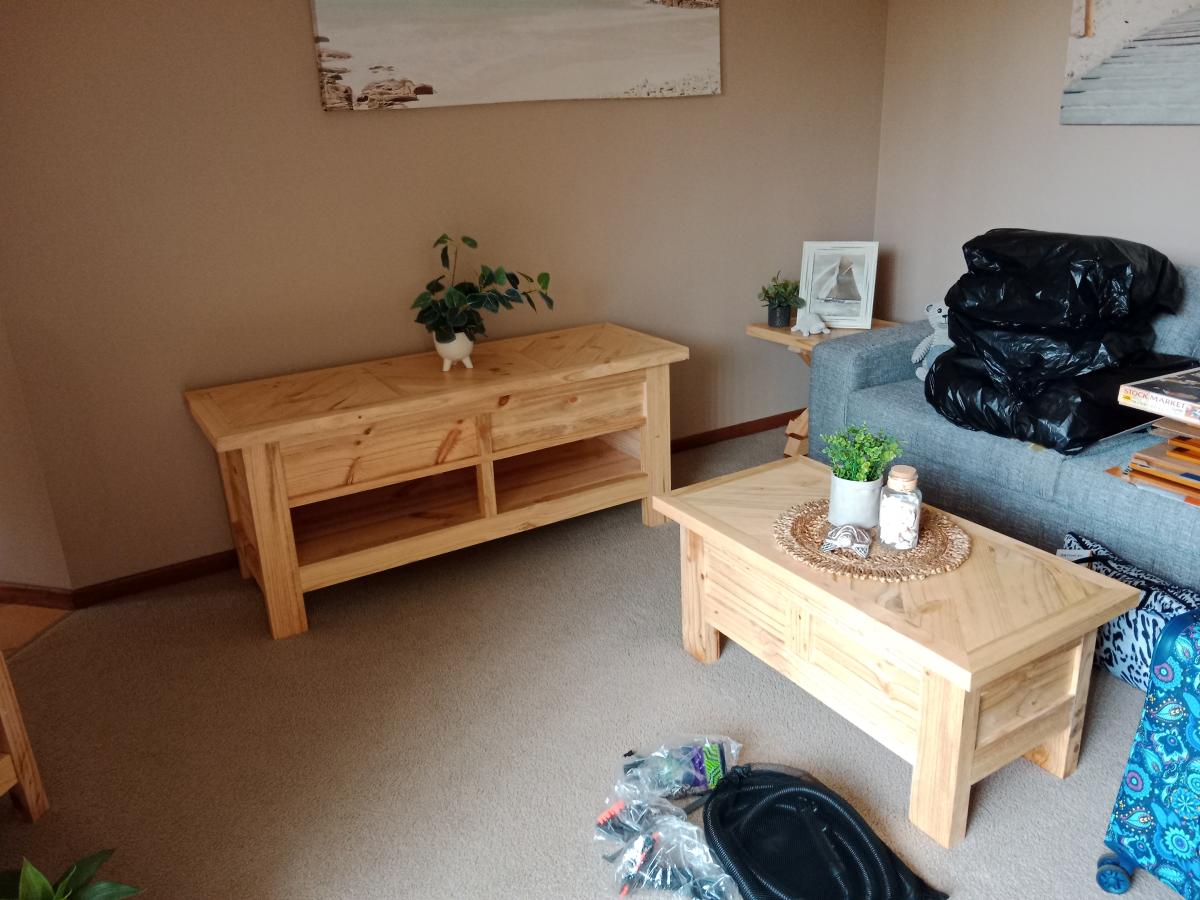
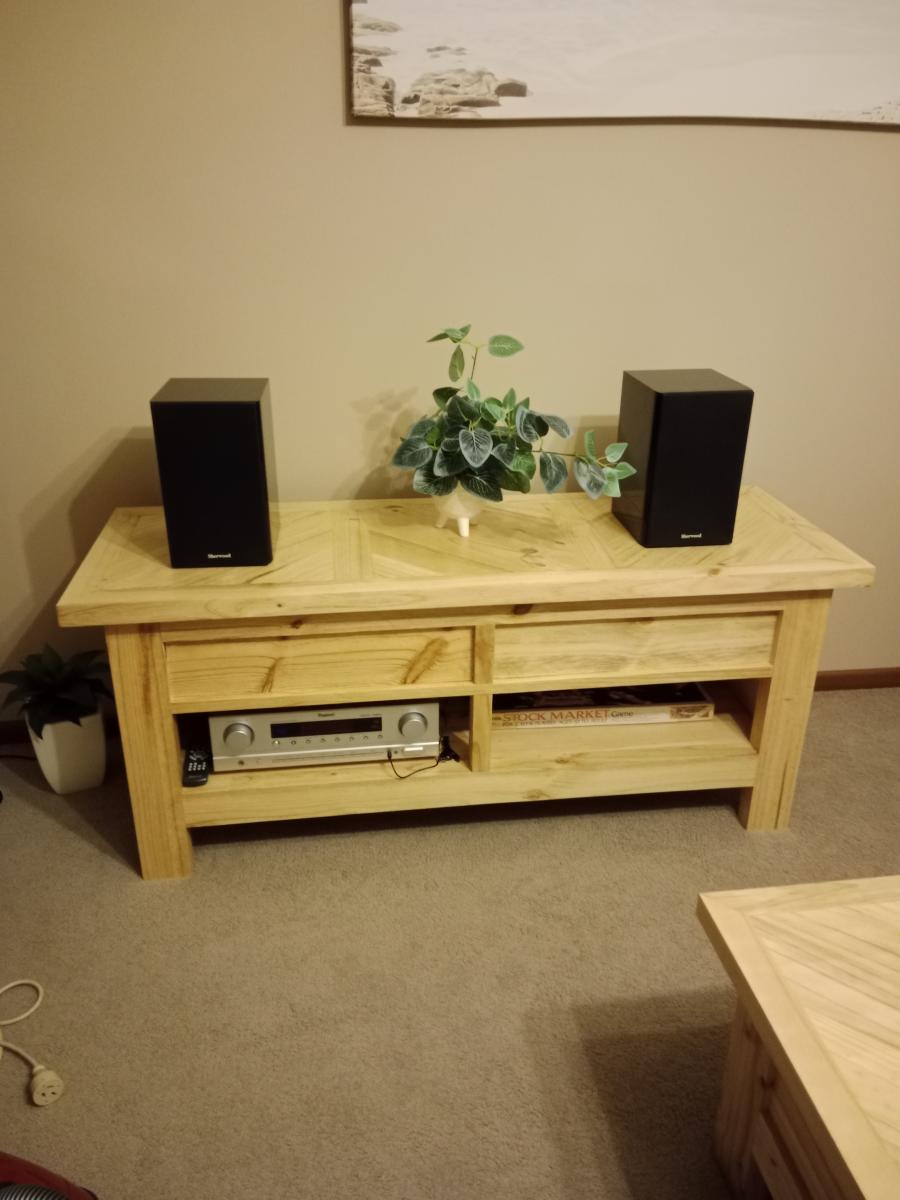
Entertainment Unit
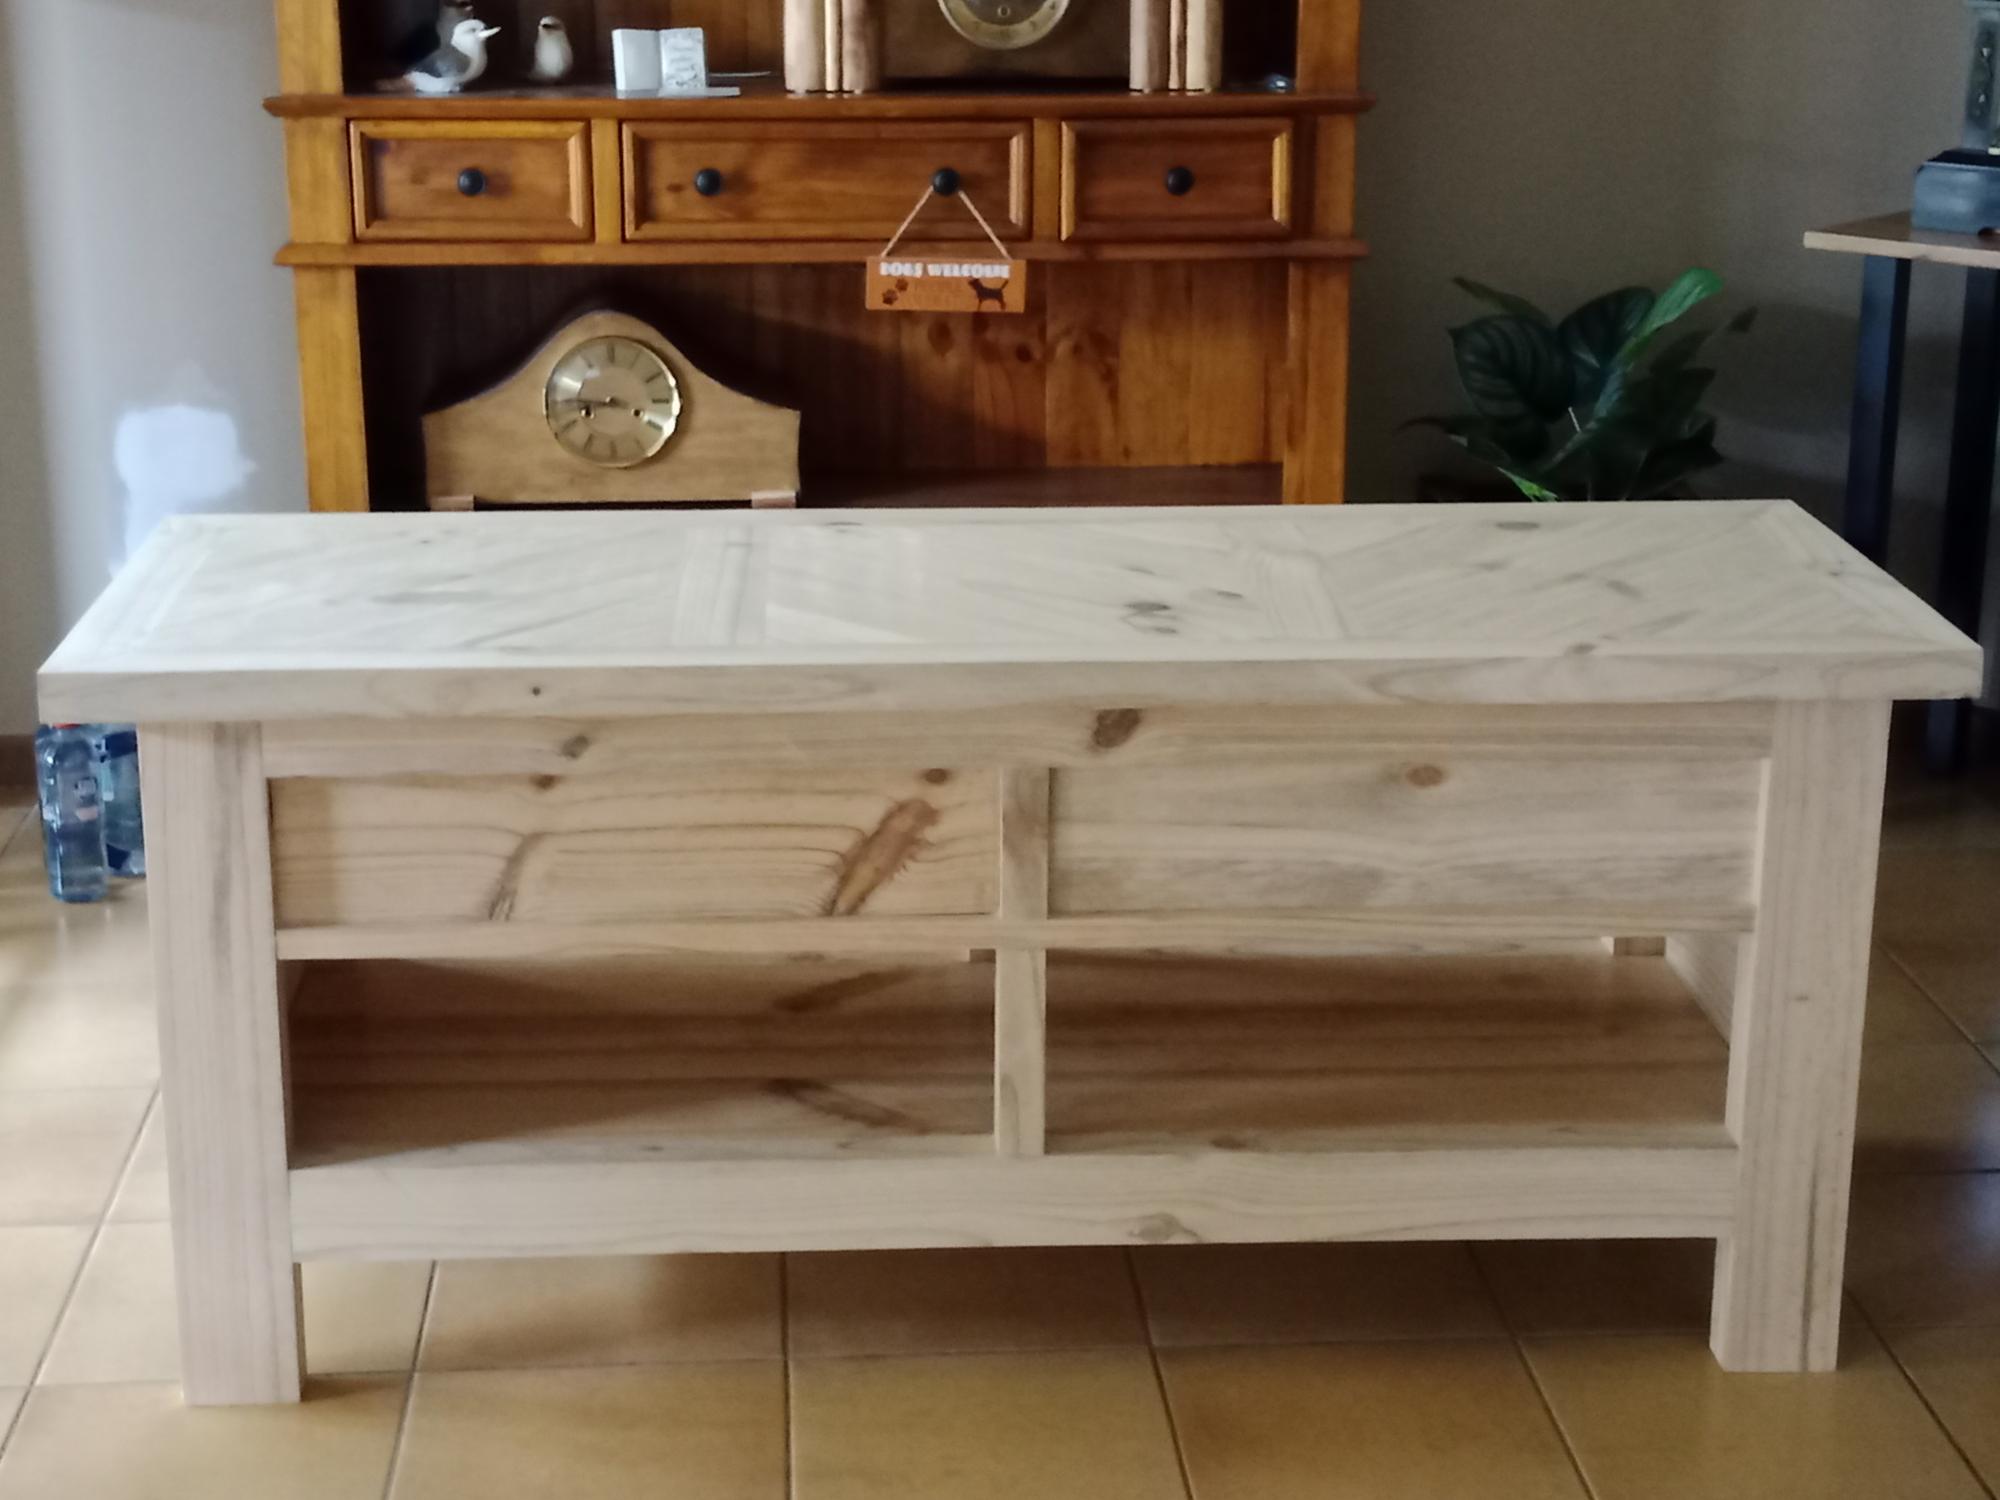
This entertainment unit was inspired by the 4x4 x base pedestal dining table with planked wood top. It completes the set which also includes the Table, coffee table and lamp table.
All 4 pieces have the same top design
Made from 200mm x 50mm pine sleepers and finished with Cabots benchtop clear finish
Built from Plan(s)
Comments
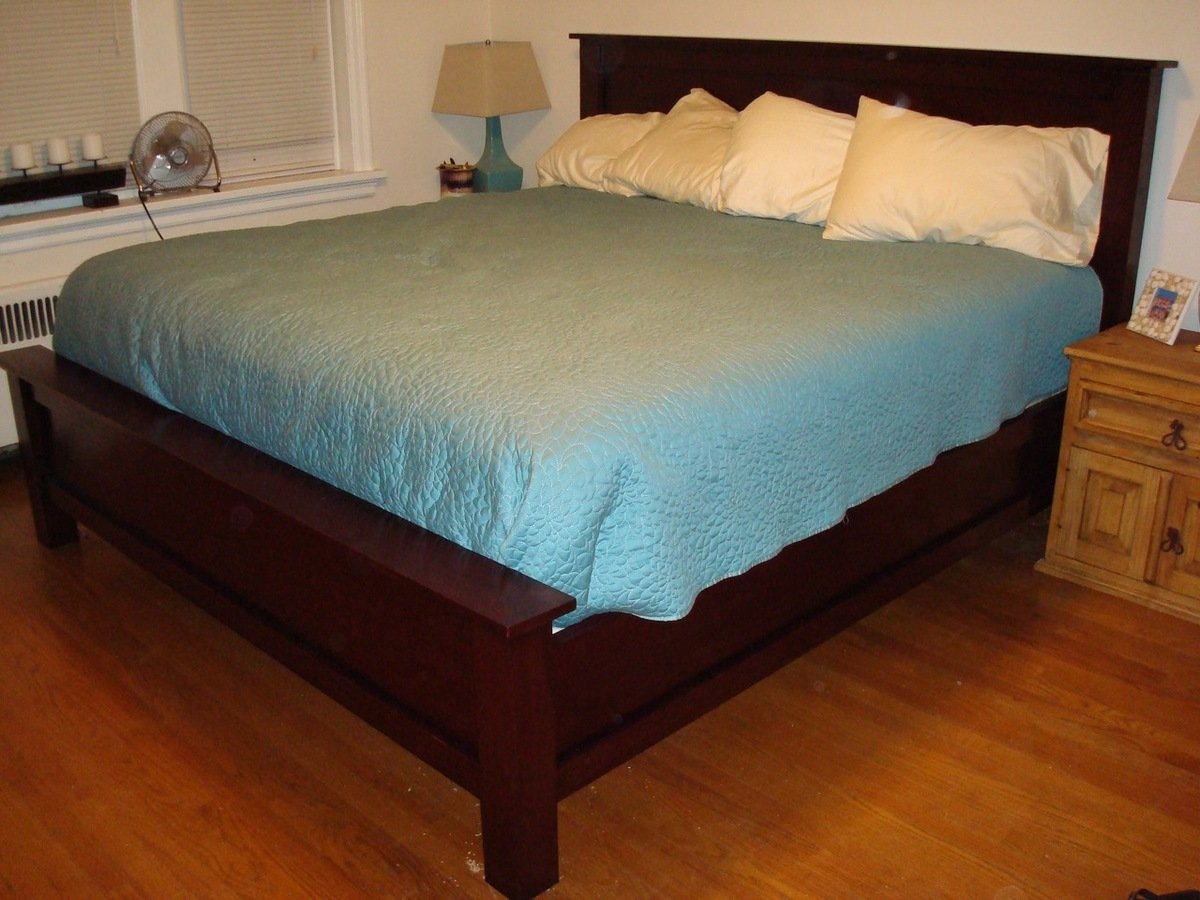
Modified farmhouse bed - my first time building anything ever!
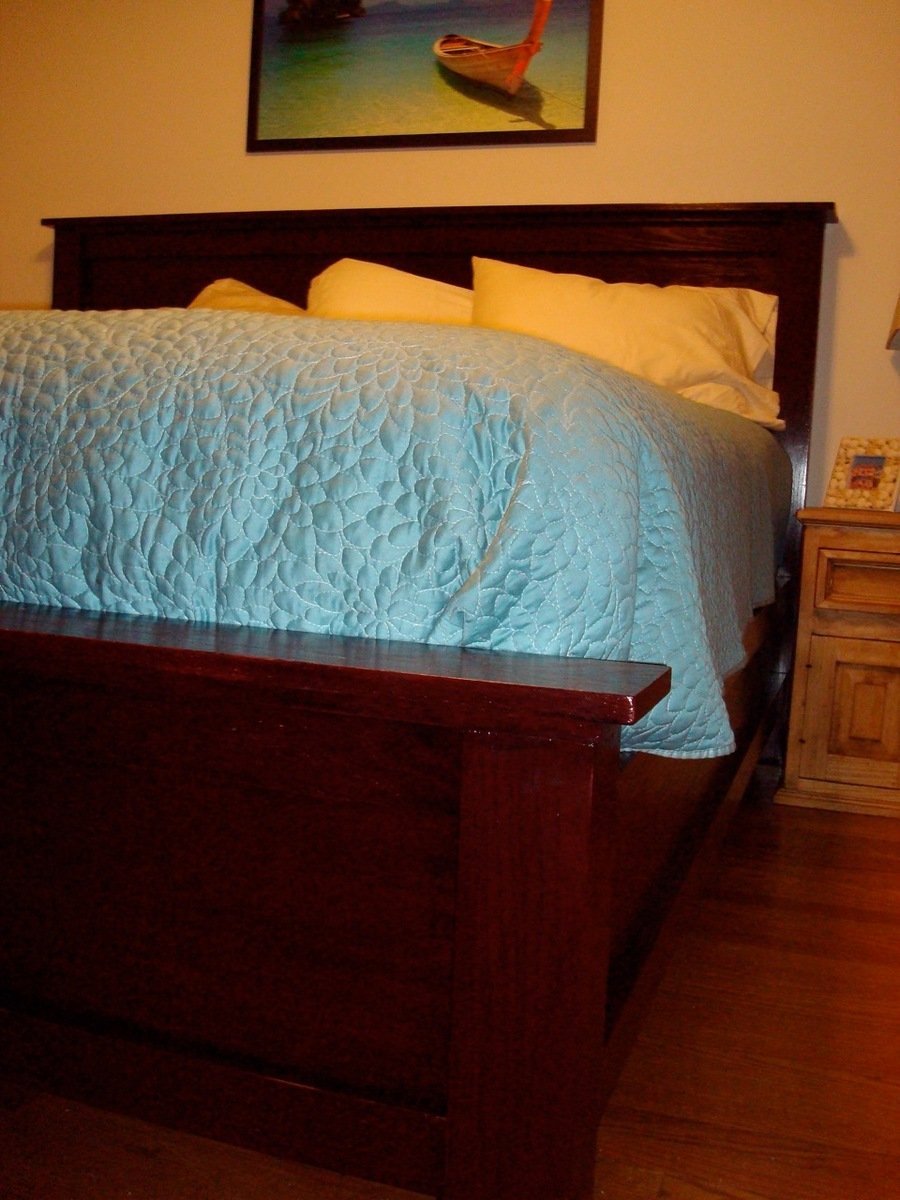
Got a new (and larger, King sized) mattress this summer, and wanted to have a real bed/headboard for the 1st time ever instead of just using one of those metal frames. Looked online for awhile, and somehow stumbled on this site - and so so glad I did, it saved me tons of $$! I really liked the farmhouse beds from PB, so decided to modify the plans from here to look more like that one - with a solid headboard and footboard (I used plywood for it).
It took me a long time to finish because I did all the sanding by hand, and used a hand saw to make cuts that I didn't get done when I bought the wood (the only power tool I own is a drill - and prior to this I'd only ever used it for drilling to hang shelves on the wall).
I've definitely got the building bug now, and have so many ideas for other projects I want to tackle. Thank you so much for this site and all the inspiration! Even though its not absolutely perfect, I absolutely love my new bed!

Built from Plan(s)
Estimated Cost
600-700
Estimated Time Investment
Week Long Project (20 Hours or More)
Finish Used
I used 1 coat of General Finishes water based stain in Rosewood, and then 4 coats of their water based poly, sanding in between each with 320 grit.
Recommended Skill Level
Beginner
Comments
Thu, 09/08/2011 - 07:03
Beautiful!
You should be very proud of this piece, it looks wonderful! Very nice work with the hand saw and sanding, you worked hard and it shows!
Thu, 09/08/2011 - 11:46
Great color!
I have been thinking about this project for some time. You should be proud this is a great bed.
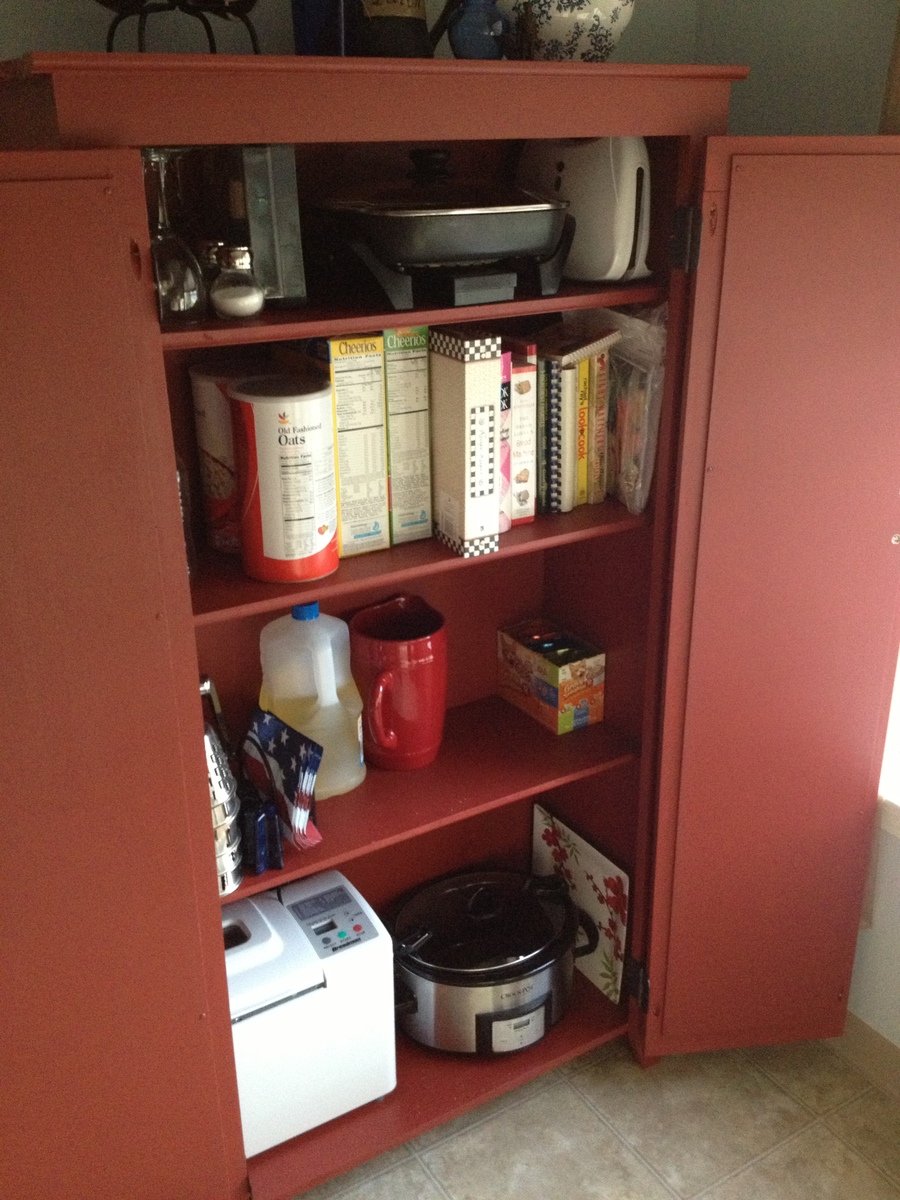
Kitchen Cabinet
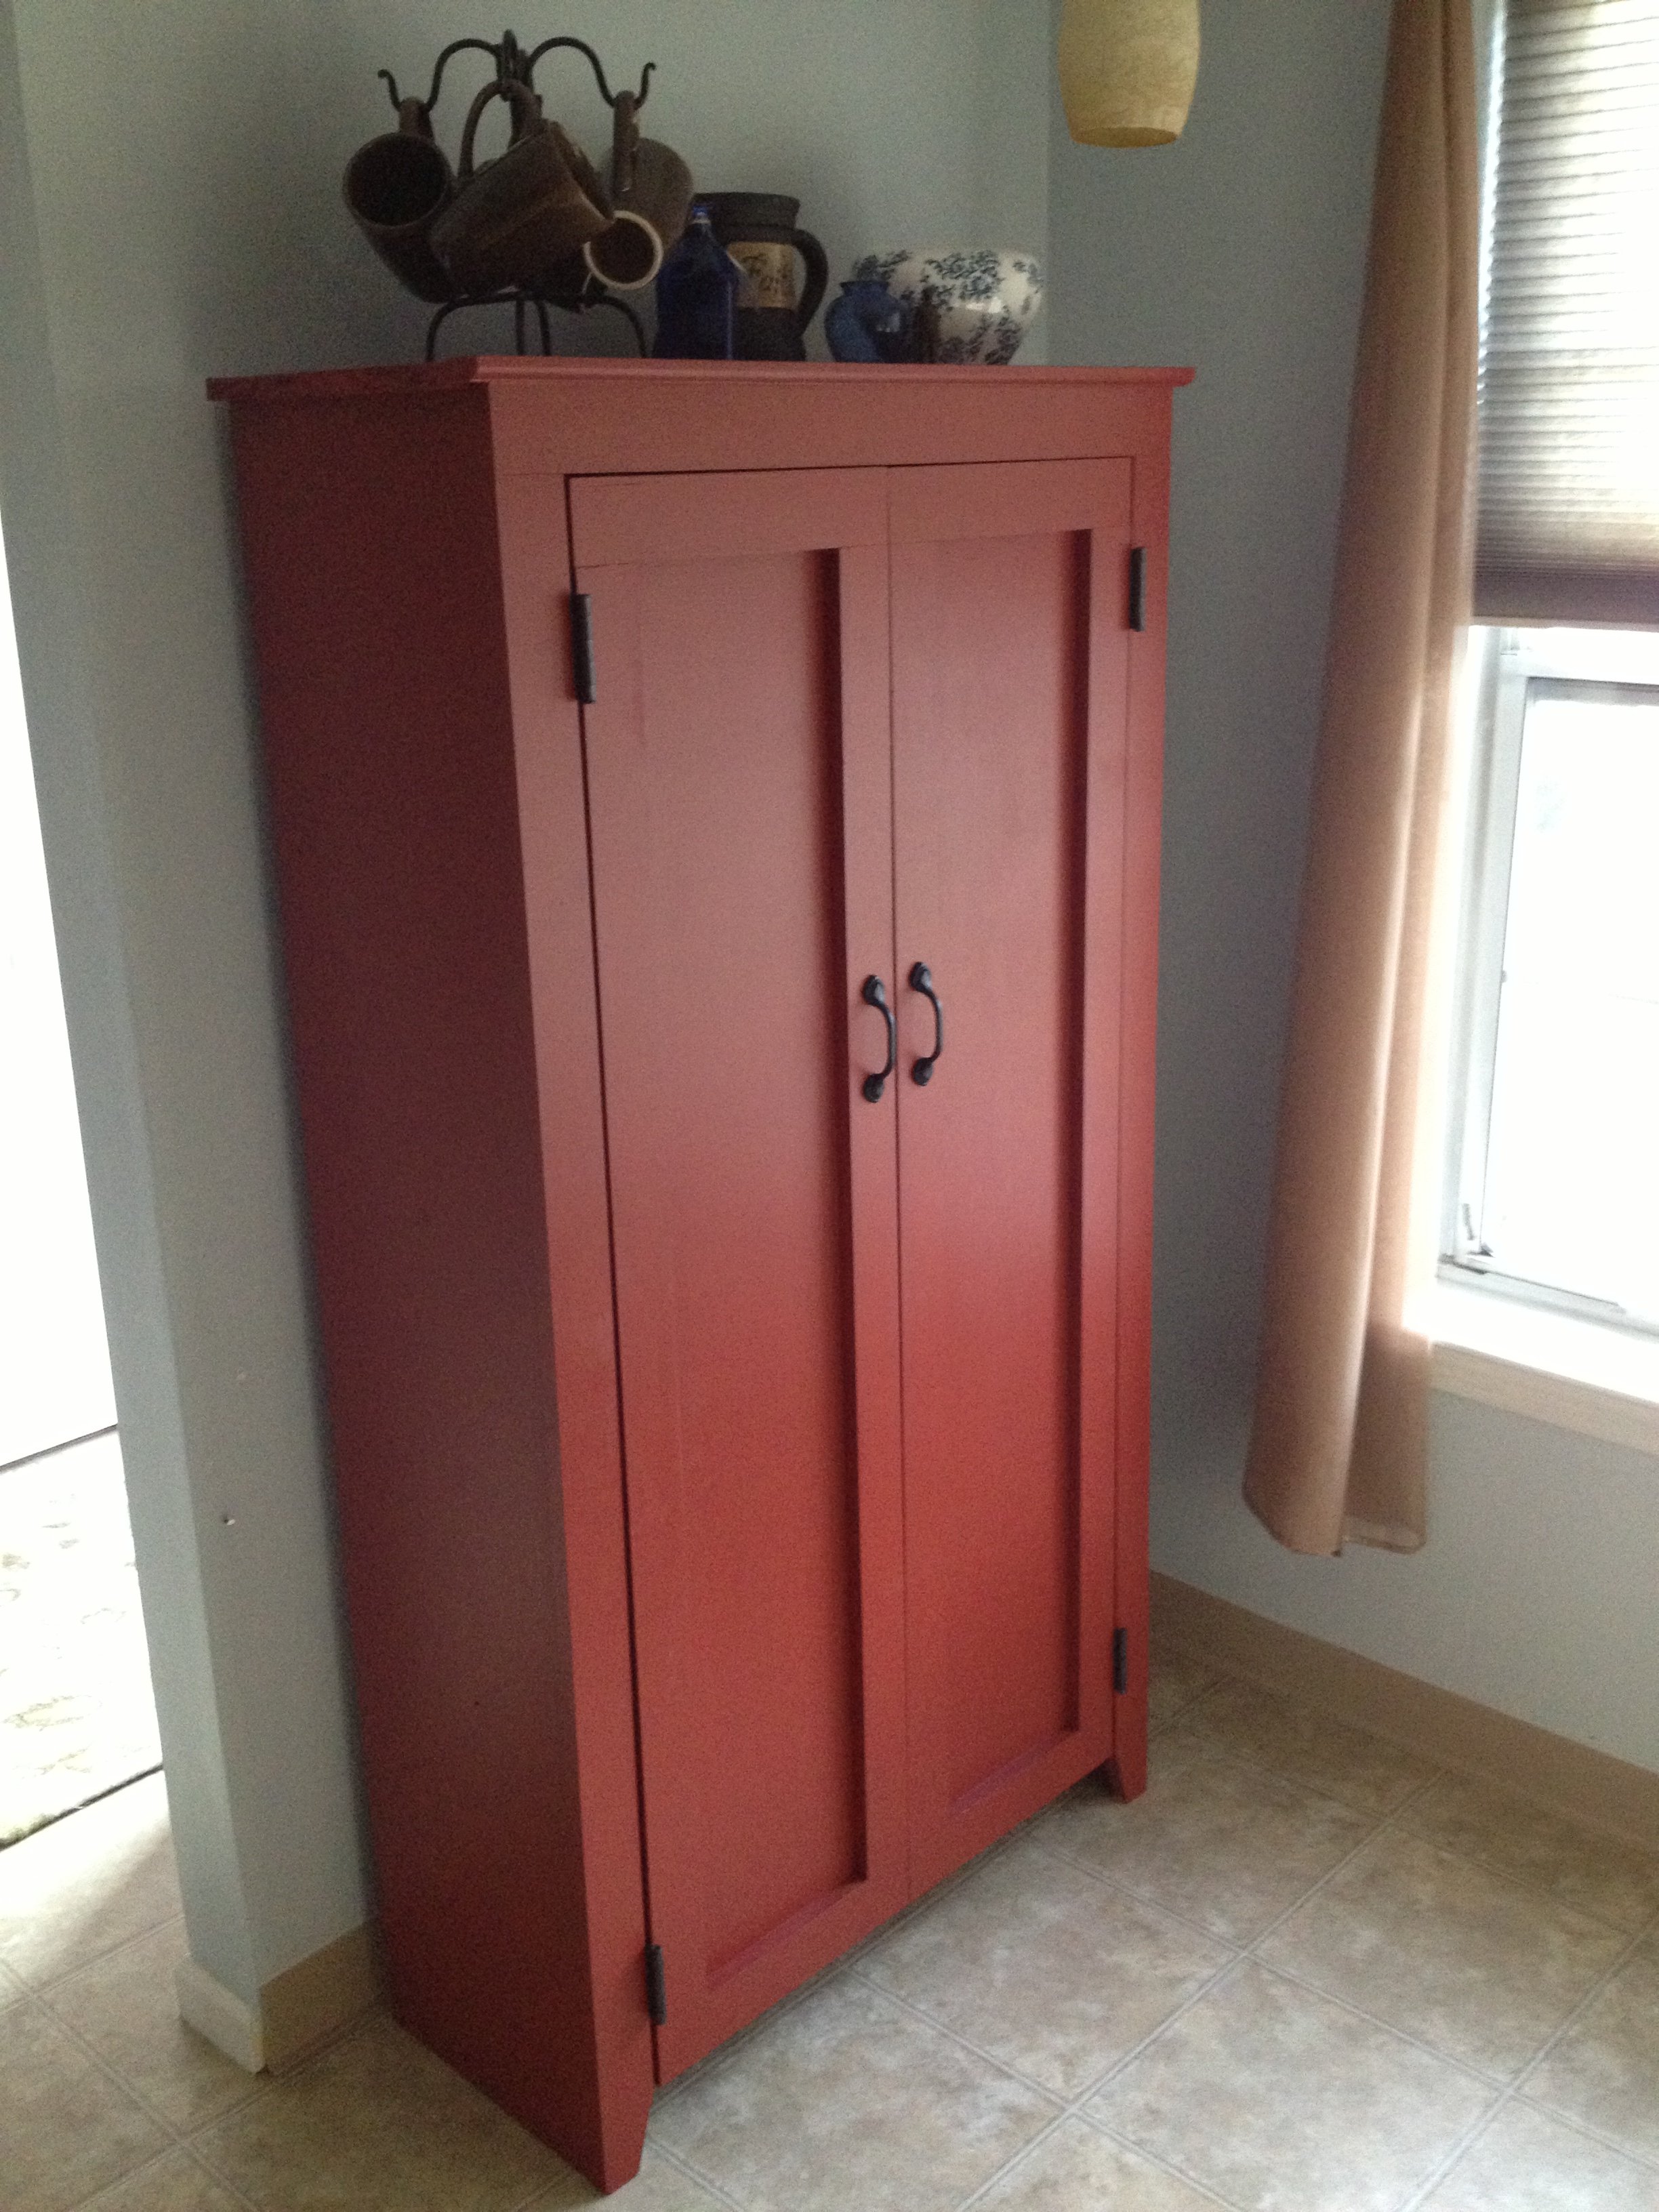
My wife and I needed space in our kitchen to store various items. This cabinet works perfectly for that purpose.
Built from Plan(s)
Estimated Cost
$100
Estimated Time Investment
Weekend Project (10-20 Hours)
Finish Used
Dark Red paint. I am not sure of the name.
Recommended Skill Level
Beginner
Comments

Fri, 09/27/2013 - 21:17
paint colour
That paint colour is beautiful. As is the pantry, very well done. I wish you could find out the name and brand of the colour. It is stunning.
Fri, 09/27/2013 - 21:17
paint colour
That paint colour is beautiful. As is the pantry, very well done. I wish you could find out the name and brand of the colour. It is stunning.
Mon, 09/30/2013 - 05:30
I believe this was the color.
I believe this was the color. Red Brick S-H-170 by Behr. Hope that helps.
Thanks for the great plans!
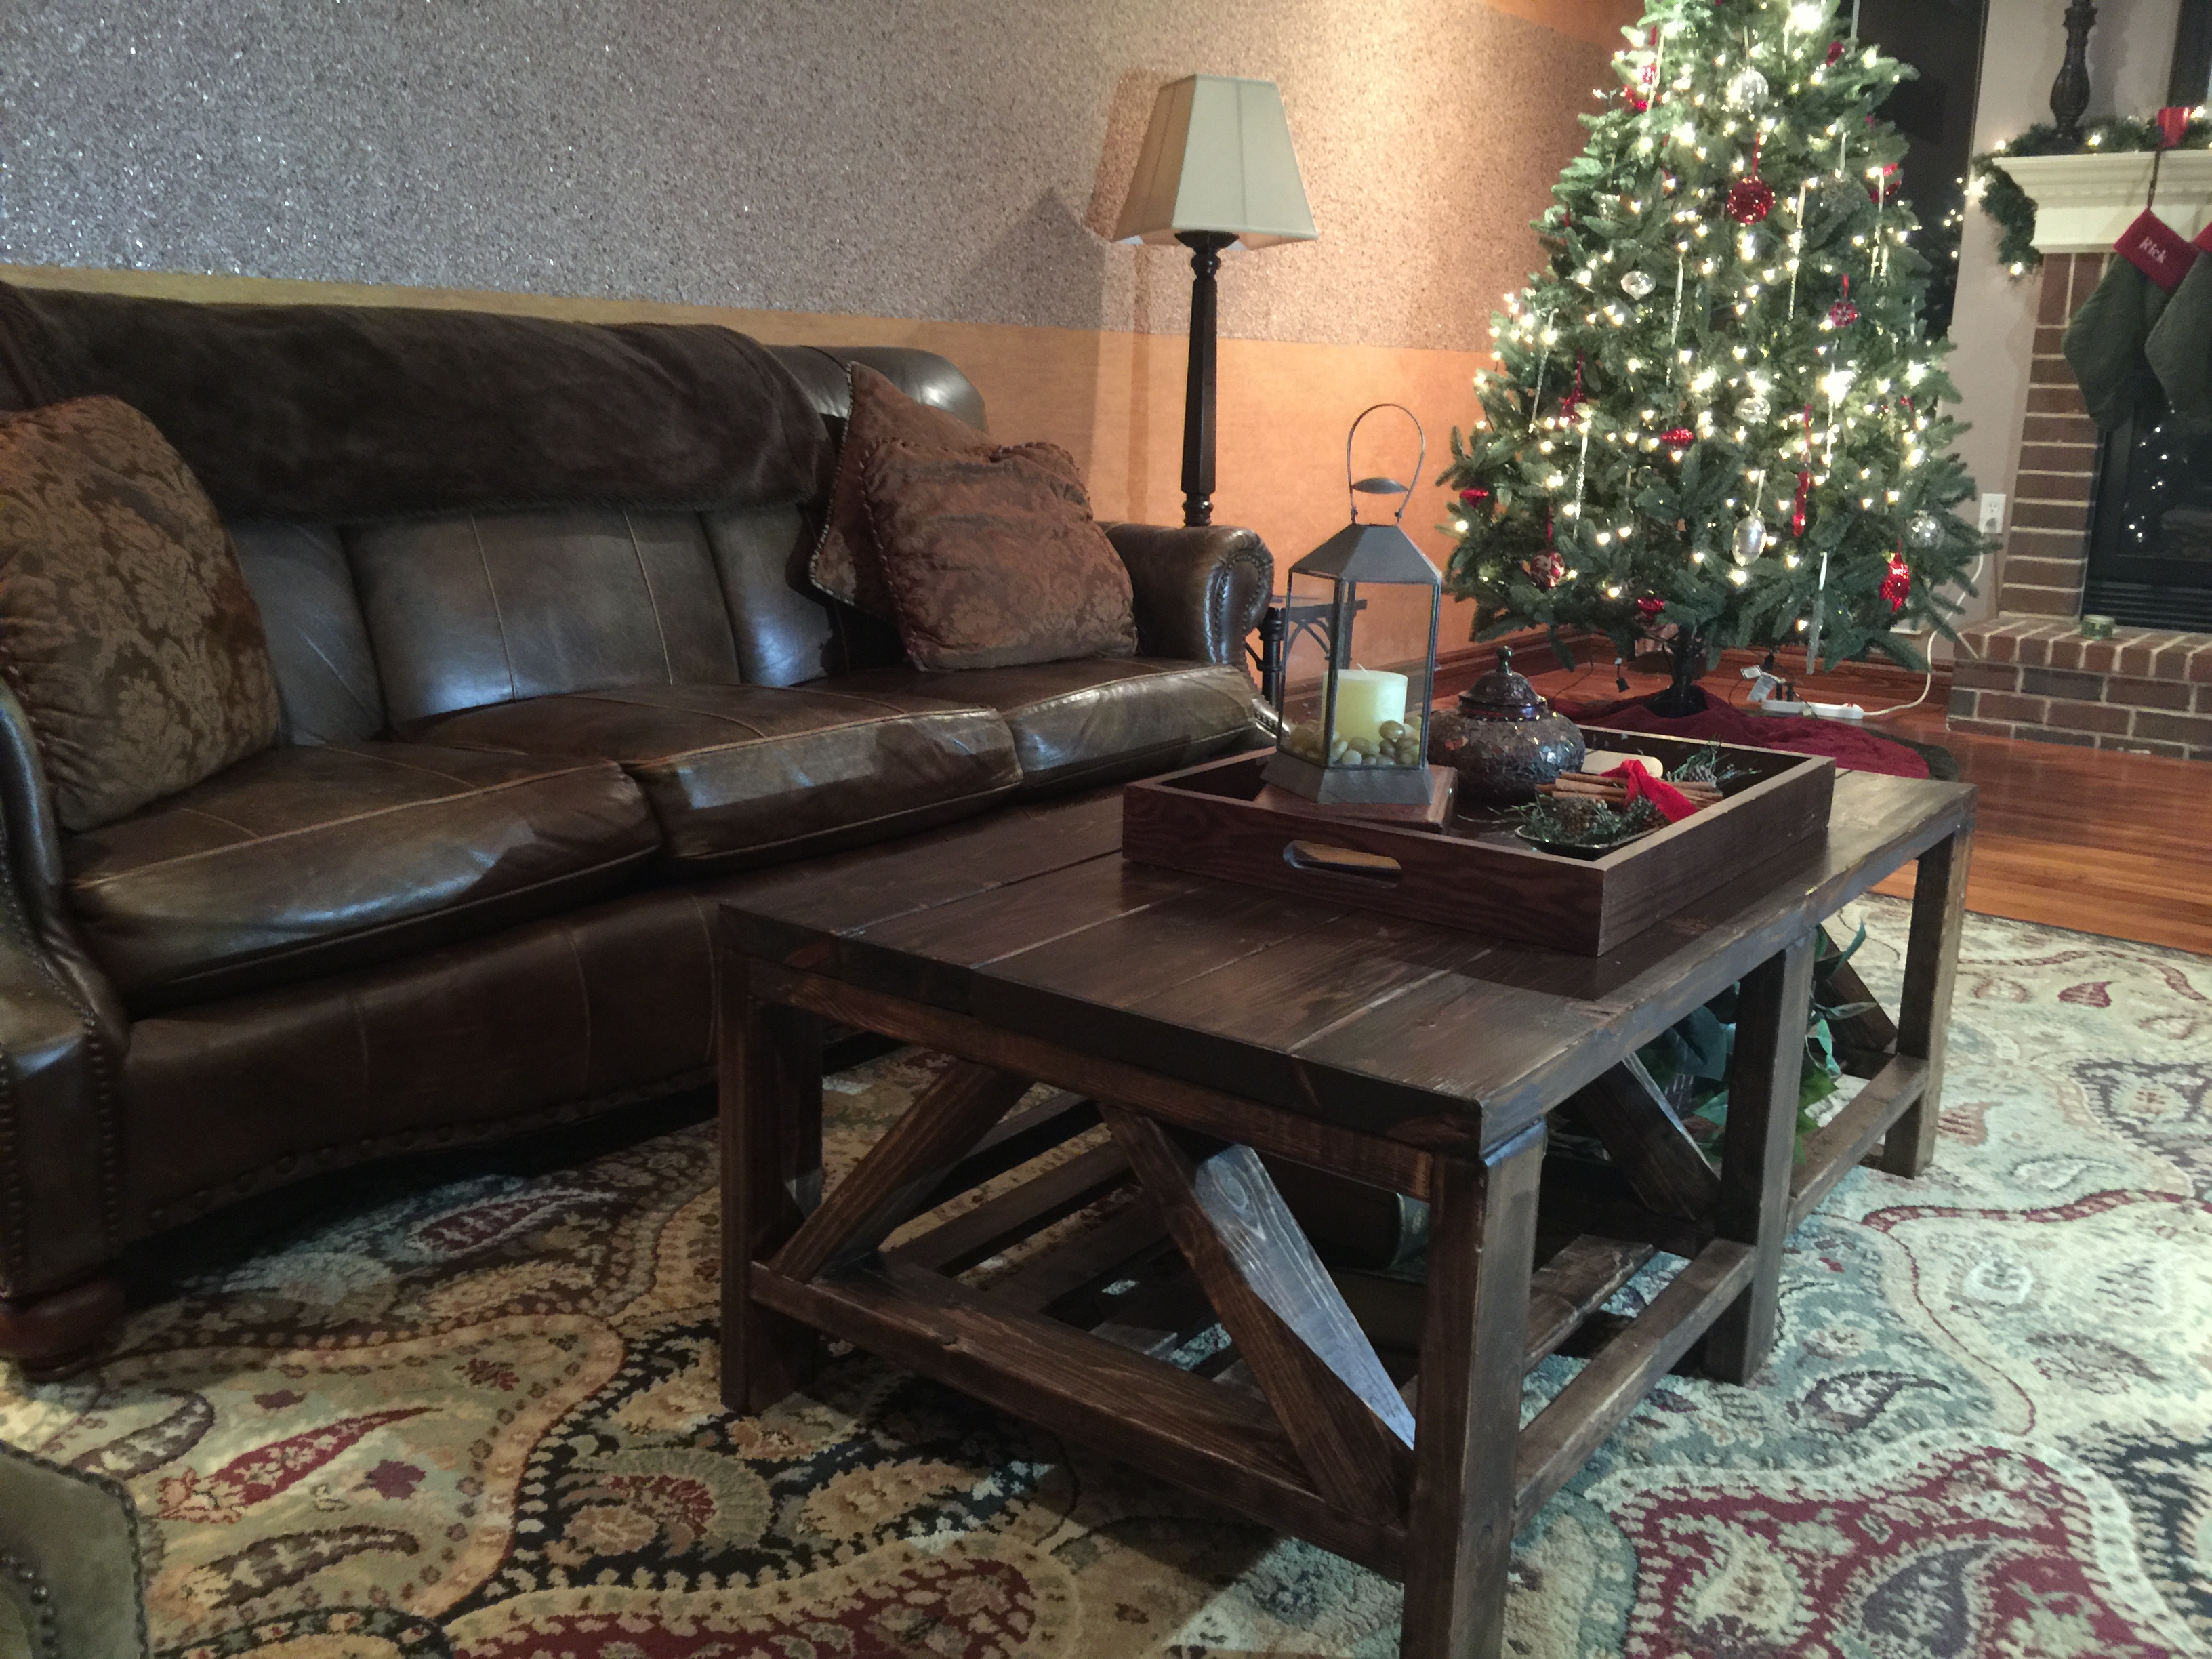
Needed a good sturdy coffee table so now I've got one. Joined each 2x6 for the top together with pocket holes and it's solid. A lot of fun to build.
Built from Plan(s)
Estimated Time Investment
Weekend Project (10-20 Hours)
Finish Used
Varathane Kona
Minwax Quick drying poly - Satin
Minwax Quick drying poly - Satin
Recommended Skill Level
Beginner
Comments

Thu, 12/10/2015 - 14:54
Very nice and beautiful
Very nice and beautiful coffee table! Love how it turned out!
Ladder Vanity Shelf
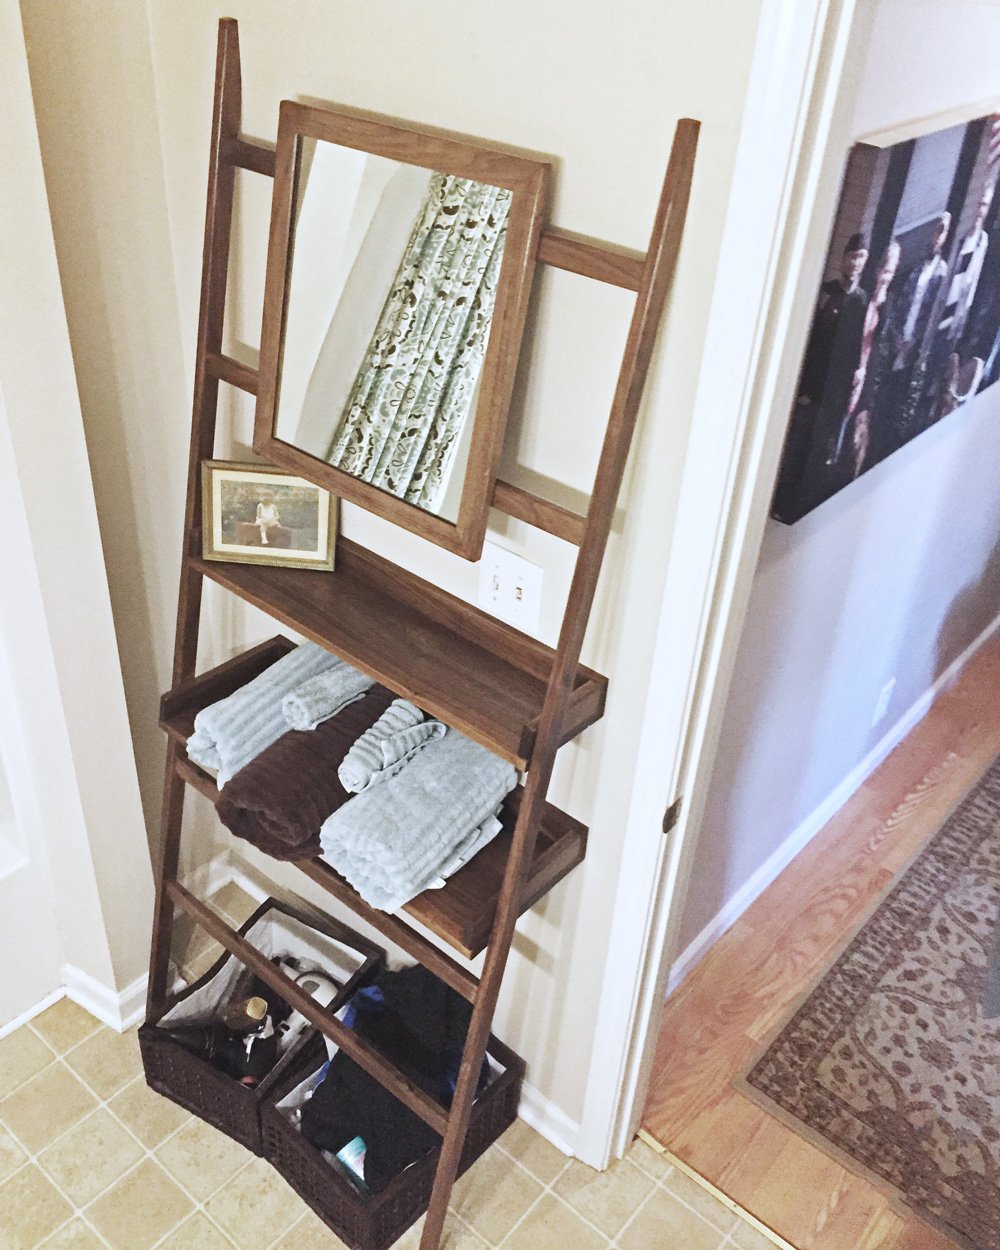
I used the basic ideas of your project but sized it to the wall in the bathroom. My first hardwood project. Pretty pleased.
Built from Plan(s)
Estimated Cost
$100 for the wood and the mirror.
Estimated Time Investment
Weekend Project (10-20 Hours)
Finish Used
Watco Danish oil for the color, General Finishes water based topcoat.
Recommended Skill Level
Beginner