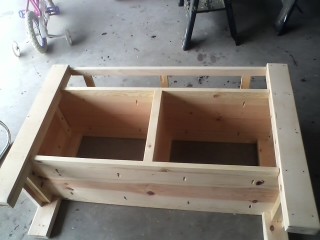
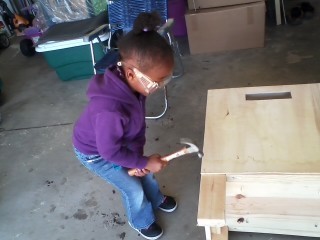
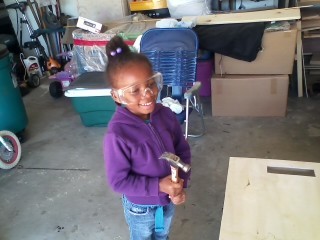
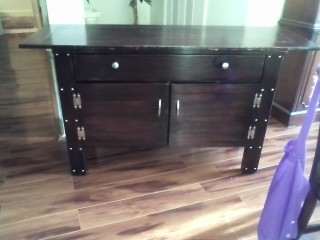
Toy box
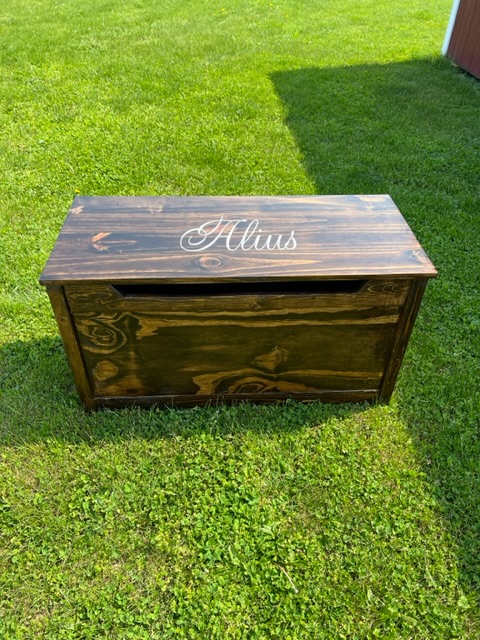
I made this toy box for a couple that I worked with. They like it so much, that they asked me to make them two more
Built from Plan(s)
I made this toy box for a couple that I worked with. They like it so much, that they asked me to make them two more
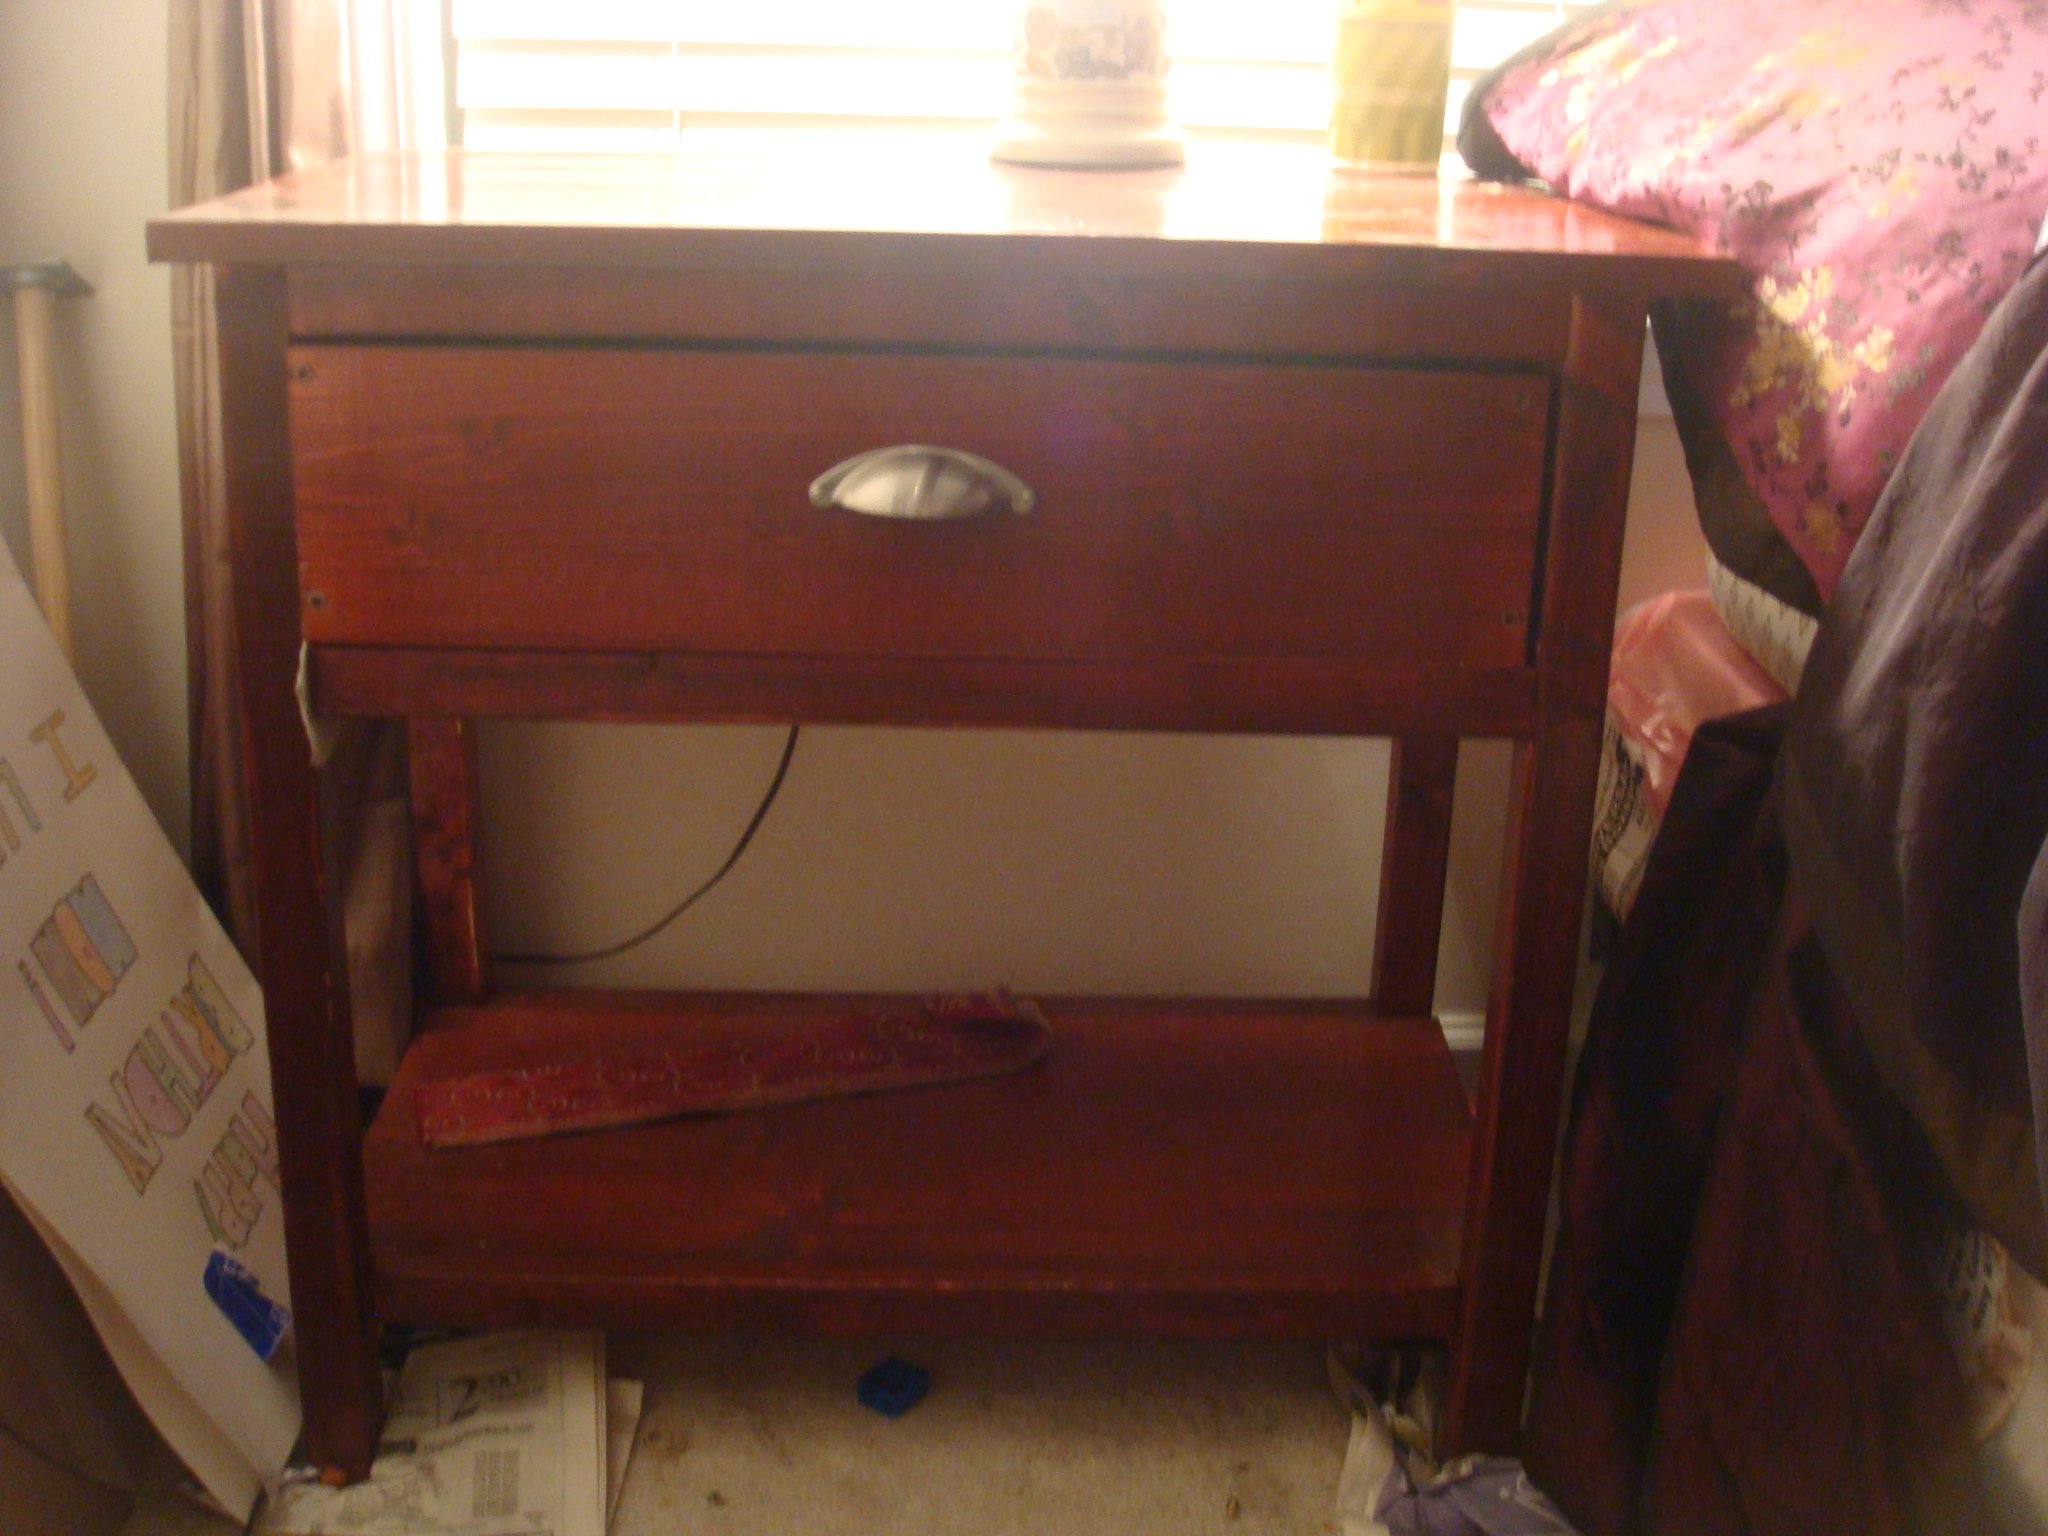
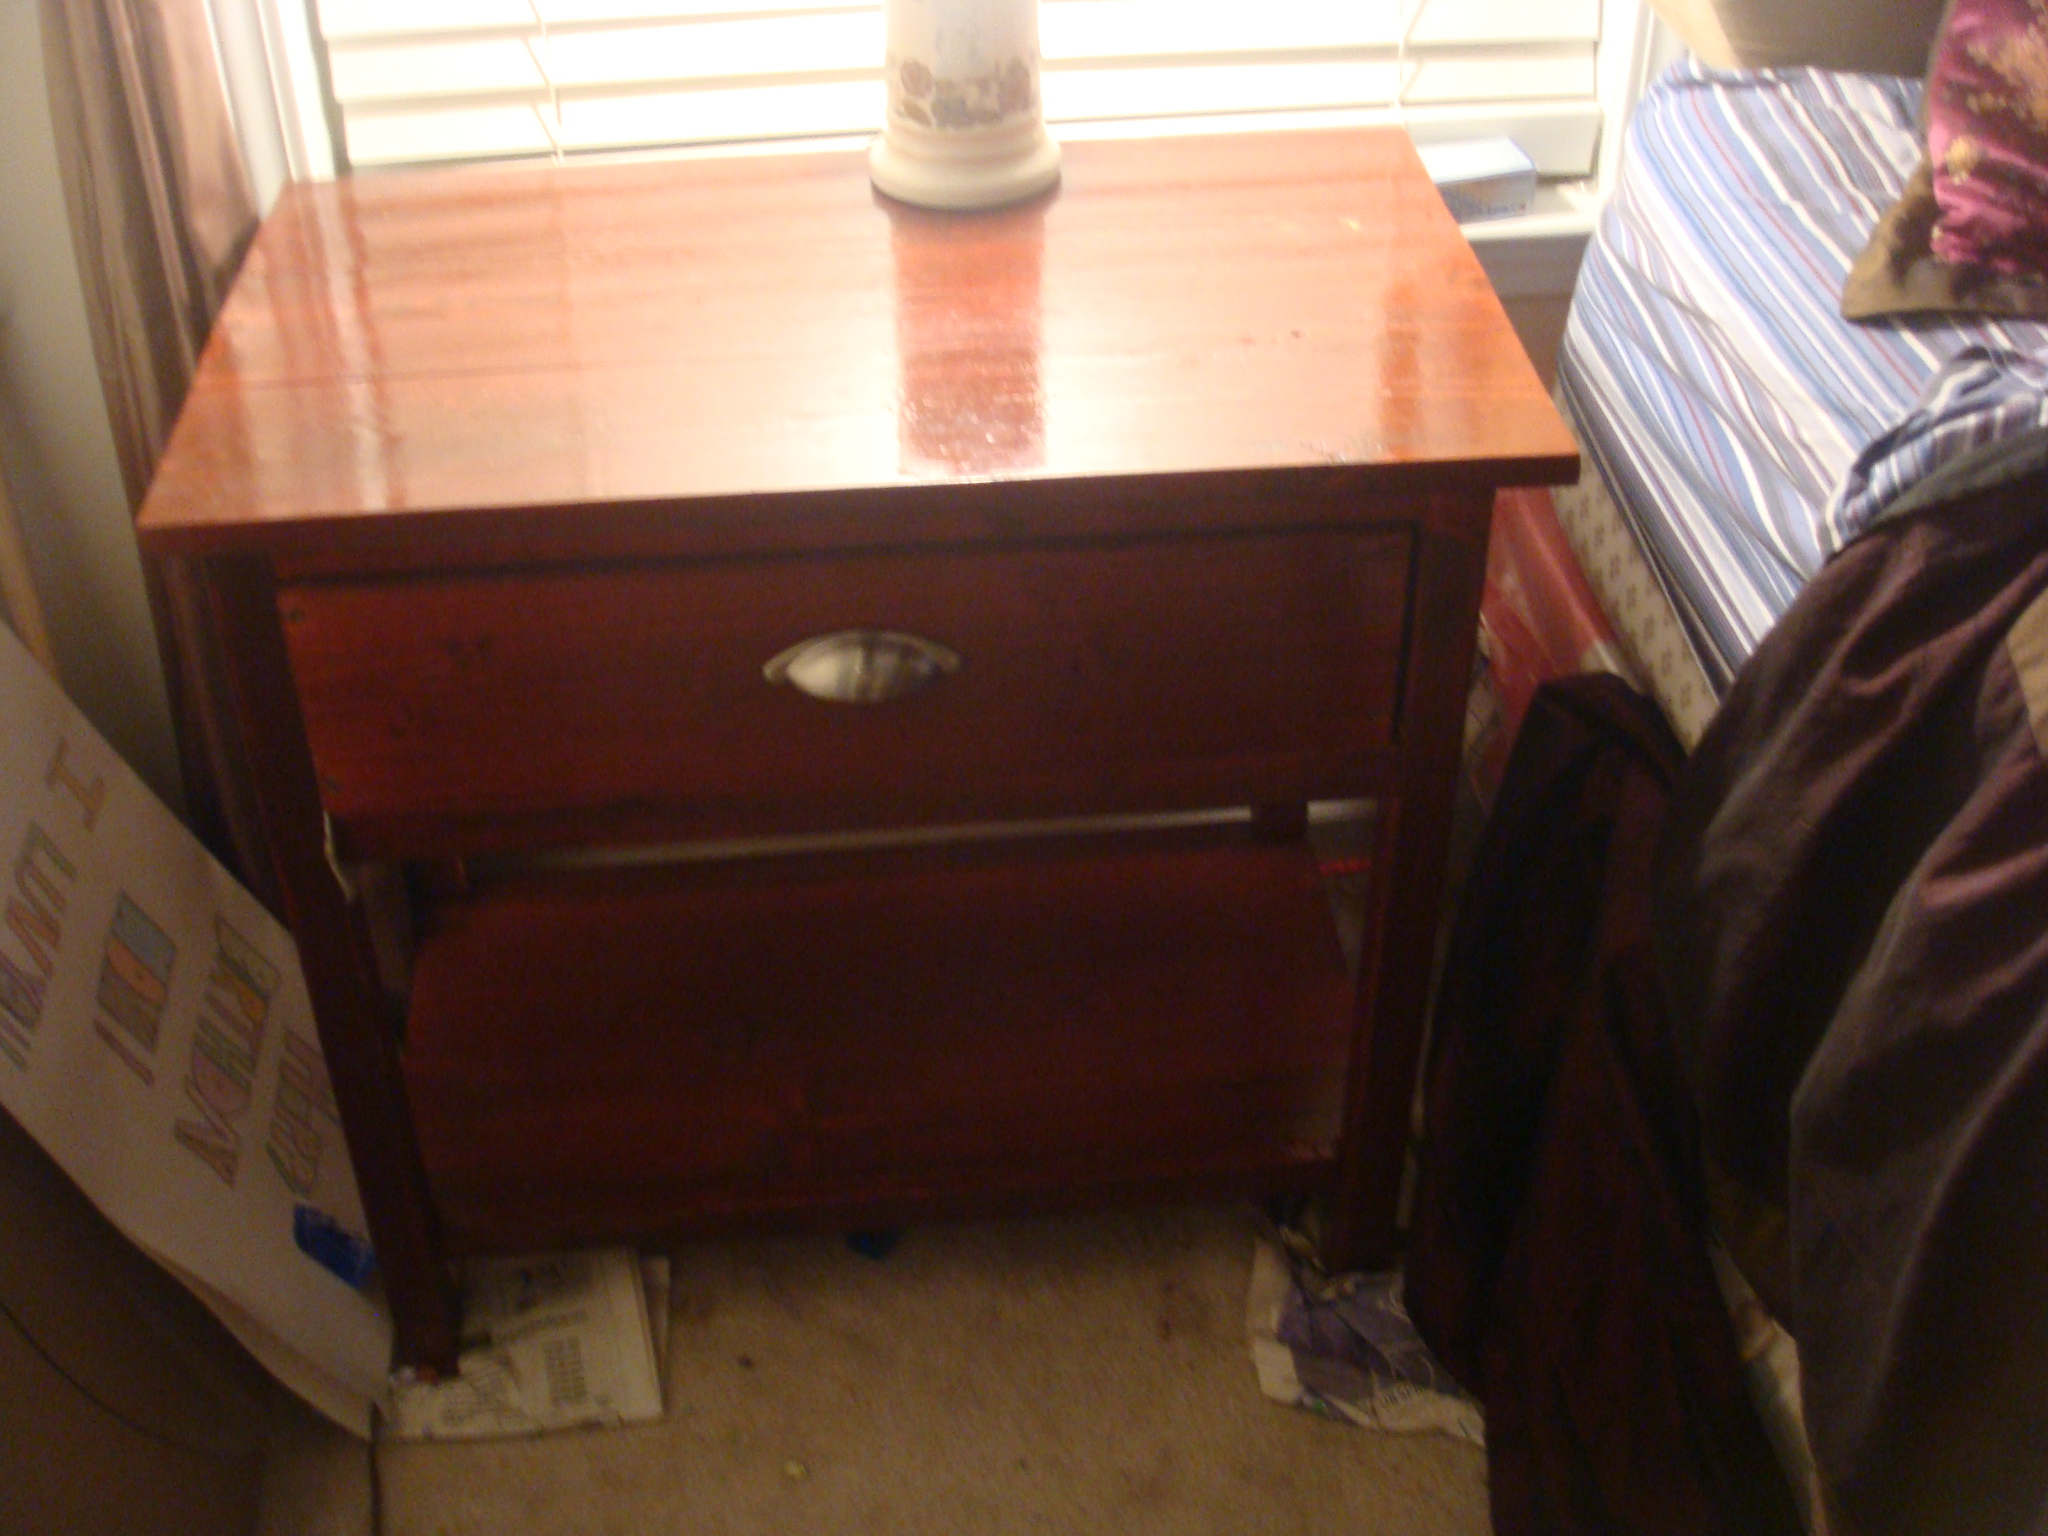
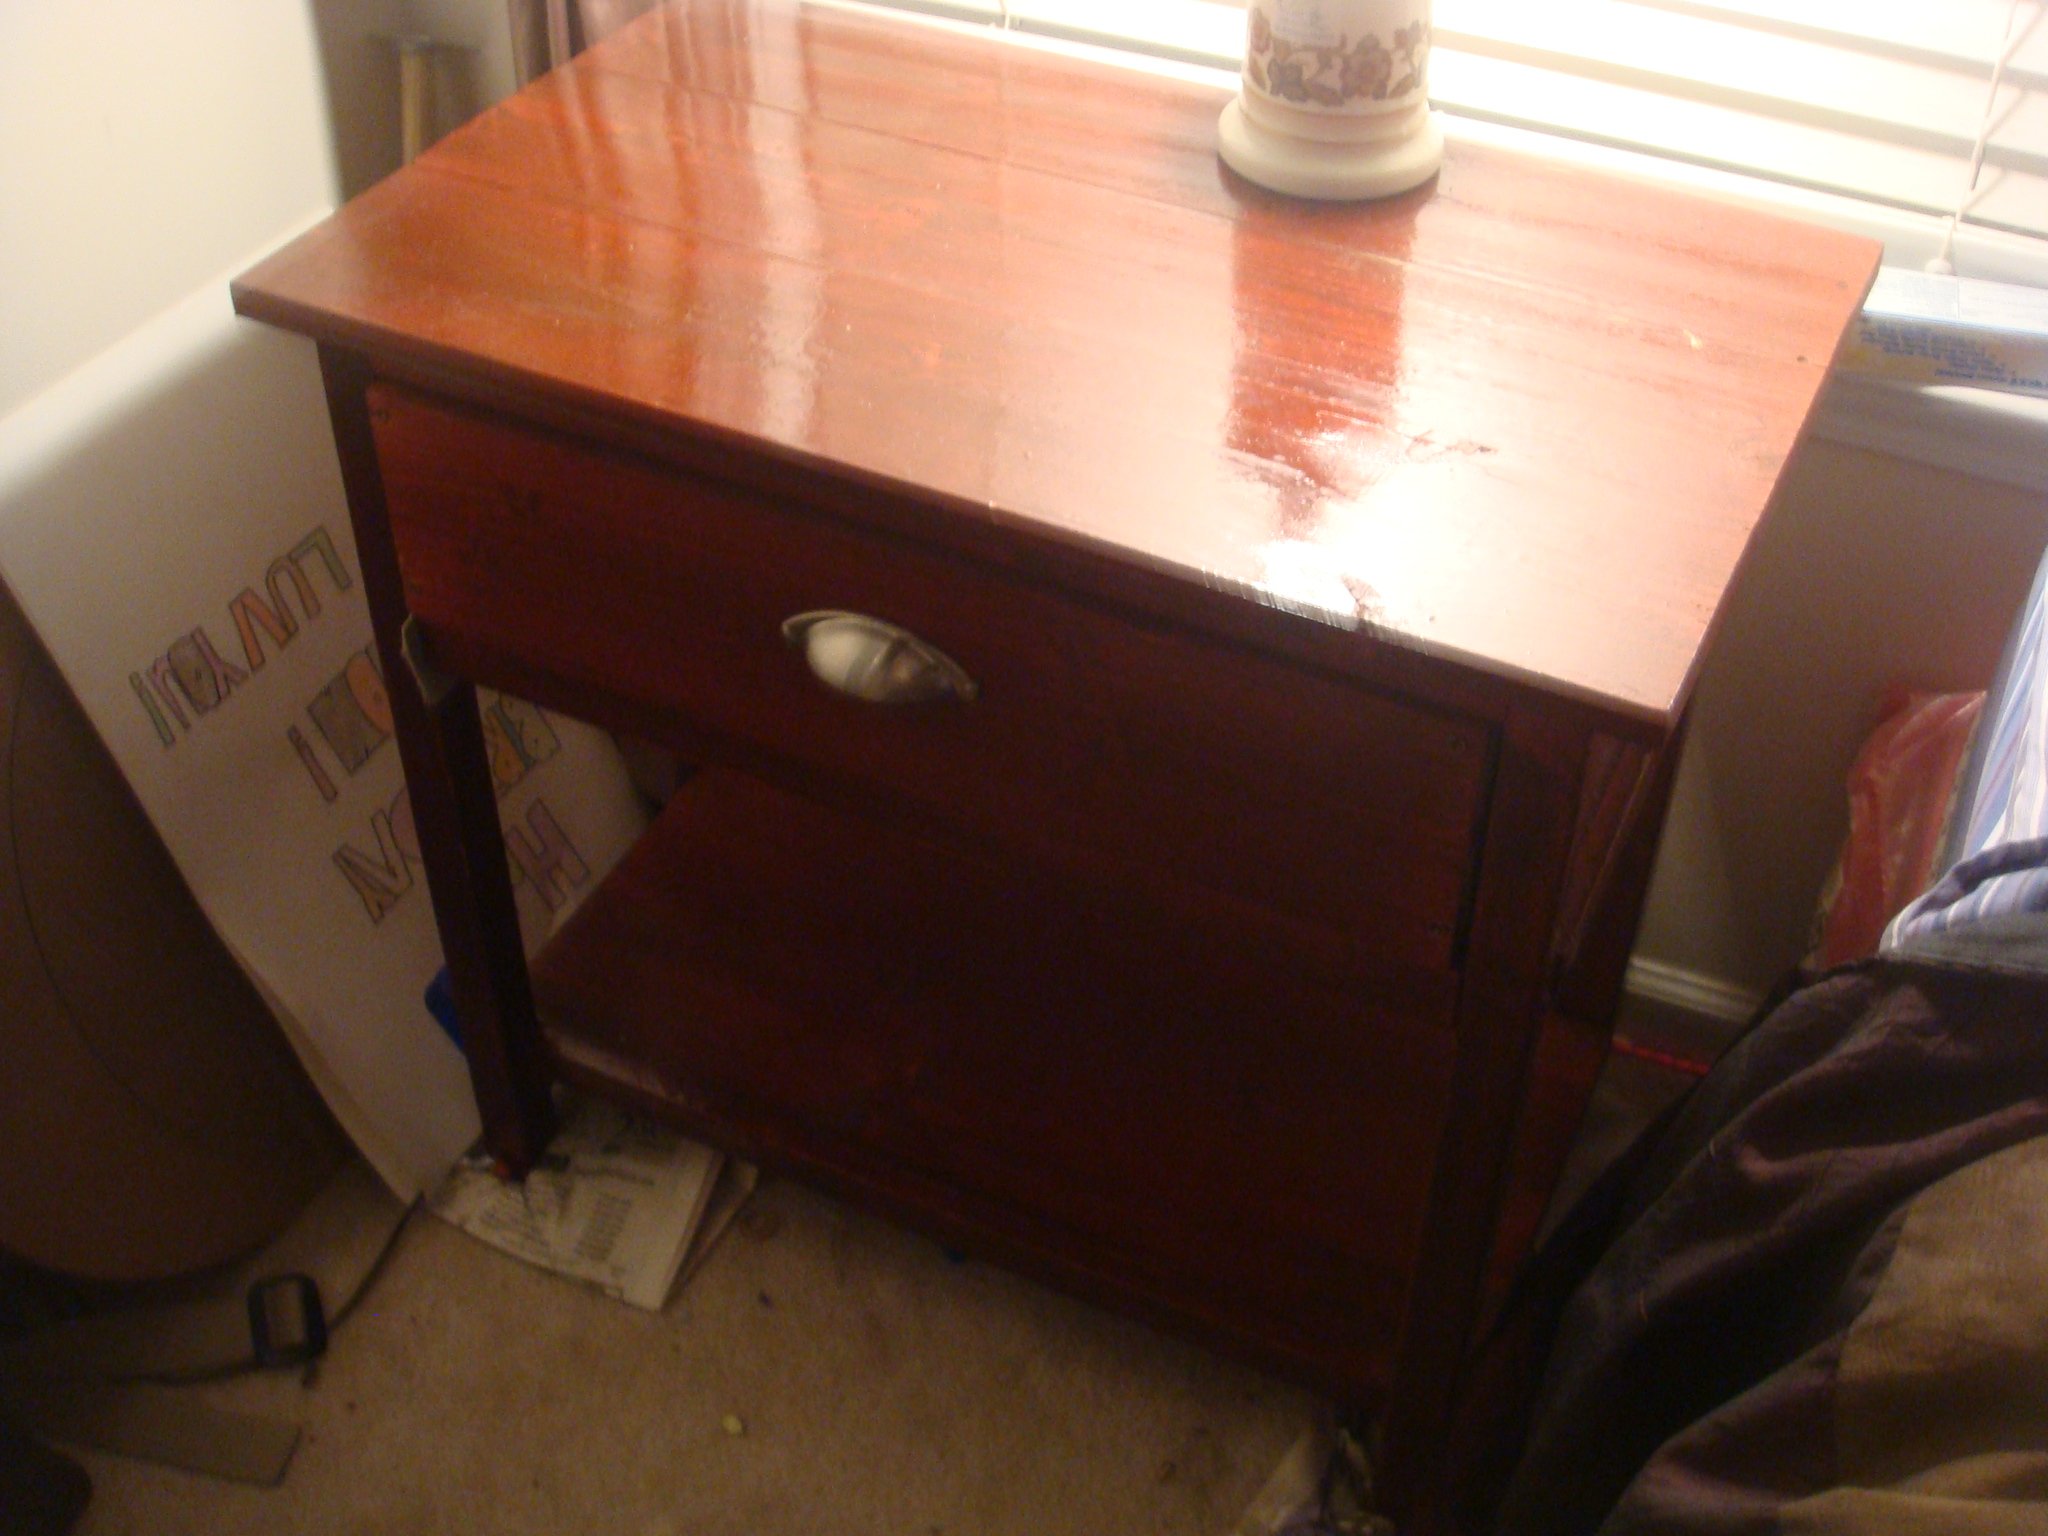
The Farmhouse bedside tables I made for my bedroom.
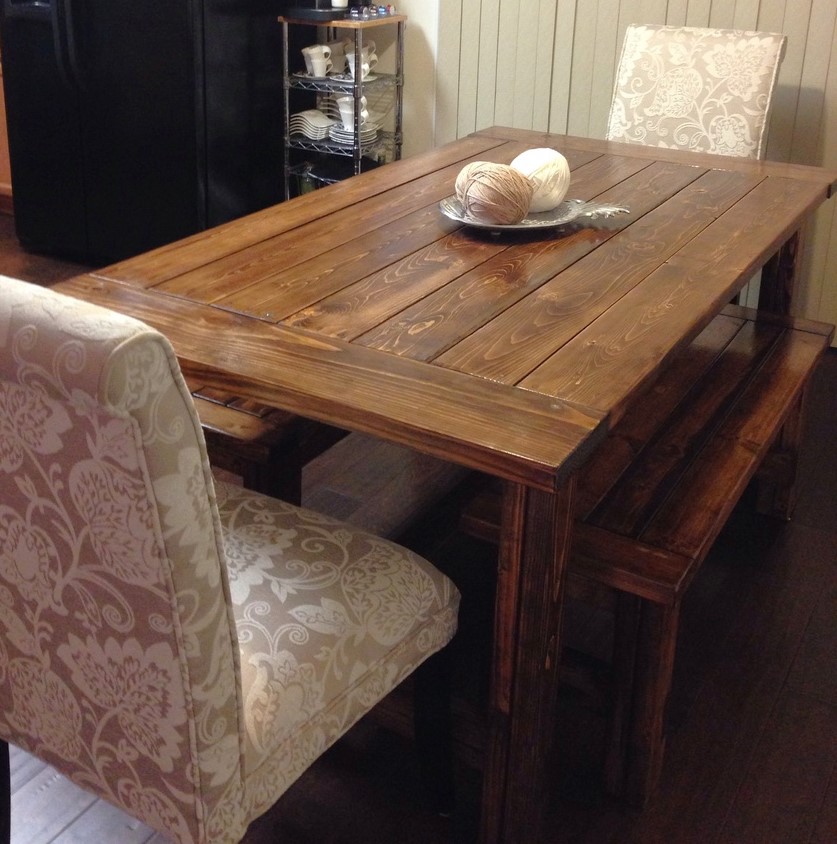
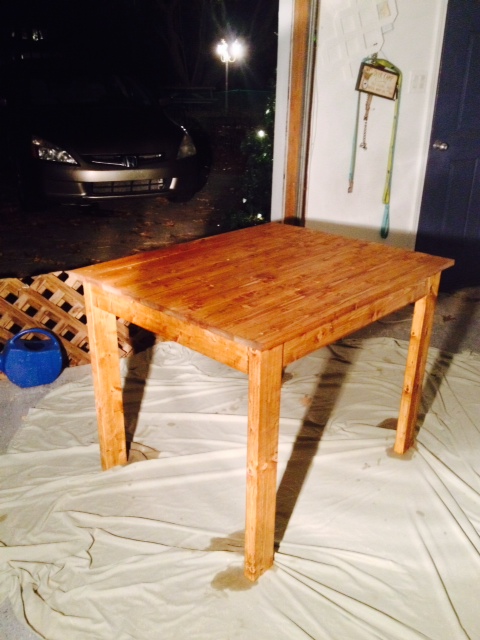
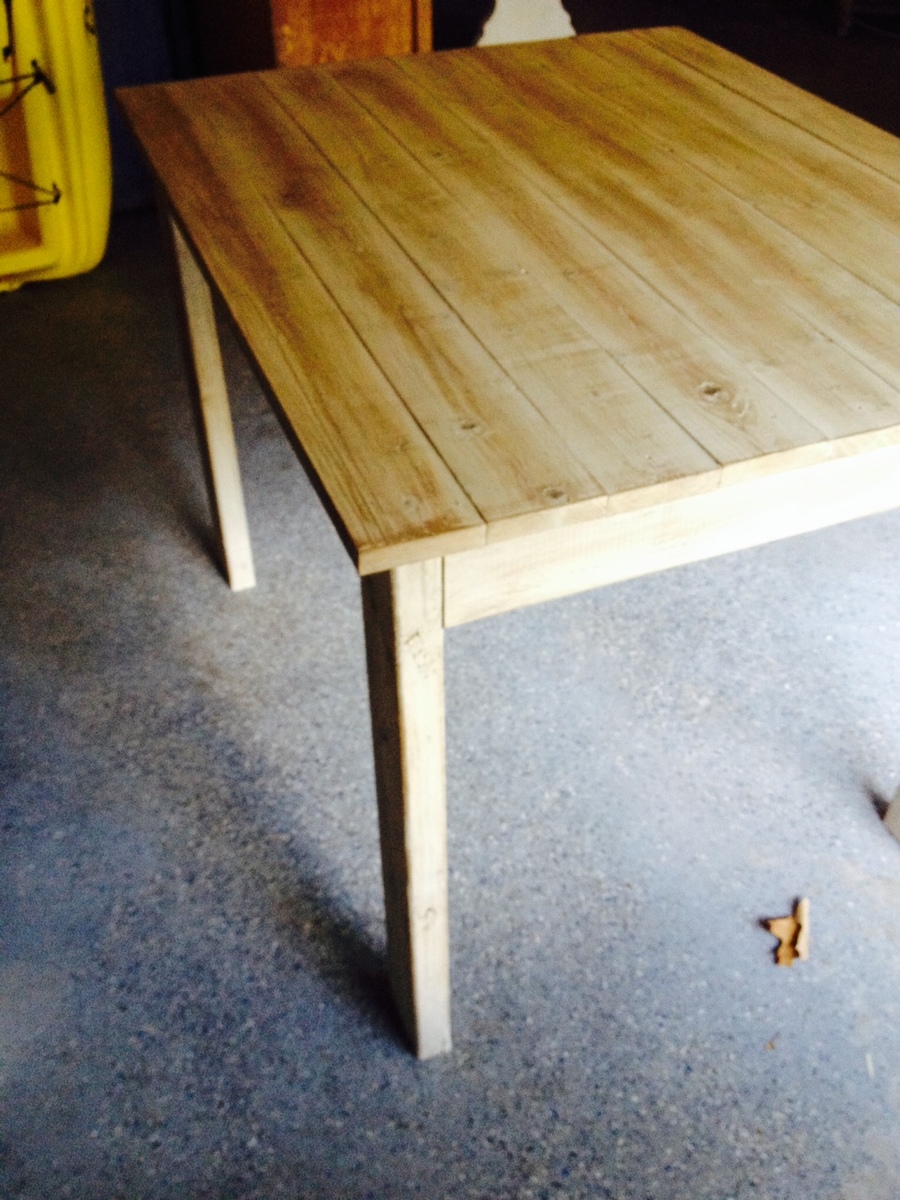
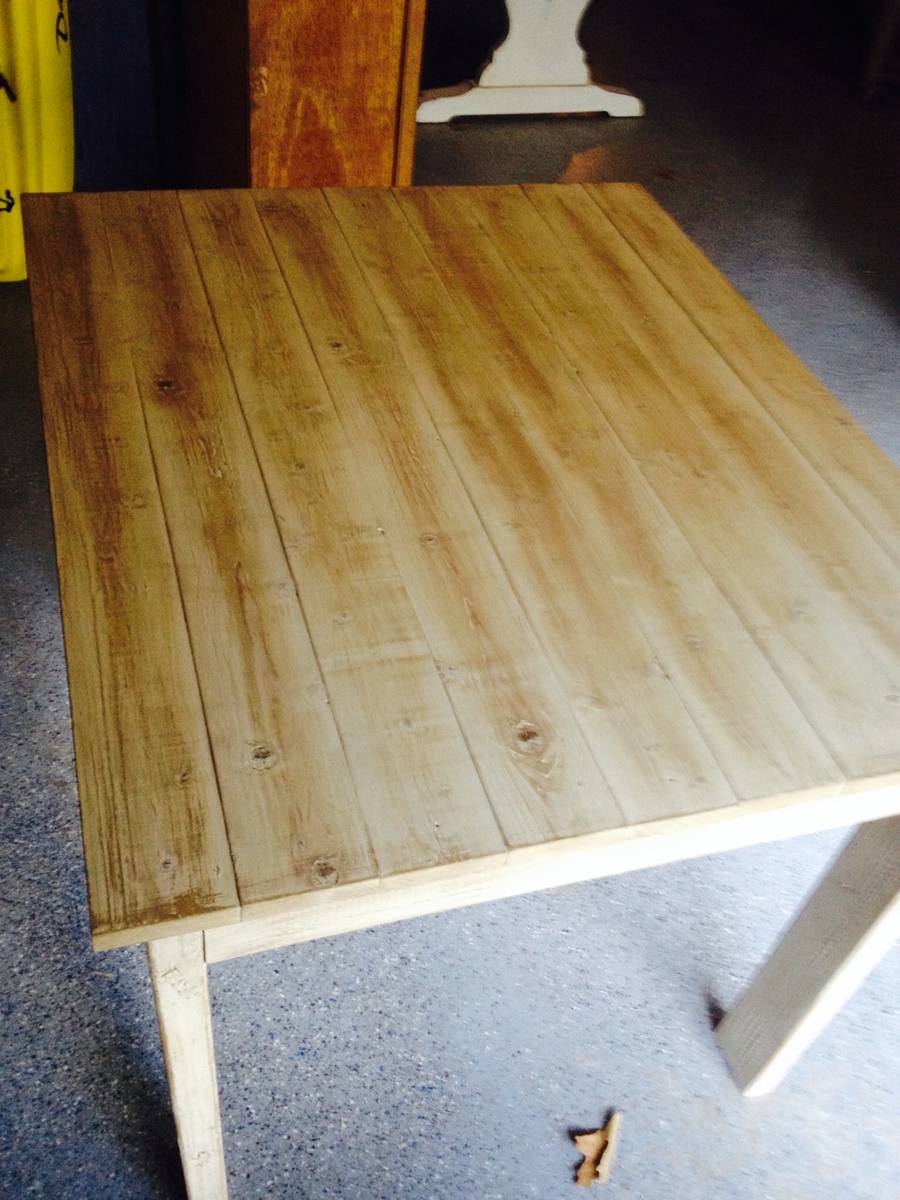
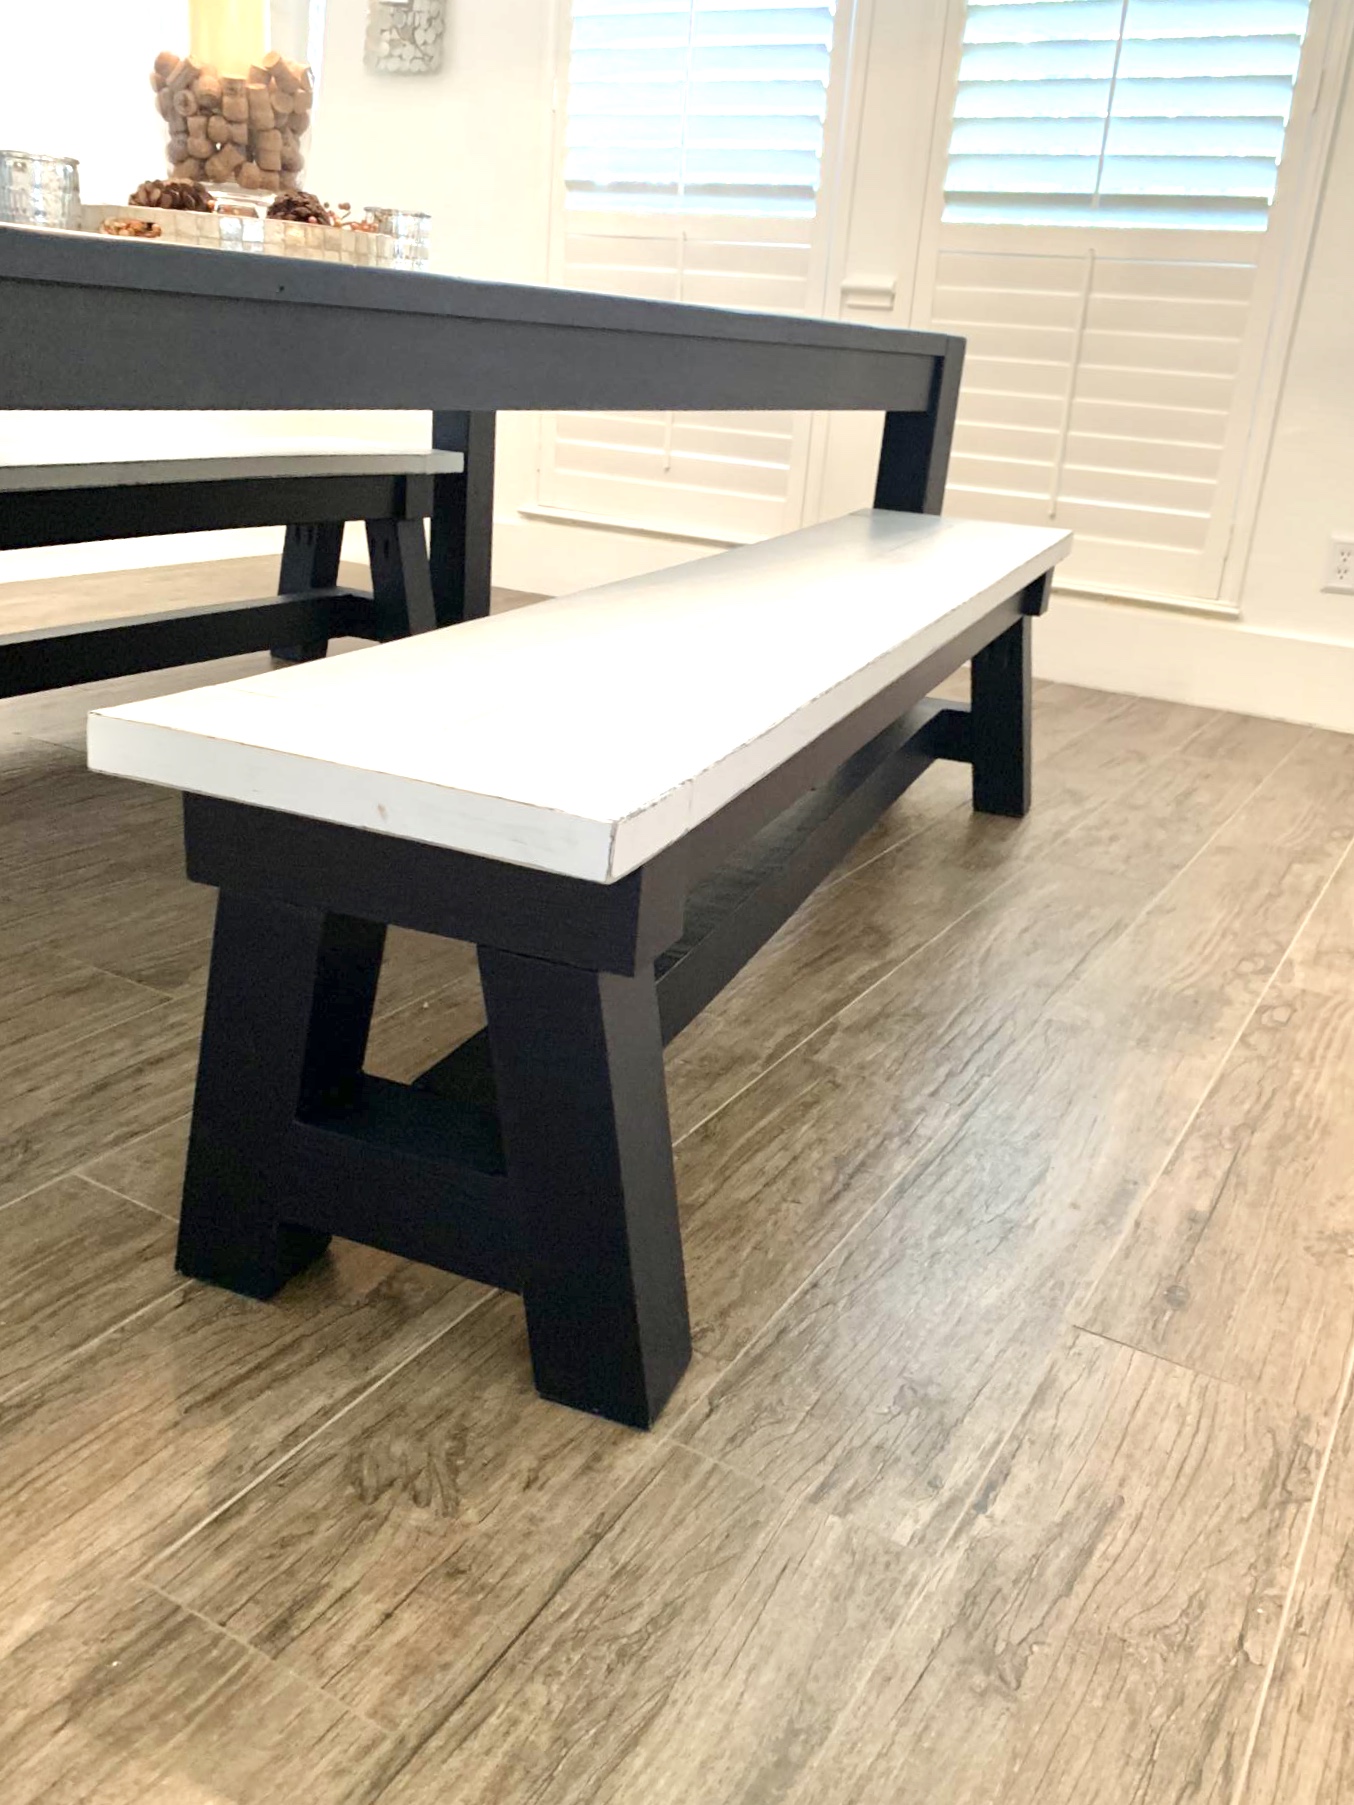
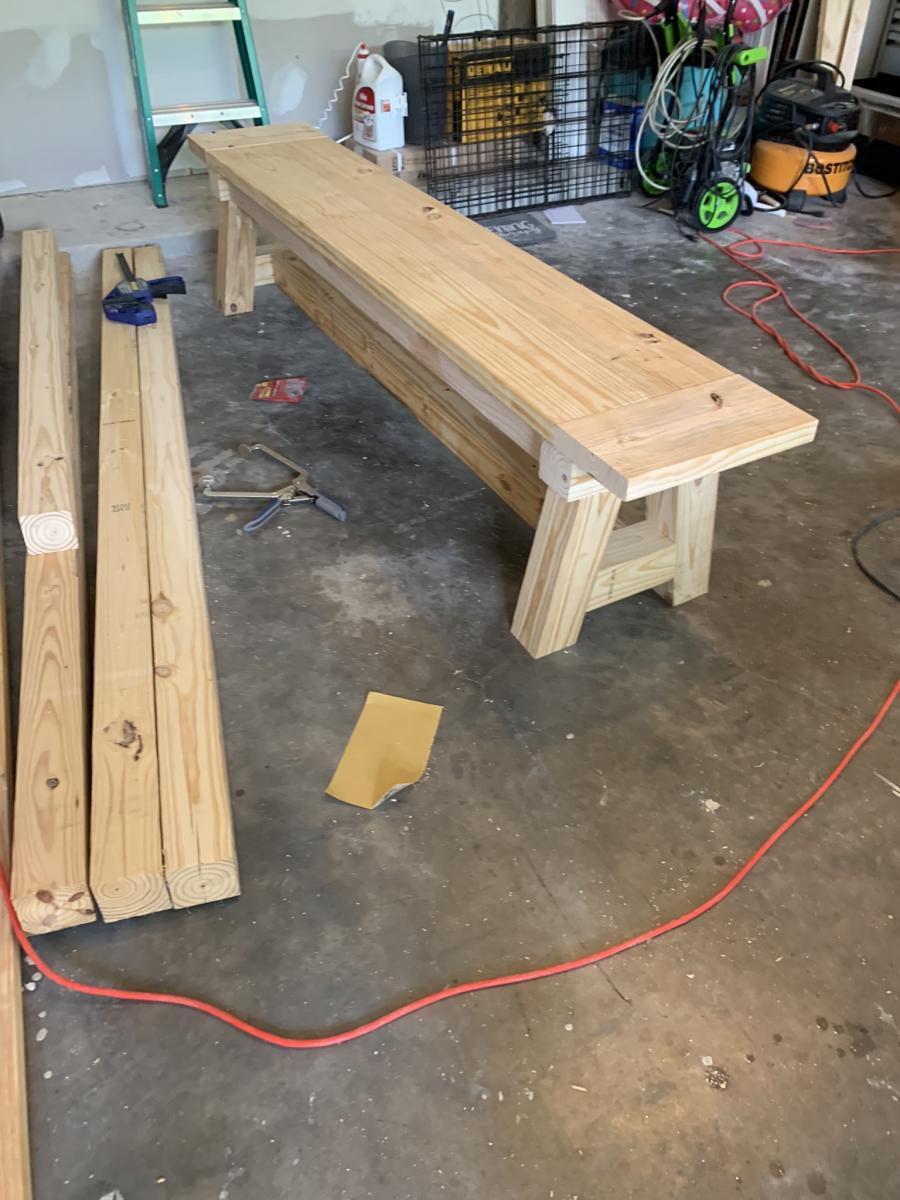
My first build, farmhouse table and 2 benches. Thank you for the great plans, Ana!

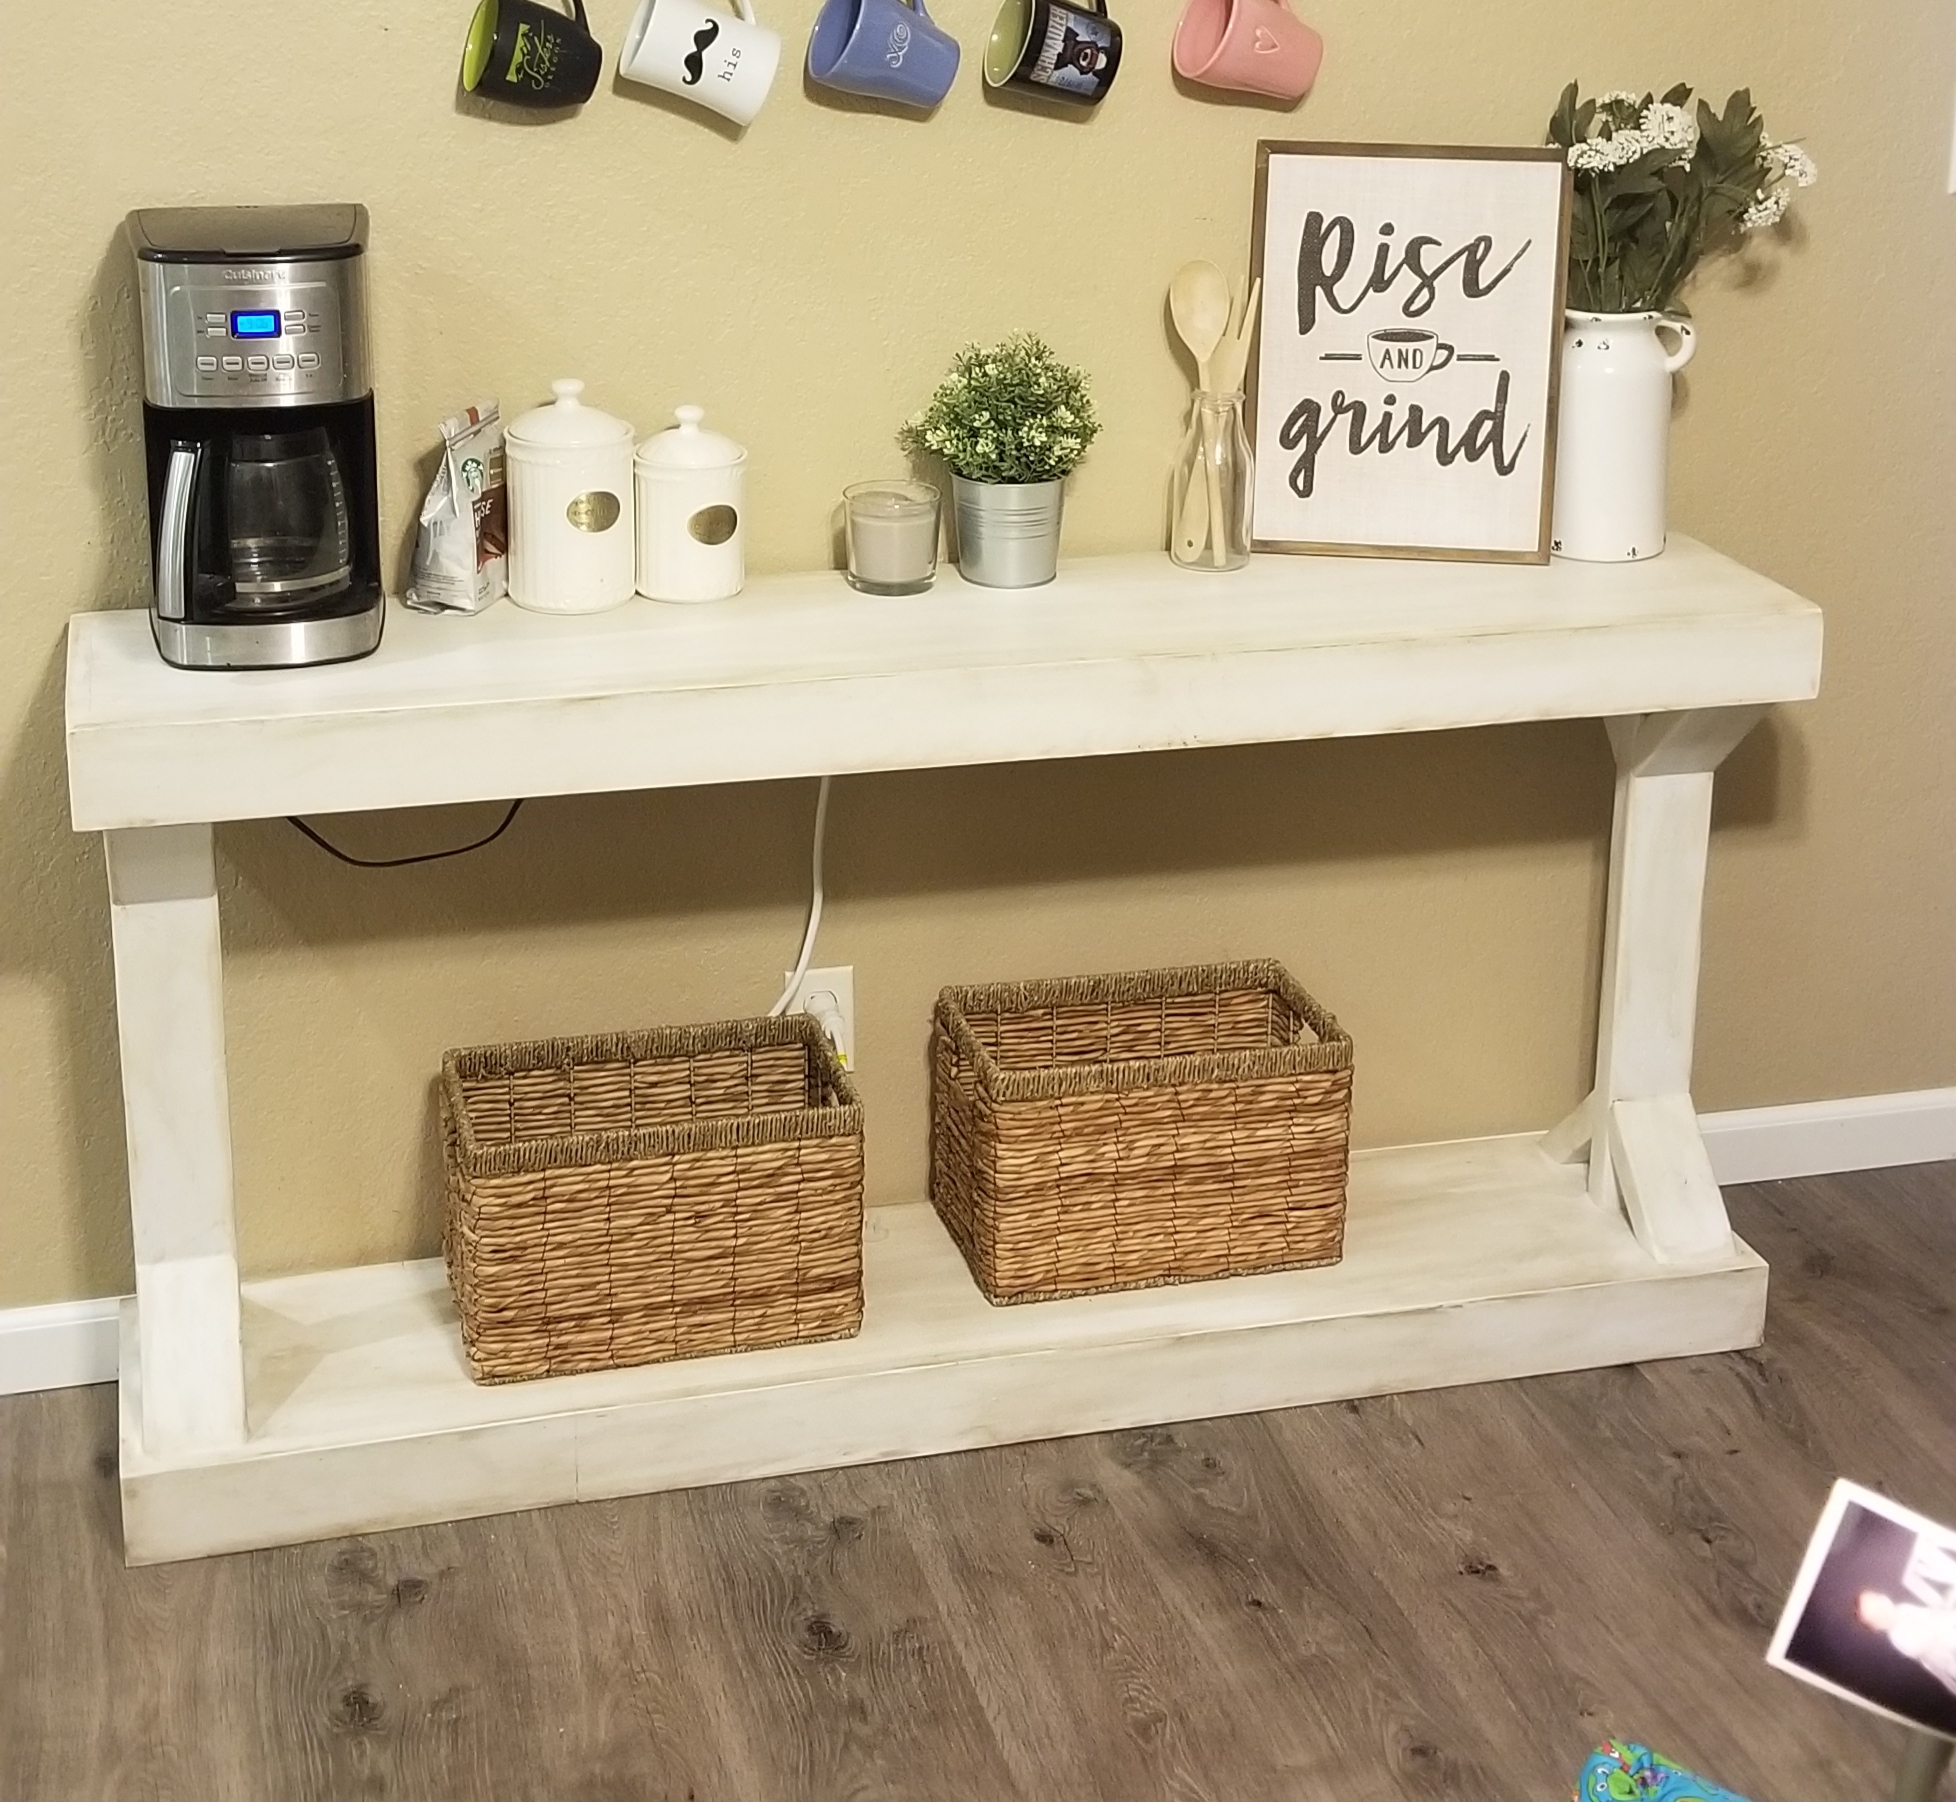
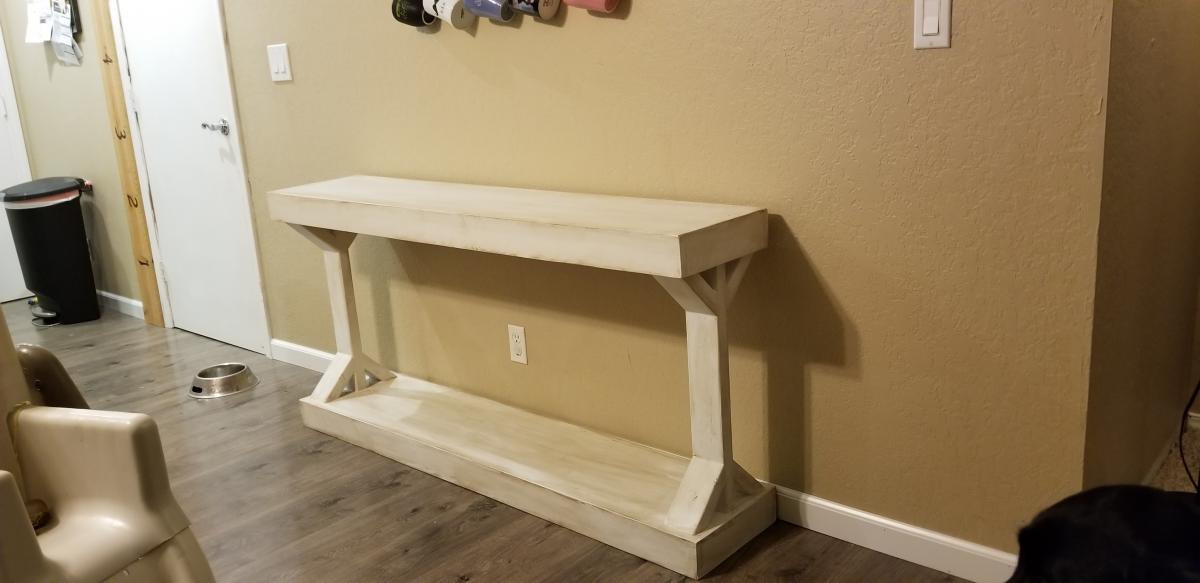
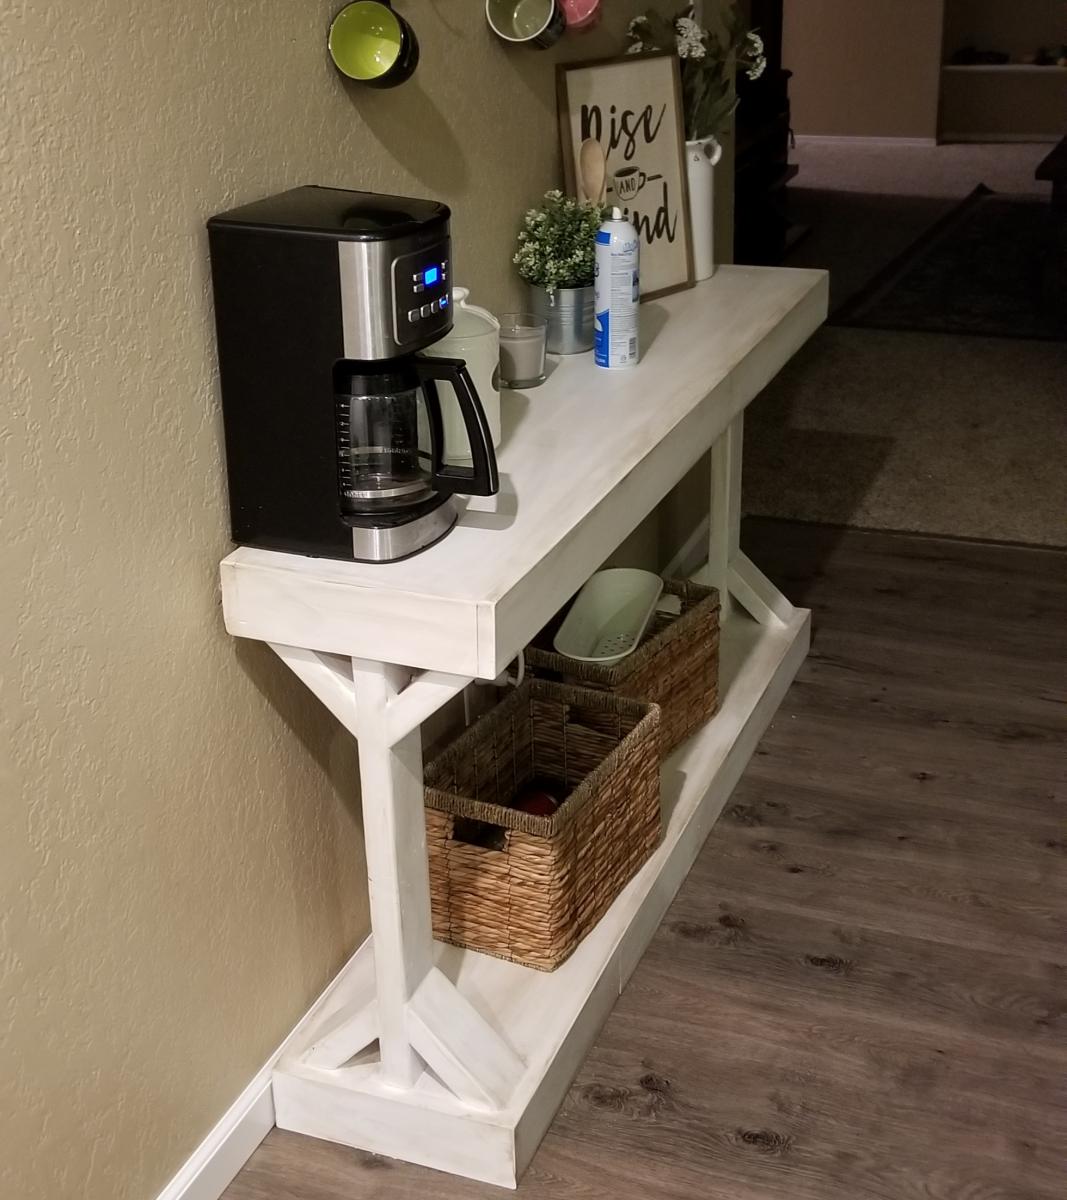
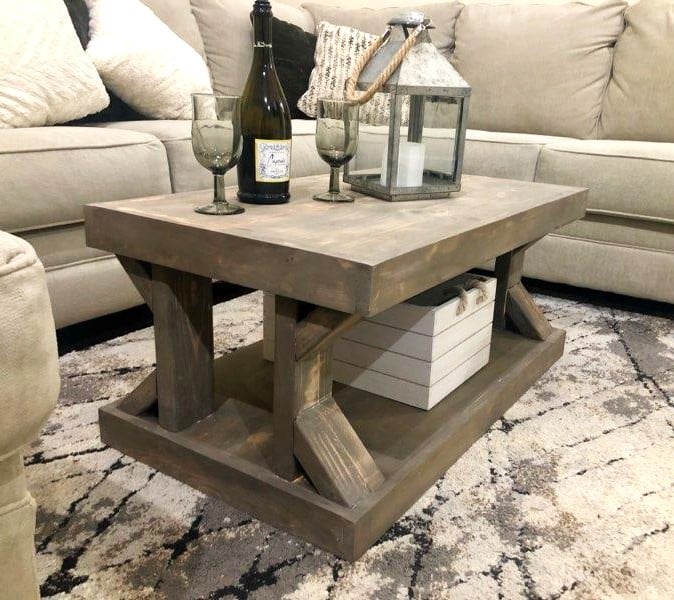
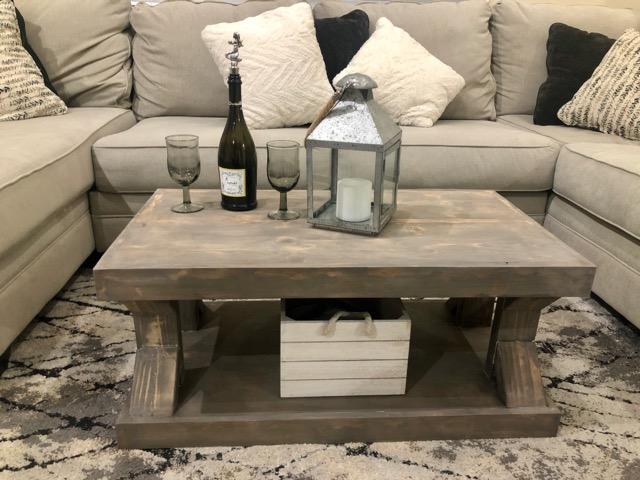
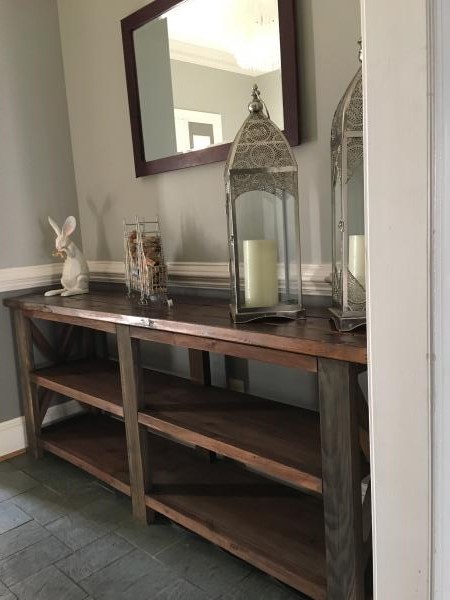
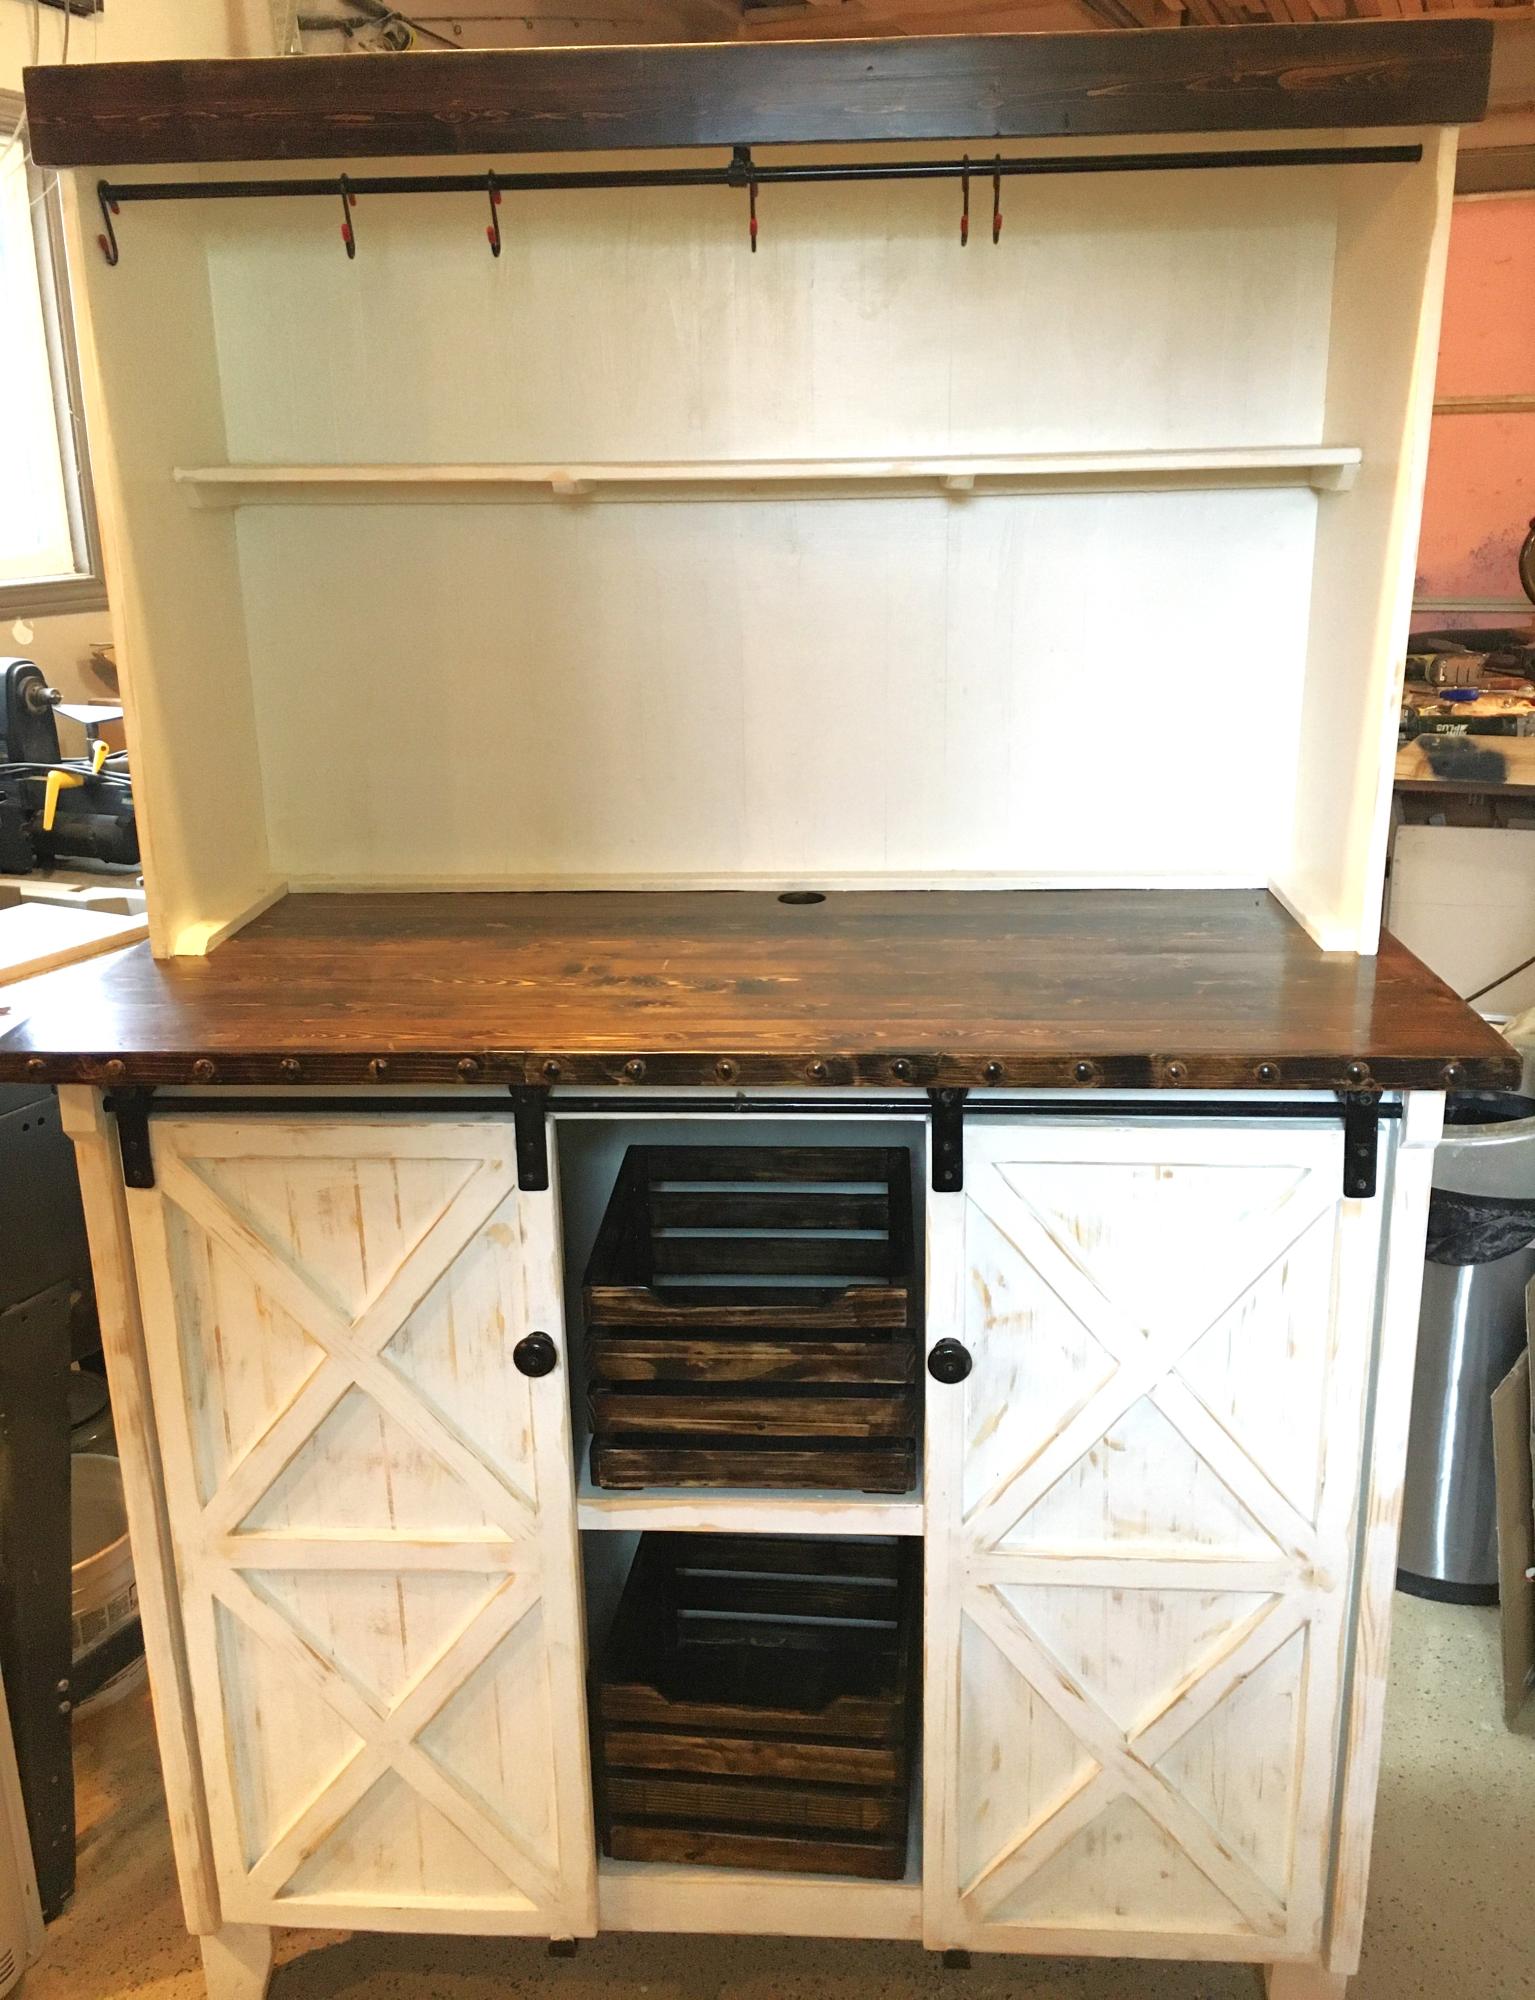
Attempted this plan, but I used 2x12 boards and made it 5ft long for my wife's coffee station.


Thu, 10/03/2019 - 12:07
This is awesome!!! I love the wider width, it really works with the 1x12!

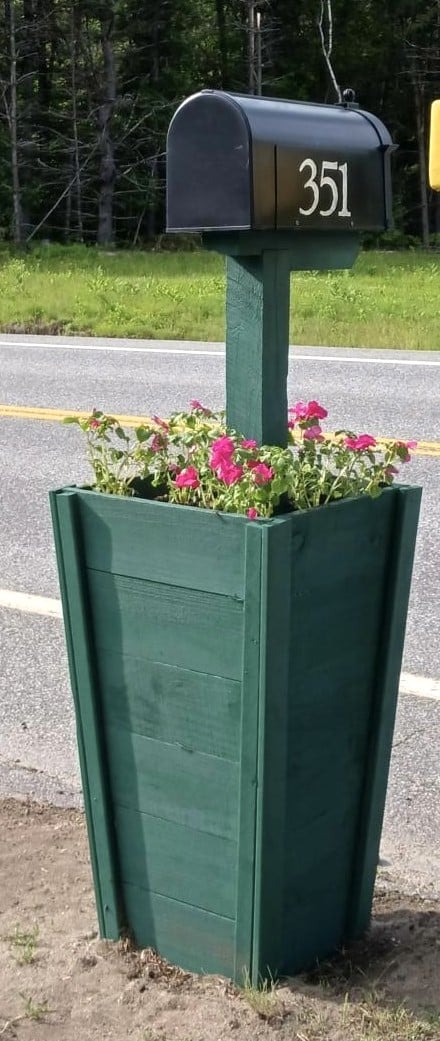
Thank you, Ana, for providing such great plans and video so I could accomplish the mailbox planter. It took me a lot longer than it did you, but I got it done! Had a hard time finding cedar pickets in my area, but ended up using the dog-eared ones as that's all I could get. Keep up the phenomenal content on your site...it is very much appreciated!
Thu, 06/15/2023 - 14:29
Love the idea of using this plan for a mailbox planter, well done! Thank you for sharing.
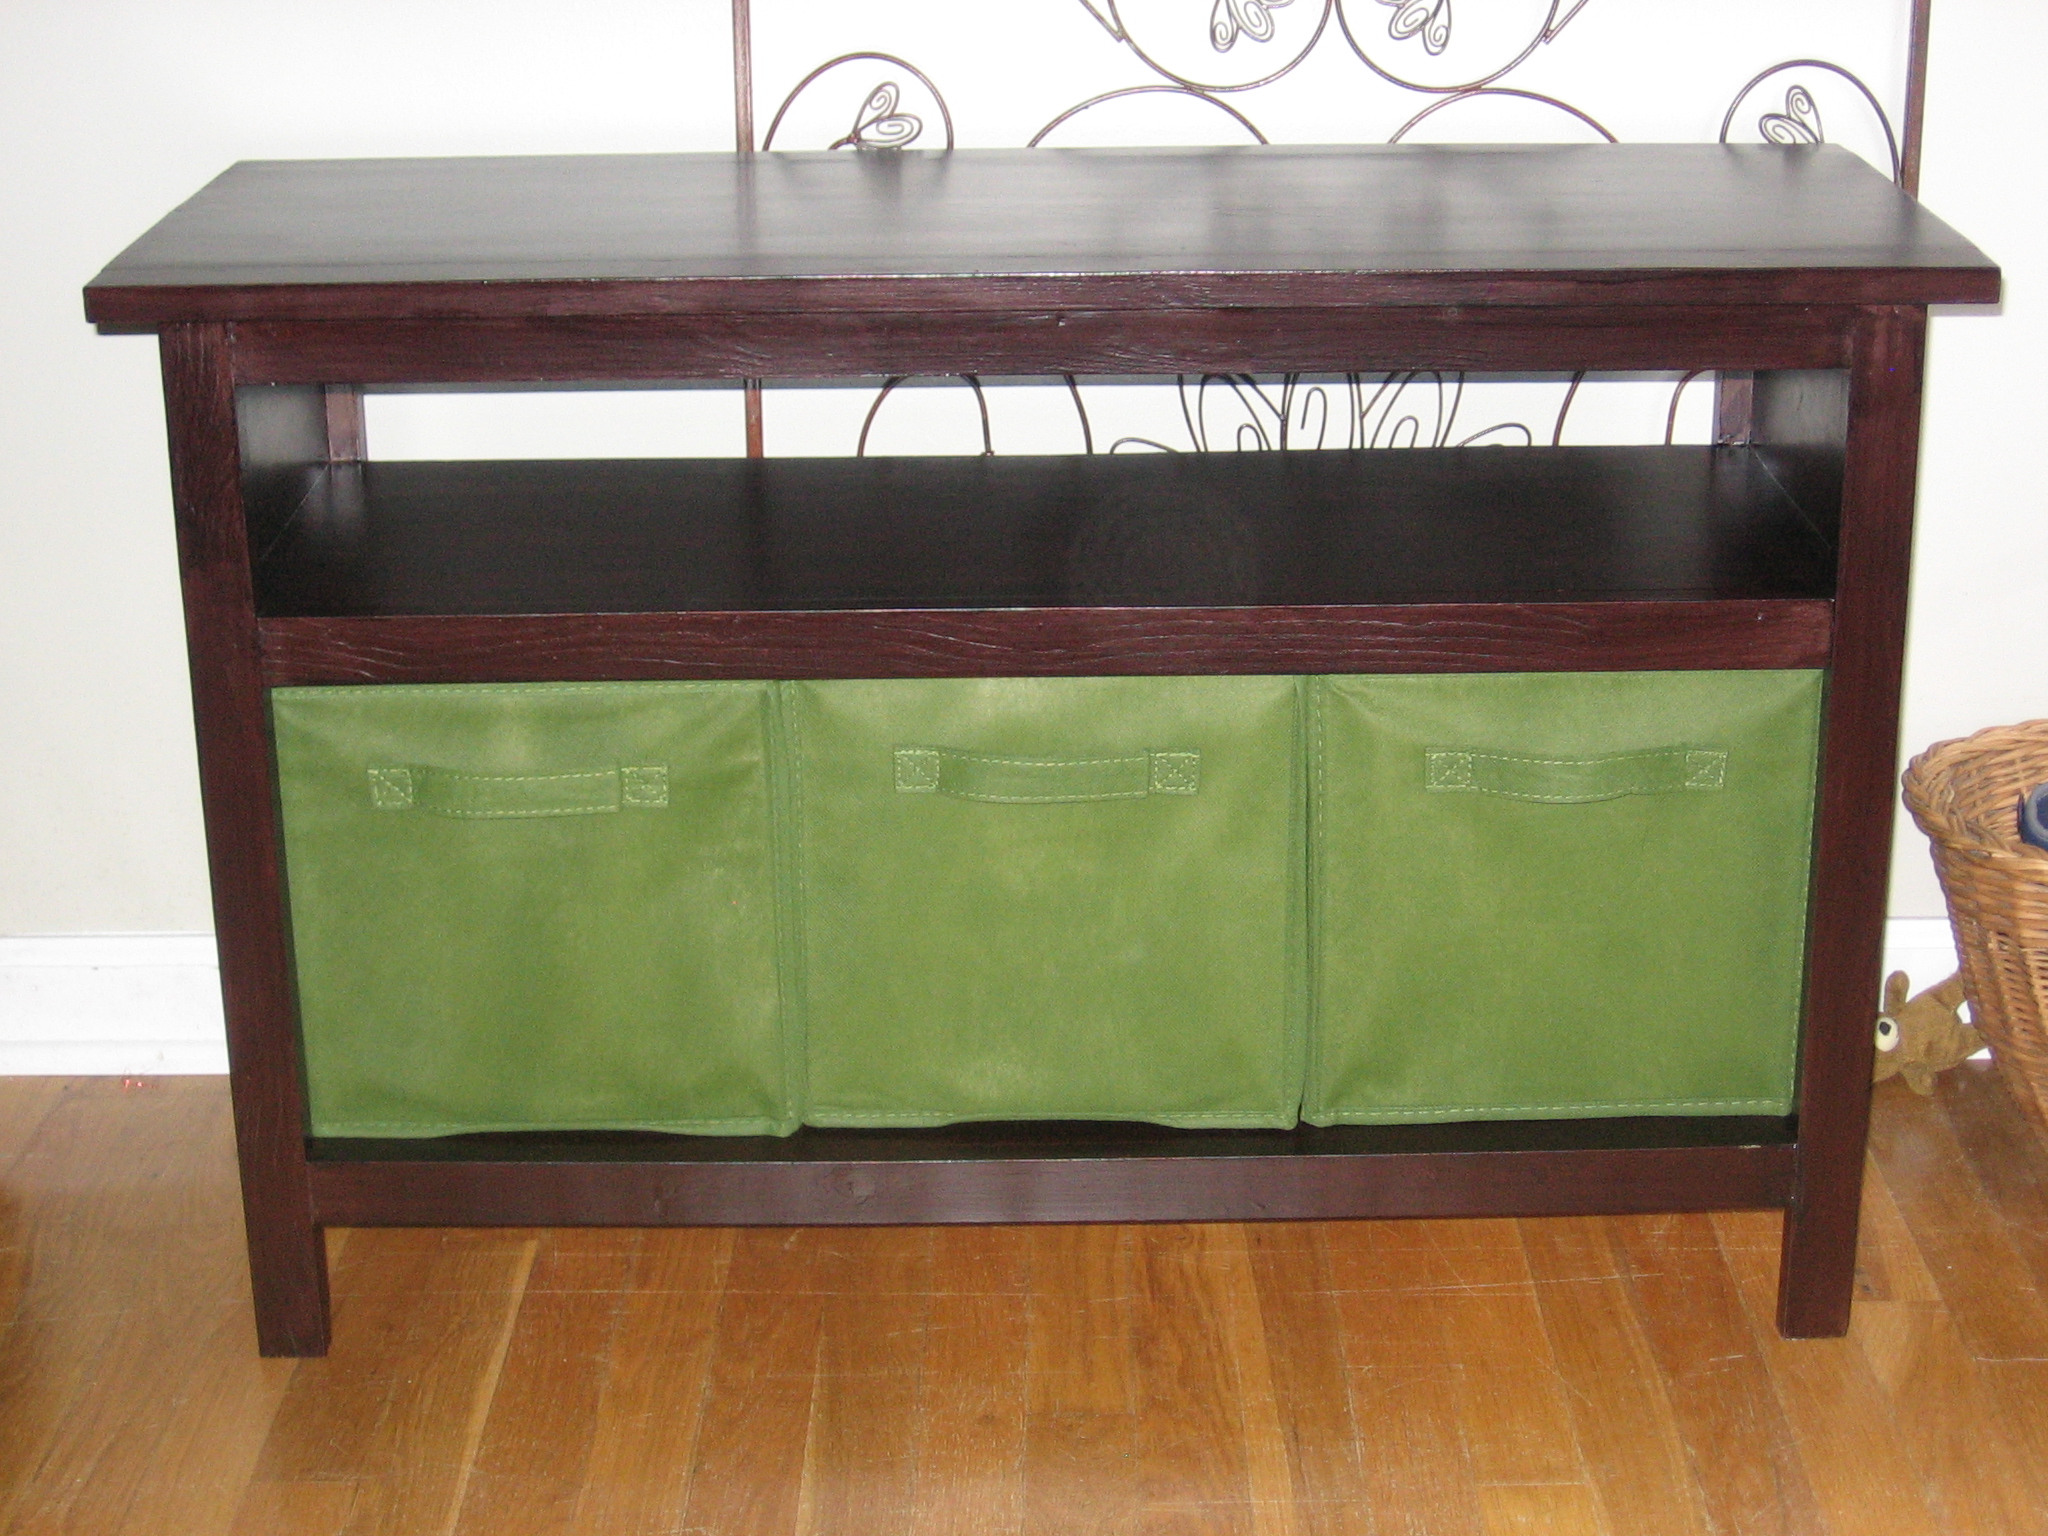
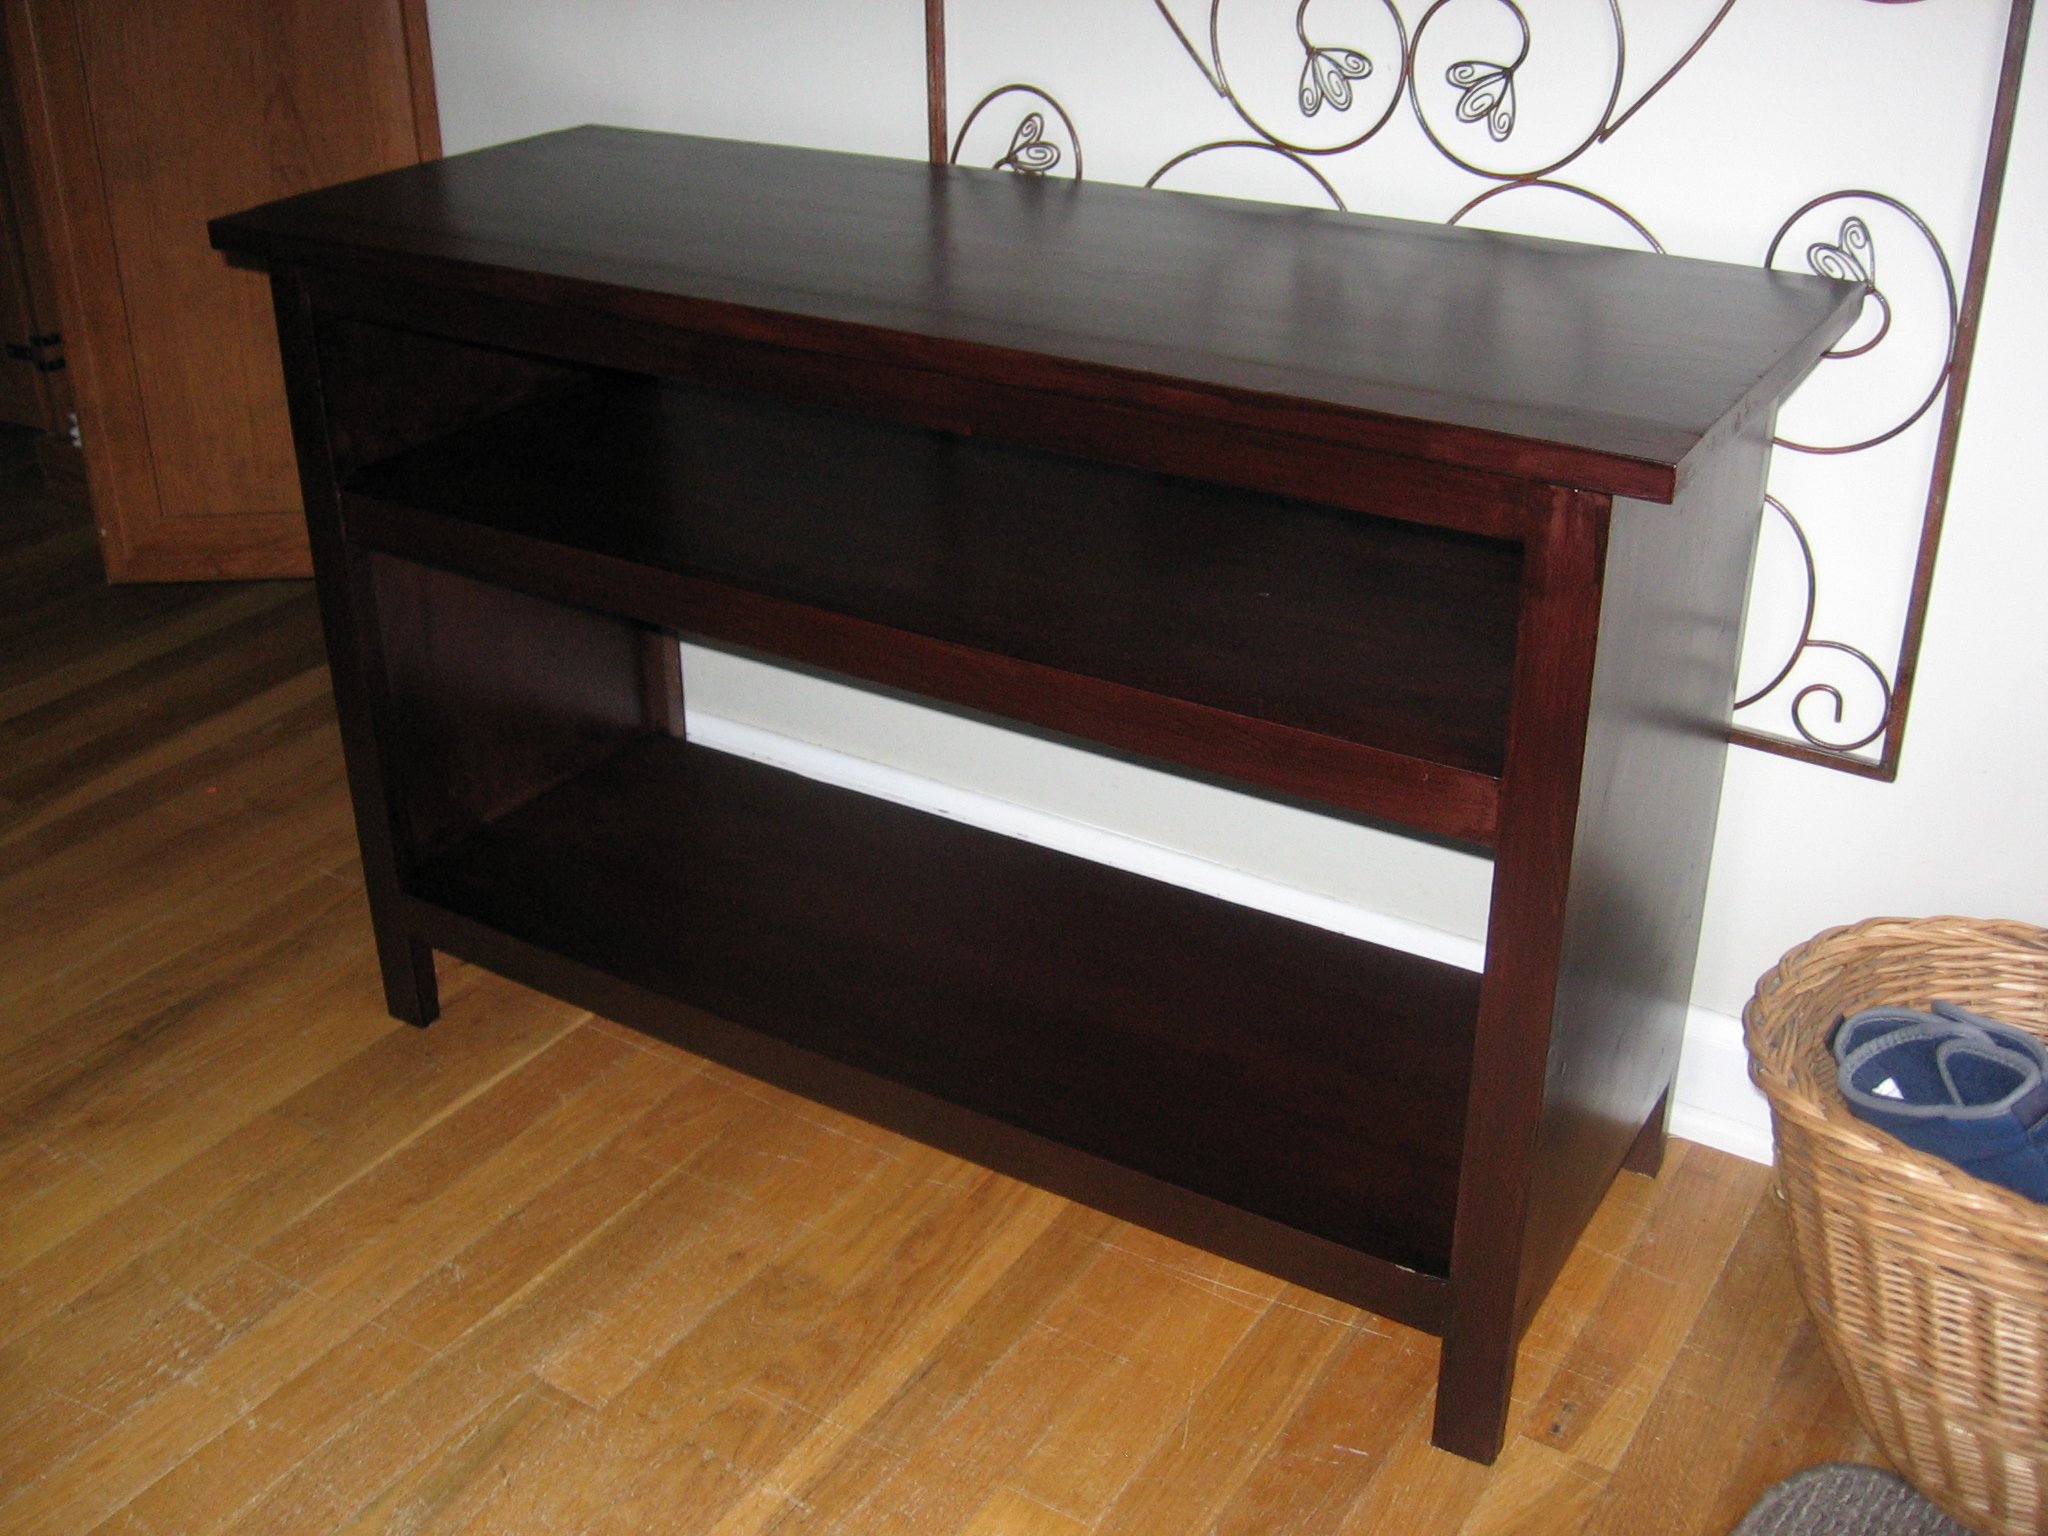
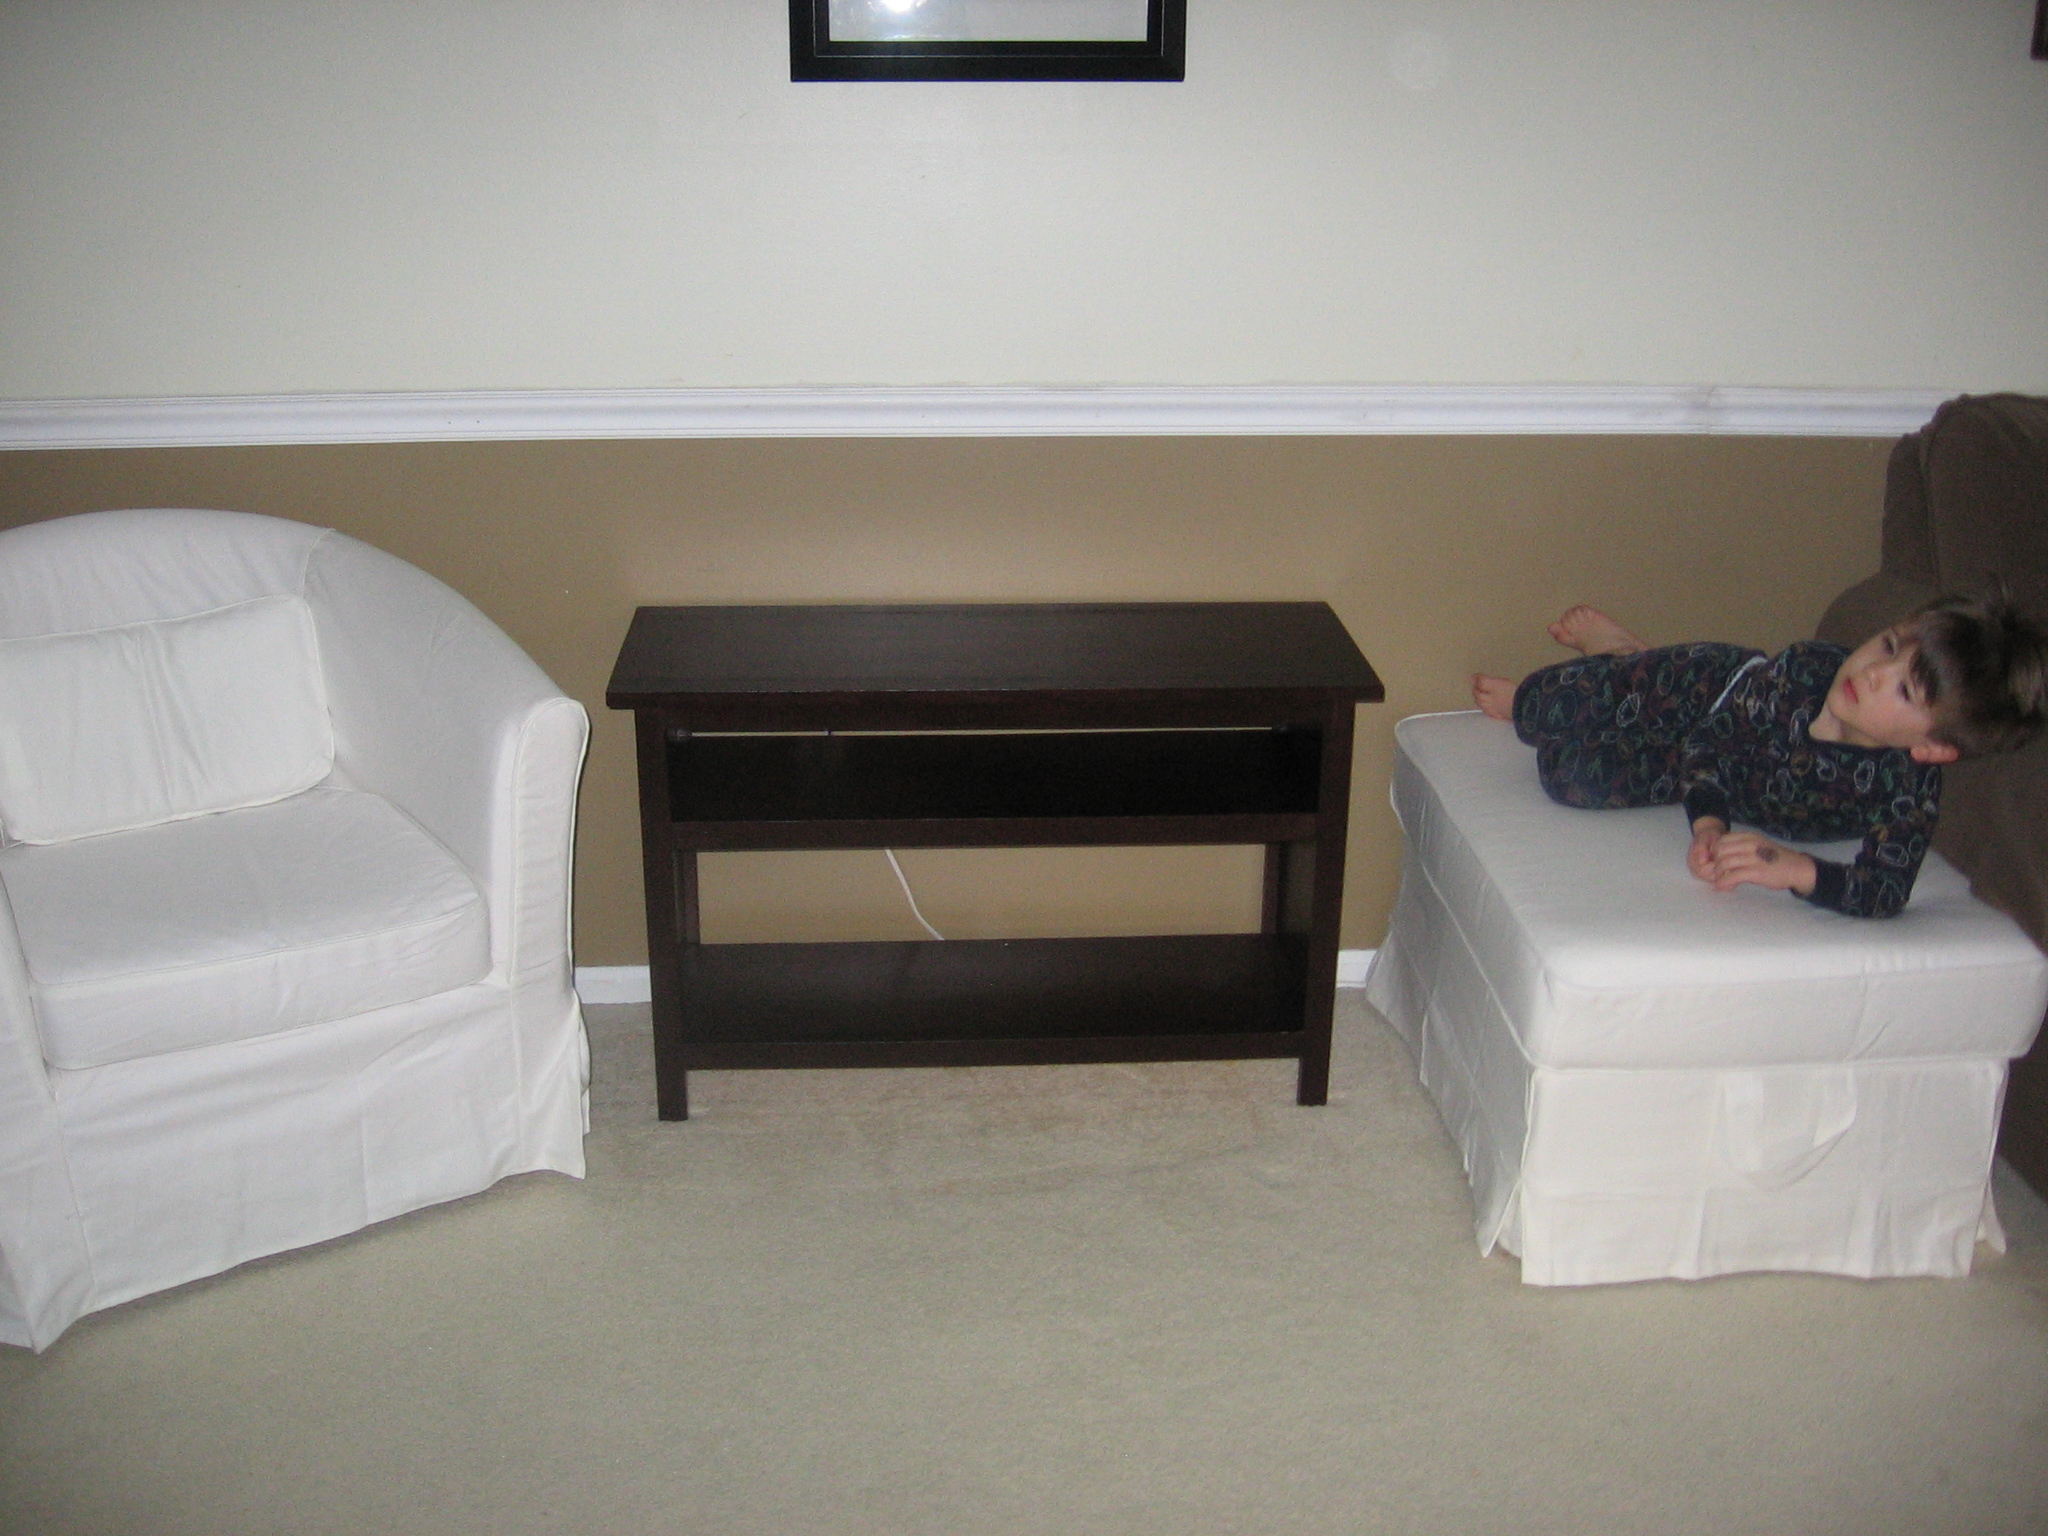
I wanted a prettier way to store my kids toys in the family room, but was having a hard time finding something with the right dimensions. I modified Grace's Bookshelf to fit my space needs. This is my first furniture build, so it's not perfect. I needed a lot of wood filler and it took forever to get the right finish. But I'm happy with the end product and am inspired to build more!
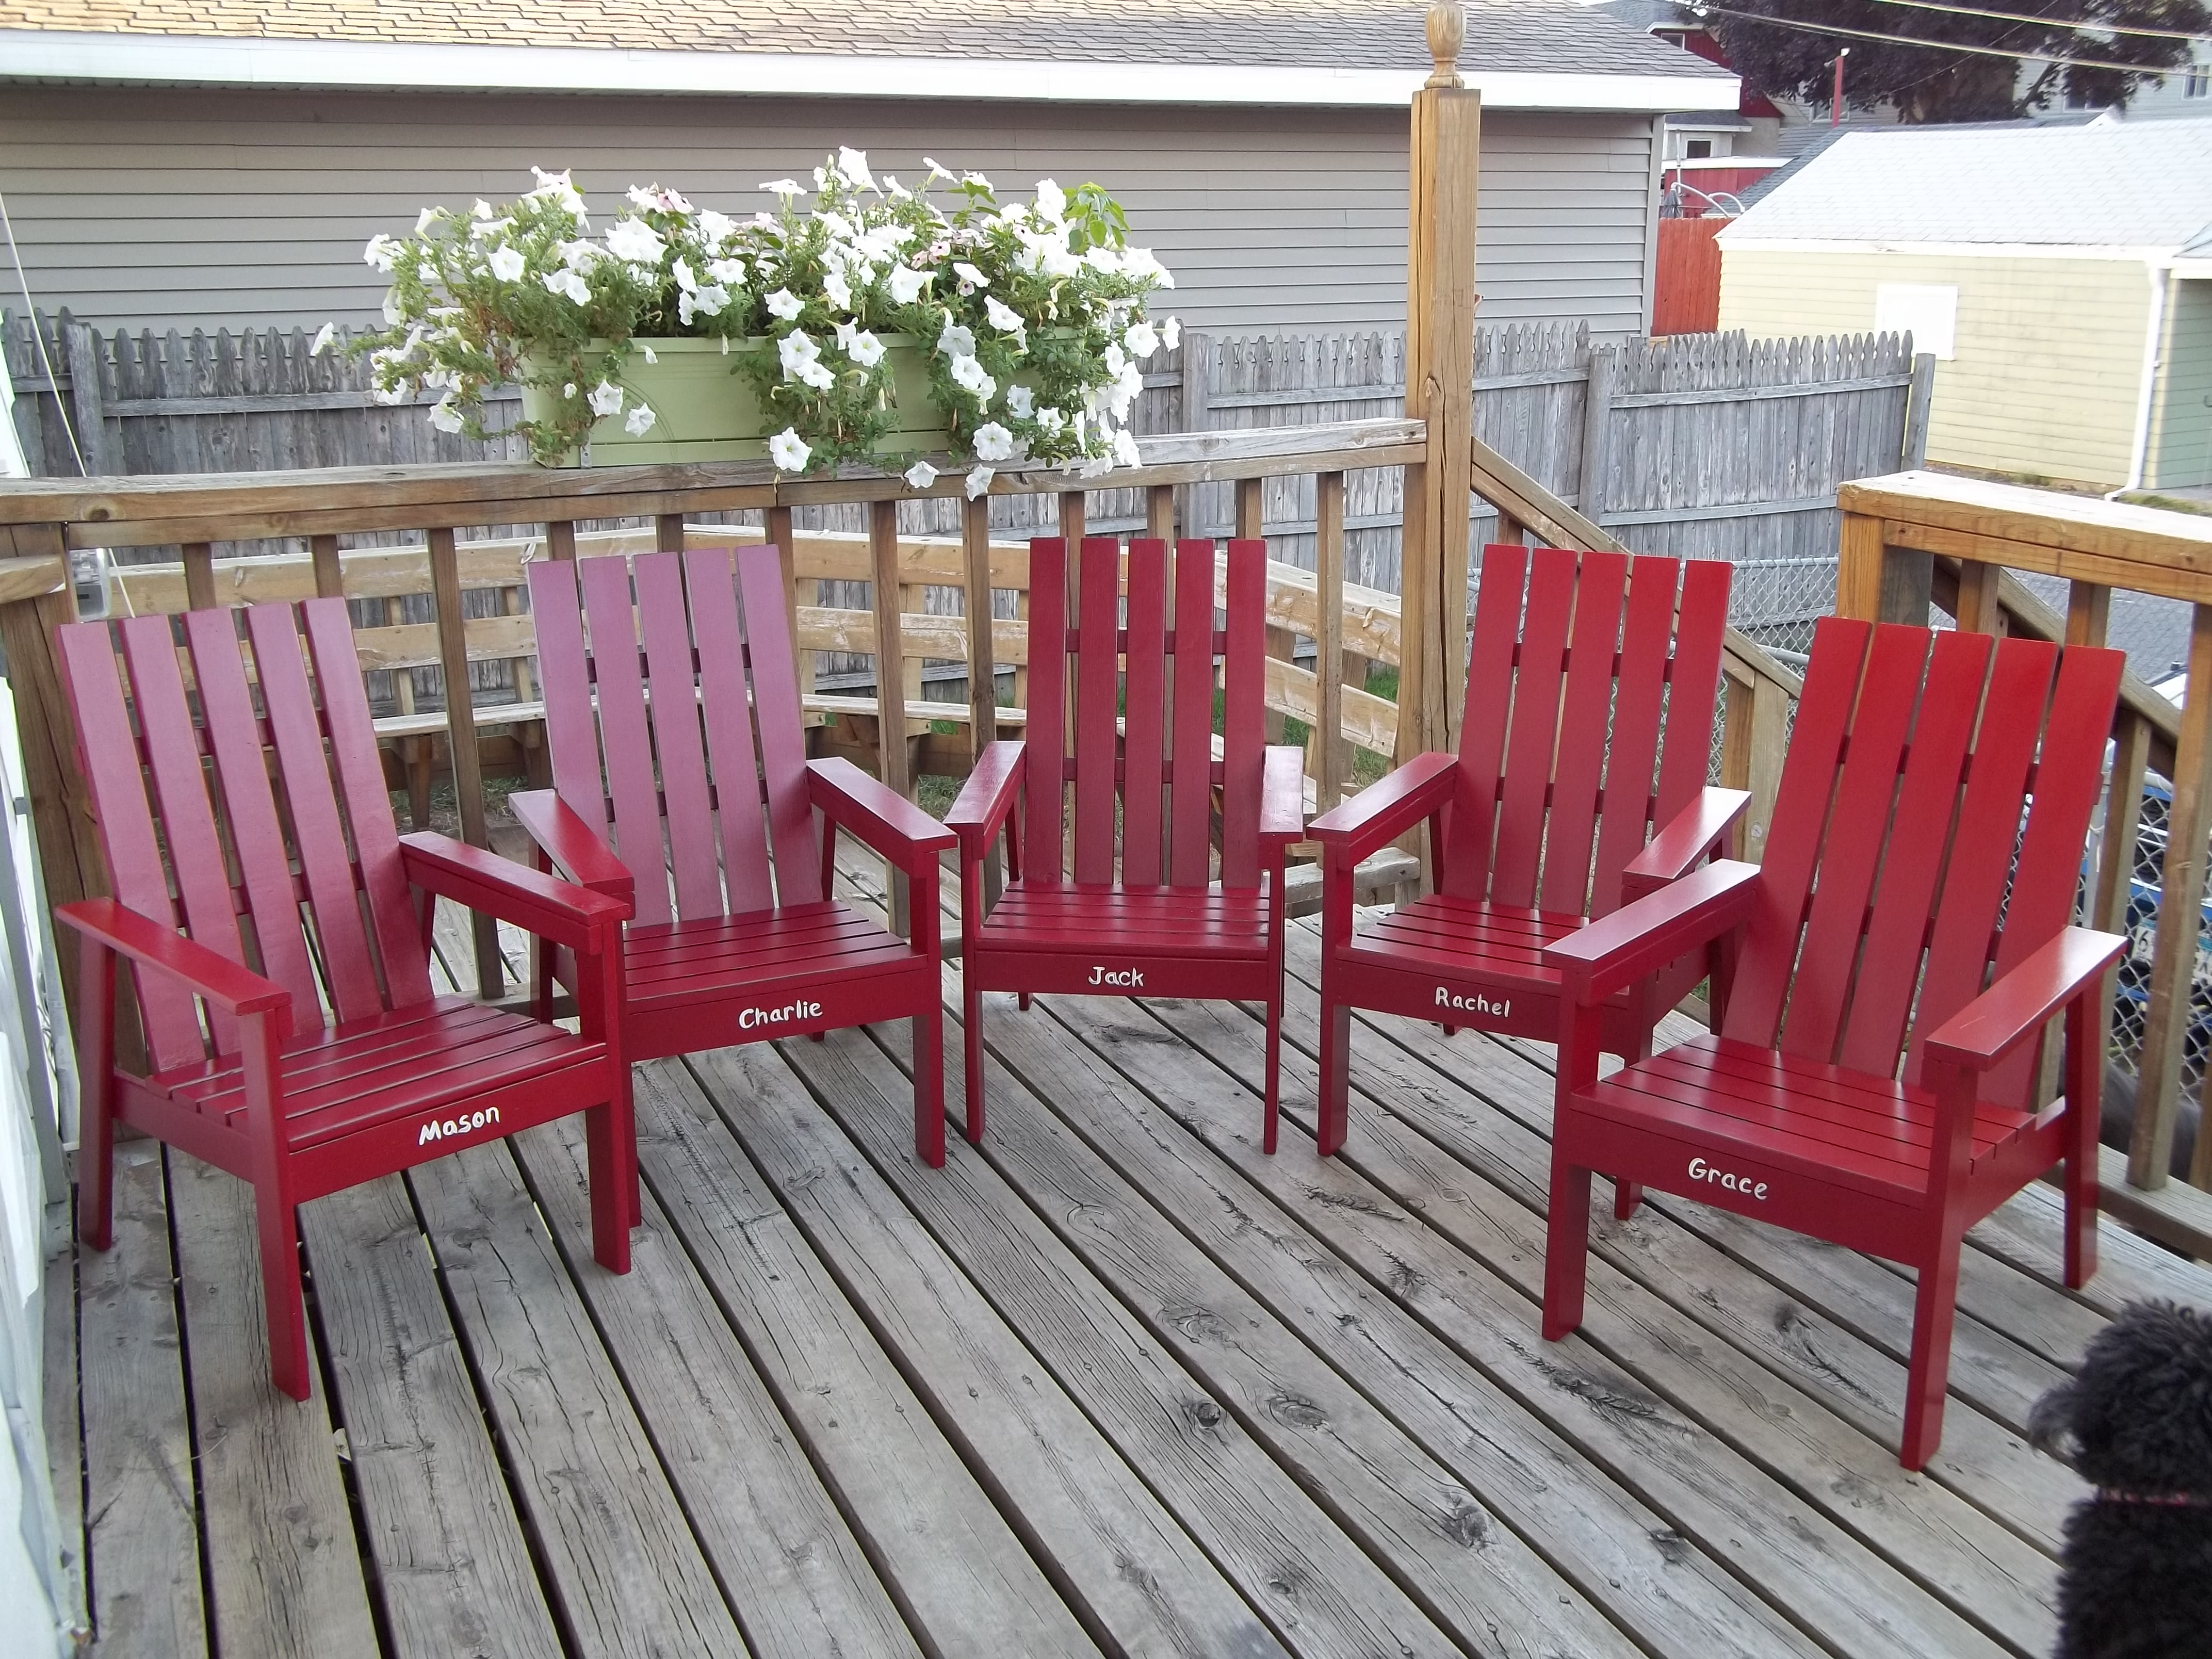
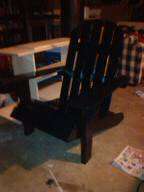
These chairs turned out great. I have five grandchildren and made one for each. To cut down on arguments, I painted them all the same color and painted their names on their chair. This is a really sturdy chair they will enjoy for years!. Thank you, Ana, for the great plan in your book, "The Handbuilt Home."
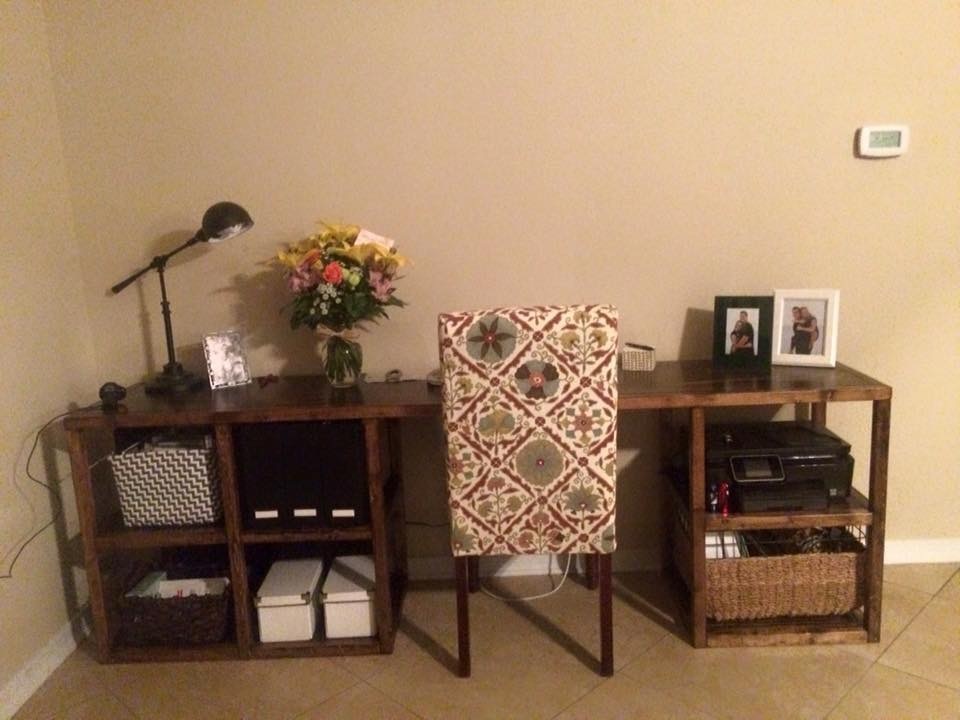
Custom length Parson Tower Desk.
This was great easy project I could do for my wife while she was at work and surprise her before she came home. I use the same color recommended stain but added the valspar white glaze to makenit more gray and weathered look. Sealed with a matte finish.
Fri, 10/04/2019 - 14:44
Awesome!!! Love how you made it the perfect size too!
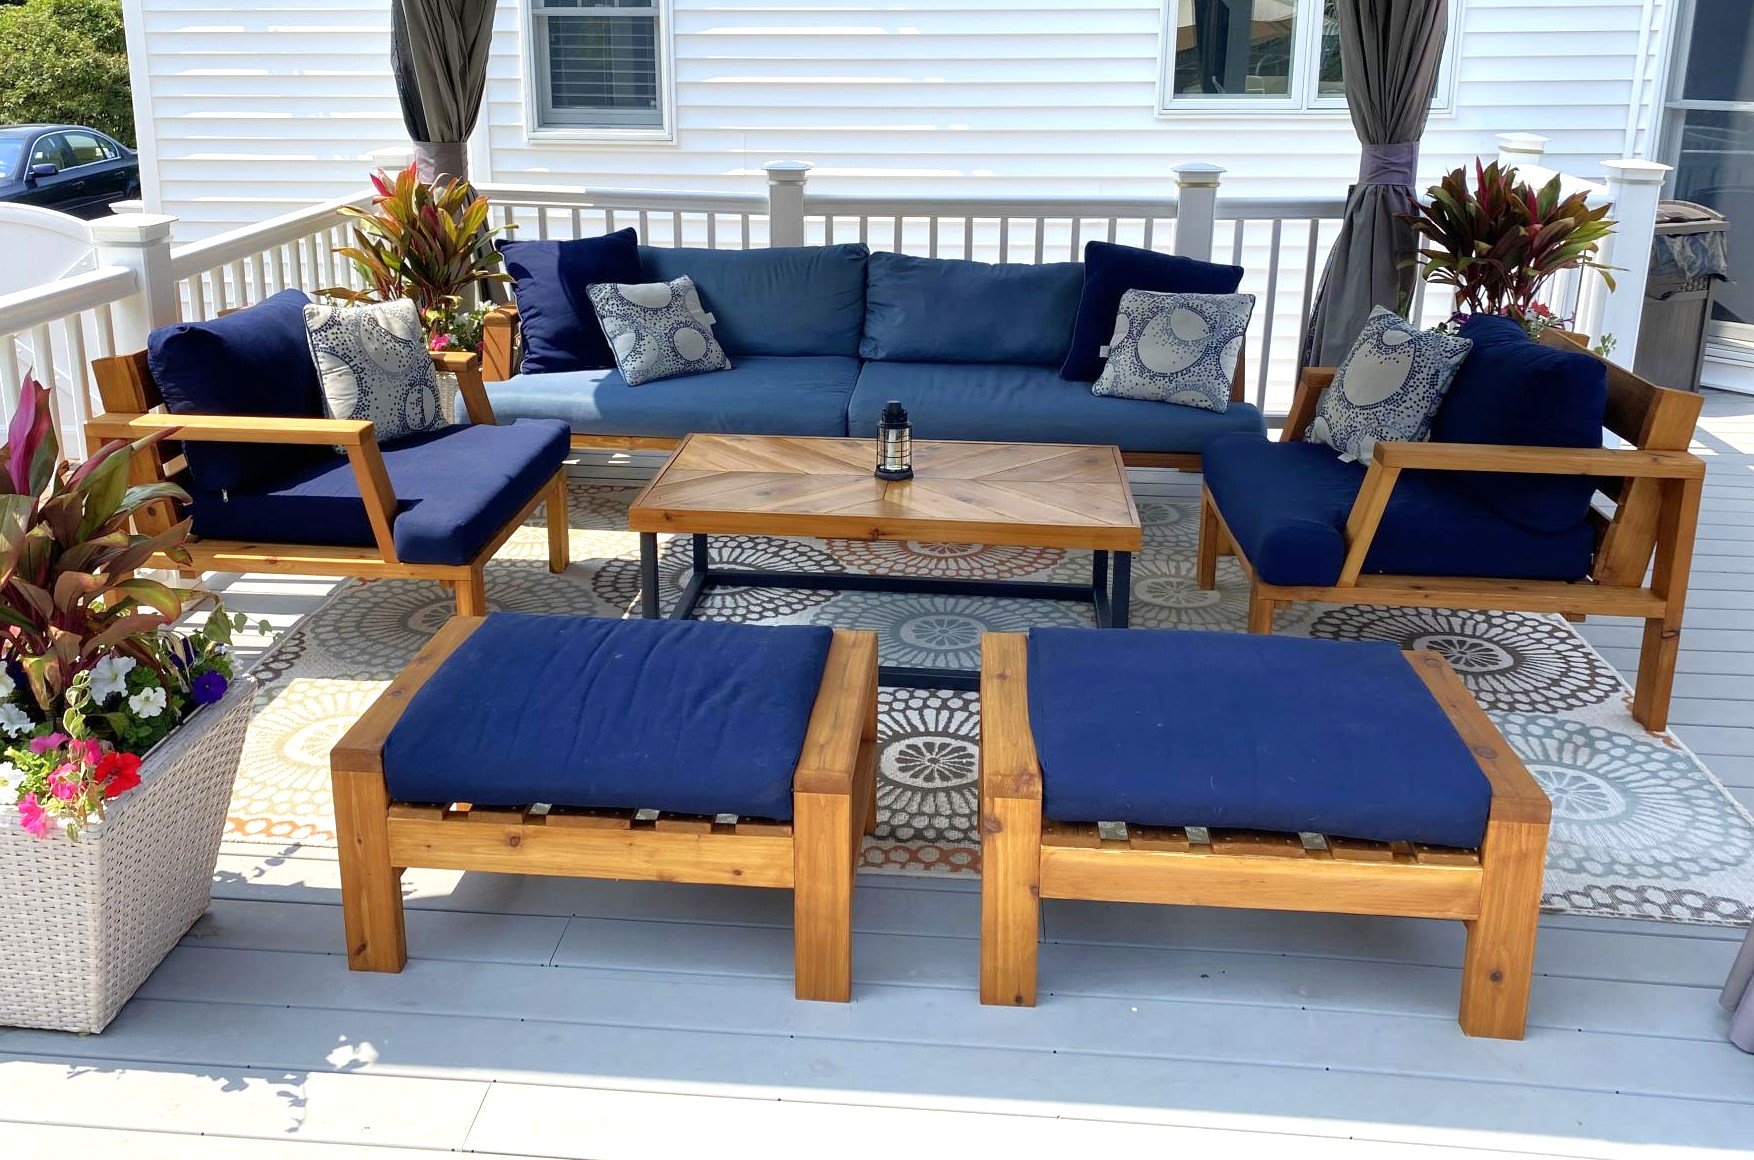
Our outdoor furniture from Costco was falling apart but the cushions were still in great shape so I decided to design the furniture around the existing cushion dimensions. I used all Cedar wood and stained it with Australian Timber Oil Honey Teak stain. The table design was from a picture I saw on another site.
Tue, 06/20/2023 - 12:56
Excellent idea to design the size around the cushions you had! Thanks for sharing ❤️
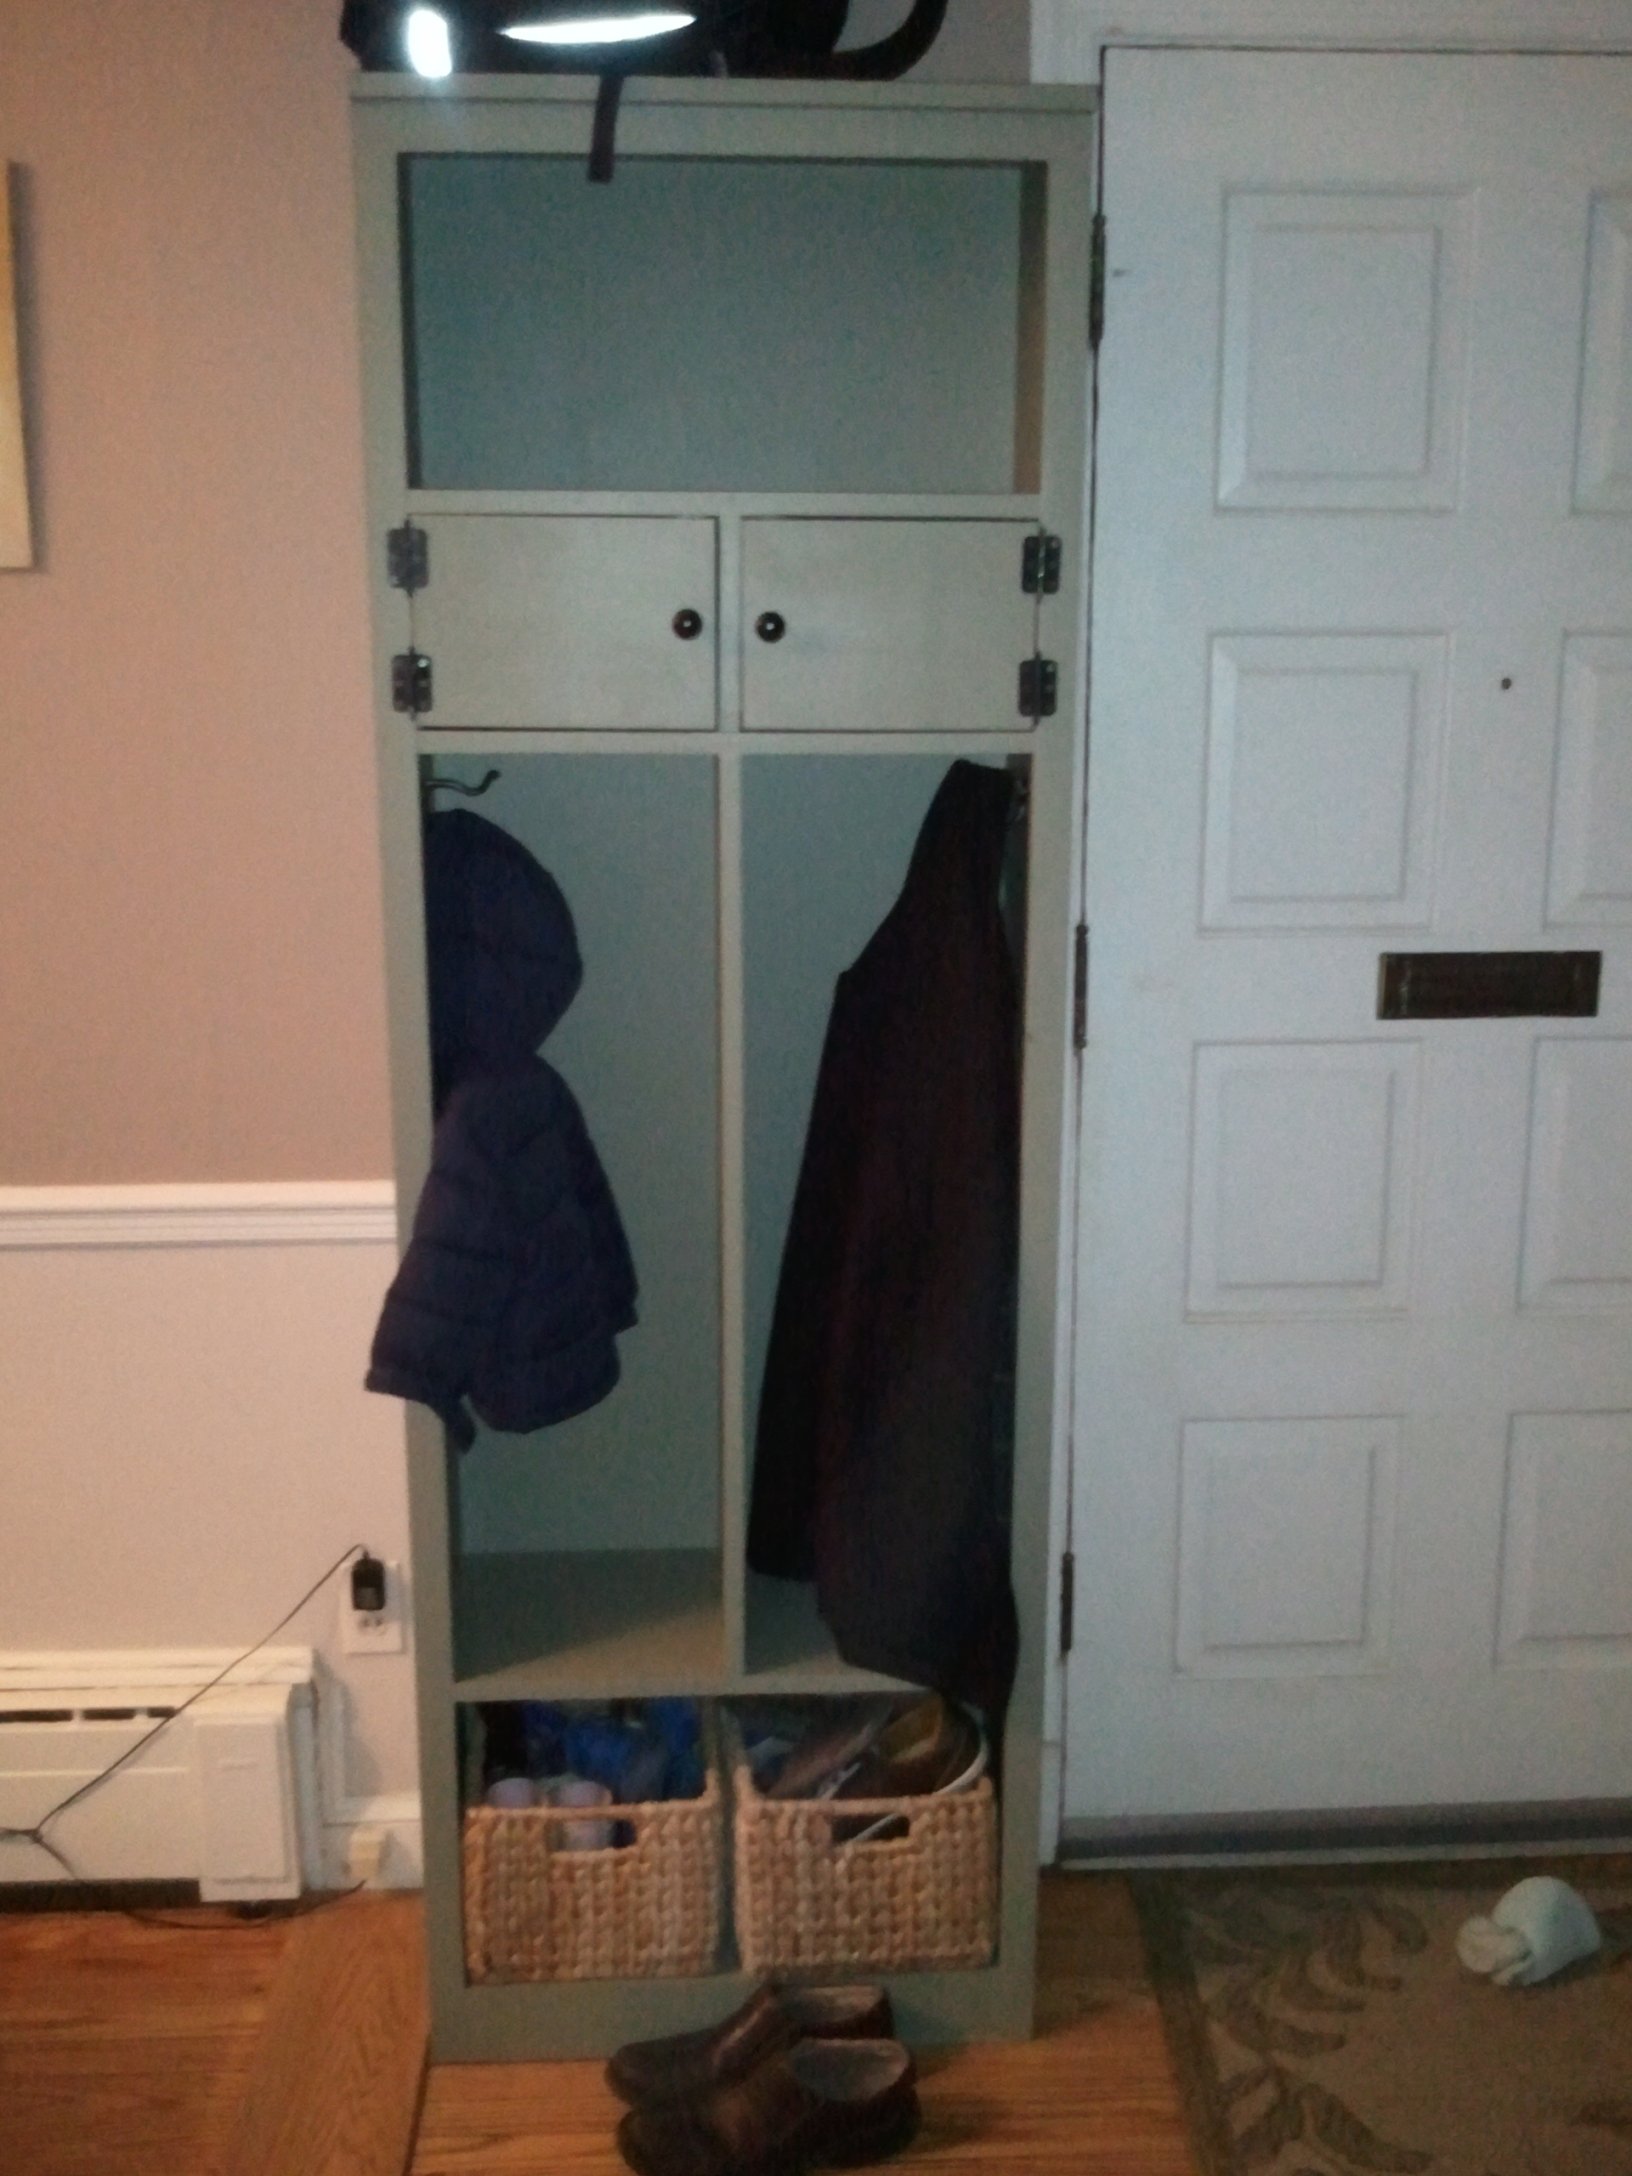
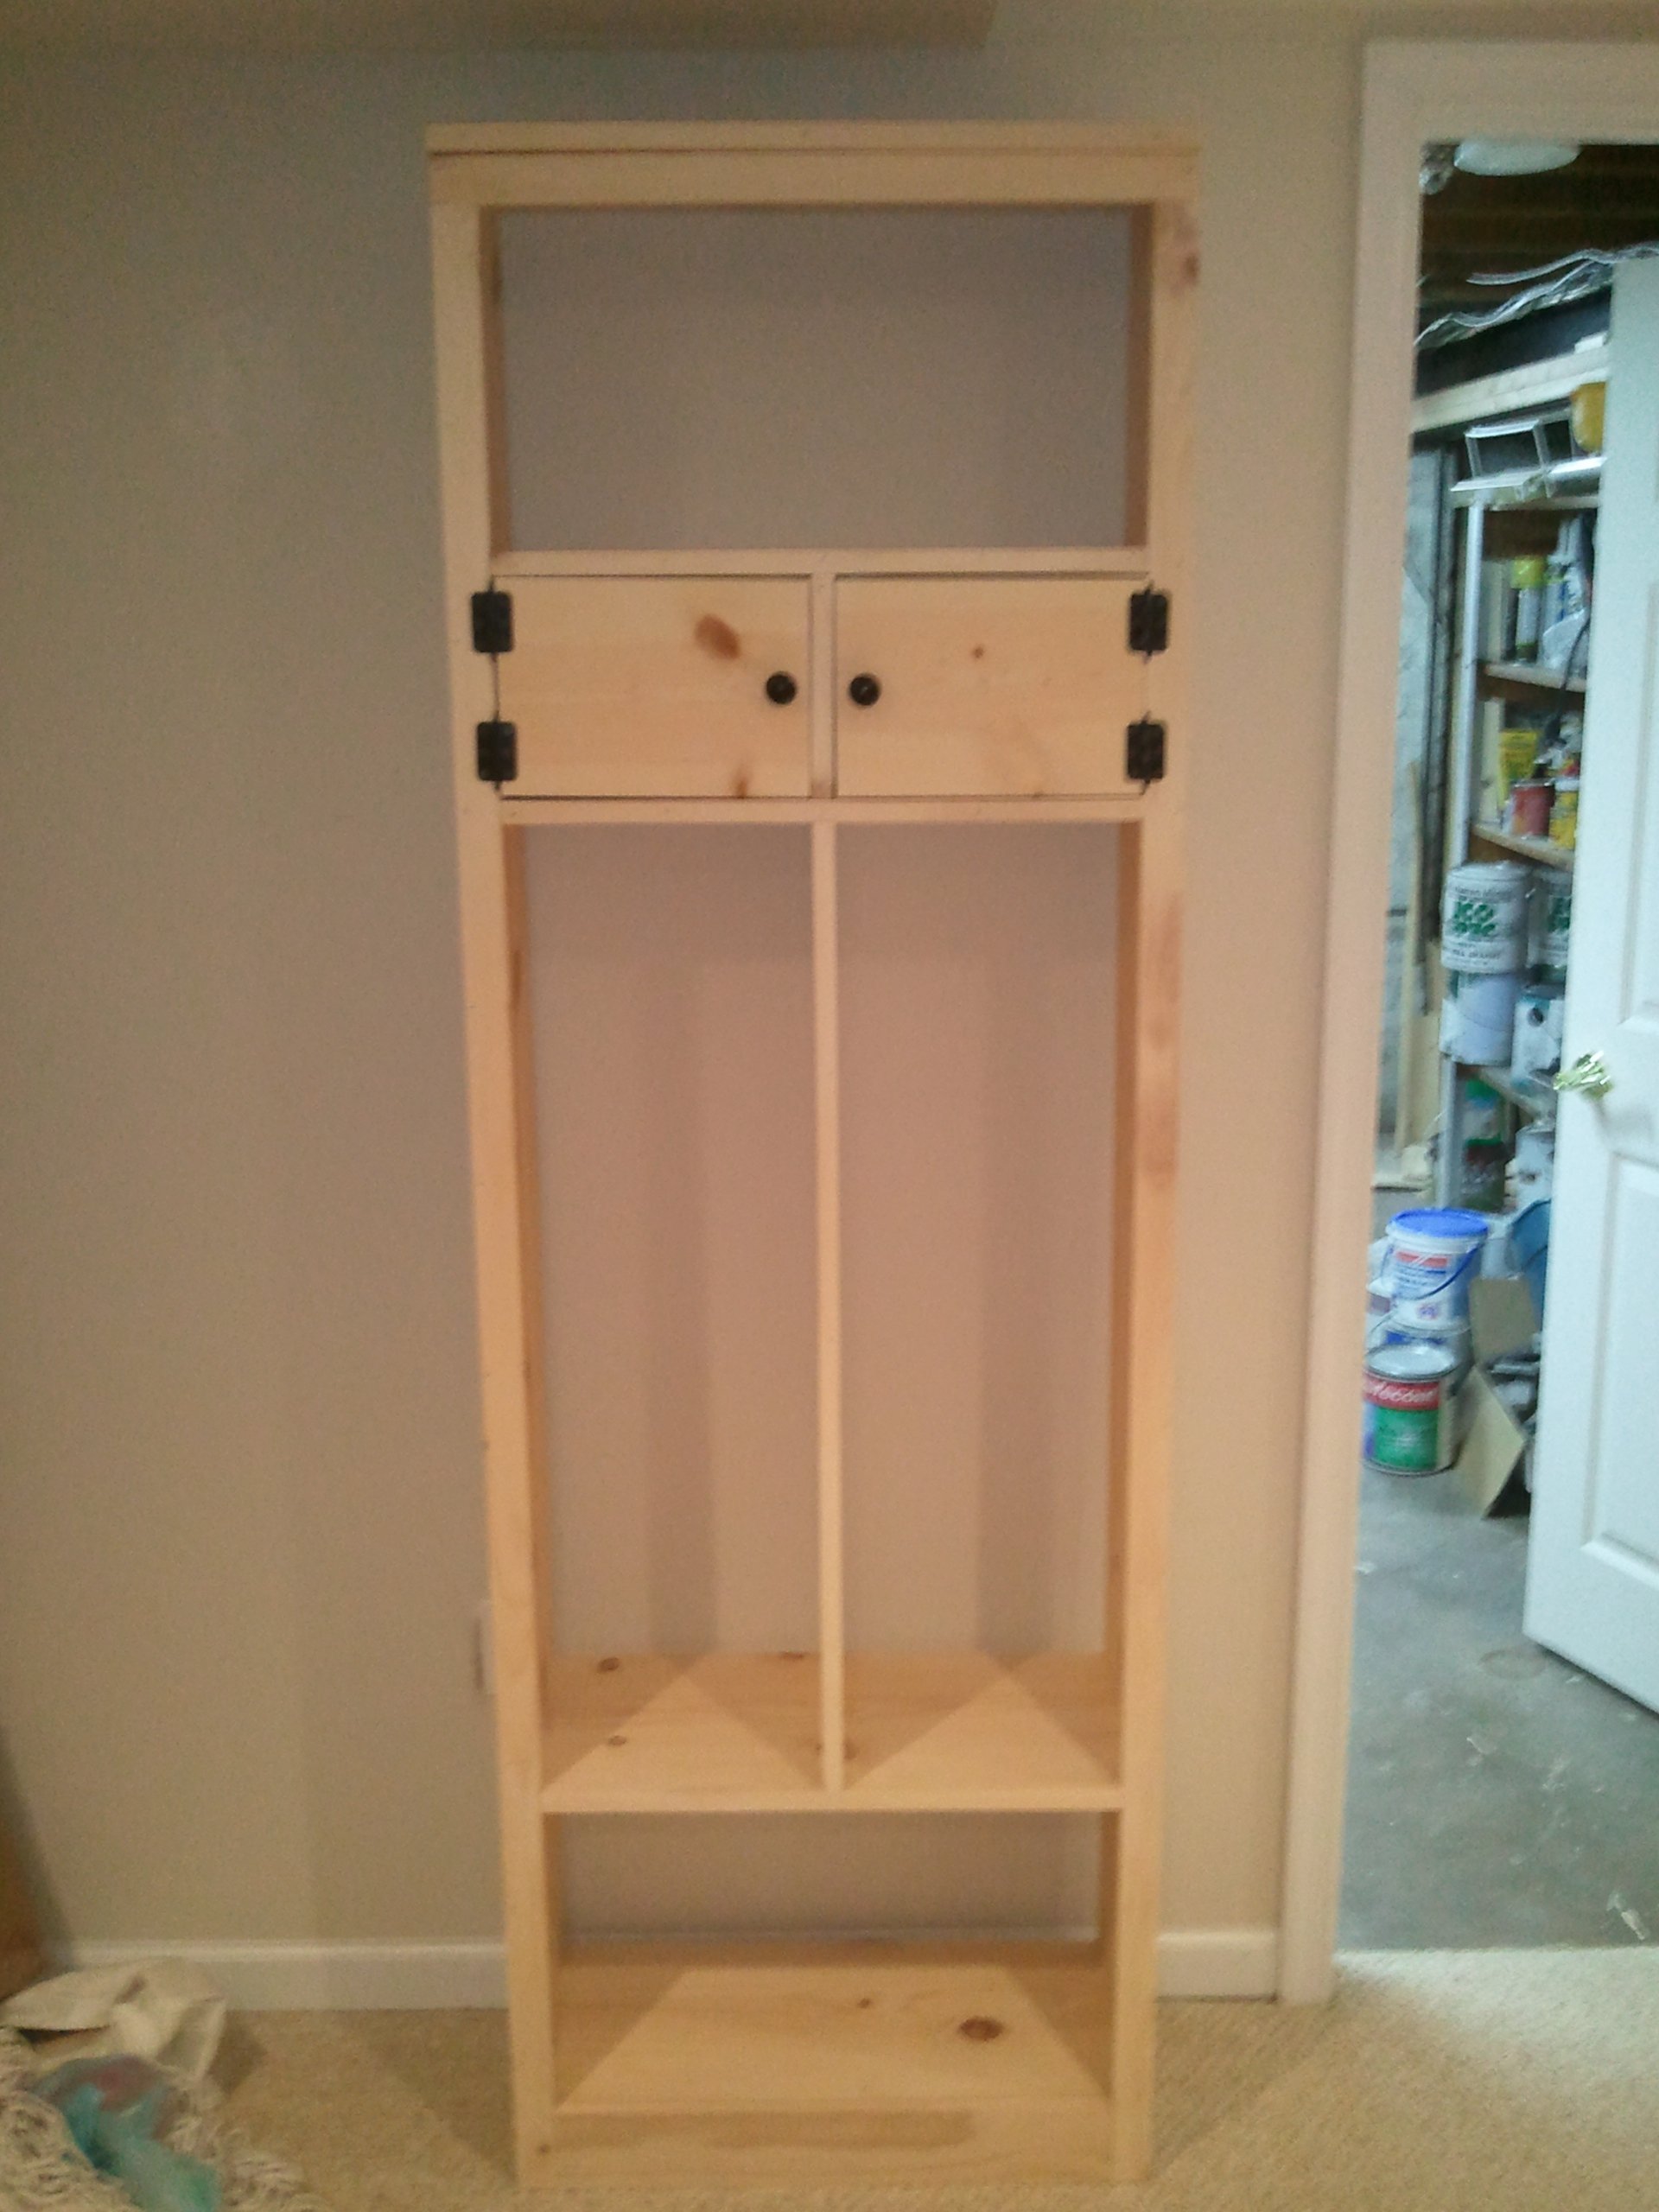
I found this website a while ago, but it was a while before I had an opportunity to utilize the plans as I have a long honey-do list of things around the house (insulation, installing new light fixtures, putting up crown moulding) that took priority. Well, I finally got some time and Hillary's locker cabinet was a perfect first project.
We have a small Cape Cod with no separate entryway, so our coats, shoes, bags, keys, and other accessories ended up on our windowsill or the dining room table, which was okay until dinner started and we had to clear it all off before eating. It was aggravating to say the least. So the narrow cabinet was the perfect solution. I made a few changes to the plan - added doors instead of drawers, and changed some dimensions to fit my space, and I also added trim pieces to the inside shelves to finish it off a little more - and it worked out great. The spaces between the doors and the trim are not even, and while that bothers me a little, I'll just have to improve on my next piece...and there will be a next piece. Soon.
Thanks Ana and Hillary!
Wed, 02/22/2012 - 18:36
Great work! How did you like using Mystic Paint? I've heard about it before but haven't worked with it before. What sheen is it? Did it sand well?
I built this media console several months ago. In the beginning I saw the one Ridge Media Console and loved it, but I don't have the right tools to make the drawers like the plans, so I decided to take a couple of plans to make mine different. I also wanted to build a console that was easy enough because I'm still a beginner. I also loved the Benchwright media console and used some of the plans to get what I wanted. The storage flips down by adding euro hinges. And I added doors. I added my own silver decorative pieces. At 1st I thought that was too much silver, but now I like it. When I first built it I would pass by it and had to remind myself I did not buy this at a store, but built it. I can't say how much it cost because frankly I'm not that organized just yet. Since I'm a beginner I go back and forth to Lowes getting something here and there. Lowes and me have this weird relationship. They wonder why I'm there AGAIN; and I just keep coming back, AGAIN. They better watch it, I may dump them for Home Depot - lol.
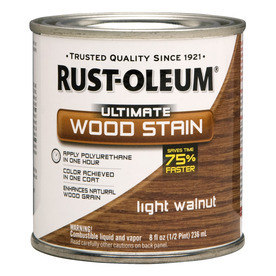
For the finish I used Rustoleum stains and finishes. I use this because I don't wipe them off and they dry quicker. I use one coat and it's done. Dries by the end of the day and ready for poly. I added the pic for the stain, but Lowes didn't have my colors on their website (shame on you Lowes).
The colors I used were 1 part black cherry and 2 parts dark walnut. I loved the colors so much I plan on using them for the rest of my builds in my living and dining rooms.

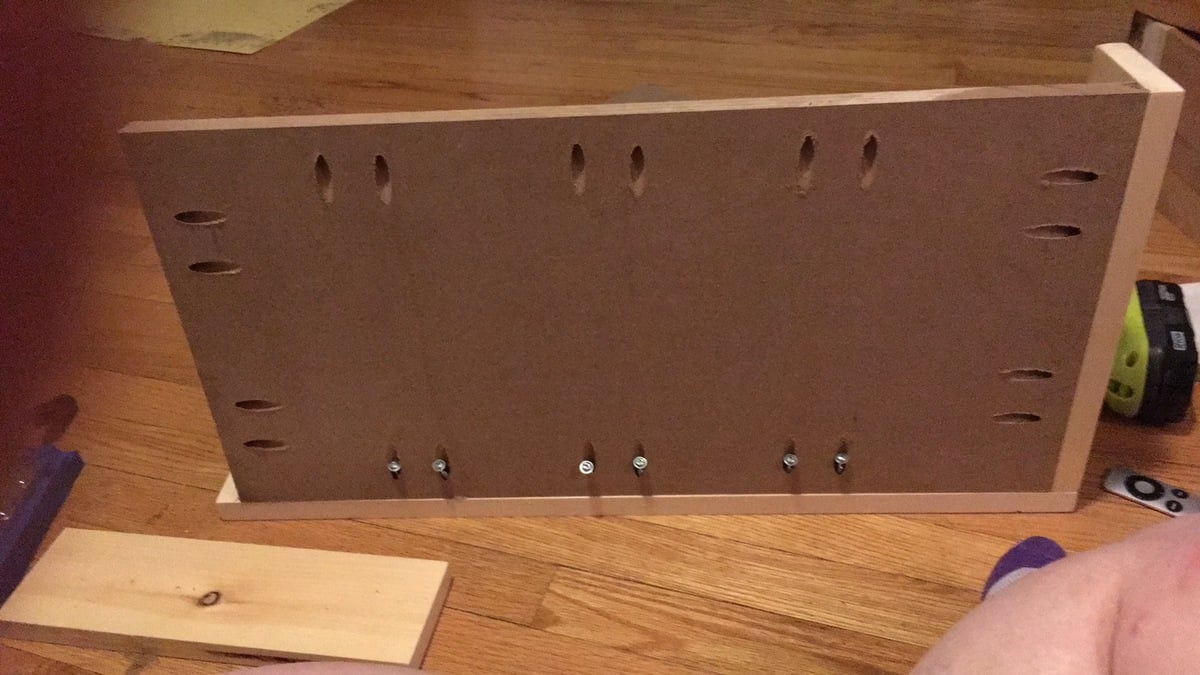
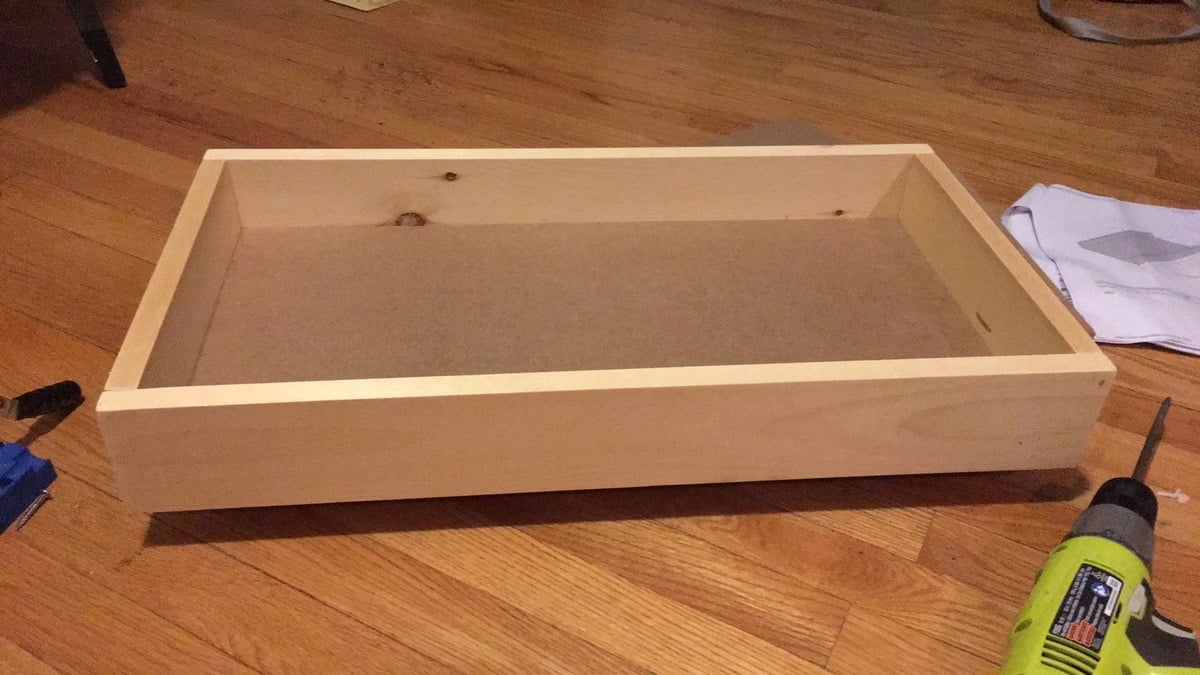
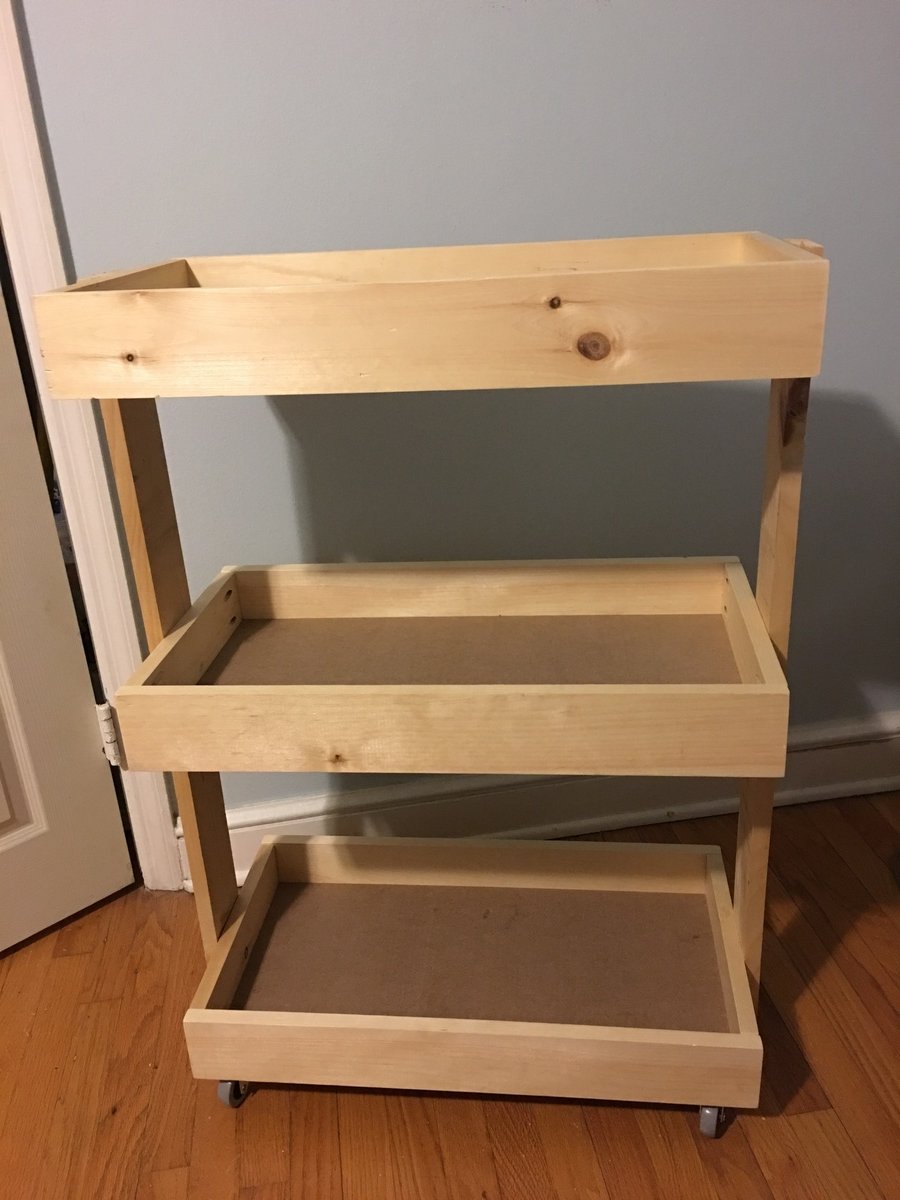
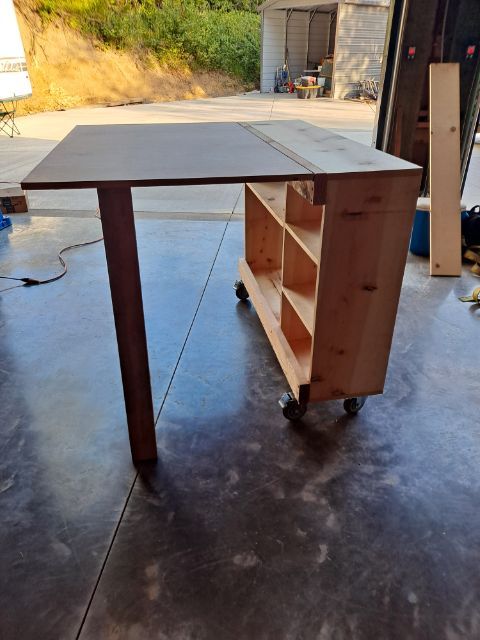
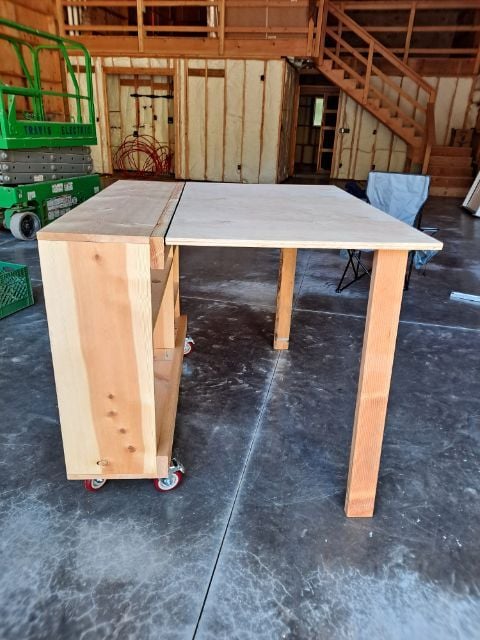
Wanted a Raskog cart from IKEA but honestly it was too small. Used scraps from my craft desk build and purchased the wheels from IKEA. Just need to finish her off. Love Ana's plans. This is my third build from her plans.
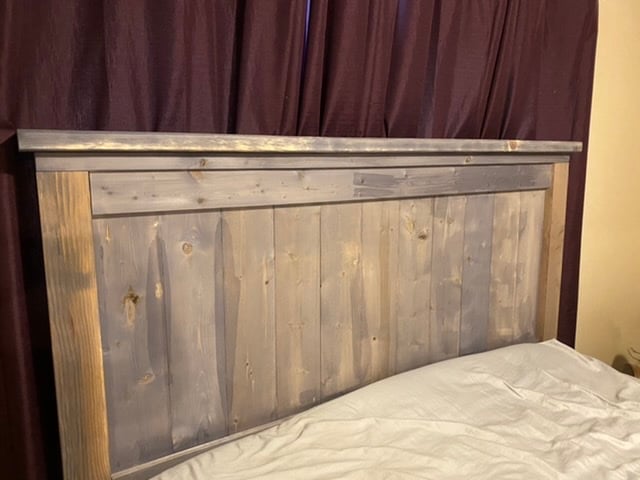
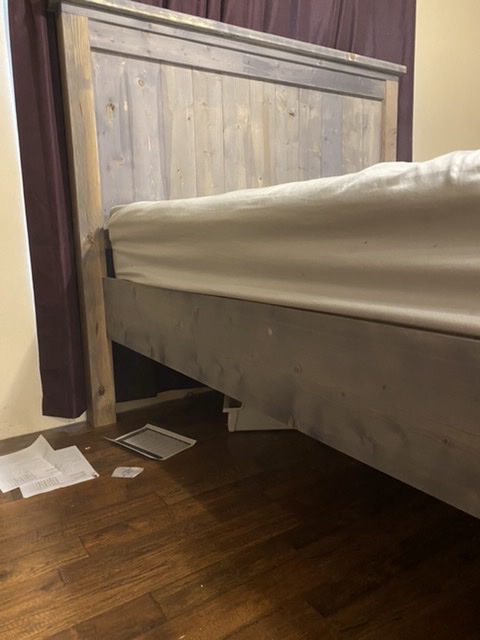
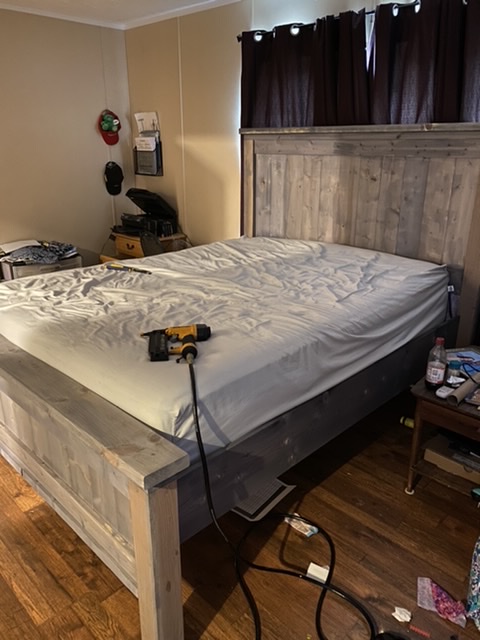
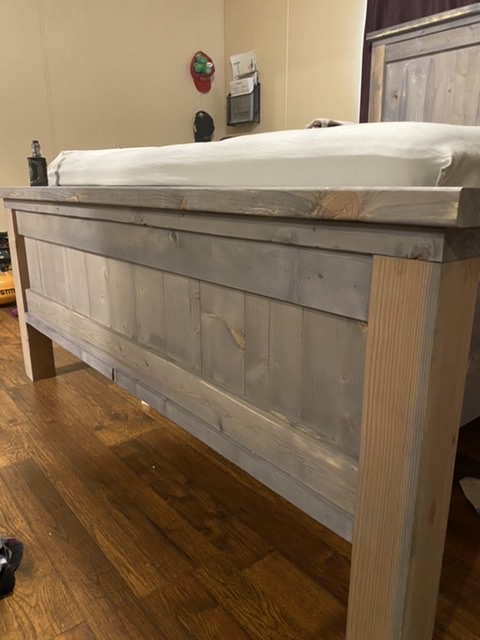
Found the plans on Ana’s website, not to hard to build and only ran about $200. Bed is made from white pine with the exception or the 4x4 post which are cedar because that’s all I could find that was untreated. I used an age excelerator instead of stain. It took me the weekend to build but I have 5 kids so there where lots of distractions. I added 5 inches to the height because my wife likes tall beds, and a 2x4 to the bottom of the headboard and footboard for added strength and I liked the way it looked. Get help moving head and foot boards around as they are heavy.

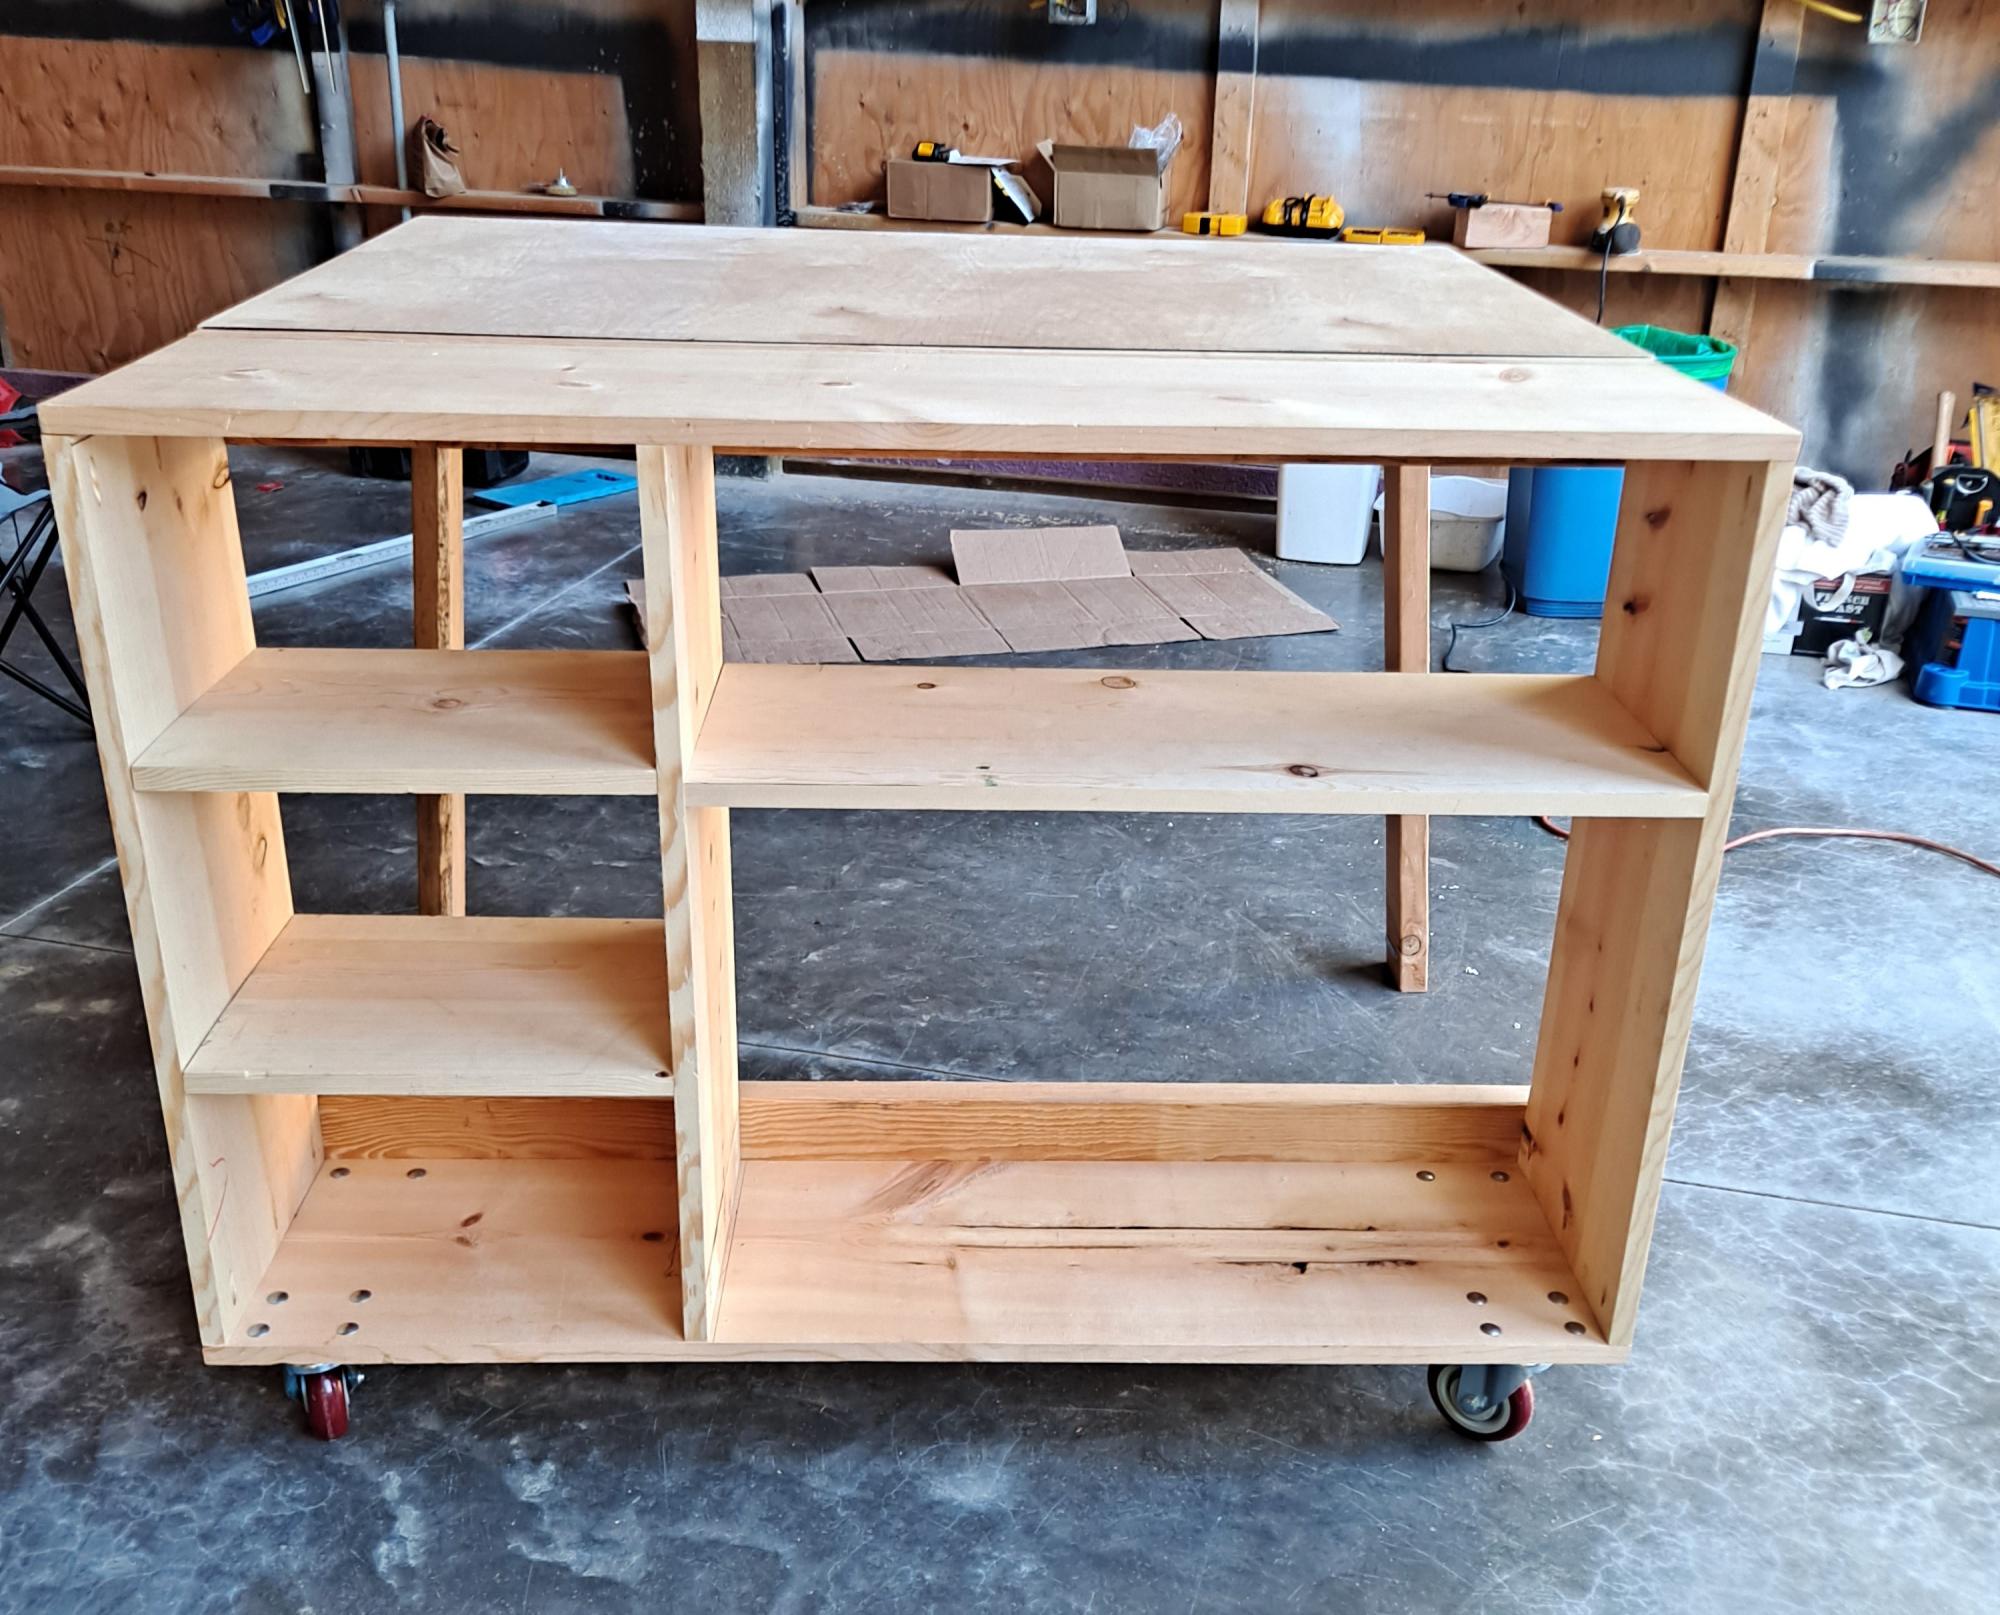
Made the portable worktable as my craft table. I'm limited on space so the fold down table was just the key. Thank you Ana. You are an amazing carpenter & inspiration to me. You make your plans so easy to read & follow. Thank you so much. I can't wait to make more of your plans. ❤️
Jodi Inman

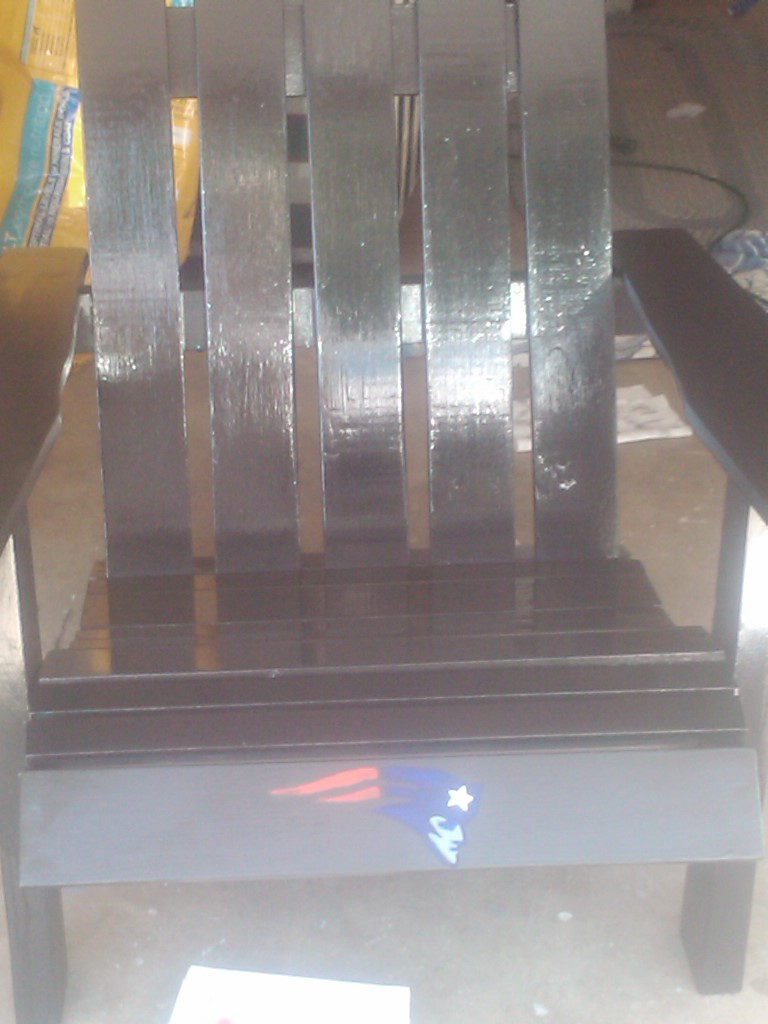
I've always wanted an Adironback chair, now I have 4! This was inspired by Ana's Adironback chair. Because we're mad Patriots fans, the logo had to be painted on as well. For the seat, I made it wider, more curved, and alternated 1x2 and 1x4's to give it a beachy look. The arms are wide to hold beverages and chip bowls. All the curves were drawn by my daughter, the wonderful artist.
Super sturdy chair.

Made this table for my daughter. She stained it golden oak, and plans to paint over it and distress. Its a handy good sized table for a desk or small dining table. Will put more pics when finished. I used 1x4s for the table top instead of 2x4's. I used the kreg jig to join the top together.
The daughter painted it with white milk paint, 2 coats. She did some sanding, and then went over it with brewed coffee.
Love this table - it turned out so nice and we have gotten lots of compliments on it.
This was my 3rd build. When I found these plans I thought they would go great with our dining room table that was one of only 3 pieces of furniture that survived hurricane Harvey. I love them! They are way better than the ones we bought to go with this table before! Thank you Ana! We will have these forever!


Comments
Ana White Admin
Sat, 06/10/2023 - 06:42
Stunning Work!
This is so pretty, thank you for sharing!