DIY Wood Patio Furniture
We built our patio furniture with your outdoor chair and couch plans! Thank you thank you!
Candice
Built from Plan(s)
We built our patio furniture with your outdoor chair and couch plans! Thank you thank you!
Candice
A birthday present for my best friend. Turned out awesome!
Next time, I will cut the 1x2 and 1x3 at the 5 degree angle to match the top and bottom planes...
Thanks for the idea! It is great
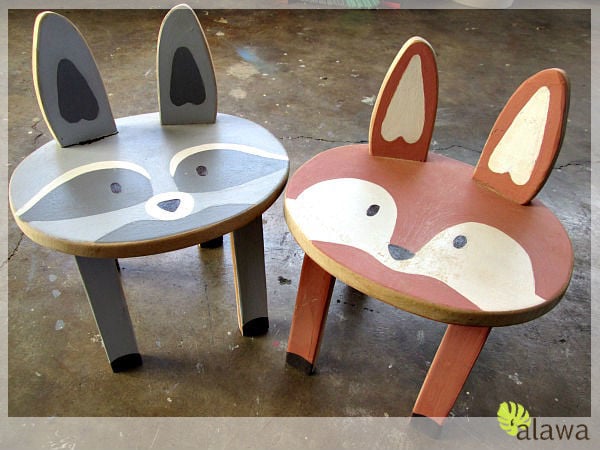
Following Brooke of Killer B Design's How-To blog post, I built and painted some woodland animal stools for my first handmade business collection. Please visit Brooke for her How To here: http://www.killerbdesigns.com/toddler-sized-animal-stools-a-how-to/
See all 4 stool designs I made on my little blog for a few more design ideas: http://sunnysideup-stairs.blogspot.com/2014/07/woodland-animal-stools.h…
Happy and safe building! :)
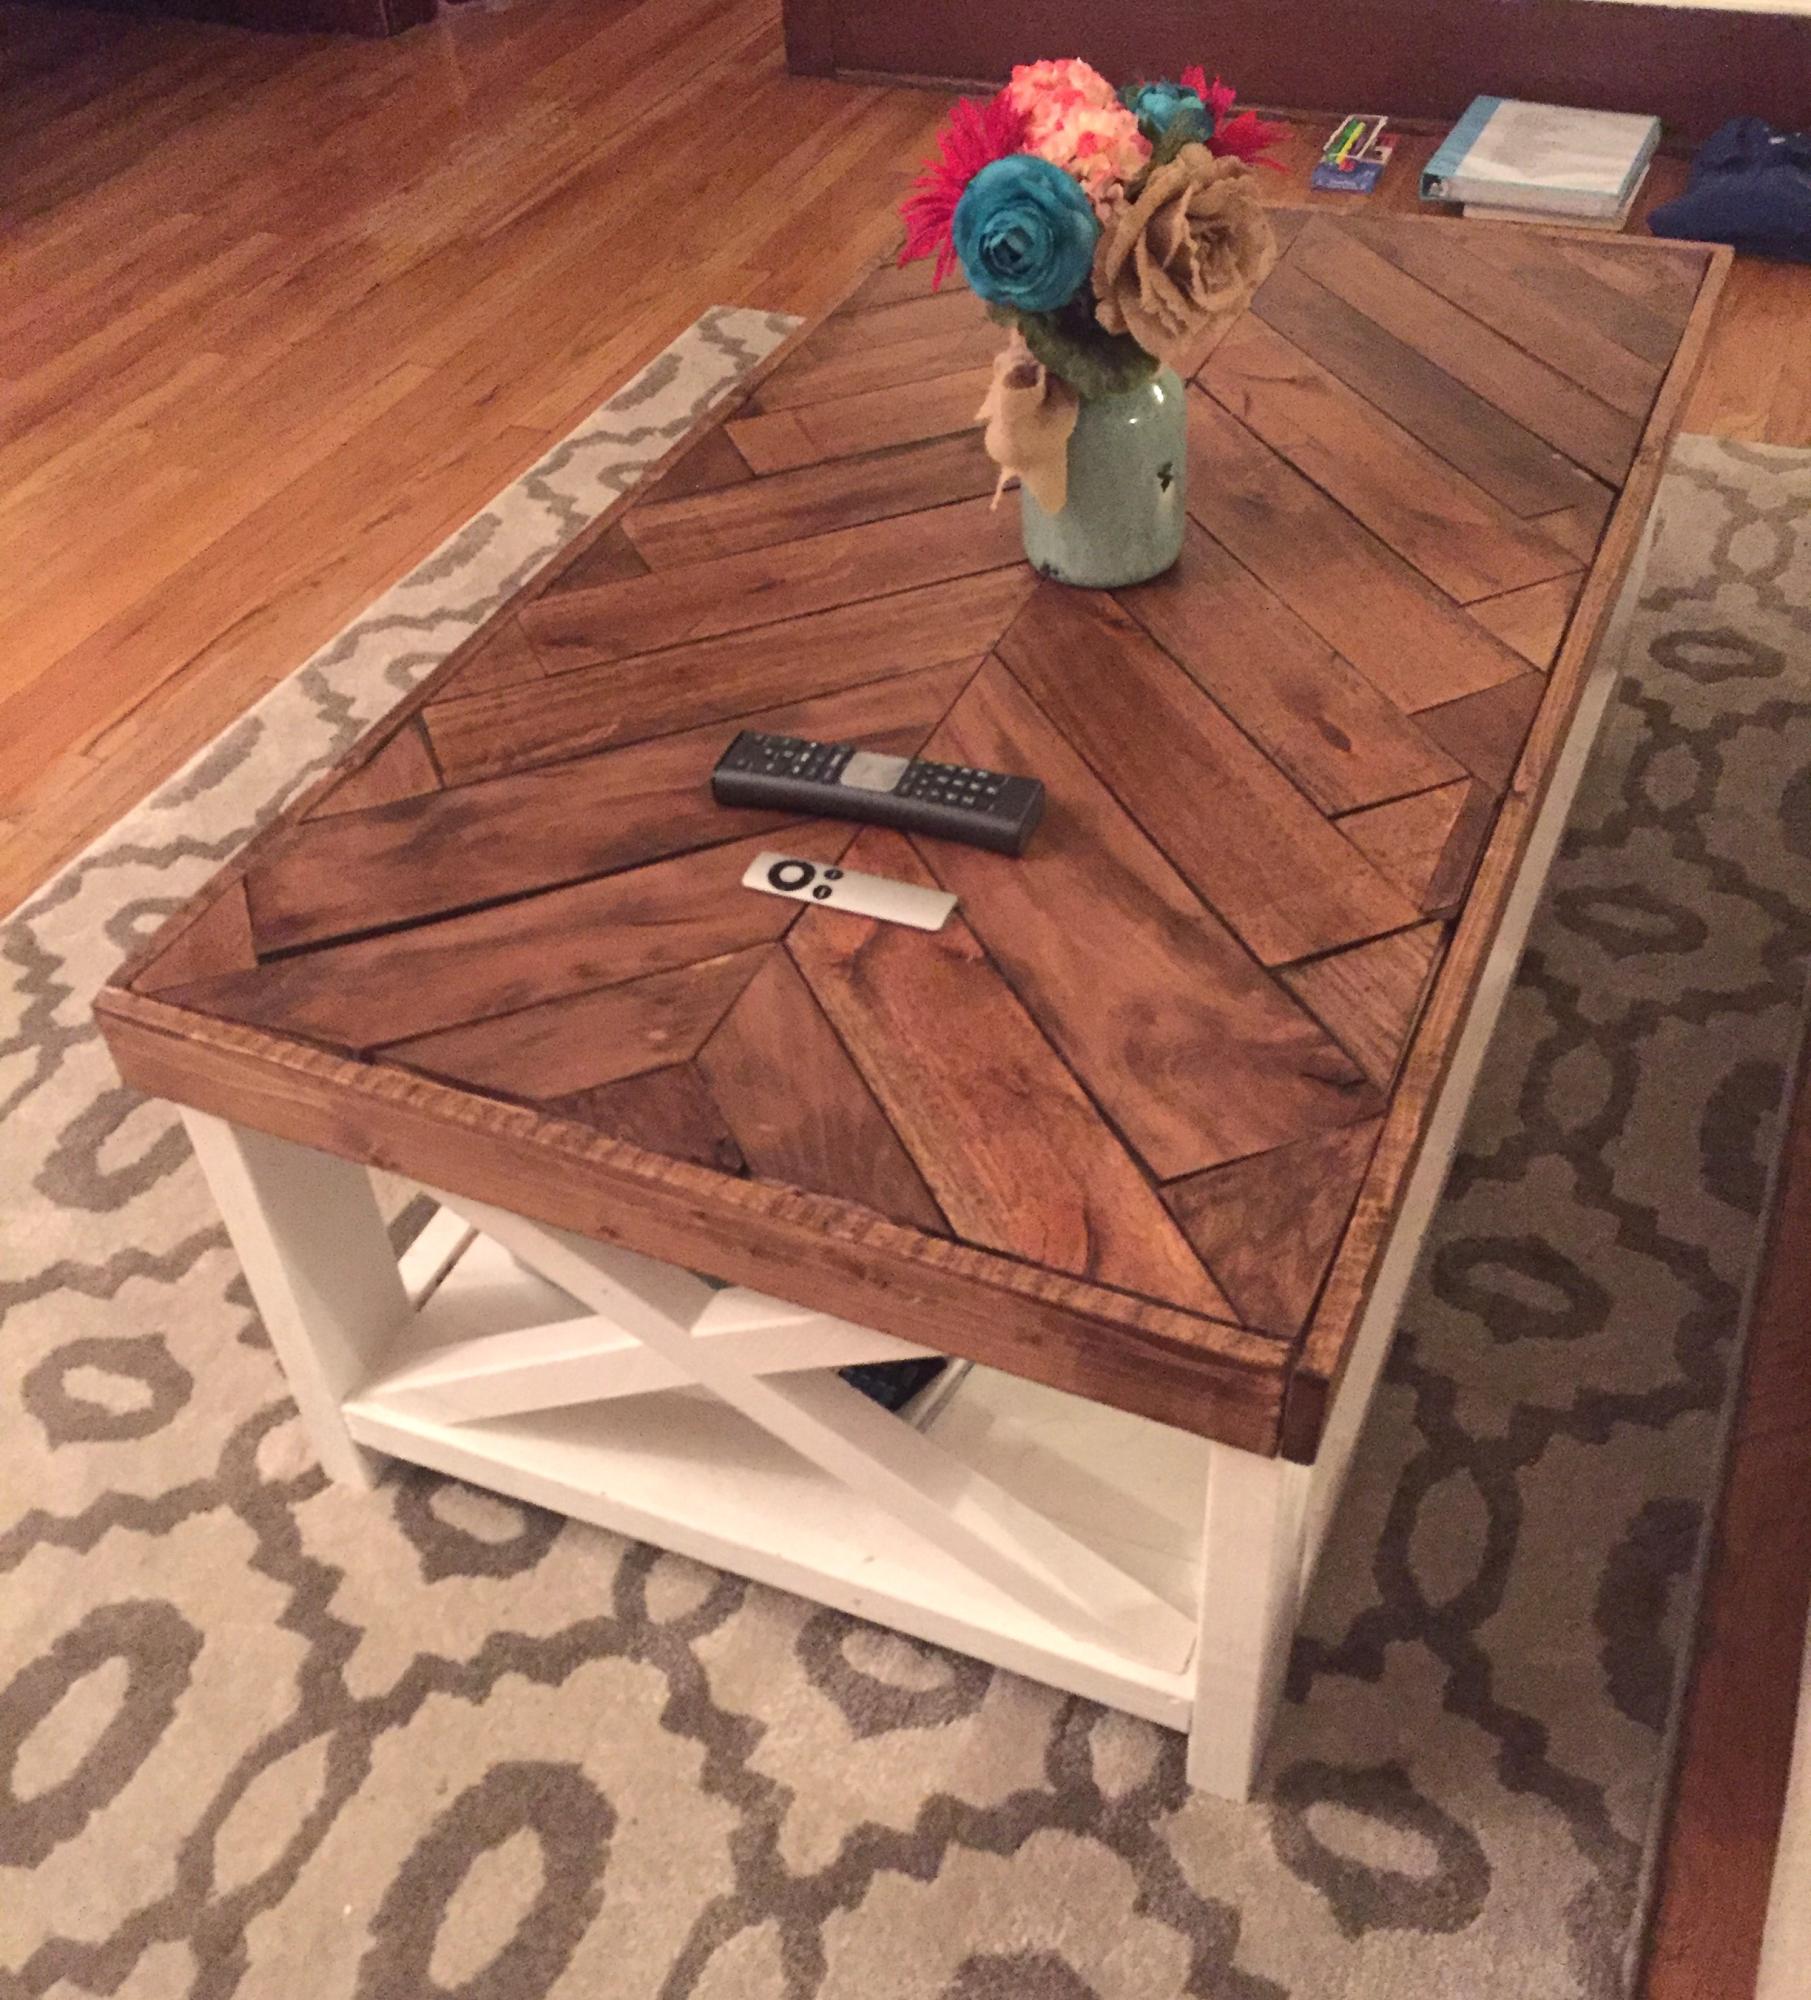
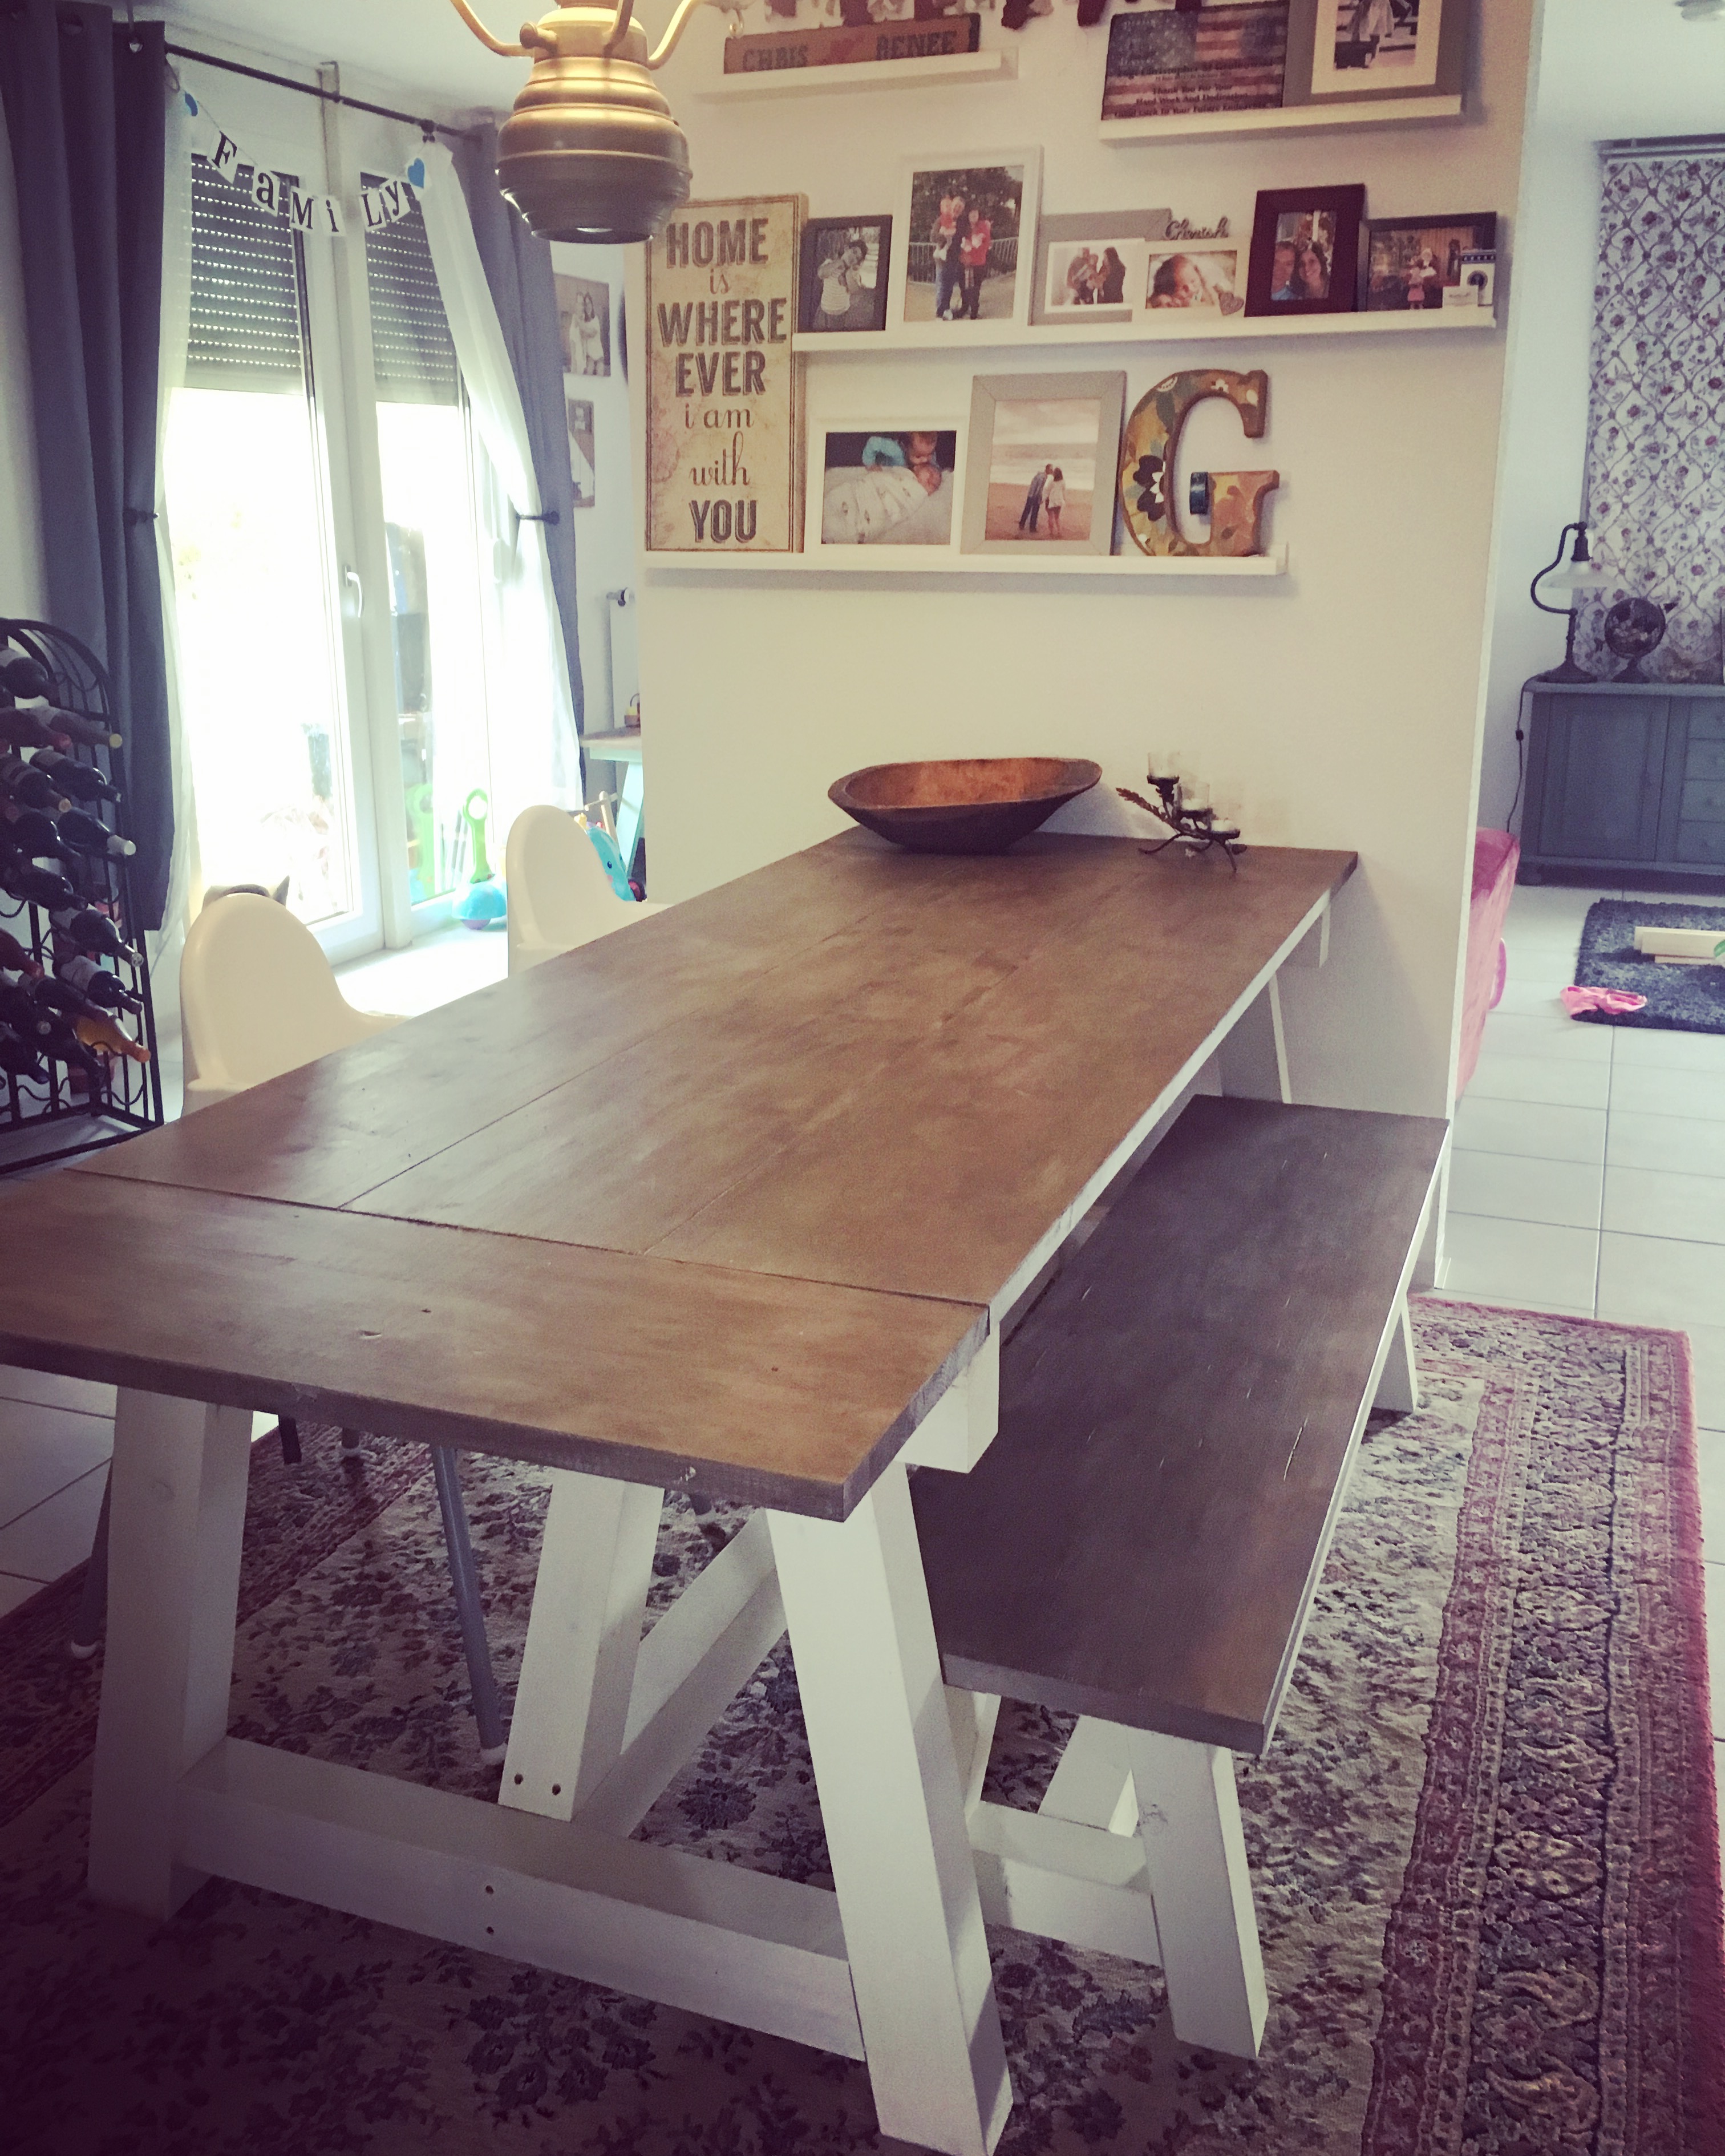
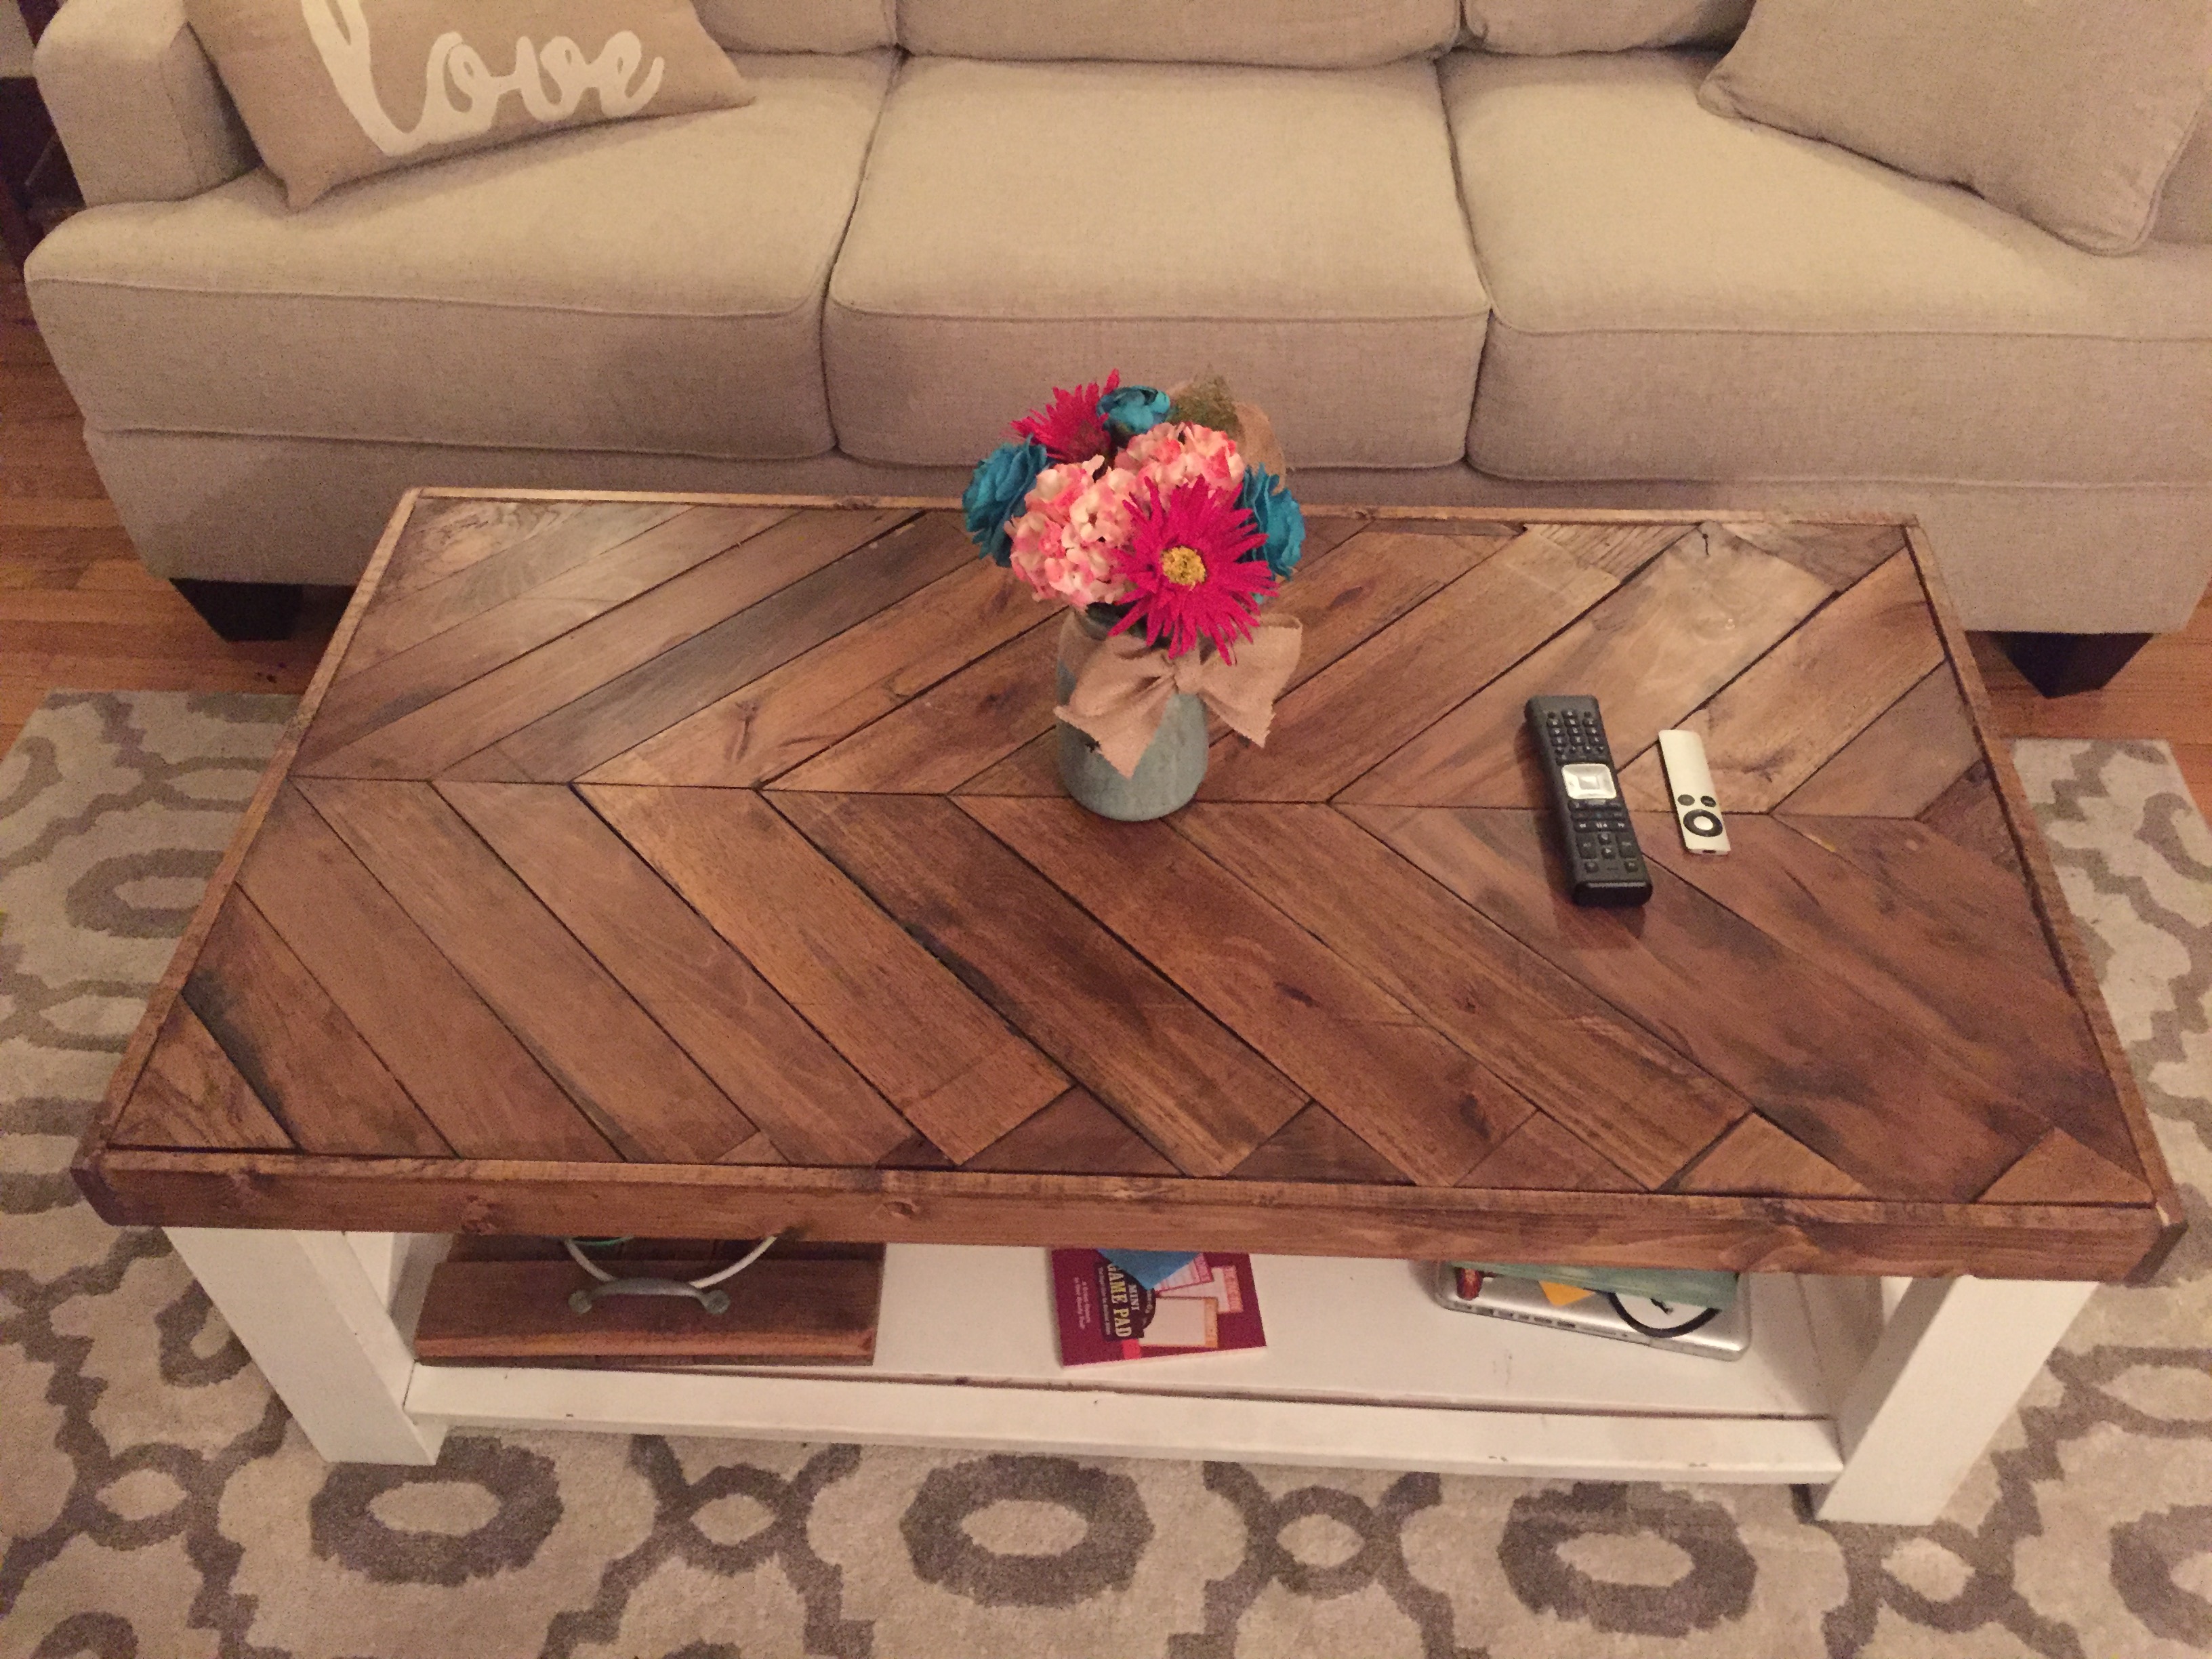
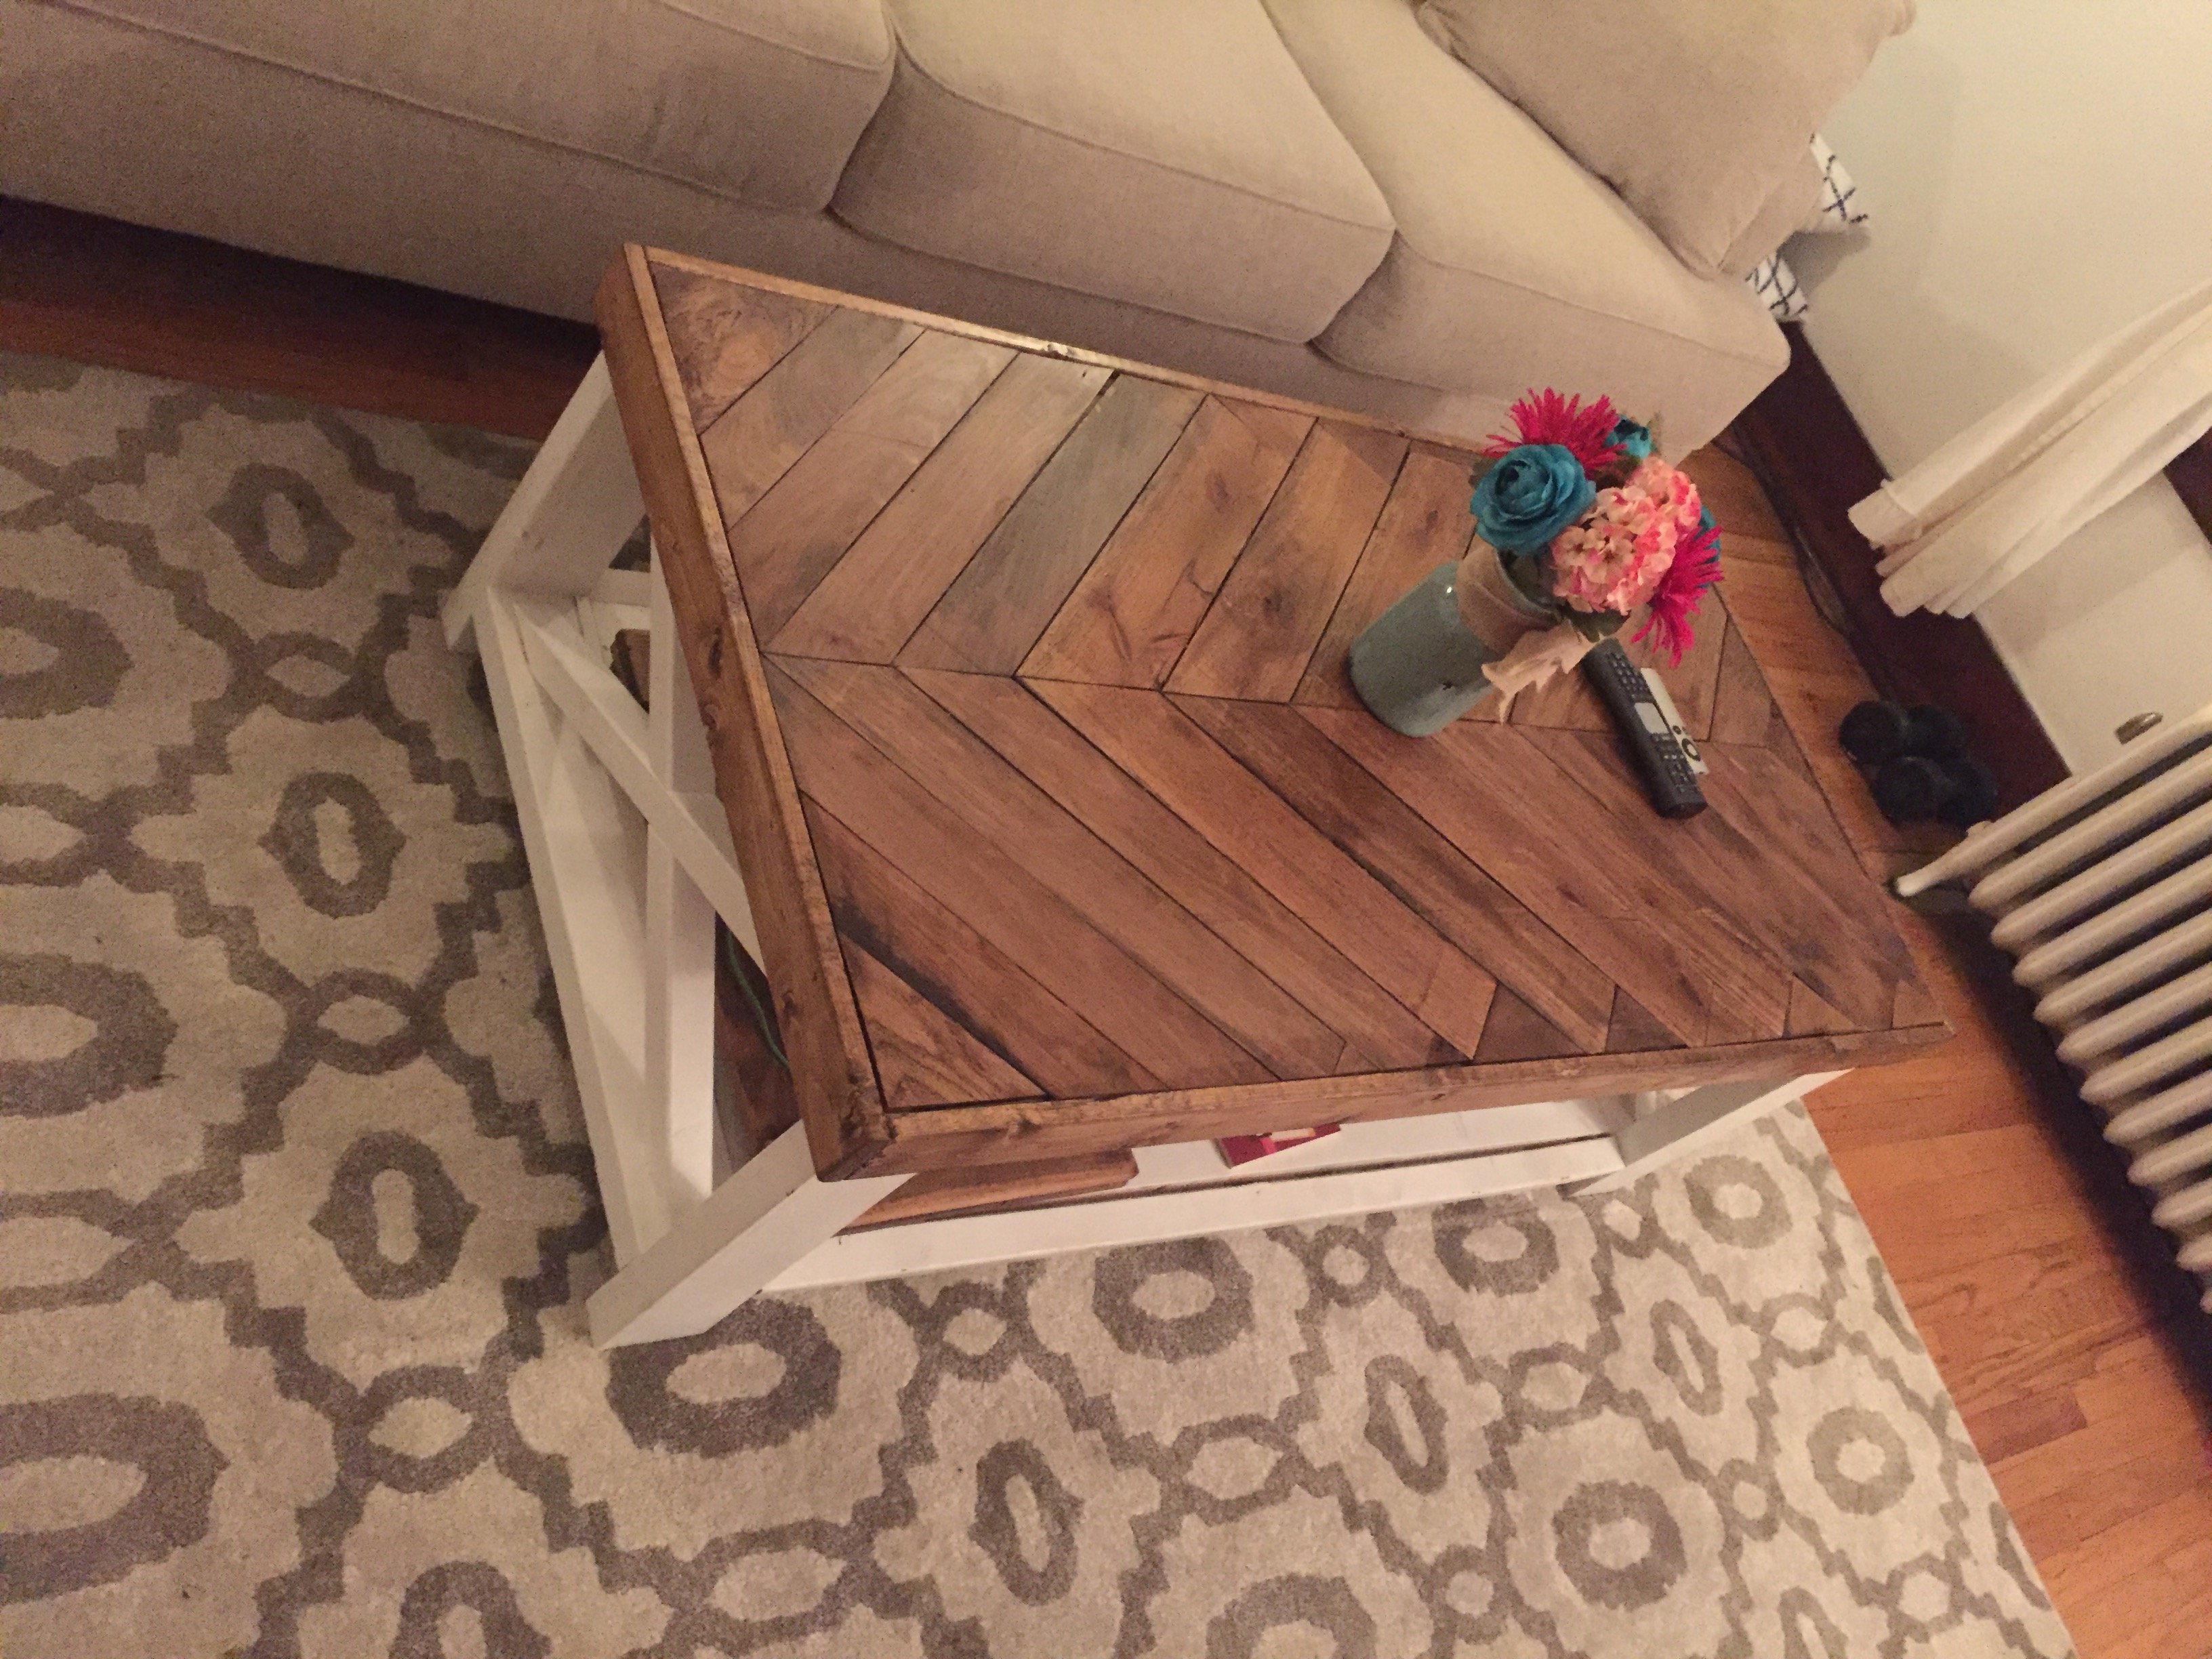
I built this coffee table at the request of my sister-in-law and it was my first attempt at a project like this. It was definitely a rewarding and great learning experience. I used a thickness planer for the pallet wood to get a consistent thickness for the top and so that the stain would set well. Other than the pallet wood itself, this table was built to the specifications of the original plan.
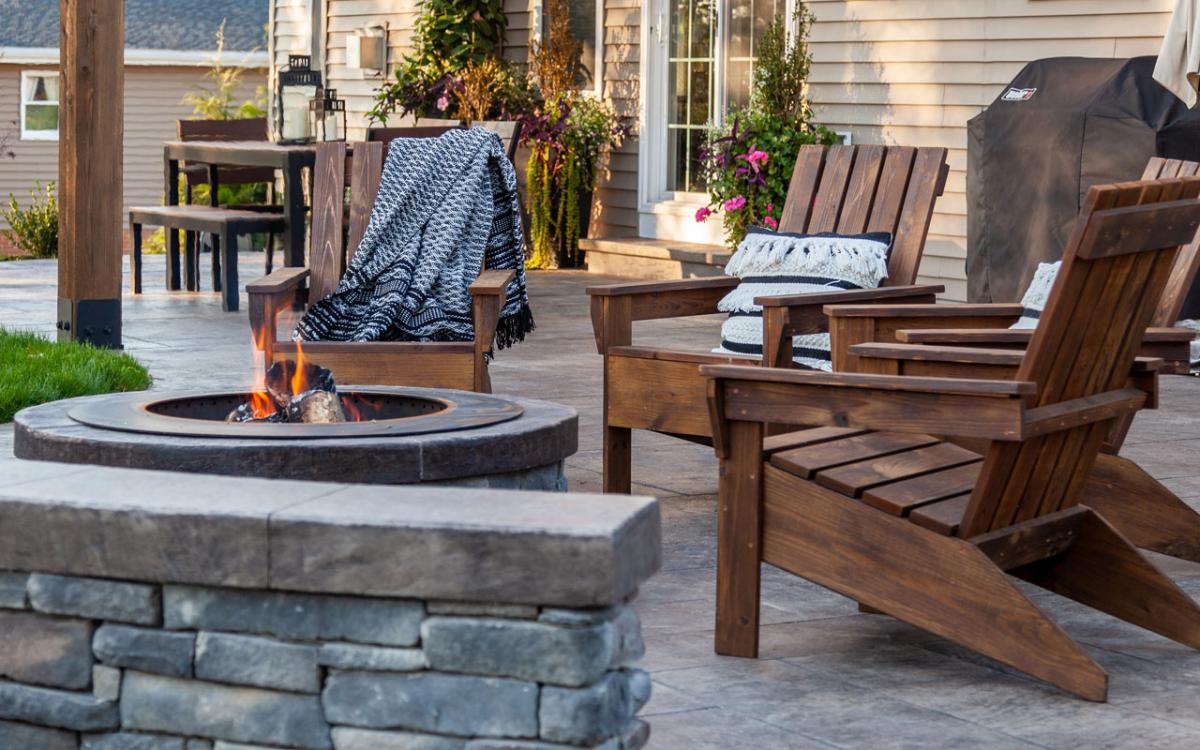
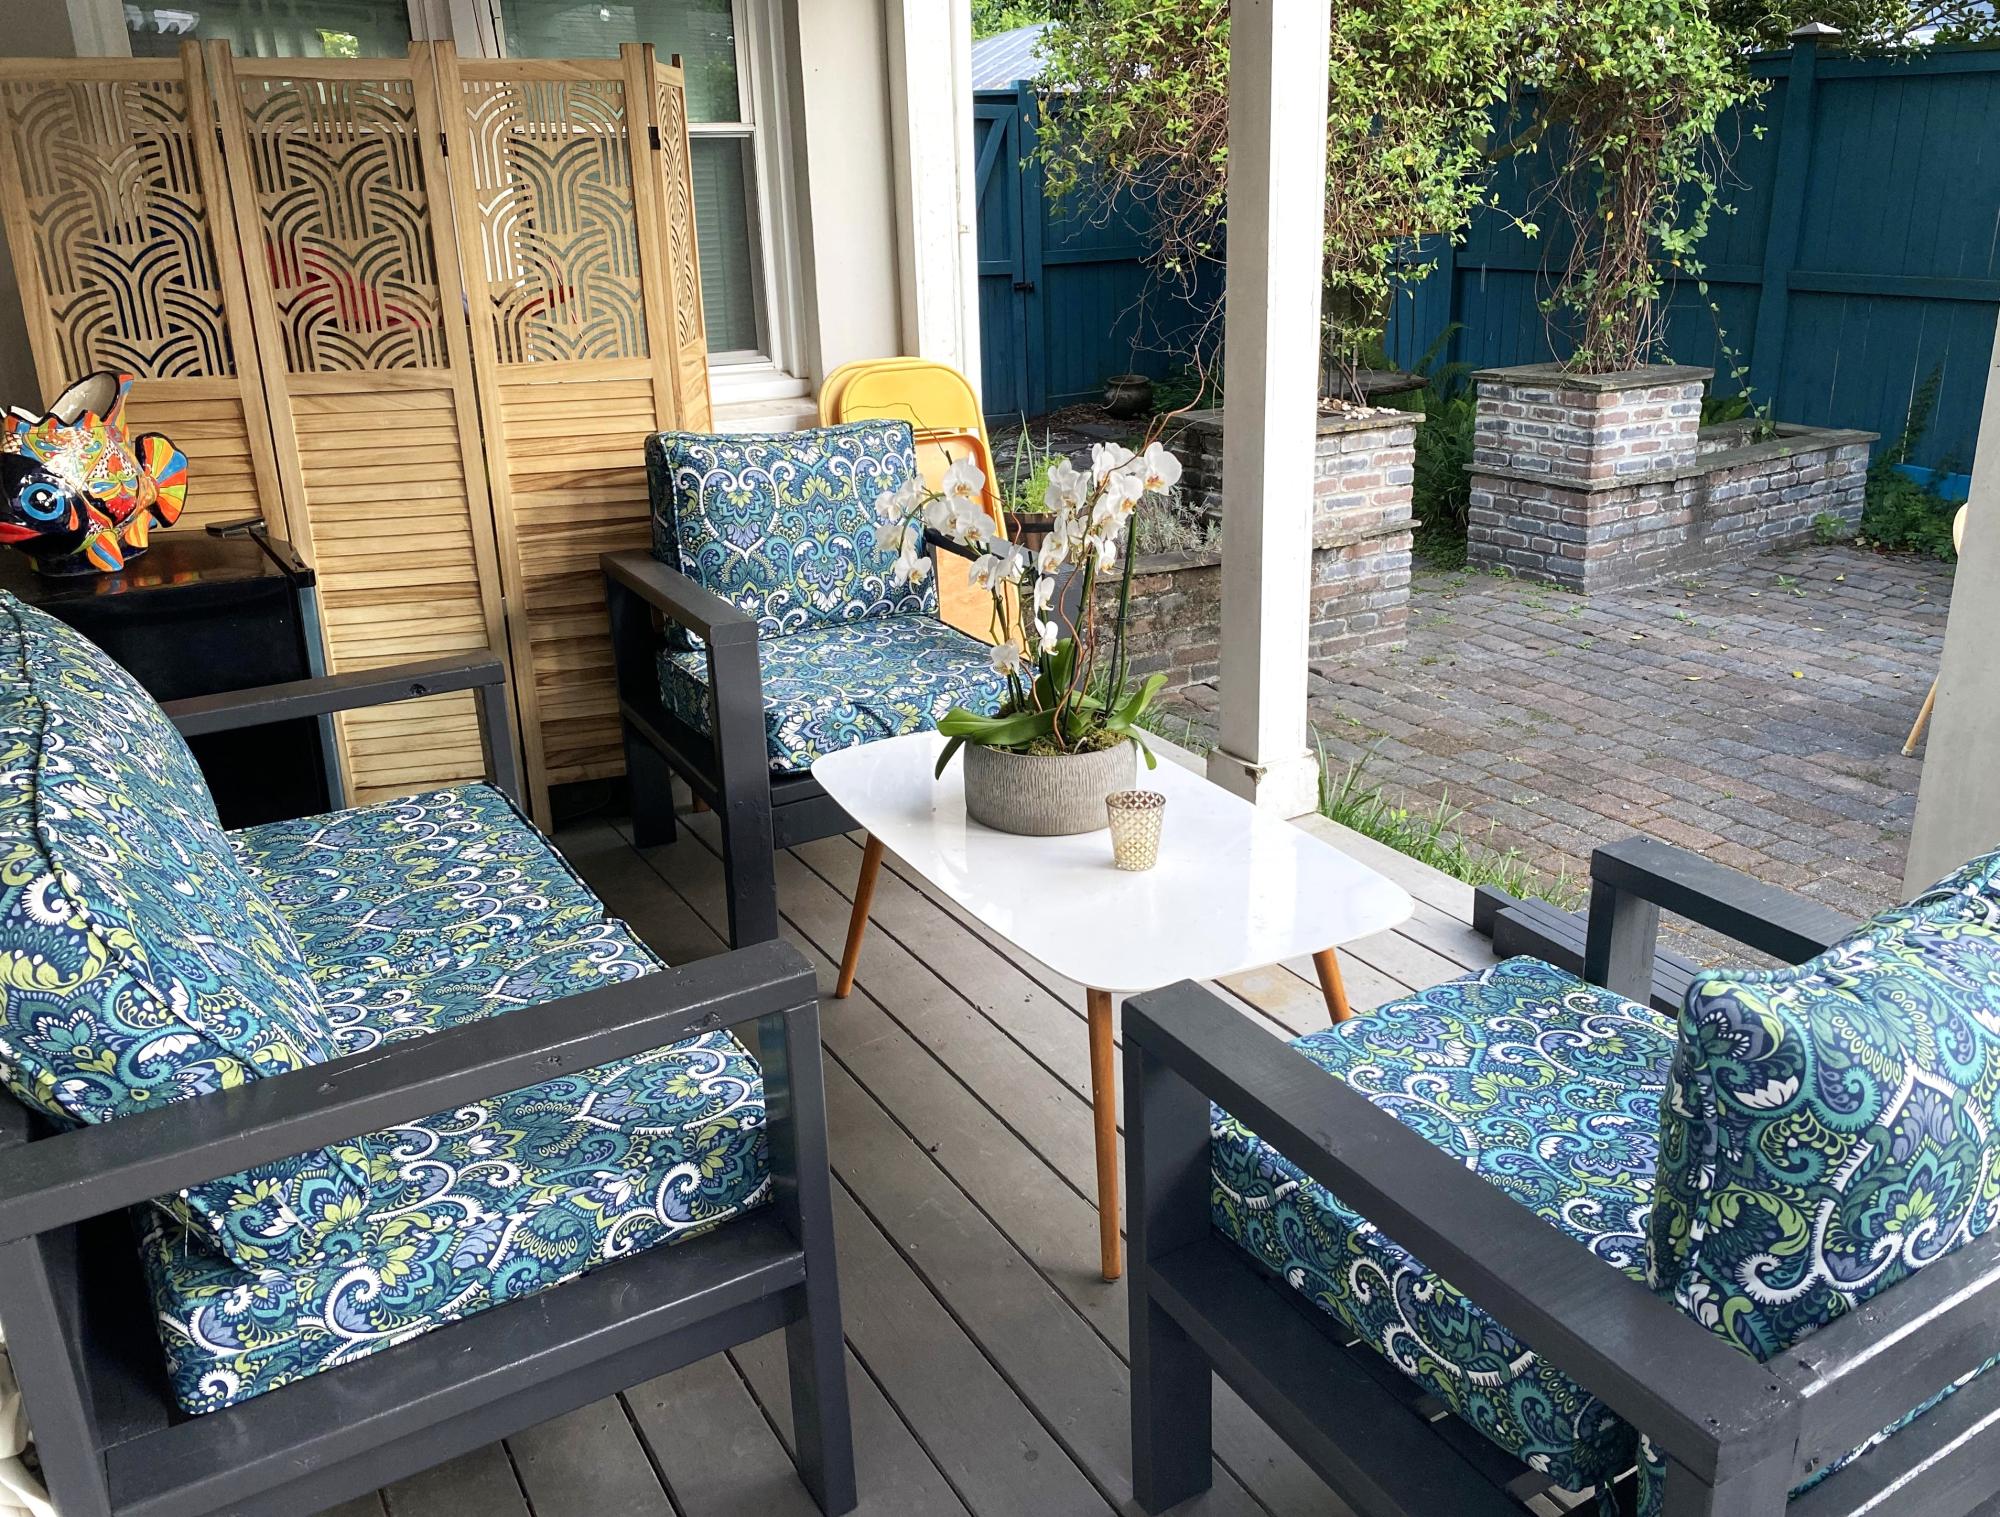
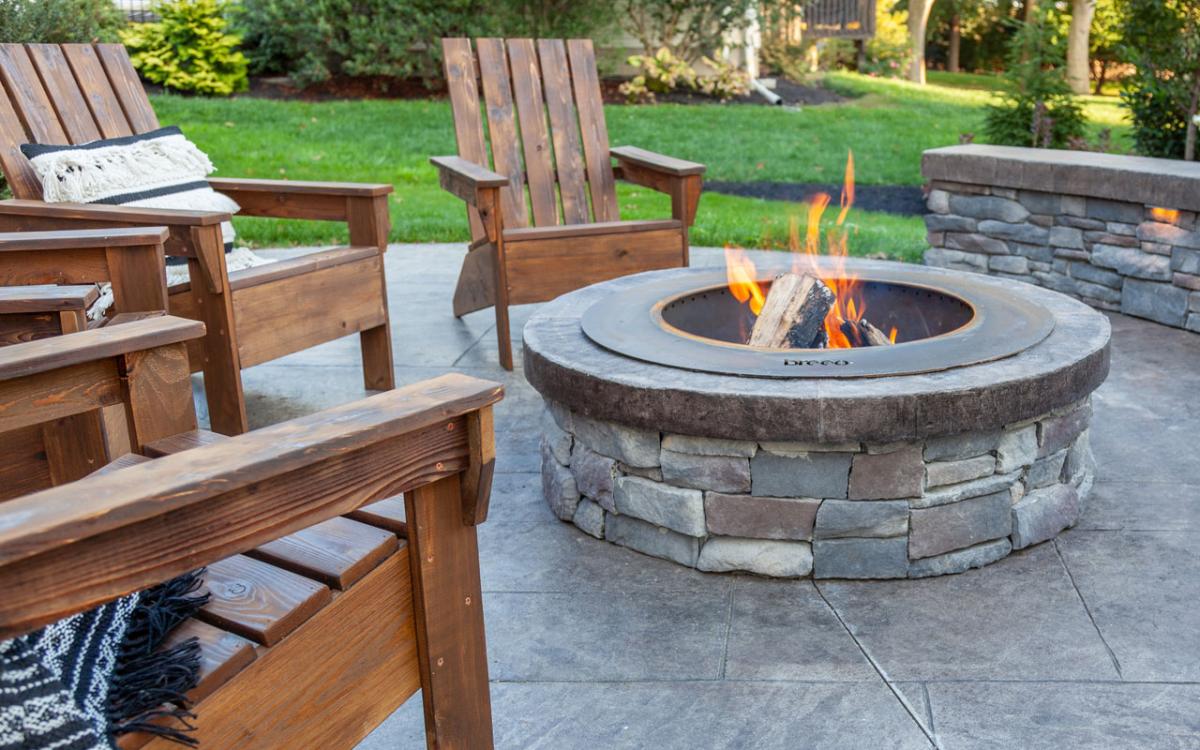
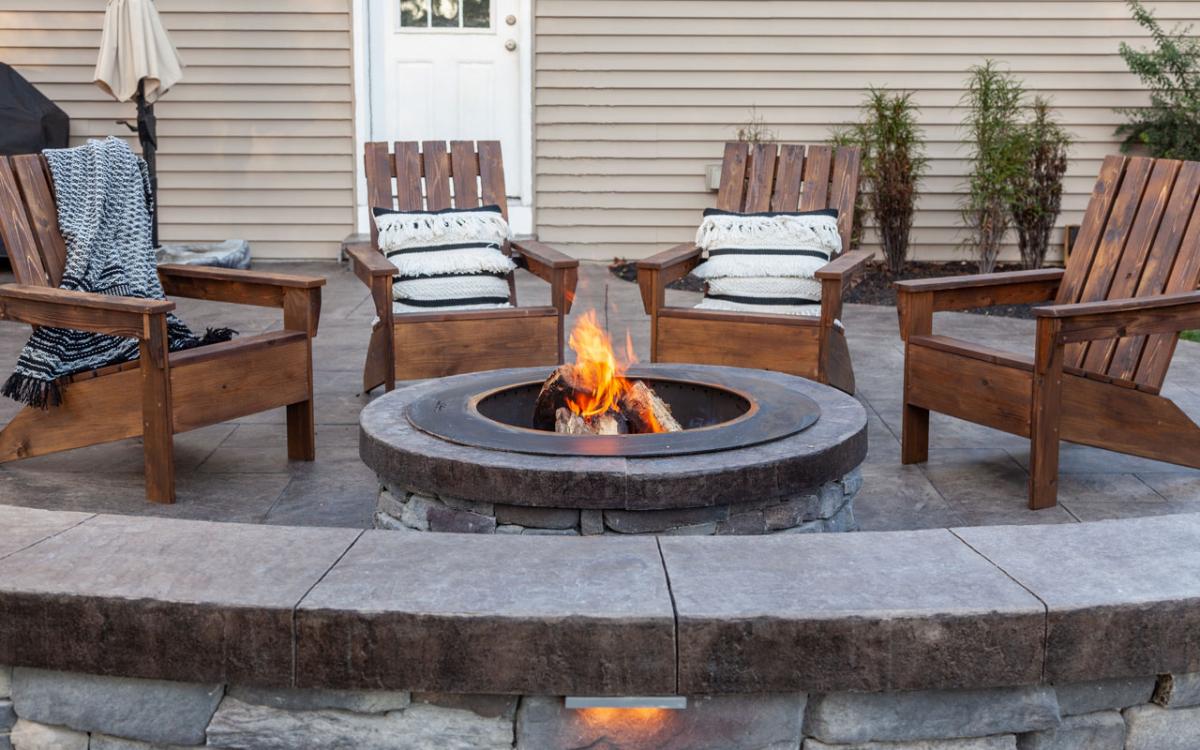
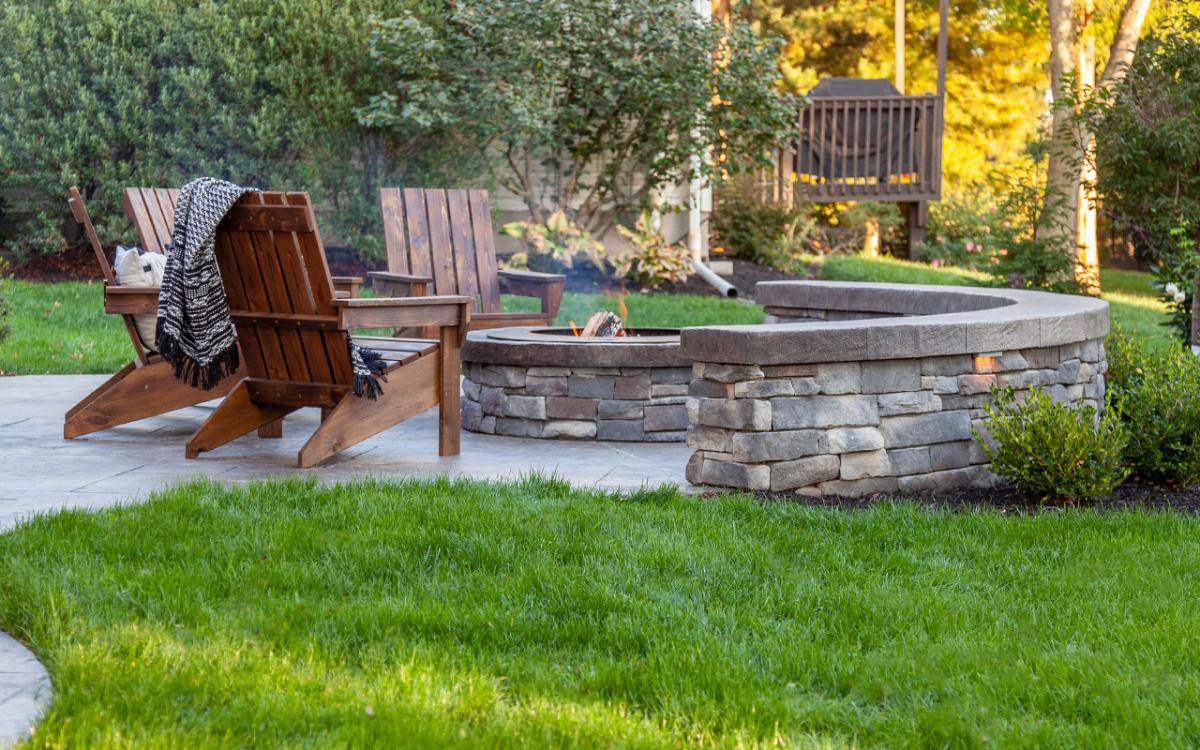
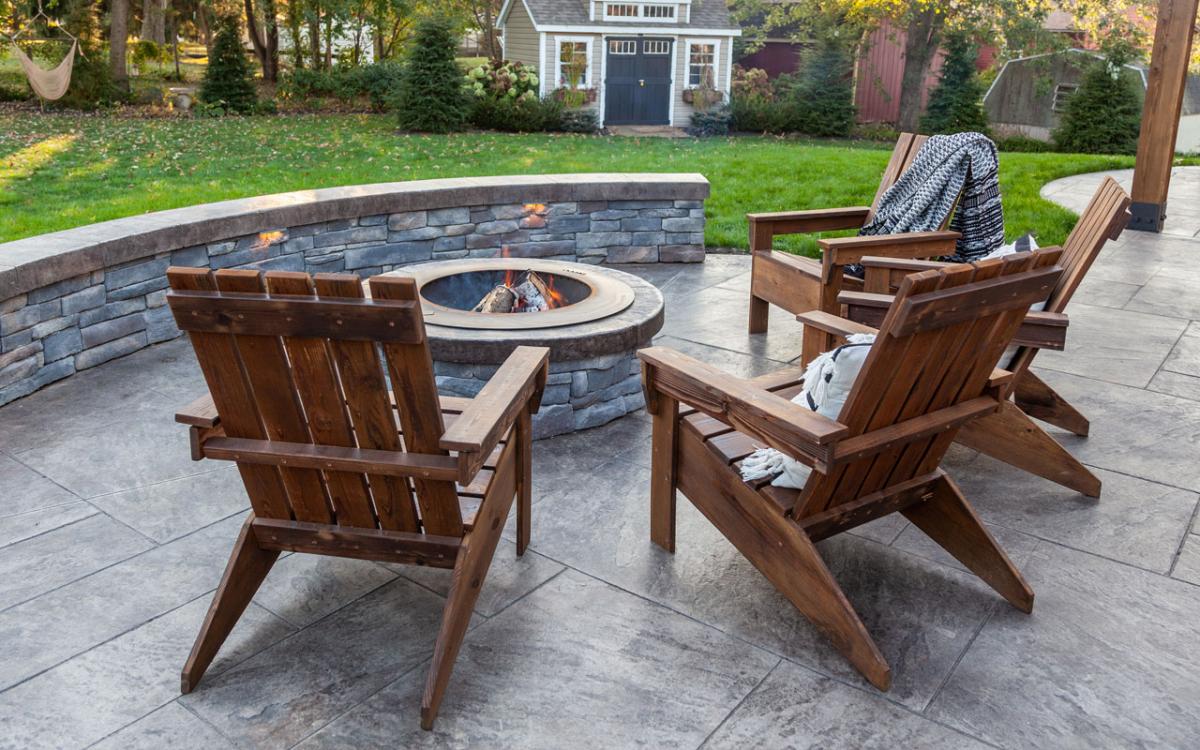
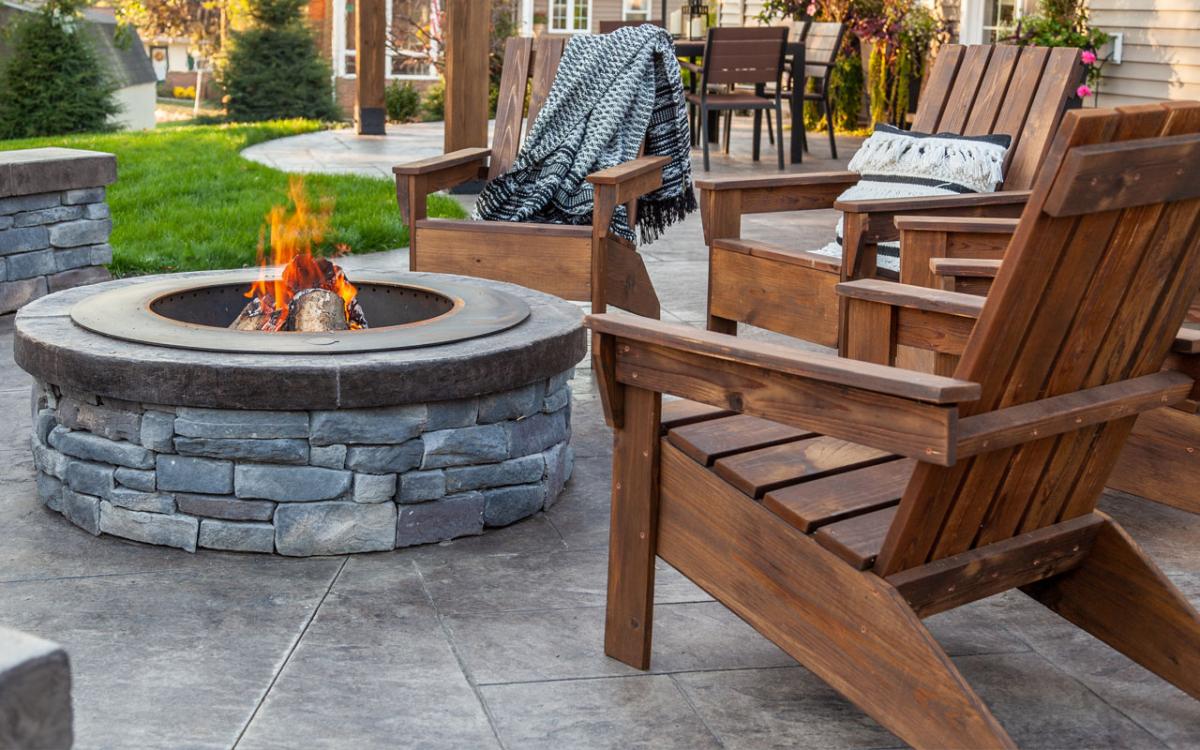
I am long overdue to share these Adirondack chairs that I made last fall. I followed the exact plans for Ana’s Adirondack Chair to make my own. These chairs have such a simple, clean, modern style that I love. Adirondack chairs, no matter what style, are just an all-around classic!
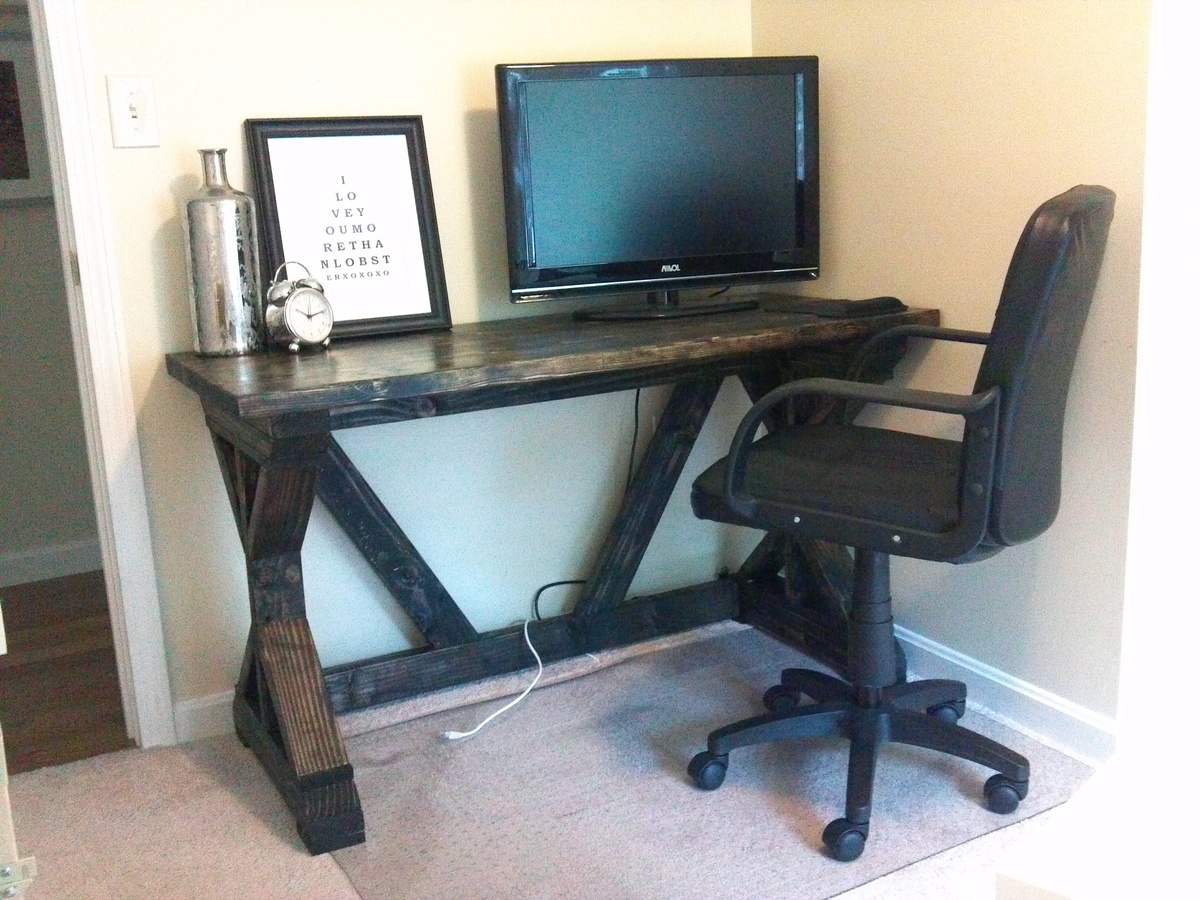
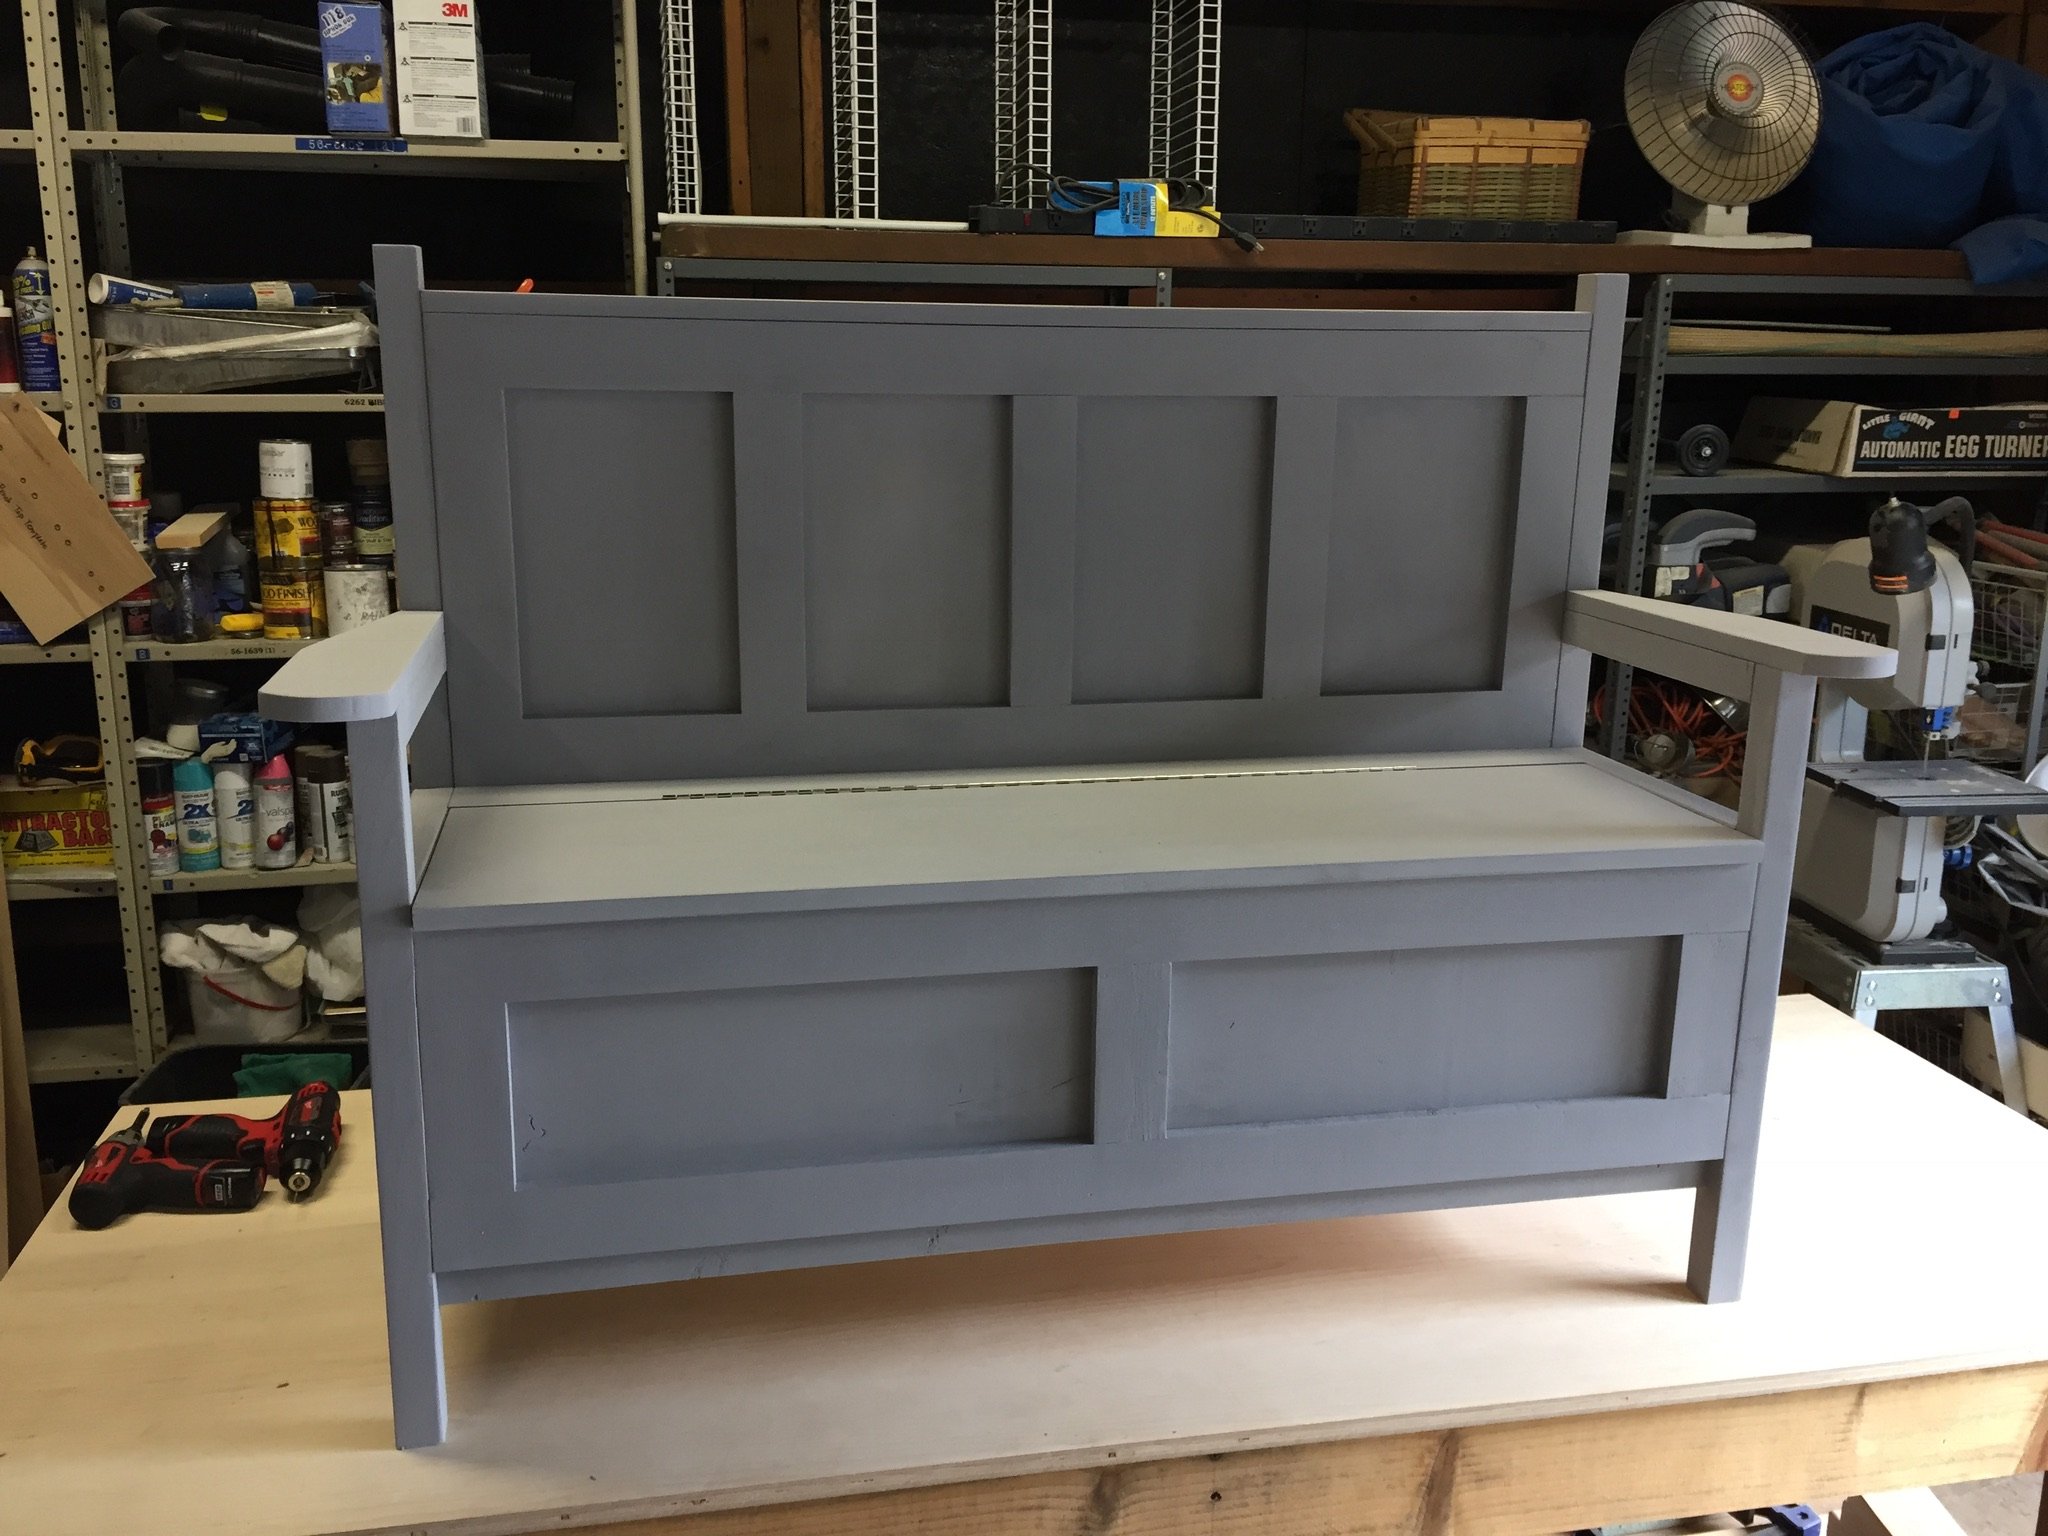
I built it for my husband, but had to make a shorter version, only 52" instead of 72" to fit it into the corner.

What a great project! I went all out with it, spending much more time and money than a sandbox probably deserves :) but I wanted something similar to the colors on our house.
Since we have humid summers, and much of the wood wasn't pressure treated, I sanded, primed (2x) and painted (2x) after cutting. I also changed the base to a 12" wide board rather than 8" to make it deeper. . . changing this one aspect doesn't effect any of the other instructions or measurements. Because of the primer and paint and paint supplies, the project cost about $150. But the kids love it and are in it every day we are home!

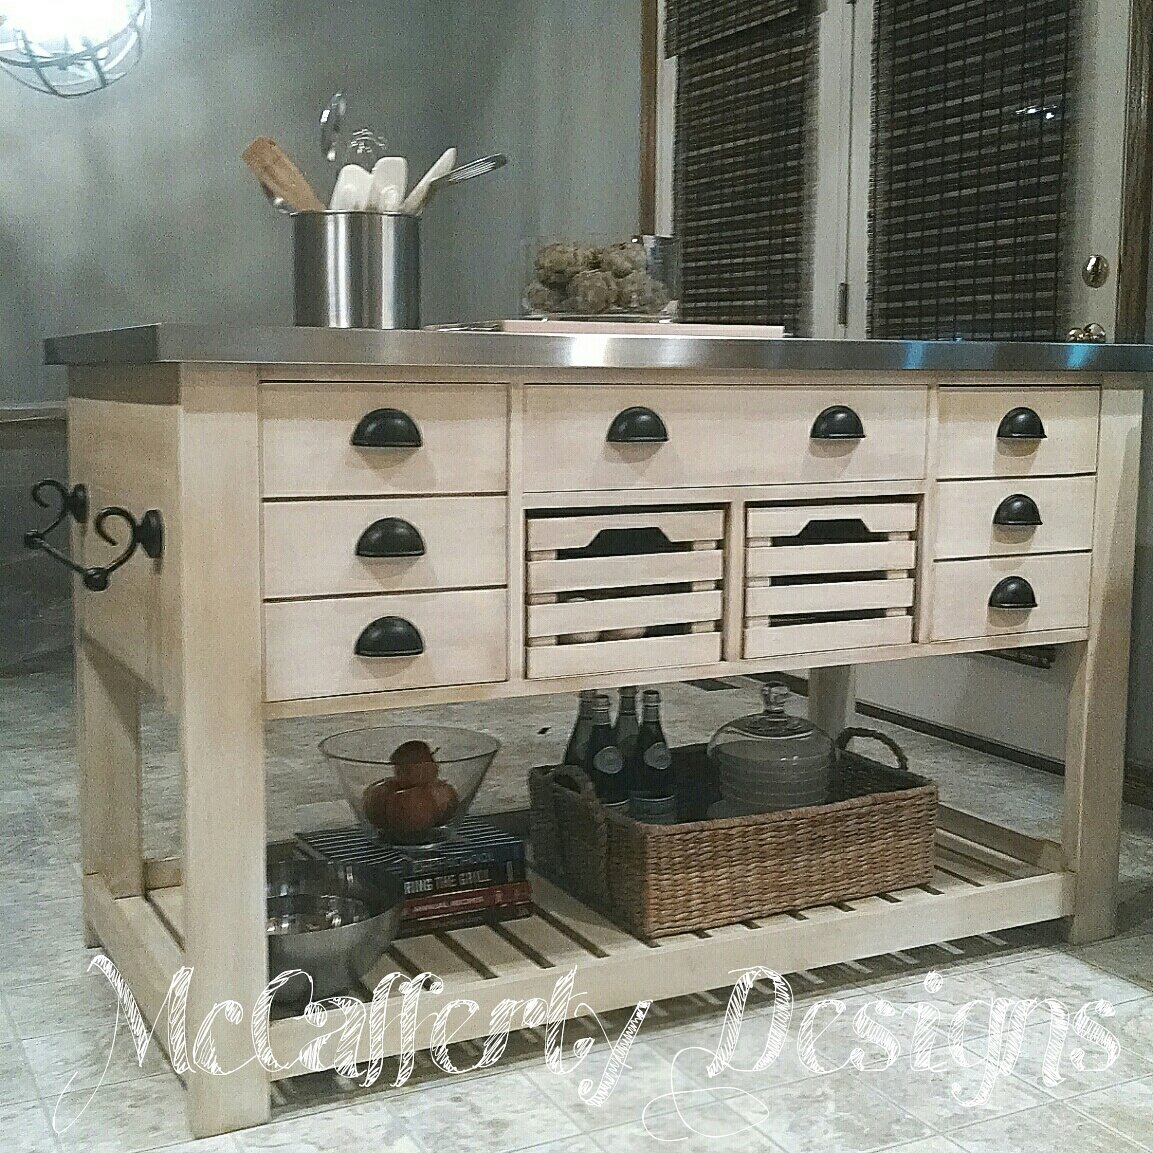
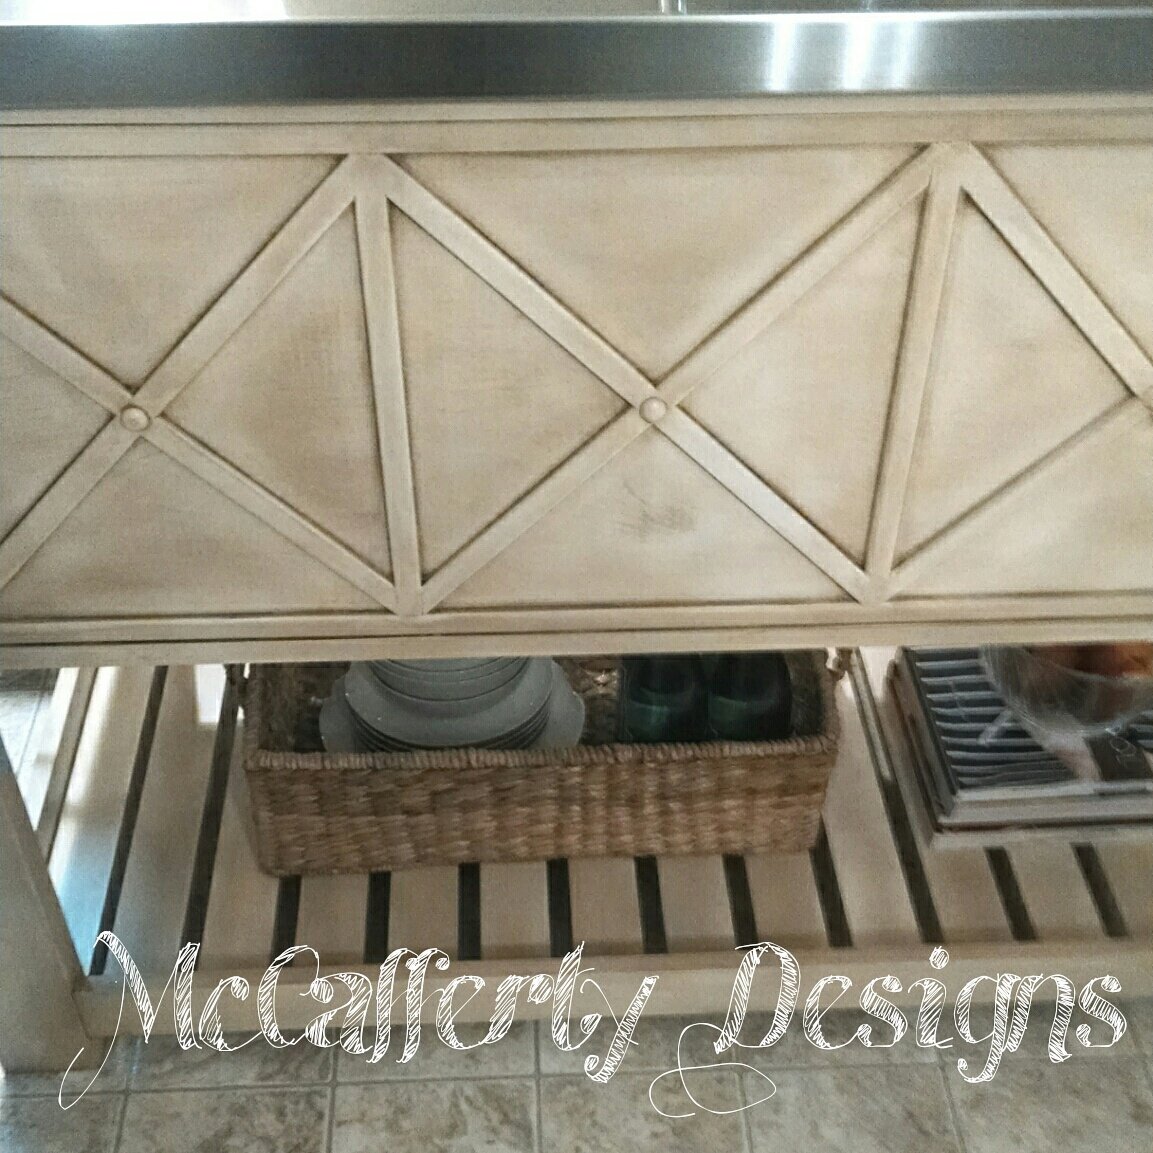
Custom built kitchen island with stainless steel top. Everything hand crafted. 4 stage paint process to acheive the desired finish.
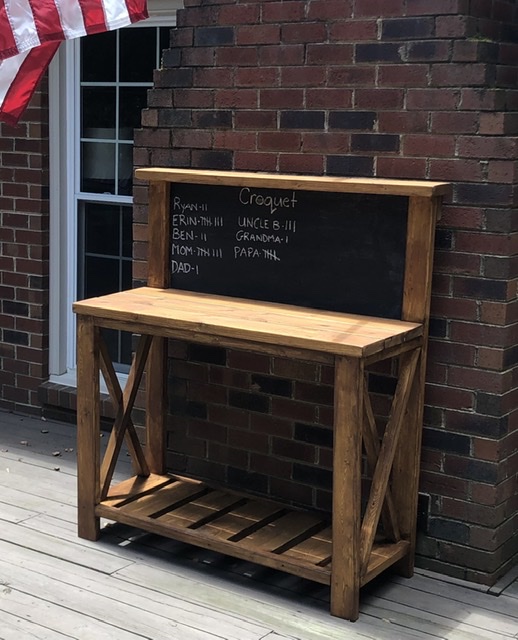
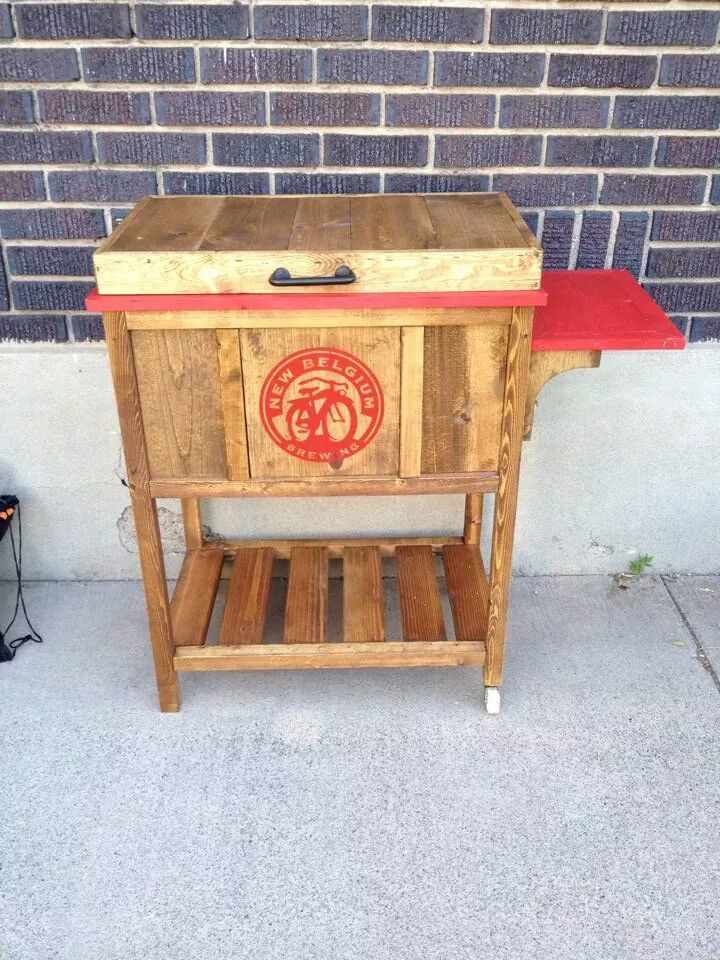
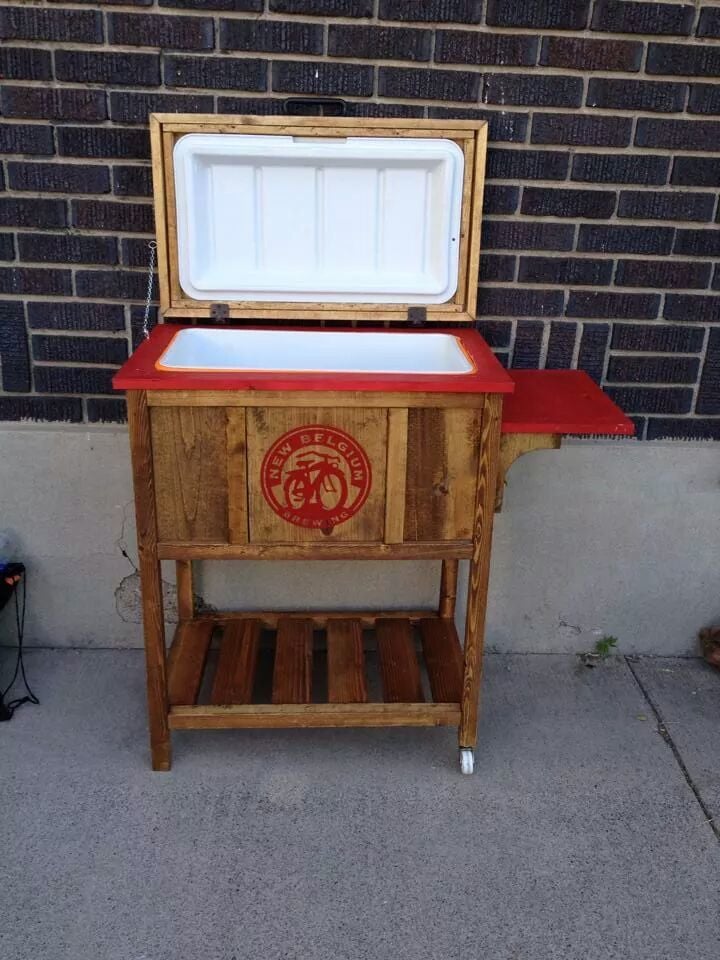
Mom wanted croquet scoreboard and I needed a grill prep area.
Built on a few hours
Sanding and finishing took a few evenings.


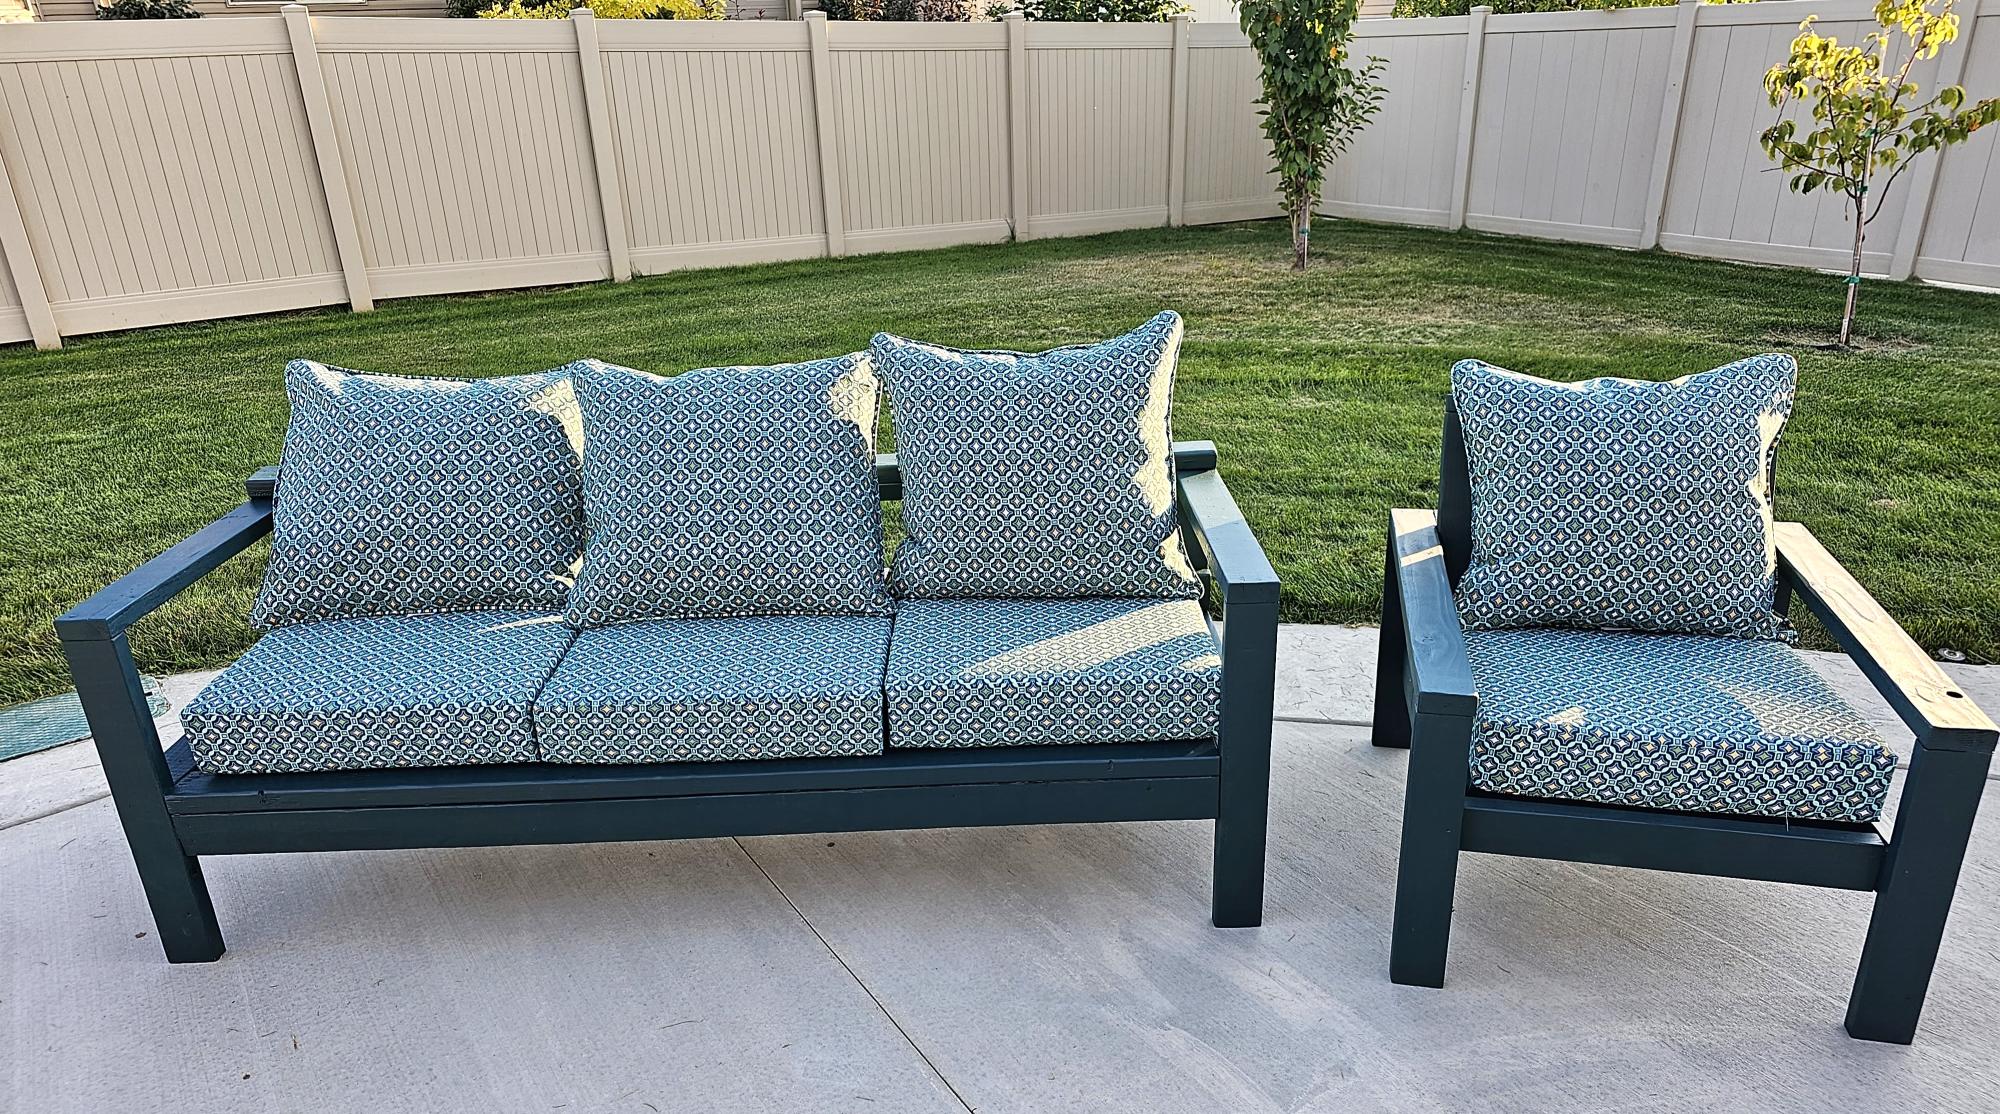
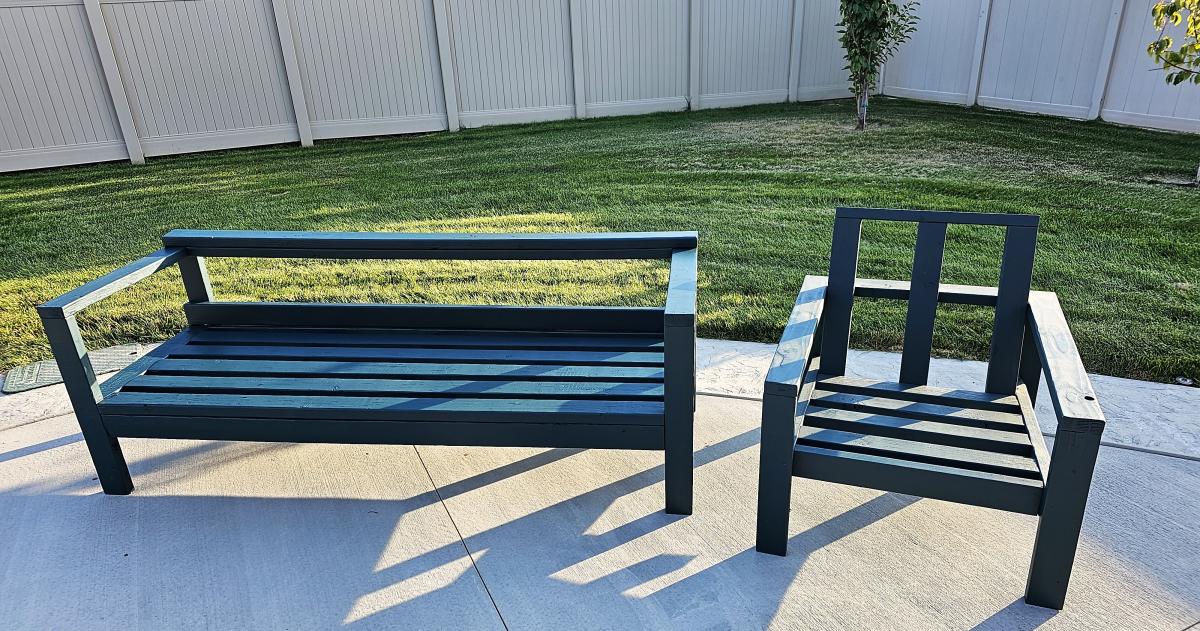
I couldn't see spending several thousand for outdoor furniture, so I looked at what you had done. It was so much easier and sturdier than I thought it would be. Thank you for all you do for the community.
I added the board on the back of the sofa to stop the cushions from slipping through. My wife wanted a fun color so we found a waterproof stain and had it tinted. I thought it came out very nice.
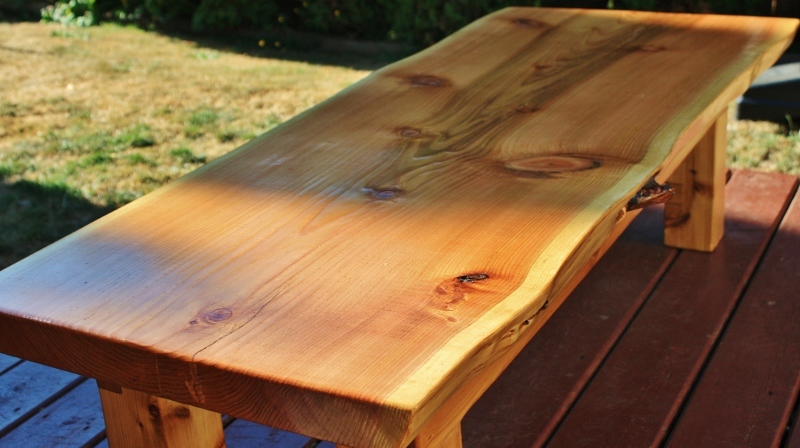
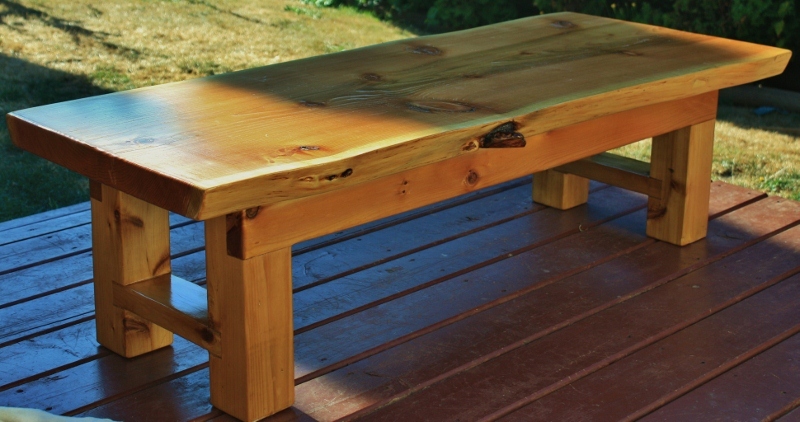
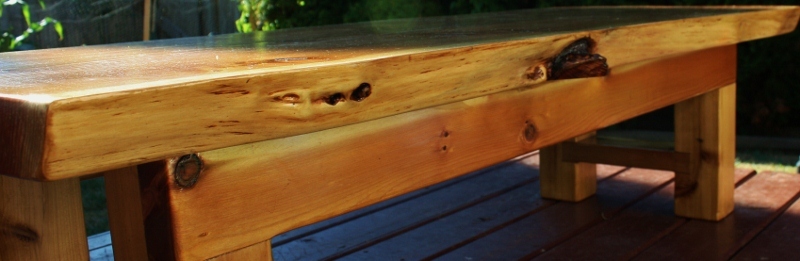
I located an 11ft piece of cedar 5 inches thick and 21 inches wide. The first thing I thought was to splice it and make an outdoor dining table....but realised i could get some distance out of this and decided to start with a coffee table. The tryde coffee table was the inspiration to get this made. It was a weekend project that was done while my 2 year old took his afternoon naps. My wife loves it, so managed to score some brownie points with this one. It didn't take too much to sand, a quick skim with 60 grit to get rid of the major splinters and saw scars, then an hour or so of 120 grit. The legs are s4s cedar 4x4 posts with s4s cedar 2x4 supports. I don't have too many tools so used a band saw at my neighbours workshop to quickly rough out the joints. once all pieces were cut and sanded, it was assembled with glue and held in place with multiple bar clamps and cured overnight. The top was assembled the next day with glue, sanded in place and stained / urethaned on day 2. A fun project for a novice like me.
Wed, 09/19/2012 - 04:16
That's beautiful. Nothing compares to a beautiful piece of furniture made from eye catching wood..and cedar is just that. Great job!
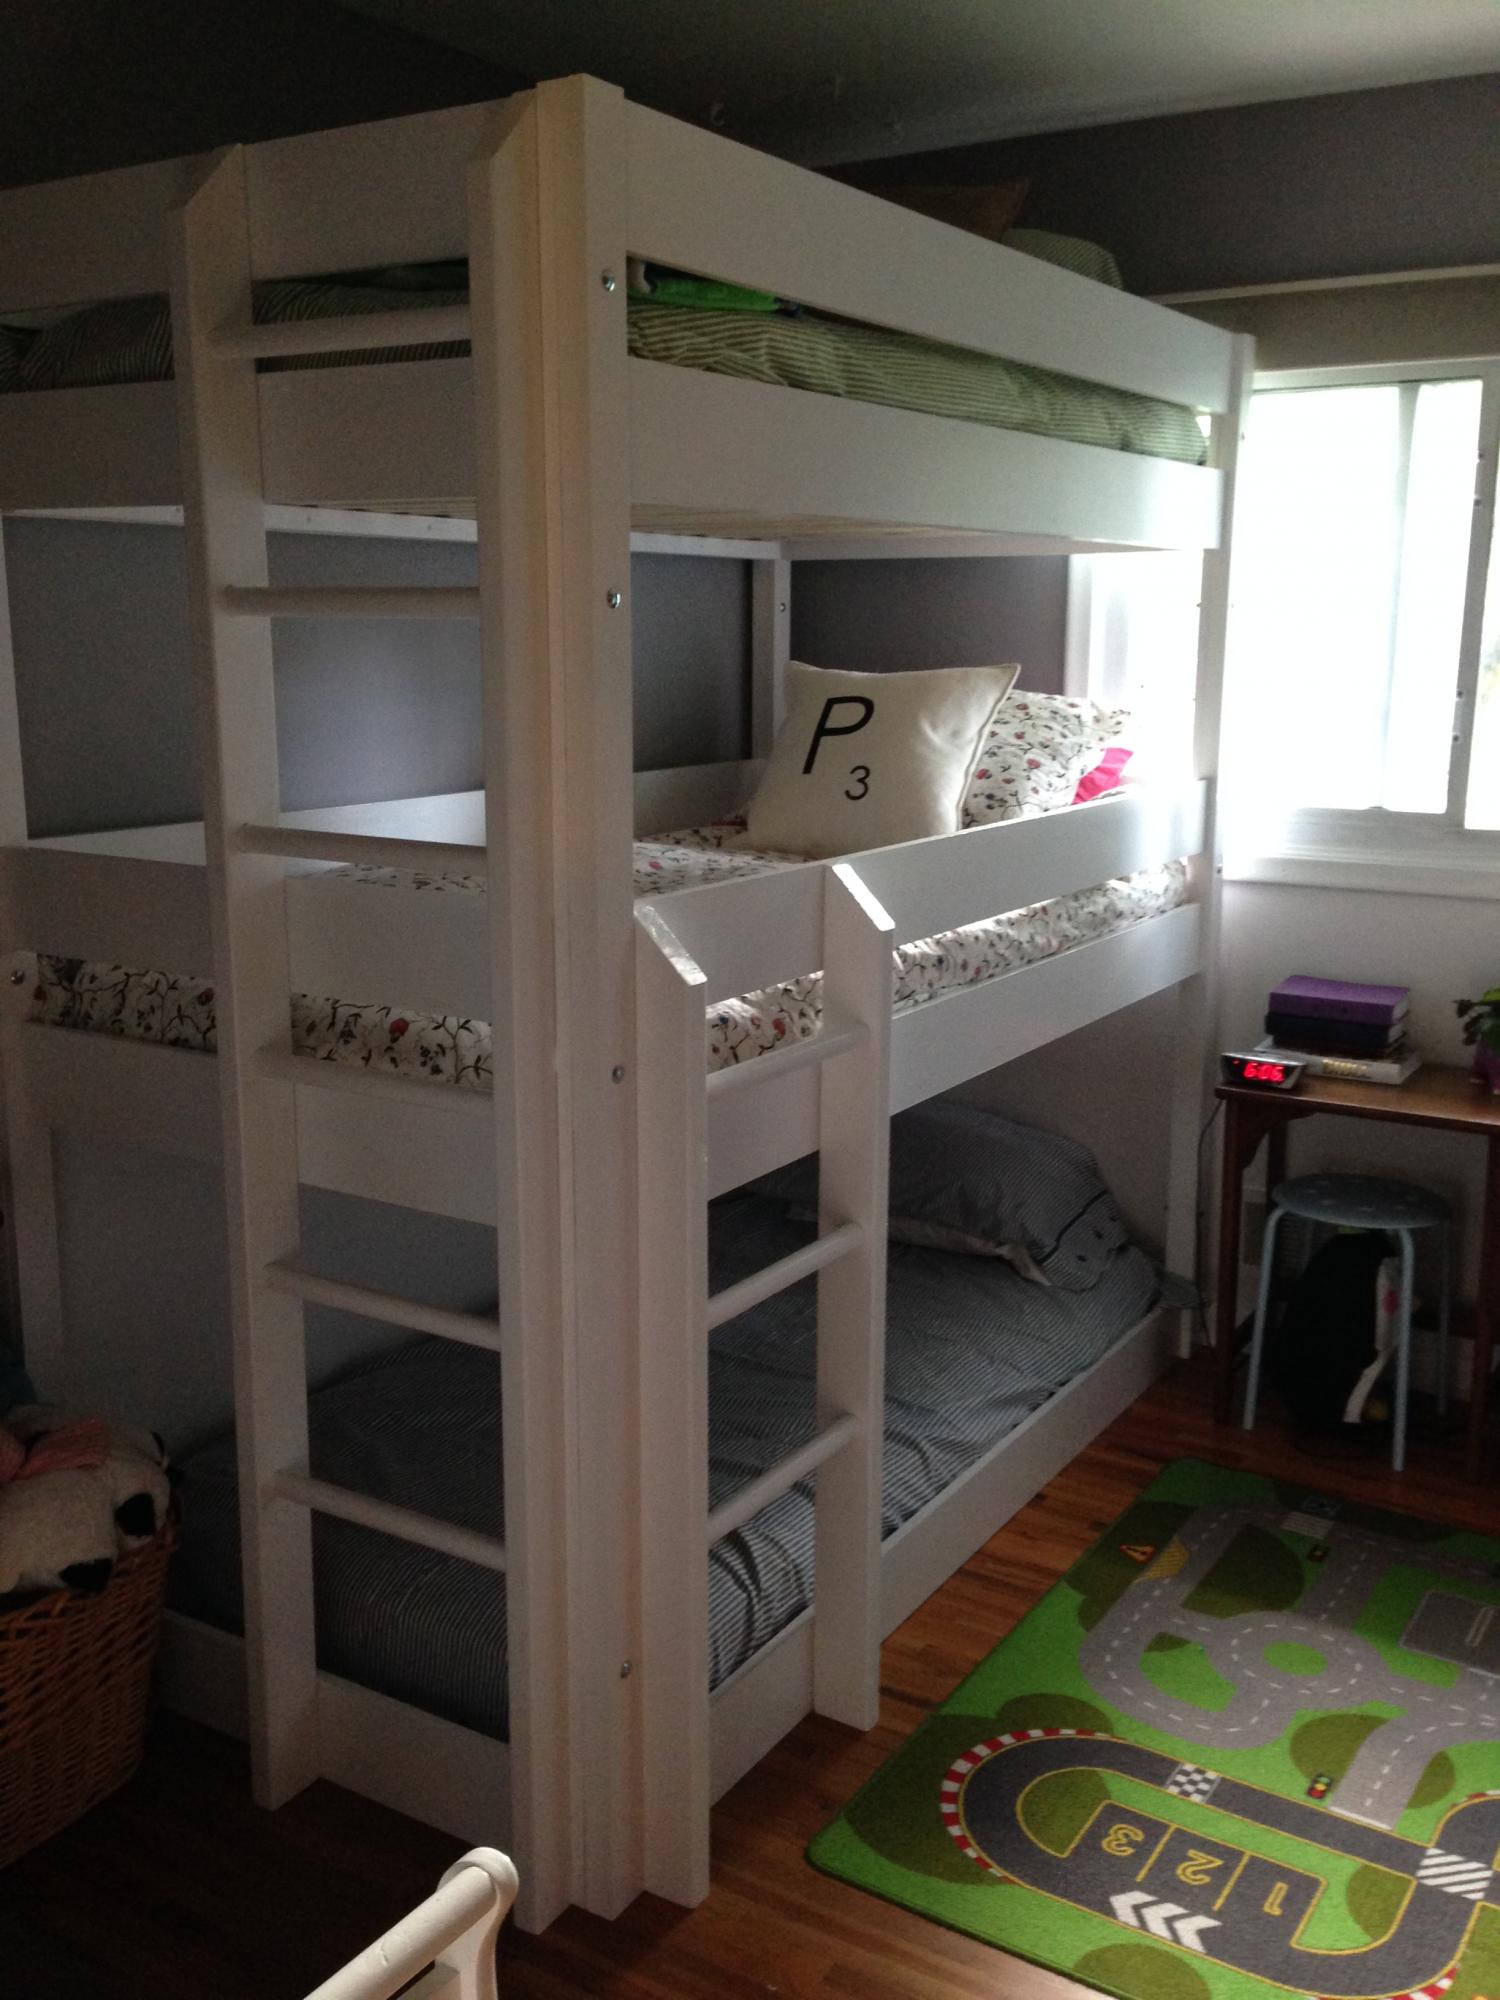
I created identical sides and then added the ladder afterward. I modified the plans to create a triple bunk.
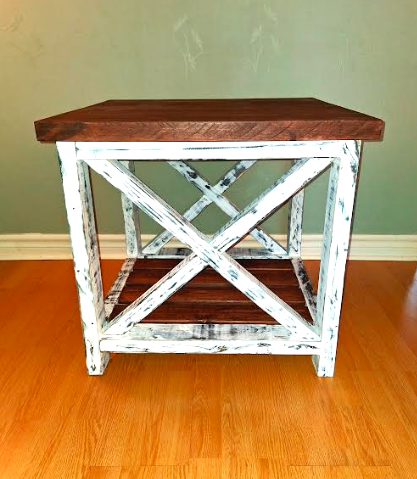
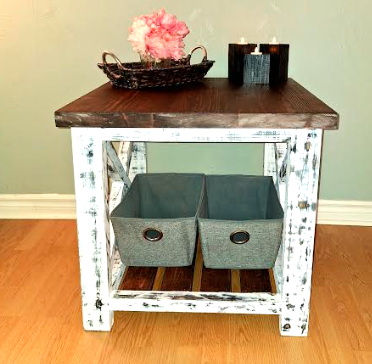
I made 2 side/end tables, farmhouse style with X braces and distressed. Dark walnut water based stain on the top and slats.Coat of black paint on the frame and a coat of white on top of it. Had fun with my sander and gave it an awesome look.
Thank you Ana!
Picard Woodworking
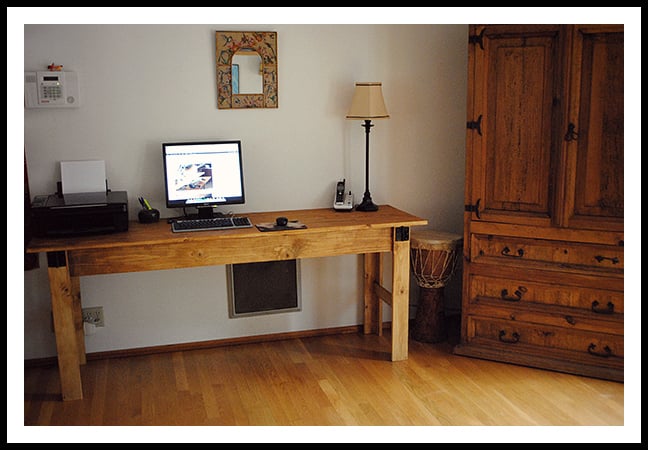
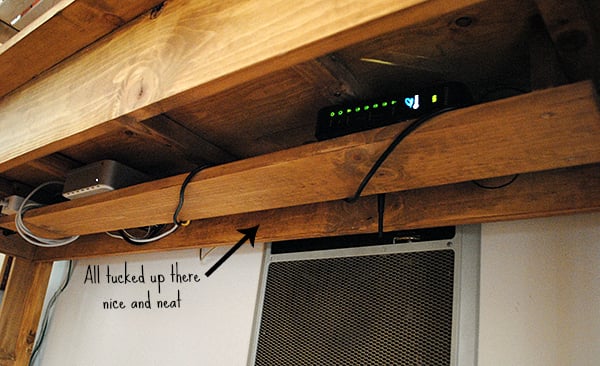
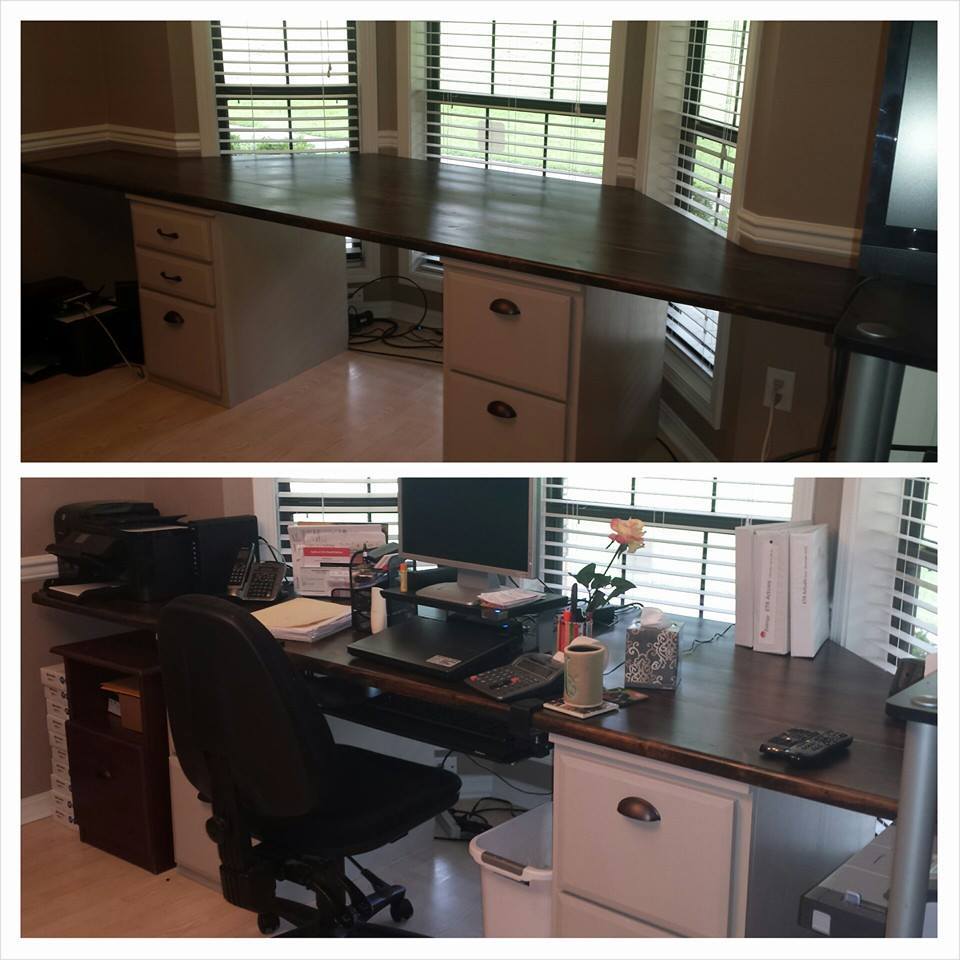
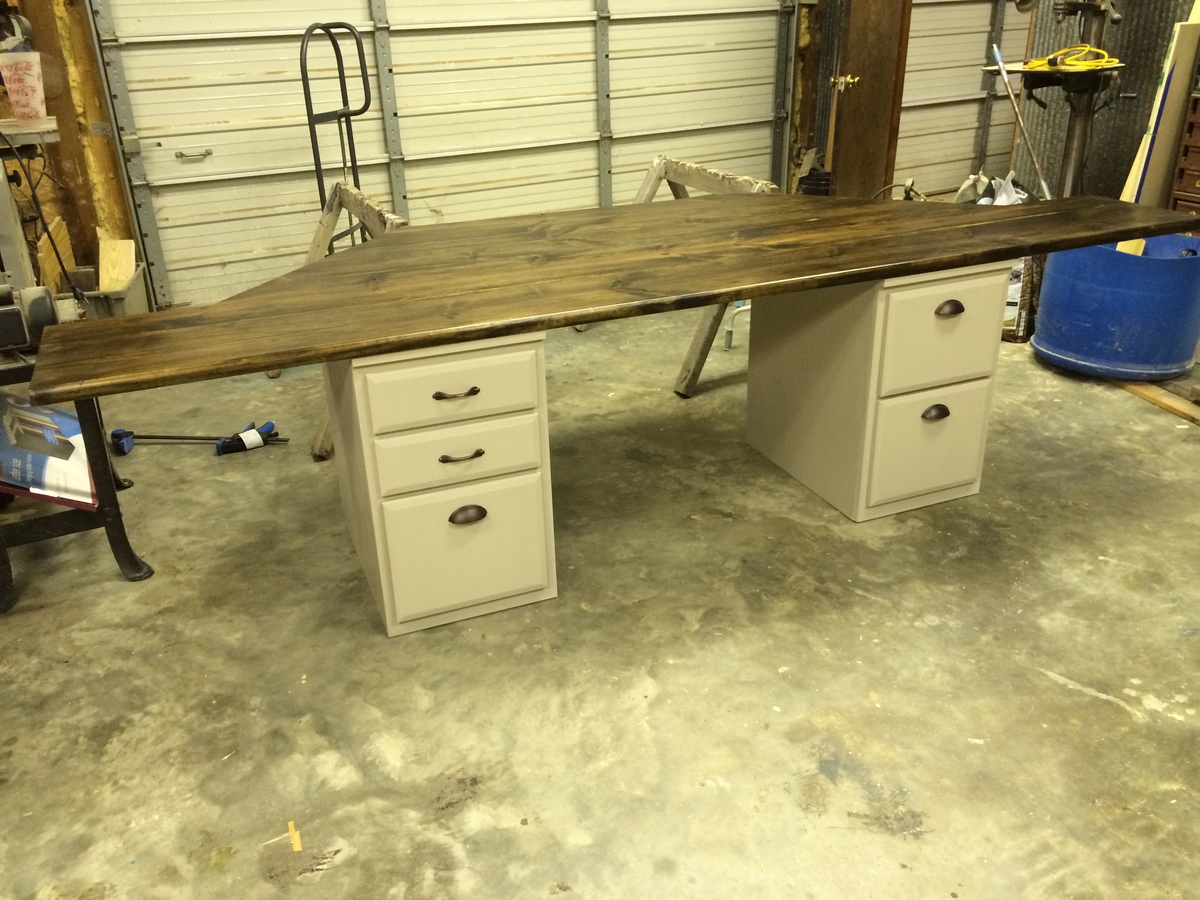
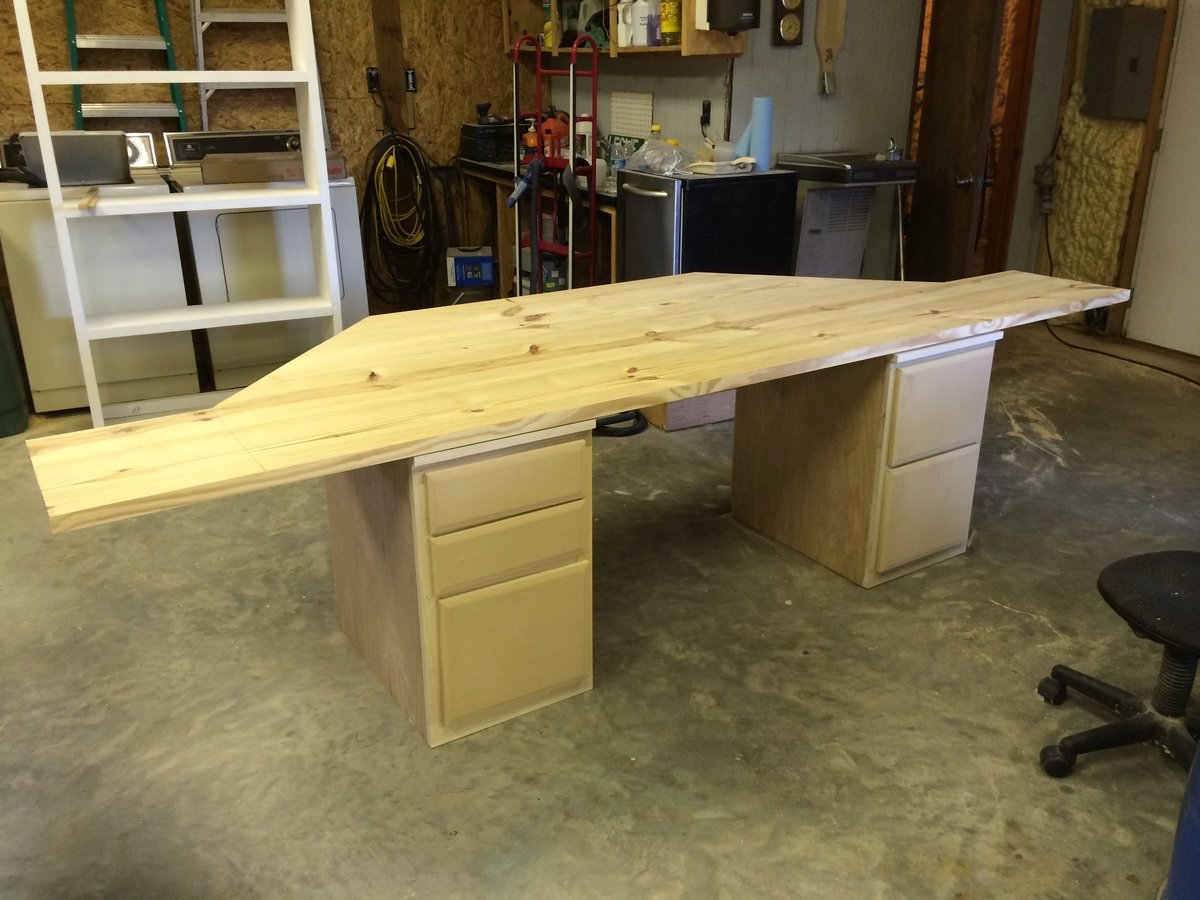
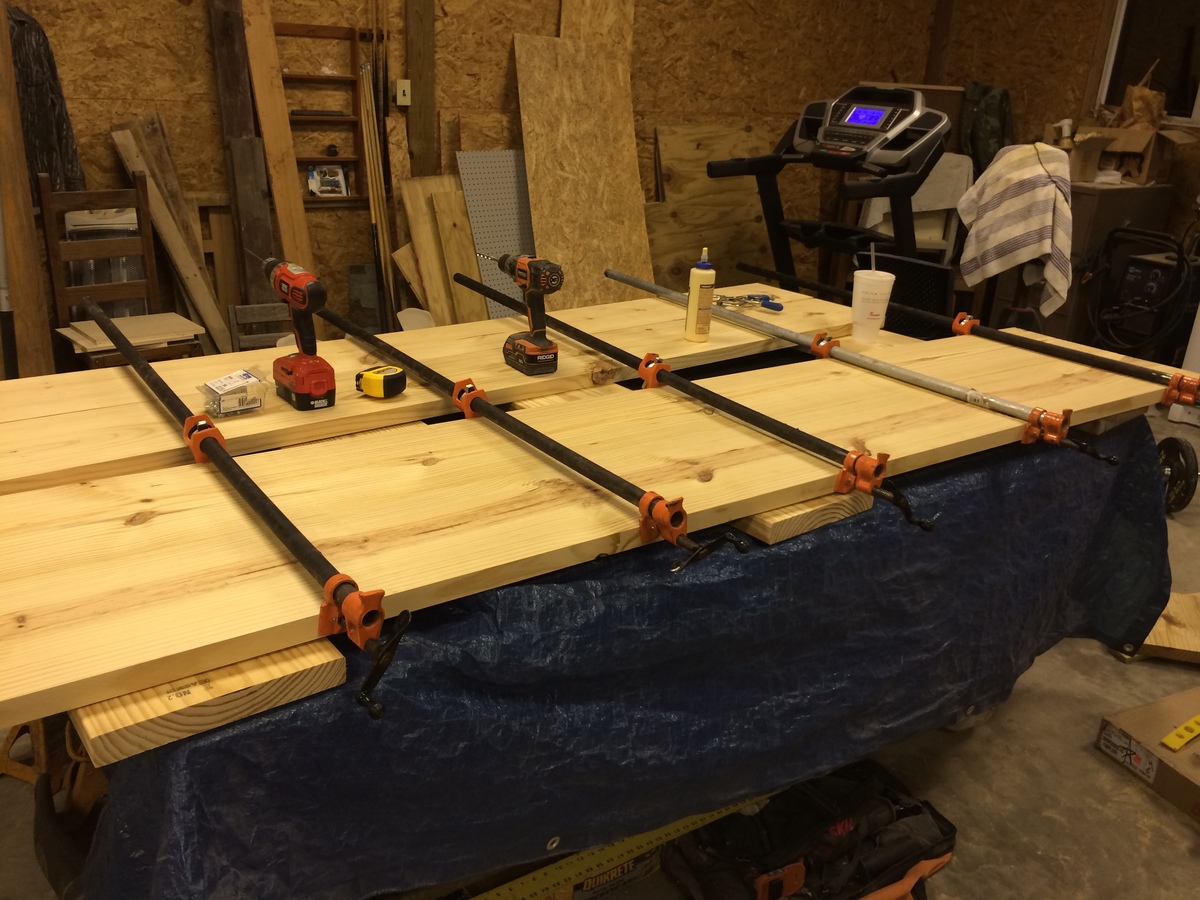
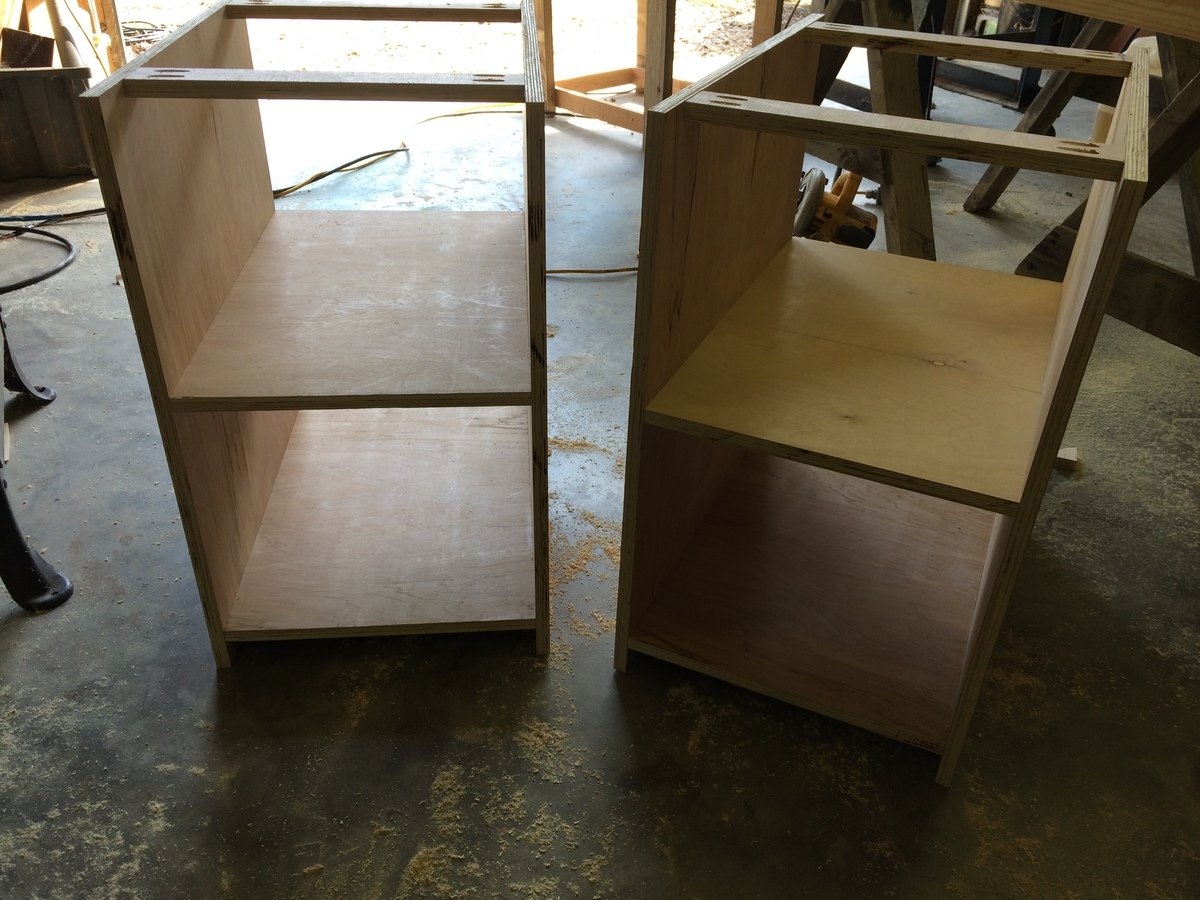
This is a bay window standalone desk. The desk has an enormous top and fits snugly into the bay window. It did not have to be attached to the wall. There are four pieces in total: the top, 2 base units and a support that spaces the desks at 36" and further secures the top.
The base unites are built from the File Base Classic Wall Storage System and the top is glued up 2x12s that were planed down and straight edged.
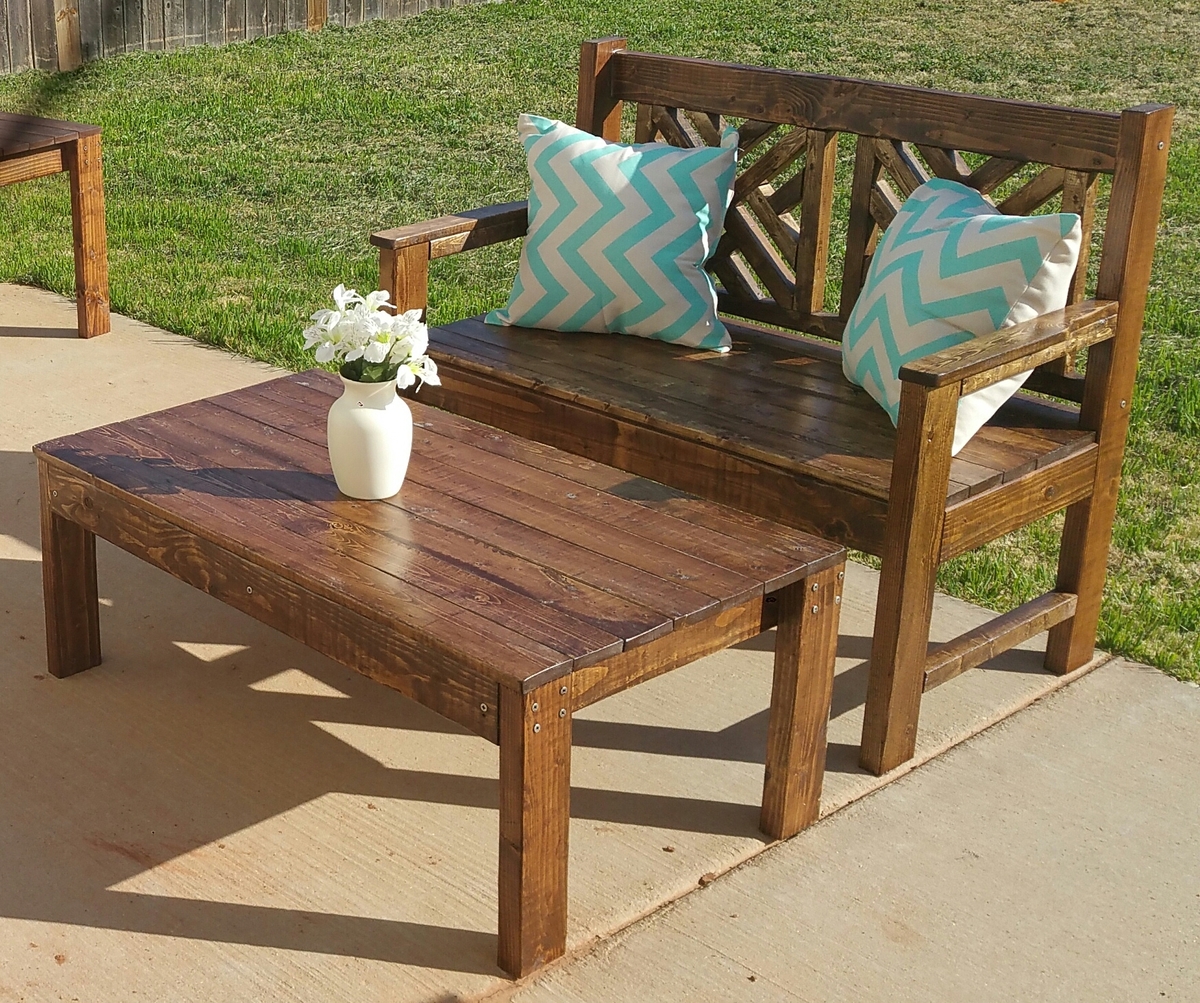
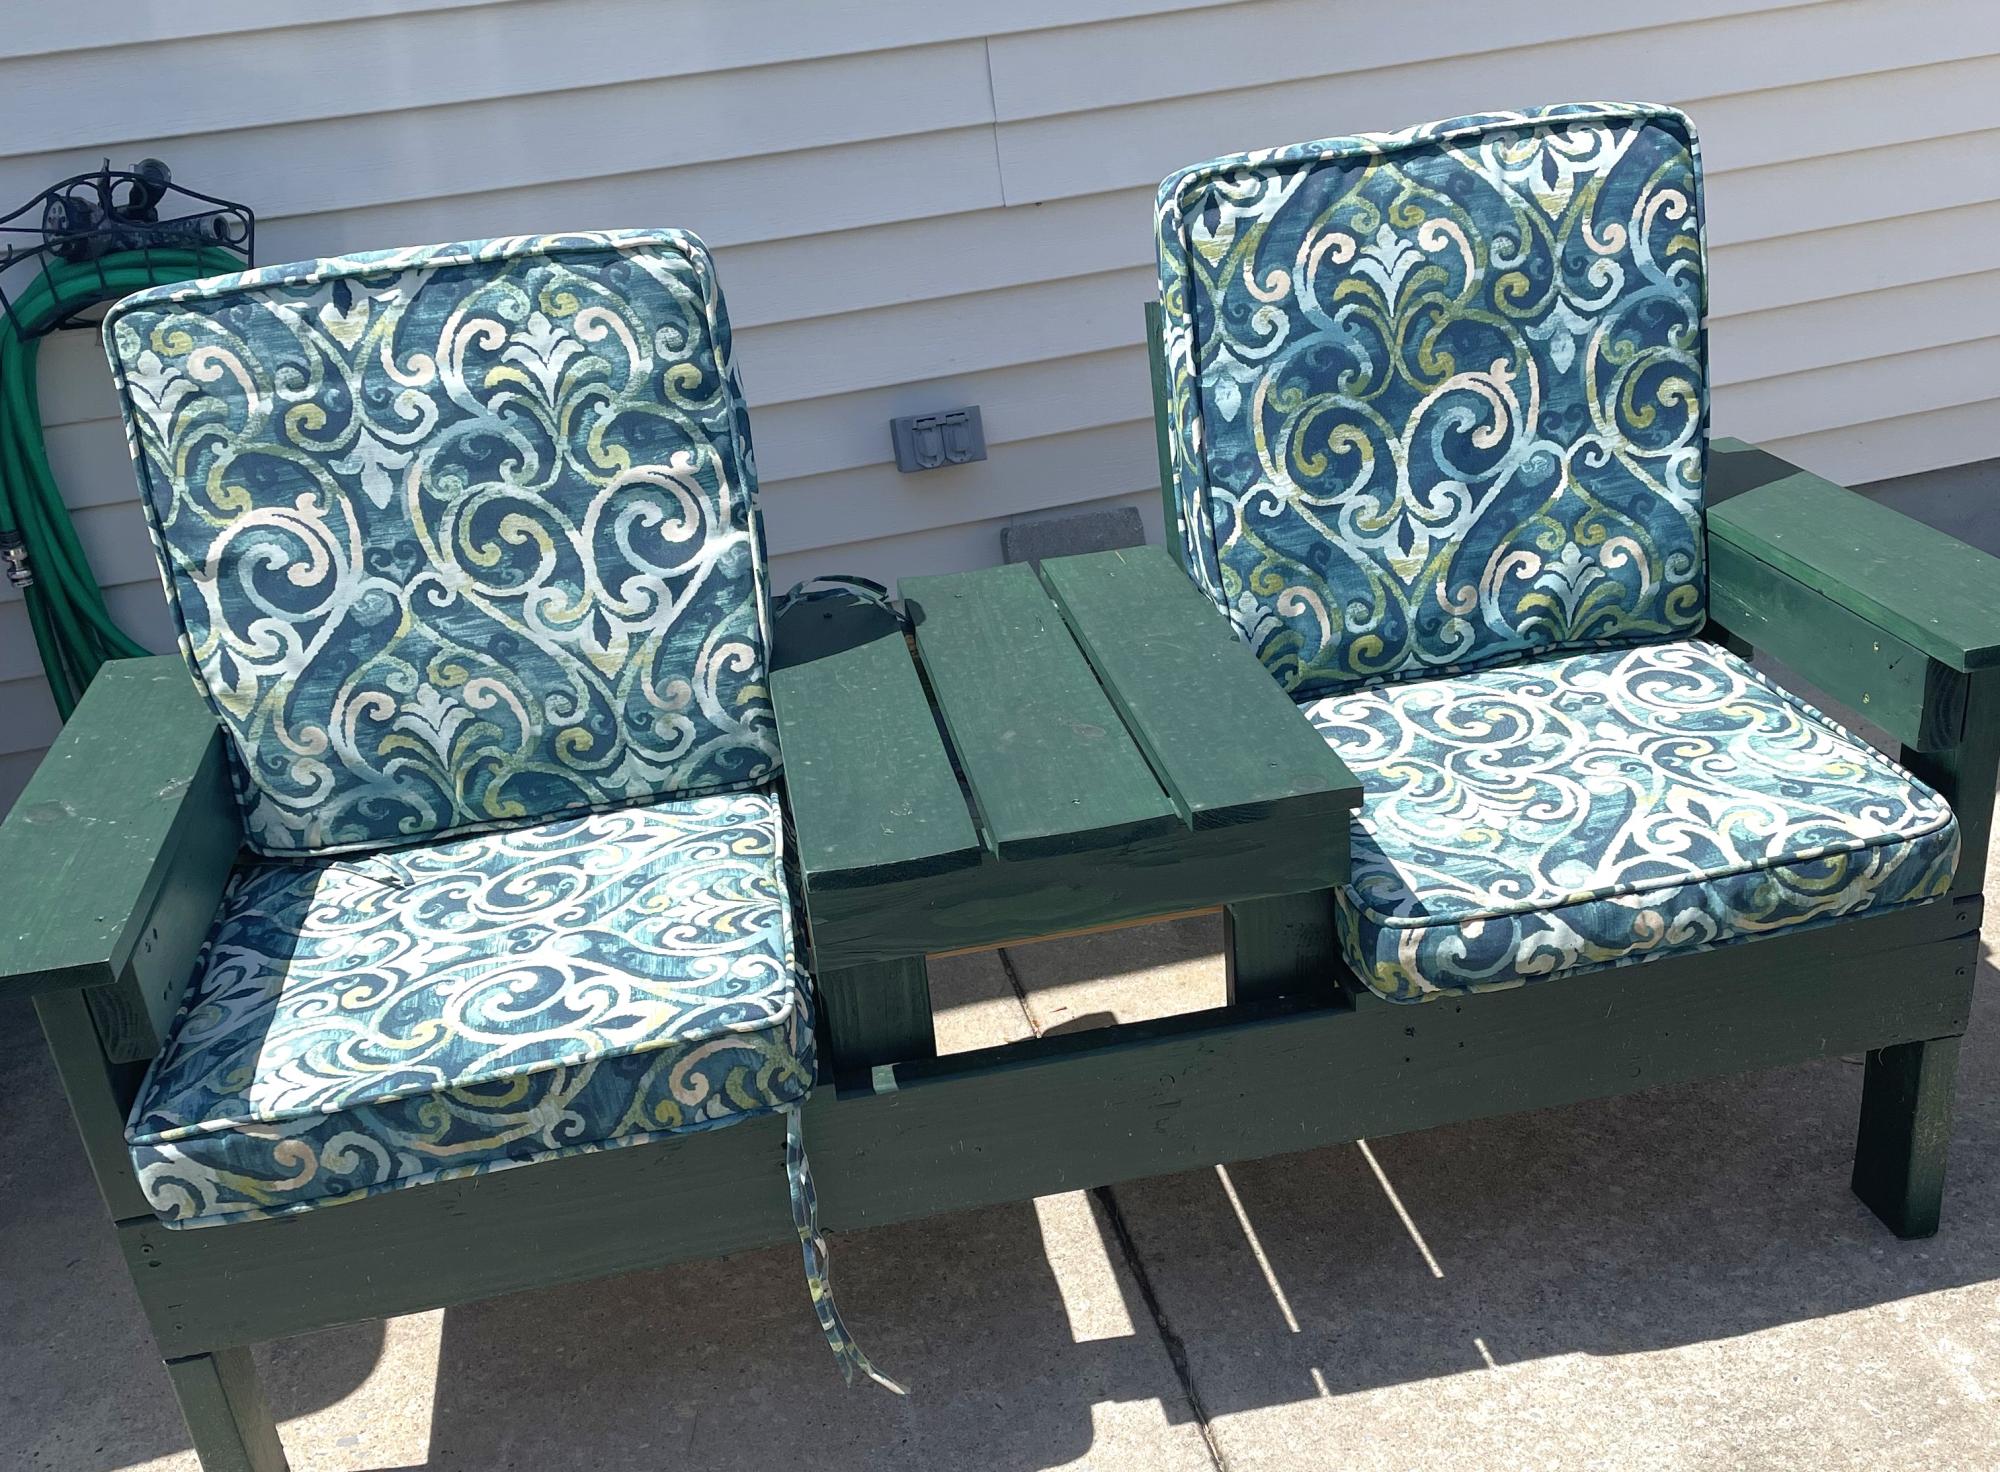
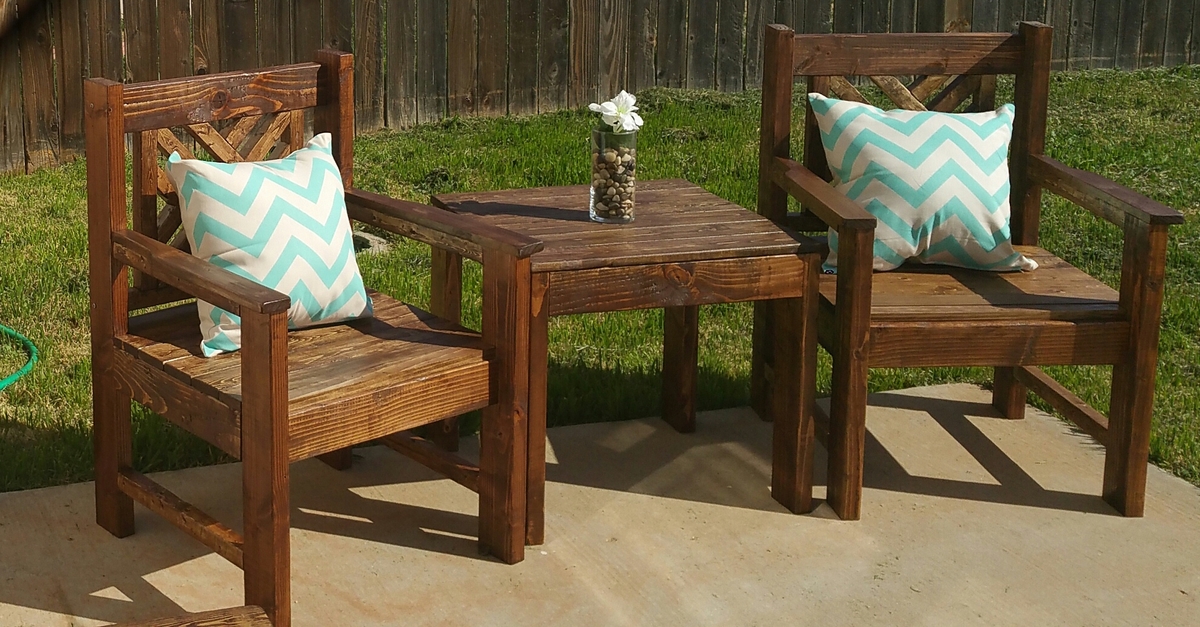
I built 2 sets. One with a bench and table and one with 2 chairs and table. I absolutely love how they turned out!!

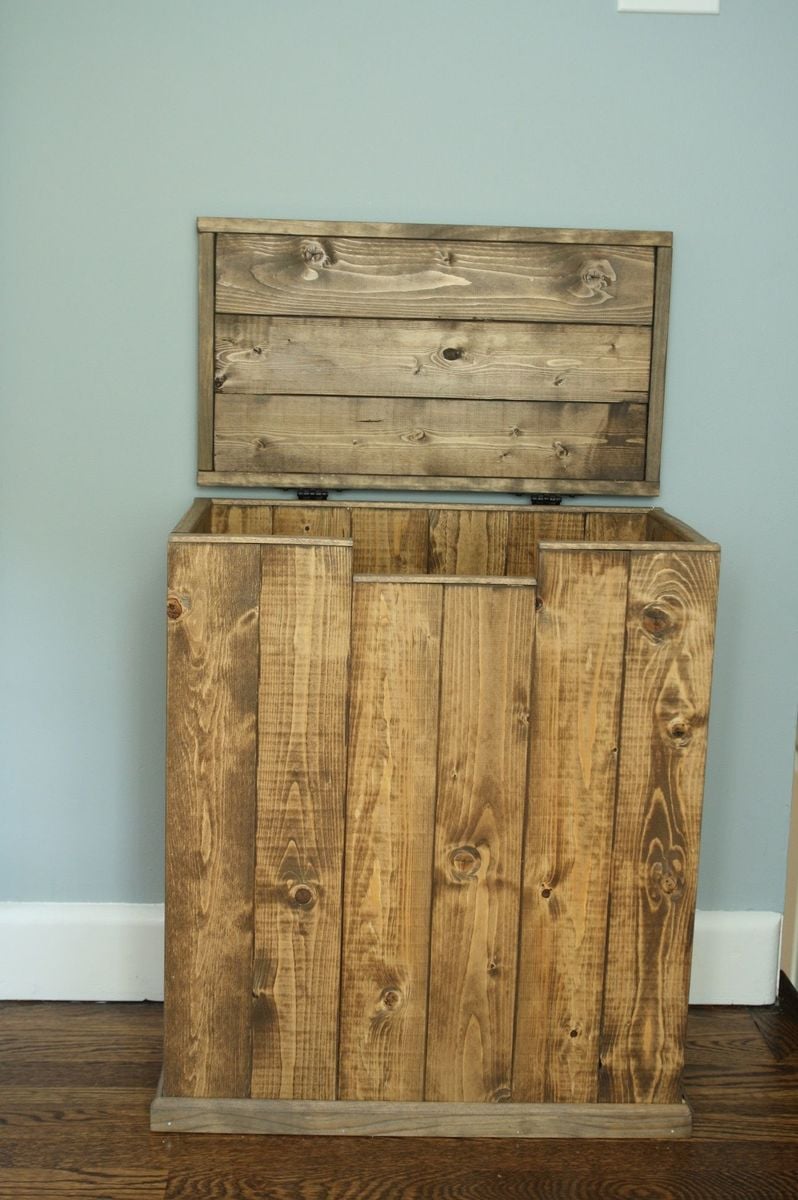
My family is expanding, which means more laundry! (I am 39 weeks pregnant now) So I decided to build a big enough hamper for us (two adults, one toddler who constantly dirties his clothes). For finish, I tried to mix two stains "weathered oak" and "dark walnut" and I think it came out really nice! I must admit I love my new hamper!

Tue, 07/16/2013 - 12:54
I would love to replicate!! It is beautiful :)
Wed, 04/01/2015 - 05:00
I liked this design of hamper you made. After looking at your photo and doing some figuring I started working on my own yesterday. So far I like it, although I think mine maybe taller. Again I really like your idea here.