Easy Clip Art Rail
This was really easy and provides a place for DS to display his artwork.
Disassembled clothespins spray painted navy, green, and khaki.
This was really easy and provides a place for DS to display his artwork.
We finally got our grass green and back yard clean, after all that work the lop sided blue little tykes picnic table stood out like a sore thumb. This was the perfect table to fit our back yard make over.
When Ana says read all comments she means it. Cherie posted "if you plan carefully you really only need 5-2x4's instead of 6. Cut 2-2x4's in half for the seats. Cut 2 legs and one seat support from the third 2x4. Repeat for the fourth 2x4 and finally cut the bottom suppport and the 2 table supports from the 5th 2x4. Just plan carefully." I still bought 6 2x4's but only used 5.
I did pocket holes on almost all the joints. I put the table on risers and was even able to use a pocket hole to add the seat boards. I did have a bit of a problem with the table top supports, I am not sure what others did but I cut mine at 45 degrees and they still wasn't enough to get the measurements the plans had. I just left it and marked where it would have been. I had some scraps from a fence pickets I ripped for my $10 raided garden bed left,over that I used as a spacer for my table top and seat boards, made it so easy and they are perfectly spaced. They are just over 1/2 an inch but It worked great.
http://ana-white.com/2010/04/plans-bigger-kids-picnic-table.html
I used Ana White's plan as a base but completely modified to suit our needs. The post on our site includes detailed pictures, instructions, and even the SketchUp file so you can easily modify the plans yourself.
I drew inspiration for this project from Ana's basement playhouse project, however I made some modifications to accomodate the smaller (10x11) bedroom that I was working with.
Each playhouse has an upstairs and a downstairs, and each room is designed to accomodate a twin sized mattress. There is a secret tunnel under the stairs connecting the bottom rooms, and each room is wired with its own switch-controlled lighting.
My daughter wanted her side painted pink and purple, and my son wanted his to be green and blue. I thought painting the stairs to look like a road between the two houses would be a fun touch, and the kids absolutely love this!
As you can see, it is still a work in progress, but I thought I'd share some initial pics and perhaps post updates later. Thank you for the inspiration Ana!
Sincerely,
Ron Floyd
Portland, OR
I was commissioned to build these bookshelves to go along with the “Rustic X” consoles table. The finish is distressed white and True Browns stain.
We had this extra room that was sort of a "catch-all" room. We never used it, except when William wanted to play his guitars he went in there. There was an old, dated college-style desk and bookshelf in there (particle board) an old couch and a chair.
I figured that if I gave this room a purpose, it might actually stay clean and "catch-all"-free. To add to my decision making process was that around Xmas time, we didn't really have anywhere besides 1 guest bedroom for people to sleep. None of the couches are pull-out couches and I don't really like when people sleep on couches. The 1 guest bedroom has a queen sized bed in it, but my sister usually crashes in that room with her 2 dogs, leaving no other place for say, my mom or gramma if they wanted to stay, too. So I thought this new room could be another guest bedroom.
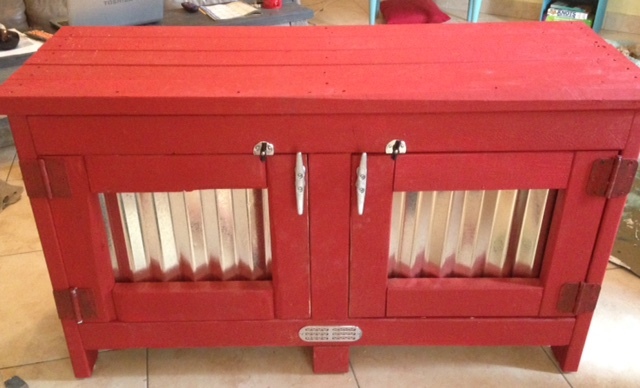
I decided I wanted to go with a minimalist look in the room, opposite of its cluttered origins. I had finished building a reclaimed/recycled wood queen size farmhouse bed for in there and wanted nothing else really besides William's chair to play guitar, but I did need to address storage in the room. There IS a closet, but it's also the attic access and I want to keep it clear of anything so we can get into the attic if we need to... sooo... When William redid the guest bathroom, he didn't throw out the old vanity, and when we re-did our master bath just recently, we kept the vanity from there too. One is a single vanity and one is a double vanity.
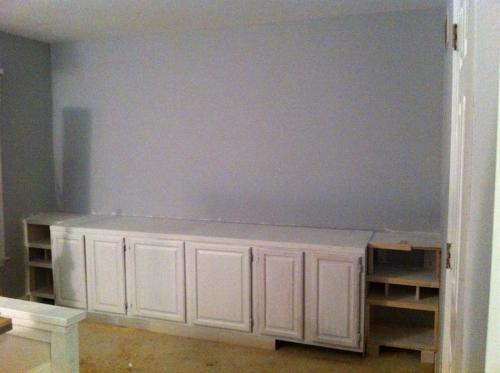
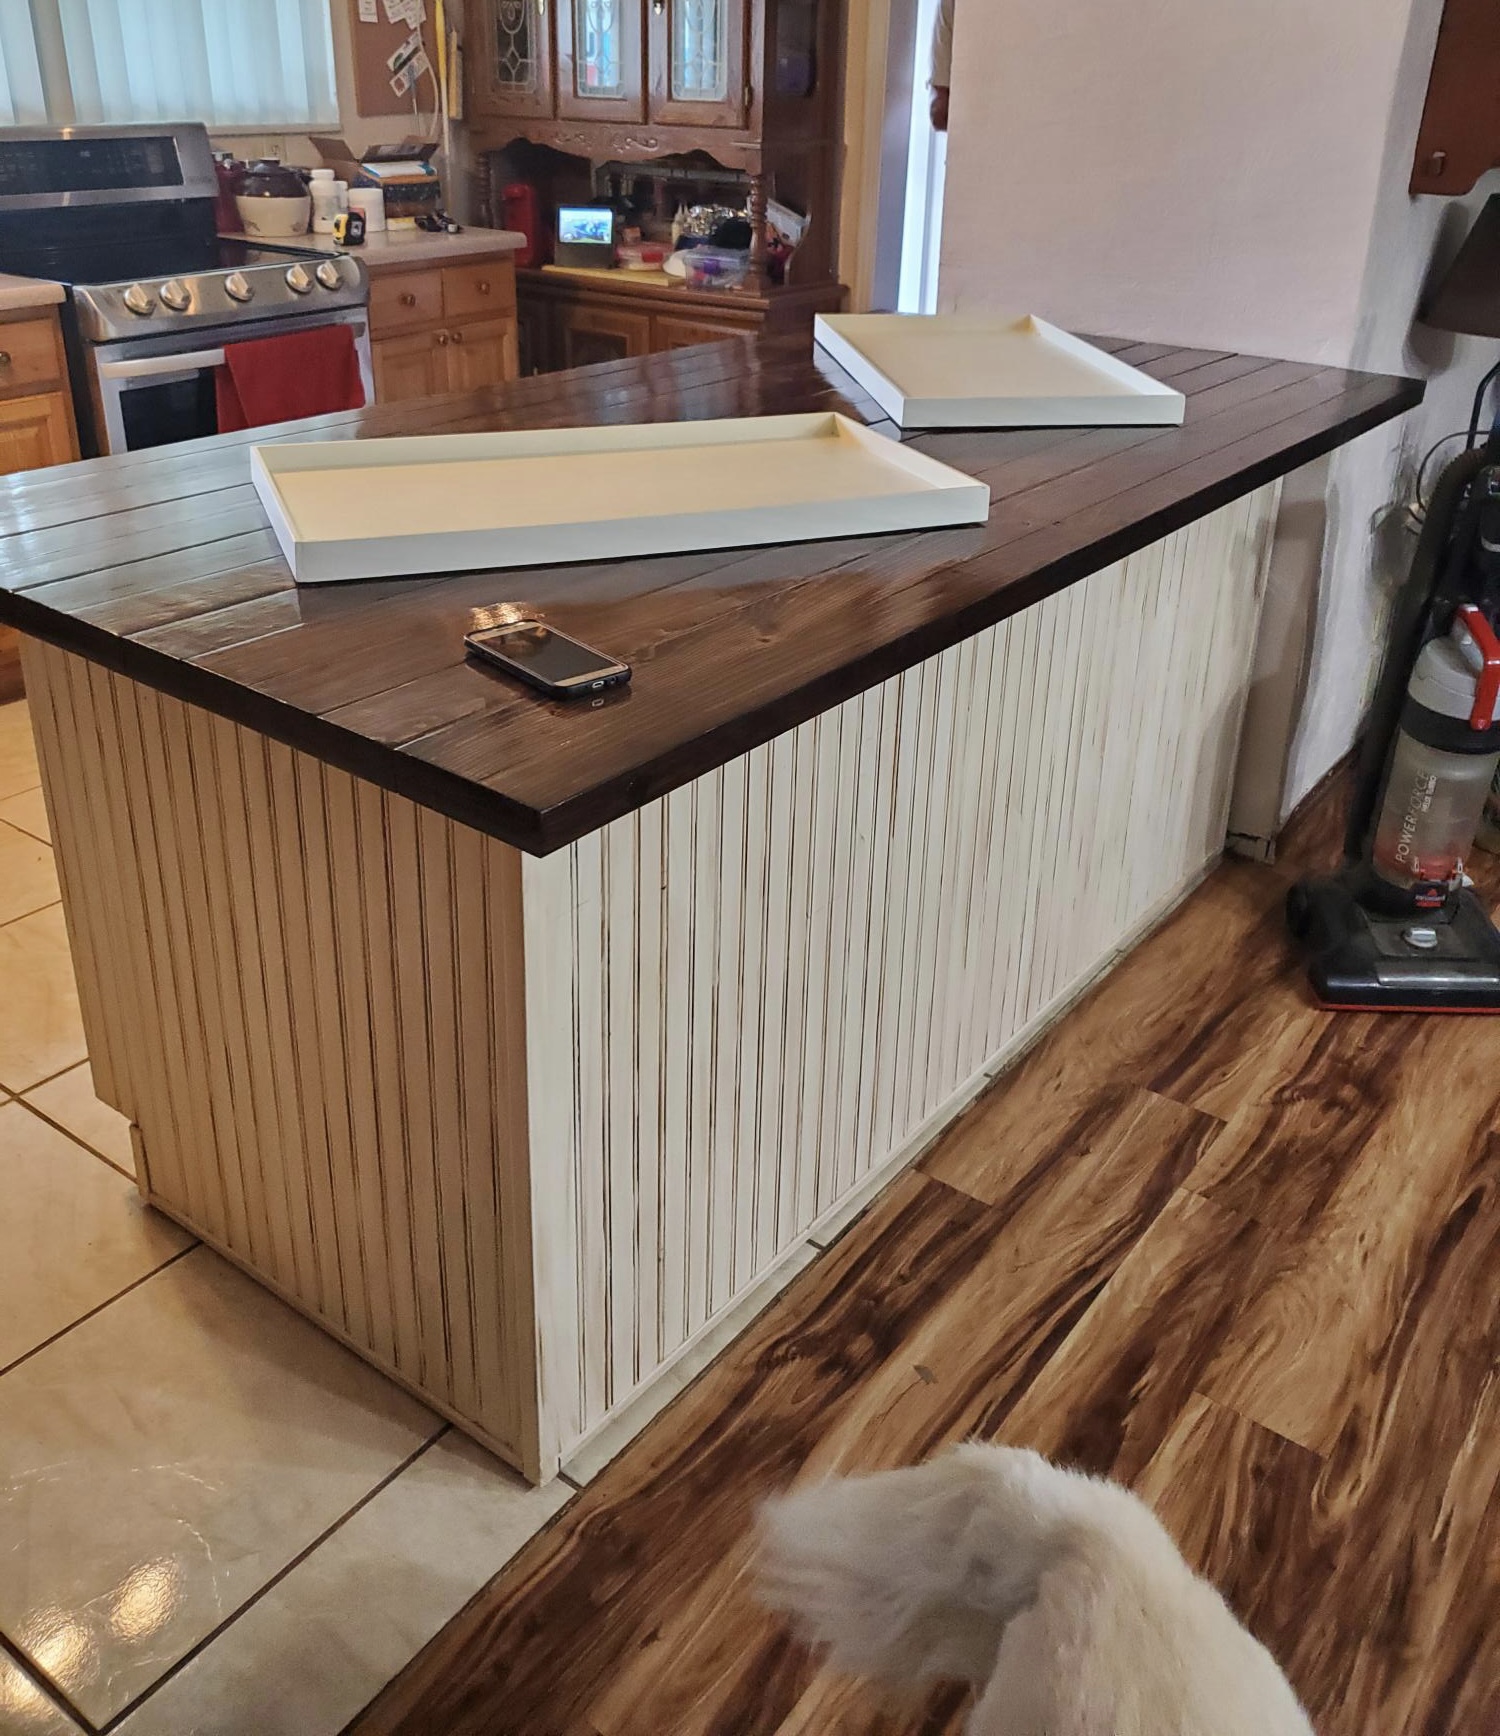
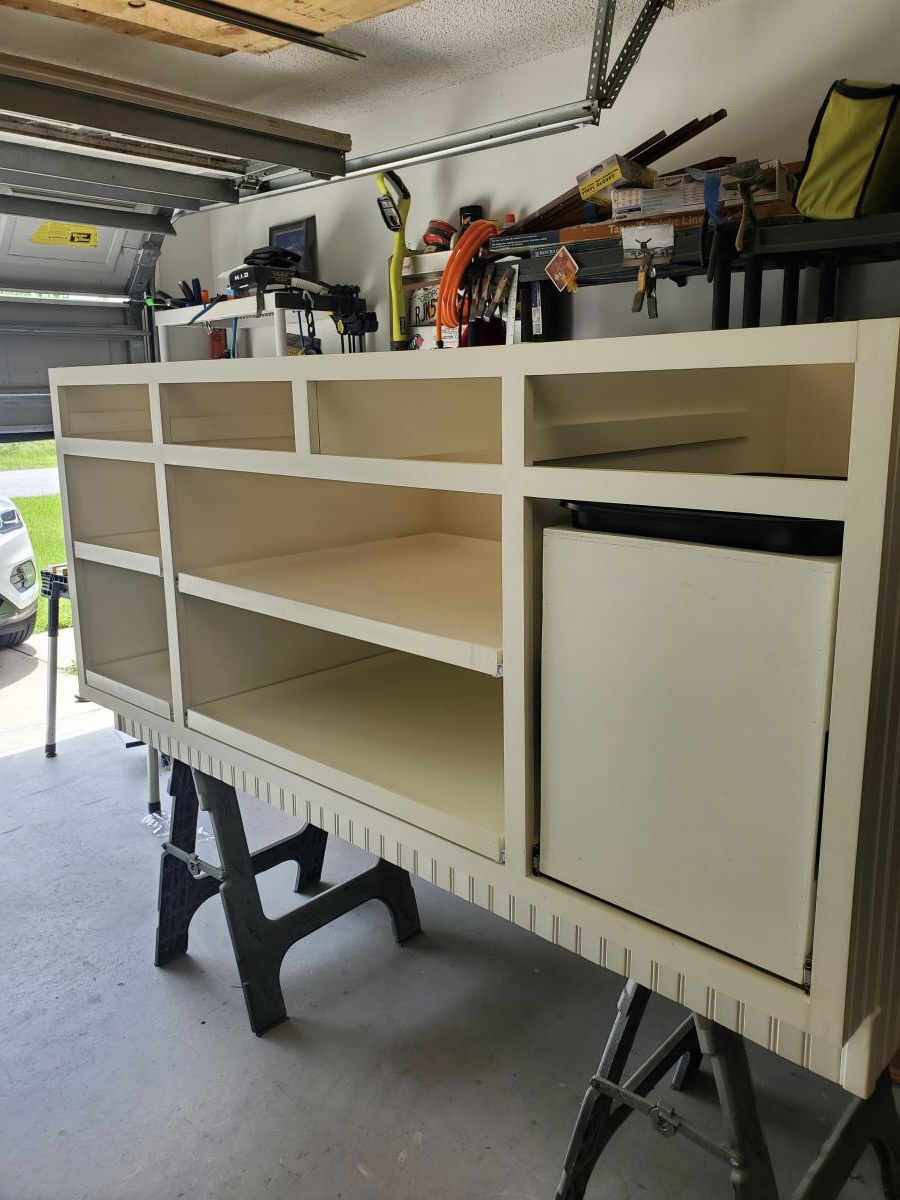
The cabinet bases are solid wood except for the sides which are paneling or something very thin. I definitely wanted to continue the recycled theme of the room so I decided to use these cabinets. Only problem was that the double vanity had 2 sets of smaller doors than the single vanity's wider 1 set of doors. If i placed them side-by-side, it would look weird. So, I sawed the double vanity exactly in half and then flanked the single vanity with them. It actually looked really good. I took the tops off of the vanities and decided to build a new top using left-over plywood we had laying around in the garage. I painted everything white to match the farmhouse bed and I centered the cabinets on the back wall of the bedroom - they don't quite reach from 1 side to the other, so i decided to fill those 18 inches with shelves I built.
I wanted to go with a mid-century-modern look for the room, so that's the design I made for those side shelves... now, looking at it, I kind of want to put doors on them, because it looks a bit odd to have the cabinets and then those shelves without doors. I'll have to figure that out. Anyway, now that I had a base, I wanted to build the built-in hutches to add shelf/storage space and to make a striking piece in the room, since there's so few other things in it.
I used the TOMMY plans to build the center hutch and side hutches, not realizing that the base cabinets for those plans are different heights, so my side hutches ended up being MUCH lower than the center hutch, but it's not the end of the world. Then I just mimic'd the same design of the side hutches to make 2 MORE side hutches to flank them. I just made them even lower in height than the first 2 side hutches. I accidentally forgot to measure the guitars before this last step and ended up building the last 2 hutches 6 inches too high to display the guitars and had to take them back apart and re-build them. It took me about 5 hours to completely build the hutches. It took a few more days of sanding, hole filling and painting, though.
Finally I got it all up and painted and I decided to not use the crown moulding, and instead just used the same moulding that we put on the changing table we built - I didn't want anything more fancy than that. I still have to put some of that same trim on the shelf fronts, as you might be able to see from the photo, but otherwise, it's done. I used all of my scrap pieces of wood to build an artwork piece in the empty space of the center hutch. I painted it the colors of the room (green, gray and white) and I just glued them all in place. A TV will sit on the unit in the middle section.
Modified the plan to use pallet wood and stained it classic grey for a weathered look.
Sun, 01/24/2016 - 22:40
how many pallets did it take to make this. Thanks
I would love to supply plans, but I just get an idea and "wing it", need to start writing things down! Cost, less than $50.
I used Ana's Library Base Plan and modified it slightly to include cubby holes on the bottom and an acrylic "window" at the top to create a post office for my daughter. This now also gets used as a "bank" and a "fast food window"! Lots of fun!!
This is my first woodwork project, completed as a team, with my husband. Was good fun at times and frustrating at times! Our wood was thicker by a couple of millimetres out meaning the plans needed to be tweaked.
Table was designed with the chair structure.
We had cushions and covers made to measure (we live in SE Asia so cheaper than UK or US) about £200.
Looking forward to building some deck chairs next!!
Basically followed the plan, but added 4x4 legs and used 2x8s for the long ends to make it a little wider. I used the basic plans for the Farmhouse Bench (http://www.domesticated-engineer.com/2012/05/29/bench-for-farmhouse-tab…) for the bench, but tweaked it to make it match the design of the table.
It was time to upgrade my boy's toddler beds to big boy beds. They wanted bunk beds but I was afraid they'd take turns jumping off the top bunk. When I came across the Sweet Pea bunk bed plans I was so excited because the design wouldn't allow them to jump off the top bunk.
I was inspired by someone else on this feed who built doors. I also tweaked the pergola a bit. I also added extra support to the rear panel framing by adding another vertical post from the top of the horizontal post to the top bunk horizontal post and then another from the top bunk to the bottom bunk horizontal post, both directly down the middle. Probably overkill but felt that was a long run for the rear panel sections. I made my roof out of plywood siding panel and framed it on the back side to keep it from bowing and added support. A few more added elements are a dedicated fan for each bunk, reading lights, and led light strips that flash and fade into different colors.
I had a lot of fun building this and since it's been completed, I've had even more fun building much smaller projects.
Thank you Jenny for sharing your plans on Anna White's website and thank you Anna White for sharing all of your wonderful plans as well!
The first pic is the rustic x with 2x6. These plans are easily modified. The second is the rustic x with 1x material. Both projects were fun to complete!
Wed, 10/06/2021 - 09:37
Thanks for sharing, love the finish choices and the different tops!
This is my first project and I was very excited about doing it. I wanted something unique but something like the Tryde table.
I hope you all enjoy it and get inspiration from this table like I did.
Thank you Ana.
My husband built this with the help and guidance (and tools!) from his dad. Great family project (bro in law and nephew also helped) and bonding experience. It was their housewarming gift to us. My husband did all the finishing work (ebony stain and minwax varnish) and I got to pick out the hooks (anthropologie). We upgraded the wood to oak. LOVE it. Thank you!!
We couldn't find the perfect piece that would accommodate a crowd. As always, Ana's easy-to-follow and adaptable plans came through for us! We used a version of the One Arm 2x4 Outdoor Sofa to build this 8x12 sectional.
Tue, 12/14/2021 - 14:06
WOW, that is so awesome and inviting! Thank you for sharing:)
I have always loved handmade gifts, both giving them and recieving them. So when we got an invitation to our friend's 3yr old son's party, I knew the perfect gift. I loved this plan from the moment Ana posted it, but my kids were just too old for it now :(
This was a very inexpensive an easy build. The best part was putting a giant bow around it and taking it to the party. Jax lit up when he saw it.
I had built a few of these chairs a year and a half ago similar to the red ones that you have on the step by step instructions. That was my first time at customer building and painting anything. Needless to say, my skills have improved over time.
So, I wanted to build this chair for my dad for fathers day. He had an old plastic Adirondack chair sitting in his backyard that was really gross. I wanted to replace it with something nice. So he is obviously a UK fan and I wanted to see if I could paint the logo on correctly while also giving myself the opportunity to build something and see if I can make this chair a lot better than the ones I had previously built.
So I decided to curve the back of the chair and curve the ends of the arms. I recently got a nice dewalt random orbital sander which helped out alot in getting it nice and smooth. I made my own wood putty using the leftover sawdust and glue mixed together. I also fastened the wood together using glue and polymer coated screws. Which are supposed to last alot longer than regular wood screws when using pressure treated pine.
I took my time to make sure the pieces were all square when assembled which was better than previous building projects. Also, as far as finishing the chair, I primed it and then put 3 layers of the Kentucky blue Outdoor paint with a brush (which seems like it took forever). I made the stencil by just printing the logo on a piece of cardstock paper. Then I cut out the logo with a razor, then I wrapped the paper in duct tape to make the stencil it a little stronger and to fix the areas that ripped when cutting the card stock paper. Then I cut out the duct tape where the logo is. I made a couple of test paints using the stencil on some scrap to make sure my technique was good. Then once I felt comfortable, I painted 4 coats of very thin paint on the chair where the logo is. After all was dry, I did a light by hand sanding to make it smooth and then sprayed some clear coat on it for an extra level of protection and to make it shine a little.
It was a fun project and my dad really liked it.
Some things I would have done differently for next time would be to use a router to flush cut the seat slats and also use the router to give a nicer rounded edges for the arms and all of the slats as well. Also, It would be nice to mount a stainless bottle opener to the chair to open your drinks (maybe on the outside of the arm of the chair.
Thanks for the plans. I check your site all the time for ideas.
Me and my husband built this table last year. We built everything according to the plans, except we needed it to be shorter. The table is only 3 feet long instead of 5 feet long. We love how it turned out! Thank you Ana for the awesome easy to use plan.
Decided to add a secret compartmet on the bottom of this stand for small personal items. Used piano hinge and cabinet push latch. Wanted to hide the hinge but kept it easy and simple so I painted it black and you can barely see it. This site is amazing and I cant wait to make more projects.