Community Brag Posts

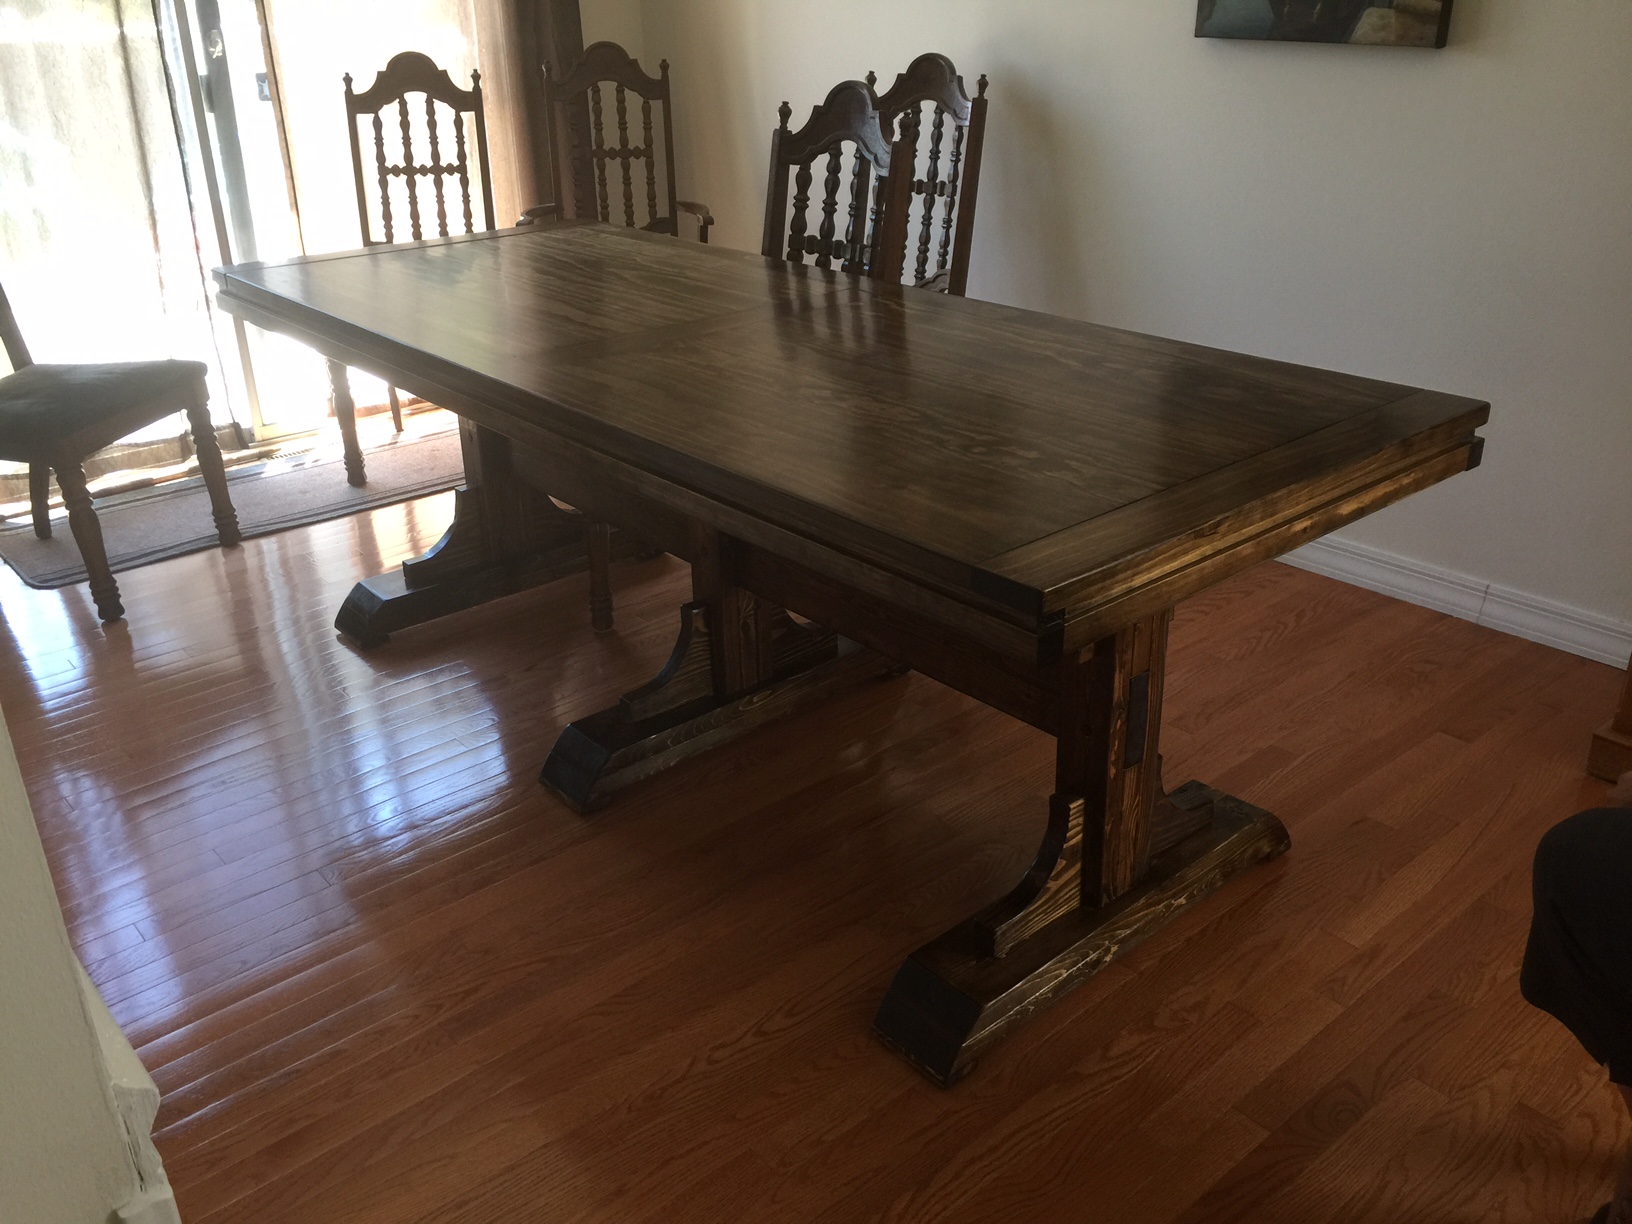
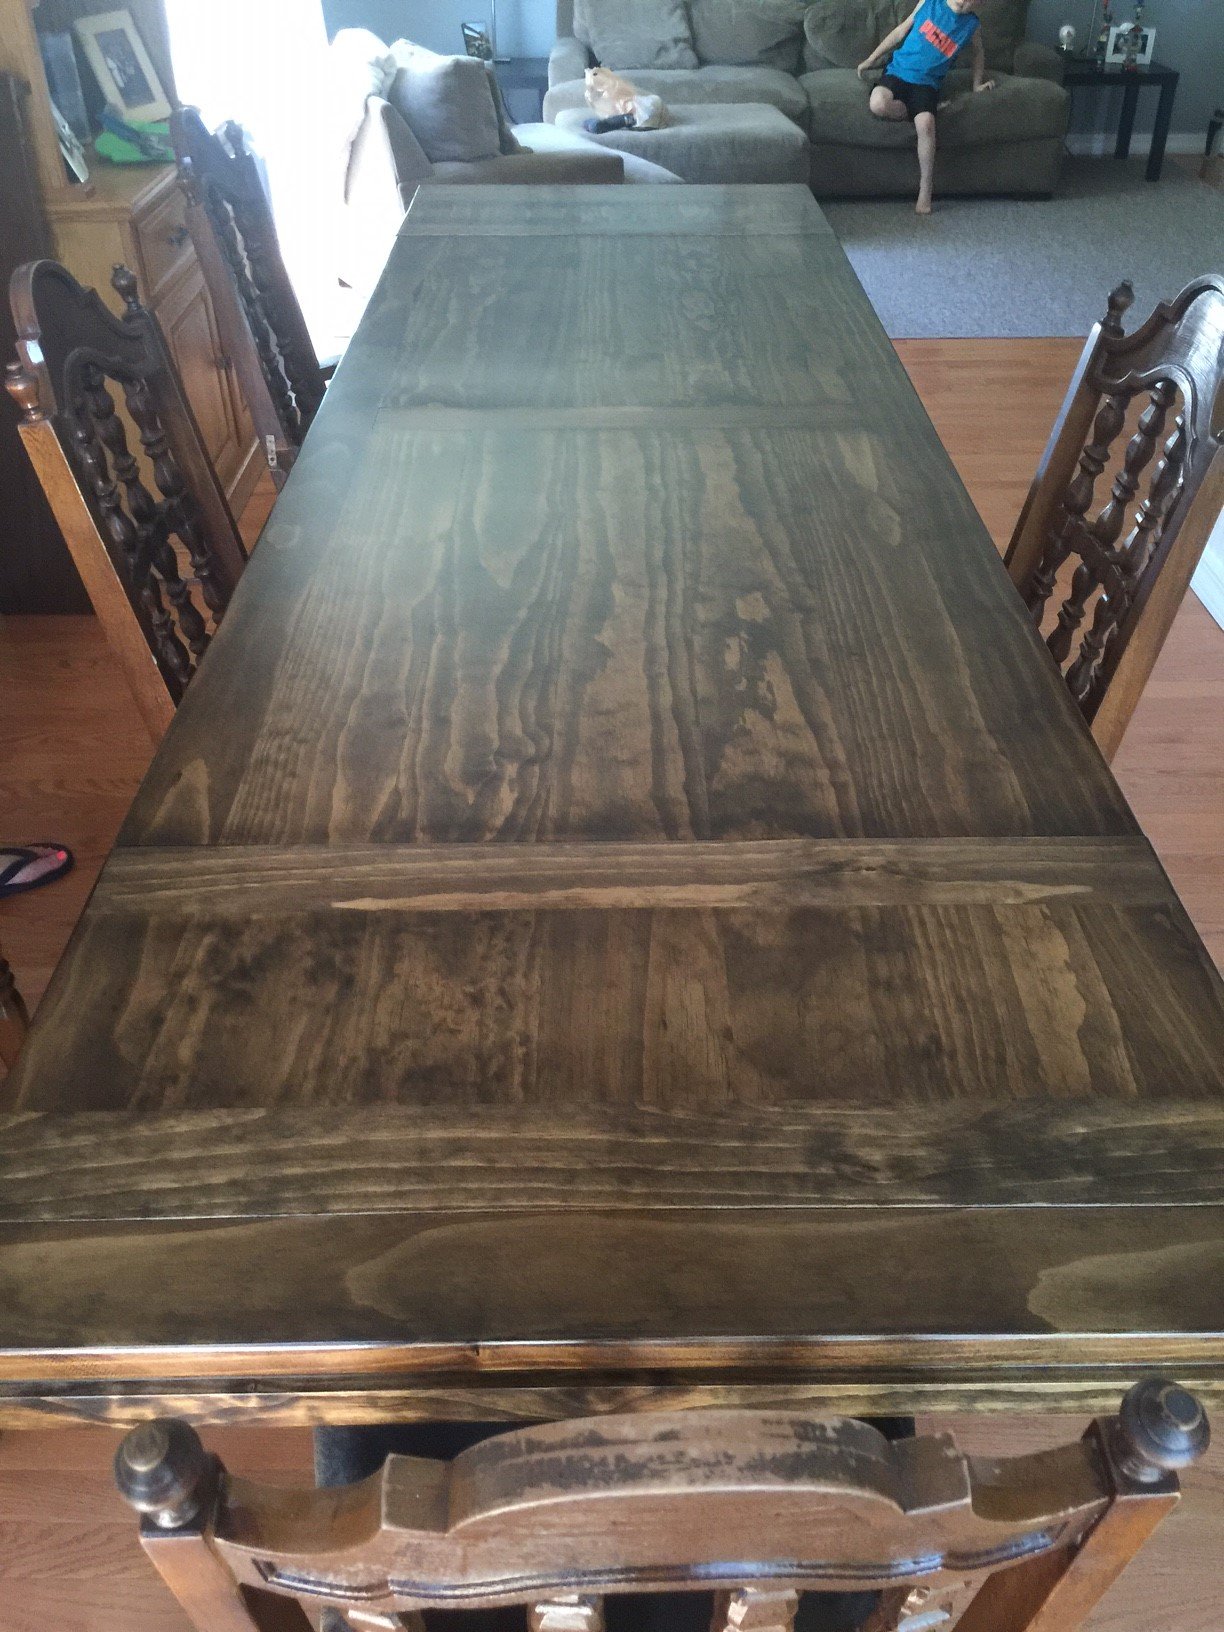
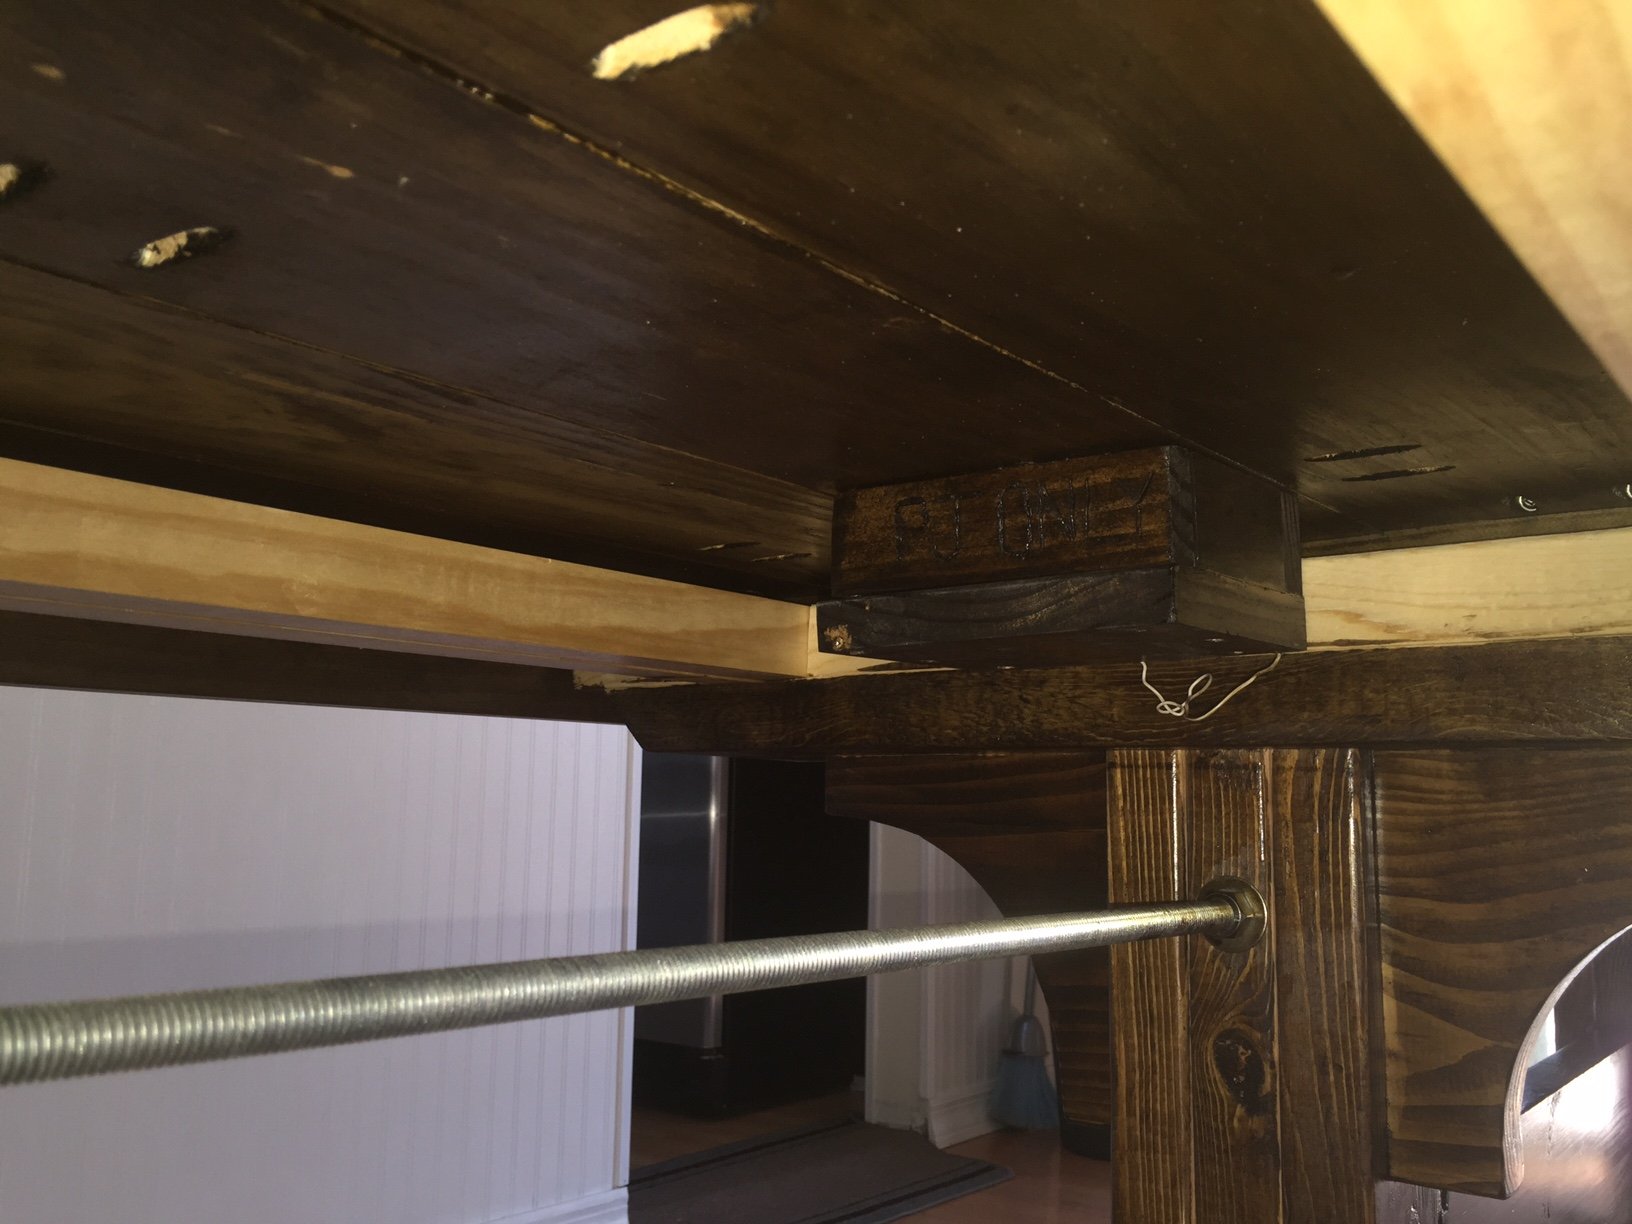
Extendable Triple Pedestal
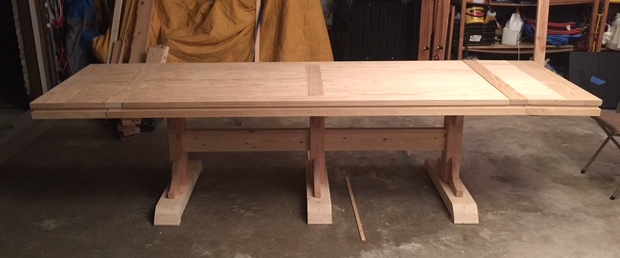
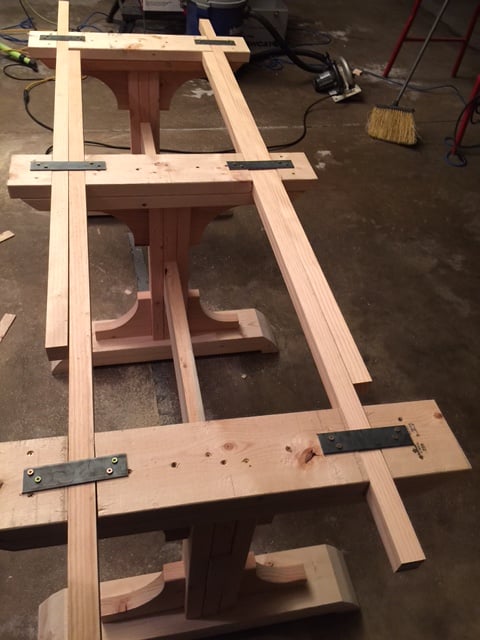
I made this extendable triple pedestal table based on Ana's orginal plans. I had to "engineer" the extension system - which was fun - and it worked out nicely. I also added a threaded rod through the pedestals (towards the top) to give added support in addition to the pegs through the centerboard.
Thanks for the inspiration and the plans, Ana!

Built from Plan(s)
Estimated Cost
I used select pine for the table top, but construction grade lumber for the base. For the extension slides I also used 2x2 select pine. Therefore the cost for me was higher (than Ana's) - and all totaled about $400. More, if you include stain, poly, hardware, misc. tools, brushes... But you get the idea.
Estimated Time Investment
Week Long Project (20 Hours or More)
Finish Used
Dark Walnut Stain (minwax) 1 coat
Helmsman Spar Finish (minwax) 3 coats on table top; 2 coats on base
I used beeswax on the extensions to get them to slide nicely. But don't get beeswax on any wood that you're going to finish...it repels stain and finish.
Helmsman Spar Finish (minwax) 3 coats on table top; 2 coats on base
I used beeswax on the extensions to get them to slide nicely. But don't get beeswax on any wood that you're going to finish...it repels stain and finish.
Recommended Skill Level
Beginner
Comments
Thu, 06/16/2016 - 12:21
Happy to answer questions and send additional pics...
Happy to answer questions or send additional pics, if you'd like to know more about this table.
Kitchen Island and Floating Shelves
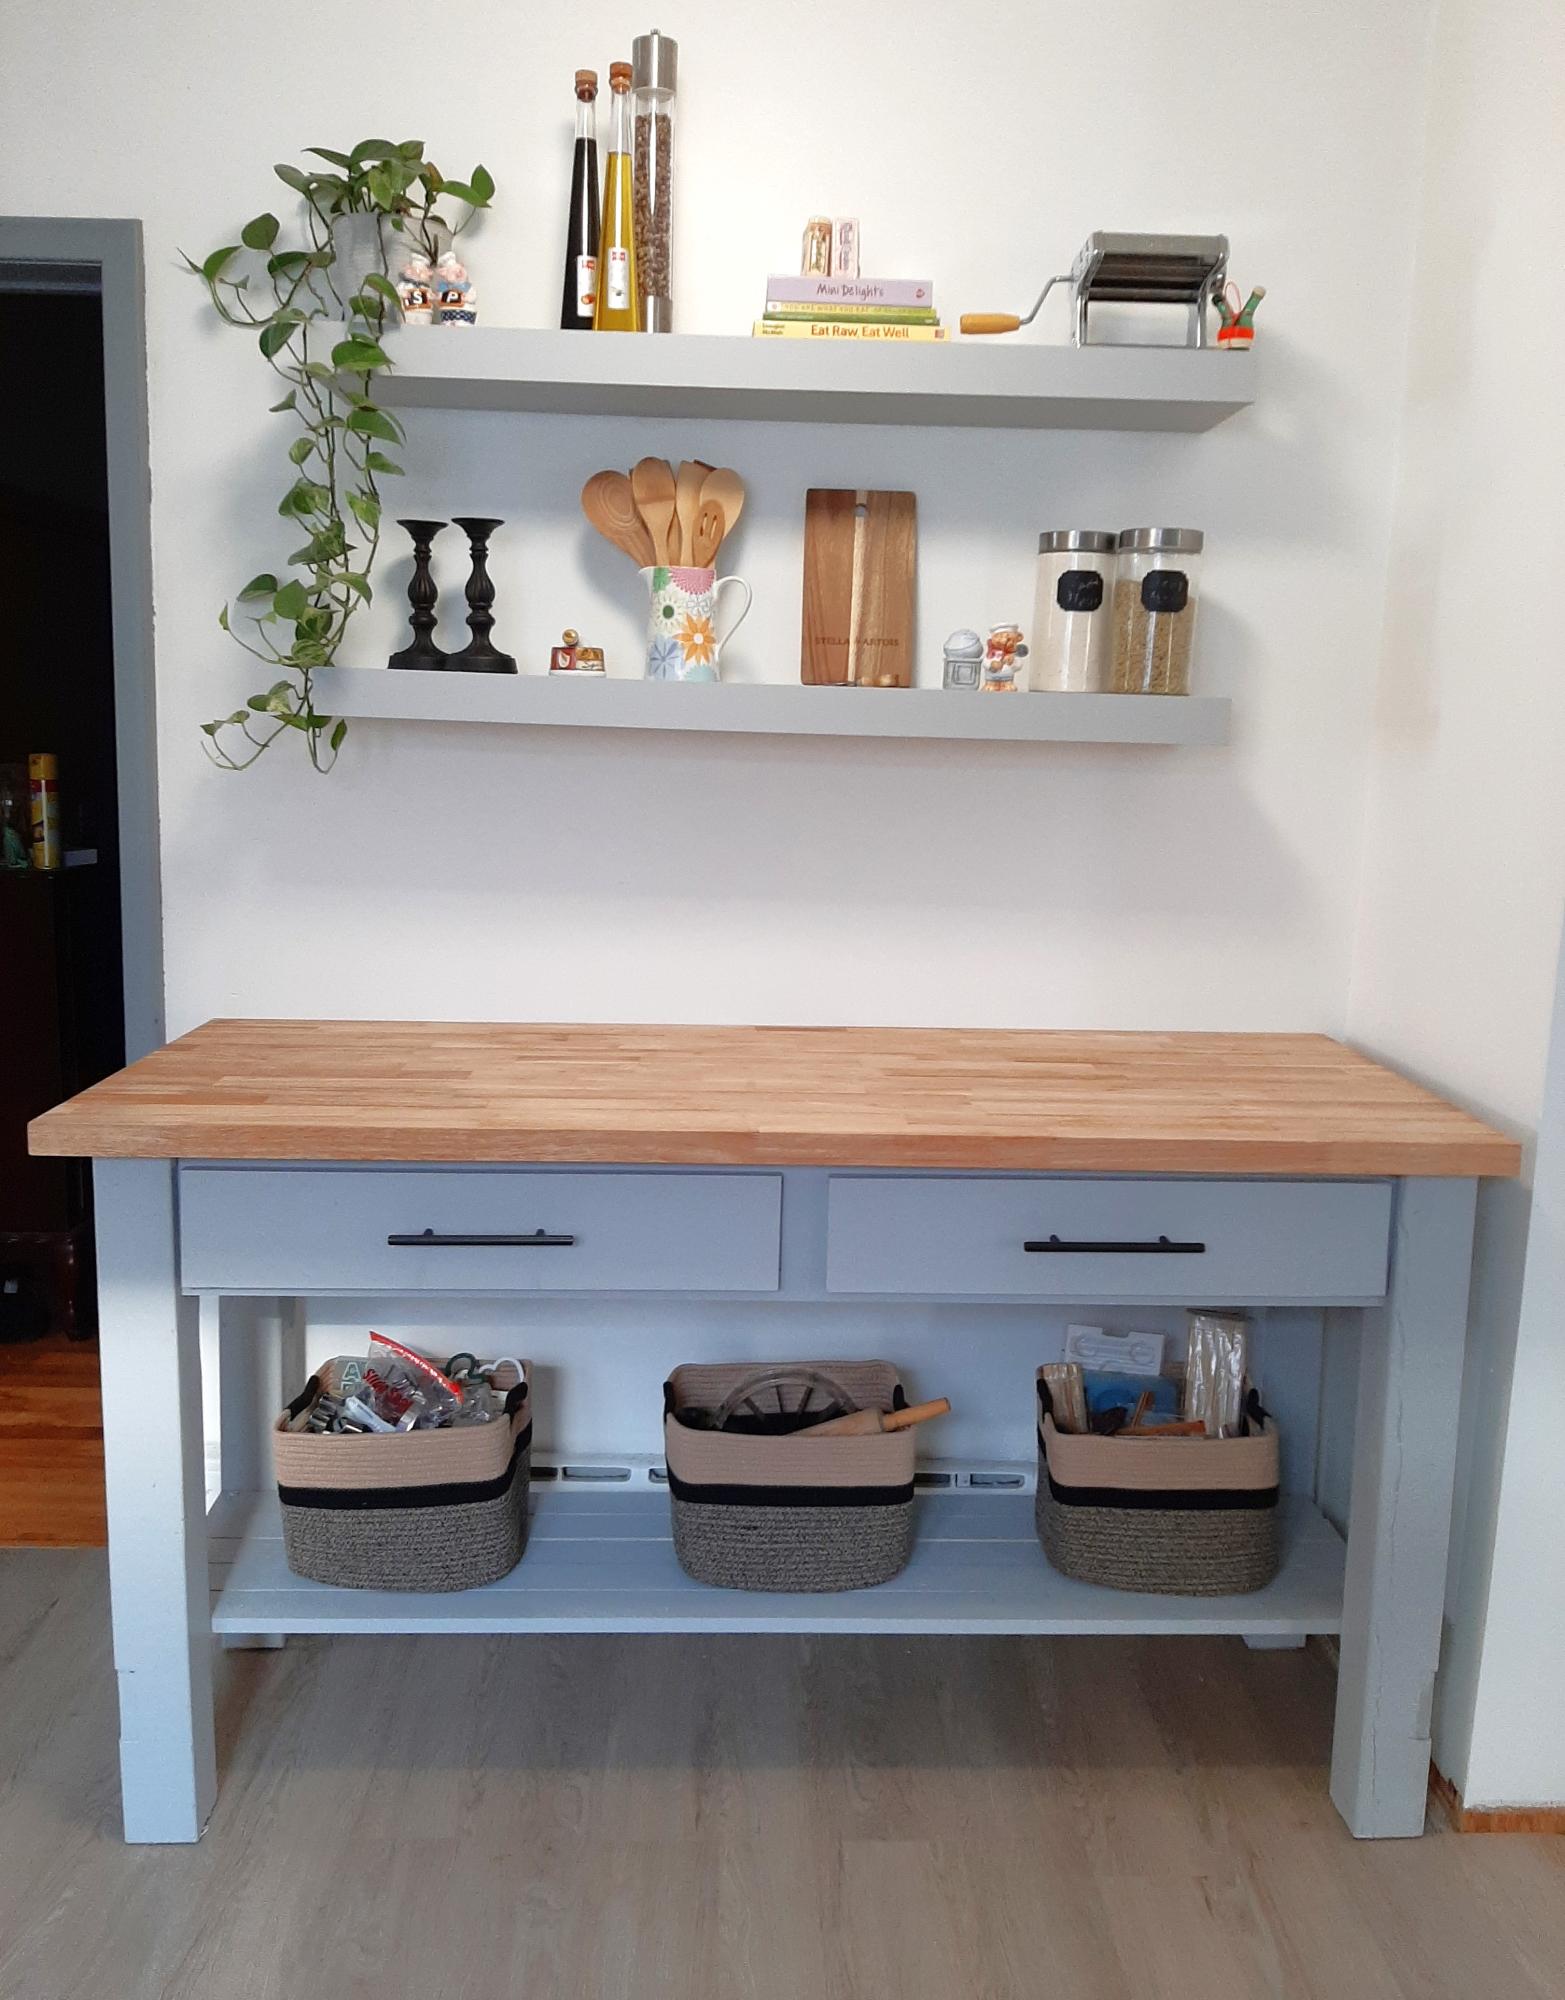
Our very first project. Both Ana White projects. Loving it! Thank you so much for free plans!
Built from Plan(s)
DIY PB William Vanity Sink Base
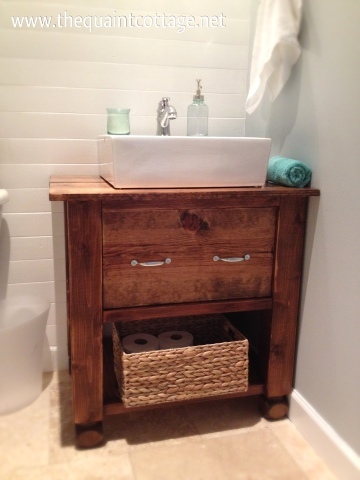
I found the William Vanity on Pottery Barn and loved the look, just not the price. I recreated it with a top sink and a drawer for a fraction of the cost.
Estimated Cost
$70-$100 for wood, stain, screws, etc.
Estimated Time Investment
An Hour or Two (0-2 Hours)
Finish Used
Stained with Early American Stain and water resistant grade poly
Recommended Skill Level
Beginner
Comments
Mon, 01/30/2017 - 12:33
Need Instructions
The link to the instructions for this vanity is no longer valid. Would really love to get the instructions for the vanity.
Locker Cabinet
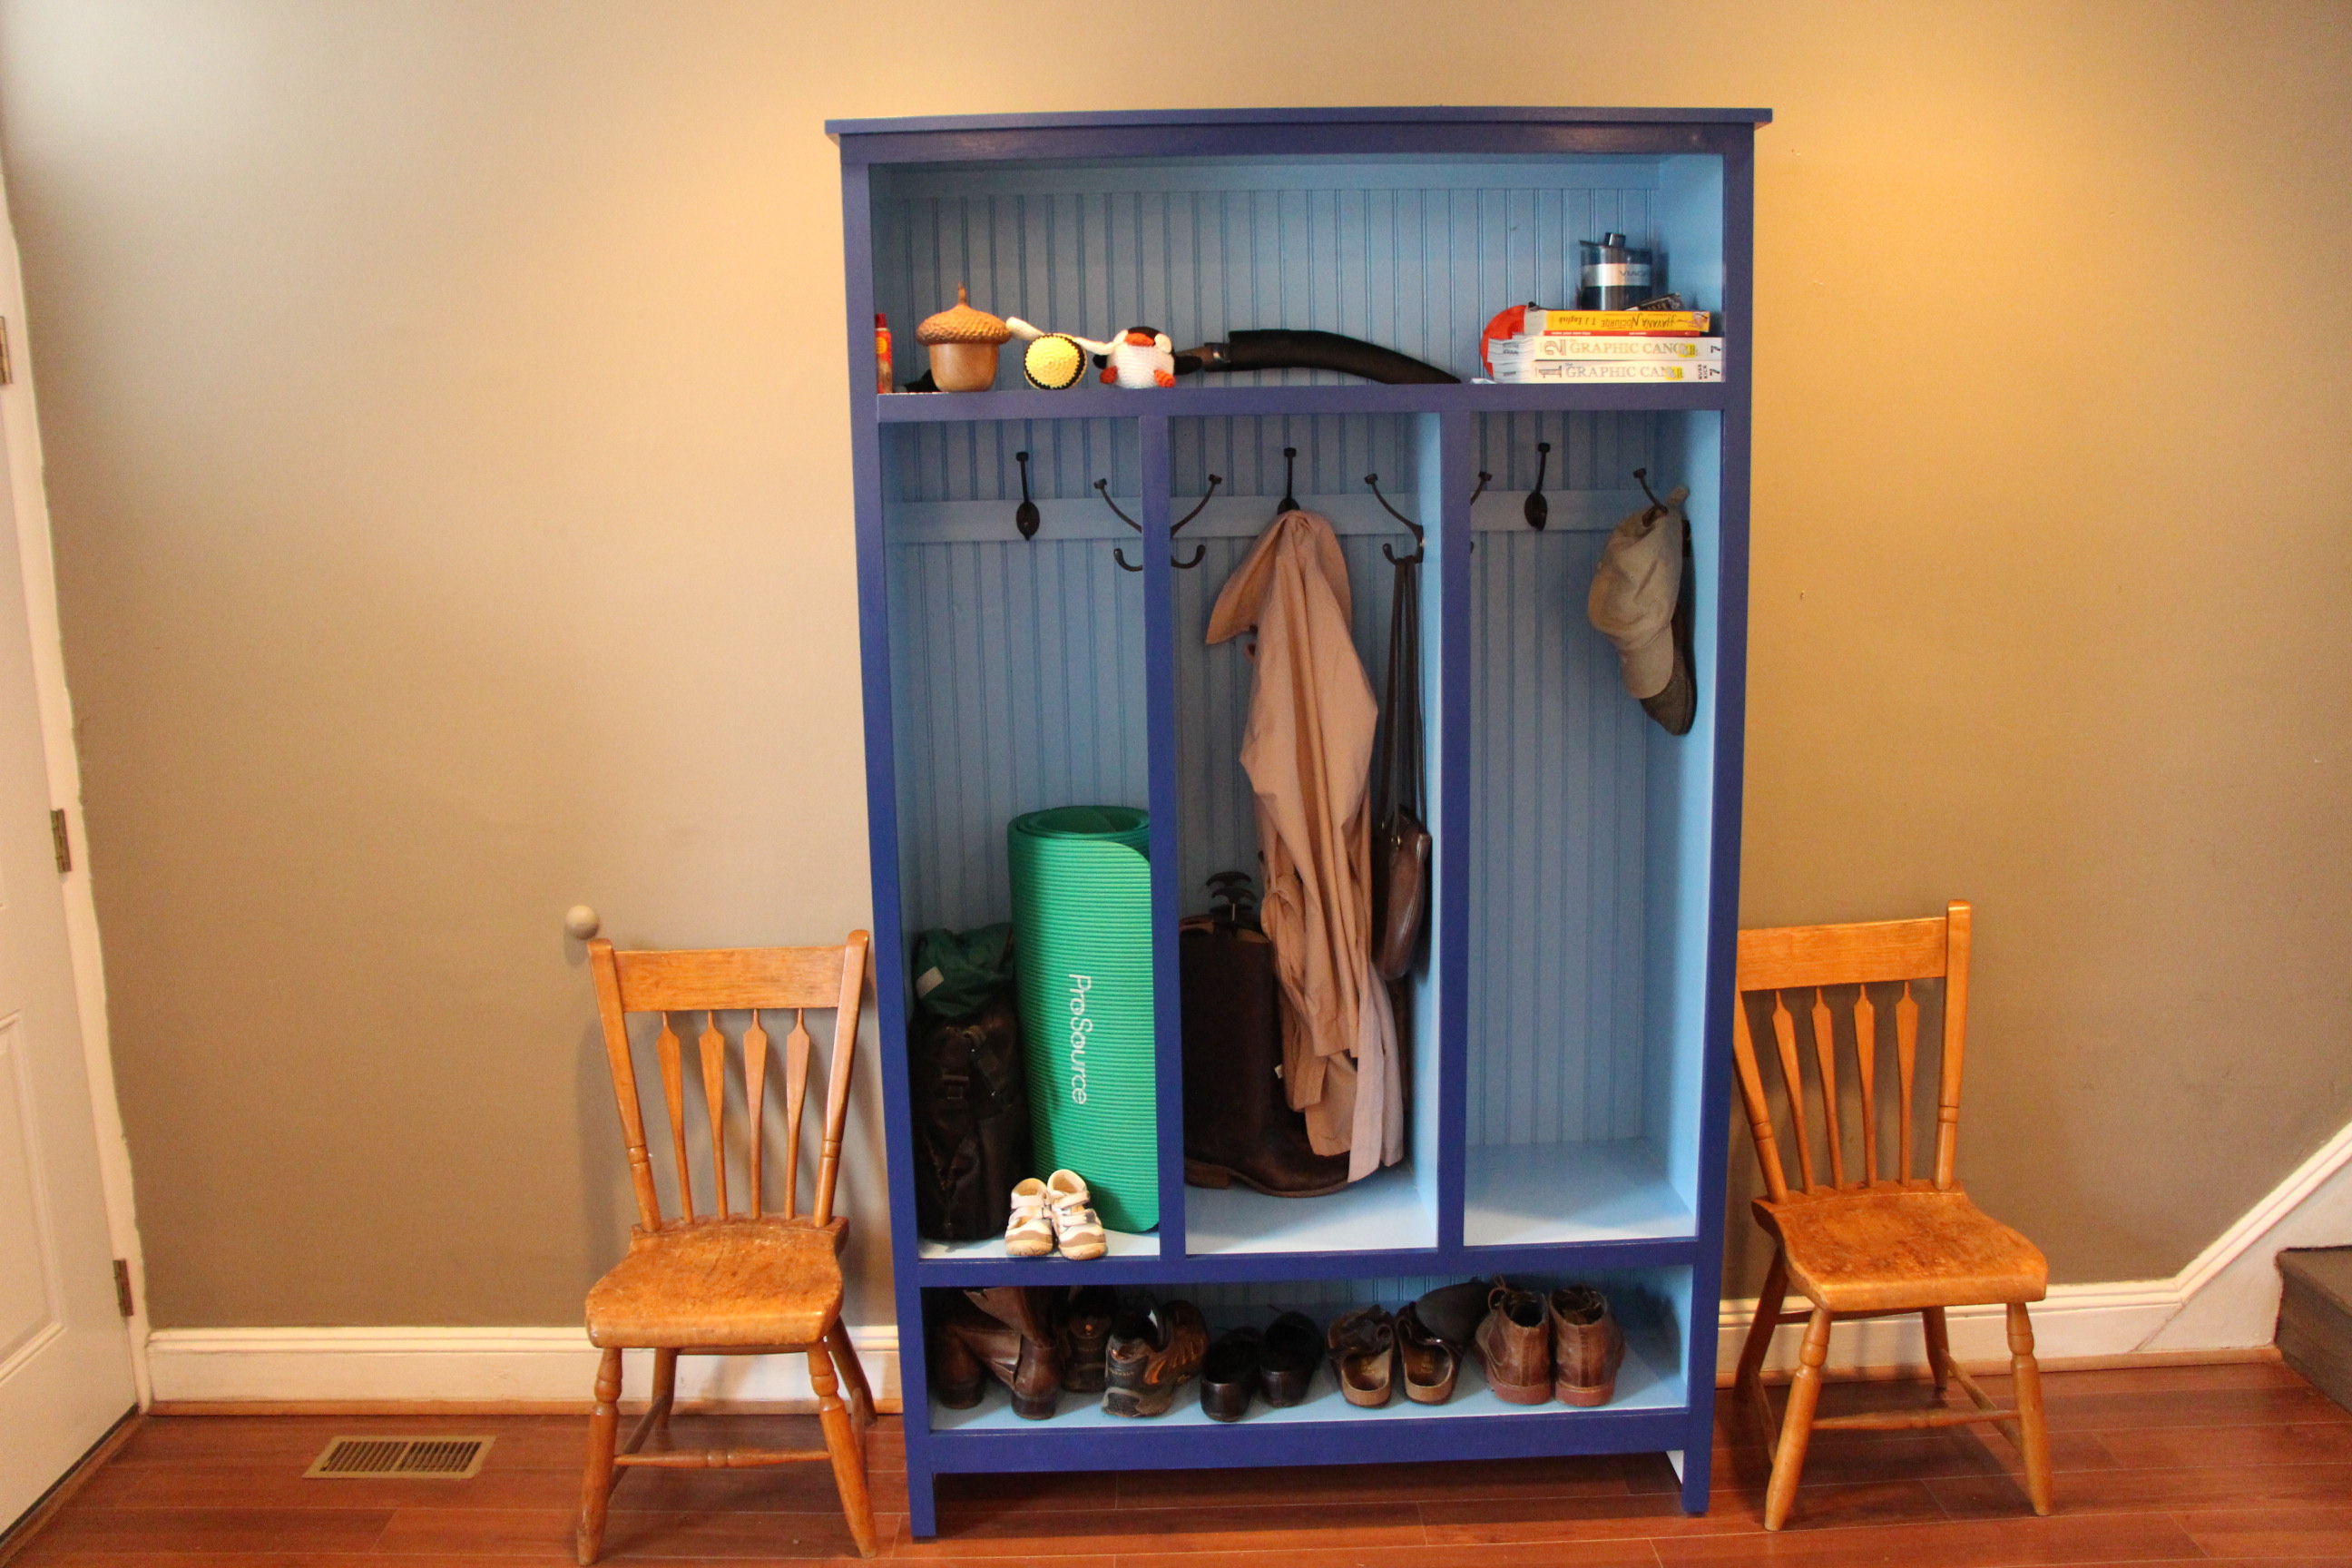
I made the locker cabinet and resized it to 80 inches to provide a little more locker height, and changed the depth to 16 inches. I haven't installed the last coat hook because I'd like to make a charging station on the top shelf using the outlet under the cabinet. Went really well!
Built from Plan(s)
Estimated Cost
200
Estimated Time Investment
Weekend Project (10-20 Hours)
Finish Used
High gloss sherman williams
Recommended Skill Level
Beginner
Comments
Wed, 03/19/2014 - 13:36
modifications
Oh, and I decided to face frame everything so I wouldn't have to see the plywood edges.
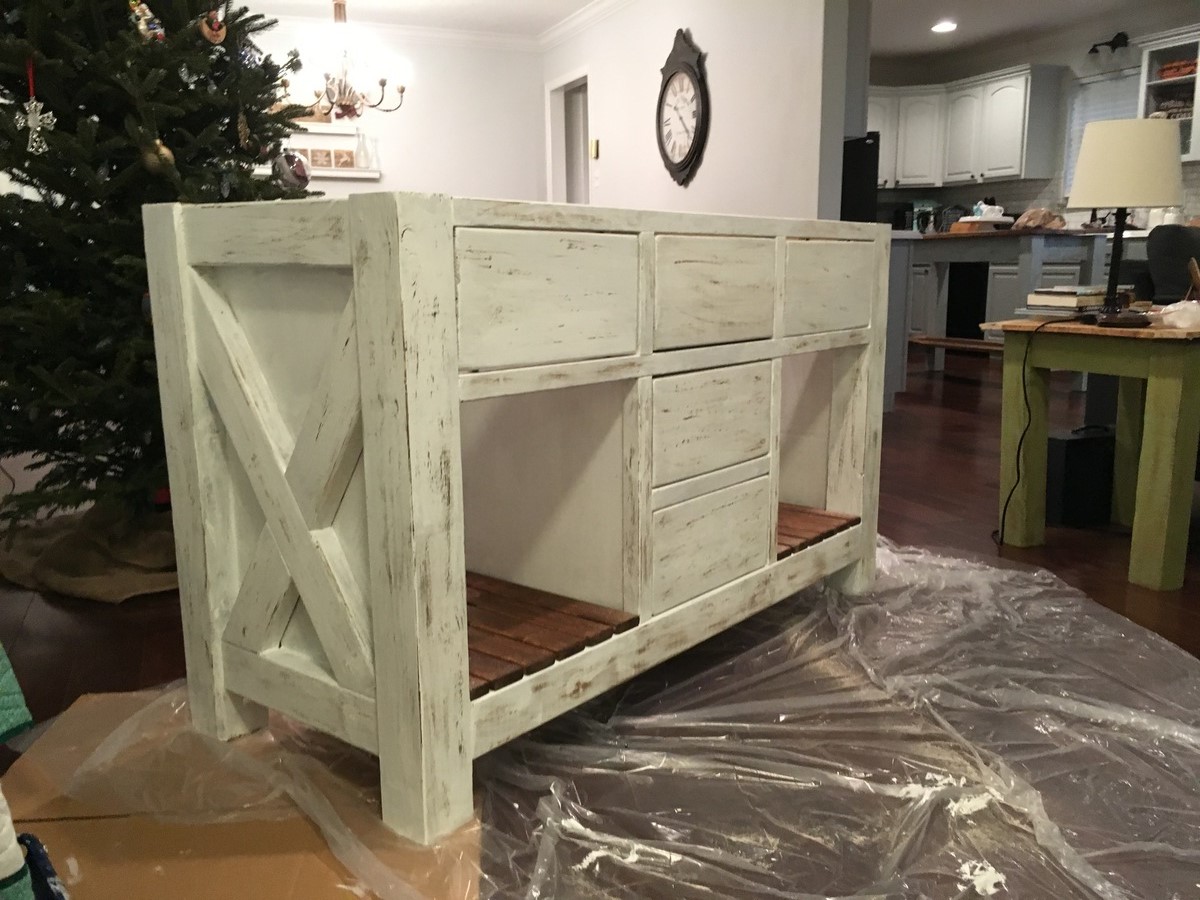
Rustic X Bathroom Vanity

This is a heavily modified version of the rustic x kitchen island that I tweaked to make for 2 sinks.
Built from Plan(s)
Estimated Cost
$250
Estimated Time Investment
Weekend Project (10-20 Hours)
Recommended Skill Level
Intermediate
Comments

Thu, 08/15/2019 - 11:52
This is gorgeous! Thanks so…
This is gorgeous! Thanks so much for adding a brag post!
Mon, 11/25/2019 - 11:39
Do you happen to have plans…
Do you happen to have plans or info on what you did to modify it to hold the sinks?? Absolutely love this!!!
Mon, 02/03/2020 - 06:41
Modified plans
Absolutely love this but I would like the actual modified plans . Is it possible to get them?
Sun, 01/03/2021 - 16:01
Love this!!! Great job!!!!…
Love this!!! Great job!!!! II need new vanities... this will be a great project!!
Farmhouse Console Table
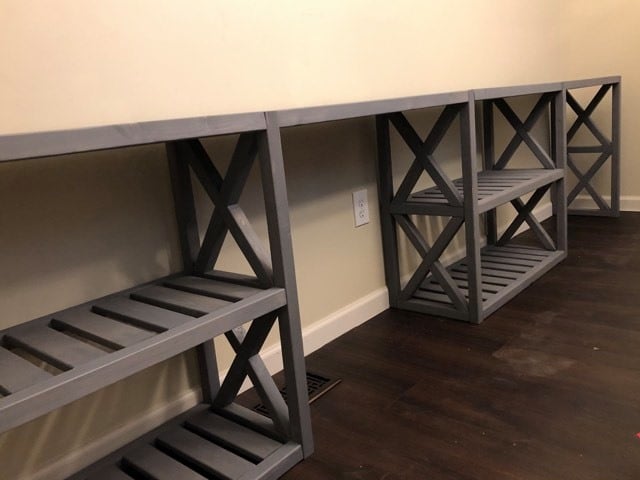
My husband and I both work from home and we don't have a lot of space. I was getting frustrated that he was always working at our dining room table, so I wanted to create dedicated work areas for both of us. I really liked the style of the farmhouse console table, so I modified the plan to add a second desk on one end. They are very functional and did not take up a lot of space. Best of all, they were very affordable!
Built from Plan(s)
Comments
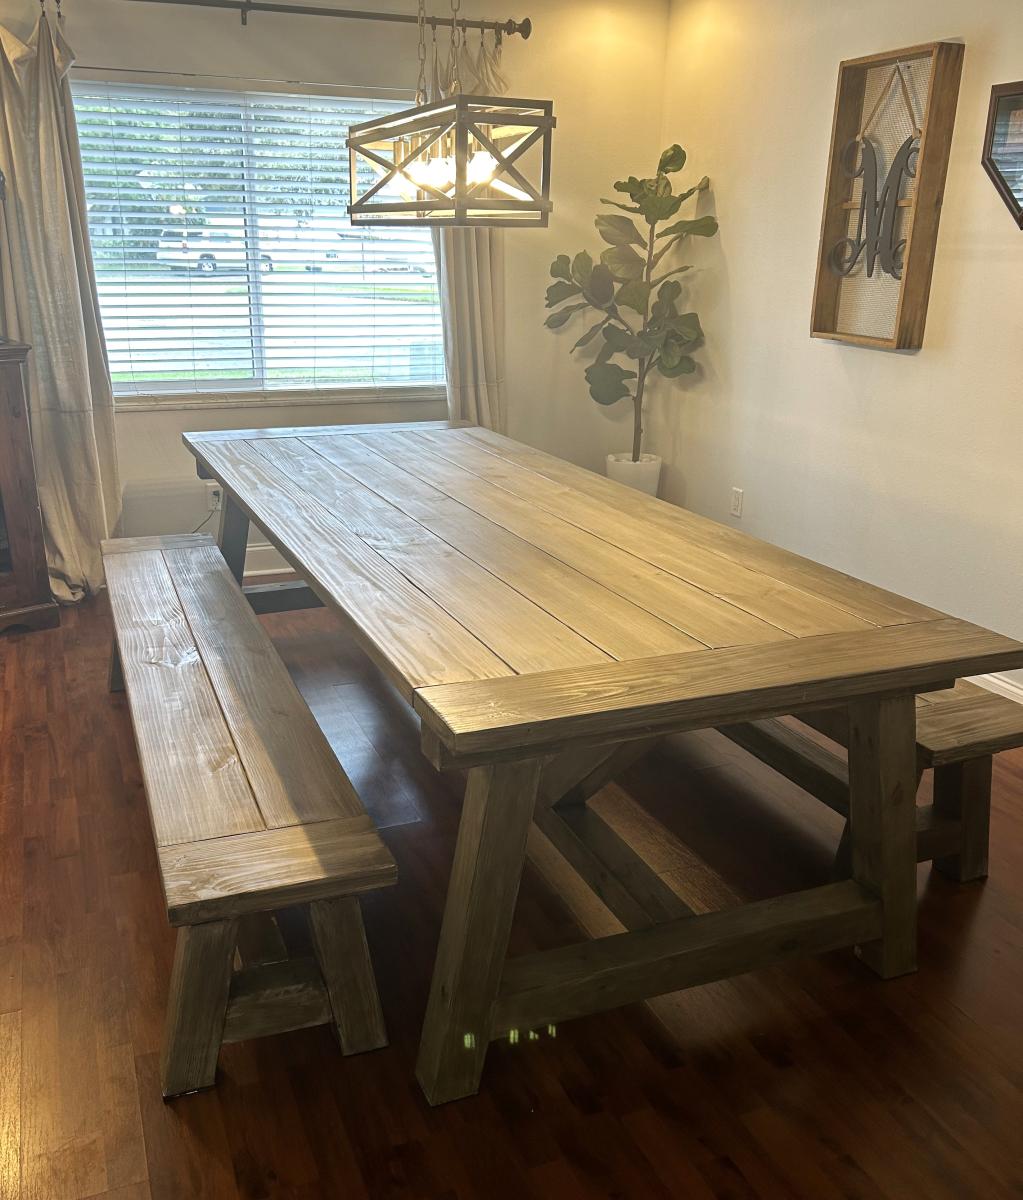
Thanksgiving Table for 14!
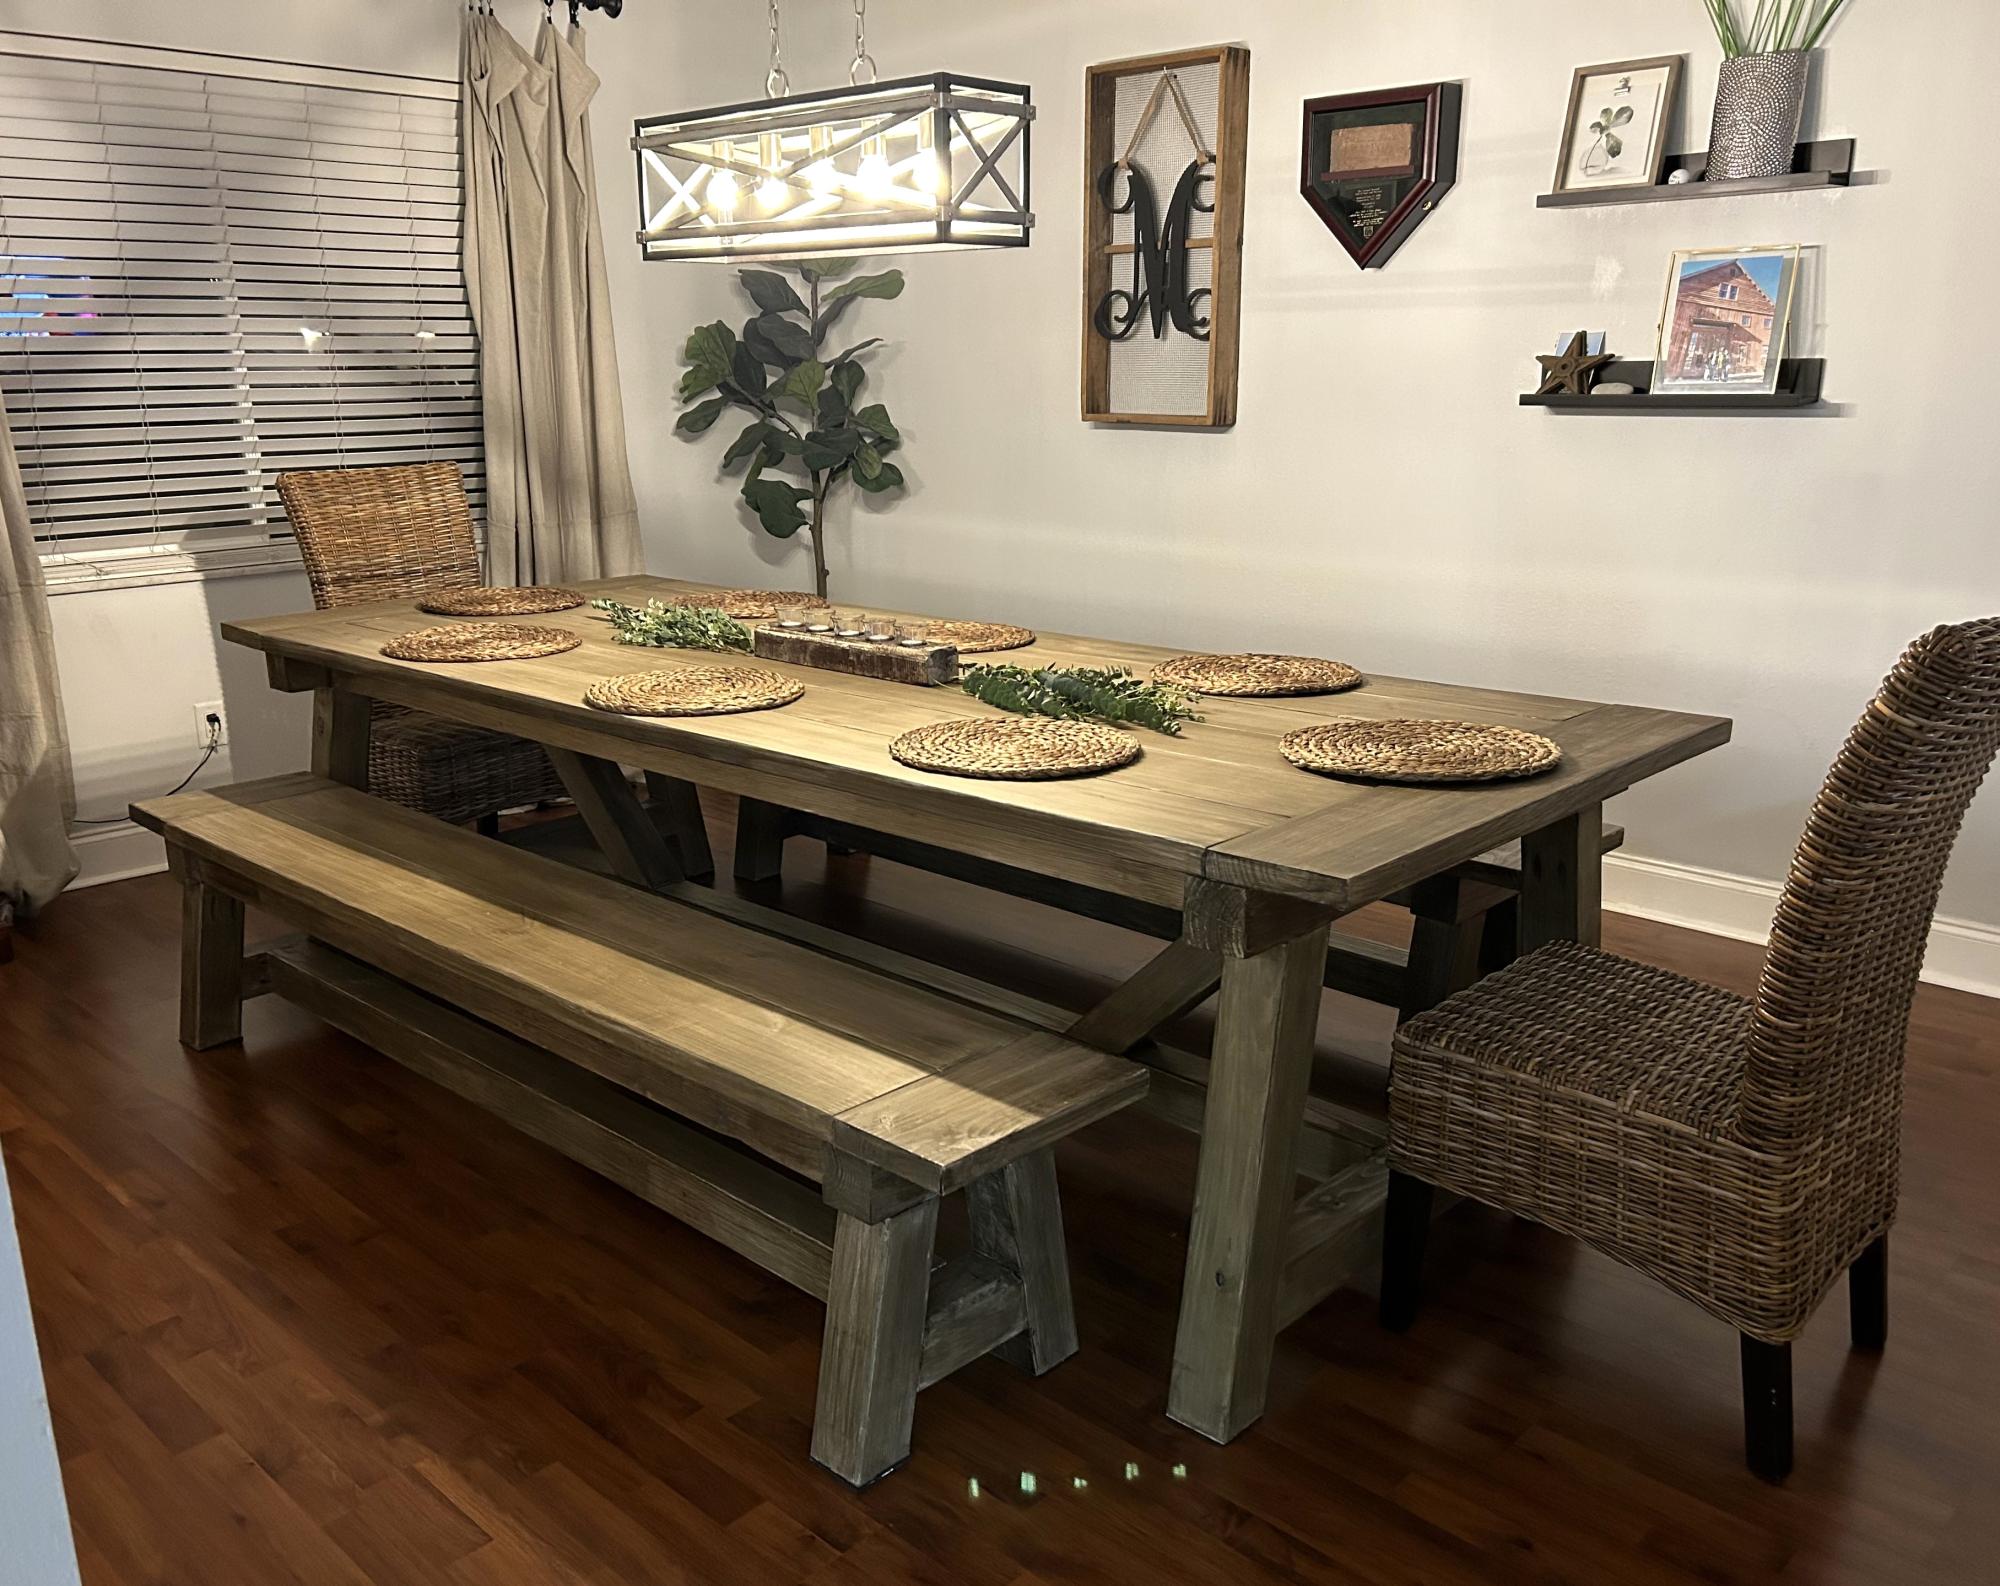
4x4 Truss Table and truss bench
Extended table to 109 inches. Finished just in time for Thanksgiving dinner. All 14 of us fit around the table comfortably.

Built from Plan(s)
Comments
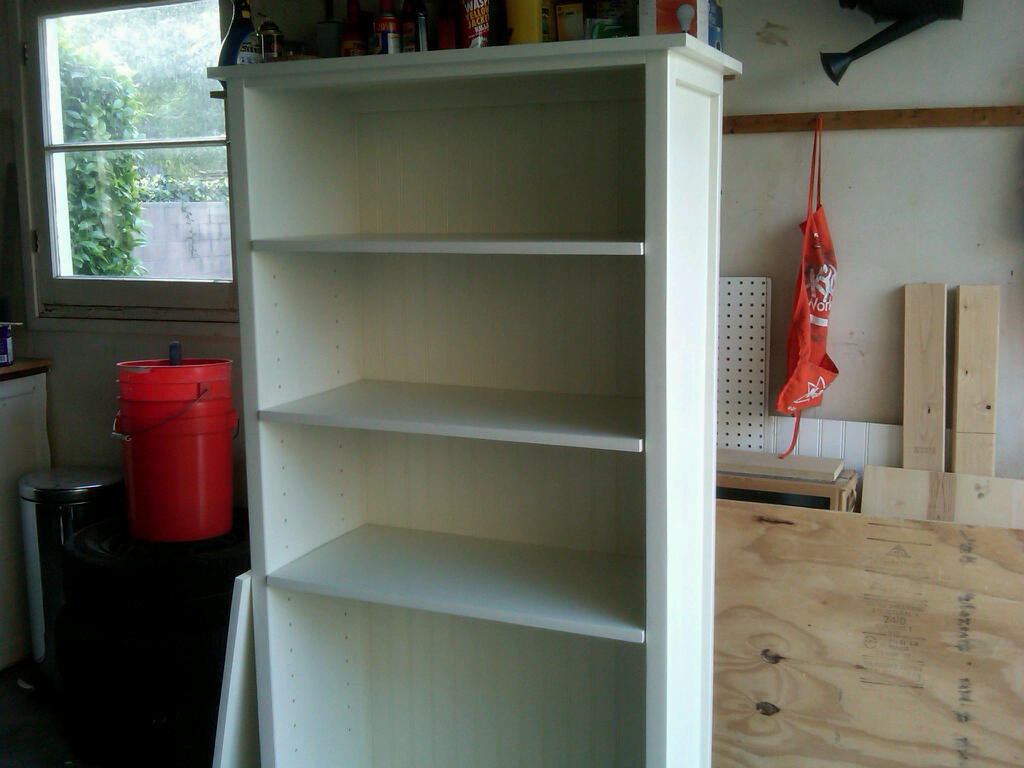
Channing Bookcase
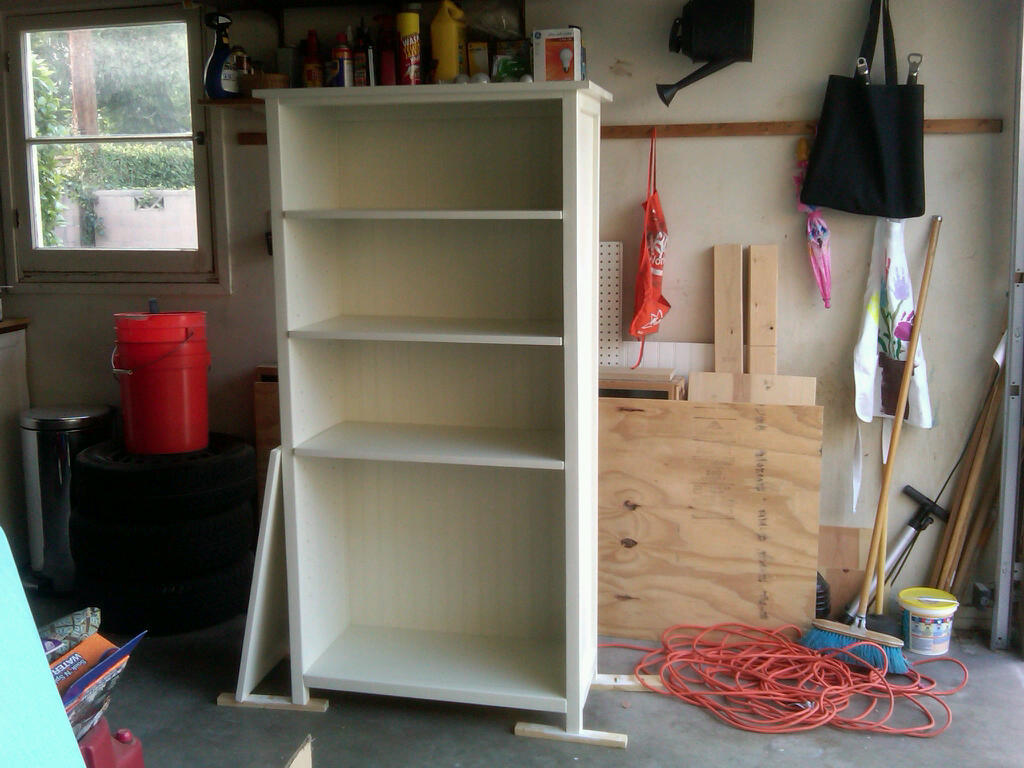
This is my first project. It was very fun and quite a learning process. Thanks Ana for the great site and inspiring me to start a new phase in my life. I was missing a couple of shelf pins
Estimated Time Investment
Weekend Project (10-20 Hours)
Finish Used
Interior paint to match a bedroom set with polycrylic finish in semi-gloss.
Recommended Skill Level
Beginner
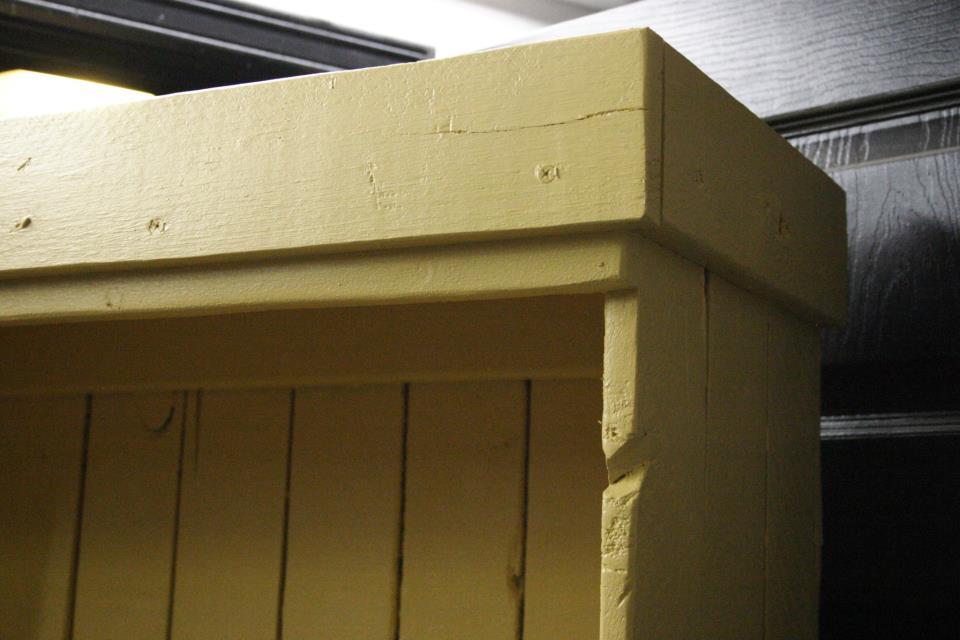
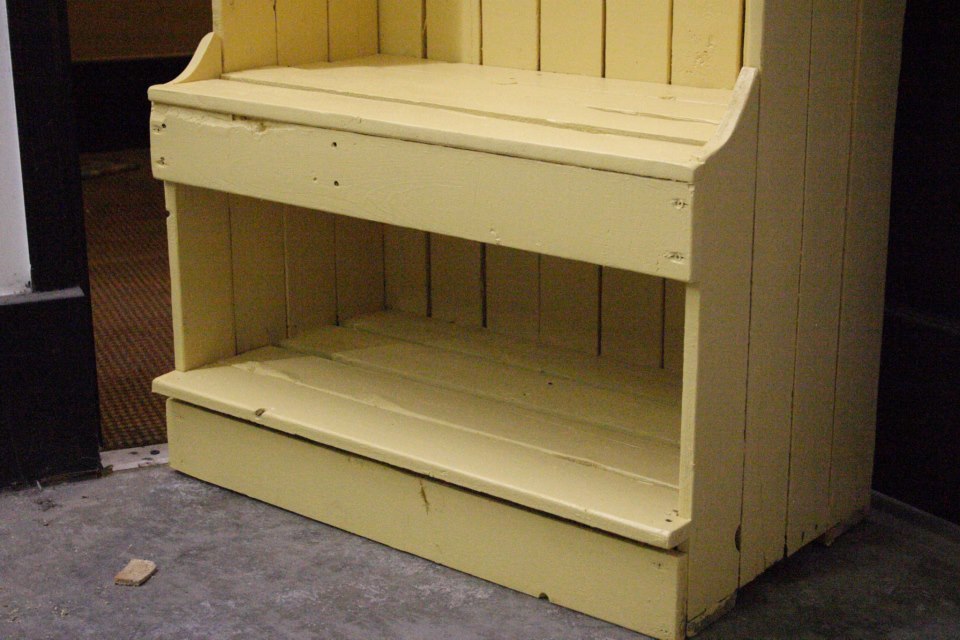
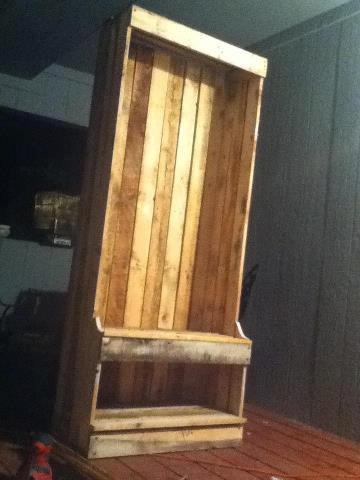
Reclaimed Pallet Hall Tree
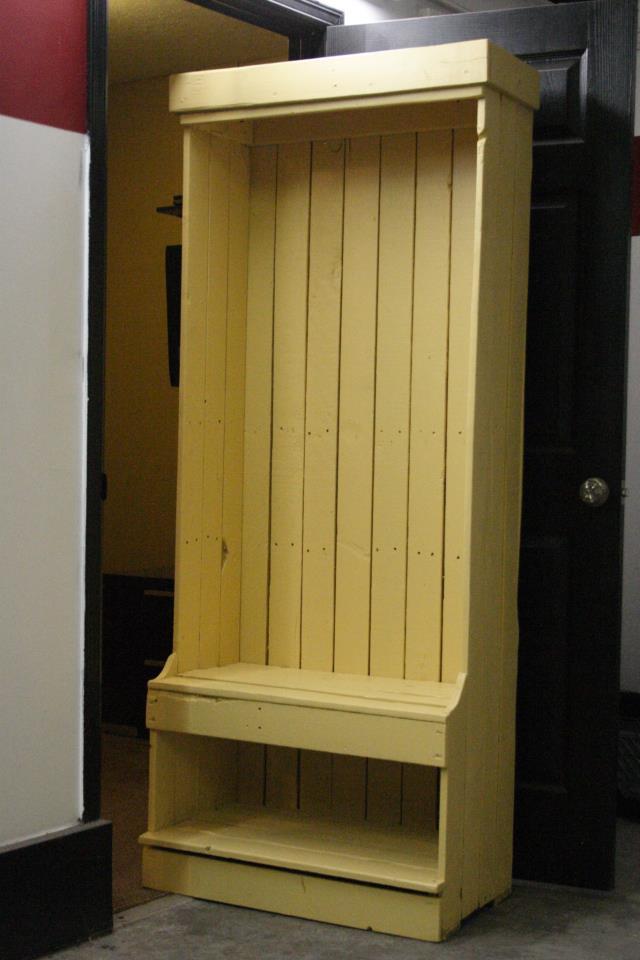
This hall tree started life out as a pair of ceder pallets.
This isn't based on a plan but could easily have been modified from the single locker cabinet plan here on Ana White.
The whole thing was screwed and glued together using 7/8" drywall screws and Elmers all purpose white glue.
I have no money into this unit that wasn't already spent. I got the wood for free. The screws glue and misc. tools I already had laying around.
The lady that bought it from me intended to put coat hooks in it and use the space below for shoes.
Built from Plan(s)
Estimated Cost
$10 to $20
Estimated Time Investment
Weekend Project (10-20 Hours)
Recommended Skill Level
Intermediate
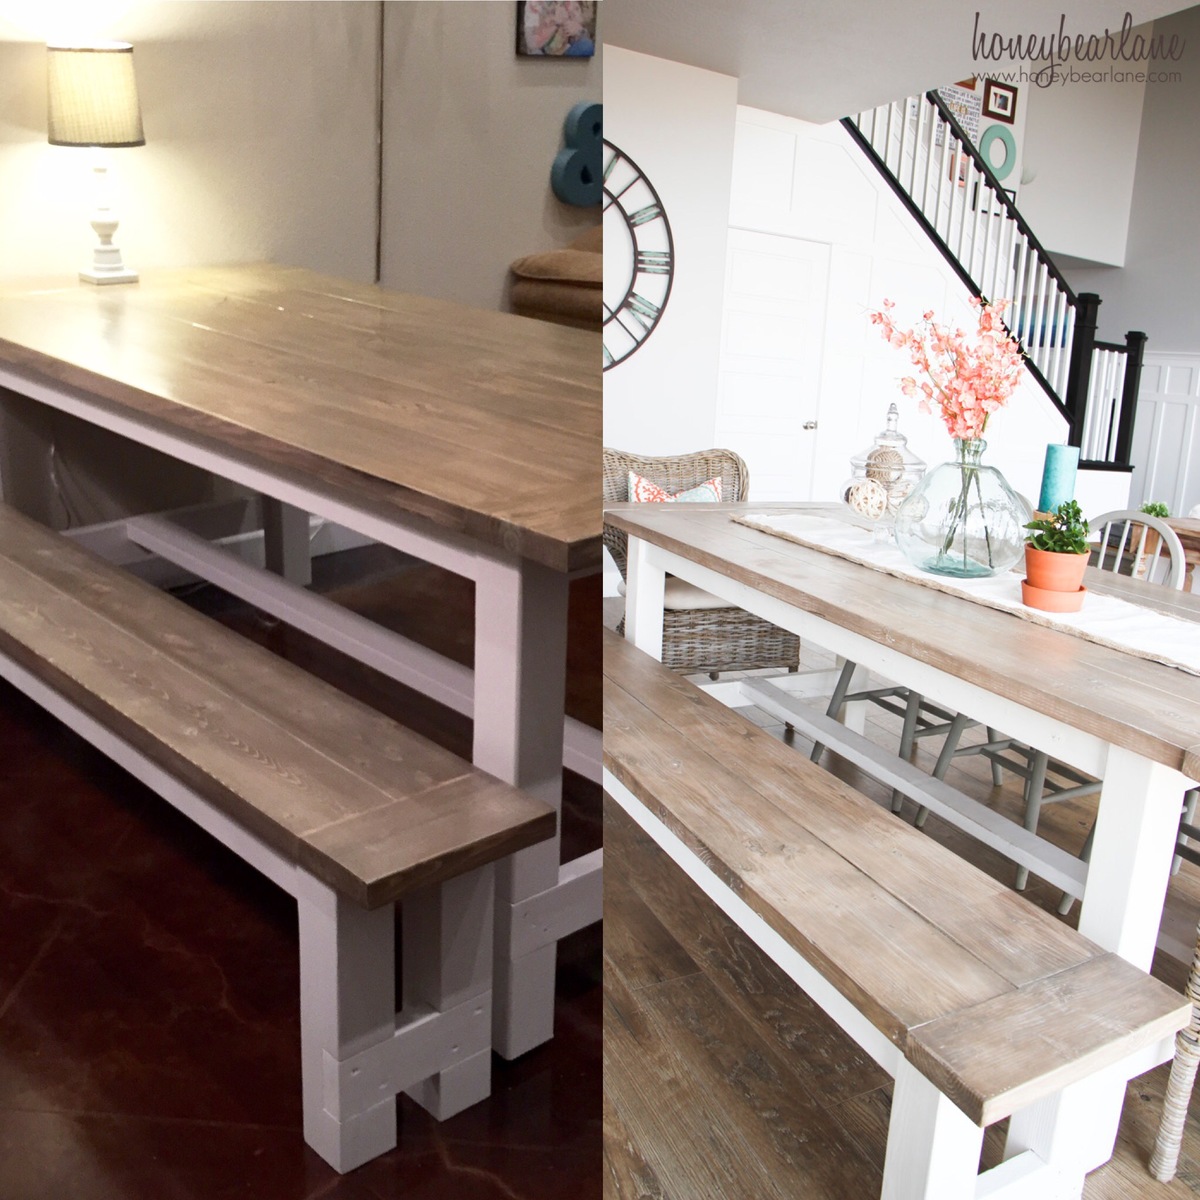
Farmhouse Table
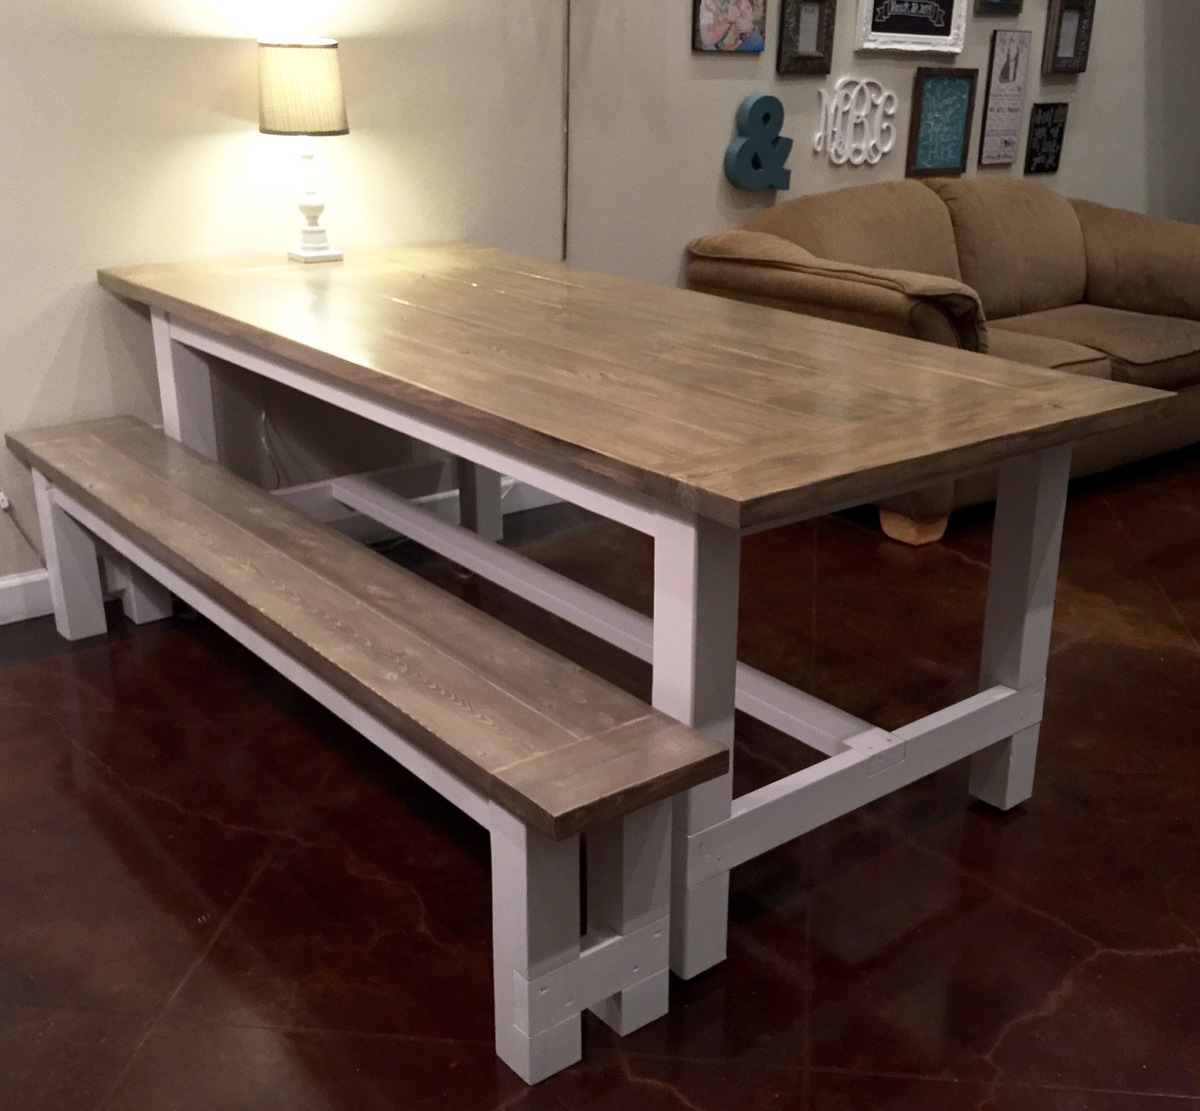
Farmhouse style table using Ana-white plans and HoneyBear finish.
Built from Plan(s)
Estimated Cost
Wood $100
Kreg jig $100
Paint/misc $50
Kreg jig $100
Paint/misc $50
Estimated Time Investment
Week Long Project (20 Hours or More)
Finish Used
White paint
Dark Walnut Stain
Min wax semi-gloss poly
Dark Walnut Stain
Min wax semi-gloss poly
Recommended Skill Level
Intermediate
Workbench
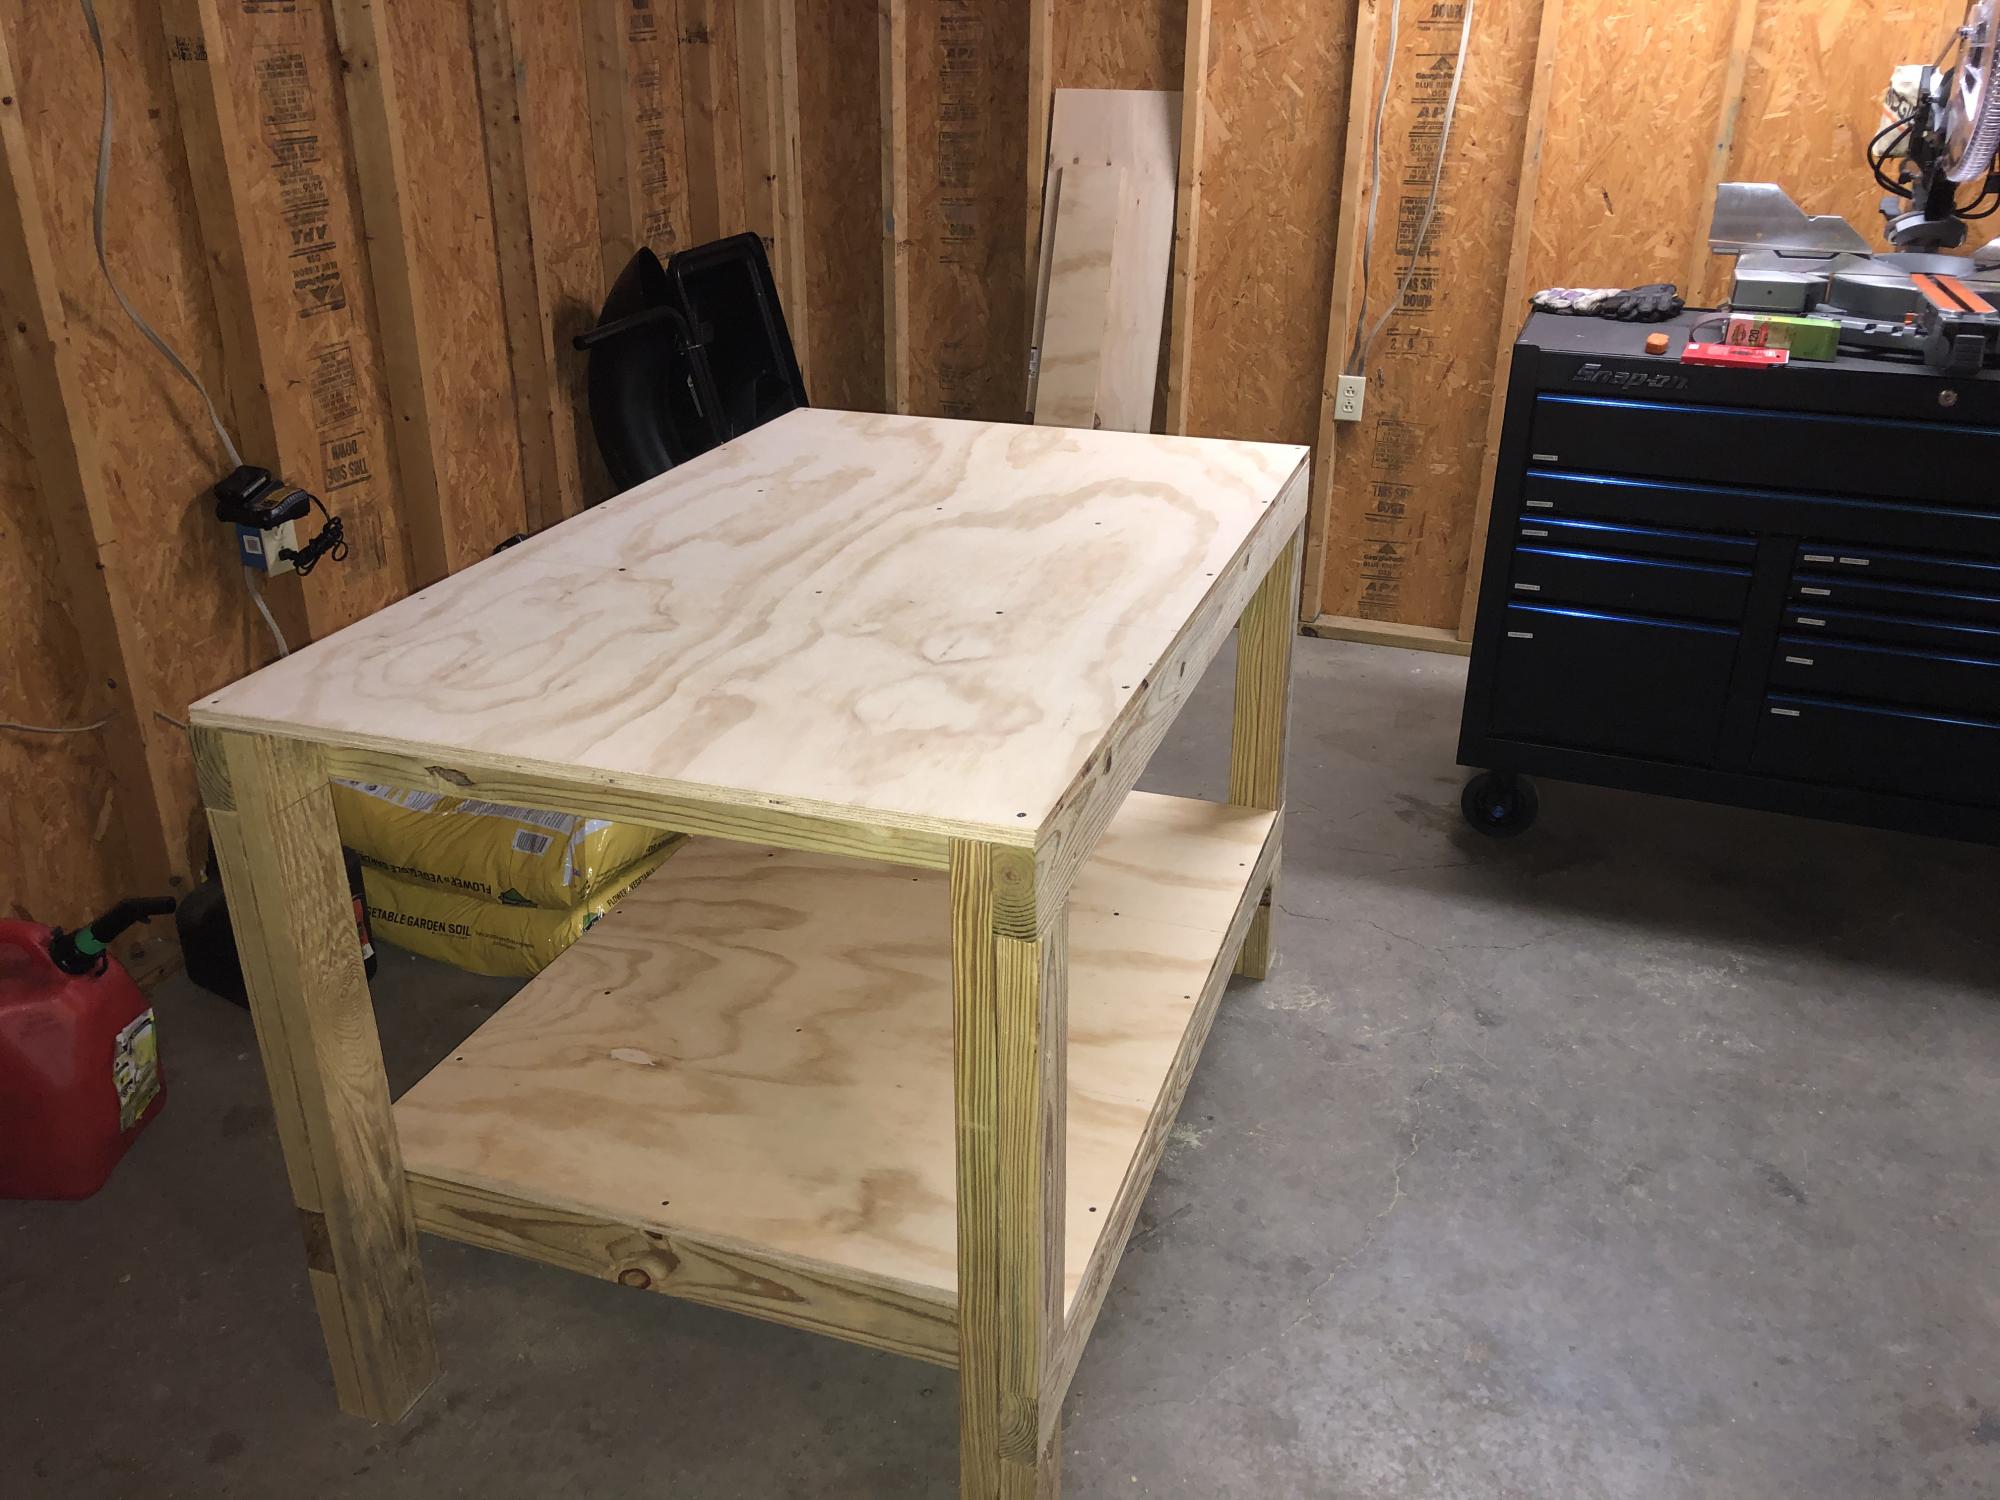
Wasn’t too awful bad. The cuts were basic and easy to duplicate. I would recommend having some clamps to hold the supports in place while you try to screw them together. Otherwise, this table is pretty heavy duty and a lot bigger than I thought it would be. I sprung for a more durable and harder wood top, oak so the cost was about $25 more.

Built from Plan(s)
Estimated Cost
100
Estimated Time Investment
Day Project (6-9 Hours)
Finish Used
None
Recommended Skill Level
Beginner
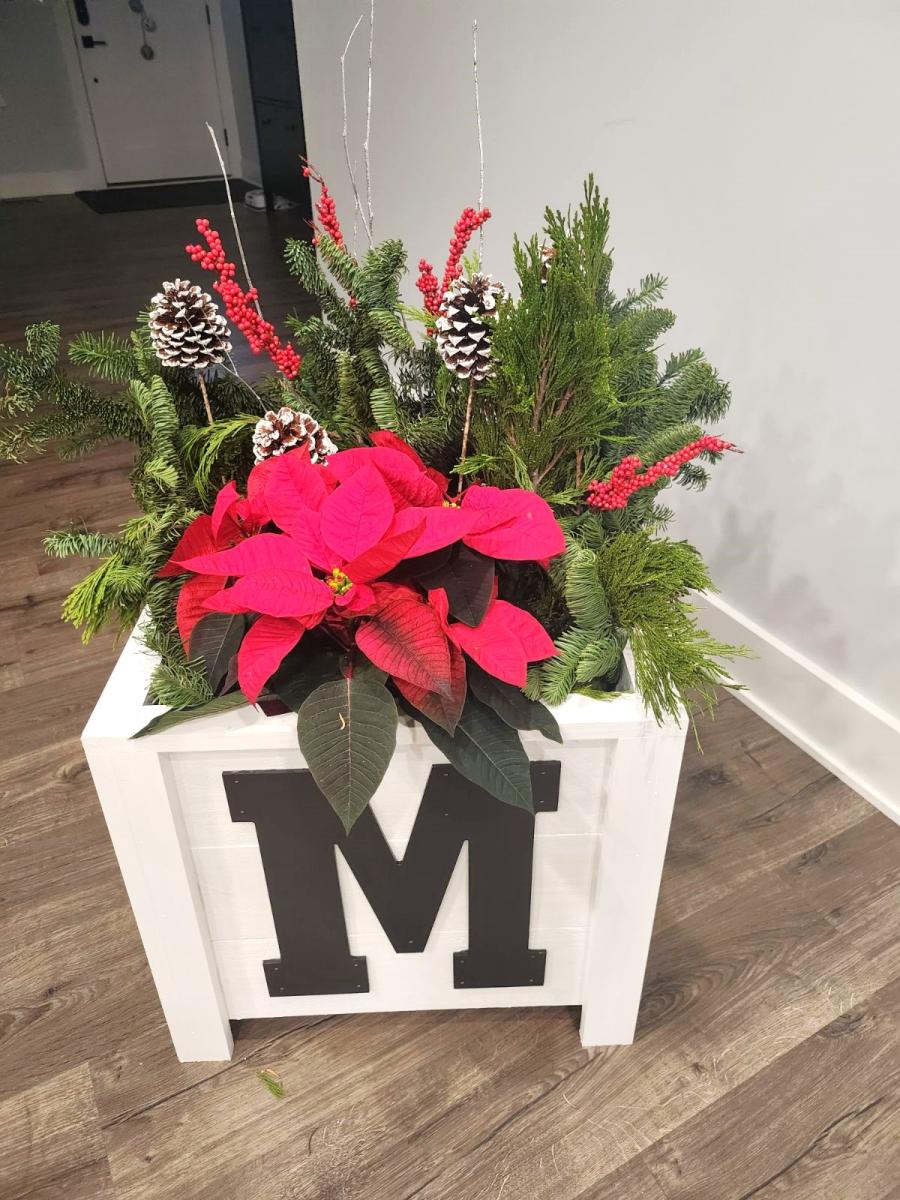
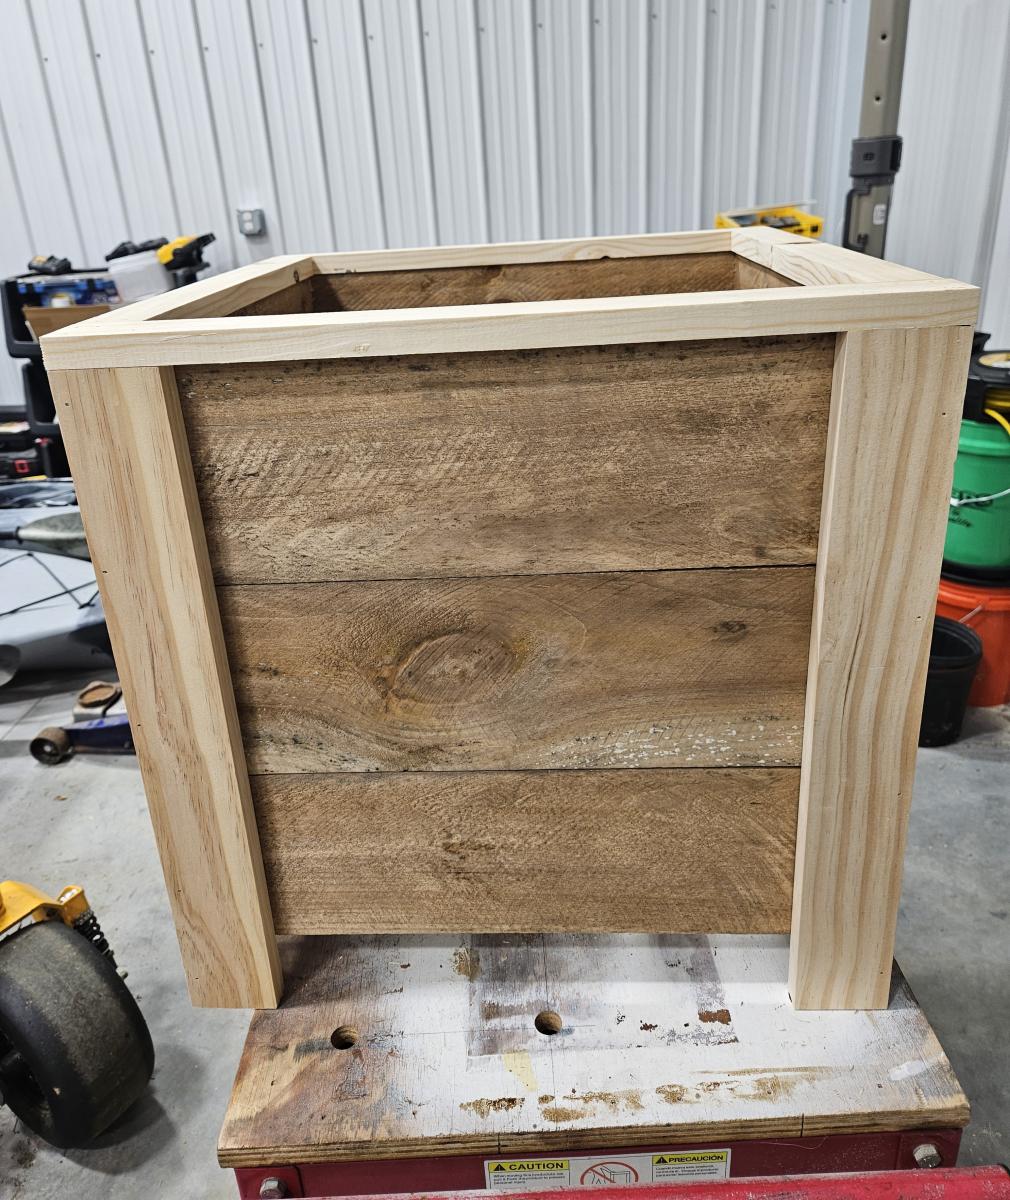
Christmas Planters
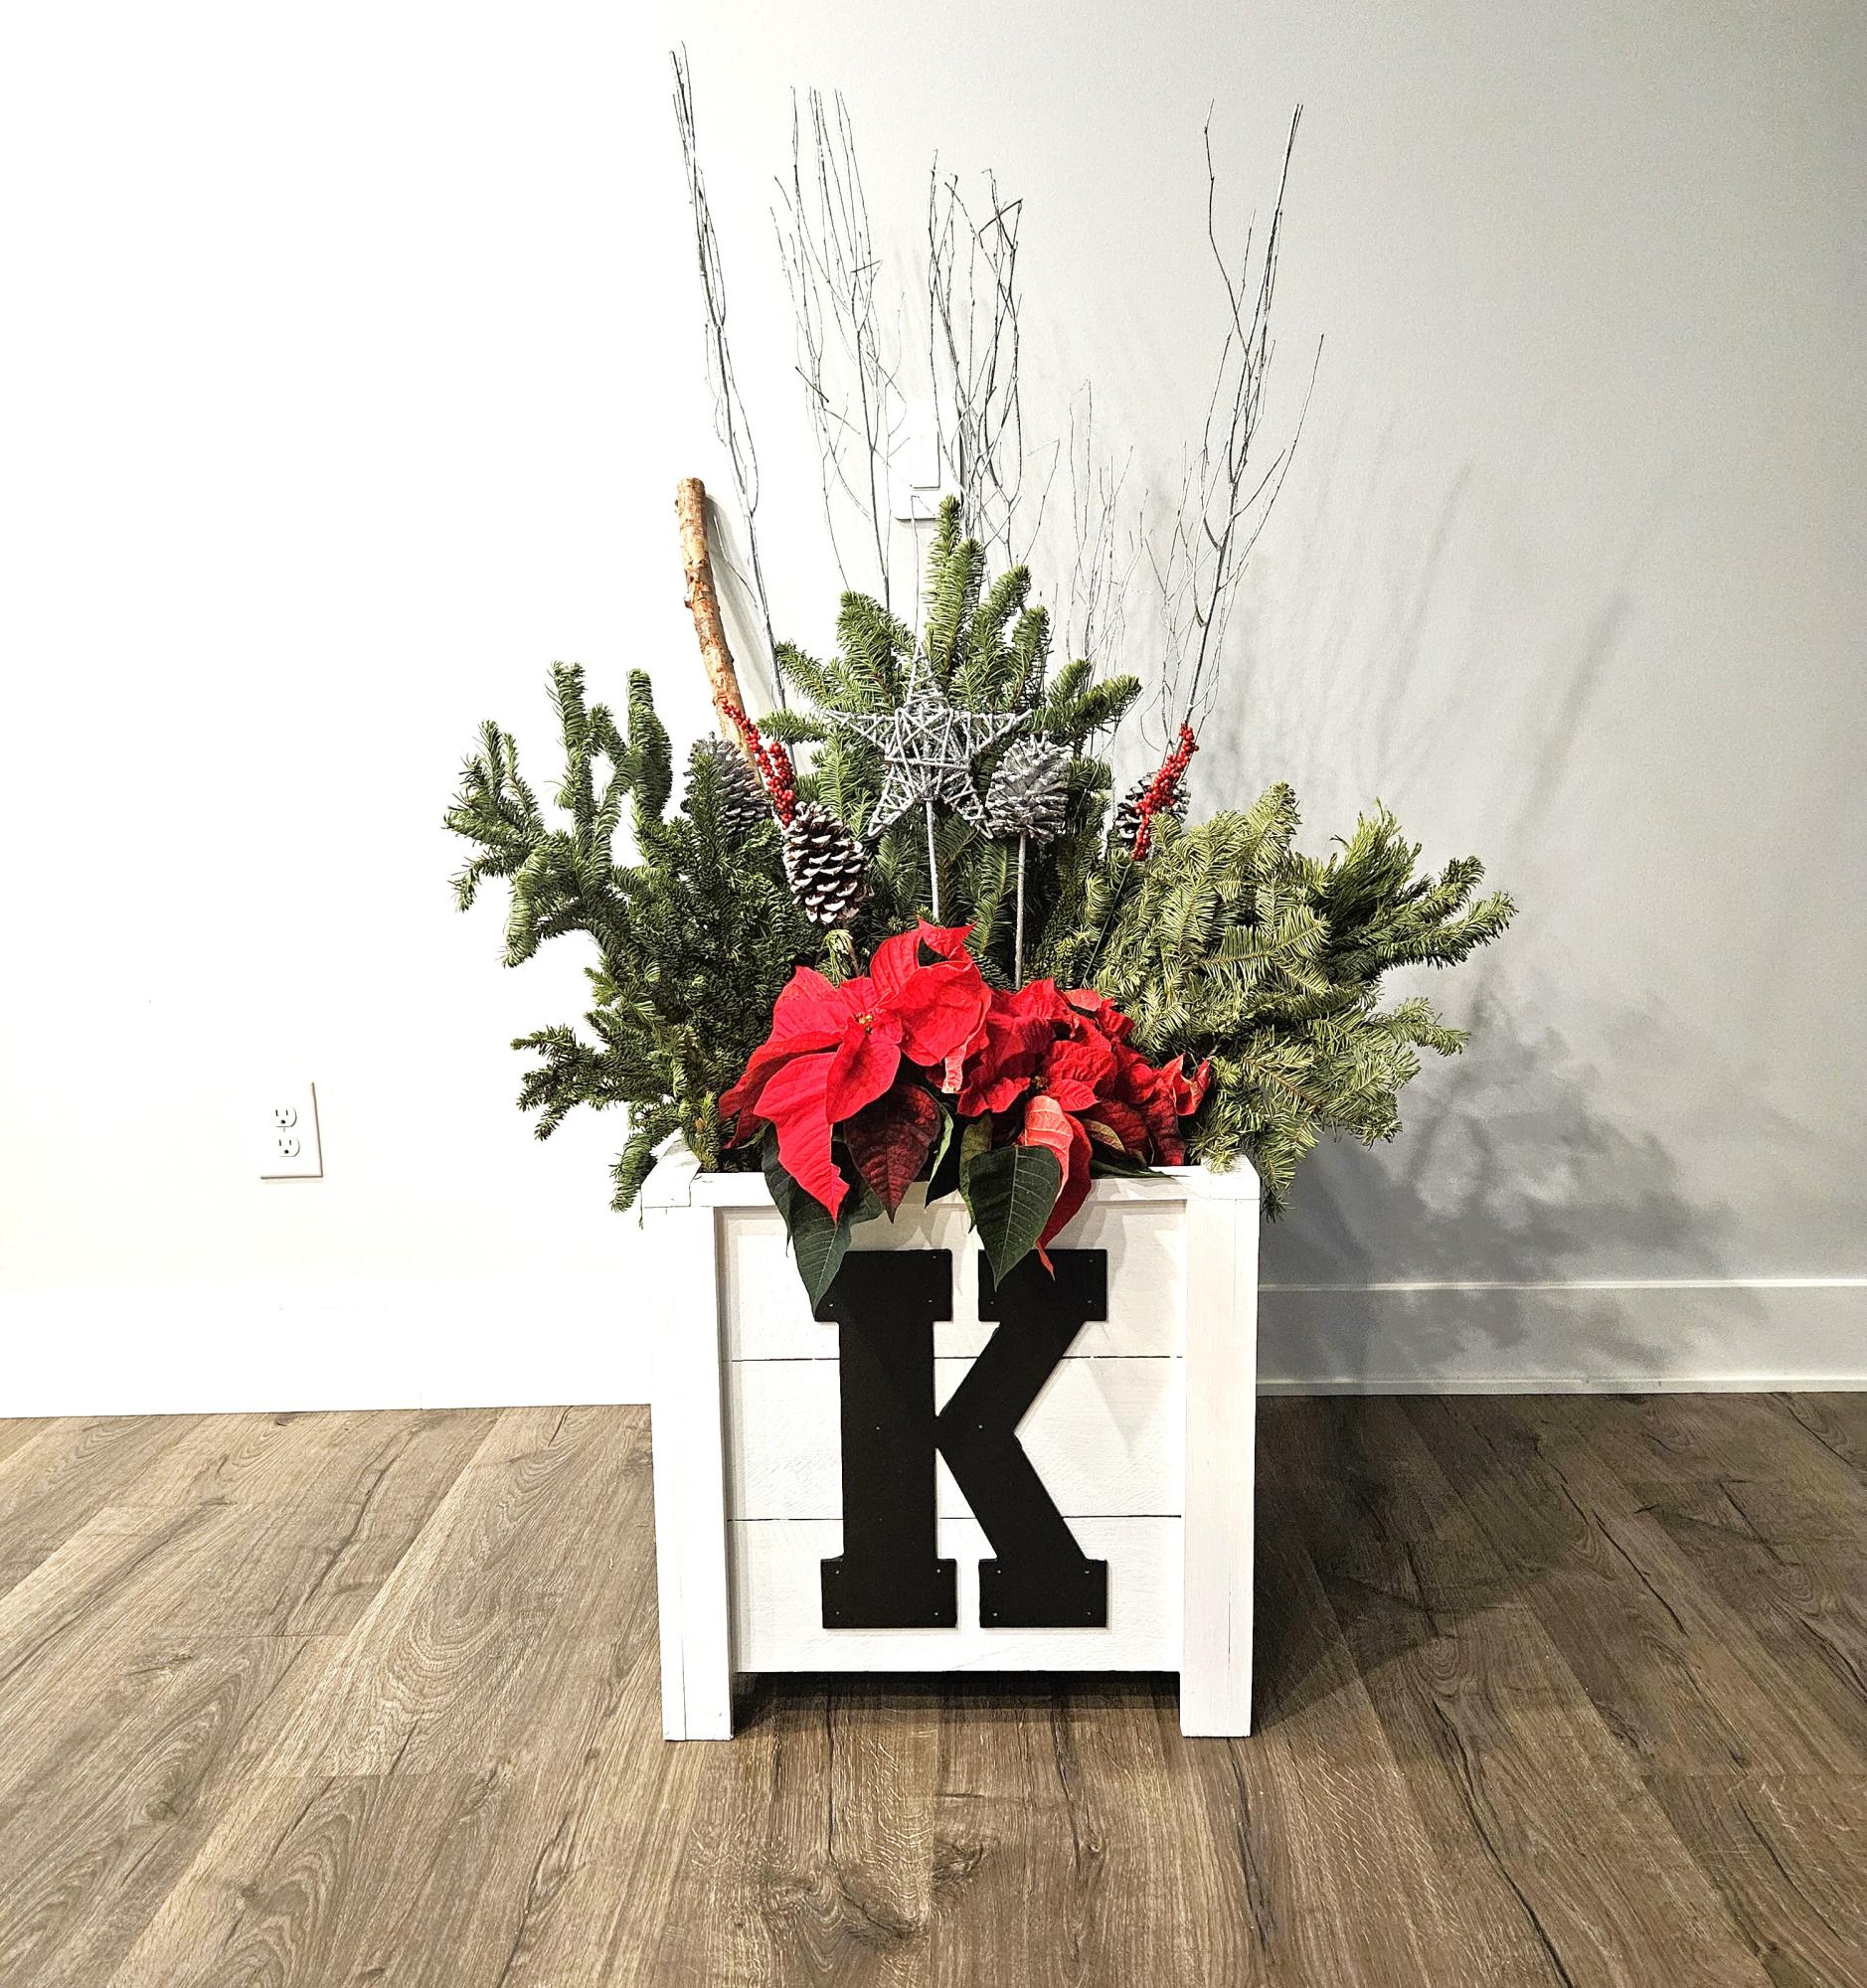
Christmas gifts my wife and I have been working on. These are great projects Anna, thank you!!!
Robert and Crystal
Built from Plan(s)
Seasonal And Holiday
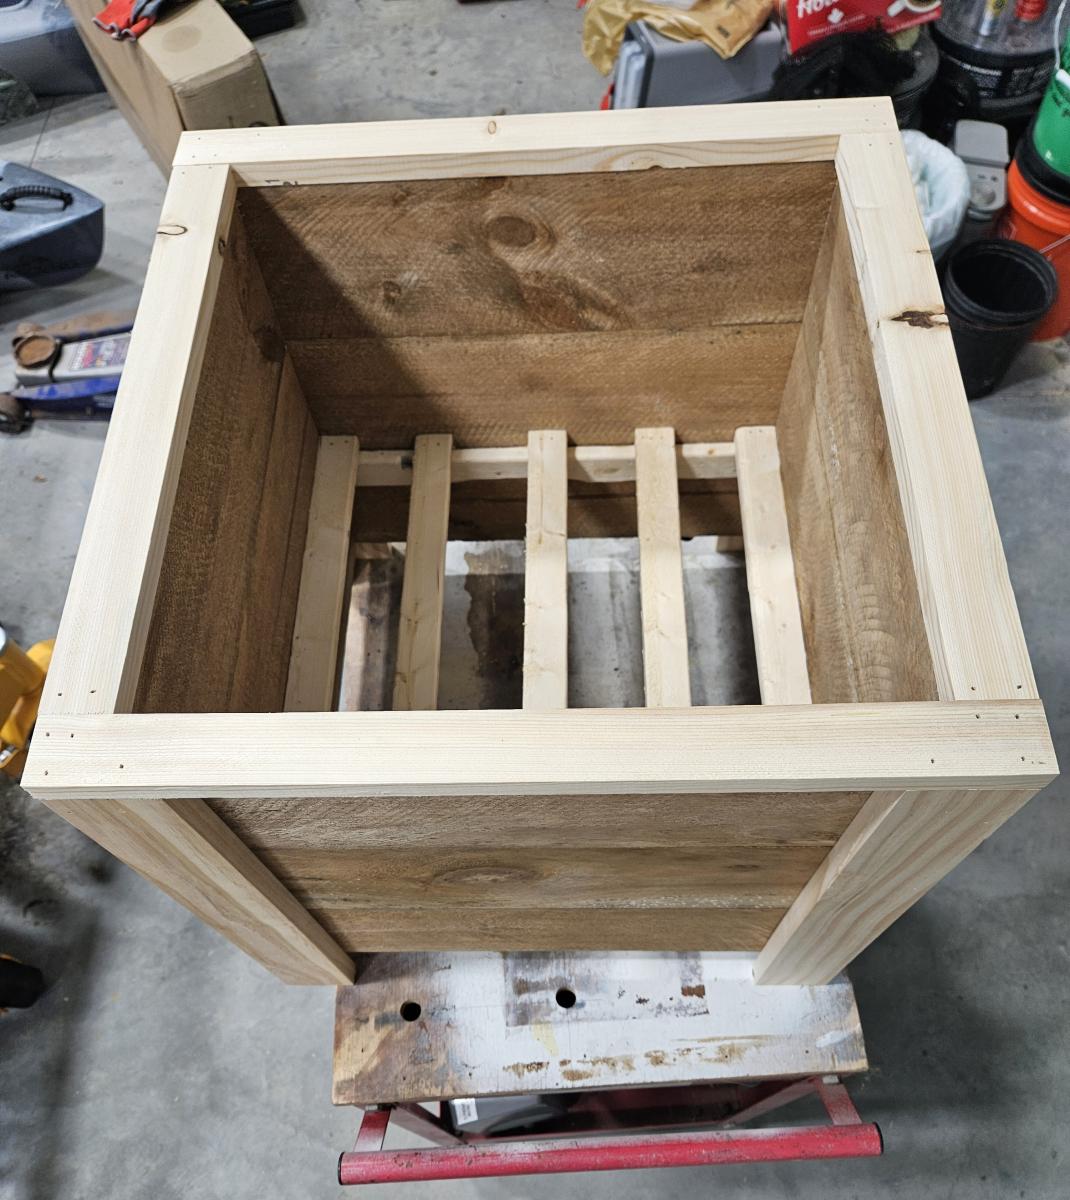
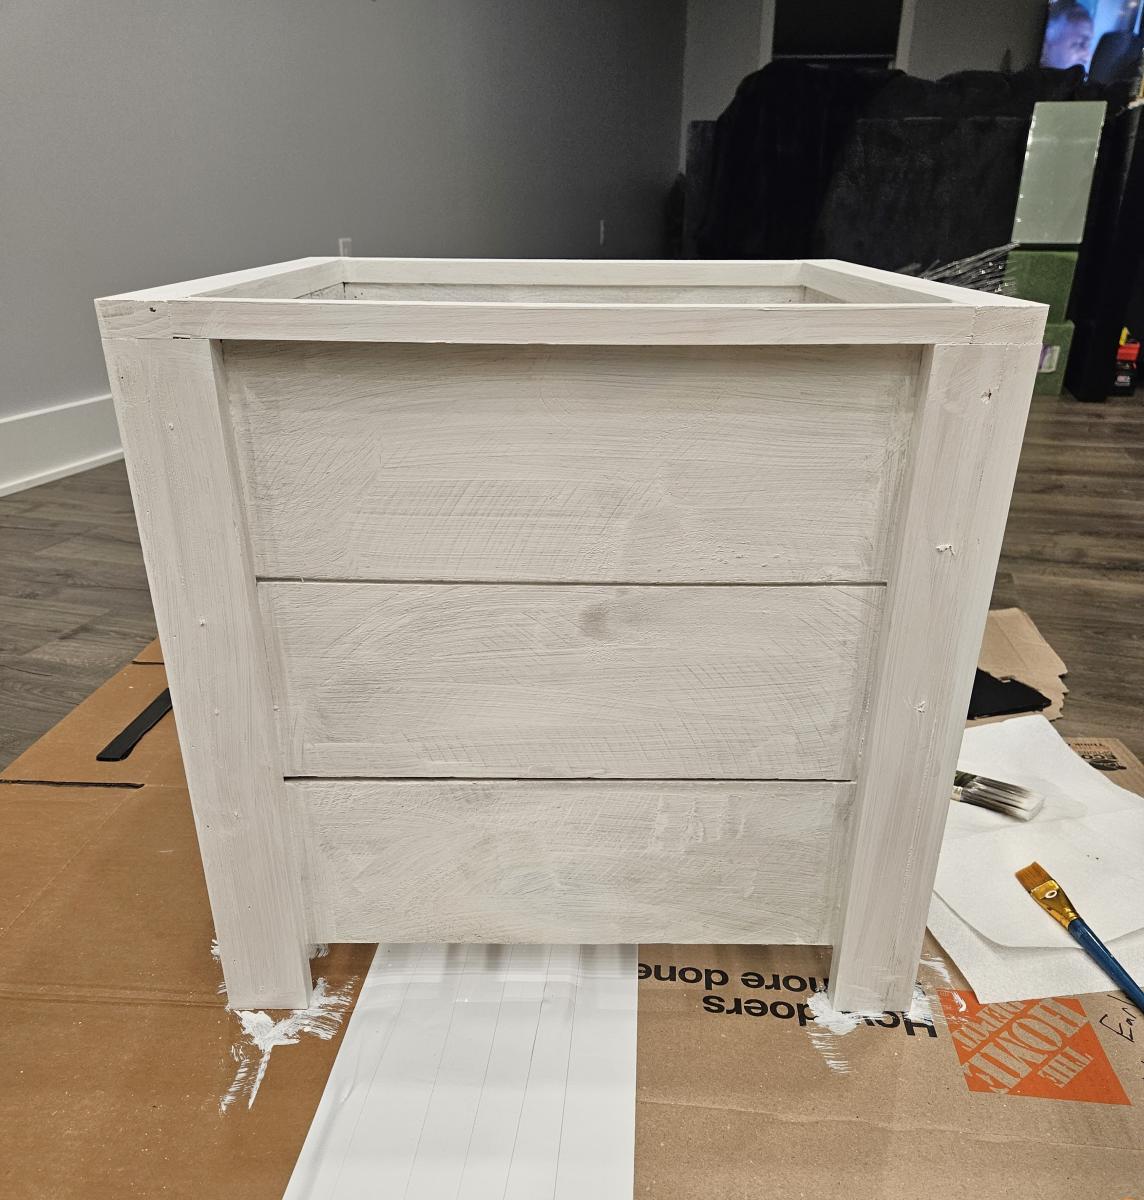
Laundry Basket Dresser and Countertop

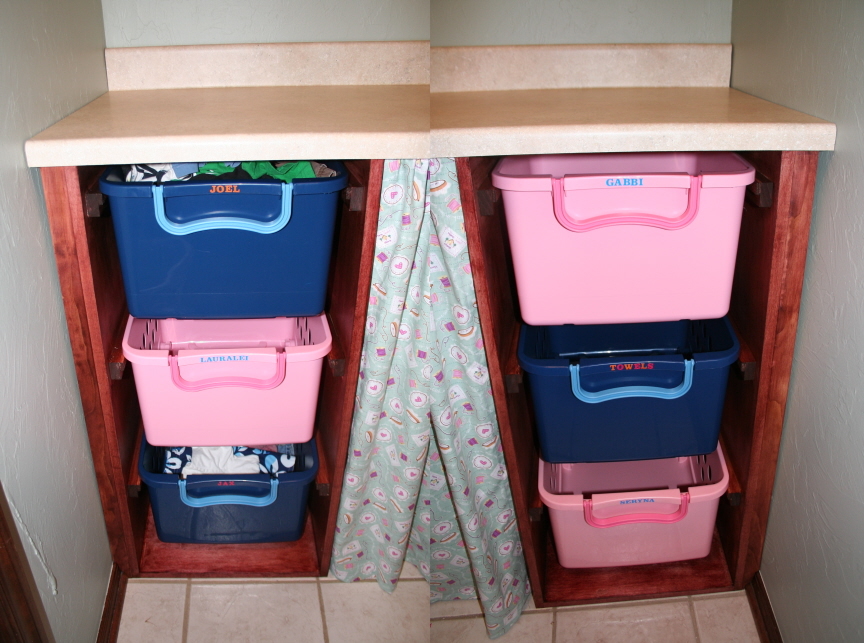
I had already bought these rolling & stackable baskets from Target for my 5 kids (http://tinyurl.com/72be9cn - 2.37 Cu. In., 10.75 " H x 16.38 " W x 20.0 " L) and I knew I wanted a countertop for sorting clothes. I thought I had an idea of shelves to put these on under the counter (which would have been attached to the wall) and somehow have a space for the litter box too, but then I found the "Laundry basket dresser" here. I was so excited because this was exactly what I was looking for.
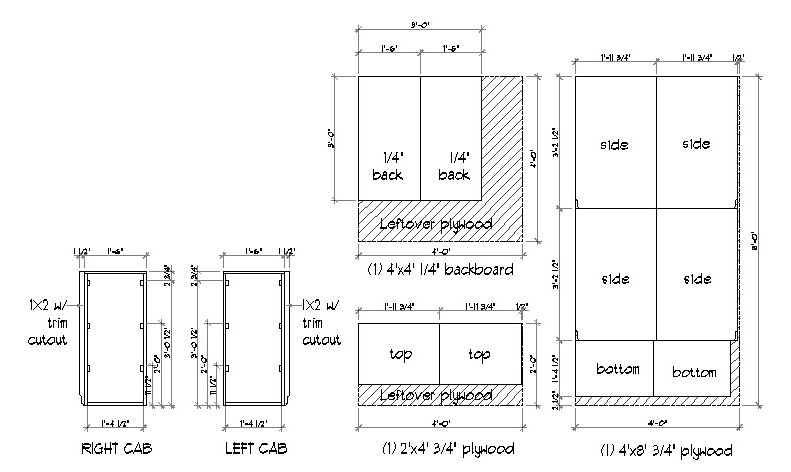
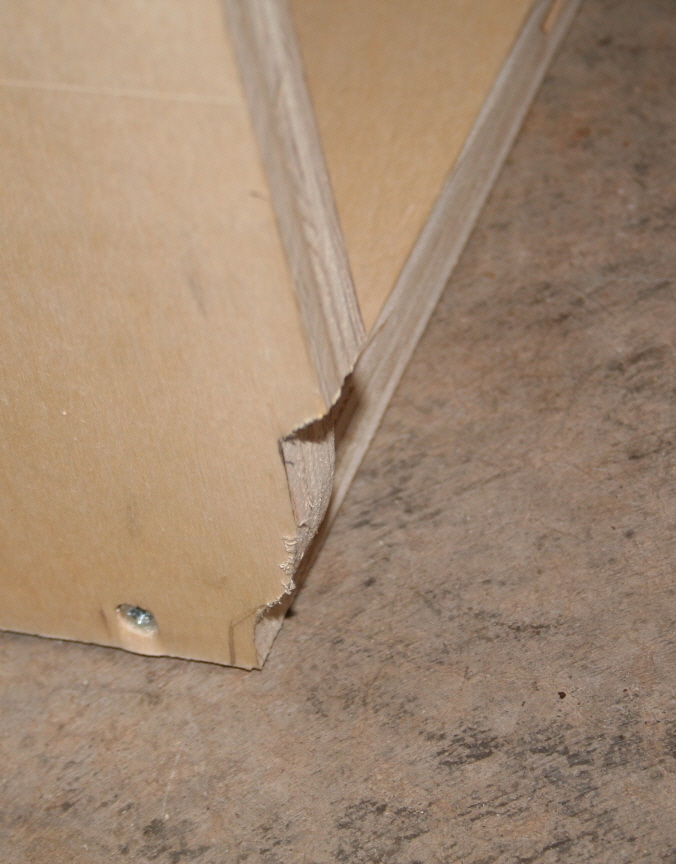
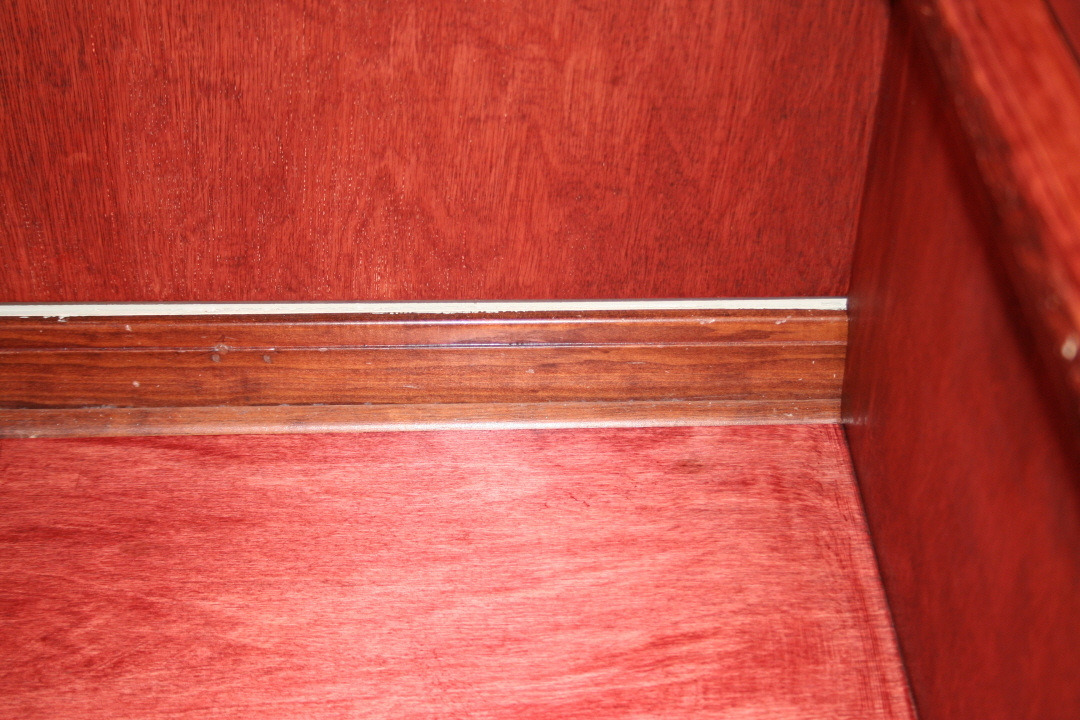
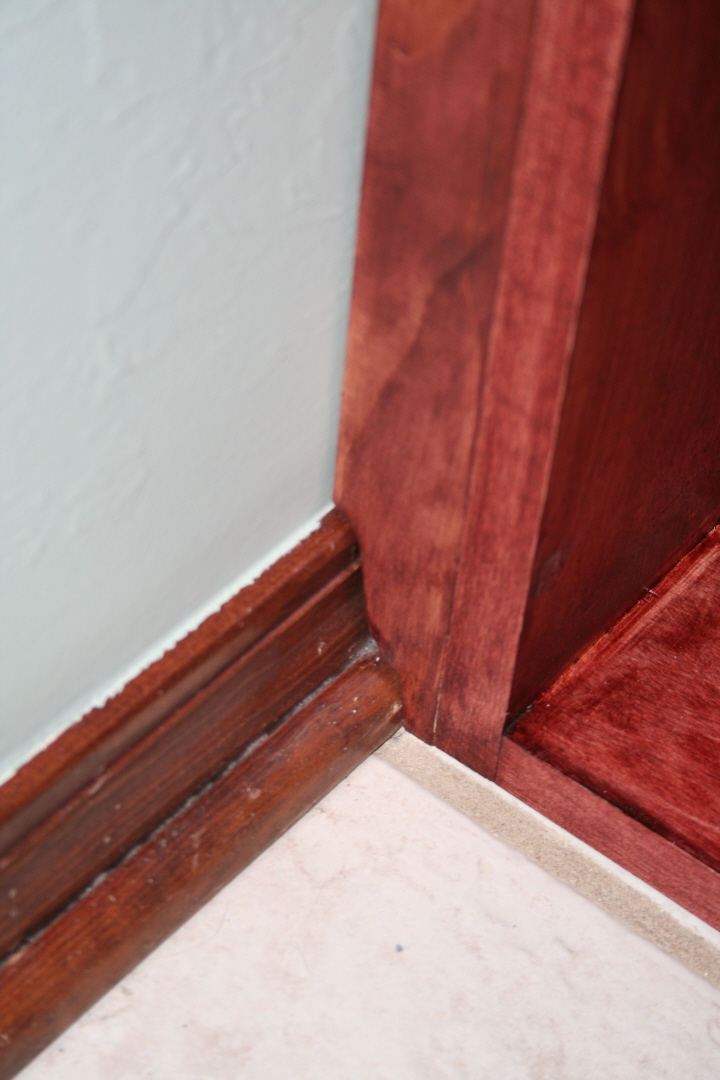
I modified the plan first by making these countertop depth, then making the base of the cabinet (at the floor) not as deep and cutting a trim shape out of the side panels so the cabinet would slide all the way back against the wall without having to remove the trim. Then, I added a 1x2 on the left side of the left cabinet and the right side of the right cabinet with the same trim cut out so I could get it against the wall on either side. I didn't want to have these sitting with gaps at the back & sides like a freestanding cabinet, but I wanted it to look built-in. Finally, the counter could sit right on top against all 3 walls only screwed to the cabinets underneath without having to be attached to the walls. So, it's a freestanding cabinet with counter.
I attached the plans I used for building this. I was able to take this to Home Depot and have all the major cuts done before even bringing it home. Then it was easy to put together. I added the curtain to cover the area where my litter box goes between the two cabinets. It would also be an excellent place for a laundry hamper.
*NOTE: One thing I've noticed is many of these laundry basket dressers have their 1x2 (that holds the baskets) align with the front (on each side). I think it looks better to push back the 1x2 1" so it's not so noticeable from the front view. That's how I did mine.
Built from Plan(s)
Estimated Cost
$170 for wood and supplies plus $66 for countertop
Estimated Time Investment
Weekend Project (10-20 Hours)
Finish Used
Minwax Polyshades Bombay Mahogany Satin
Recommended Skill Level
Beginner
Comments
Fri, 06/08/2012 - 08:48
Great idea!
I love this. Really great job on cutting it to match the profile of the baseboards. I don't think I'd have the patience or skill for that! :-)
Sat, 06/09/2012 - 12:58
Actually pretty easy.
THANK YOU!!! We have a contour gauge like this: http://preview.tinyurl.com/btauo6x It makes it really easy with a jig saw to get the correct shape & cut it right out.
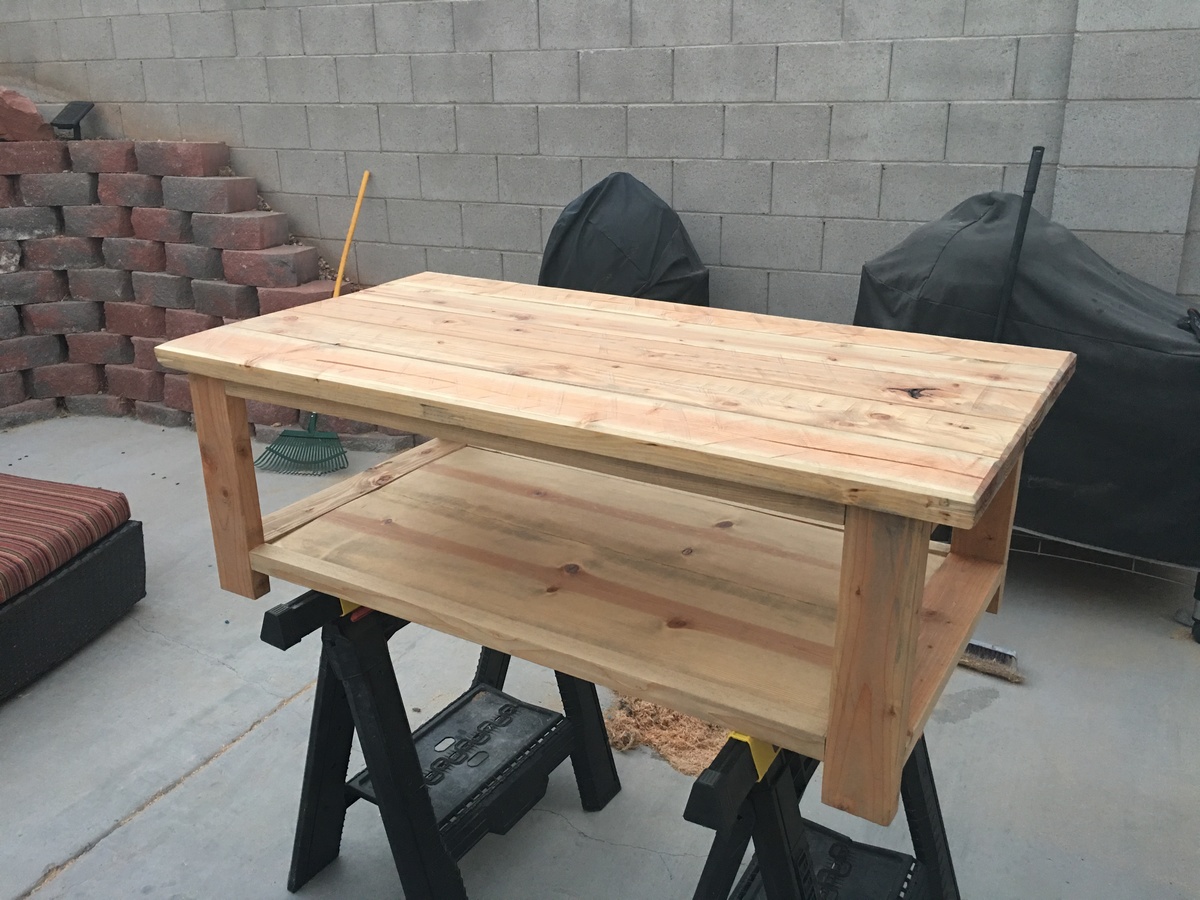
Sawhorse outdoor table

Changed the top and some dimensions but love how it turned out
Built from Plan(s)
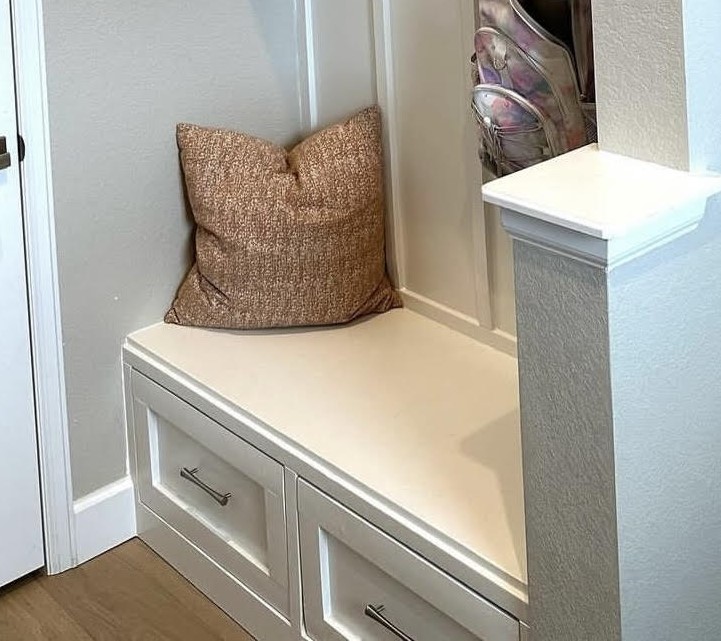
Small Mudroom with Drawer Bench and Floating Shelves
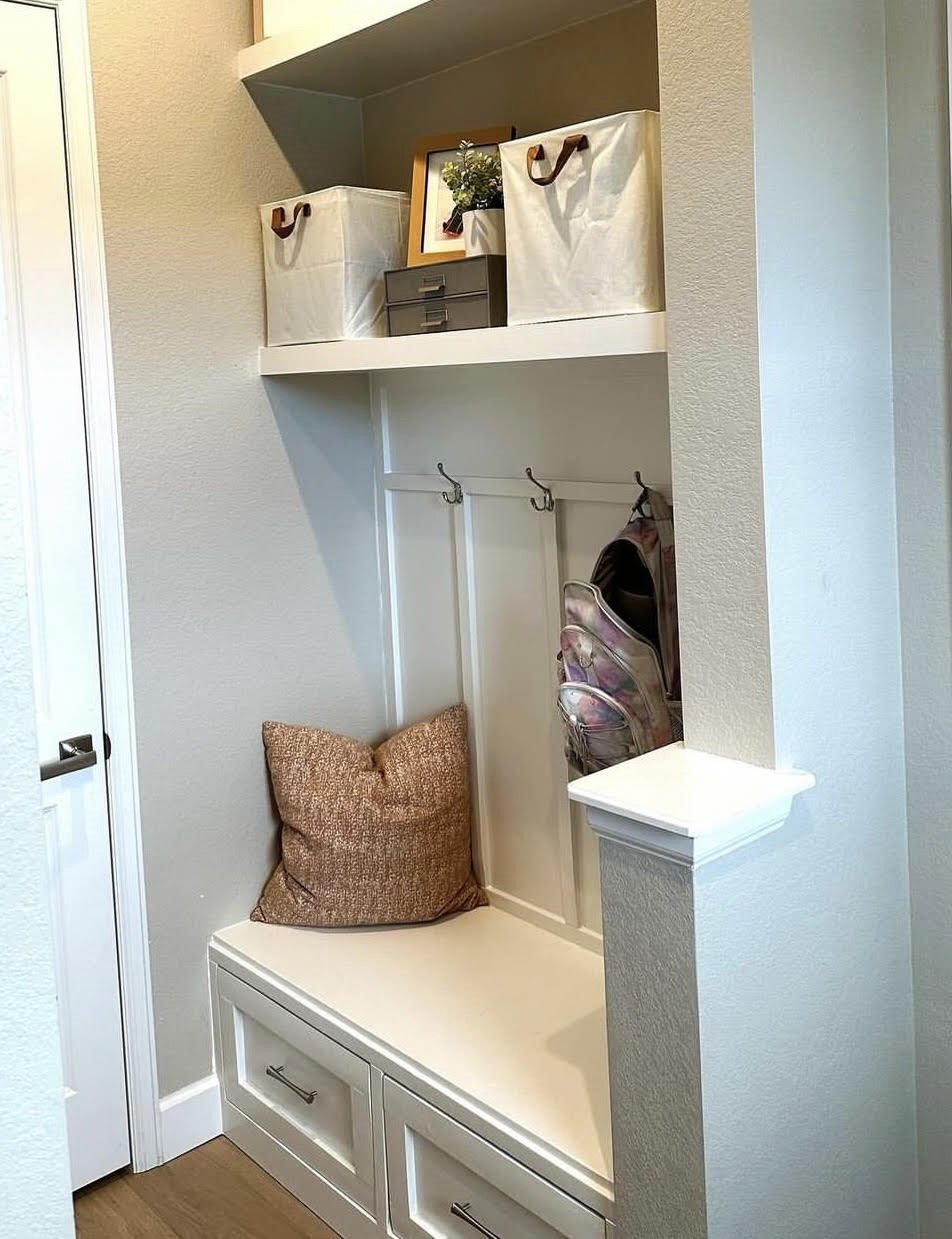
And she’s DONE!
I am so proud of this first project and I smile each time I walk in here. It has saved my sanity to have a dedicated space for backpacks and shoes!
Shout out to Ana White for her amazing plans for this bench that started this transformation!
Filling Blank Walls on Instagram
Built from Plan(s)
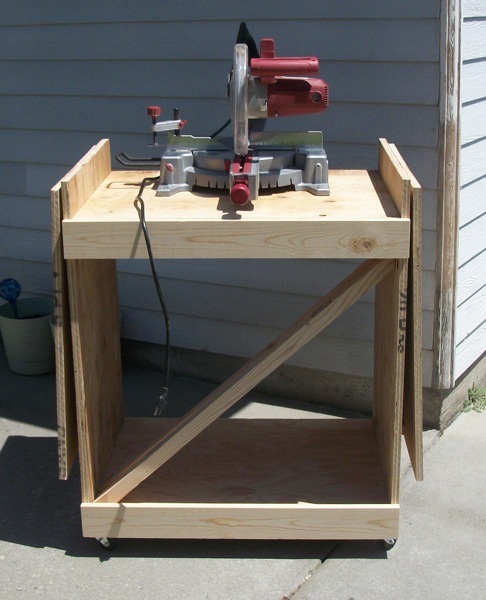
Miter Saw Cart
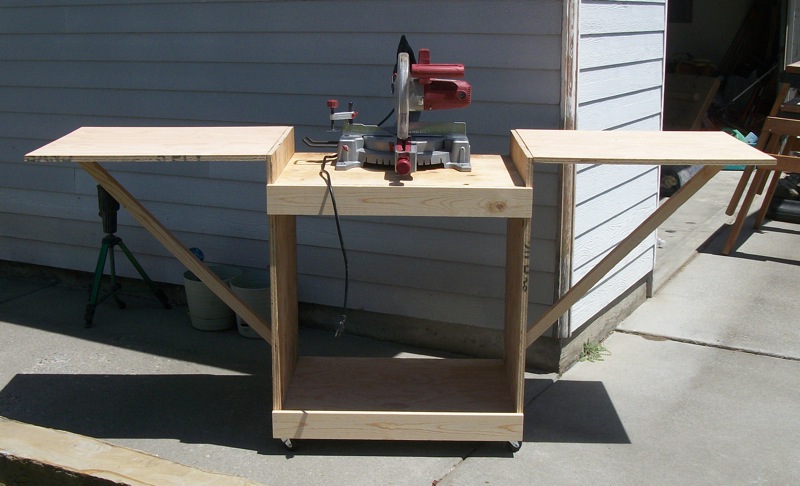
Love this plan, it was easy to do. I did modify it a little as did another member with longer support arms. I just purchased an extra 2x2 and cut it to fit! Thanks for the great plans!!! Hope to see more shop furniture on here soon!
Built from Plan(s)
Estimated Cost
$45
Estimated Time Investment
Afternoon Project (3-6 Hours)
Finish Used
None
Recommended Skill Level
Beginner
Comments

In reply to This is just great!!!! by Ana White
Thu, 06/14/2012 - 01:00
Thanks Ana!
Always love to get feedback and when the Queen Bee of Building comments with a compliment, I'm just thrilled!! Thanks a bunch for posting the plans!!!!
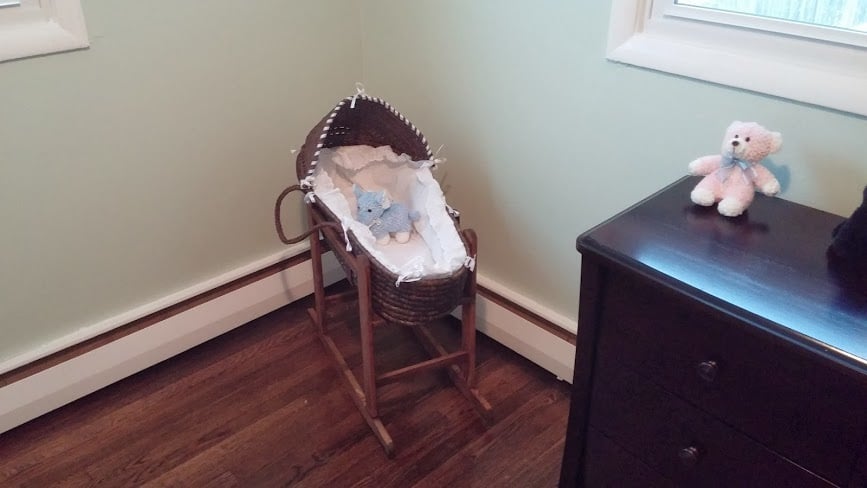
Rocking Moses Basket Stand
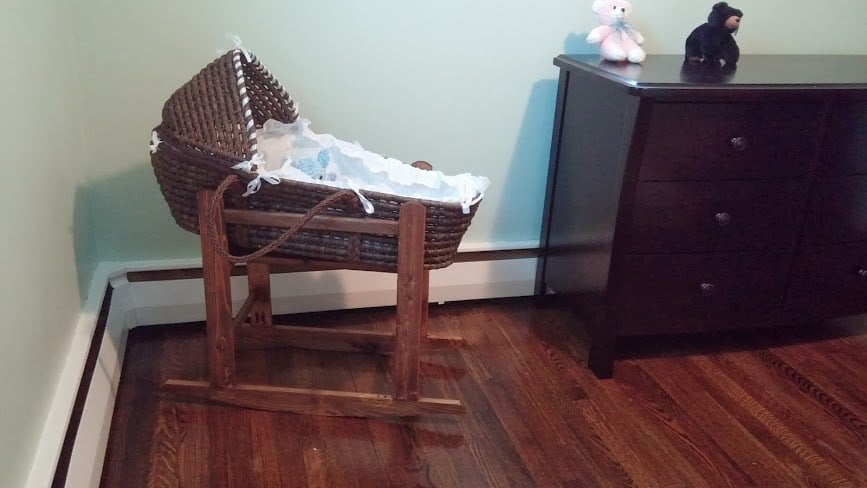
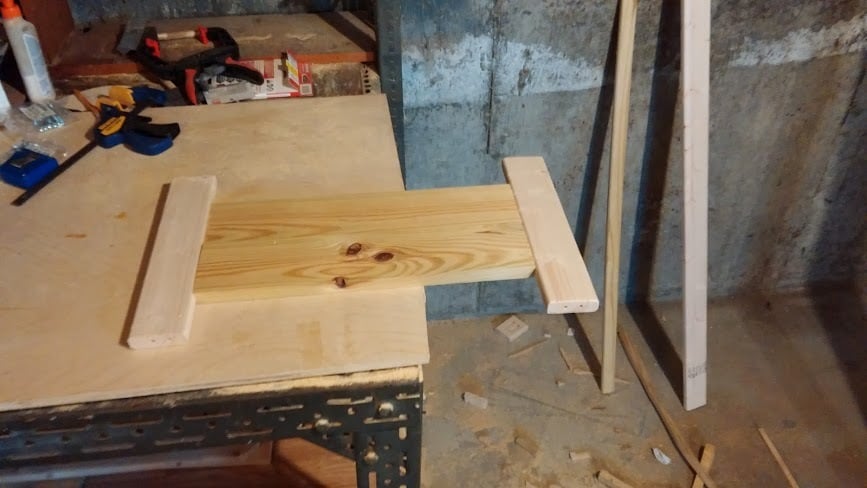
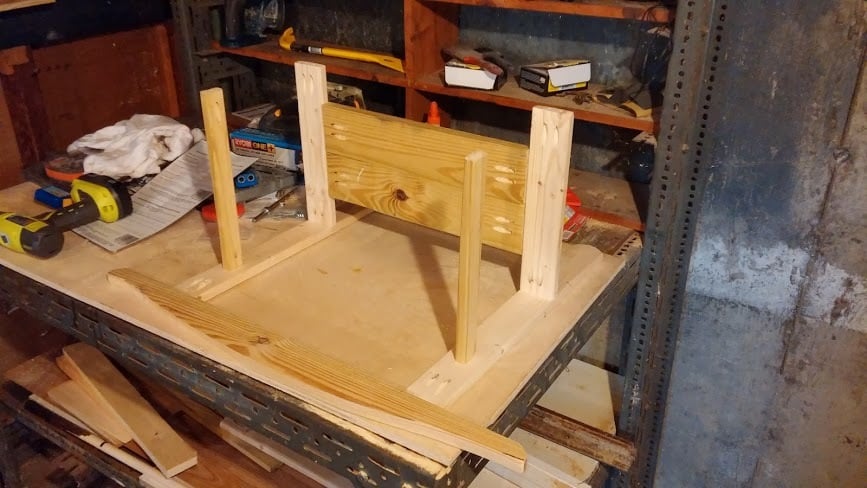
I made this over a weekend when this plan first was posted and have meant to upload these; however, this can be done in a day if you know what you are doing with the rockers. The main difference between the plan and mine was I kept the top of the rocker square, which made it a bit easier to attach the legs to it. I also made the mistake of making the curvature of the rocker too steep, which does not allow for smooth rocking and instead makes the rocker sort of hit only only 3 points.
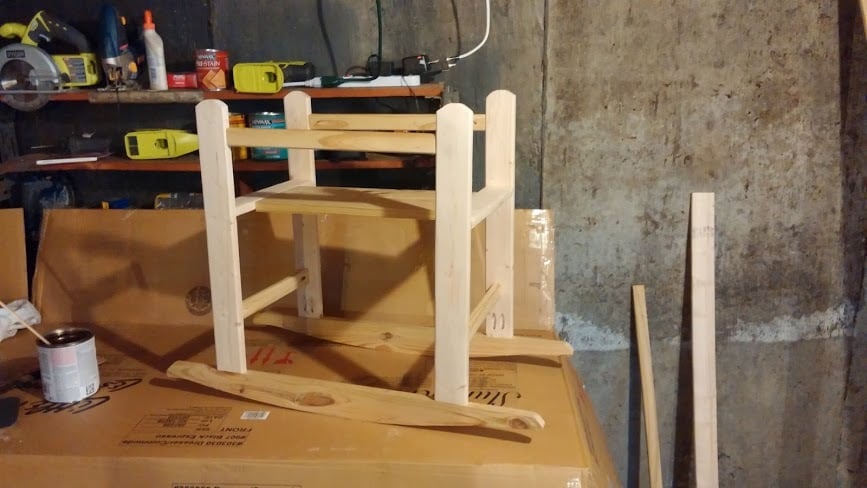
The advice I can offer on this, is to print out the rocker from the plan. I forced the picture to be as long as I wanted to rockers, then printed it out on multiple pages, taped it together and traced. If I had done this from the start my rockers would have gone much faster; instead, I did my own trace, then figured out it was too steep and then had to take what I had done apart and fix them with the stencil.
All in all, this was pretty easy and I spent under $8 on lumber, which is really awesome.

Built from Plan(s)
Estimated Cost
$40-50 (lumber and basket. add a bit more for stain if you have none)
Estimated Time Investment
Day Project (6-9 Hours)
Finish Used
Dark Walnut
Recommended Skill Level
Beginner
Comments
Thu, 10/08/2015 - 11:31
Rocker Plans
Where is the link to the printable rocker plans? I can't find them.
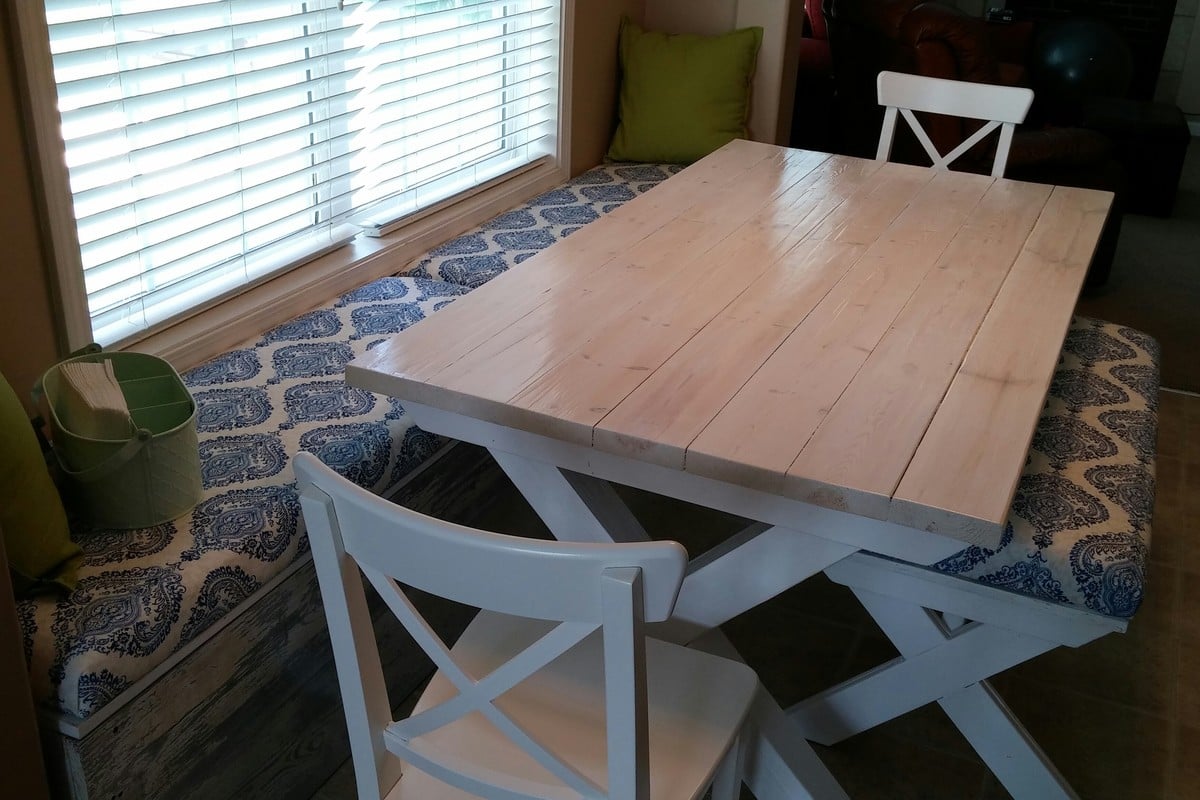
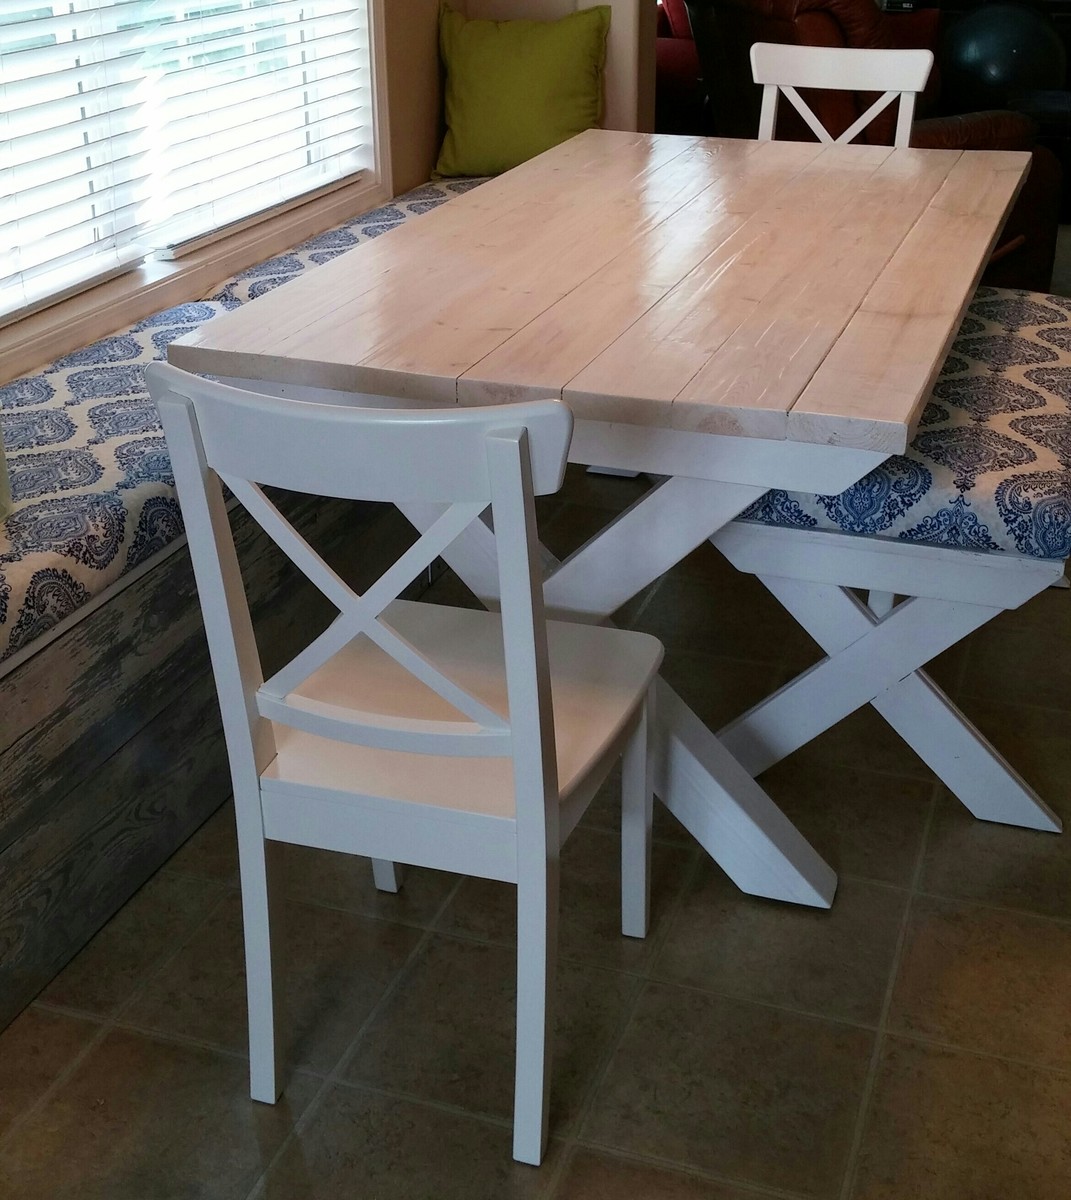
Our Vanessa Table
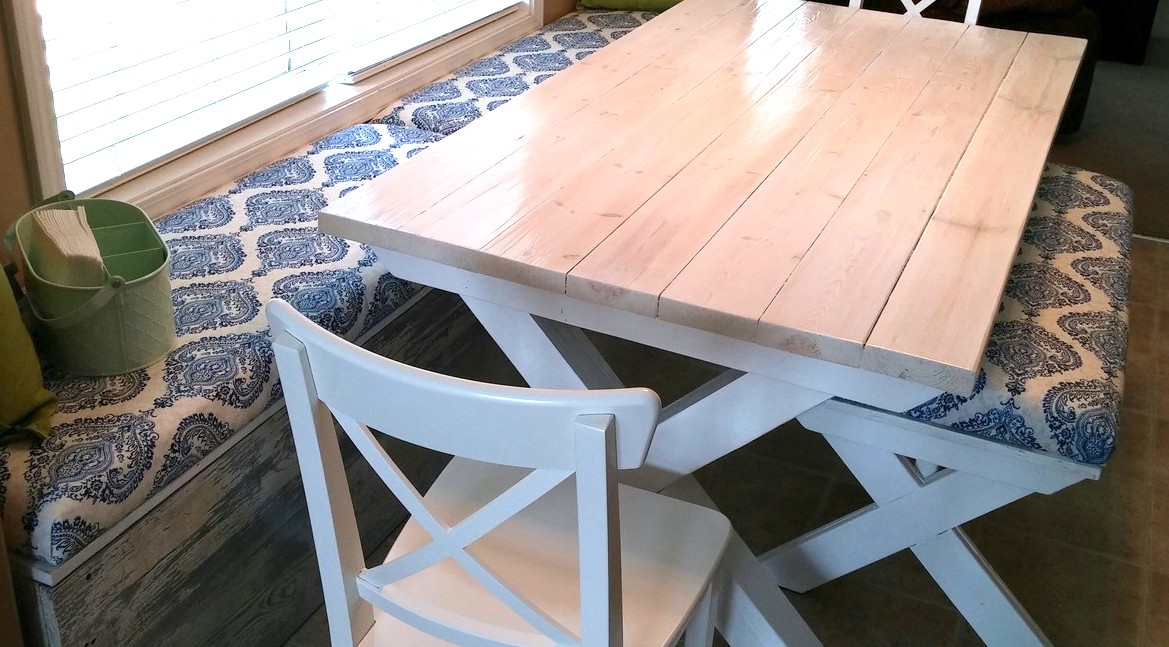
We love our table with the new similar bench and also bankette seating my husband made also. Chairs we bought at IKEA to match. The bench he made from the table plans but modified them to fit under the table. We have a small space to pass by the table from one end to the other. So the bench under the table helps visually make the space look bigger.
Built from Plan(s)
Estimated Cost
With wood, foam, paint and fabric we estimated the cost of about $300 for everything. The two chairs we bought at IKEA. The barn wood on the bankette seating we got from a friend from an old barn on his property. The bankette seating/storage benches my husband measured and made himself. No plans were used for that. If you need alot of foam for cushions buy on the internet, its alot cheaper than a fabric store.
Estimated Time Investment
Weekend Project (10-20 Hours)
Finish Used
White paint, foam, and fabric. We used home decor fabric from Walmart. Super cheap and it only cost me about $20 for the entire project for the fabric. To white wash the top we used the same white paint as the bottom but added water in the paint, then wiped it off. We also used felt coaster rings on the bottom of the small bench seating and the table. Easy to pull in and out. You can buy those at Lowes or Home Depot.
Recommended Skill Level
Beginner
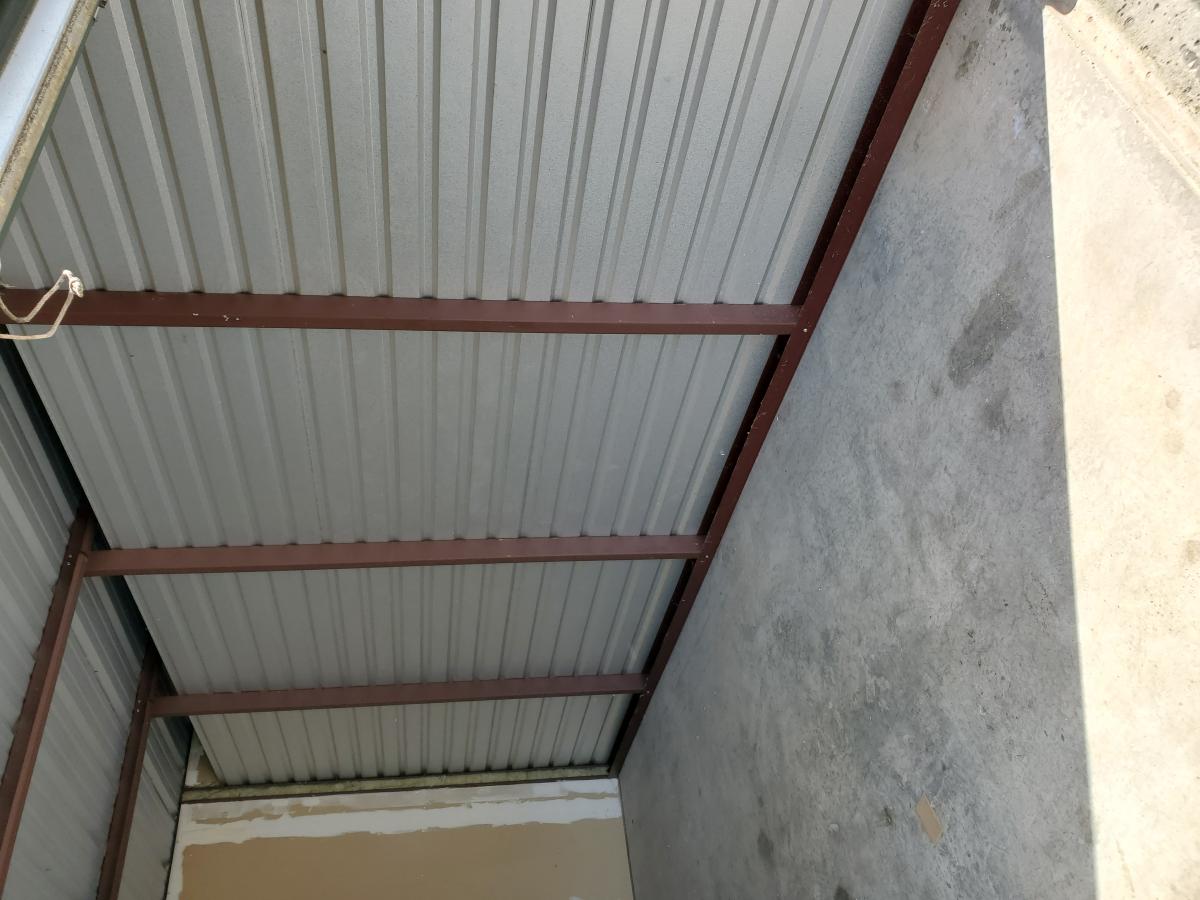
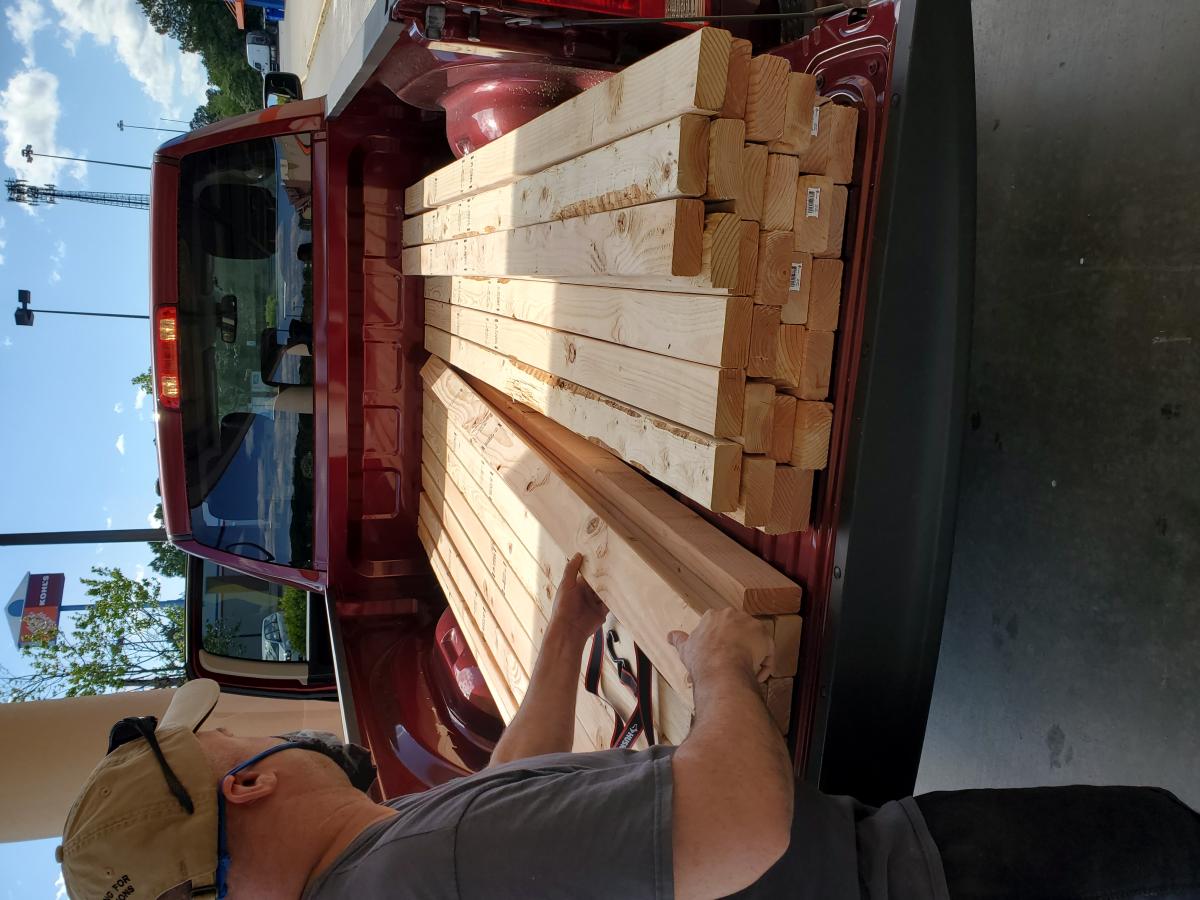
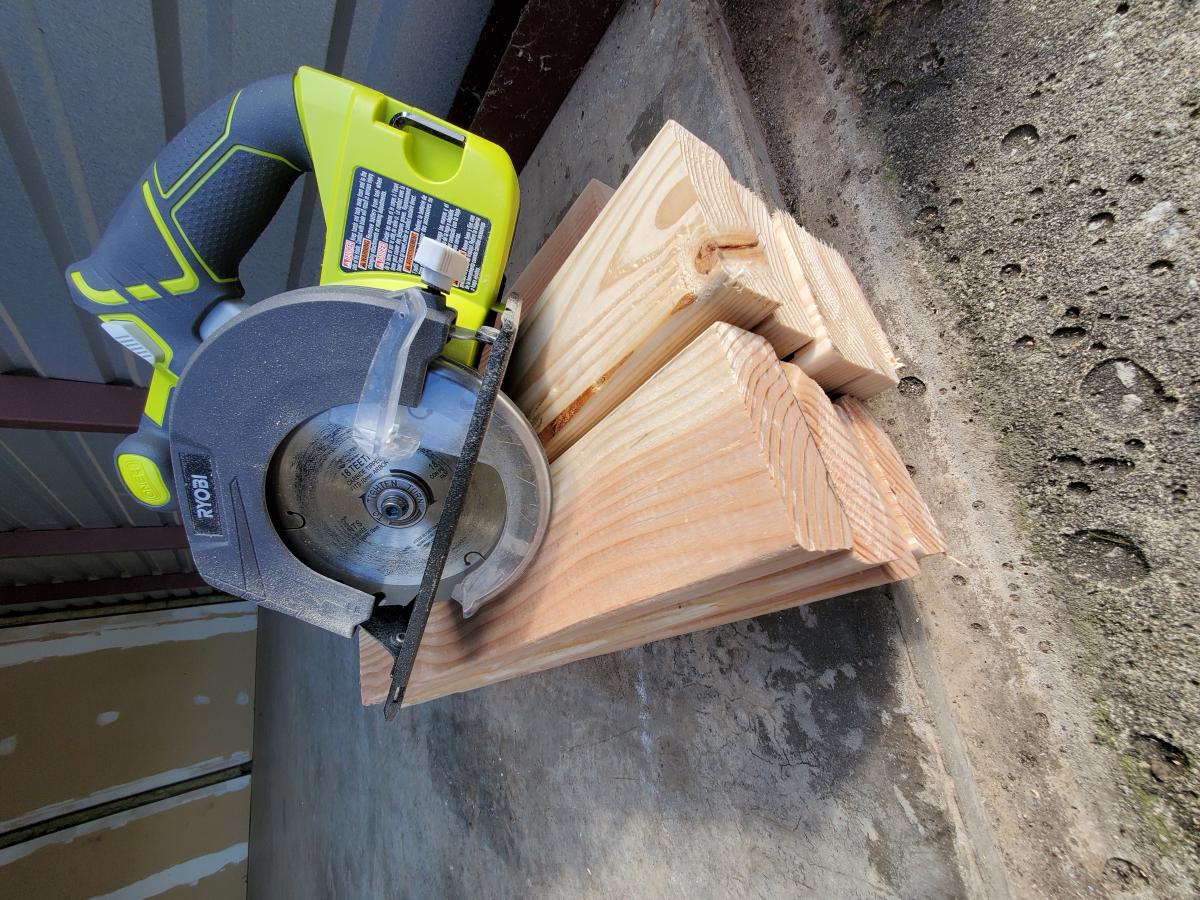
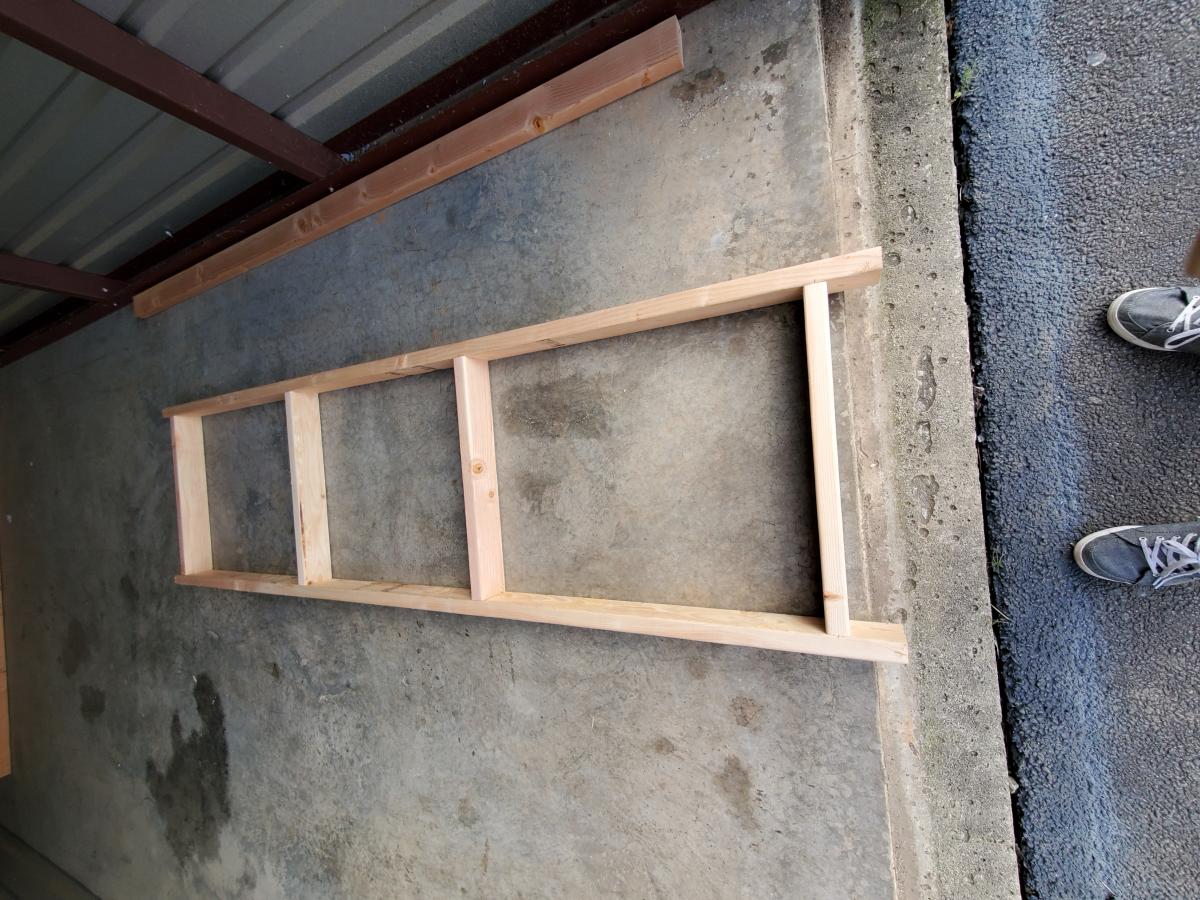
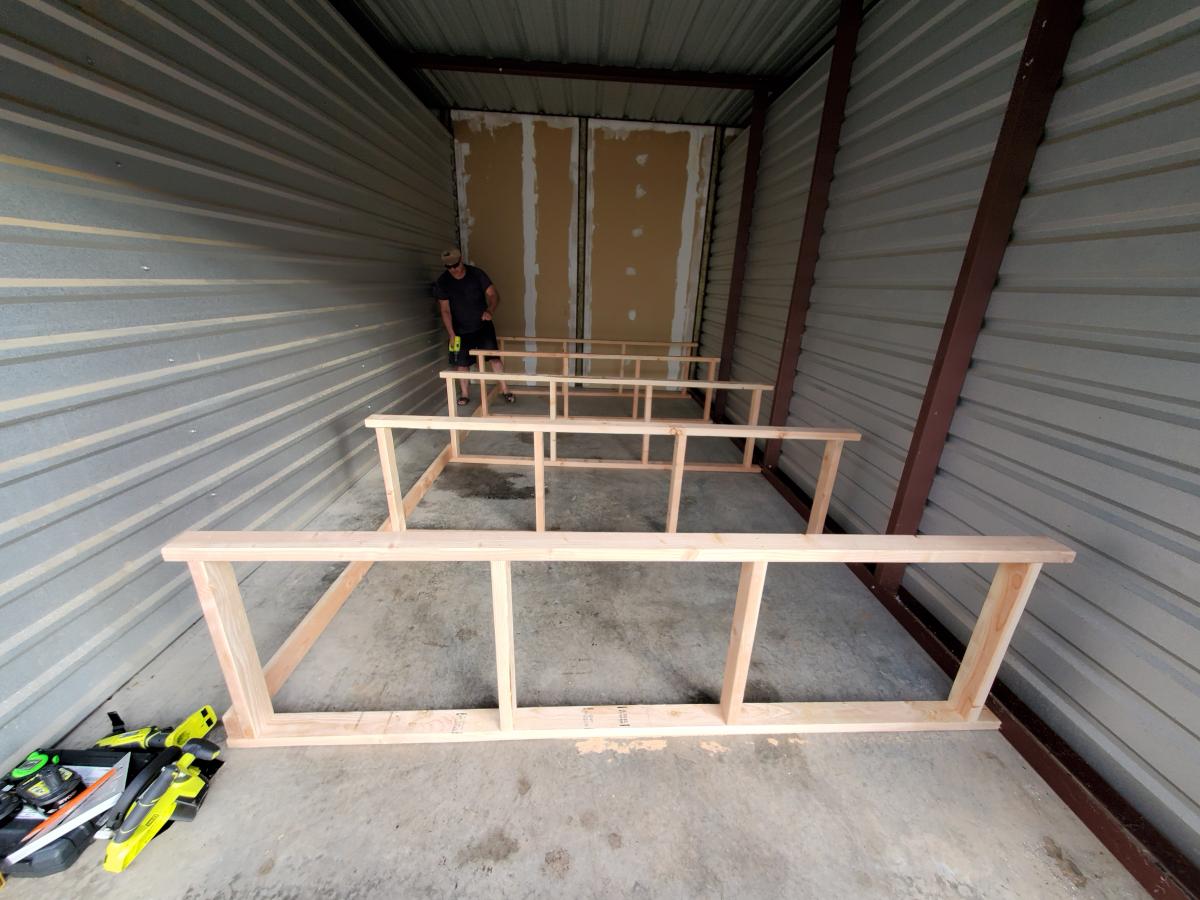
Freestanding Garage Shelves
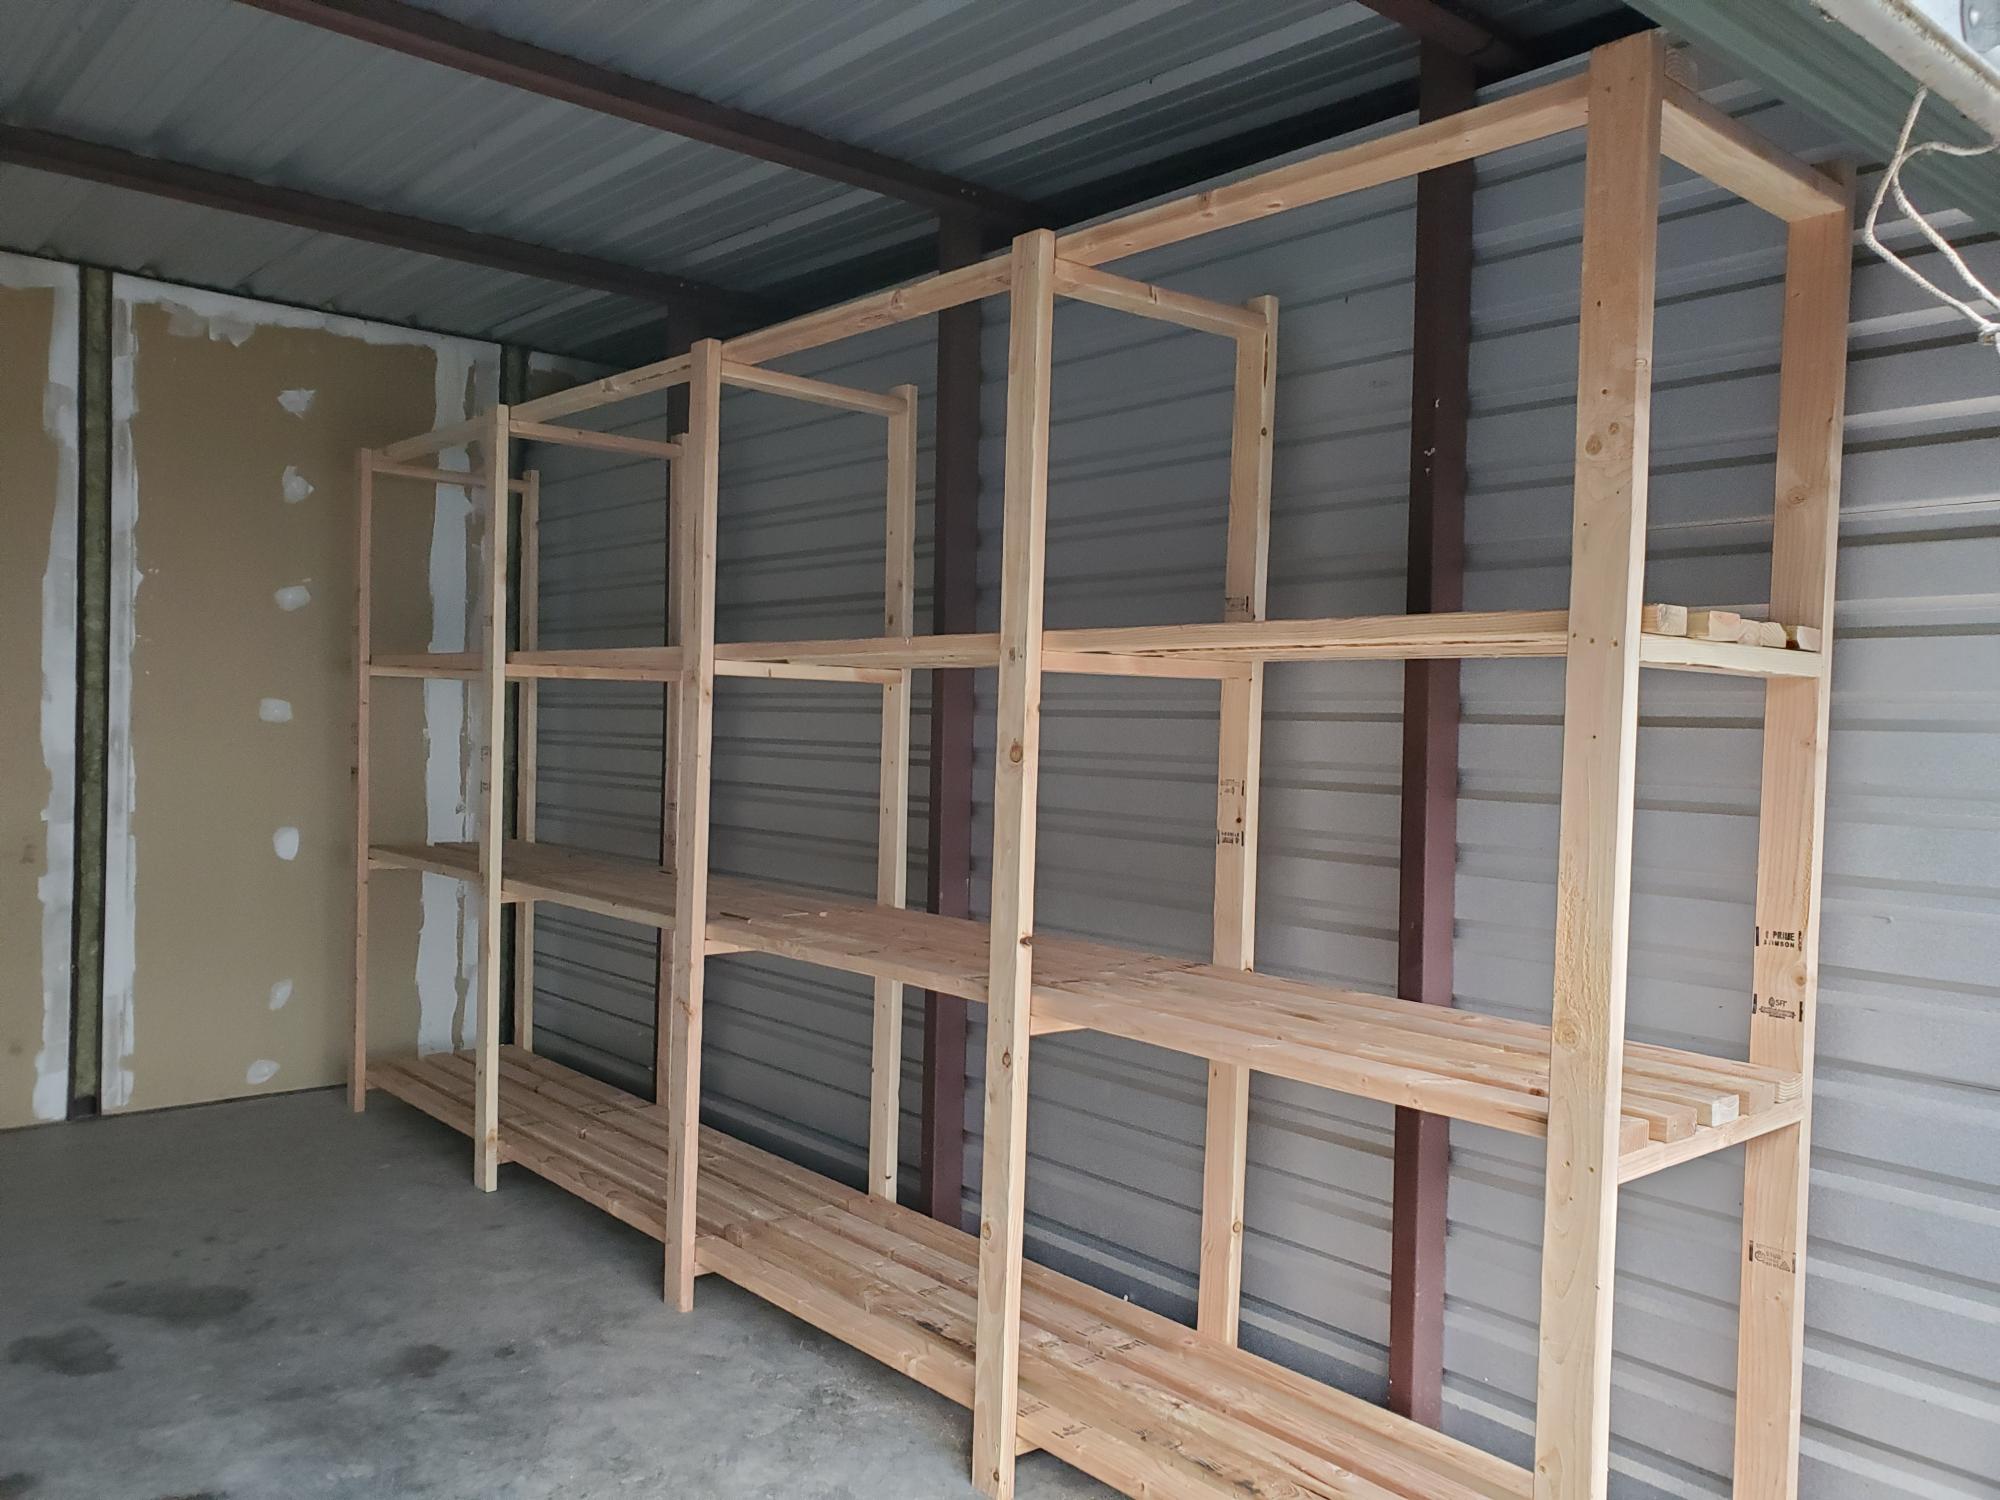
This was our first real DIY from scratch project. We somehow made it a bit too tall and so have not put the top shelf planks on. Over all we are pretty happy with it. This was in a rental storage unit. We plan to give it another go in our garage too.
Built from Plan(s)
Estimated Time Investment
An Hour or Two (0-2 Hours)
Finish Used
None
Recommended Skill Level
Beginner