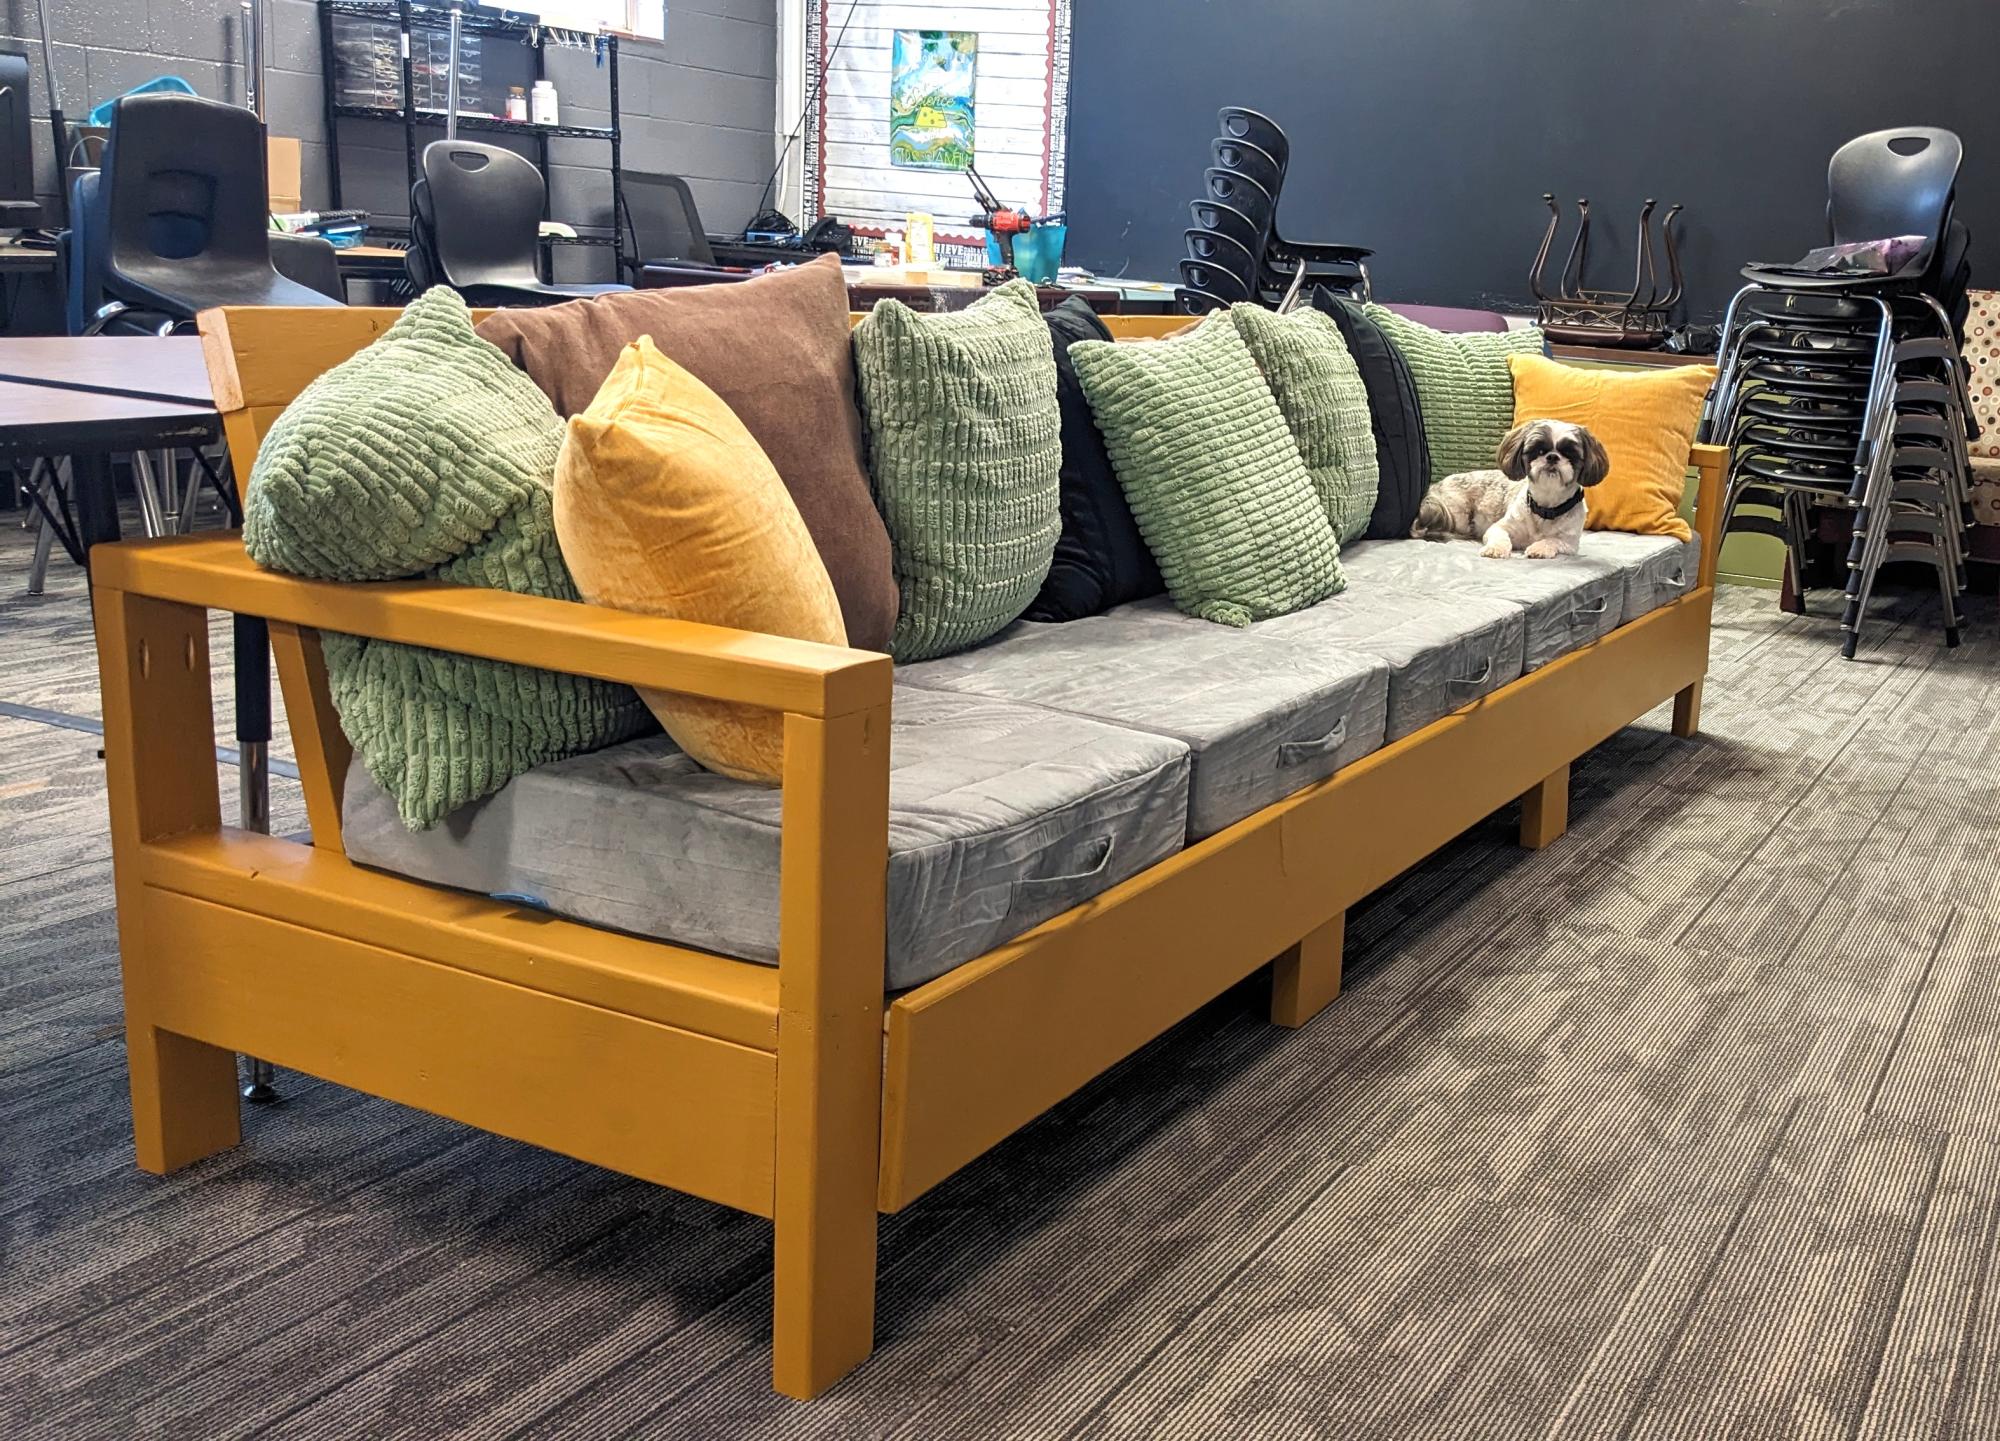
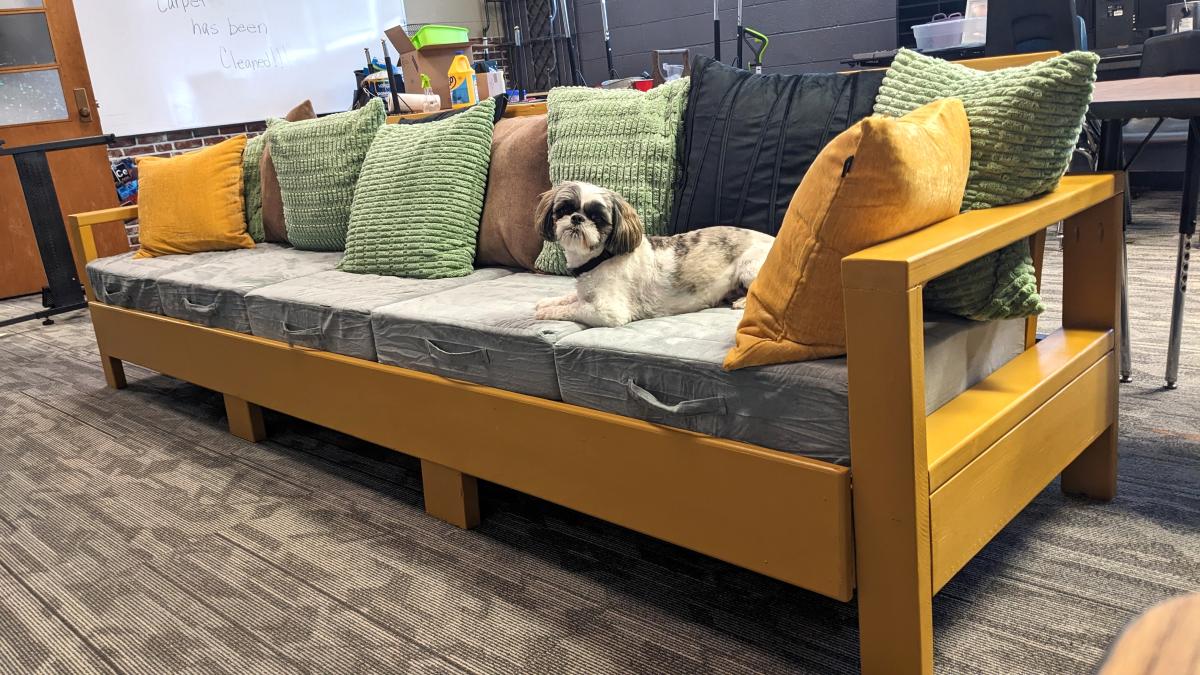
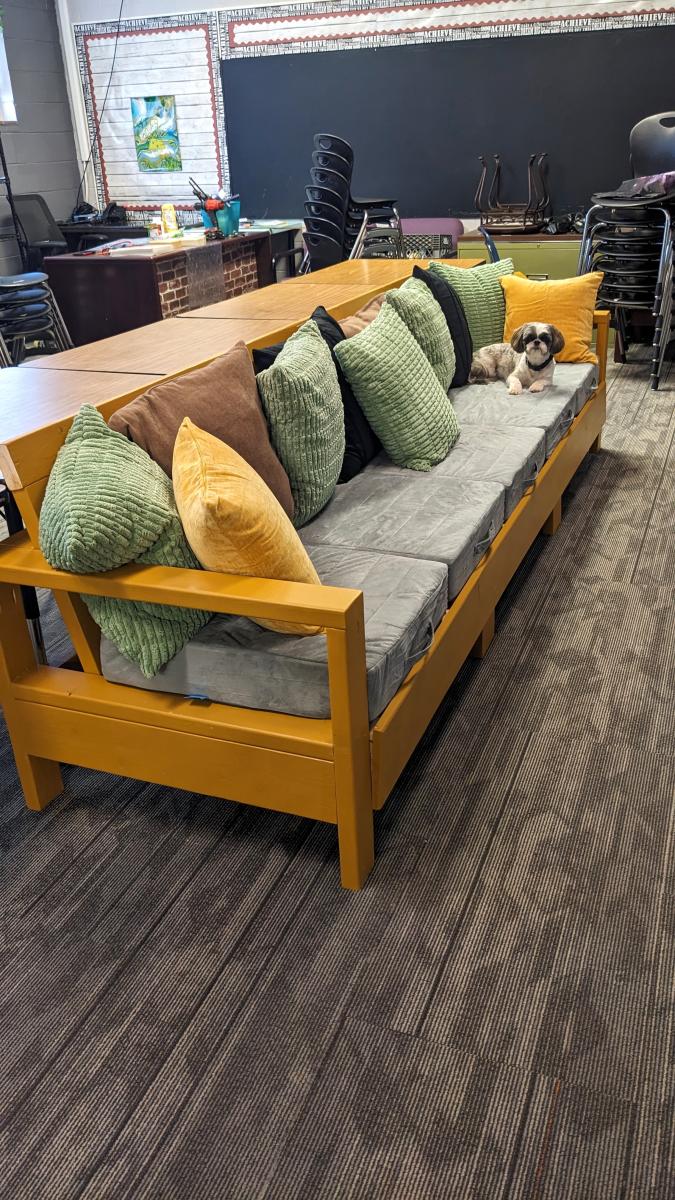
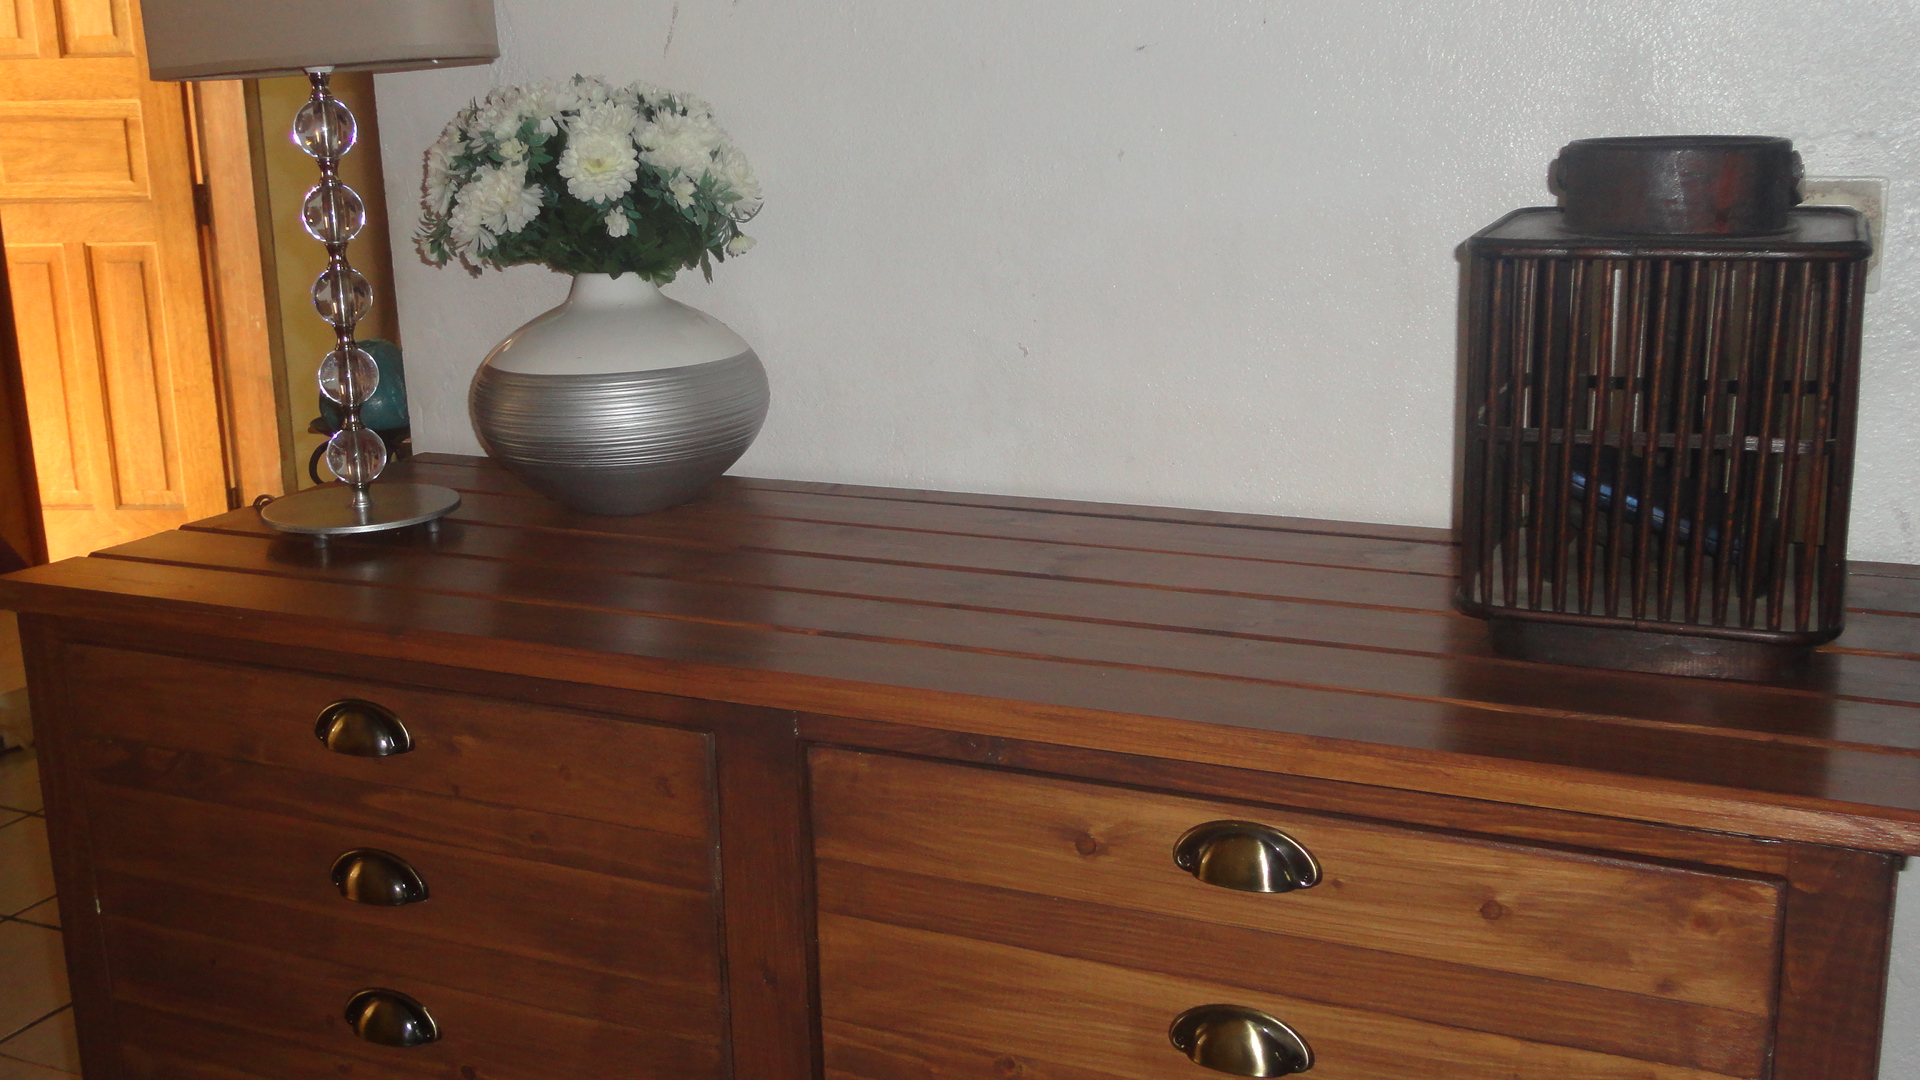
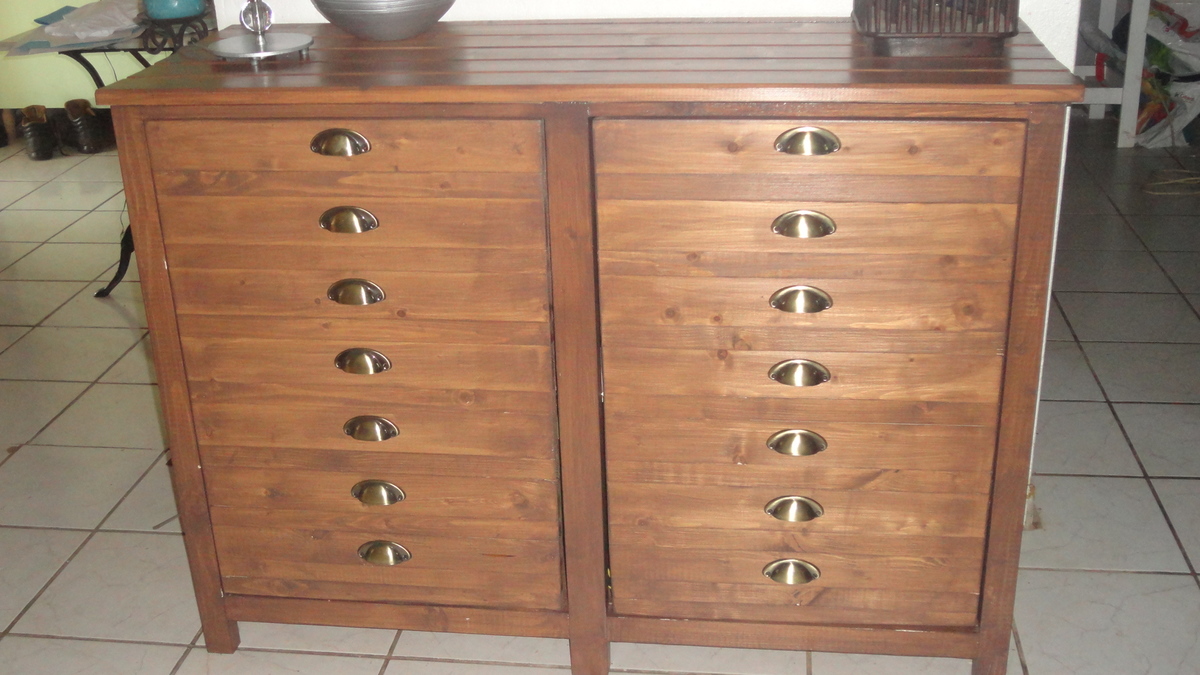
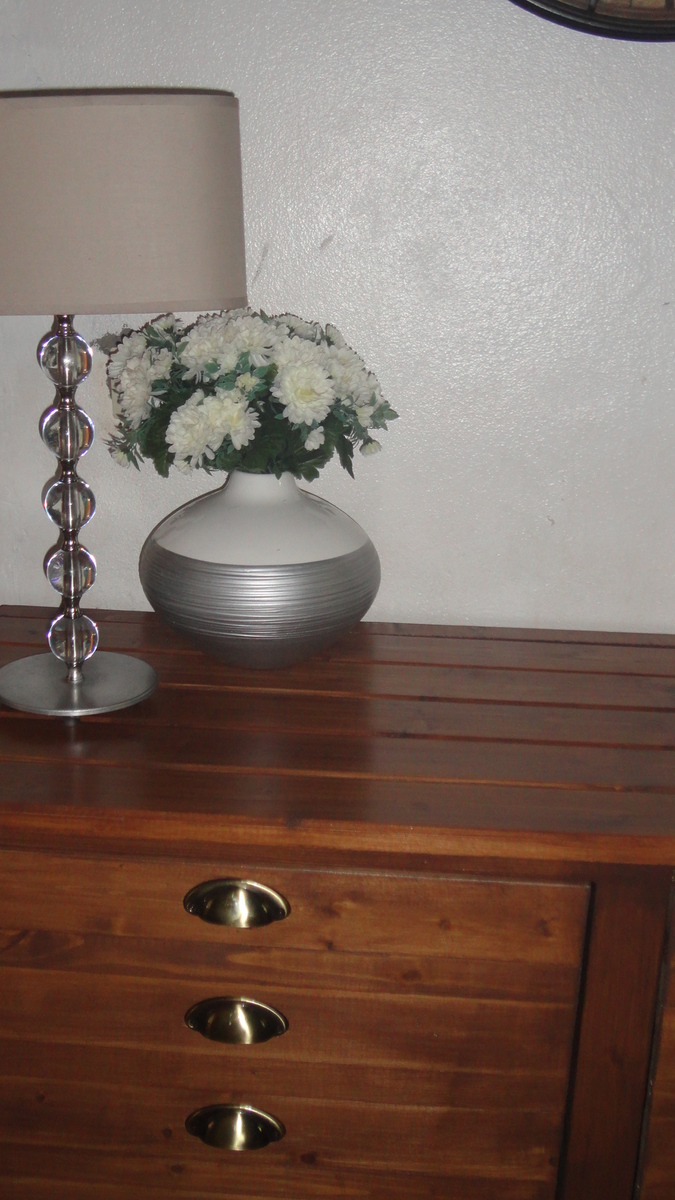
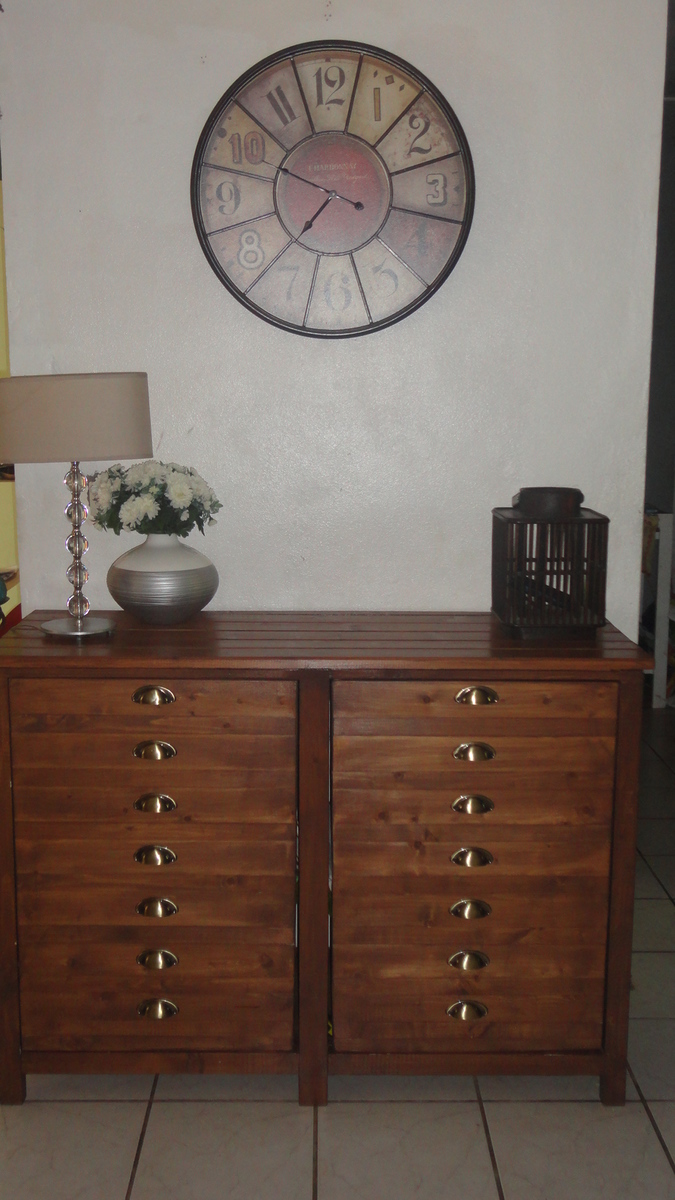
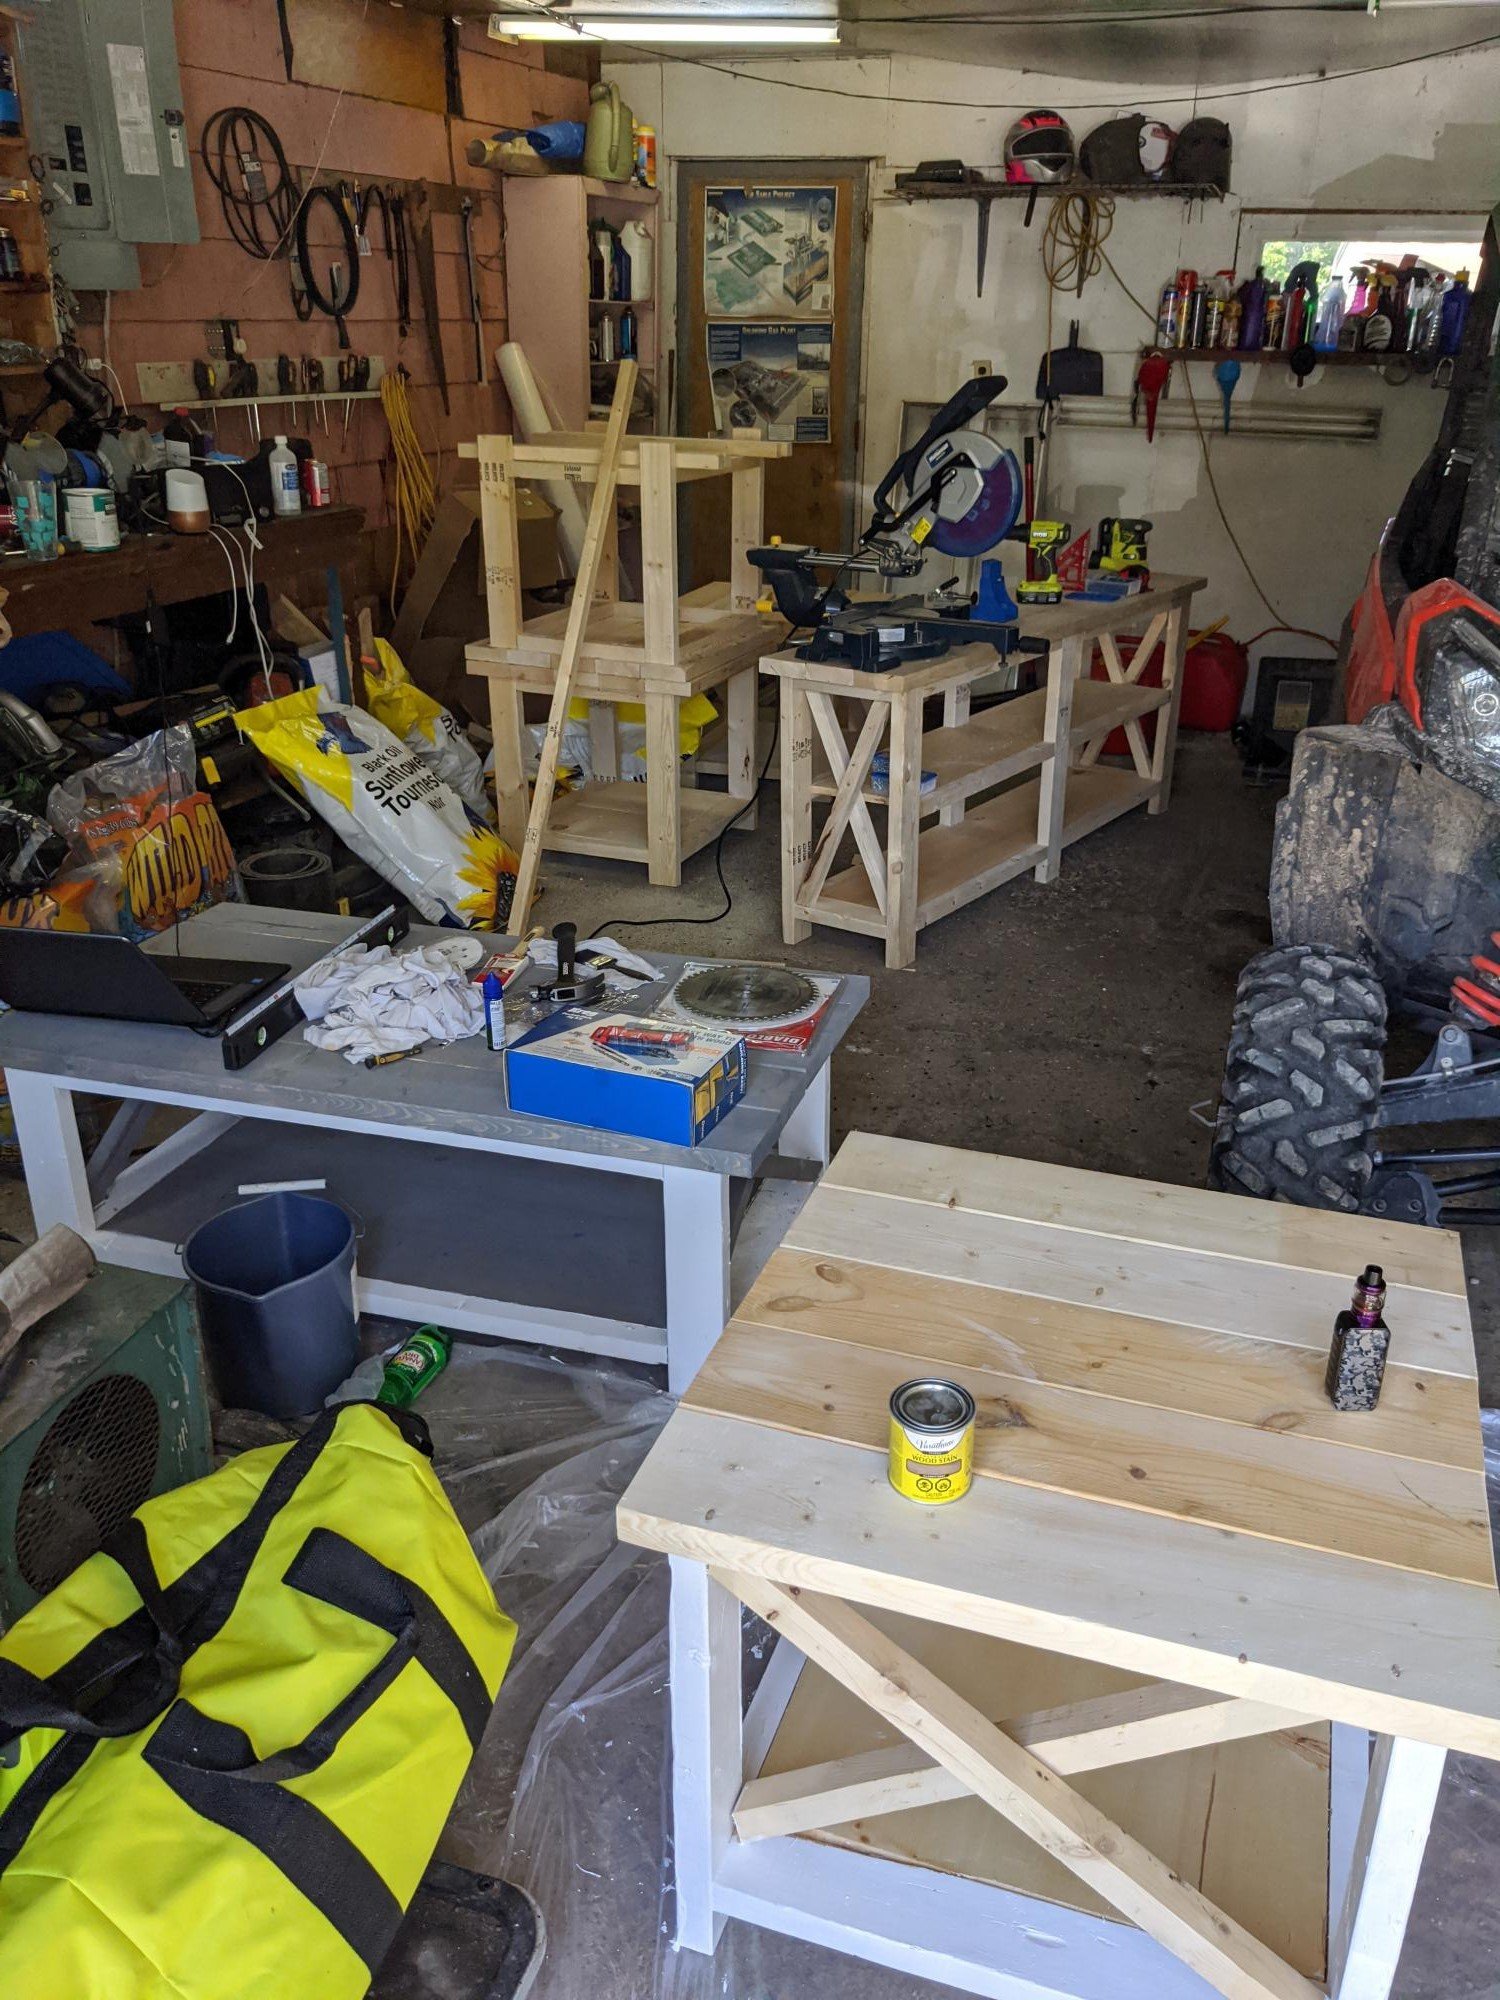
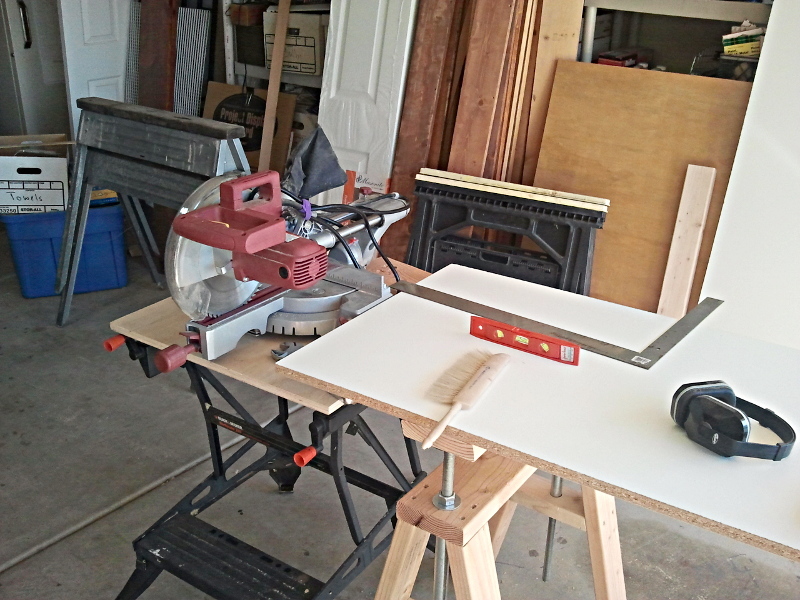
Community Brag Posts

Pony Wall Workbench

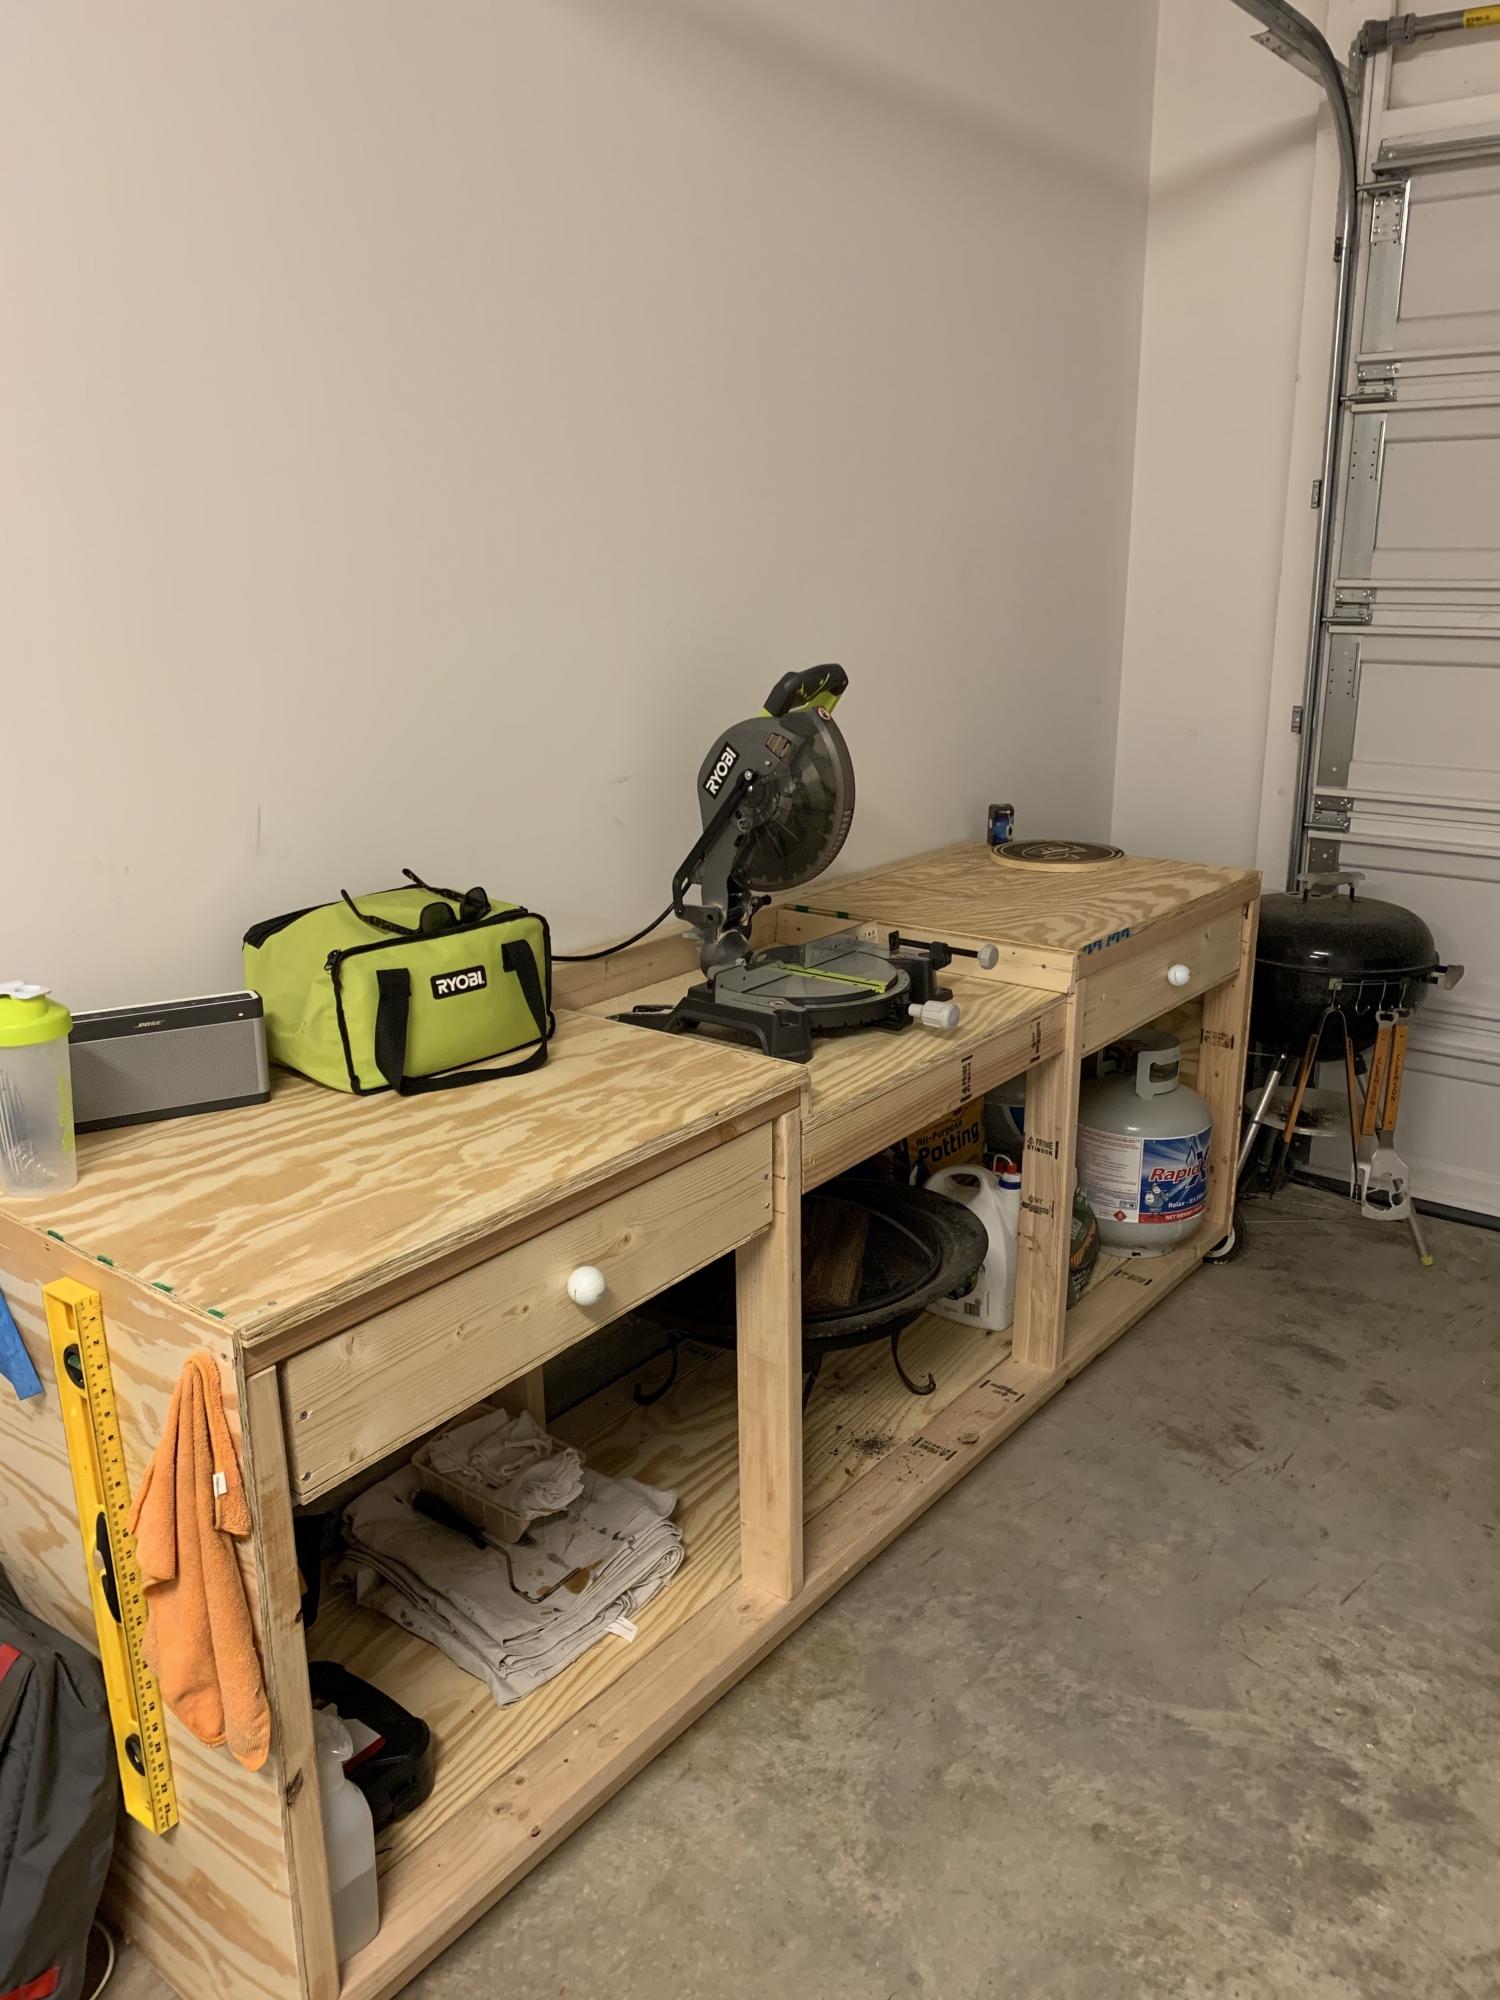
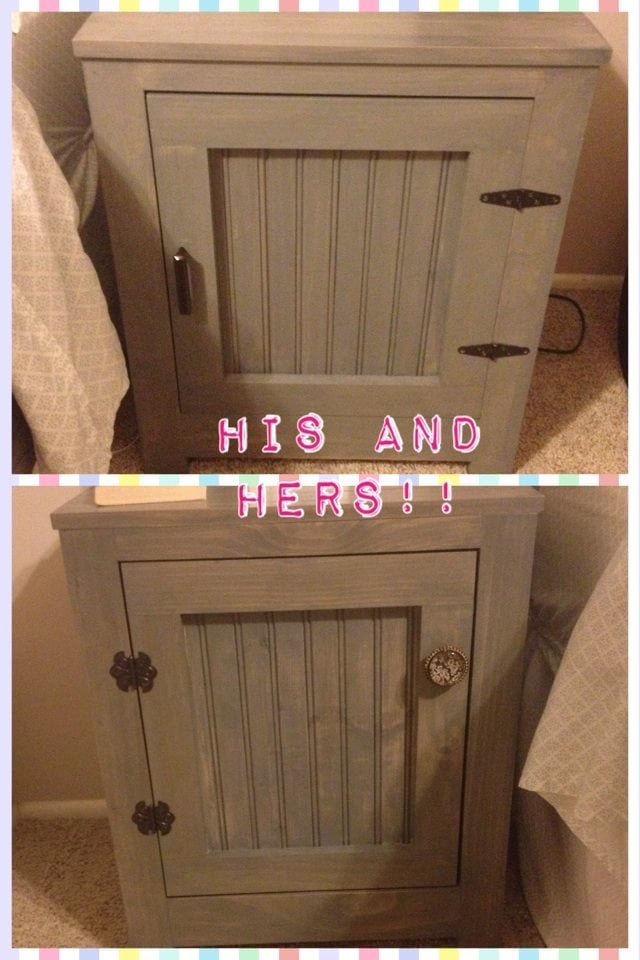
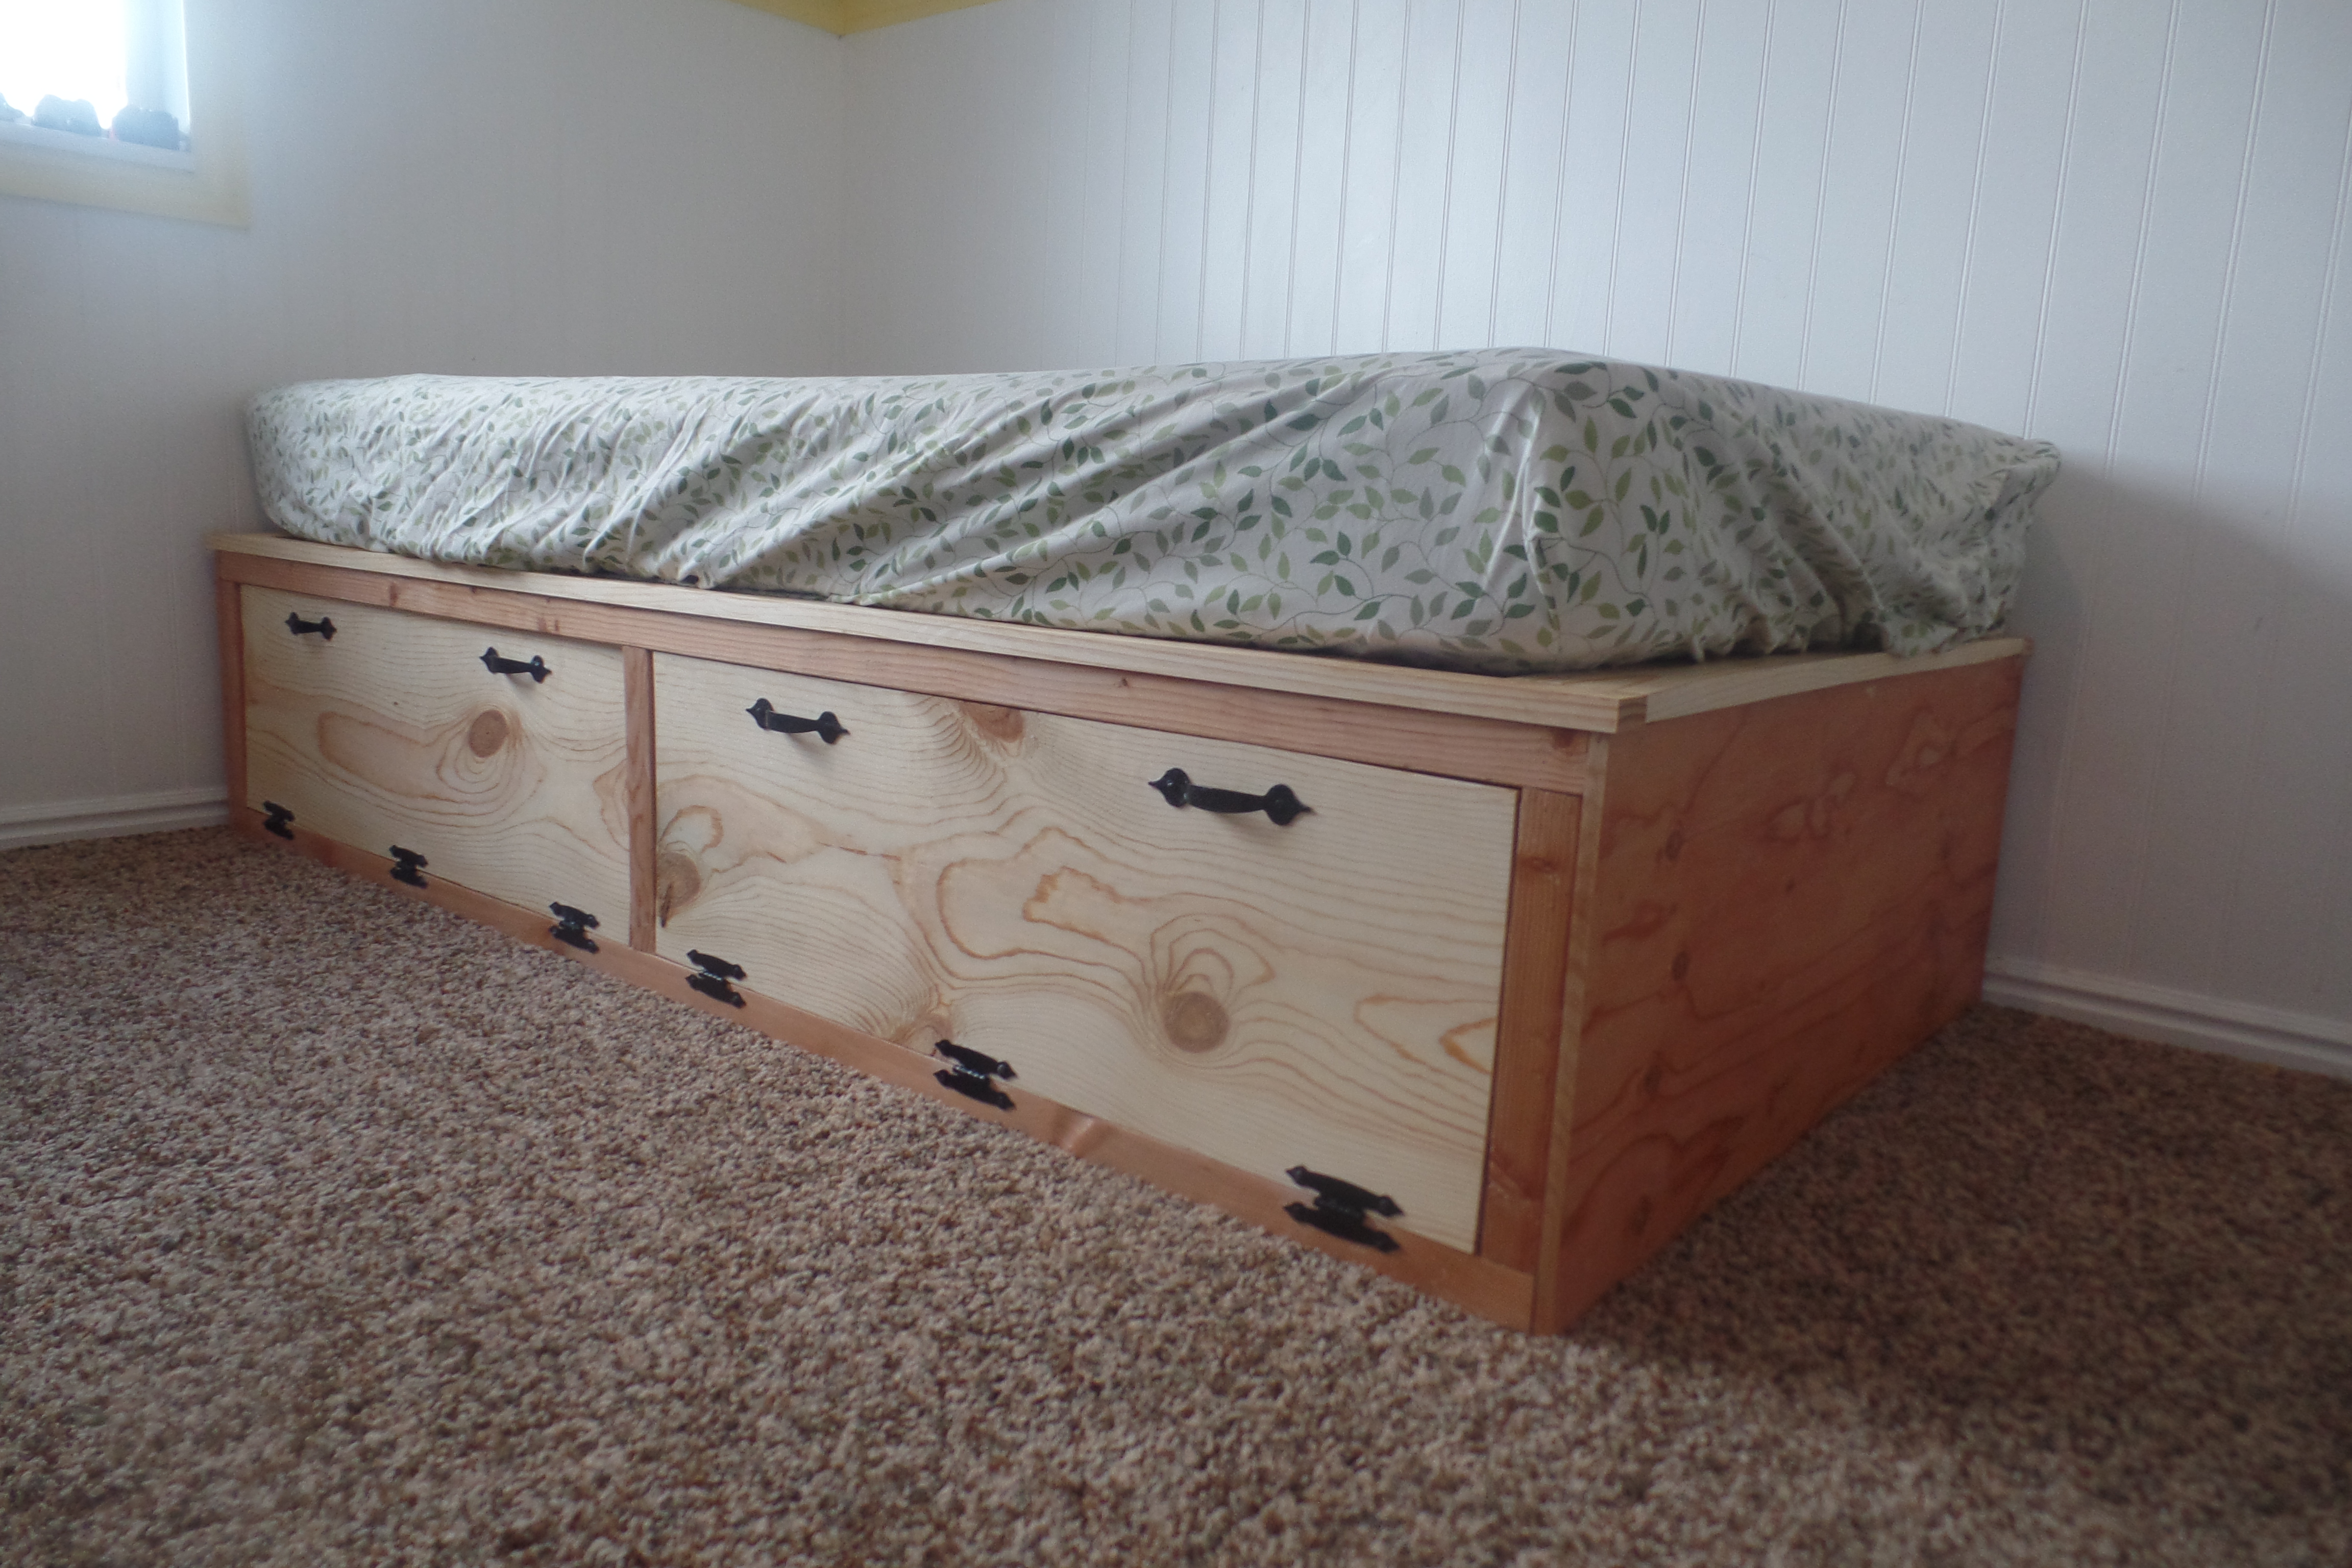
I picked up wood working as an indoor hobby during the Coronavirus and working from home. I was doing everything on the floor in my garage until I saw these plans for the Pony Wall Workbench. I'm 6'4 so having a bench to work at is such a savor for my back. I didn't have as much room, so I just used the 8 foot section and dropped the miter saw into the middle, two drawers on either side. I'm a big golf fan as well, so I spiced it up with some old golf balls I had laying around for drawer knobs!

I really appreciate this site and all the plans. I'm looking forward to many new builds, not on the ground haha!

Built from Plan(s)
Estimated Cost
$150-$200
Estimated Time Investment
Day Project (6-9 Hours)
Recommended Skill Level
Intermediate

Train Table with drawers and flippable top

Submitted by kcobbuofa on Fri, 10/12/2012 - 13:50

When I built the Mom's Train Table, I wanted the top to flip to look like an actual painted train table. That meant while the kiddo was playing trains, he wouldn't be able to access the storage below the plywood. To solve that problem, I used almost the entire storage space for two drawers, one for trains, one for track. The drawers were built on wooden slides, using 1x4" pieces for the sides and backs. The slides were waxed to slide better. Since the drawers allow access to the inside of the table, I also decided not to add the "access hole" to the center of the plywood top.

Built from Plan(s)
Estimated Cost
$175
Estimated Time Investment
Weekend Project (10-20 Hours)
Finish Used
Stained with pecan color and a high gloss top coat. Sanded again with high grit after two coats and then a third coat was applied.
Recommended Skill Level
Intermediate

Comments

Pallet Wood Chalk Board, Shower Wall and Shower Mat

Submitted by kdins31 on Tue, 08/05/2014 - 06:13

As part of my backyard overhaul I've added an outdoor shower and chalkboard against the wall of the house. There's also a small sand pit and deck area, so the shower comes in handy to wash the dirty feet. I had a few pallets sitting under the deck for years and finally put them to use. Some cuts here and there and some sanding and they look great. For the floor mat I just cut the pallet piece you can see in one of the photos in half and framed it with treated 2x4". The chalkboard is a plain sheet of 2x4' project board primed and painted several coats with flat black exterior paint. I used this over the 'chalkboard' paint because it's exterior grade. It works great, even better than chalkboard paint imo. The frame is made of the cut slats of the pallet, just glued and nailed on. The fence also is a cut pallet. I just made random cuts about half way through on varying angles which resulted in two mirrored halves of the pallet. They fit the space perfectly. I love the random look of it and may give it some paint eventually.

Estimated Time Investment
Afternoon Project (3-6 Hours)
Finish Used
I used flat black exterior paint for chalkboard, over several coats of primer to protect the wood in the elements.
Recommended Skill Level
Beginner

Mini farmhouse bedside table

Submitted by Anonymous (not verified) on Thu, 11/17/2016 - 19:35

Built this from the mini farmhouse bedside table plans, but decided to use the lathe on the legs (which also added a lot of time). This was one of the first furniture projects I've done and it was pretty easy to follow the plans.

Built from Plan(s)
Estimated Cost
$45
Estimated Time Investment
Weekend Project (10-20 Hours)
Finish Used
Paint
Recommended Skill Level
Beginner

Comments

My version of the Small Chicken Coop with Planter, Clean Out Tray and Nesting Box -with the addition of a chicken run

I loved the design that Lady Goats and Ana had created but it wasn't quite right for me, so I used the 'essence' of the coop and tweaked it.

I had some leftover metal roofing sheets from a tool storage area I'd made so used this on the roof, and also made the roof a pent shape. I moved the doors to the side, and also reduced the size of the planter. Next to the planter I've made a lift up hatch so that I can more easily replace the water and feeders.
I've added in a 2m x 1.8m (approx. 6.5ft by 6 ft) run so that the little chicks are safe and can run about from their coop.

The whole coop is covered in stainless steel rodent mesh so not only can foxes not get in (our main predator in the UK) but also rats and mice won't be able to get in to take their food and bring their disease.

I undercoated all the wood and then double-coated in exterior weather-proof gloss. Inside the coop I triple coated (I wanted to be thorough!) and also sealed every single joint in the whole build to avoid water penetration as well as mites setting up camp. It's already very easy to clean and hopefully should last a long time.

Hope that you like what I've done here. I'm so pleased with the results but pretty tricky to do by myself.
I'm learning, learning, learning though :-)

P.S. Sorry that the pics below aren't the correct way up -I don't know how to make them appear in the right direction.....

Estimated Cost
£500
Estimated Time Investment
Week Long Project (20 Hours or More)
Finish Used
I sanded all the wood to within an inch of it's life (!) then undercoated all the wood with an exterior weathertight product (Zinnser BIN primer sealer) and then double coated all the non-inside areas with Sandtex Exterior white gloss.
The areas inside the coop were tripled coated and every joint was sealed with exterior caulk and then repainted.

It should hopefully be washable, mite-proof and last a long time now!
Recommended Skill Level
Advanced

Comments

Classroom Couch

Submitted by Anonymous (not verified) on Mon, 07/15/2024 - 13:27

I'm a high school teacher and like flexible seating. I needed something that is very sturdy and can take a beating from teenagers. I used Ana's "2x4 Outdoor Sofa" plan, made it longer, added some extra braces, and here it is! My new classroom couch.

Julie Stanfill

Built from Plan(s)

My Printer's Console

I built this console for my living room. I love the style and the color of the console of shanty2chic and I wanted the same.
Thanks for the plan and inspiration.

Built from Plan(s)
Estimated Cost
150 euros
Estimated Time Investment
Weekend Project (10-20 Hours)
Finish Used
stain and varnish
Recommended Skill Level
Beginner

Comments

Project Jumanji

Sun, 09/01/2013 - 06:46

You did a great job! Any tips or hints about steps that you may have done differently from the plan, or found challenging or got you stuck?

vintage bar stool

I modified the legs to fit a counter height table
I made the seat 25in tall to fit a 36in table...

Built from Plan(s)
Estimated Cost
20
Estimated Time Investment
Afternoon Project (3-6 Hours)
Finish Used
dark walnut
satin poly
Recommended Skill Level
Beginner

Rustic X Coffee Table

Submitted by JScherer on Sun, 11/20/2016 - 18:09

Changed the top a bit, but otherwise matches the plans.

Built from Plan(s)
Estimated Cost
$50-100
Estimated Time Investment
Day Project (6-9 Hours)
Finish Used
Minwax dark walnut & semi gloss polyurethane
Recommended Skill Level
Intermediate

First time woodworking

Submitted by Anonymous (not verified) on Sun, 08/09/2020 - 04:58

Me and my wife bought a new house, and instead of paying 1000$ for coffee/end tables and a tv stand I decided to go out and buy a Ryobi kit and kreg jig and followed these plans. Must say everything turned out awesome and love how heavy and sturdy they are. Can't get over how easy these plans are to follow !! Now I can't stop building things 🤷

Built from Plan(s)
Estimated Cost
234$
Estimated Time Investment
Weekend Project (10-20 Hours)
Finish Used
Classic grey stain, flat white paint
Recommended Skill Level
Starter Project

DIY Easy Build Wood Headboard Twin Size

A fun project we did with my 12 y/o niece and husband. It was fun and fairly easy. We distressed the wood by using a copper brushalong the grain and used nails to make holes. We chose rustoleum sunbleached stain hoping to create and washed out gray driftwood look. It took about an hour to put together. The next day I sanded and stained , left it dry for the rest of the day then sealed it with polycrylic spray. The hardest part was getting up 2 flights of stairs, solid wood, it was heavy. The headboard was a little tall we thought. Plans are originally for Full so as bed gets more narrow the height becomes more noticeable. I thought about cutting down the legs a bit but after we got it in the room we thought it looked fanastic. We love love love it.

Estimated Cost
65.00$
Estimated Time Investment
An Hour or Two (0-2 Hours)
Finish Used
Rustoleum " Sunbleached" stain

After I finished sanding the entire headboard with about 150 grit sandpaper I starting distressing it. Hoping that the stain would sink further into crevices and give my headboard and varied look. I distressed by poking holes with a nail in random groupings. I then followed up with that copper wire brush you see. I took the brush and with some force and went horizontally across the surface following the wood grain. The put lots of grooves into the wood, again hoping that stain will sink into crevices. I chose Rustoleum "Sunbleached" stain for this headboard going with the driftwood theme. Rustoleum does not require a wood condtioner so I save myself a step here. But really I chose it because of this great color. The best way to put on stain is with a rag. The box of rags you see in the image are the absolute best. They stay together. Much stronger than a paper towel. You just throw them away when you are done. Applying stain in this manner is the best way in my opinion. Wood is porous so applying the stain with a rag forces the stain into the fibers of the wood. Using a paint brush will not achieve the same results. It also takes alot longer with a brush and then you have to wash the brush out... ugh. Staining this headboard took me 10 minutes. That's right 10 minutes. So much easier with a rag, it's like you are just wiping it down. Because I can force the stain into the wood fiber I can put the stain on a little thicker and the wood absorbs more negating the need for 2 coats. Try it and see. Of course wear gloves. Do not soak the paper towel dripping wet. As much of the towel wet as possible without dripping all over. Wipe it on with the grain paying special attention to knots in the wood. Let it dry thoroughly for a day or so. Spray with Polycrylic which also only takes a few minutes. Polycrylic recommends then lightly sanding and spraying again 3 times. We did it twice. Seems fine to me. I'm Done.
Recommended Skill Level
Intermediate

Comments

Camp Loft Bed twin XL w/ shelf

My daughter needed a loft bed to give her more floor and storage space in her bedroom. I modified the original plans to fit her twin XL bed, which is 5 inches longer than a regular bed. I also added an extra 2x6 across the back two posts for extra support.

Cutting and assembly was relatively easy; I glued every joint and used pocket holes per the instructions. I sanded using 80, 120 and 220 grit. The finish is a Minwax "parchment" water-based stain, with 3 coats of Polycrylic. All pocket holes were pre-drilled prior to finishing.

I assembled the platform and footboard in the garage and brought it into the house as a single unit; same with the headboard. I brought in the rails separately. To assemble, I marked 1 1/4 inches from the outside post edges, and used wood scraps/clamps to align and hold the rails while securing them with pocket hole screws.

My daughter's mattress is very high; it rises only about an inch below the top of the top rail. So I build a bed-length shelf which also had the added benefit of providing a little more height/protection against her rolling out of bed in the middle of the night (see pics).

In all, I was surprised at how long this took me. Probably because I'm a novice and this was only my 2nd project. The totals are:
- Cut and assembly: 14 hours
- Sanding: 25 hours
- Finishing: 2 days

After finishing, I left all pieces in the garage for 5 days to air-out before bringing into the house.

Total cost the lumber was $125, 1 qt stain @ $13, 1/2 gal Polycrylic @ $50 per gal, and $20 hardware for a total of just over $200.

Estimated Cost
$210
Estimated Time Investment
Week Long Project (20 Hours or More)
Finish Used
Minwax water-based stain, "parchment" (single coat)
Minwax Polycrylic (three coates)
Recommended Skill Level
Beginner

Comments

mariad444

Tue, 03/15/2016 - 22:17

I am curious what your mattress size was here, please educate me as I think I will have a similar issue. I liked the shelf idea you did! 

Farmhouse Table and Matching Bench

Submitted by Anonymous (not verified) on Thu, 11/24/2016 - 06:35

So we finished construction on a new house in September and my wife wanted to buy a $3000 table for our keeping/breakfast room. I bet her a new TV that I could do it for 10% of that. 

It's not perfect... there are some gaps between the boards and especially between the breadboard and those perpendicular to them... but it still looks amazing. And. Ow I have a new TV. 

Estimated Cost
$350
Estimated Time Investment
Week Long Project (20 Hours or More)
Finish Used
The table was built using pressure treated 2x8s (that's all that was available), and one 2x10 that wasn't pressure treated. (Again, that's all that was available, but it actually gave it a unique look with the lighter center board) so that's just Minwax Early American for the top and Satin White chalk paint for the legs. The bench was stud grade 2 and 1 Xs, so I used 2 coats of early American and then to try to match the darkness of the table I added 1 coat of Minwax Gel Hickory. The bench color turned out much better than I expected.
Recommended Skill Level
Intermediate

Adirondack Chair

Submitted by josolivas on Thu, 08/13/2020 - 19:25

As soon as I saw this project I bought the material and built it in a day. The paint , stain and seal took a bit longer but just because you have to wait for second coats. I recommend for anyone building this chair to measure twice before cutting the legs.

Estimated Cost
40
Estimated Time Investment
Afternoon Project (3-6 Hours)
Finish Used
Stain Pecan and black satin pain. Thompson water sealer.
Recommended Skill Level
Starter Project

Kid's storage table and benches

Submitted by spiceylg on Wed, 10/24/2012 - 10:08

We built three of these for a women and children's shelter. We had friends help us with various aspects of the project. The colors are definitely more vibrant in person. Table tops are painted with chalkboard paint. Because we built three, it took three weeks with some down time here and there. Haven't sat down and figured cost but I know other bragposts have included them if you are curious.

Built from Plan(s)
Estimated Time Investment
Week Long Project (20 Hours or More)
Finish Used
Gray primer, Olympic 2 in 1 paint (still needed primer!) and Valspar Chalkboard paint for table top. All topped off with three coats of Polyurethane.
Recommended Skill Level
Beginner

Comments

Guest ma crazy (not verified)

Wed, 10/24/2012 - 20:49

This is beauitful I love the colors! The children are going to love them too! Keep doing God's work!

yurra-bazain

Mon, 02/25/2013 - 20:57

It is amazing that you built these for a women and children's shelter. You are truly using your talents for good. :) Thank you for the inspiration.

MrsPowers

Fri, 06/28/2013 - 22:27

Hi! I absolutely love the colors you used (and the chalkboard paint is pretty awesome as well). I did have a question. I saw your question about the type of material to keep costs down. The 1 in material in my town is way more expensive than 3/4 in quality Purebond plywood. Do you think the plywood would hold up? This would be much more cost effective and leave some change to do a couple of extra small projects. Thank you in advance for your help!

spiceylg

Tue, 07/23/2013 - 05:12

MrsPowers, I am just now seeing your comment, my apologies! I don't see why the plywood wouldn't hold up, but unfortunately, I am not the one to ask. I am still quite the novice! I had asked about material for the top because I originally didn't want to buy the pre-made round tops. However, time got away from us, so we ended up just biting the bullet and buying them after all. If you are on Facebook, you will probably get a question answered quicker there. Ana's wall name on Facebook is Knockoff Wood. Best wishes on your future projects and sorry I couldn't be of more help!

Kentwood Nightstands

My wife and I made his and hers nightstands based on the Kentwood Nightstand plans. Pretty easy. This was our first project and all I can say is that we've learned alot from the builds. The kreg jig, which we purchased at Lowes, is amazing. We live in Southern California and wood seems to be pretty pricey here. Still with wood being expensive I find piece of mind knowing that the furniture is solid and custom. Thanks Ana!

Estimated Cost
$100
Estimated Time Investment
Weekend Project (10-20 Hours)
Finish Used
Rustoleum Weathered Grey stain with 3 coats of Rustoleum Polyurethane Semi-Gloss
Recommended Skill Level
Beginner

Cabin Daybed

Submitted by Anonymous (not verified) on Mon, 11/28/2016 - 10:59

I'd never done hinges before, and decided to go with surface-mounted hinges because I was pretty sure I could get those right. I wanted to leave the wood its natural color, both because I thought it would look good in this room, and because I think it makes the hardware pop. Accordingly, I used iron-on edge banding on the plywood so the edges don't show.


I used a simple, homemade finish of mineral oil and beeswax, and the hardware is just from Home Depot. I'm not positive how much time it took -- I did it in bits and pieces over several weeks. In any case, I'm really happy with how it turned out! The new owner of the bed likes it immensely, too.

Estimated Cost
$60
Estimated Time Investment
Weekend Project (10-20 Hours)
Finish Used
Homemade mineral oil and beeswax melted together, using this recipe: http://www.instructables.com/id/Simply-Gorgeous-and-Food-Safe-Beeswax-Wood-Finish/
Recommended Skill Level
Beginner

Farmhouse Queen bed

Farmhouse Queen bed. My first project! I used one coat of an Ebony stain. Modified the bed frame a bit. Bought some detachable brackets for easy take down and put together. Also used tounge and groove in the middle of the headboard and foot board.

Built from Plan(s)
Estimated Cost
$250
Estimated Time Investment
Week Long Project (20 Hours or More)
Finish Used
Ebony Stain - one coat
Recommended Skill Level
Intermediate

Modern Industrial Adjustable Work Stand

$120 for 2 bases, one top ... less if you have scrap lumber and pipe

The hard part of some woodworking is what to do with the stuff BEFORE and AFTER it goes through the tools.

We need an infeed and outfeed table for routers, drill press, and saws but have no room to install a permanent workbench with an adjustable tool lifter.

We saw the coffee table to desk height adjustment mechanism and lightbulbs went off! This adjusts! We can take the top off! It stores!

The first photo shows it adjusted to align with the miter saw's cutting area.

As built, there are a couple of changes:

1 - It's taller. Lowest table height is about 30" ... add 8 inches to each leg.

2 - We only used 1 leg brace, about half way down the leg. Cut it to fit after you get the legs screwed to the top.

3 - the wobble of the adjustable bar on the threaded rod is not good for precision woodworking ... the second picture shows the guide pipe that keeps the threaded rod straight up and down.

4 - No pocketholes (sorry Anna) because this is a workbench, not fine furniture.

5 - The tops are cut from one sheet of 4x8 3/4 in melamine coated MDF ... 2 are 2x6 and one is 2x4.

This could also make an adjustable craft table. Raise or lower it to handle fabric for your sewing machine.

Estimated Cost
$120 for 2 bases, one top ... less if you have scrap lumber and pipe
Estimated Time Investment
Day Project (6-9 Hours)
Finish Used
None
Recommended Skill Level
Intermediate

Comments

Back