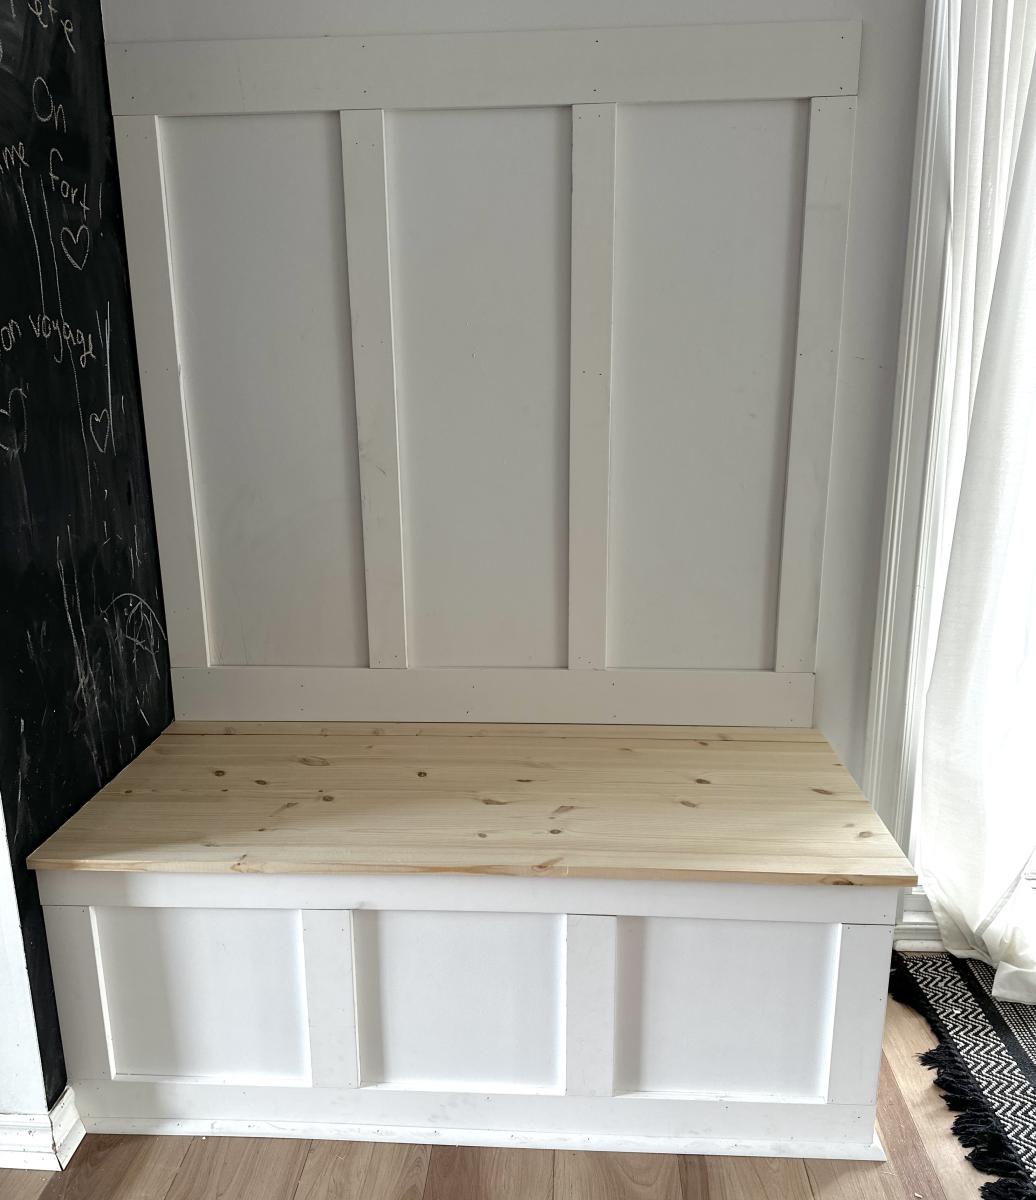
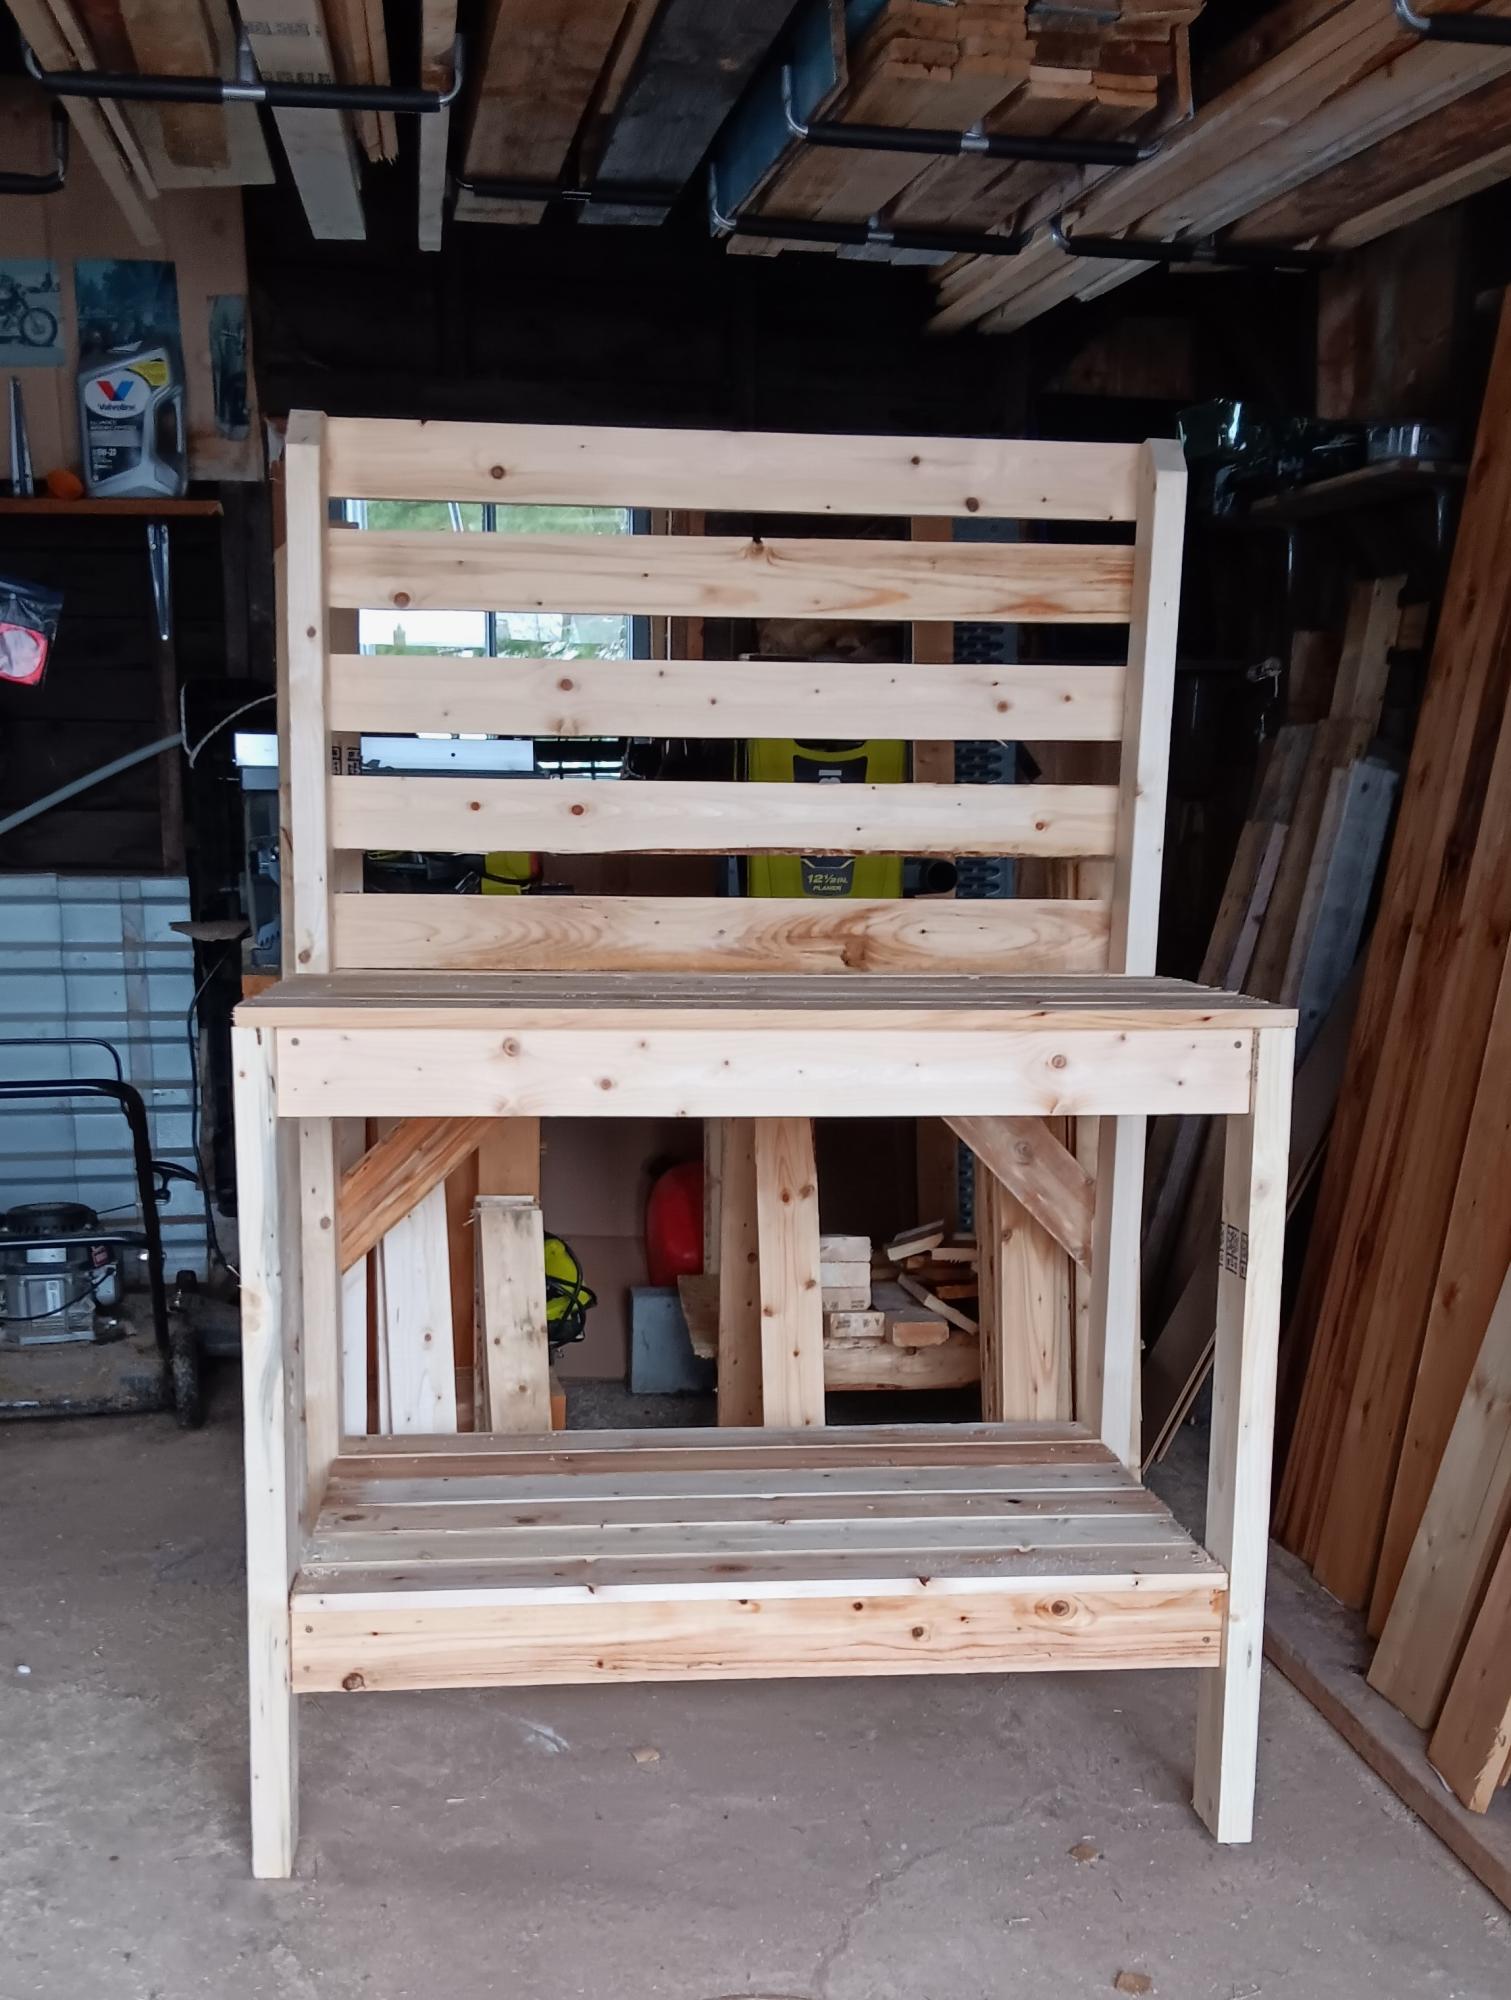
Banquette Bench Used as Hall Tree Bench

A nice bench with storage!
Built by Sylvie
Built from Plan(s)
A nice bench with storage!
Built by Sylvie

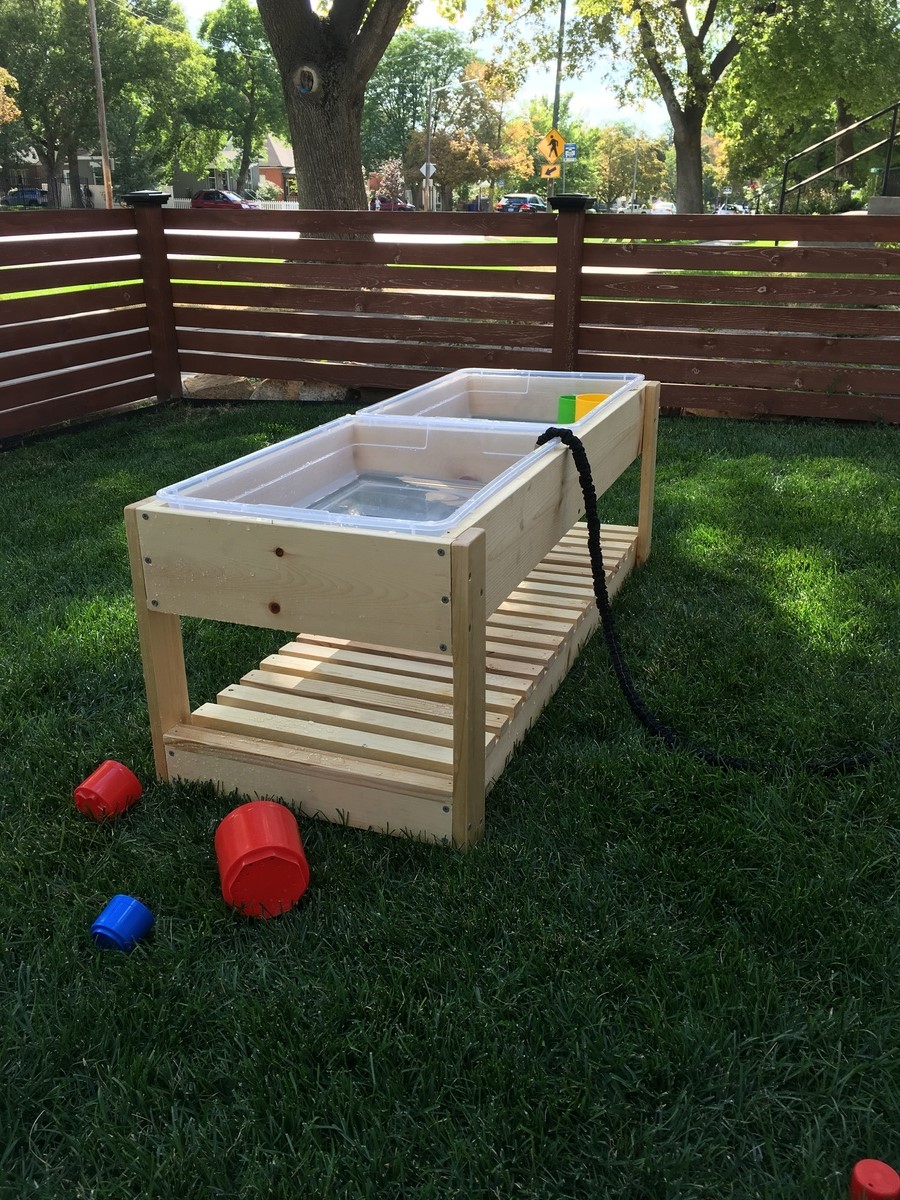
Project: was great fun
Labor: 2 hours -- 15 year old son helped. He loved it.
For: Gracie/ age 4. Also, the rest of us.
Lumber: mostly 2 by 6 Why? Gracie needs a partner
Thanks: to Ana, and all
Level: just beginner.
Hope: to do more projects inspired by Ana and other

Tue, 09/04/2012 - 17:45
This Looks like a terrific teeter totter! Seems the kids are having fun on it! I would love to make this for my house. I love the blue and red together. Very nice!!!
Tue, 09/04/2012 - 17:47
This looks like a terrific teeter totter!! Very nice and it looks like the kids are having a ton of fun! Also love the blue and red!
Sat, 10/20/2012 - 06:37
I love it. Makes you want to jump on and have fun.
The kids are sure having fun. What a great gift for Gracie
and the whole family.
One of a kind. Great Job!
Sat, 10/20/2012 - 06:47
I Love it. Great gift for Gracie and the rest of the family.
The tennis balls are a great accent to the blue and red.
Makes you want to hop on and have fun.
Great Job Rodney
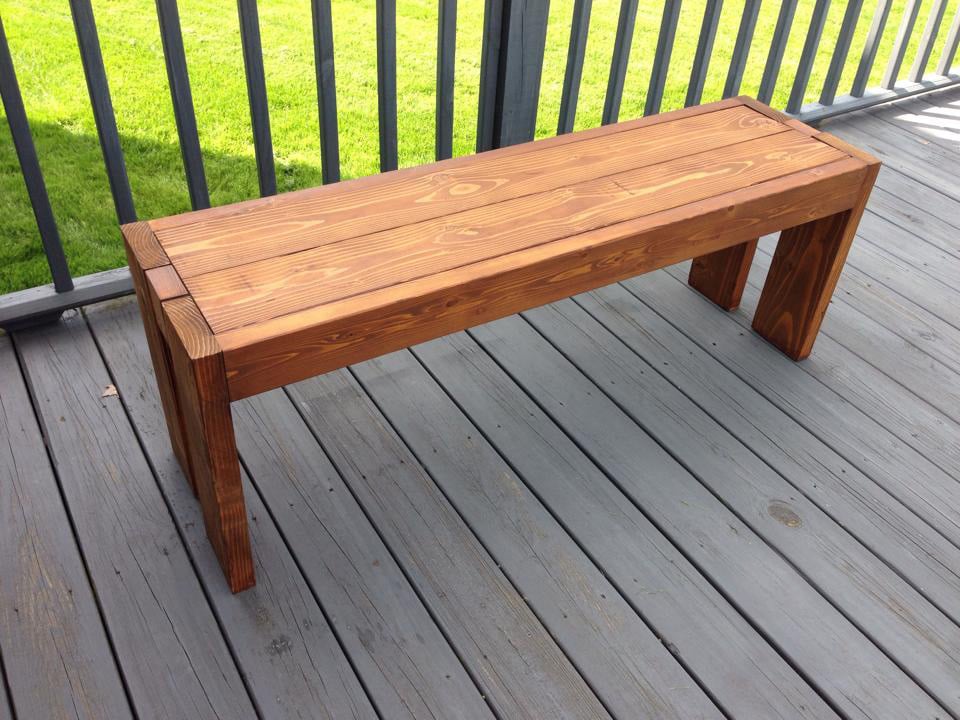
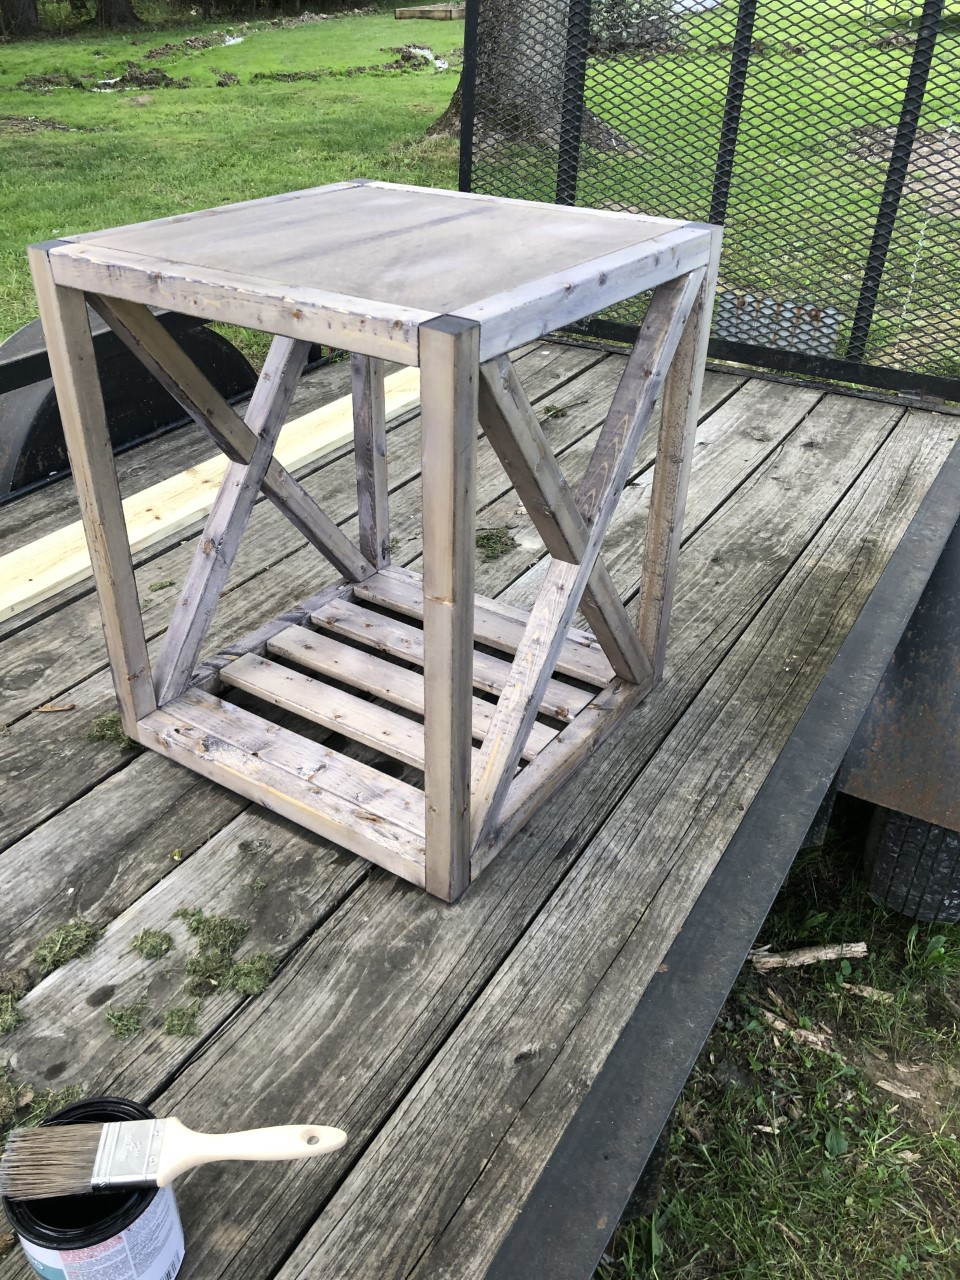
I've built a few projects from Ana's site, but this was my first try at something intended to hold people! It came out very well, and is living out on my deck. It's the only piece of deck furniture I have that's heavy enough to not blow around when it's windy. Thanks, Ana!
Shortened the legs to 17" and used 1x2s on the shelf because that's what we had on hand. Sealed with Thompson's aerosol clear waterseal.
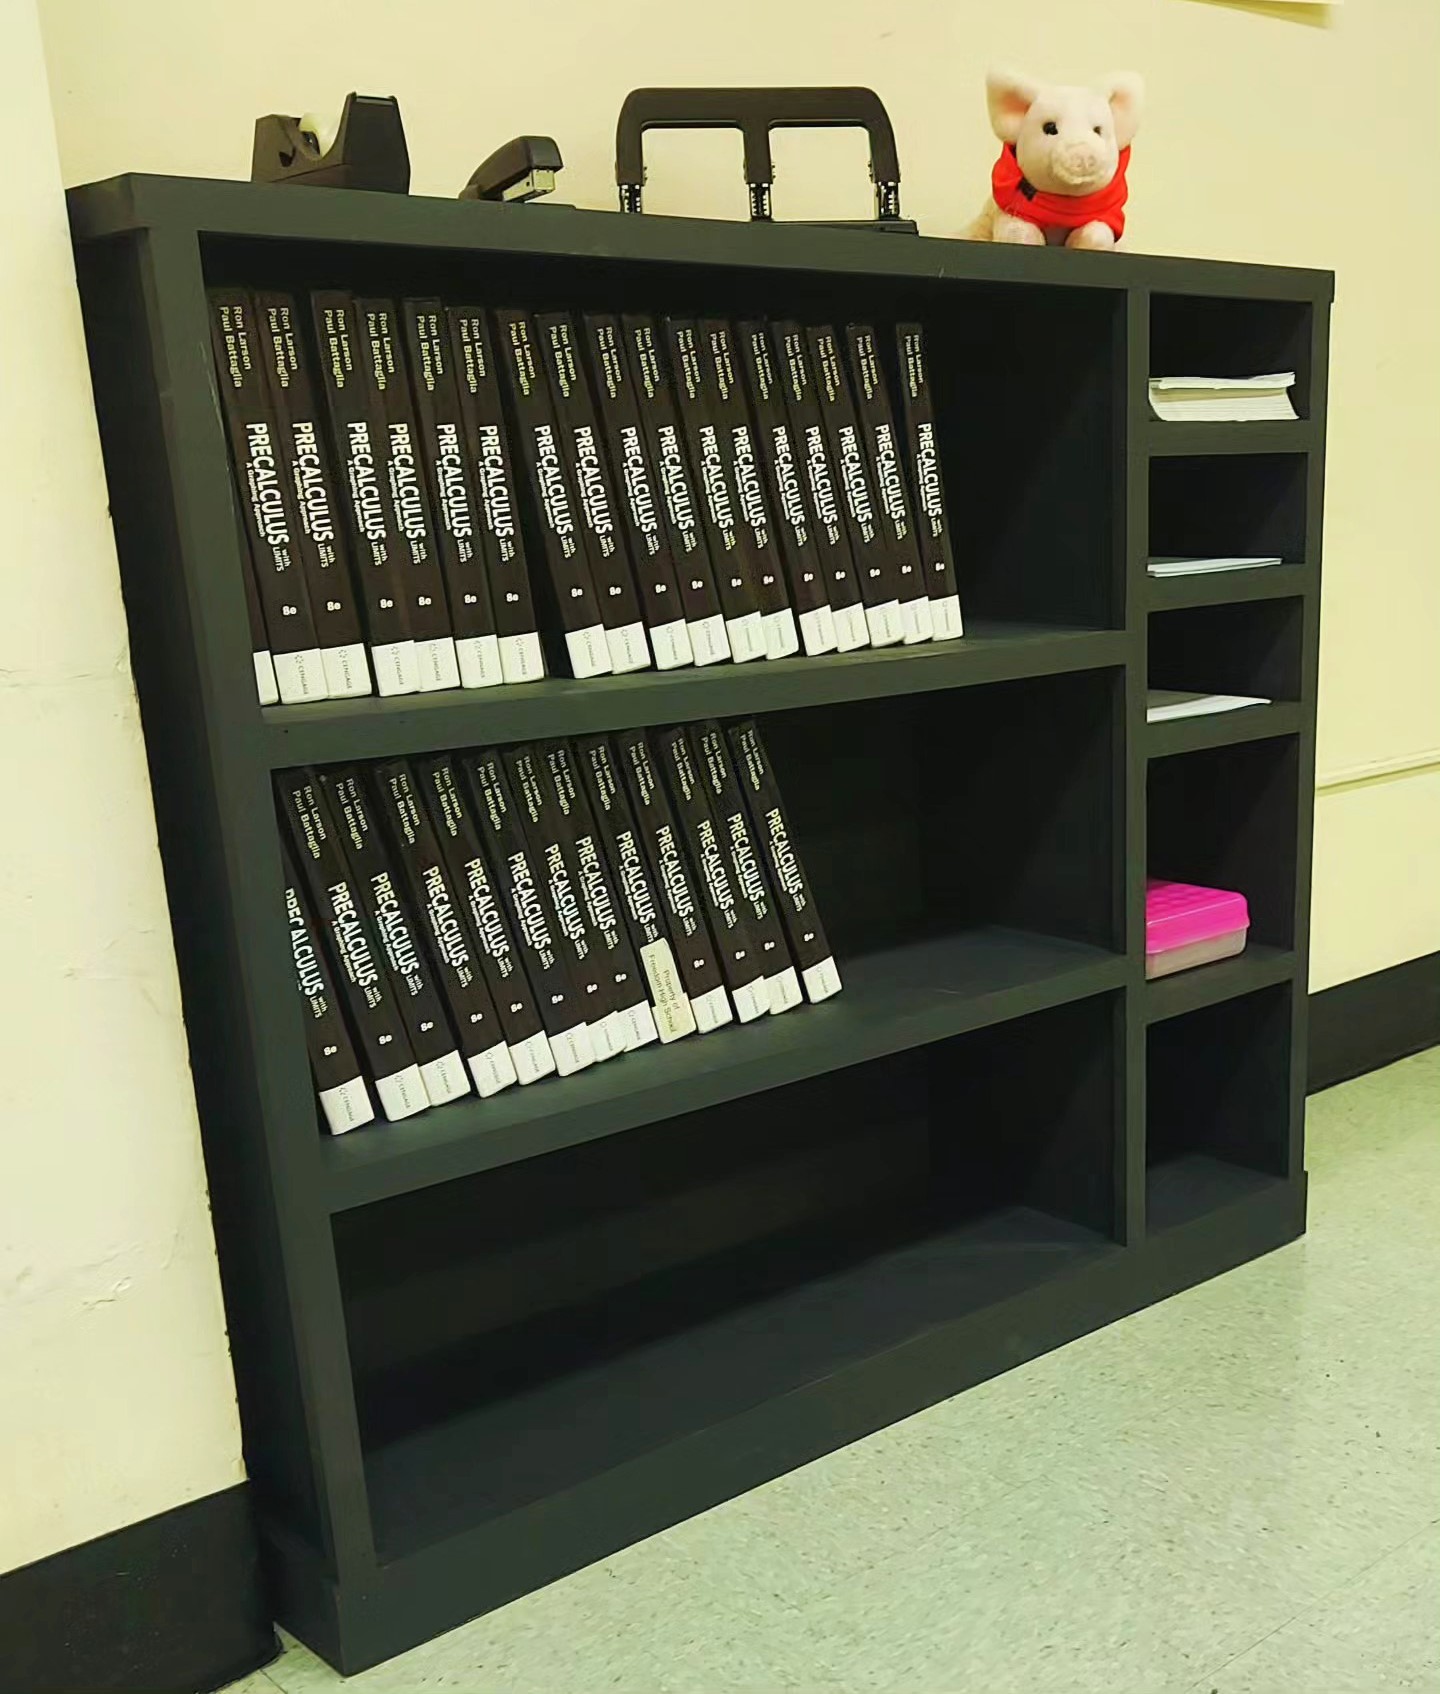
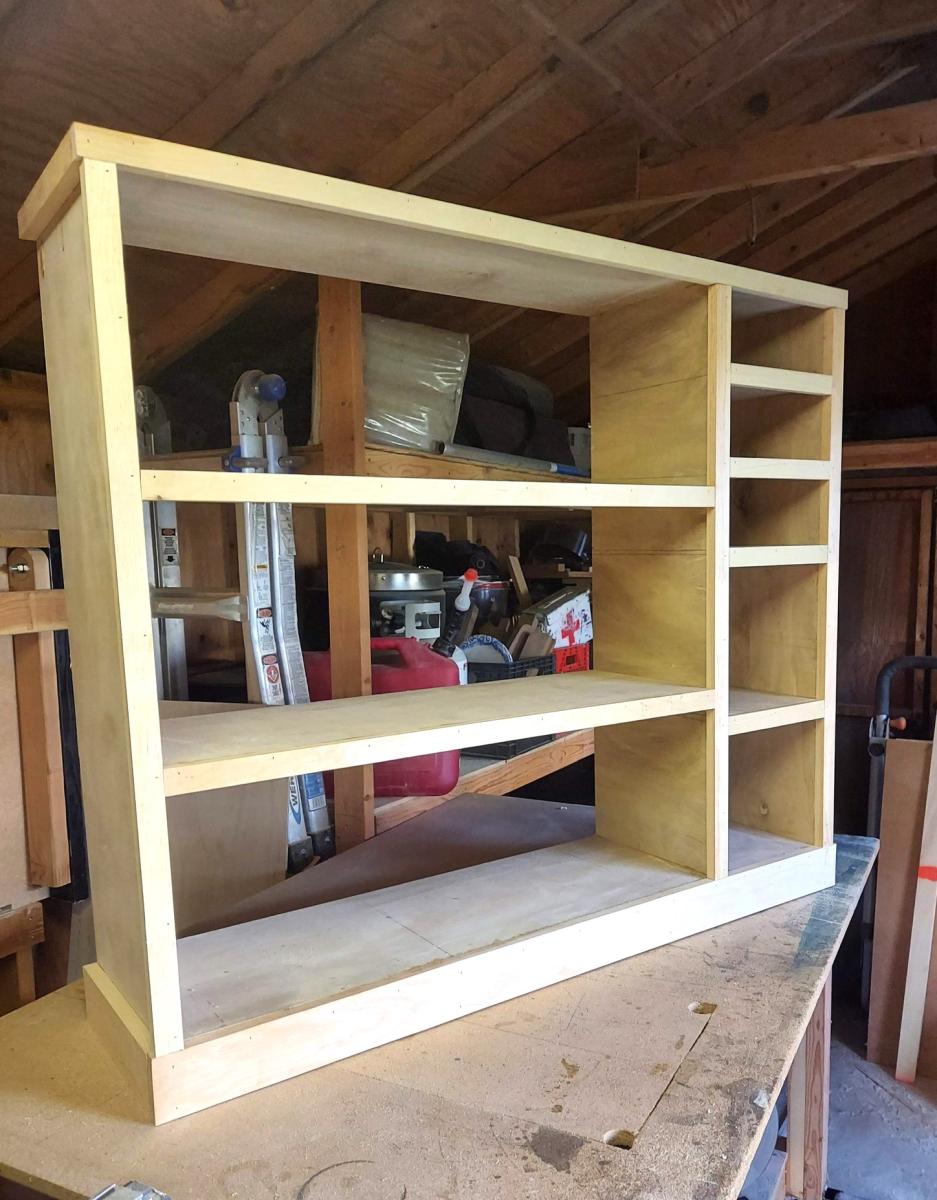
I needed a bookshelf for my classroom. I decided to make it multi-use by adding some extra storage shelves for classroom supplies. I used your design app to create the plans. I then used an online tool that allows you to input dimensions of parts and the size of the material you are working from to optimize layout and minimize waste. Total material was 1 4x8 sheet of 3/4 plywood for the frame and shelves and a 4x4 sheet of 1/4 for the back. I finished it with a 1" pine face frame.
Charlesh62

Sat, 07/06/2024 - 14:18
It's true that having a well-organized workspace for a student increases enthusiasm for completing assignments. A tidy and comfortable study area makes it easier to focus and be productive. However, it never hurts to have https://www.phdresearchproposal.org/ at hand. Their professionalism can help students completely eliminate writing stress. By using their services, students can manage their workload better and ensure high-quality work without feeling overwhelmed.
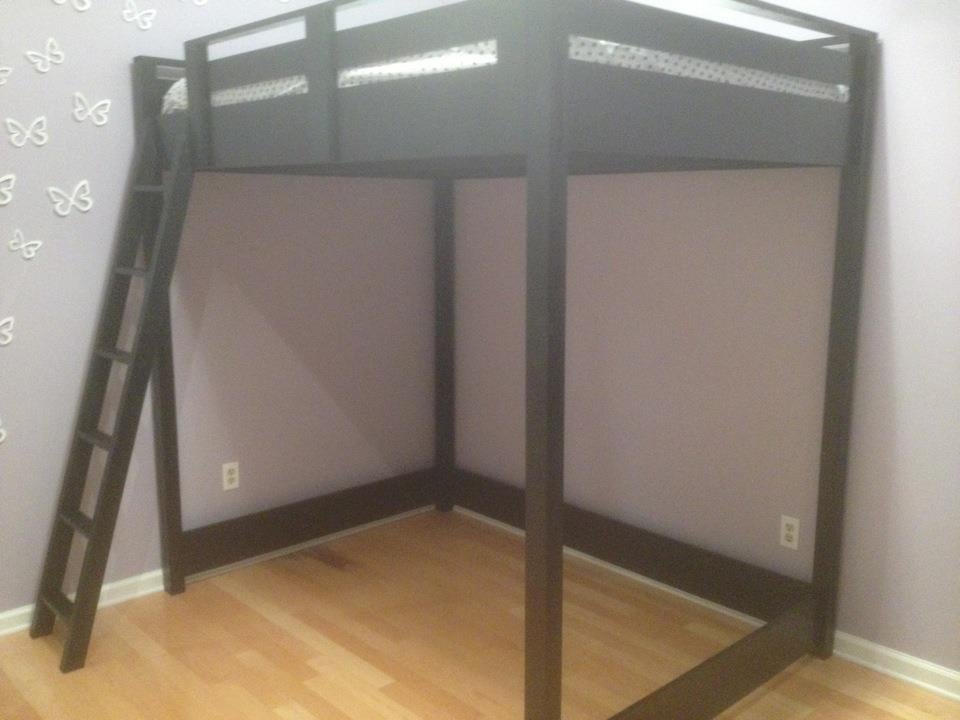
I used the Loft Bed design as a starting point but modified it to meet our specs. We used the Full Size version (added the 15 inches to the width and also made all the legs 8 inches higher. We felt like the plan was great but we wanted a little more headroom underneath. This did make figuring out the ladder dimensions a bit complicated, but with some common sense (and a little trial and error) we were very pleased with the results! We originally were going to just purchase an IKEA Stora loft bed. It was on sale for approximately $300.00 plus shipping, which would have been an additional $300.00! Instead we built this and kept the price around $250.00. This bed is extremely sturdy, doesn't squeak at all, and can easily hold a full size adult. Thank you Ana for the great plans!!
This was my first wood working project! Now I just need to make 3 more.

Built for our little playhouse. My first project.

first time ever building anything... my wife loves it and wants me to do more!
Loved this build. Straightforward so requires little skill.
Of course my ryobi tools make it easier.
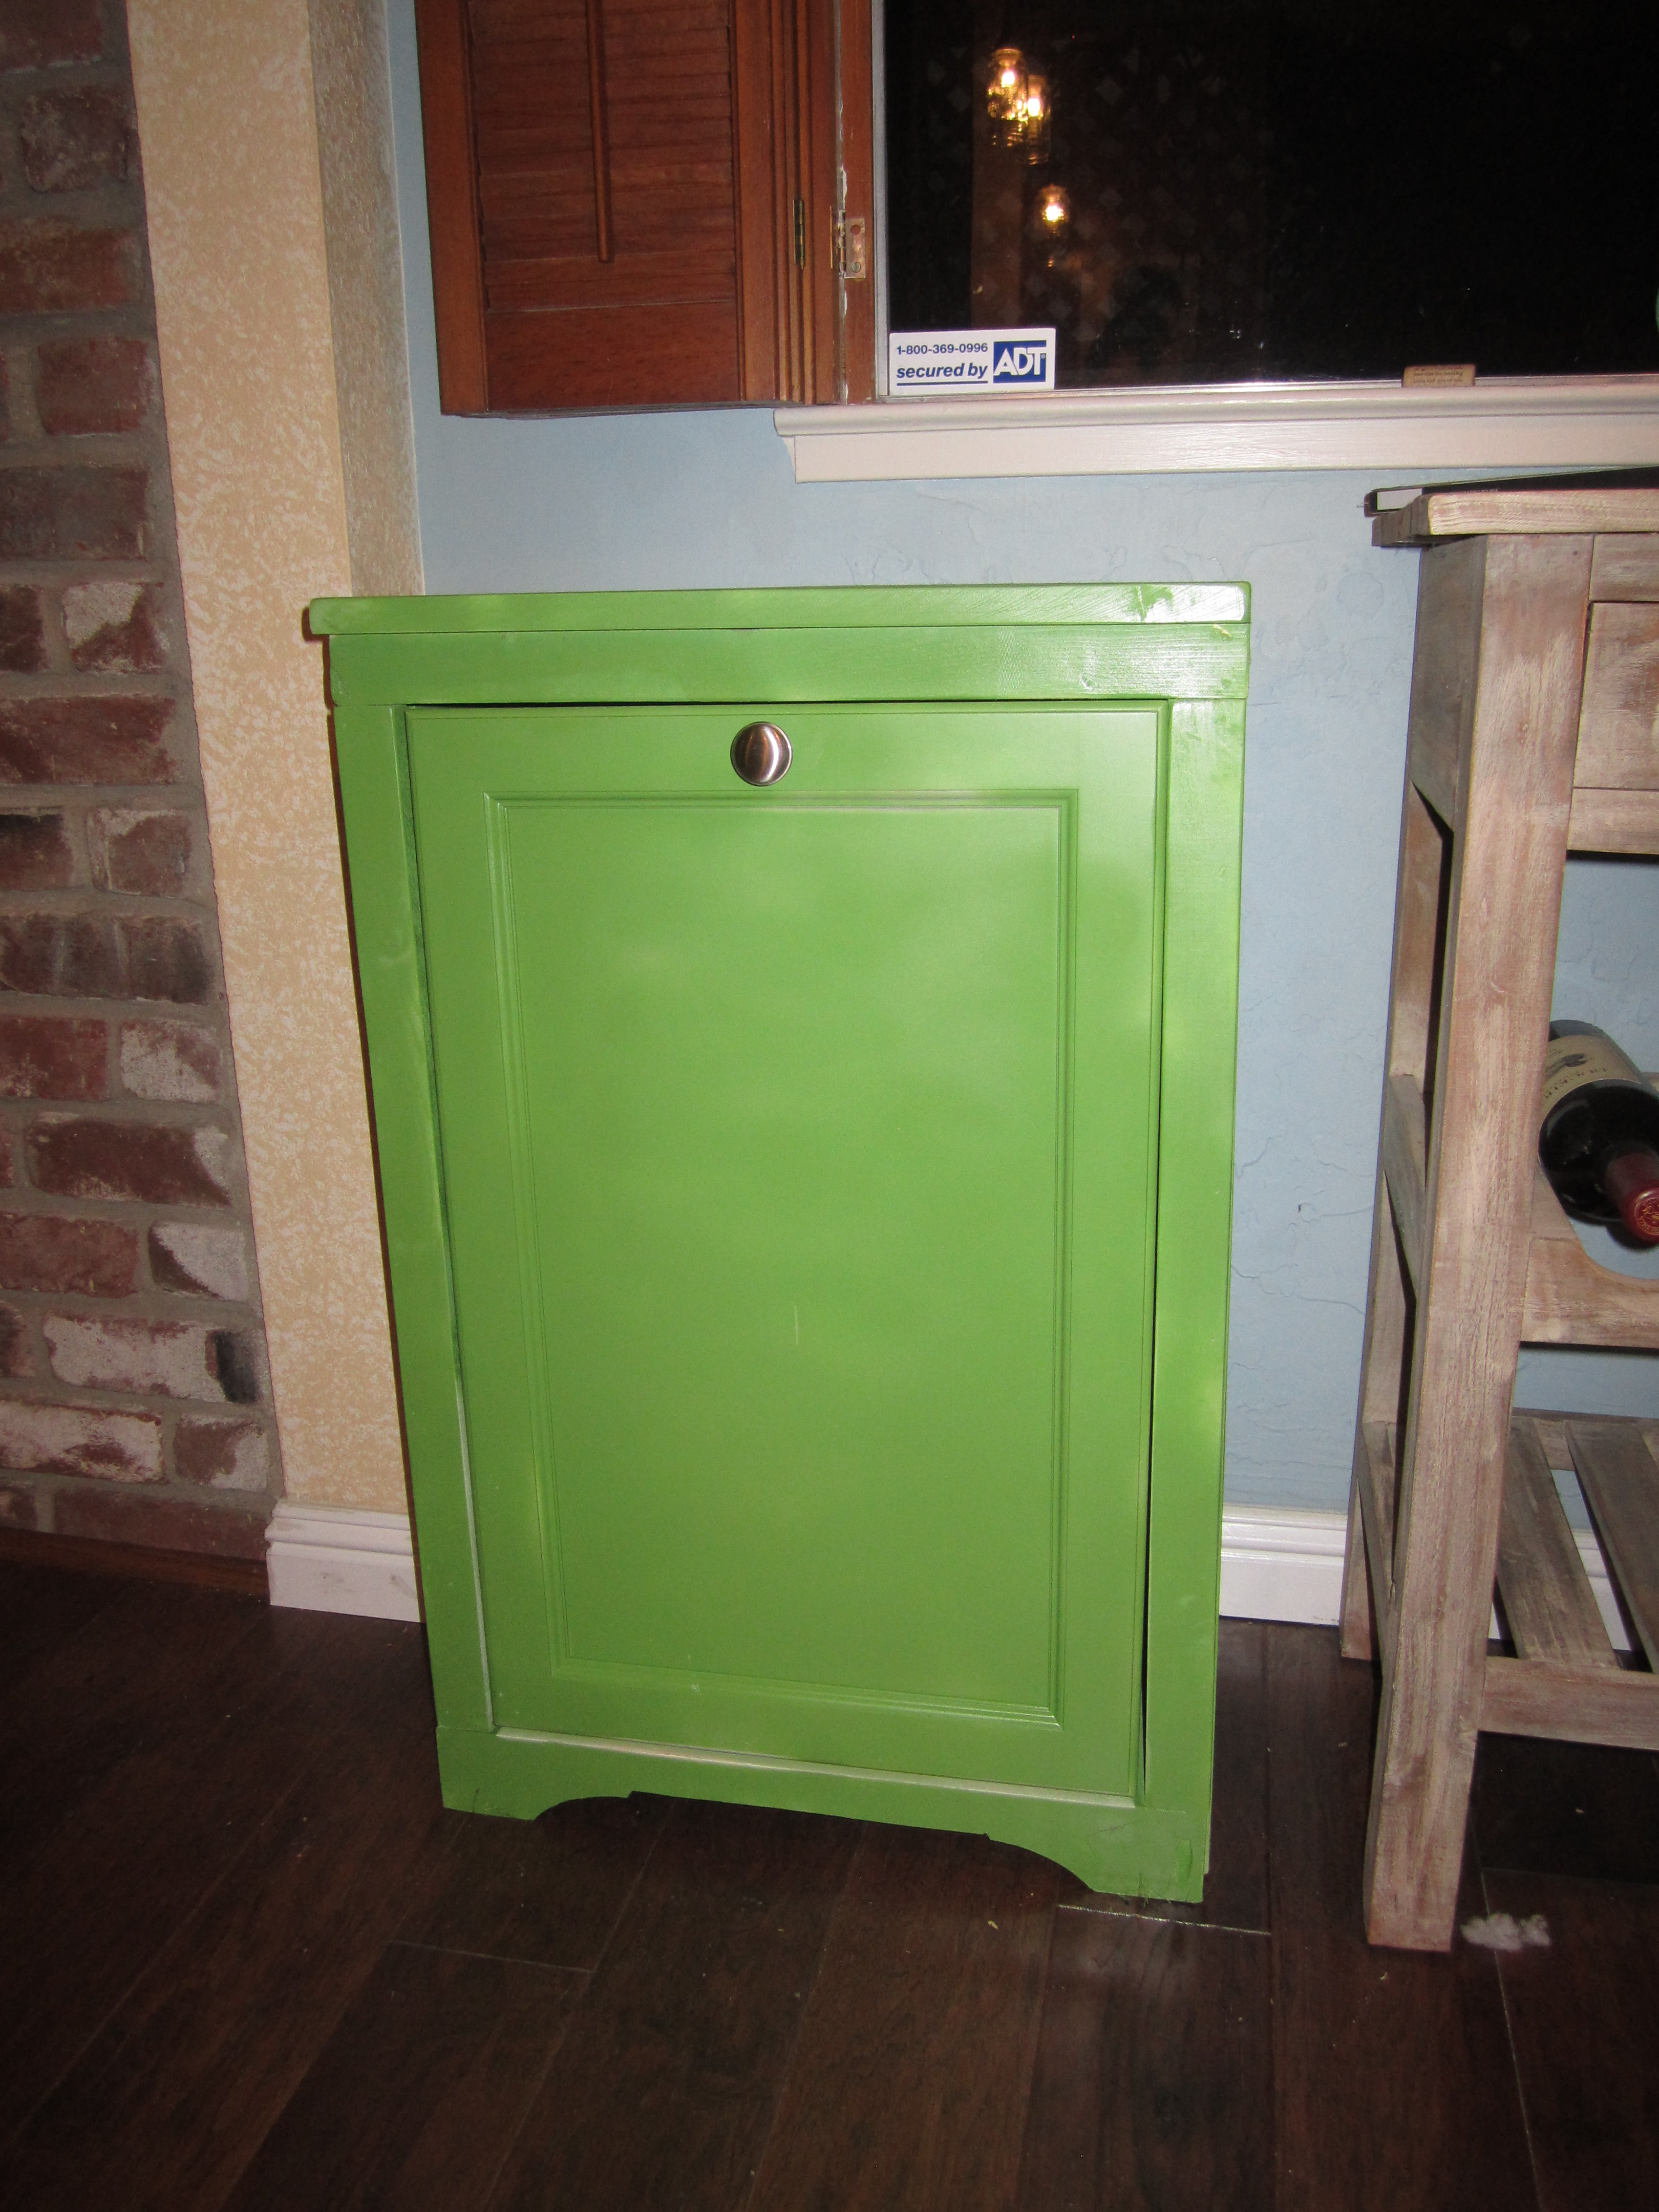
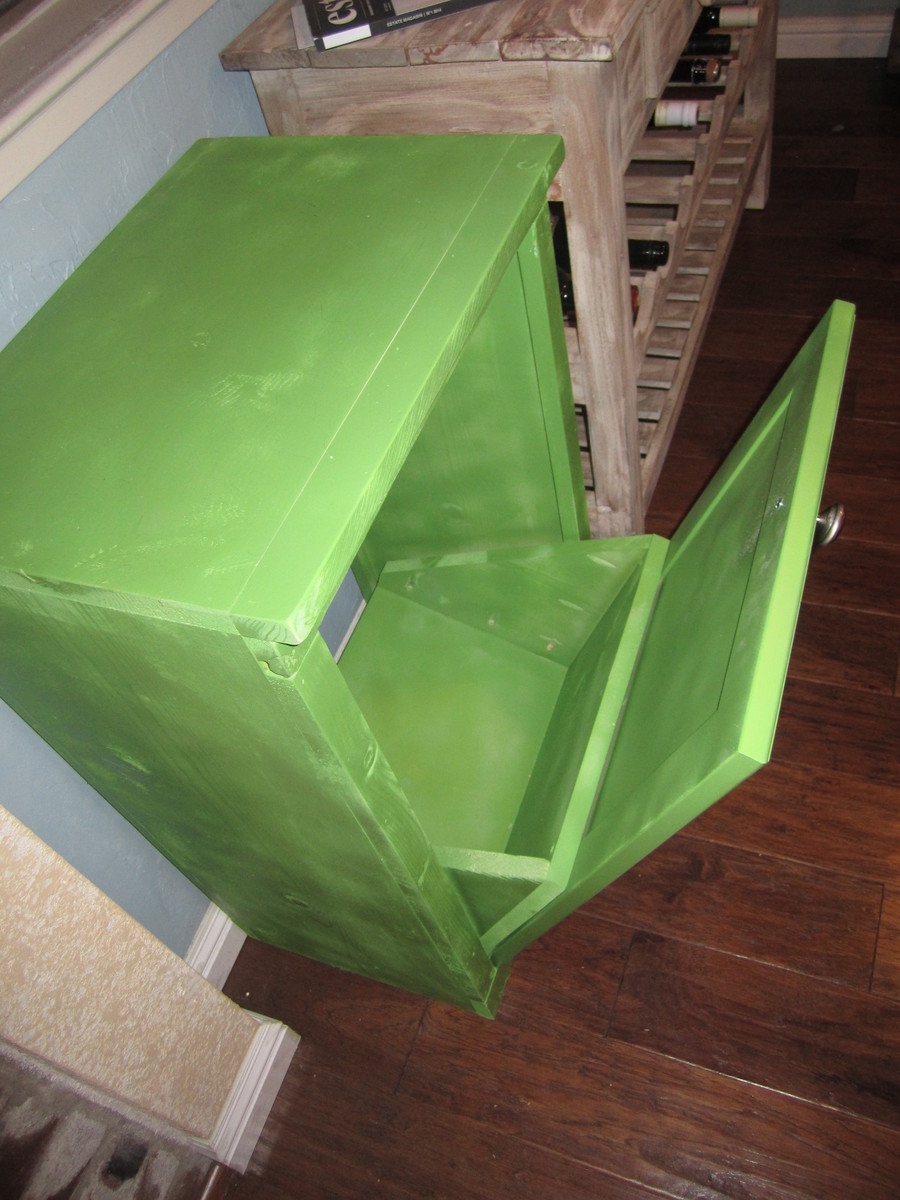
We really needed something to put our recycling in. A paper bag on the floor just wasn't cutting it anymore! I saw this plan and knew it would be perfect, especially because it fits your normal grocery store paper bags. It was also my first project using a Kreg-Jig and I love it. A lot. Just fyi for anyone on the fence like I was for a while.
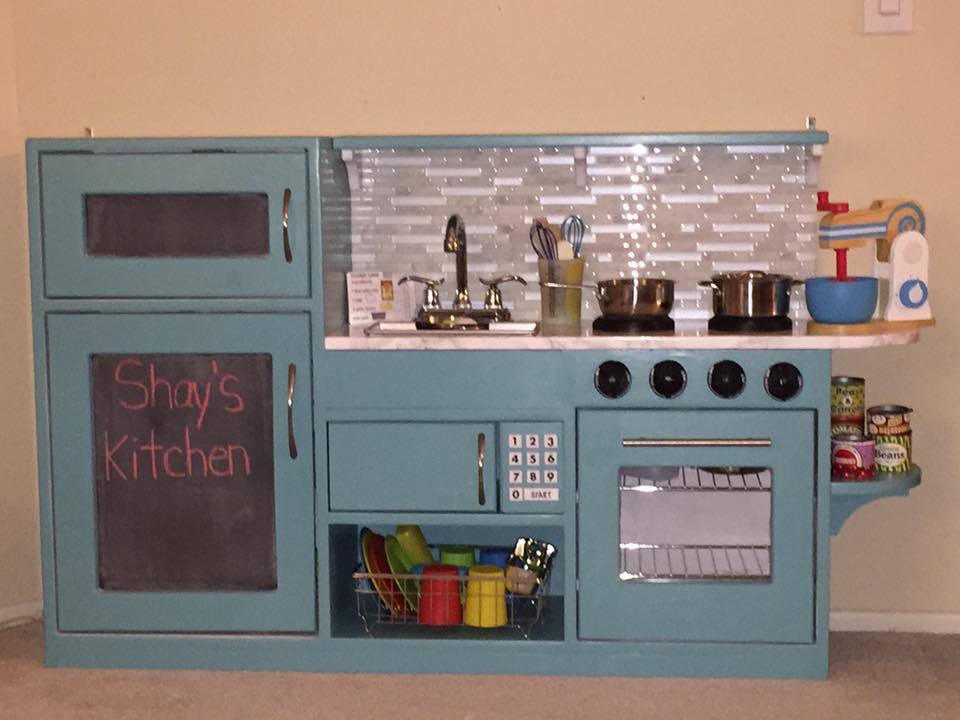
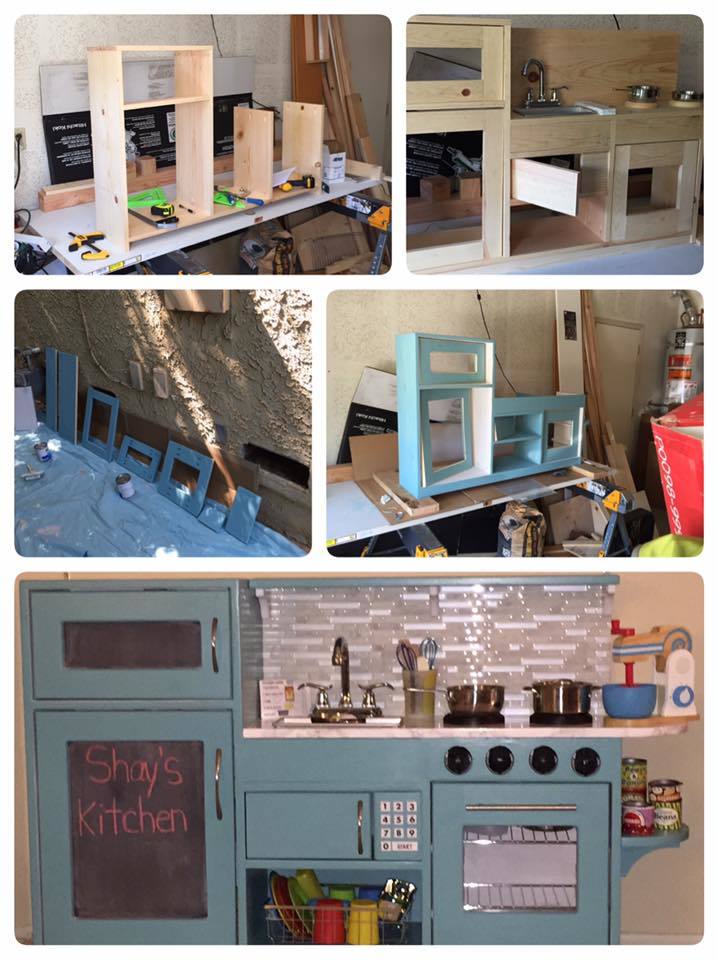
Had a lot of fun building this and learned a lot. The most important part is that my daughter absolutely loves it. Here are some mistakes that I made so you can try to avoid them:
- The cut list and the photo of how to get the cuts don't match. Use the cut list! The photo of how to lay out the cuts only has one of the 14 1/4" x 12" but you need two. Instead it shows two 6" x 12" and if you cut the 6" on the bottom board you won't have enough length to get the second 14 1/4". I had to head back out to HD to get another board.
- I planned to cut it out and dry assemble with pocket screws and then disassemble it for paint. Unfortunately, the cheap whitewood lumber from HD started to warp when cut and I managed to get it assembled and fairly square and was worried that if I took it apart that it would never go back together square so instead of using a paint sprayer I had to paint by hand which took a lot longer. I either needed to buy the lumber weeks earlier and let it acclimate to my garage or just know that it was never going to get disassembled.
- Speaking of painting, the directions on the can said recoat was possible after 4 hours and I had to wait at least 24 due to work so I figured I was fine. I primed the wood first and then started with the latex paint from HD. Unfortunately the last coat led to something called "blocking" and left the kitchen with a tacky feeling. It is starting to go away but was a real bummer after all the work to build and paint it and find it had a sticky feeling that kind of killed the excitement. I think its ok now but I would give each coat more time to not just dry but cure to avoid this in the future.
- We kept adding things as we went like fridge shelves, oven racks, a microwave, deeper full length shelf mounted on top, etc. This made assembly a pain because it took a lot to figure out the final order. The biggest holdup was we decided to use fake marble contact paper on the countertop and wanted to do that at the very end so it didn't get ruined. But without the counter screwed down, I couldn't install the backsplash, shelf, and back.
- Knobs. I think I have figured out a way to make them click but just ran out of time and had to get it done. I bought aluminum bushings to fit in the screw holes to keep the bolts straight and give them something to spin freely against. In the back, I had used a forstner bit to drill out 1" holes where the bolt would come through and sit centered. To make the clicking sound, I drilled out some dowels and screwed them onto the end of the bolt so I could drill a 1/16" hole to glue in a brad nail. In the larger forstner holes, I drilled small holes and put thin strips of plastic. This would have worked like a playing card in a bicycle spoke. Unfortunately, finding the right kind of plastic and getting the brad nail centered started to take too much time and I had to scrap the idea. I'll keep it in my back pocket for the next time I can spend time to make upgrades.
- Hinges. I didn't like the look of exposed hinges so I used 90 degree surface mount hidden hinges. They work well but have a fair amount of closing force for such light cabinets. I'll have to teach my daughter to keep her fingers out of the way or there may be some ouchies. These tend to close more than 90 degrees so I also bought some small magnetic catches to hold the door flat to the front and created a positive close. I think they actually give it a more finished feel.
- I rabbeted the oven door to mount the plexiglass and wish I had taken the time to do that for the fridge and freezer door because it would have looked cleaner but in reality my daughter couldn't care less.
- For the fridge shelves, I wish I had taken the time to cut dados to hold them but I didn't want to disassemble the frame and it was already painted when we decided to add shelves.
- Cut the sink hole tight and just snuggly fit the sink you choose. I didn't glue it because I hear it is going to get dirty and sticky so it will be a lot easier to just take it out and wash it then mess with trying to clean it in place.
For supplies, we used common whitewood lumber from HD, Behr latex paint, knobs, hinges, and latches from HD, the marble contact paper came from Amazon, the backsplash is peel-and-stick vinyl tile from Wayfair (4 was enough if you cut them right), the faucet is a cheap $15 faucet from Amazon, the sink is a 1 1/2lb Loaf Pan from Amazon, the knobs were 2" circles from Joannes, the buttons are some project wood pieces from Joannes with stick on numbers sprayed with clear Acrylic, and the motion lights were a cheap 3 pack from Amazon.
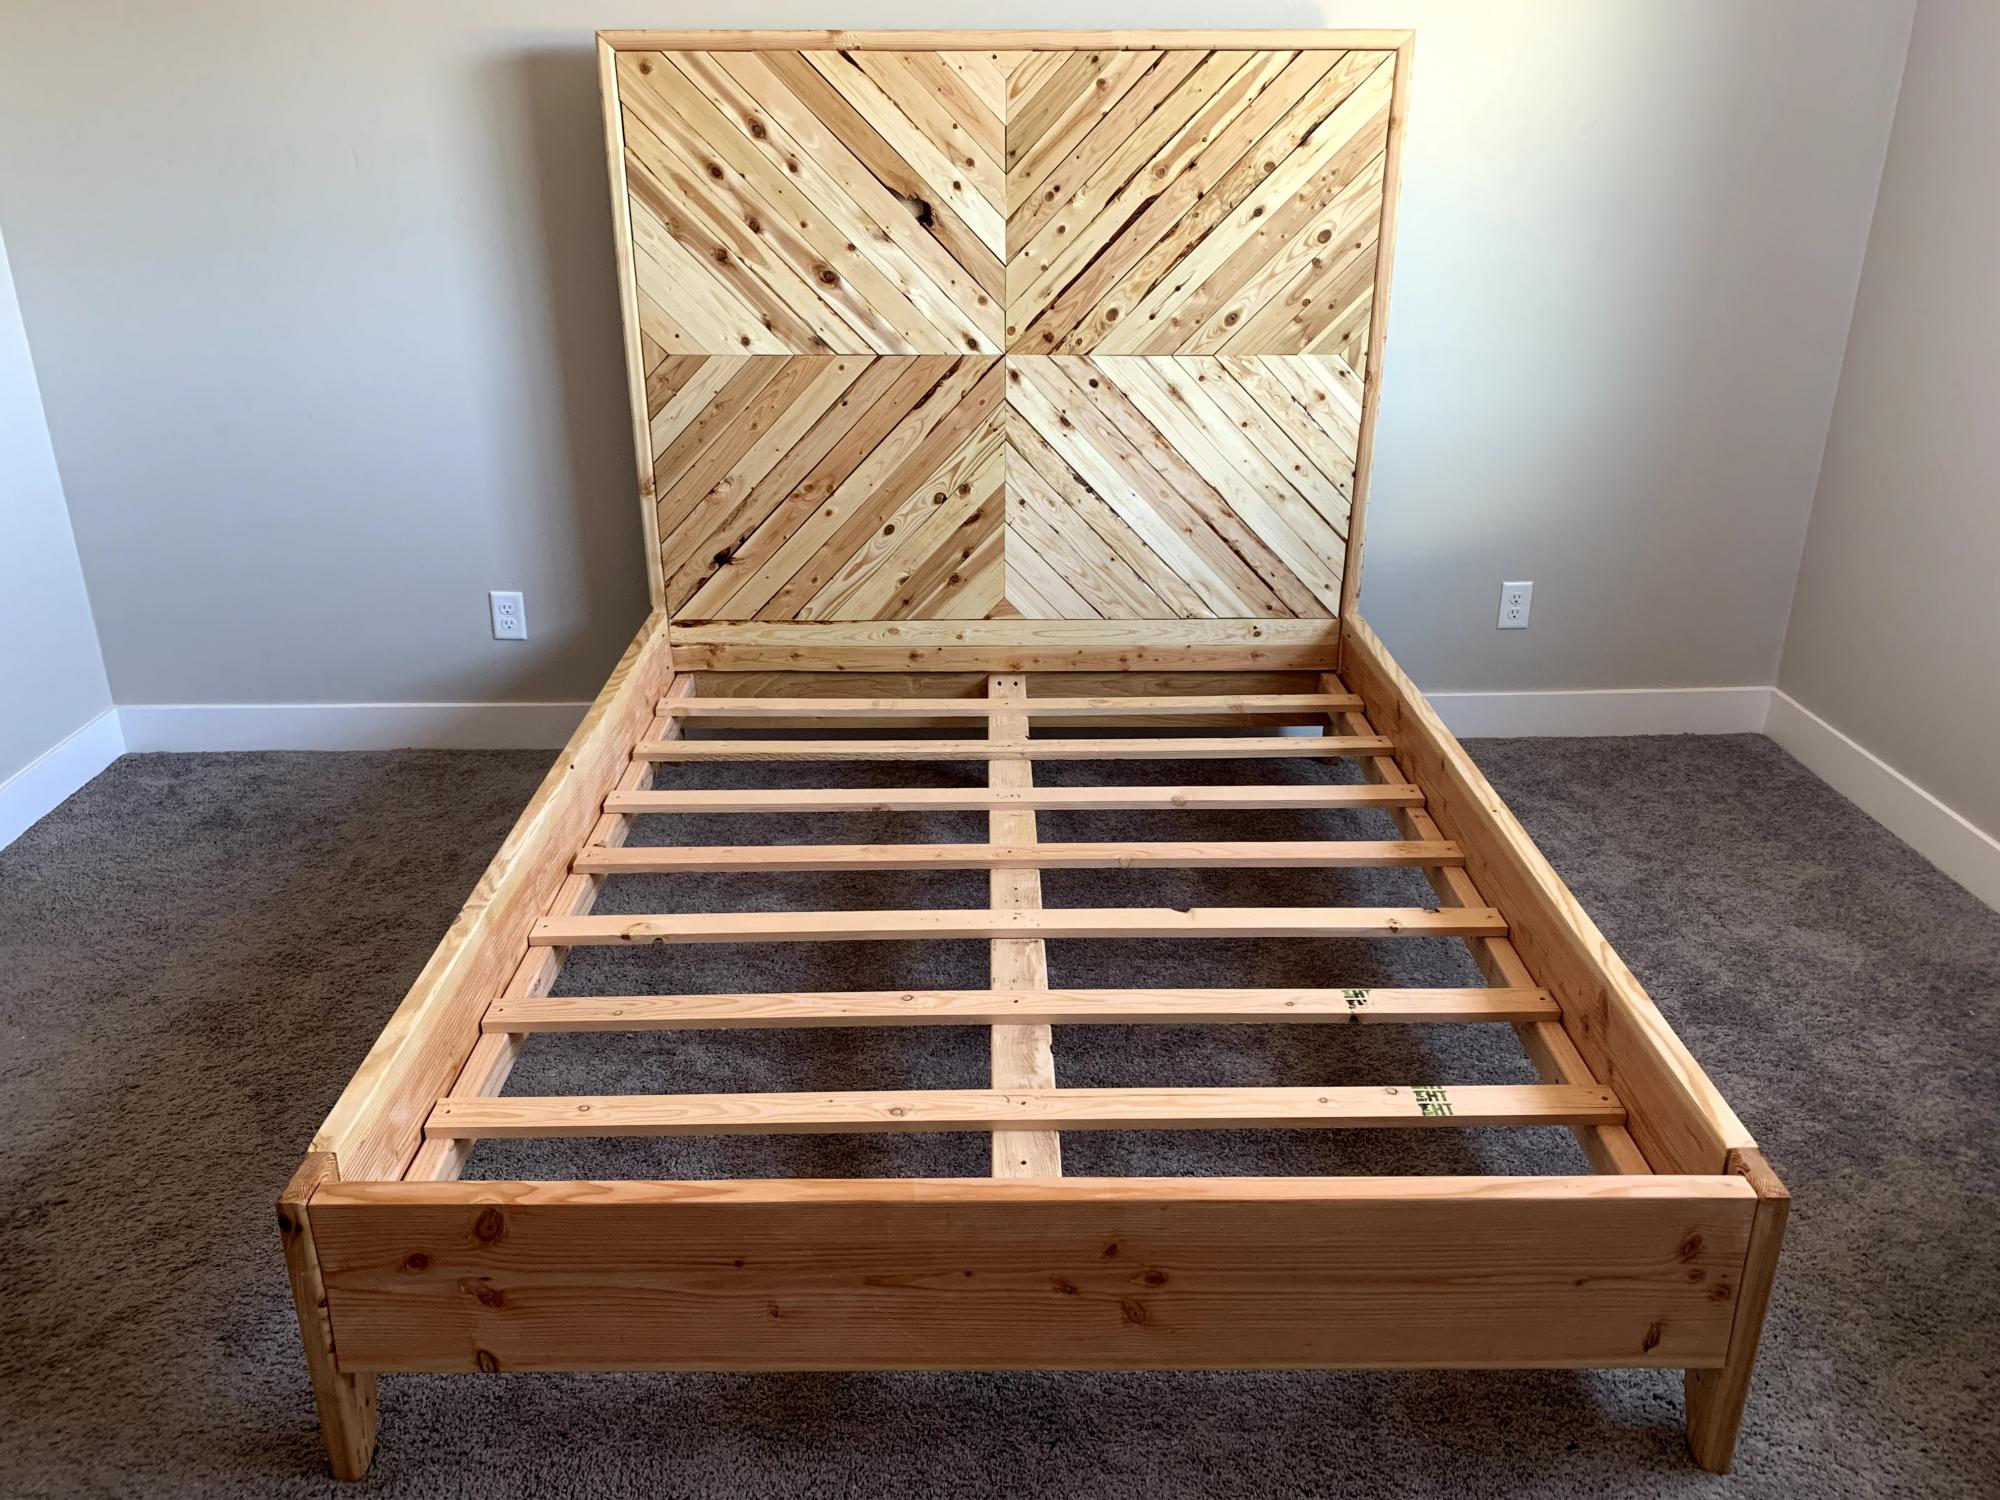
We mashed up the headboard featured on Ana's site with a different design for the platform. Turned out good, not perfect, but this was my very first project.
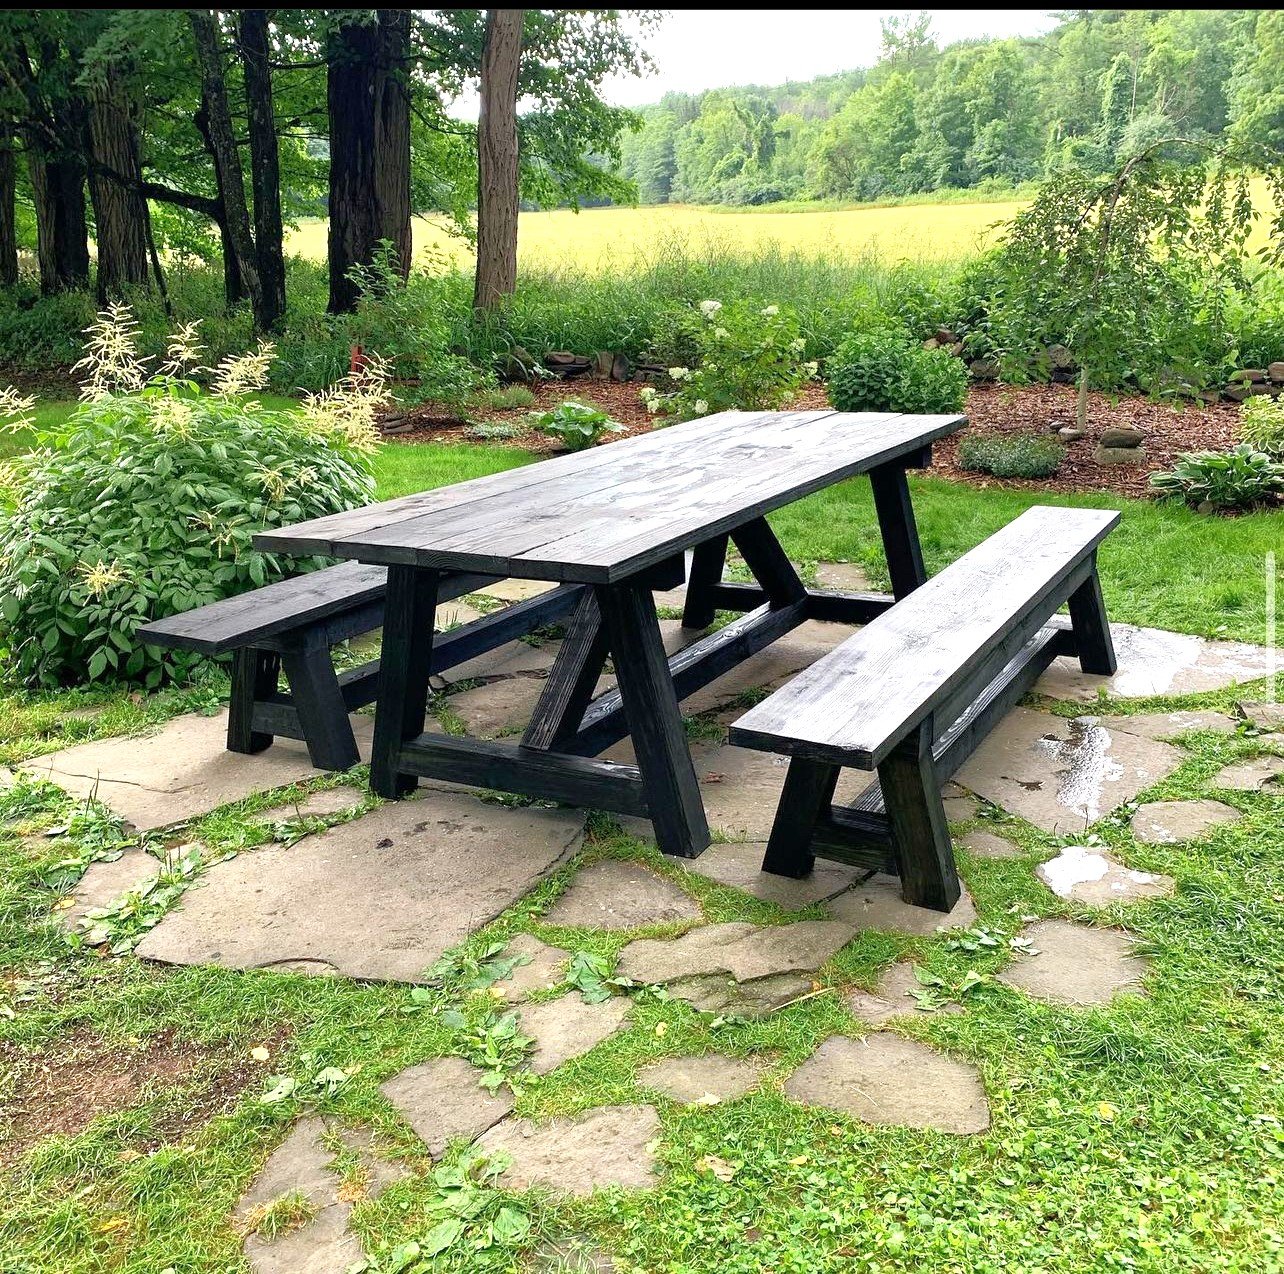
4x4 Truss beam table and benches. This could have not been a more rewarding project. Absolutely love it! Thank you for the guidance Ana! Keep them coming.
@jtarcos

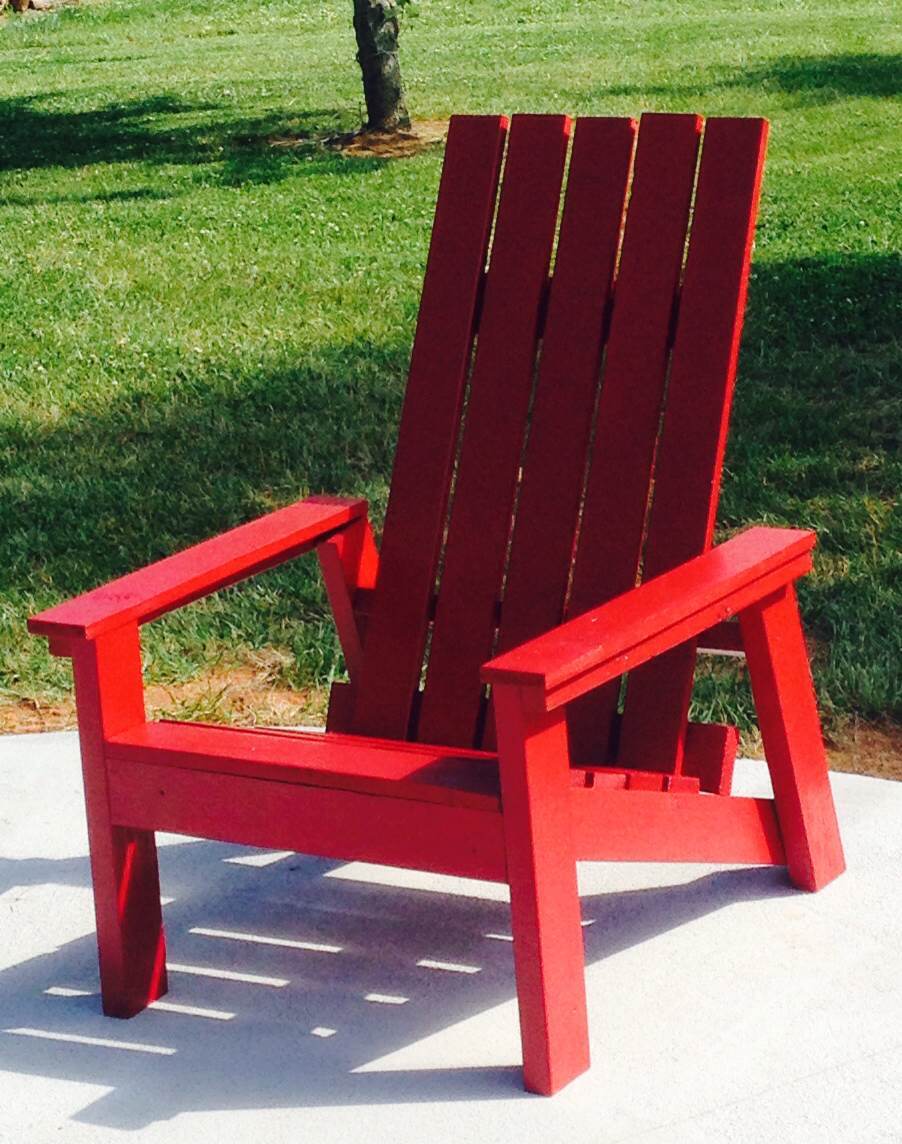
These chairs are fairly easy to make. The side boards were the hardest part.


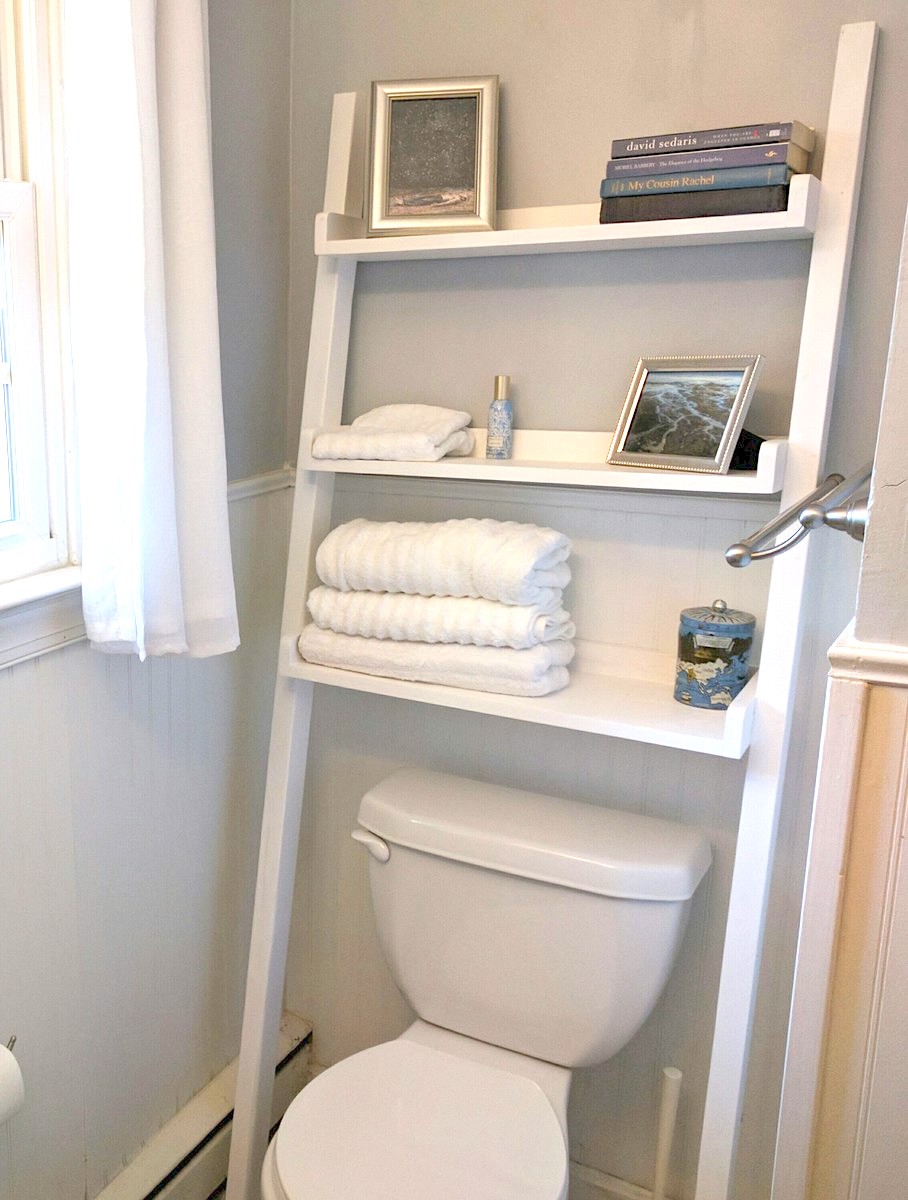
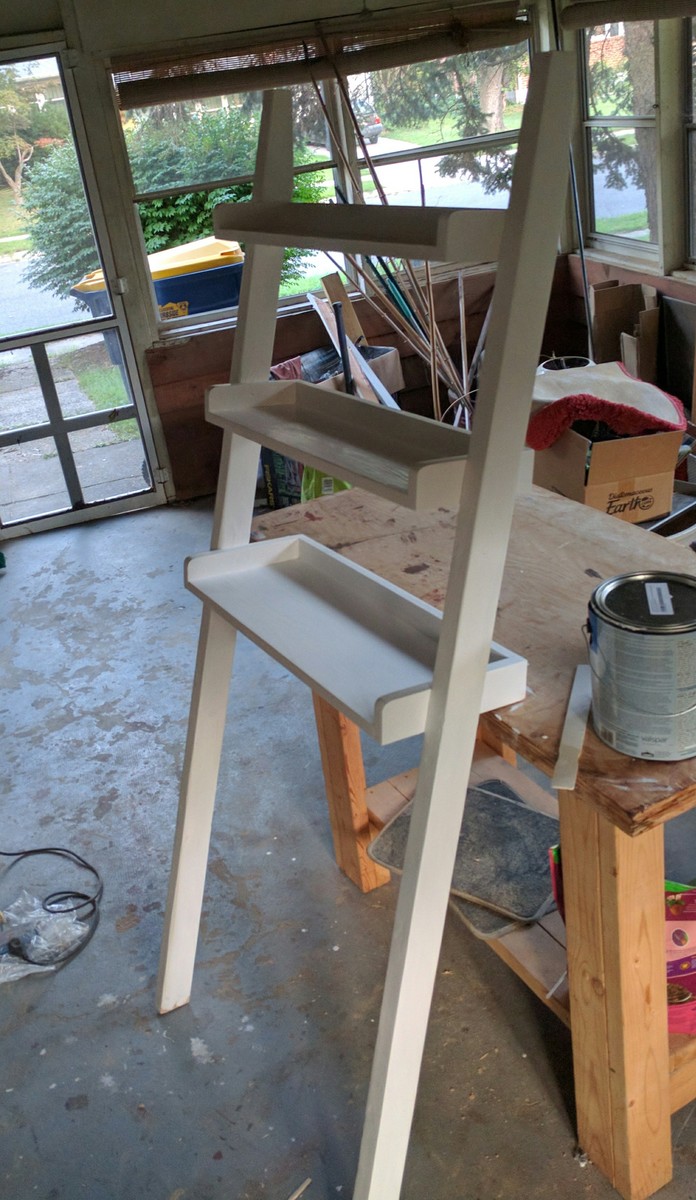
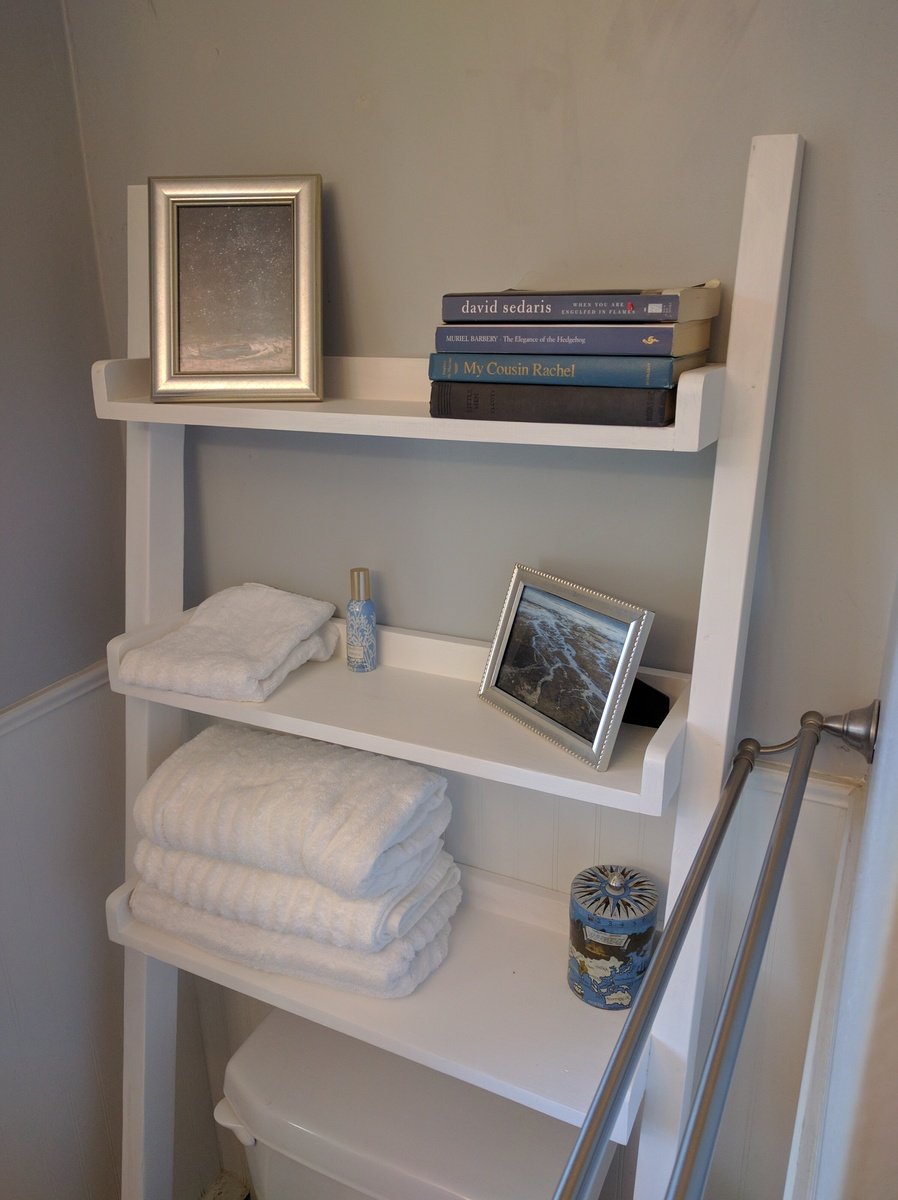
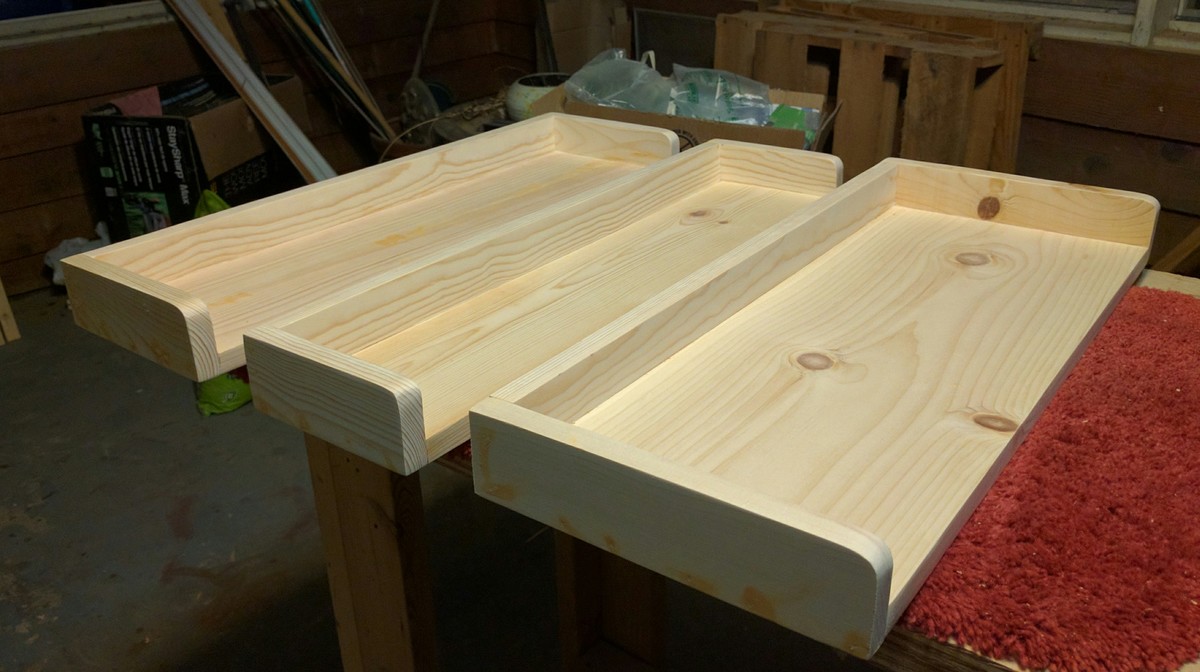
This was a perfect Labor Day weekend project and solved a storage problem in my cramped bathroom. I plan on getting some wicker baskets or bins to store toiletries on the shelves. It's also a great spot to store fresh towels so guests have easy access. The shelf feels very stable when leaning against the wall. I curved/rounded the front, top corners of the shells using 40 grit sandpaper.

Radiator Cover! My son was starting to crawl and be interested in the giant radiator in his room, so it was time to cover it. I'm so happy with how it turned out and since we left 4-5 inches of space from the top, we can use it as a space to keep his air filter & light. I left 2-3 inches around the sides as well and put a board across the back for support and to keep the cover in place.
Margaret Cember

This is a Christmas gift for my granddaughters, and it was a huge hit! It is white pine 1x4's with 4 coats of polyurethane for a smooth finish.


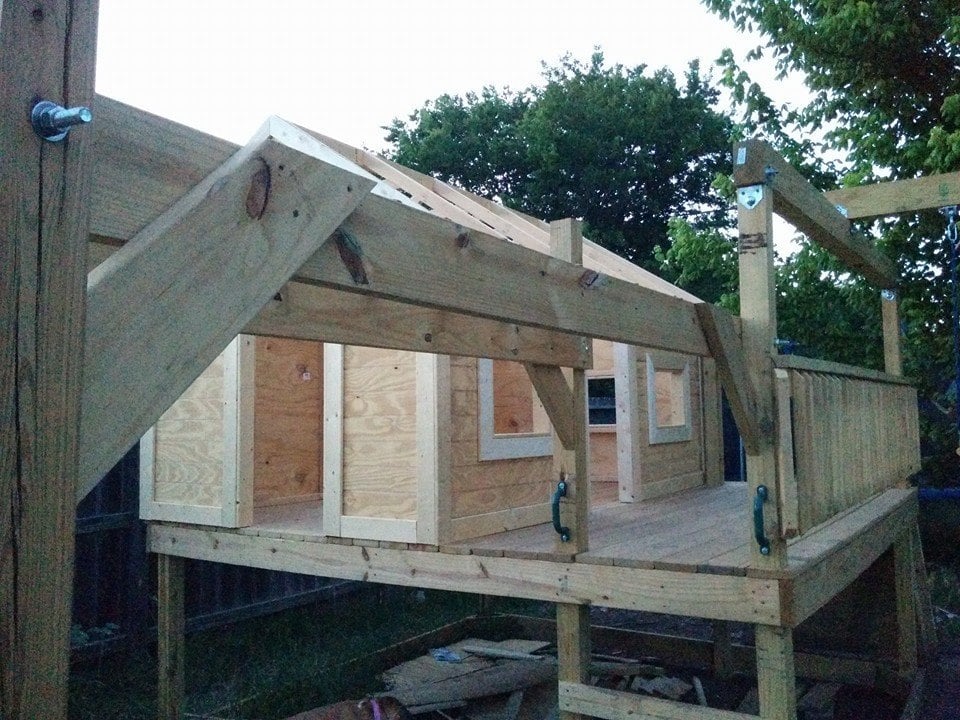
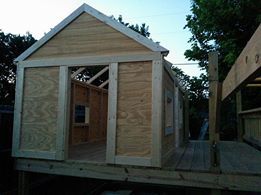
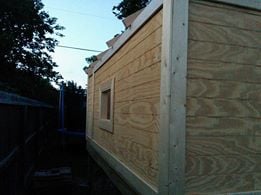
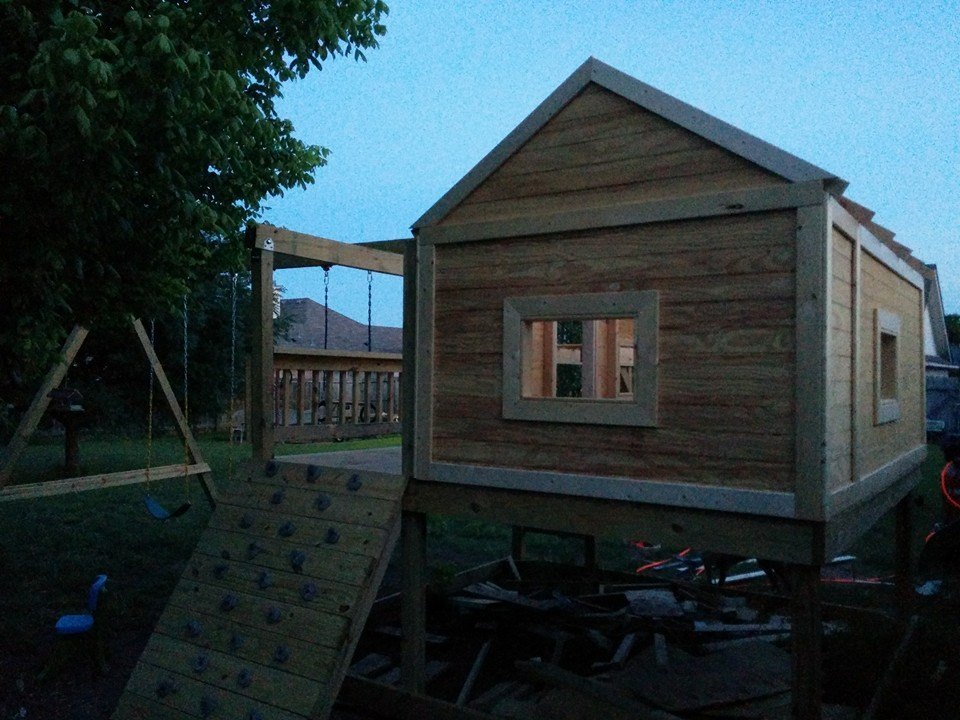
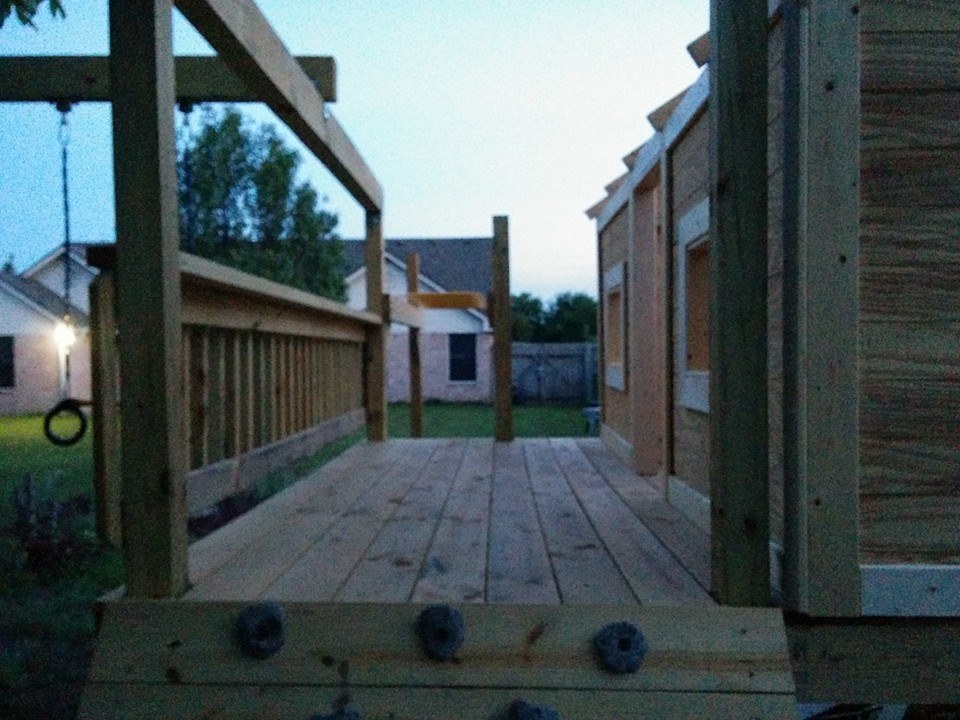
Built using the plans as a starting point and built it bigger than the plans called for.. The deck is 10x10 and the playhouse is 6x10. I used pressure treated lumber for everything but the playhouse. I still need to paint the house and stain the deck, then put the roof on.. if it would stop raining.. Once i'm done staining the deck I can put the slide back on also. ''
Swings, monkey bars, and rings / trapeze was ordered from Amazon.
Project costed more than expected but only because I had to buy the Kreg and a new hand sander. Other than that probably close to $120. Great proejct and great addition to our home!


