Community Brag Posts

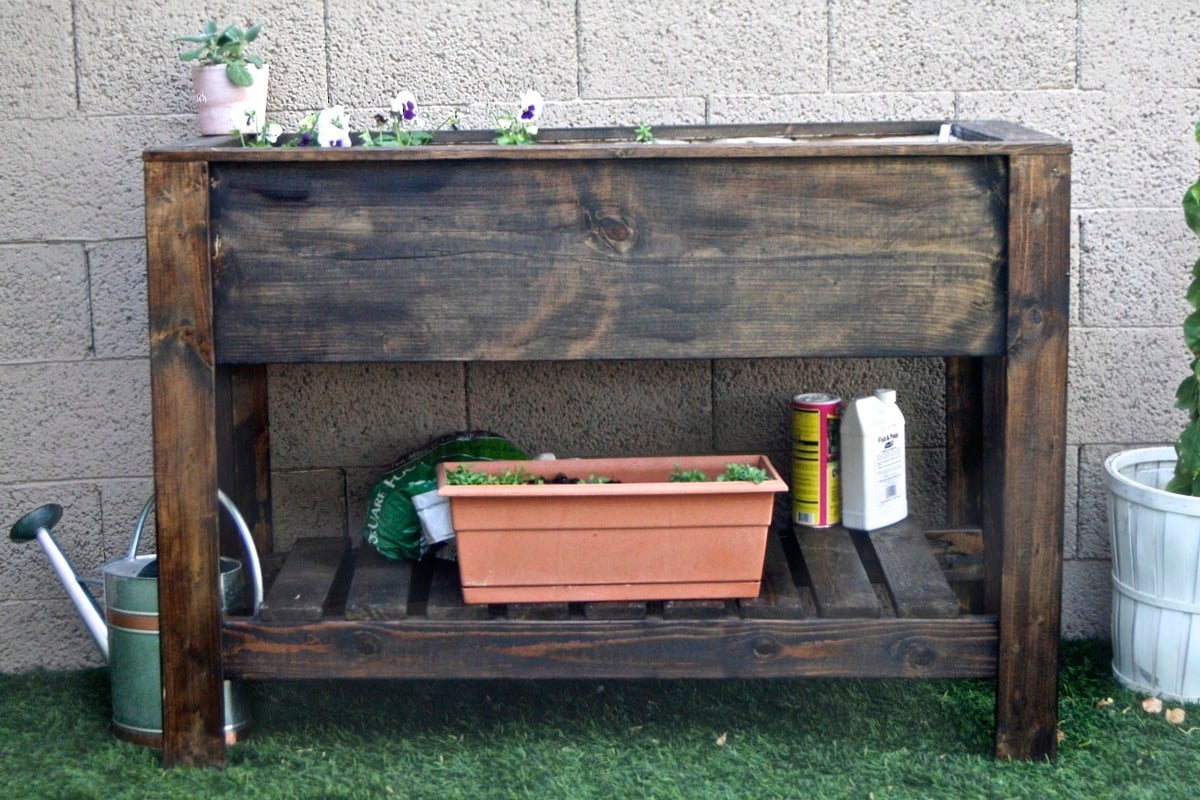
Wood Pallet Wine Rack

Wine Rack

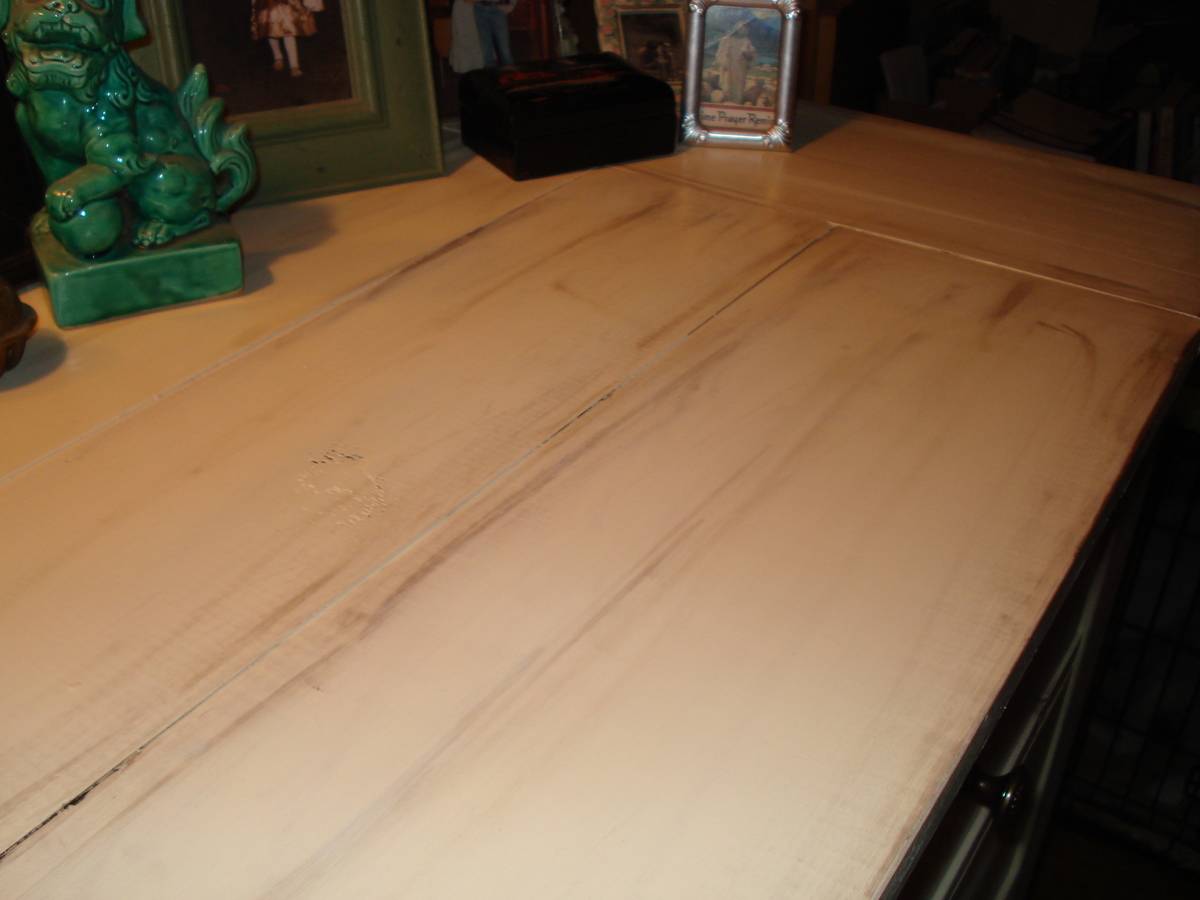
Material: Re-claimed wood

Specs: 32″ width x 5.25″ depth x 21″ height

Description: Two shelf wine rack.

I had an old pallet leaning up against my garage and decided to build a wine rack for a birthday gift.

This is a very simple project to tackle. I really liked the lettering on the pallet, so I wanted to make sure that was a feature in the finished product. I simply sealed the wood with water based poly to bring out the colors in the wood and to seal it.

If you are not a drinker it also makes a great spice rack!

Estimated Cost
$0
Estimated Time Investment
An Hour or Two (0-2 Hours)
Finish Used
Water-based poly
Recommended Skill Level
Starter Project

Little Adirondack Chair

Submitted by wabilinski on Fri, 11/07/2014 - 13:31

Built this for my daughter to enjoy sitting around the fire pit roasting marshmallows on crisp fall evenings.

Built from Plan(s)
Estimated Cost
~$30
Estimated Time Investment
Weekend Project (10-20 Hours)
Finish Used
-Valspar Duramax Exterior Matte Tintable Latex-Base Paint and Primer in One
-Cabot Satin Spar Varnish Aerosol Spray
Recommended Skill Level
Beginner

Comments

Noyehx4

Mon, 07/20/2020 - 14:50

These are so cute! Debating on sizing...my 11 year old is almost as tall as me, 4 foot 11 inches, and daughter not far behind him. Would you say this is geared towards 6-10 year old kids? Thinking of making the regular sized for my son. Or is this for 3-5 year olds?

Murphy Bed

Submitted by Anonymous (not verified) on Mon, 02/13/2017 - 19:21

More difficult build then I'm used too. Modified it to fit a full mattress but I think it turned out great! It's a lot cheaper to build than most Murphy beds to purchase out there on the market. Enjoyed these plans. Thank you Ana!

Estimated Cost
$250
Estimated Time Investment
Weekend Project (10-20 Hours)
Finish Used
Dark walnut
Recommended Skill Level
Intermediate

Full farmhouse bed

Submitted by hrsgrl337 on Thu, 11/12/2020 - 09:33

Full size farmhouse bed chalkpaint and grey glaze. I did have to modify to fit a queen mattress after so the side boards got moved out just a couple inches...

Built from Plan(s)
Estimated Time Investment
Weekend Project (10-20 Hours)
Finish Used
Chalk paint and glaze

Two-Toned shabby chic 4X4 Truss dining Table and Benches

4c4 truss with dark walnut top 4" thick, base stained dark walnut with white wash and shabby etching.

Estimated Time Investment
Weekend Project (10-20 Hours)
Finish Used
Dark walnut, white paint, matte pily
Recommended Skill Level
Intermediate

Comments

thewoodbuilder

Tue, 11/18/2014 - 04:55

I know right, i think looks even more amazing when seen in person.  I did 2 chairs to match as well. which i will load up now.  :0)

Sideboard / buffet table

My husband built this buffet table as a mother's day gift, for me. It matches my farmhouse dinning table, that he also made from Ann white's plans. He Installed soft closing drawers. It took him  about 17 hours. 

Built from Plan(s)
Estimated Cost
$260
Estimated Time Investment
Weekend Project (10-20 Hours)
Finish Used
I used a dark walnut stain.
Recommended Skill Level
Intermediate

American Girl Doll House-tweeked

Submitted by Anonymous (not verified) on Thu, 11/19/2020 - 21:09

I loved the AG Doll House plans you designed and when my granddaughters asked me to make one for them.... how could I resist. Unfortunately my 7' basement ceiling and steps created a challenge. As a 72 year old female, there was no way I could man-handle a 6' x 4' x 2' - 3/4" plywood project in addition to the challenges of my work space. I was not going to disappoint my granddaughters so I had to come up with a plan. Instead of making the doll house in one piece, I decided to make it as 3 individual boxes (the floors) and stack them on top of each other. Not only would I be able to handle them mostly by myself, but I would be able to work around the low ceiling and transport them up the steps. With only a few modifications to the original plans, I believe I came up with a workable solution.

Instead of the sides resting on top of the doll house floor, I extended the sides 3/4" longer to run past the floor for more stability. I also used 1x 2s to frame the inside at the top of each unit for more support and to help in keeping the box square. This may not have been necessary, but I just wanted to make sure it would be sturdy. The main change to the original plan was to add 1" x 3" routed trim to the outside top of each box having it extend 3/4" above the sides. This created a pocket that allowed the next floor to nestle in place and protect it from sliding off in case any little ones decided to climb on it. I also made a 2 car (30" x 30" x 24") detached garage for the AG vehicles. I did fill the holes, plugs, and errors with wood putty, sand numerous times, prime and paint. It was a real help to add some of the paint to the primer because plywood really soaks it up. I think this kept us from having to paint a 3rd coat. The floor was painted a med dark brown, but wiped with the grain before it dried to give a wood grain look.

I finished it in time for the birthday party even though it took 3 vehicles to transport it to the destination. It was a joy to see their faces when it was unveiled and to watch them climb on it of course.

Estimated Cost
$200 (+/-)
Estimated Time Investment
Week Long Project (20 Hours or More)
Finish Used
PPG Acri-Shield (Exterior Semi-Gloss 100% Acrylic Paint and Primer in one.
Recommended Skill Level
Beginner

Modified Wide Cabin Dresser

Submitted by rhettar on Fri, 01/18/2013 - 20:59

I live in a small mobile home, so I didn't make the dresser as wide. I also used a little combo of the 2x4 look from the Rustic X Console (which I already made a modified version of) I liked the 2x4 look and I wanted the dresser a little sturdier because I was making it a little taller without a bottom shelf. It's 44" wide and 40" tall. I wanted a space where my dog could have her bed out of the way (you can already see her in her spot :) ) Because I didn't make it as wide I also thought 3 drawers to the top would be too busy, so I put two to the top and one large bottom drawer. It is already given me more room for clothes.

I have to estimate on skill level and time, because I do it here and there, but I probably finsihed this with in a week. I haven't been real good at keeping track of costs because I have bought wood here and there, but this may have been around a $100 more or less?

This was also my first project with drawers. The first was a toughie...but the other two went right in (???).

But I am proud of it and love it! Without Ana and her website I wouldn't have been able to do it....

I also have 4 other dogs who started out as fosters....so more space saving projects on my list....tons to do! So, please don't look at any mess, still lots of work in progress :)

Estimated Cost
$100
Estimated Time Investment
Weekend Project (10-20 Hours)
Finish Used
I used 2 coats Behr paint and primer "Corner Stone" and Rust O Leum Dark Walnut stain (I've used Minwax before, but thought I would give it a shot). I paint and stain my pieces before I put everything together. This is just my preference I find it not as frustrating as trying to paint a big piece and getting into odd spots. The finish is what seems to be the most time consuming, waiting for the drying between coats. Before staining, I sanded around edges of pieces some enough to expose some wood. I also use a small brush for my stain mostly making a streak where the exposed wood was, use it sparingly and wipe immediately, letting the rag do the rest of the work in some places. I found this gives me the finished effect I like vs. other techniques I have seen or tried.
Recommended Skill Level
Intermediate

Comments

Ann M. (not verified)

Sat, 01/19/2013 - 04:51

Lovely build and excellent space saver too. Also, so kind to keep your furry buddies comfort in mind as well.!

ACM (not verified)

Sat, 01/19/2013 - 04:53

Lovely build! Love the adaptations to fit your space AND make a wonderful place for your furry buddies!

rhettar

Sat, 01/19/2013 - 05:20

Thank you for the comment Ann. Quite a few of my projects will have my babies in mind :)

Dana P (not verified)

Sat, 01/19/2013 - 09:19

I love the way you painted it. Looks great!

Dana P (not verified)

Sat, 01/19/2013 - 09:20

I love the way you painted it. Looks great!

Cool Dresser

Submitted by Gotwake7 on Thu, 11/13/2014 - 08:39

This project is built from a/b sanded plywood, pine select trim, and pine 2x2 furing stirps.  I was a little scared to do the drawers as i have not had great luck with them in the past.  But after watching some videos and reading the tutriol for the slides i tackled it and it came out great.  I didnt want the wheels so i made the side 2" taller and it worked out great.

Built from Plan(s)
Estimated Time Investment
Weekend Project (10-20 Hours)
Finish Used
minwax red mahogany no poly on it just stain to keep the satin look
Recommended Skill Level
Intermediate

Fancy X Desk- 4 foot version

Submitted by Anonymous (not verified) on Sat, 02/18/2017 - 17:39

Love this desk and have gotten so many compliments!

Estimated Cost
$60 worth of lumber. Already had paint and screws.
Estimated Time Investment
Weekend Project (10-20 Hours)
Recommended Skill Level
Intermediate

Queen size Farmhouse Bed

Submitted by Anonymous (not verified) on Thu, 11/26/2020 - 07:51

Stained Aged Barrel with mixed Whitewash

Built from Plan(s)
Estimated Cost
500.00
Estimated Time Investment
Week Long Project (20 Hours or More)
Finish Used
Min wax Aged Barrel
Recommended Skill Level
Advanced

Dollhouse Bookshelves

Submitted by GBolton on Mon, 01/21/2013 - 19:17

We used Ana’s plans in the Grade 12 Custom Woodworking class this semester at St. Theresa of Lisieux CHS in Richmond Hill, Ontario, Canada. Surprisingly the all boys class really enjoyed the project and there effort shows in the final products. We built them to order and sold them at cost to the other teachers to replenish the ever shrinking lumber budget.

For the first few bookcases we used wood screws,dowel plugs, and biscuit joints, but quickly smartened up and purchased a Kreg Master System. If you were on the fence about getting this system, then take our advice and go out and buy one. We now have a second system on order.

We added customizations with mitered trim pieces, custom colours, wallpapering (see pink shelf), and choice of a backer board or choosing to leave it open with trim all around. The project is such a hit, we now have 6 more shelves on-order for next semester.

Thanks for a great website.

Built from Plan(s)
Estimated Cost
$120 CAD
Estimated Time Investment
Week Long Project (20 Hours or More)
Finish Used
Lowes Valspar Signature Paint (primer + paint)
(White, Pink, Lime Green, Wild Grape)
Because we used Pine with knots we used spackling compound to seal the knots and all parts were sanded with 80, 120 and finally 220 grit sand paper. Prior to painting in all corners we ran a bead of paint-able white caulking to give a nice finished look.
Recommended Skill Level
Beginner

Comments

X Coffee Table

Submitted by AK Newbie on Sun, 11/16/2014 - 22:24

A rustic x table for our cottage!


Built from Plan(s)
Estimated Time Investment
Weekend Project (10-20 Hours)
Finish Used
Semi gloss poly.
Recommended Skill Level
Beginner

Comments

Reclaimed wood-look headboard

Submitted by TxDork76 on Mon, 02/20/2017 - 11:59

I used wacman's idea for faux reclaimed lumber to make this headboard by using a saw to score lines in the long boards to make it appear to be smaller pieces ( http://www.ana-white.com/2017/01/DIY_furniture/farmhouse-faux-reclaimed…

I played with different stains, mixing some, overlaying others. I darkened the "seams" in the boards with some java glaze

The 1x3s and 1x4s were from the bottom of the stacks at HD, so they had lots of gouges, nicks, and imperfections that were perfect for the "rustic" look.  Had to do a bit of sanding, but overall the "ugly" lumber ended up looking great.

One change to the plans I'll make next time.  the top & bottom 1x4 boards end up getting covered by the final trim 1x4s.  Next time I'll use 1x3s for the trim pieces so that a bit of the top/bottom 1x4s show.

Estimated Cost
under $50
Estimated Time Investment
Day Project (6-9 Hours)
Finish Used
different stains, some overlayed others mixed: Provencial, Red Mahogany, Ebony, Jacobean, Early American, Weathered Oak, Classic Gray, Dark Walnut, Colonial Maple.
Recommended Skill Level
Beginner

My build of the Potter Barn Keyhole Desk

Submitted by Anonymous (not verified) on Sat, 11/28/2020 - 15:54

I know it's been a while since you and Pneumatic Addict worked on the Pottery Barn Keyhole Desk but I wanted to let you know I was so inspired by it that I built my own. I also made a build video: https://youtu.be/AzkjgI3VmAo. Thanks for your great inspiration!

Estimated Cost
$700
Estimated Time Investment
Week Long Project (20 Hours or More)
Finish Used
Dark Walnut
Recommended Skill Level
Intermediate

Comments

Tryde Side Table

Made a couple of Tryde side tables for our living room along with a Tryde coffee table and kids country bench.

Estimated Time Investment
Day Project (6-9 Hours)
Finish Used
Dark Walnut Danish Oil
Recommended Skill Level
Intermediate

new mudroom!

The drawers were my very first project!  I have never built anything before and I loved how deep the drawers were here.  I'm really thankful my dad helped!  Super happy with how it turned out!

I picked up the hutch at an old barn sale for $65.  It's perfect to hold all of our coats and stuff and the shoe drawers are super deep and hold ALL our shoes.  Here's our story...   http://onblissstreet.blogspot.com/2014/11/mudroom-makeover.html


Built from Plan(s)
Estimated Cost
$75
Estimated Time Investment
Weekend Project (10-20 Hours)
Finish Used
White paint
Recommended Skill Level
Beginner

Comments

OnBlissStreet

Fri, 11/21/2014 - 20:14

Thanks so much!  Love your site and how "beginner friendly" so many plans are!  I'll work up to the hard ones!

Retro Art Station

We decided to turn this little retro play kitchen into a kid art station. It's so adorable.

Estimated Cost
$60
Estimated Time Investment
Afternoon Project (3-6 Hours)
Finish Used
Paint in white and Aspen Aura
Recommended Skill Level
Intermediate

Comments

Tall Planters

These were made using the Tall Planters plan...4 cedar pickets for each one. I also used cedar rough cut trim for the 1x2's and 1x3's. They are painted to match cedar shutters I made for my parents mountain house. I used Cabot's Solid Color Acrylic Deck Stain in Evergreen to protect the planters exterior. The only alteration to the plans was adding the top trim. I used 1x2's cut at 16" long each on a 45 degree angle to form the box. I glued and nailed together the trim before nailing into the tops.

Built from Plan(s)
Estimated Cost
$35.00 ea
Estimated Time Investment
Afternoon Project (3-6 Hours)
Finish Used
Cabot Solid Color Acrylic Deck Stain (tinted to Evergreen)
Recommended Skill Level
Beginner

Raised Planter Box

Submitted by ang312 on Fri, 01/25/2013 - 12:24

Living in Tempe, Arizona, I am always in need of creative planter boxes so that I can garden with more ease. I loved this tutorial and recommend it to anyone, even beginners! A full tutorial can be seen here: http://www.barerootgirl.com/homemade/2012/11/5/homemade-diy-raised-gard…


Estimated Cost
$30
Estimated Time Investment
Weekend Project (10-20 Hours)
Finish Used
Minwax Stain in Provincial
Recommended Skill Level
Beginner
Seasonal And Holiday

Balin Console Table

My husband built this in his spare time and I stained it, makes a great addition to my foyer!


Built from Plan(s)
Estimated Cost
About $150
Estimated Time Investment
Week Long Project (20 Hours or More)
Finish Used
General Finishes Java, applied wood conditioner 15 minutes before staining. One coat of stain on table top and 3 on bottom. This gel stain really does a better job on pine than other stains.
Recommended Skill Level
Beginner

Comments