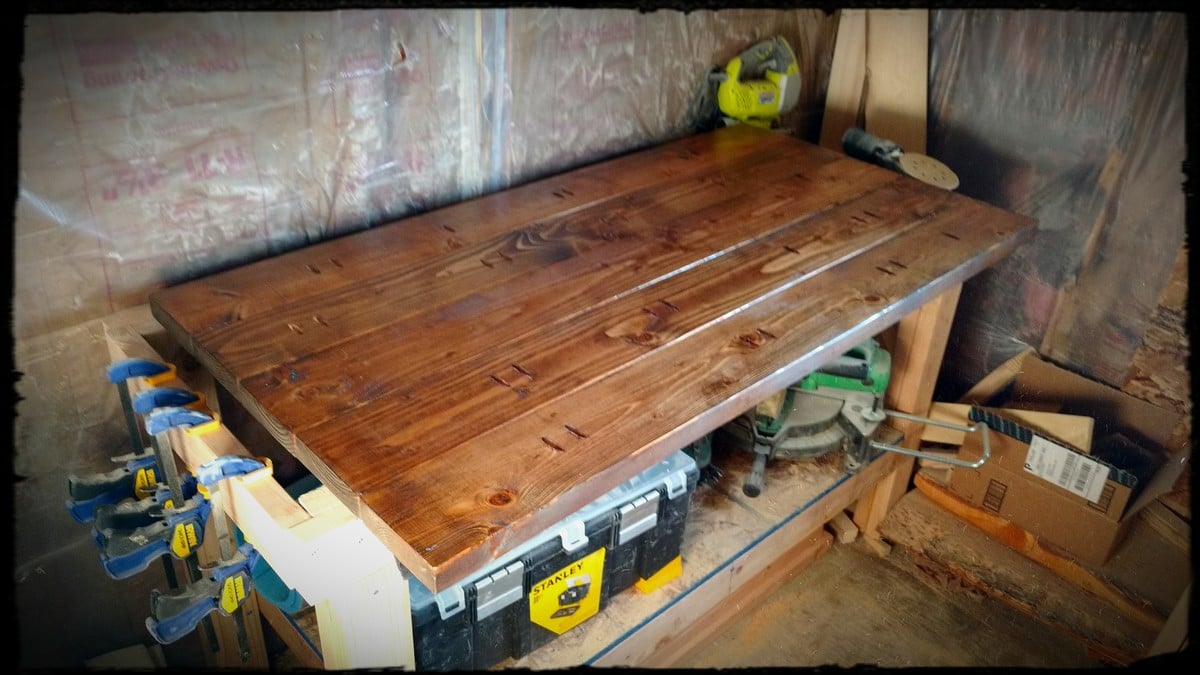
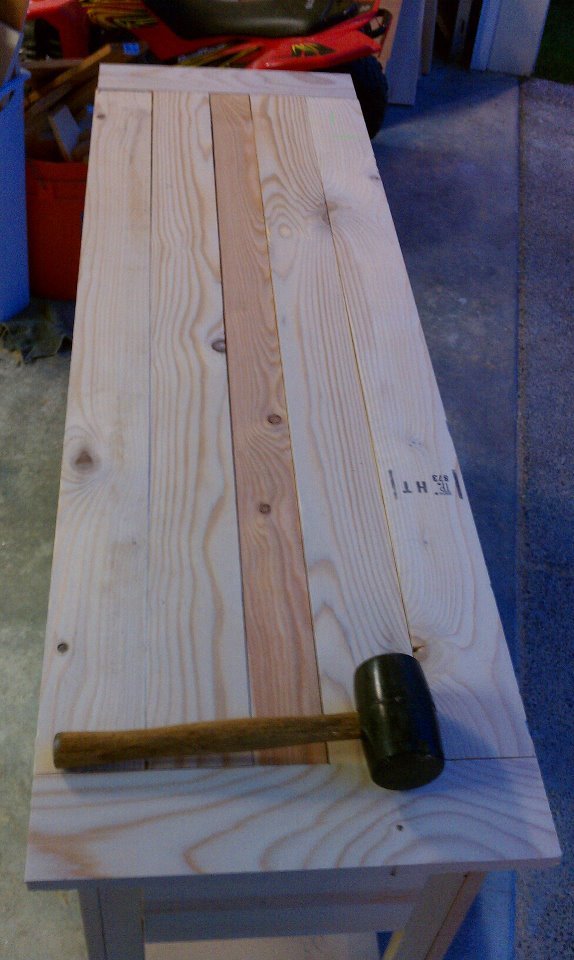
Small entry table
First attempt at trying this.
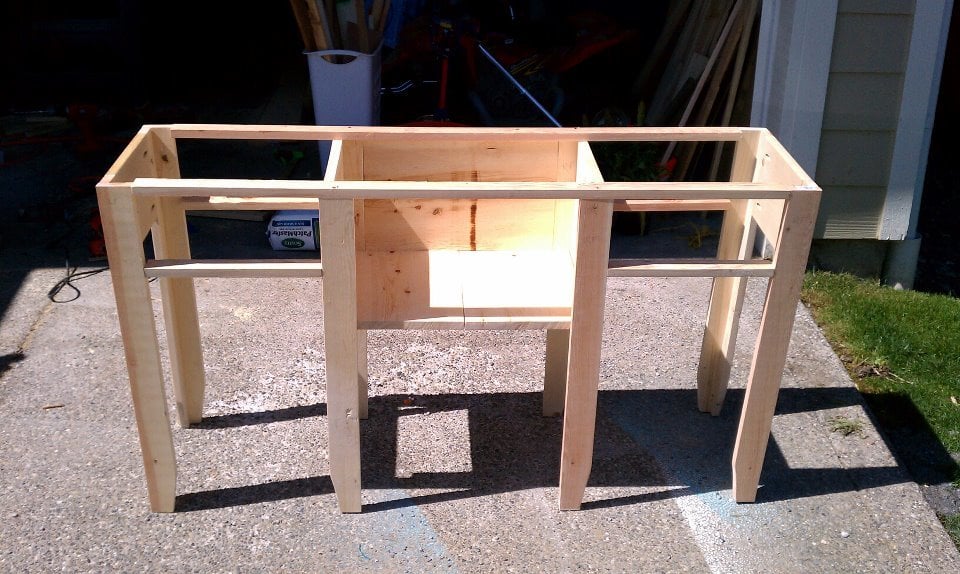
Built from Plan(s)
First attempt at trying this.

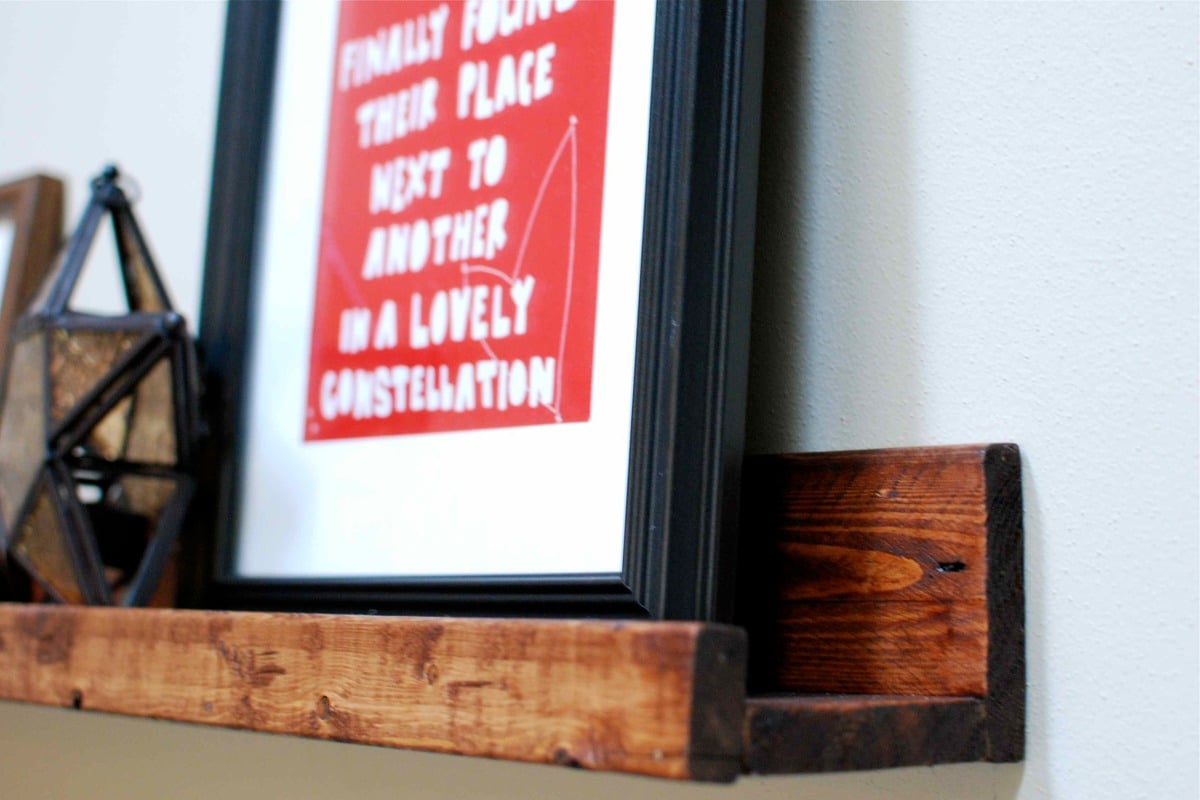
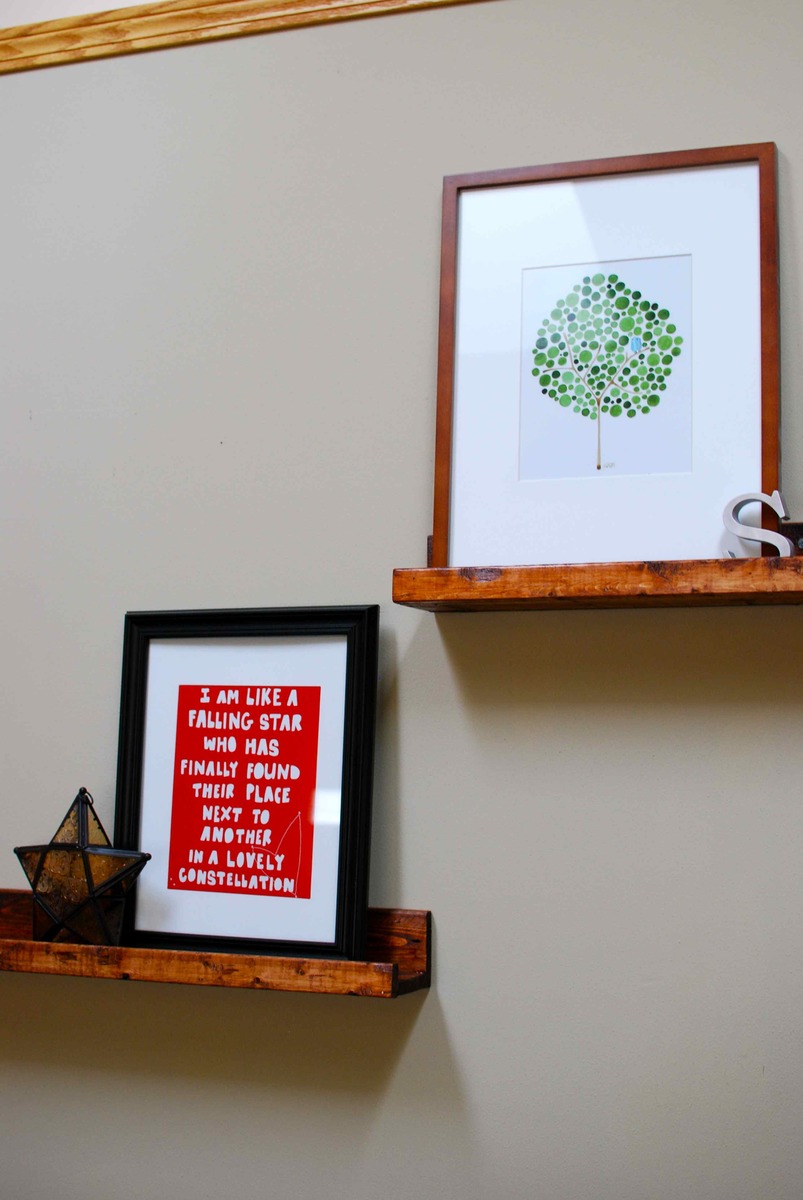
Our take on the 10 dollar ledges. We definitely wanted a rustic look. I love them!
Mon, 10/08/2012 - 00:37
Hello, these are gorgeous! What kind of stain/finish and in what color was used on these shelves? Really love it and would like to know how to make them look liek this.
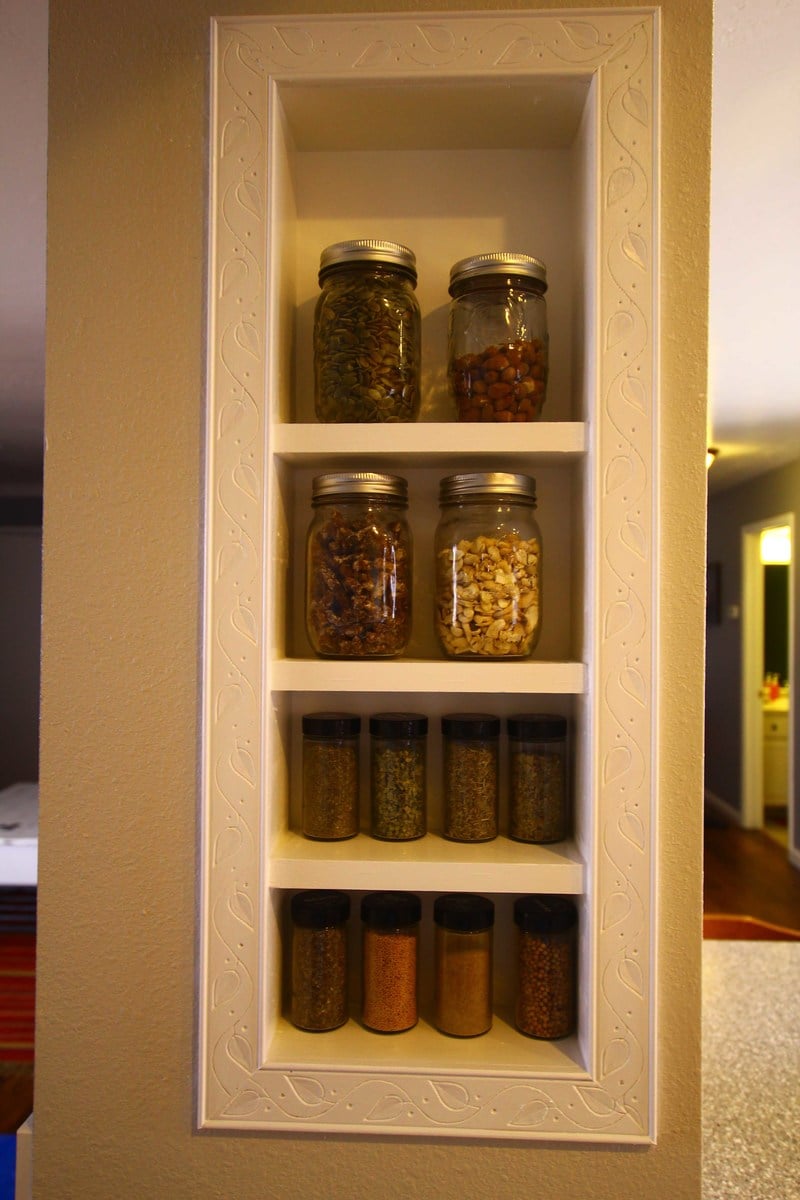
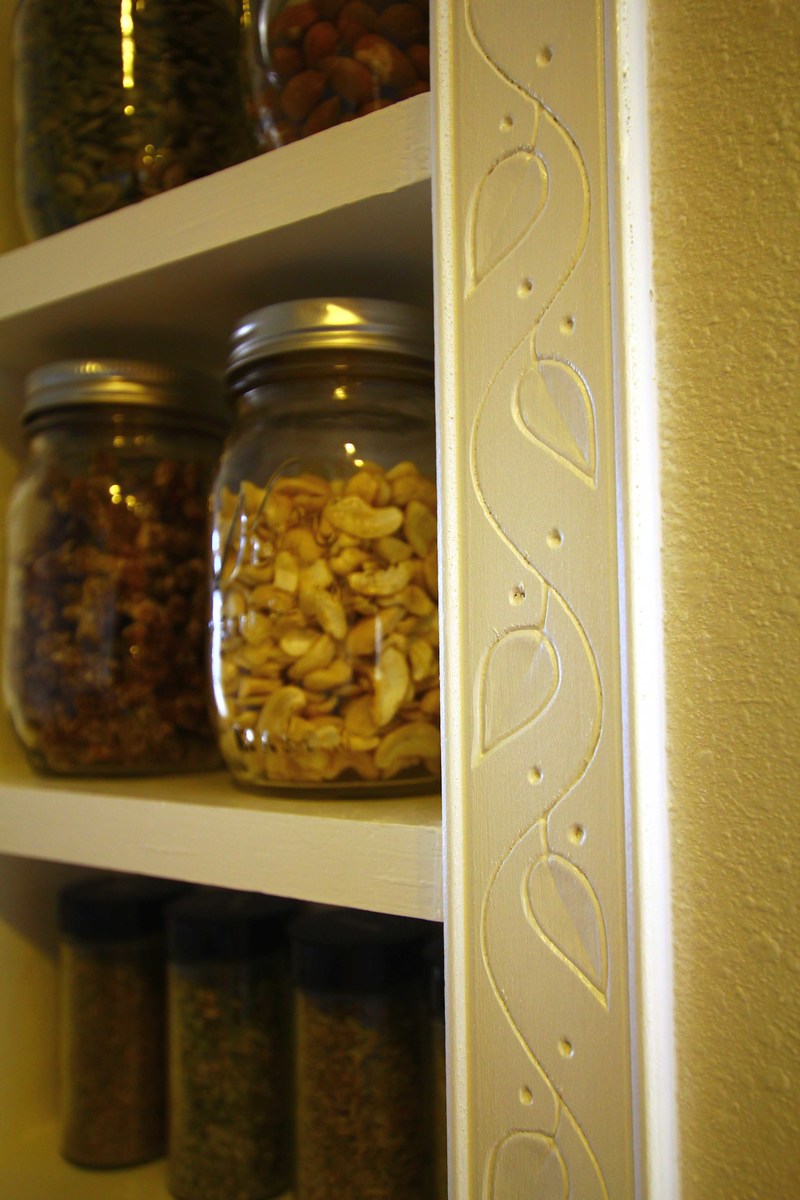
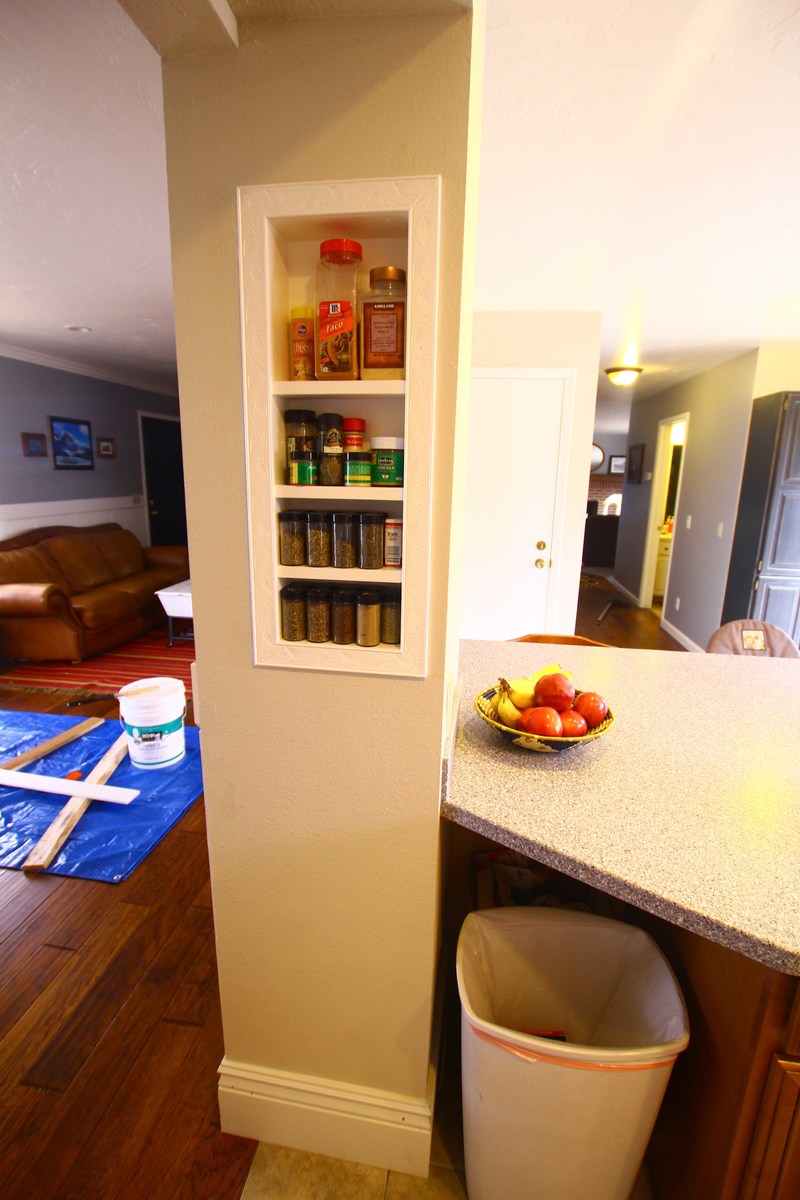
I followed the spice rack plans but put this right inside my wall and added a face frame. I love the detail in the carved wood!
This was my 4th build, and only took a few weekends to do, working on it a few hours at a time each day. Pretty easy, though I didn't include the X braces on the sides due to miscutting them (just got the angles backwards). I used Minwax Provincial and Minwax polyurethane. Excuse the mess in the photos.

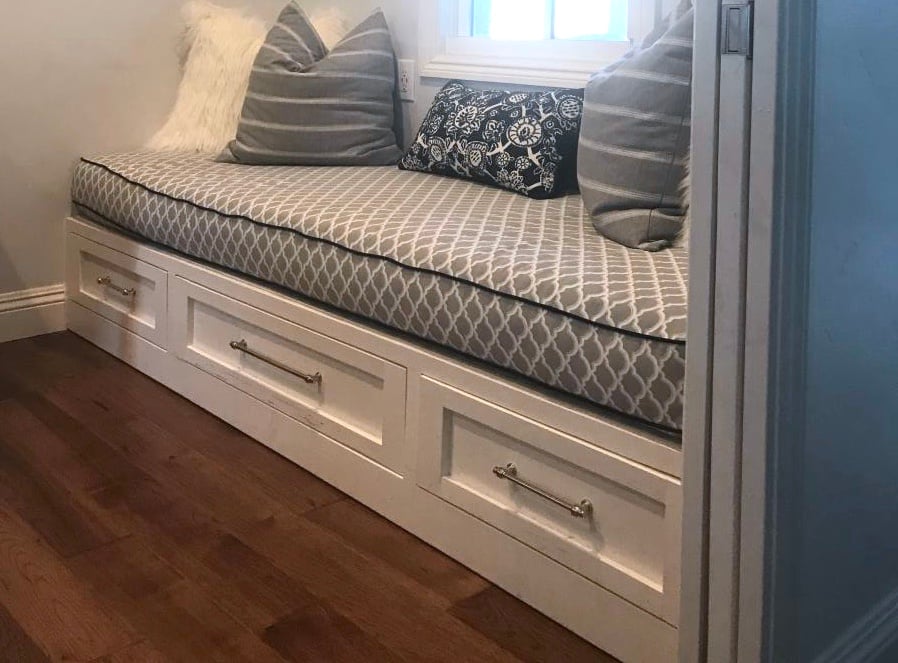
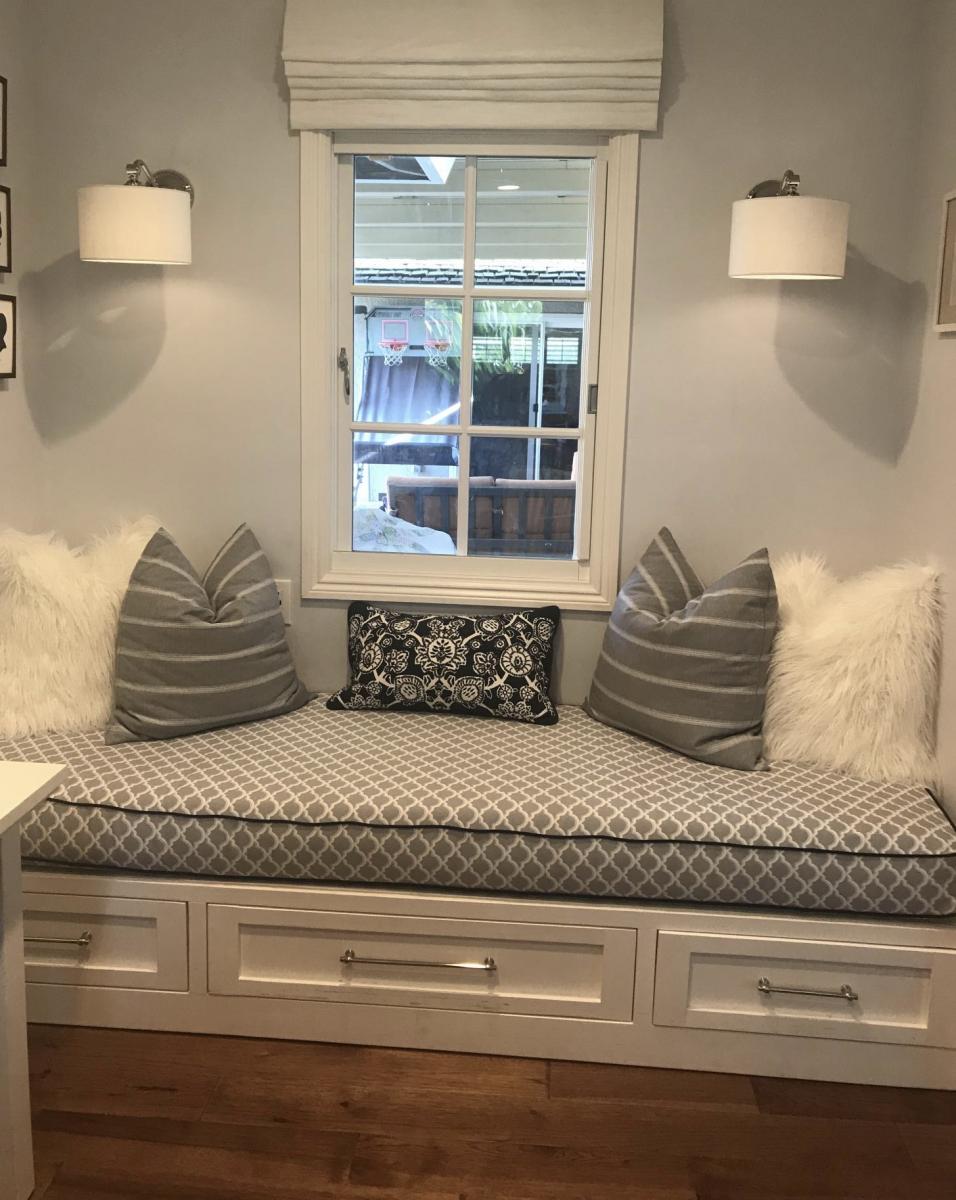
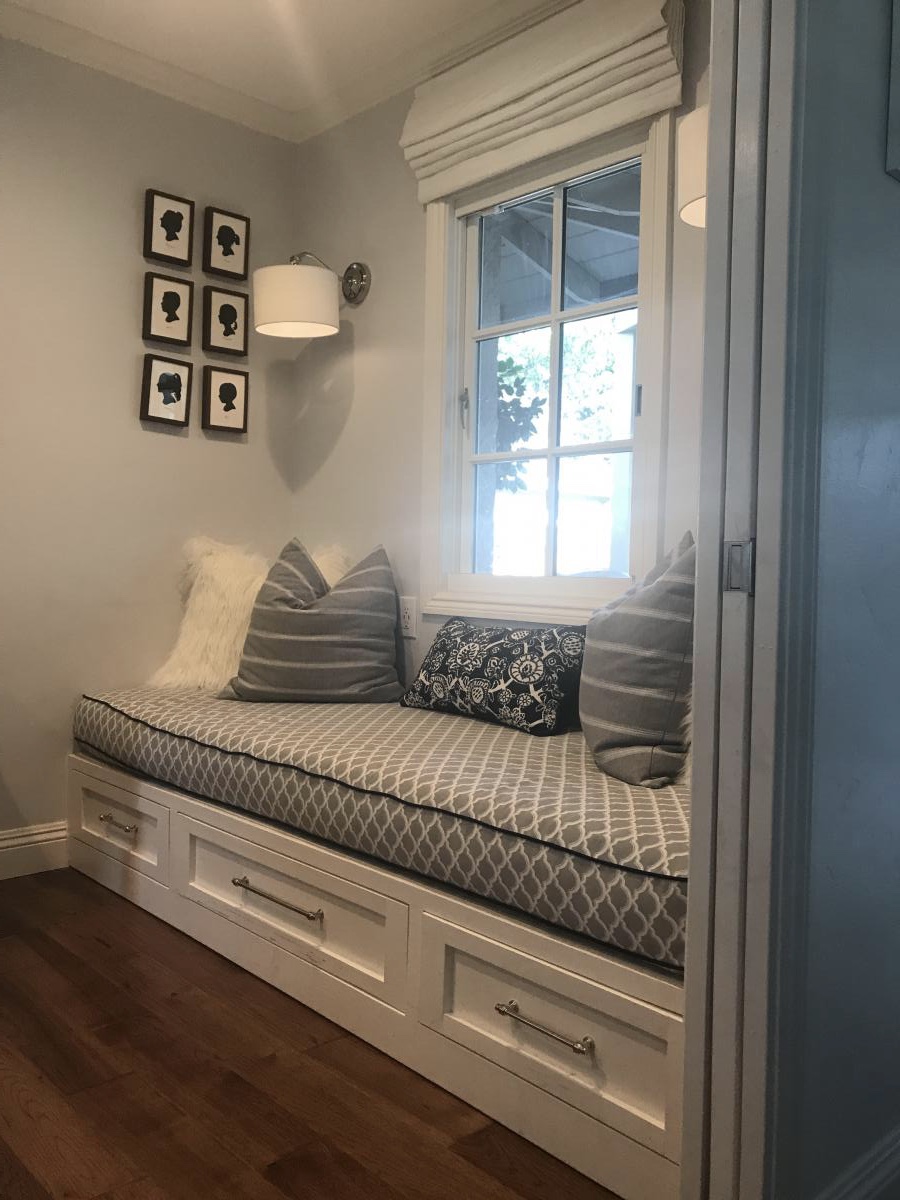
Ana White, you inspired me! My husband bought me a miter saw for Christmas but I was too afraid to use it for all of my woodworking dreams...and then I found your blog!
I am a mother of six young kids but I watched your videos over and over and I reworked your plans to fit our little build-out and voila! We are beyond thrilled with the results! We have a new bed for overnight guests and a great reading nook for 2-3 people at a time!
Thank you for empowering women in the BEST way. My husband was there to help me with the heavy lifting and to cheer me on when I needed it. But if I hadn’t found you, I’m not sure I would have tackled it in the first place. Thank you and God bless your family!!

Sat, 03/14/2020 - 14:11
We are building a bed for my son with drawers. Would you mind giving the dimensions of the drawers you mad? Thank you

Extra large chalk board for church coffee shop. Made from plywood 90 x 40 (cut by Home Depot), chalk board paint, pine boards for frame. Used stencils for most lettering. The board on right is attached with Velcro strips so it’s removable so that I can change out every season. Super easy to build.
Sheri Robertson
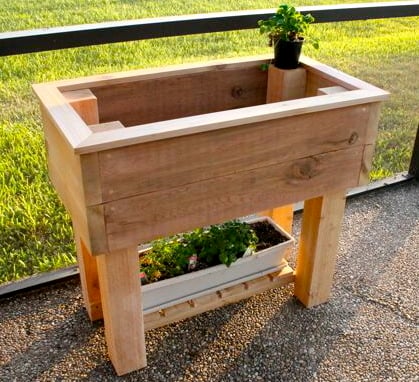
My husband and I decided that we want to learn how to do some gardening and thus decided to build an elevated planter box. A full tutorial is available here
http://sawgrasshome.com/?p=1495
We love it and hope you will too!
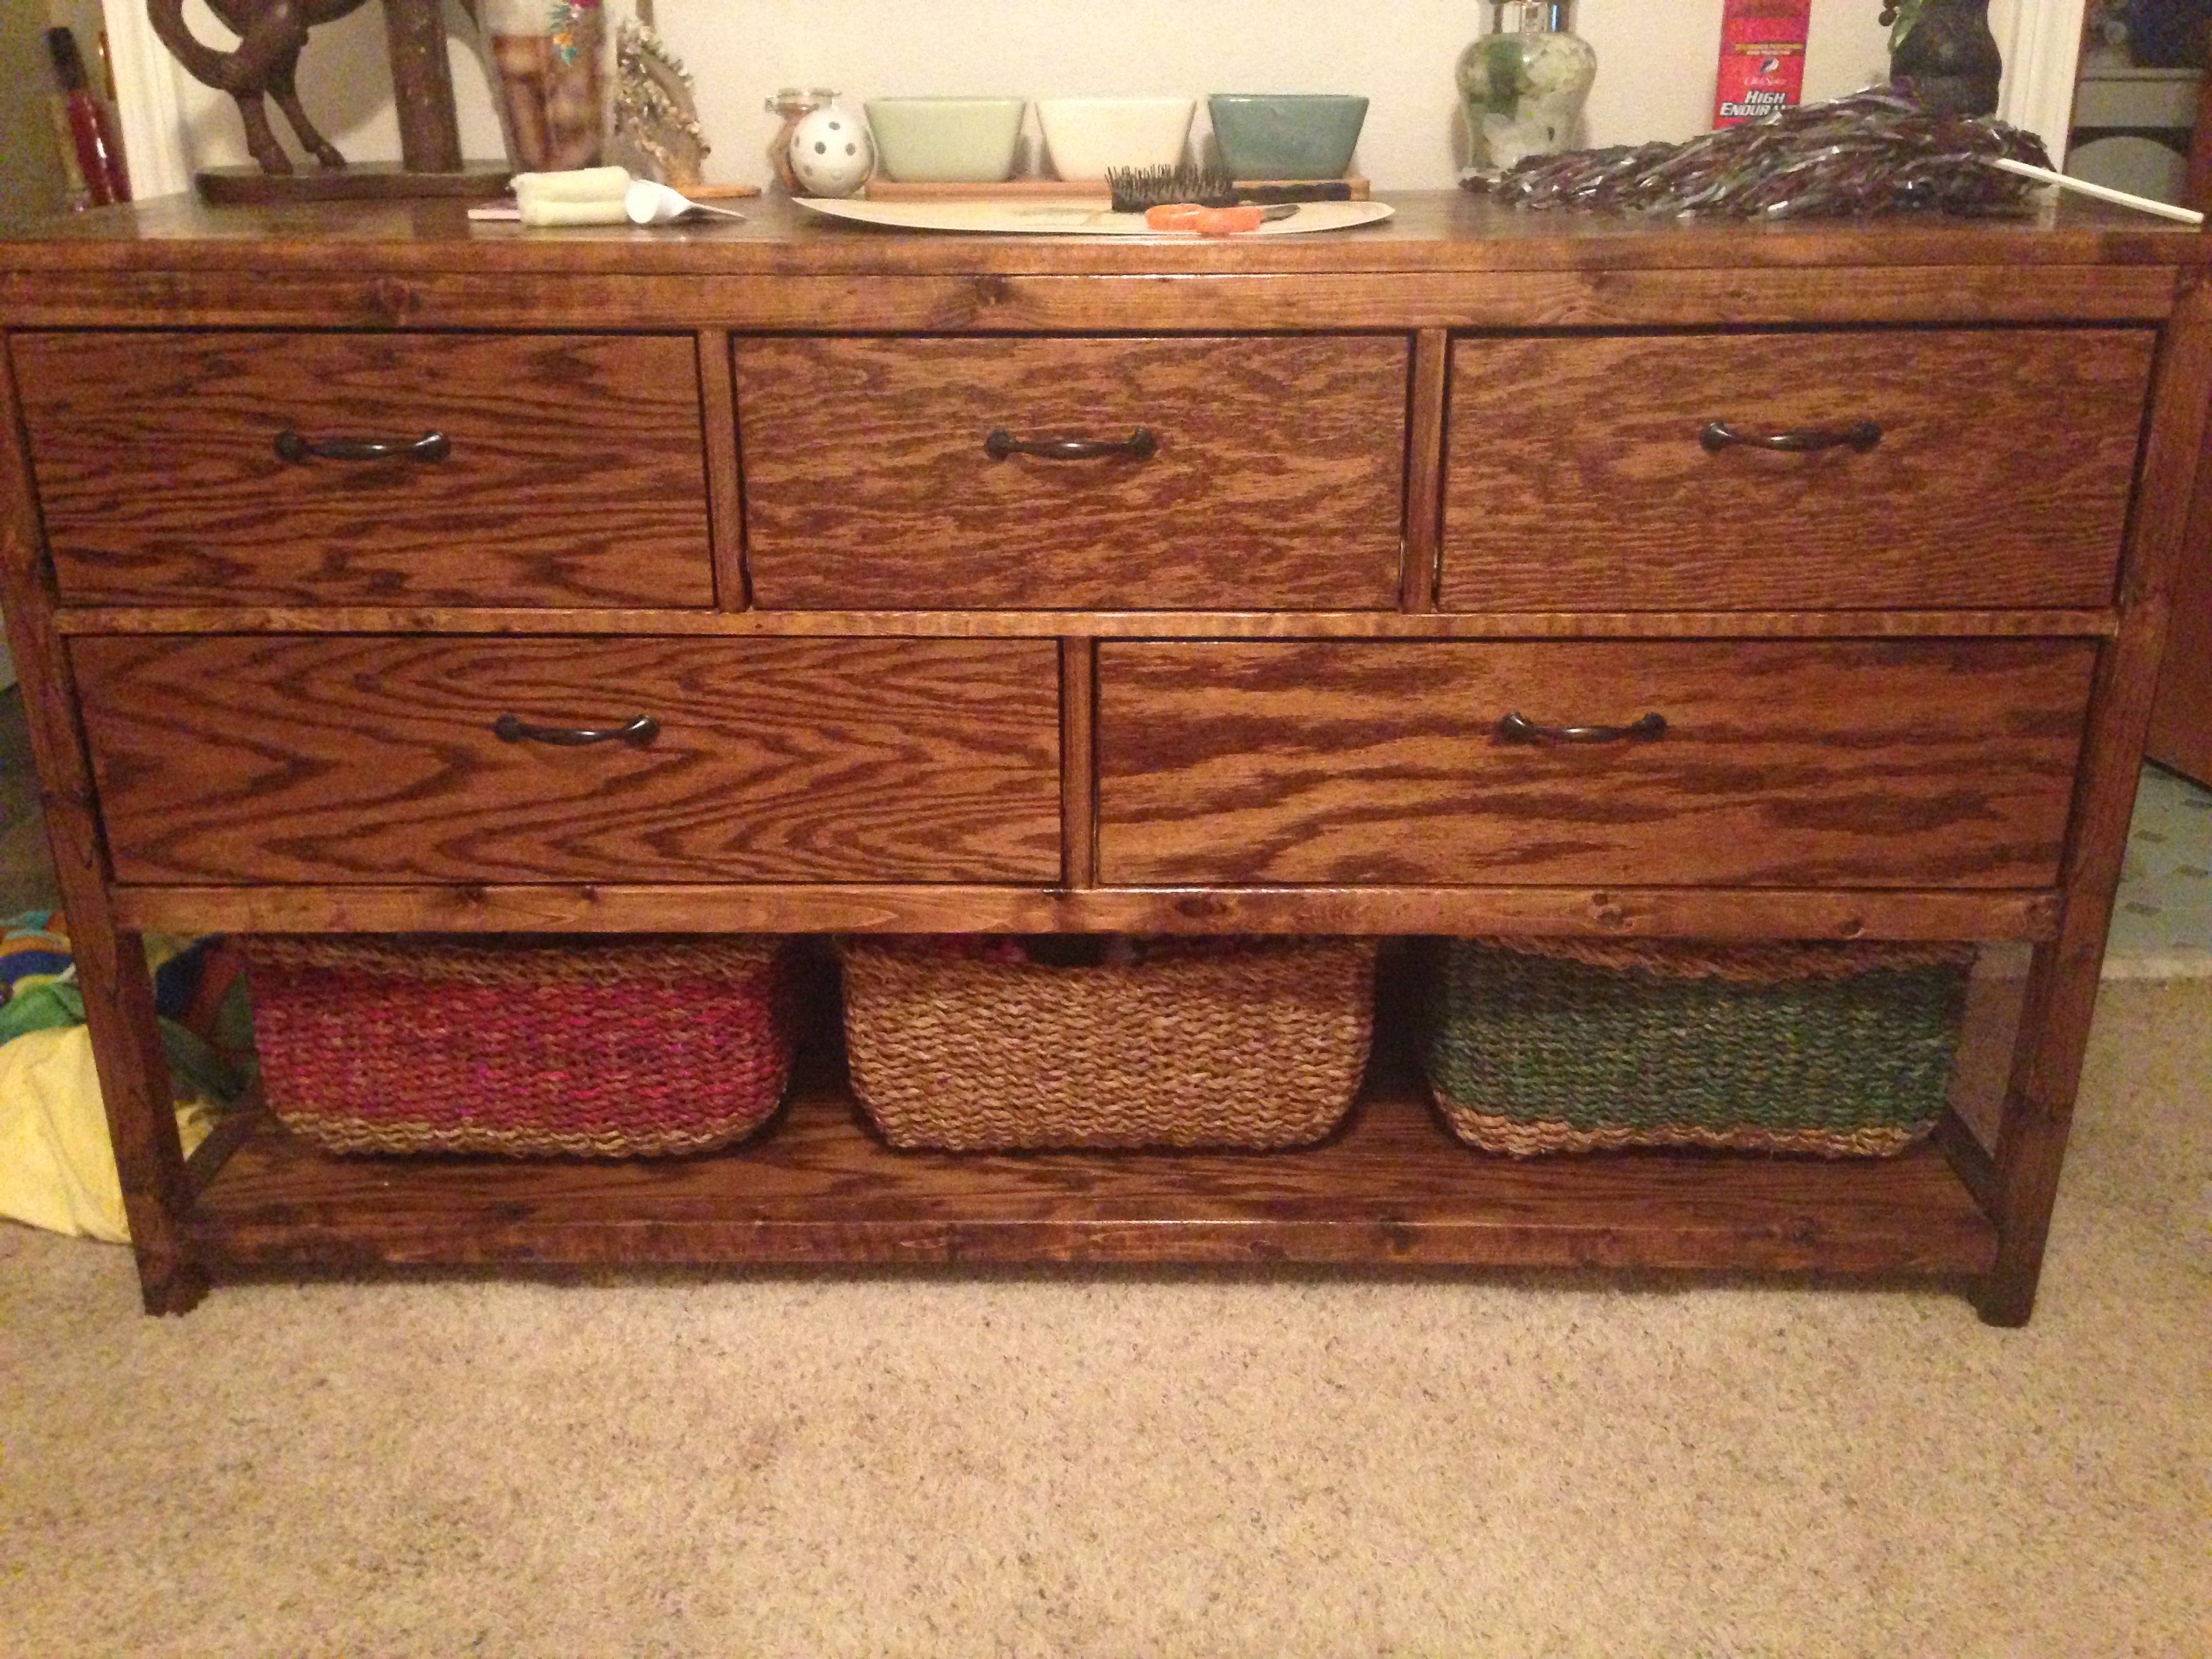
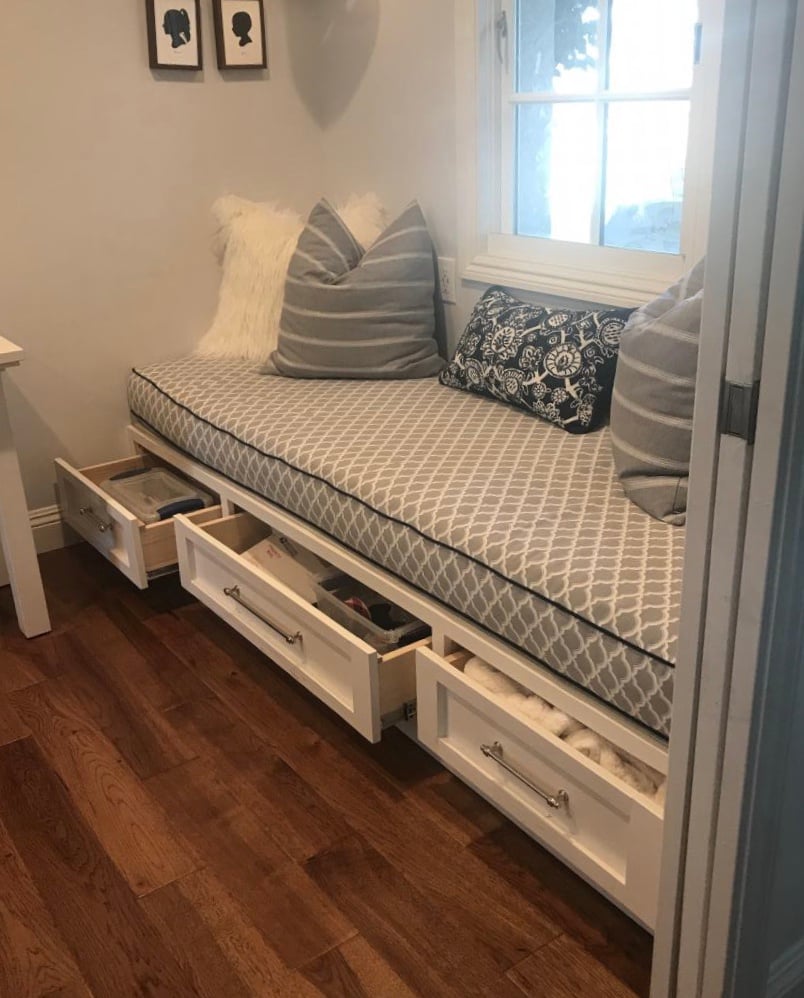
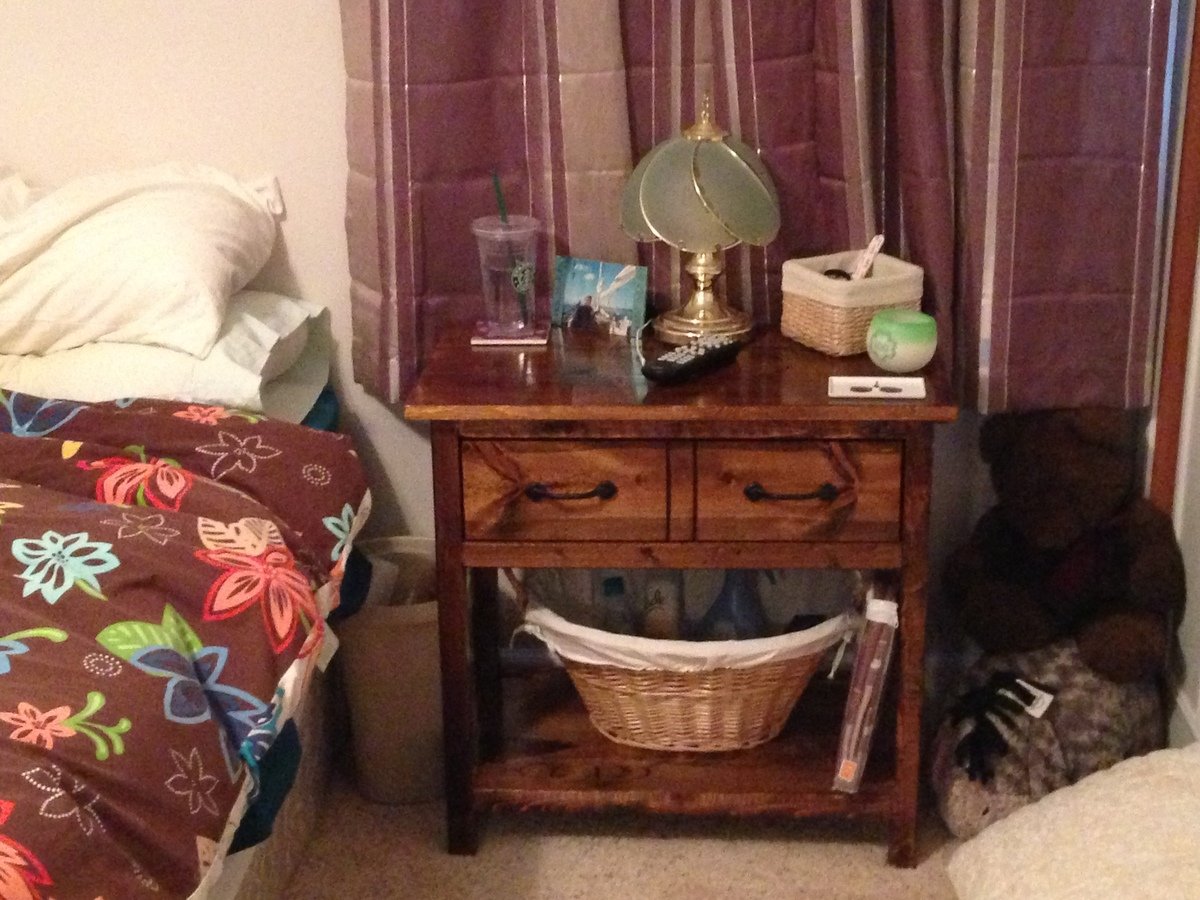
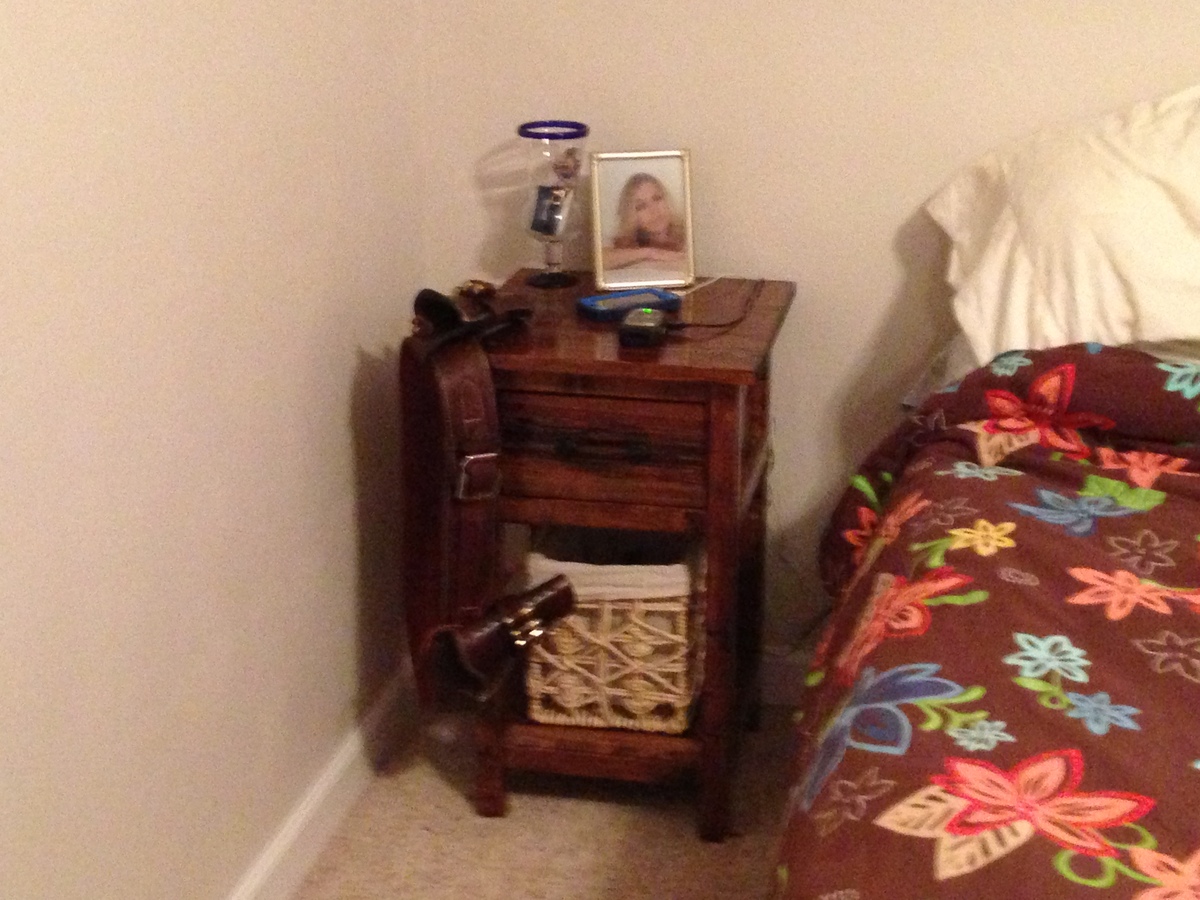
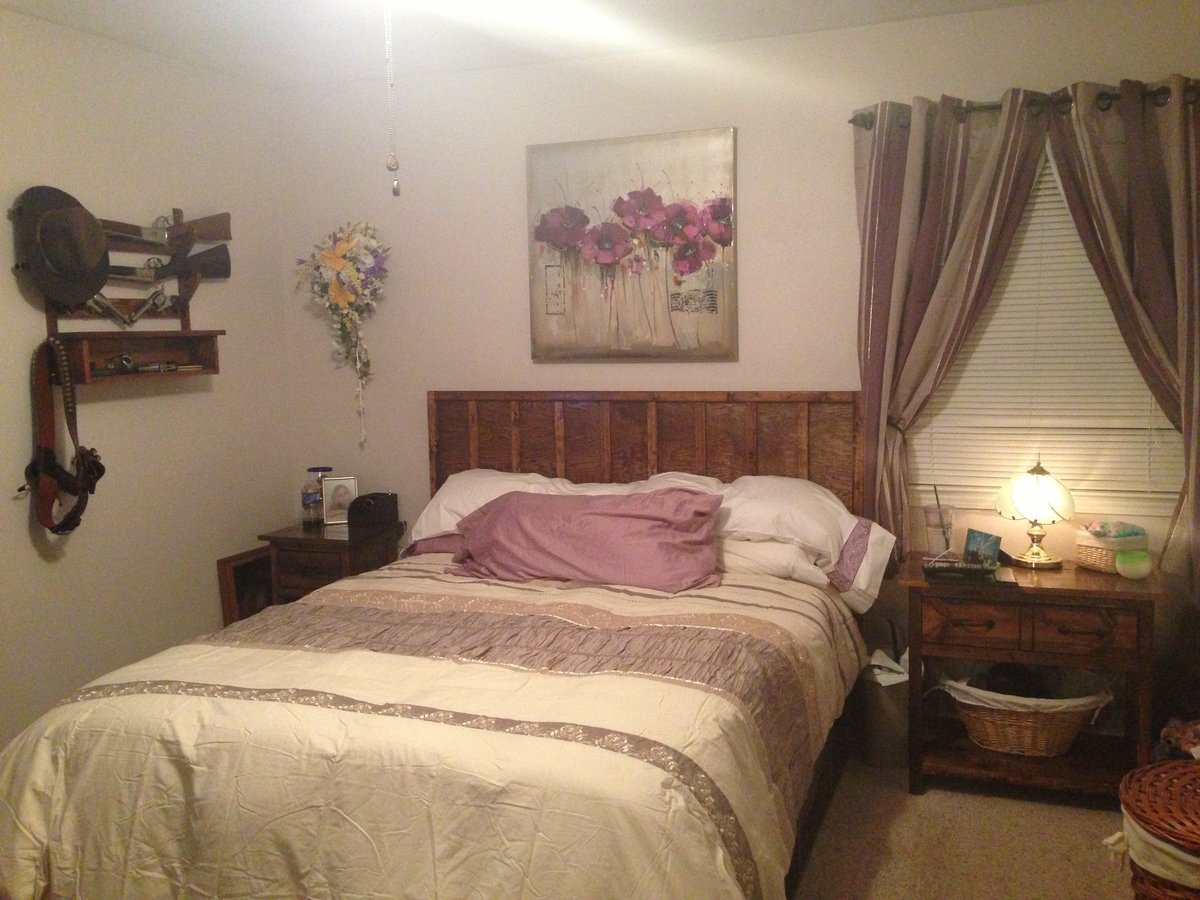
This was my first big project...I wanted to get rid of the store-bought bedroom set that overwhelmed our small room, but I still needed to keep all of the storage space it provided. I started small with the Farmhouse Nightstand, then moved to a double size nightstand. I couldn't stop once I got rolling! The most challenging was the dresser, but I have no complaints! It was a wonderful challenge. Lastly, I made a queen platform storage bed - it has open cubbies underneath with baskets for drawers. I couldn't be happier or prouder of how this came out, our bedroom looks 10 times bigger! I've always been a do it yourself kind of gal - but I surprised myself with this one!
The tables were quick to build, they can both be done in a day. The dresser was a weekend project as was the bed. The finishing has to be done over several days. I'd say this could be done over a week if you have the time. I did this over 3 weekends and finishing in the evenings after work.

Fri, 01/31/2014 - 20:47
Your farmhouse bedroom looks awesome! Looks like you used all your available space beautifully and to its best advantage. And the finish is gorgeous! Great project!

Fri, 01/31/2014 - 22:46
You did a great job and I love the finish!! Im looking at building the dresser soon.
I thought I'd wait and take these glorious after photos once I was done - but nevermind that idea. Here are some pictures of progress, start to finish. I still plan to build some shoe cubbies for the towers so that my wife has a little more shoe-room.
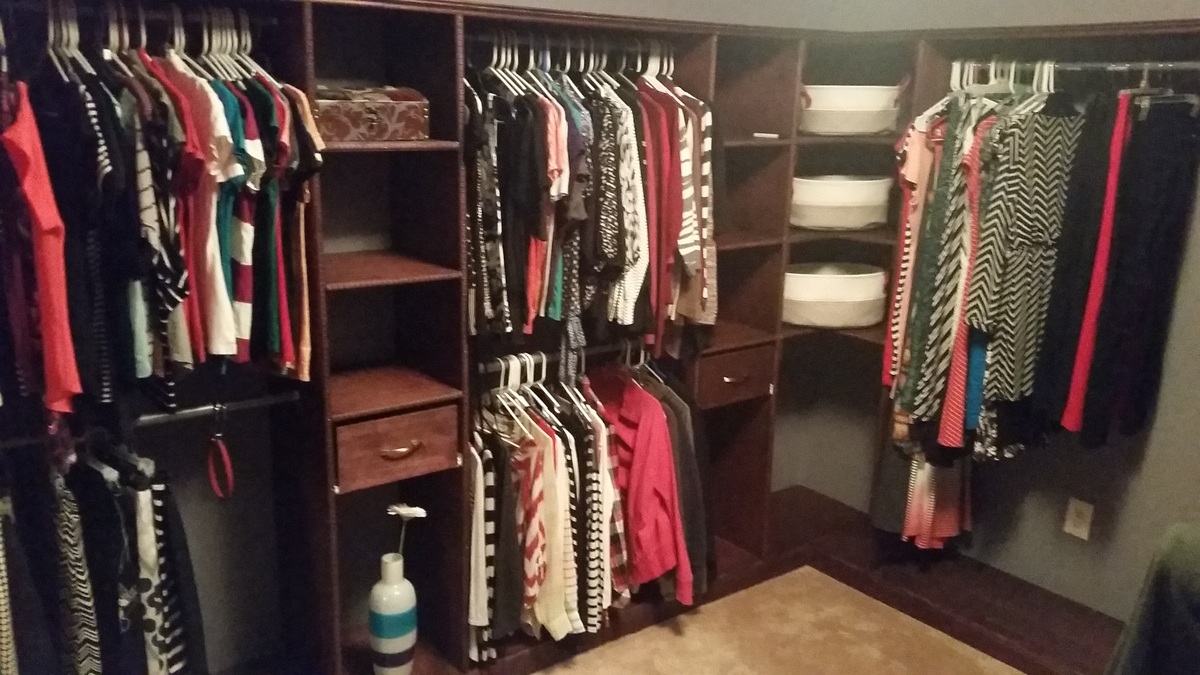
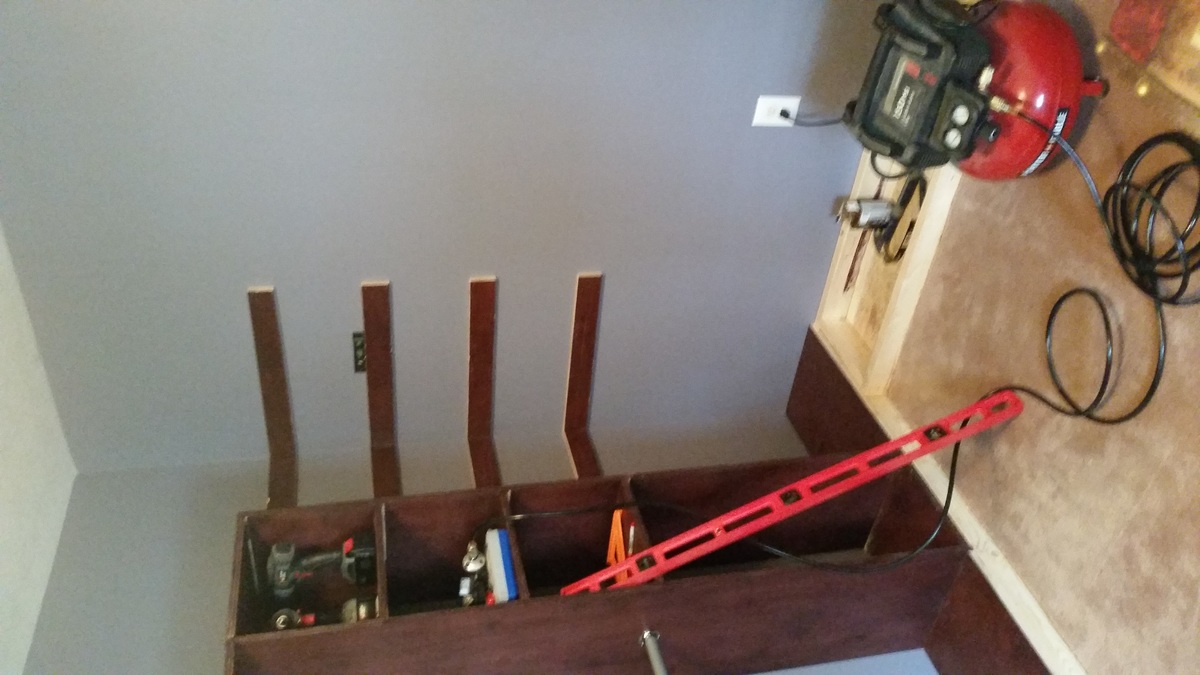
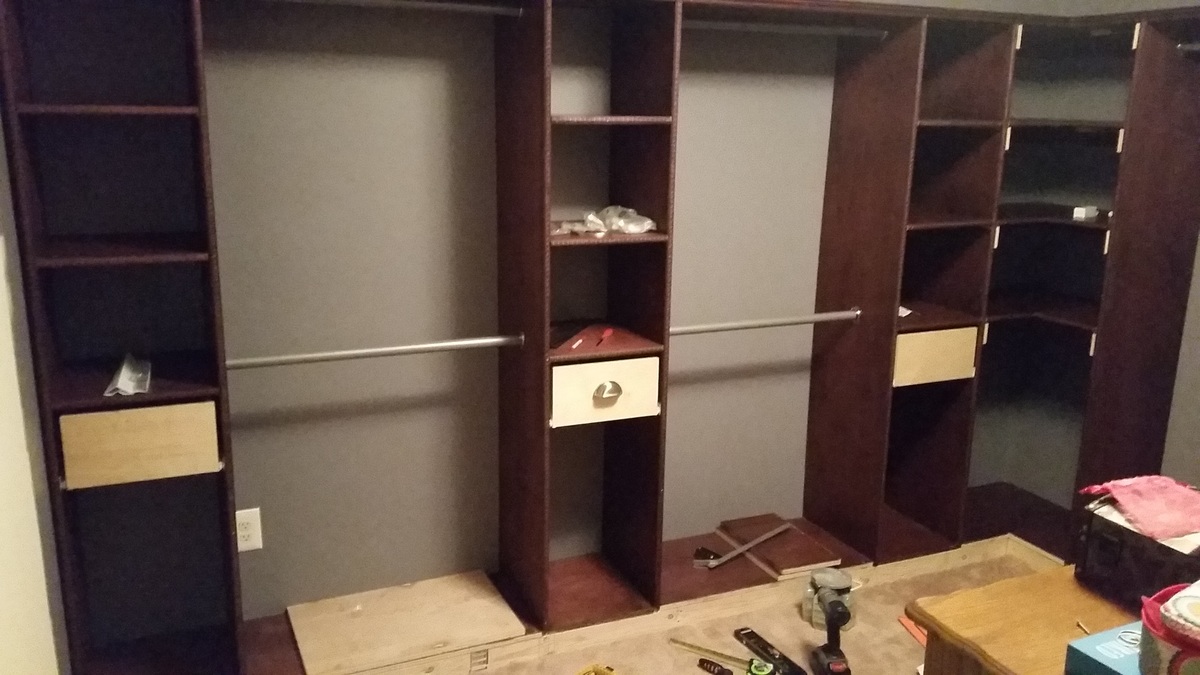
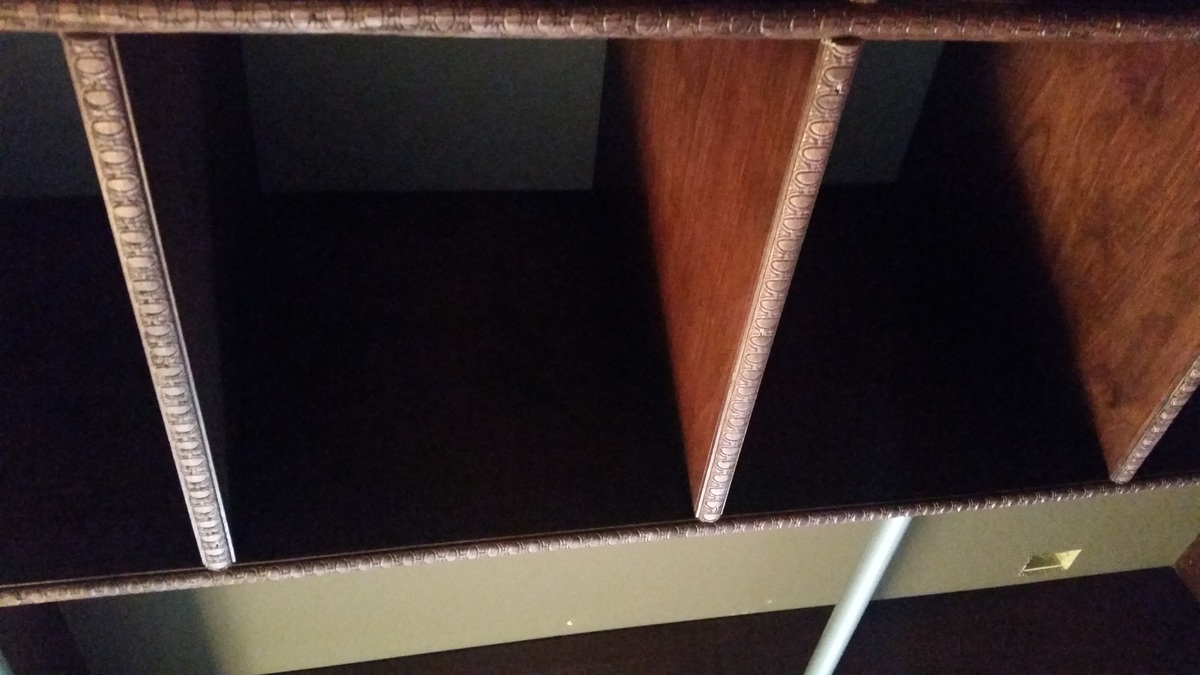
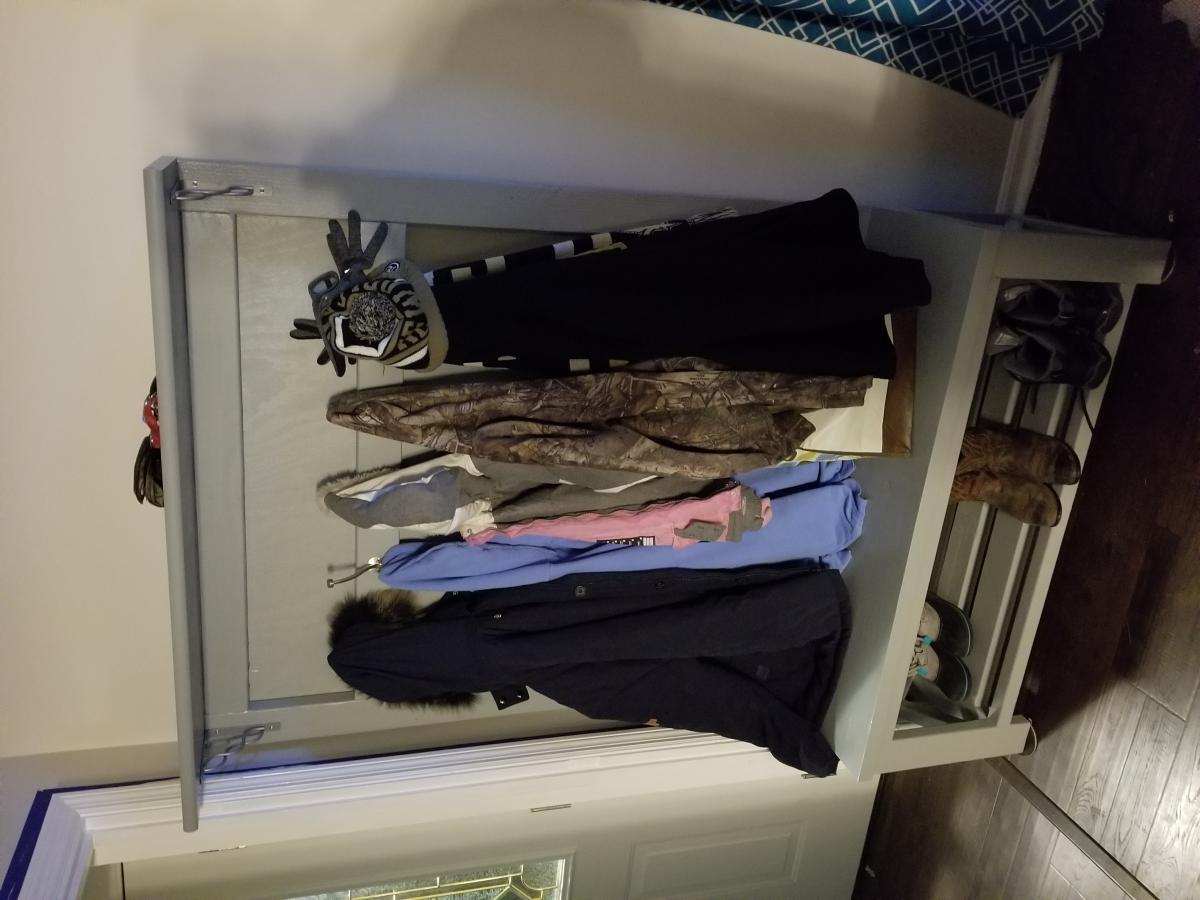
We have a 5th bedroom directly off the master with a double door entrance where the 5th bedroom's closet would have been. The room had been an office for the previous owner and my wife decided it would be a perfect closet for her. I followed the plans quite closely for the towers. I wish I had considered my 8+ foot ceilings and just built the towers taller because 1) storing stuff on top will look messy, and 2) The hanger rods aren't spaced quite well enough for longer clothing. Because of this, I had to build her another hanger on the other side of the wall, which increased the complexity of the project (corner shelves, more wood, more staining, more finishing, etc). In the end, I think it turned out great. I will walk through the process very quickly.
That is pretty much it. I think I have about $500-600 in it. Probably 60-70 hours. If I did it all over again, I could do it better and faster and on the same budget. As noted in the plans, SQUARE is the most important thing. I had to fix all the tower shelves once I had them mounted to the wall because they just were not level/square enough.

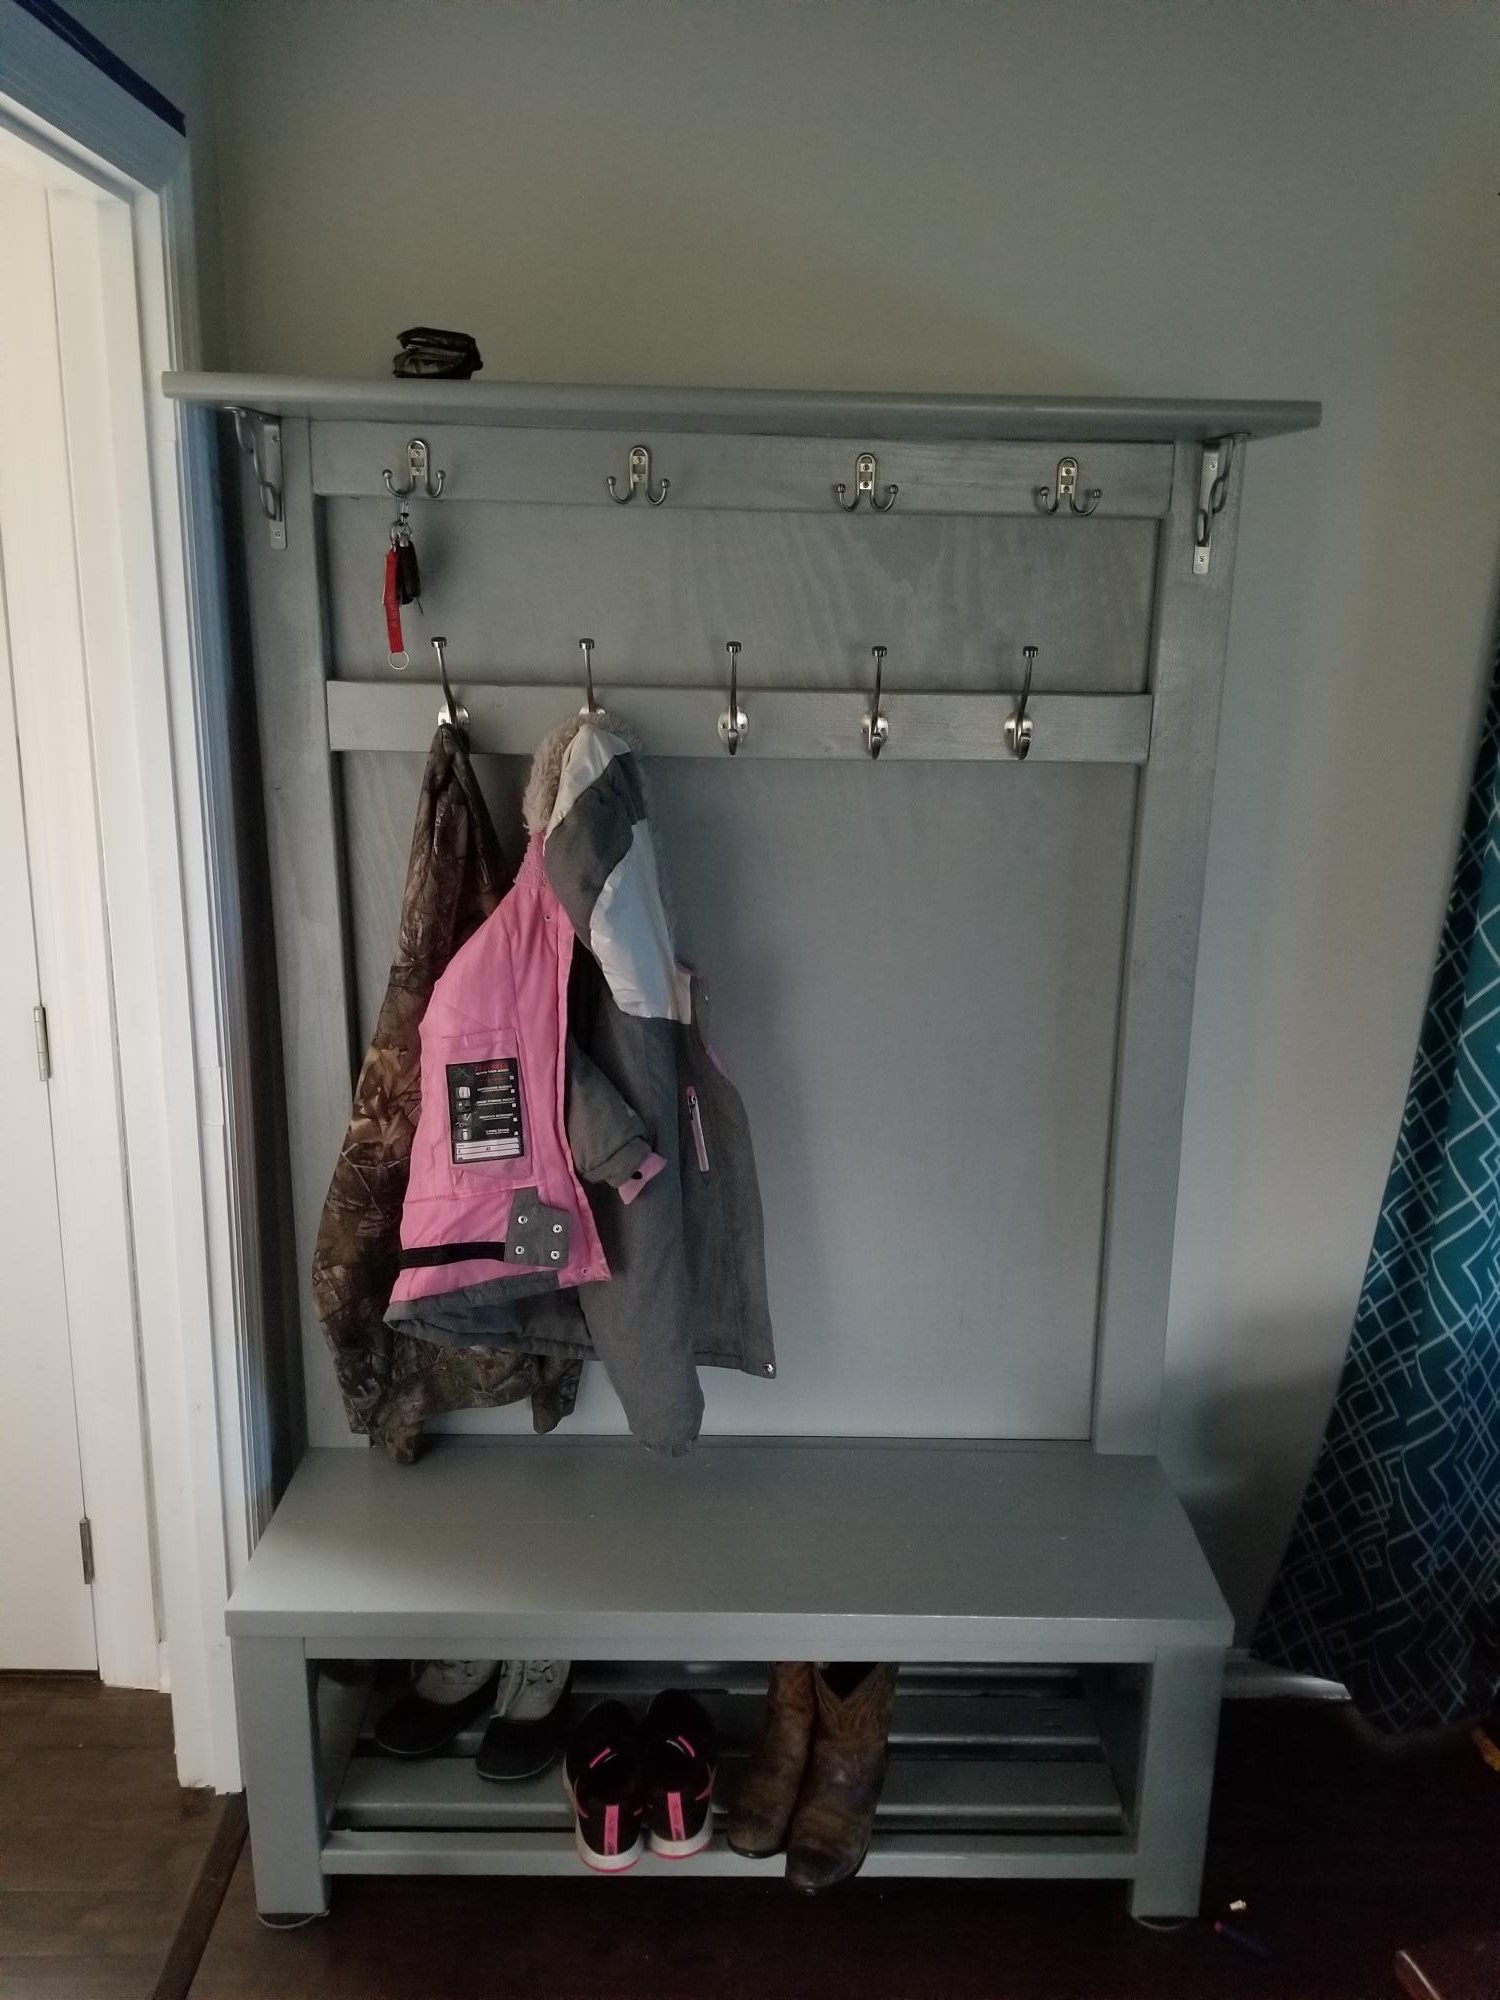
These plans were awesome! Thank you so much for sharing!! I added a few hooks on top for my keys and found this top board at Lowe's for $10, no I have a place to lay my wallet and phone. I tweaked mine to fit my needs but again, this plan was amazing, that KS for sharing! I look forward to making more of your projects.
Note: I chose this project as a weekend long project because I applied paint and it did take much longer for the paint to dry in this cold weather. The build was approximately 1 day.
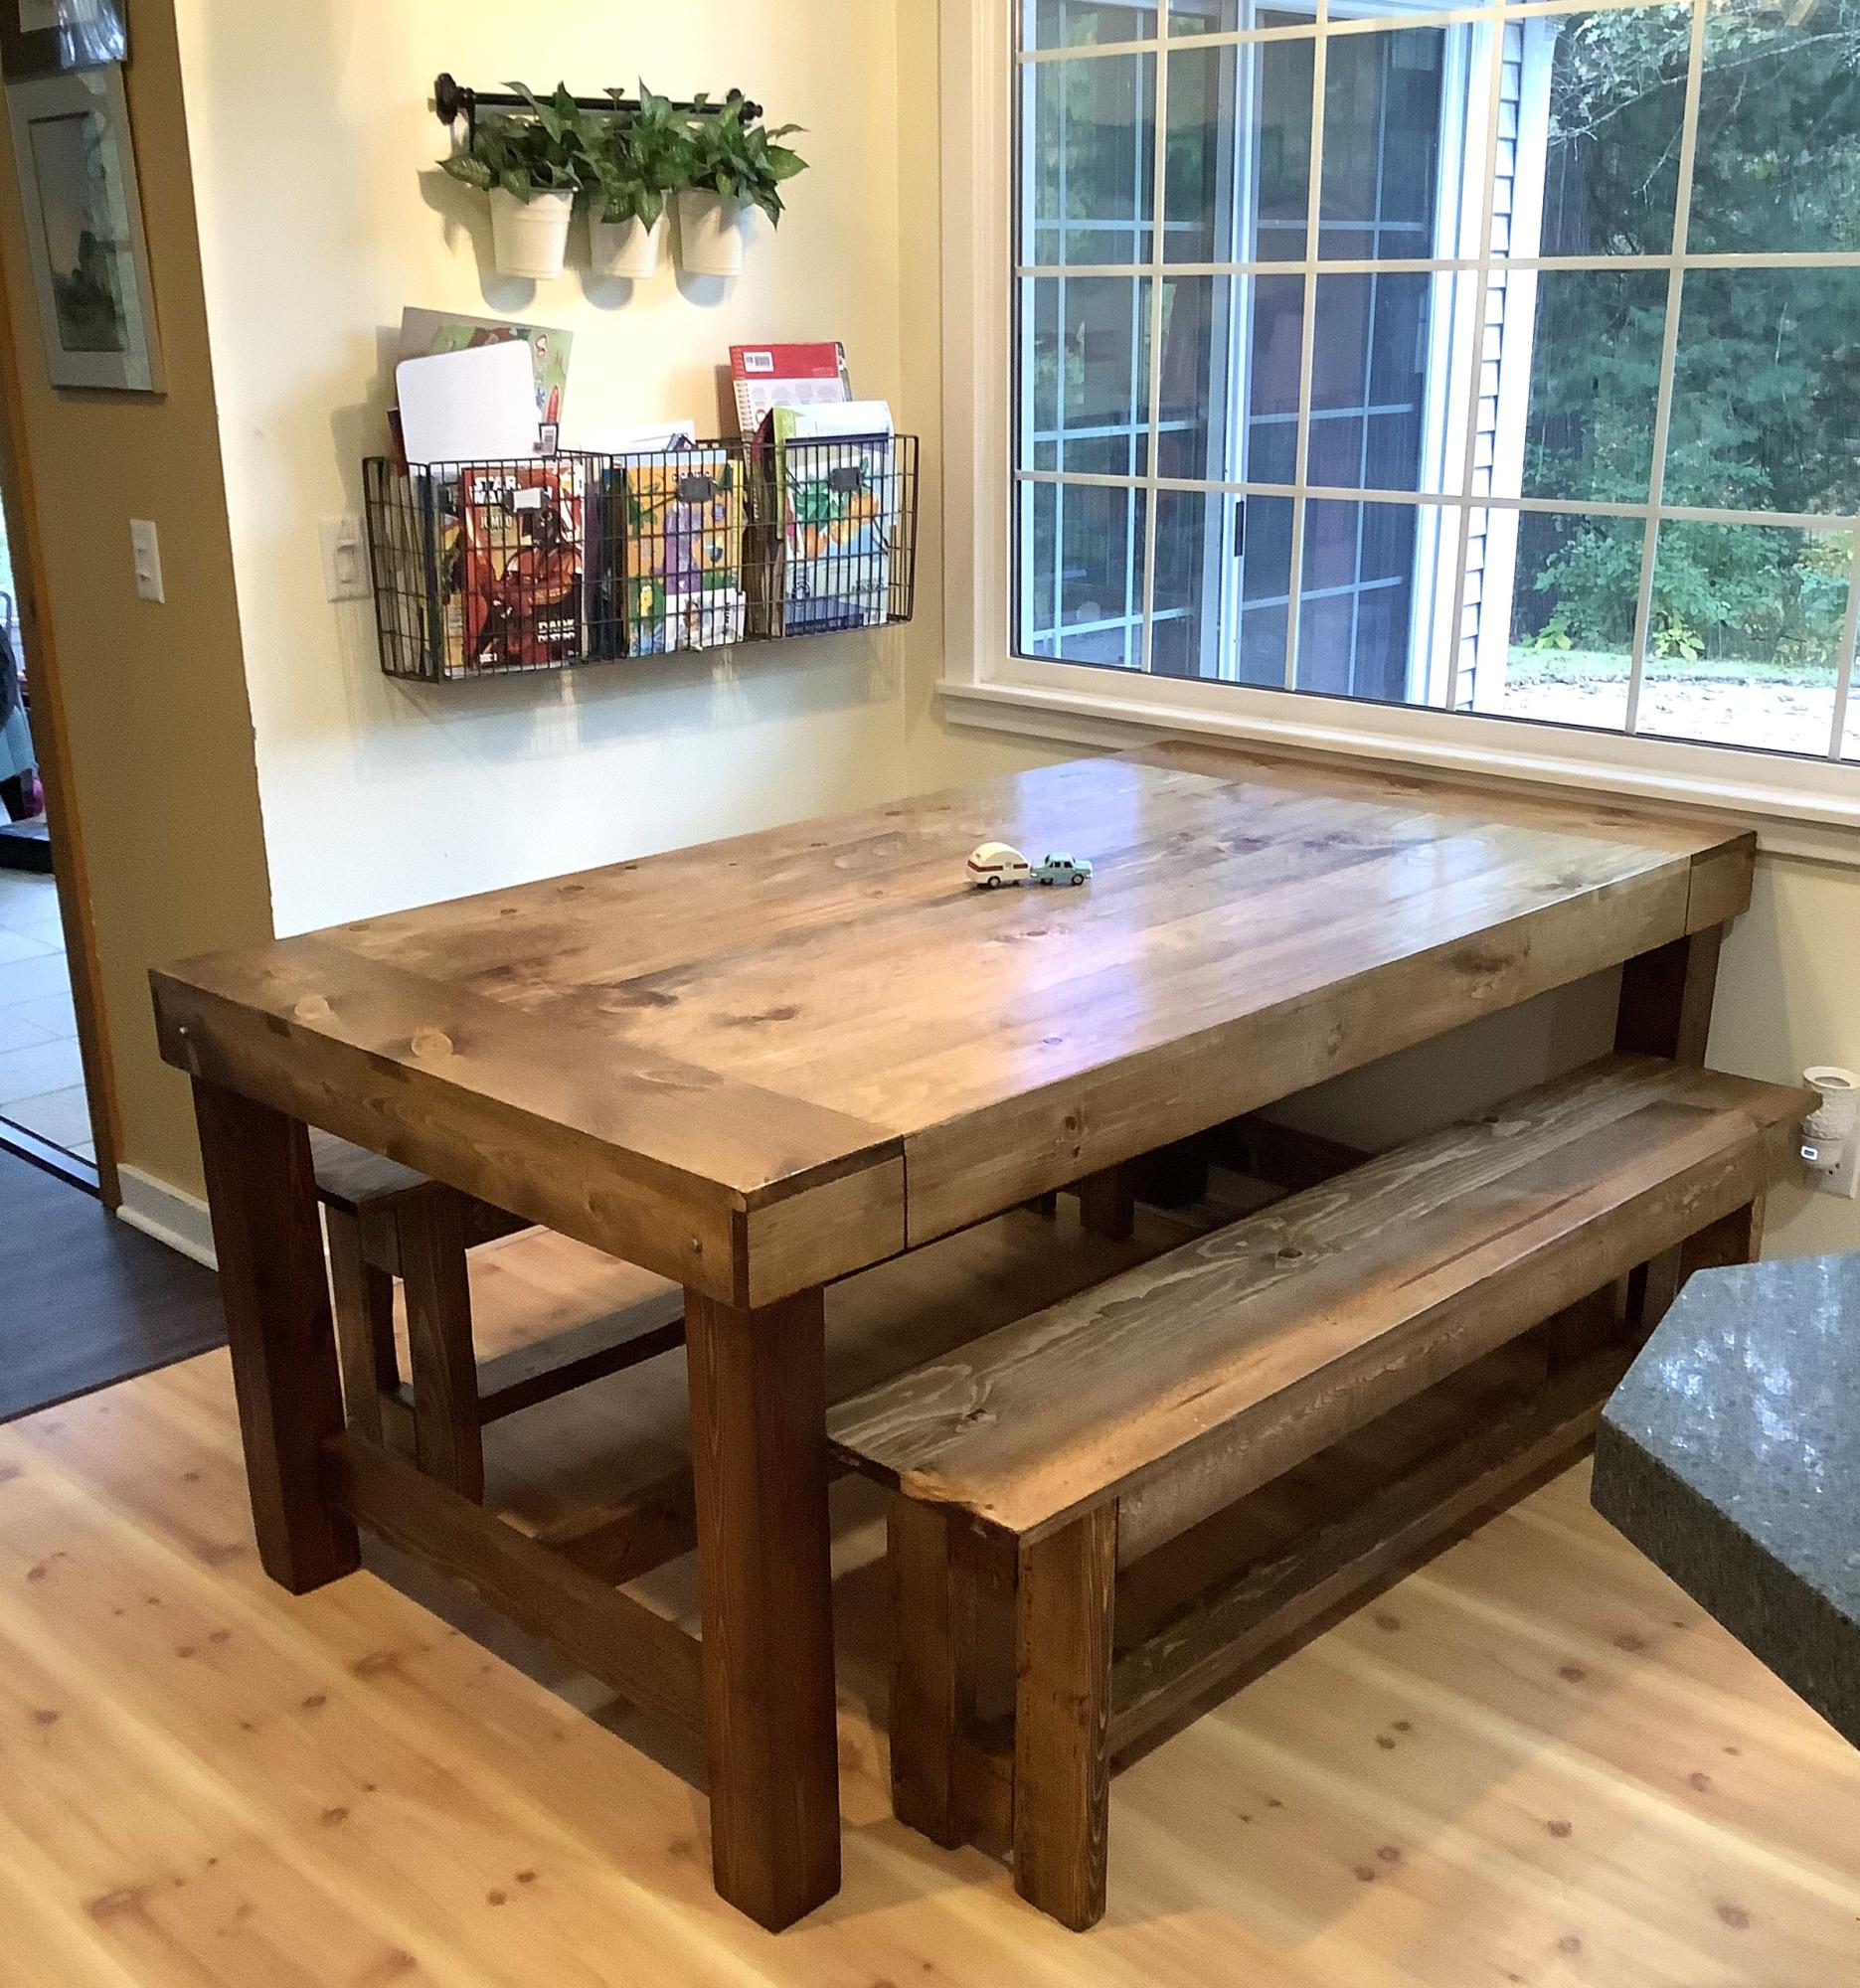
Modified two building plans into one farmhouse style table. Two of Ana’s benches as well.
Grace LeBlanc
I promised my daughter that I would build her a new room for her birthday (in February). I finally got around to it in late March and I couldn't be more excited! She picked out the paint color (blue) for her room. And I got to work! Every time I go in her room I smile and feel so incredibly accomplished! I did the whole project myself! The only exception was carrying it up to her room. I overcame my fear of the circular saw which was awesome. The only problem was my oldest took one look at the room, fell to the ground in tears and wanted to know why her little sister had a "better" room than she did. And where her bed was! So I told her we'd get her a desk - she looked at me and said "No Mommy - I want you to build it!" I love that!

Sat, 04/21/2012 - 09:11
You have every reason to feel accomplished! The room looks stunning. And you've already inspired your daughters to DIY. Time to build some memories ;-)
Sun, 07/12/2015 - 19:31
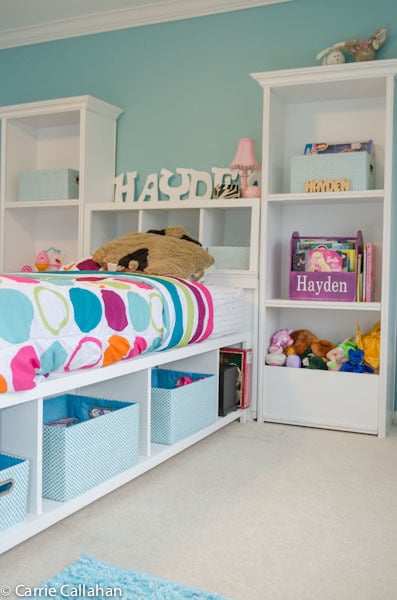
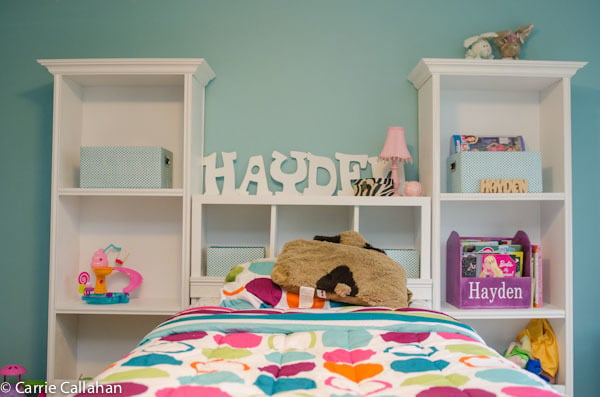
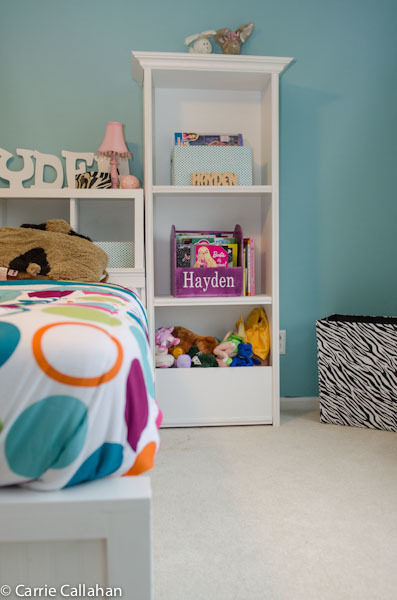
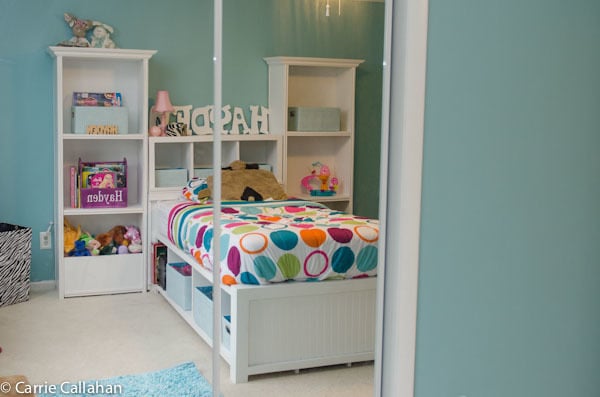
Okay I have found the plans for the bed, the towers and the hutch on top but i cannot find plans for what the hutch is sitting on. I know its non on the bed or that would shorten it. Where can i find plans to build the headboard that the hutch is on?
I was shopping for a porch swing for my 1924 Four Square home and I couldn't find any to my liking...I stumbled across this web site on Shanty2Chic's Blog via Pinterest....and I am thrilled by what I have found!
Attached is a photo of the swing I built. I need to finish sanding, filling in the holes and then paint it. I will post a pic of the hanging on my front porch once the weather breaks.
The only deviation in the plan design is that I made the back 2x4 50' long so I could attach eye bolts to support the back. If you have scrap lumber, it would have cost me hardly anything.
Think spring!!
Super easy project. My space is smaller so I modified to 6ft instead of the 8ft used in the plana. I plan to make the white board crates to finish the project.
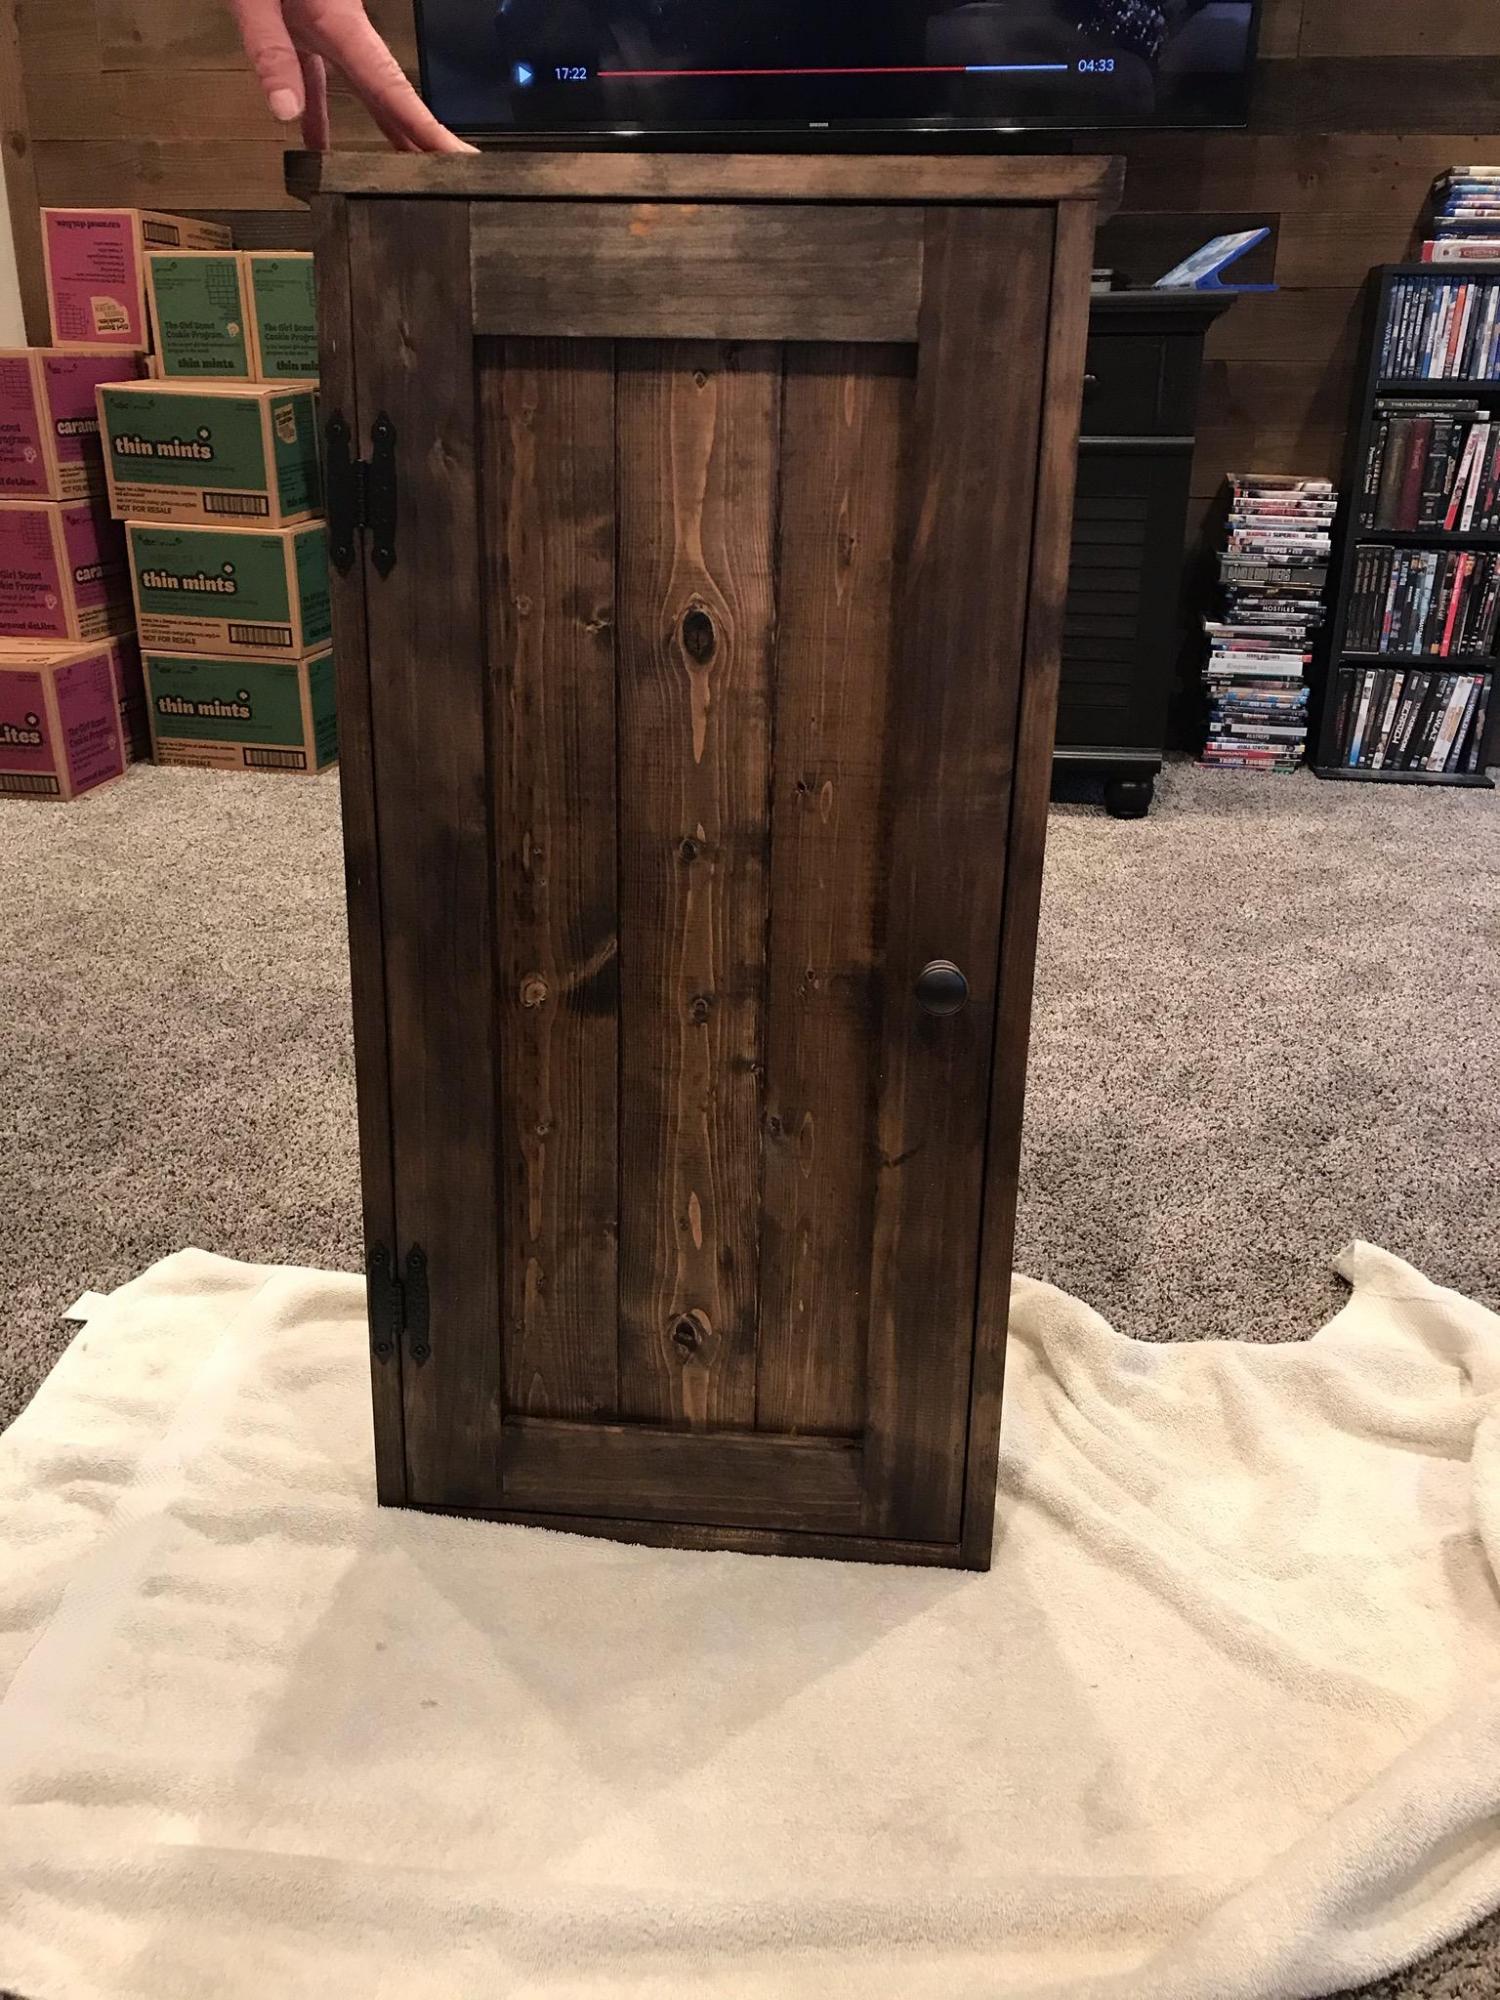
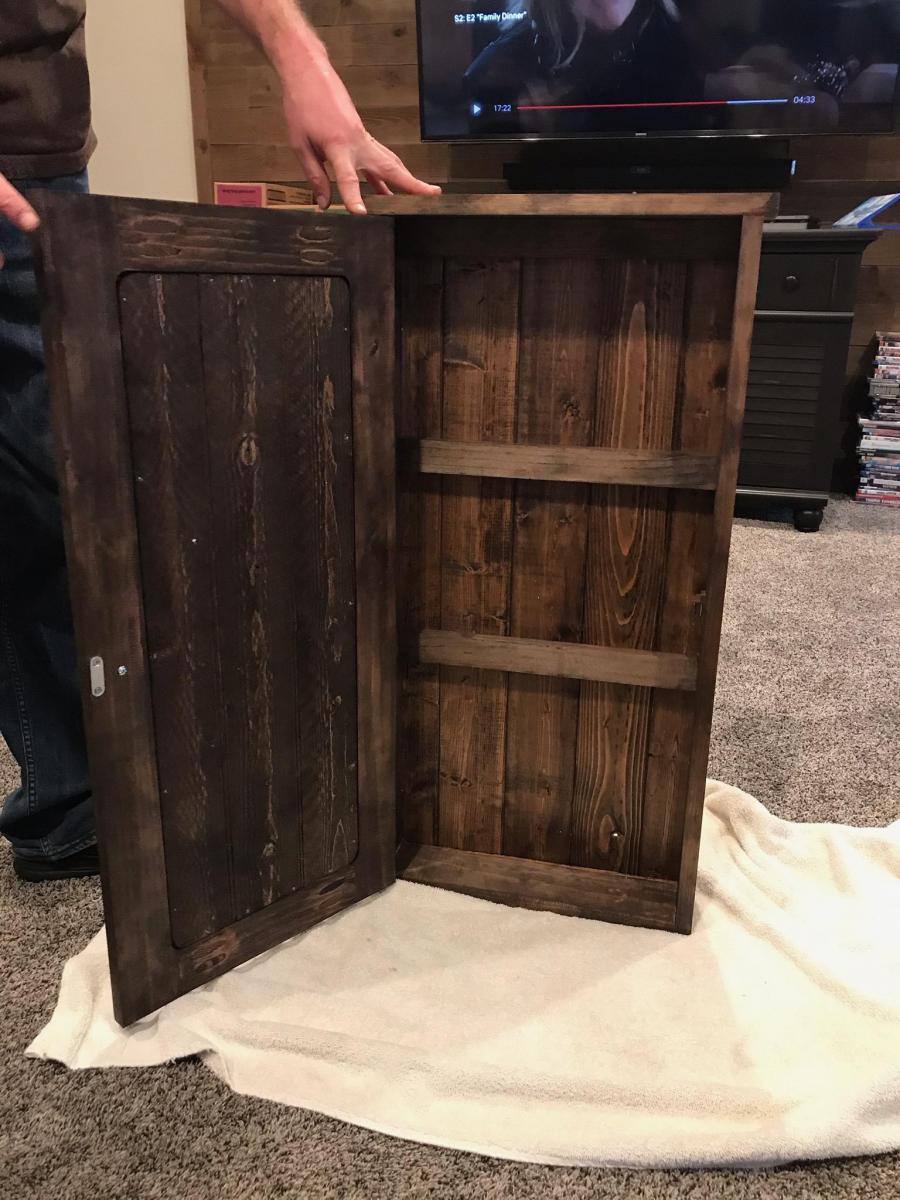
The plans were simple to follow. Made some small changes, used some pine wood wall paneling from Lowes. The pine paneling was used on the back and door. Both were inset with a routed step the same thickness as the panels.
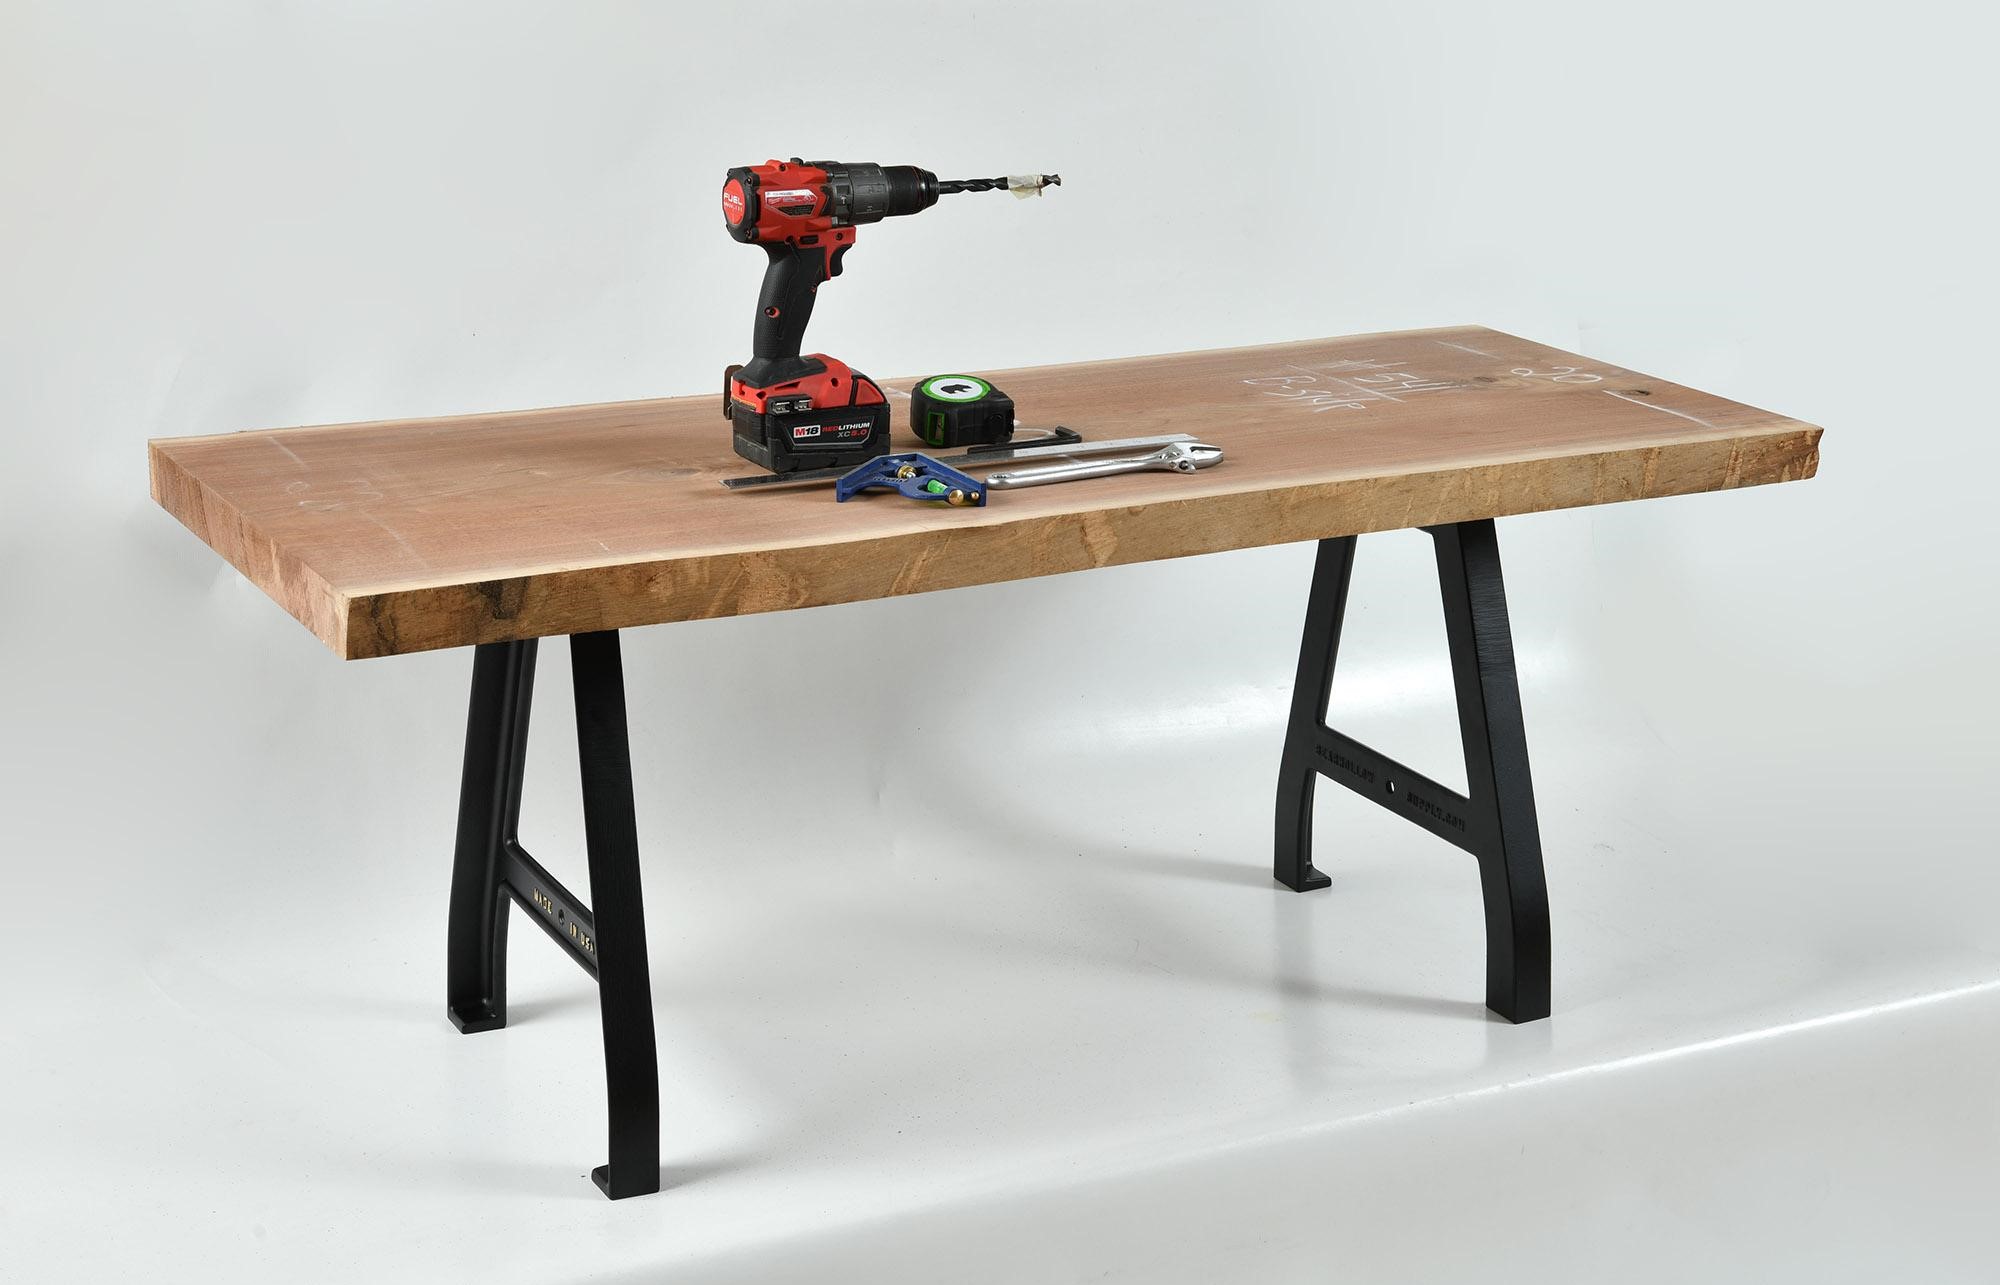
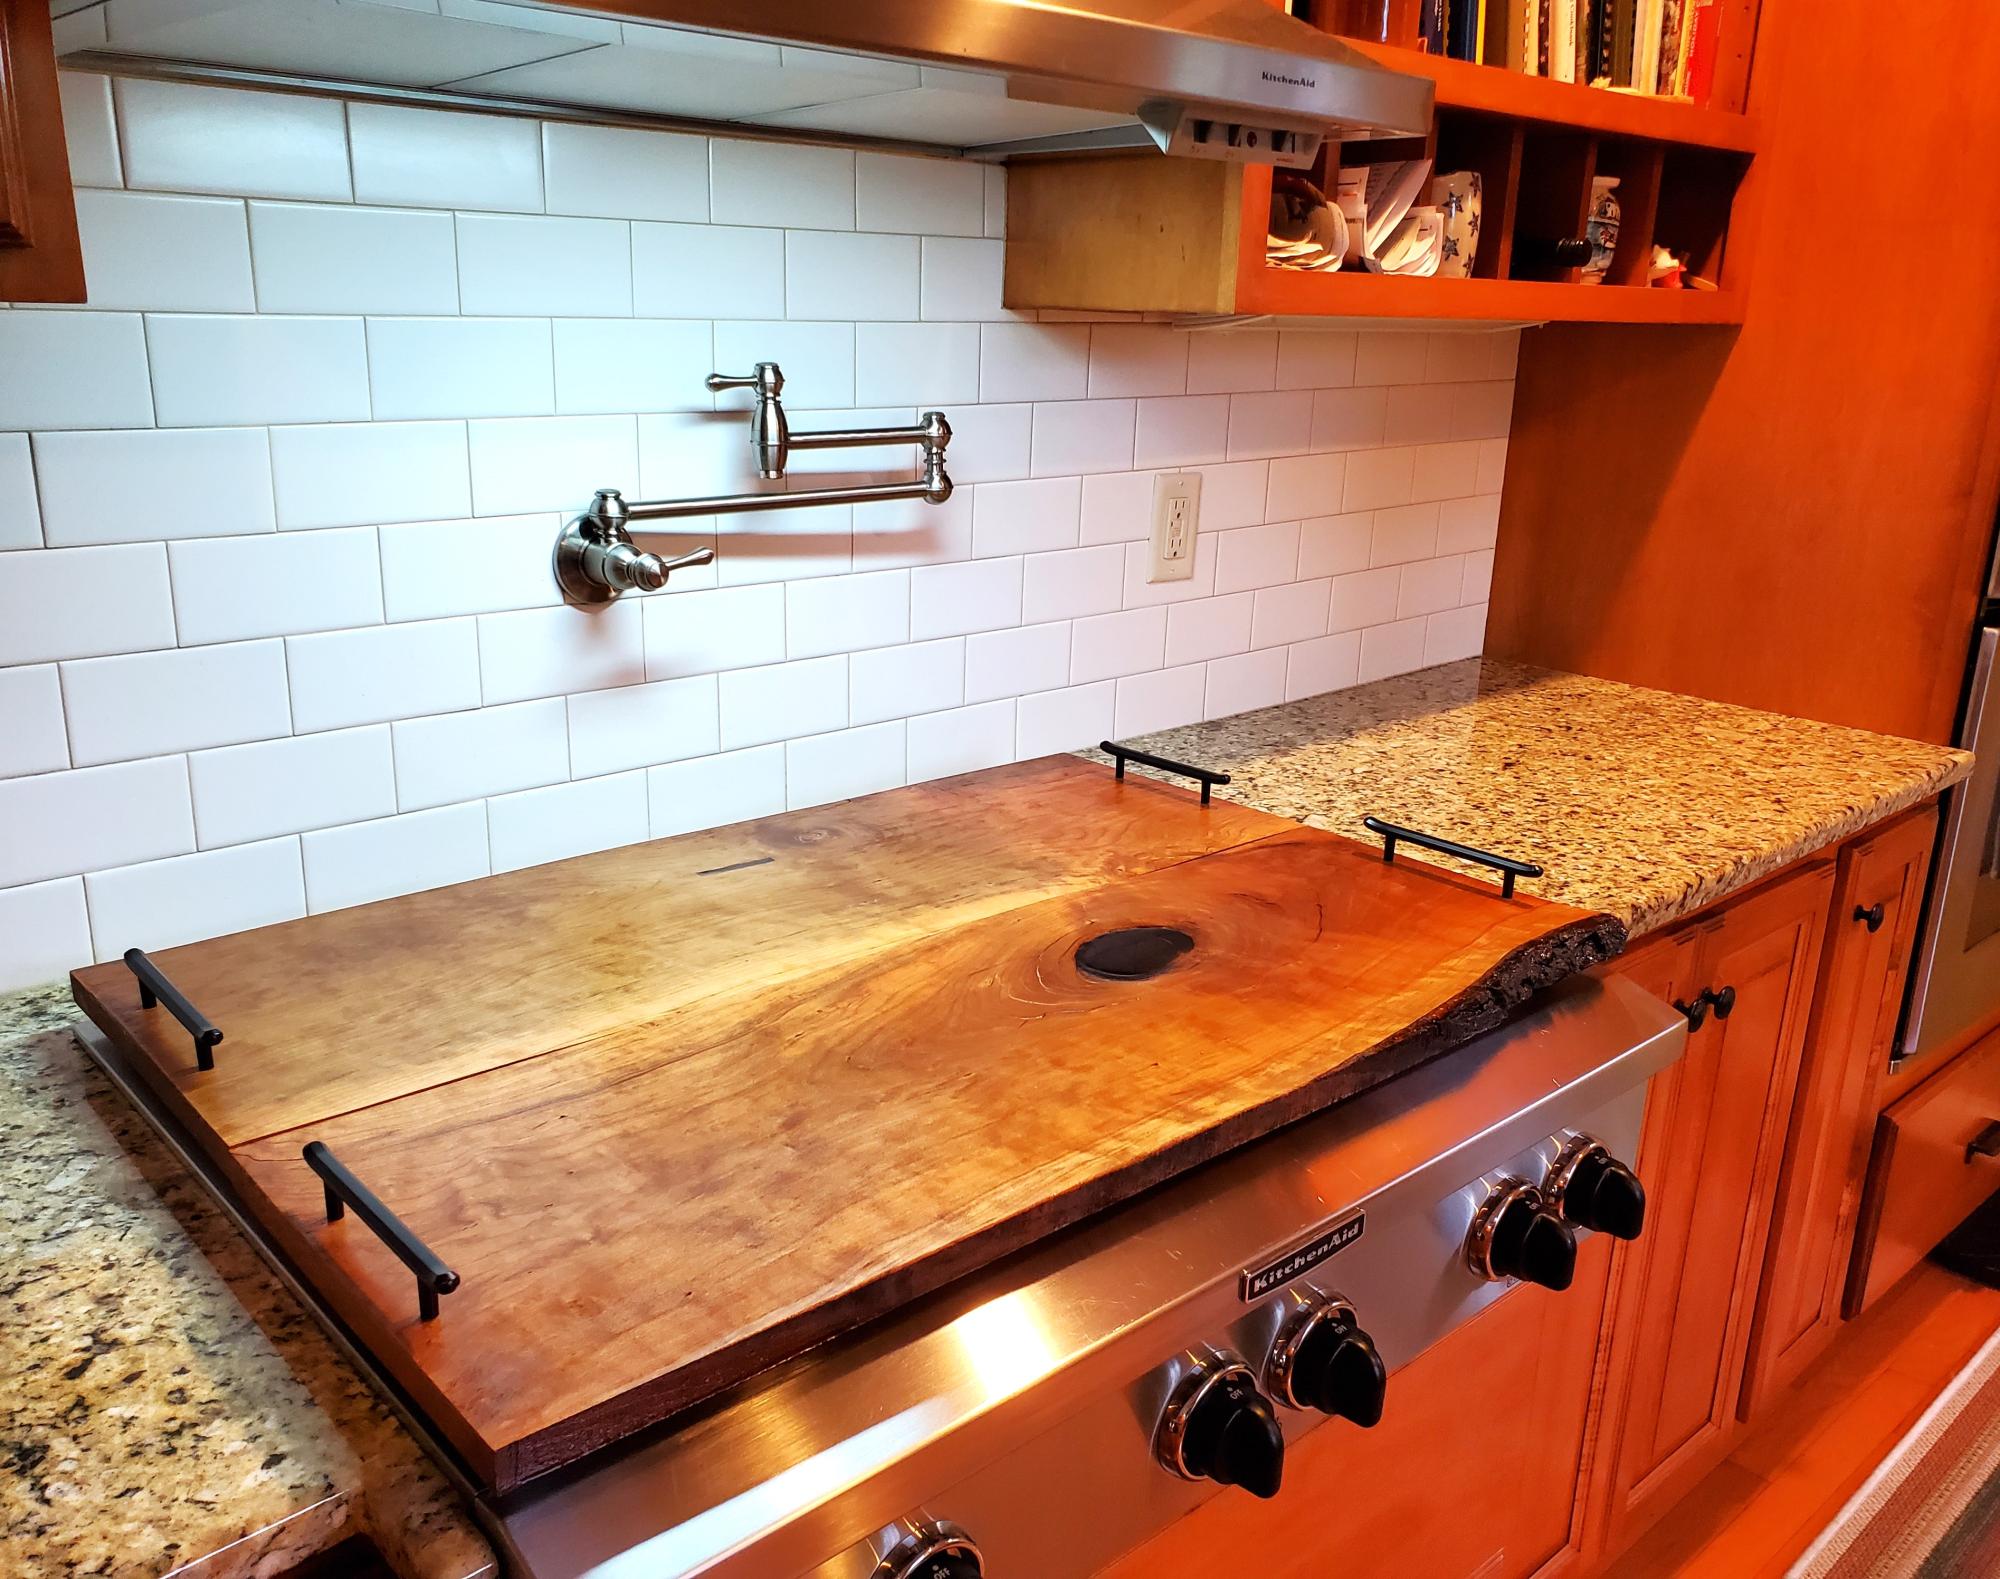
I built a simple, yet very classy table using table legs from Bear Hollow Supply. All you need is a table top, which in my case I used a nice looking wood slab. Then you just attach the legs and you're done. It's a very simply process and the final results is a great looking table.

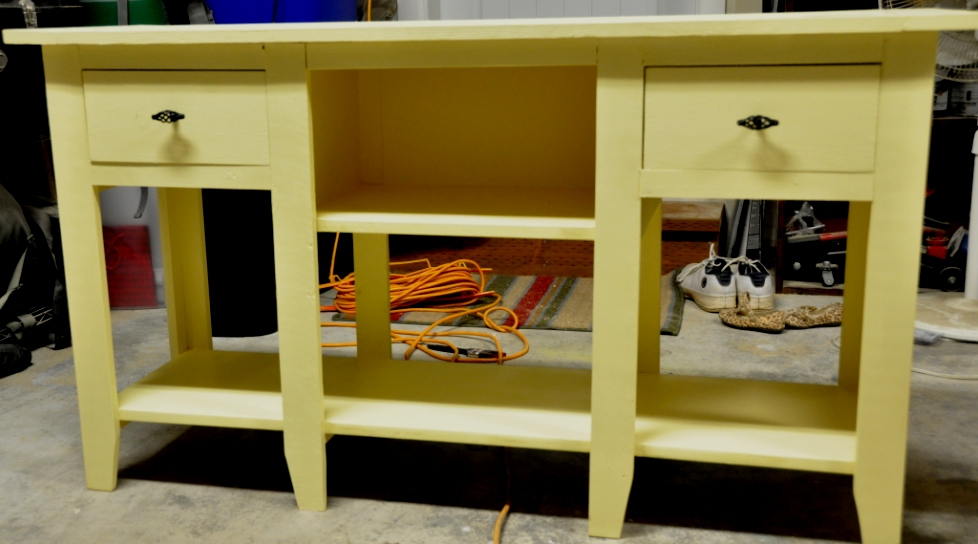
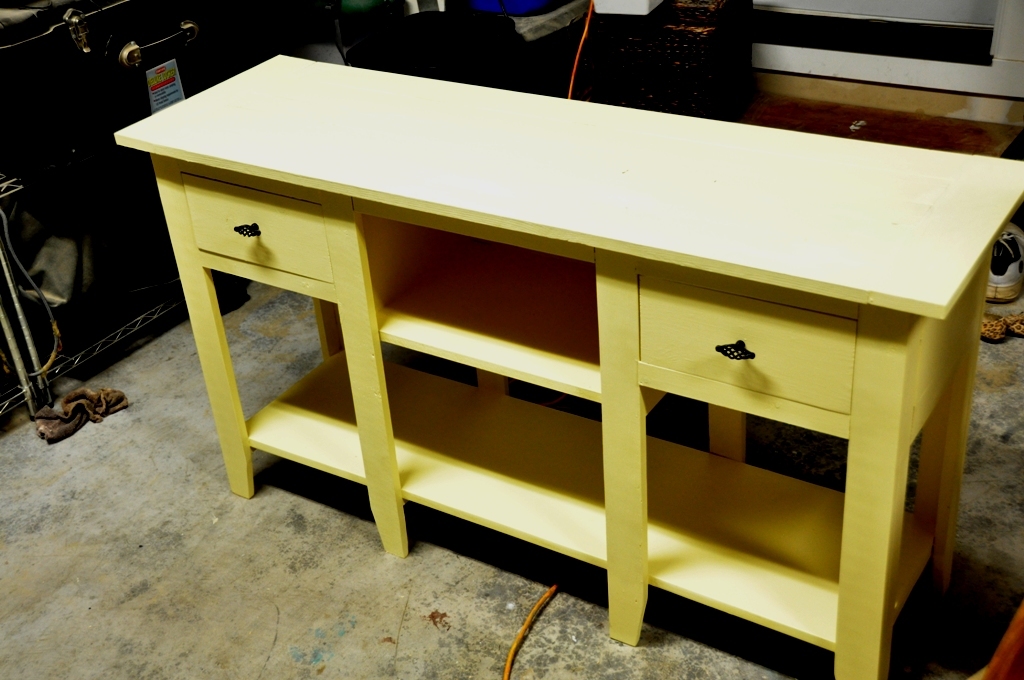
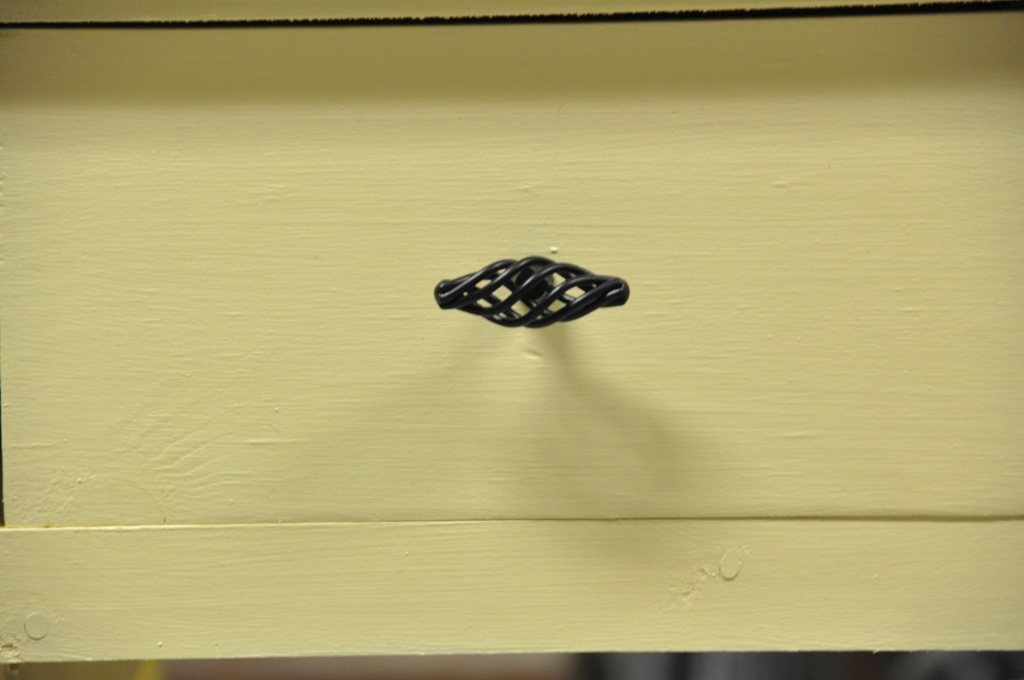
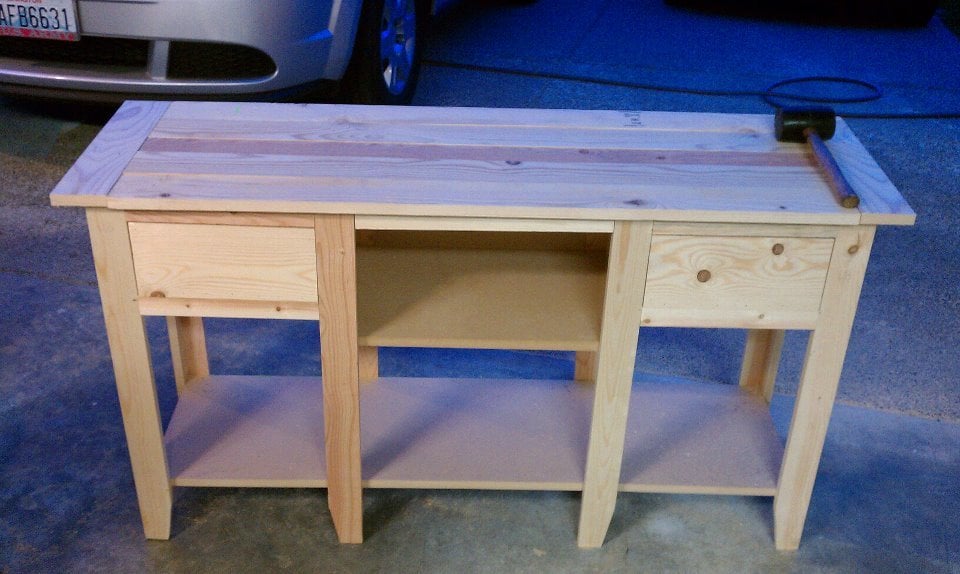
So my wife got her new Country Sampler magazine the other day and she saw this table in there that she liked. After an hour of research I found the table at Becker Furniture World online. The table is called the Liberty Casual 2-Drawer 2-Shelf Sofa Table by Steve Silver. I decided to draw up some plans in my head and give it a shot. After 2 rounds of Home Depot warped 1x 12s we got the table together. Instead of making this a sofa table, I extended the table top out a little to make it into a console table. If you want to see my inspiration google search Liberty Casual 2-Drawer 2-Shelf Sofa Table by Steve Silver. If you like it let me know and I will give out the wood list and the cut list.
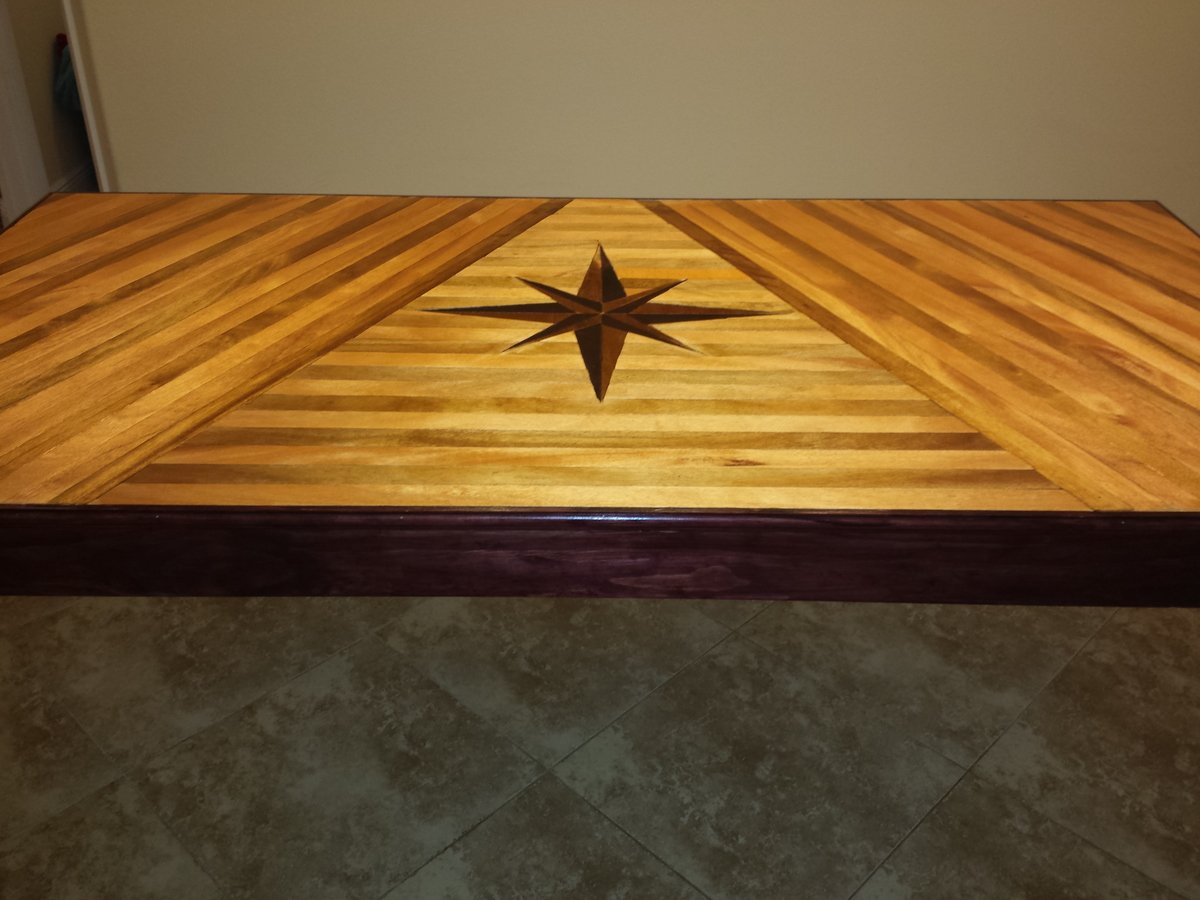
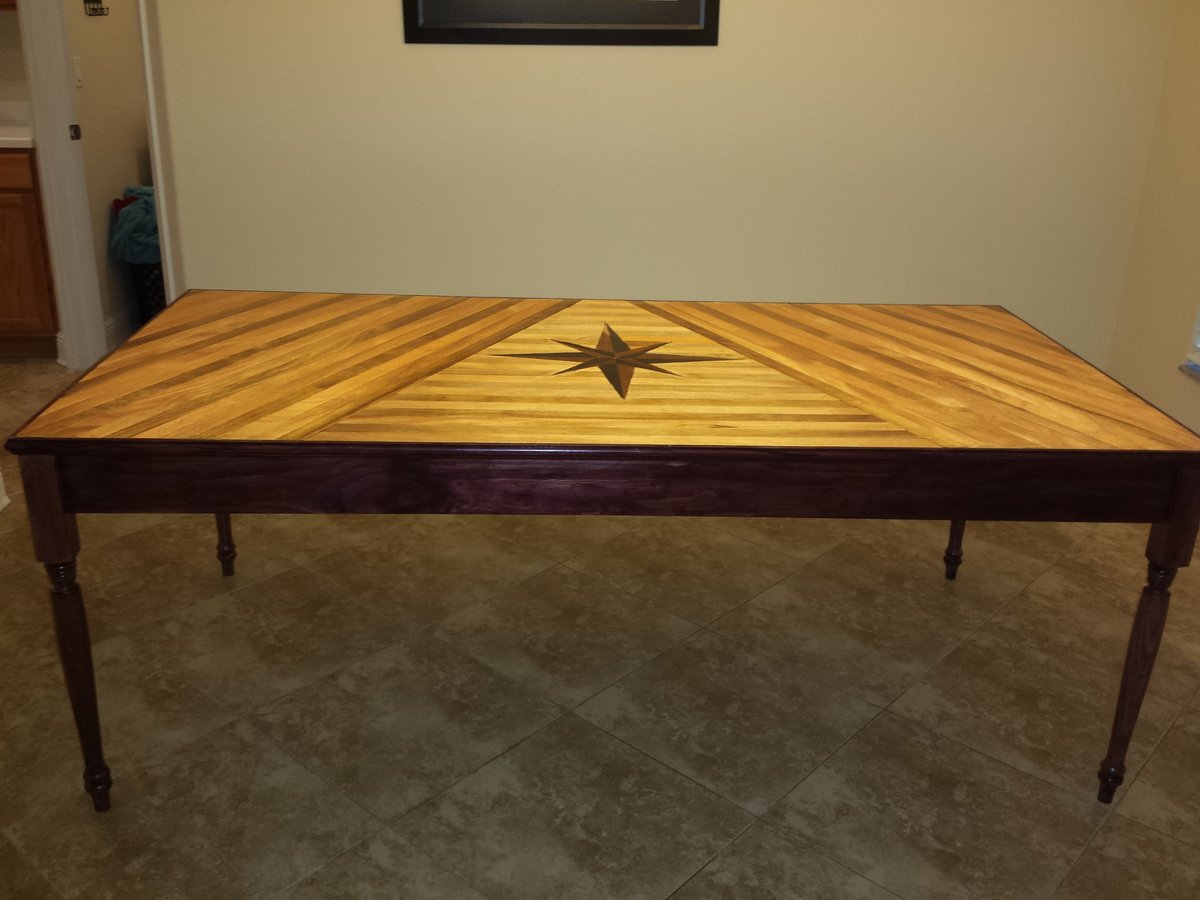
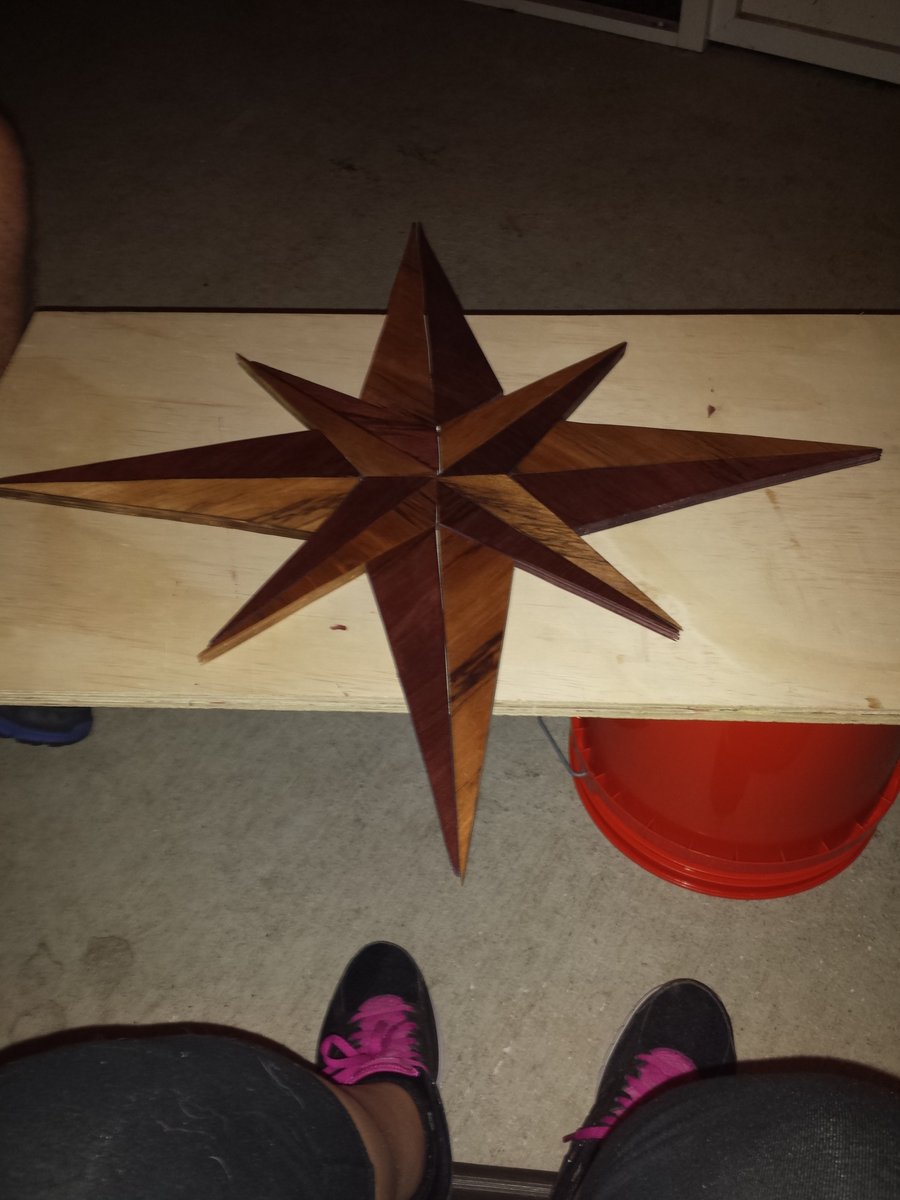
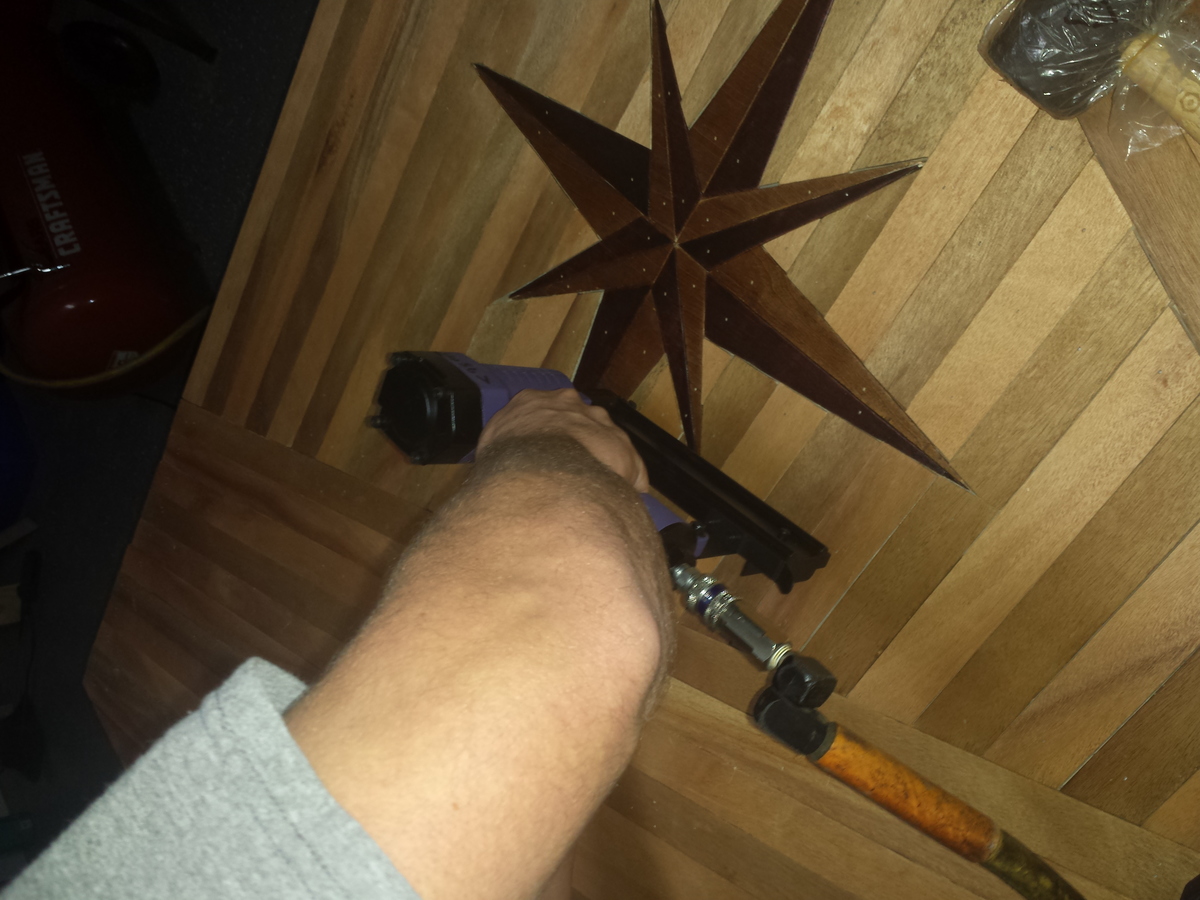
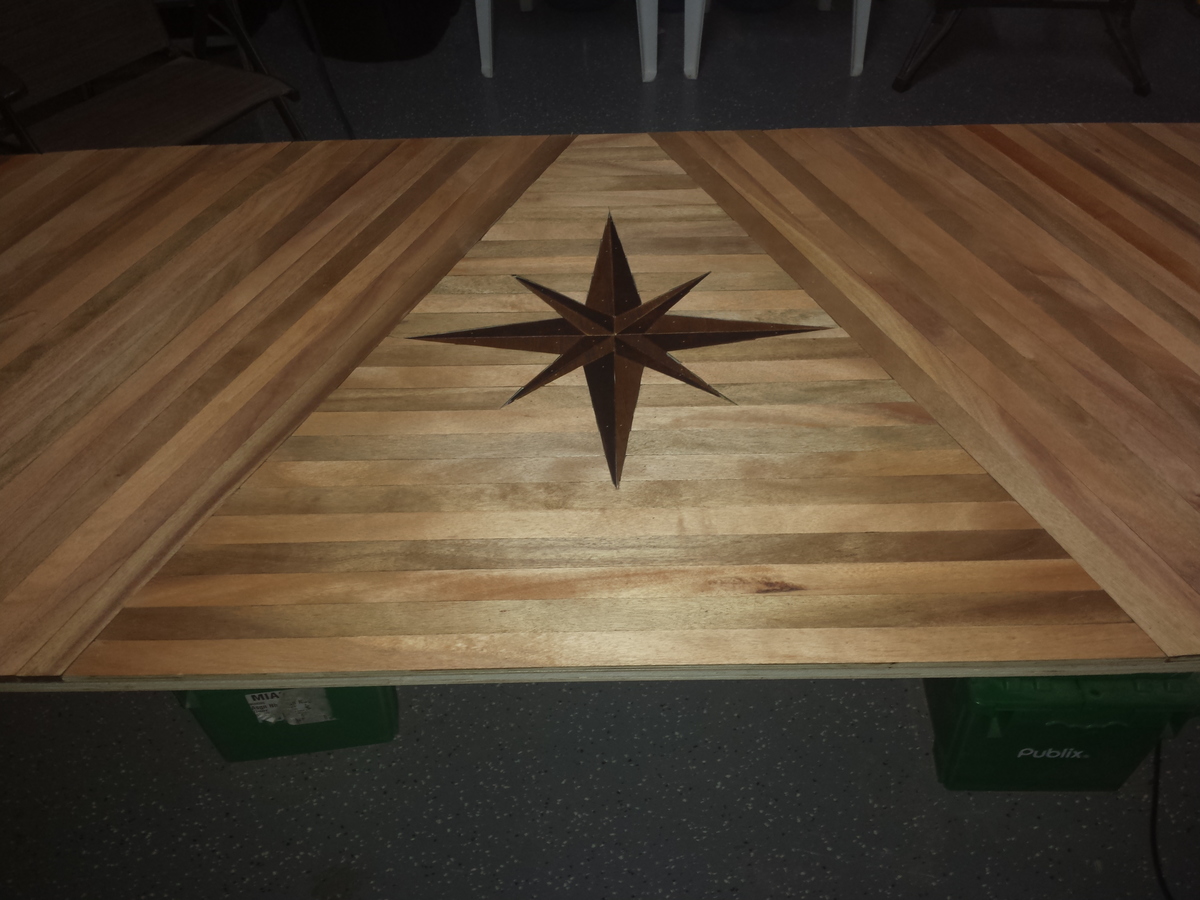
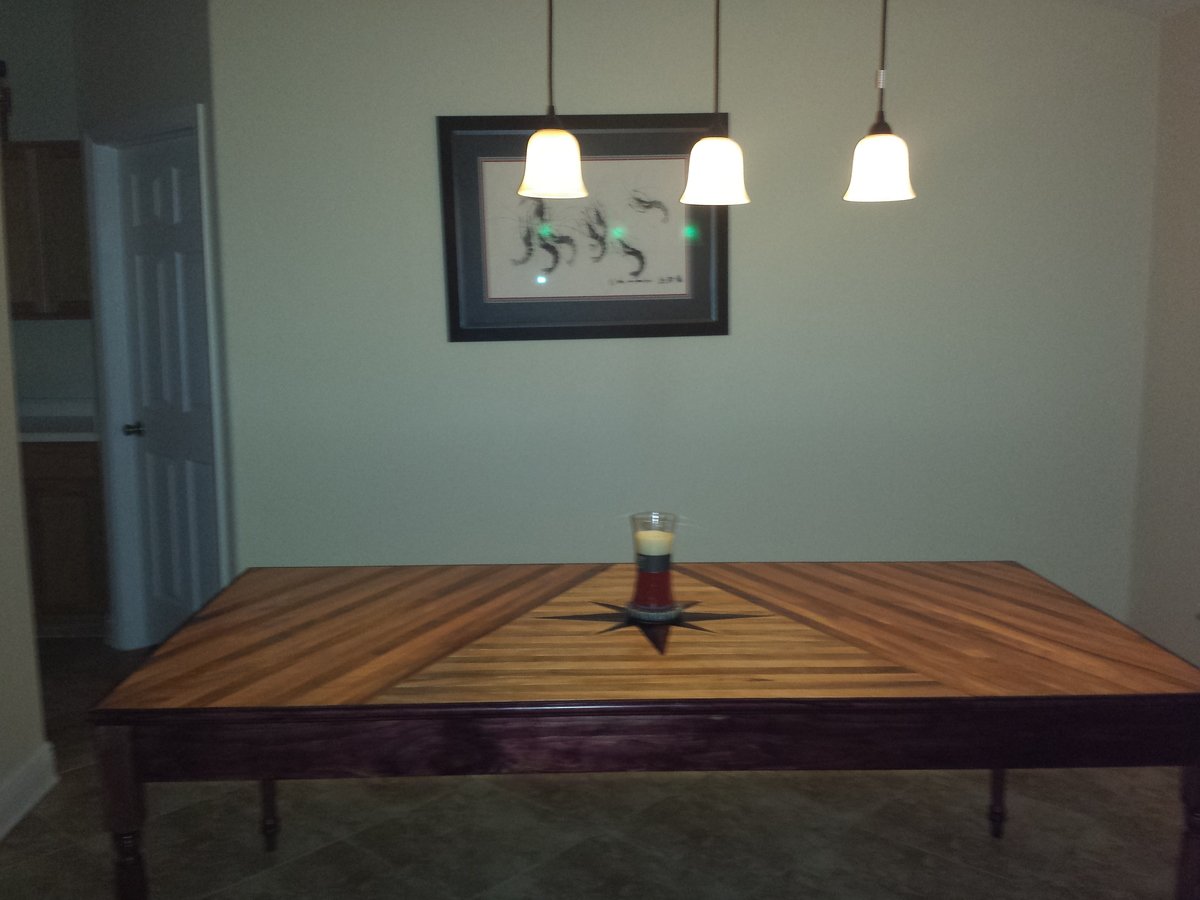
Compass rose dimensions: 22×22 (90 degree cross) tilt 45 degrees 16×16 (90 degree cross) then connect lines with a ruler, start with the 16" lines connect from outer point to 2" from center of the 22" crossed lines, once that star is complete make lines from point of the 22" lines to 2 1/2" down side of star adjacent to that point (hint: it's much easier to look at a picture of a compass rose while trying to sketch it). Cut sizes should turn out to be: 8- 9"×7"×2 1/2" triangles and 8- 8"×7"×2" triangles (hint: we had best results using a table saw to make all the cuts)...
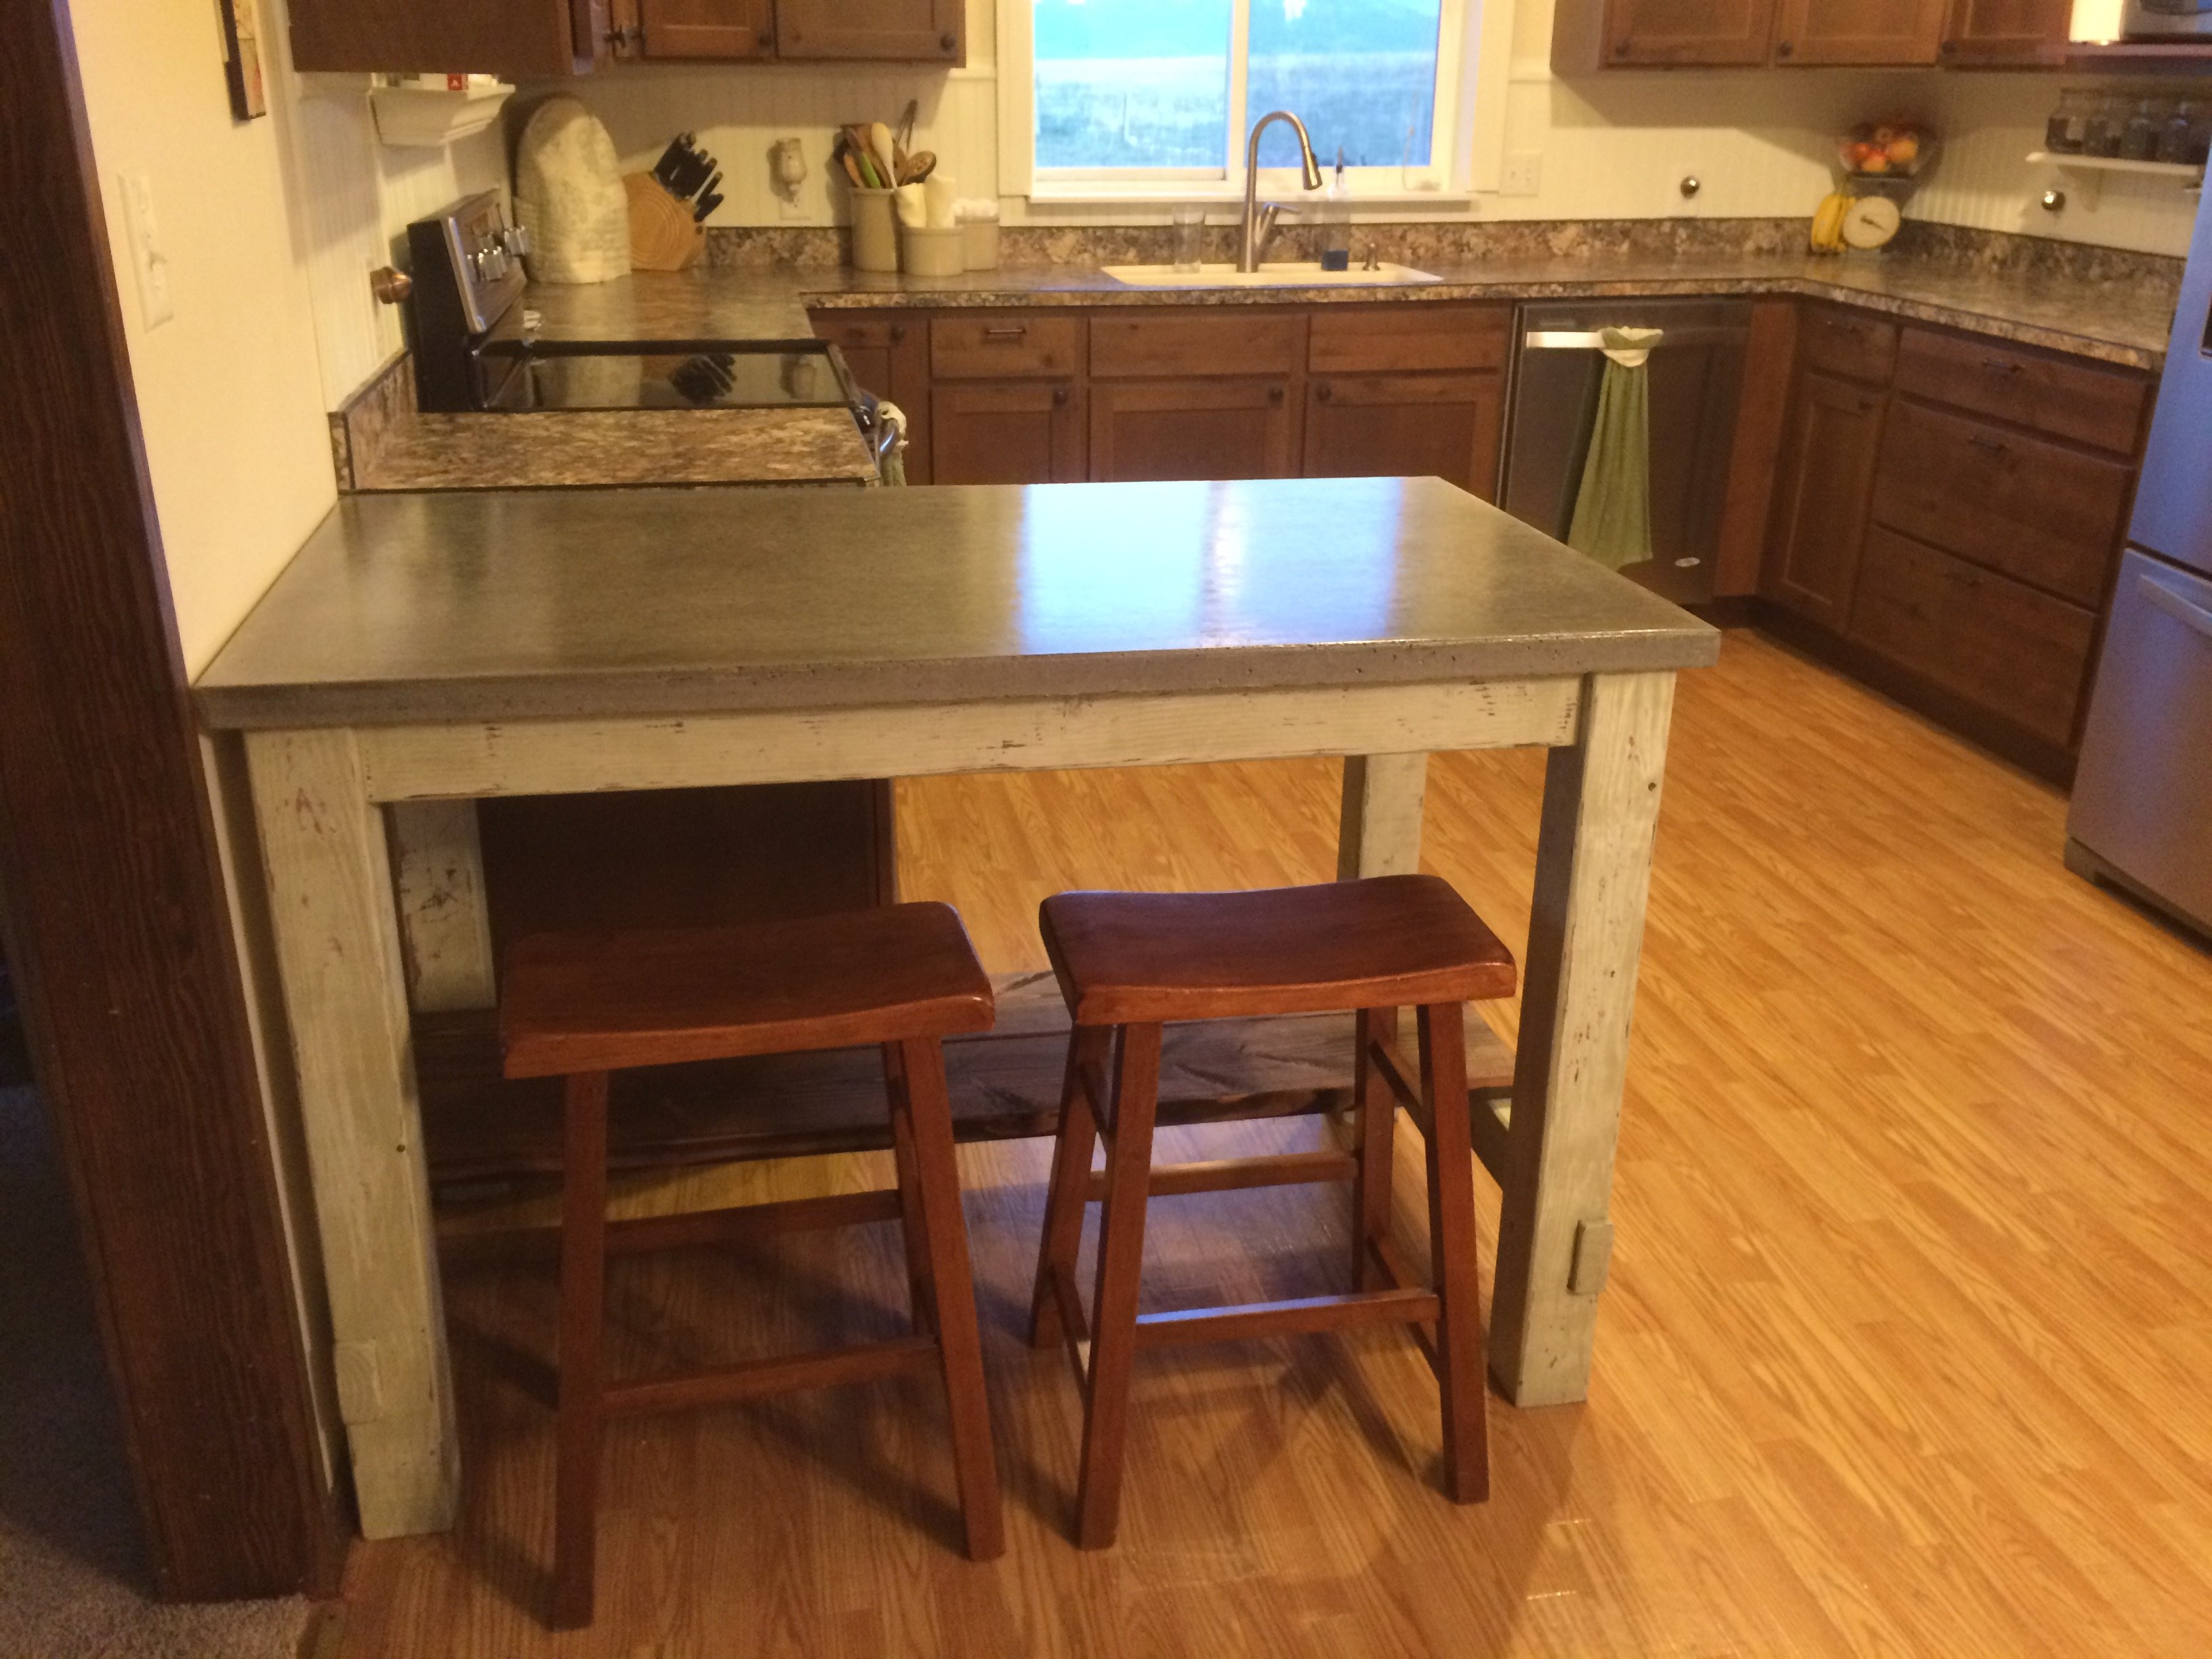
This was super easy to build and I love the way it turned out. I painted mine to add some color to my kitchen and did a concrete countertop.
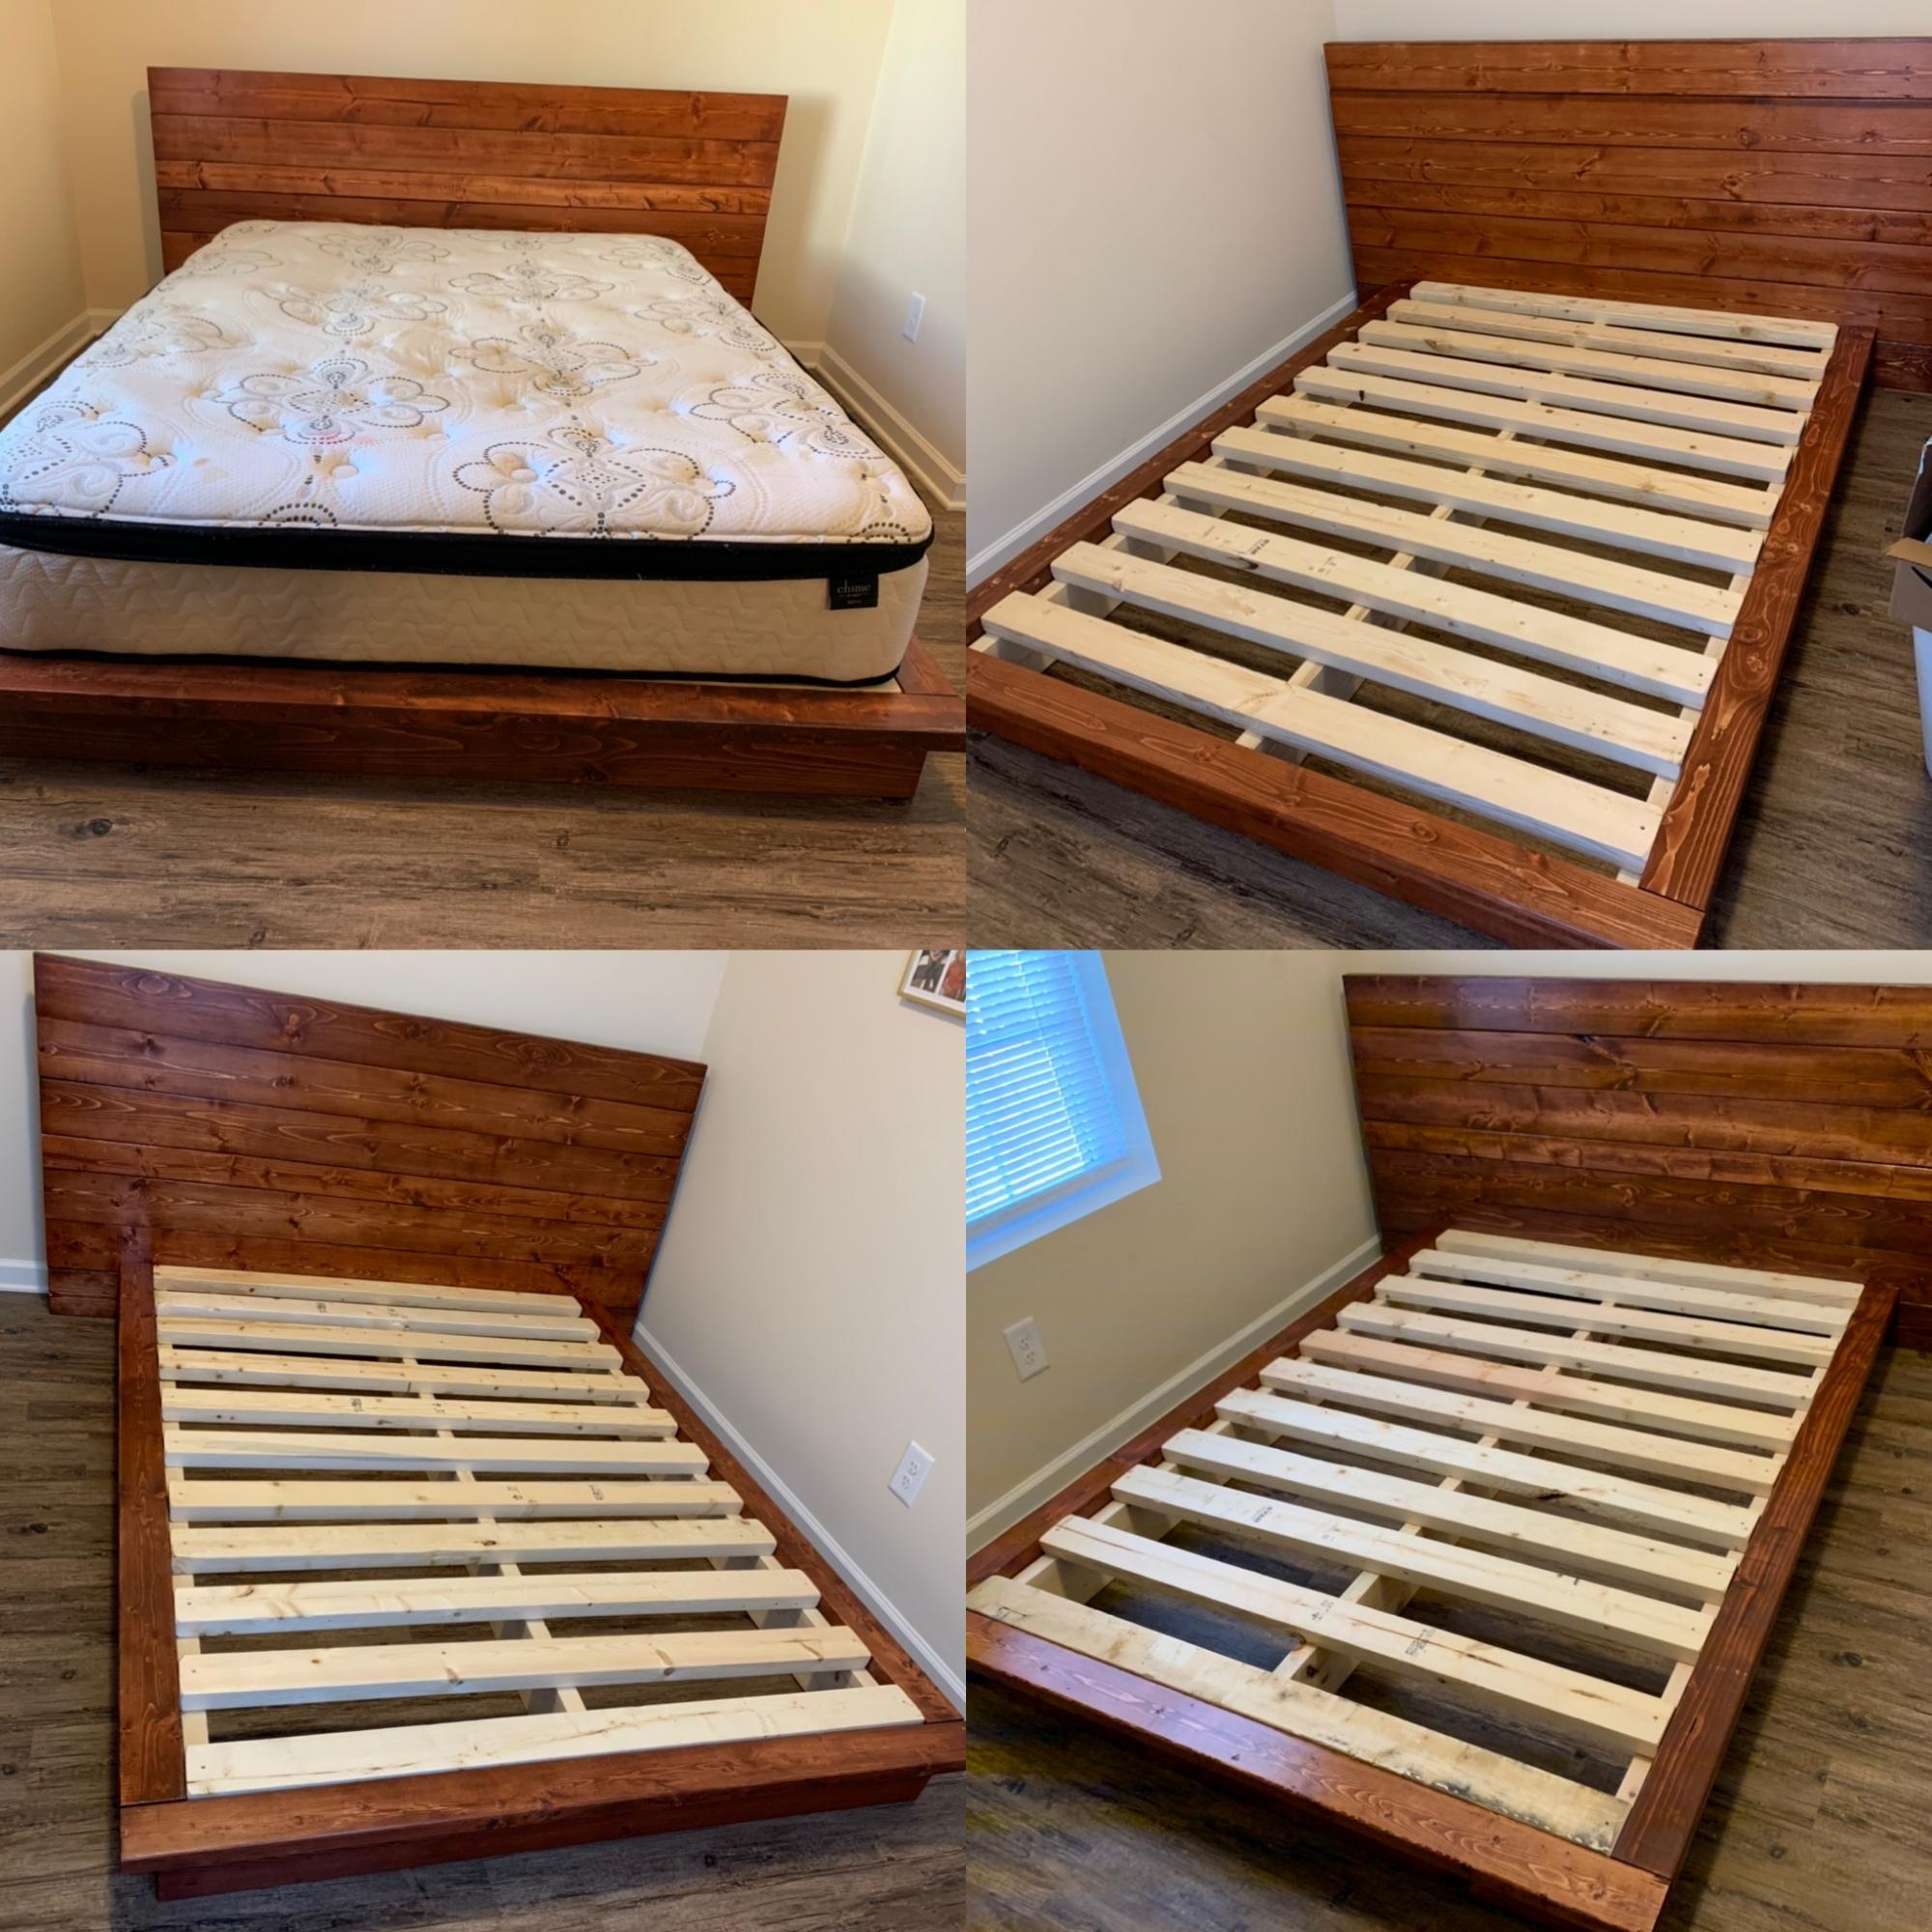
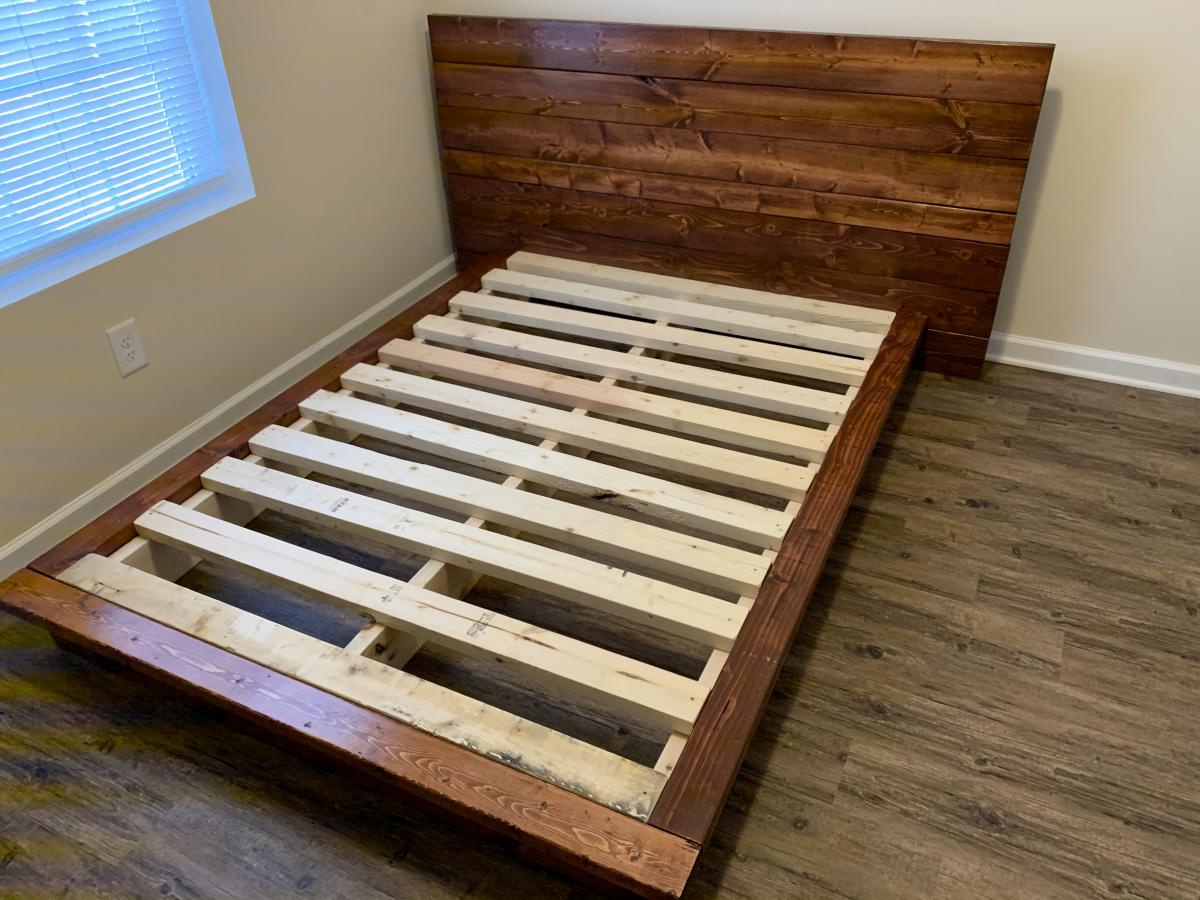
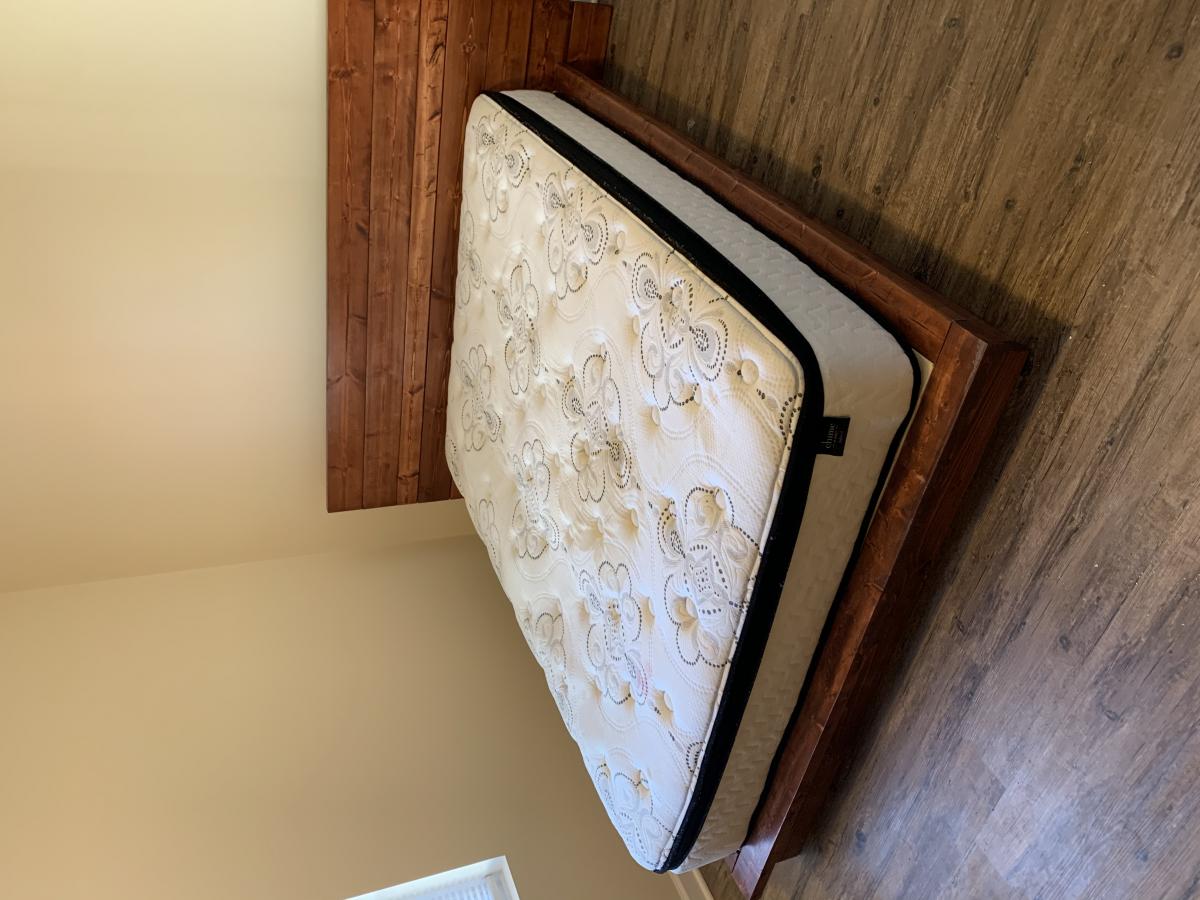
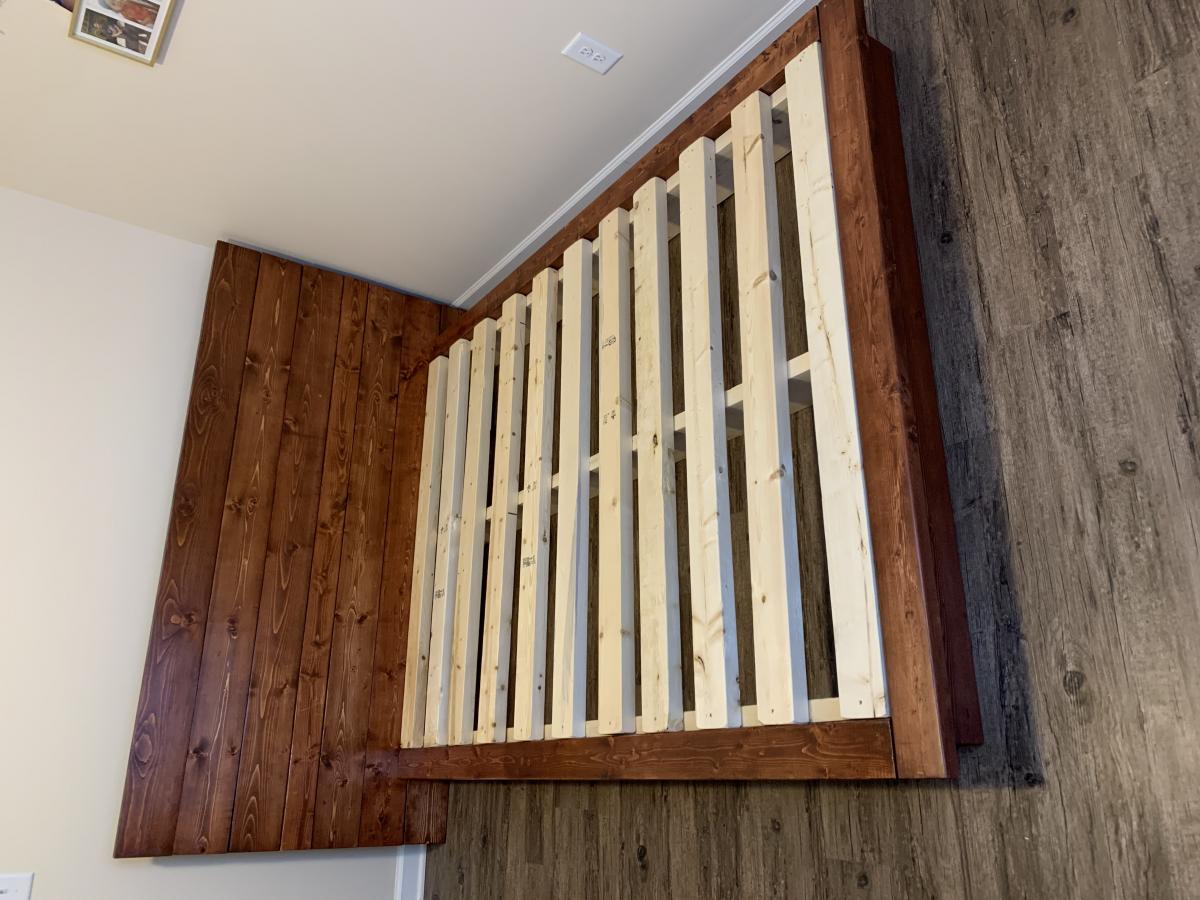
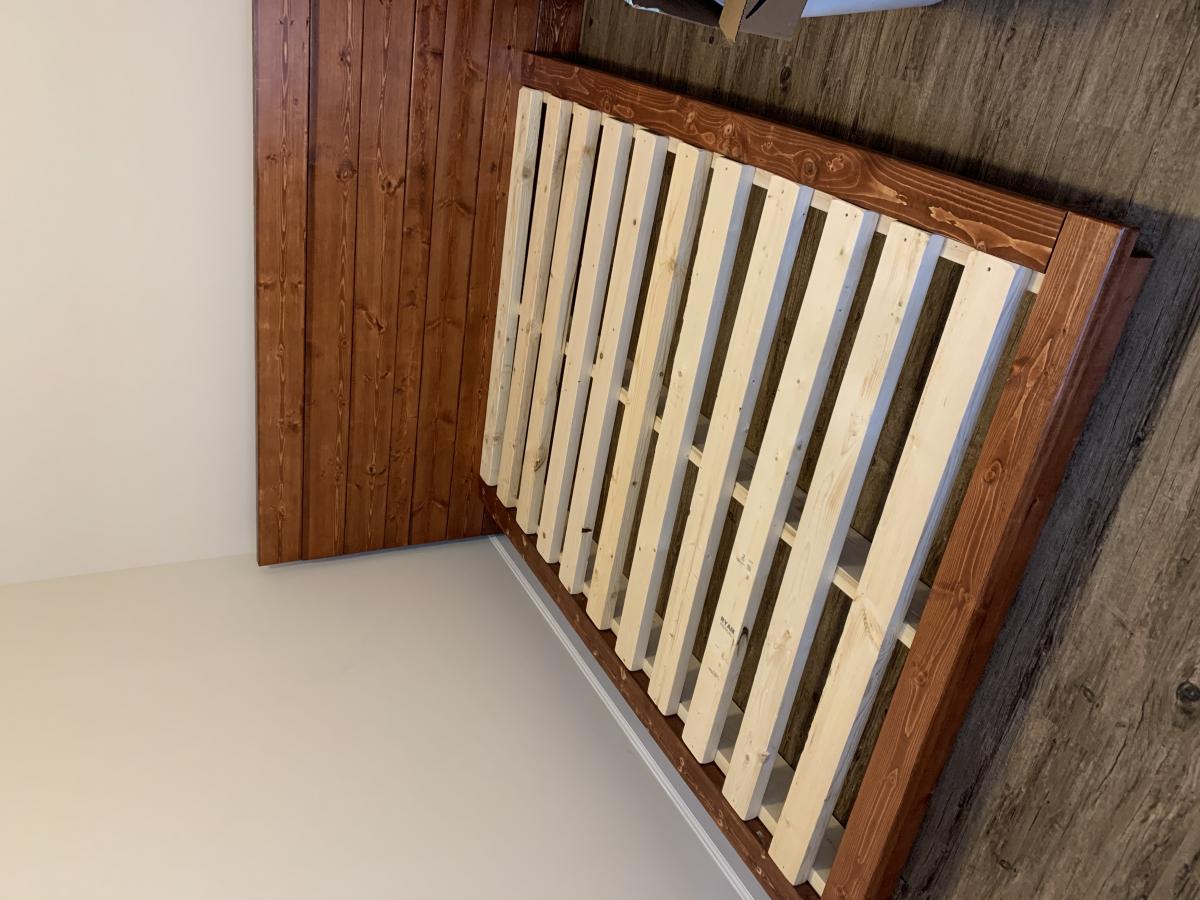
A lady that my husband works with just got her forever home through Habitat for Humanity. We wanted to do something special for her and her kids so we used Anna’s platform plans to build one queen and 3 full size bed frames. The plans were easy to follow and assembly was a snap on delivery.
To make the fulls we took the queen dimensions and modified the cuts for the full size mattress dimensions.
Thank you Anna for helping us to make 4 beautiful additions to our friends home.