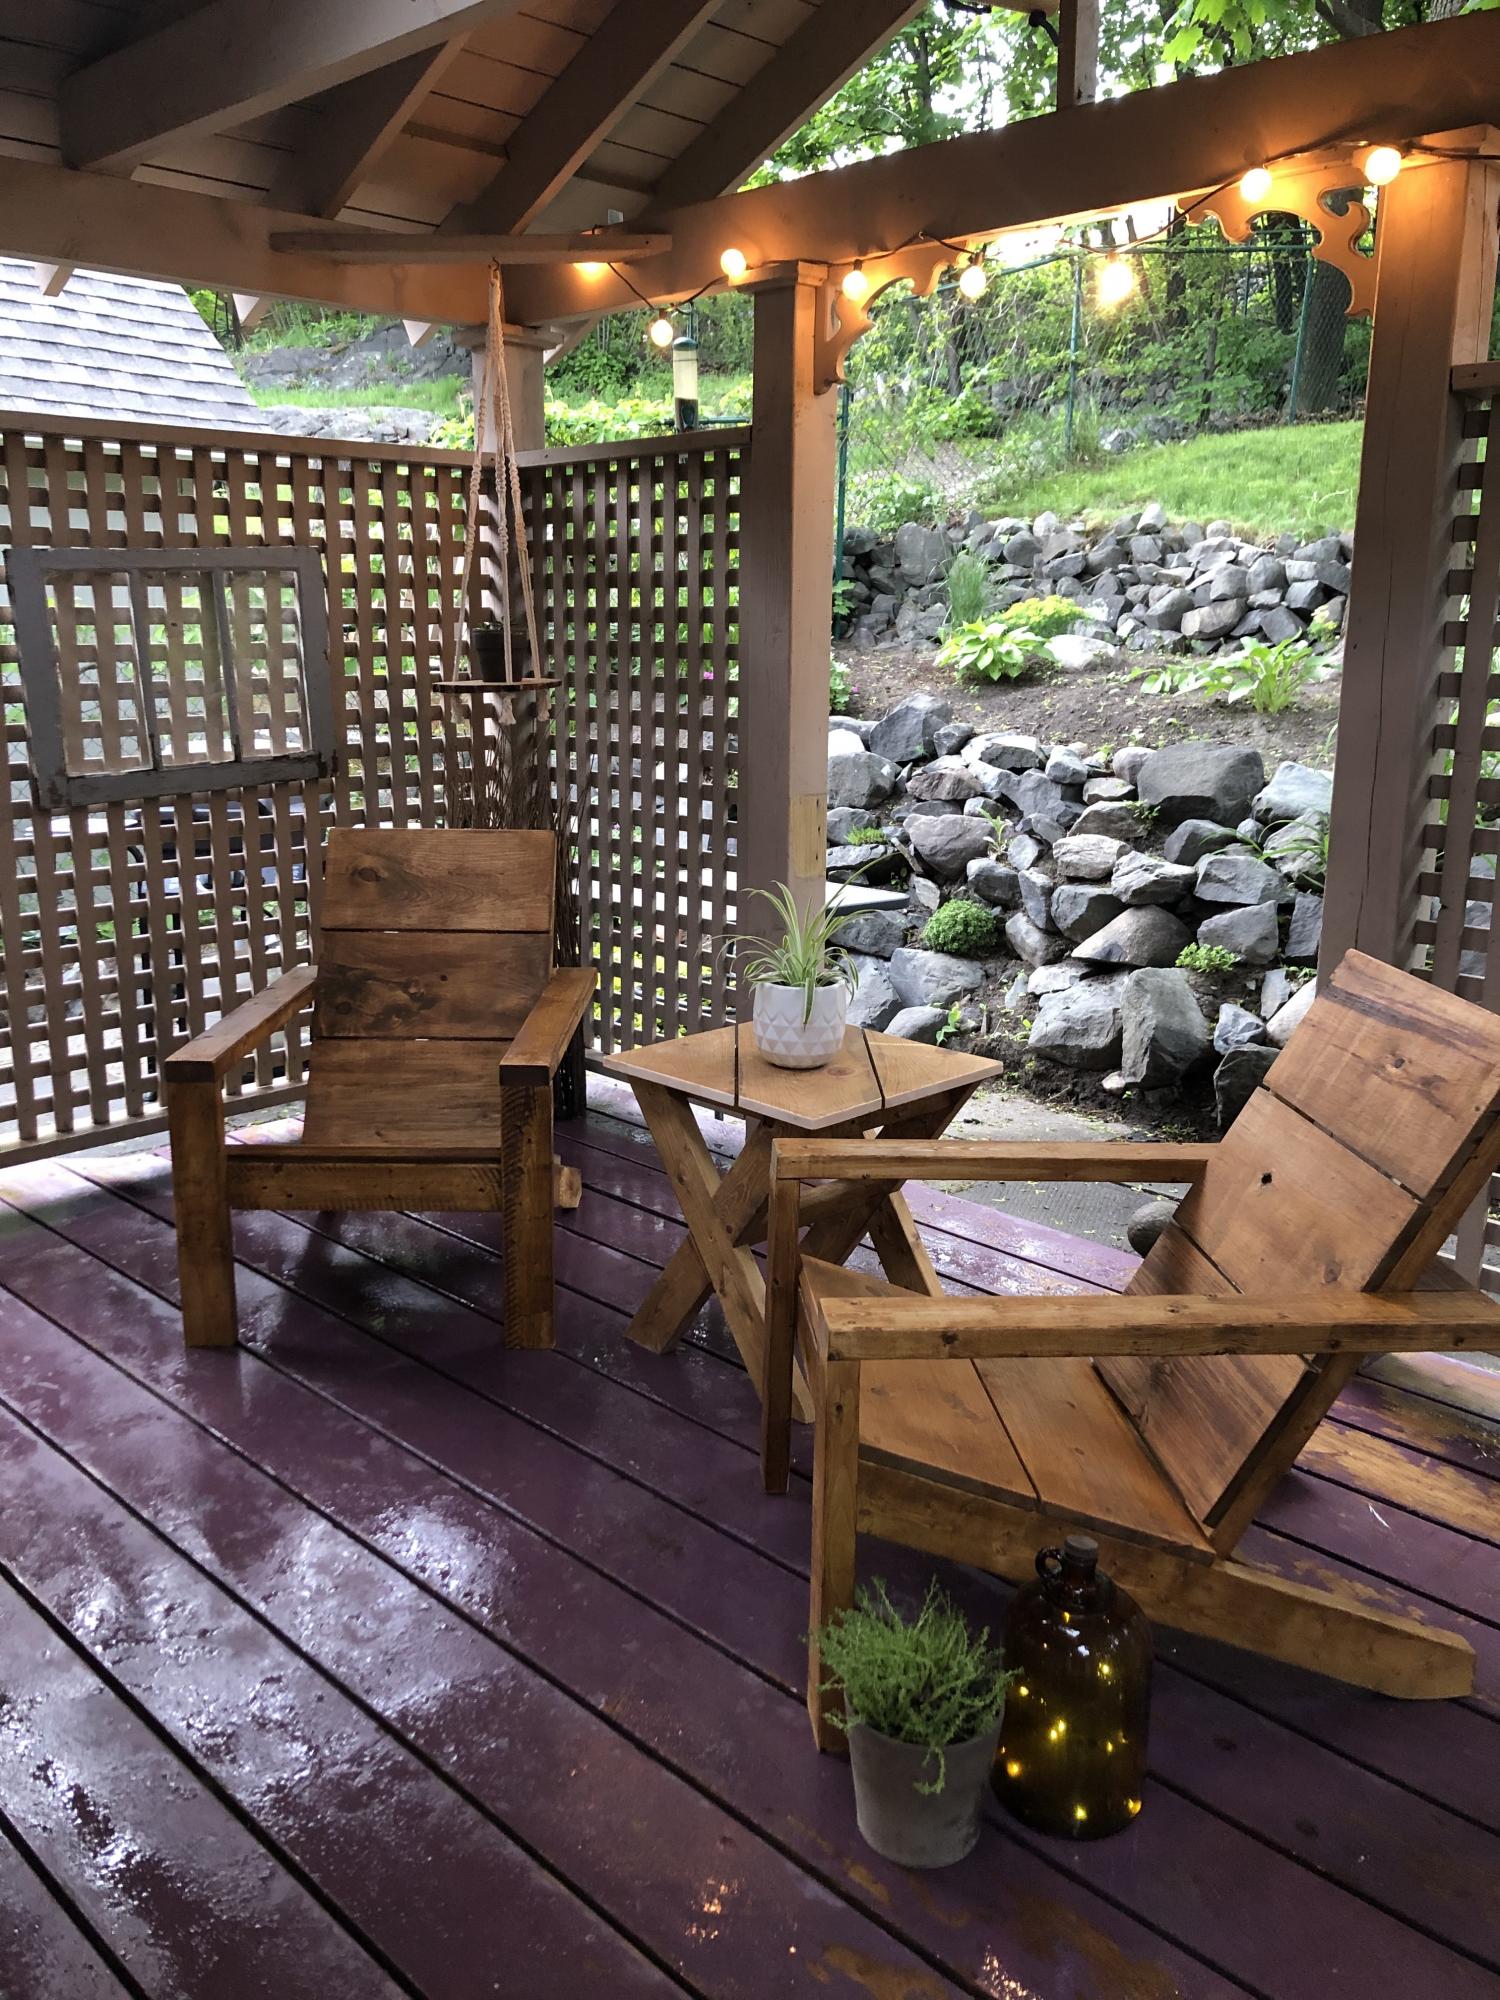
Wood Adirondack Chairs
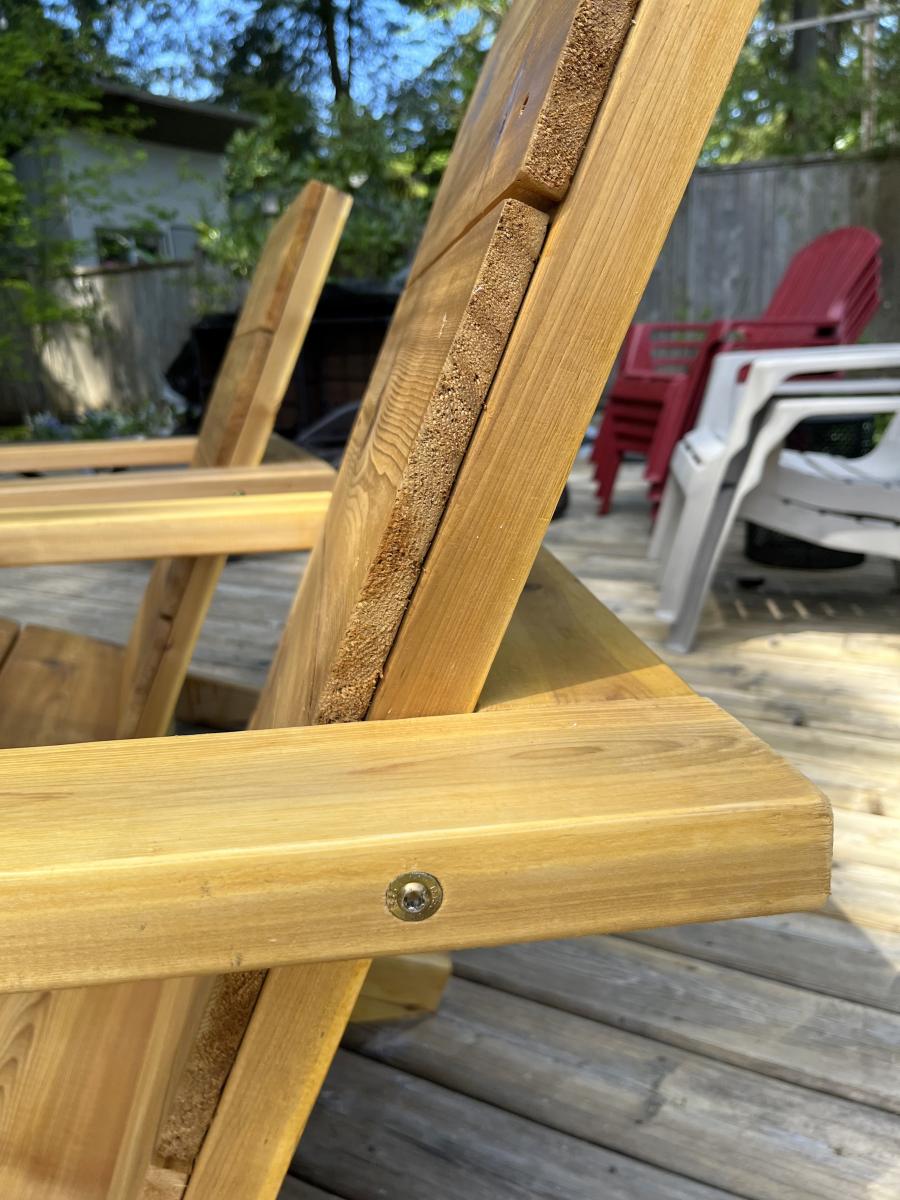
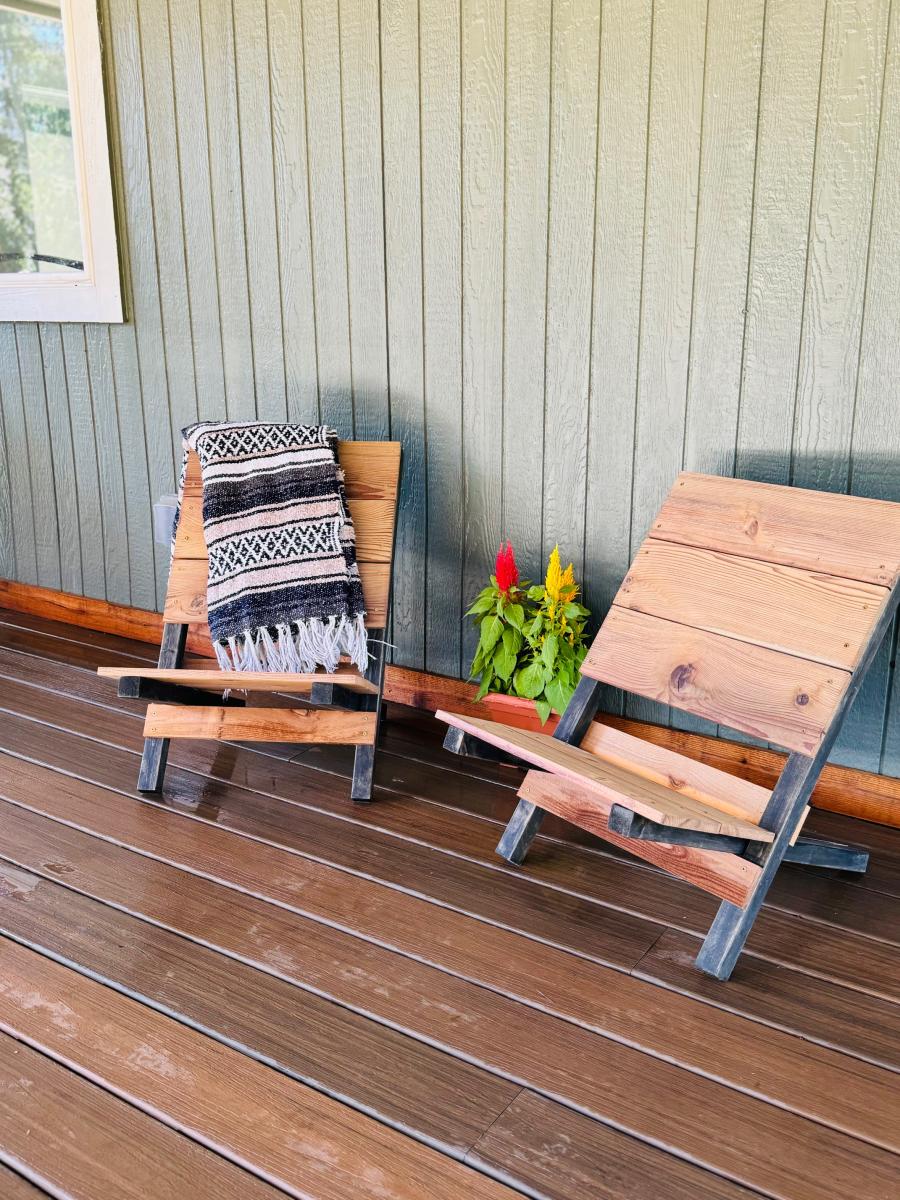
I added a 6 inch lag screw to support the arm in case someone sat on the arm. I also added small metal brackets hidden to help secure the leg strength.
Matt
Built from Plan(s)
I added a 6 inch lag screw to support the arm in case someone sat on the arm. I also added small metal brackets hidden to help secure the leg strength.
Matt
Loved these plans. Made a table as well. Great set!
Thu, 06/11/2020 - 13:18
I am so in love with the table you made to match! Did you find the plans here?
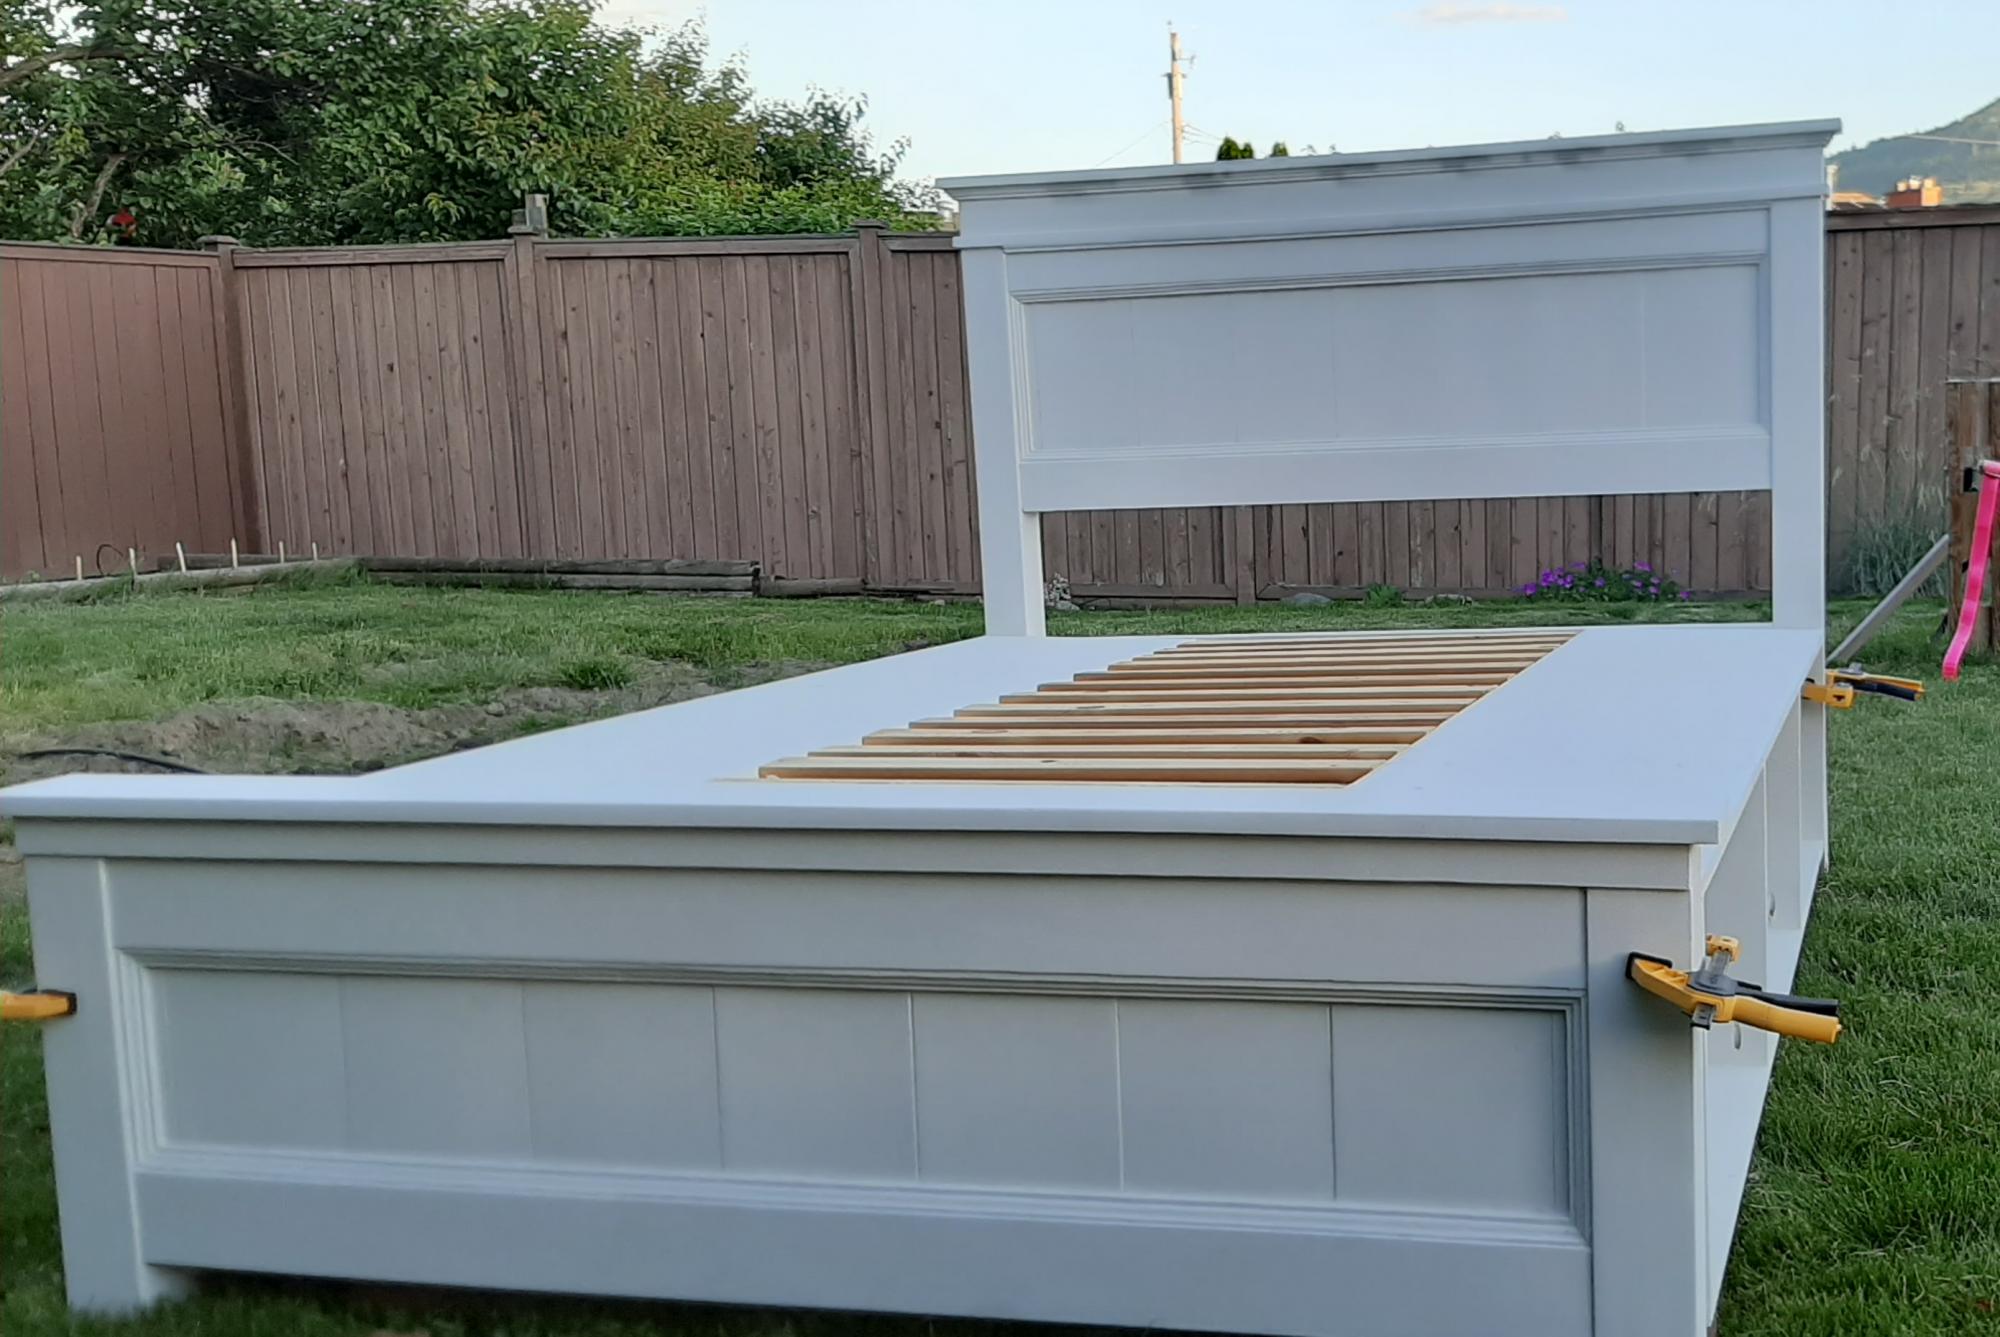
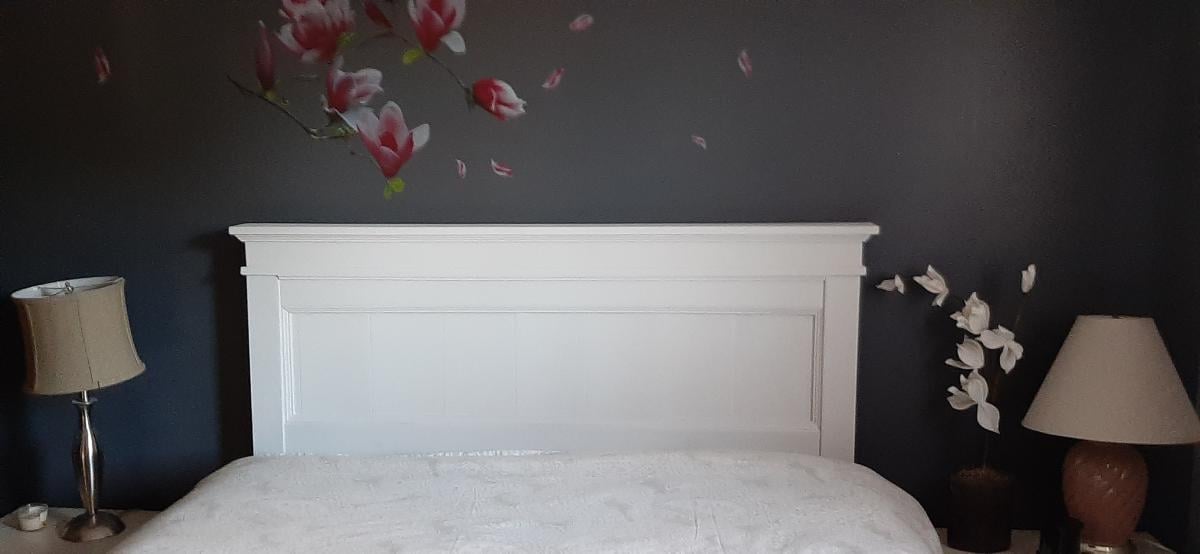
I used wood from an older Ana white project of a loft bed my daughter had out grown. I liked the look of Ana's Mom bed but wanted storage so I modified the plans slightly. I will add drawers later.


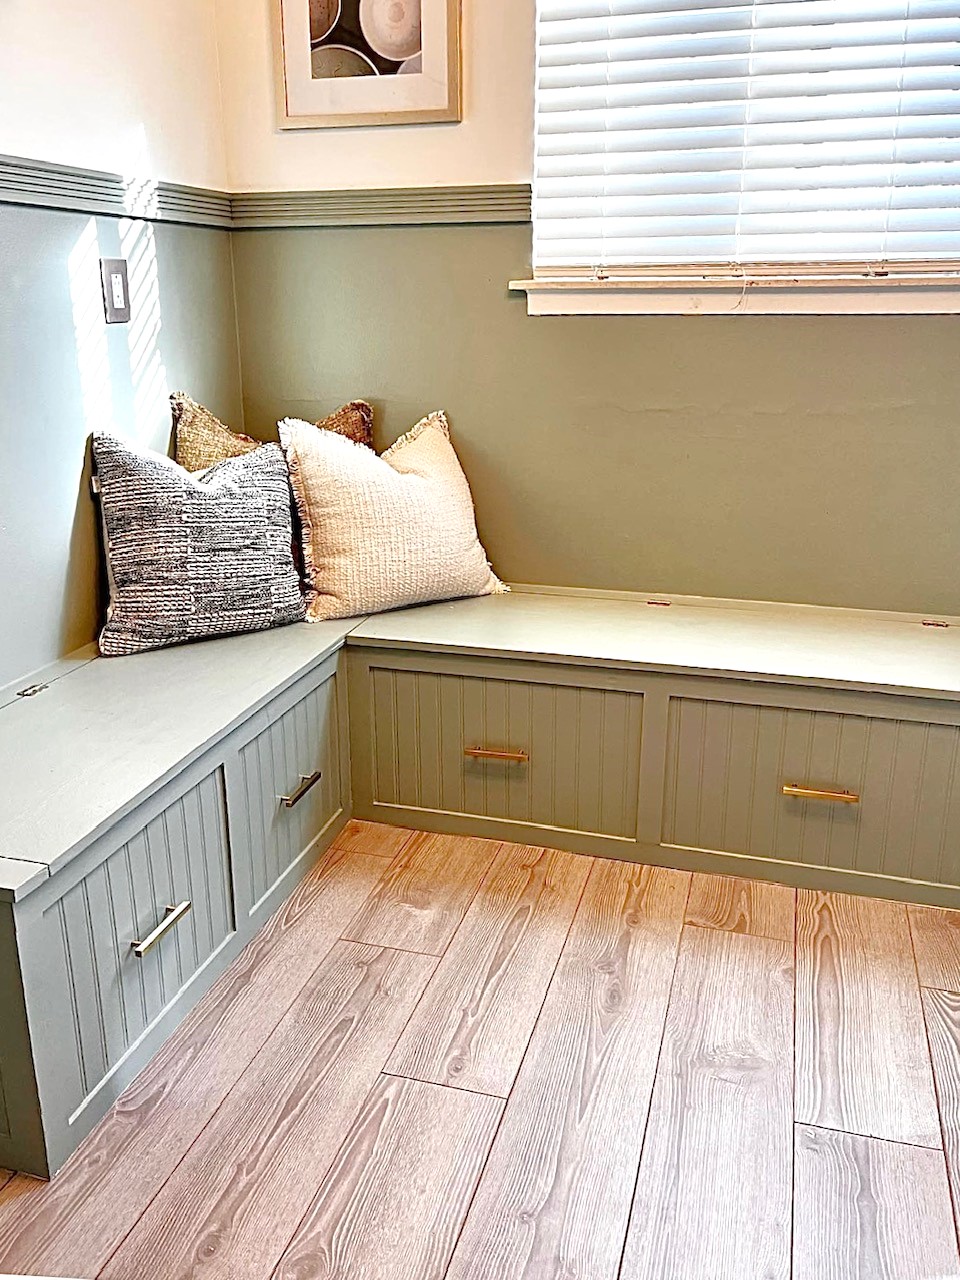
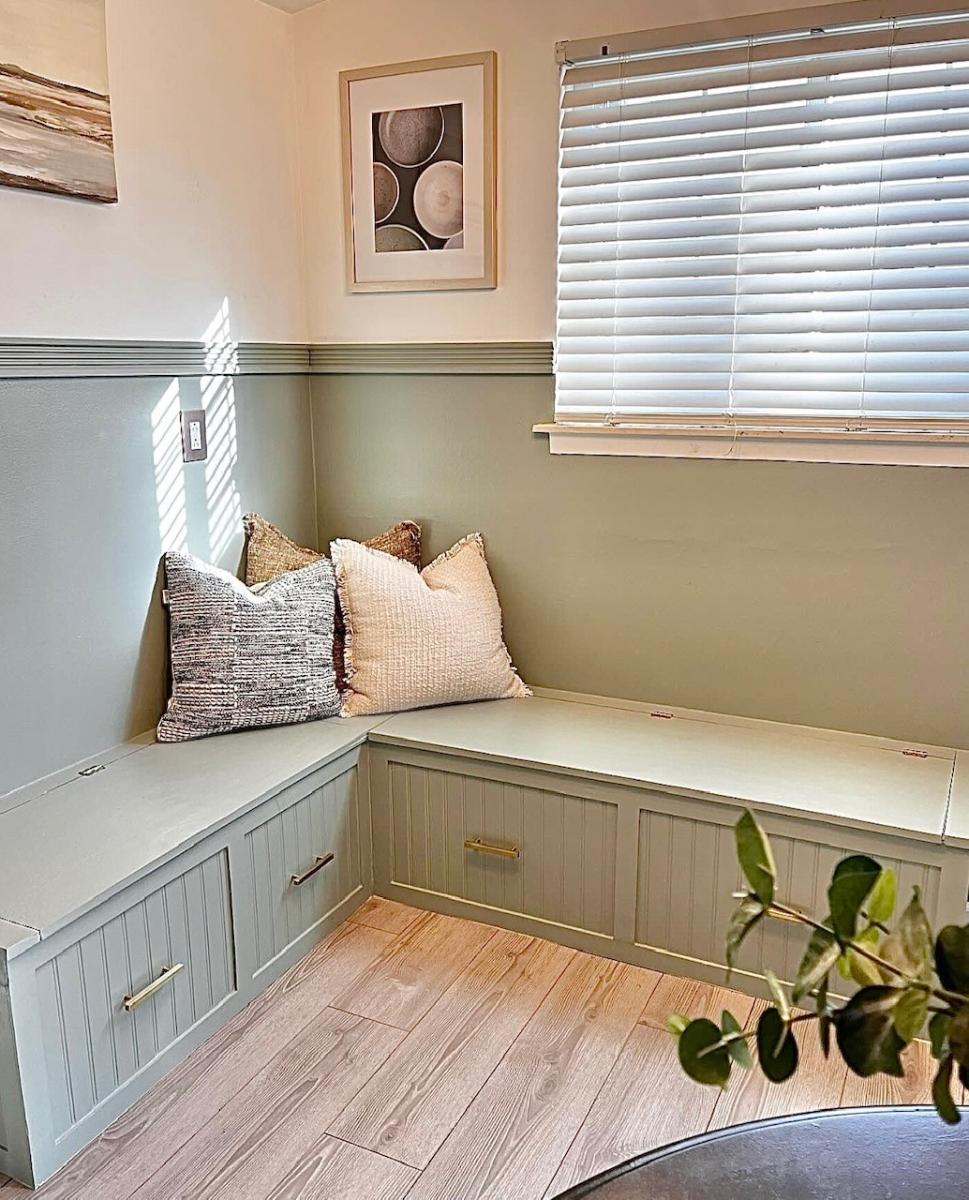
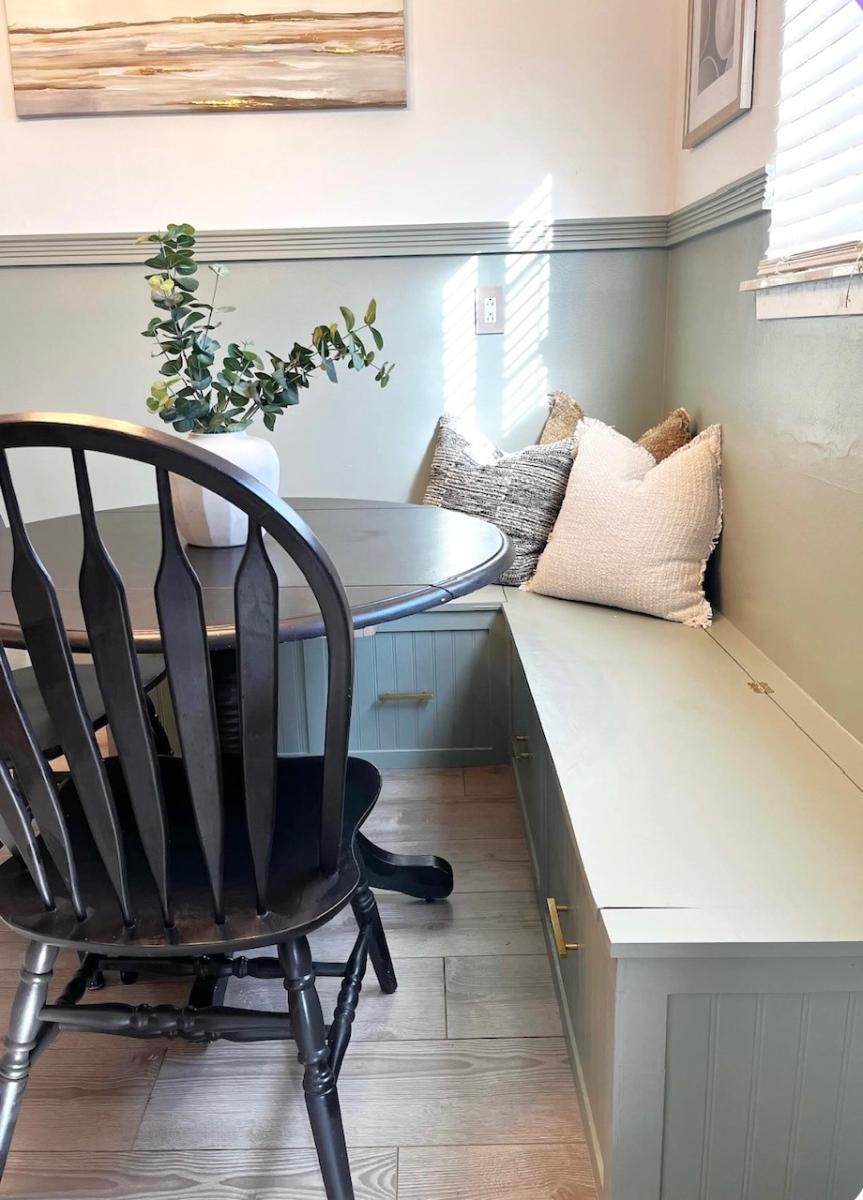
Our kitchen is smaller than our last house, so we turned our breakfast nook into more storage and could yet space. I love Ana White’s plans, tips, videos, and community.
Beth Ivy
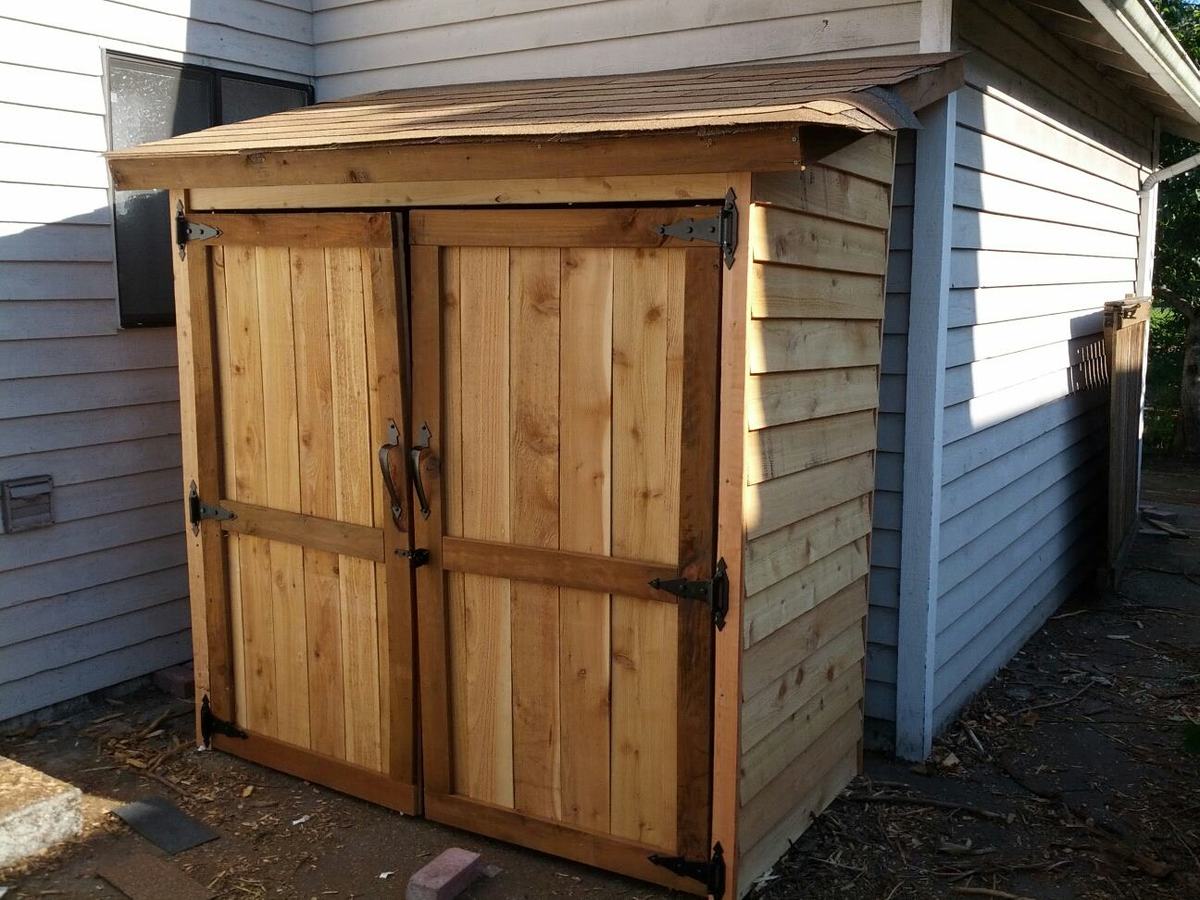
I have been dreaming about building so many things featured on this website, and I finally buckled down and built something. I figured that an outside garden shed would be a bit more forgiving than a project requiring a bit more precision, and from the picture, you can see that it's not perfect! I'm still working on trimming the shingles and I still have to stain/seal it. I've got to admit, when I first picked up the wood for the project at the store, I wondered what I had gotten myself into. But I just jumped in, and here it is.
Thu, 10/11/2012 - 10:45
What a perfect spot for it as well! Really good job with your first project.
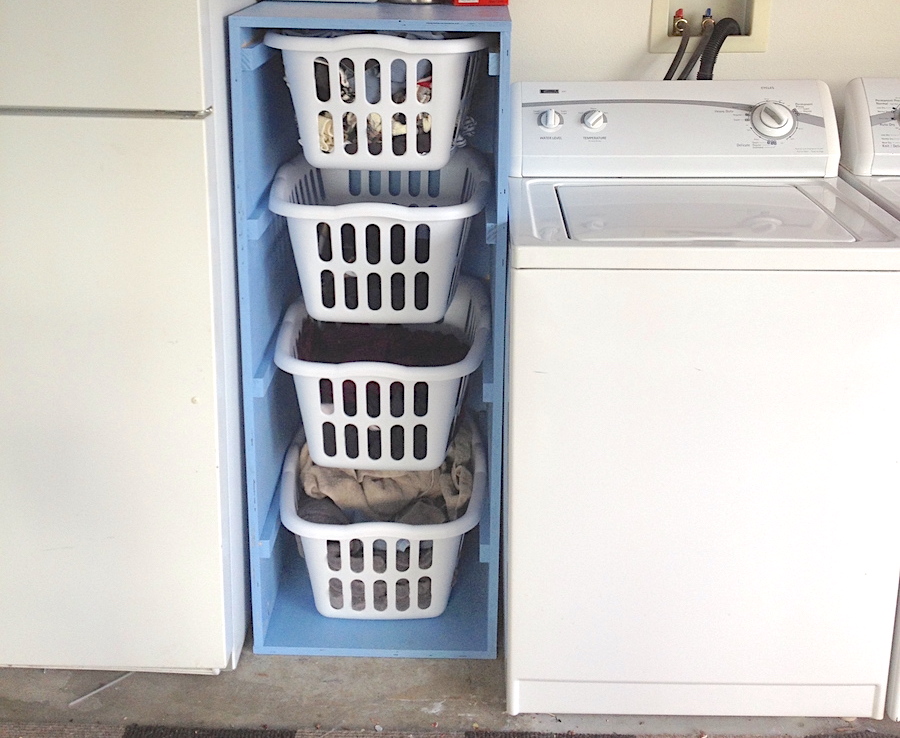
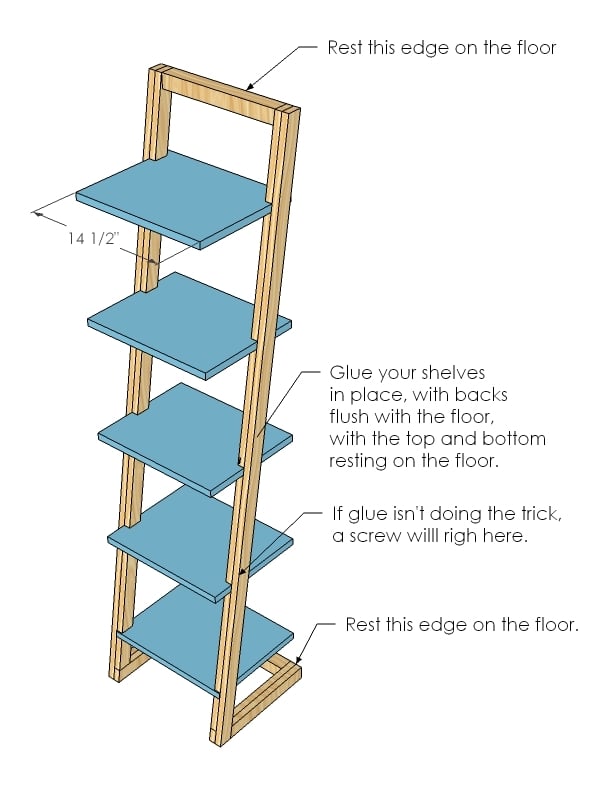
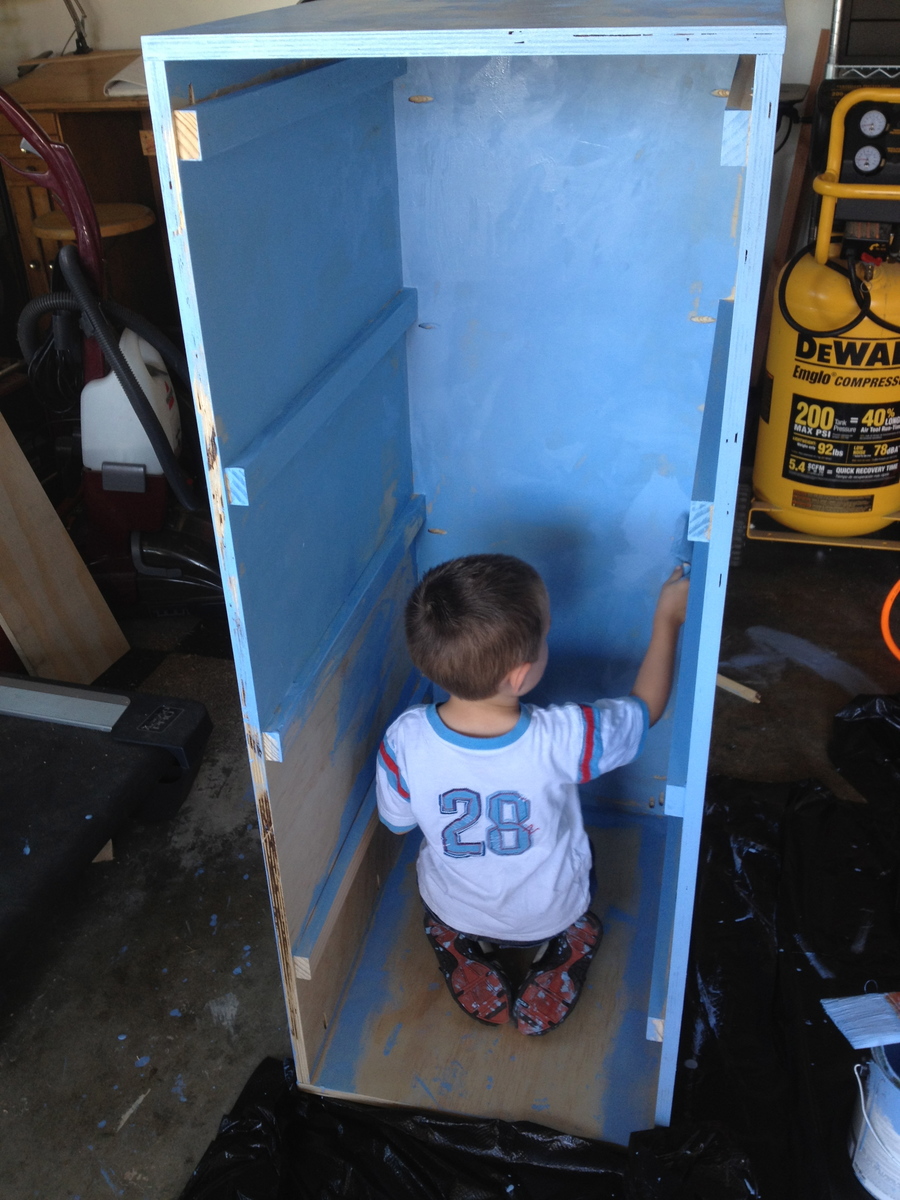
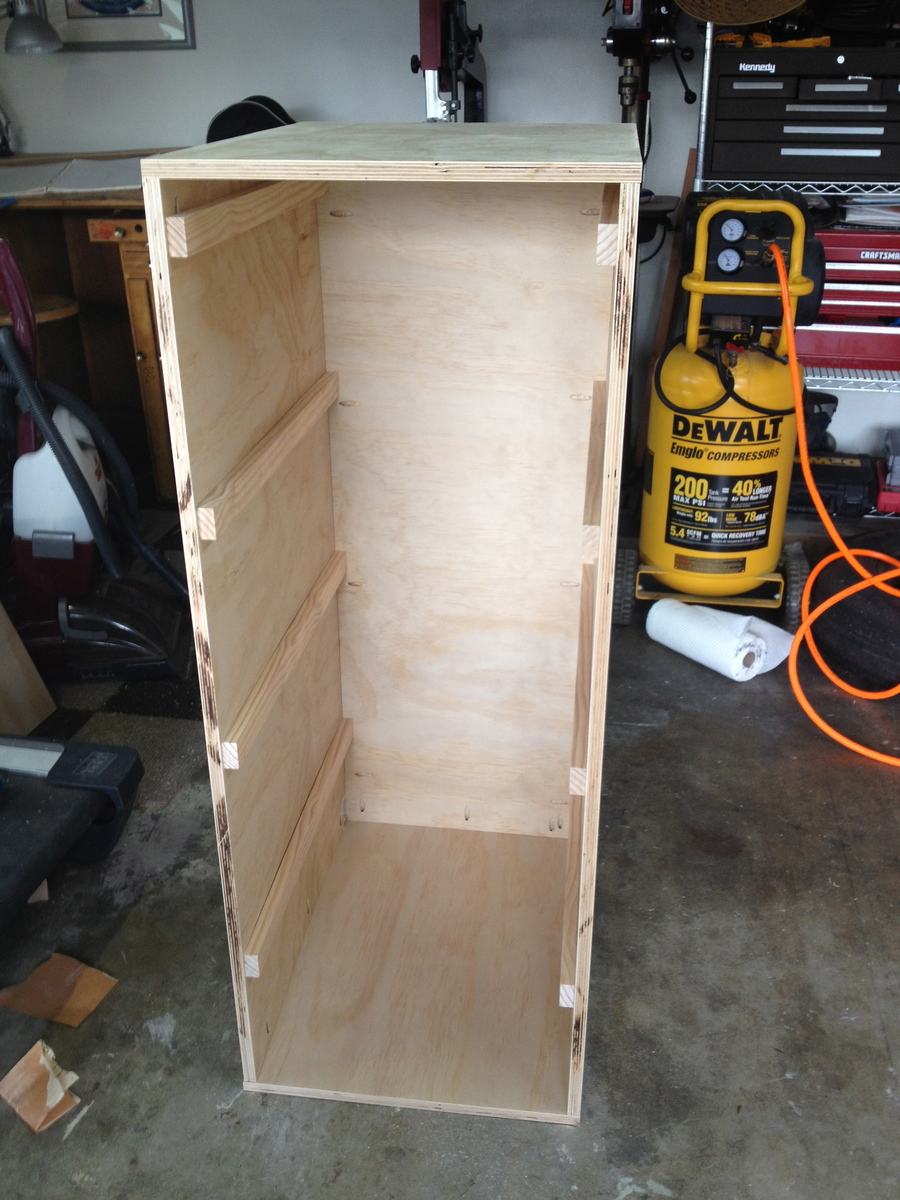
I was tired of having my laundry piled on my garage floor. These plans were the perfect solution. It fits great in the small space I had next to my washer. And it was so easy. I was able to do it all by myself. My husband just had to catch the plywood for me when I ripped it. I was able to find the baskets on the plans at Target and used left over paint from my sons' playroom. My laundry is now always sorted, making it much easier and faster to clean.

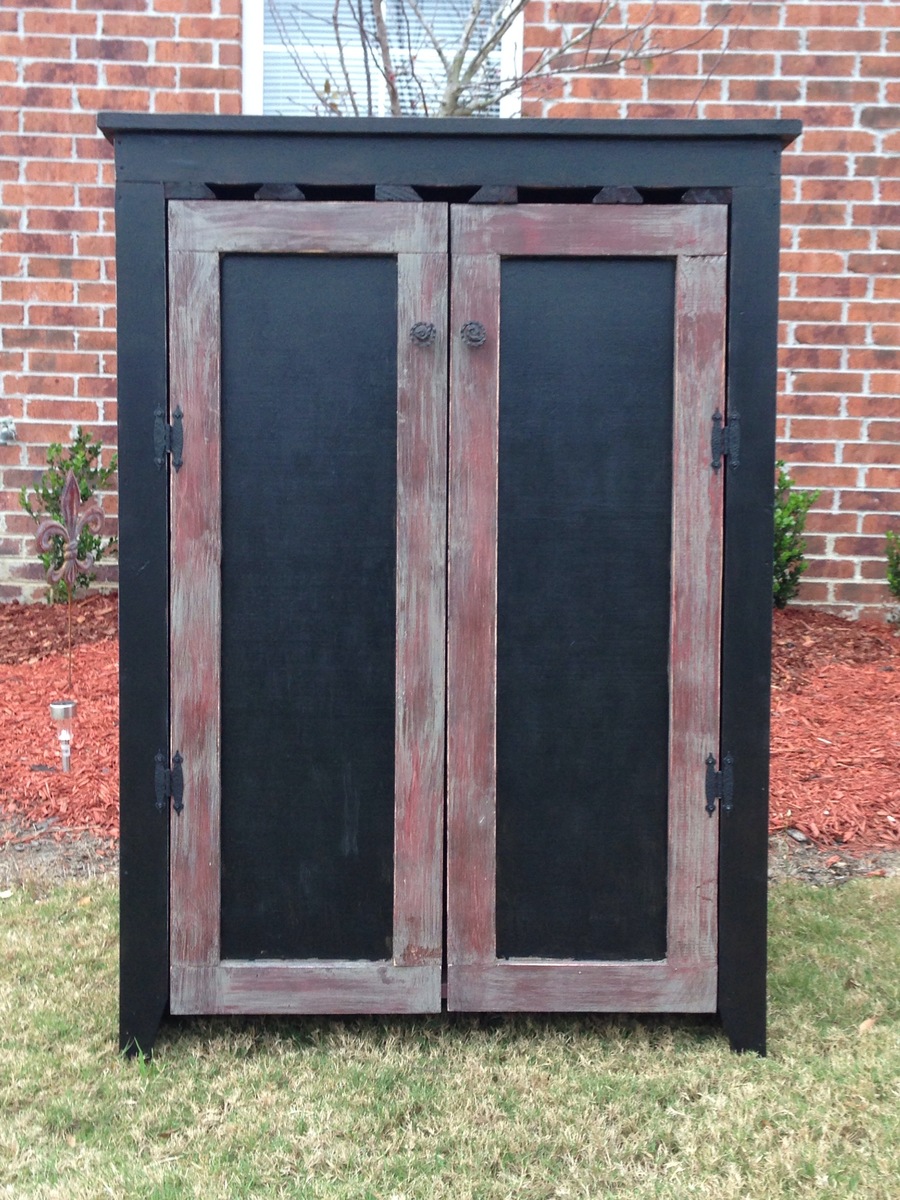
We used the plans from the jelly cabinet \pie safe and added a wine rack at the bottom and wine glass rack that the top! I love it! I get so many compliments on it.


I just started wood working this past few months, and this is I think my 6th project already. Super easy to make and so sturdy!! This will definitely help make building easier!!

Mon, 06/29/2020 - 12:44
I also made one of these last week and it has already proved it's worth many times! Yours looks great - I hope you get lots of use out of it :)
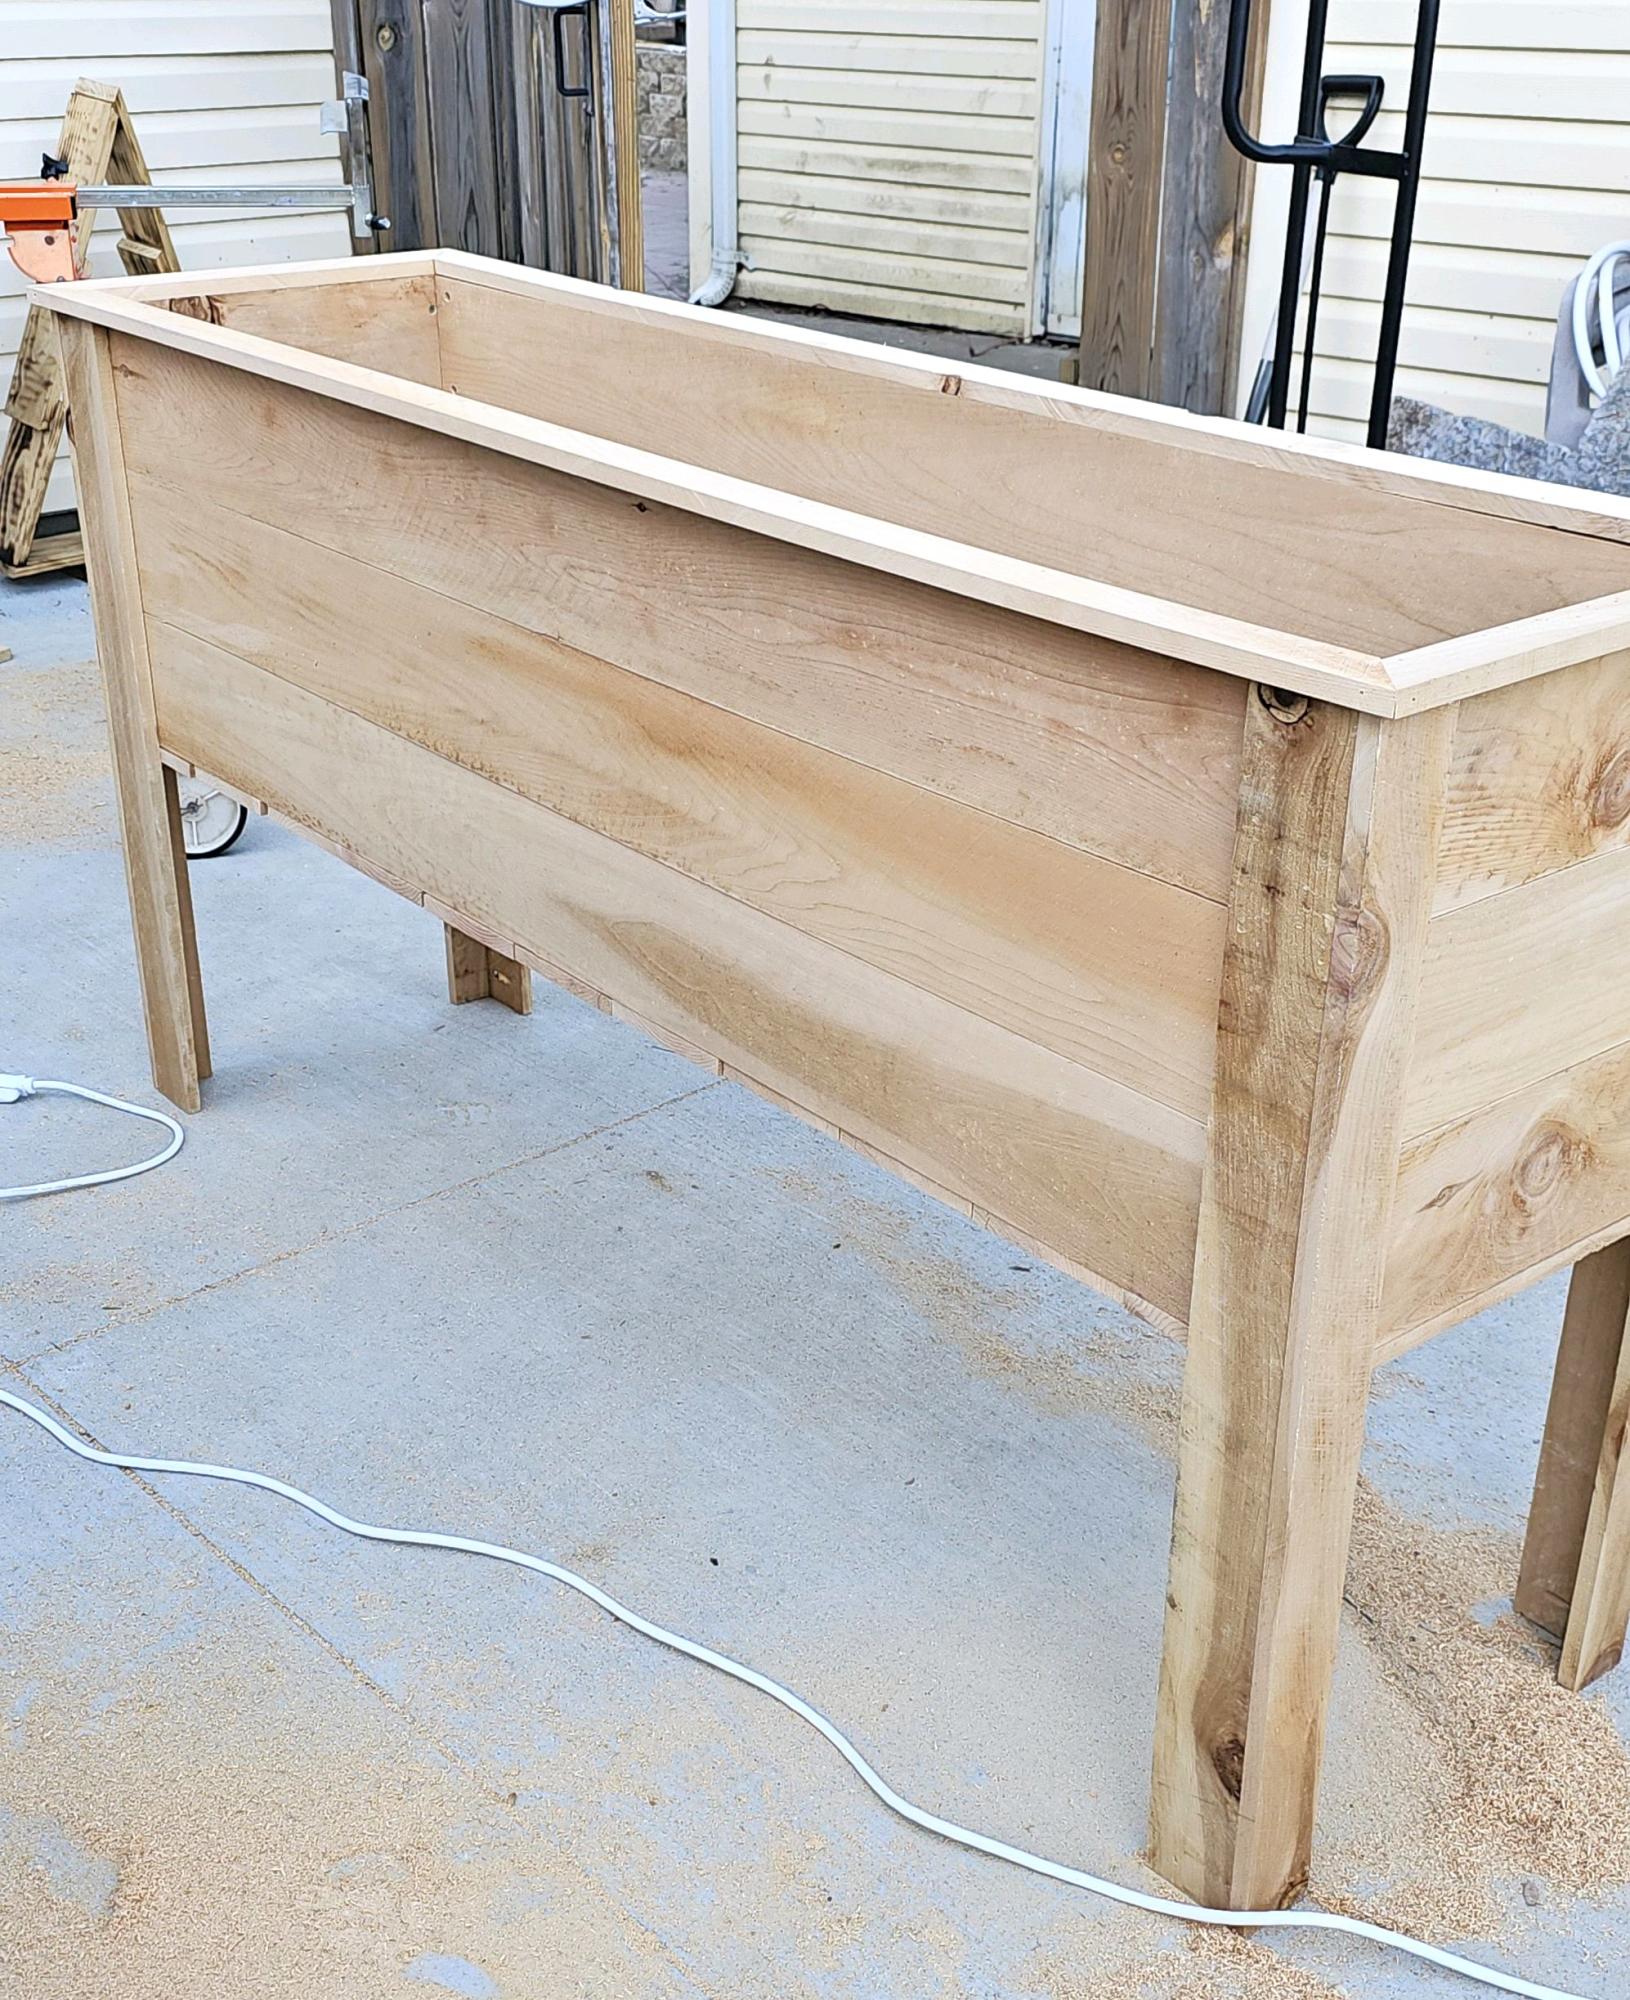
Followed Ana’s plans down to the measurements. Didn’t have a brad nailer, so I attached the 1x4 sides with 3/4in pocket holes and 1 1/4in PH screws. Additionally used trim screws and 1 1/4 finish nails throughout it for places I couldn’t put a PH. Plan on getting four more brackets for the bottom half, like the top. Very proud of myself.
Stained the legs, top, and base before completely assembling them.
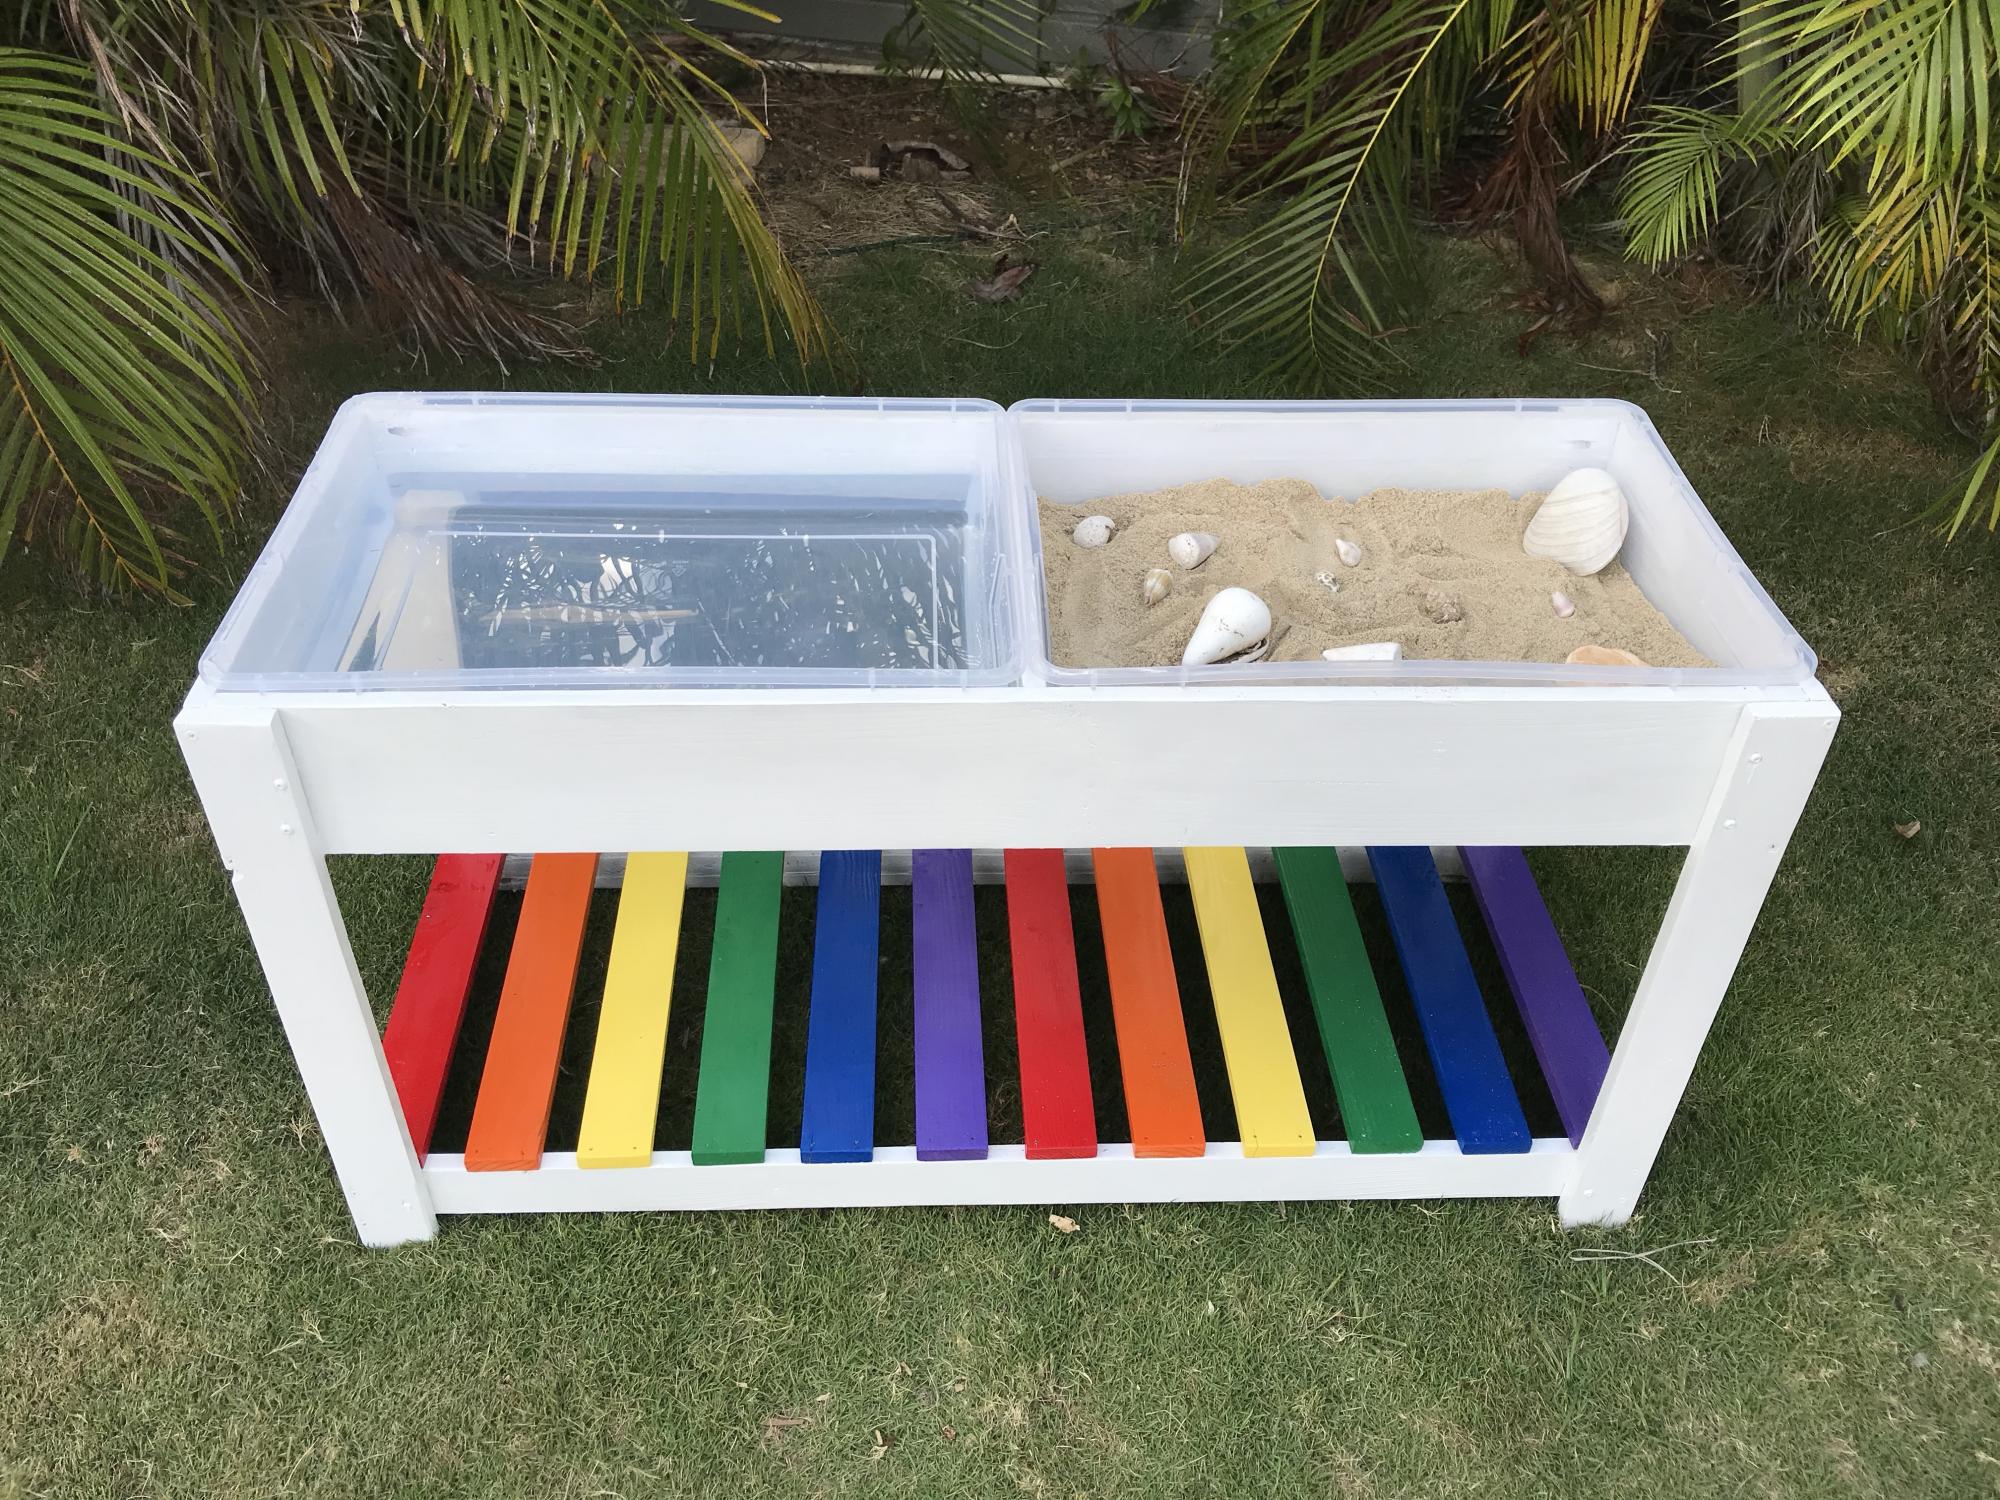
I'm new to woodworking, and this was so much fun to make! Pocket holes make it sturdy, and I spent plenty of time on sanding so no slivers for little ones. The plastic containers just barely fit so be sure to not undercut anything in the plan.
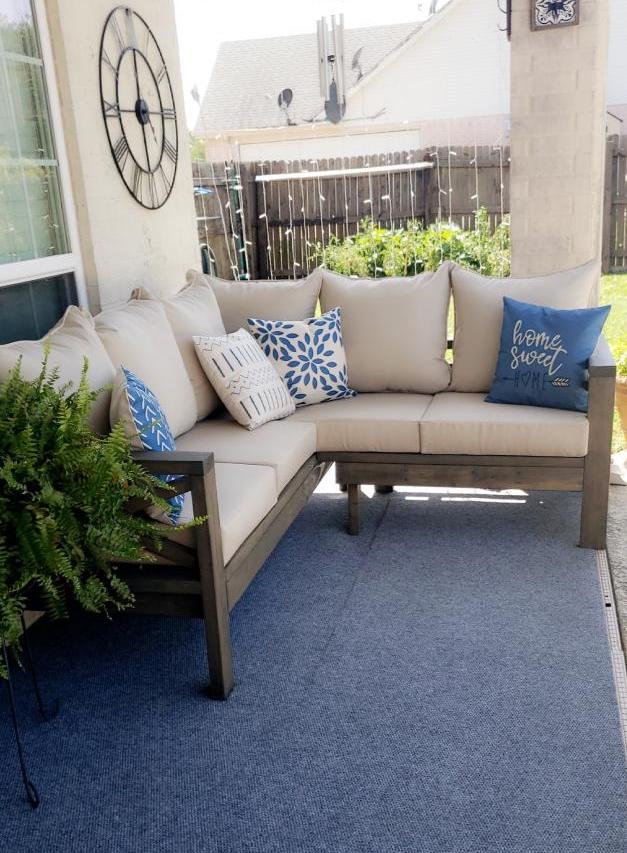
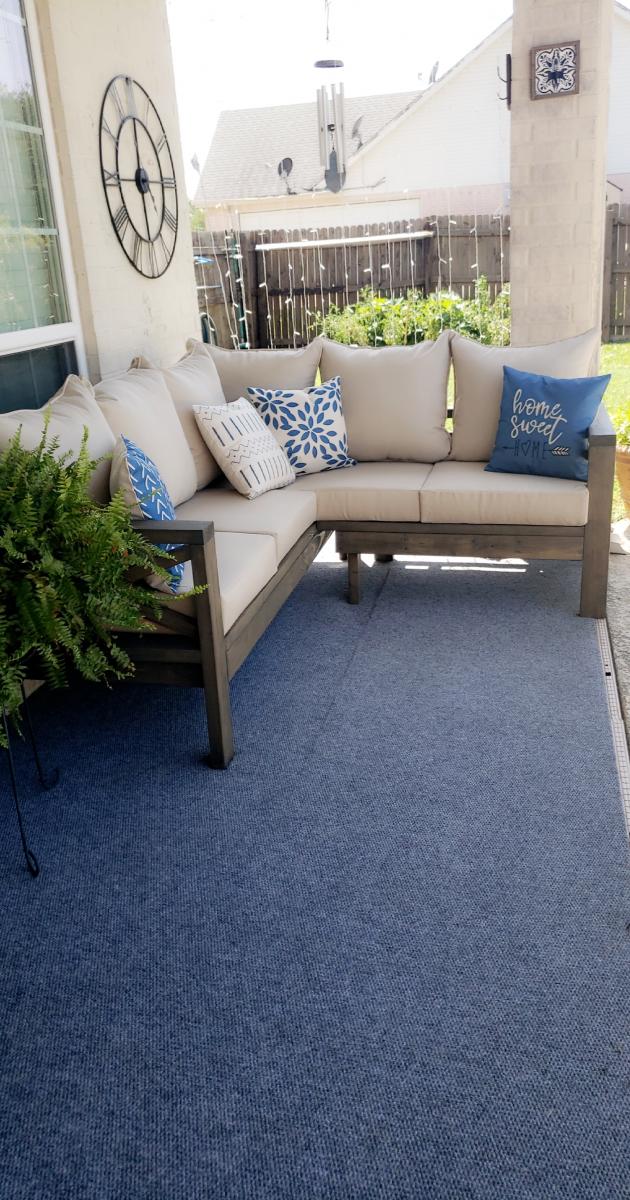
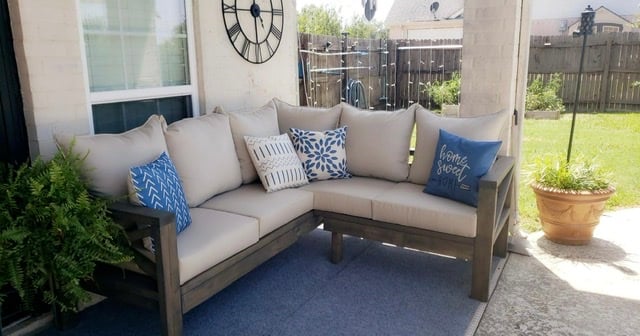
I made this outdoor sofa on a weekend.

Square coffee table based on a discontinued design from West Elm.


Wed, 10/13/2021 - 13:18
Could you please post the plan and cut list and others info??
It is so nice and i like to make it .
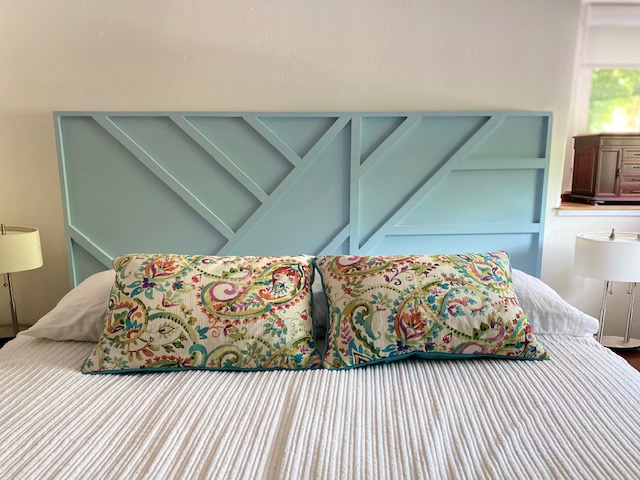
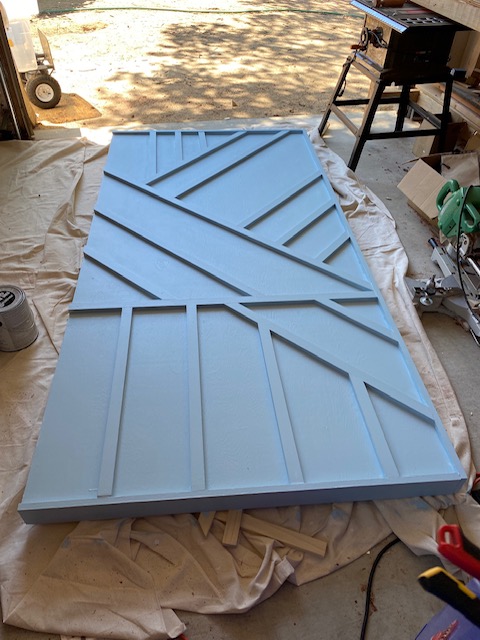
This project was fun and I learned a ton! I used the Modern Geo Headboard plans and then modified them to fit my room. This was my first project and I'm glad I did it but I should have started with something simpler to learn about my tools and understand the process better. I'm proud of myself and I'm looking forward to my next project. Thanks to Ana for the plans and the inspiration, staying busy during this pandemic is a lifesaver!

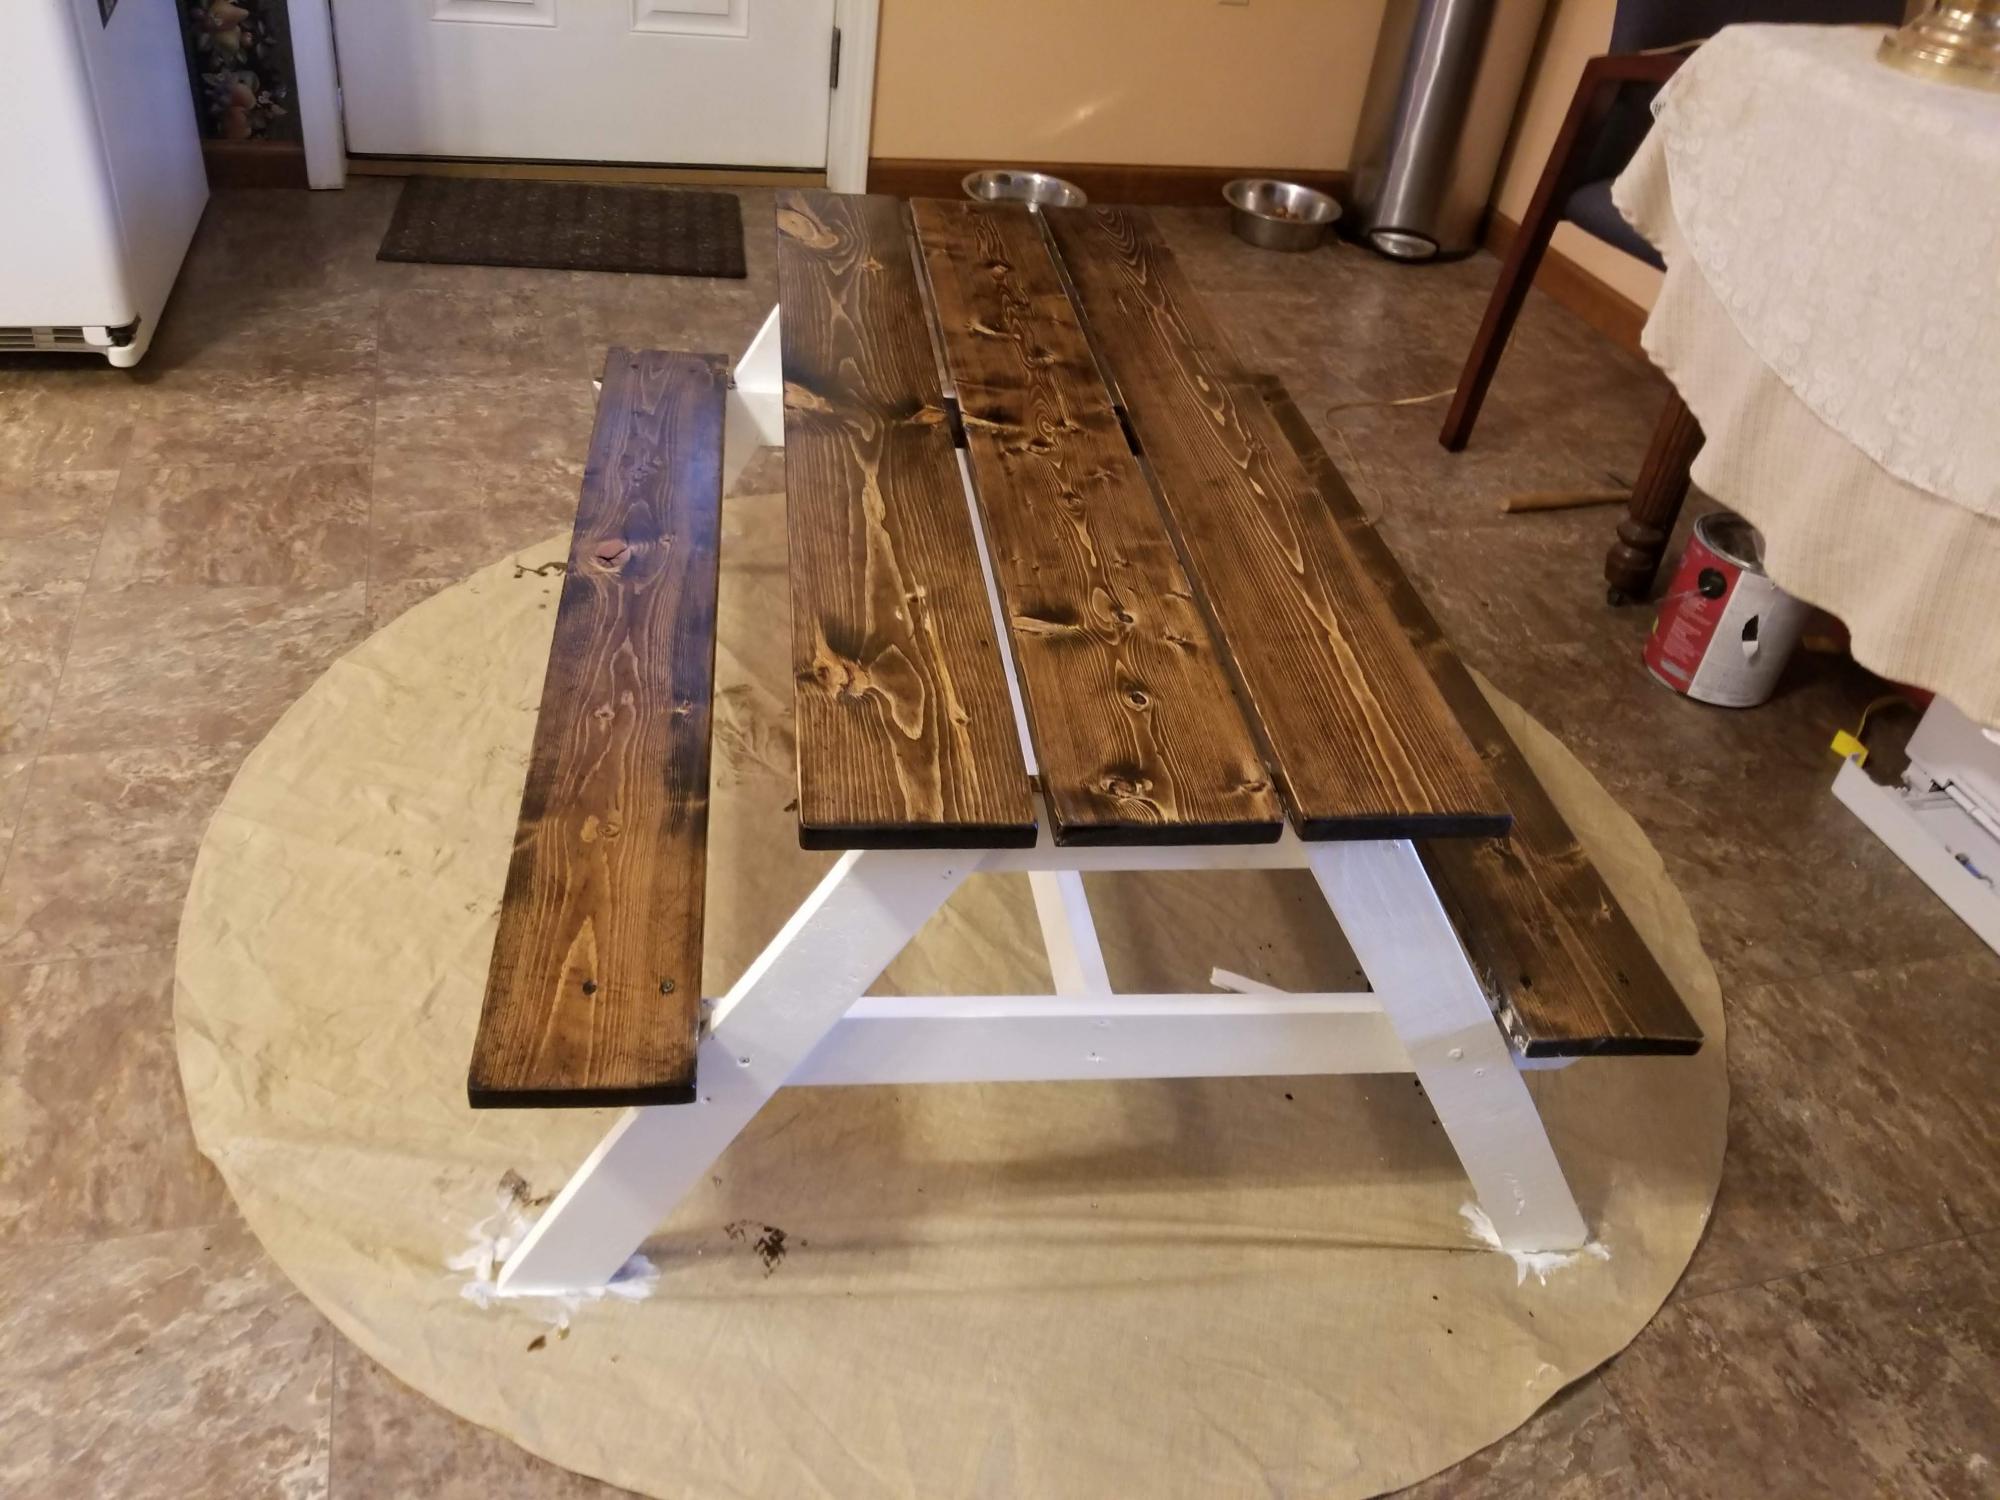
Love this picnic table. I have 2 grandchildren, Kayden is 3 and Kinsley is 1. They both love using it.
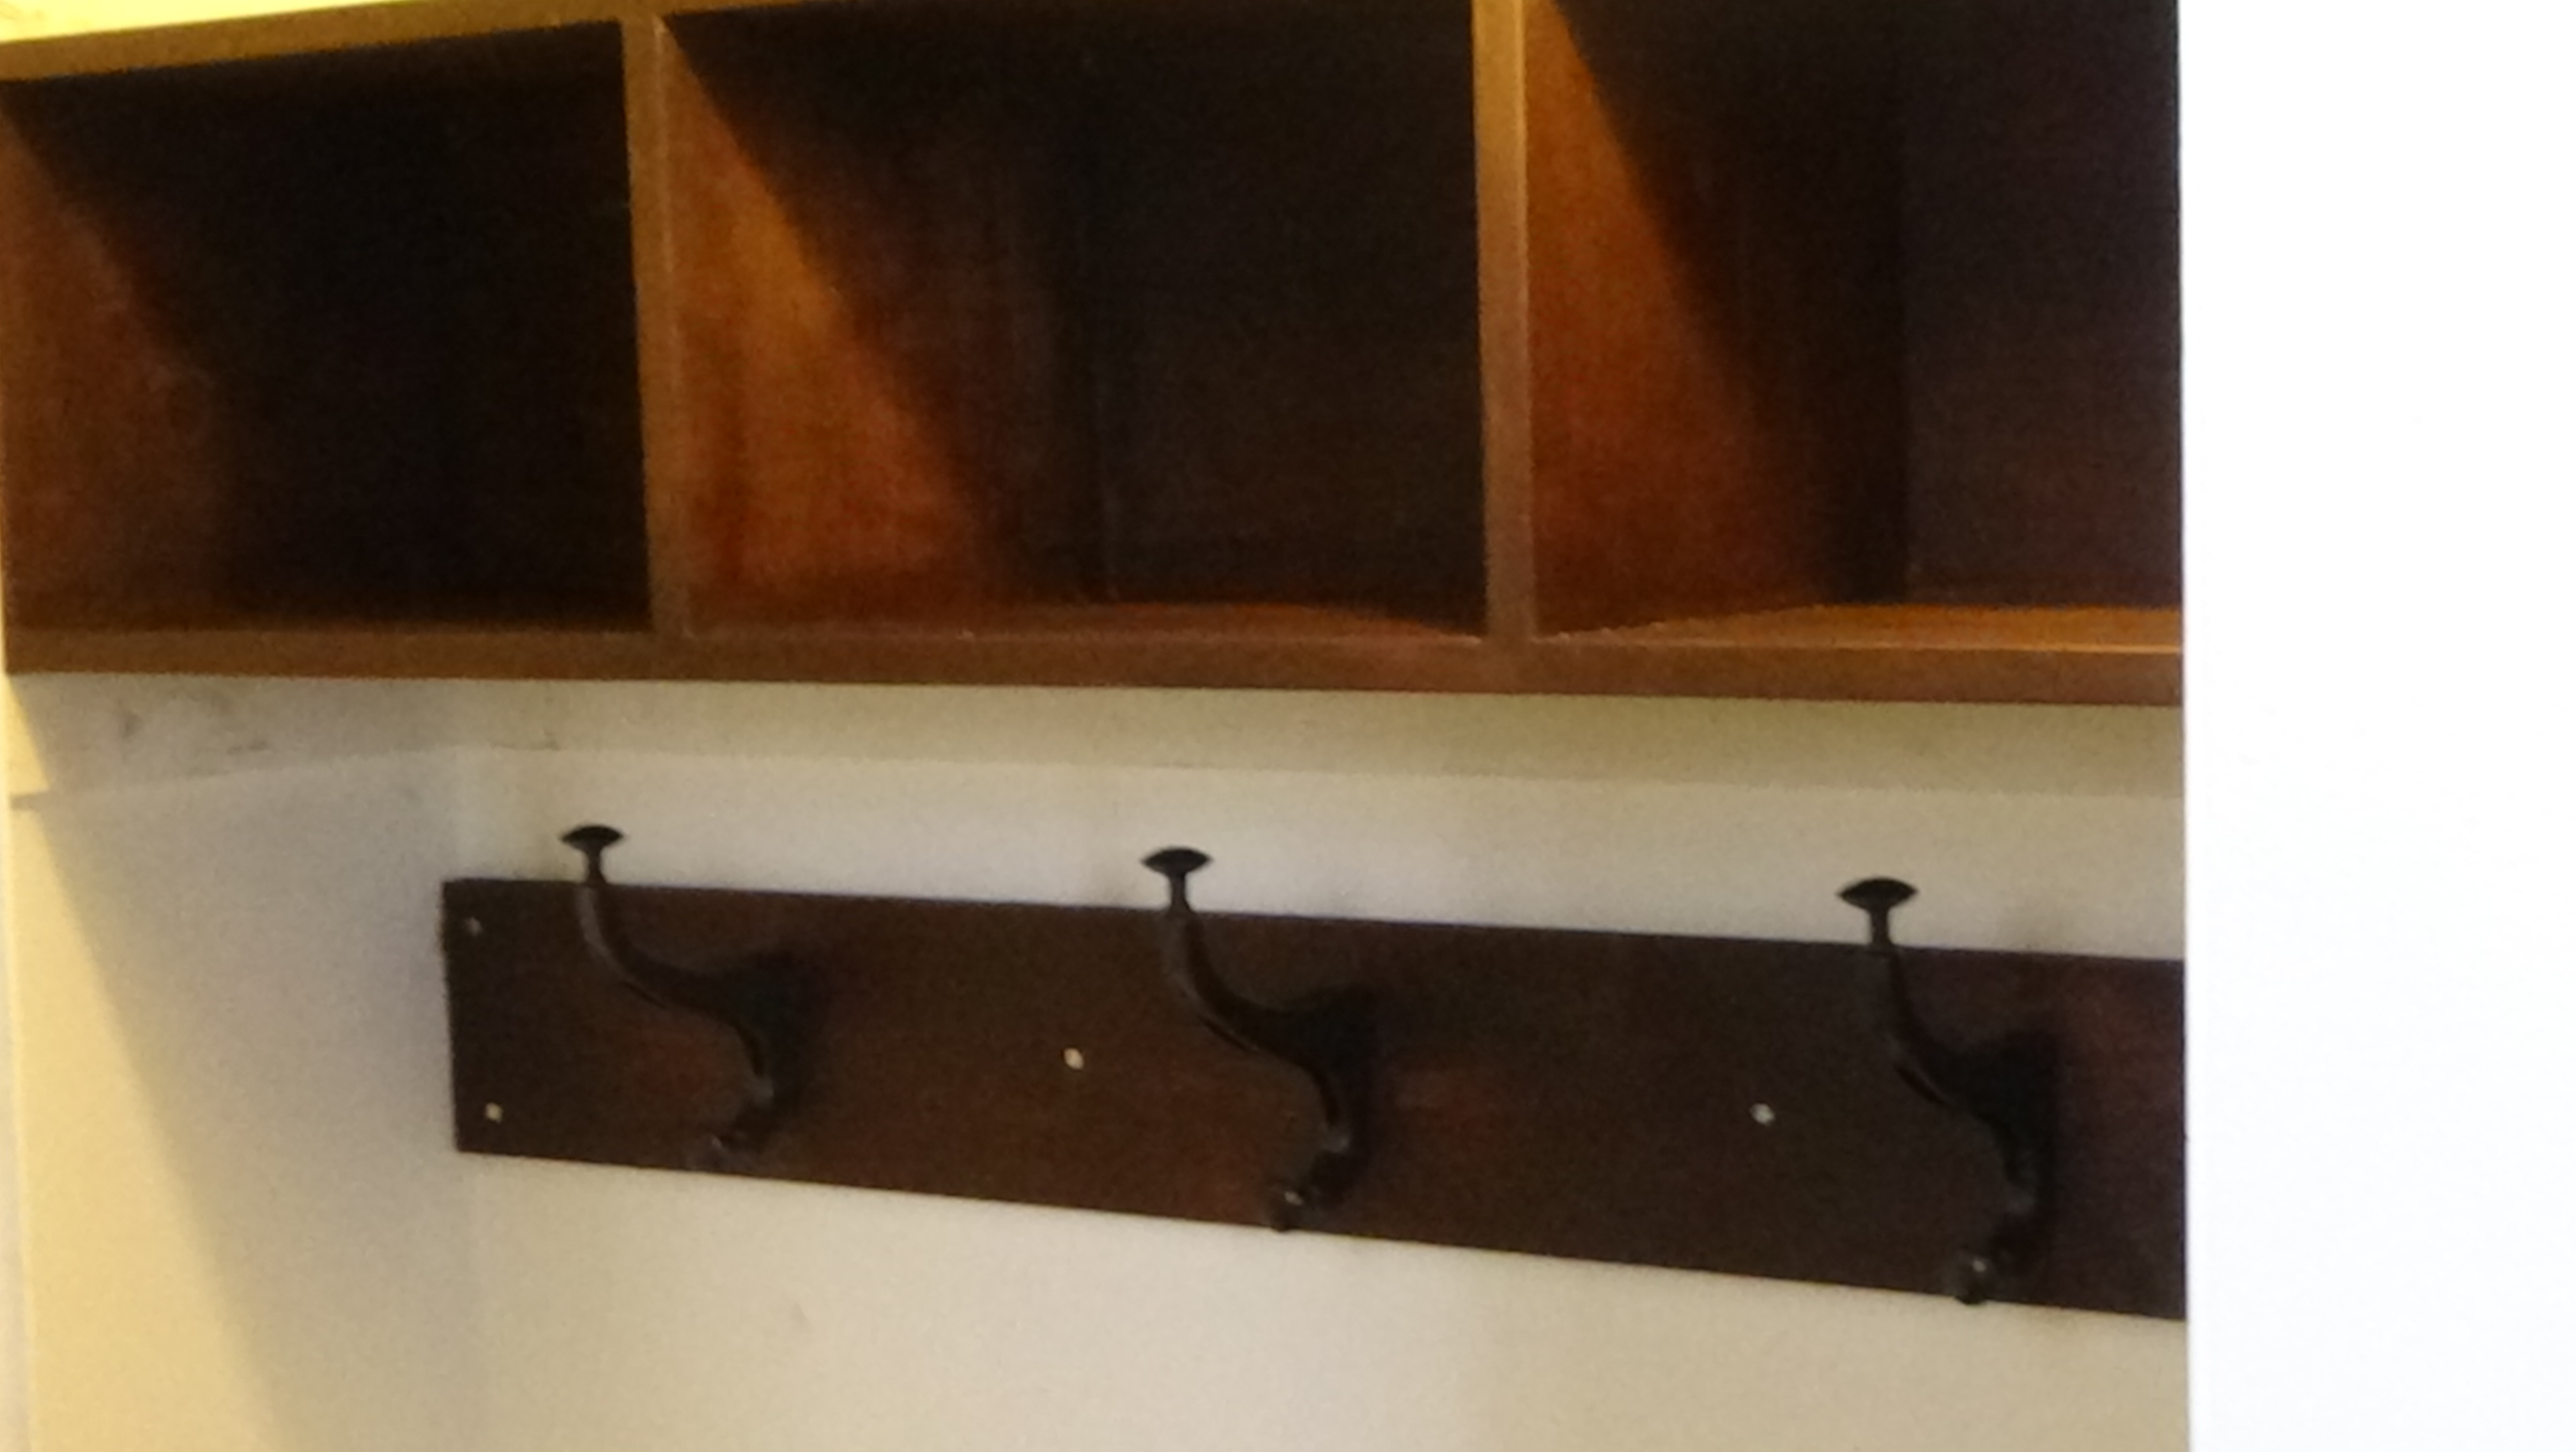
My front closet was transformed into a mudroom. Hidden storage is a genious idea. Thank you Ana!!! It wasn't easy though.
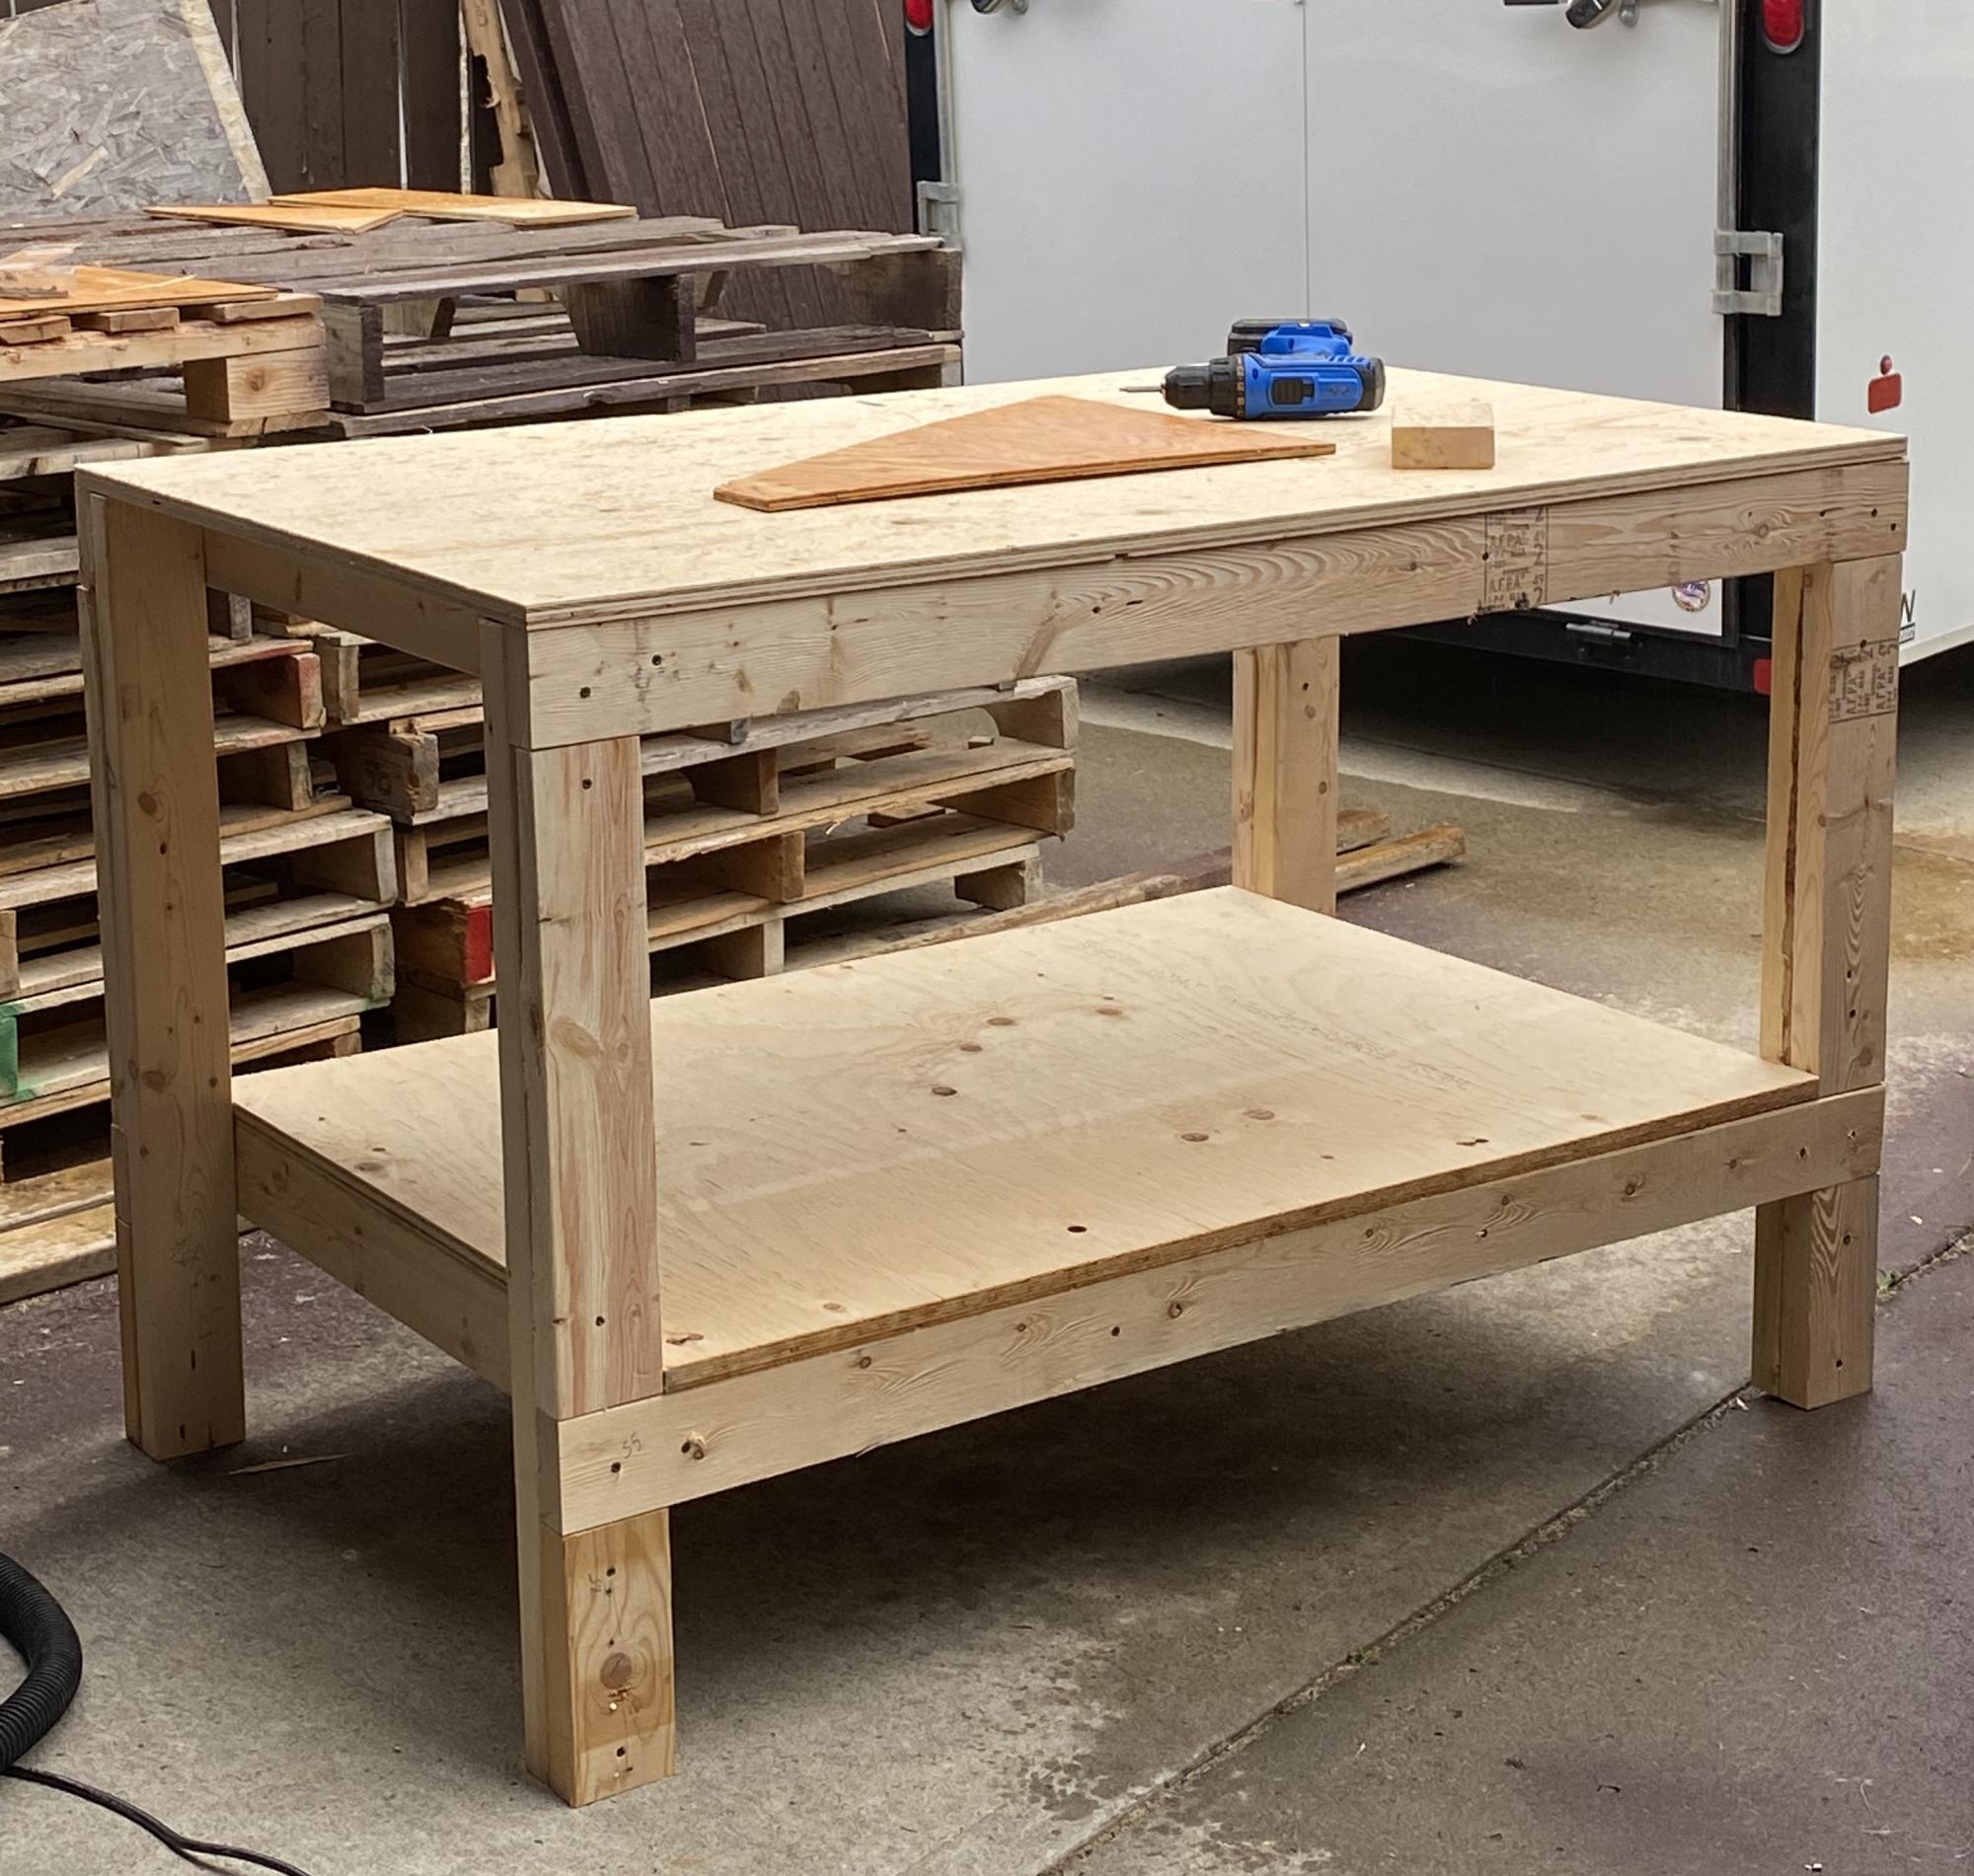
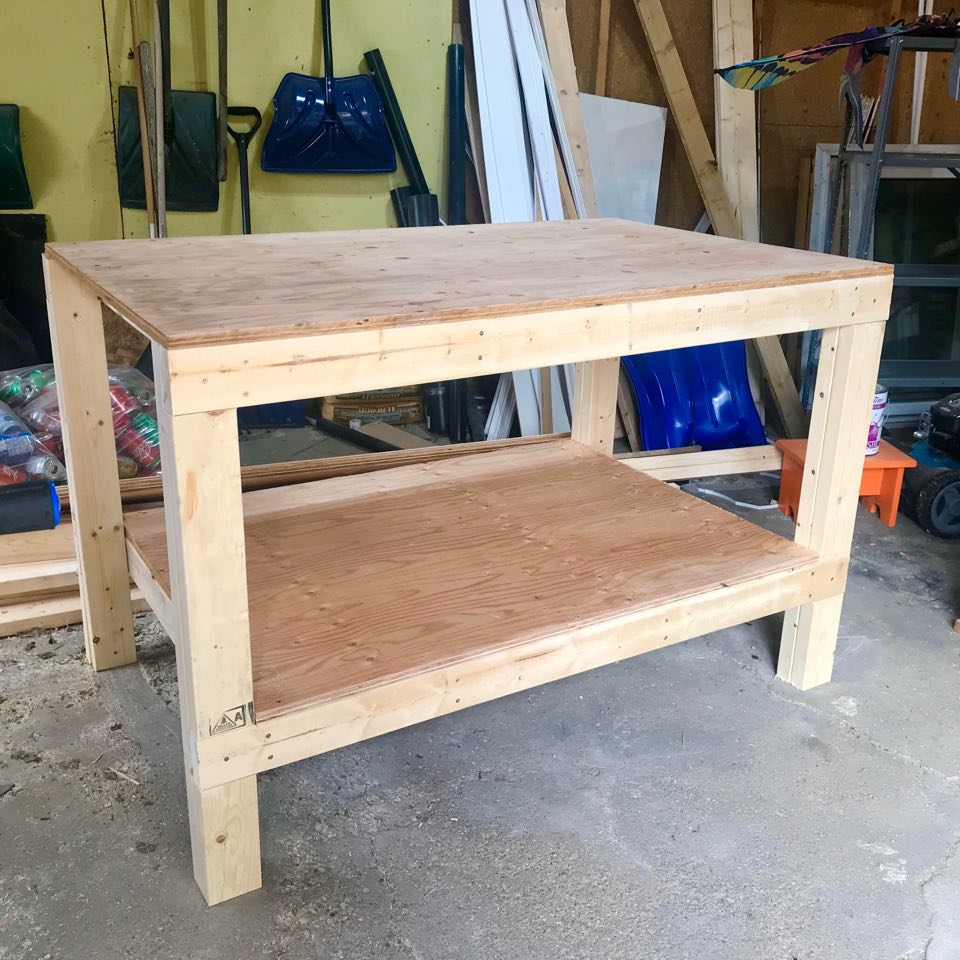
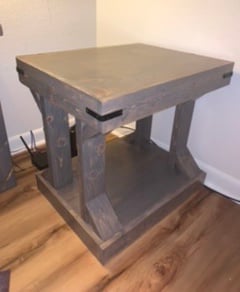
Started to renovate hubby’s bathroom, got annoyed with lack of space on his work bench, built my own. Since this pic, I’ve added locking casters, a power bar up one leg, and a plain metal tool holder on one side. Still have some thoughts rattling around in my head about various other upgrades. Super plans, easy one-woman job.
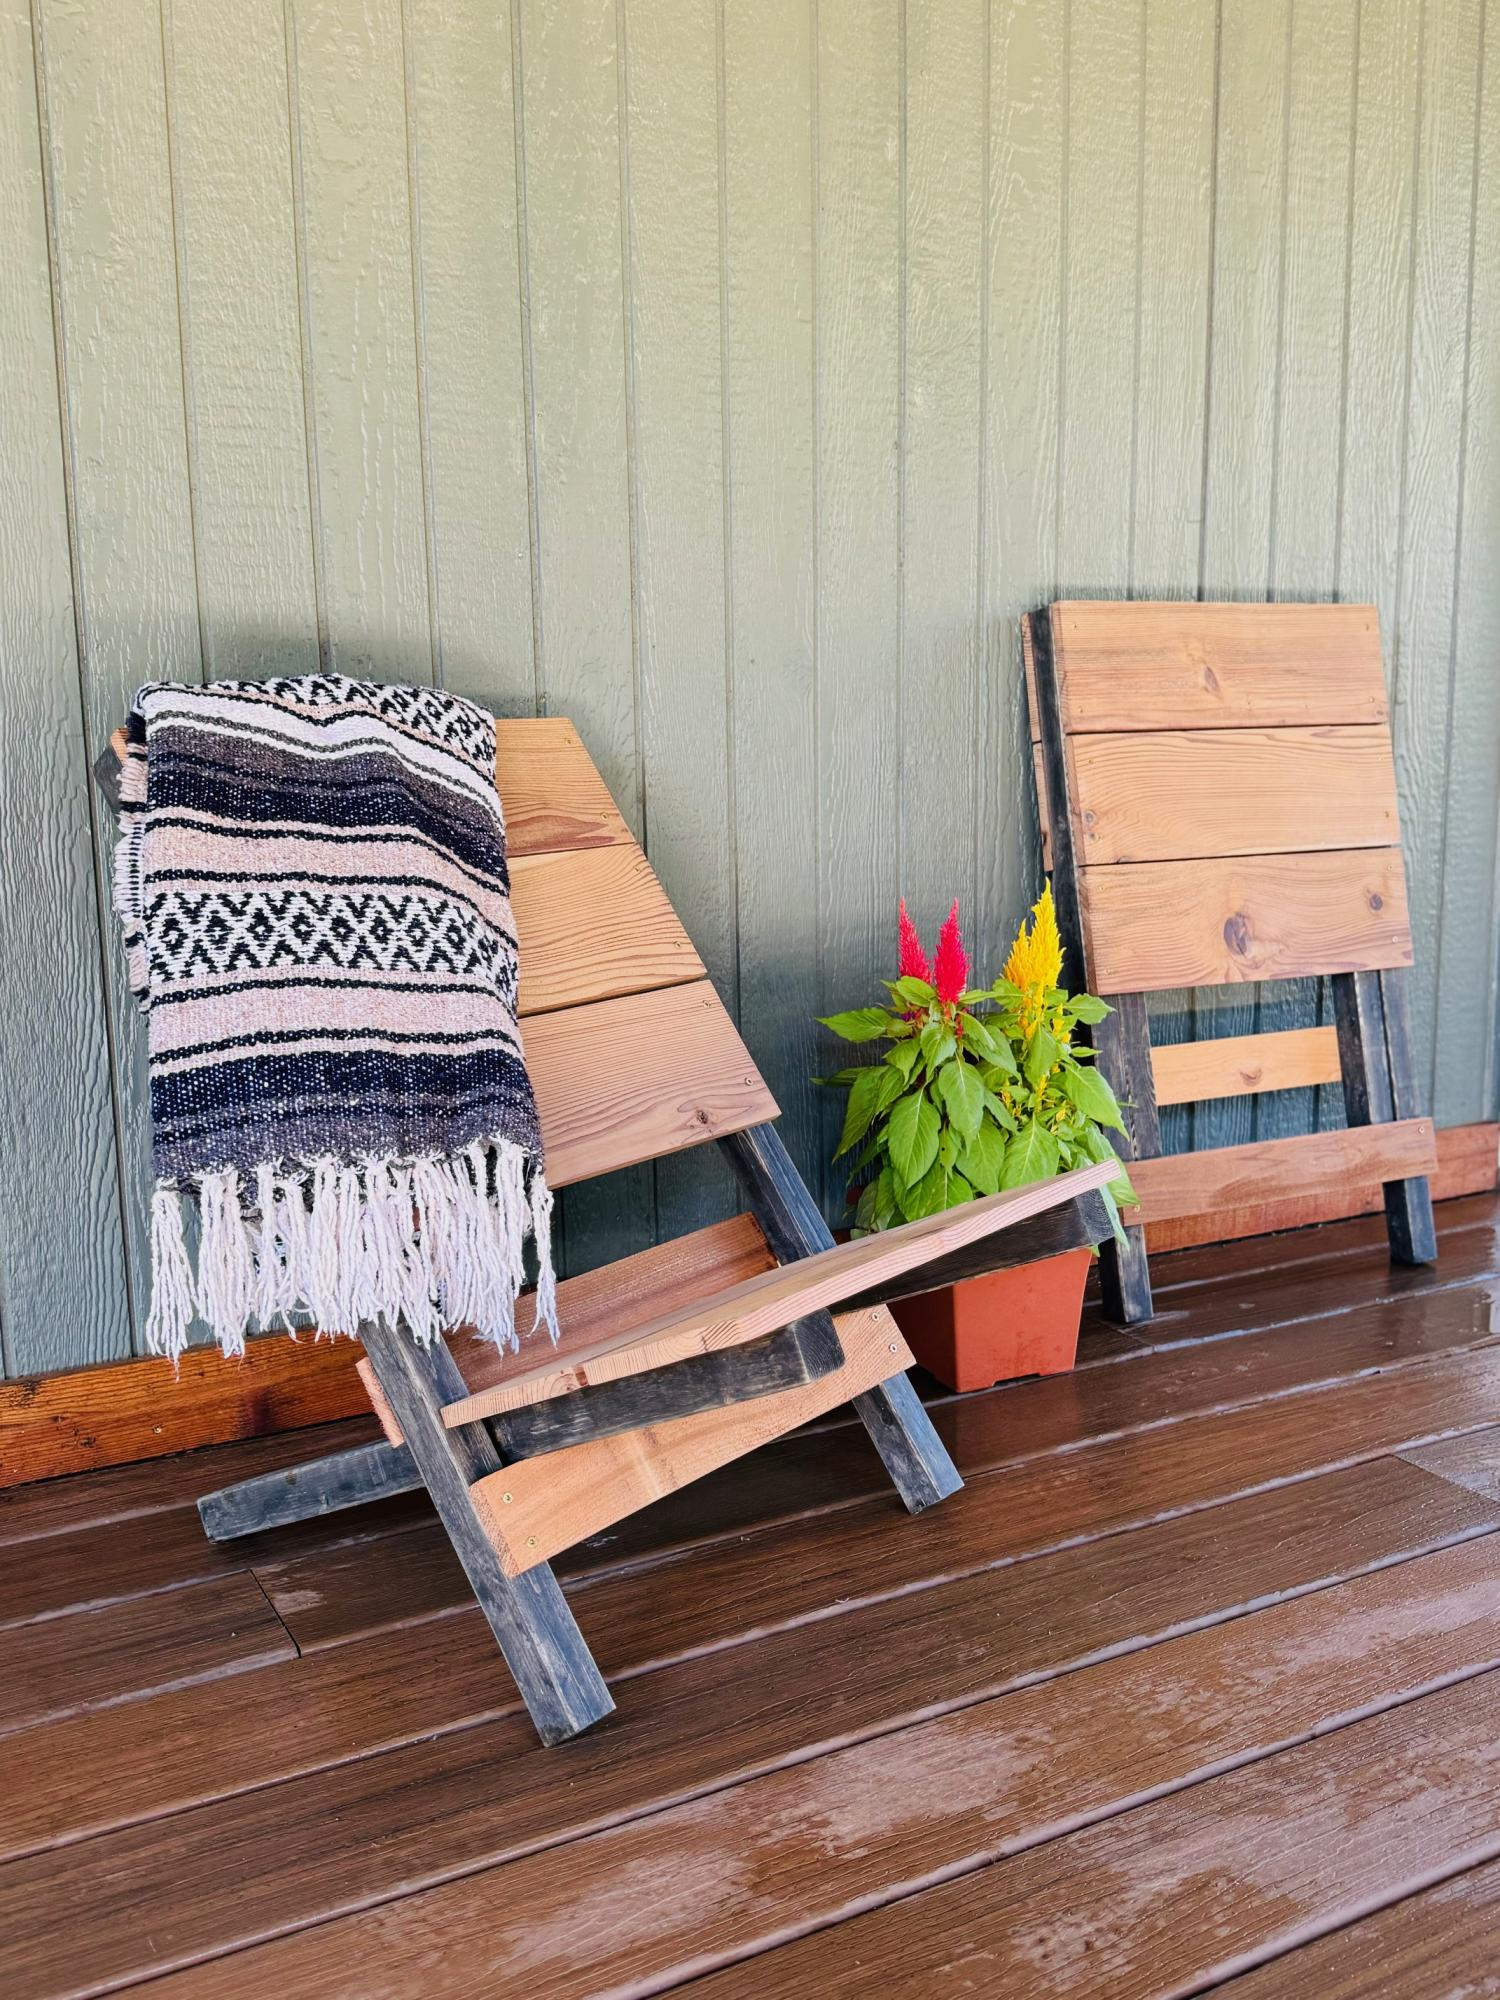
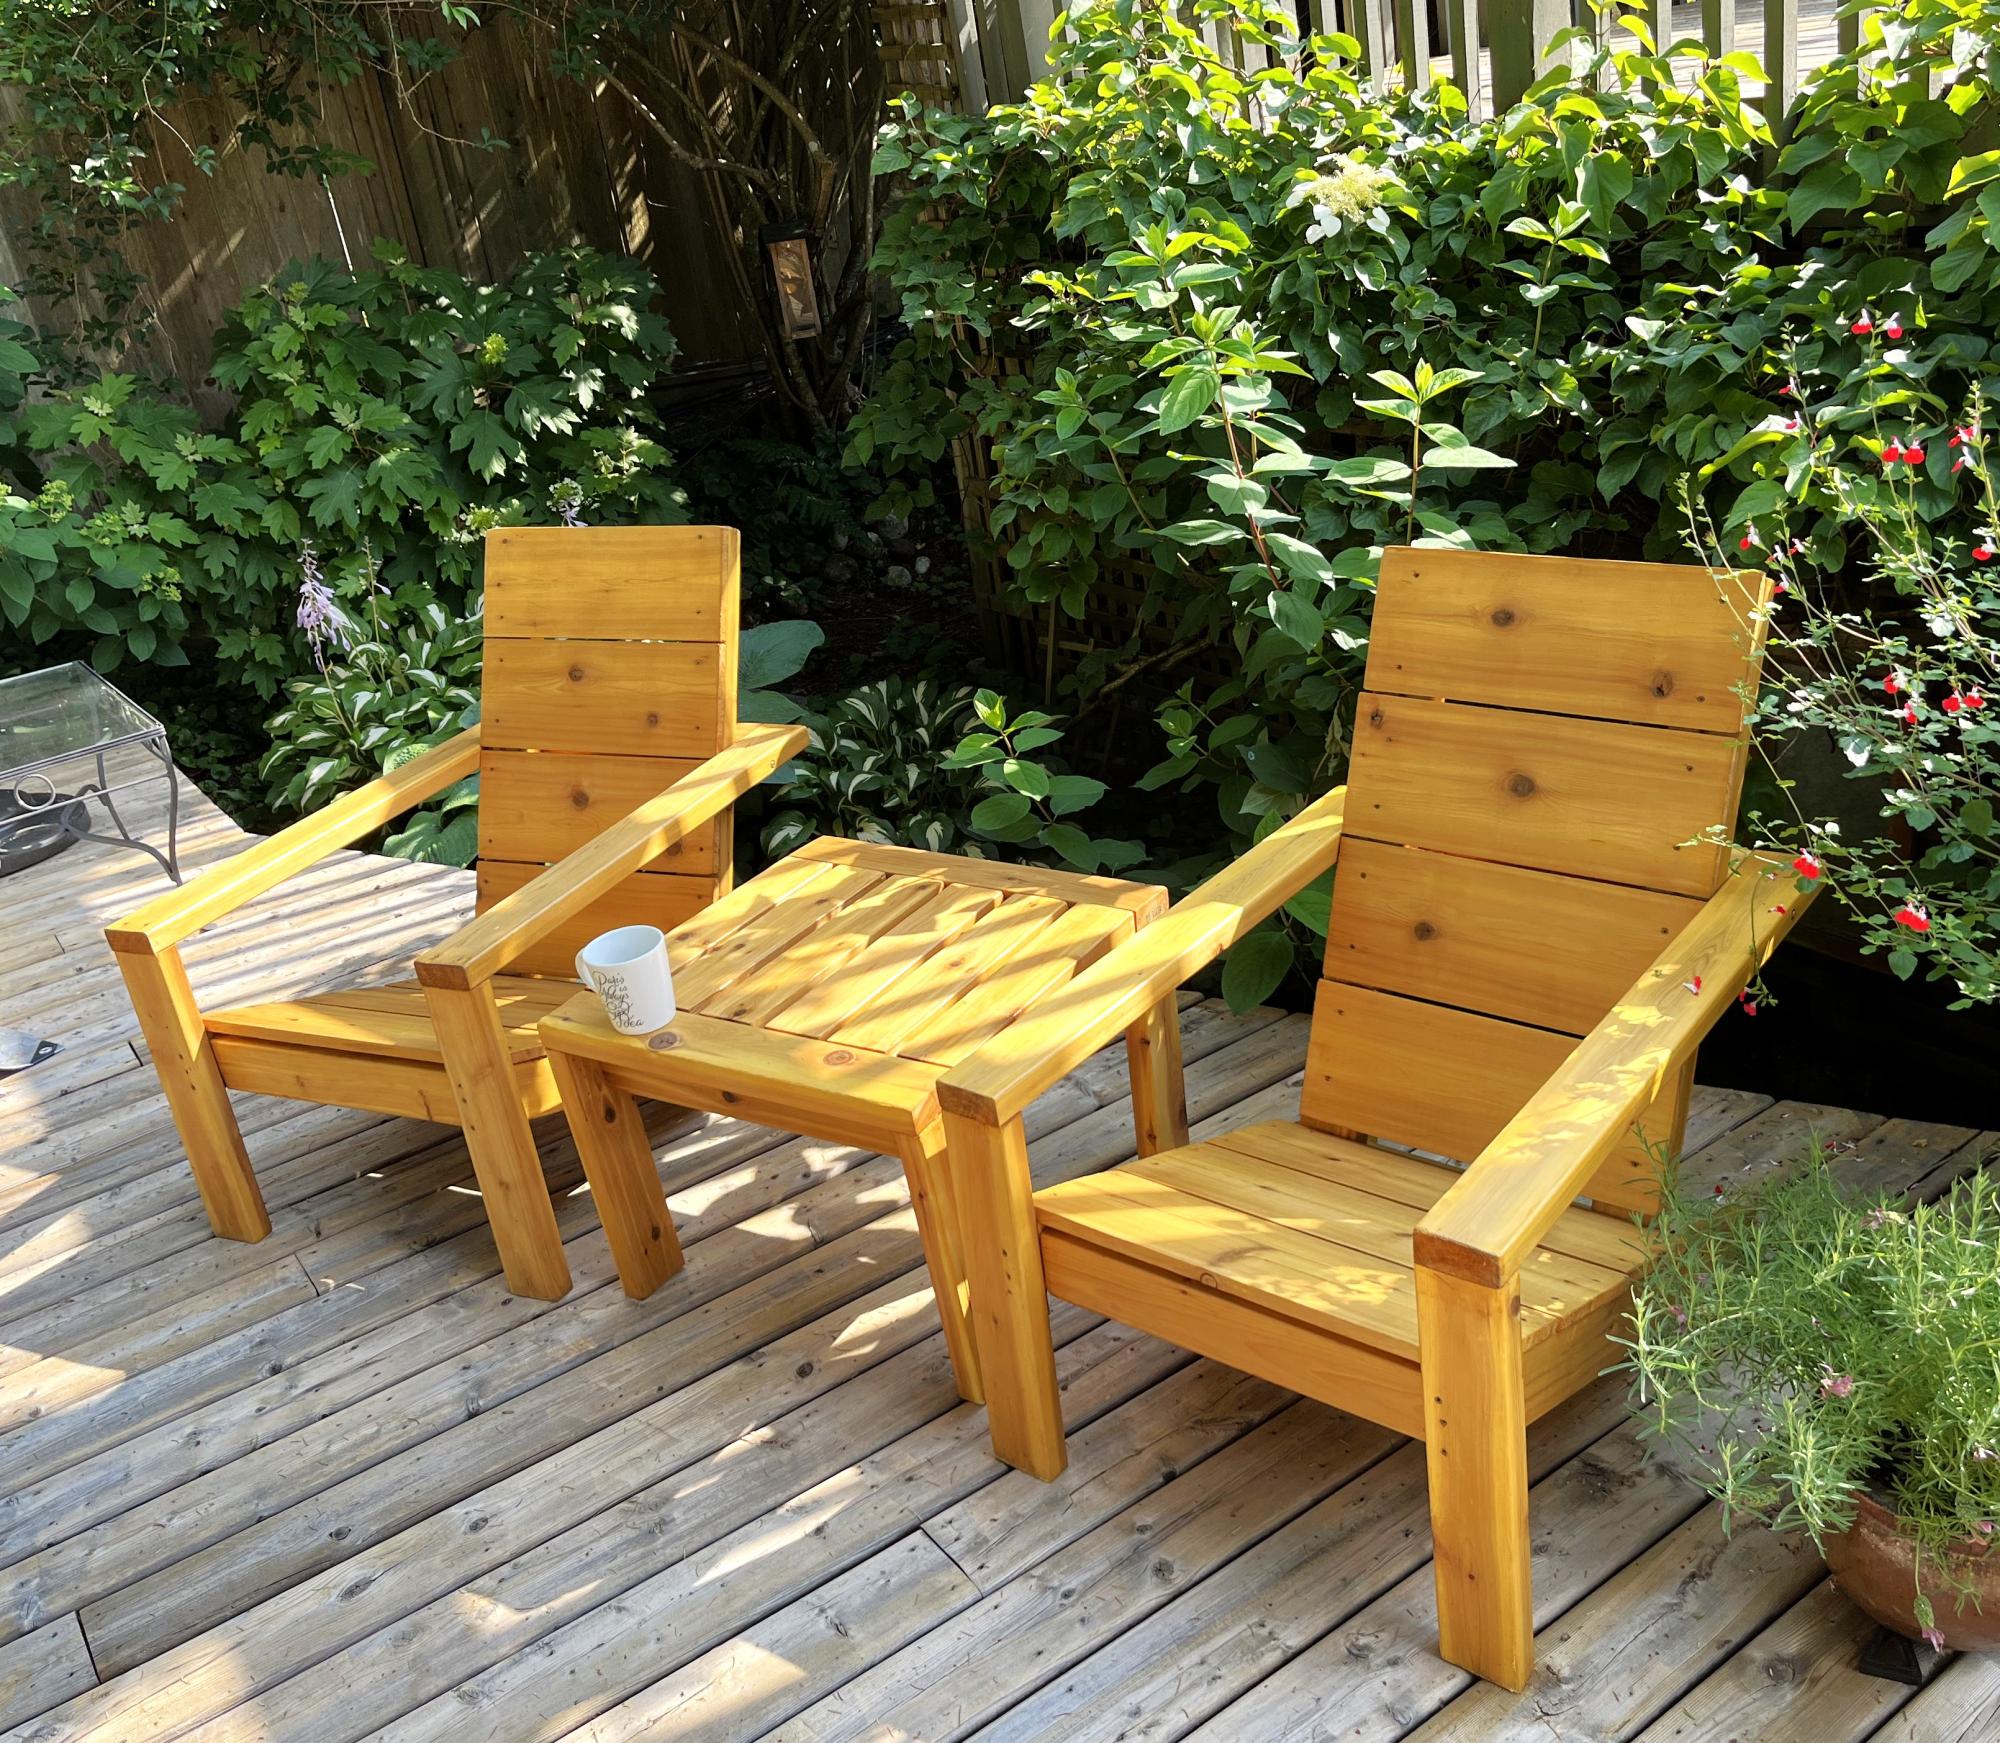
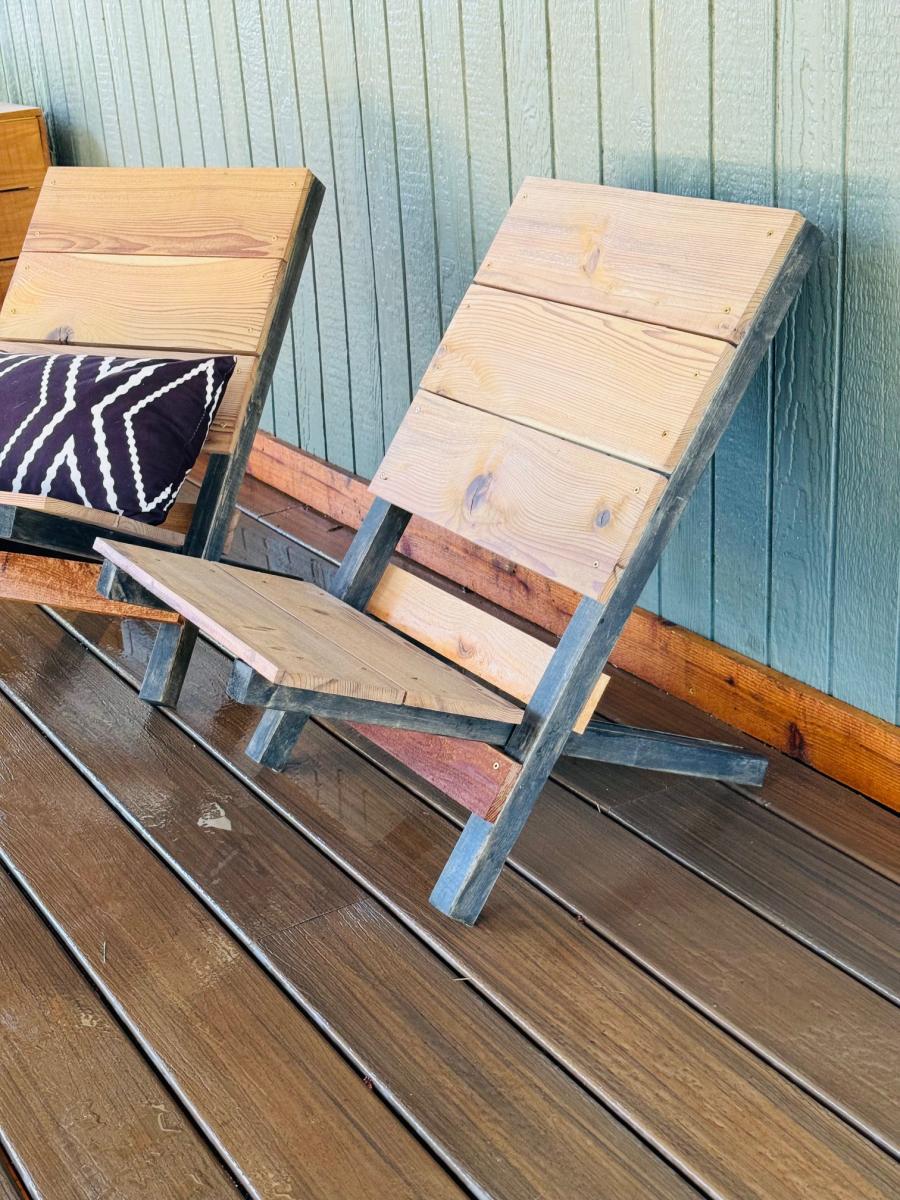
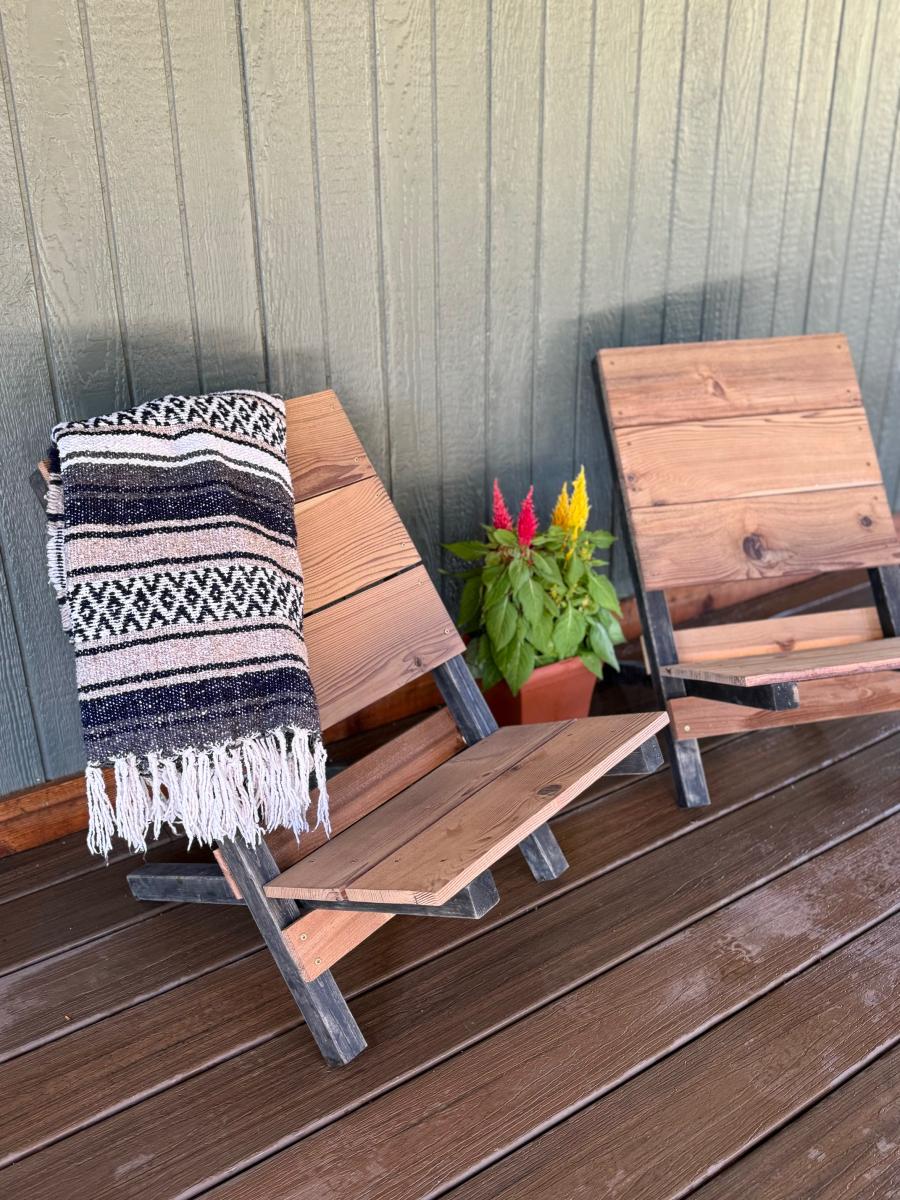
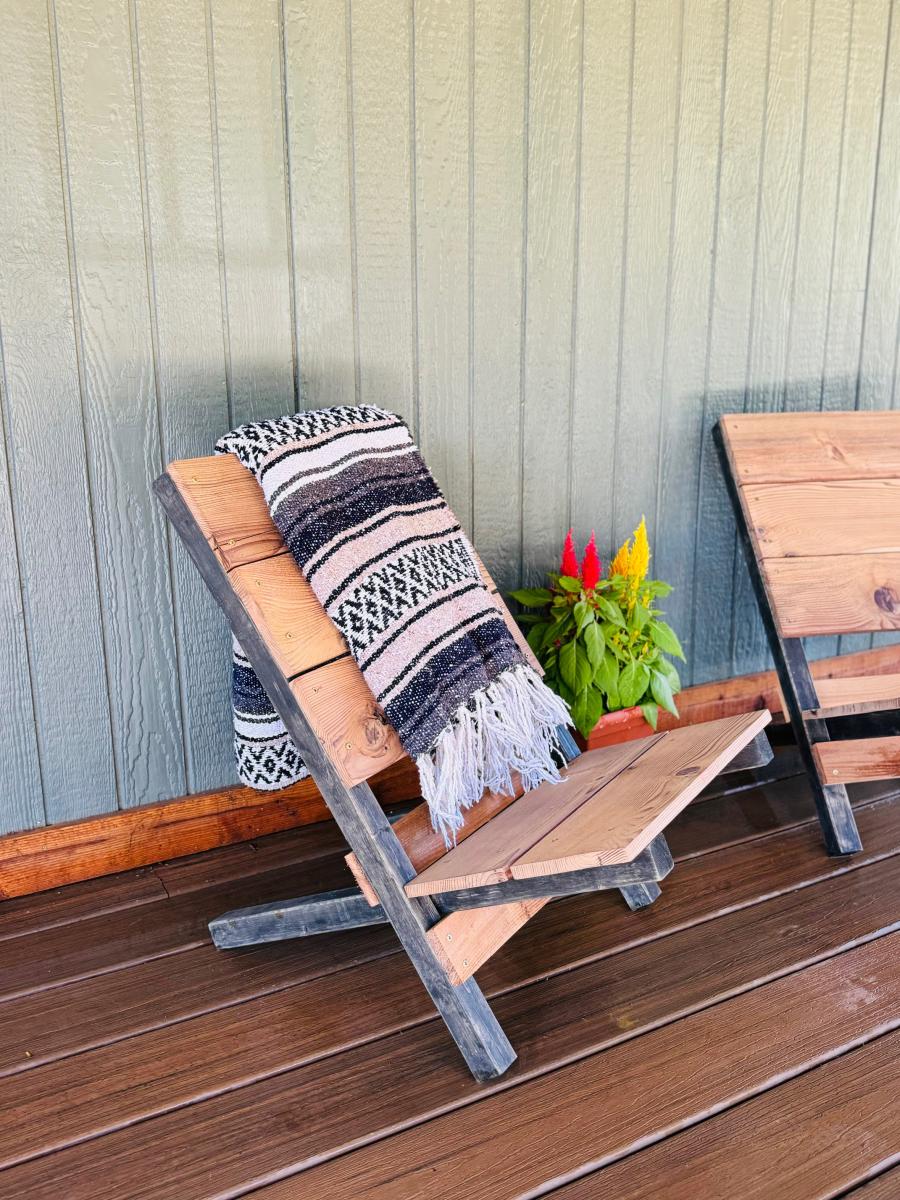
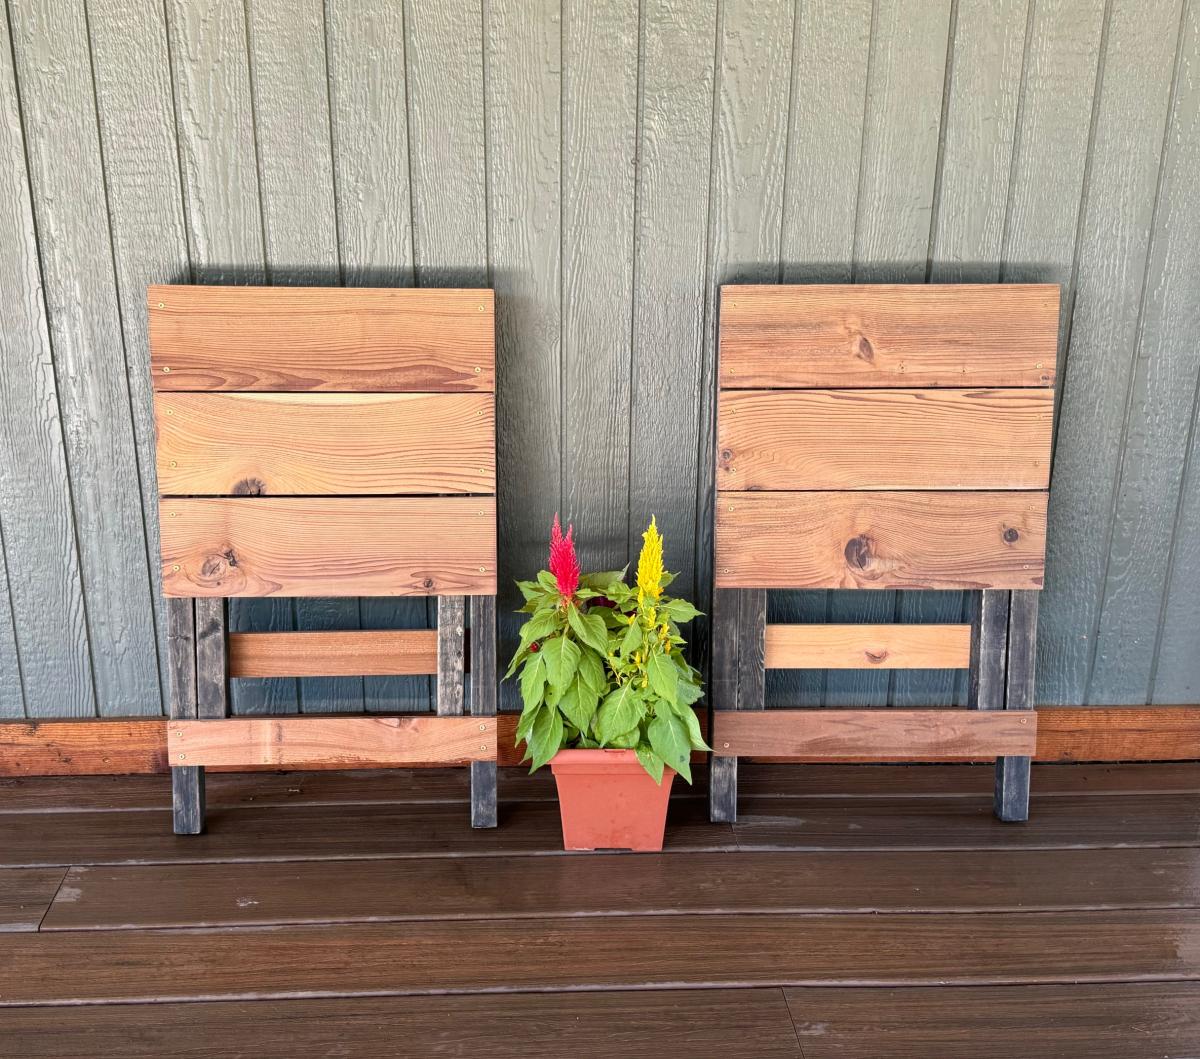
I built these chairs in about 90 minutes. I started with cutting enough boards for 2 chairs according to Ana's cut list. I then prefinished them by sanding and prestaining all the boards. Once they were dry I started assembly. At first I was having issues with the wood splitting, so I ended up predrilling my holes. I made the seat and the back 18" wide and where Ana uses the 1x3, I ended up just ripping the cedar fence picket to 2.5" wide. This was a fun build and will be nice to easily transport to an outdoor activity!

I used your simple outhouse plans and modified the roof with clear corrugated plastic roofing for maximum light inside. I used the leftovers to line the hole and direct everything into the hole so no smelly wood. I also used wood from free pallets for door and inside trim to keep cost down.
I have to credit to “Girl in the woods” from youtube that mentioned you Ana, and for the roof idea. Your plans were easy to follow and I’m so proud of my first build.


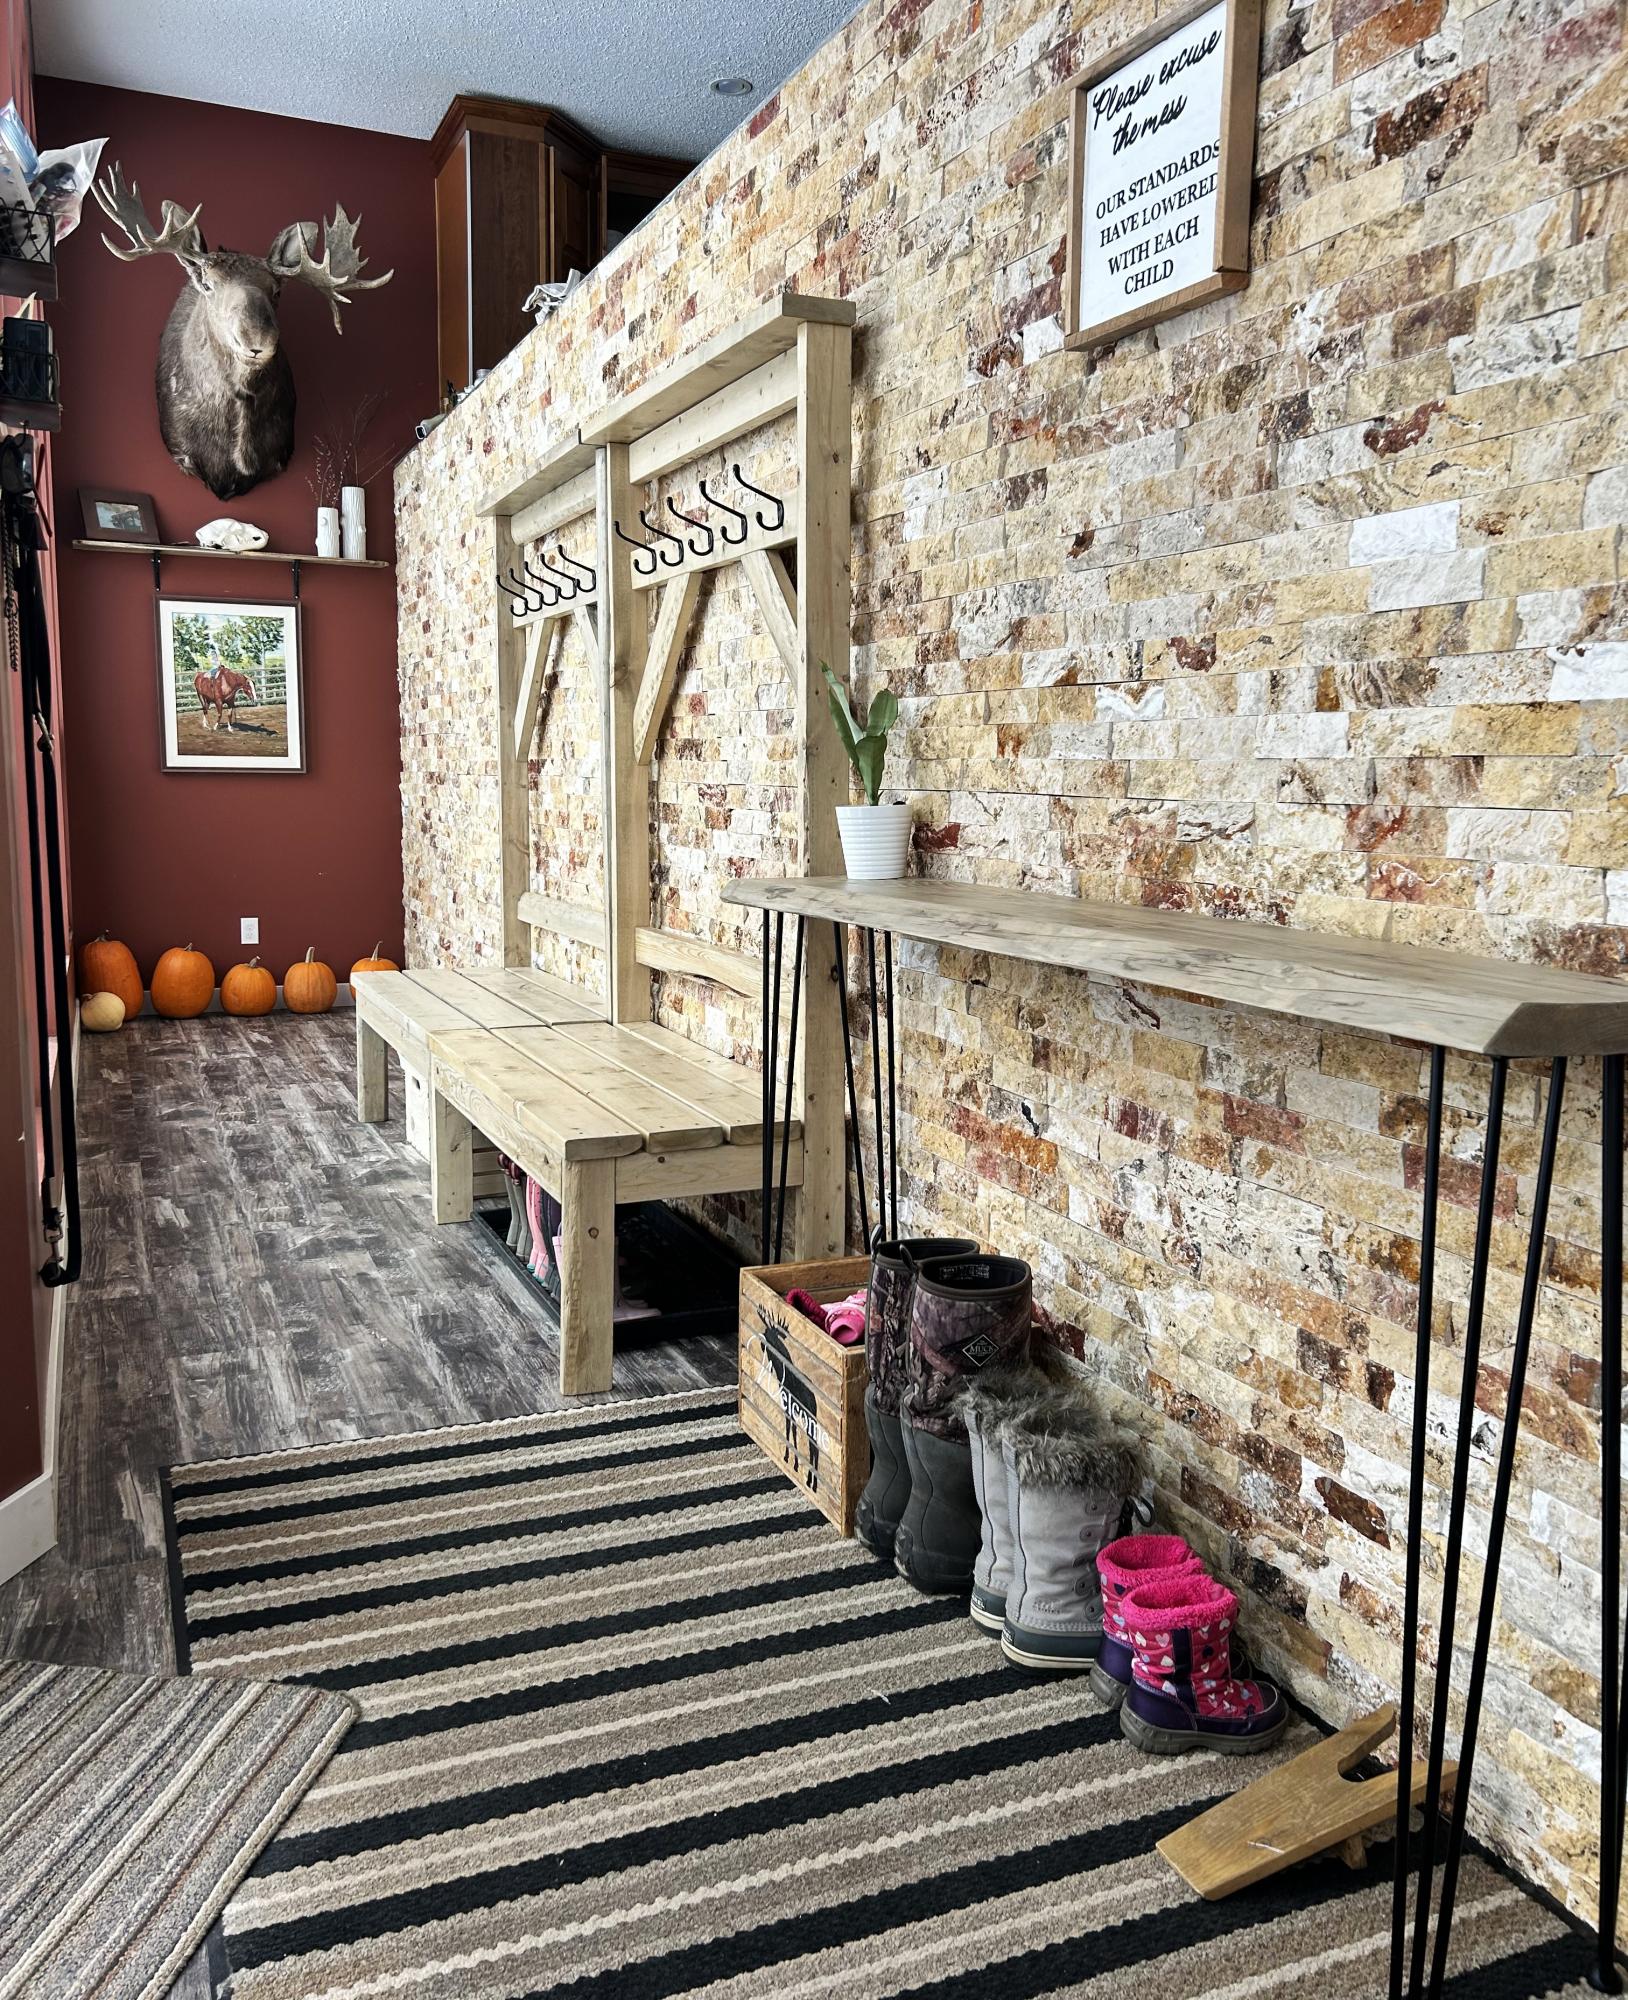
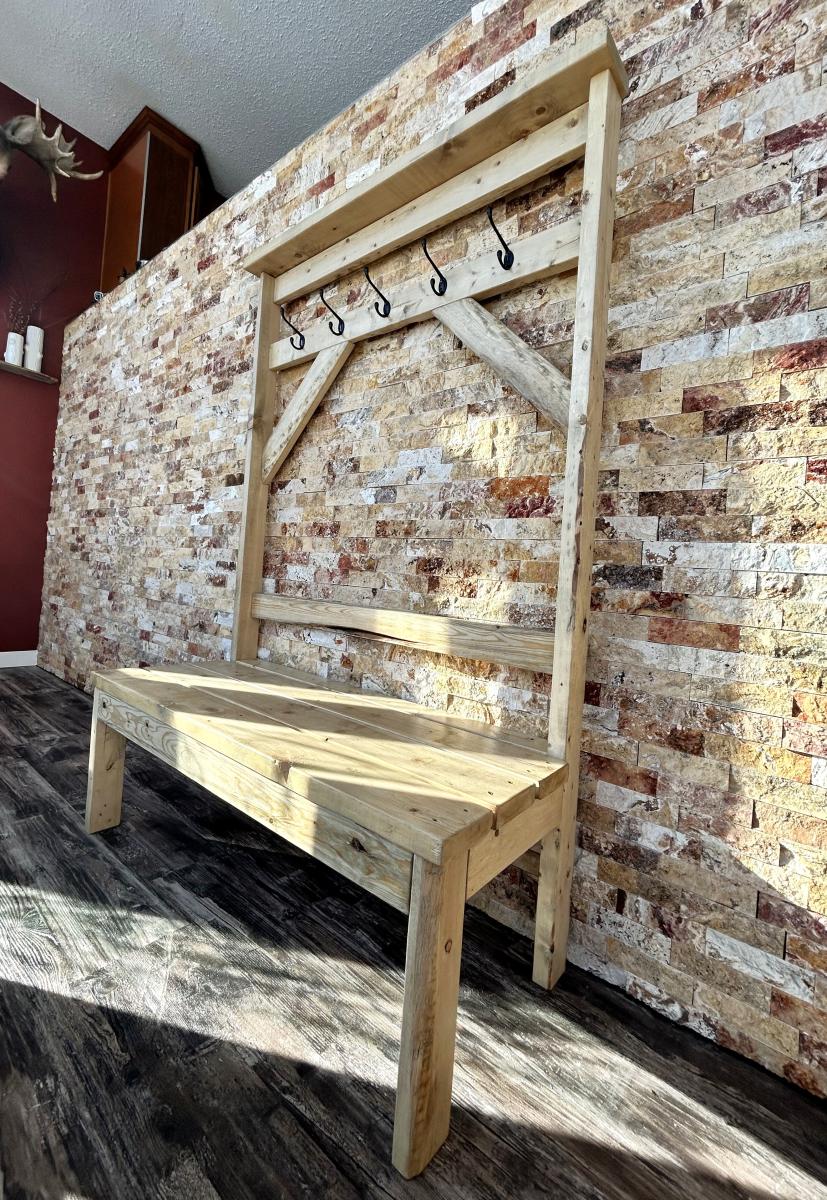
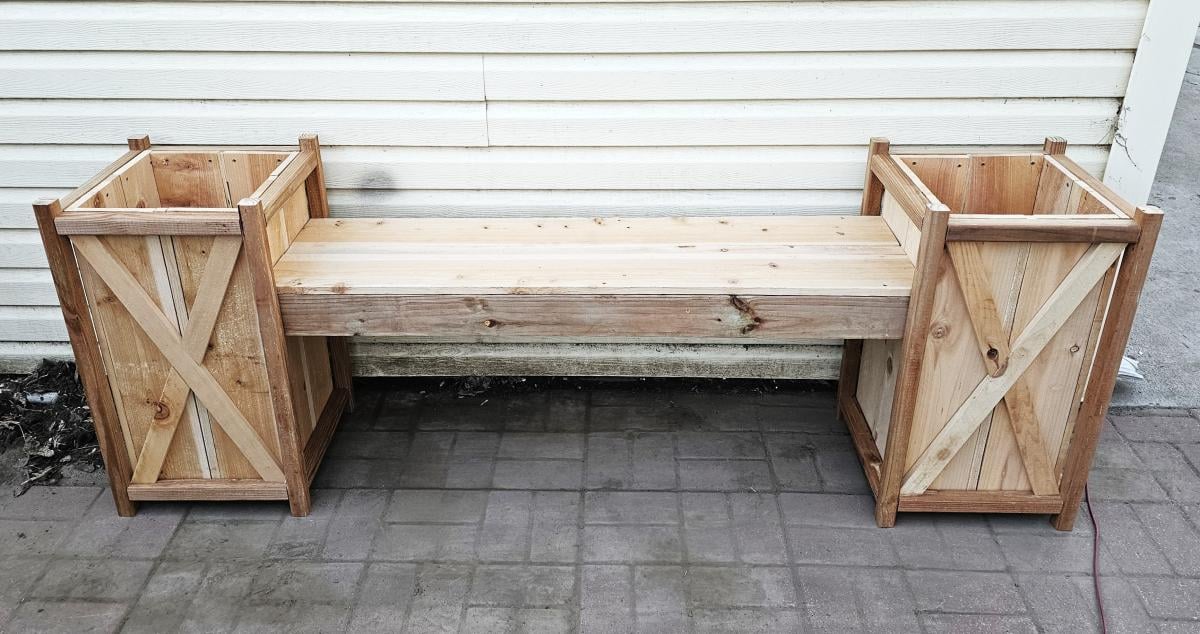
Using your entryway bench plans I made 2 of these. They are the envy of everyone who visits!
Brittany M