Community Brag Posts

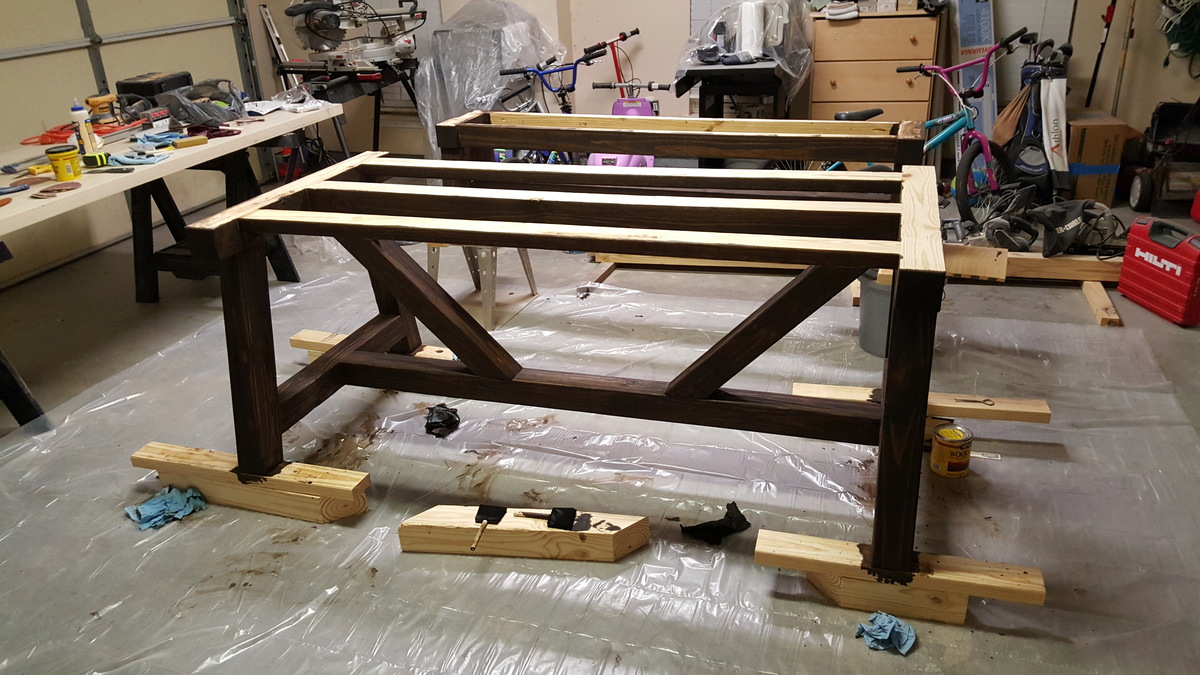
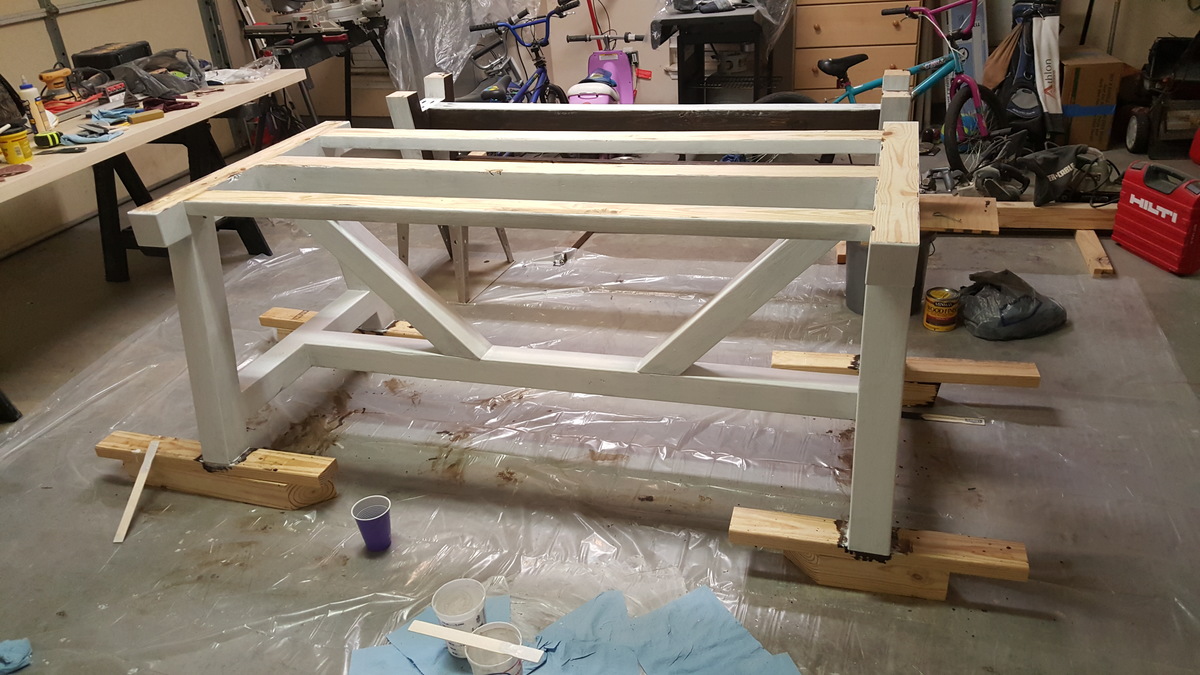
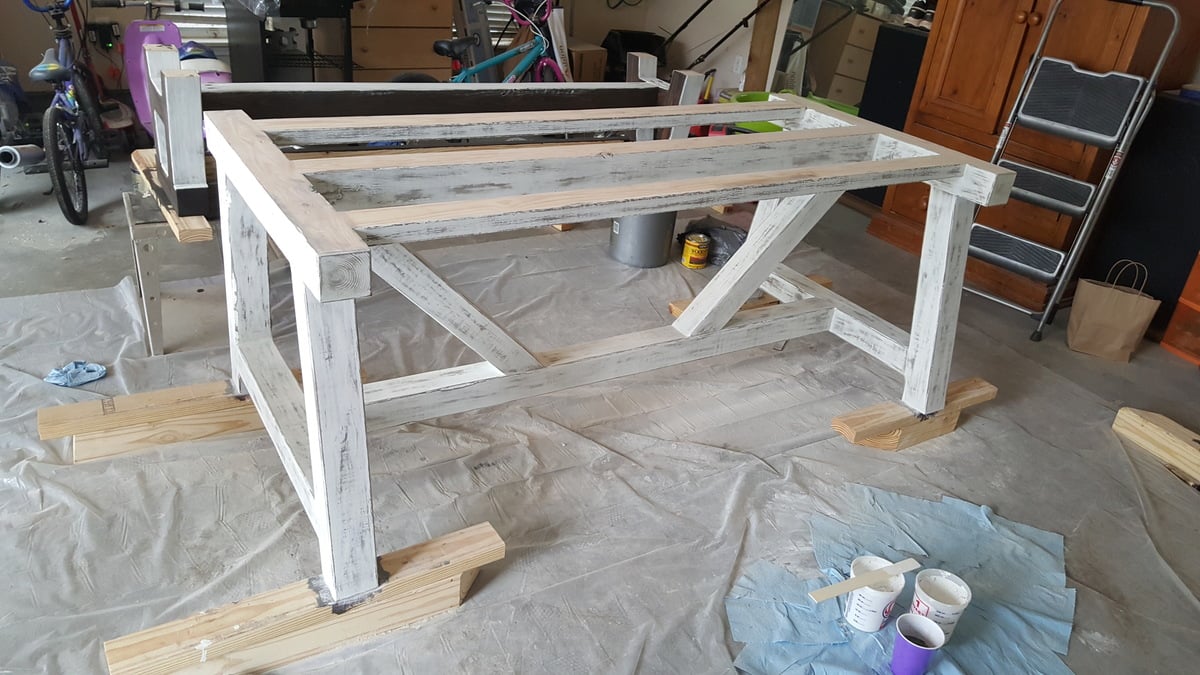
4x4 Truss Beam Table & Bench
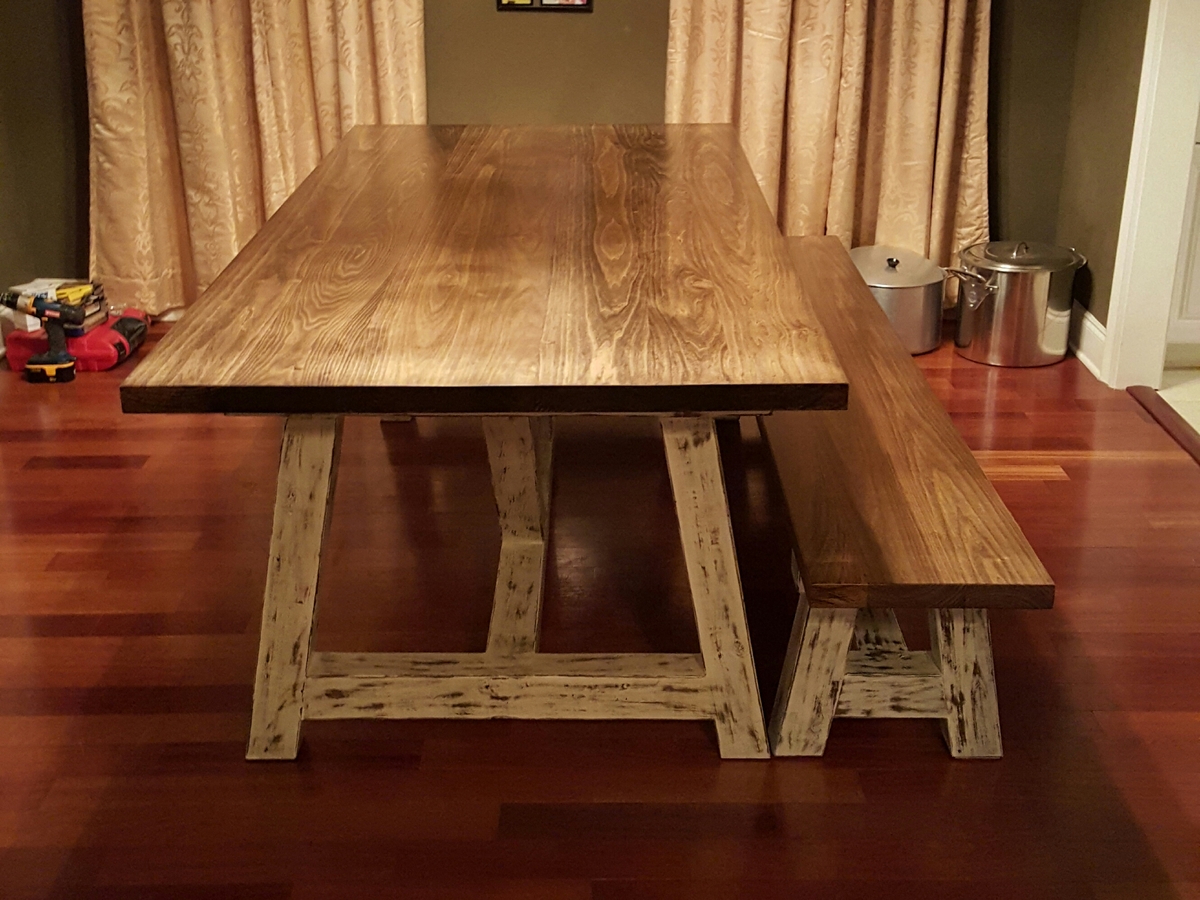
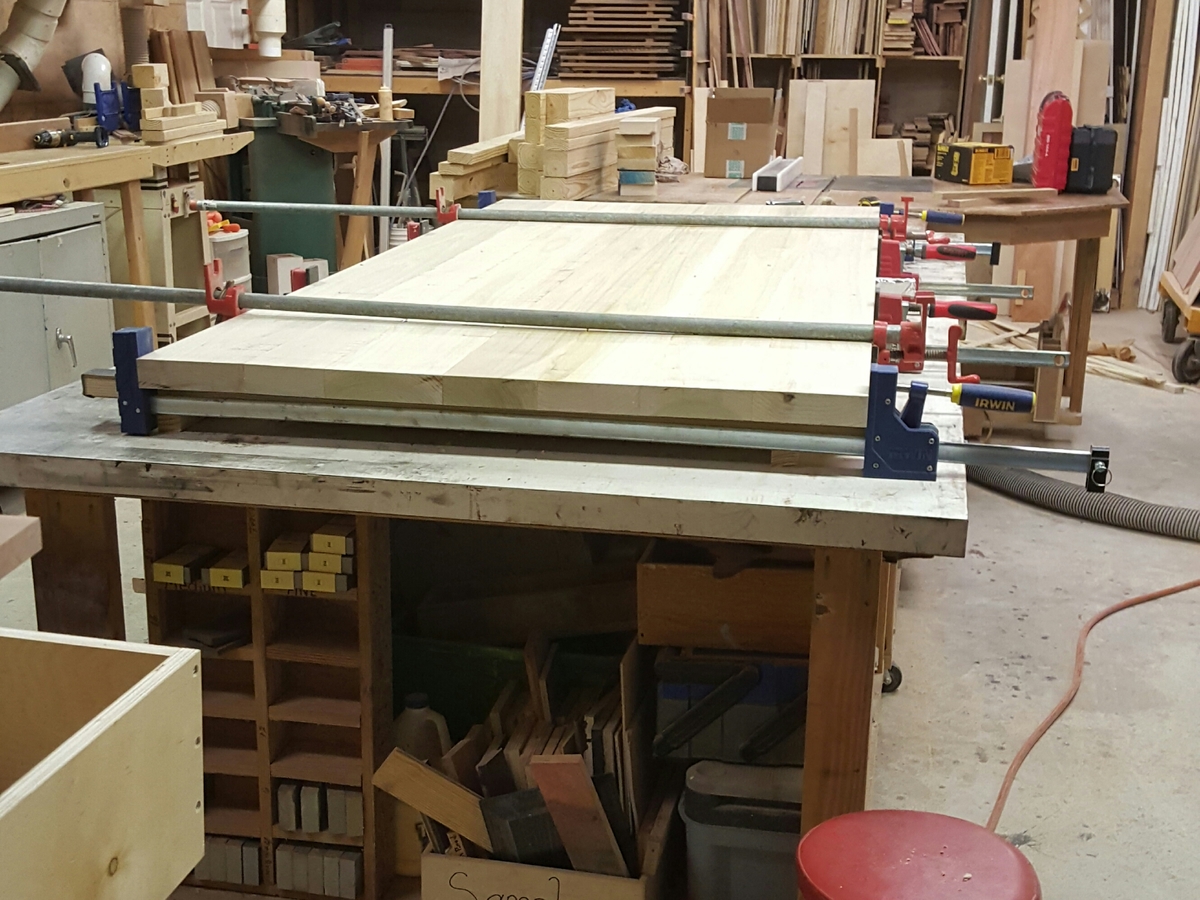
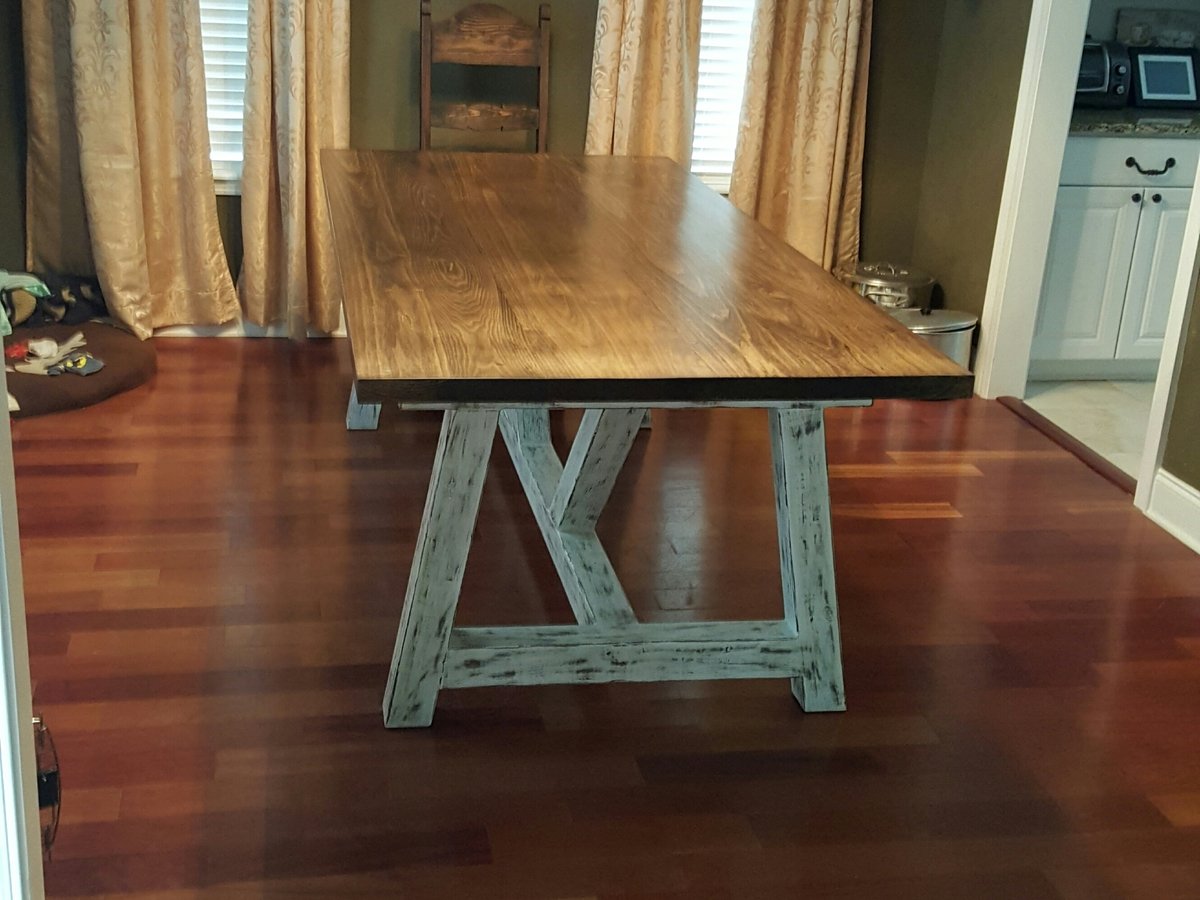
When my wife and I moved we sold our old table and was in need of a new one. We've shopped around and didn't like anything we were seeing. She insisted that I build one but I never had any time due to my job. In the past it would've been easy because that's what I did was woodworking. So she researched and came across ana's plan and she loved it. Keeping the wife happy I made time. I made my material list & cutlist but was concerned with using construction grade lumber for the tabletop due to over time it likes to cup and warp in the right conditions. Instead I went with 8/4 Poplar which will make a solid tabletop and last forever. I was only able to work weekends on the project so it was finished in a month which I added the total hours & it equaled 1 week. She loves her new table and is now shopping for 5 canvas chairs to go with it. With her posting on social media I now have requests to build more. Where will I find the time?
Built from Plan(s)
Estimated Cost
$375.00
Estimated Time Investment
Week Long Project (20 Hours or More)
Finish Used
I started with Minwax Espresso wood stain on the base of the table & Bench. I then applied 2 coats of Old Fashioned Milk Paint Snow White. Next I used 320 grit sandpaper to knocked any loose paint chips off & distress areas I wanted to antique. Finally I applied 3 coats of Minwax Polycrylic Matte, sanding with a 320 grit sanding block in between coats. The top I started with wood conditioner because poplar doesn't take stain well it is very blotchy. Next I used Minwax Espresso wood stain. Finally I applied 4 coats of General Finishes High Performance Flat while sanding in between coats using 320 grit sanding block.
Recommended Skill Level
Intermediate
AP - Play Kitchen
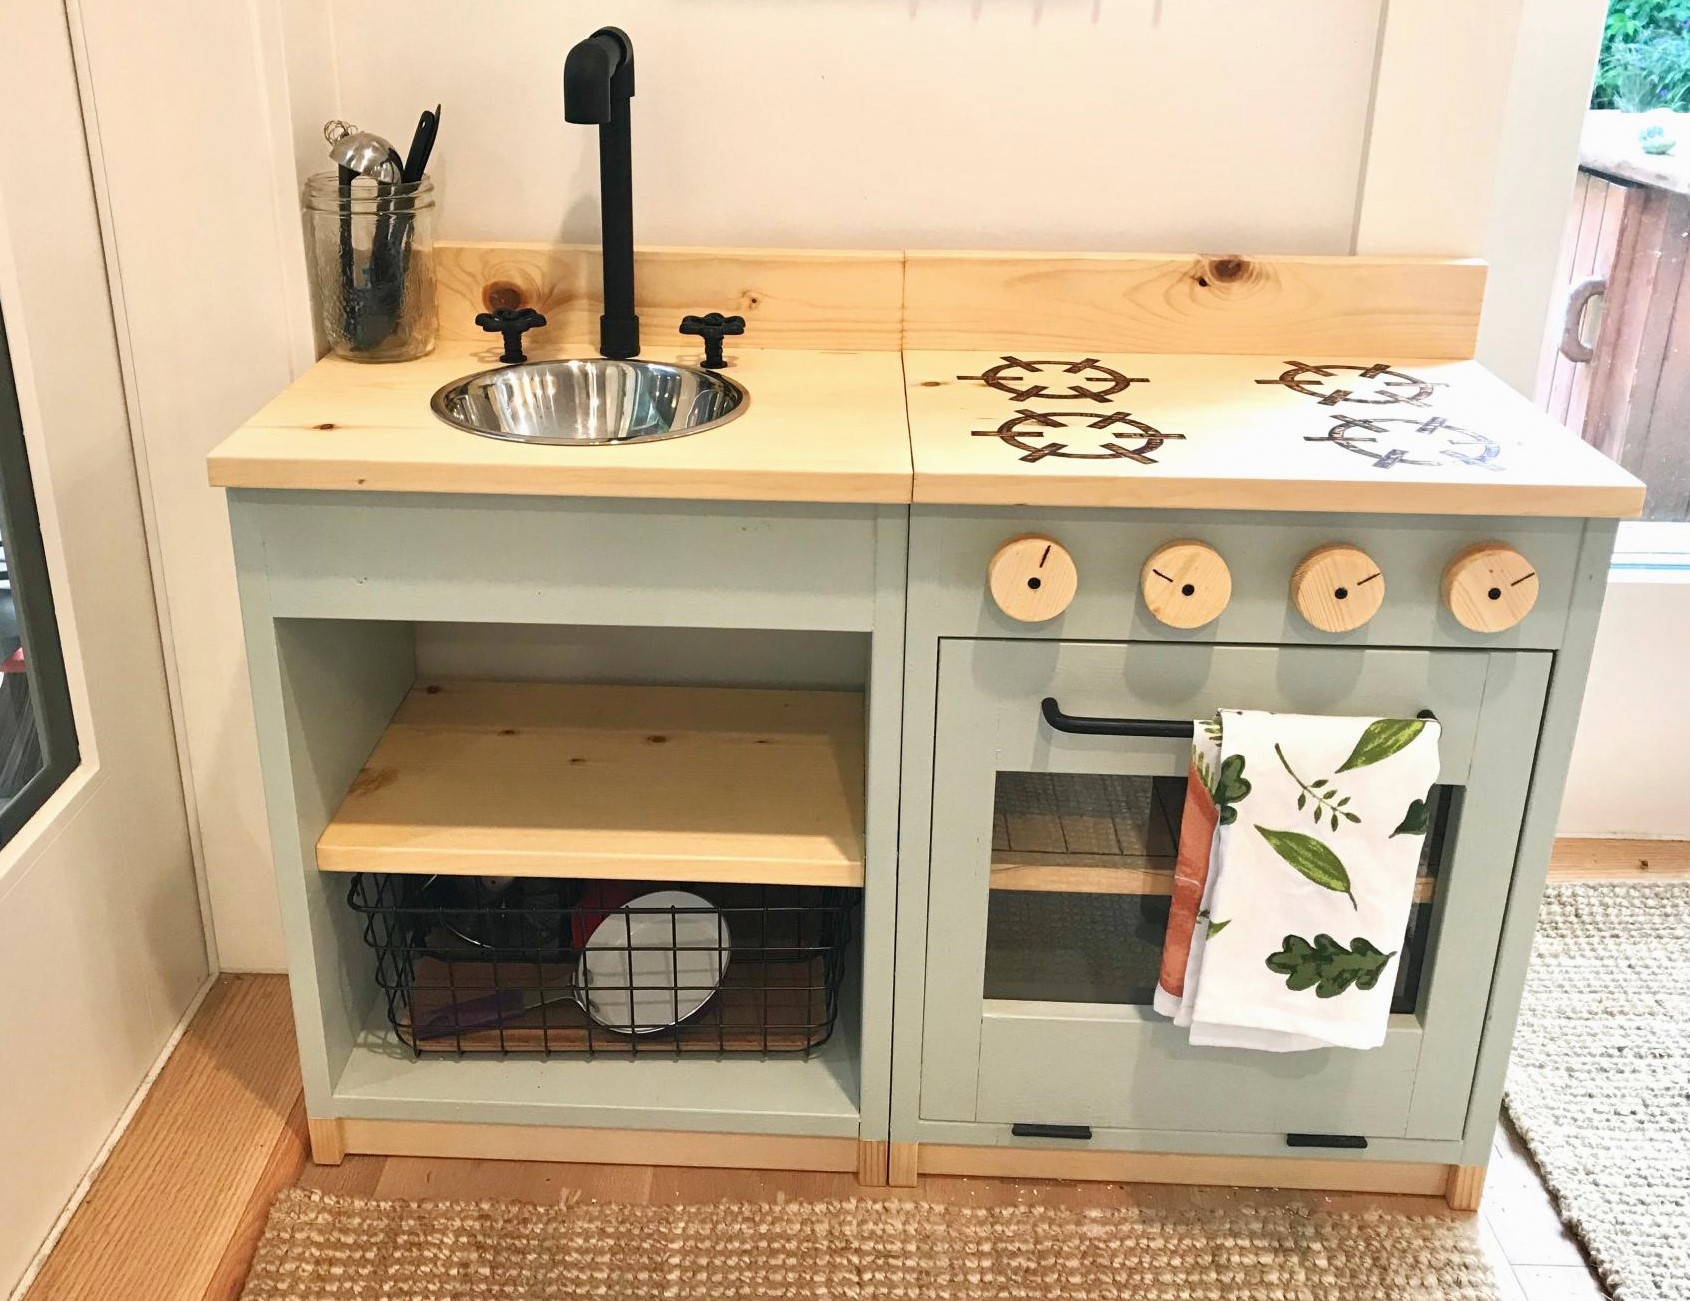
Loved the plans from the site Ana! I got inspired seeing all the lovely play kitchens that everyone had created! Thought I'd share the one I've made for my little one as well, she loves it!
Built from Plan(s)
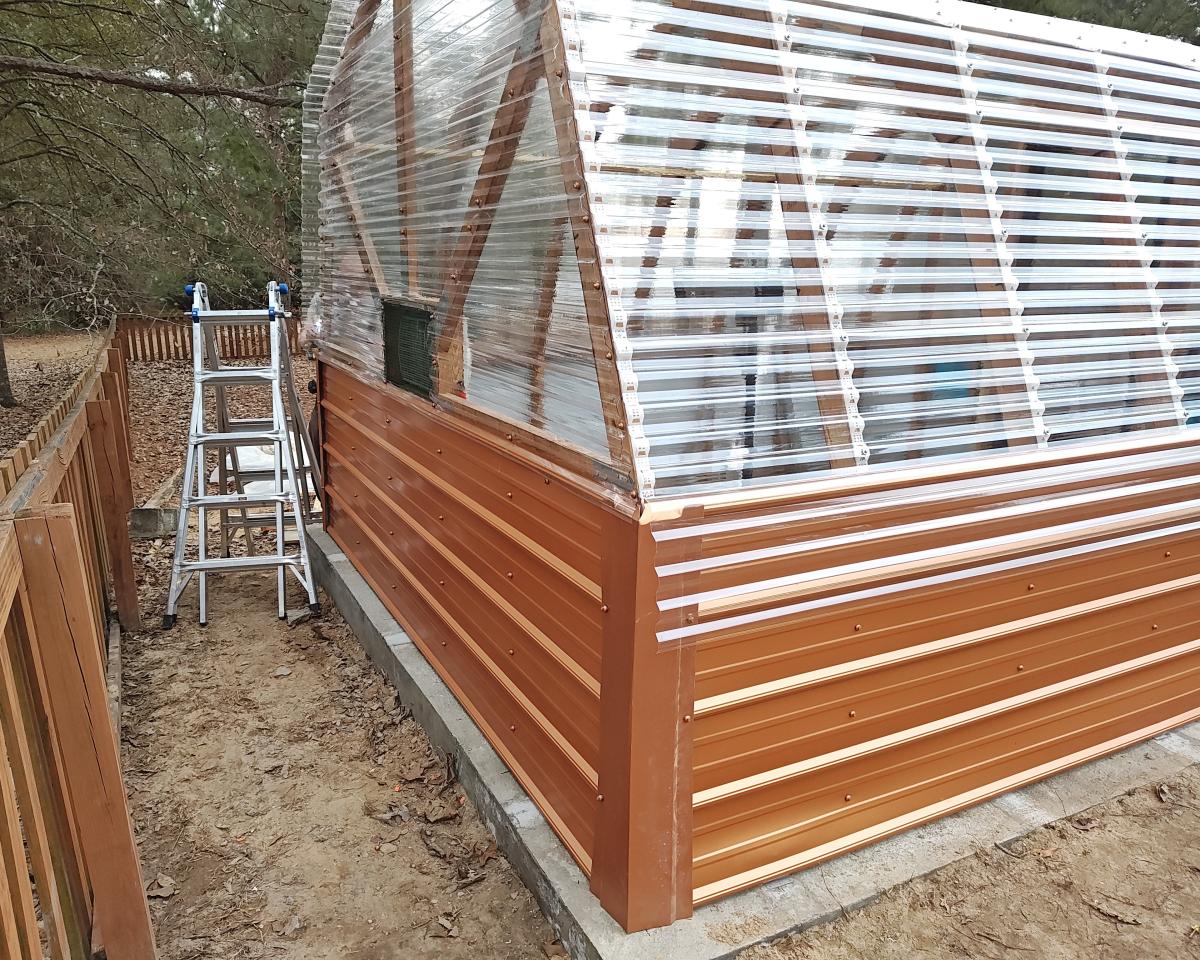
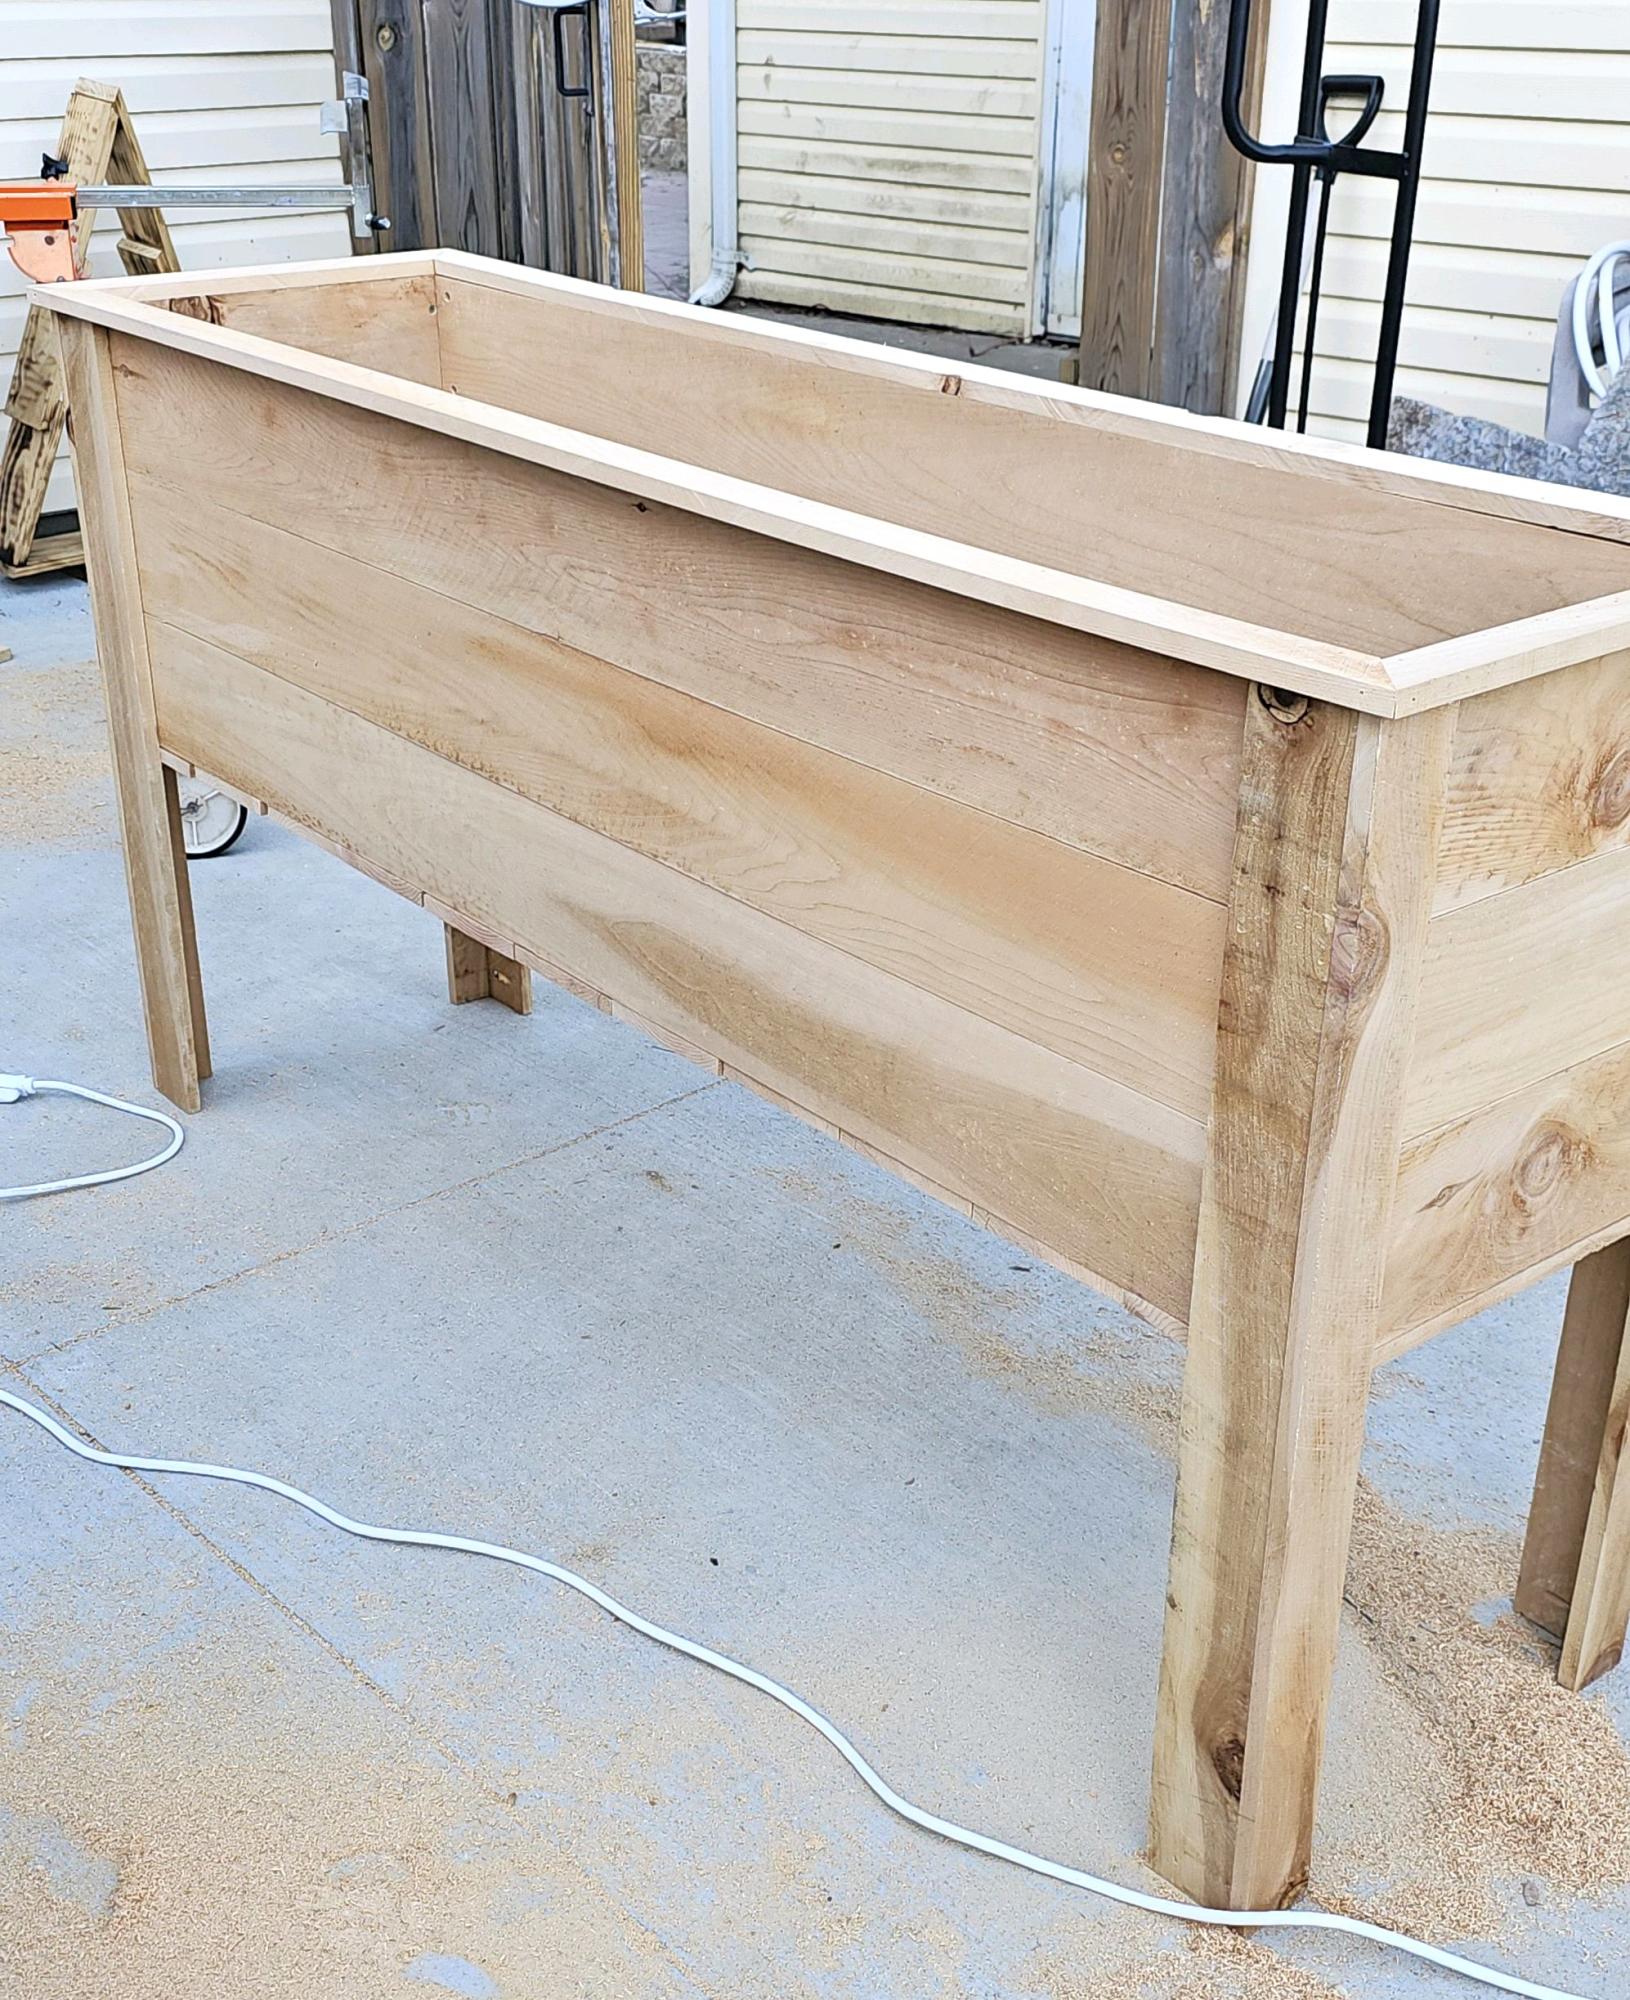
Barn Style Greenhouse with Extras!
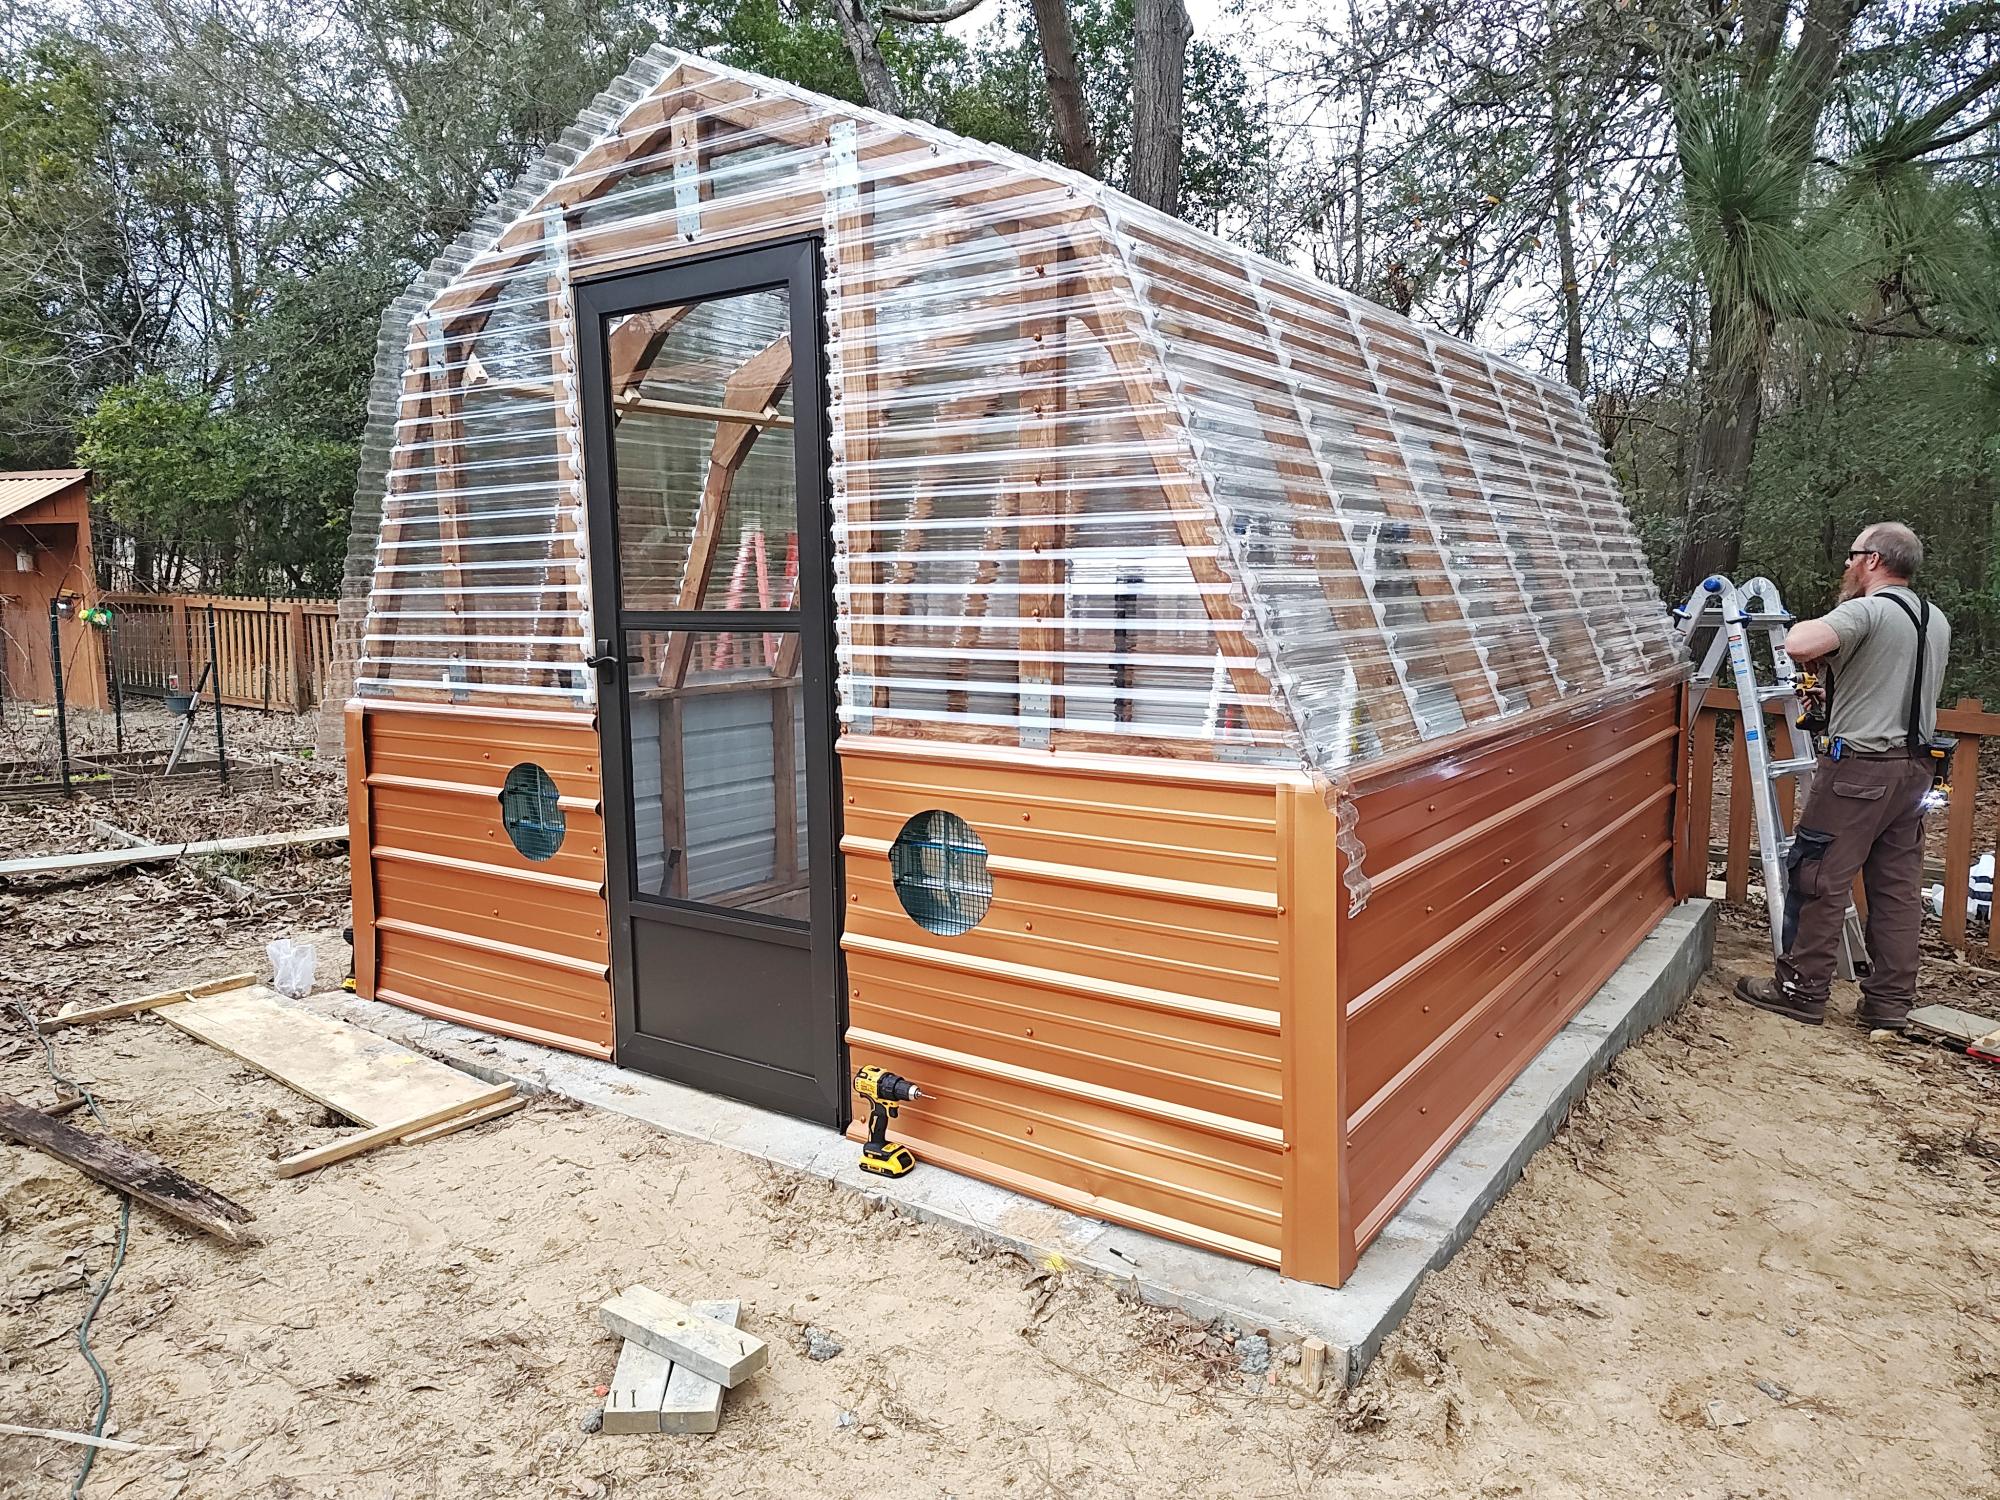
A variation on your barn style greenhouse. I included a cooling fan with intake louvers, temperature controlled heater and grow lights. Also used anchor bolts embedded in concrete footer.
David Buckmaster d [email protected]
Built from Plan(s)
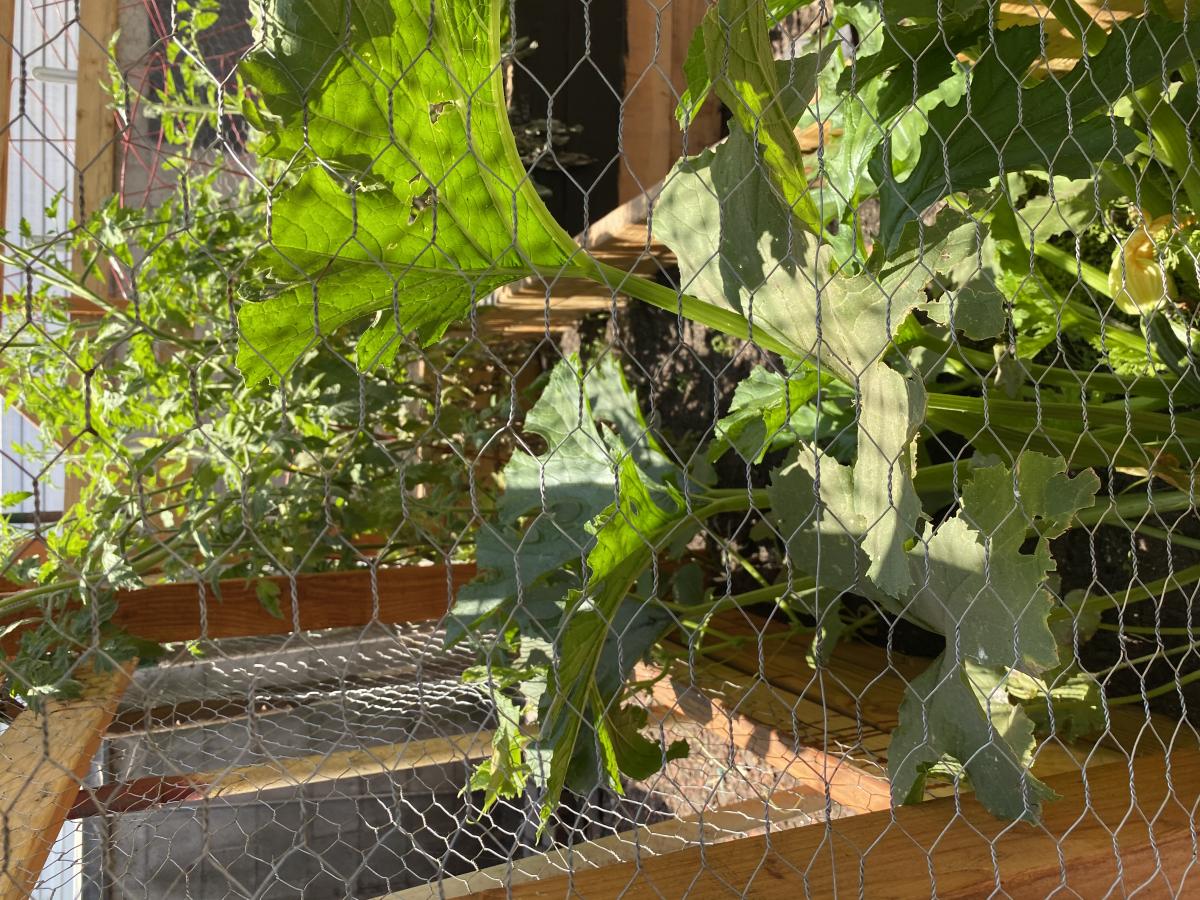
Garden Enclosure
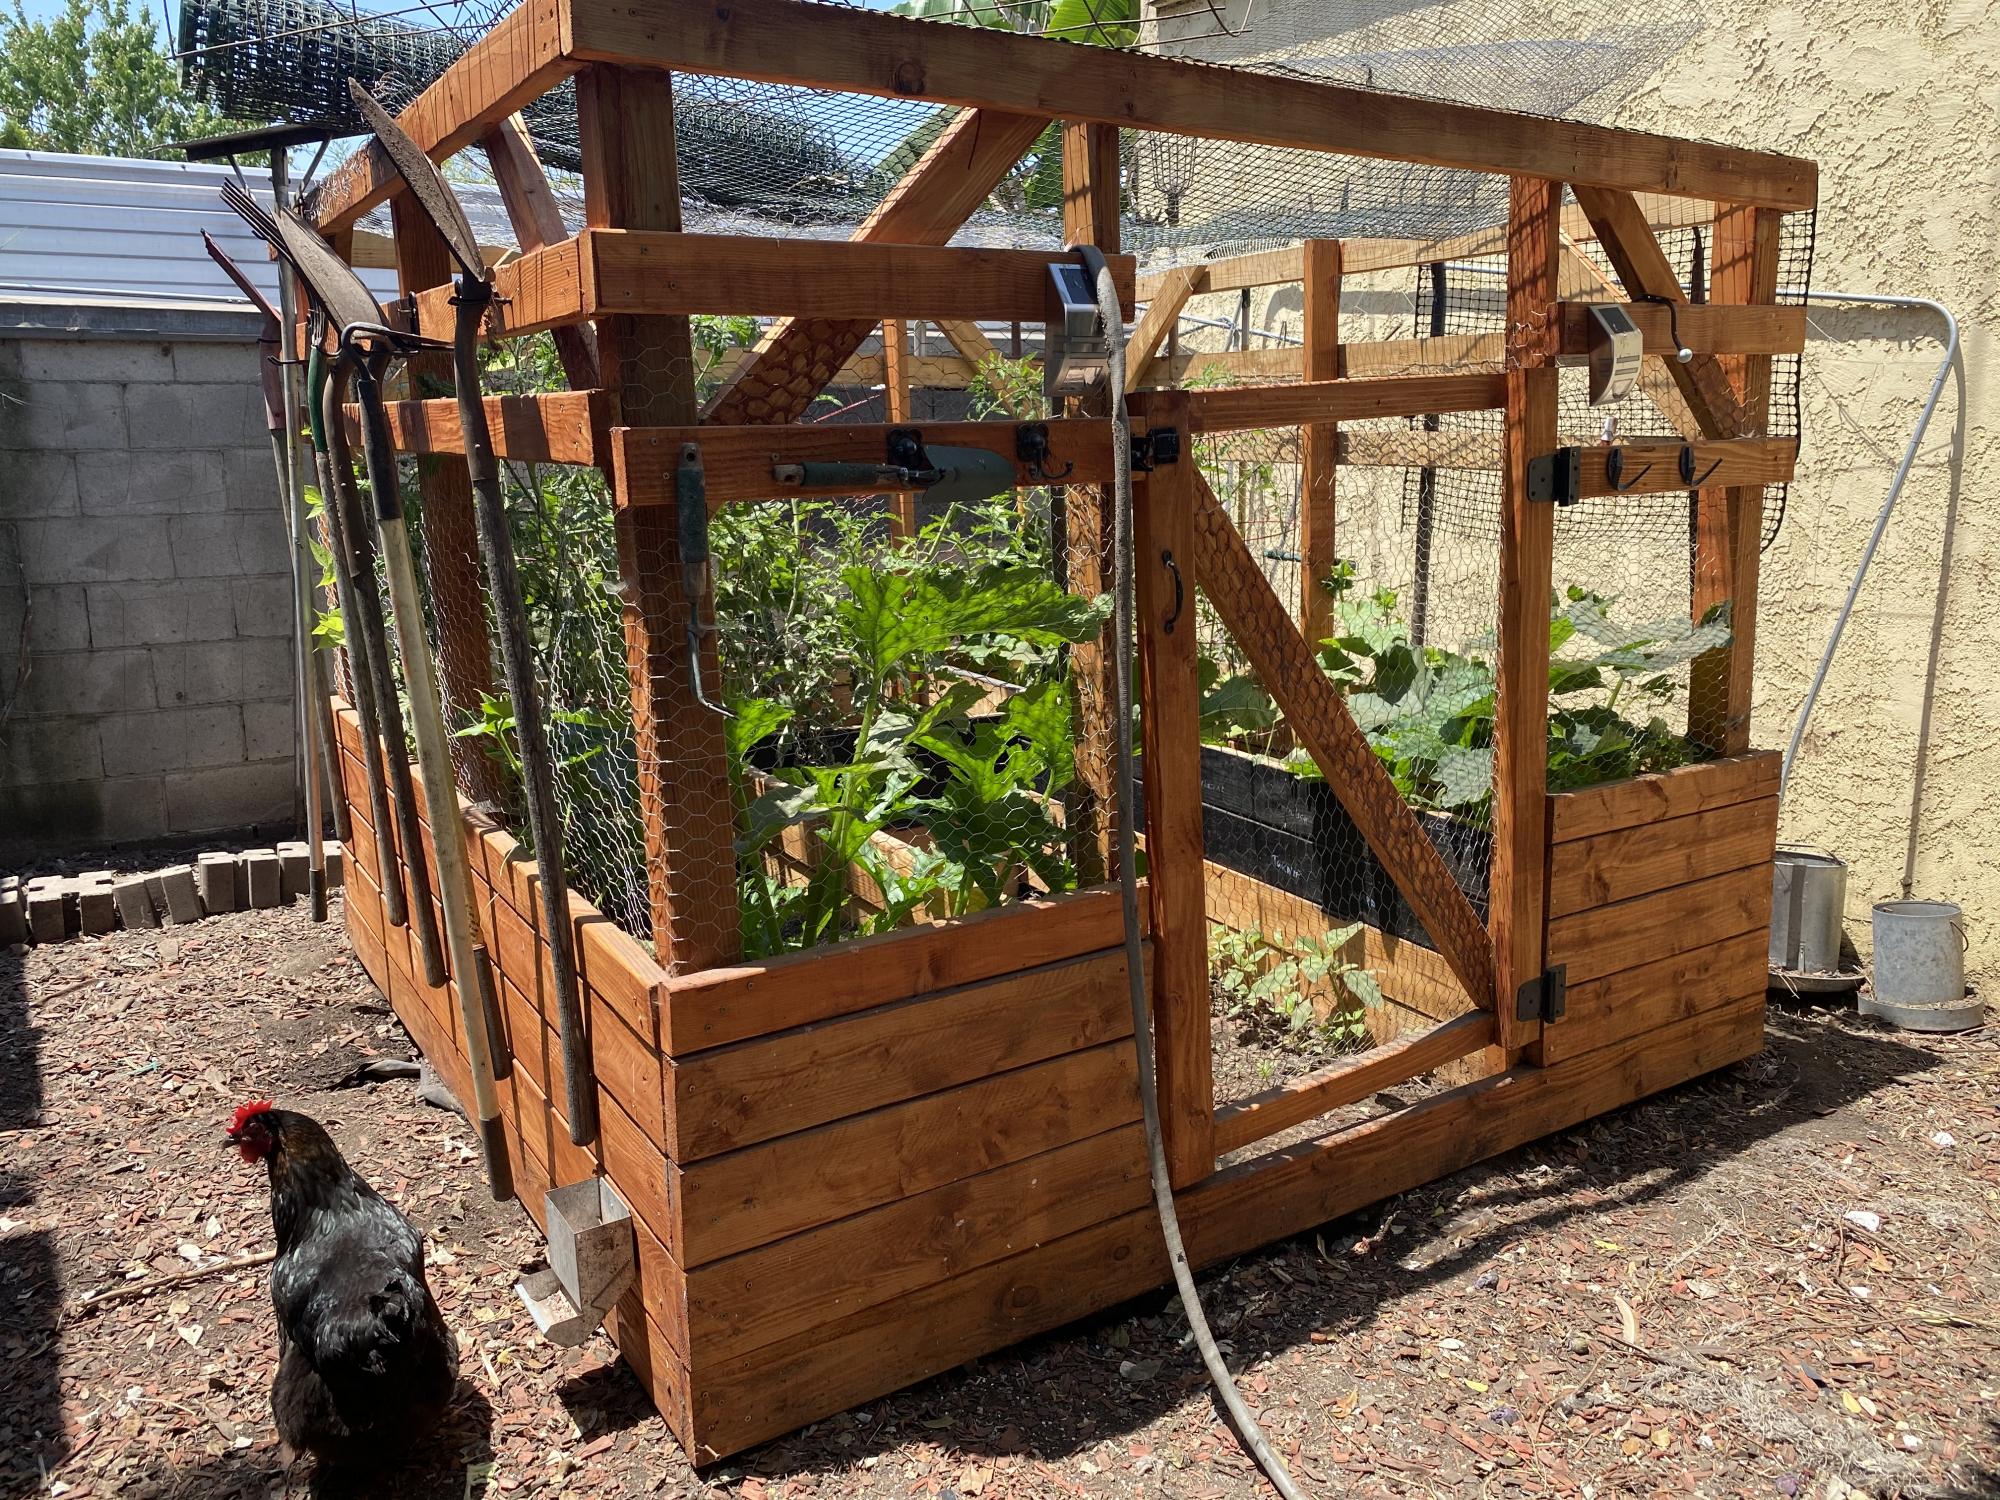
My chickens took over my garden area and being the voracious raptors they are, I needed to build a garden enclosure to keep my veggies safe. I modified a little, making my beds deeper. I also had to stretch chicken wire over the top to keep the great flyers out. I also used it as a way to organize my garden tools (which is possible because I live in Southern California with moderate temperatures and little rain. Thanks for the plans! Yvonne
Built from Plan(s)
Estimated Cost
500
Estimated Time Investment
Weekend Project (10-20 Hours)
Finish Used
Deck on the outside. Clear coat on the inside. I also added chalkboard paint on the inside so I could fill in what I’m growing and erase it after.
Recommended Skill Level
Beginner
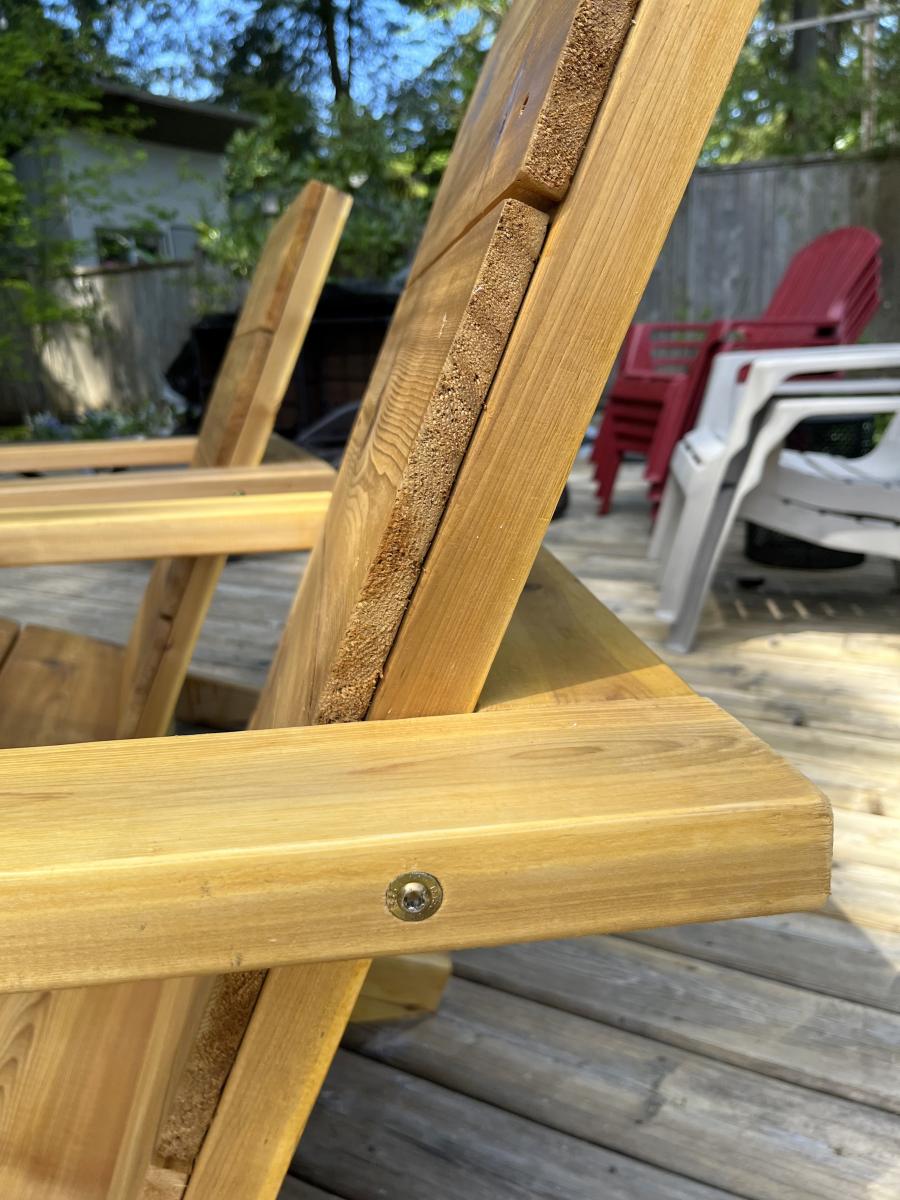
Wood Adirondack Chairs
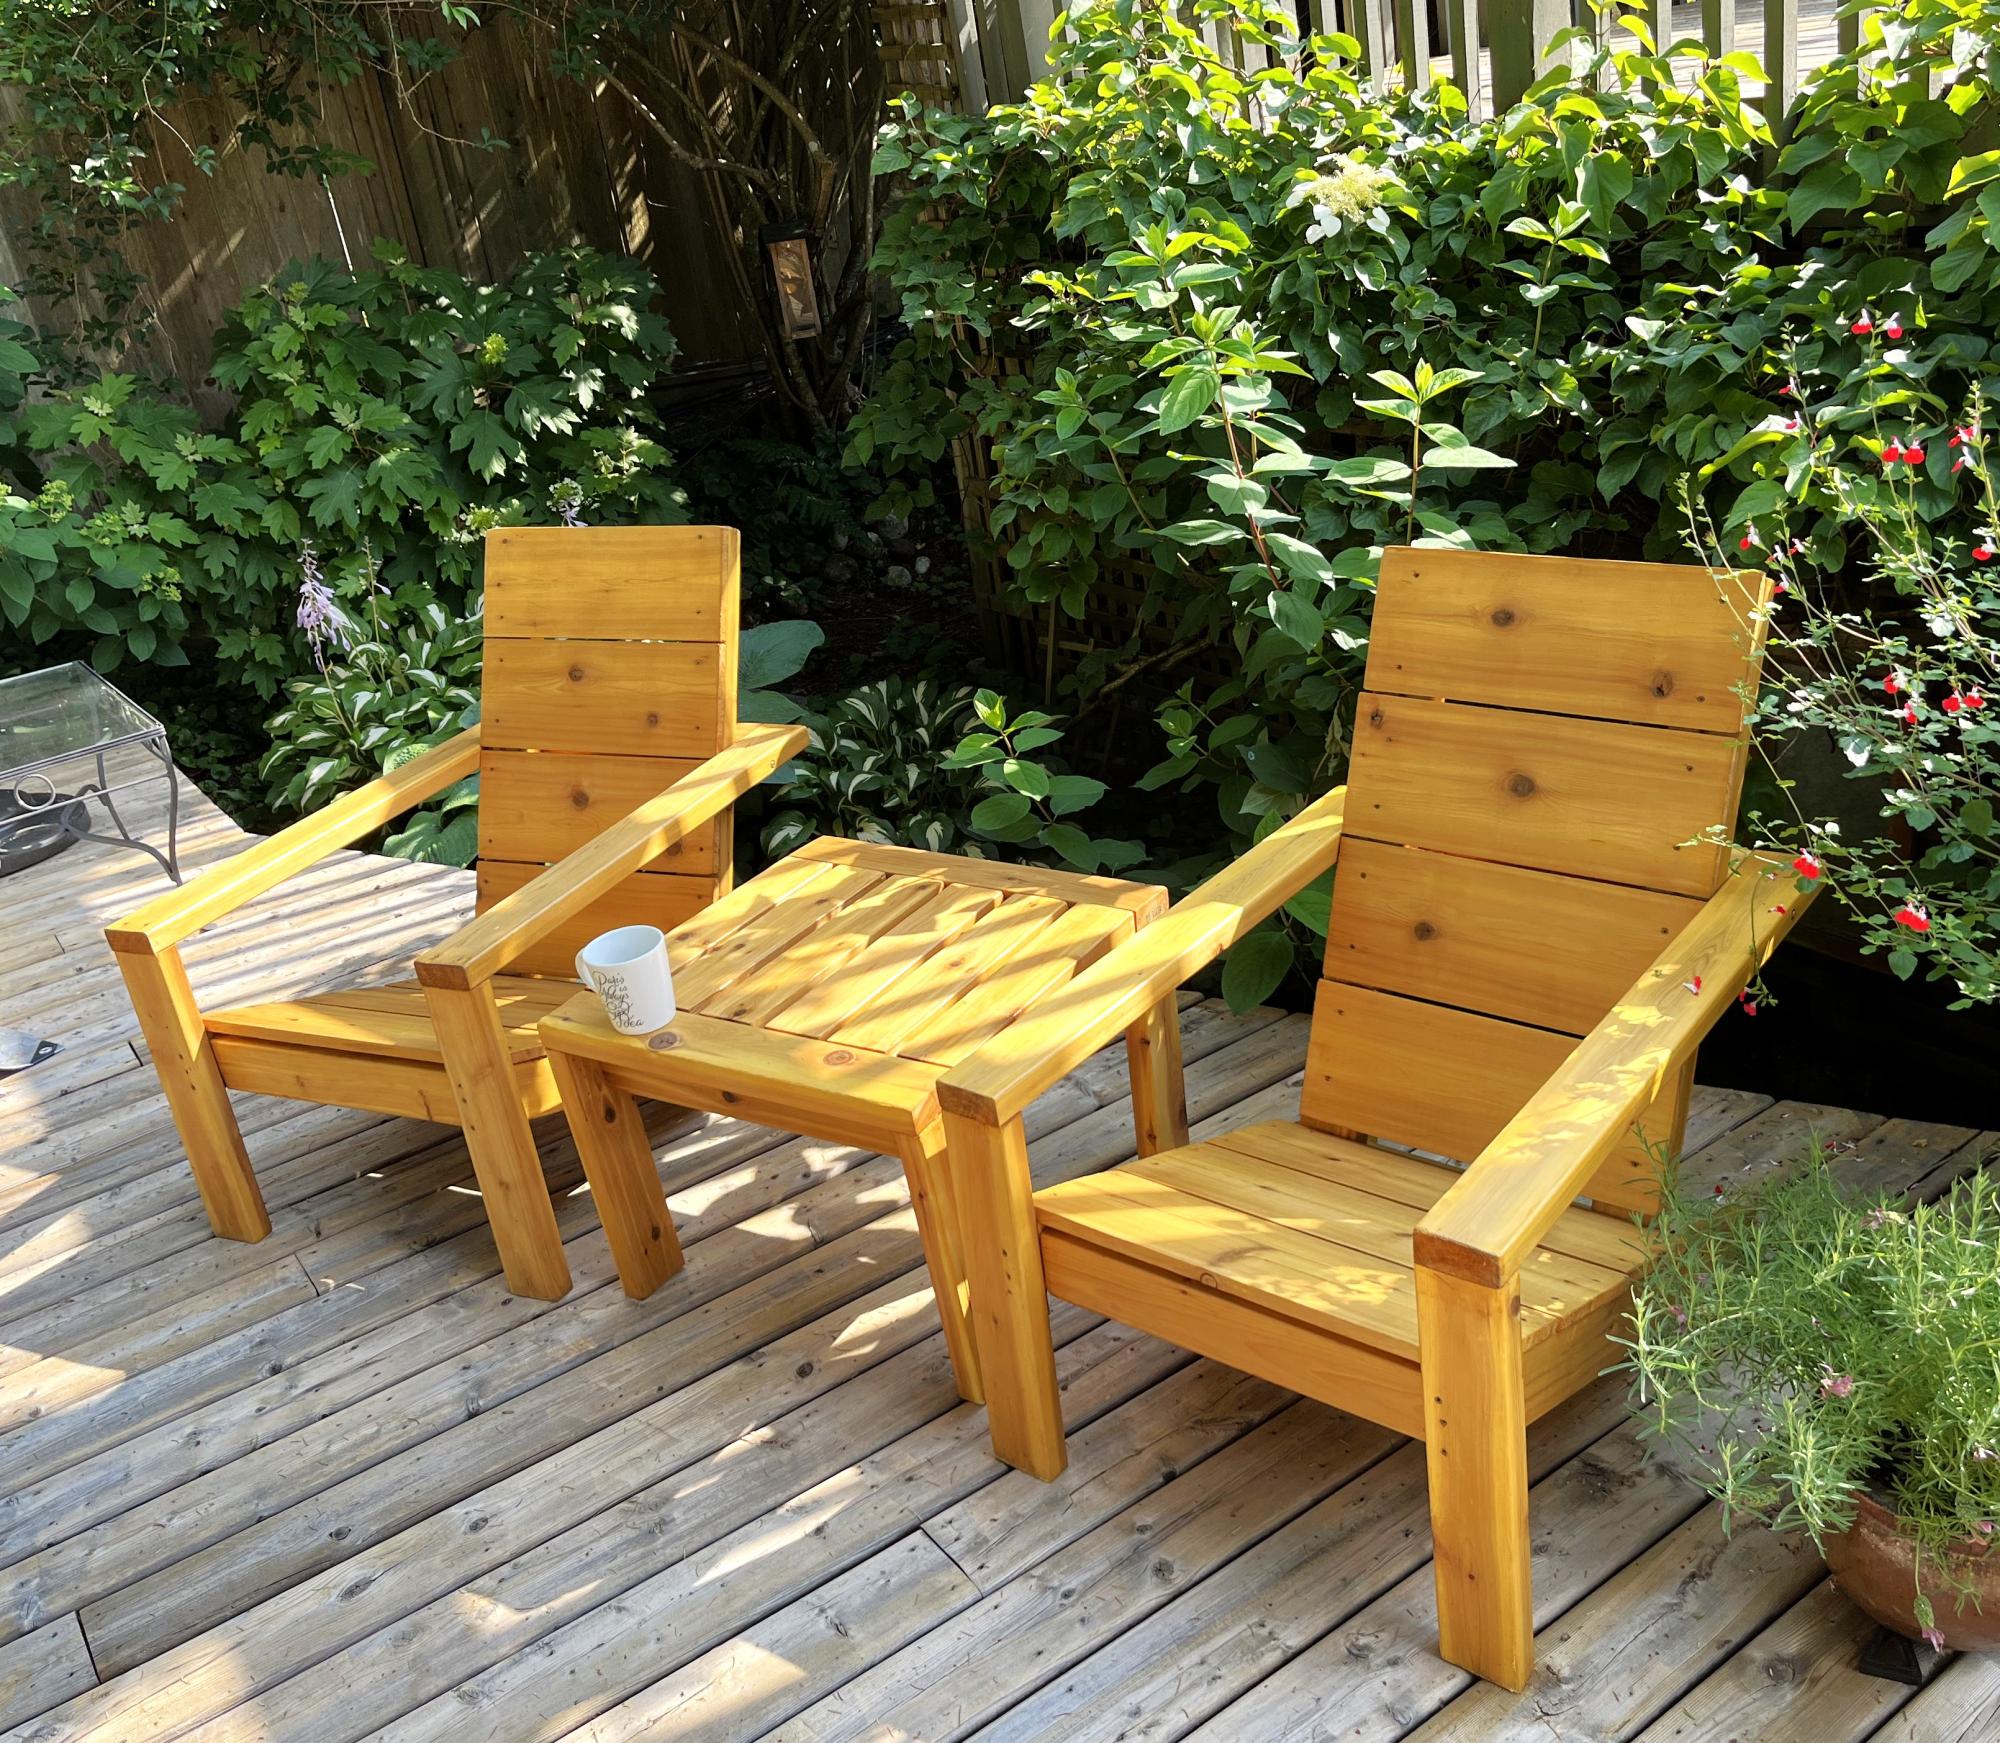
I added a 6 inch lag screw to support the arm in case someone sat on the arm. I also added small metal brackets hidden to help secure the leg strength.
Matt
Built from Plan(s)
Adirondack Chairs
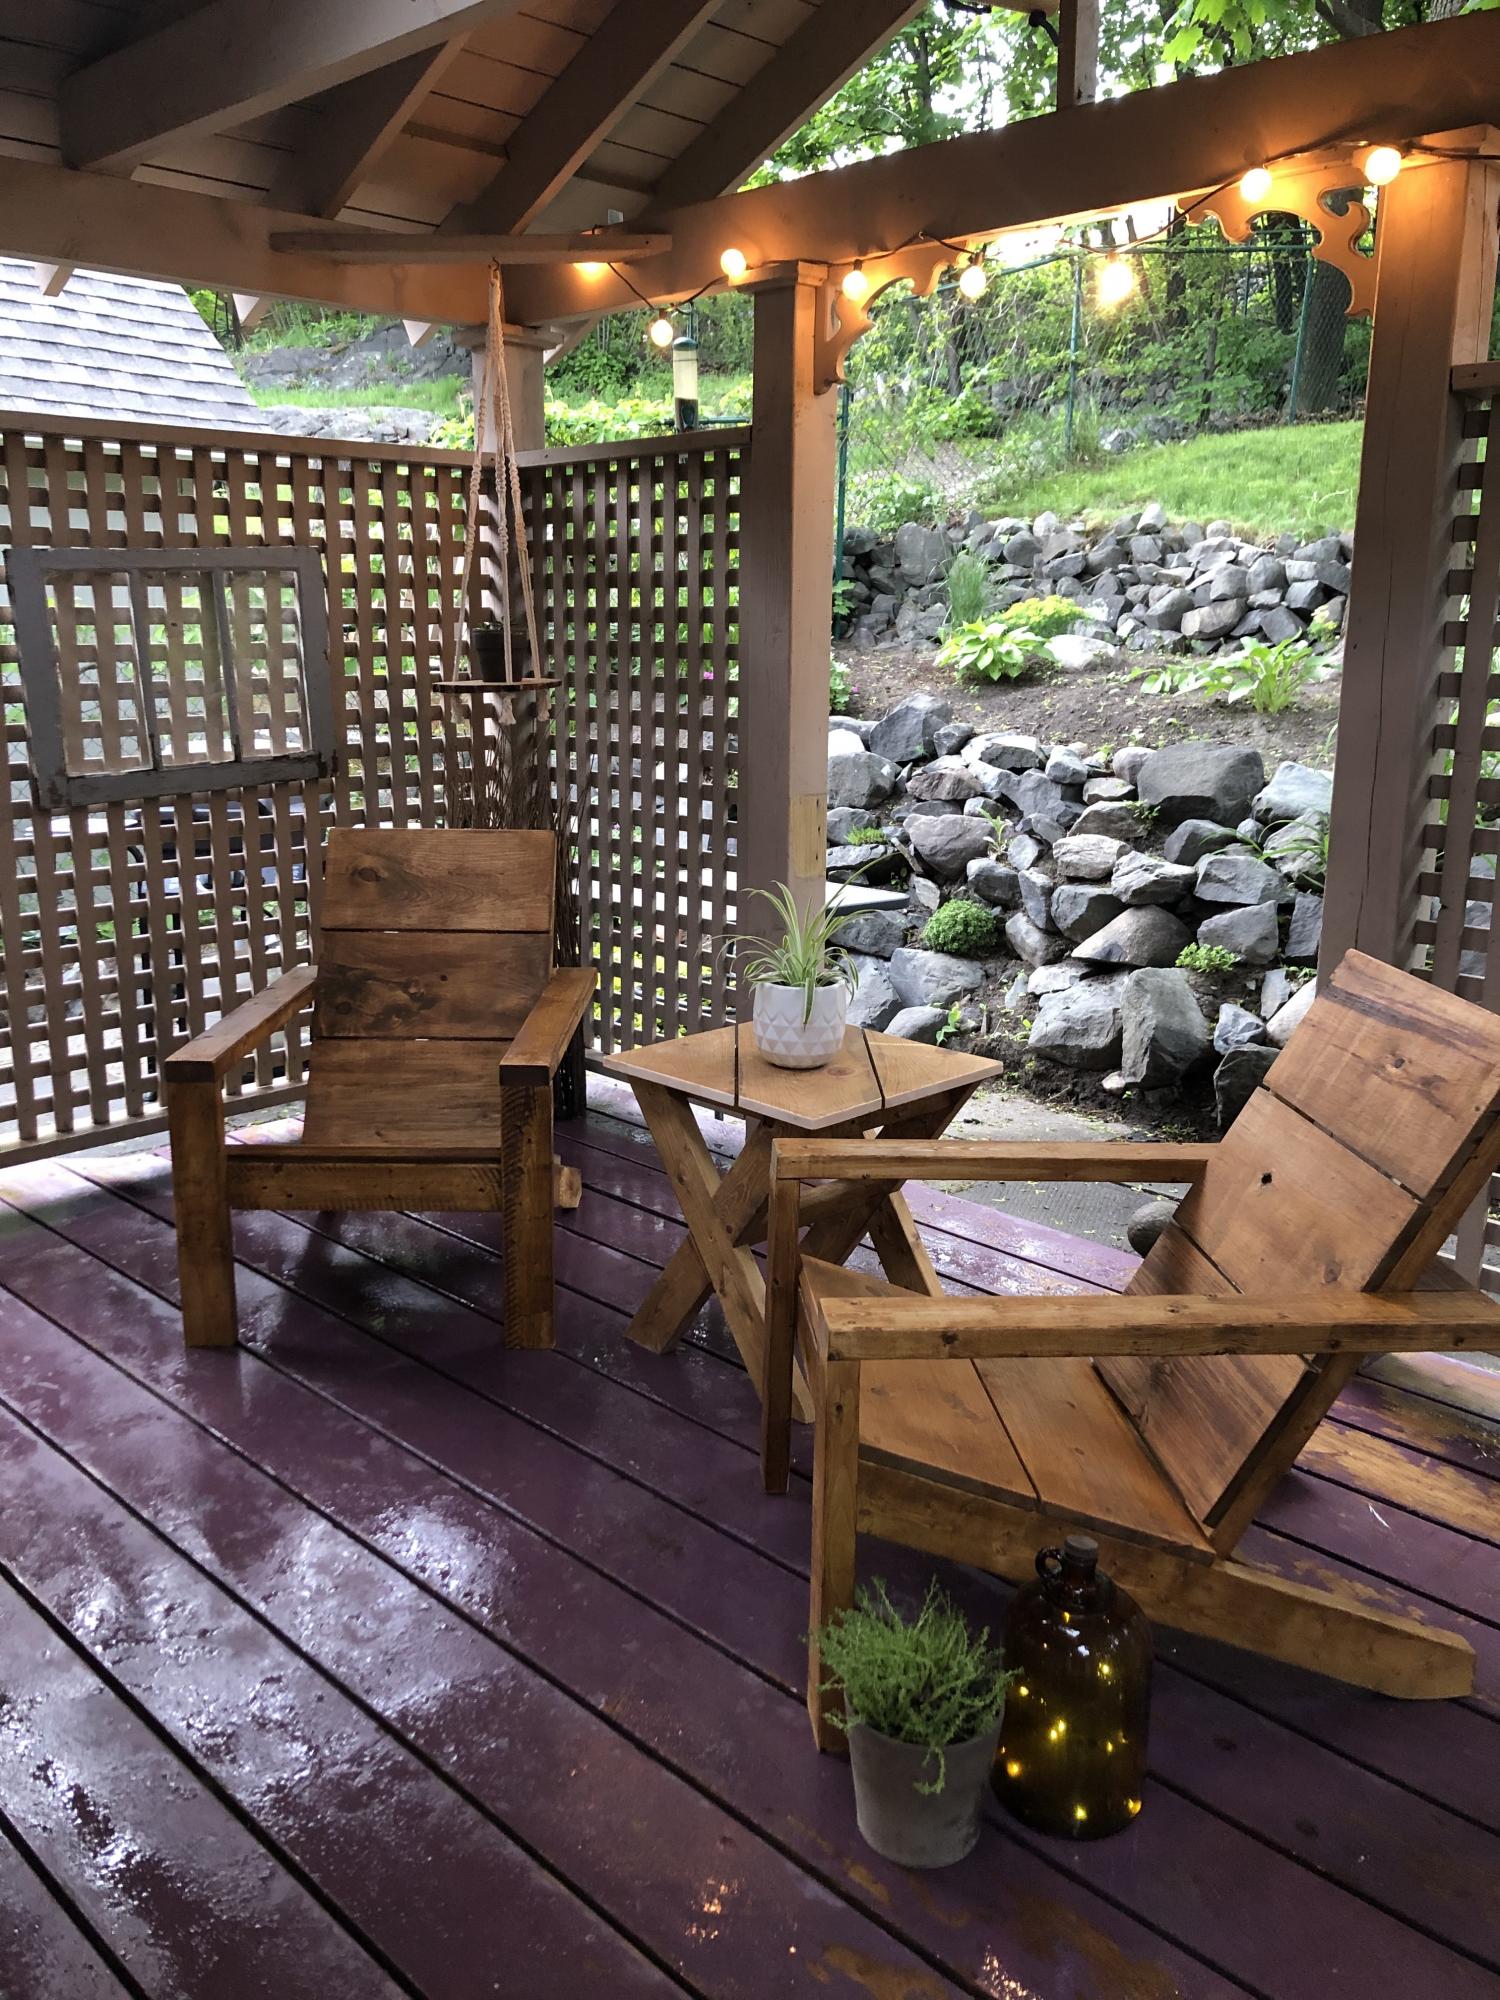
Loved these plans. Made a table as well. Great set!
Built from Plan(s)
Estimated Cost
$100
Estimated Time Investment
Day Project (6-9 Hours)
Recommended Skill Level
Intermediate
Comments
Thu, 06/11/2020 - 13:18
I am so in love with the…
I am so in love with the table you made to match! Did you find the plans here?
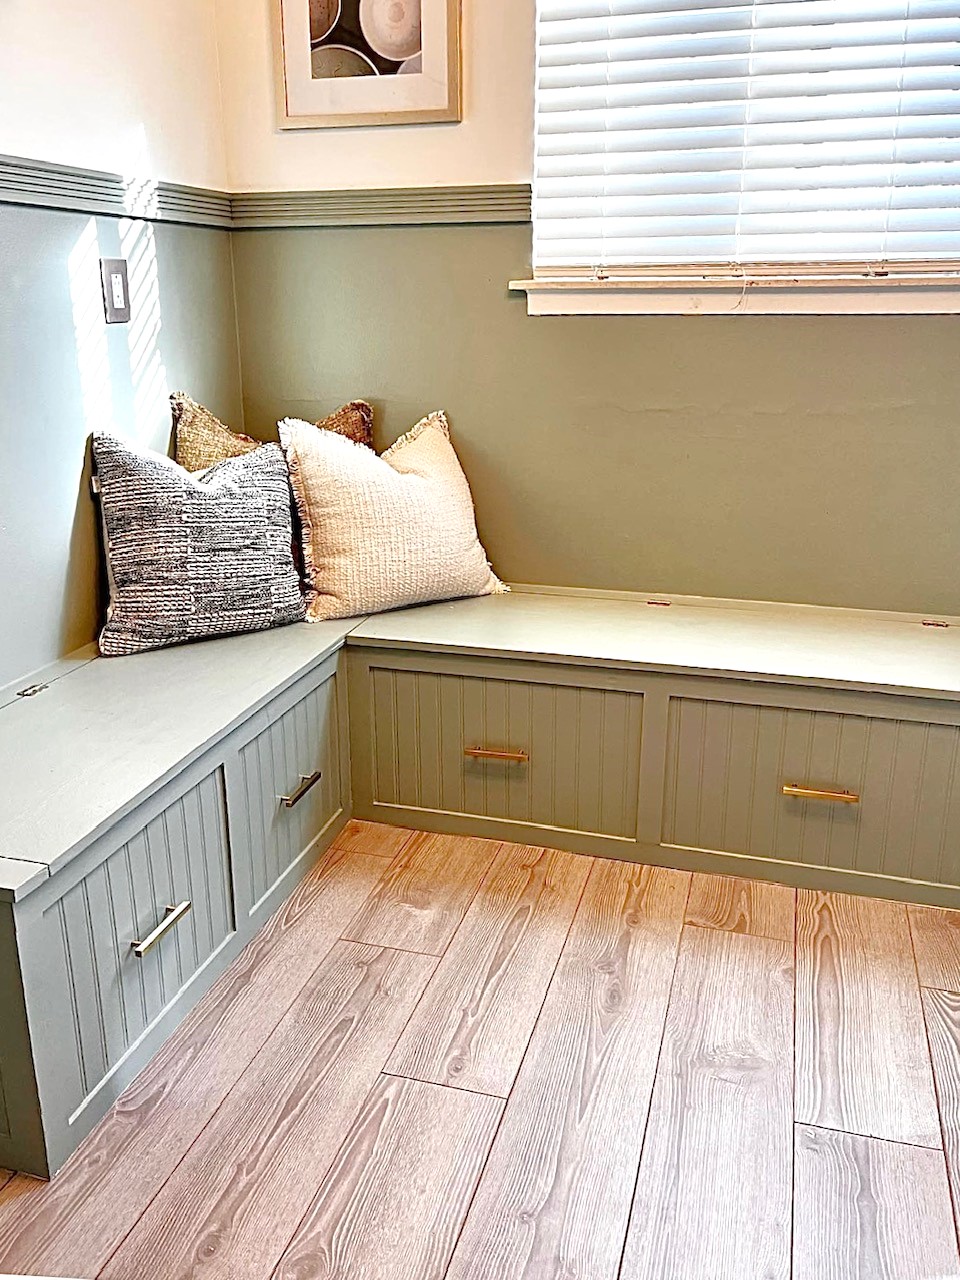
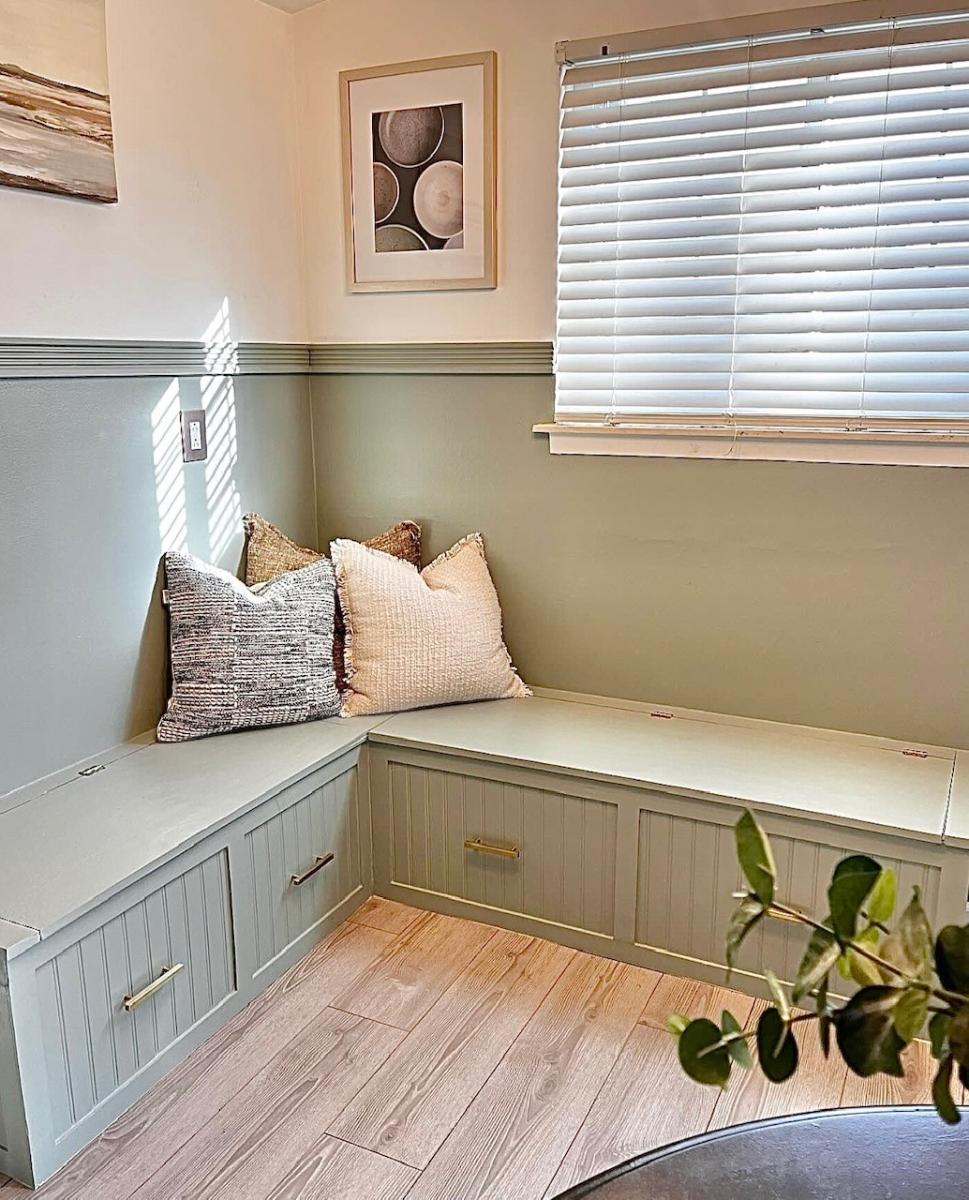
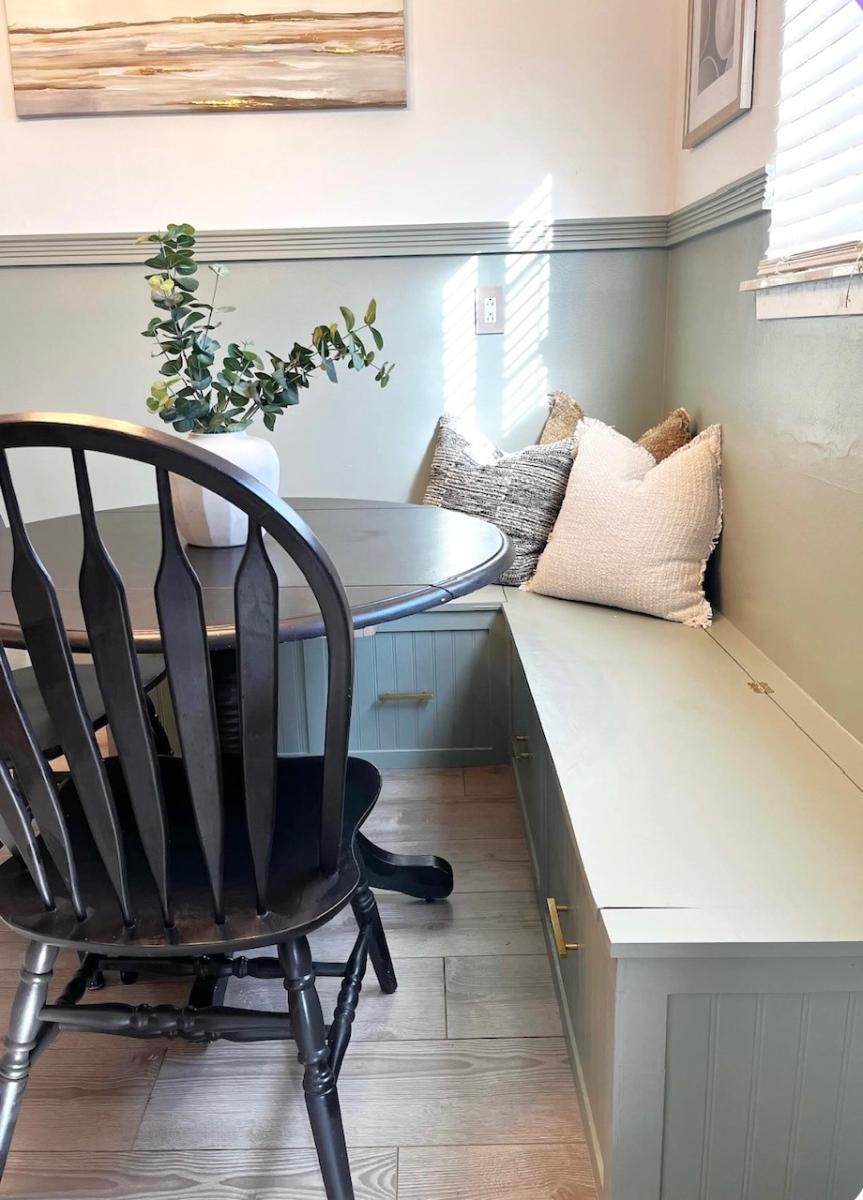
Banquette Storage Bench with Faux Drawers
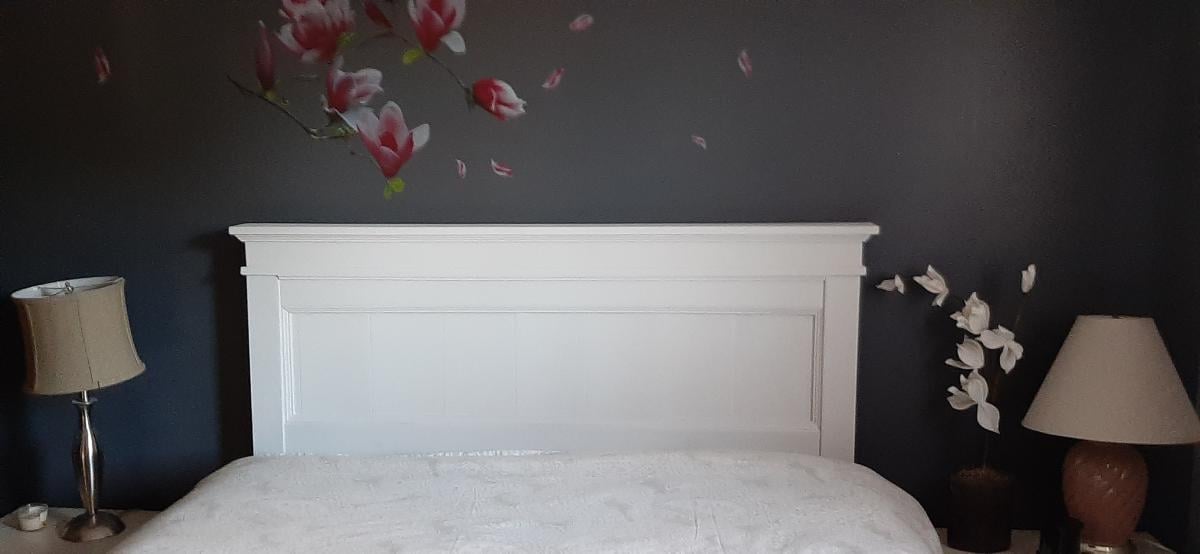
Queen storage bed modified
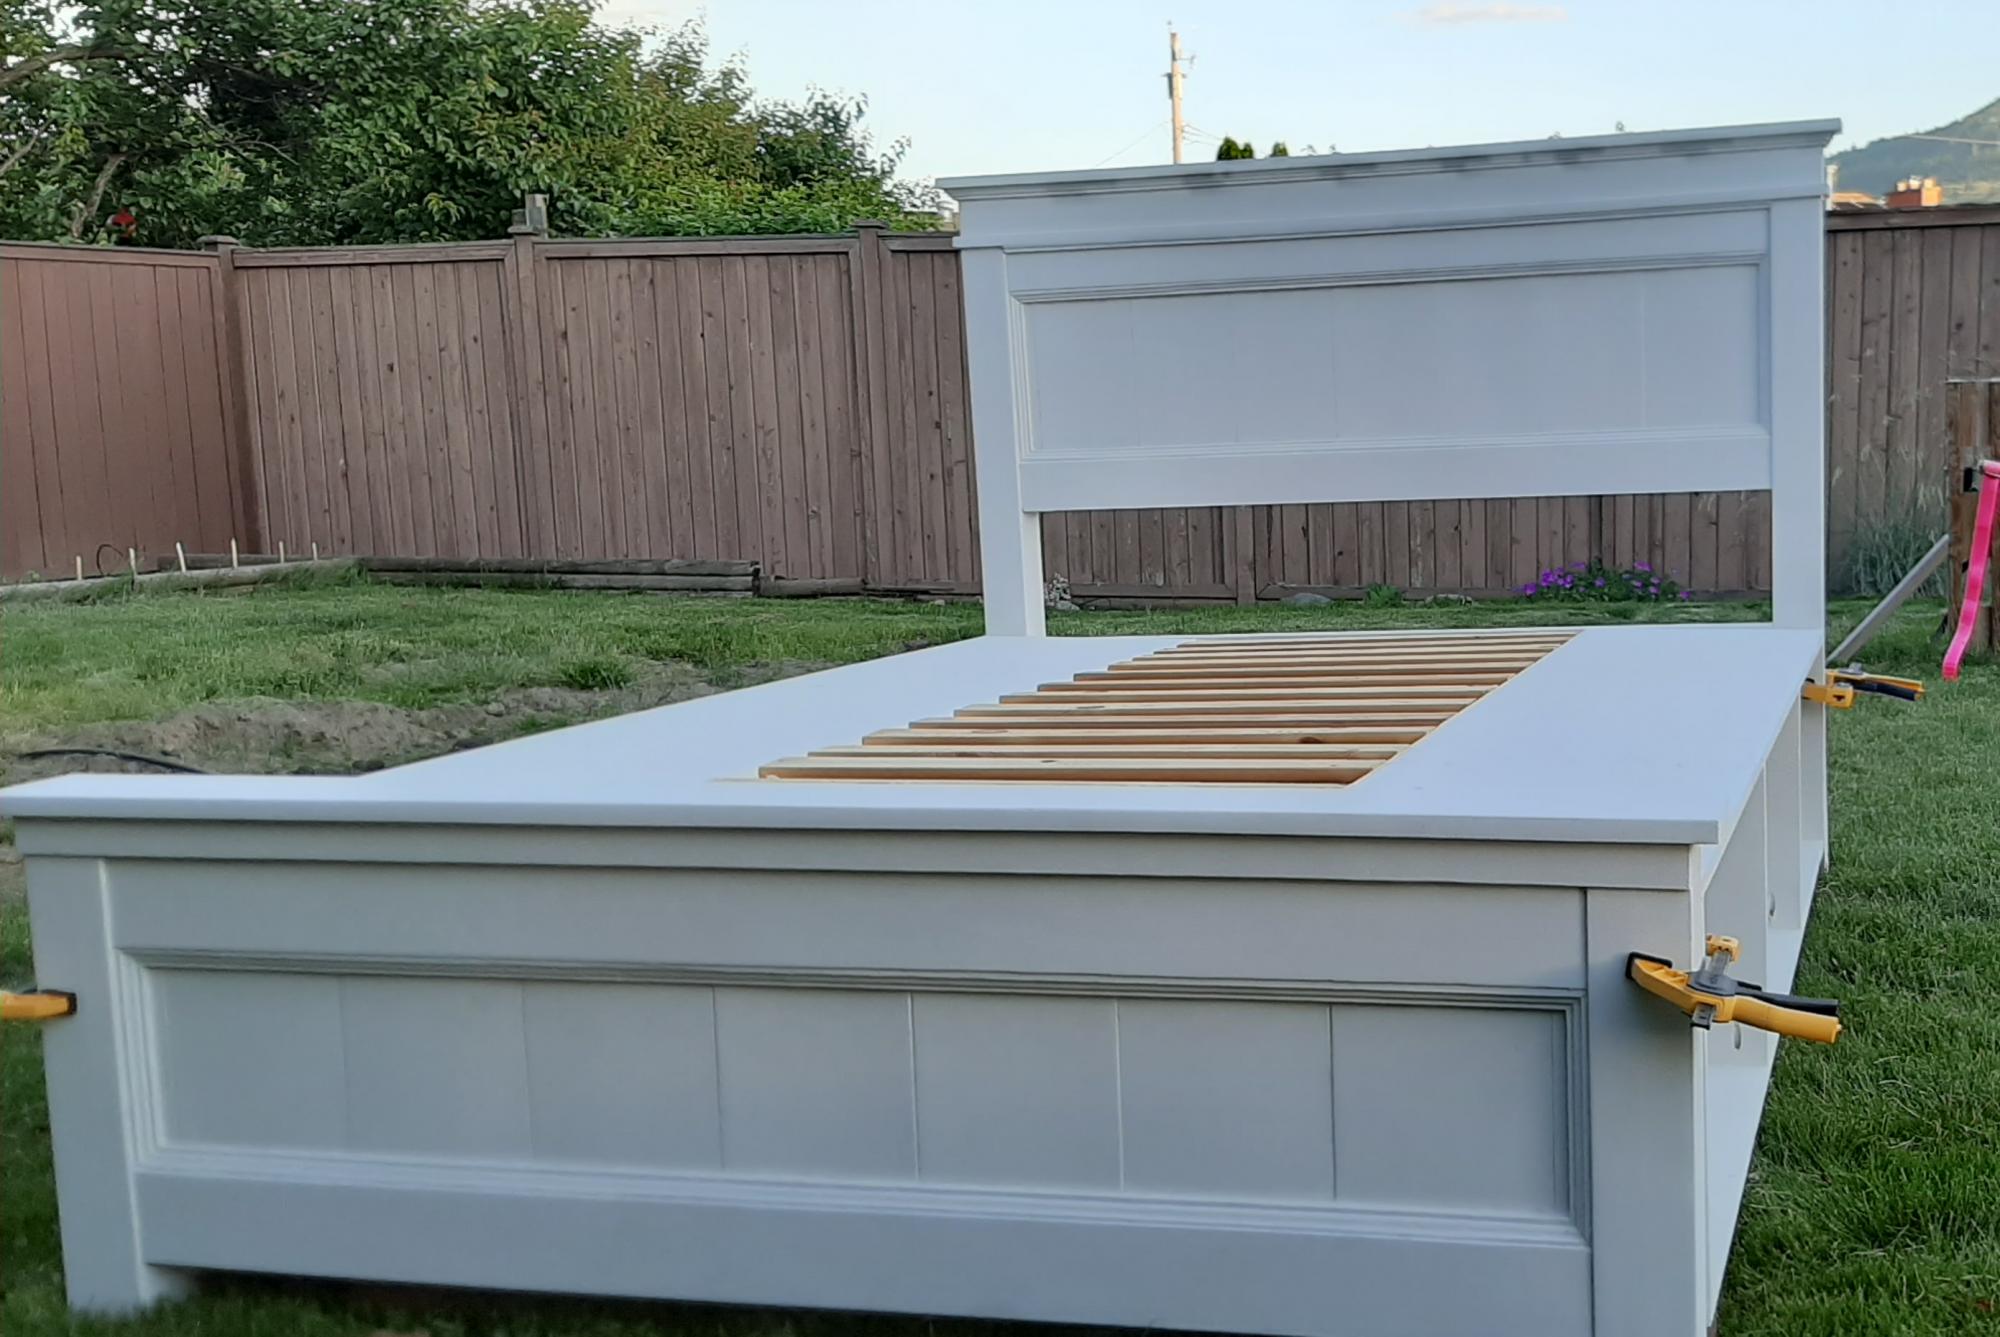
I used wood from an older Ana white project of a loft bed my daughter had out grown. I liked the look of Ana's Mom bed but wanted storage so I modified the plans slightly. I will add drawers later.

Built from Plan(s)
Estimated Cost
200
Estimated Time Investment
Weekend Project (10-20 Hours)
Finish Used
Sweet coconut easy flow paint in Matte
Recommended Skill Level
Intermediate
Small Kitchen Storage Cabinets

Our kitchen is smaller than our last house, so we turned our breakfast nook into more storage and could yet space. I love Ana White’s plans, tips, videos, and community.
Beth Ivy
Built from Plan(s)
Garden Shed
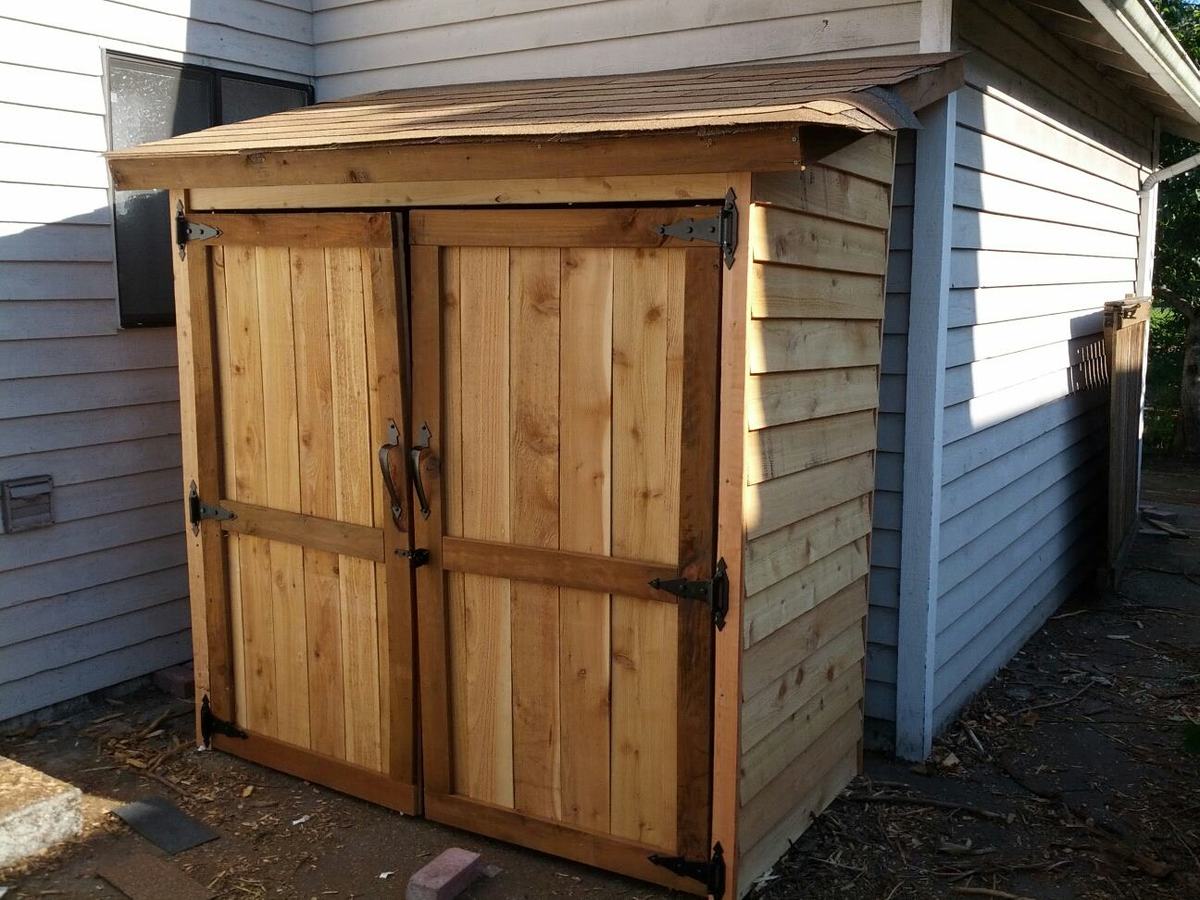
I have been dreaming about building so many things featured on this website, and I finally buckled down and built something. I figured that an outside garden shed would be a bit more forgiving than a project requiring a bit more precision, and from the picture, you can see that it's not perfect! I'm still working on trimming the shingles and I still have to stain/seal it. I've got to admit, when I first picked up the wood for the project at the store, I wondered what I had gotten myself into. But I just jumped in, and here it is.
Built from Plan(s)
Estimated Cost
$300
Estimated Time Investment
Weekend Project (10-20 Hours)
Finish Used
Plan to stain it with some sort of deck stain.
Recommended Skill Level
Beginner
Comments
Thu, 10/11/2012 - 10:45
Looks great!
What a perfect spot for it as well! Really good job with your first project.
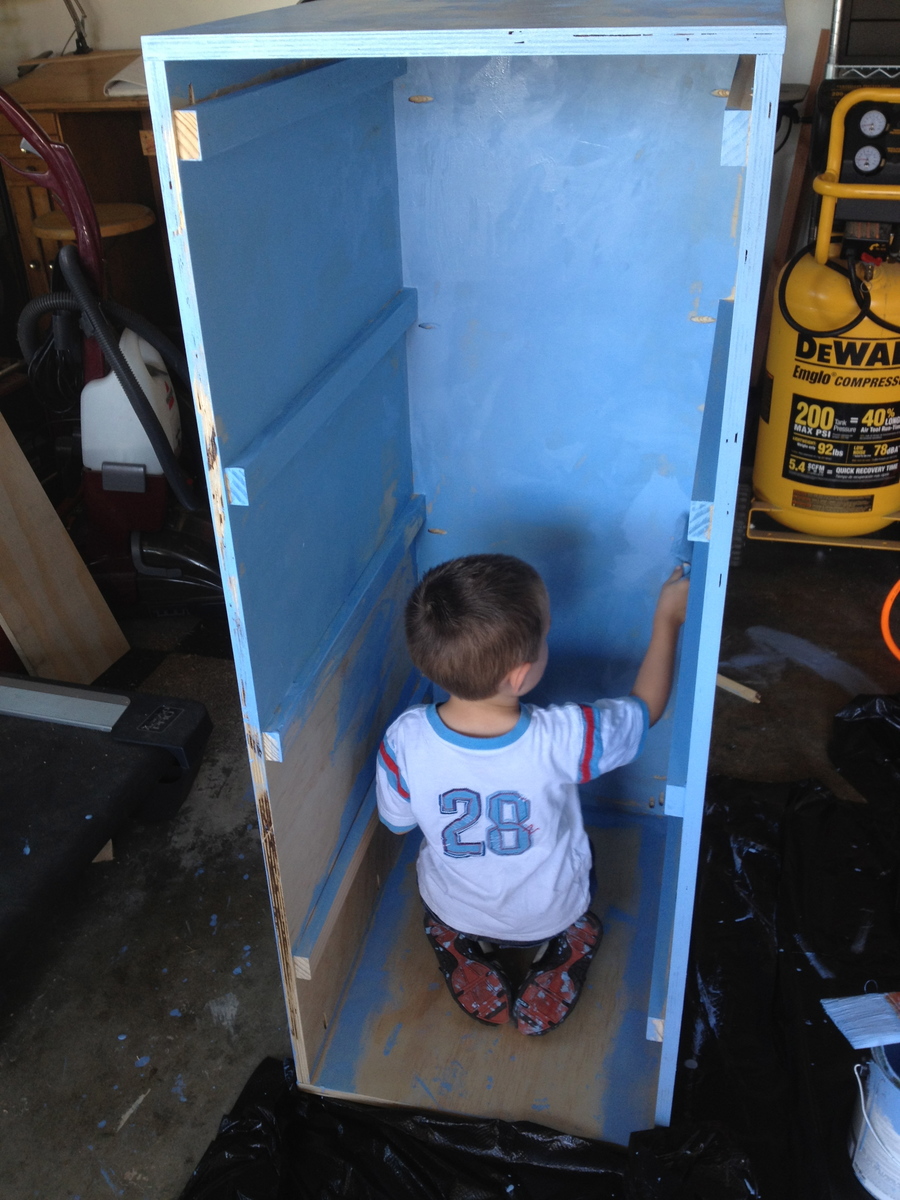
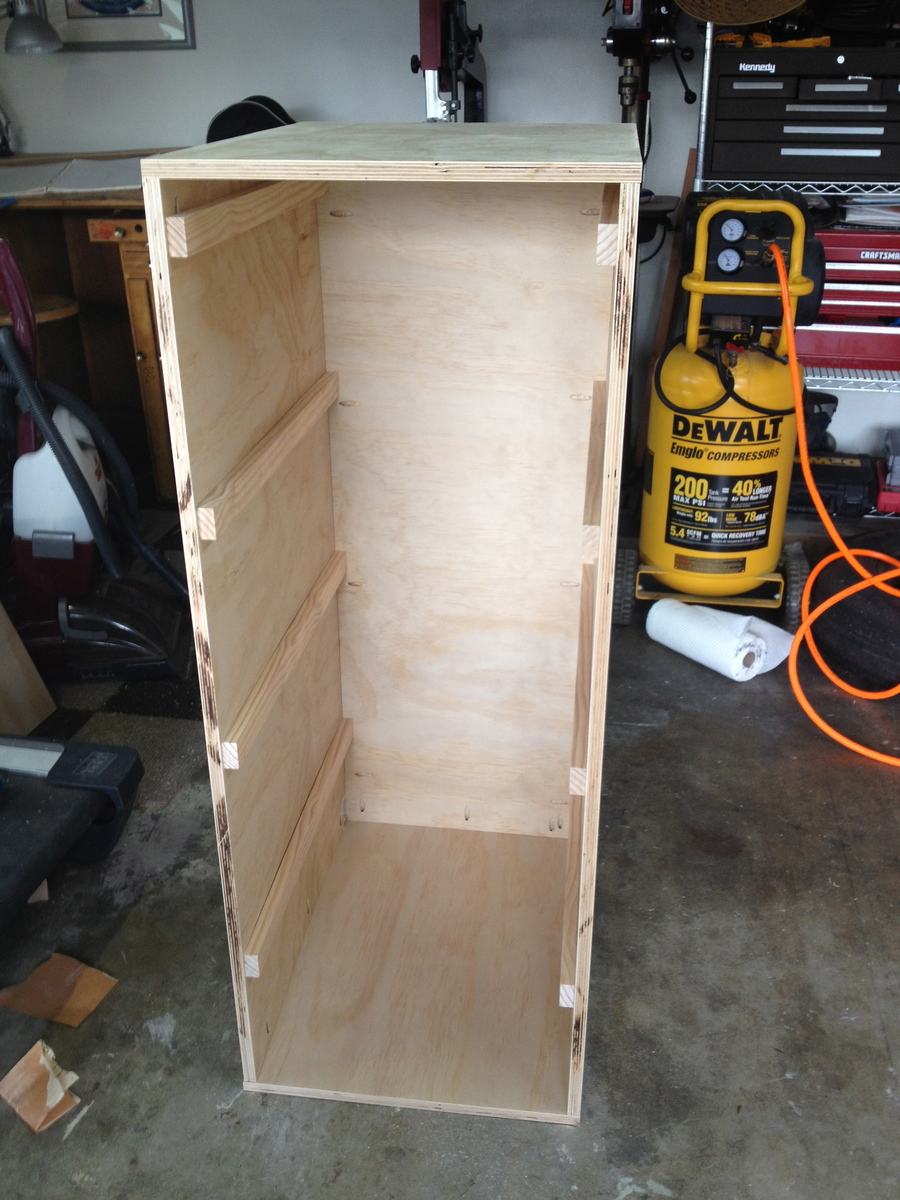
Laundry Sorter
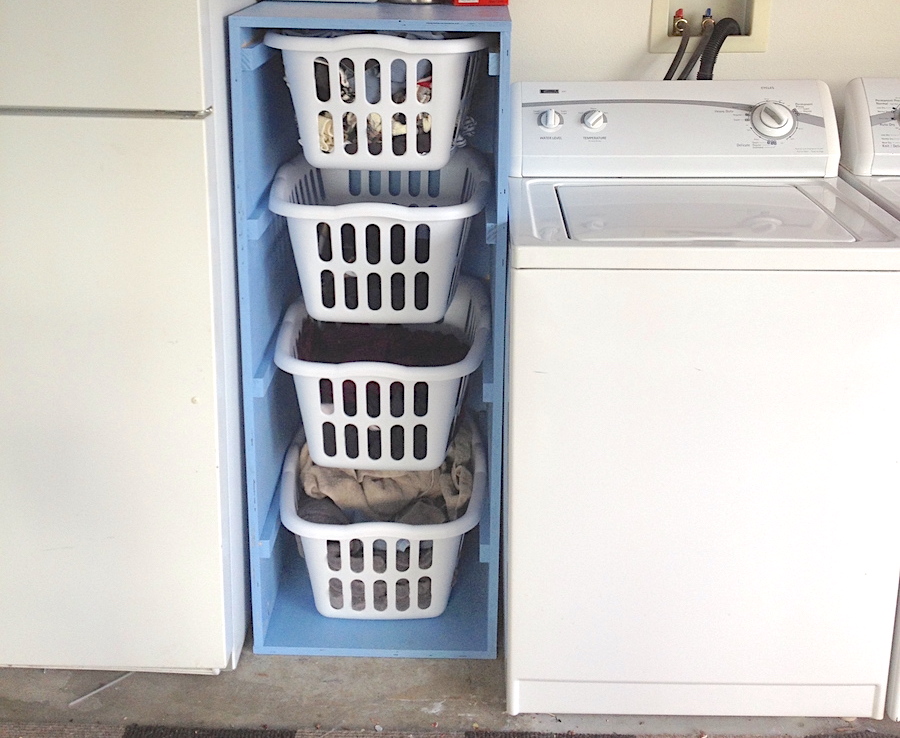
I was tired of having my laundry piled on my garage floor. These plans were the perfect solution. It fits great in the small space I had next to my washer. And it was so easy. I was able to do it all by myself. My husband just had to catch the plywood for me when I ripped it. I was able to find the baskets on the plans at Target and used left over paint from my sons' playroom. My laundry is now always sorted, making it much easier and faster to clean.
Built from Plan(s)
Estimated Cost
$60
Estimated Time Investment
Day Project (6-9 Hours)
Finish Used
Water based paint in eggshell finish. Since this was going to be in the garage I just used leftover paint. If it would have been used anywhere else, I would have used a semi-gloss.
Recommended Skill Level
Beginner
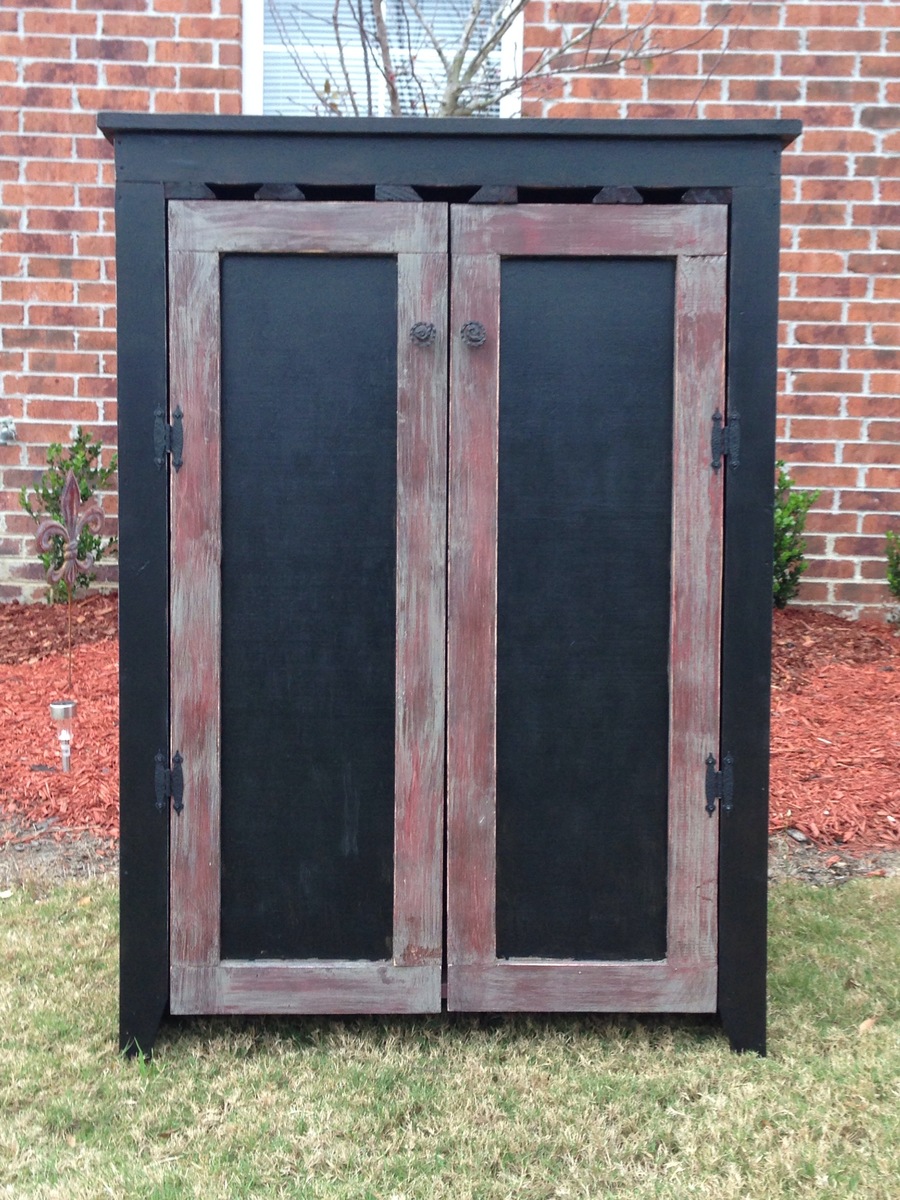
Wine Cabinet - Made from jelly cupboard\pie safe plan

We used the plans from the jelly cabinet \pie safe and added a wine rack at the bottom and wine glass rack that the top! I love it! I get so many compliments on it.


Estimated Cost
$150.00
Estimated Time Investment
Weekend Project (10-20 Hours)
Finish Used
I wanted it to look rustic\antique so I used spray paint and regular paint. It was my first time doing something like this. I was pretty much just experimenting and it turned out perfect.. We are building one for my Mom next, I wait to see how it turns out!!
Recommended Skill Level
Beginner
Work Bench
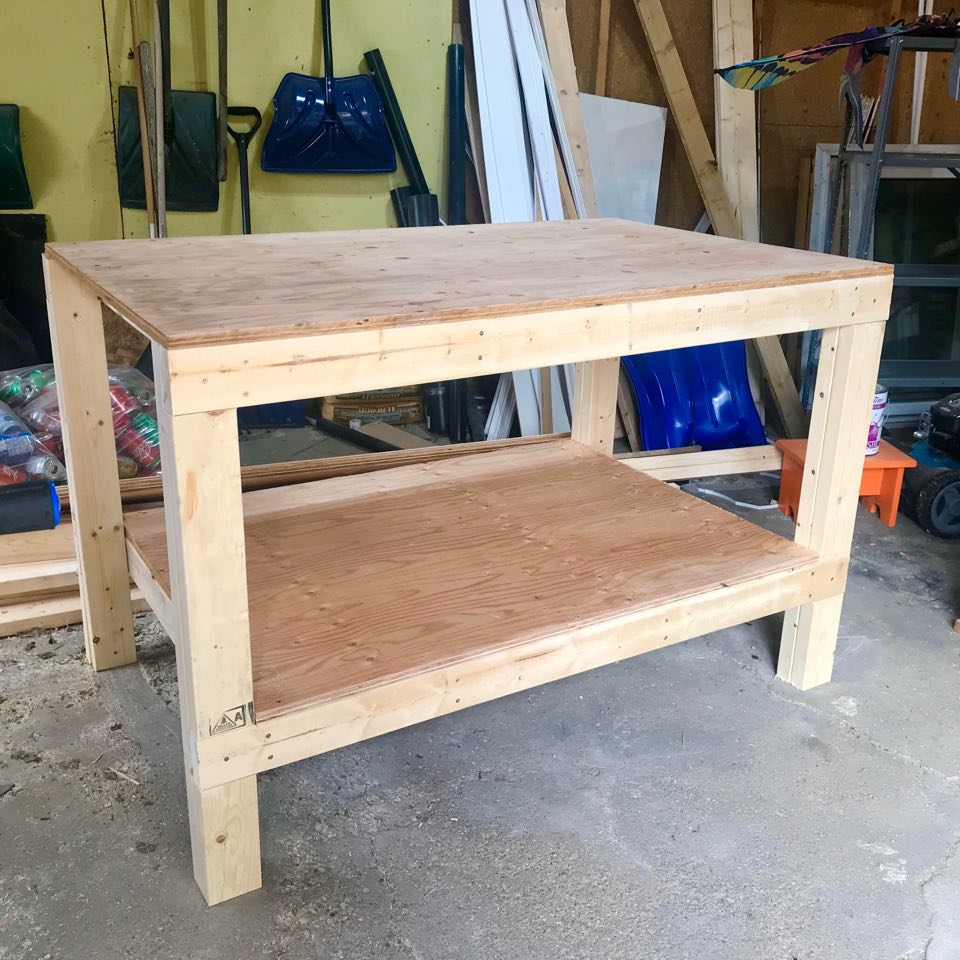
I just started wood working this past few months, and this is I think my 6th project already. Super easy to make and so sturdy!! This will definitely help make building easier!!
Built from Plan(s)
Estimated Cost
$100
Estimated Time Investment
Afternoon Project (3-6 Hours)
Recommended Skill Level
Beginner
Comments

Mon, 06/29/2020 - 12:44
I also made one of these…
I also made one of these last week and it has already proved it's worth many times! Yours looks great - I hope you get lots of use out of it :)
When you follow directions and plans..
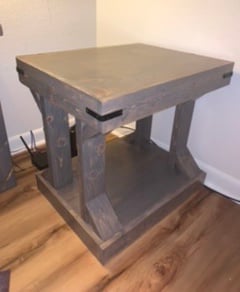
Followed Ana’s plans down to the measurements. Didn’t have a brad nailer, so I attached the 1x4 sides with 3/4in pocket holes and 1 1/4in PH screws. Additionally used trim screws and 1 1/4 finish nails throughout it for places I couldn’t put a PH. Plan on getting four more brackets for the bottom half, like the top. Very proud of myself.
Stained the legs, top, and base before completely assembling them.
Built from Plan(s)
Estimated Cost
$35 (without tools and screws)
Estimated Time Investment
Weekend Project (10-20 Hours)
Finish Used
Varathane Briarsmoke. Three coats of Satin finish.
Recommended Skill Level
Beginner
Rainbow Sand & Water Table
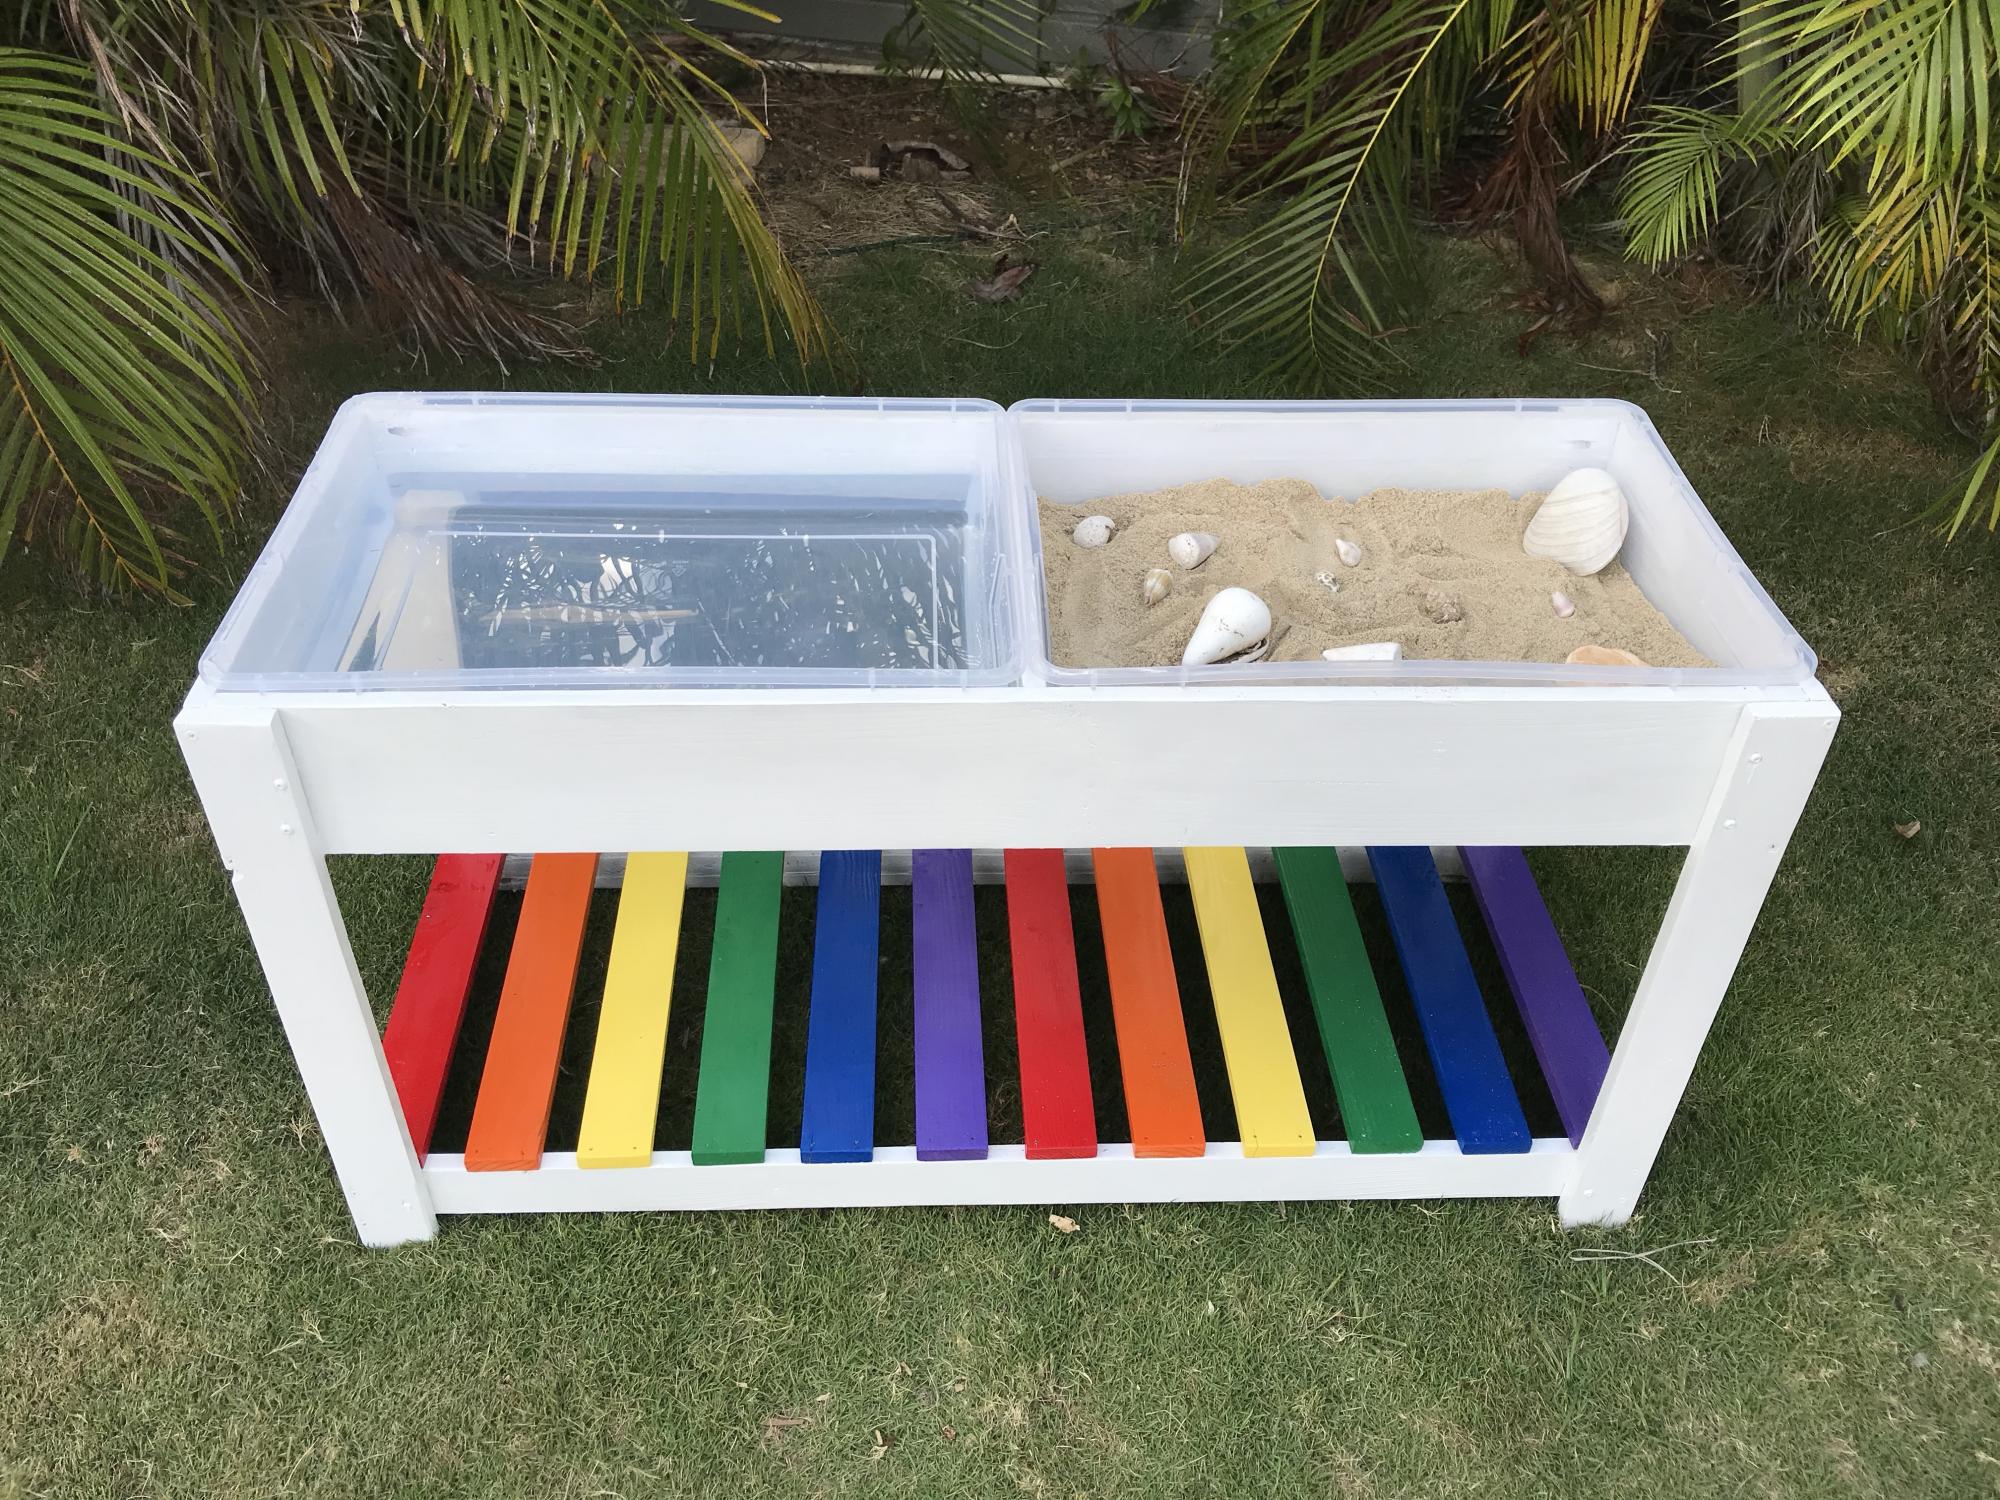
I'm new to woodworking, and this was so much fun to make! Pocket holes make it sturdy, and I spent plenty of time on sanding so no slivers for little ones. The plastic containers just barely fit so be sure to not undercut anything in the plan.
Built from Plan(s)
Estimated Cost
$20 in wood, $15 in containers, $4 each color of spray paint, white paint/screws/wood glue I had on hand
Estimated Time Investment
Afternoon Project (3-6 Hours)
Finish Used
White primer paint and spray paint for the shelf boards
Recommended Skill Level
Beginner
Comments
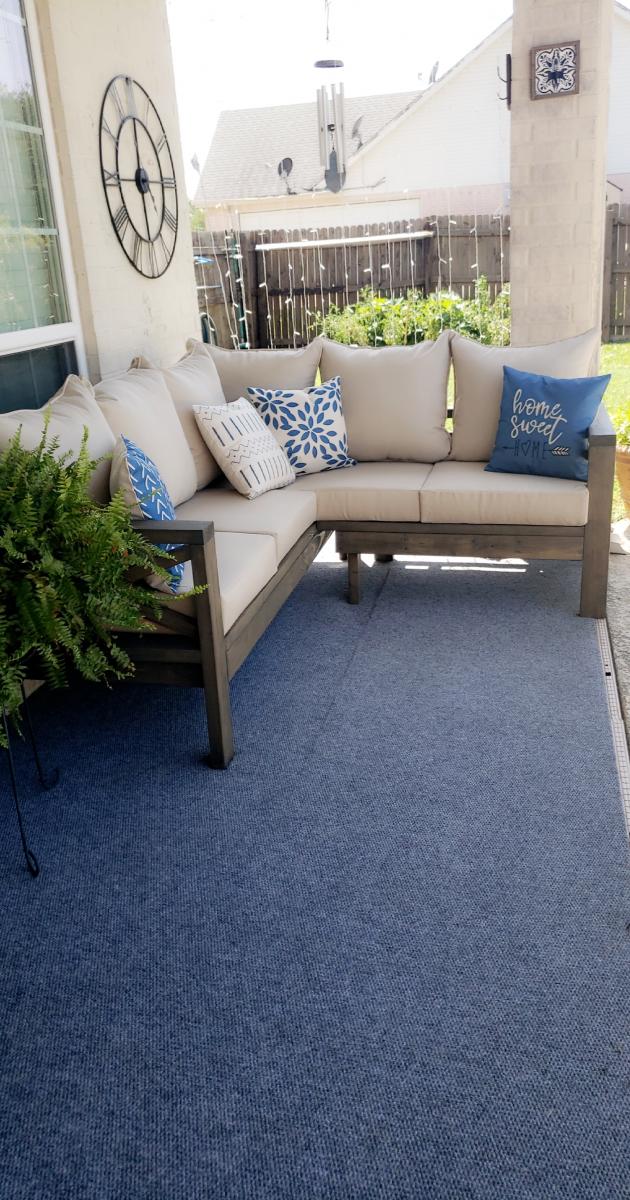
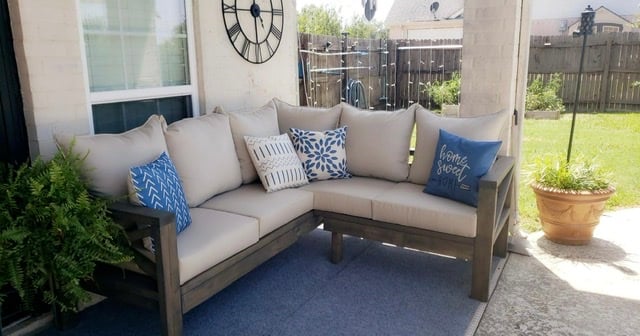
Ana-white outdoor sofa
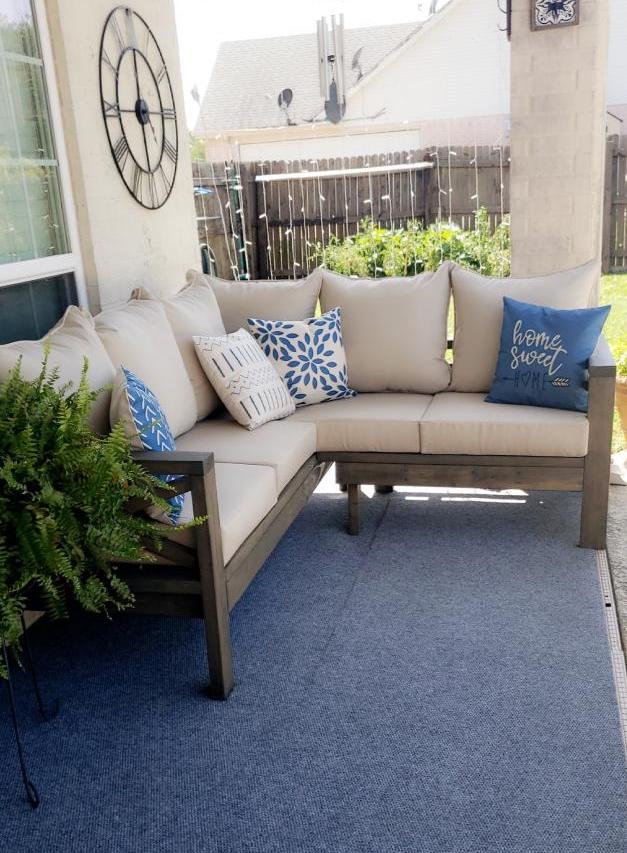
I made this outdoor sofa on a weekend.
Built from Plan(s)
Estimated Cost
$150
Estimated Time Investment
Weekend Project (10-20 Hours)
Finish Used
Varethane Aged Barrel
Square Coffee Table

Square coffee table based on a discontinued design from West Elm.


Estimated Time Investment
Weekend Project (10-20 Hours)
Finish Used
Rustoleum Dark Walnut. Wood Conditioner. Rustoleum Polyurethane.
Recommended Skill Level
Intermediate
Comments
Wed, 10/13/2021 - 13:18
asking for plan
Could you please post the plan and cut list and others info??
It is so nice and i like to make it .
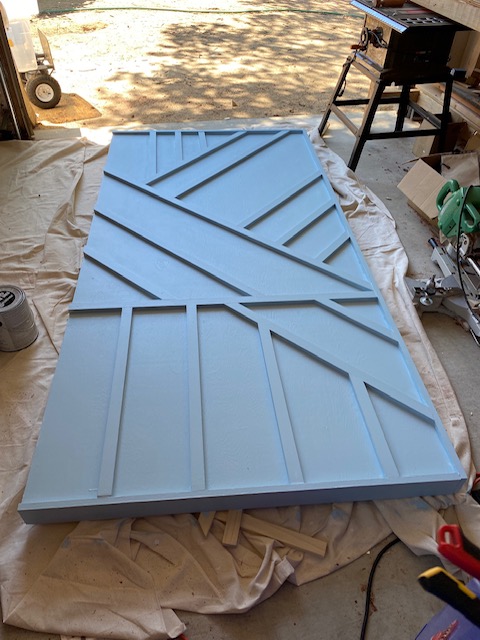
Geo Headboard -first project
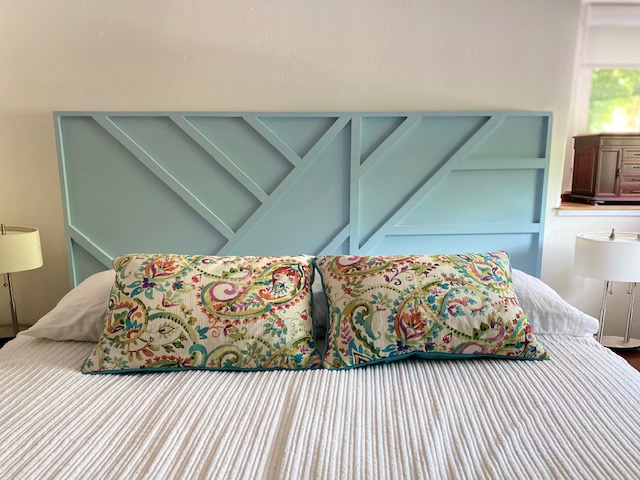
This project was fun and I learned a ton! I used the Modern Geo Headboard plans and then modified them to fit my room. This was my first project and I'm glad I did it but I should have started with something simpler to learn about my tools and understand the process better. I'm proud of myself and I'm looking forward to my next project. Thanks to Ana for the plans and the inspiration, staying busy during this pandemic is a lifesaver!

Built from Plan(s)
Estimated Cost
$200
Estimated Time Investment
Afternoon Project (3-6 Hours)
Finish Used
Magnolia Paint- Vibrant Horizon
Recommended Skill Level
Beginner
Toddler's picnic table
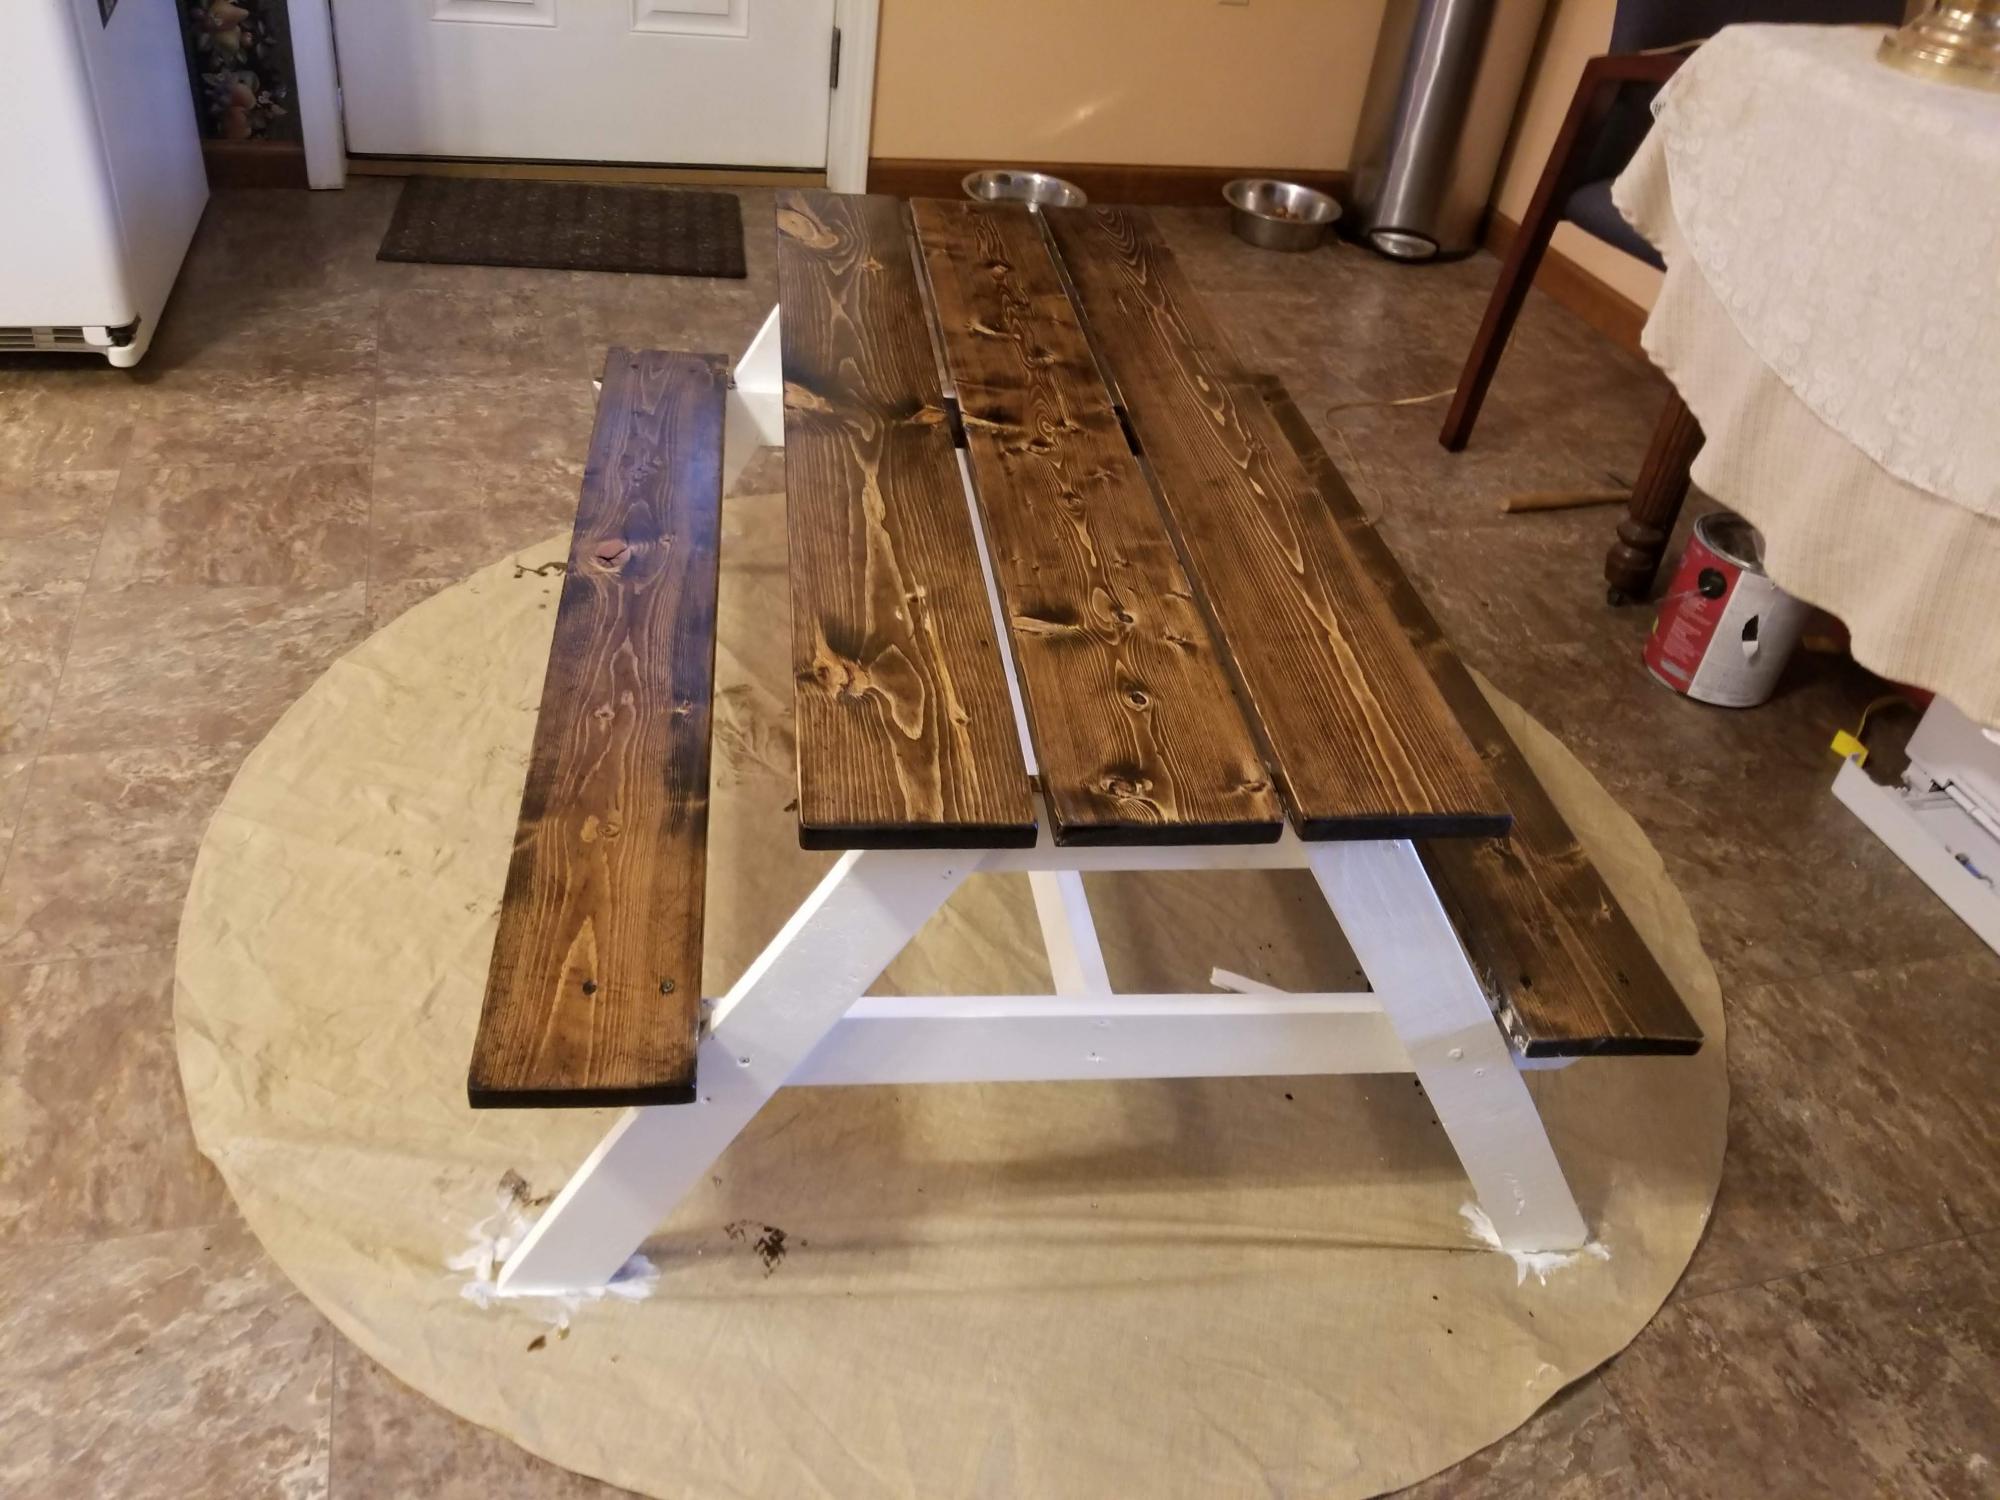
Love this picnic table. I have 2 grandchildren, Kayden is 3 and Kinsley is 1. They both love using it.
Built from Plan(s)