Community Brag Posts
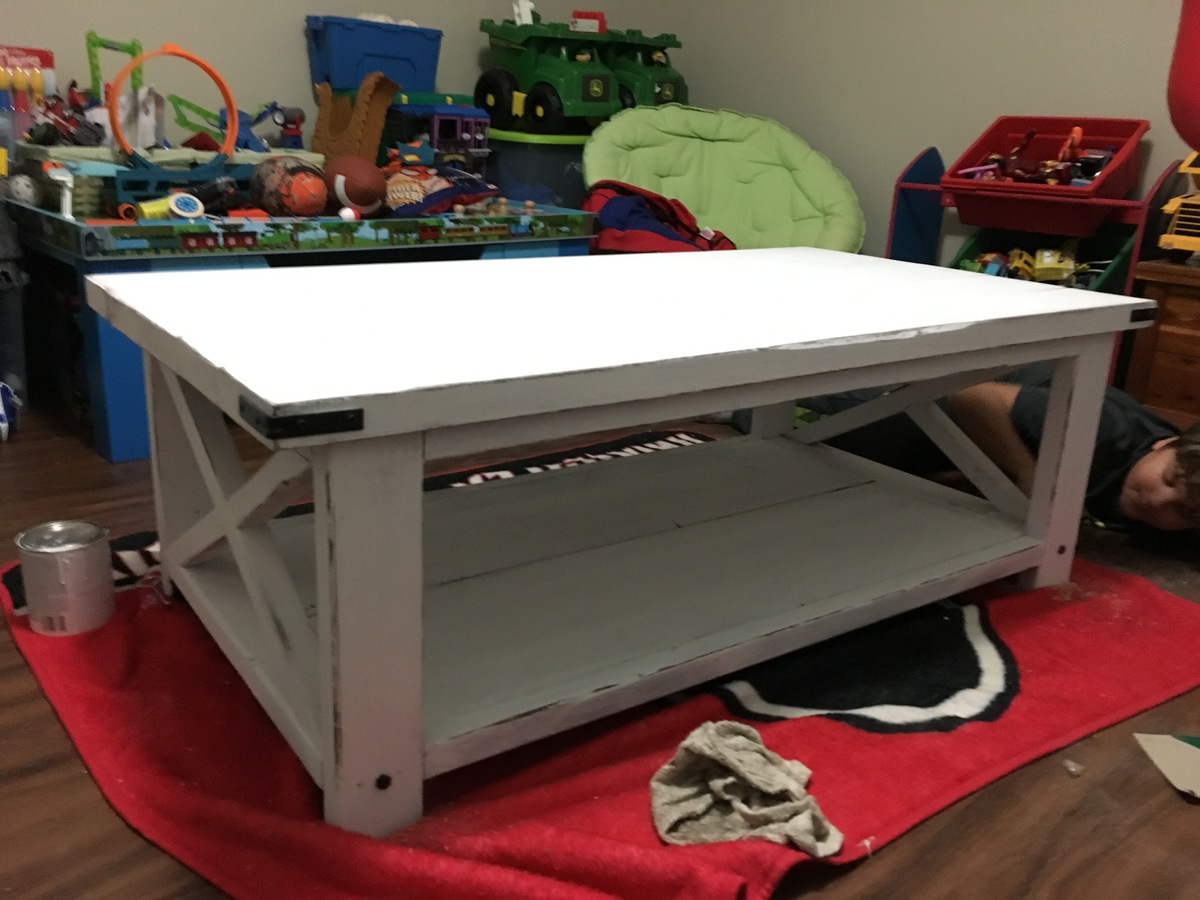
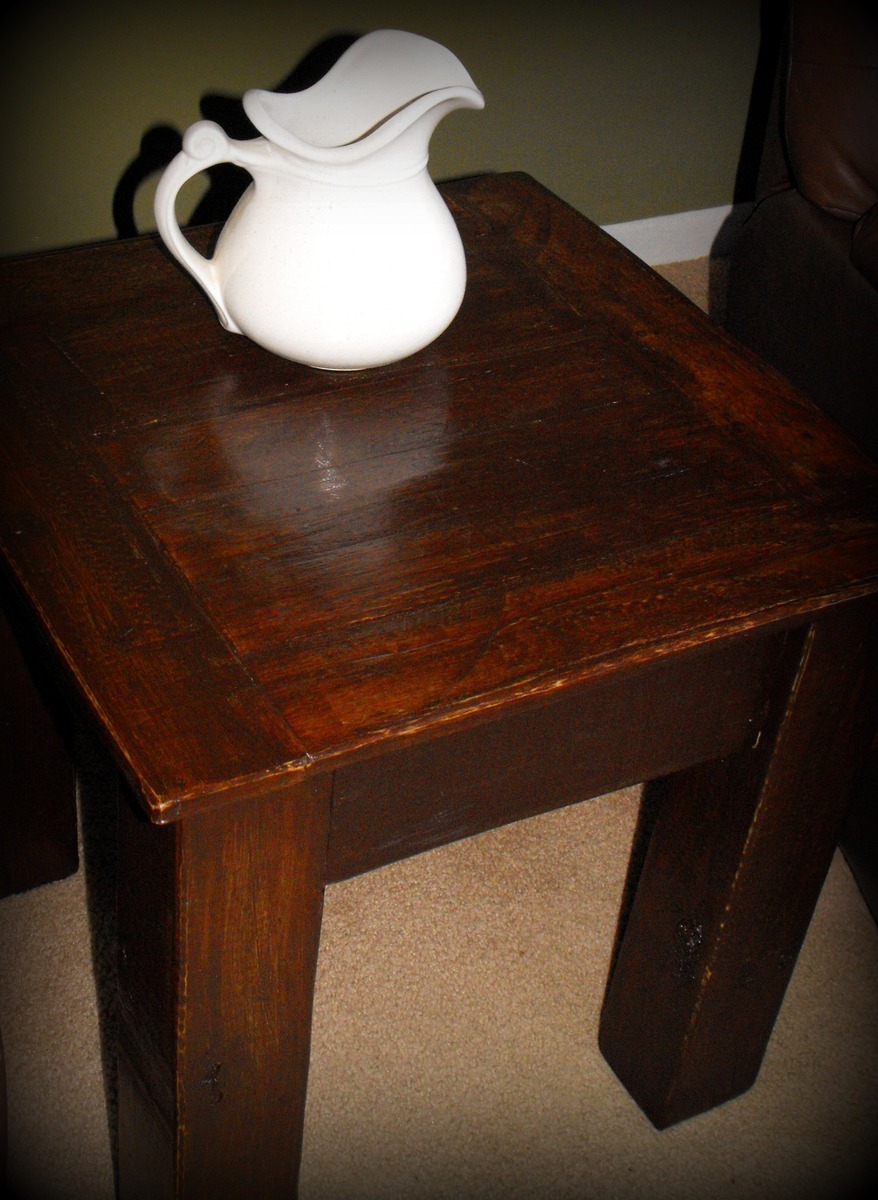
Tryde Coffee Table
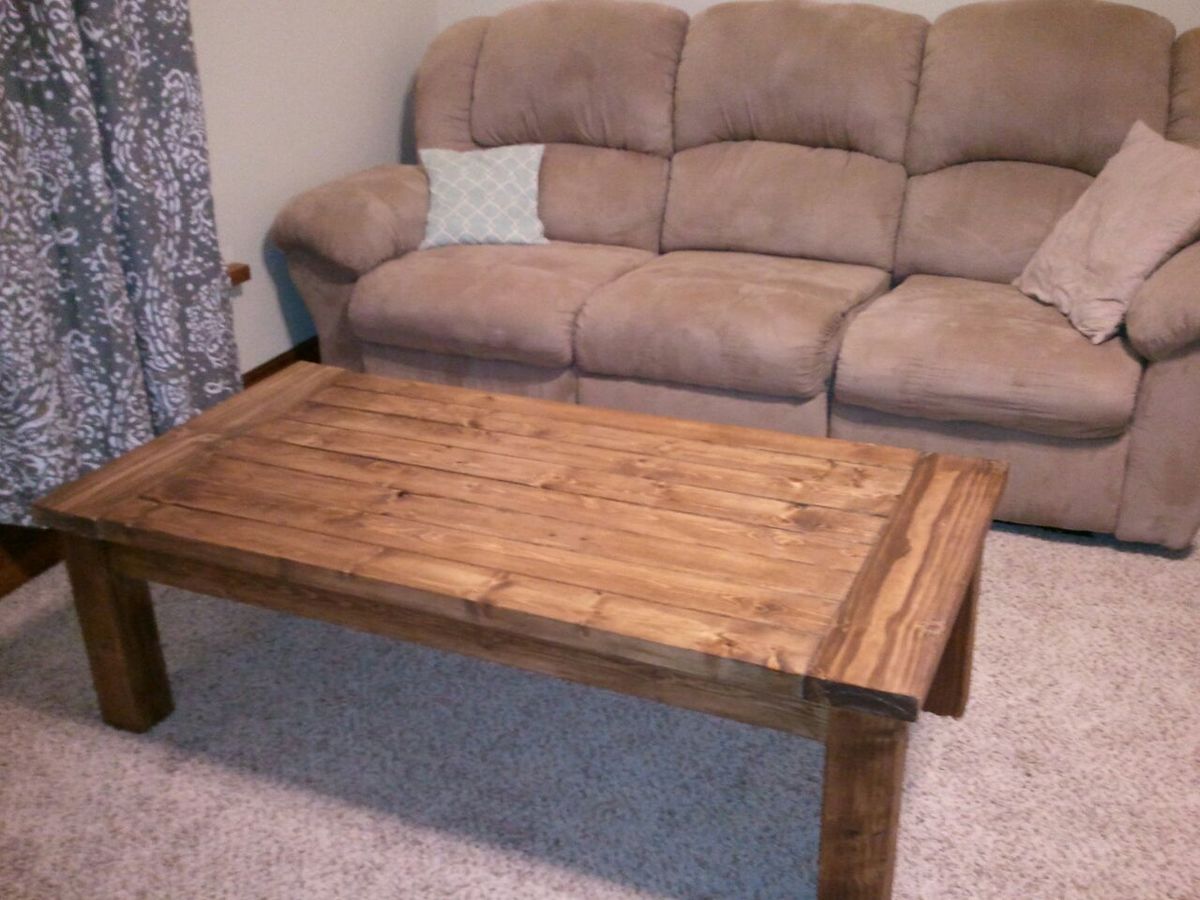
This was my first project. We are using it in the Man Cave.
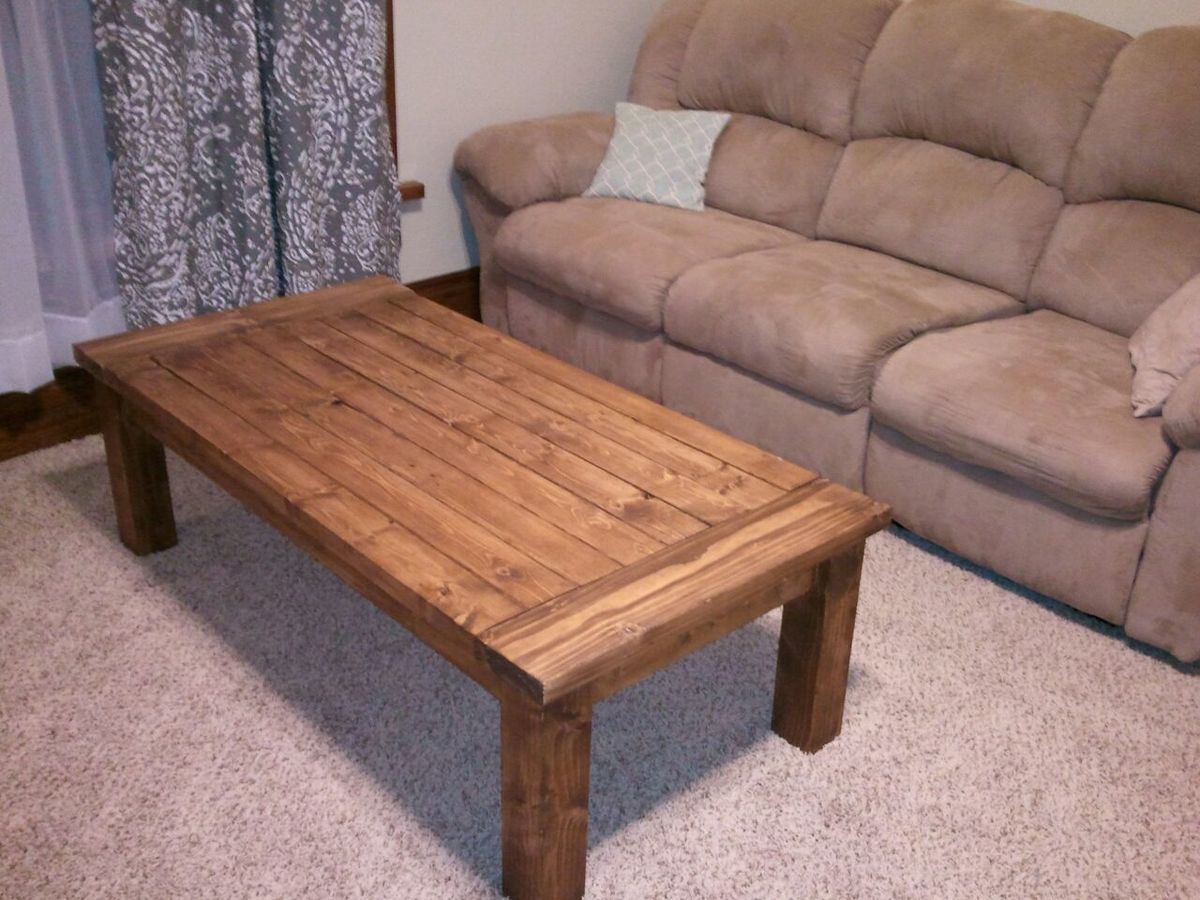
Estimated Time Investment
Afternoon Project (3-6 Hours)
Recommended Skill Level
Beginner
Comments
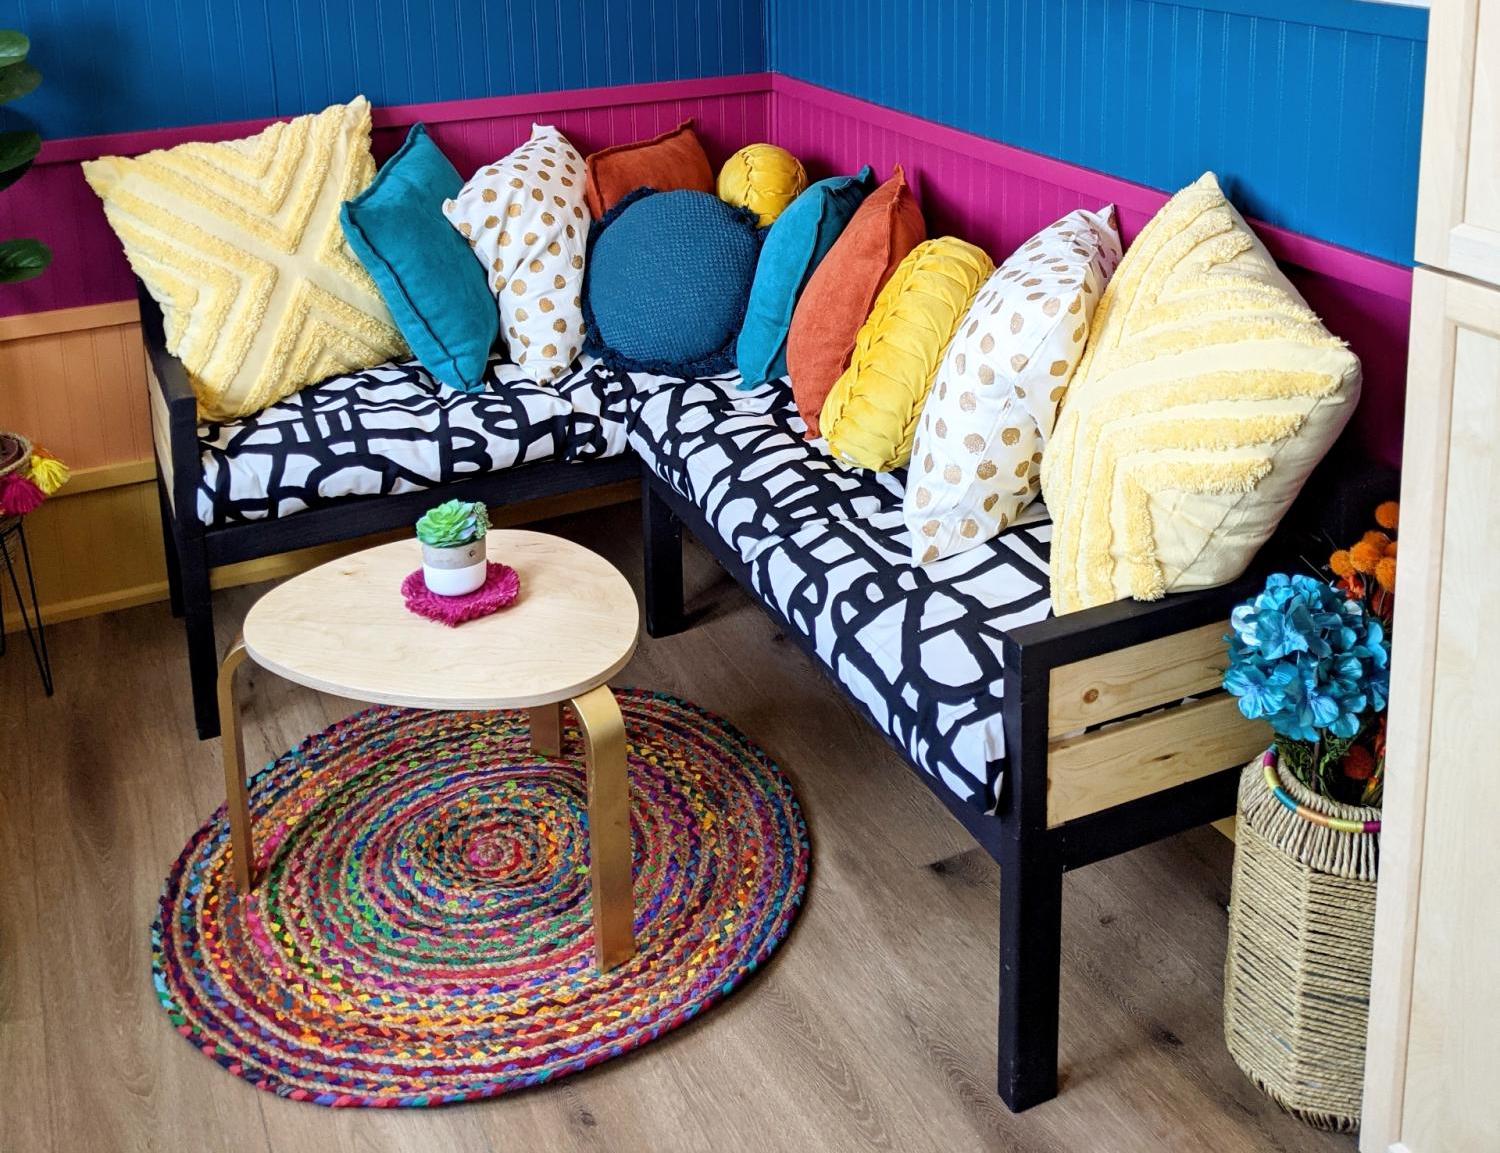
Poolside sectional
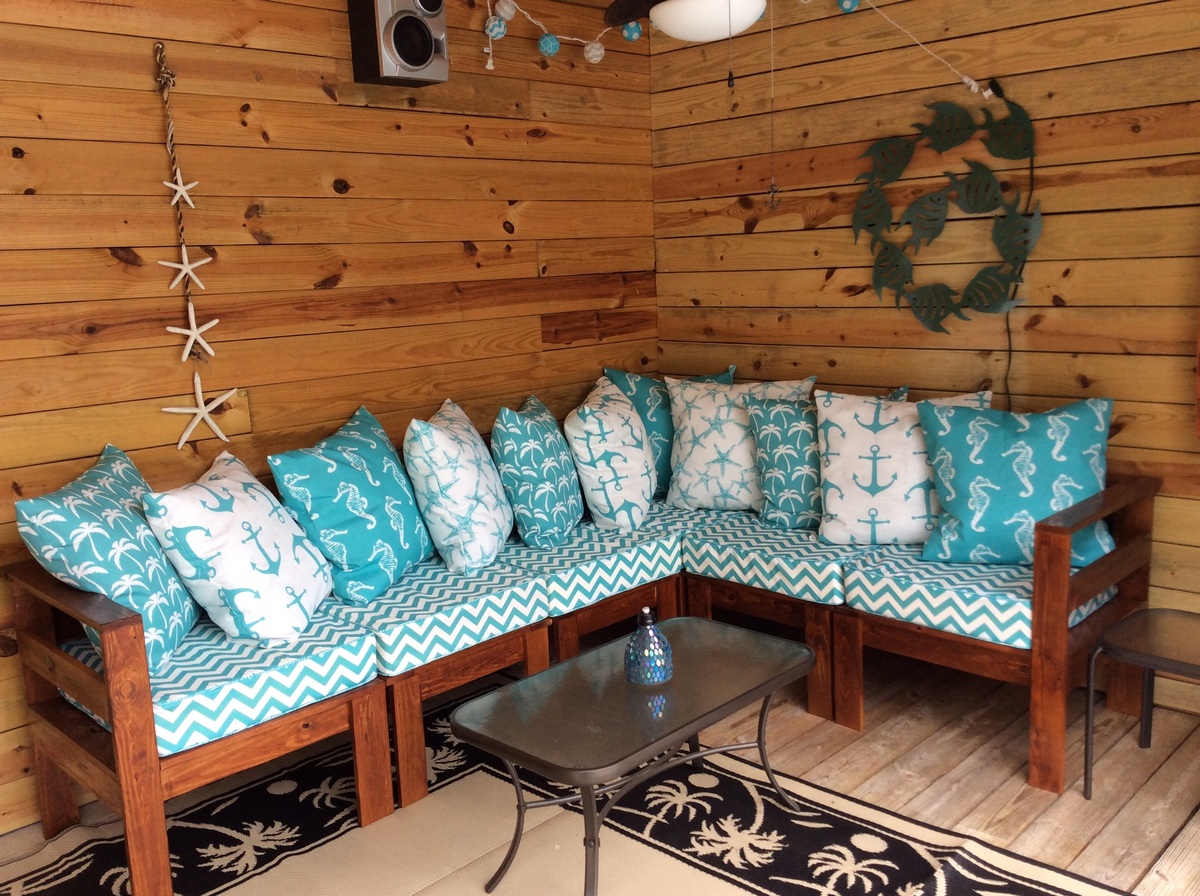
This was our first diy furniture project but definitely not our last. We were looking for furniture to put by our pool but everything that we liked and was comfortable was way out of our budget. I came across the post on pintrest and recruited my husband to do the woodworking for me. I the meantime I made the cushions and back pillows using outdoor fabric from fabric.com. The sectional is stained using Olympic Elite semi transparent exterior stain in kona brown.
Built from Plan(s)
Estimated Cost
$500.00
Estimated Time Investment
Week Long Project (20 Hours or More)
Finish Used
Olympic Elite semi transparent stain in kona brown. Topcoat of Helmsman polyurethane
Recommended Skill Level
Beginner
Comments

Thu, 05/21/2015 - 08:04
That looks like a great place
That looks like a great place to relax! I love your fabric choices, Premier Prints are the best!
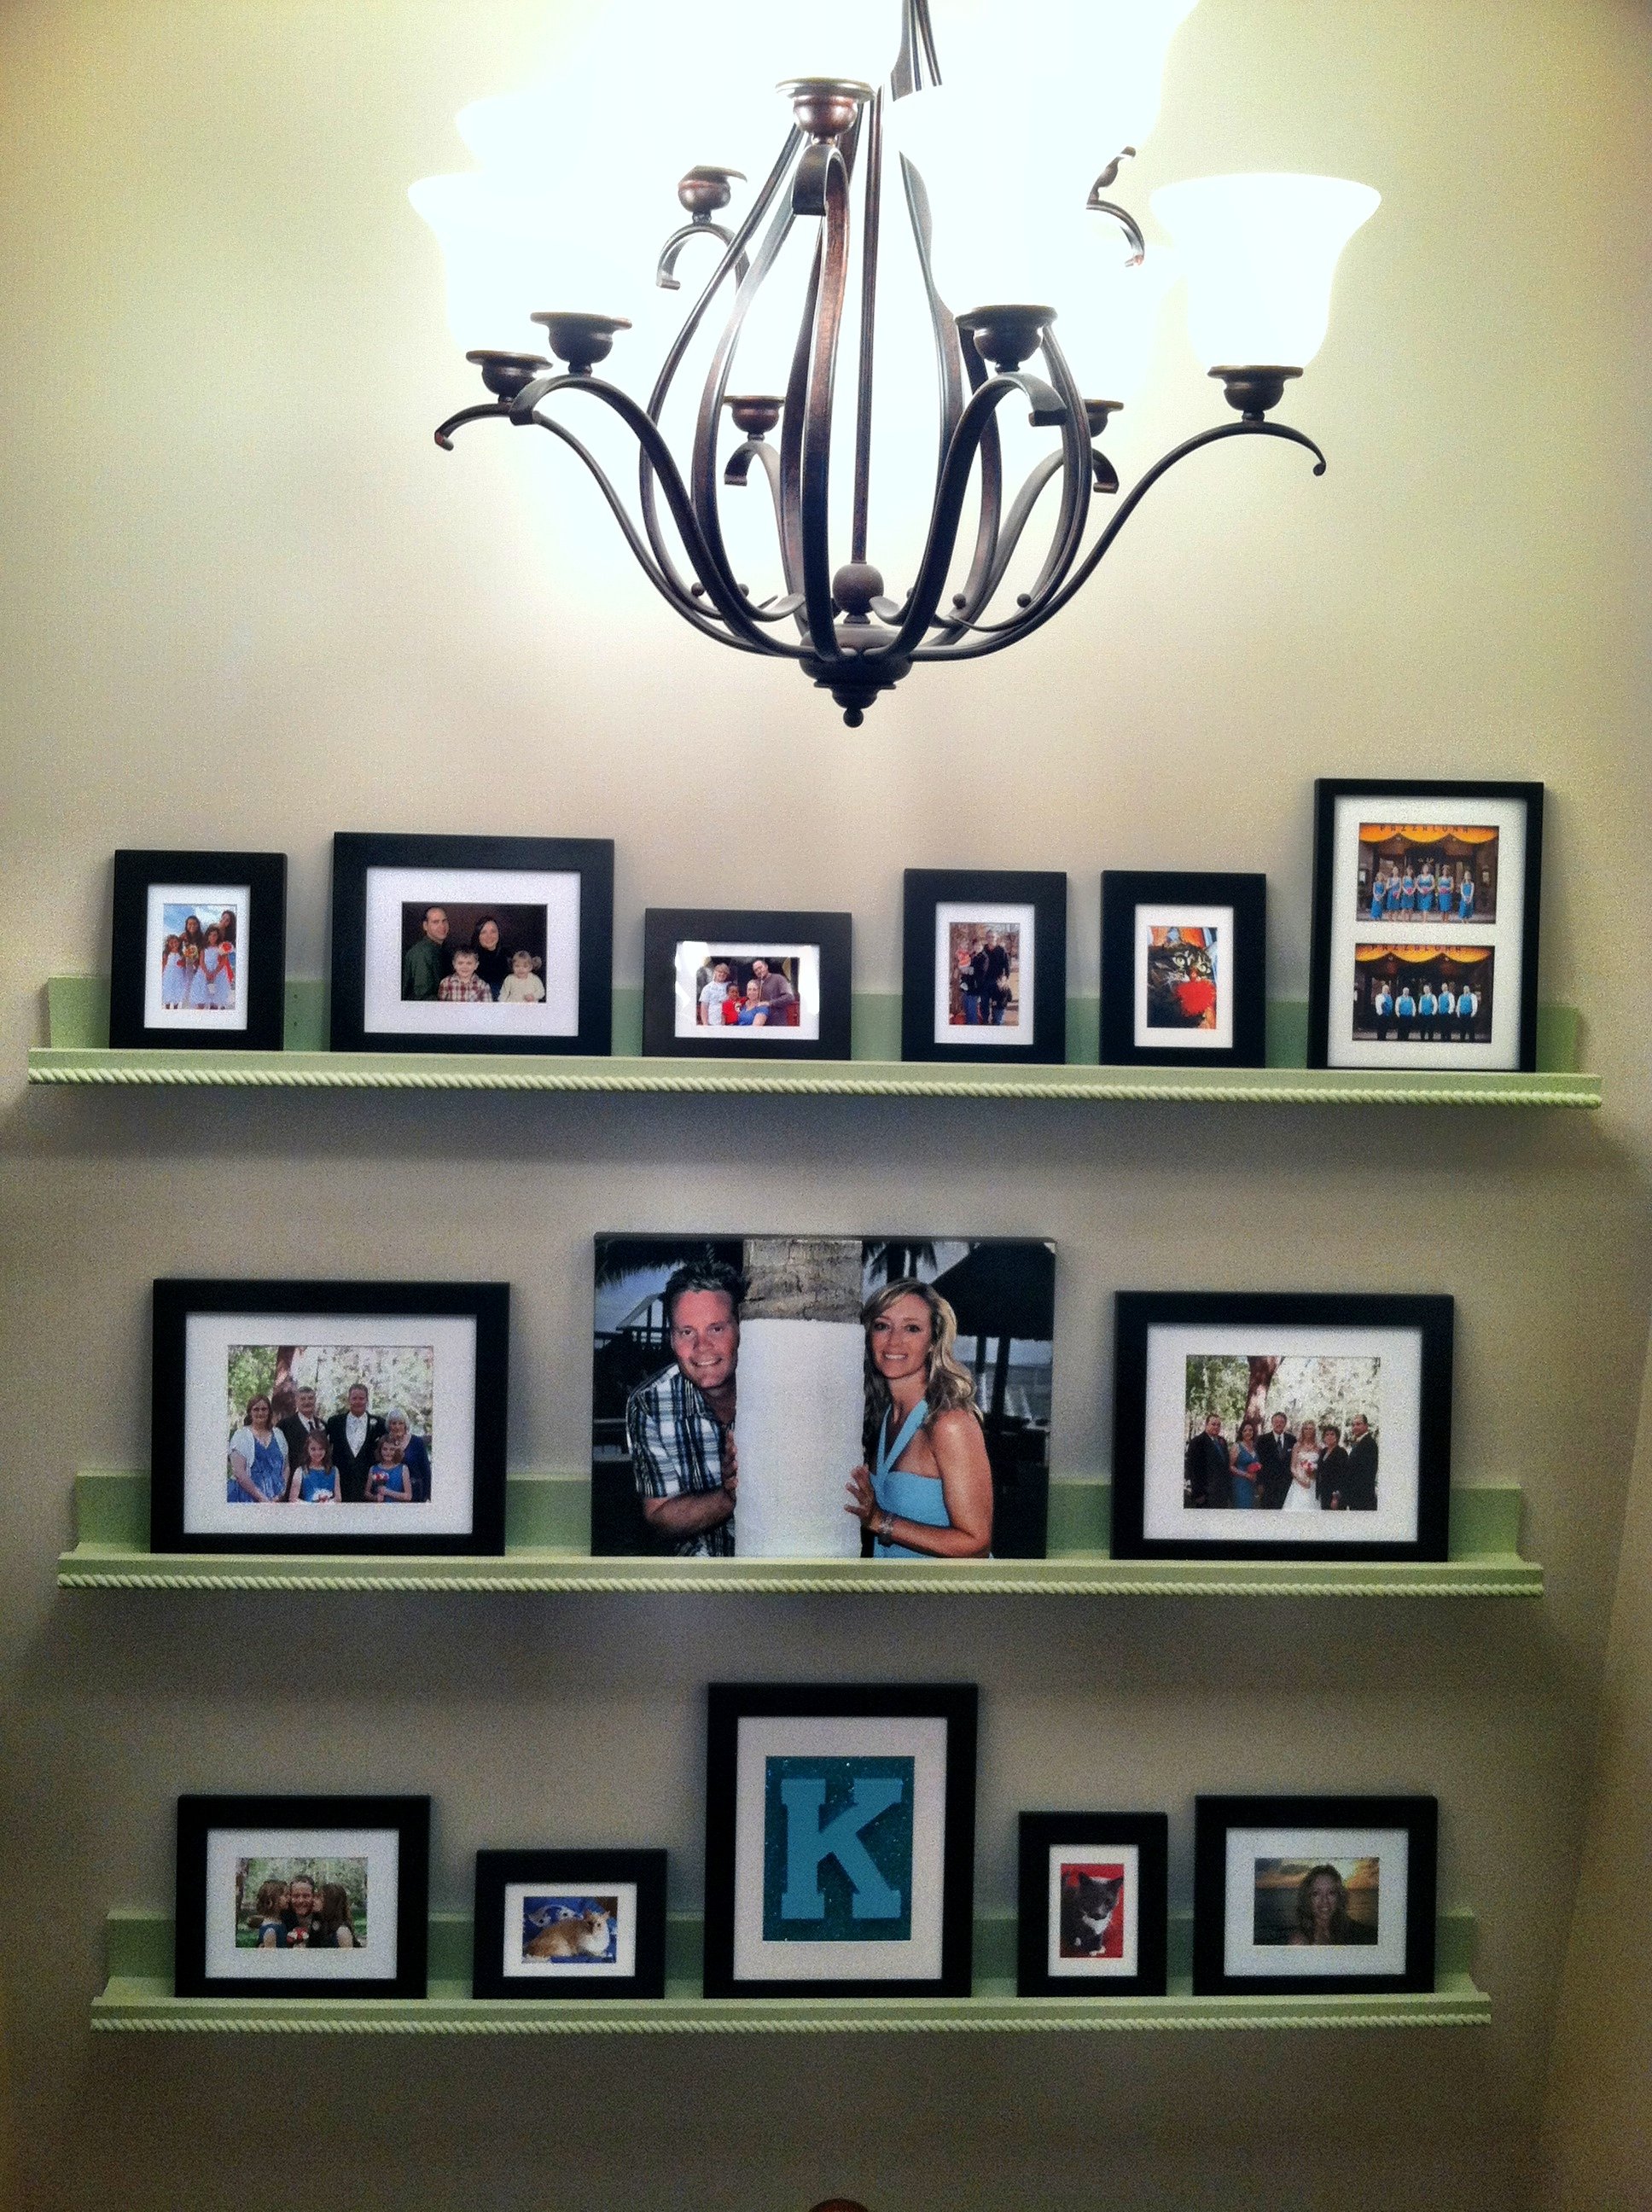
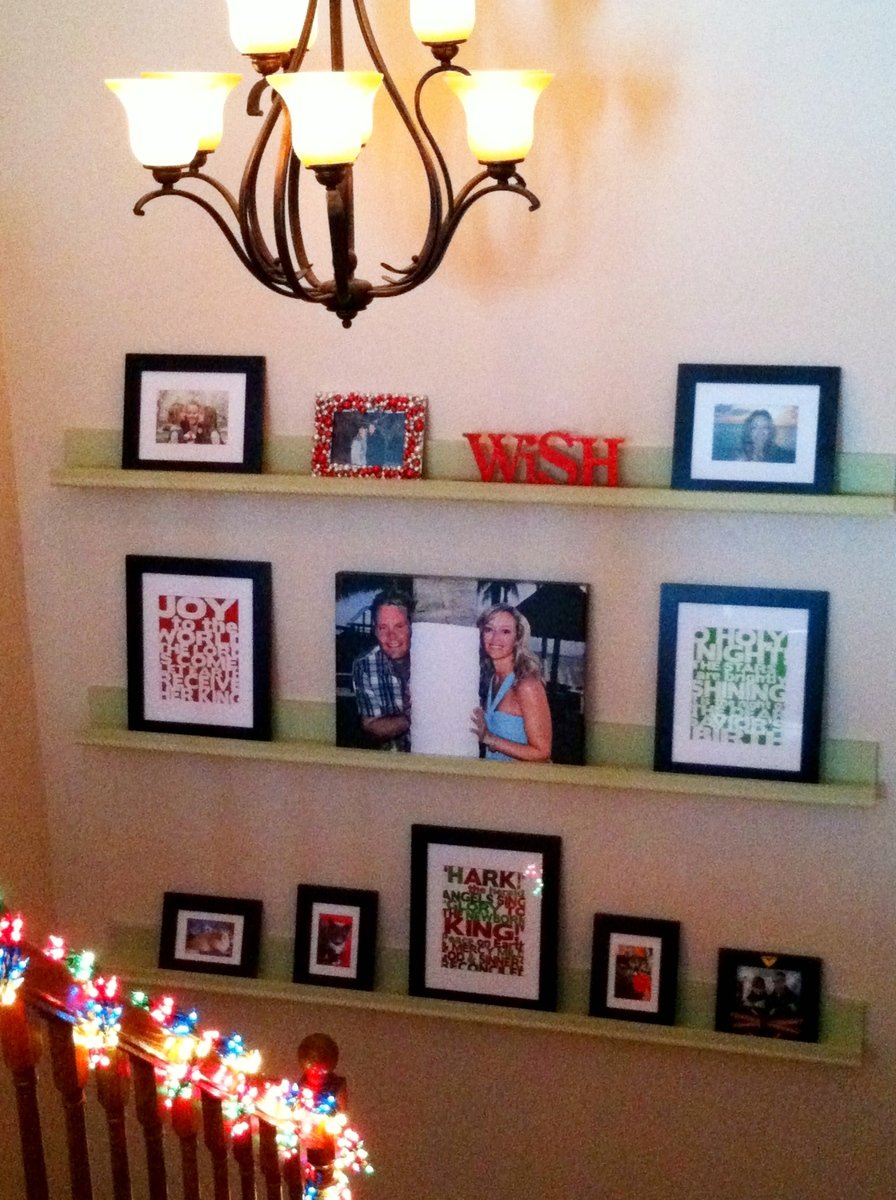
Tree Shelf
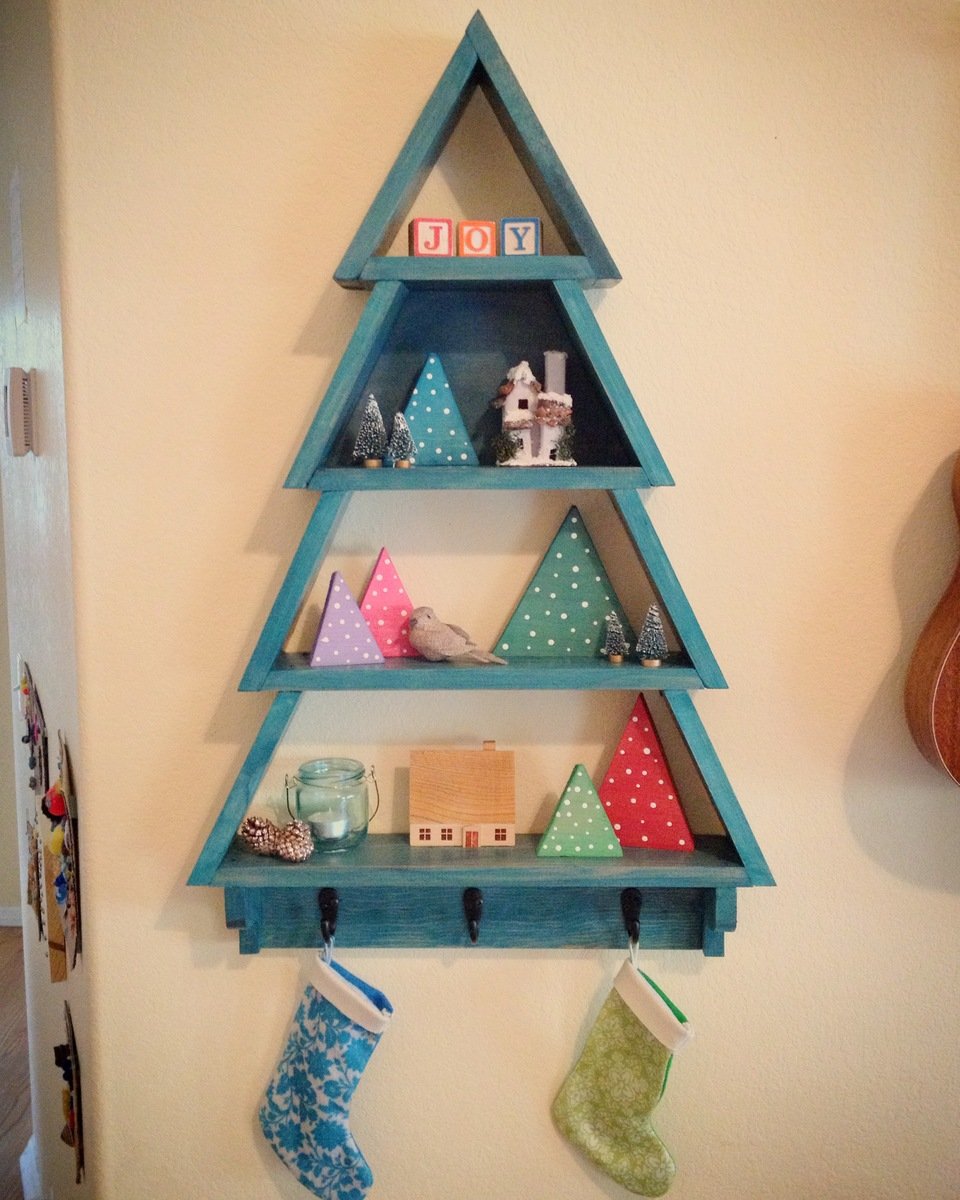
We moved about 18 months ago to a house without a fireplace after having one for almost 7 years. When The Christmas dilemma of where to hang the stockings came up last year, we used an Ana White plan and built a super amazing faux fireplace. After the holidays we decided we'd install it in our bedroom instead of storing it away all year....AND we ended up liking it there so much, that's where it stayed and a bookshelf took its spot in the living room. This Christmas when the stocking question was raised I looked online for ideas and, wouldn't you know it, Ana White to the rescue again!! We are completely in love with our new Christmas shelf. Also as a bonus, we now know how to use a miter saw, which I'm sure will open up all kinds of new project possibilities!
Happy Holidays!
Built from Plan(s)
Estimated Cost
$30
Estimated Time Investment
Afternoon Project (3-6 Hours)
Finish Used
Weathered gray stain with a bit of teal paint mixed in followed by a clear varnish.
Recommended Skill Level
Intermediate
Crib Mattress Sofa Sectional
I used Ana's outdoor sofa plans to customize this sofa for a playhouse. I left the separate railing piece detached so the kiddos could push the two pieces together to form a bed for sleepovers!

Built from Plan(s)
Comments
Kids Adirondack chairs
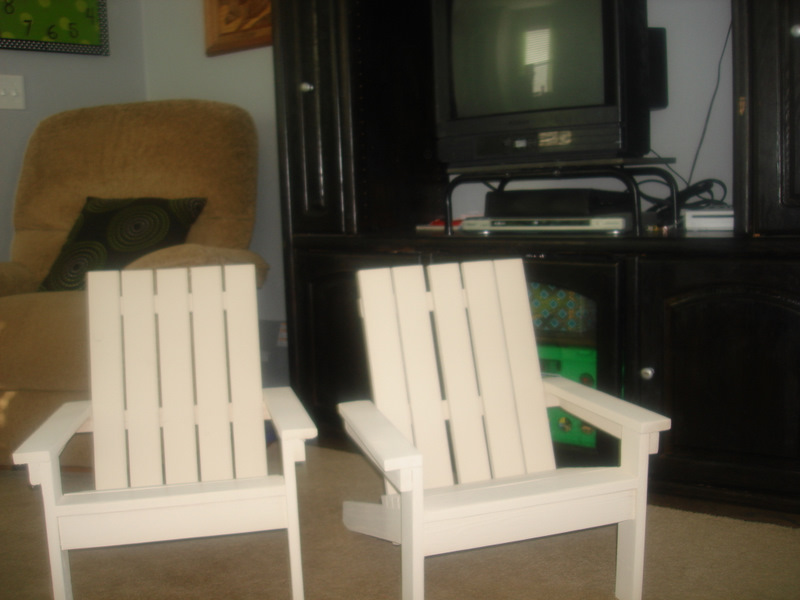
This was admittedly a little harder than I thought. The first one turned out short of perfection trying to get things looking great. The second one was better using a level and being more careful. However, the fact that my nail gun totally went out halfway through made the project a long one. But my kids LOVE them and they look so cute and luxurious out in my grass. I love it.
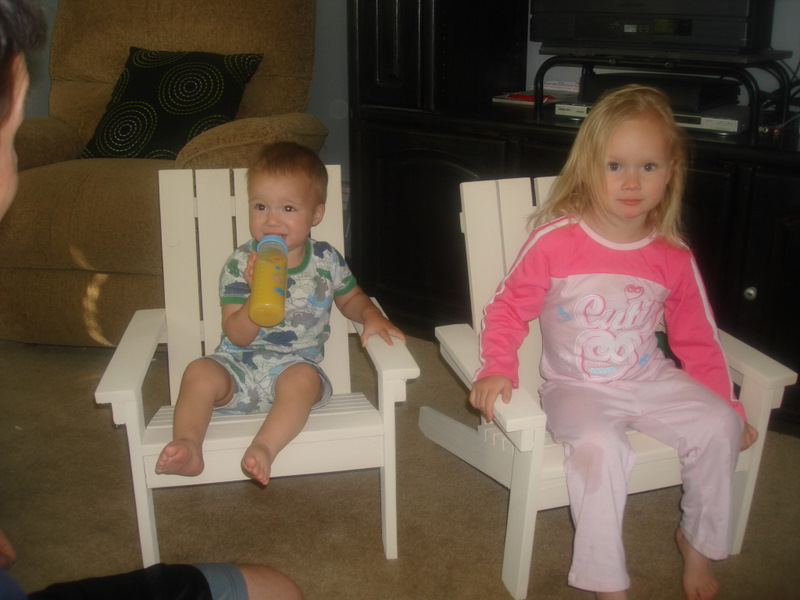
Built from Plan(s)
Estimated Cost
$10
Estimated Time Investment
Afternoon Project (3-6 Hours)
Finish Used
off white paint and poly
Recommended Skill Level
Beginner
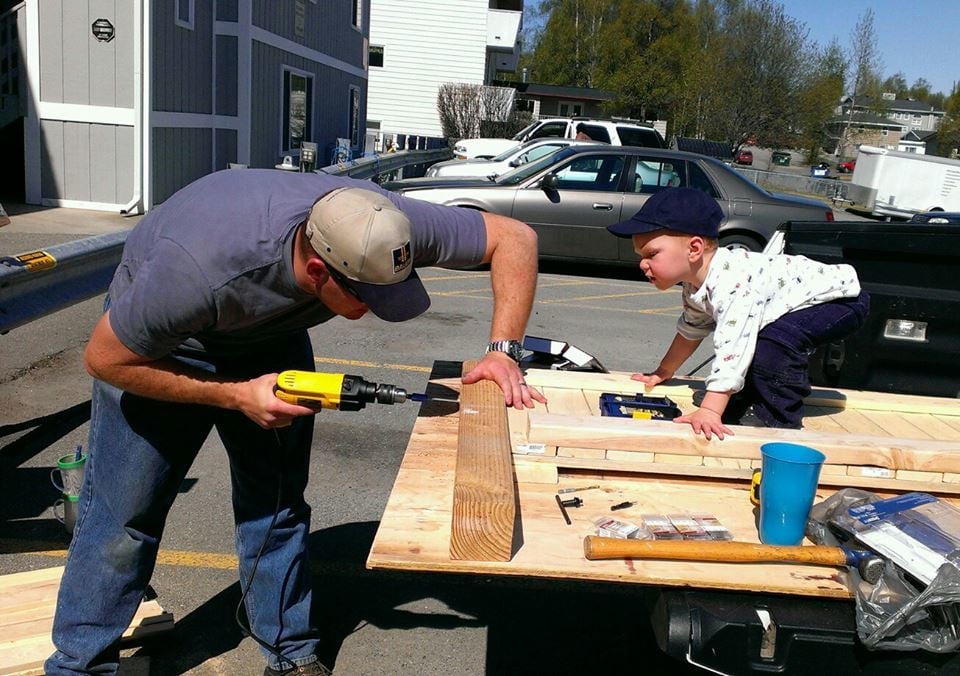
Farmhouse Style Bed
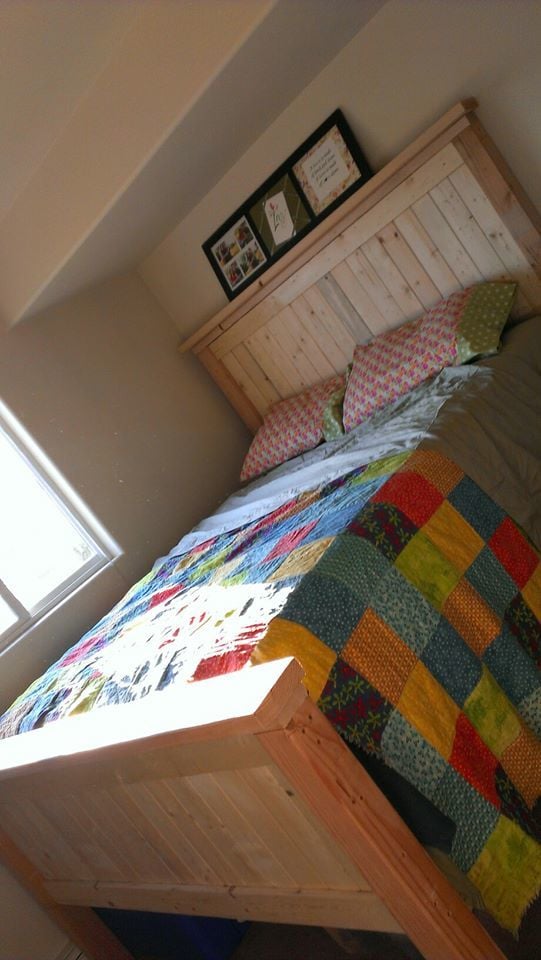
It took about 7 hours to complete this project. We used Ana White's Farmhouse Queen plans, with some modifications: the bottom of her bed frame is about 4-6 inches off the floor, ours is 17 inches for extra storage space. We also made the footboard slightly deeper to accommodate longer legs. Due to limited space, we built it on the bed of our truck with the "help" of our 18 month old. We love the way it turned out.
Built from Plan(s)
Estimated Time Investment
Day Project (6-9 Hours)
Finish Used
Unfinished
Recommended Skill Level
Beginner
2x4 garage shelving

I built this to fit inside a closet that I have in my garage to store all my camping stuff. I built it 5 feet long so I only had to buy 2x4s that were 10 feet long. I also built the bottom shelf closer to the ground to allow just a little bit more space between the first and second shelf. All in all it was a very easy and fulfilling project. I was a little worried about how sturdy the shelves would be but they are very solid. Thanks Ana!
Built from Plan(s)
Estimated Cost
$60
Estimated Time Investment
An Hour or Two (0-2 Hours)
Recommended Skill Level
Beginner
Comments
Sat, 05/23/2015 - 15:14
picture is weird
For some reason when I upload the photo it saves sideways....sorry
Wed, 08/12/2015 - 06:11
Your version is exactly what
Your version is exactly what I'm planning on building. Nice to see it before I get started.
My amazing husband surprised me
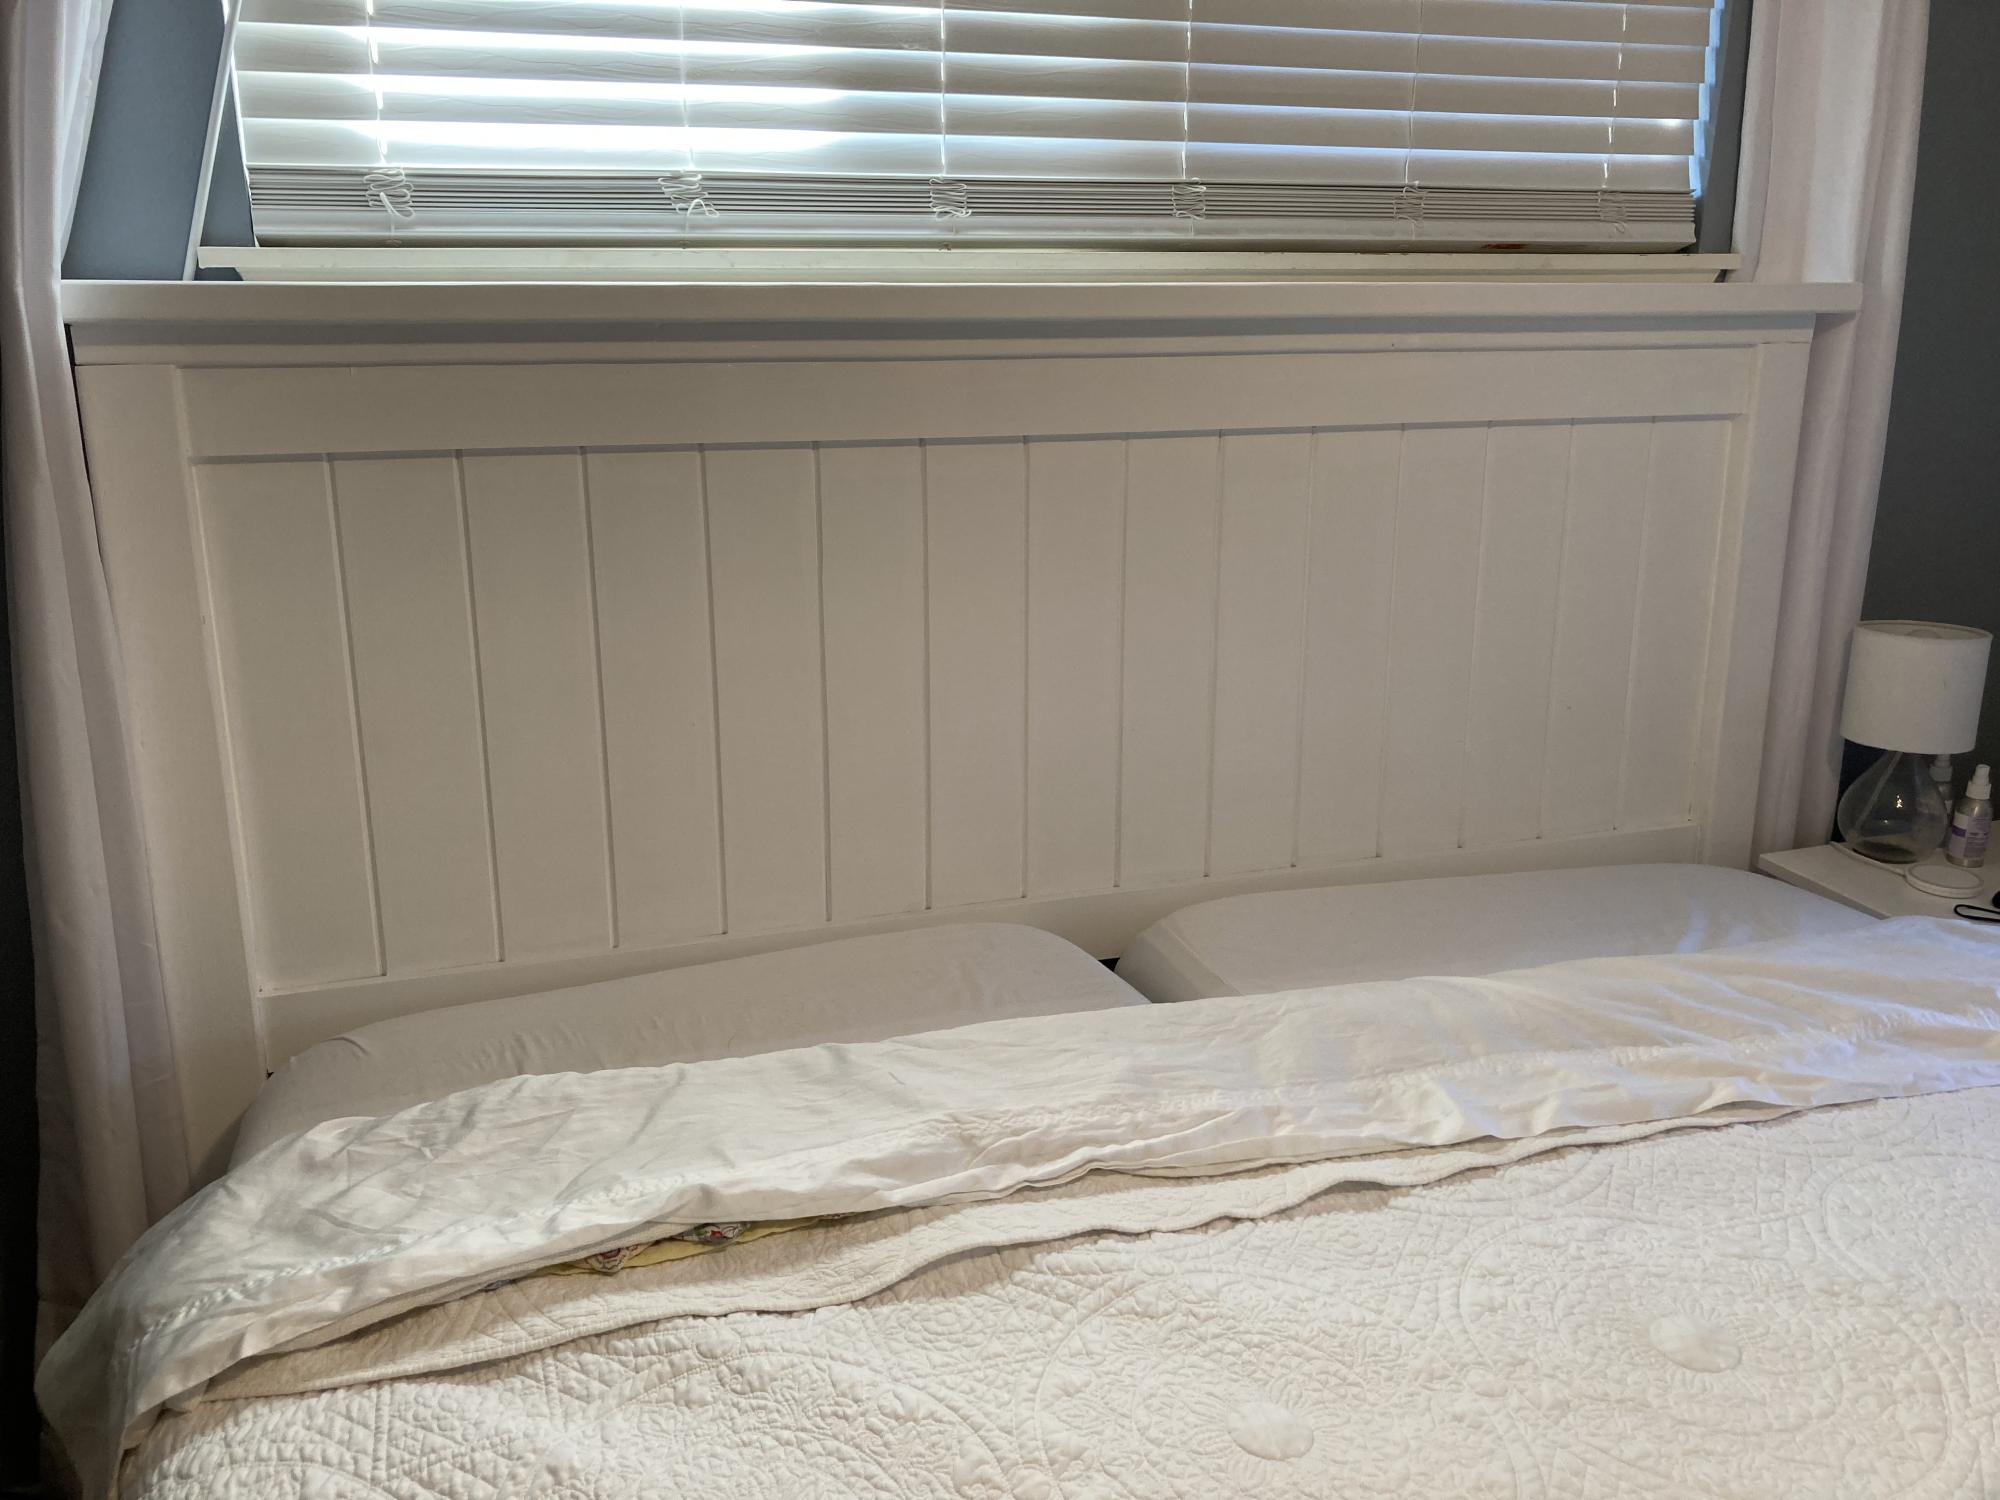
My amazing husband surprised me with this awesome headboard for my birthday!❤️ ❤️
Comments
Tue, 12/07/2021 - 15:26
Beautiful custom headboard!
Lucky you, it looks amazing, thanks for sharing!
Fire Truck Bed
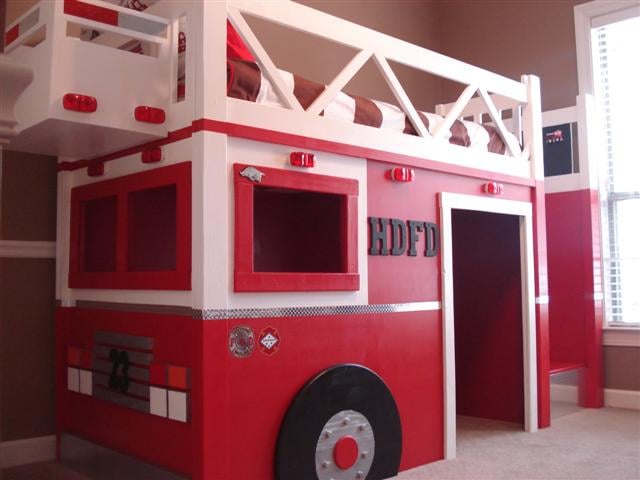
I started this project several weeks ago, and I am very happy with the outcome. Please see my Blog since there is so much information. www.atouchofarkansas.com
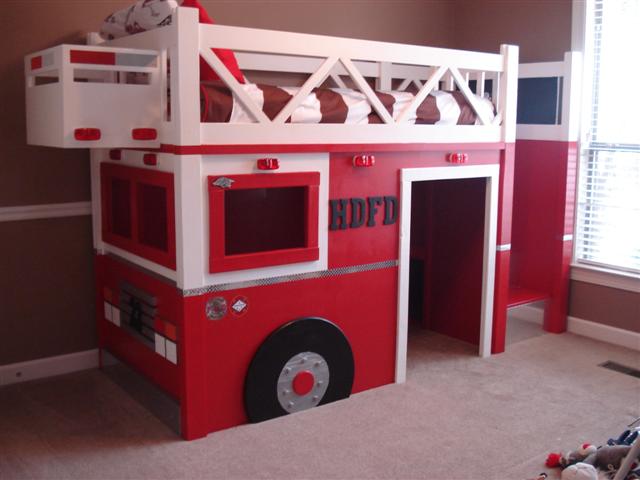
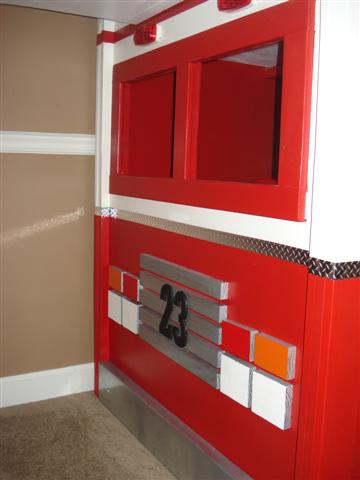
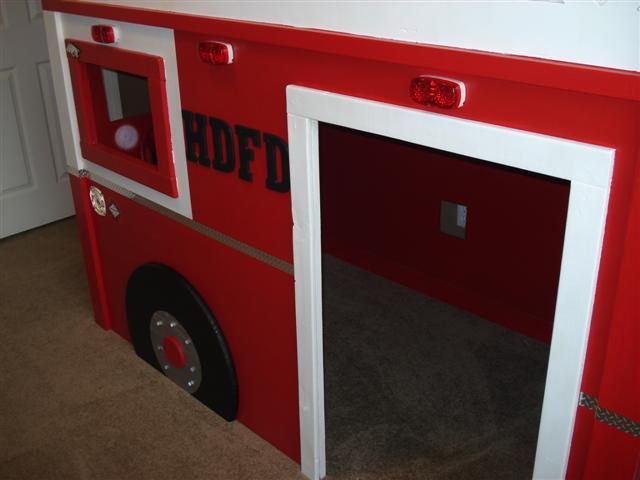
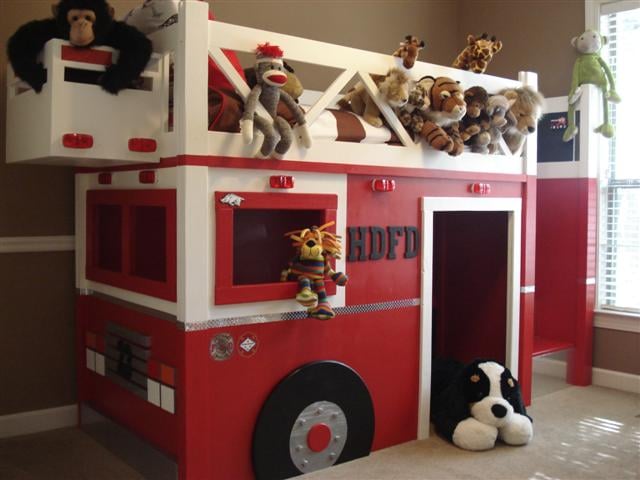
Built from Plan(s)
Estimated Cost
$500
Estimated Time Investment
Week Long Project (20 Hours or More)
Finish Used
I used red & white paint & primer in one.
Recommended Skill Level
Intermediate
child airplane swing

Airplane swing made from pine and "A" frame made from 2x4's


Built from Plan(s)
Estimated Cost
$80
Estimated Time Investment
Day Project (6-9 Hours)
Finish Used
Rustoleum outdoor paint in Patriotic red,white ,black. Plus Navy stickers.
Recommended Skill Level
Intermediate
Matching Adirondack Chairs
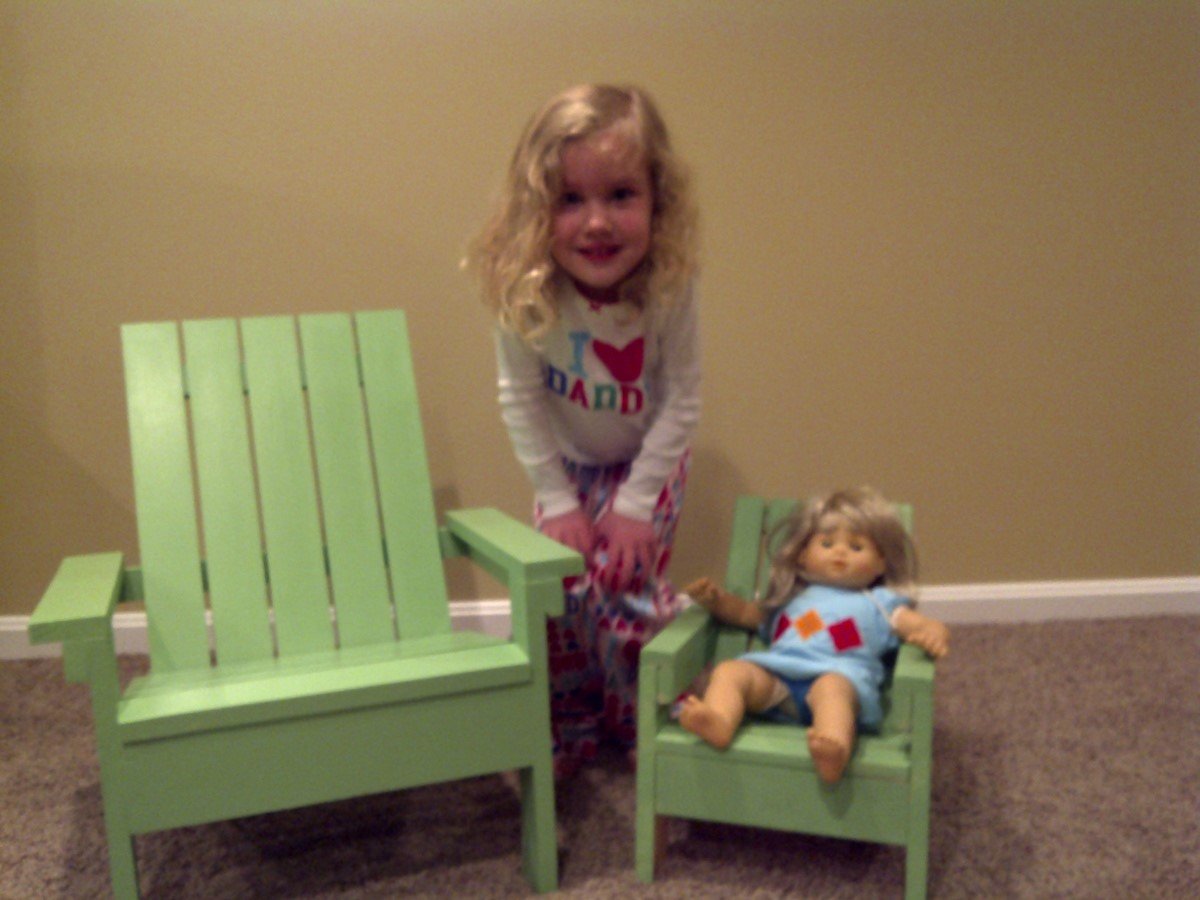
Matching American girl Adirondack chair and kids Adirondack chair build!
Built from Plan(s)
Estimated Time Investment
Afternoon Project (3-6 Hours)
Recommended Skill Level
Beginner
Loft Bed Turned Bunk Bed
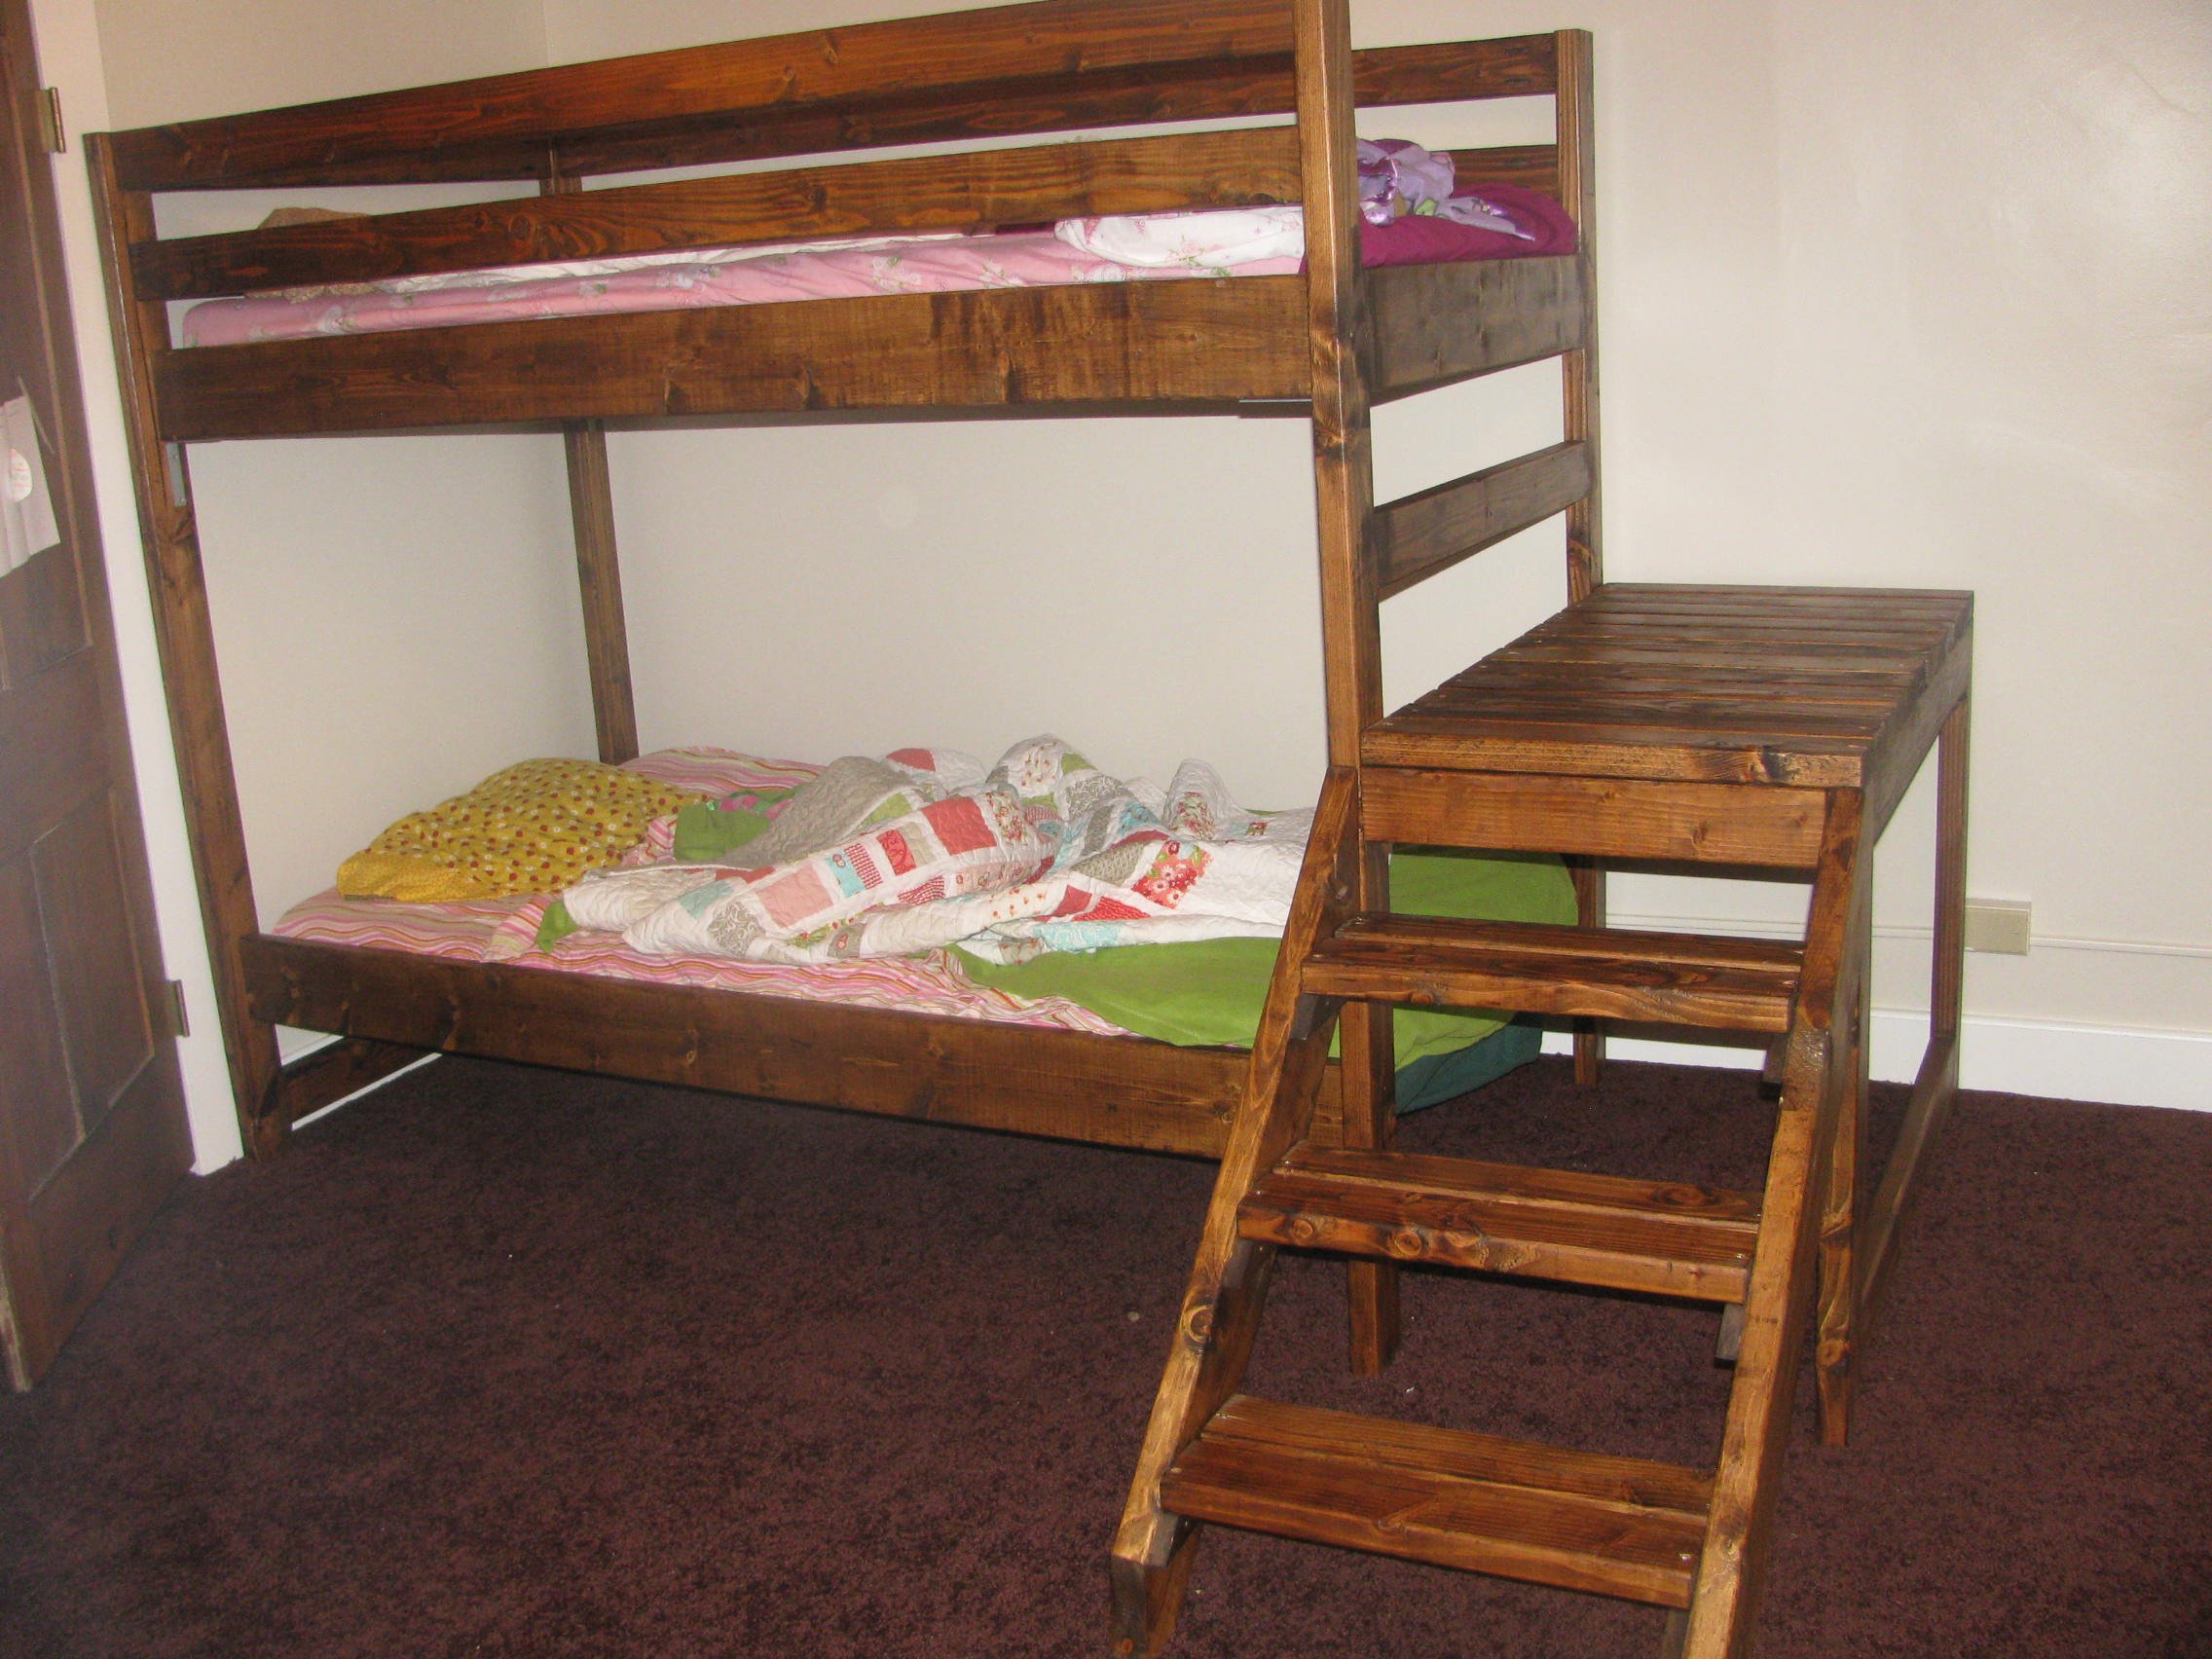
When we started building this bed, we liked that it wasn't too tall for our low ceilings, but could still utilize the space beneath it. As we were building it, we thought we would just put a 2nd mattress on the floor, but when we measured it, we decided we could safely turn it into a bunk bed for our 2 youngest daughters. We just built an additional set of rails. Instead of buying another piece of wood for the mattress support, we used the support from an ikea bed that we weren't using. We put the bottom mattress off the ground around 10 inches.
Built from Plan(s)
Recommended Skill Level
Beginner
Comments
Tue, 06/25/2013 - 19:12
We kept the overall height of
We kept the overall height of the bed the same. I think (and I will try to remember to check in the morning, the kids are all in bed) that there is about 37 inches between the bottoms of each support. WE had another bunkbed and the measurements are pretty similar between the commercial bed and the bed we made.
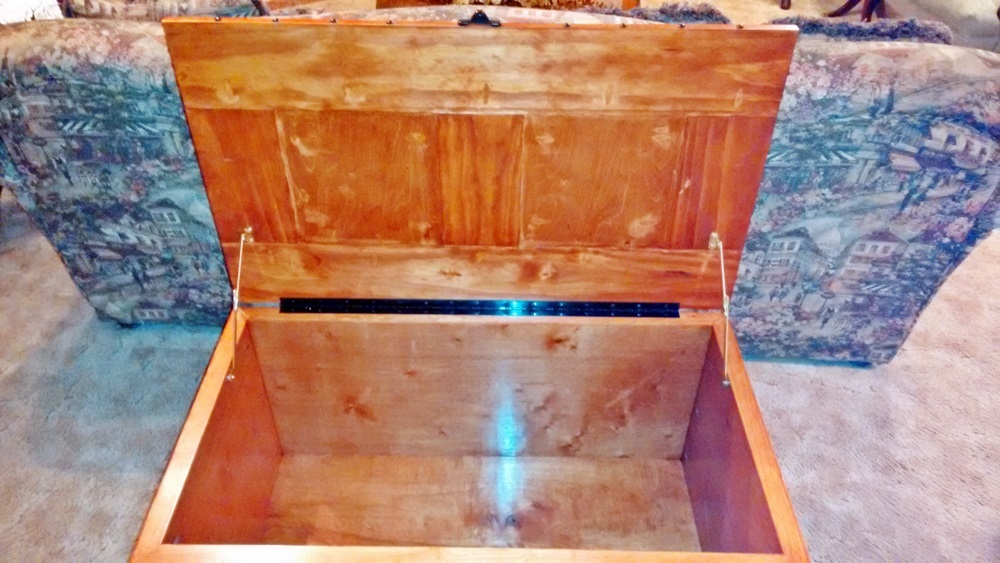
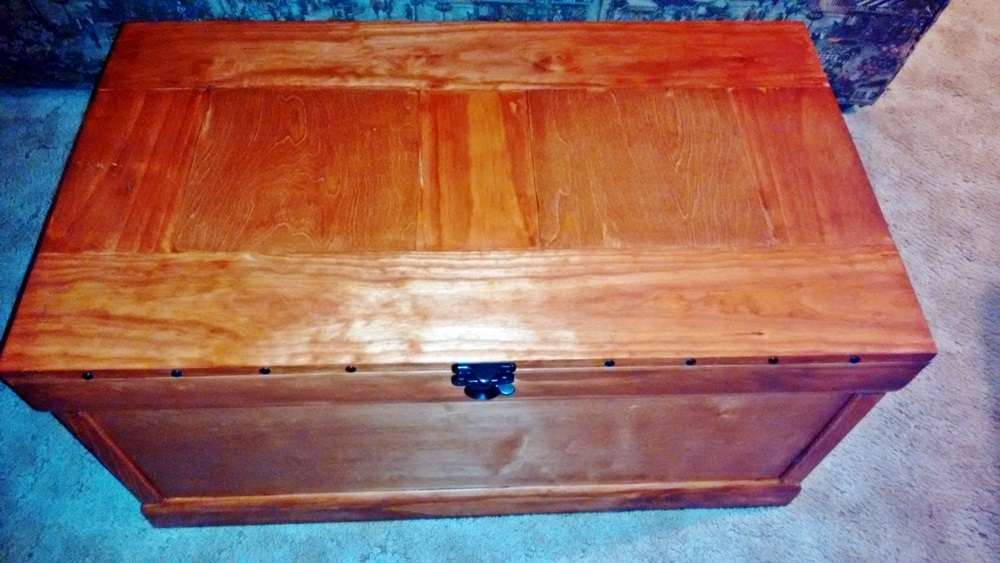
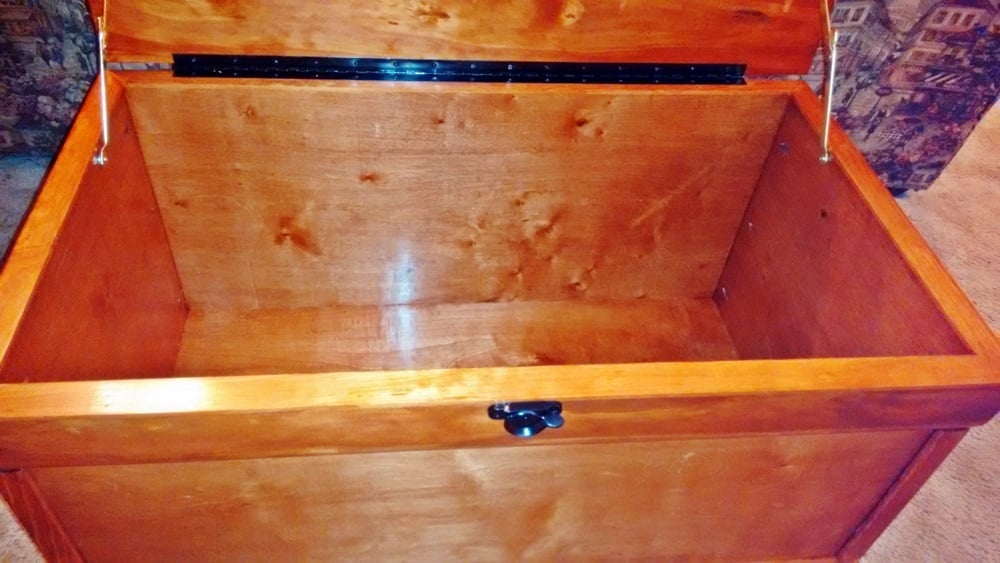
Becca Trunk
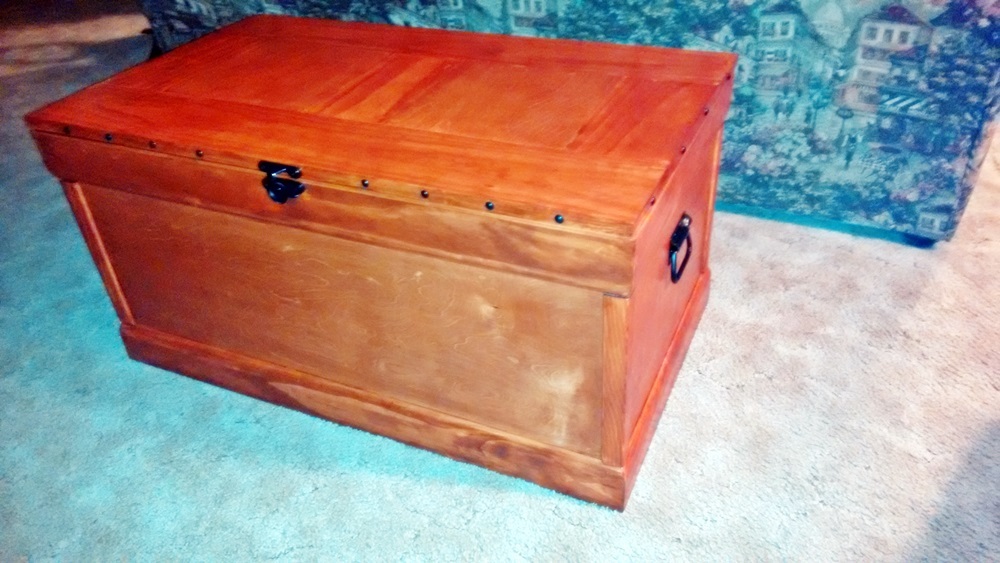
I built this trunk for my grandson’s high school graduation, and filled it with a lot of things he might need as he begins his life in the U.S. Air Force. Here are a few hints:
• Build the top after you place the moulding around the top of the box so you can measure exactly how long and wide the top needs to be.
• Don’t forget to measure the width of the 1” x 6” boards; if they are not exactly 5 ½”, adjust the length of the vertical boards on the trunk top or it could be slightly too small.
• Because of the extra width the moulding creates around the perimeter of the box, use narrow utility hinges, piano hinges, or Beverly of bzhays used black decorative strap hinges from Amazon.com.
• I used black handles from Amazon.com: Reliable Hardware Company RH-0540BK-2-A Set of 2 Chest Handle, Black
• For a more finished top on the inside, I filled the holes with wood putty and sanded it smooth, then stained and polyed like the outside of the trunk. The kreg holes are still visible, but not too much.
• Before screwing the box together, I recommend finishing the inside surfaces first; cover the edges that will meet with painter’s tape so the glue will have bonding surfaces.
I love the rustic look most have used in their finishes, but since I used a traditional stained finish, I used the ideas from Justin of jeverette1 who covered the exposed plywood edges with scrap. Since I didn’t have that, I used corner moulding for the corners, and lattice strips to cover the top edges of the box. This gives the trunk a more finished look if you are not going for the rustic/distressed look. I notated below a week-long project - I spend a lot of time in the finishing and do so over several days. Others could certainly finish in a weekend.
I’d like to thank Ana for the wonderful plans, and Whitney of Shanty 2 Chic for the great step-by-steps. Also, a big thank you to Beverly of bzhays and Justin of jeverette1 for responding to me with my questions; you were both so helpful.
Built from Plan(s)
Estimated Cost
$150.00 - I used better pine and stain-grade burch plywood to avoid hours of sanding.
Estimated Time Investment
Week Long Project (20 Hours or More)
Finish Used
Stain: Rusteoleum “classic cherry”; one coat and it took every drop of the small can. Finish: Minwax wipe-on poly, one can is enough for several coats. The pictures were taken at night with a flash, so it appears much shinier than it really is, plus the color is off too - not as "orange-ish" as it appears. I also had to paint the sash lock black (couldn't find any in black) and the piano hinge. The decorative tacks were found at Lowe's in the hardware section among the nails and they come in several finishes.
Recommended Skill Level
Beginner
Carrots Included
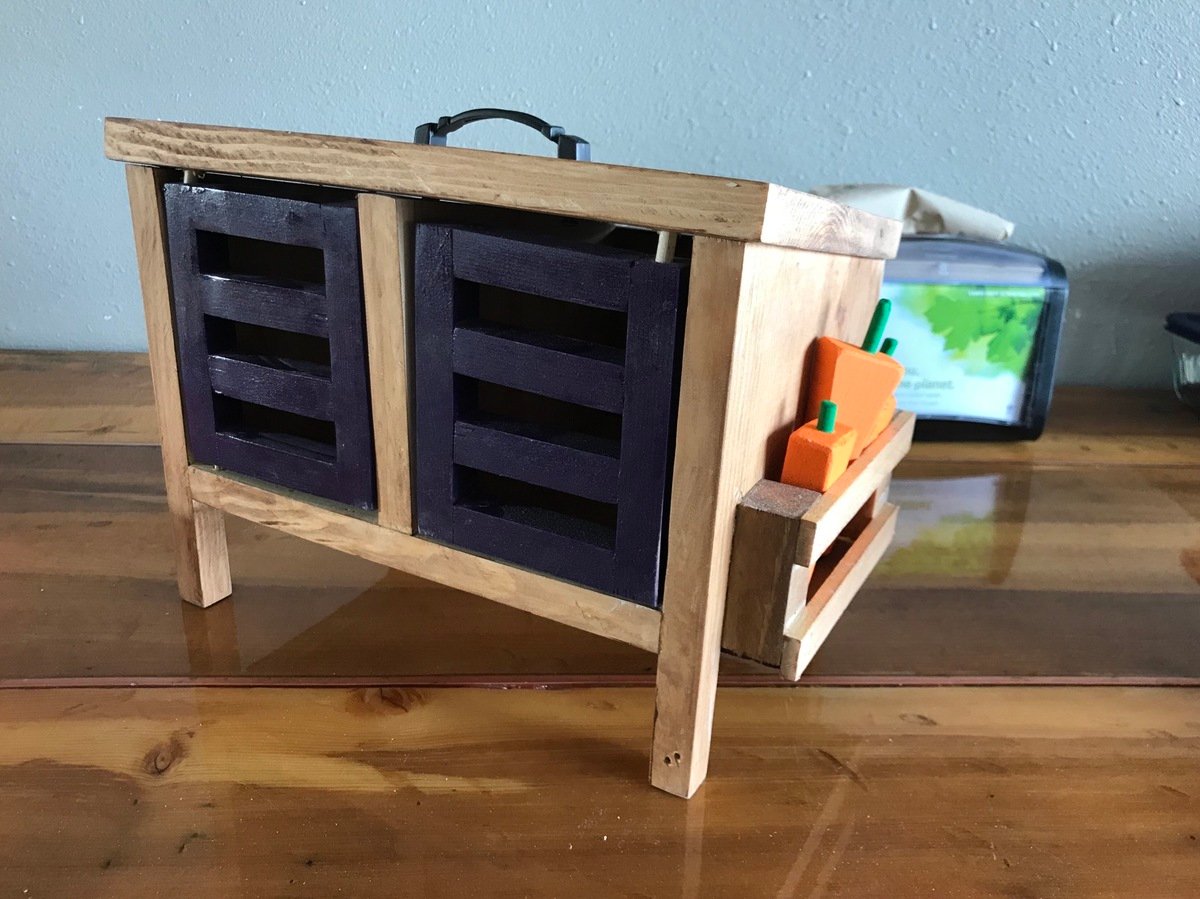
Adorable gift ready for Christmas!
Built from Plan(s)
Estimated Cost
This project was less than $10 because I used hardware and scraps in my shop.
Estimated Time Investment
Afternoon Project (3-6 Hours)
Finish Used
Minwax Express Colors
Spray Paint
Spray Paint
Recommended Skill Level
Beginner
Work Bench
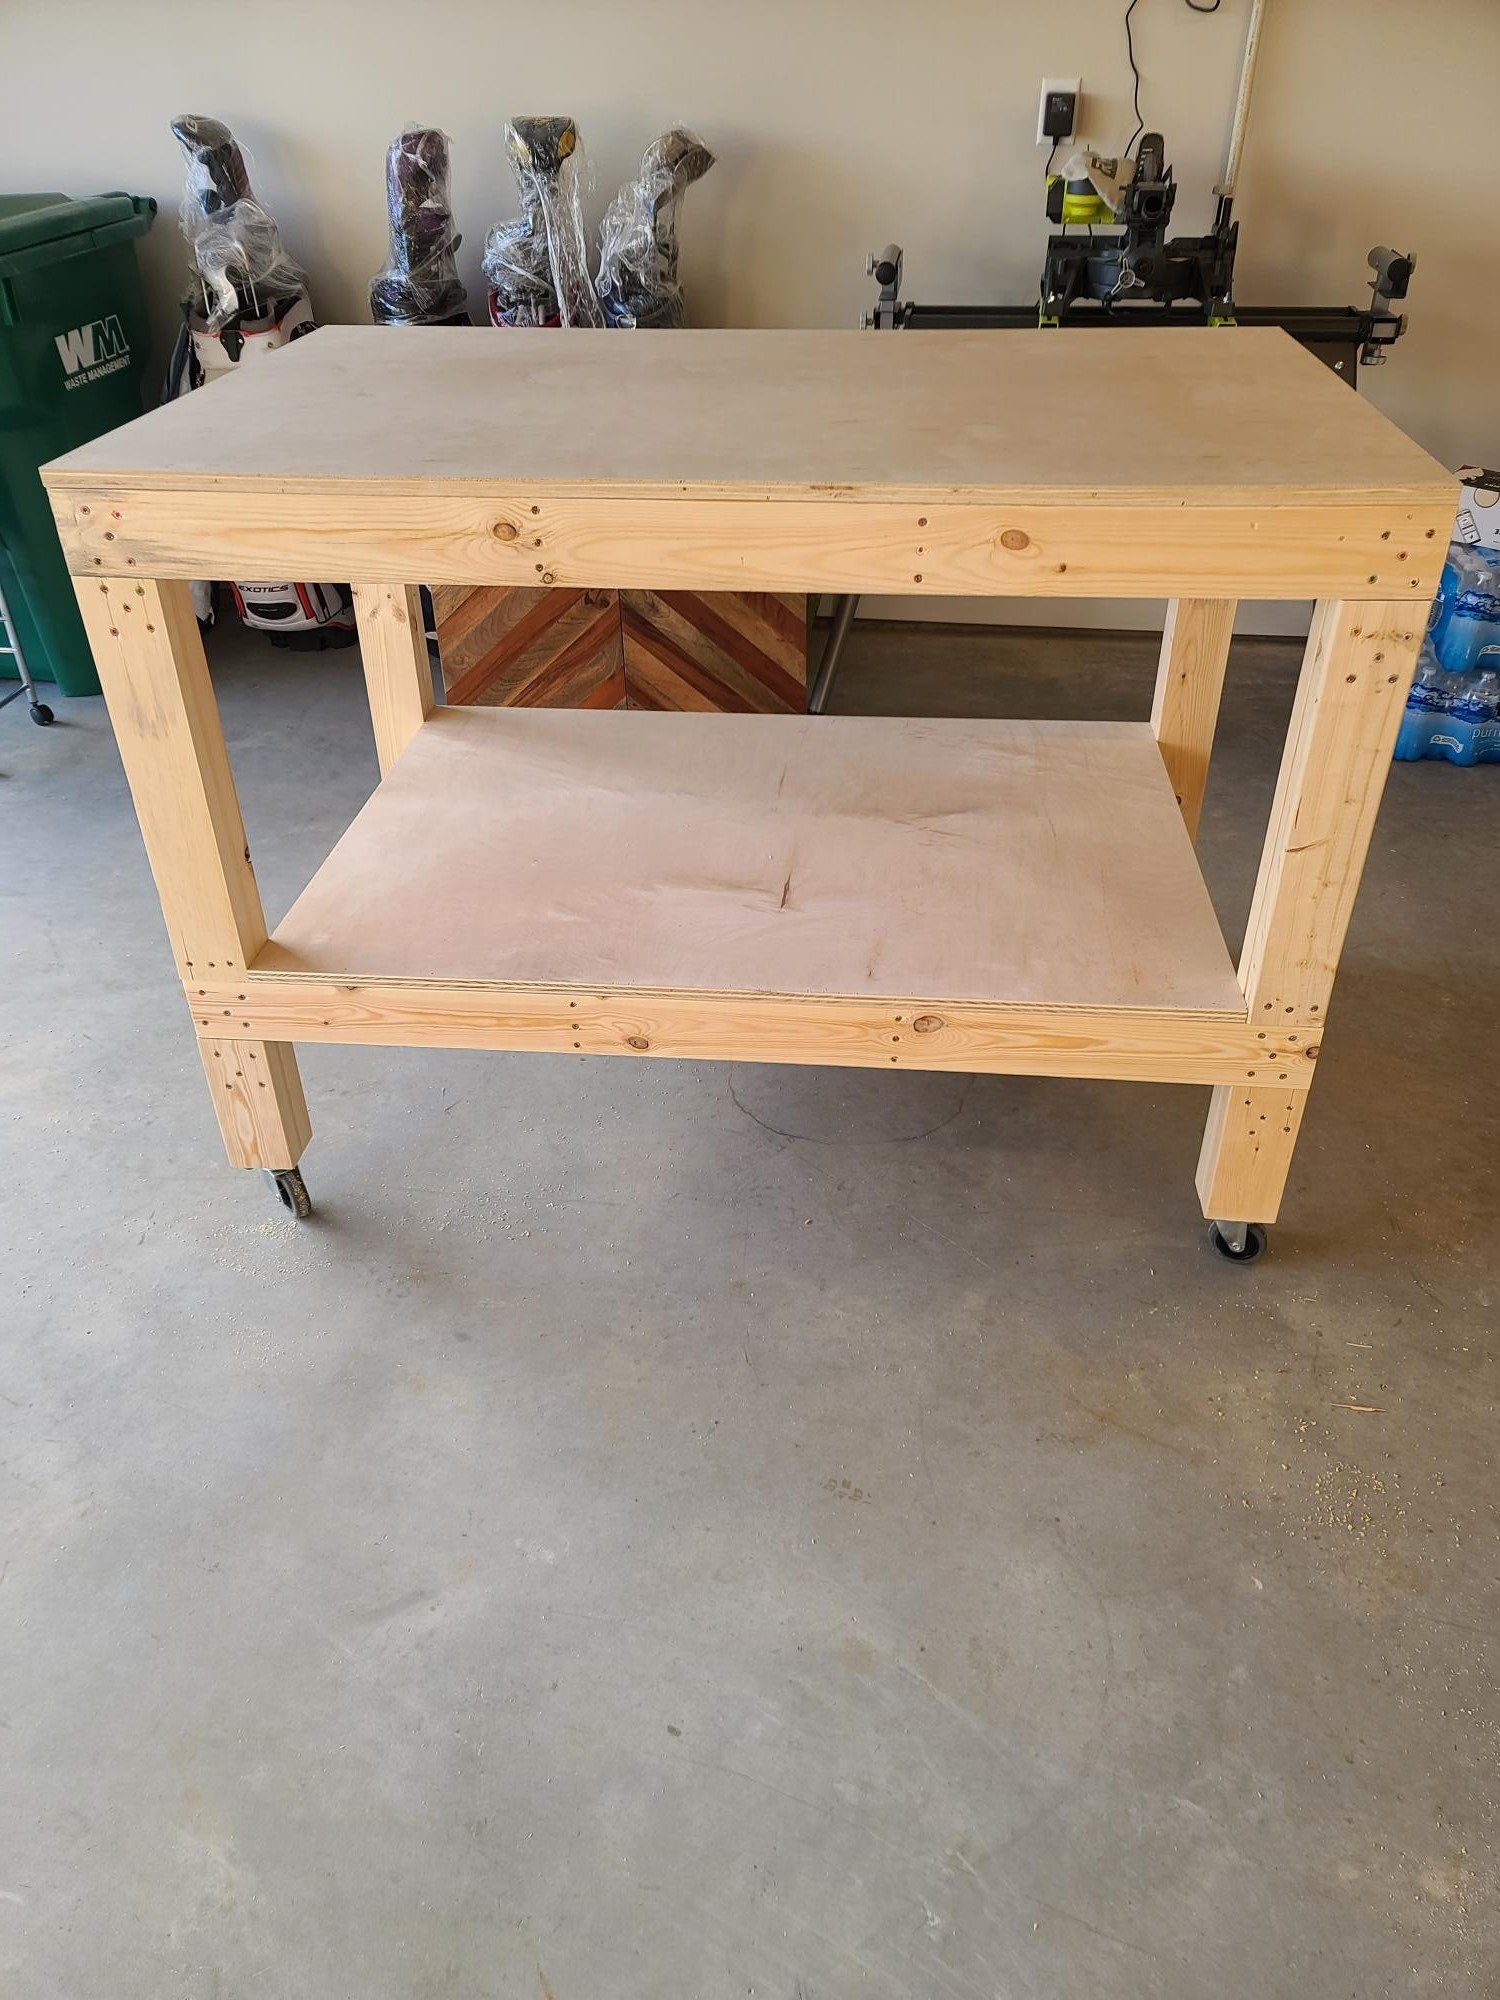
Built the DIY garage work bench, added wheels came out perfect...plans from Ana White were awesome@
Built from Plan(s)
Comments
Side Table with Pallet Top
I wanted to make a custom sized side table to fit just right between our two recliners. And I really wanted to make use of some pallet scraps. So I built this frame the same as Ana's plan (adjusting for my size), and then came up with a layout for the top to make use of my small 15 inch pieces of pallet wood.
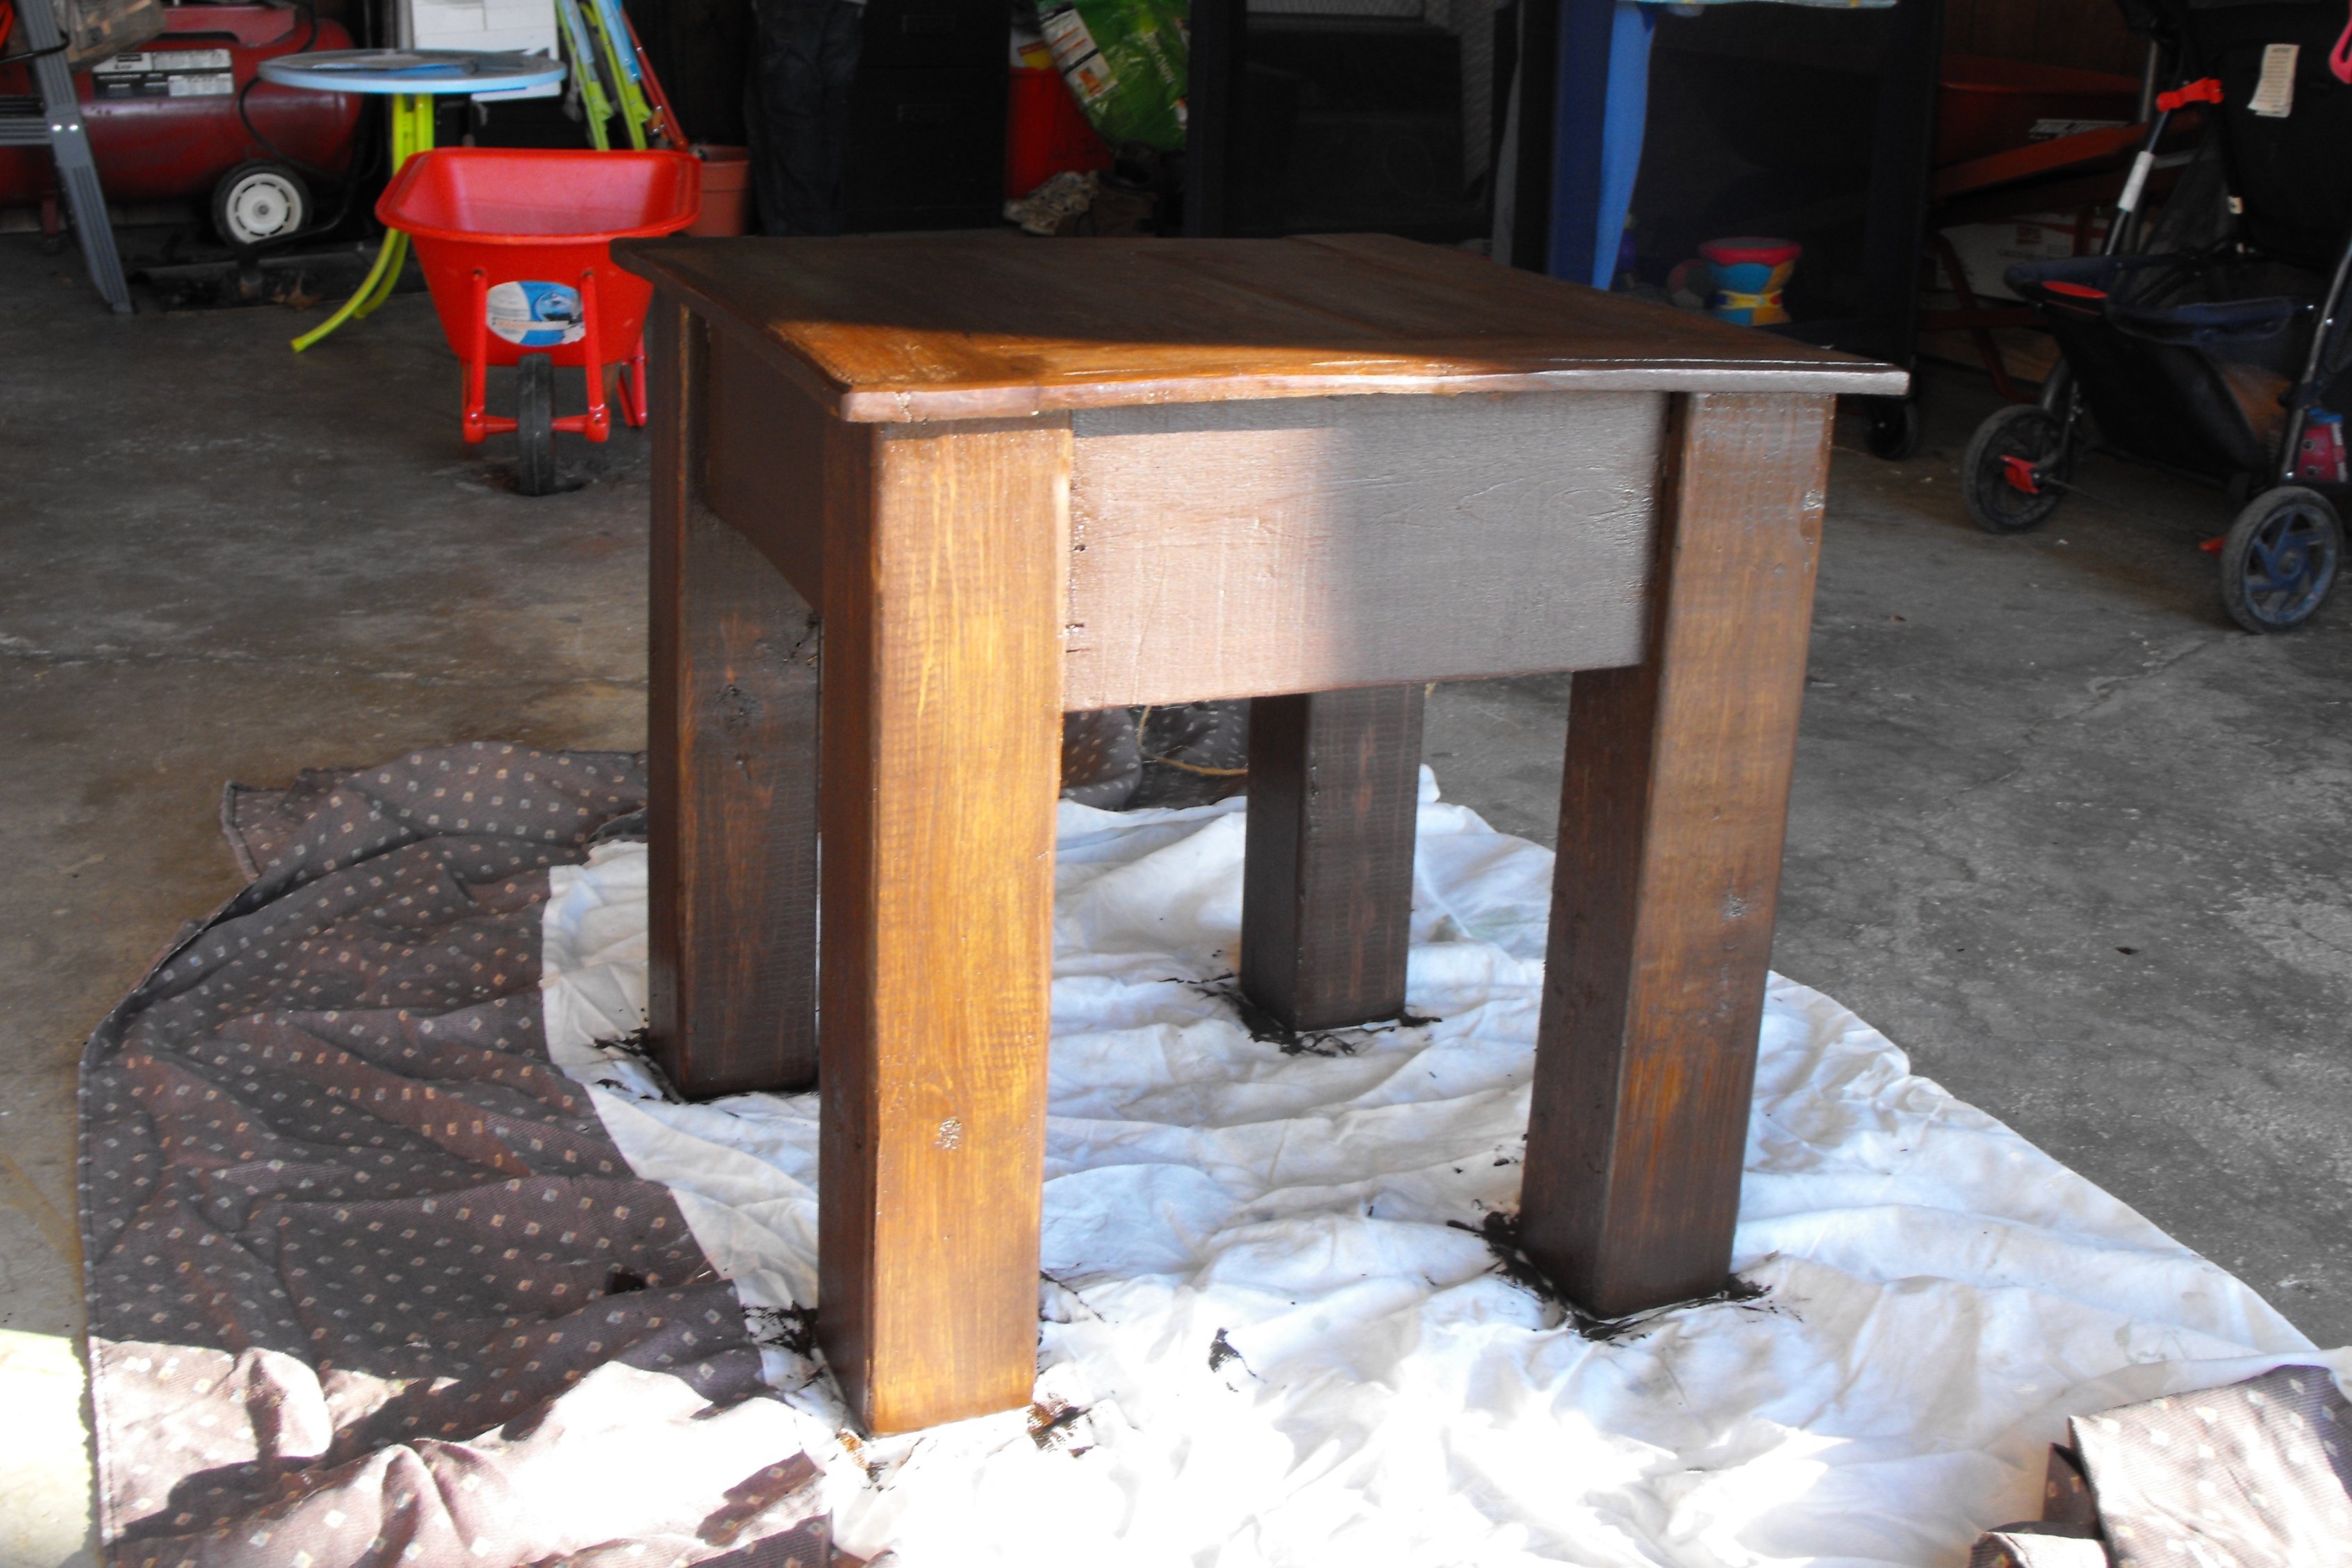
Built from Plan(s)
Estimated Time Investment
Afternoon Project (3-6 Hours)
Finish Used
I screwed the top on, filled the holes, sanded like a mad woman, and stained with a gel stain. I then applied two coats of shellac. It accidentally purchased the shellac but I really like the way that it turned out and it has held up quite well so far!
Recommended Skill Level
Beginner
My first "build"
This was my first Ana White project. It was really super easy! I love the way it turned out! I can play around and change photos depending on my mood or the holiday. We had them all together pretty quick. I sanded and primed them and my husband used the spray gun to paint them. I quickly learned there is a technique to that and I didn't want to screw them up! Great beginner project, now I'm hooked on this site!
Built from Plan(s)
Estimated Cost
$70
Estimated Time Investment
Afternoon Project (3-6 Hours)
Finish Used
BEHR Rejuvinate
Recommended Skill Level
Starter Project
Farmhouse nightstand
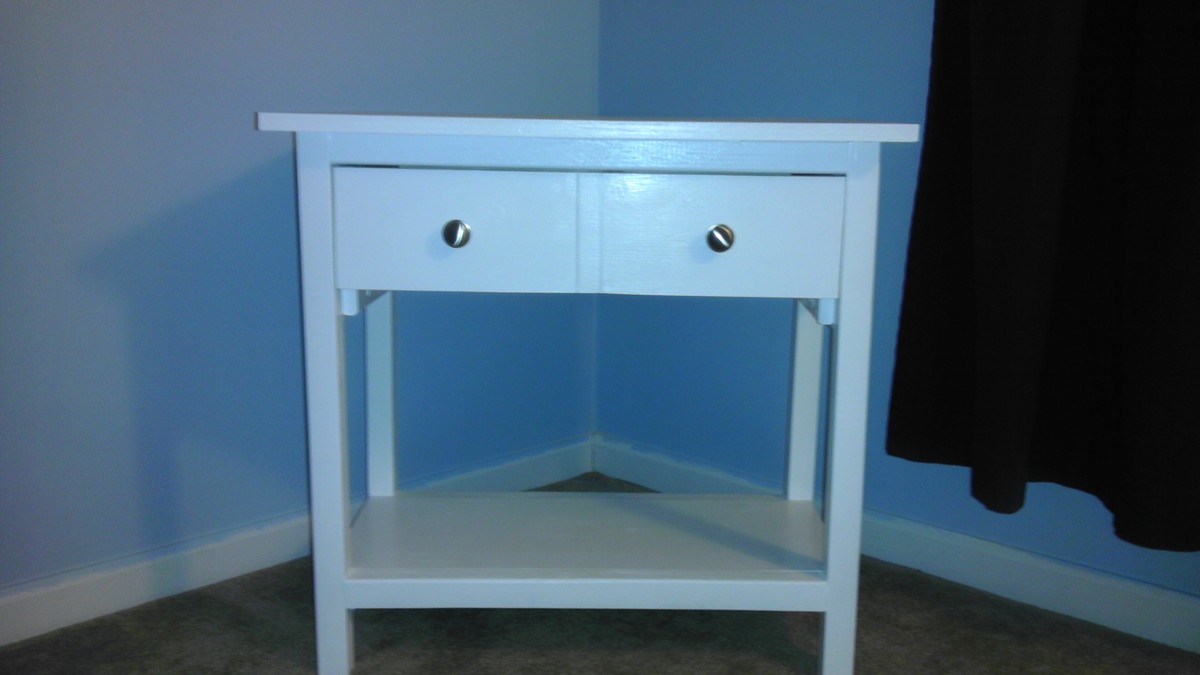
This project was very fun, and it was my first nightstand. The directions are so easy to follow. Thanks Ana : )
Built from Plan(s)
Estimated Time Investment
Weekend Project (10-20 Hours)
Recommended Skill Level
Beginner
Comments
Wed, 06/03/2015 - 22:59
Do you have a cut list that
Do you have a cut list that you used to modify the original plan? I love this version of it, very well done!
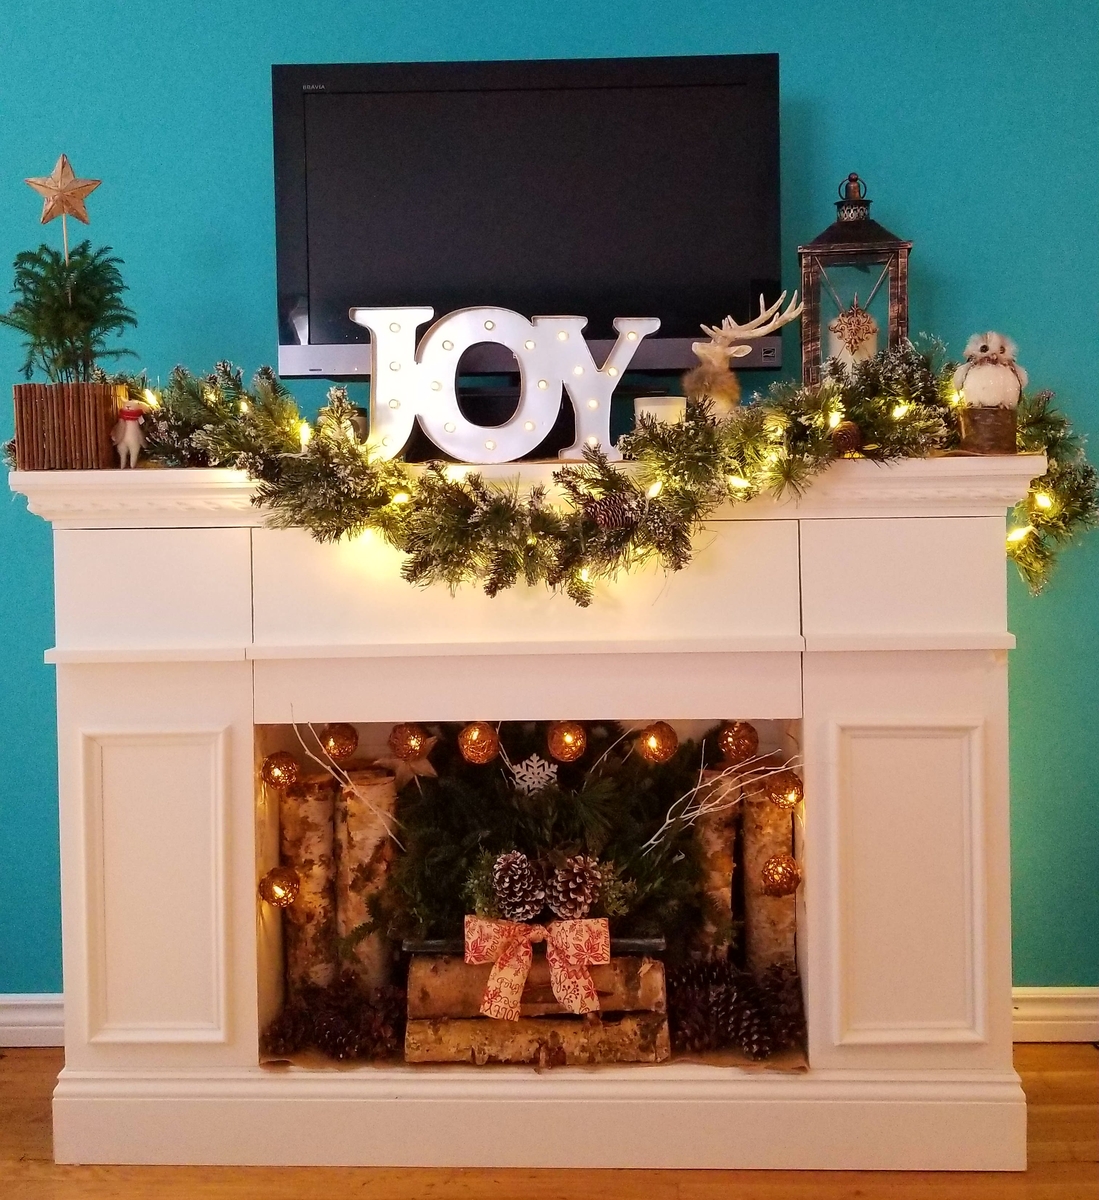
Faux Fireplace Mantle
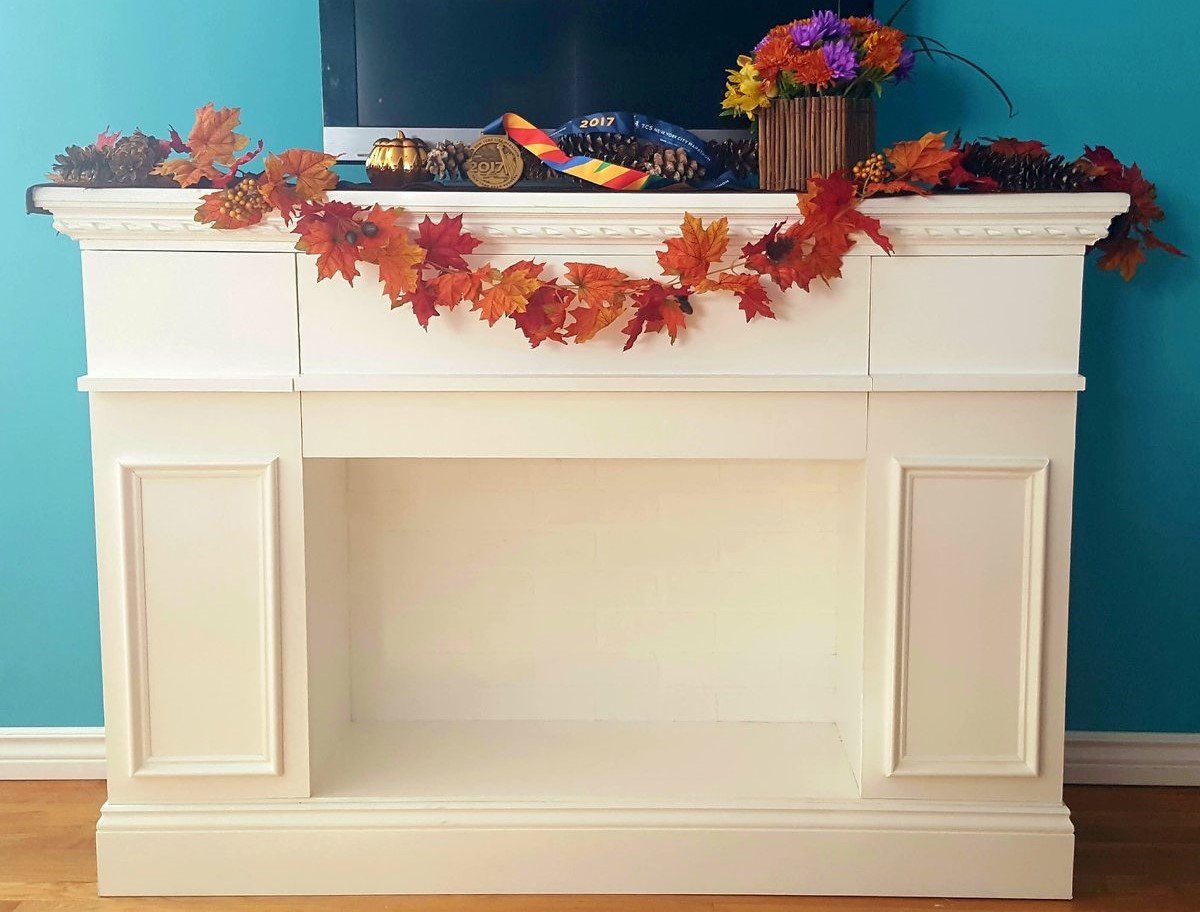
Thank you for providing the plans to this mantle. I had a lot of fun building it with my father while I was training for the NYC Marathon. We finished it the day before the race and was a great way to display both of my accomplishments! It was also a lot of fun to decorate for the holidays. Next I have to build a nice shelf to display all of my finisher medals!
Built from Plan(s)
Estimated Time Investment
Weekend Project (10-20 Hours)
Finish Used
Distant Gray paint with satin finish.
Recommended Skill Level
Beginner
Comments

Tue, 11/12/2019 - 16:34
Amazing! Turned out really…
Amazing! Turned out really well. Hope the marathon was awesome!
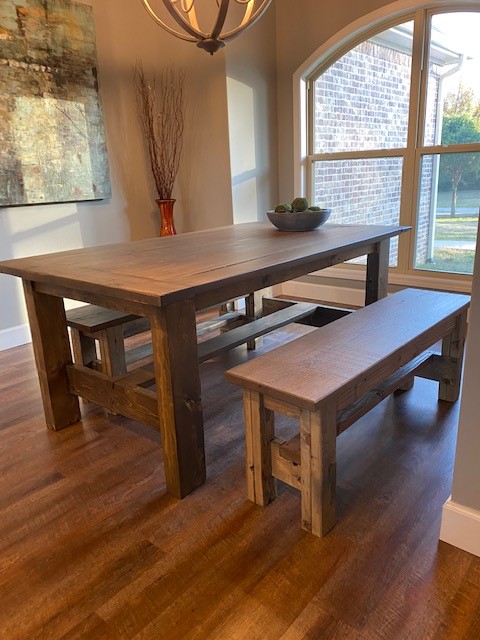
Seasonal And Holiday
Comments
Ana White Admin
Tue, 11/16/2021 - 12:29
WOW, what a table!
You did a stunning job on this build, thank you for sharing!
Ana White
Wed, 11/17/2021 - 09:52
Love the chunky legs on this…
Love the chunky legs on this table! Beautiful job, thank you for sending in a brag post!