Community Brag Posts
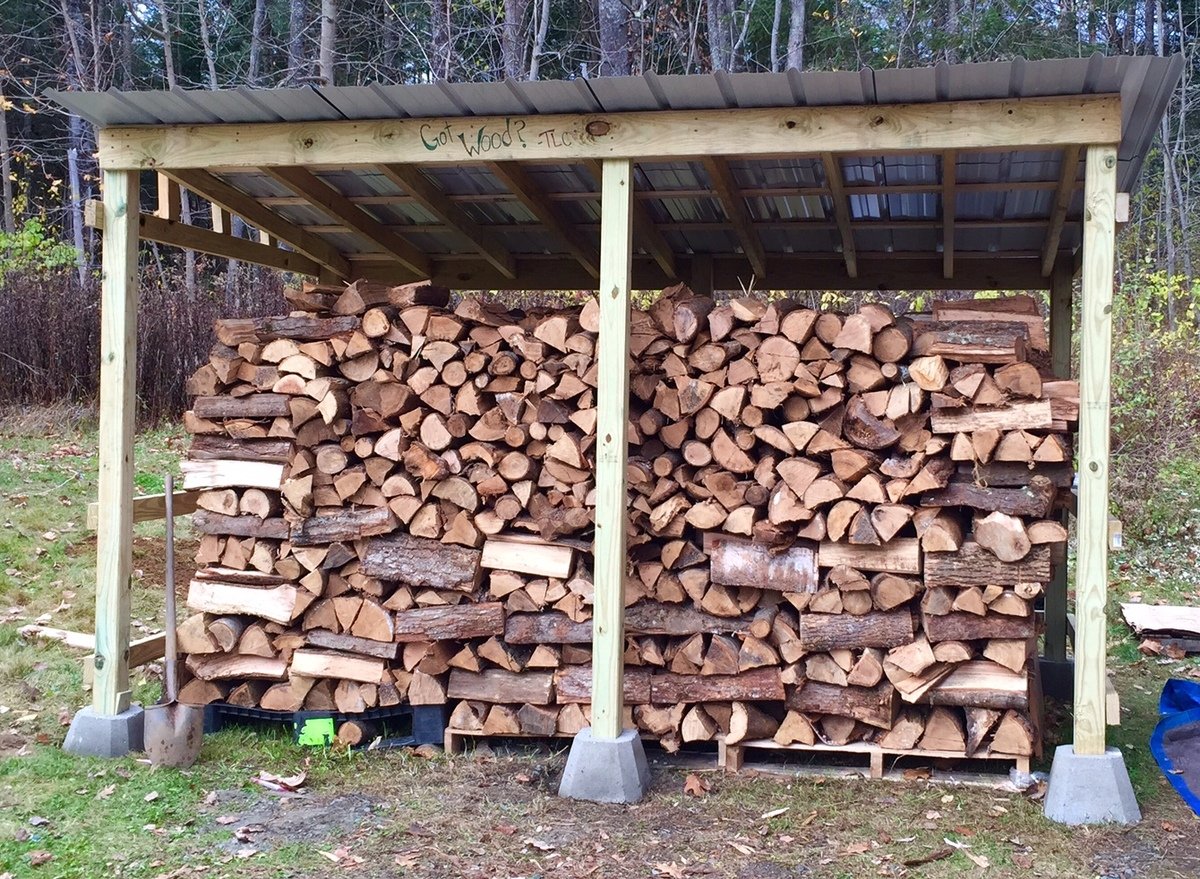
Firewood Shed

When I decided to build a woodshed I was freaked out because I've never done anything even remotely like this. I struggle with precision and patience, which made this project seem overwhelming as I knew I had to do a lot of prep work to properly level the ground, measure the wood, learn how to operate a saw, calculate angles to cut, etc... I did a lot of research online and found this simple blueprint a great starting point. I made some adjustments since i needed a much bigger shed, it's 11.5' x 7' x 7'. Also, I already had the wood resting on pallets so I just build this shed around the wood with no built in floor. Overall, I'm thrilled with how it turned out!
Built from Plan(s)
Estimated Cost
$500
Estimated Time Investment
Weekend Project (10-20 Hours)
Recommended Skill Level
Beginner
Comments
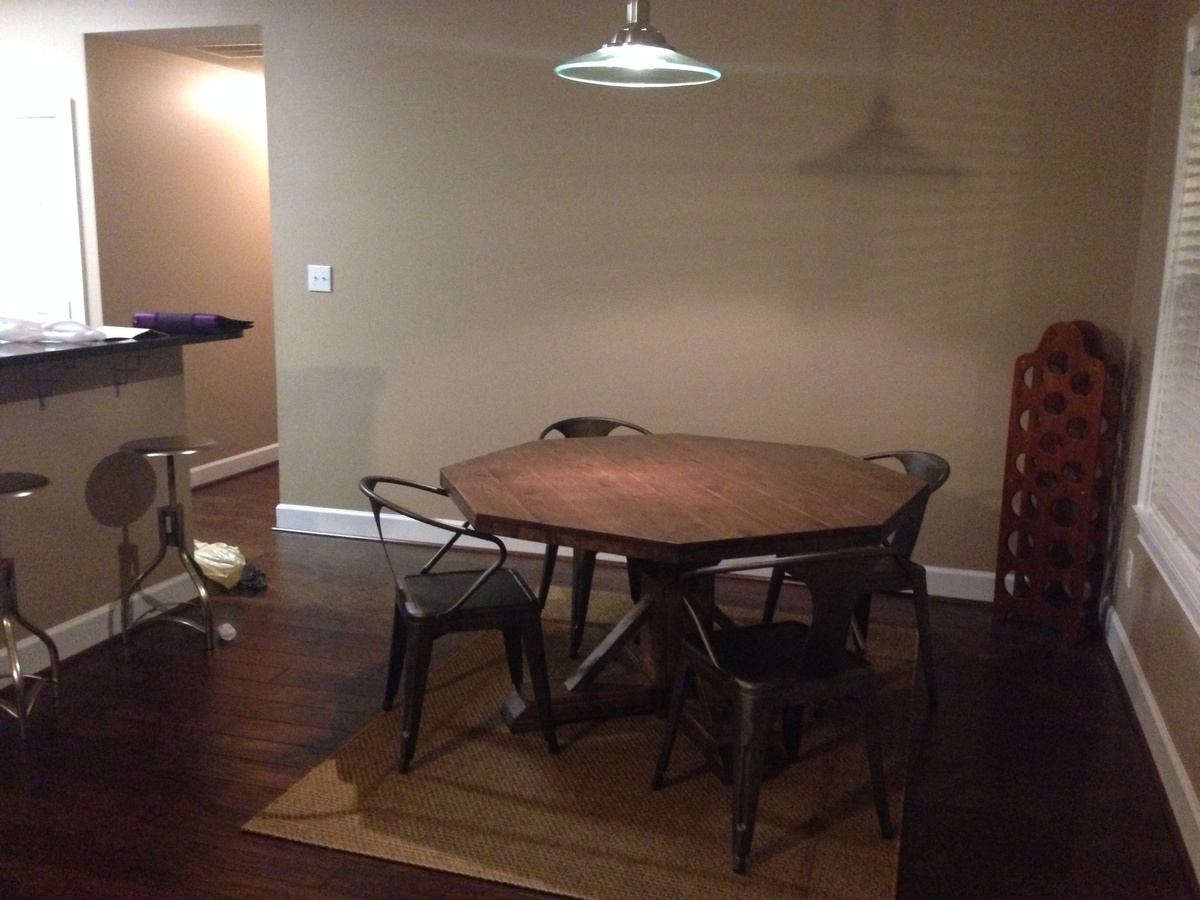
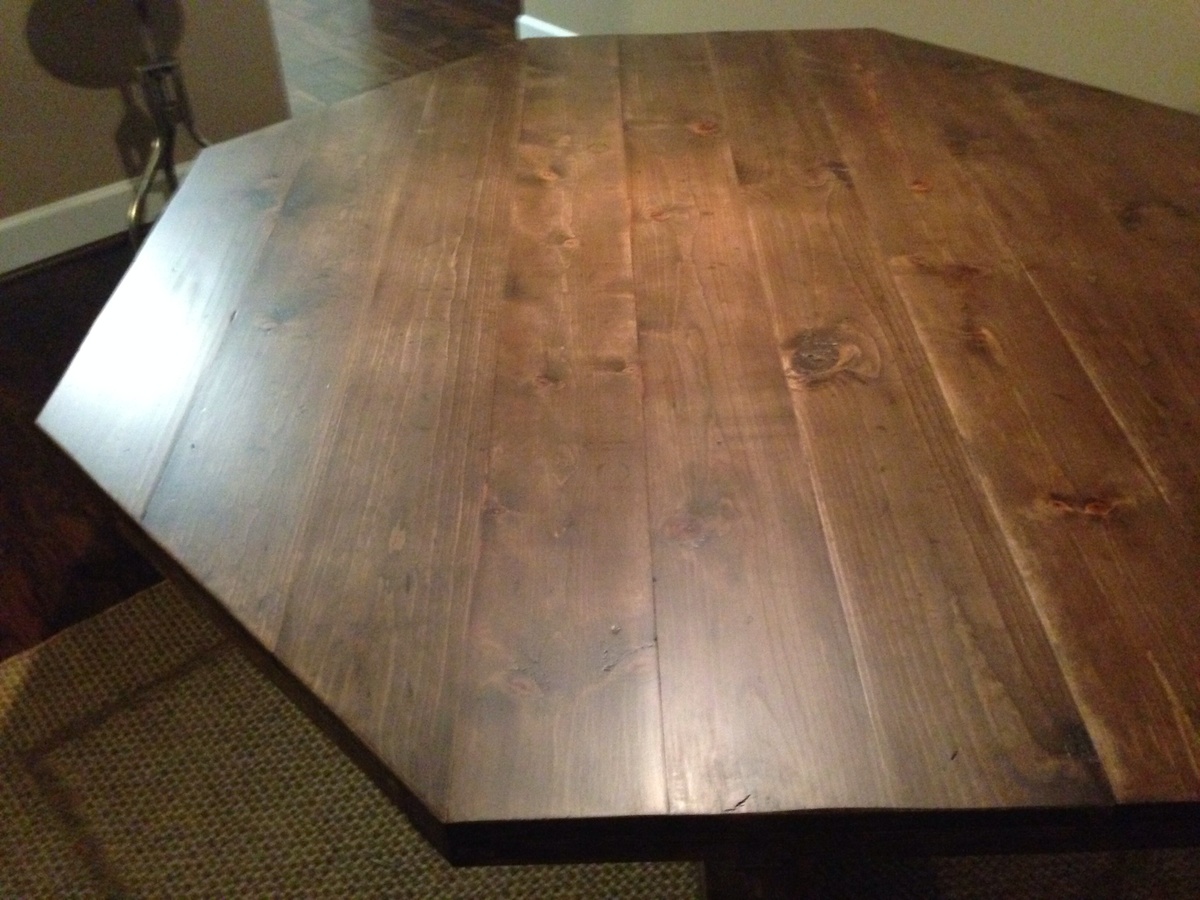
Octagon Table

Octagon table with metal chairs

Built from Plan(s)
Estimated Time Investment
Weekend Project (10-20 Hours)
Finish Used
Stained with a vinegar/steel wool oxidizing mixture-then with common tea. I then used rustoleum matte finish polyurethane.
Recommended Skill Level
Intermediate
Comments

Fri, 11/21/2014 - 09:22
Wow that looks amazing! It
Wow that looks amazing! It looks great with your wall color and the floors! The rug is also a reall nice touch!
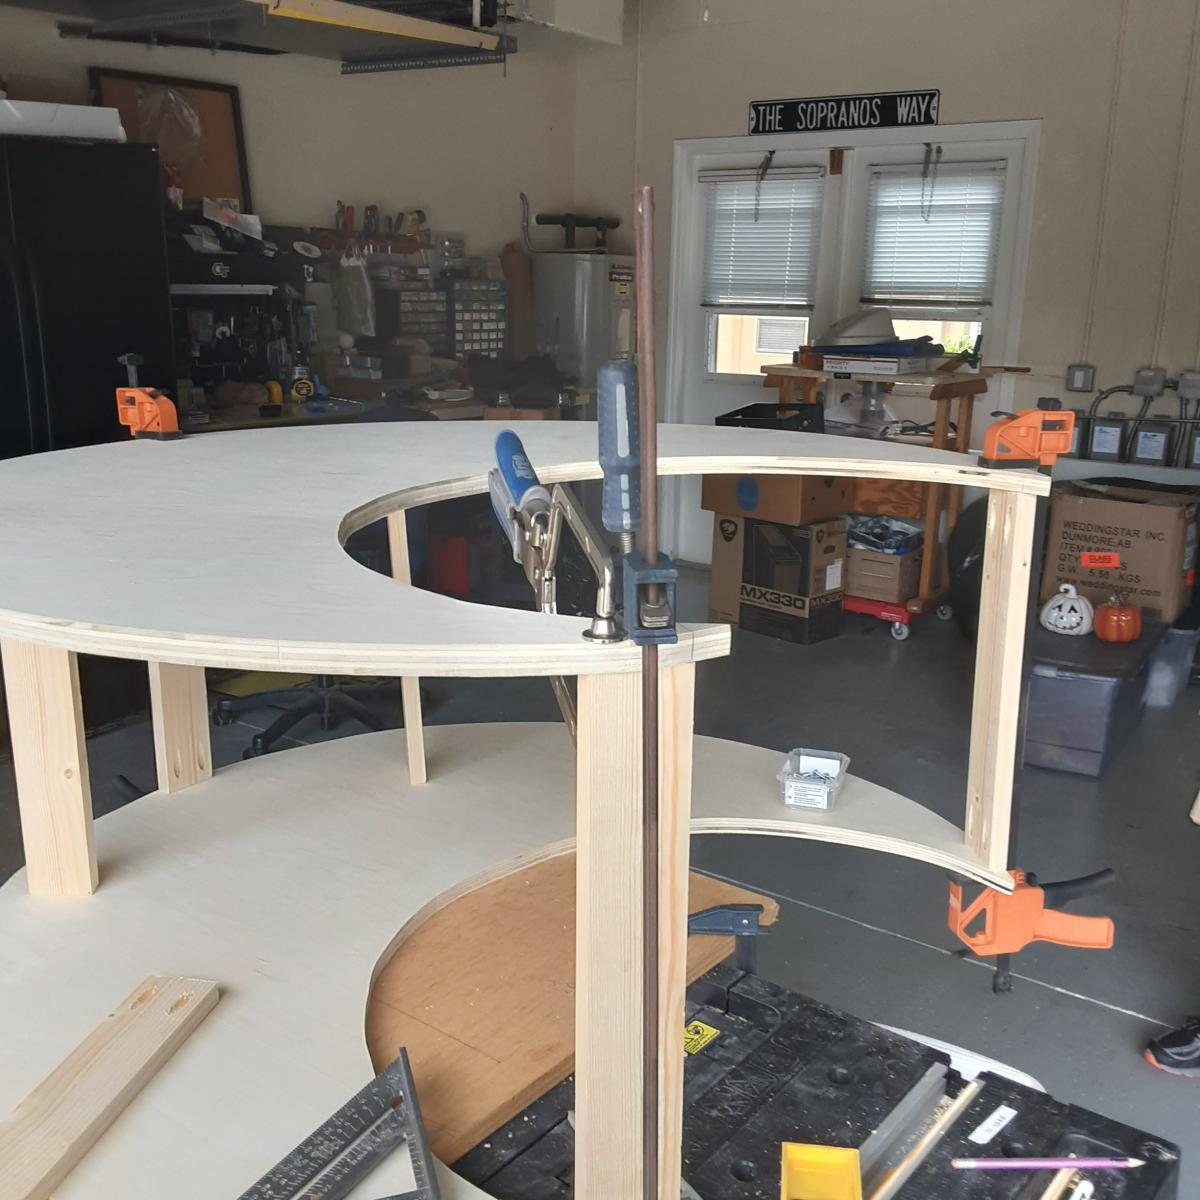
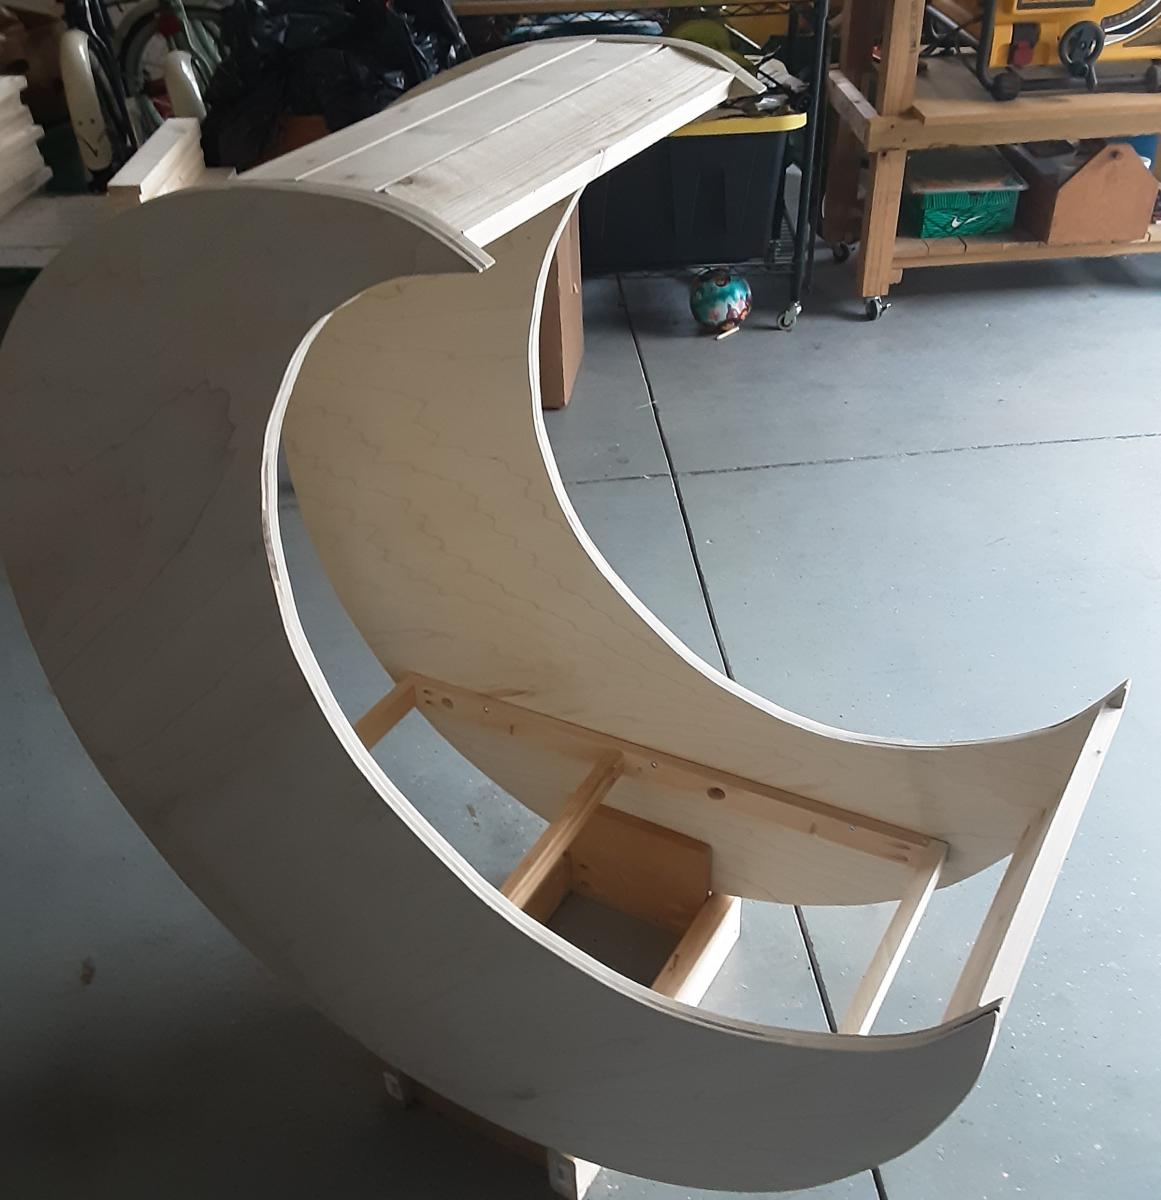
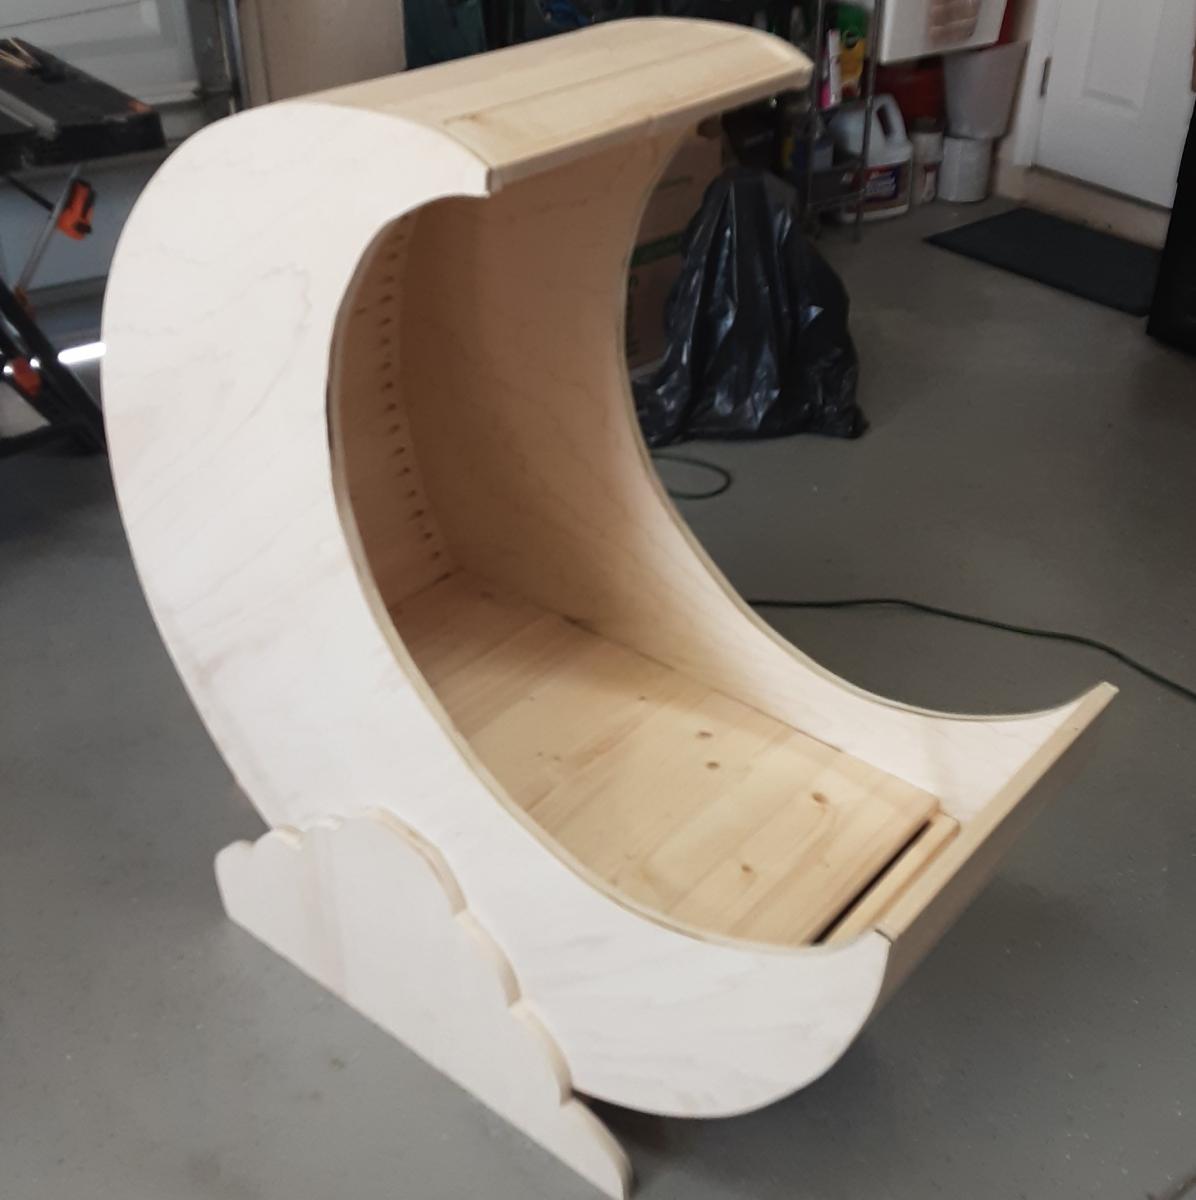
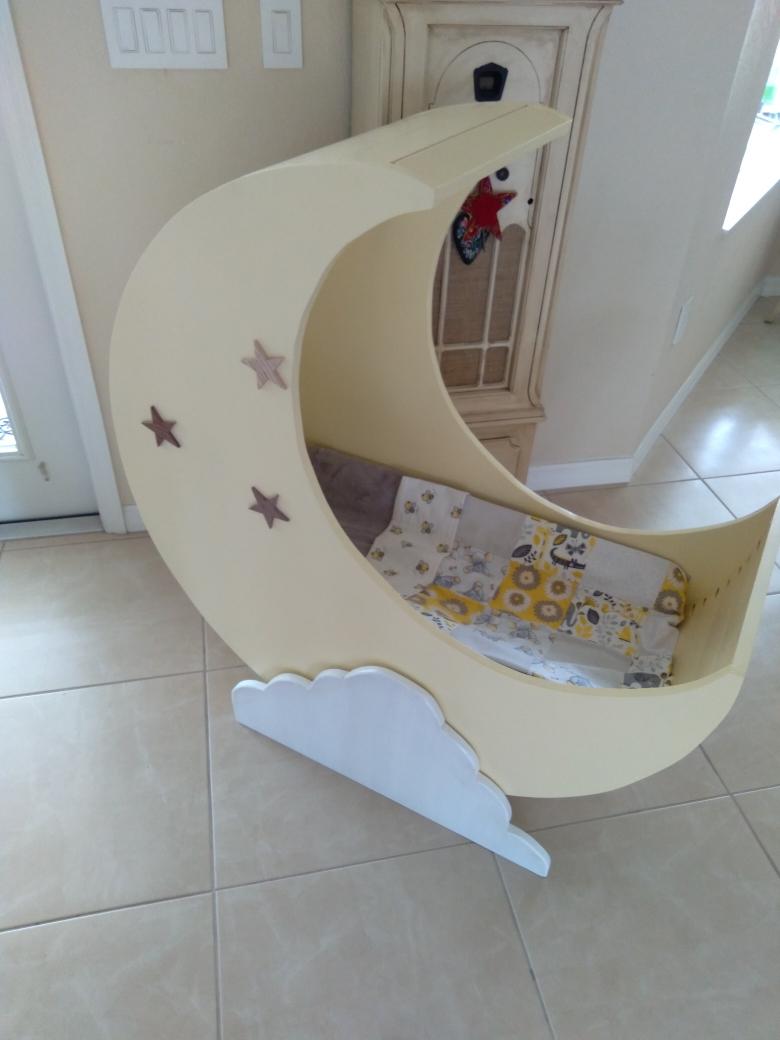
Half Moon Baby Cradle
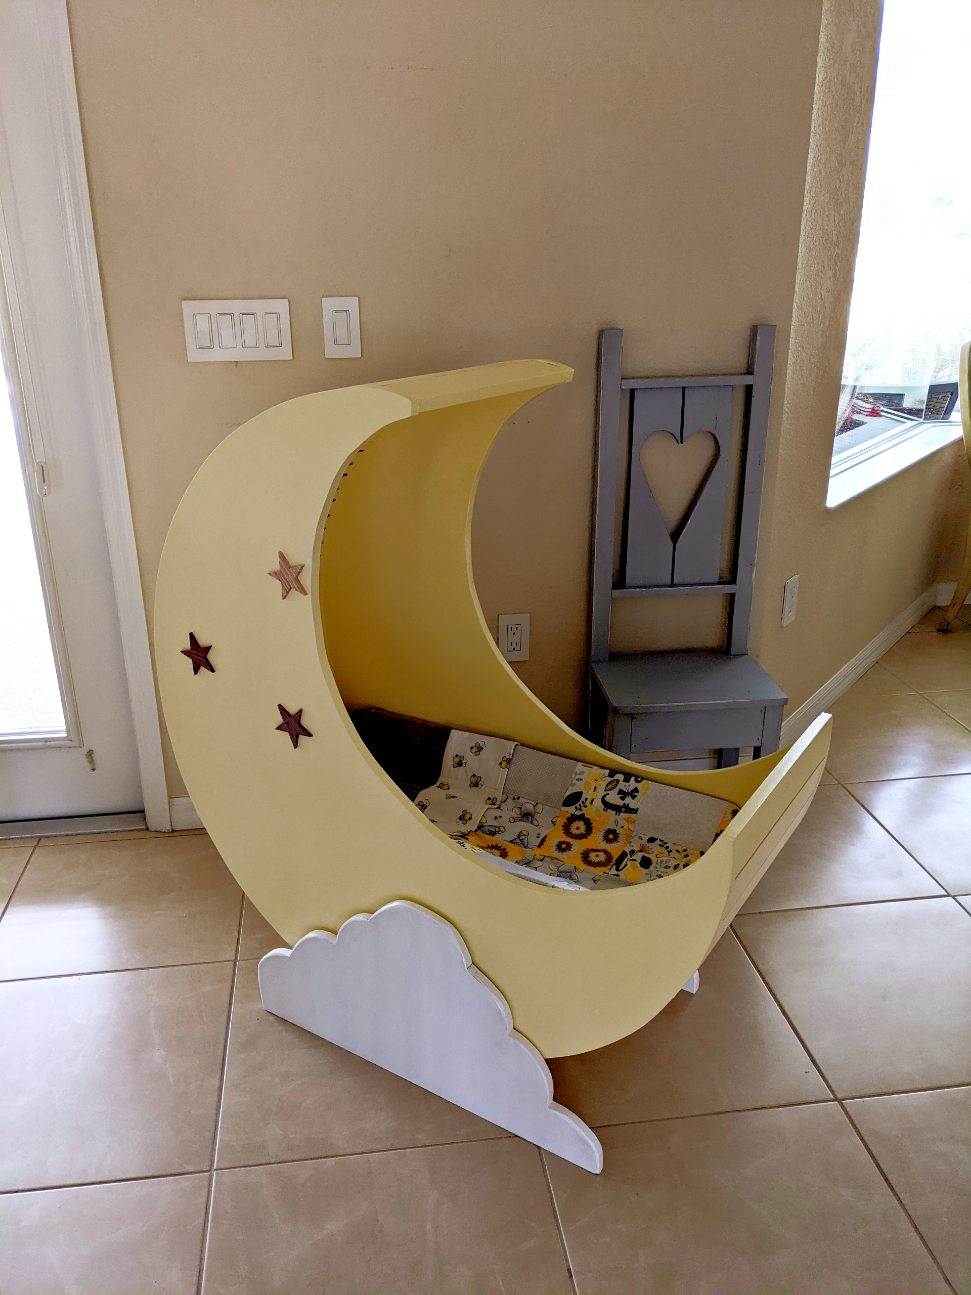
Built for my first Grandson Lucas. Made of pure bond poplar plywood and white pine. Templates were made of cardboard for a circle (20" radius) and a circle (14.5" radius). Placed small circle inside the larger circle to create a half moon shape. Identical sides were cut from the plywood. Extensive use of Kreg pocket holes to attach (25) 16" boards to the plywood sides. Each board requires 2 pocket holes (1 1/4) on each side. Added a base to the cradle for stability and attached plywood cloud shapes to cover base and add a decorative touch. Frame installed and attached rails to the inside supporting 30" by 16" infant mattress.

Estimated Cost
$100
Estimated Time Investment
Week Long Project (20 Hours or More)
Finish Used
Behr Vanilla Ice Cream; White for clouds
Recommended Skill Level
Intermediate
Comments
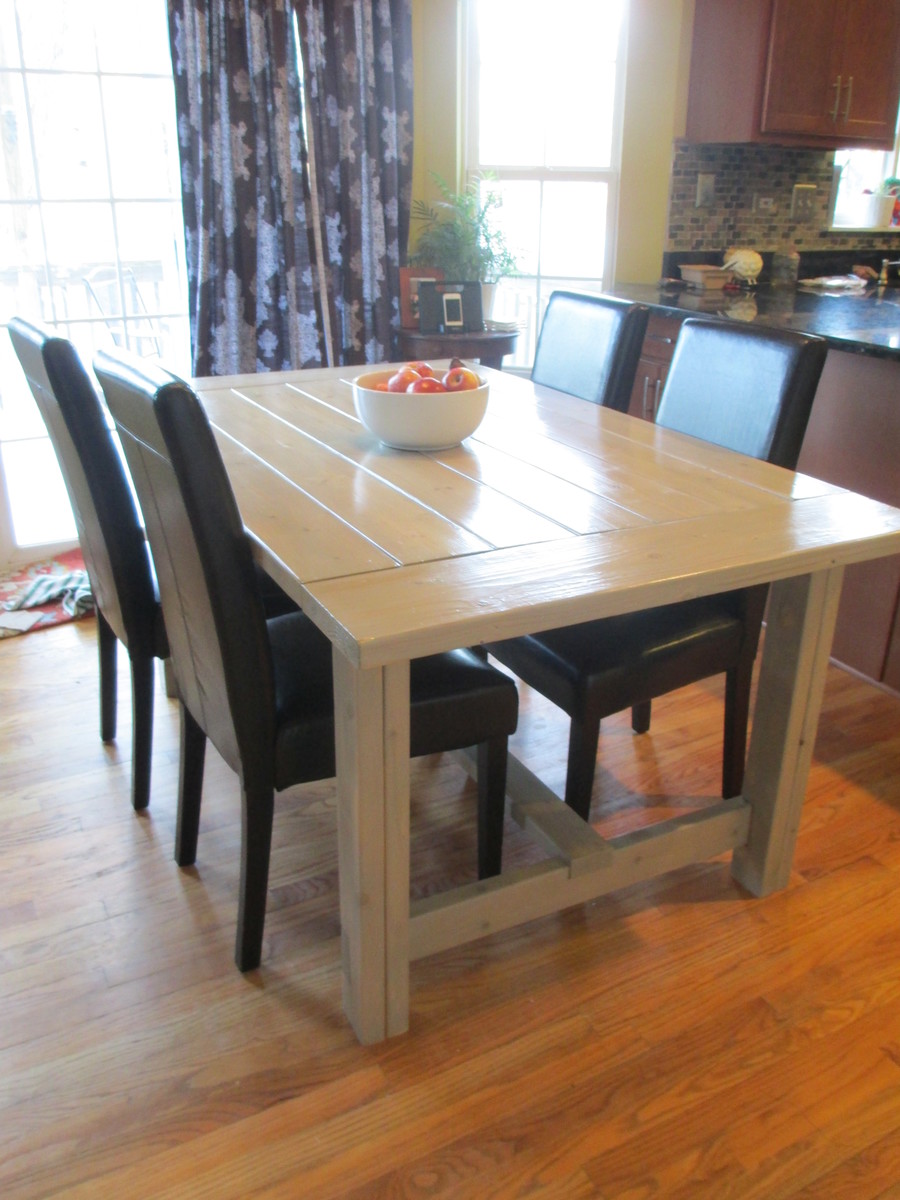
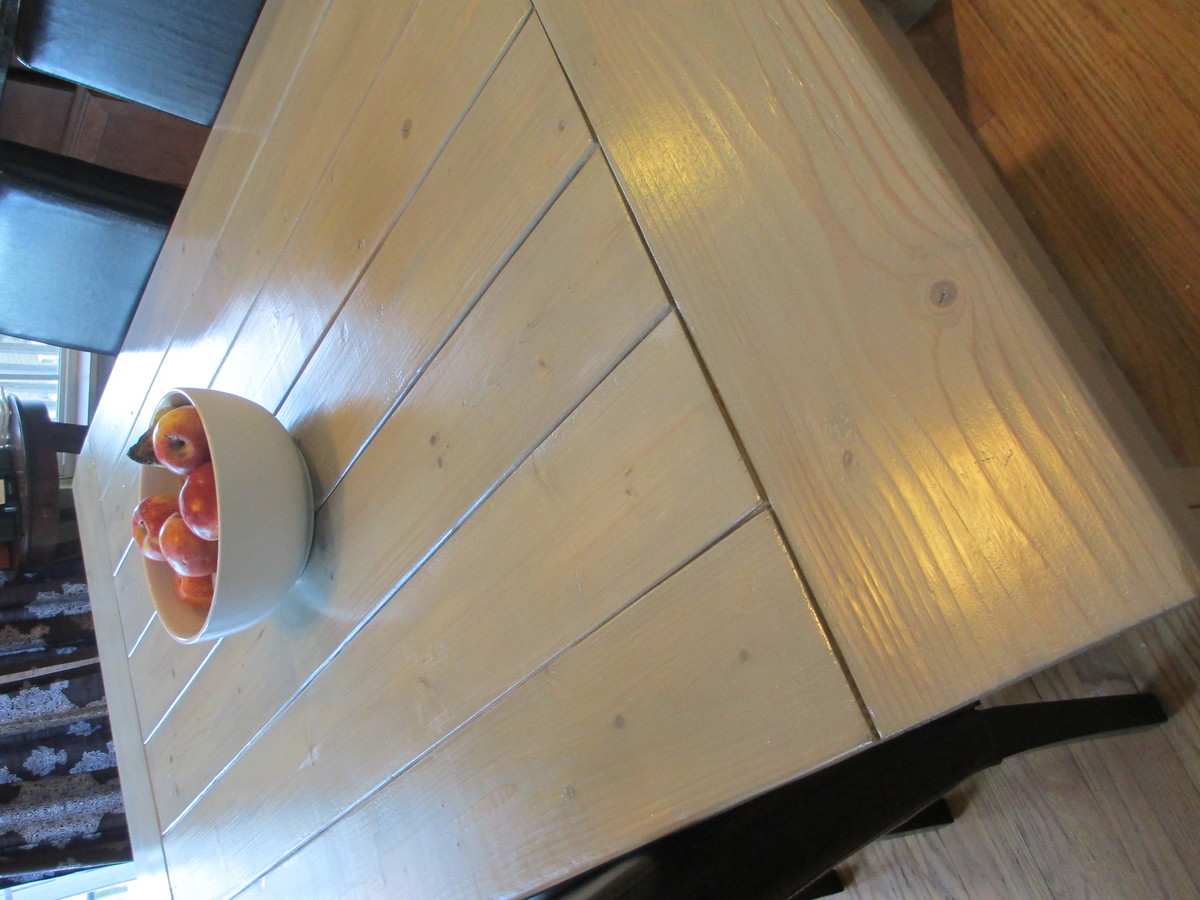
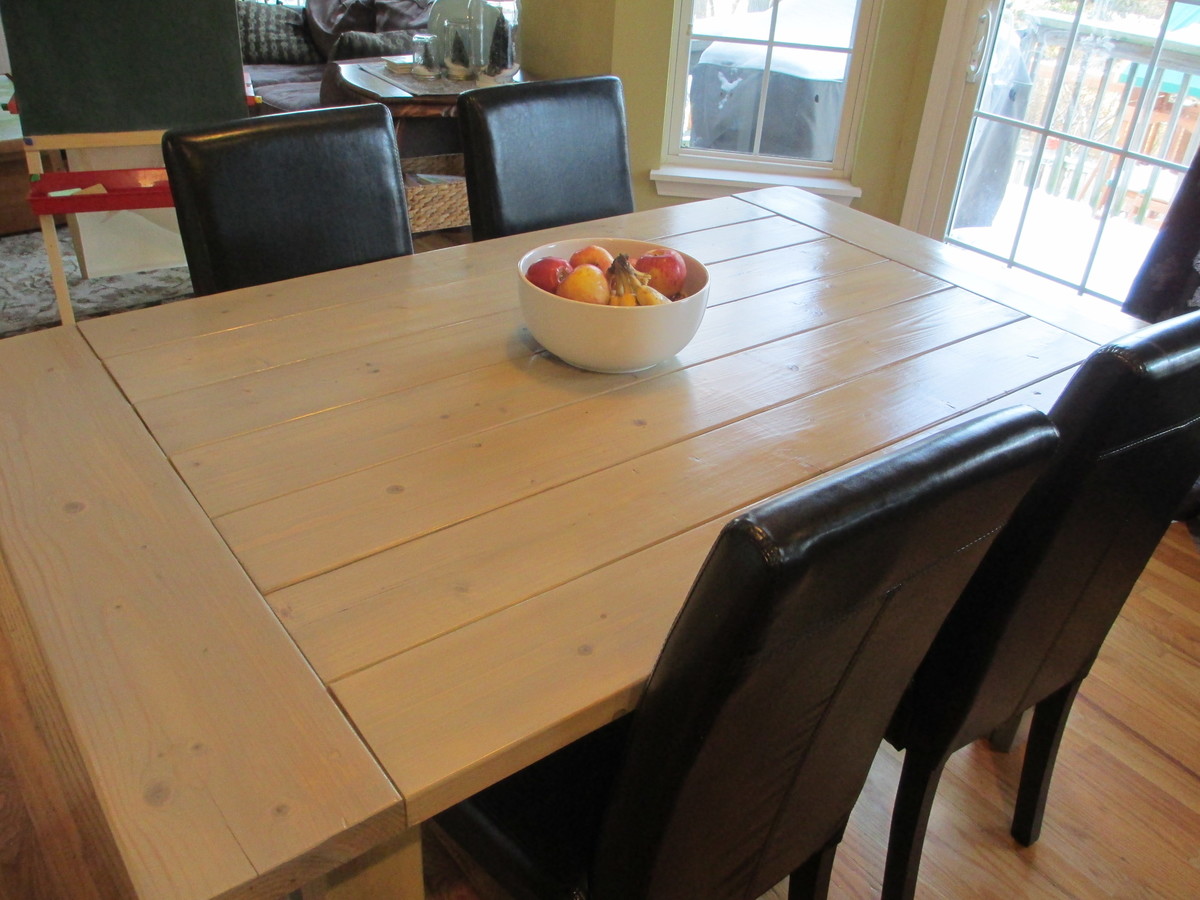
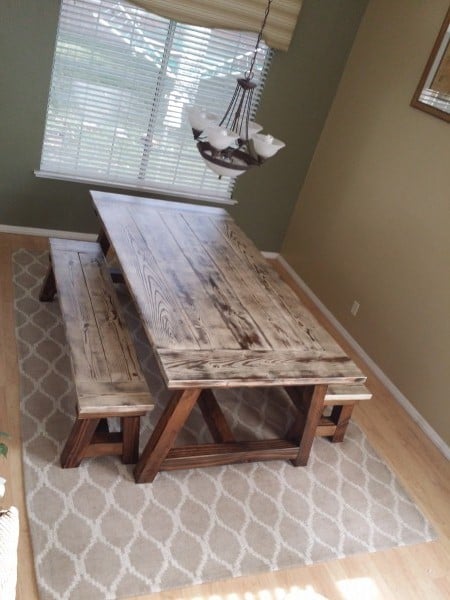
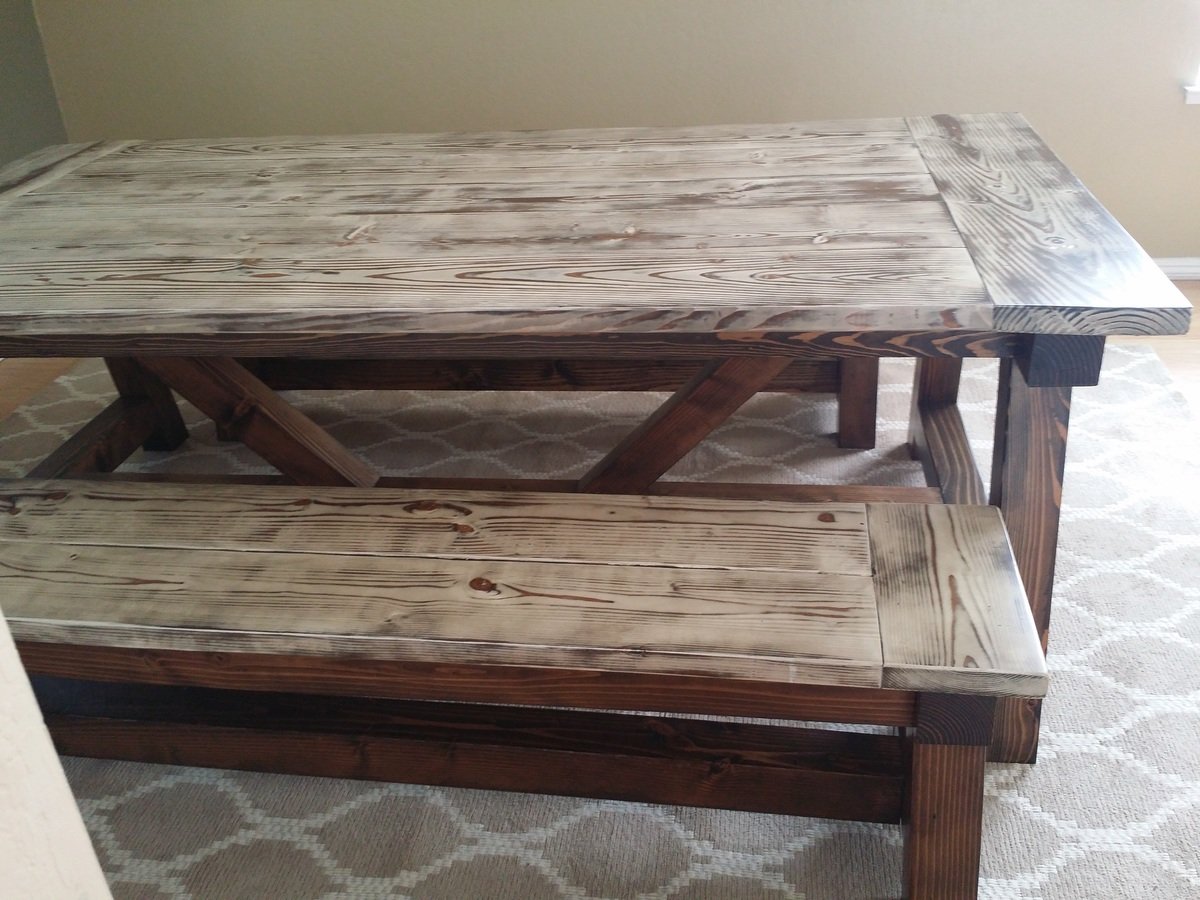
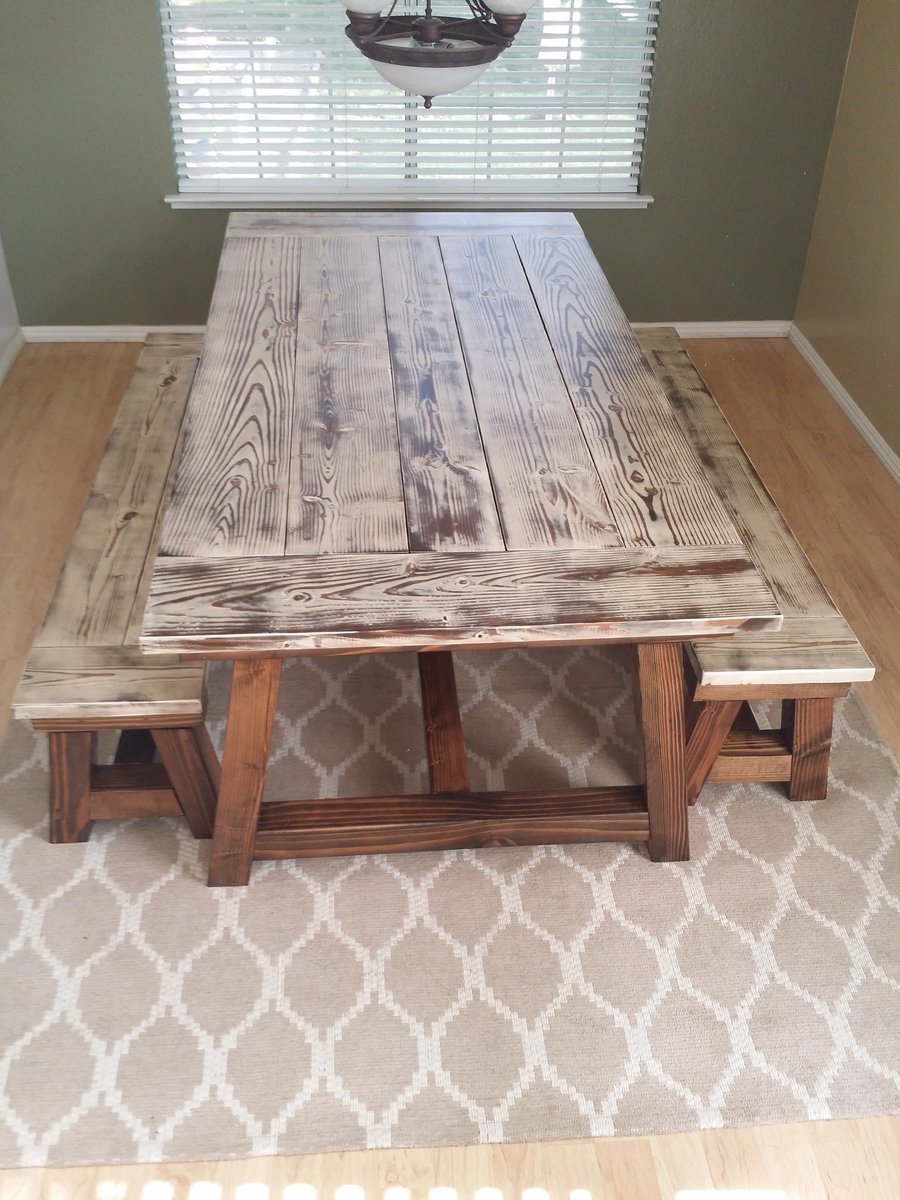
Farmhouse Dining Table
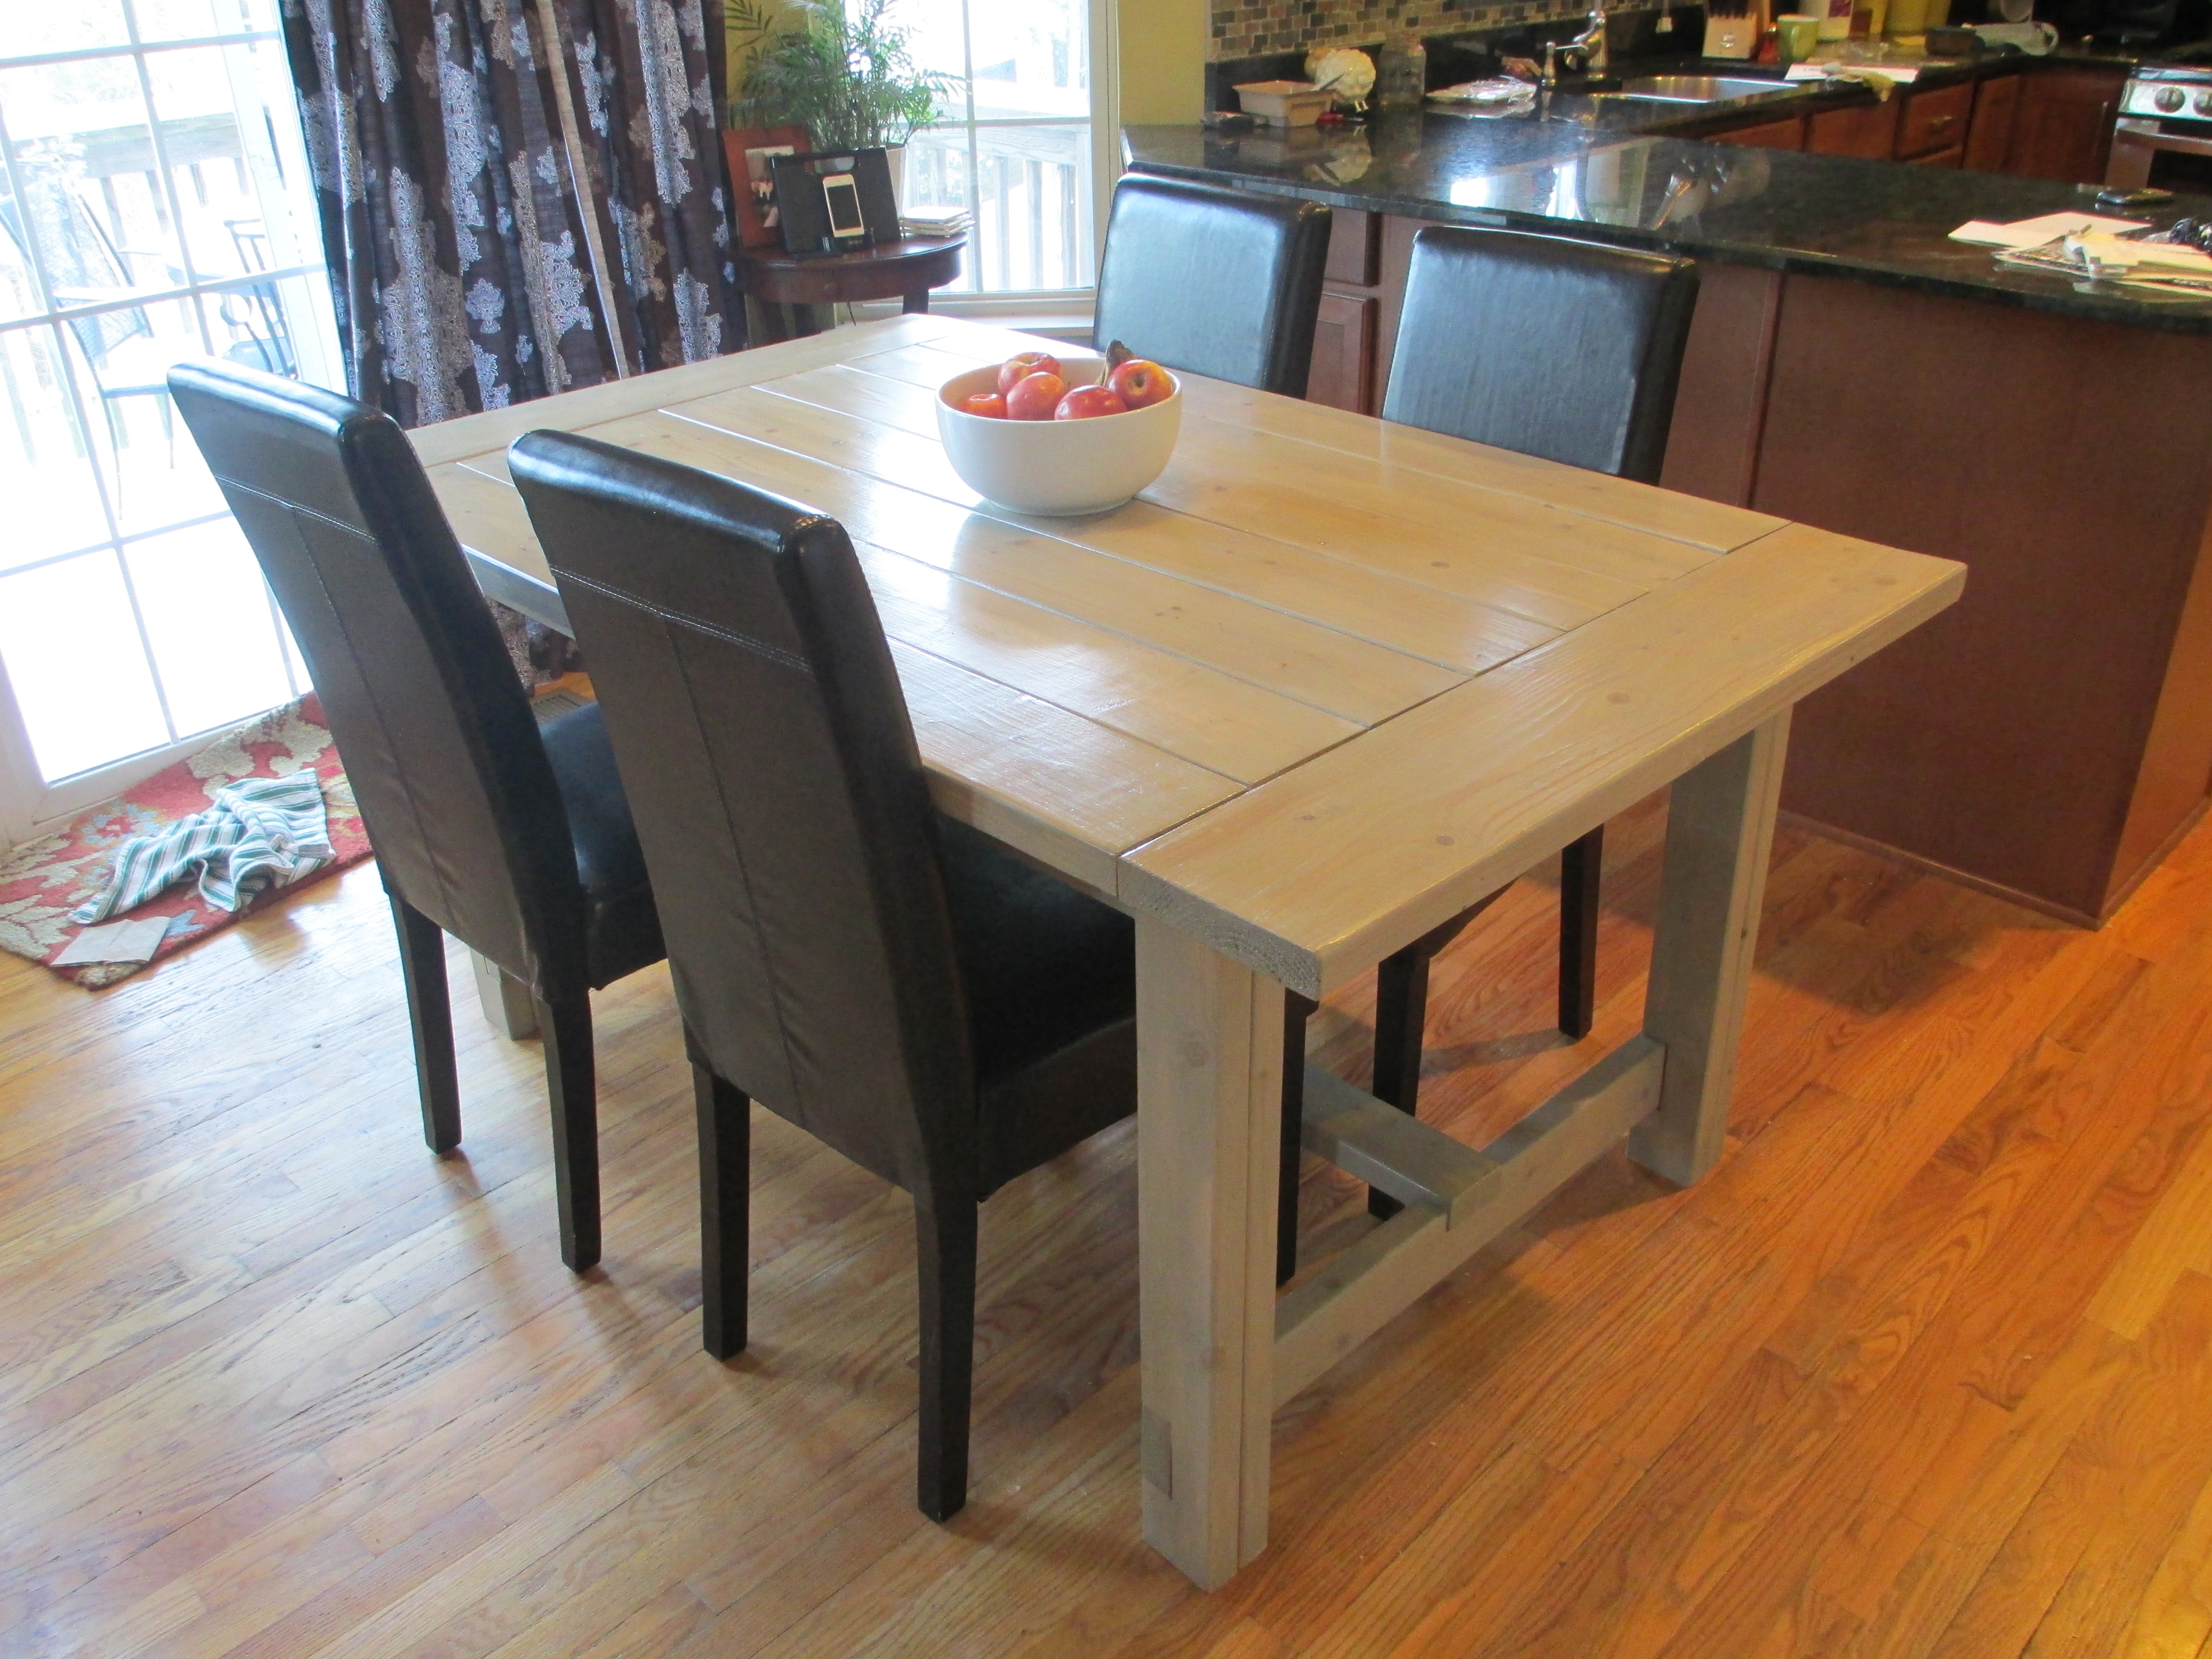
This was the first attempt at building furniture for my husband and me...and we're thrilled with how it turned out! We had a table from Crate and Barrel that was not holding up at all (I convinced them to take it back after 1 year) and wanted to try to build our own. We used Ana's Farmhouse Dining Table original plan, and only shortened it to 64", but followed the rest exactly. We looked into getting oak or a more expensive wood for the table, but save your money and get the pine! After the polyurethane, it's harder and more durable than our C&B table!
Built from Plan(s)
Estimated Cost
$100
Estimated Time Investment
Weekend Project (10-20 Hours)
Finish Used
After building the table, I sanded it really well. I then applied wood conditioner, and Minwax "Sunbleached" oil-based stain for a greyish finish. The top of the table has one coat, the rest two (I liked how one coat allows the wood color to show through with the grain, among the grey of the stain). I sanded after the staining, then did two coats of satin polyurethane (sanding in between coats). I'm so happy with the color!
Recommended Skill Level
Beginner
Comments

Thu, 02/07/2013 - 19:49
Beautiful Job!
Nice job and I love the finish! I will keep that stain in mind for one of my next projects...
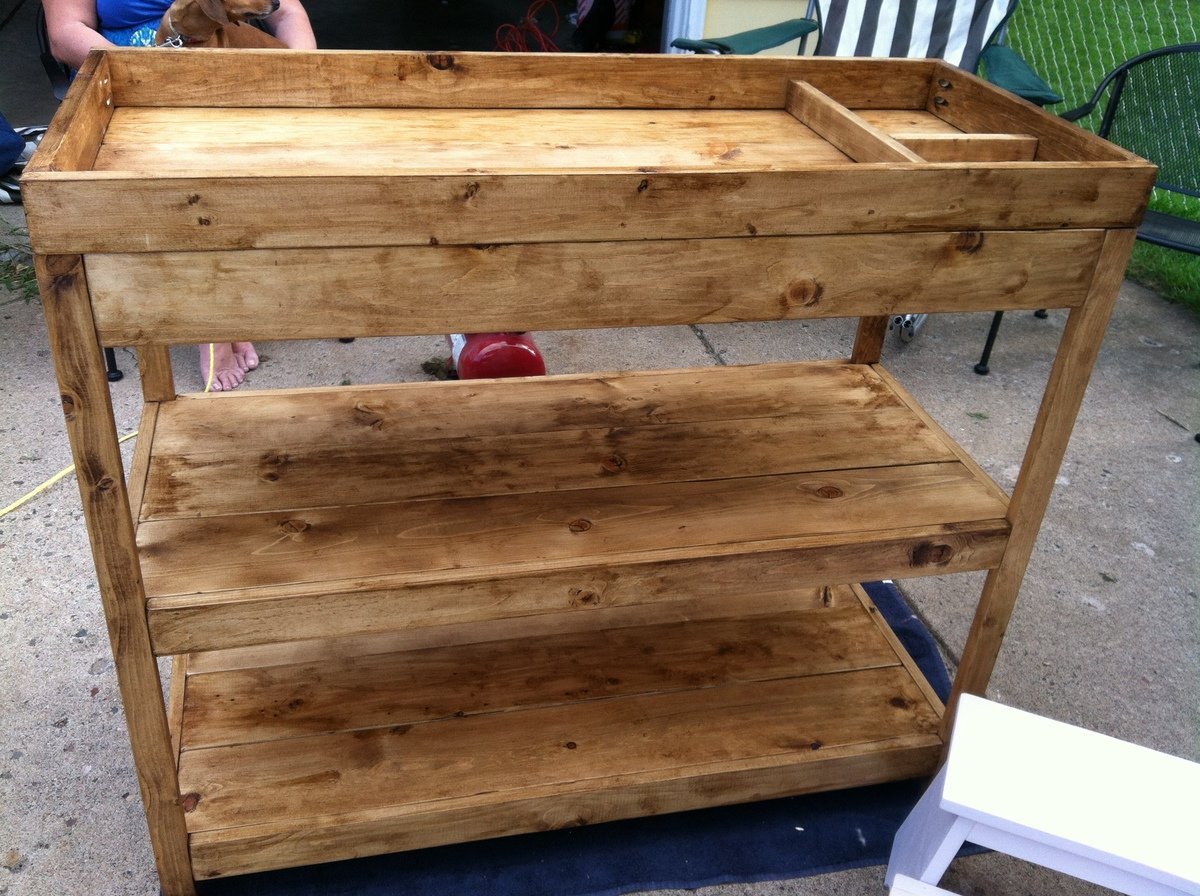
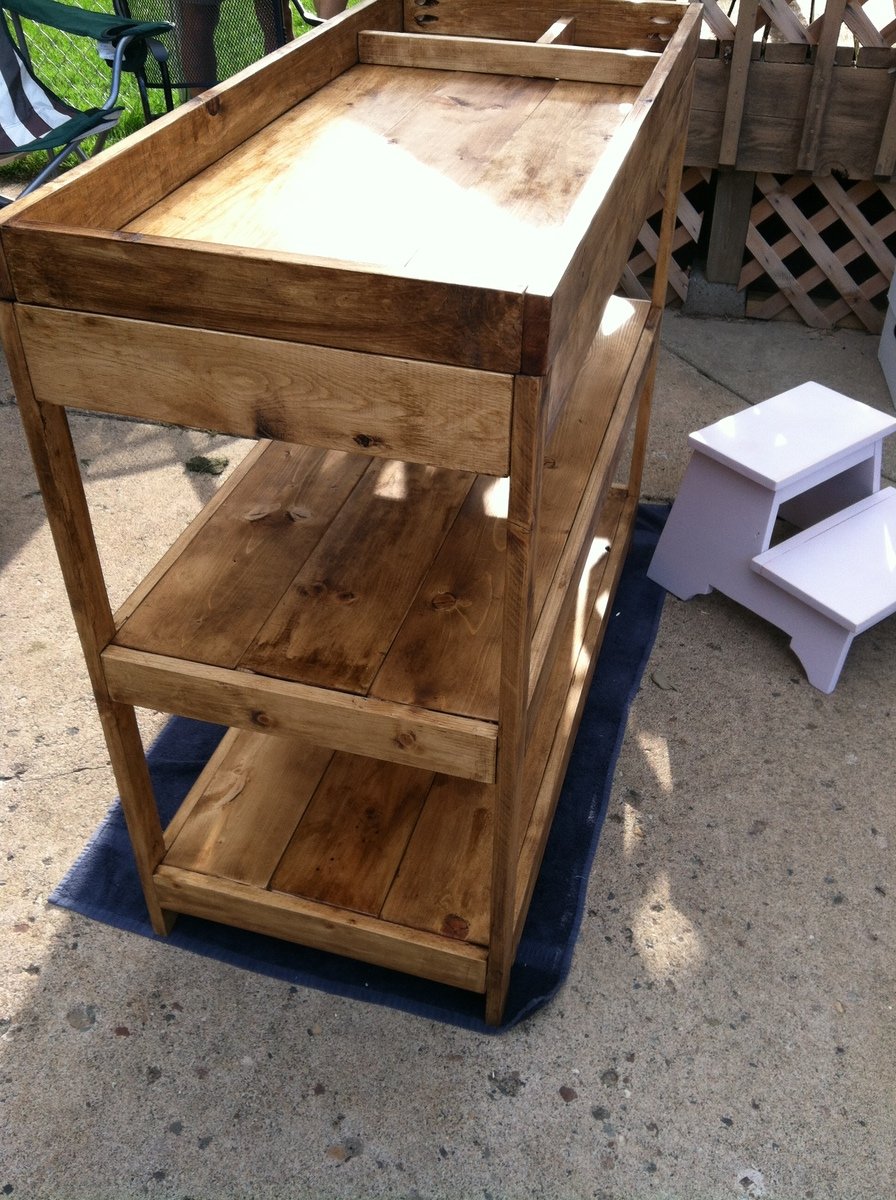
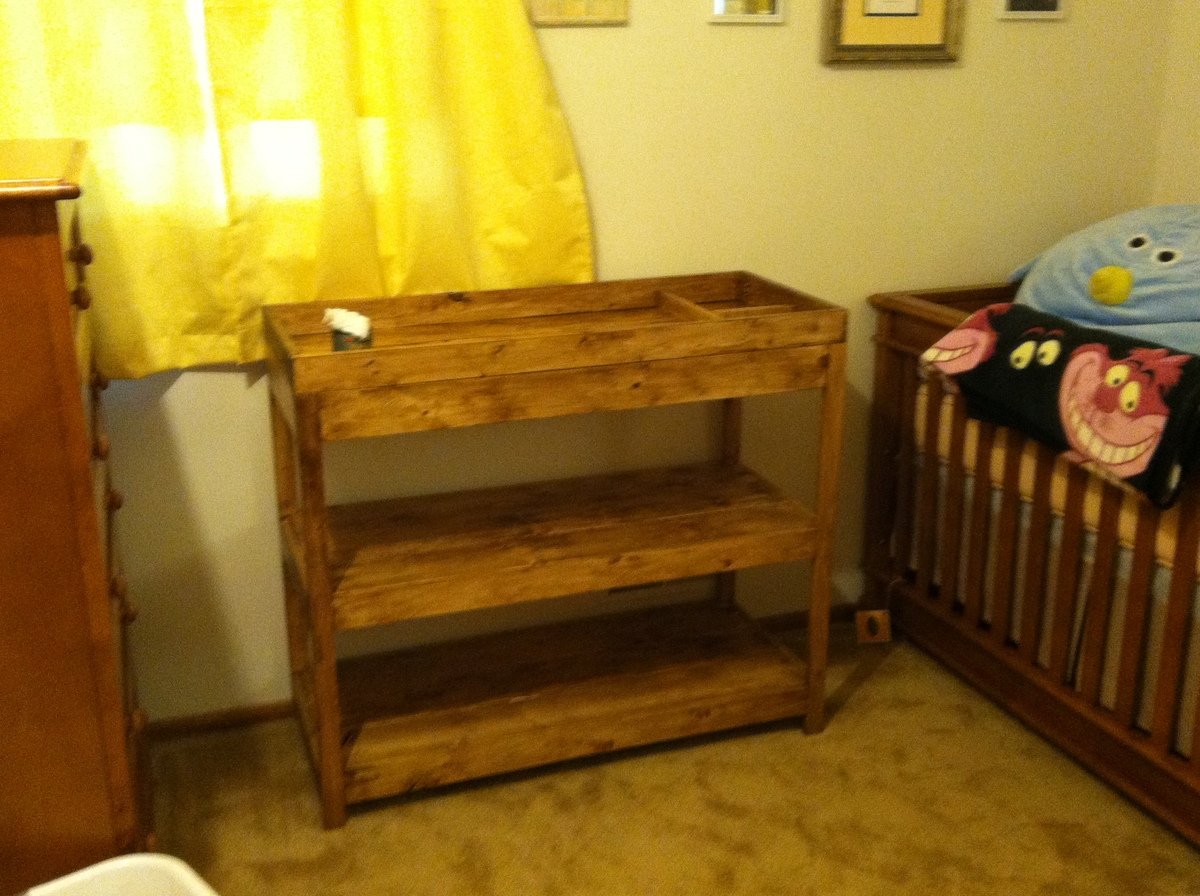
Simple Changing Table
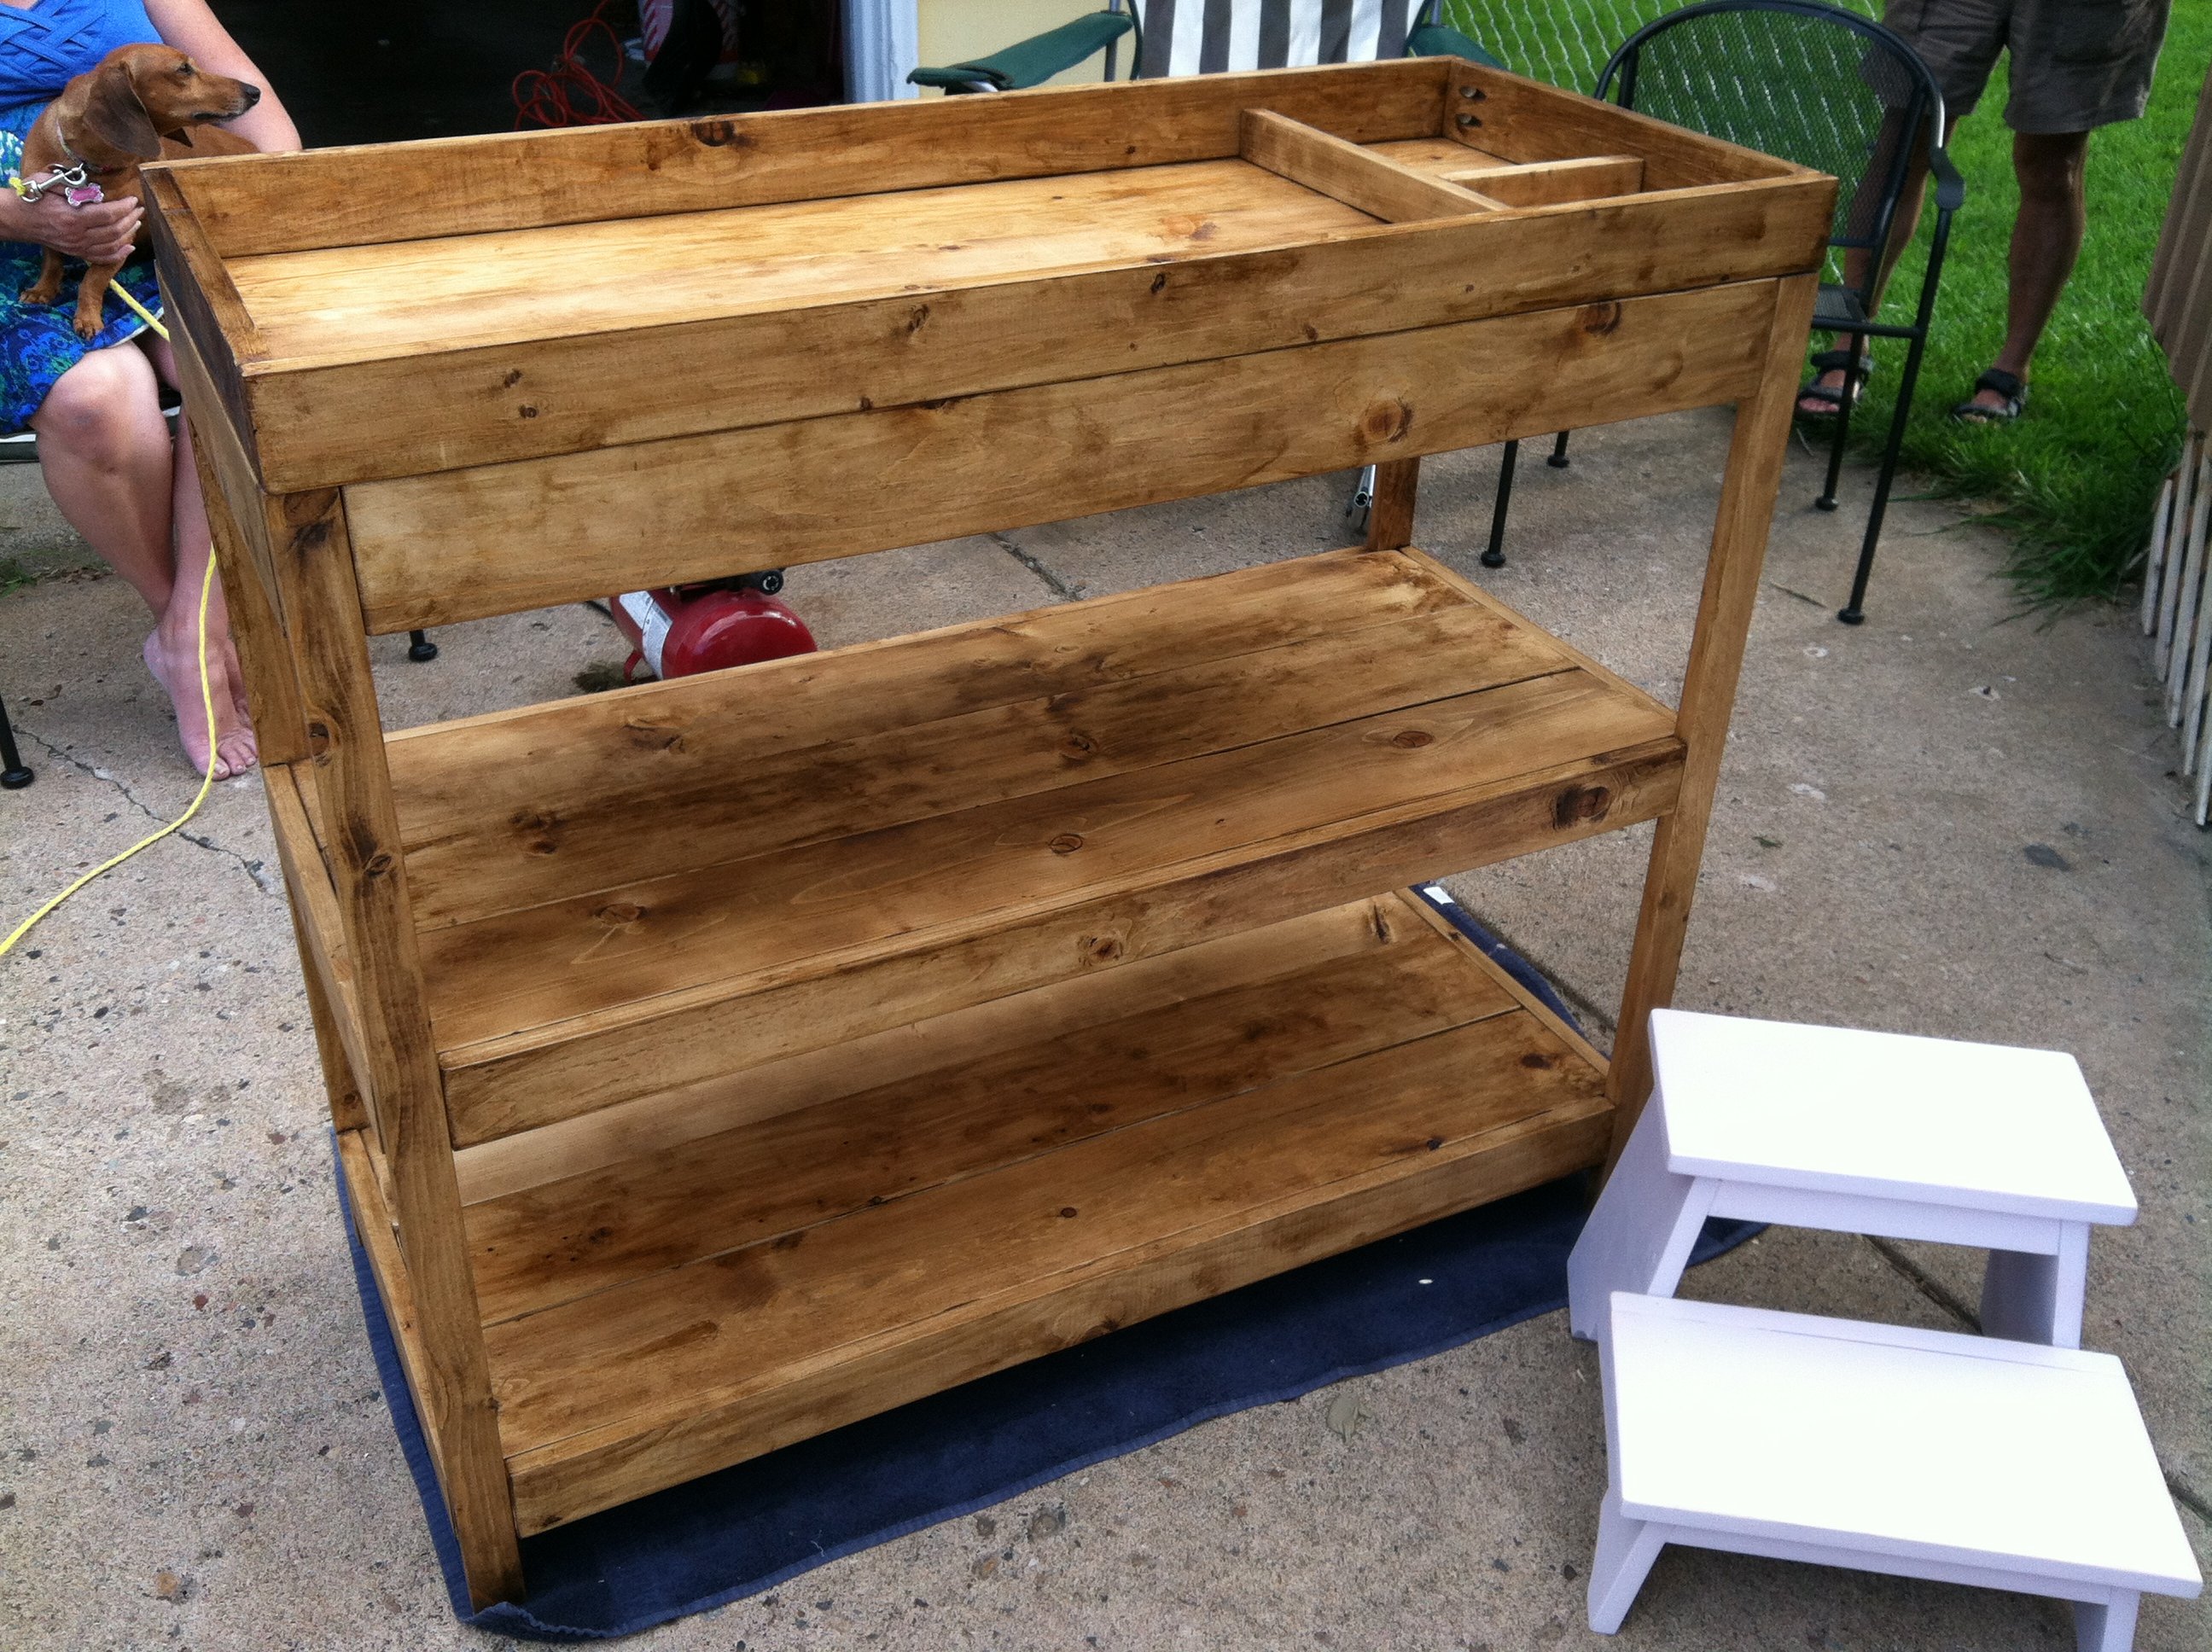
I built this changing table for my friend's new baby. I had to stain all the individual pieces and assemble it at her house. It wouldn't fit assembled in my vehicle! :)
I also built her a stepstool as well.

Built from Plan(s)
Estimated Cost
$60
Estimated Time Investment
Weekend Project (10-20 Hours)
Finish Used
Minwax Polyshade Golden Oak
Recommended Skill Level
Intermediate
Farm Table
This table is a dream come true. I have always wanted one of these but could never find one I absolutely loved. I have now.
Built from Plan(s)
Estimated Cost
450.00 dollars plus time
Estimated Time Investment
Weekend Project (10-20 Hours)
Recommended Skill Level
Intermediate
Comments

Wed, 12/17/2014 - 16:04
I really like the look of the
I really like the look of the tabletop. How did you achieve that finish?
Tue, 12/23/2014 - 15:32
Finish on table
My husband painted the top with white paint, let it dry and then randomly sanded it all over and then put a coat of walnut stain on and rubbed it off and then put three coats of minwax polyurethane.
Tue, 12/23/2014 - 23:58
Great!
The design of table seems to be simple. However, I do like the color that you made for this. How can you mix the color like that?
http://www.proweb365.com
Horse Stable

I followed the plans given, then painted it white and stained the roof with a dark finish.

Built from Plan(s)
Estimated Time Investment
Weekend Project (10-20 Hours)
Recommended Skill Level
Beginner
Barn door bookcase
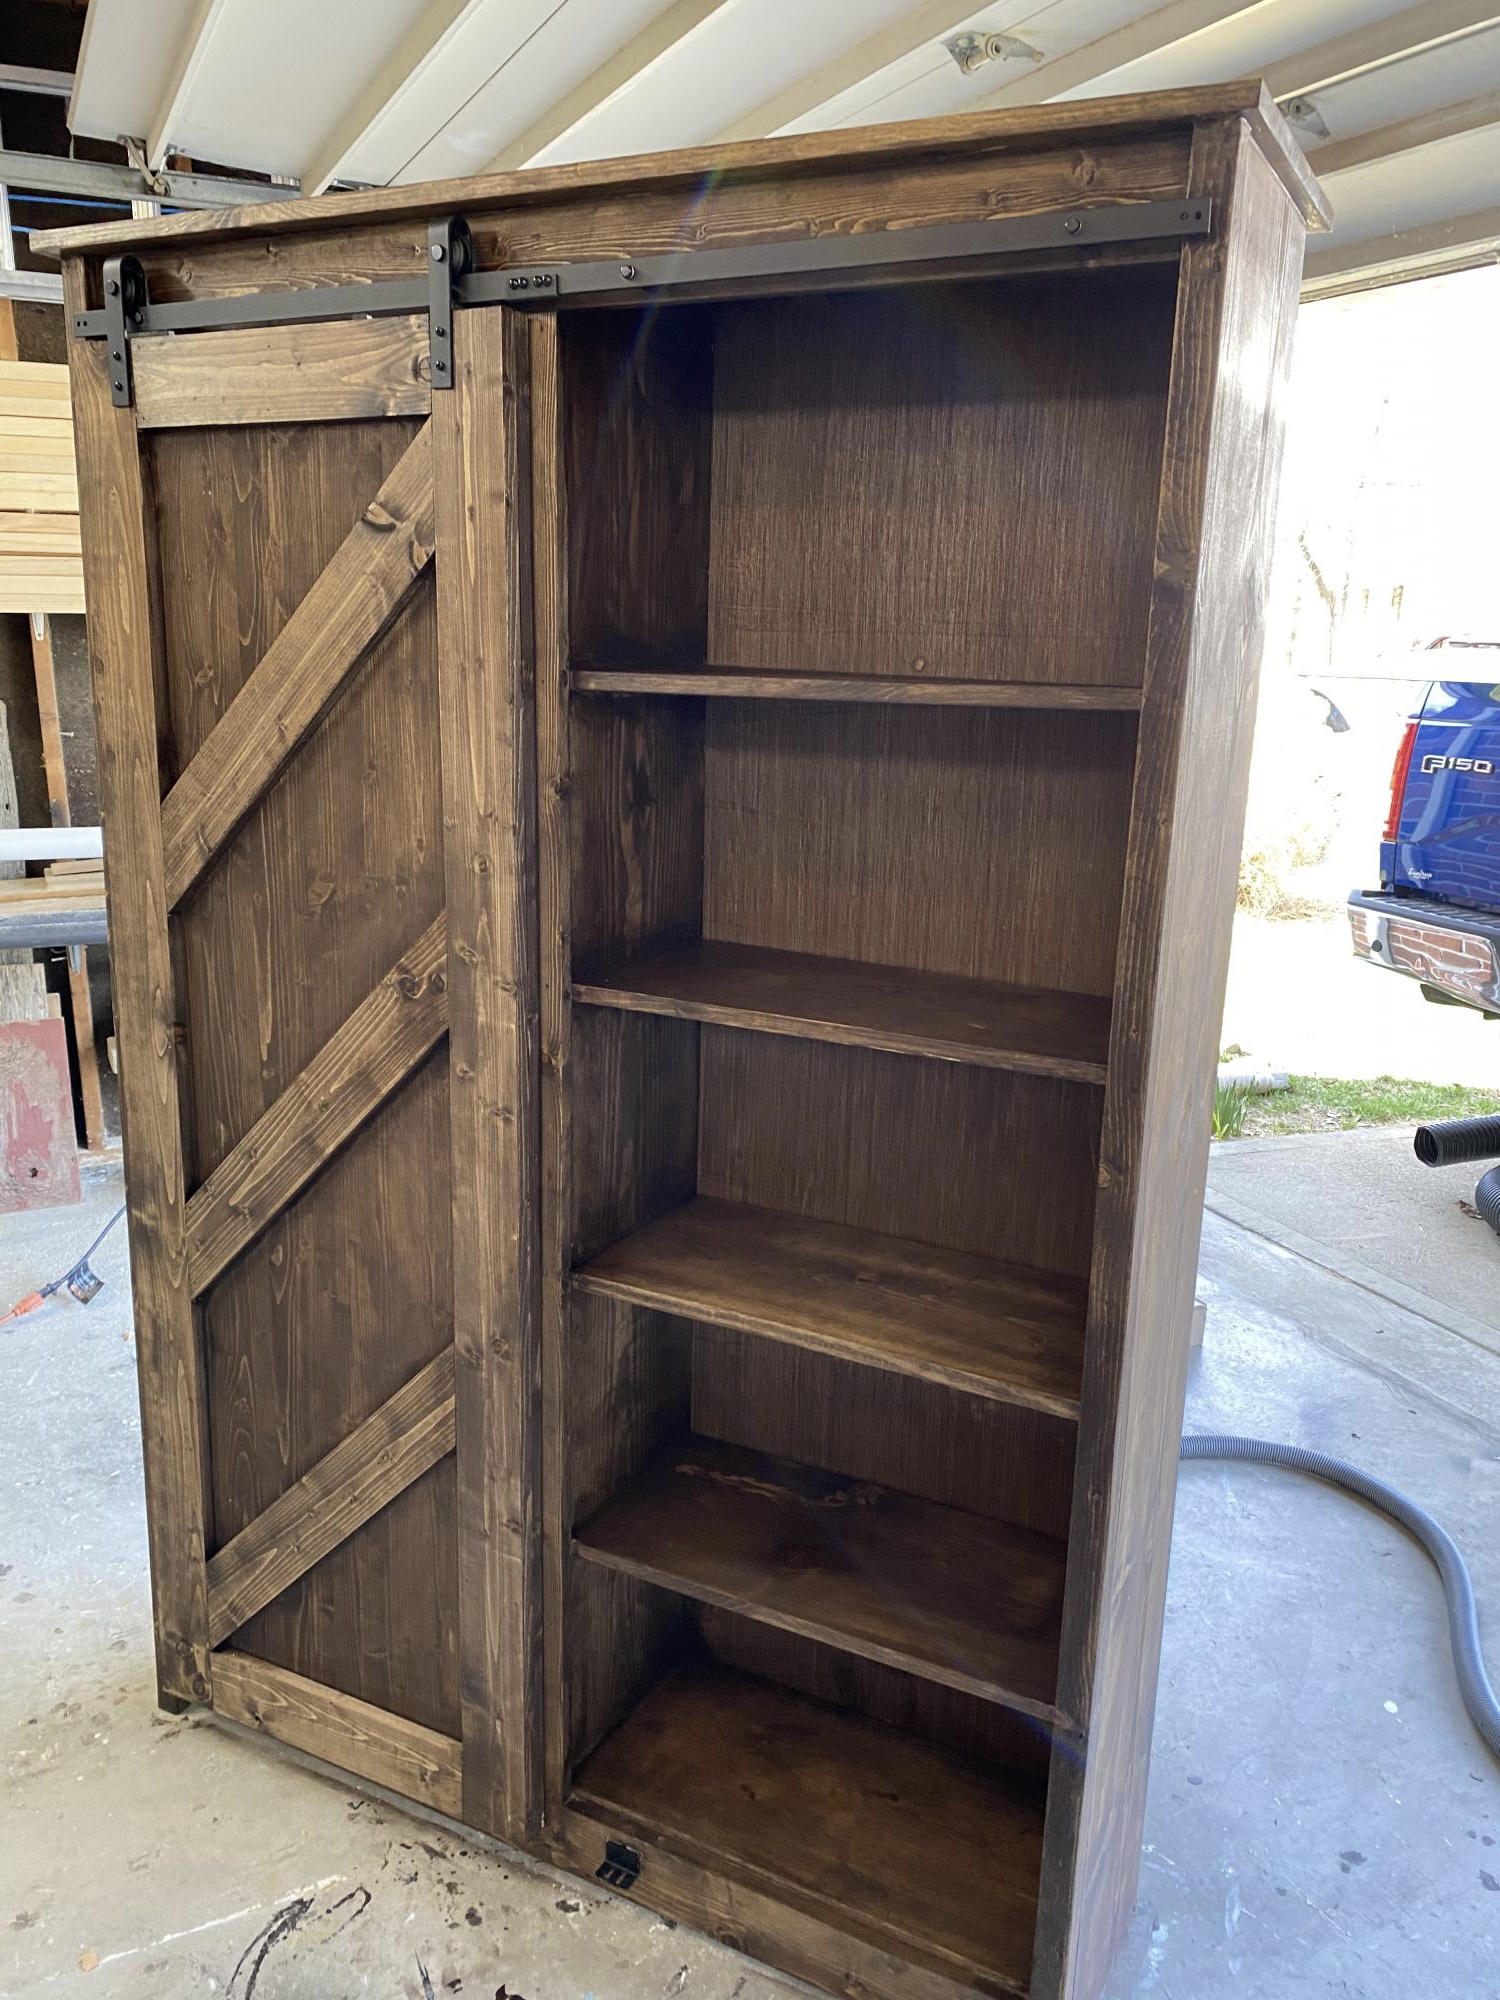
Fun project!
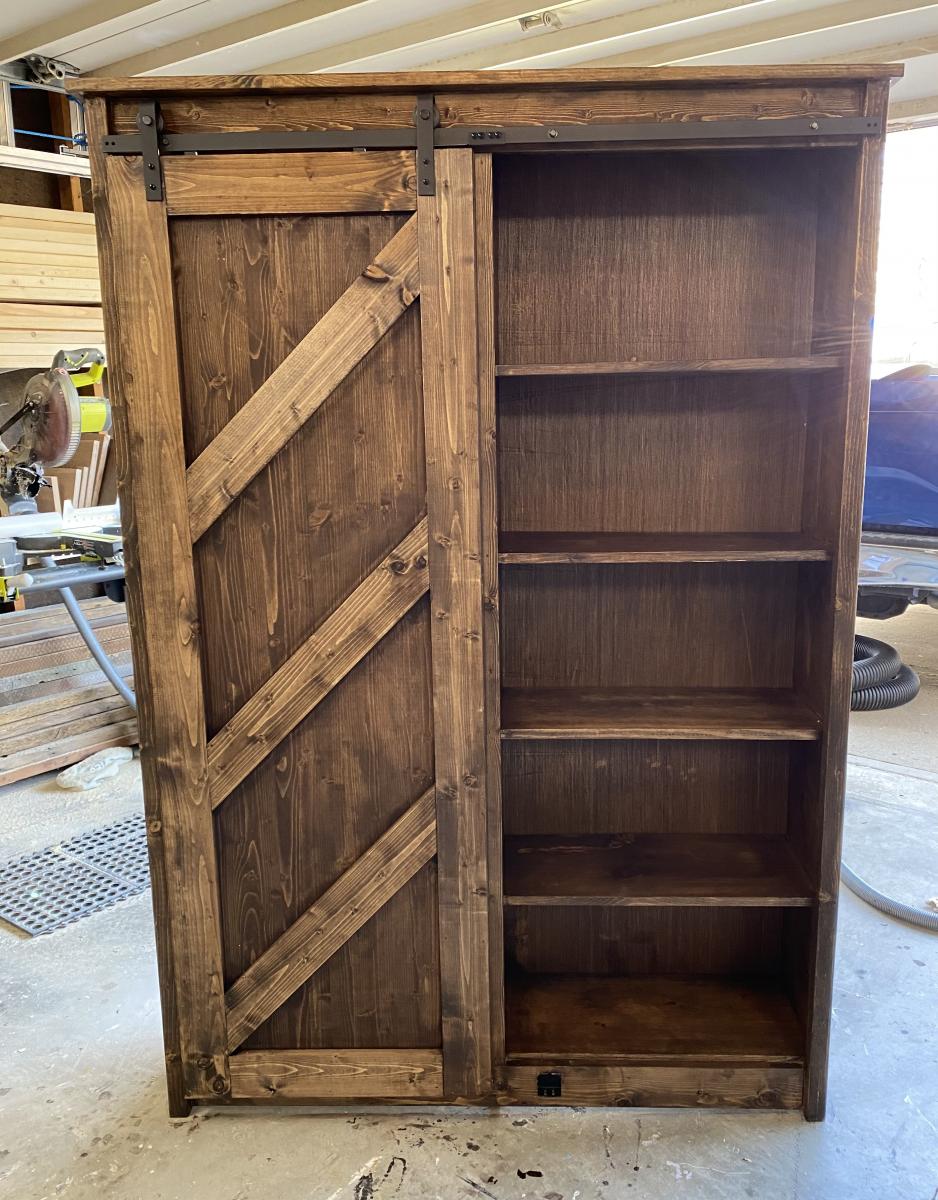
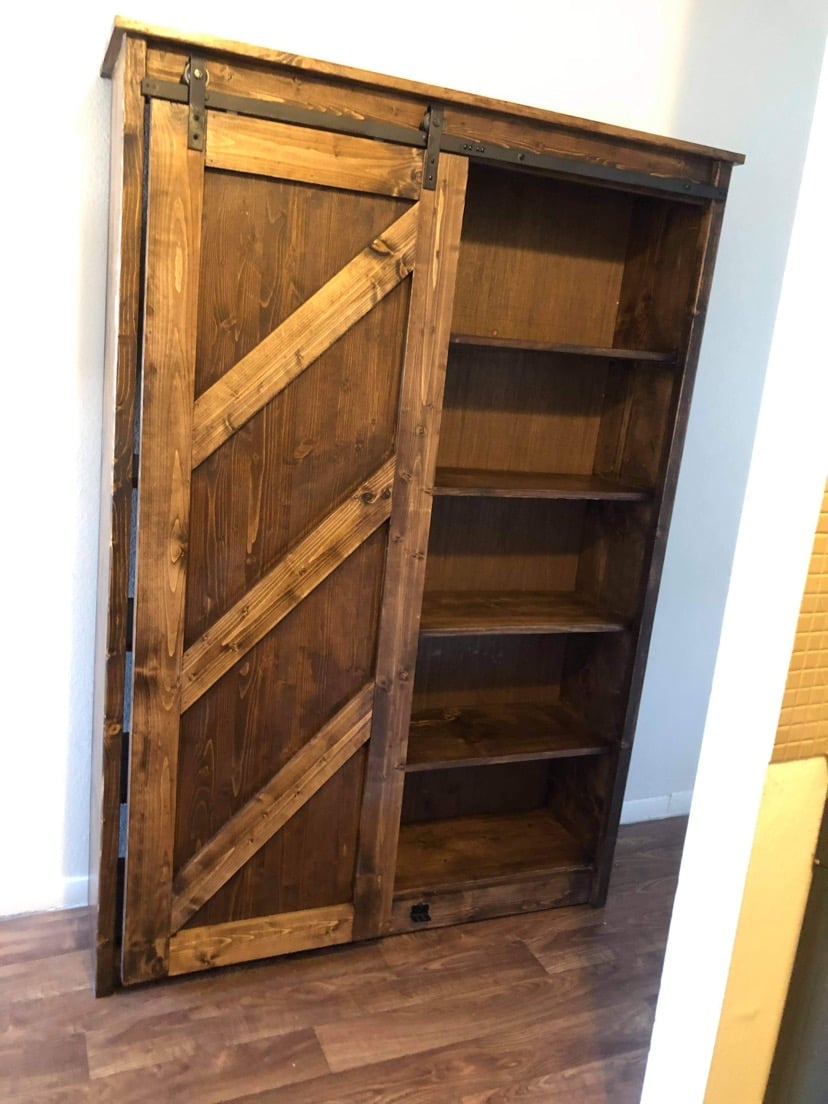
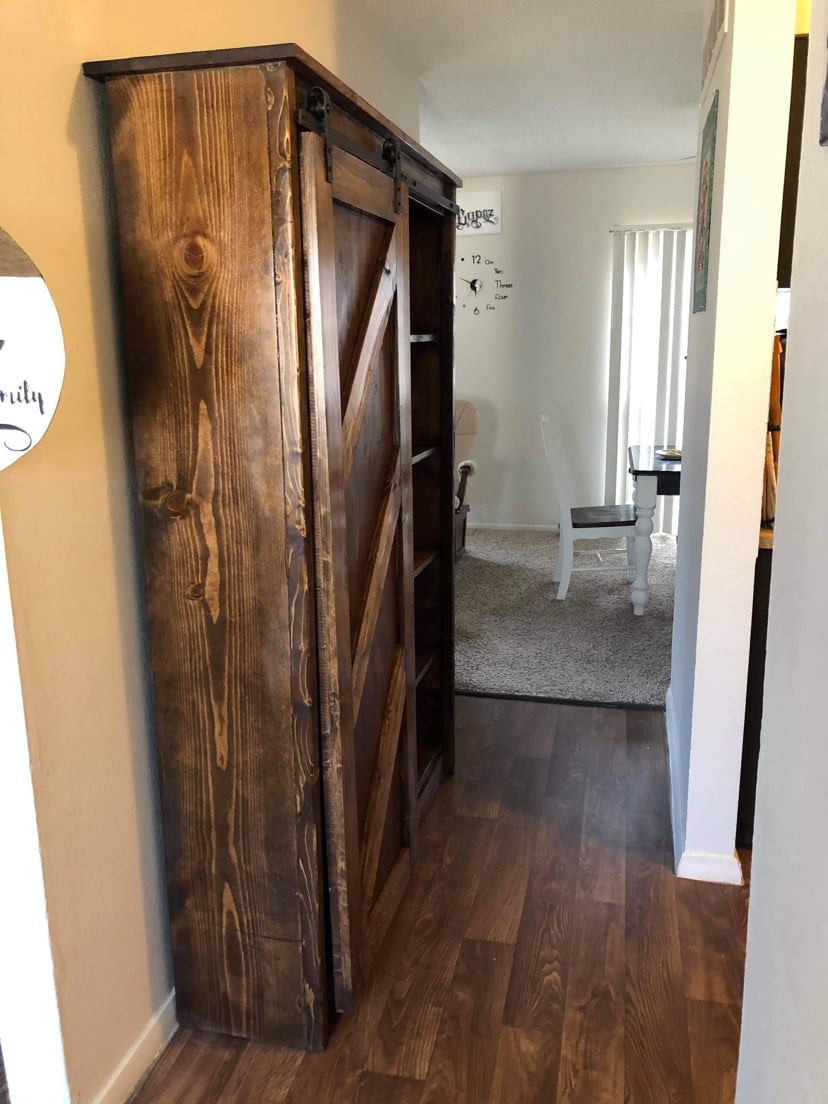
Built from Plan(s)
Comments
Our Daughter's Playhouse
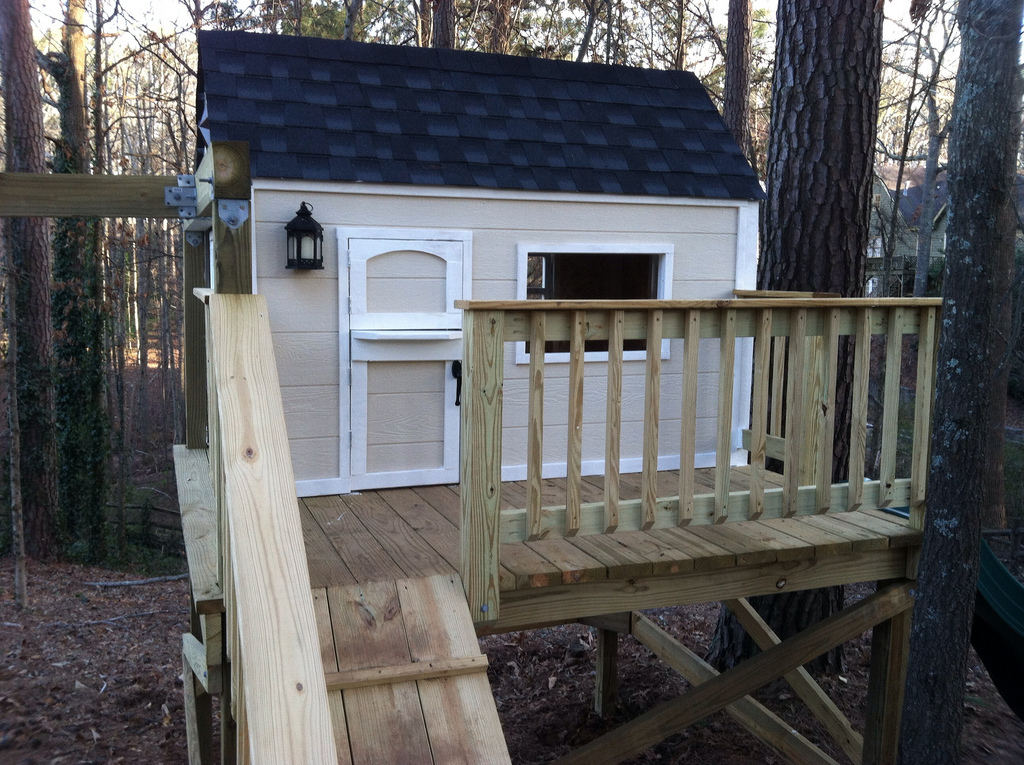
We built this in early 2013. We ended up turning the house 90 degrees on the deck, because the slide worked best off the backside of the deck due to the various heights around the deck. The sloped back yard caused some challenges, but in the end it's a very sturdy deck with the cross beams attached. Thanks for posting these plans online for us, our 3 daughters are loving the playhouse and swingset! Here are some more pics of the project: http://www.flickr.com/photos/11031534@N00/sets/72157633009259873/
Built from Plan(s)
Estimated Time Investment
Week Long Project (20 Hours or More)
Recommended Skill Level
Intermediate
Comments
Fri, 03/22/2013 - 16:39
This is great!
Love this - my grandson's back yard is too small to build something like this; which is why we had to settle for his loft bed airport/clubhouse.
Thu, 06/27/2013 - 05:24
Question overload (hope you don't mind):
I'm planning on building two A-Frames and no playhouse, so my questions are focused there.
Did you do any modifications to swing portion of the plans?
Is it sturdy enough for an adult to swing on as well?
It looks like you put the posts in the ground, did you cement them in too?
How high off the ground is the bottom of the support beam for the swing?
Is there any issue side-to-side swaying?
Awesome Adirondack chairs!!!
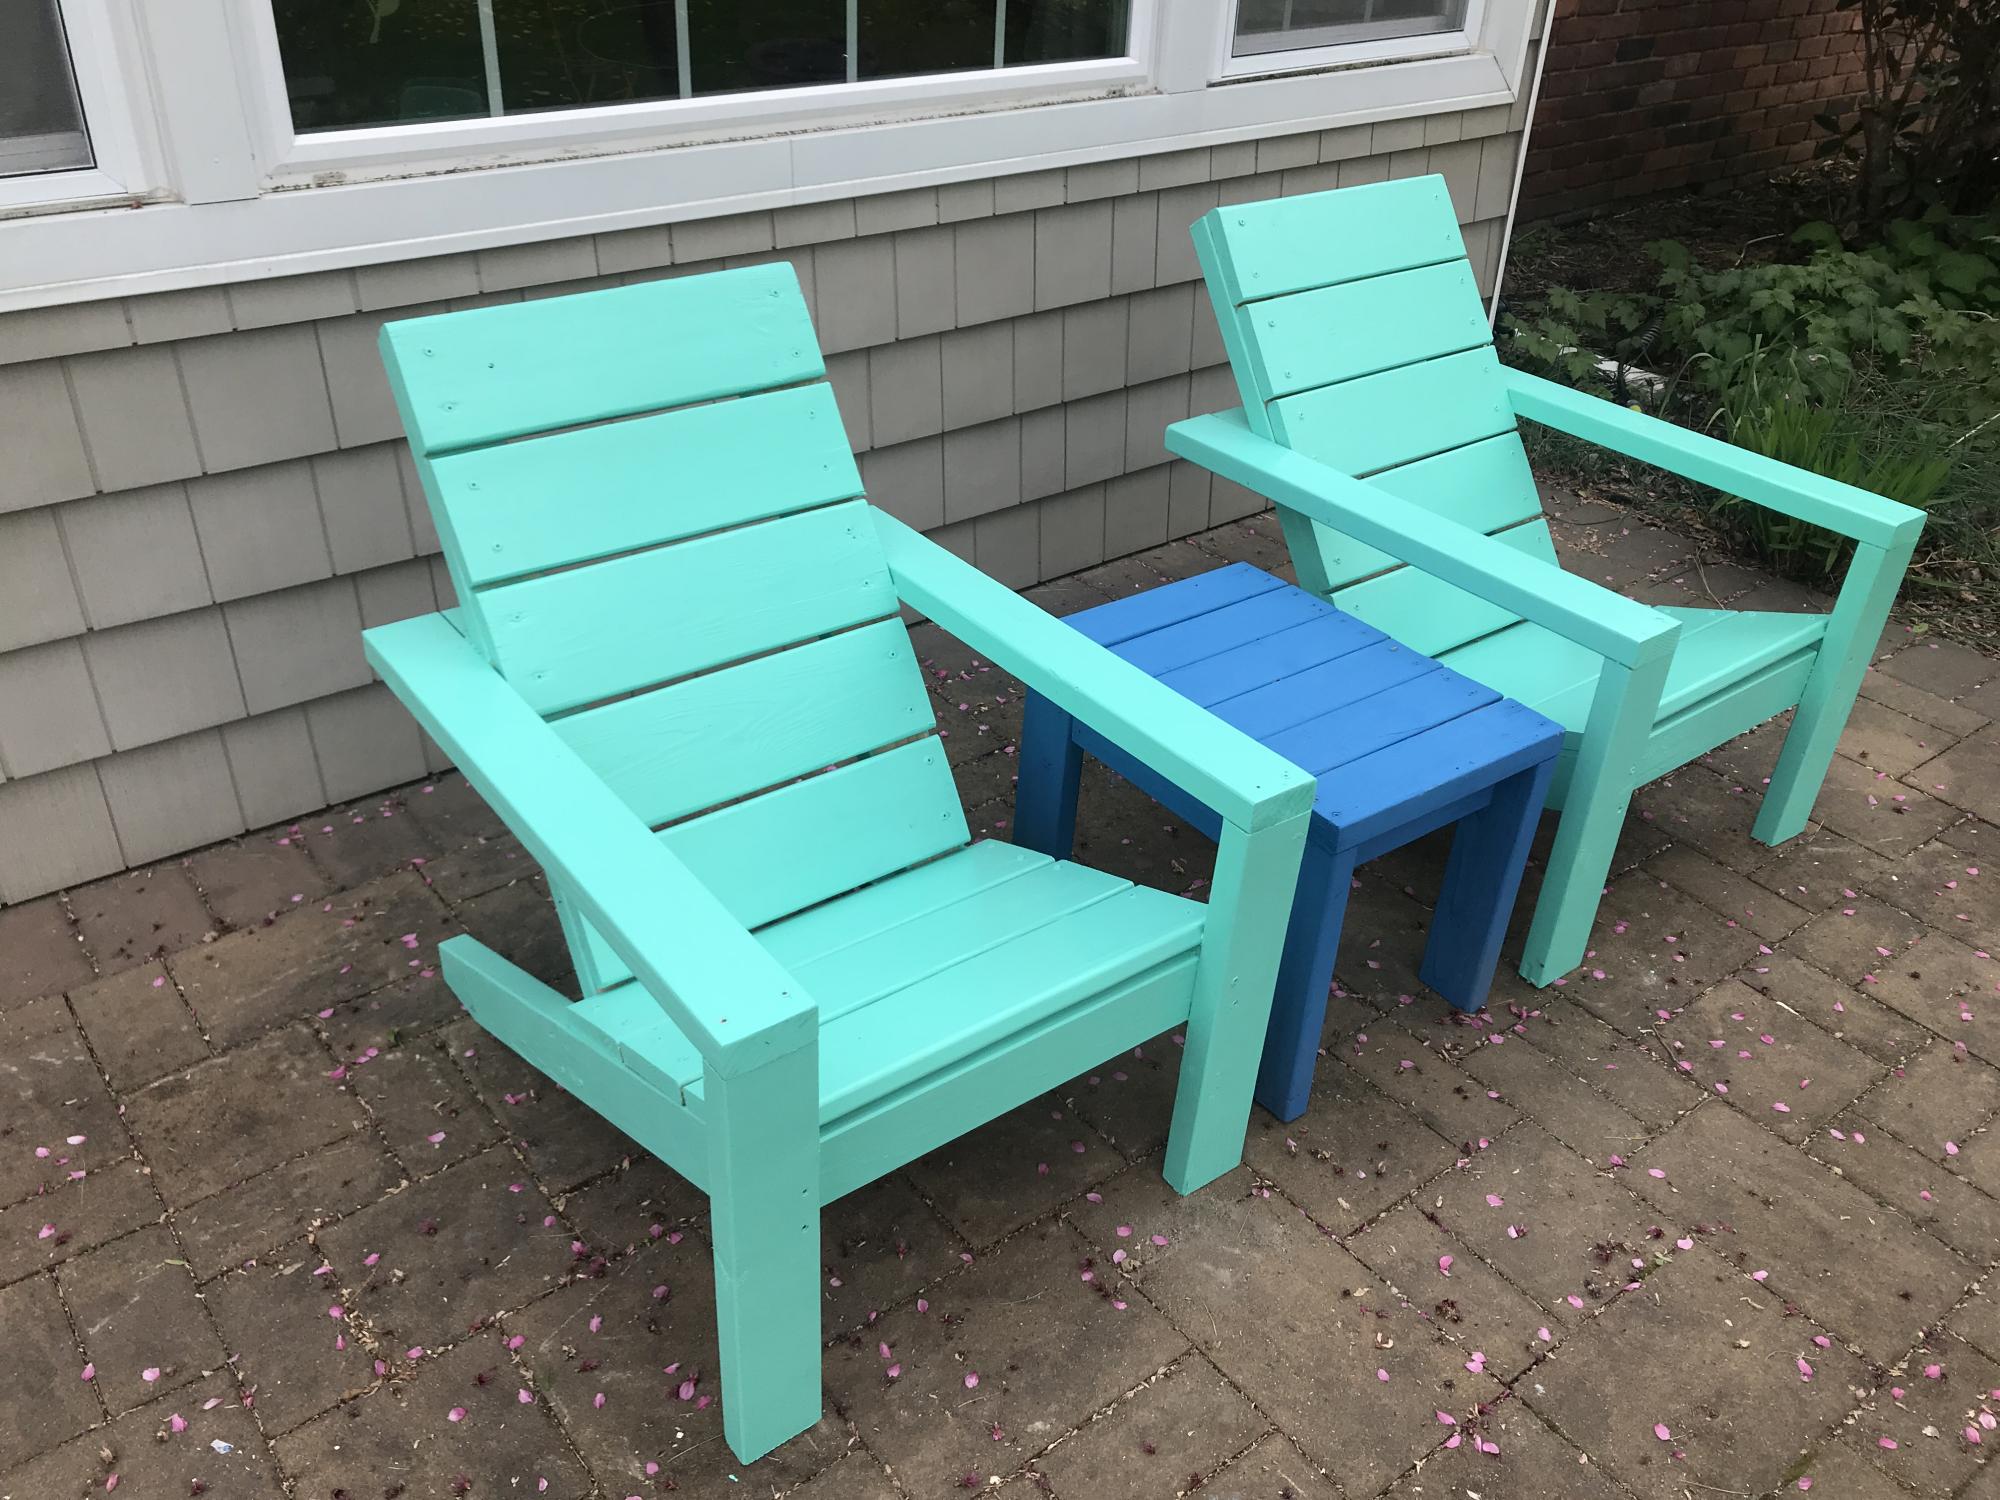
I'm a mom of two kids and new to wood working. The video instruction and the plan were so comprehensive! Thank you Ana, you inspired me to do more wood projects. I feel so accomplished and got so many comments on my new chairs. They are really really comfortable. My husband, who has a stiff back, loves the chair as it is also comfortable for him.
Built from Plan(s)
Estimated Cost
$120
Estimated Time Investment
Day Project (6-9 Hours)
Recommended Skill Level
Beginner
Comments
Mon, 05/24/2021 - 09:25
Fantastic!
I am so happy you built them, and love the color choice! Happy building:)
Wed, 03/16/2022 - 11:54
Love it - what is the finish/paint?
Love it! Can you tell me what you used for the finish? Stain or paint and what brand? How is the finish holding up?
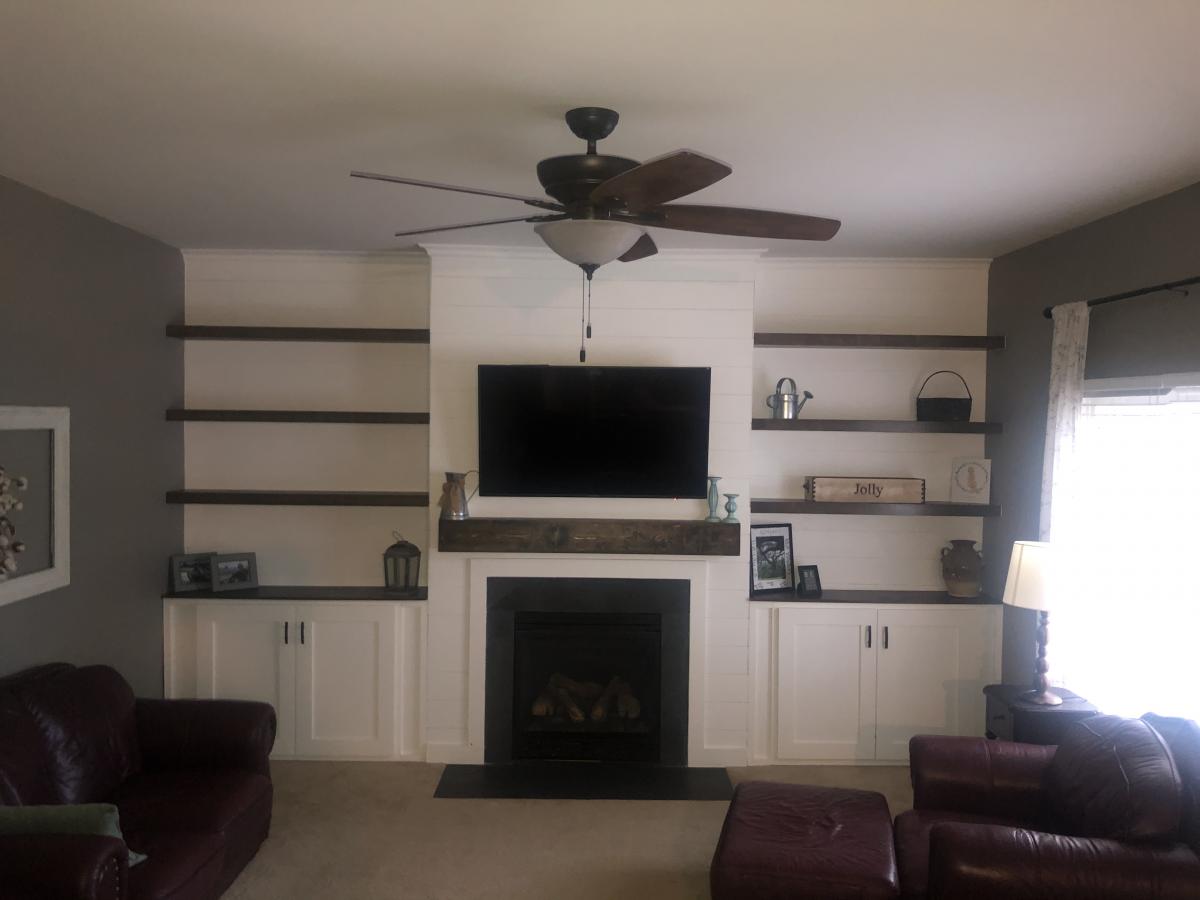
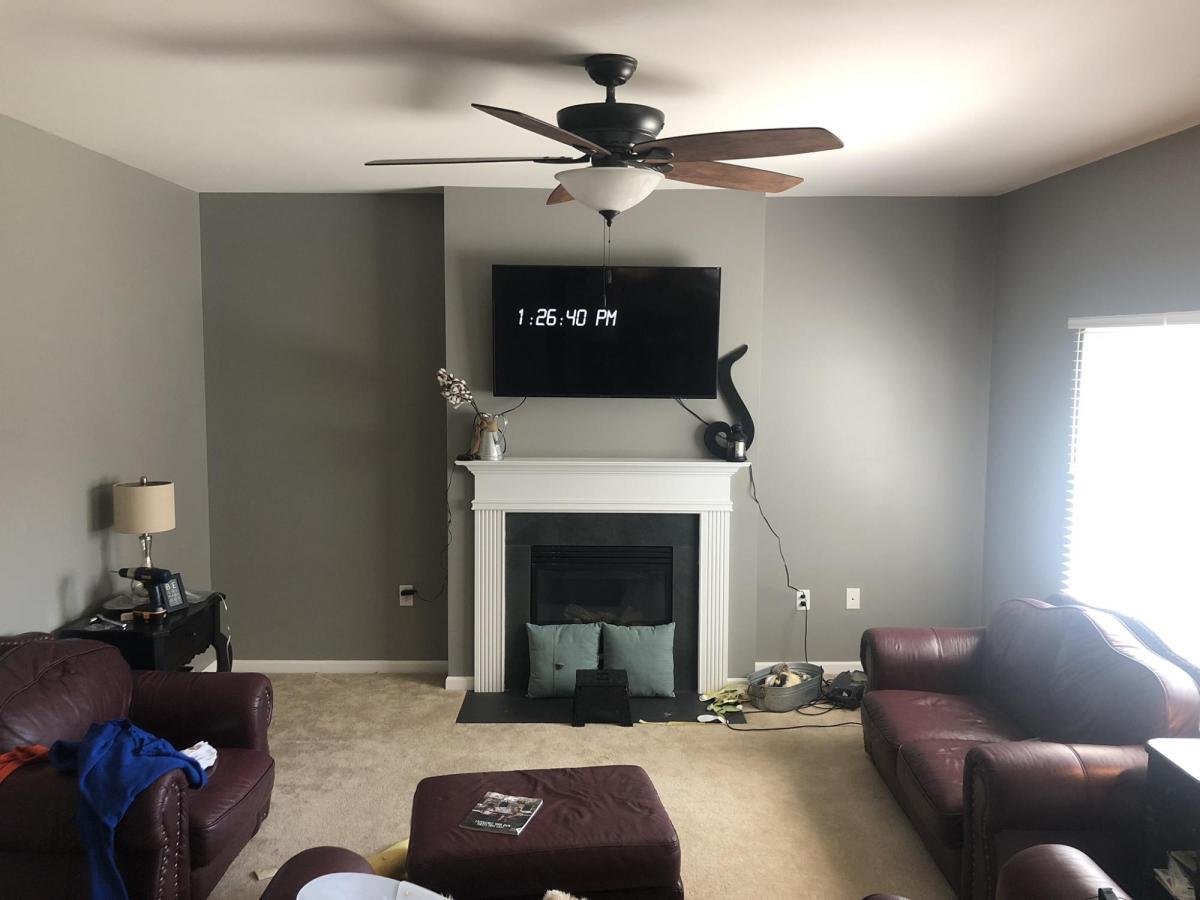
Living Room Wall Makeover
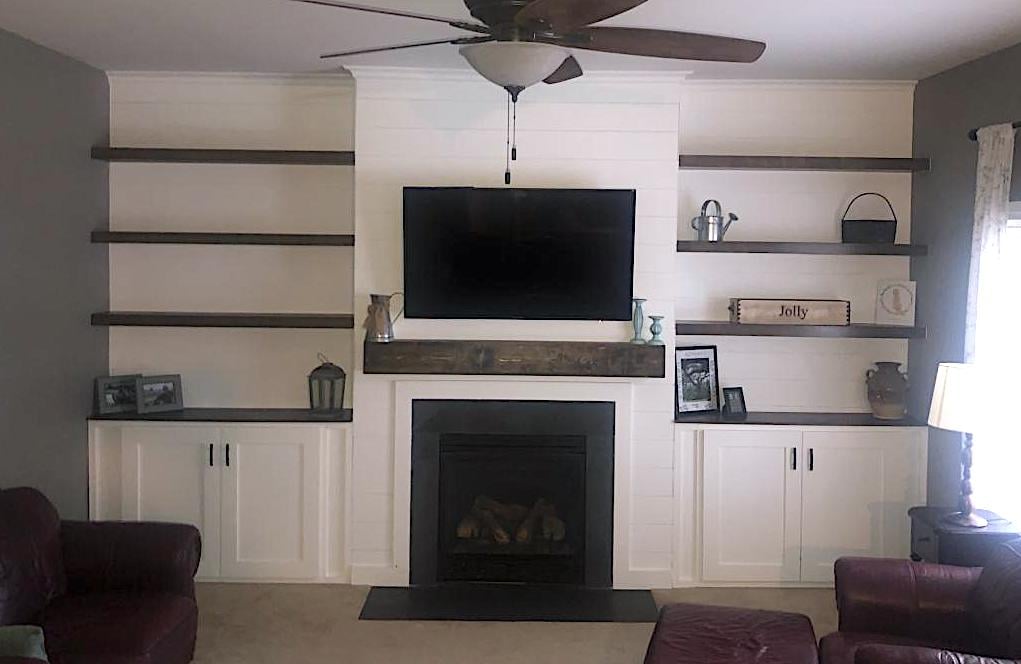
We have lived in our home for 2 yrs now and have been trying to figure out what we wanted to do with the plain boring wall with cords handing from out behind the tv due to no power outlet on that wall. We finally decided to do the whole wall in shiplap but the the cost of lumber going through the roof I went with 1/4 underlayment that I had ripped down to 6in strips at my local hardware store. I cut them down to size with my miter saw the painted them white before I attached them to the wall with 1 1/4 brad nails and used nickels for my space in between each row. The cabinets are 36 in tall. The carcass is made fro 3/4 in MDF and the face frames are made from 1x3 pine and attached with wood glue and brad nails. Cabinet doors are made from 1x4 pine for the frame and 1/4 underlayment for the center. I used my hand router to route out a 1/4 deep groove for the center to drop into the frame I used wood glue and brad nails to attach it to the frame and filled in any gaps with paintable caulk. They are attached to the studs in the wall with 3 in wood screws. The mantle is made from 1x6 pine boards and attached to a wall bracket made from 1x6 that are attached to the wall in each stud with 3 in wood screws. The mantle is attached with wood glue and 1 1/4 brad nails. The shelves were made out of 1/2 Poplar 4x8 plywood sheet ripped down to size. The wall brackets are made from 1x2 pine attached to studs with 3 in wood screws. And the shelves are attached with wood glue and 1 1/4 brad nails. I added 3 1x2 spacers to each shelf between the top and bottom board to prevent them from sagging before attaching the face of the shelves with wood glue and 1 1/4 in brad nails. This project took about a month to complete because I worked on it during free time. Also this was the first major build I have ever done so I was also learning along the way. Some parts were frustrating but most of it was fun and a great learning experience. Also this project evolved as I was building it. My wife loves the finished product. Now it’s time to find my next project.
Built from Plan(s)
Estimated Cost
500
Estimated Time Investment
Week Long Project (20 Hours or More)
Finish Used
Dark walnut stain. Valspar Ultra in eggshell and ultra white for the color of the cabinets , shiplap and crown
Recommended Skill Level
Intermediate
Comments
Sun, 05/30/2021 - 11:05
Gorgeous Upgrade!
What a beautiful space you created, thank you for sharing!
Tue, 12/05/2023 - 11:47
Beautiful upgrade!
Surprisingly makes your living room appear so much larger compared to the before picture! Thank you for sharing your photos with us and congrats on a great result!
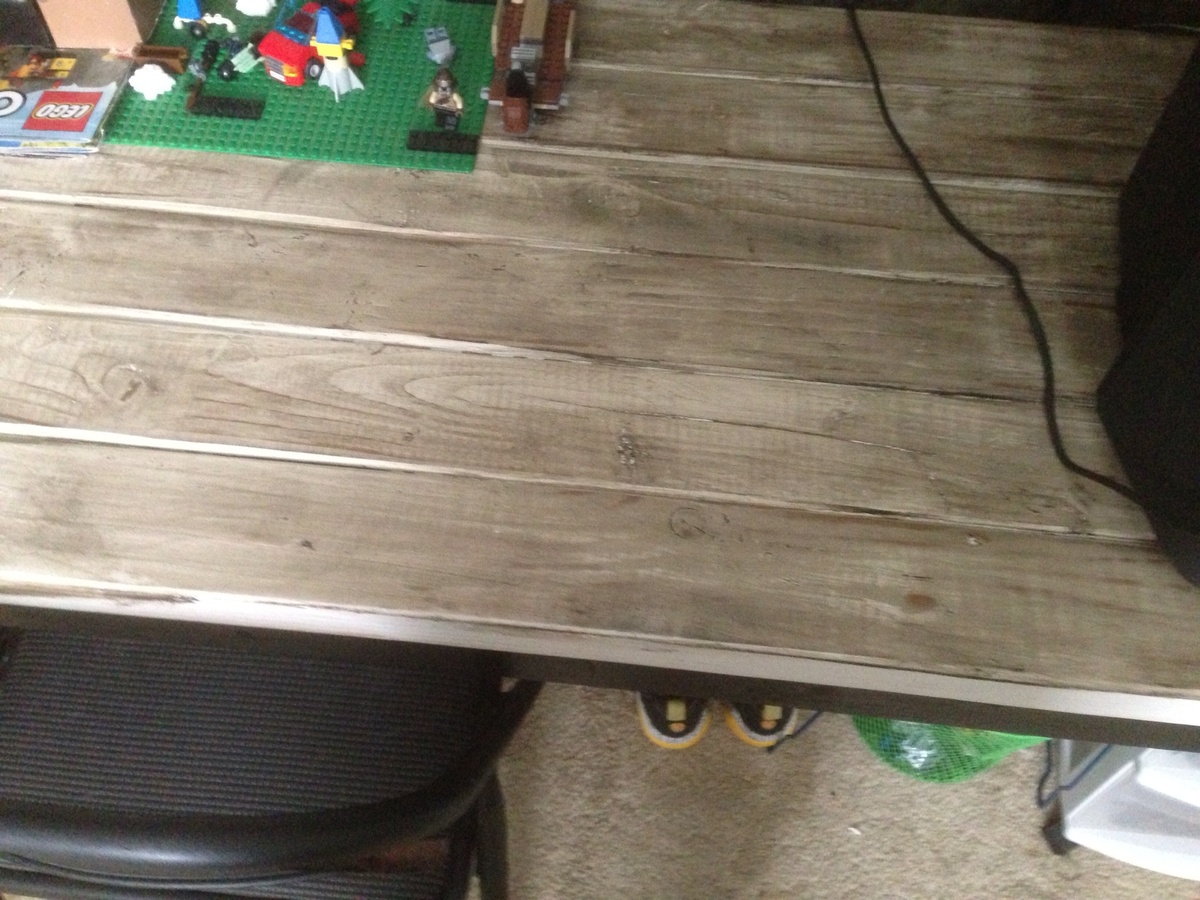
Zach's new desk
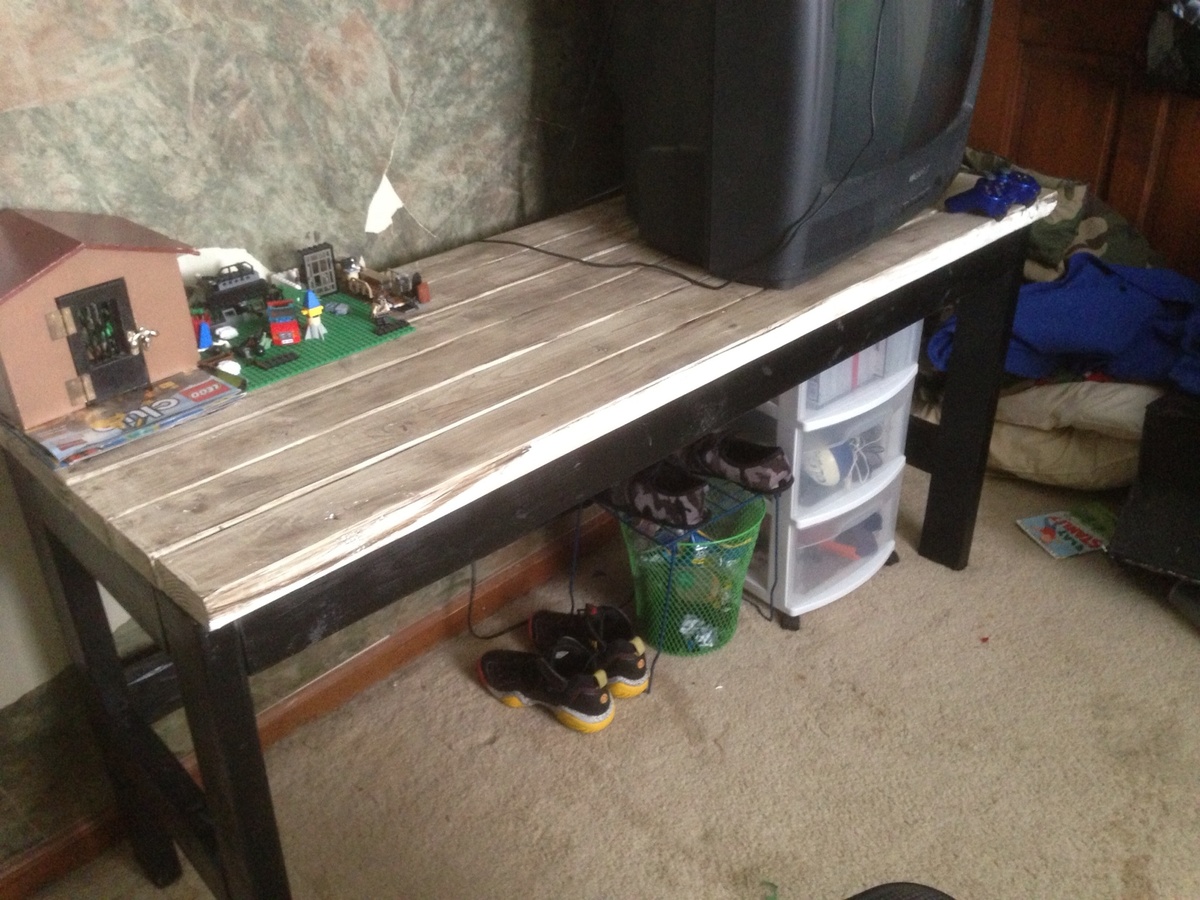
I built this desk so my son would have a place for his old school tv and to do his homework! It was super easy and I love how the finish came out! His room is a huge work in progress but this is the first step:)
Built from Plan(s)
Estimated Cost
20.00 as I had scraps and finish supplies
Estimated Time Investment
Afternoon Project (3-6 Hours)
Finish Used
I sprayed the bottom with satin black paint The top I painted white then sanded it down with 80 grit and rubbed on then rubbed and wiped minwax poly espresso stain until I got the look desired. Easy!!!
Recommended Skill Level
Beginner
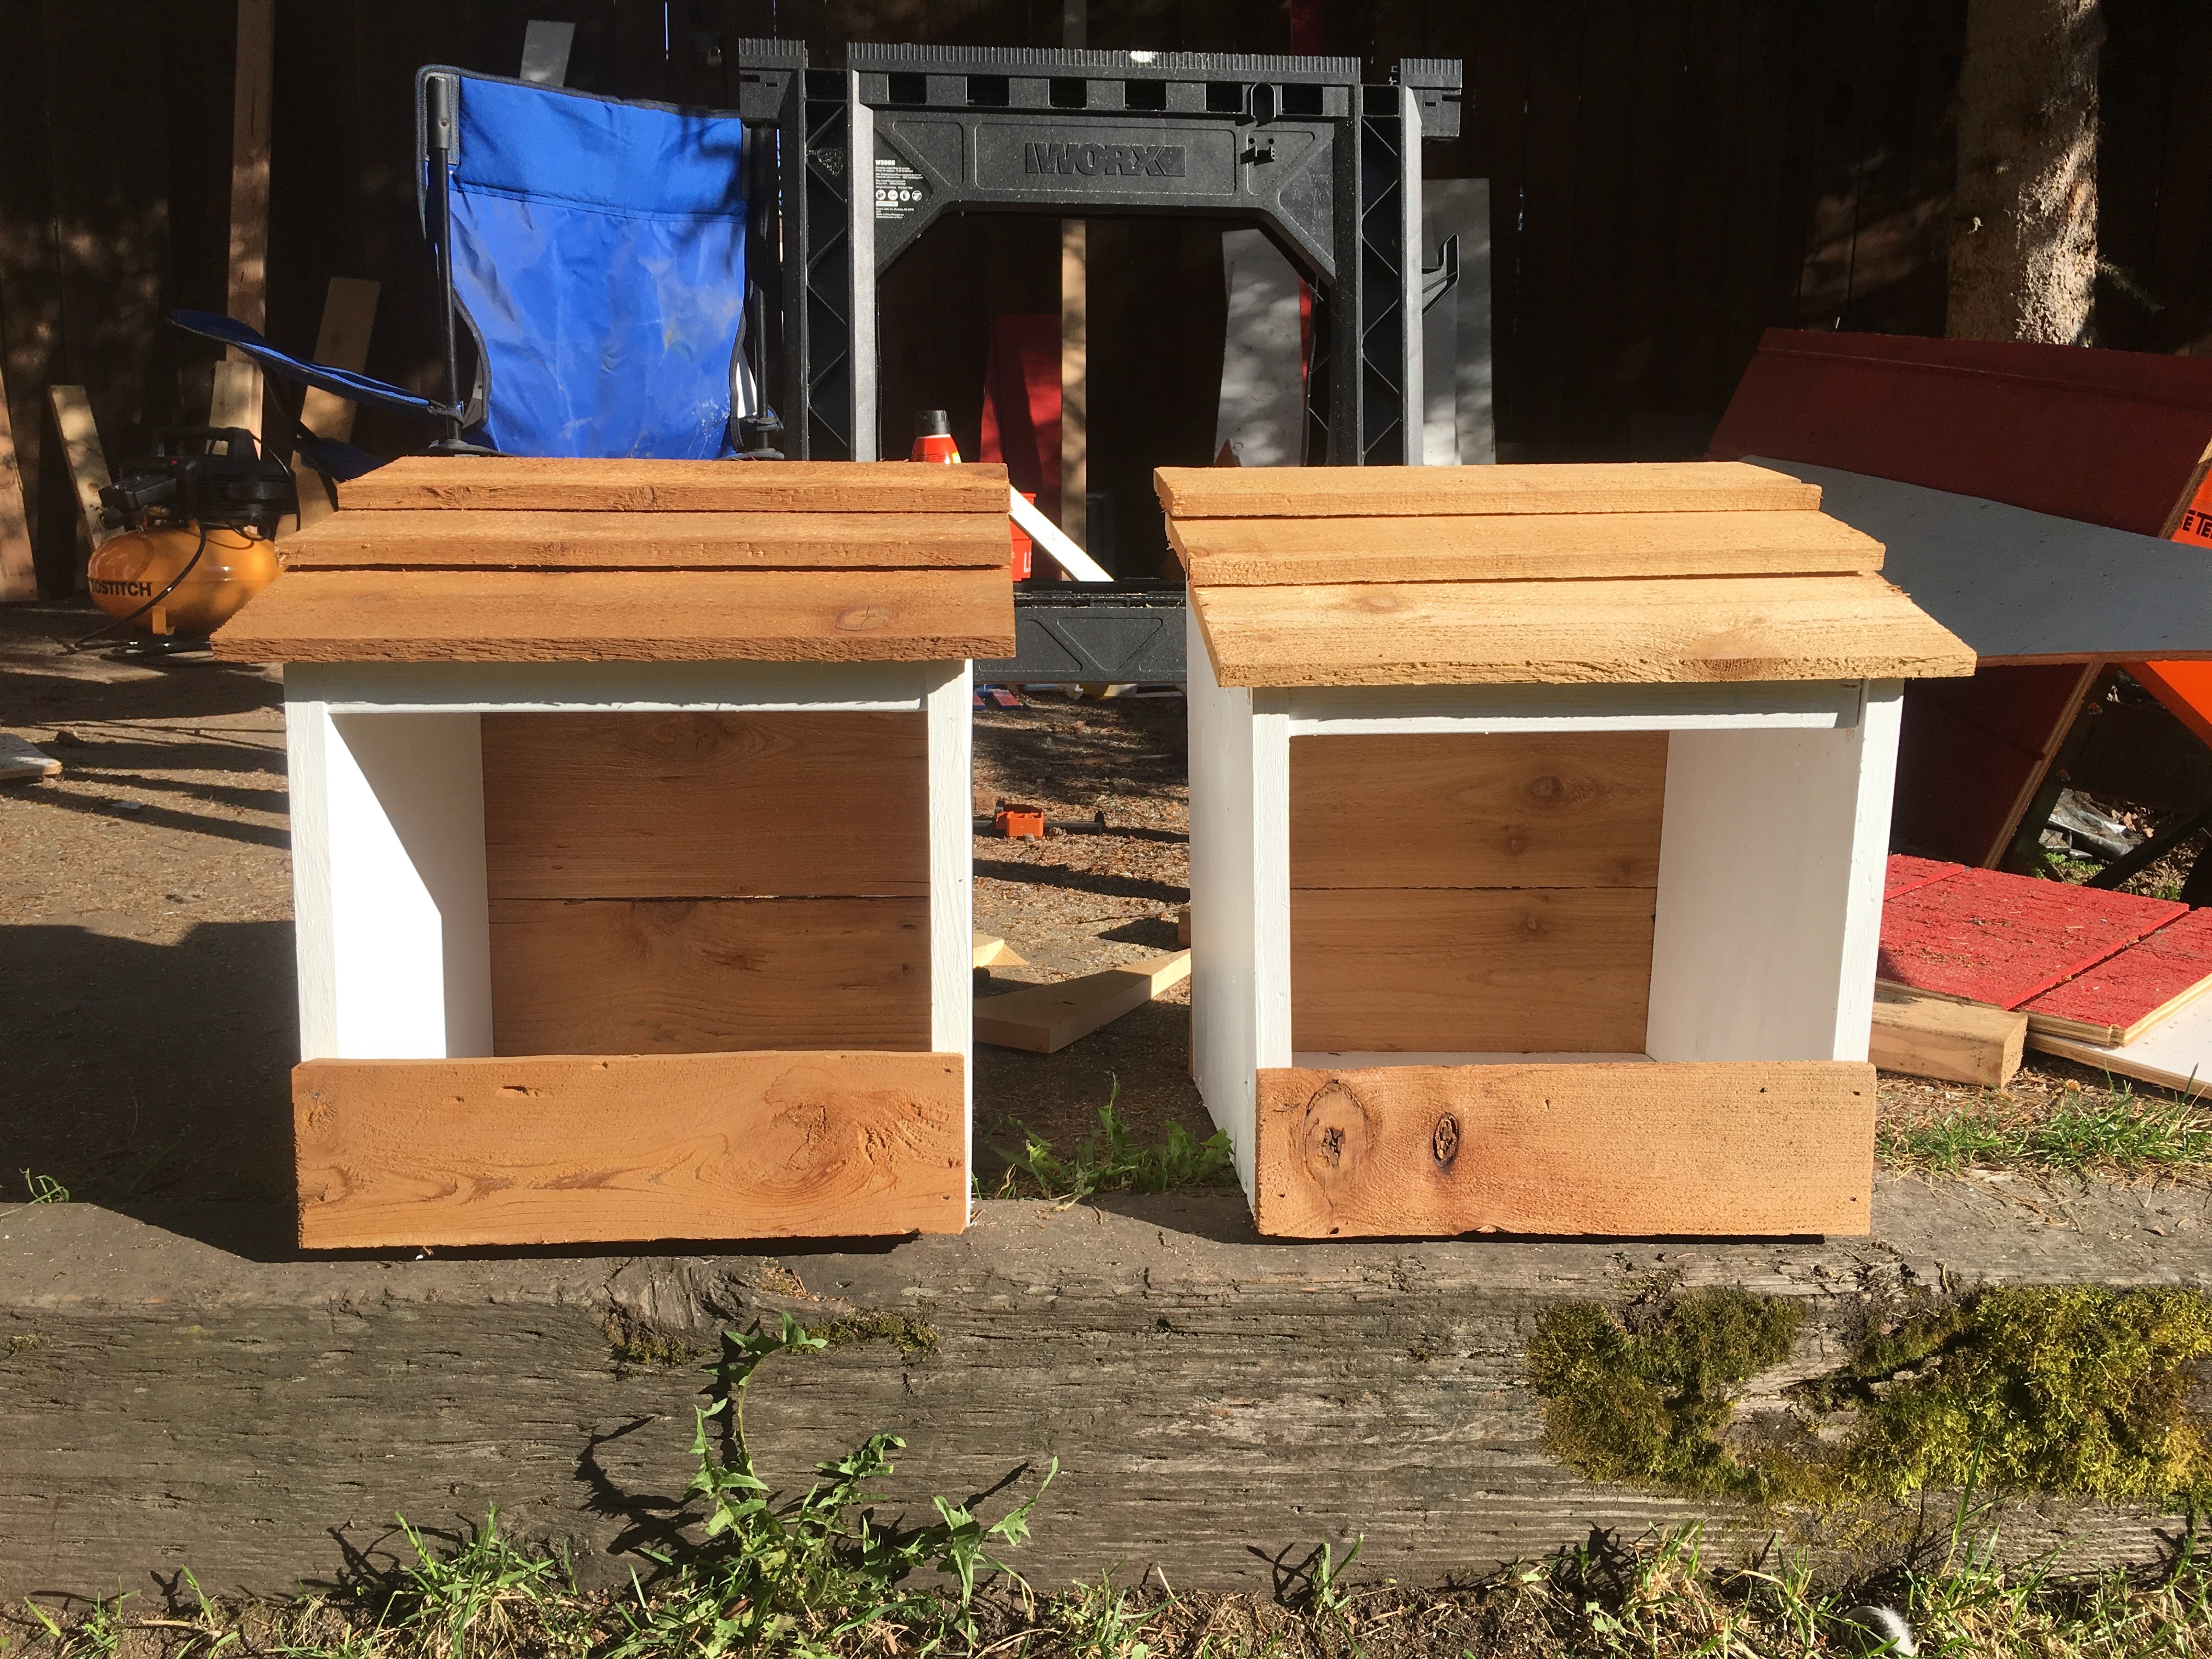
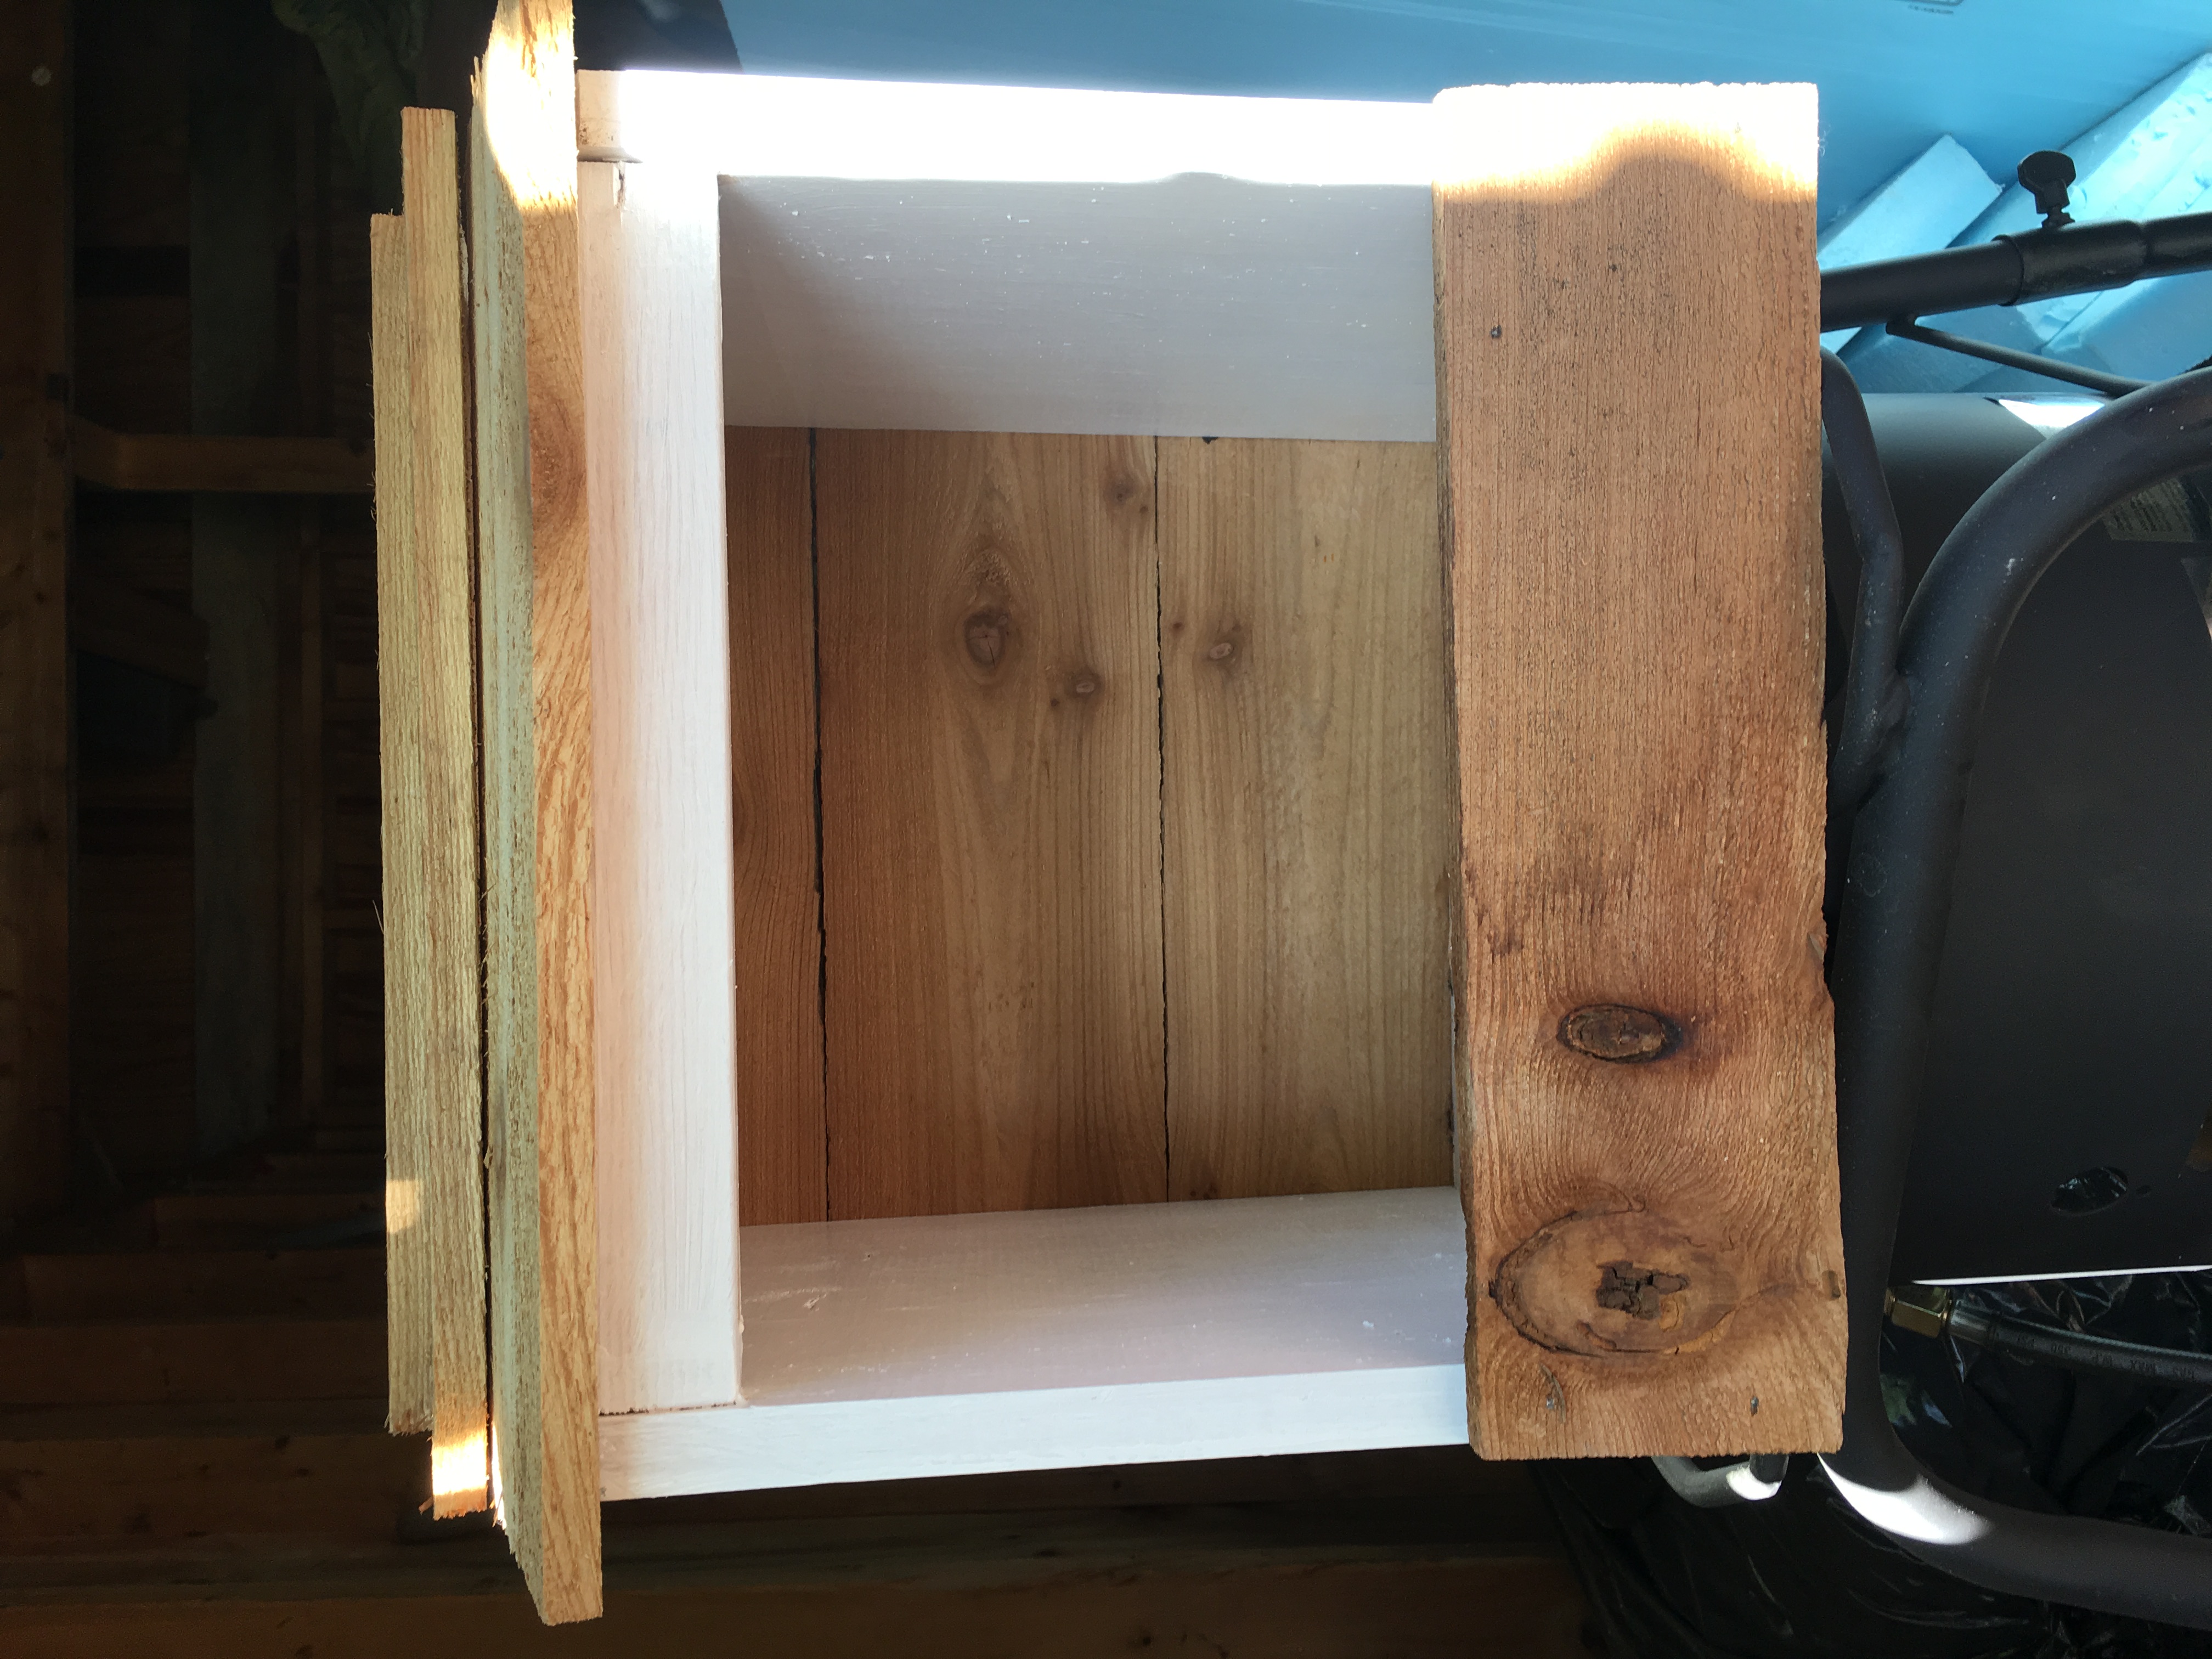
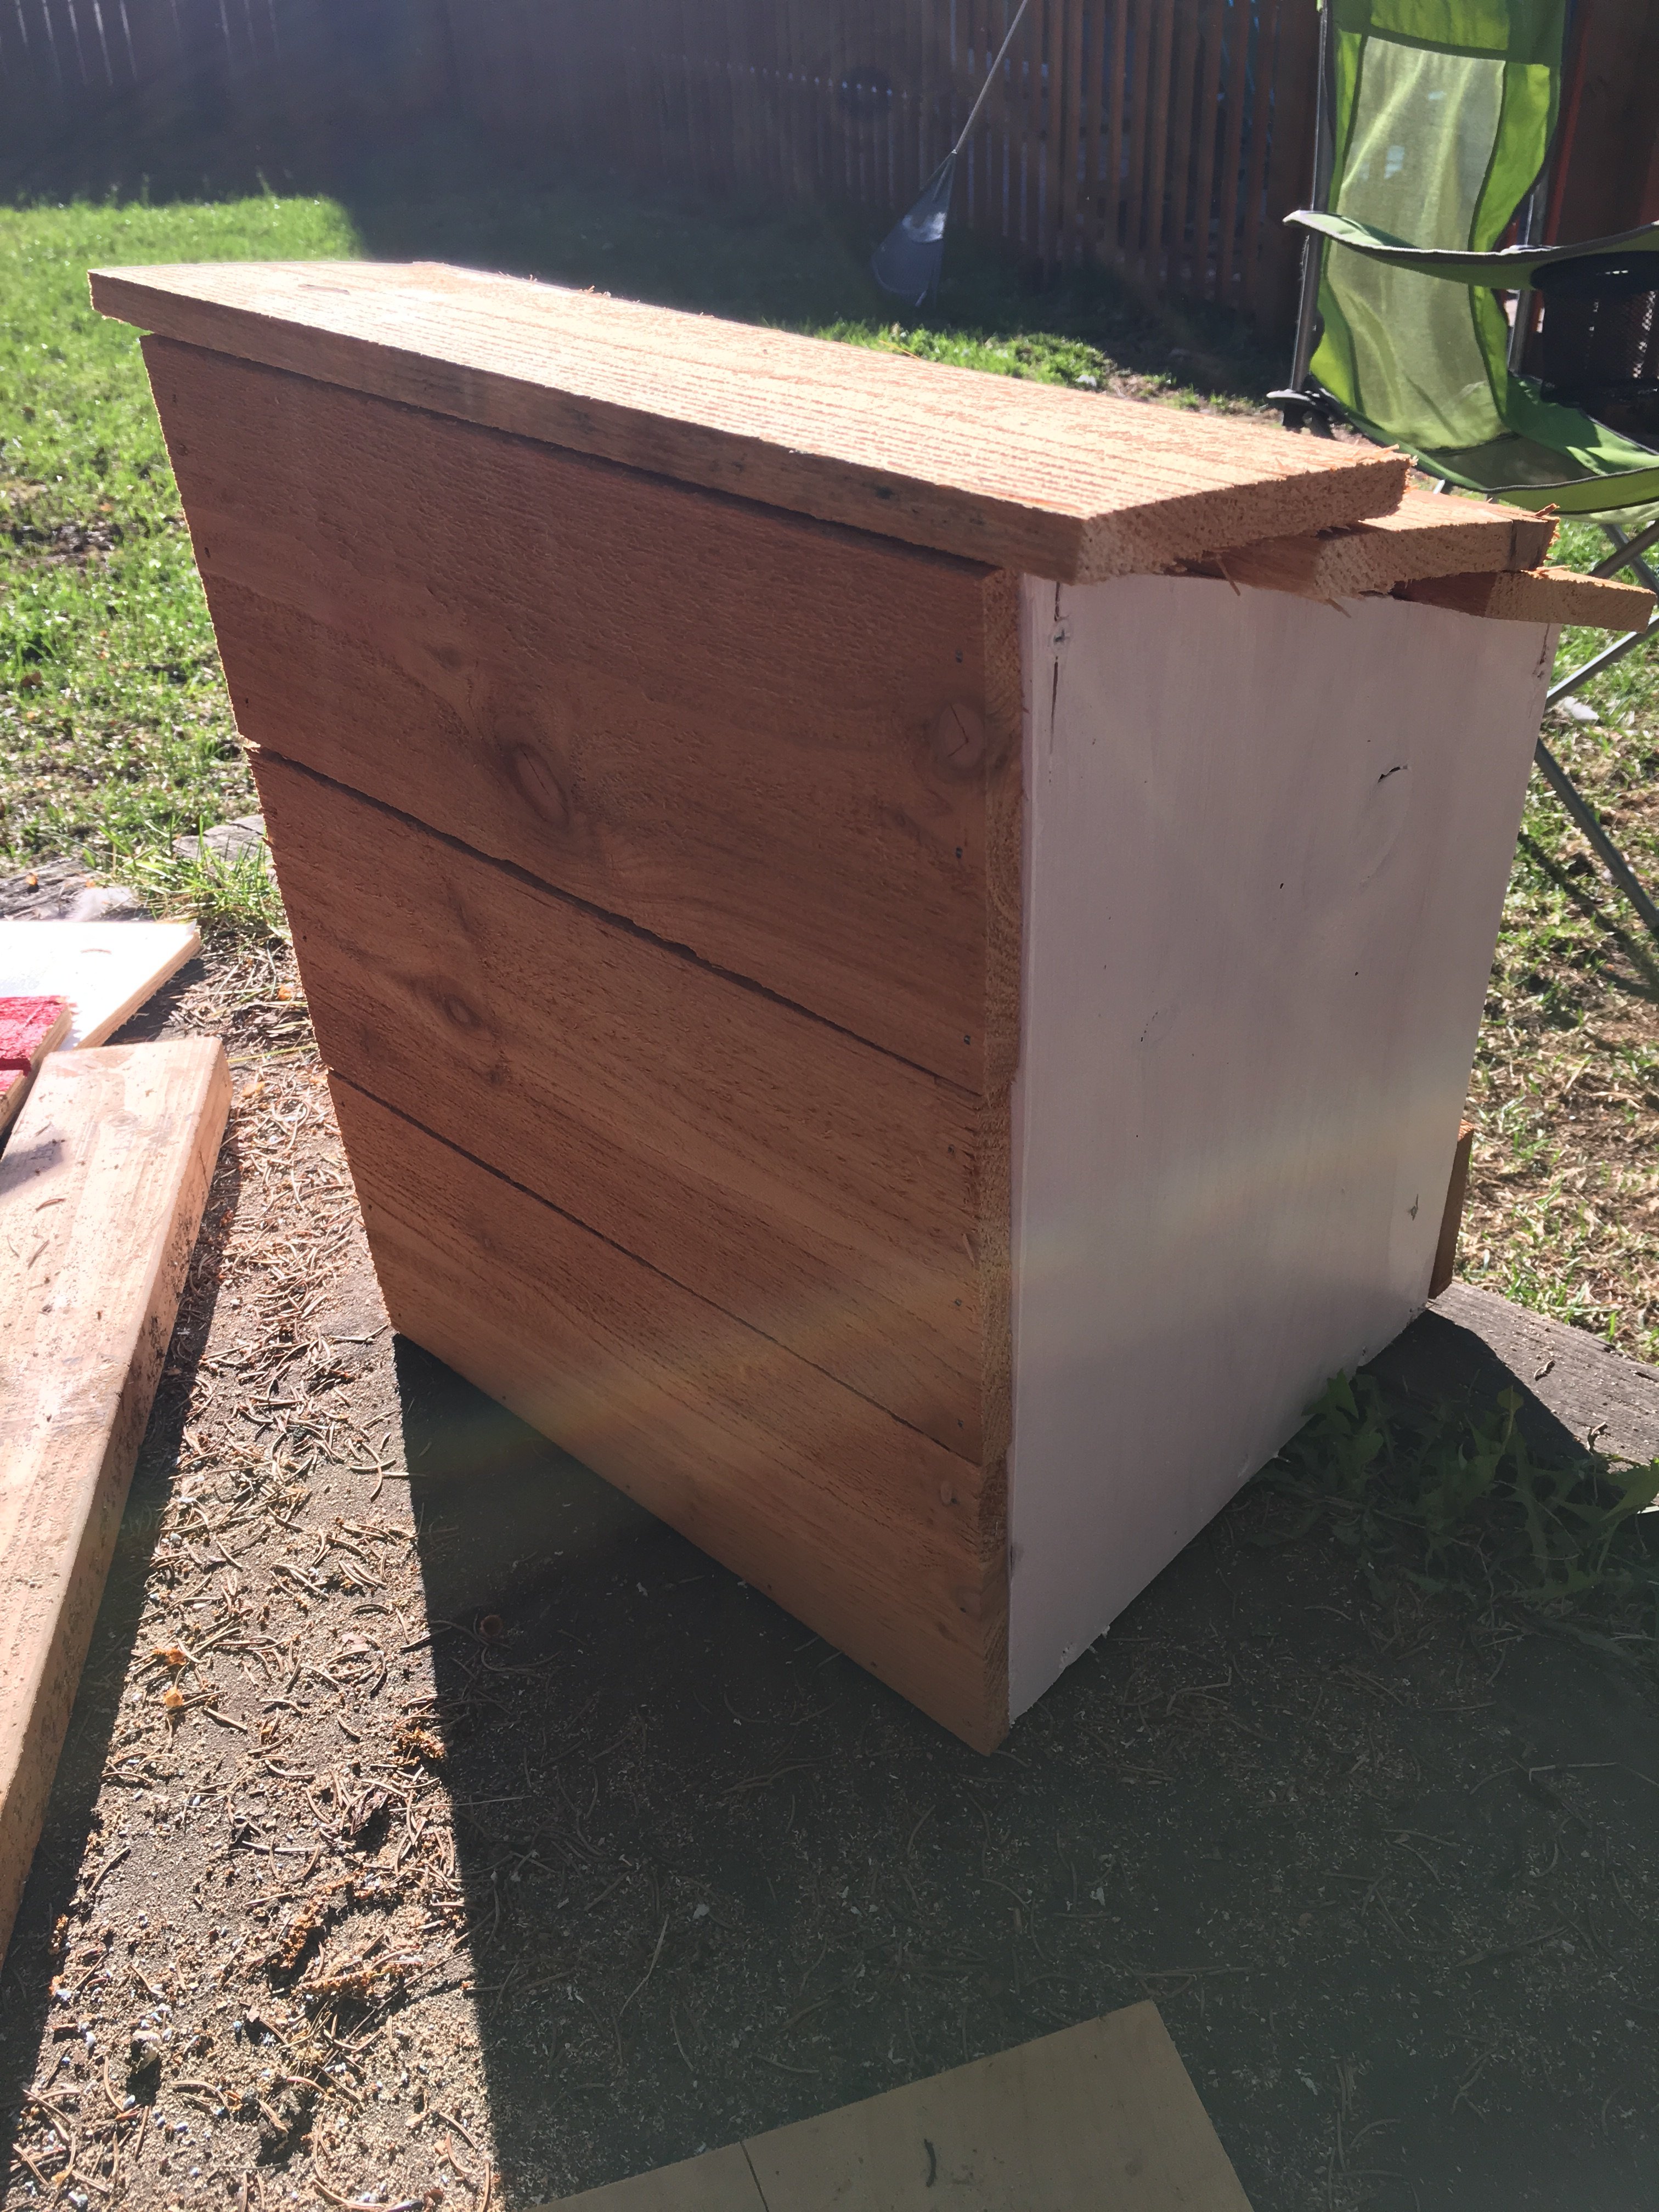
White and ceder nest boxes
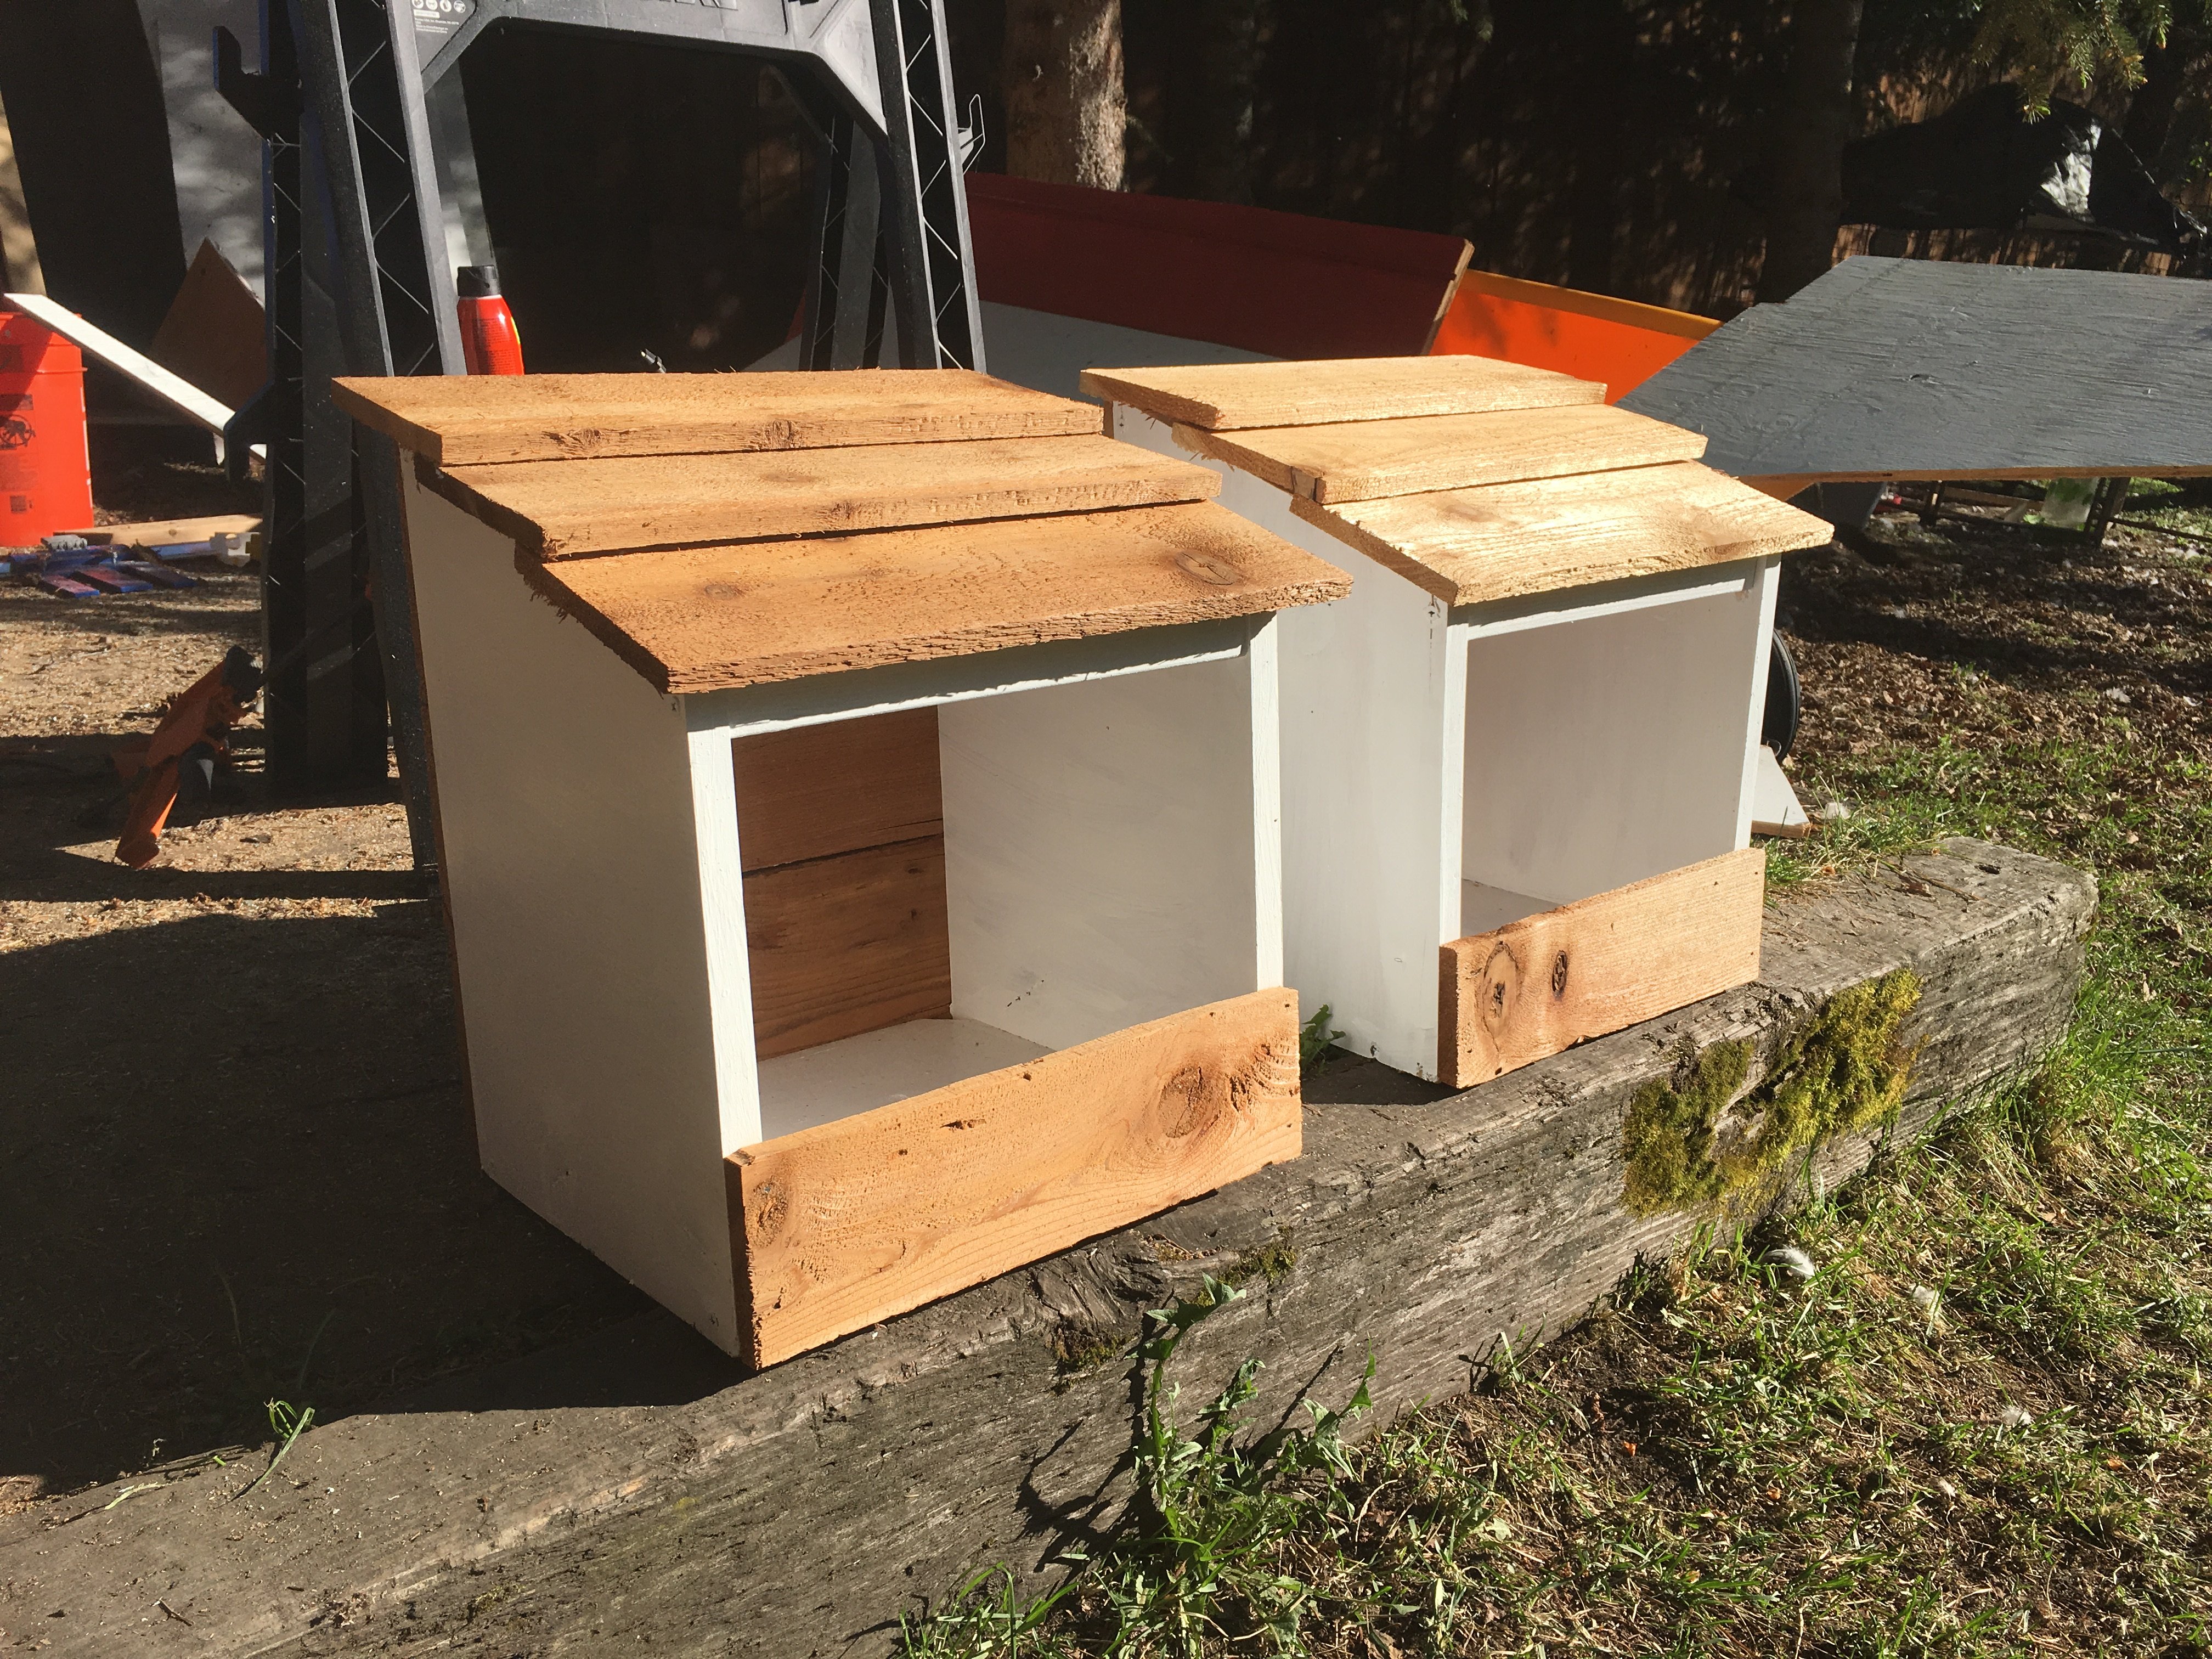
I mostly followed Ana's plans but used 1 5/8 screws and had a problem with wood splitting so for the ceder I used a finish nailer instread which worked great. I also painted before nailing the ceder pieces so they would really stand out and I also cut a few inches off the front ceder piece as I think 5.5in is too high and covers too much of the entrance.
Built from Plan(s)
Estimated Cost
30 dollars
Estimated Time Investment
Afternoon Project (3-6 Hours)
Finish Used
Just an exterior white paint on the pine.
Recommended Skill Level
Starter Project
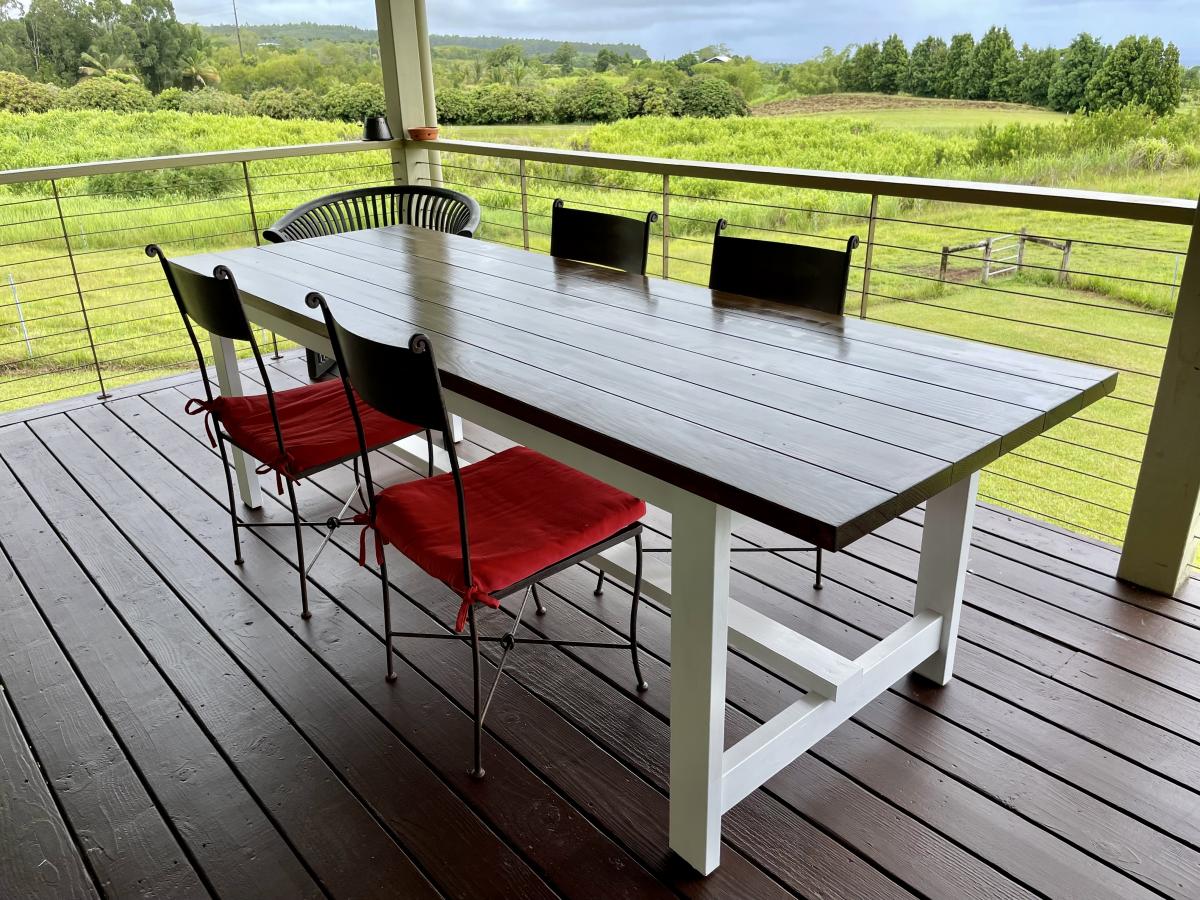
Exterior farmhouse table for the farm
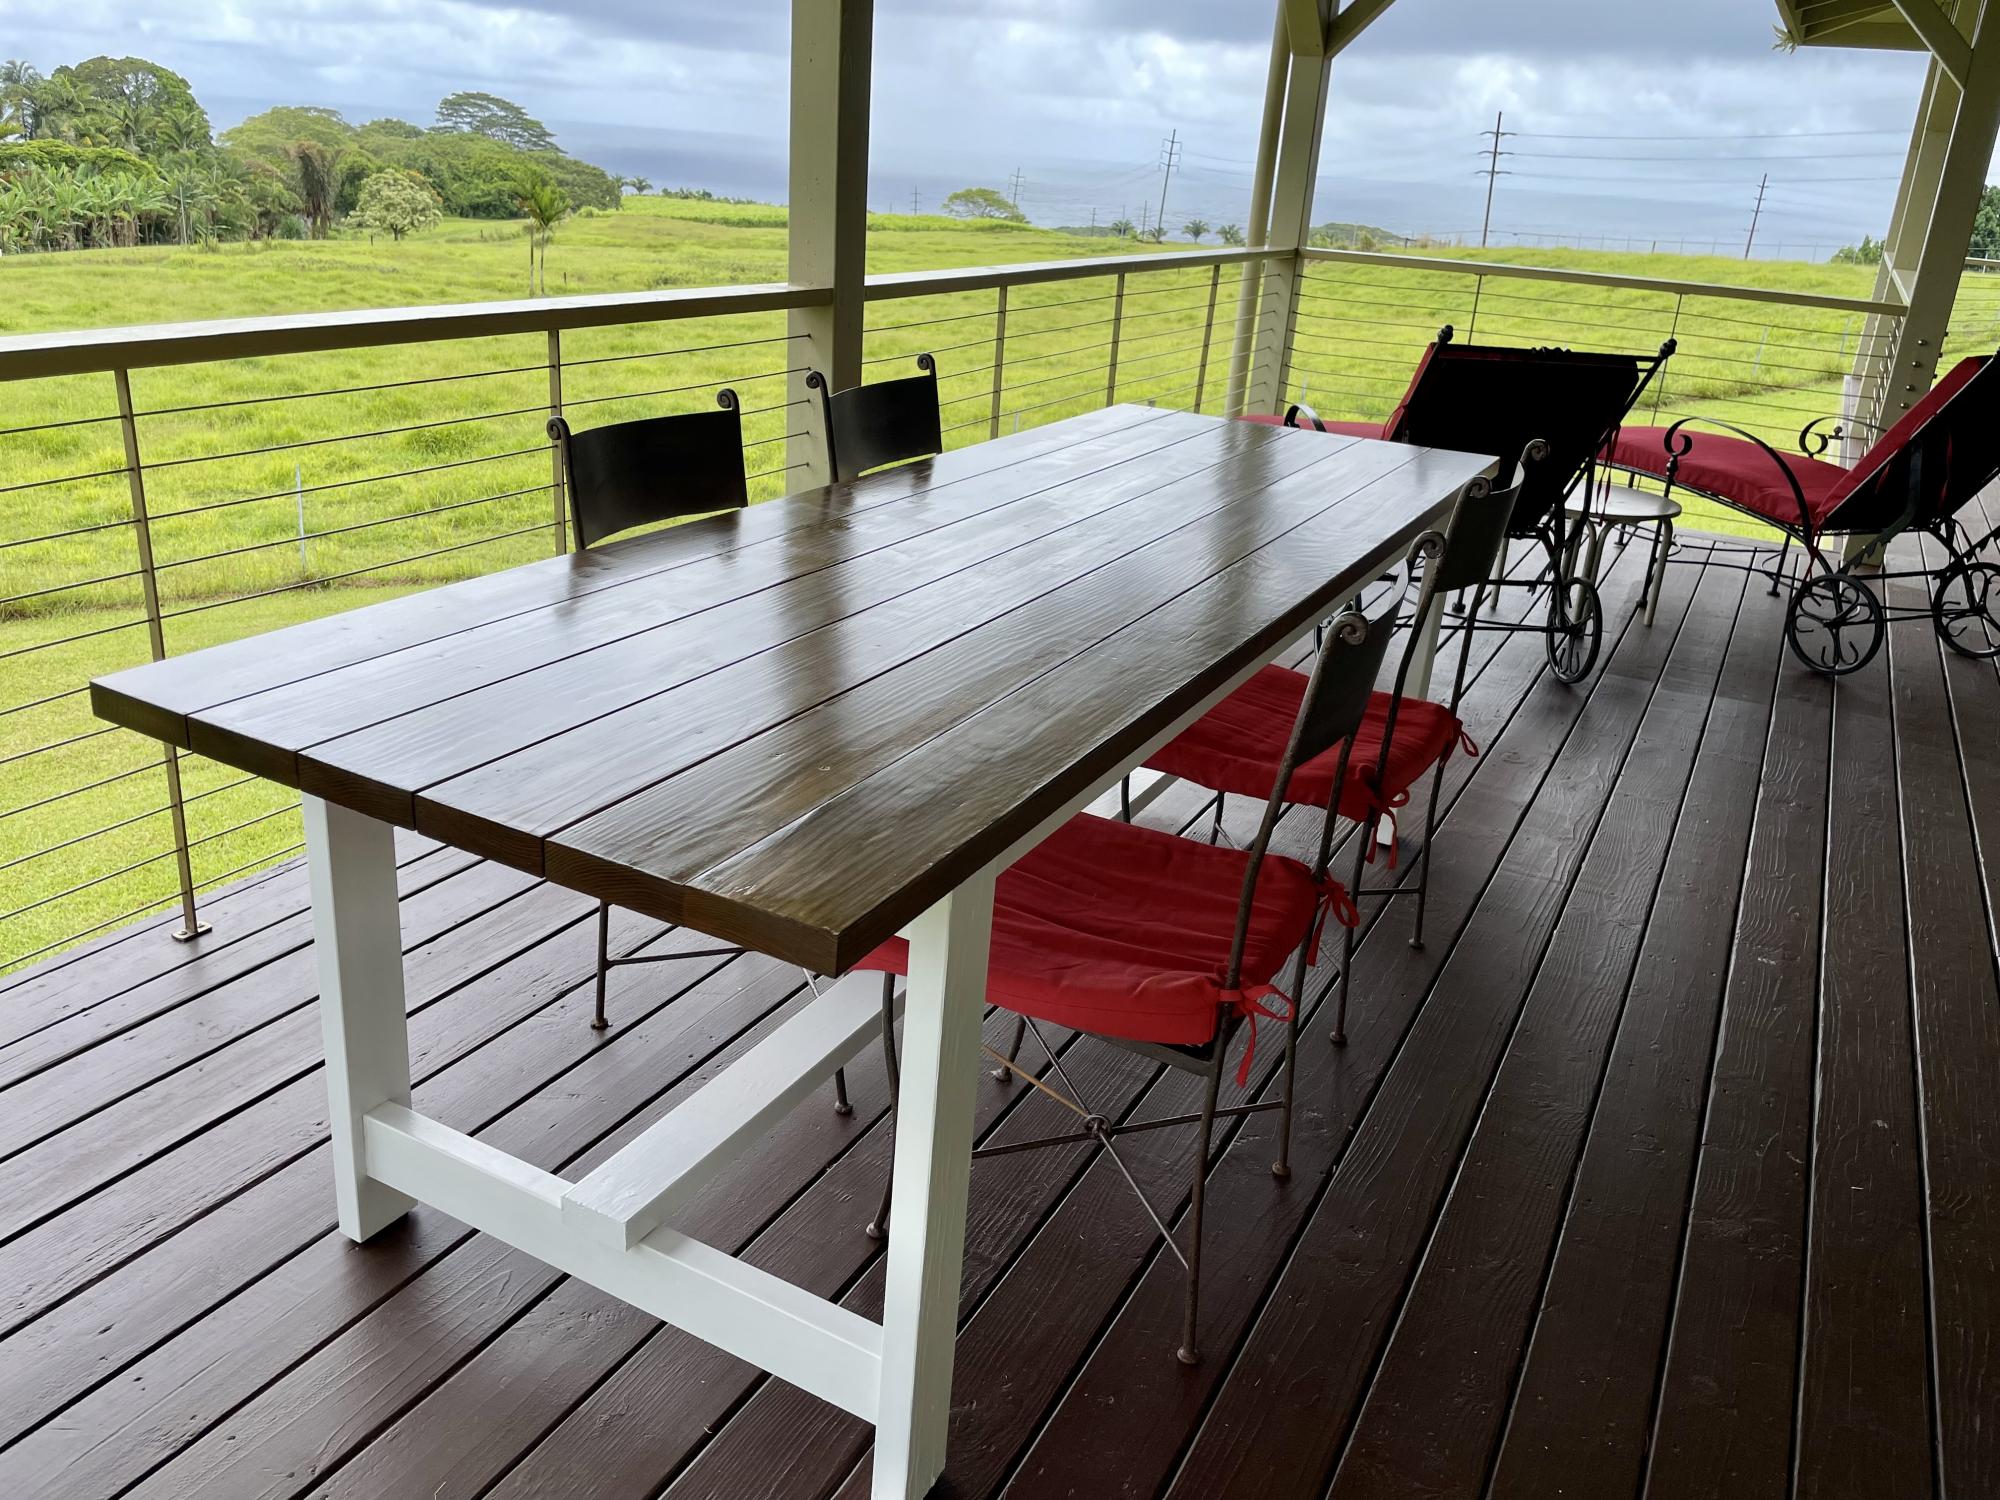
we needed an exterior table big enough for 8 on short notice. It's hard to find nice exterior furniture on the Big Island of Hawaii so we decided to build ourselves using borrowed tools. only wish i had my kreg jig nearby :).
*this is July 2021 (pandemic) so wood prices have shot up. that's the reason the cost of the project is higher than normal.
Built from Plan(s)
Estimated Cost
350
Estimated Time Investment
Weekend Project (10-20 Hours)
Finish Used
1. Primer: Zinsser Bulls Eye 1-2-3 Primer
2. Wood conditioner: Varathane pre-stain wood conditioner
3. Paint – Legs: Benjamin moore soft gloss finish premium exterior paint in white
4. Stain – Top: Varathane premium poly+stain in Satin Jacobean
5. Varnish: Minwax Helmsman Spar Urethane
6. #9 x 2-1/2 in. Star Flat-Head Wood Deck Screws by Deckmate
Recommended Skill Level
Beginner
Comments
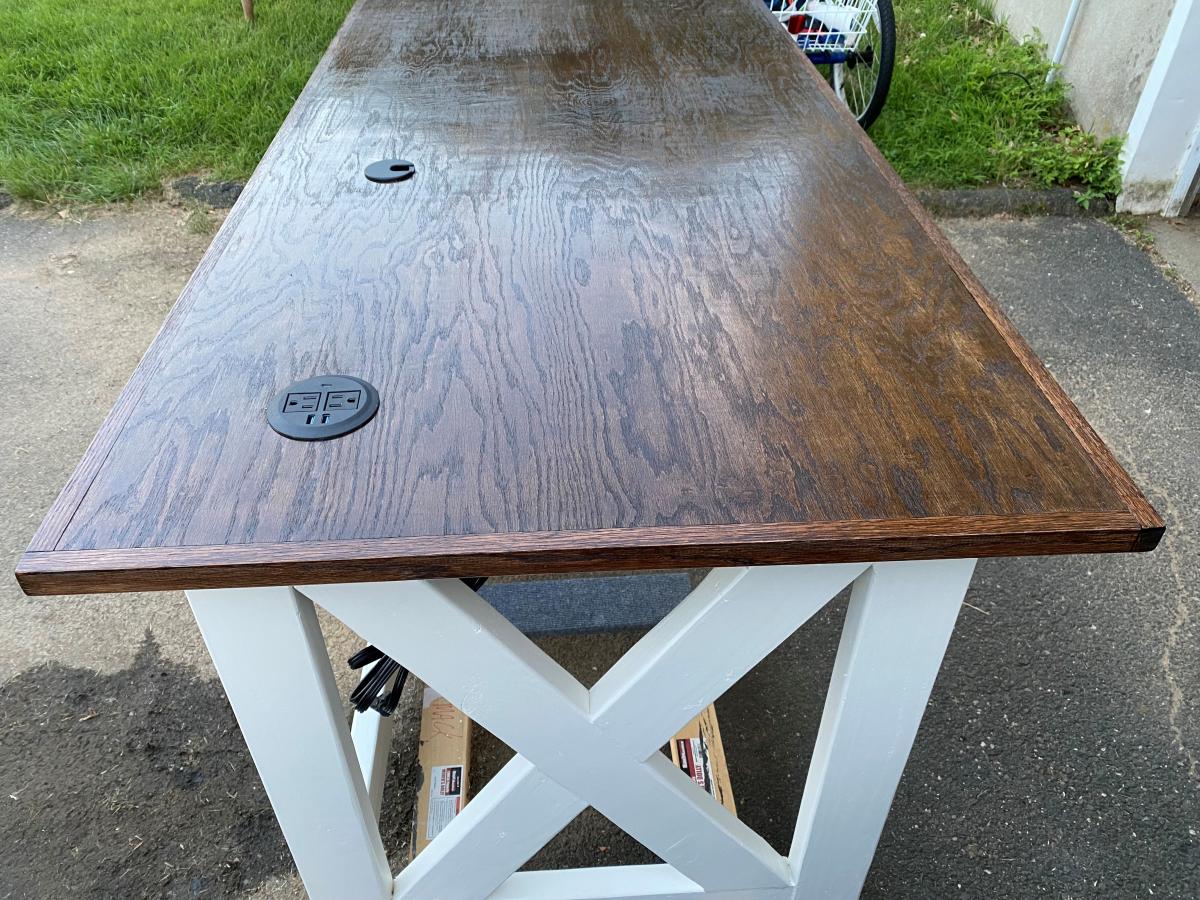
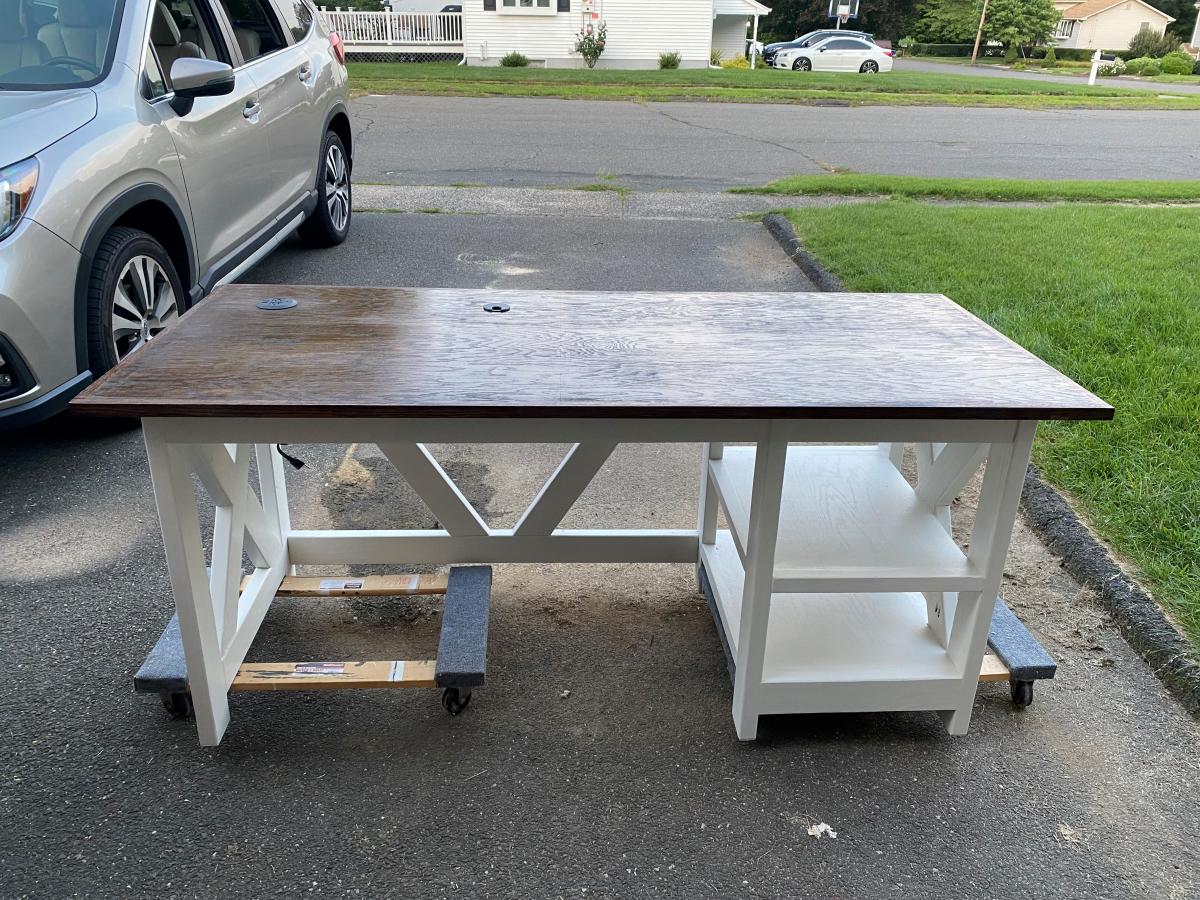
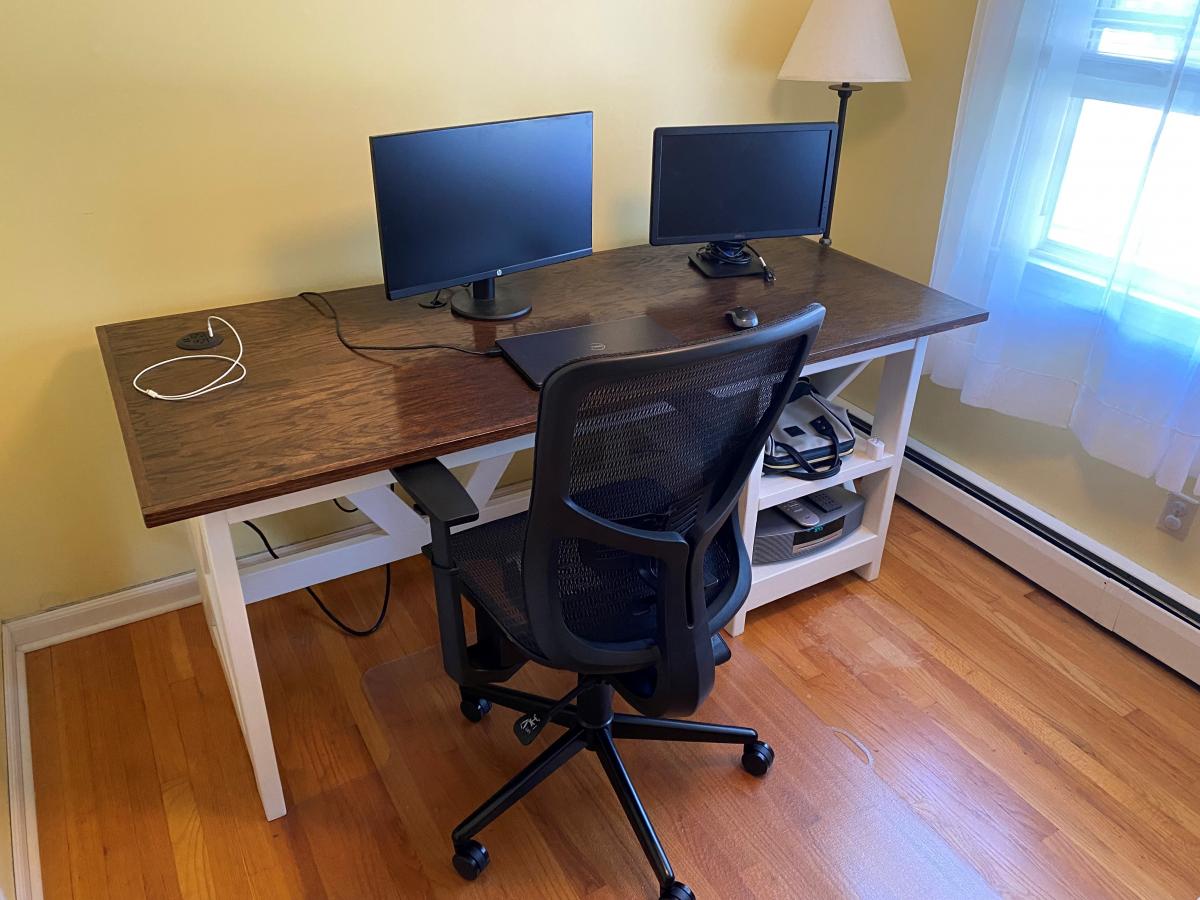
Farmhouse Desk

My wife needed a desk to work at home from and nothing on the retail market interested us, so I offered to build one. I followed the plans for a Farmhouse Desk, but with a change for the top. I chose a pre-sanded 3/4" red oak top and trim to cover the plywood edges. We didn't want the lips or edges that may show up using the planned 1x6" planks. The desktop measures 31.5 x 71.5" which is large, but allows for a lot of work to be accomplished. I added a grommet hole for the wires and a 3 1/8" hole for a desktop outlet with 2 USB's, 1 USB-C and two regular outlets. I also added a 9-input power strip / surge protector on the underside of the desk that the desktop outlet plugs in to. So only the power strip plugs into the wall and everything is surge protected.
It took me 4 weeks and about 25 hours, as I made it around my work schedule and family life.
Built from Plan(s)
Estimated Cost
$250
Estimated Time Investment
Week Long Project (20 Hours or More)
Finish Used
Desktop: Minwax Espresso Stain
Base: Valspar All-weather White Solid Exterior Stain
Base: Valspar All-weather White Solid Exterior Stain
Recommended Skill Level
Beginner
Comments
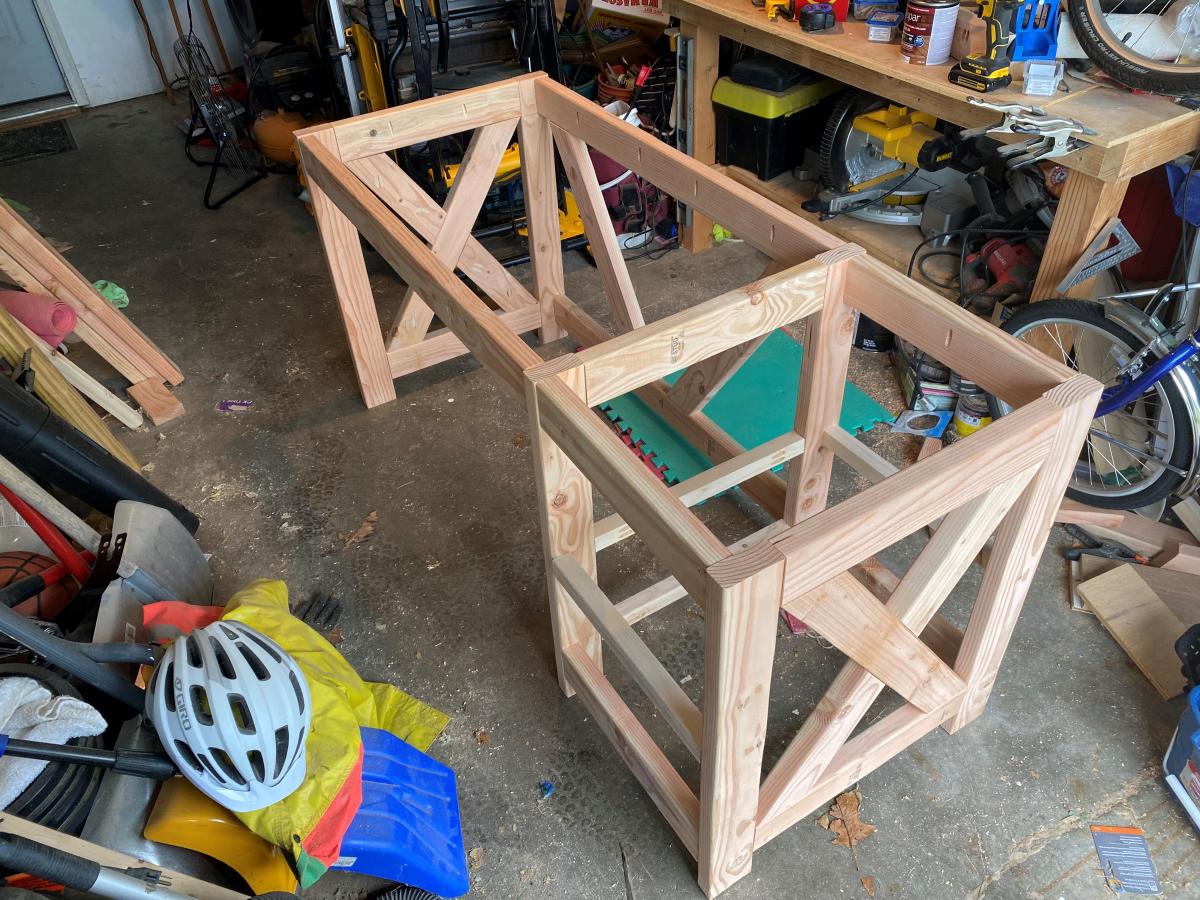
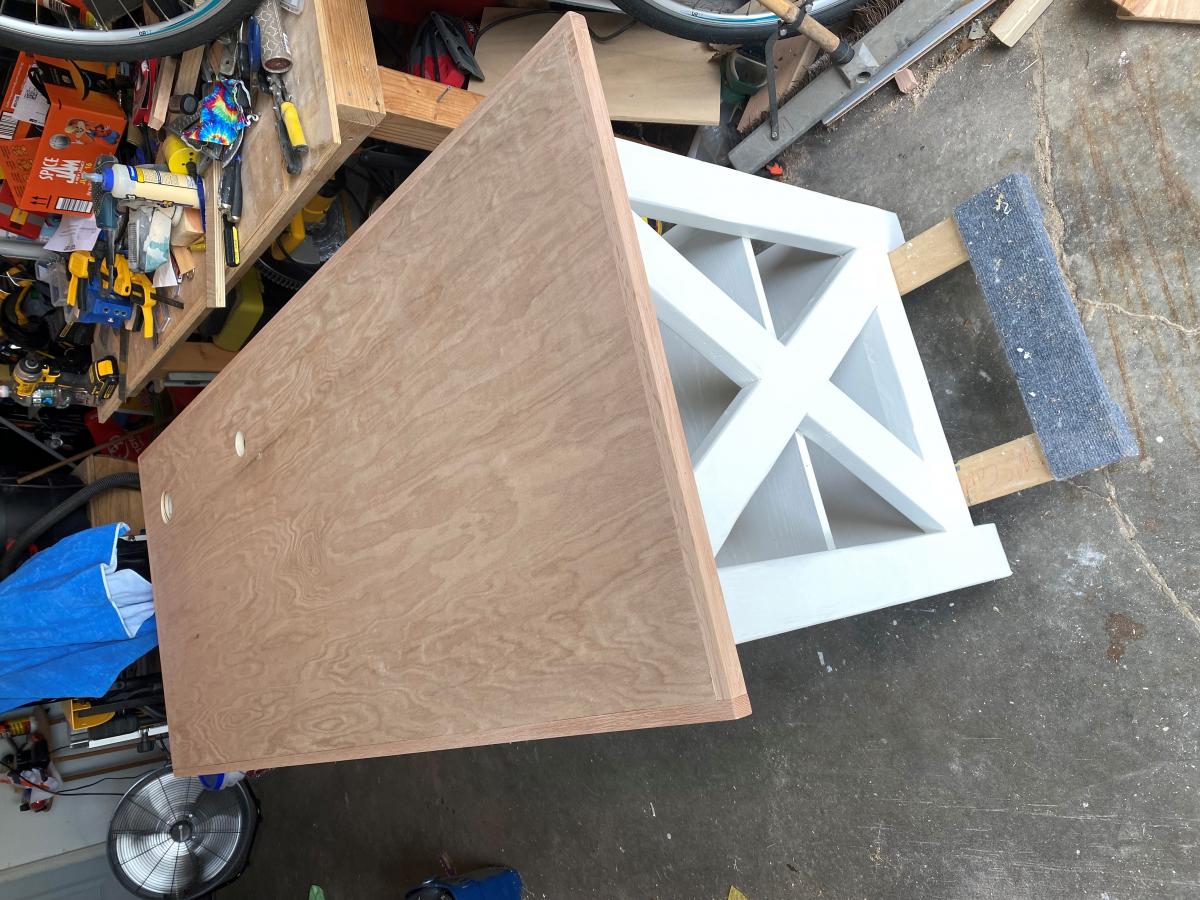
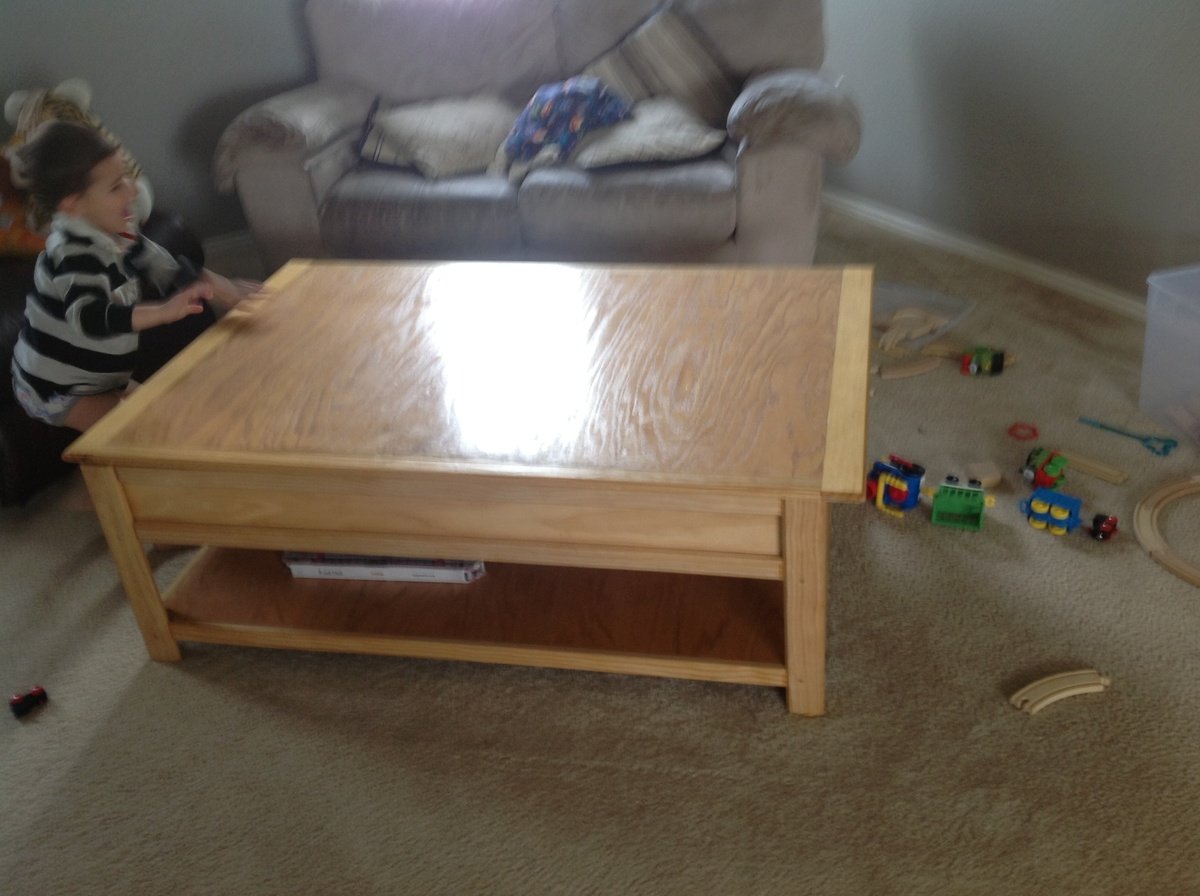
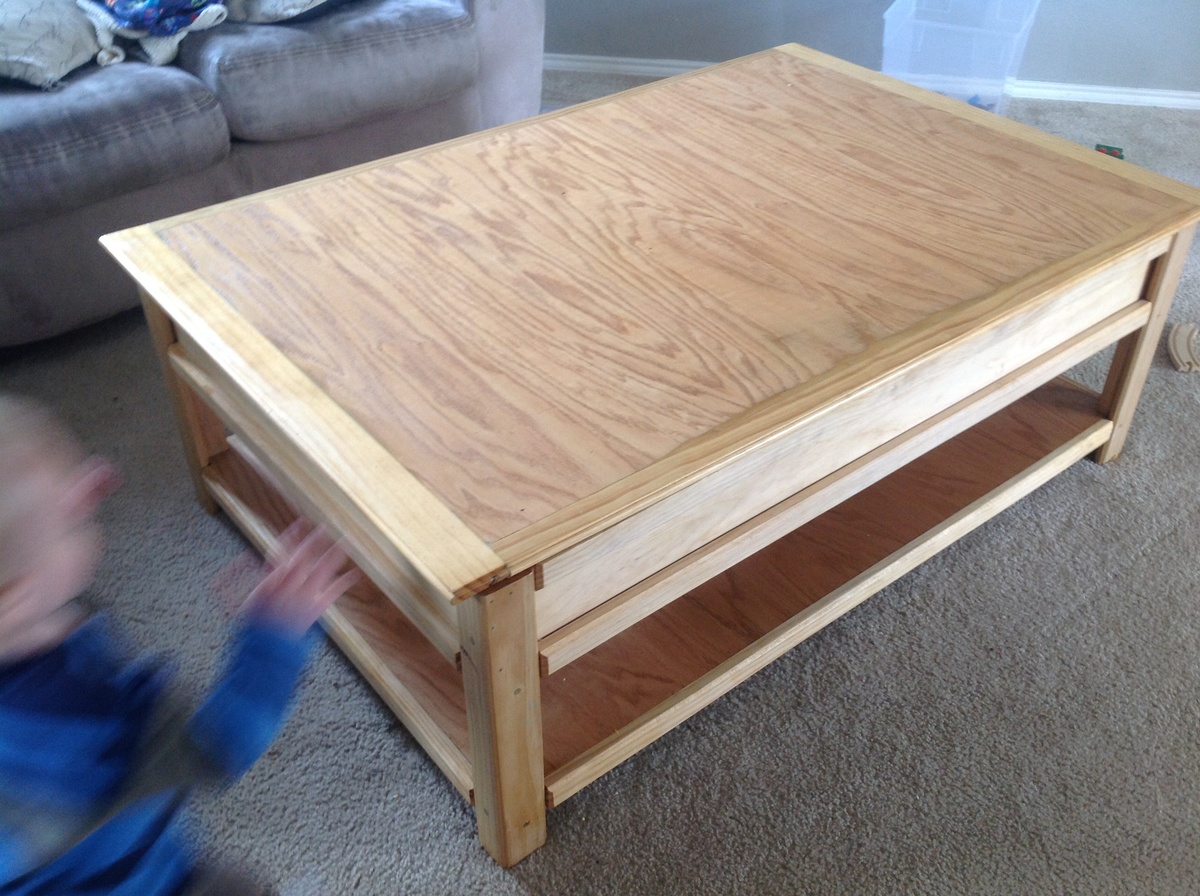
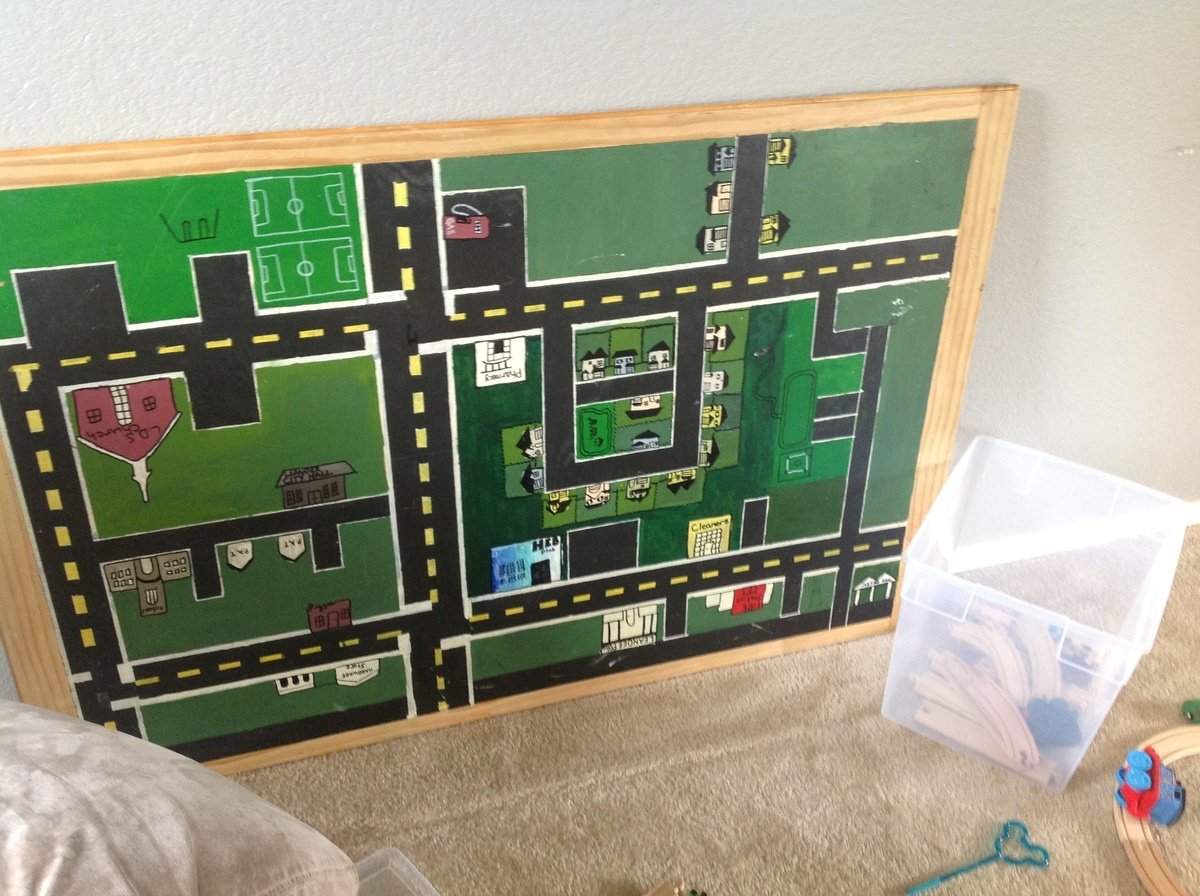
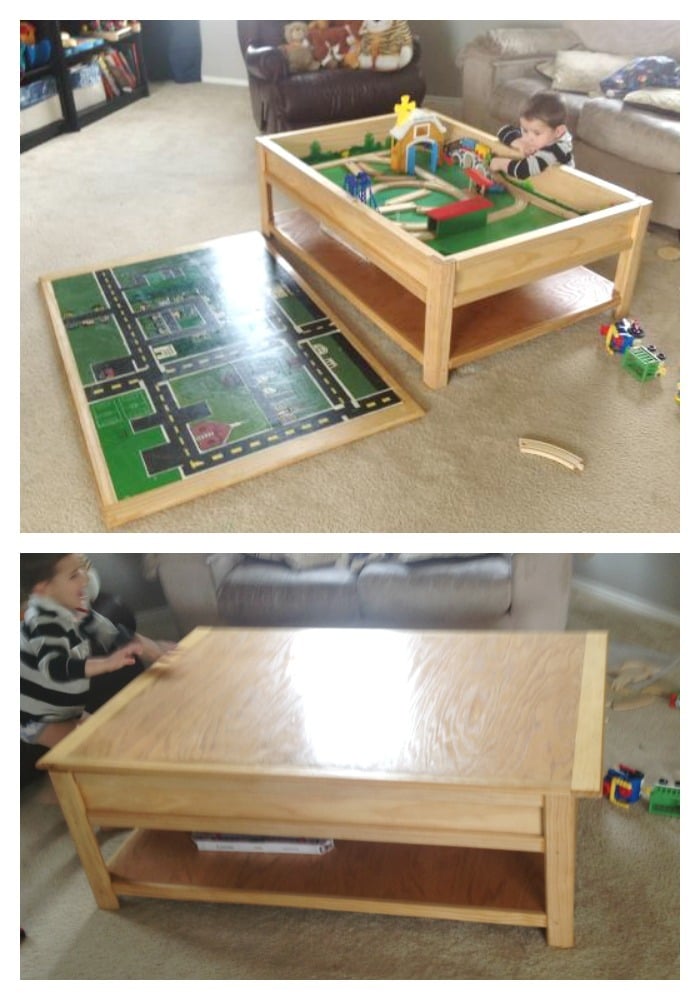
Train & car table
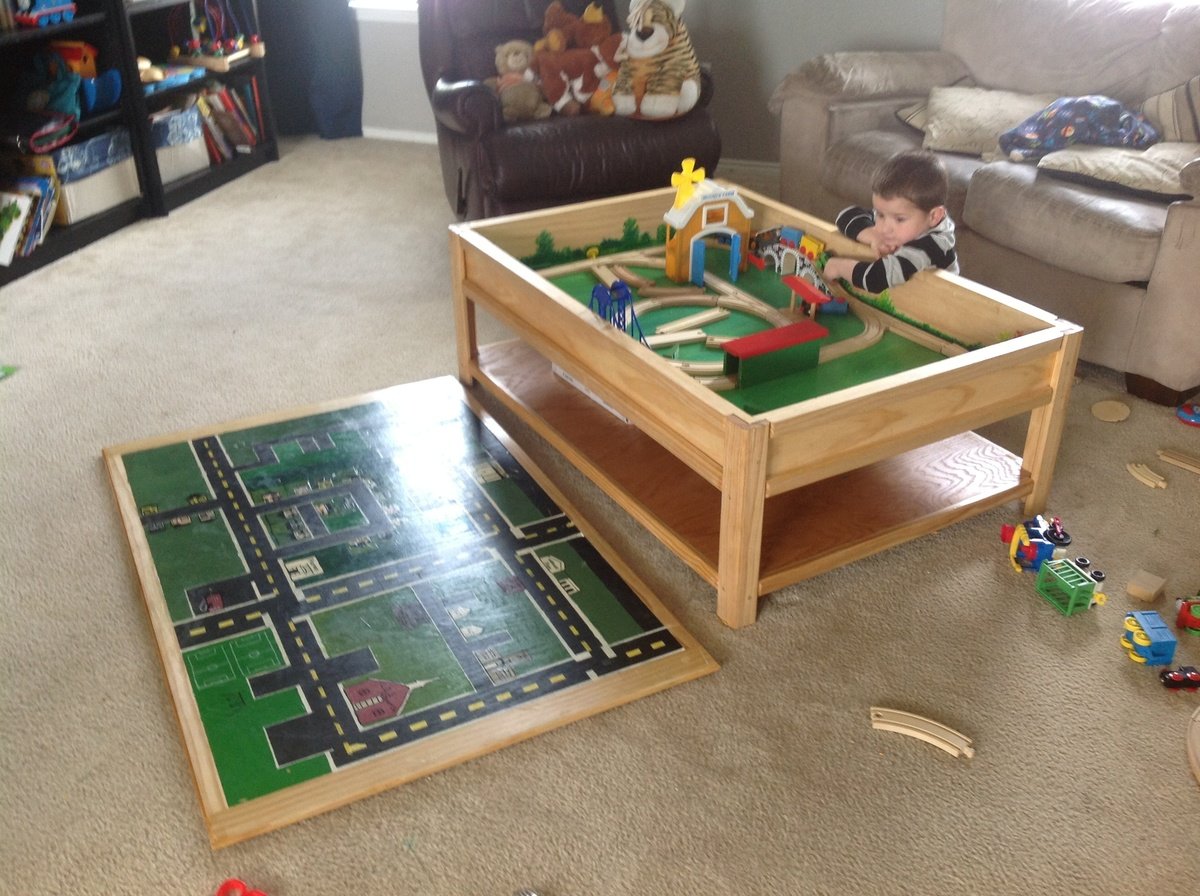
We customized the train table a bit and laminated the top into one solid piece so that we could paint a car map of our neighborhood on the underside. It's heavy! But with two boys in the house it's never really on anyways! :)
Built from Plan(s)
Estimated Time Investment
Week Long Project (20 Hours or More)
Finish Used
Tung oil
Recommended Skill Level
Beginner
Comments
Modern Farmhouse Bed Twin version
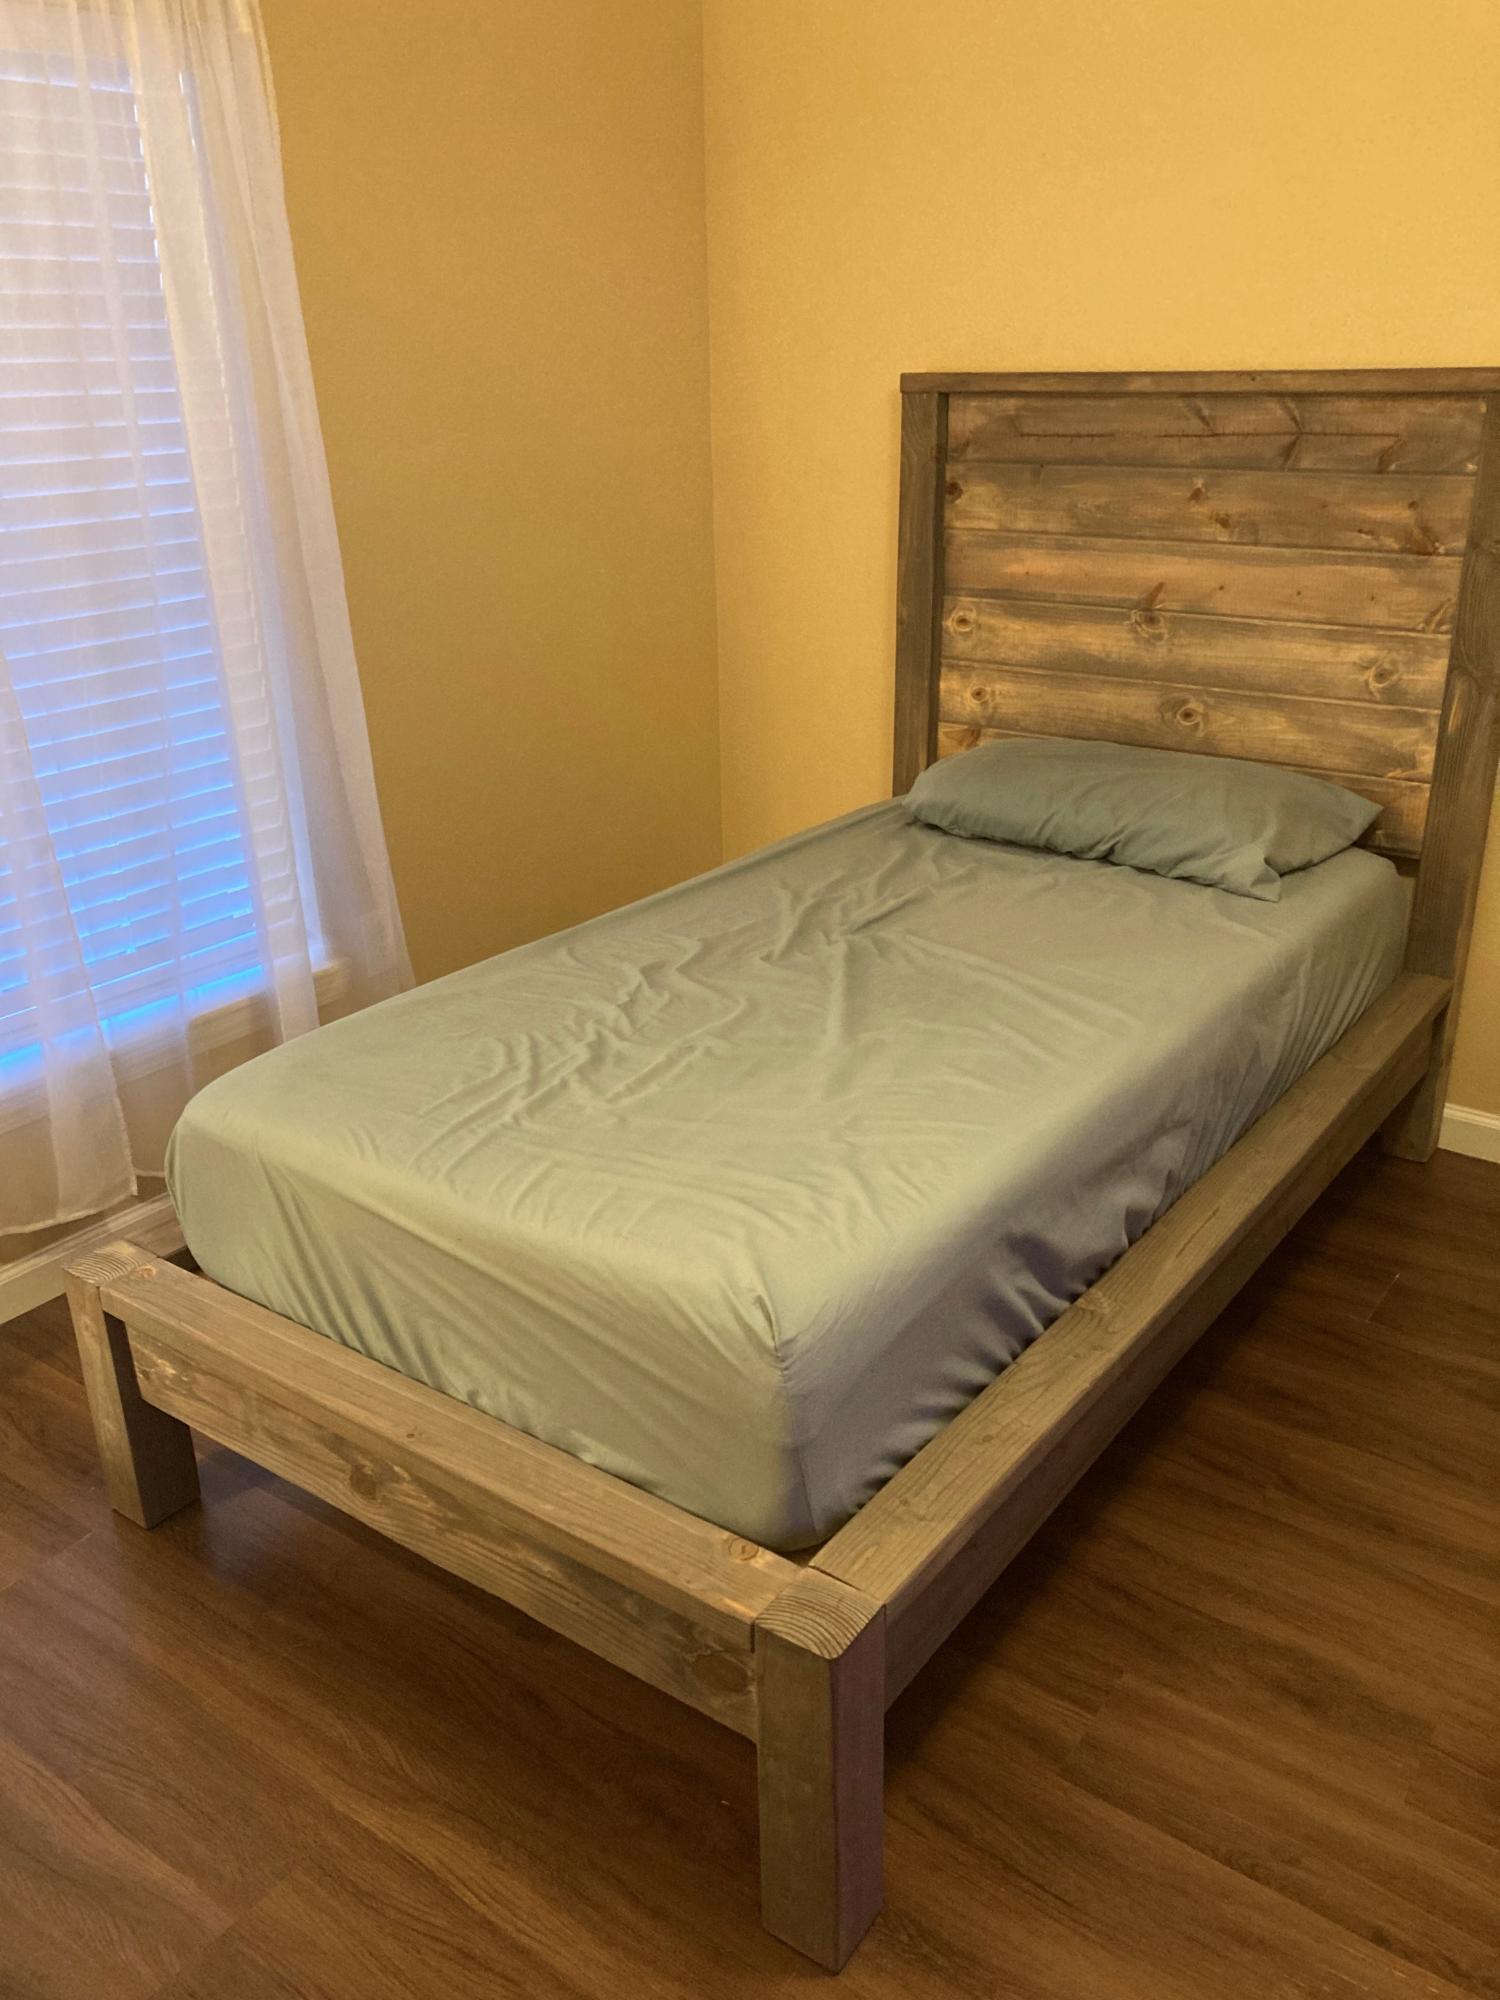
I built this bed for my (adult) son. The instructions were easy to follow. I left off the 2 x 2" cleats on the headboard to make it easier to attach the tongue and groove headboard pieces with pocket hole screws (I did lay two 2 x 2's underneath the tongue & groove pieces for spacing as I attached the boards). Since I made this as a platform bed I added a 6th tongue & groove headboard piece and the optional center cleat underneath. I used the suggested Varathane Weathered Wood Accelerator for the finish; mine came out much more grey than the bed pictured with the plans and my son liked the finish (I did too). Finding non-pressure treated 4x4's and semi-straight 2x4's was the hardest part. I used pine wood and bought all the lumber for about $175 (purchased at peak COVID lumber prices). This bed is definitely solid and I'm looking forward to making the matching nightstand! Thank you Ana for the bed plans!
Built from Plan(s)
Comments
Sun, 09/05/2021 - 11:13
Wonderful!
Wonderful job, it looks amazing, can't wait to see it with the matching night stands!
Fancy Farmhouse Bed
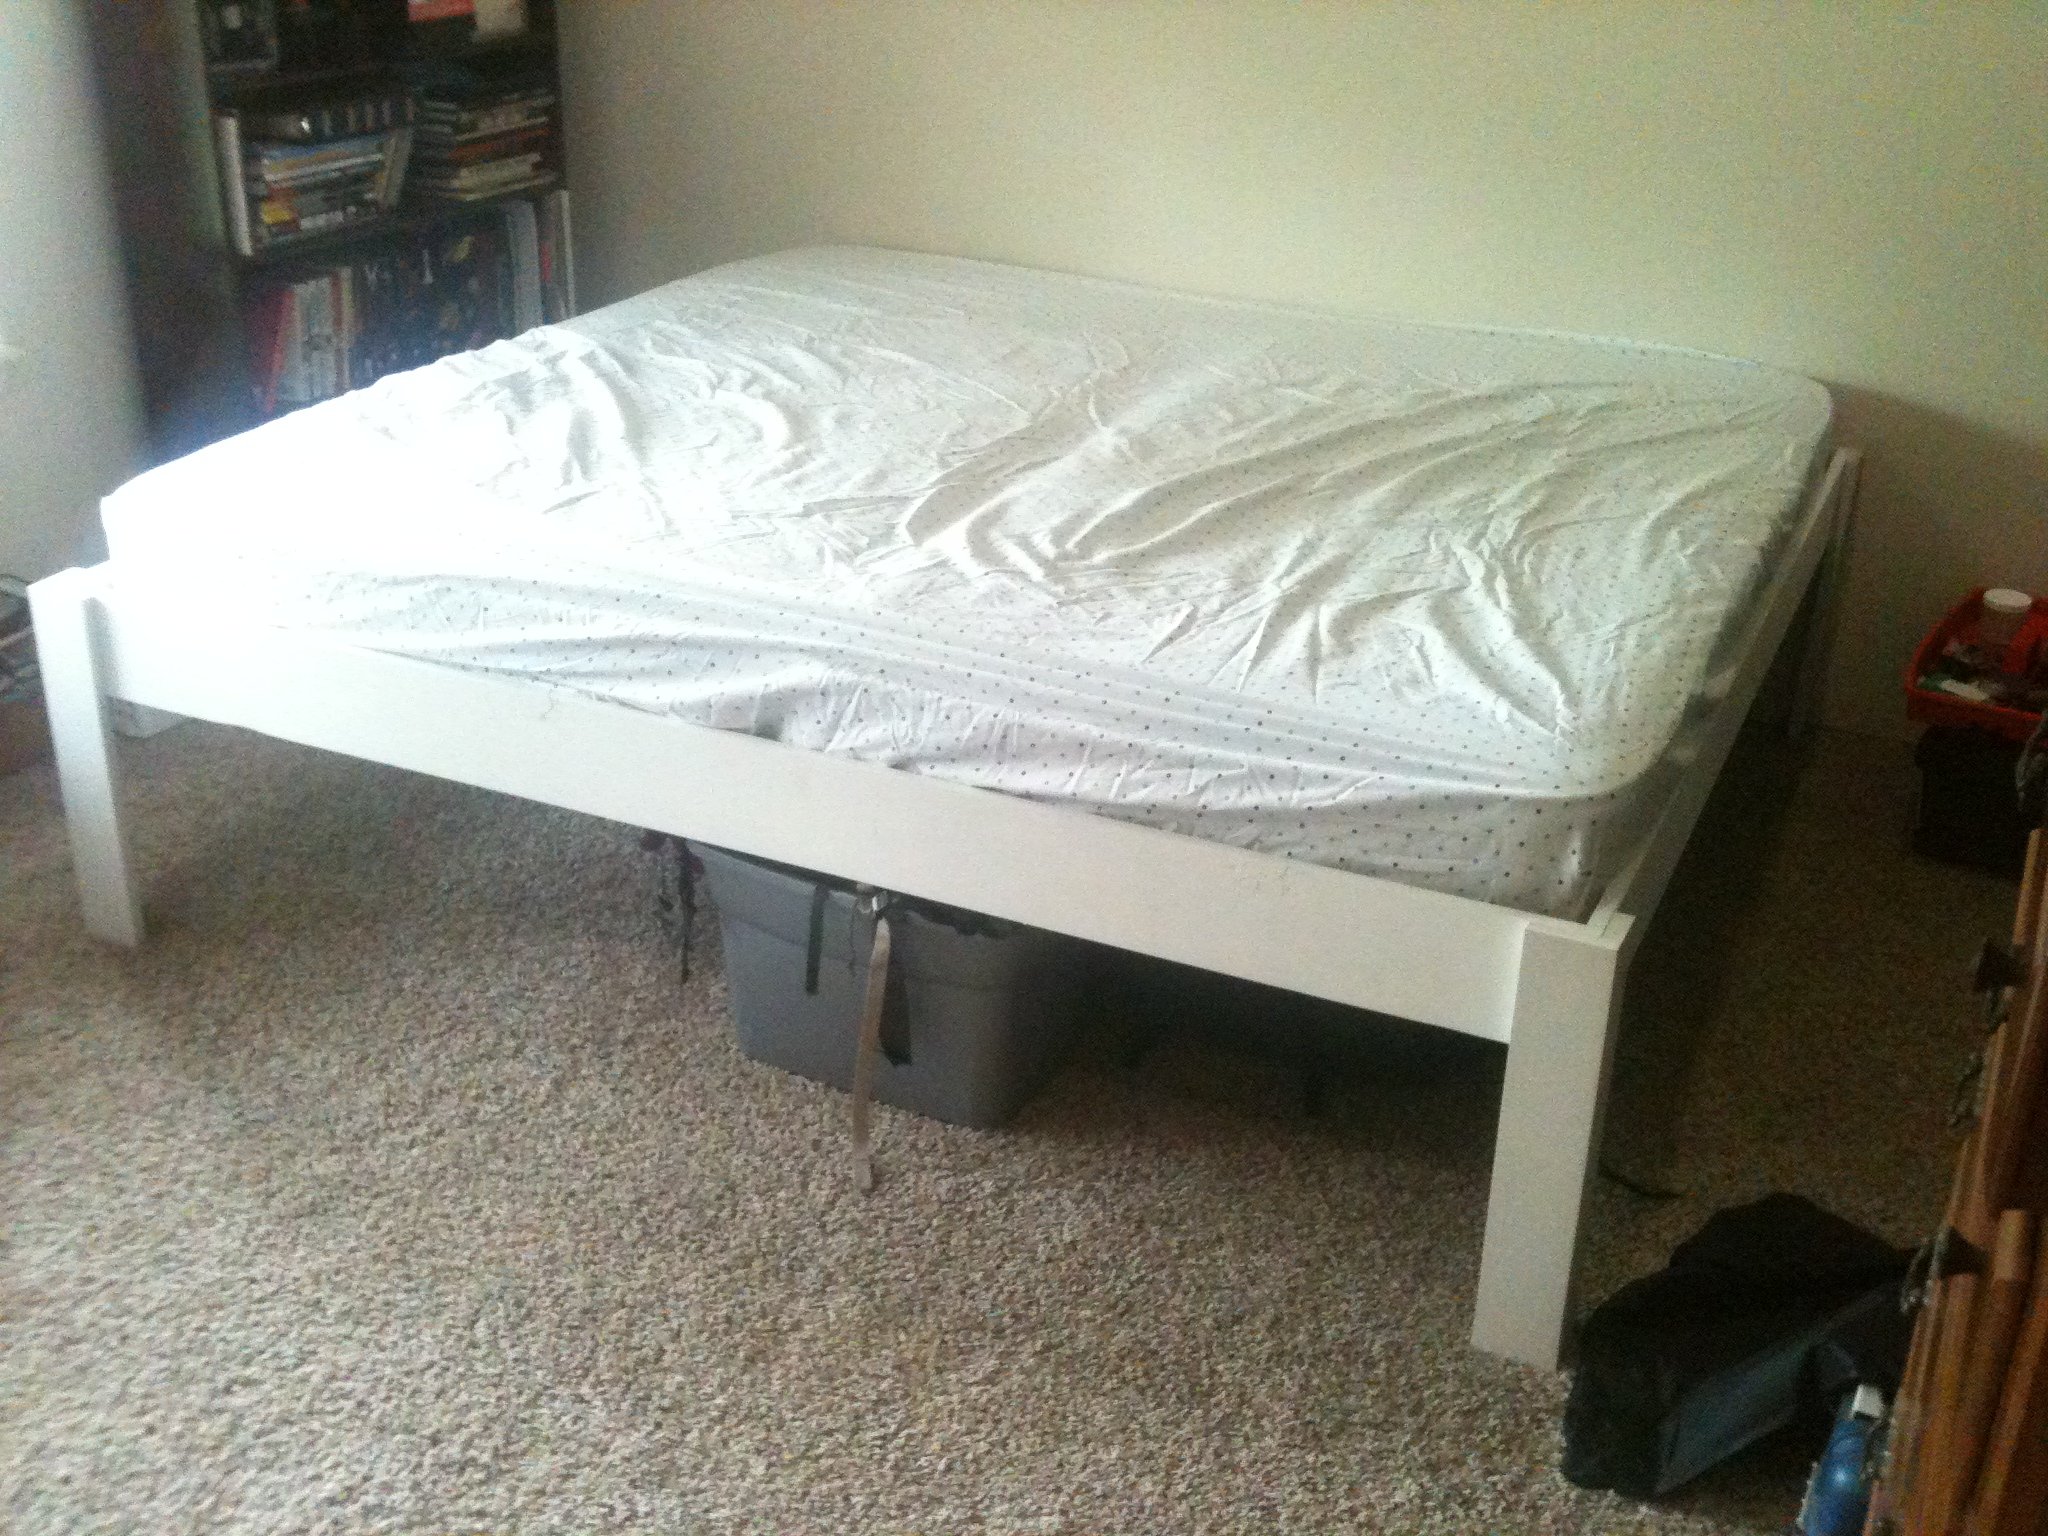
With a child on the way, our house has been undergoing some changes. We were in need of a guest bedroom for family members and needing to store my wife's childhood twin bed with a hidaway twin underneath that was set up in the room that would become the nursery. We also needed to clean all the backpacking gear out of the closet in the nursery room to get ready for it to be taken over by all the baby stuff. I decided a "King-sized" bed out of the two twin mattresses would be a good solution as it would keep us from "storing" the two mattresses and meet the guest bed need. After I came across the plans for the fancy farmhouse bed, I knew if i just added some height to it, I could meet the storage need too! There's 14'' on my version of the fancy farmhouse bed between the carpet and the rails, plenty of room for medium sized plastic tubs to slide in and out (as seen with the "test tub" in the picture. Under my bed there are currently 9 tubs, two large suit cases, a PA speaker, Power speaker head, a large double sleeping bag, and a little room for more. I'll try to add pictures when I finish the room out with night stands (wine crates mounted to the wall), a bedskirt, lamps, and a headboard. Once I got the wood home, it was a fast build. The slowest part was painting
Built from Plan(s)
Estimated Cost
$75
Estimated Time Investment
Afternoon Project (3-6 Hours)
Finish Used
Flat white valspar paint
Recommended Skill Level
Intermediate
Comments
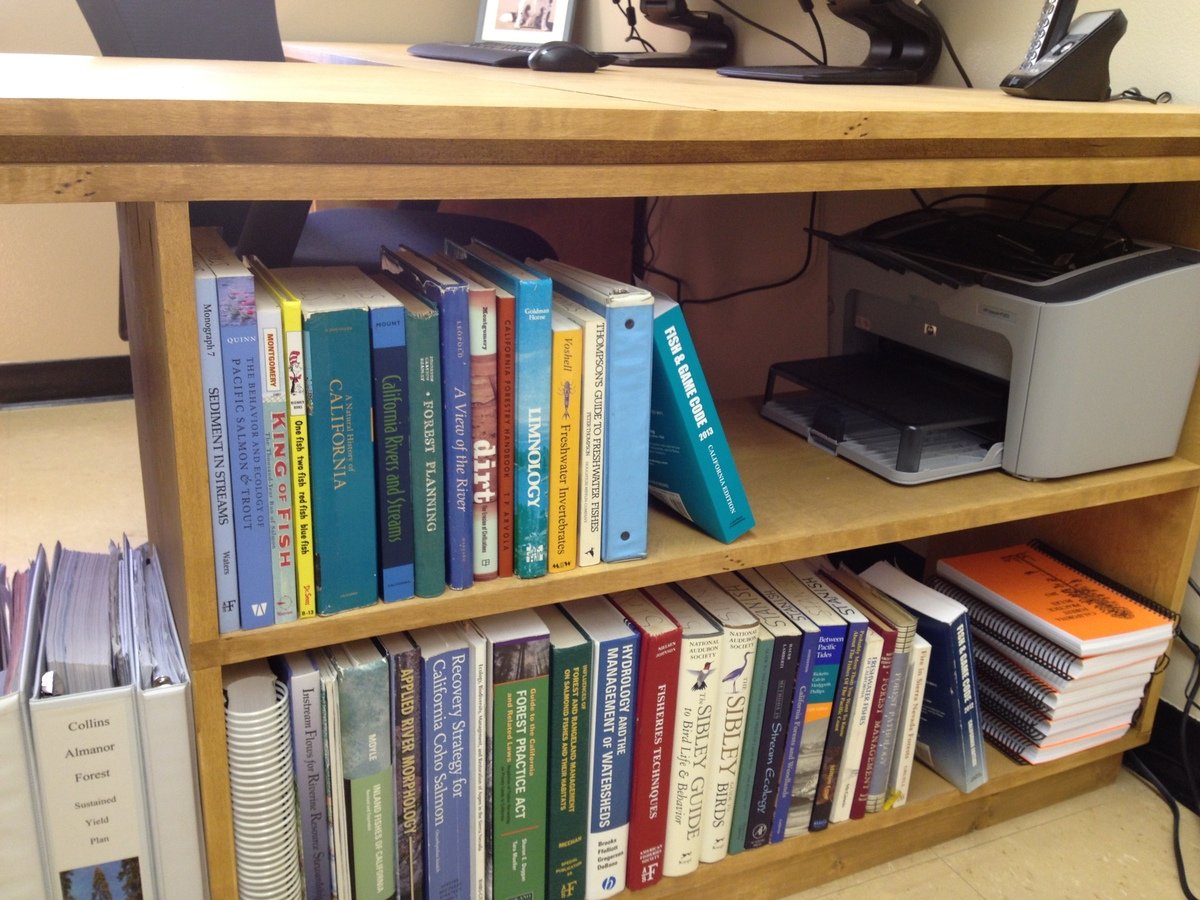
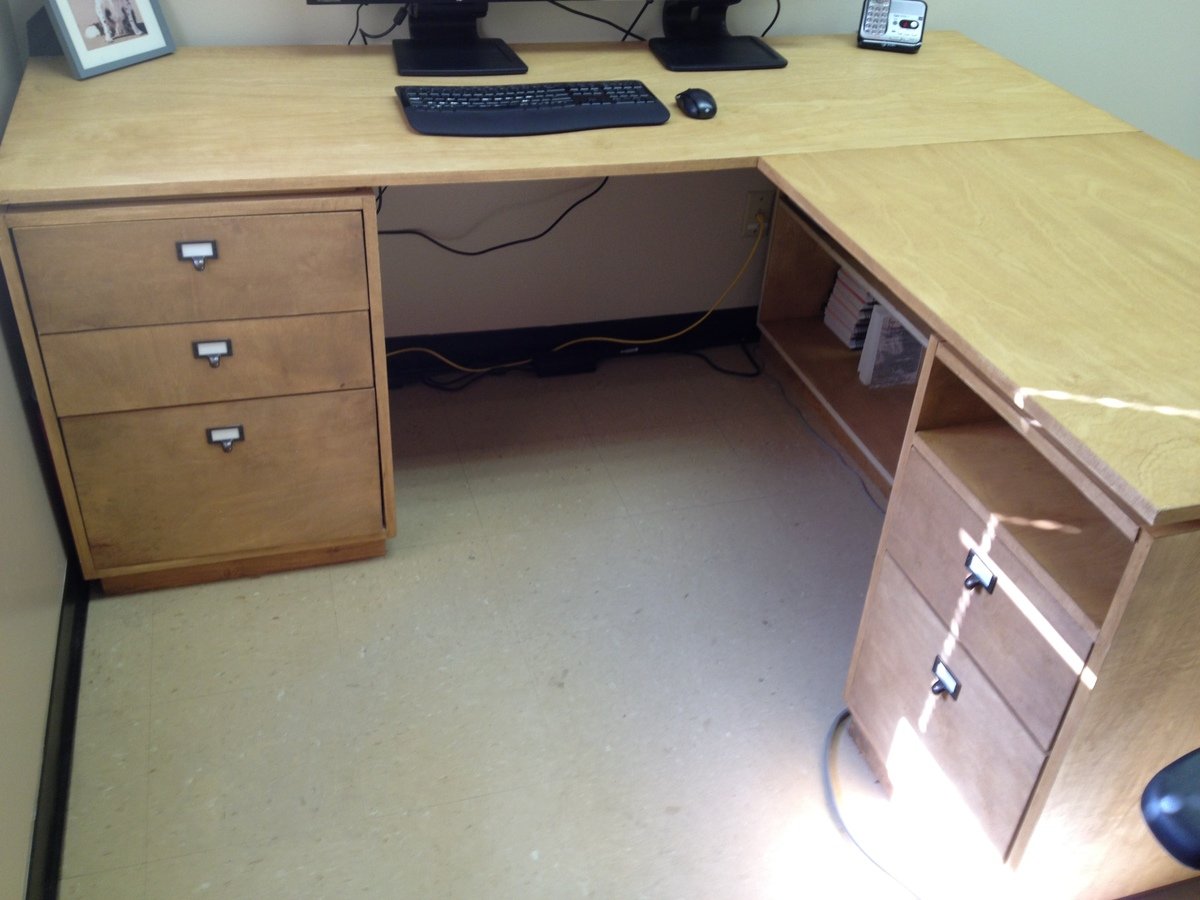
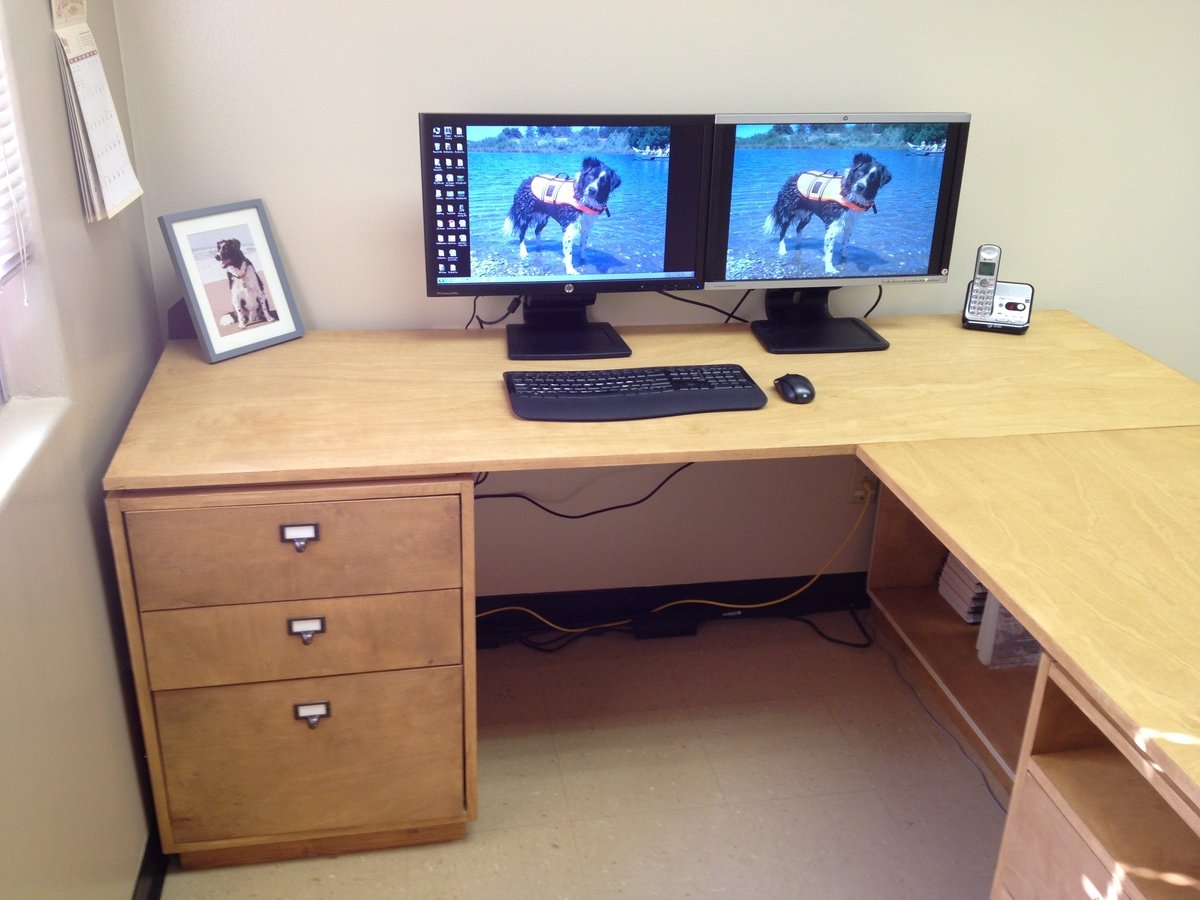
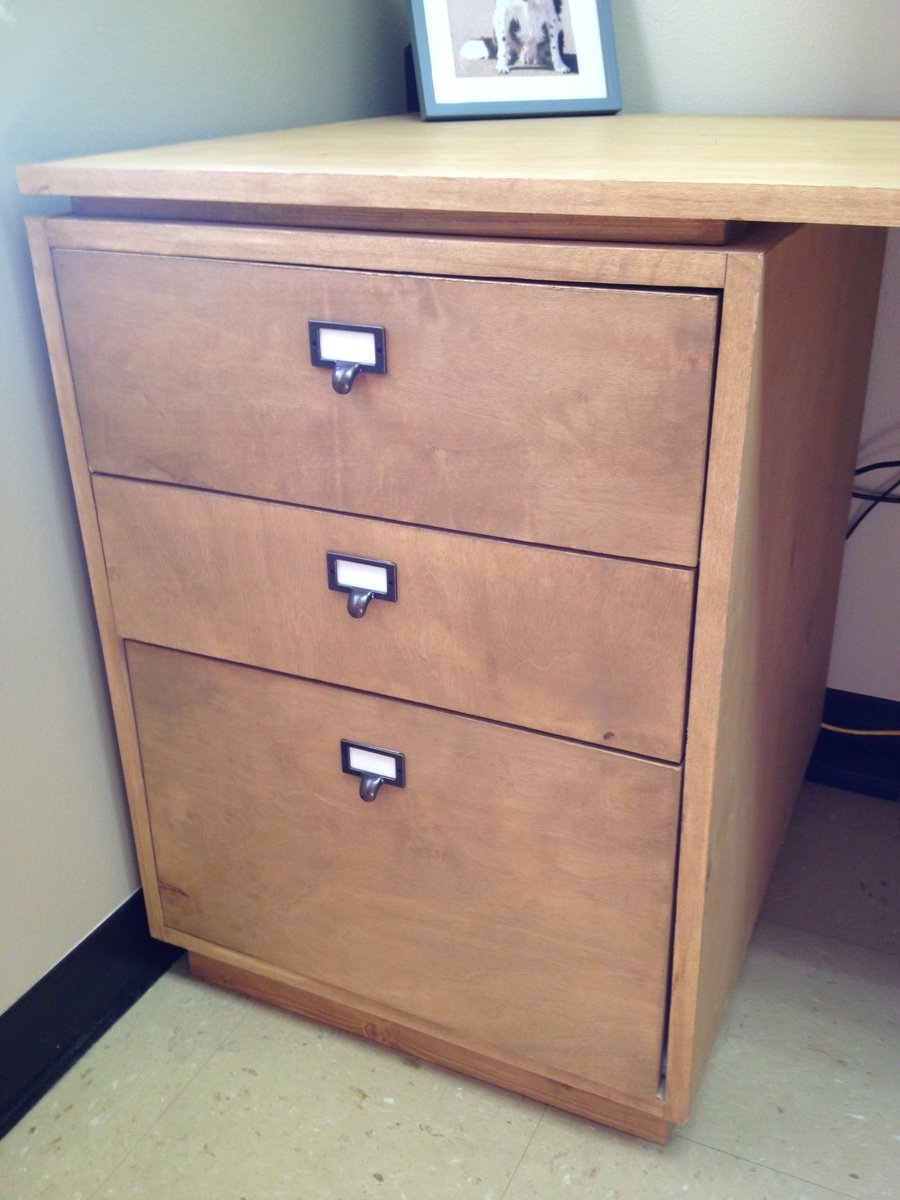
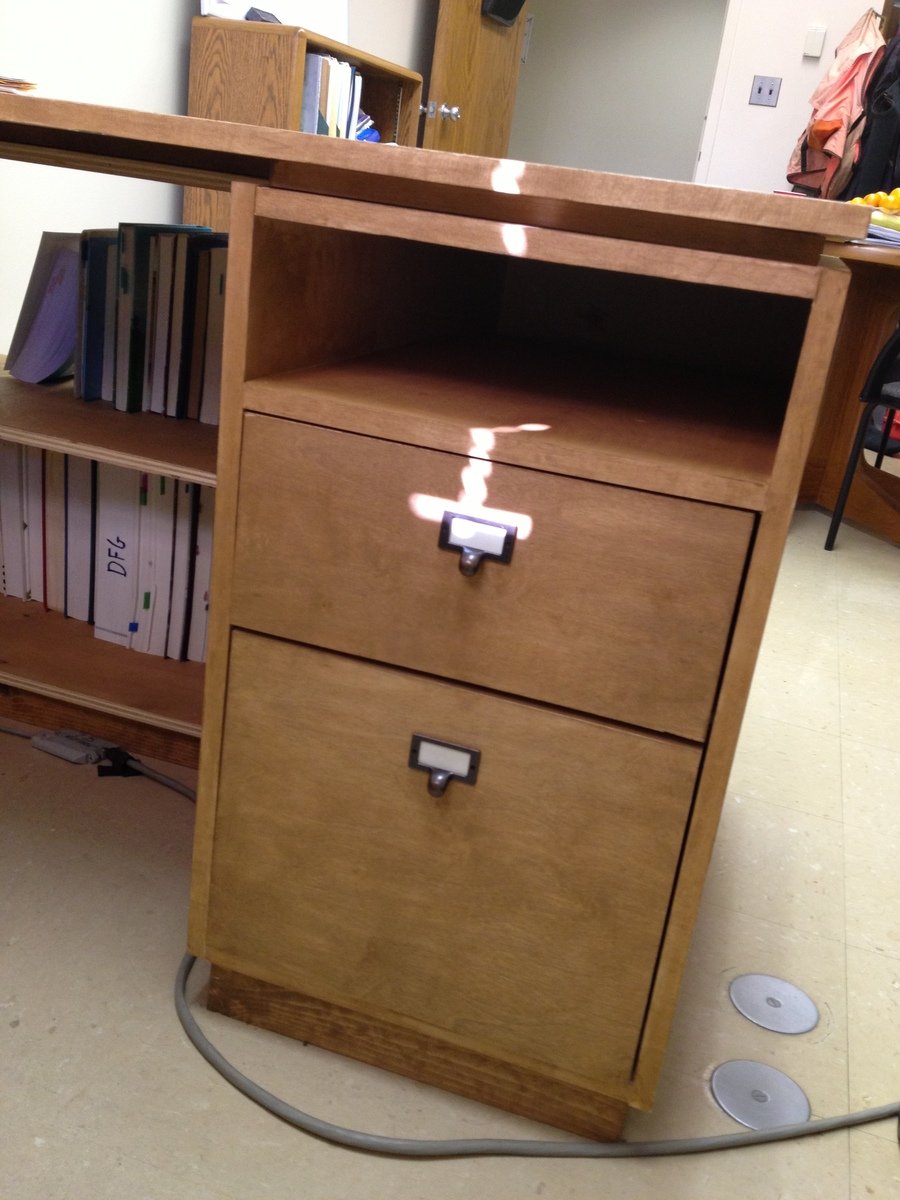
Eco Desk
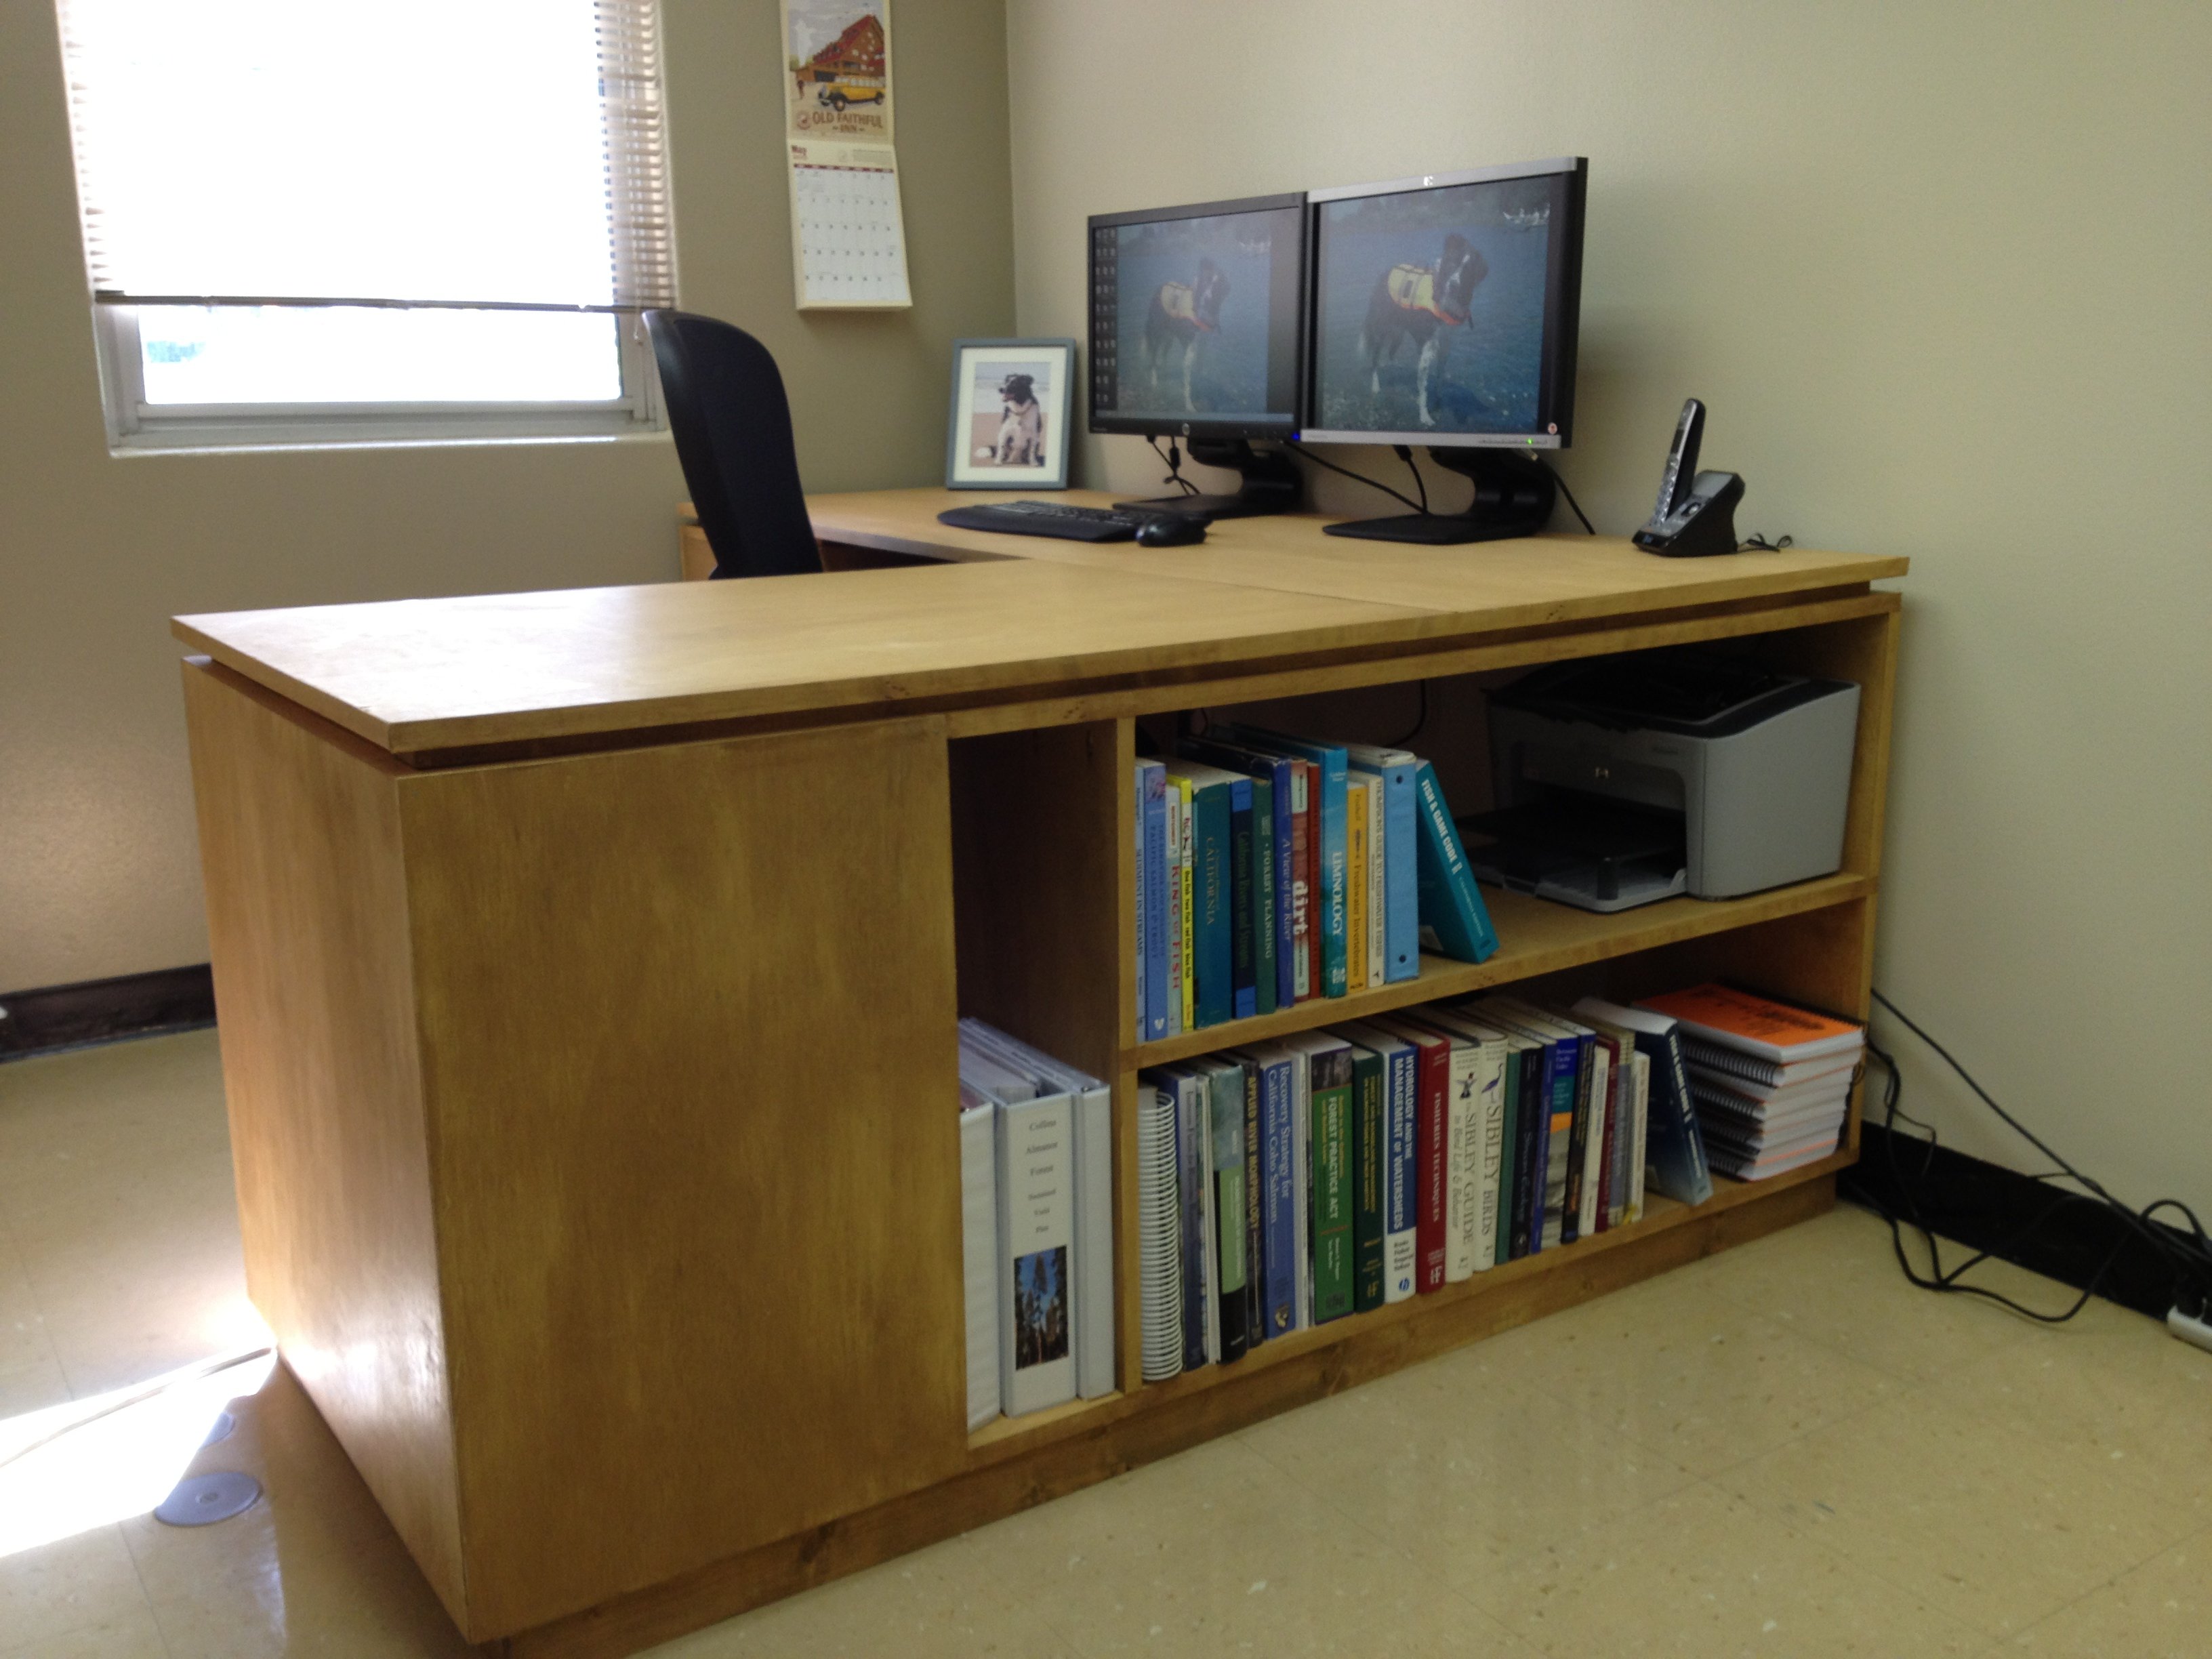
I've been meaning to build my own desk for my office and I wanted to stay true to the Eco Modular design. But, then I was offered a huge promotion with a larger office in a city 3 hours away. The space already had the "executive style" desk made by prison industries, so I thought I would replace it with with the "executive style" based off the Eco Modular design. I used Purebond plywood, cut all of the pieces at my house, put them in my car, drove them 3 hours to the new office, and crossed my fingers that it would all fit...and it did! The drawer faces were a bit more of a challenge, getting everything sized properly, but it's all come together. I like having the shelf on the one side to get my printer off the desktop. More room to spread out.
Estimated Cost
$350
Estimated Time Investment
Weekend Project (10-20 Hours)
Finish Used
Cabot's Fruitwood stain
Recommended Skill Level
Intermediate
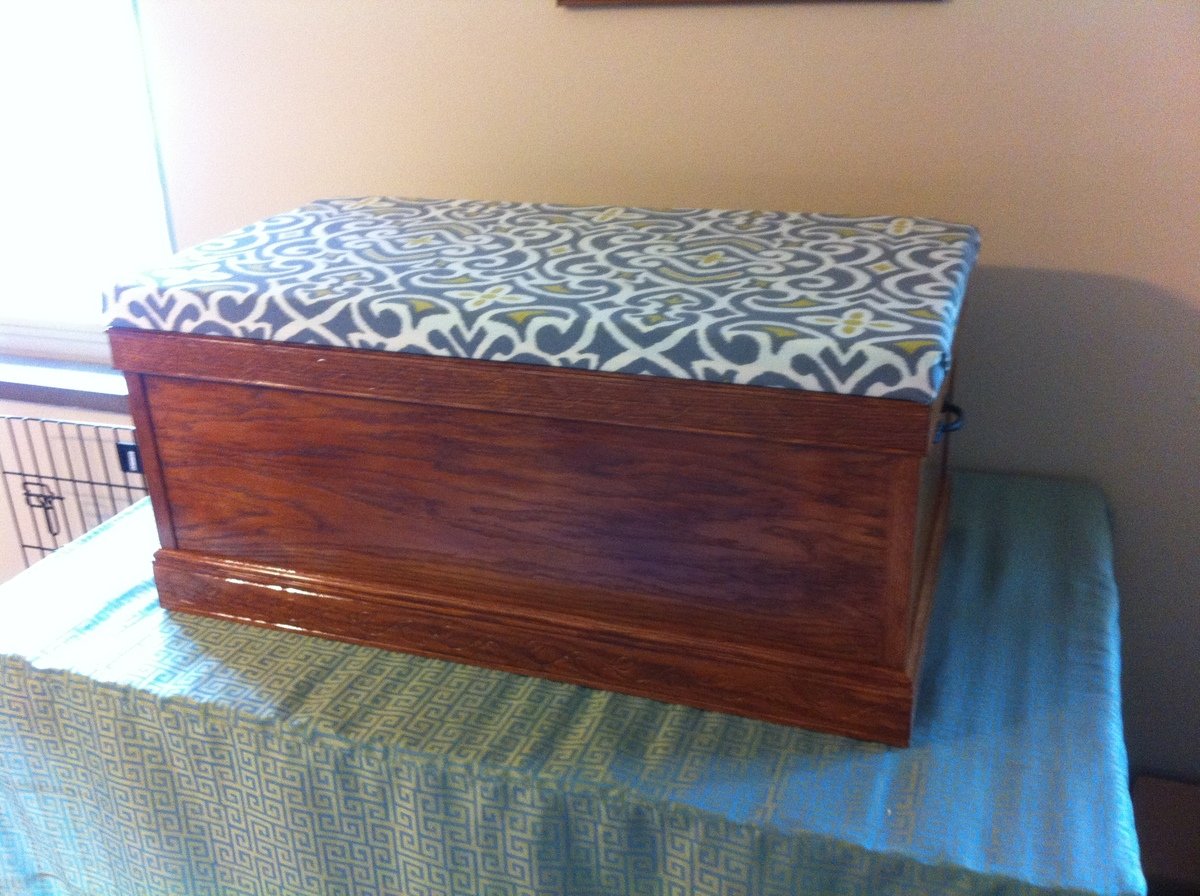
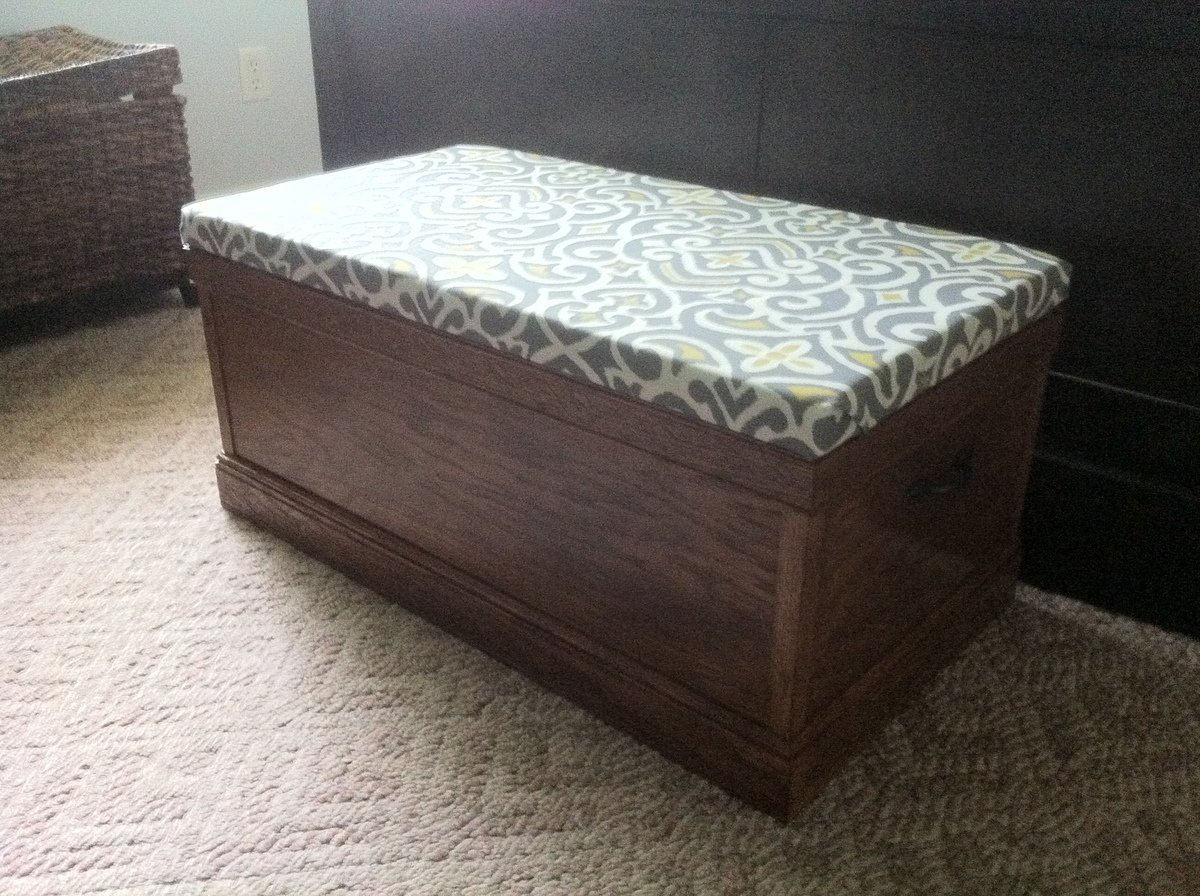
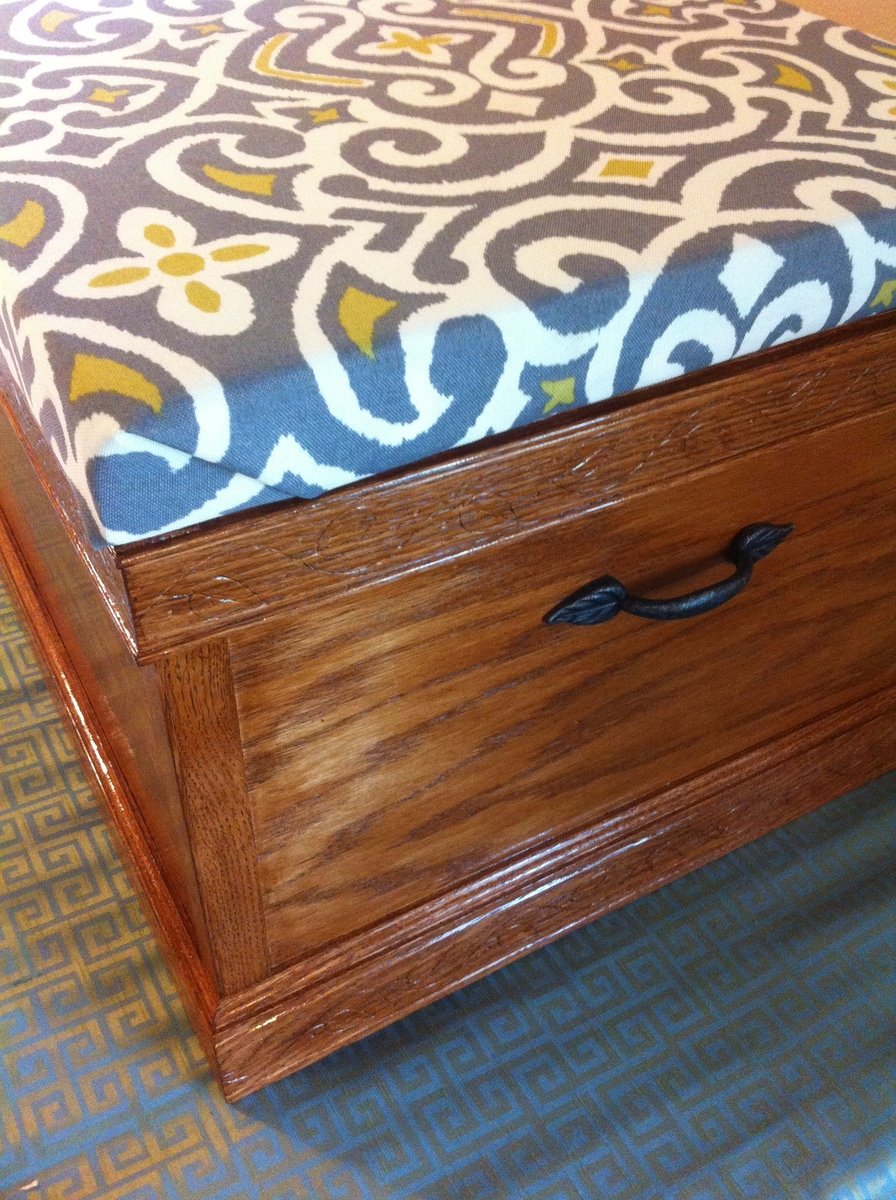
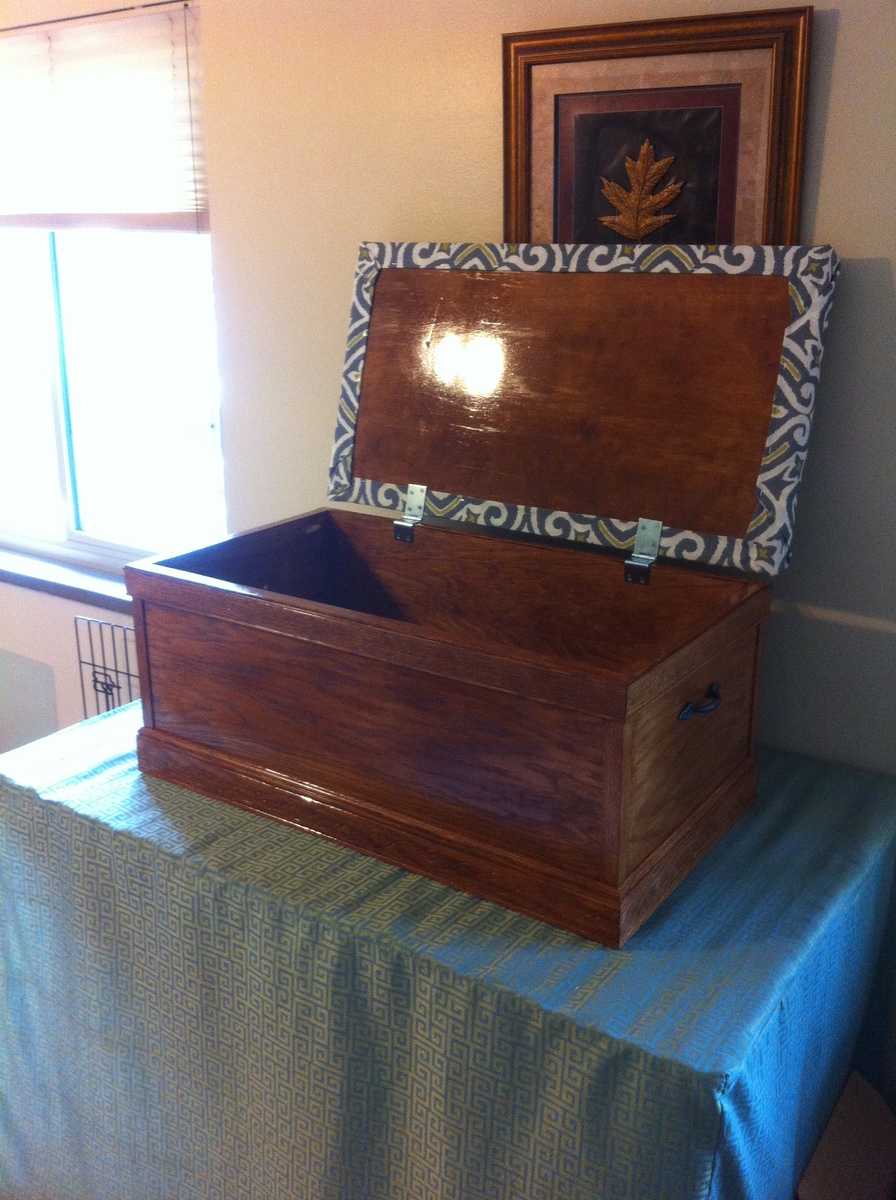
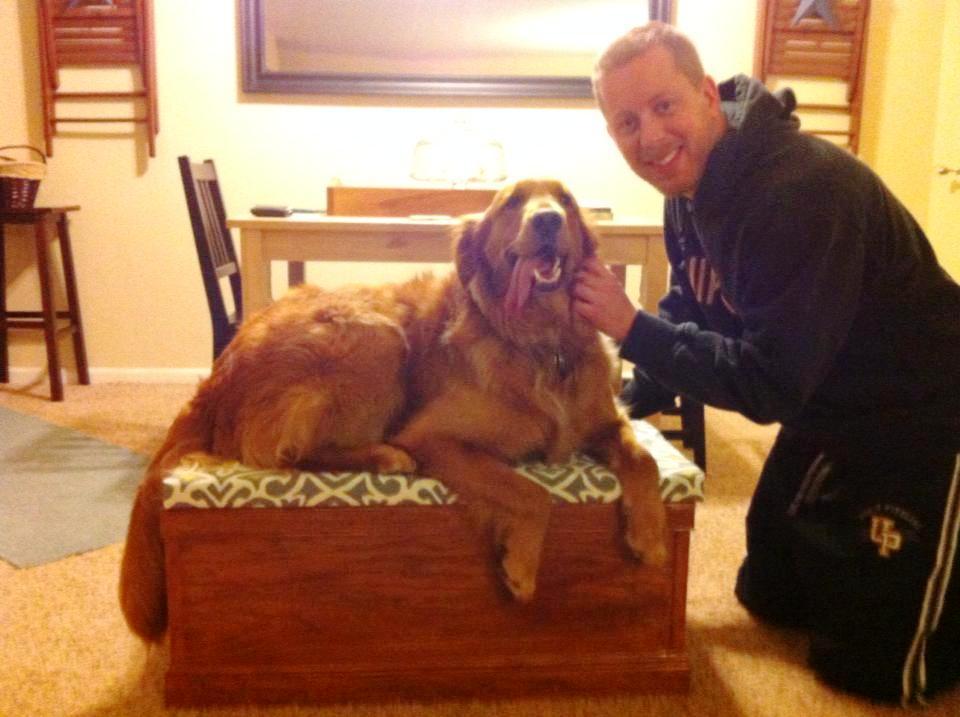
My take on the Becca Truck
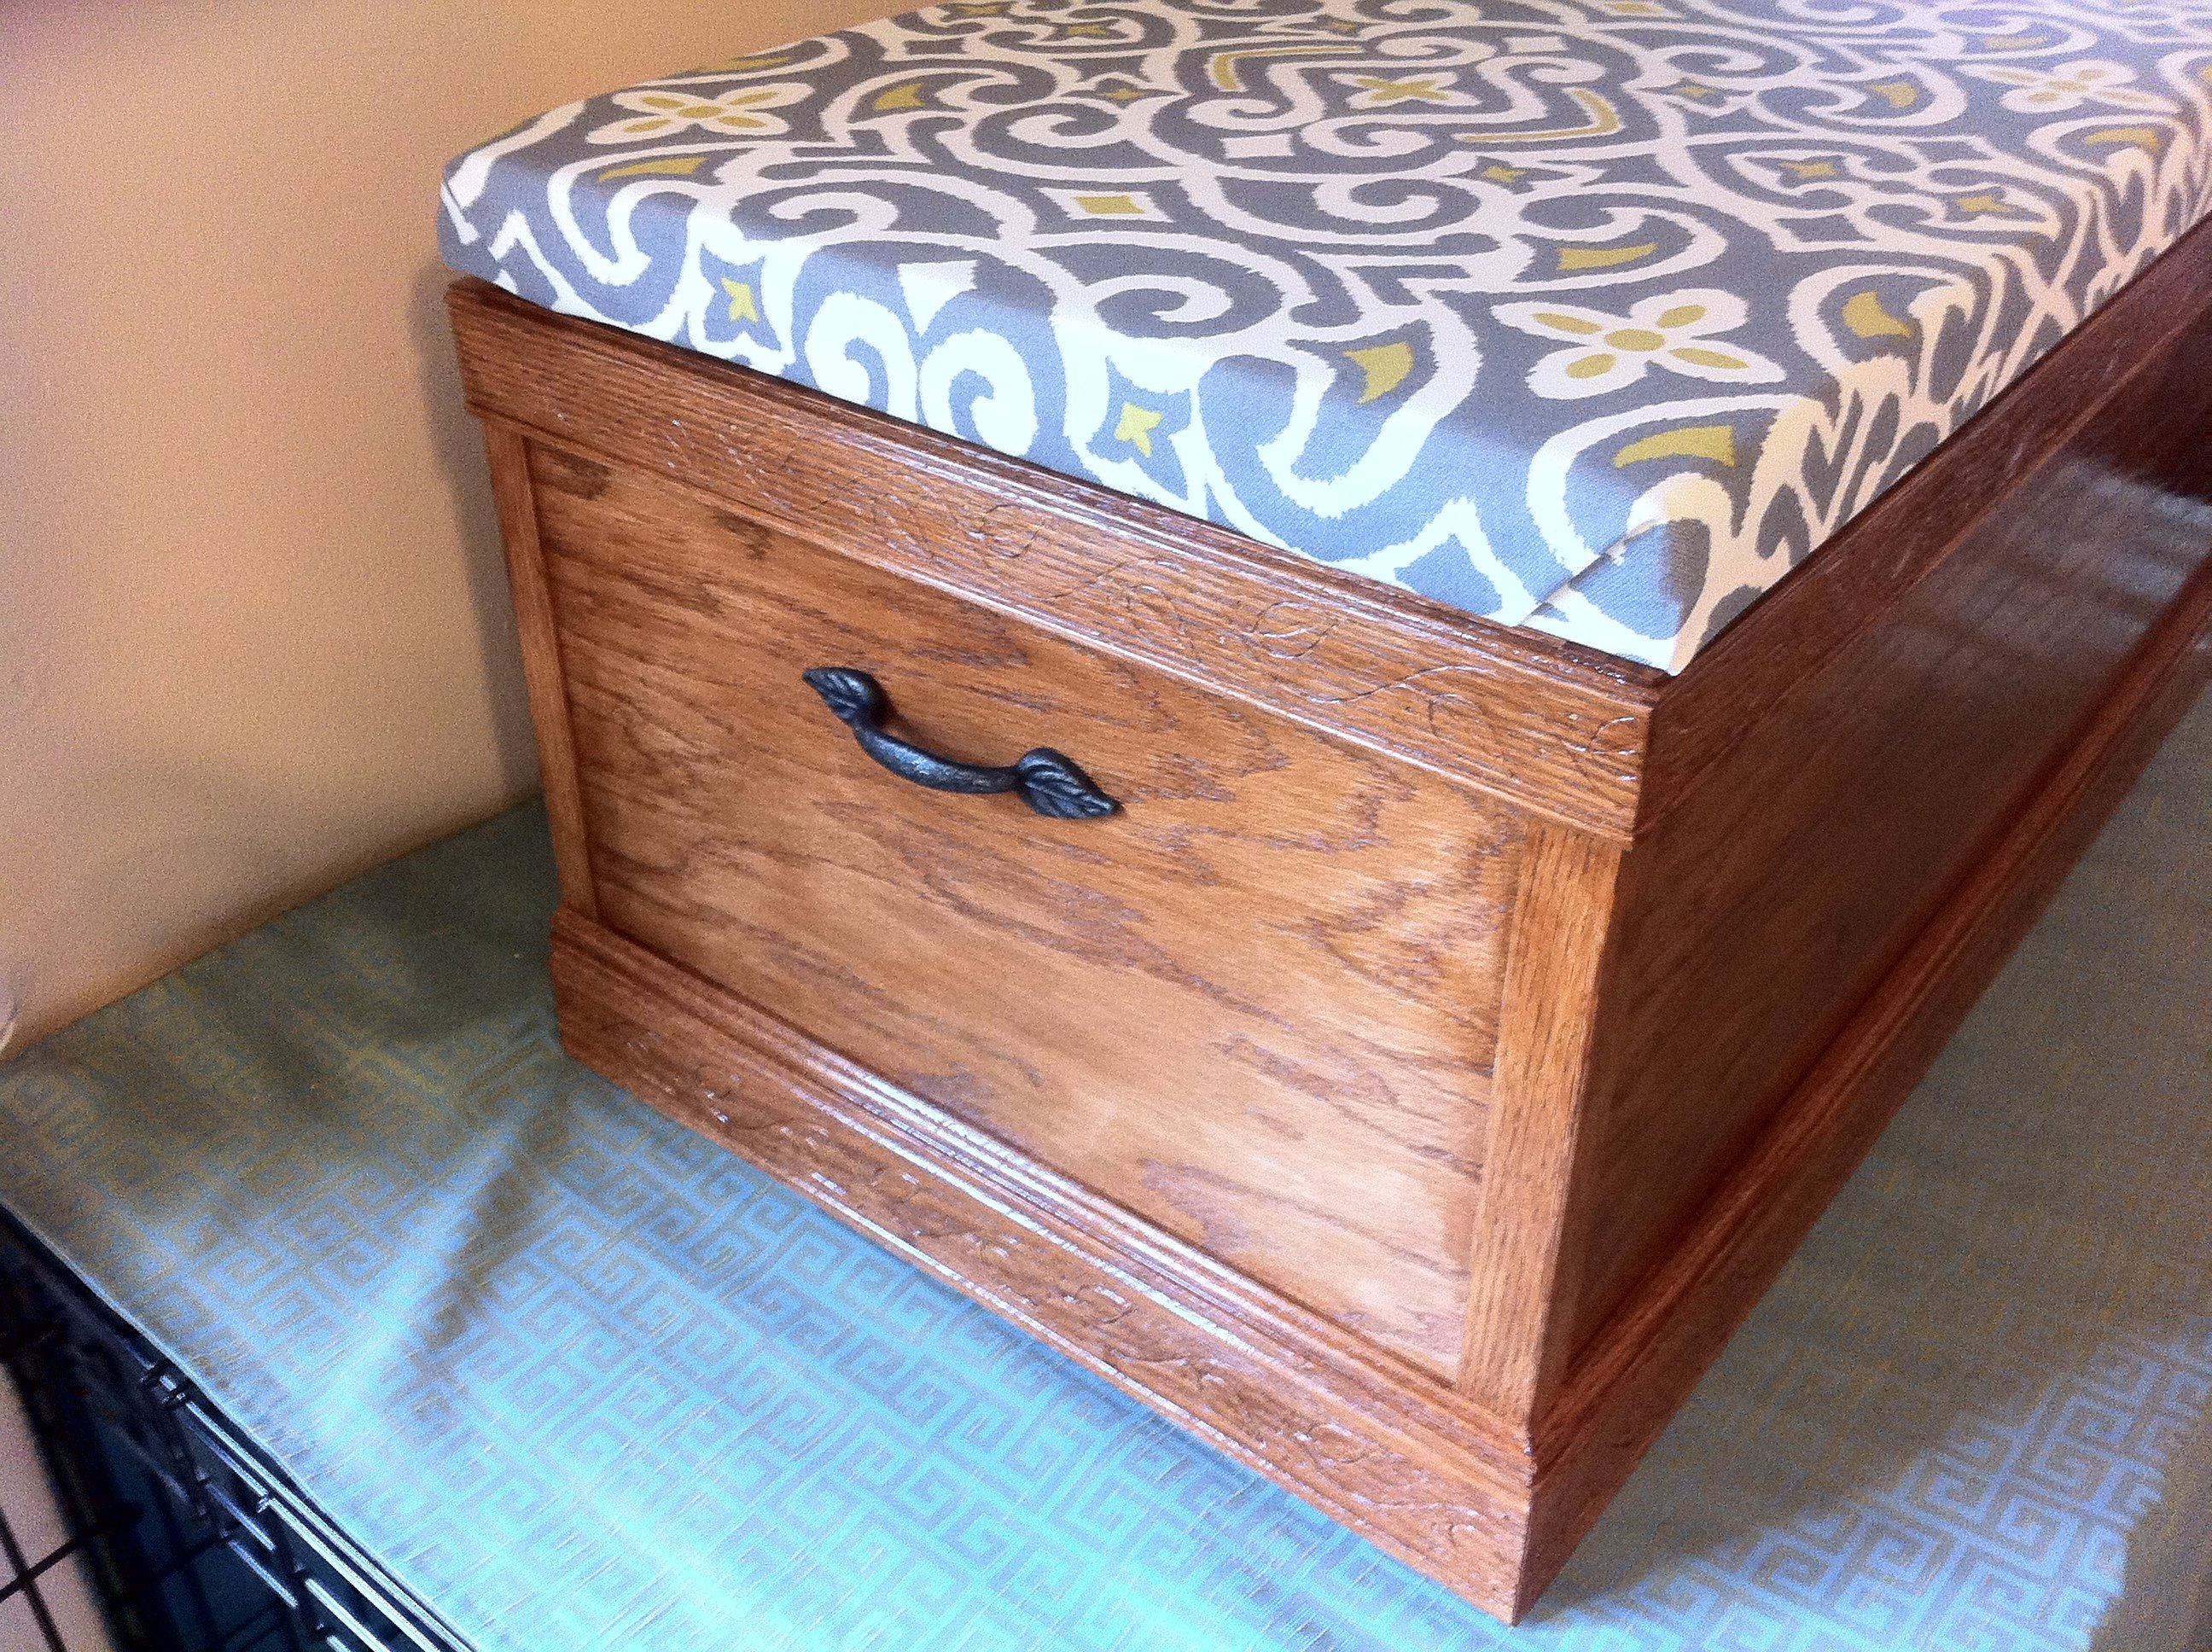
My wife and I have a 2 year old, 85lb, golden retriever named Lily. She has a tough time jumping up on our bed and has hurt herself on a few occasions. I was inspired to build her a step, but also wanted some storage. When I saw the Becca Trunk I knew I had to build it!
I used oak ply and solid oak for the trim, including some decorative leaf inscribed trim for the top and bottom. My wife and I picked out some outdoor furniture fabric that was stylish and would hold up to a big dog jumping on it. She used some firm padding and staple gunned the fabric to create a really neat and clean look (I am lost when it comes to that stuff, but she is a genius with scissors).
Built from Plan(s)
Estimated Time Investment
Week Long Project (20 Hours or More)
Finish Used
Minwax Polyshades Antique Walnut Gloss
Recommended Skill Level
Beginner

Comments
jahnkerk
Mon, 09/14/2020 - 09:42
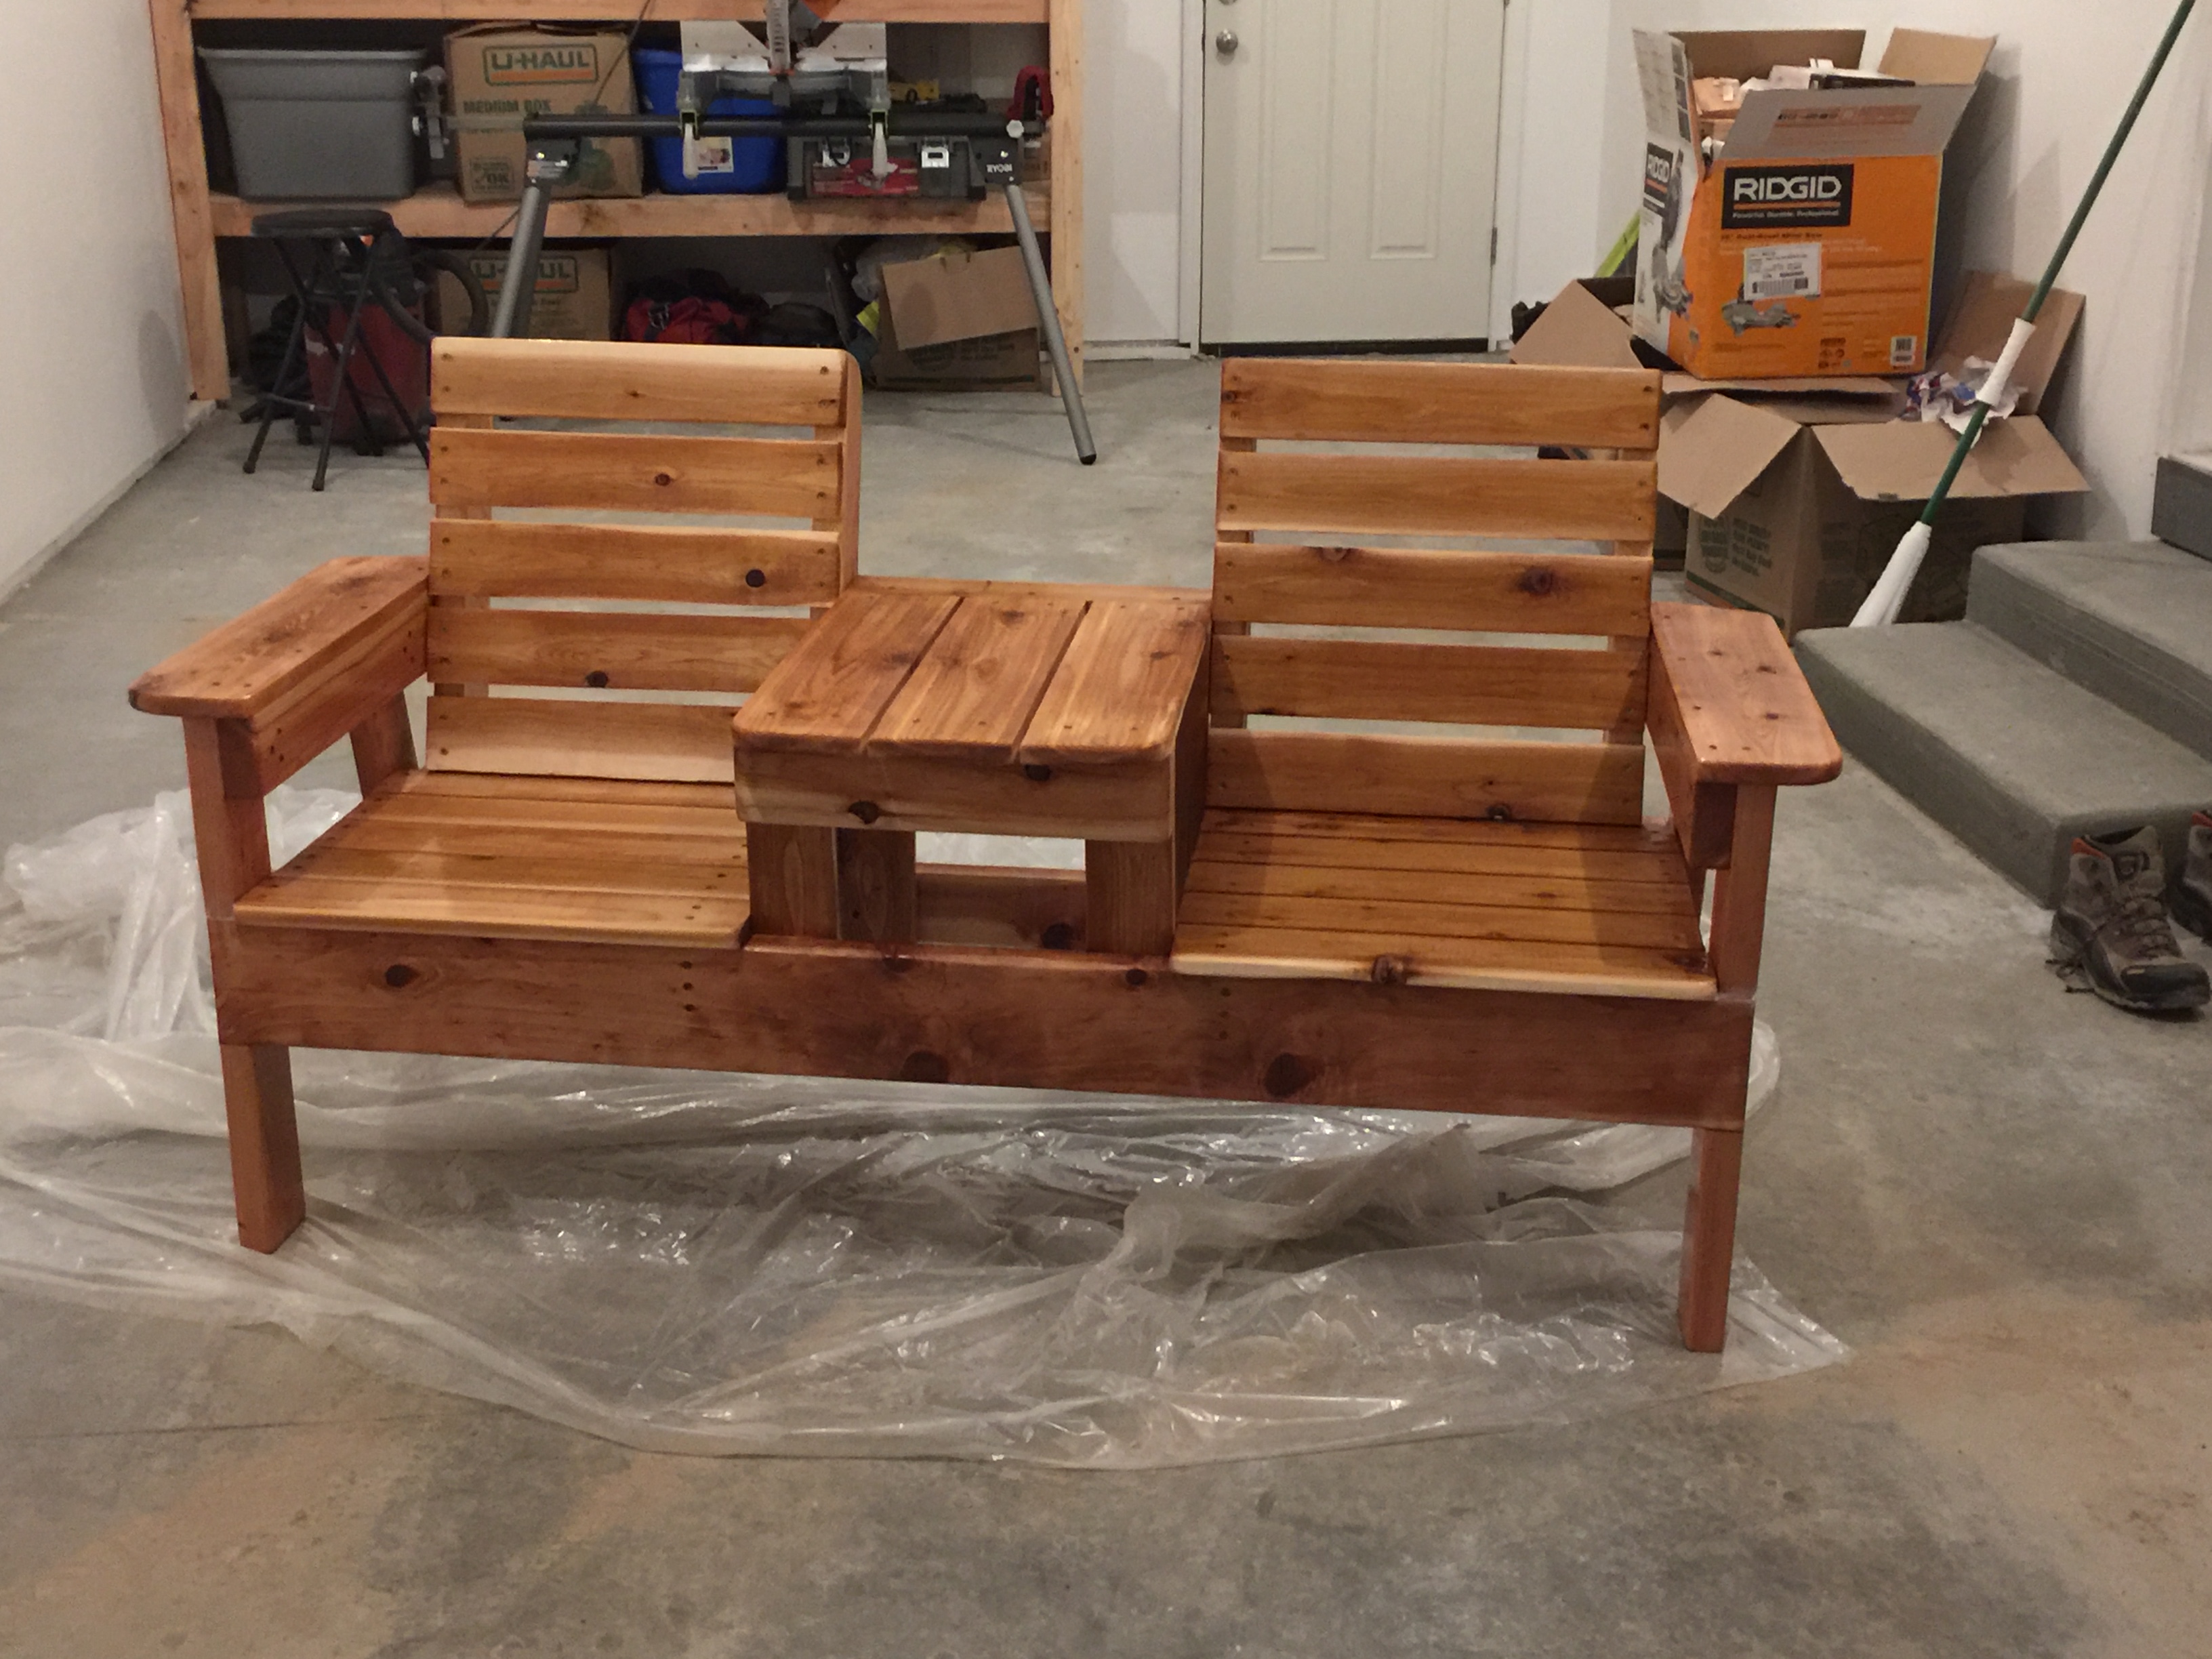
Two Seat Bench
I love this two seat bench. Are the plans for building such a bench available?
bernieMac
Wed, 10/13/2021 - 13:17
Plans for Two seat outdoor bench
would be interested in the plans