Community Brag Posts

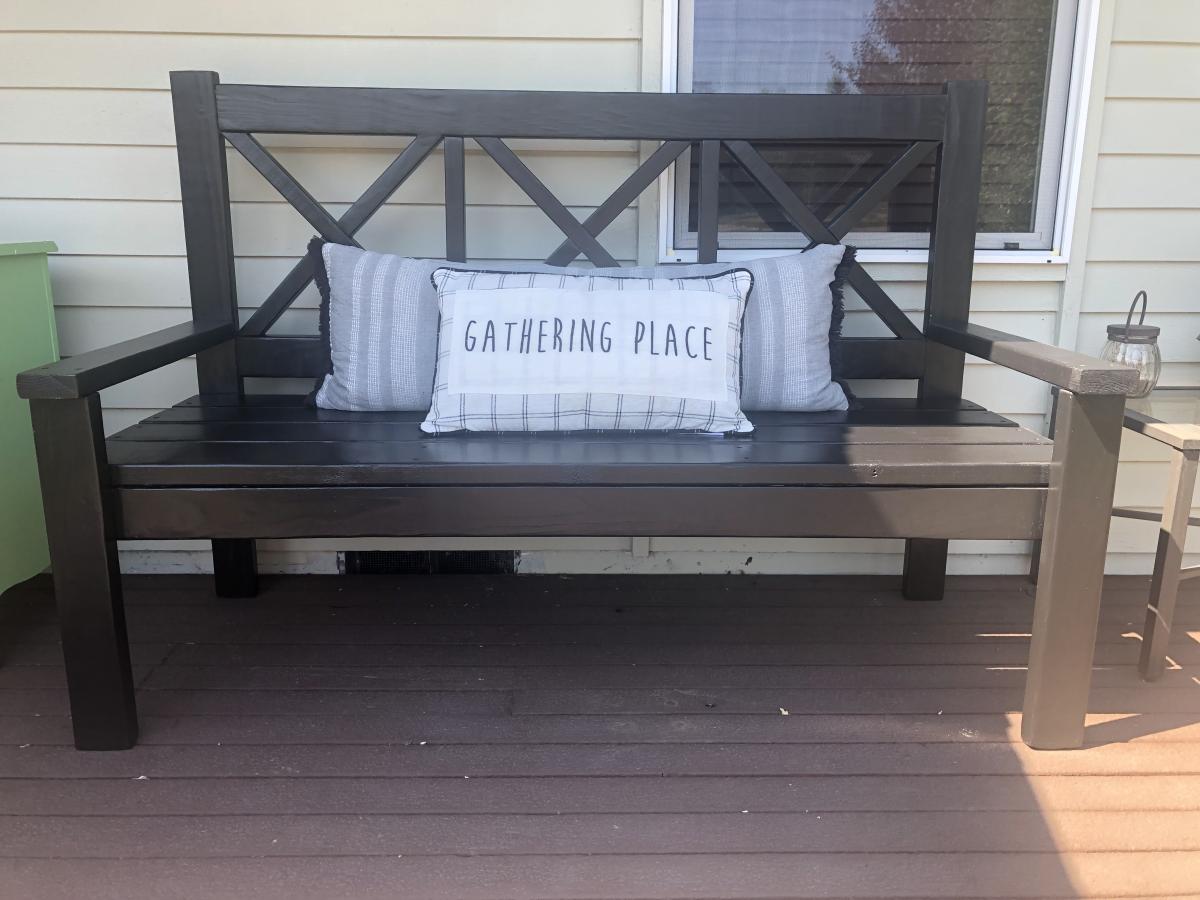
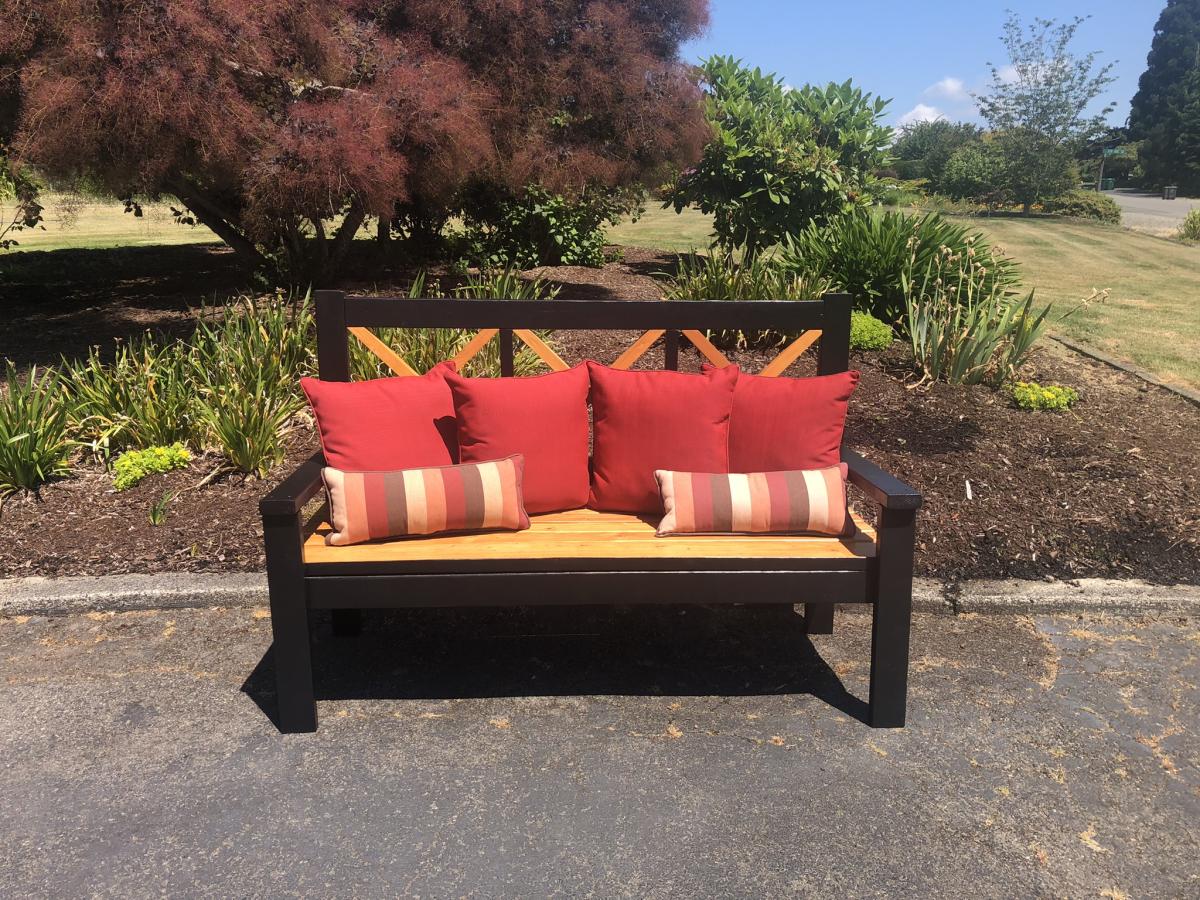
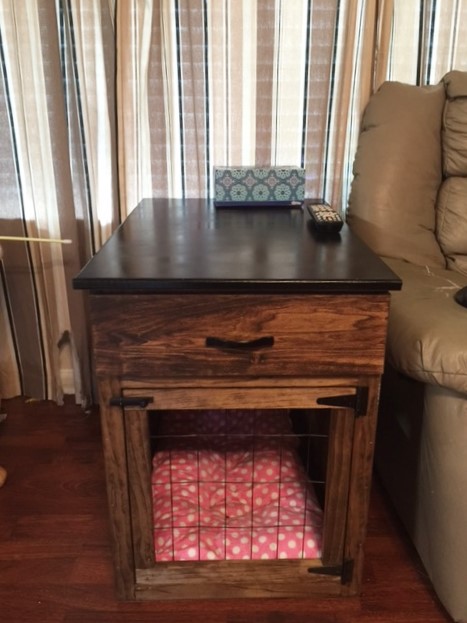
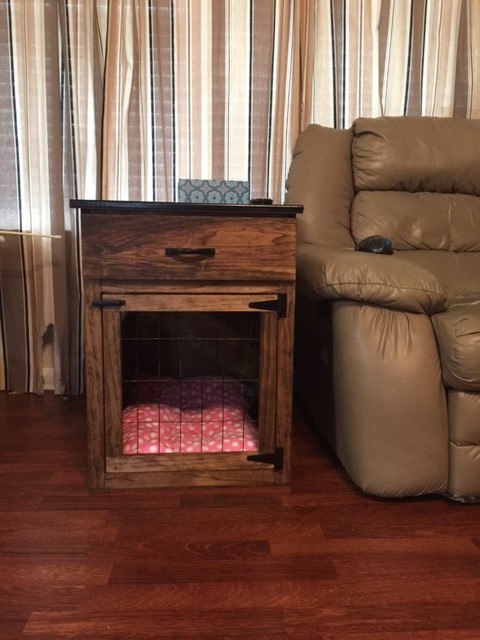
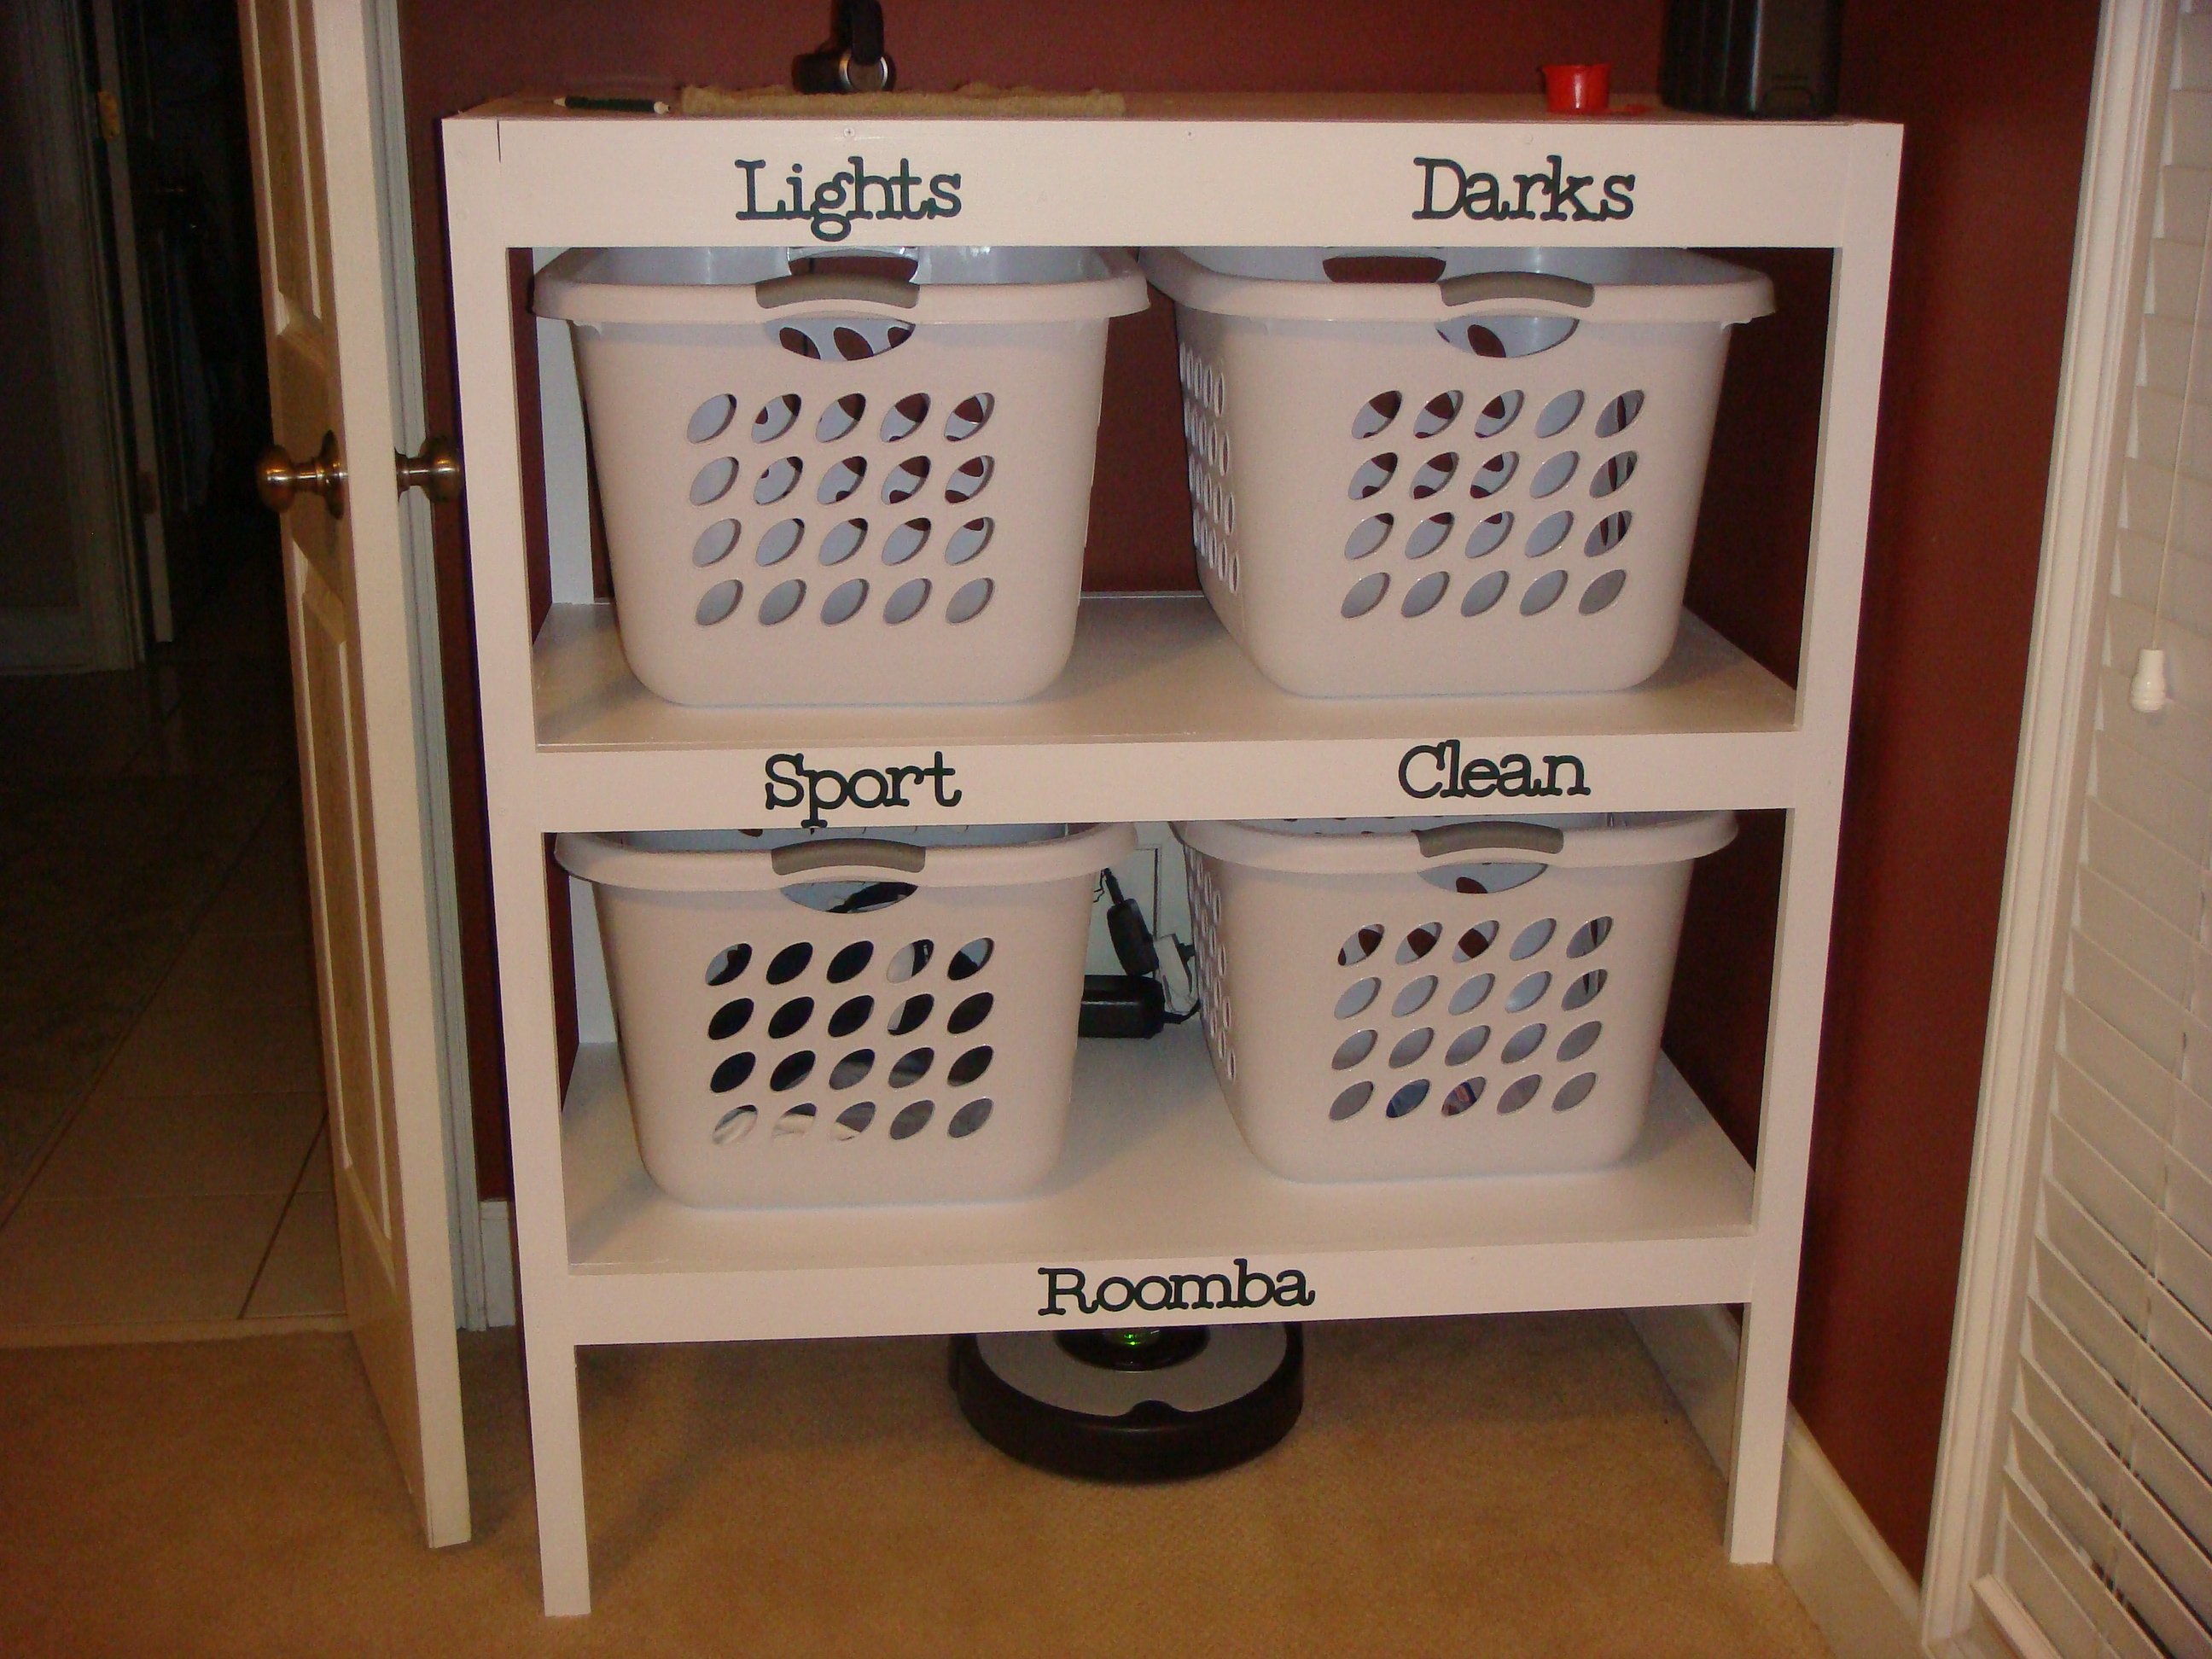
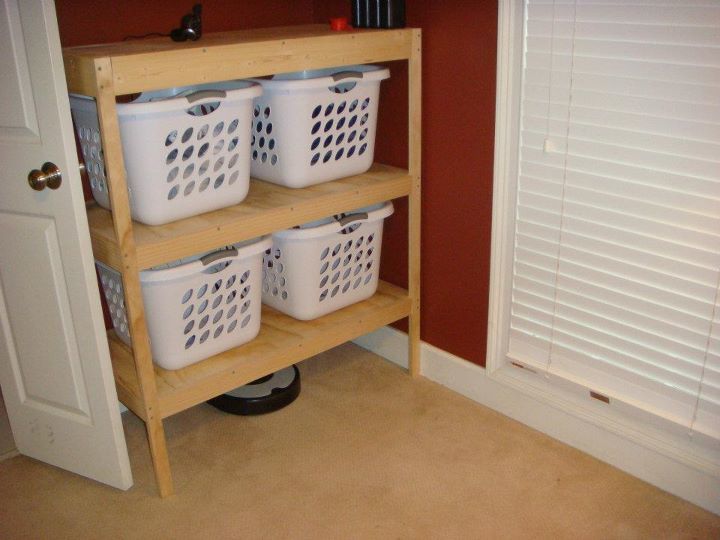
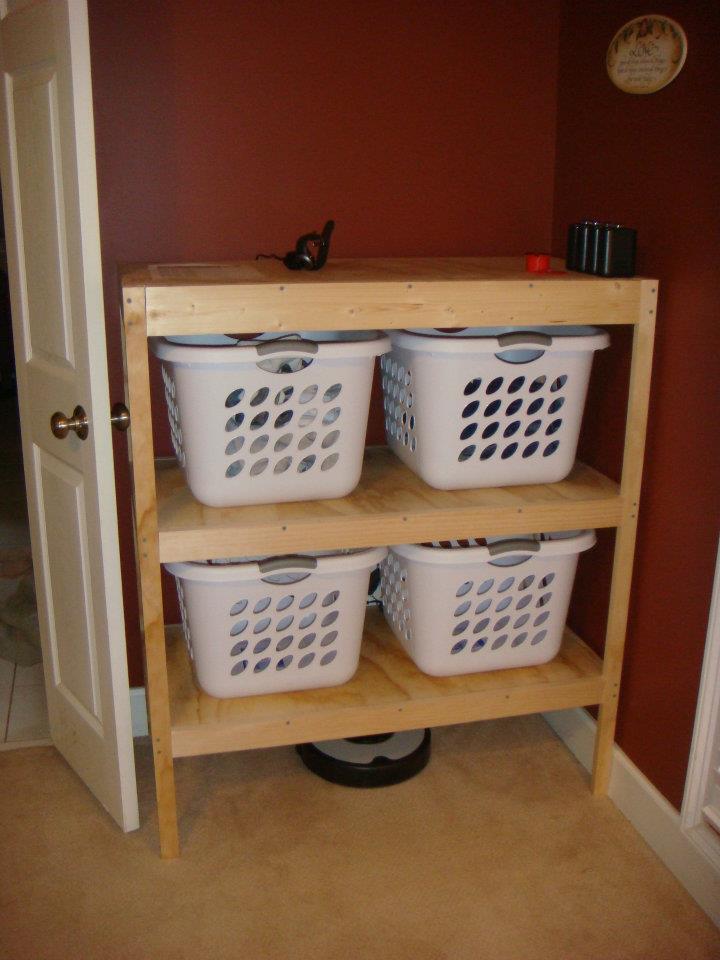
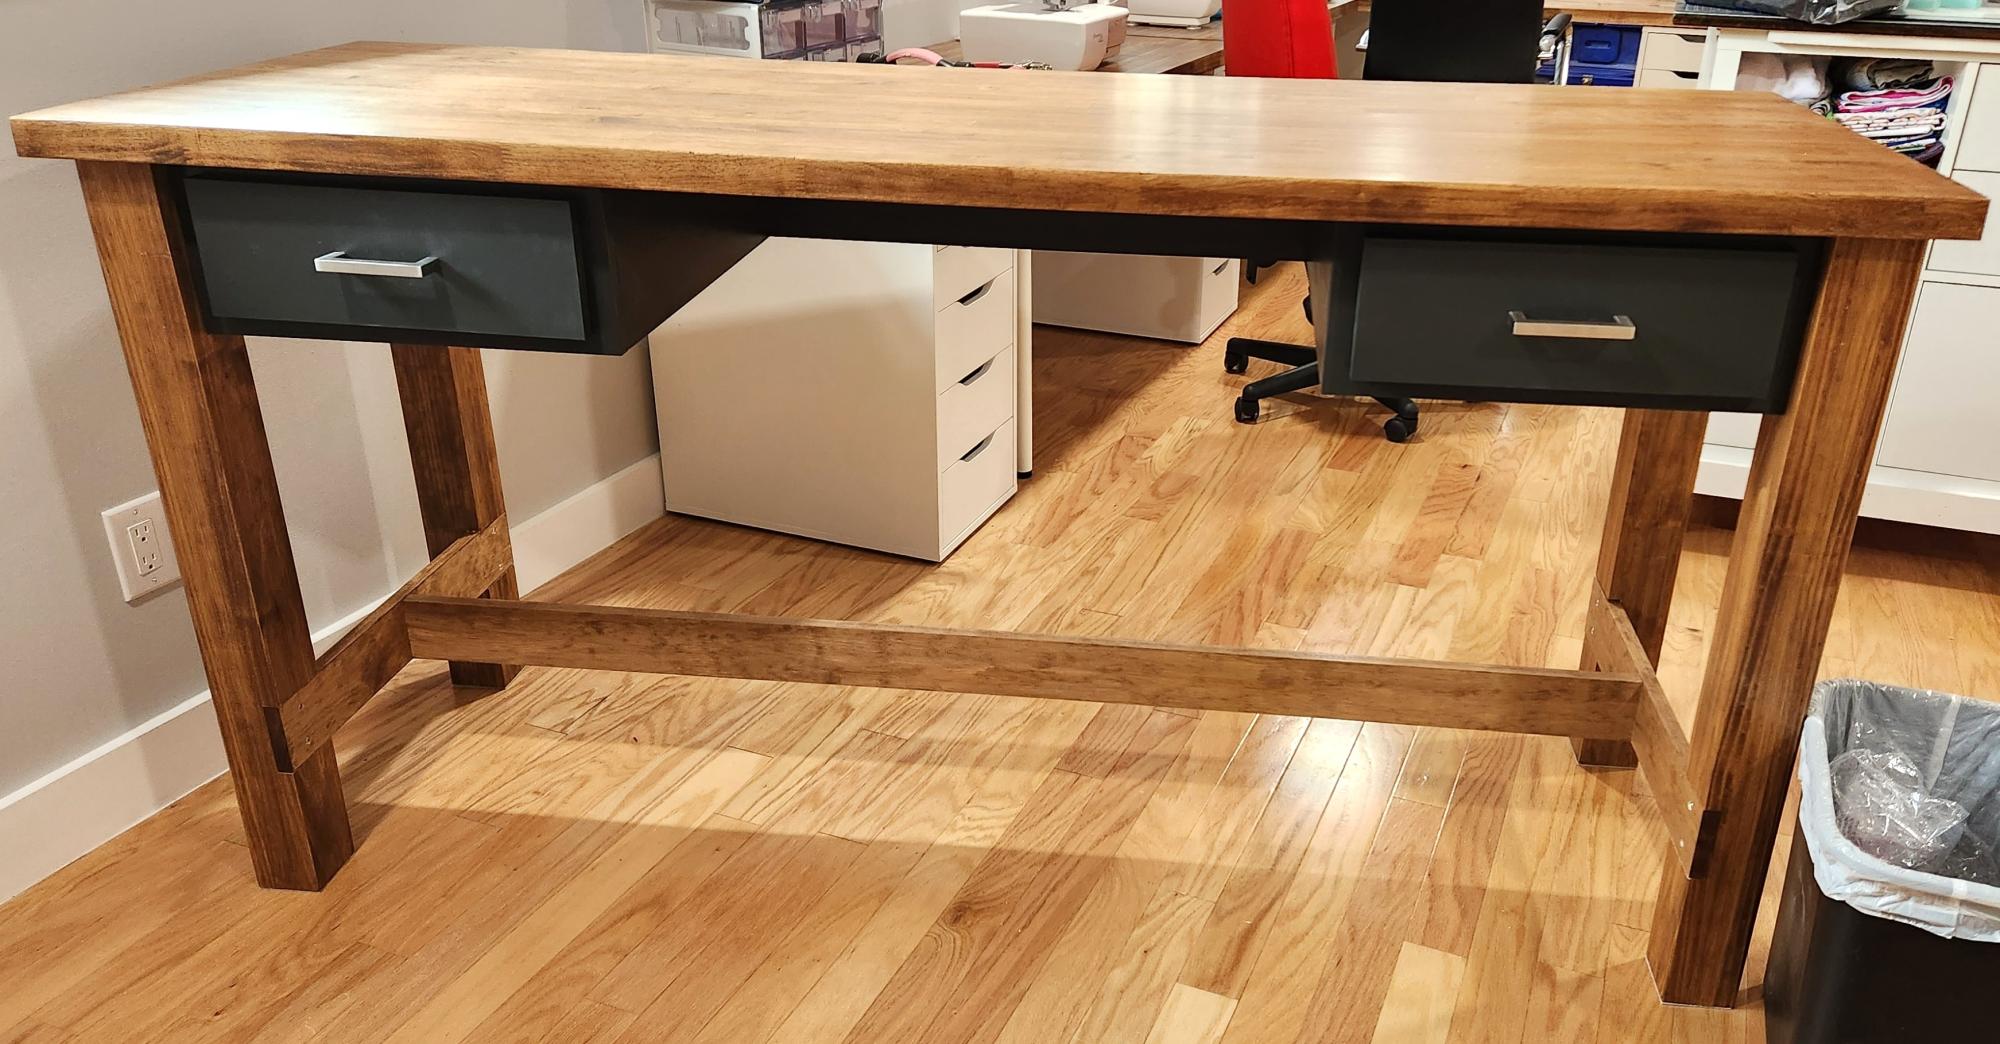
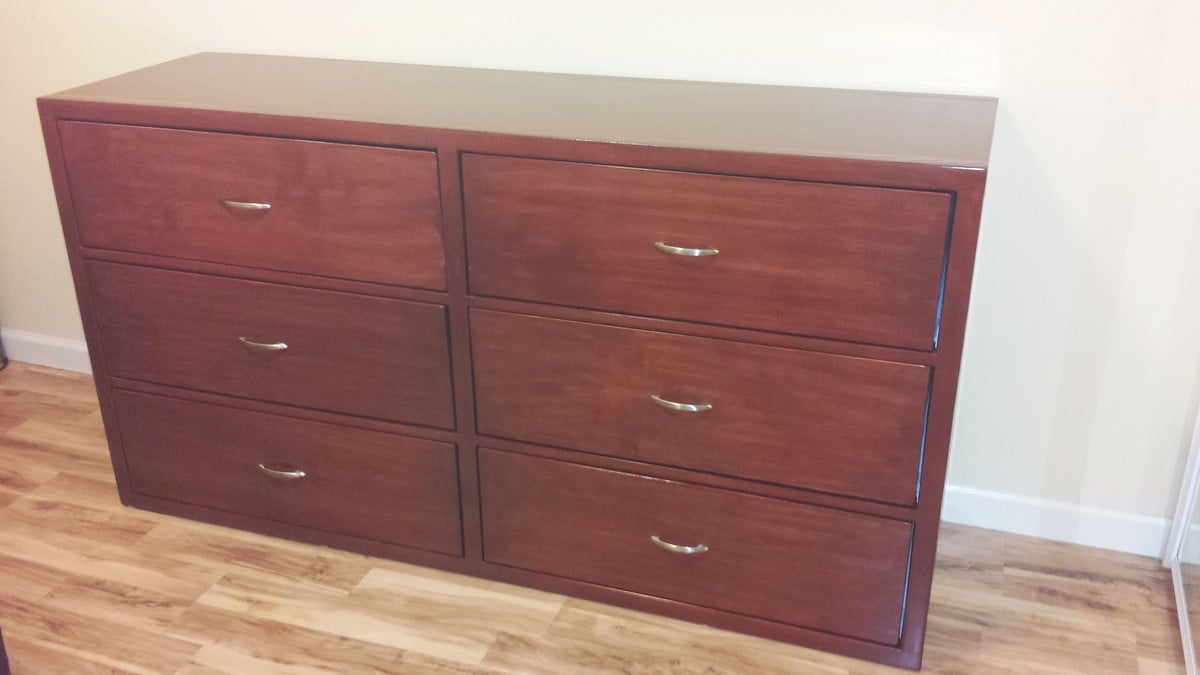
ROLLING RUSTIC WOOD DRESSER

Submitted by jimmysingh on Sun, 09/01/2013 - 13:08

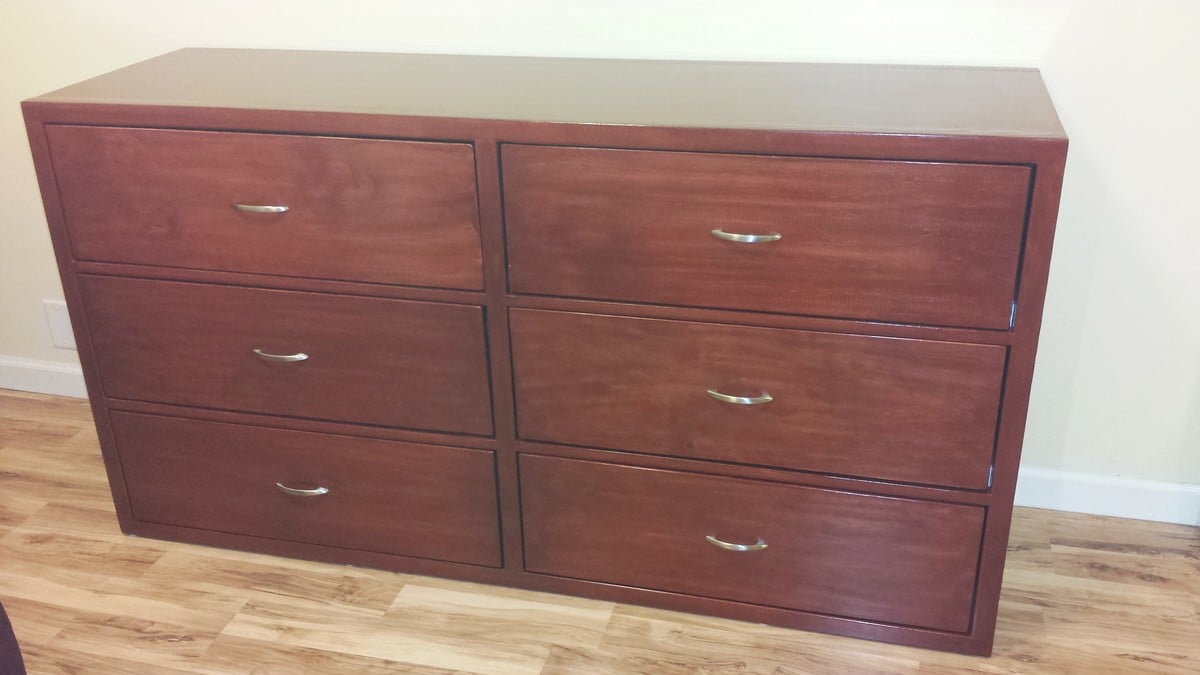
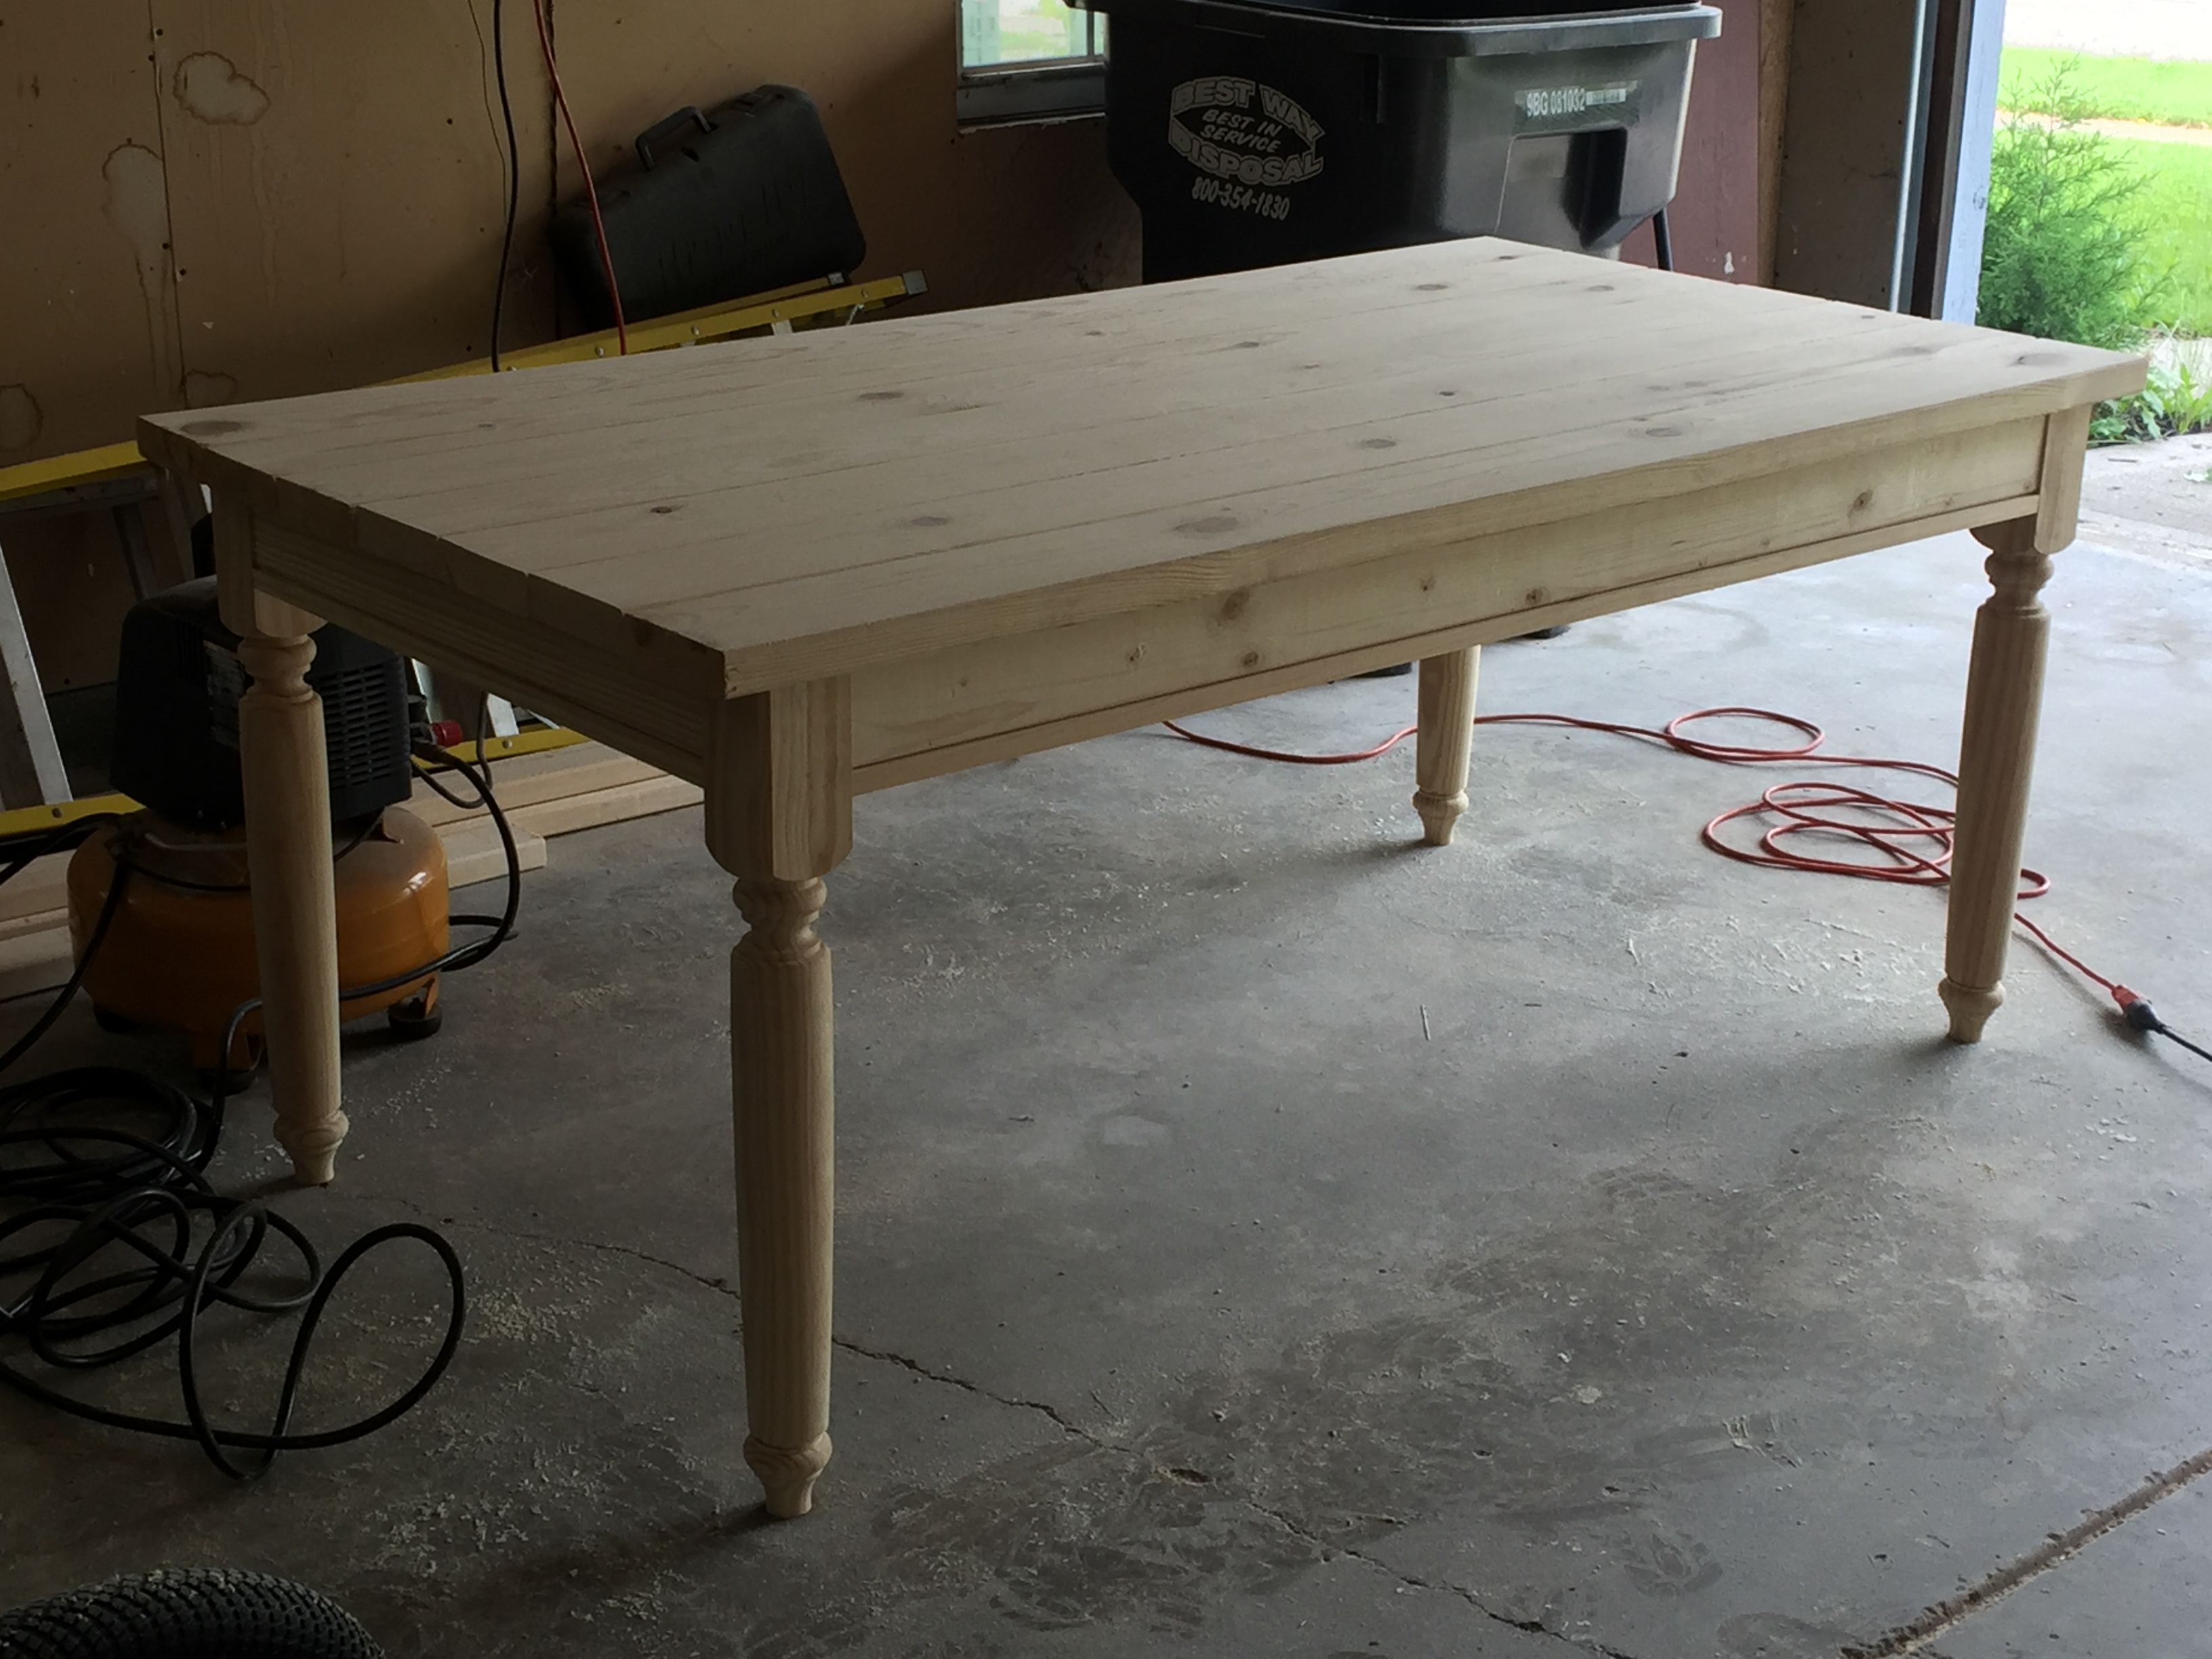
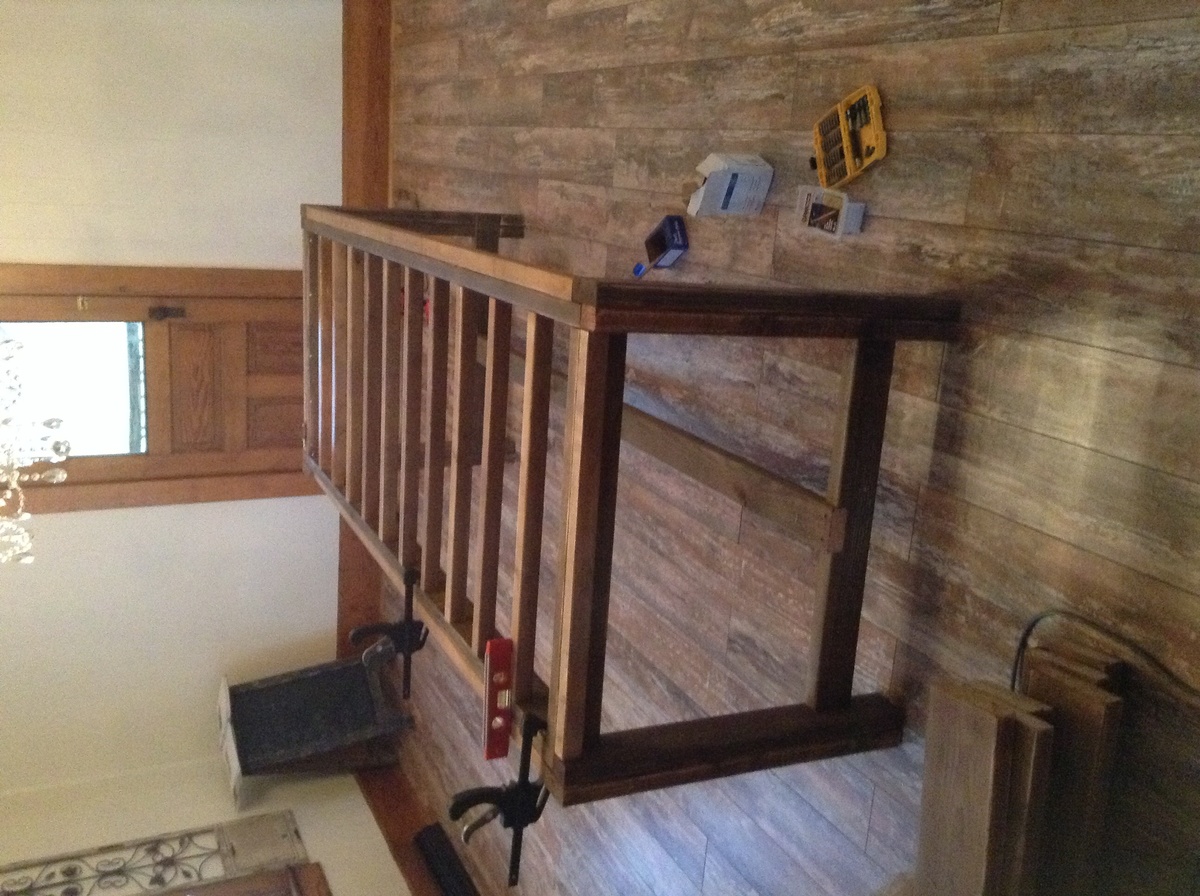
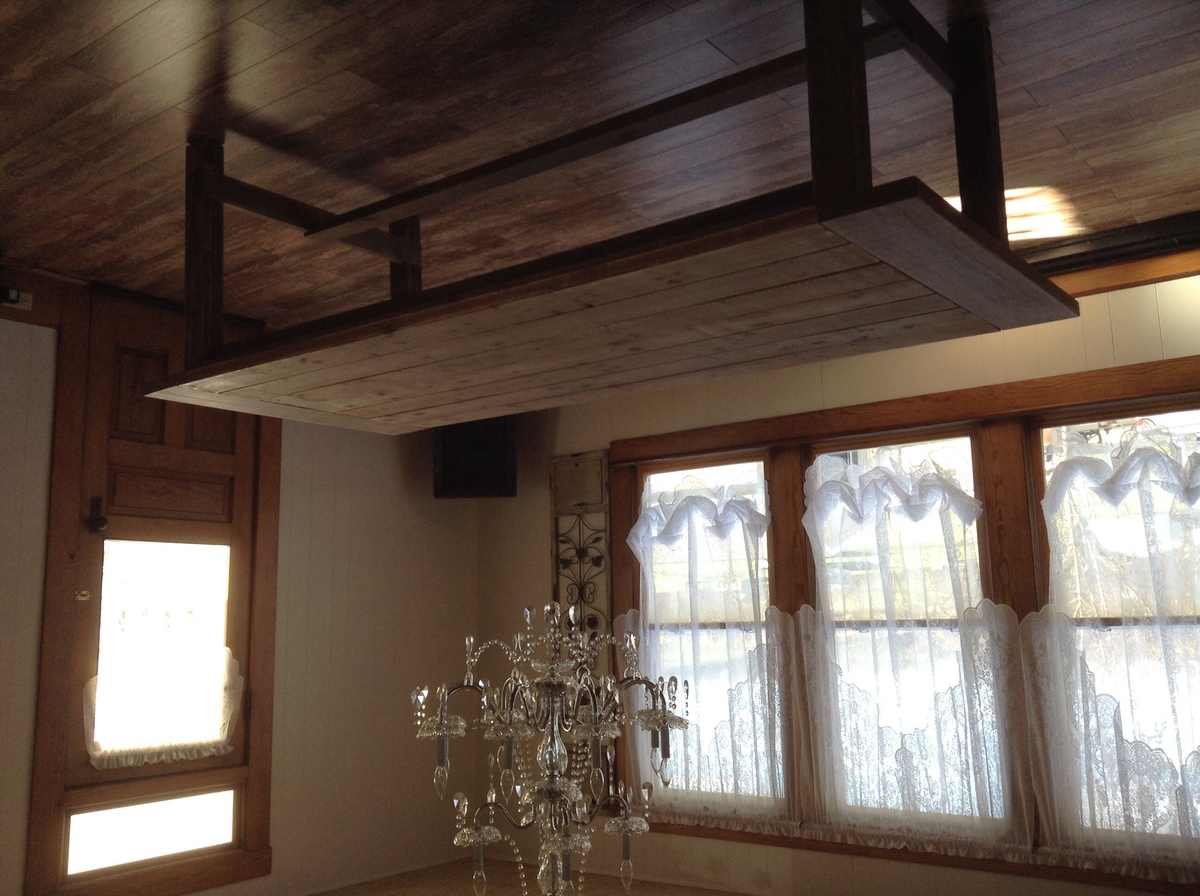
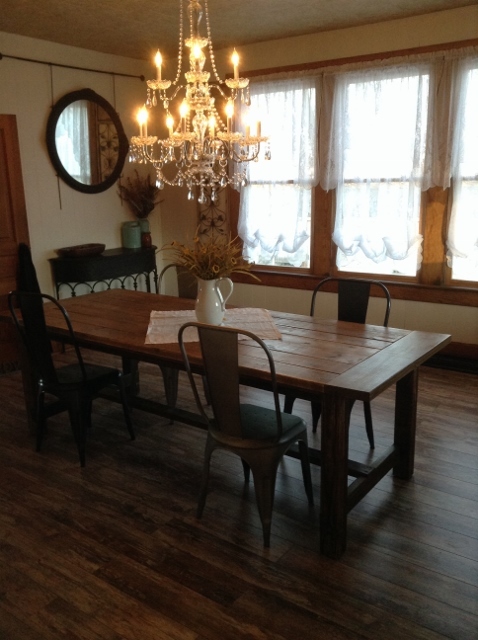
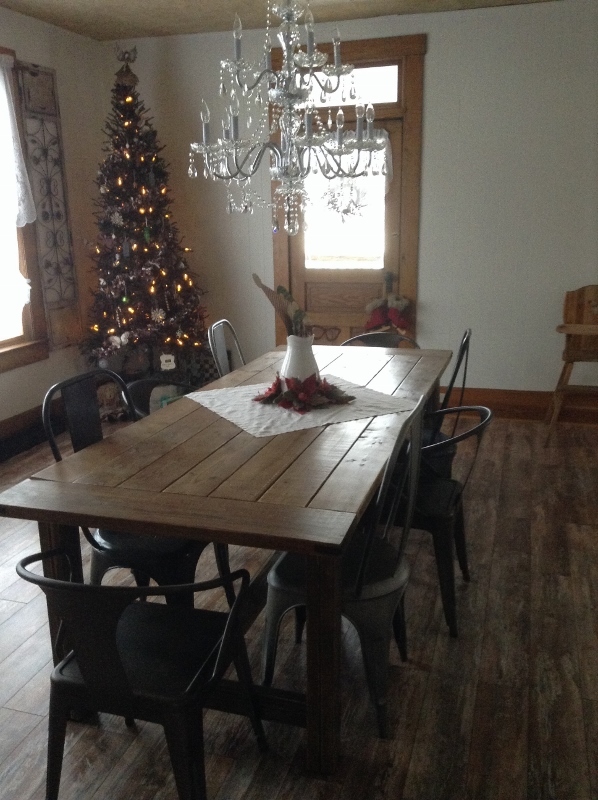
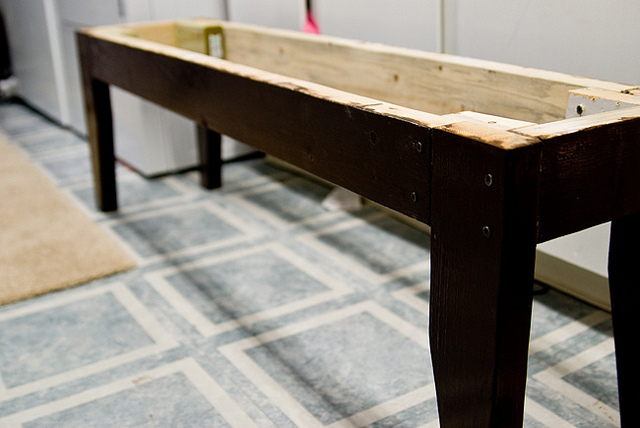
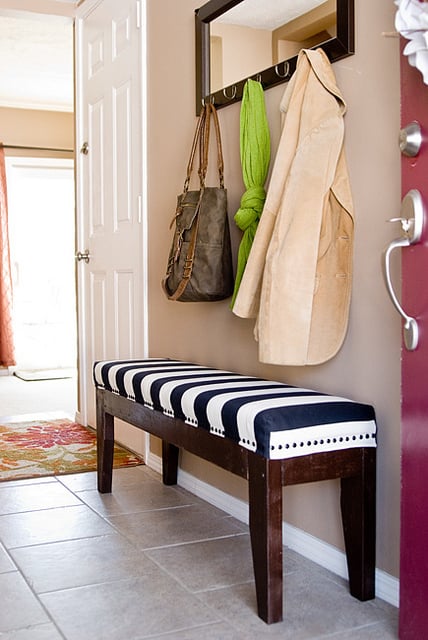
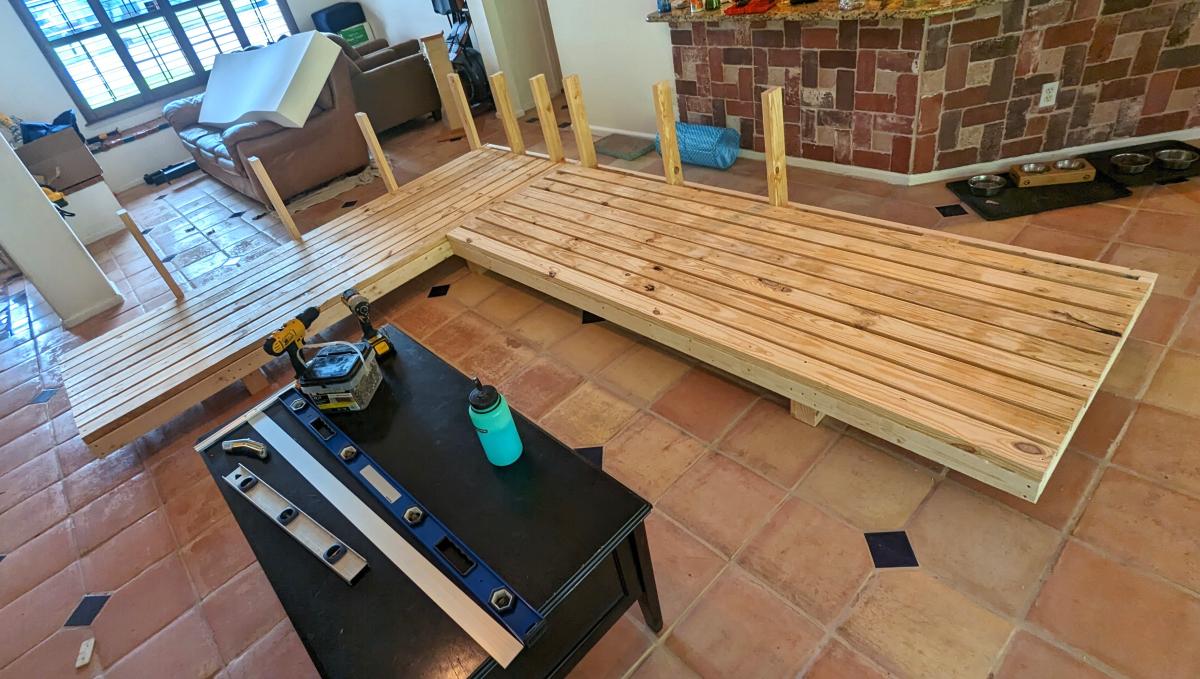
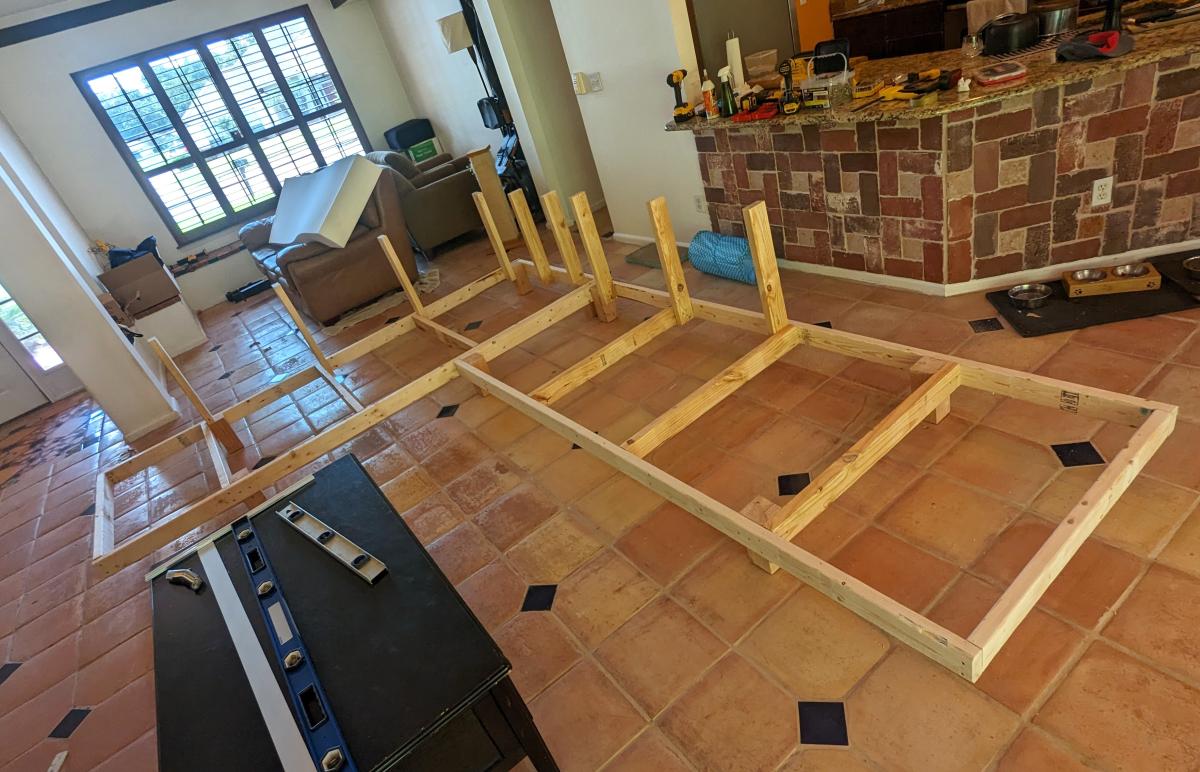
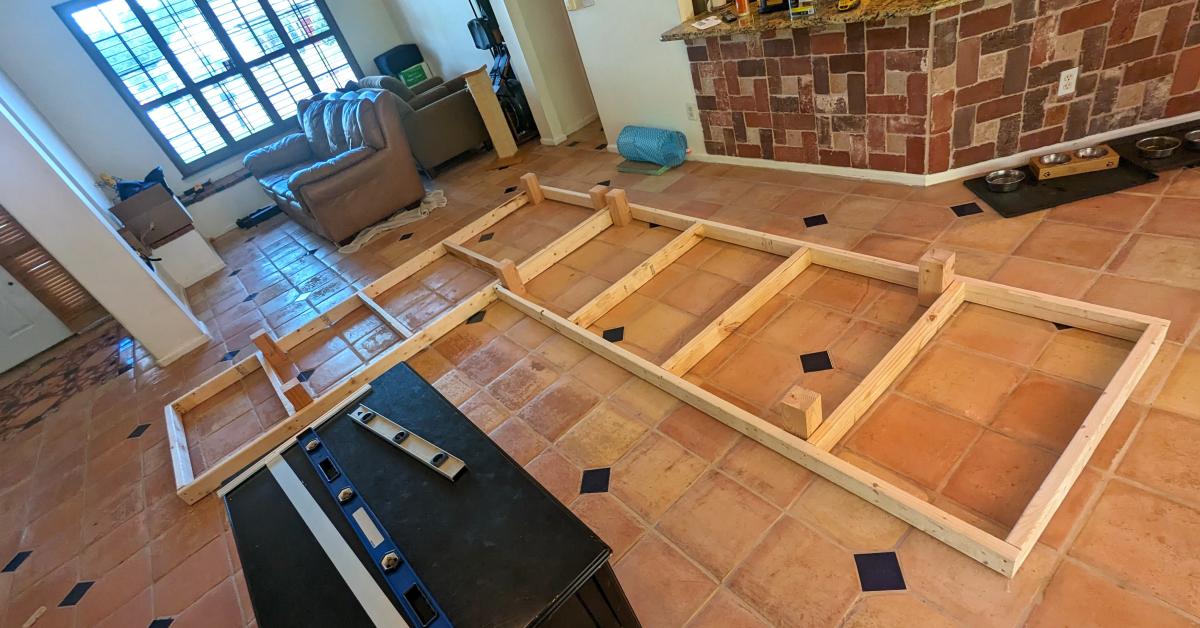
First big project, big for me anyway. Dresser came out better than I had imagined. I followed the plan exactly step by step except for the wheels part. Thank you Ana for the plans.

Built from Plan(s)
Estimated Cost
300
Estimated Time Investment
Weekend Project (10-20 Hours)
Finish Used
Rust-Oleum Traditional Cherry Wood Stain
Recommended Skill Level
Beginner

Large Porch Bench with X backs

Submitted by Anonymous (not verified) on Wed, 10/05/2022 - 16:39

I have built 2 of the large porch bench with X backs - one was all black and the other stained & painted. The only thing I had trouble with was the X backs - but that was with me, not the plans. Lots of compliments on both of them!

Comments

Beadboard Cabinet

Submitted by jamie_C on Sun, 08/28/2011 - 20:26

Since we don't have a garage or any really good place to keep our tools, they end up all over the house while we're working on a project. So, we decided to build a cabinet that would look nice in our house, and also house our tools. We chose the armoire plan because it has plenty of space.

This project took us forever, so it's hard to really estimate the actual working time. We began working on it back in June, then we were evacuated because of a forest fire.... By the time we got back into our house and we were organized again it was the end of July.... and now finally the end of August it's finished. It took us a while, but it's a great addition to our house!

We modified this cabinet by using 1/4 inch beadboard backed with 1/4 plywood for the doors. We also modified the size of the armoire to make it deeper.

Built from Plan(s)
Estimated Cost
$125 approximately?
Estimated Time Investment
Weekend Project (10-20 Hours)
Finish Used
Sanded, then painted the outside with a quart of "creamed coffee" oops paint, and painted the inside with a sage green paint from Habitat for Humanity Restore.
Recommended Skill Level
Beginner

Comments

Outdoor chair frames and coffee table

I built a set of chairs and a coffee table for our newly designed outdoor area. These look amazing and people love sitting on them and hanging out outside our house.

Comments

Seasonal And Holiday

Smaller Dog Crate with a drawer!

Submitted by imalearba4 on Wed, 01/06/2016 - 14:02

You may remember my green stratton day beds that I built a long time ago- finally I have another project to post- I am soo happy I found Ana White's website. We just got back from a 2.5 week vacation in Israel and my dogs were staying with my sister. She told me they had been sleeping in the same kennel together instead of separately. Their kennels are too small so I decided to build them one using wood I already had. But since they are small dogs, I decided to size it down- but I wanted it end table height- so I built a smaller kennel- 20"H x 19"W x 28"D. but... I added a drawer to the top to bring it to the right height. You can read all about it on my blog- link below.

Built from Plan(s)
Estimated Cost
$35 - for drawer pull, stain, drawer slides, and hinge hardware- I had the 2x2s and plywood in my stash
Estimated Time Investment
Weekend Project (10-20 Hours)
Finish Used
Provincial stain
Recommended Skill Level
Intermediate

Comments

KryssQuinn

Sat, 04/11/2020 - 15:17

I really like this idea. We have a repurposed dresser currently housing two crates, but this is cleaner.

Farmhouse Table and Bench

Submitted by shaunbeck7 on Wed, 06/05/2019 - 08:28

This project took me about 3 weeks of my spare time. Maybe an hour or two a day. I was lucky that I bought the table legs and bench legs together to match. I’m really pleased with the results. Thank you Ana White!

Estimated Cost
$250
Estimated Time Investment
Weekend Project (10-20 Hours)
Finish Used
Stain the table and painted over top the stain with chalked white paint and sanded down to show some of the stain through the paint for the rustic look. Stain and polyurethan table top. Used wipe on polyurethane which I liked better then the brush on. Took about 4-5 coats though.
Recommended Skill Level
Intermediate

Twin over Full Bunk Beds

Submitted by bohman825 on Sun, 01/08/2012 - 15:47

I wanted my kids to have more space in their shared room, but I did not want to pay a ton of money for a new bunk bed. My husband and I found a plan for this bunk on Ana-White and fell in love with the design. It turned out so great that we will still be using it in our next home whether it's needed or not. We did change a couple of things on the plan that we didn't care for. The first is that we added a side rail for safety. Secondly we also traded the 1x6 boards on the head and foot boards for 1x4s on the top but kept the 1x6s on the bottom.

Estimated Time Investment
Weekend Project (10-20 Hours)
Finish Used
Stain: Colonial Maple and polyurethane.
Used a sponge brush to apply stain and dry cloth to wipe off. Used a brush to apply poly.
Recommended Skill Level
Intermediate

Comments

Tony (not verified)

Mon, 01/09/2012 - 06:31

The guardrail looks great. How did you attach it to the corner post?

bohman825

Mon, 01/09/2012 - 17:39

With pocket screws on the bottom and then one screw through the 1x4s into the post before the 2x4 on the top goes on. And then the 2x4 is screwed onto the 1x4 and post with trim screws.

NicoleS (not verified)

Fri, 03/23/2012 - 04:36

How much did it cost you to build this bunk bed? I'm wondering if we can build this one as it turned out great looking!

NicoleS (not verified)

Fri, 03/23/2012 - 04:37

About how much did it cost to build this bunk bed? I'm wondering if we can build it since it turned out great looking!

Jillian (not verified)

Wed, 03/28/2012 - 13:02

Cost us about $300 and over an entire weekend of time spent on this project.
It's not for beginners. My husband has had many many years of experience in carpentry and woodmaking.

Good luck to you.
Also, he changed a few things in the plans we found in order to make it look better.

Thank you

Jillian

Jillian (not verified)

Wed, 03/28/2012 - 12:59

Cost us $300.00 to make and almost non-stop making it for the whole weekend. And then stained for hours.
This is with many years of experience in construction and woodmaking.

This is not a beginners project and then expect it to look amazing.
My husband changed these plans a bit to make it look better than the other ppls that we've seen on here.

But, good luck to you and make sure to have plenty of room and time.
Also, we had to make this bed in 10-15 different pieces and put together in the bedroom we wanted it in. There is absolutely no way it will fit otherwise.

Jillian

bohman825

Sun, 04/08/2012 - 15:26

Yes you'd just have to change measurements for queen instead of a full.

rdaneel

Sat, 10/25/2014 - 22:25

I don't see how you could put the fill/twin over a queen since the queen is longer.  Obviously you could spin the queen around and make it an L-shape but then you are looking at a different build.

Jesse and Jillian (not verified)

Thu, 12/06/2012 - 09:53

Yes any size would work as long as you have the room and the extra materials.

rdaneel

Sat, 10/25/2014 - 22:28

I really like the look of this ... I'm going to try to replicate!

What does the bottom of the guard-rail look like?  Did you space out your slats a little more than the original design?  I like the 2x4 topper instead of the 1x6.

hmagnani

Sat, 02/28/2015 - 16:46

We made this bed over the course of a week, both of us have extensive experience in woodworking and building. Ours is very wobbly on the long axis. We had a friend who is a structural engineer come in and take a look. He offered suggestions to shore it up and nothing really worked. The 3/4" overlap is not enough to secure the side rails, imo, and we used a variety of brackets to make it not wobble, to no avail.

This bed is coming apart in a few weeks and will be stored. If it is ever used again, it will be as two separate beds. I spent about $400 on this. My son never felt safe sleeping on the top bunk and has slept on the bottom exclusively.

Just my $0.02.

Queen Farmhouse Bed

We've built over 100 of these farmhouse beds - we've tweaked the design ever so slightly. 

Our first Farmhouse Bed took roughly a day to complete. We sanded the entire bed, applied stain & then applied two coats of matte varnish. At least apply one. Stain can leak for weeks, and smell bad for longer.

We use 2x3's for our slats and find them extra strong! 

Built from Plan(s)
Estimated Cost
A Queen Costs roughly 160.00 for just the wood. That isn't including stain, screws, poly or any of the other materials.
Estimated Time Investment
Afternoon Project (3-6 Hours)
Finish Used
We used minwax stains mixed to make a custom stain called "beachwood".
Then we applied A matte polyurethane - We also used metal caps on the holes in the top of the footboard/headboard.
Recommended Skill Level
Beginner

Leaning Herb Garden by Love & Renovations

"For this project, I decided to lean on the expertise and creativity of someone else, and I followed a tutorial from Ana White It was incredibly easy to follow, really well written, and a super simple build. It took me just a few hours to build the leaning planter, and cost about $45 in wood." - Amanda


Seasonal And Holiday

Laundry Station

Submitted by docfin02 on Sun, 01/22/2012 - 19:14

My original plan was for a laundry cart or stand for laundry baskets. I ended up building one that is pretty big for 4 baskets, a shelf on top, and elevated 10" on the bottom for our Roomba vacuum to be stored.

Built from Plan(s)
Estimated Cost
$80 + paint
Estimated Time Investment
Afternoon Project (3-6 Hours)
Recommended Skill Level
Intermediate

Comments

Fancy Hall Tree Bench

Submitted by blmalloy on Thu, 12/05/2013 - 12:08

I saw the plans for this and had to have it! My husband had it assembled pretty easily (we've built several dining tables/benches, but this was our first piece that went out of that box, lol) and the whole project took maybe a day or two including staining. We left of the end pieces just because we were trying to get it done quickly for Thanksgiving; we intended to add them on later, but I kind of like it open. Everyone who has seen it loves it!

Built from Plan(s)
Estimated Cost
$75
Estimated Time Investment
Day Project (6-9 Hours)
Finish Used
Rustoleum Ultimate in Early American with two coats of poly. If I had to do it again, I would stain the pieces used for the bench before they were assembled; staining inside those cubes was a bit difficult.
Recommended Skill Level
Beginner

Comments

Val Manchuk

Sat, 12/07/2013 - 21:46

Your hall tree looks really good! (Early American is my favorite stain color!)

Val @ artsybuildinglady.blogspot.ca

Farmhouse Table

We recently moved back to my hometown and bought a beautiful farmhouse that was built in 1908. We knew Ana's Farmhouse Table plan was perfect for our dining room! We followed Hillary, from The Friendly Home, advise and black tea stained the wood, then sanded it with an 80grit paper. The next step was to apply the oxidizing solution, made up of 000 steel wool dissolved in white vinegar. We will continue to use this finish technique on other builds so we now keep a massive mason jar in the basement. If you decide to do the same, remember not to tighten the lid. The mixture creates a gas expansion in the jar that could pop the top! Once this was applied we let it dry completely and started sanding again. This is the fun part. The love of my life, who had never attempted to build anything before, felt like an artist! It was so much fun to hear him exclaim he had created another masterpiece! Once we had all the pieces sanded , we put the whole thing together and applied 2 coats of min wax. Unlike Hillary, we did not add color to our wax, but decided we liked the color just as it was.

Estimated Cost
$85
Estimated Time Investment
Weekend Project (10-20 Hours)
Finish Used
Tutorial from The Friendly Home
Recommended Skill Level
Beginner

Comments

Easy Upholstered bench

Wonderful project! Very fun. Built a bench from scrap 2x4s (left in the garage by our home's previous owner, so they were free!) and a piece of MDF shelving. Perfect for our entryway. The bench itself was incredibly easy to build. The hard part, in my opinion, was finishing it. So many pretty things to choose from! I used a piece of 2-inch foam plus a double layer of batting for the top, some striped upholstery fabric, and 160 nailheads to finish it off. Love it.

Built from Plan(s)
Estimated Time Investment
Day Project (6-9 Hours)
Finish Used
Minwax stain in cognac, and then two coats of minwax poly.
Recommended Skill Level
Beginner

Comments

Guest (not verified)

Sun, 02/19/2012 - 12:54

Love it! Wondering if I could build it and have some type of slipcover on it. (house with three kids under 5 years old does not go well with permanent upholstery! haha)

Guest (not verified)

Fri, 03/09/2012 - 09:06

If you check out Ana's original plans for the Easiest Upholstered Bench, you'll see that she DID use slipcovers! You could make different ones for each season, or for holidays like Christmas or birthdays...

ehahn1

Wed, 10/30/2013 - 08:36

Hi Katie, I am having a difficult time finding fabric (hard to believe)! did you get yours online? How wide are the stripes? most fabric I am finding is not wide enough to cover the top and sides. Thanks for the help! Great build!

Workbench

Submitted by cjlaw on Mon, 03/07/2016 - 06:44

I built this to accommodate my miter saw but I also wanted a place for my band saw. I added drawers to make the table level with the miter saw and they add some extra storage space.

Estimated Time Investment
Weekend Project (10-20 Hours)
Recommended Skill Level
Intermediate

Comments

Modern Adirondack chair

Submitted by Anonymous (not verified) on Tue, 10/29/2019 - 12:43

Finally built my daughter a chair and she loves it

Built from Plan(s)
Estimated Cost
40.
Estimated Time Investment
Weekend Project (10-20 Hours)
Finish Used
Patio sitting area
Recommended Skill Level
Beginner
Seasonal And Holiday

DIY Platform Sectional

Submitted by Anonymous (not verified) on Mon, 08/07/2023 - 17:20

Hello! Thank you so much for providing information and inspiration. I was looking for a very specific couch and I found one. However it was $3000 and had to ship from CA to FL and then I had to assemble it to decide if I liked it or not. Some friends directed me to your site where I found your plans for the outdoor sectional. I modified them to fit my desired outcome and wow! I'm so happy about this. Thanks again!

someJabr0ni

What I used:
36 - 2x4x10s
1 - 4x4x8
A whole bunch of screws
Foam cushions from foamfactory.com
Cushion covers from slipcovershop.com
Minwax jacobean stain (finish on top tbd)

Built from Plan(s)

Levi's play kitchen

Submitted by Ash Matson on Thu, 12/26/2019 - 11:17

We modified the plans a little we made the 2 pieces together instead of separate. We used a 2” hole saw to cut out the oven knobs, then drilled holes a tad bigger than the screw so they would still turn once attached. We also made the back splash taller to accommodate our faucet that had to attach on the back splash instead of the counter top. We used all pocket holes to attach everything it makes it look so much nicer but doesn’t need to be done that way. We bought vinyl circles for the burners on the stove. A dog bowl for the sink and a laundry room faucet for the faucet.

Links to products we used

Faucet - https://www.amazon.com/gp/product/B01KRCTHEA/ref=ppx_yo_dt_b_asin_title_o07_s00?ie=UTF8&psc=1

Oven hinges - https://www.amazon.com/gp/product/B004K7V8UU/ref=ppx_yo_dt_b_asin_title_o08_s00?ie=UTF8&psc=1

6 – 4 inch circles matte black Stove vinyl - https://www.etsy.com/listing/713062039/circle-circles-pack-set-vinyl-decal-car?ref=yr_purchases

Sink 56oz dog food bowl - https://www.amazon.com/gp/product/B00H6OXRN0/ref=ppx_yo_dt_b_asin_title_o01_s00?ie=UTF8&psc=1

Oven handle - https://www.lowes.com/pd/Sumner-Street-Home-Hardware-Vail-10-in-Center-to-Center-Matte-Black-Pull/1001368422

Estimated Cost
100.00
Estimated Time Investment
Weekend Project (10-20 Hours)
Recommended Skill Level
Beginner

Comments

Benchwright Console Table

I followed the plans exactly, except I didn't put the trim pieces on the lower shelves sides. I really like the way it turned out, and my wife painted it with Annie Sloan Chalk Paint, color "Paris Grey" and then used Annie Sloan finishing wax (both clear and dark wax) to protect the piece and age it. I think it turned out great! Thanks for the plans!

Nothing was to difficult with these plans, at least not if you have a Kreg Jig. I would add that I used pocket screws on the top pieces not only to join them to the breadboard end pieces, but also to each other. That made it really strong!

Built from Plan(s)
Estimated Time Investment
Weekend Project (10-20 Hours)
Finish Used
Annie Sloan Chalk Paint. Yes, its called chalk paint, but not neccessarily chalk BOARD paint. its just a really flat paint that has way more color pigments per oz than most latex interior paints. In other words, less coats, and rich colors. You can paint it on raw wood (no primer needed) and you can paint it over old finished pieces too, and it has great coverage and bonding strength! Also used Annie Sloan clear and dark waxes for the finish. Just apply with a stipple brush and then buff. And don't forget fun drawer pulls to top it off!
Recommended Skill Level
Intermediate
Back