Community Brag Posts

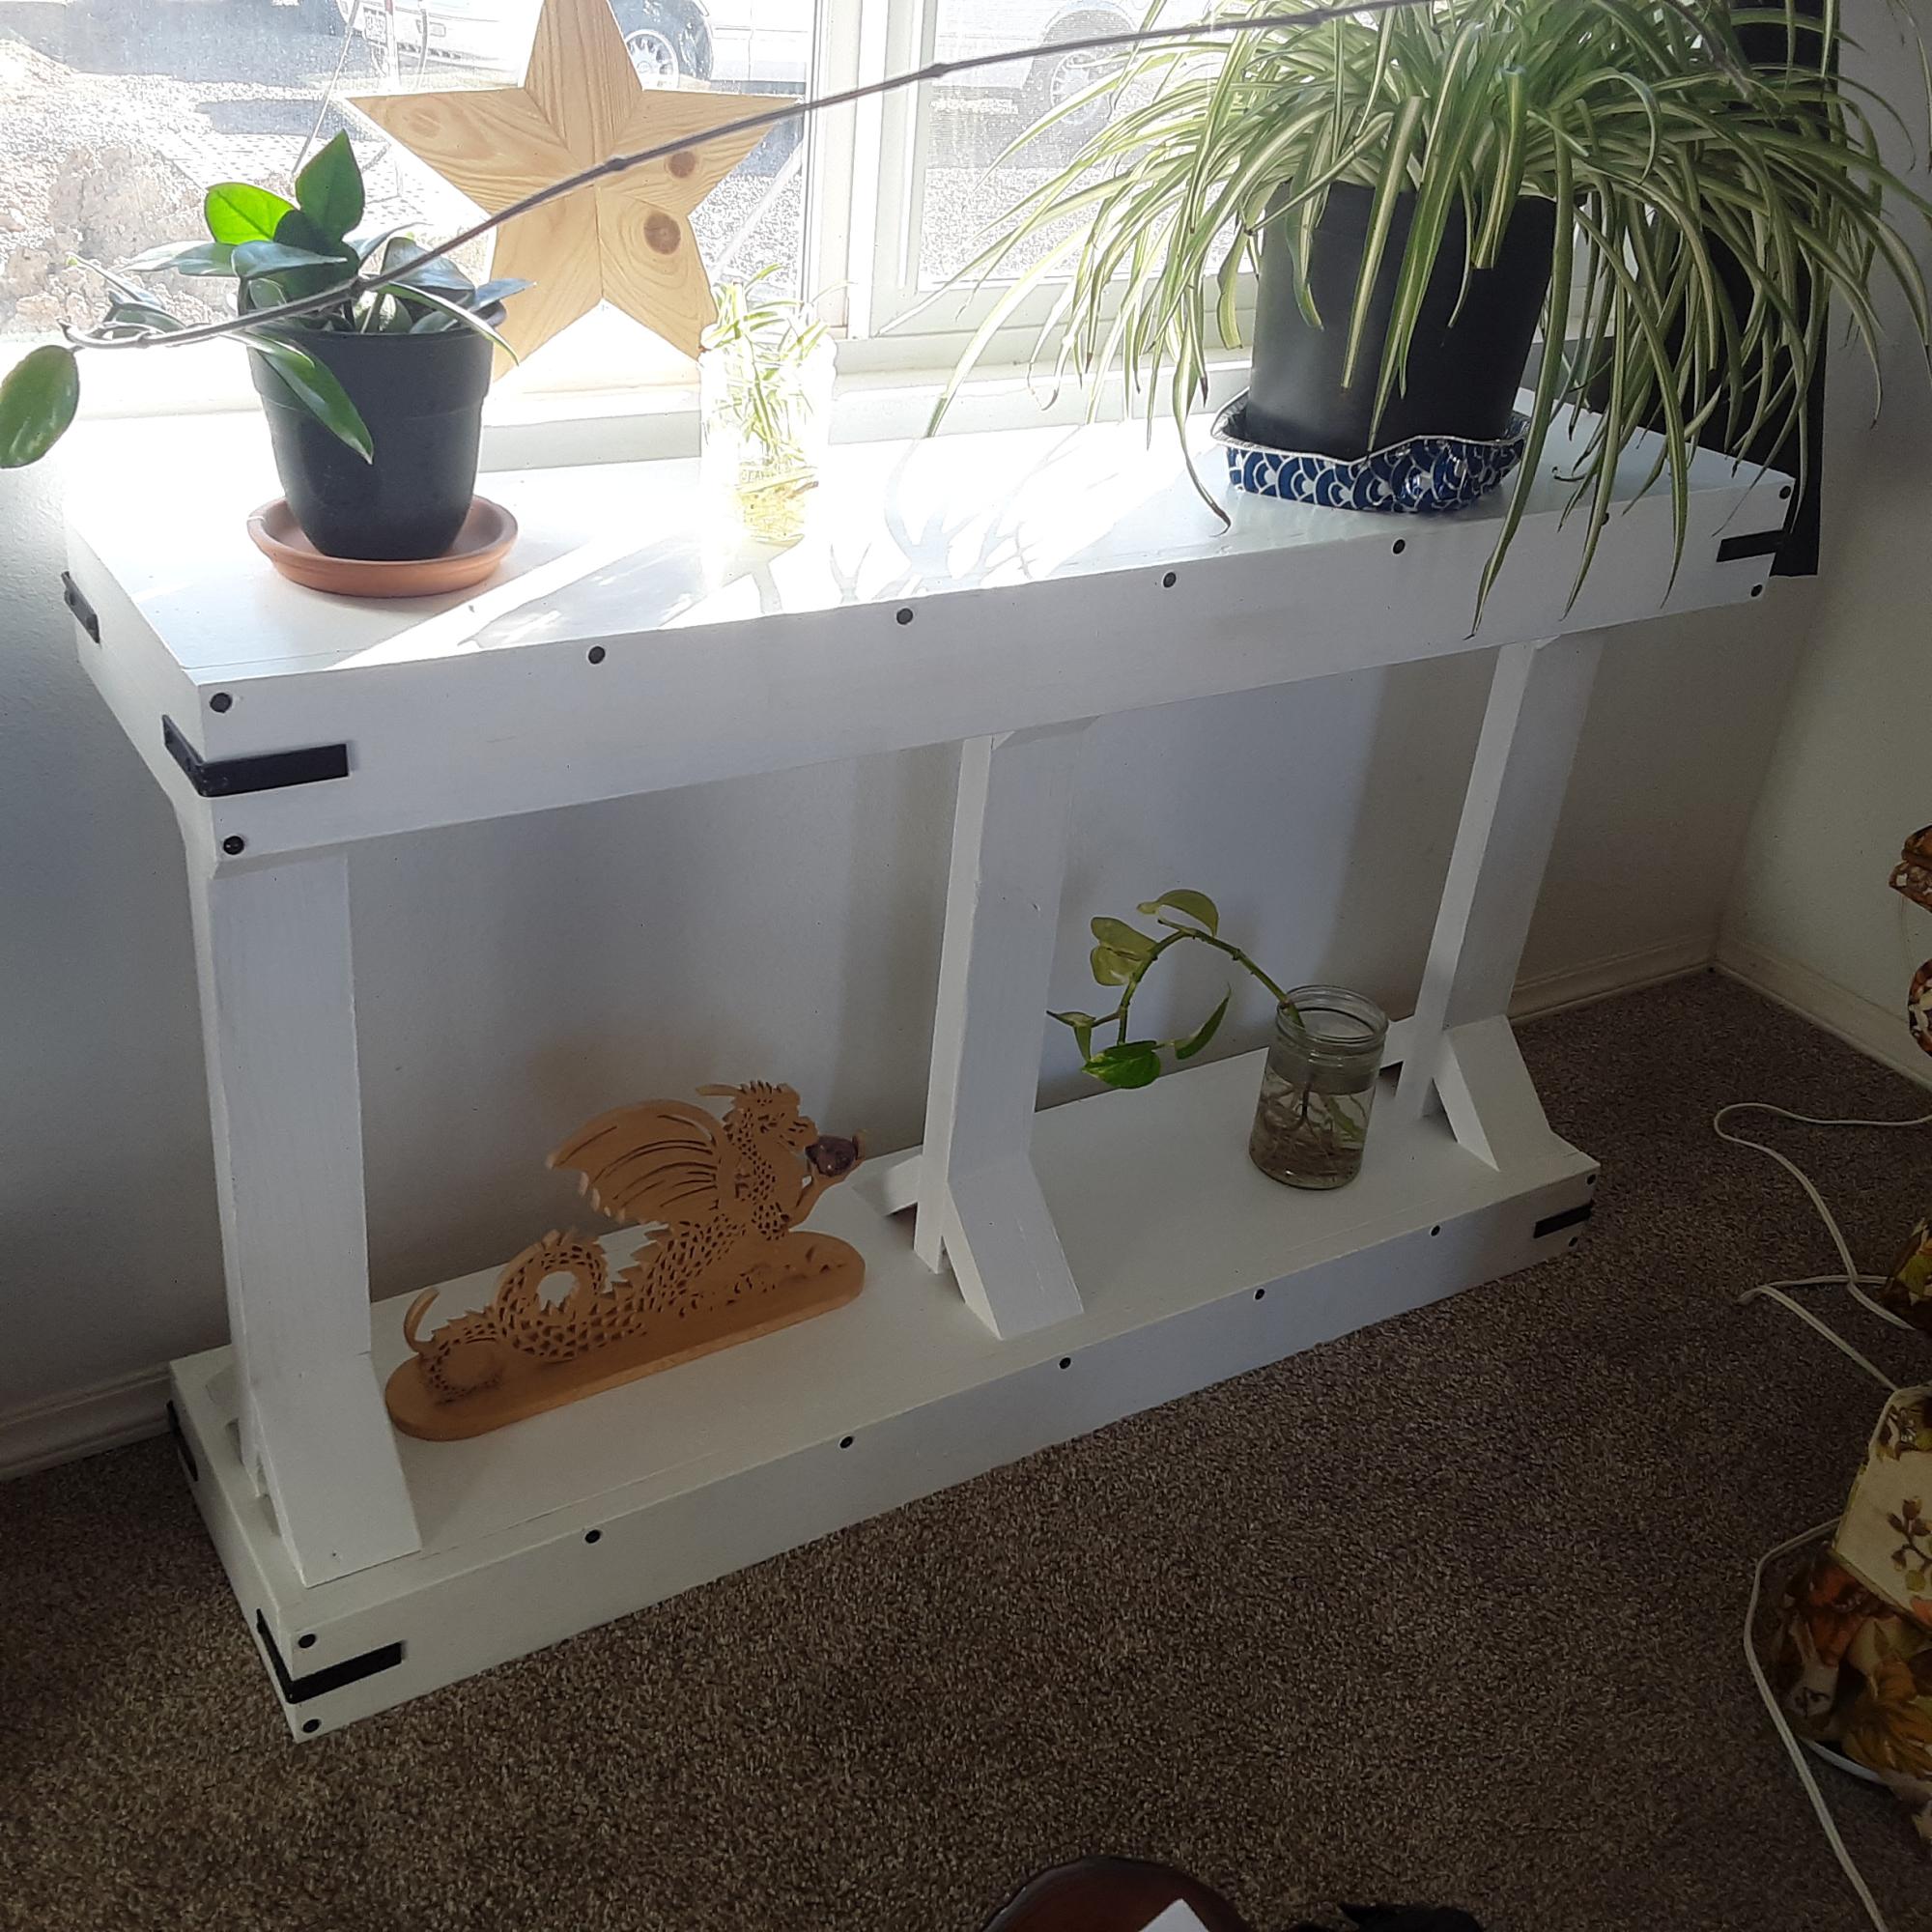
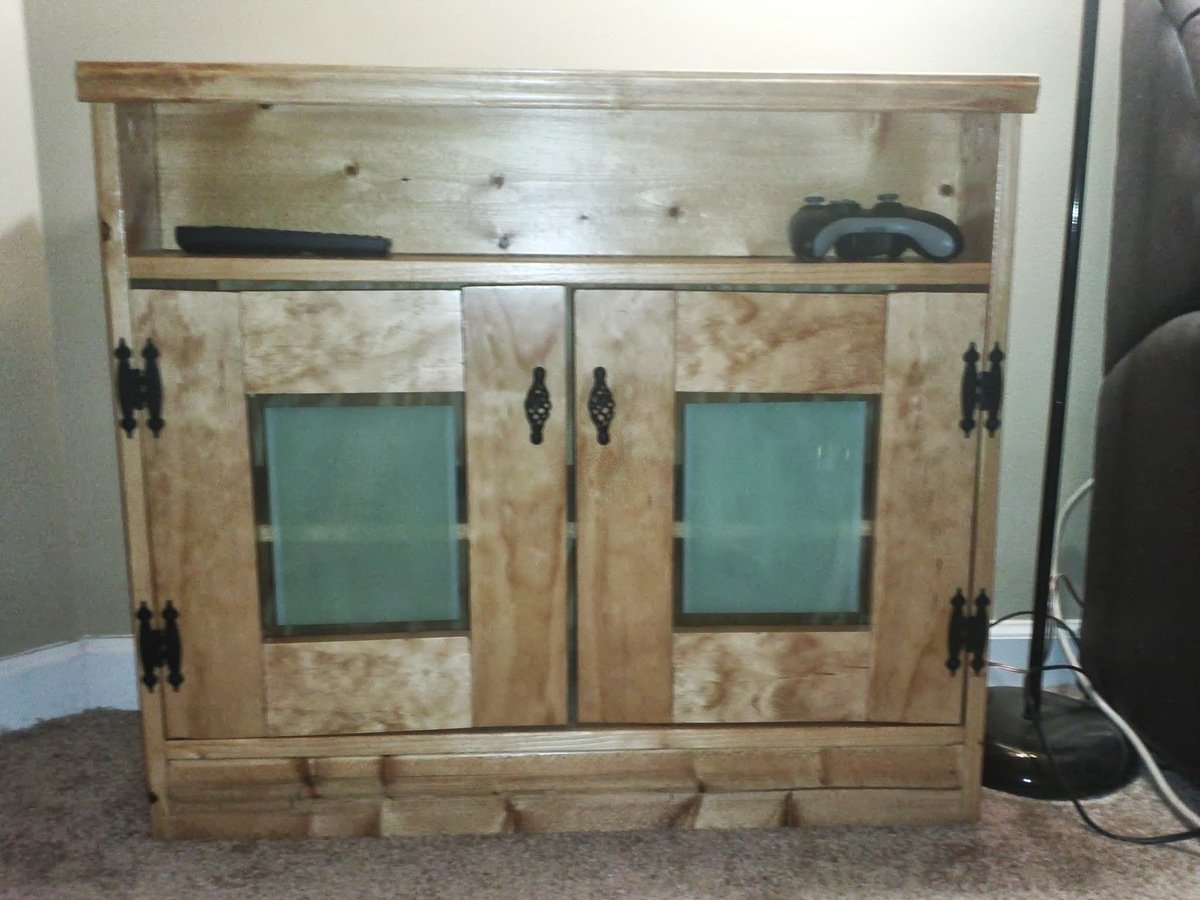
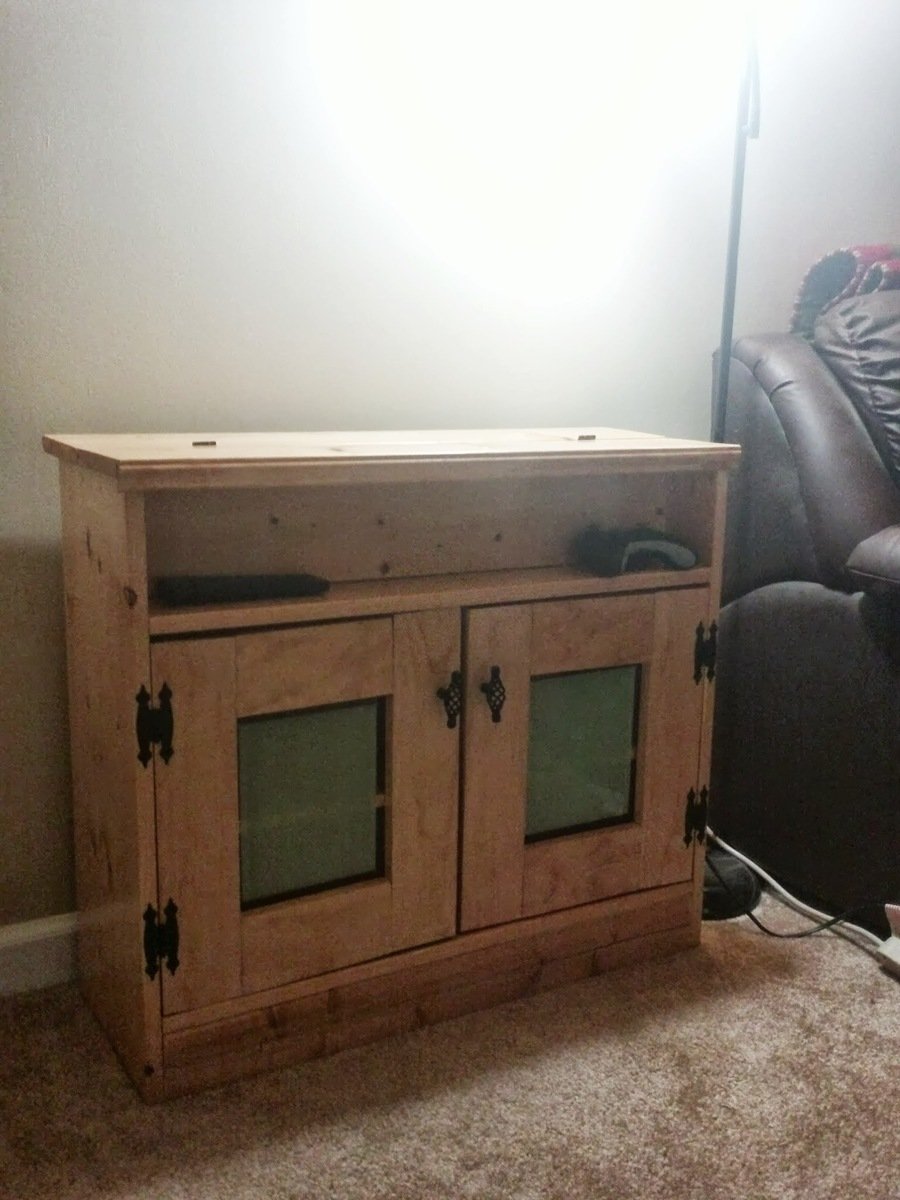
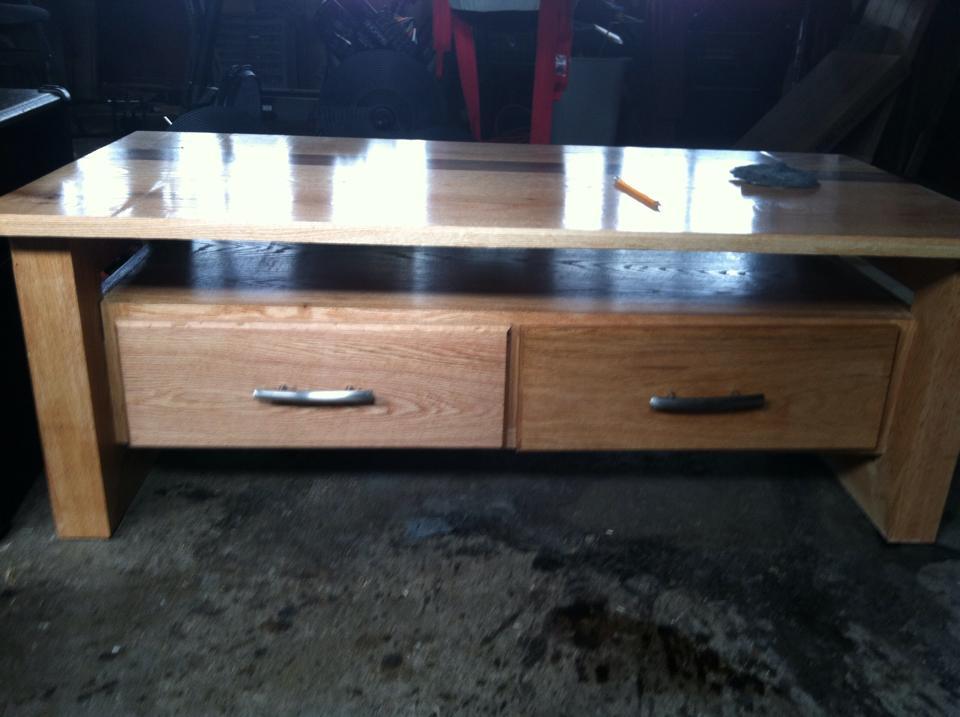
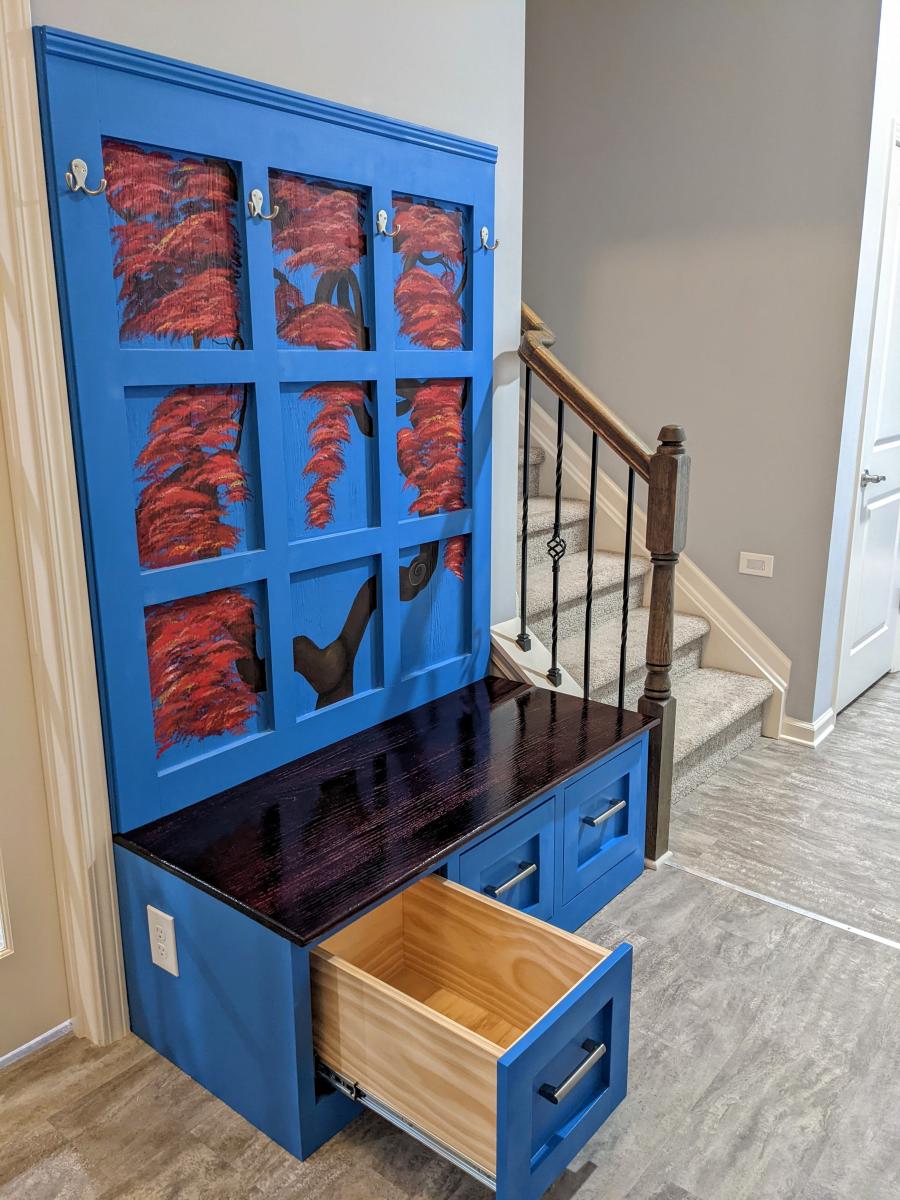
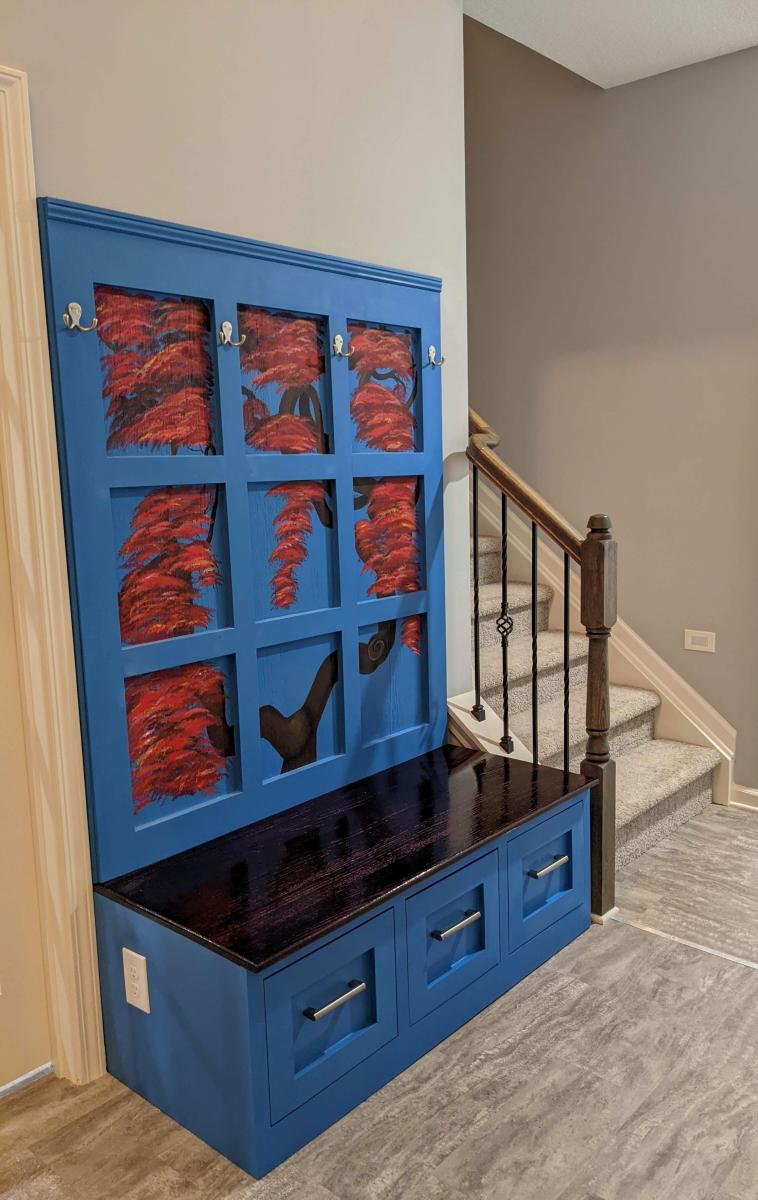
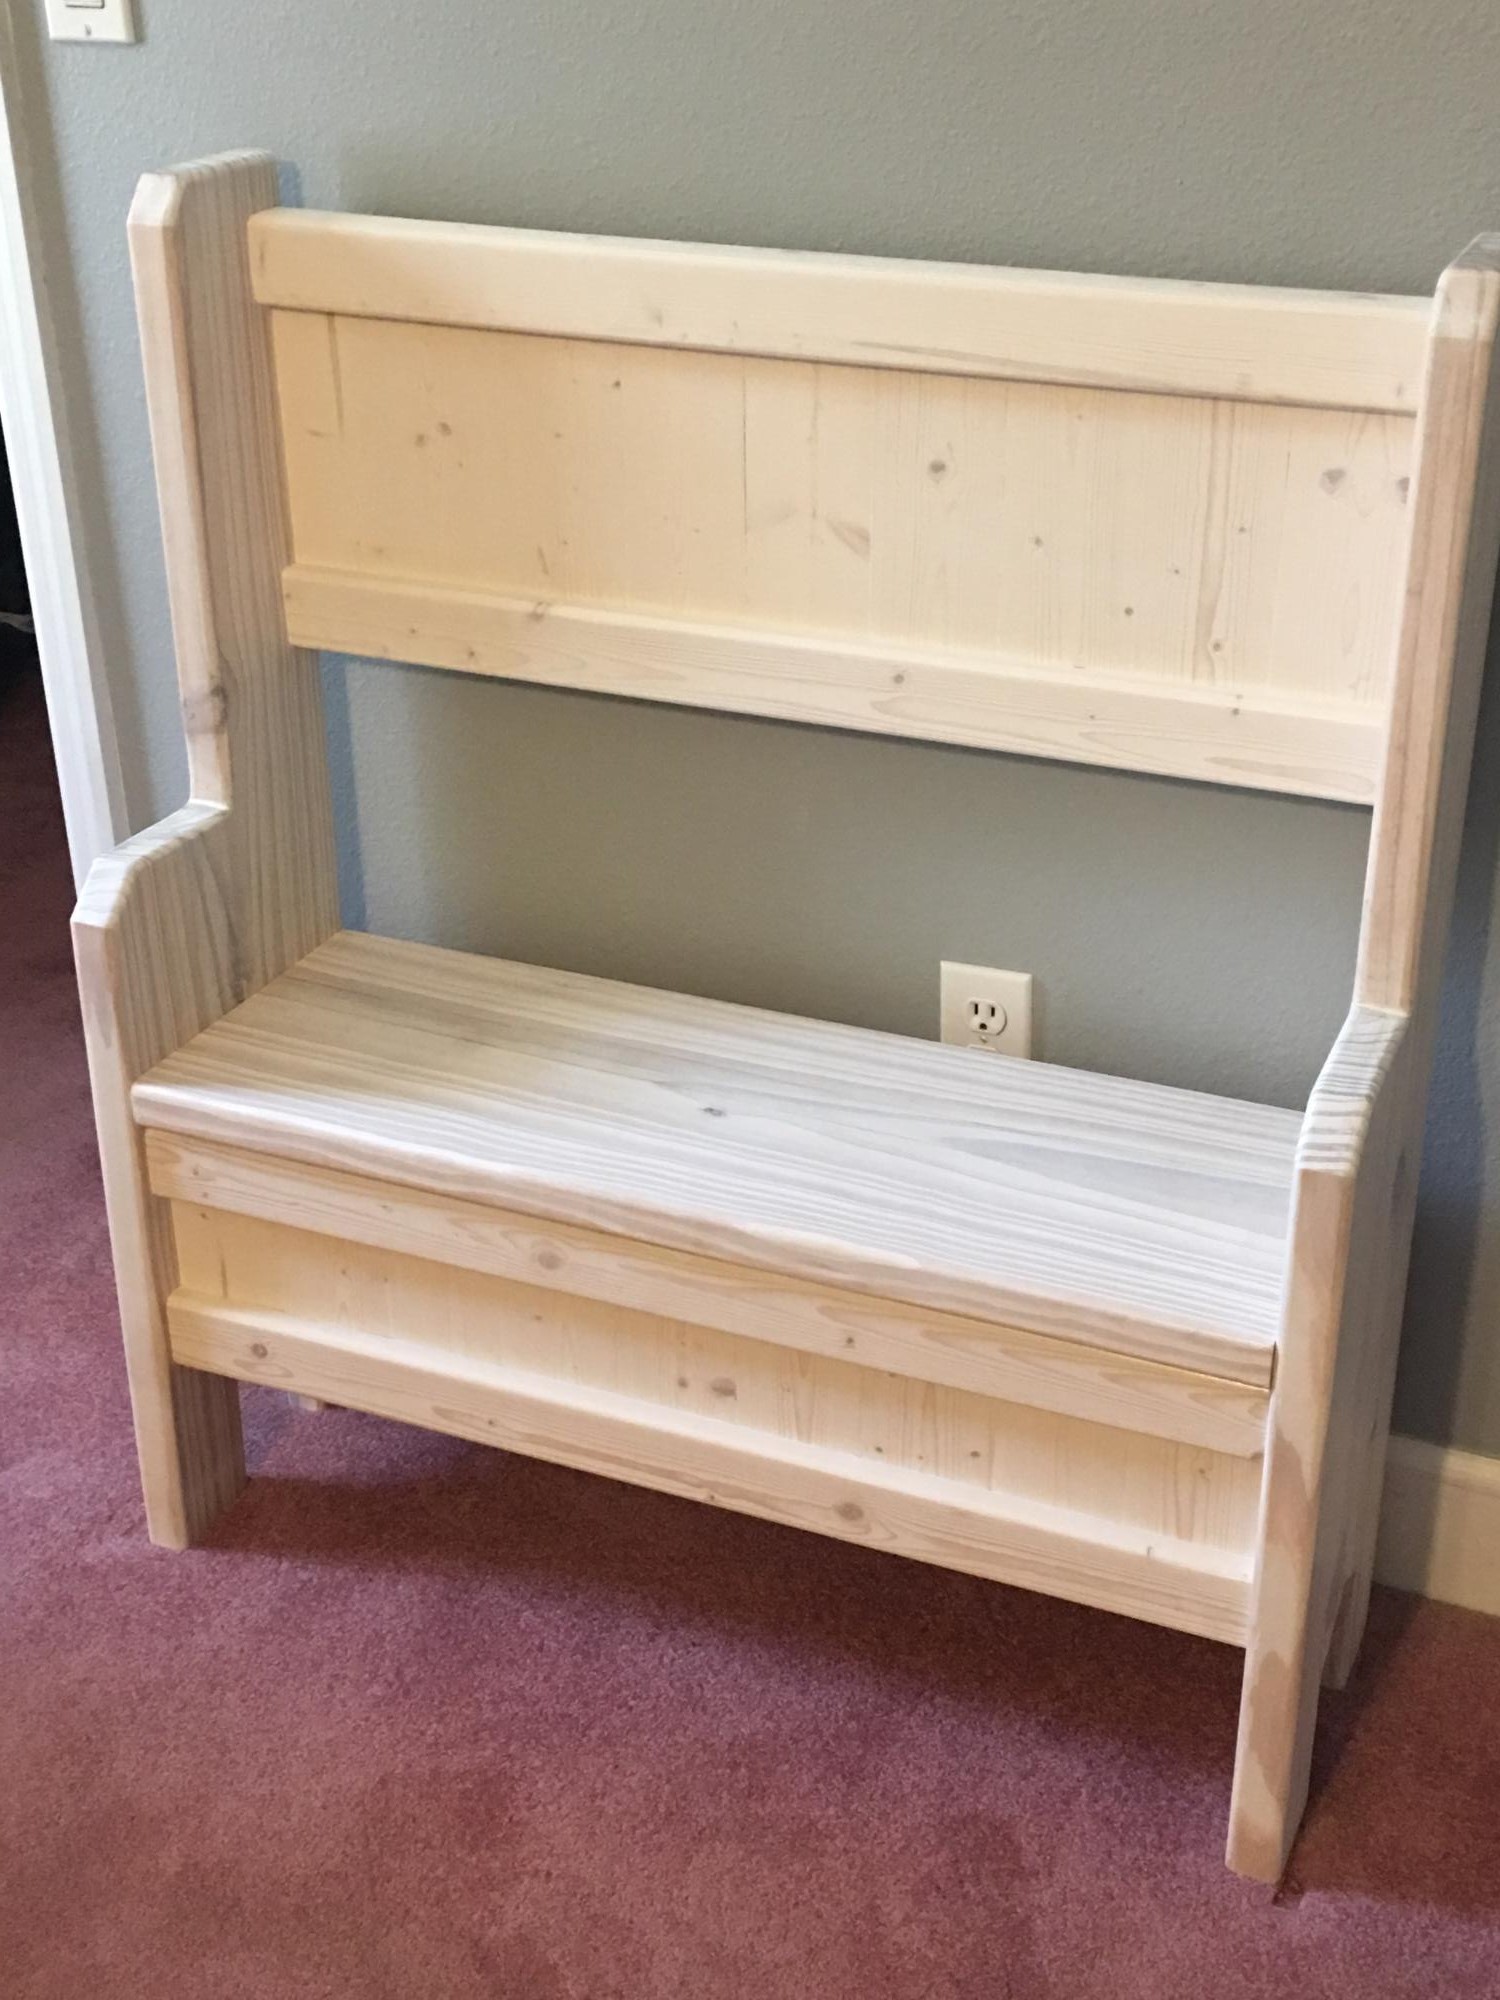
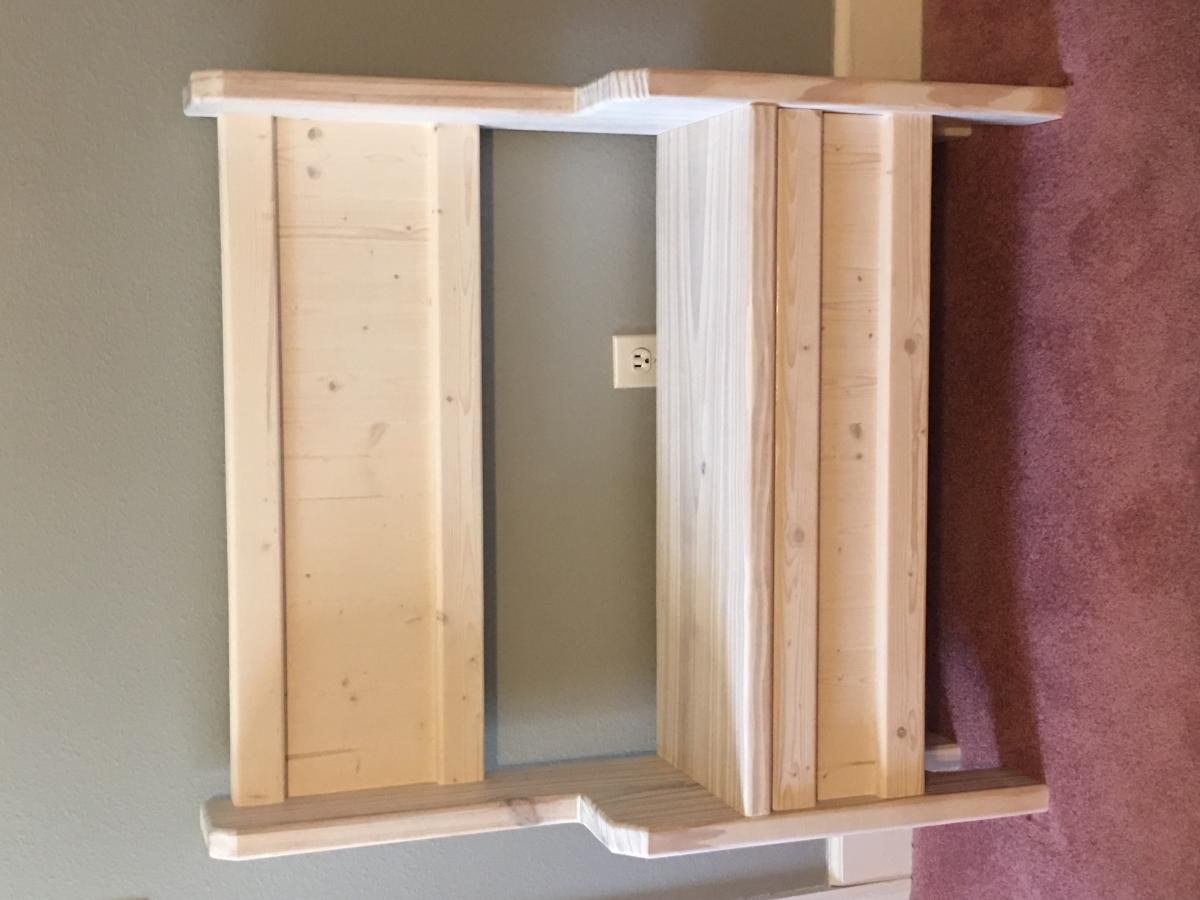
My First Build - Modular Bar

Submitted by SaraLodise on Sun, 06/30/2013 - 08:36

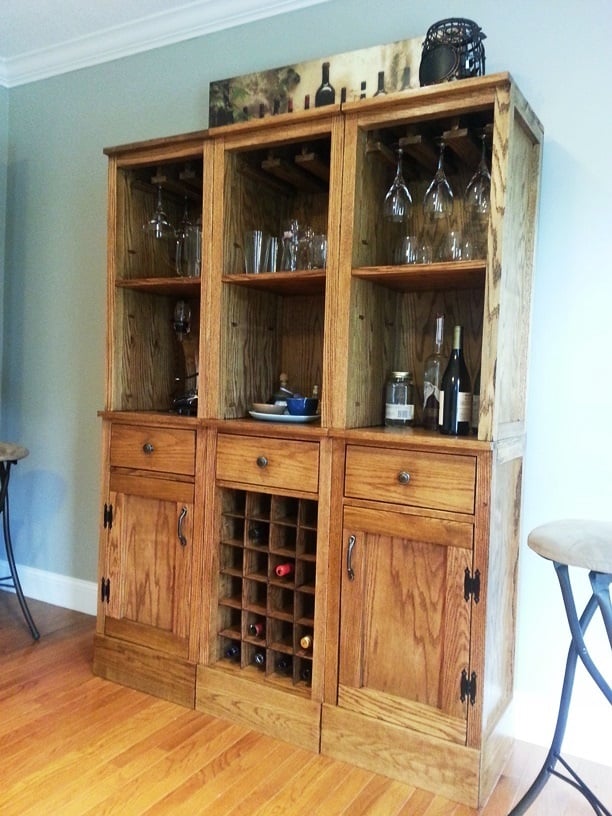
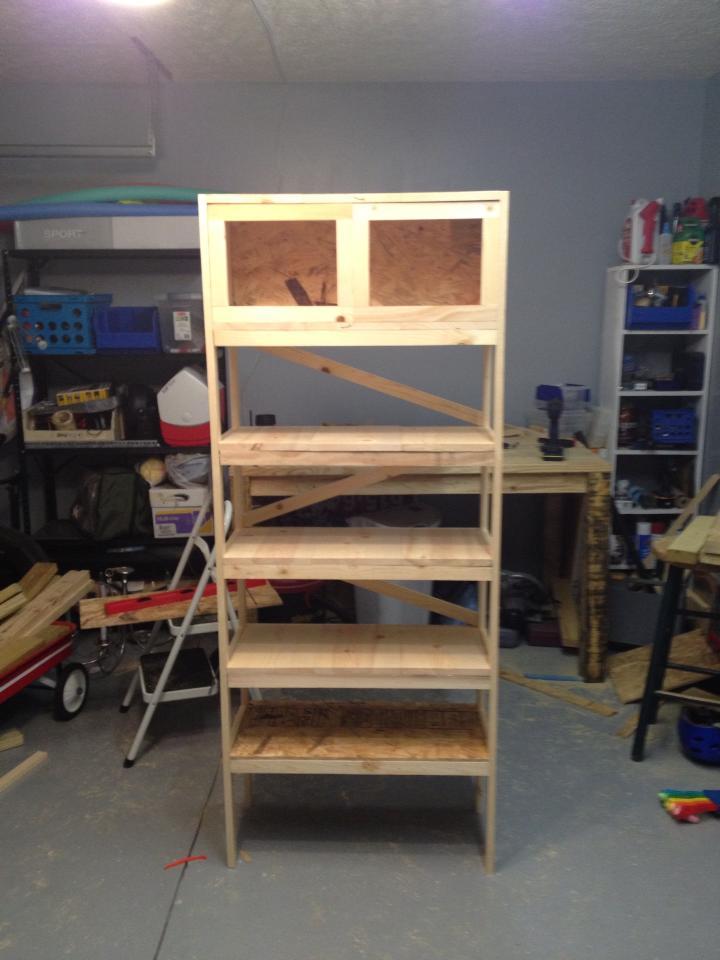
My first build from ana-white.com was maybe more intricate than I should have done for a first project, but we needed a bar so that's what I did. In the end I was able to learn so much: using the kreg jig, the saws, building doors and drawers, getting things square (or not and redoing it). Mistakes were made but I learned so much! In the end the thing stands up straight and looks pretty dern good in our dining room. I was able to complete this project in 6 weeks while working full time (my many learning experiences added to the time, lol).

Estimated Cost
Oak Boards: $600, Hardware: $30, Finish: $40
Estimated Time Investment
Week Long Project (20 Hours or More)
Finish Used
Minwax Gel Stain in Aged Oak (1 coat) + Miniwax Satin Poly
Recommended Skill Level
Intermediate

Comments

terdickison

Mon, 07/01/2013 - 10:17

Would you come to my house and build me a bar? This easily looks like something you'd have to pay $1000 or more for at Pottery Barn or Restoration Hardware. Nice job. Go have a drink.

Aubrey

Tue, 01/07/2014 - 08:30

This settles it. Woodworking is my new skill for 2014. I pick something every year to build upon. Last year was sewing and I love that. But this is the piece from pottery barn i've been salivating over for a few years. It will be mine!

End Tables

I built 2 end tables to go with my park bench. I had a lot of trouble with splitting wood, because the 1x2s where so thin. I'm used to more robust lumber. I tried something new. I drilled pocket holes, sanded, primed and painted everything before I assembled. I don't like painting as much, because I love using power tools. I psyched myself out by thinking I was giving it an elegant finish. Sounds so much nicer than slapping some paint on wood.

My son made some tic-tac-toe pieces from scrap treated lumber, by painting black X's on one side and white O's on the other. Now we can play on the end table!

Ana White's site is wonderful with downloadable, step-by-step shopping list, cut list and instructions.

#AnaWhite #GetBuilding2015

Built from Plan(s)
Estimated Cost
less than $20 for 2 end tables
Estimated Time Investment
Weekend Project (10-20 Hours)
Finish Used
White exterior latex paint.
Recommended Skill Level
Beginner

Farmhouse Table

Submitted by debbB78 on Sun, 01/07/2018 - 14:26
Build this table with provided plans but tweaked them a little to make the table a little wider. I used (4) 2x10's and (1) 2x12 in the middle to make the top. I build the base wider to accommodate the larger top. It's a beast but I love it! Brought the base in the house and attached the top in the dining room.
Estimated Cost
I honestly didn't keep track of what I spent but I'd sat around $250
Estimated Time Investment
Week Long Project (20 Hours or More)
Finish Used
Stained it with one layer of Minwax Special Walnut, let that dry over night then added a layer of Minwax Weathered Oak. 
Recommended Skill Level
Beginner

Narrow Console Table - Farmhouse Collection

I loved this project. Since I can't buy wood, I have to use wood from pallets, or where ever I can find free wood. In this case I used 2x4's from pallets, 1x4 oak slats from an old bed frame I acquired and 1x4's from a large solid maple dog crate I acquired. The top was made from cabinet grade plywood we had left over from cabinets my husband made two years ago when we remodeled the kitchen (so I have to say that was purchased). The maple dog crate had some awesome wood, even tho it had been broken in a couple places. Just had to plane down the reddish finish on it. Since it was going to be painted, I didn't care what kind of wood I used. The only thing I had to buy were the corner brackets. Even the screws were from pallets we acquired, just had to paint the heads black.

Comments

Step Stool

I love this step stool!! My daughter uses it EVERYDAY! This was the first thing I built and I think it turned out pretty good. I did a different design on the bottom sides to make it a little girly since I was painting it blue (girls can have blue stuff too!)

Built from Plan(s)
Estimated Cost
$10
Estimated Time Investment
An Hour or Two (0-2 Hours)
Finish Used
I dont know what color of blue this was because it was a "mis-tint" that I got for $3, then I sanded to distress it.
Recommended Skill Level
Starter Project

Variation on the Charging Table

We loved Ana's charging table, but didn't think we needed the holes for charging - what we really needed was just a side table to go next to our couch, but one with storage capacity (hence the shelves behind the doors on the bottom) and a place to put the remotes and game controllers for the TV (hence the shelf at the top). We decided to keep the "secret" compartment on top that flips up, like in the original plans, for storing messy things with cords like the headphones that you can see in the picture.

We also decided to replace the solid wood doors with a glass pane, and used glass paint to paint a square in the middle of the glass.

This was our very first - ever! - furniture-making project and we both really love how it came out. :-)

Estimated Time Investment
Weekend Project (10-20 Hours)
Finish Used
Golden Pecan Stain and three layers of a polyurethane finish
Recommended Skill Level
Starter Project

Love this nightstand

Submitted by ehrobson13 on Thu, 01/11/2018 - 11:39

We were looking for nightstand that would match our new mantle moulding headboard and stumbled across these plans.  It was a cinch to build.  I adjusted the height and width up a bit, as we have a platform bed that is higher than most nightstands.  It turned out beautifully!  


I also made a few modifications and additions, for my own purposes.  I cut out a square in the backer board and mounted a charging block to the underside of the top piece.  That way, my phone, kindle and fitbit charging cords can be tucked away in the storage bins and I don't have wires all across the top. And I purchased a piece of thin plexiglass that I'm using to protect the top of the table.  It looks great and will keep any coffee or water rings/spills from damaging the stand's surface.


Also, hardwood plywood is a BEAST.  Good gawd, the splinters are a nightmare.  You HAVE to have leather or some other really thick gloves.  But there are just some things that are tough to do wearing gloves. So for the second nightstand, we put a coat of primer on the sheet of hardwood before we even started measuring and cutting.  That has helped so much with the splinters.  


Built from Plan(s)
Estimated Cost
$85
Estimated Time Investment
Weekend Project (10-20 Hours)
Finish Used
2 coats of primer and 3 coats of latex semi-gloss
Recommended Skill Level
Beginner

Lawn Chairs

Submitted by Anonymous (not verified) on Tue, 12/28/2021 - 12:06

Built these for my daughters new home

Built from Plan(s)

Comments

Reclaimed Wood Desk Caddy

Submitted by melaniesue on Tue, 05/10/2011 - 12:11

I wanted to build something fun and challenging for me. I was inspired to do more caddy things because of Anas fun plans for her Soda Caddy. I often try to design my own plans, (the old fashioned way, because skechup hates me!). I LOVE to look at pictures online, and just see if I can replicate it somewhat. So this Desk Caddy is what I came up with. I used all old wood that I had in the shed, and was begging to be made into something fun! I think this would be cute for so many different areas. Outside, you could organize your gardening items, seed packets, shovels and pots. It could be an awesome message center, mail area. Whatever!

If the dimensions are with the image, it's much easier for me to figure out, this one had dimensions, so I just went with my gut and I think it turned out ok. It sold in my booth, at our local antique mall in 2 days.

Without the Kreg Jig, I would not have had the confidence to build this, and sell it. I love the Kreg Jig!

Clearly I need to get a new camera, and need to take better pictures, SOON!

Built from Plan(s)
Estimated Cost
Free
Estimated Time Investment
Afternoon Project (3-6 Hours)
Finish Used
Steel wool/vinegar mixture, slight dry brush in an oops white I had on hand, 2 coats of satin poly.
Recommended Skill Level
Beginner

coffee table

this is a coffee table that i had build just by looking at a picture and taking measurements of my previous coffee table that i had, I'm very glad to show the table off!

Estimated Cost
roughly $80-$90
Estimated Time Investment
Week Long Project (20 Hours or More)
Finish Used
polyurethane
Recommended Skill Level
Intermediate

Farmhouse Bed

Submitted by mwg10 on Mon, 01/15/2018 - 07:57

I made a few modifications. 

I used shiplap instead of tongue and groove, raised the footboard by adding an extra 2 x 6 & used jacobean stain.

Thanks Ana for putting the plans and video on your site.


Built from Plan(s)
Estimated Time Investment
Weekend Project (10-20 Hours)
Finish Used
minwax jacobean
Recommended Skill Level
Beginner

Hall Tree with Drawers using a combination of 2 plans

Submitted by Anonymous (not verified) on Fri, 12/31/2021 - 19:40

We had an empty area at the bottom of our stairs that was just calling for a hall tree. I love watching and learning from Anna's videos. I really liked 2 of her plans: the Farmhouse Hall Tree and the Mudroom Bench with Easy Drawers. I decided to combine them to make my own unique hall tree. Our teenage daughter used the "window panes" in the back to paint a Japanese Maple tree. I think it turned out beautifully. This is the first of Anna's plans that I've used, but I plan to use many more! Thank you, Anna for your amazing videos and desire to share your knowledge. We appreciate it so much!

Comments

Leaning Bookshelves

Built this over a relatively warm Saturday in January. Like most projects, the building wasn't bad but the finishing took forever :)

Estimated Cost
Built it so long ago I don't remember for certain, but less than $100 I'm sure
Estimated Time Investment
Day Project (6-9 Hours)
Finish Used
Mascarpone paint in Semi-Gloss; Benjamin Moore
Recommended Skill Level
Intermediate

Red Hen Home's Modified Providence Bench

This is a slightly modified version of the Providence Bench. I used 1x wood rather than 2x wood, so the legs are slightly longer to make the bench come out to the same height. Made this to match a planked-top table. More photos on my blog: http://redhenhome.blogspot.com/2013/07/the-other-solomon-table-bench.ht…

Built from Plan(s)
Estimated Cost
50
Estimated Time Investment
An Hour or Two (0-2 Hours)
Finish Used
Custom mix of Minwax Weathered Oak and Antique Walnut stain, followed by hand-rubbed polyurethane.
Recommended Skill Level
Beginner

Comments

JW

Thu, 09/12/2013 - 05:46

I like the planked top! Great job on the finish - it's rustic without being overdone. It's one of the things i love about pottery barn furniture.

What is the hand-rubbed polyurethane? Is that just the wipe-on stuff I keep seeing at the store? Was it easy to use?

Farmhouse table

Submitted by Camberjak on Tue, 06/30/2015 - 20:23

First large wood working project my husband and I completed. In love with Projects and plans by Ana white !

Built from Plan(s)
Estimated Cost
150 dollars
Estimated Time Investment
Weekend Project (10-20 Hours)
Finish Used
Minwax dark walnut and table top was pure white and sanded down and minwax dark walnut was rubbed on with a rag
Recommended Skill Level
Beginner

Comments

Quick basement shelves

Submitted by Panda on Thu, 01/18/2018 - 14:22

What a great project! This is my first Ana White project and definitely won't be my last!


I modified the garage plans to fit our basement. We have two beams the shelves needed to fit between, so I made the length 10' and bought 2x4s at 10'. Otherwise, I didn't do any modifications.


The wood was cut at the store for the lengths needed, making it super easy to come home and assemble! We secured the shelves to the basement supports and along the back wall. It's pretty secure and stable.


Overall this probably took a few hours (we took a break while constructing it). Next time I would make the shelves a bit deeper. 17" was fine, but a few more inches would have made the bins fit a bit better.


I am looking forward to making more!

Estimated Cost
$140
Estimated Time Investment
Afternoon Project (3-6 Hours)
Recommended Skill Level
Beginner

Bench

Had a small bench that the previous owners of our house left. It was all made from 1x. Wanted something a little beefier to match the bed I built. So came up with this bench. Made from all pine.

Comments

Beach Cottage Dresser

Again I'm sorry I have no plans, but what I do have is a great instructional video. Drawer slides are such a pain to install without the right tools. I'm sure you can find great dresser plans but the kicker is how you install the drawers. These inexpensive drawer slide mounting tools might save you from going insane. Check them out. http://youtu.be/vI3jgkhxxPE

Estimated Cost
$100-140
Estimated Time Investment
Weekend Project (10-20 Hours)
Finish Used
Martha Stewart Interior Semi Gloss
Recommended Skill Level
Advanced

Bathroom Towel rack

Submitted by sean1023 on Tue, 07/09/2013 - 20:10

I kind of came up with this on my own. I used 1 x 3 furring strips for the legs and stops for the shelves. I used 1 x 8 for the shelves. I wanted a semi distressed look so I painted white and then painted the blue very messy making sure I missed certain areas.

Estimated Time Investment
Afternoon Project (3-6 Hours)
Recommended Skill Level
Beginner

Cottage End Table in Oak

Submitted by JanMarie63 on Mon, 07/06/2015 - 06:48

I loved making this Ana White's Narrow Cottage End Table plan after seeing it here on a search. I made it for my mother's 83rd birthday. She asked for oak and a light stain (Rust Oleum's Summer Oak Stain). Used three coats of wipe on Poly and one coat of Johnson's paste wax on the top. I bought the blue knob at Cost Plus World Market. The project took me two days. Will difinitely make another one but in pine this time.

Estimated Cost
$40, plus scrap wood on hand
Estimated Time Investment
Weekend Project (10-20 Hours)
Finish Used
Rust Oleum Summer Oak Stain, Minwax Wipe-on Poly (3 coats), Johnson Paste wax final coat for table top.
Recommended Skill Level
Intermediate

Comments

Fancy X Farmhouse Table and Bench

Built this table and bench for my wife. She wanted to host Thanksgiving dinner and needed a bigger table. I used the 96” plan, building the bench first and the table second. 3 coats of Danish oil dark walnut, and 2 coats of poly. I get a lot of compliments about this table. The bench is remarkably comfortable and sturdy. And yes, my wife was very pleased, plus I finished on time for dinner.

Comments

BearWoodworks

Mon, 01/17/2022 - 13:49

Thank you. The set up gratitude goes to my wife. She inspires me to complete these builds. And thank you to Ana White for these awesome build plans. I’m running out of house for all the builds so far.