Spring Tiered Planter
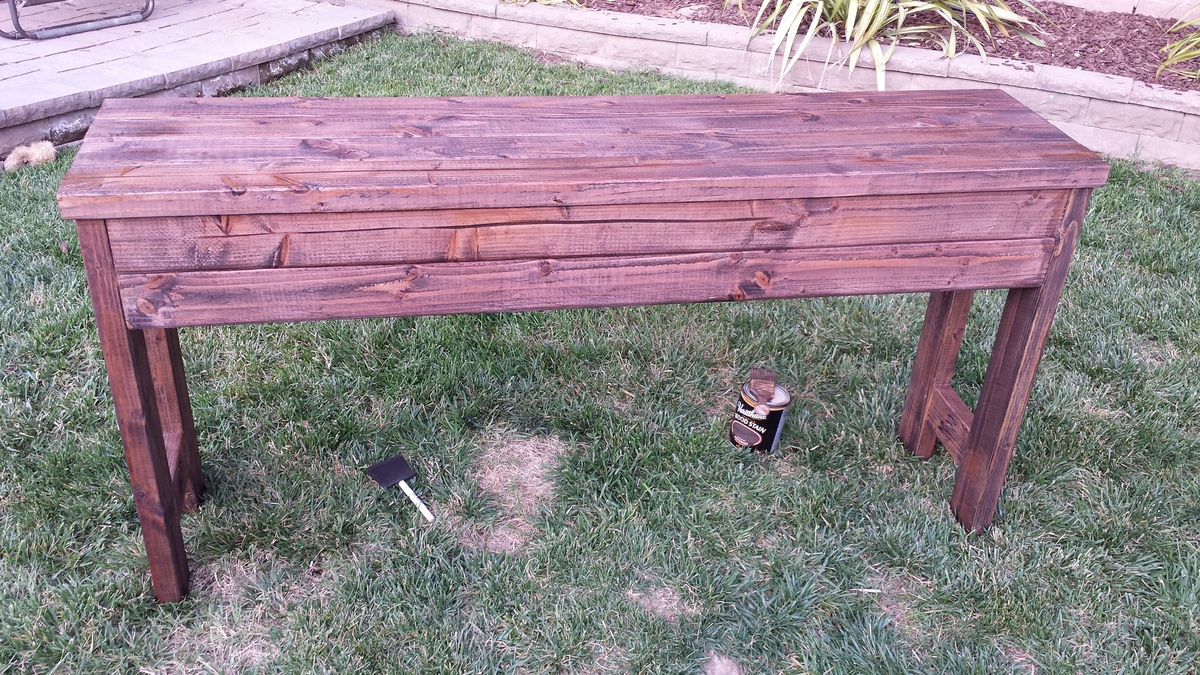
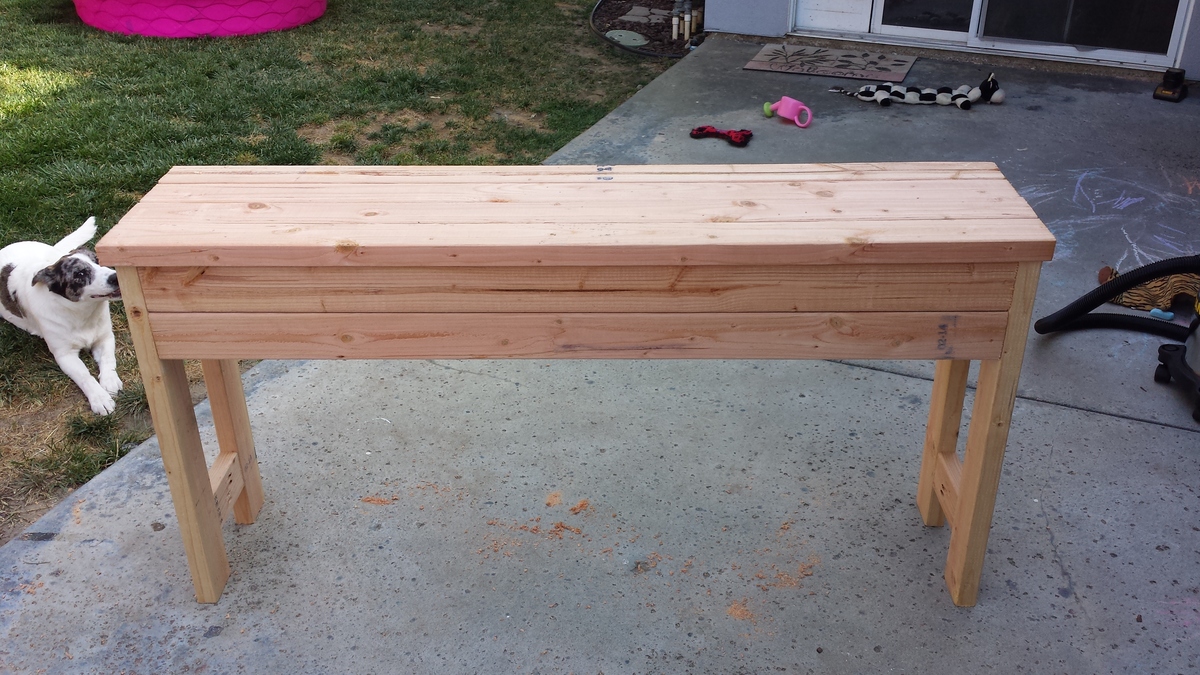
Tiered Cedar Planter
Built from Plan(s)
Tiered Cedar Planter
I live in Japan right now and my wife and daughters went to the states to visit family for 3 weeks. I decided to make a few projects. I went to my local home improvement store (HOMES), which is a combo of Lowes, Walmart, a pet store, and a furniture store rolled into one crazy store. I purchased the wood for about 11000 yen, paint for 1080 yen, hinges 800 yen, and door knobs for 2880 yen. Grand total of basically $200. I found that it is not cheap to buy supplies over here. I modified the plan and made 16 "drawers" instead of 20 due to the height of the space where I am putting the table. I used the plan for finishing with the distressed coffee stain. I really like it in our room.
Tools:
Miter Saw
Table Saw
Jig Saw (b/c my bandsaw is down)
Oscillating Spindle Sander
Orbital Sander
Router
1/8" roundover bit
1/4" roundover bit
Kreg Jig
Tape Measure
Tri Square
Materials:
S4S Poplar
Kreg Screws
Kreg Stain Grade wood plugs
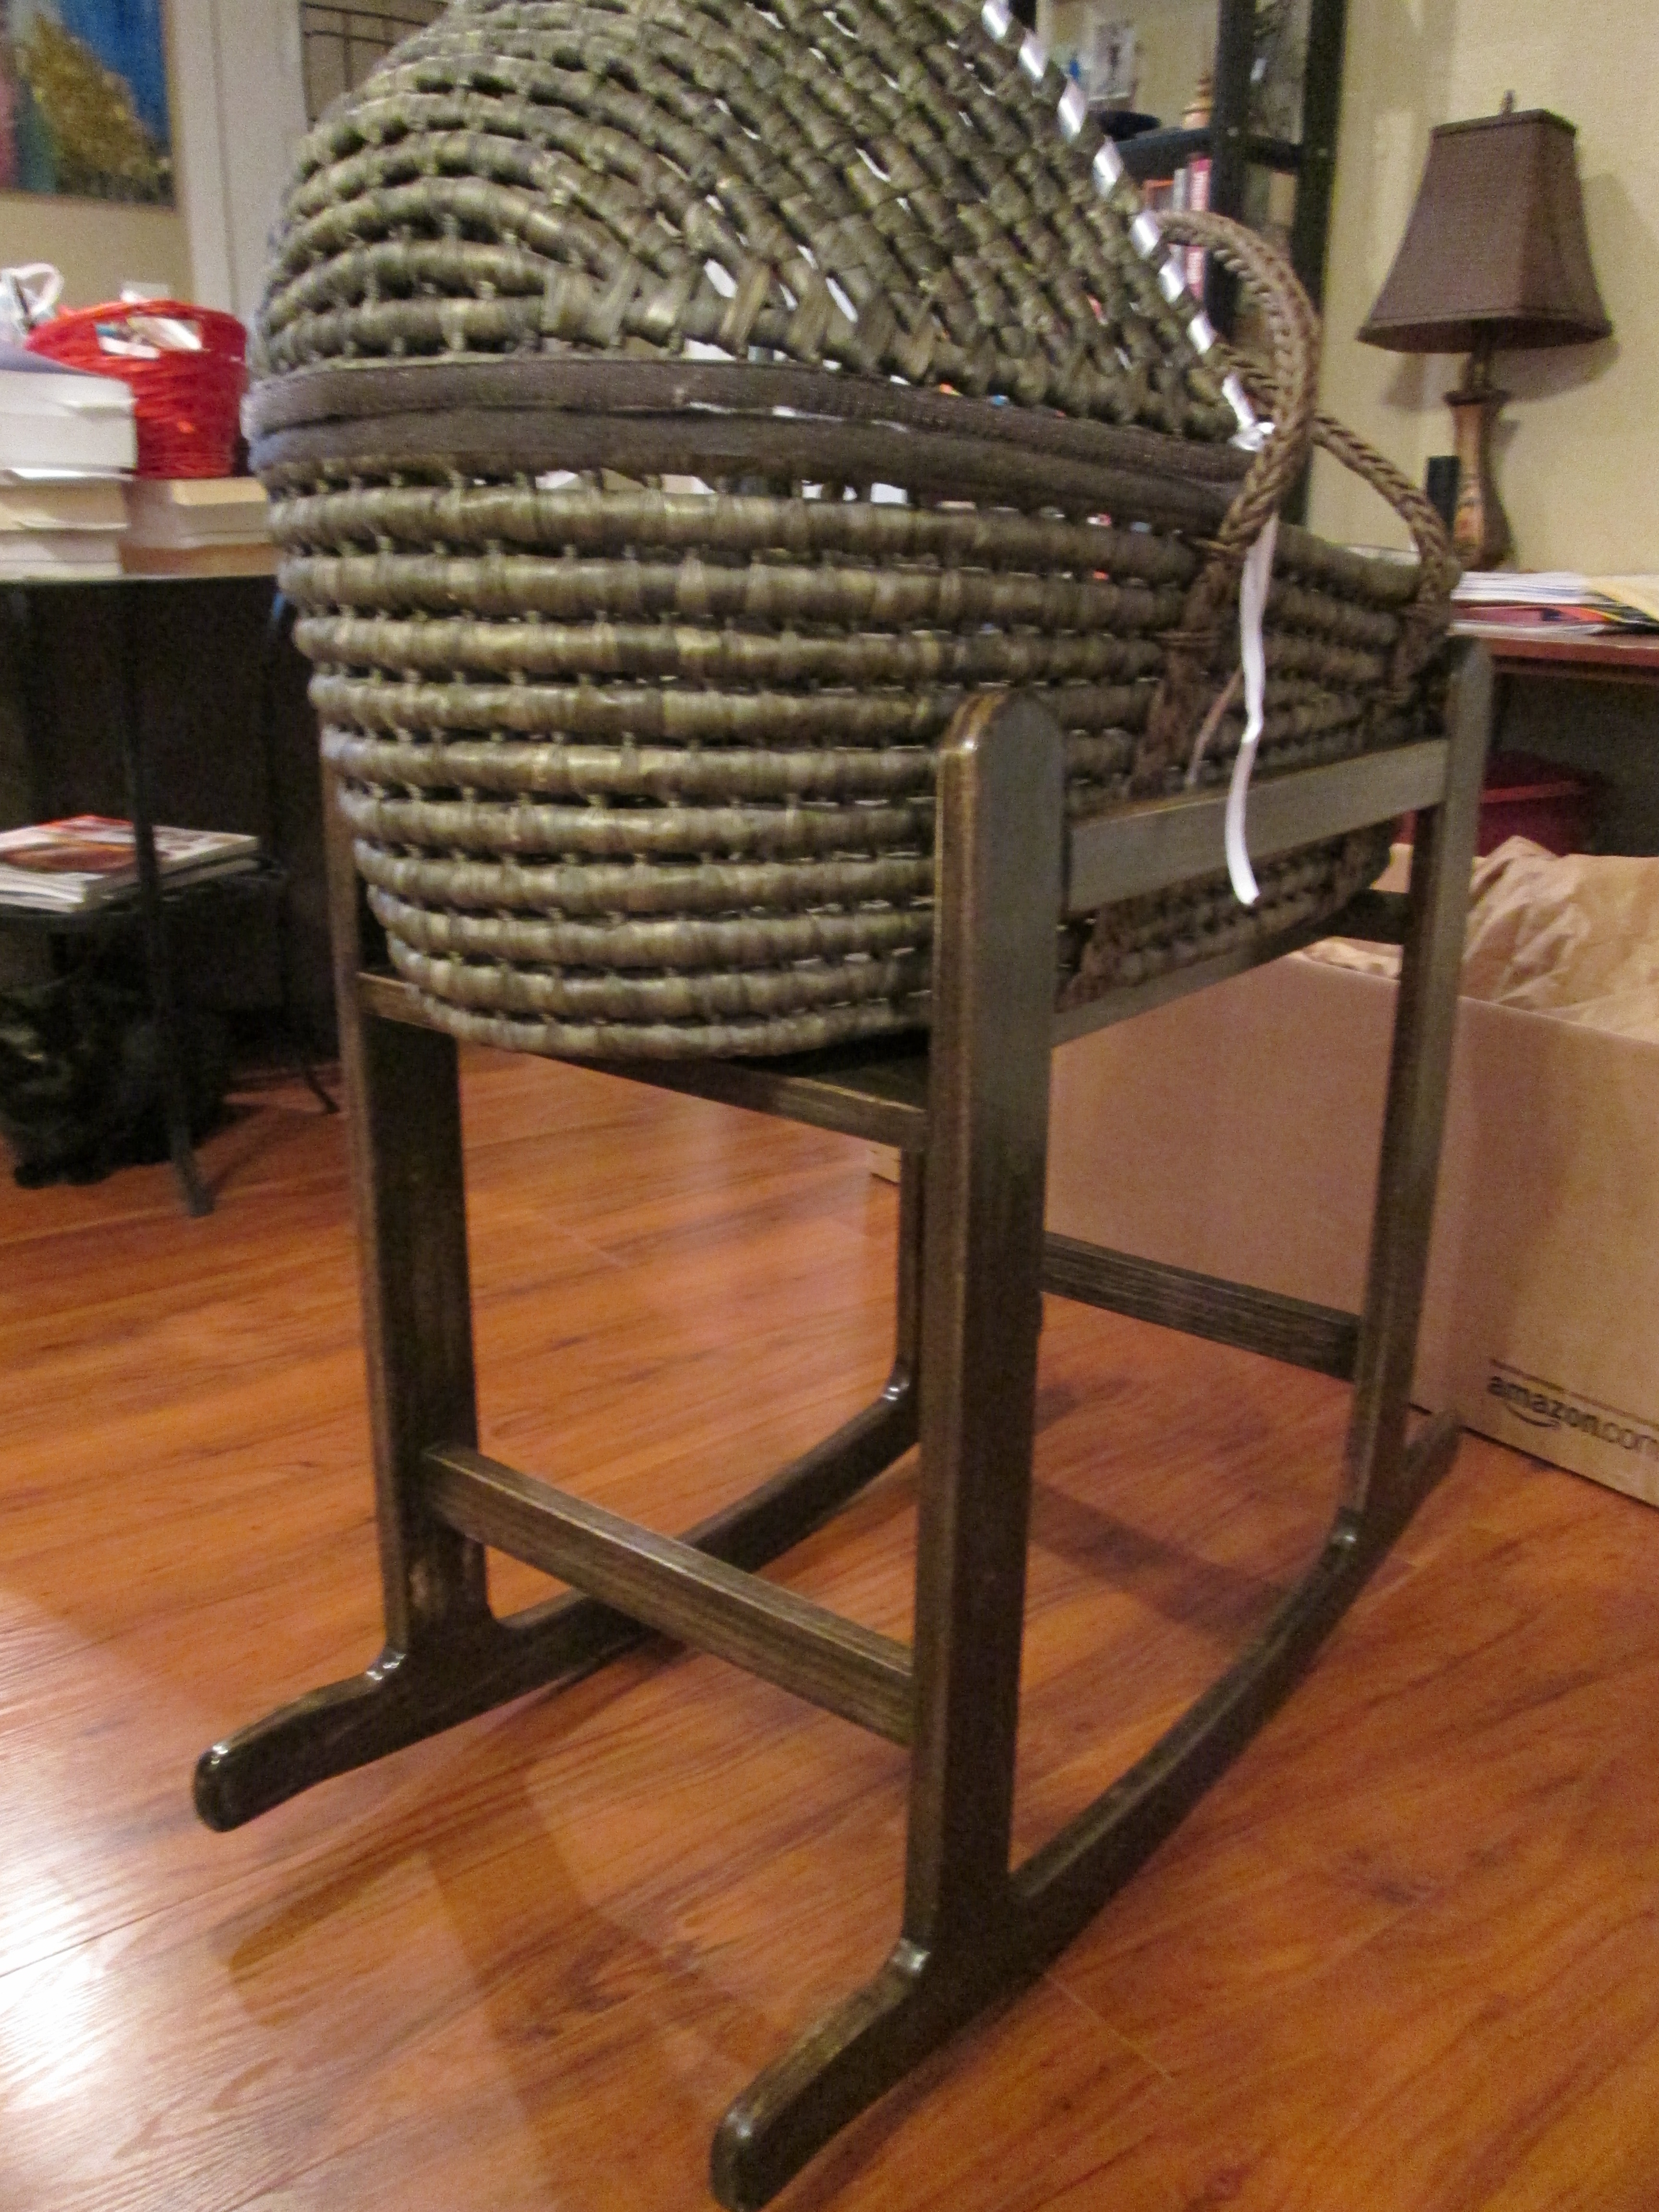
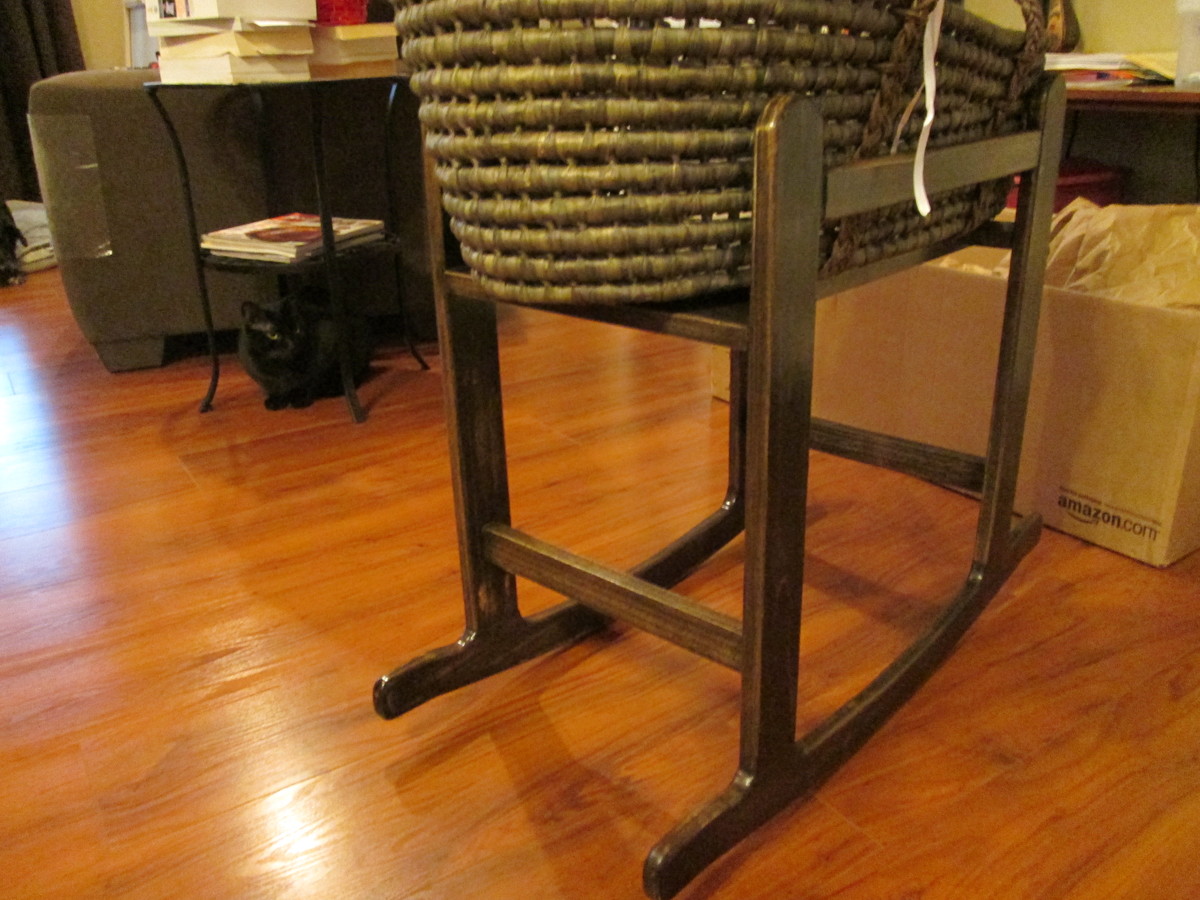
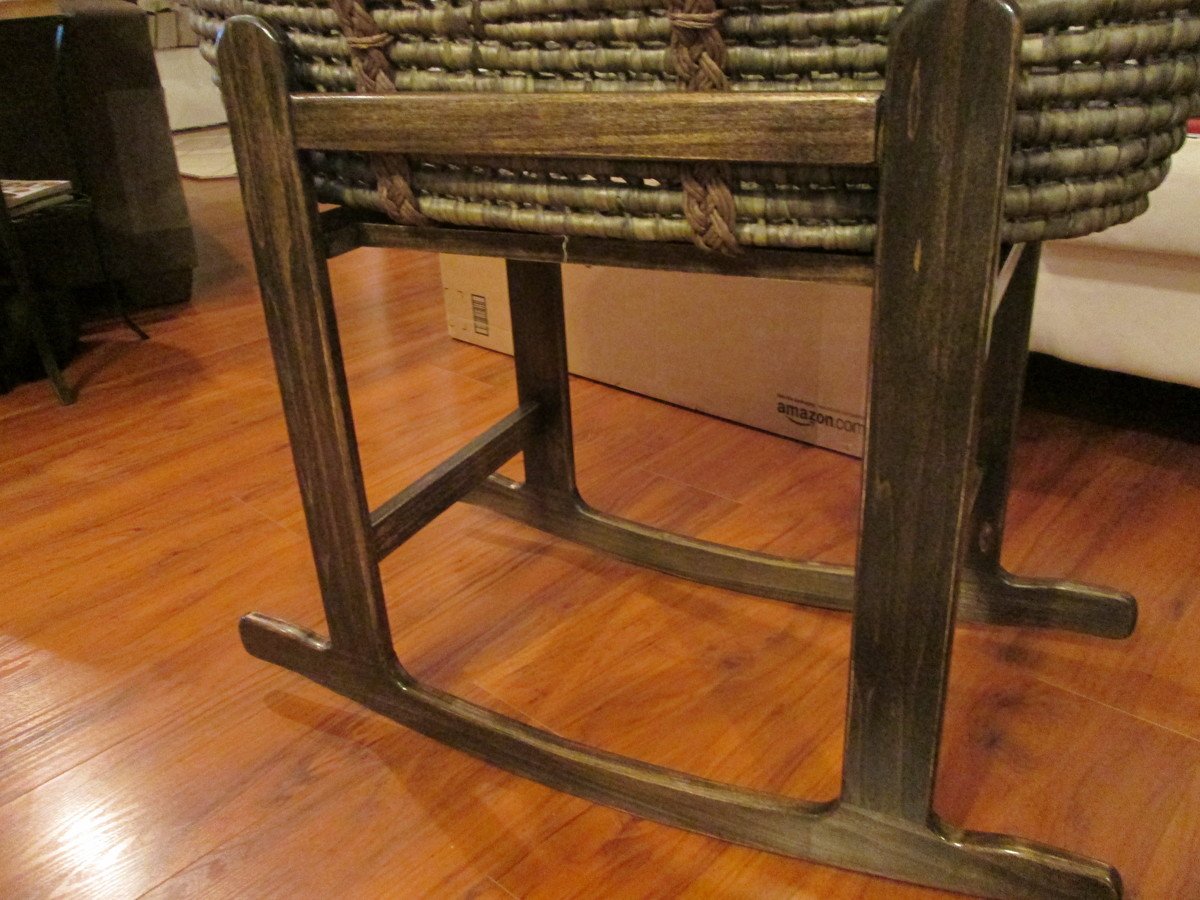
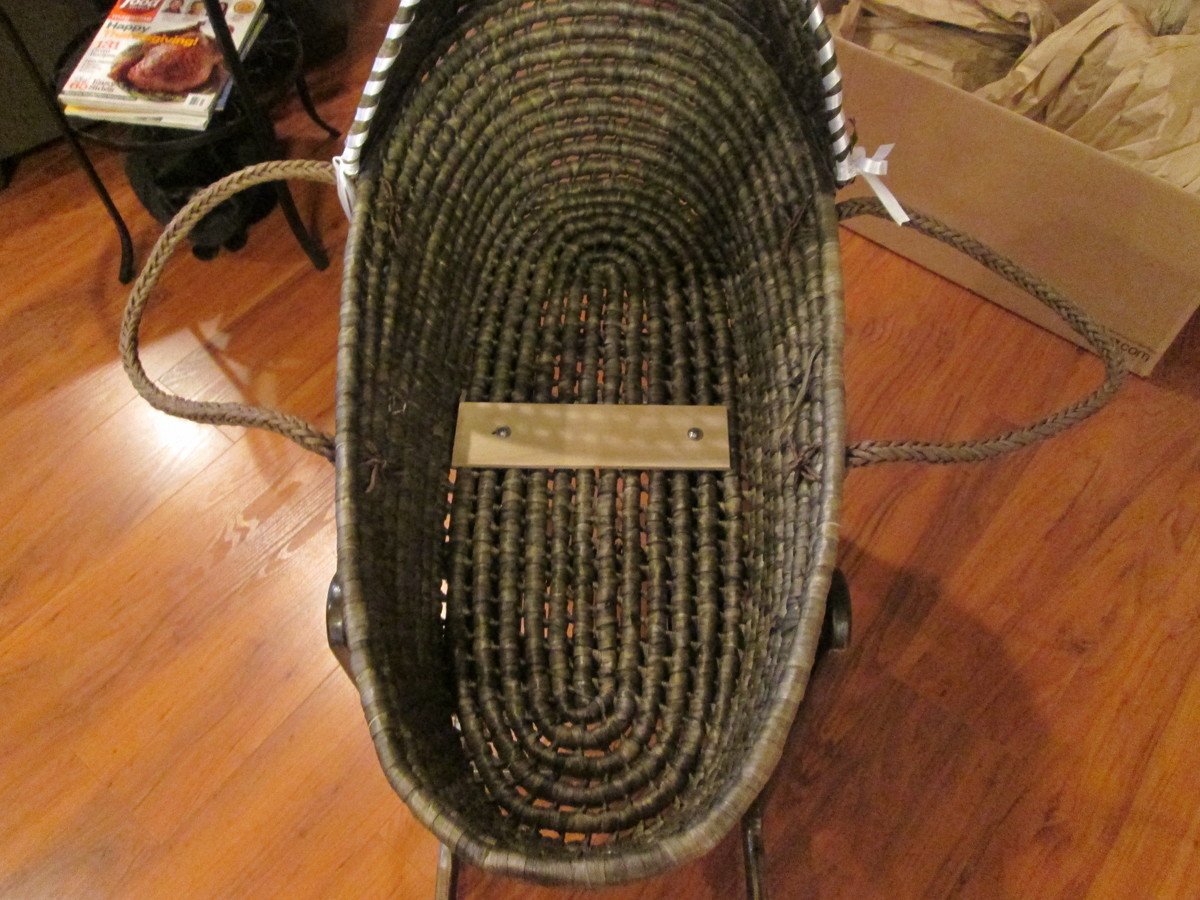
3" panhead screws with matching washers and wingnuts to attach basket to rocker.
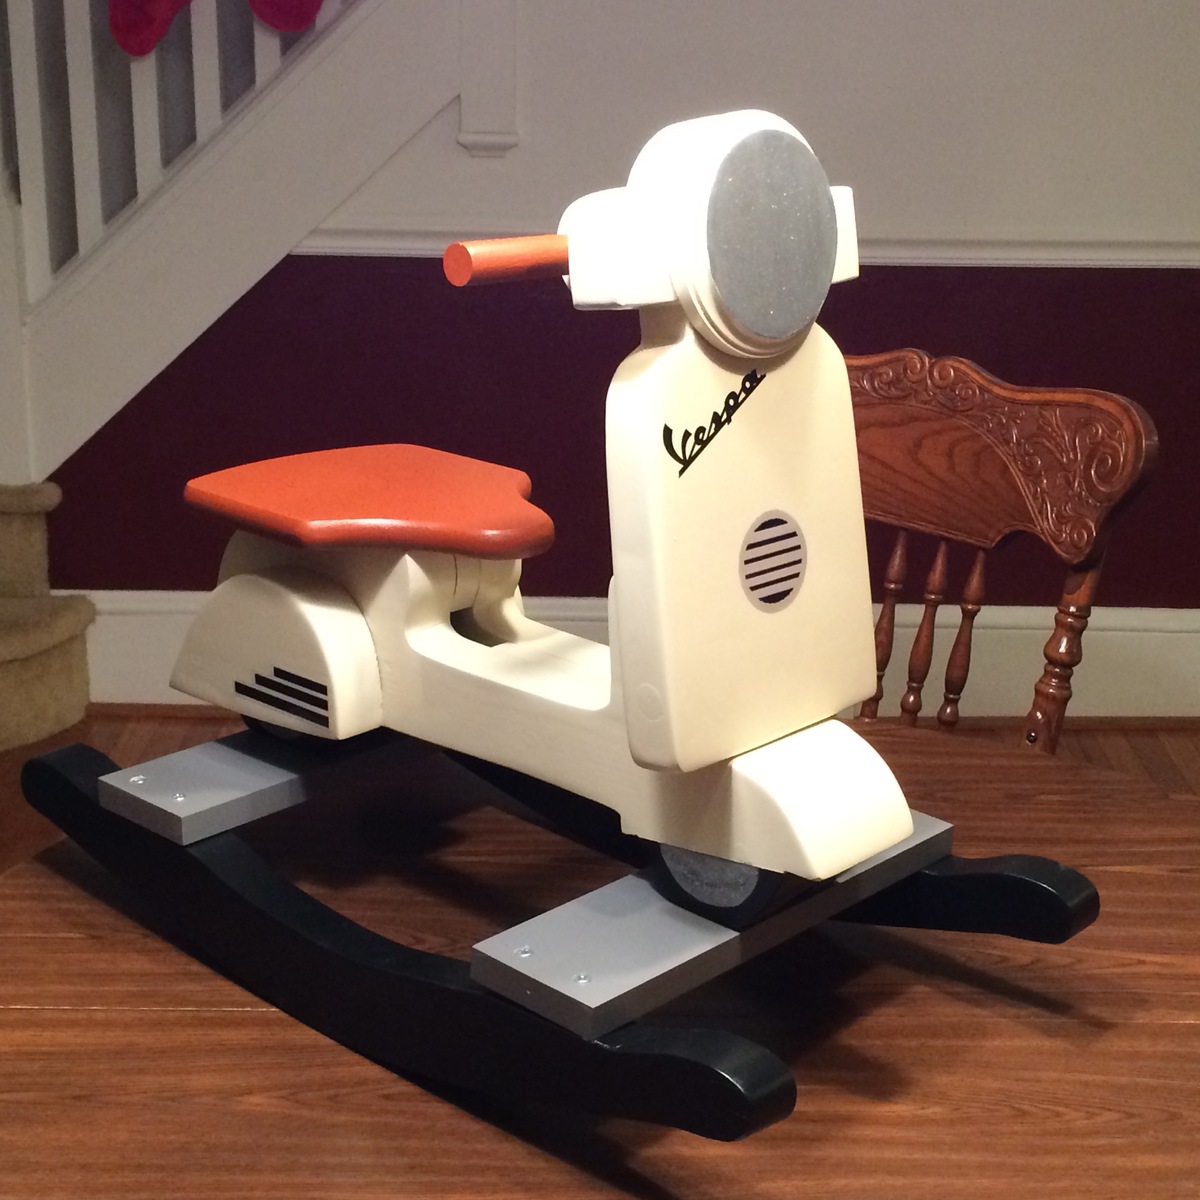
This is my third "Ana" project. I've built her baby changing table and the child tower thing for toddlers to stand at a counter.
I built two of these rocking stands for the Moses Bassinet (found on Amazon). The first was a prototype and joints at the rockers were just straight pieces of wood cut at the angle of the rocker. I built it out of pine from the big box store and used my Kreg jig for the pocket holes.
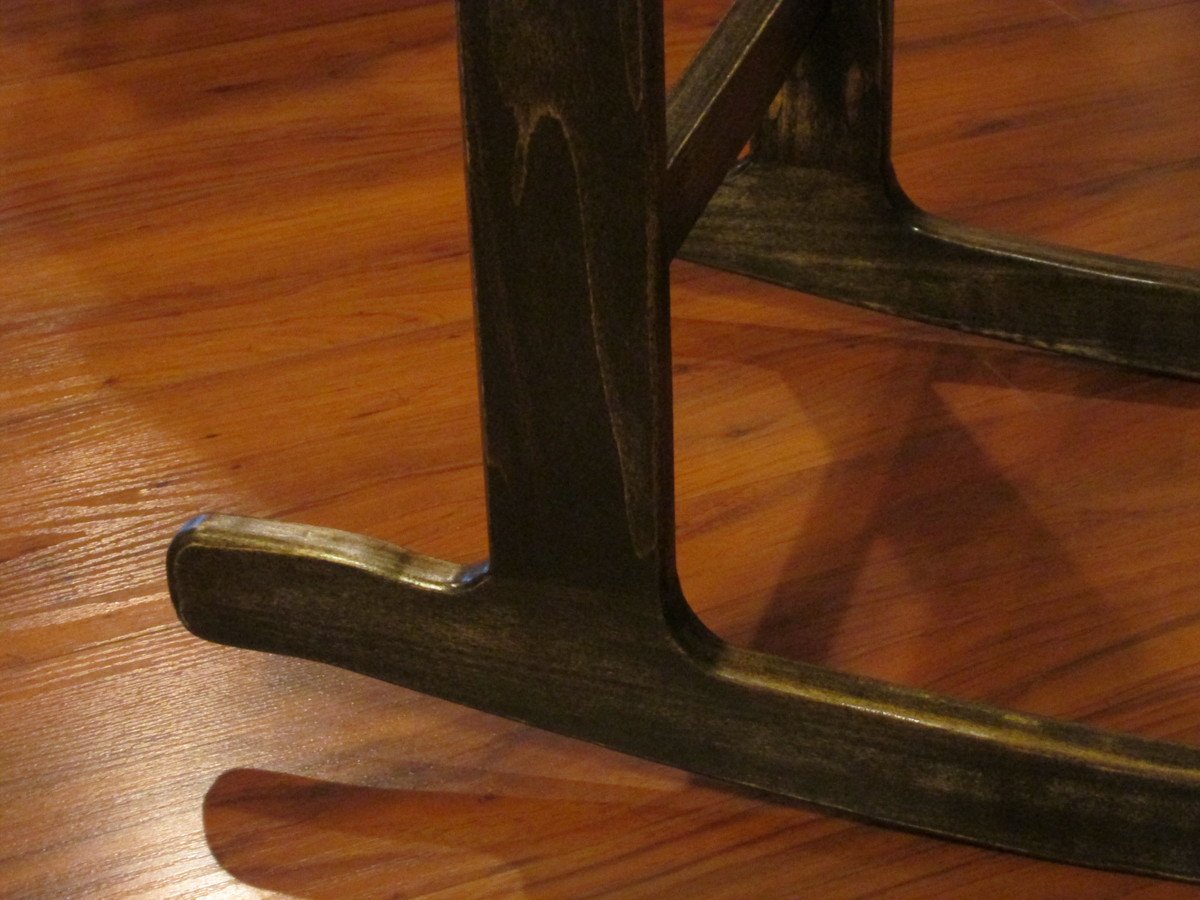
The second one (featured) I used S4S poplar which cost more but came pretty well uniform. I still had to find boards that were free of twist and bows, but that just took time and was easy to do. I use a "lay it on the floor" method and flip it to see if it rocks, twists, etc.. It works for now. I still find myself cutting around imperfections though. With this second rocker, I molded the sides into the rocker-bottoms./
I'm saving to buy a planer, which will be the last major tool for the wood shop (garage), so then I can mill my own lumber and be done with HD and L's.
Just some observations and steps I took:
To make the rockers and other parts of the project uniform that had curves which needed to be parallel to each other, etc., I used double-sided tape and put the pieces together when cutting and sanding. I recommend using the least amount of tape as possible. I learned the hard way and on the prototype rockers, I covered the entire surface of the pieces with the tape. It took an act of God to get the pieces to release after I had spent an hour or so cutting and sanding the edges. It nearly failed to come apart and I would've had to start over because it was the 3 major components that were taped together like this. On the second run with the featured rocker, I used a couple small pieces of double-sided tape. This held together through cutting and sanding without any issue.
I rounded some of the edges w/ a 1/8th or a 1/4" roundover bit on my router. On the pieces that weren't hit by the router, I just broke the edges with sandpaper, to keep hands from getting splinters, etc.
For finish I used Minwax wood conditioner, oil based stain and polyurethane. I first sanded the entire piece to 320 by hand. I applied the conditioner as instructed. It's a must on softer wood such as pine, poplar, whitewood, etc. Otherwise, you will have blotches. After that I applied one coat of stain. I applied a coat of poly with a foam brush. I didn't like the results. I sanded it down w/ 320. I then went and bought a "nice" brush for polyurethane at the big box store for like $8.00 and applied another coat. This one came out better. I sanded it with 400 grit and applied one final coat with a fine cotton cloth.
I followed the plans on here for the most part. They are complete and were easy to follow. Thanks Ana!

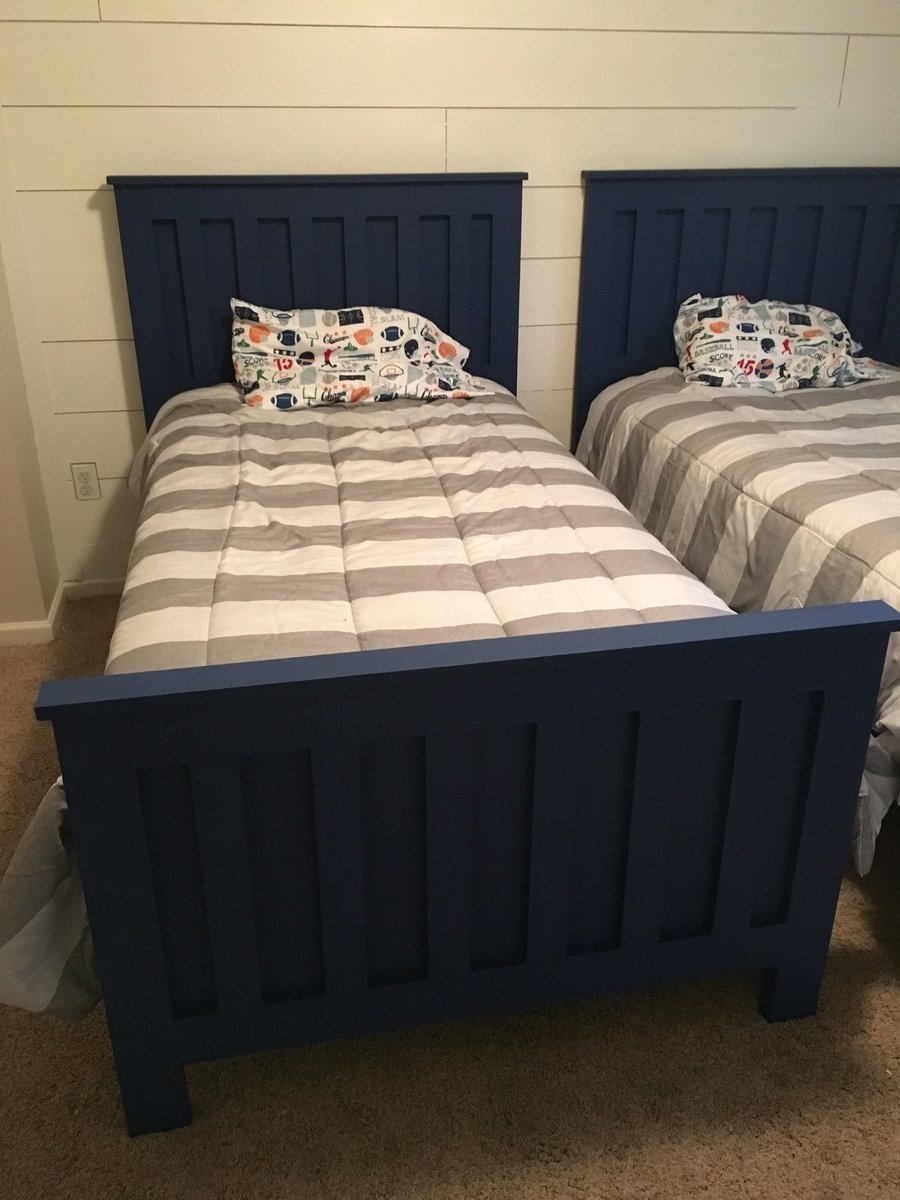
I made twin beds for my boys. It was the first time making furniture. It was a pretty easy plan to follow. Lowes did all my cuts for me so I didn't even need to find a saw.
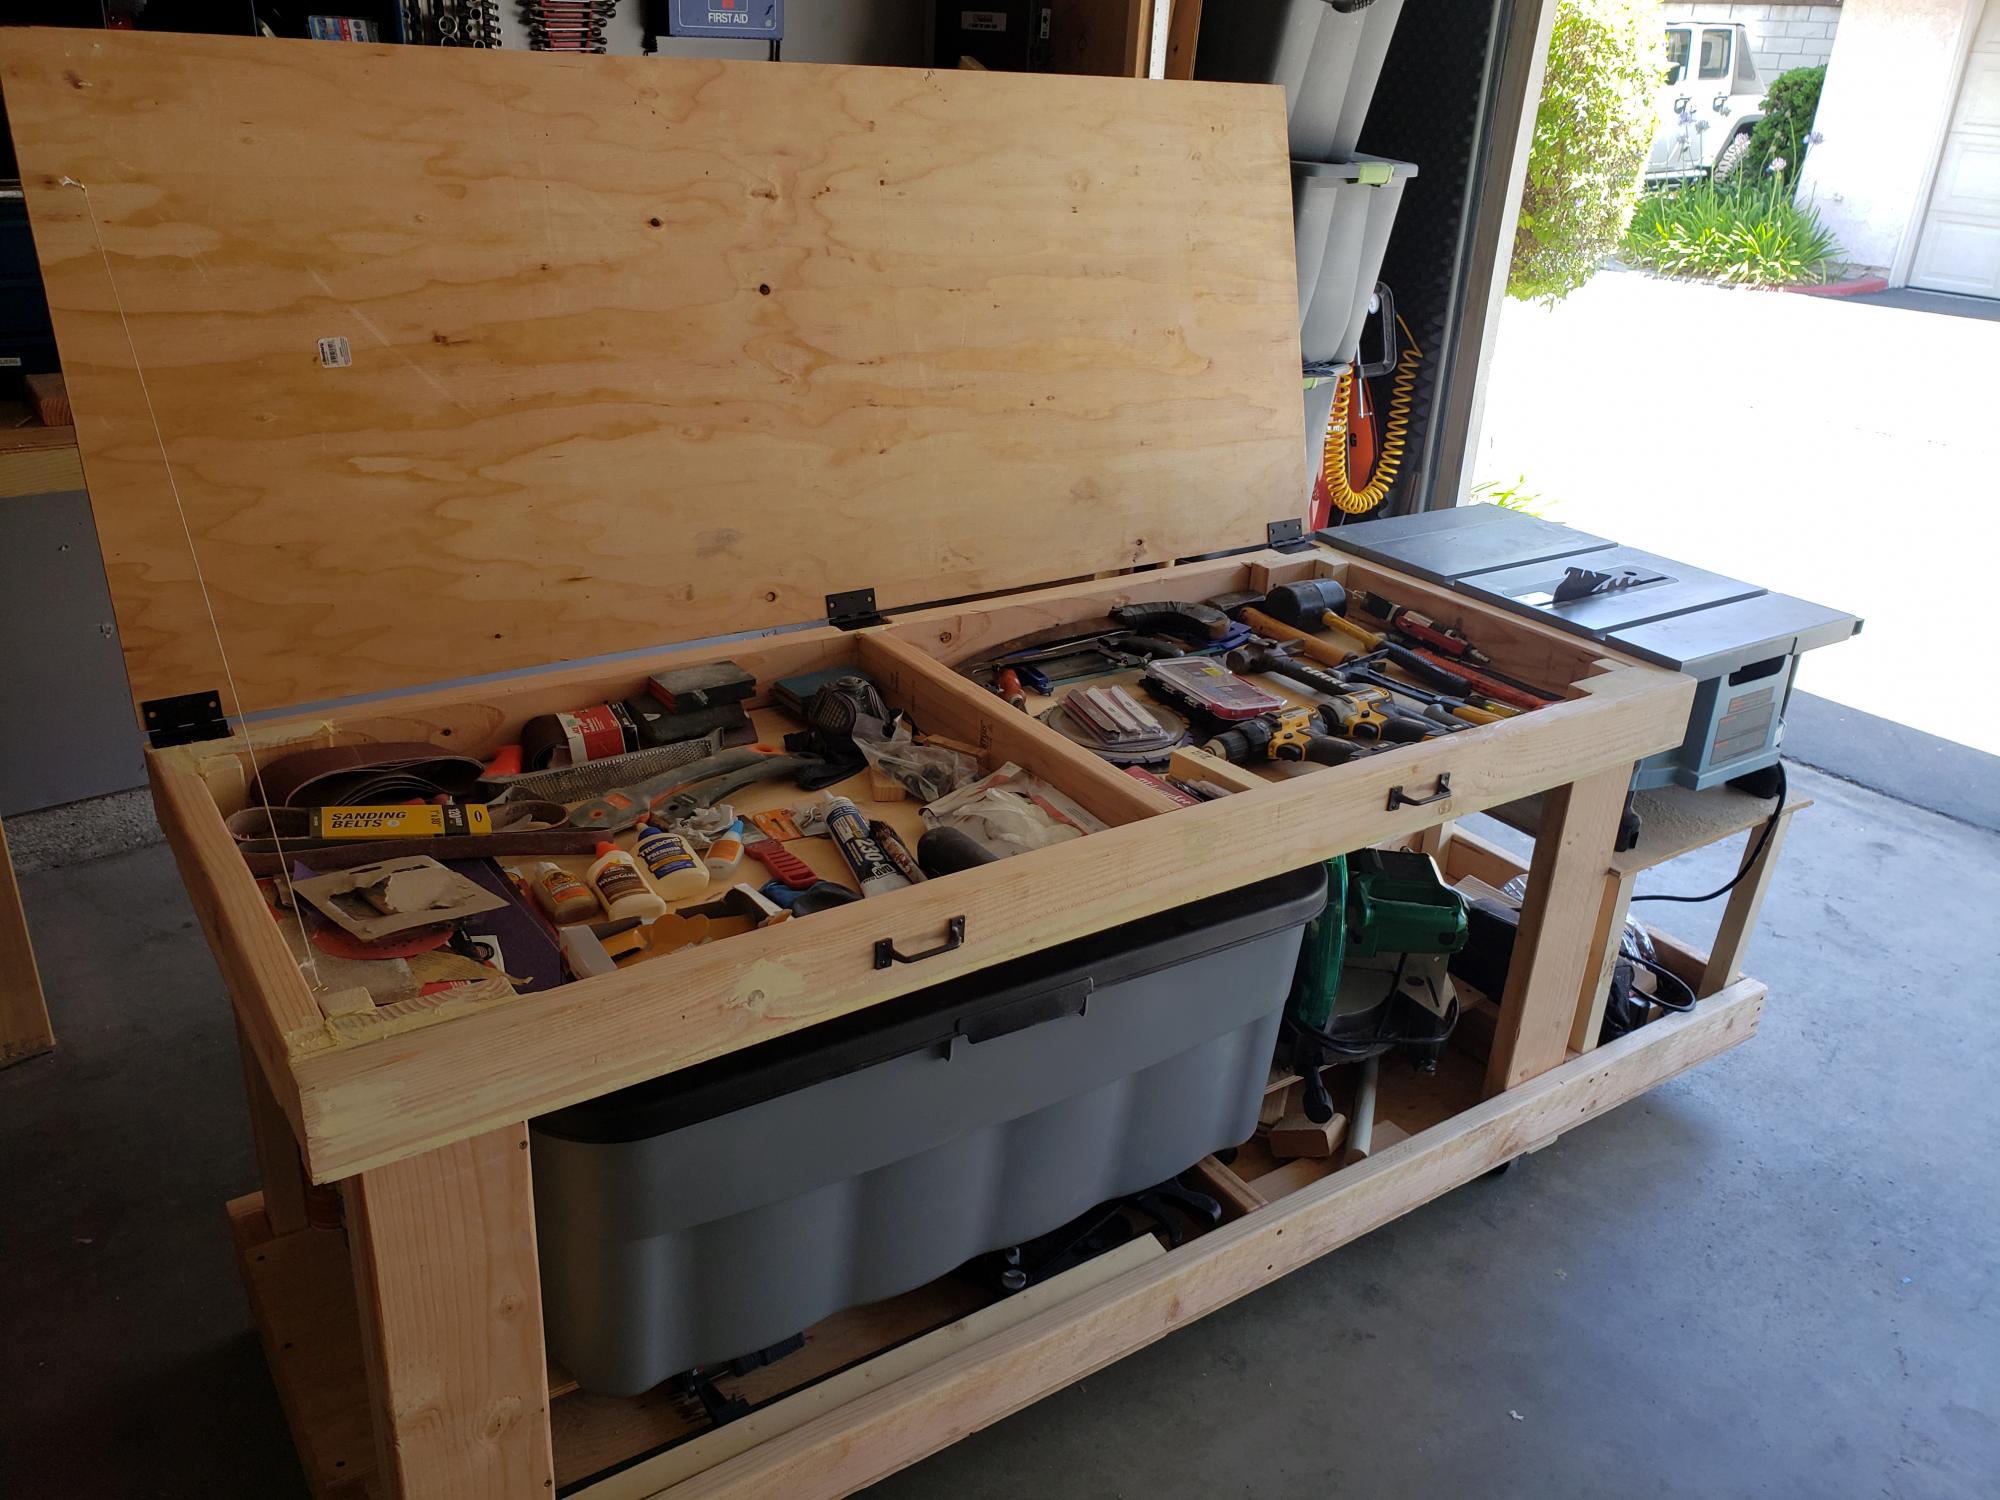
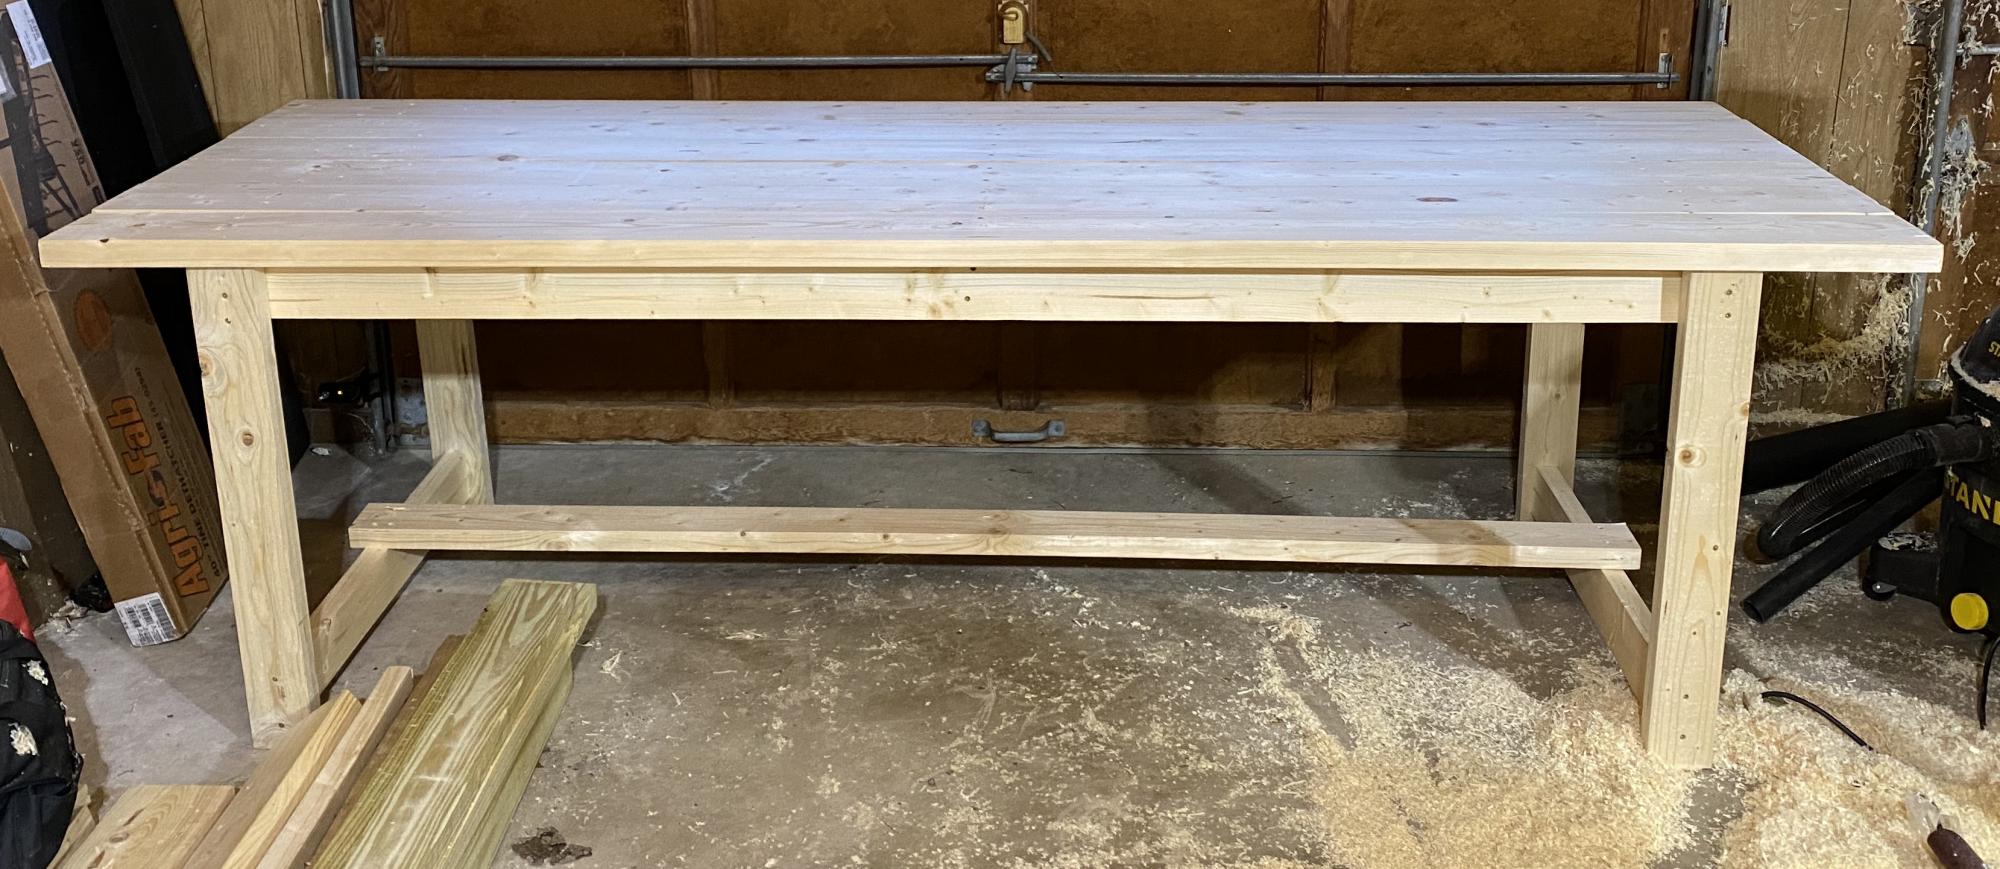
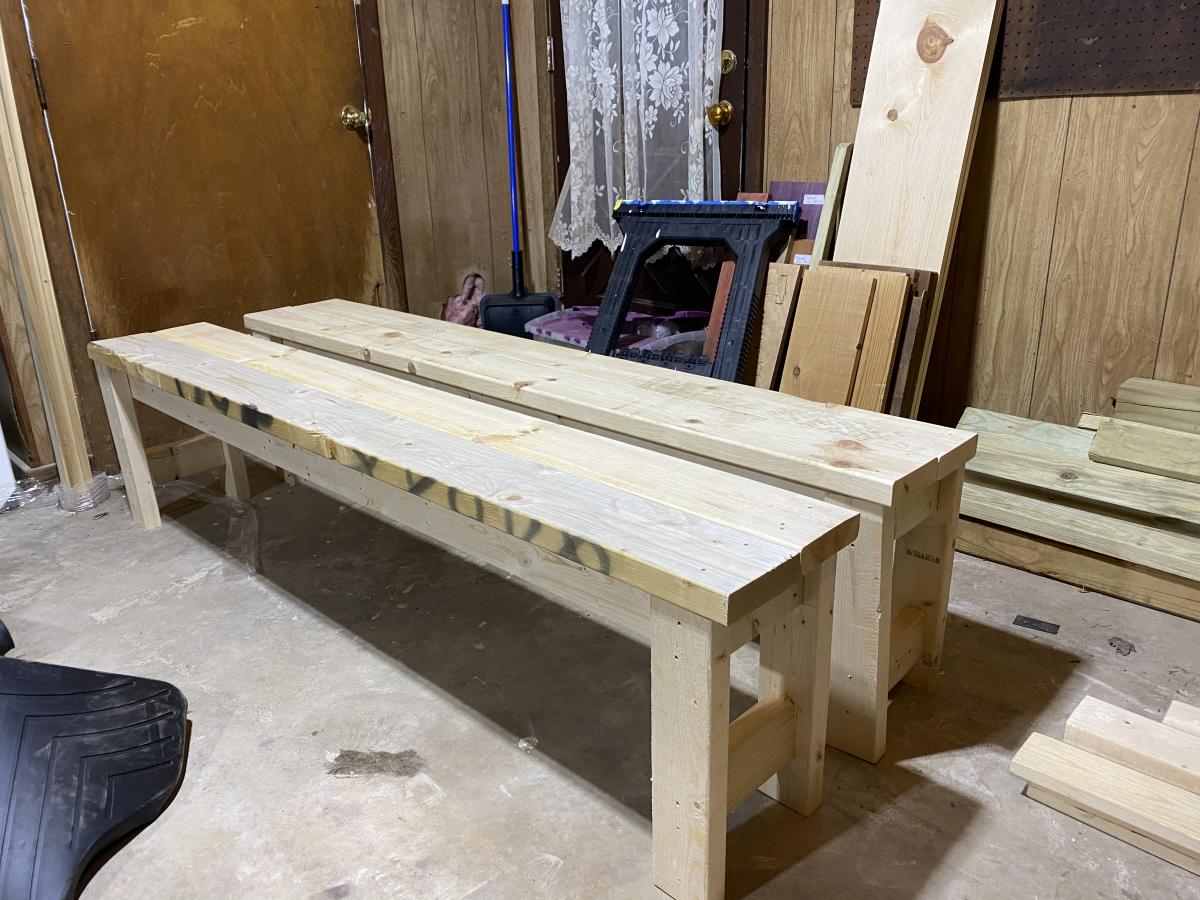
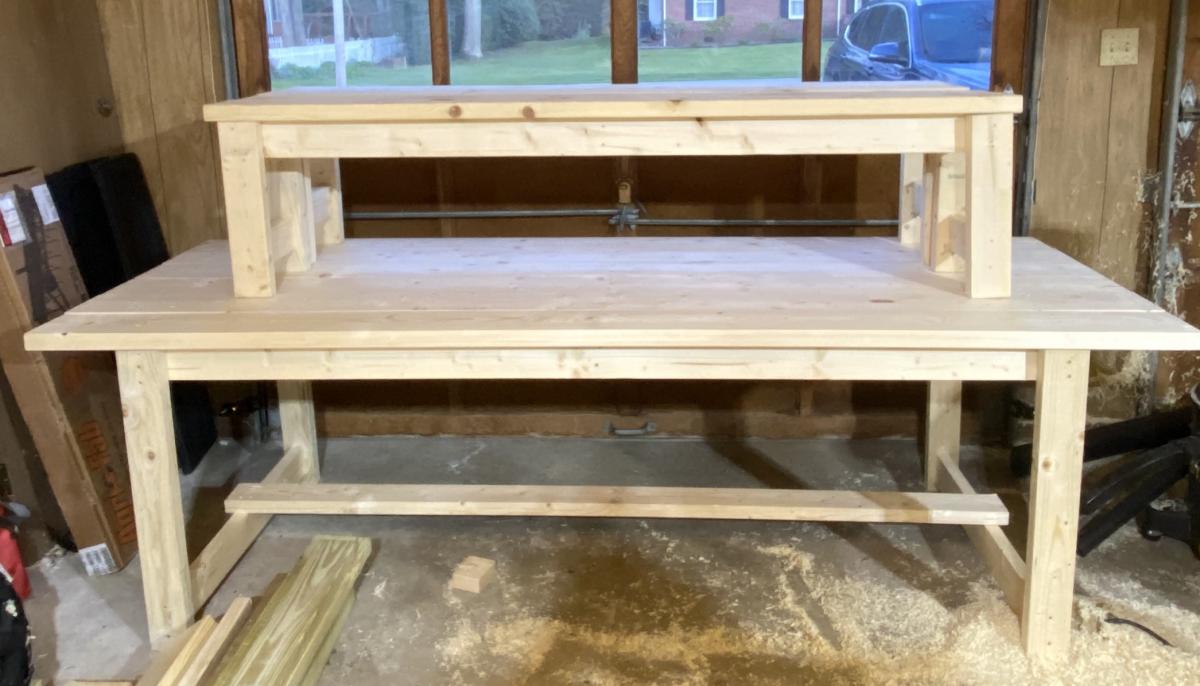
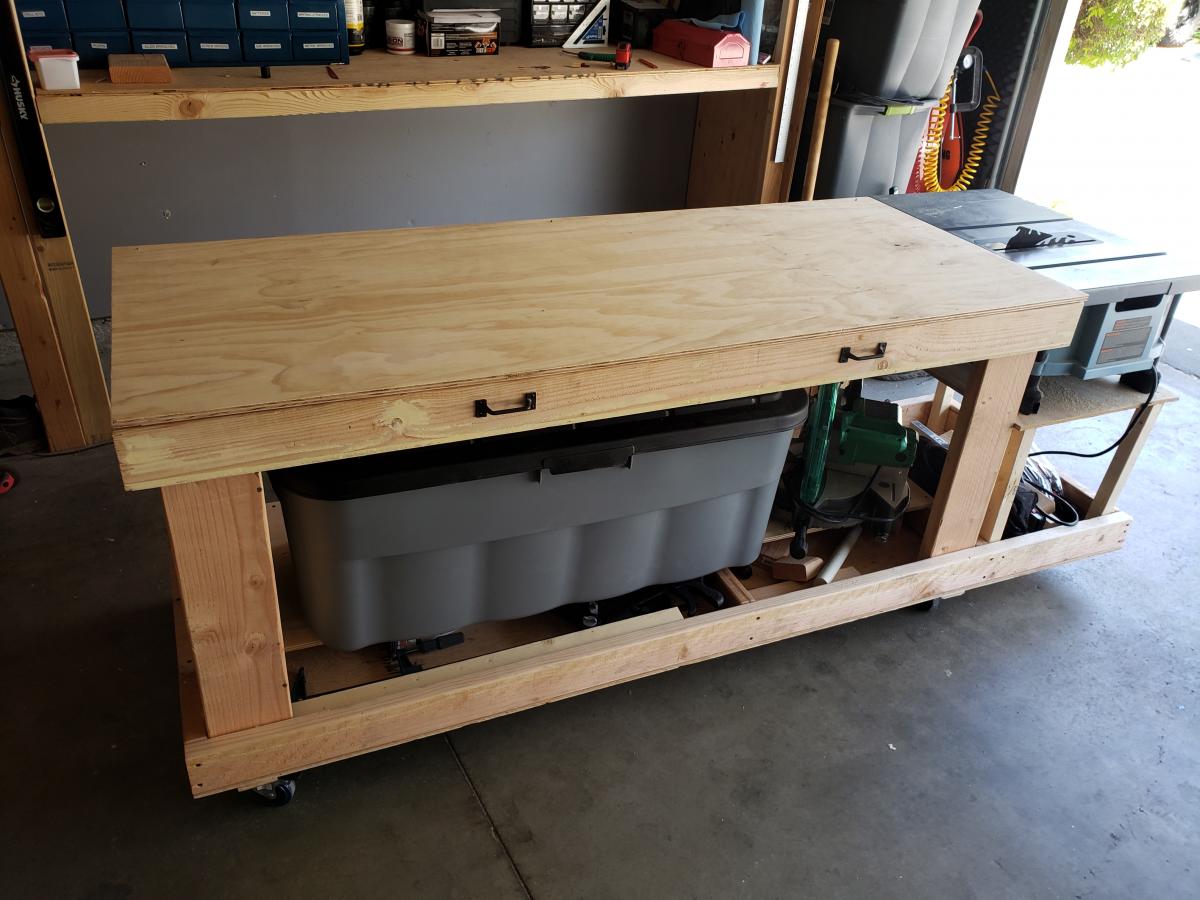
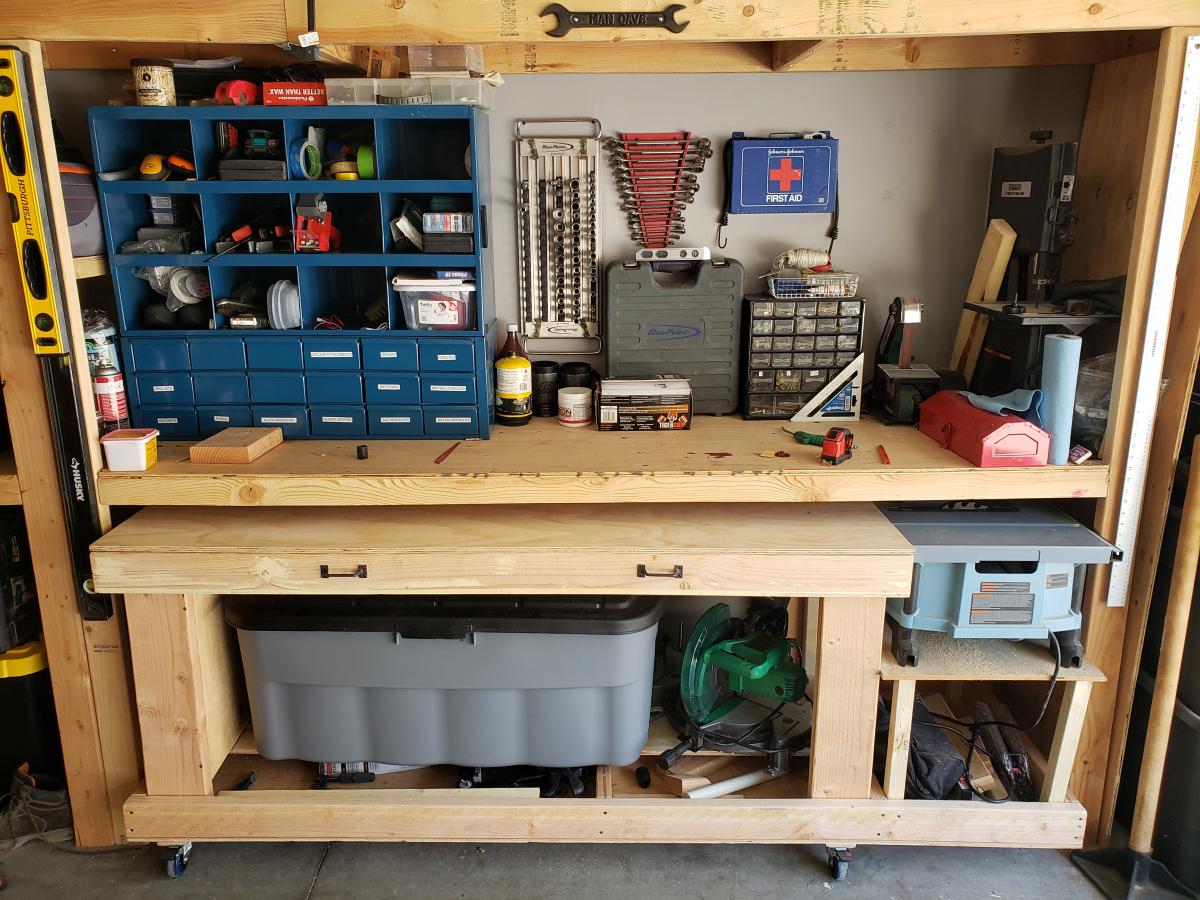
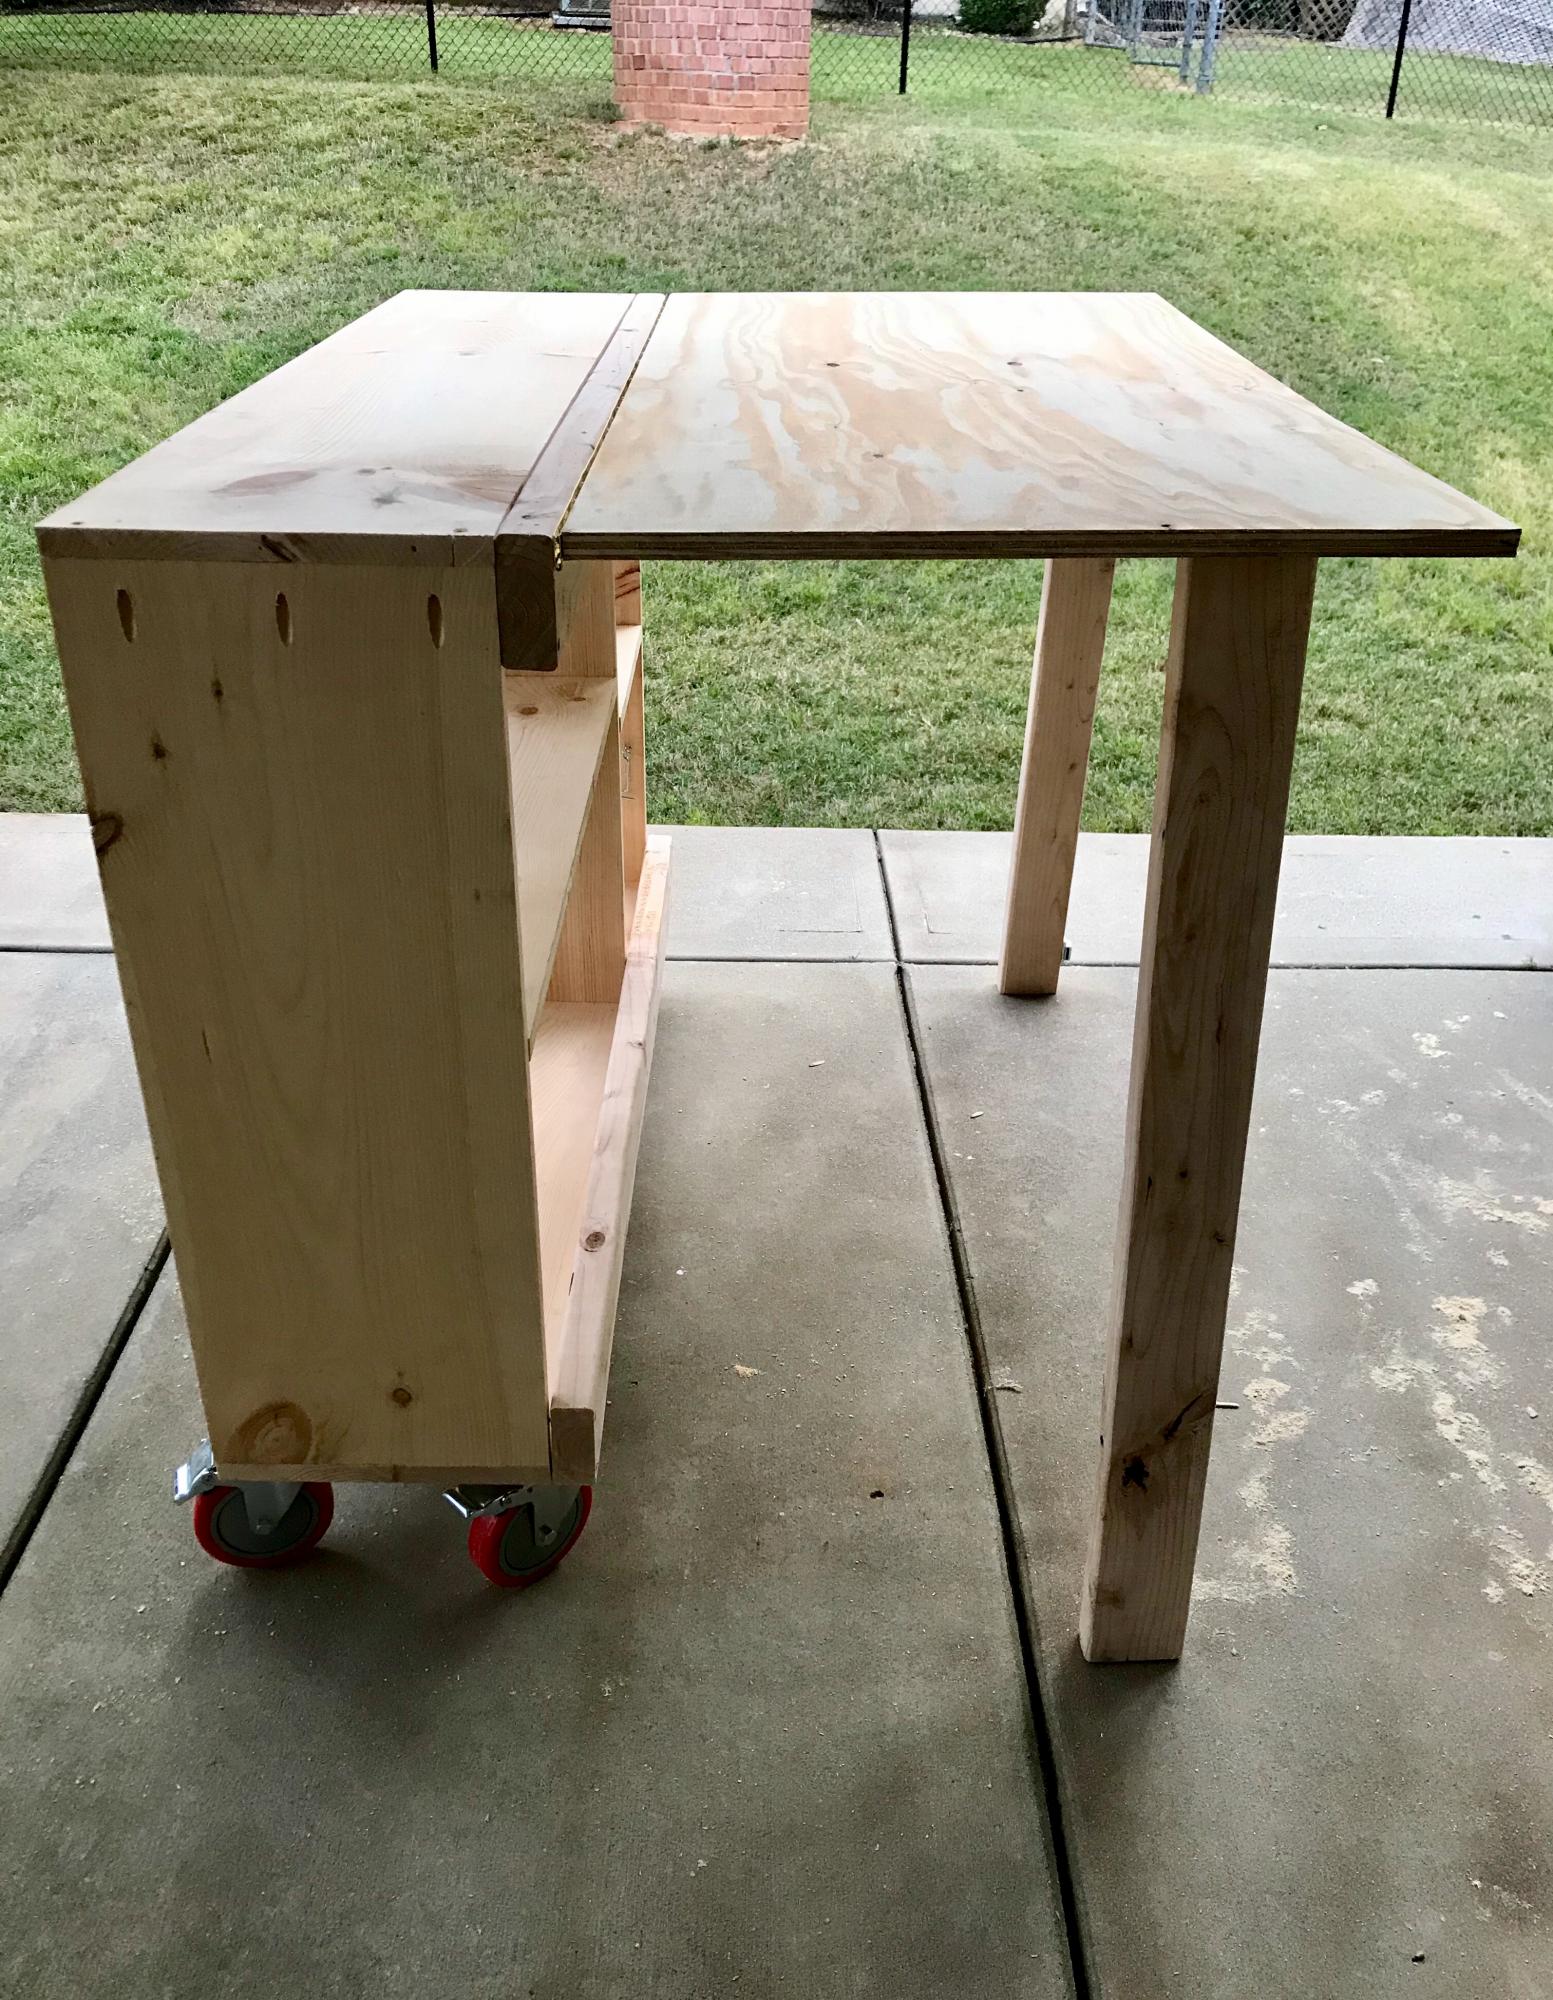
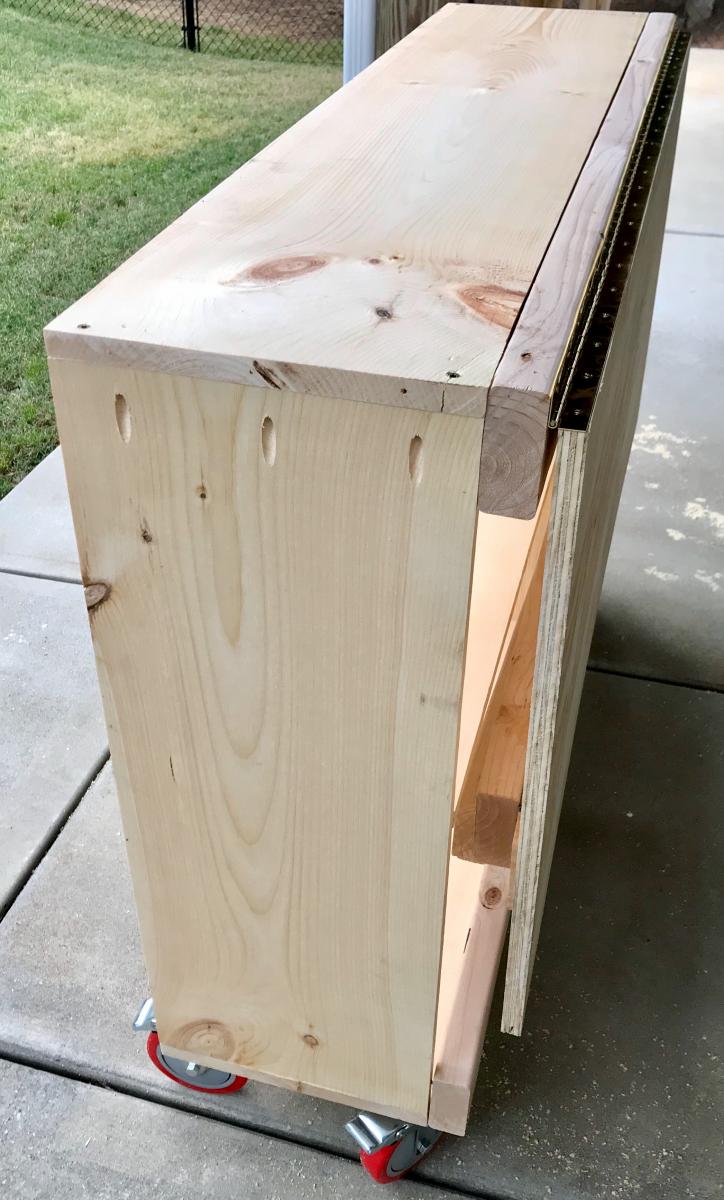
A modification of the traditional work bench. Great for storage. Bench area of 70 inches with 18 additional inches for the table saw.
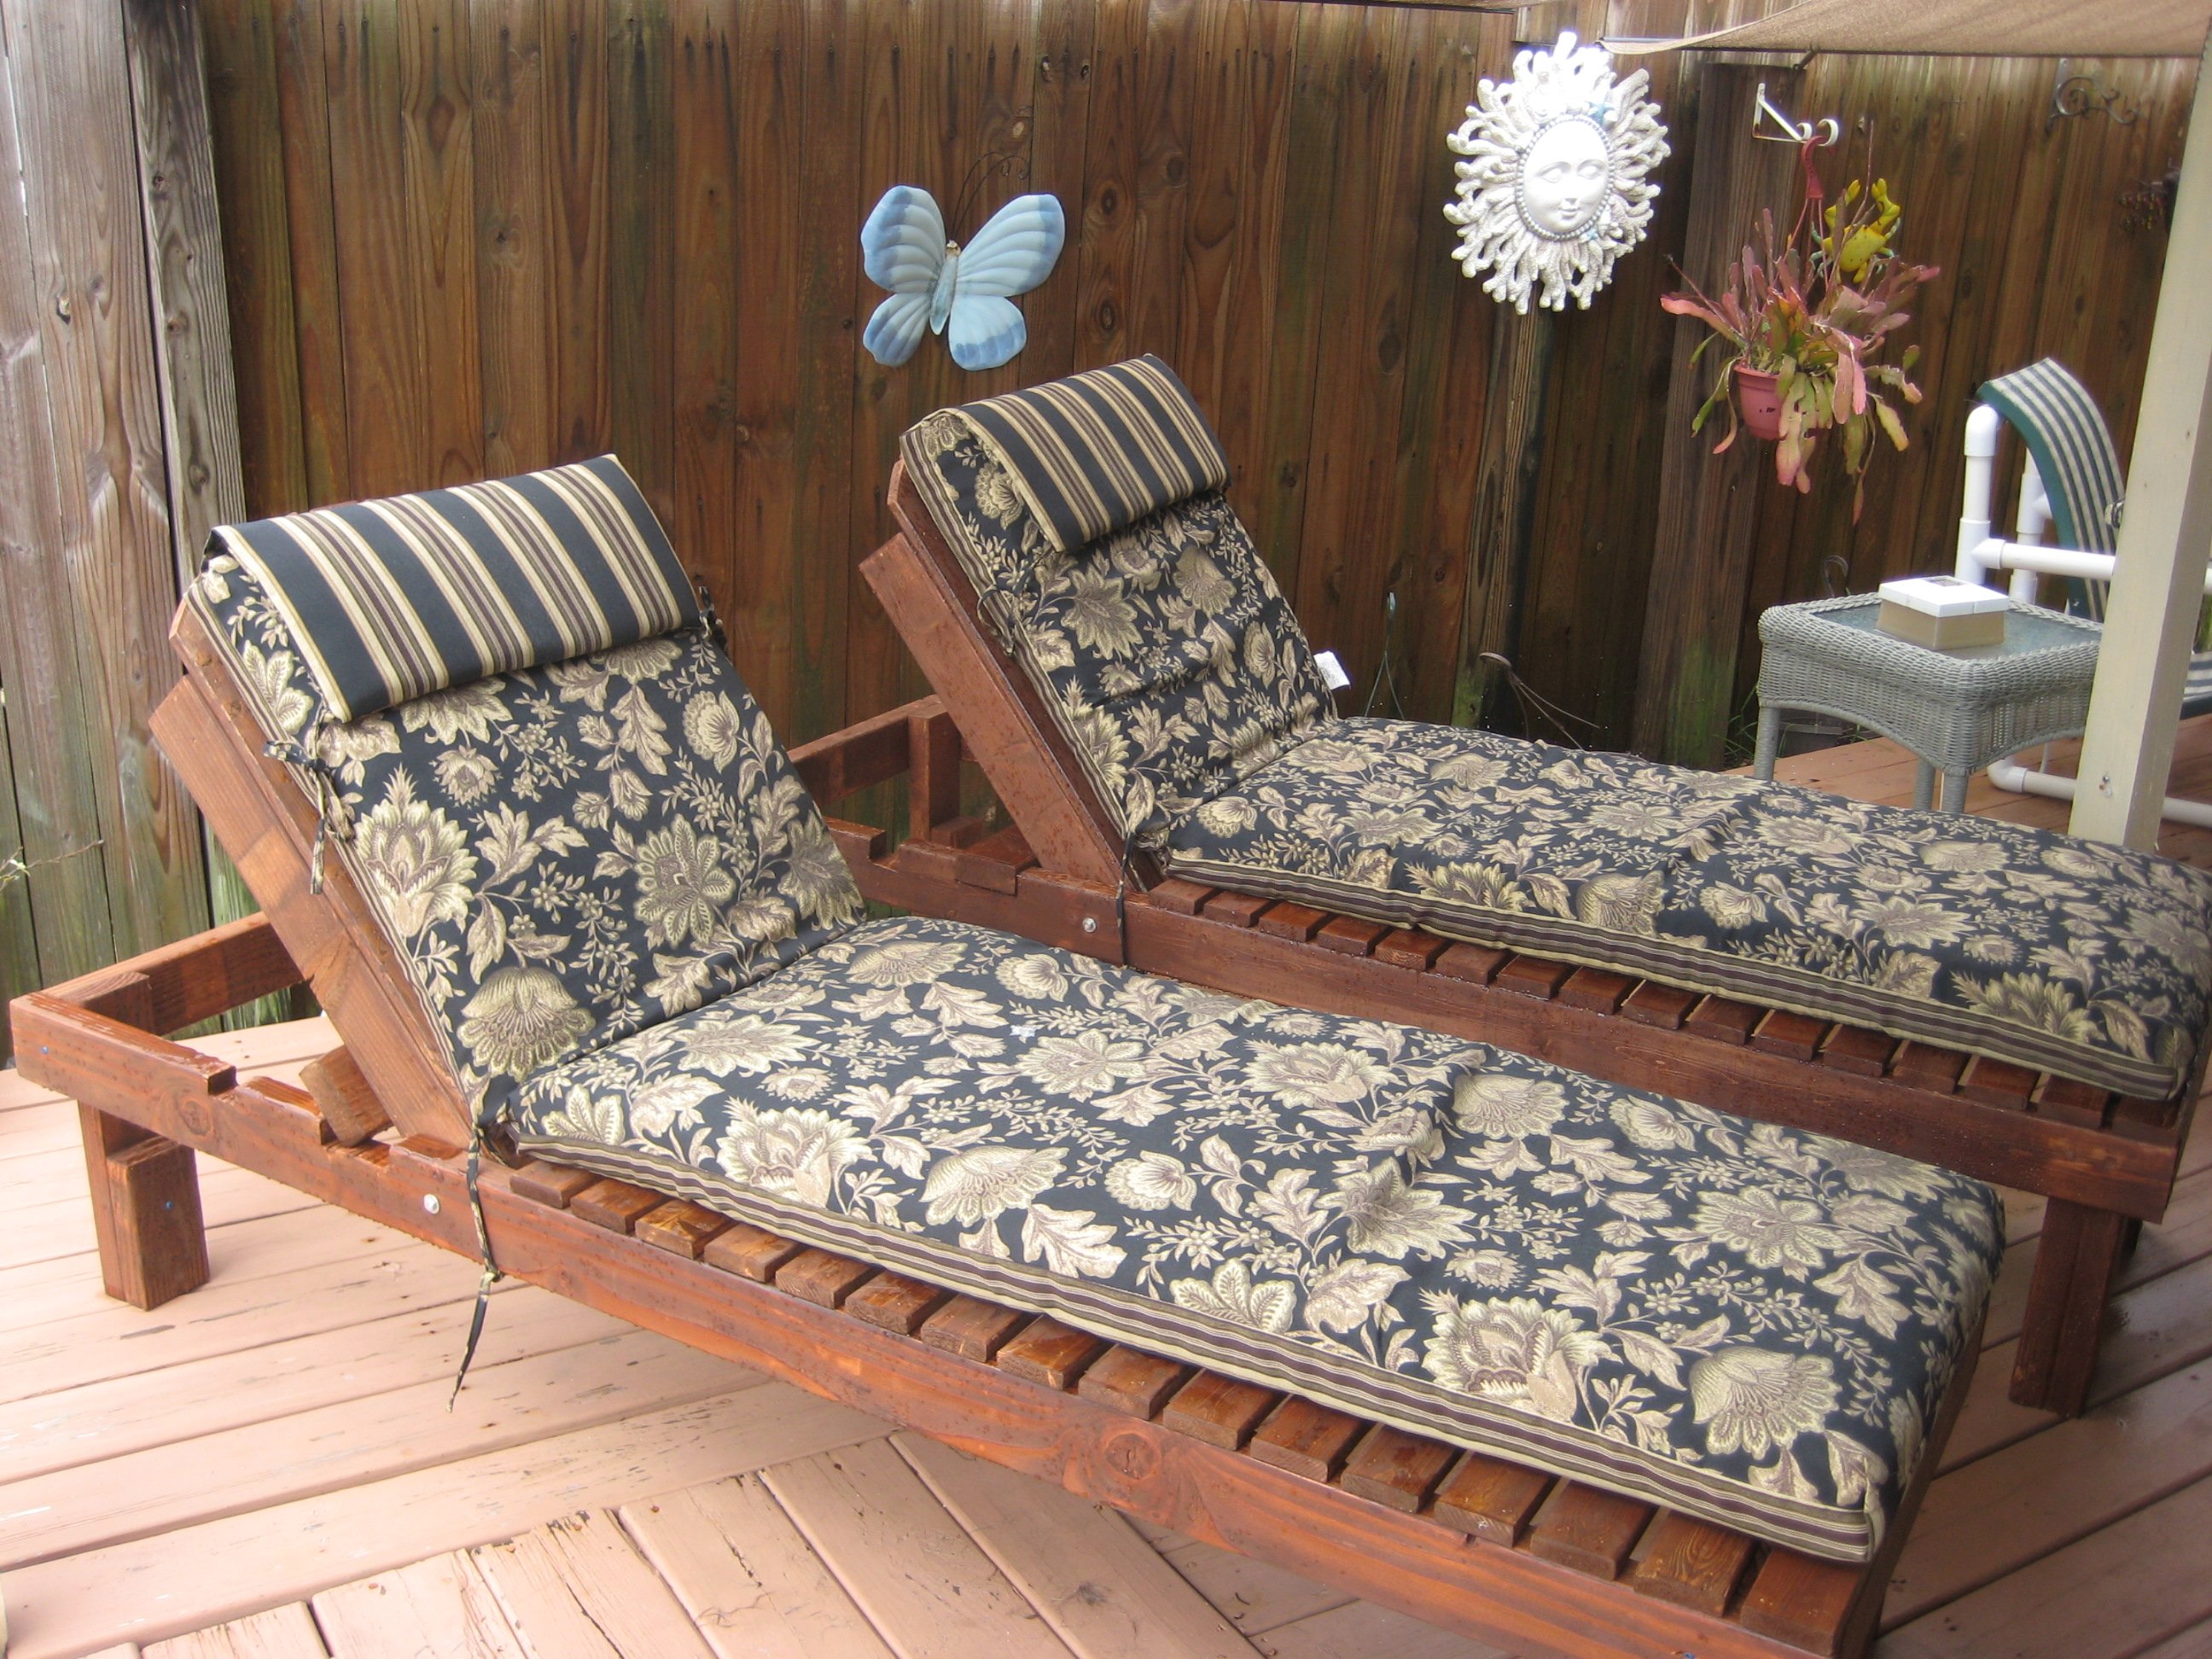
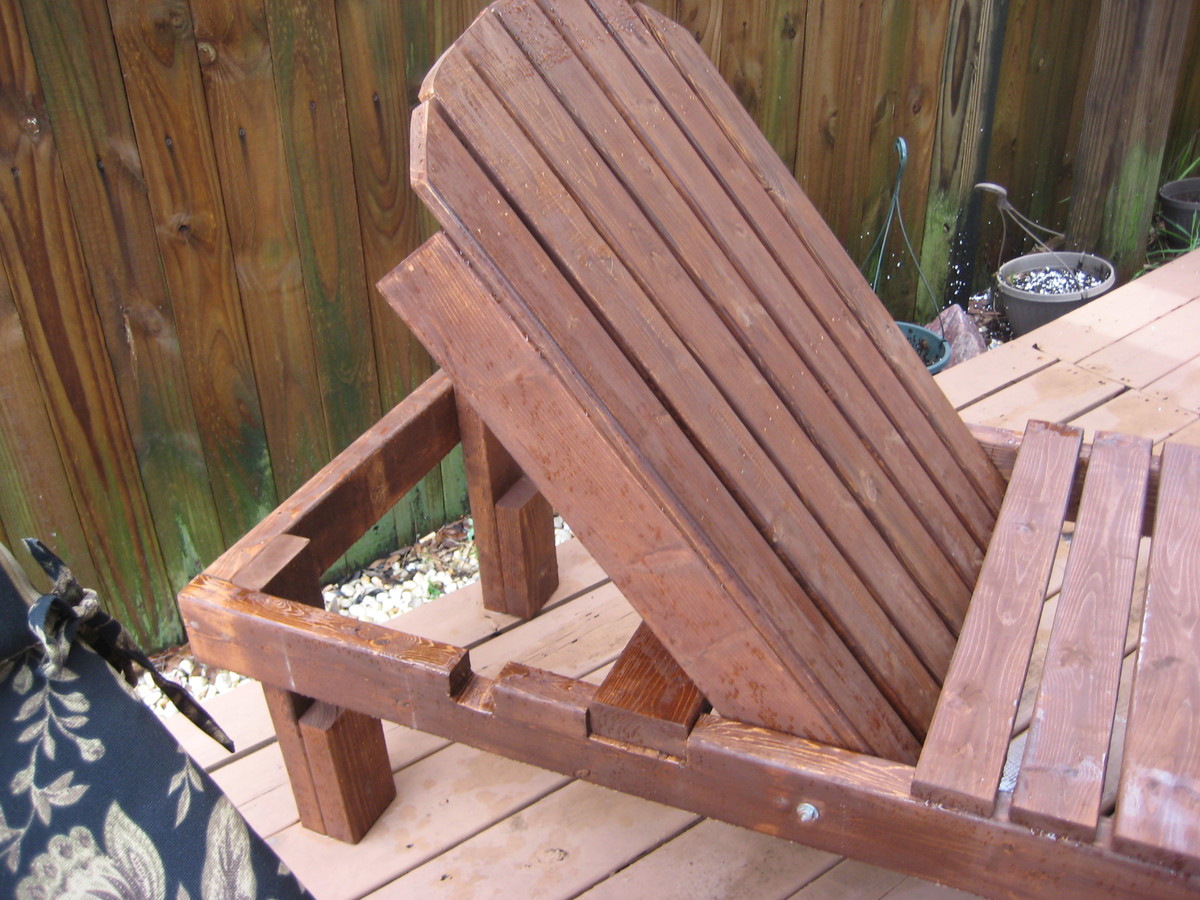
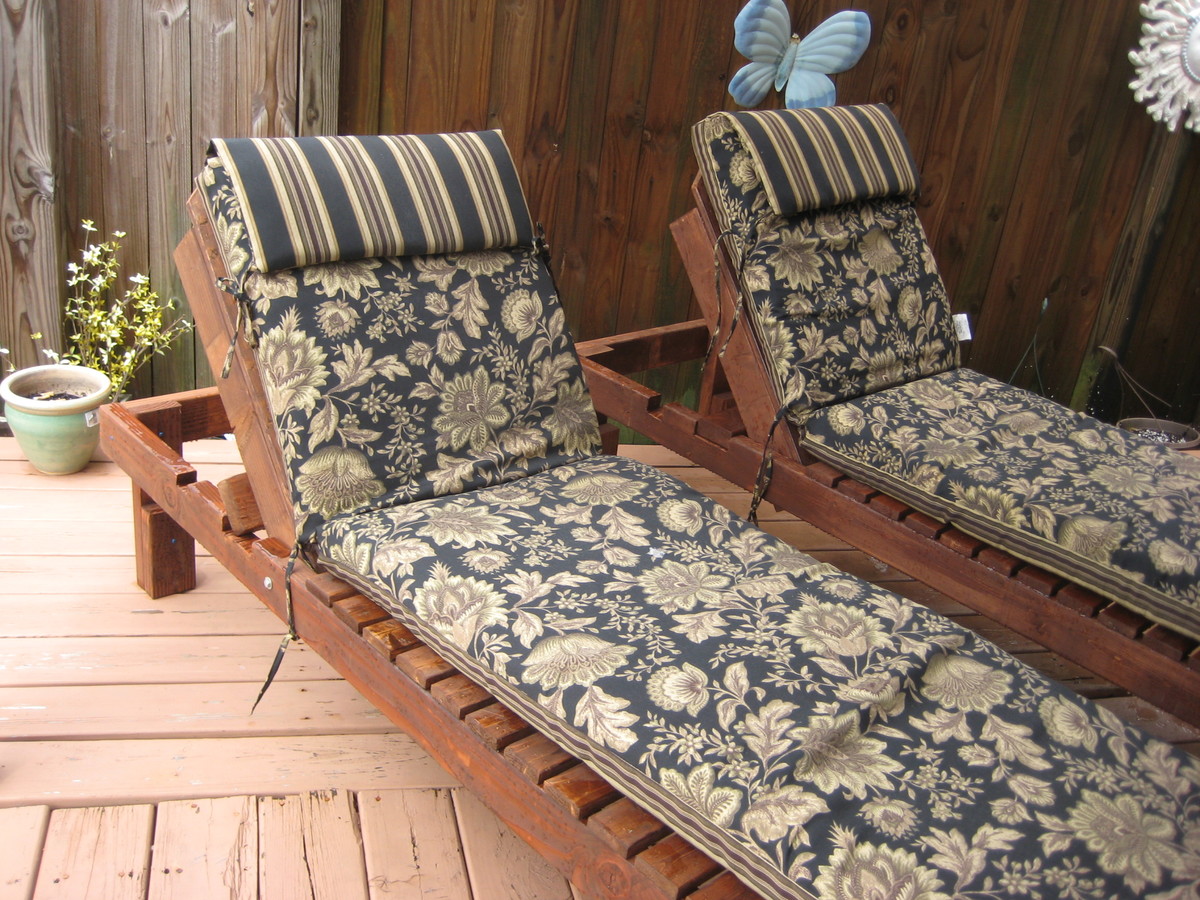
Love these outdoor Chaise Lounges. They are very sturdy and comfortable. I am hoping to make a loveseat and tables to match. Makes a perfect patio sent for my back porch and pool!

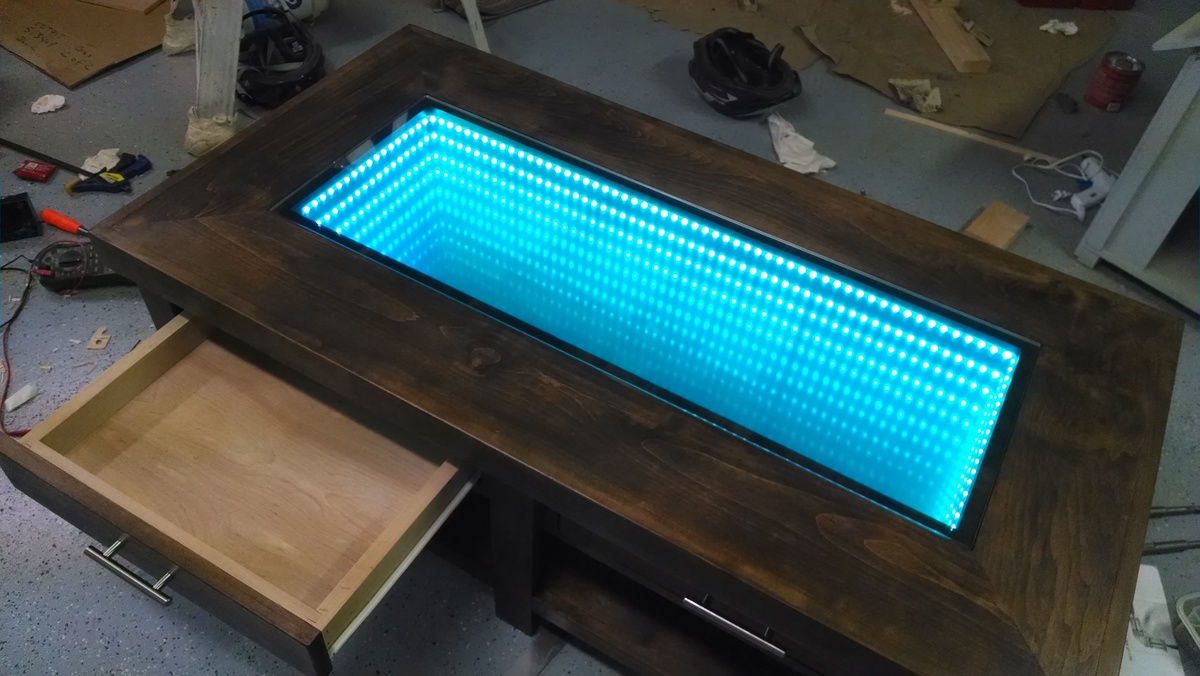
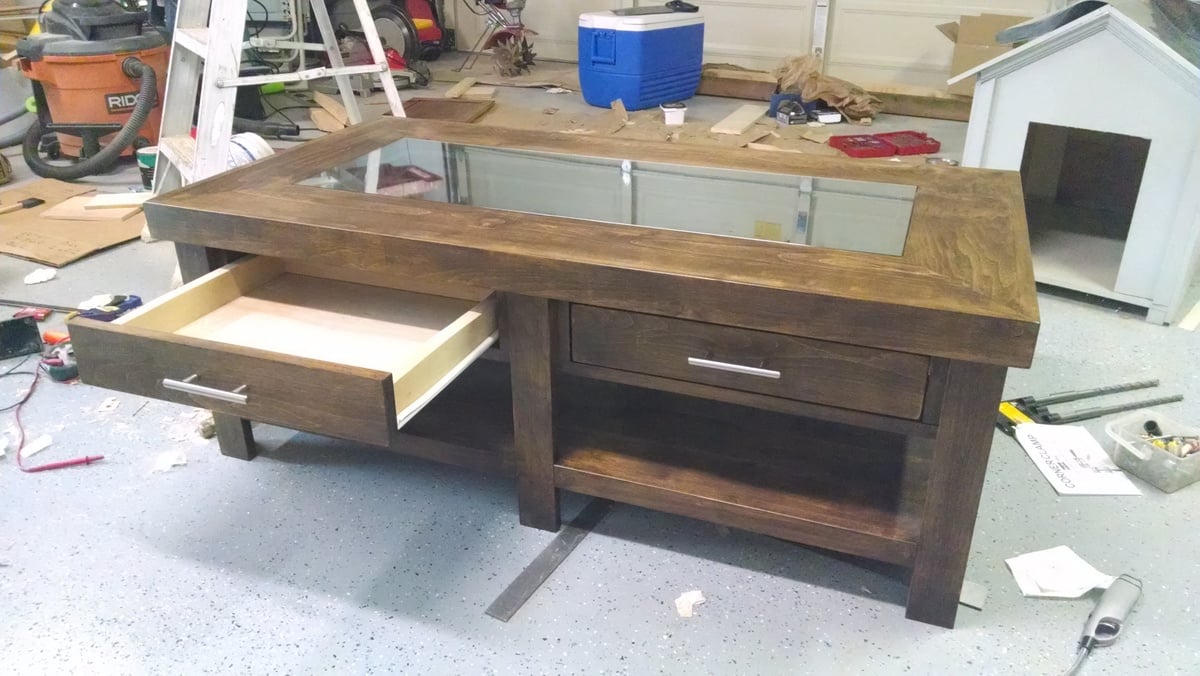
Used the Benchwright Coffee Table for all of the base which was very easy to follow. I used rough cut Alder, which I would not try to do again (way too many linear feet to cut!). I've done drawers before, and I've found that it's easier to attach the slides to the drawer box and the horizontal pieces that attach to the table. After that, attach once of the horizontal pieces first, and shim the other before attaching to the table. The top is 3 boards tall and is comprised of 1 layer of birch plywood, 1 layer of spacers, and the mitered edges on the top. The infinity mirror feature comes from a row of LED's sandwiched between a mirror (base) and glass with a semi-transparent mirror film (also known as one way mirror).
I have a small workshop so this workbench allows me to bring the work outside. It was my first project and I think it came out great.
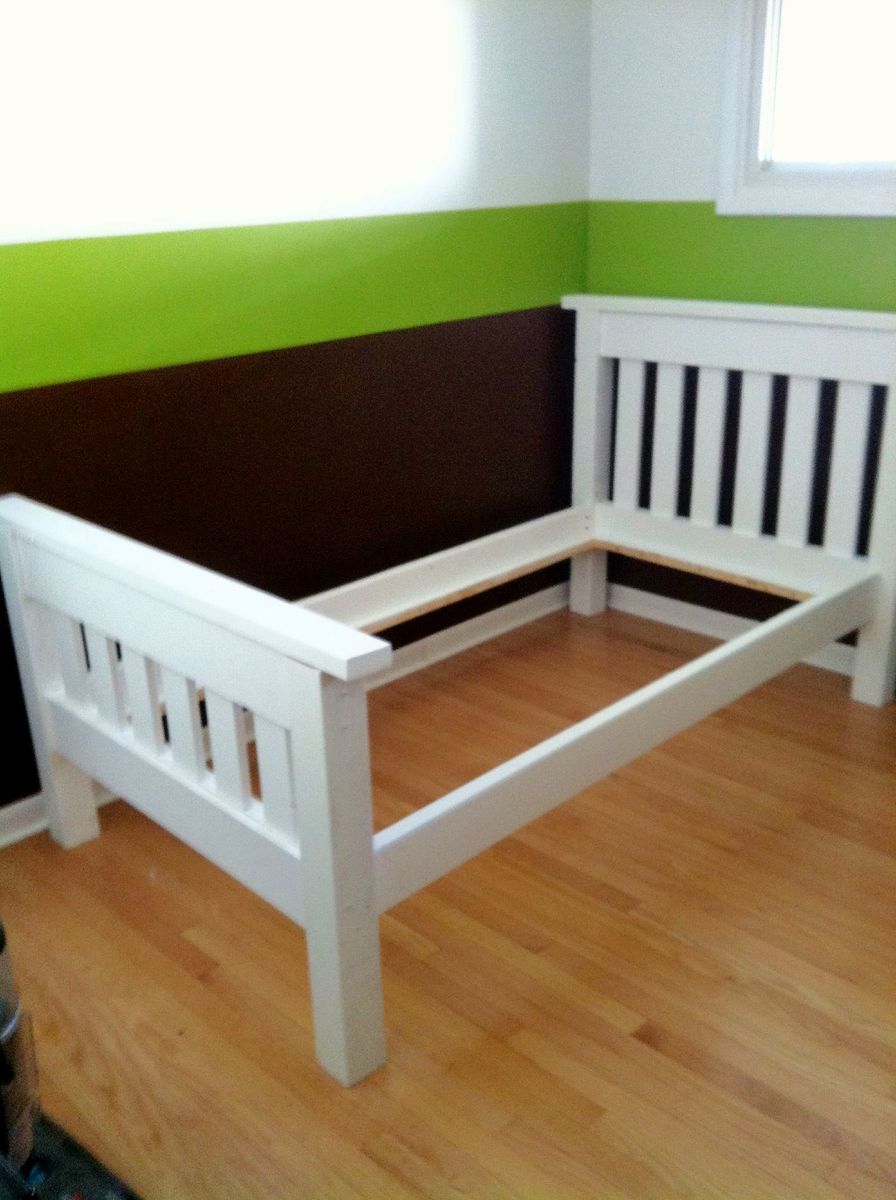
Just finished this Twin Size Simple Bed direct from the Ana White plans. This is my first project that I've completed, and it went well! The plans were great, and my only advice would be to take your time. I know that some people don't like to paint the wood, but this white just fit the room perfectly. As a side-note, this bed is SOLID and very heavy! Amazing what a difference real wood is to the stuff you get at the furniture store.
Wed, 07/25/2012 - 12:49
I am looking into making this bed but into a bunkbed, but I am afraid of doing a bad paint job....any suggestions?? Should I paint prior to putting together? Thank you your detoured out GREAT!!!
Thu, 07/26/2012 - 05:20
Hi Amie! After putting this all together and then sanding and painting, I think this time around (I'm making a 2nd one), I'll cut the pieces according to the cut list, then sand and paint the pieces before putting them together. The painting wasn't too bad to do after putting it together, but the sanding was difficult with some of the angles on the head and footboard. I'll update this after I do it this other way..good luck with your project!! It's very satisfying to see the finished result after you finish!
Sun, 01/06/2013 - 13:35
I just priced this out and the lumber comes to $130 for decent pine...
Sun, 01/06/2013 - 16:00
Hi Ahab.. One thing I've figured out from reading posts is that the cost of lumber (and pine) varies widely across regions. Each store also has different grades of lumber available. If you take the time to go through lumber piles and choose boards that are straight you can save a fair chunk of change. Just my 2 cents.. Good luck with your project though!
Thu, 12/18/2014 - 16:36
I have a question on how the rails connect to the head and foot board. I think the original plans have you make a box out of 2x2's, Do the 2x2's just screw to the headboard and footboard? This seems like the easiest, unless you want to take it apart and move it! Anyone have ant thoughts on this?
This is the first thing I have ever made. I had my wood cut at Lowe's, bought a Kreg pocket hole jig and screws. I borrowed a friend's drill, sander and stain. I was amazed at how easy this was and how well it turned out.
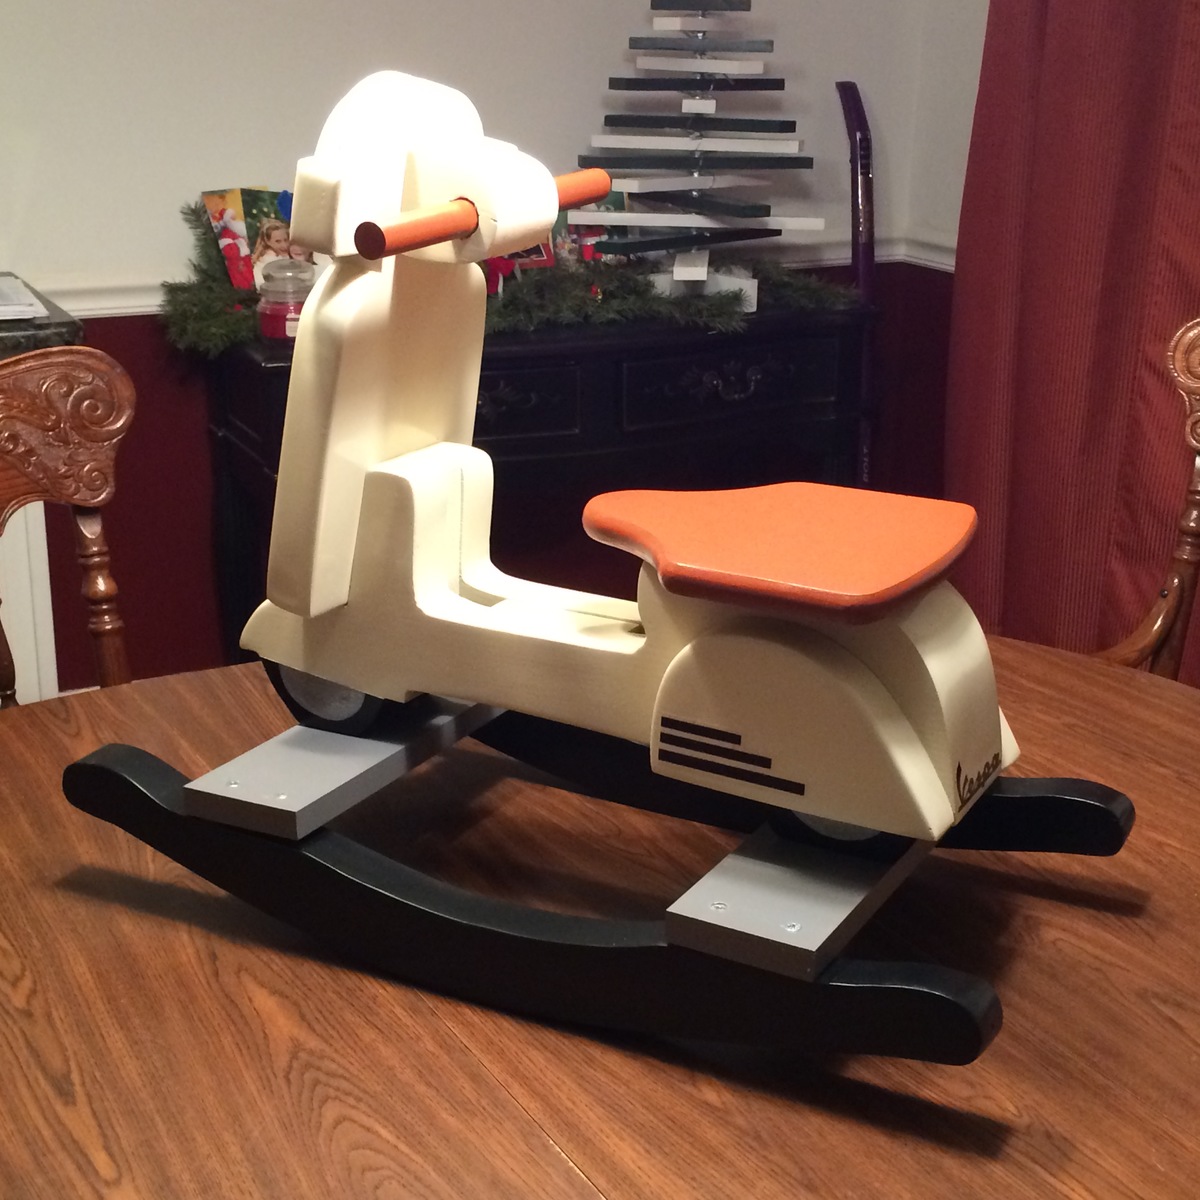
Fairly easy to make with a jigsaw and sander. I would suggest to whomever makes one of the Charlie scooters to use a hardwood as some of the section in the handlebar area can be fragile when weight is applied.
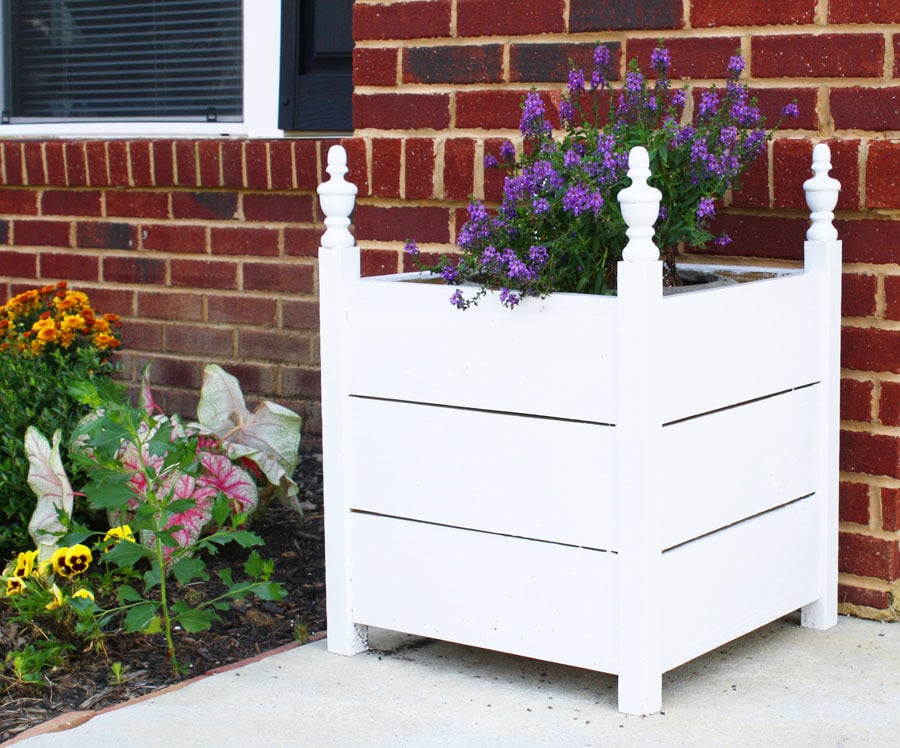
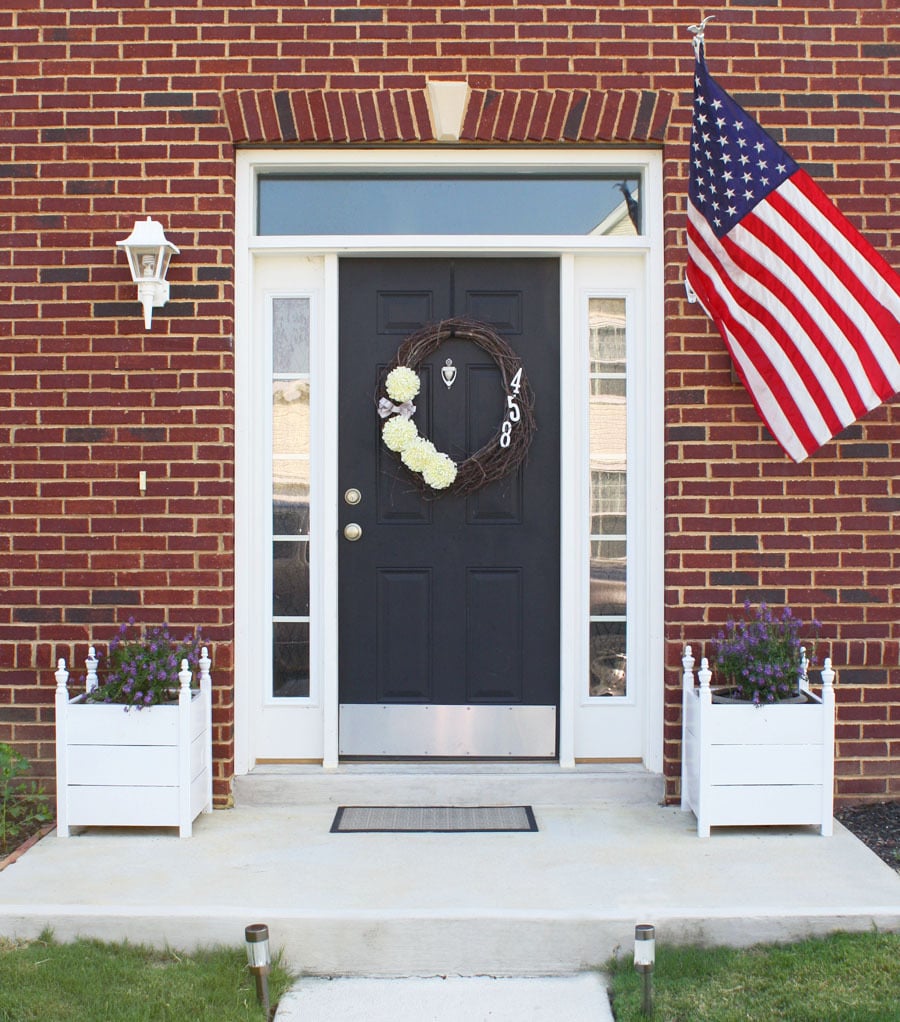
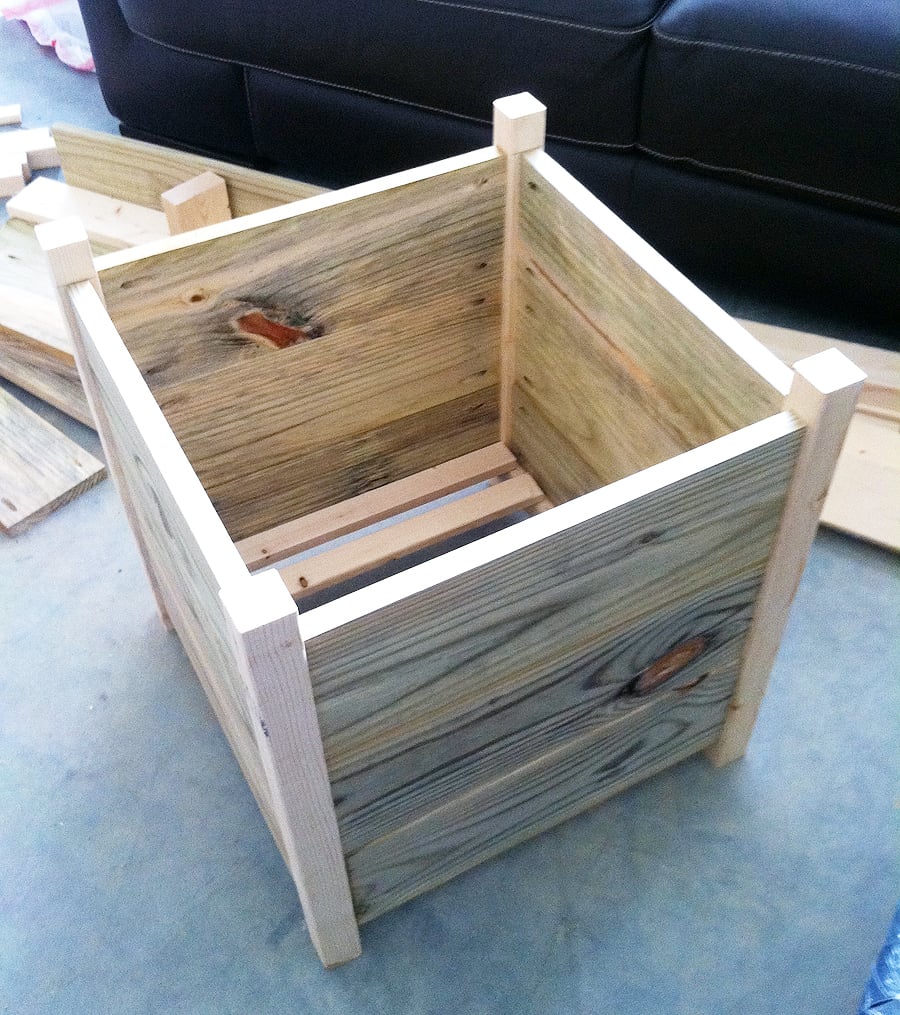
Super easy project to do with a Kreg Jig! I made two for my front stoop. The finials add that extra touch! Check out my blog link for more info!
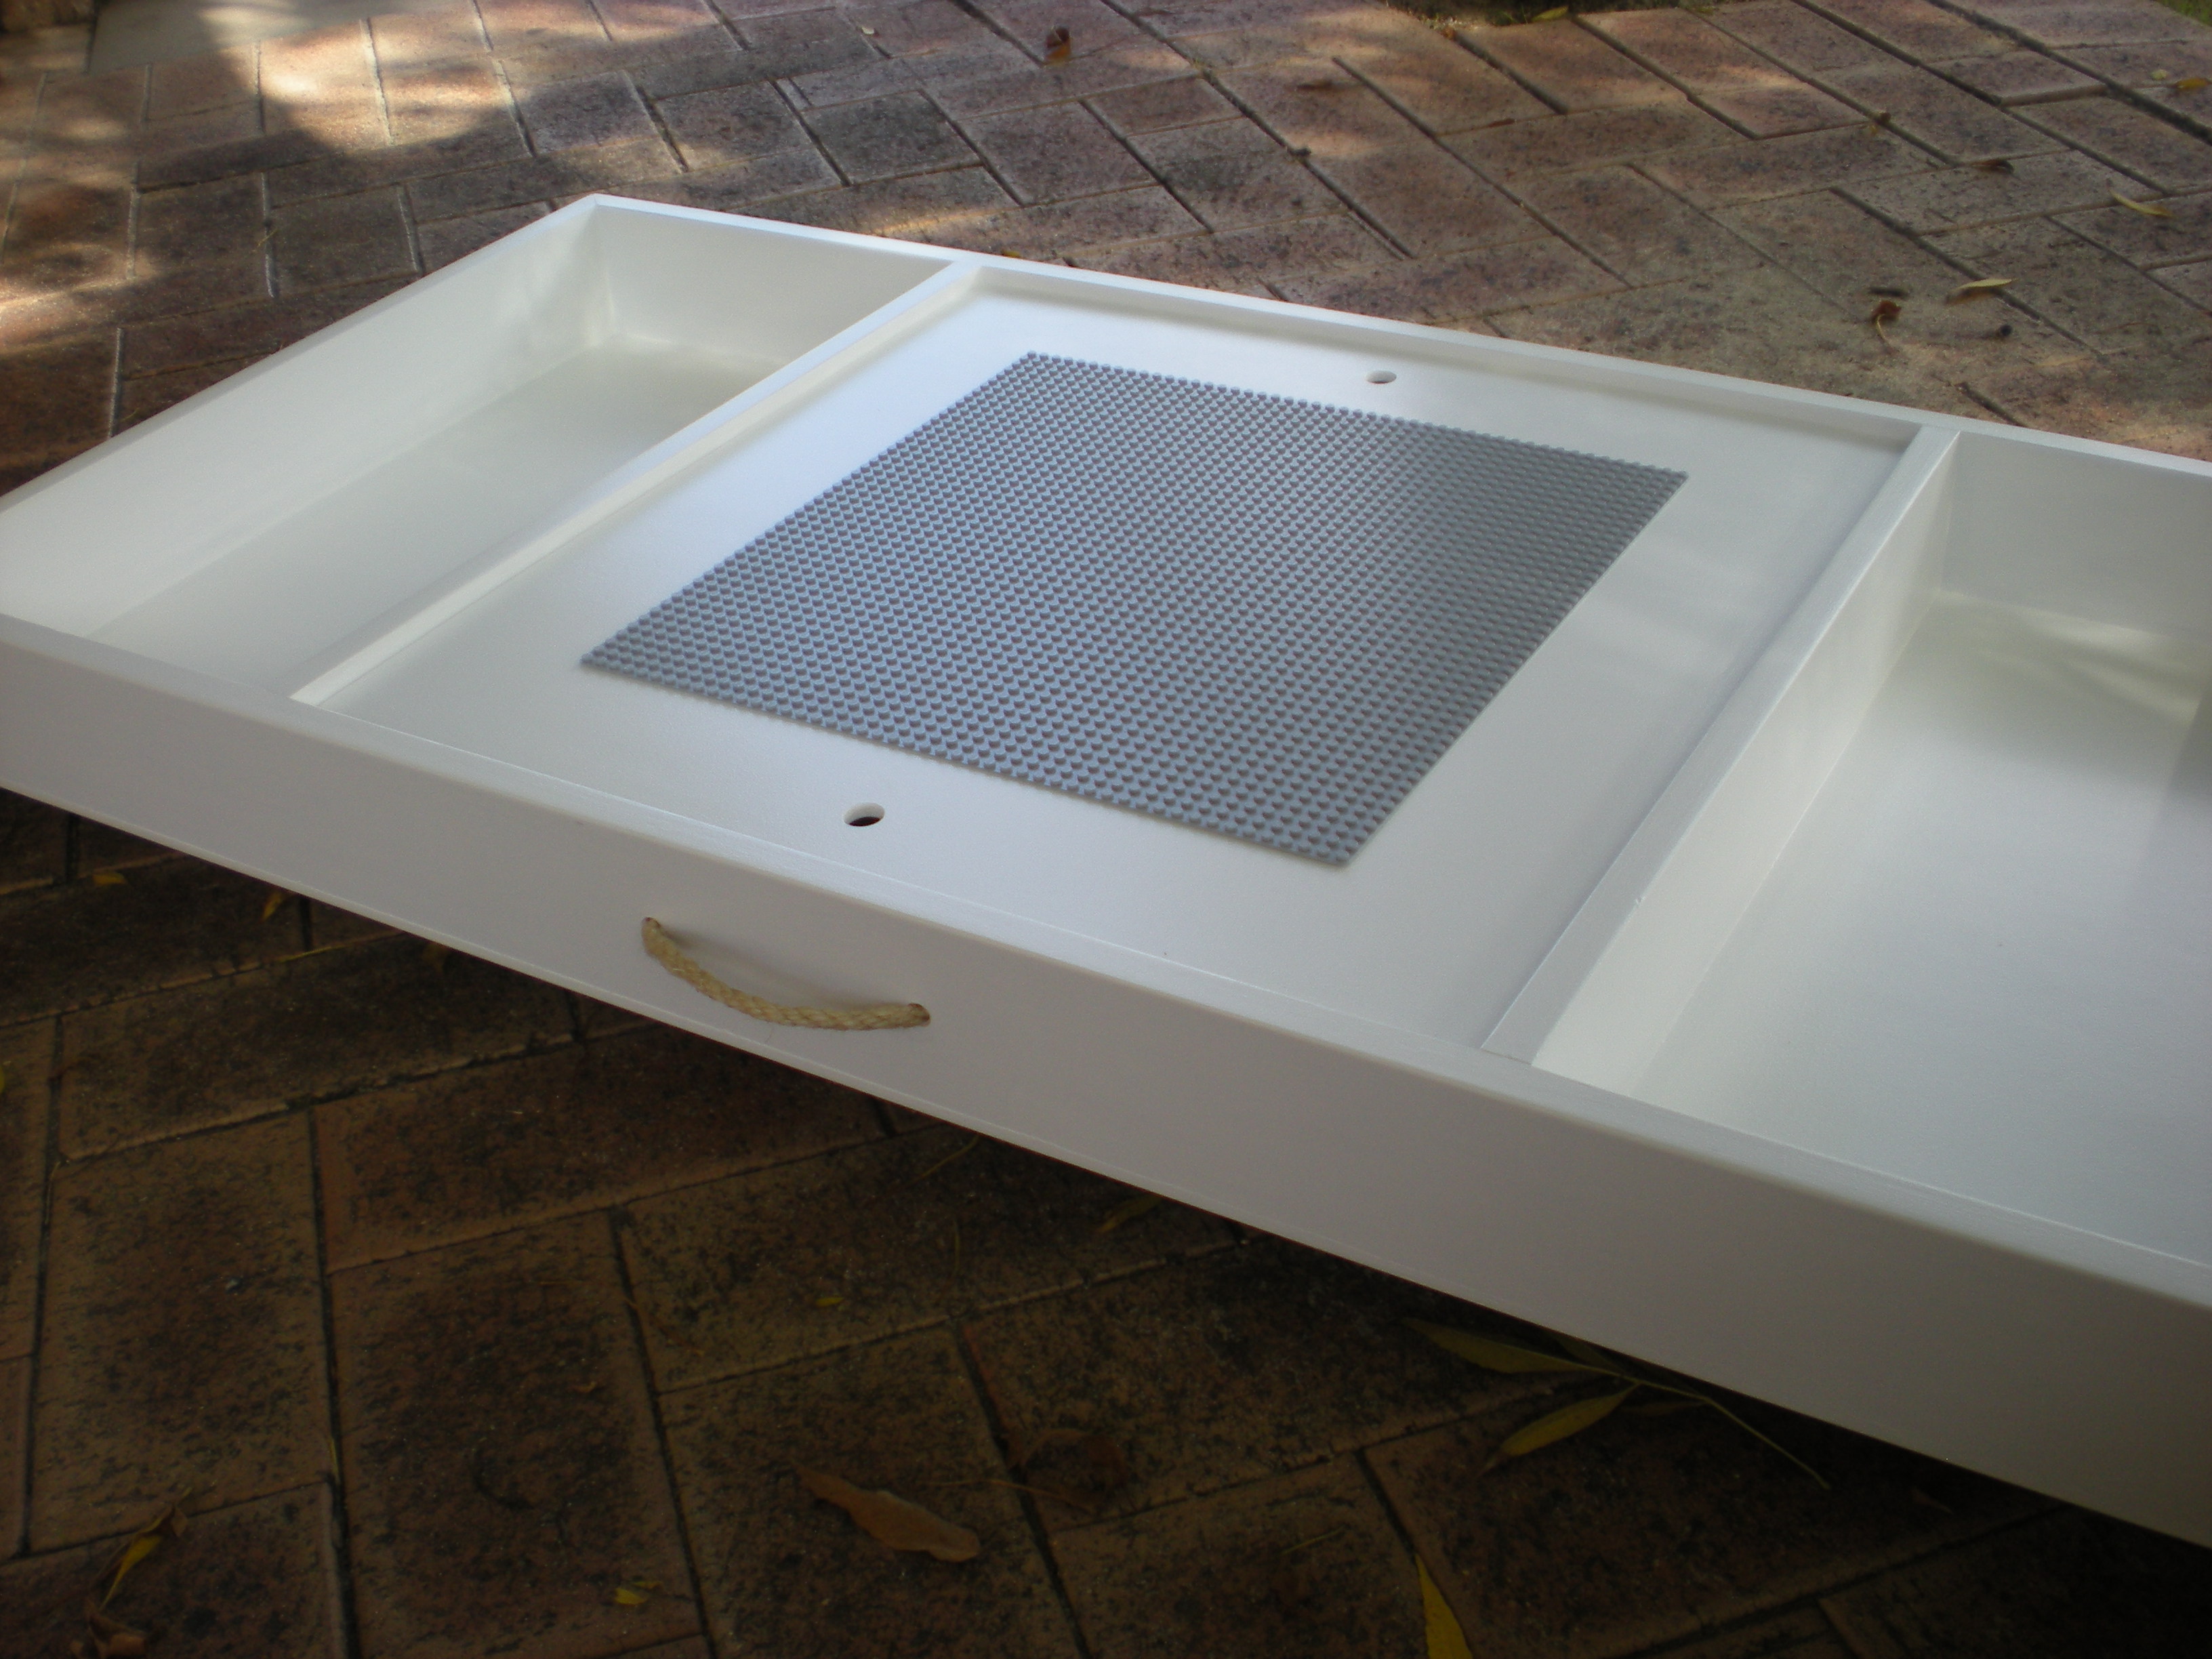
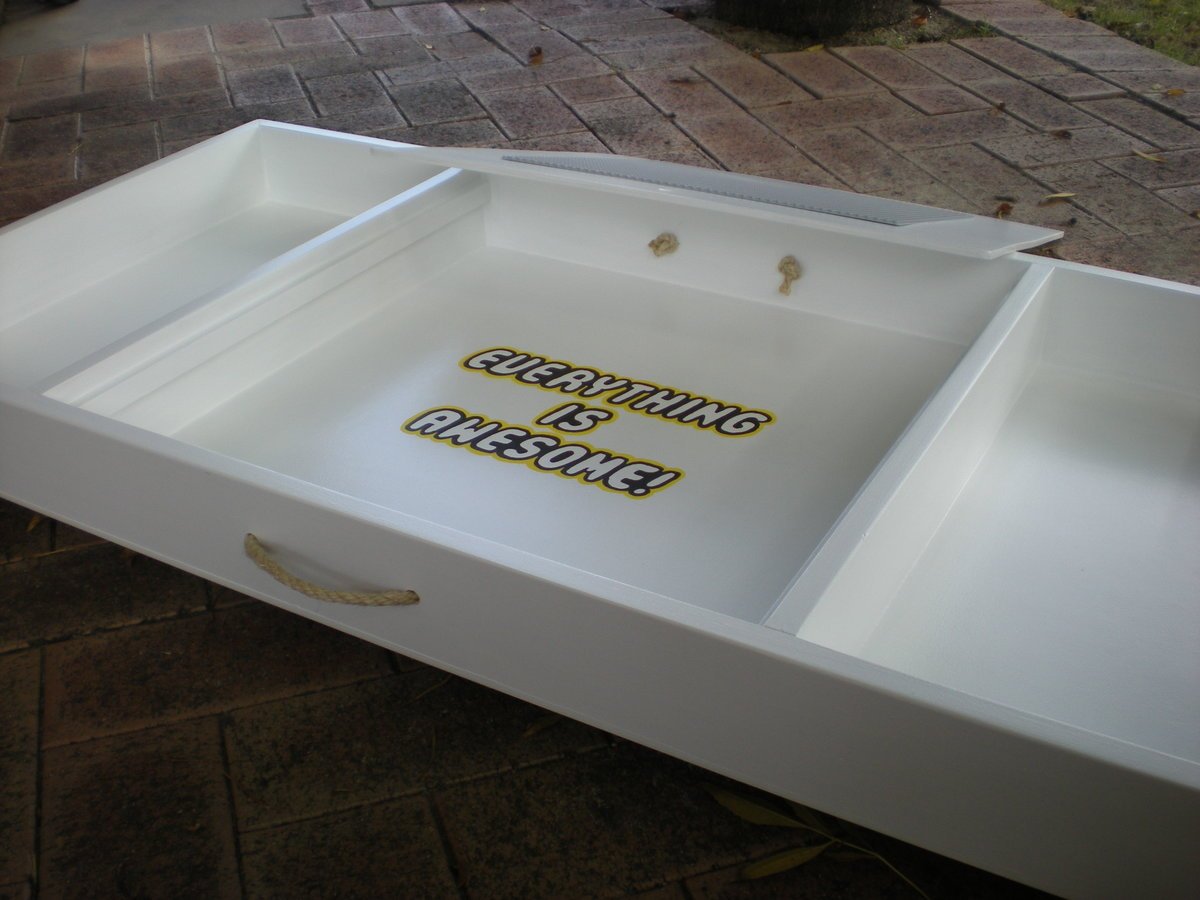
We were in desperate need of a lego storage solution for our son's small bedroom. I made this for his 7th birthday. I saw a photo of a similar one as a result of a google or pinterest search and decided to draw up some plans.
I recessed the top slightly so that pieces won't fall off. I just glued thin cleats to the inside of the box to hold the lid, (using spacers to get it at the height I wanted) Ideally the top would be reversible however I didn't quite get one of the dividers square so it only fits one way. I used Posca water-based markers to do the text. Make sure you wait until the text is really dry before you try to seal it (don't ask me how I know that...) Turns out that the markers don't react well with the brush on poly so I just left the text unsealed.
I was just going to have one handle on the front but then I made a stupid mistake and wrote the text so it would be upside down when pulled out (I know, dumb right!) So I added another handle on the other side. I used a water-based enamel for the whole box. Not sure if that was worth it of if I should have just used flat and given it a top coat of poly. I used a brush on the inside corners and found it really hard to get an even finish because I rolled the flat surfaces. Painting the pieces before assembly would probably fix this.
Added some castors so it can be pushed under the bed.


Sun, 02/05/2017 - 08:48
This is so awesome. Do you think you could share a more detailed account of build. Dimensions? Supplies? I am a newbie at this! I would greatly appreciate!

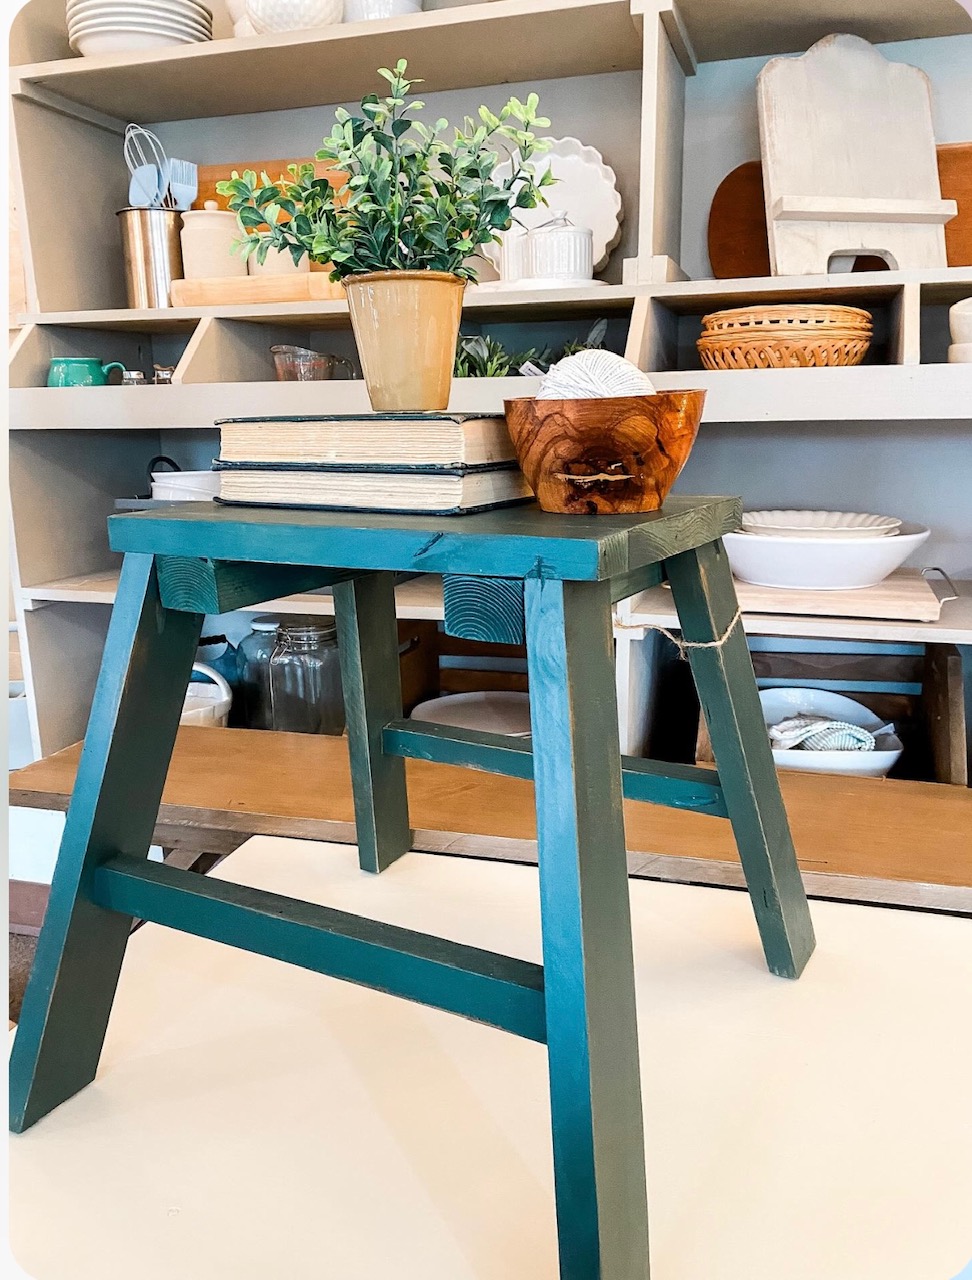
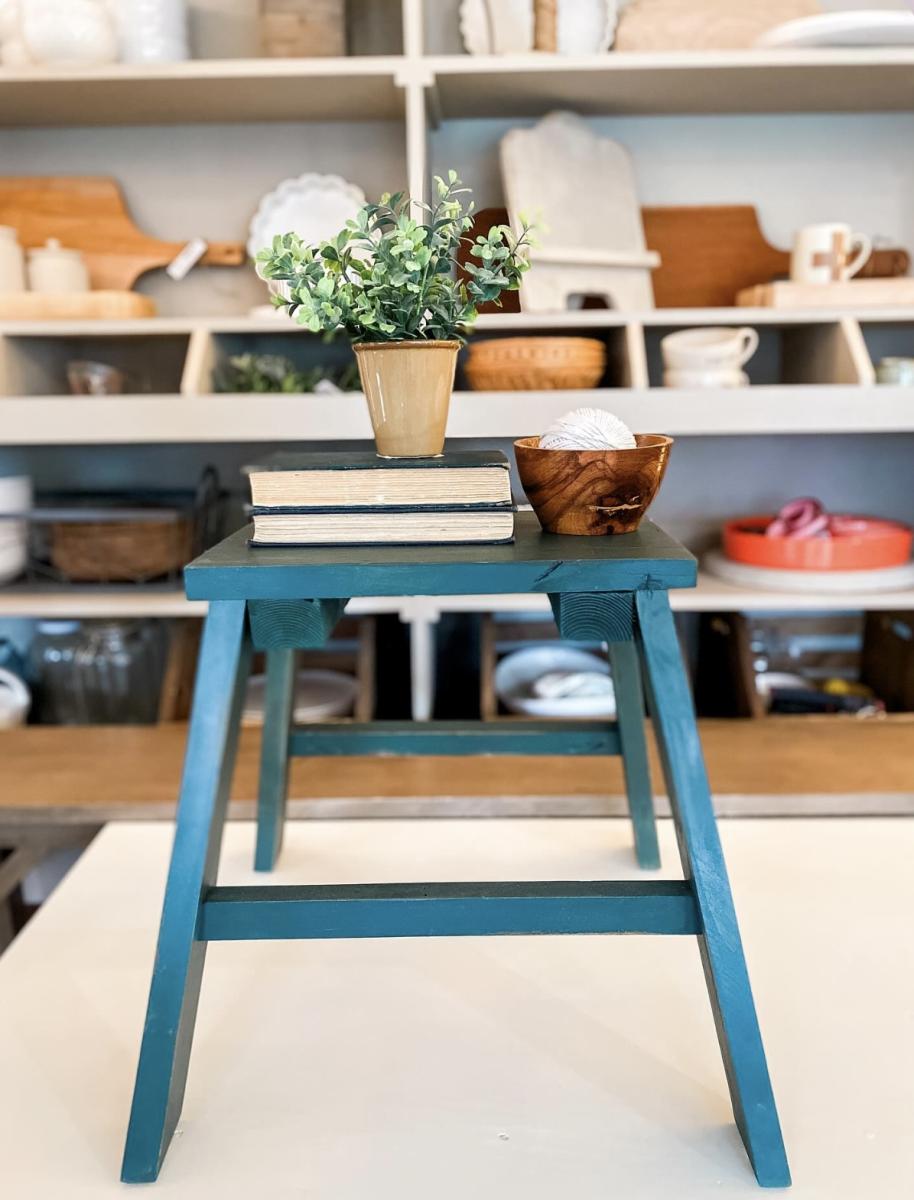
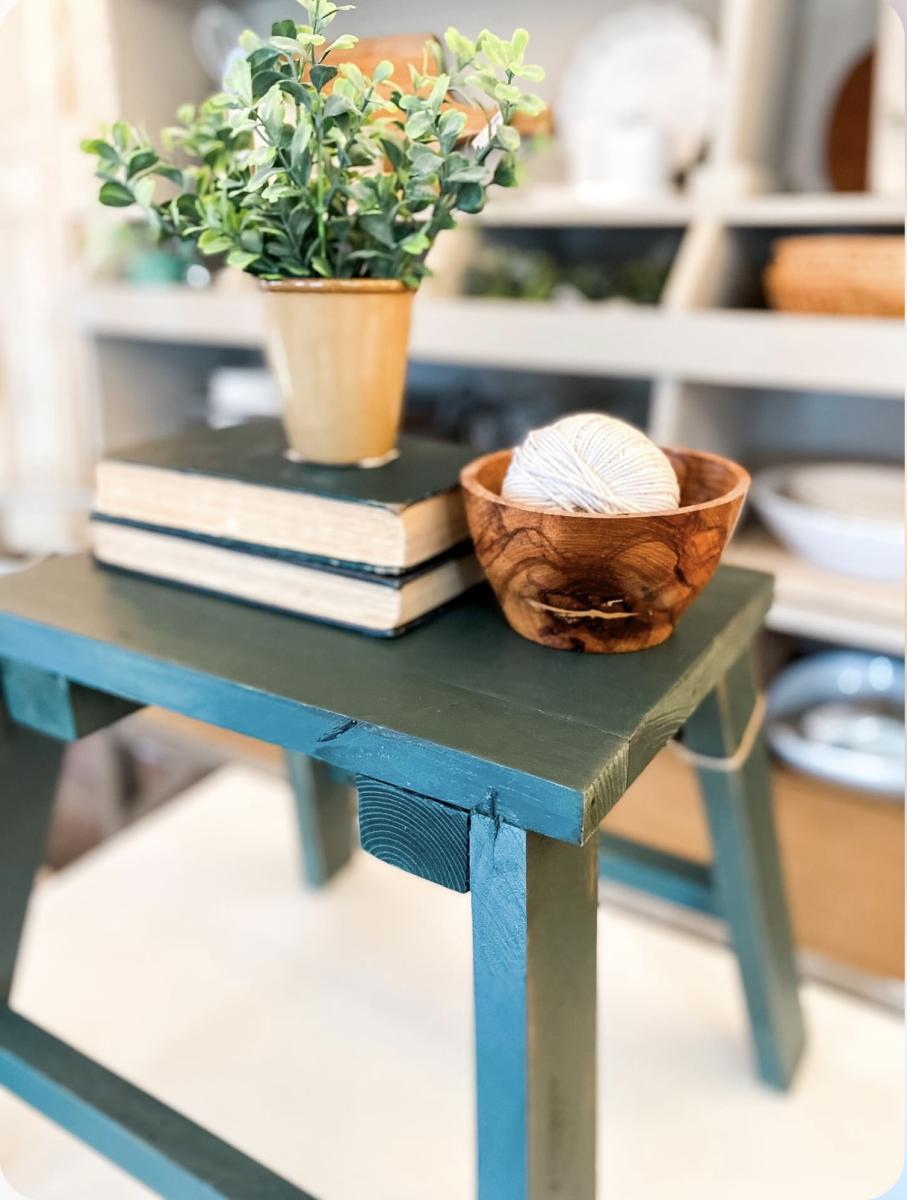
My kids needed a step stool and I had some scrap wood (2x10) left over from a previous project
Thu, 08/18/2016 - 20:12
Thank you! The dimensions are the same as the Ana White "Simple 1x10 Single Step Stool" except I used 2x10's instead of 1x10's like the plans called for. I also used some scrap pallet wood to make a design on the top of the stool.
- Stool height: 7 1/2" for legs, 1 1/2" for top, and 1/2" for scrap pallet wood; which gives a total height of 9"
- Stool width: 9 1/4" x 16"
- 5 degree angle cuts were made on the legs
Wed, 04/17/2024 - 09:21
Are the rails a 2x10 cut in half.? Or is it pallet wood?
Great family project, thanks Ana!
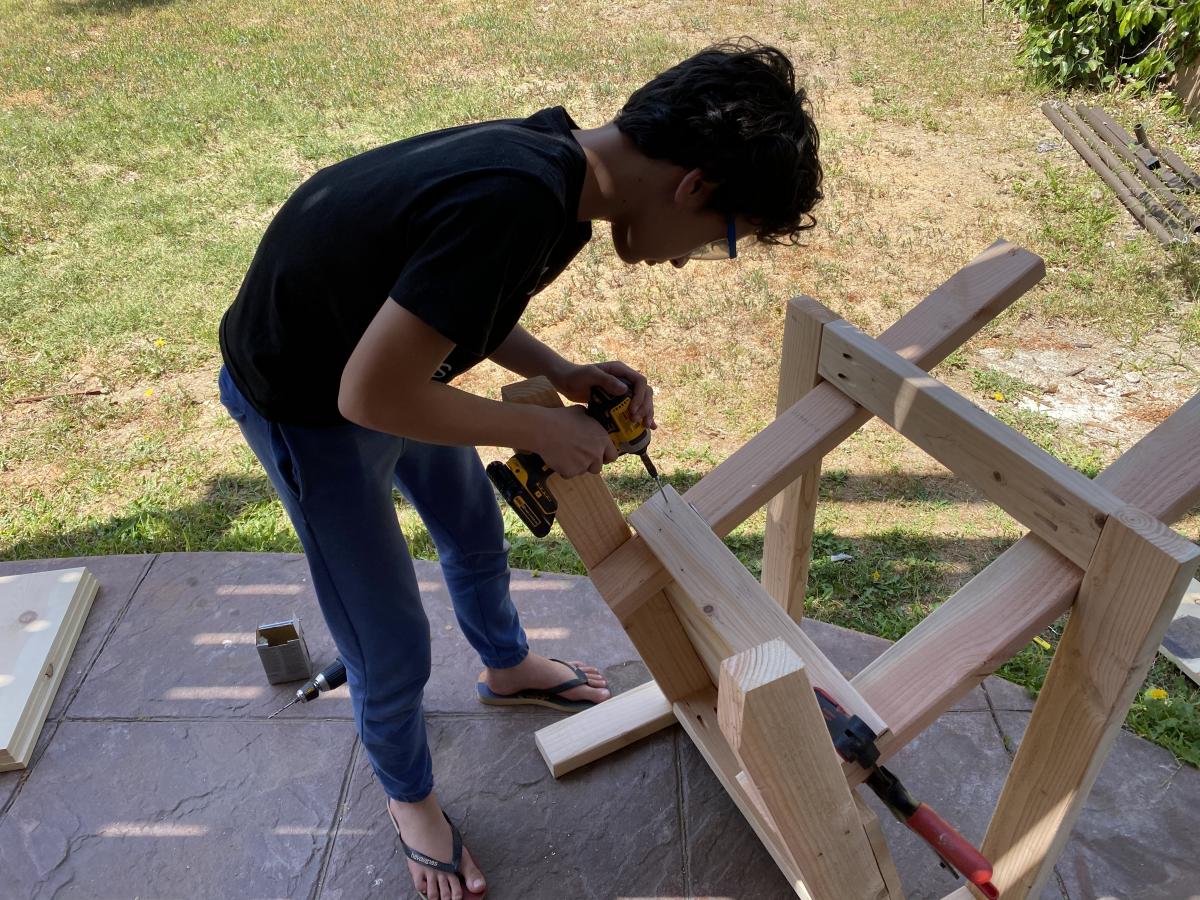
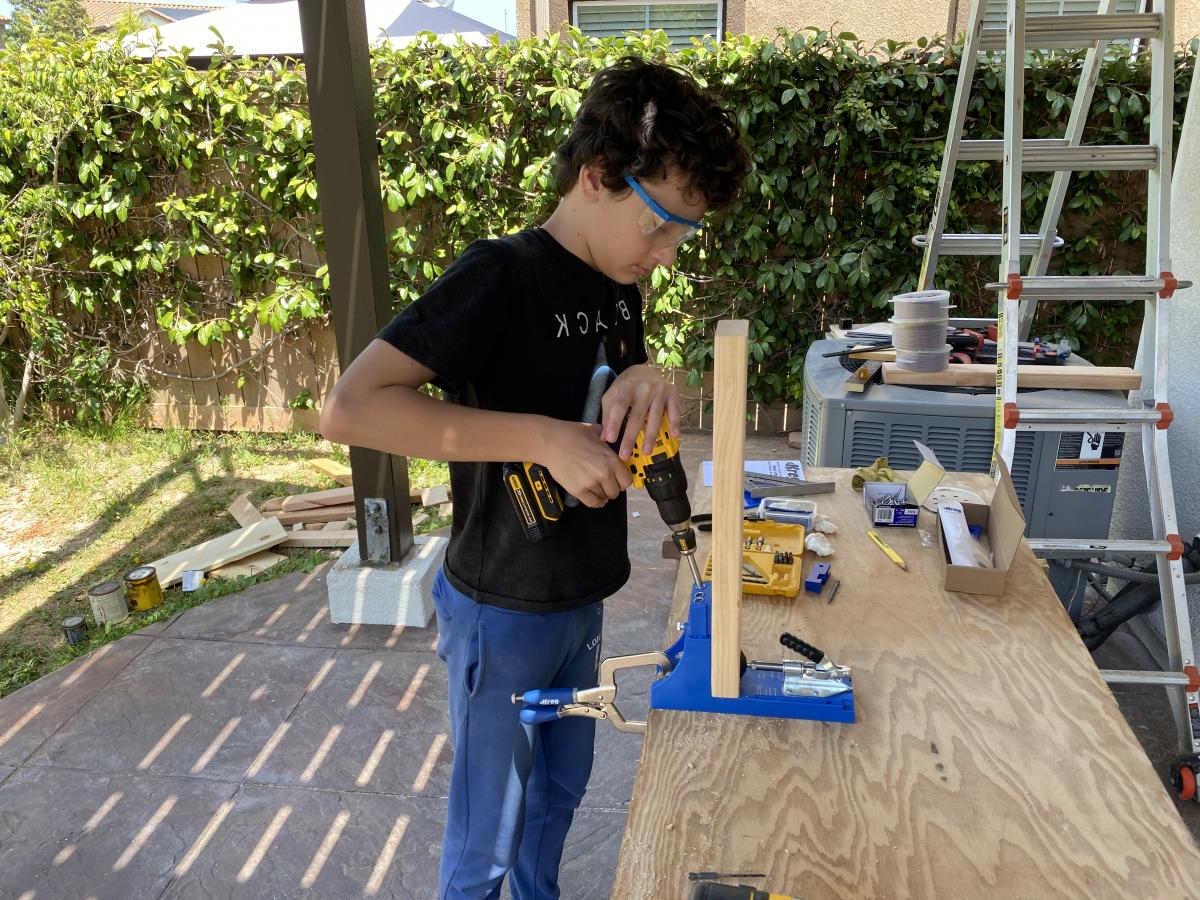
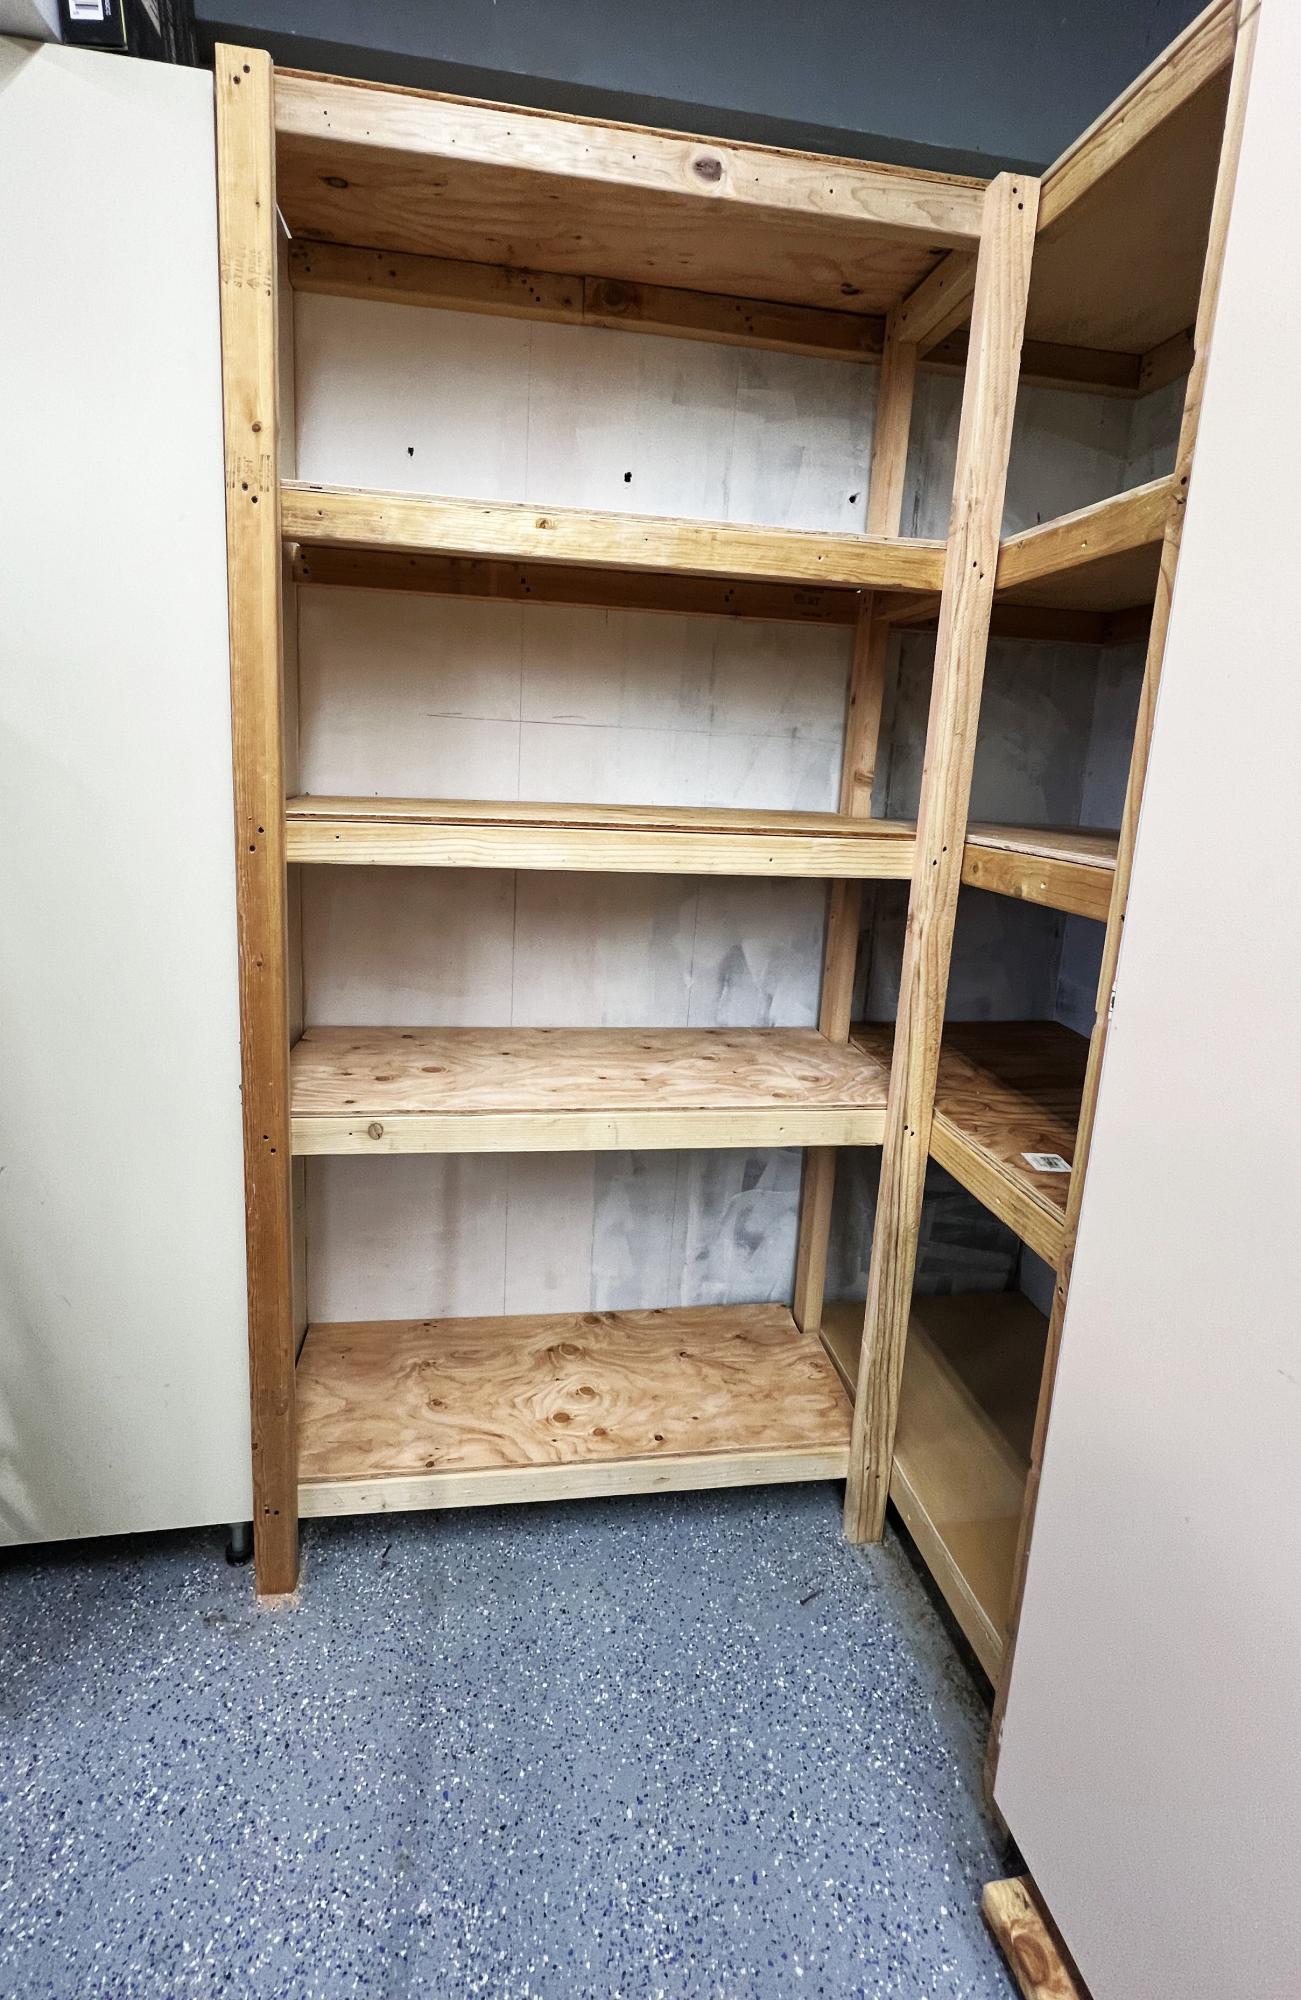
This was made using Ana's "Garage Shelf" plans. I modified it for a corner spot between two exiting cabinets, so it took a bit of thought, but the Ana's technique for the build made it so easy.
AND I used up scrap wood that I'd been hording in the garage for the build.
Thank you Ana!

Loved all your tables!! I was inspired by the tweaked plans of Modified Simple Outdoor Patio Table and made mine out of pallets :-) (Only the top slats, not the frame and supports)