Square Outdoor Umbrella Table for 8 People
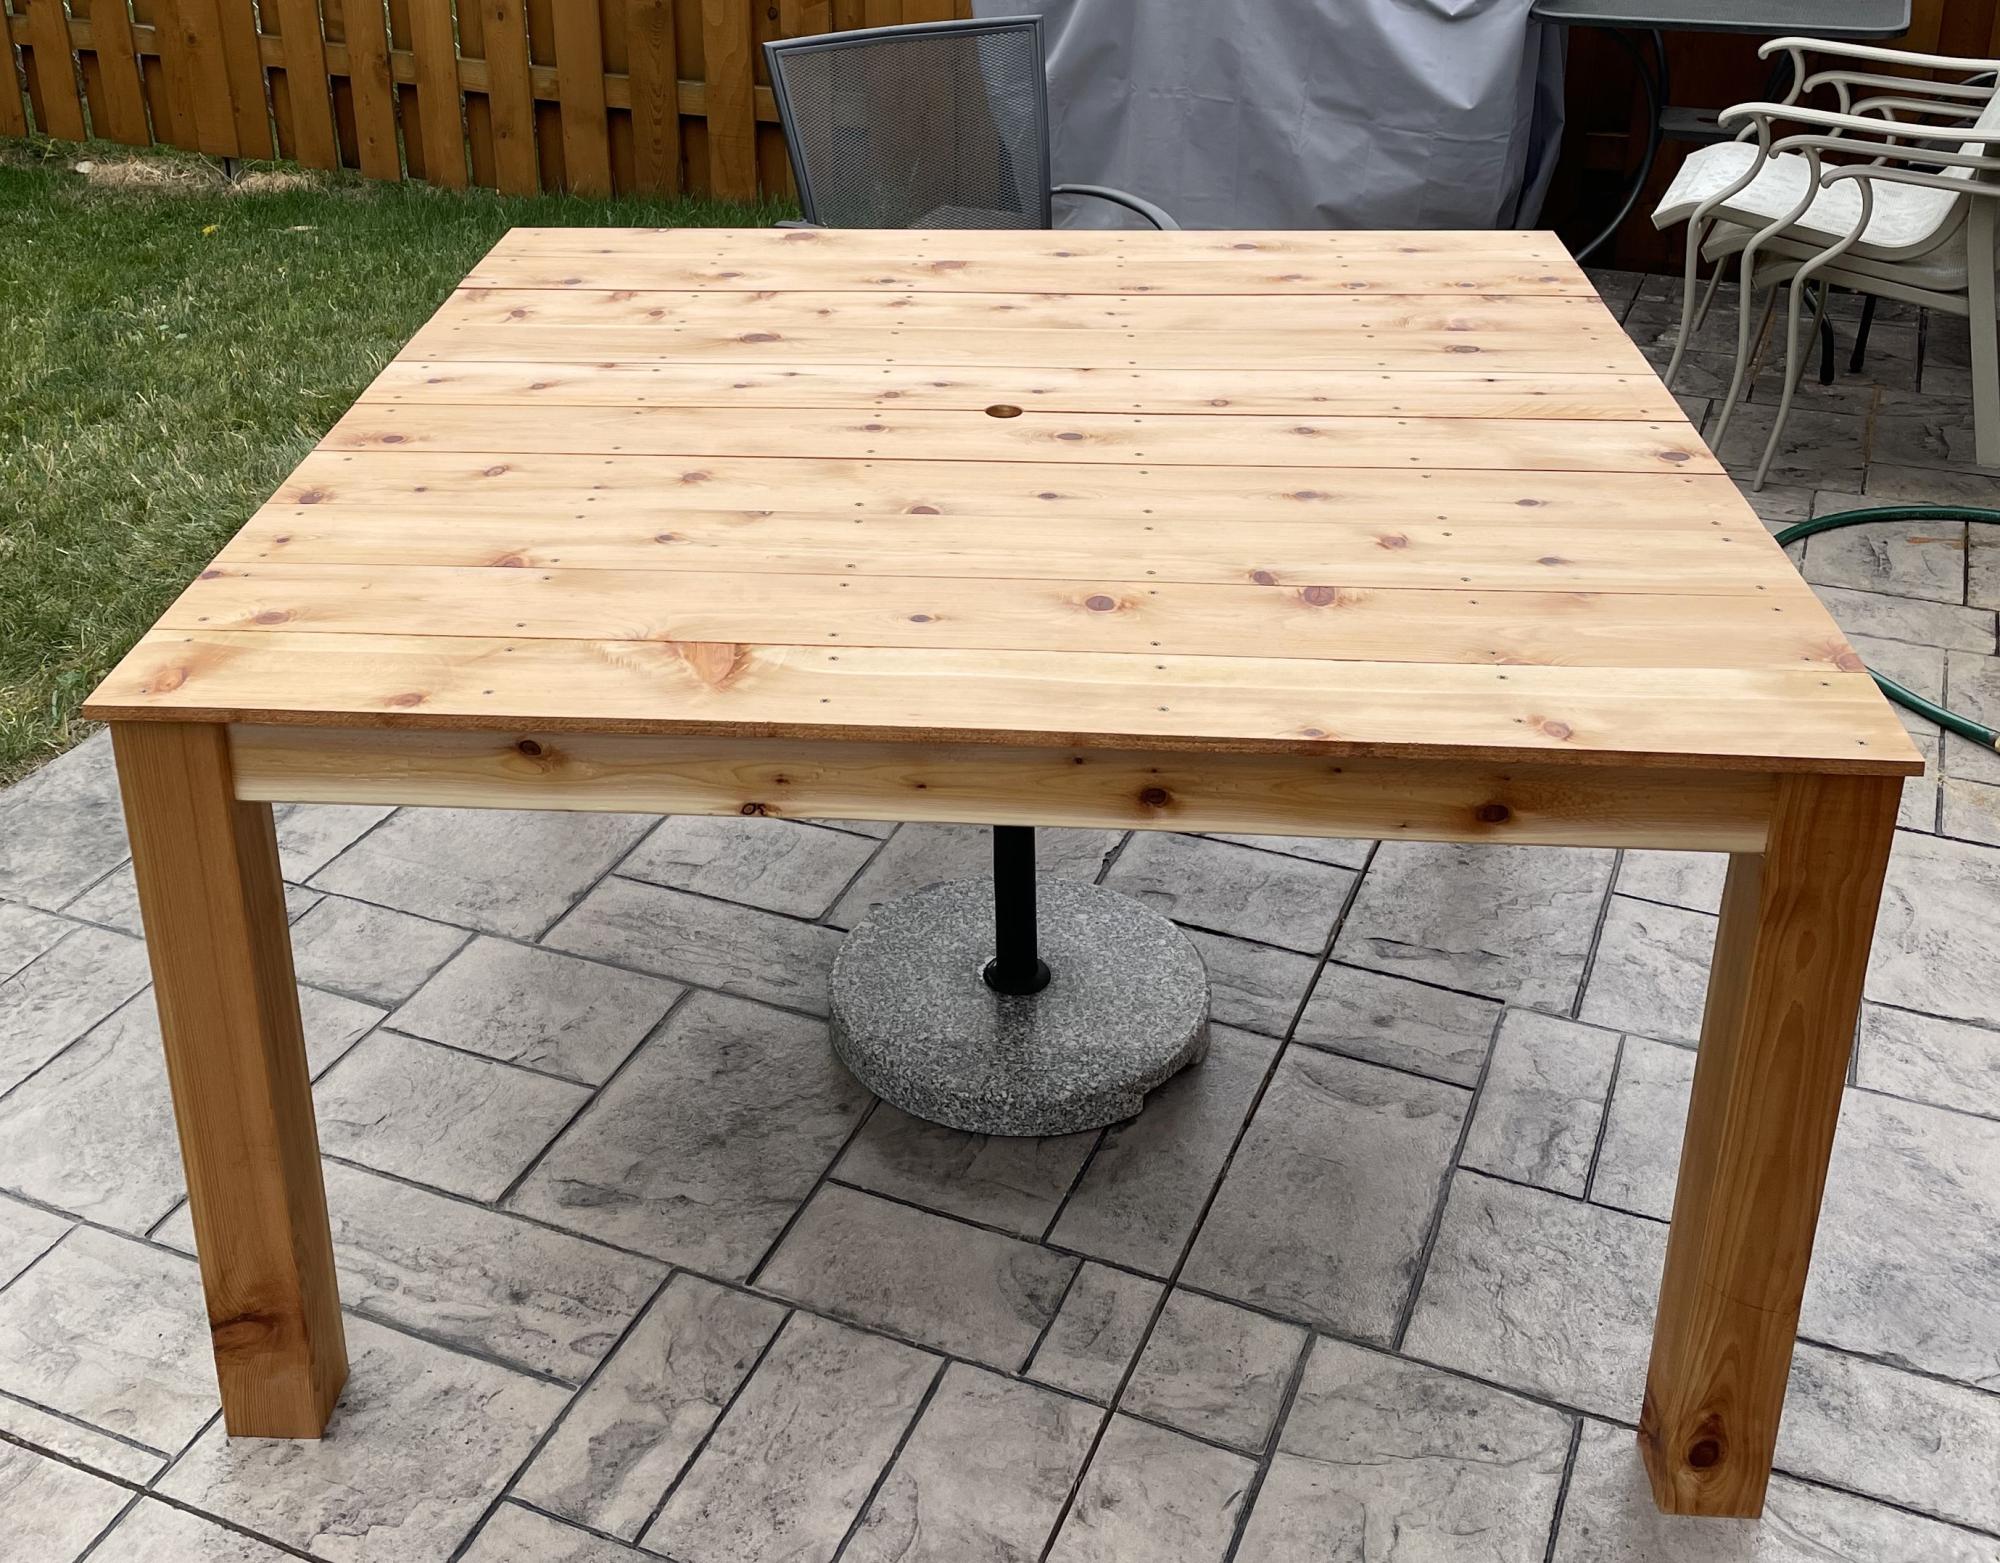
Square Outdoor Table
Built from Plan(s)
Square Outdoor Table
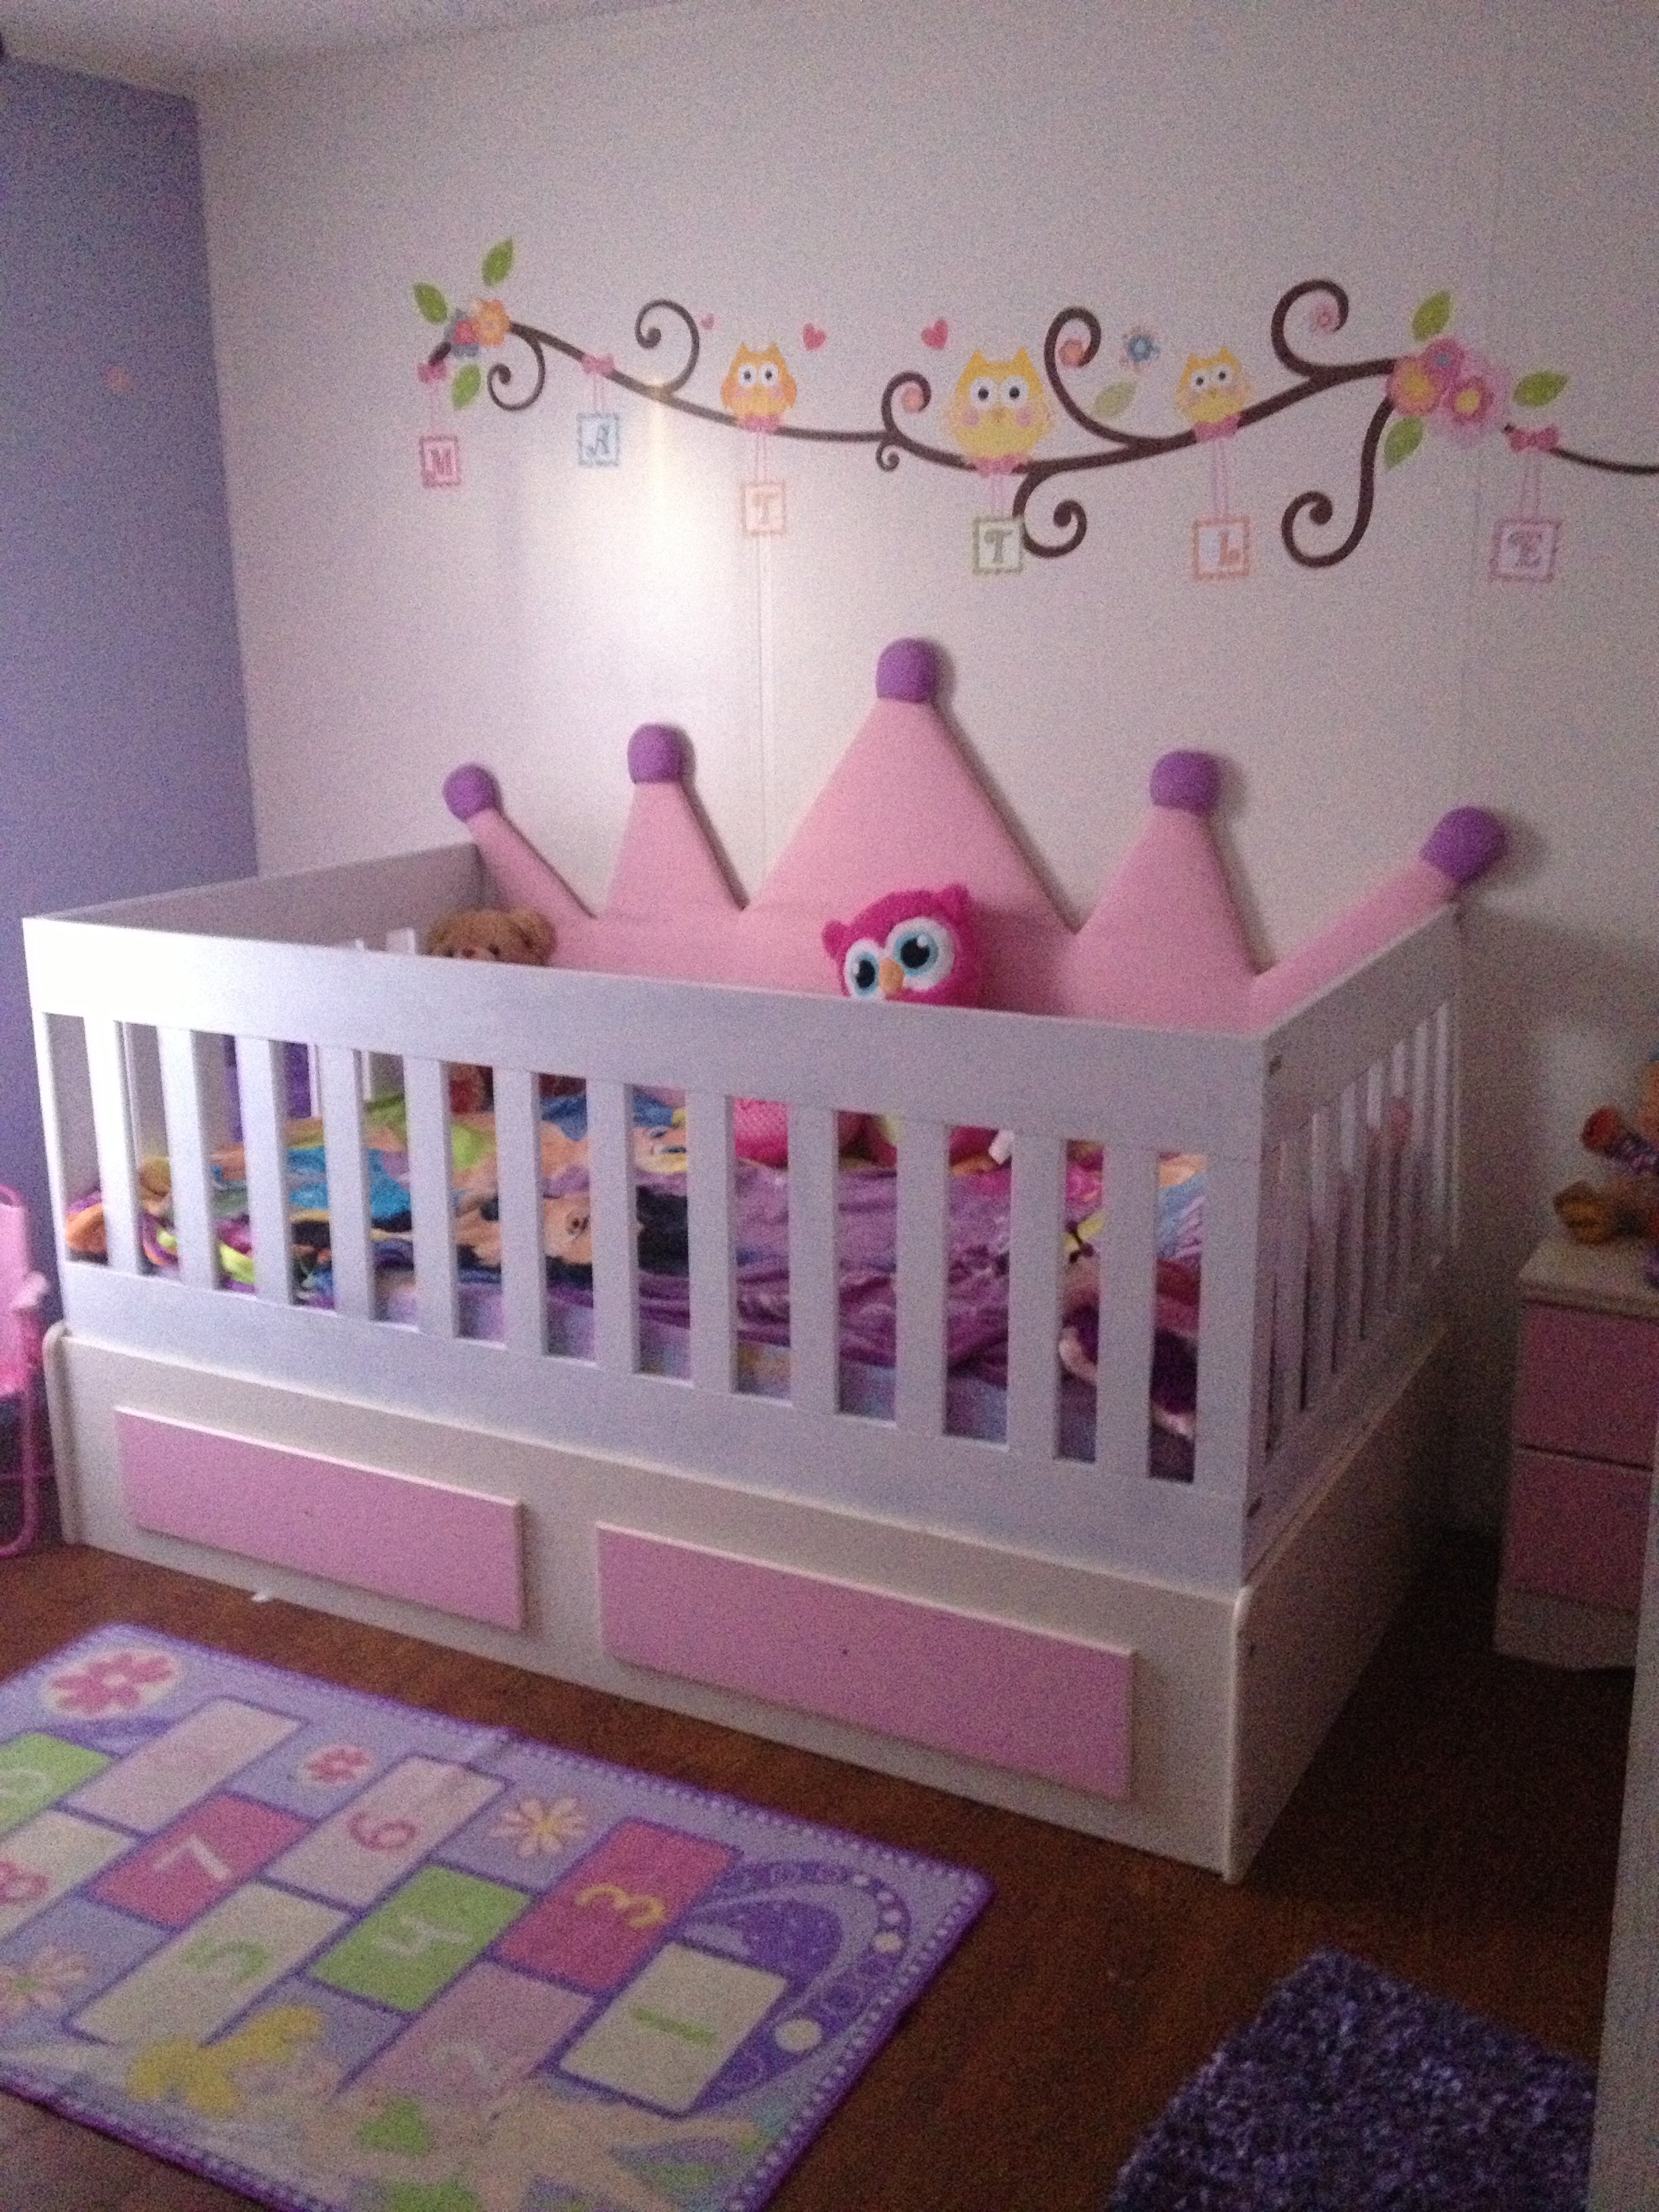
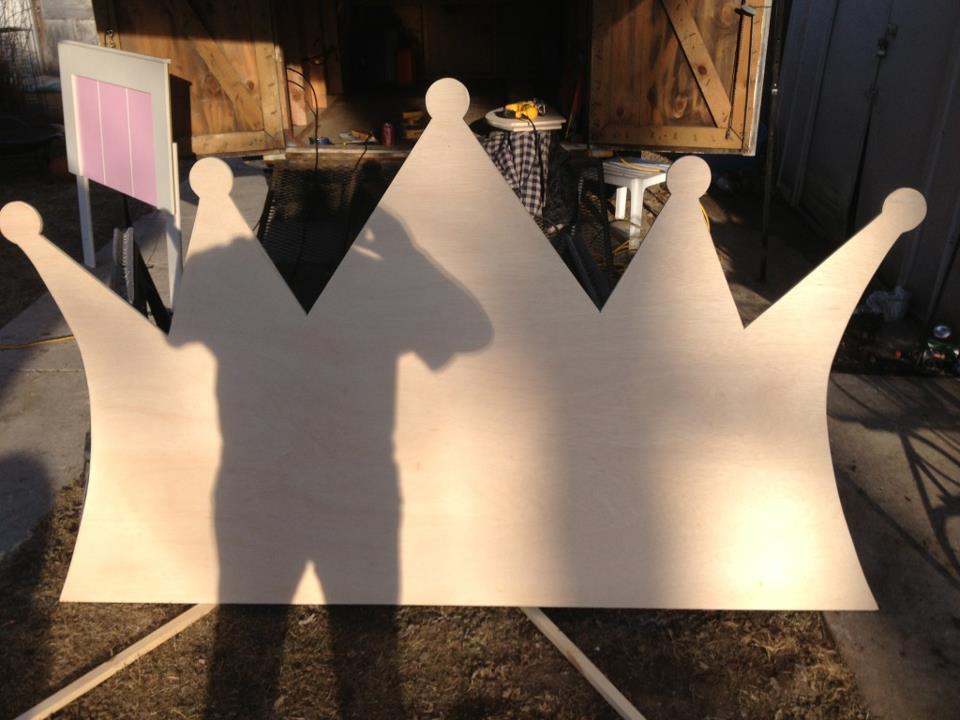
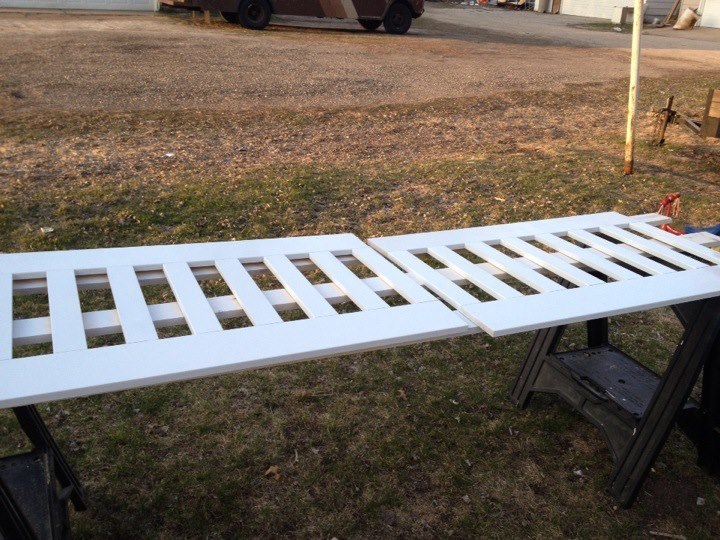
I purchased a twin girls captins bed for my daughter to grow into but she wasn't quite big enough for it yet so I had my husband convert it into a twin size crib!!!! Im in love with how it turned out. My husband Free hand a crown on a sheet of ply wood and cut it out. I used quilt batting and covered it with pink material and did the tips of crown in purple.

I was wanting a work bench for my outside shed to work on occasionally and help keep organized. This is the first piece of furniture I have built totally on my own! The plan was easy. I sized it down a little with no problem. I'm a little off on a couple of the cuts but will practice more! Overall, thrilled and extremely proud of it!
Lori B
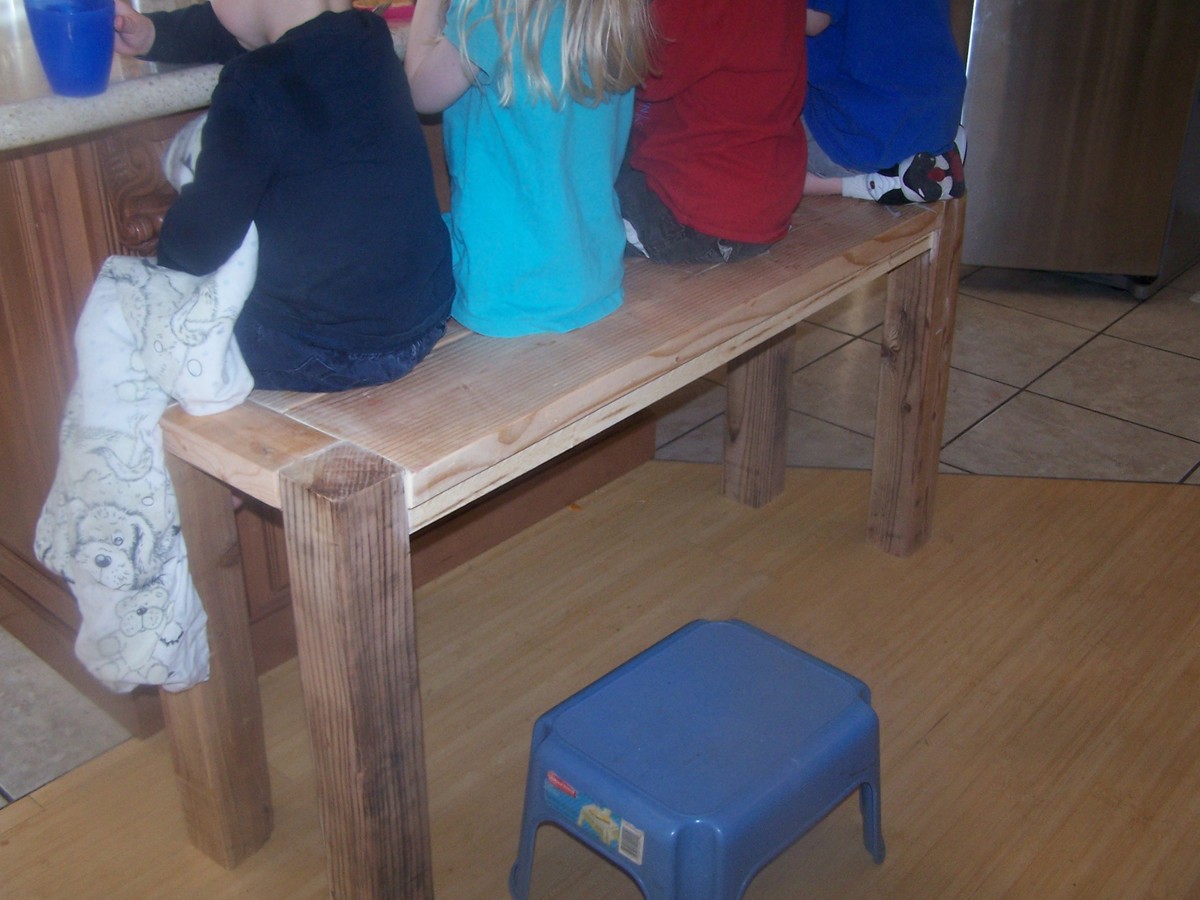
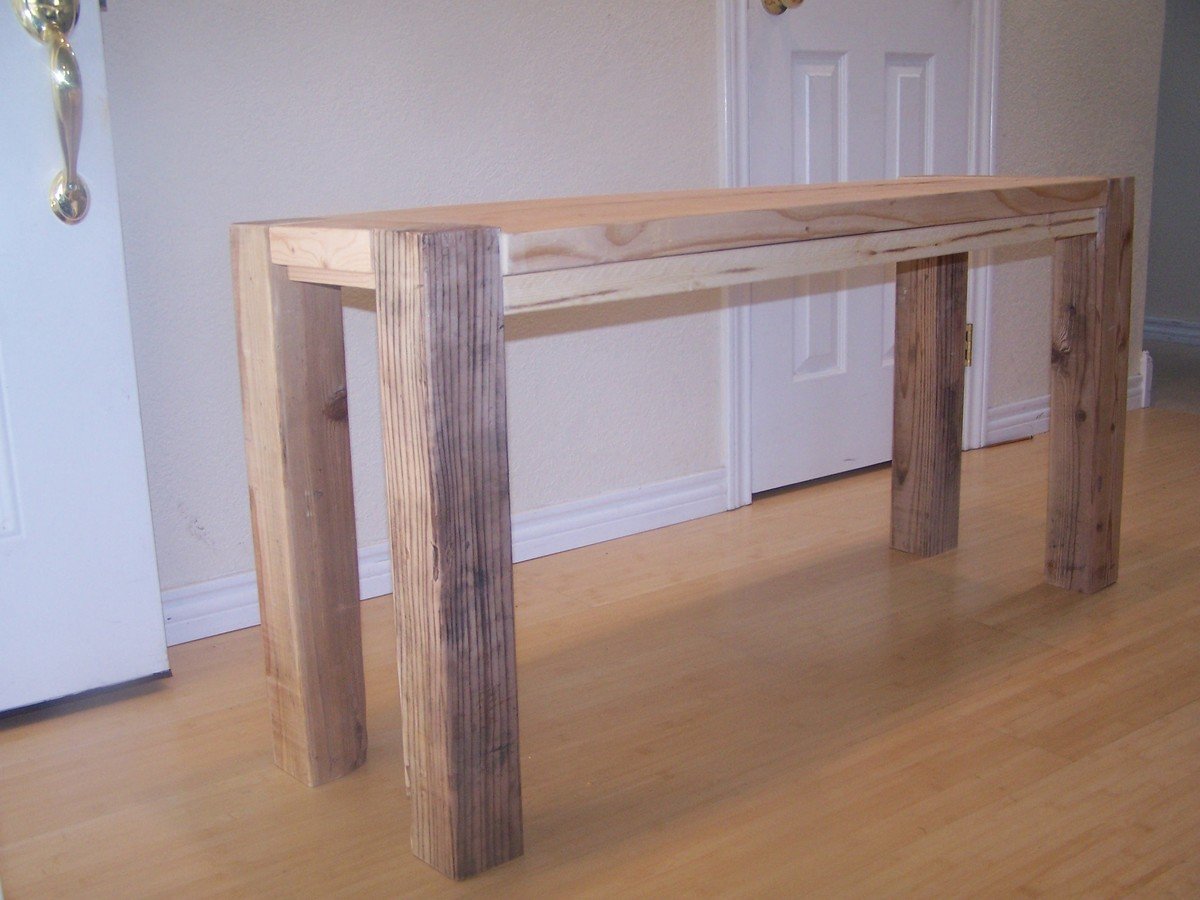
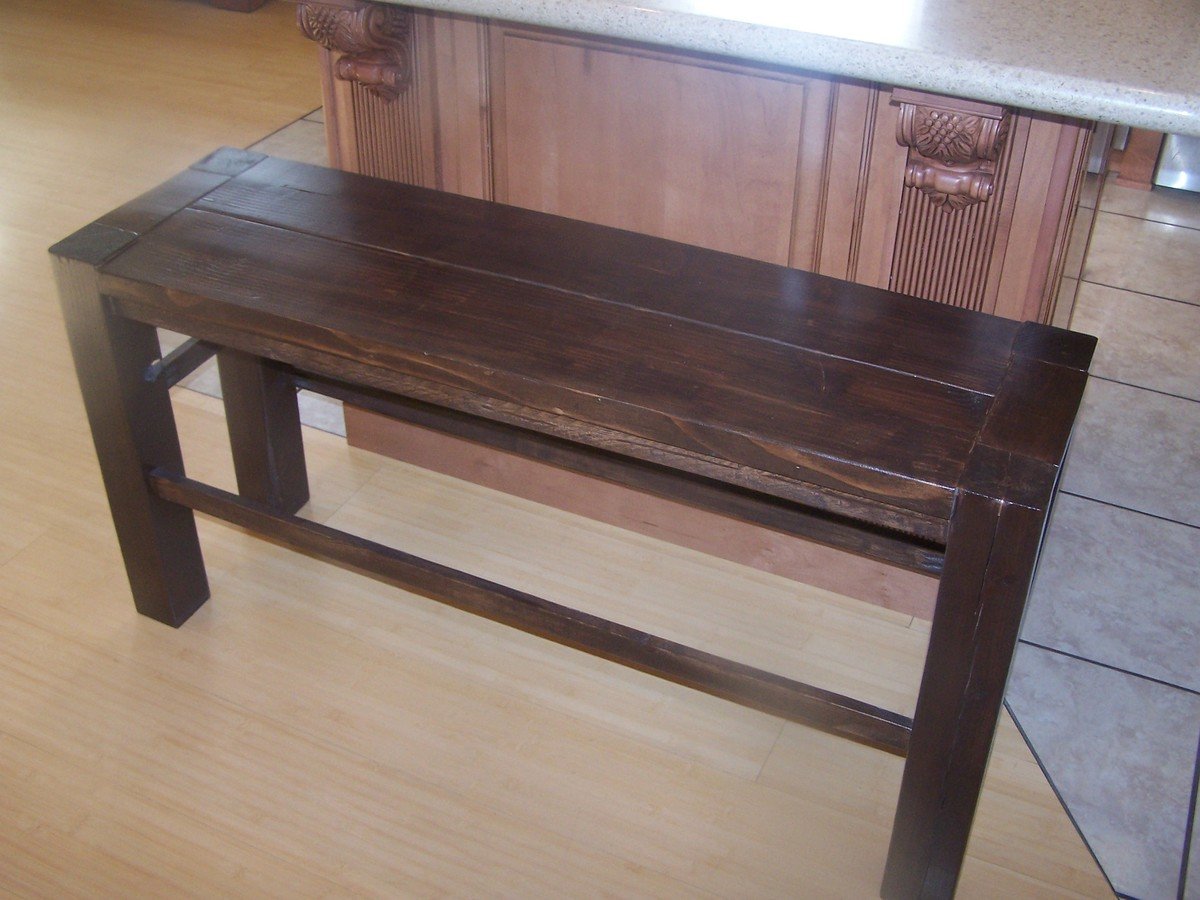
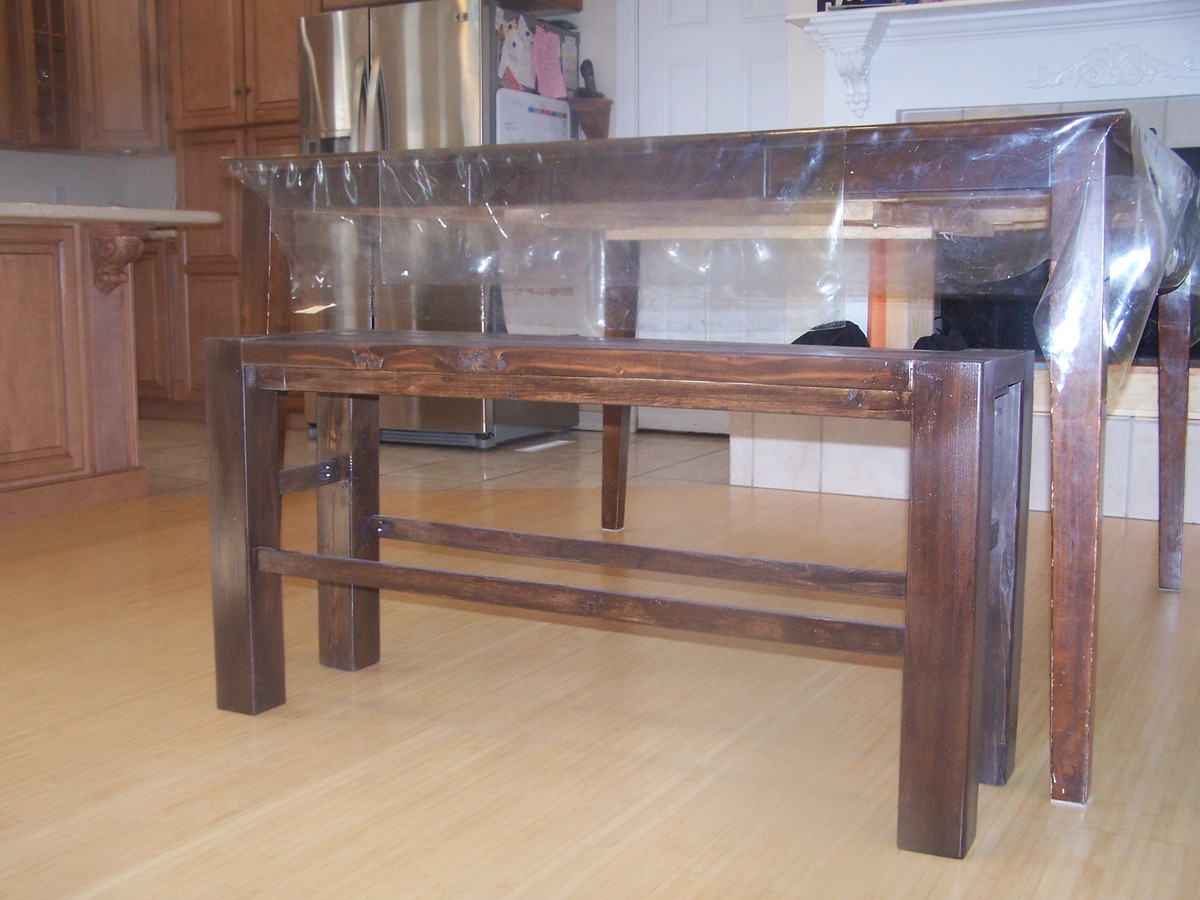
I have been wanting a bench for my counter for sooooo long! I loved the Big Ur bench and finally got up the nerve to adjust the plan to be a counter height bench.
Since I am so cheap, I like to collect wood from the free section on craigslist. And that is how this bench came about! I had these 4x4's (well actually they were a little small and had to adjust for that as well) And these great top boards, which were a little warped, I think it just adds a little character to the bench to not be totally perfect, like me! :) (that was a joke, I am FAR from perfect!)
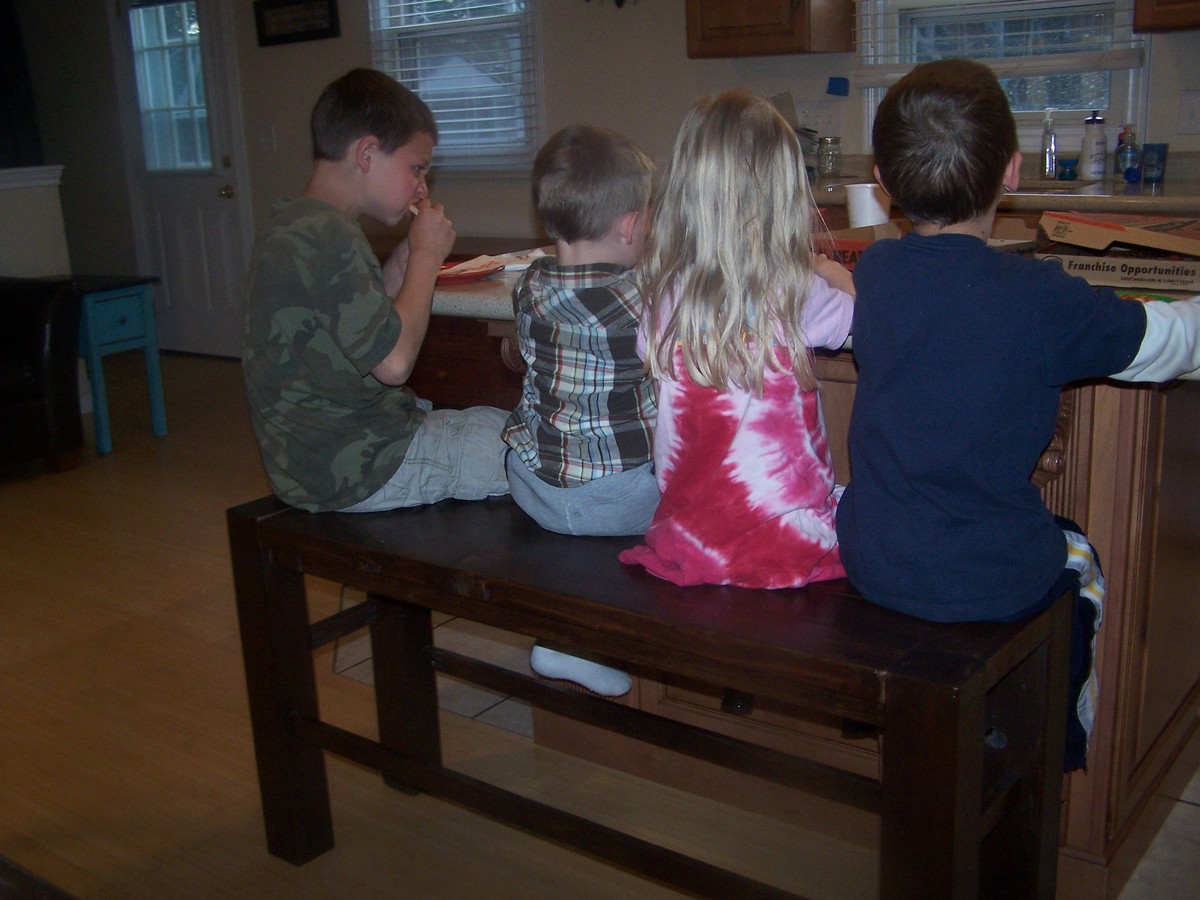
I made it like the plan, and as you can see from the unfinished picture my little ones needed a stool to climb up on the bench. So I added some 1x2's to give them a ladder for climbing. I love how it turned out and the best part is that it fits at my table as well!
Now my husband thinks I should build a smaller one for the short side of the island. We have six kids and this bench only fits four....we'll see.....

In reply to Well.. by Bunnie1978
Thu, 04/12/2012 - 13:12
Yeah, you could say I am crazy, in a good way! I do feel like a chicken with it's head cut off sometimes, but I am not sure I have a handle on things, does anyone? It's fun though! Thanks for the comment on the bench, and I am WAY impressed with your son's playhouse loft bed, I am still trying to find courage to tackle a project that impressive, great job!
Thu, 01/21/2016 - 09:44
You did an excellent job on this! I'd love to build something similar, but with upholstery on top.
BTW, I adore large families, and know that your six little ones must be a great blessing!
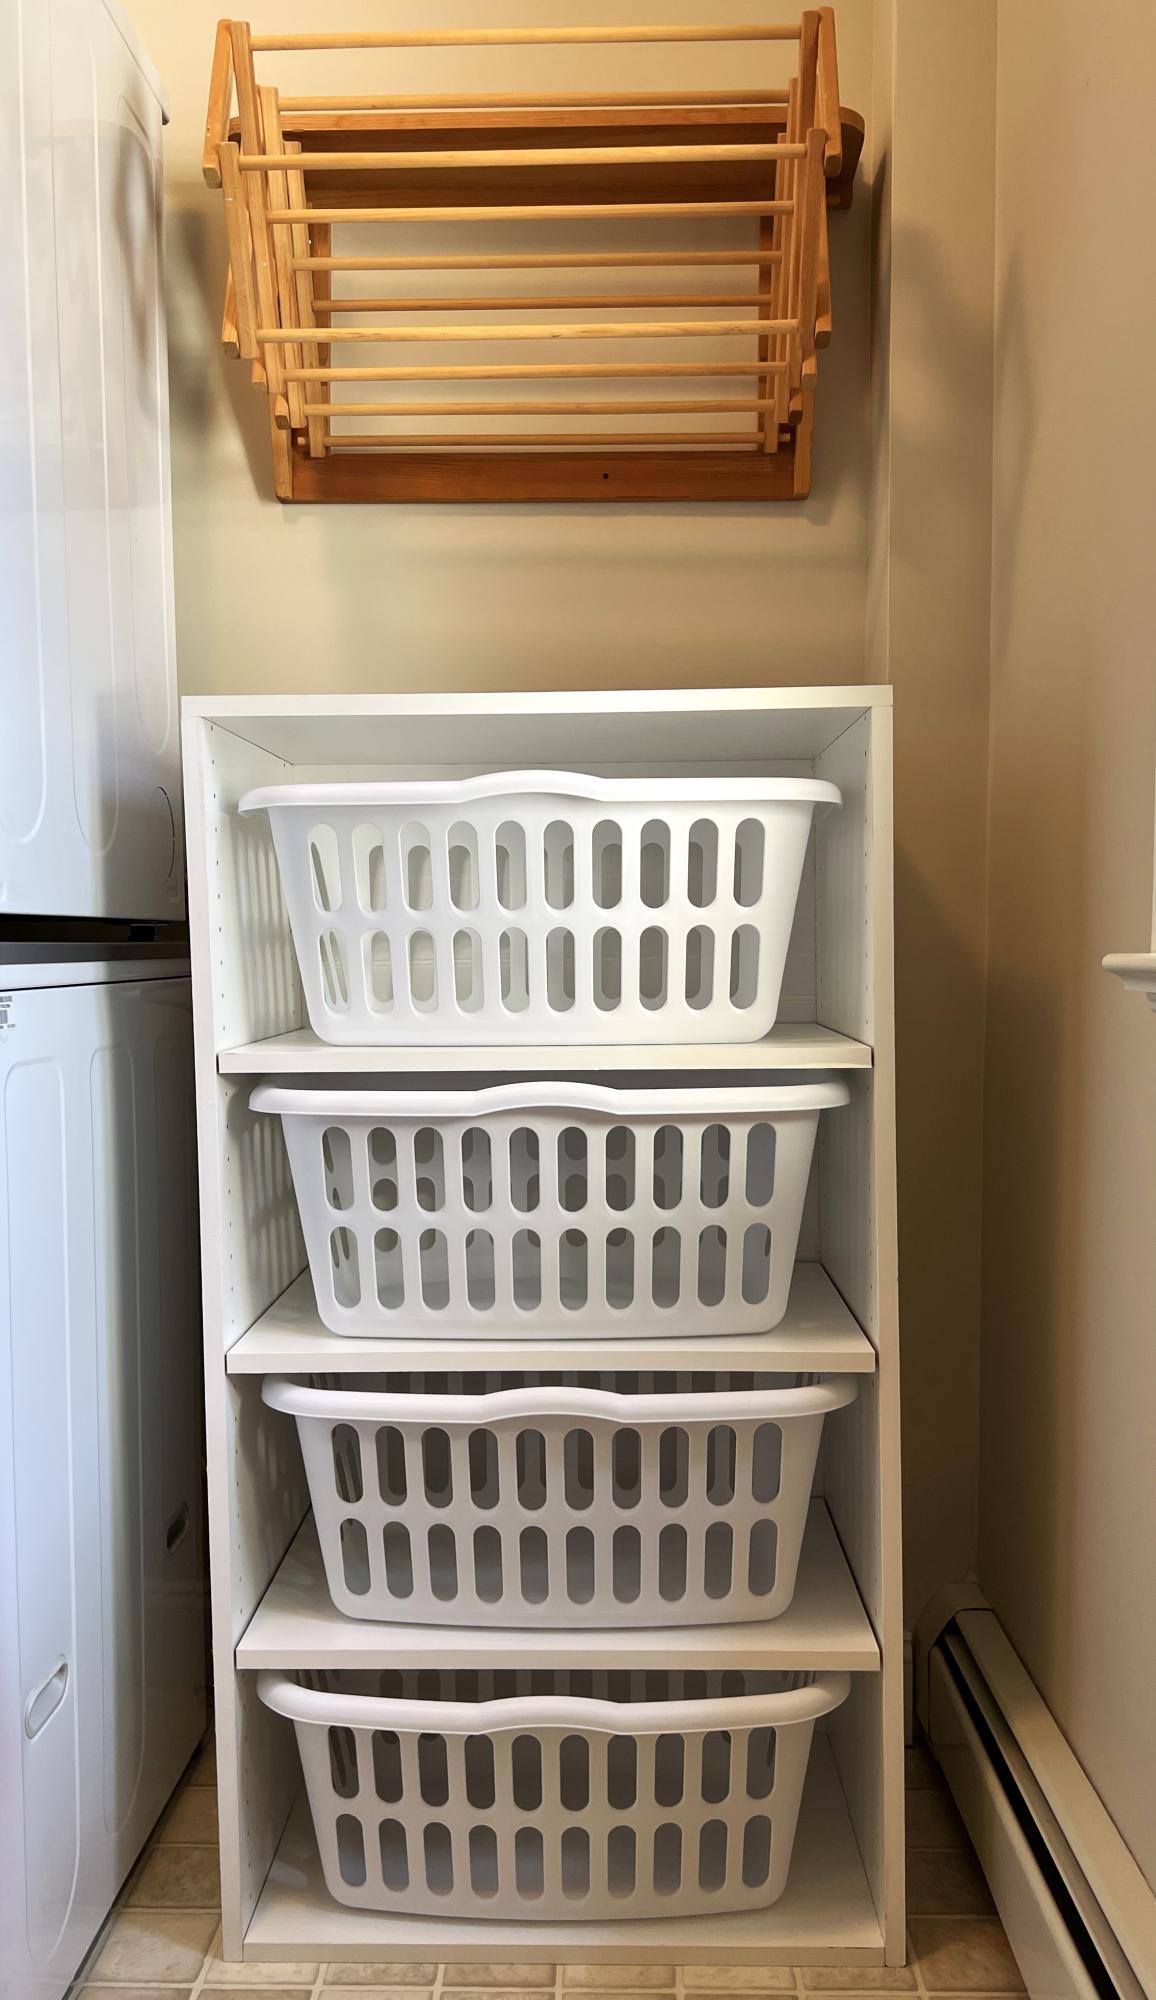
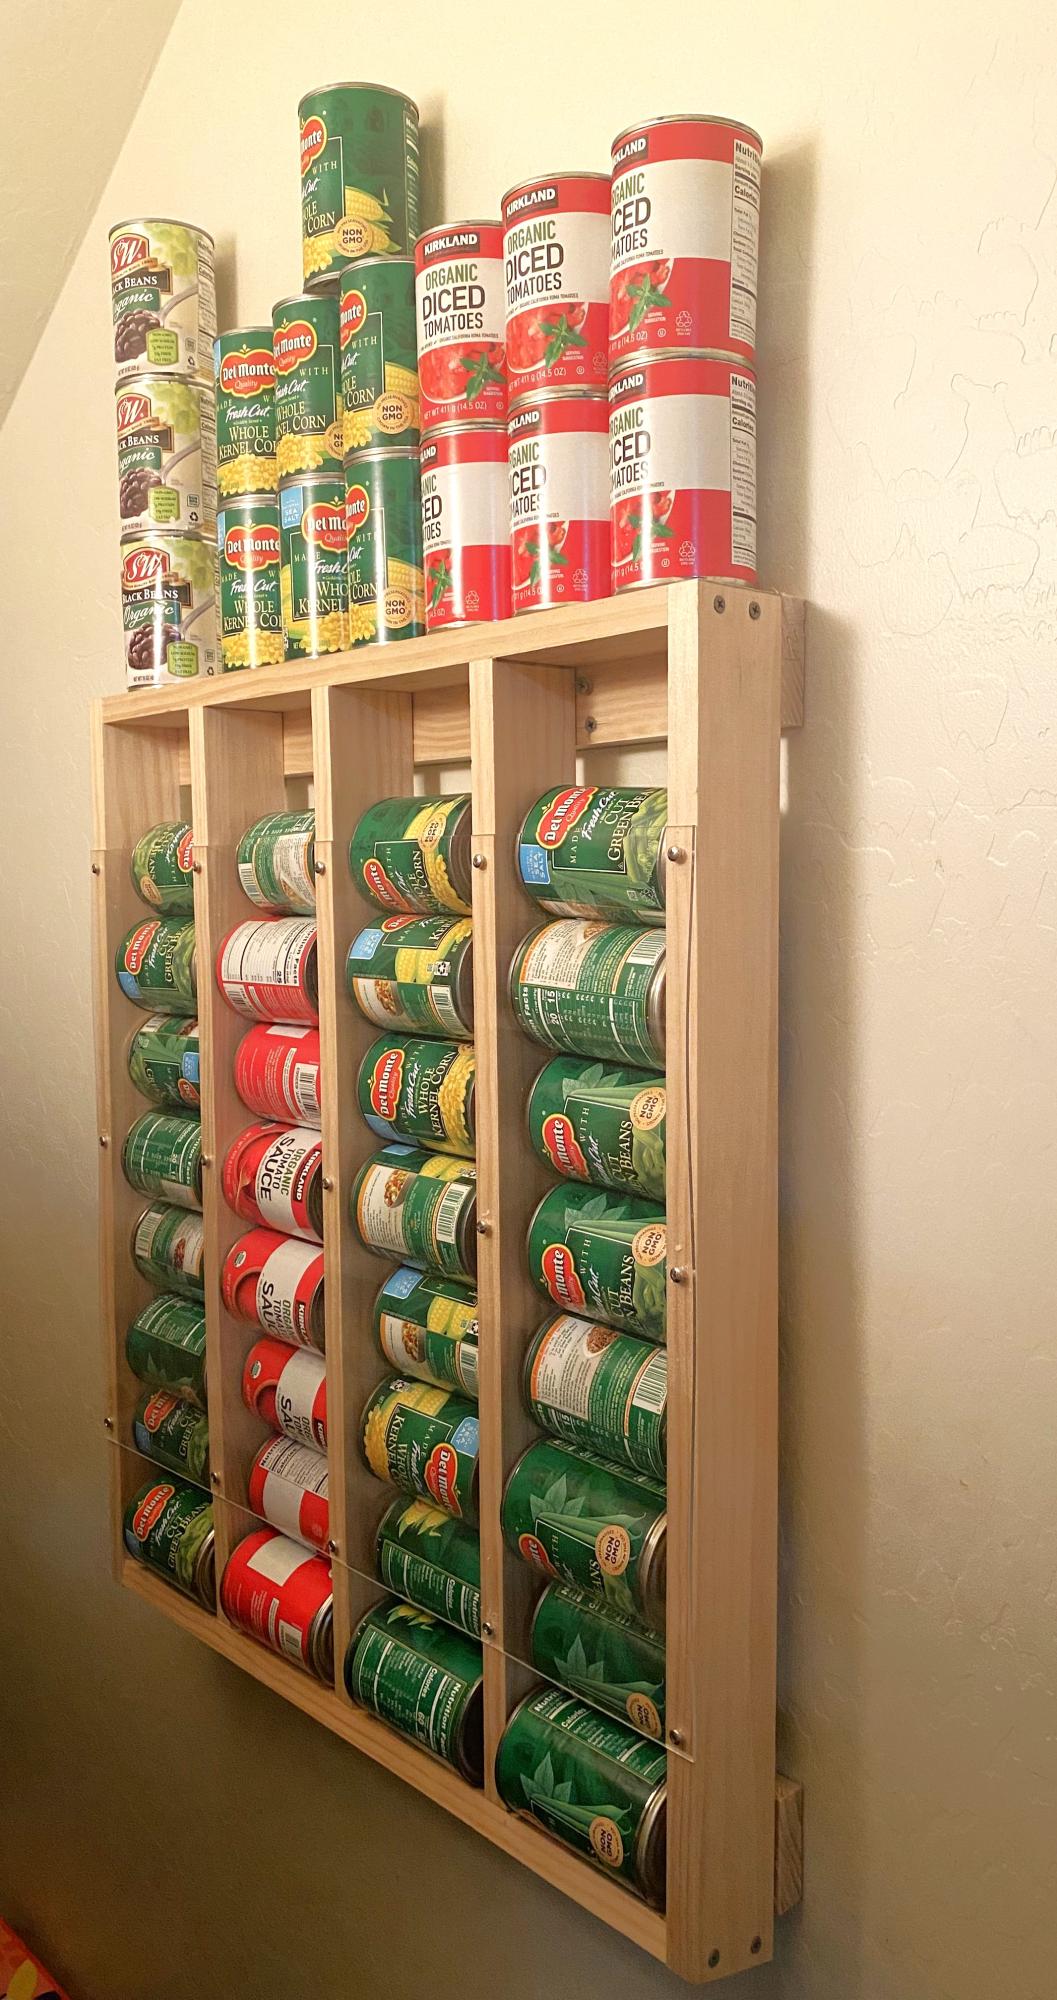
I didn’t want to have to paint or cut the metal angles - plus I wanted 4 basket tall so I used pre-drilled melamine for the sides making the unit 48” tall. Then cut top and bottom same as plans and bought 5mm L shelf pegs and had shelves cut 24 1/4”. Used white wainscot panel for back. Very easy - especially since I had big box store make all my cuts! Just have to make sure you have peg holes lined up at bottom or you won’t be level.
Deb D.
Wed, 09/13/2023 - 09:38
Thanks for sharing, it looks like the perfect fit and solution for your laundry room!
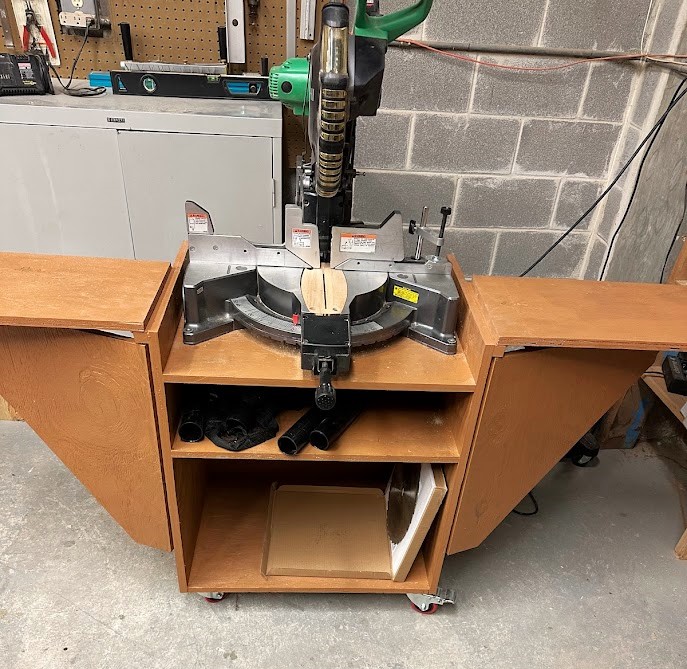
A friend and I built the mobile miter saw stand from your plans. We live in a retirement community and use the saw in our woodworking shop.
Built by Holli Peterson
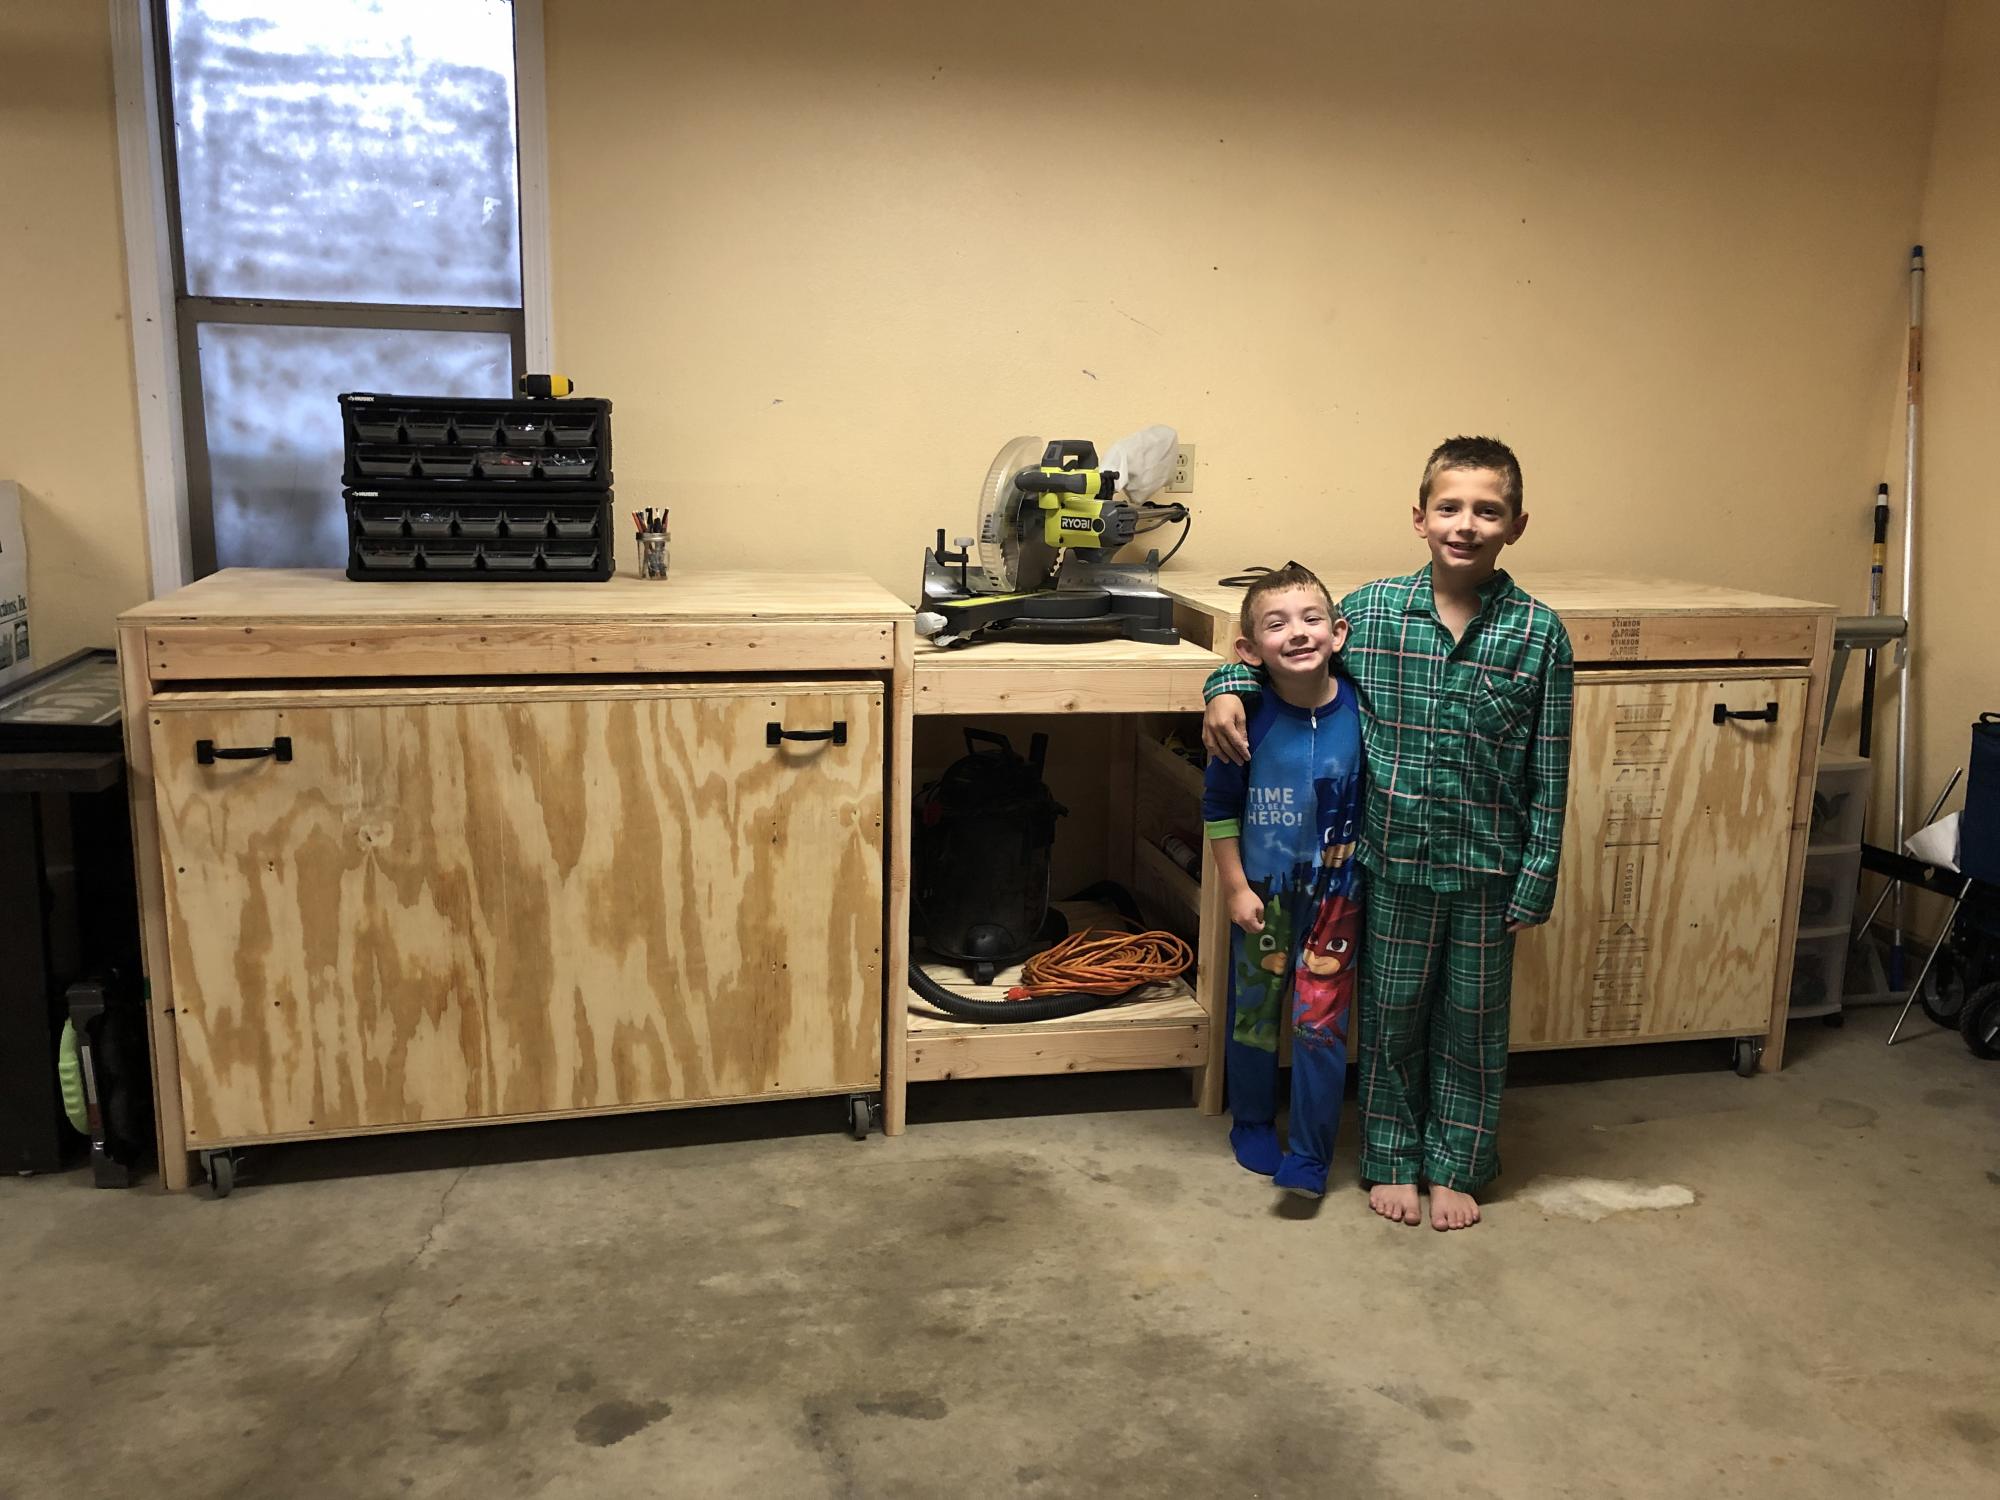
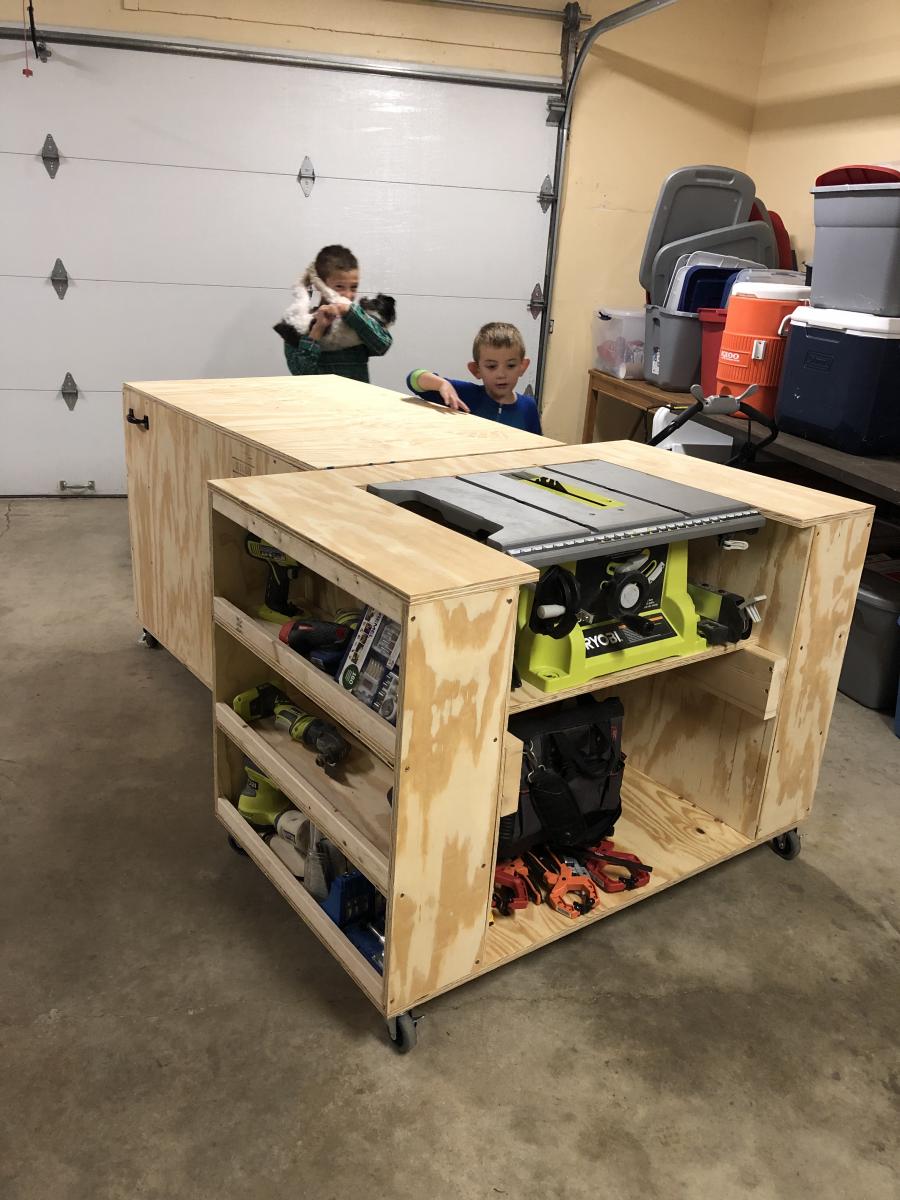
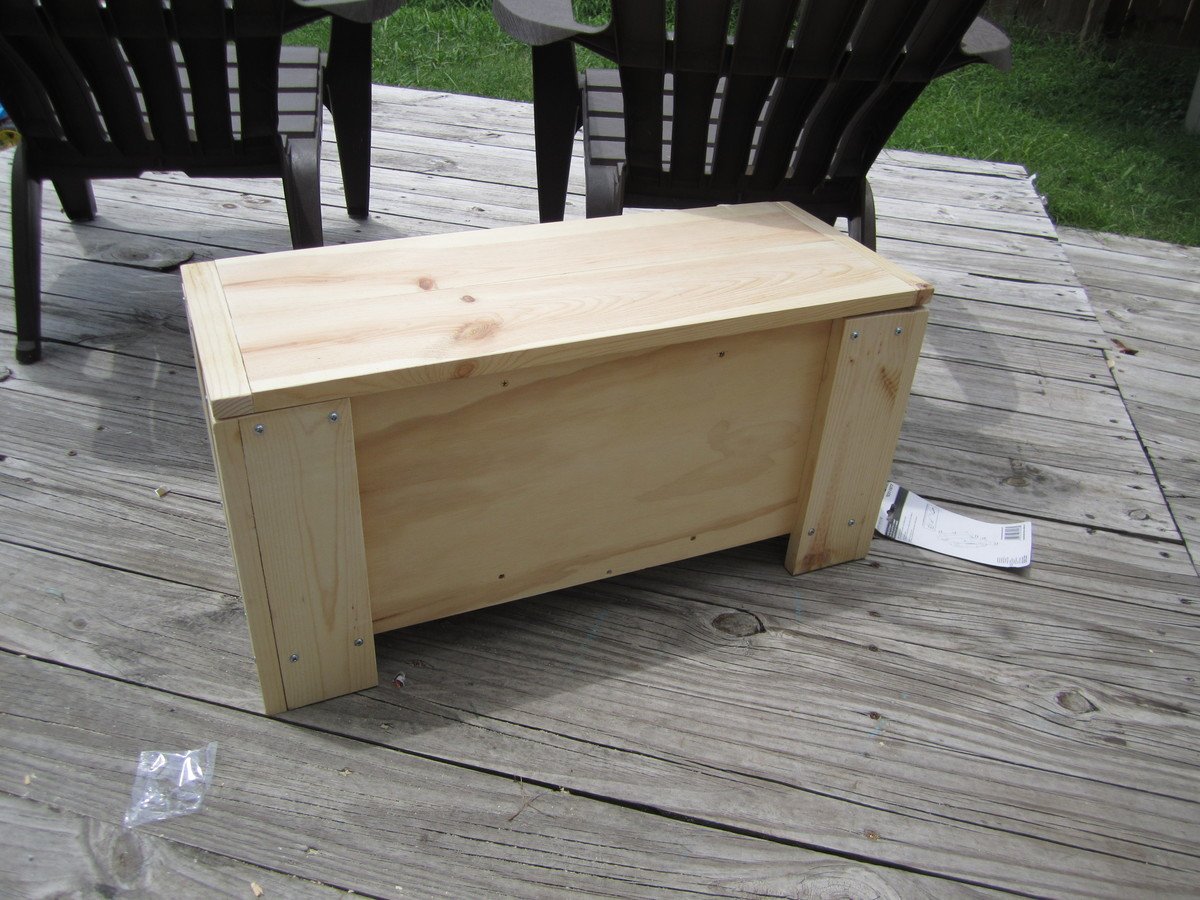
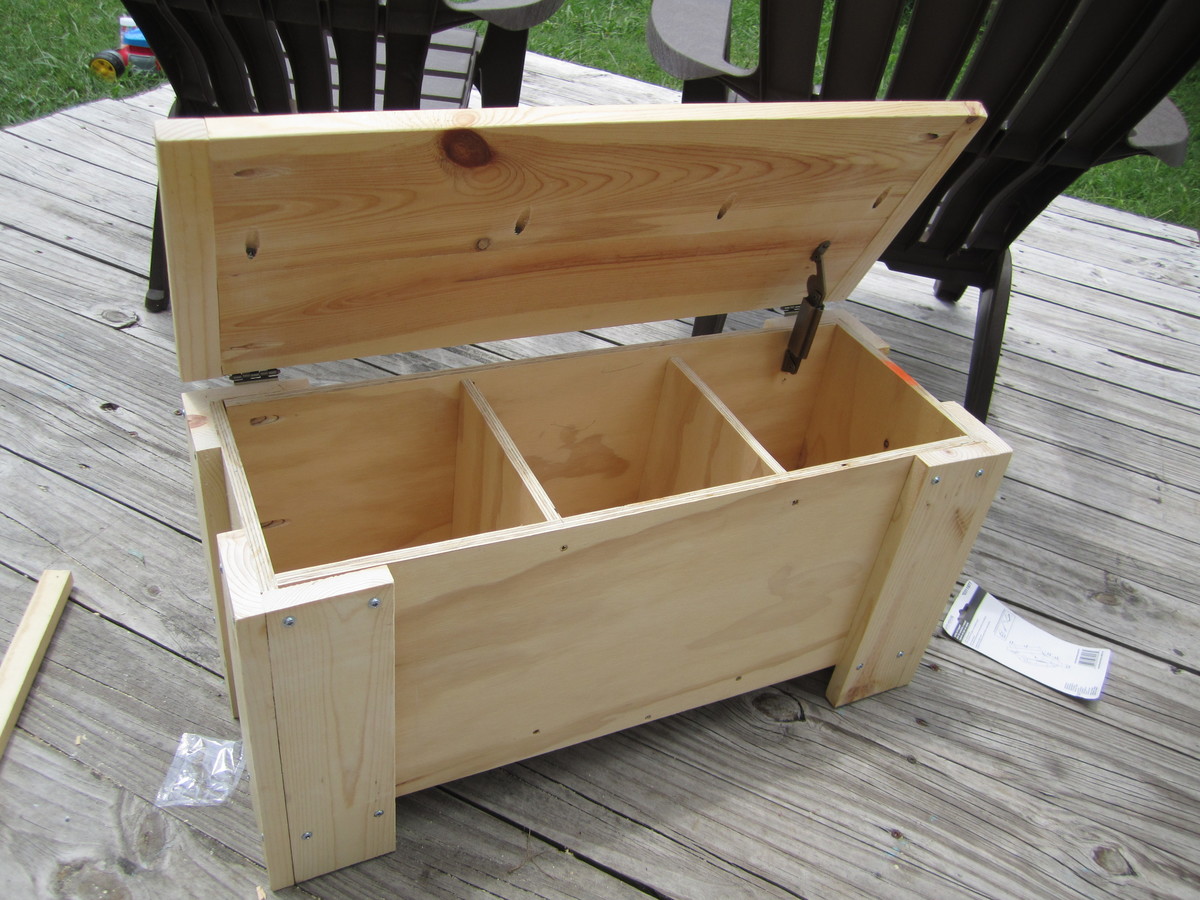
After collecting my tools, I needed a place to store them that would protect them. I had already had two jigsaws break because I was storing them in a rubbermaid tote. When I saw this plan I knew it was going to be perfect for my shop. My husband was supper happy because I would finally have a central spot for my workshop. My boys were happy to help when they could.

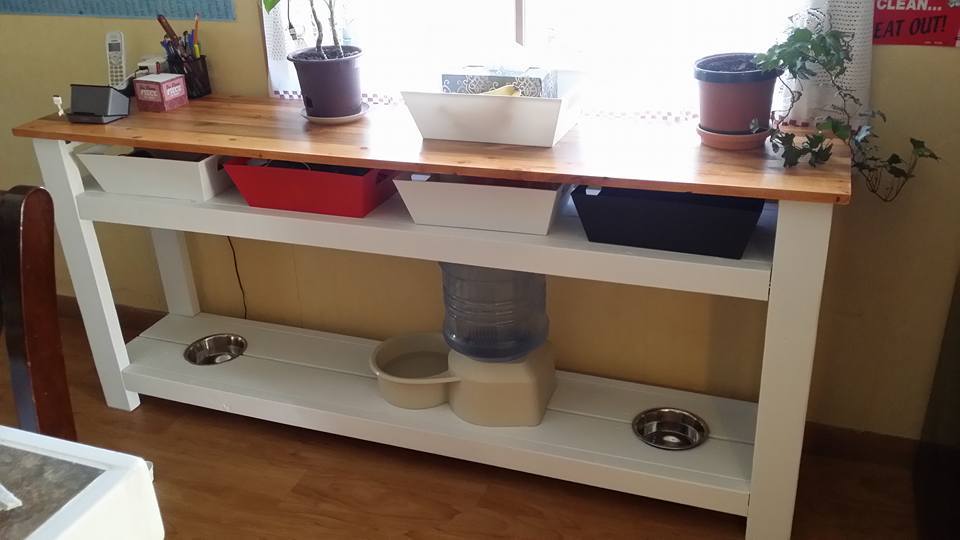
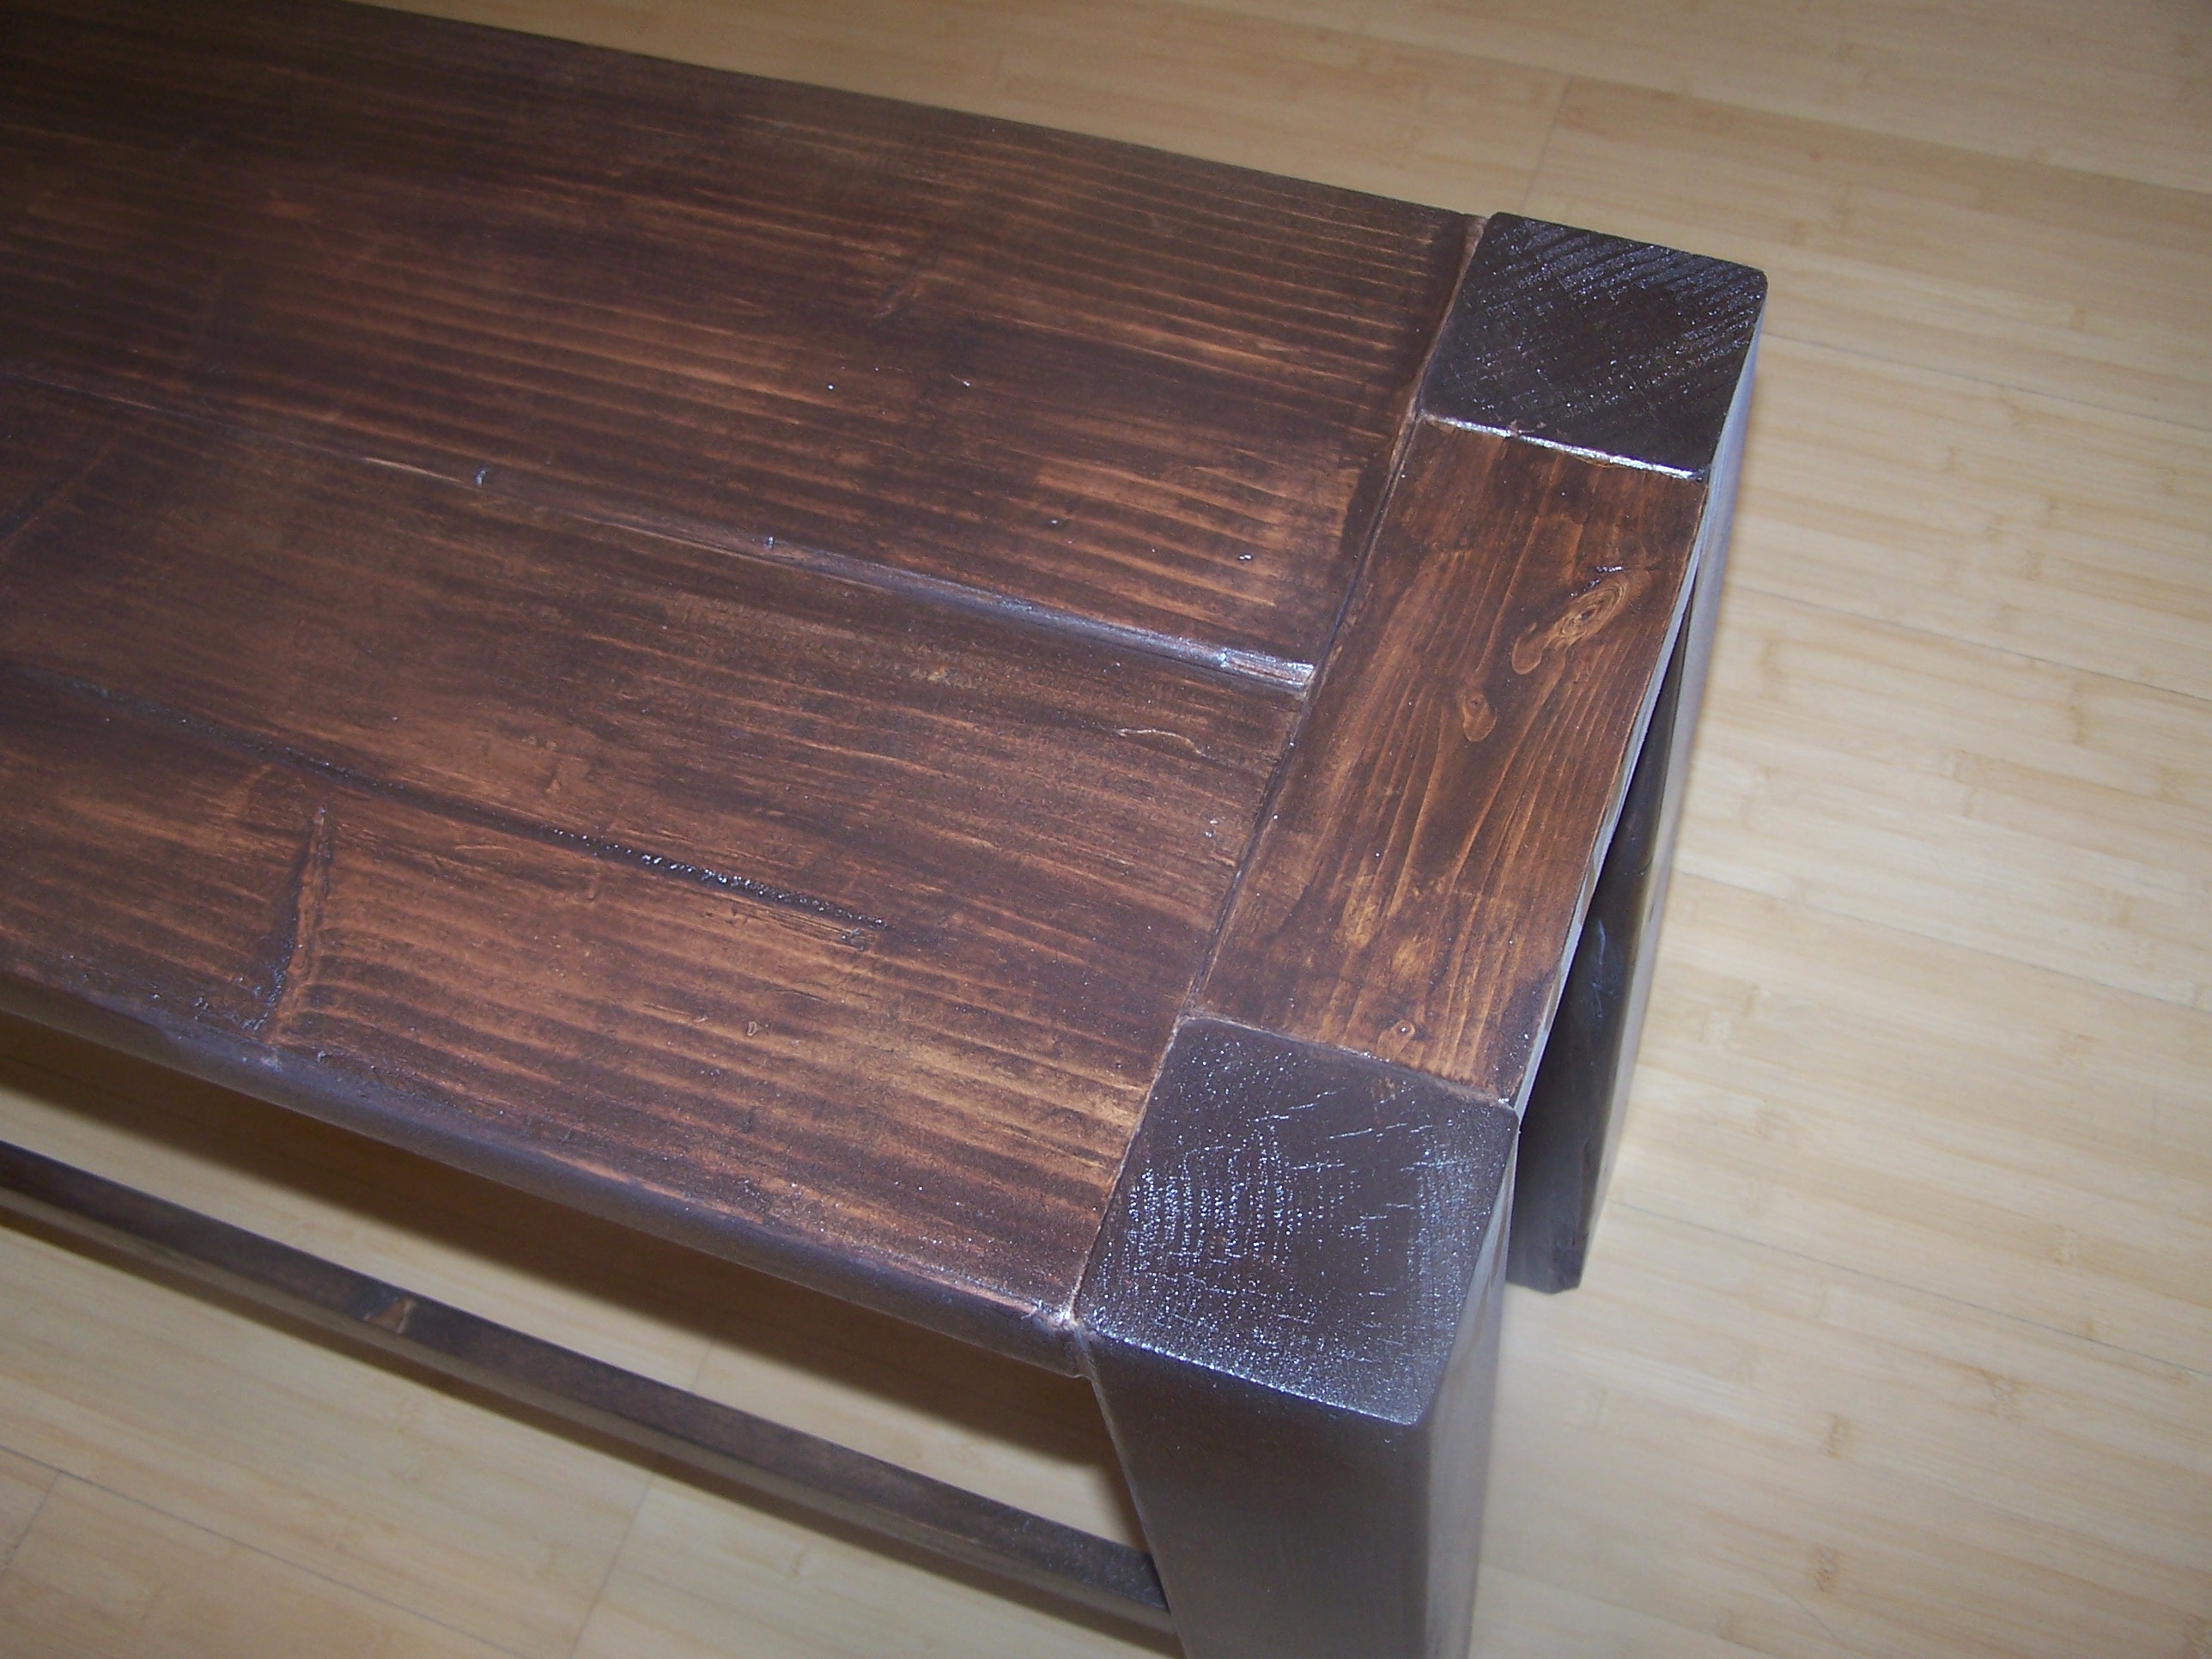
I needed a skinny table for the kitchen. I build this with dog dishes built in to make life easier. It's an all purpose table that looks nice too. Custom plans made from ideas from other plans.
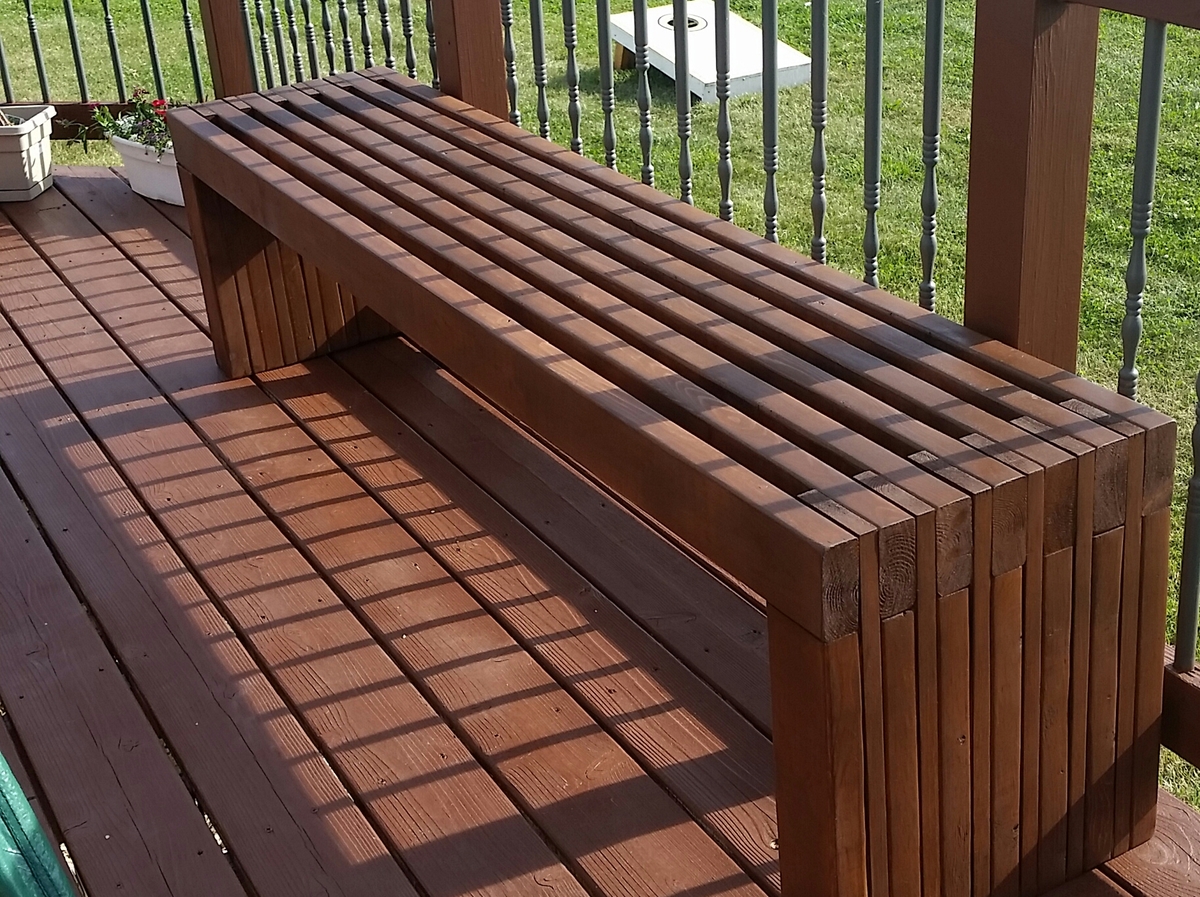
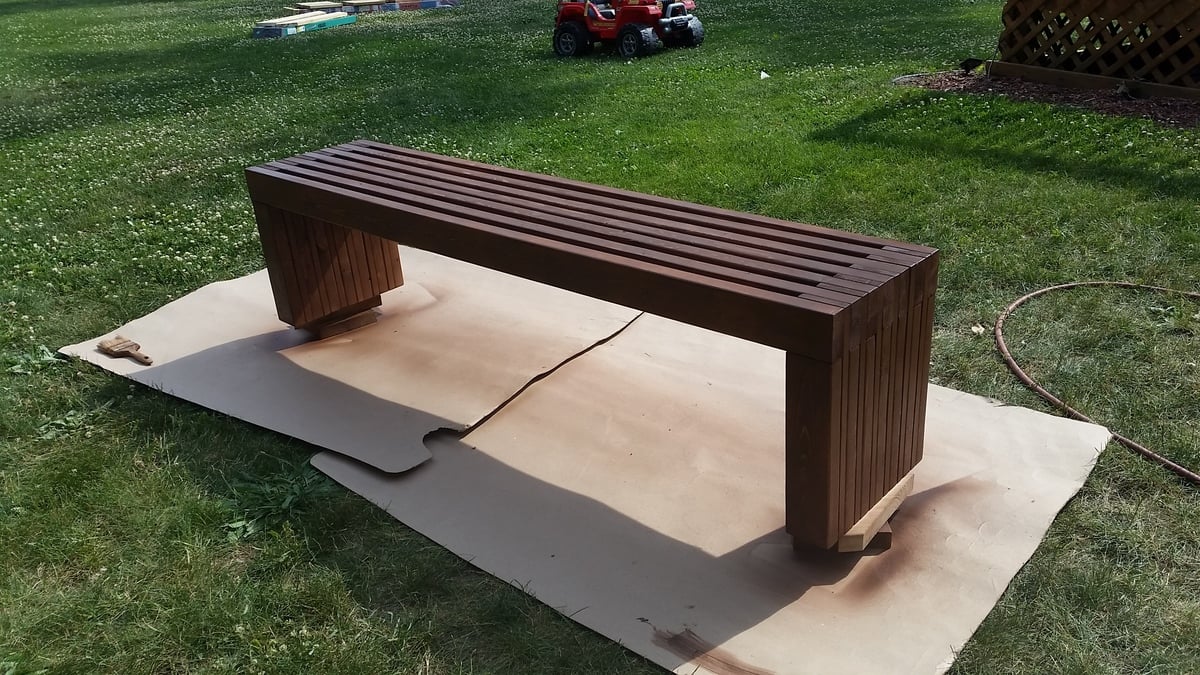
I made this for my sister the day before her house warming party. It was a pretty easy build. I used wood glue and 2" nails. Using a nail gun, this came together pretty quickly. I do wish that I had wide enough clamps to hold everything in place while it dried, because there were a few gaps due to some imperfect boards. I used 104" stud length boards, so I only need to purchase 7 instead of 9. this was enough to make the cuts for the top and both leg pieces from each board. the price was the same and we had limited space in our van for boards, so this was a better option for us. I used a sprayer hooked up to an air compressor to apply the stain and was able to get in between the slats fine with this method, brushing over it as I sprayed. Luckily I chose the same color as her deck not knowing, so it matches great. Now I need to make one for myself! :)
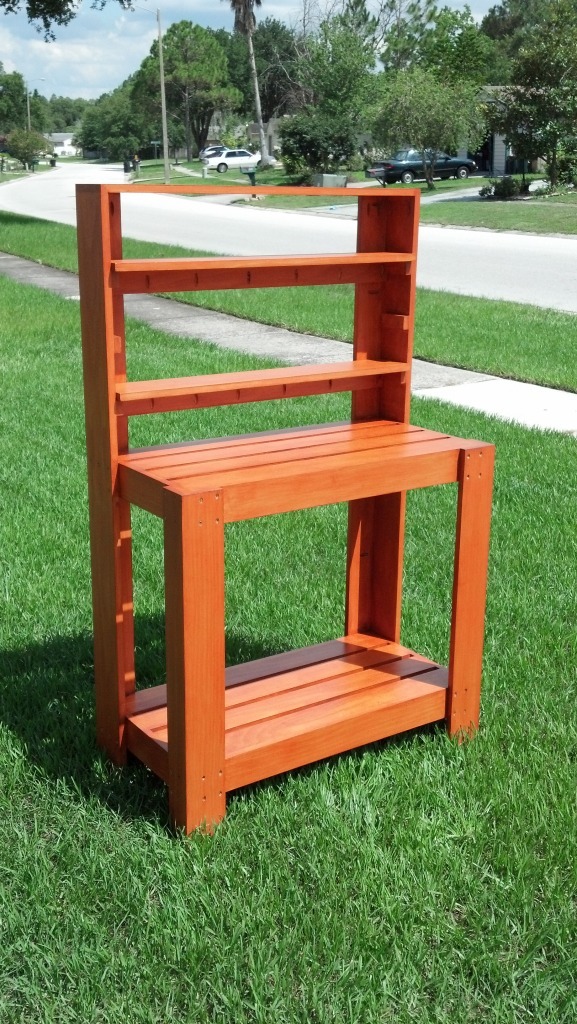
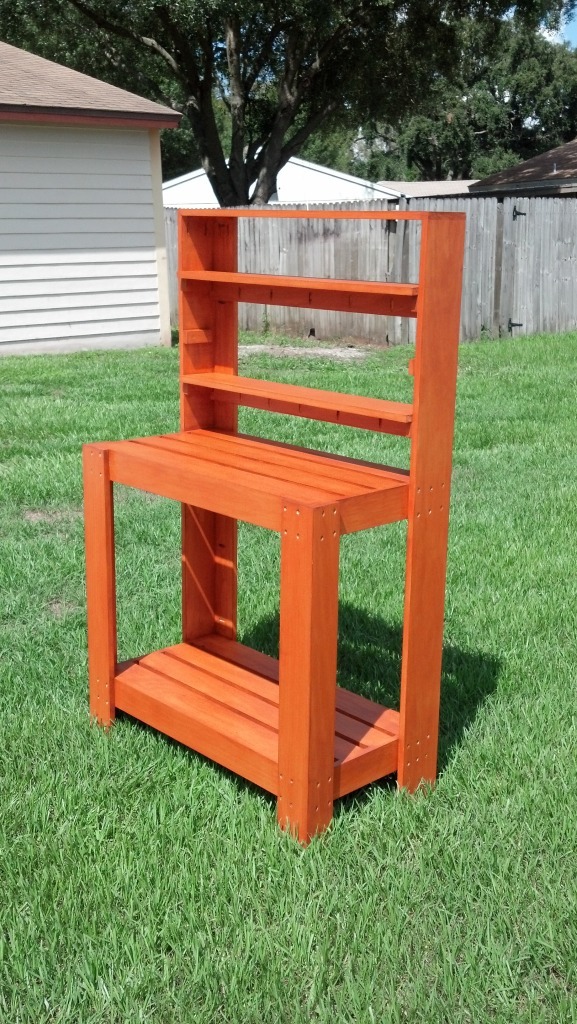
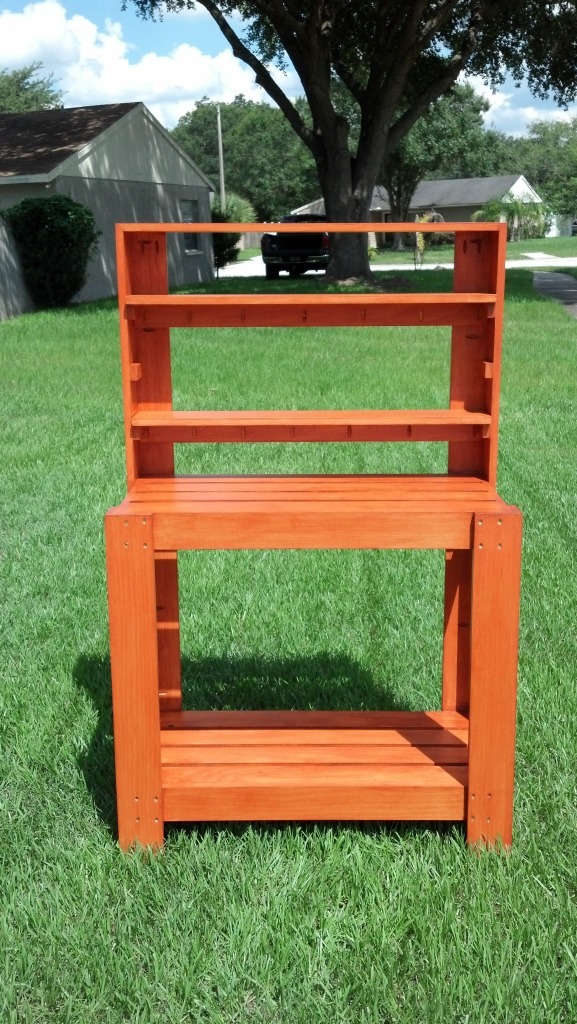
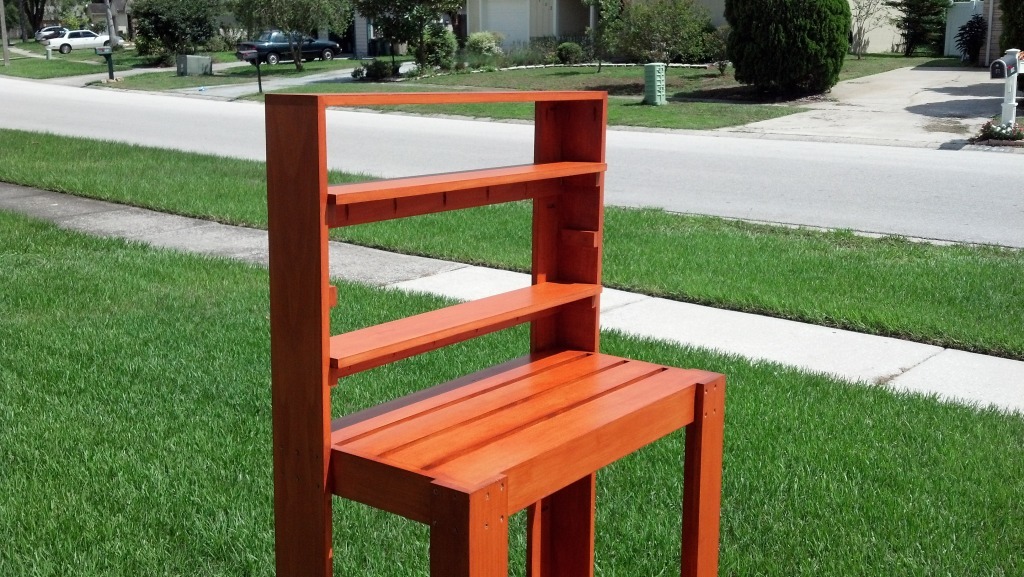
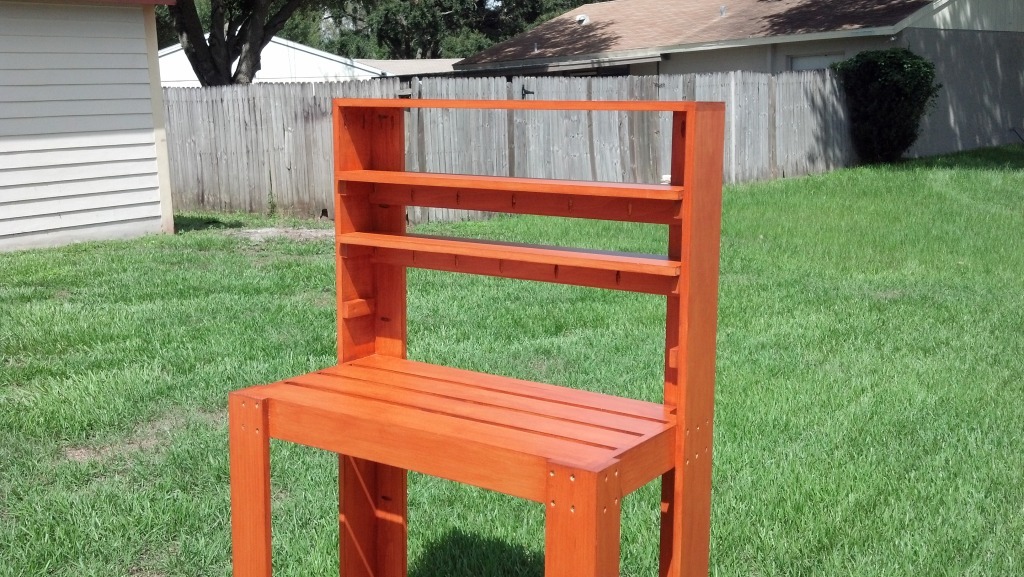
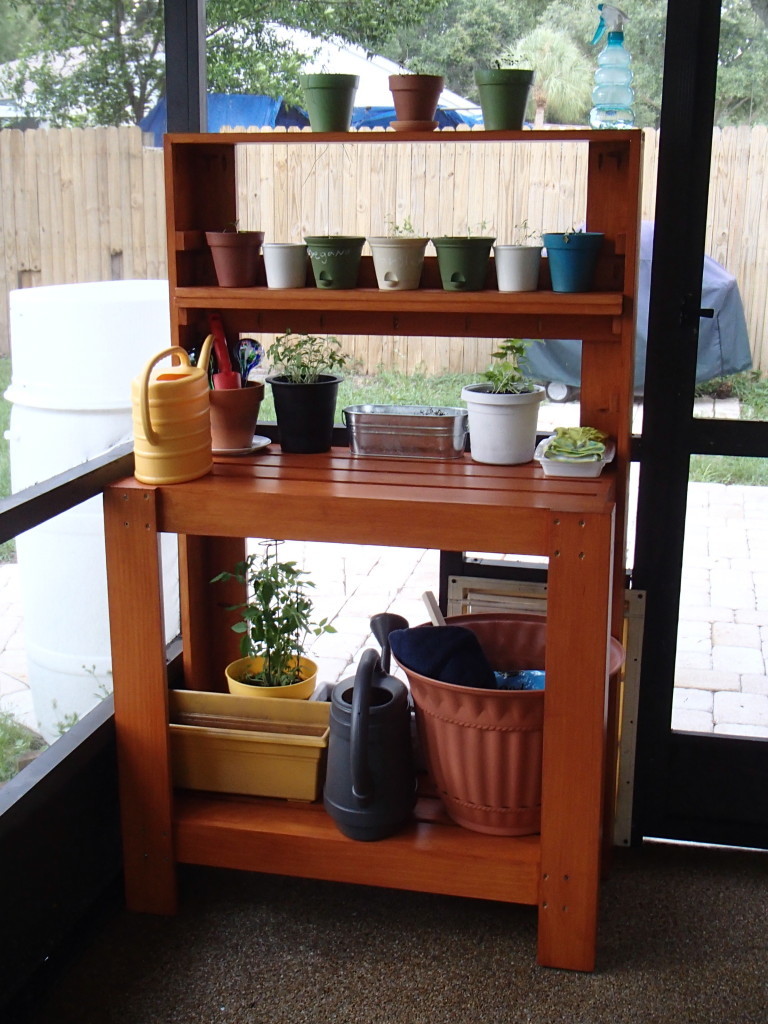
I made this potting bench as a plant rack/stand for my wife for the back porch. She has had the plants on the ground and now this will give her some place to put them on as well as not having to work on the ground. I changed the dimensions to fit our space as well as used 1x4's mostly since it is what I had. I used 1x6 for part of the back legs so as to have a deeper shelf. I also made it to have additional shelves that are a bit adjustable to (3) different levels. I also changed the front a bit so it is closed in. Thankfully you can't tell in the pictures much but this was my first time trying to stain something. Definitely not my forte. Hopefully will get better with time and experience. Thank you for posting the plans for to build from.
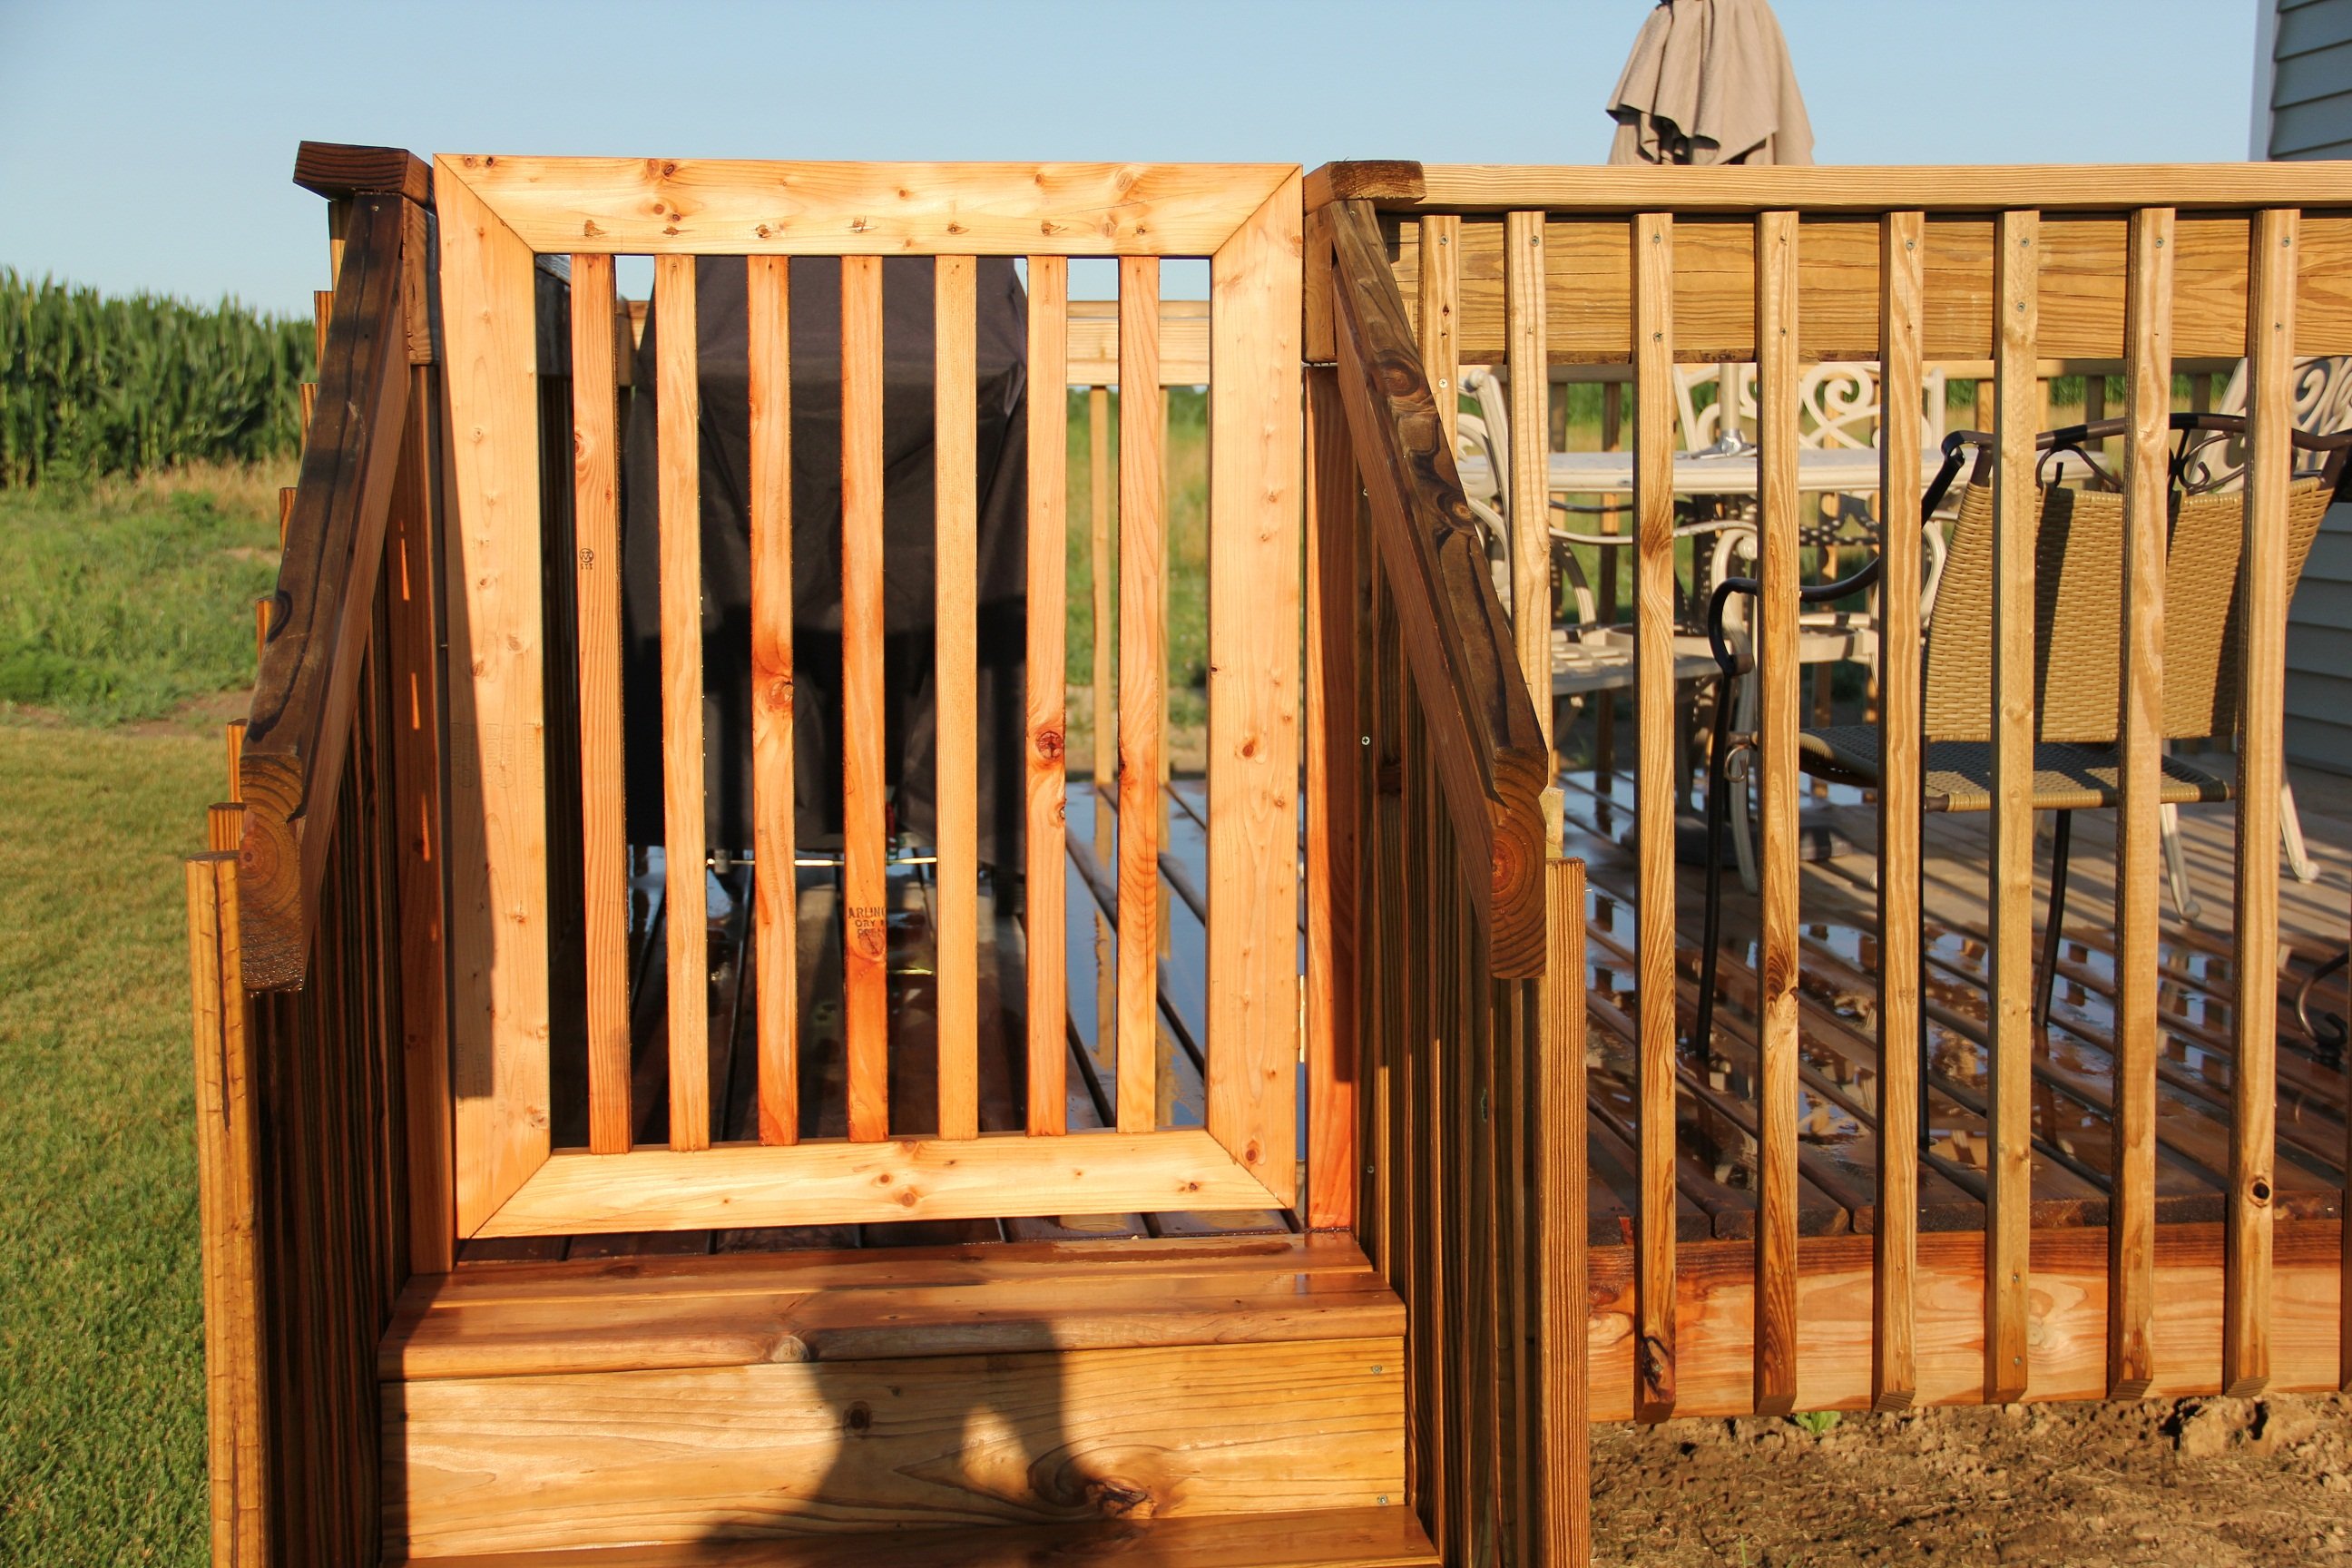
With grandchildren and pets we decided to put a gate on the deck.
The gate is made from 2 X 4's and 2 x 2's. I used brass hinges to prevent rust and smooth operation
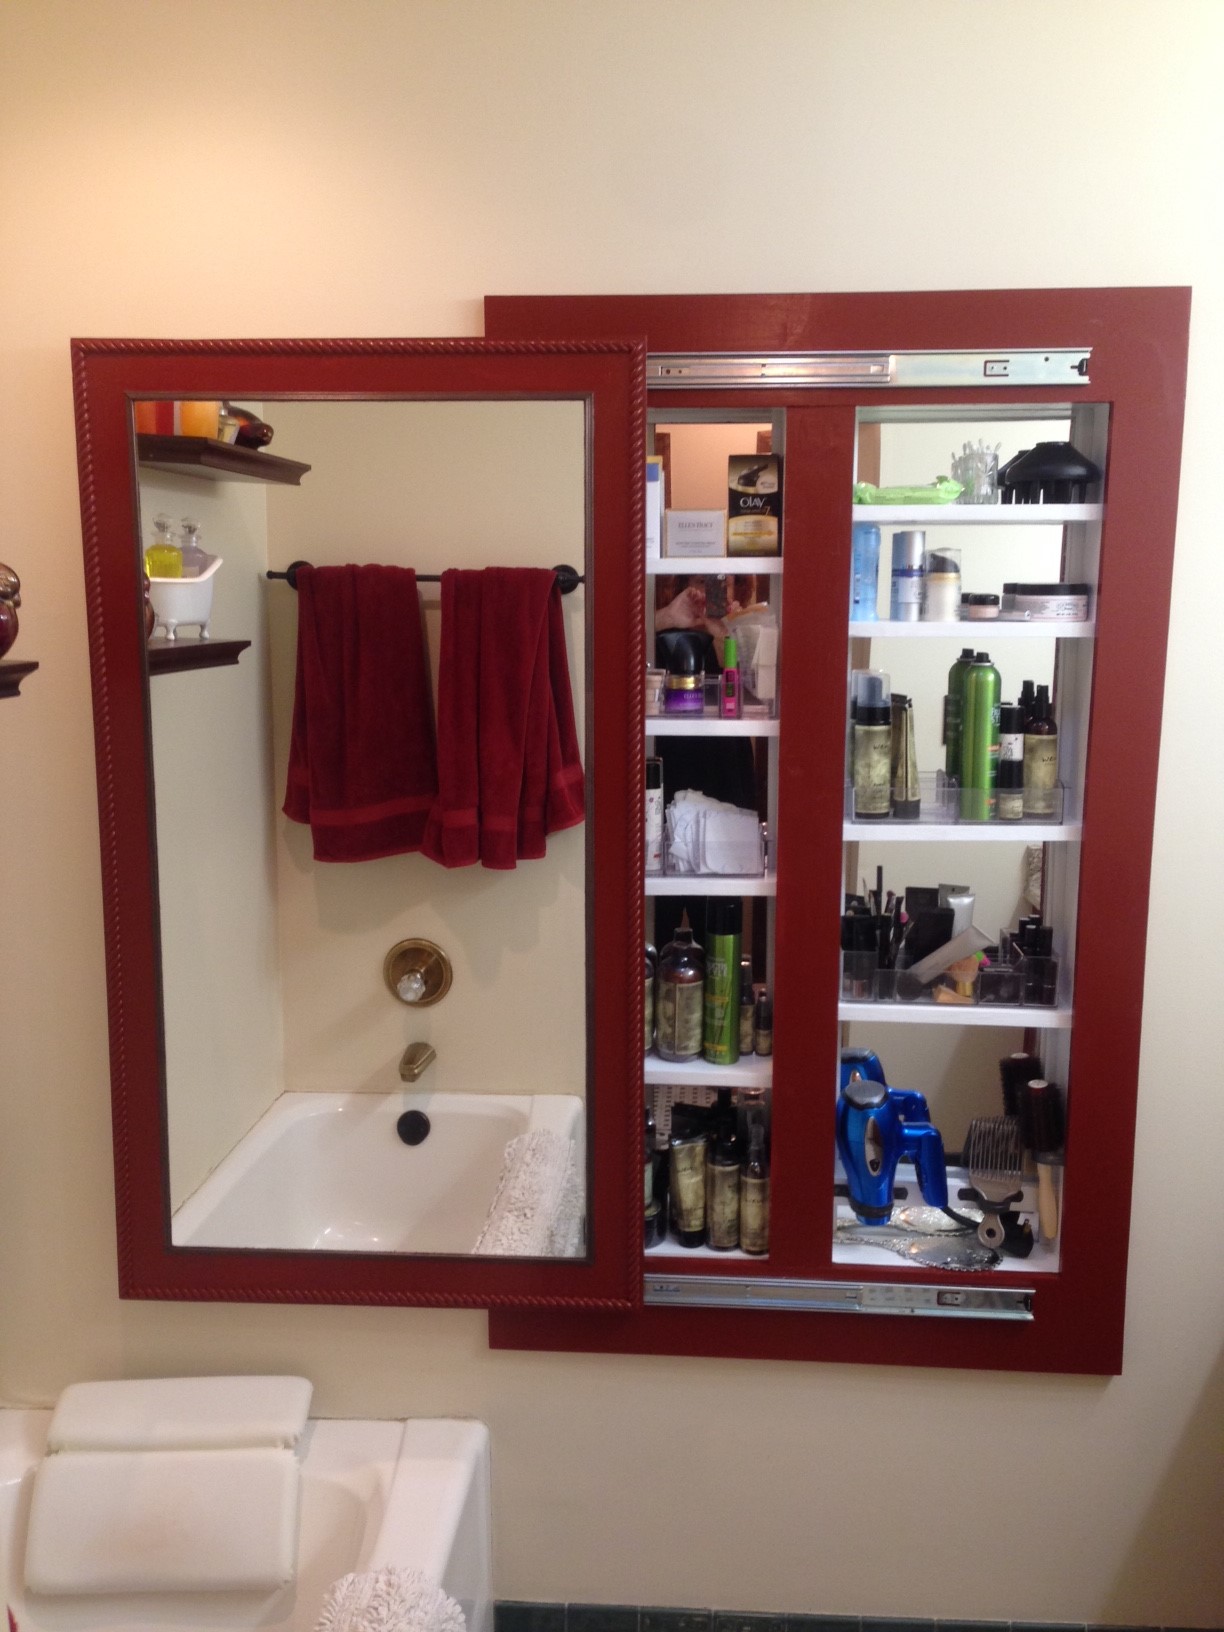
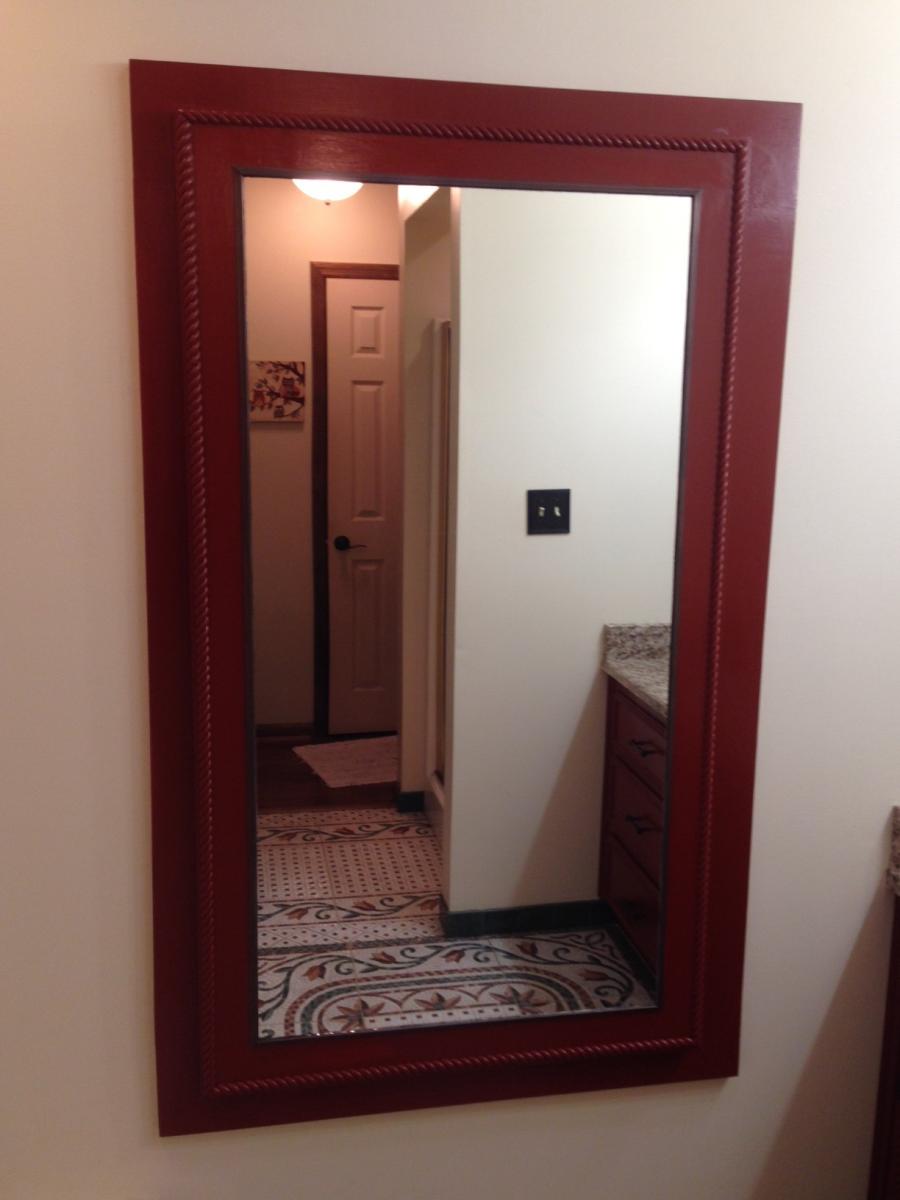
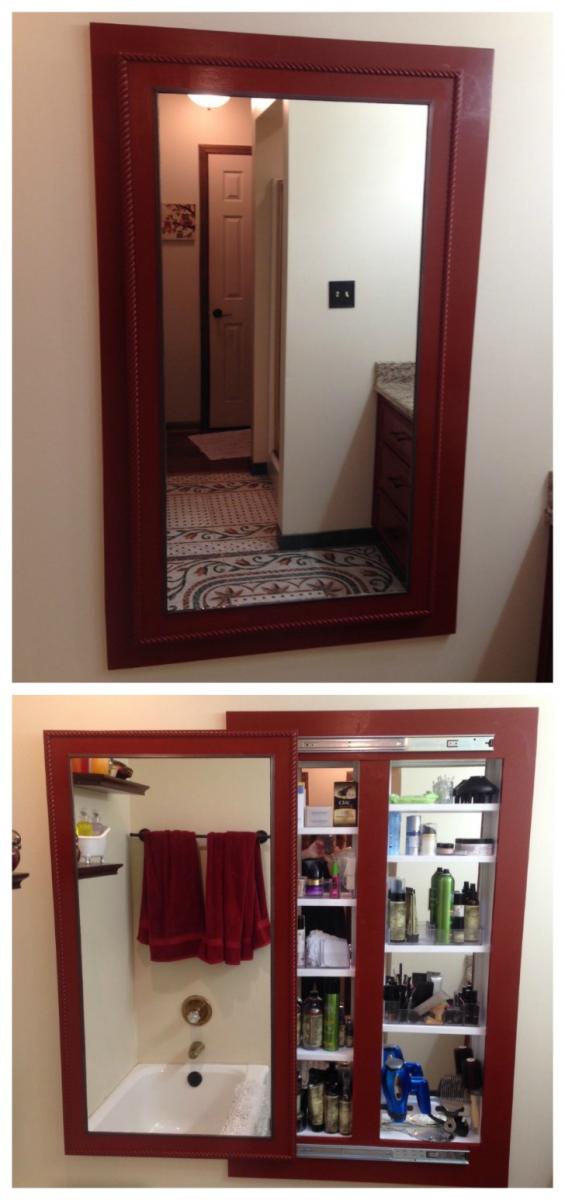
Adapted Ana's full length mirror storage idea. I needed to recess the cabinet into the stud cavity to save needed floor space. Opened two cavities and made the interior the same length as the cheap $6 behind the door mirror. Was able to just sit them on a ledger board and the shelves hold them from falling forward.
The cabinet looks wonderful and holds a TON of things. Thanks Ana for the inspiration!

Thu, 07/25/2019 - 18:20
I love this!! So smart to make it recessed. Thanks so much for sharing the photos!
Sun, 02/27/2022 - 15:58
I am wanting to build a thin or recessed cabinet for an incredibly small area in my bathroom and knew to go right to Ana White! The combination of these two projects is perfect and exactly what I was looking for! Now here’s to praying I can pull it off!! 😬
This was the second project I've ever built. It was an easy project.
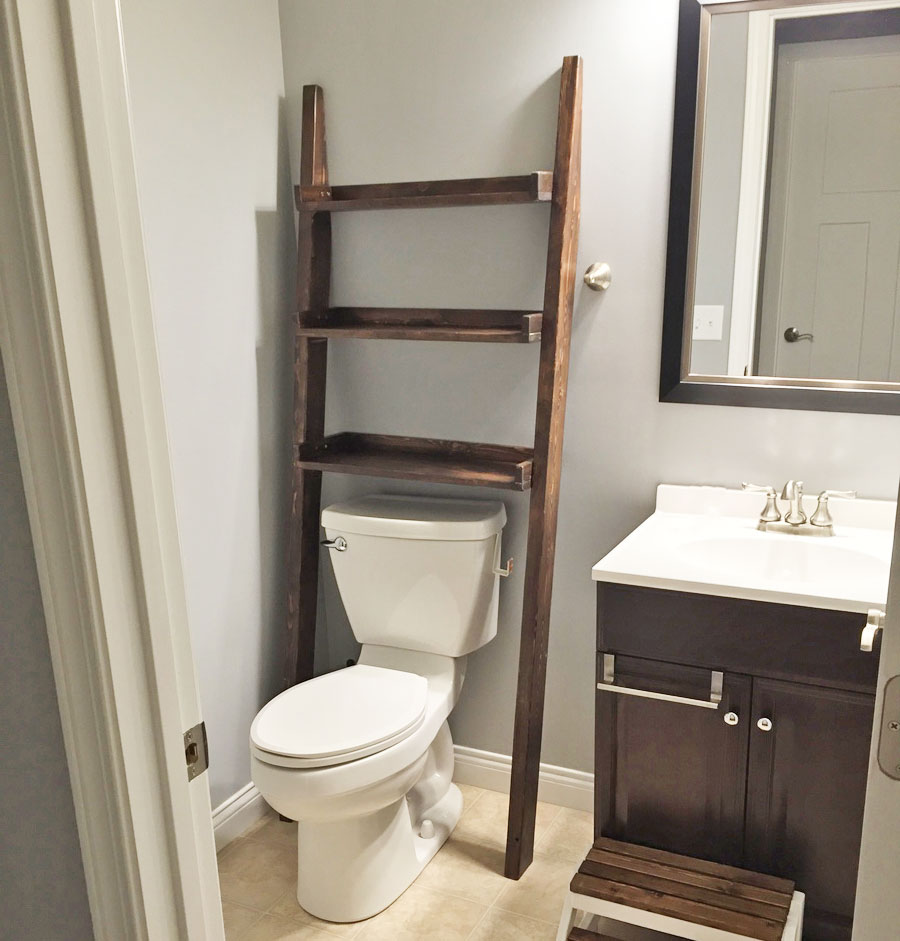
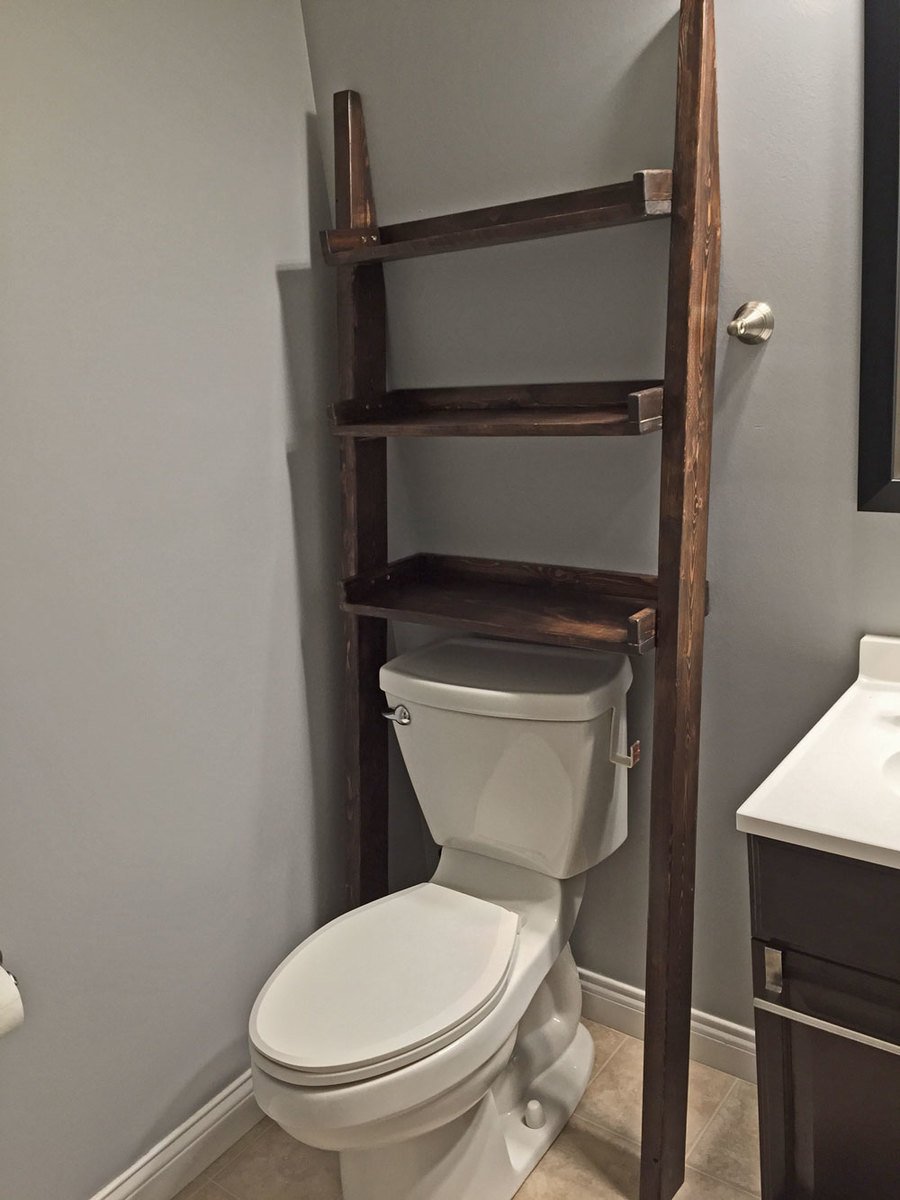
My wife saw your post for this shelf and knew it would be perfect for our half-bathroom. She showed it to me and I agreed. I built it in a few hours one afternoon. Stained and sealed a few days later and it fits perfectly. Now we just need to wait (impatiently) for everything to cure so we can actually begin to use it. We'll try and share another final photo when in full use.
Made this for my dry closet. Super easy to construct and it works perfect. I just wish there was something similar to use for paper towels.
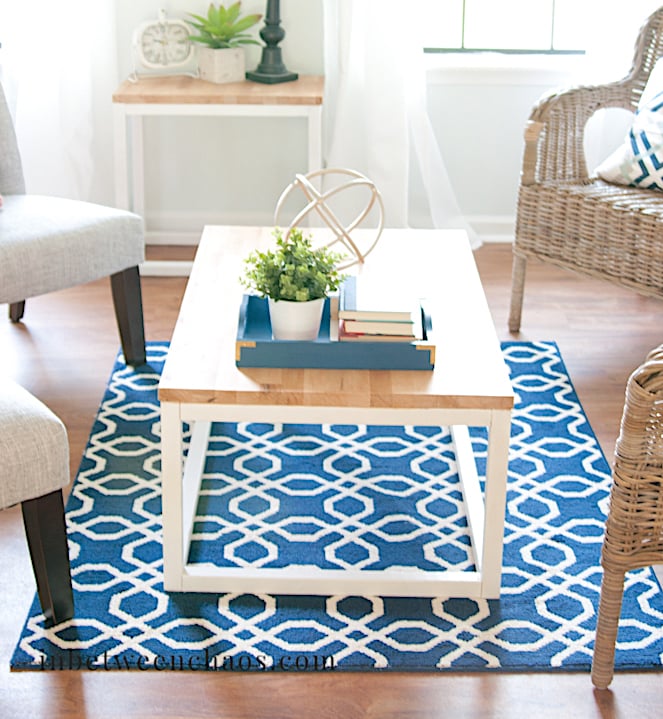
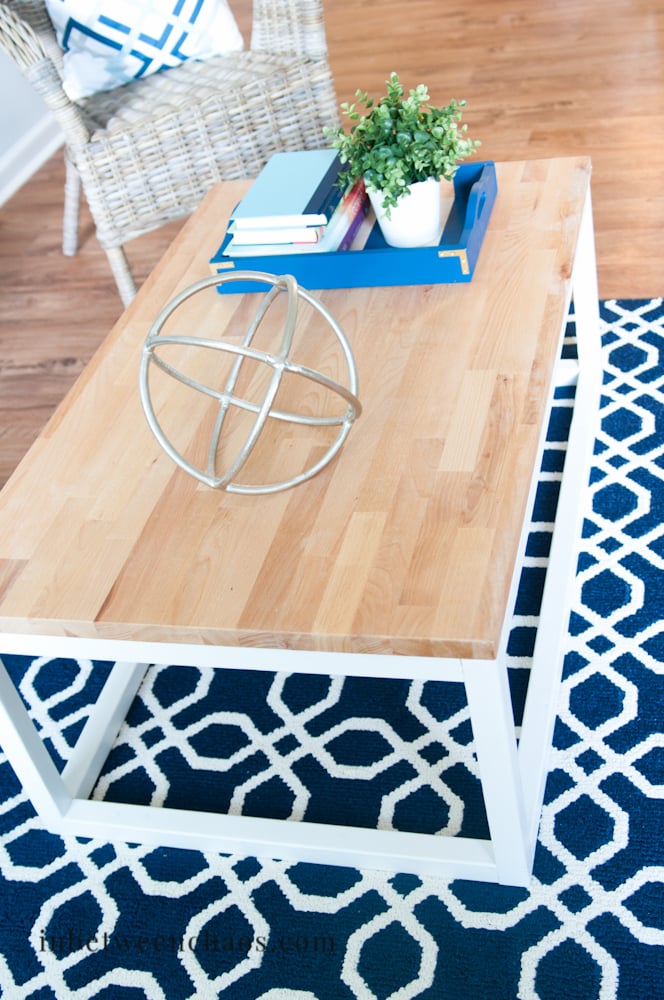
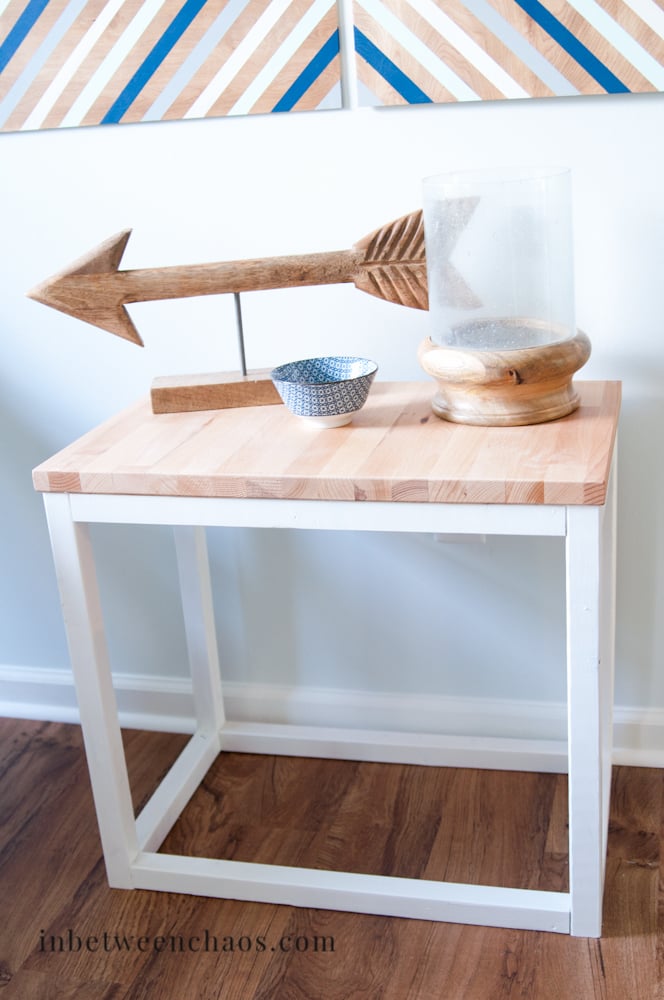
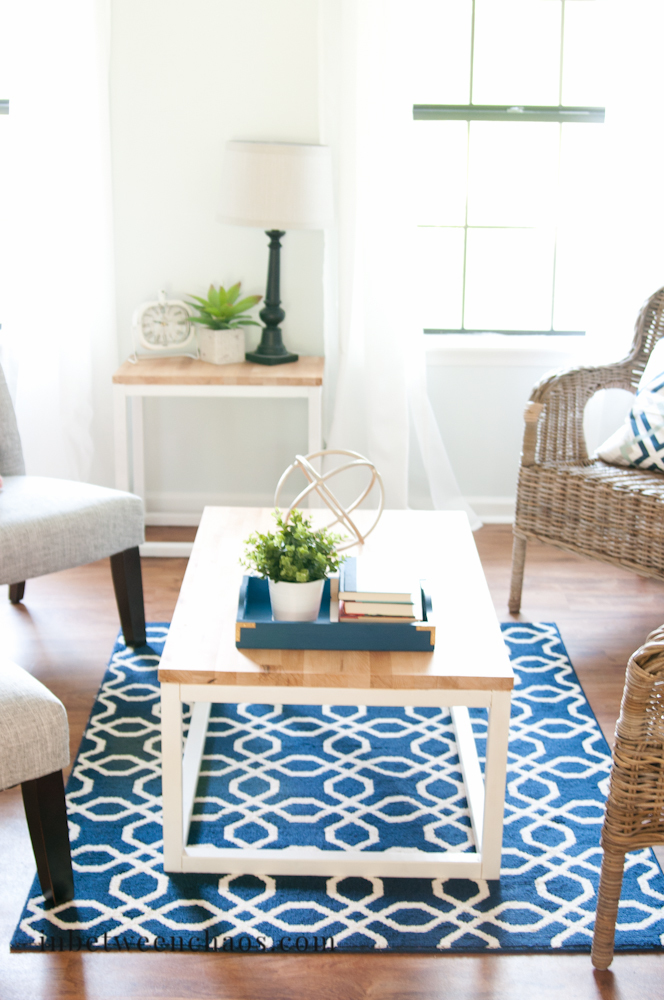
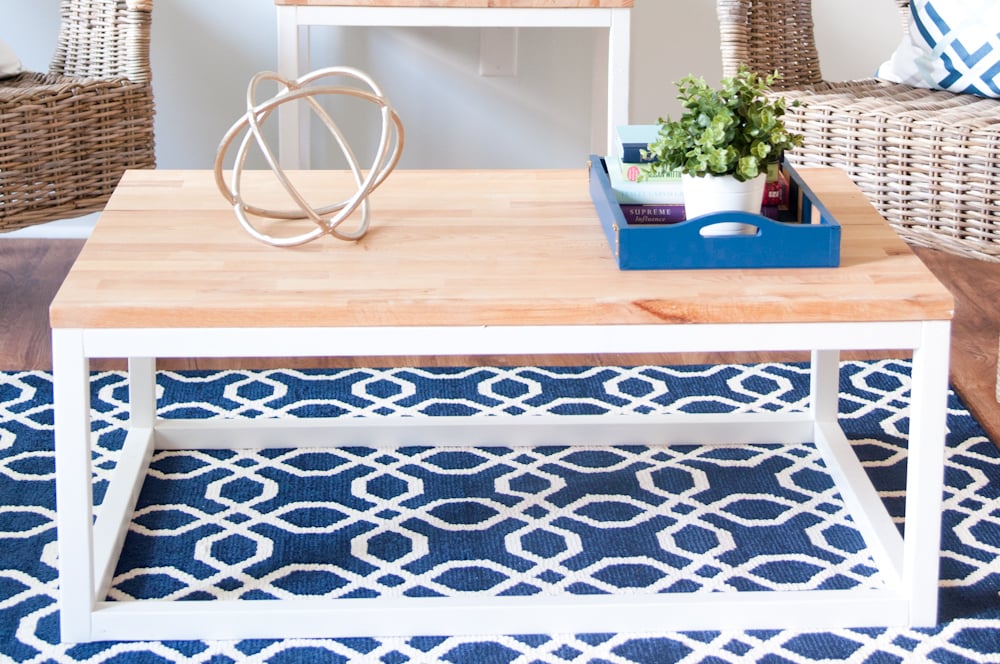
While staging my most recent flip house, I needed some accent tables for the living room. I picked up a butcherblock countertop at IKEA, then created two end tables and 1 coffee table. I loved Ana's simple design, and I thought it was a great balance to the warm butcherblock top. Thank you Ana for a great plan as always!
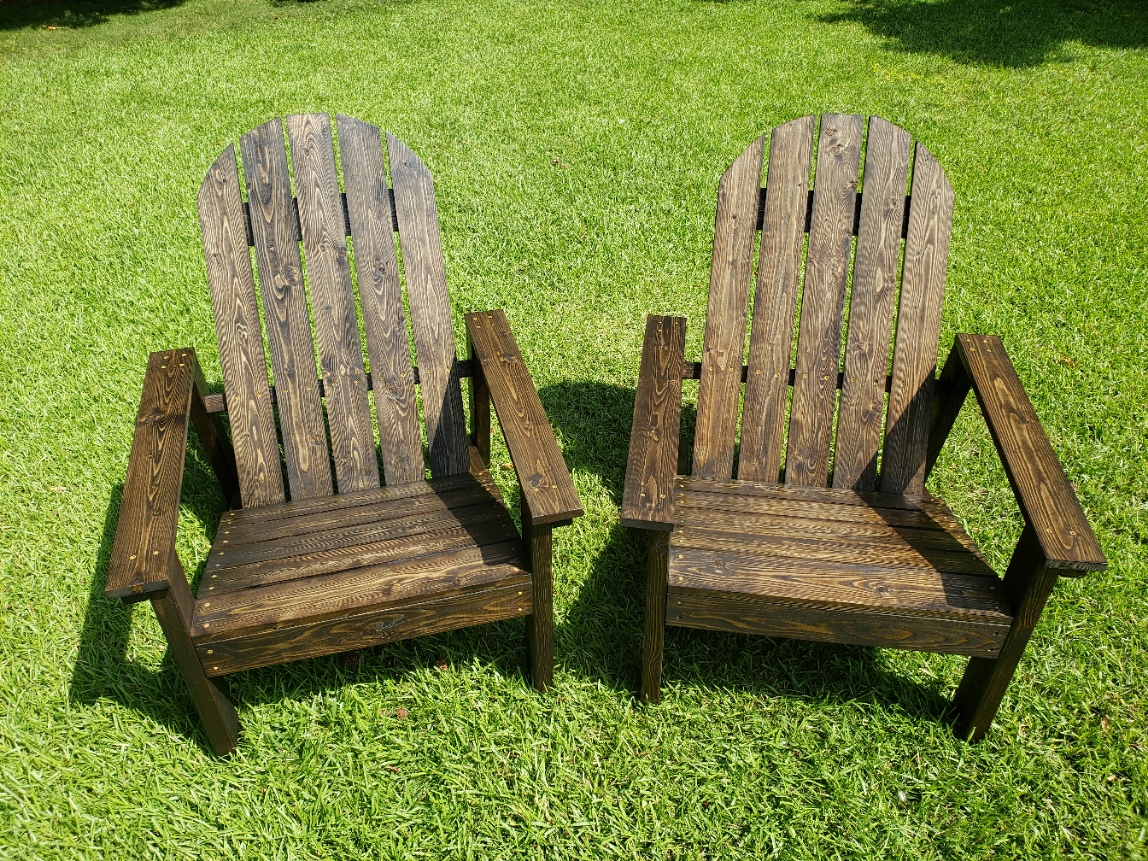
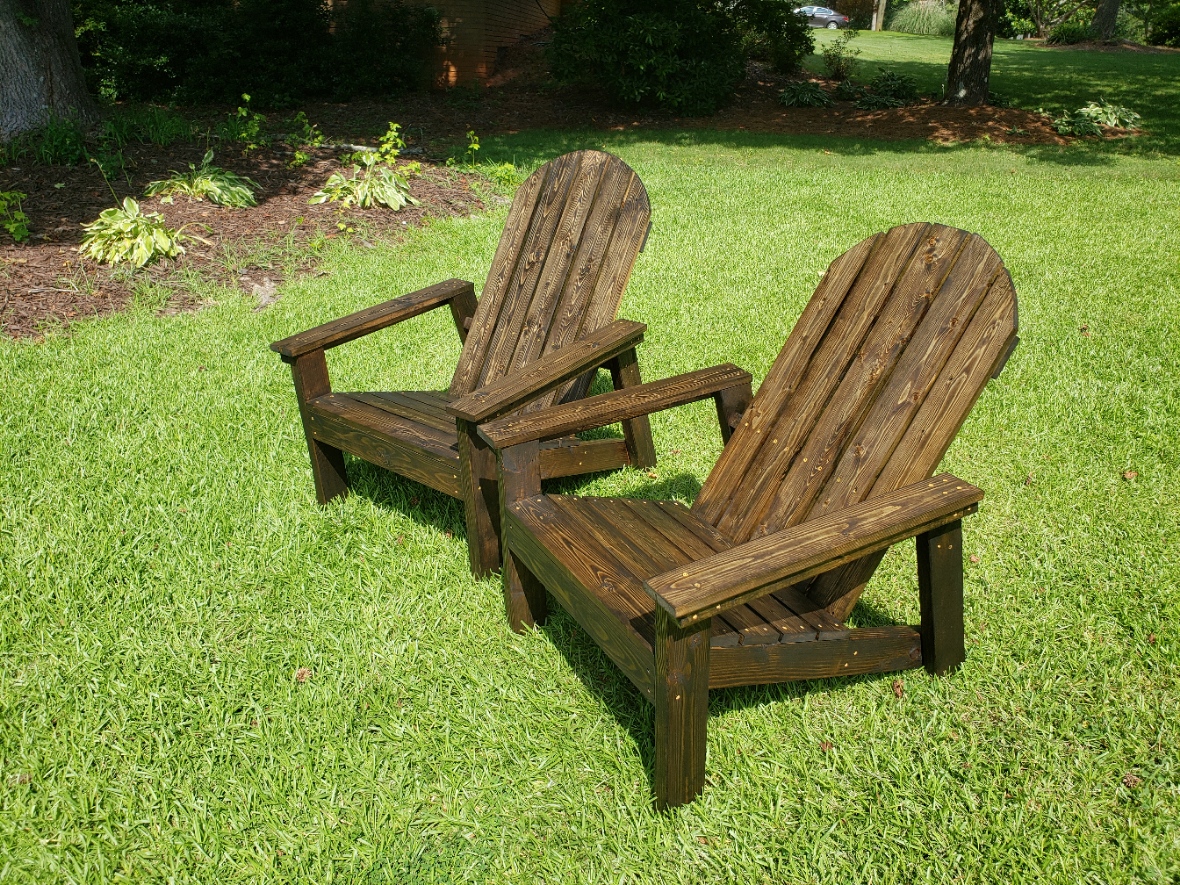
I've made 6 of these chairs! This was only my third woodworking project and I'm really happy with how they turned out. They are just the right size for me, I'm 5' 5", and my husband, he's 6'1". They are very comfortable and look great around the fire pit.

After building a few things from plans I decided to come up with something on my own, and from scraps I made this bench for my son.
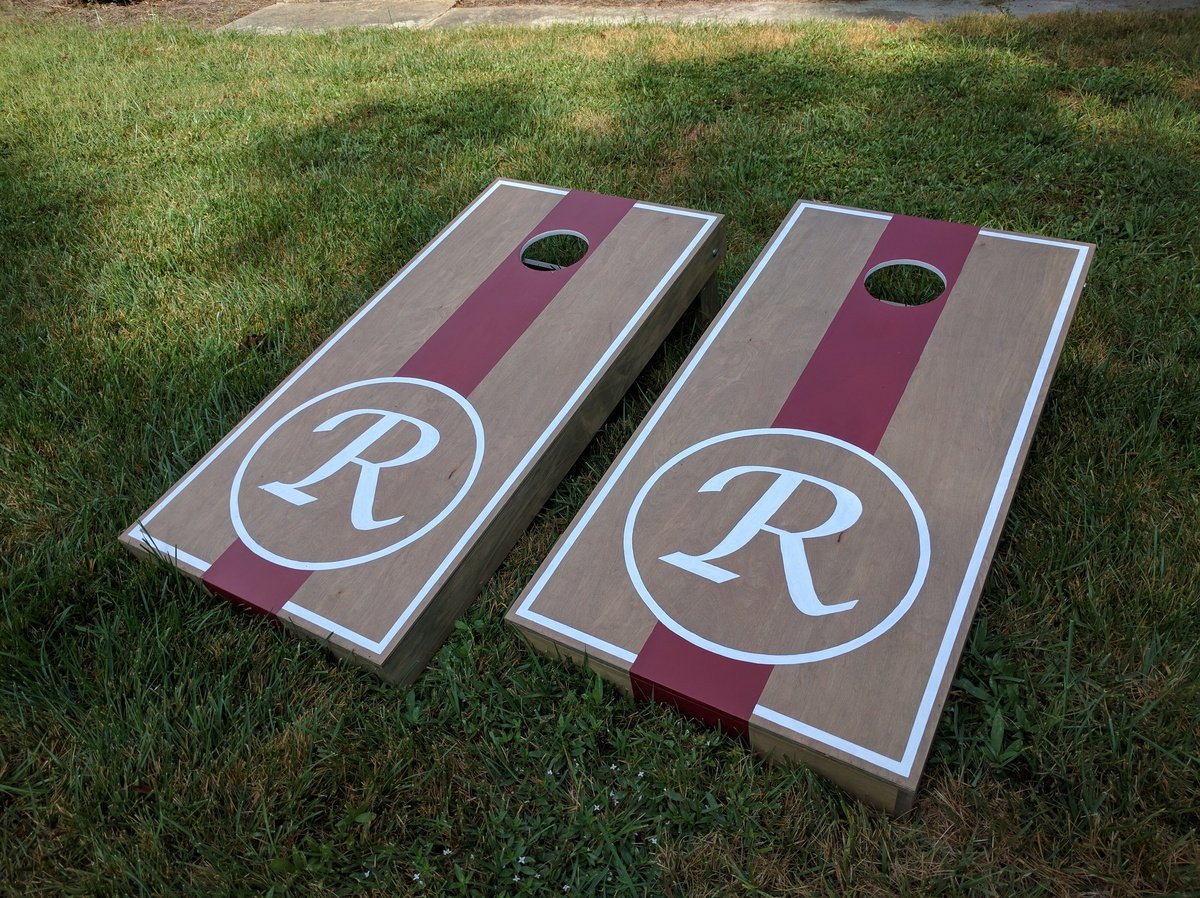
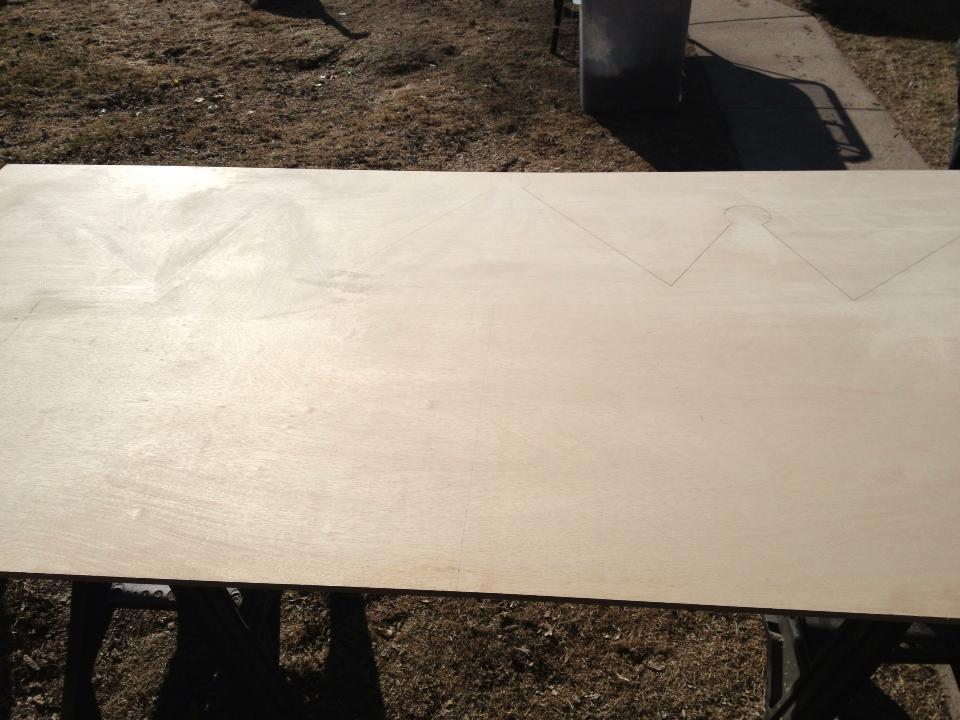
Cornhole boards for friends and family :) Used 1x4s for framing and legs, 1/2" ply for top.
"R" set: Birch plywood tops w/ (2) coats of Miniwax Weathered Oak oil stain. Red stripe is Behr 'Cherry Cola.' (3) coats of Polycrylic finish.
"AW" set: Regular plywood tops w/ (1) coat of Miniwax Special Walnut oil stain & Glidden 'Clemson Orange' stripe. (3) coats of Polycrylic finish.

Sat, 09/24/2016 - 10:16
Gorgeous! These would make such a fabulous wedding or house warming gift!
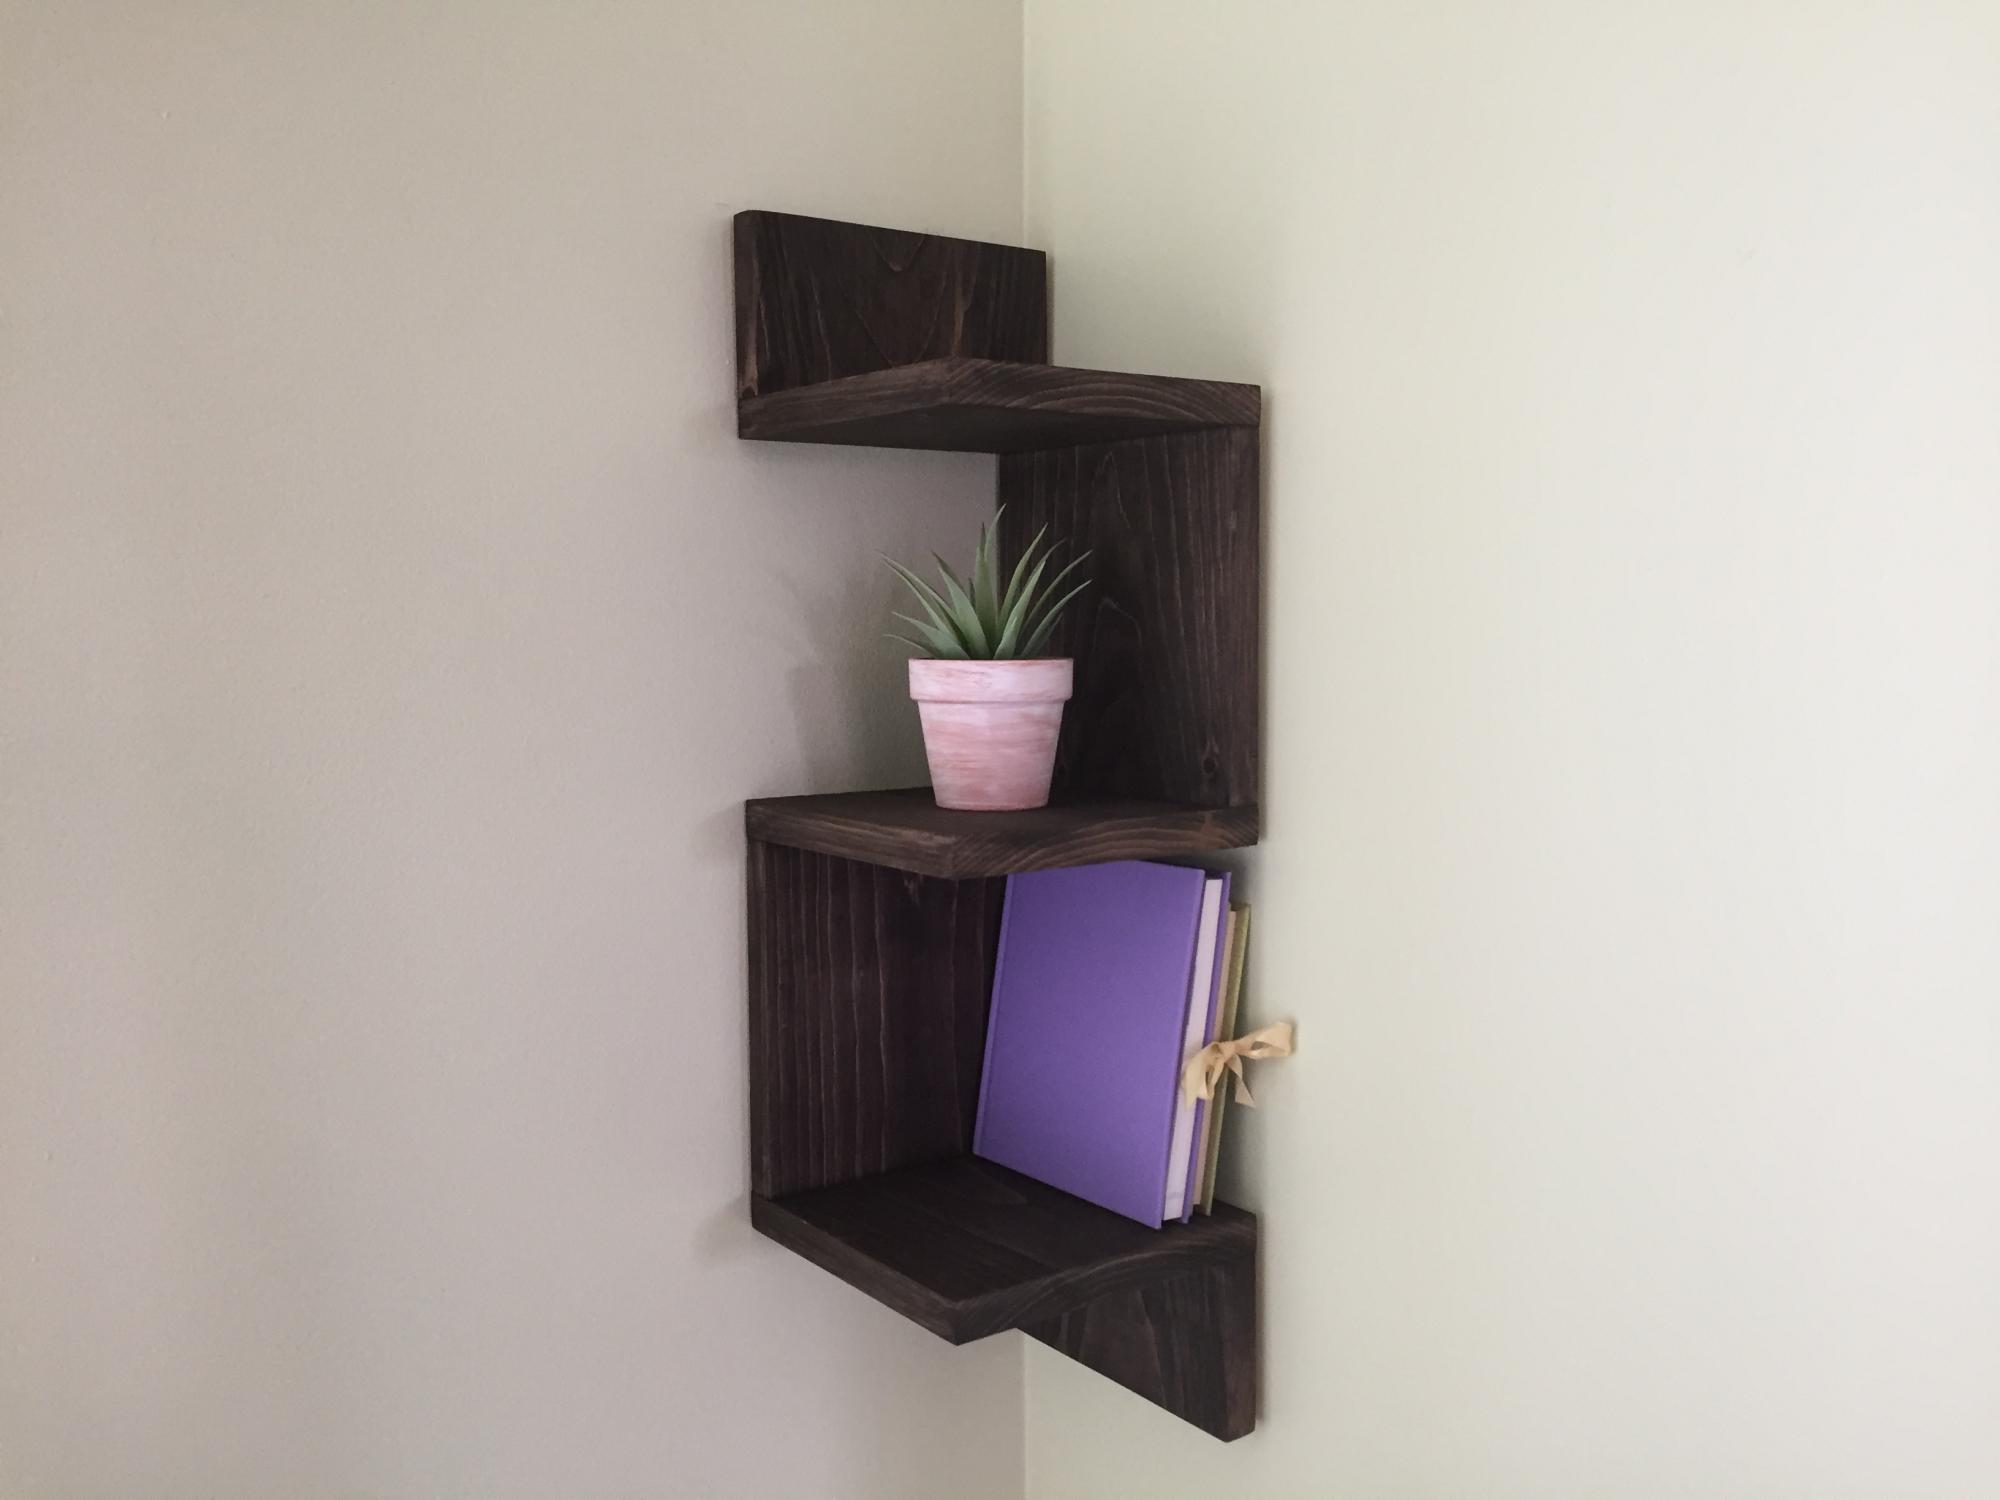
I built these beautiful corner shelves for a friend. It is a great beginner project. I used a 1x8 board but you could also use a 1x10 board. You could also build 5 shelves instead of 3. I used pocket hole joinery.
