Community Brag Posts

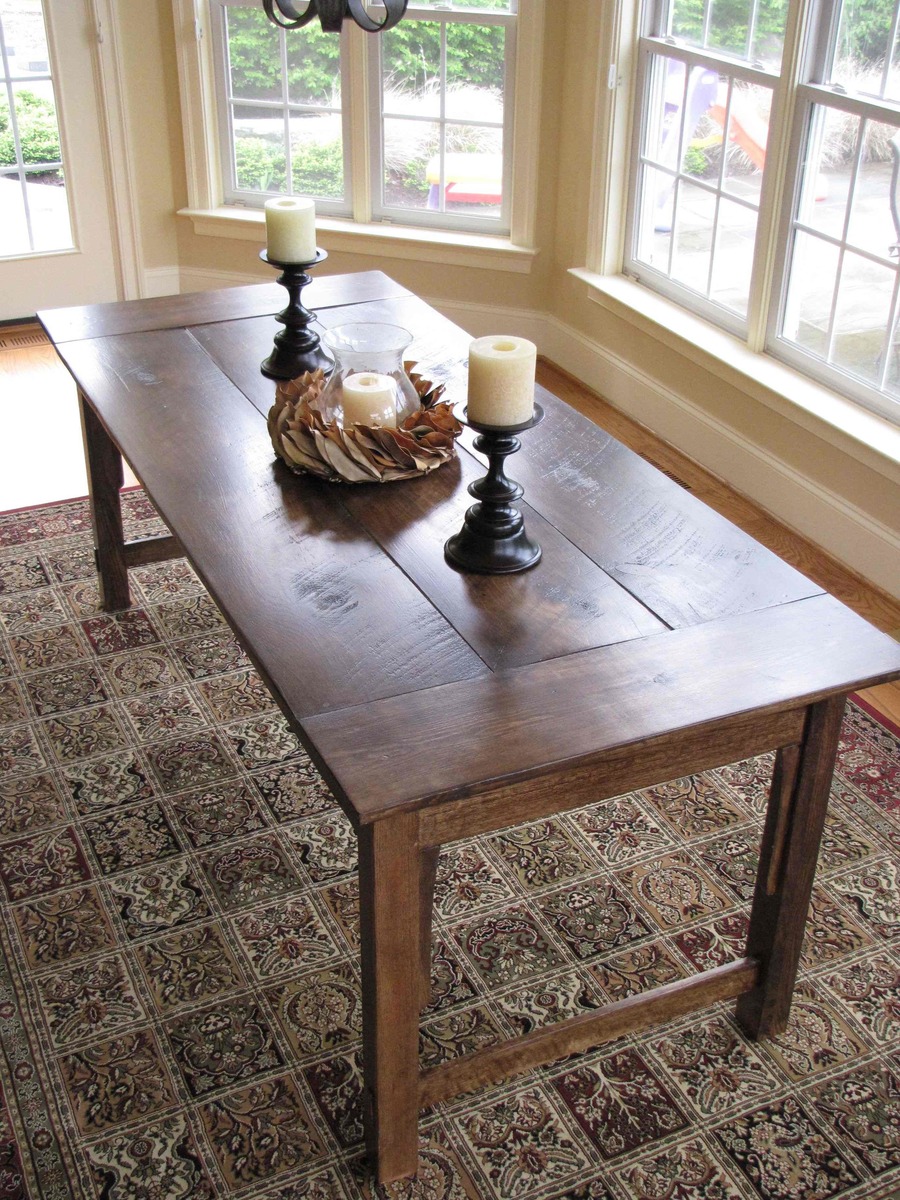
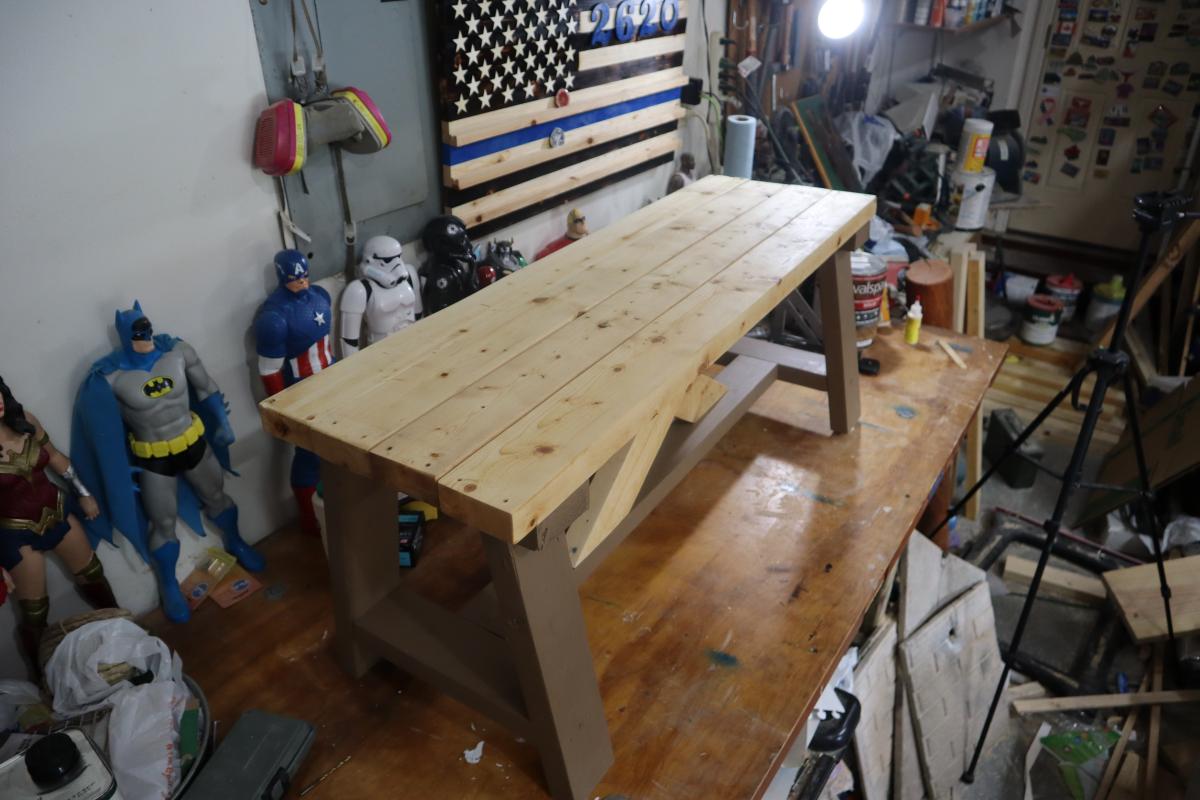
reclaimed timber farmhouse table - first build

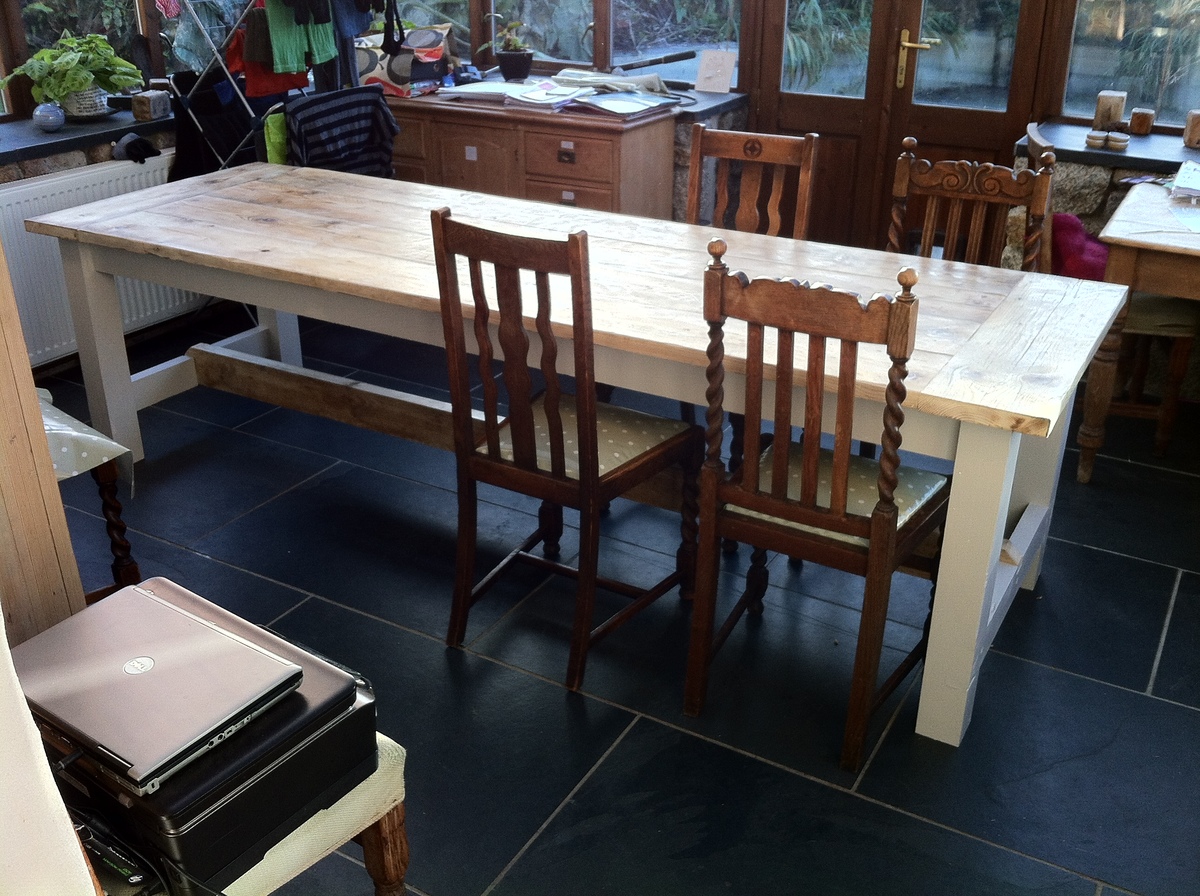
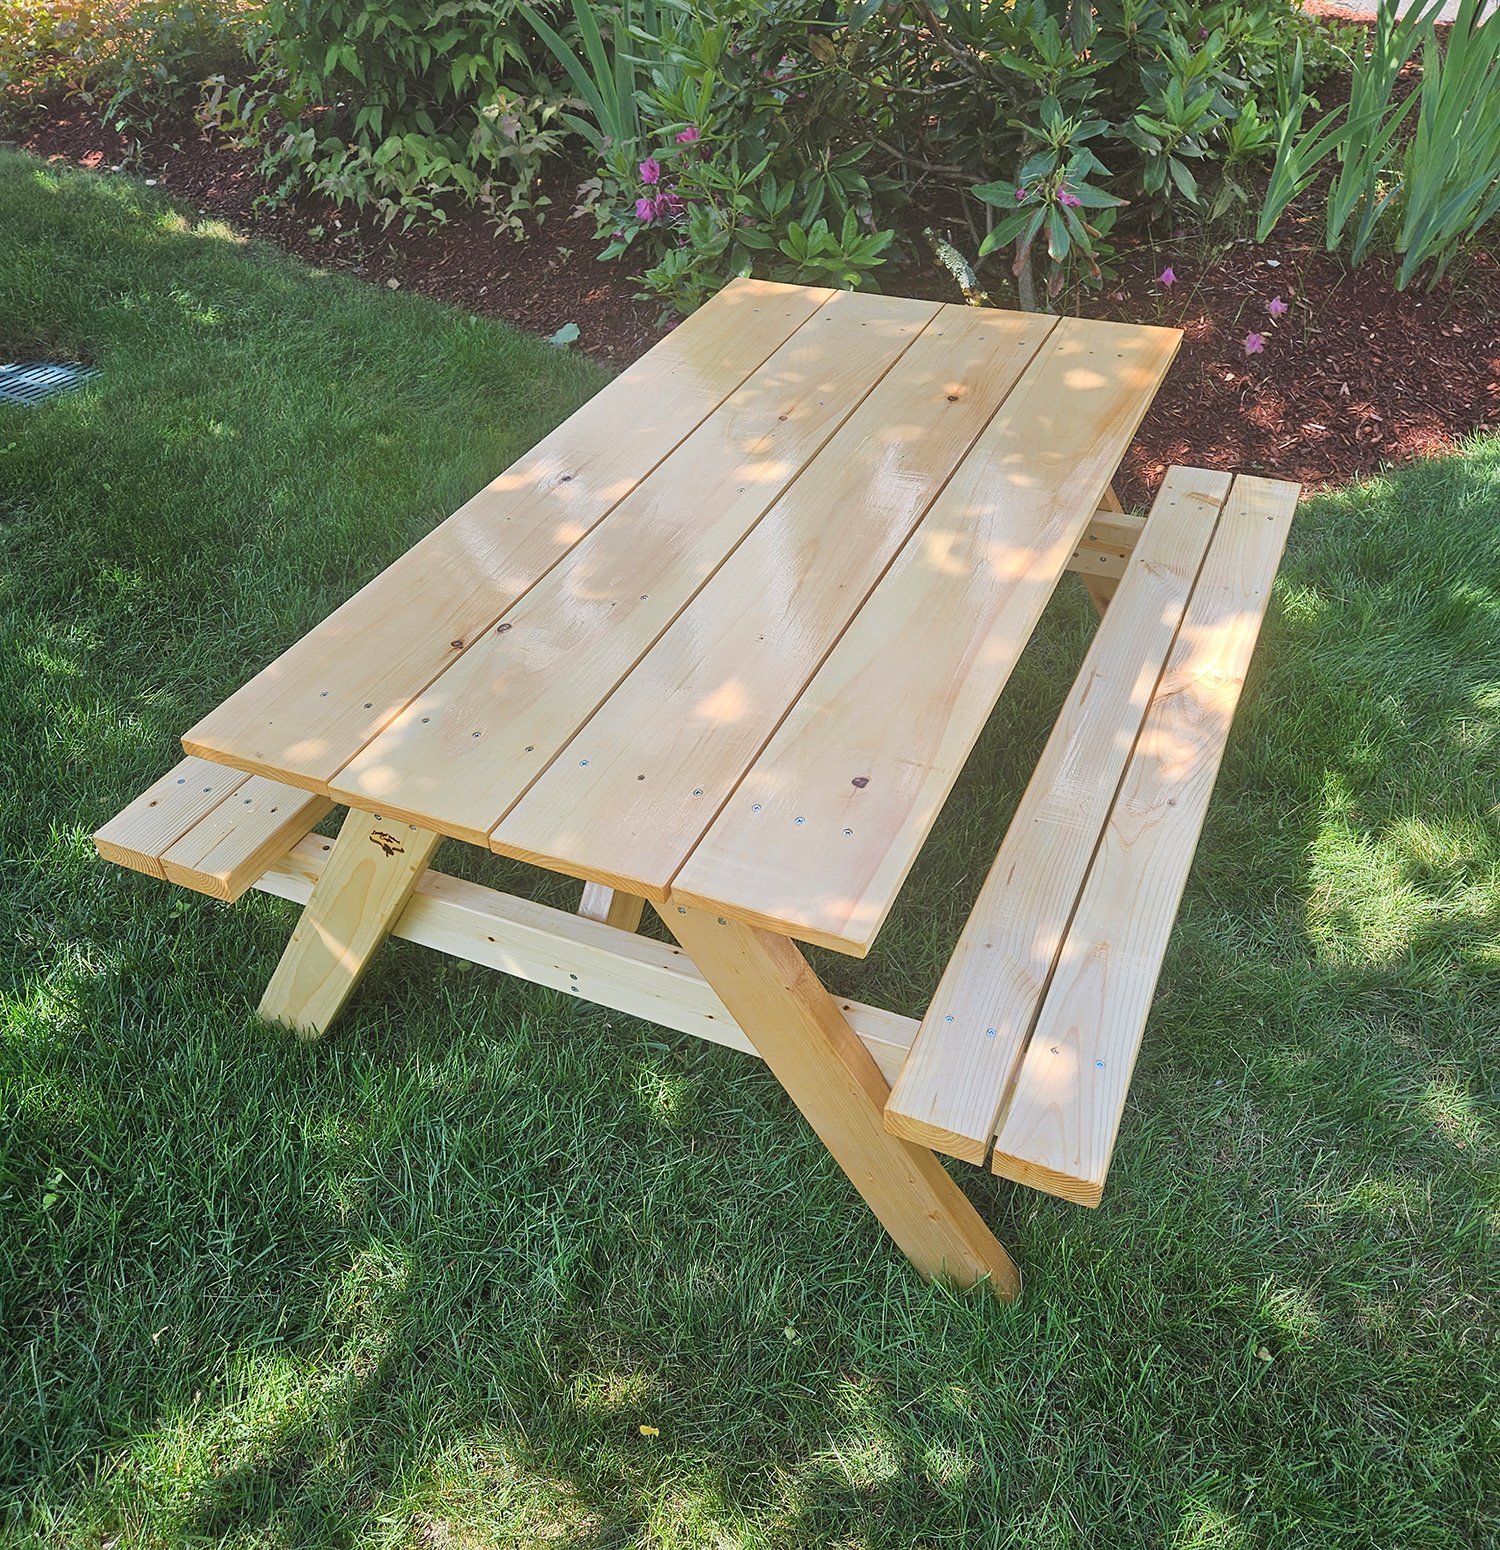
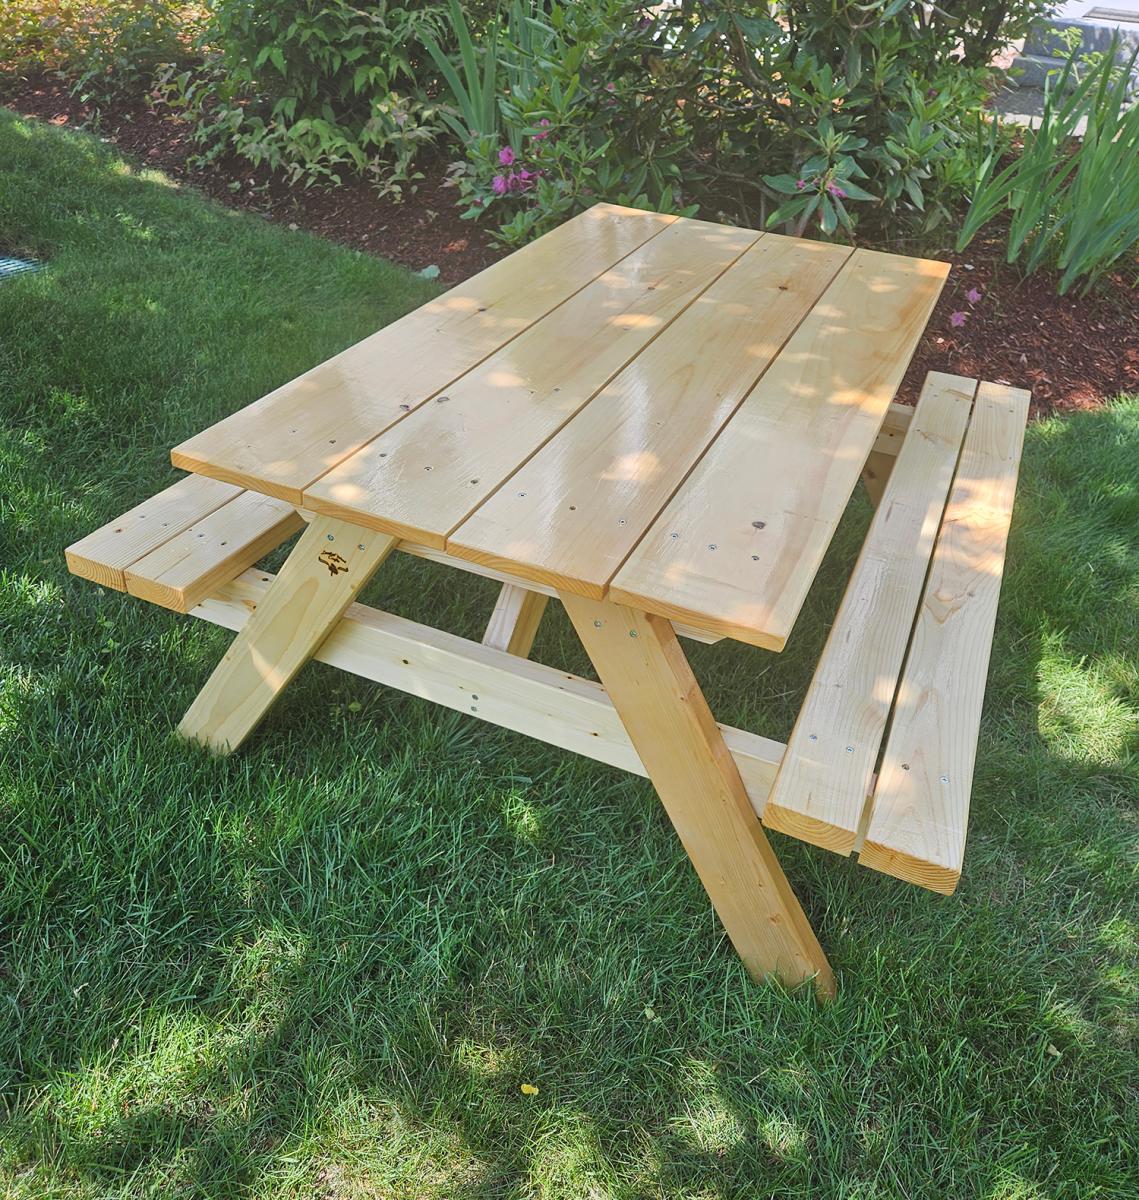
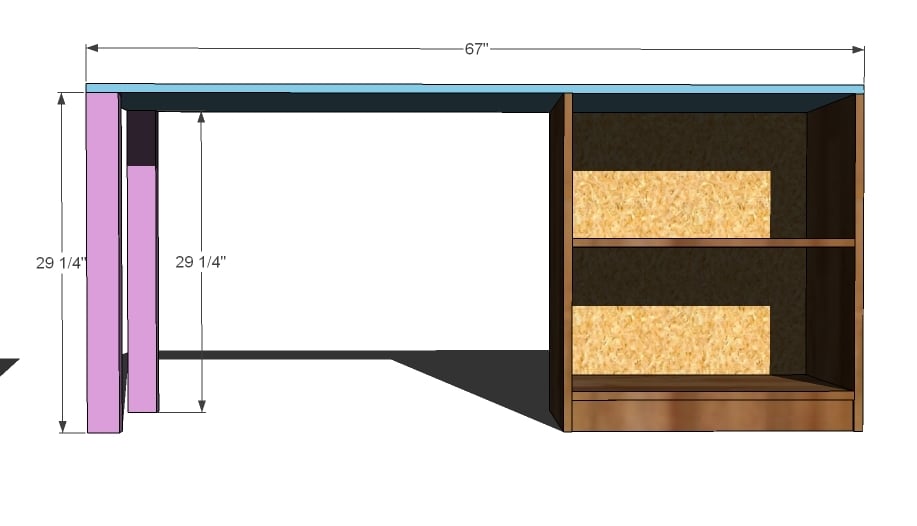
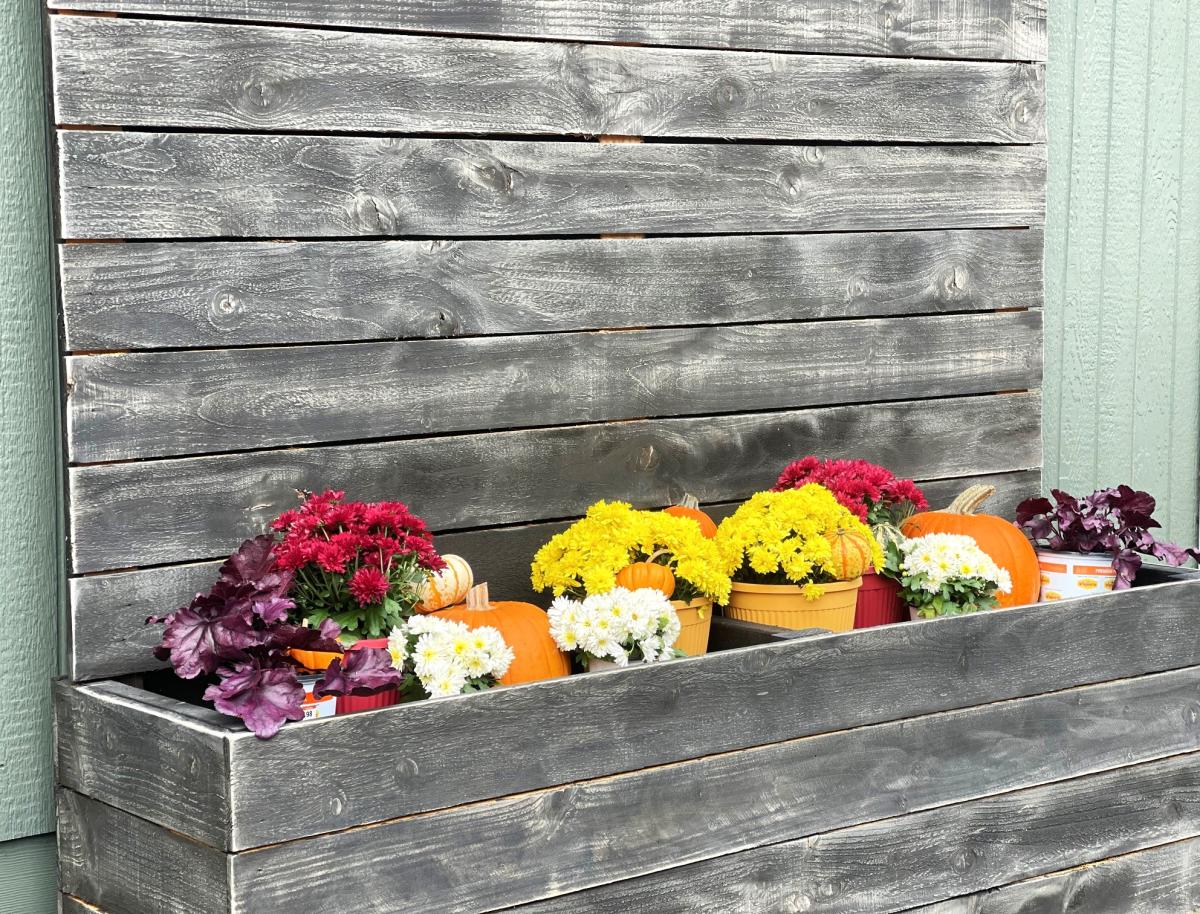
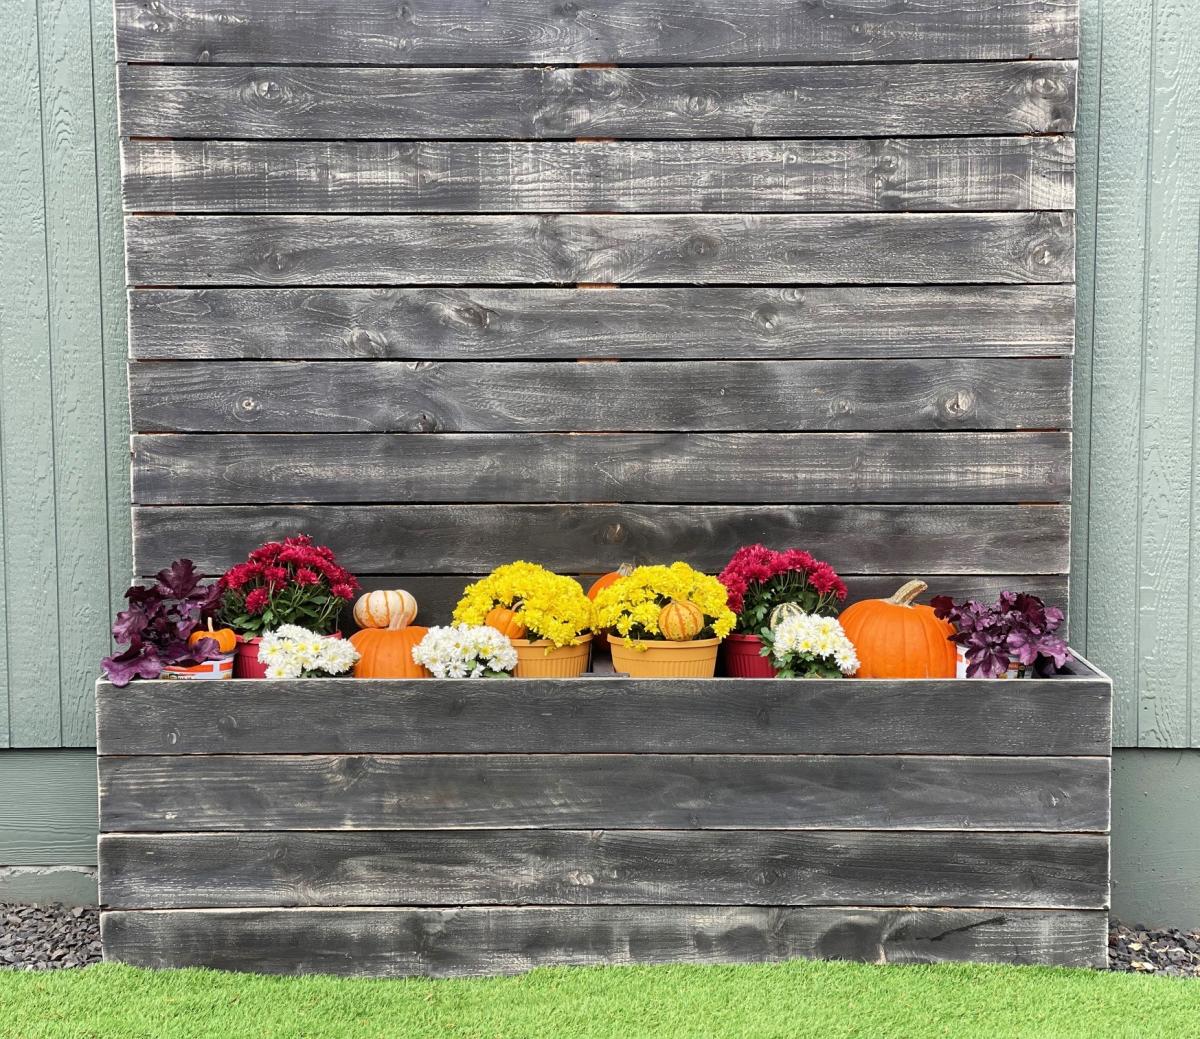
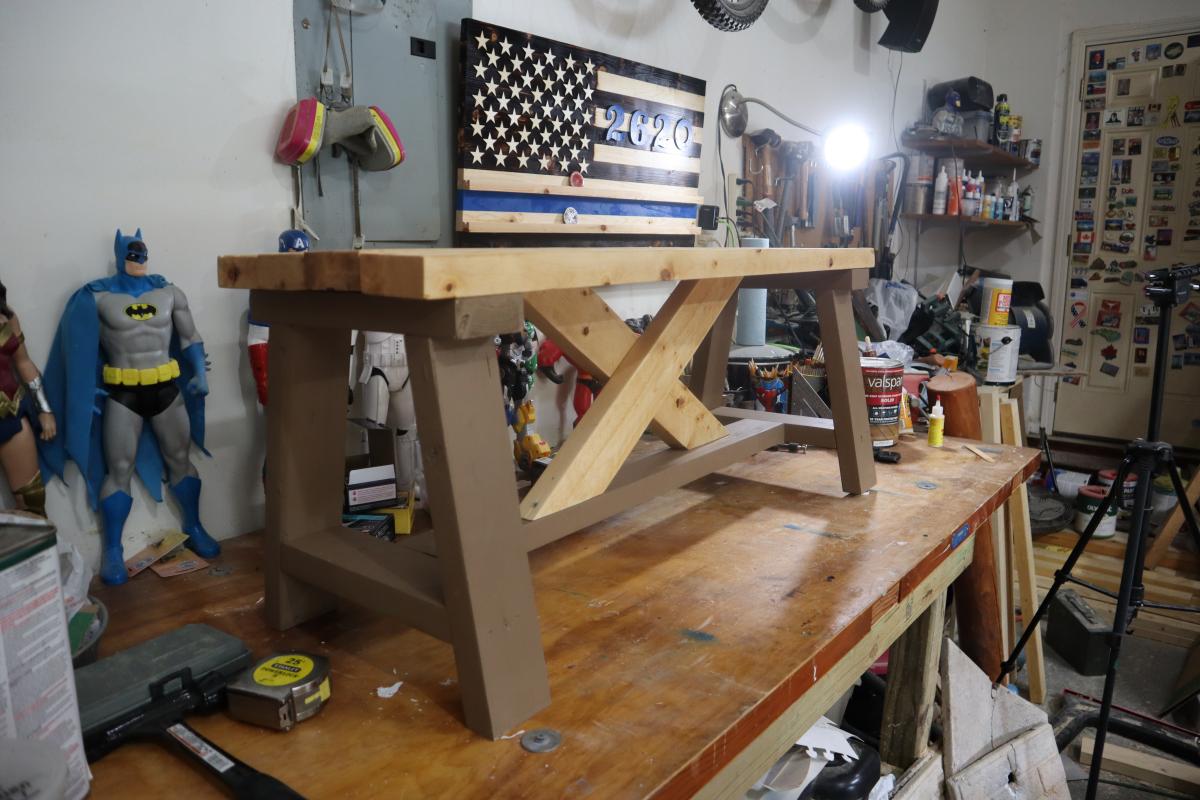
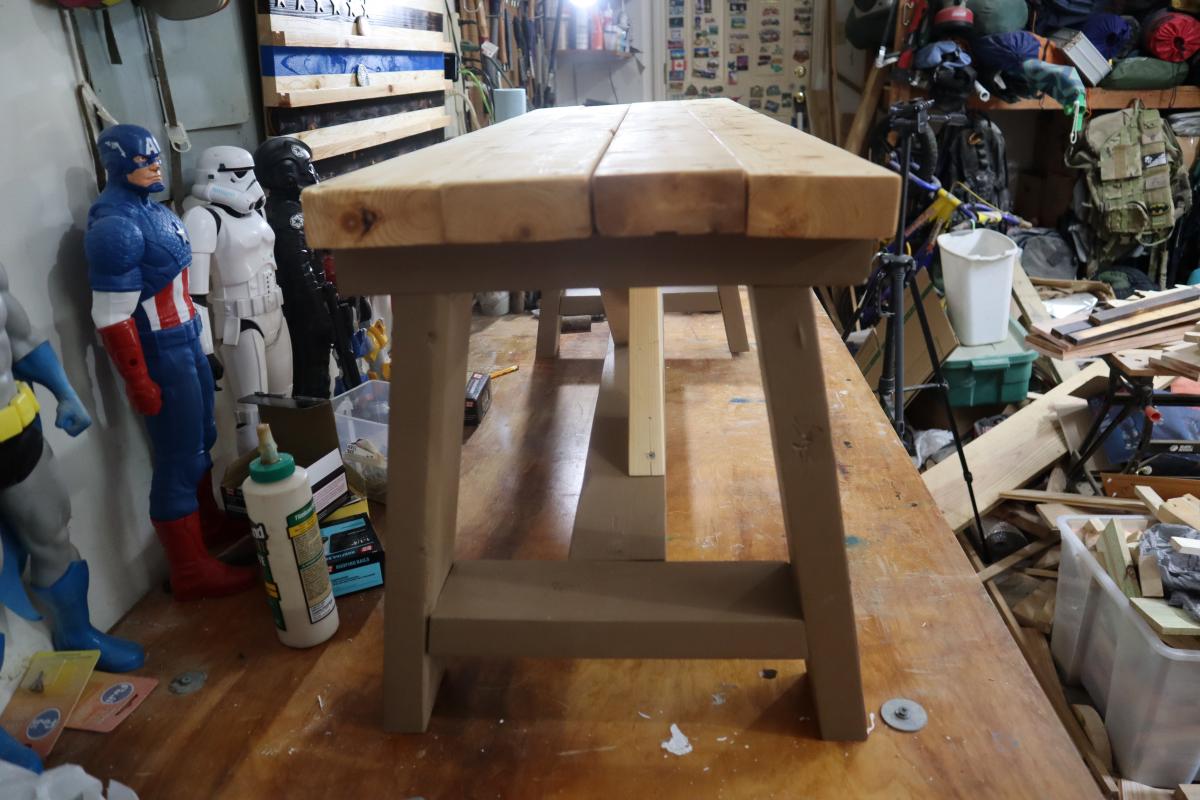
wanted a big table for christmas, this is over 8 foot, and we couldn't afford a table like that so having seen the site thought i'd try and build one. thanks for the plans absolutely great
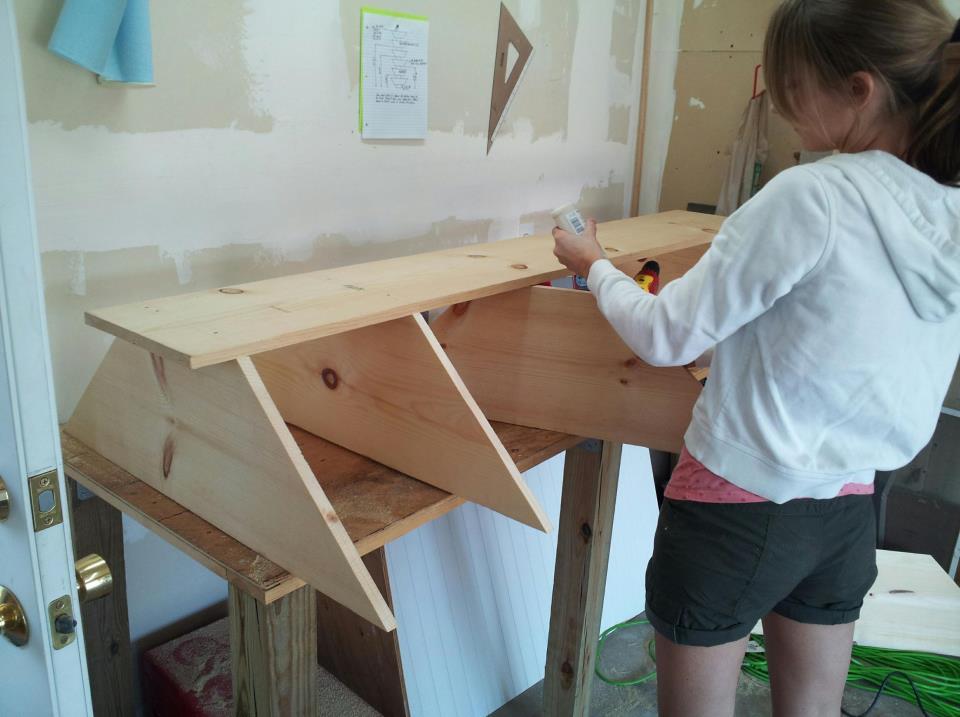
first project, no real woodwork experience but competent diy-er

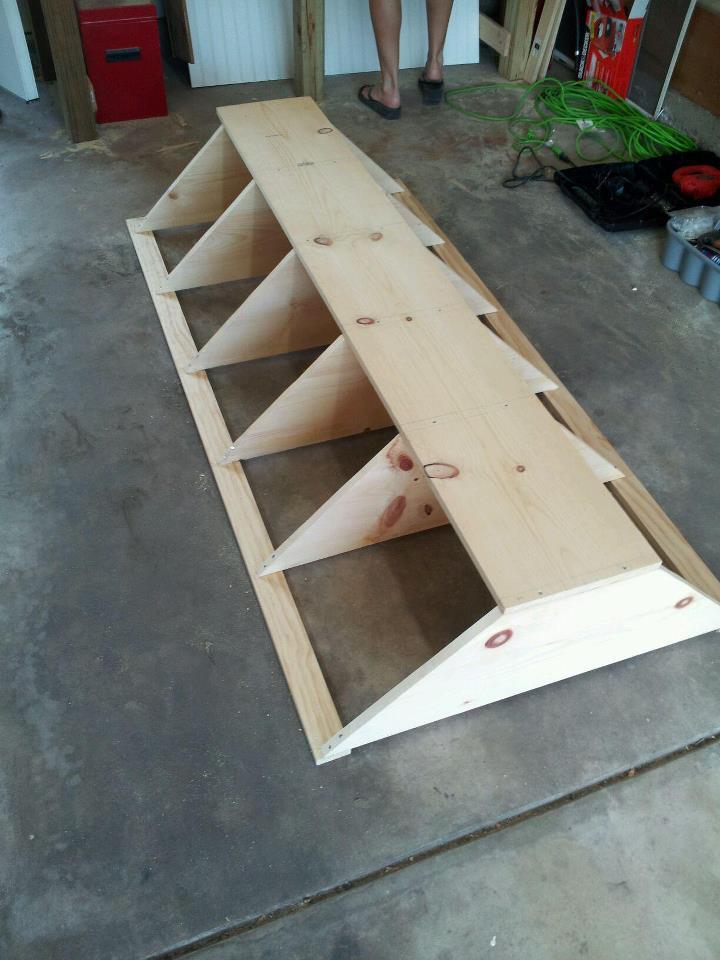
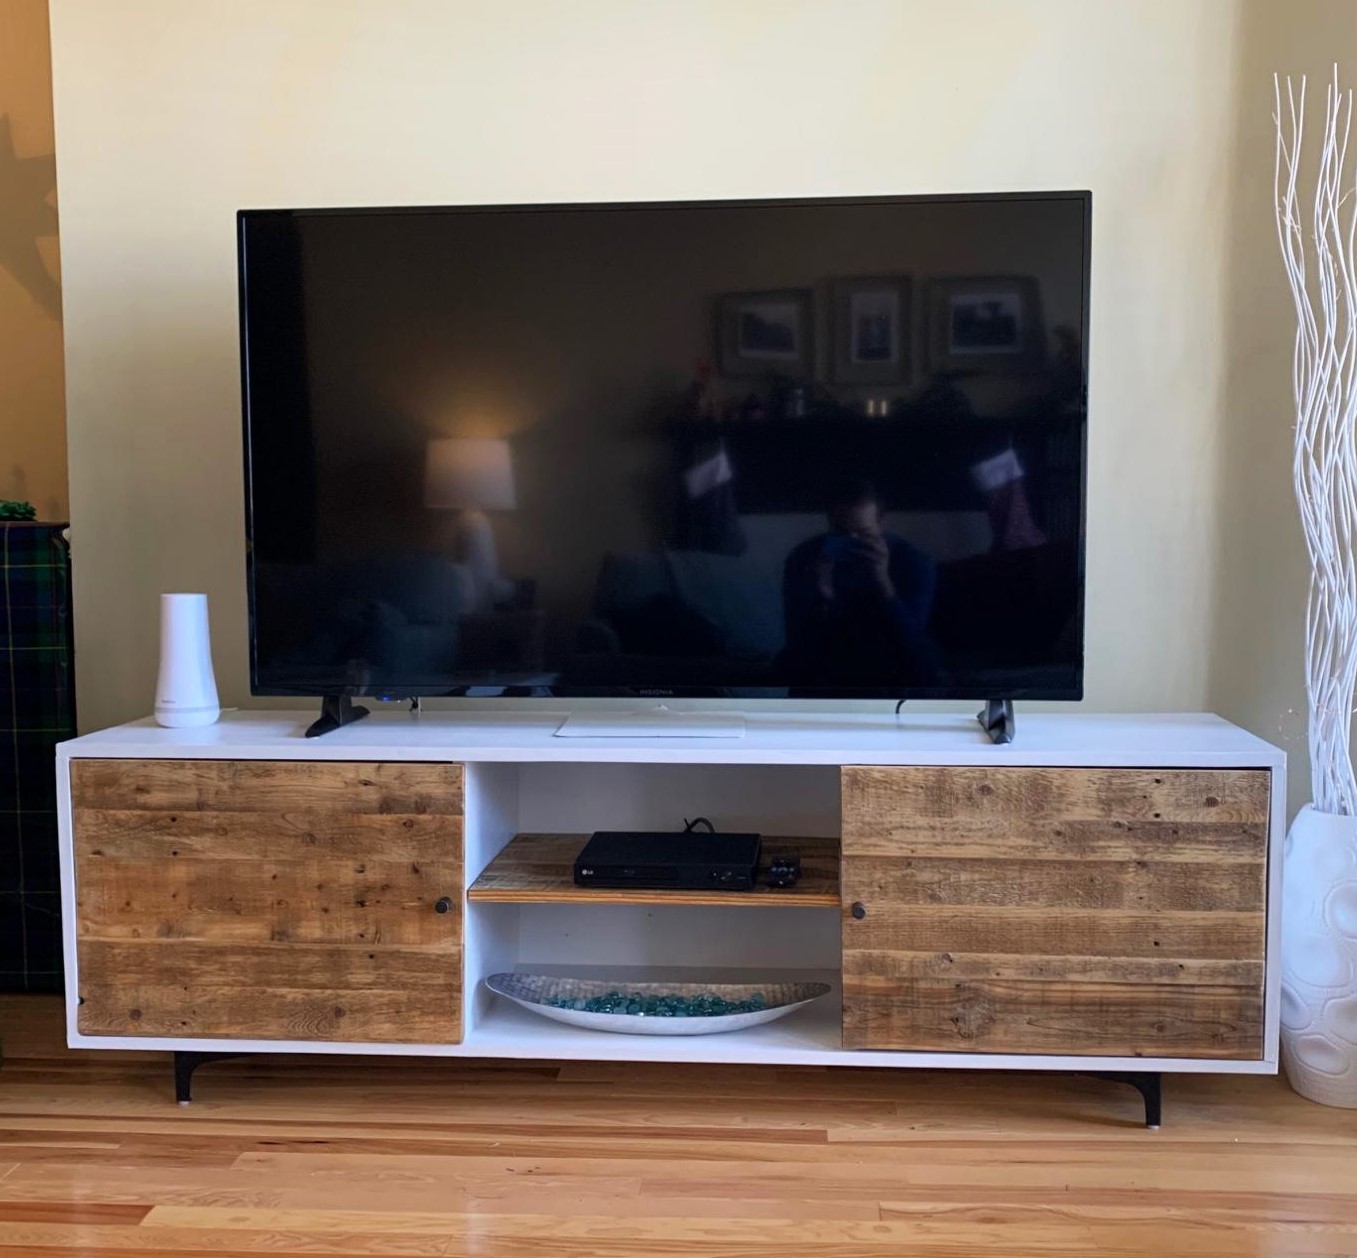
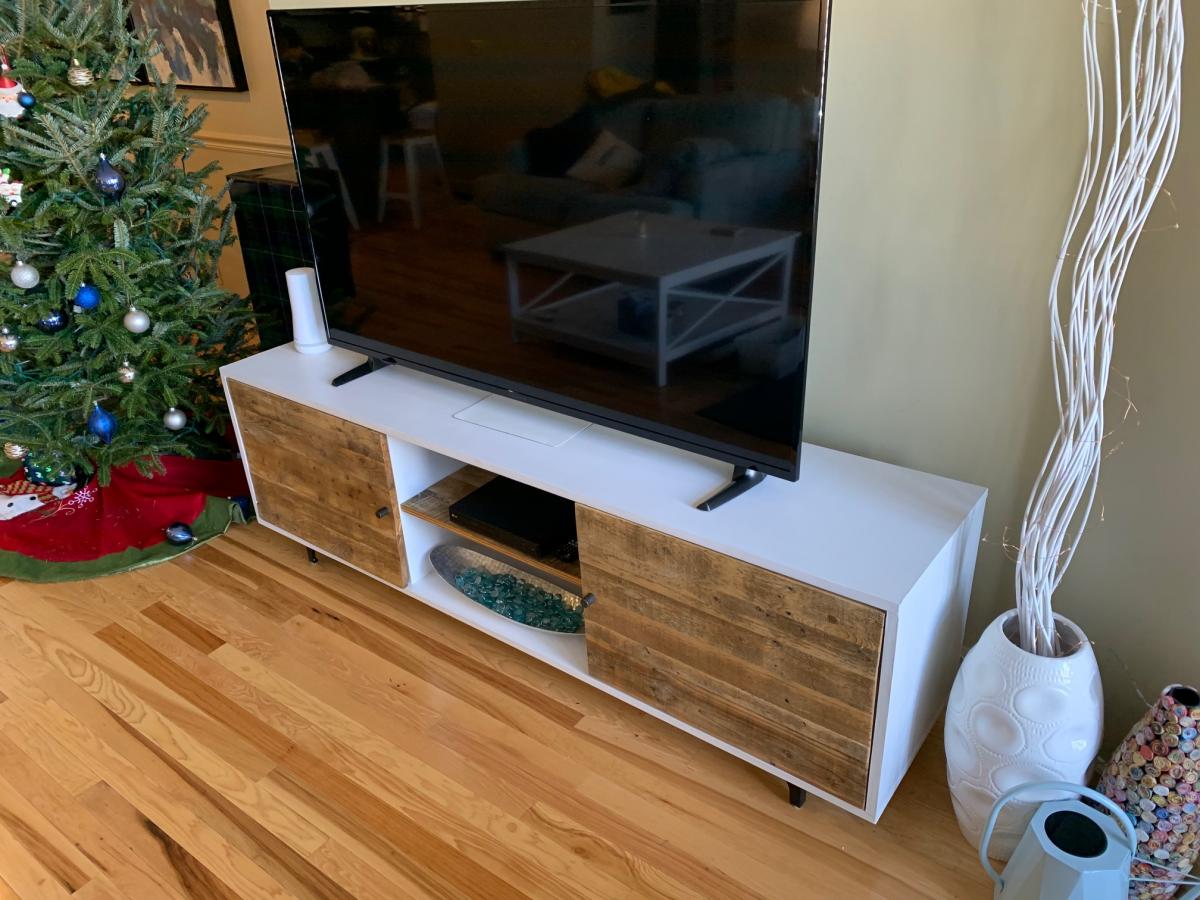
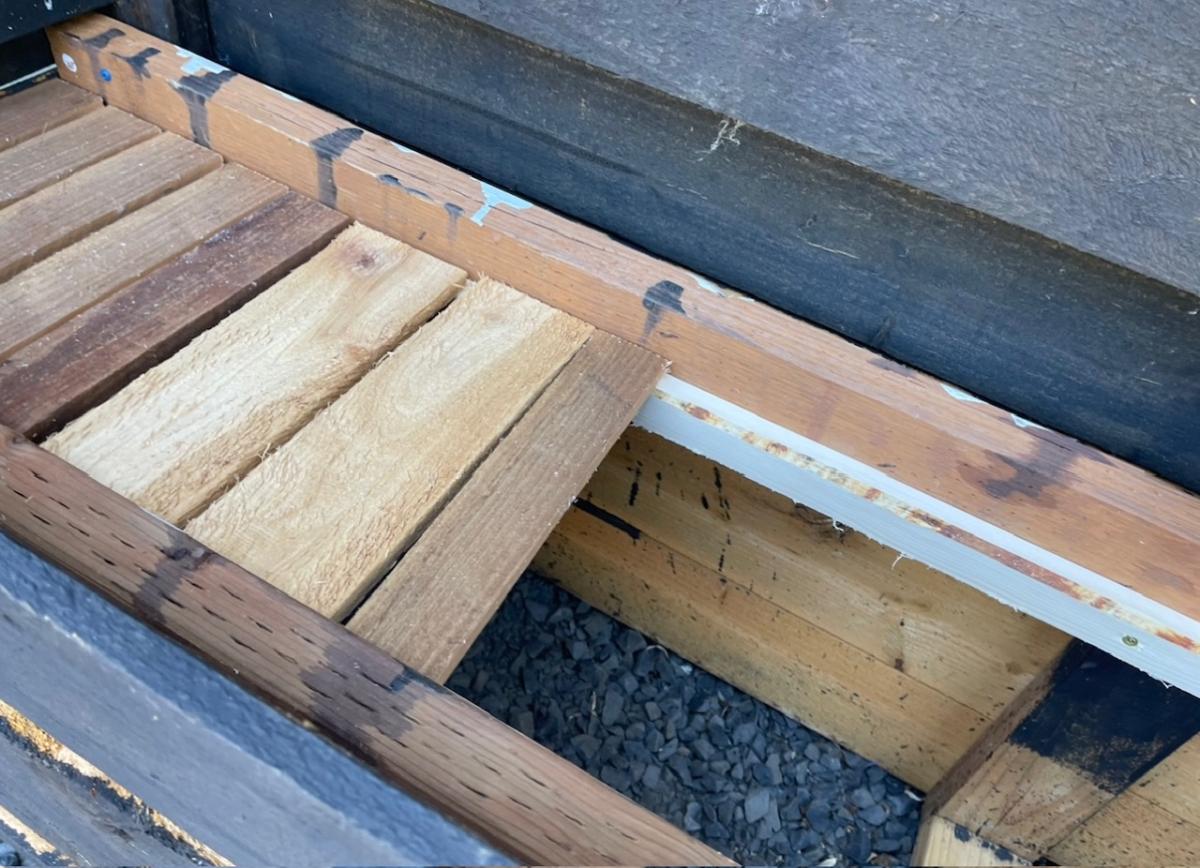
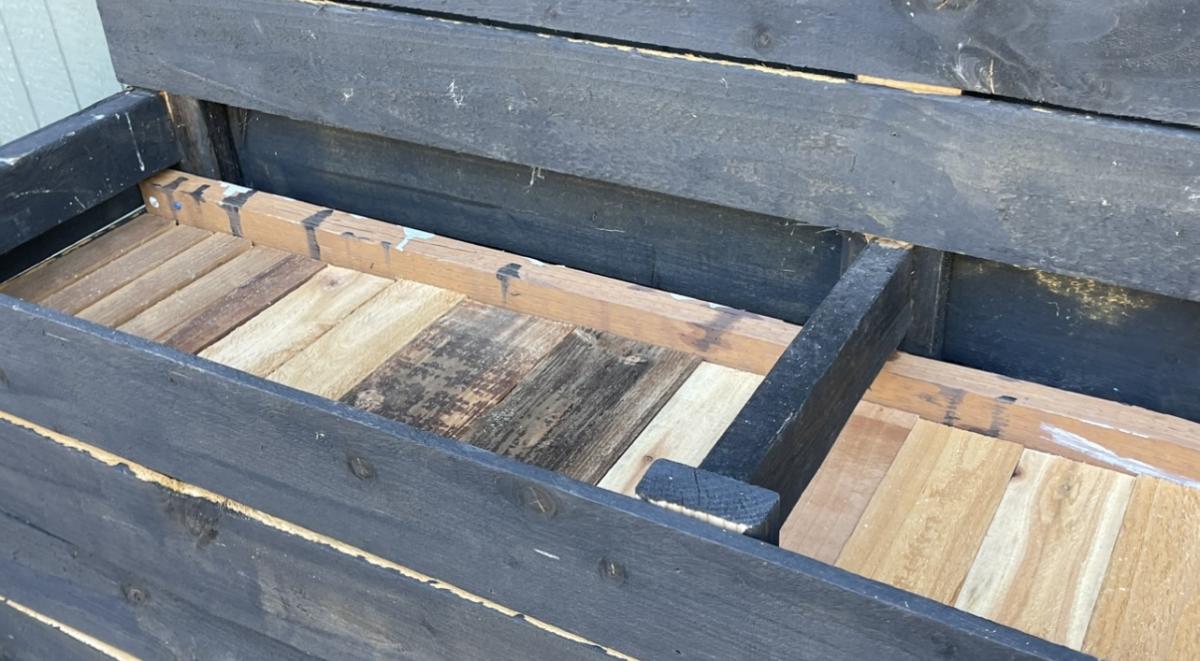
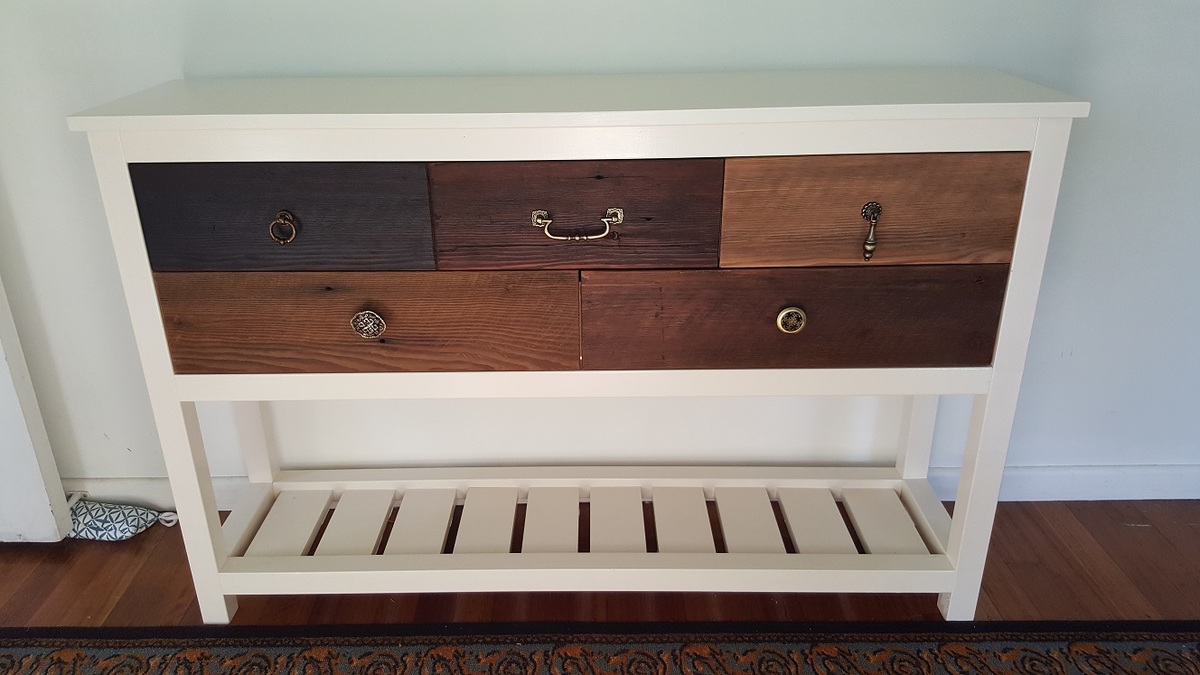
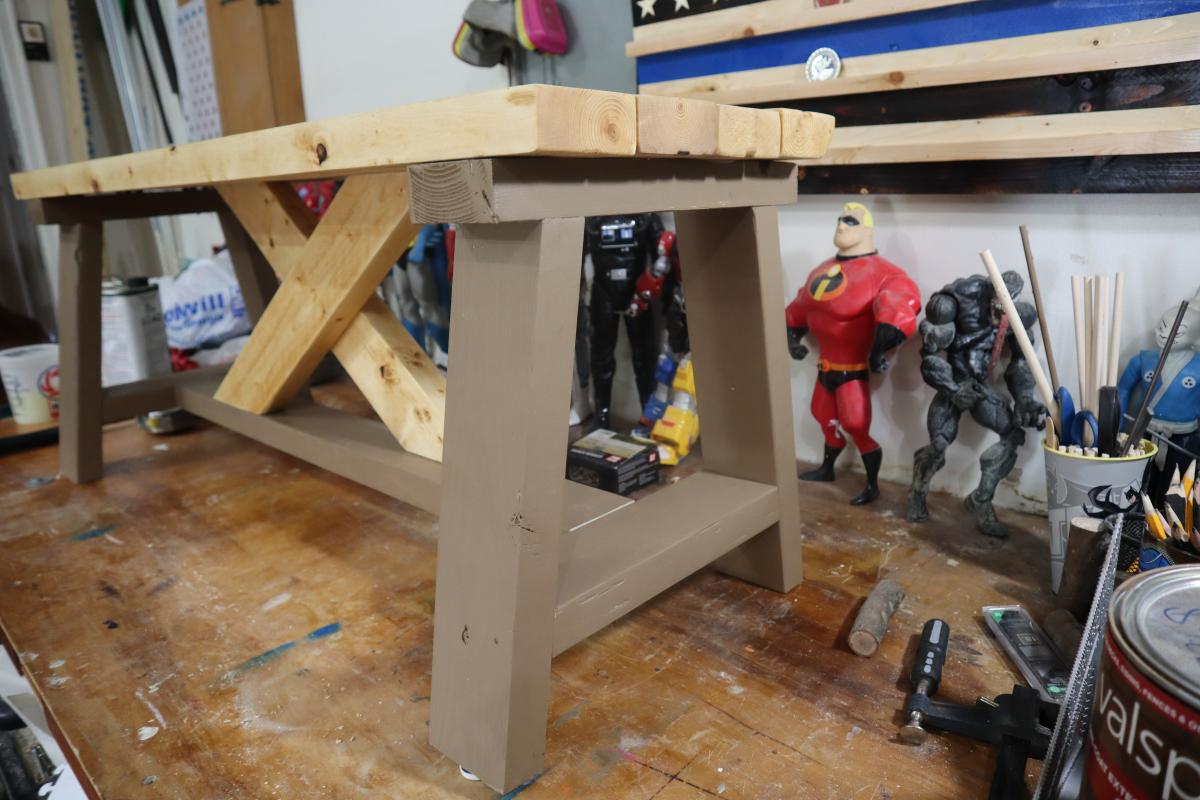
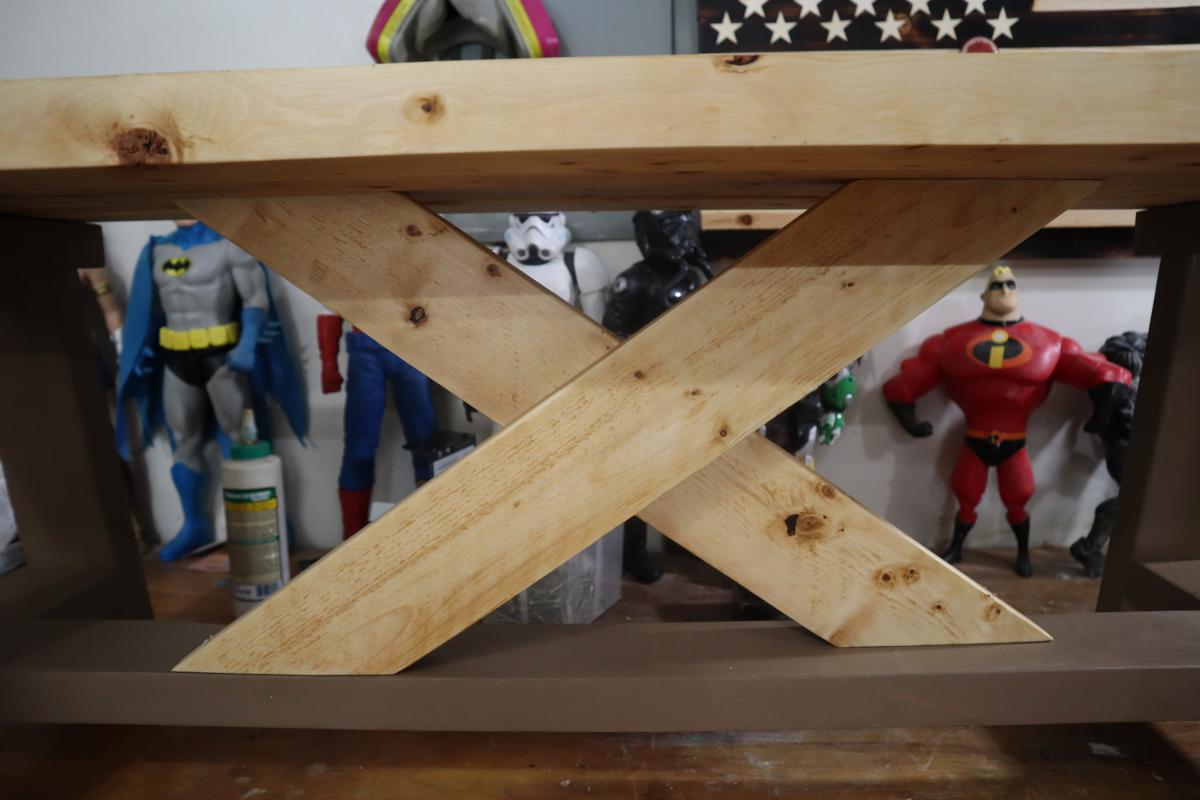
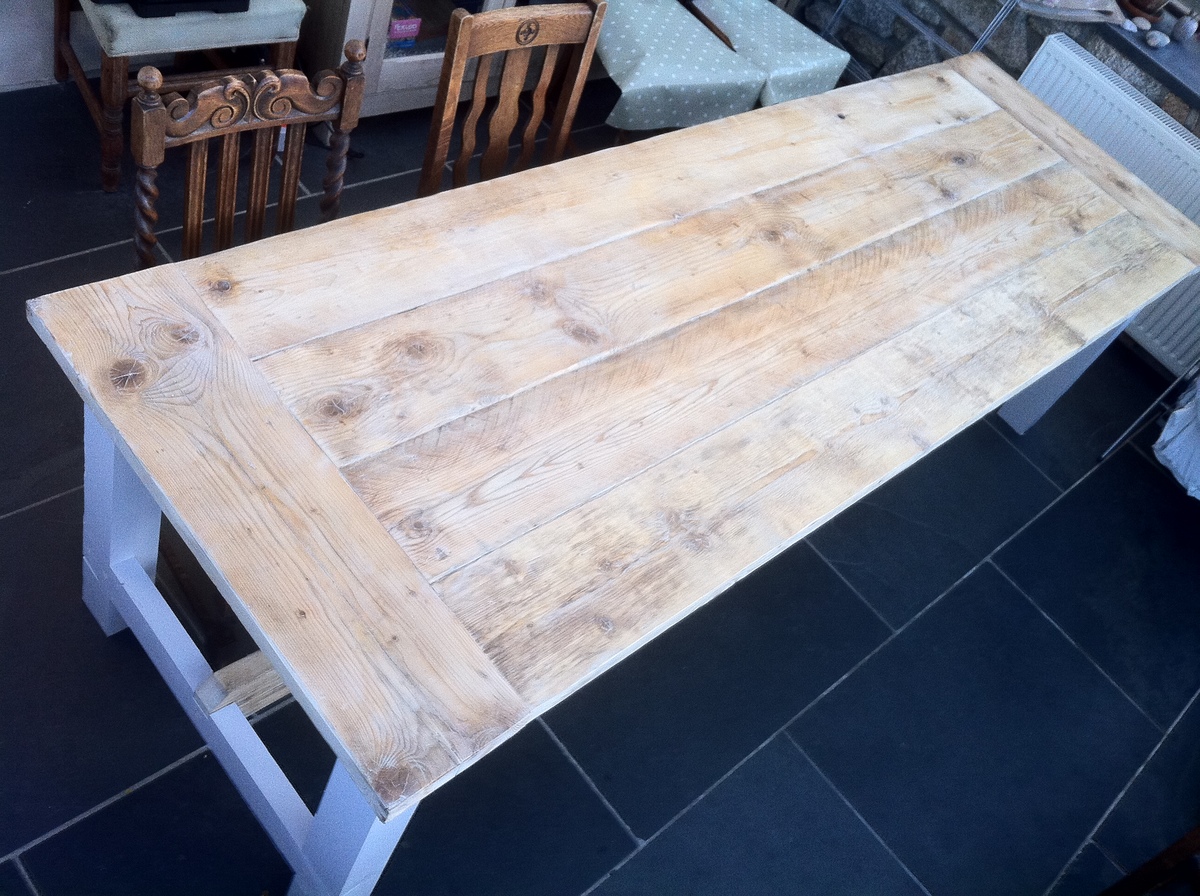
made mainly out of reclaimed wood, the top and side apron are made of old scaffold boards and the main brace a chunk of wood form my neighbours shed.

i did have to buy some 2x4s for the legs and the cross braces

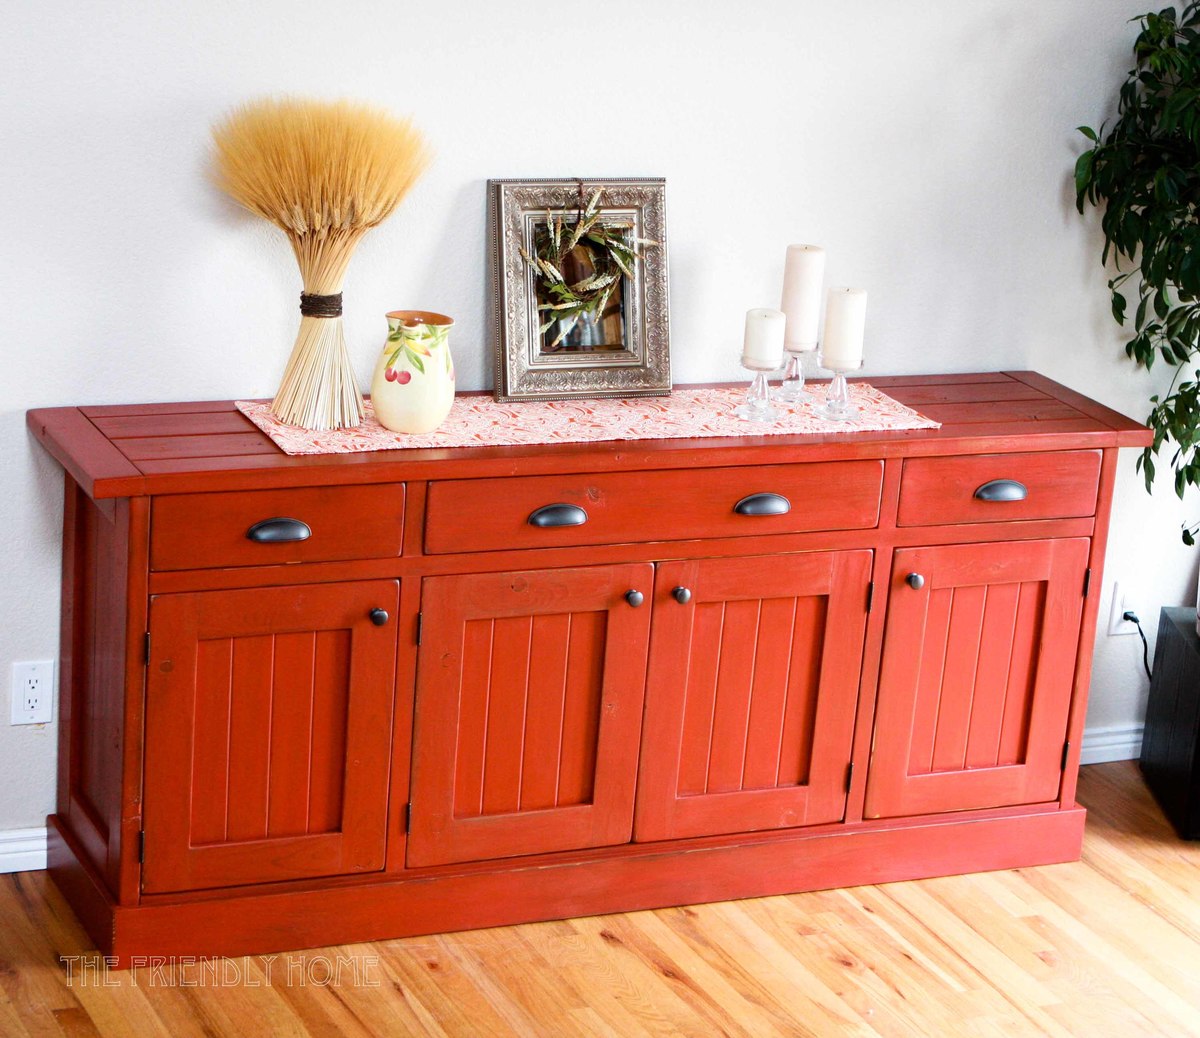
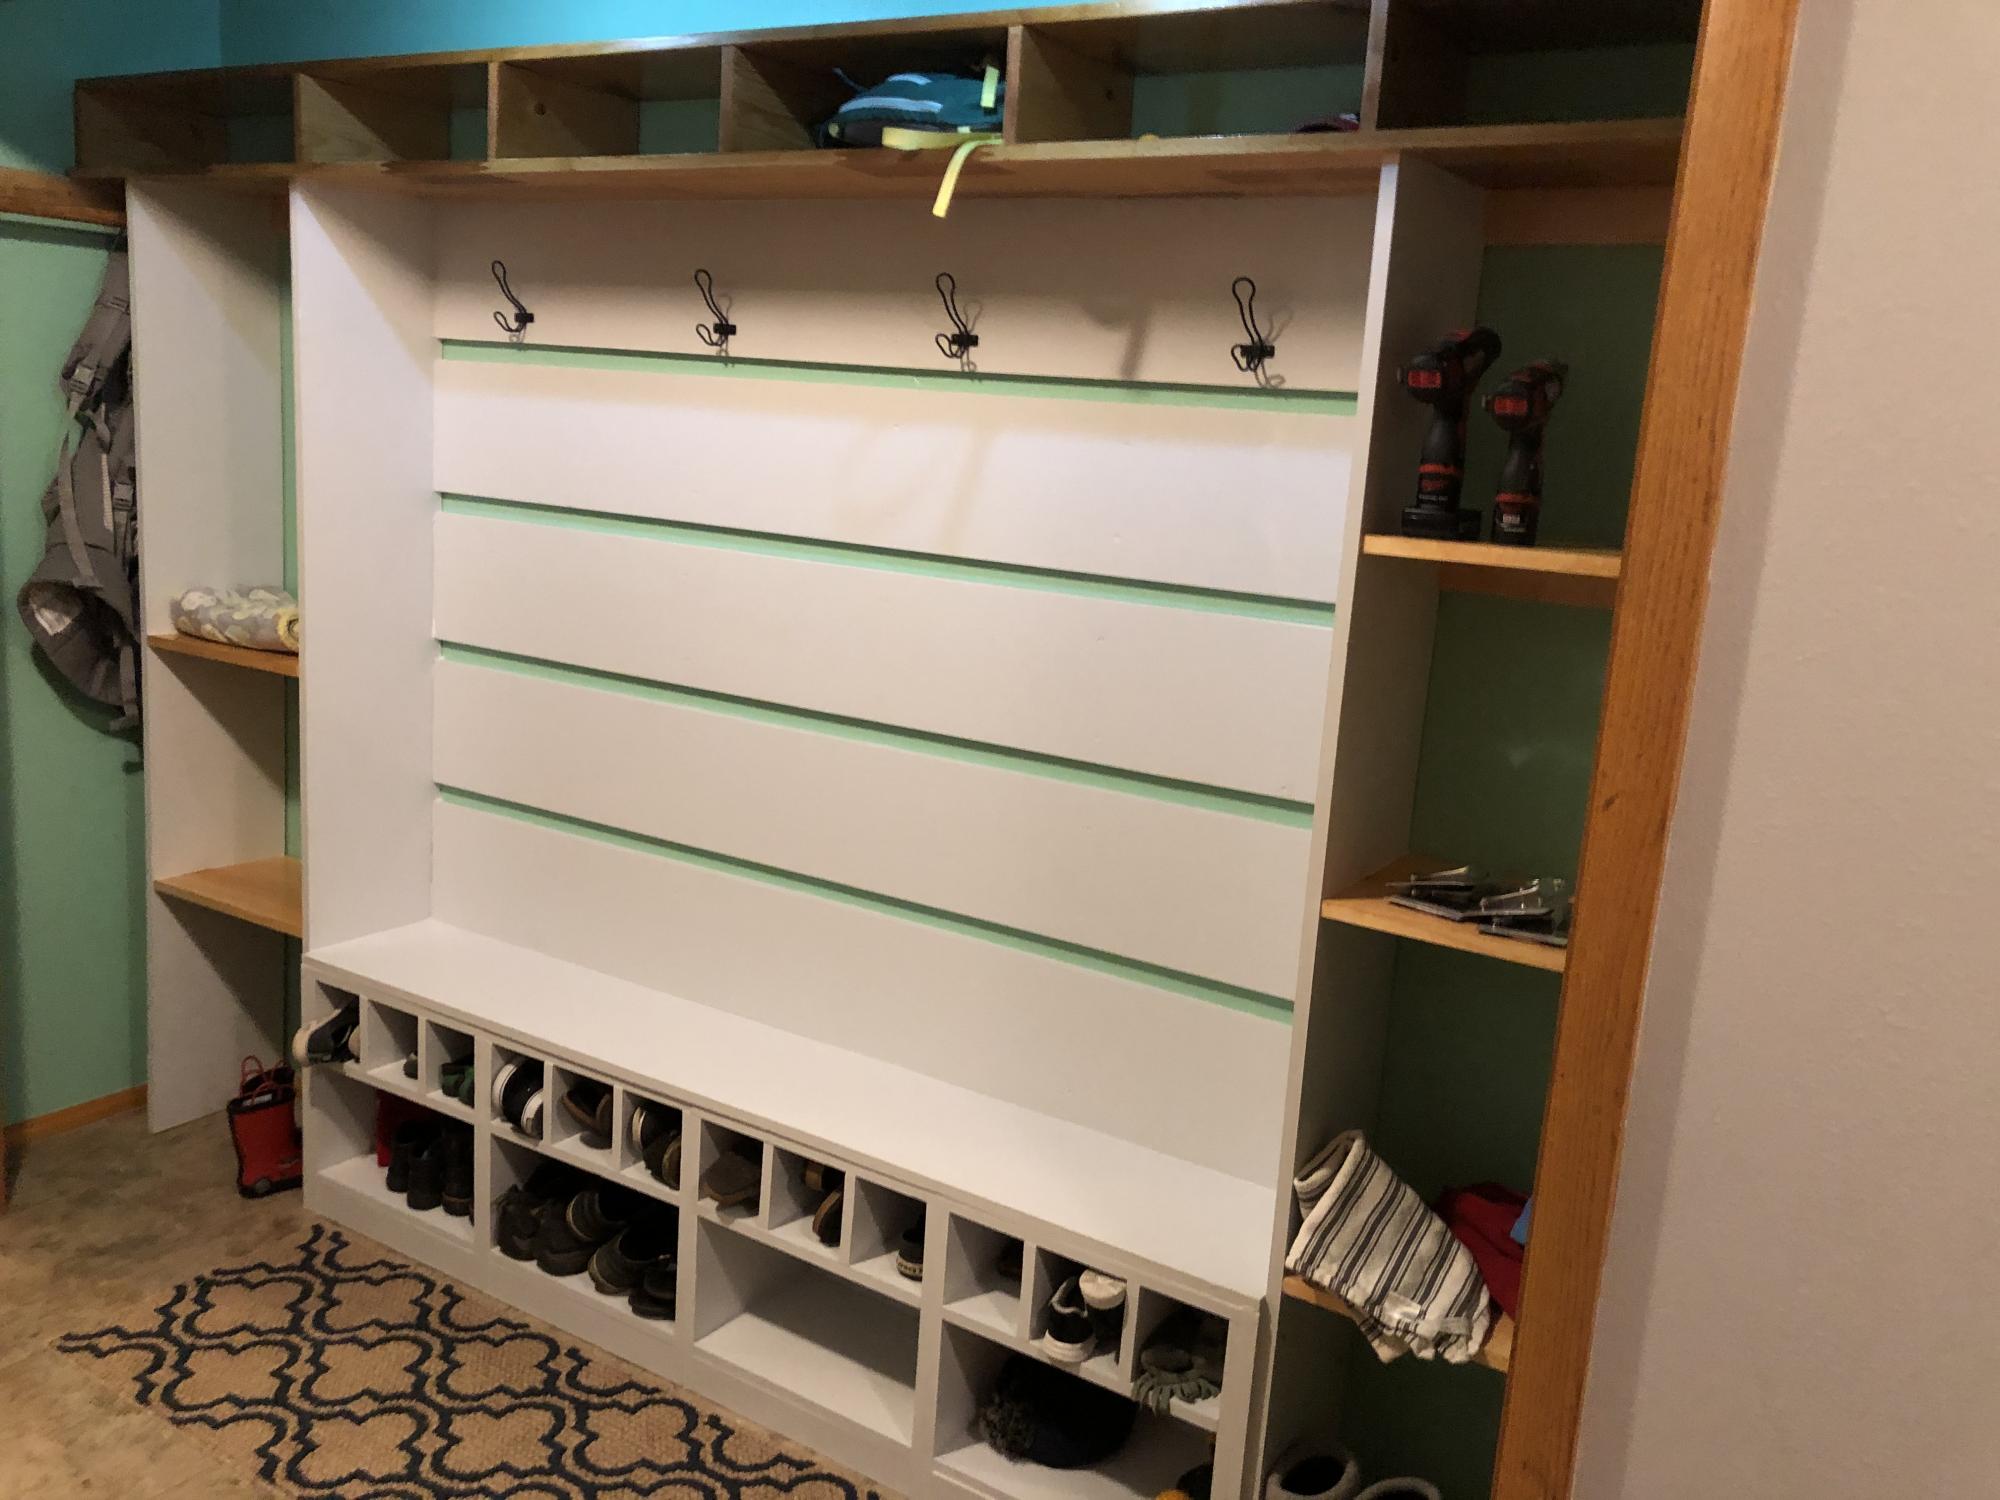
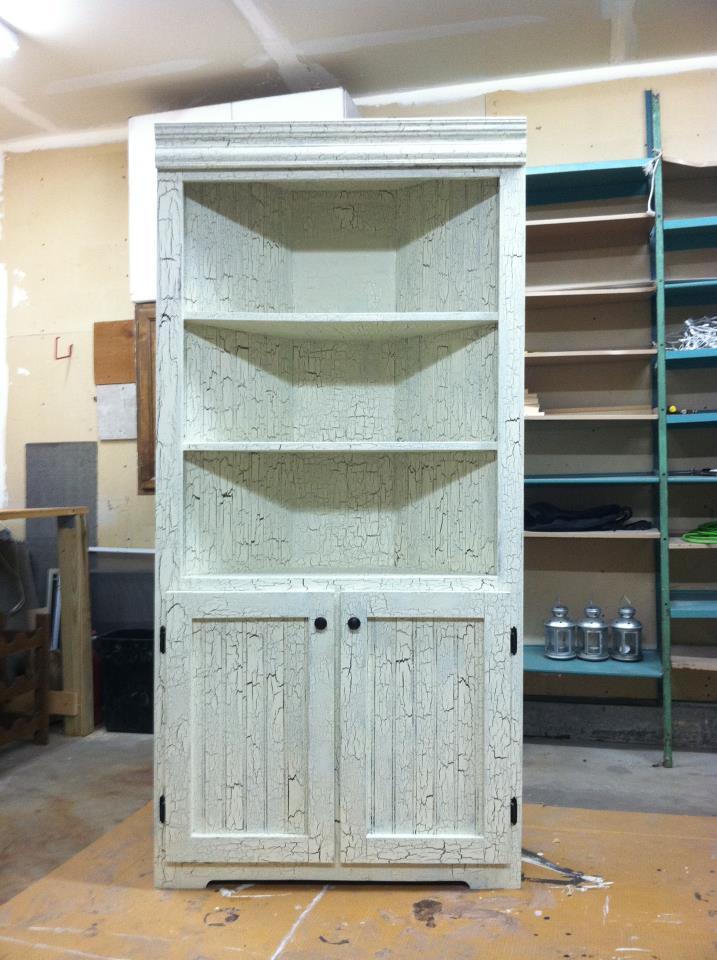
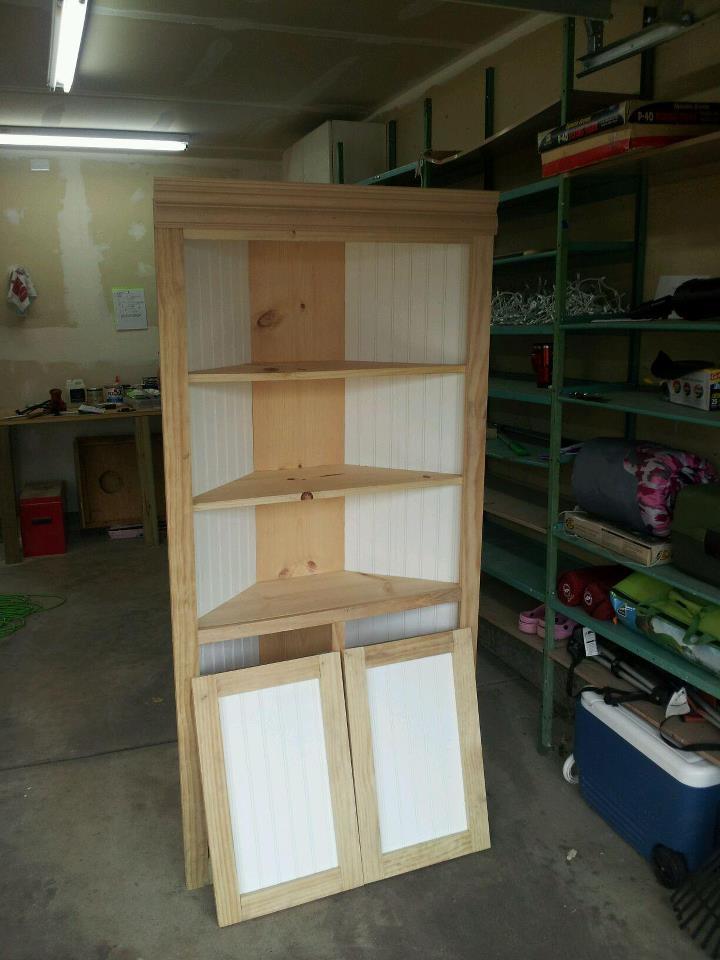
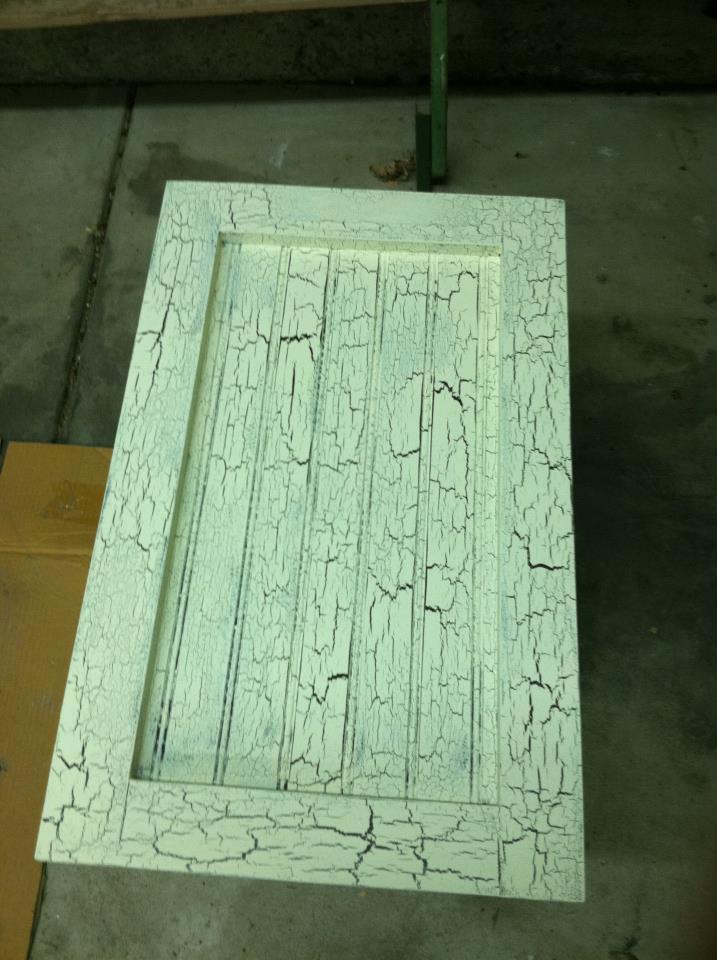
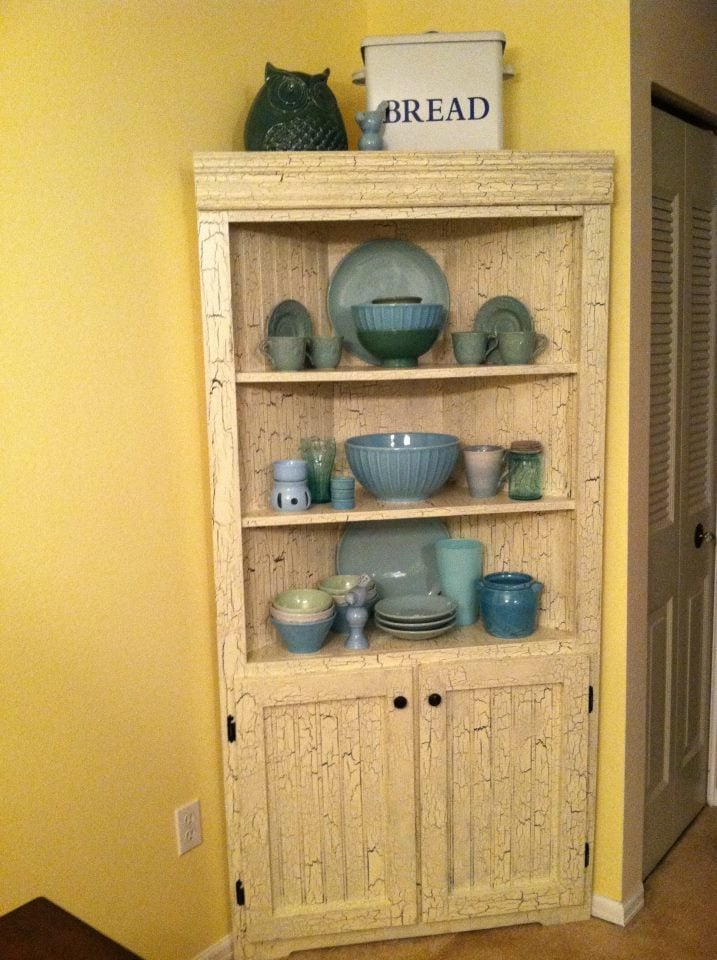
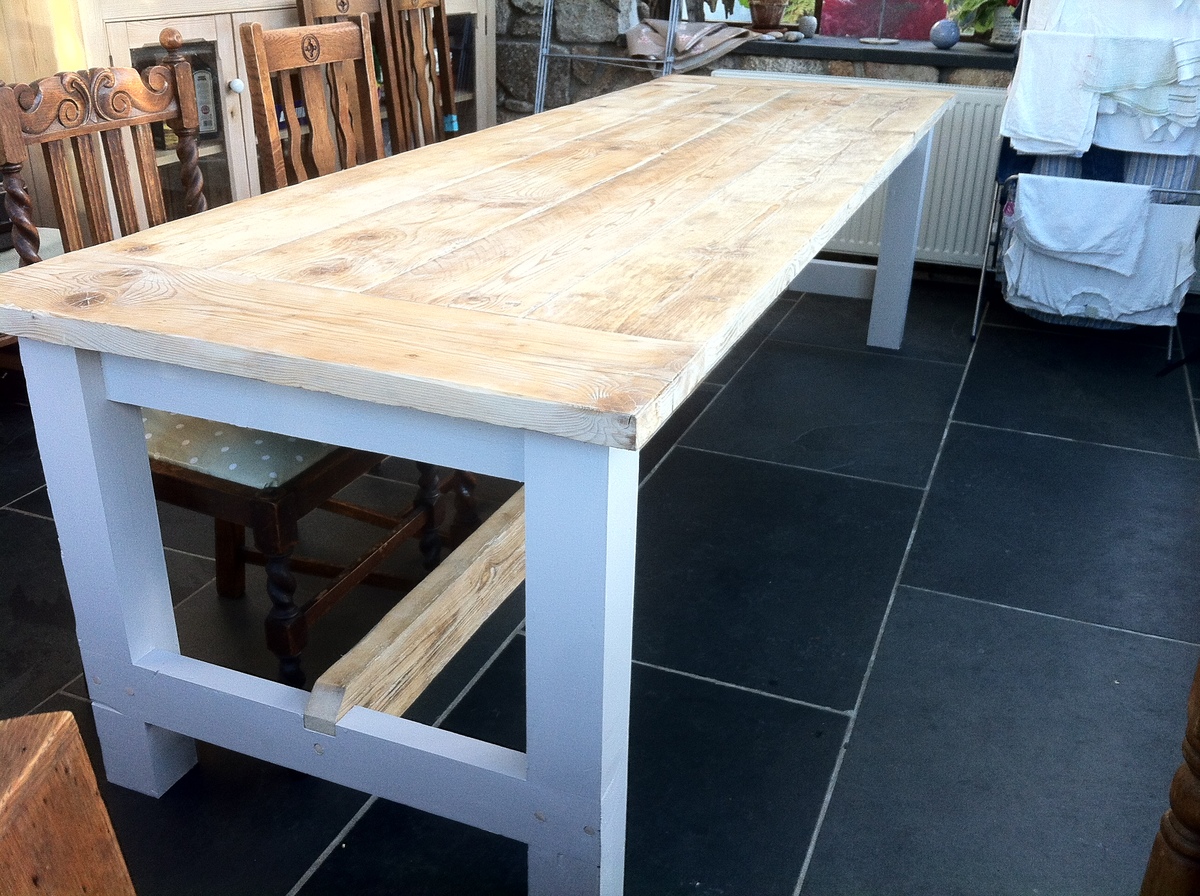
sides painted and the top waxed, looks a bit patchy in the photos but the finish is good.

all in all cost about £70

Estimated Time Investment
Week Long Project (20 Hours or More)
Finish Used
paint and wax
Recommended Skill Level
Starter Project

Perfect size for two granddaughters

Submitted by Anonymous (not verified) on Fri, 06/16/2023 - 11:01

The plans for the small and medium picnic table came at a perfect time. Our two granddaughters were growing out of their plastic play table and a big party was on the horizon - a graduation from pre-school.

As it turned out, I had purchased some very nice pine pre-covid and decided to use it for the table. The only change I made to the plan was to use 1" x 6" boards for the top as that was what I had. It gave the table a lighter look. I'm not sure if the boards will cup over time but I'm hoping the 5 coats of Spar Varnish will prevent that from happening.

I was surprised at how easy the plans were to follow and that the level of detail was enough to get it build without questioning "What do I do next?" or "How do I do this?"

I must say that having a miter saw and drill press made the job go faster but I could see that using more basic tools would certainly get the job done. Having the material allowed me to build the table in a single day. The coats of varnish took time to apply and let dry but I believe it will protect the table better than polyurethane.

Built from Plan(s)

Comments

Cedar Garden Bed

I made this garden bed in one evening. I love it! I bought 6 6' cedar fence pickets and two cedar 1x2s. I don't have a table saw, and they wouldn't rip a fence picket for me at the store, so I had to buy the cedar 1x2's but the project was still very affordable. I wanted it a little wider than the original plan, so I just cut the 6' pickets in half for the sides.
It is 6' x 3' and I didn't bother to cut the dogears off. You probably wouldn't even be able to tell they are there. I didn't trim the top out because that would add on about $6, and I like it just the way it is.
Now, lets see if I can actually grow some plants in it!!
I'm a beginner, and this project was really easy.

Estimated Cost
$20
Estimated Time Investment
Afternoon Project (3-6 Hours)
Recommended Skill Level
Starter Project

Comments

Lisa P (not verified)

Tue, 04/03/2012 - 08:08

This is exactly how I was going to modify Ana's plans as well. Have you started growing anything yet? Looks great!

Tara Kirkland

Tue, 04/17/2012 - 20:55

Yes, I've started "trying" to grow a few things. I don't usually have much luck, but maybe.... just MAYBE this will be the year!! :)

Lindyer0523 (not verified)

Mon, 04/23/2012 - 07:13

What would you have used for the top trim?

Rustic Planked Wood Sideboard

Check out my blog post for more on building this giant, hardworking piece! It took me about 45 hours to build it from start to finish (I work slowly) and cost about $400 in materials.

Estimated Cost
$400
Estimated Time Investment
Week Long Project (20 Hours or More)
Finish Used
General Finishes water-based stain, milk paint, glaze, and Staples Crystal Clear bowling alley wax. More details on my blog post.
Recommended Skill Level
Intermediate

Comments

Icepickman

Mon, 02/02/2015 - 07:21

hey, great build, i'm going to attempt a similar project. i could not get to your blog post?

Main closet

Submitted by Anonymous (not verified) on Sun, 10/27/2019 - 19:23

10 ft closet that had a lot of space but little organization. First attempt at building anything. Built the bench first in four different sections then attached together. Closet already had two long 10 ft boards so just added vertical dividers to match the cubbies for each person. Added shelving on sides using the concepts of making the original bench. Our baseboards have tile that was installed up to it so I didn’t attempt to remove them but notched out the backs of the wood to fit around. On the side left about 6 inches and installed the rod front to back using C hooks to hang things from them. Will be adding lots more hooks on the sides as well. Used a couple different plans but ended up making changes along the way based on my skill level and what I thought would work best for the family.

Estimated Cost
250
Estimated Time Investment
Week Long Project (20 Hours or More)
Finish Used
Painted sections are Sherwin Williams Olympus white and stained shelves are classic oak
Recommended Skill Level
Beginner

Corner Cupboard, Corner Cabinet

Submitted by Anonymous (not verified) on Fri, 04/15/2016 - 21:33

I saw the plans on Ana White website and and used them to put this together. I changed it slightly to fit my needs. I made this for my in-laws and it was a lot of fun to do. Hardest part was using blue tape on stain and paint.

Built from Plan(s)
Estimated Cost
125$ includes four cans of Rustoleum White Satin primer and paint from Home Depot, hardware, and lumber. Measure twice Cut once and all will be well.
Estimated Time Investment
Week Long Project (20 Hours or More)
Finish Used
Min wax Red Oak
Min wax satin poly
Rust oleum White Satin Paint and Primer
Recommended Skill Level
Intermediate

Privacy Planter Fence

Submitted by Anonymous (not verified) on Fri, 09/08/2023 - 08:25

Created a privacy planter fence, using multiple planters. Most of the bases were custom sizes due to the existing rock wall. Tongue and groove cedar utilized and coated with linseed oil. I ensured the frames were square and plumb which the directions omit for some reason. Great week long project!

Kyle

Built from Plan(s)
Seasonal And Holiday

My own weathered corner hutch :)

This was my first project. It took me a weekend to build and prime. Since I chose to use a crackle finish, waiting time between coats extended the total time to one full week. My husband and I were supposed to make this hutch together, but I became obsessed and did most of it alone! I adjusted the size a bit to make it larger, so I could fit big pieces on shelves and in cabinets. Thanks for the plan Ana!!

Built from Plan(s)
Estimated Time Investment
Week Long Project (20 Hours or More)
Finish Used
Weathered Crackle Finish done as follows:
1. Killz2 latex primer (highly recommended)
2. Valspar interior satin finish, "Frontier Road" (this is the color that shows in the cracks)
3. Valspar weathered crackle glaze (a suggested substitute that costs less is Elmer's glue)
4. Valspar interior flat finish, "Churchill Hotel Lace" (must be a flat paint, this is the dominant color of your piece)
5. Valspar clear protector (also highly recommended to protect the finish you worked very hard to create, when you paint the same piece of furniture 5 times in one week your sanity will agree!)
Recommended Skill Level
Starter Project

Comments

JoanneS

Fri, 04/13/2012 - 14:47

Wow, this is sooo beautiful! The finish is just awesome. My Hubby hates to paint, and he saw this multi-step finish and said you must have the patience of a saint! :) Congrats on such a stunning first project!

kmsdance (not verified)

Mon, 10/01/2012 - 23:33

Very Nice! What did you do to make it "bigger"...did you make it deeper or wider? Just curious, because I would like to try and make a bigger version as well. Did you still cut the shelves on each side at a 45 degree angle? Thanks!

Long Modern TV Console with Pallet Wood

Submitted by Anonymous (not verified) on Fri, 01/17/2020 - 14:18

This project was a Christmas present for my girlfriend. I modified these plans a little bit to put the open shelf in the middle and used the pallet wood for this instead of it being white. The pallet wood was such a pain to cut up in to usable strips but after cutting them down, gluing them up, and sanding them down (for ages) I couldn't be more pleased with how they turned out. I used Watco Danish in medium walnut for the finish and I think it brought out the imperfections in the wood beautifully. I just used some pre-made legs from Amazon instead of the base out of laziness.

Estimated Cost
$125
Estimated Time Investment
Weekend Project (10-20 Hours)
Finish Used
Watco Danish Oil in medium walnut
Recommended Skill Level
Intermediate

Farmhouse Table

Since I am in the middle of a divorce, my ex- took my dining room furniture. I decided instead of buying something new, or getting a hand me down, I would build a new table. The wood top was made of 3 wood planks from my sister in laws hardwood flooring leftovers. It was sooo fun to make this. The stain was a mix of Minwax Providence and Ebony 3 to 1 mix appx. I did not add the bottom wood piece, as I did not think it needed it, it is plenty strong without it. I am working on the bench and chairs now. This has been by far my most fulfilling project ever. Enjoy!

Estimated Cost
$100 for stain, trim, poly etc. I had a lot of the wood, not the breadboards
Estimated Time Investment
Weekend Project (10-20 Hours)
Finish Used
2 coat mix of Minwax Providence and Ebony (3 parts to one part)
4 coats Polysealant

Recommended Skill Level
Beginner

Comments

brookifer86

Tue, 04/24/2012 - 09:55

I think you came up with a great solution to your dining room problem. As a victim of the "ex furniture snatch" myself, I also decided to build my own instead of buying. It was quite the confidence boost! Love the table with the wider boards. I also didn't use a stretcher for my Farmhouse Table, and it's held up perfectly for over a year now.

KellyJo1180

Thu, 09/27/2012 - 08:38

I am looking to do the same design with the larger boards in the middle. What size are the boards running vertically on the ends? 1 x 6?

justjack5454

Fri, 12/12/2014 - 13:59

I love the table you built thanksgiving day my table went
awol, so I need to get going on your design. P. S. I'm lipstick, sawdust, n wheelchair.

Hall table

Submitted by jcar on Sat, 05/14/2016 - 03:38

This was a great first project.  Thanks for the plans and the inspiration.
I needed to make a hall table so made a narrower version, and had to alter the dimensions to suit the metric system and readily available materials at Bunnings (Australia), and also made the upper and lower sections identical in height.  It ended up about 300mm deep because the shortest drawer runners I could find were 250mm. These are full extension Hafele side rails, opening 100% to make the most of the narrow depth.
The drawer fronts are from a single piece of reclaimed Oregon Pine sourced locally and then stained with various strengths of Victorian Antique Wood Dye from eBay.  The stain is natural/non-chemical and made from walnut husks - just dilute with water to the desired shade and worked well on this timber.
Thanks Ana and thanks Jamison!
 

Built from Plan(s)
Estimated Time Investment
Week Long Project (20 Hours or More)
Recommended Skill Level
Beginner

Great Toy Box Plans

Submitted by dkakridge on Sun, 03/01/2020 - 18:55

So proud of how this turned out.  Plans were so easy to follow.  Thanks for such a wonderful site. 

David Akridge

Built from Plan(s)
Estimated Cost
$120
Estimated Time Investment
Weekend Project (10-20 Hours)
Finish Used
Rustoleum painters touch white gloss, Kilz Primer
Recommended Skill Level
Intermediate

Simple Outdoor Stabackable Chairs and Table

We used cedar for these nice, little chairs and based the table on the chair model, only 24" tall, rather than the 18" of the chair seats. It took longer to cut than assemble these - total time: @4 hours for all.

Thank you, Ana!

Darin

Built from Plan(s)
Estimated Cost
$60
Estimated Time Investment
Afternoon Project (3-6 Hours)
Finish Used
Stain with weather protectant.
Recommended Skill Level
Beginner

Boys Bunk Bed

Submitted by Colby032 on Fri, 04/18/2014 - 11:08

This was my first building project, made possible by finding this wonderful website. The beds were made from the Classic Bunk Beds plan. Several months later I added a slide made out of melamine board and 2x3s - very sturdy and somewhat overbuilt to compensate for not using any plans for the slide).

I used Minwax polyshades for the finish - my first time finishing wood, and let's just charitably say that I learned a few lessons in doing so.

The steps are a repurposed solid pine Ikea Trofast unit - it worked very well for the kids (4 and 2 when the bed was built). However, it wasn't a great choice for getting my wife and I up to the top bunk - one of the top panels eventually broke... leading to a big bruise for my wife and strict instructions that I quickly build a new, more solid staircase option - to be shown in a future brag post.

All in all, I am very thankful for this website and its plentiful plans - more brag posts to come!

Built from Plan(s)
Estimated Time Investment
Weekend Project (10-20 Hours)
Finish Used
Minwax polyshades (don't remember which shade)
Recommended Skill Level
Beginner

Apothecary Console Table

I live in Japan right now and my wife and daughters went to the states to visit family for 3 weeks. I decided to make a few projects. I went to my local home improvement store (HOMES), which is a combo of Lowes, Walmart, a pet store, and a furniture store rolled into one crazy store. I purchased the wood for about 11000 yen, paint for 1080 yen, hinges 800 yen, and door knobs for 2880 yen. Grand total of basically $200. I found that it is not cheap to buy supplies over here. I modified the plan and made 16 "drawers" instead of 20 due to the height of the space where I am putting the table. I used the plan for finishing with the distressed coffee stain. I really like it in our room.

Estimated Cost
$200
Estimated Time Investment
Afternoon Project (3-6 Hours)
Finish Used
Hapio water based all weather paint (teal), Starbucks French Roast Coffee, Clear spray lacquer.
Recommended Skill Level
Beginner

2x10 Step Stools

Submitted by msyoung22 on Tue, 08/16/2016 - 07:26

My kids needed a step stool and I had some scrap wood (2x10) left over from a previous project

Estimated Cost
20 dollars
Estimated Time Investment
Weekend Project (10-20 Hours)
Finish Used
Minwax (weathered oak stain)
Minwax polycrylic protective finish
Recommended Skill Level
Starter Project

Comments

kristyzed

Wed, 08/17/2016 - 20:40

These are great.  Can you share dimensions and if there are any angle cuts on the legs?

msyoung22

Thu, 08/18/2016 - 20:12

Thank you! The dimensions are the same as the Ana White "Simple 1x10 Single Step Stool" except I used 2x10's instead of 1x10's like the plans called for. I also used some scrap pallet wood to make a design on the top of the stool. 

- Stool height: 7 1/2" for legs, 1 1/2" for top, and 1/2" for scrap pallet wood; which gives a total height of 9"

- Stool width: 9 1/4" x 16"

- 5 degree angle cuts were made on the legs

Wood Garage Shelves

Submitted by Anonymous (not verified) on Tue, 02/20/2024 - 08:40

This was made using Ana's "Garage Shelf" plans. I modified it for a corner spot between two exiting cabinets, so it took a bit of thought, but the Ana's technique for the build made it so easy.
AND I used up scrap wood that I'd been hording in the garage for the build.
Thank you Ana!

Book Stand

Submitted by romanweel on Mon, 05/19/2014 - 00:37

This was a project undertaken to facilitate my current pursuit of learning how to cook, but I think it will serve me well as I study, too, holding my textbooks up. It also let me experiment a little with staining and with using milk paint (which has NO VOCs but is kinda weird to work with). And it let me put to use some scrap wood that I think I was unconsciously saving for something special.

Because I had a scrap pile, screws, a few hinges, and the finishing products, this project was Almost free...I had to buy a narrow hinge ($1.50? I think?), and I chose to buy some pretty page weights ($3 including both pendants and the chain). So...not too bad, right? For a solid book stand that has meaningful beauty to me?

Ok, so this is all scrap wood. The stained pieces are maple leftovers from my cabinet project, and the rest is a mix of pine and poplar. See the dimensions in the last photo. The paint is Miss Mustard Seed Milk Paint in Lucketts Green, and the stain is Red Chestnut oil-based stain by Minwax. I finished the whole thing with one coat of wax buffed to a soft sheen (my new favorite finish).

I used a miter saw for my cuts and a router for the kickstand grooves, but really a regular circular saw would've worked just as well (or better, for the grooves). It took me several days to finish this project, but there's no reason it should take (someone other than me) more than an afternoon.

Estimated Cost
$5
Estimated Time Investment
Day Project (6-9 Hours)
Finish Used
Milk paint, Miss Mustard Seed in Lucketts Green in a 1 to 1 ratio, single coat
Minwax oil-based stain in Red Chestnut (I applied mineral oil first as a conditioner, then the stain for a few seconds, then wiped off - it still turned a little blotchy, though)
Regular furniture paste wax, one coat
Recommended Skill Level
Starter Project