Twin Beds with Corner Cabinet
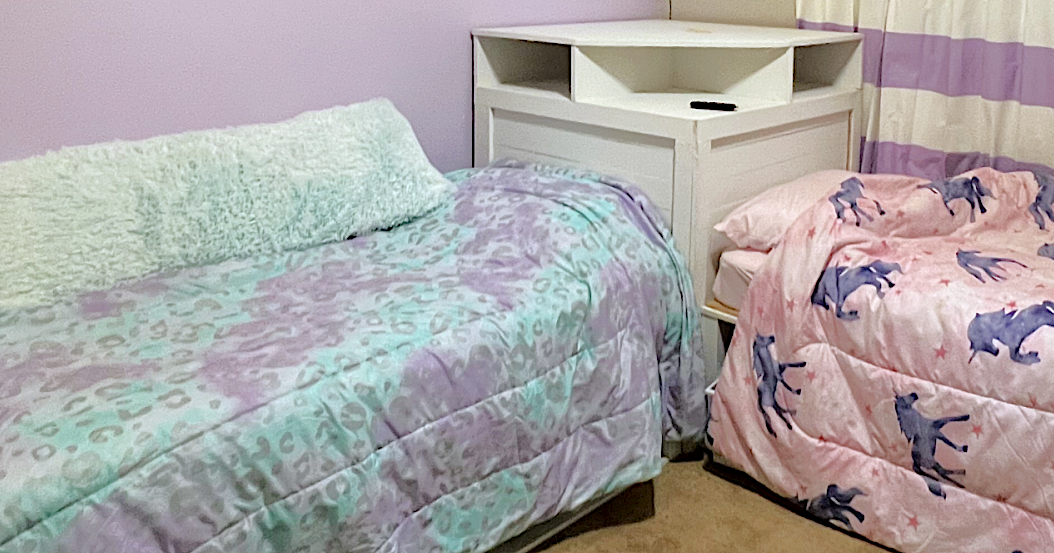
Made this for my granddaughters from Ana White’s plans.
jburks23 Instagram: johnburks31
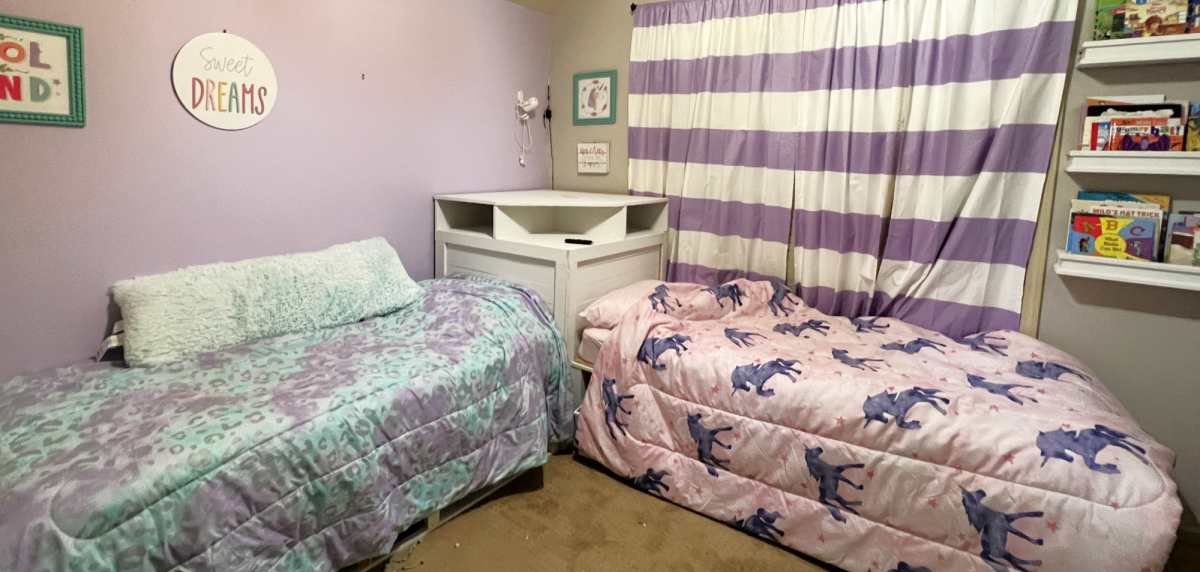
Built from Plan(s)
Made this for my granddaughters from Ana White’s plans.
jburks23 Instagram: johnburks31
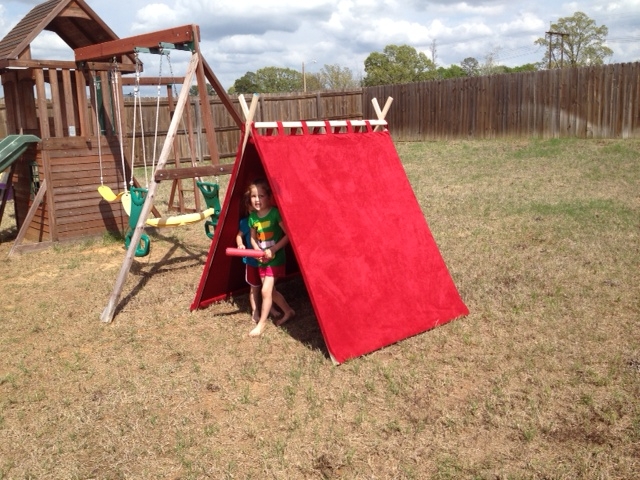
I had been wanting to make this for sometime but didn't have the curtains. I was at a friend house and she asked if I wanted the red curtains that she was going to throw them away. So I got to make the tent, her daughters got a cool place to play and the curtains got a new purpose also the tent was made to fold for storage!!!
Thanks Ana for all the plans and ideas you give us!!
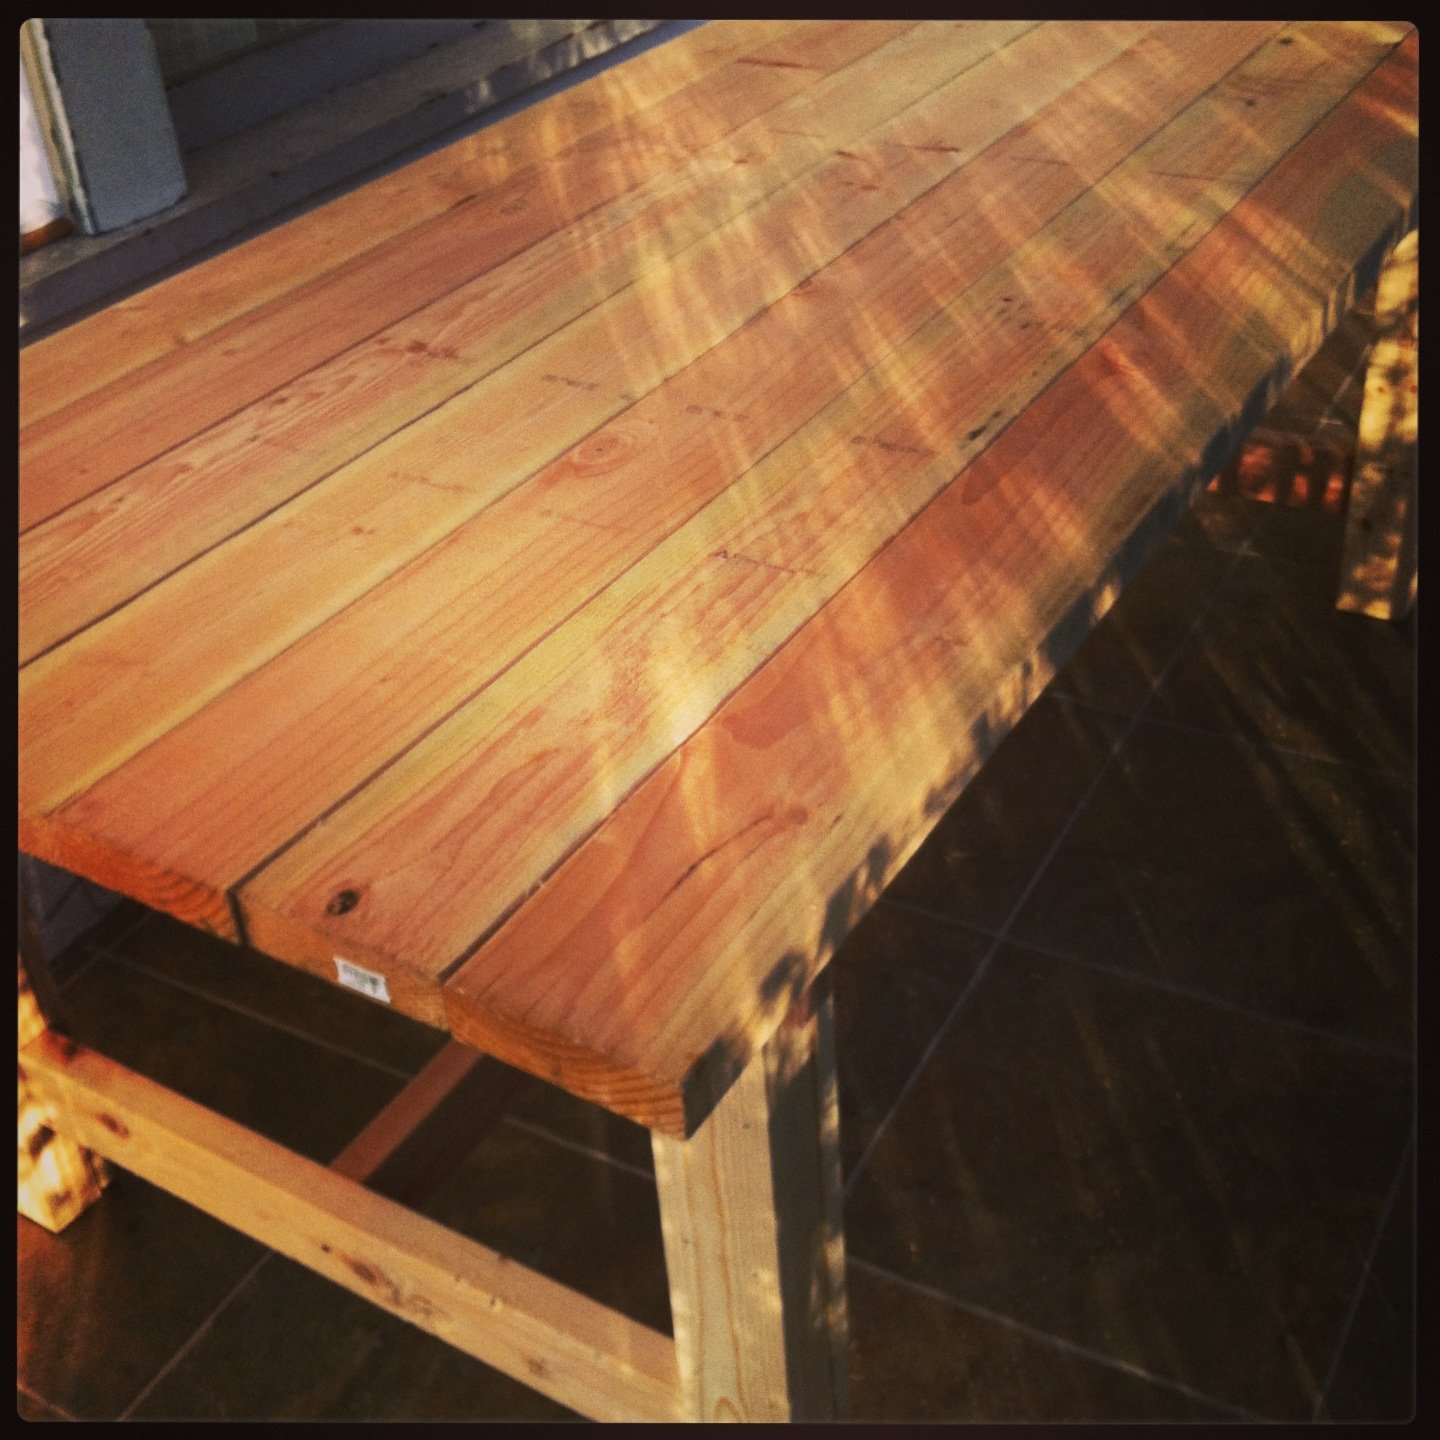
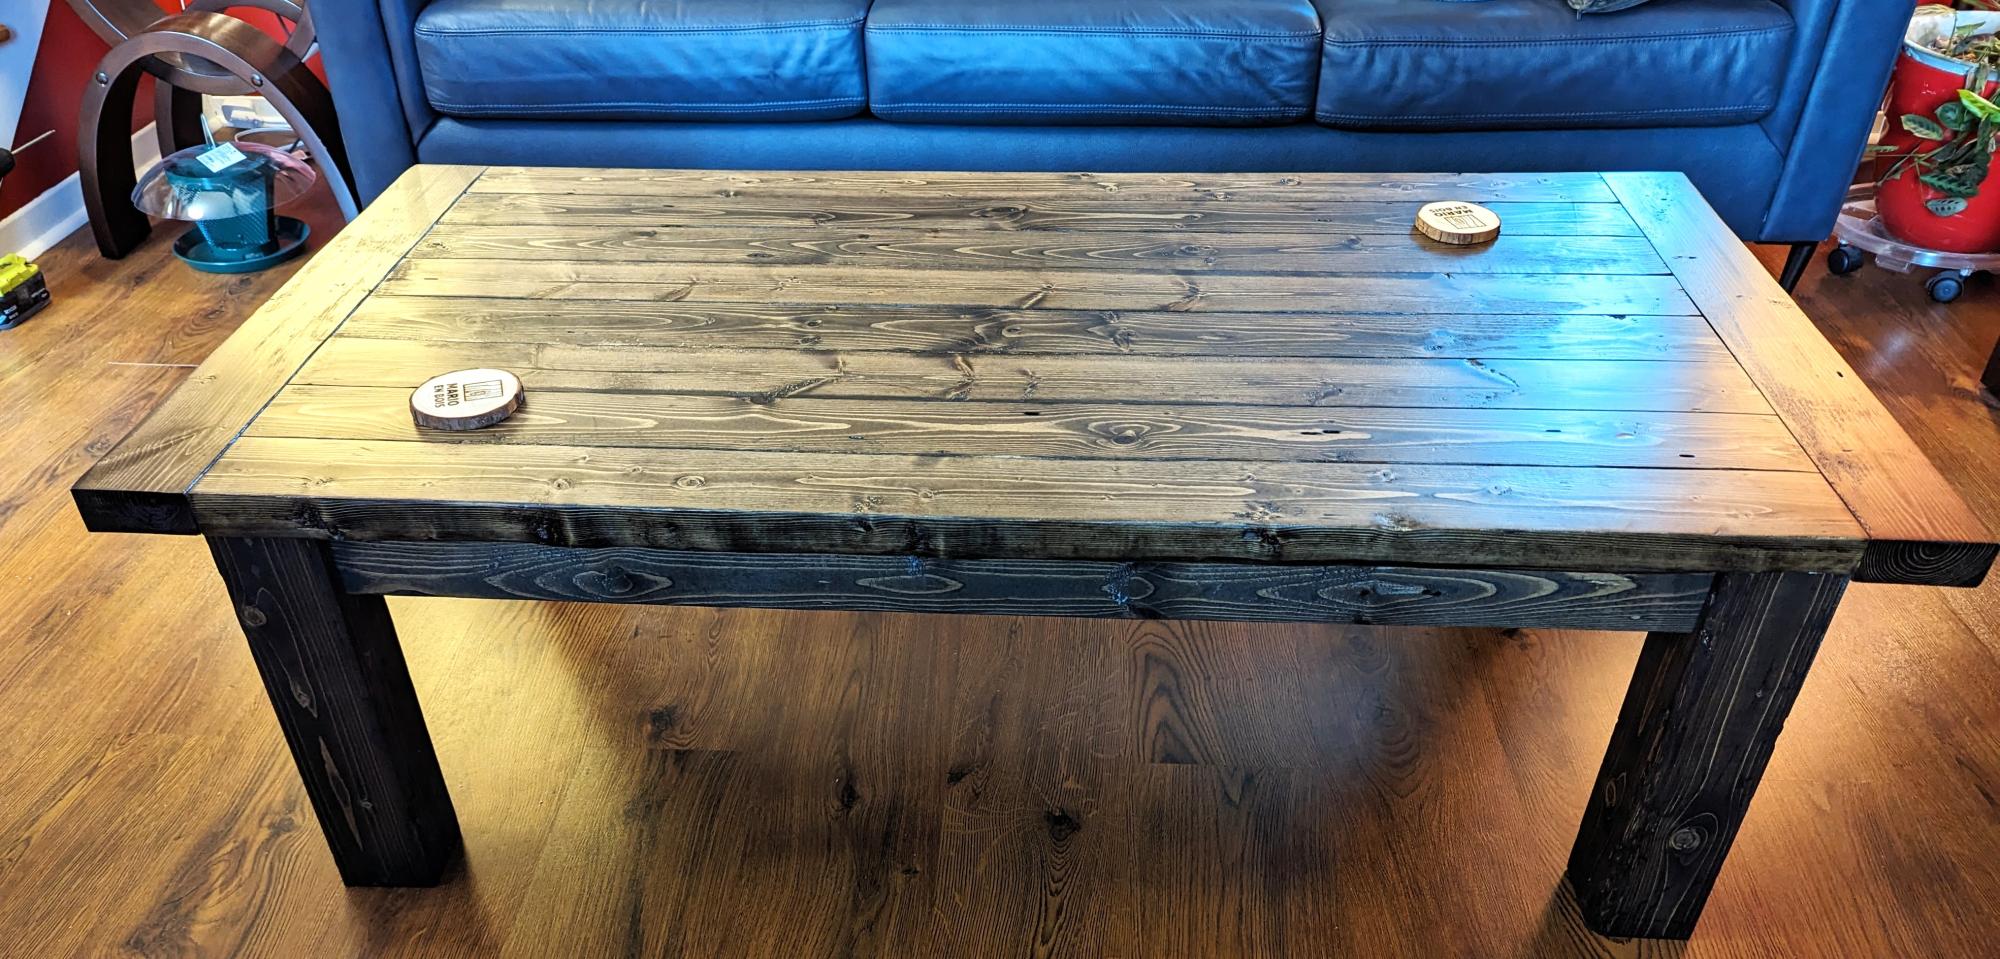
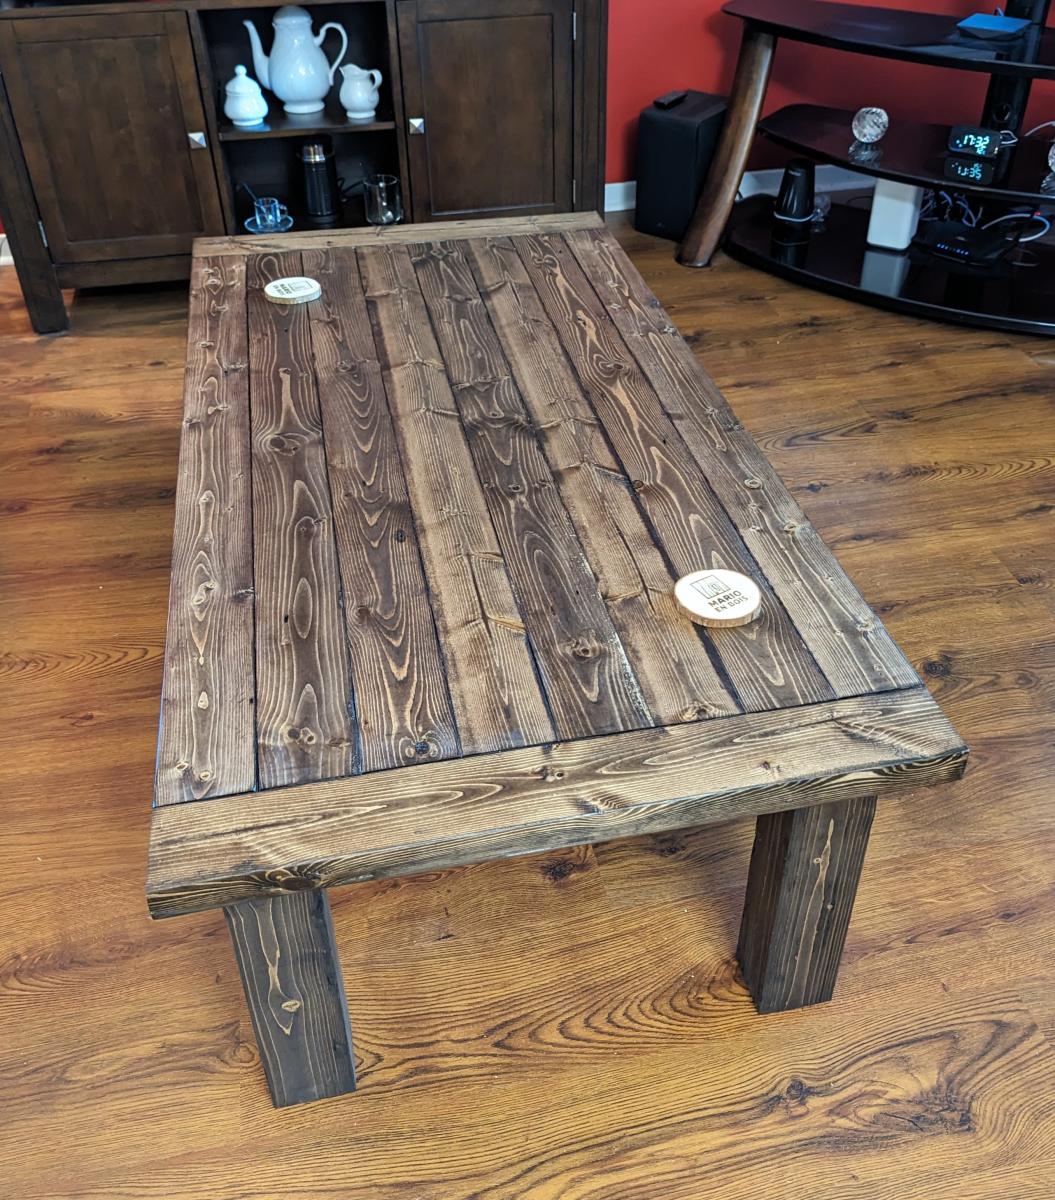
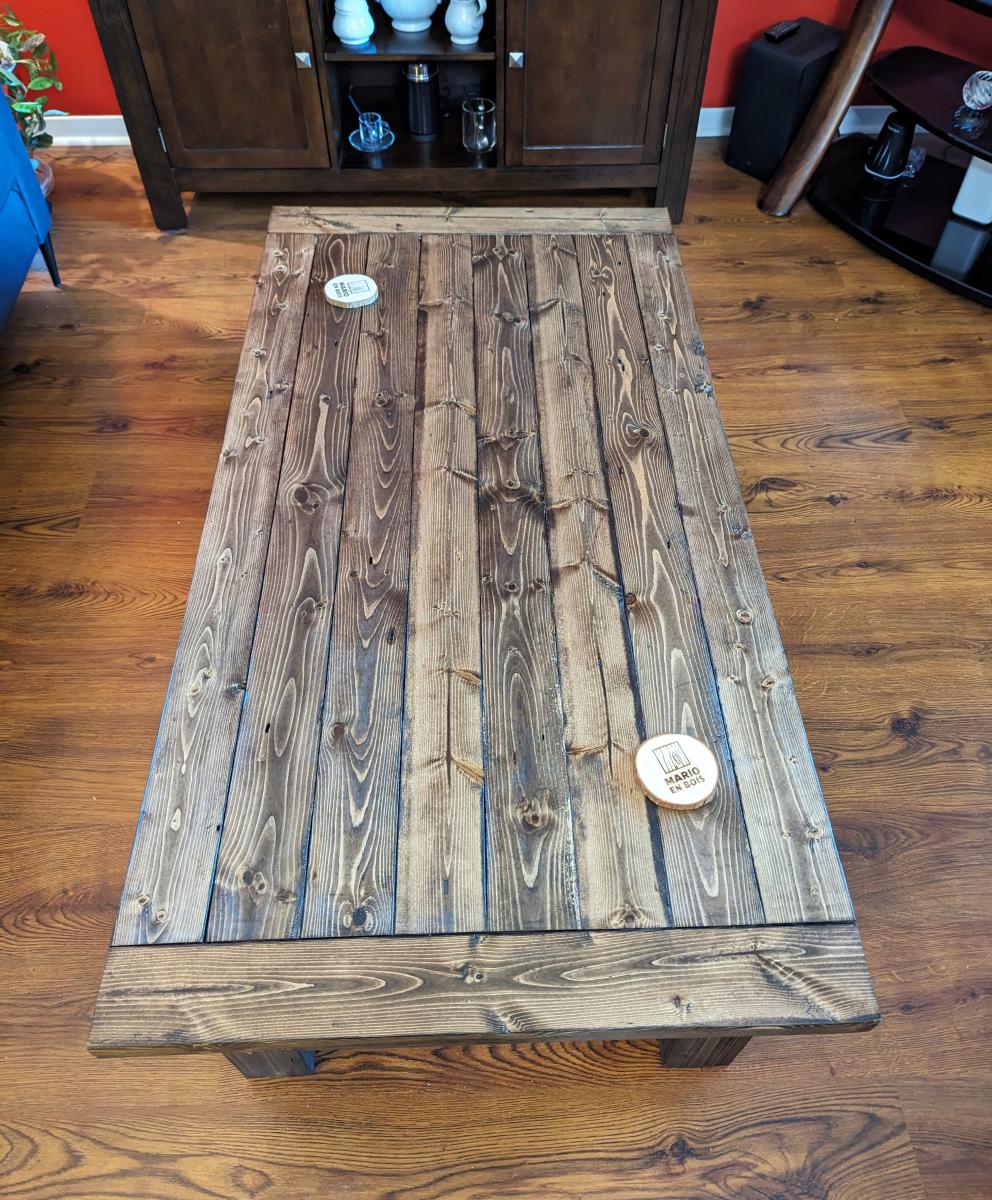
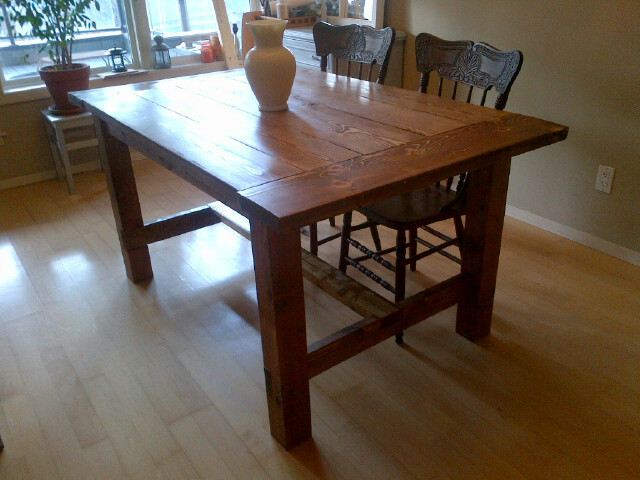
This was the first piece of furniture we ever built and it was a big success, although knowing what I know now, I certainly would have done a few things differently. Luckily for me, following Ana's plans don't require a very steep learning curve if you have read The Handbuilt Home! Instead of investing $1500 into the brand new table I wanted from Pottery Barn, I decided to invest that money in power tools, equipment and materials for the table, which I acquired for about $900 (I had no tools in my possession at all so was basically starting from nothing). The price of this table decreases every time I make a new piece of furniture from scratch, and in the year that I began making furniture, I have made the farmhouse bench that accompanies this table, a coffee table, an upholstered vanity seat, a kitchen island, a book shelf, lots of shelves and small tables, and I am currently in the process of making a bathroom vanity for our newly renovated master bathroom. Each project I make from Ana's plans is easier than the one before it, and I continue to feel more confident in the work and in my understanding of how furniture is built. I feel so grateful to Ana for sharing her work and for inspiring so many people, both men and women alike, to reach a bit outside of their comfort zone and develop new hobbies that they never would have imagined having.
Built by Susan Boucher
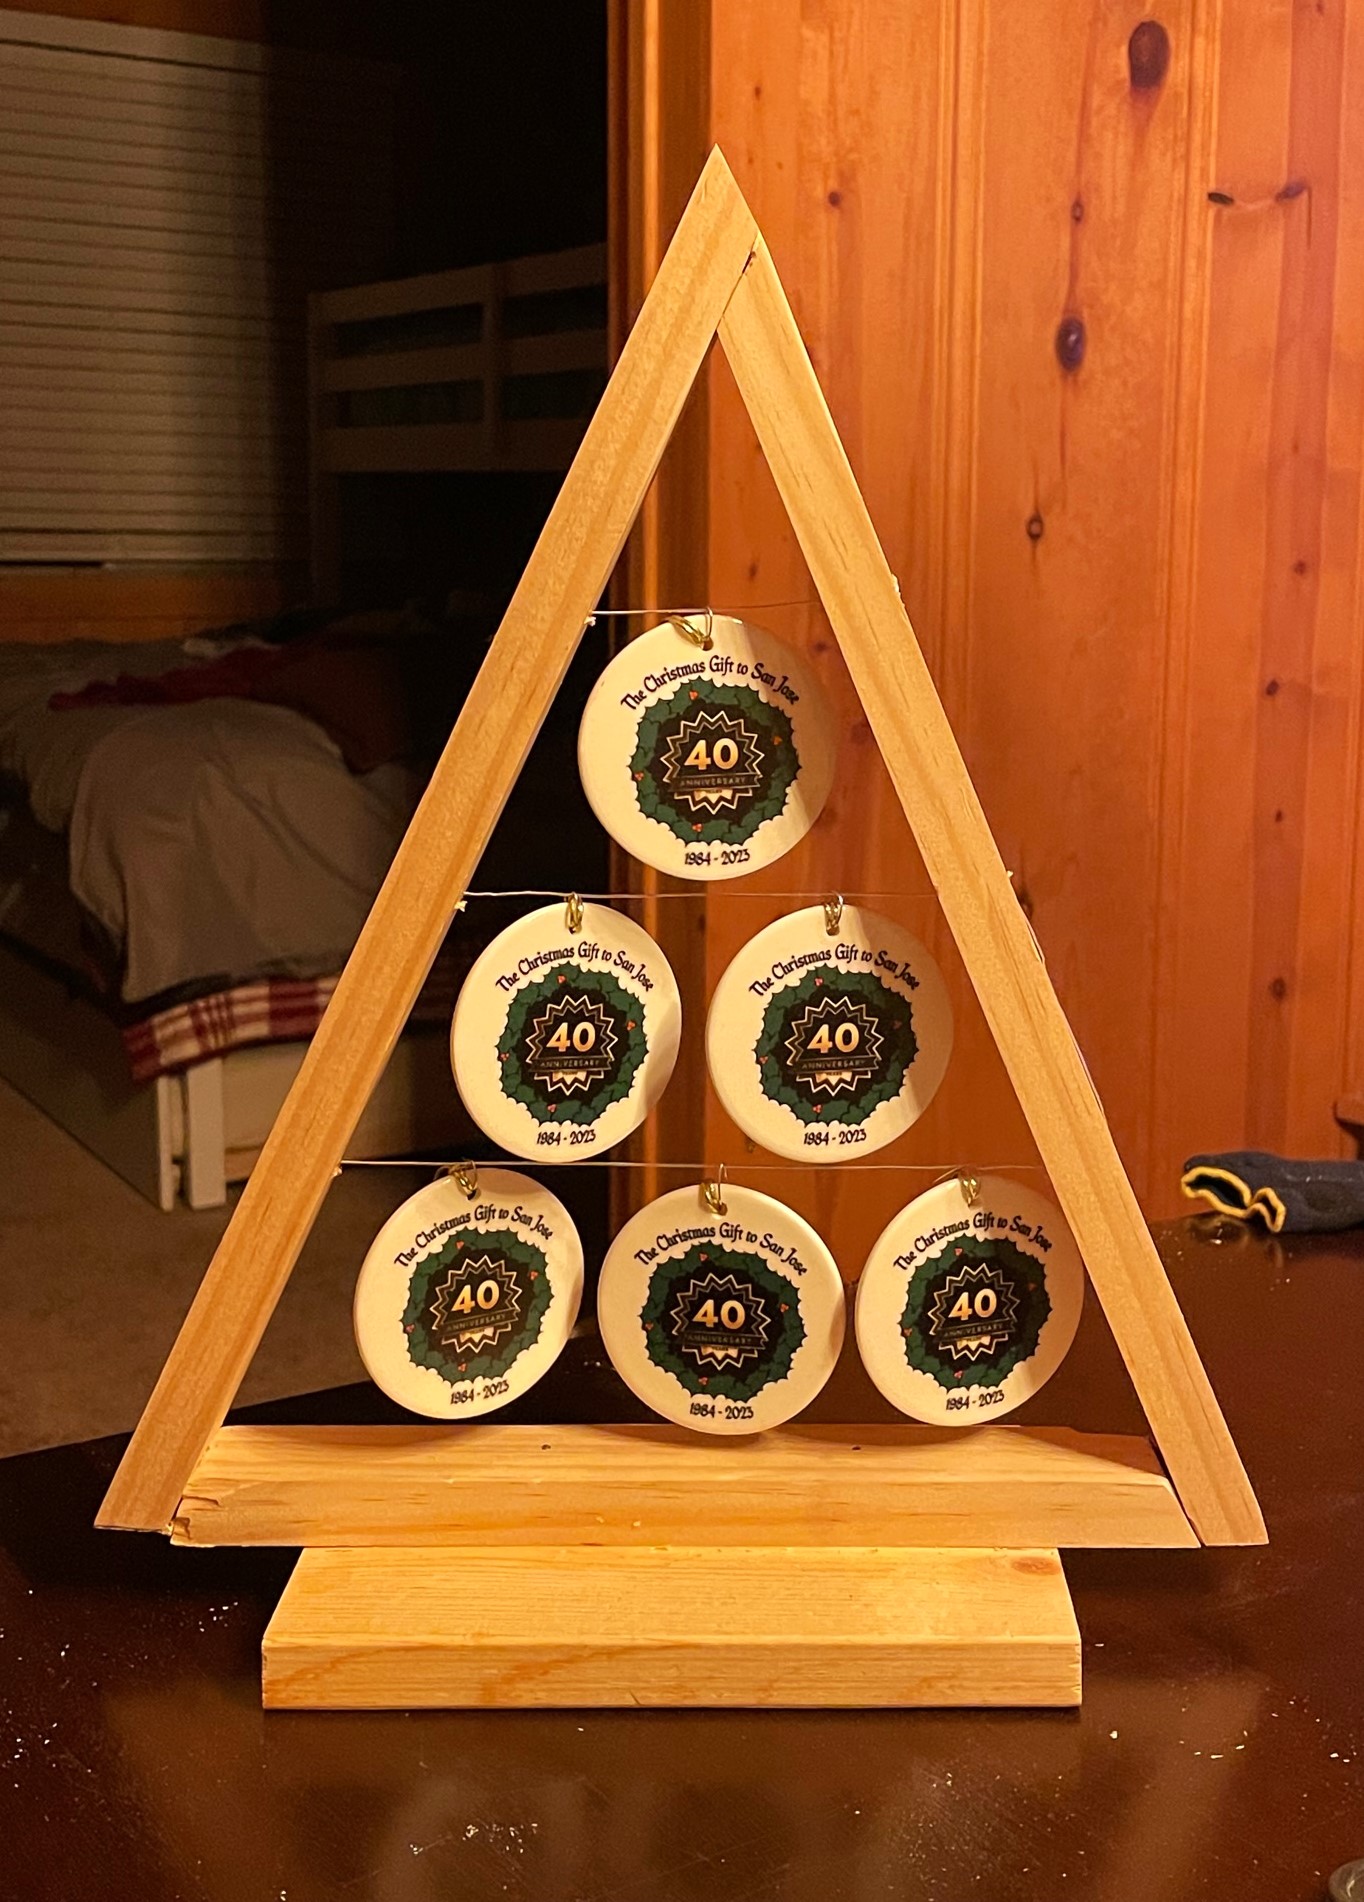
I made 15 of these ornament trees for our church's Christmas banquet. We adjusted the height to 14". I locked the wire in place with 8 x 3/4 screws that were countersunk. I plan to paint the trees gold.
Don Fugate
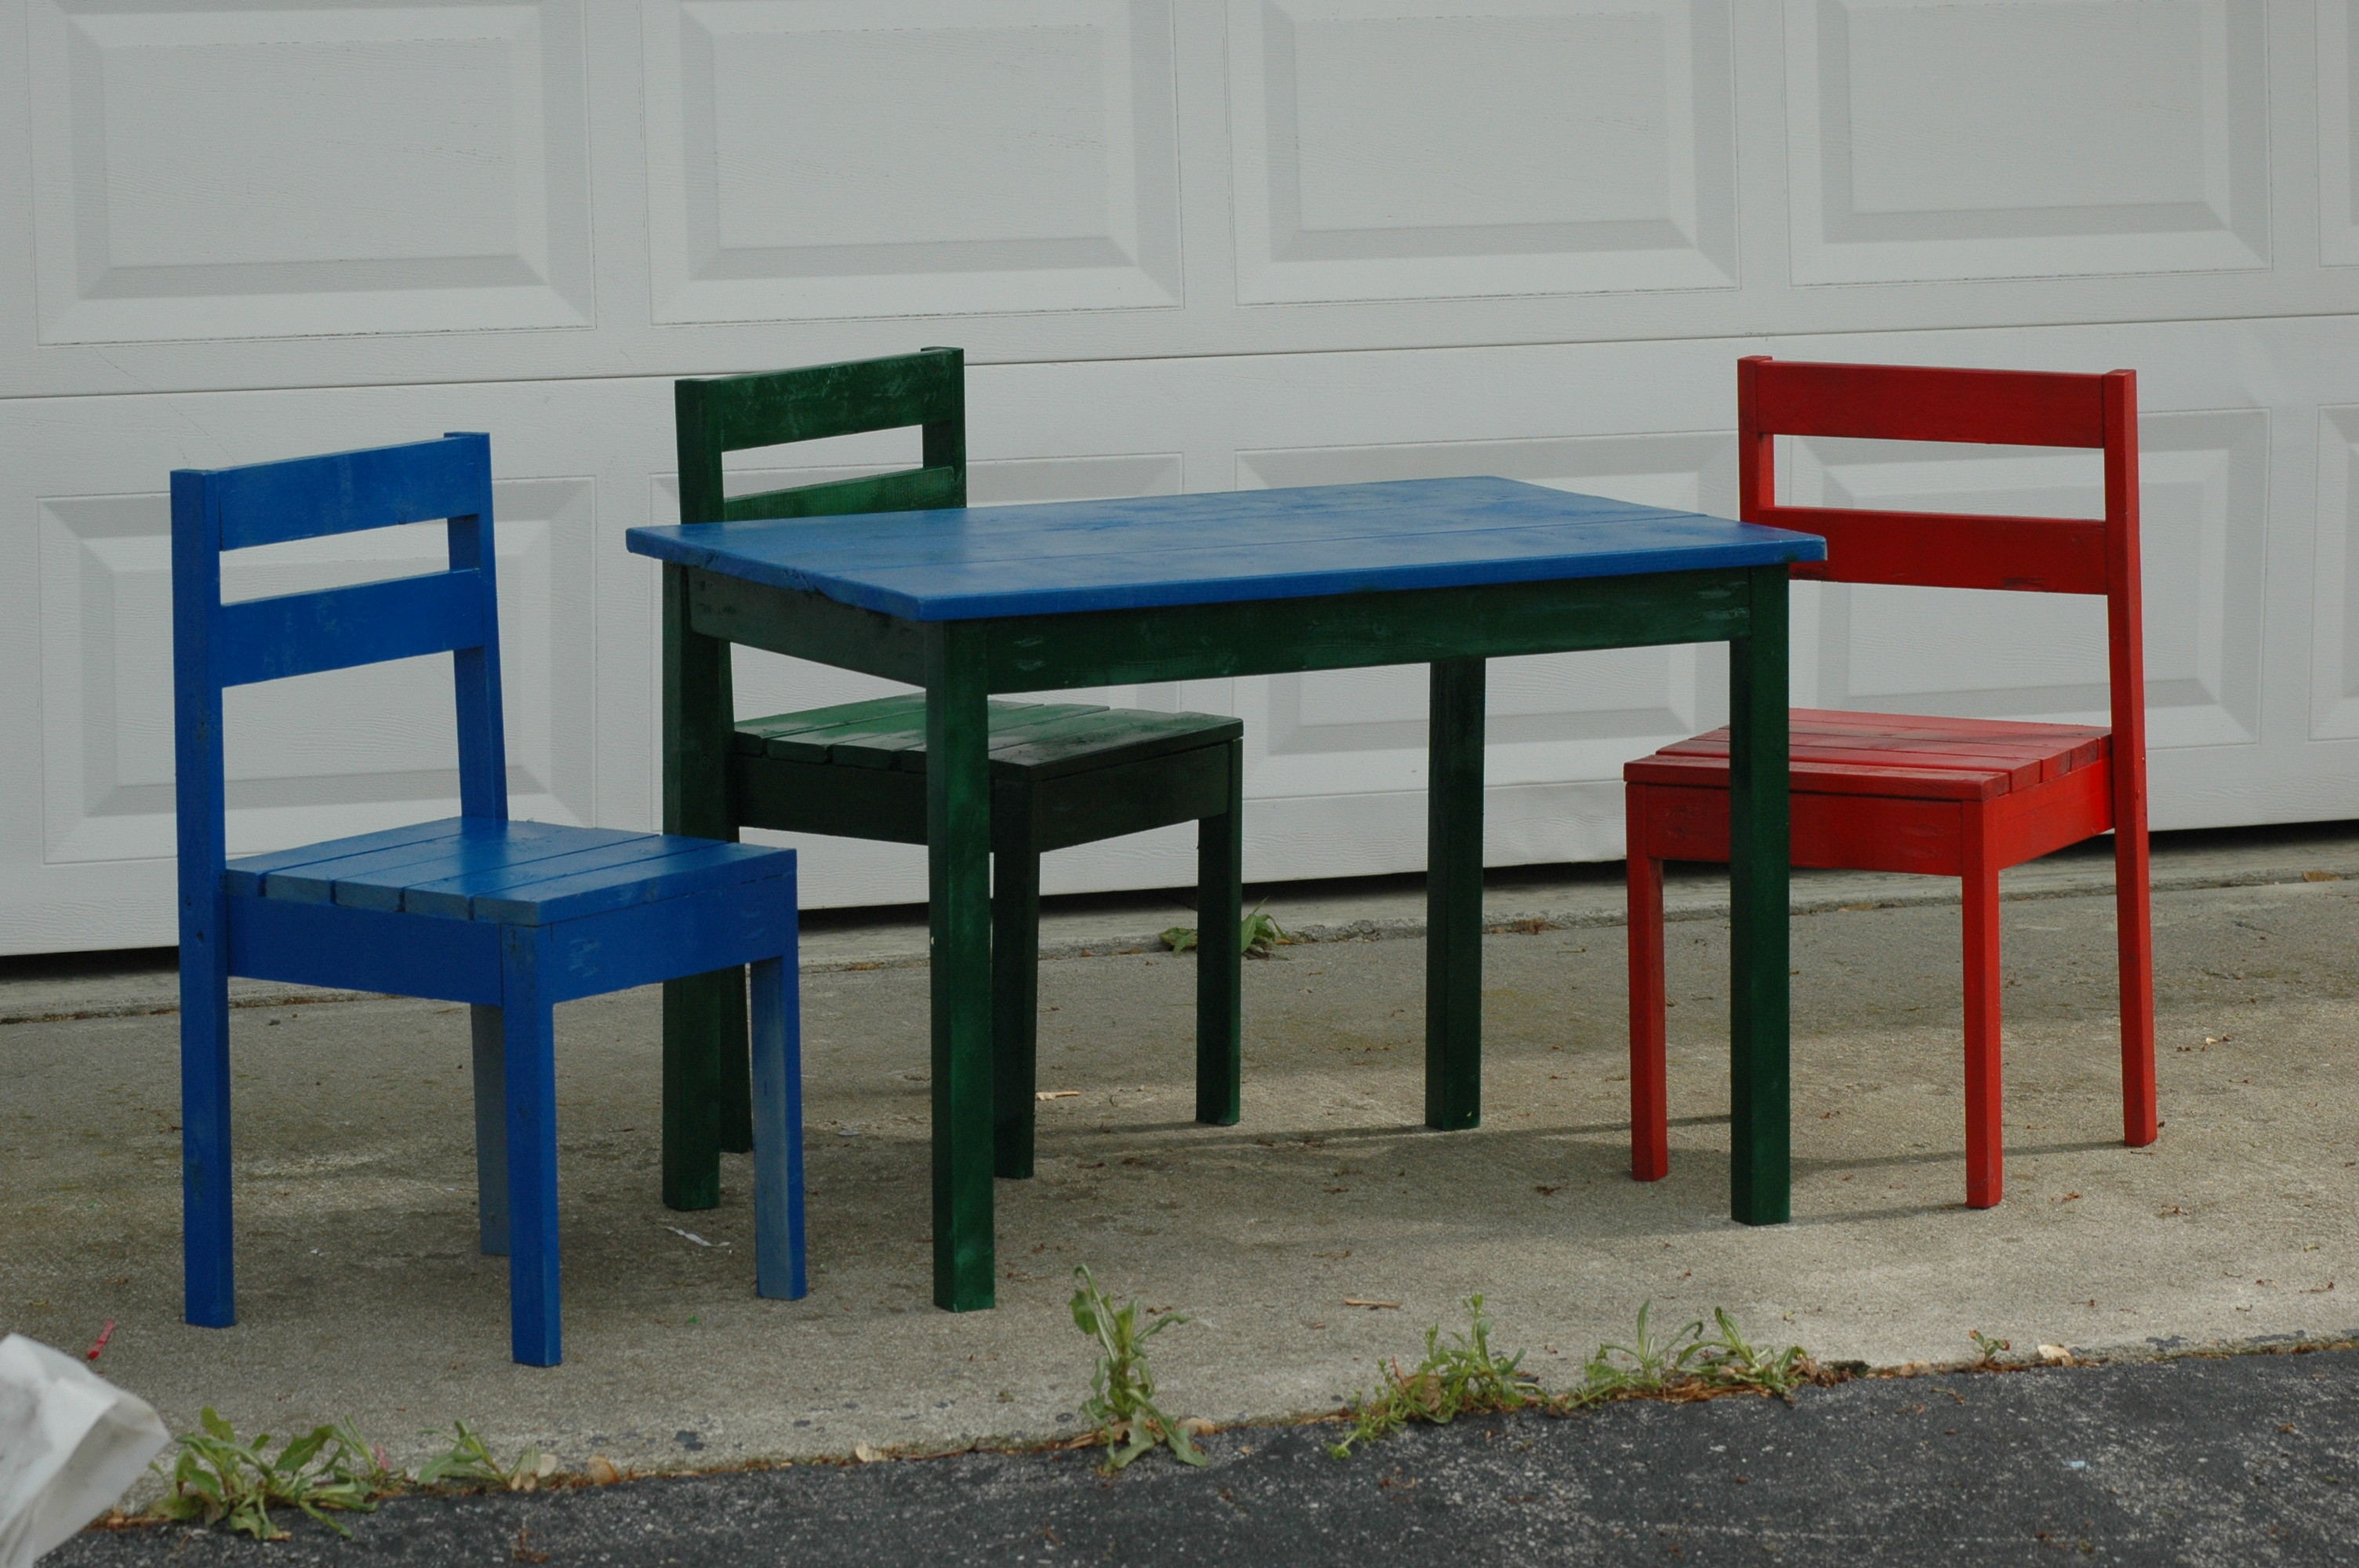
Fun, easy build. This is the first project from this site and the kids loved helping make their own chairs. They got to pick their own color paint - I think I spent more on paint than I did on the wood!
I saw this project and fell in love with it. Ive never done a wood working project before and wanted to do this all on my own so i wouldnt let anyone help just to know if i could do it. It didnt turn out perfect but i CAN NOT stop looking at it. Ana thank you somuch for theses plans!
Mon, 02/24/2014 - 11:22
Looks amazing! I'm dying to build this also and am nervous about trying out that finish. Where did you get the corner hardware?

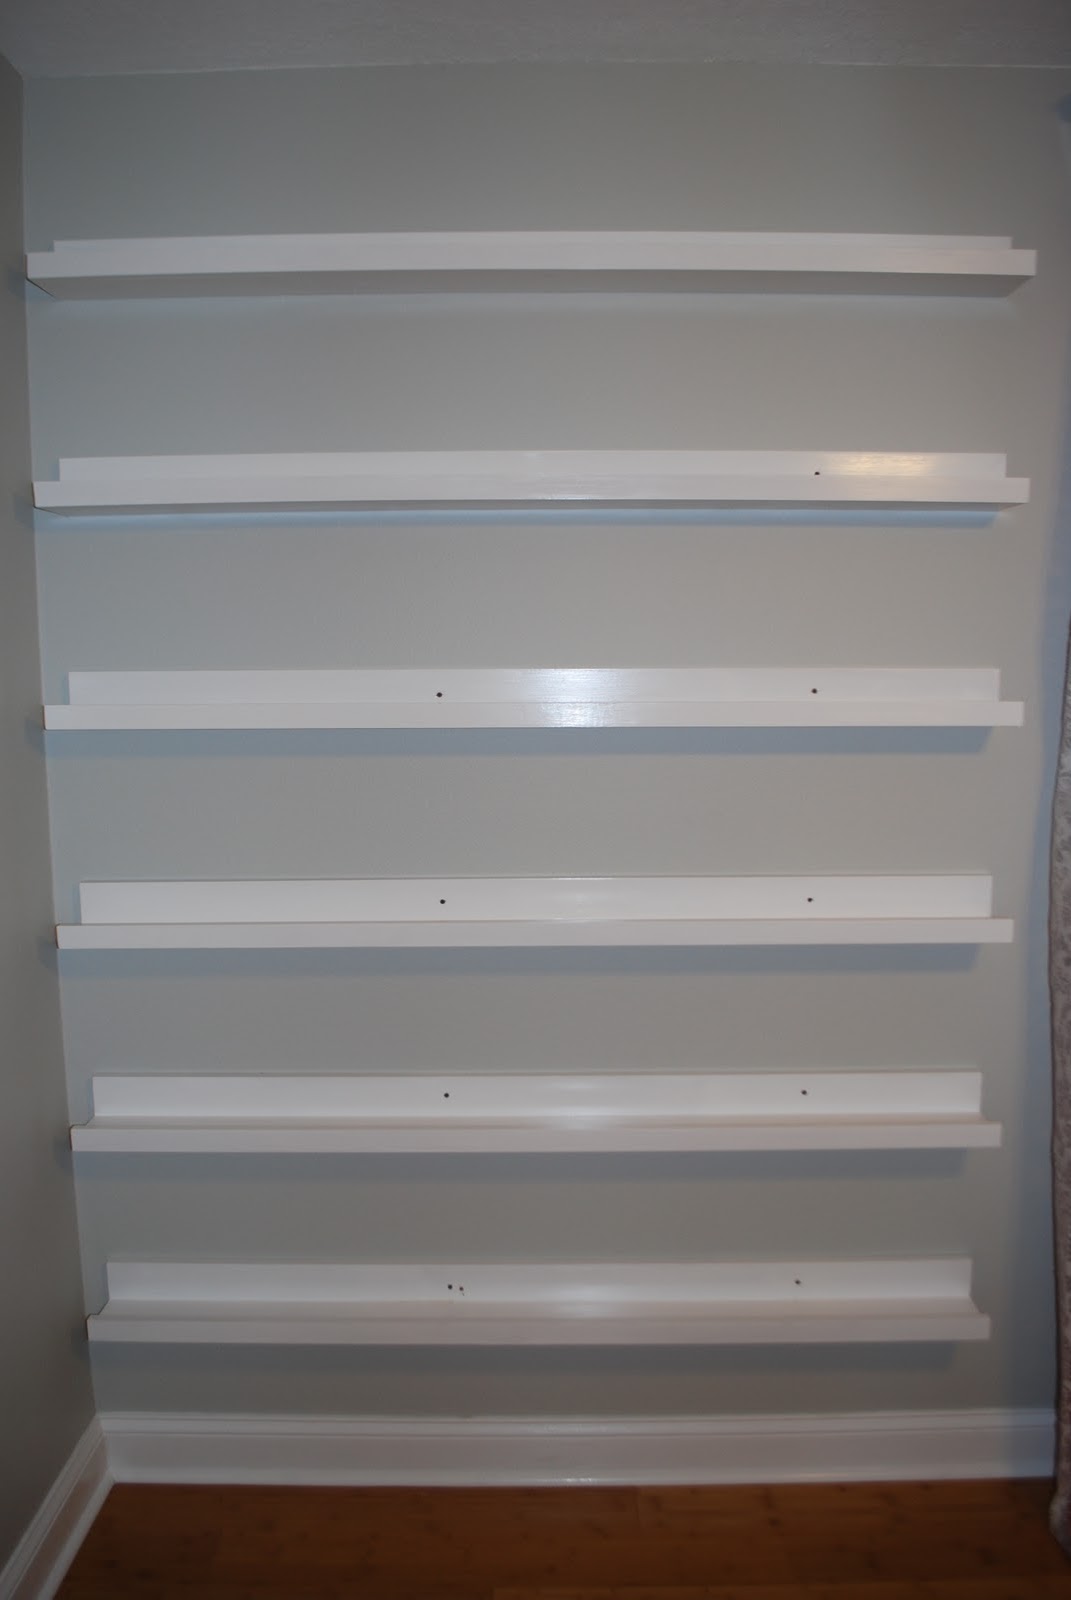
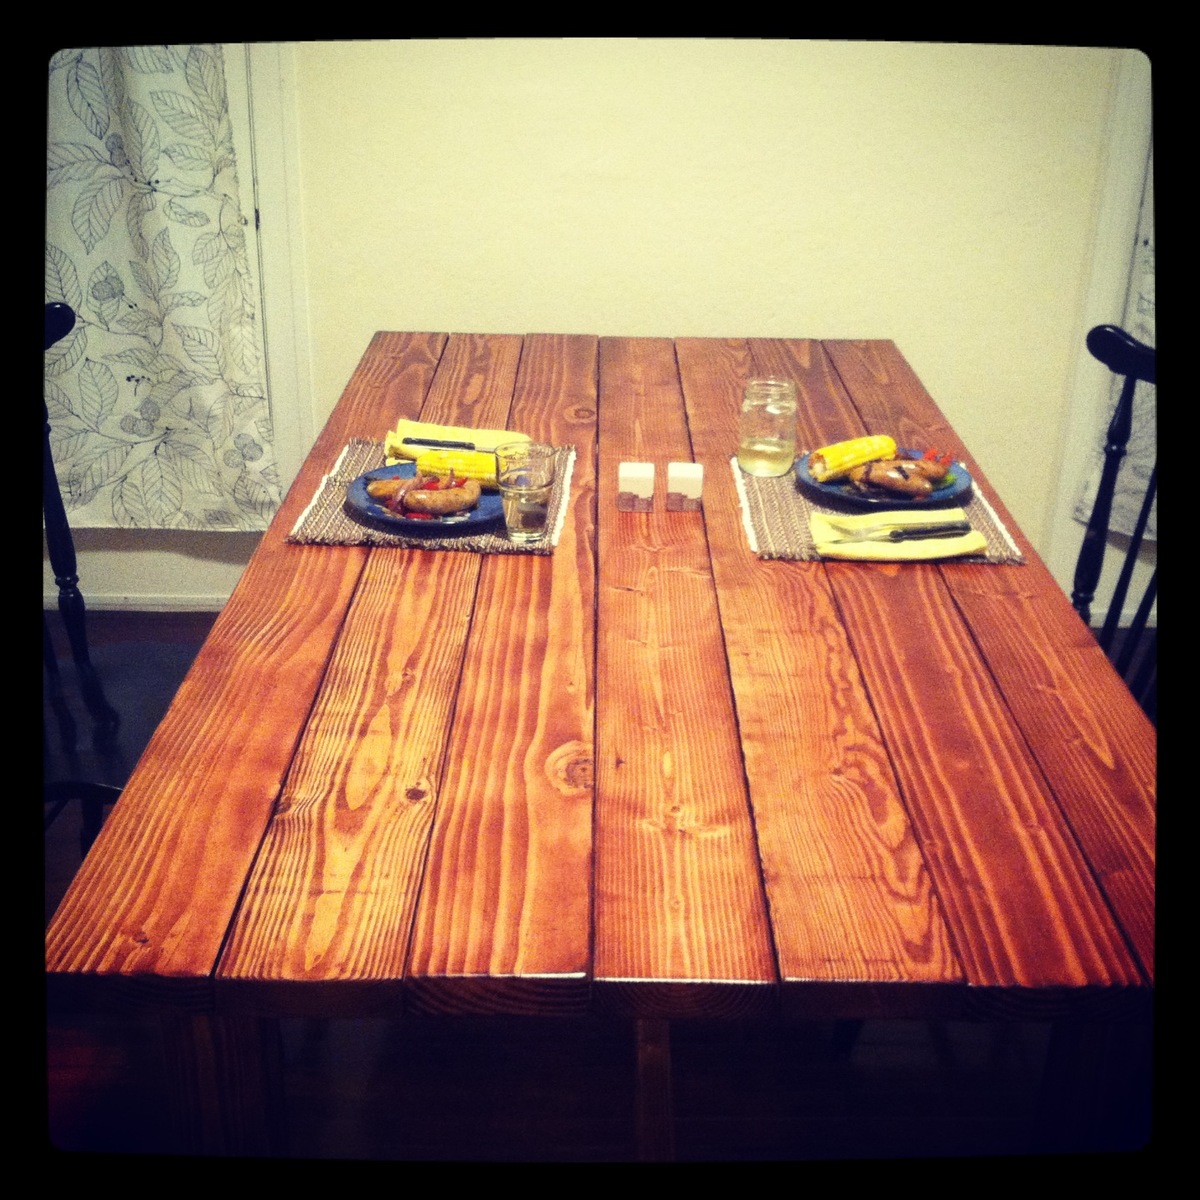
Rustic Farmhouse Table with pocketholes and Special Walnut Finish
Make sure your wood is straight withno warping!

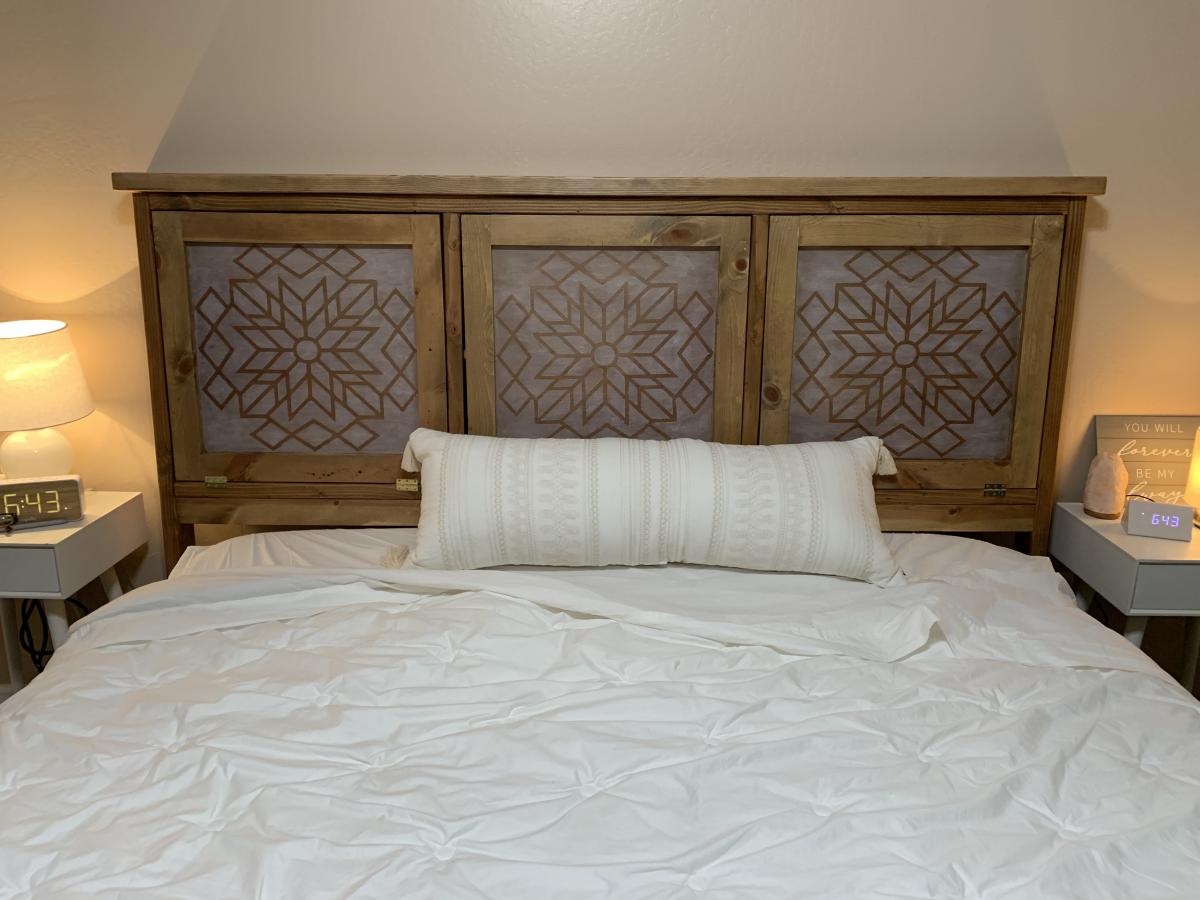
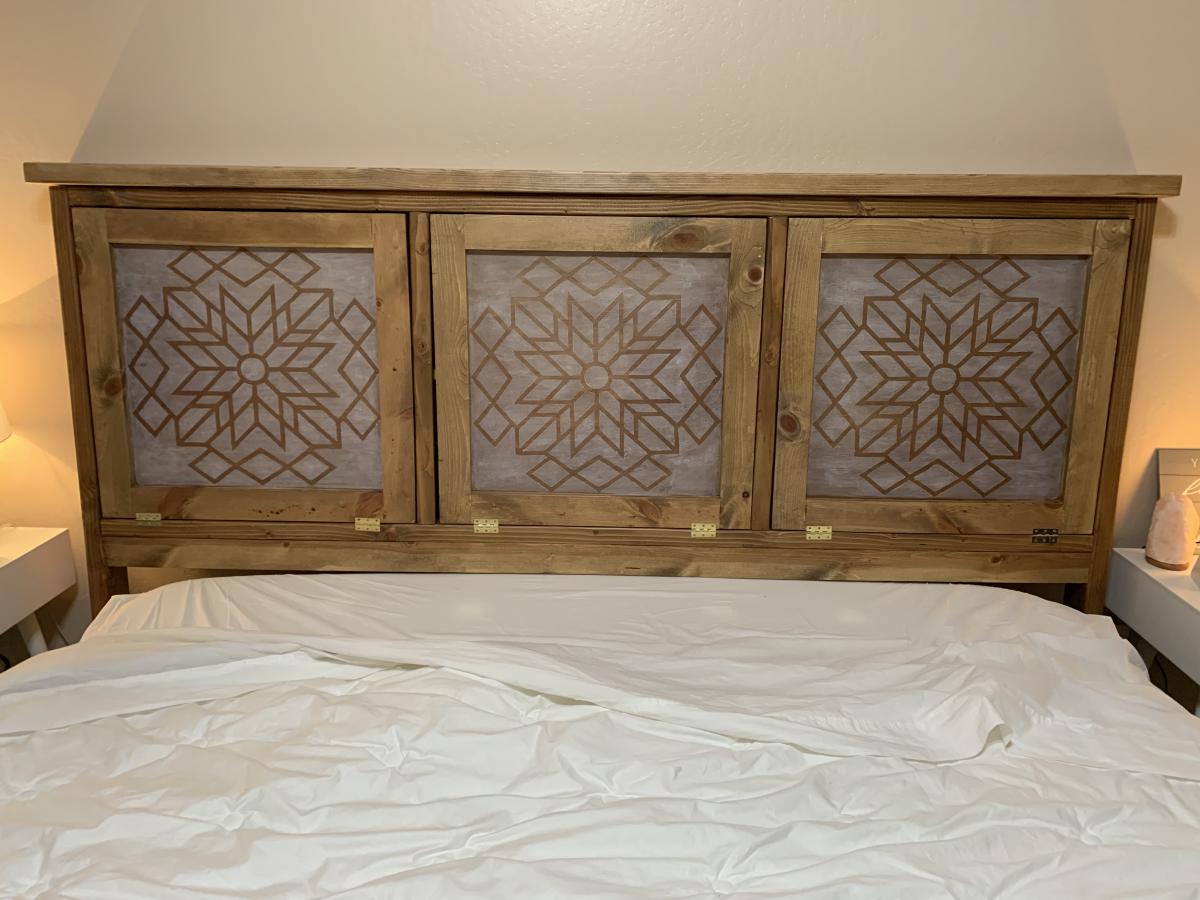
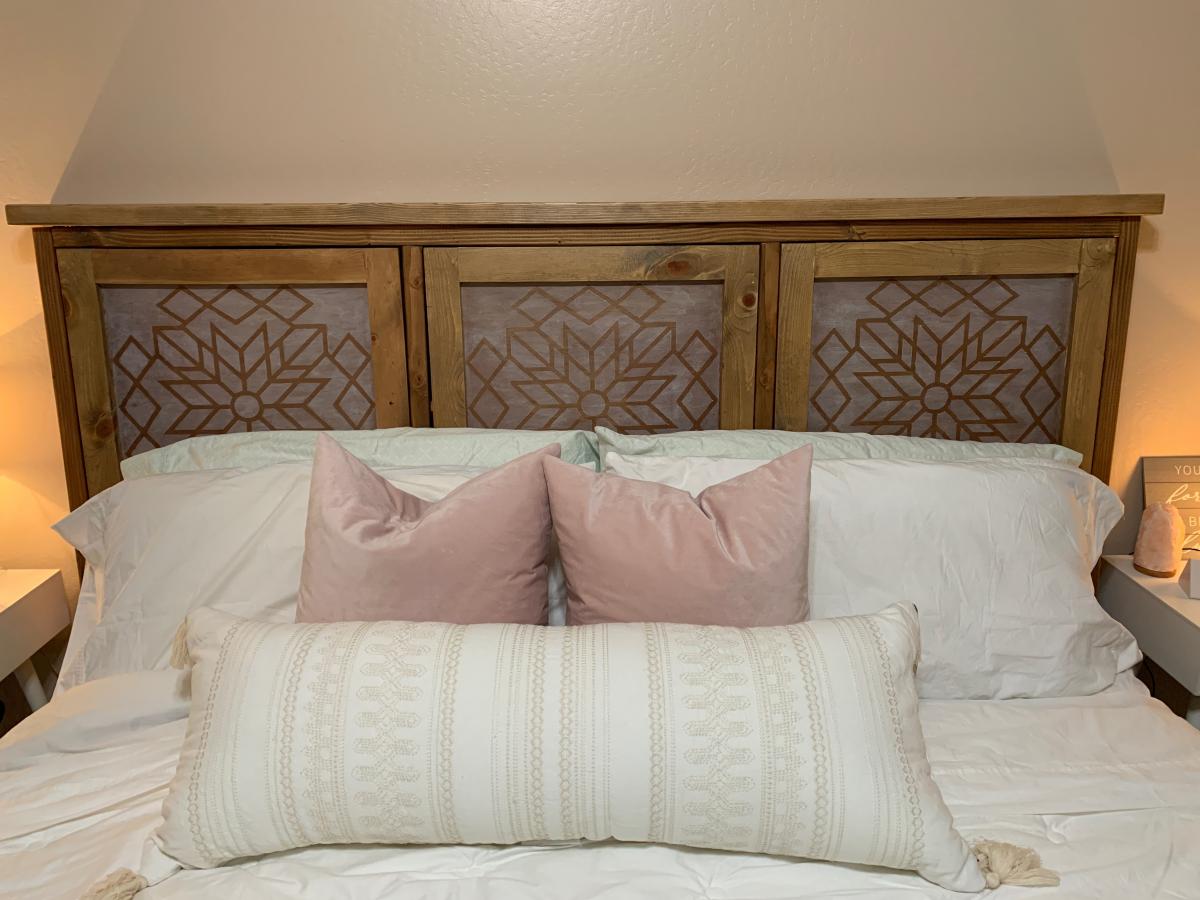
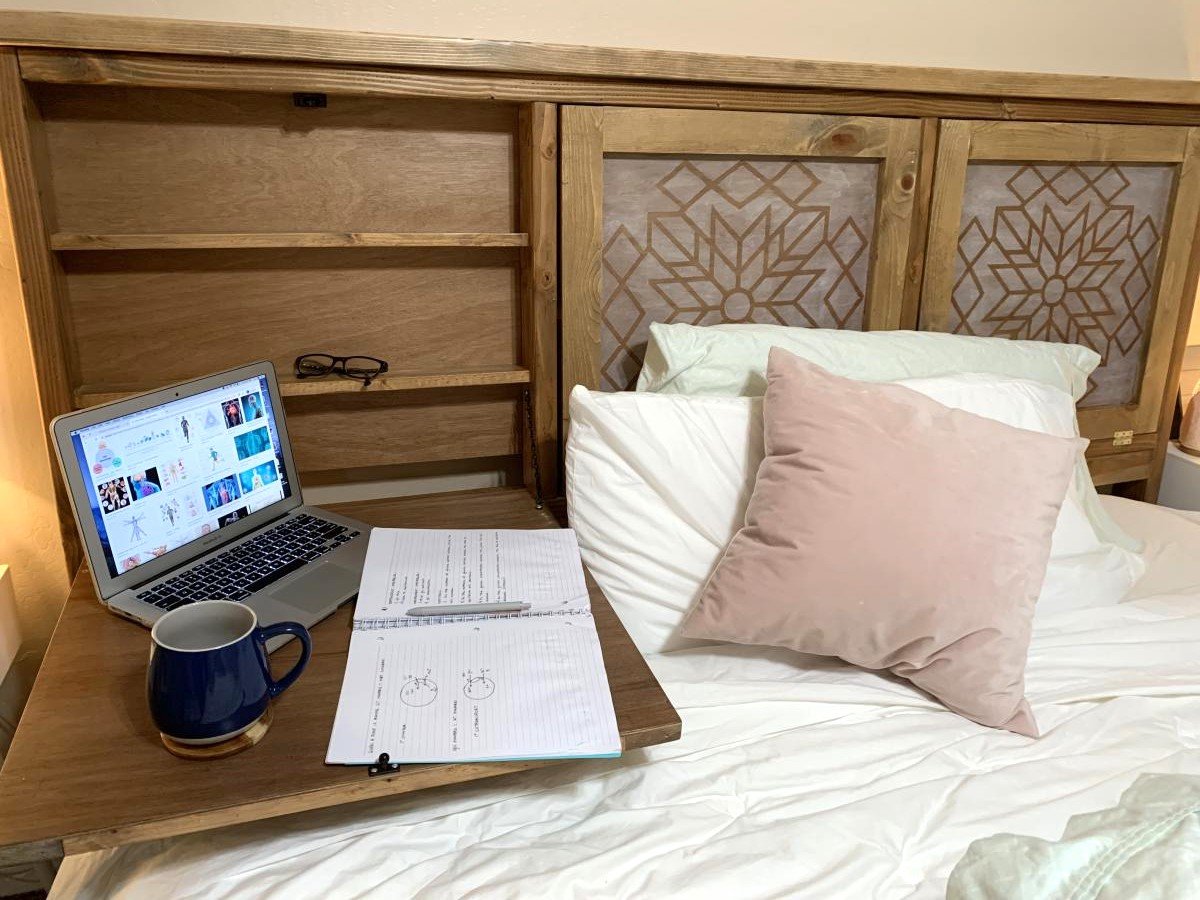
I made the fold down headboard to fit a California King bed and added a design to the panels using my vinyl cutter. The last picture continues to be flipped when I try to post it here sorry.
Sun, 10/04/2020 - 15:50
This is PERFECT. Would you mind sharing the name of the SVG you used for the stencil? I’d like to use it for a table I’m refurbishing. TIA!
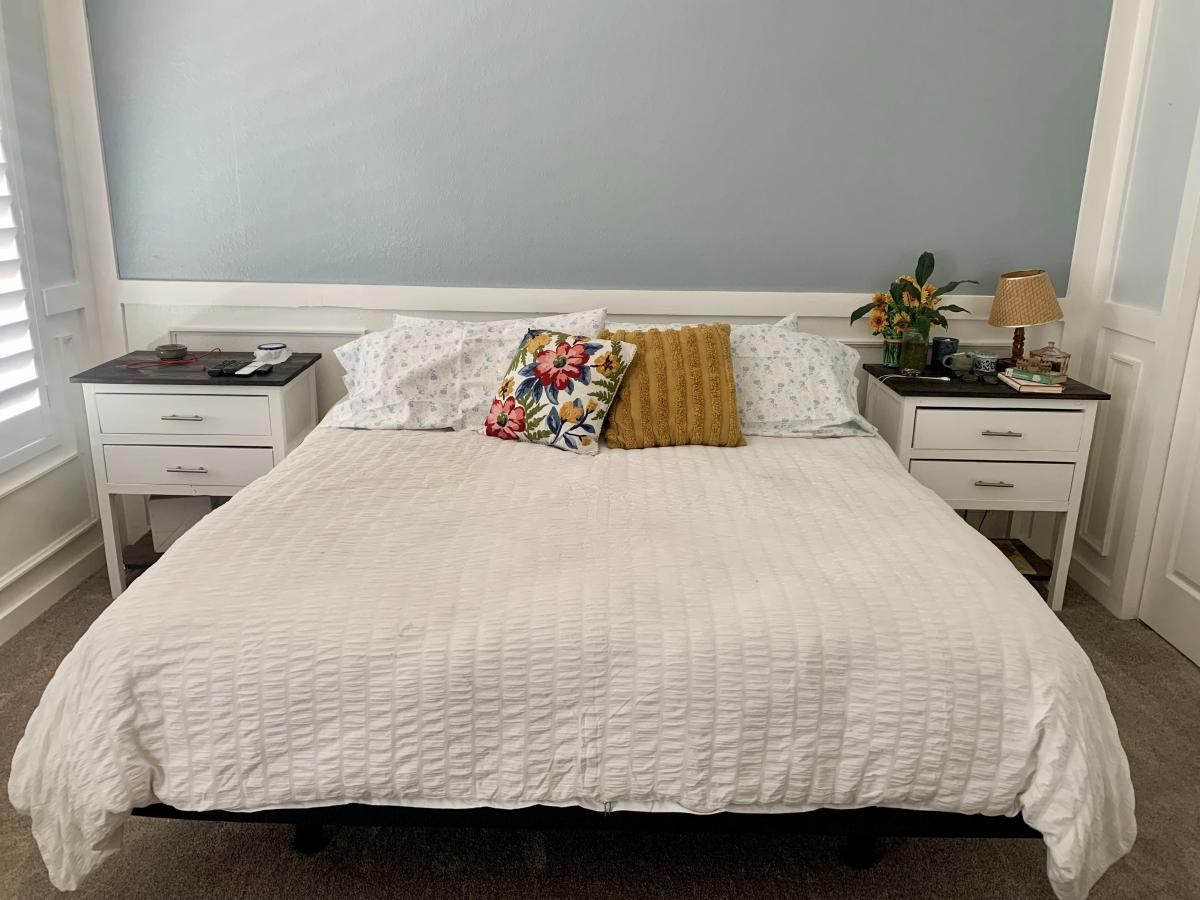
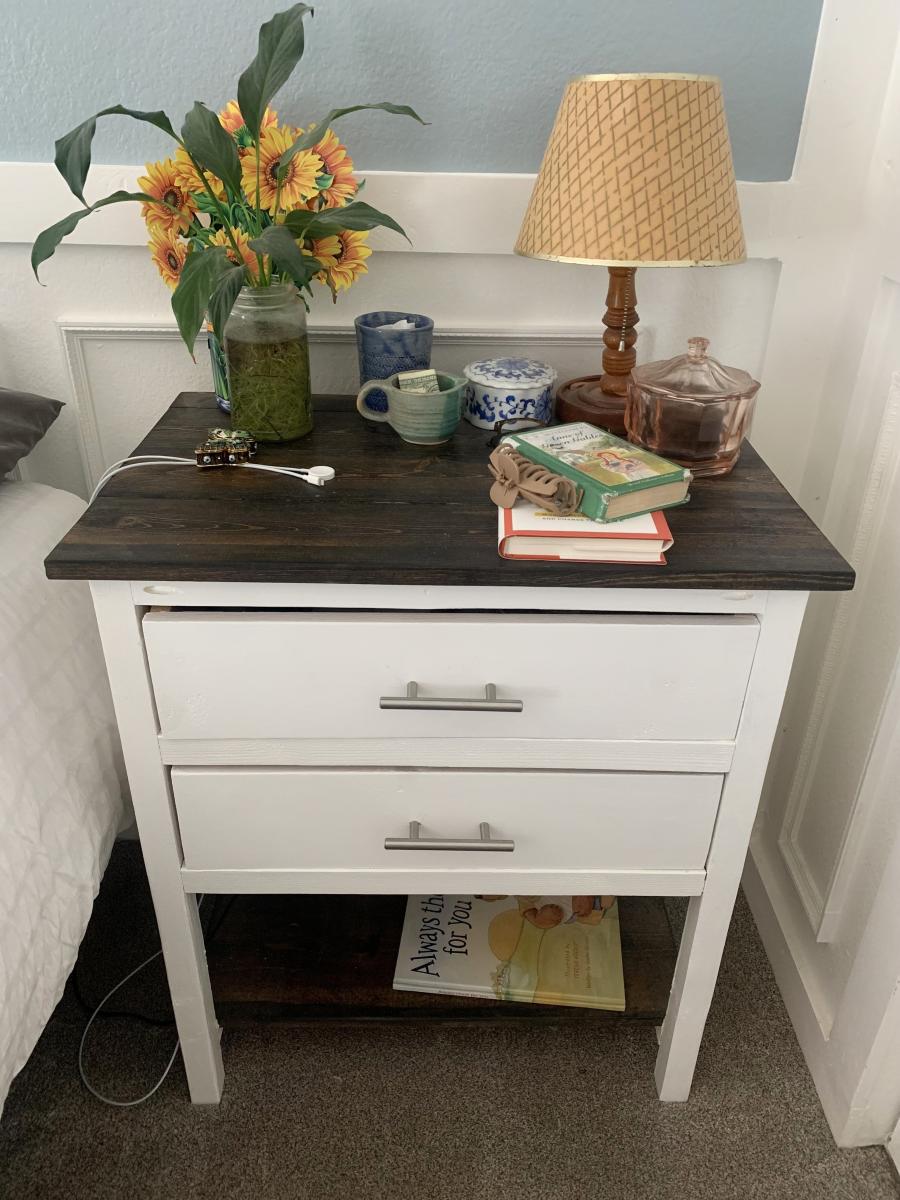
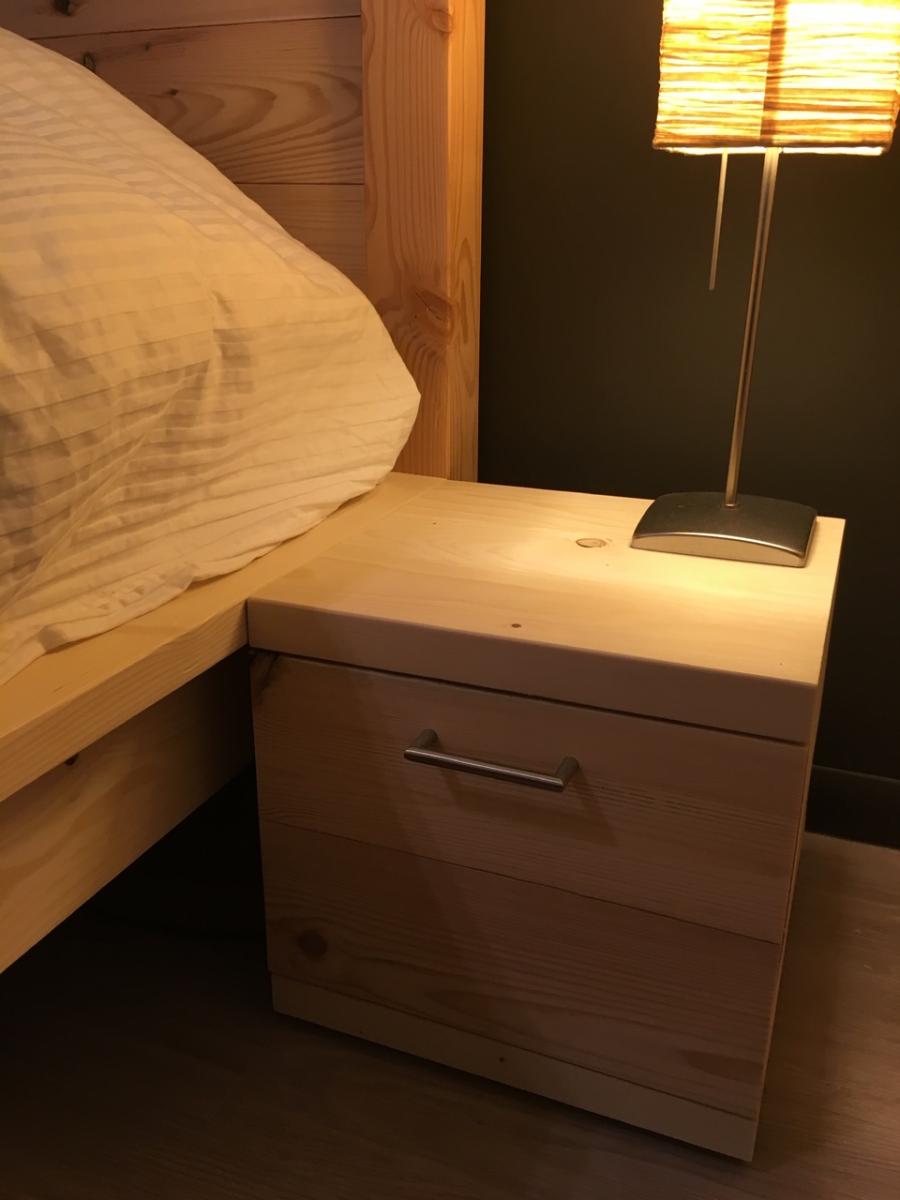
I have always wanted to build some furniture. So, when we were looking for some nightstands for our bedroom and couldn’t find any we liked I found your Farmhouse Nightstand plans and decided to build them as a surprise gift for my husband for Valentine’s Day. I personalized them by adding an extra drawer and making them a little taller and wider to fit the space we had. We absolutely LOVE them! Thank you, Ana, for helping to make a dream of mine come true!
Toni Imlay @ toniimlay.com
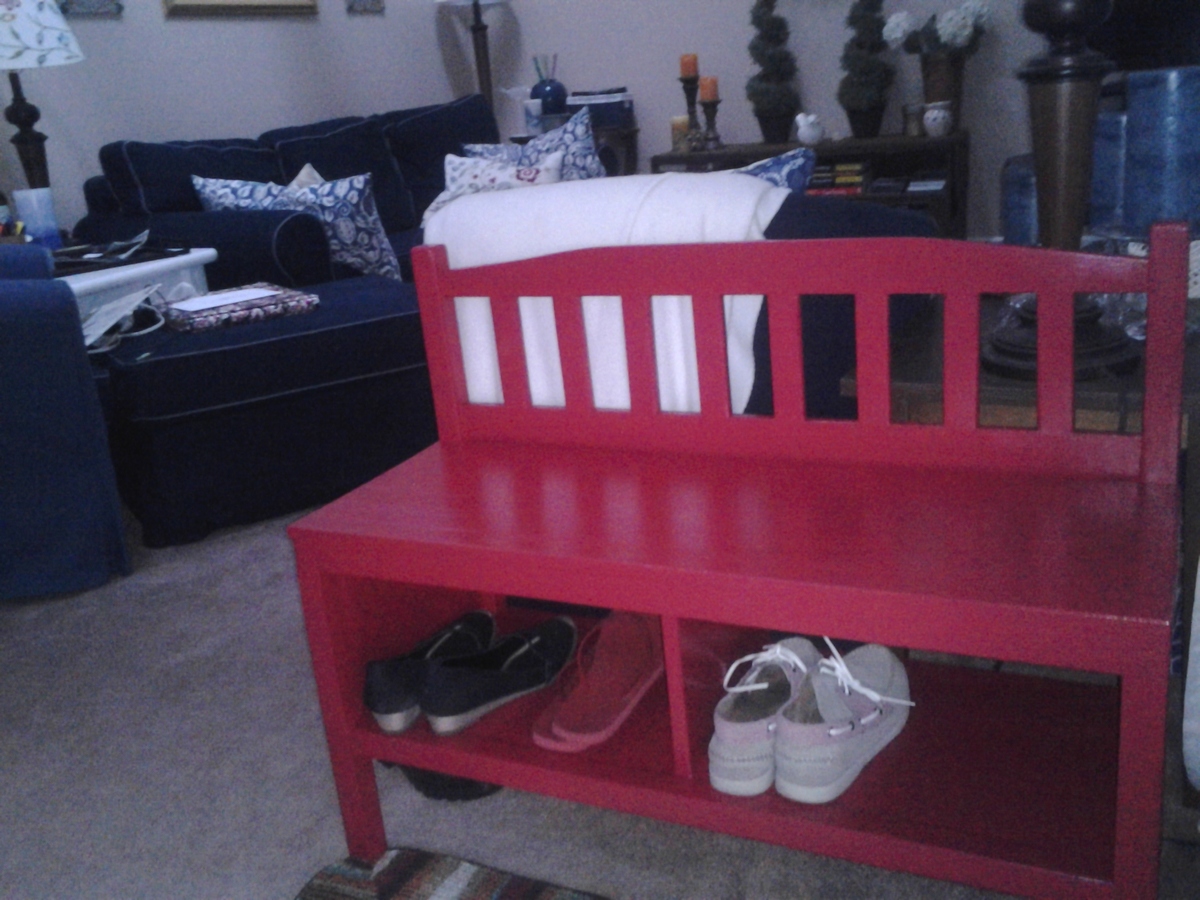
I really wanted a place to sit down and take my shoes off when I got home. I don't have a large entryway, so the space was tight. I looked online for a bench that would fit the measurements, and found a few that looked good-- except for the price! Luckily I already knew about Ana White, so I came here in search of some plans and lo and behold she already had plans posted for the exact same bench I liked most from the catalogs!
I've used power tools before, but never actually *built* anything from scratch. I thought my boyfriend would help me with this (he's got woodworking experience), but I got tired of waiting for him to get around to it, so I just did it all by myself!
I first attempted to make this without a Kregg Jig, cause I didn't want to spend the money on it if I didn't need it. But it didn't take long to figure out that I needed it. So back to the store I went (found out the hard way that Lowes sells Kreggs but Home Depot does not, at least the ones near me). And holy cow it was SO WORTH IT!
I also got to buy a new sander for the project, cause the hand-me-down from my dad had a missing bit of the clamp that holds the sandpaper to the sander (kind of essential)
So all in all I spent more than the catalog price of the bench, but I will get to use the tools to build all sorts of fun stuff!!!
Thank you Anna! You empowered me to build exactly what I wanted and I LOVE IT!!!!

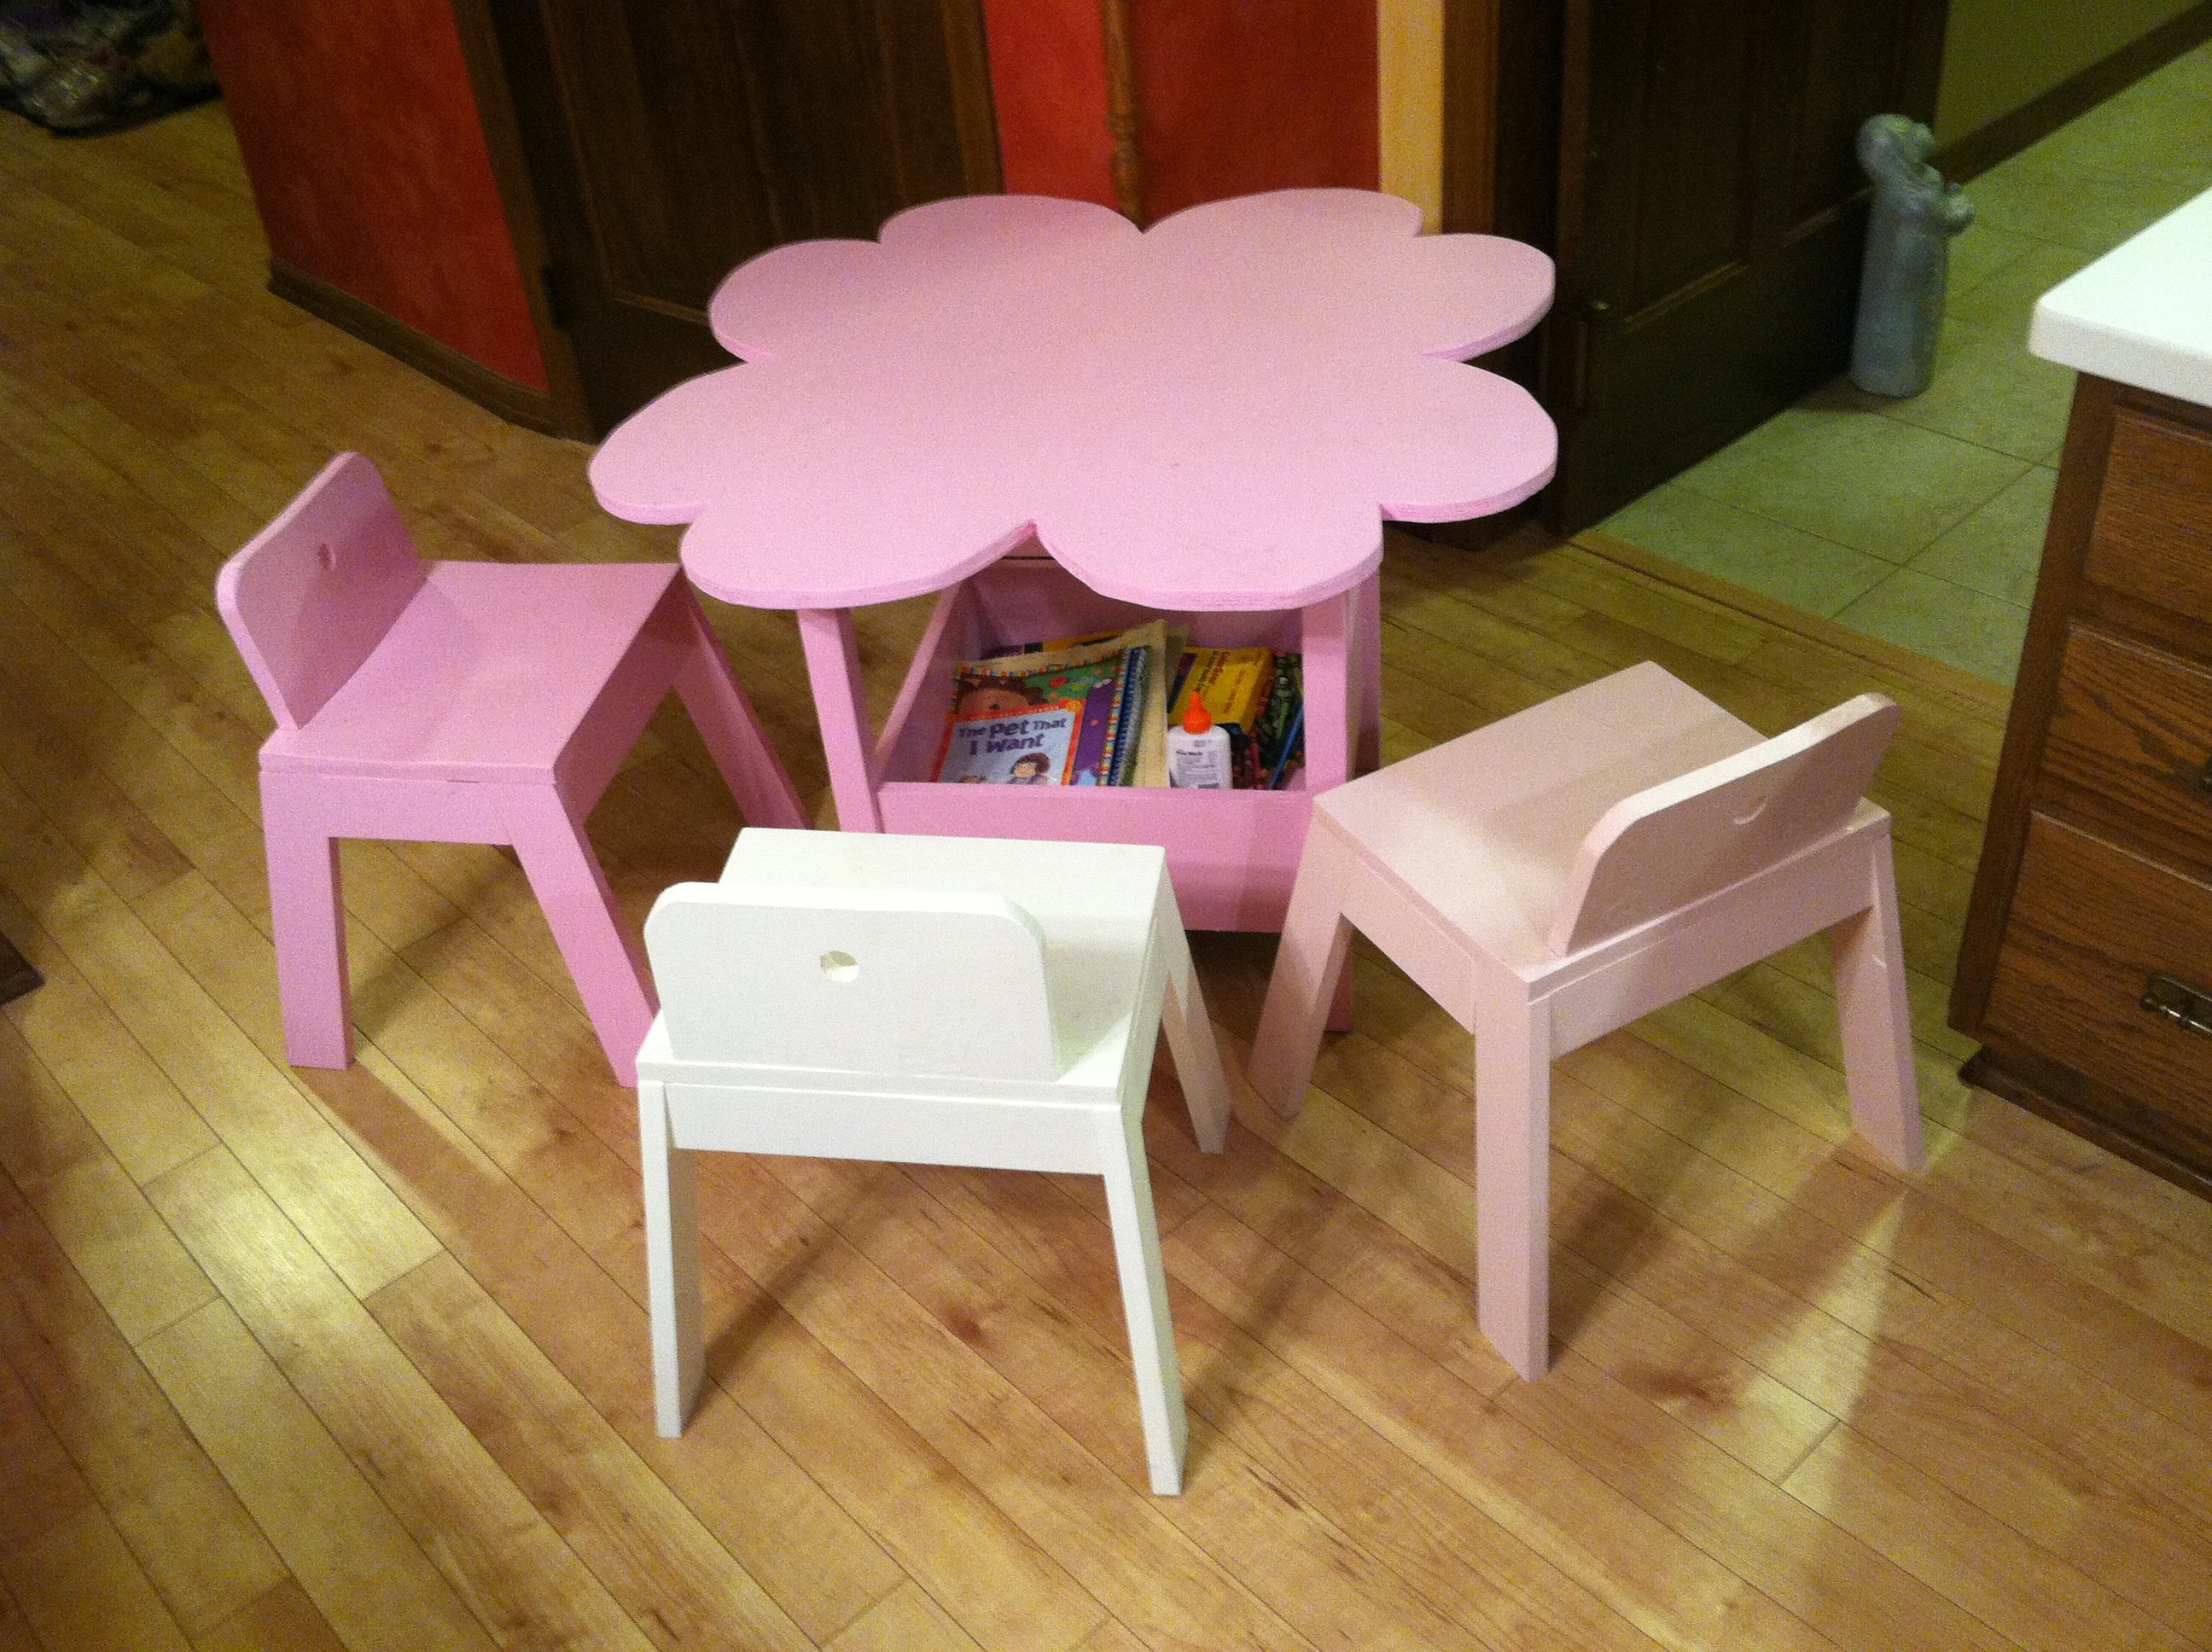
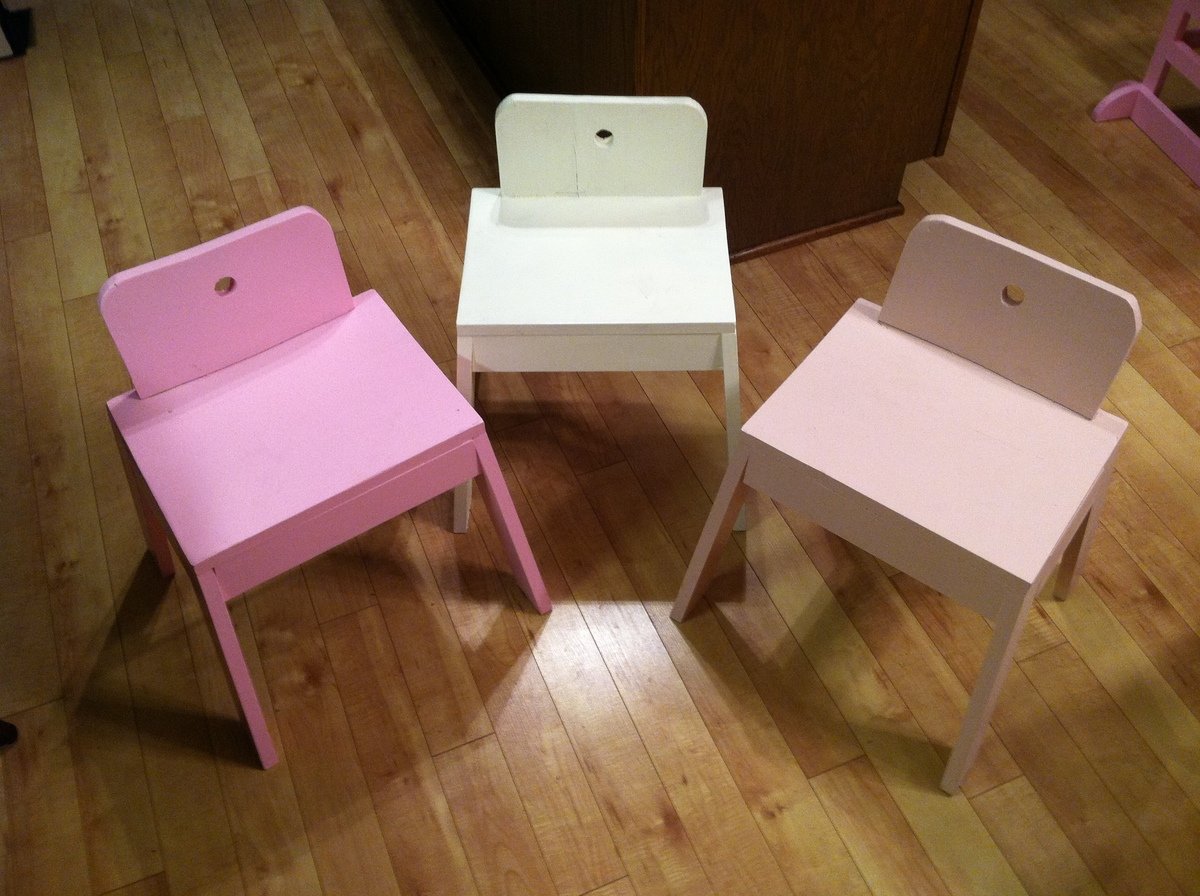
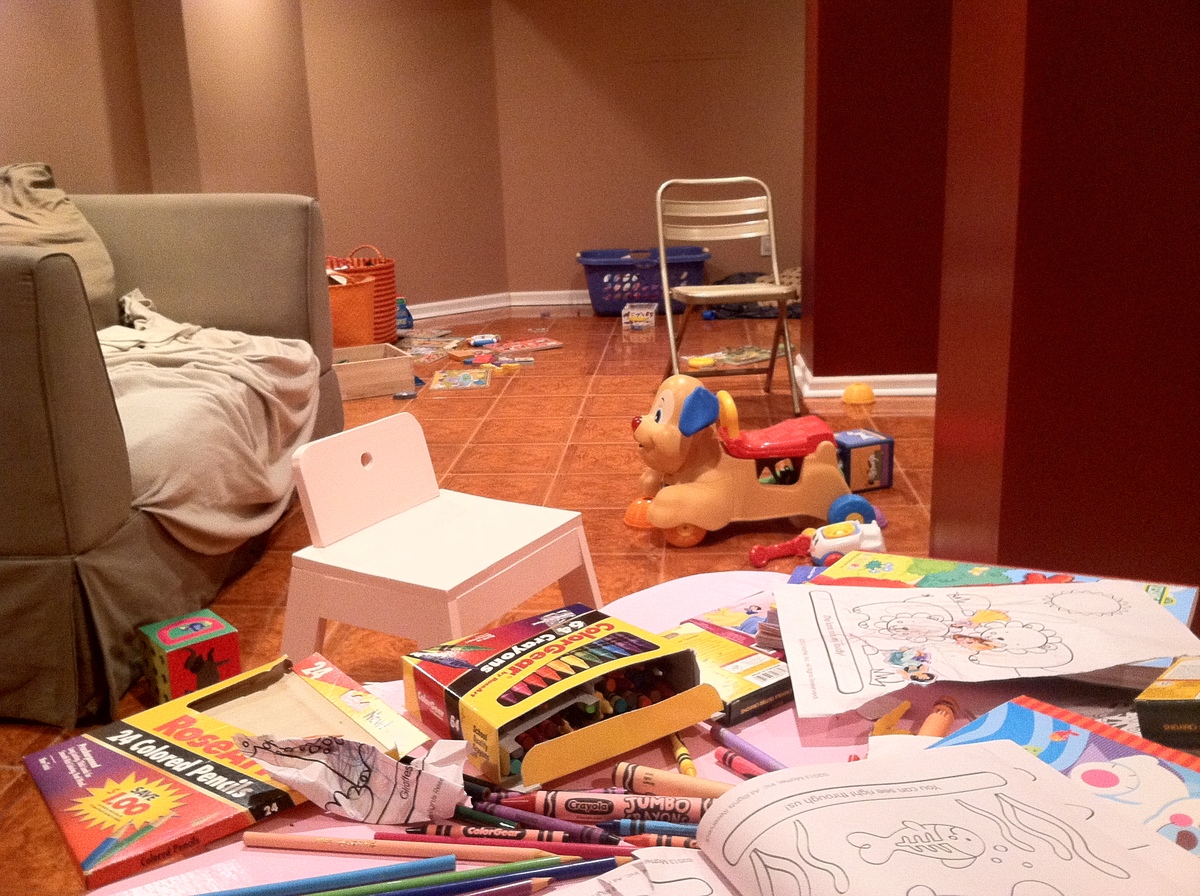
I put together the flower storage table and the thumb chairs during the week leading up to our daughter's first birthday party. With a lot of older toddlers/kids at the party, the table served as a perfect coloring station in our basement (as you can see from the mahem/aftermath photo below). In any event, as my daughter is about to turn two, she has really grown into using the table and chairs for completing her own arts and crafts projects.

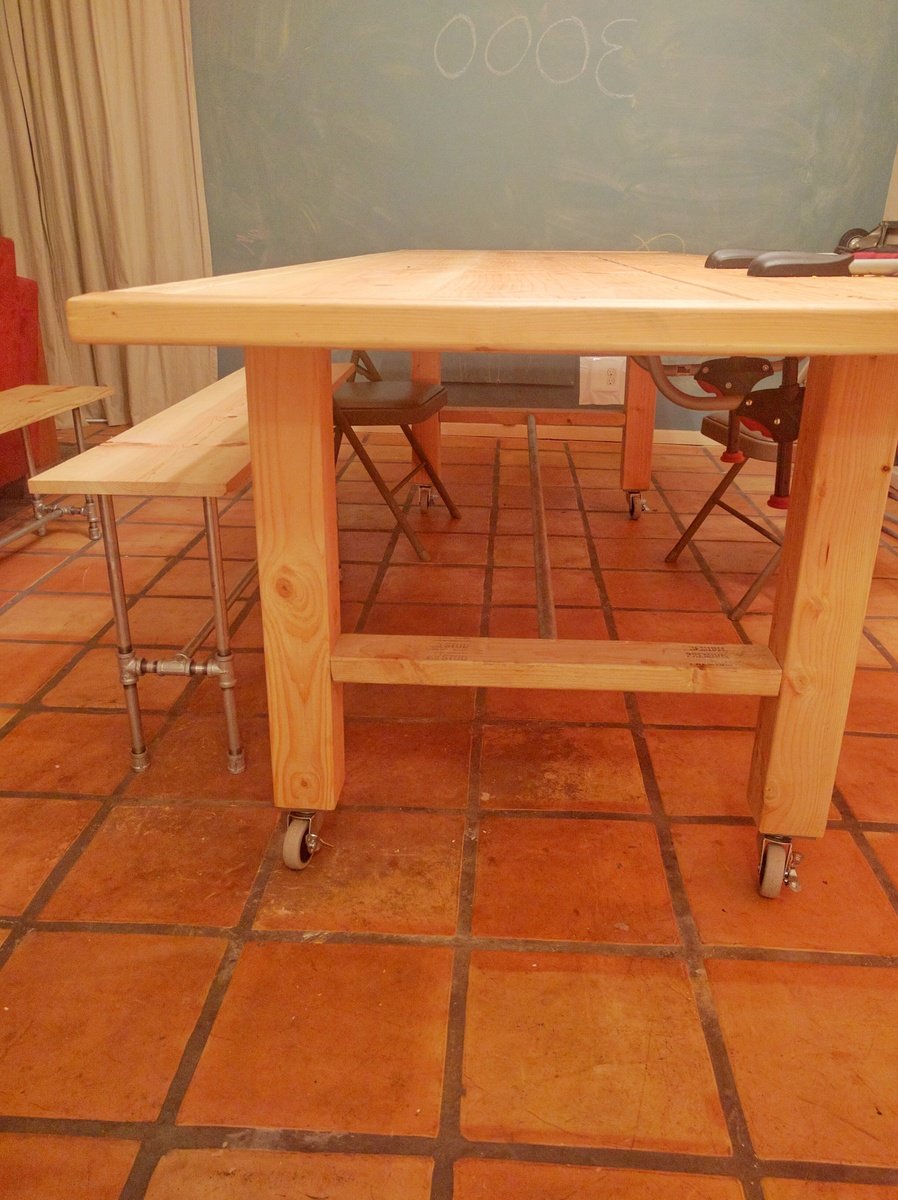
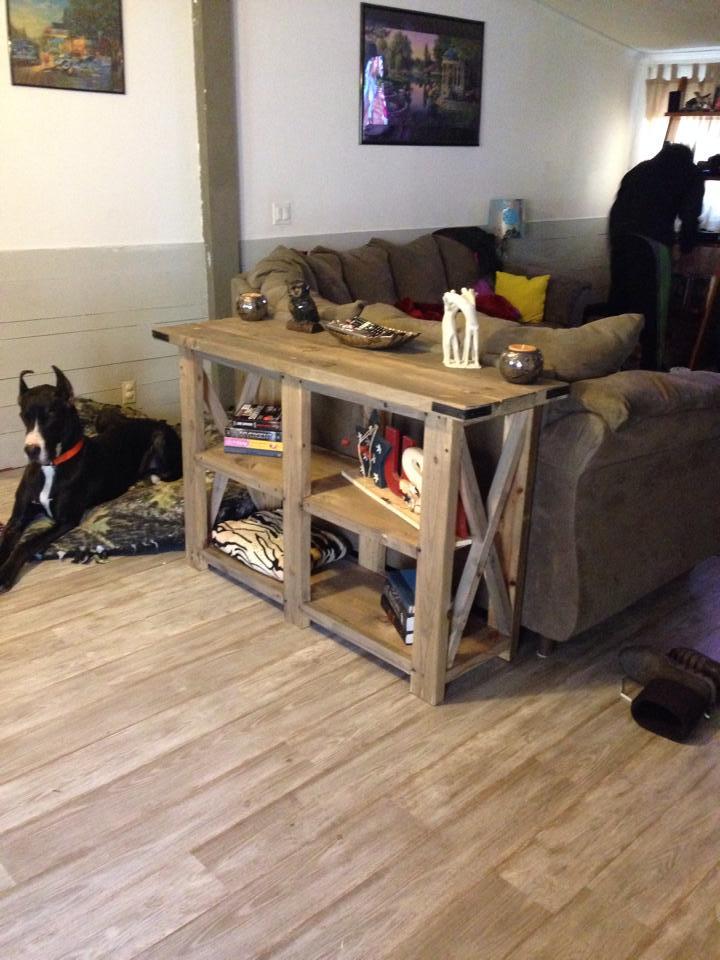
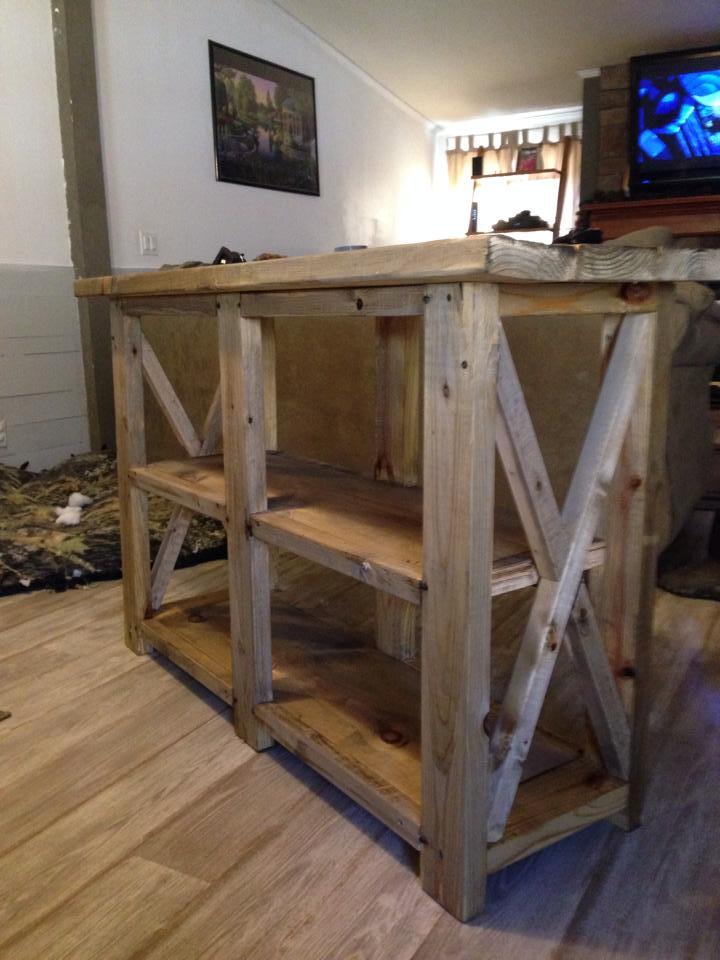
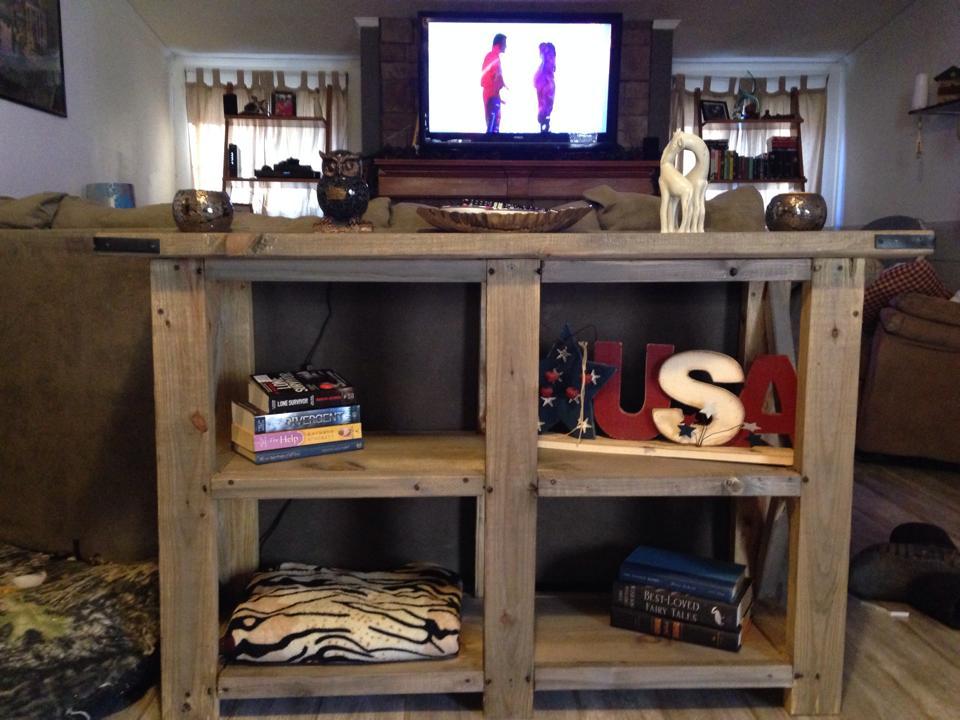
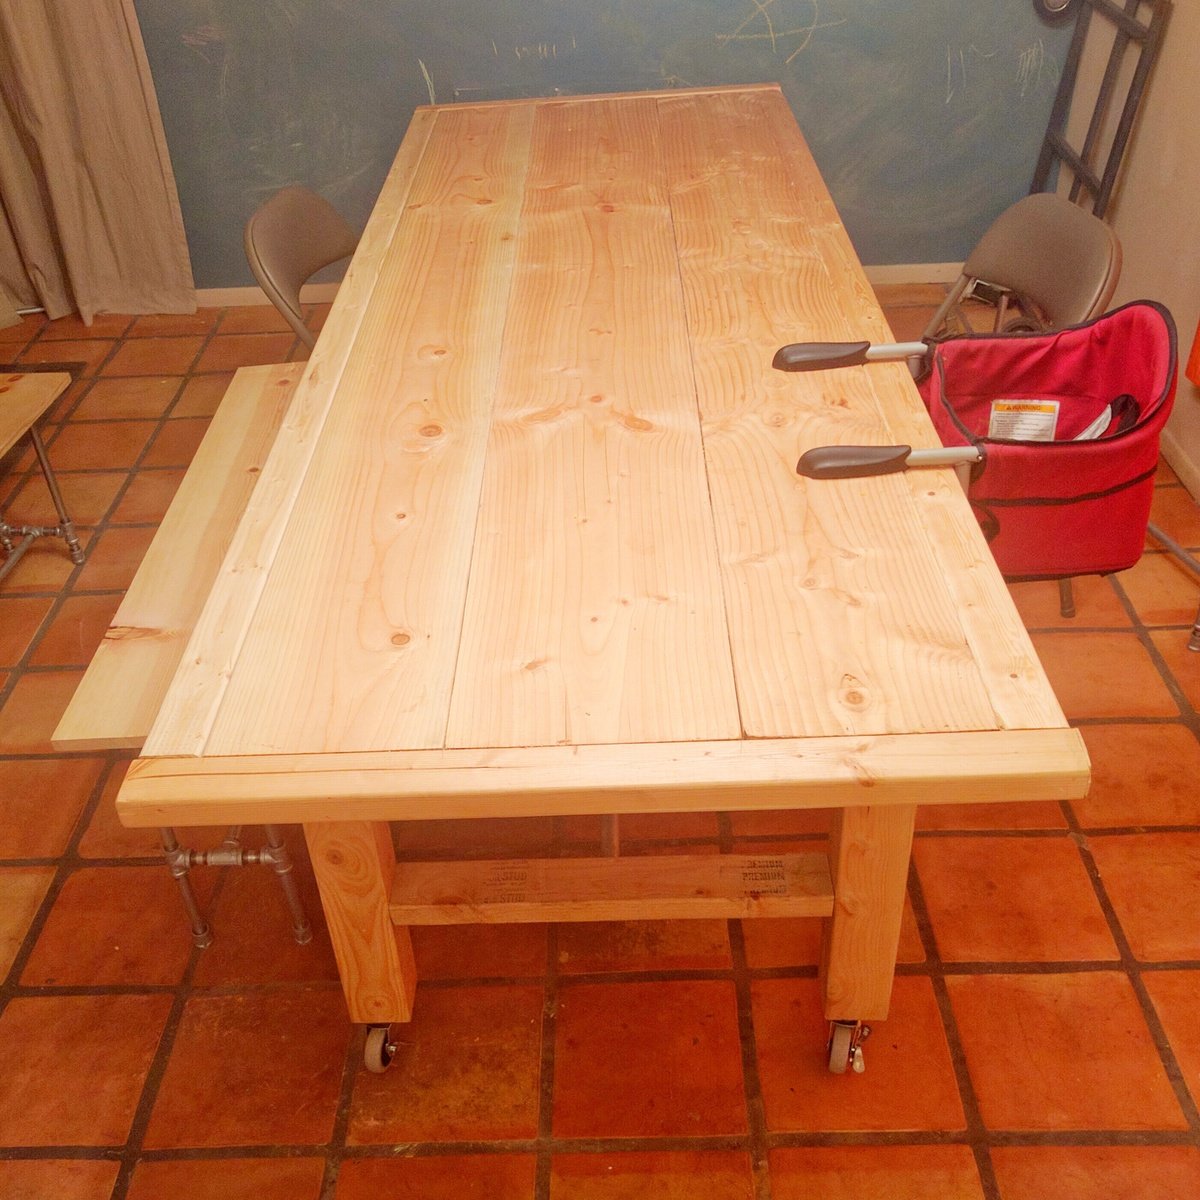
Modified top boards, 3/4 inch galvanized pipe as center support to reduce cuts needed, and casters so the massive thing can be moved.
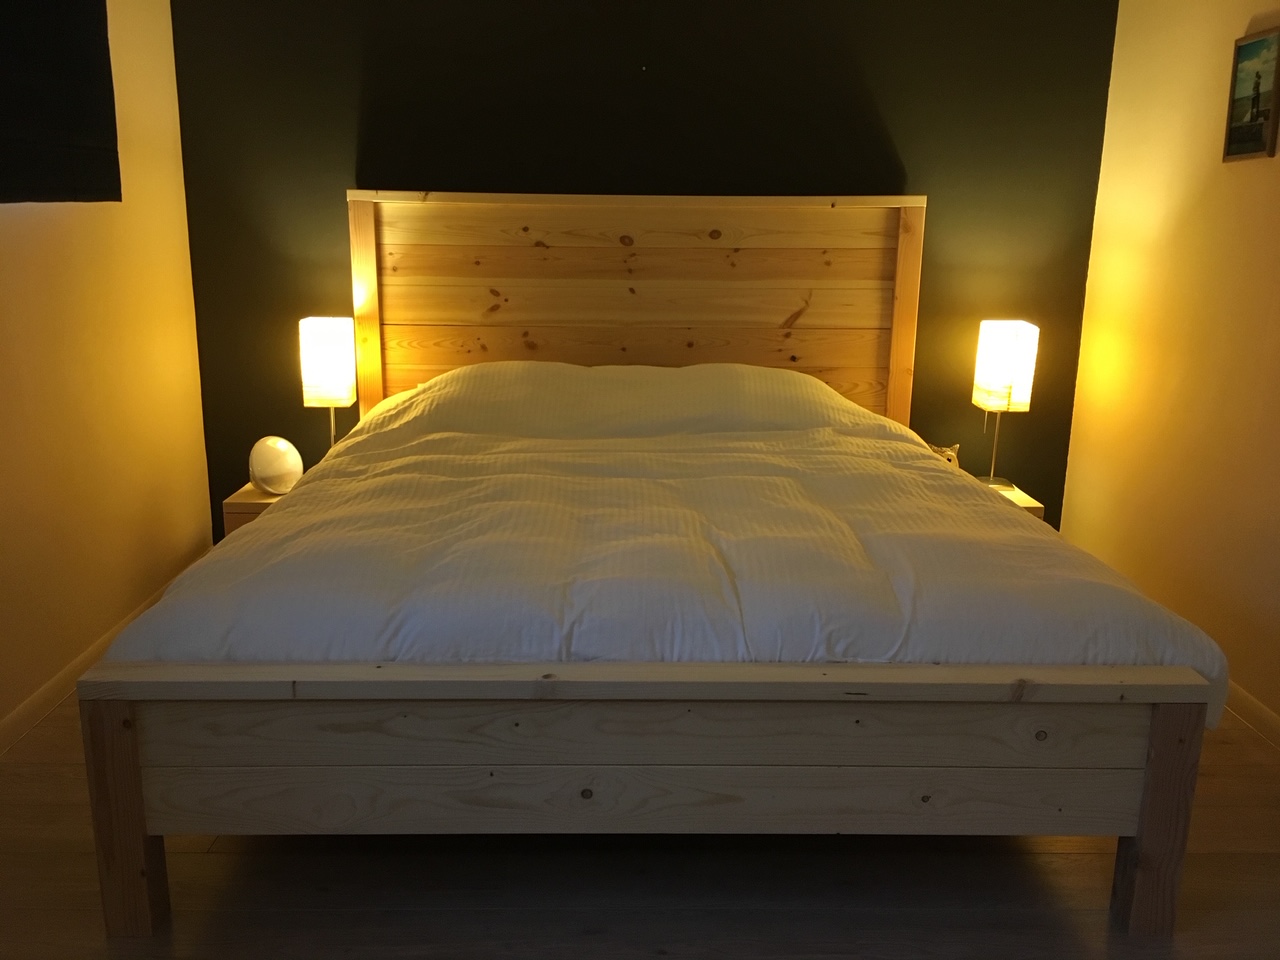
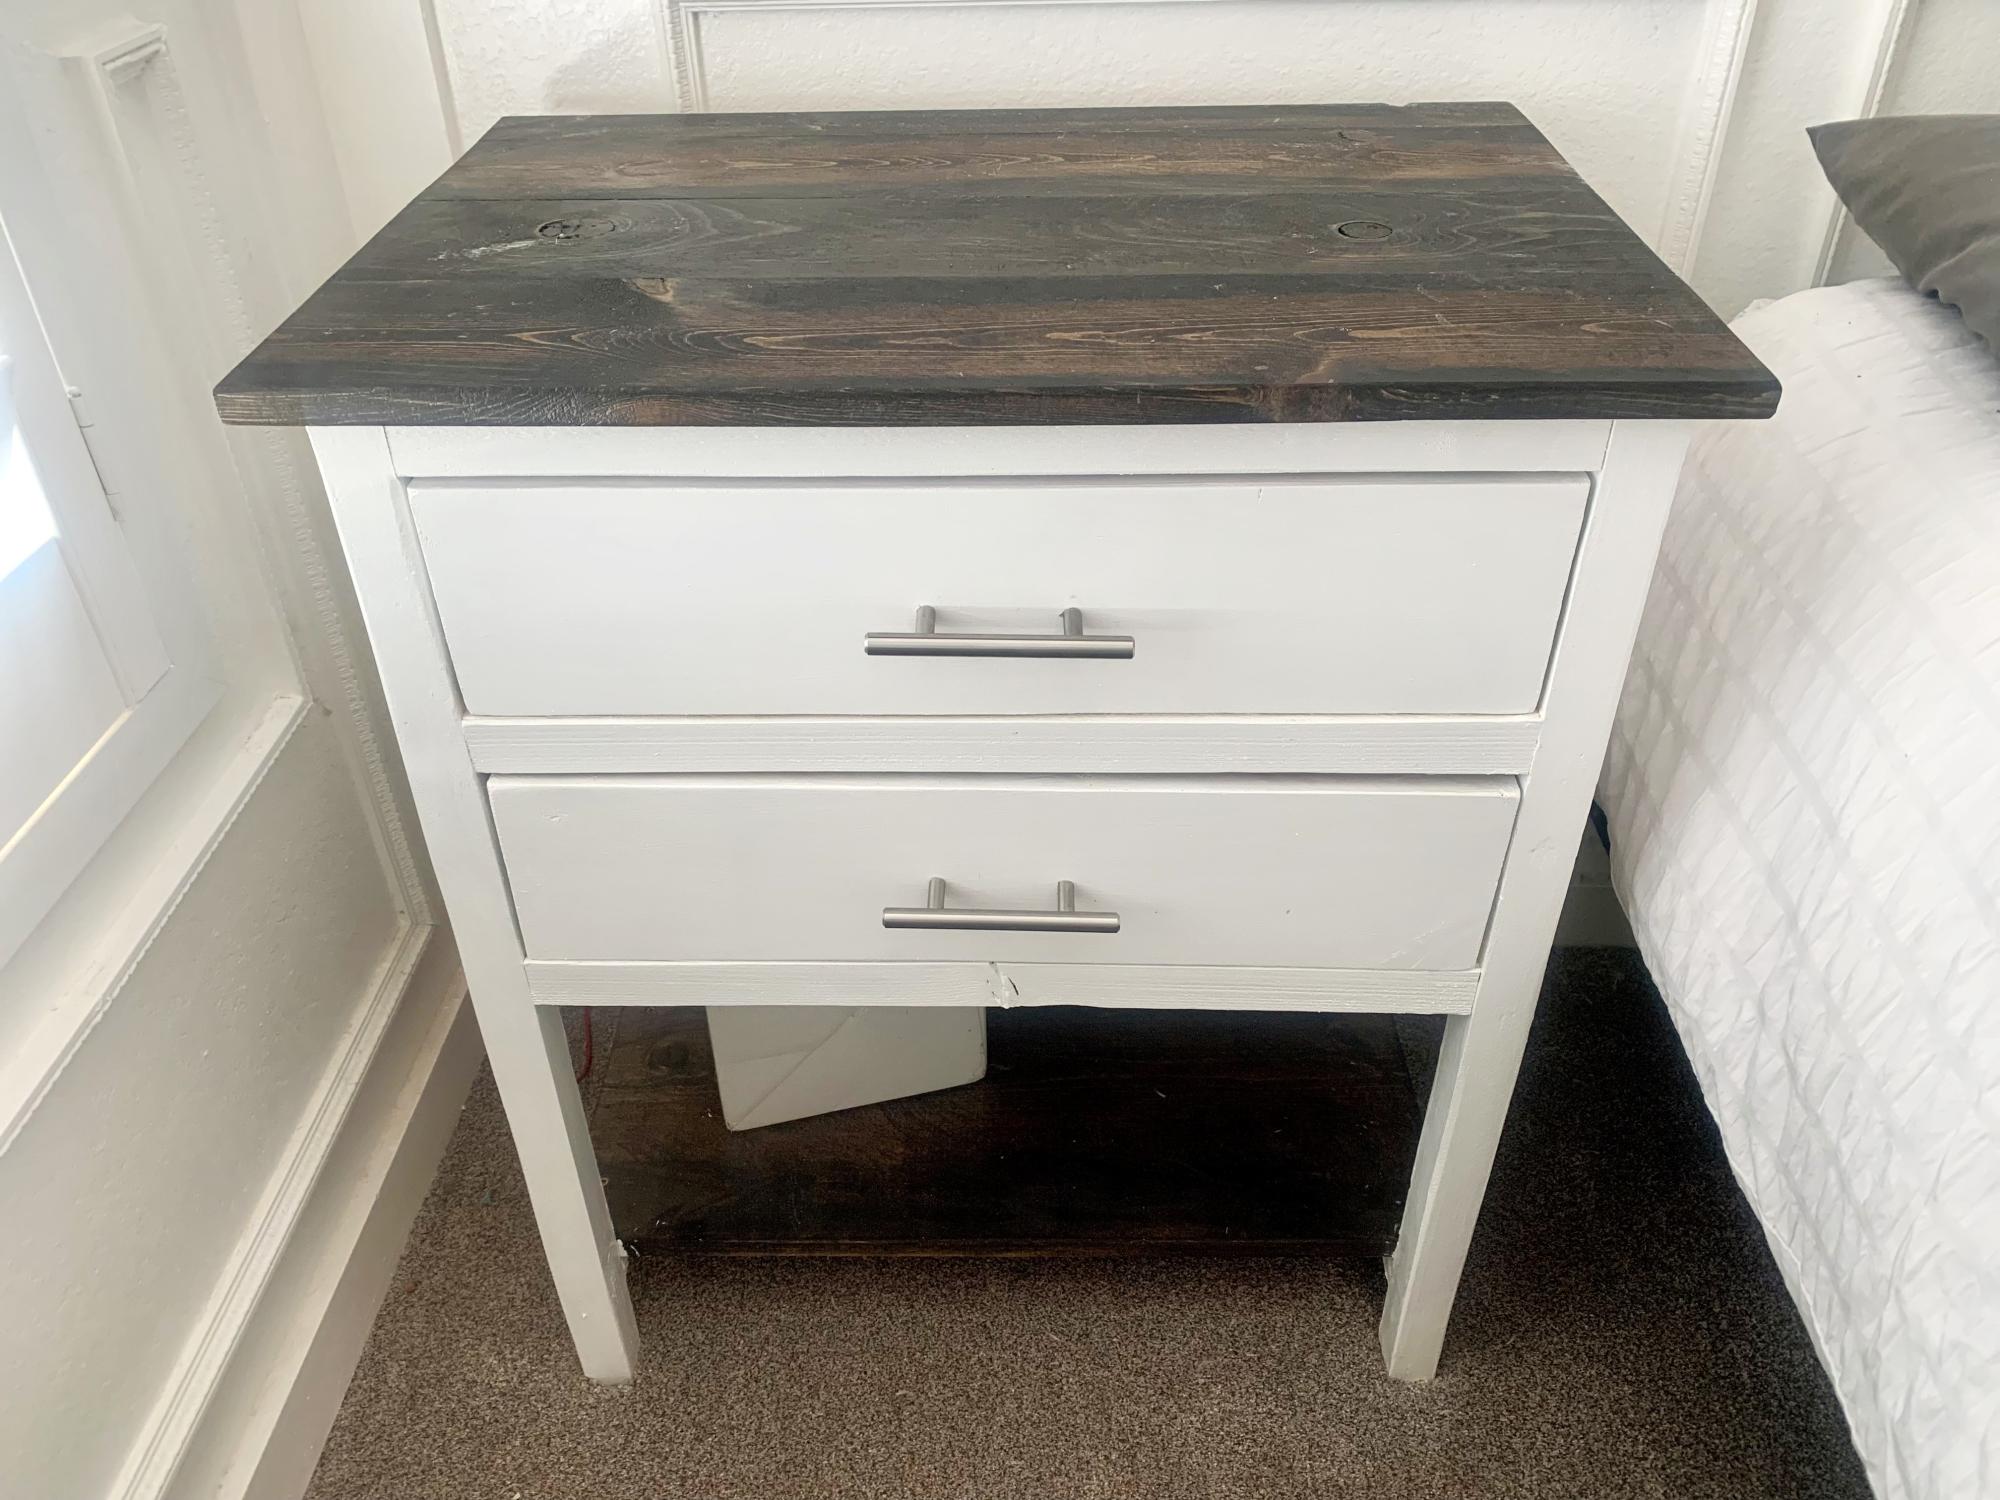
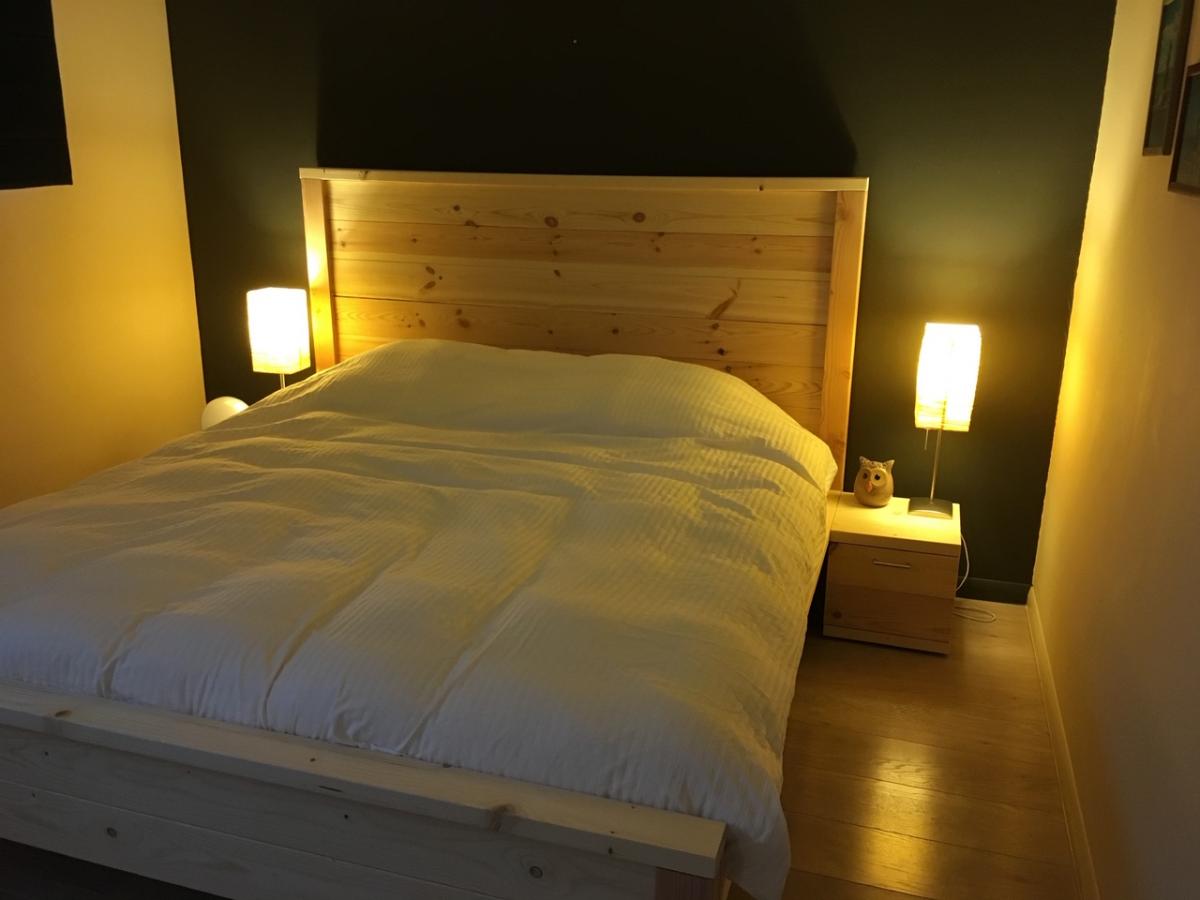
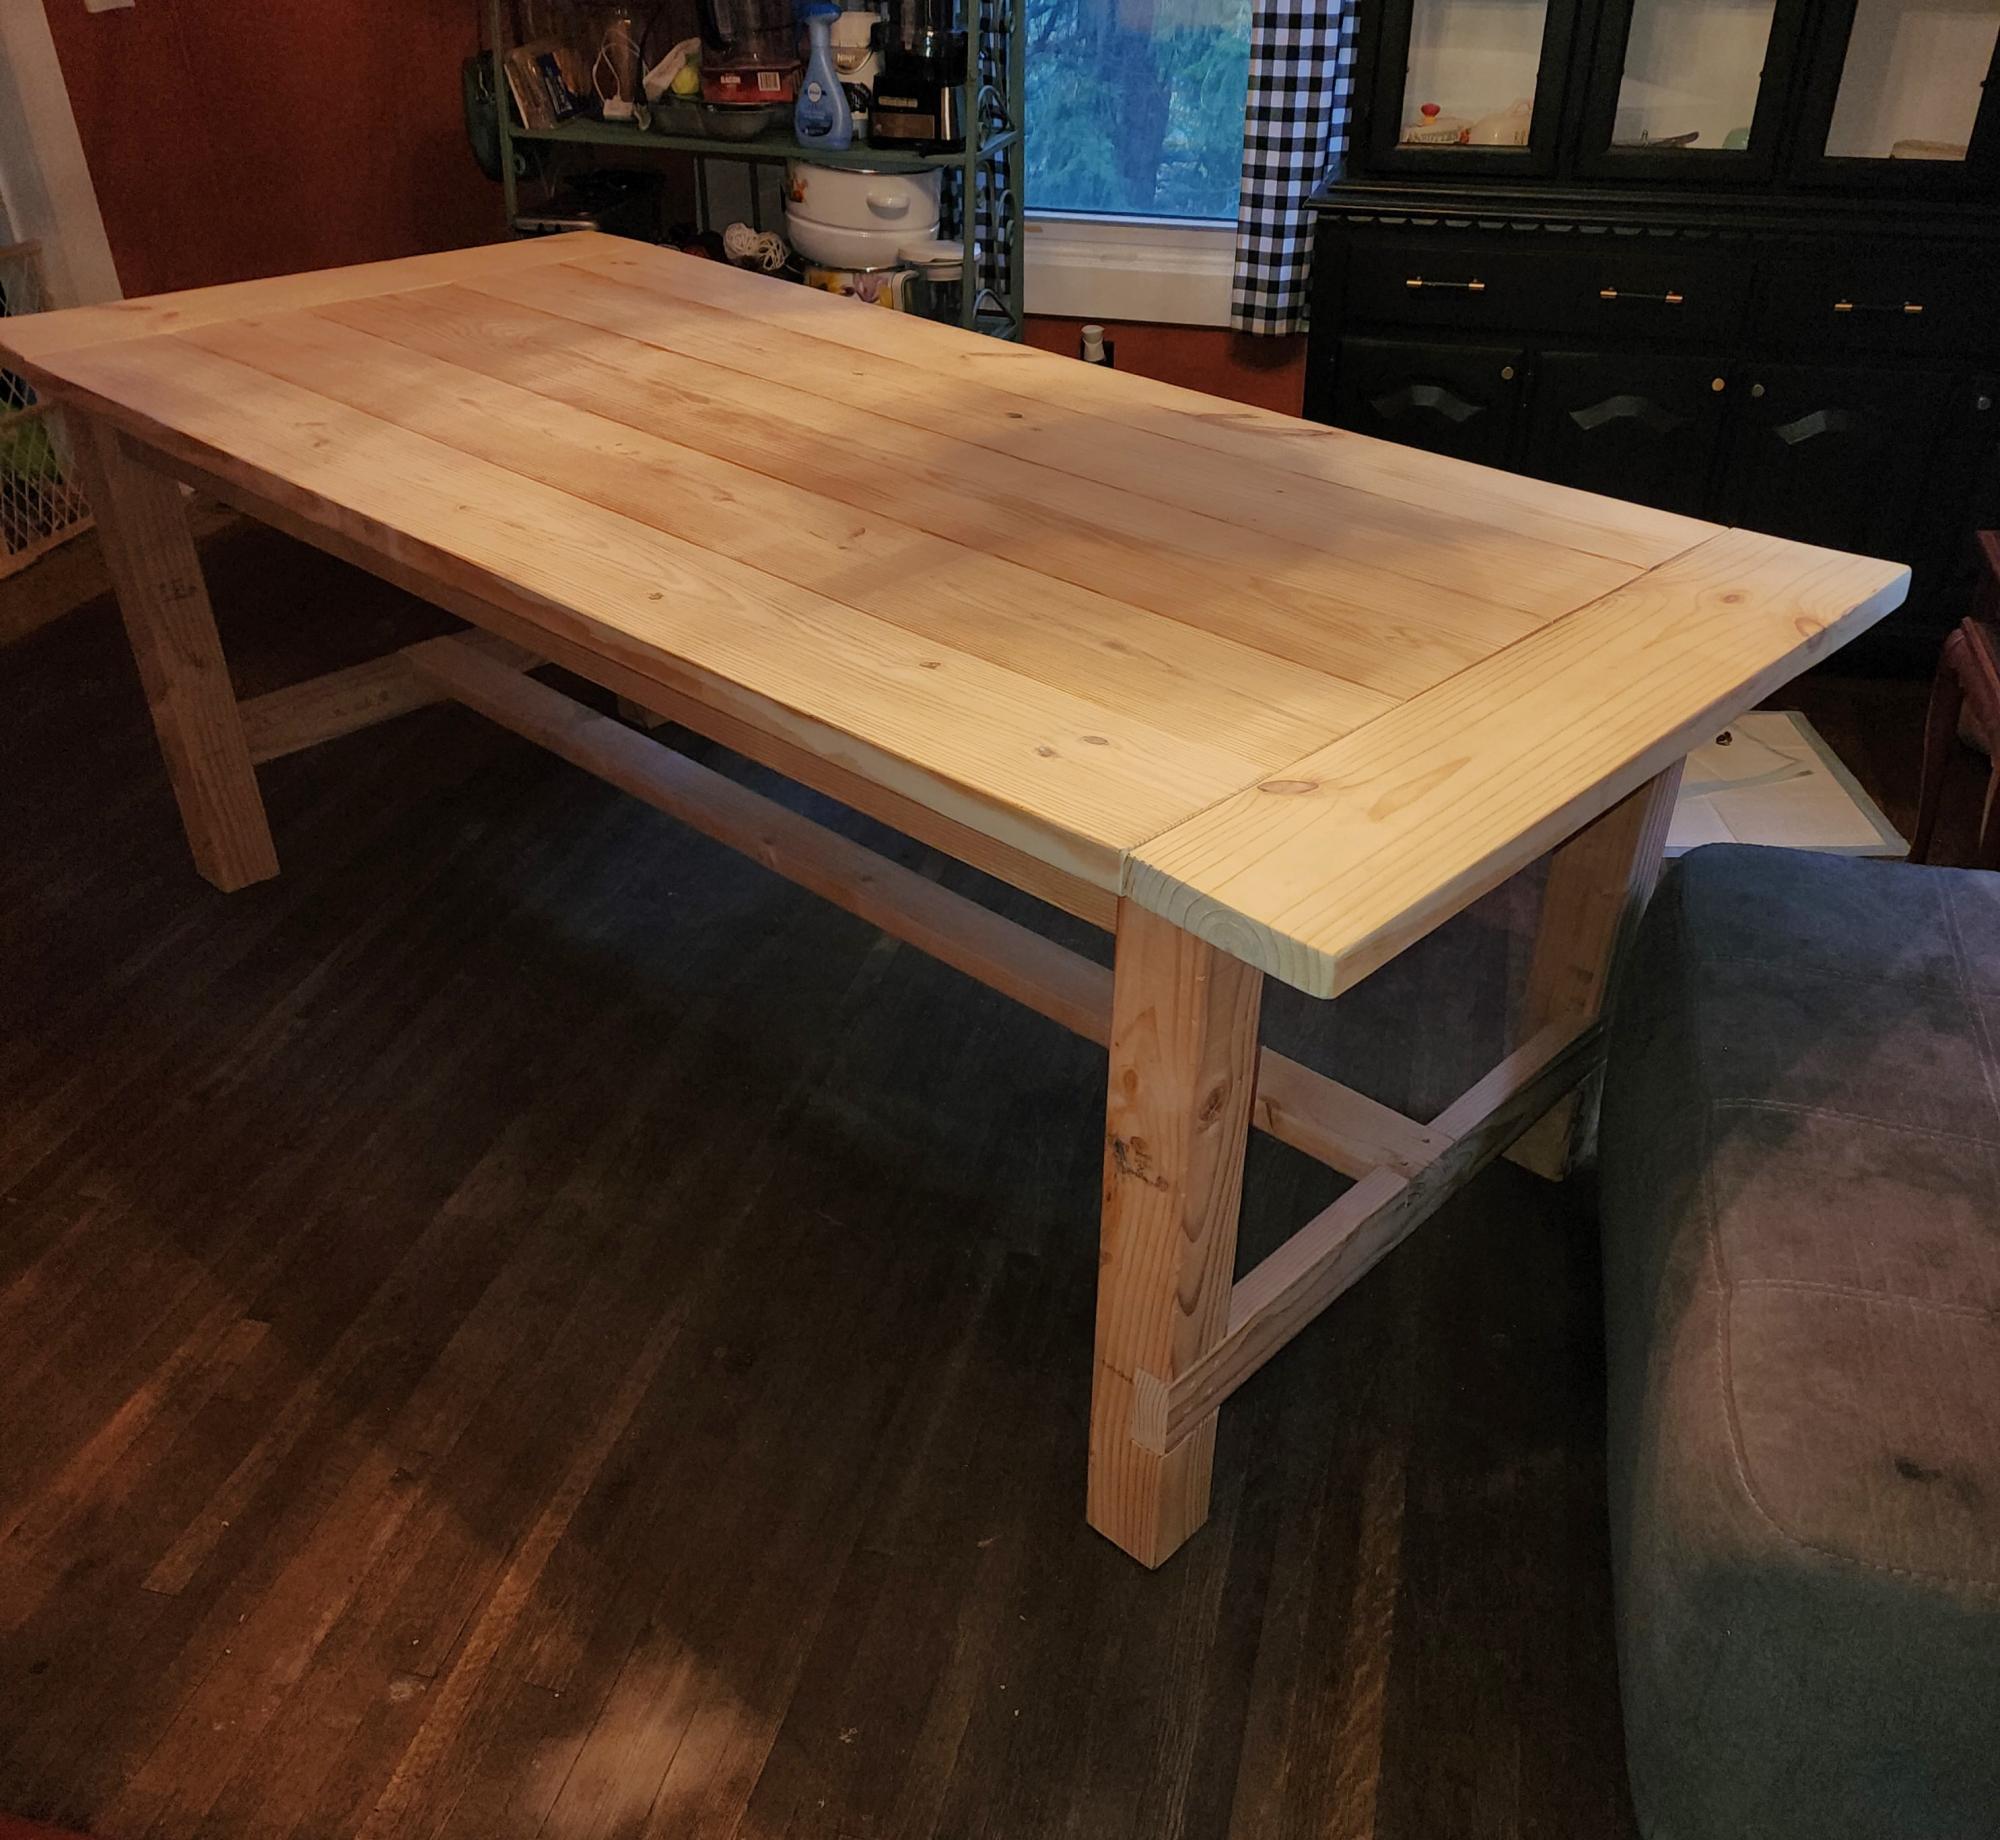
I made this beautiful bed in just one (long) day (12h). The next day I made the nightstands with the scraps of wood from the bed.
Loved building this table. Look forward to building more! Thanks Ana!

Easy, fun great project that my husband and I did together. This project cost about $202, and I will take that price over the price that you would have to pay in the furniture store any day. We found some great wood at Lowe's that worked perfectly and gave it the "rustic" look that we like. Thanks Ana for the plans and sharing them with us.
Wed, 05/16/2012 - 19:01
That's a fine quality piece of furniture!
Why can't I get dark walnut stain to look like that?

Wed, 05/16/2012 - 19:45
Debi_G, I've had lots of trouble getting stains to look the way I want too. What I've taken to doing is either mixing my own (see http://claydowling.com), as well as trying out various commercial stains until I find one that satisfies my desires. Good use for your scrap.
So far the best commercial stains I've found are from General Finishes. They're designed to sit partially on top of the wood, which prevents some of the splotchy and washed out look that make some stains unpleasant to work with.
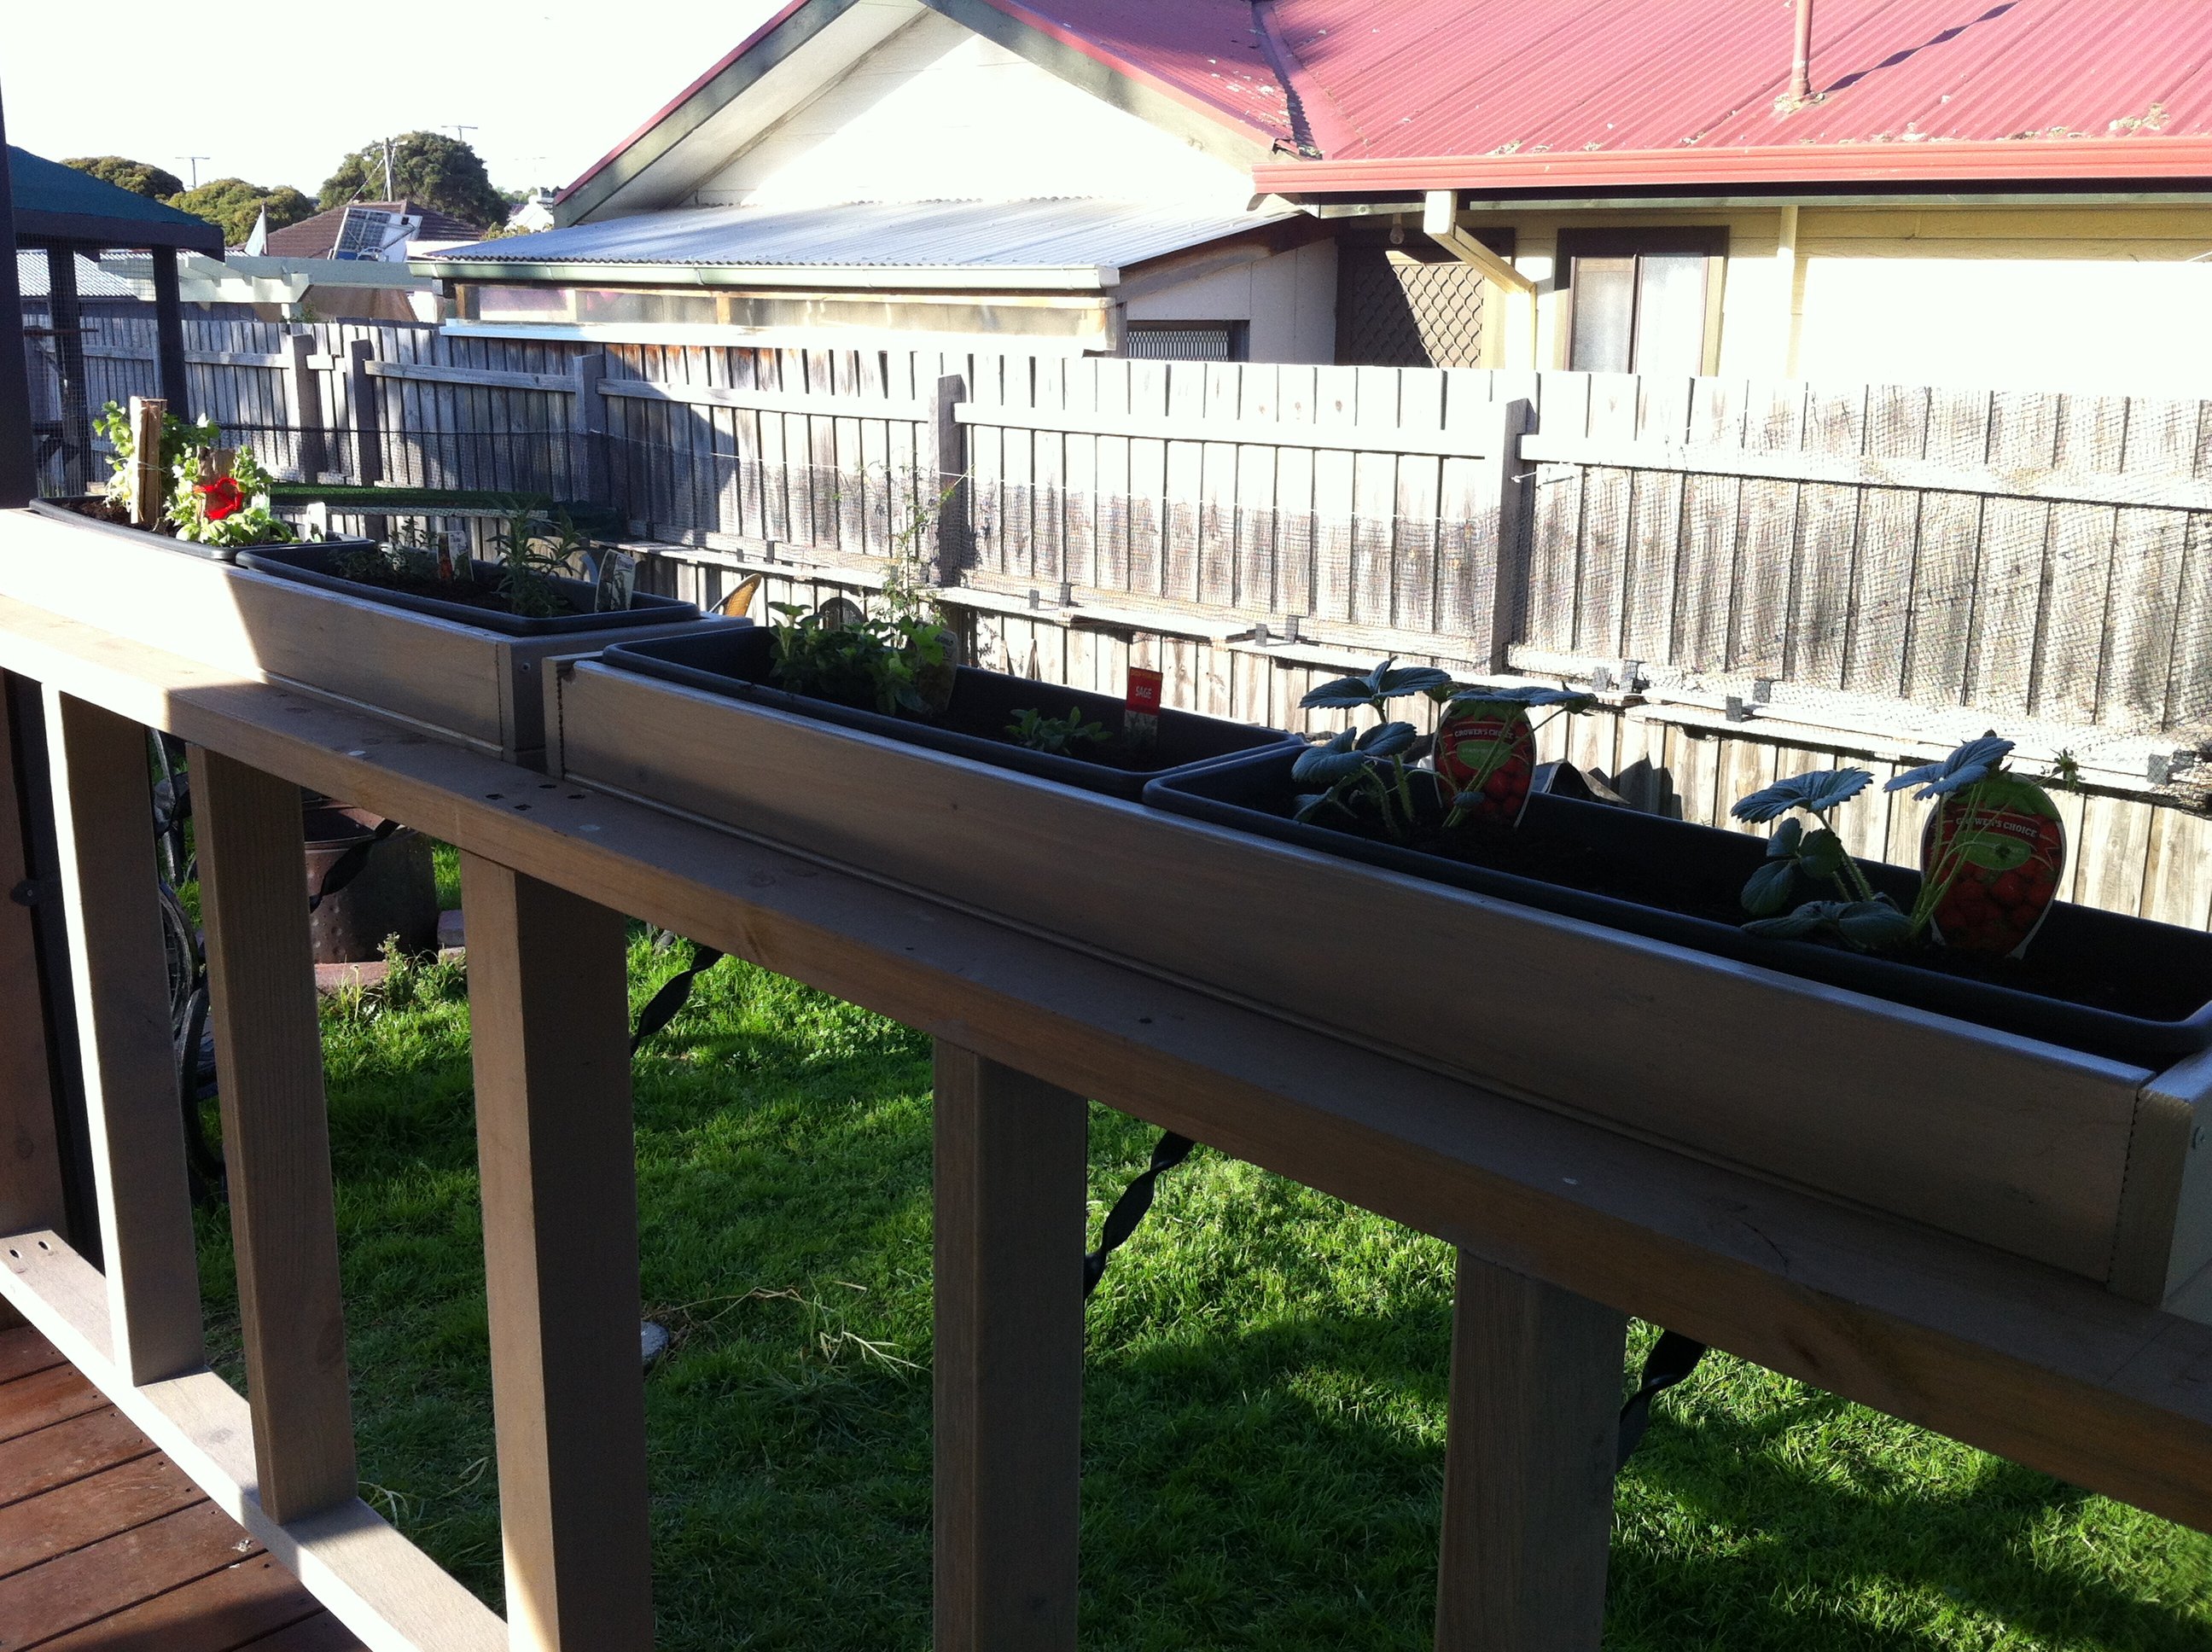
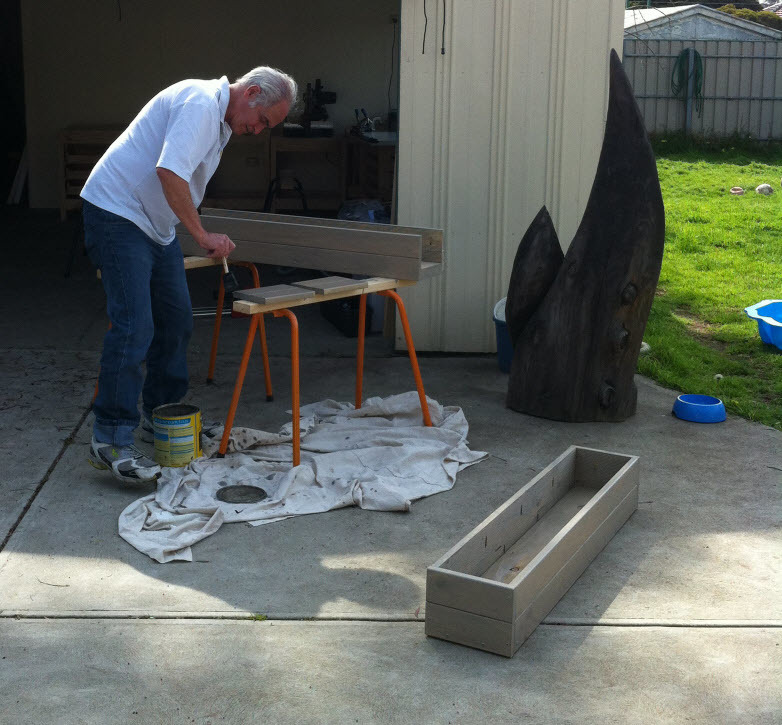
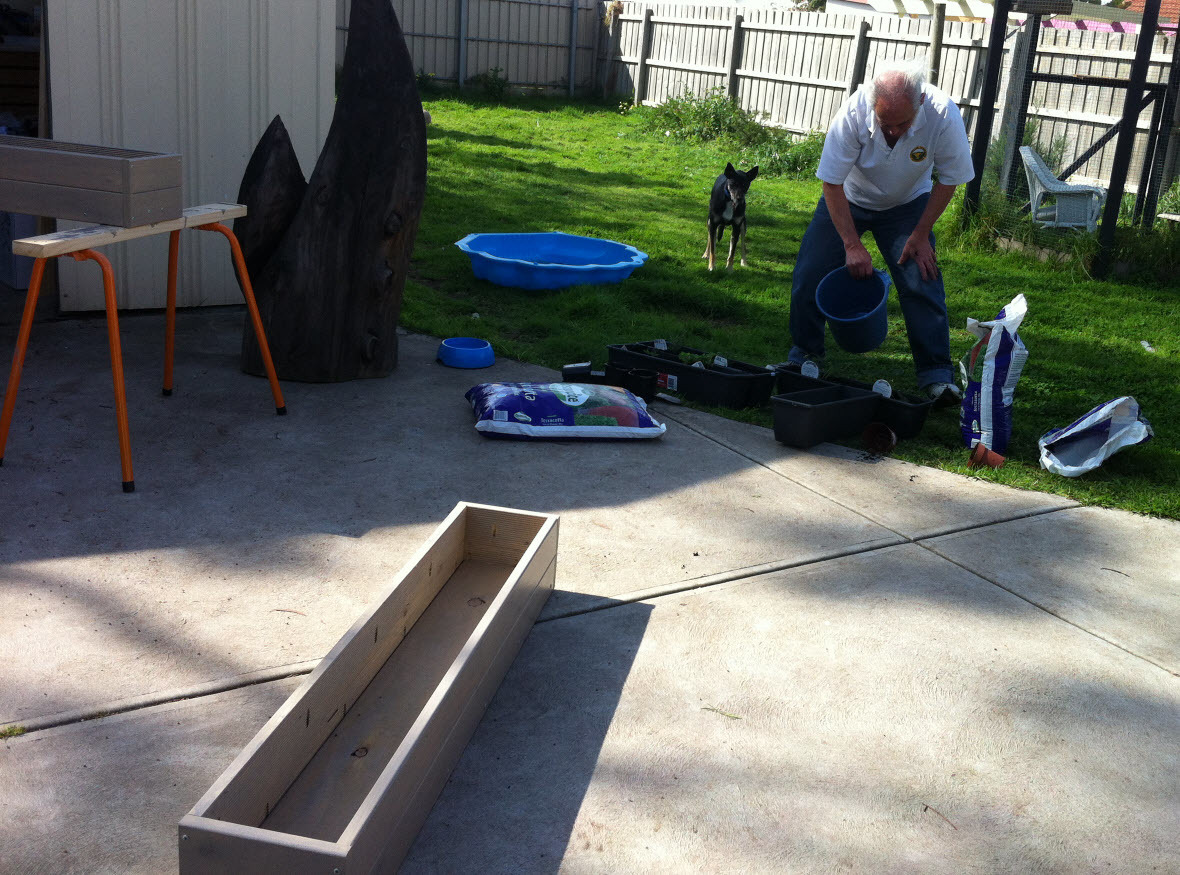
I made these boxes with my dad one afternoon. We had a great time! We wanted our herbs to be close to the kitchen and still get plenty of sun, so attaching them to the deck railing was ideal. I made them out of timber decking with pocket holes, and attached them to the railing with metal brackets underneath.
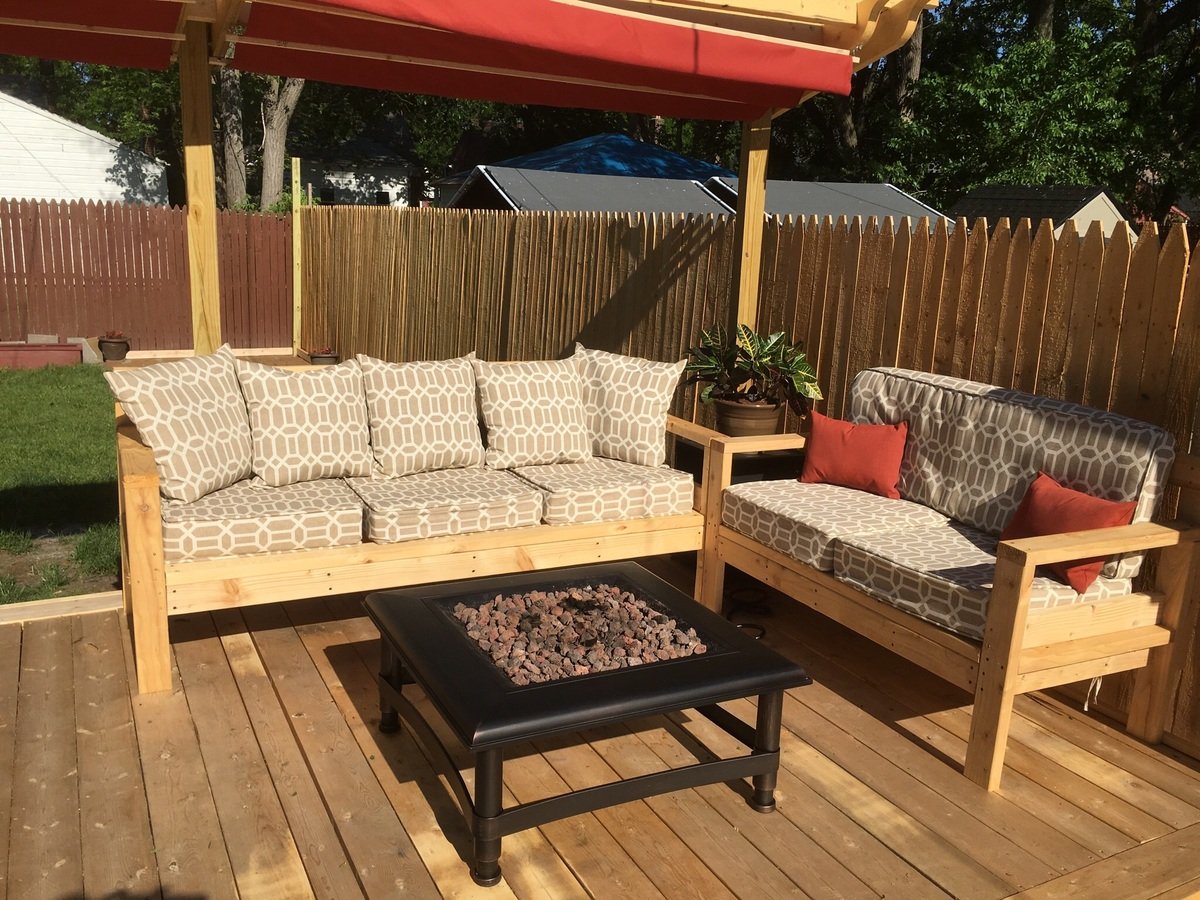
This was by Far The Best Sectional plans on the Net! Very Easy To Make! Thanks Anna white
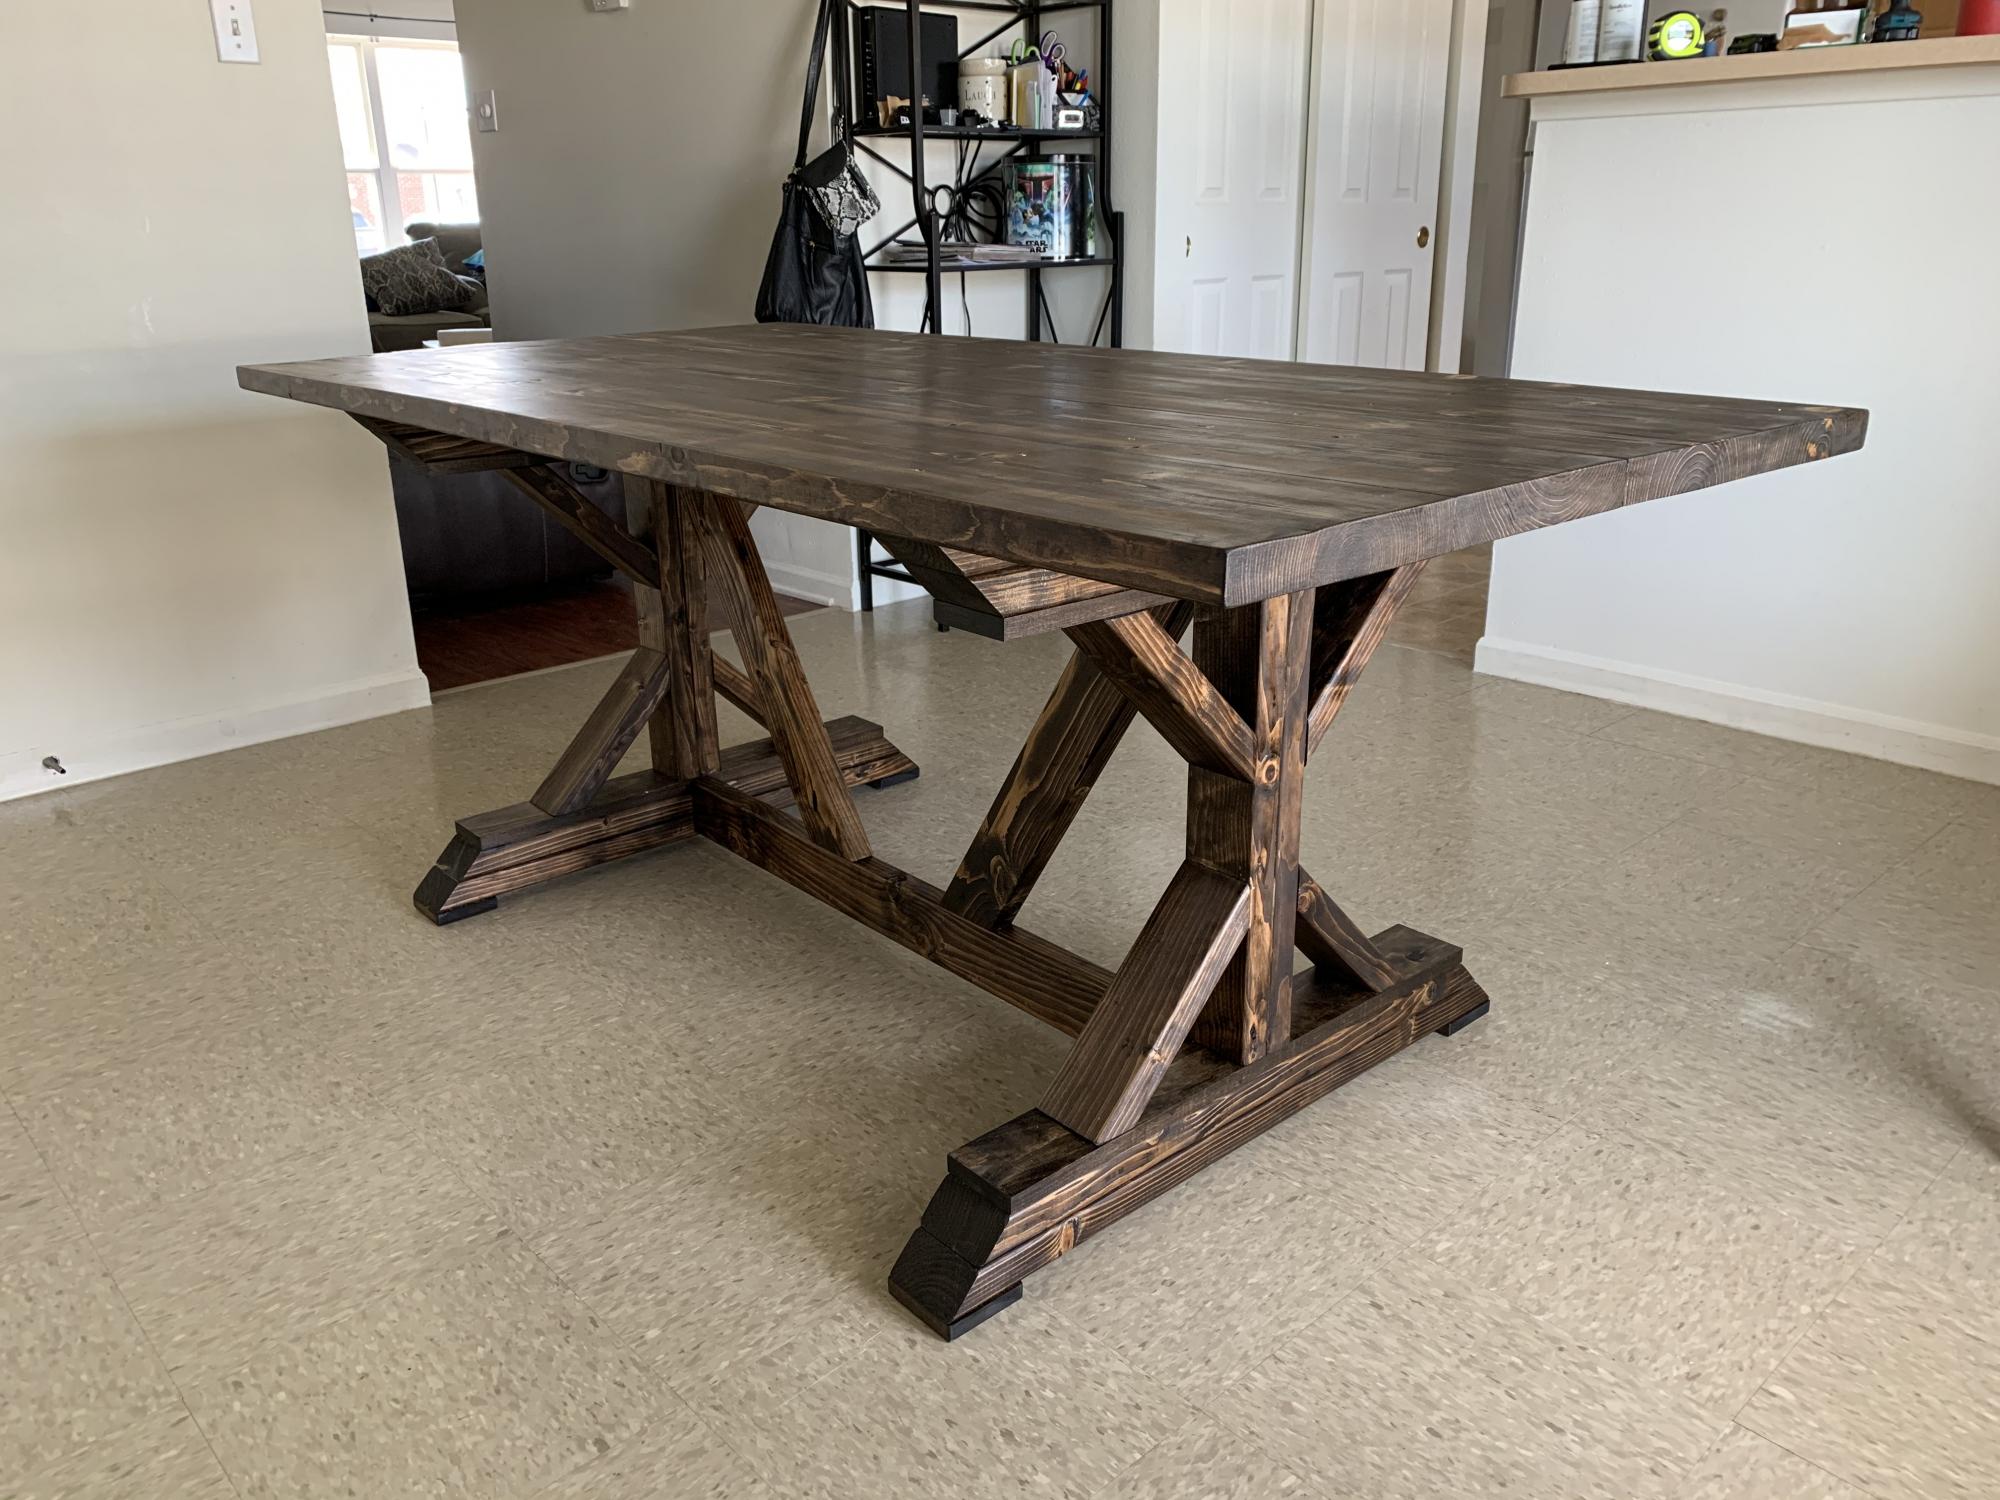
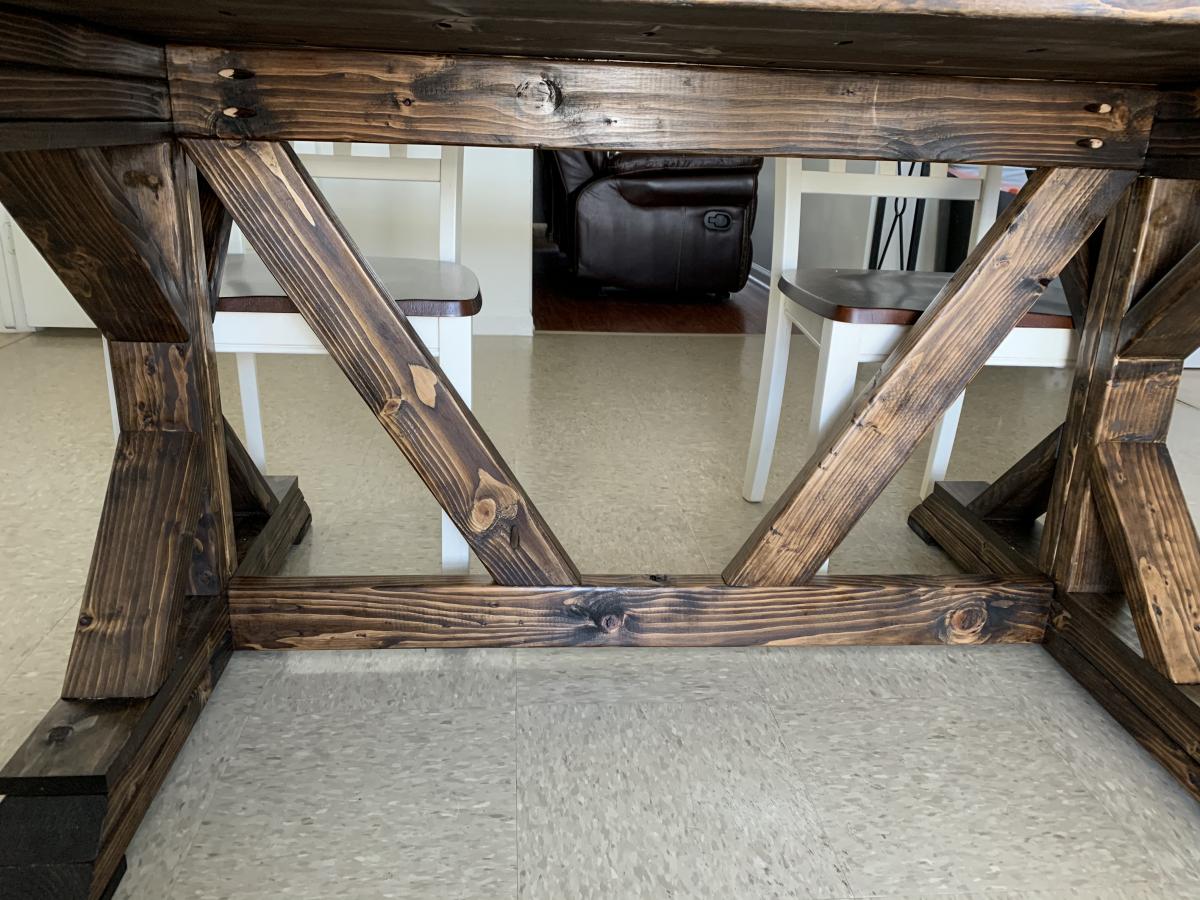
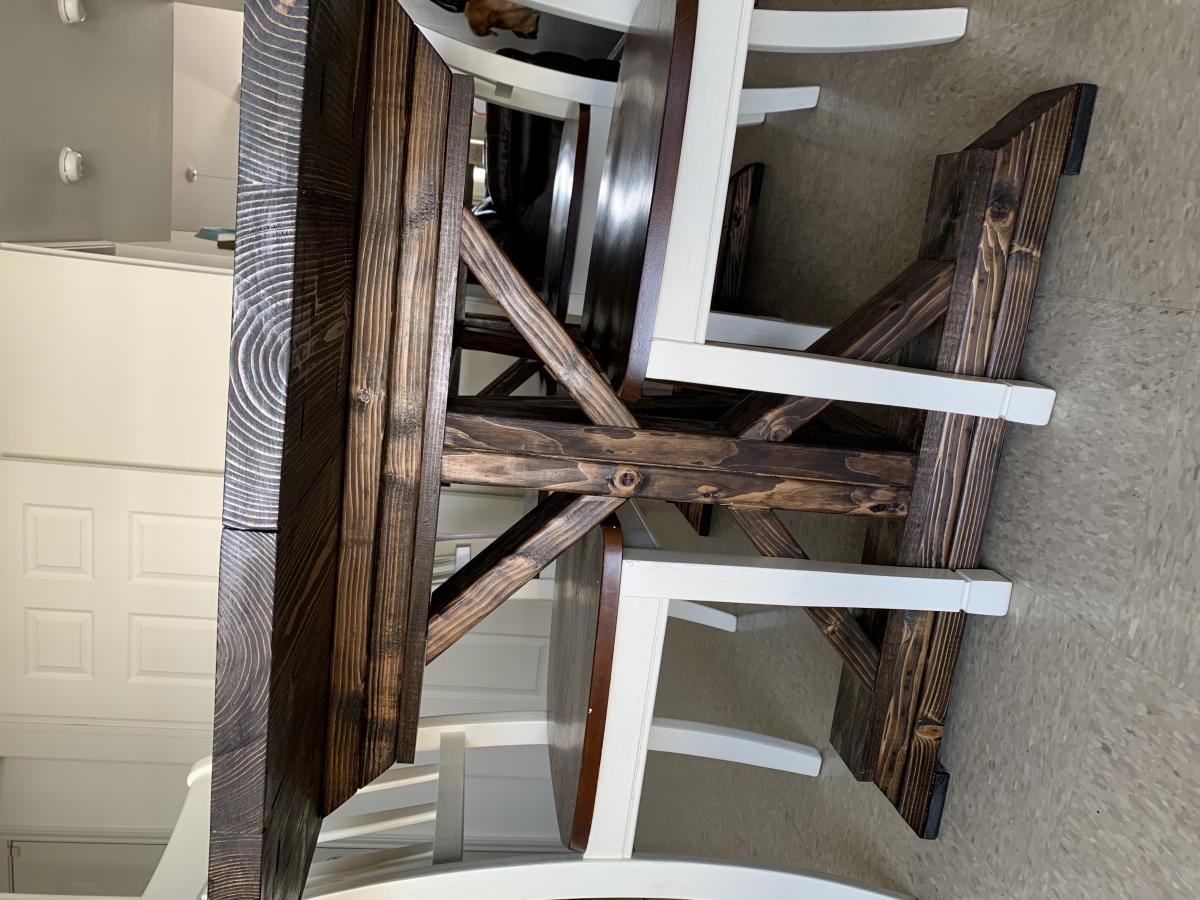
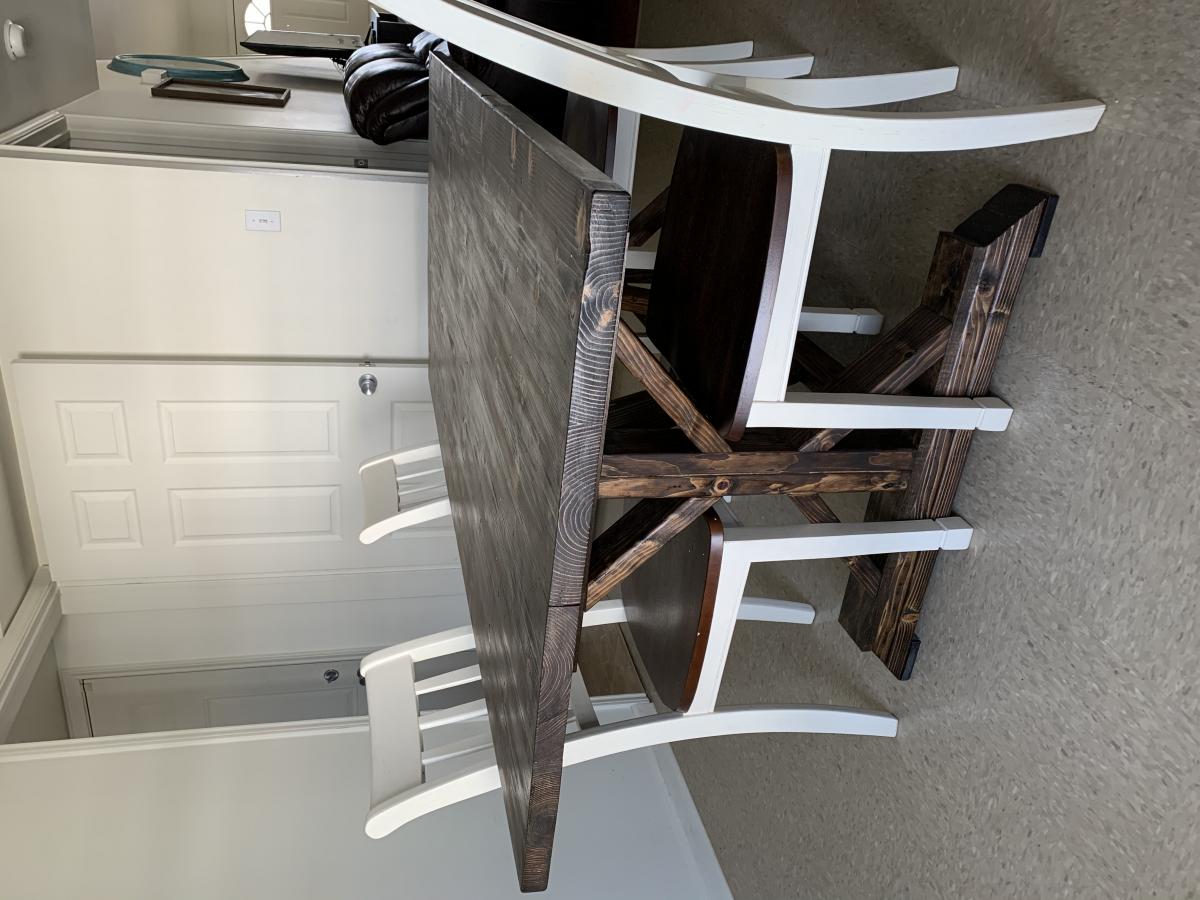
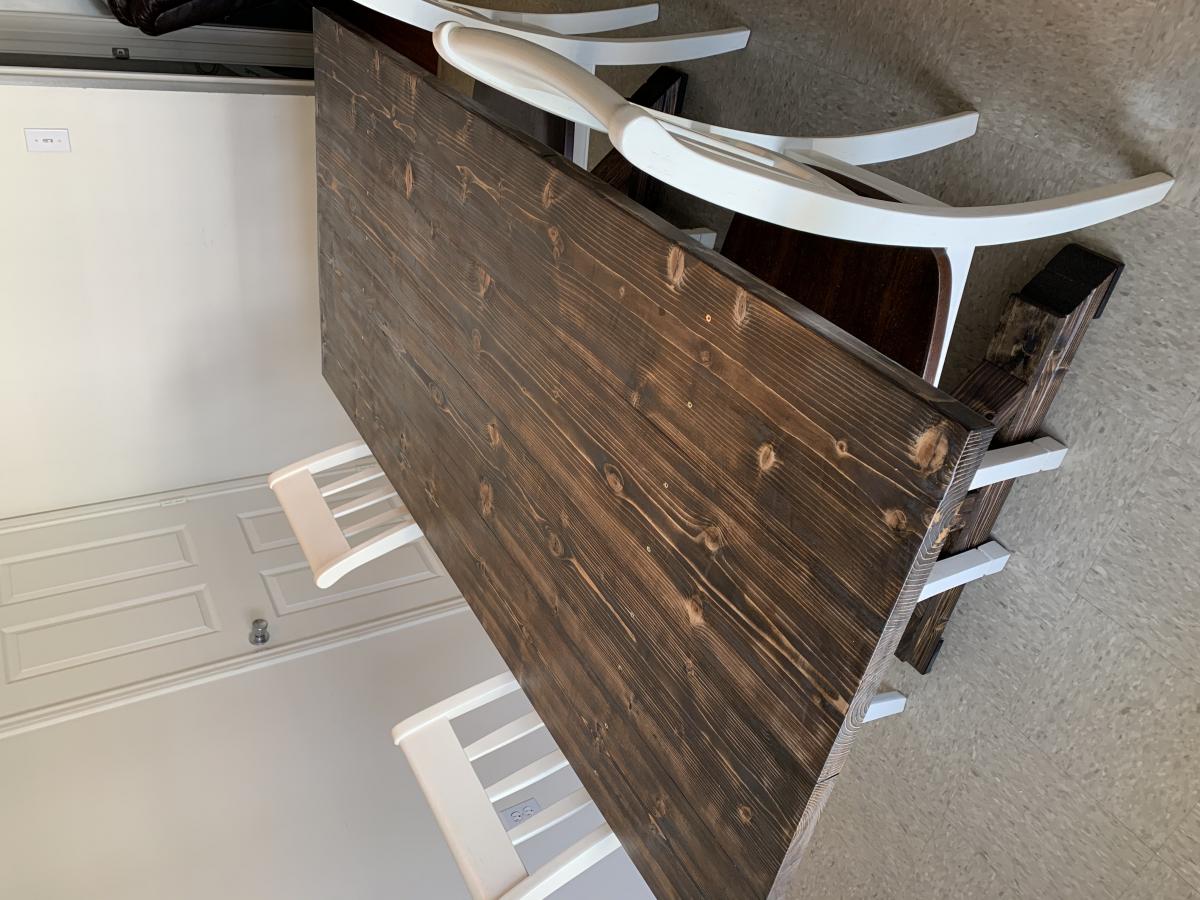
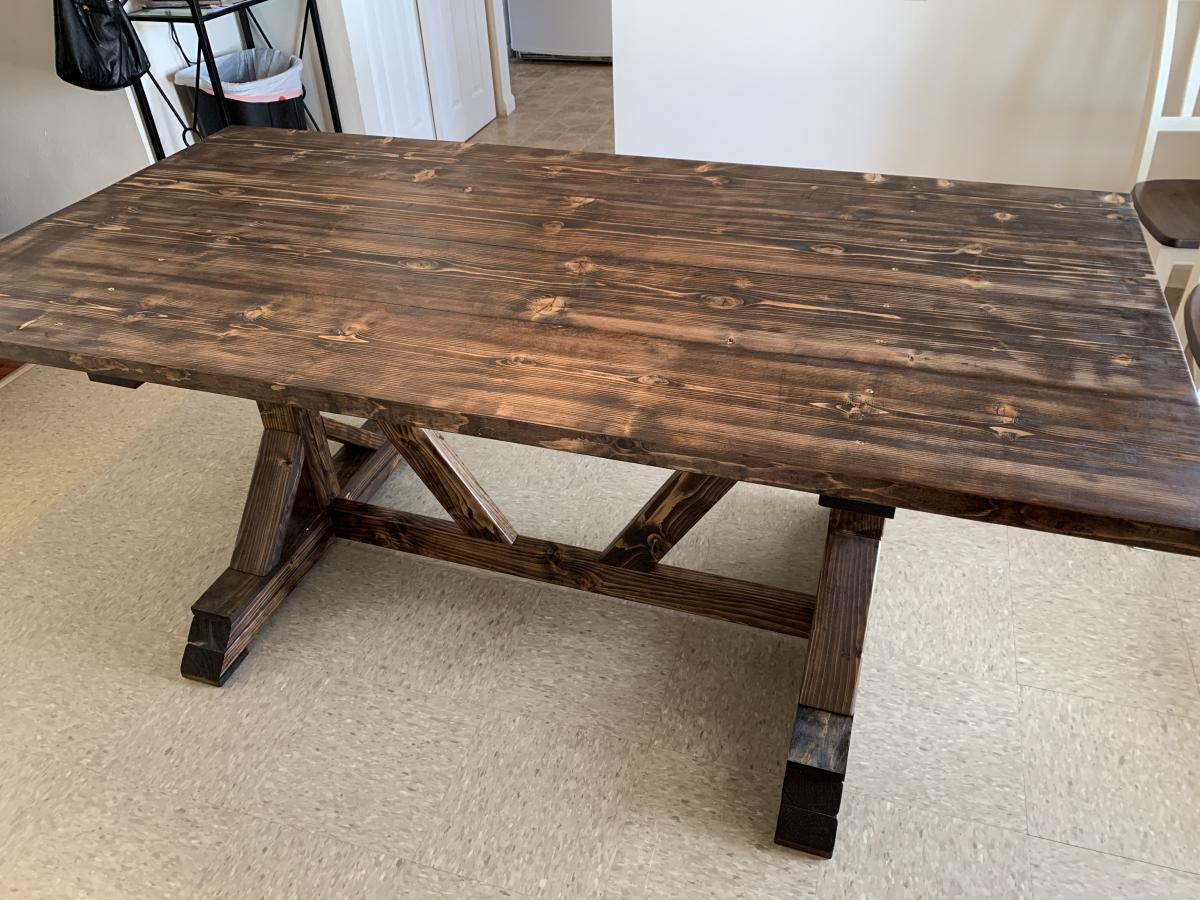
This is my first big project. It took about 5 days with the help of my 3 yr old little boy. I made a couple of modifications. I took the size down to 6 ft to fit our current dining room. Essentially I just took 24 inches off of the table top and the long cross braces. For the diagonal cross pieces, I just clamped the wood on the side and marked where the cut was needed. Somehow though, I ended up needing 8 2x4’s... It turned out a lot better than I expected. Although I wish it was explained how they attached the table top. I ended just screwing in from the top. Wish there was a way to avoid this, and the ensuing shown screws, but it will do for now!
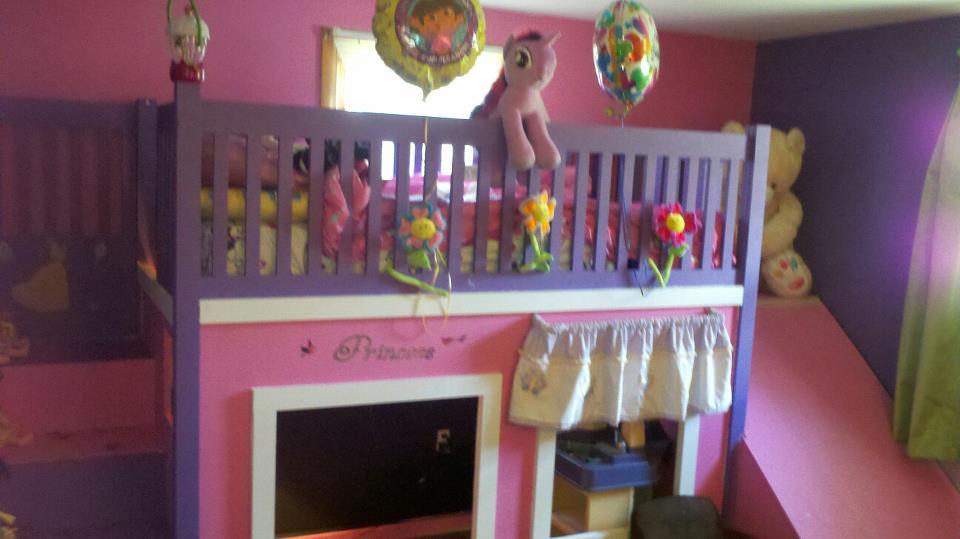
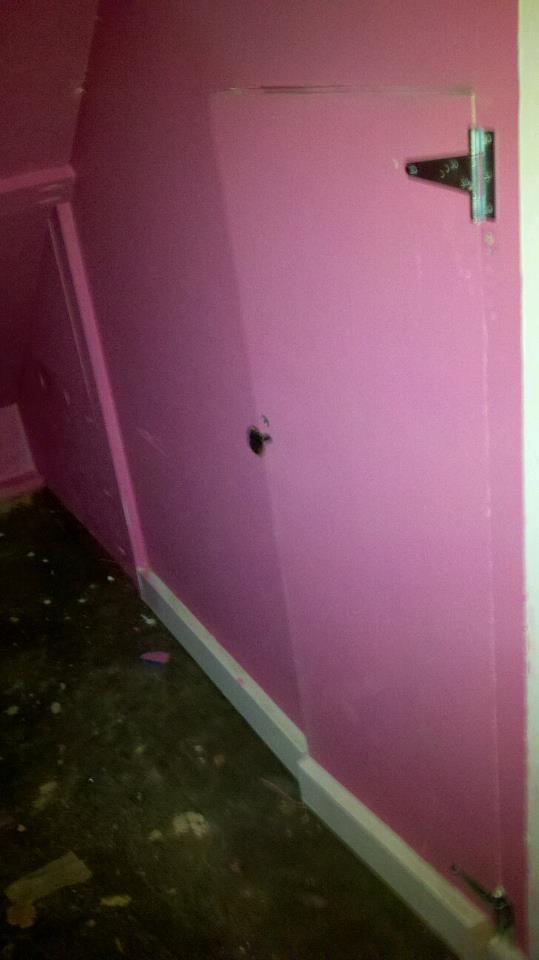
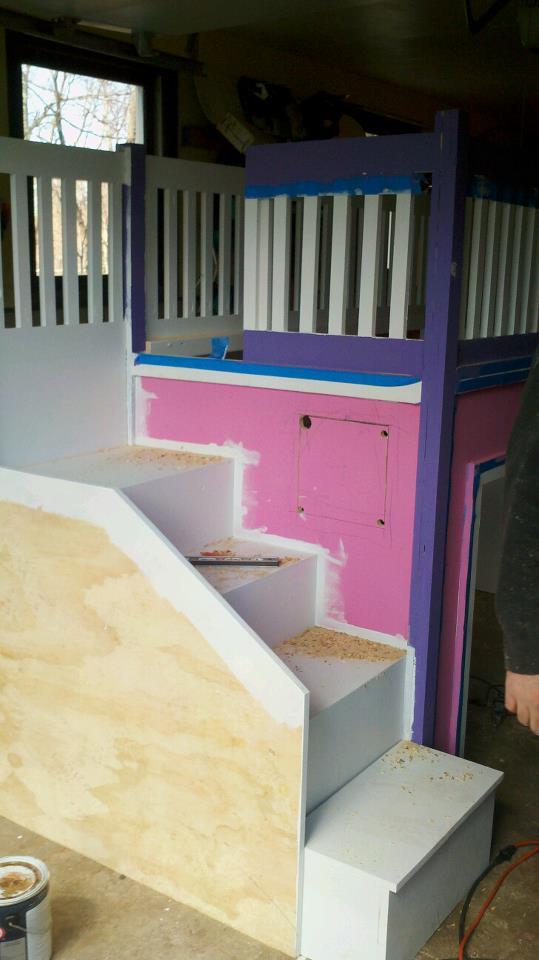
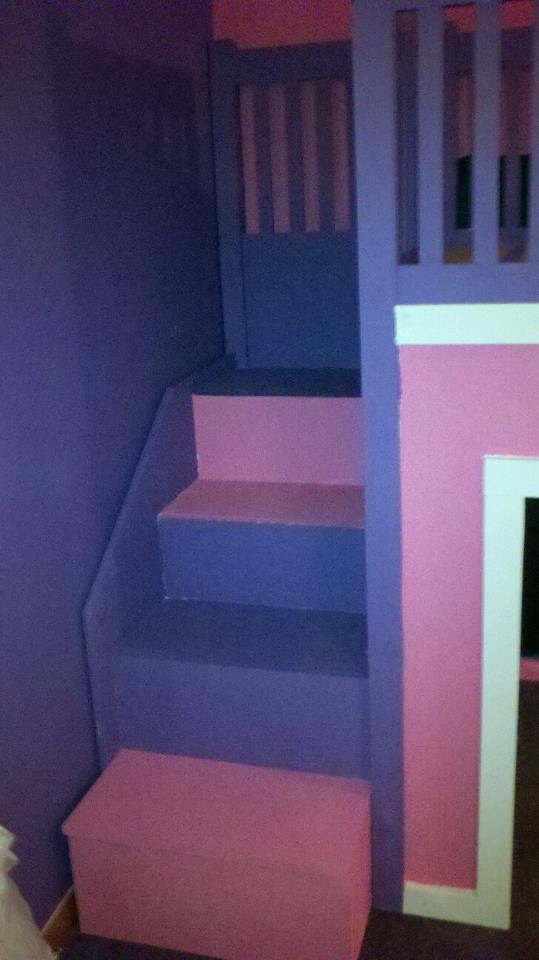
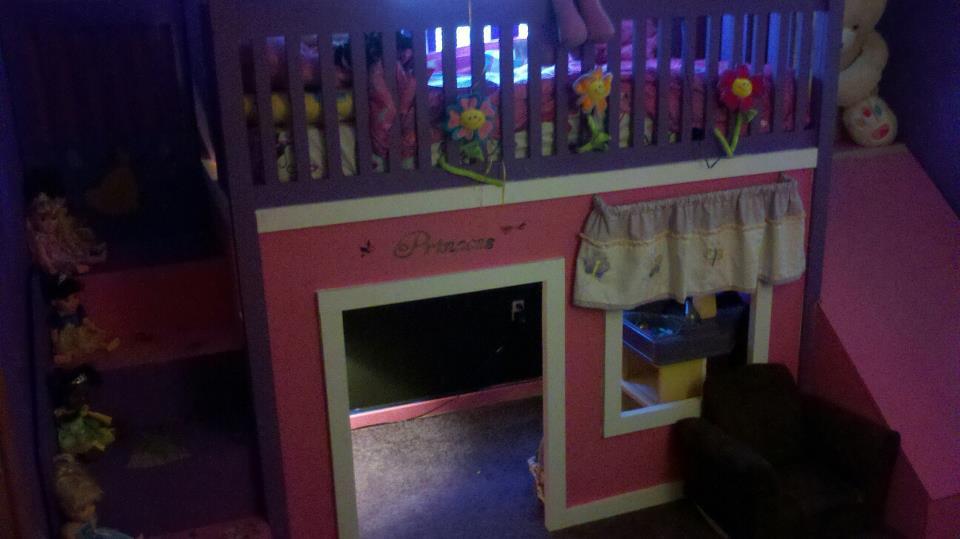
My daughter was turning 4 and we were expecting our 2nd child in a few months and needed her crib/toddler bed back to start setting up the nursery. After googling fun big girl beds for a few weeks i came across the plans for the cottage bed and decided to sit down with my husband and decide if we could build her this bed. by building instead of buying the bed of her little girl dreams we were creating many fond memories with her and a real attatchment to it so she would actually sleep in it. We went through alot of the other brag posts first and picked out a few things we liked from each and made a few modifcations. I felt the spindles around the bed needed to be taller to keep her from falling out of the bed. We also made a door way under the slide that is now a little secret fort for her to go in and read her books and have quiet time. Under the steps my husband made a closet for her dress up clothes utilizing as much of the space under the bed as possible as it takes up most of her bed room We painted the back wall under the bed with chalk board paint to give her a art space under there as well. In the end it took us about a month to build the bed working on it on the weekends. We spent around 500 dollars including the purchase of a few tools we diddnt have and needed like the kreg jig and all the paint and princess decals. She loves the bed and my very amazing handy husband has been approached by many friends and family members to make one for their children as well.