Community Brag Posts

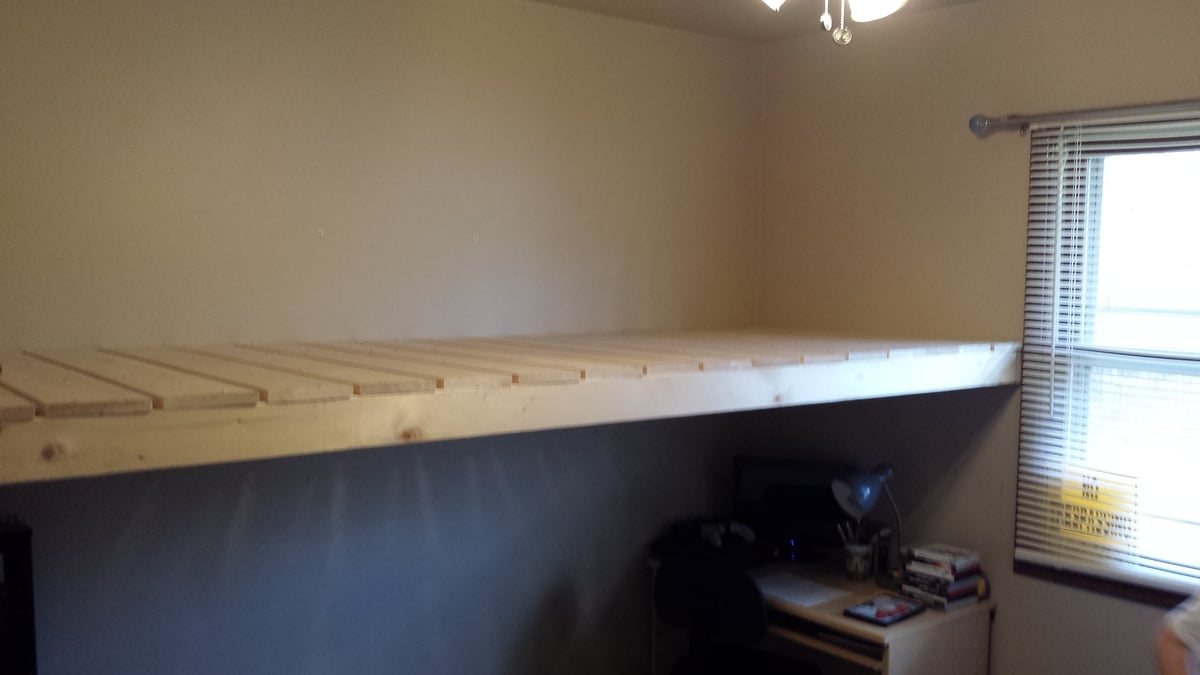
Loft Bed in a Day

Submitted by Anonymous (not verified) on Tue, 03/15/2016 - 06:21

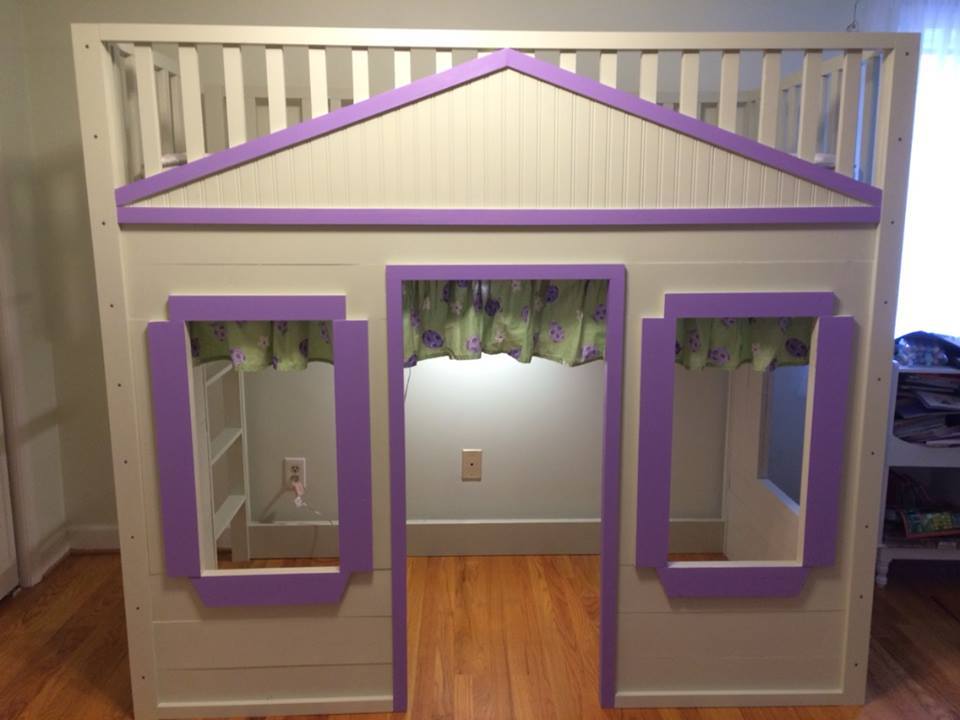
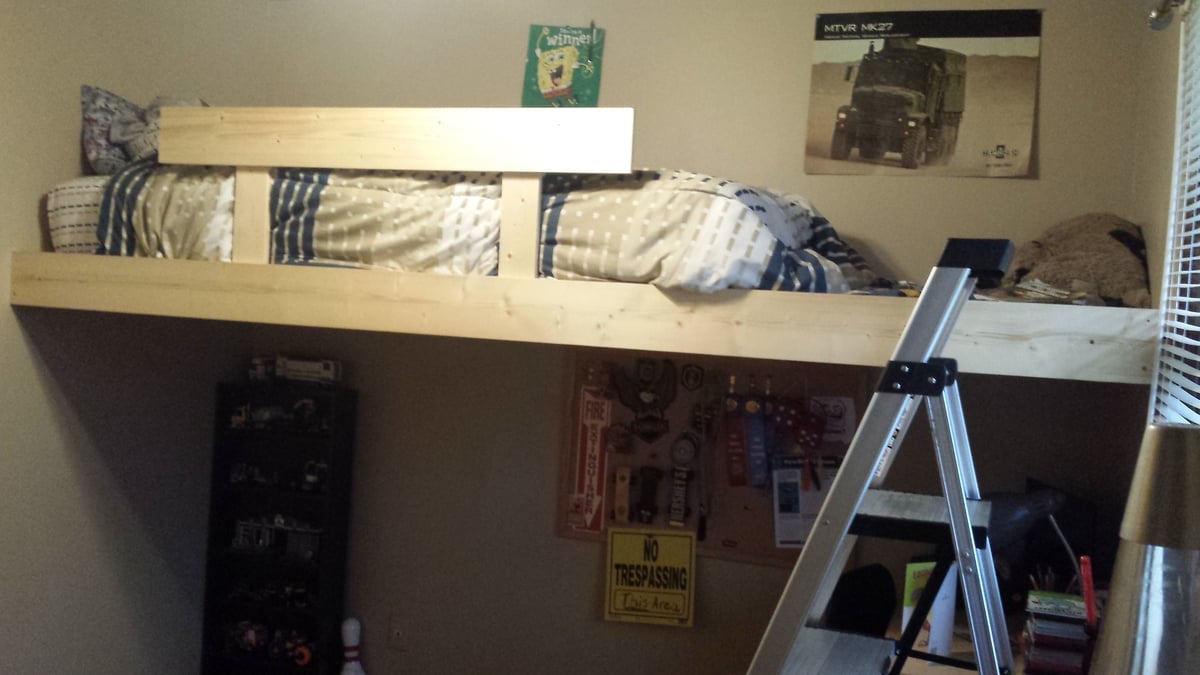
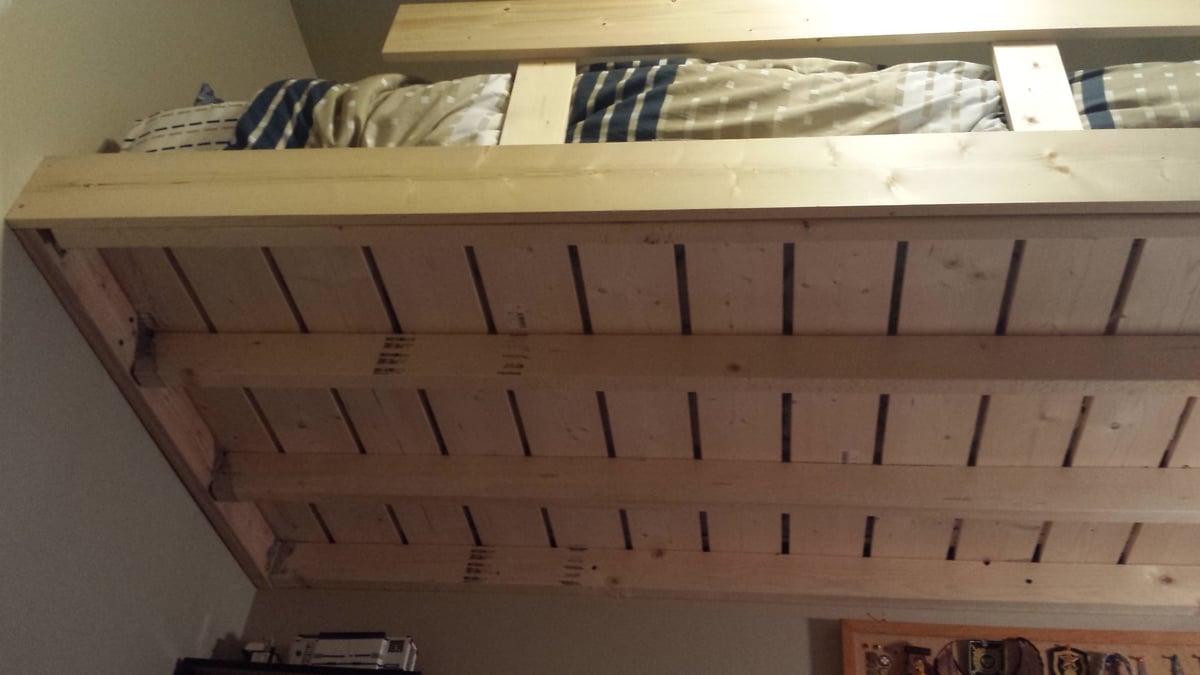
Yes, really a bed in a day! It took 24 hours from the time we bought our supplies to completion. So much nicer than any store bought we looked at, these plans are really a breeze even though I had never tackled a project like this before.

Estimated Cost
$100
Estimated Time Investment
Weekend Project (10-20 Hours)
Recommended Skill Level
Beginner

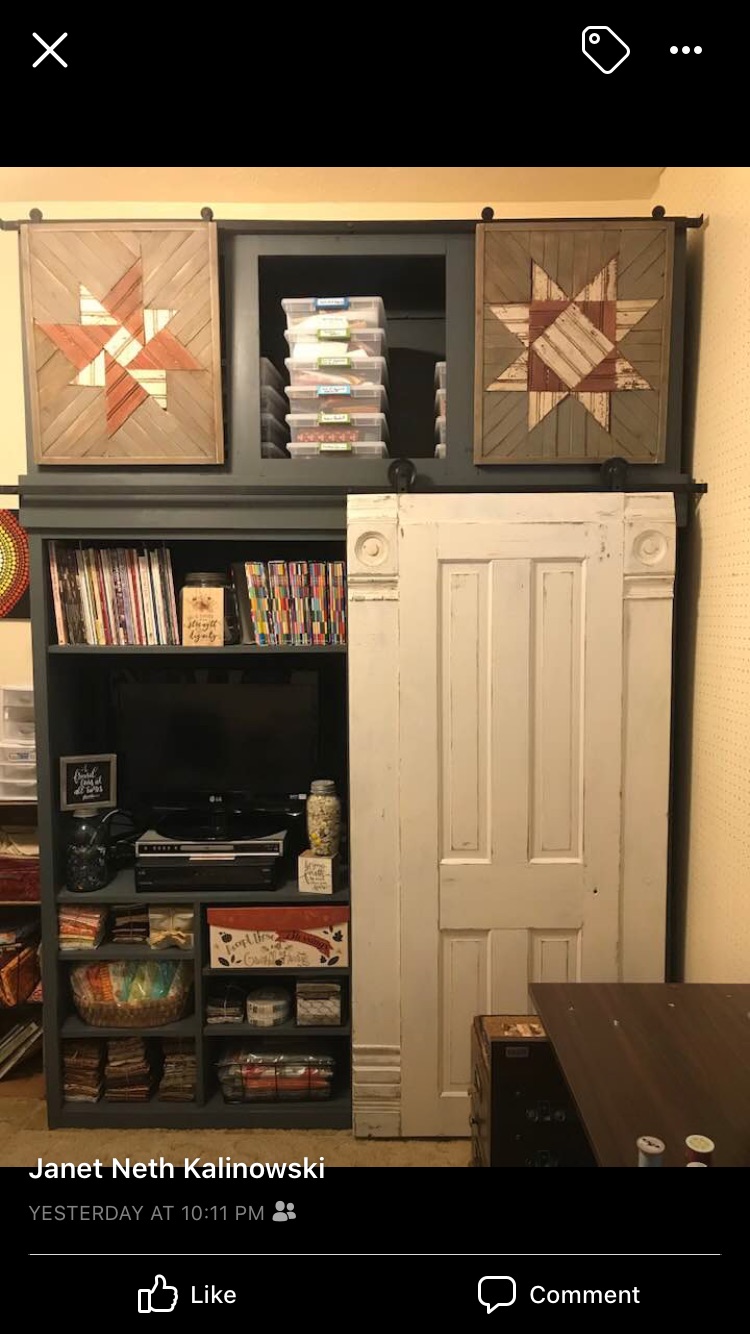
Sewing Cupboard

Submitted by Anonymous (not verified) on Mon, 10/28/2019 - 15:08

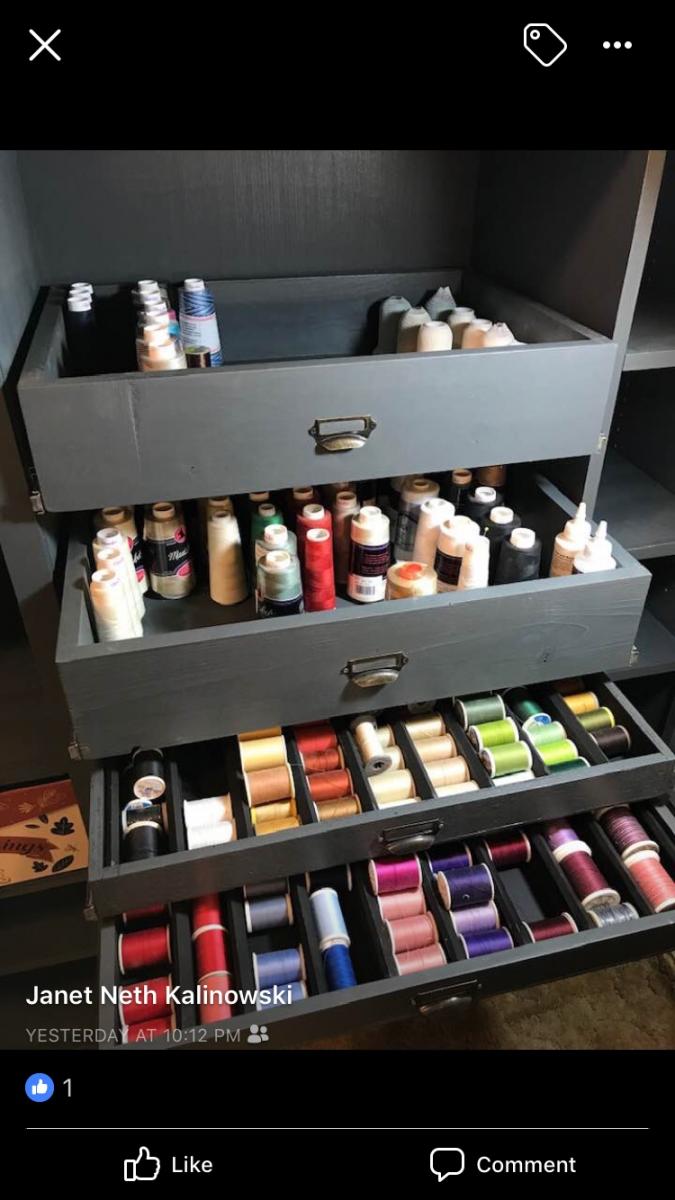
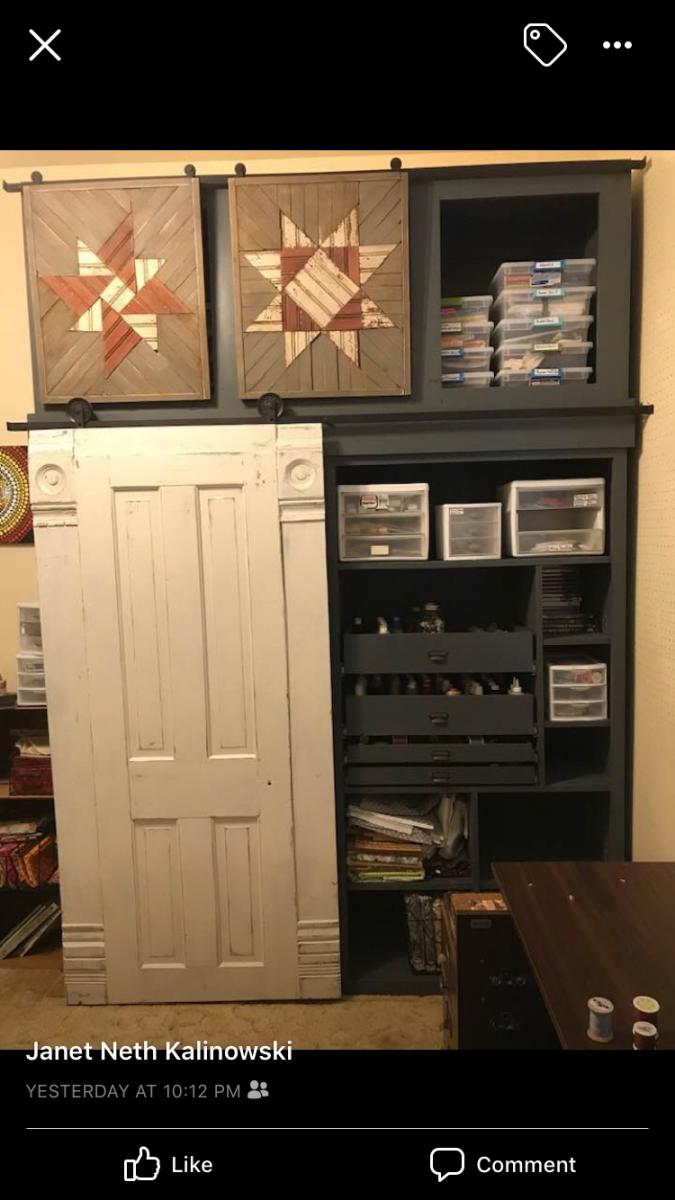
Sewing cabinet for avid quilter. Rolling barn doors on top with barn quilts. Rolling door on bottom. Drawers for thread and cubbies for projects.

Built from Plan(s)
Estimated Cost
$300
Estimated Time Investment
Week Long Project (20 Hours or More)
Finish Used
Latex paint.
Recommended Skill Level
Intermediate

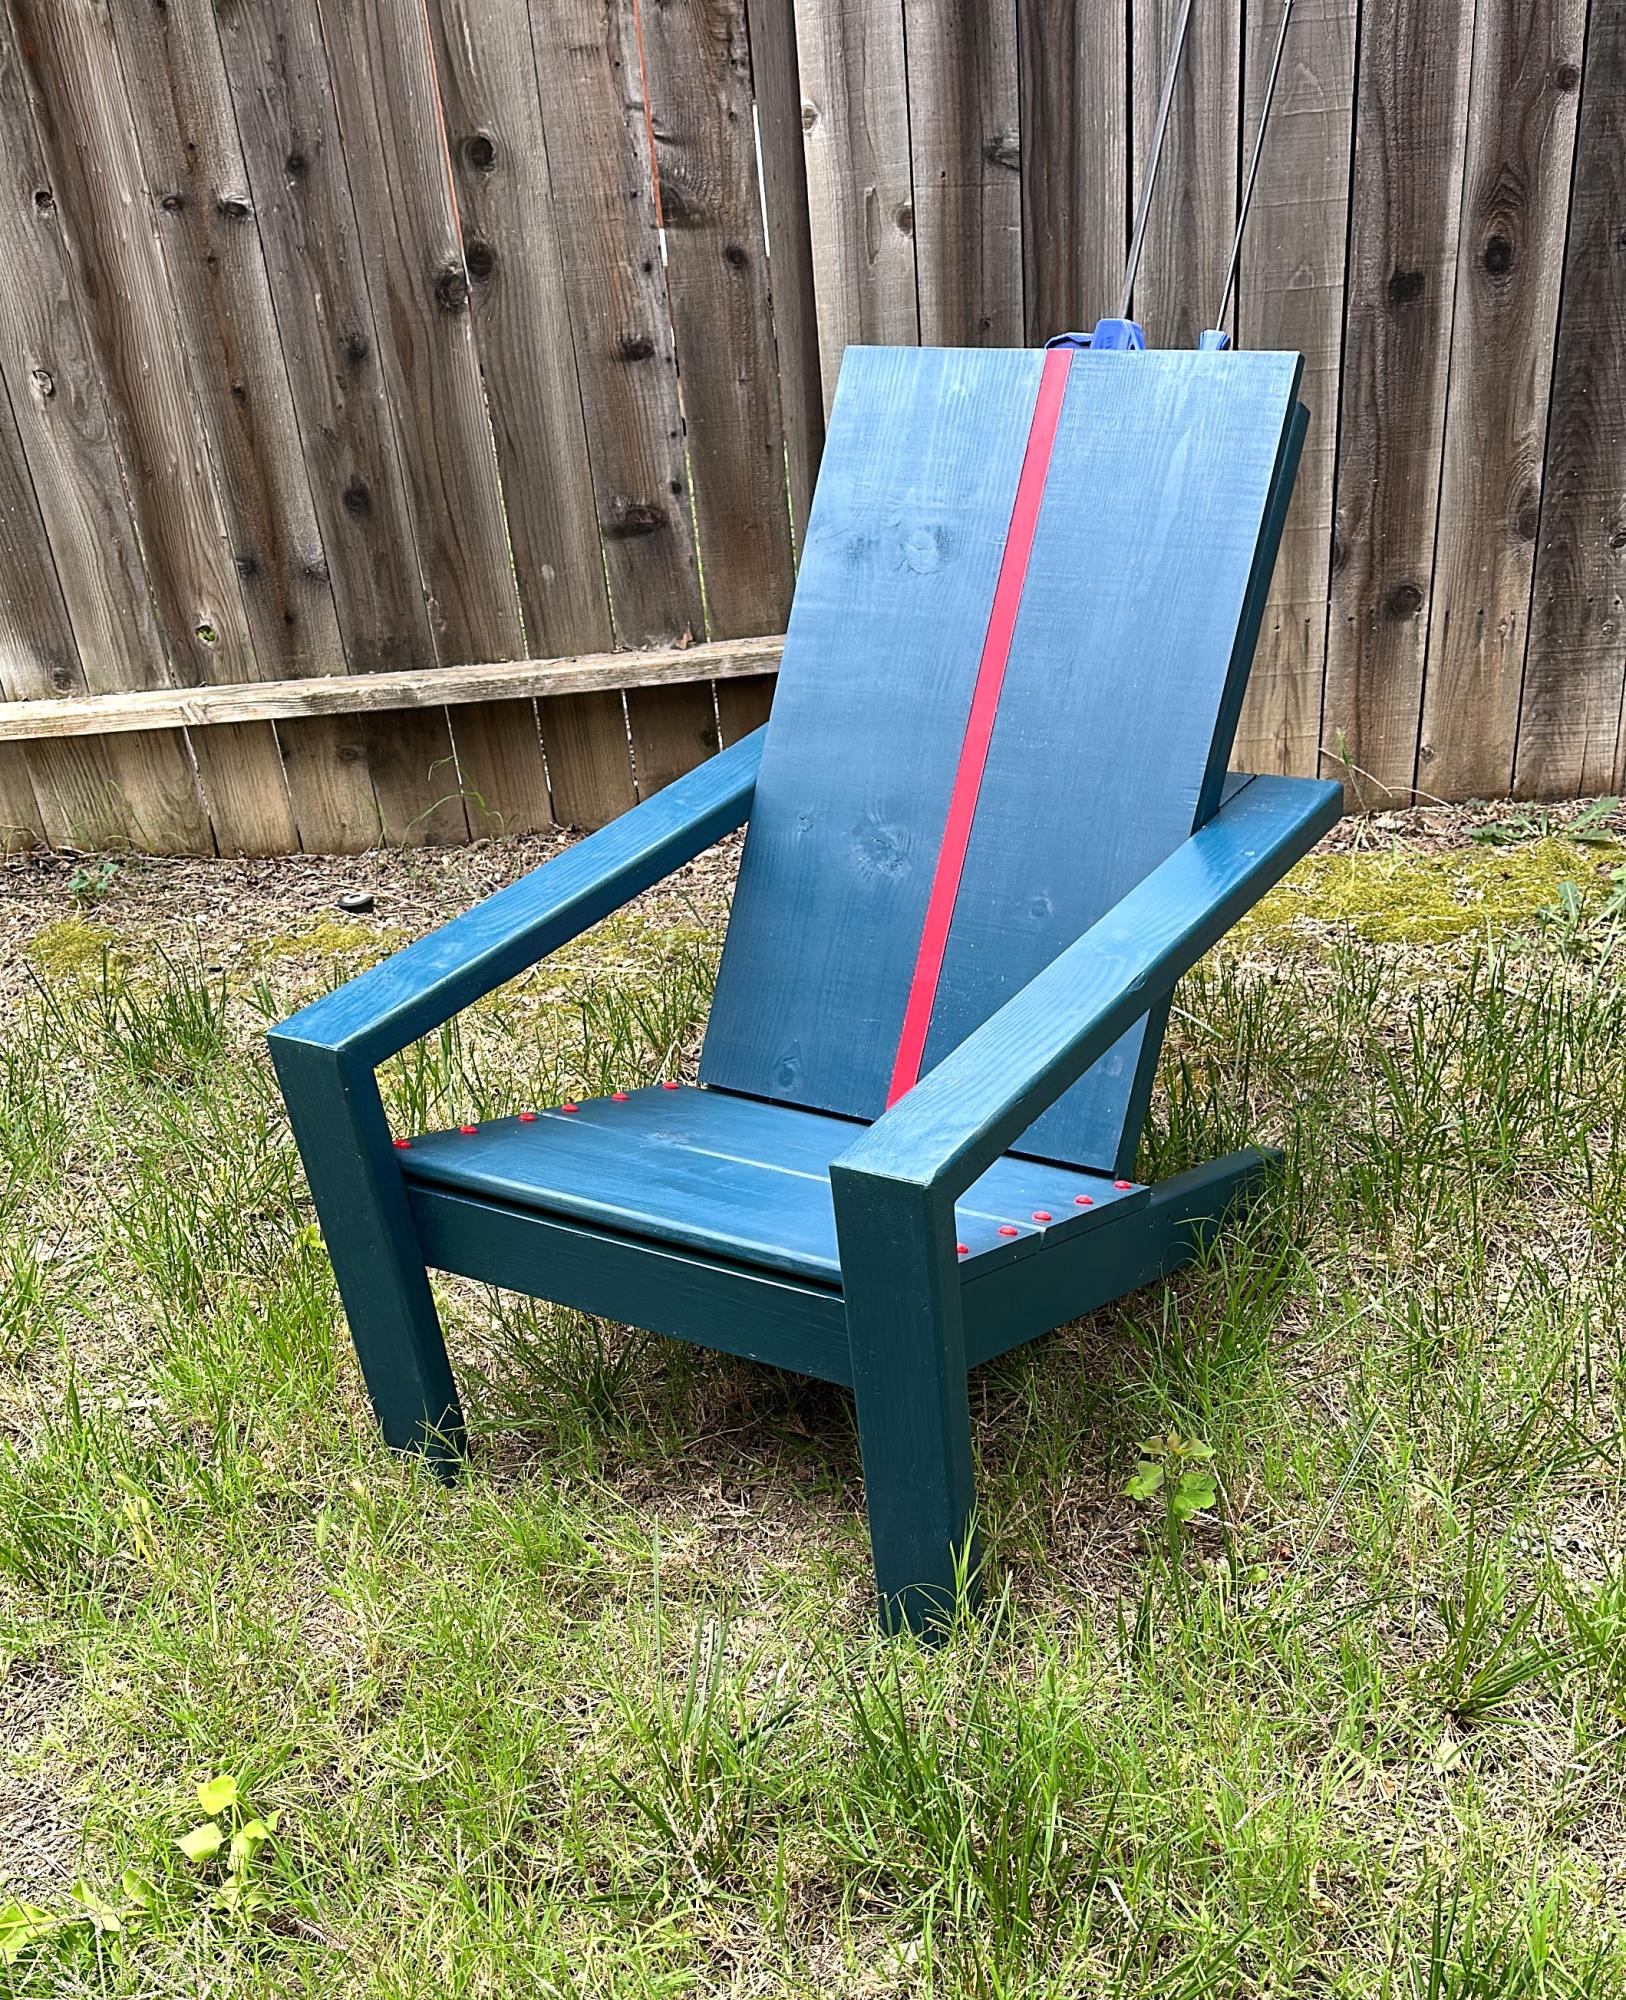
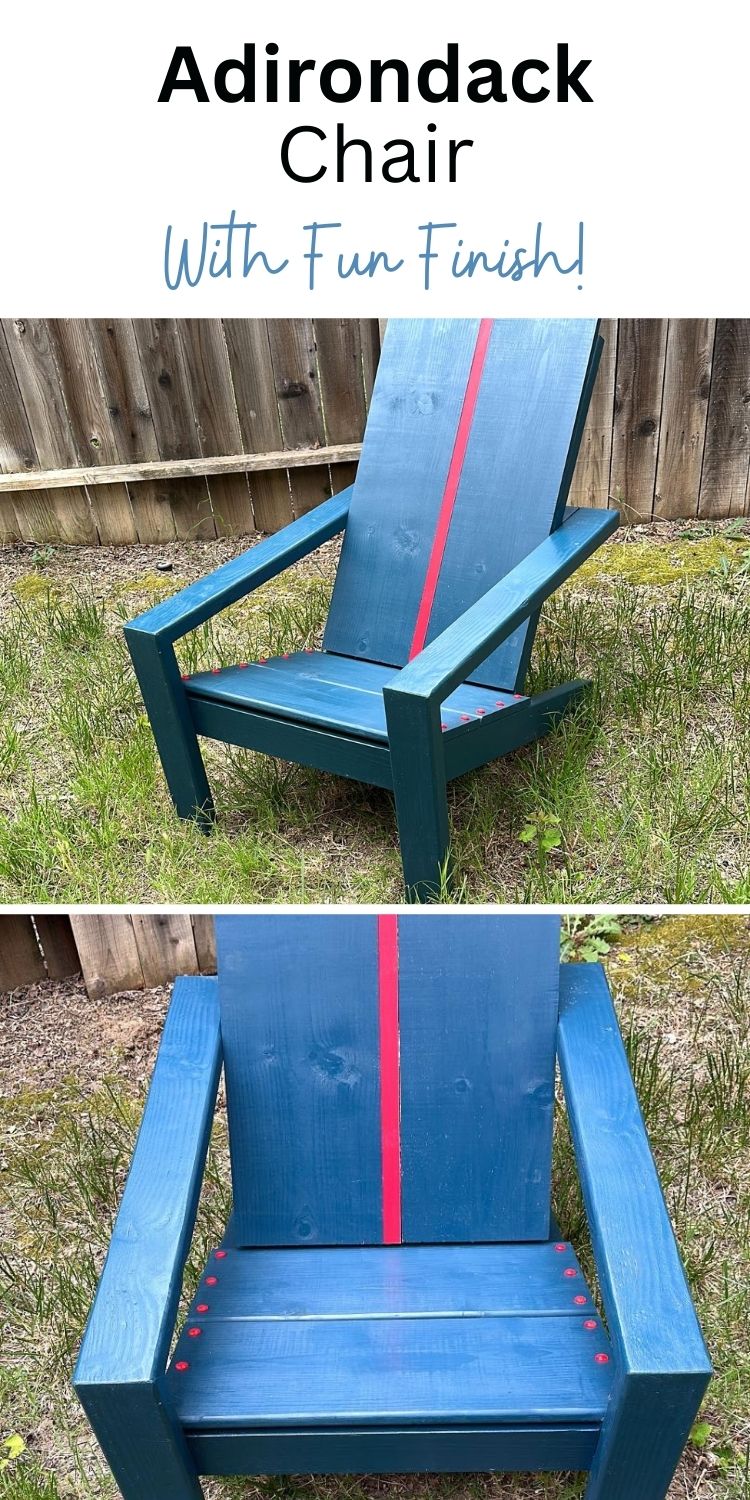
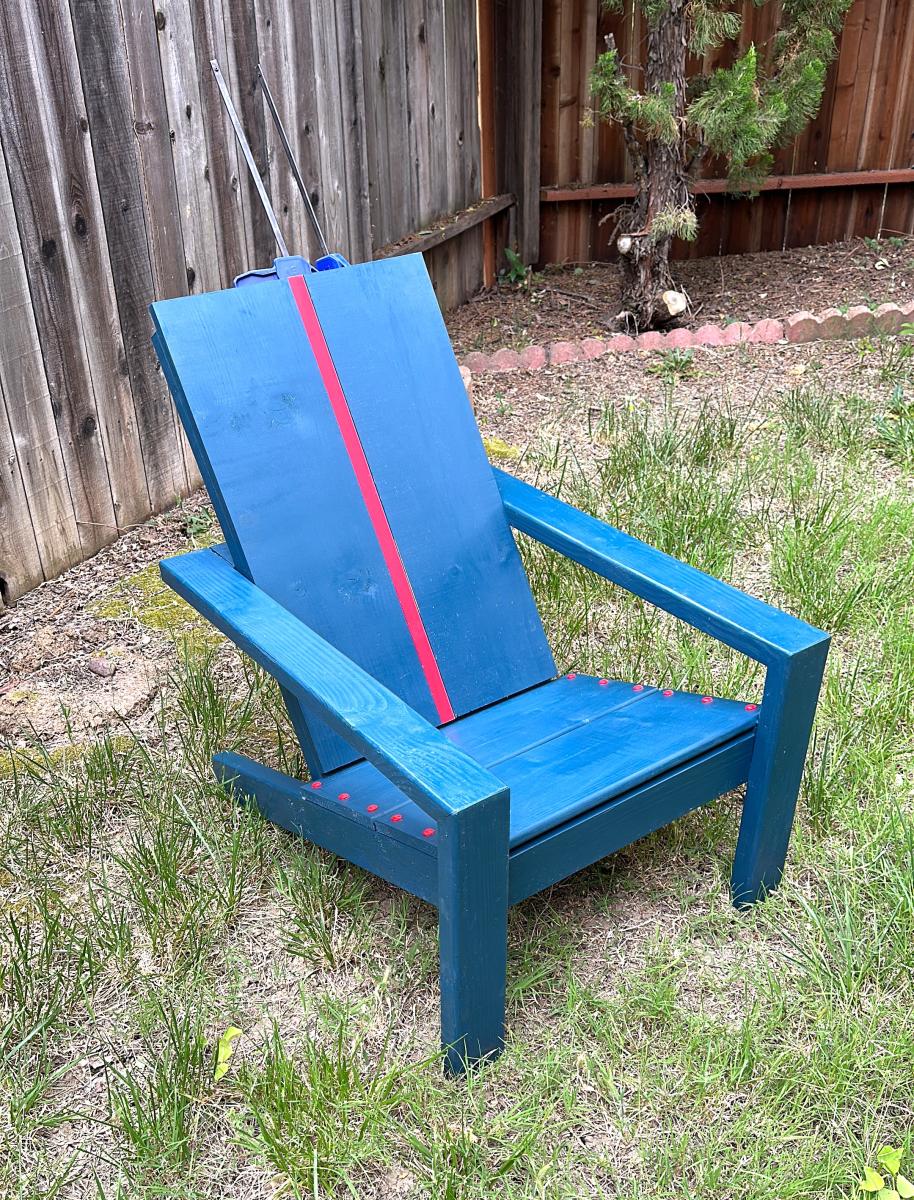
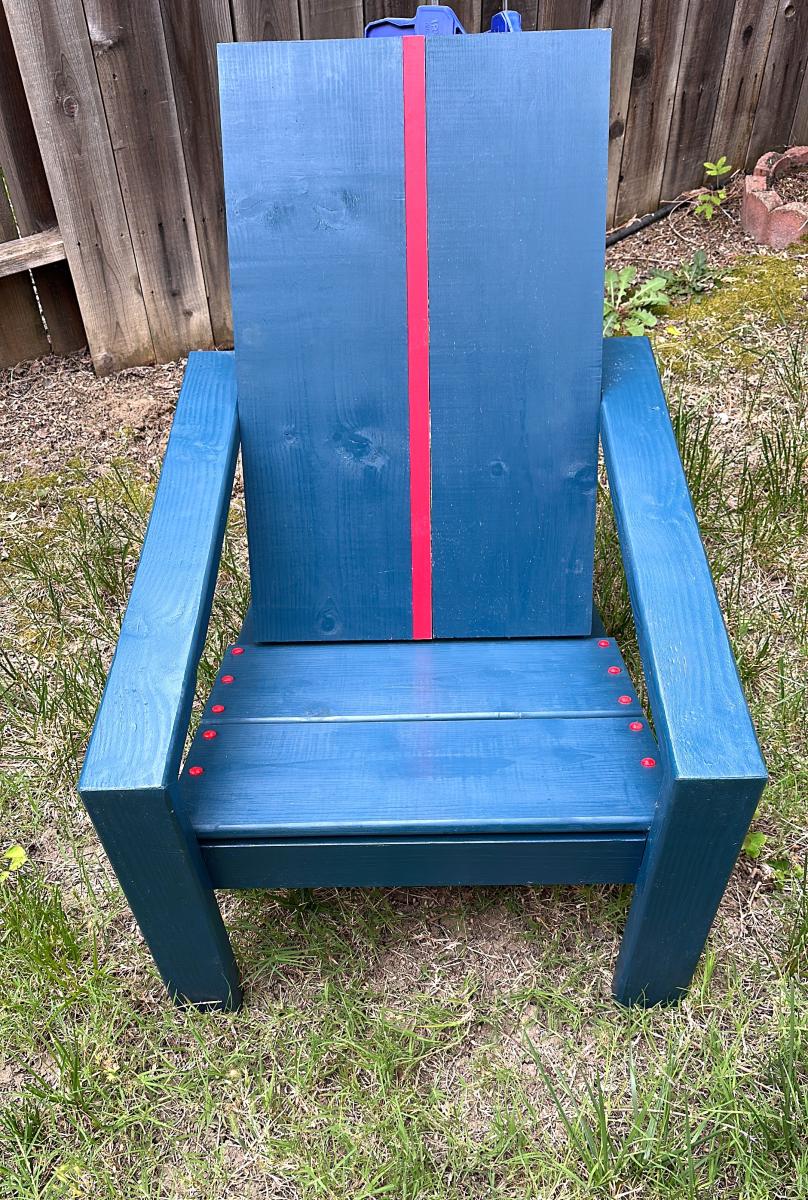
Adirondack Chair with Fun Finish!

Submitted by Anonymous (not verified) on Tue, 07/11/2023 - 07:54

I love this chair. Thanks to Ana-White! I added a little pop to it. The red buttons are screw hole plugs I bought from one of the big box stores. A one inch strip of pine I painted red to coordinate with the blue.

Patrick


Pin For Later!

Adirondack Chair with Fun Finish!

Changing Table/ Storage Shelf Combo

Submitted by westmjk on Sat, 03/03/2012 - 11:09

Combination of Entryway Bench and Storage Shelf with Hooks and simple changing table. I did make the table a little taller as my wife and i are pretty tall. I also had to add about an inch to the overall length of the table as well to fit the baskets. Mostly straight forward.

Estimated Cost
~$150
Estimated Time Investment
Weekend Project (10-20 Hours)
Finish Used
4 applications of Min-wax "Red Mahogany" stain, and 4 coats of satin polyurethane. Stain kind of hides the grain, but you do what your wife asks...
Recommended Skill Level
Intermediate

Comments

Farm Table

Submitted by fenway75 on Wed, 01/01/2014 - 06:32

A farm table modified slightly from the Farmhouse Table plans. Six feet in length, pine wood, Ipswich Pine stain (minwax) with gloss polyurethane coating (3 coats). Woodburning tool used to distress tabletop and legs. Great plans made this build easy and fun, thanks Ana!!

Estimated Cost
125.00
Estimated Time Investment
Week Long Project (20 Hours or More)
Finish Used
Minwax Ipswich Pine
Recommended Skill Level
Beginner

Closet Organized!

Submitted by anne_c on Fri, 03/18/2016 - 12:21

I love the look of a nicely organized closet, but after moving into new house where closets weren't as big, organization became an issue. I love the look of this plan. The modifications I made were making it nice and tall and still fitting a full shelf in at the very top. Also, I didn't want to have to worry about redoing bars when my daughter had adult sized hangers and clothes, so I made sure that my clothes would fit in the top and bottom levels. I love how it turned out. Now to make over all the other closets in the house...

Built from Plan(s)
Estimated Cost
$50-$70
Estimated Time Investment
Afternoon Project (3-6 Hours)
Finish Used
white chalk paint with wax finish
Recommended Skill Level
Beginner

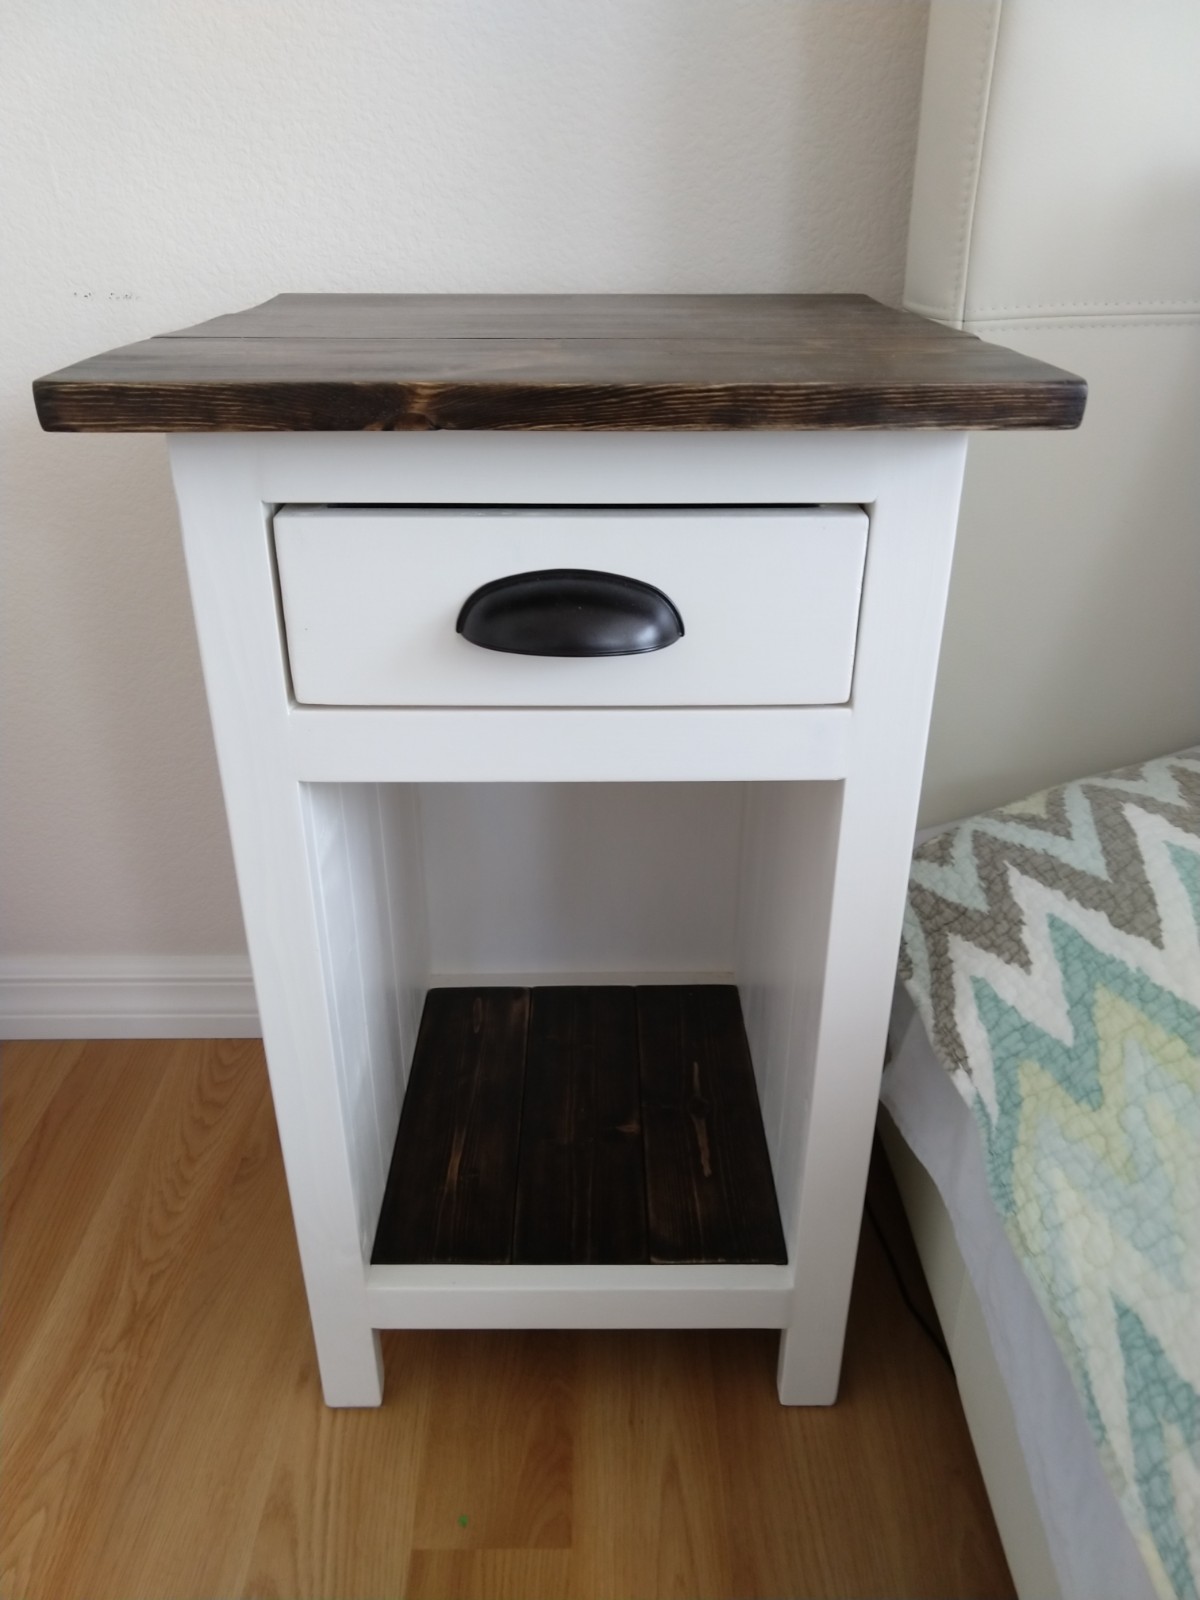
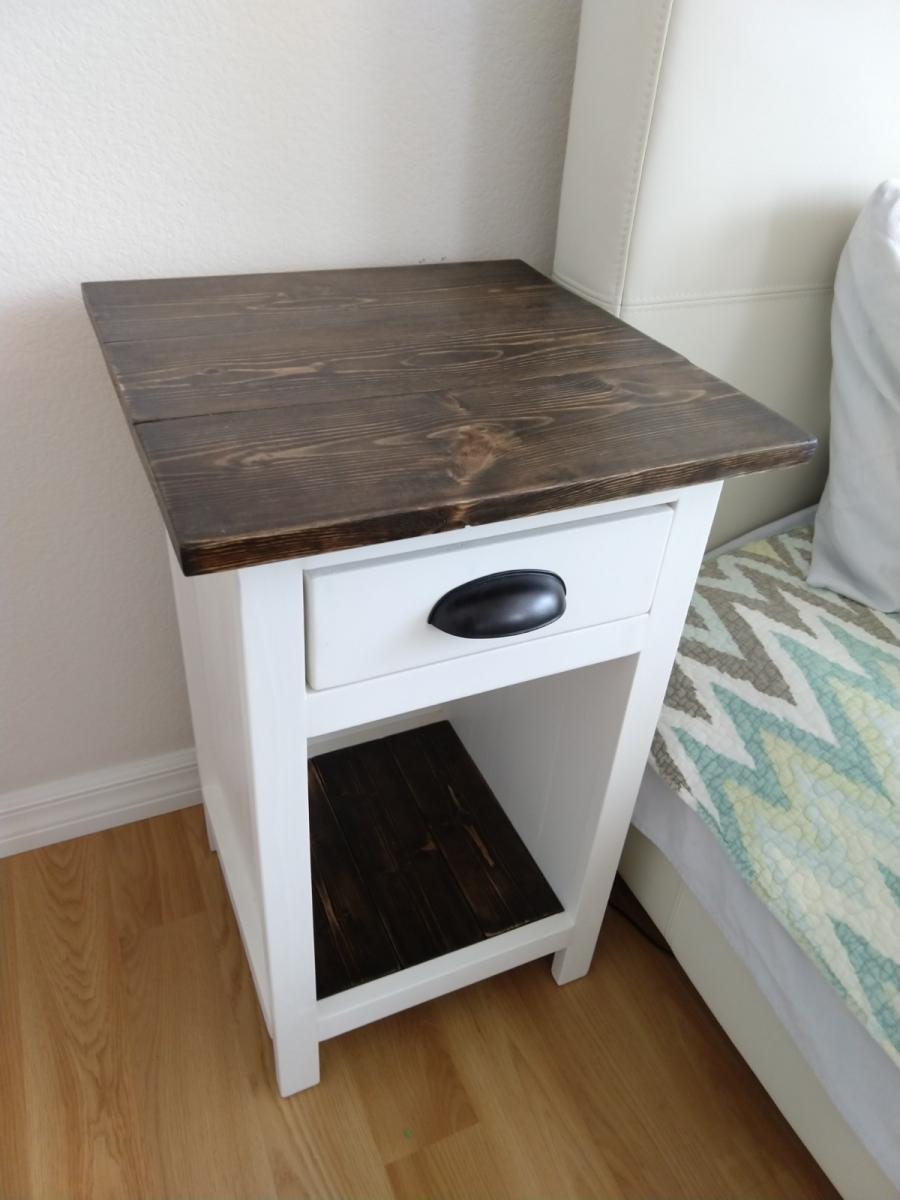
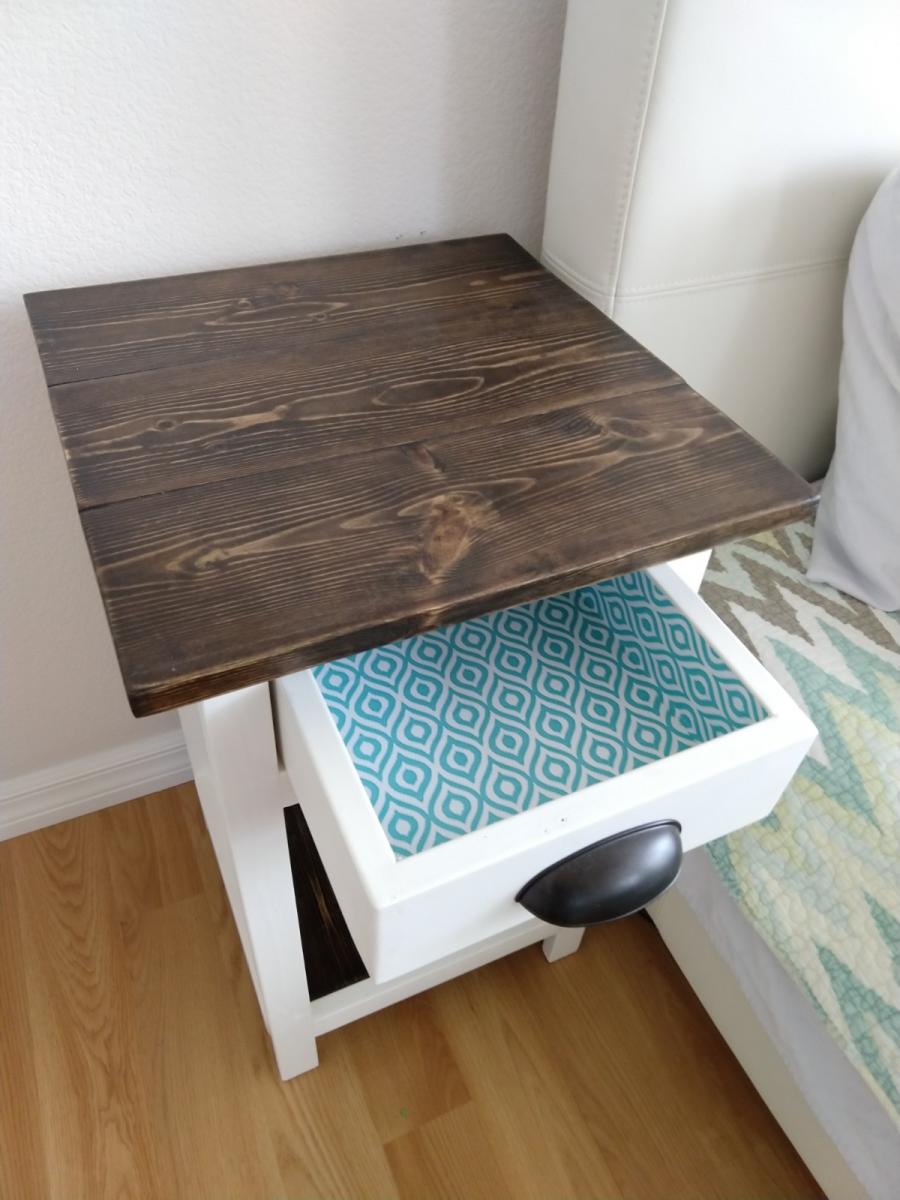
Mini Planked Farmhouse Bedside Tables

By far my favorite project! It was challenging combining two sets of plans, changing dimensions, and learning new skills all at the same time yet so, so, rewarding.

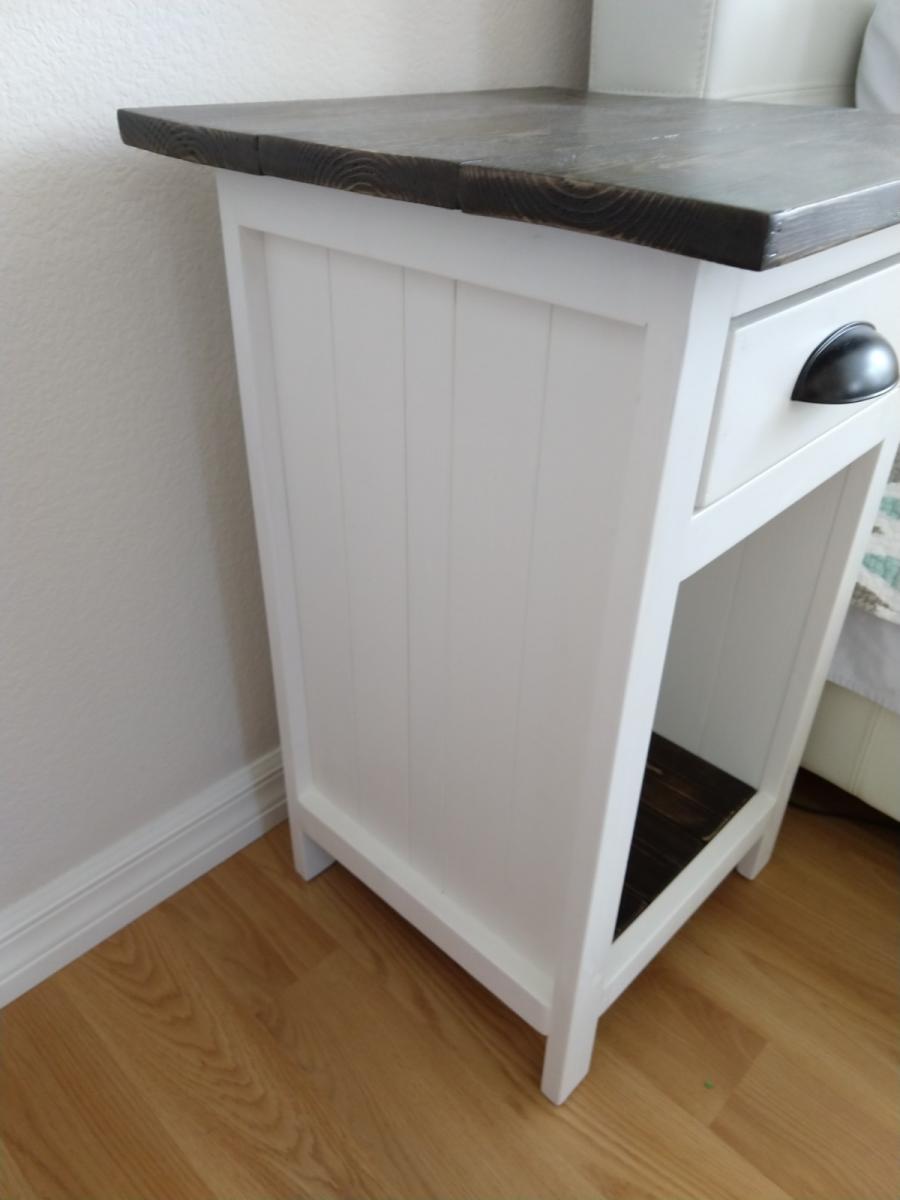
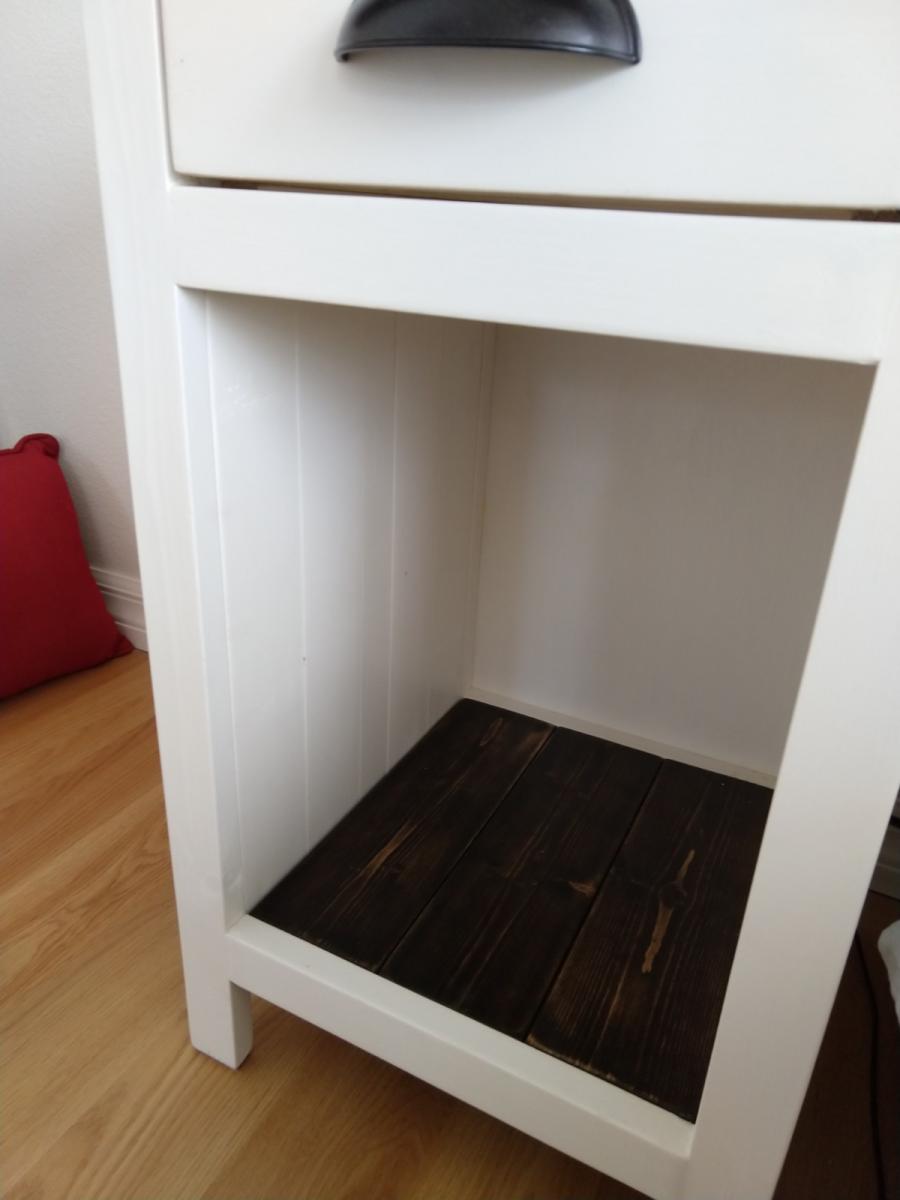
I loved the look of the Mini Farmhouse Bedside Tables but wanted to create a bookshelf as well so, I used the planks idea from the Planked Wood Bedside table plans to create solid sides, and a plywood backing for support and to hide lamp and phone cables.

I have a very low bed, so I shortened the height and made the top proportionate in size.

I used 1x6s for the top, 1x4s for the bottom shelf, 1x3s and a 1x2 for the side panels, 1x4s for the drawer, and 1x2s for the trim and a piece of 1/4" plywood for the backing.

I found that the drawer fell out when you pulled it too far so I added piece of wood between the drawer and the top to keep it from dropping as you pulled it out. 

Estimated Cost
$120 for 2
Estimated Time Investment
Week Long Project (20 Hours or More)
Finish Used
Minwax Penetrating Stain and Minwax Polyurethane
White cabinet paint from Sherwin Williams
Drawer liner :)
Recommended Skill Level
Intermediate

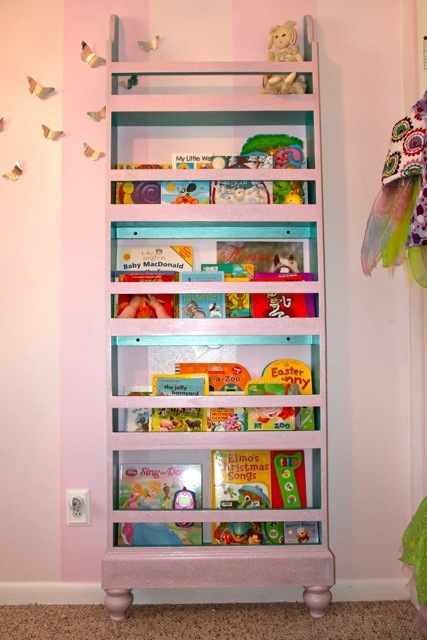
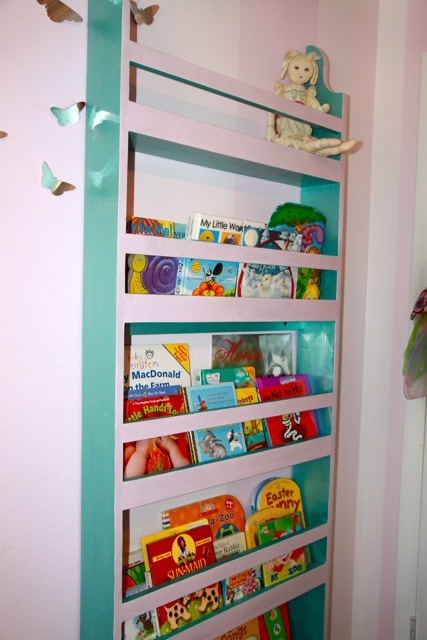
Girly Flat Wall Bookshelf

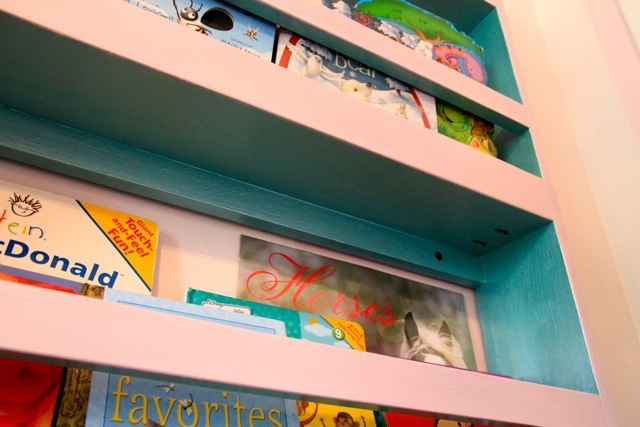
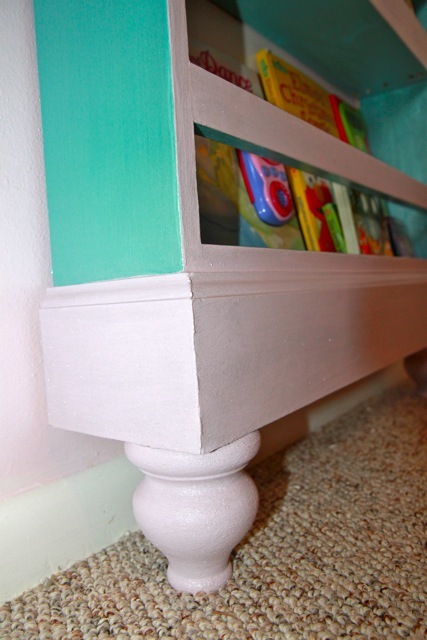
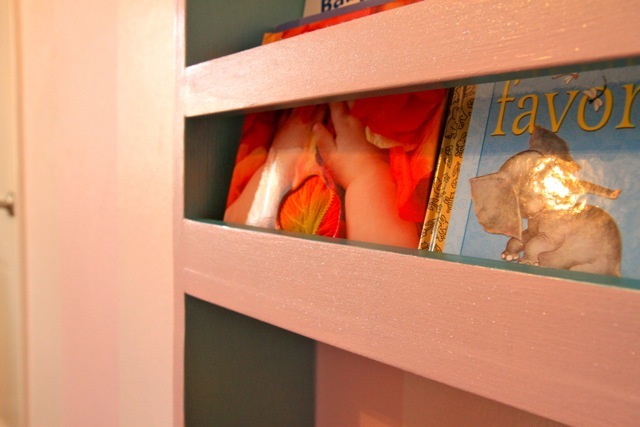
I built this bookshelf over the summer and finally decided on paint over the weekend. I LOVE how it turned out! I followed the plans for general directions, but my dimensions are taller and wider than the plans. I used 8' 1x6's for the sides and the shelves are about 14". I also added bun thingy's (or whatever they're called!) to the base so that the unit would fit completely flat against the wall. Otherwise you'd have to either cut out your existing wall trim or notch the shelf trim around your wall trim. This was my first time using the Kreg pocket hole jig. It took a little getting used to, so I'd suggest practicing with some scrap parts first to make sure you don't end up drilling the pocket hole completely through the board.

Built from Plan(s)
Estimated Time Investment
Afternoon Project (3-6 Hours)
Finish Used
Valspar Pink Glow and Valspar Brilliant Metals Grass Lake. For the 2nd coat of pink I mixed 3 packages of the Valspar glitter with about 1 1/2 cups of the paint. You can't see it very well from the picture, but the glitter is very visible and glistens in the sunlight!
Recommended Skill Level
Beginner

Pebble Art with Pallet Wood!

Submitted by kdins31 on Thu, 01/02/2014 - 09:01

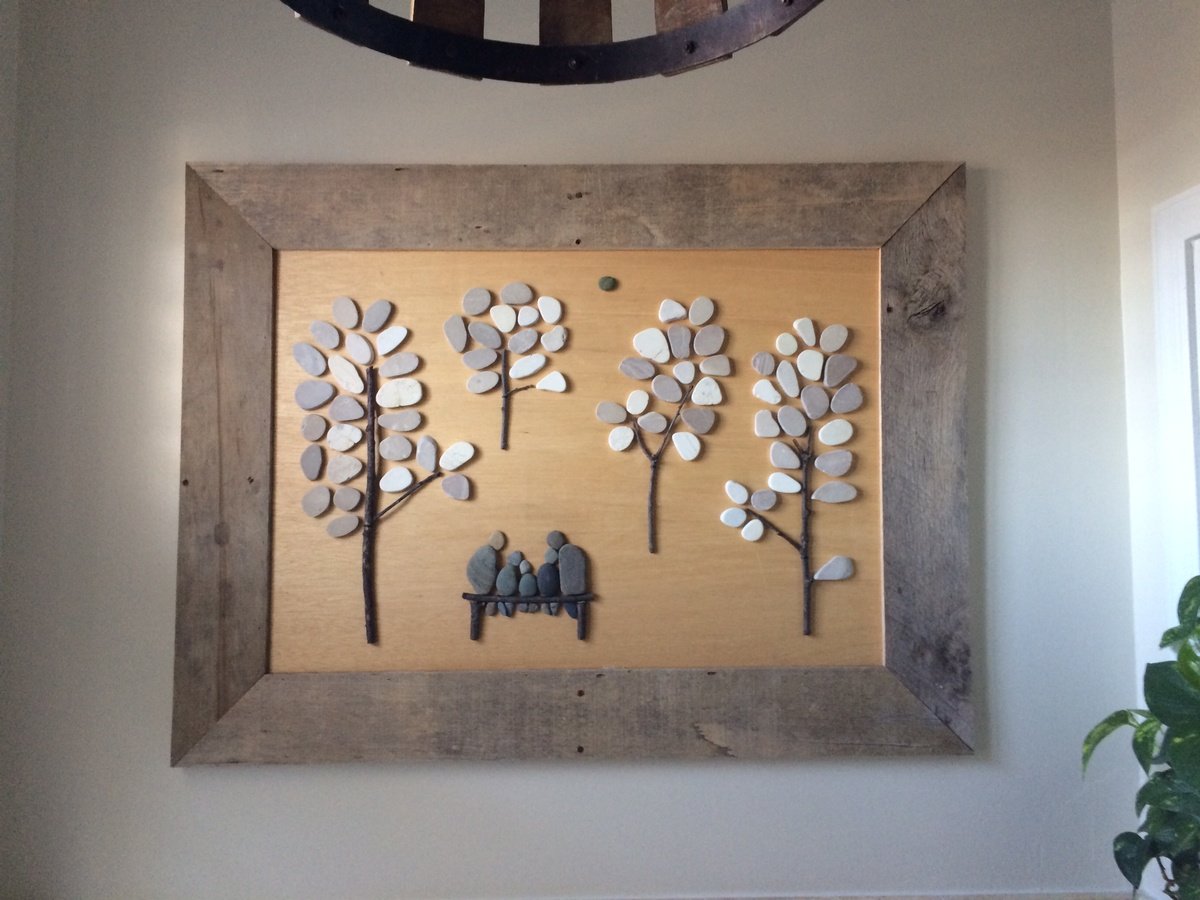
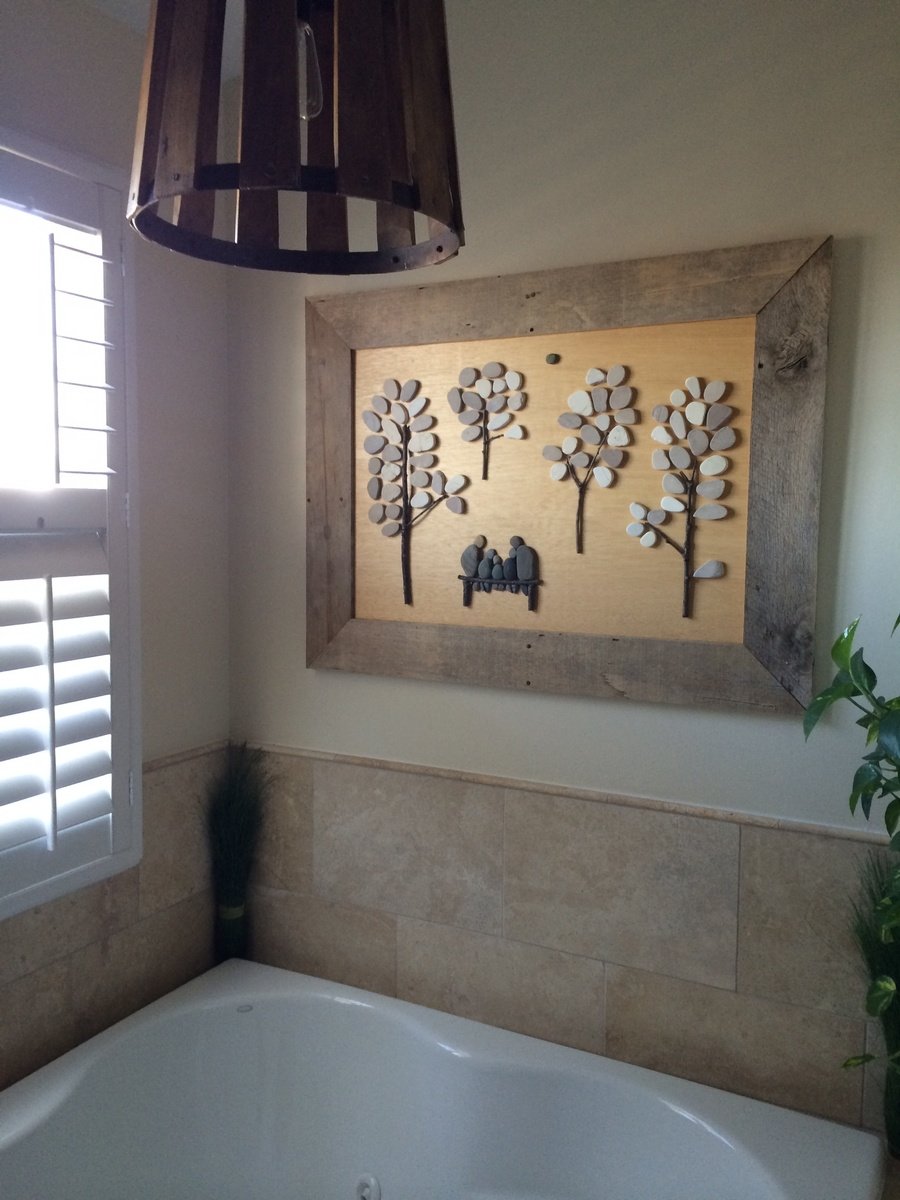
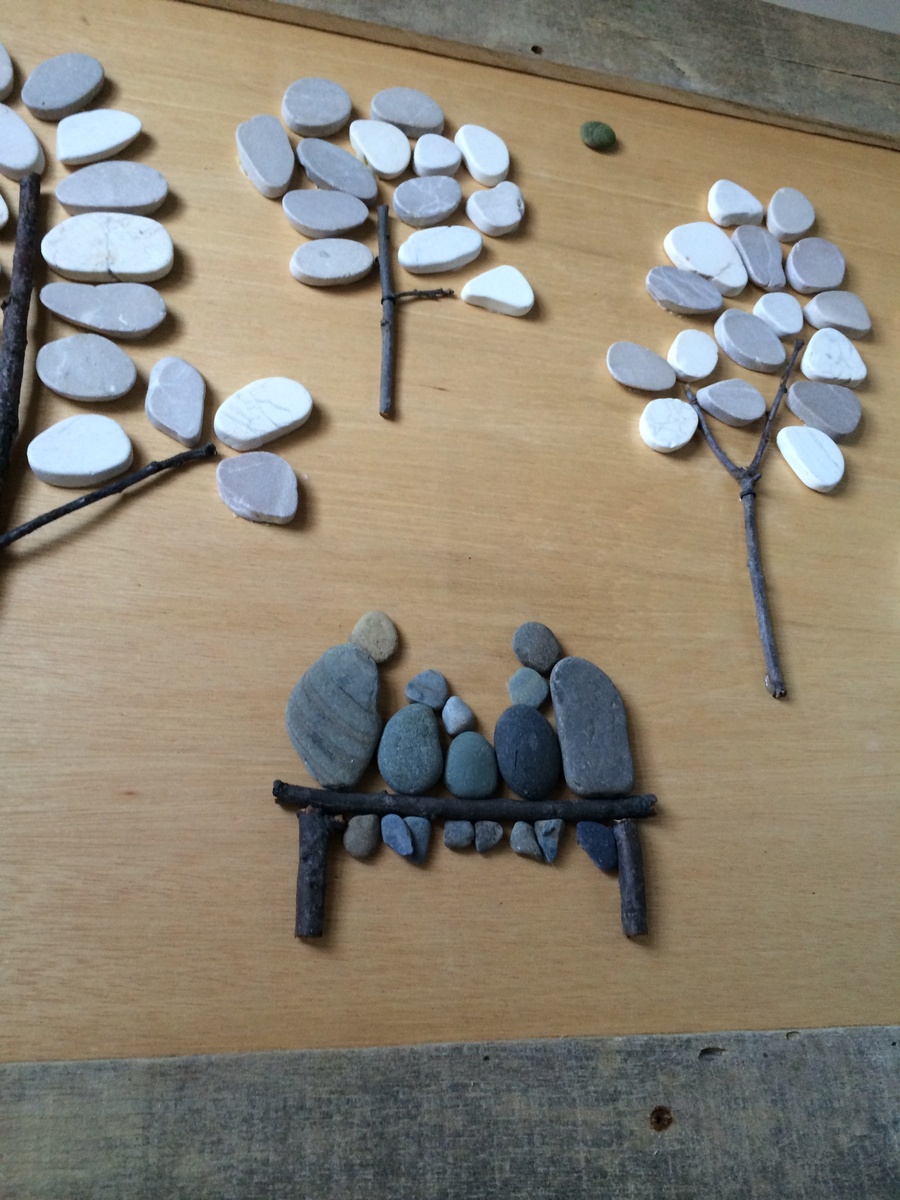
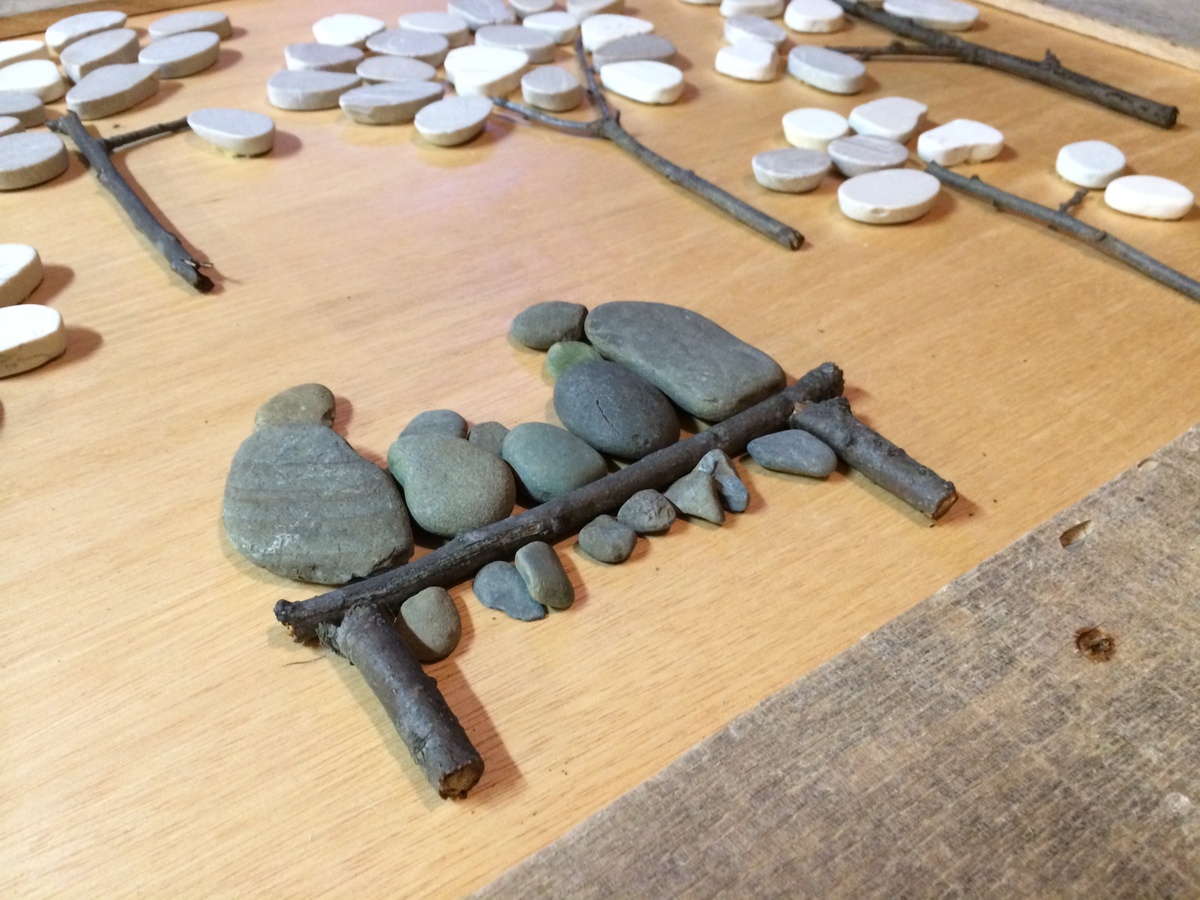
I made this using leftover pallet wood, sanded plywood backer, leftover sliced pebbles from my bathroom remodel and plain old sticks and stones from my backyard. Took all of 2-3 hours or so to cut, sand and glue. The longest part was finding the perfect stones for the family and the layout of the trees. In case you're wondering, that's my wife and me and my three young daughters. This was the perfect piece to finish off our newly remodeled bathroom. This would be a great project for a family of all ages.

Estimated Cost
I used all leftover materials, so $0.
Estimated Time Investment
Afternoon Project (3-6 Hours)
Finish Used
Just poly over backer, nothing else. The pebbles are glued with liquid nails and sticks are held with basic garbage bag ties.
Recommended Skill Level
Beginner

Comments

Linda7

Tue, 01/07/2014 - 10:18

This is so creative! A wonderful finishing touch for your bathroom remodel.

Rustic X Console

Submitted by Anonymous (not verified) on Sun, 03/20/2016 - 15:50

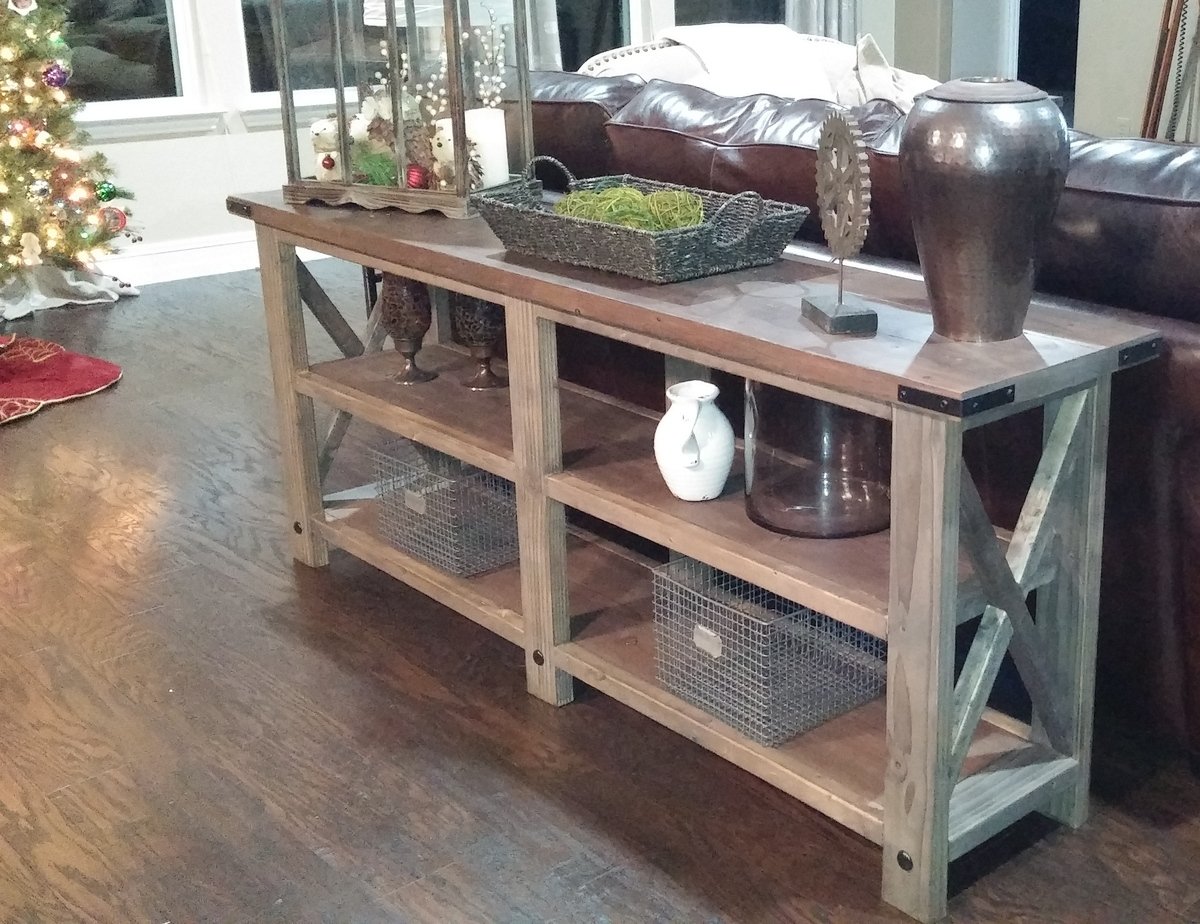
The most time consuming part was staining the wood, and getting the Xs to fit properly.  We love how it came out and are making an outdoor bench and end tables to match.

Built from Plan(s)
Estimated Time Investment
Week Long Project (20 Hours or More)
Finish Used
homemade steel wool/vinegar stain
Recommended Skill Level
Starter Project

Can organizer

Submitted by Anonymous (not verified) on Thu, 10/31/2019 - 16:46

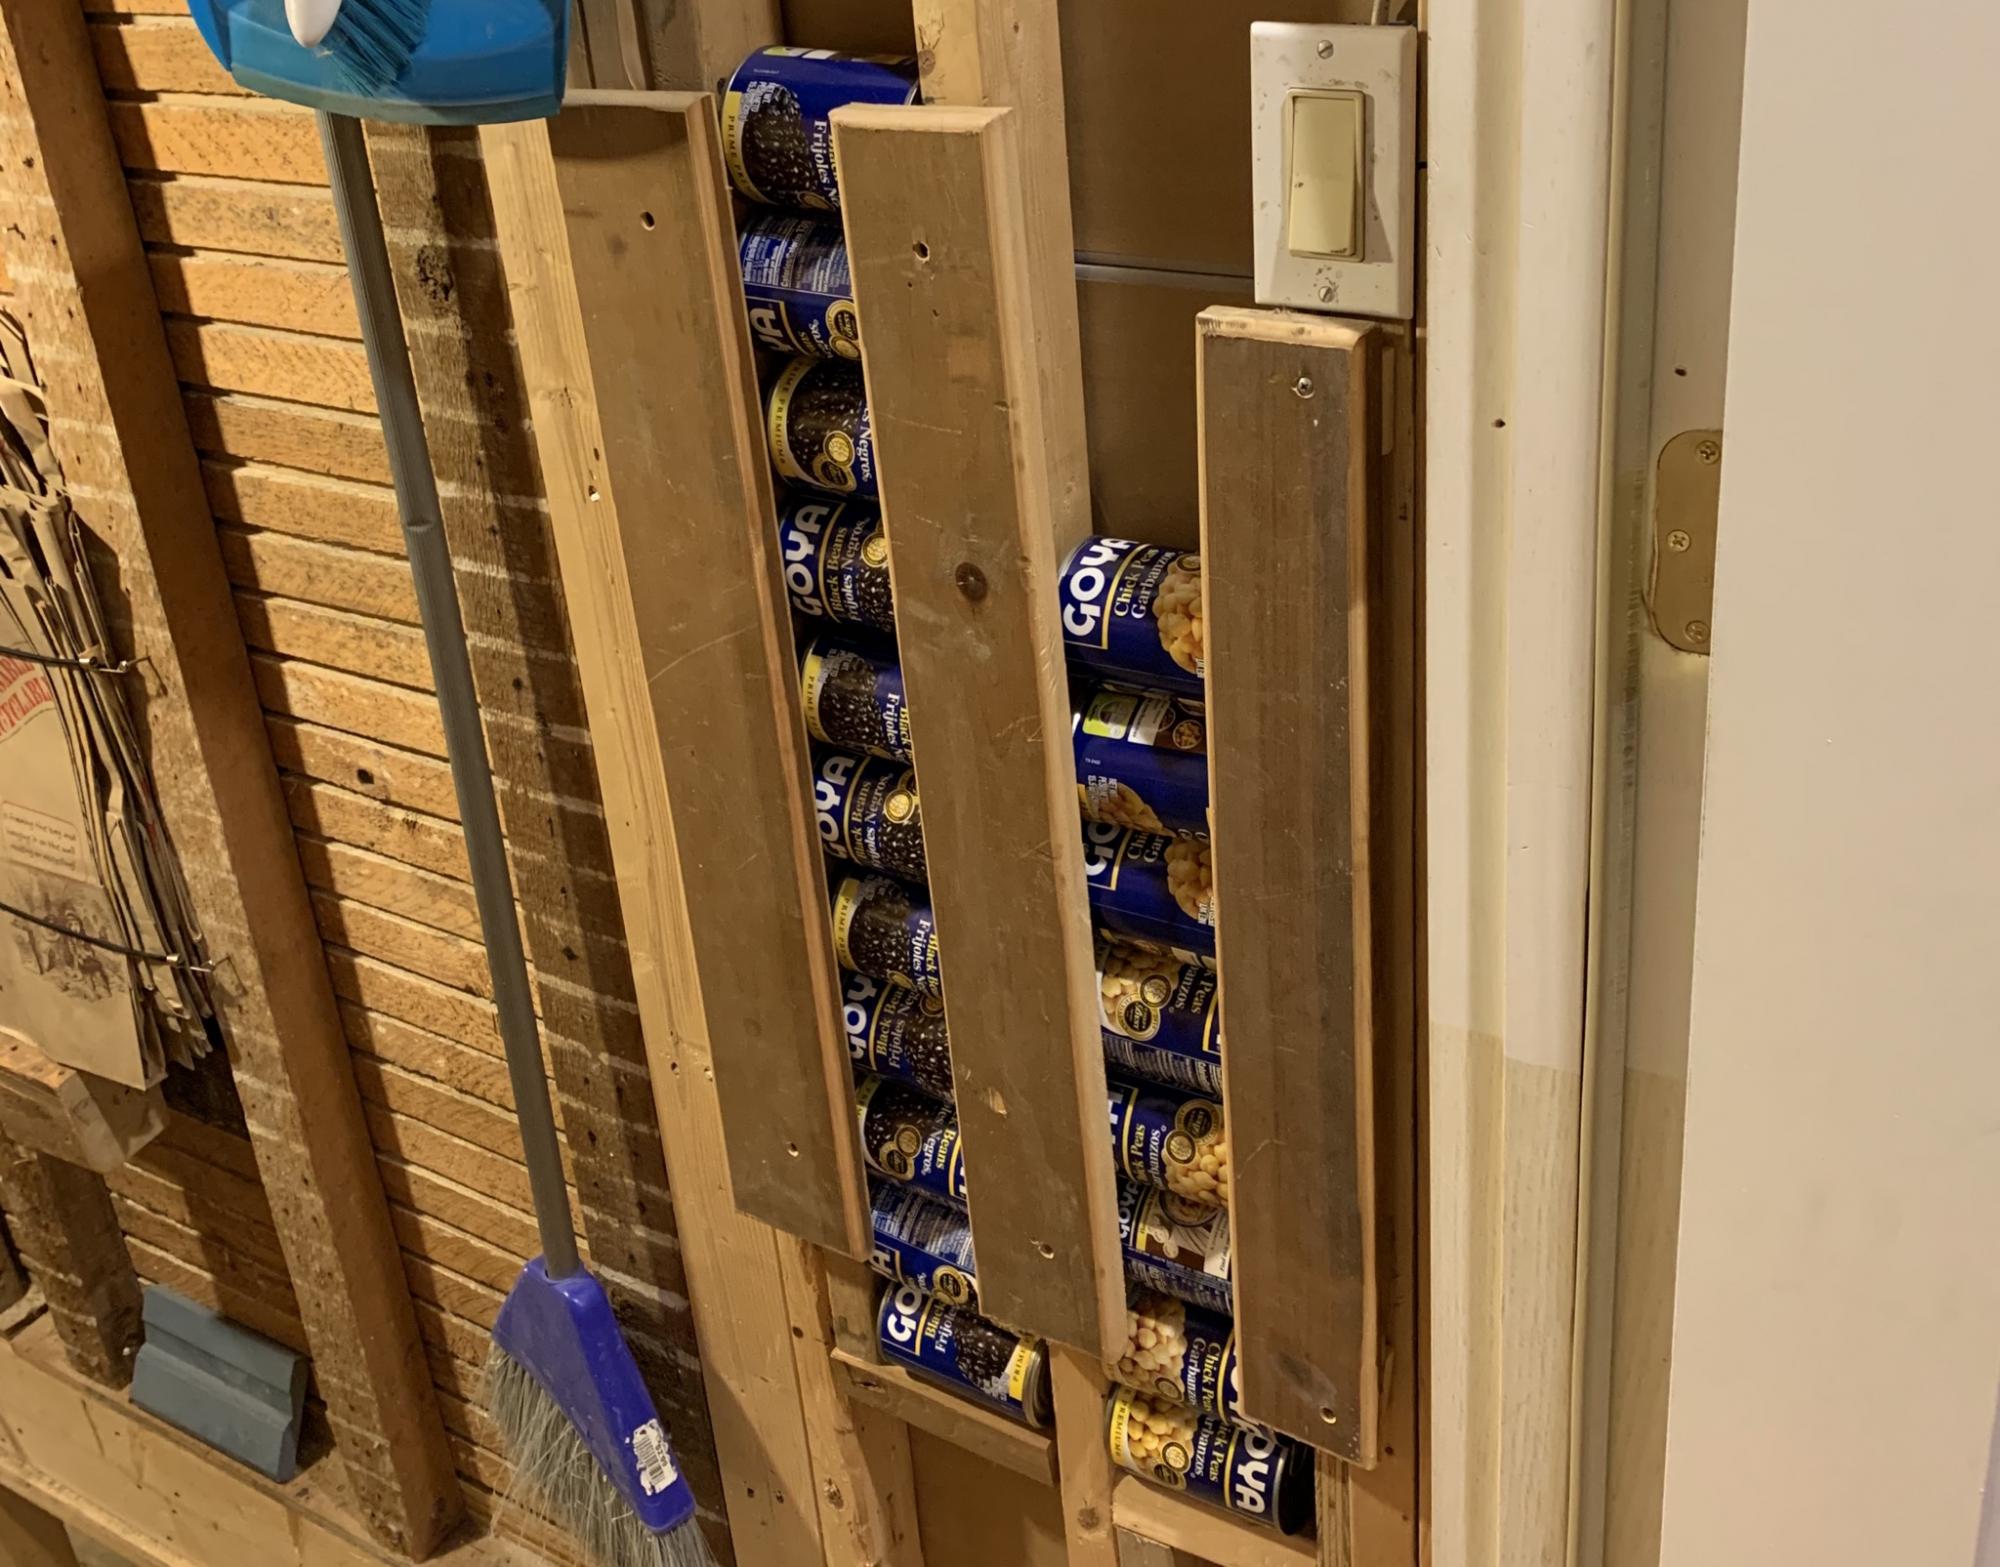
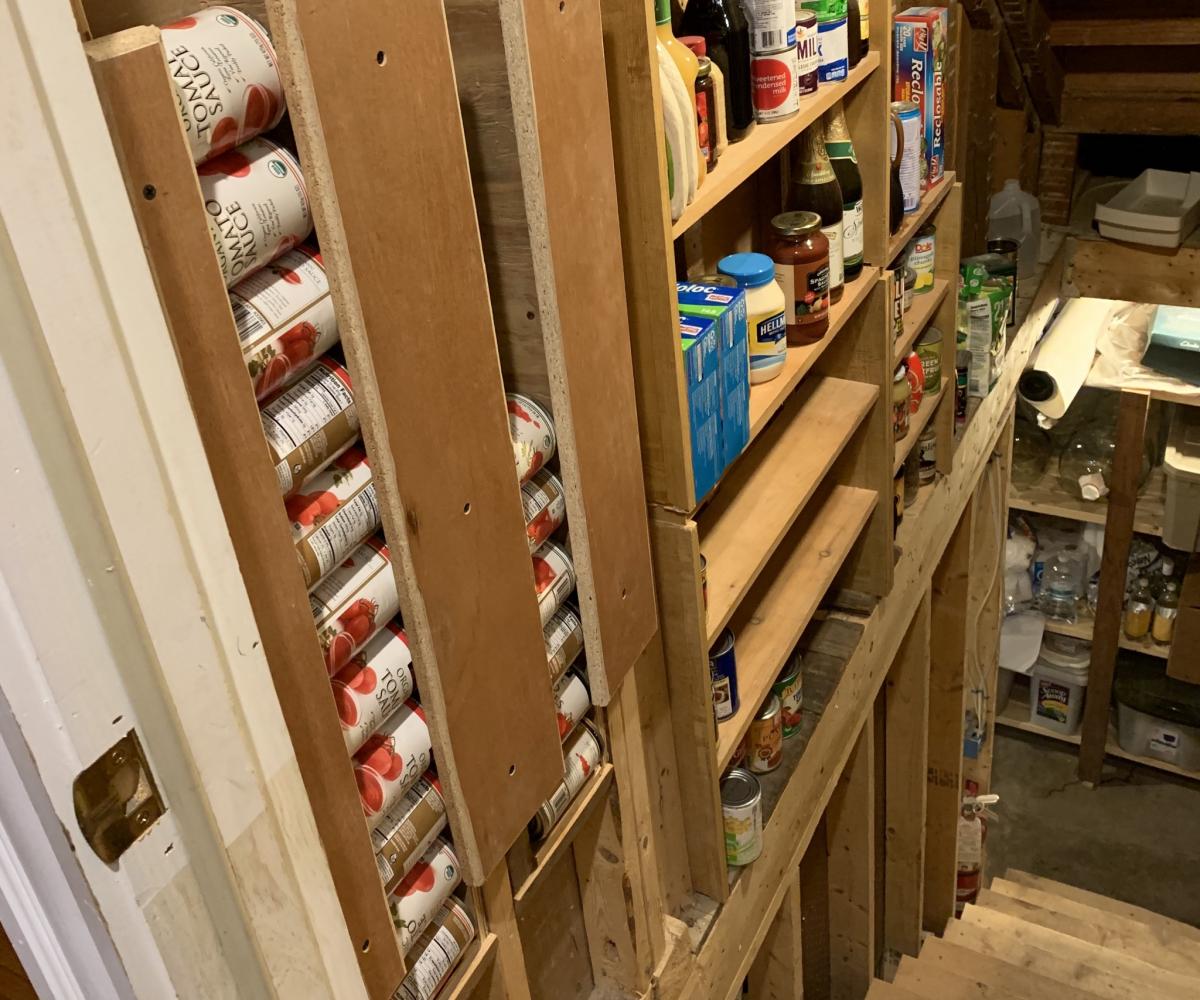
I adapted the wall mounted can organizer to take advantage of the stud spaces at the top of the basement stairs. It perfectly frees up some of the horizontal space on the shelves that we use for overflow of the pantry.

Estimated Cost
$0 -Used scrap wood for the retaining boards
Estimated Time Investment
An Hour or Two (0-2 Hours)
Recommended Skill Level
Beginner

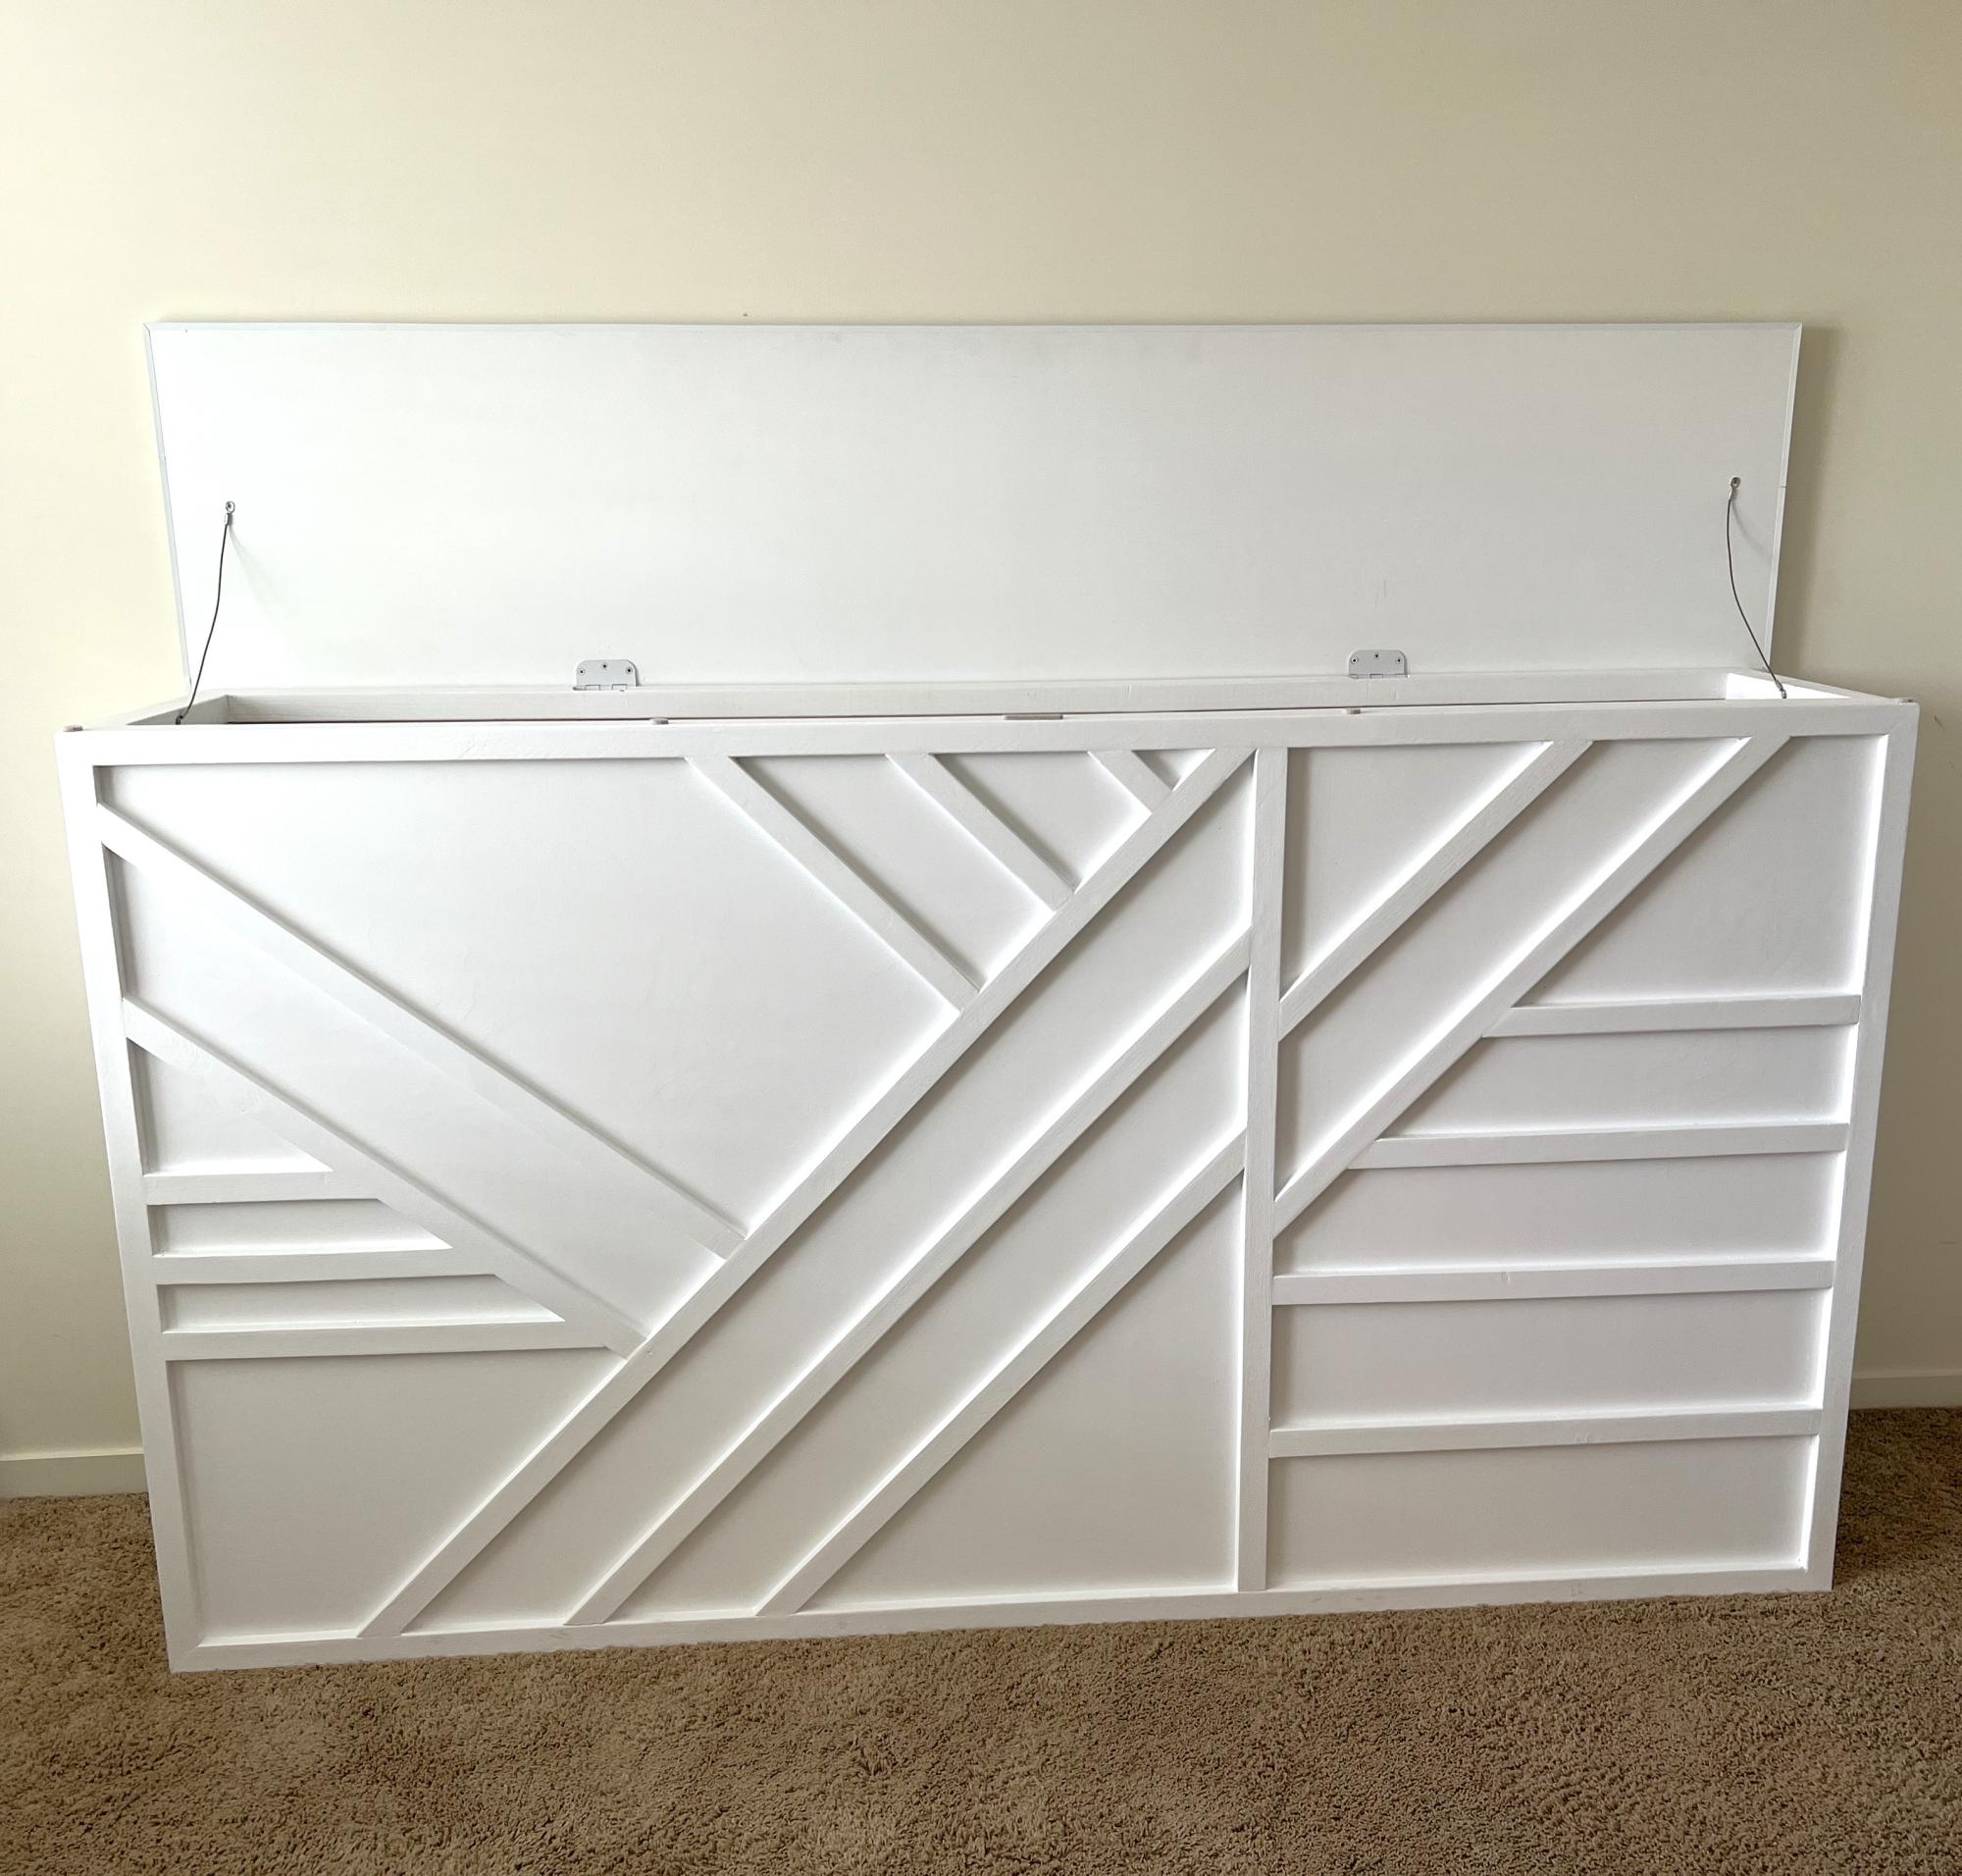
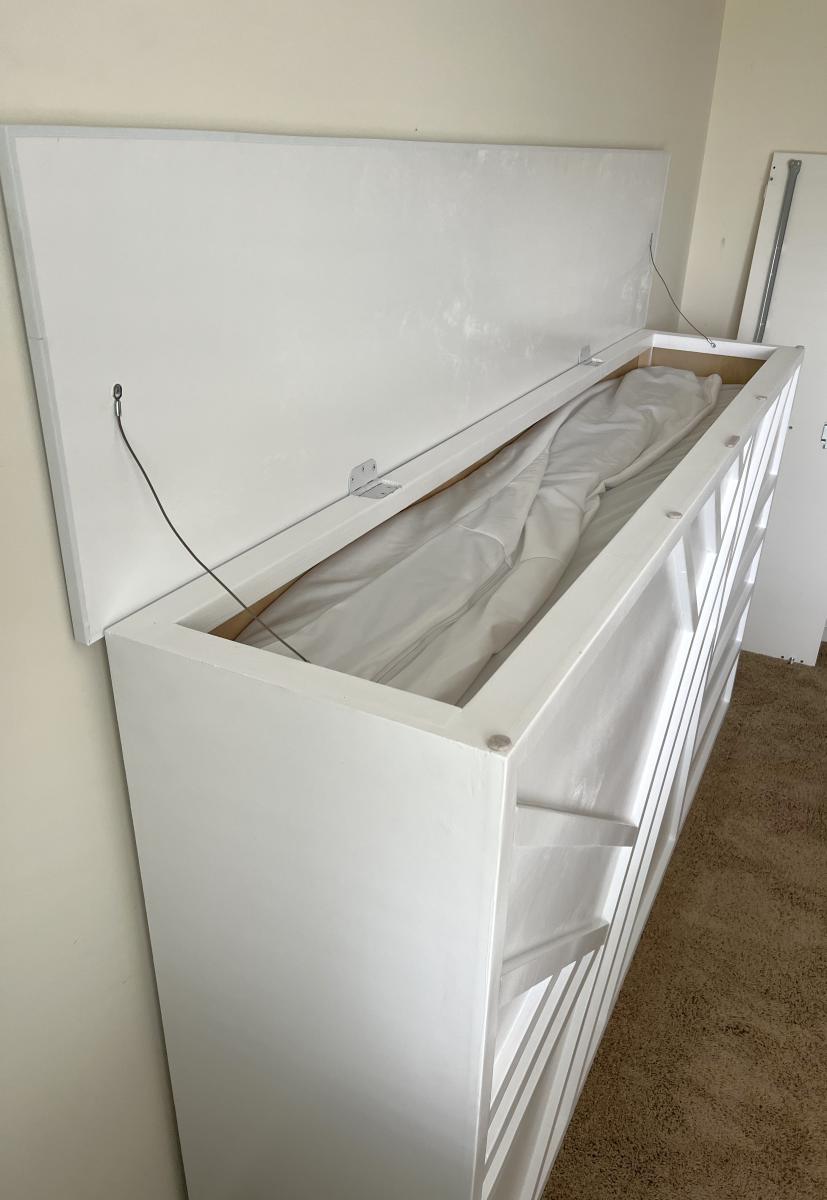
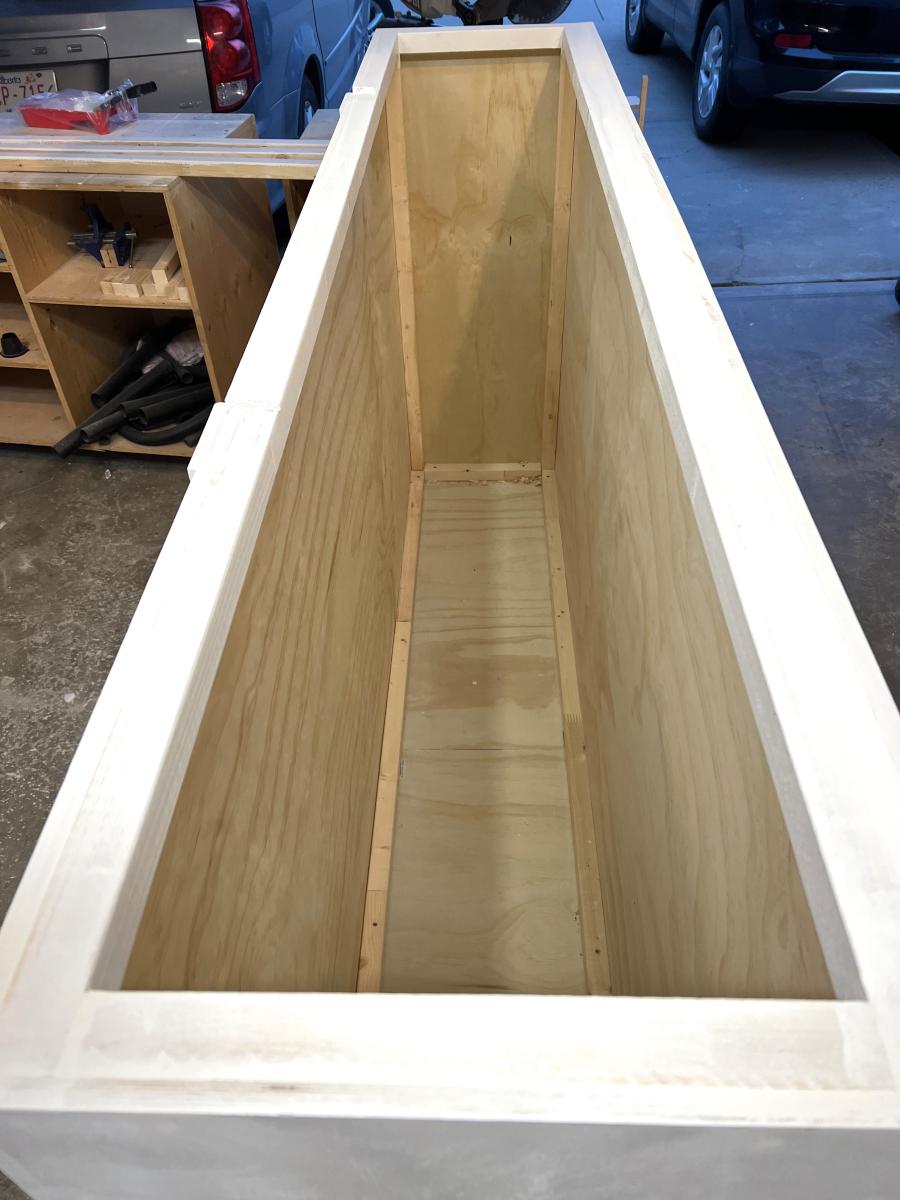
Storage Headboard

Submitted by Anonymous (not verified) on Thu, 07/20/2023 - 15:16

This project changed 3 times from the day i started.
It was supposed to be a simple vertical box to hide 2 twin mattresses
Then she decided to do a horizontal box (chest).
Then she decided to put it behind her be.
By the end it became a headboard storage and the design is Modern Geo Headboard

by Ana White

Built from Plan(s)

My first build. Queen size playhouse loft bed.

Submitted by Bunnie1978 on Sat, 03/10/2012 - 18:57

Aiden's Clubhouse.

I can't even believe I was able to build this! Everyone thought I was crazy for undertaking such a huge project. I made it a queen size because my son would always sleep in my bed anyways... so I just gave it to him. The bed took 4 weeks because I could only work on it on Saturday afternoons. The first week, I made a frame with cleats on the wall. The second week I built the house and stairs. The third week I built the slide and did some of the painting. Today, I finished painting and trim.

I did modify the plans and merged the plan for the slide into my plan, which was a last minute addition. As such, I had to "measure-and-cut-as-you-go" build this bed. I would highly recommend to anyone considering such a task, don't do that. Make a plan, cut all your wood, paint before assembly, and stick to the plan. My stairs all lift up, and under the top landing there is also a cut out inside Aiden's clubhouse-you can see it behind him in the picture below. Also under the slide is a cut out for storage. I have not done anything with the inside of the clubhouse yet. Someday...

I designed the bed specifically so that I could take it apart if we ever move... we live in an apartment. The stairs/stairwell are only connected to the rest of the bed with a single screw. The other wall is a bit more difficult to remove, but not impossible.

I learned a few things doing this, that I want to share with you all..
1. The Kreg-Jig is the best thing ever.
2. I LOVE LOVE LOVE power tools.
3. 4x4 sheets of MDF are difficult to carry upstairs by myself.
4. I can do anything.

I hope you all like it. This was my son's 4th birthday present and he really loves it.

It isn't finished yet though. The far wall in the room is about 2 ft away from the bed, and I haven't decided what to do with that side of the bed, so it's still plain. I would love some ideas! What do you think?
Estimated Cost
$800 including the new tools.. table saw, nailer, kreg, new drill
Estimated Time Investment
Week Long Project (20 Hours or More)
Finish Used
Behr paint. I coordinated the colors on the Behr website to try and match the colors already on the wall.
Recommended Skill Level
Intermediate

Comments

Bunnie1978

Sun, 03/11/2012 - 06:30

I did make a couple mistakes with the slide. I made it too narrow. Right now it is 1 foot wide. Next time I would do 1 1/2 feet wide. I also would make the landing at the top bigger. I like the angle of the slide now at 45 degrees, but my son did have to learn how to slide down it without falling foward at the bottom. So, a more well designed slide would be less steep, wider, and with a bigger landing at the top. Another tip... for the top of the stairs, take extra care to make sure they swing straight and are about 1/2 inch less wide than the space so they don't scrape the side of the stairwell walls.

spiceylg

Sun, 03/11/2012 - 03:56

This is you FIRST build? Impressive indeed. You did a great job and Aiden is one blessed boy!

Bunnie1978

Sun, 03/11/2012 - 06:32

Technically, I did finish the ten dollar ledge above his bed earlier this week, before I completed the bed, but it was all part of the same project! :) The only other thing I've built is 2x4s slapped together to hold aquariums. My other hobby is breeding fish. :)

Ganny Girl

Mon, 03/12/2012 - 11:01

This is amazing! I can't believe it was your first build! Did you add any extra support to accommodate the queen size mattress?

Bunnie1978

Mon, 03/12/2012 - 11:29

Yes I actually made a whole frame. Basically just studs - on the walls they are just screwed into studs in the wall, then the other two sides are supported by the walls of the house and a vertical frame piece also. There are two stud slats connected to that, so that bed isn't going anywhere. This is the same method I use for supporting 1500 pound aquariums. I have a bunch of 1x3 slats in there as well...

So, if I want to move the bed, I would remove the side with the stairs (~62 inches)- that whole side is one unit, secured to the frame with one screw, and secured to the other wall by about 5 finish nails and one screw. The longer wall (~85 inches) is secured to the frame by 6 screws.

Queen mattresses are HEAVY. :) I learned that too.

Dani83264 (not verified)

Sun, 01/06/2013 - 08:21

we're making the Playhouse Loft Bed for a queen bed as well. Maybe you can answer a question for me. Are the dimensions to fit a queen size bed as written, or do we need to convert them. A queen mattress is 75 x 80 and it looks like that's what this is made to fit, but I don't wanna find out i'm wrong after I already have that thing hoisted up over my head :) Thanks for any advice you can offer!

ashleymyers233

Thu, 06/25/2015 - 00:53

Can anyone guide me as to what parts of the clubhouse and castle bed plans were used here to make this bed

Faux Christmas Mantle

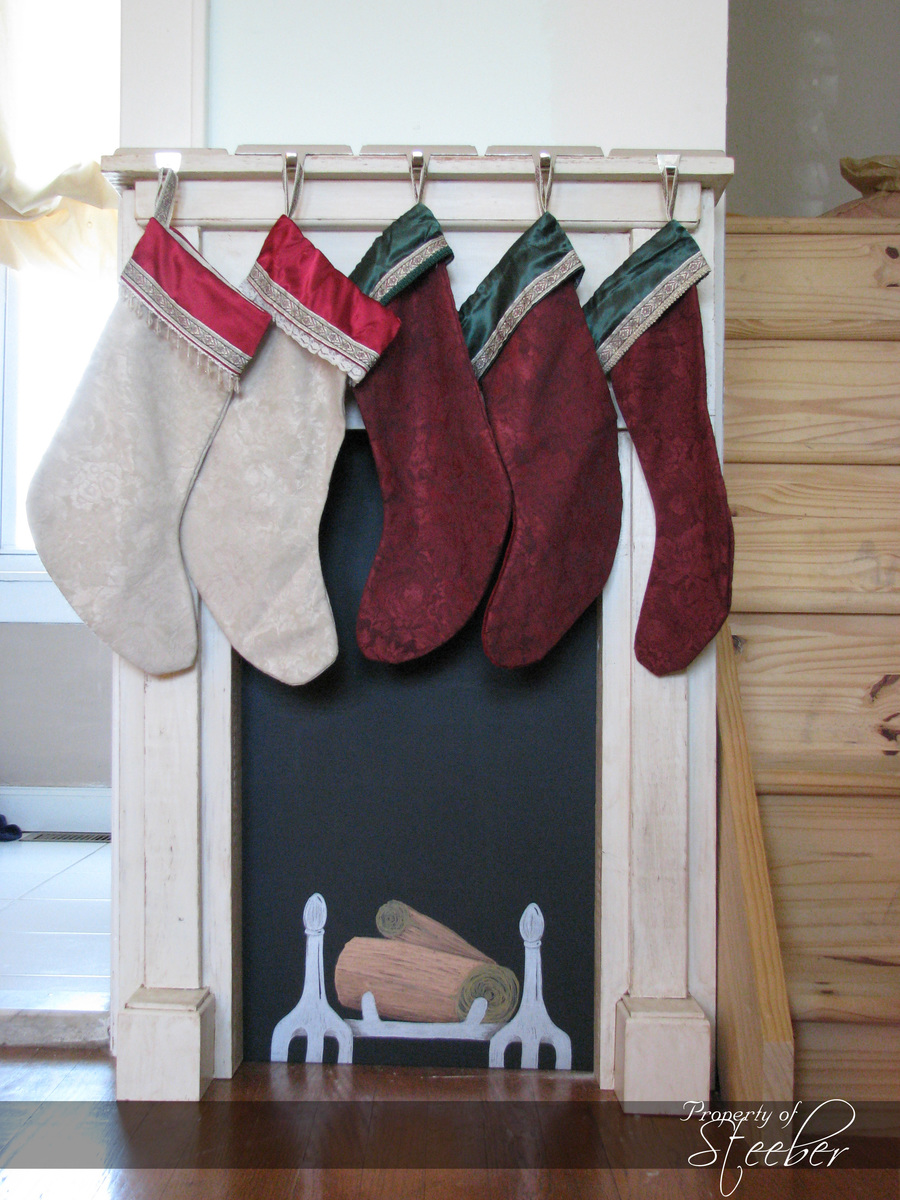
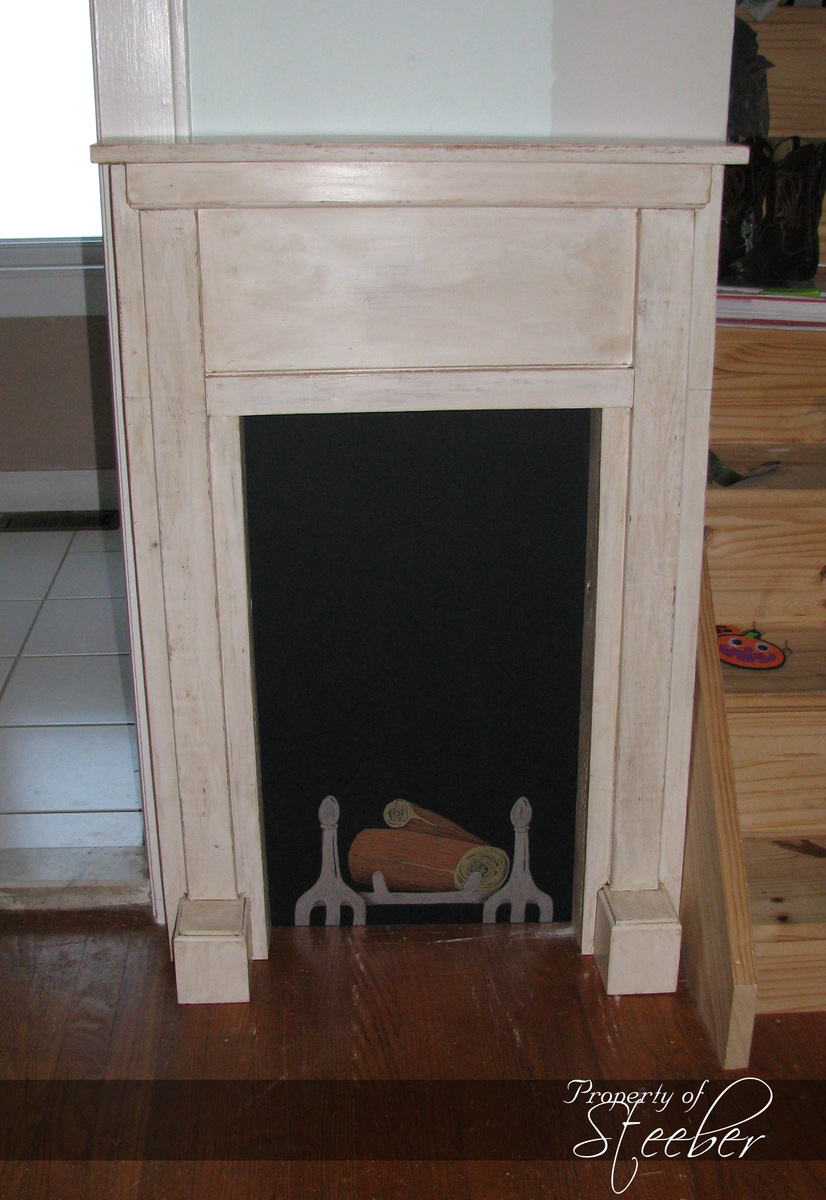
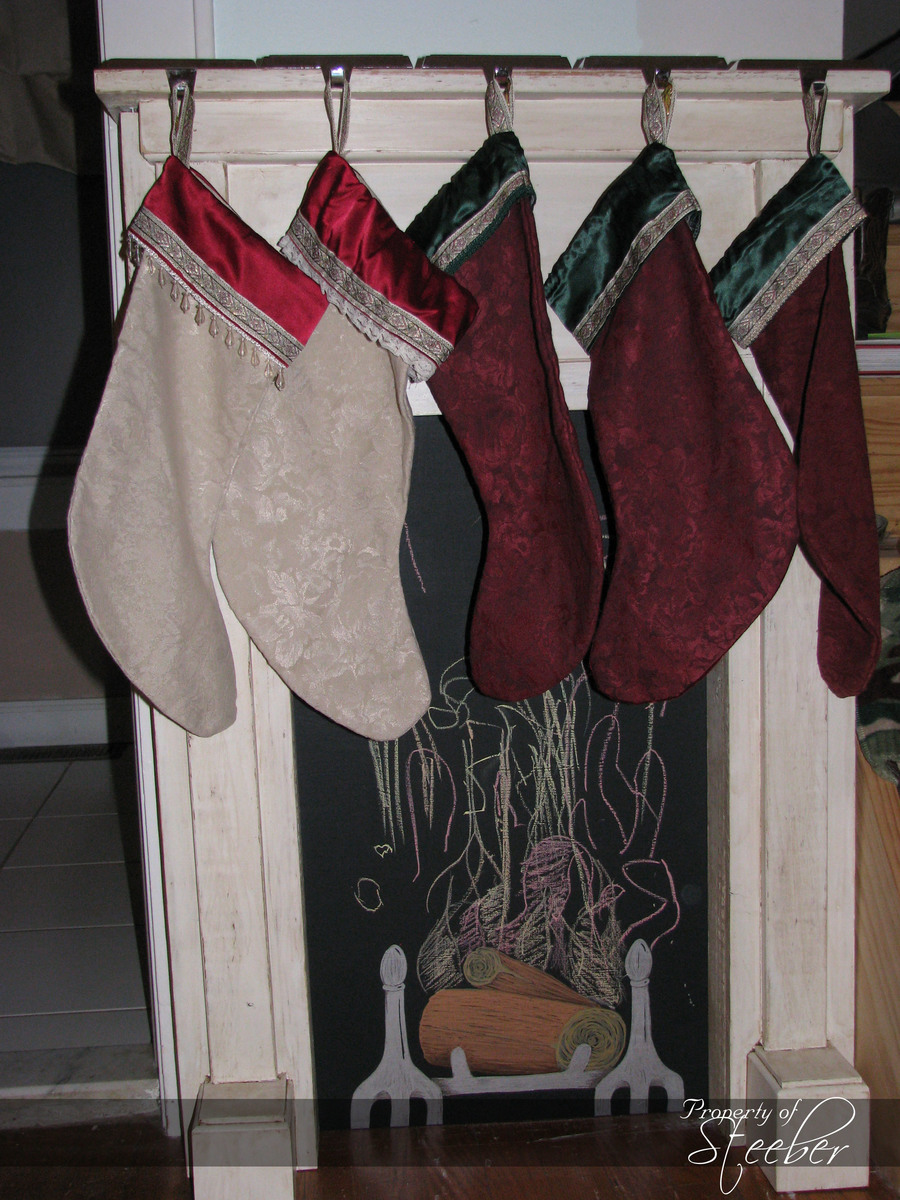
With all our changes and renovations, we no longer had a place to put up Christmas stockings. When I saw the idea for a fake mantle I knew this would be a good solution. The wall area I had was only 30 inches wide, but we made it work! The mantle itself was made almost entirely out of wood scraps. We also painted a thin piece of wood with chalkboard paint and used metallic Sharpies to create the grate and logs. That attached to the back of the mantle to serve as the "inside" of the fireplace. The kids added their own version of flames with some colored chalk on Christmas Eve night. Best part is I can store it in the attic until next year!

Estimated Time Investment
Day Project (6-9 Hours)
Finish Used
We painted the mantle with a milk colored latex paint, then roughed it up with some sandpaper and finished off with Minwax Dark paste finishing wax.
The inside of the fireplace was a piece of 1/8 inch plywood painted in chalkboard paint, and decorated with metallic Sharpies to create the grate and logs.
Recommended Skill Level
Intermediate

Double Pedestal Table, Benches and Bar

Submitted by Anonymous (not verified) on Mon, 07/24/2023 - 10:37

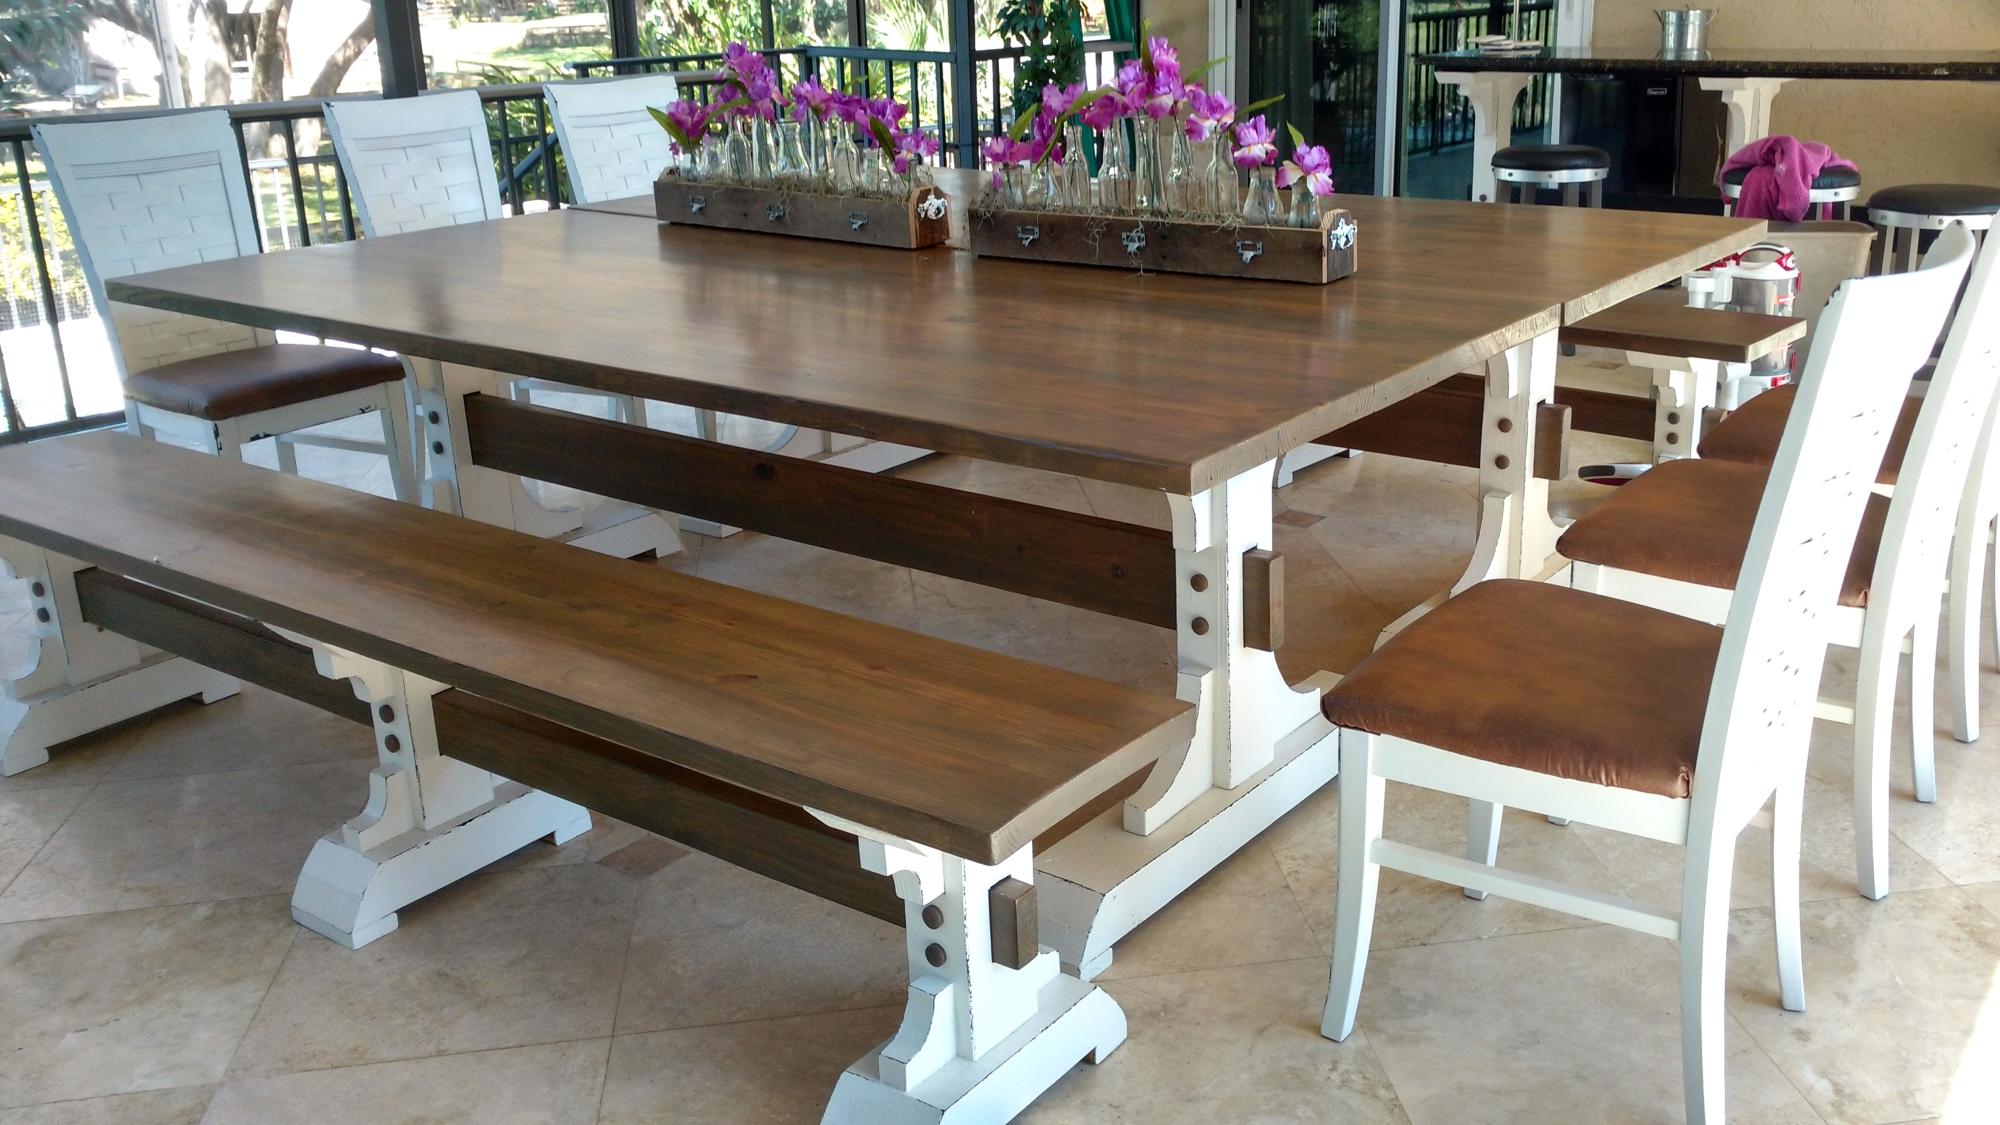
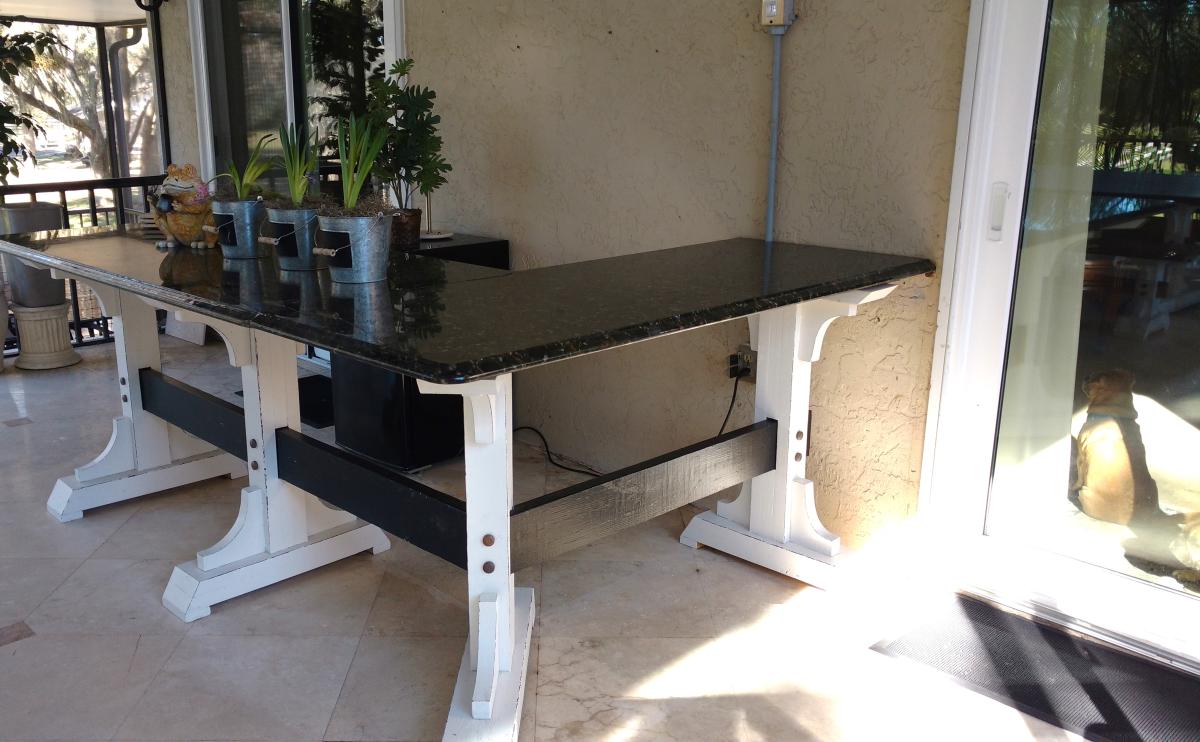
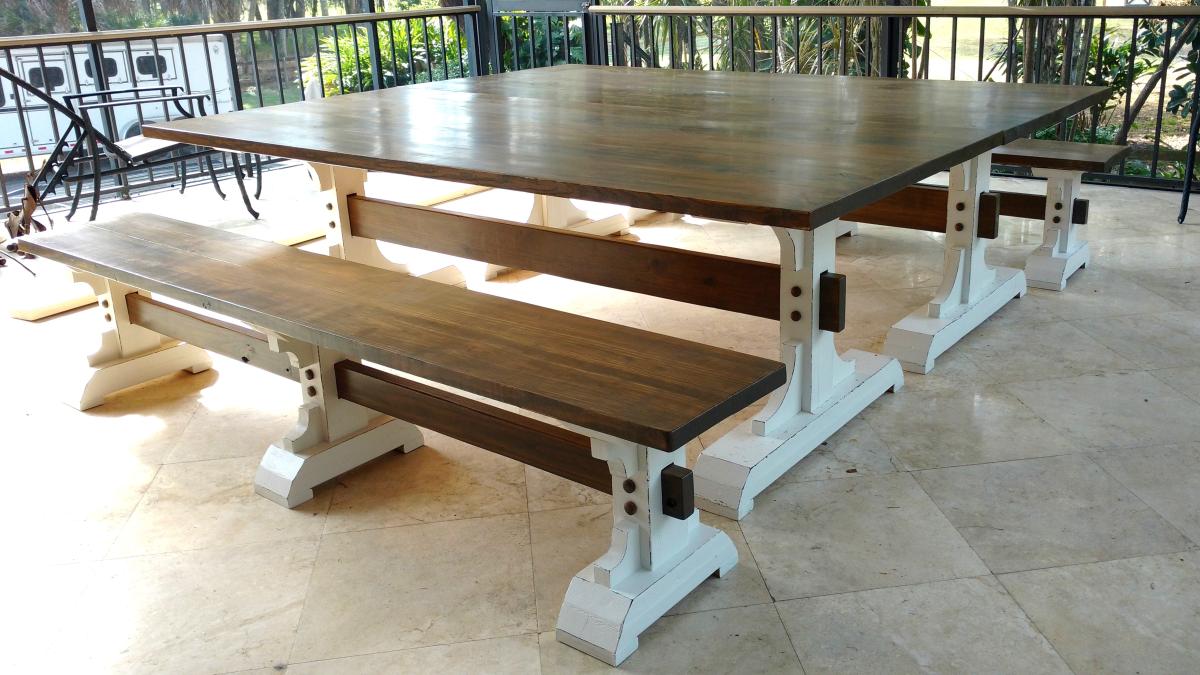
I was so inspired by Ana's plans I made two tables, that can be put side by side, alongside each other or used as two separate tables with benches. I also made a bar with granite top...... It was lots of sanding as I did not have a planer at the time, but I love the finished project and get compliments by all that see it. Thank you Ana White.


Cathy B

Jack's Play Kitchen

Submitted by AmyW on Tue, 03/13/2012 - 14:17

My husband and I built this kitchen for my son's 2nd birthday and it continues to be a huge hit. We scaled the dimensions up a bit so he can use it longer, and used 3/4" birch plywood with veneer on the ends. The oven knobs spin on dowels, the stove burners are just painted on and we added moulding to the edge of the countertops to give it a nice rounded edge. We used a cheap bar faucet from ebay, hardware from IKEA, and a stainless steel bowl with a rim for the sink. I highly recommend using a flap stay on the stove door to keep it from slamming open, and magnetic catches on the oven and fridge doors. We also used anti-tip furniture straps because these suckers are heavy.

Estimated Time Investment
Weekend Project (10-20 Hours)
Finish Used
clear stain on bases,
red mahogany stain on countertops,
many many coats of poly (this thing will survive the apocalypse)
Recommended Skill Level
Beginner

Comments

TIffonie

Sun, 07/08/2012 - 18:16

I've been planning on building these for my son soon. Your color choices are fantastic! How much bigger did you make them?

AmyW

Sun, 07/08/2012 - 22:00

Thanks Tiffonie!
We added three inches to the width and height. It was a bit large for him at two years old. Now that he is 3.5 it still gets played with every day, and the size works well. Good luck- your son will love it!

Little Cottage Loft Bed Animal House

Submitted by davisnc on Mon, 01/06/2014 - 11:17

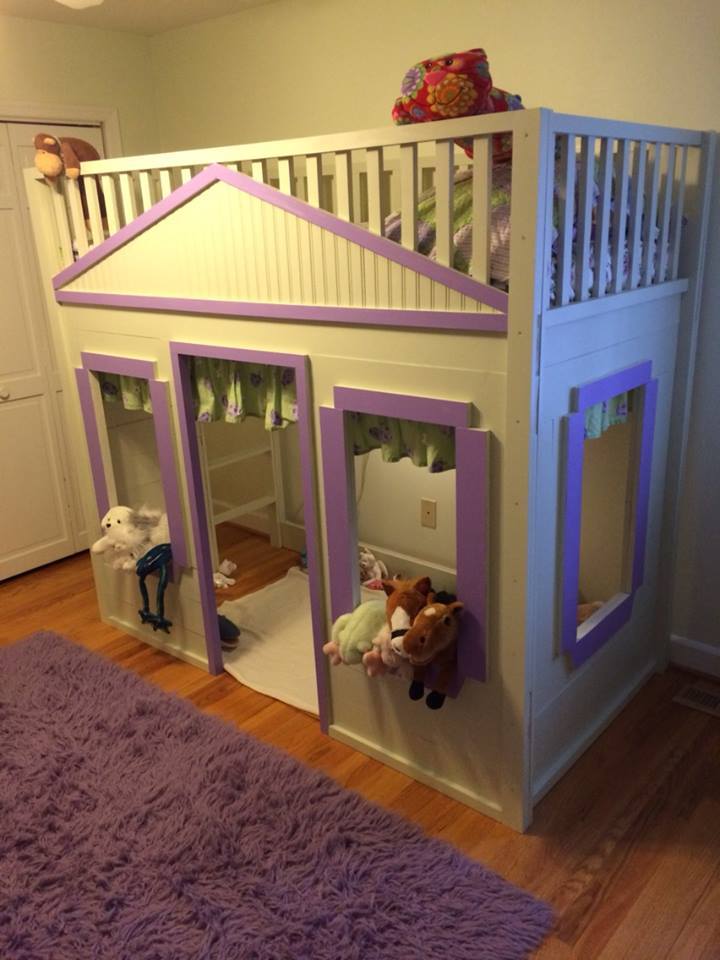
I spent time over my winter break from work to build this for my nine year-old. She absolutely loves it. It is much sturdier than the basic wooden loft I had in college. Now my 6YO wants one! I bought a Kreg Jig, which was a great investment to build something like this. I used a circular saw but next time around would borrow or purchase a miter/table saw for the large number of cuts required. I spent $475 in lumber, screws, nails, paint, etc which was more than I had planned, but we are happy with the result! It took me about 40 hours to build this in my basement. Great project for daddy/daughter time while school was out; she made the majority of the measurements for me! There were very slight issues with the plans but overall it was not too difficult.

Built from Plan(s)
Estimated Cost
475
Estimated Time Investment
Week Long Project (20 Hours or More)
Finish Used
Olympic One paint with primer
Recommended Skill Level
Intermediate

Patio Table/ my work table

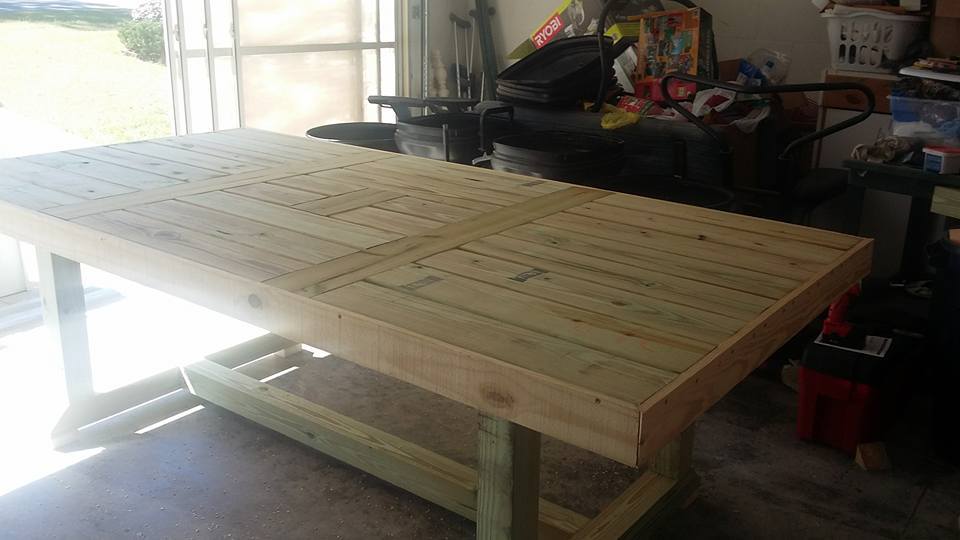
I decided since I was doing a lot of wood working projects I needed to have a work table. I came across the patio table on Ana site and fell in love. I now have a great table in my garage for all my woodworking projects.

Built from Plan(s)
Estimated Time Investment
Weekend Project (10-20 Hours)
Recommended Skill Level
Beginner

Modified Farmhouse Standard King Size Headboard

Submitted by LampAtFeet on Fri, 11/15/2019 - 15:56

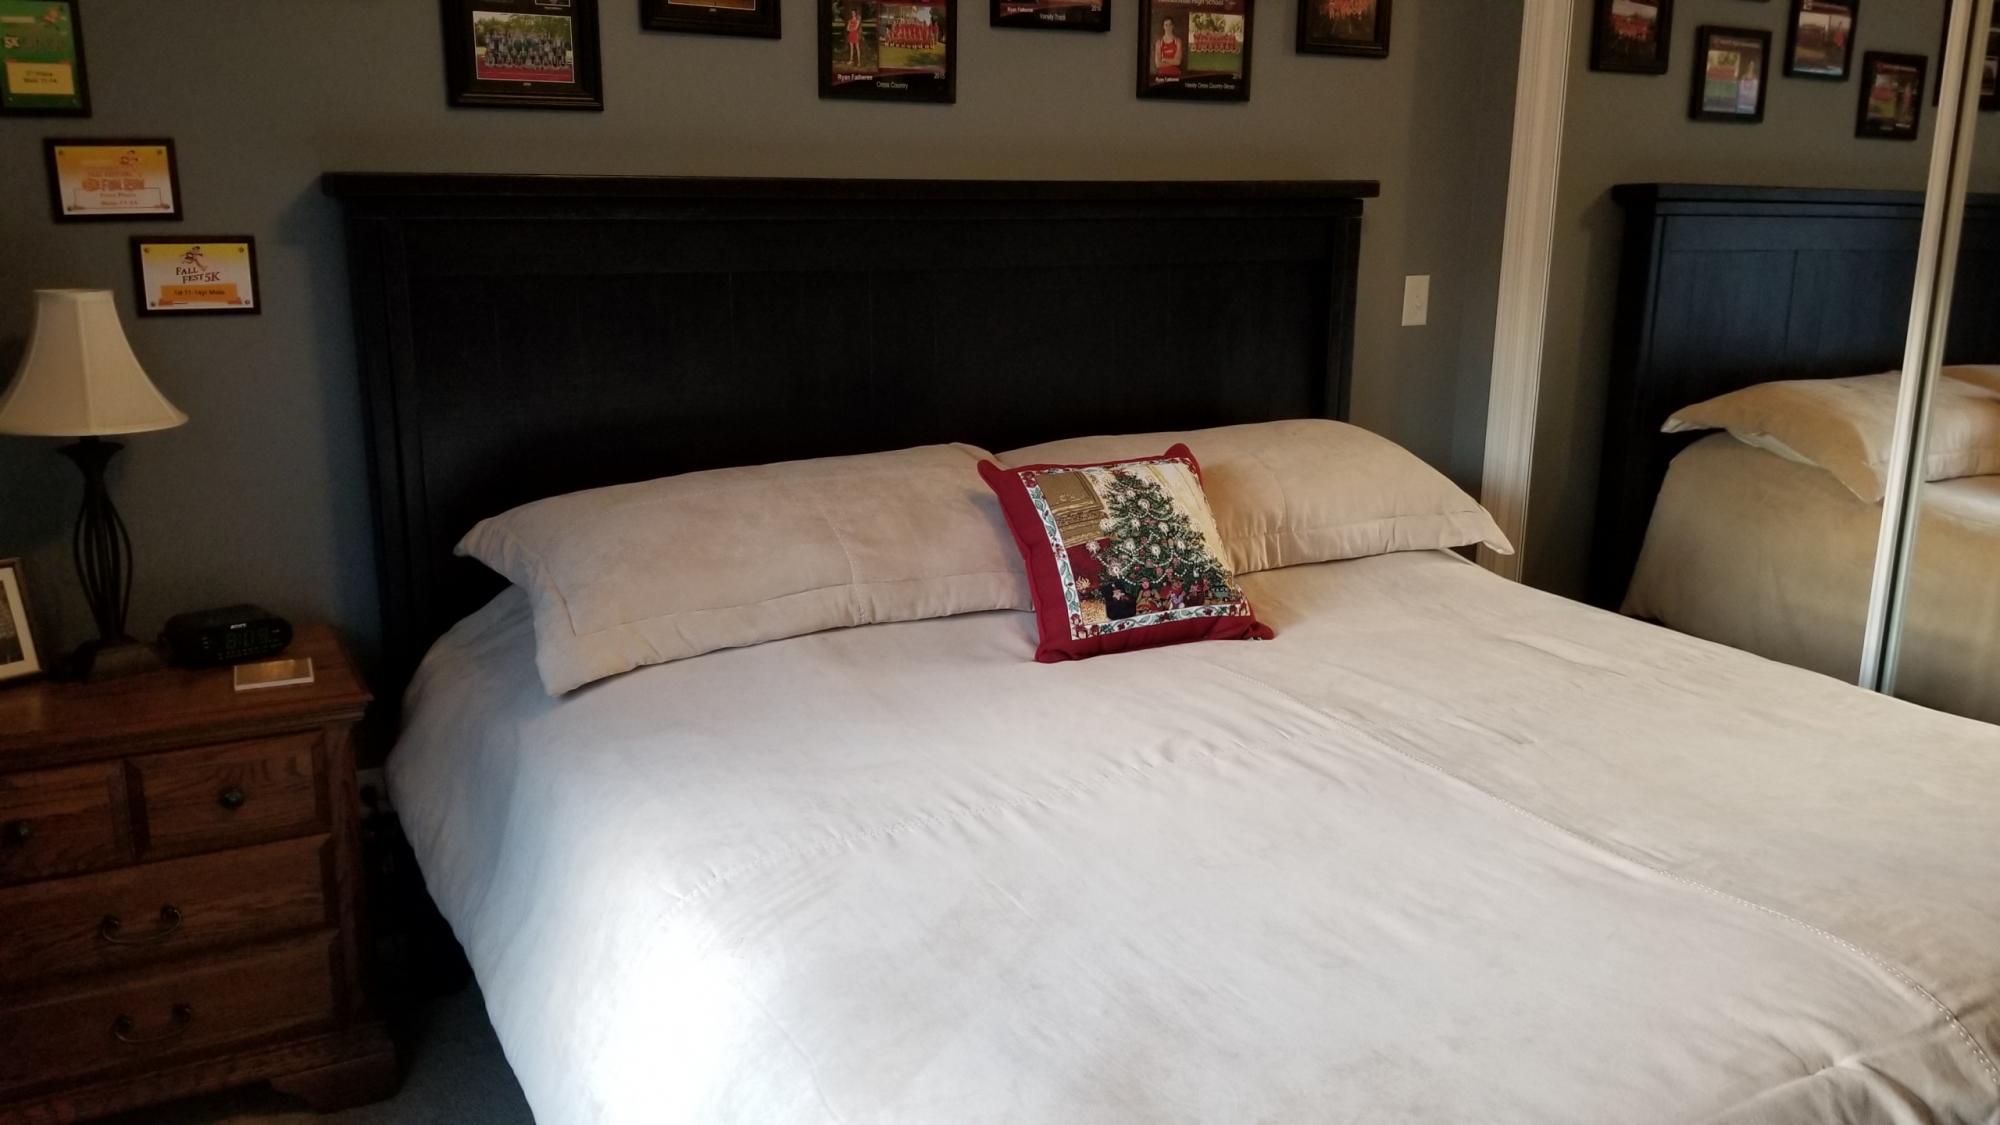
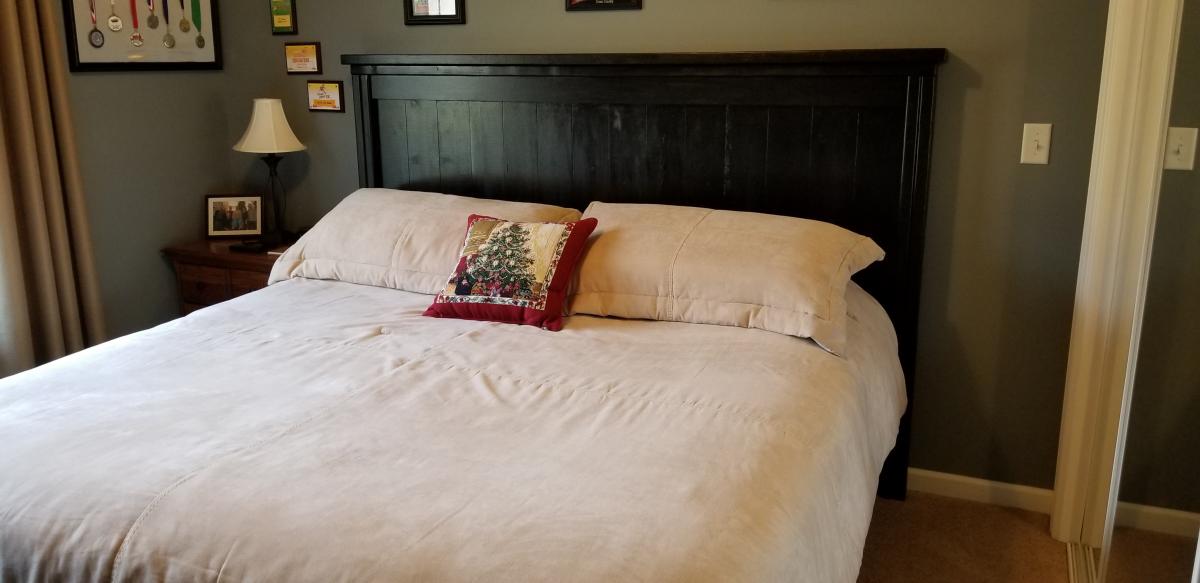
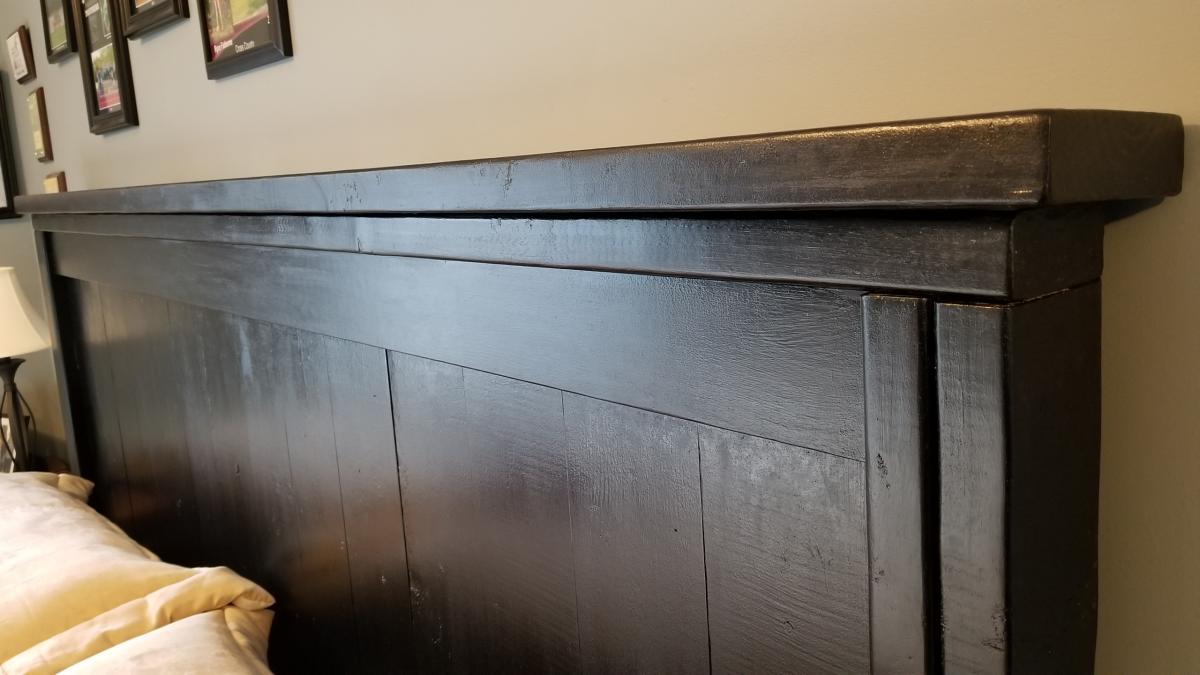
Thoroughly enjoyed building this Farmhouse headboard. Thank you so much Ana, for the great plans! I couldn't find any 4x4s suitable for indoor furniture, so I ended up following another plan on your site that used 2 2x4s per leg for the Farmhouse headboard. I didn't need the footboard or side rails since our bed already had a frame (it's also a bed that raises up and down at the head and foot sections) Anyway, I just needed a headboard and it works perfectly! We anchored it to the wall to avoid any possible accidents. Keep up the great work! 

Estimated Cost
$50-100 depending on what supplies you have on hand
Estimated Time Investment
Afternoon Project (3-6 Hours)
Finish Used
Painted using Rustoleum black chalkboard paint, then 2 coats of Satin Wipe On Polyeurethane.
Recommended Skill Level
Beginner