Rustic x coffee table with 2x4 X
This is the rustic x coffee & end table I used 2x4's for the X. I like the wider look of the 2x4's over the 1x's it adds more dimension to the table.
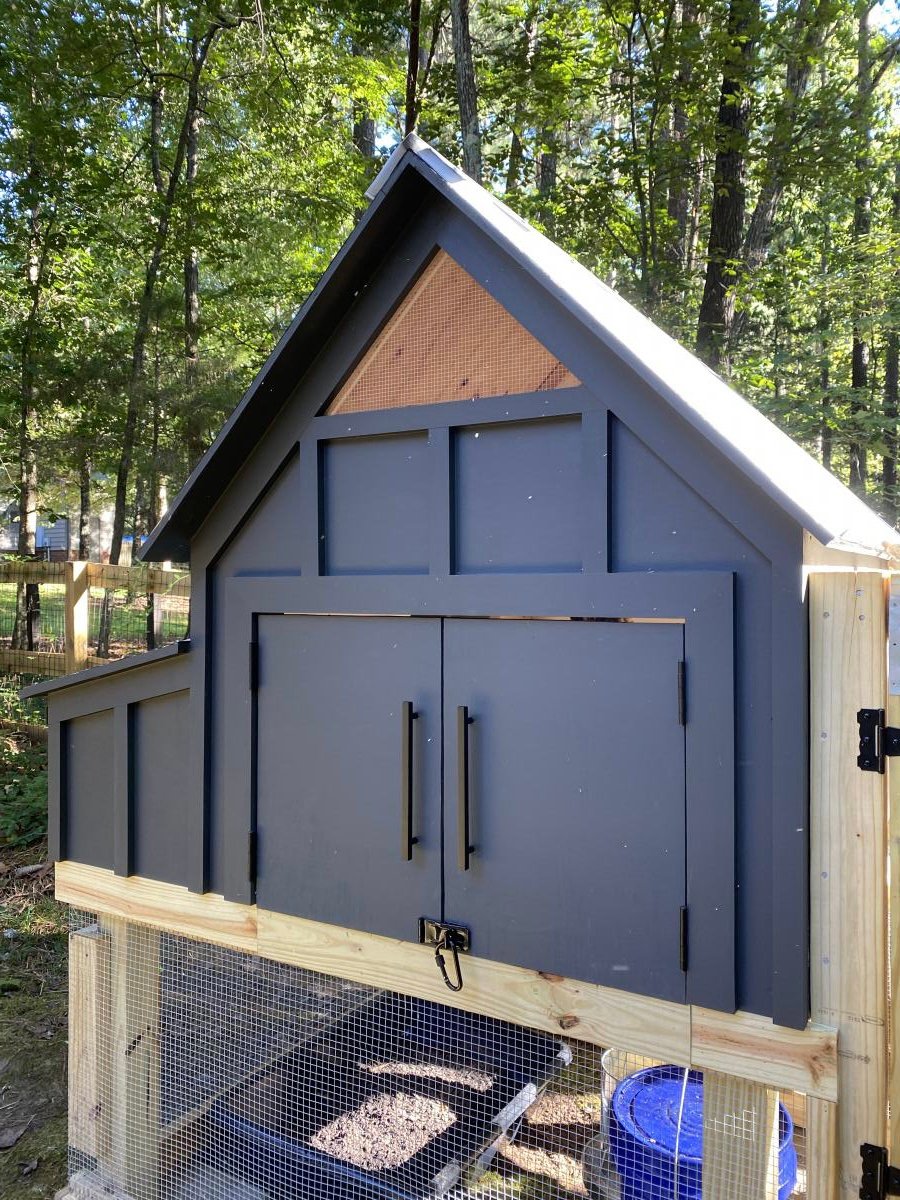
We took some creative liberties on the Williams Sonoma inspired coop posted here. Because we don’t get a whole ton of sun in our backyard, we eliminated the herb garden planter and instead built a longer run. We also made the coop a bit wider to accommodate for the inevitable chicken math. And, you’ll notice the vent both shaped differently and is a bit higher. This was to increase air flow, avoid the dreaded draft, and to lend a more Scandinavian vibe. We also decided to place the chicken exit on the outside wall to allow for more living space under the coop itself. The project took about a month to complete, dedicated to only working weekends. And, it was very much over budget! Who knew wood is so expensive?! But overall, the outcome was even better than I expected. The chickens love it and I don’t mind looking at it!
P.S. this was a pretty advanced project. The fractions alone had me yelling “uncle!” Thankfully my husband is pretty handy, and my father-in-law (career in the construction industry) had a few pointers, so they took the lead in executing. I chose the paint colors and suggested the deviations from the original blue print. ;-)
Wed, 11/18/2020 - 12:55
Thank you! Yes, I suppose everyone is wanting wood for home improvement projects now that we're not leaving the house! Also, I didn't mean to post a picture of my son and his friends. Am I able to delete?
Thu, 01/14/2021 - 07:43
does this roof have the same angle as the 'Small Chicken Coop with Plans'? It seems to be 'less steep'. Wanting to start this project next weekend and trying to get my mind wrapped around everything!. Thanks.
Wed, 03/16/2022 - 09:53
Do you have a run side photo? I am thinking about adding more run onto mine.....
After searching retail stores for farmhouse tables and not liking the pricetags, my wife talked me into tackling this plan. (I'm glad she did) This is my finished product.
I made the breadboards extendable so we could add extra boards if we needed additional seats for guests.
Thu, 01/24/2013 - 12:03
I basically notched out the end apron so that 2x2's could slide through, then attached the 2x2's to the breadboard. I originally attached them so they were just under the edge of the breadboard, but have since changed it so that it goes about halfway. I hope you understand what I am trying to say, if not I can add some more pictures.
Sat, 05/18/2013 - 06:55
Every time we visit websites, we saw almost the same as the other article and topic but I am shocked when I first read the title from this page. I never think that the blogger has the knowledge of making something new online. I only saw this kind of blog in this page. I concur that the blogger has the intellect of Albert Einstein. منتديات
Very happy with the results.
Fri, 11/14/2014 - 14:02
I really like the look of this! You did an awesome job!
Fri, 12/19/2014 - 17:33
How do you like the drawer pulls that you used? Do they hold up well? Great job on the project! I've started building this myself :)
First table!! I used all white pine that was milled over 45 years ago cut my own lumber out of this wood and the table top was made with 3 pieces of wood to make the top. Bench is being made now!
Built these two end tables from Ana's nightstand plans. Modified to add a shelf and drawers. I used stair treads to make the tops which give a nice thickness and strength. The shelves are cedar fence pickets. Shelf and tops are stained Jacobean with a semi gloss poly finish. Had to watch Ana's videos several times to get the build right, but spent much more time on the finish than the build. Added electric extension/usb outlet. Really happy with the project. THANKS Ana!
Sun, 11/15/2020 - 16:28
Project for my son. End tables with one and 2 drawers. Shelf and tops stained with poly, frames and drawer primed and painted. Tops made from Stair treads. they are 12" edge glued so just had to trim down and glue together. comes with one bullnose, rounded off the other sides with a 1/2inch roundover router bit.
We used kristenlotz plans and AZCA33 style.
Fri, 01/18/2013 - 15:58
I love looking at the brag posts and seeing similar entertainment centers to the one we built! I am so glad people like our plans. It looks way good in white. I think we are going to re-do our doors and add the rope trim. I love how it looks. Just wondering, do you use the plans we posted at our woodworking blog at http://www.jrlwoodworking.com/2012/12/furniture-plans-custom-entertainm… ? I am so glad you built this. We love ours!
Liked the Griffen Reclaimed look Media console, but not the $1099 price tag that came with it! LOL
So with $100 and 3 hours of work, BAM!
70L x 15W x 30H
Thu, 12/08/2016 - 11:46
Great work! I used your piece as inspiration for a similair project that I added a fire place to!
http://www.rachovation.com/single-post/2016/12/01/Fire-Place-Console
This was the first furniture my husband built. He also did amatching sideboard table using Ana white plans.
Thanks for the plans. had fun building this. I made it a little higher and added an additional shelf. I wanted it to be rustic, so I beat it with a chain, hammer, and some screws. Used Early American stain. Used Rustoleum Triple Thick Poly satin finish. Not all straight and perfect, but it works. It matches the farmhouse table I built last year.
This is my first Ana White project. It was so fun to do and turned out really well. Thanks so much Ana for your great plans and help with building them. the Kreg jig is great!
Made from your Fancy X-desk plans. Dark Walnut & clear gloss polyacrylic Miniwax finishes.
I love your designs and could spend hours browsing here! But that doesn't get things built! ;)
I used your general plan to build this cute bench as my first project for my new Handywoman Business
I was easily able to adjust and customize it to my customers specifications and it is very sturdy. Also my first adventure in pocket holes and I am in love!
Organization is a constant struggle in our house and our junk drawer became more of a place to stick things when you didn't want them on the countertop than an actual funtional part of the kitchen. That won't change with the addition of the organizer, but it was nice to have it cleaned out.
In total, this only cost about $12 (for 3 drawers) and that was only because I used the S4S wood. My HD didn't carry 1x3 in anything else. May have been for the best because now I didn't have to sand anything.
The lesson learned from this project was that I should have cut everything to size instead of relying on the measurements of the drawer. The silverware drawer wasn't perfect and I will likely redo a little of it because the junk drawer turned out great.
Large cube shelf made to fit 13" cubes or milk crates, for my two and a half year old son. For the larger cubes, I added 2" to the measurements for each cube, so 6" to the horizontal and 4" to the vertical measurements. Total shelf measures 46.5" wide by 35" high by 13.5" deep.
Thanks for the plans! Modified the scale to make it shorter and deeper. Really happy with the results!
The scale changes tested my math skills :)
It took some creative Googling to find the hardware you used. A link would be awesome. I actually did a Google image search of your hardware image to locate it.
Tue, 12/01/2020 - 11:27
YES! Mods can be challenging:) It appears you rose hugely to the occasion, I will try and do better at linking hardware!
This is one of the first furniture projects ive done in 2 years. A finished picture will be up later on. I painted this project because the customer wanted it painted not a big fan of paint but what they want the get.
I built the coffee table and console to plan and also a custom cover for our dog's crate to match. Simple builds with easy to follow plans! For the Xs, I just clamped the 2x2s up to the opening and scribed where to cut. Then, I notched out where the intersection is so that the X is more solid and I didn't have to worry about the cut portion lining up. A bit more time consuming but definitely worth the effort. So happy with how these turned out, thanks Ana!
Fri, 11/21/2014 - 09:15
This really makes your living room look great! Thanks for sharing!
The challenge this go around is build benches to match a wheat colored dining table, sight unseen. Quite a challenge!. The table has X legs with cross braces running from leg to table bench top for support. Coming up with a design to match the X legs was simple however matching the color was not easy and left me anxious until I delivered the benches. Thanks to my previous experience building a farmhouse bench and using this plan, I had the foundation and cut list to execute. With a few tweaks it came together very nice!
Visit charitybuilds.com to find our how the color turned out!
Comments
Grafton Made
Sun, 02/12/2017 - 09:38
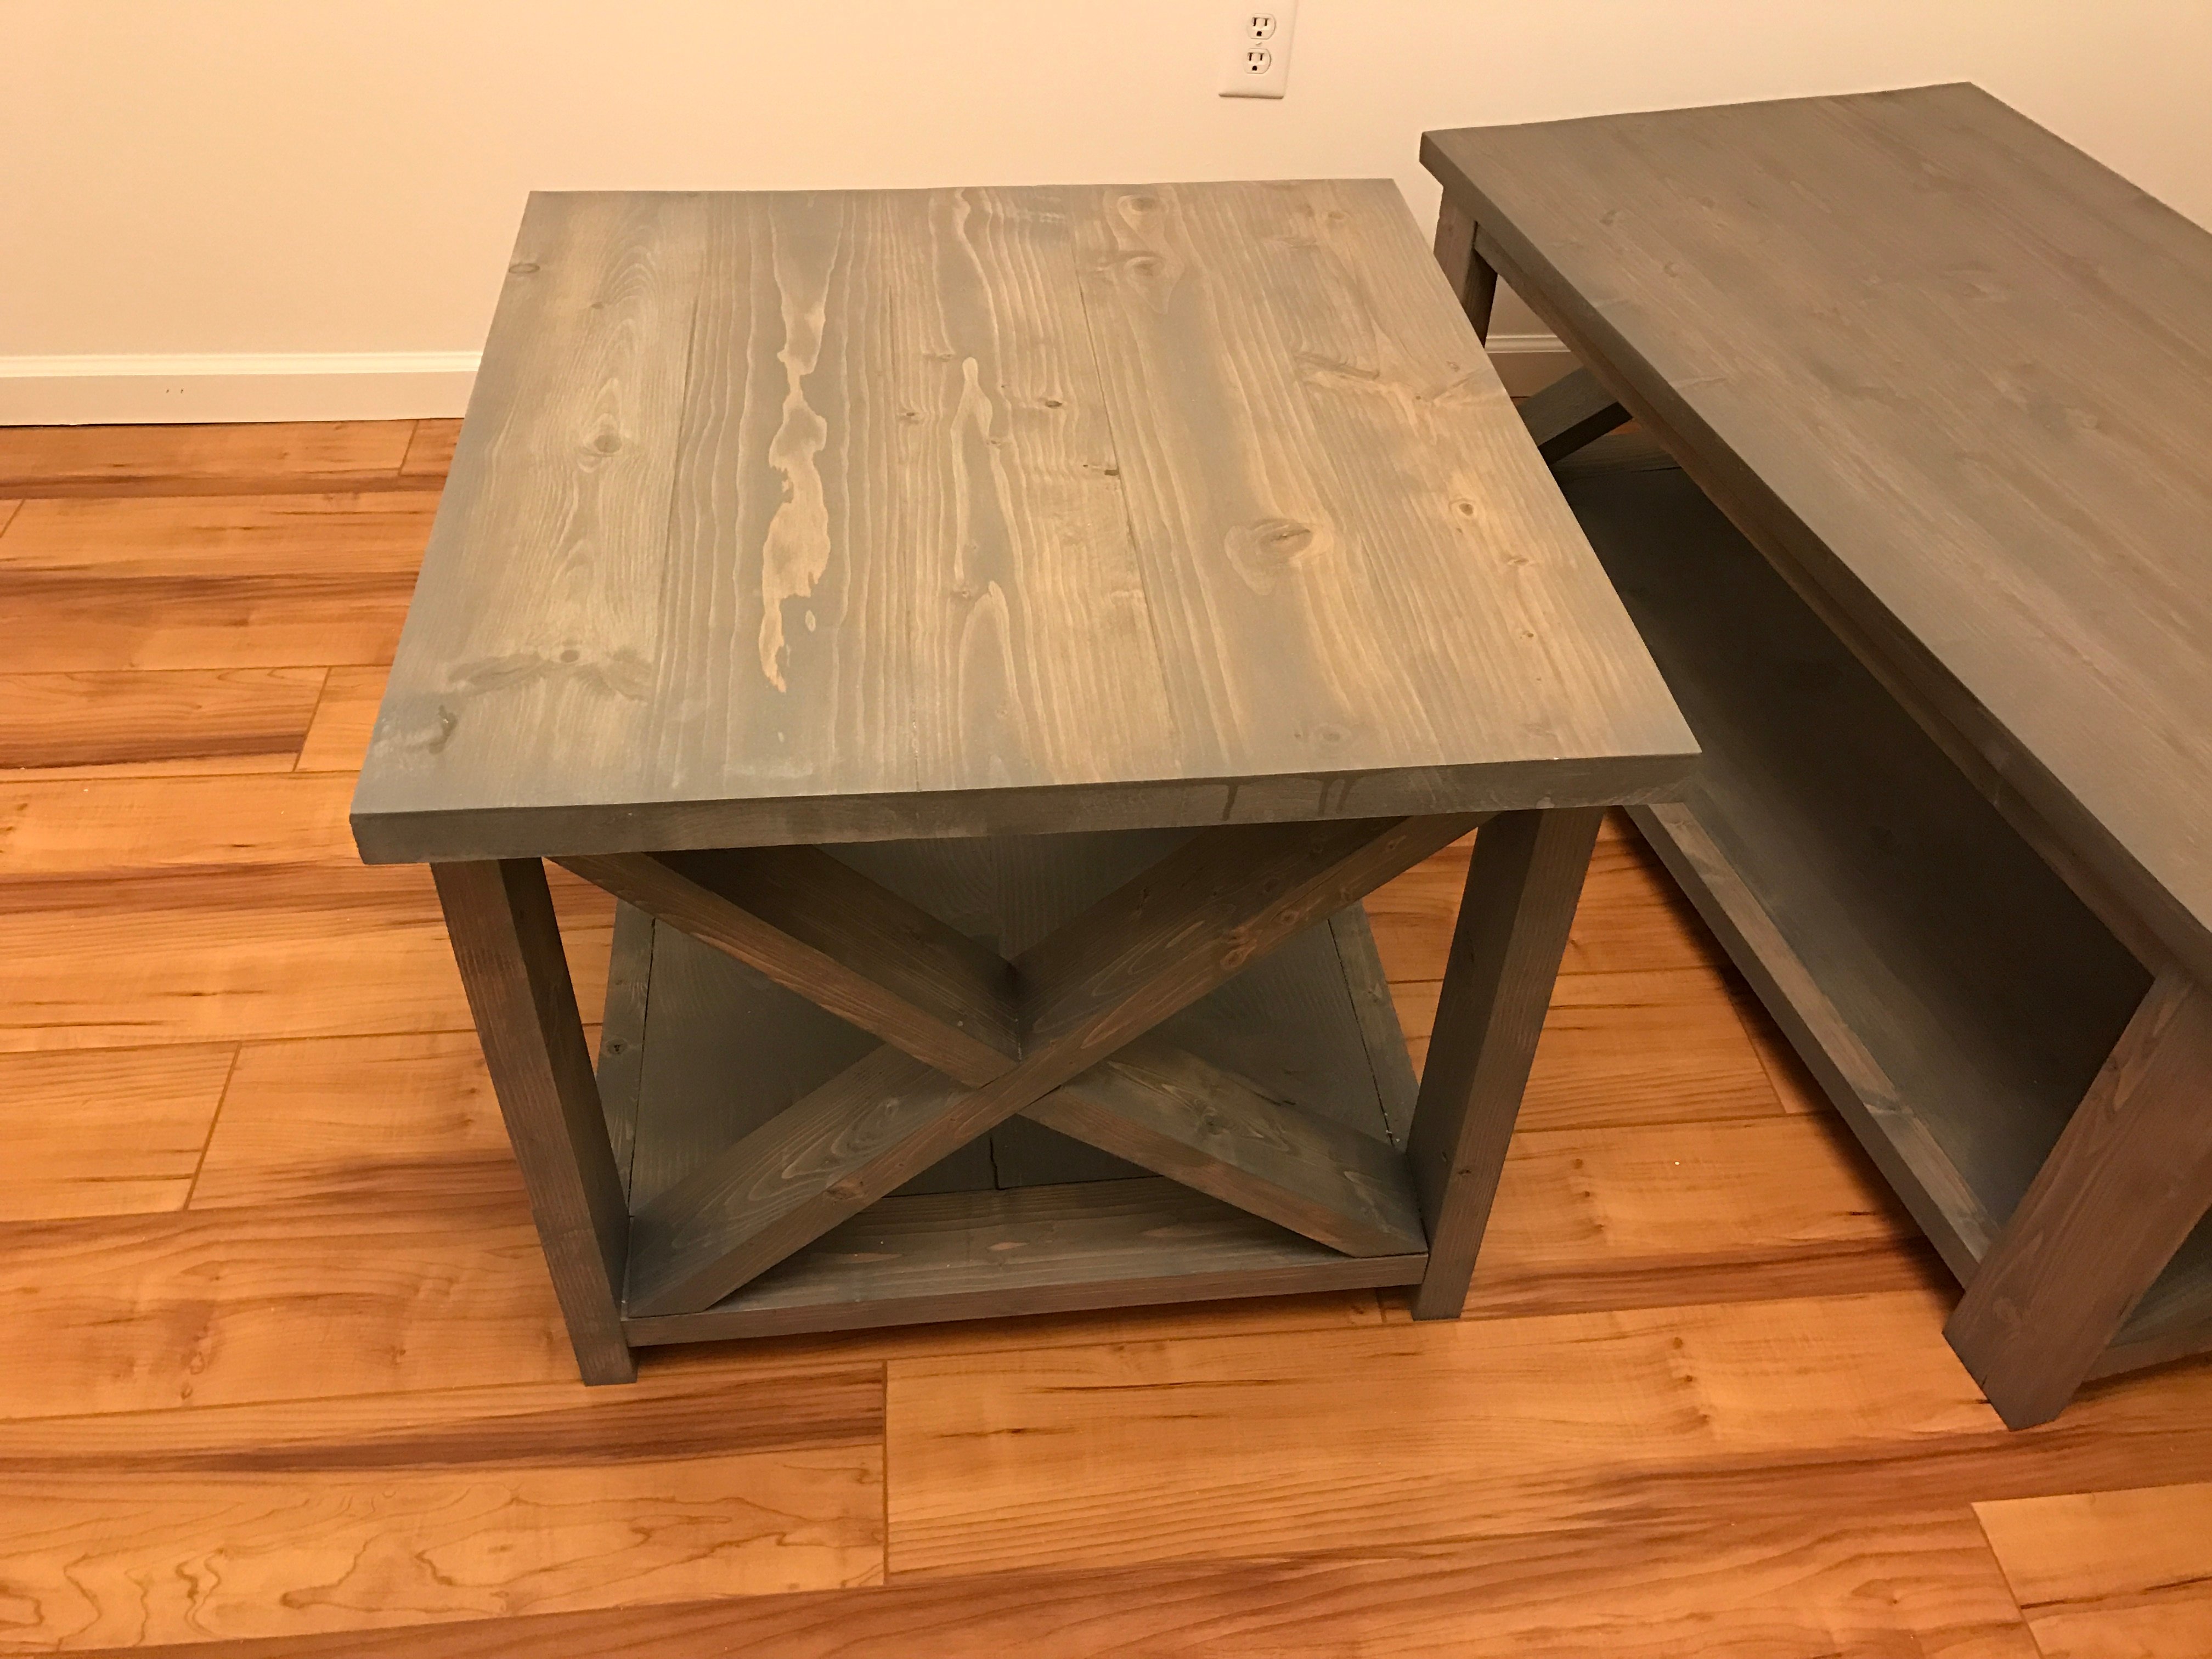
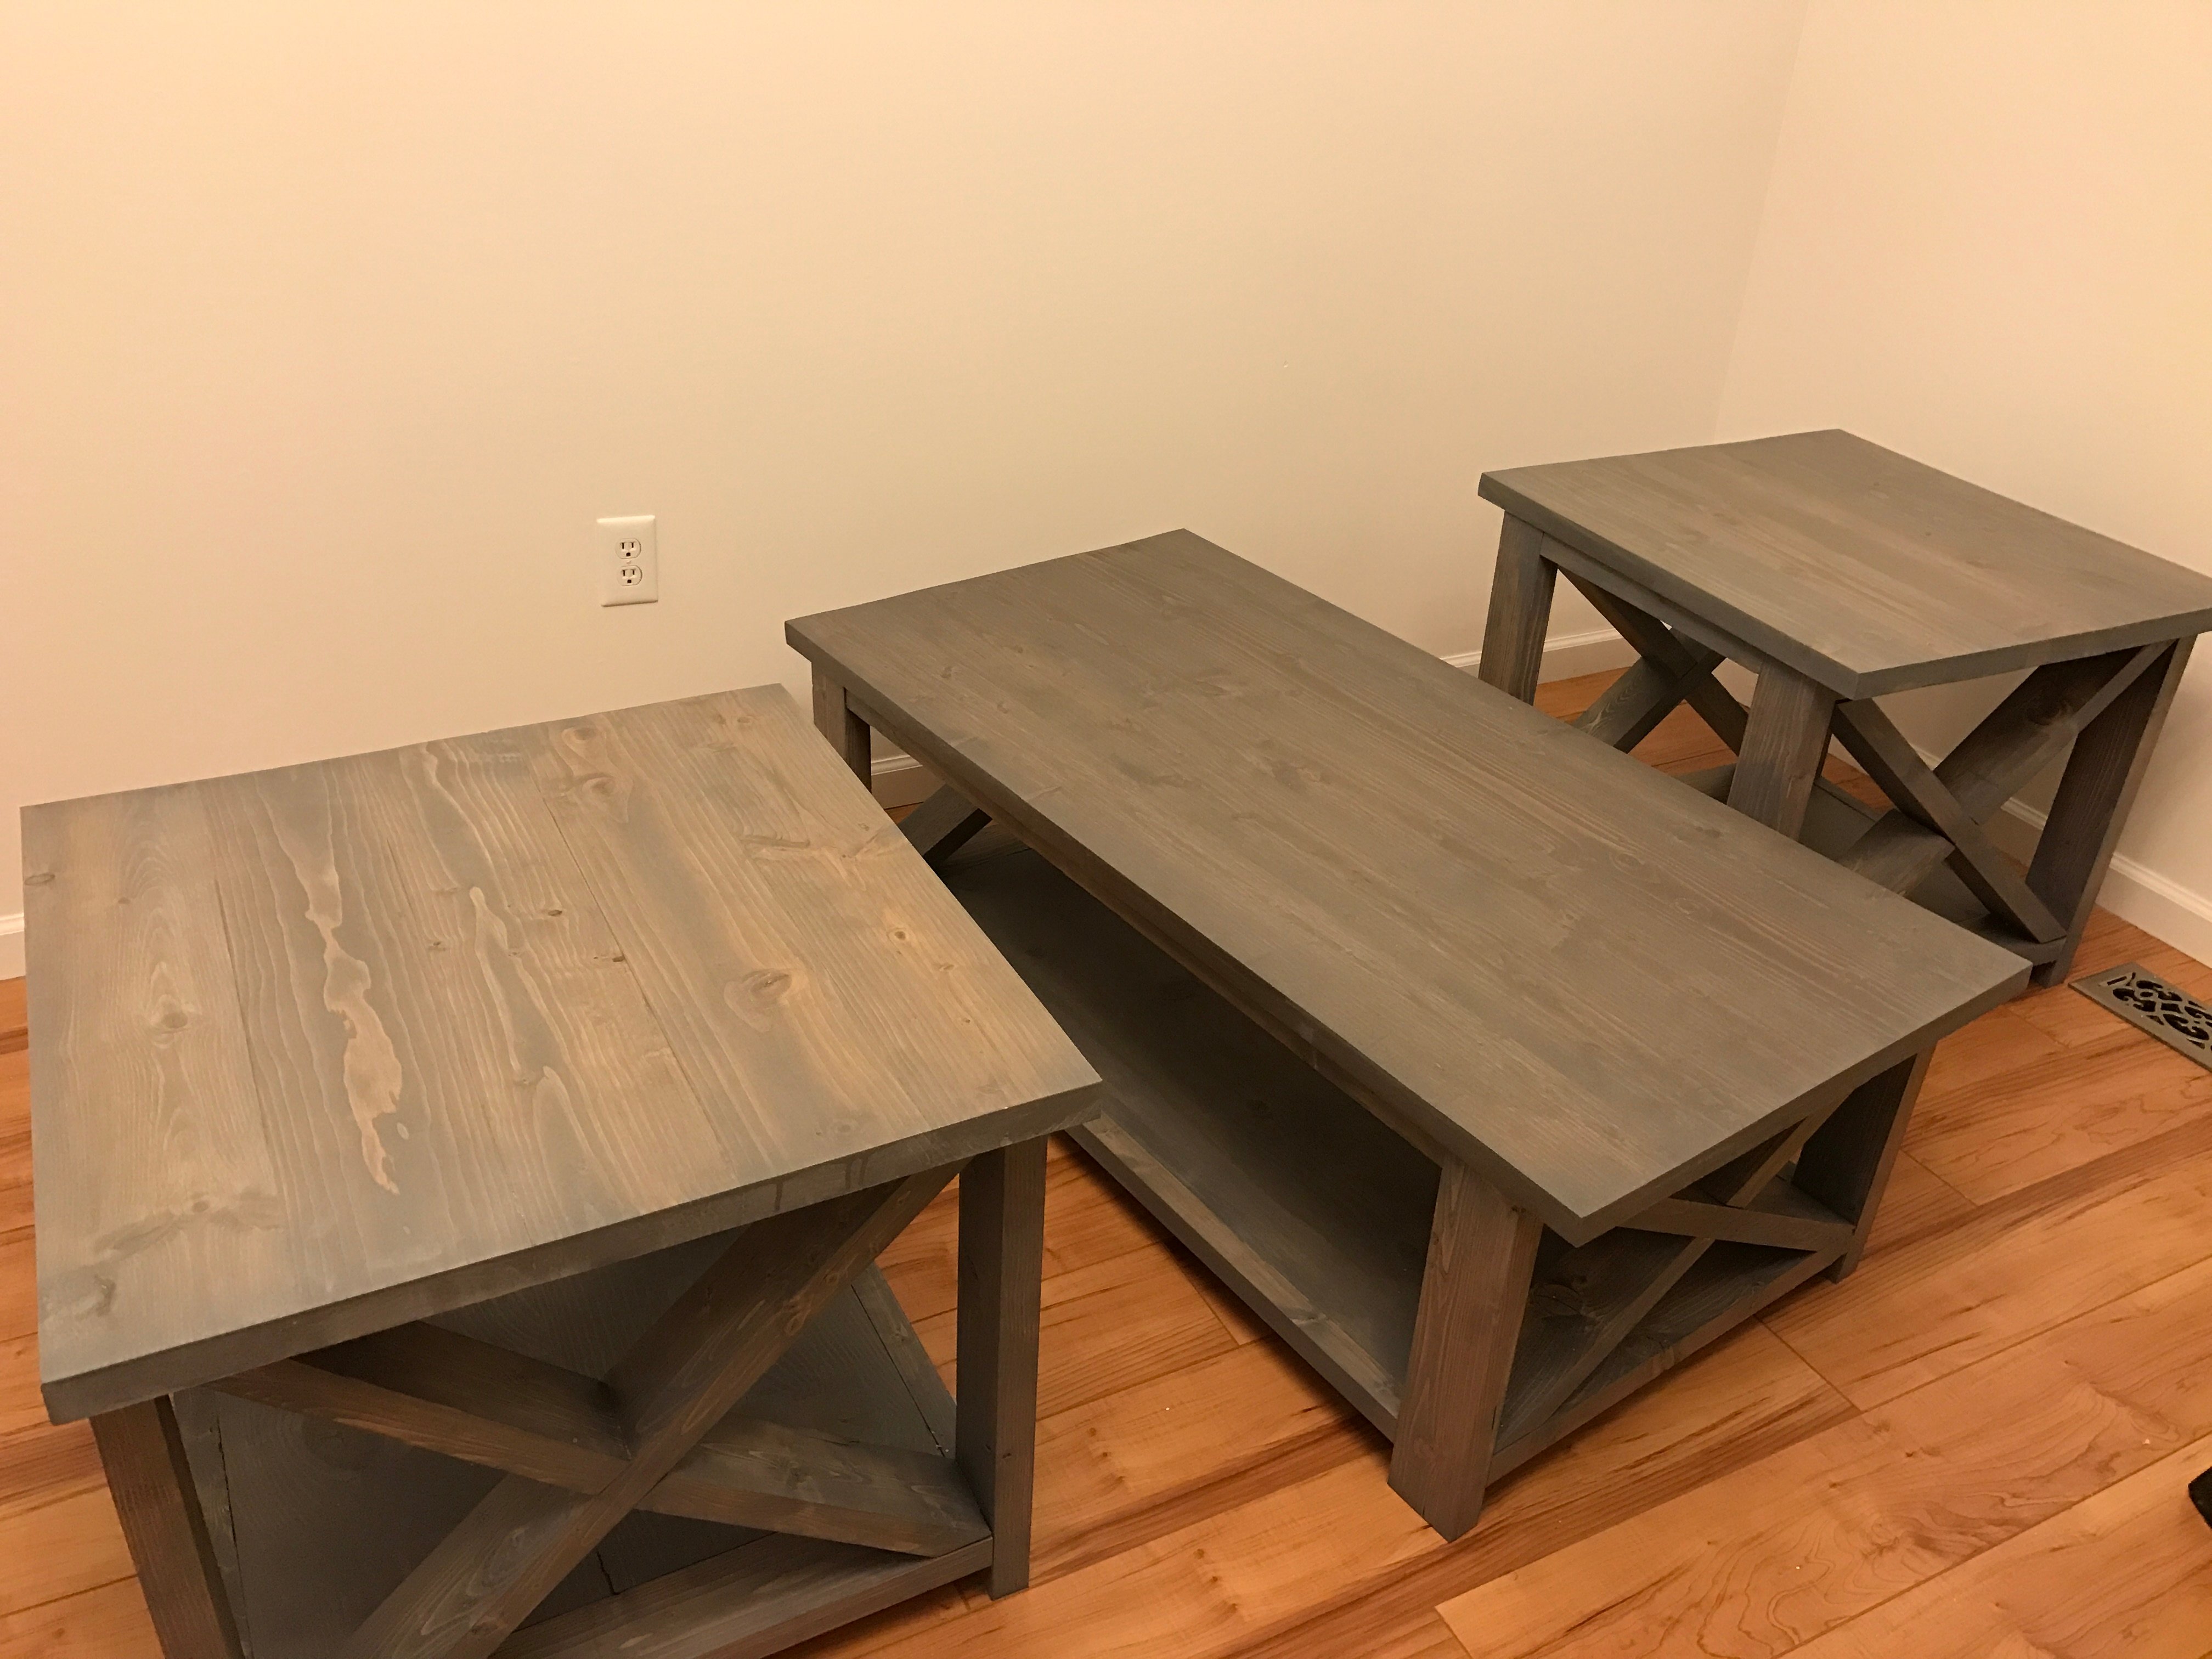
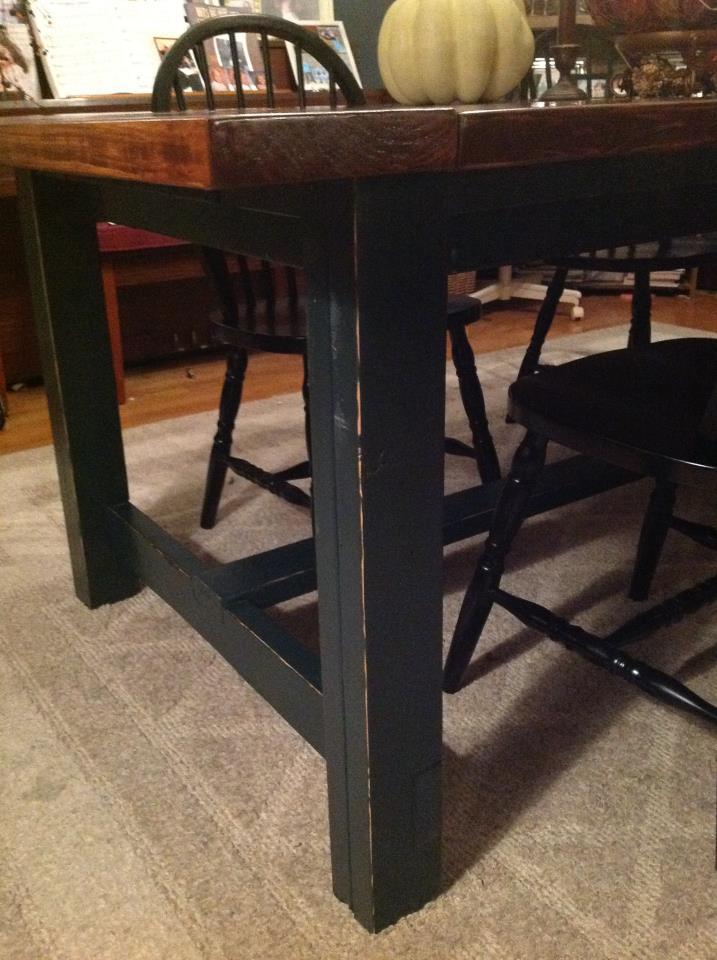
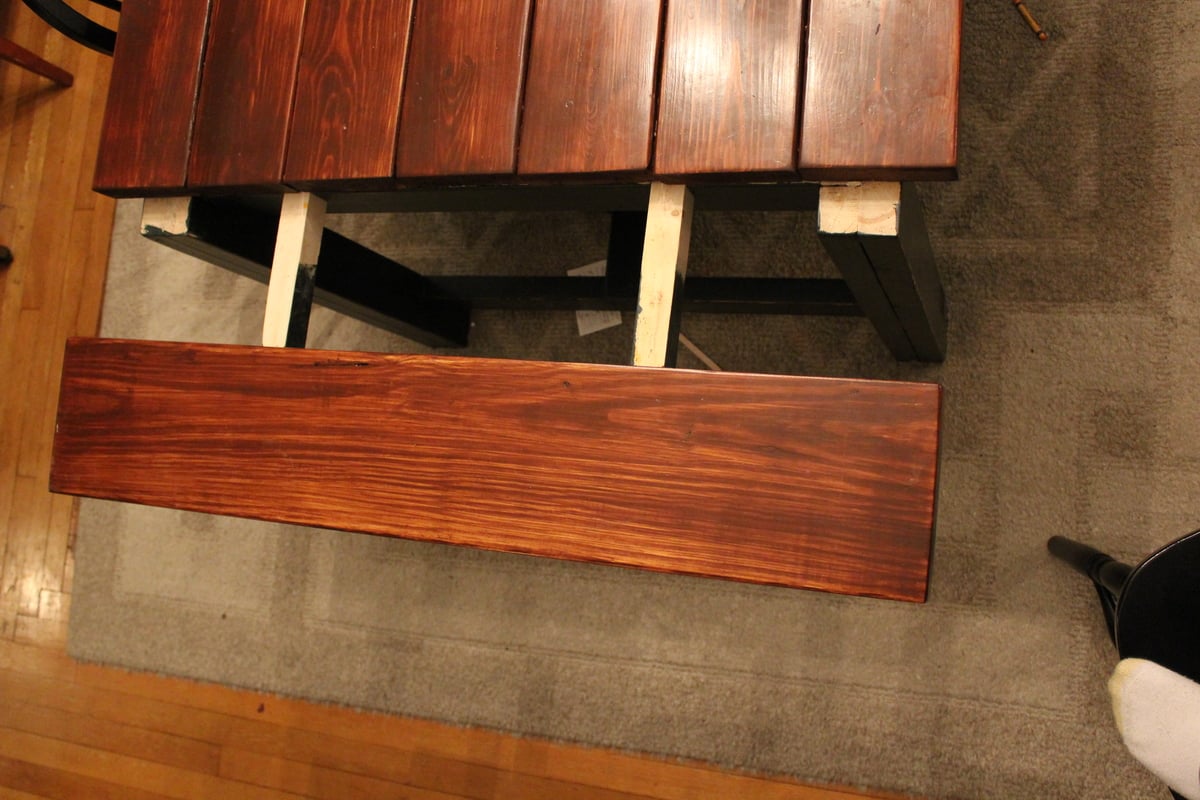
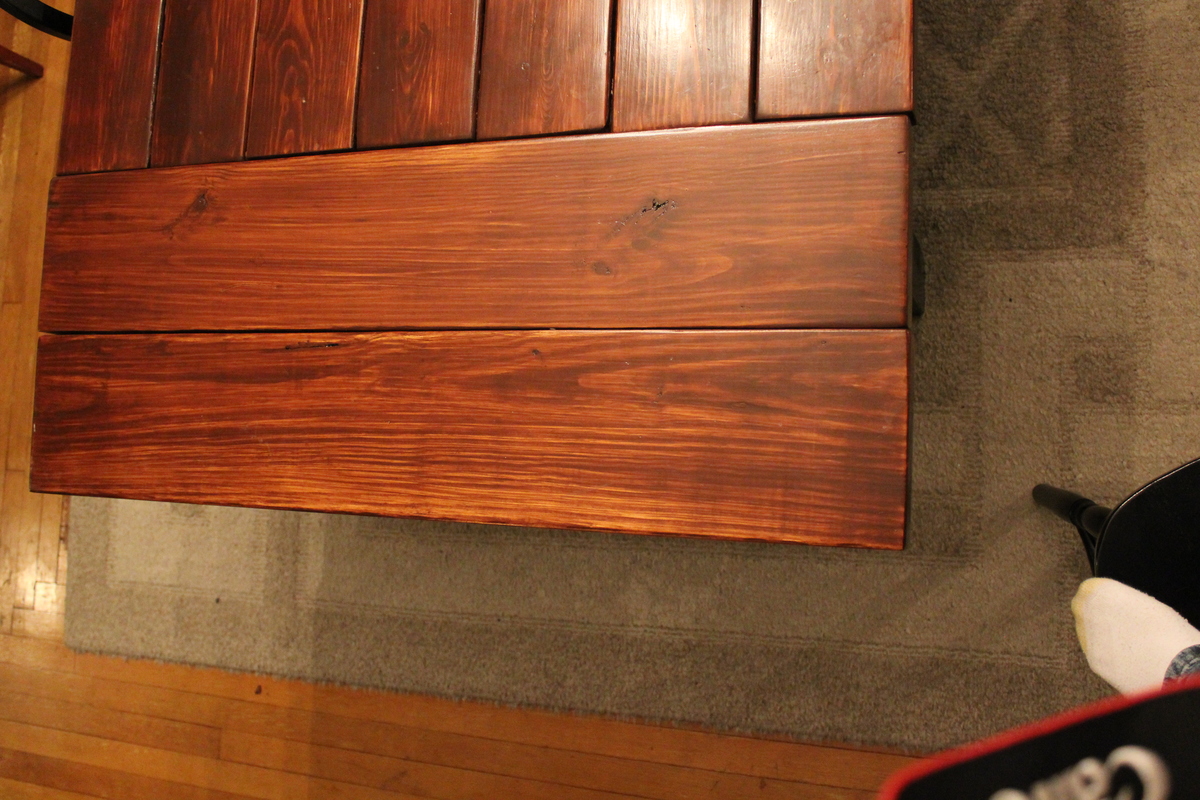
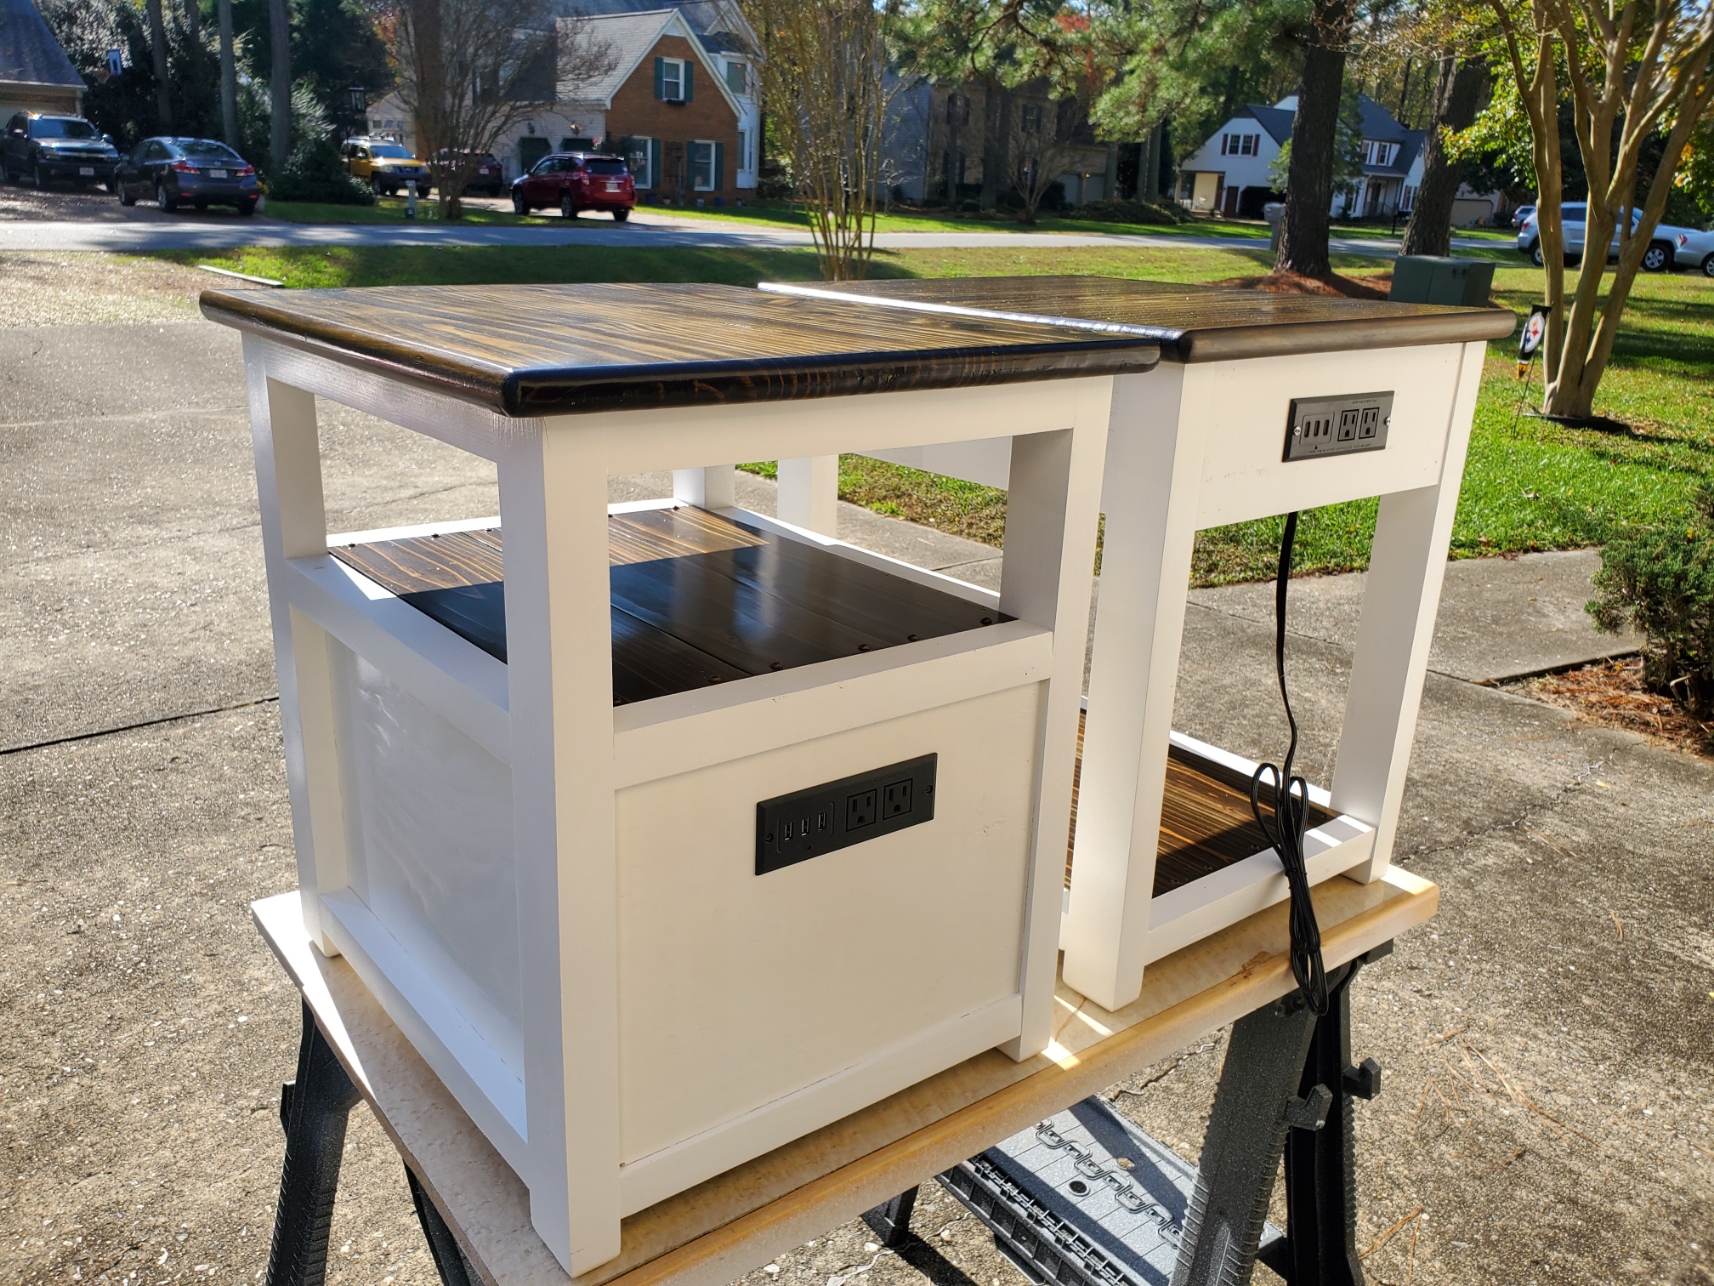
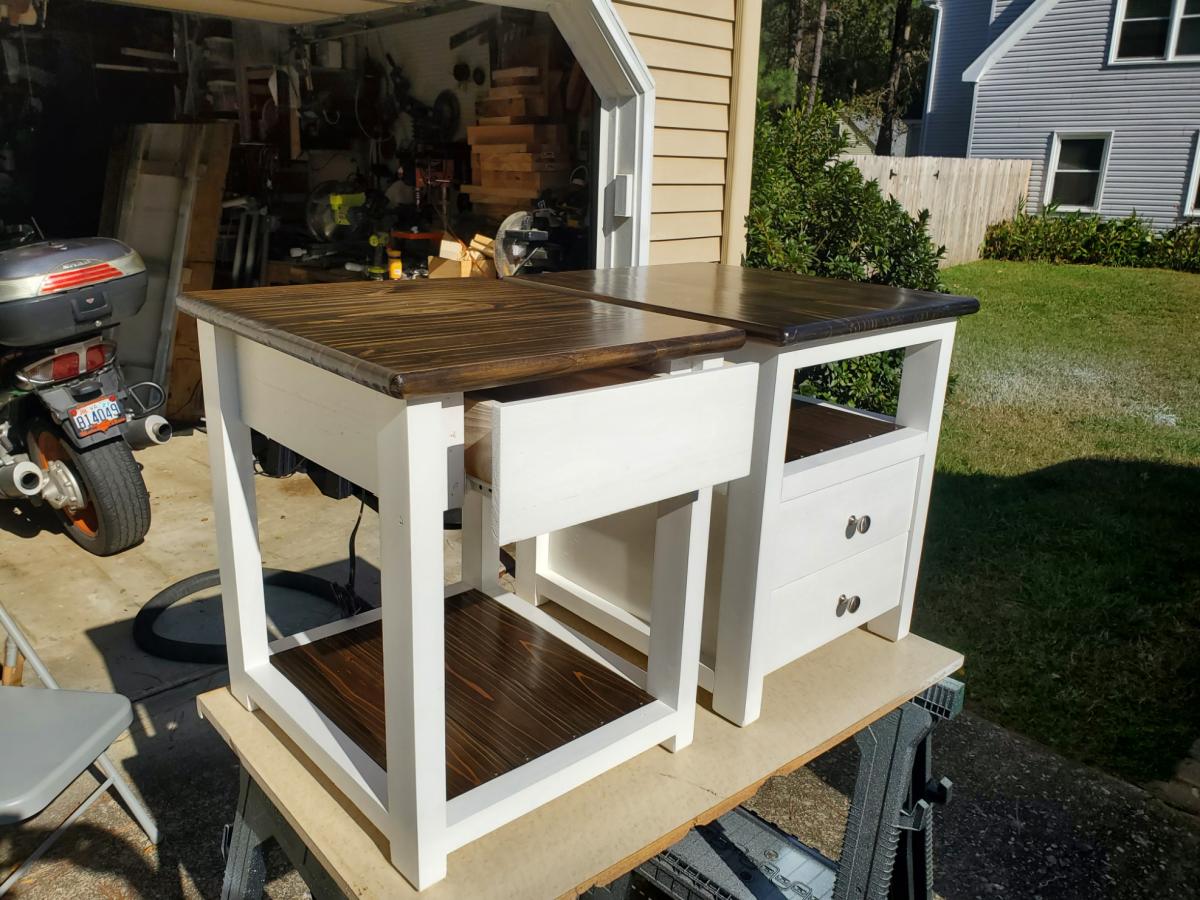
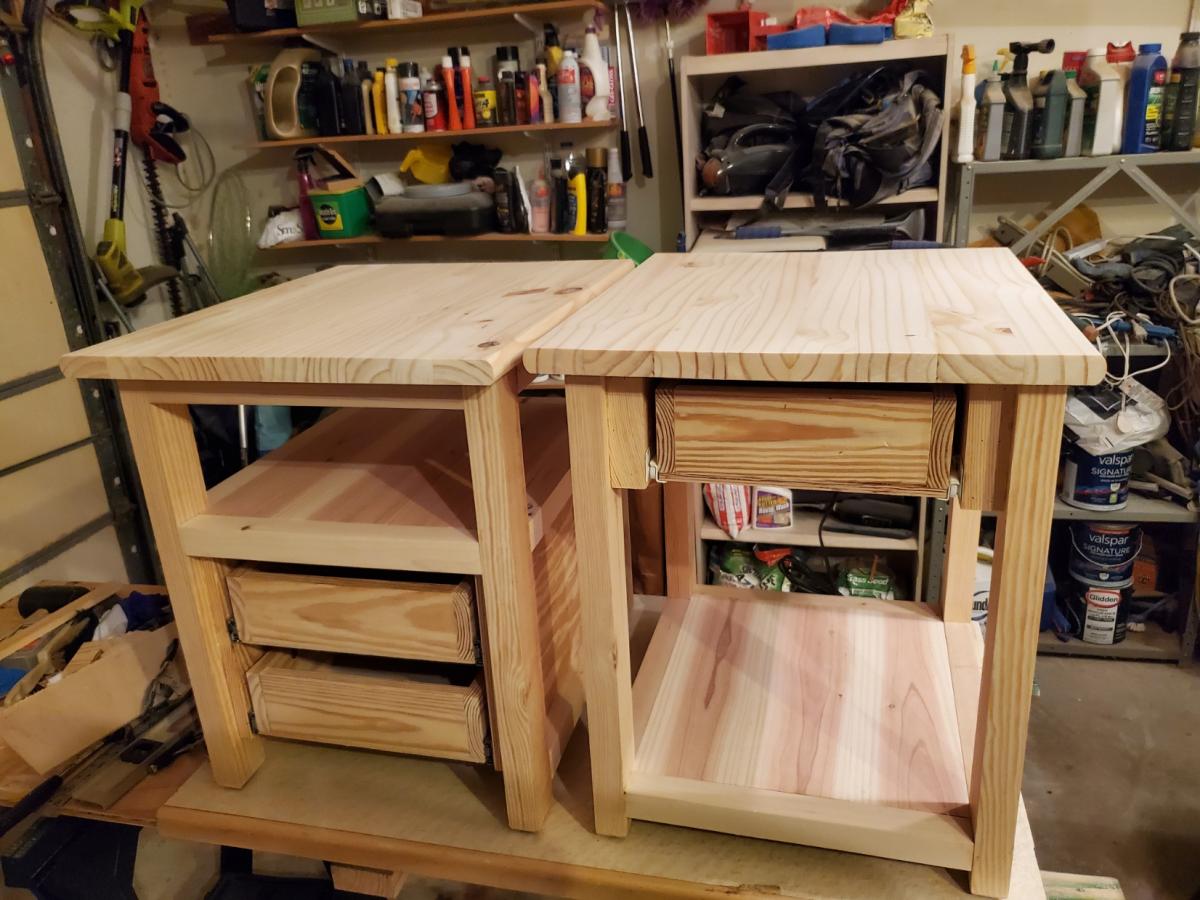
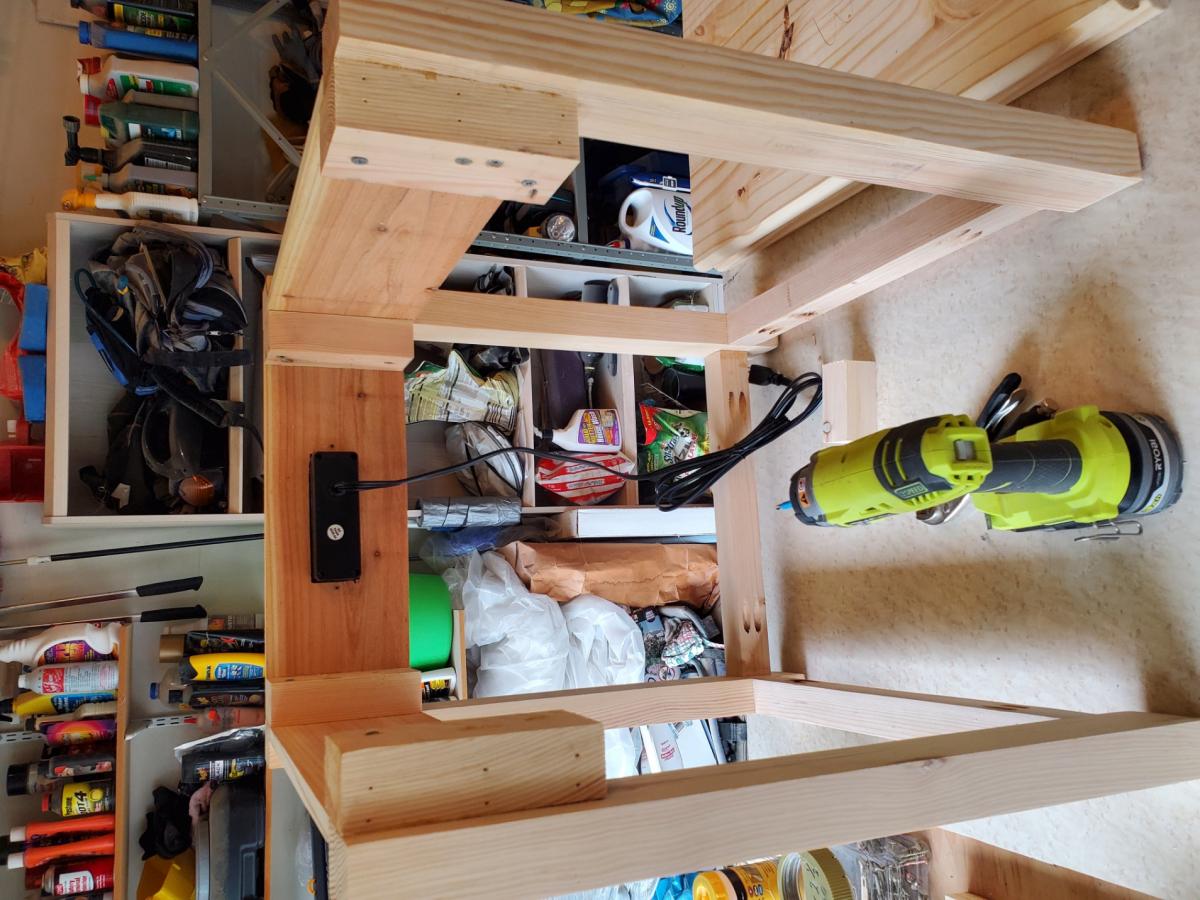
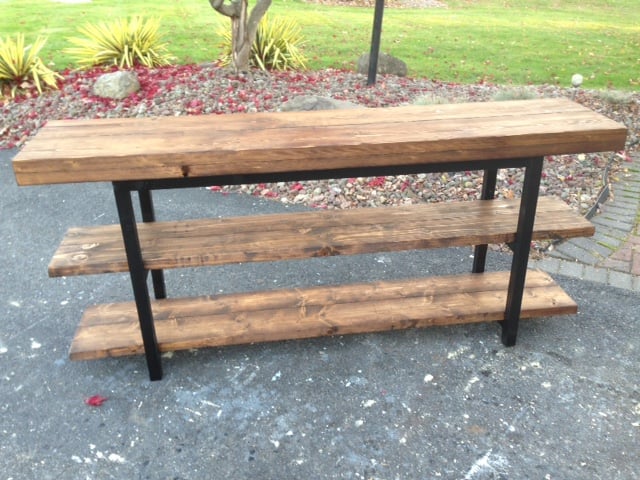
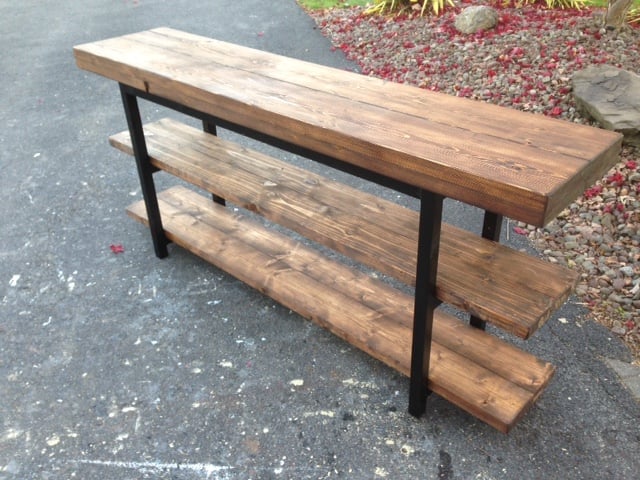
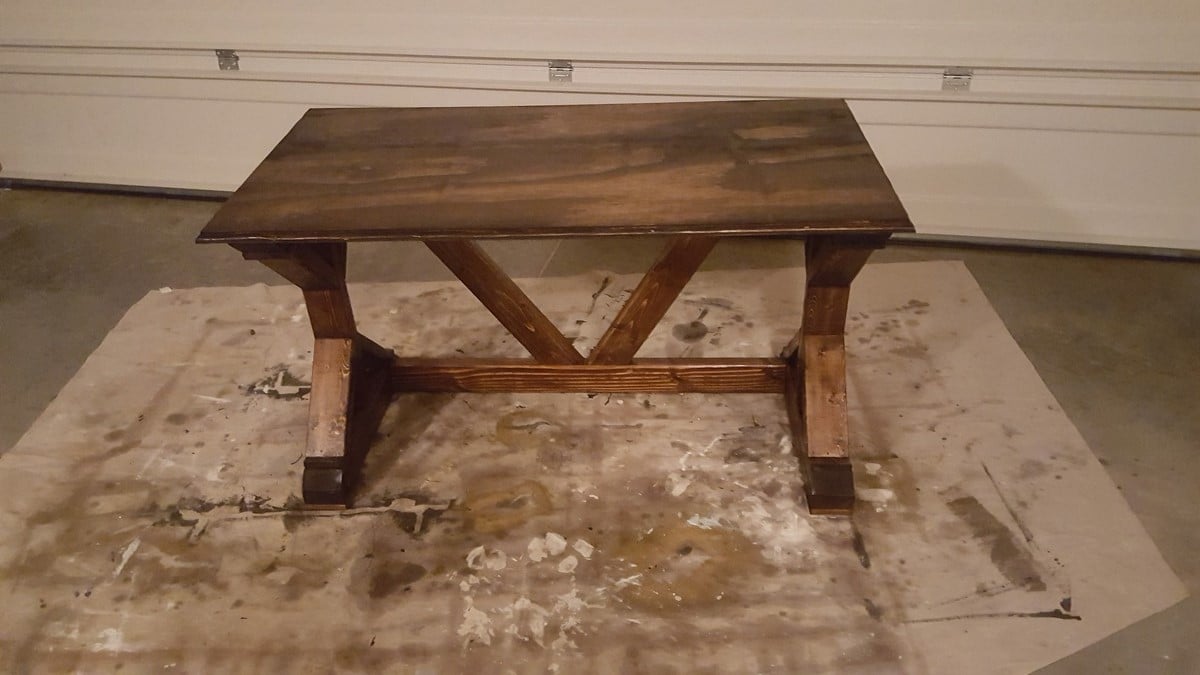
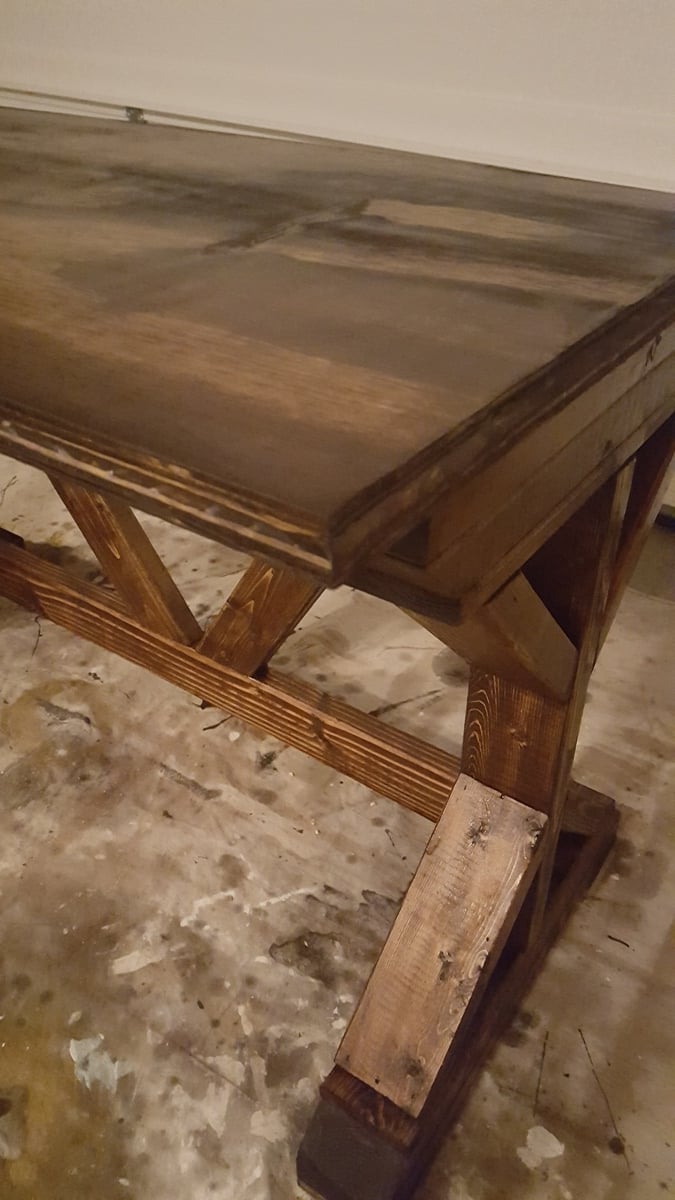
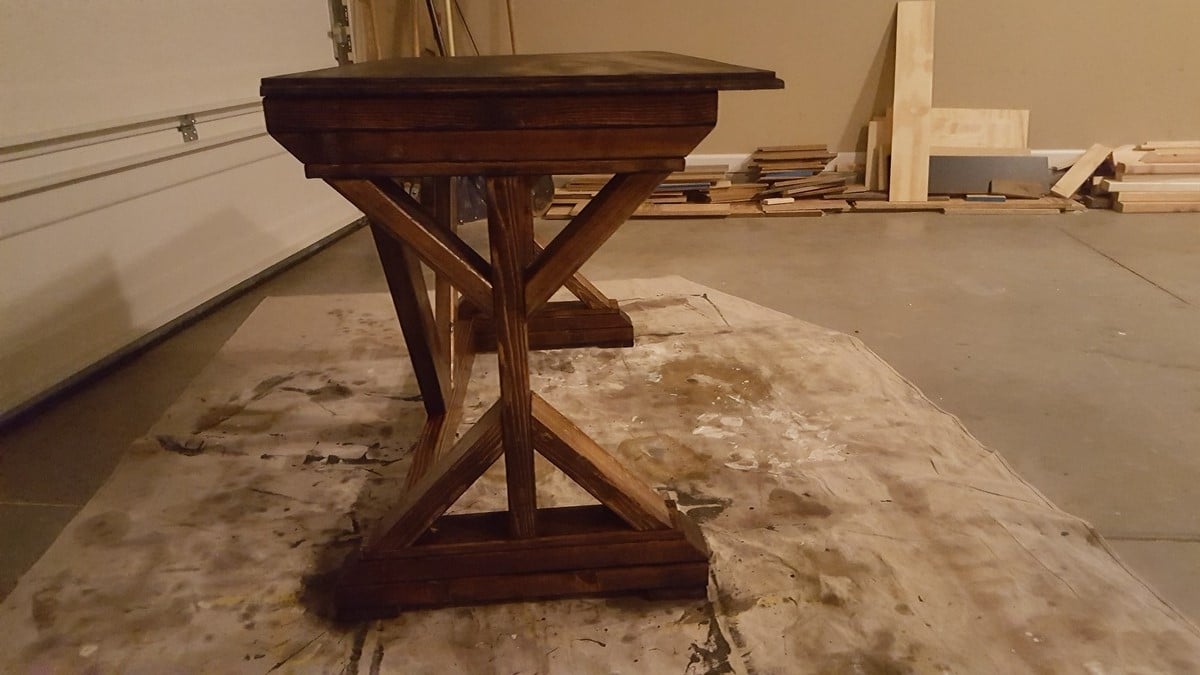
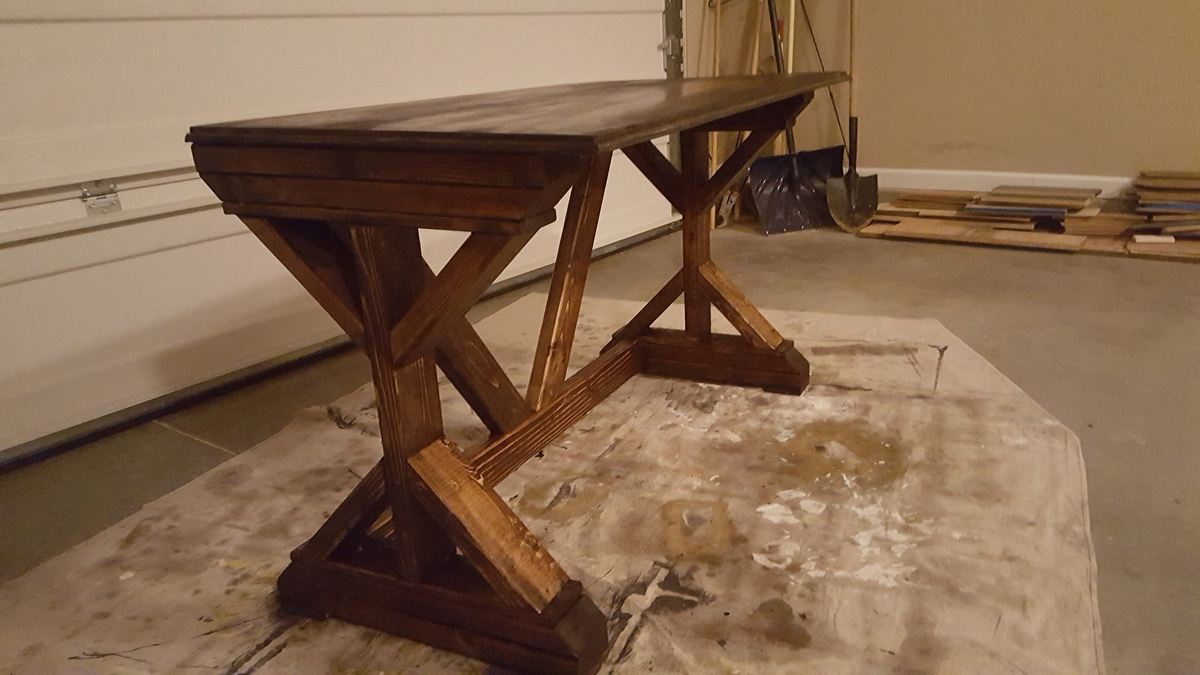
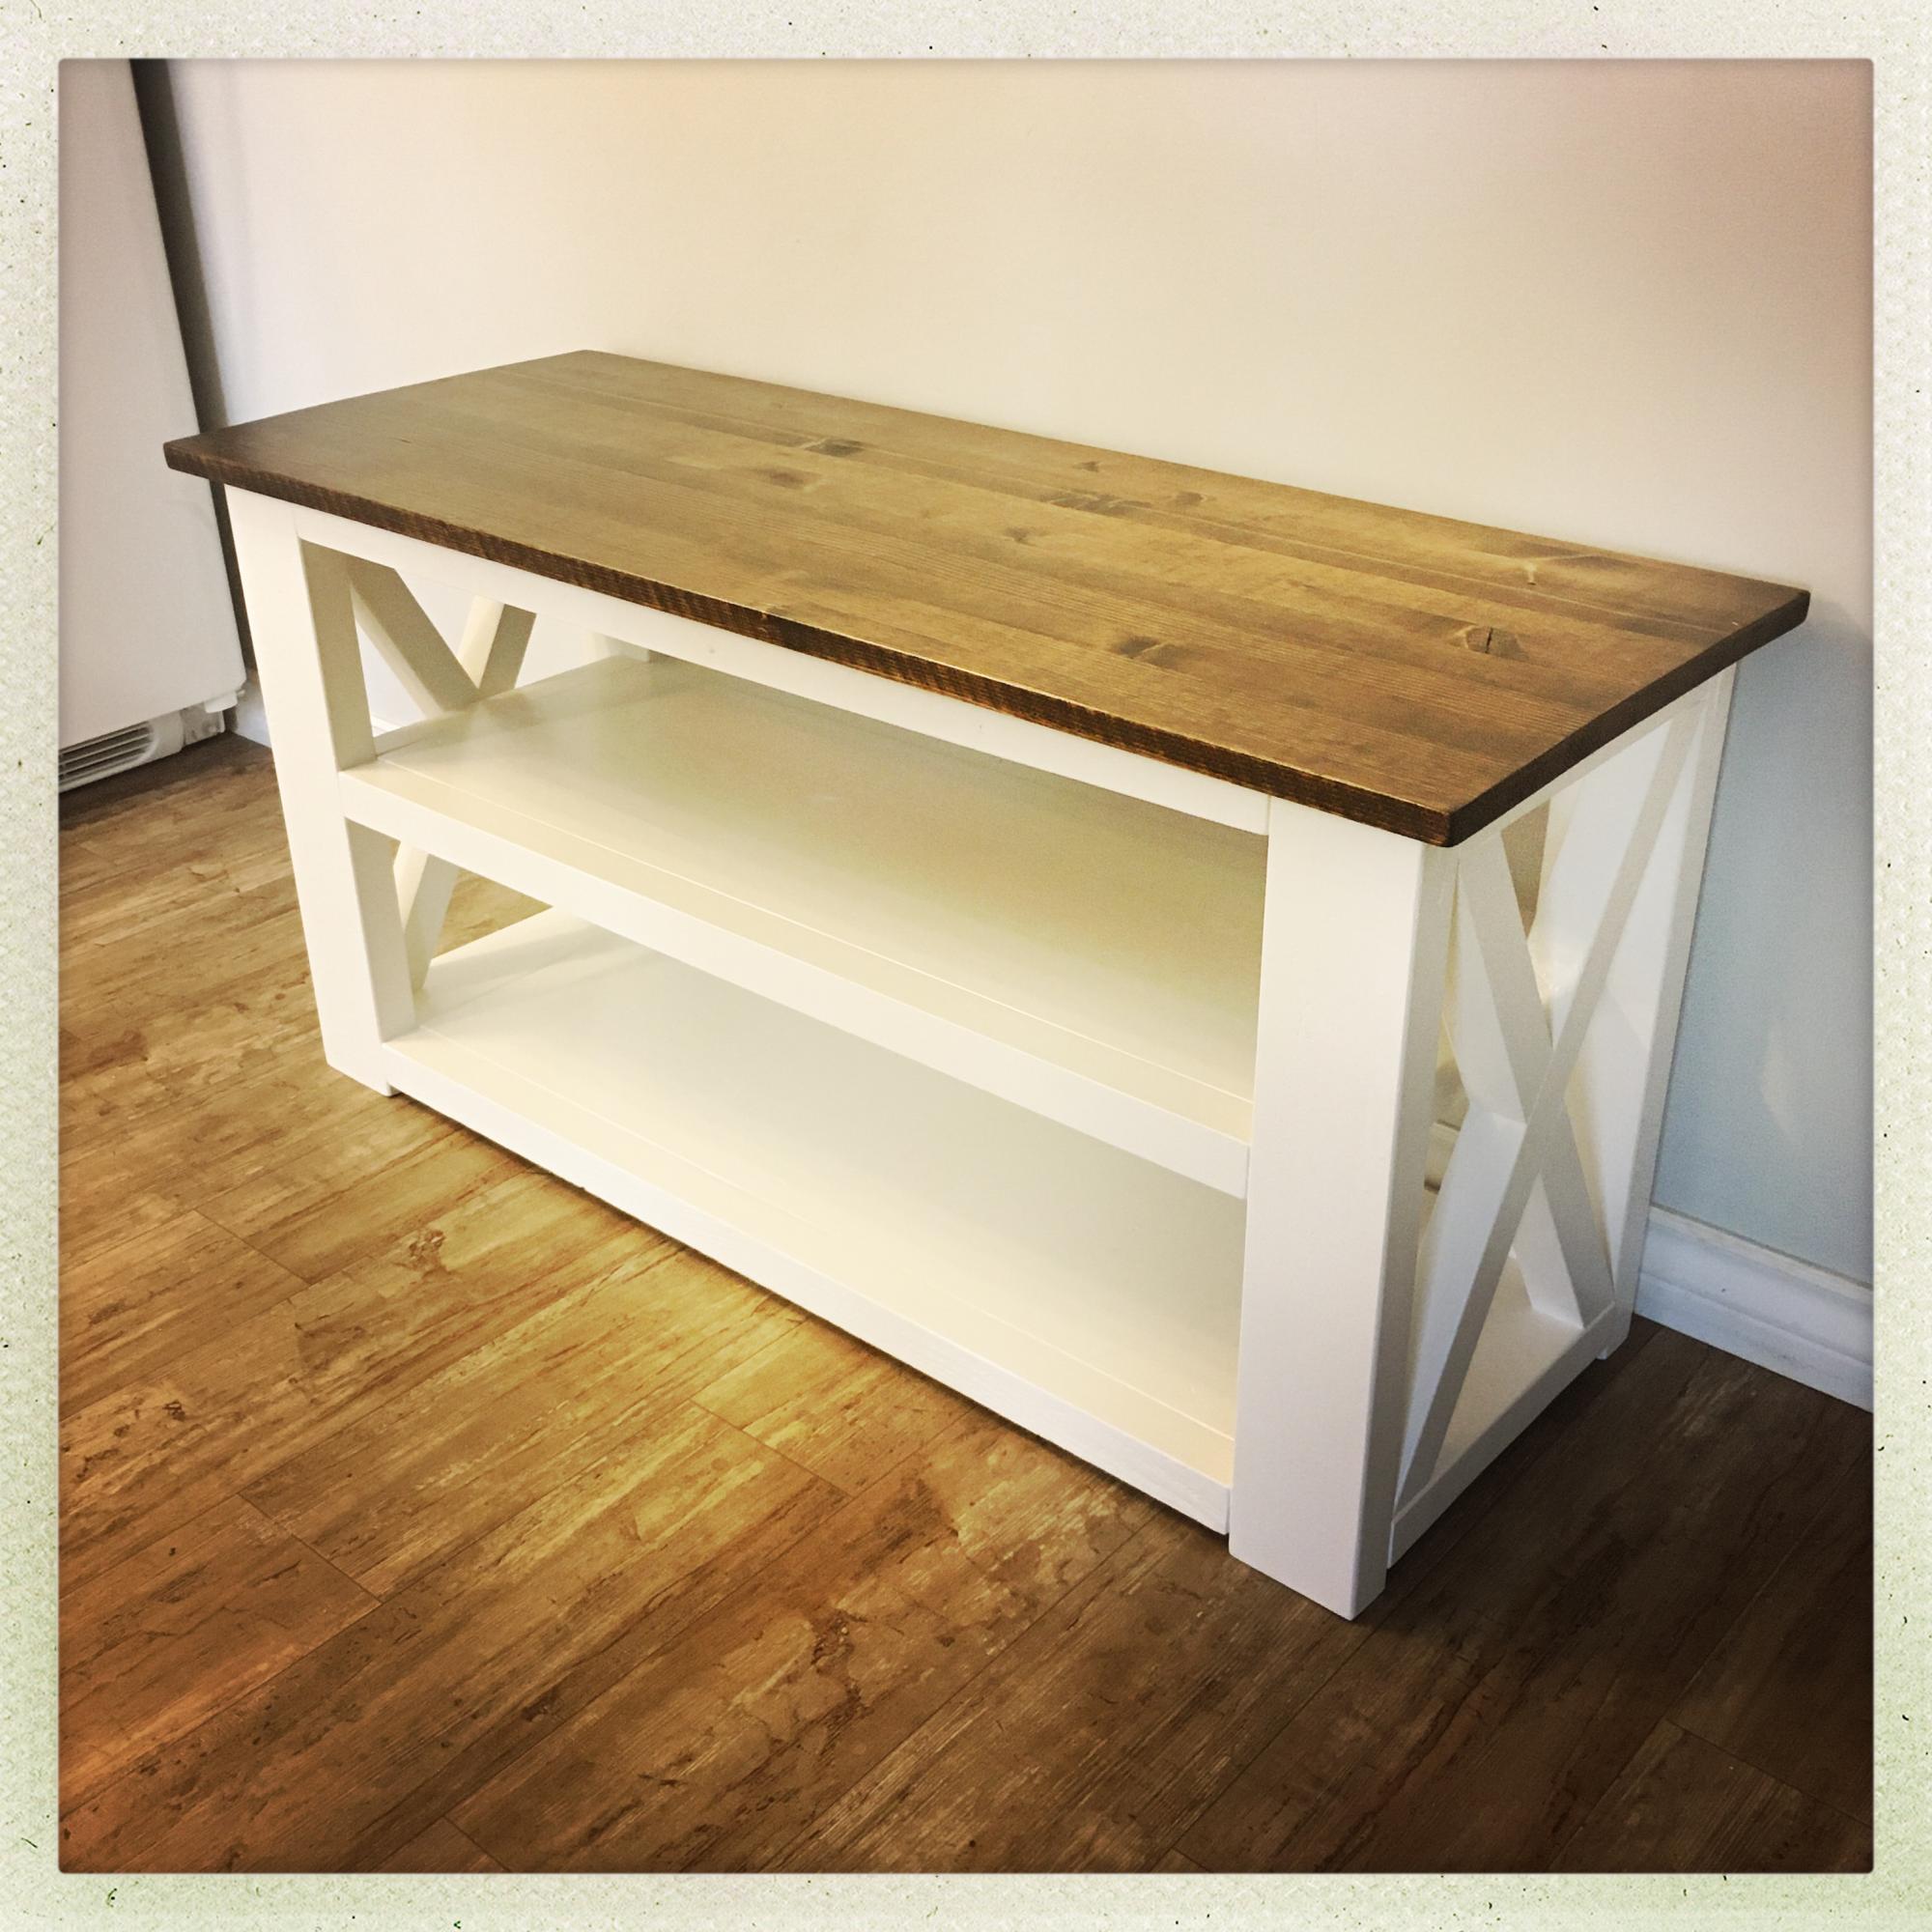
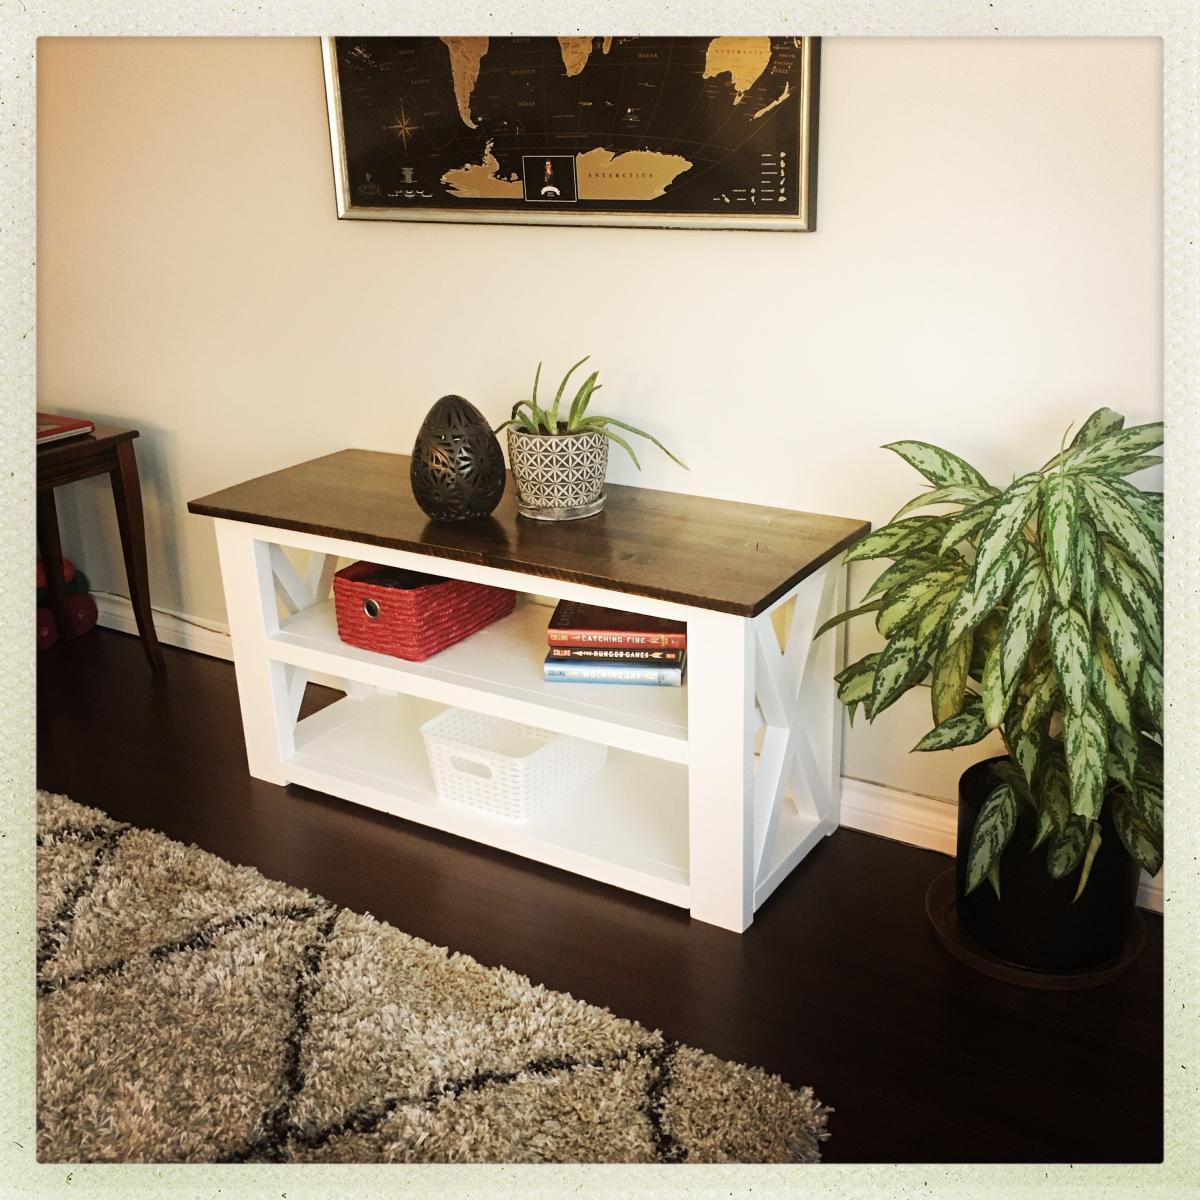
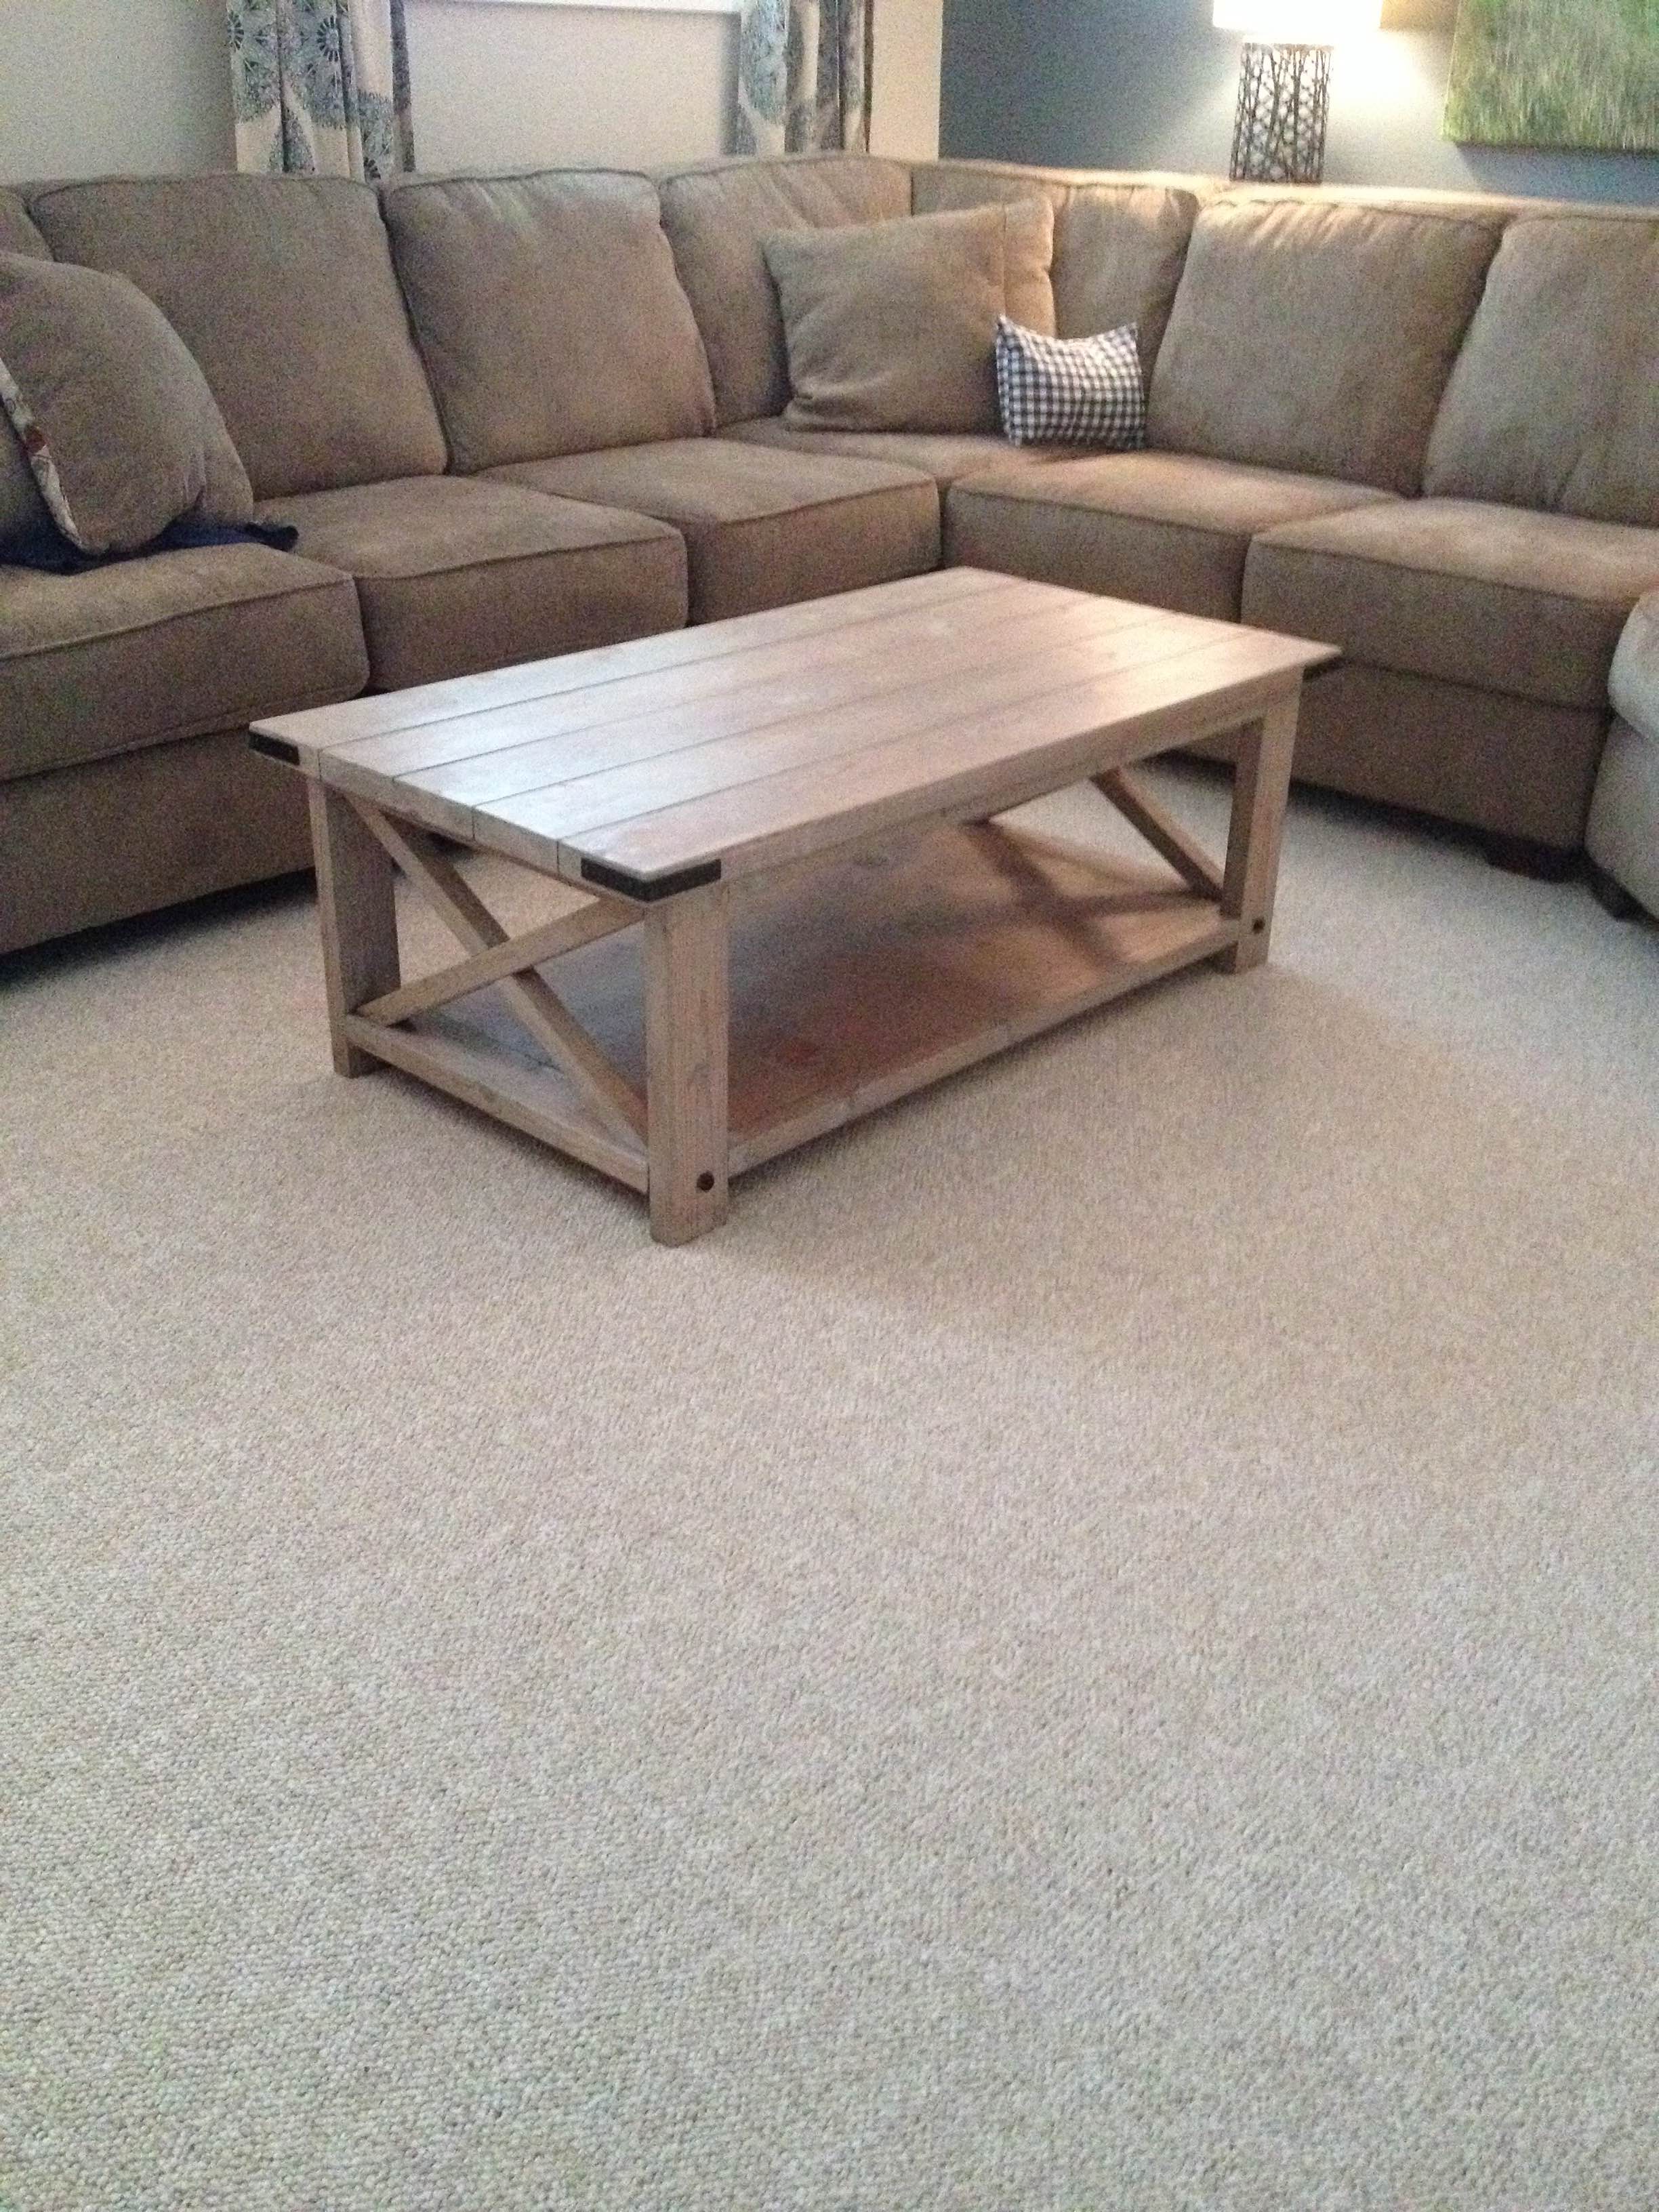
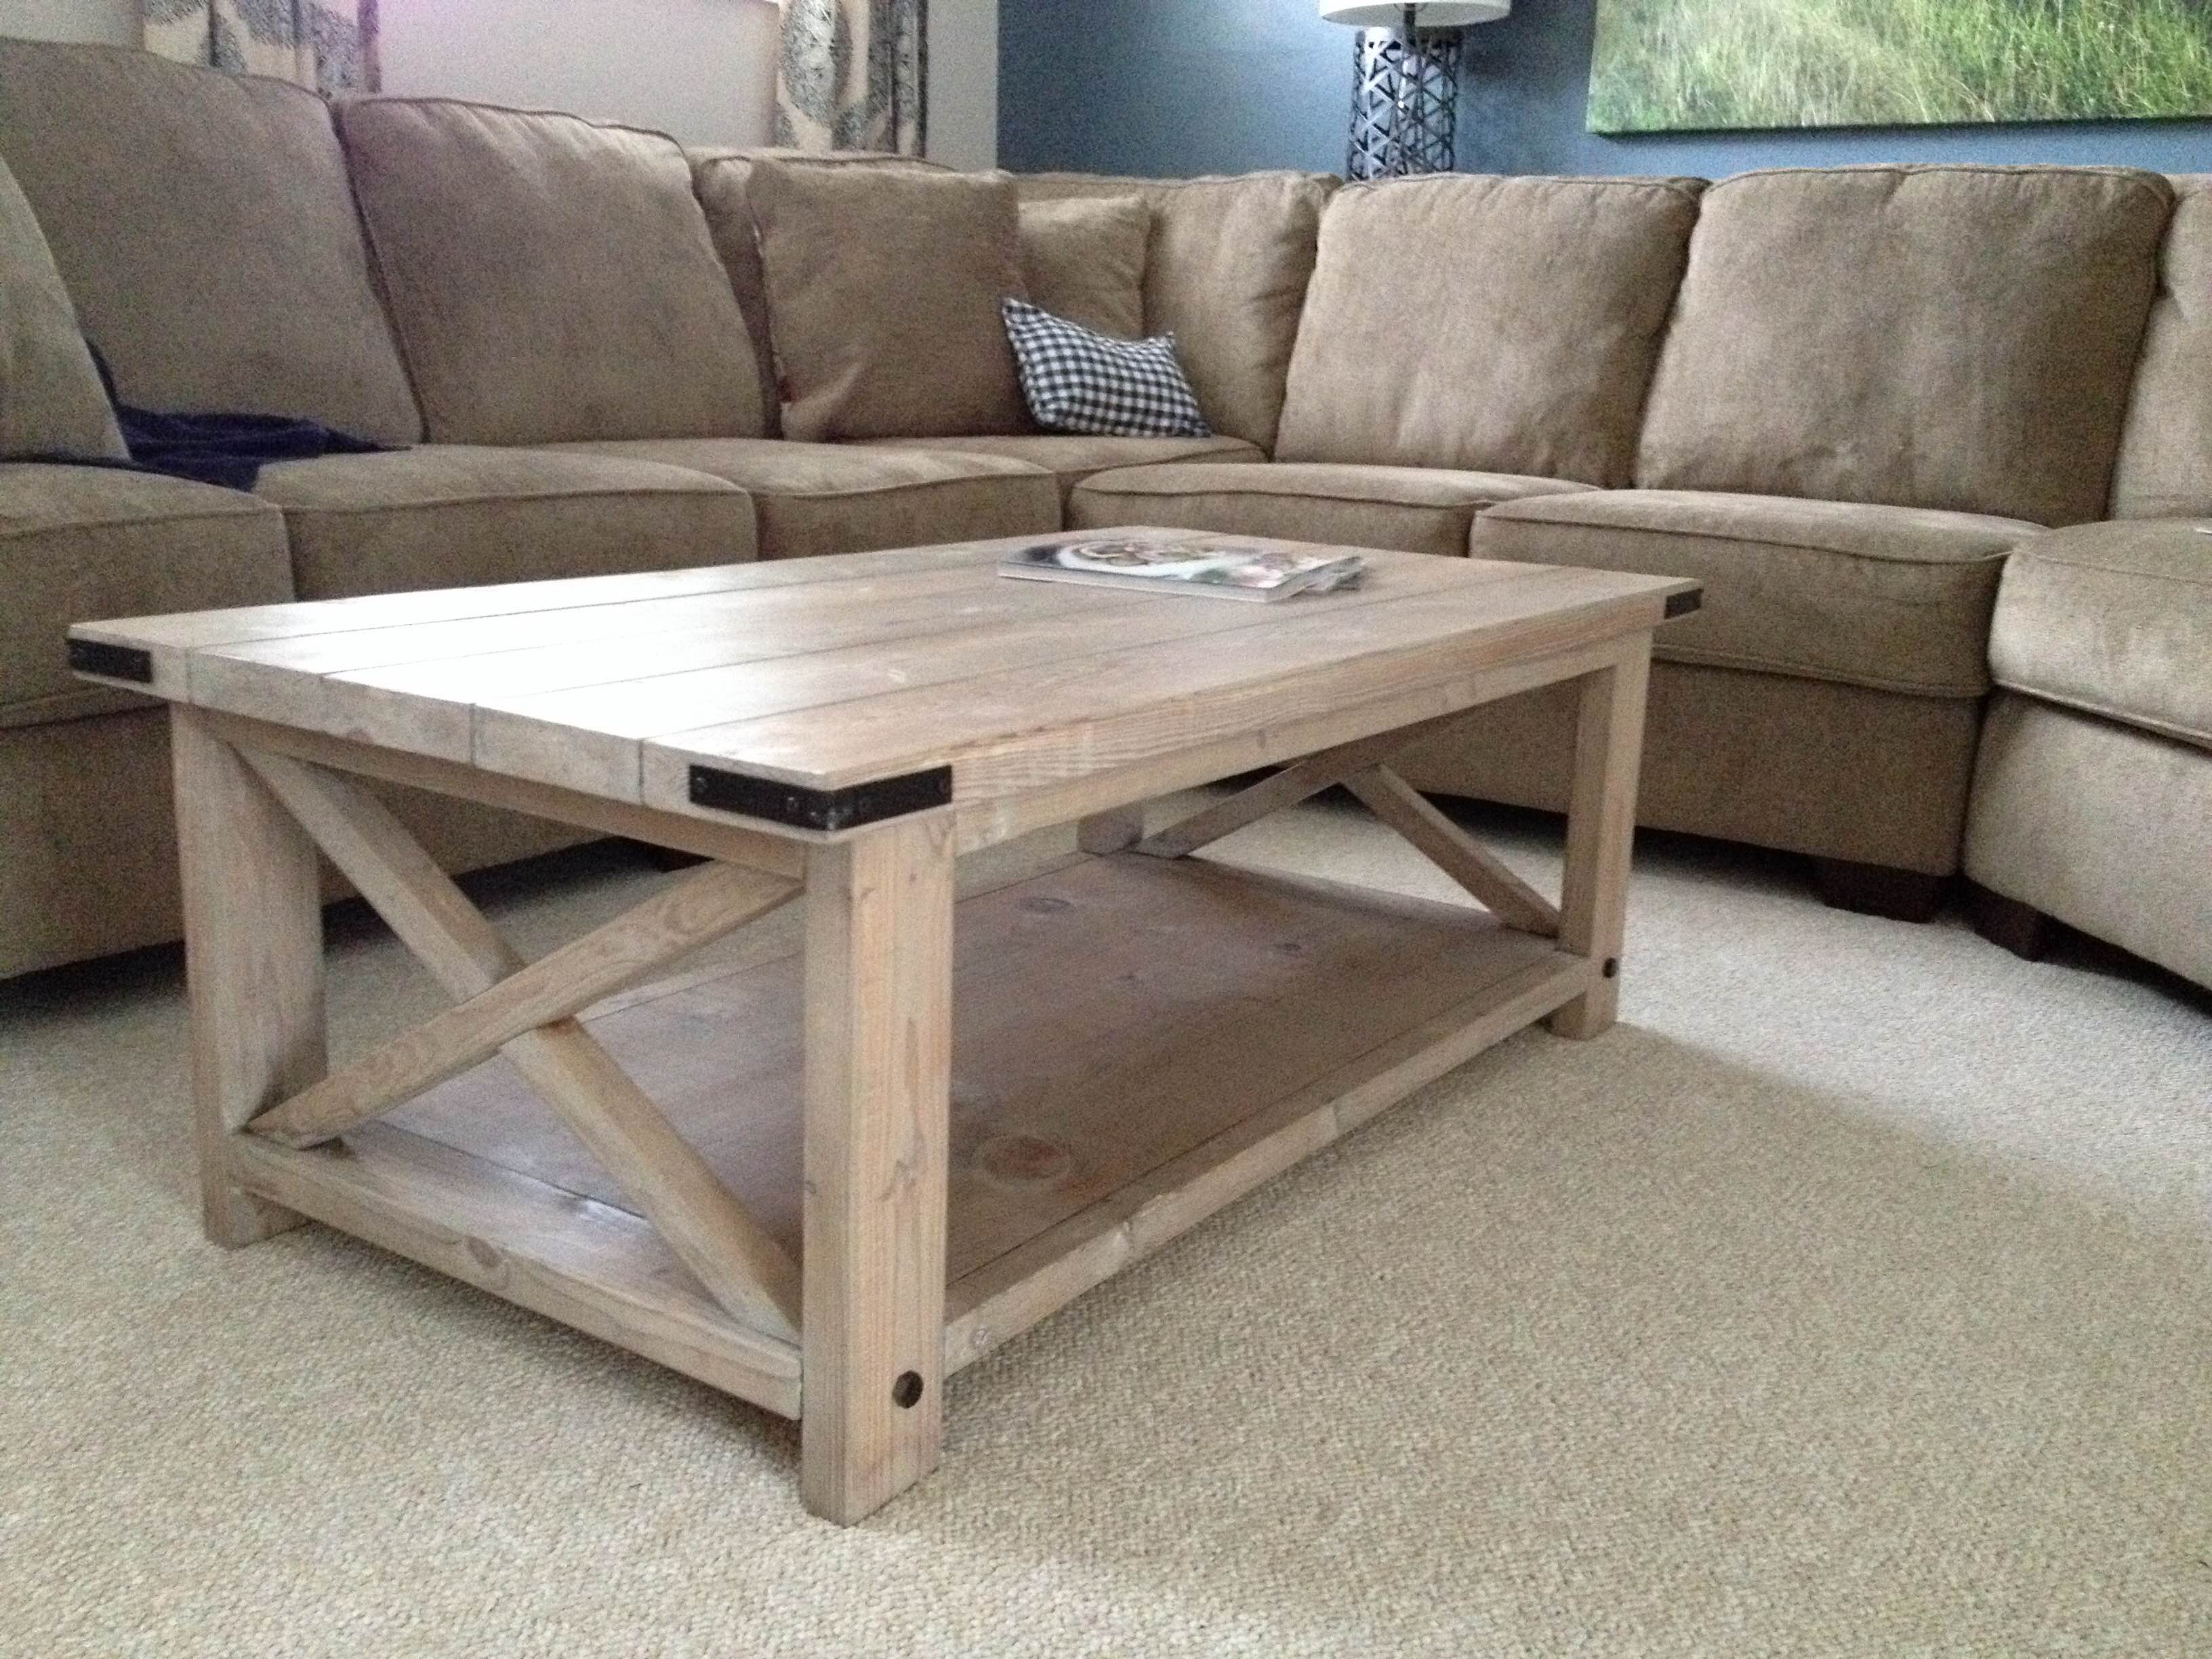
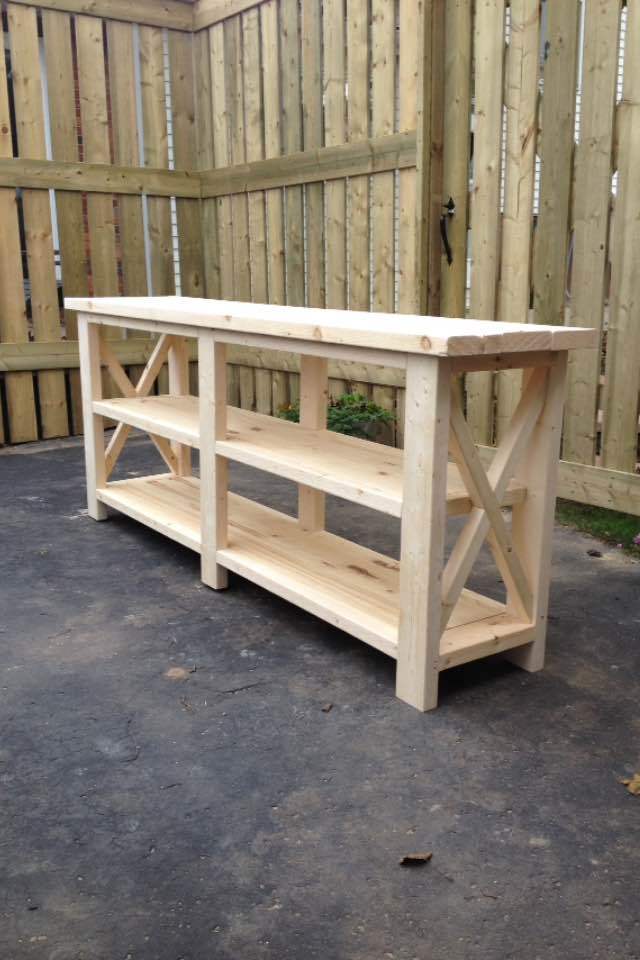
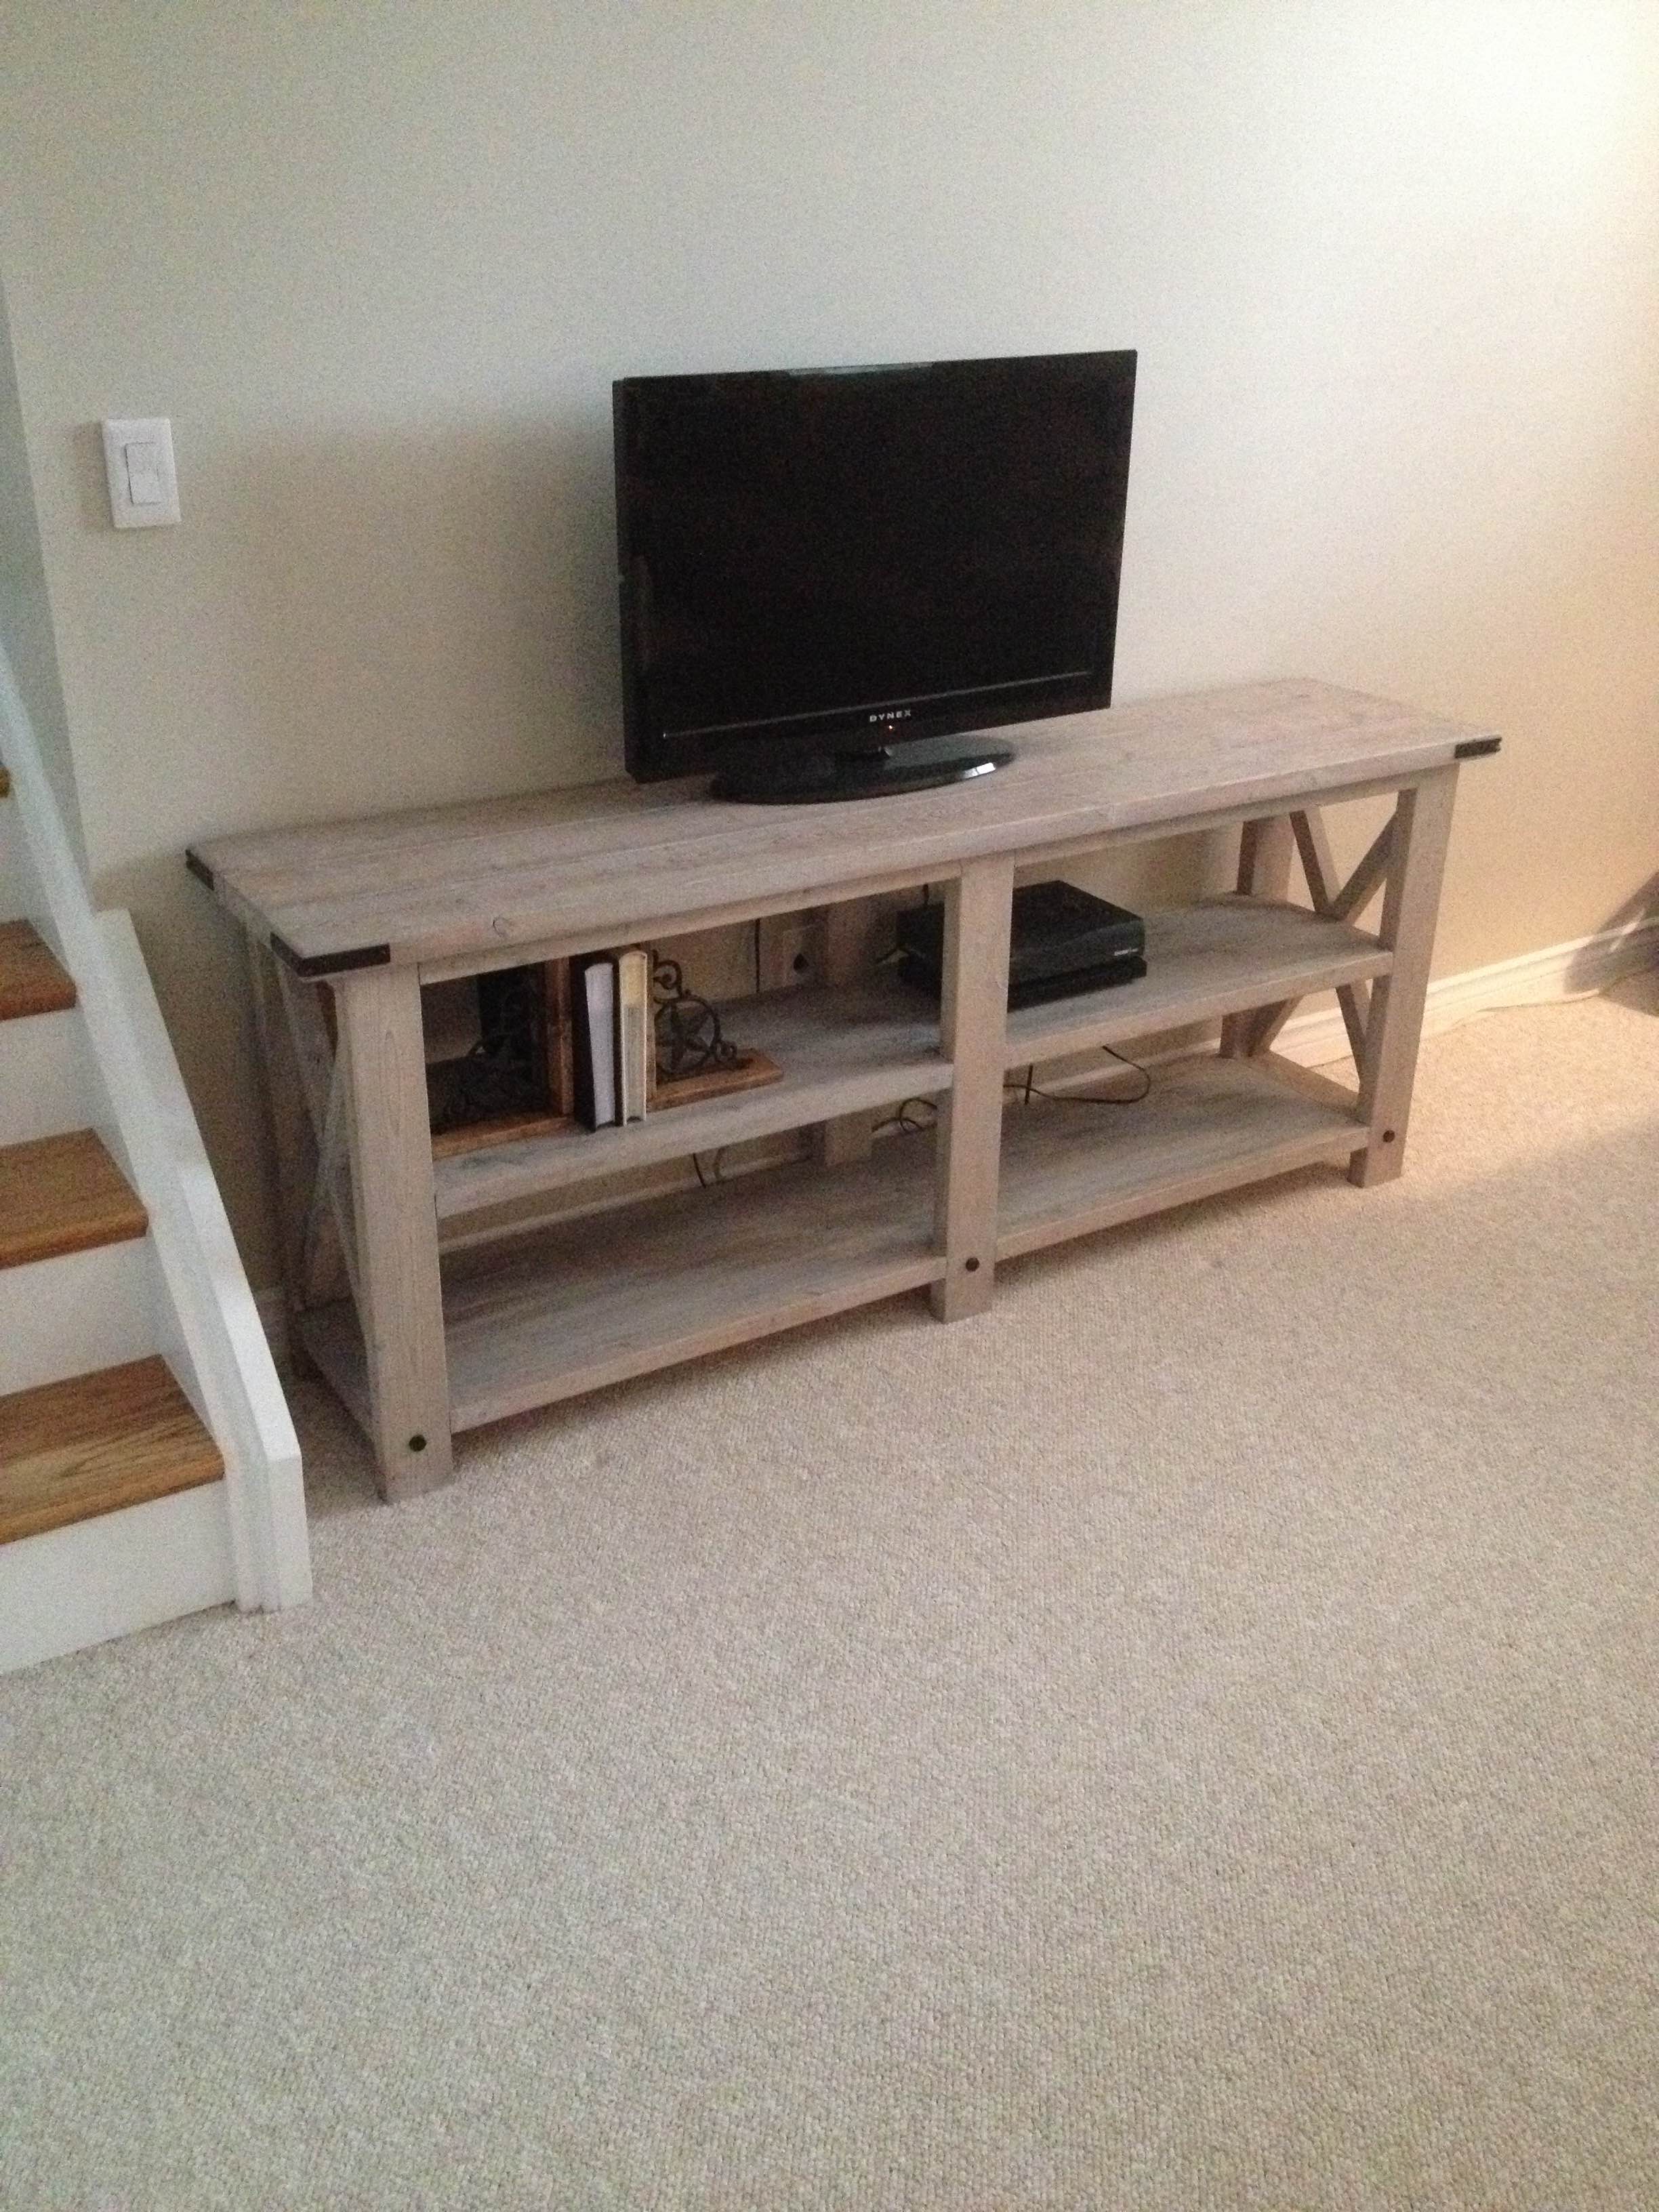
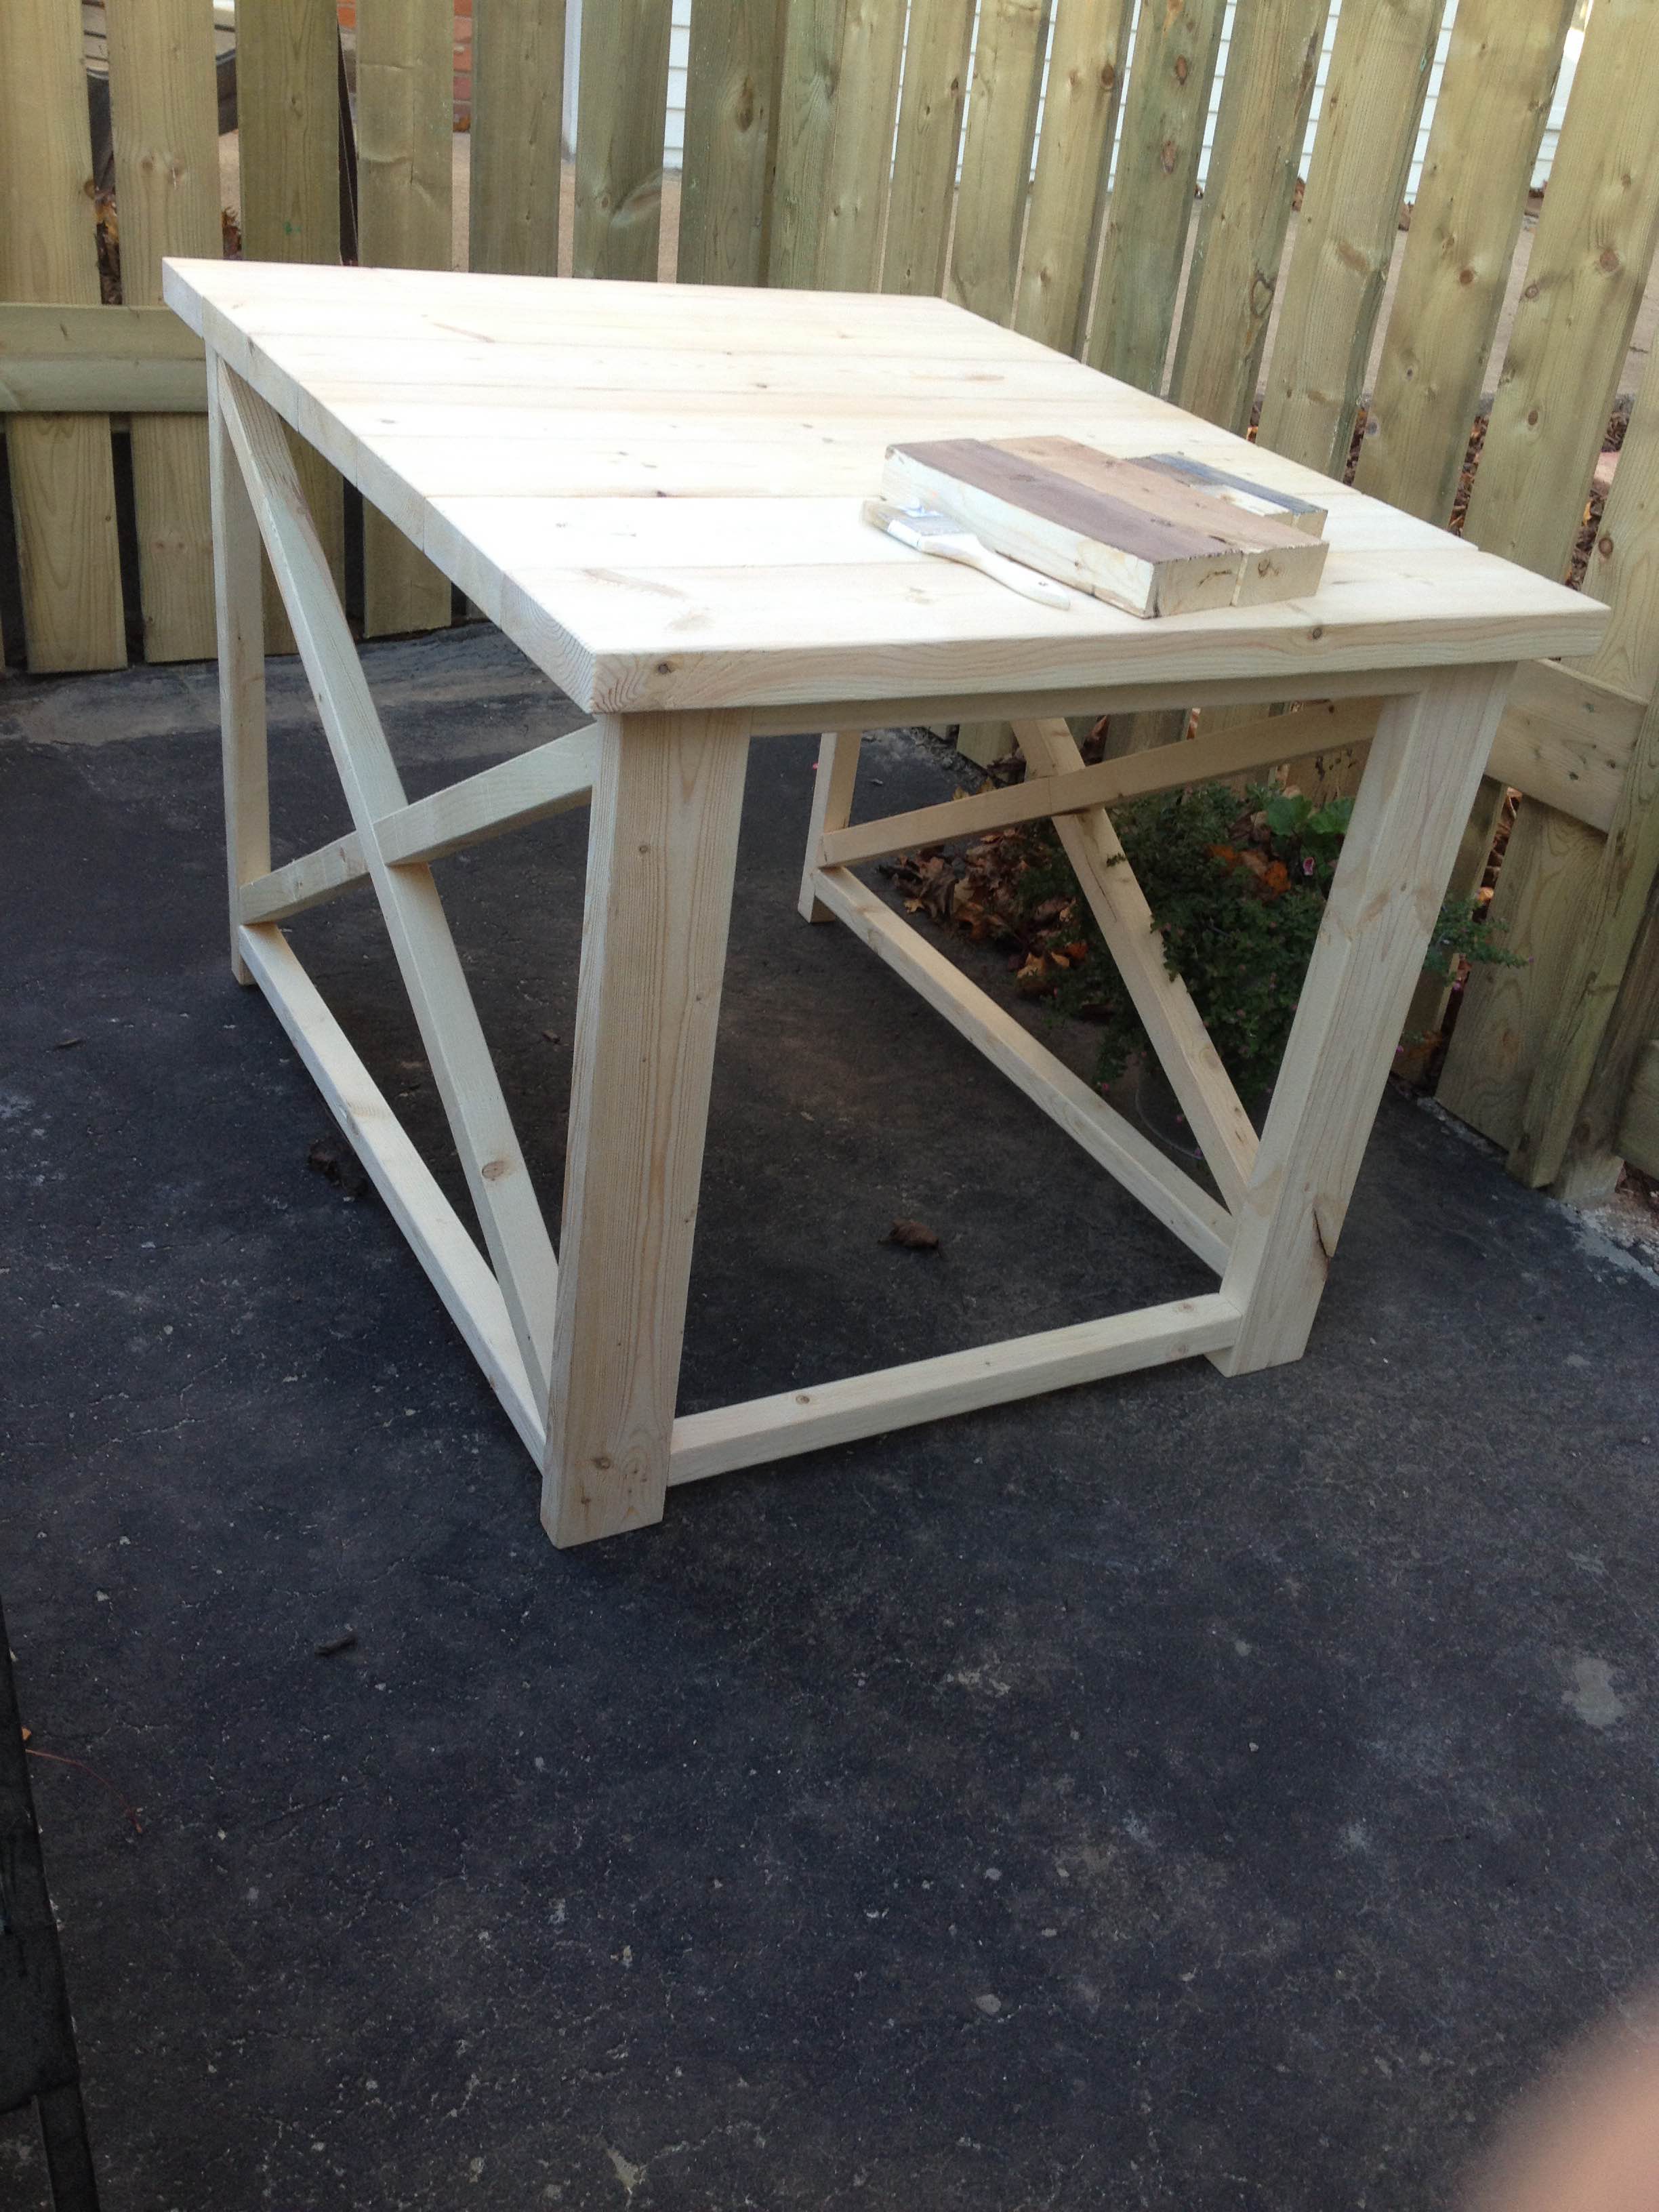
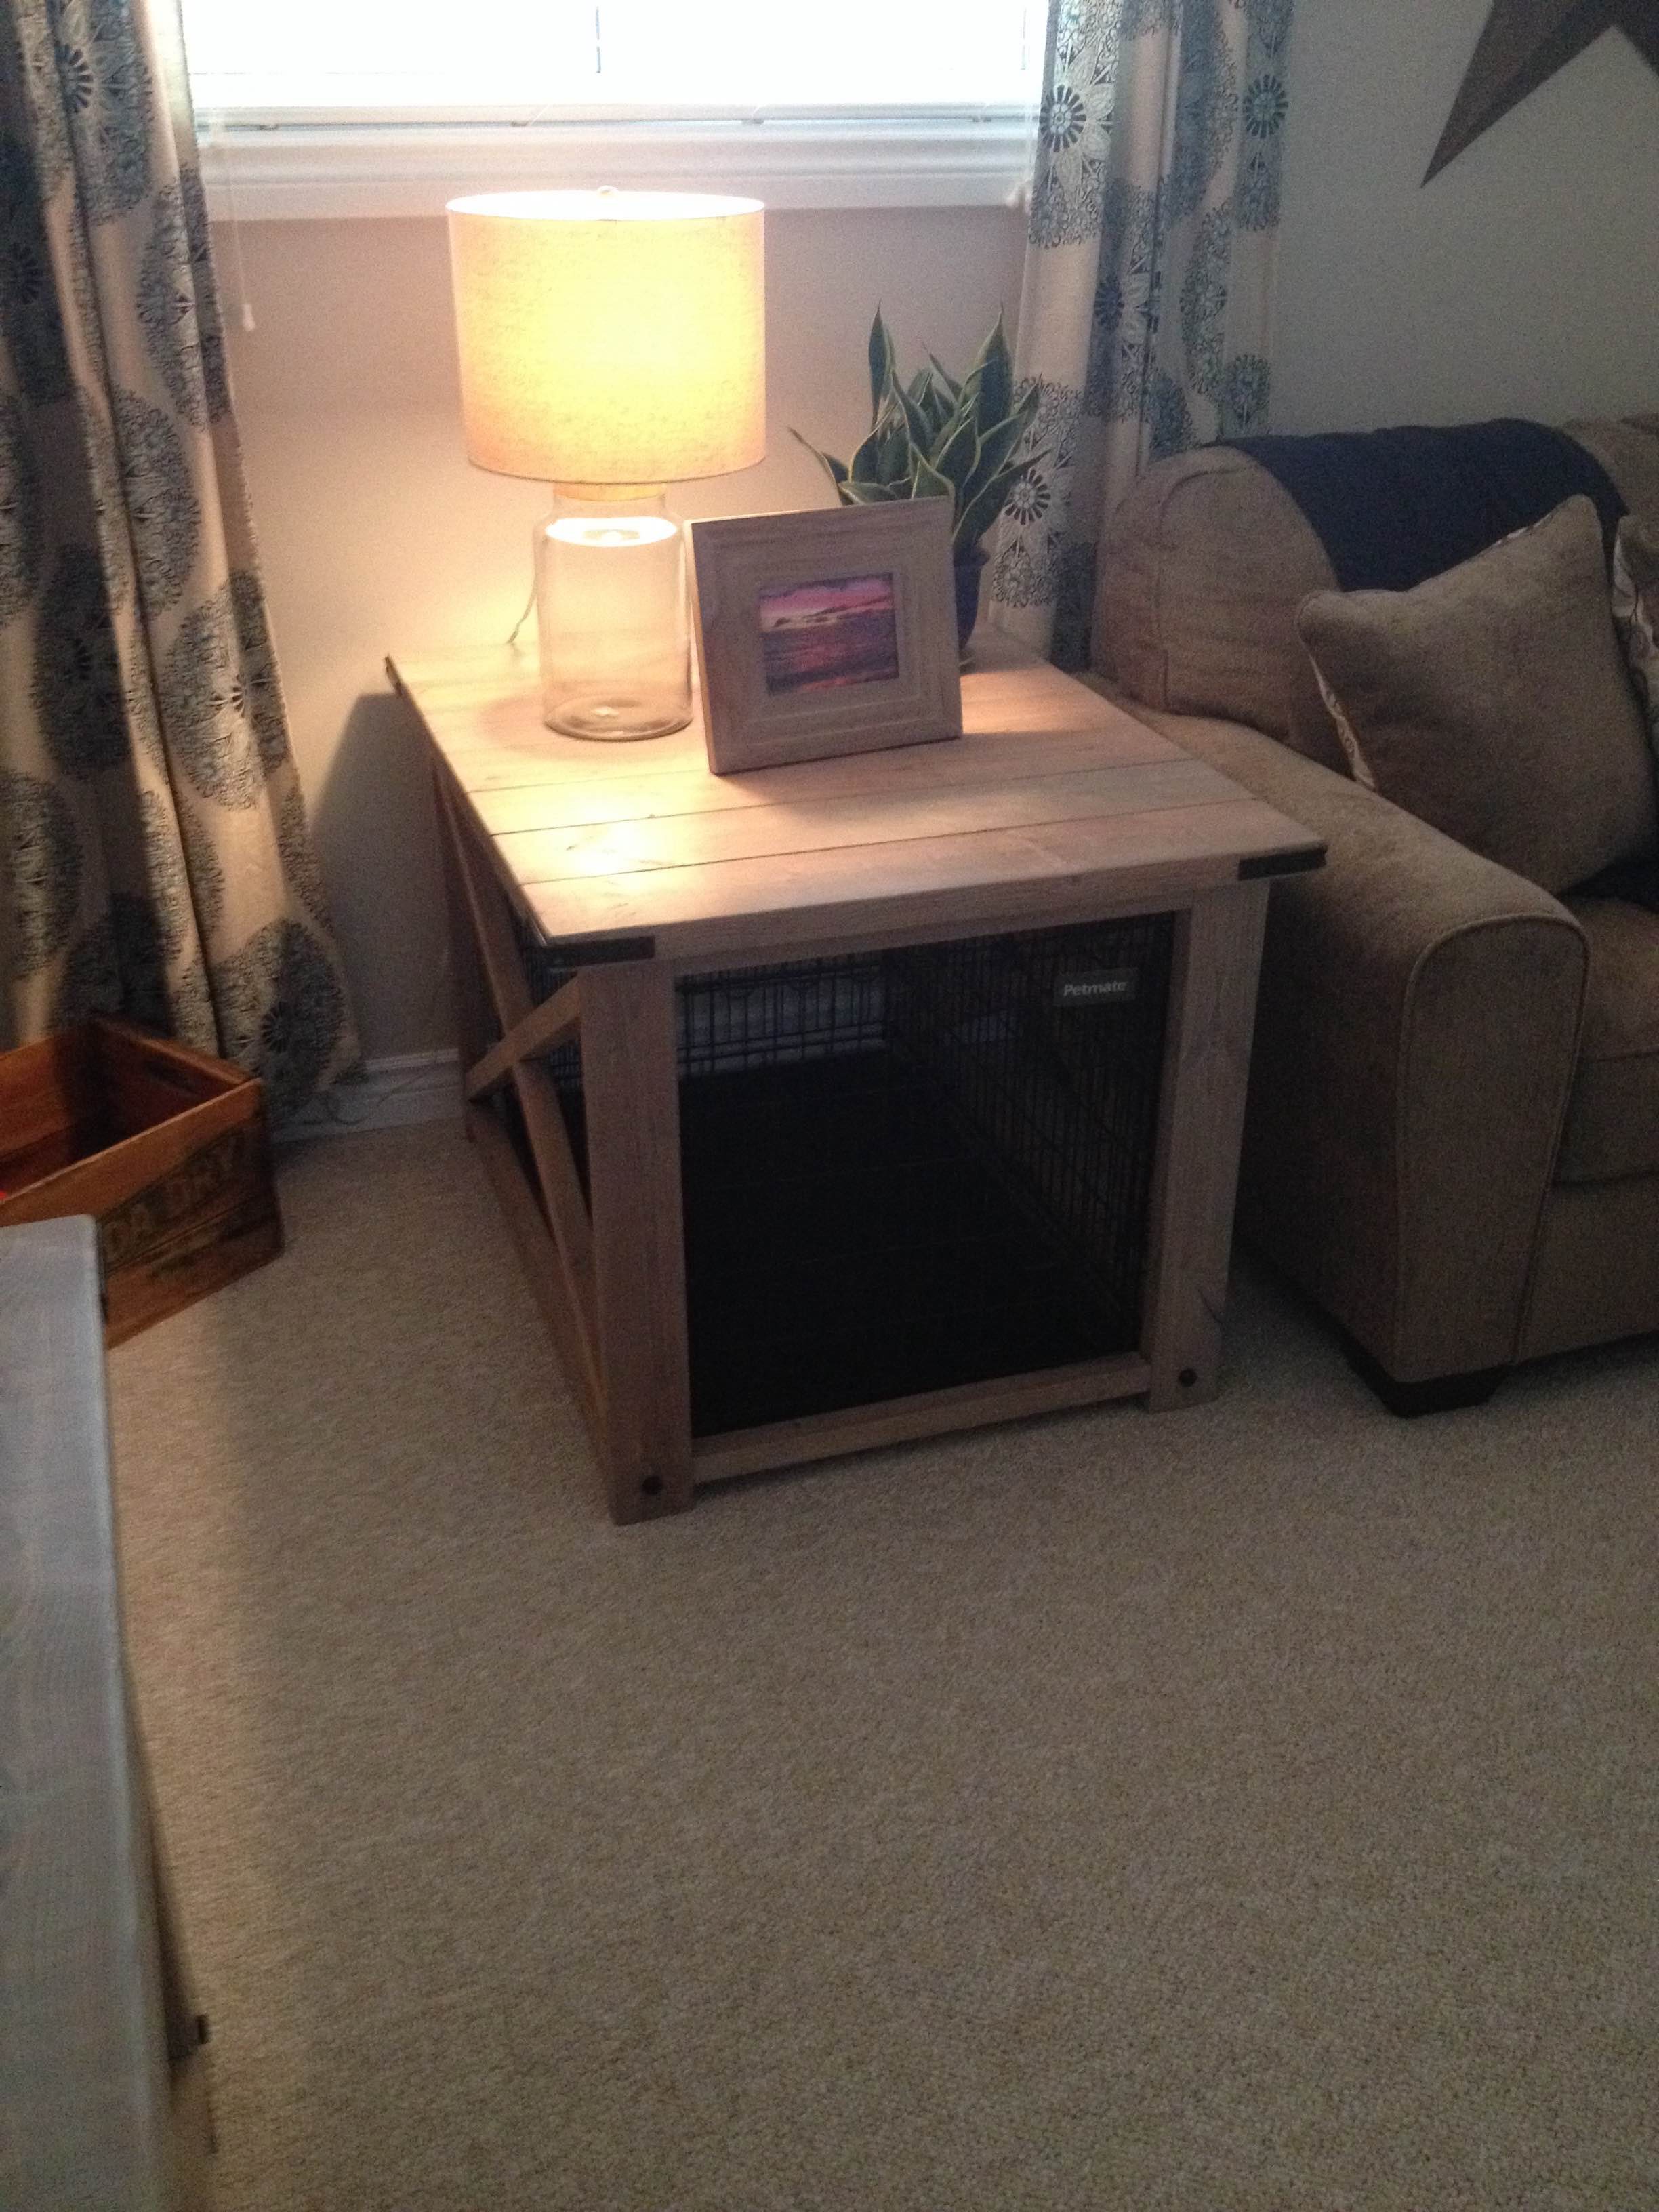
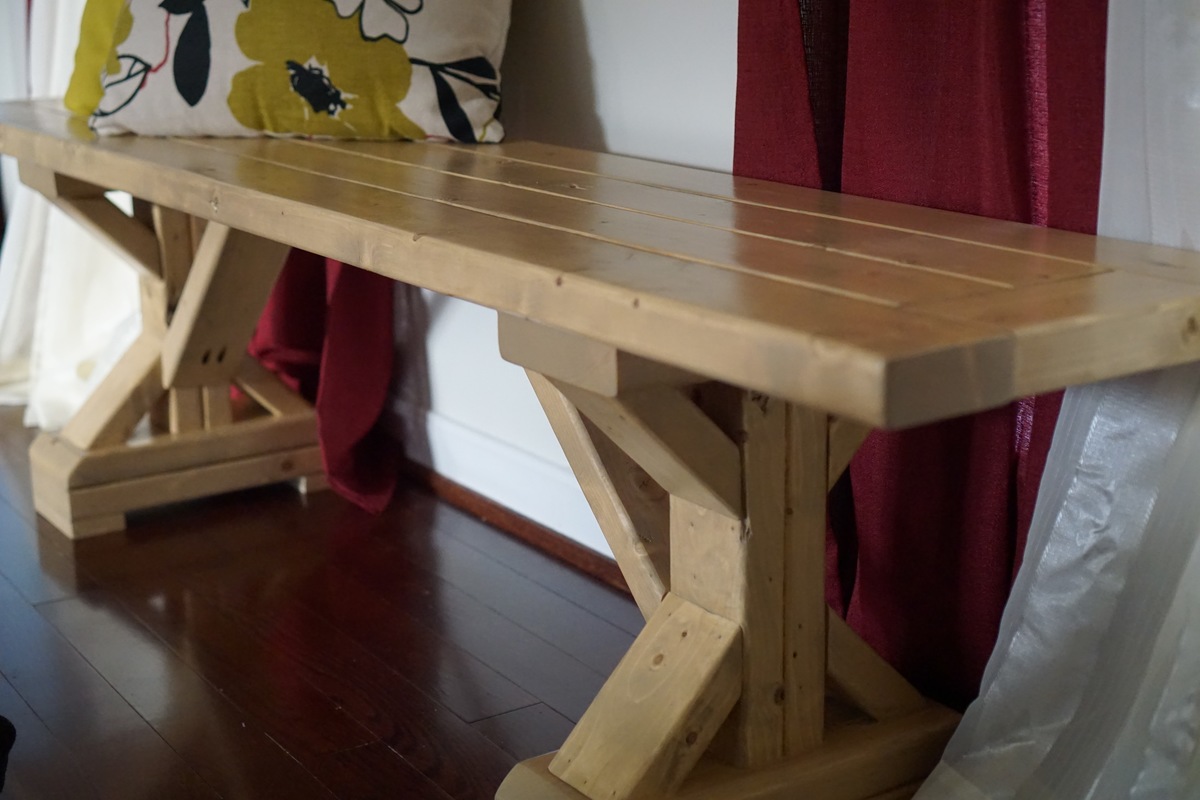
Rustic coffee and end table
Let me know what you think
loveSaturday
Sun, 02/12/2017 - 09:40
Nice!
Good call on the 2x4s for the X. Really like how it looks. Nice job!