DIY Outdoor Sectional
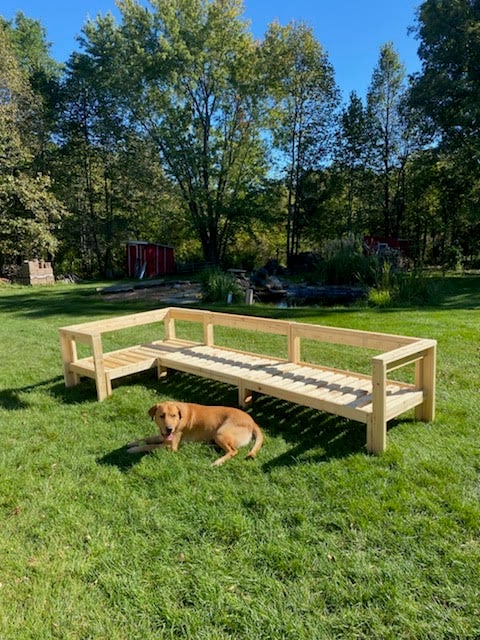
Outdoor wood sectional!
by Elizabeth
Built from Plan(s)
Outdoor wood sectional!
by Elizabeth

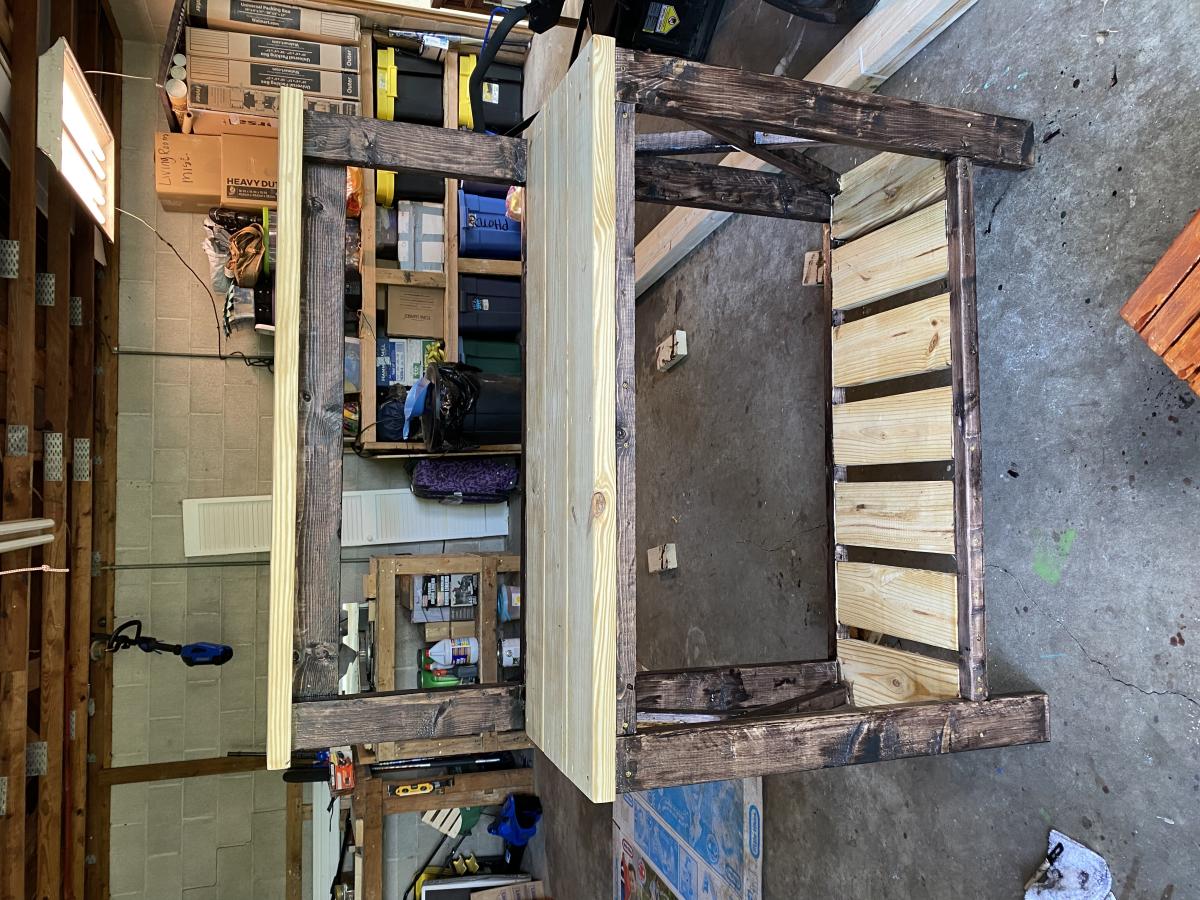
This was actually my first build. I had just about had it, went with all three kids, got the wood, and built it while my hubby was at work (24 hr. shifts at the fire station). And yes, that was after I finally Googled, "How to unlock a Dewalt Compound Miter Saw" after 30 minutes of unsuccessful prodding! :-) I'm super happy with how it came out (despite the poor flashy picture)! And it was great "practice" for doing my girl's farmhouse beds.
Sun, 05/20/2012 - 22:18
I think it is beautiful! I love the stain! This was my first build also, I used old red barnwood, but a friend wants me to build her one, so I'm thinking about going with the same finish you used, absolutely gorgeous!
This was hard for me because I am horrible at using the jigsaw. If I do another one I'll probably not do as many door openings.
It took longer than expected due to filling in all the pocket holes an waiting for the wood filler to dry.
My grandson loves it, he didn't care about my mistakes on it.
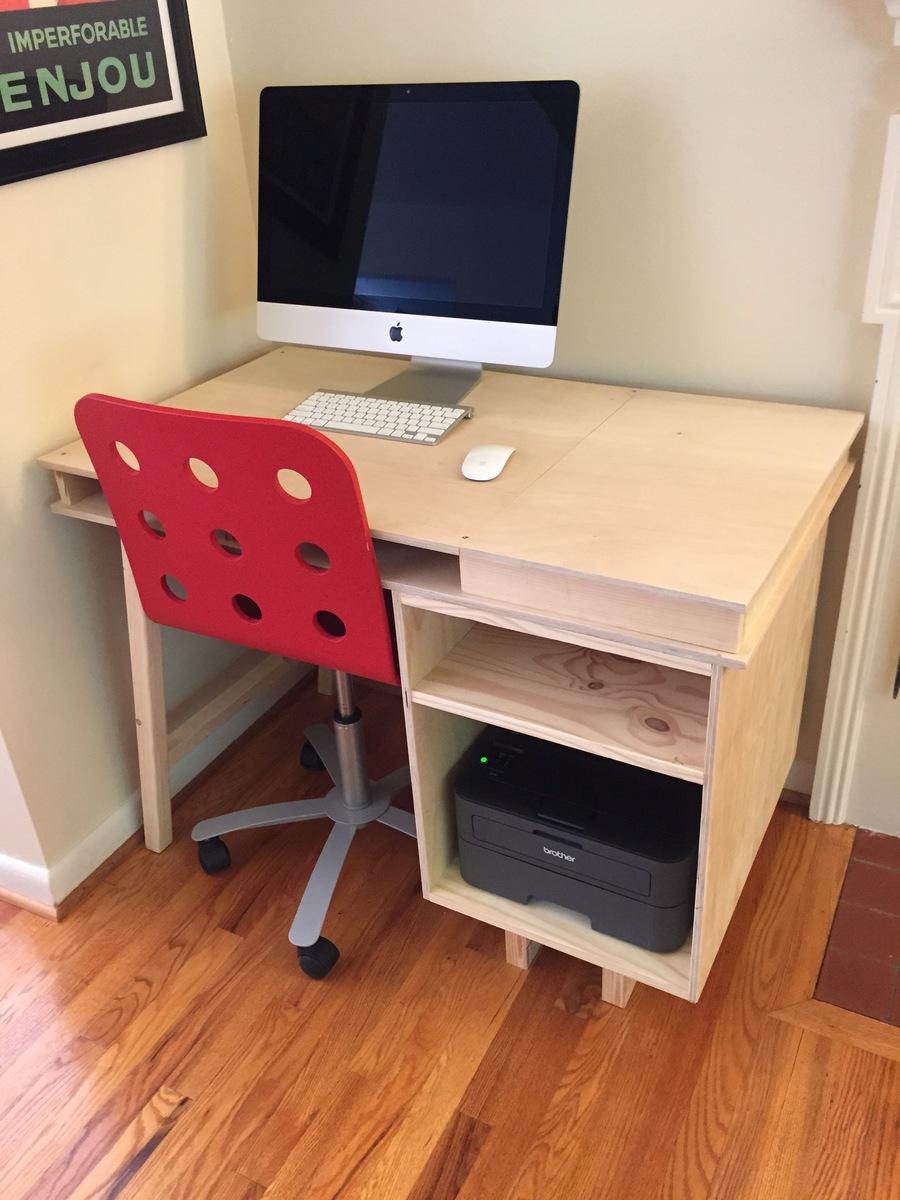
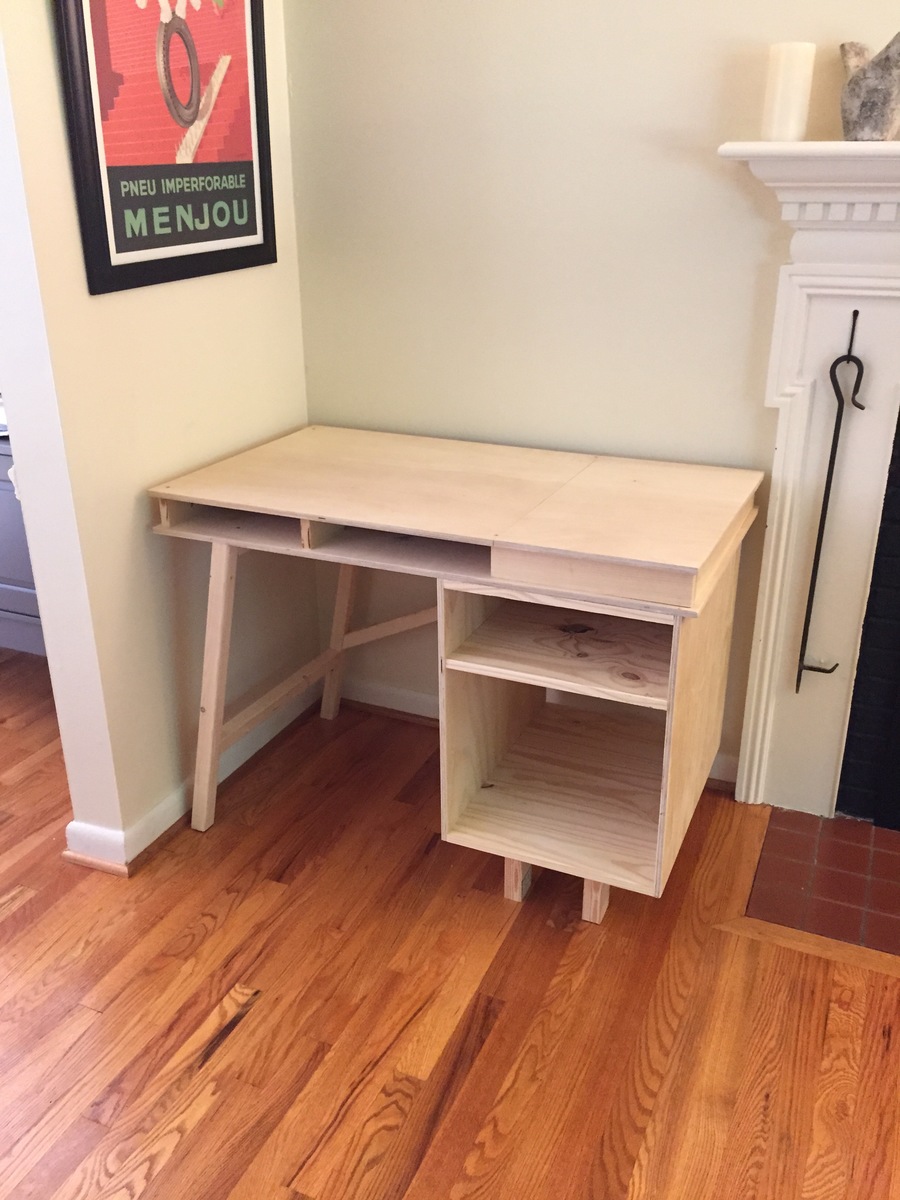
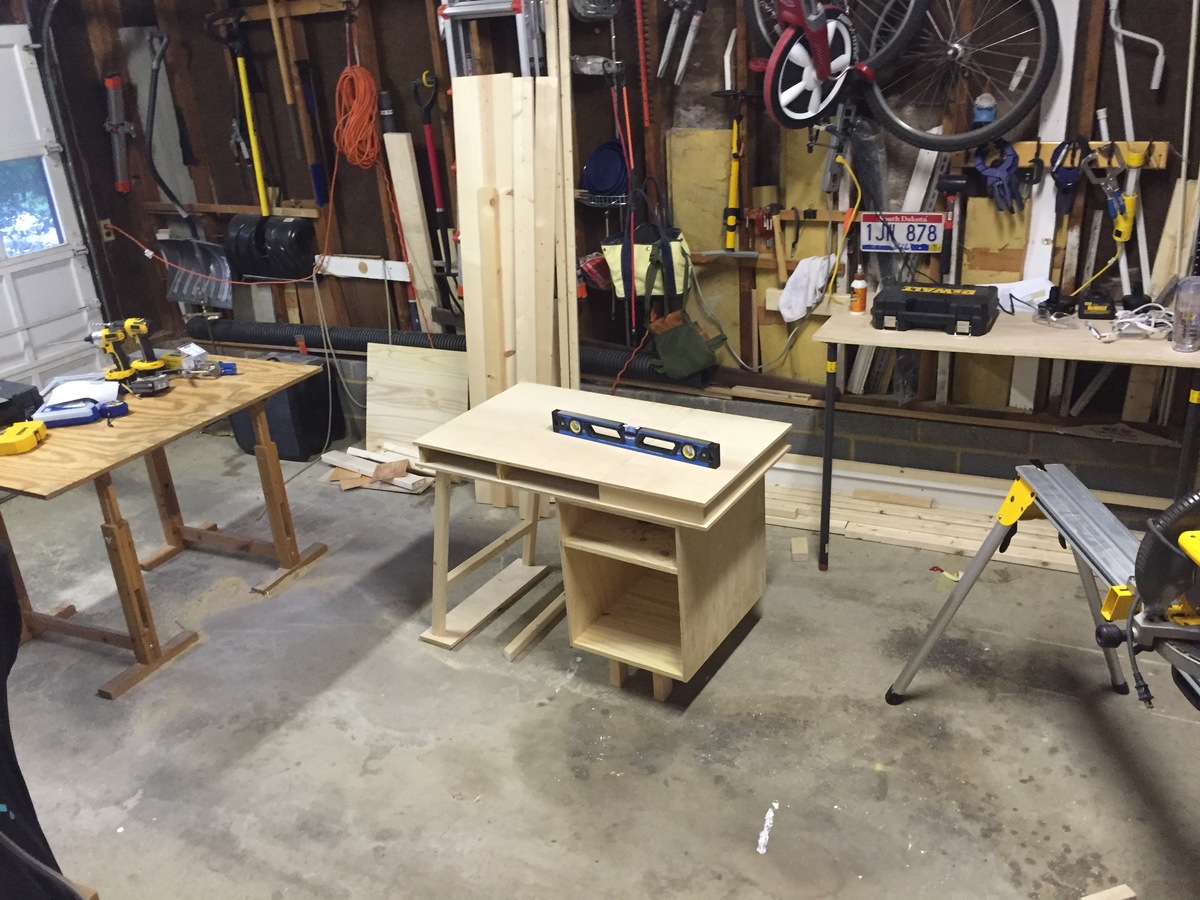
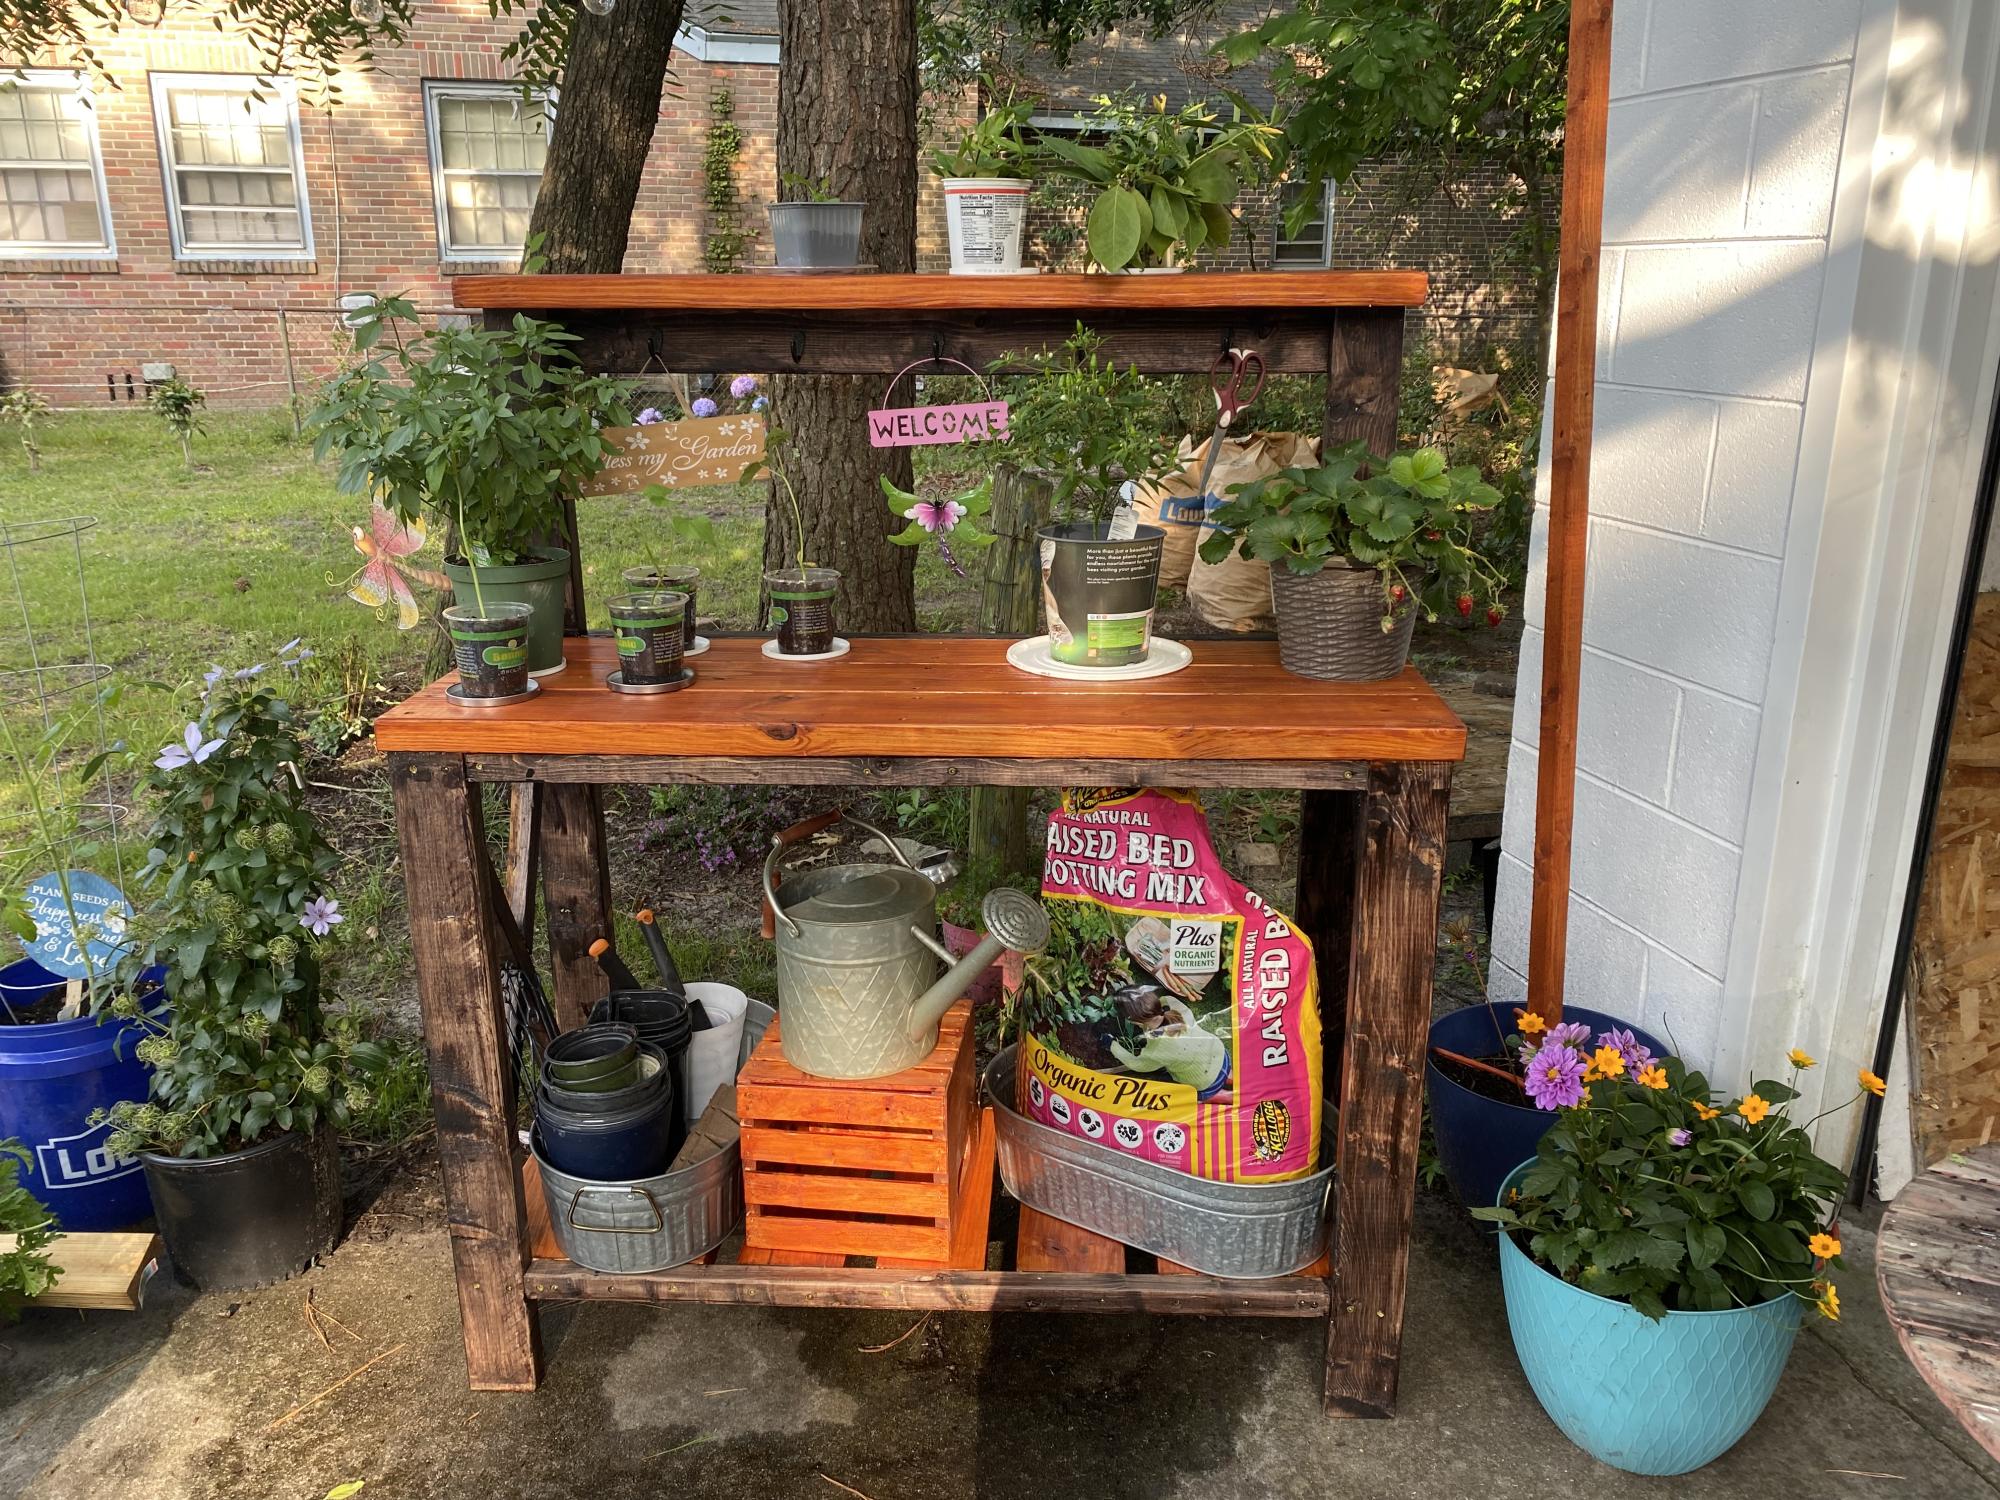
I modified the plans in several ways. First I made the desk smaller to fit the space. In doing so I decided it would work better to have only one part of the desk flip up for storage. I also made the box that makes up the base larger to fit a printer. That left a smaller space for a chair. Turns out the chair I had fit perfectly. I decided not to finish with paint, stain or varnish. I may do that later. Over all I am very happy with this project.
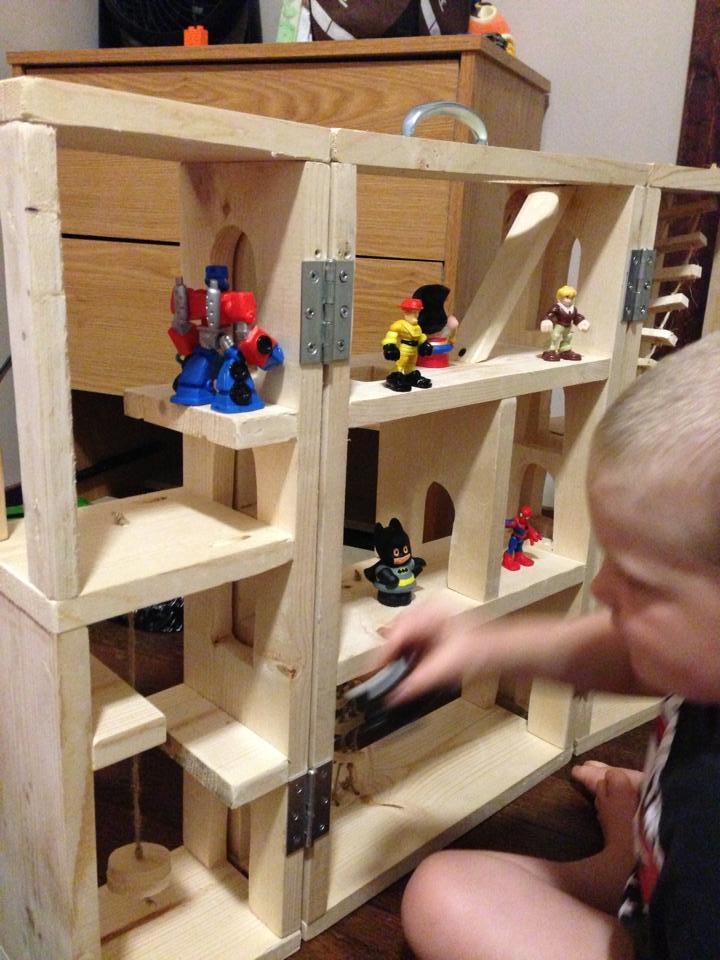
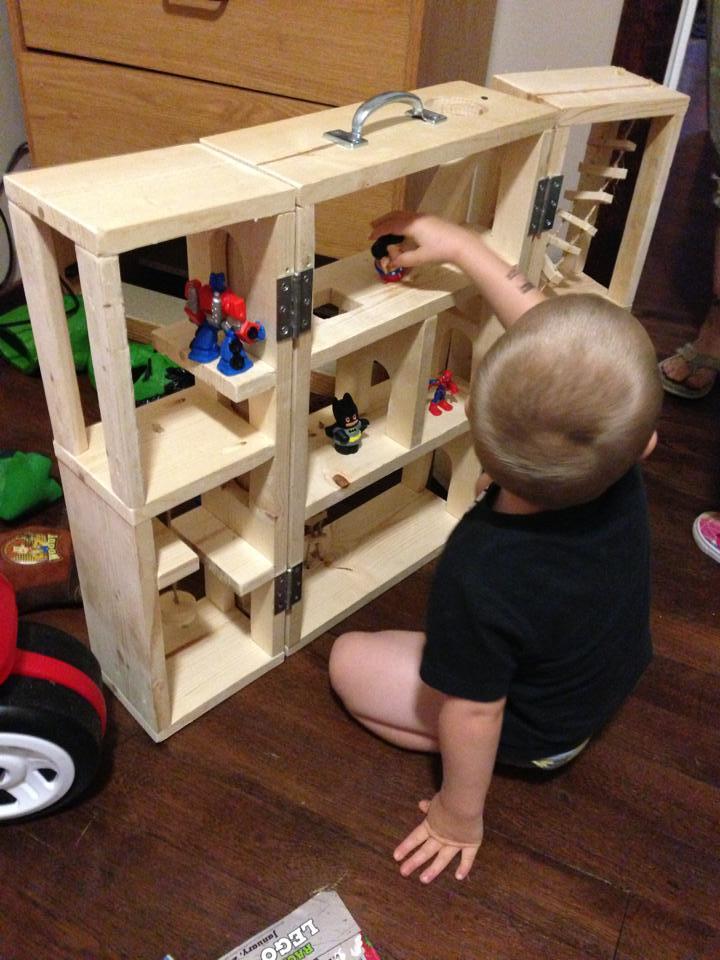
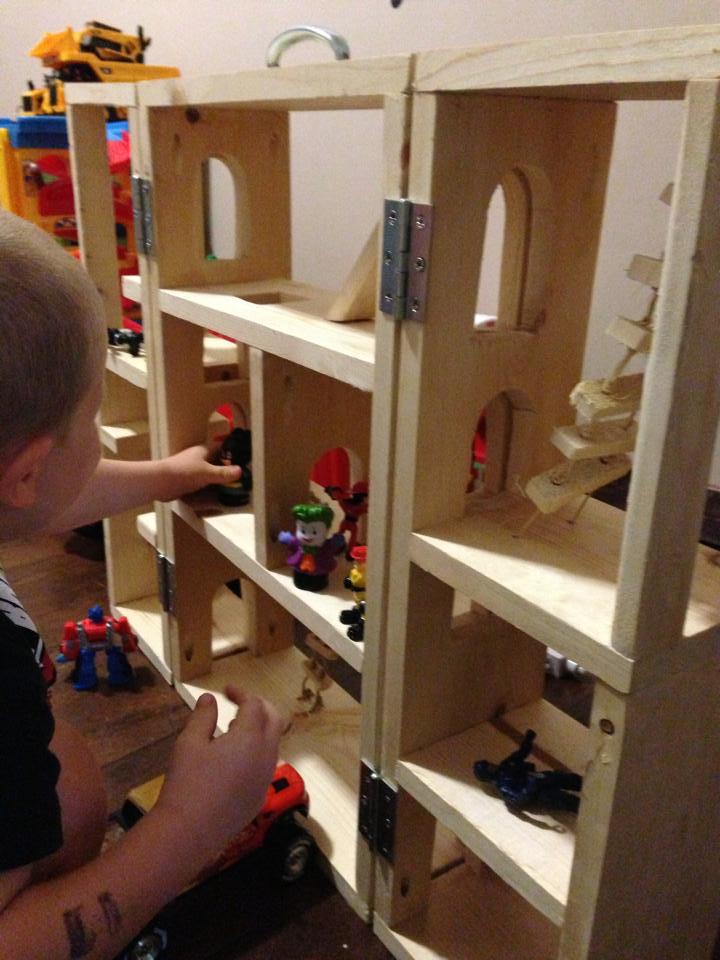
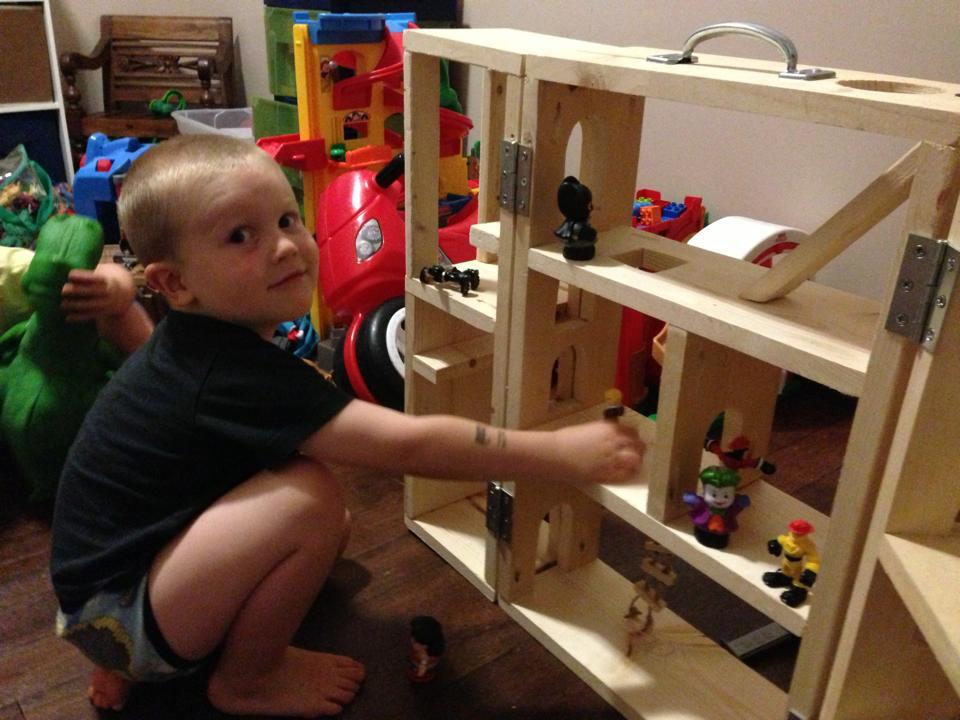
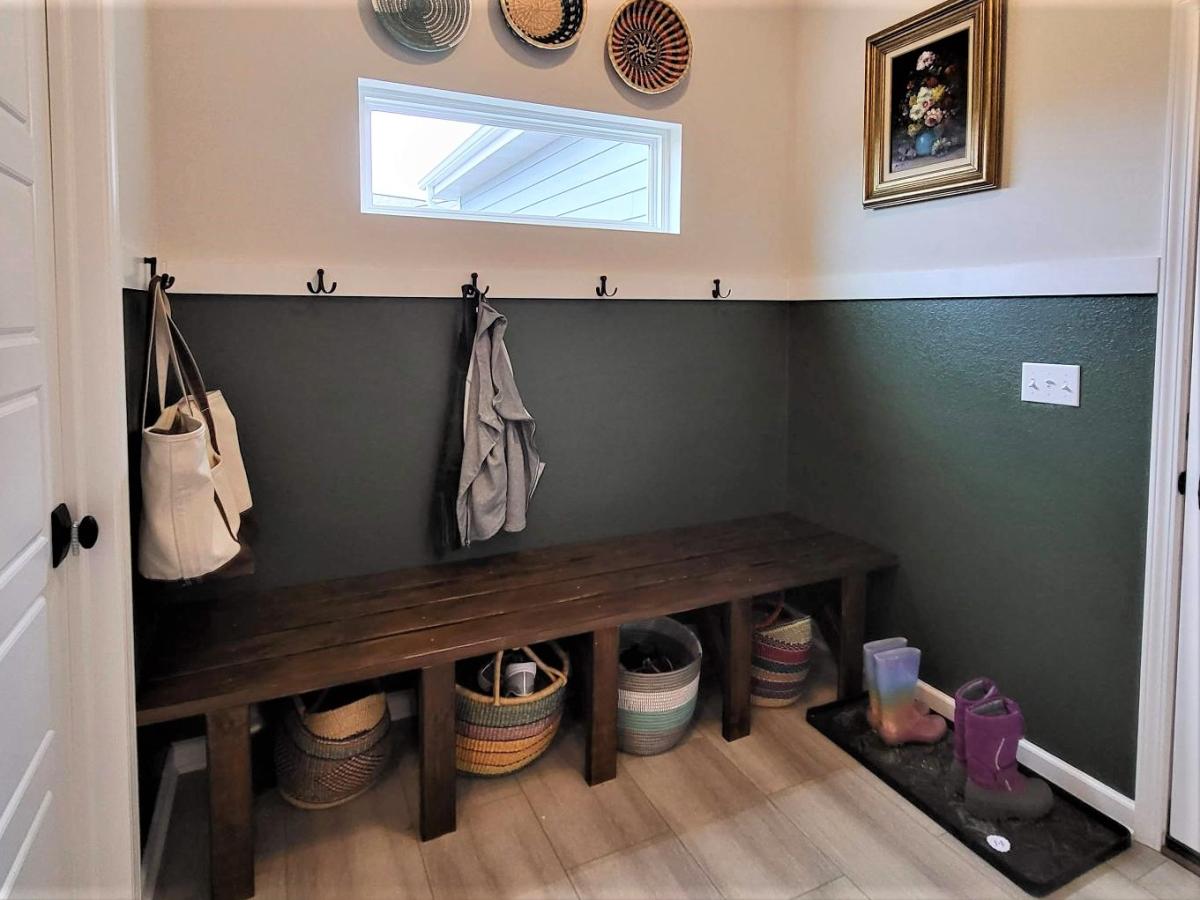
Entry Cubby-First Project
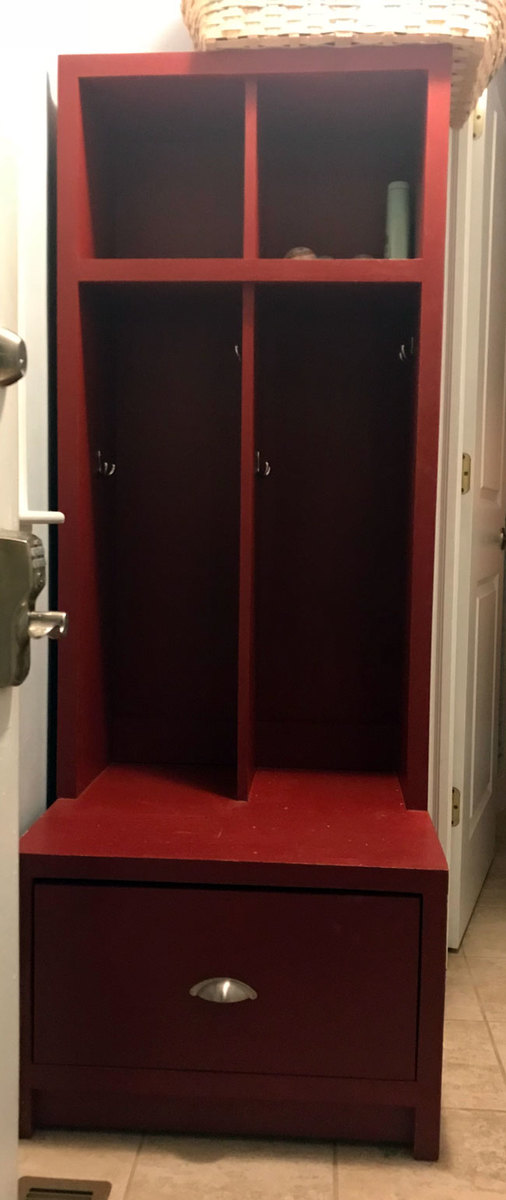

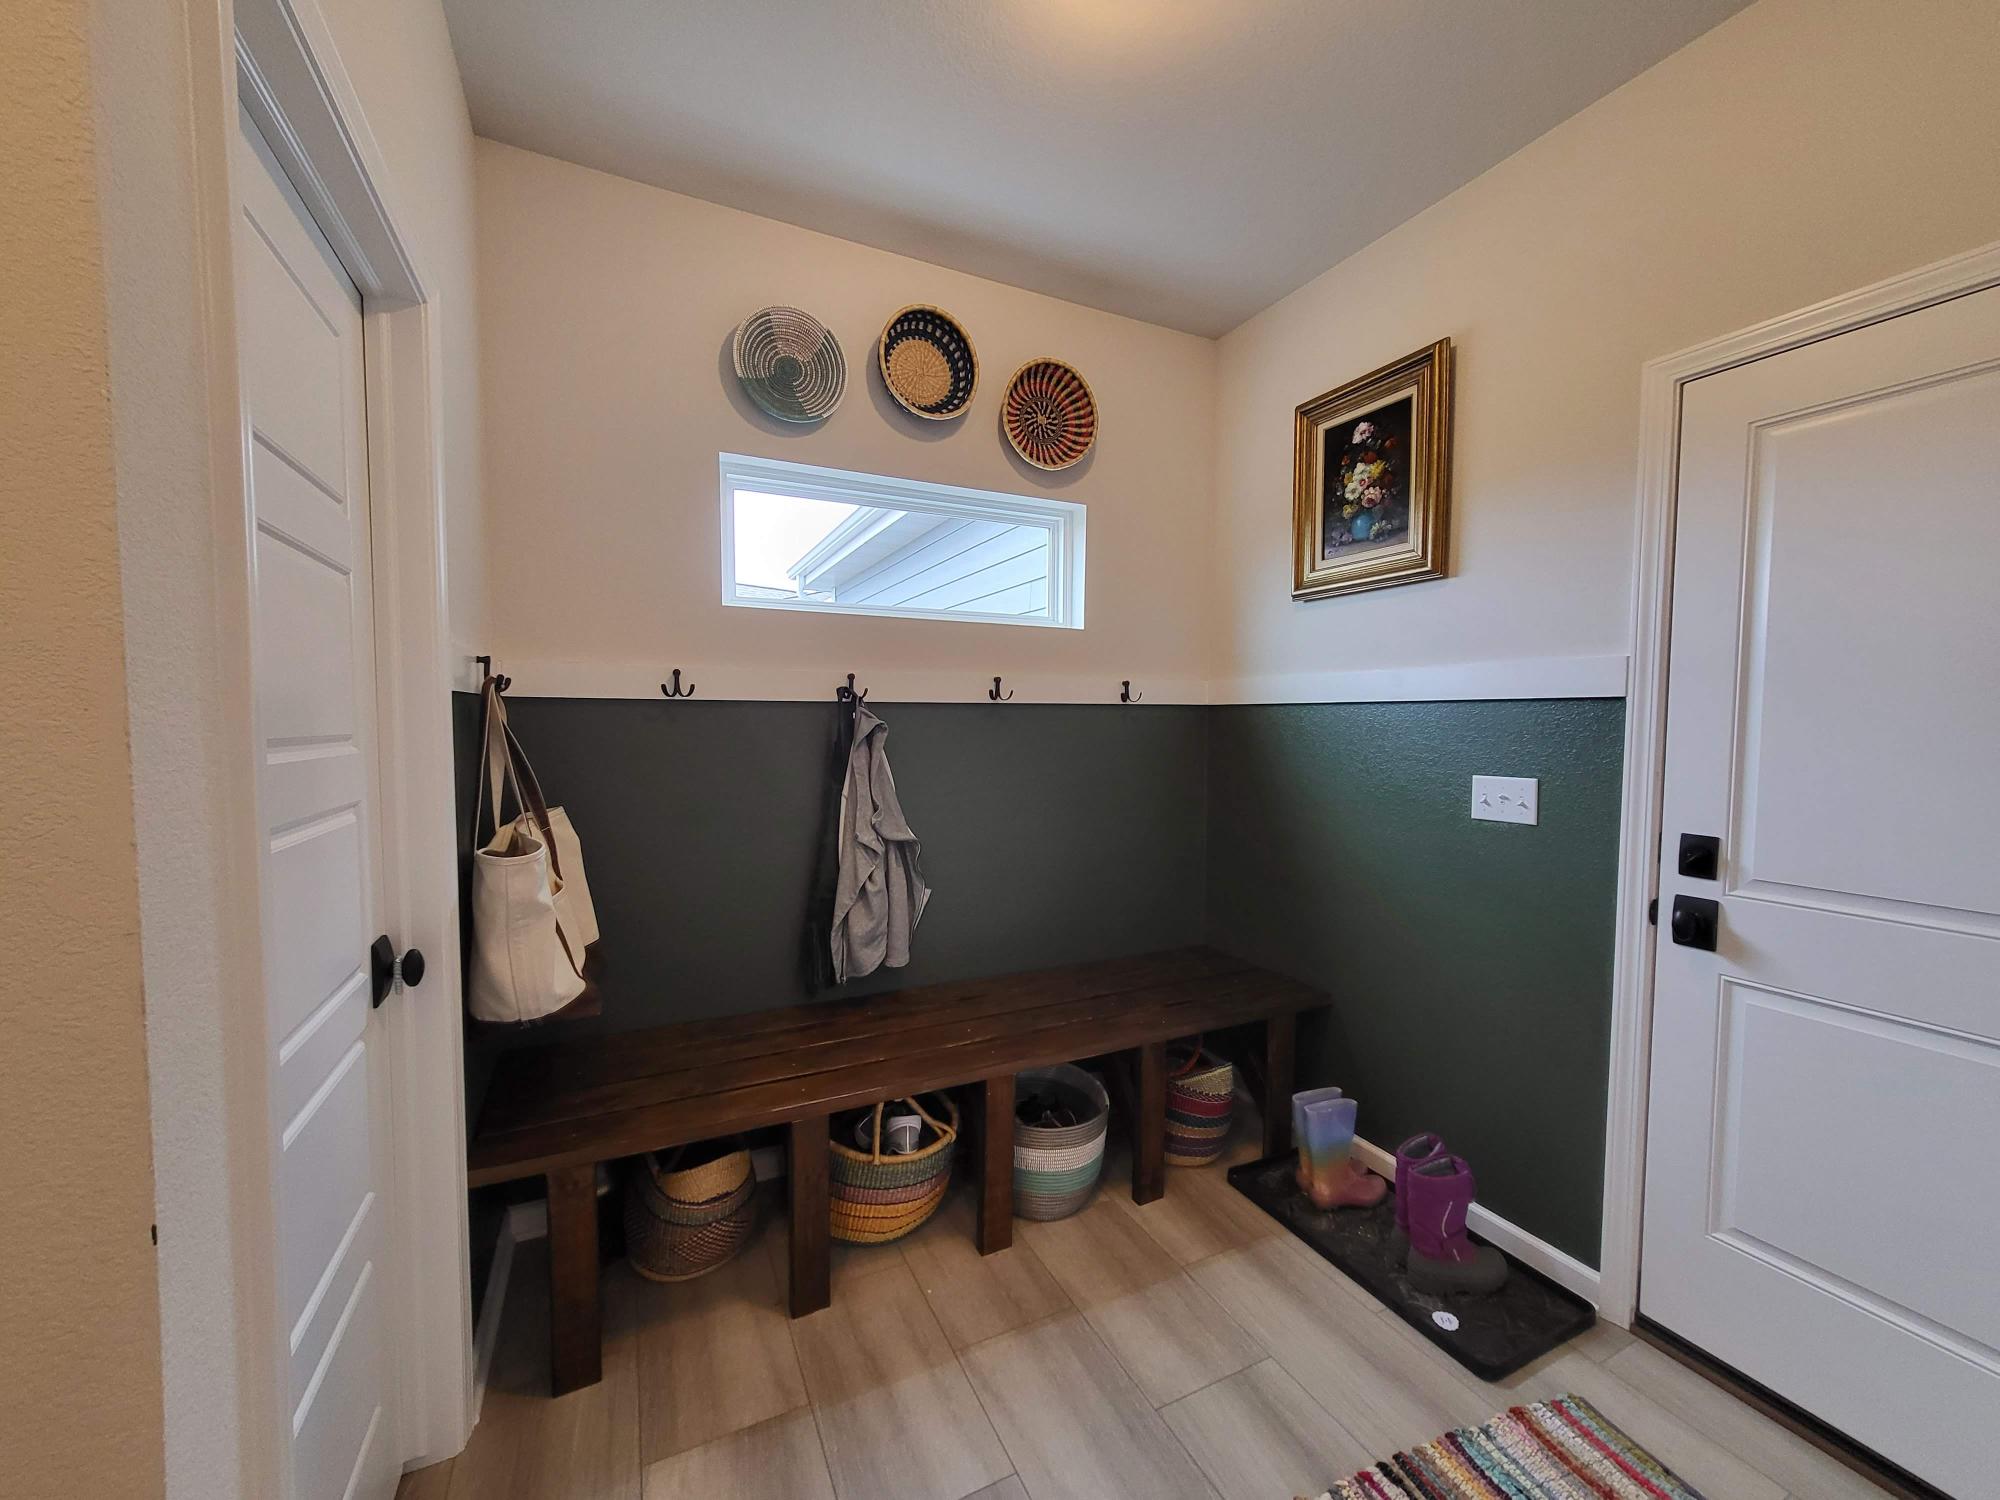
Used the warming hut bench plan to build this rear foyer bench! I used Behr Stain & Poly in Mission oak (2 coats) and love the way it ties in with the rest of our house. Plus I love saying "Thanks, I made it!" when people see it and ask where I found something that fit so perfectly. :)
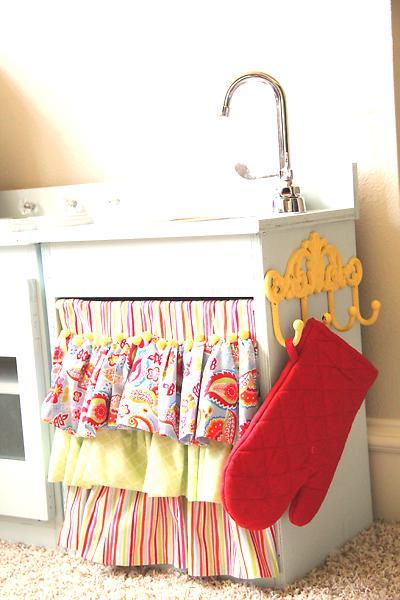
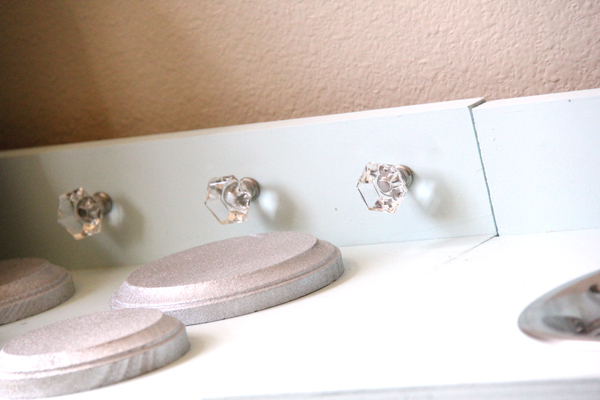
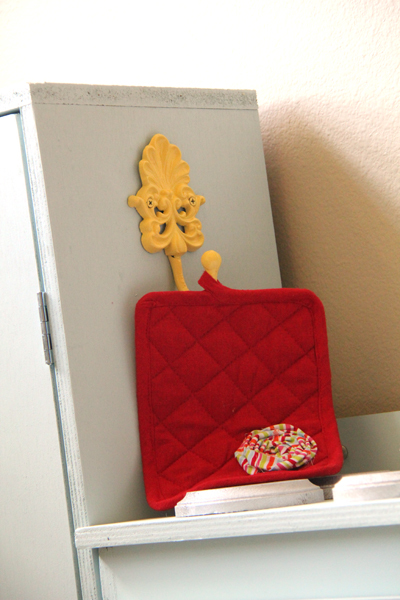
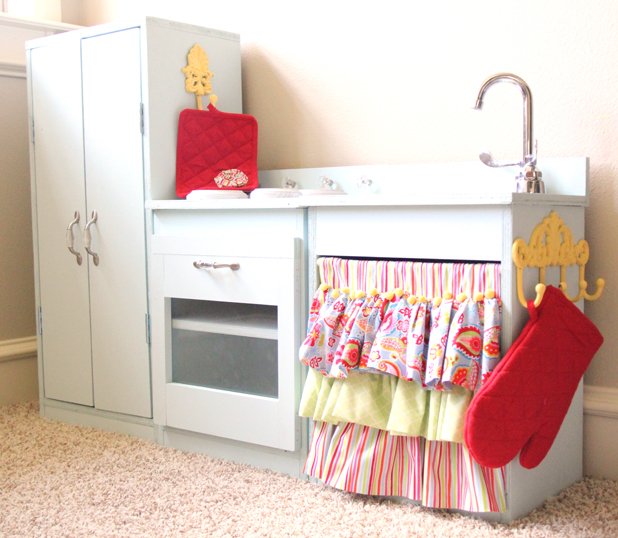
I used Ana's plans for the play stove, fridge and sink. I LOVED Crafting Chick's take on it so I copied her great accessories. I found my knobs at Walmart and my hooks at Hobby Lobby. I also found the fabric at Hobby Lobby. I used 3/4" hardwood plywood, but if I could do it again I would have used MDF. It's much smoother! I still love it though! Oh... So do the kids ;-)) You can read more details at http://www.shanty-2-chic.com/2011/07/play-kitchen-reveal.html.

Thu, 12/22/2011 - 16:05
Hi! We are building this kitchen right now and can not figure out how to mount the hinges!
Not sure what kind of hinges you used? we bought some regular door hinges but they are only able to mount to the outside of the doors. please help. thanks!
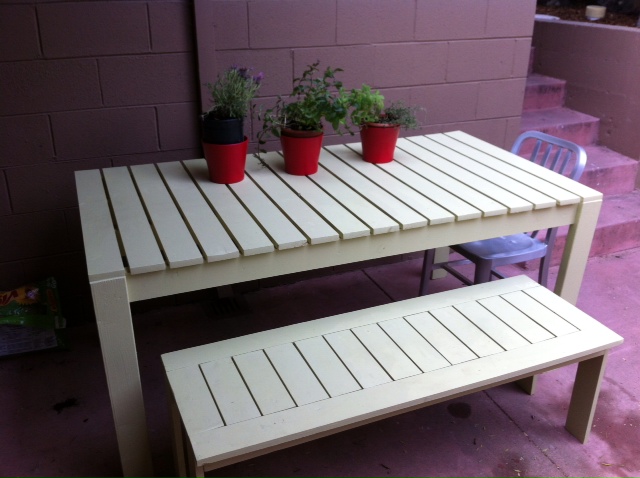
We started with the bench as a weekend project. After counter-sinking and filling all those screw holes we borrowed a Kreg jr and took onothe table project. However we ended up countersinking the top boards for the table as well; it was easier for us to visualize the spacing between boards and make sure everything was as square and level as we could make it... We used behr paint and primer in one in a satin finish and opted for a punchy green to brighten up our courtyard.
We plan to build another bench since it will tuck in nicely under the table when not in use, and we can pull the table out and use the bench when we need more seating.
We love our new outdoor furniture!! Thanks Ana!
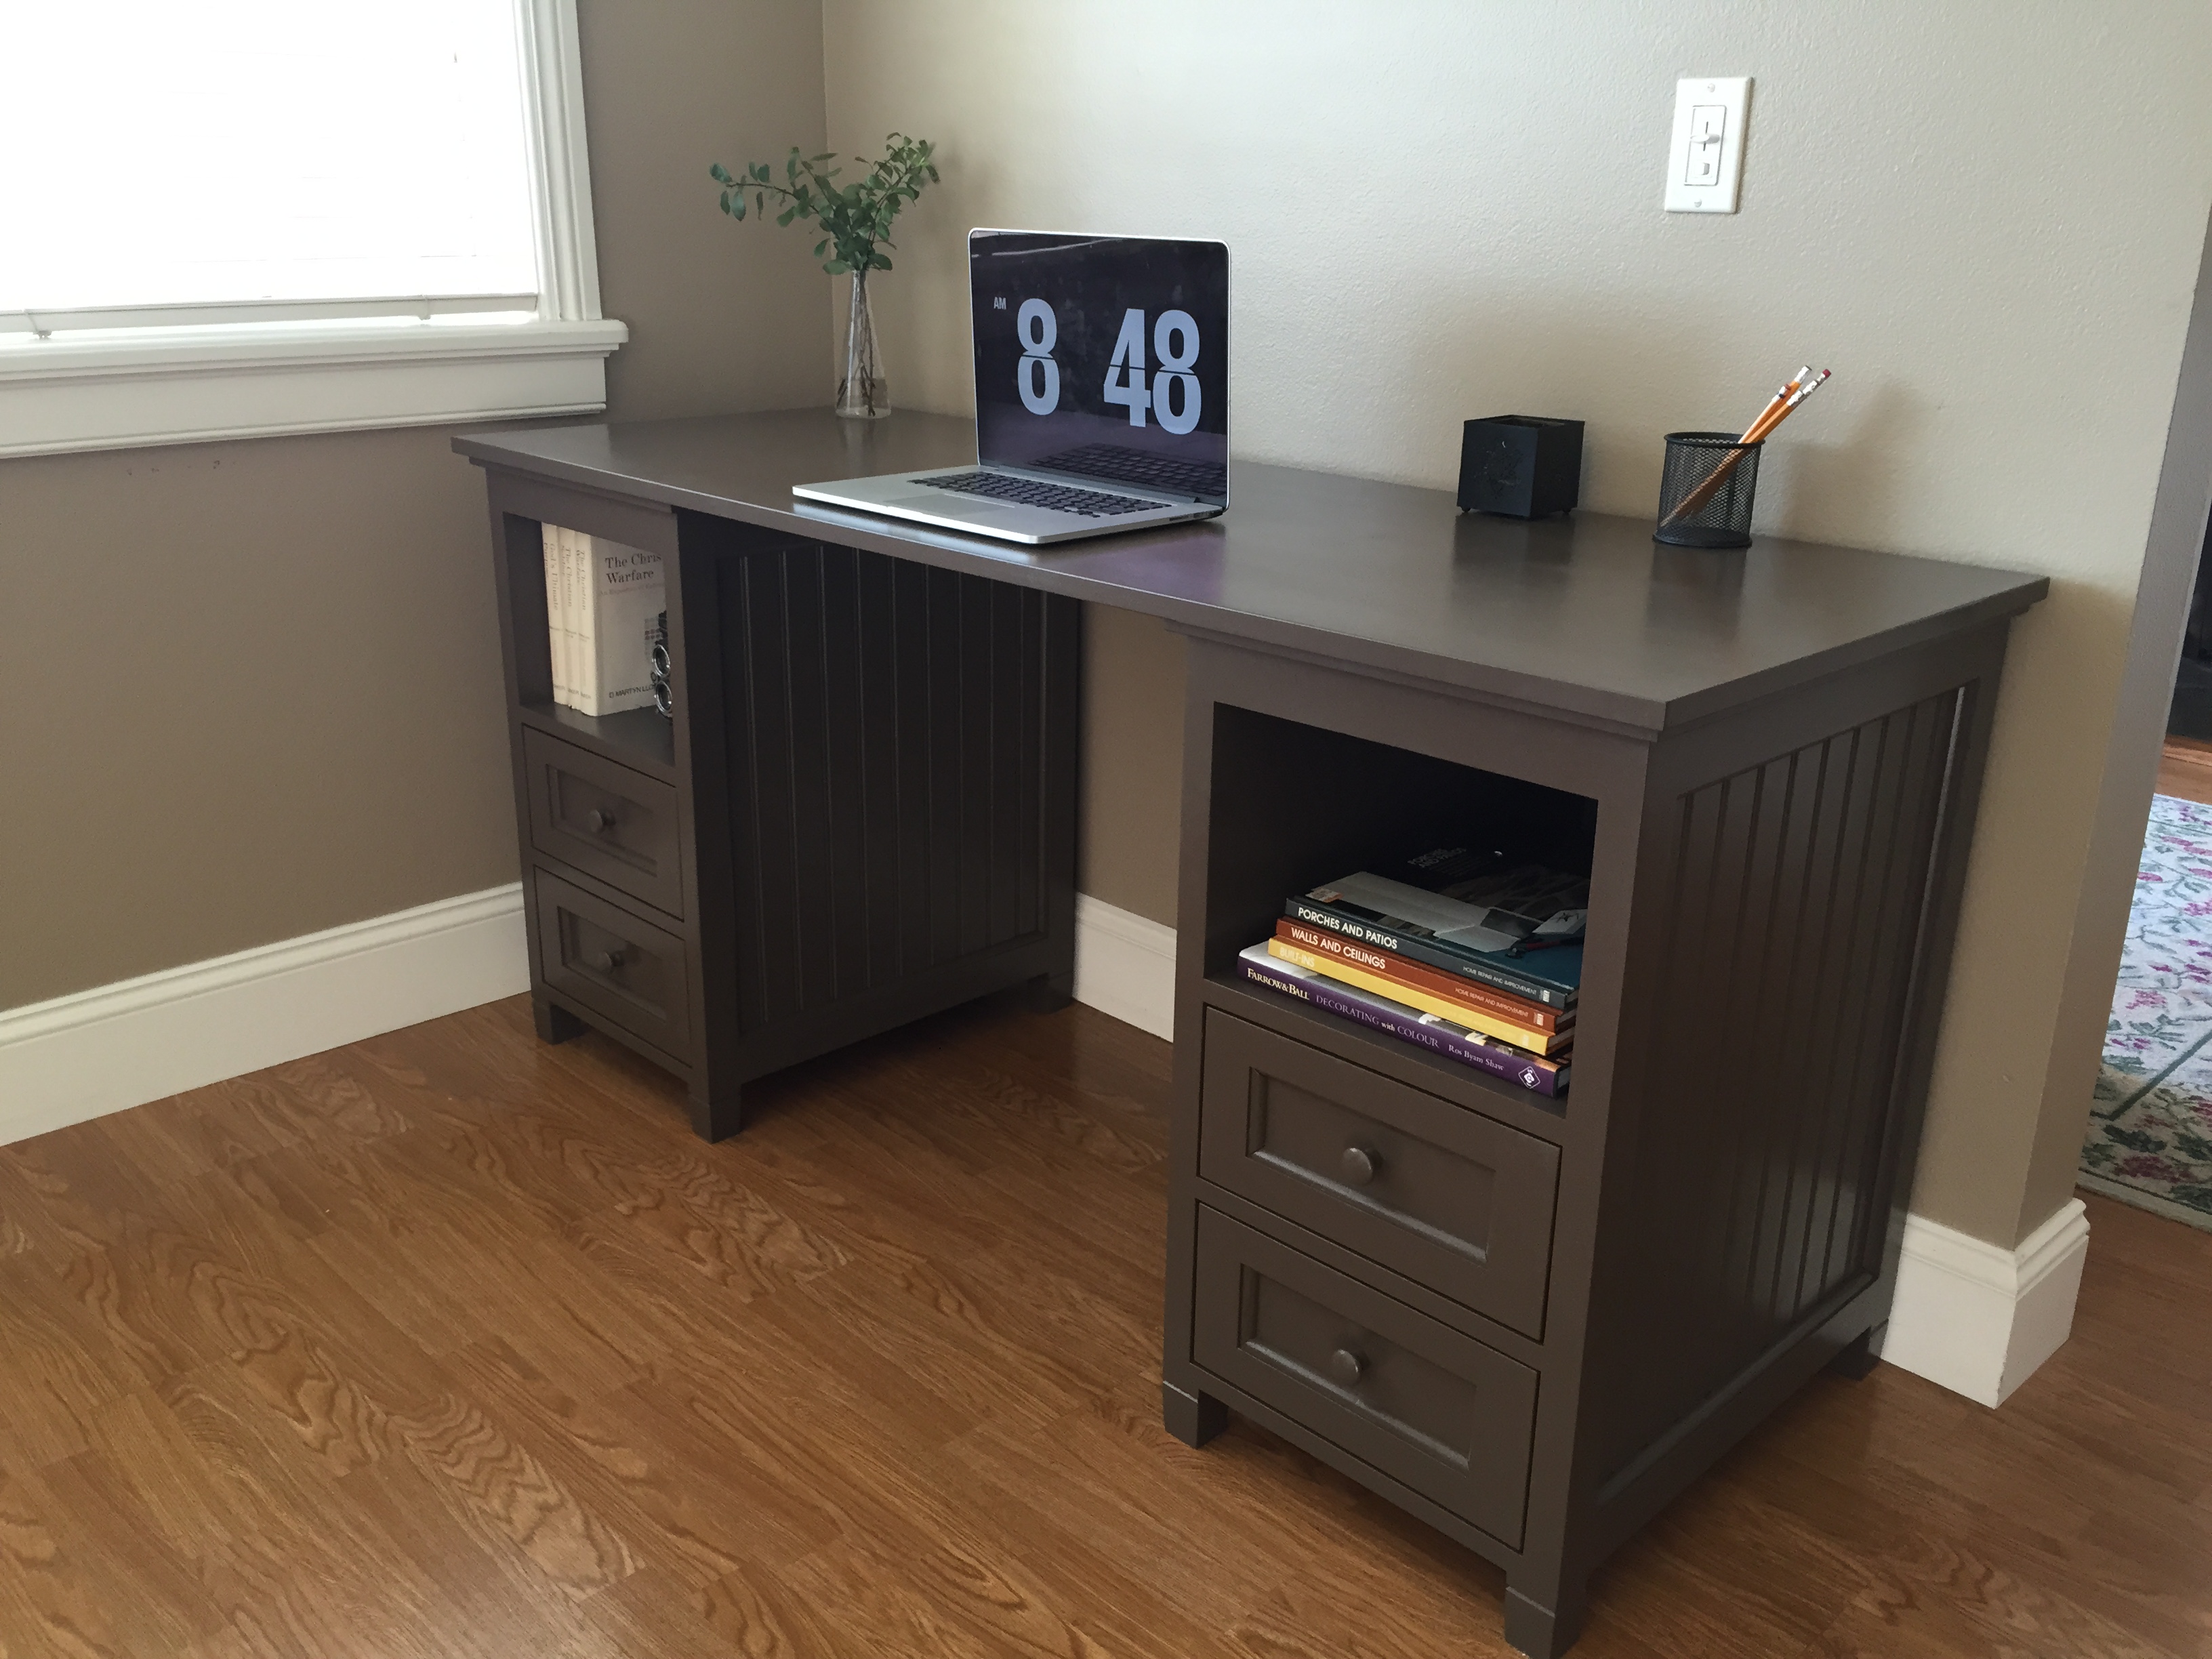
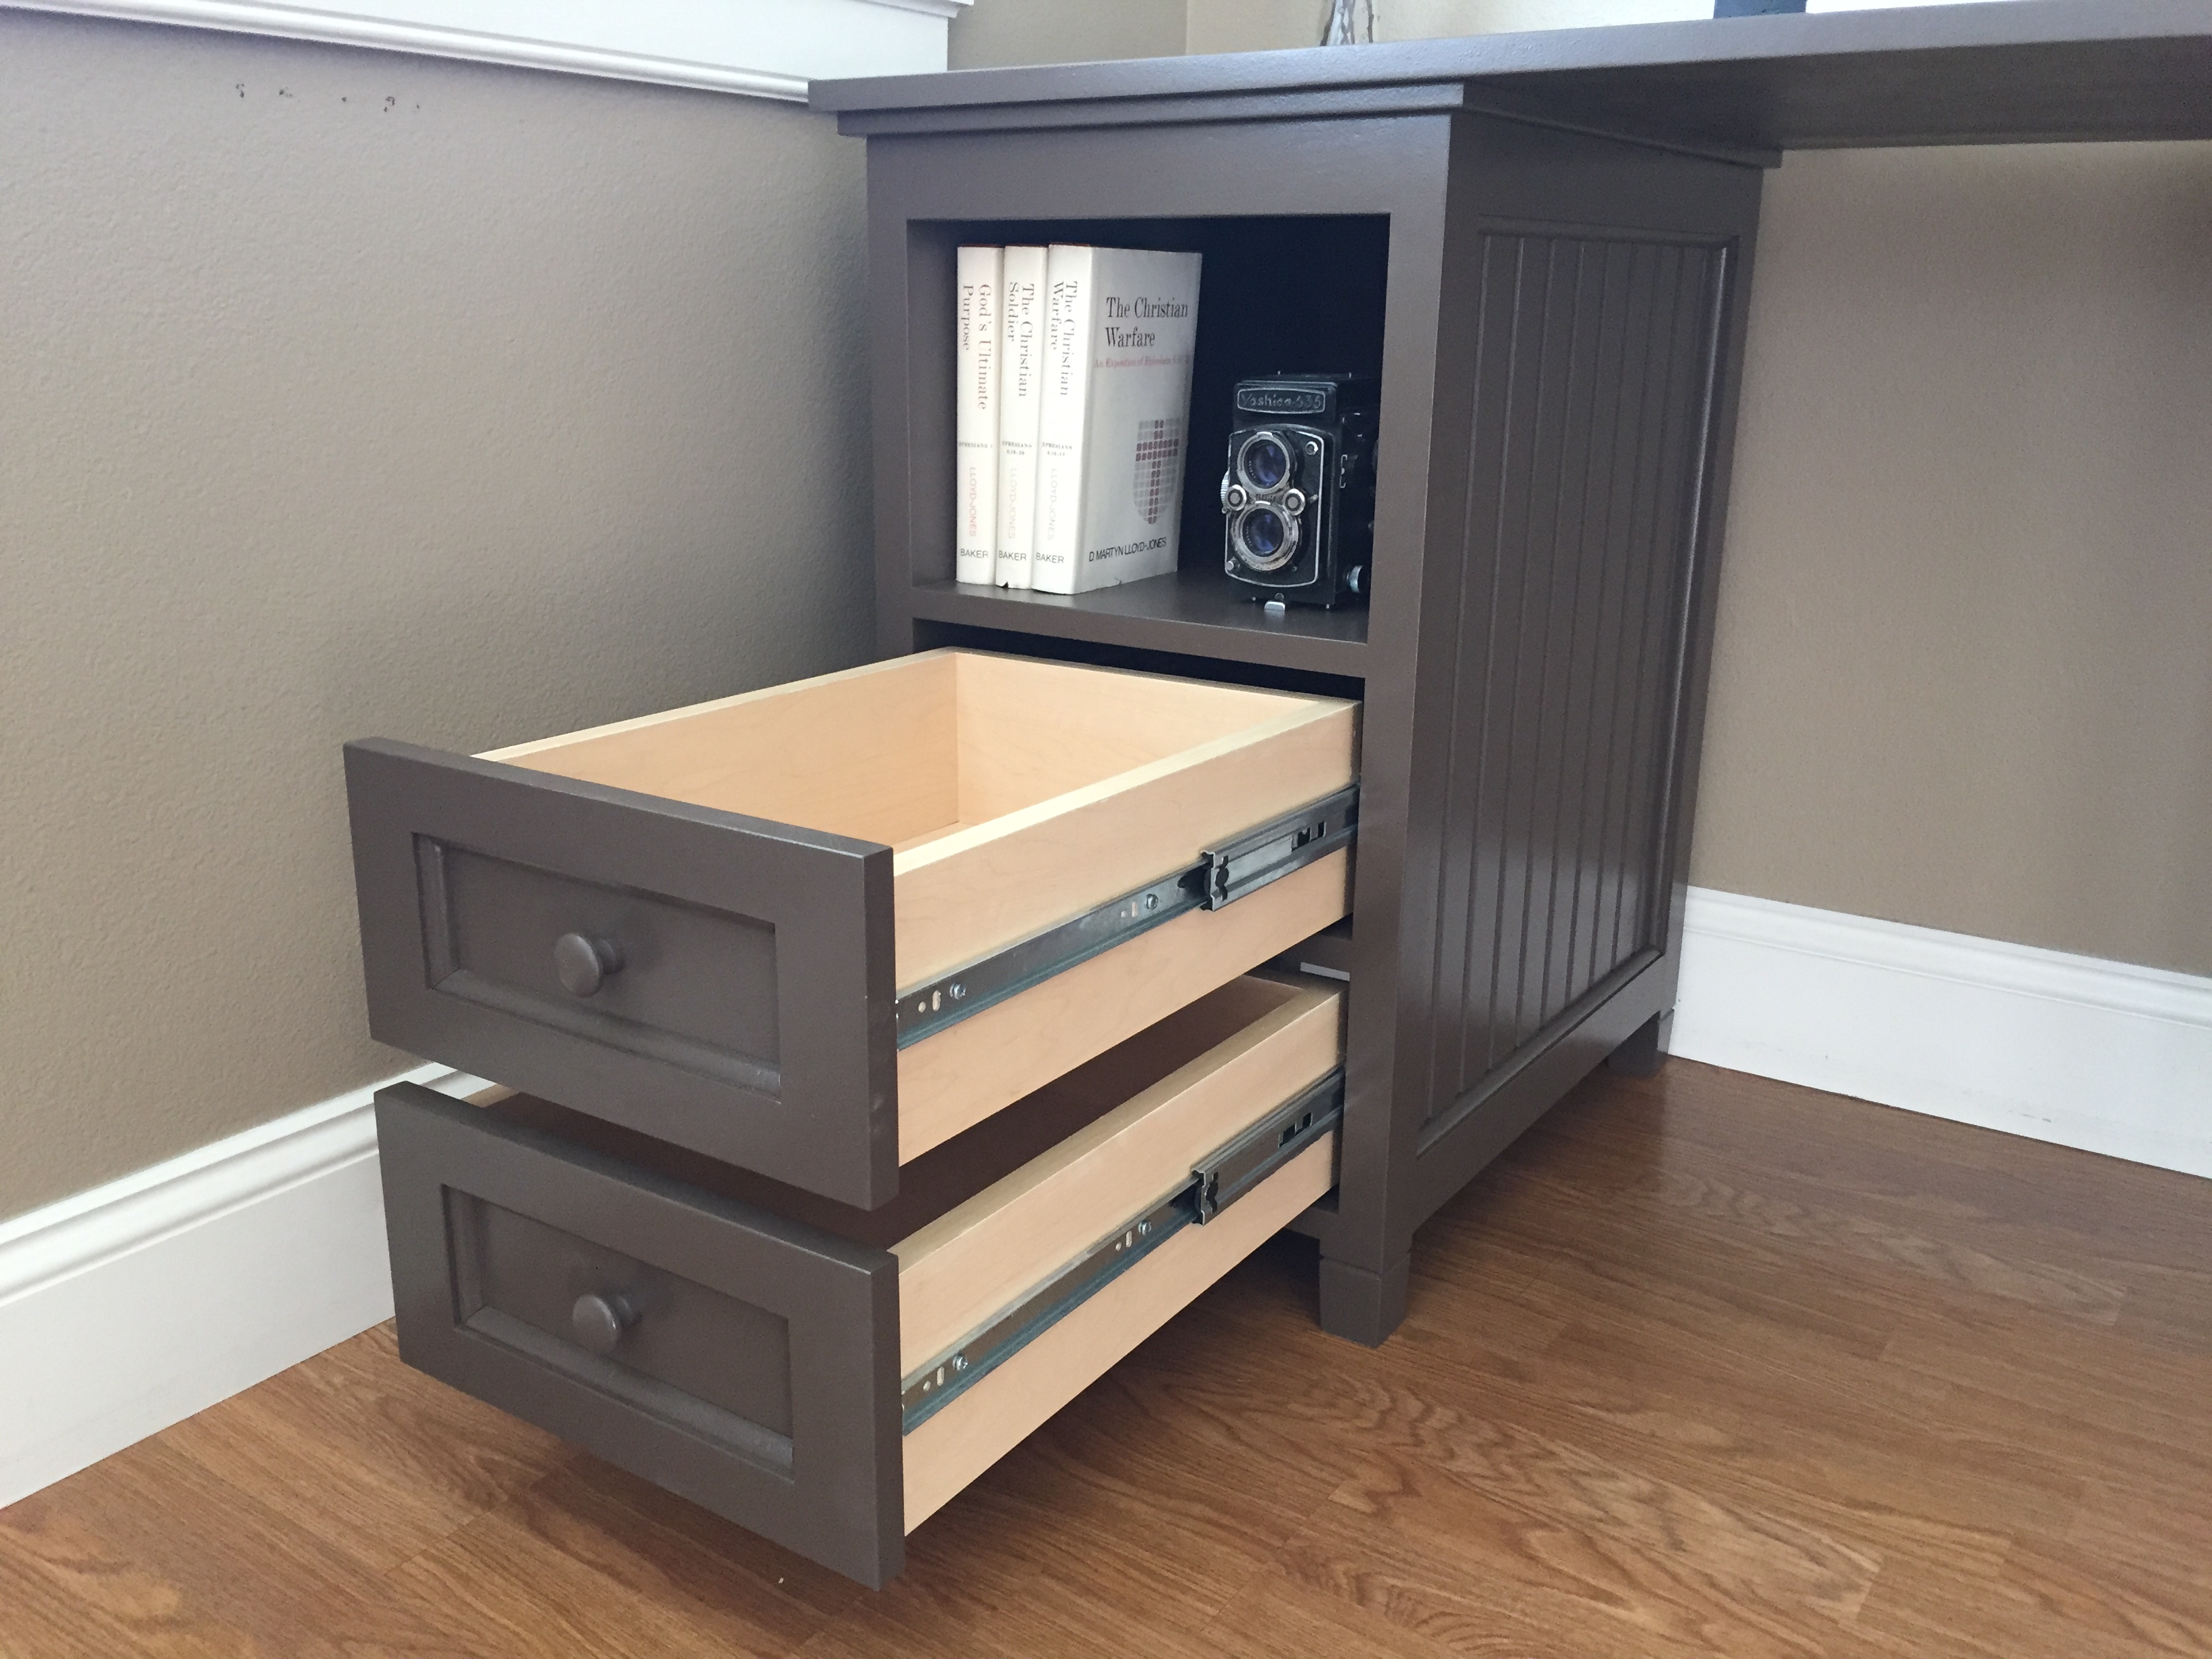
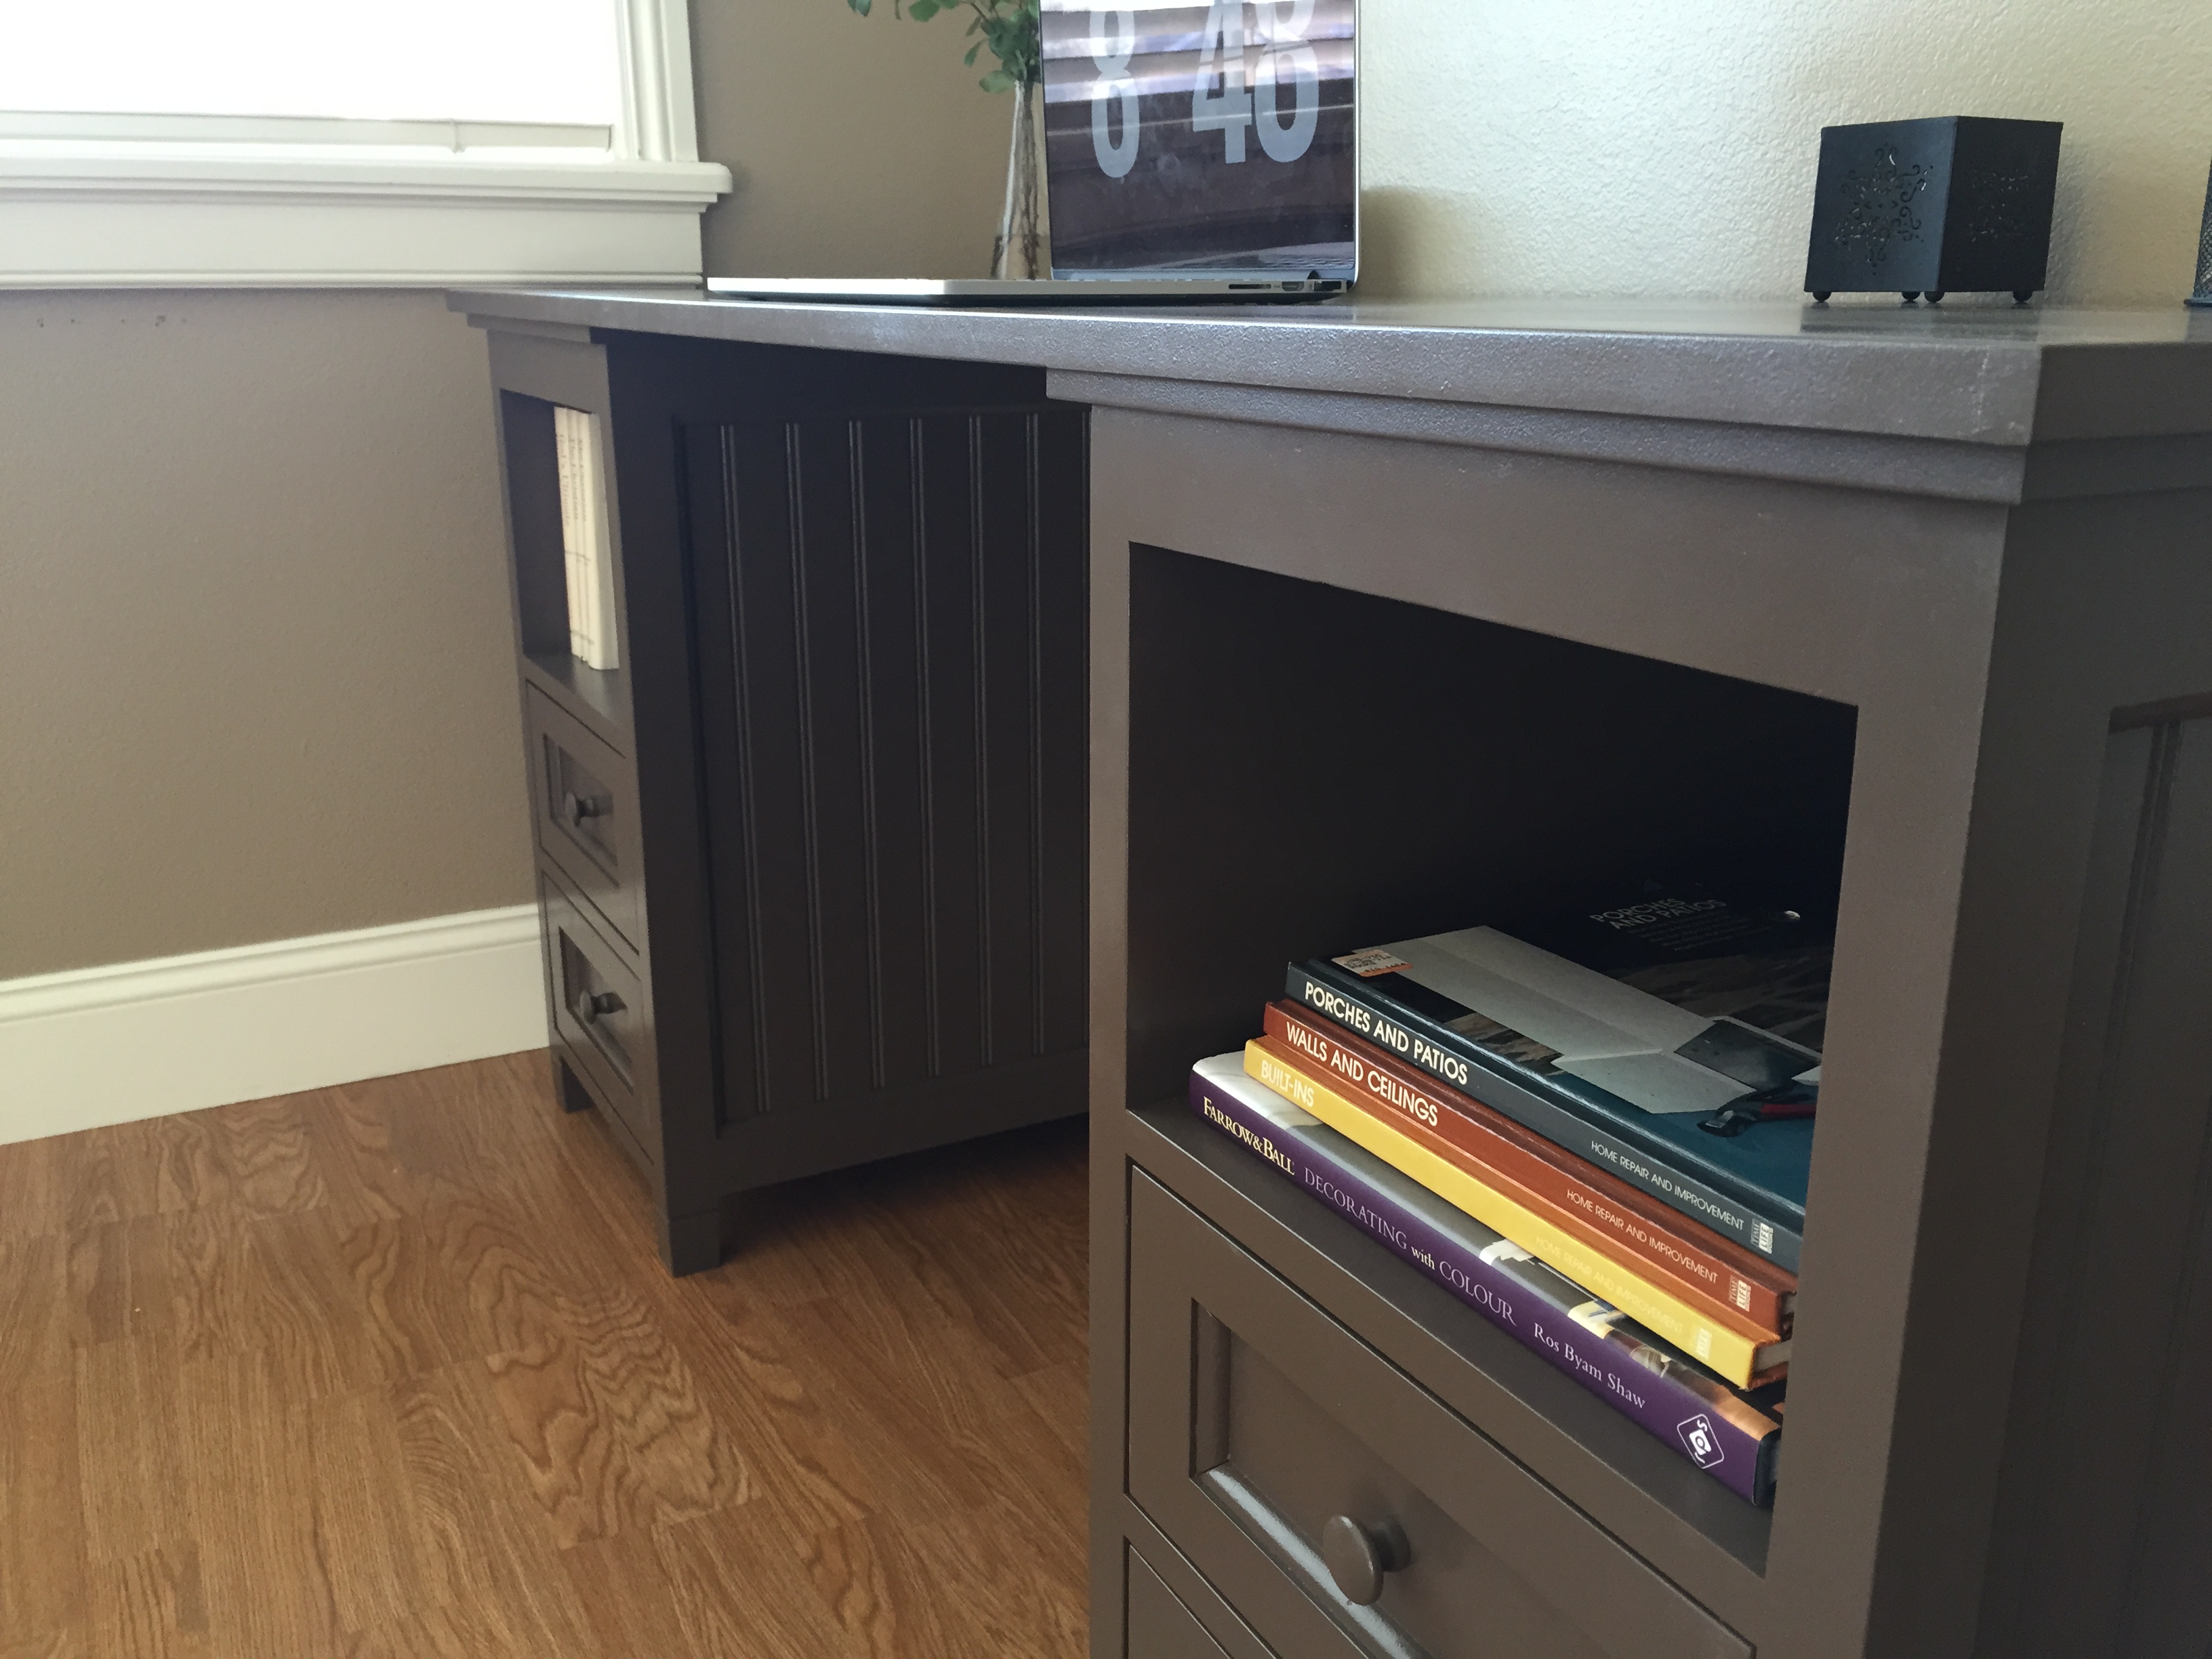
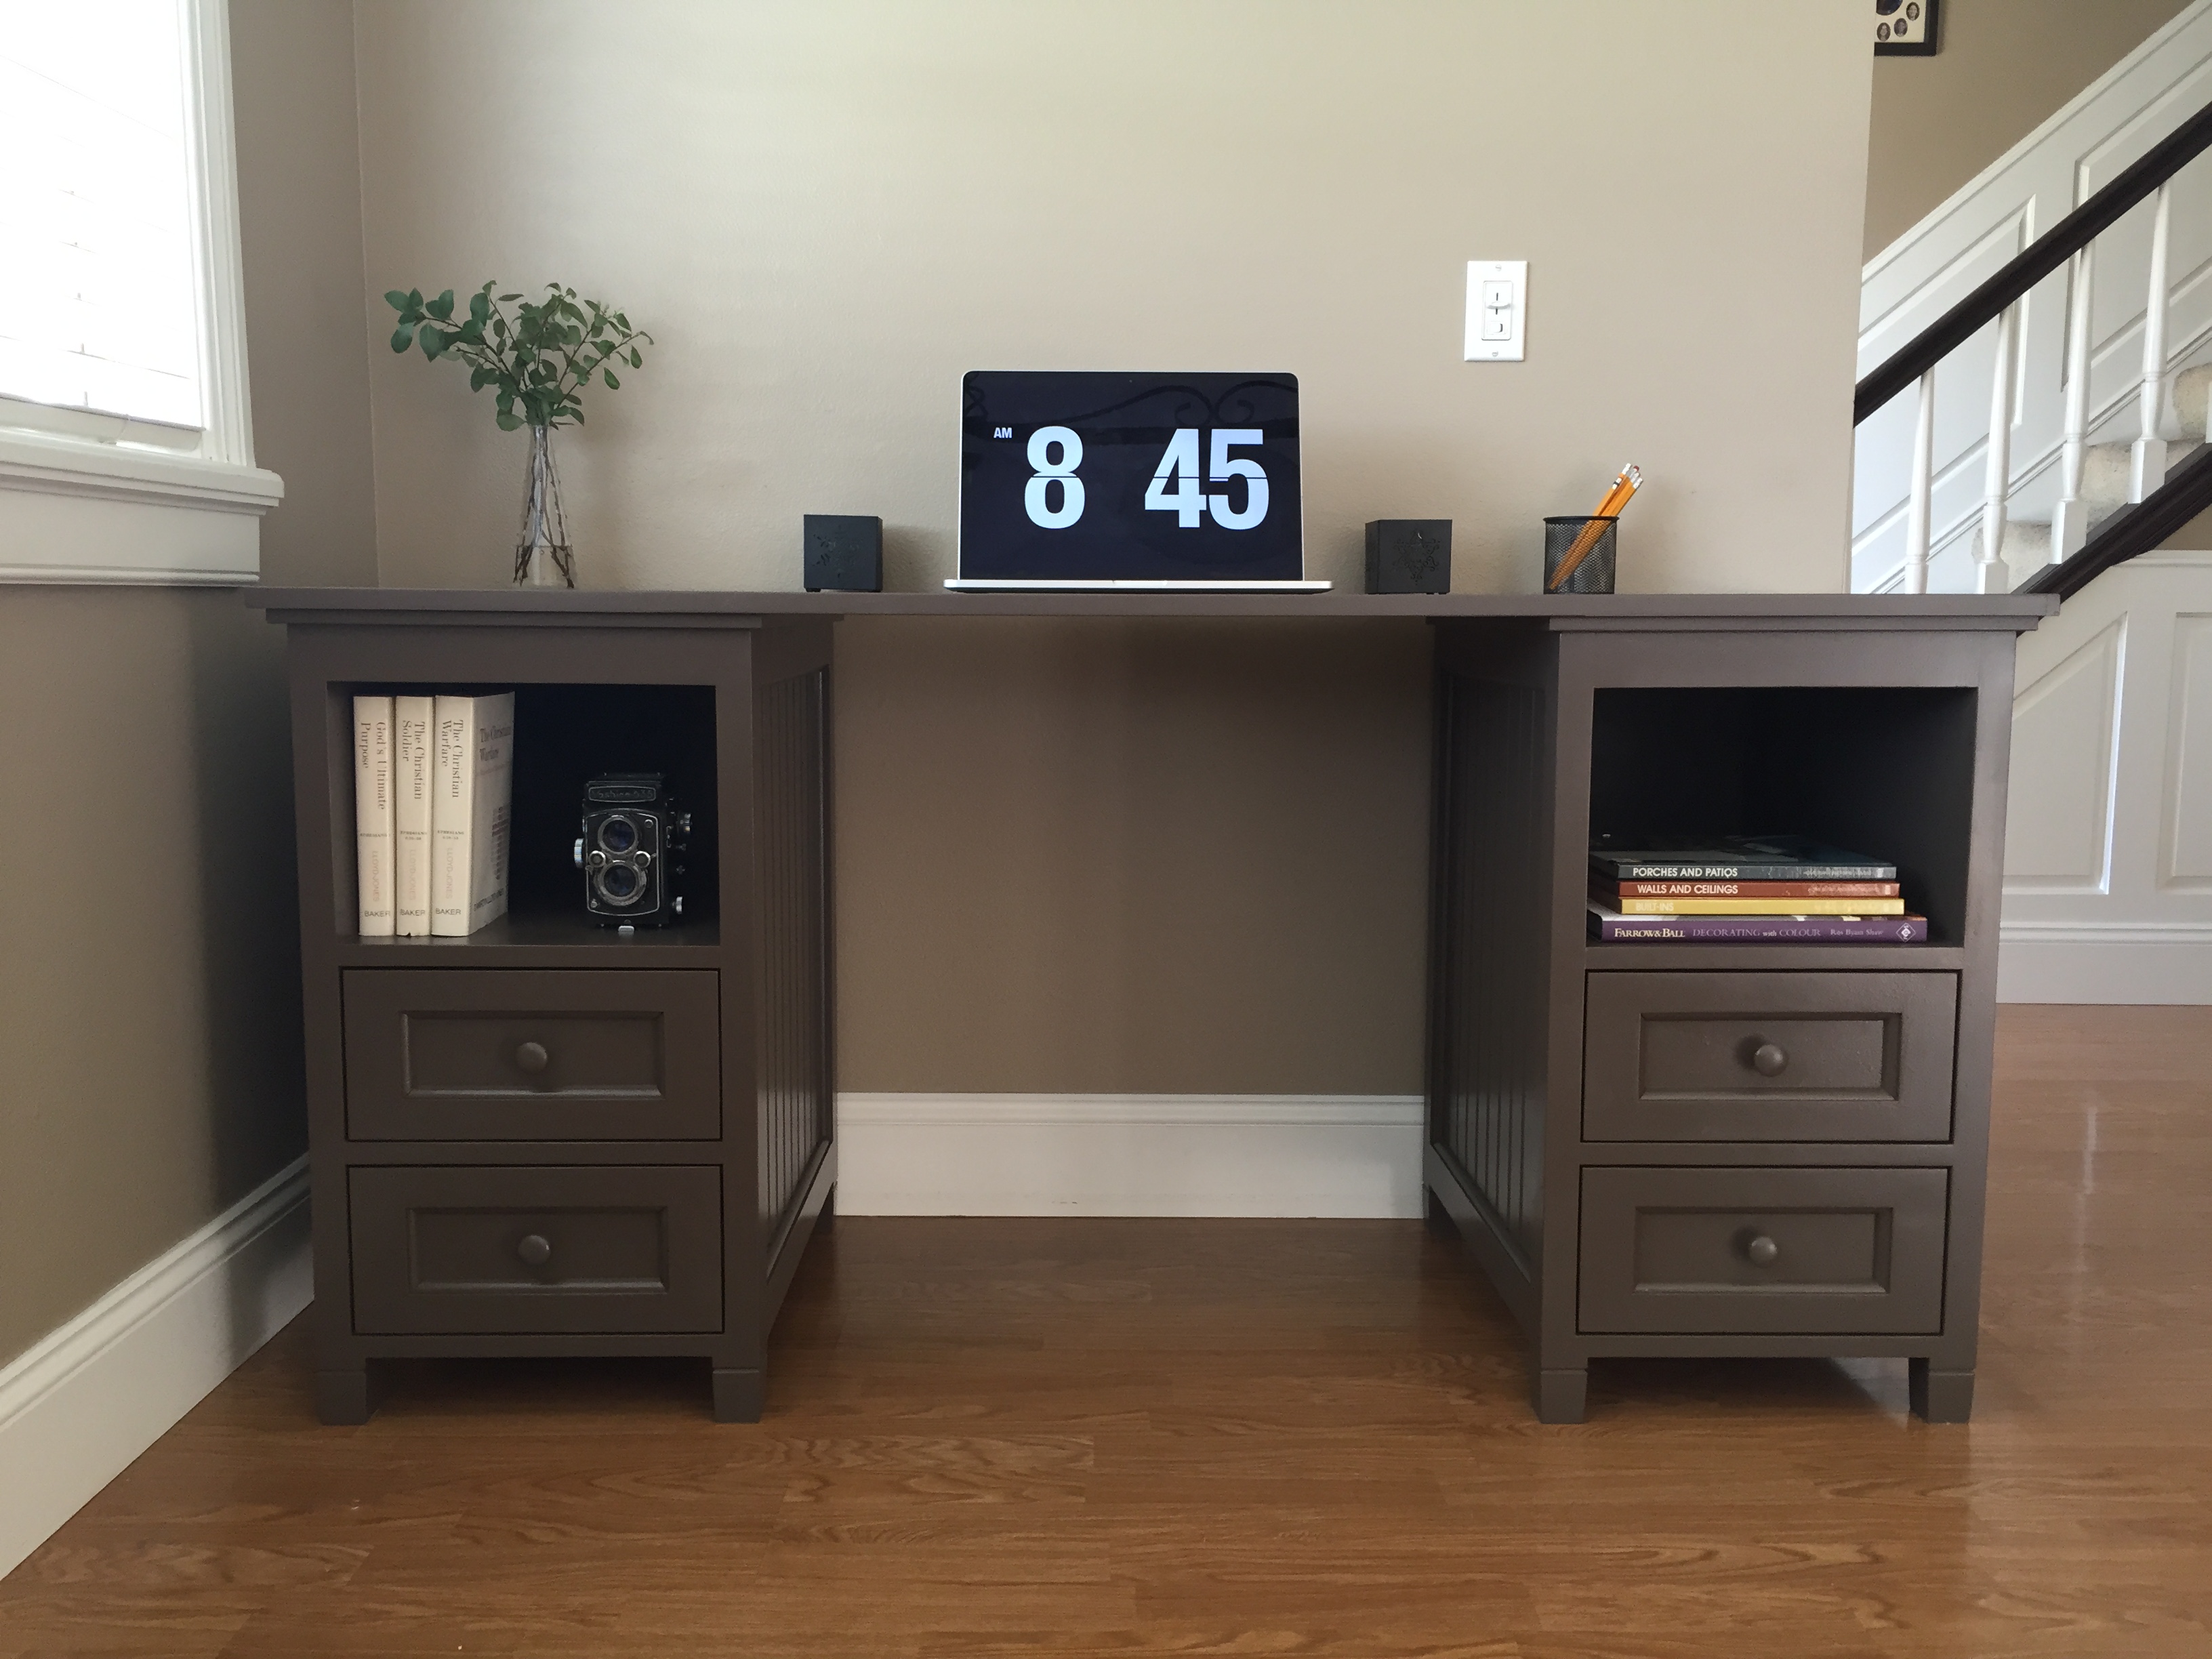
Here is a desk I recently built. It is a Pottery Barn piece. It features full extension drawers slides and simulated maple melamine drawer interiors.
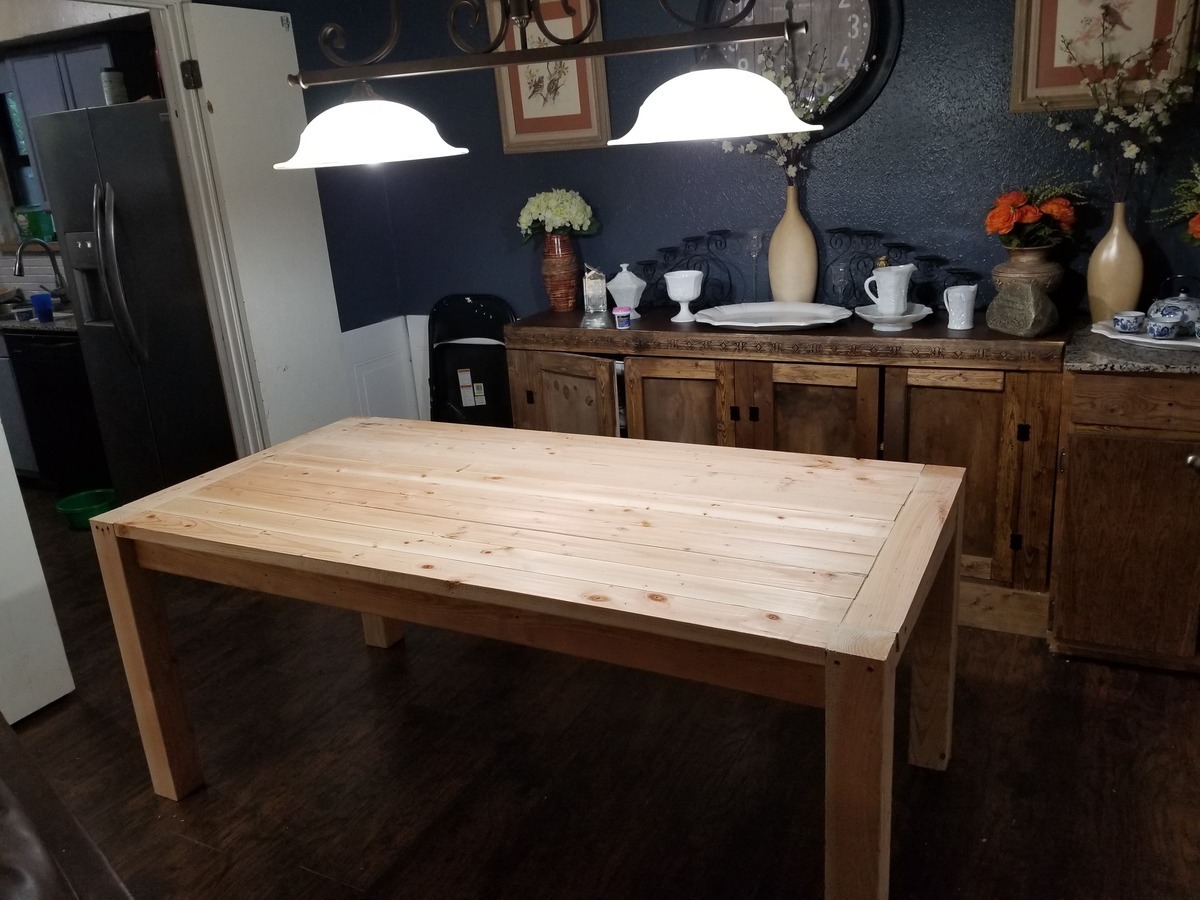
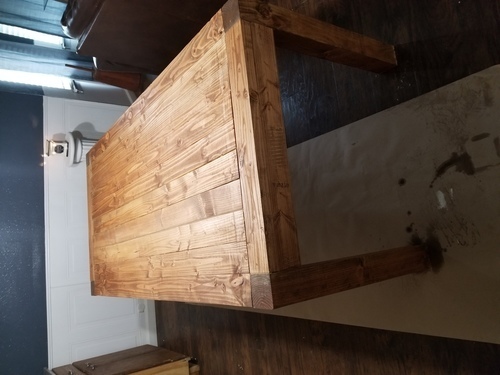
Very easy to cut/assemble and very pleased with the result! It took about an hour to cut the boards and screw then together. Then another hour to same/pretreat/stain. Love it!
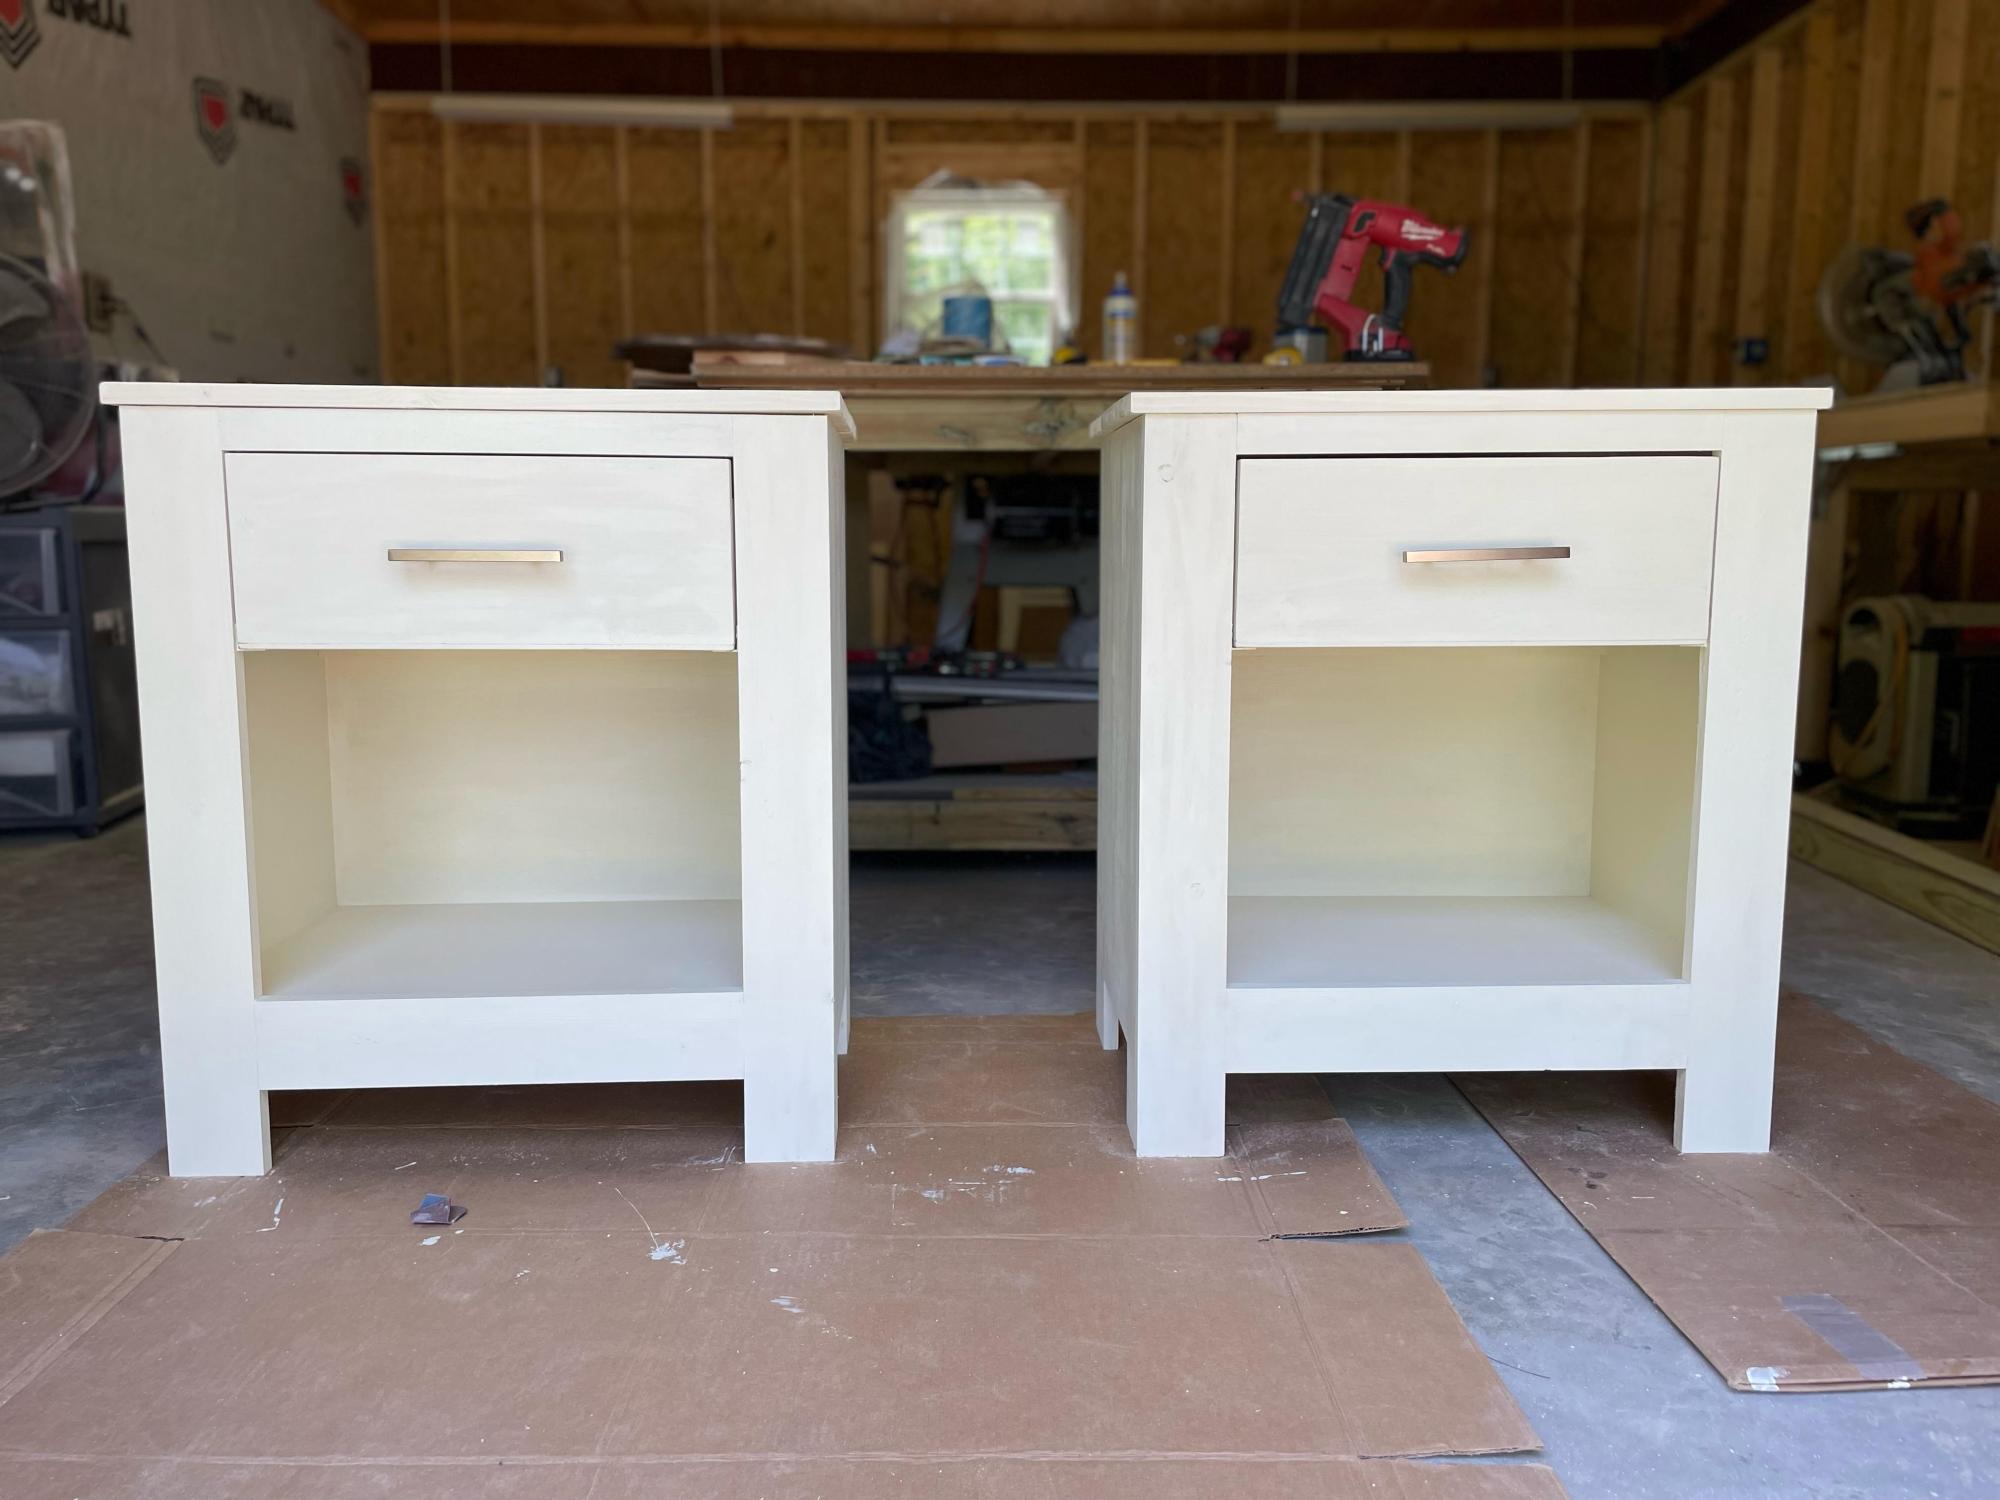
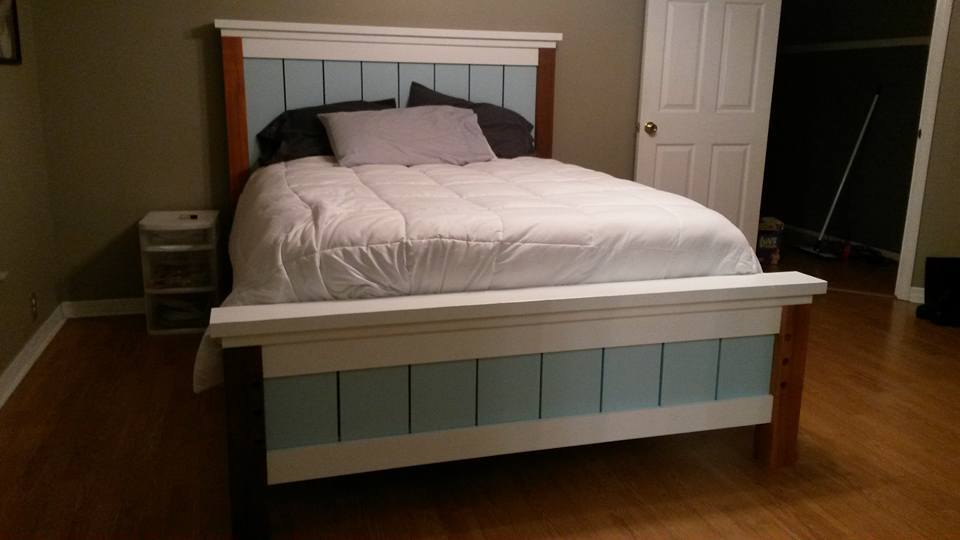
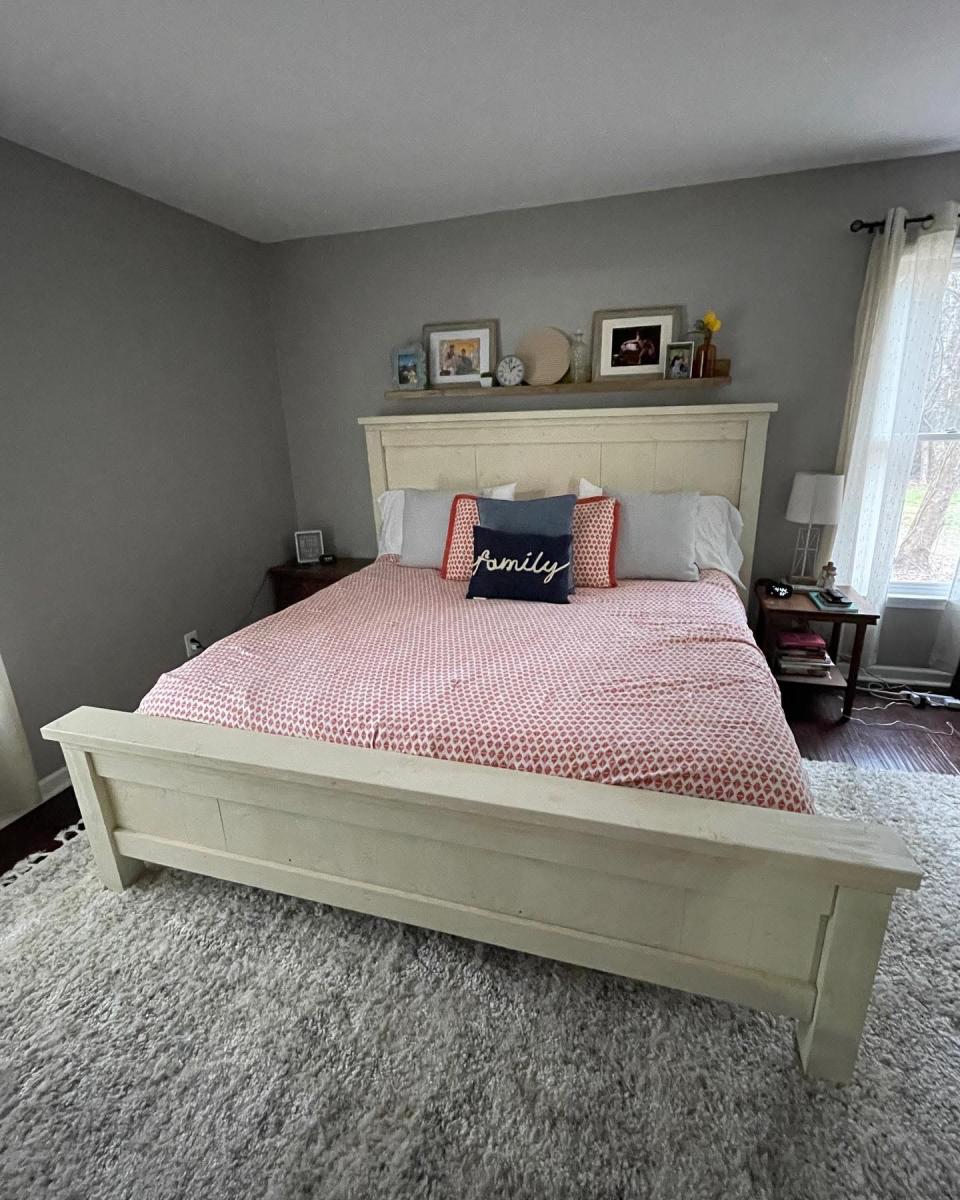
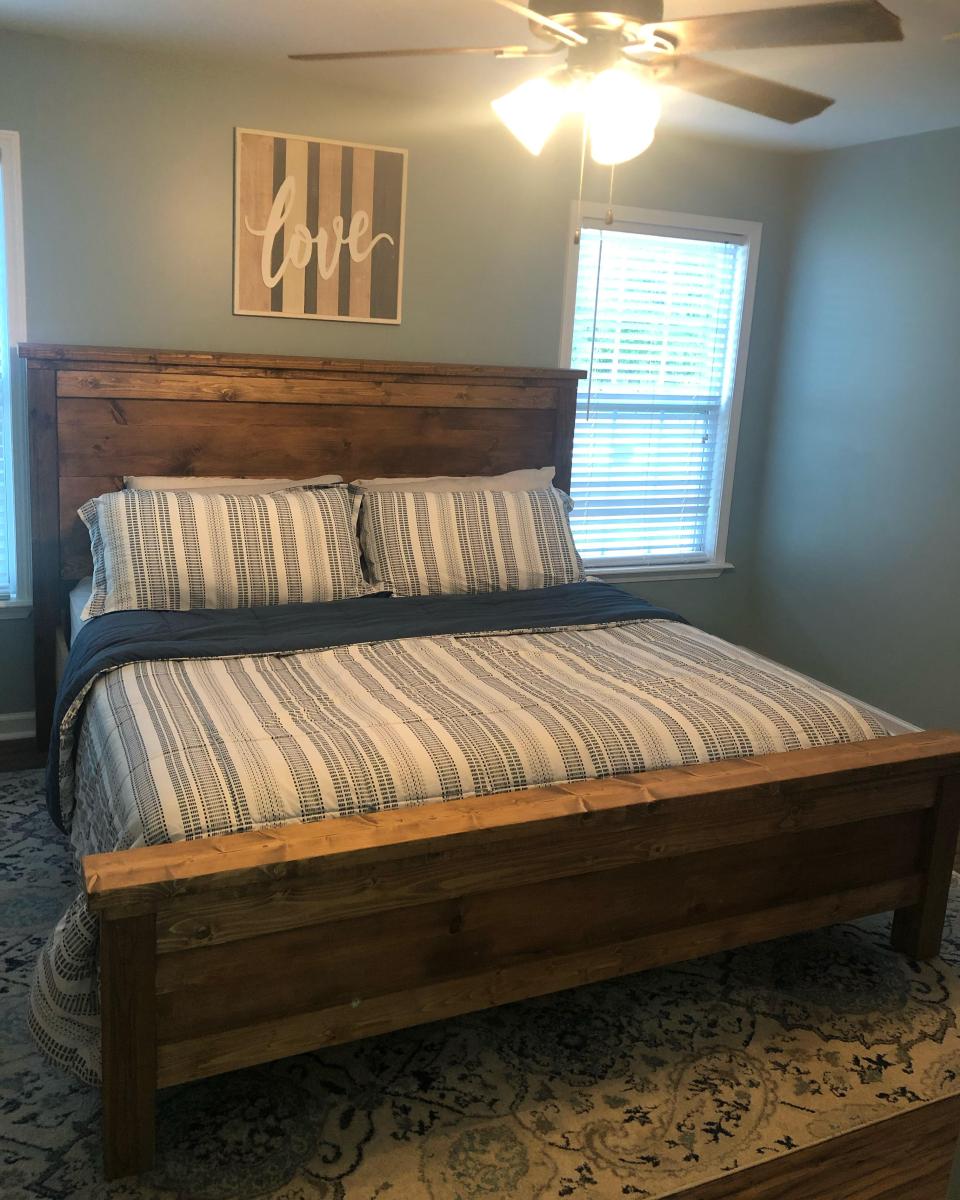
Off white standard king farmhouse bed and matching nightstands and modified (horizontal slats) standard king farmhouse bed stained.
I love your plans!!!
by Tiffany
This was a father's day present. My husband was quite impressed!
Sat, 11/26/2011 - 08:43
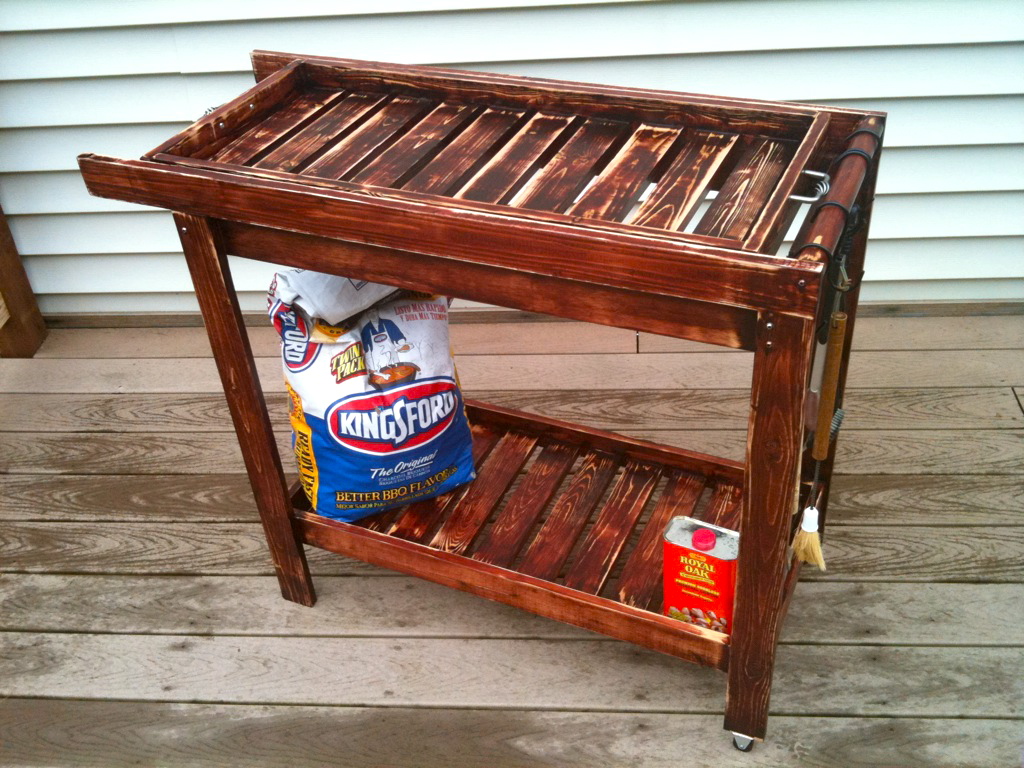
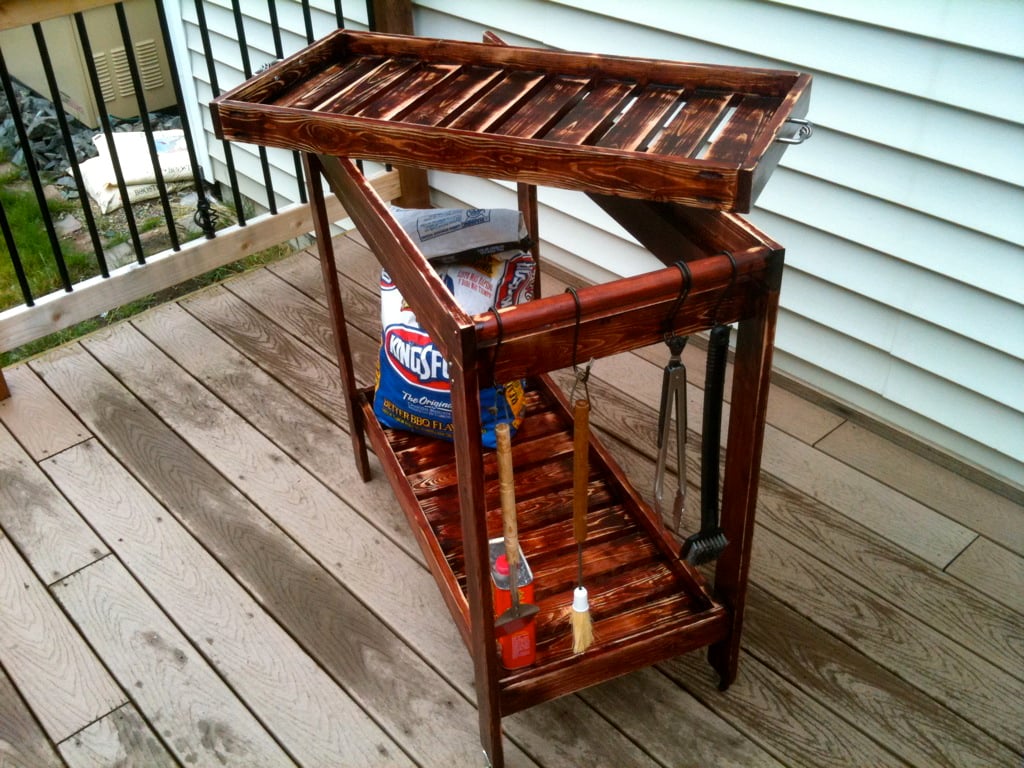
Hi, this look is the result of trying to fix a very VERY sloppy stain job. I had applied the stain much to thick and uneven and had runs all over the cart. So I decided to sand off the excess and even it out a little. I finished it off with a coat of clear poly. We like the way it looks too and it was really easy.
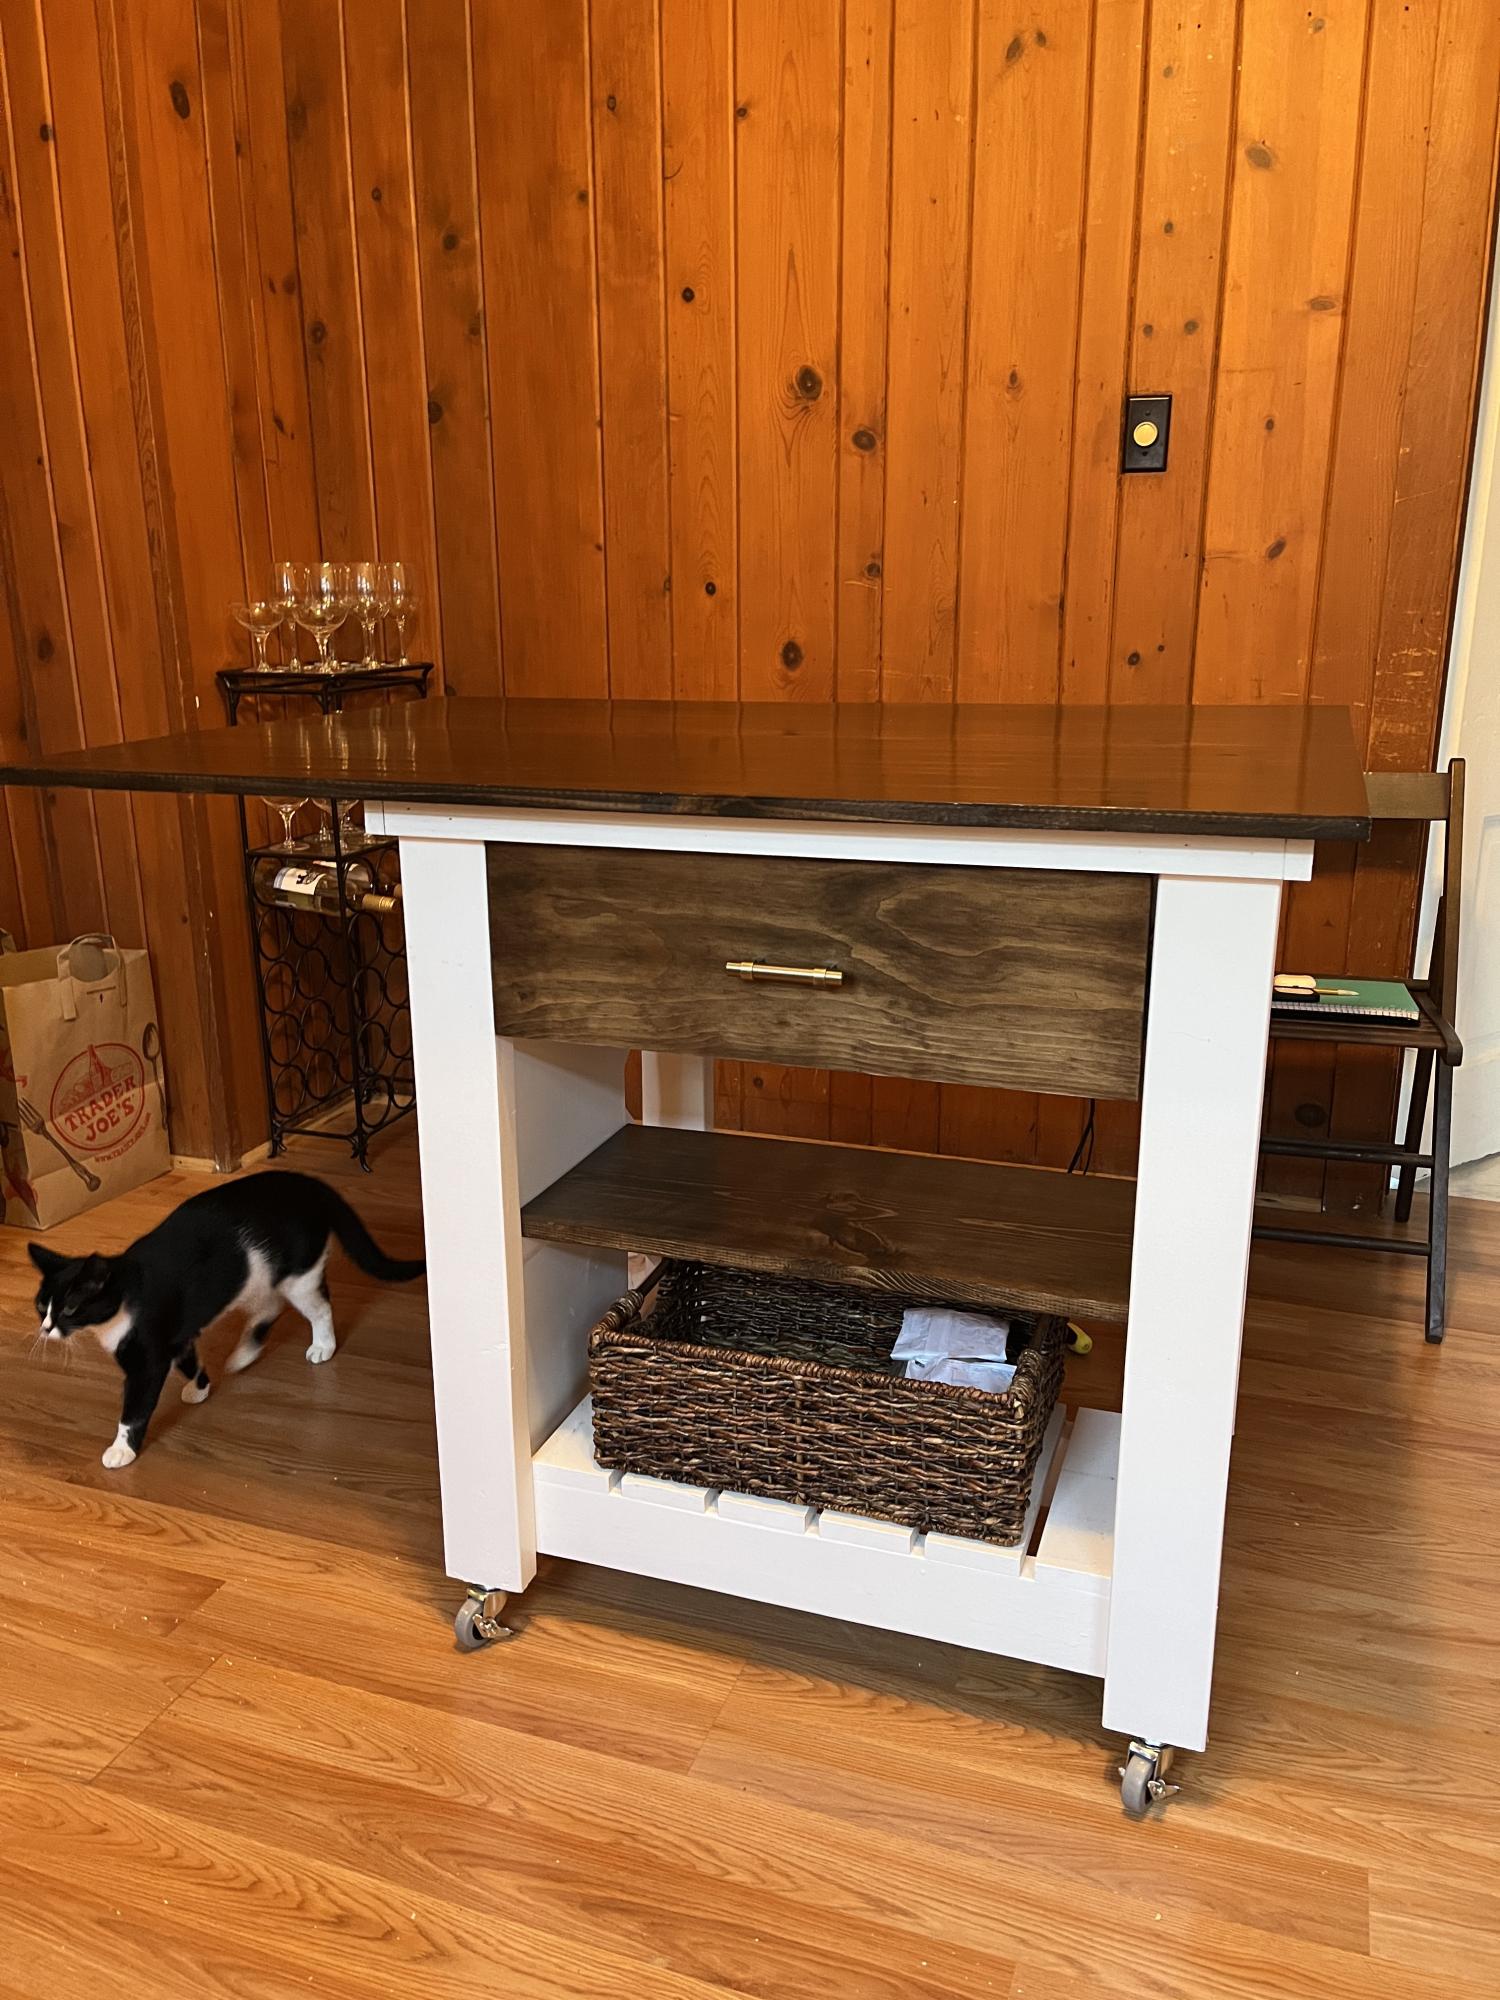
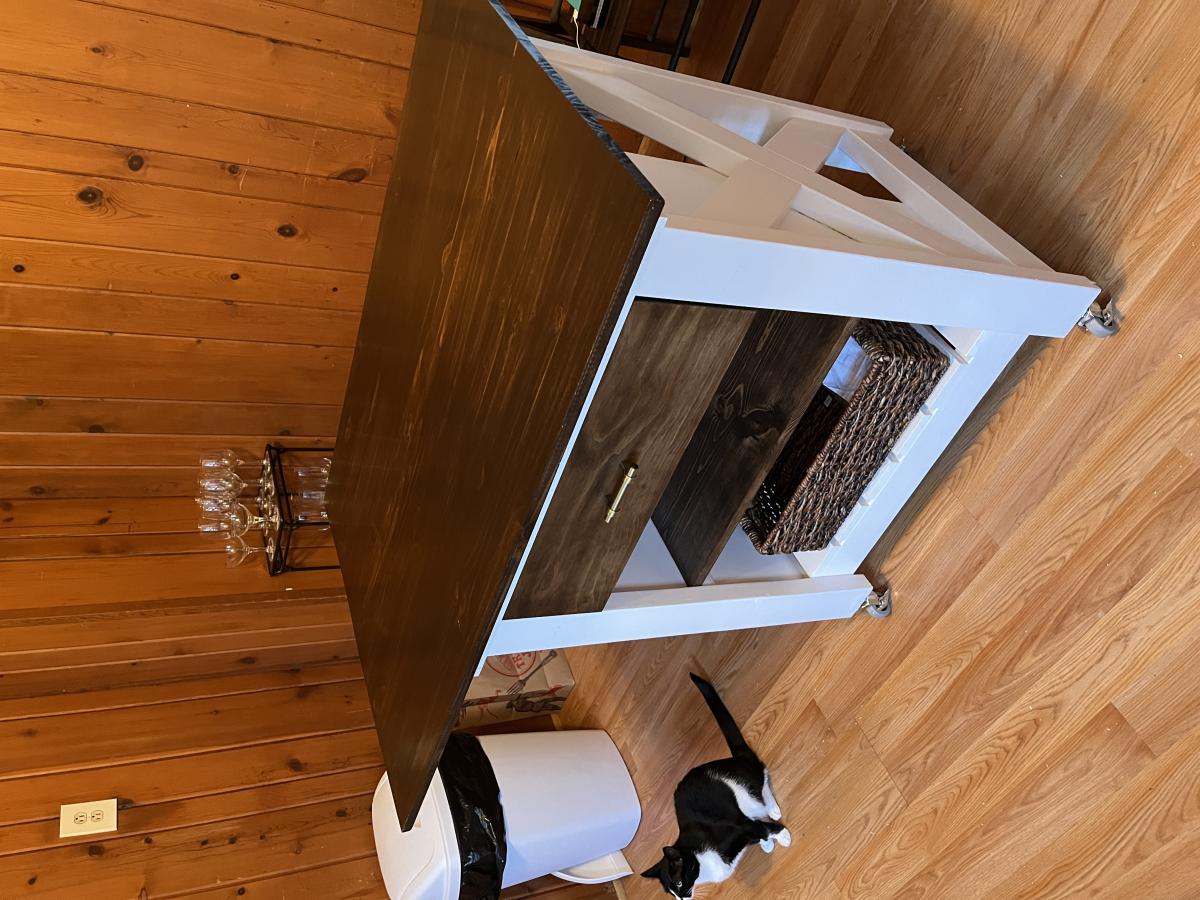
We needed more counter space in our kitchen and I saw the plan for Michaela's kitchen island I thought it would be perfect. I asked my husband to alter it to fit our space. We used Poplar for the base and Walnut for the top. My husband planed and joined the walnut from rough cut boards. We then shellacked and polyed the top. On the bottom we used SW Urbane Bronze with a walnut stain over the top. I Love how it tuned out! Thanks for the great plans!

Fri, 08/16/2013 - 16:26
Your island is beautiful! Love the finish, and the walnut top is just gorgeous!

Loved building this :) think it came out great. Only thing is i wish i had the screws ana talks abt bc the boards split over and over :( what kind of screws do u use ana? Also couldnt find 2 3/4 deck screws, only 2 1/4"

So easy… about 3 hours to cut and assemble. Will make another one for sure when I go to visit my mom at Thanksgiving. I absolutely love it!
Wed, 06/01/2022 - 08:04
Wonderful build, it looks fantastic! Thank you for sharing:)
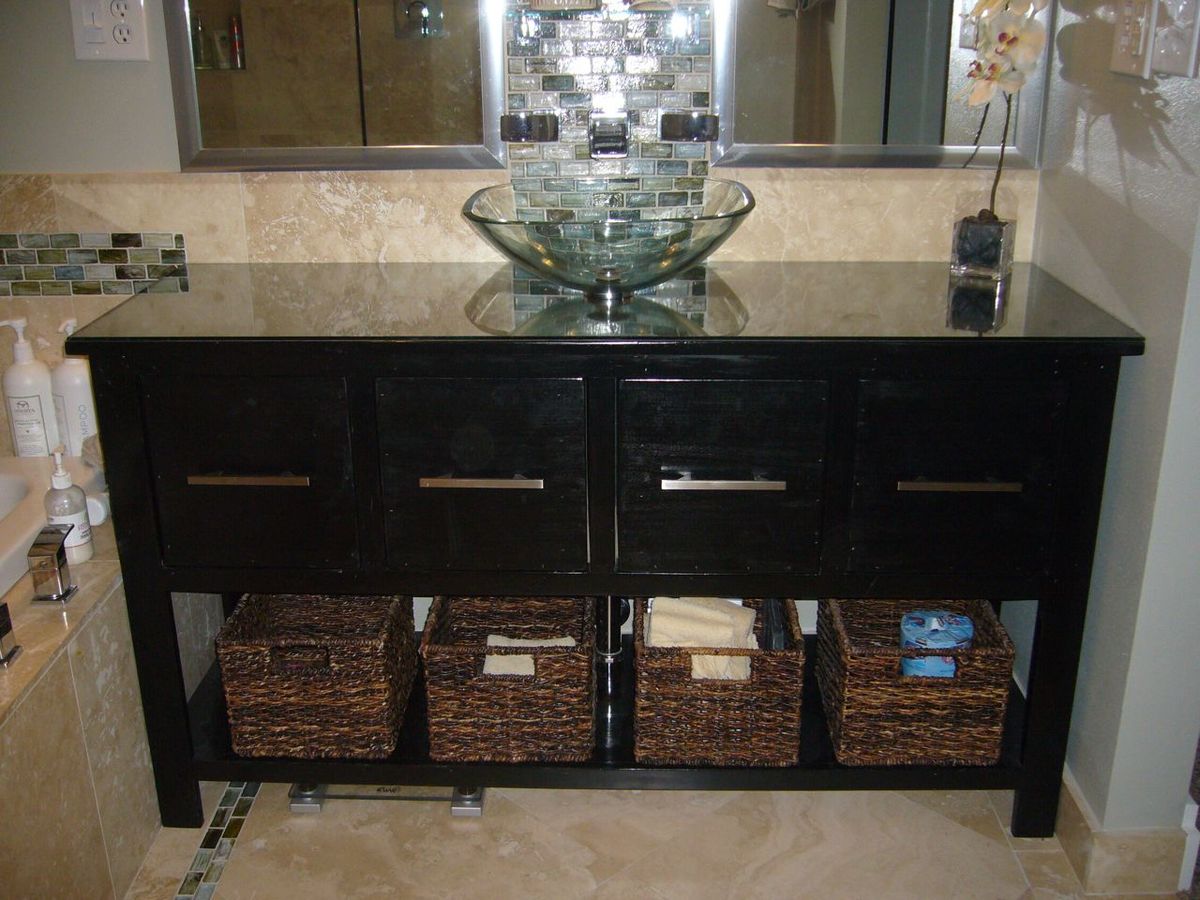
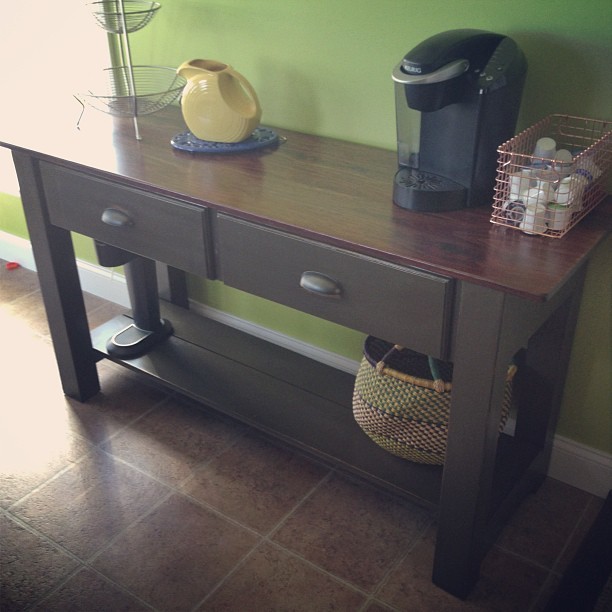
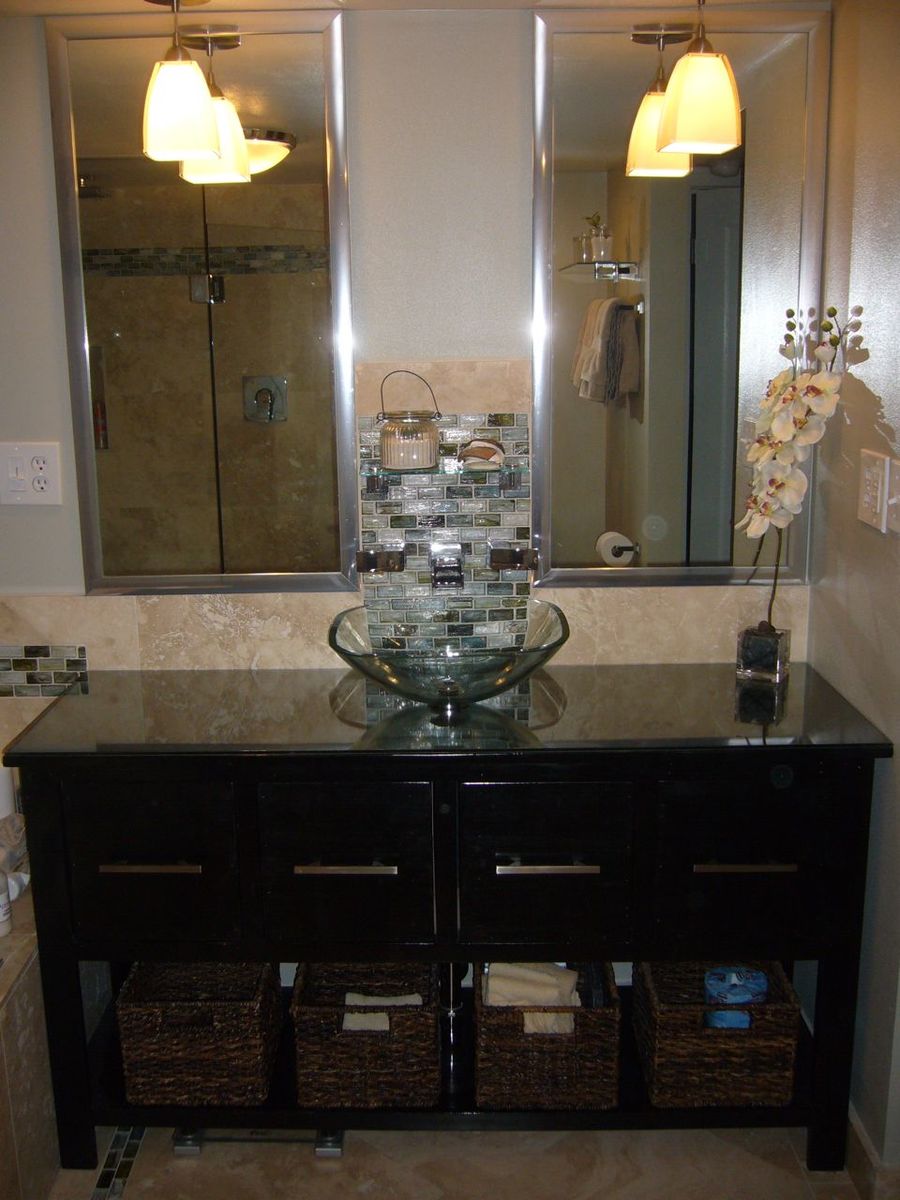
We remodeled our basement and added a master bathroom. The vanity space we had needed a custom vanity. We saw the Balin Console Table here and thought it would work nicely. It does! The four 12x12 drawers hold everything we need to use and keep discrete and the storage space underneath works nicely for extras that need to be away but quickly accessed.
In reply to Beautiful! by dananryan
Fri, 07/15/2011 - 23:16
We had to make some changes, especially in its depth as it needed to hold a sink. It came out at 31 3/4" tall, 57" wide and 20" deep. We also added a shelf at the bottom. Thanks for the compliment!
Wed, 08/10/2011 - 12:41
It looks like you have a glass top on this vanity? Or maybe its just the finish? I am very interested in doing this build for our bathroom remodel. I too would like the shelf for extra storage, and advice on how you added that?
I'm going to have to shorten it some as we only have like 53 inches for the vanity. Might just make it 48 inches which is still a plenty big vanity and just make 3 drawers instead of 4.
It looks awesome!!! Great work!
Sat, 08/13/2011 - 14:04
Yes, it has a glass top. We had the glass guy cut it to size and sand the edges and put a sealing sticky tape around the edges to make it safe and water proof. We also had to have a hole drilled in the middle for the drain and I put a bead of clear caulk to water seal that spot.
The shelf was easy. Just a couple of ledger pieces nailed with a nail gun (or screwed if you pre-drill) to the legs on each side (from back to front). Then glued the ply wood for the shelf on to the ledgers. I then measured and cut facing to cover the plywood edge and add stiffness to the plywood. I just glued and clamped those on. You may have to cut out a slot in the shelf if your drain pipes are low on the wall (I had to).
Careful is you're going to do three drawers. You'll have a drain pipe going down the middle of the vanity! I had to offset the inside drawers so that they would not hit the drain pipe. I offset them about an inch on both sides (one offset to the left, the other to the right). You can't tell from the front as I sized all four drawer faces the same. If you do three drawers, that middle drawer might need to be less deep (6" verses 12 or more) or you might just make it a false drawer...one that doesn't open at all. Either way, the four drawers (12x12x10) are plenty large enough for our needs. if I had just two drawers i would make them deeper. Good luck! Share a picture with us when you're done!
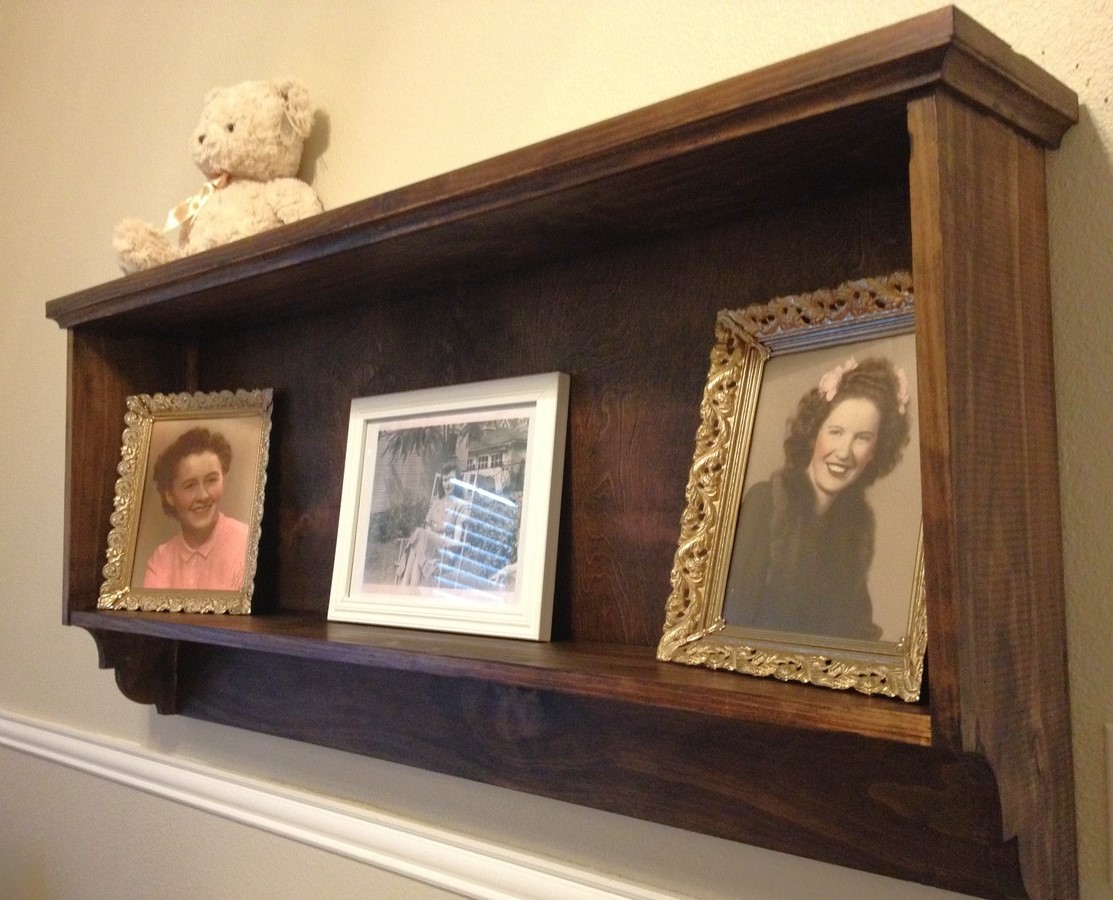
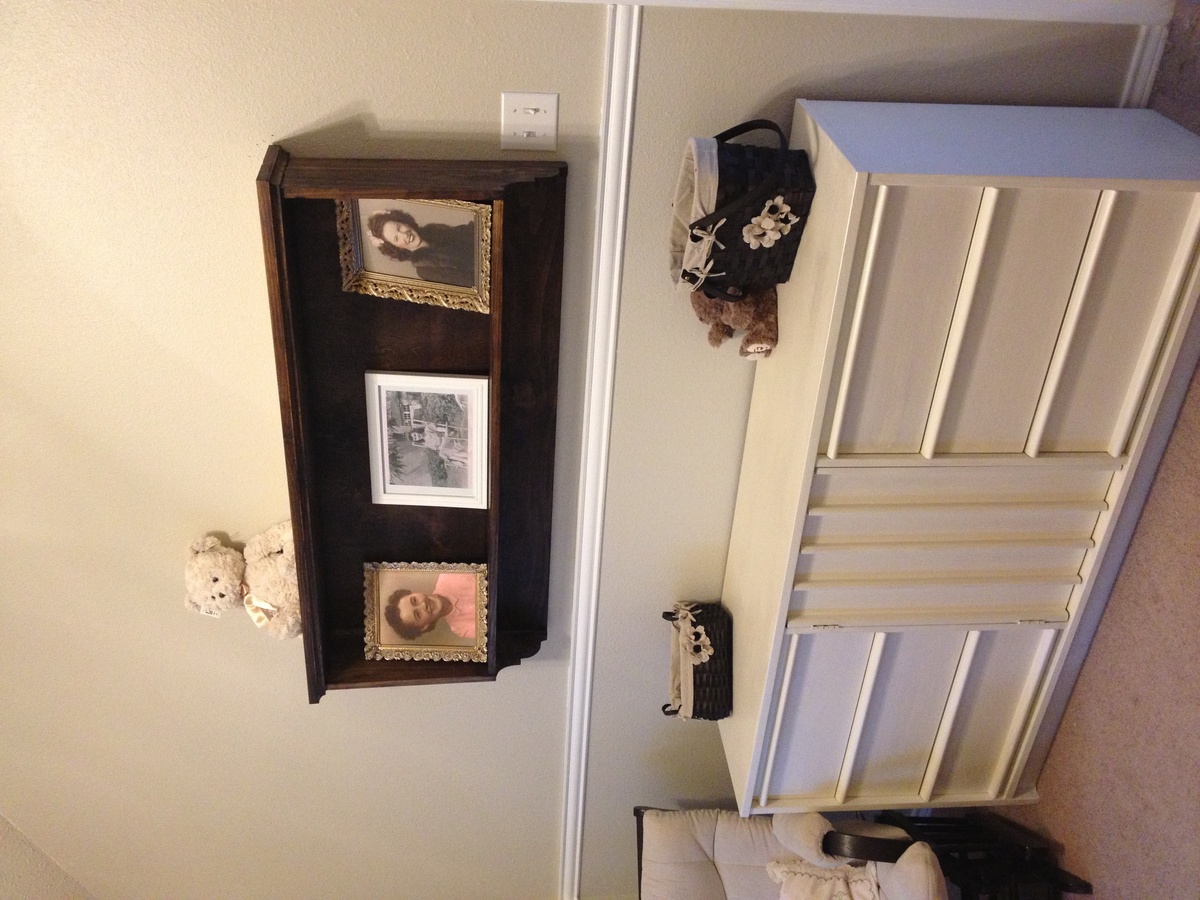
I used the Martina Bath Wall Shelf as a design element and extended the length to 49.75" to create a custom piece to hang over my little one's dresser in the nursery. I used select pine, pre-stain and dark walnut for the finish. I spent a little more than what can be expected as I didn't have scrap pieces in the desired size as well as spent $20 on bar brackets that can hold 200 lbs. I went a little overboard on the strength capacity but its for a baby's nursery.

Mon, 08/19/2013 - 22:17
I love this take on the Martina Bath Wall Shelf! I built the smaller one for our bathroom, but I'm thinking one similar to yours would look really nice on the wall over our bed. Beautiful work!
Val
We built this island with the top offset so you could use it for stools on 2 sides. It fit perfectly in our daughter's first college house! The plans were easy to follow we added drawer slides and dovetailed the drawer.
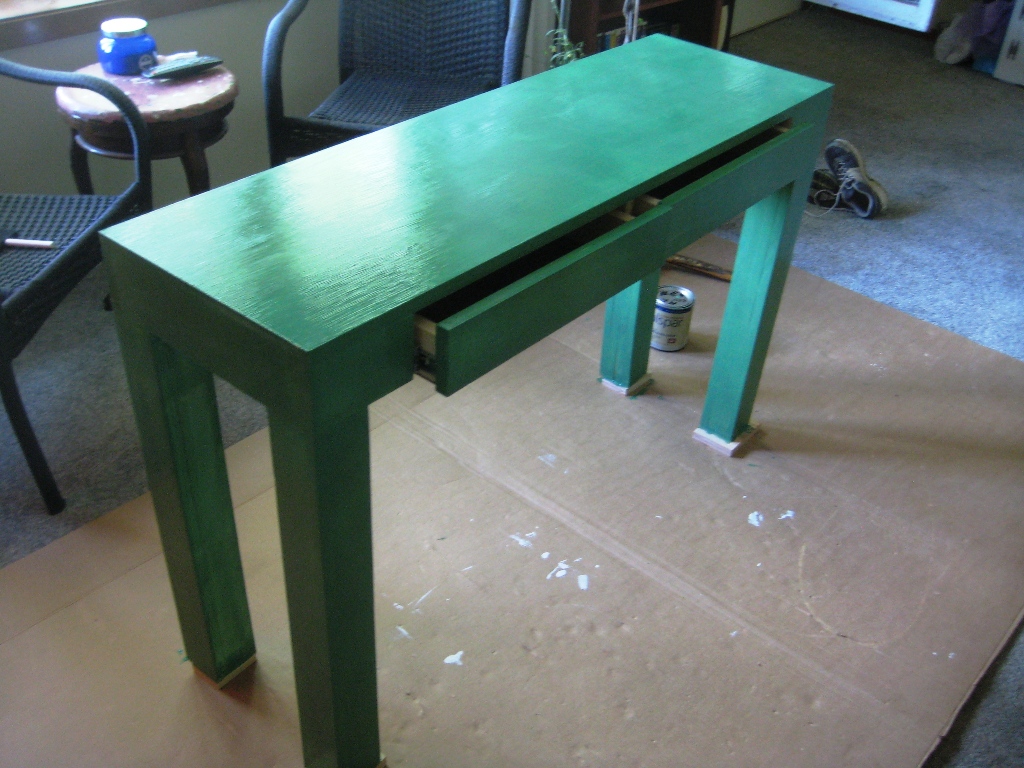
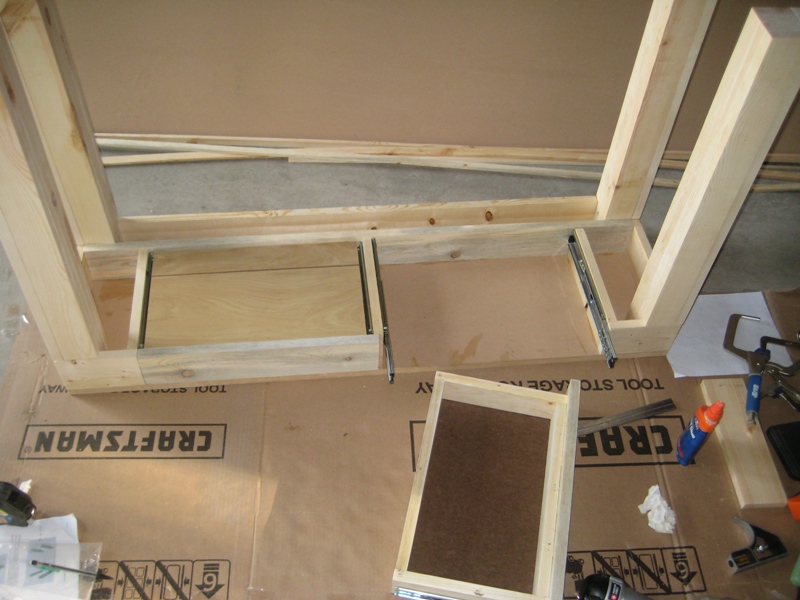
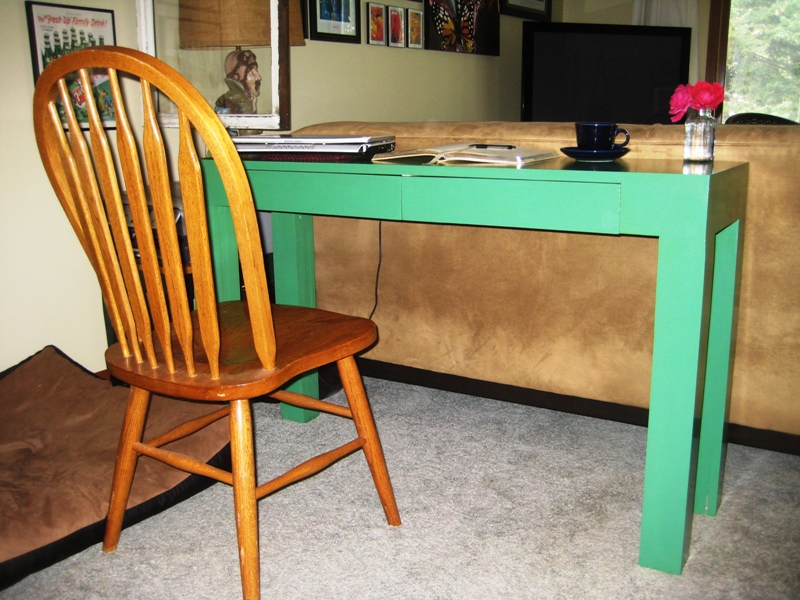
Built this a little smaller - only 15" deep and 42" wide for use behind the couch with multiple functions - laptop desk, dining room buffet table, and behind-the-couch-set-things-on table. Love it!
Tricky parts - the drawers. Because I changed the dimensions, I built the drawer box to fit my new dimensions and installed it. Then, I cut the sides of my drawers 10" deep (the smallest drawer slides I could find and a perfect fit). I laid the Hettich ball bearing drawer slides (from my local lumber and cabinet supplier, not big box) in the drawer box and trimmed down my drawer front/back until they fit nicely. If you're interested, it was 15 1/8" wide.
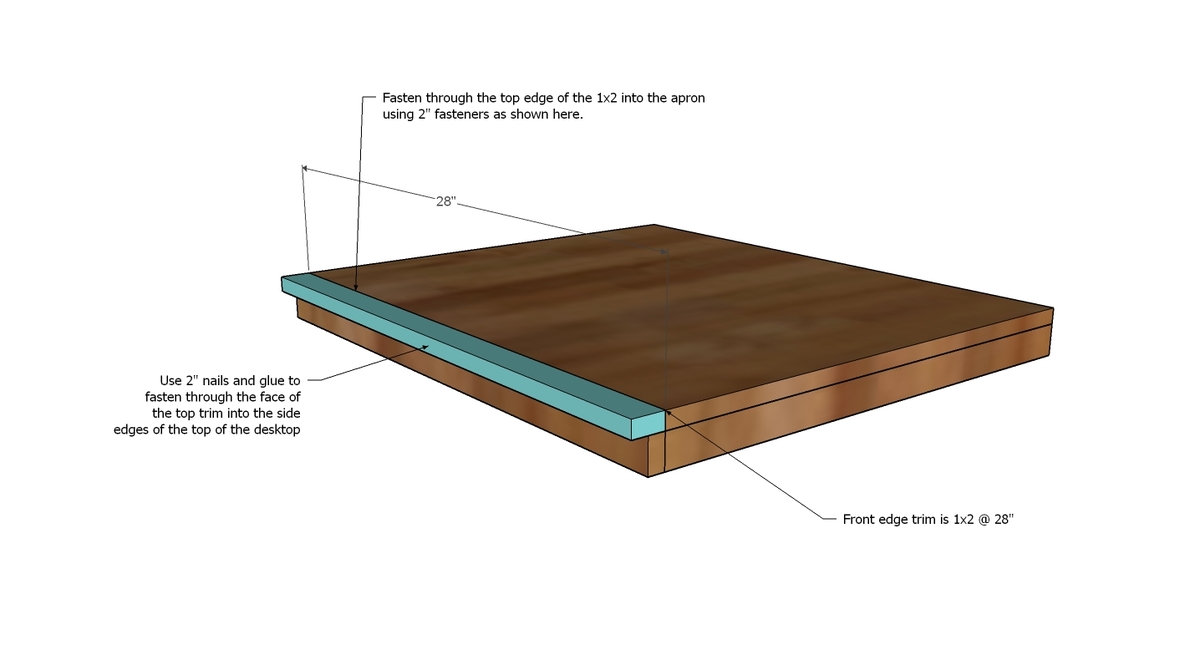
Nail gun is a must on this project!!! And remember to glue and use 2" nails.
I used the Kreg jig to build my drawers because I'm familiar with building drawers that way and feel comfortable getting them squared. I highly recommend the Kreg jig!
Then, I attacked it with my orbital sander until it was nice and smooth.
Love Ana's great patterns!

Sat, 06/22/2013 - 13:34
I've been looking for a post with dimensions more similar to my sketch and found yours. Thanks! I must say that I'm a bit puzzled with how to attack my drawers. My table's dimensions being 44Lx16D. I am in desperate need of a comp table to fit along a short wall, but need it to be functional, hence the need for drawers. Were your drawer dimensions limited to the length of the drawer slides you found? If possible, I'd like my drawers deeper. However, I'm open to one longer, less complicated, drawer as well, lol. I'm curious. Help!