Community Brag Posts
Rustic DIY Canopy Bed
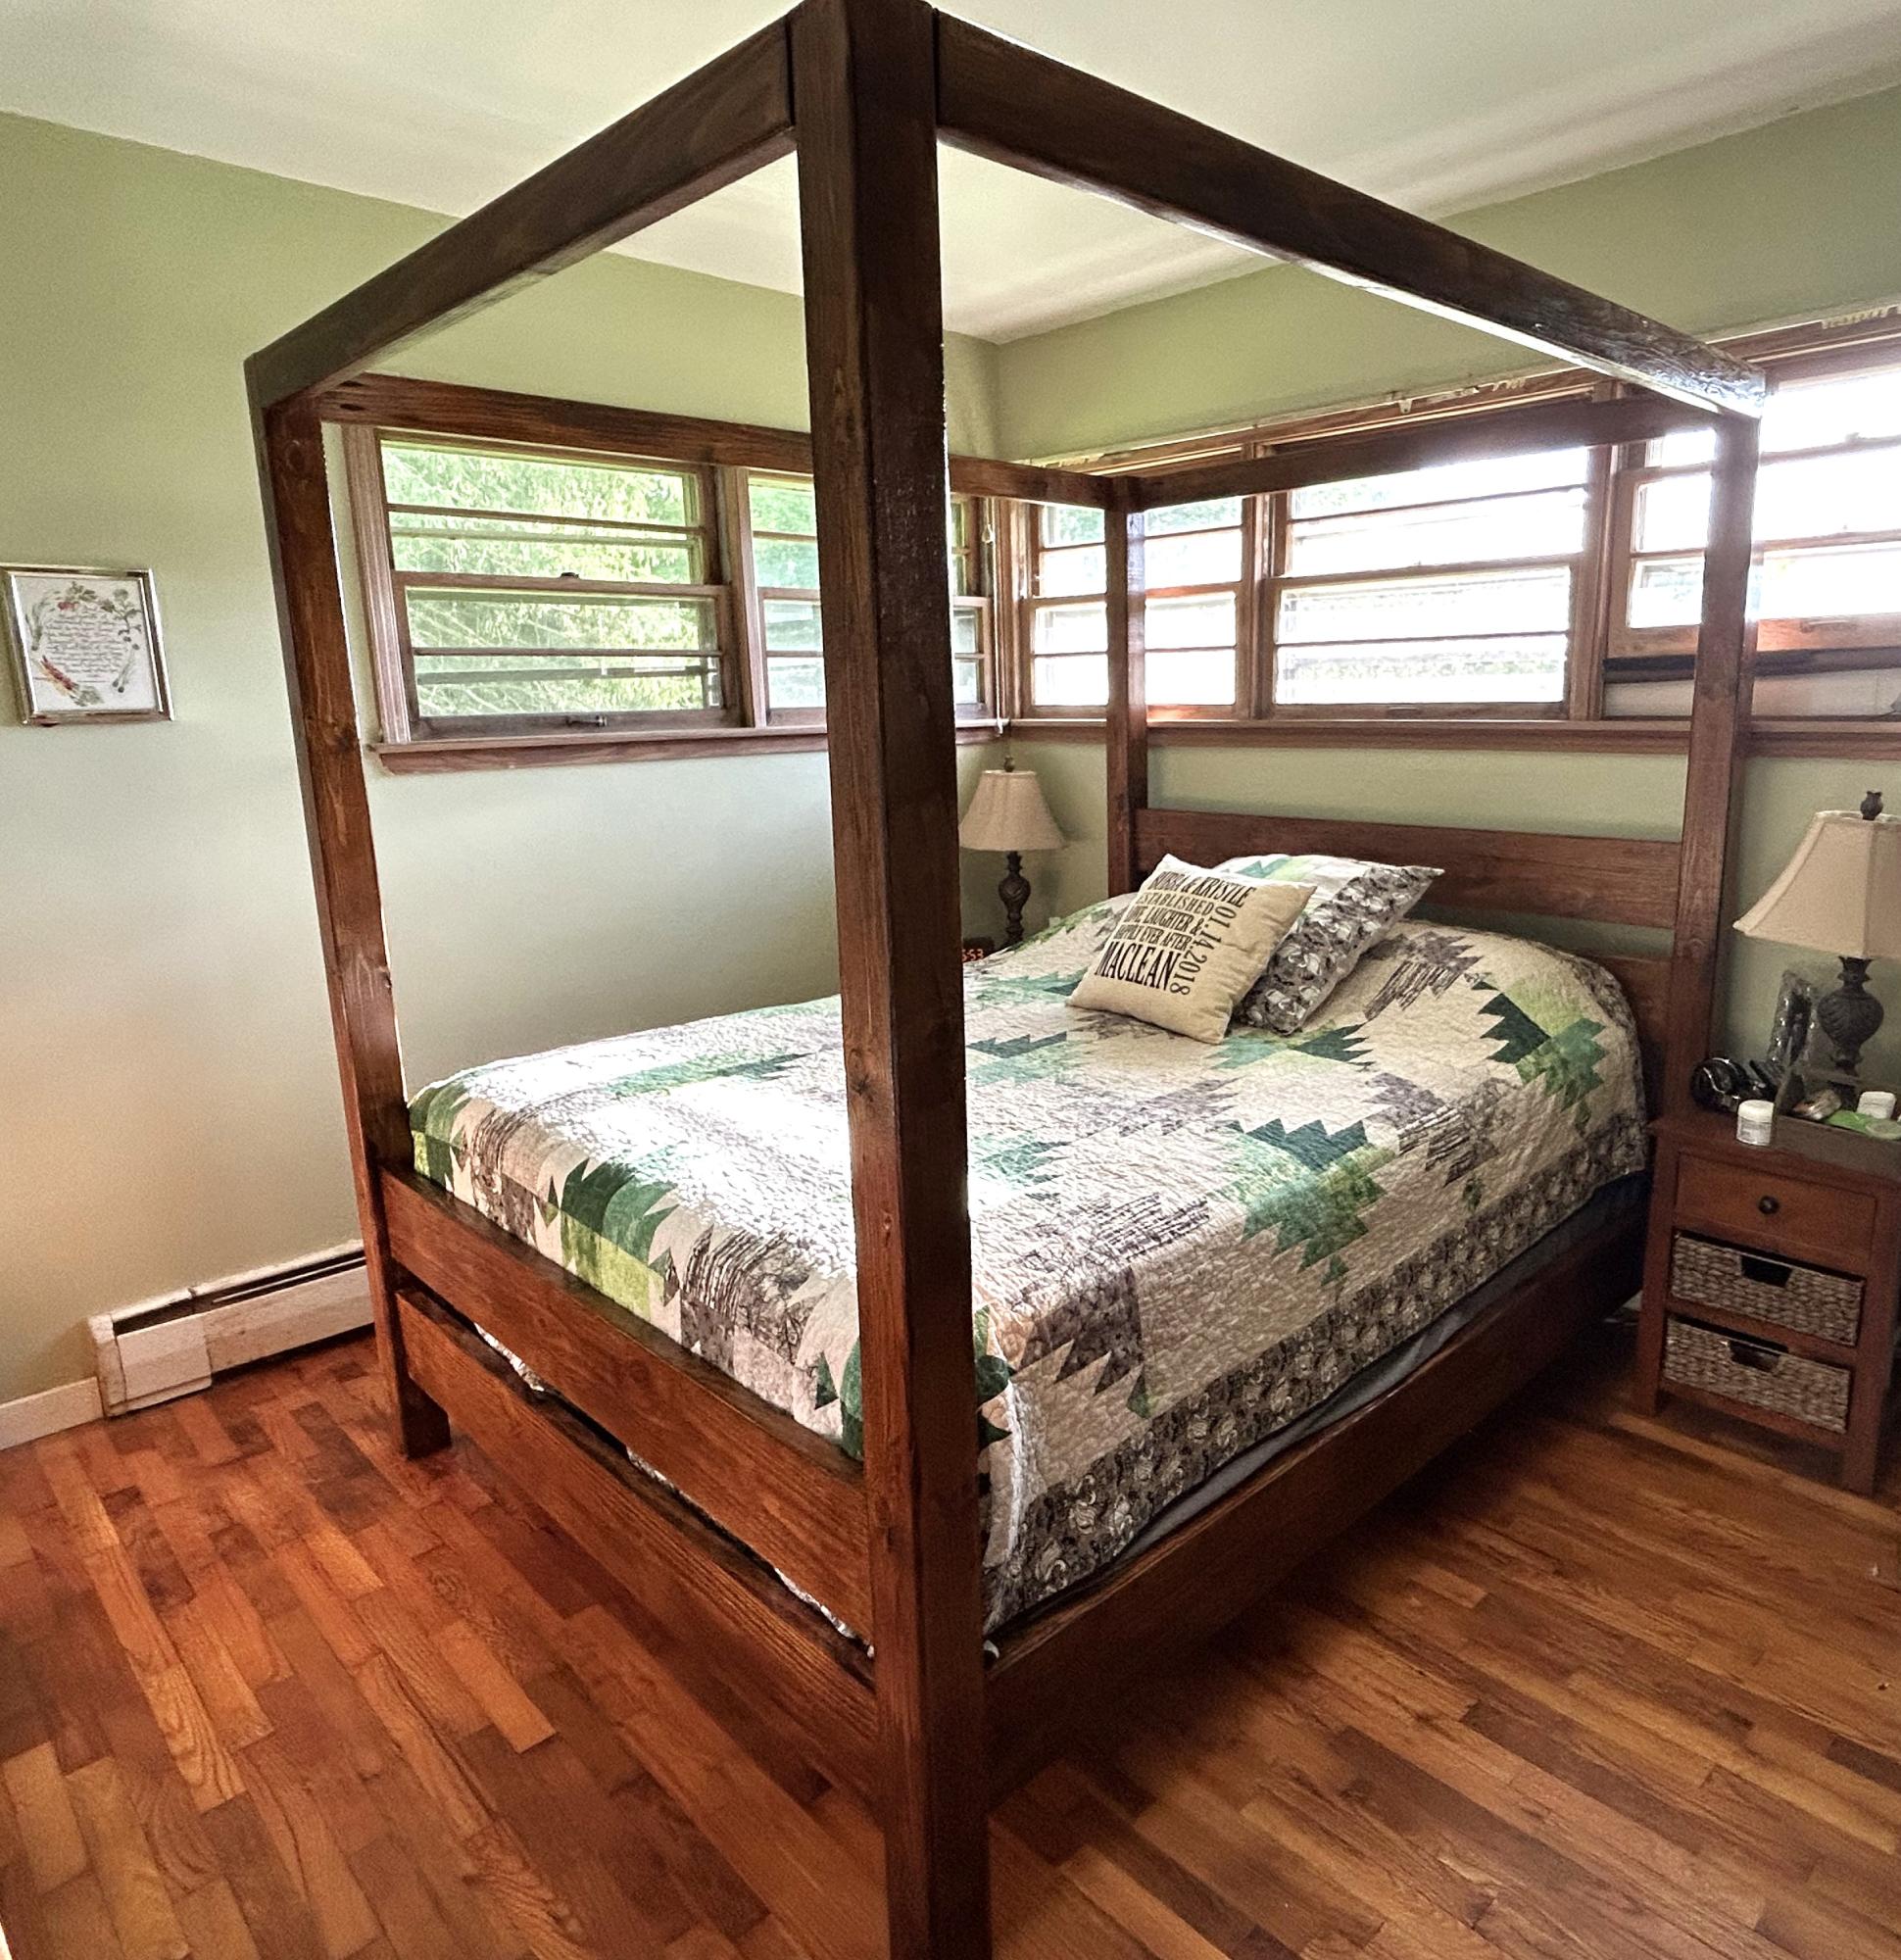
I still wanted to use my box springs, as it and the mattress were fairly new. So I lowered the base and added another 2x8 to the headboard and backboard. I love it!!
Bubba
Built from Plan(s)
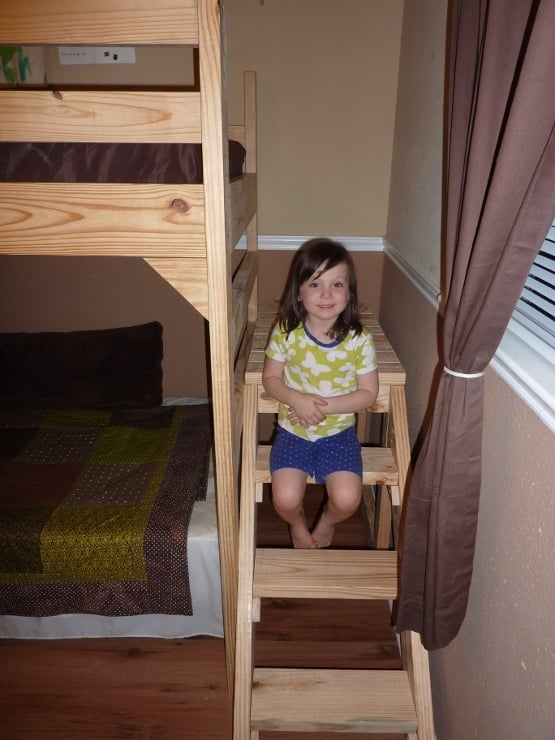
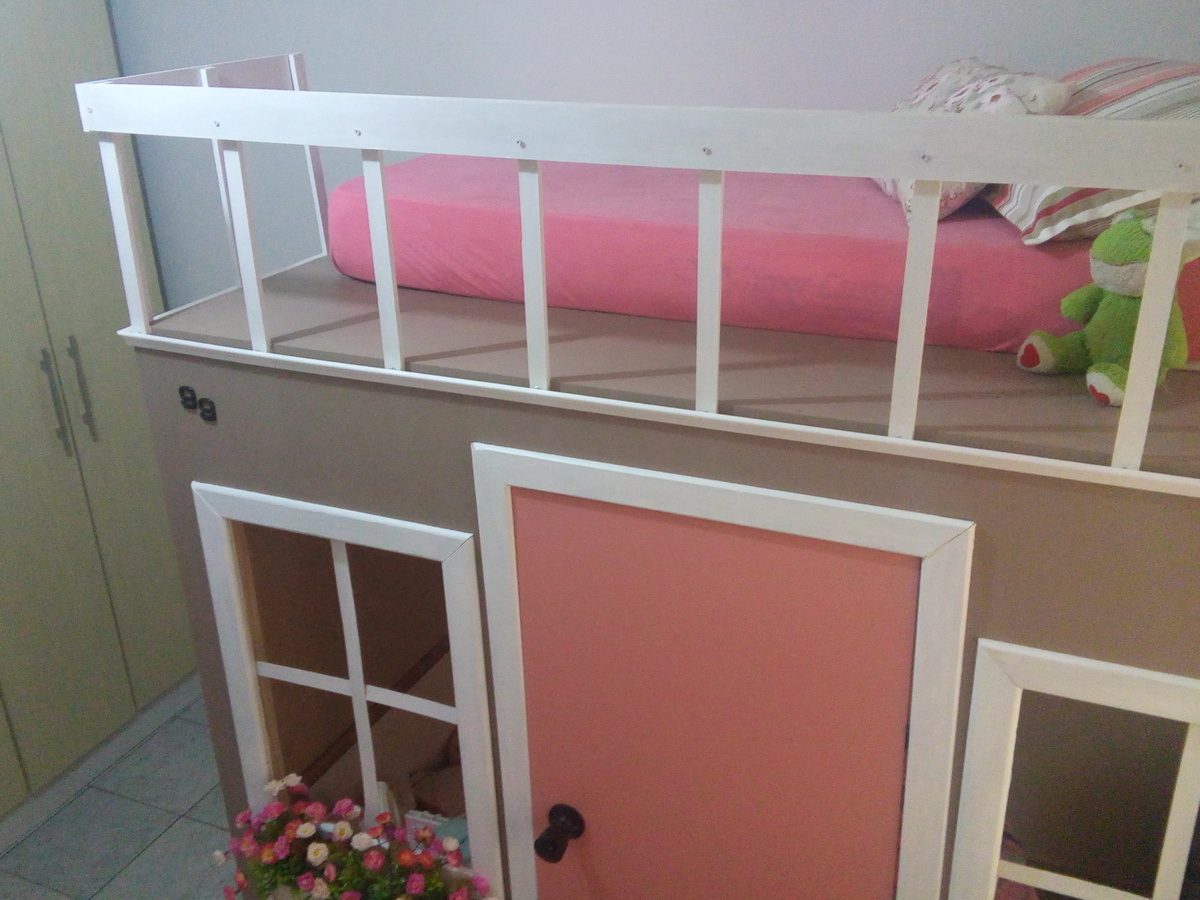
Loft bed with Staircase
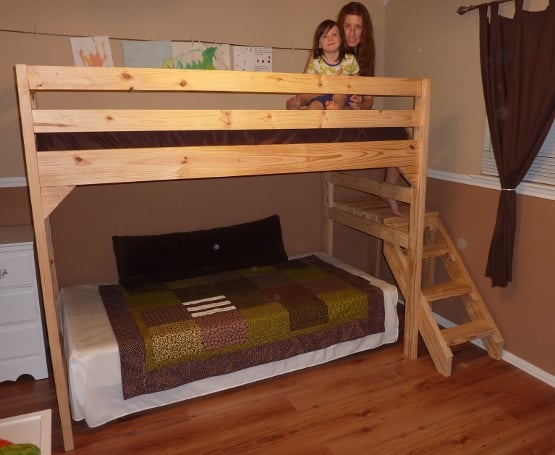
This plan was perfect for our second bedroom. We are adopting soon and are not sure what ages, genders, or sibling combinations we will be accomidating. We wanted to make the most of the space we had with the option for an additional bed if needed. This loft bed is the perfect solution. I like the stairs (instead of the usual ladder rungs) and it was pretty easy to build. Now the kids can play under it...or we can add a bed (in the photo we have a box spring set up on a bed frame, but no mattress yet) if we need to. THANK YOU, ANA!
We made a few alterations to Ana's plan:
1. We moved the staircase to the right side to better fit our bedroom set up
2. We narrowed down the platform and staircase by 4 inches....still plenty wide!
3. We brought the staircase platform in about 7 inches, so the stairs don't stick out so far.
4. We added an additional 2x4 at the base for stability (attached to the back two vertical legs).
5. We added 4 corner braces (just left over 2x6's cut at 45 degree angles to make little triangle brackets.
It's very sturdy. My husband even got up there to test it out. We haven't finished it yet, but we plan to stain and seal it.
Built from Plan(s)
Estimated Cost
$75 plus a Kreg Jig kit (totally worth it!)
Estimated Time Investment
Day Project (6-9 Hours)
Finish Used
We haven't done a finish on it yet.
Recommended Skill Level
Beginner
Comments
Mon, 09/24/2012 - 11:16
I love that you brought the
I love that you brought the stairs in! Hope you post pics when you finally get it stained can't wait to see it!
Sun, 03/09/2014 - 16:10
Plans/details for the modified version?
We have a smaller space and this version would work better for us too. Do you have more details on how you did it, what cuts you used, etc?


Yellow Painted Outdoor Chair
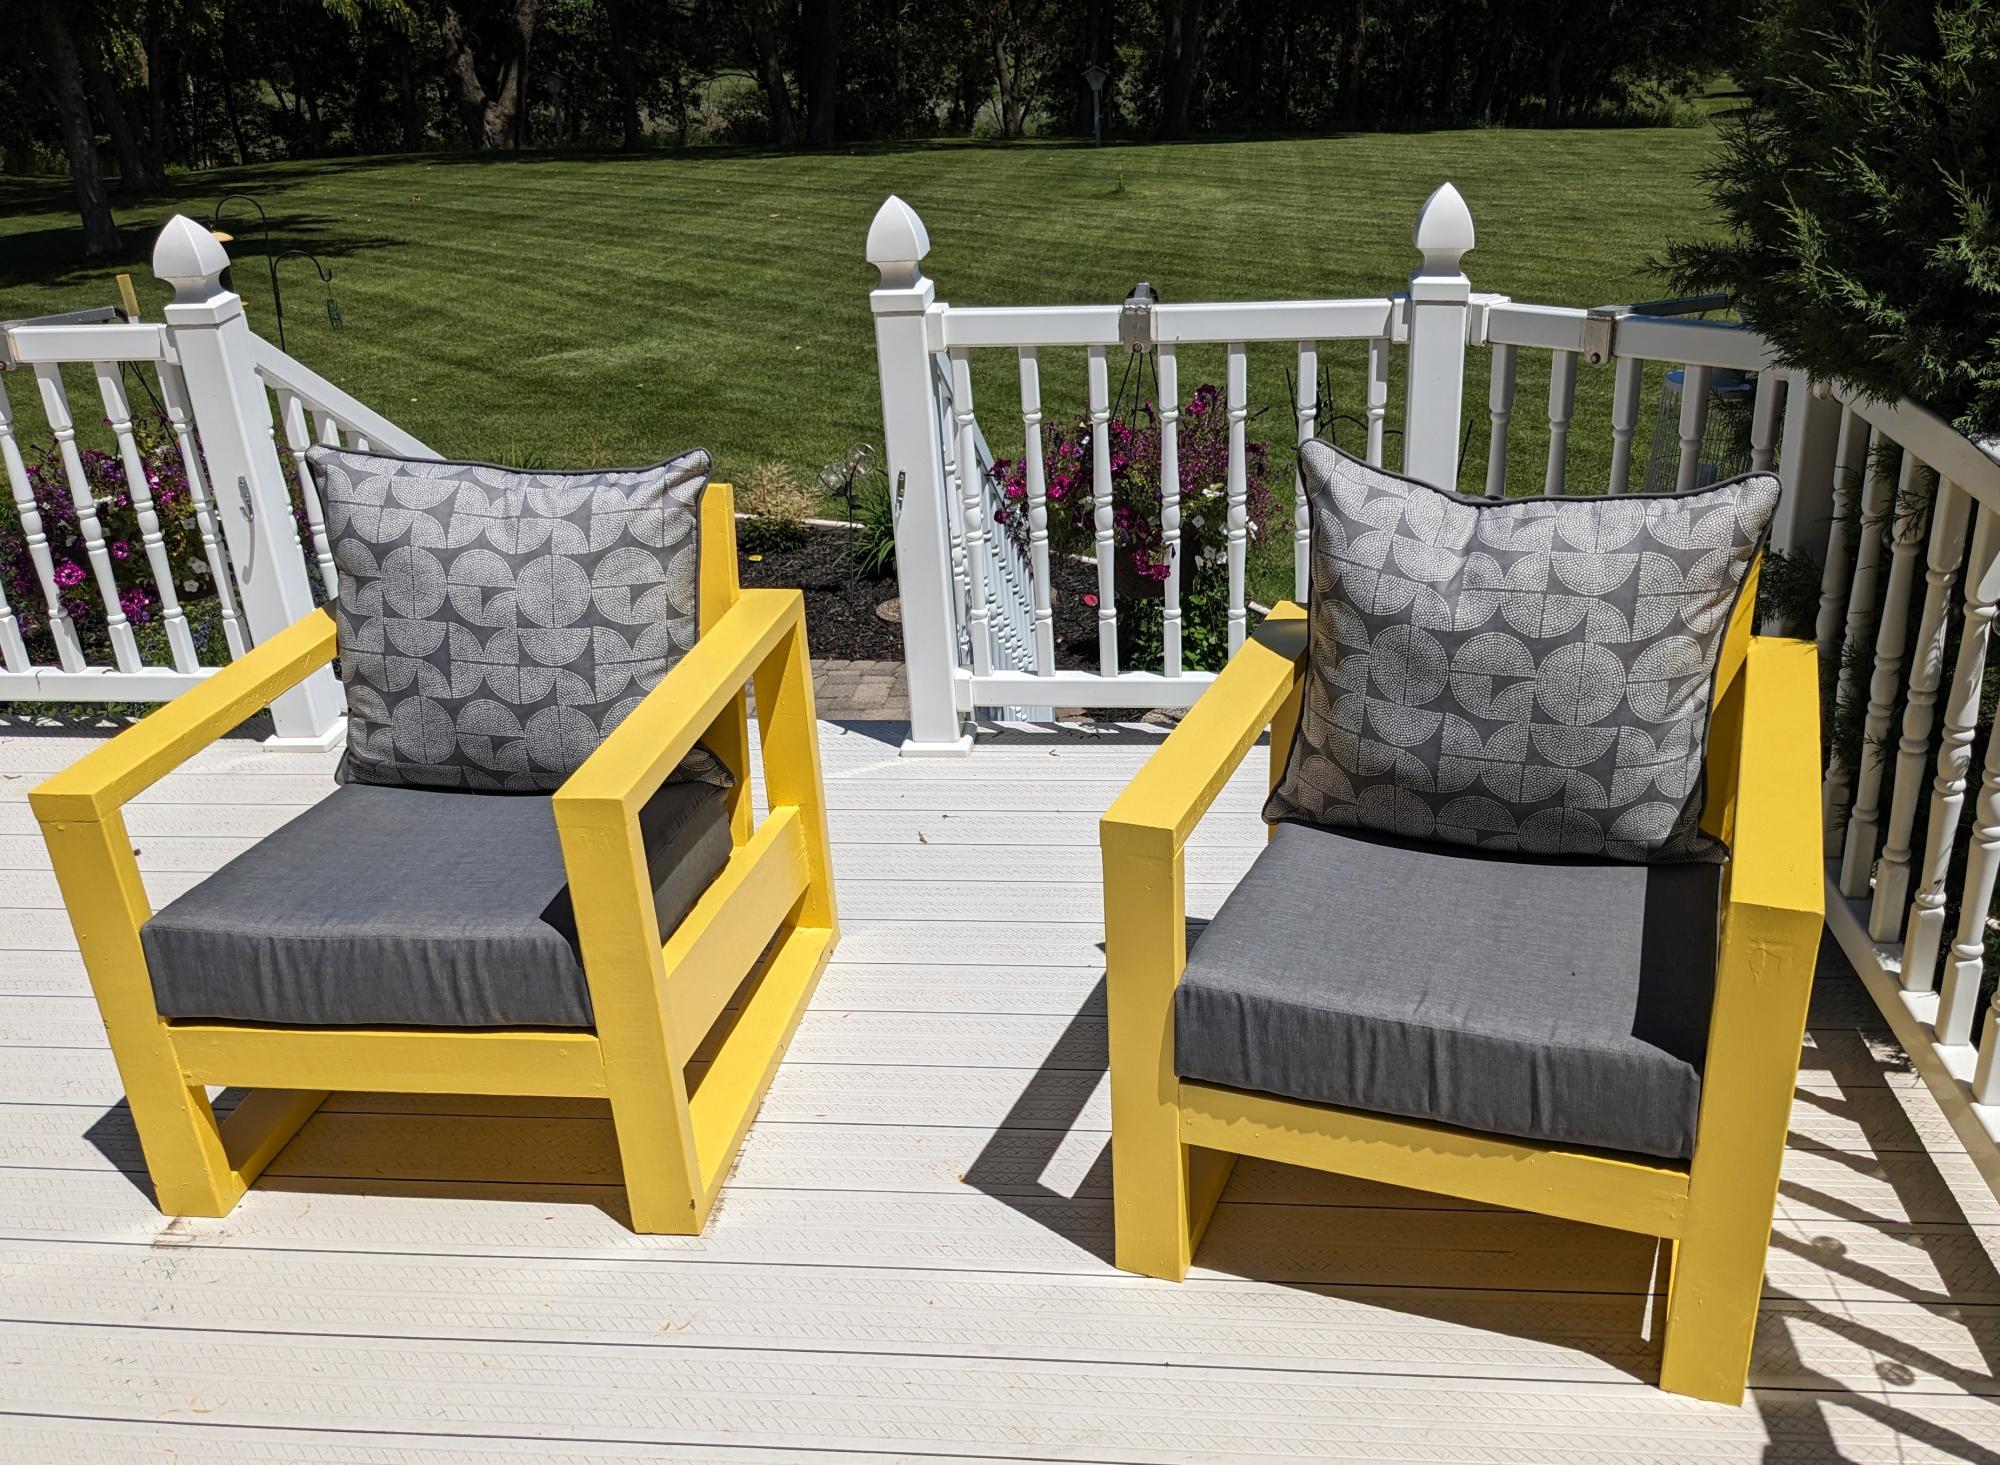
Bright and cheery outdoor chairs!
Built from Plan(s)
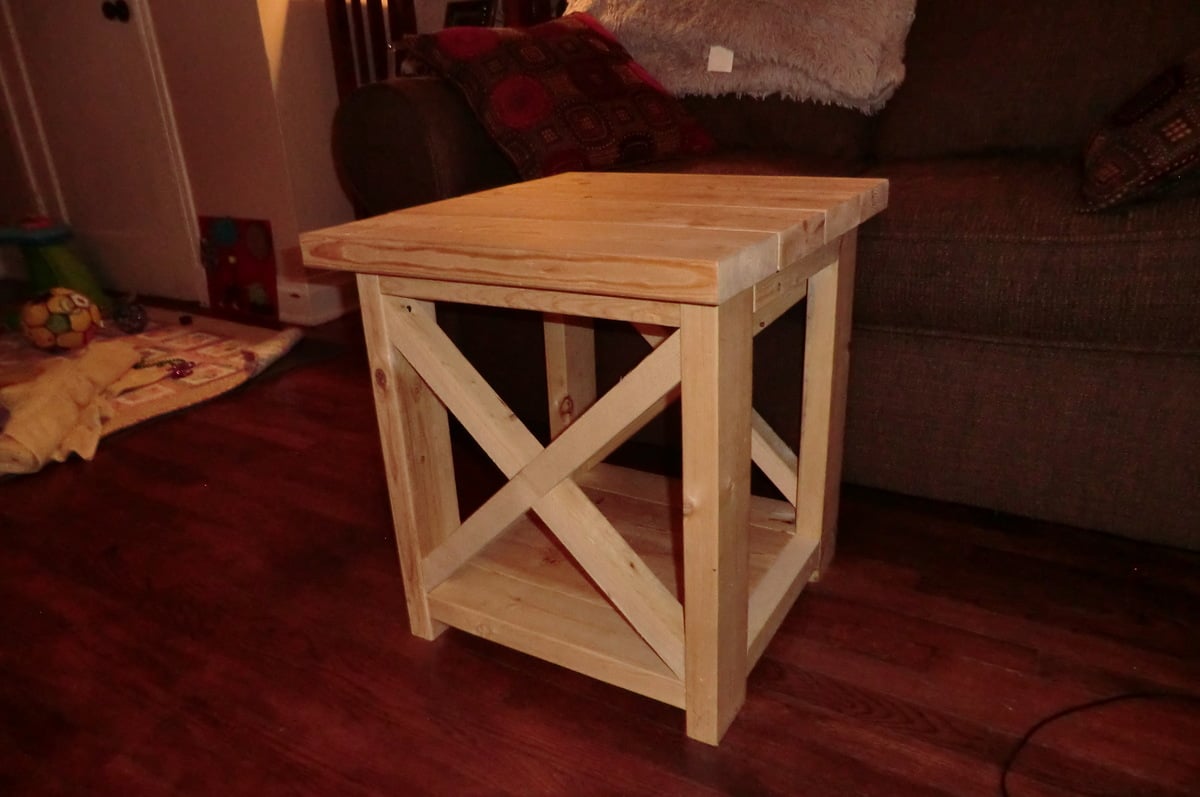
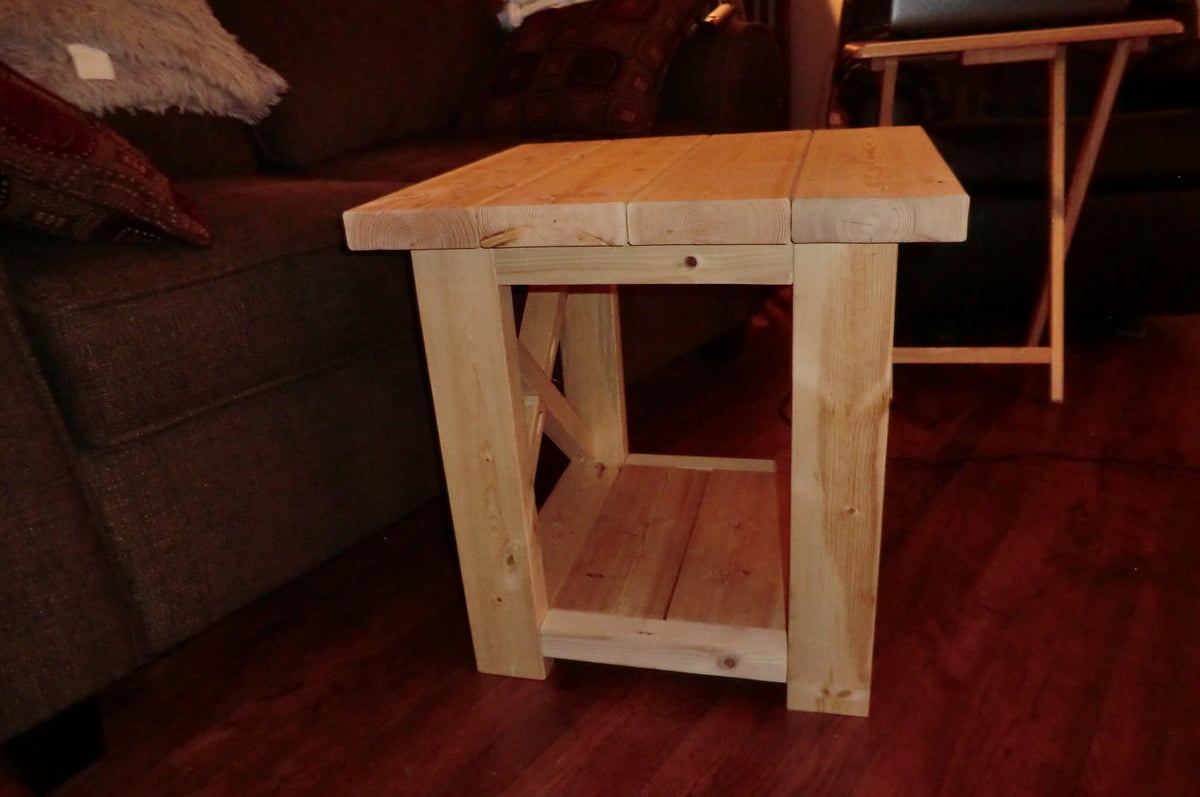
Smaller Rustic X end table
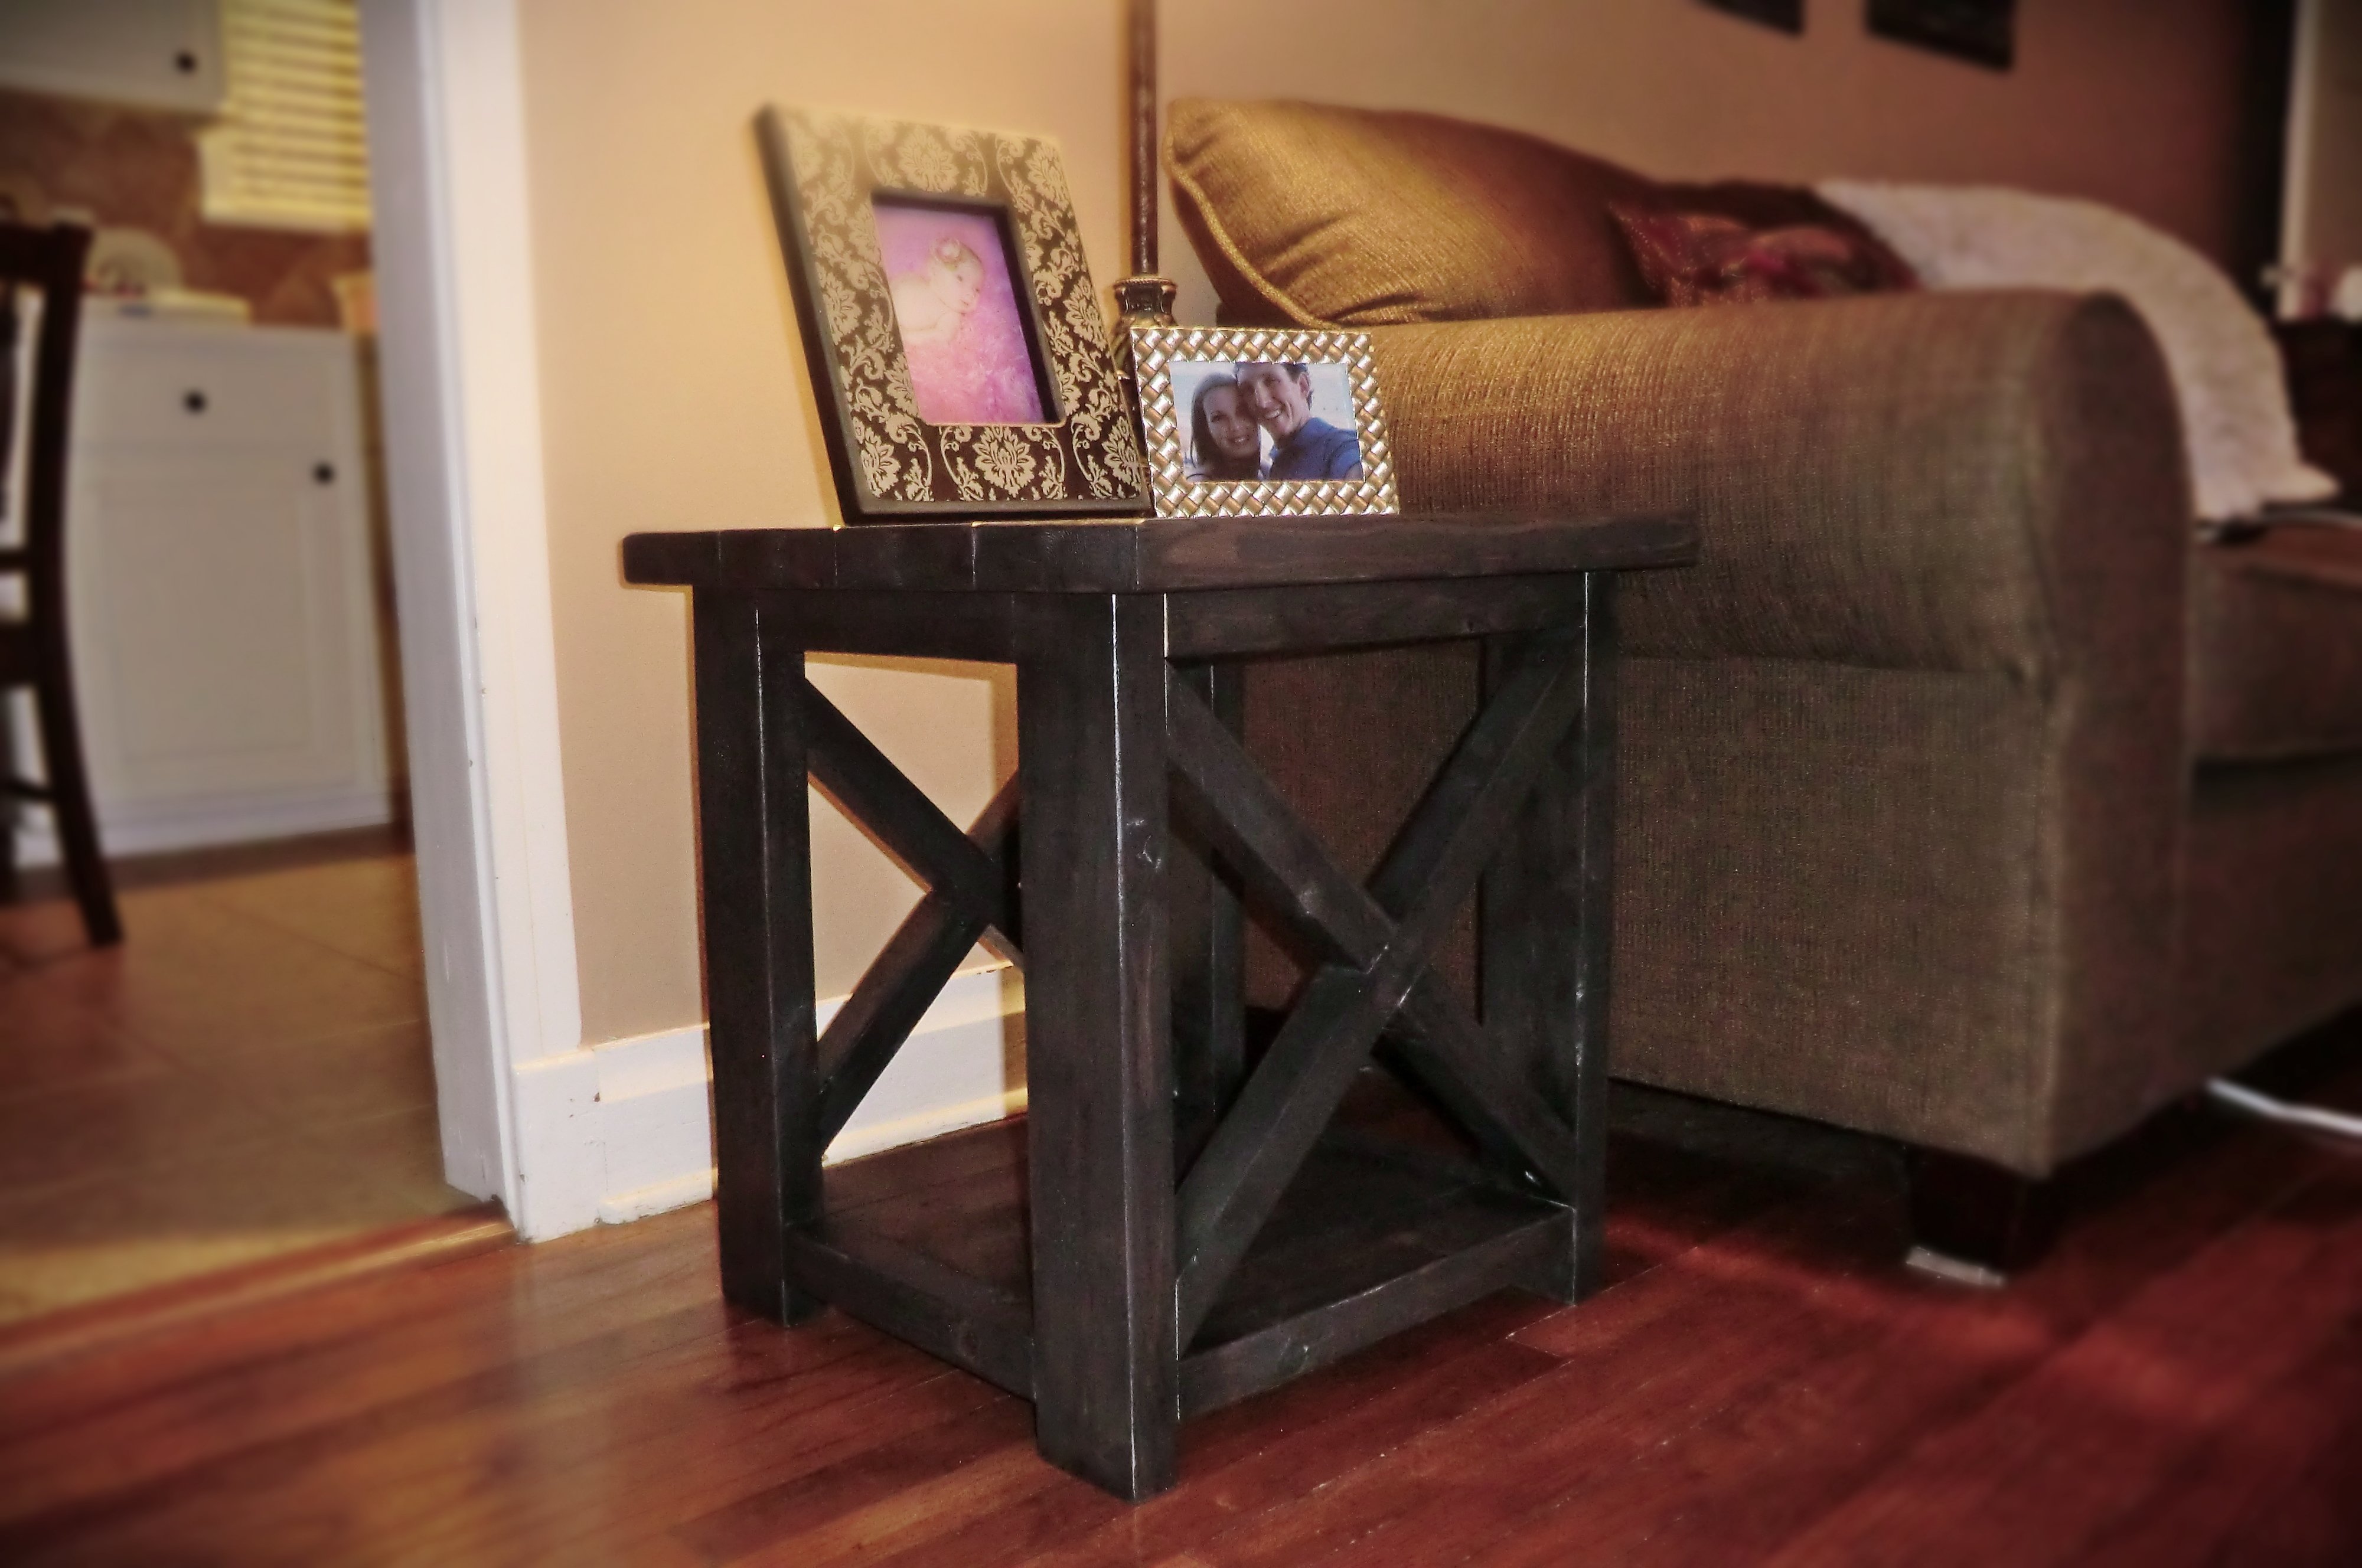
I built these two end tables from the rustic x end table plans. I tweaked the original plan to make them smaller. I only used 4 - 2x6's for the top instead of using 5, and I used 2 - 2x6's for the bottom shelf instead of using the 2 - 1x12's. My top is 20x22.5 and the base is 18x18.

Built from Plan(s)
Estimated Cost
$12/table
Estimated Time Investment
Afternoon Project (3-6 Hours)
Finish Used
I started off with a blend of minwax classic grey, rustoleum sunbleach, and rustoleum kona (I was going for a weathered grey look). It looked good on the scrap piece i tried, but it turned a blueish grey on the tables. I then covered everything with minwax ebony to try an kill the blue tint and darken it. It ended up being a dark brown with some gray tones. Finished with minwax satin polyurethane. I spent alot more time playing around with stain colors than I did actually building the tables.
Recommended Skill Level
Beginner
Comments
Fri, 09/28/2012 - 10:36
Rustic Table
Great job ! these Rustic table are good for interior design and make a good look .I read this , have good price ,timing ,wood and also your hard work .

Wed, 04/20/2016 - 05:43
smaller tables
i love this! we just built the bigger one to find out it was a bit too big but we were still able to find a place for it. my husband and I are going to build your smaller version cant wait!

Mon, 06/13/2016 - 12:46
I made the original and found
I made the original and found it larger than I wanted. I was going to do a smaller version like you did. How tal is yours?
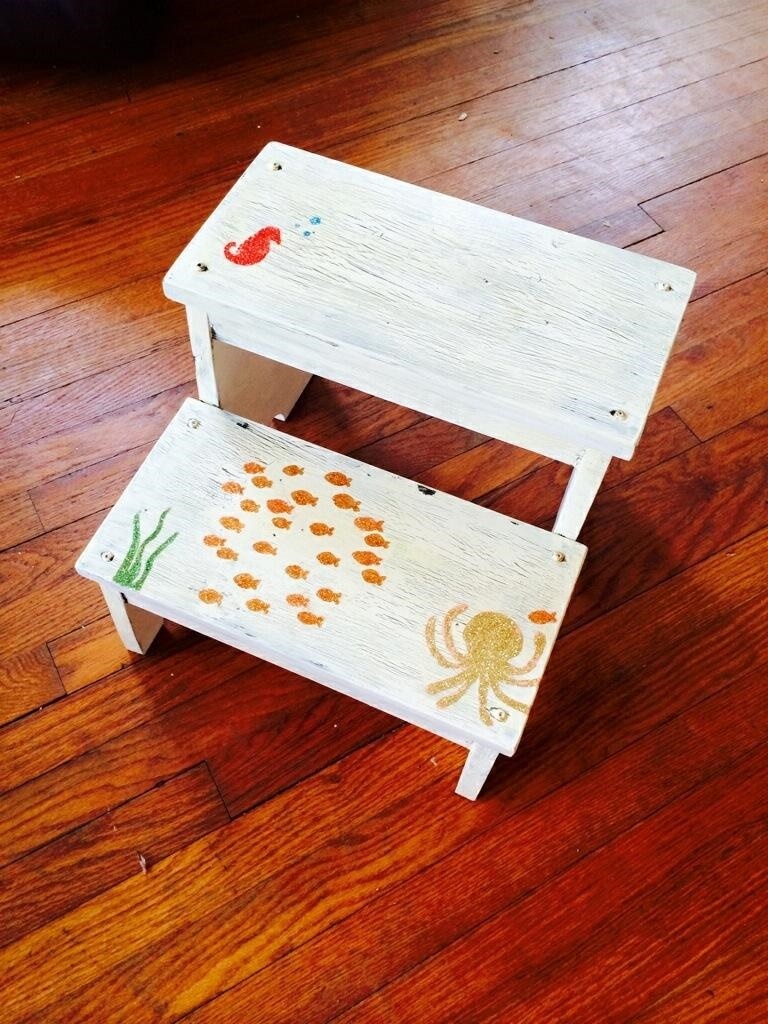
Baby's first step stool
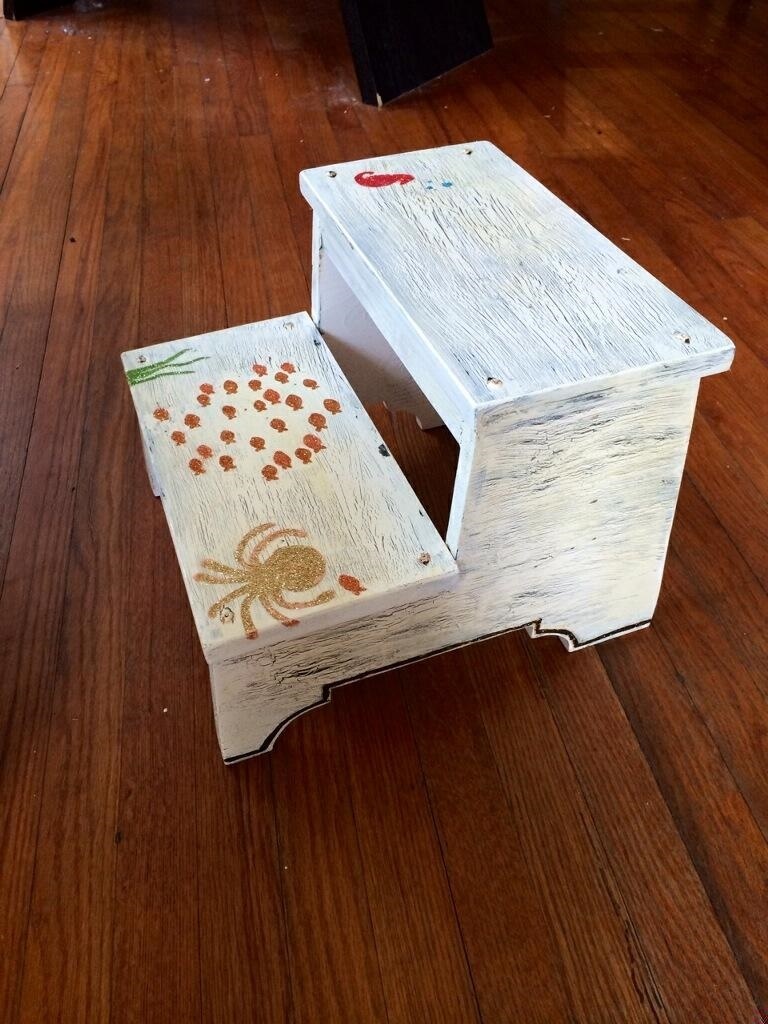
I made this for our first new family addition. My wife is 20 weeks pregnant and we find out if it's a boy or girl tomorrow at 0800! So excited, and thanks to Ana for the great plans.
Nate
Built from Plan(s)
Estimated Time Investment
Afternoon Project (3-6 Hours)
Finish Used
I applied an ebony stain first. When dry added glue over stain and painted antique white before glue dried for the "crackle" effect. Polyurethane applied afterwards (yellows the paint a bit, but that's what I was going for). My wife then painted the sea life and we covered in a spray on enamel to finish.
Recommended Skill Level
Intermediate
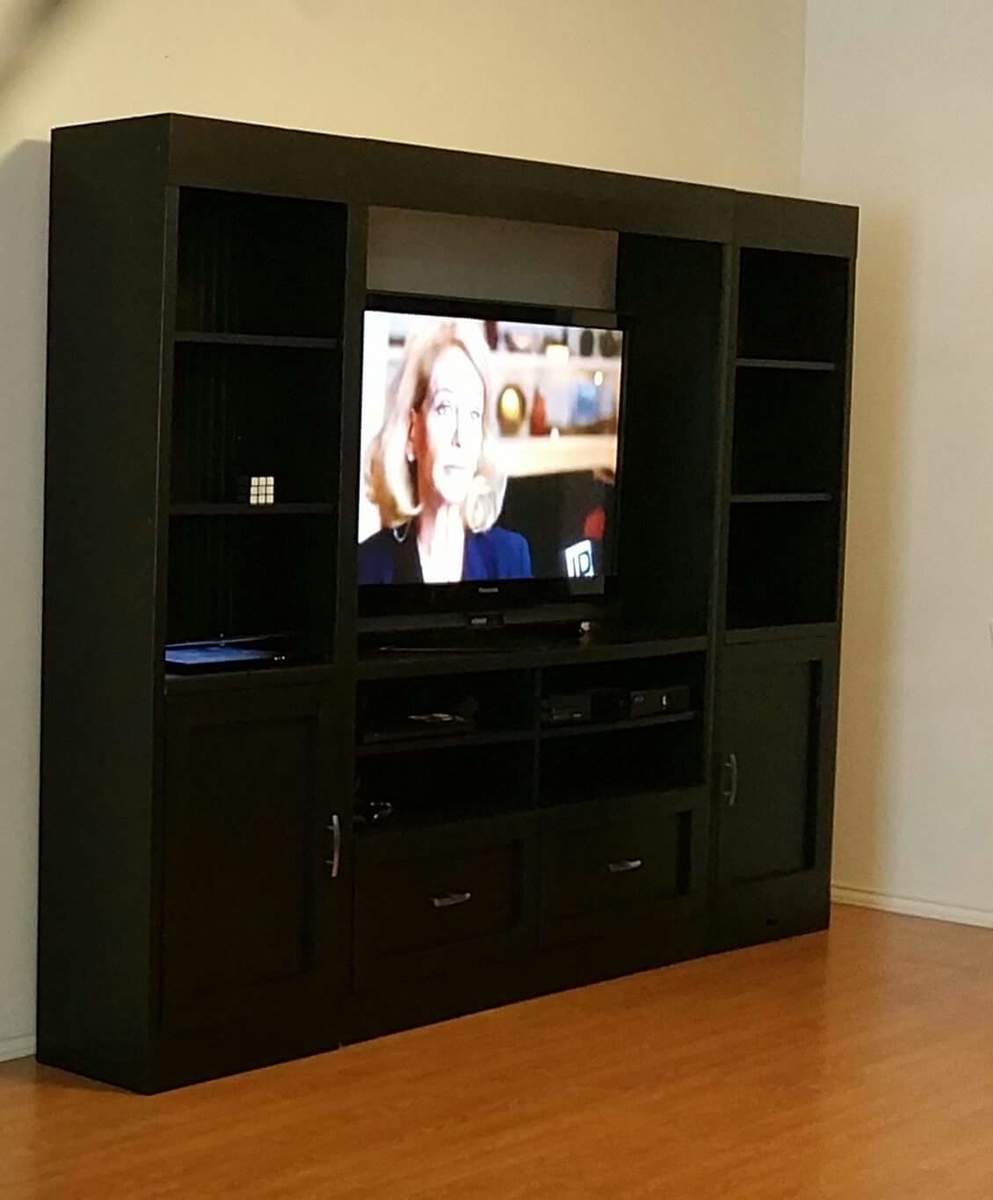
Entertainment center
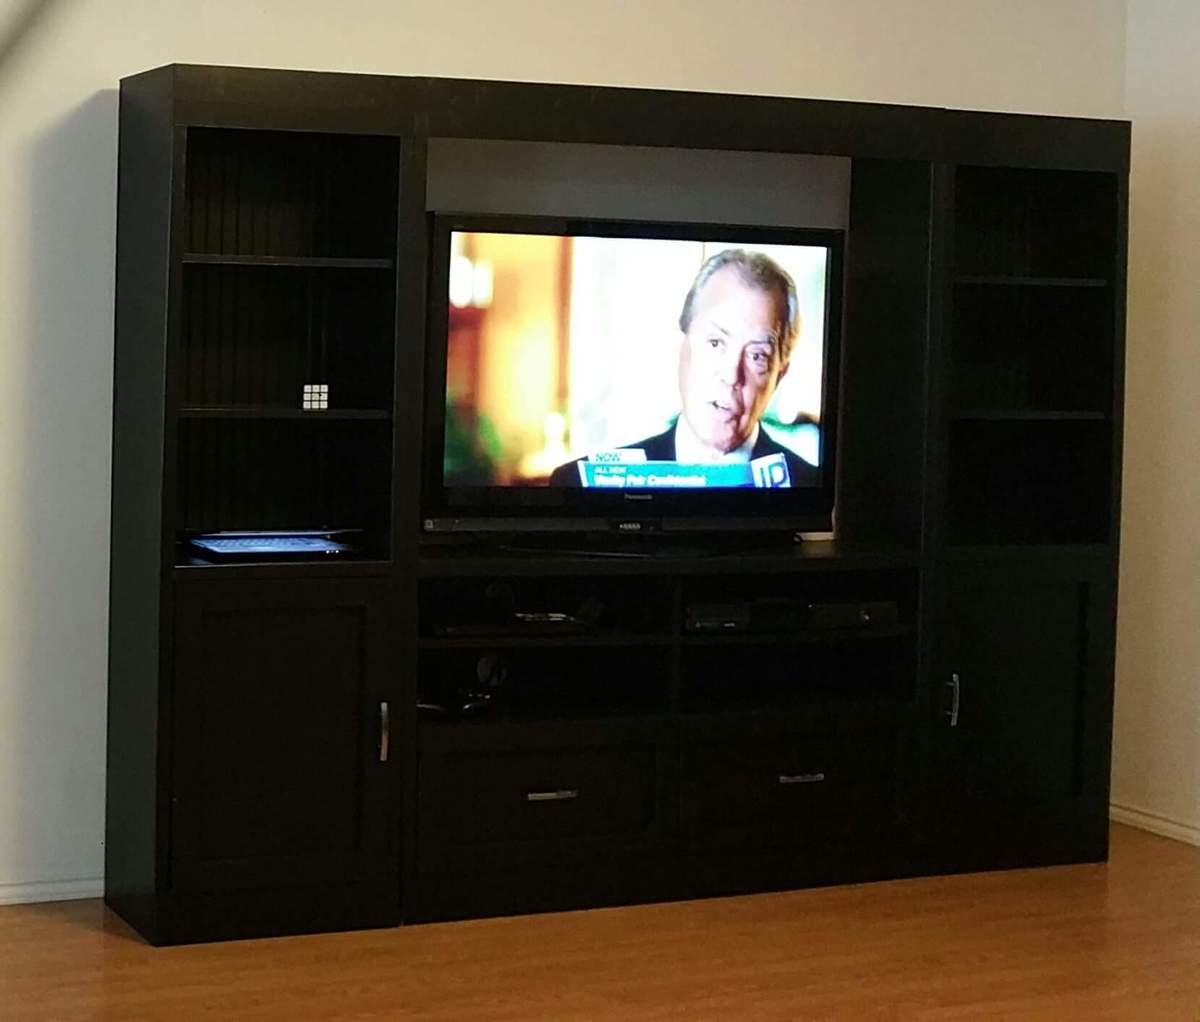
I really liked the barn door entertainment center! I attempted to make my own hardware for the door. It didn't turn out as planned. So I had to come up with a different design. This is what I came up with. I love it!
Built from Plan(s)
Estimated Time Investment
Week Long Project (20 Hours or More)
Recommended Skill Level
Intermediate
Comments
Mon, 11/07/2016 - 22:30
Thank you!! It can fit up to
Thank you!! It can fit up to a 55in TV. We have a 50in right now.
Tue, 11/08/2016 - 06:46
Thank you!! It can fit up too
Thank you!! It can fit up too a 55 in TV. We have a 50in TV.
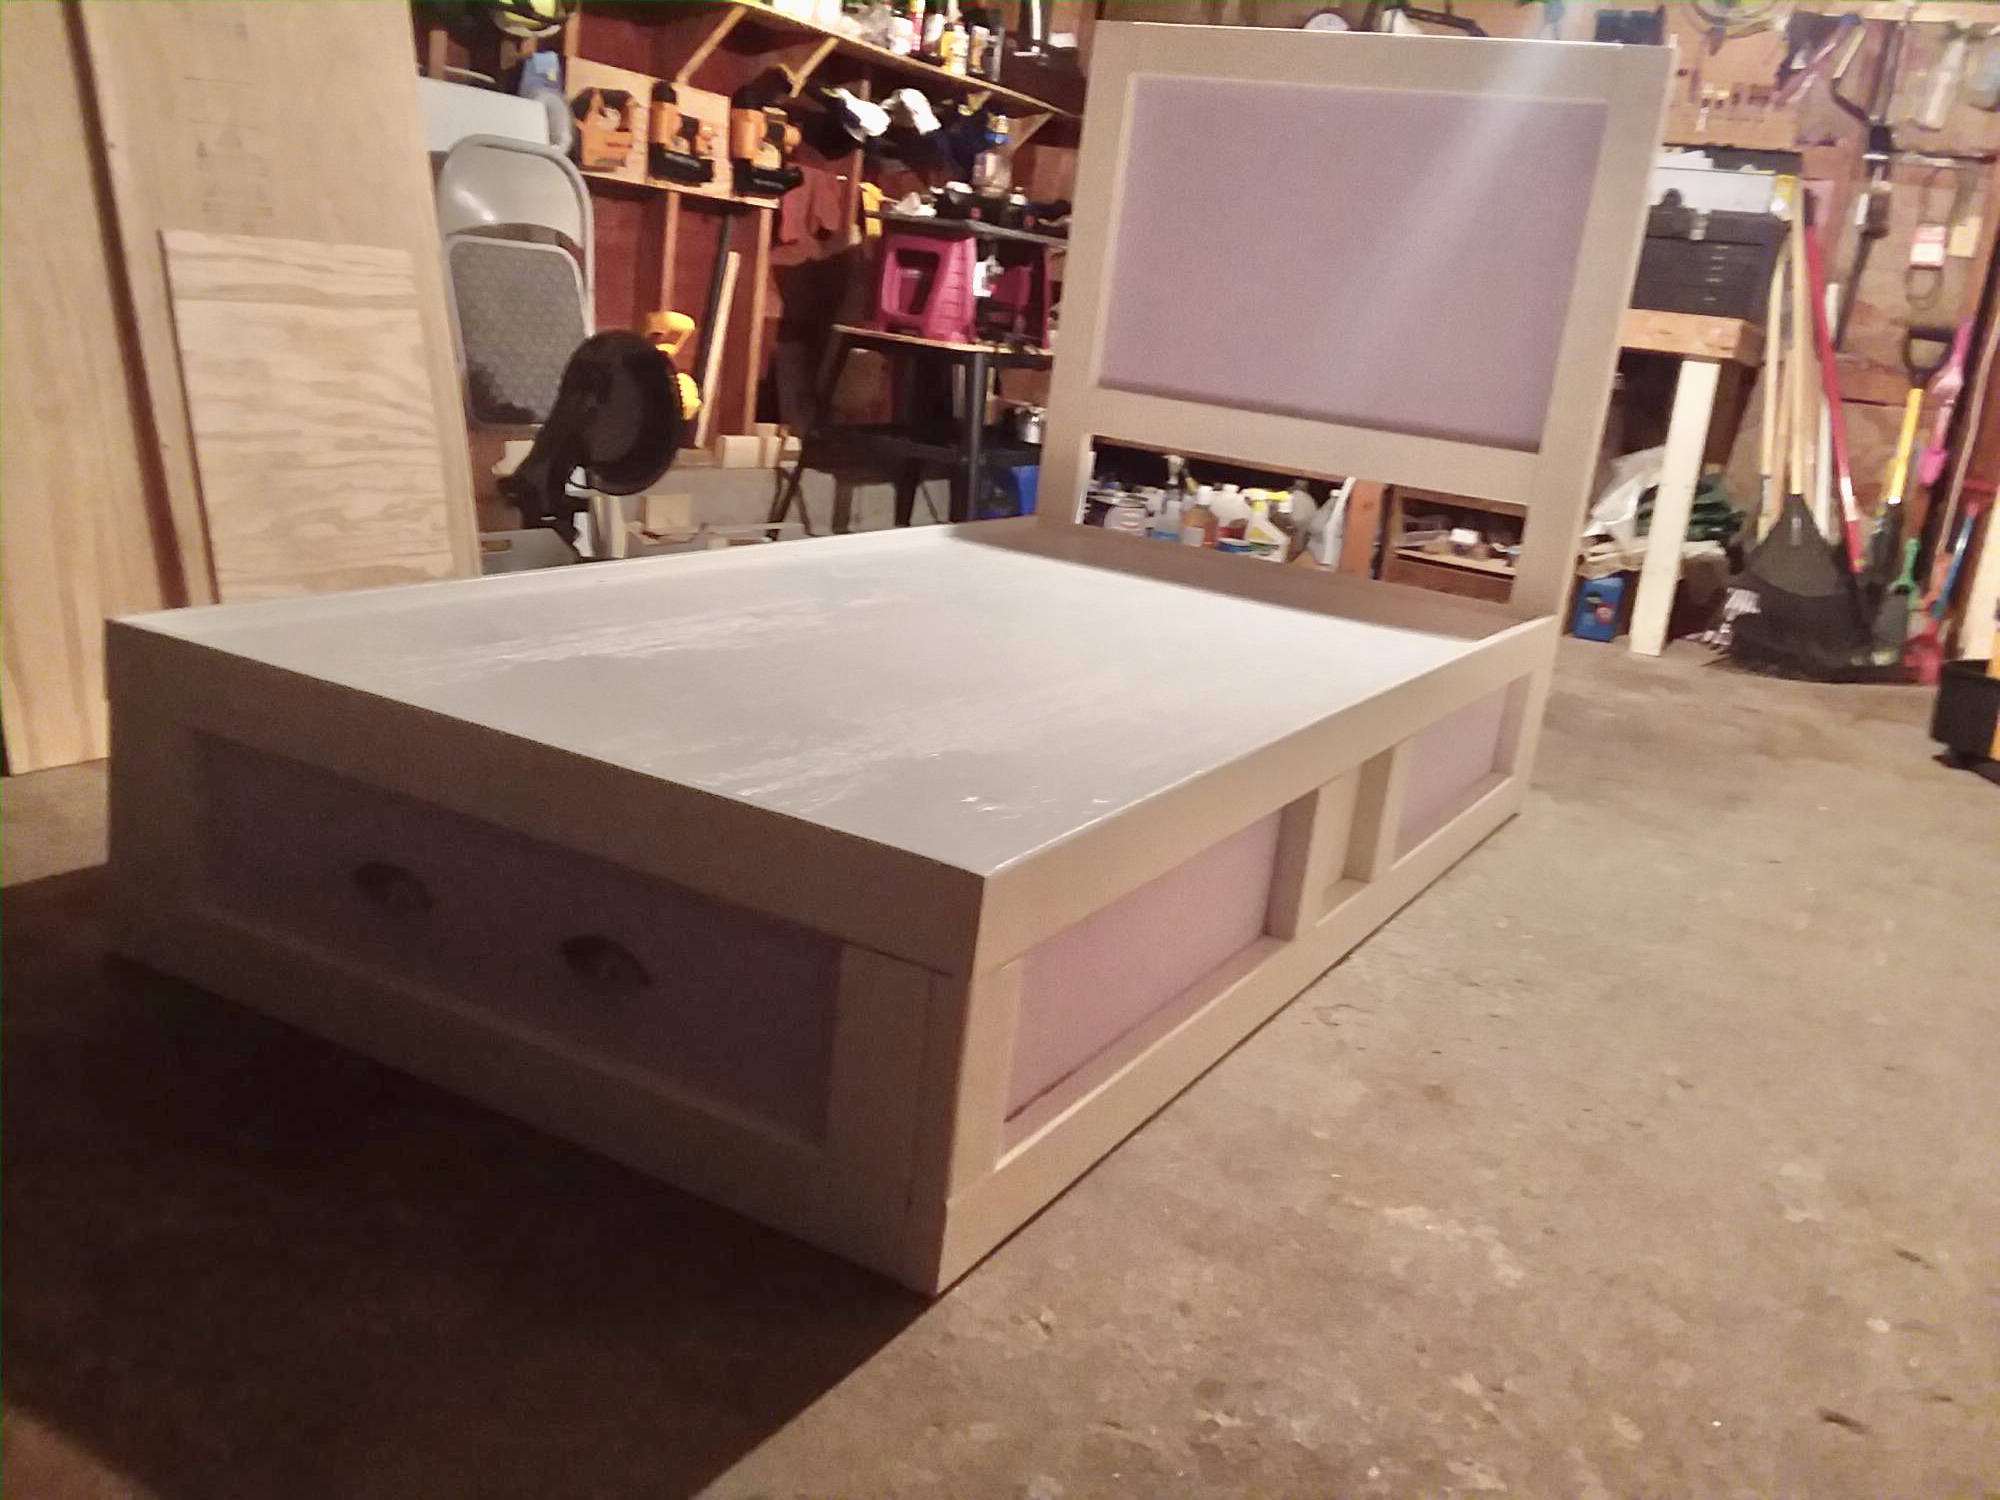
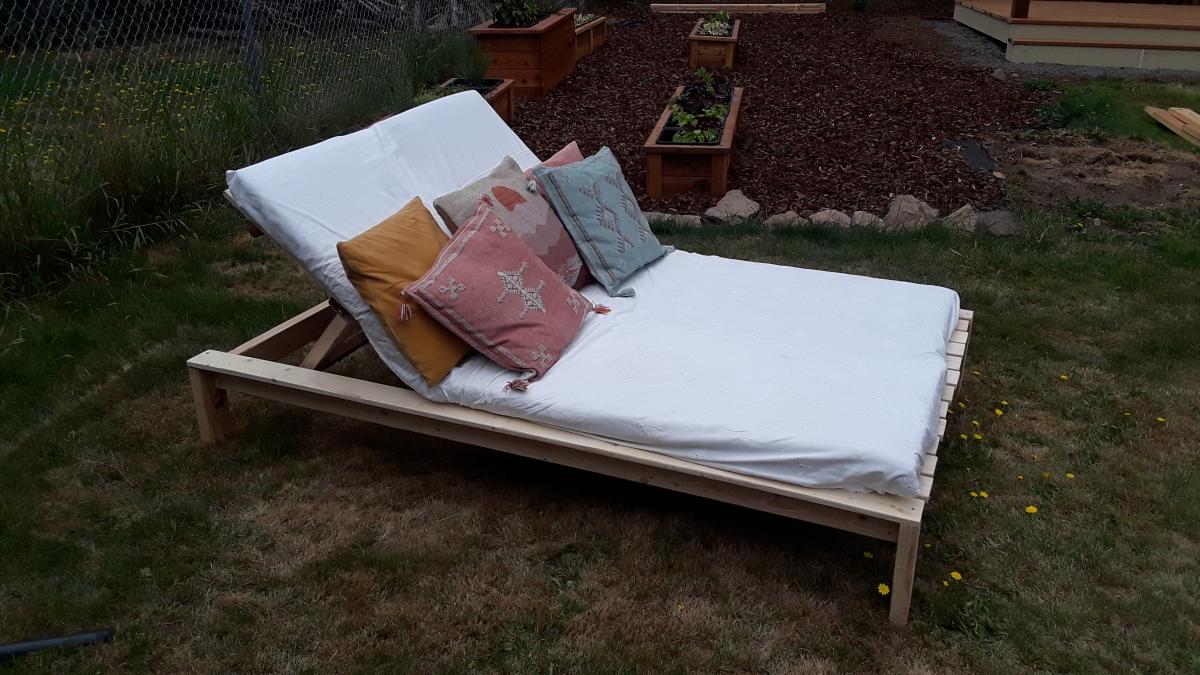
Double Wide Modern Chaise Lounge
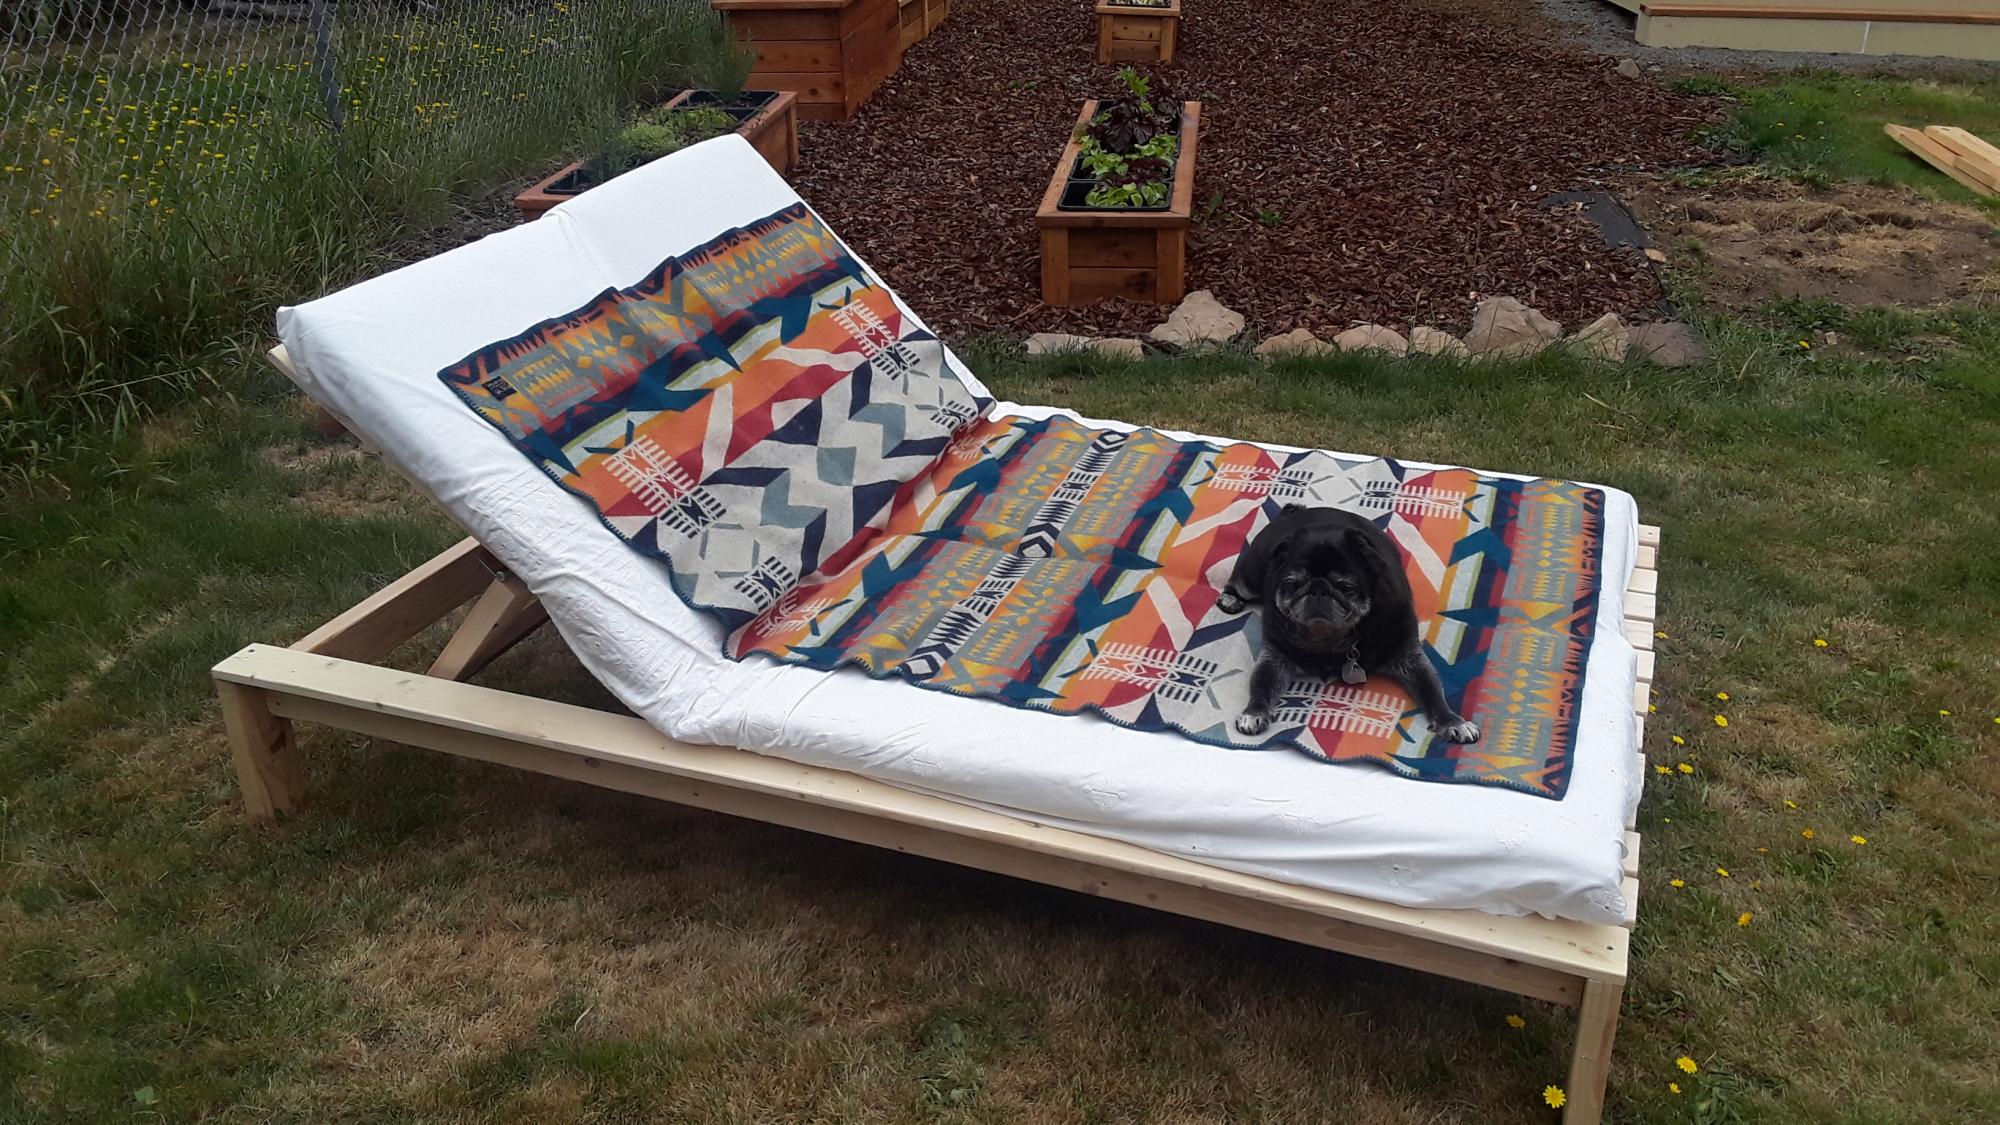
I used pine to build this bed. I am still going to paint it with some exterior house paint! The lumber and screws came in around $120. I got two cushions on clearance at Target for $20 each. I got a duvet cover on clearance at Bed Bath and Beyond for $20. The paint was $25 for a quart, and I also bought a gallon of primer to use on lots of future projects for about $20. I spent 5 hours sanding, 4 hours cutting, and 5 hours assembling with a friend. Much cheaper and more fun than the $1400 one from Restoration Hardware!
Built from Plan(s)
Estimated Cost
$225
Estimated Time Investment
Weekend Project (10-20 Hours)
Recommended Skill Level
Intermediate
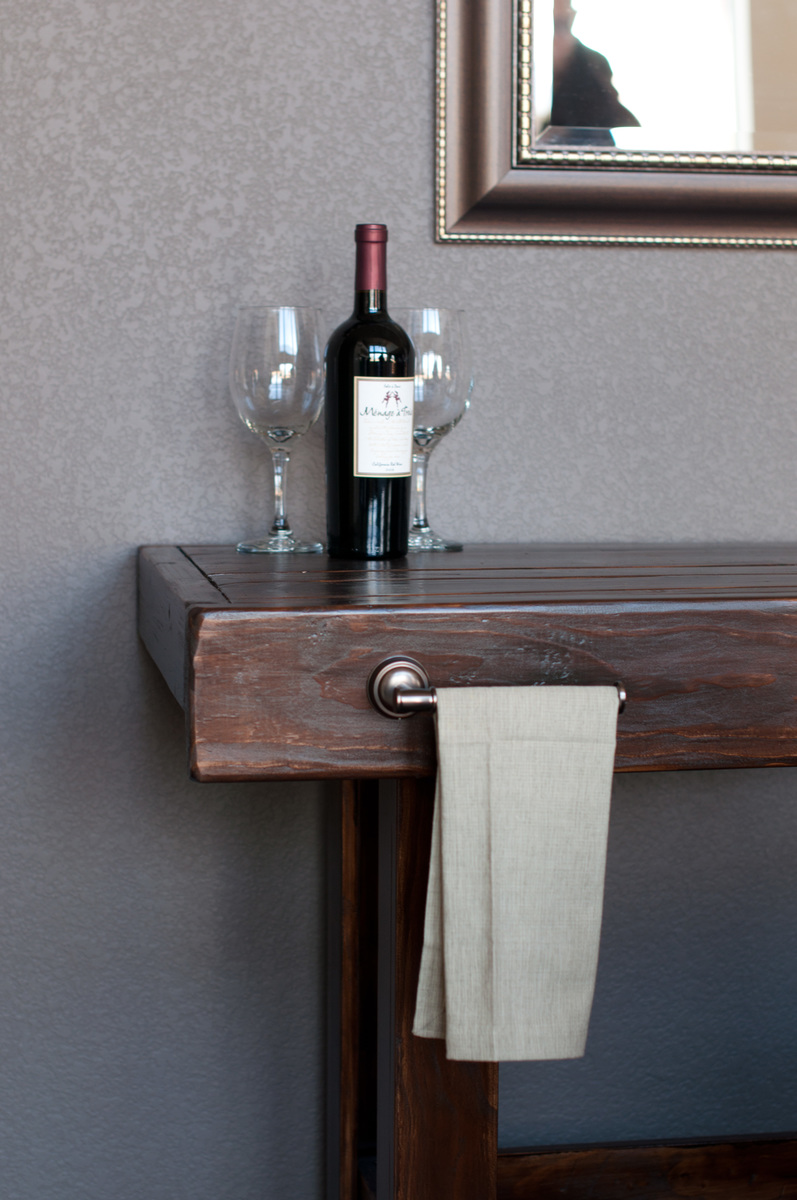
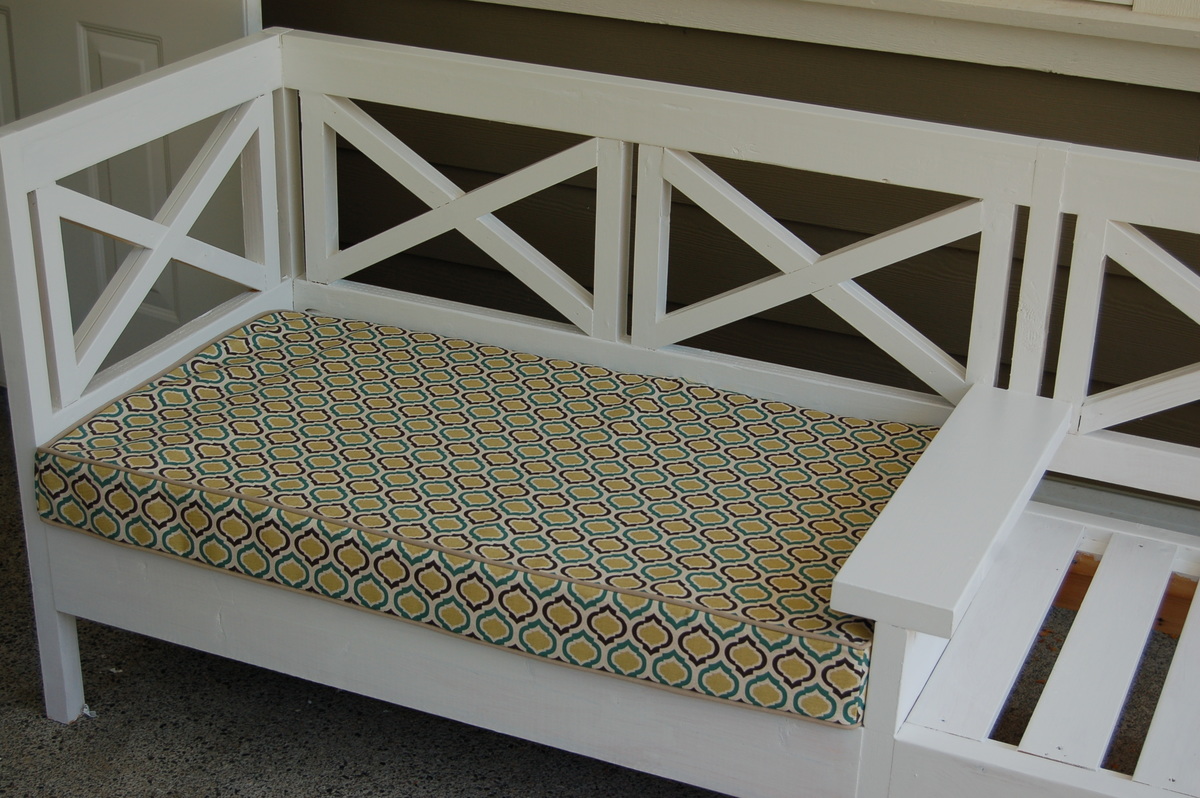
Providence Bench for my Front Porch
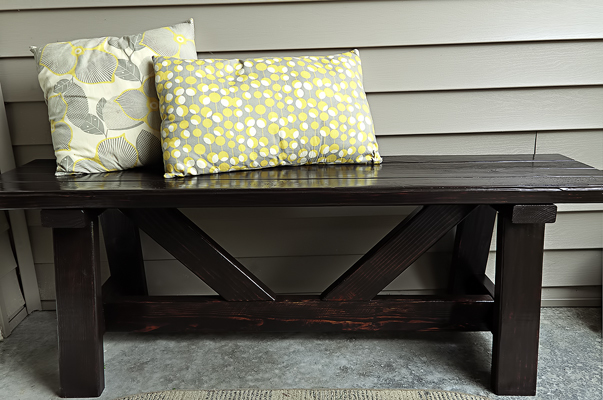
This project was quick and simple. Just keep in mind and pay attention to the plans where they state "bevel" or "miter". There is a difference!
This project was free to me as we have a huge amount of 2x4 studs left over in our garage from a previous project so I should be able to do the table and another bench for free as well.
It went together within a few hours as the cuts are easy.
Working on the camp loft bed now with some mods to add a stationary bed beneath and more height for my girls room.
Overall great build.
I stained it with one coat of Kona. I did let the stain sit and barely wiped it off that is why it ended up being very dark which is the look I was going for. I then finished it off with 4 coats of polycrylic clear in high gloss which dries very fast and does not yellow.
Estimated Cost
$10.00 - 2x4's here are about $1.54 each
Estimated Time Investment
Afternoon Project (3-6 Hours)
Finish Used
1 coat of Rustoleum Ultimate wood stain in Kona. This is the best stain ever for dry time (its not clean like gel stain though so it is runny and can get messy just an fyi)
It dries within an hour! And only needs one coat!
Finished it with 4 coats of Minwax polycrylic clear gloss. Its ultra fast drying and water based for easy clean up. Comes in matte, satin, and gloss.
It dries within an hour! And only needs one coat!
Finished it with 4 coats of Minwax polycrylic clear gloss. Its ultra fast drying and water based for easy clean up. Comes in matte, satin, and gloss.
Recommended Skill Level
Beginner
Comments
Sat, 10/13/2012 - 17:03
build a providence bench
I'm hoping for this to be my first project!! How do i get the plans ??
Sat, 12/08/2012 - 20:05
Bench Plans
I just found the plans for the Providence Bench on this site good luck...http://ana-white.com/2012/04/plans/providence-bench
Wed, 11/14/2012 - 21:56
PLANS.....PLEASE....?? =)
I'D LOVE TO MAKE THIS PROJECT FOR MY ENTRANCE HALL...! THANK YOU FOR SHARING!!
H. C.
Fri, 11/23/2012 - 10:49
Link to plans
There is a clickable link above where it says "Blog Link: Build a Providence Bench"
Sat, 12/08/2012 - 20:07
Bench Plans
Here are the plans for the Providence Bench on this site good luck...http://ana-white.com/2012/04/plans/providence-bench
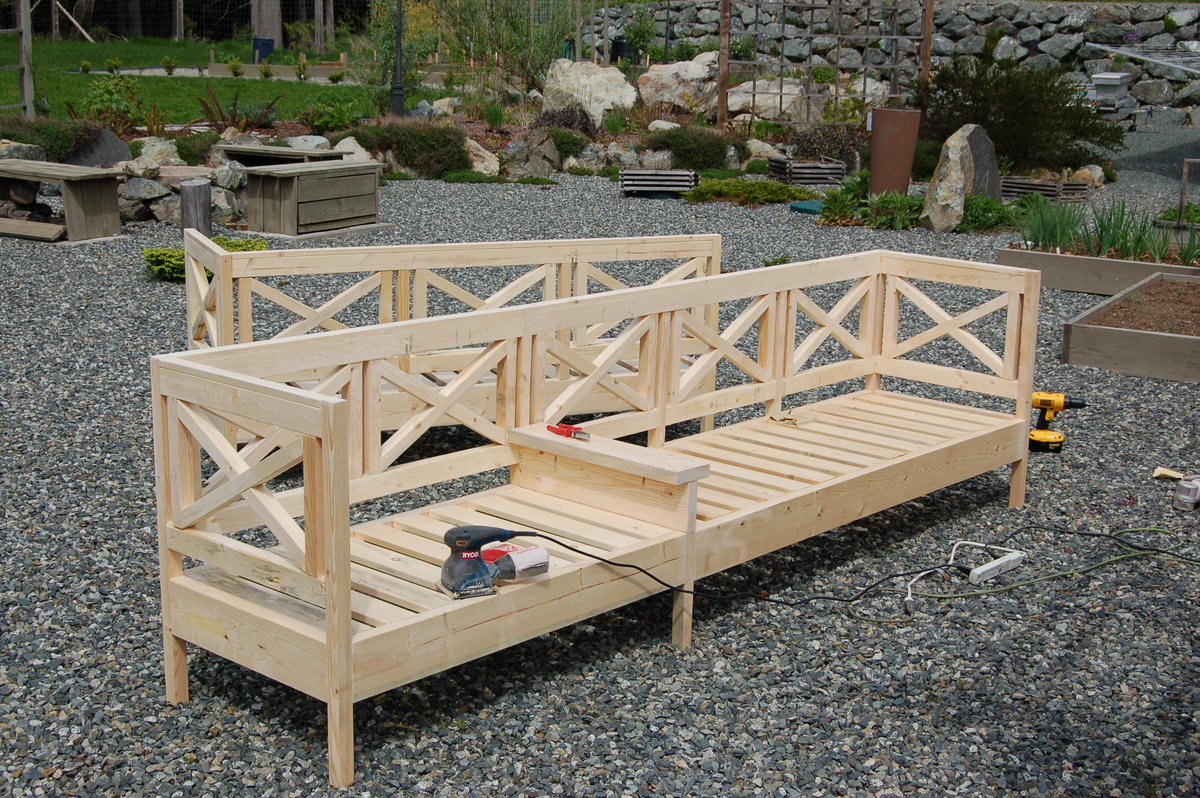
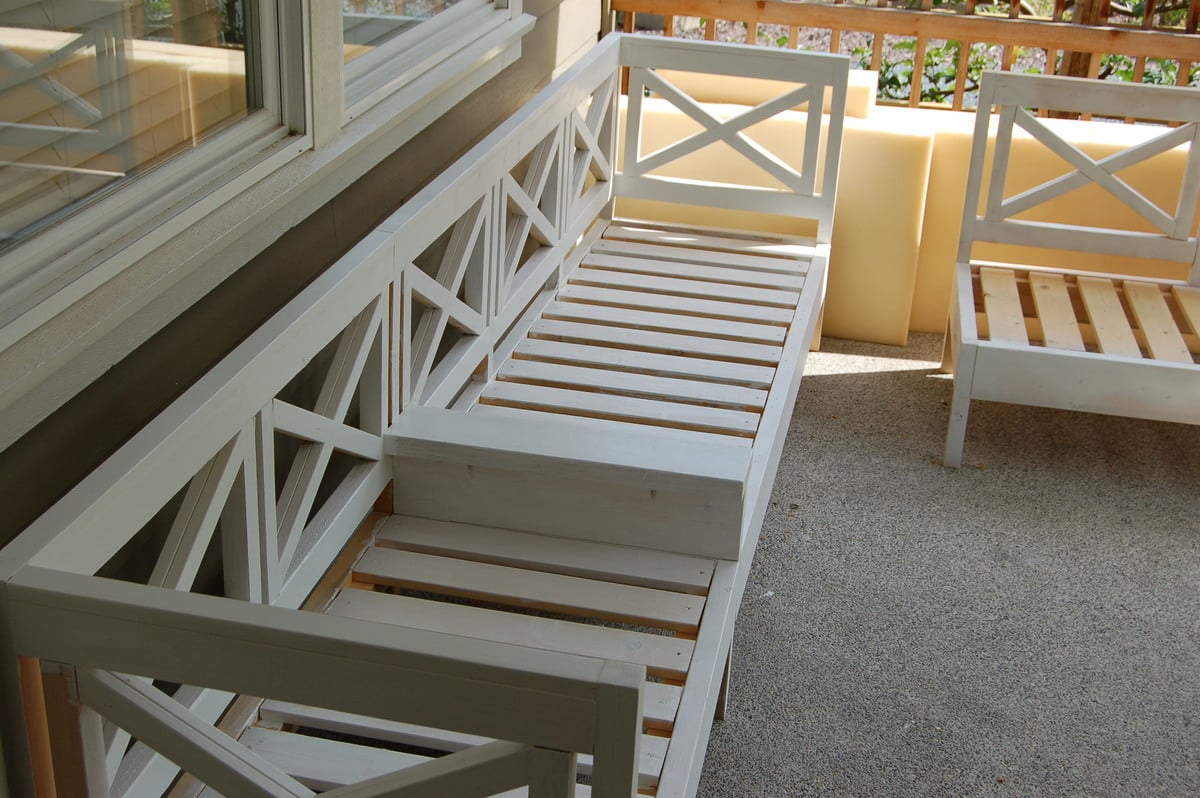
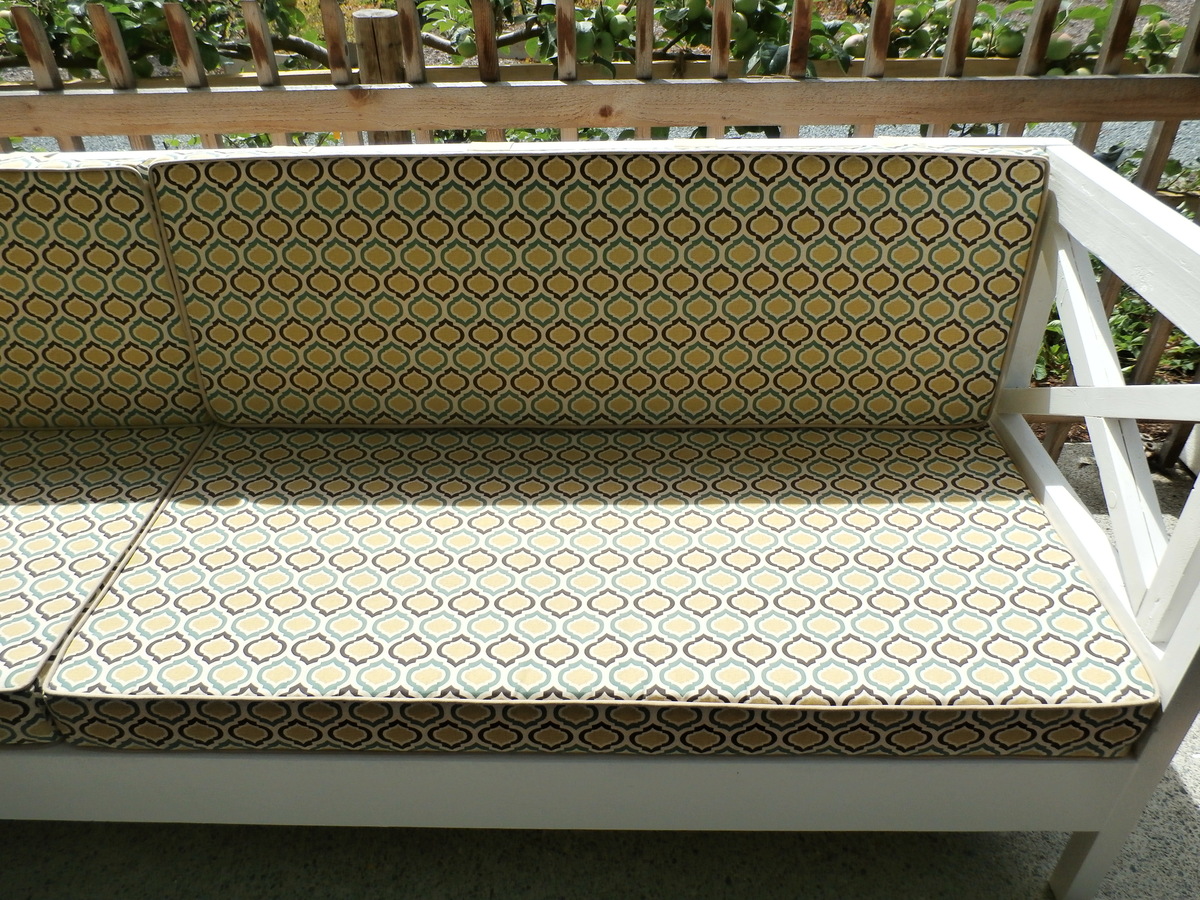
Weatherly Benches
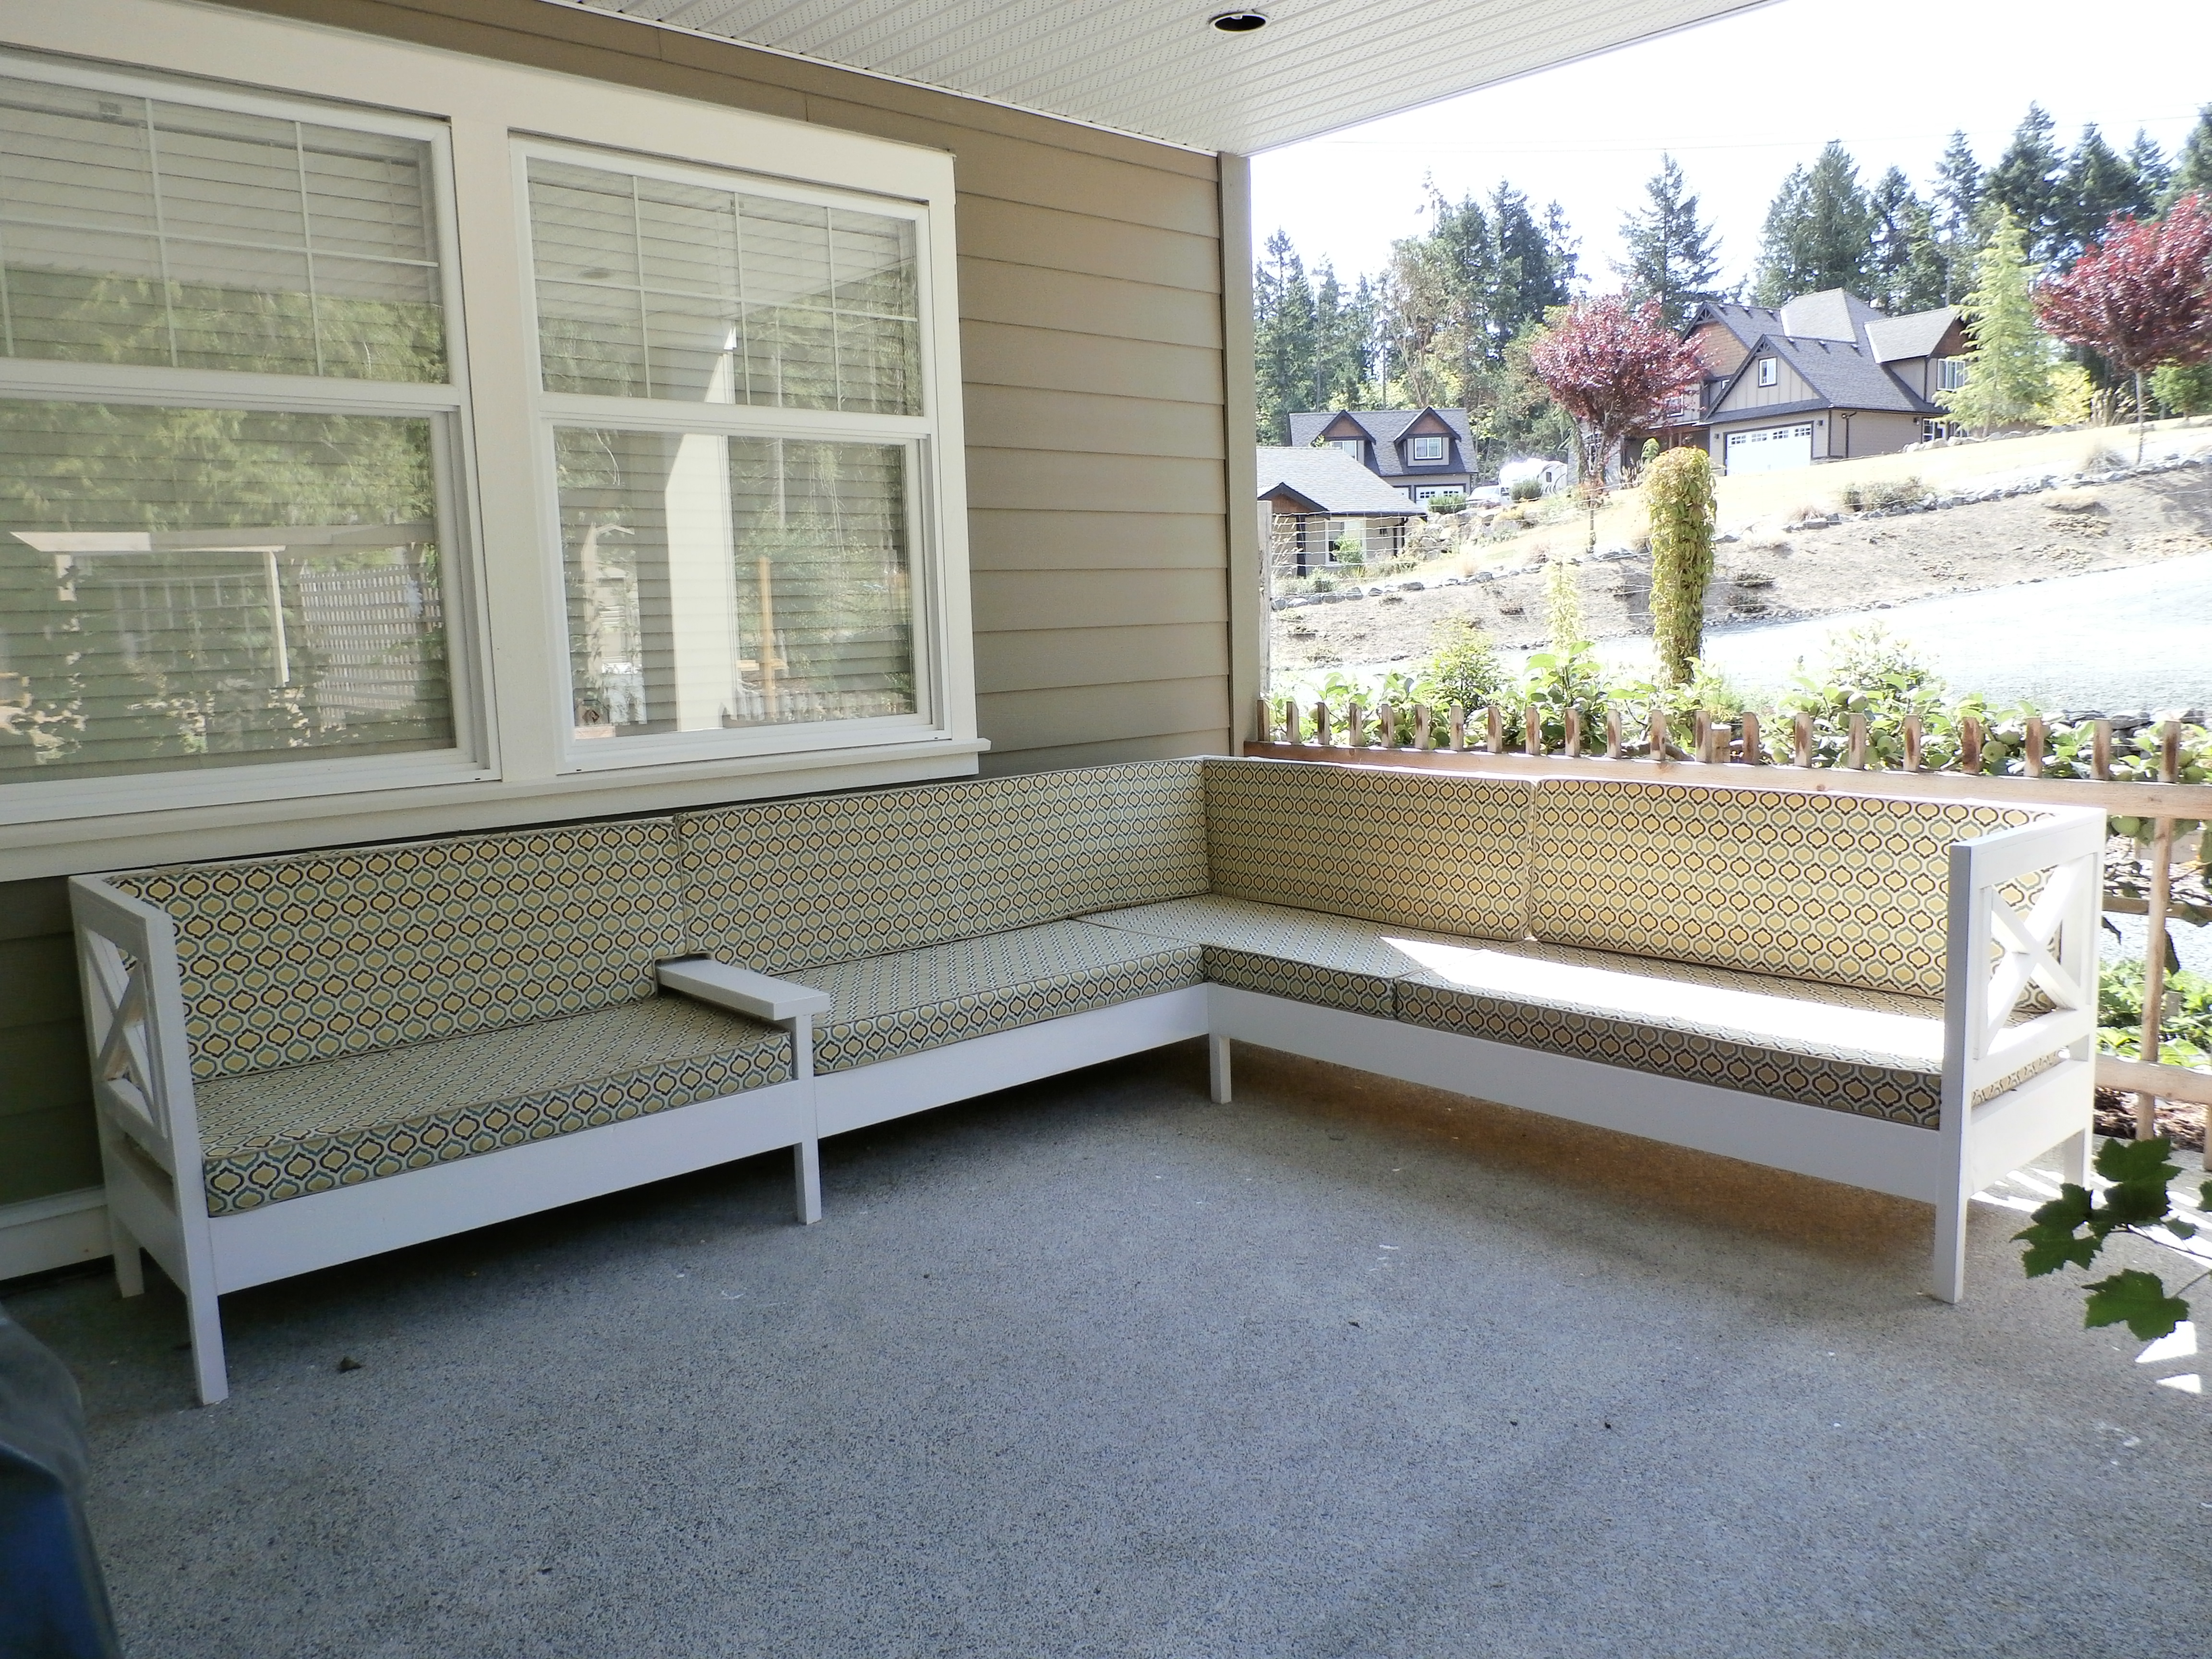
We used the Weatherly plans for this project amending in a couple of places. The two seat version was attached to the three with using just one set of legs and then we added a 2 x 6" upright at the join and put another 2 x 6" on top for a drinks tray! Rather than 8 individual 24" cushions we went with 48 x 24" seats and did the same for the backs.
The cost for materials was only about $70 and the outdoor fabric was twice that amount. As it is under a covered deck we just used 4" foam for the seats and 2" foam for the backrests, costing about $100. All Canadian Dollars.
Built from Plan(s)
Estimated Cost
$70
Estimated Time Investment
Day Project (6-9 Hours)
Finish Used
We coated everything twice with Benjamin Moore Cloud White external paint.
Recommended Skill Level
Intermediate
Dartboard Cabinet
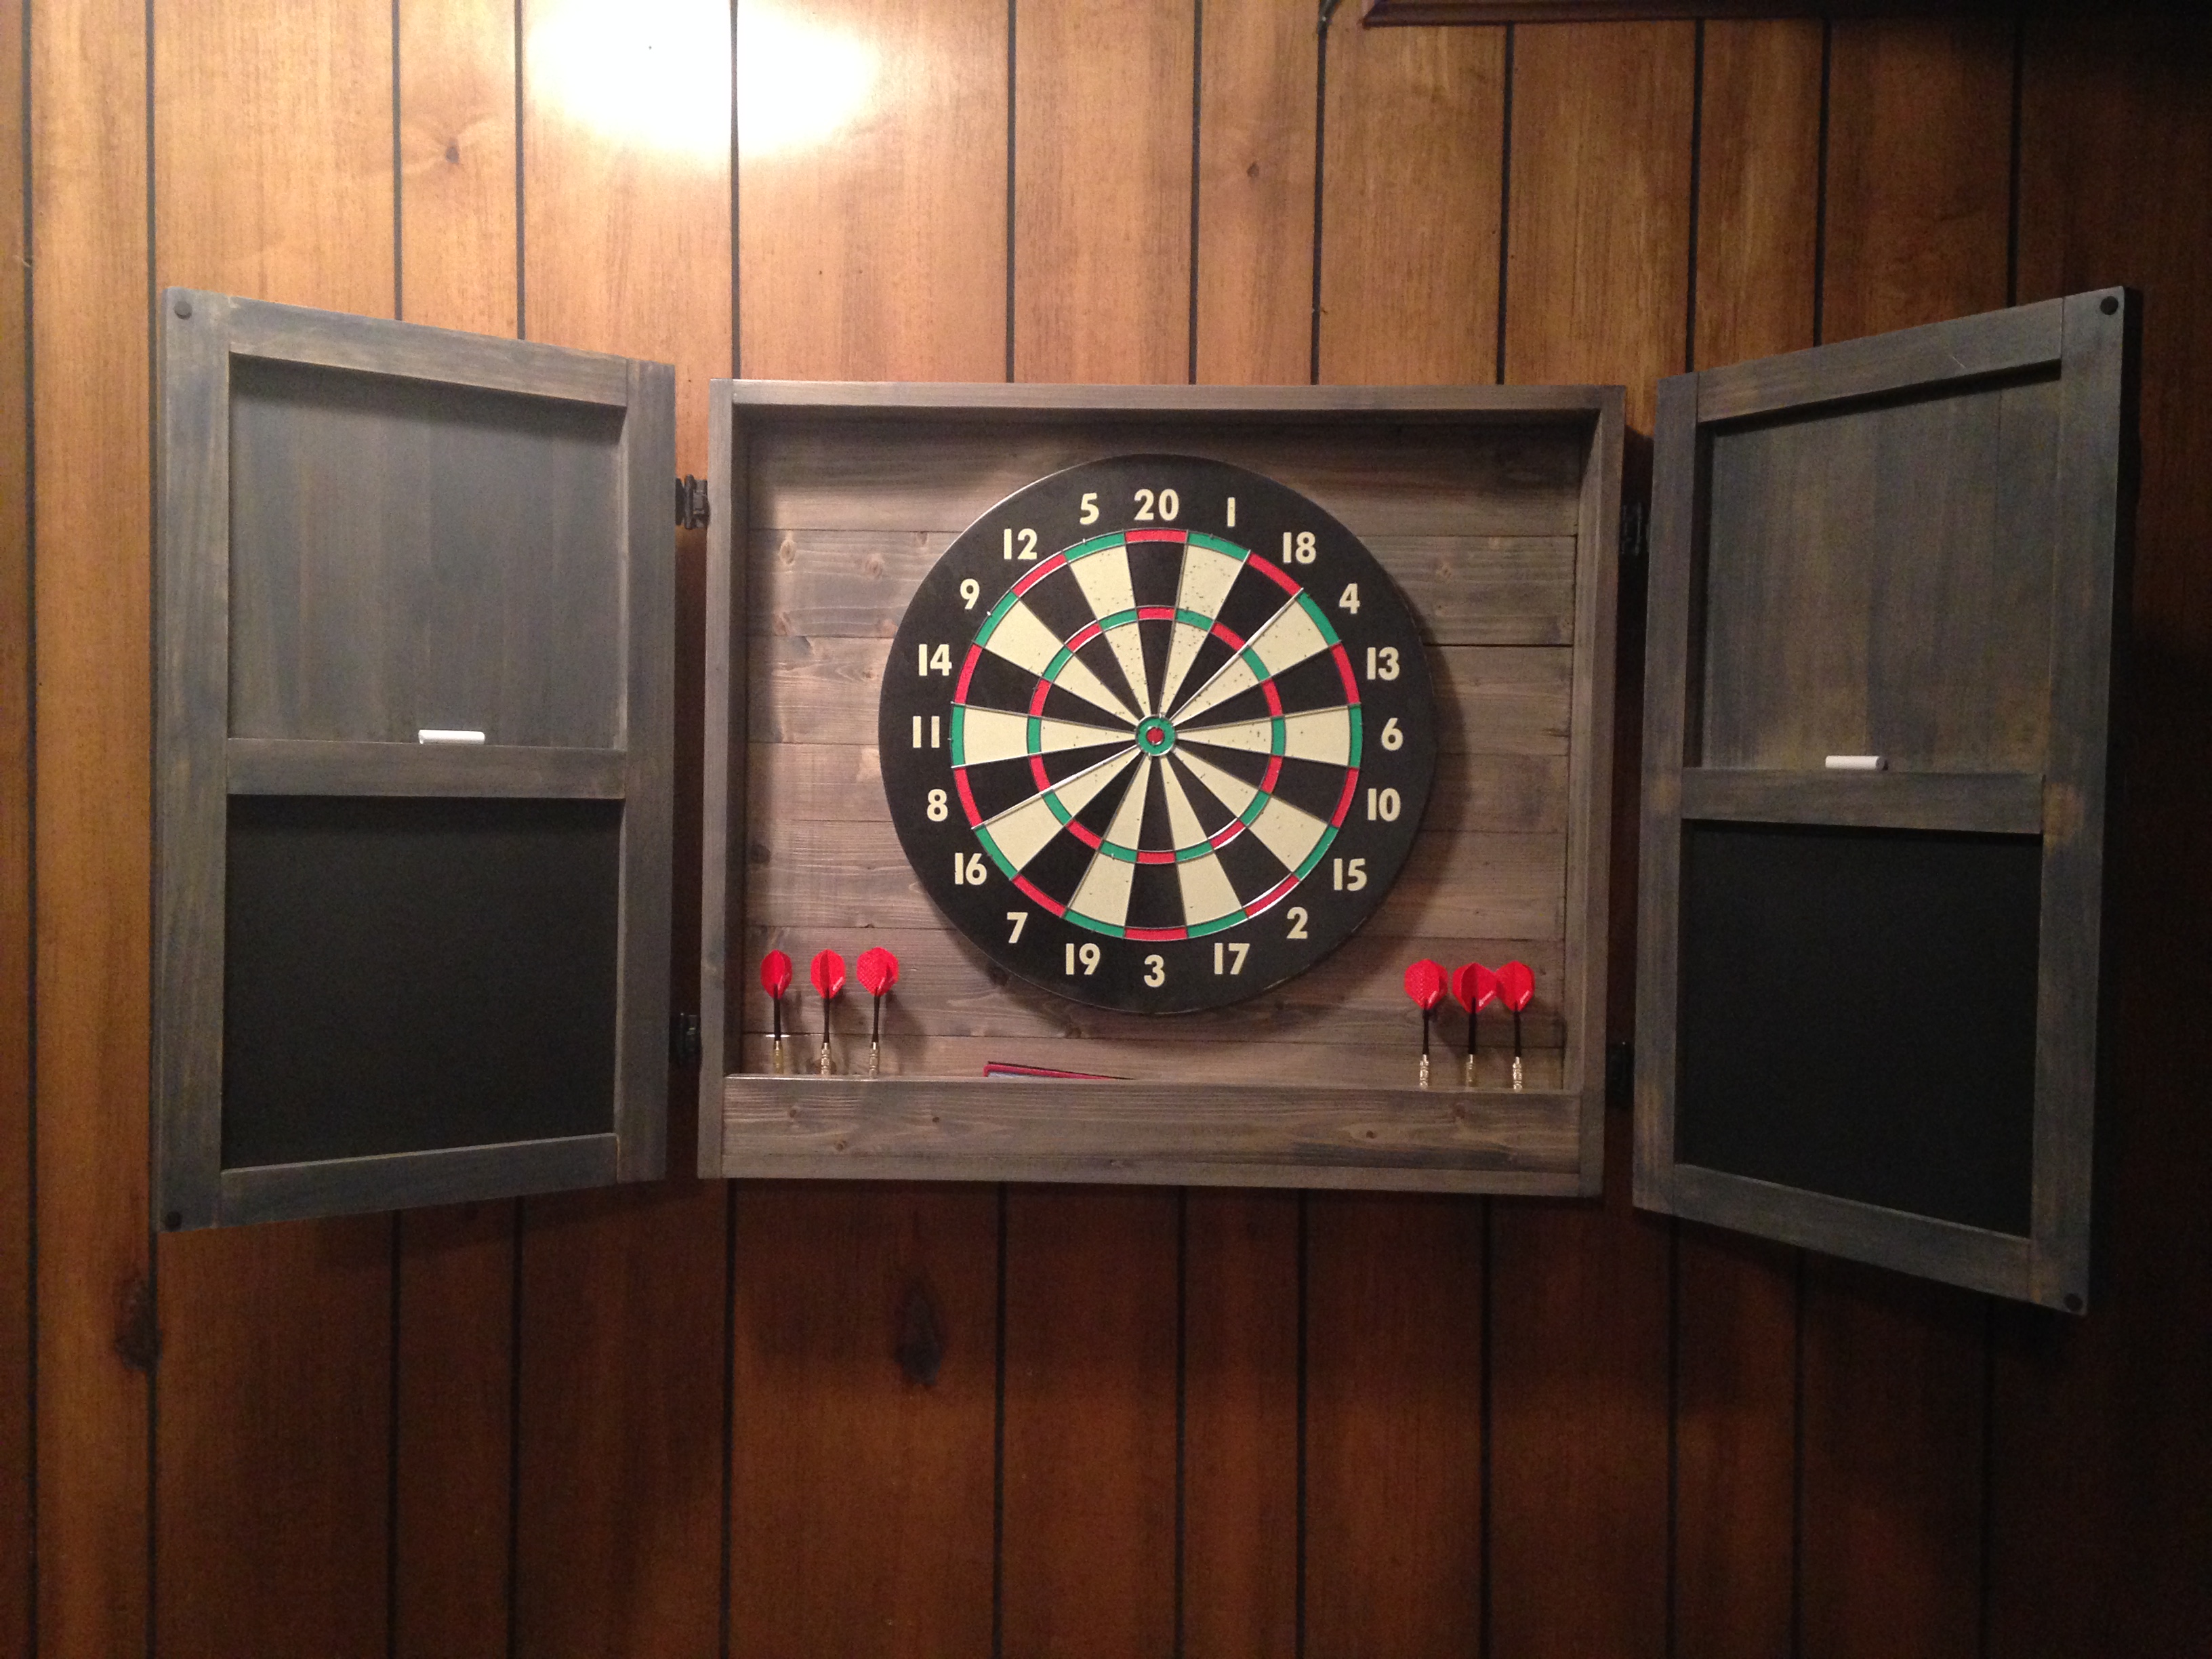
I had a big empty wall in my den/man cave, so I decided to build a dartboard cabinet instead of just hanging a dartboard on the wall. No plans for this, I just made it up as I went. Measured twice, sketched it out and cut as I went.
I use pine 1x4's for the frame and back. 1x3's for the accessory box, 1x2's for the door frame, and poplar strips for the doors and door braces. The darts are held by 6" long 2x2's with holes drilled.
Wood screws, finish nails, and small brads were used to hold everything together.
The chalkboards are simple MDF's cut and sprayed with chalkboard paint. Overlay hinges are used for the doors, and the dartbord is held on with screws from the back so it can be replaced when needed.
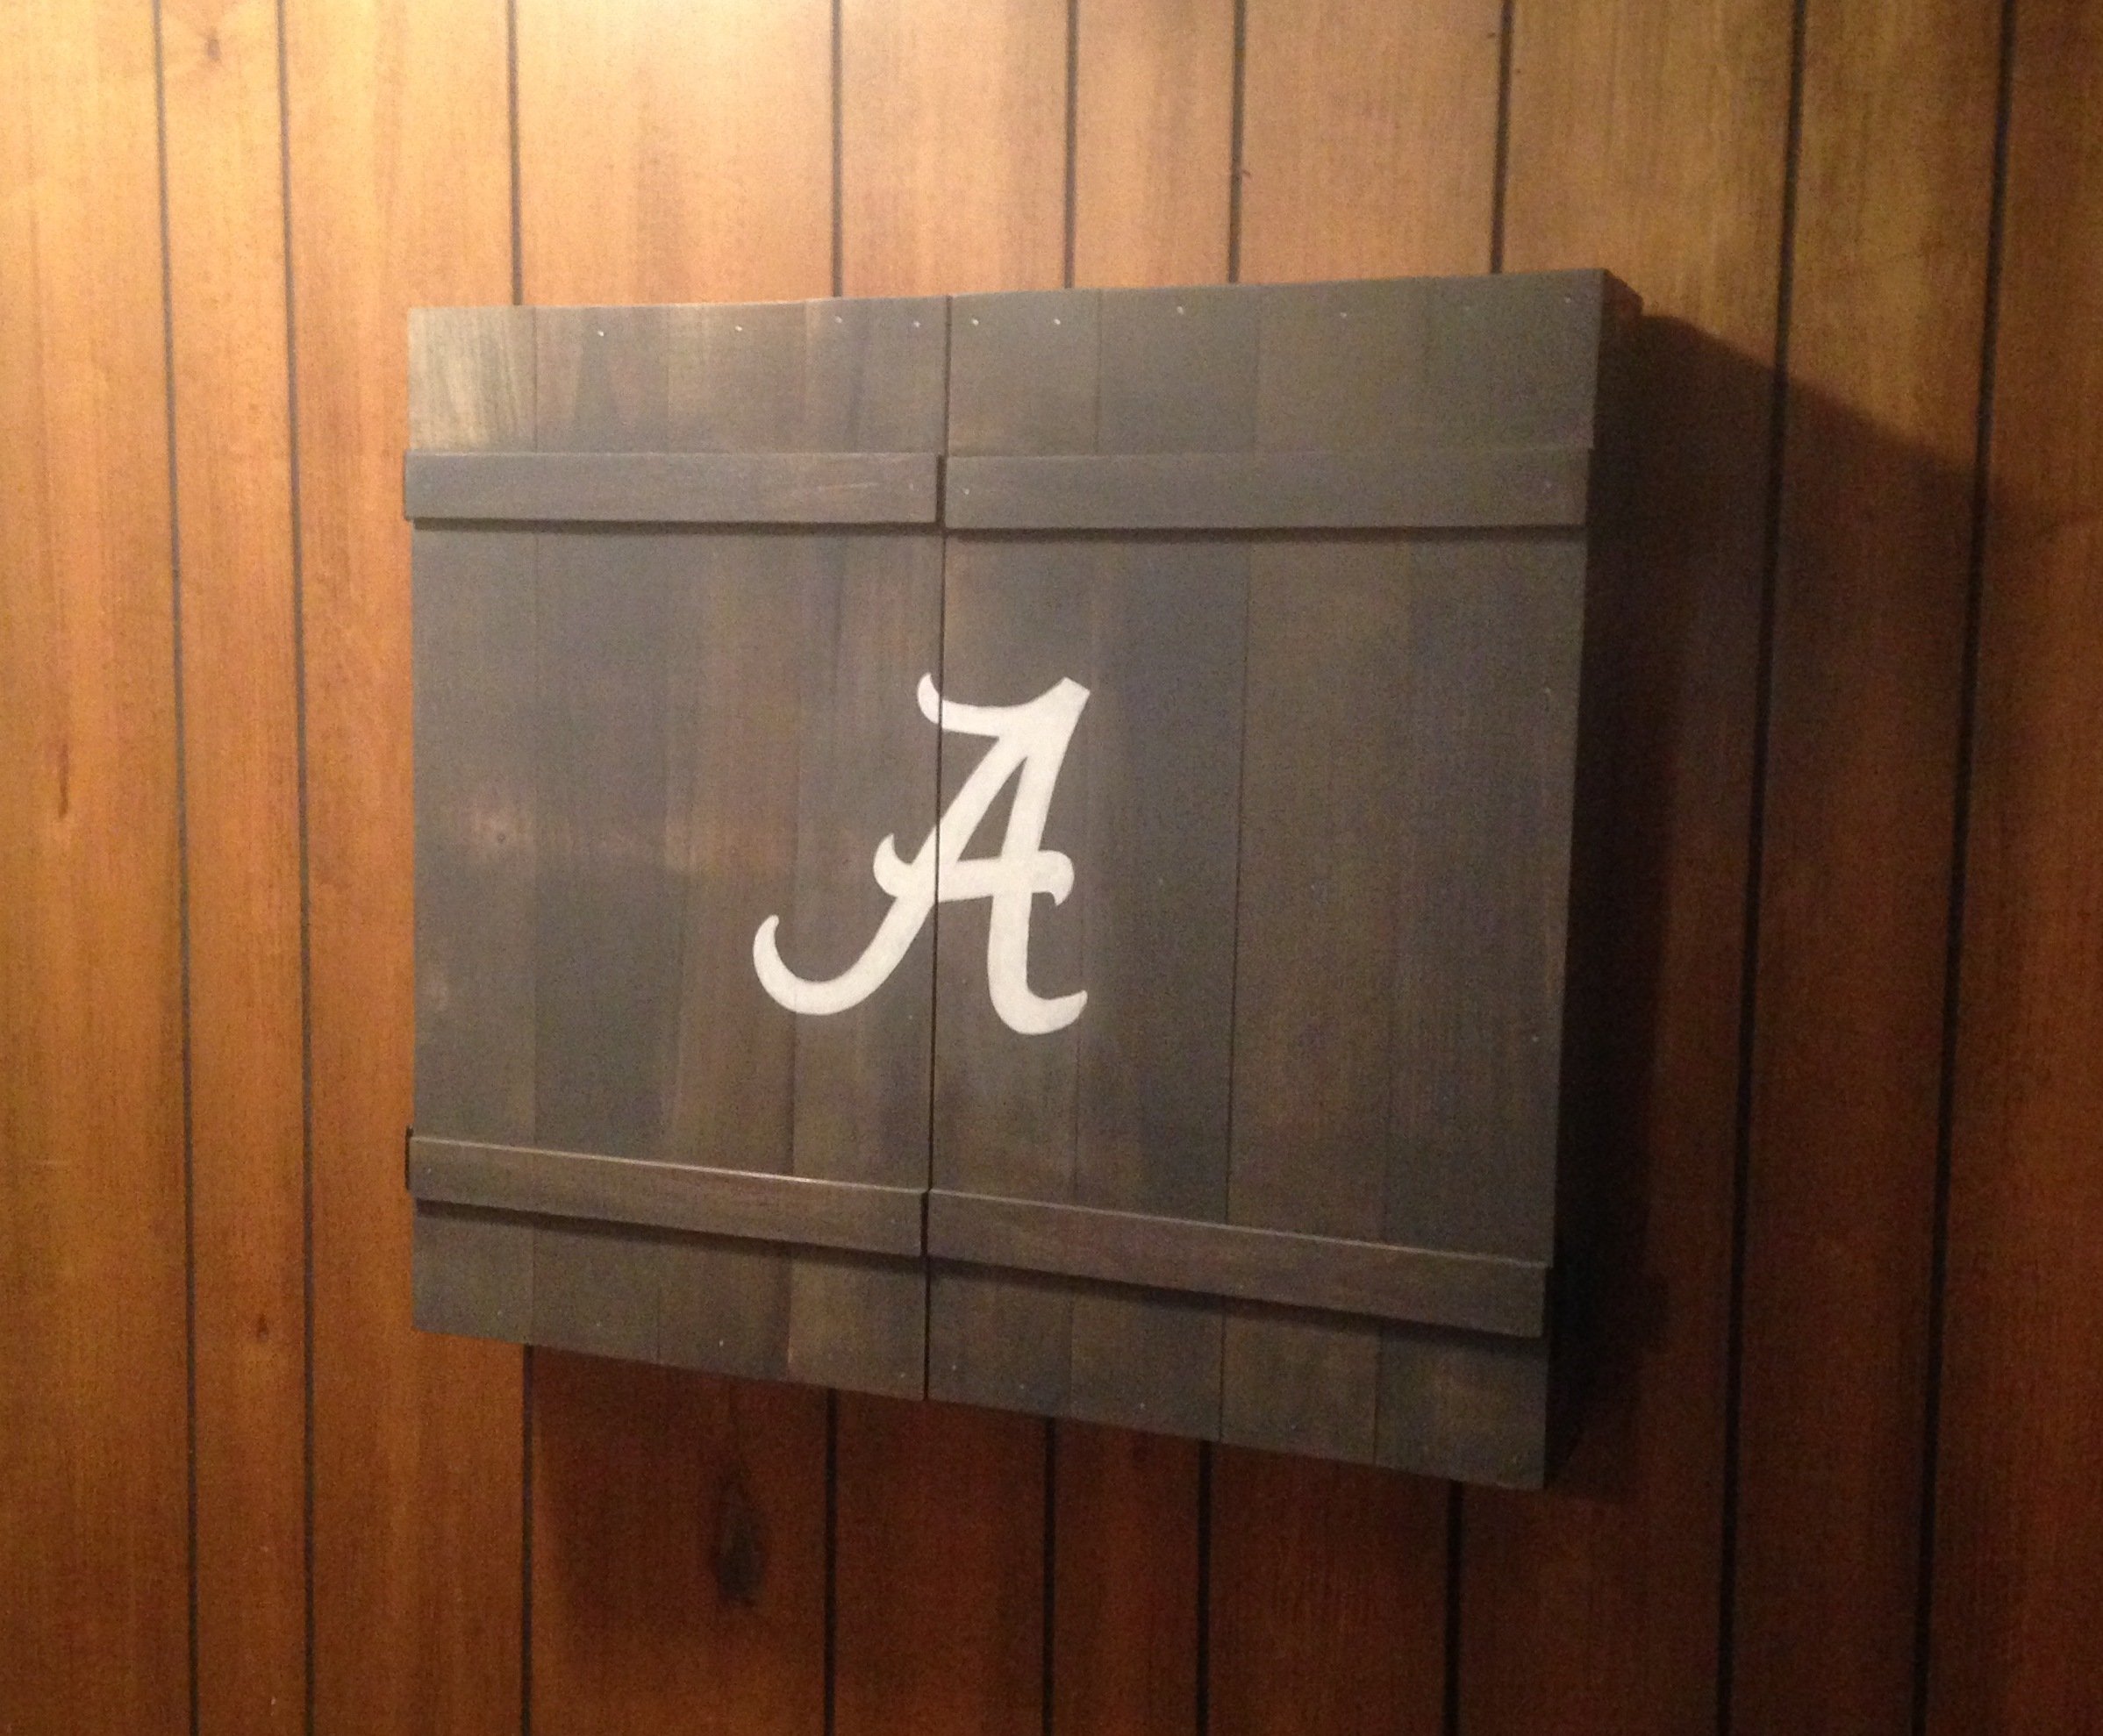
The Alabama A is hand-painted.
Estimated Time Investment
Day Project (6-9 Hours)
Finish Used
Minwax Classic Gray with light coats of spray glosscoat.
Recommended Skill Level
Beginner
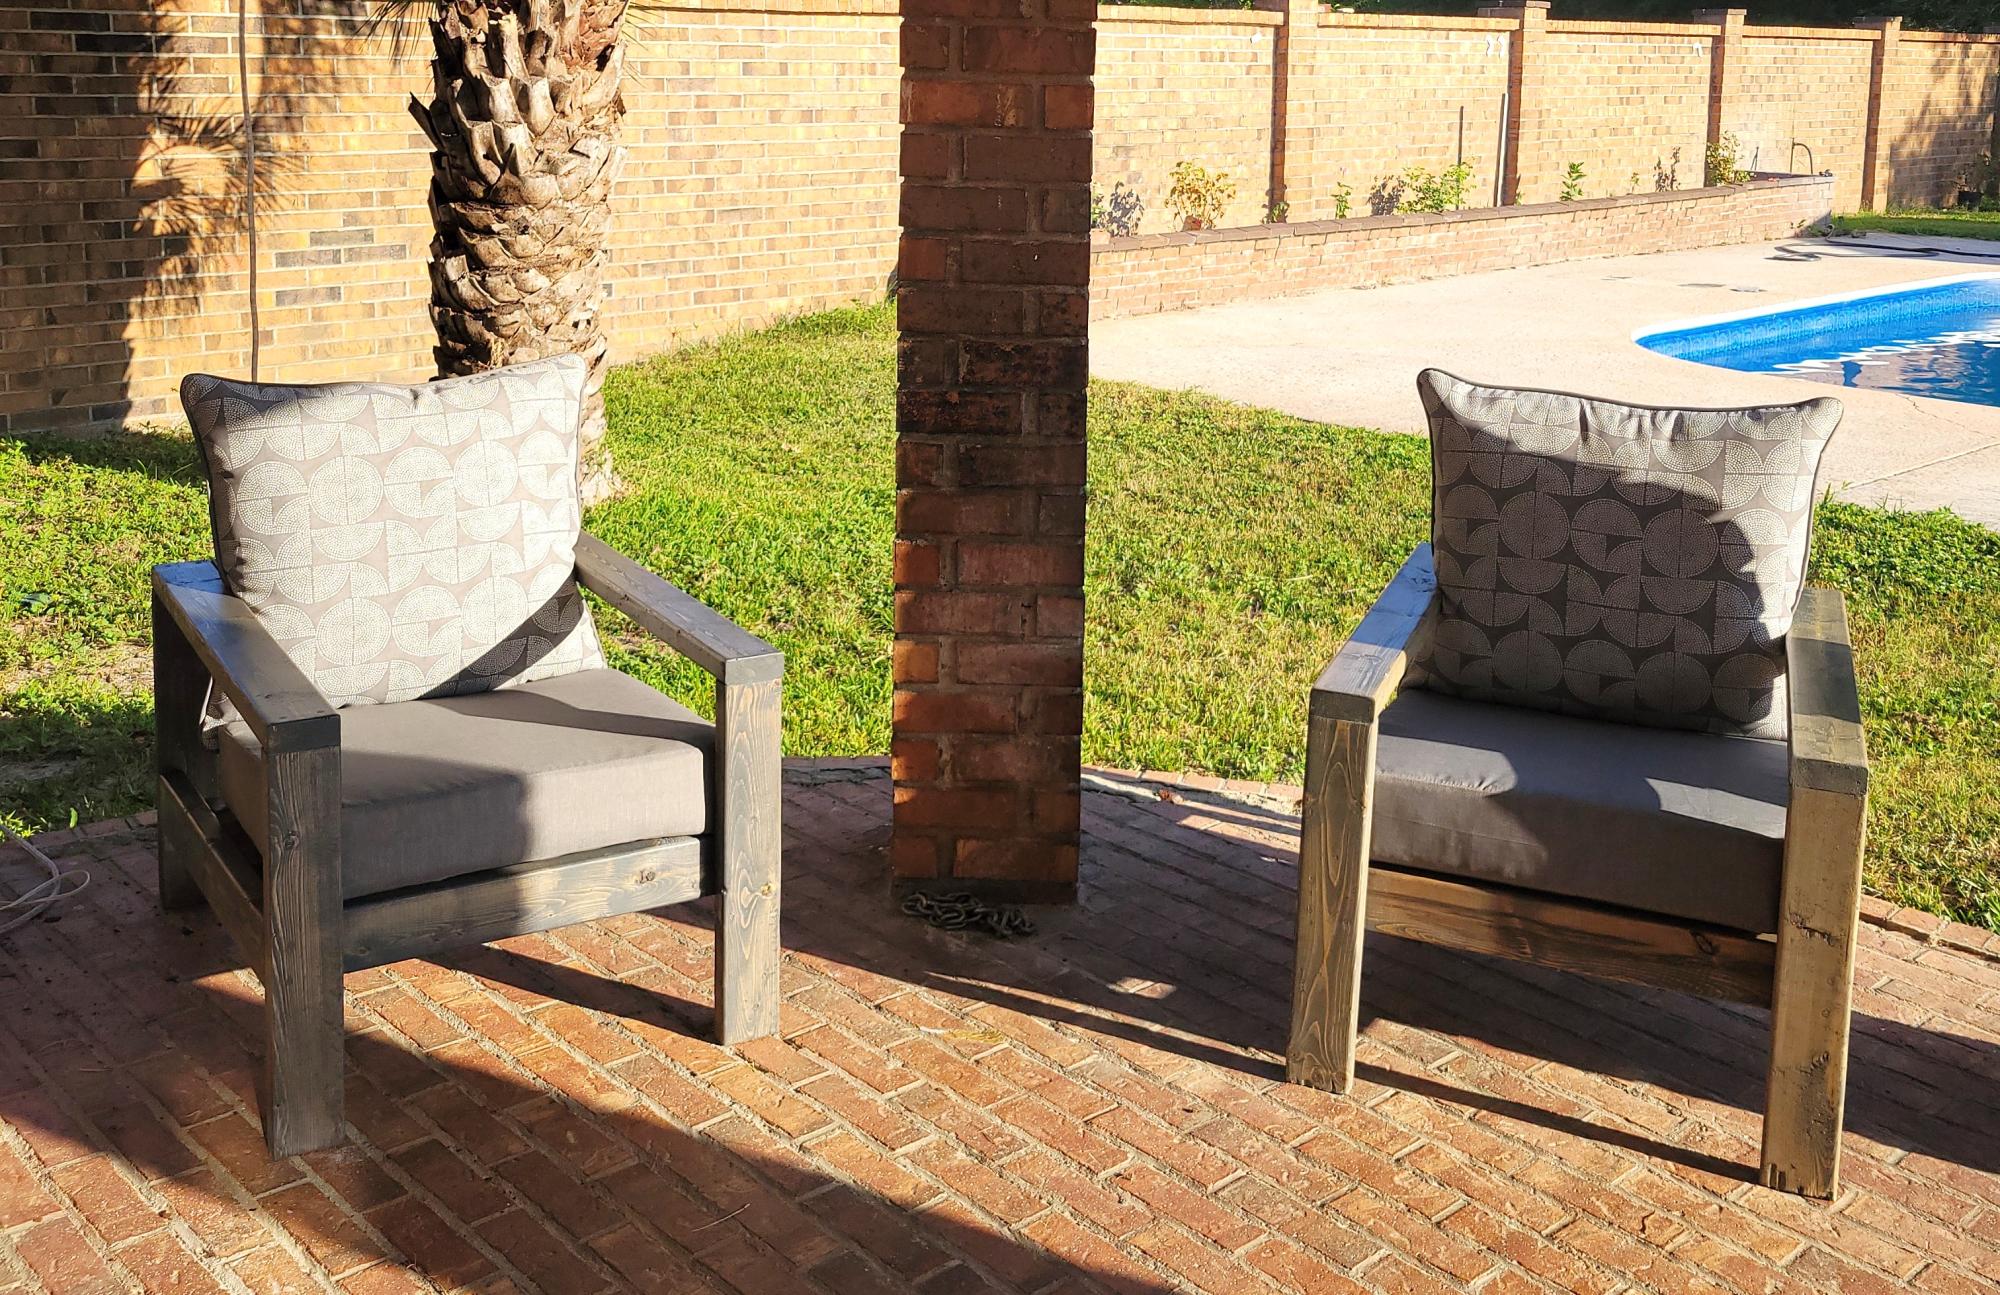
Outdoor patio furniture
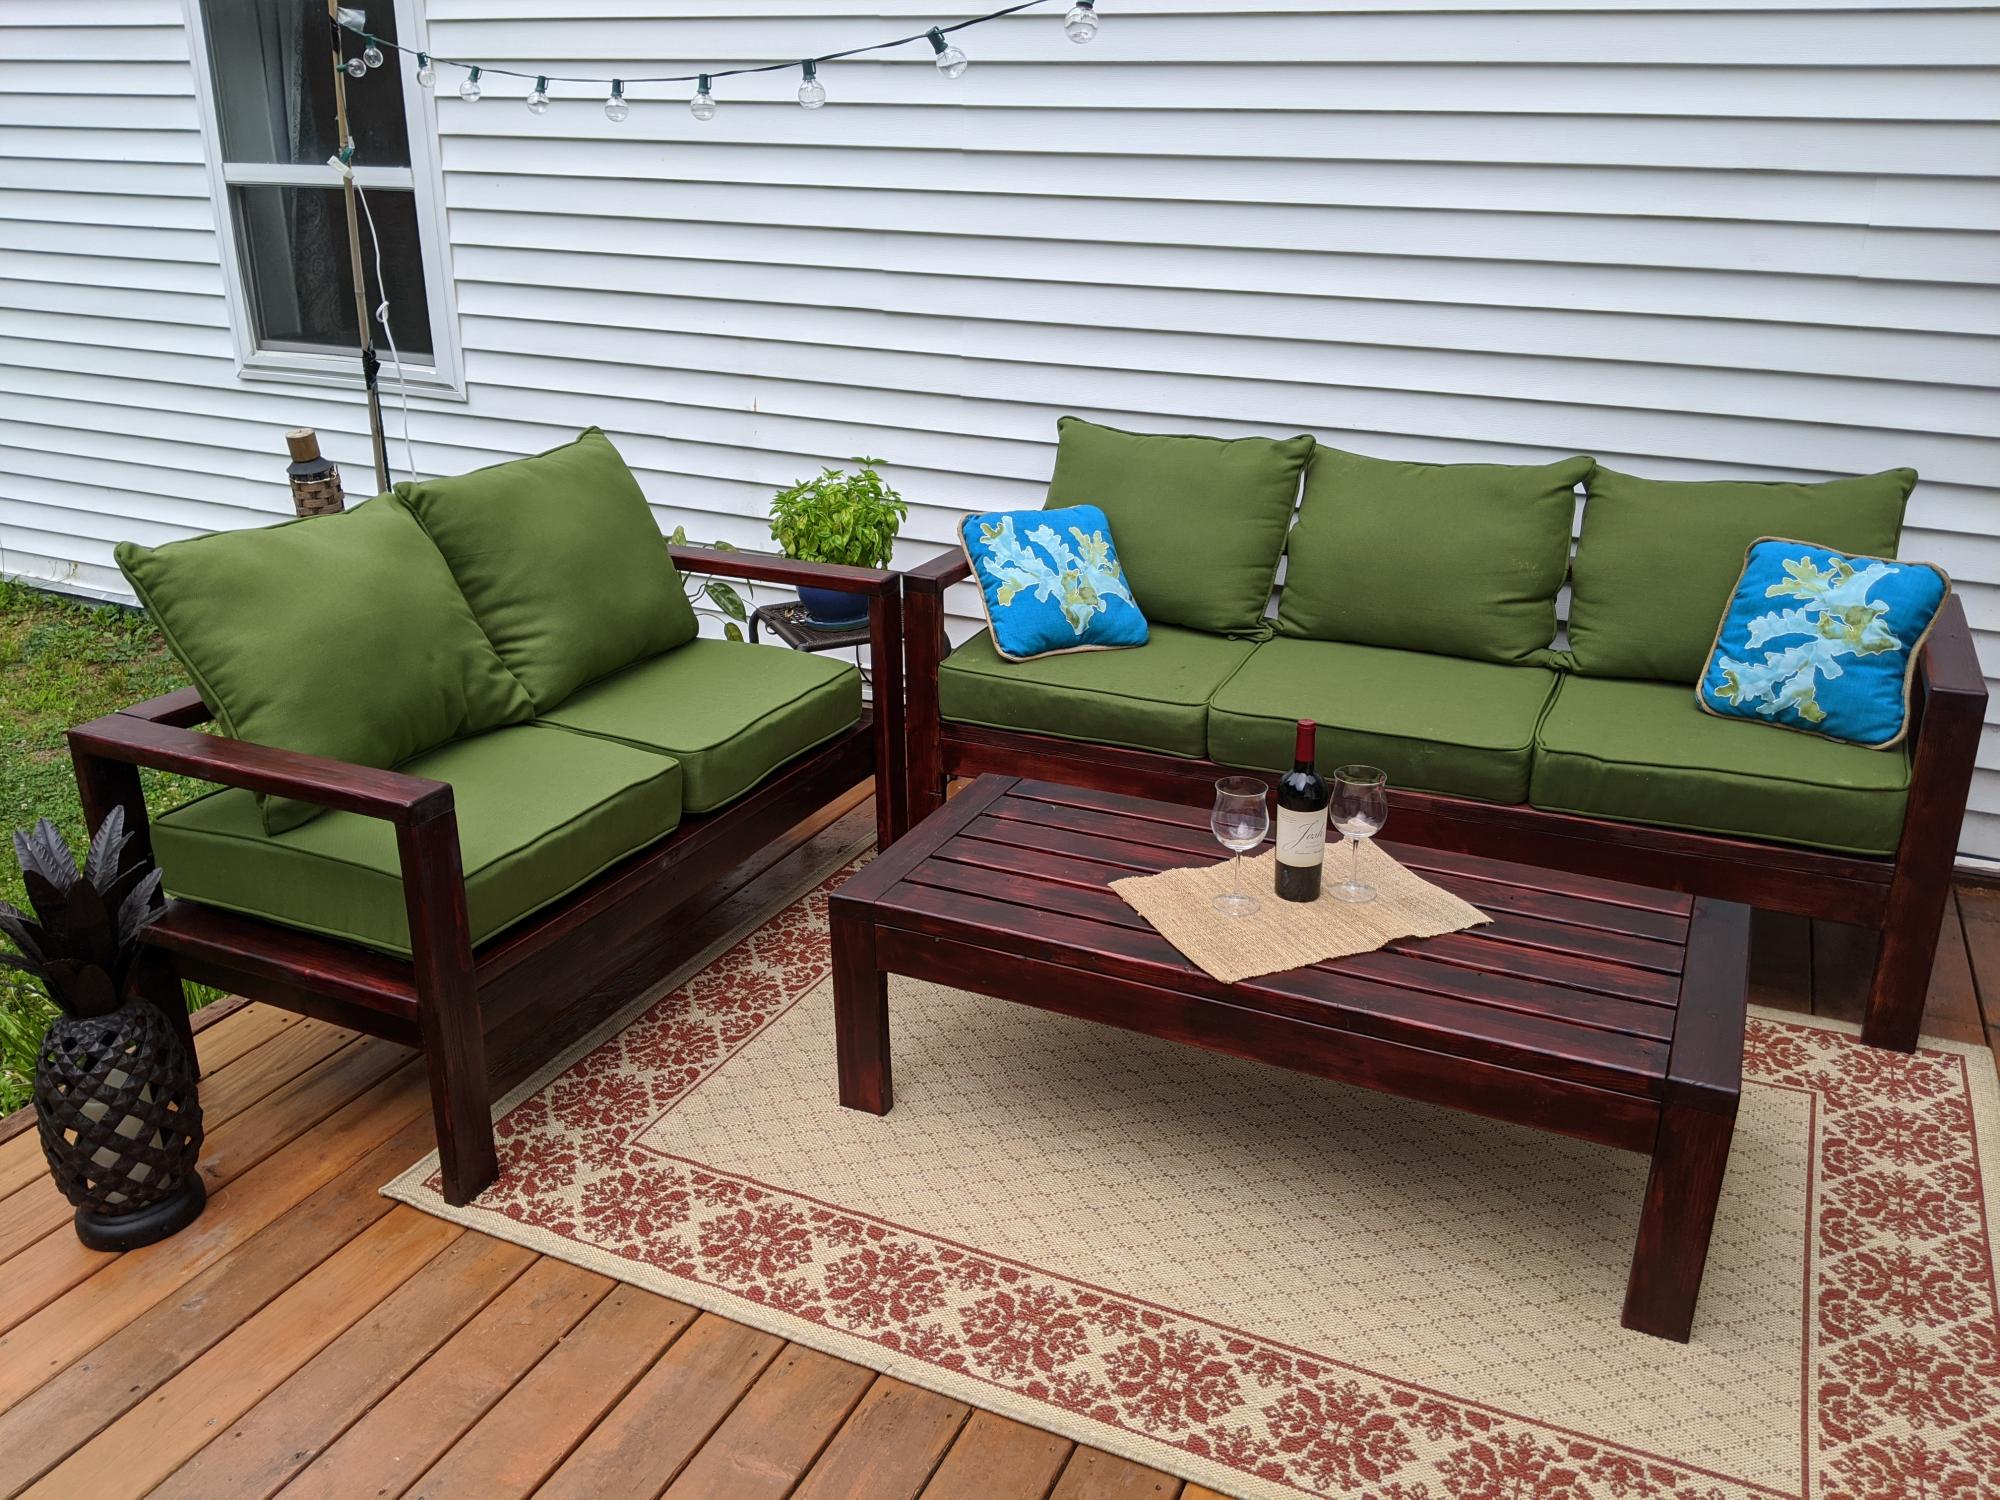
Thanks Ana, for the great plans and inspiration!
Built from Plan(s)
Estimated Cost
$450
Estimated Time Investment
Weekend Project (10-20 Hours)
Finish Used
Minwax stain & polyurethane ( Bombay Mahogany)
Recommended Skill Level
Beginner
Outdoor Lounge with Slanted Back
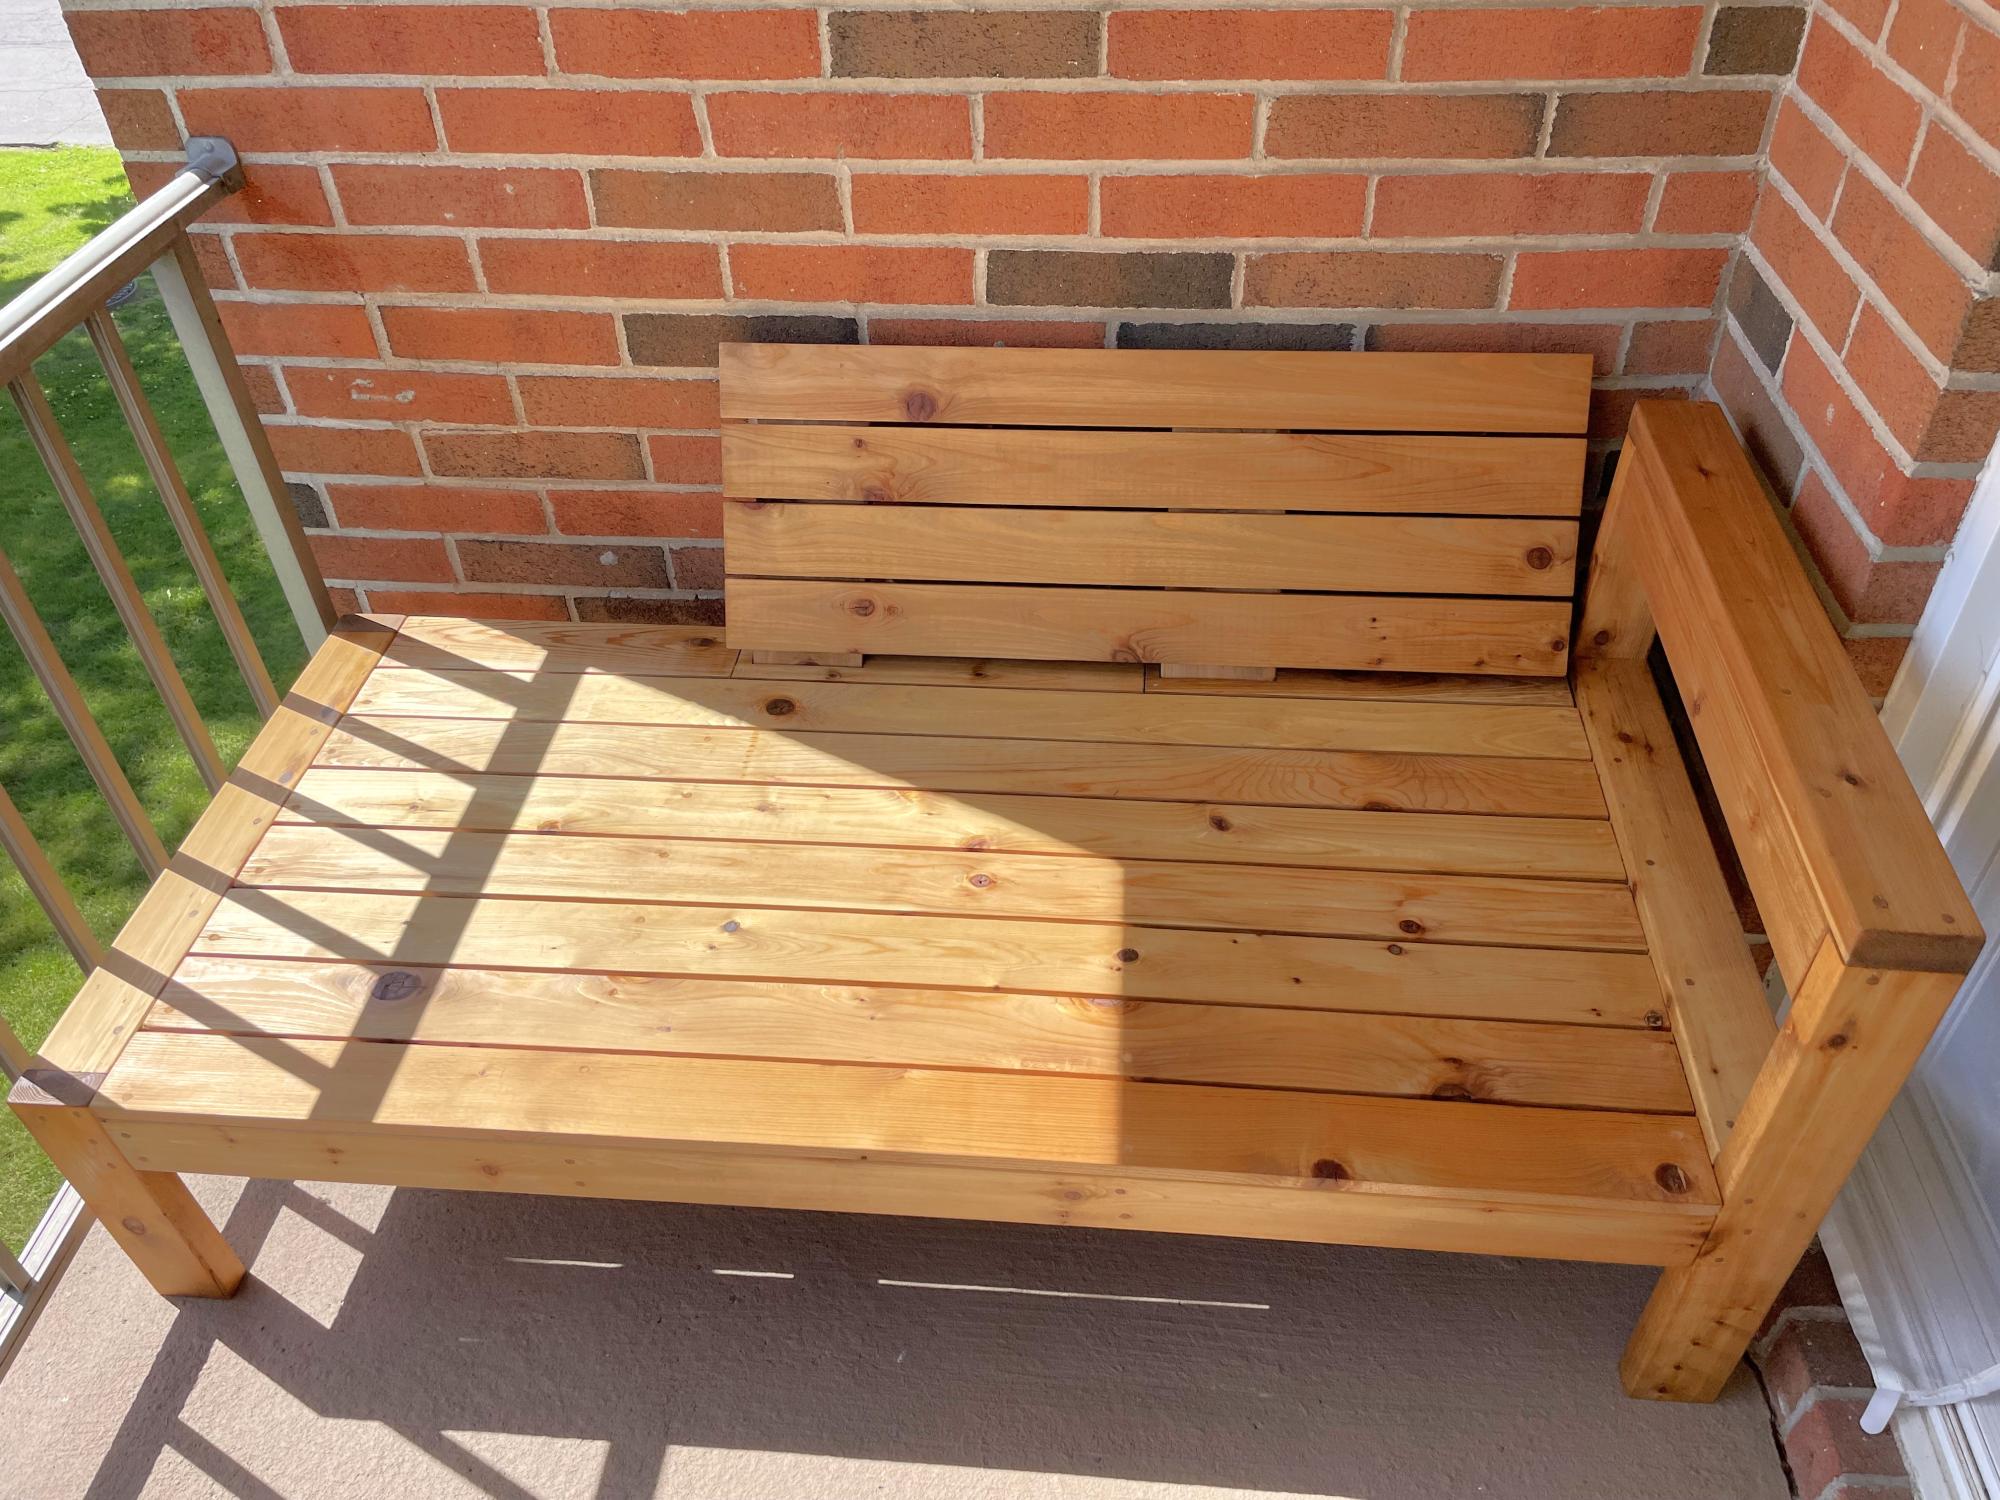
I modified your plan for a friend who wanted a slanted part. She is thrilled and so am I. Thank you so much for the plans and step by step instructions.
Susan Brubaker
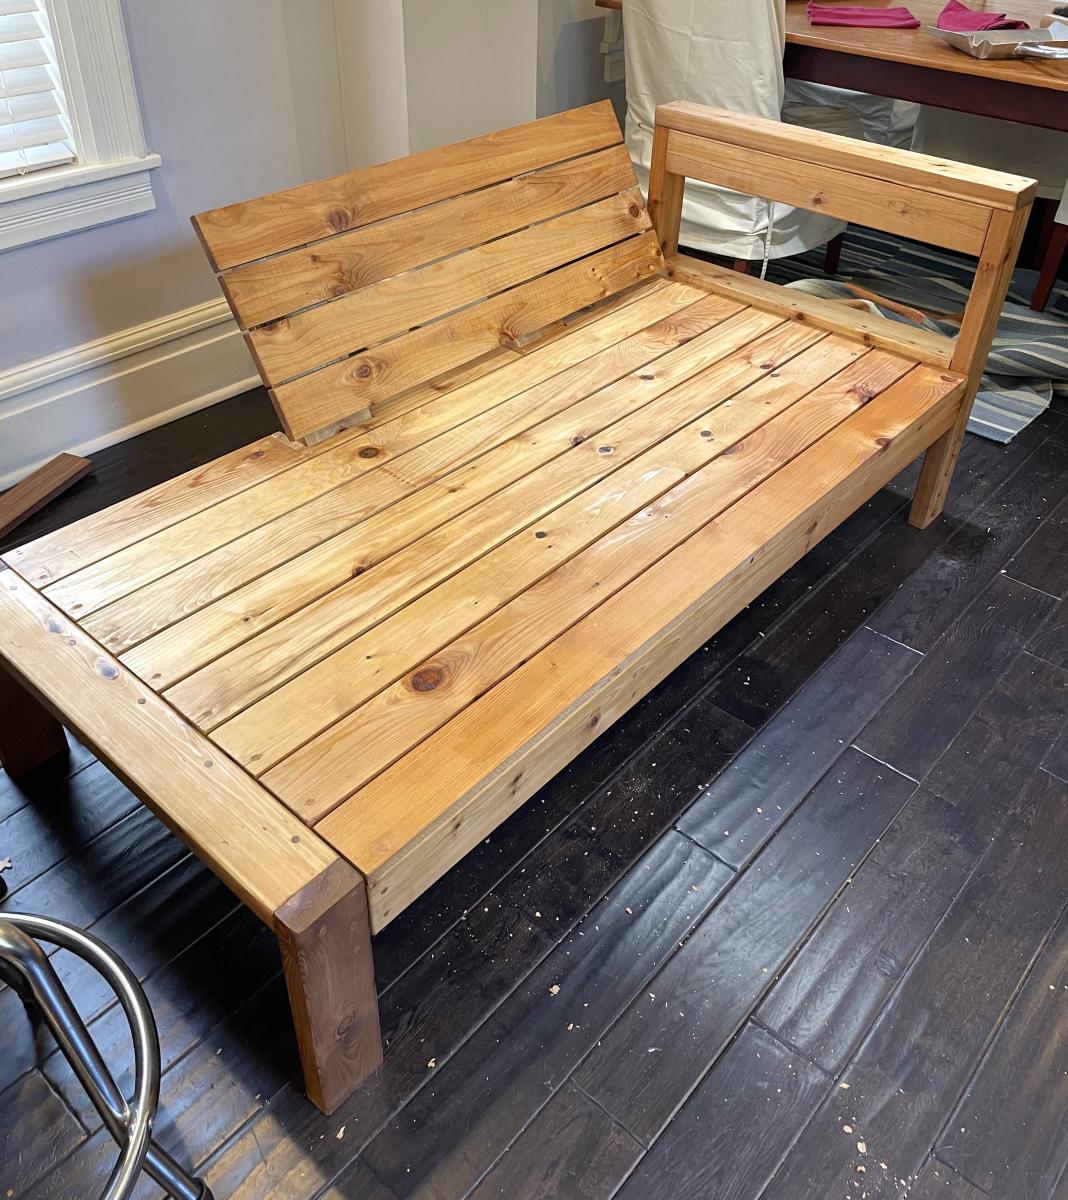
Built from Plan(s)
Ottoman
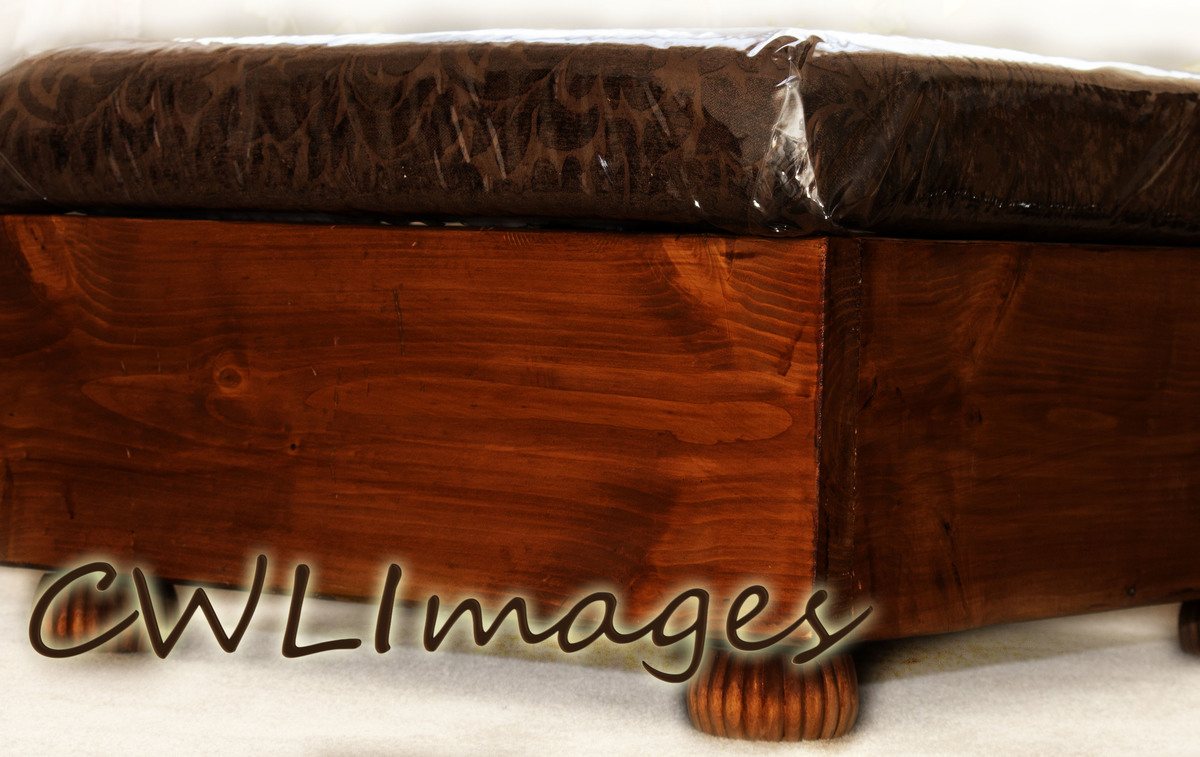
This is my 3rd completed project. This has storage, individual hinges was used.
I am still on the sofa after 9 months could not decide if I wanted to make storage.

Built from Plan(s)
Estimated Cost
estimate cast was $55 dollars, and that was due to the coast of the fabric covered top with plastic covering.
Estimated Time Investment
Day Project (6-9 Hours)
Finish Used
I sand the piece with 120, 220, 500 grit. Then stain/protection, it was suppose to be walnut, and it turn out this color. Can't complain, the cats are happy about it.
Recommended Skill Level
Intermediate
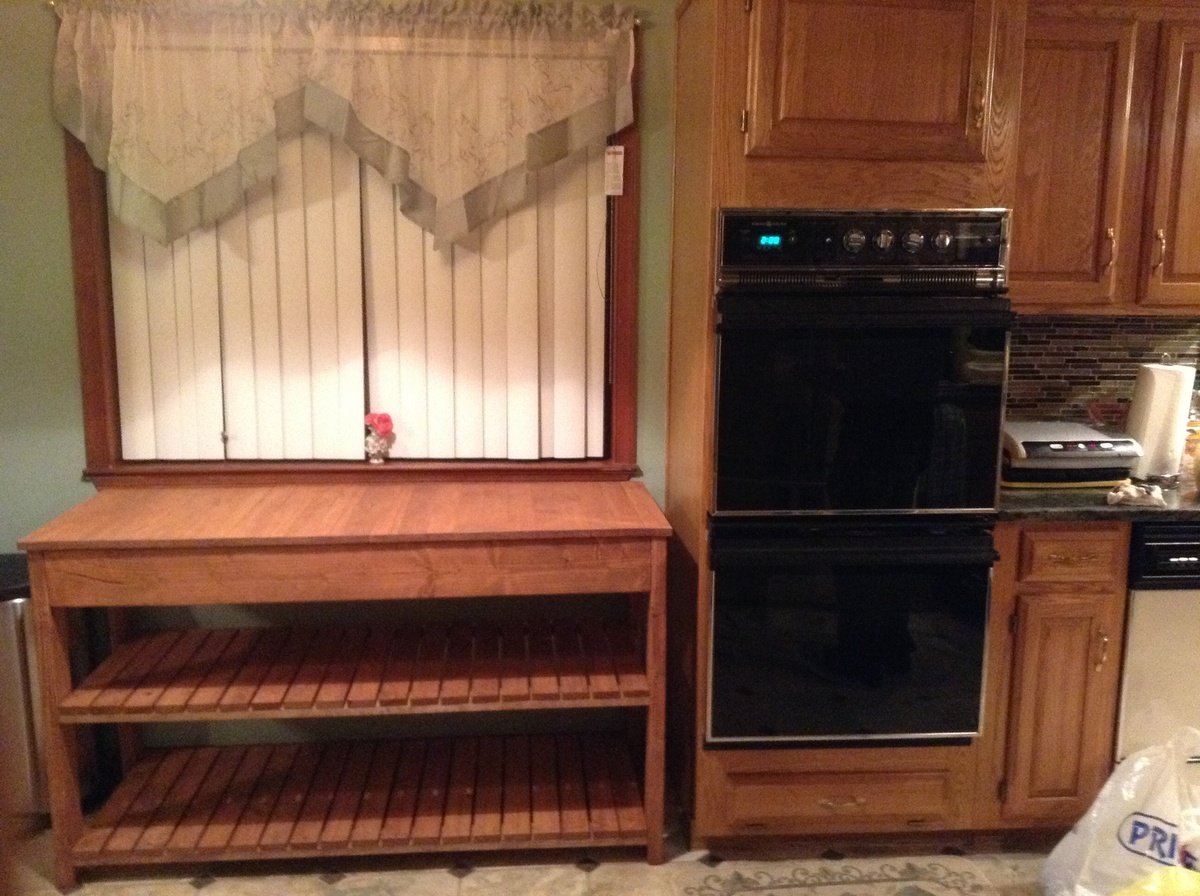
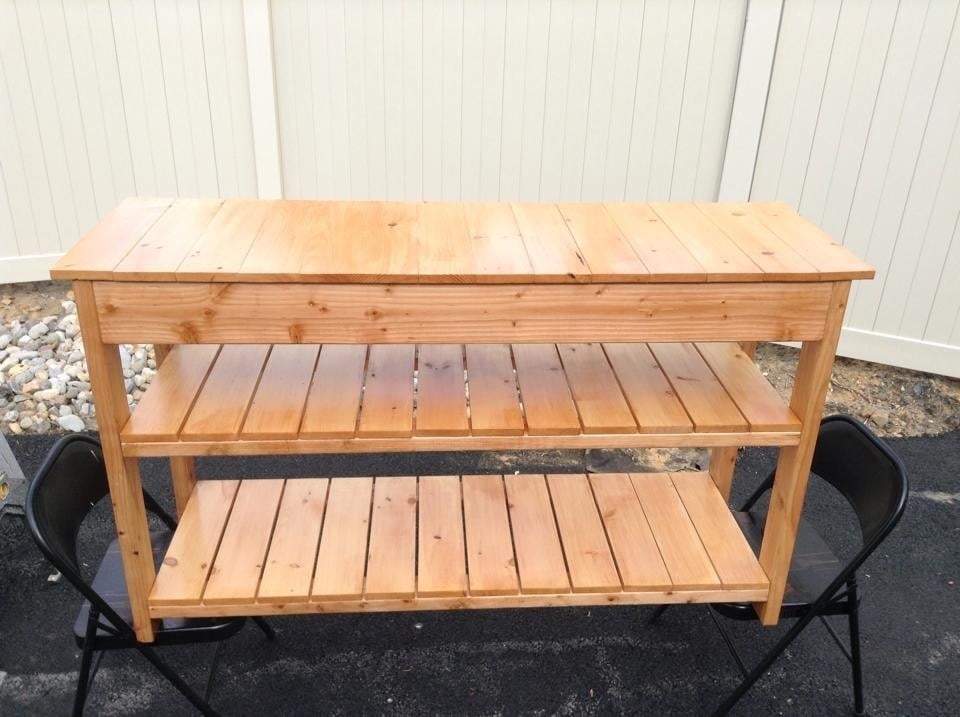
Easy kitchen island
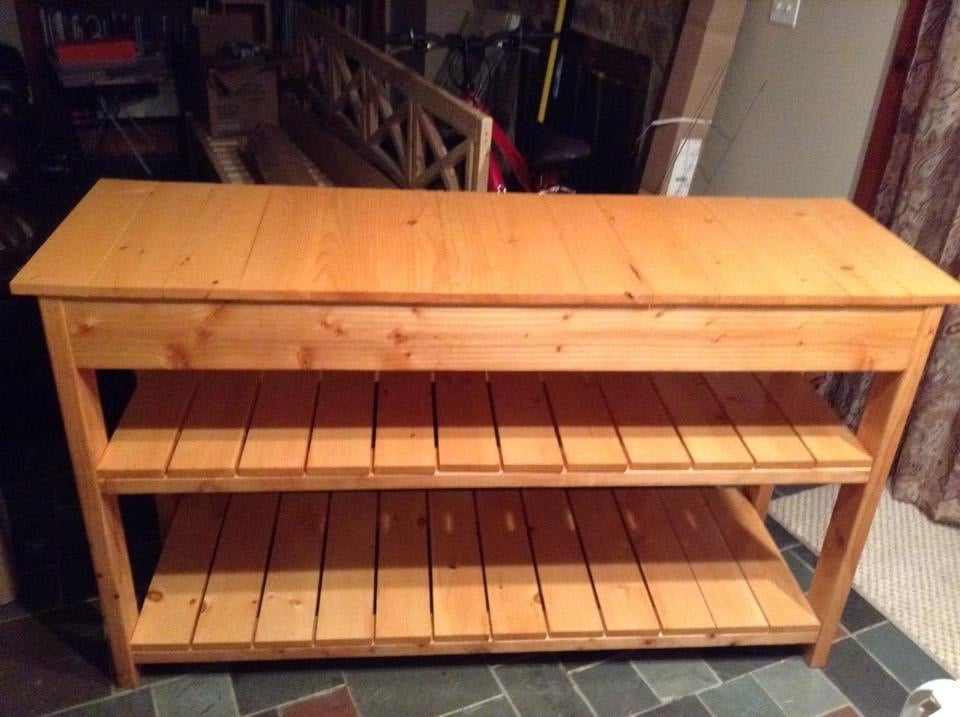
I built the cherry stained easy kitchen island for my own kitchen... After friends and family looked at it, my daughter' smother (of course my ex) asked if I could buiild her one... we love both of our "islands" even though we both have them along walls in our homes... I added a second shelf for extra storage but it's great for what I call a grocery drop off point... Very sturdy and they both compliment our kitchens... I don't have a picture of it in her home (both of these were in my home on different floors of the house) but she says it matches well with her oak cabinets... Hope you like them :)
Built from Plan(s)
Estimated Cost
Approx $150-200 depending if you stain and polyurethane
Estimated Time Investment
Weekend Project (10-20 Hours)
Finish Used
The first pic I used a medium oak stain and polyurethane... The second pic I used a cherry stain without polyurethane; however I have decided I'm going to add polyurethane to it for a nice shine ;)
Recommended Skill Level
Beginner
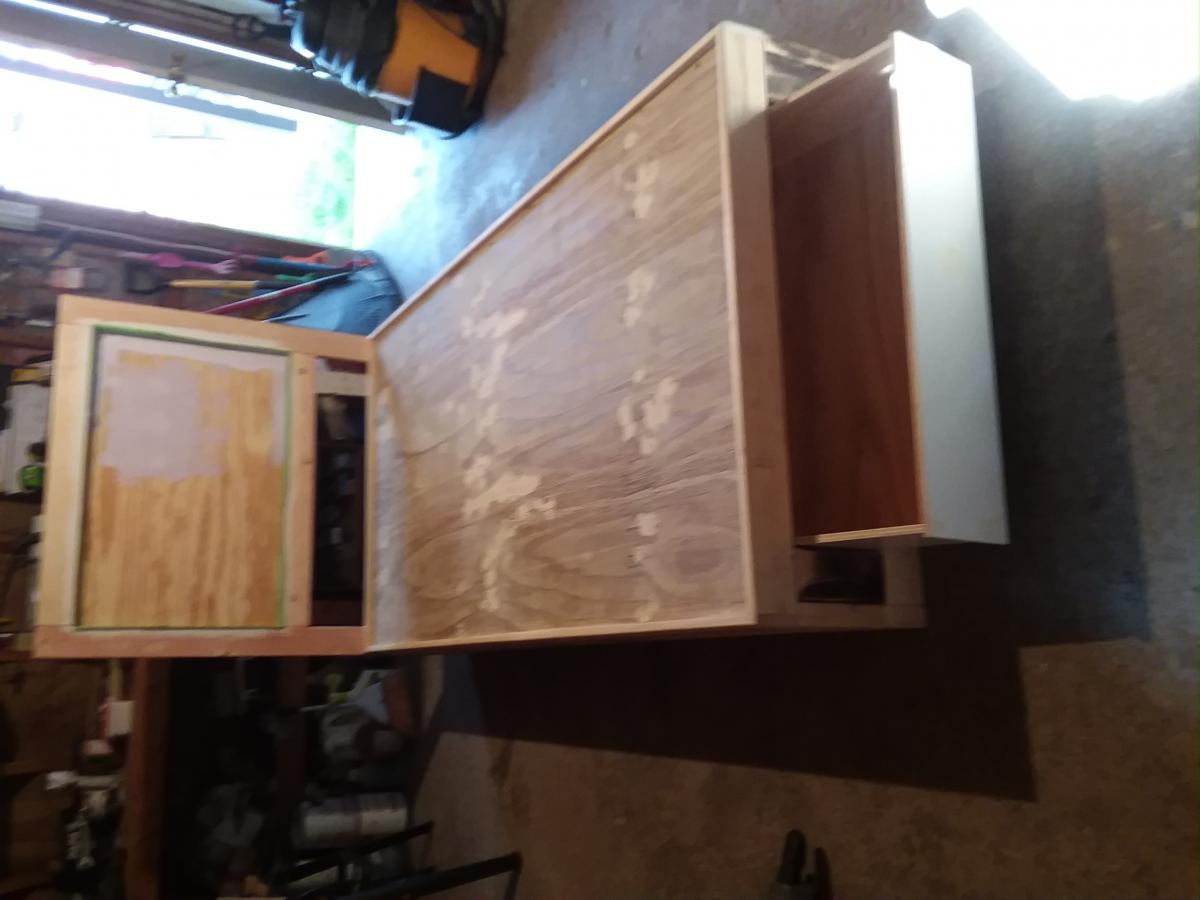
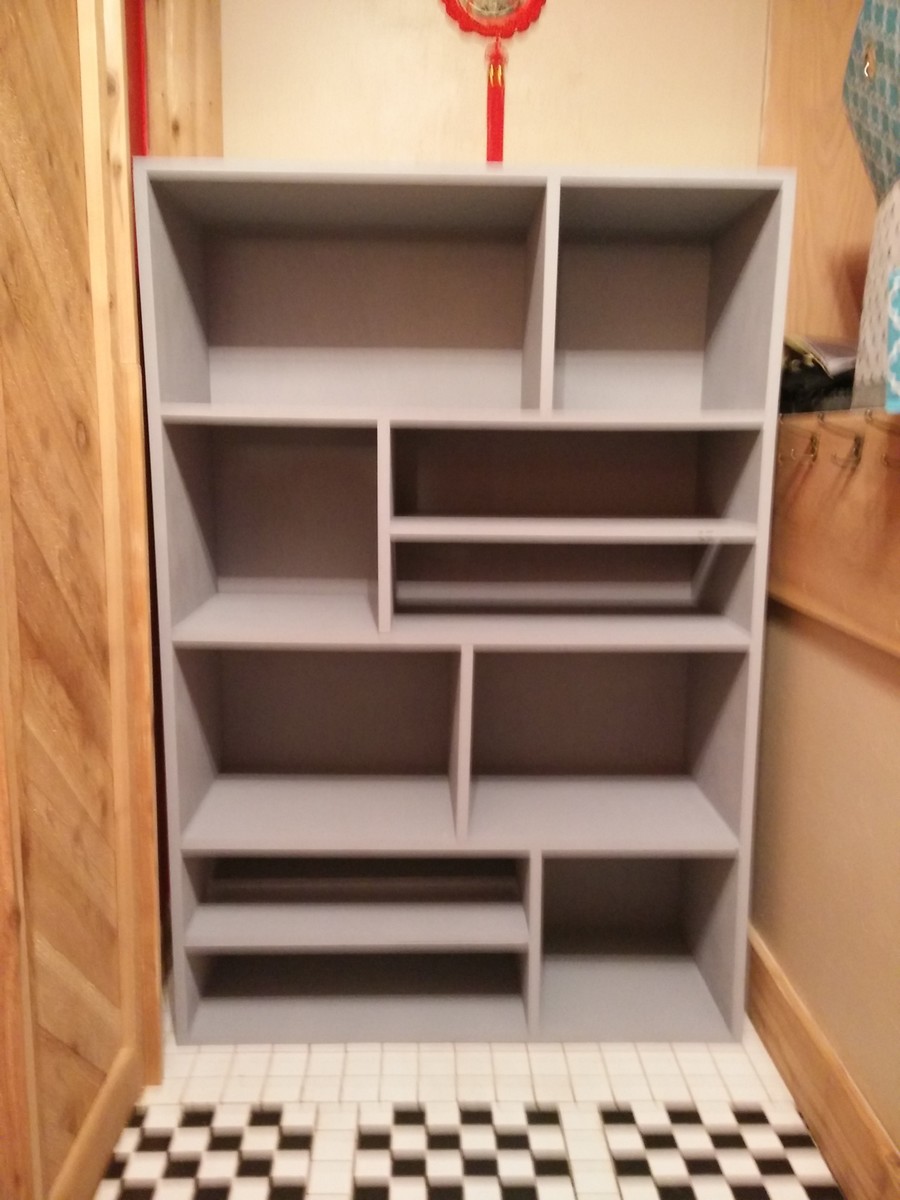
Entry way cubby
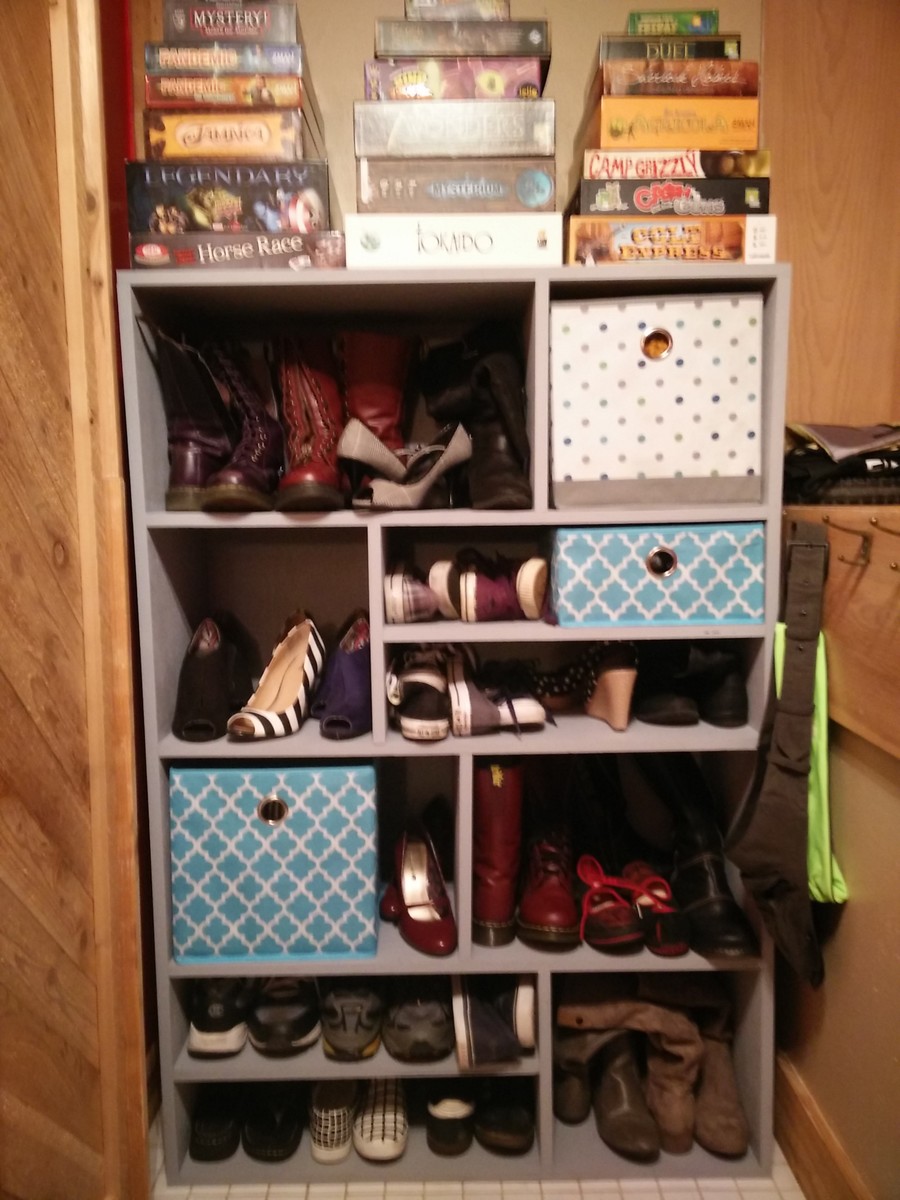
My dad helped me build this. I wanted to make one out of crates similar to another post but we decided on plywood and my dad wanted to play with the portable saw he bought me. We customized it for my space and didn't use any plans. I think it turned out nicely though I may need another for all my other shoes!

Estimated Cost
$75
Estimated Time Investment
Weekend Project (10-20 Hours)
Finish Used
Flat matte indoor Behr paint in a light grey.
Recommended Skill Level
Intermediate
Rustic X coffee table

Made another video of Ana Whit's X table!
Built from Plan(s)
Estimated Cost
$50
Estimated Time Investment
Afternoon Project (3-6 Hours)
Finish Used
oak stain and poly
Recommended Skill Level
Intermediate
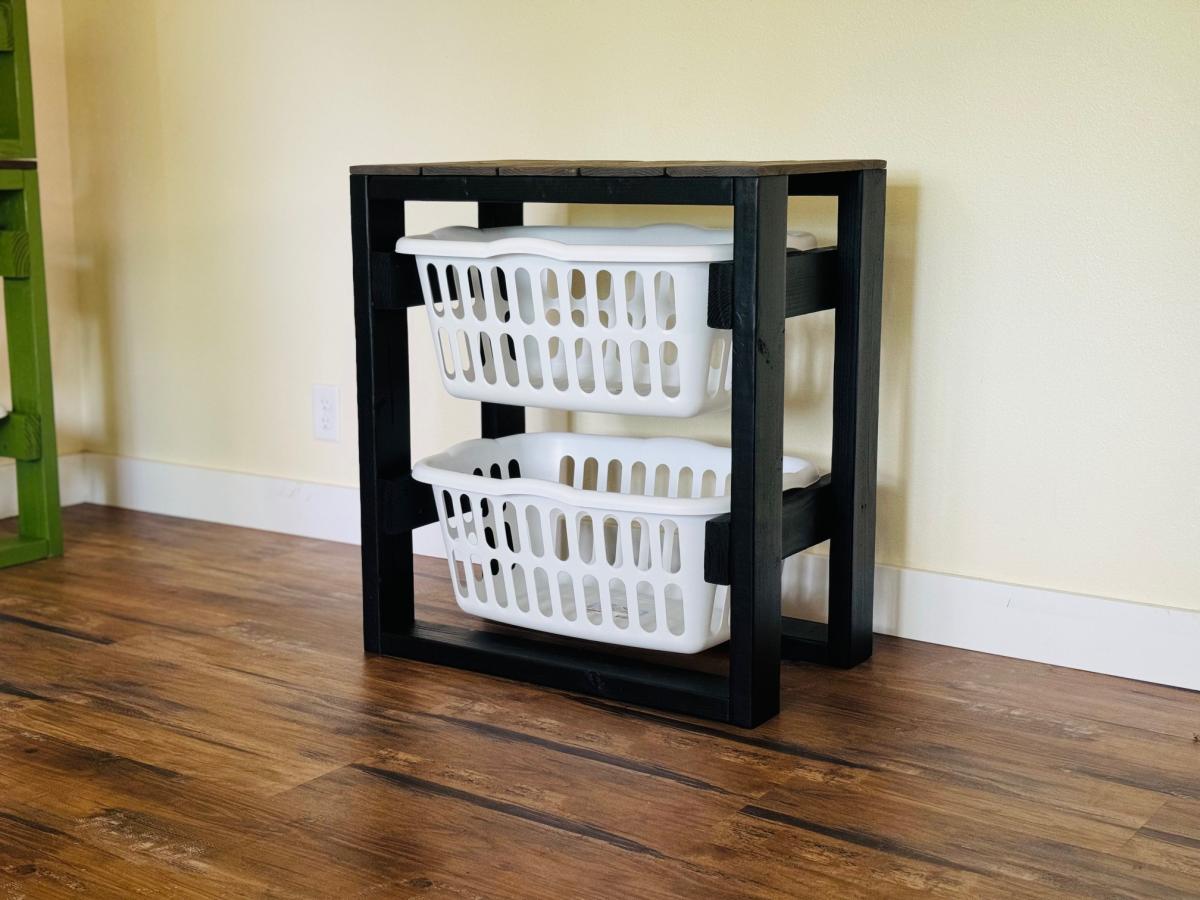
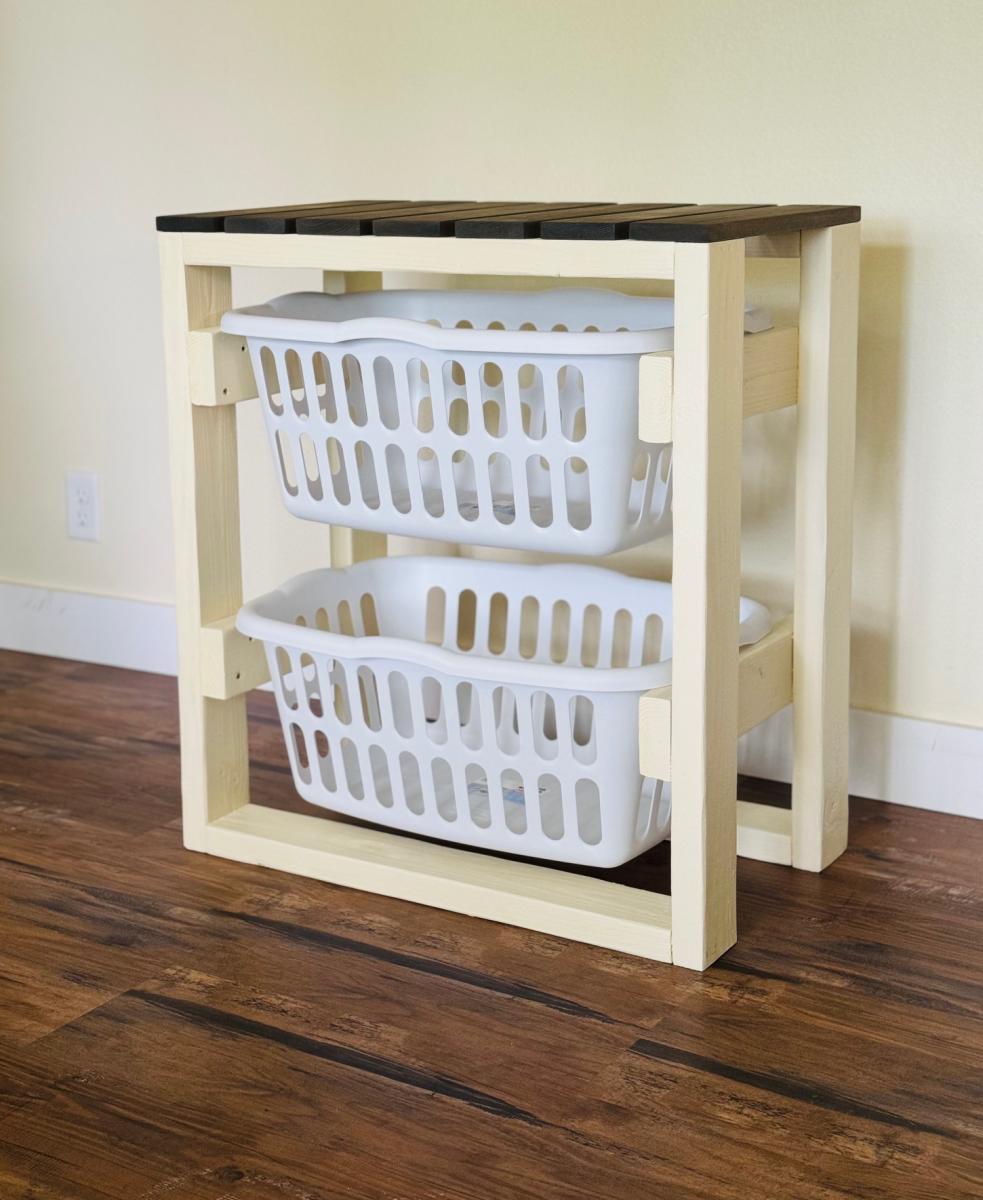
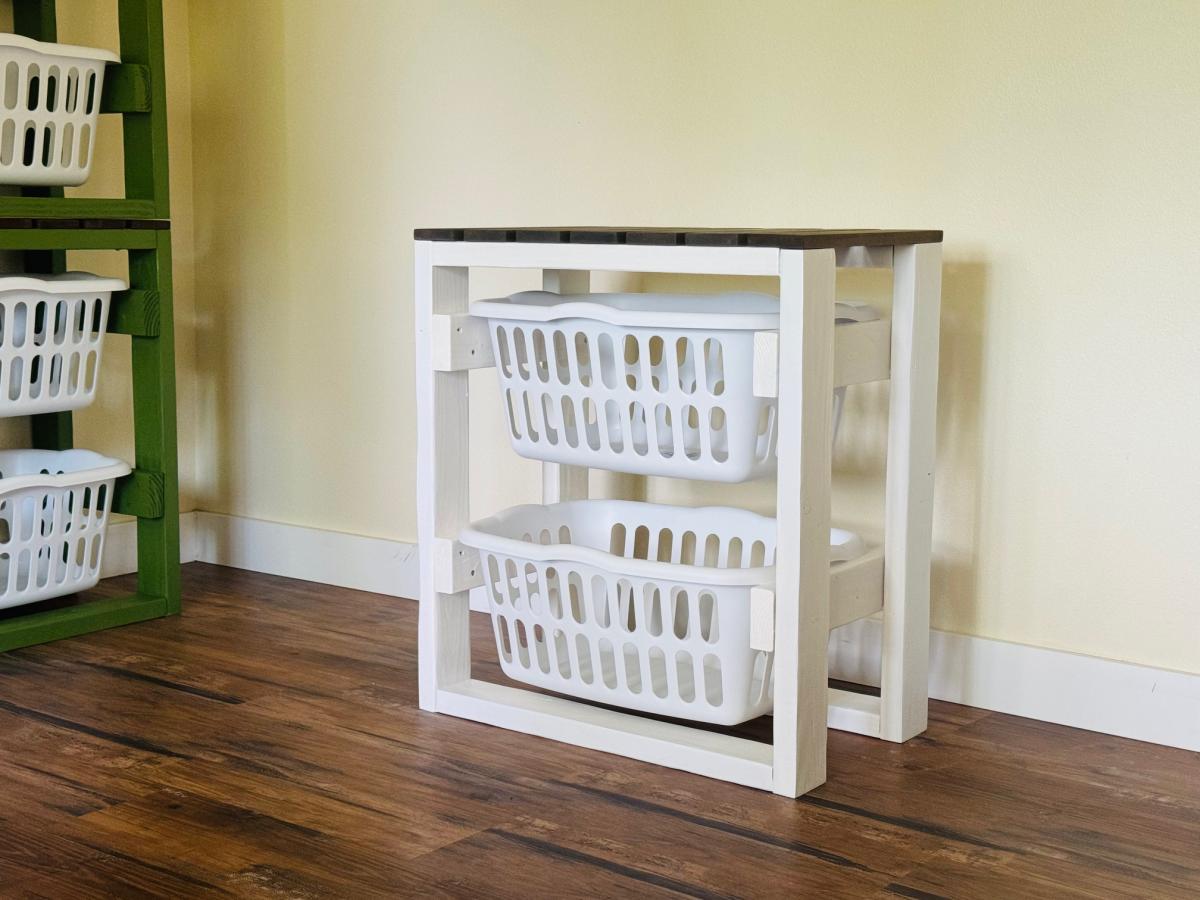
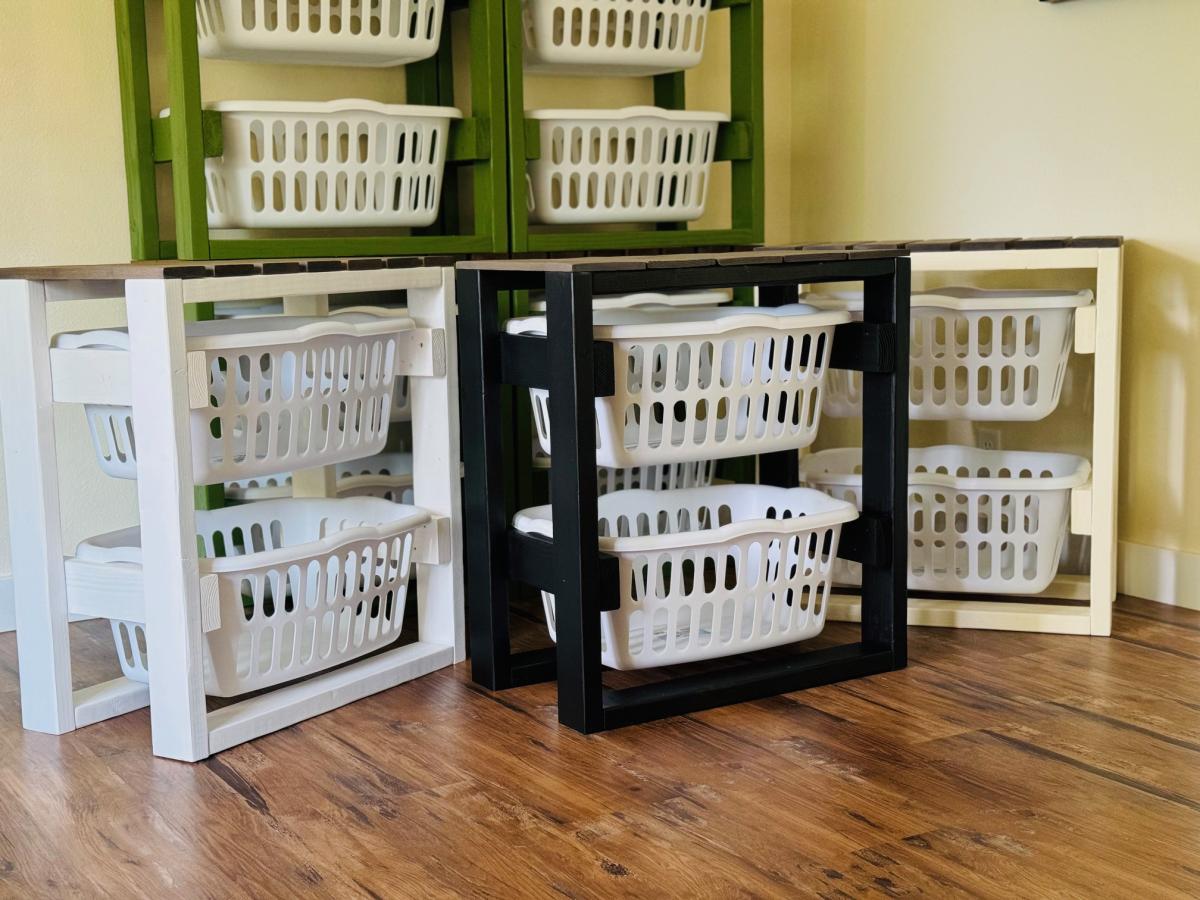
2x4 Laundry Basket Organizer

This is my first time building for resell, I learned a lot in the process. This is an easy beginner friendly project with a 2x4 frame and 1x top. I love that you can stack them or put them side by side. This plan is also easy to modify for basket size or height! Thanks Ana
Built from Plan(s)
Seasonal And Holiday