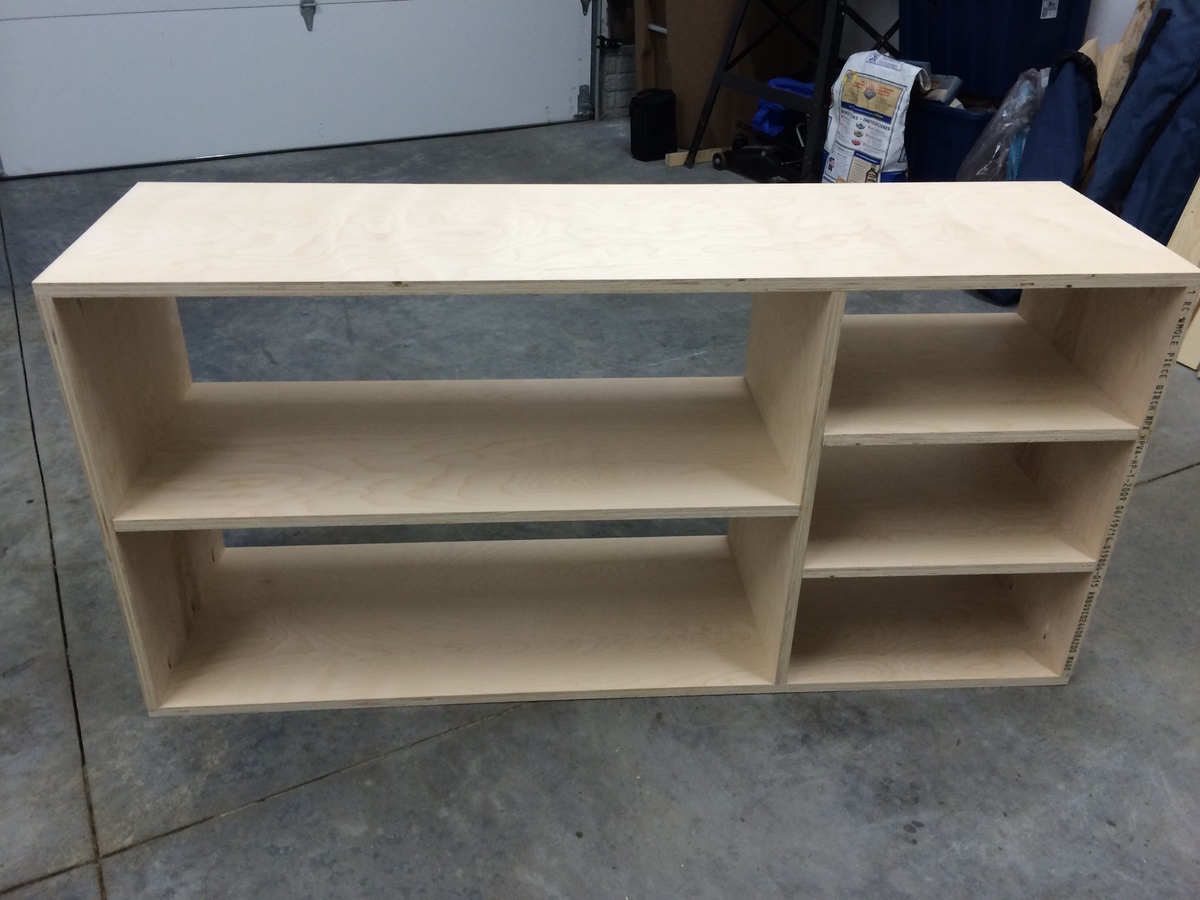
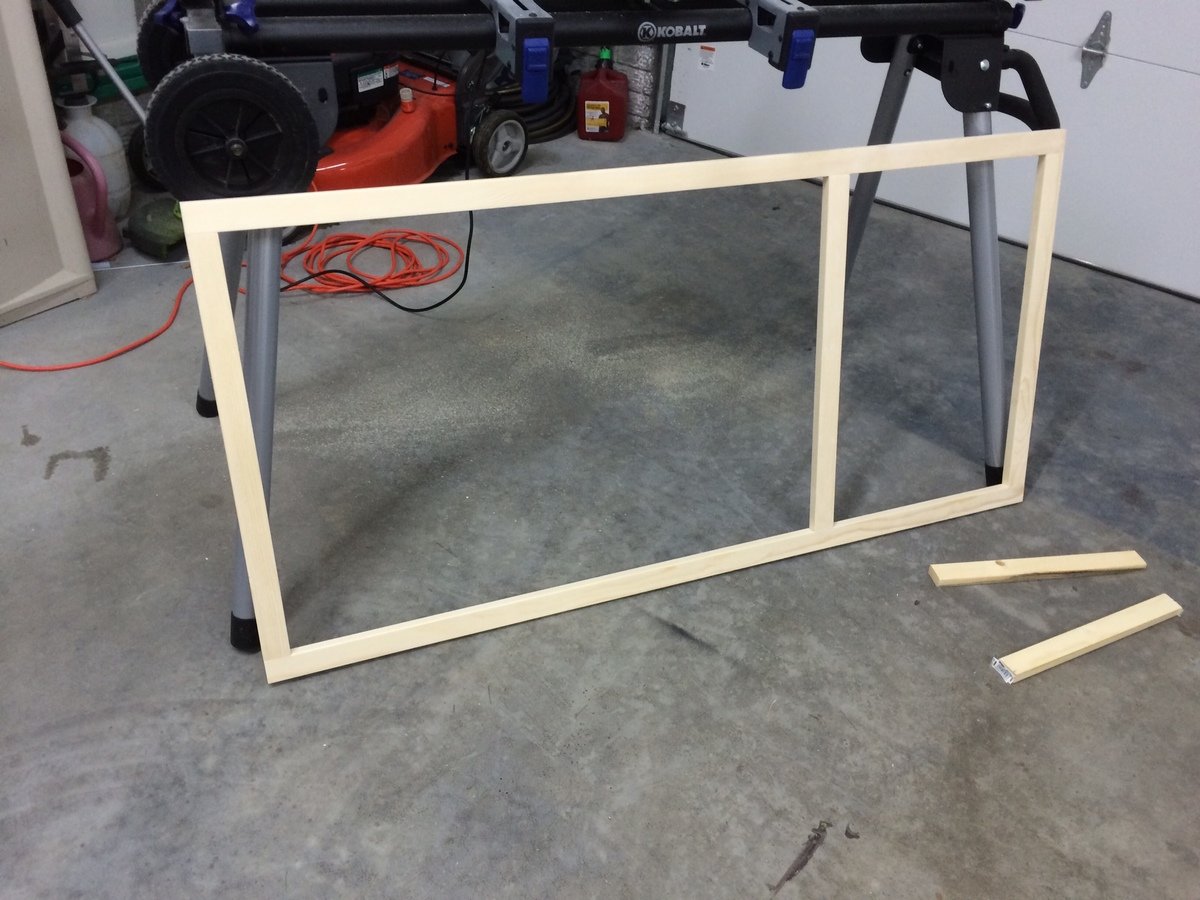
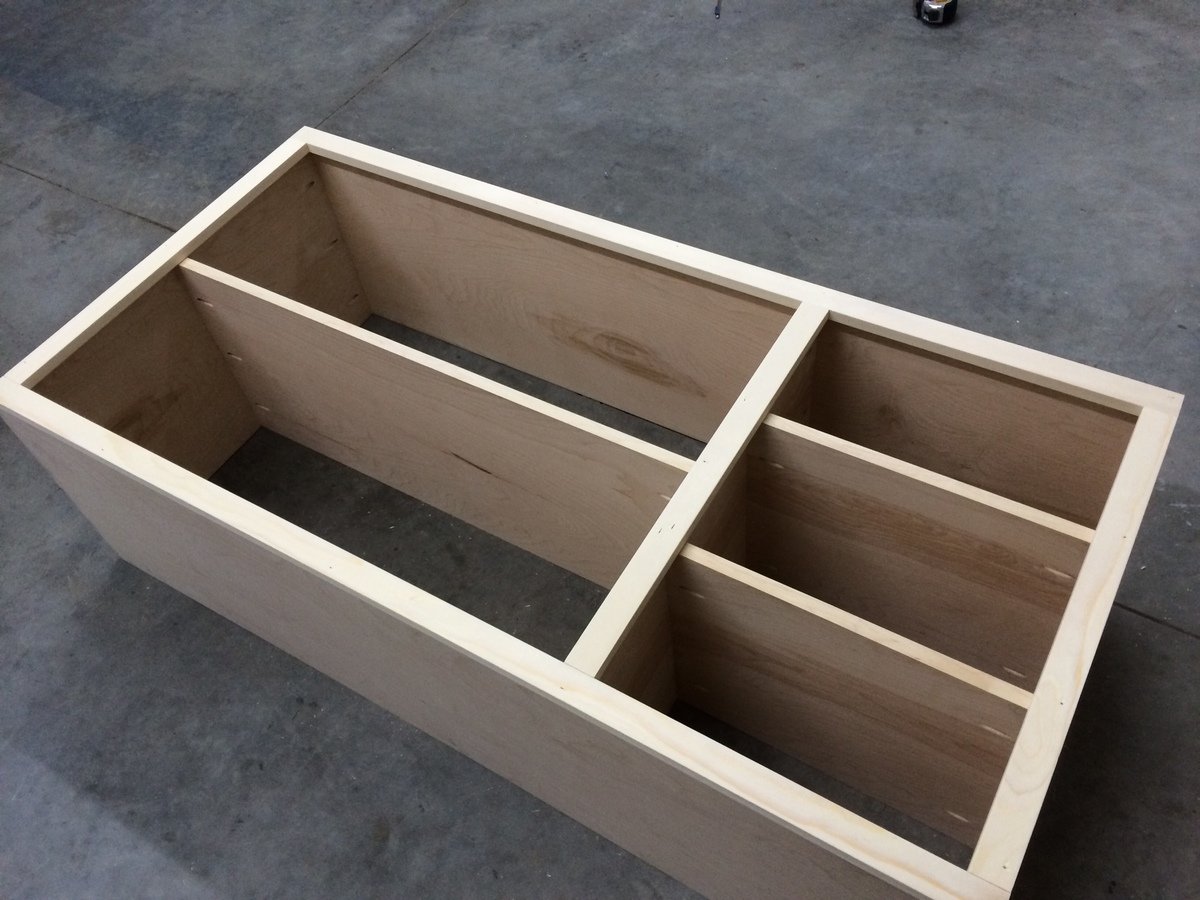
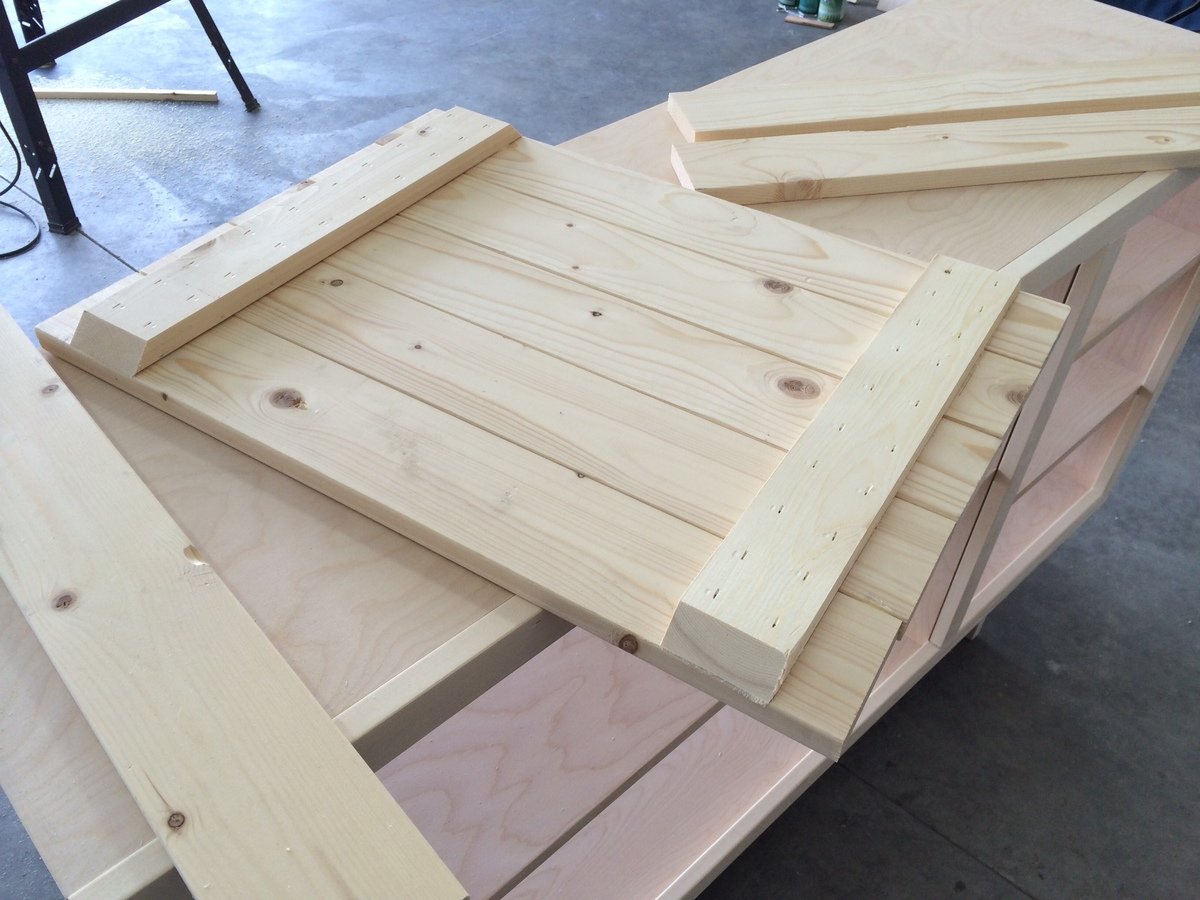
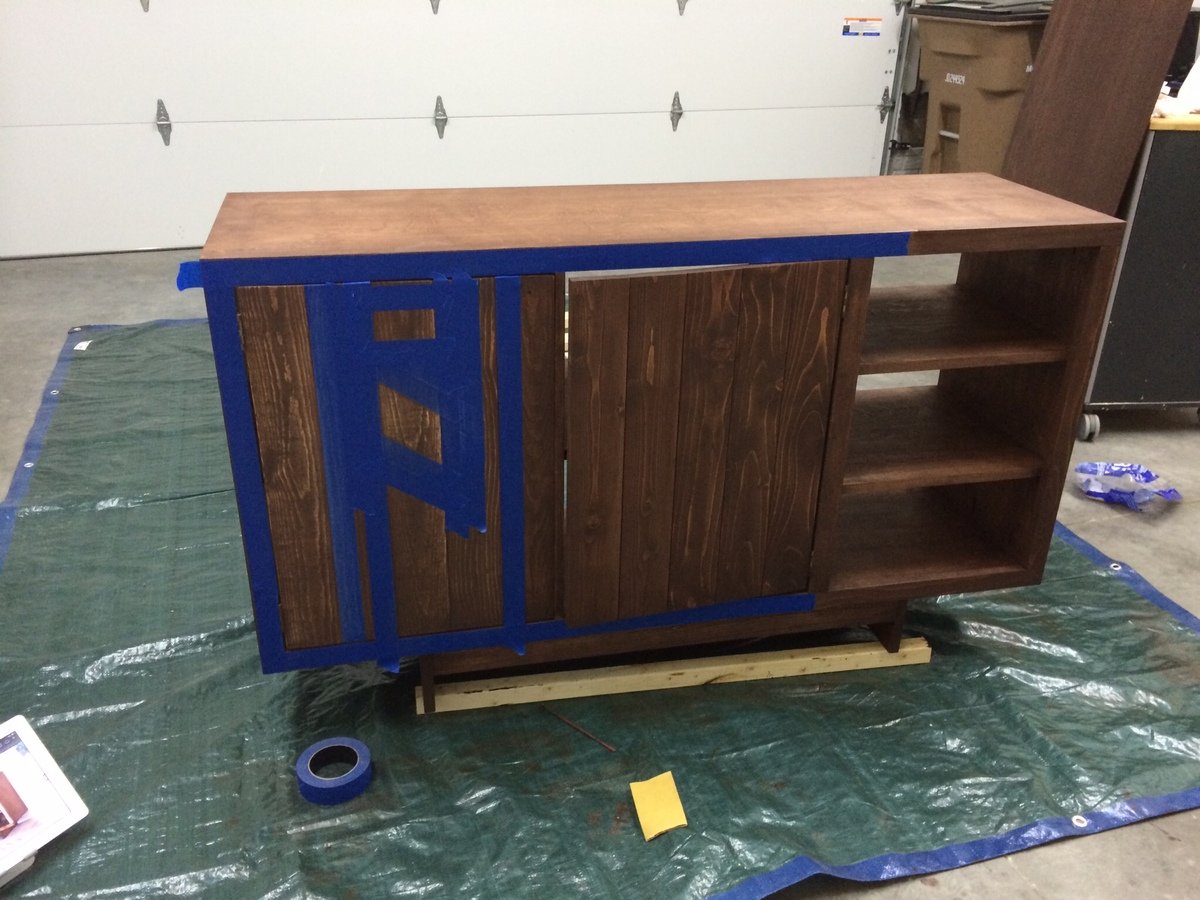
Jewelry Cabinet
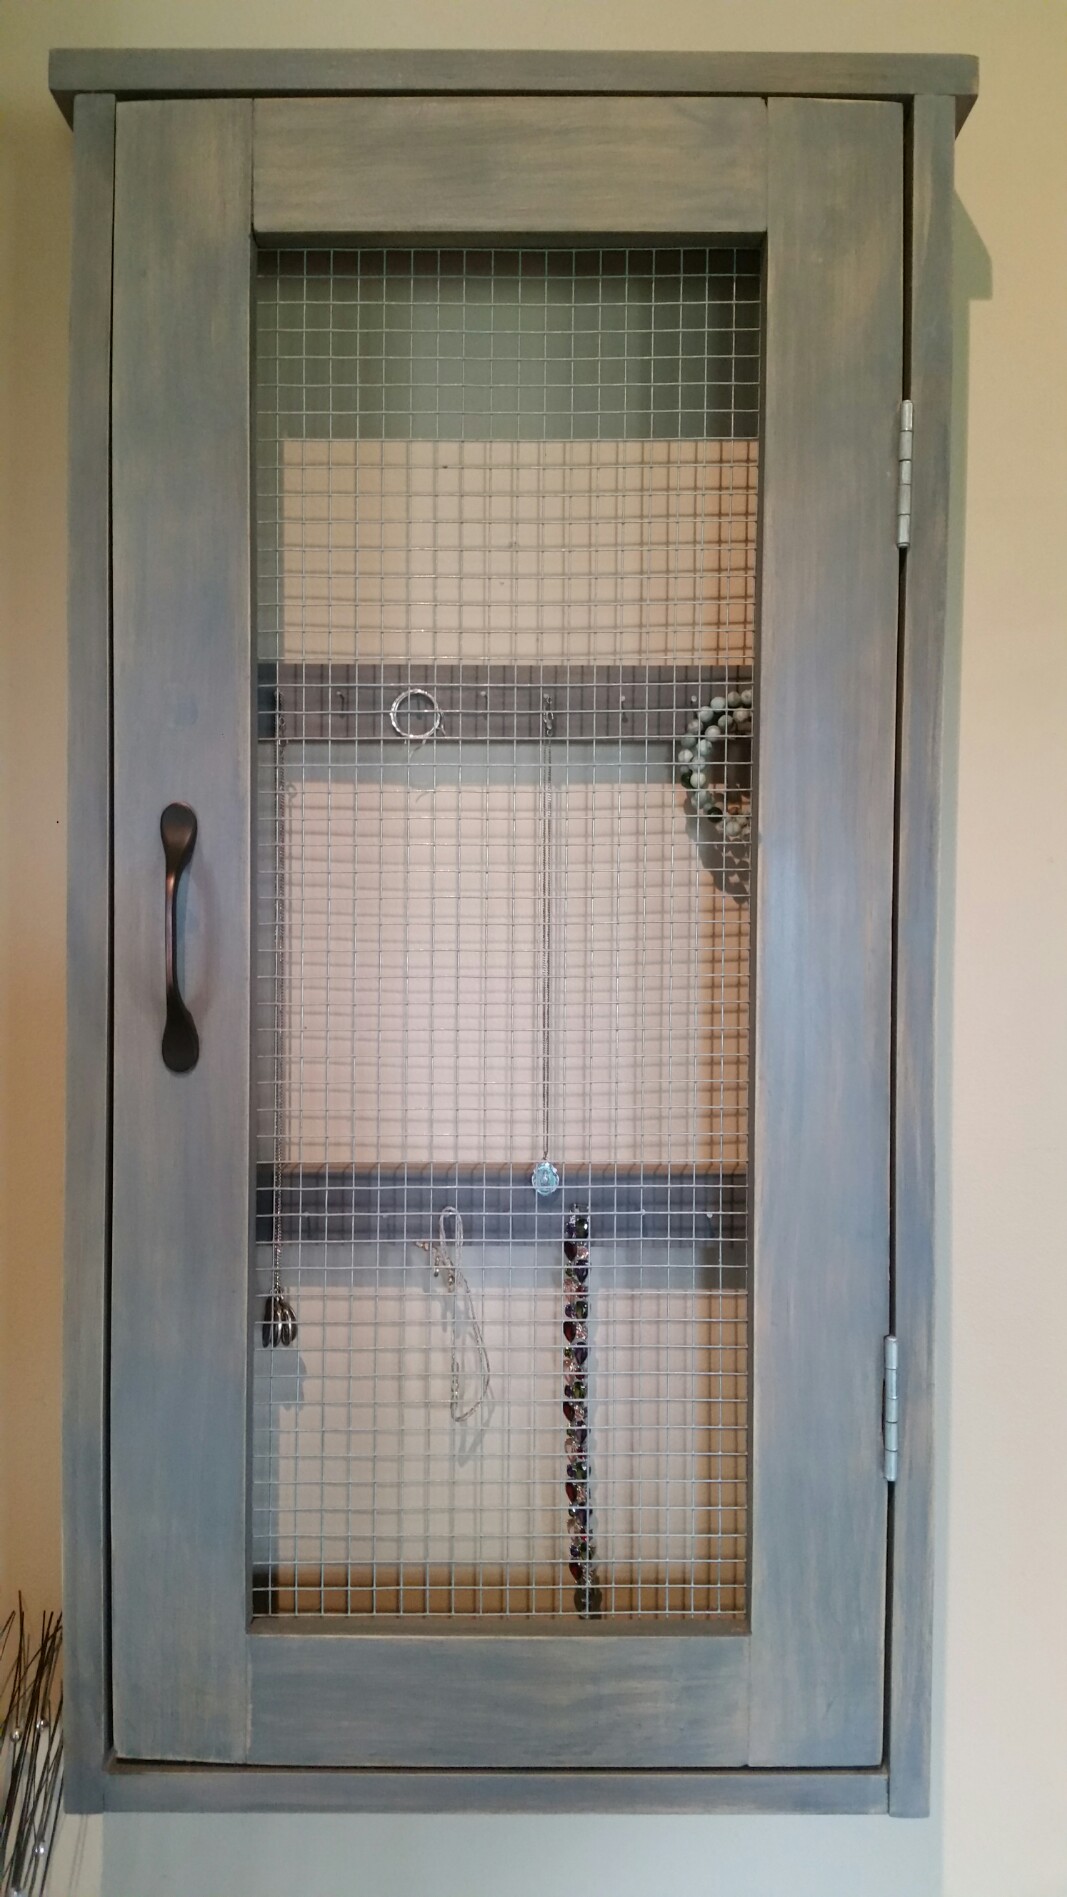
Built this for my mom as a Christmas gift!

Built from Plan(s)
Estimated Time Investment
Weekend Project (10-20 Hours)
Recommended Skill Level
Intermediate
Built this for my mom as a Christmas gift!
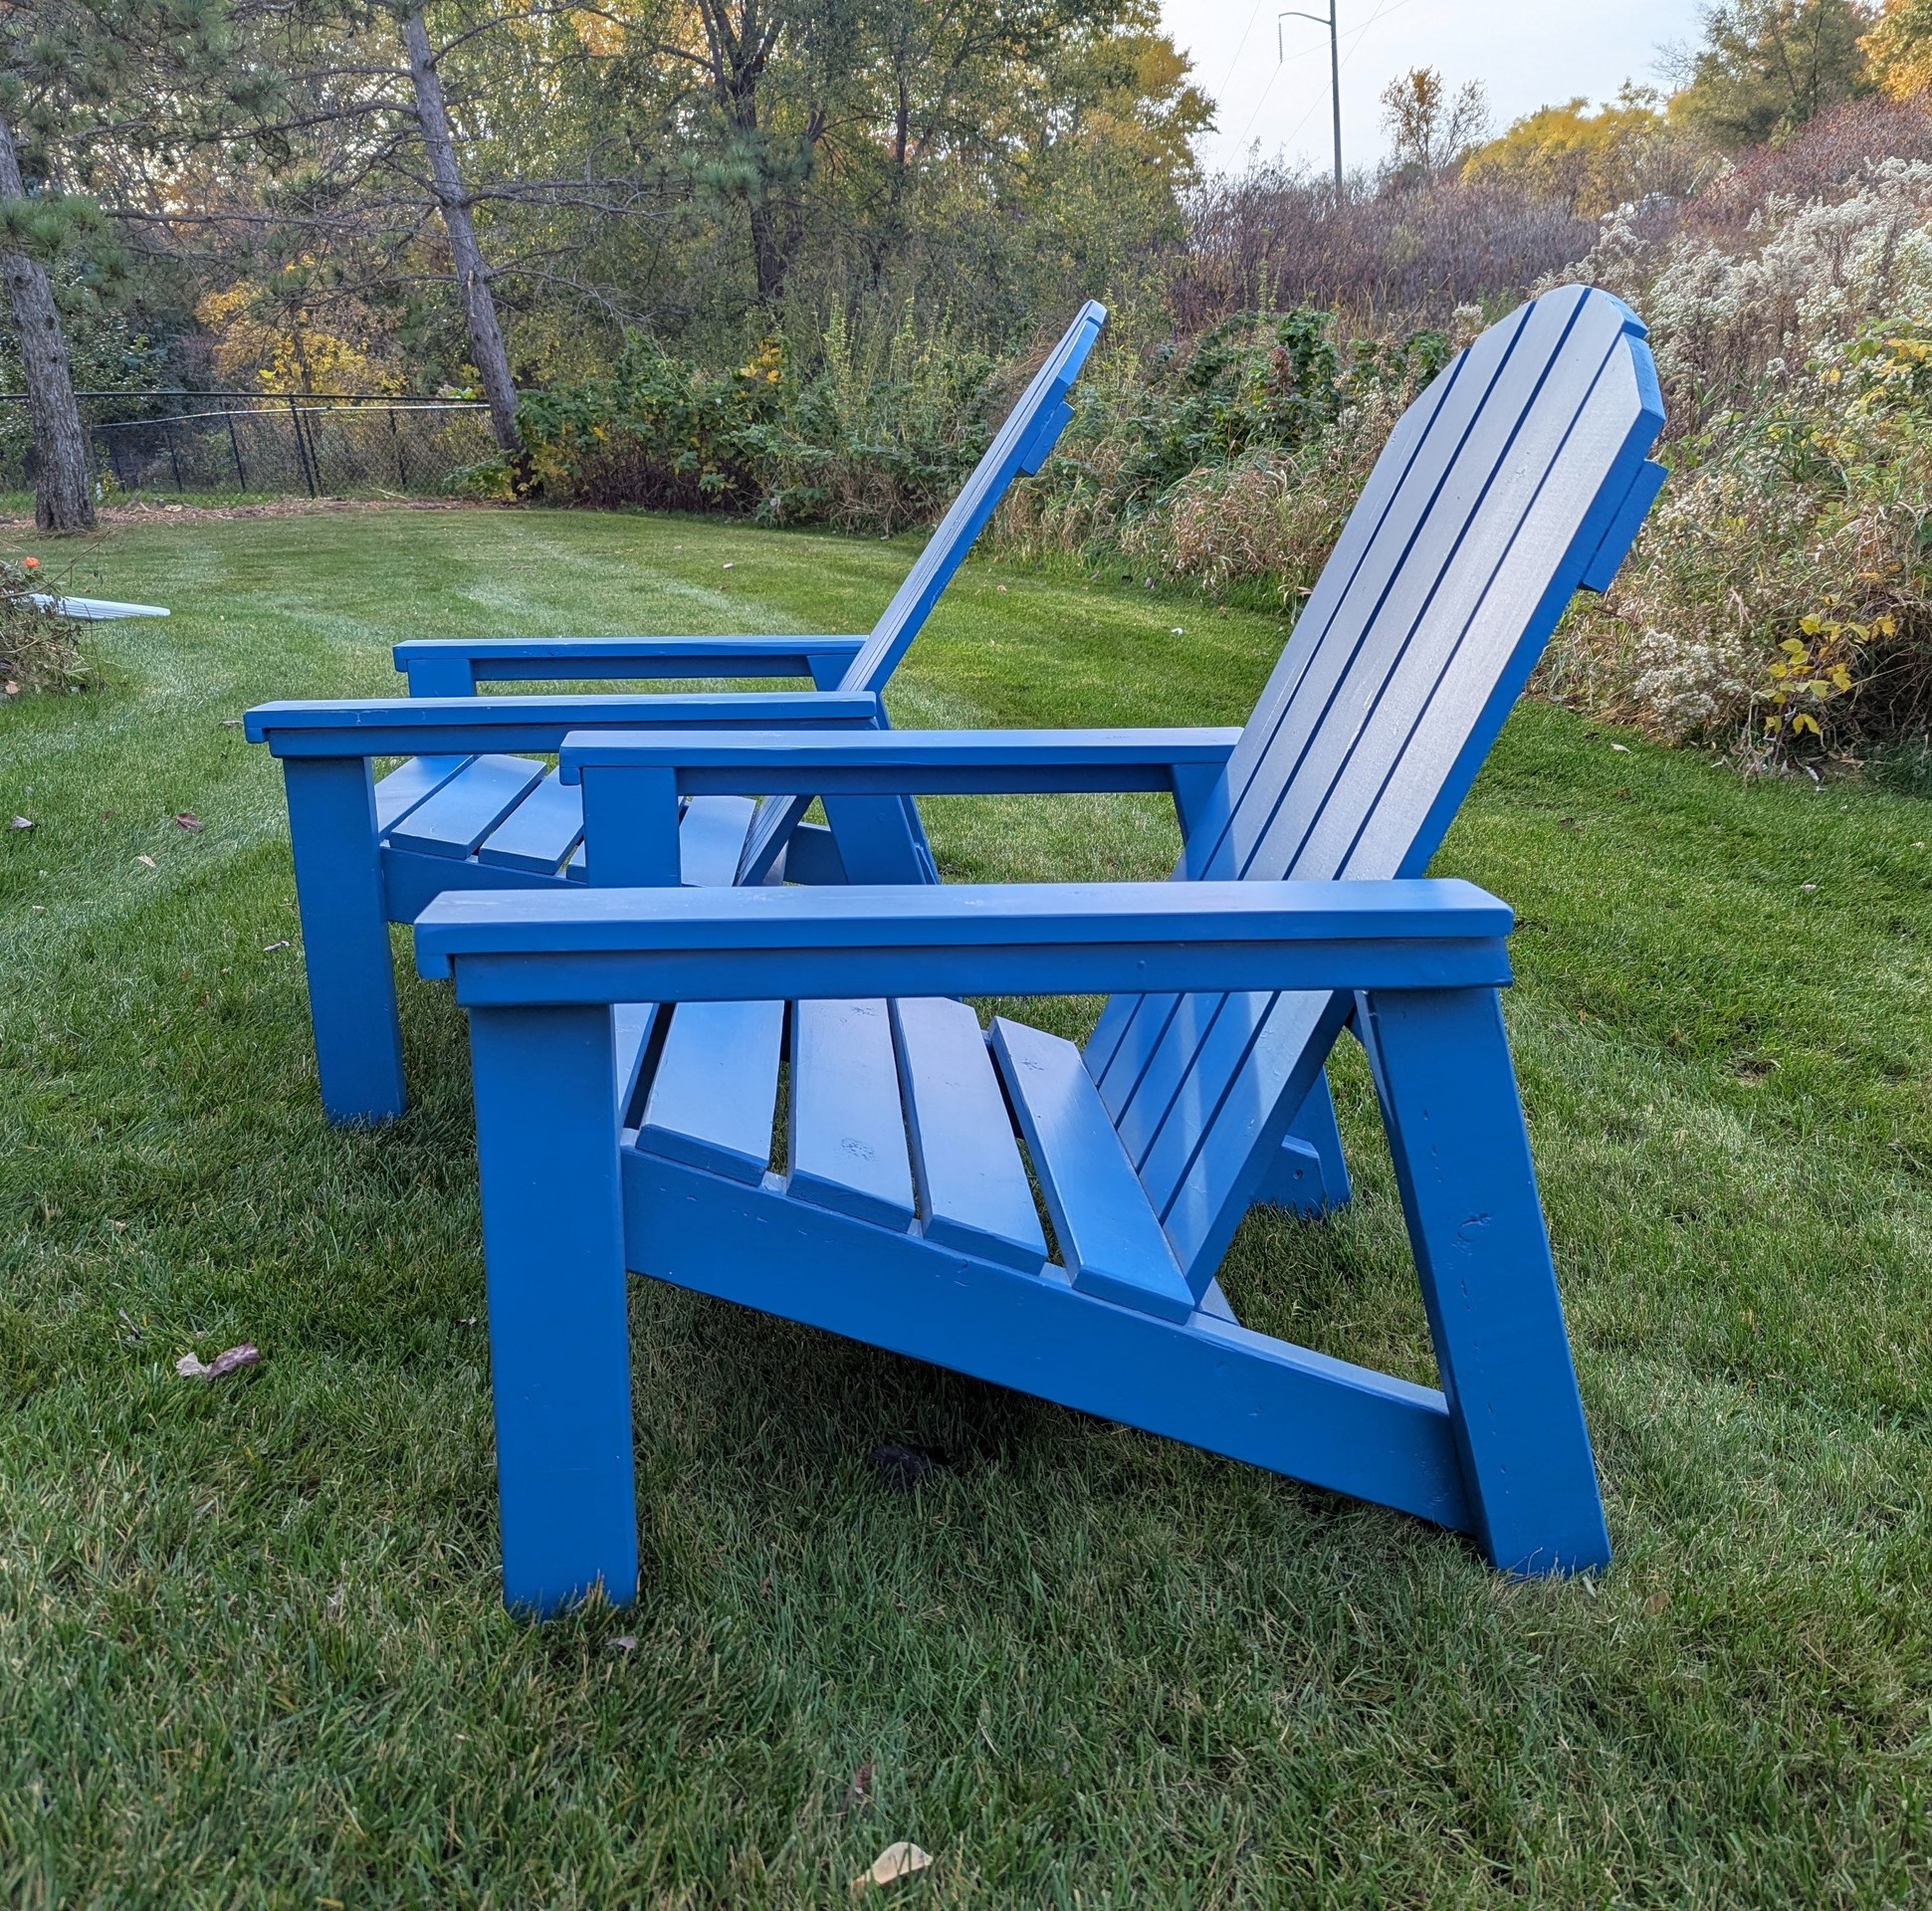
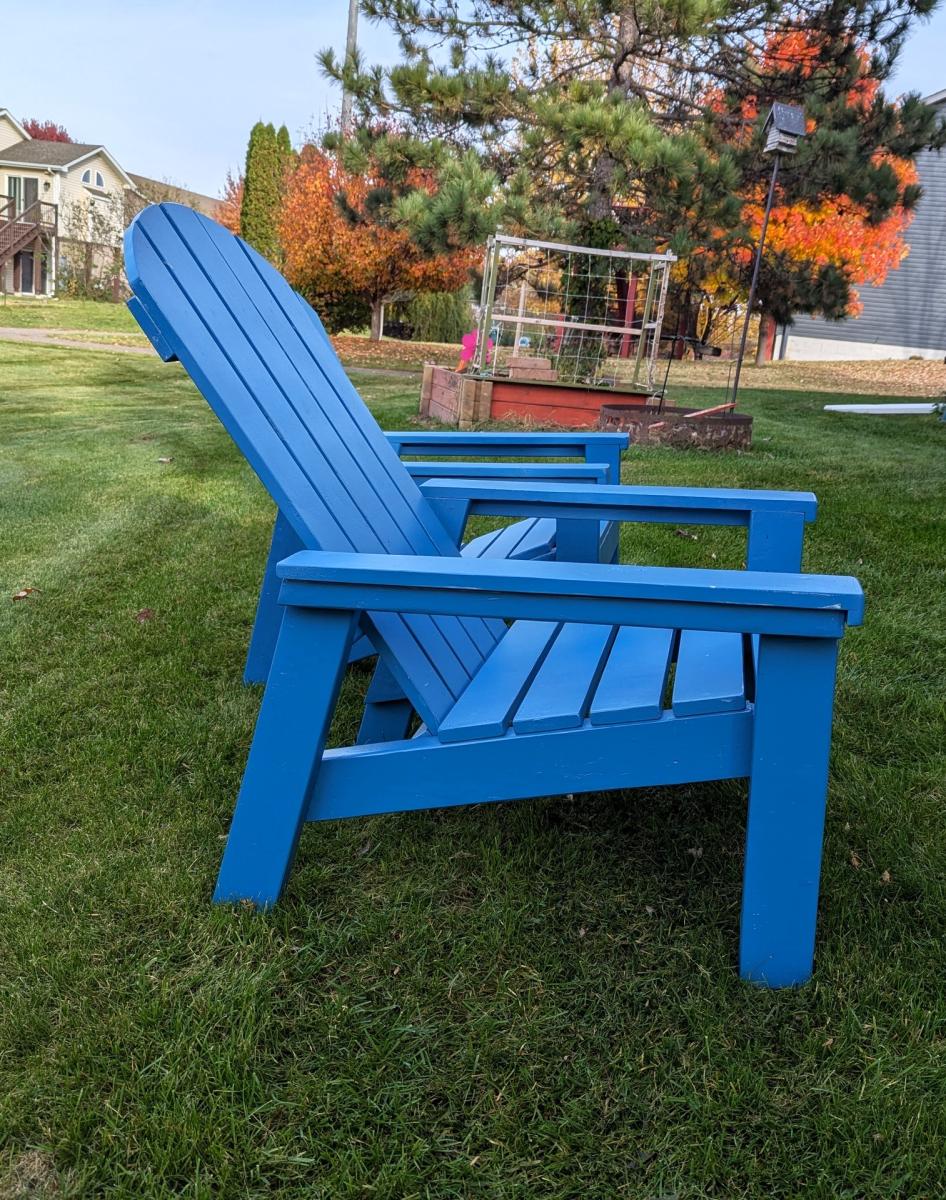
I made the first of these directly from the plans on this site. I adjusted the second version a bit to ease the angle of the seat (a bit tough to get out of the original one for us old folks). I did this by changing the first cut on the stretcher bar from the suggested 20 degrees to 15 degrees. Hope the picture show the different angle of the seat. Three coats of Sealer/Stain and four costs of Spar varnish should allow them to make it through a Minnesota winter. - Rusty Rover

Used cedar wood so I applied a few costs of oil based polyurethane to compensate for the softness of the wood.
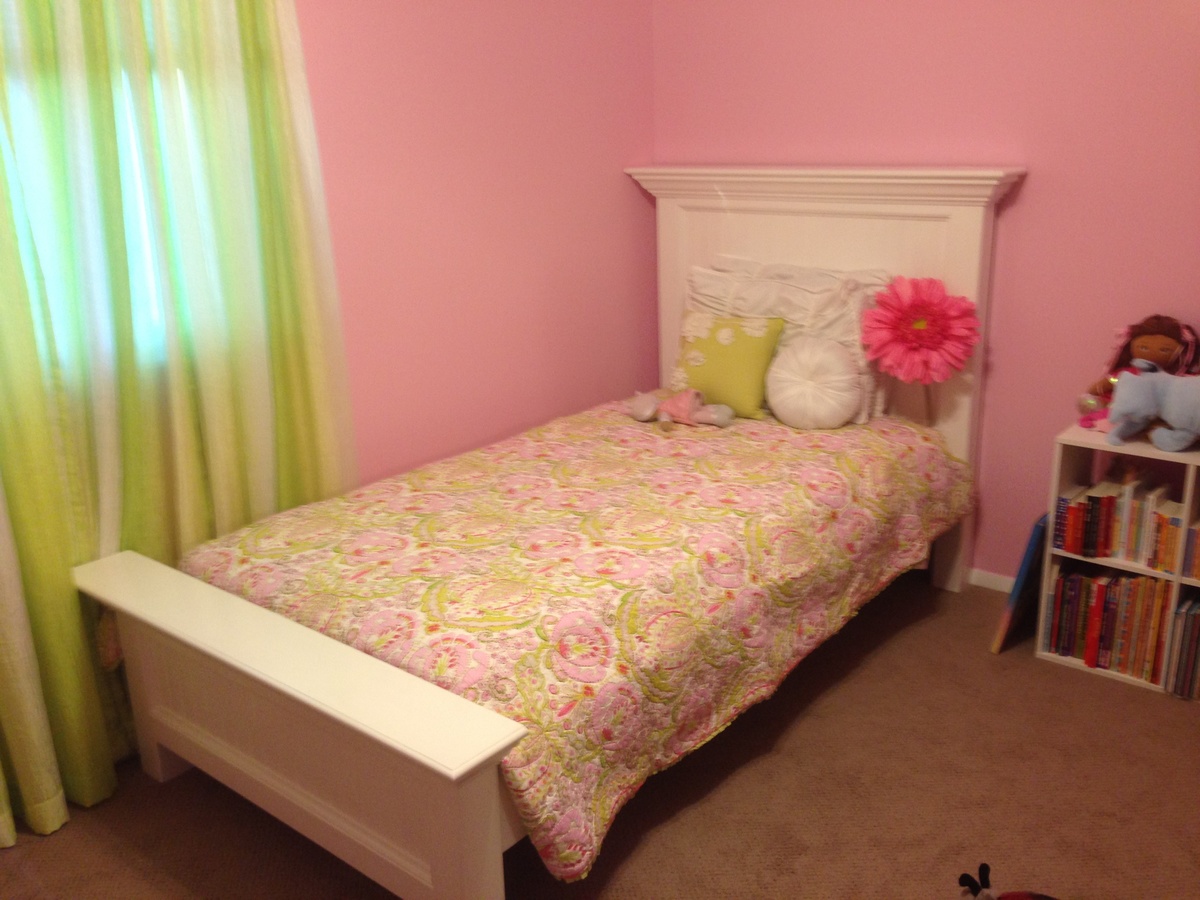
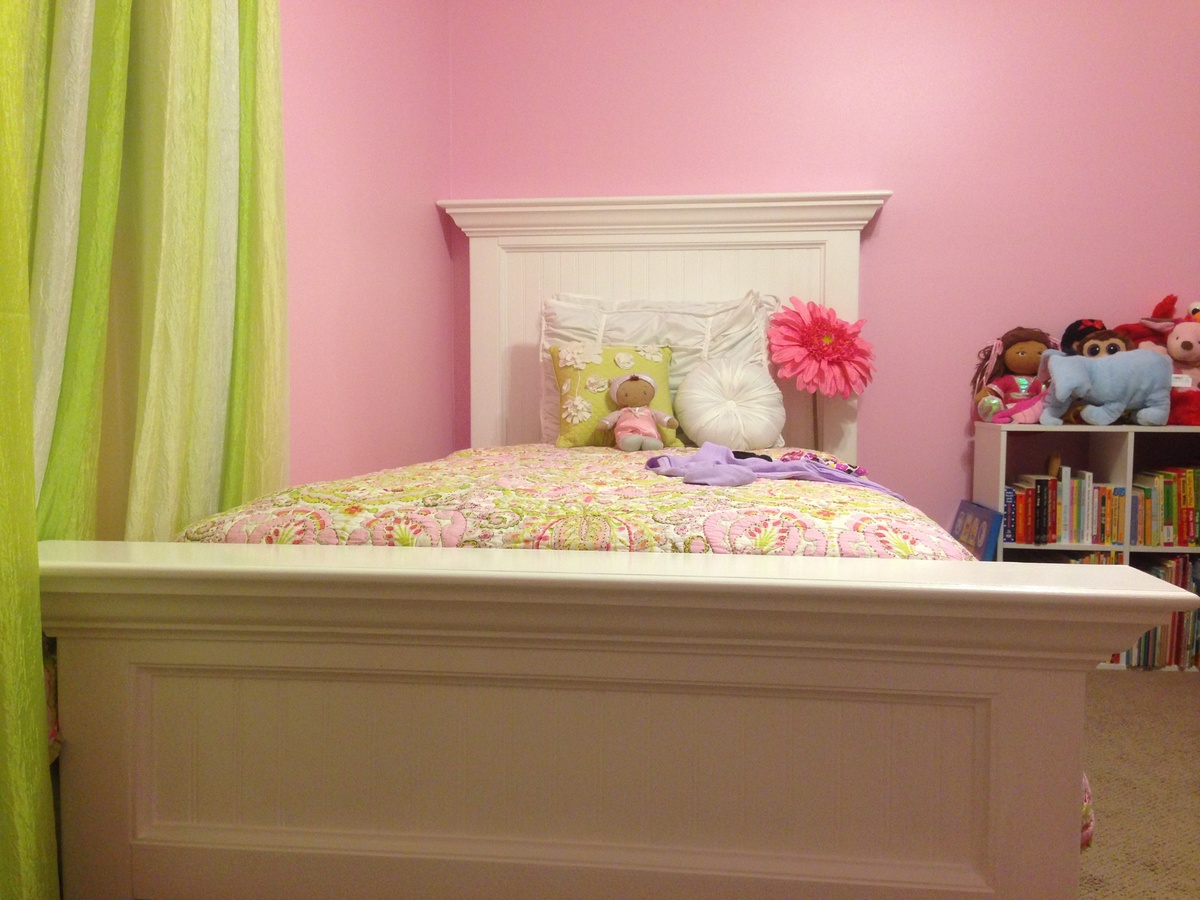
This project took a lot longer than anticipated. I had the entire bed built when it somehow fell over on its own and broke into pieces. It was at that moment that I decided when I rebuilt the bed that I would not use MDF. I used 3/4 ply for the back and I ripped a 1x8 for the top of the head board and foot board. I also used 3/4" half round to cover my semi noticeable saw marks from ripping the board. I didn't have a metal gram for the bed so I made rails out of 2x8"s and ripped a 2x4 in half to make the ledge for the slats. For this bed I placed 3/4 sheeting down instead of slats and set the mattress on that. I also had to fill in the holes from the crown with triangular fillers for the foot board since it would be seen.
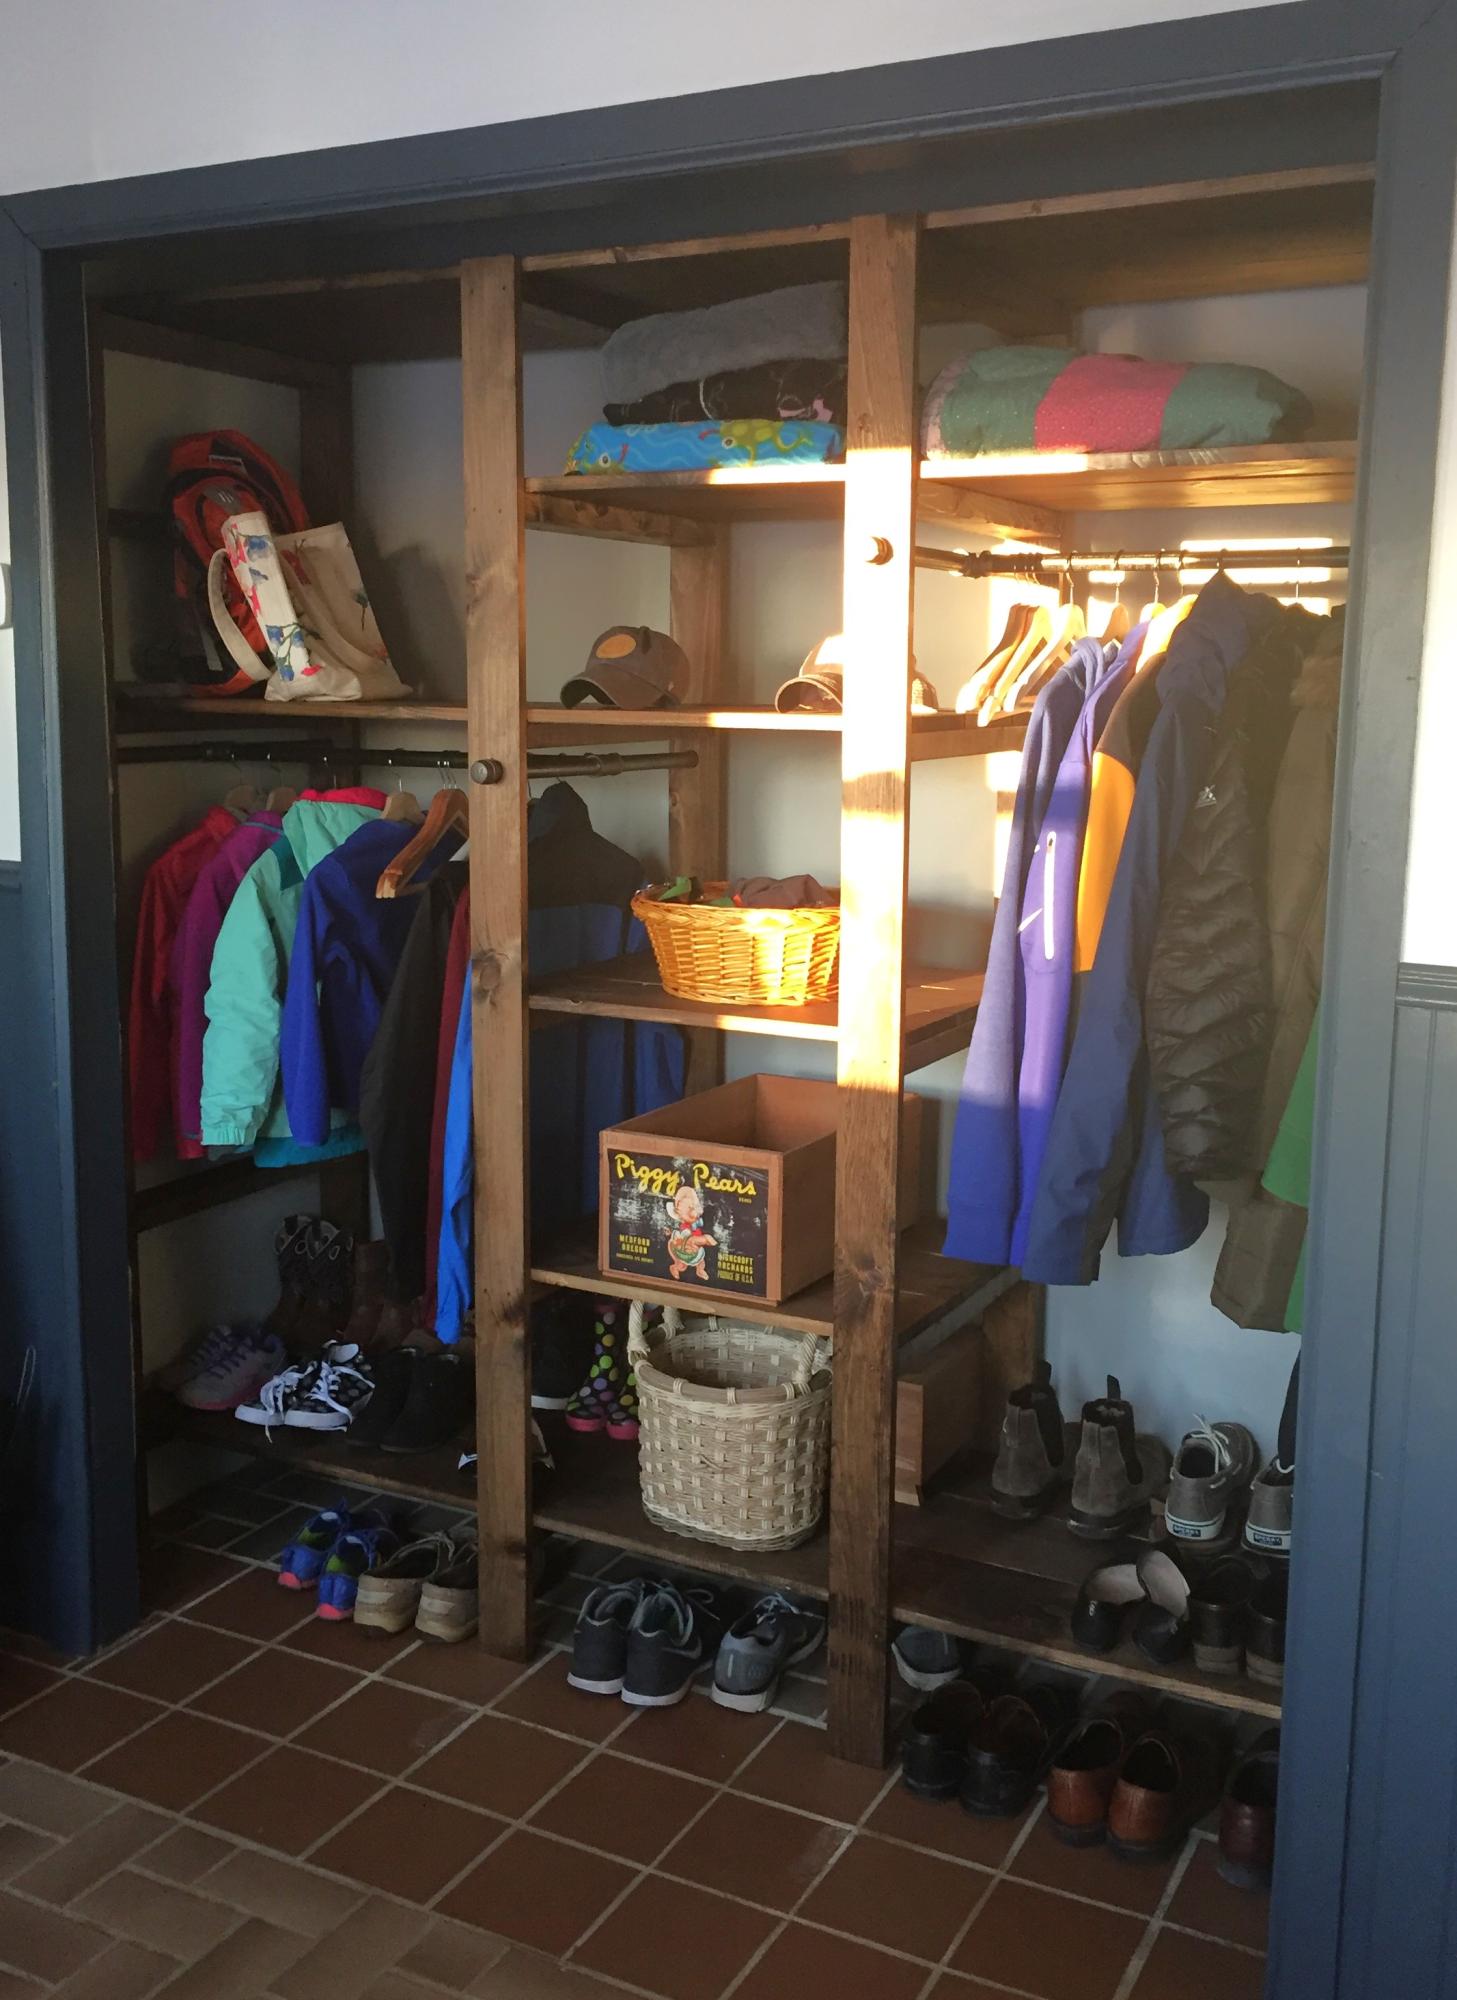
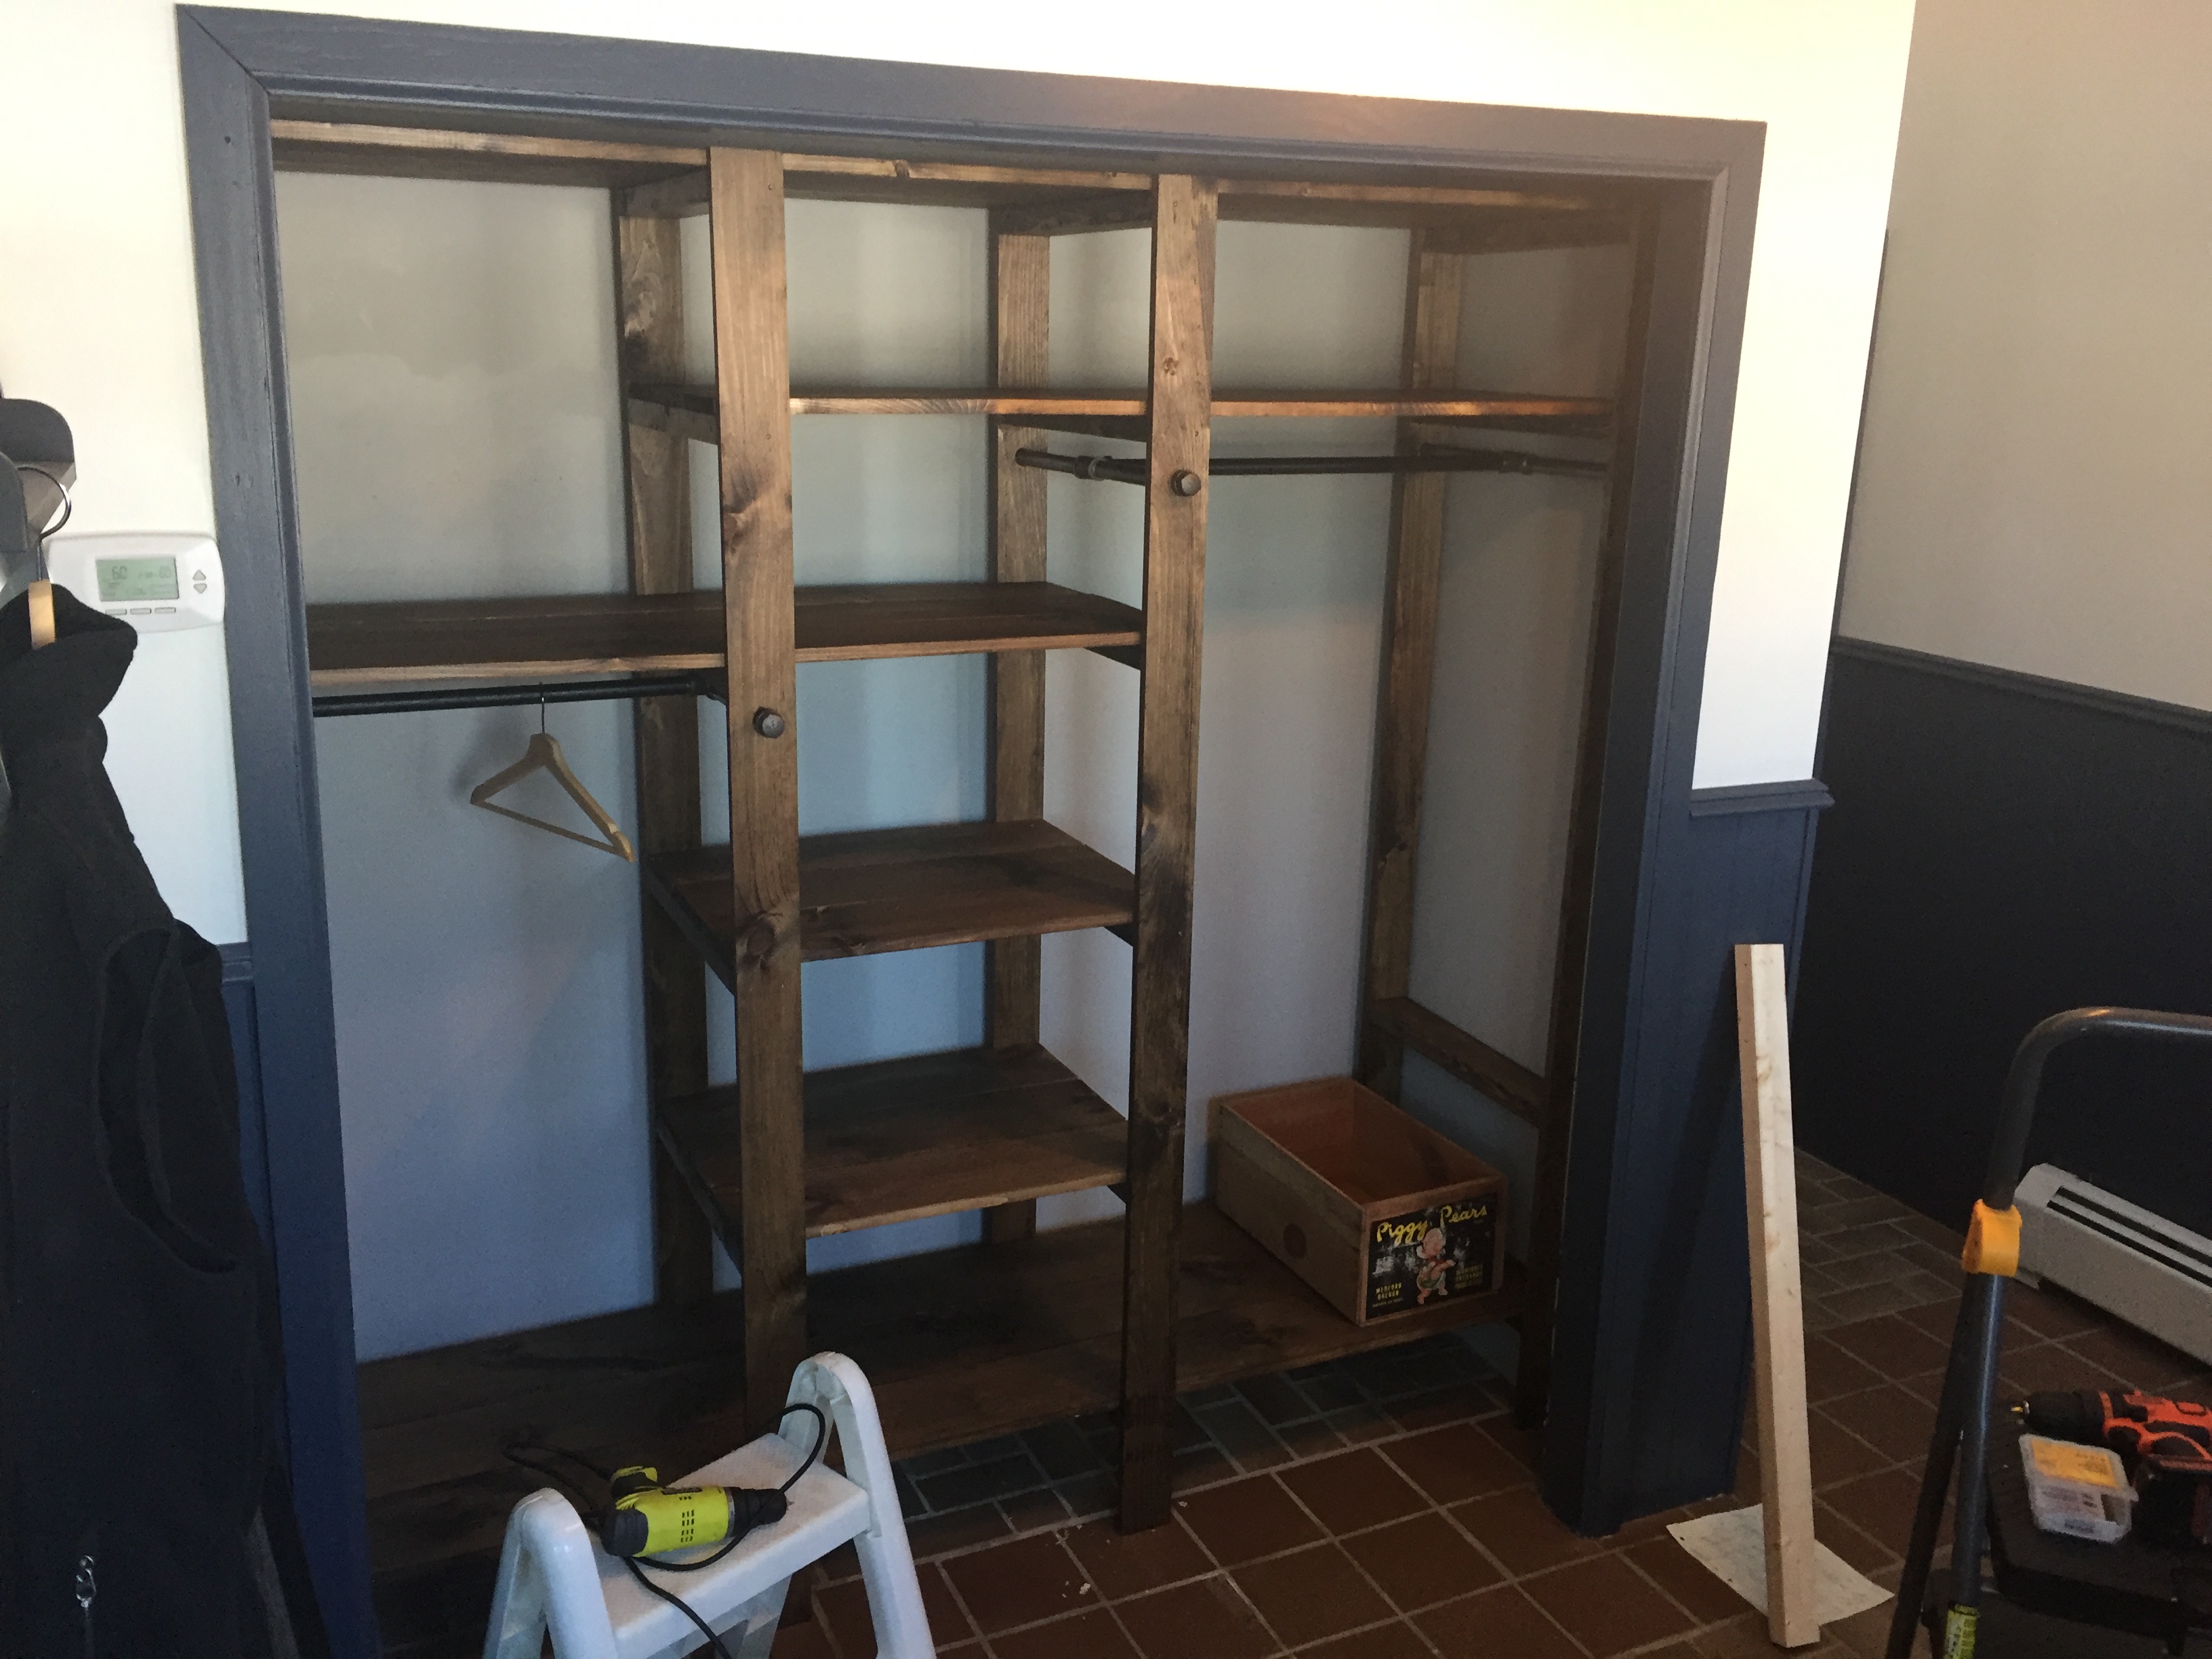
I had so much trouble deciding what to do with this HUGE closet in my breezeway. Previously it had just one bar across the top and ugly sliding doors. I loved Ana's design, but made several changes. Since my closet was super deep (32") I extended the depth of her design to about 25". I also staggered the rods for longer coats, and one that my 8 year old can actually reach to hang her stuff up! I changed the shelf design up a little bit too! Her instructions are super easy to change to your specifications. I did end up spending about $350 on this project, but keep in mind I was using 3 - 1x8's for each shelf instead of 1x4s.
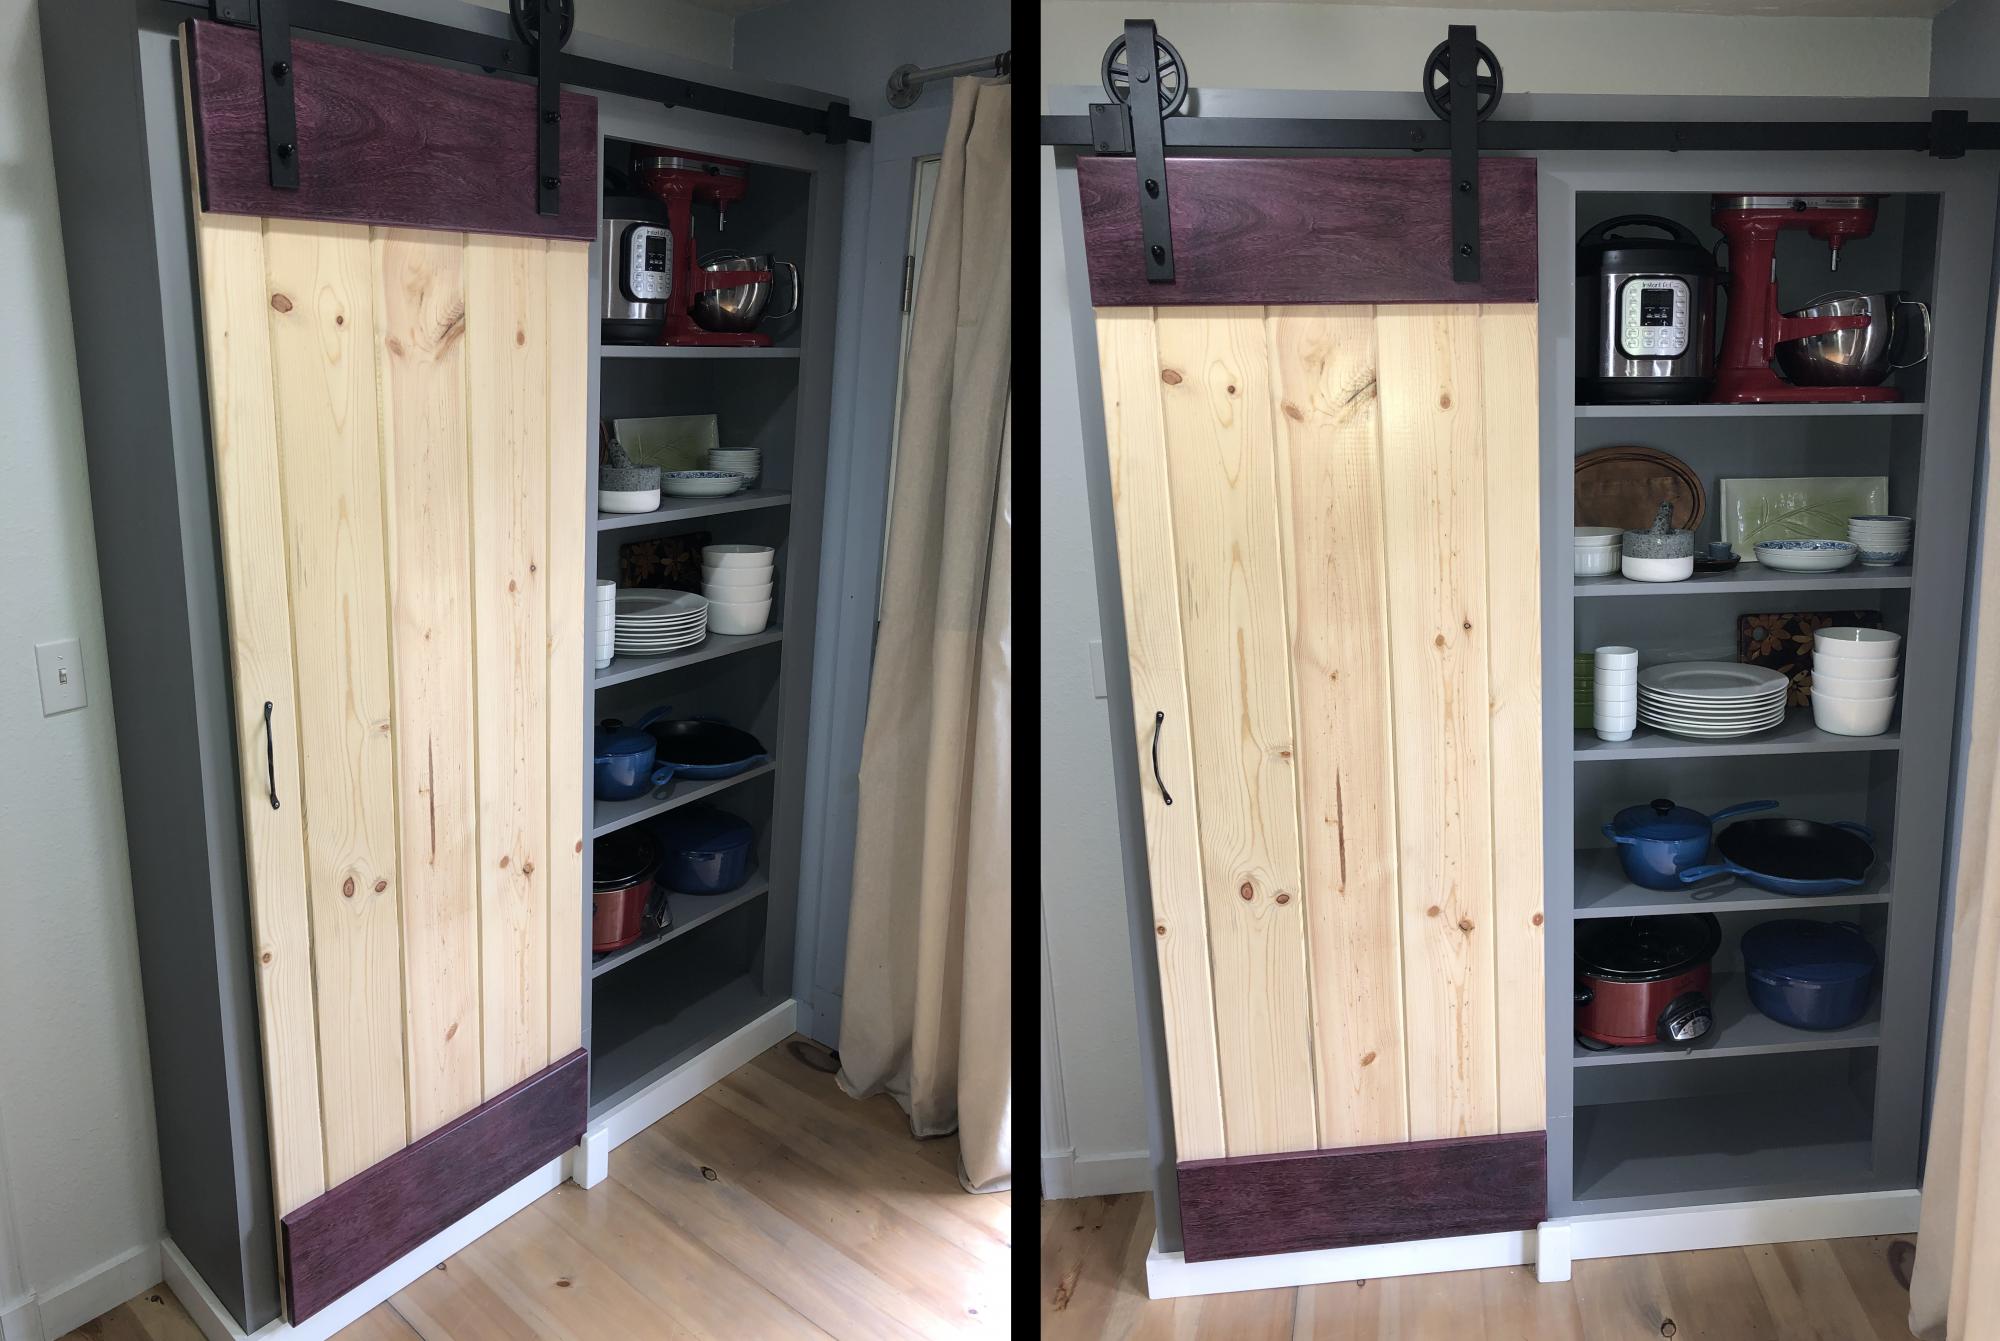
Barn door pantry scaled down to 5' x 7' with purple heart header and footer.
I had to add a guide at the bottom of the door to prevent it swinging out. Possibly my entire cabinet (or the wall) is slightly off level which is why it wanted to lean outward. I used a piece of felt inside the guide to prevent it scratching the purple heart.
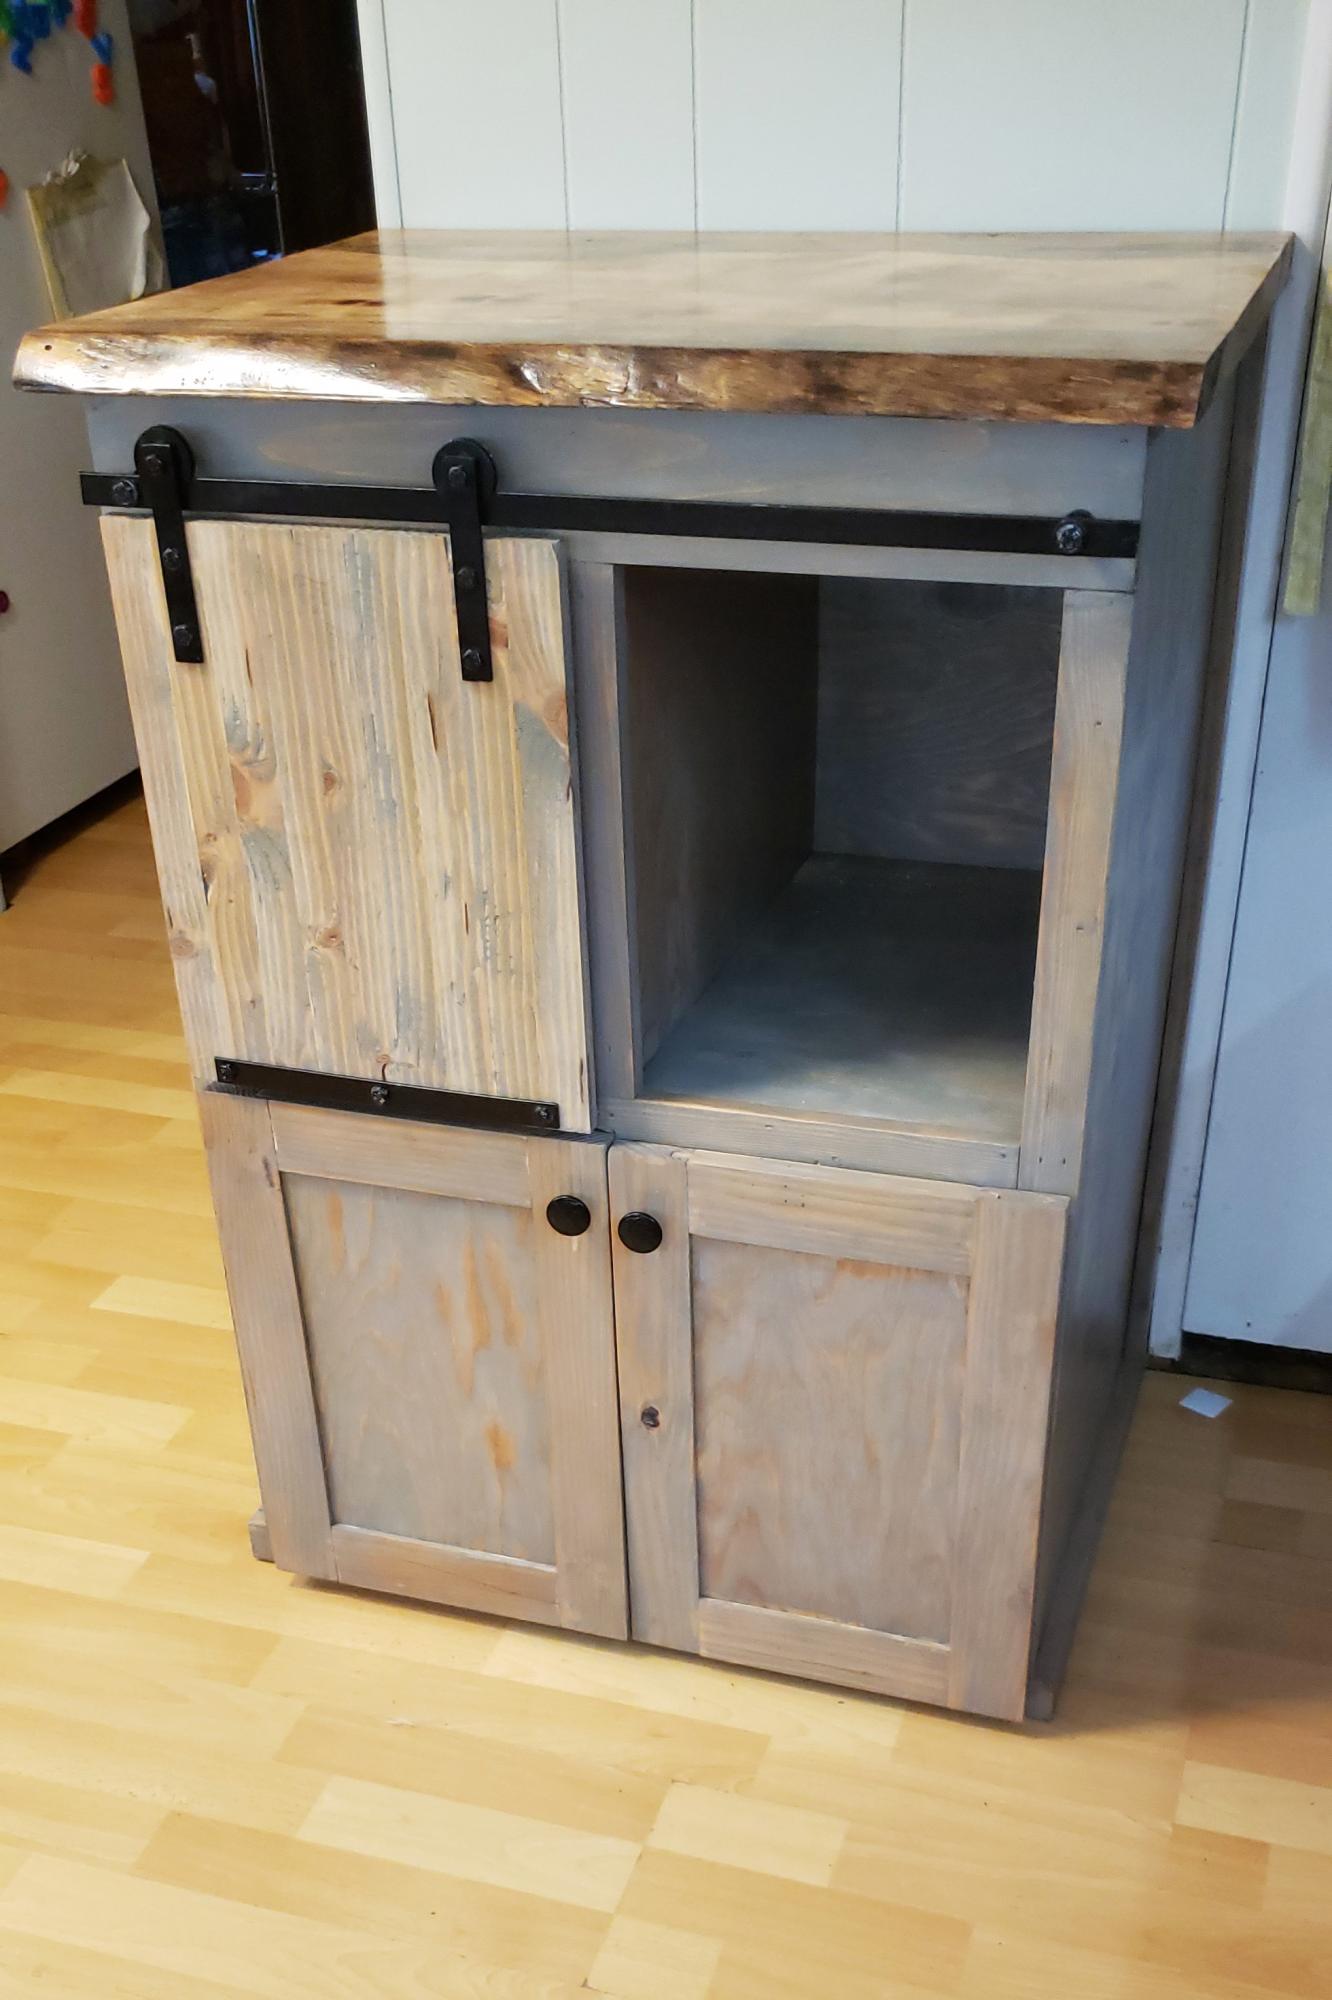
My son wanted the baker's rack in my kitchen to use as a coffee bar, so he built this cabinet as a replacement for me. His first build. The top is a piece of white oak with a live edge that was given to us more than a decade ago. I'm so pleased!
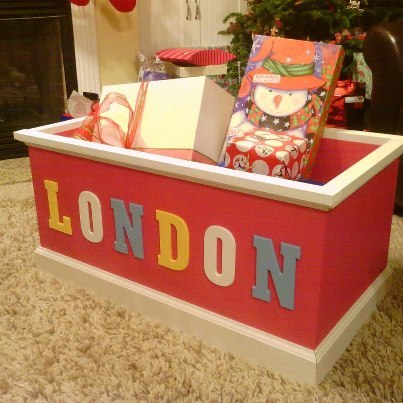
I made this for my 5 year old niece for Christmas...she loved it! Got a big hug without her parents saying a word.
Considering it's only my third woodworking project I was pleased with the results. Her Mom has requested one for London's baby brother; if I learn from my mistakes that one should be even better.
I painted all of the pieces separately before assembly, so the project was spread out over several days. If you're good enough to paint it all at once it's a weekend project.
My wife and I decided to build this with the same intent as Ana, to use as a changing table for our baby due in January 2015. We haven't built the topper yet but we're thrilled with the console table!
We did a lot of research on lumber before purchasing and ended up going through a local lumberyard, Gilcrest-Jewett for all but the pine 1x's which were purchased from lowes since the lumberyard didn't stock them in as many varying lengths and would have to mill them all from 1x4's. We used white birch purebond plywood. I understand Home Depot also carries this brand and may have been a little cheaper but the lumberyard cut all the pieces. Since we don't have a truck, hauling two 4x8' sheets of plywood wasn't an option and they can be super accurate with their wall saw. Totally worth it.
The instructions for the doors say to use glue and nails but we took it a step further and secured each board to the one before it using pocket holes, in addition to the glue. We then covered the pocket holes with the 1x3's, securing with 1 1/4" finish nails.
This was our first experience with edge banding and it really makes everything look so much more professional. If I were to give any tips, I would say to put it on the fronts of the shelf before putting the 1x2" frame in place so you can hide it, and also that I found it to be easier to use my sheet sander to get the edges off instead of a razor blade as the instructions suggest.
This was also our first experience with doors. I found that paint sticks work well to achieve that perfect gap around the edges. I should have measured and not assumed but we ended up having to add a piece in the middle of the two doors because the 1x3's (typically 2 1/2" wide) were just under 1/8" too narrow. Make sure you measure those boards before putting it all together.
In the end, we're thrilled with how this turned out. It's a real solid piece of furniture that's made to last. We actually looked at this piece at a West Elm and the floor model felt flimsy and thrown together. Great plans, thanks Ana!
Tue, 10/07/2014 - 09:59
What a beautiful build! Thanks for such clear, concise descriptions (and pictures) of how you built it.

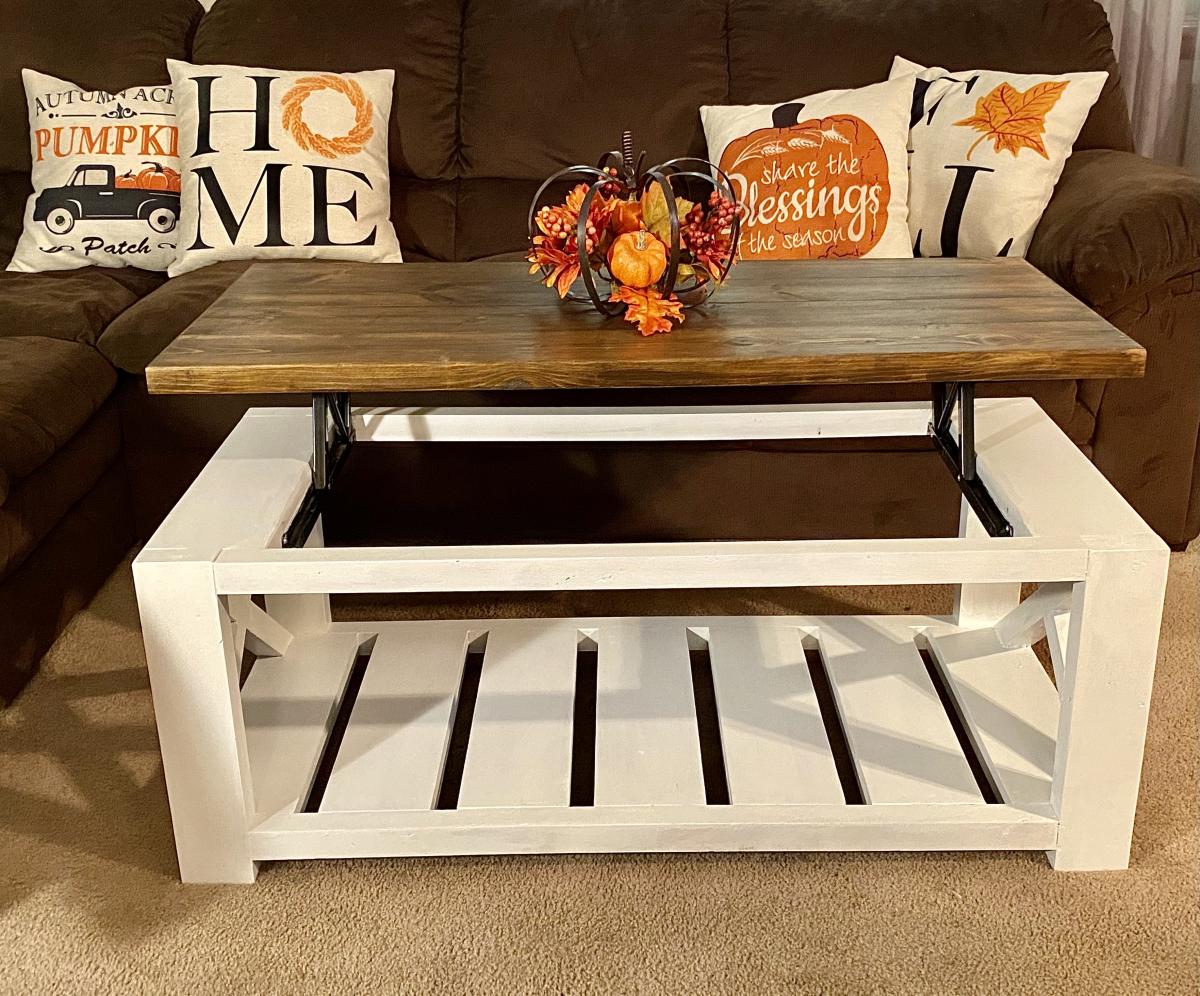
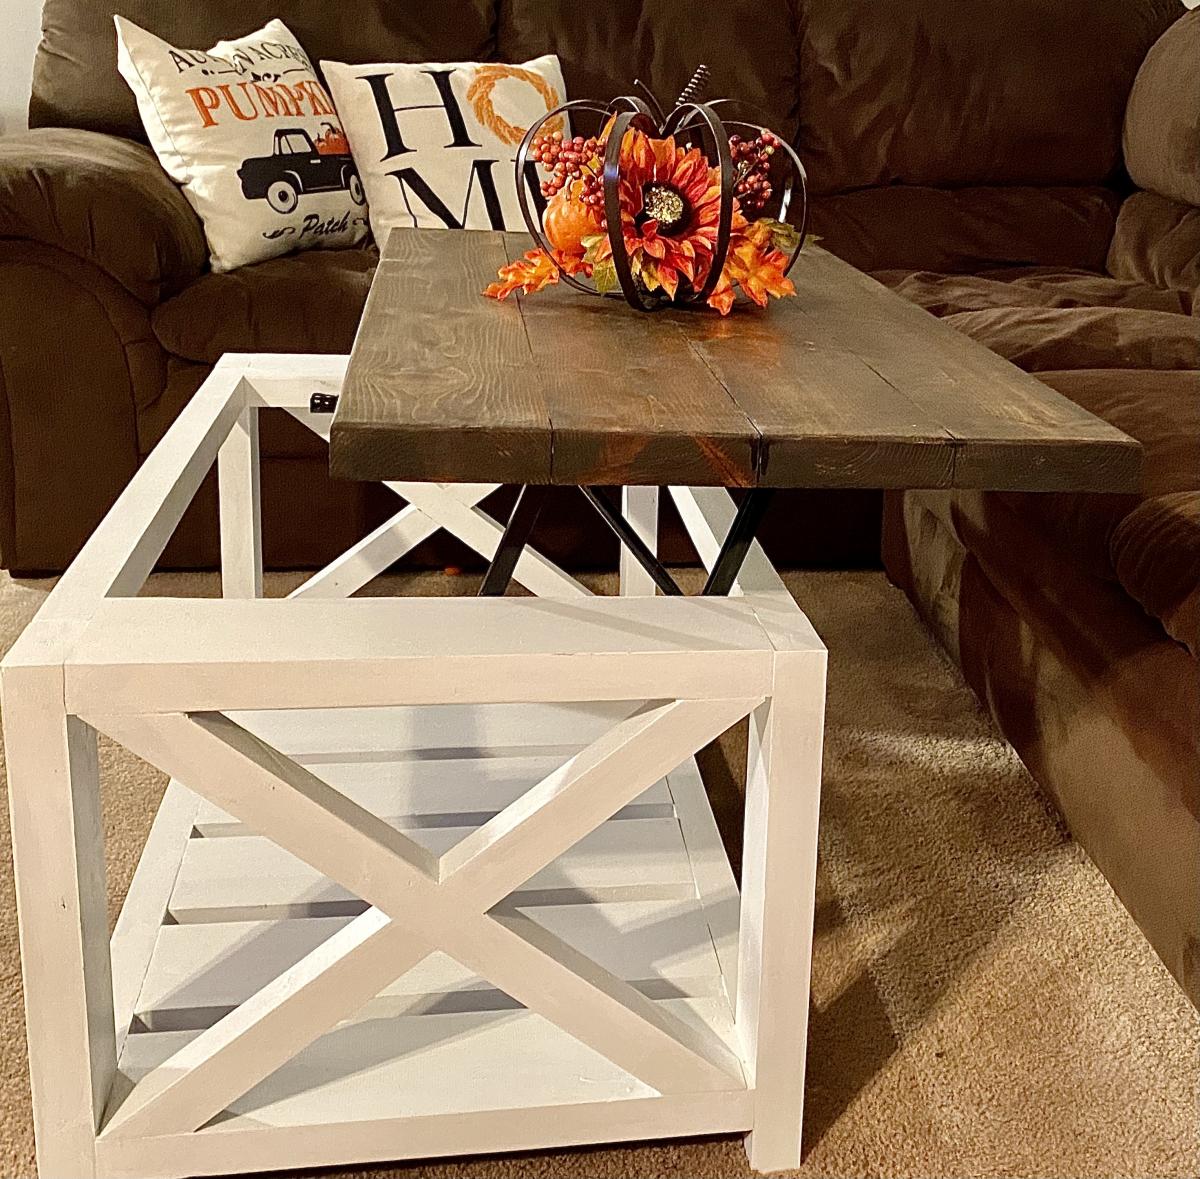
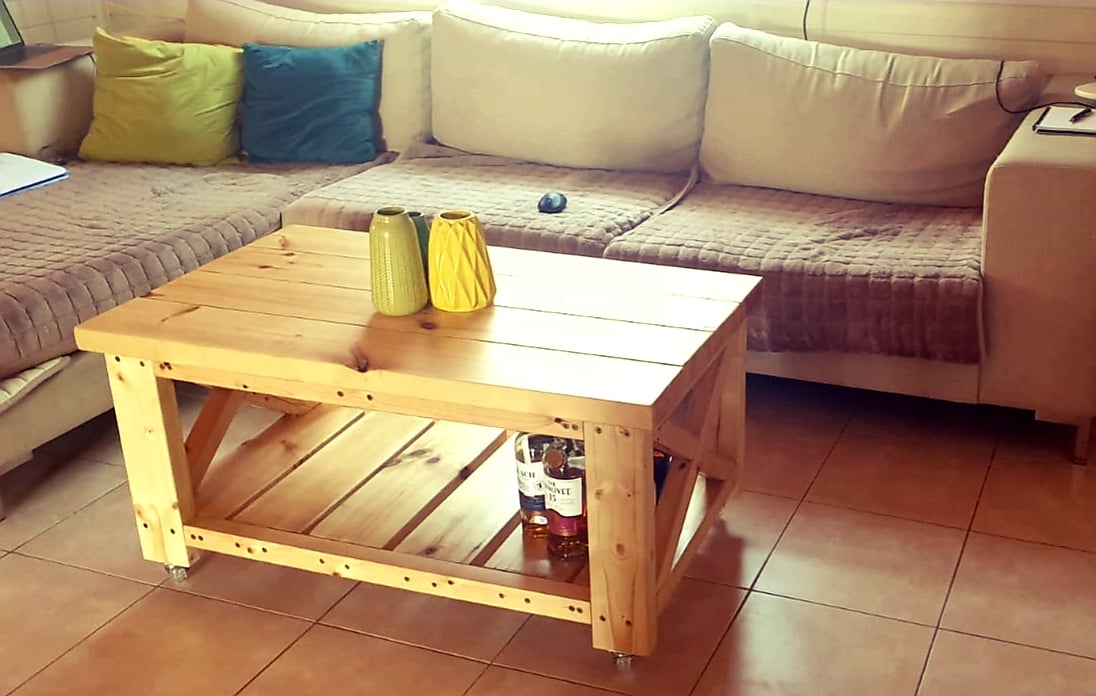
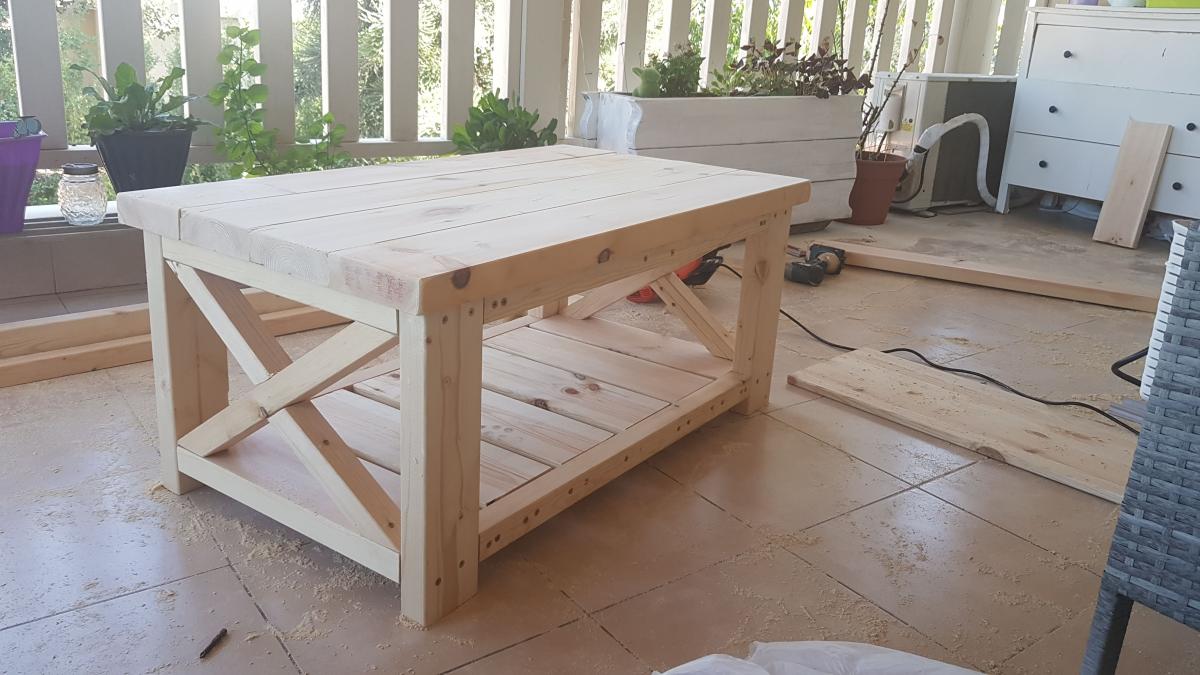
My fiancé seen the rustic x one and loved it but has always wanted a lift top one. I decided to combine the two and it turned out well.
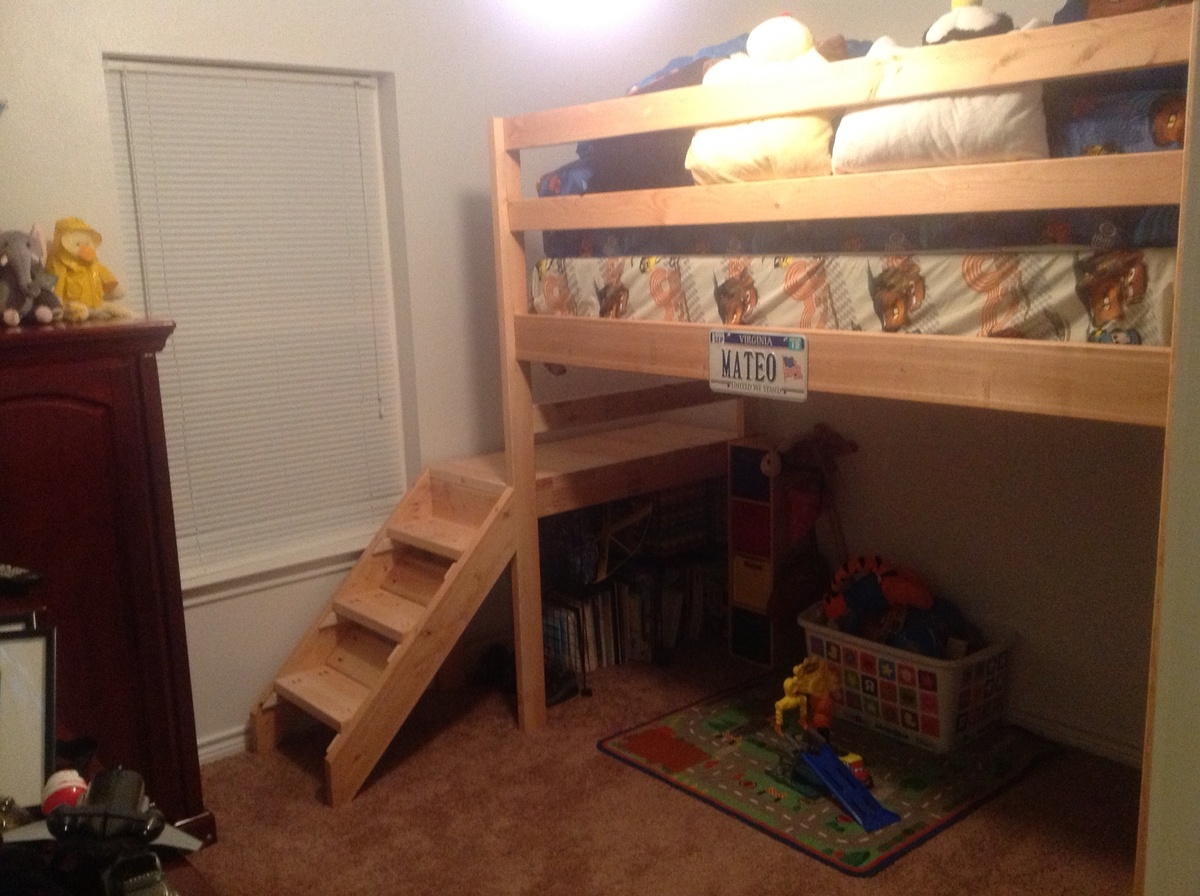
We recently moved to Texas from Virginia and downsized in living space. Our 3 1/2 year old son had his own playroom so unfortunately we don't have an extra room for that any longer. My solution to that problem was building this loft bed. We altered the plans to fit our measurements (smaller bedroom). We also made it taller so we could use it longer. Also we didn't have a keg jig so we invested in that within that $200 cost. My husband and I built this in one evening from start to finish. 6pm to 2 am! This was also our first wood project. Not bad I say!
We are on a tight budget so this was built total from scrap lumber from when we removed a wall in our house and a few other scraps. So the dimensions didn't turn out exactly right but that was my fault. Thanks for sharing your plans. My girl is going to love it!

Thank you Ana!
Love your site!
That was my first wood project, and it turned out awesome!
Here are the unfinished, and the finished version, with transparent matt lacquer.
I also added some wheels for easy moving around.
Yokhai
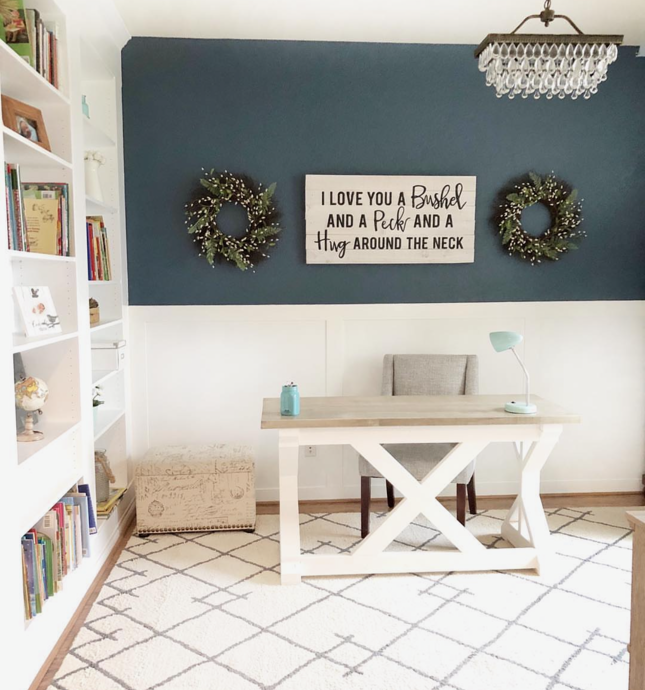
"These “built-in” bookshelves are a fun IKEA hack and just about every book we have comes from library book sales and thrift shops. There’s nothing like paying 50 cents or $1 to find out you discovered a rare gem of a book worth hundreds! Our desk is also a #diyproject made with an Ana White plan." - rootedchildhood on Instagram
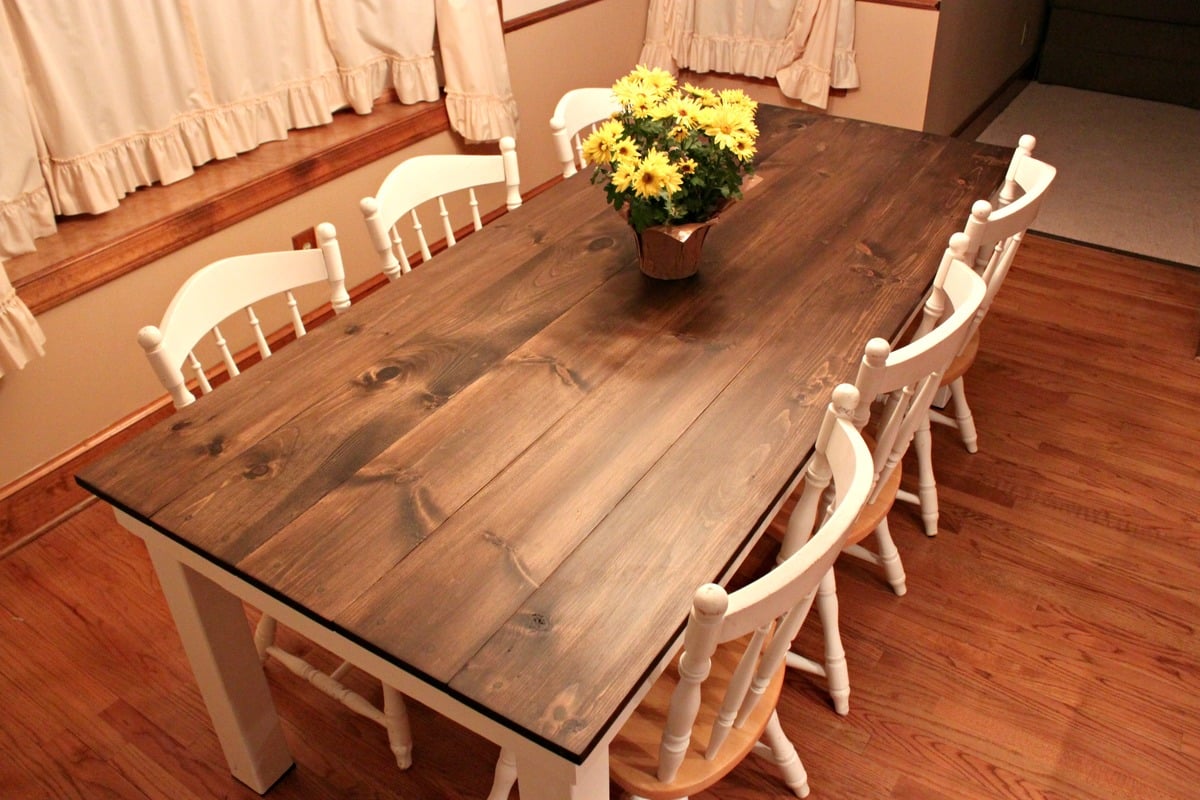
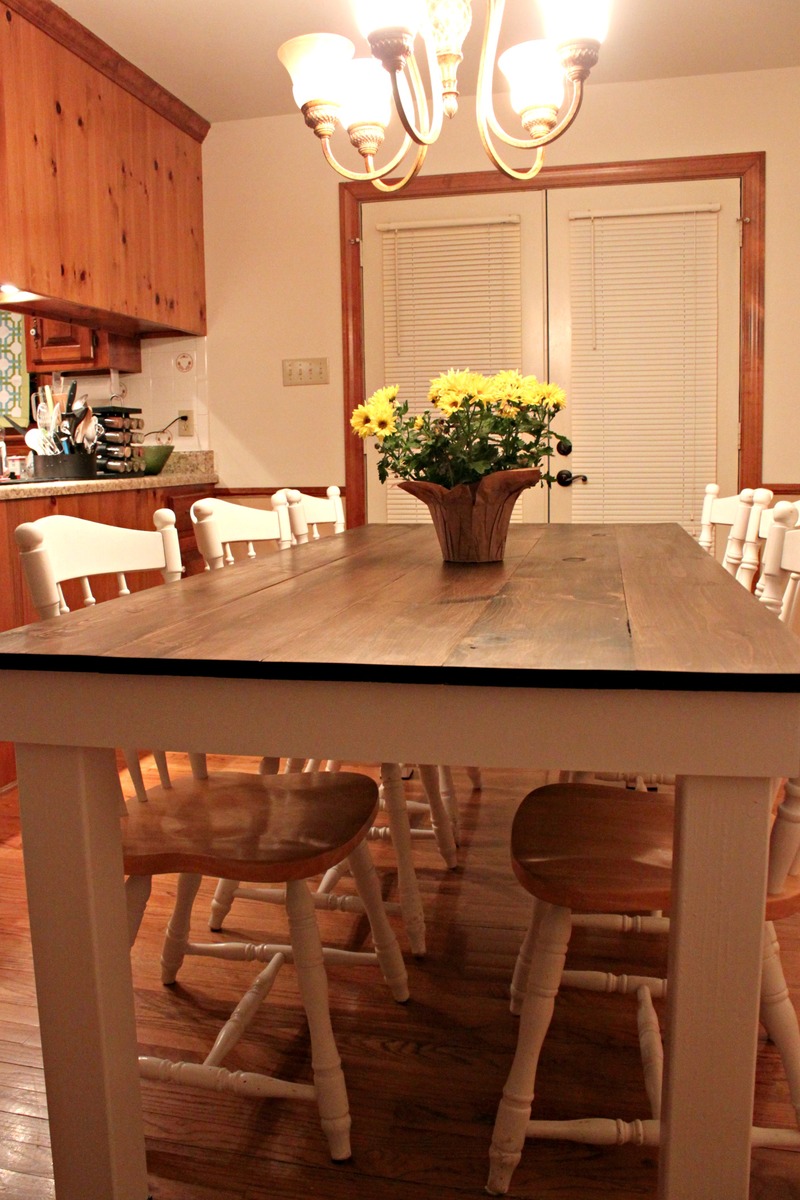
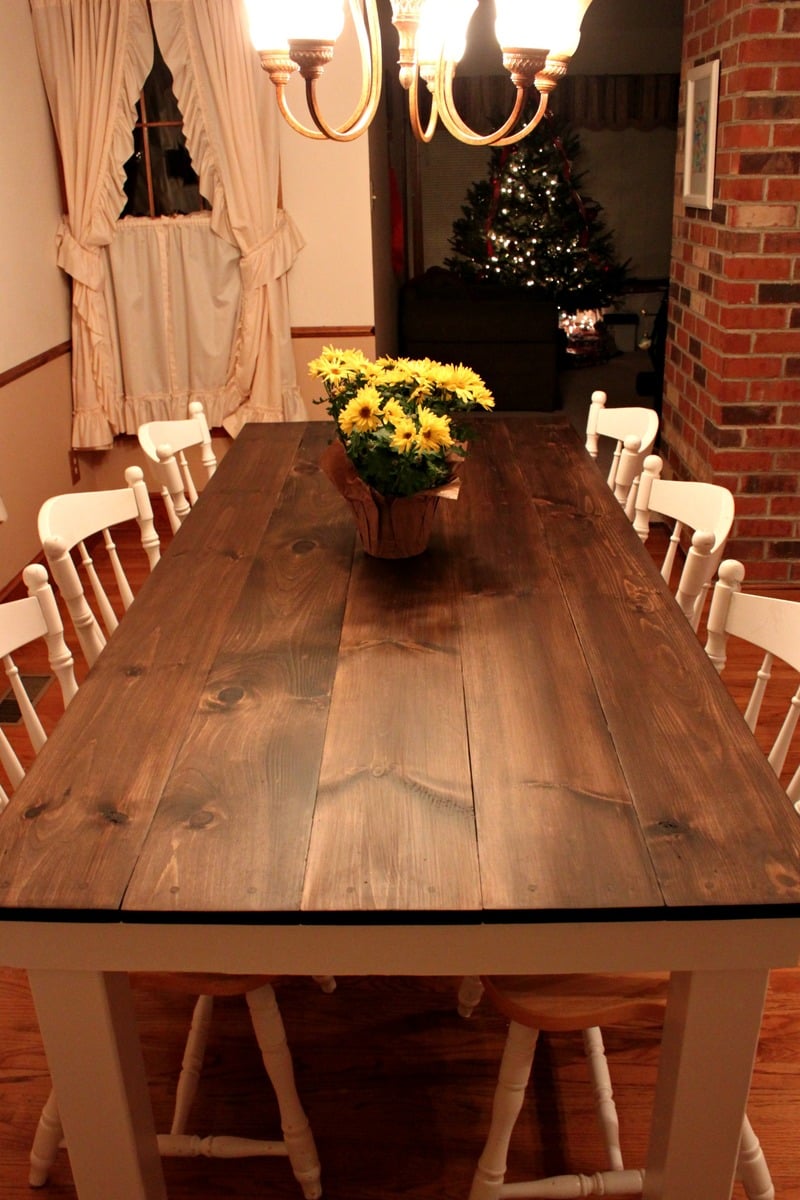
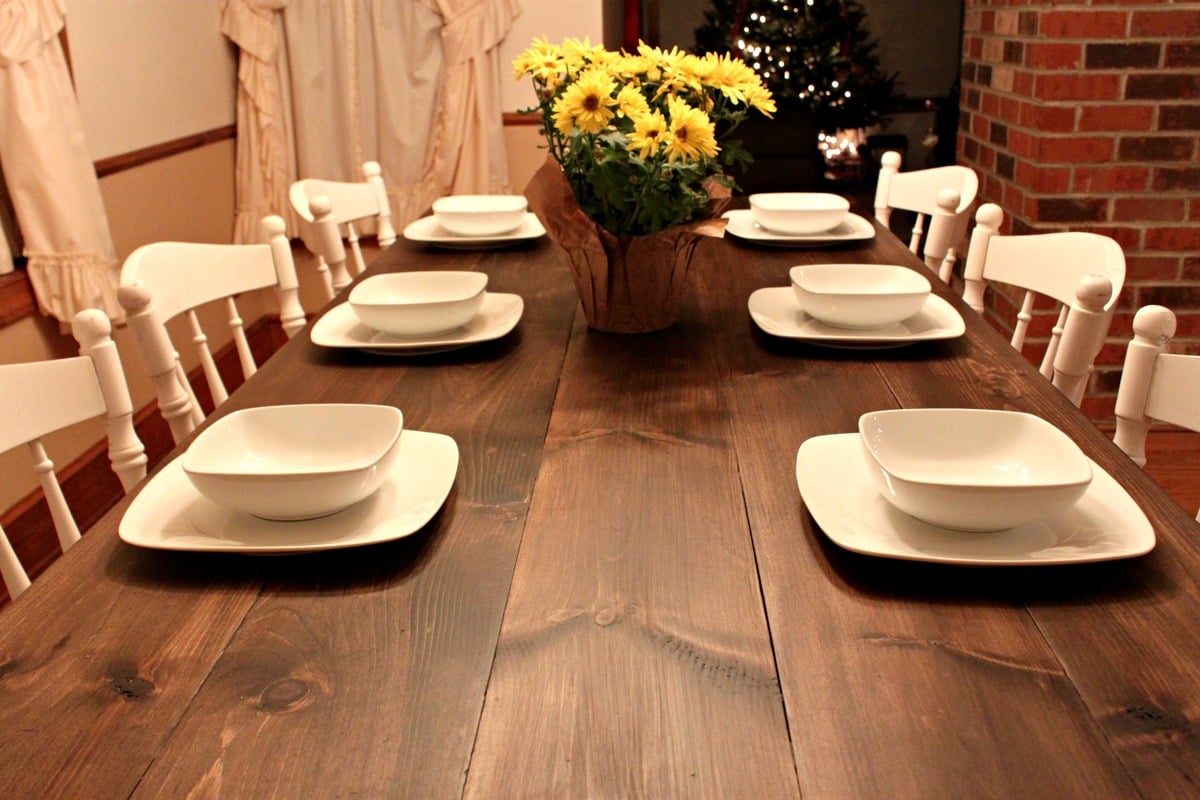
My husband and I love entertaining, but our small kitchen table was just not cutting it for both our space and our hosting abilities. We decided that instead of searching for the perfect table and spending a ton of money, we would just build our own table. We found that Ana's Rustic Table plans best matched what we were looking for, but my husband being the detailed person that he is didn’t just want to take her measurements and run with them. So we taped off the floor around our old table to decide how large we wanted our own table to be.
 We basically followed Ana White’s plans to a T.
  Until it got to the legs. Ana White used 2×4′s for her legs, but we decided we liked the look of chunkier 4×4 legs instead.
  We also did things in a different order, like attaching the legs to the apron before attaching the table top. This did make everything way easier when it came to painting, no tape needed.
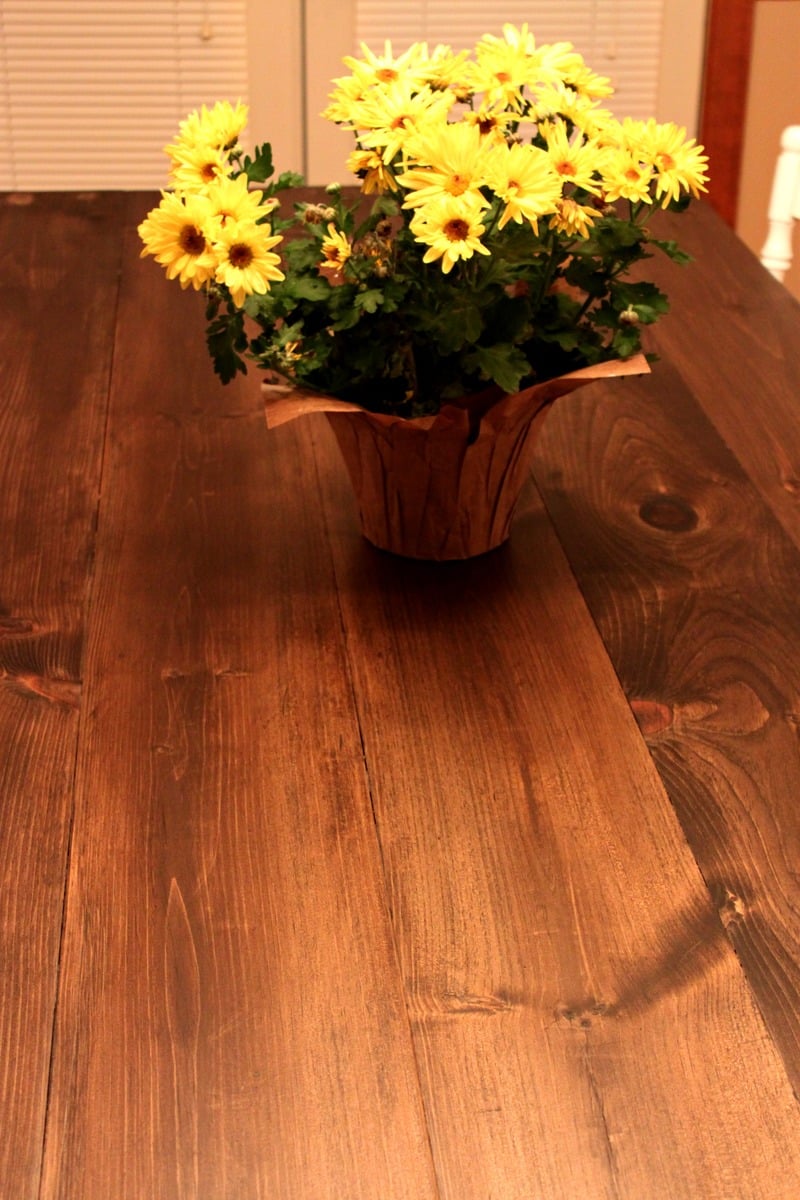
  We also stained the bottoms and sides of the tabletop boards before attaching them to the apron. After the top was attached I stained the top side and applied about 3-4 coats of Matte polyurethane. I like the matte finish because it doesn’t add any sheen and makes things look even more rustic; however, we’ll have to add a regular coat of poly as well because the matte is too soft for something that will see such rough use over the years.
  And now for what you’re all wondering about, how much did this project cost us?
Mon, 12/31/2012 - 09:43
Your table is gorgeous! You did an amazing job.
I am getting ready to attempt my first two projects, bookshelves and a buffet table. I had a couple of questions about how you got such a consistent stain.
1) The Stain - What kind of stain did you use? How many coats did it take? Did you use a conditioner first?
2) Wood filler - How did you get the wood filler to match the stained areas so well? What kind did you use?
Thanks for the advice! I was thinking I would have to paint the buffet but after seeing your table I think I may actually attempt the stain.
Just finished this project...took a little longer than I expected...it was a low cost project...I had most of the stock...but probably would cost around $75 to make. Paint and stain were the most expensive items. This was a lot of fun to make...Now to make the matching table...LOL
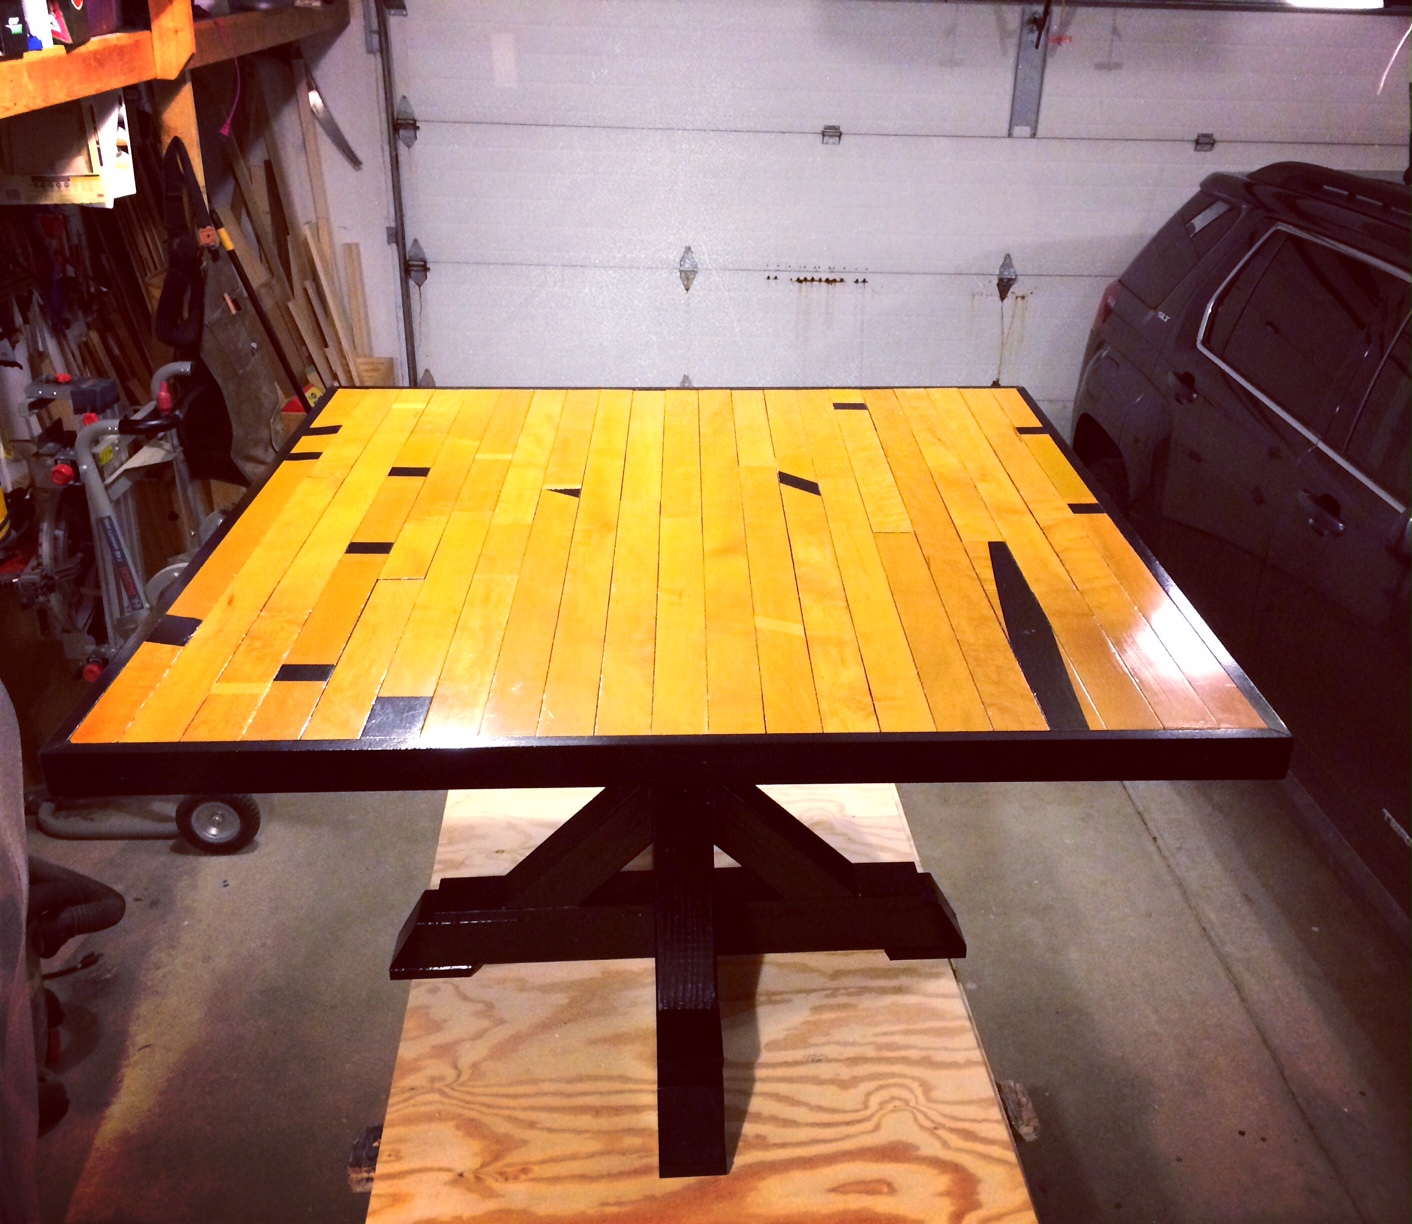
I used the "square x bass pedestal" plans to complete this 4' card table. The top is made from reclaimed gym flooring from the local high school. The "x base pedestal" provides a nice sturdy base for the large table. The project was completed over several weekends when I had time to work on it.

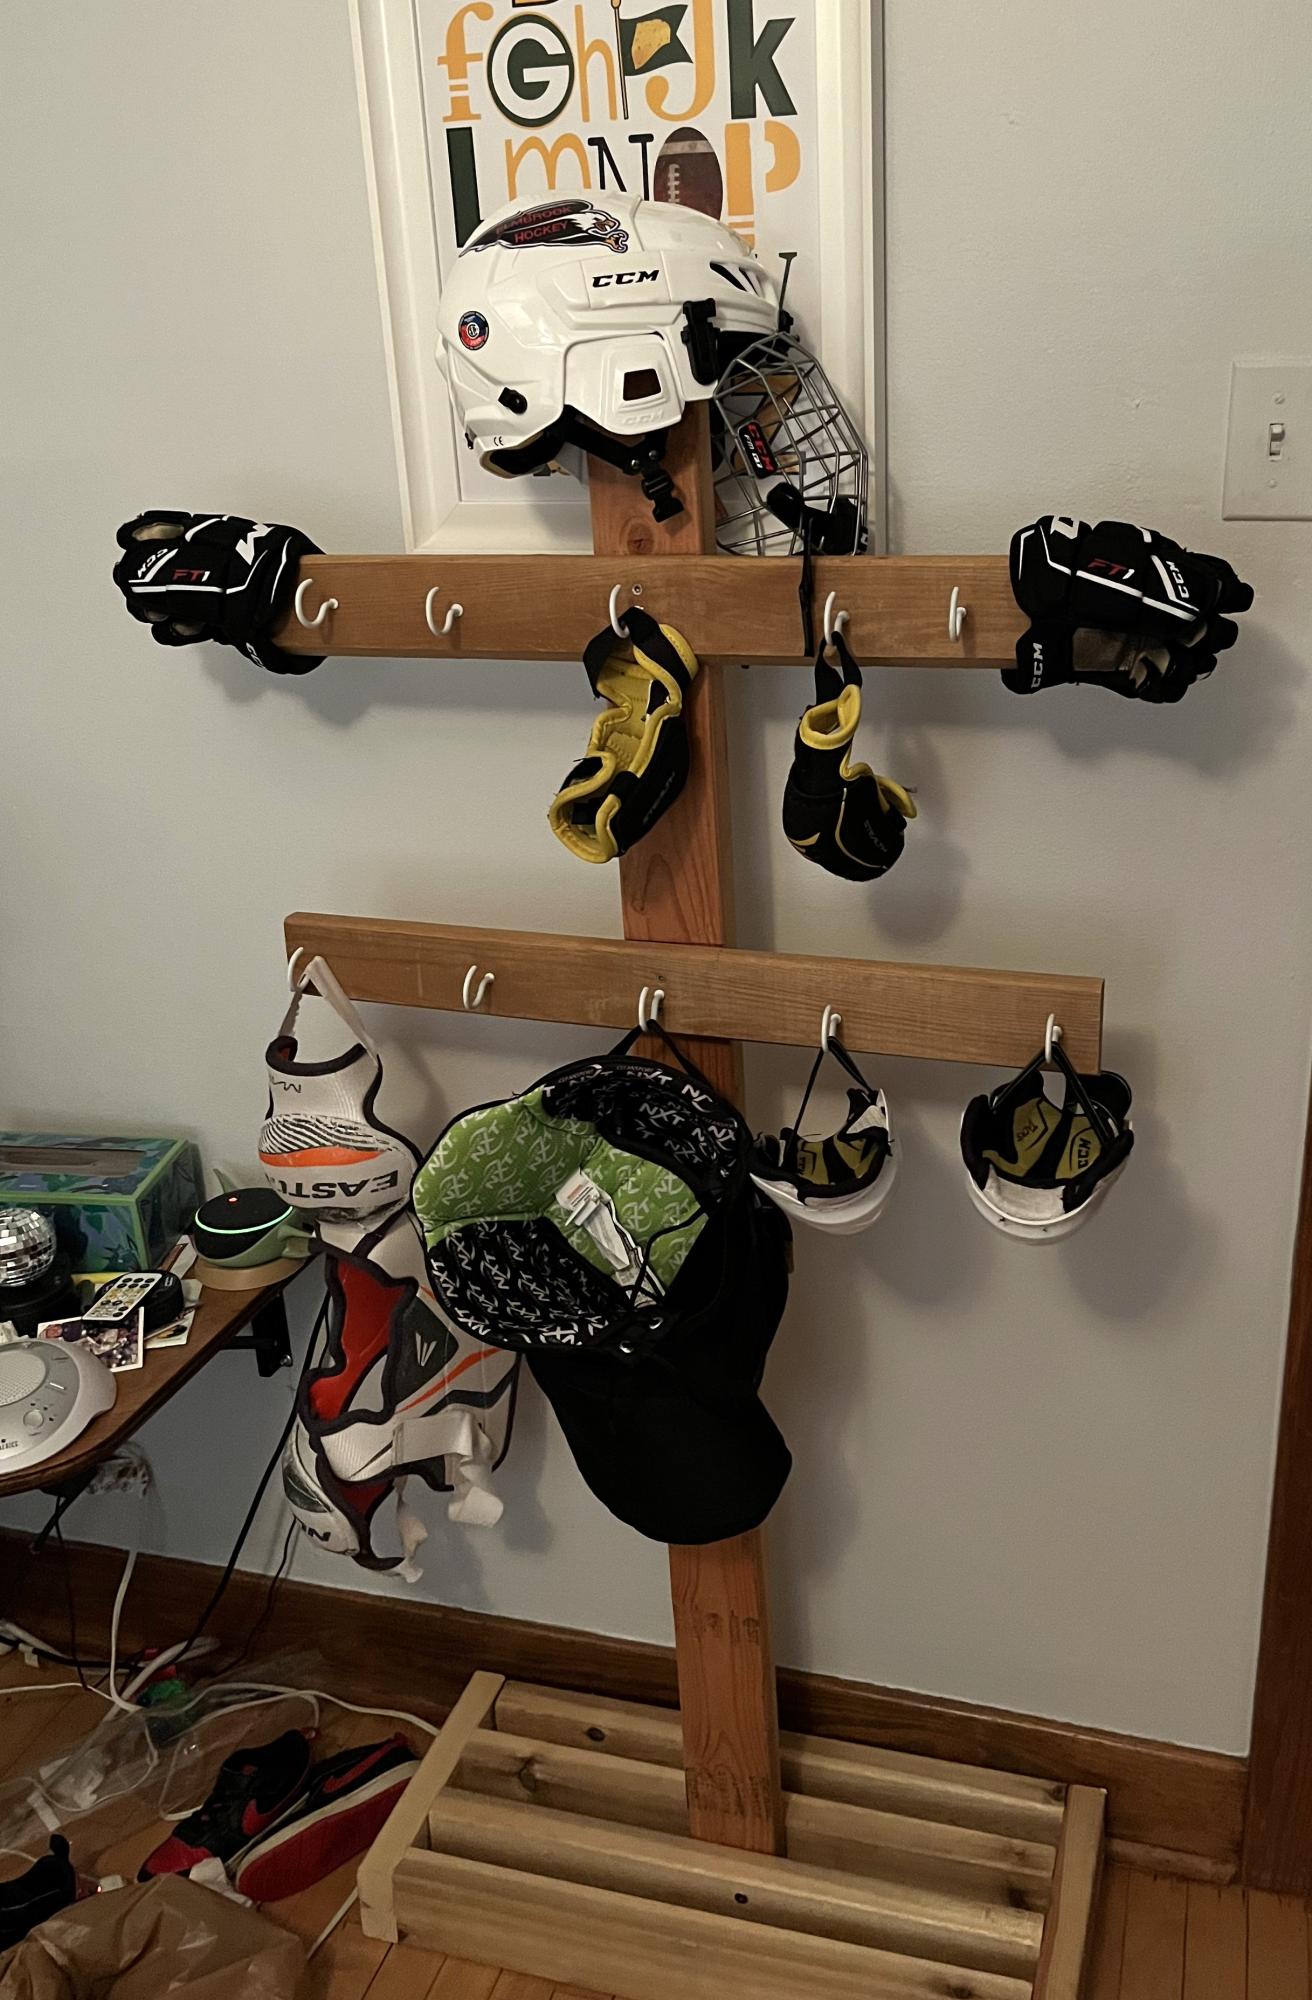
Kids gear was getting so mildewy in between practices. This was easy to build with scrap wood I had laying around and really helps the gear dry. - KuhnTosa
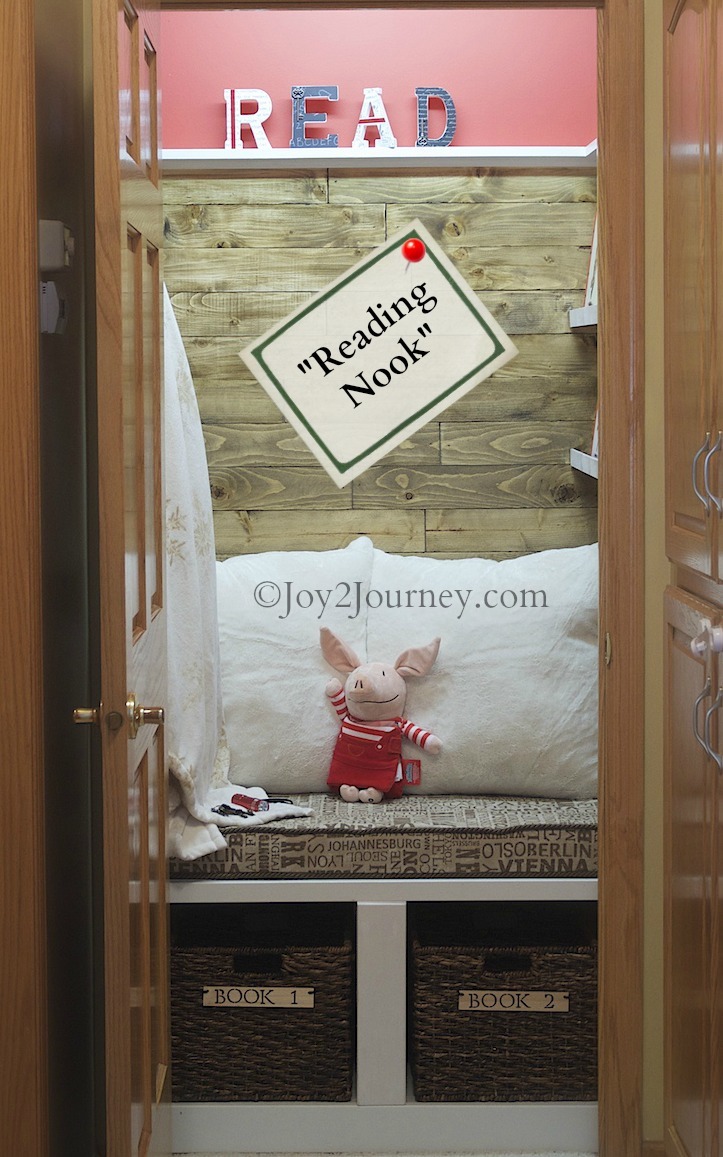
From Closet to Reading Nook ... it took me a month from start to finish to complete and worth every minute spent on it! Come by to see the full story ...
http://www.joy2journey.com/2013/01/01/reading-nook-before-and-after/
No plan was needed for this project, just imagination :)
Hugs and Happy 2013!
Bj
http://www.joy2journey.com
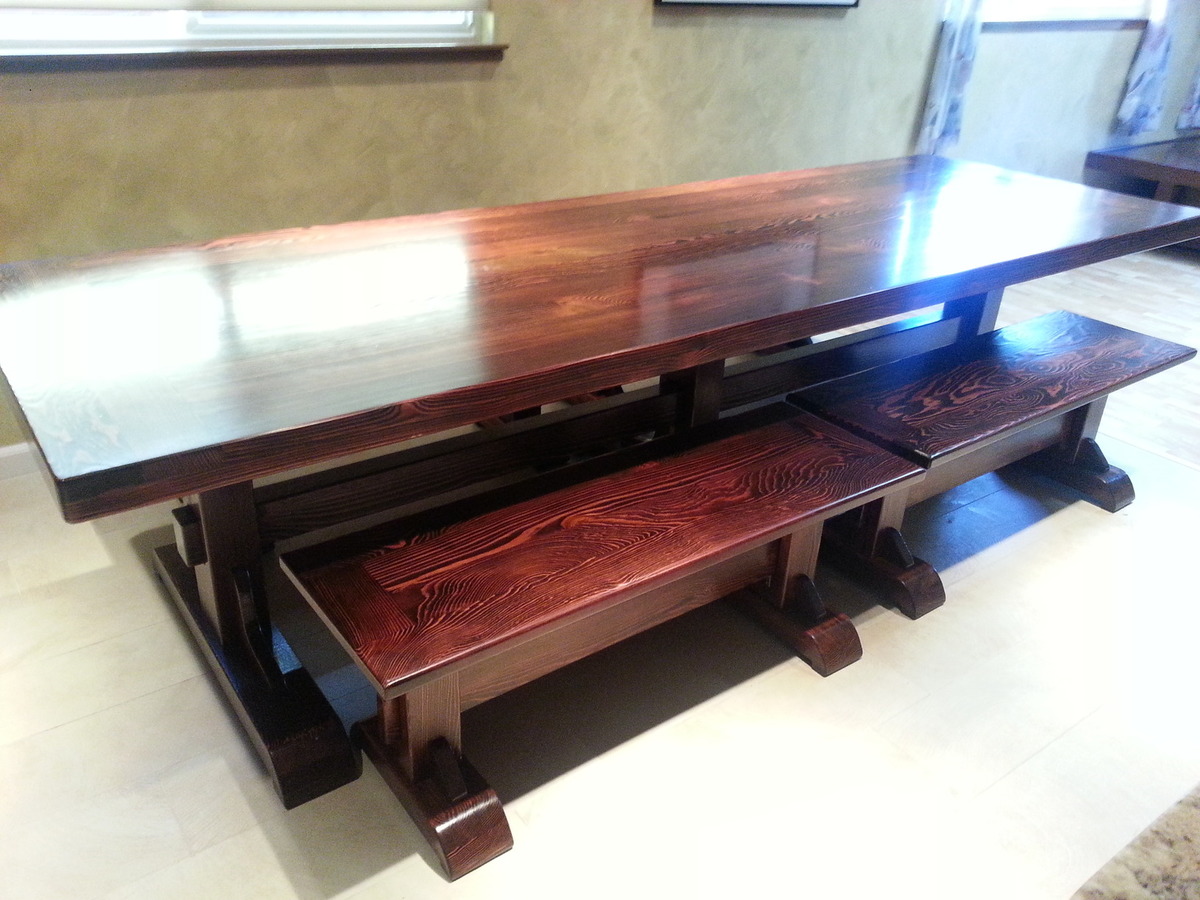
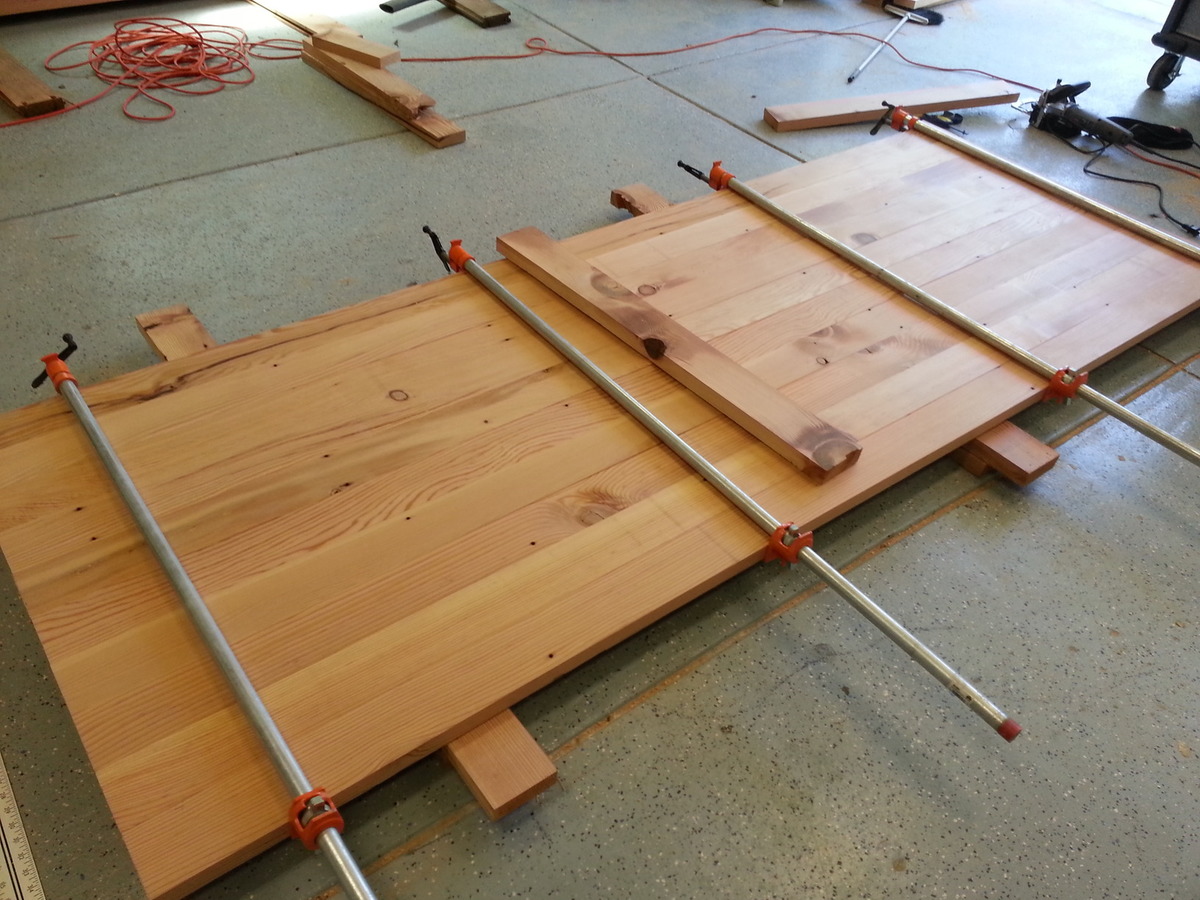
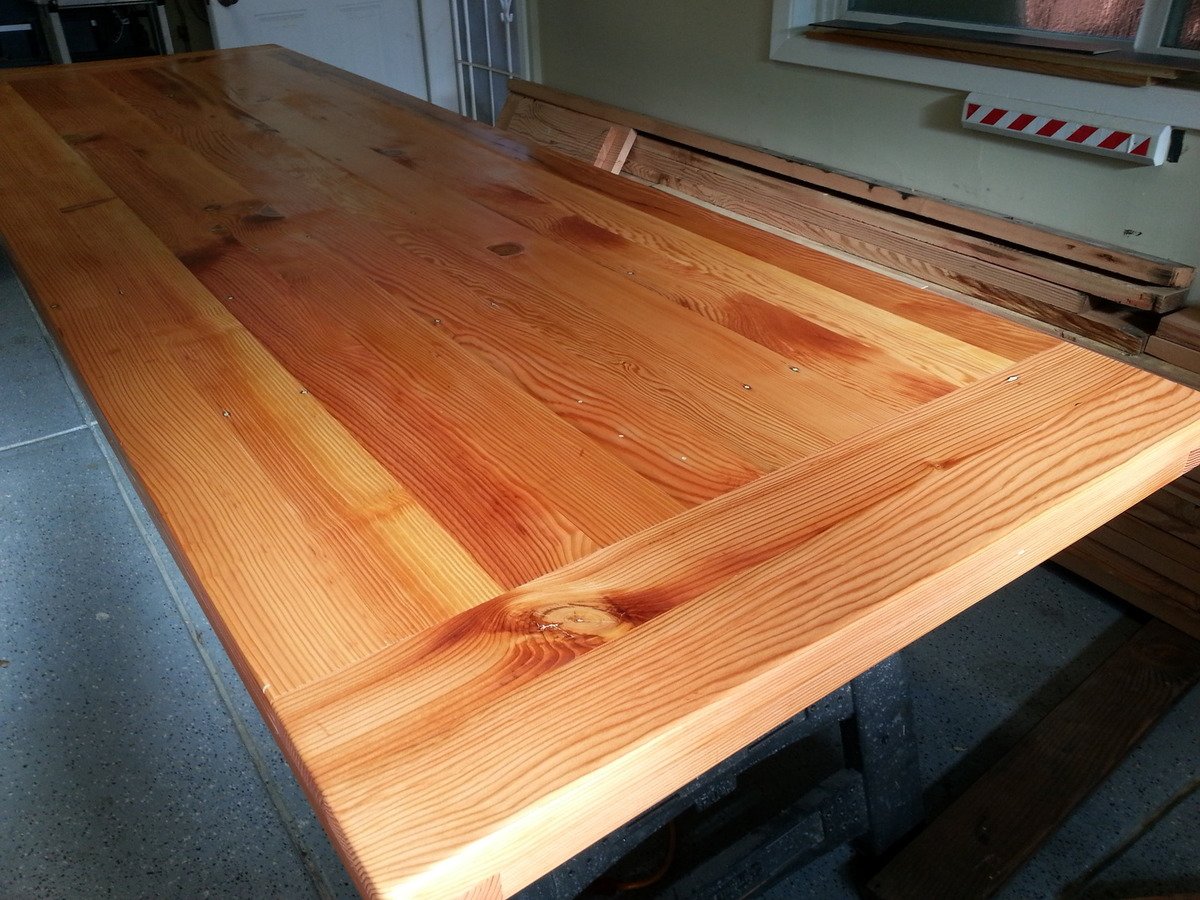
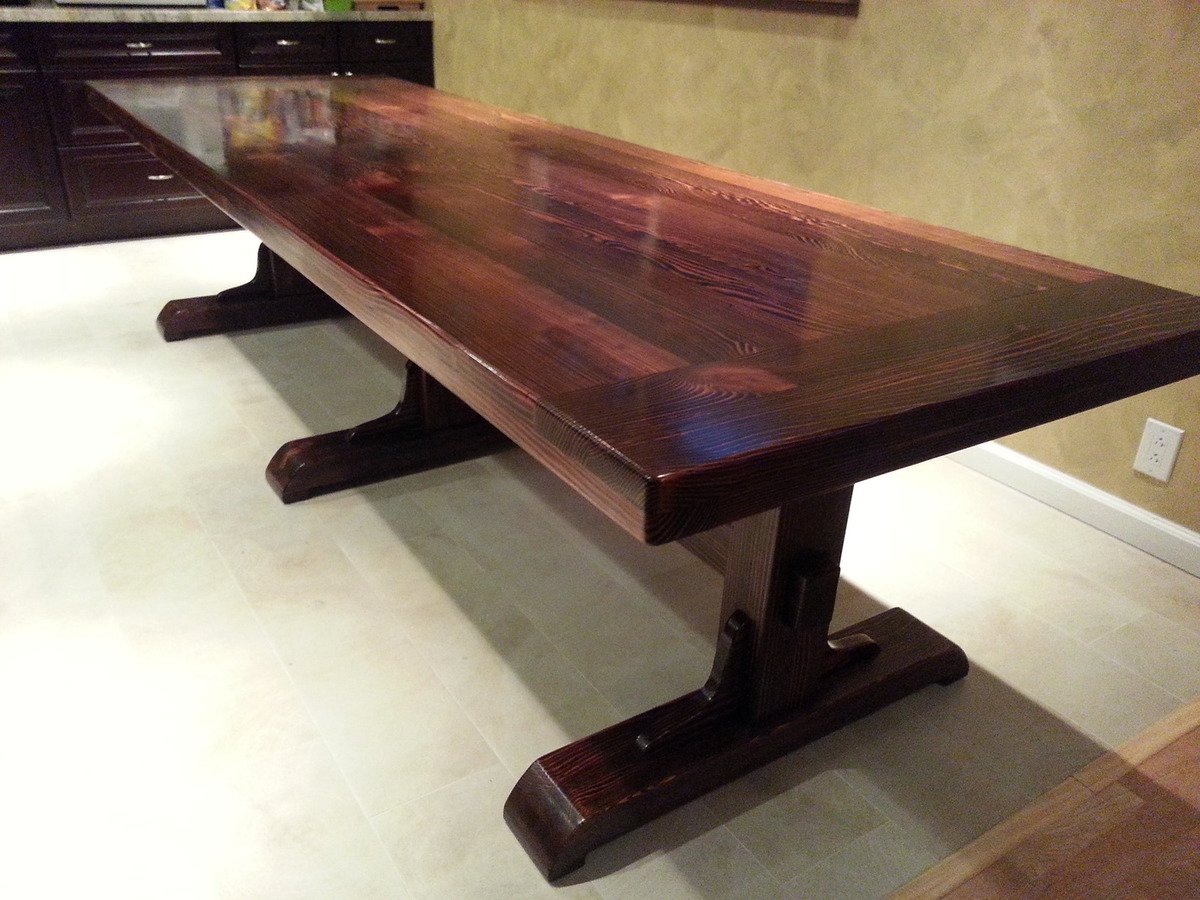
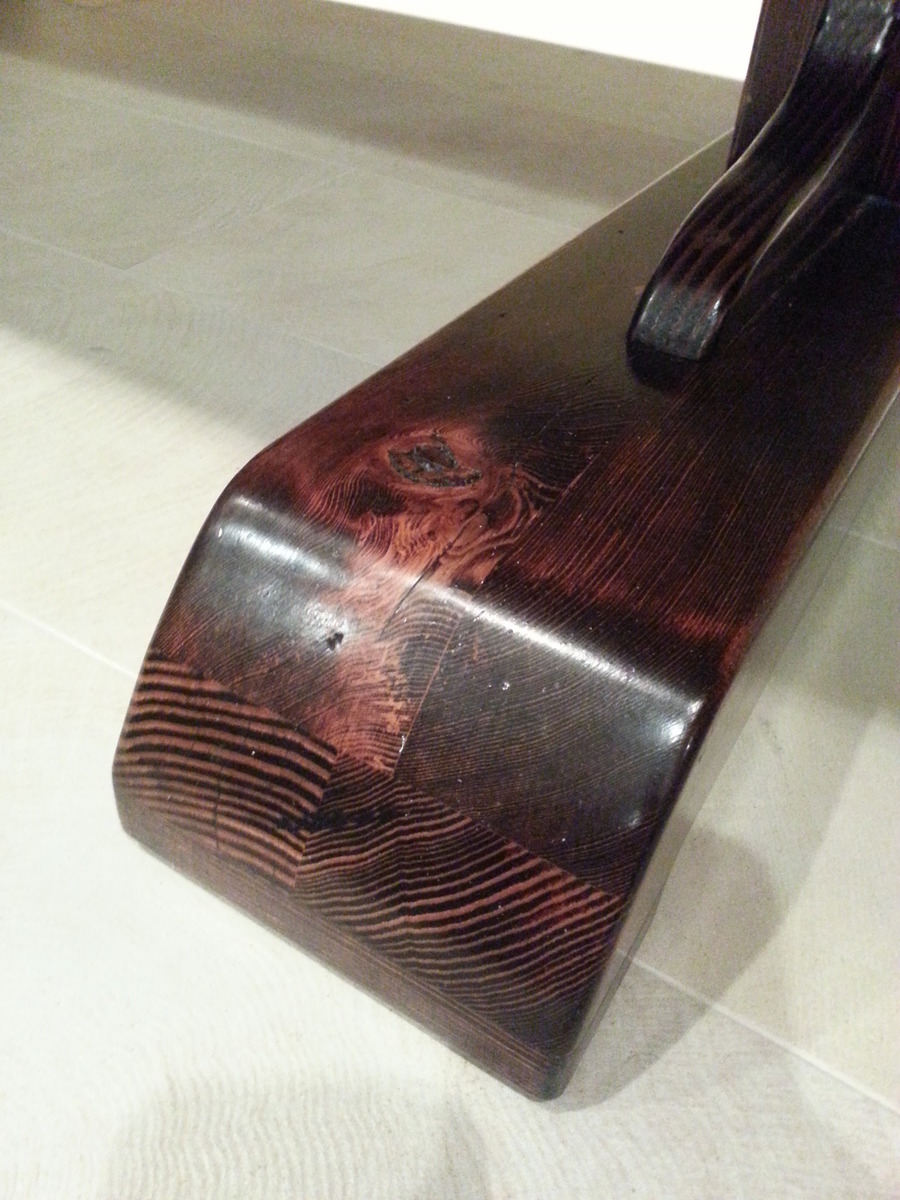
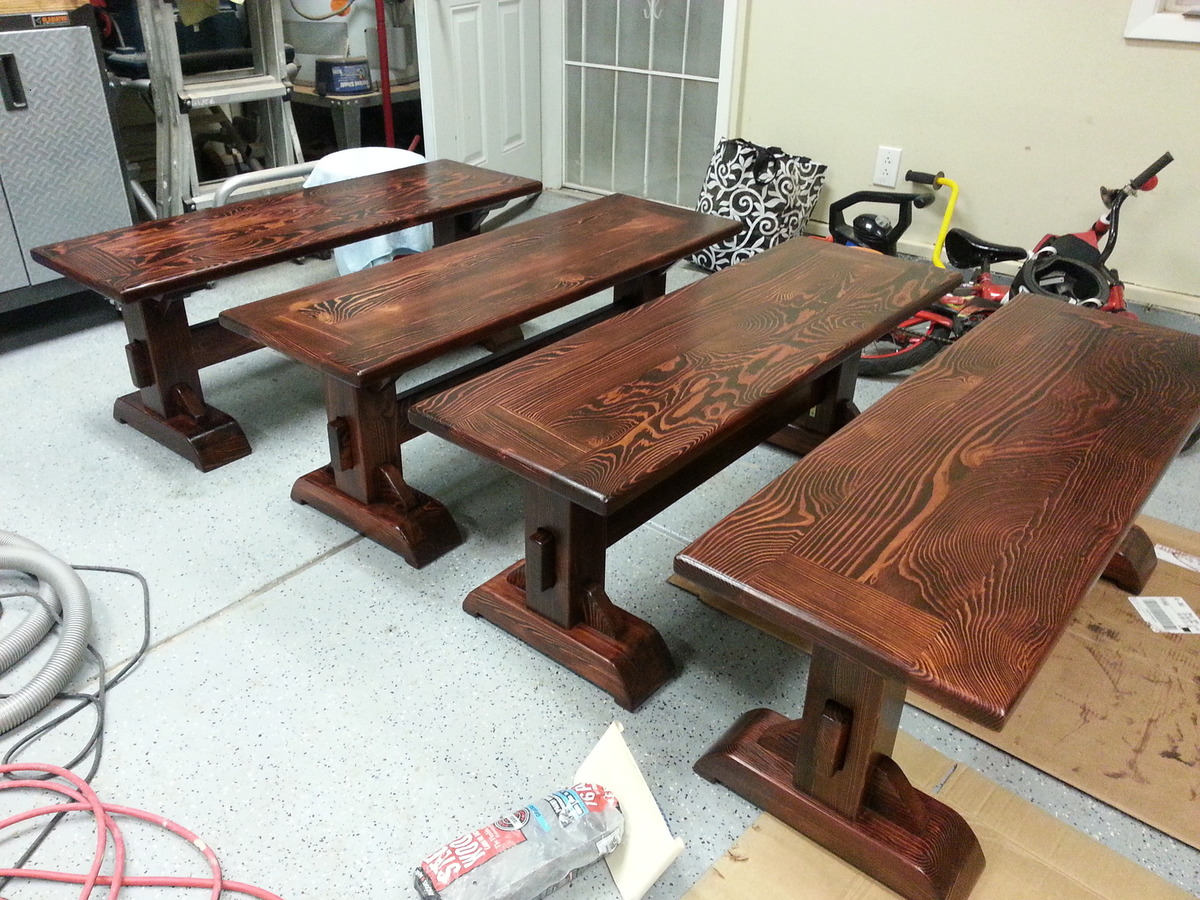
The kitchen remodel left me with 400sqft of old-growth-pine laying around(60year old subfloor). While still pine, this was too good to throw away. So I decided to build a kitchen table and some benches.
Given these were old tounge and groove 2x6 I spent a lot of time with the planer, so hardly a weekend project. Further more I decided to use biscuit joints. The table probably took me like 5-6 weekends and the benches another 4...
My kids already managed to put some dents in the table, but that just makes it look more rustic.
Comments
Ana White Admin
Sat, 09/26/2020 - 09:37
Great gift!
I'm certain she will love it, great job!