Potting bench 2.0
Made it a bit wider, added a shelf and wheels.
Building is turning into such a blast for my husband and I. This is our second project and let me tell you, with a few extra tools and practice, it's getting easier! We will be finishing up the second one of these this weekend then starting on the X Coffee Table, to be followed by the X Console Table. We are due to buy our first home in January so we are waiting til we get our home to decide on a stain.
The first larger project I've done on my own. I distressed it some before staining it but no other changes were made to the plan.
I have been wanting a longer entryway table and this one was the perfect length and style I was after! Thank you for providing these plans! You rock!
This project was made using cedar. Most of the joints are dowels or mortise and tenon. It was my first time using this complex joinery and gave me a great sense of accomplishment. It was also complex recreating the plans in Sketchup
I made this from scratch. I didn't follow a plan. I didn't pay for any of the materials either. I know a guy who has a saw mill and was able to score the top. I got the legs down my self from a tree in the woods. I didn't stain any of the wood either. I just put polycrylic on it. Overall I think it took about 4 hours to complete. More if you count the time waiting on the clear coat to dry. I notched out the legs to fit the skirts. The skirt is make up of wood that I planned to 1" thick and kreg jigged together. I then kreg jigged the skirt to the table top. I hope you like it.
Mon, 12/10/2012 - 21:19
Beautiful!
Did you let the wood dry naturally or was it kiln-dried?
Wife and I needed a console for our TV components really bad. Saw this x-console and said we had to have one! Super quick and easy to build and looks amazing.
Sun, 09/21/2014 - 01:01
Hi there!
Your table came out great! I love the stain you used. I am also building this table. Everything is going great, except the x's. Can you offer any advice?
Thu, 09/25/2014 - 03:34
I built this same table and love it. We did not put the x's in we left them out. On the 2nd shelf we just added a 2x4 to make it even.
Fri, 05/22/2015 - 22:24
This table looks amazing! Would you mind sharing the dimensions and materials you used? It looks a bit smaller than the original and its exactly what I need for my living room. This will be my first project so I'm not really sure what I need since the dimensions will be different. I hope to hear back from you!
Easy to build! Finally finished them with spar varnish. Made the side table out of scrap wood. Love the chairs!
I used Cedar balusters instead of furring strips.
love love this project !!!
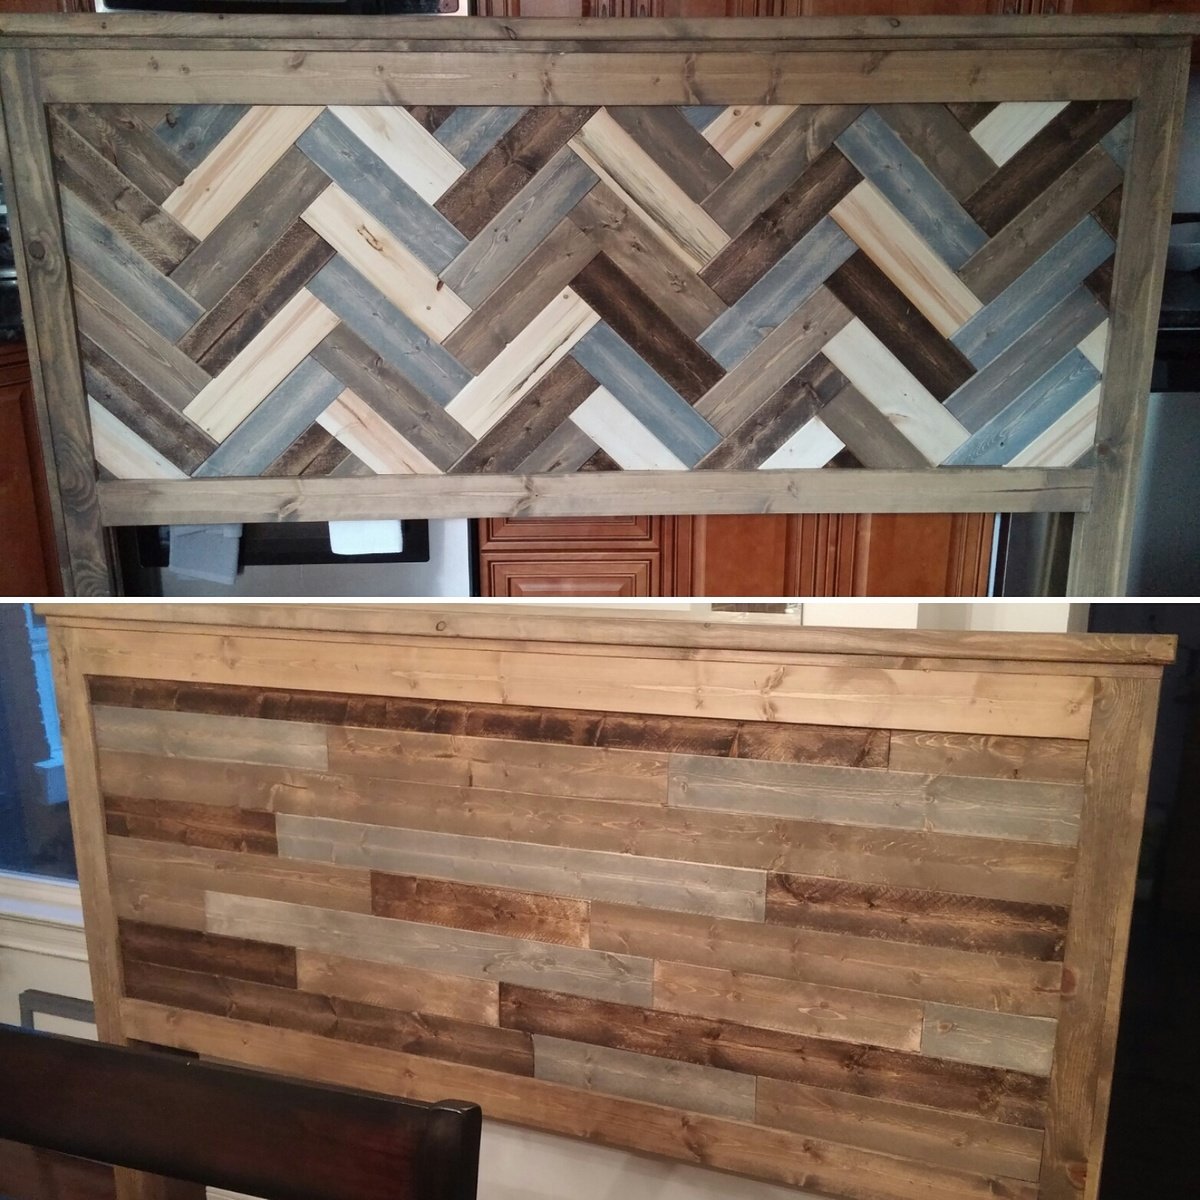
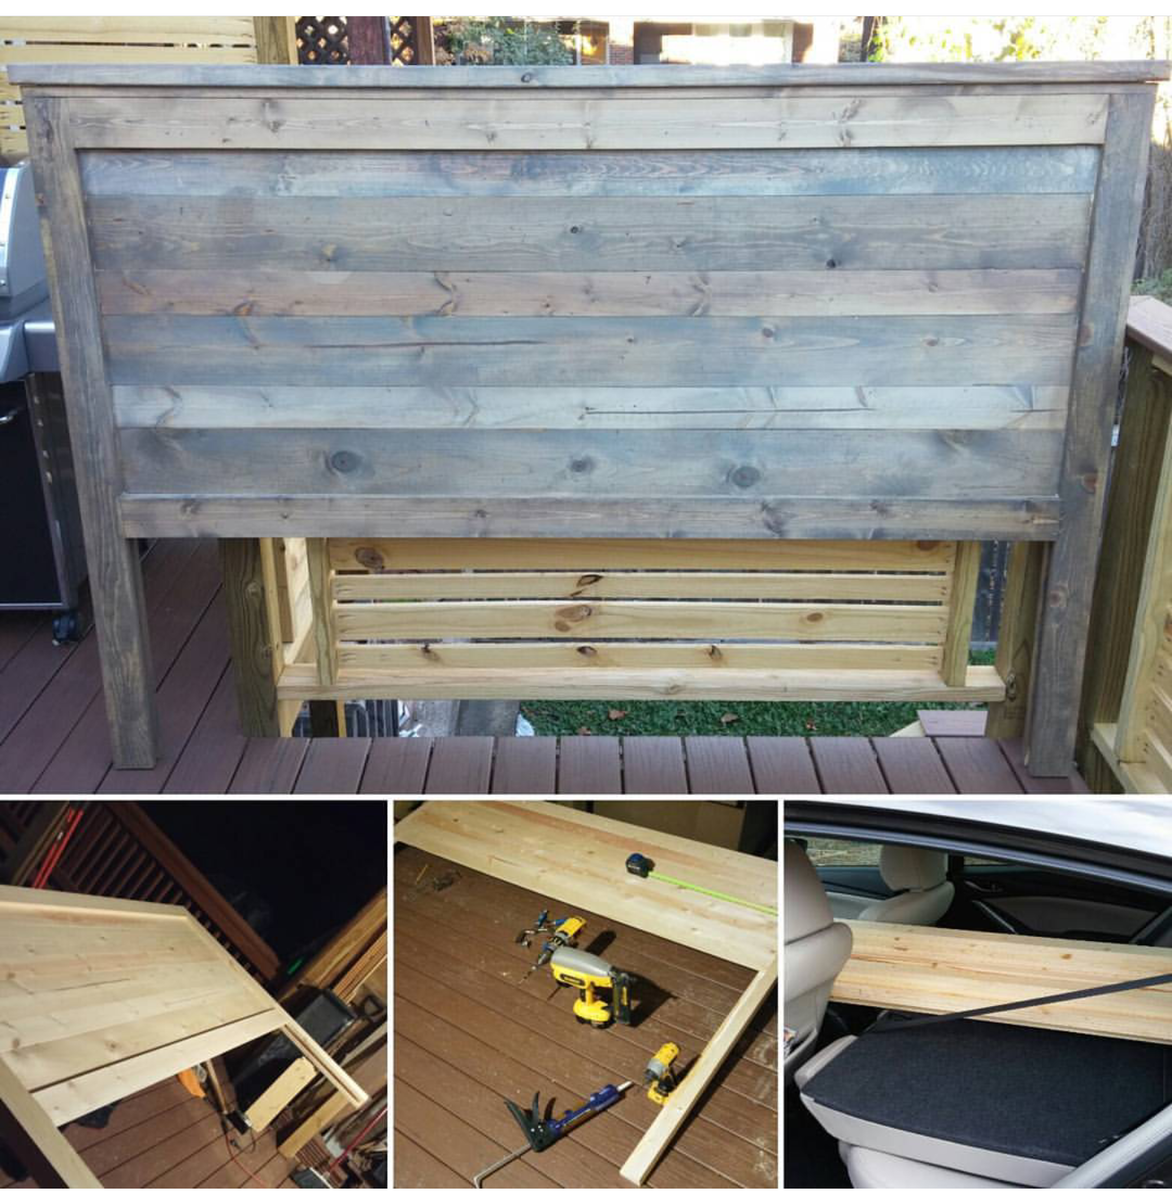
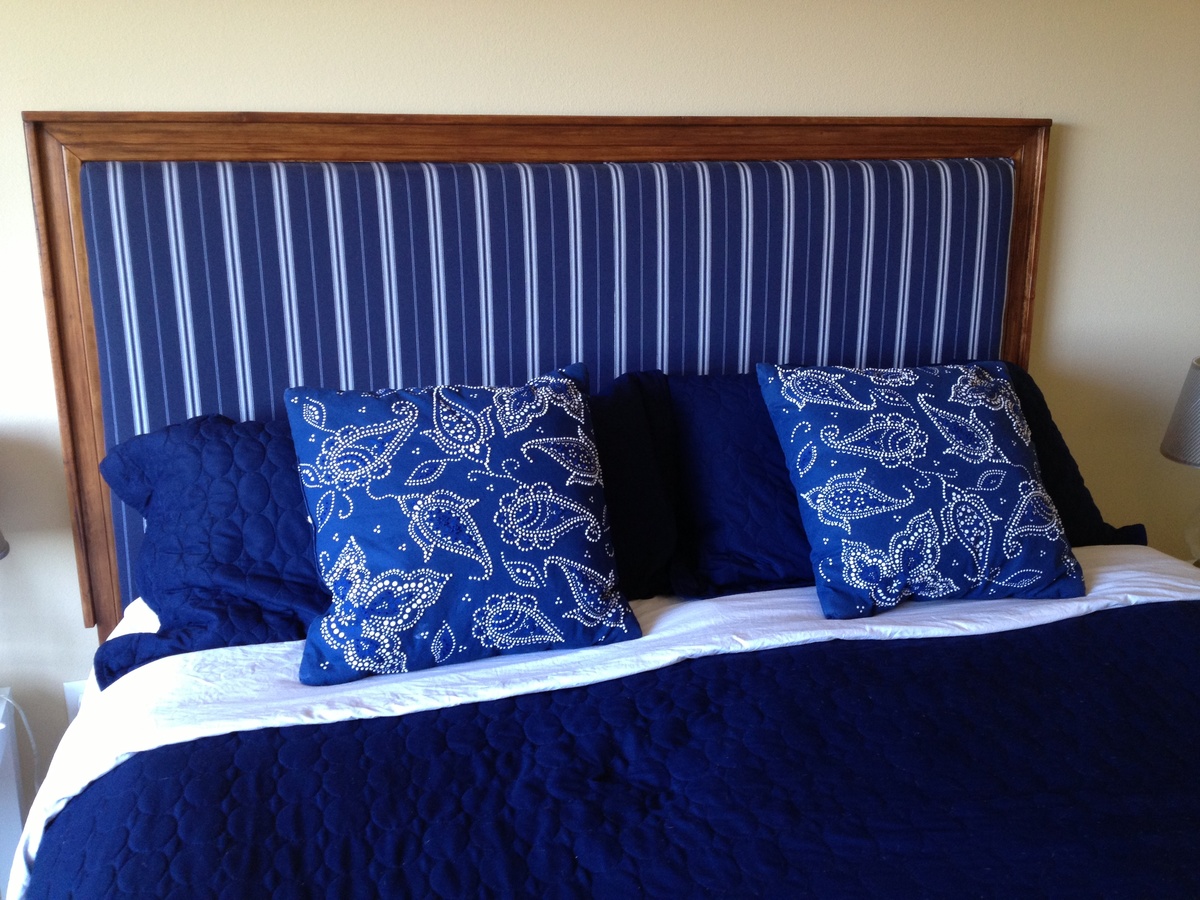
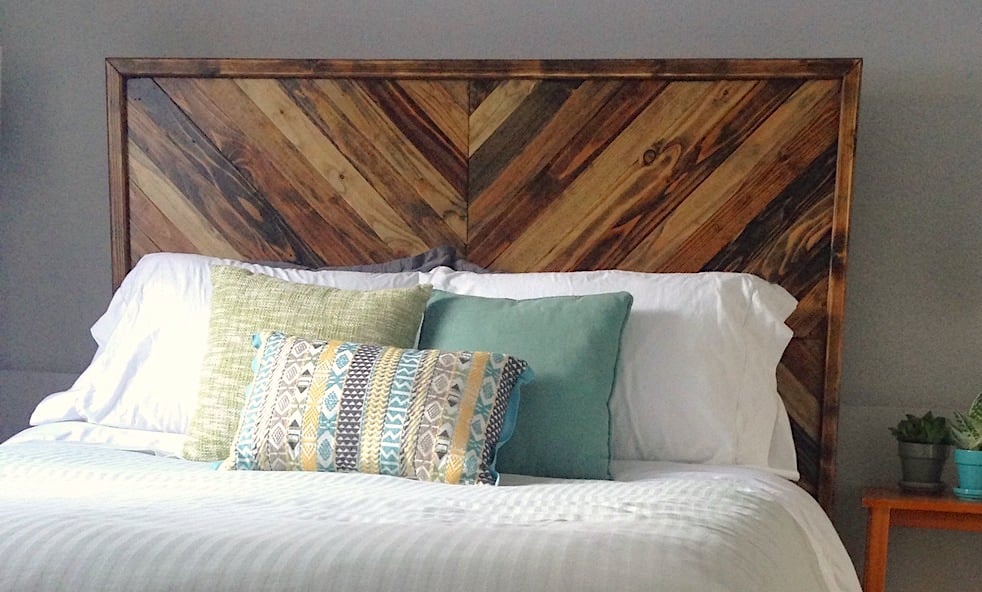
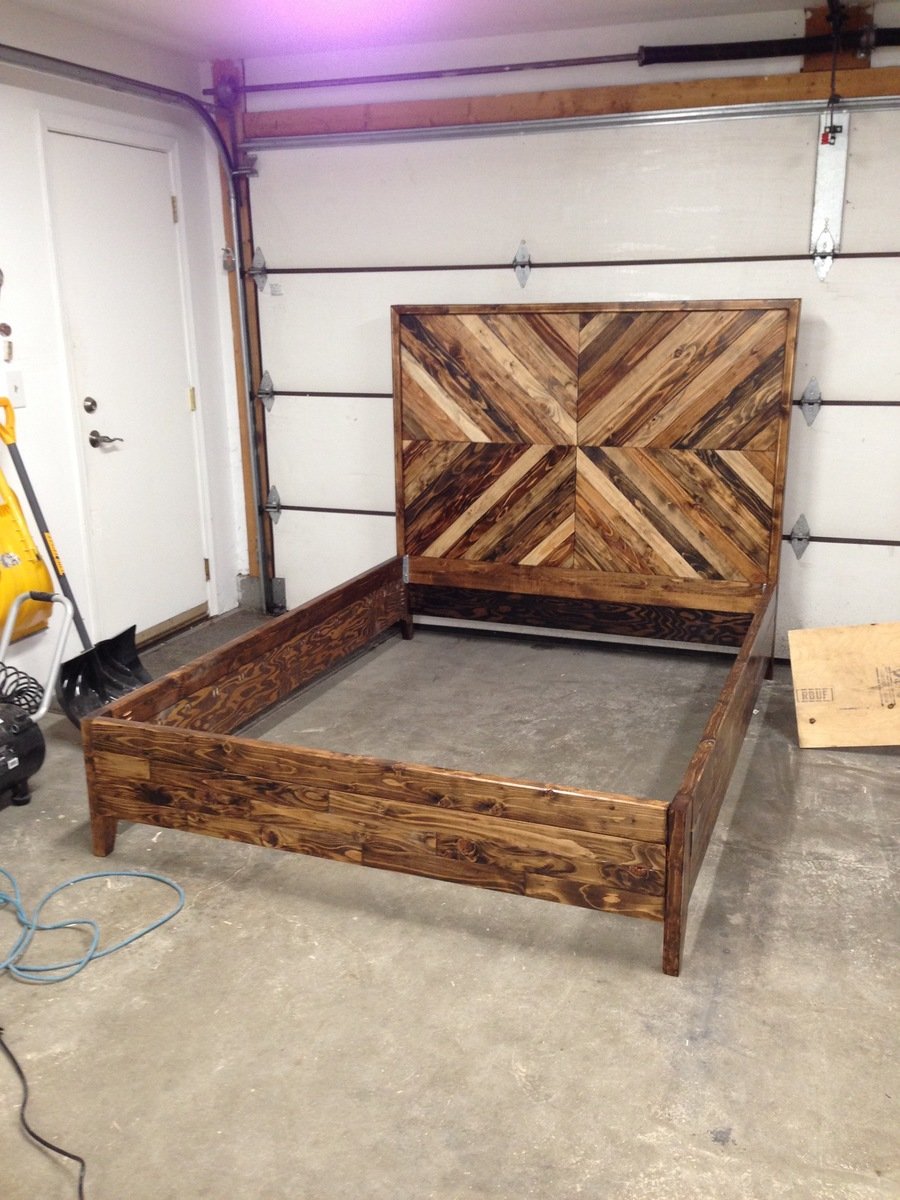
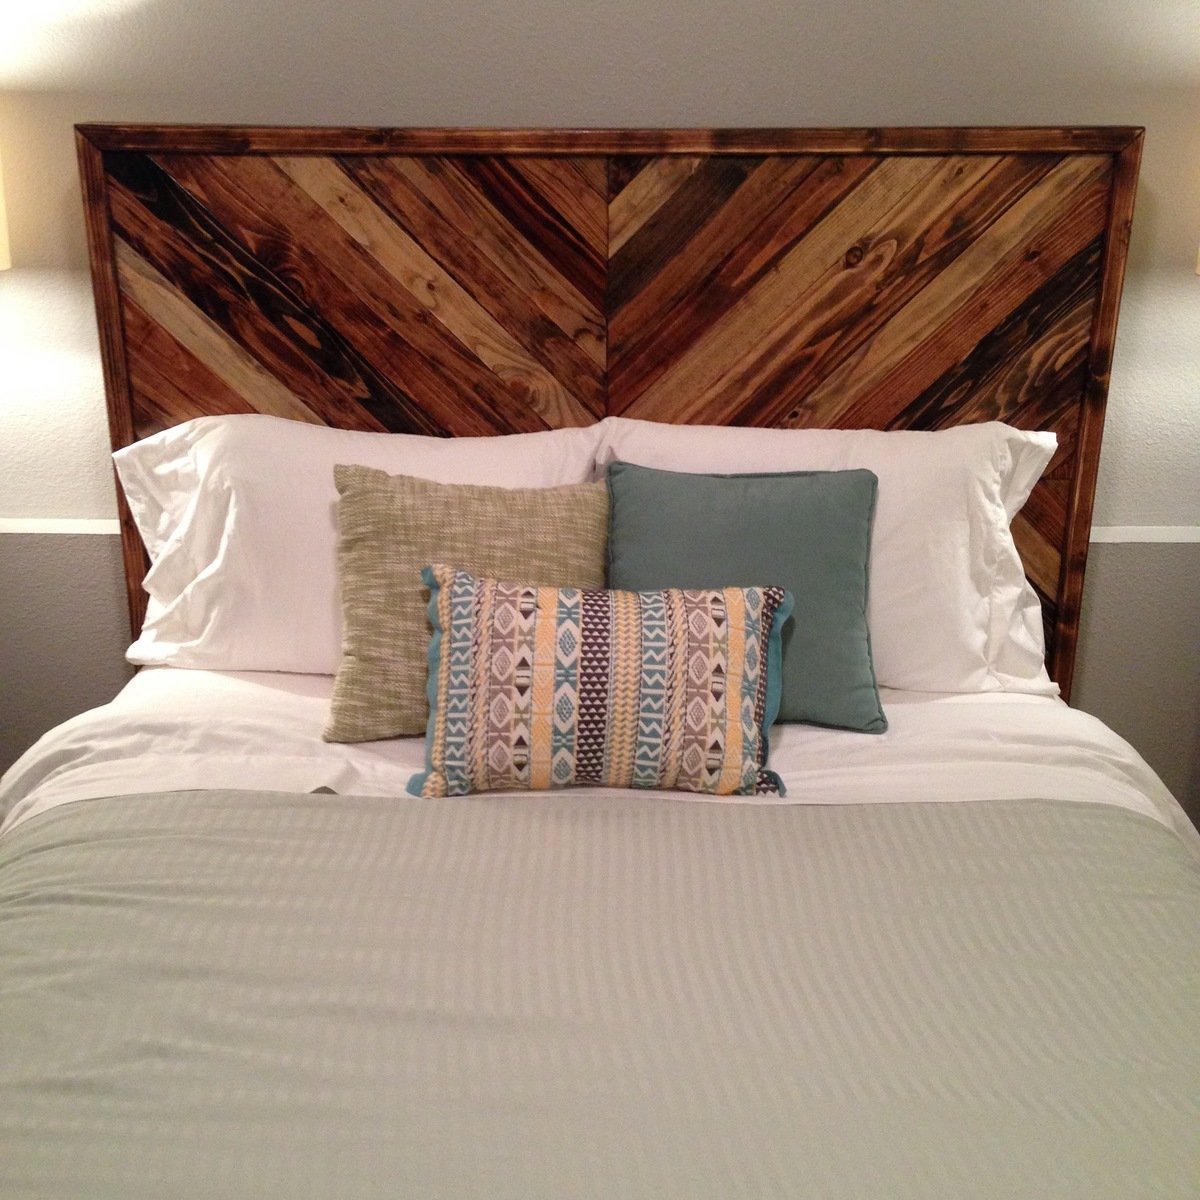
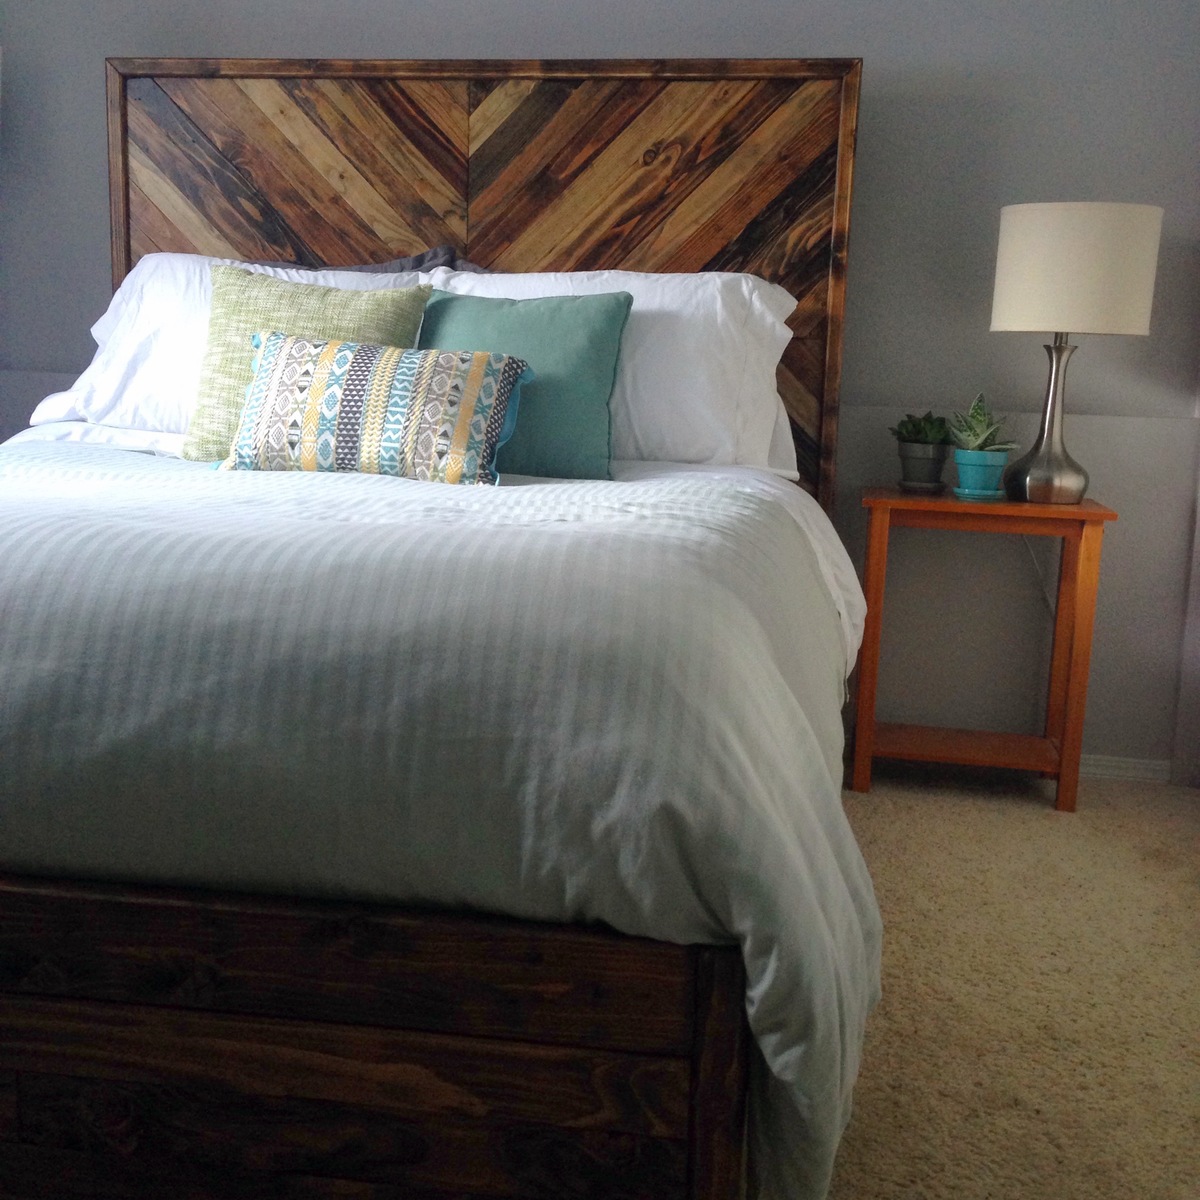
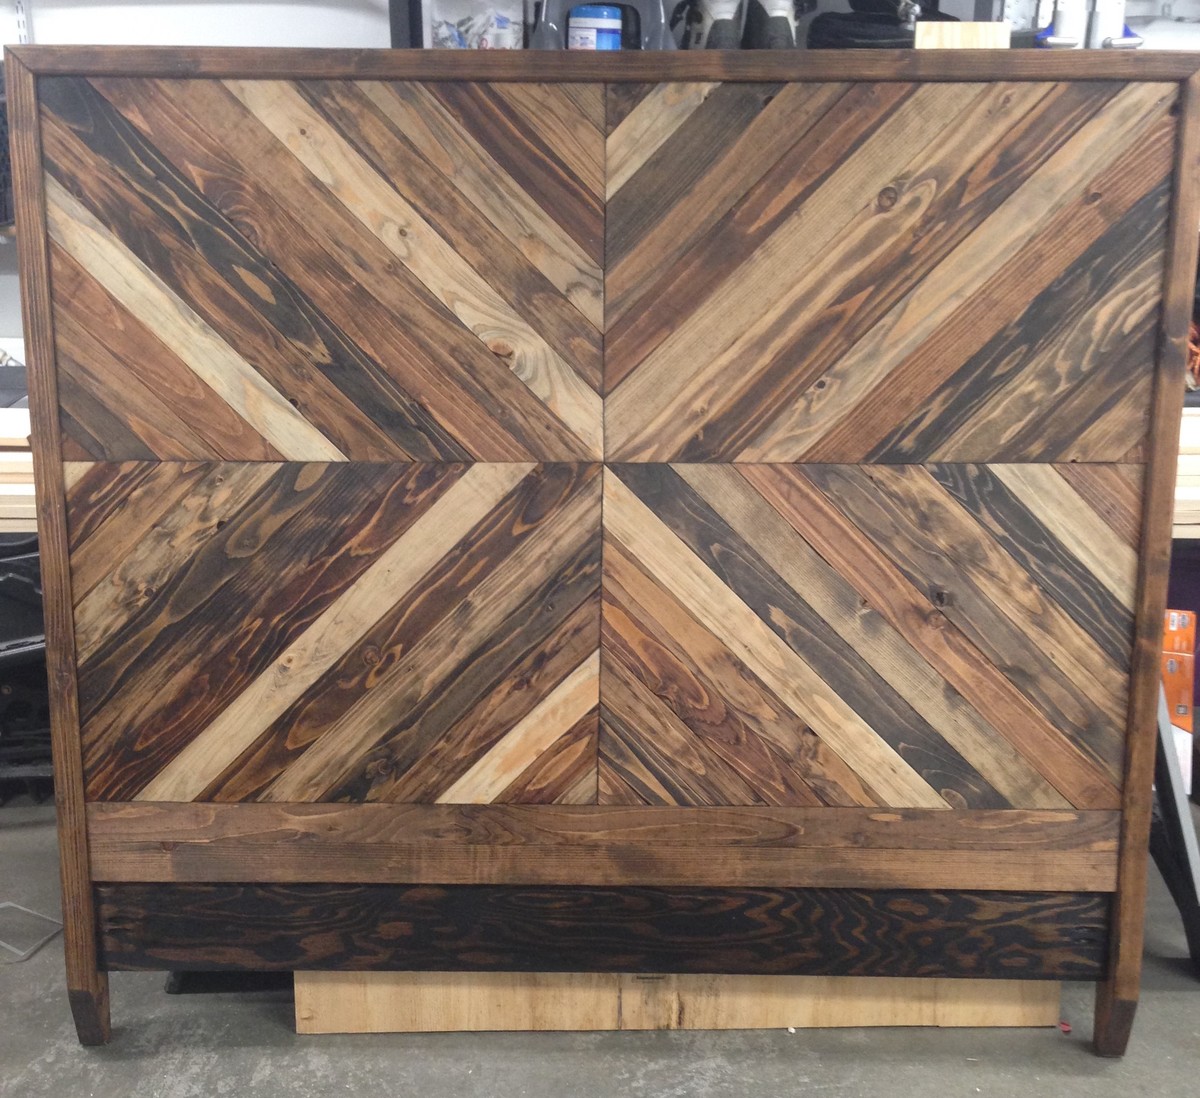
Overall, this was a simple build, easy for anyone familiar with woodworking. I built this for my sister-in-law and her boyfriend. It started as the standard king size headboard plan, however she really liked the look of my basement ceiling and requested if I could add something similar to the design. The rustic horizontal planks and herringbone pattern were added to the front and back allowing her to flip the head board to suit her interior design style without needed to buy a new headboard. The added texture of the rough cut tongue and groove pine was just what she was looking for. The original build only took a few hours. The herringbone pattern took the longest. Let me know what you think of my twist on this already beautiful project!
Required Skill Level: Beginner
Tags:
Easy project no crazy cuts or tools needed. I did change a few things on the build. I changed the top from a 1x12 to a 2x12 to match the rest of my builds. And honestly it just looks and feels better! The trim is 1×3’s but I changed the middle shelf trim to a 1×2. Add the shelf 7.5 inches up from the bottom.
Easy, fun and inexpensive headboard!
Thanks for the easy to follow plans for this corner cupboard. I enjoyed making this as much as I enjoyed making your adirondack chairs. Your drawings couldn't have been any better. Very easy to follow. Keep on posting more plans!!
RW Church
This was my first build and I am so happy with how it turned out! The plans from Jen Woodhouse were extremely easy to follow and I would definitely recommend this project to others!
This was challenging, but that made finishing it, so much greater. Ana's plans are so easy to follow.
I saw the plan posted on this site and had to bulid this for my grandson Paulie. The whole build took one day from start to fininsh. I didn't have to spend much for the project since I already had most of the material on hand. I used a tabel saw, Jig saw, and Miter saw to make all my cuts as directed by the plans. I found the project plans to be very simple to follow. I can't wait to see the look on my grandsons face when he sees this on Christmas day.
Respectfully,
Rich
This project took a lot longer than anticipated. I had the entire bed built when it somehow fell over on its own and broke into pieces. It was at that moment that I decided when I rebuilt the bed that I would not use MDF. I used 3/4 ply for the back and I ripped a 1x8 for the top of the head board and foot board. I also used 3/4" half round to cover my semi noticeable saw marks from ripping the board. I didn't have a metal gram for the bed so I made rails out of 2x8"s and ripped a 2x4 in half to make the ledge for the slats. For this bed I placed 3/4 sheeting down instead of slats and set the mattress on that. I also had to fill in the holes from the crown with triangular fillers for the foot board since it would be seen.
I had so much trouble deciding what to do with this HUGE closet in my breezeway. Previously it had just one bar across the top and ugly sliding doors. I loved Ana's design, but made several changes. Since my closet was super deep (32") I extended the depth of her design to about 25". I also staggered the rods for longer coats, and one that my 8 year old can actually reach to hang her stuff up! I changed the shelf design up a little bit too! Her instructions are super easy to change to your specifications. I did end up spending about $350 on this project, but keep in mind I was using 3 - 1x8's for each shelf instead of 1x4s.
We built a bunkie-style shabin for our off-grid vacation home. We wanted to keep it under 100 sq ft so we wouldn't have to worry about planning permission. This tiny shabin is 8ft x 12 ft with an 8ft x 7ft loft. It's perfect for our family of 4!
The whole thing (roof and all) cost around $6000 to build and we finished it in about 2 weeks. Phew! It was the perfect project for the summer.
In reply to Tiny House by michellewg76
Thu, 11/05/2020 - 11:40
Thanks! I'm pretty darn proud of it. :-)