Community Brag Posts

Doll House Bookshelf

Submitted by alhskier on Mon, 04/04/2011 - 19:43

My first project from this website.  Made it for my daughter's first birthday! Had a fun time with it. Caulked the joints for a cleaner look, it came out great.

Built from Plan(s)
Estimated Cost
$100
Estimated Time Investment
Weekend Project (10-20 Hours)
Finish Used
Caulk, and semi gloss paint!
Recommended Skill Level
Beginner

Princess Castle bed with storage

Submitted by bbcarey on Tue, 06/25/2013 - 12:36

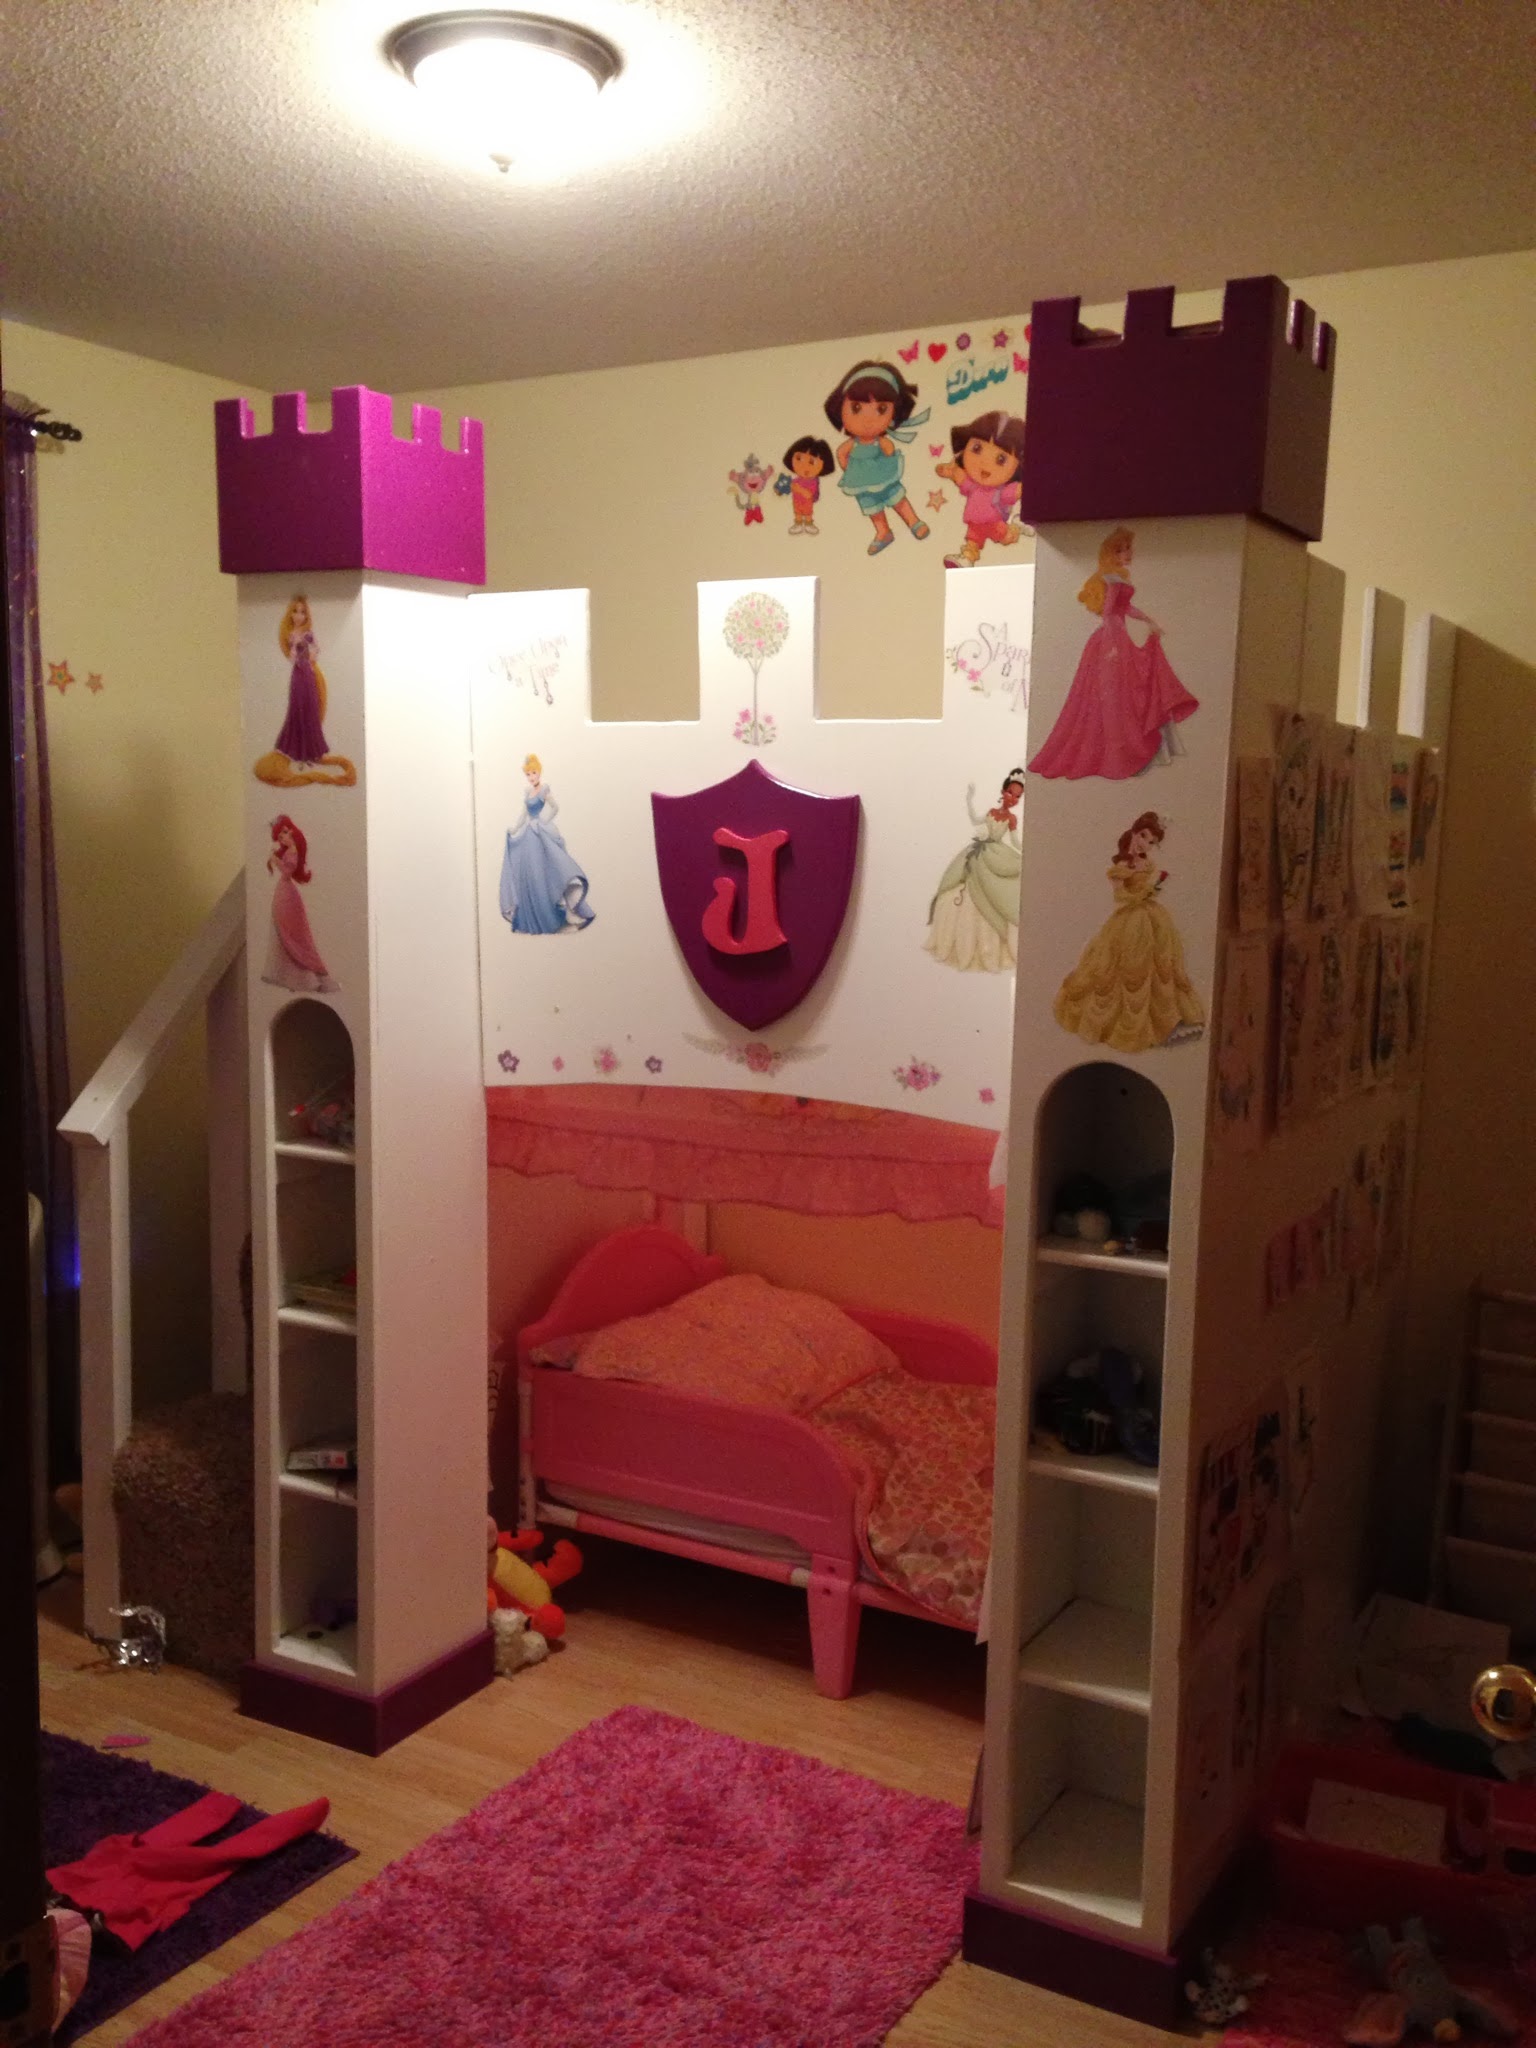
Our daughter has a very small room. She also LOVES disney princesses. So I wanted to build her a princess castle bed.... but how do you fit a castle bed in a 9x11 bedroom?

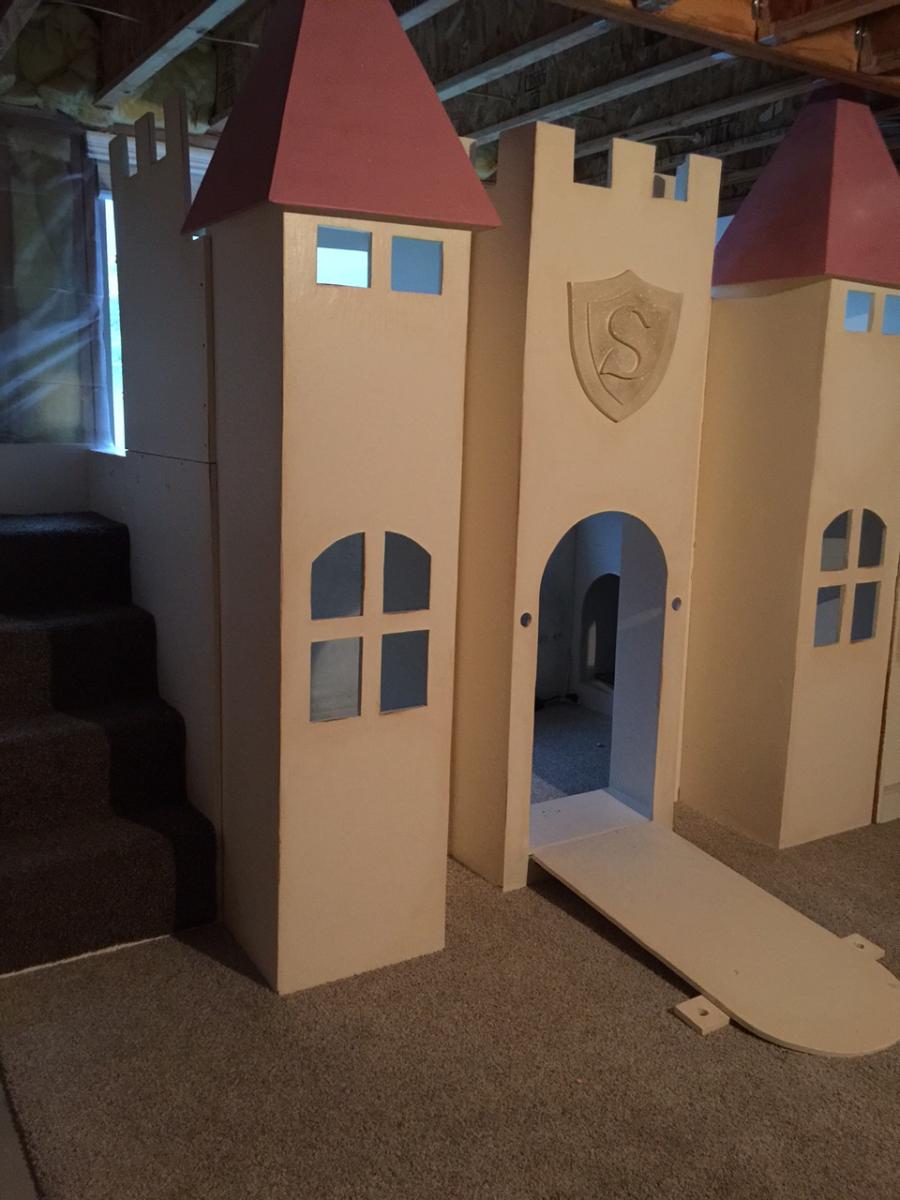
There were some plans on Ana's site (good plans), and others on-line. But many of these plans had the bed on the TOP of the castle, and we were concerned with her trying to make her way down if she needed to in the middle of the night.

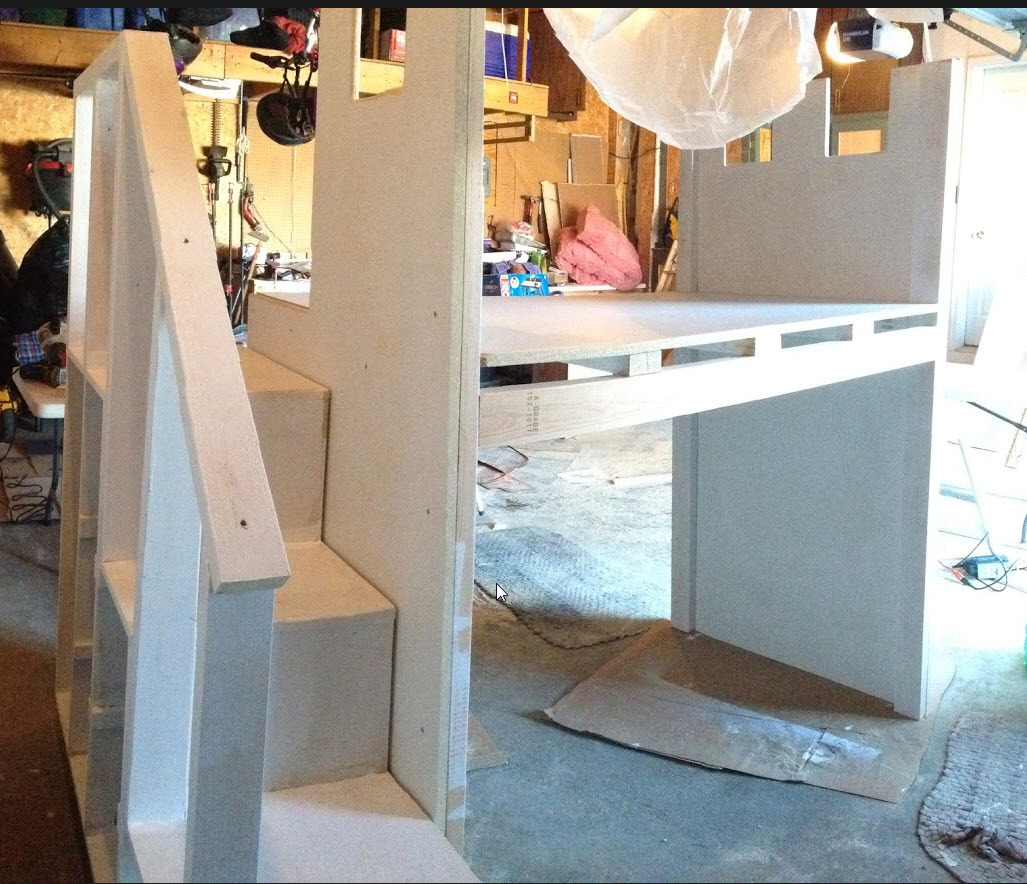
She also loves her Disney princess canopy bed that she has now... so if I could somehow build the castle around that bed, we'd be set. Which is exactly what we did.

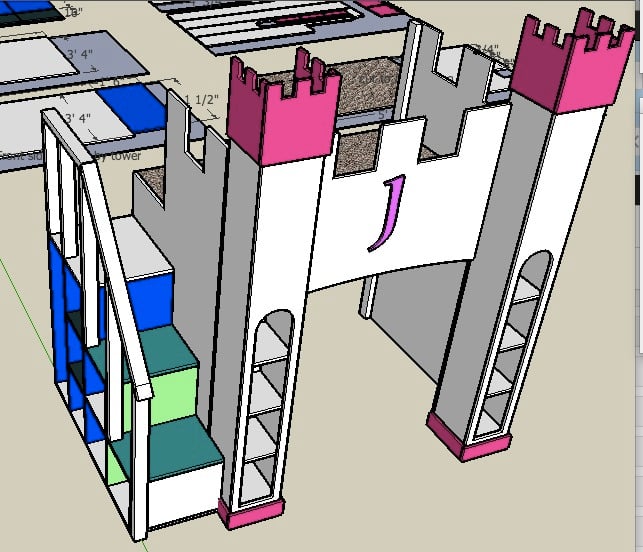
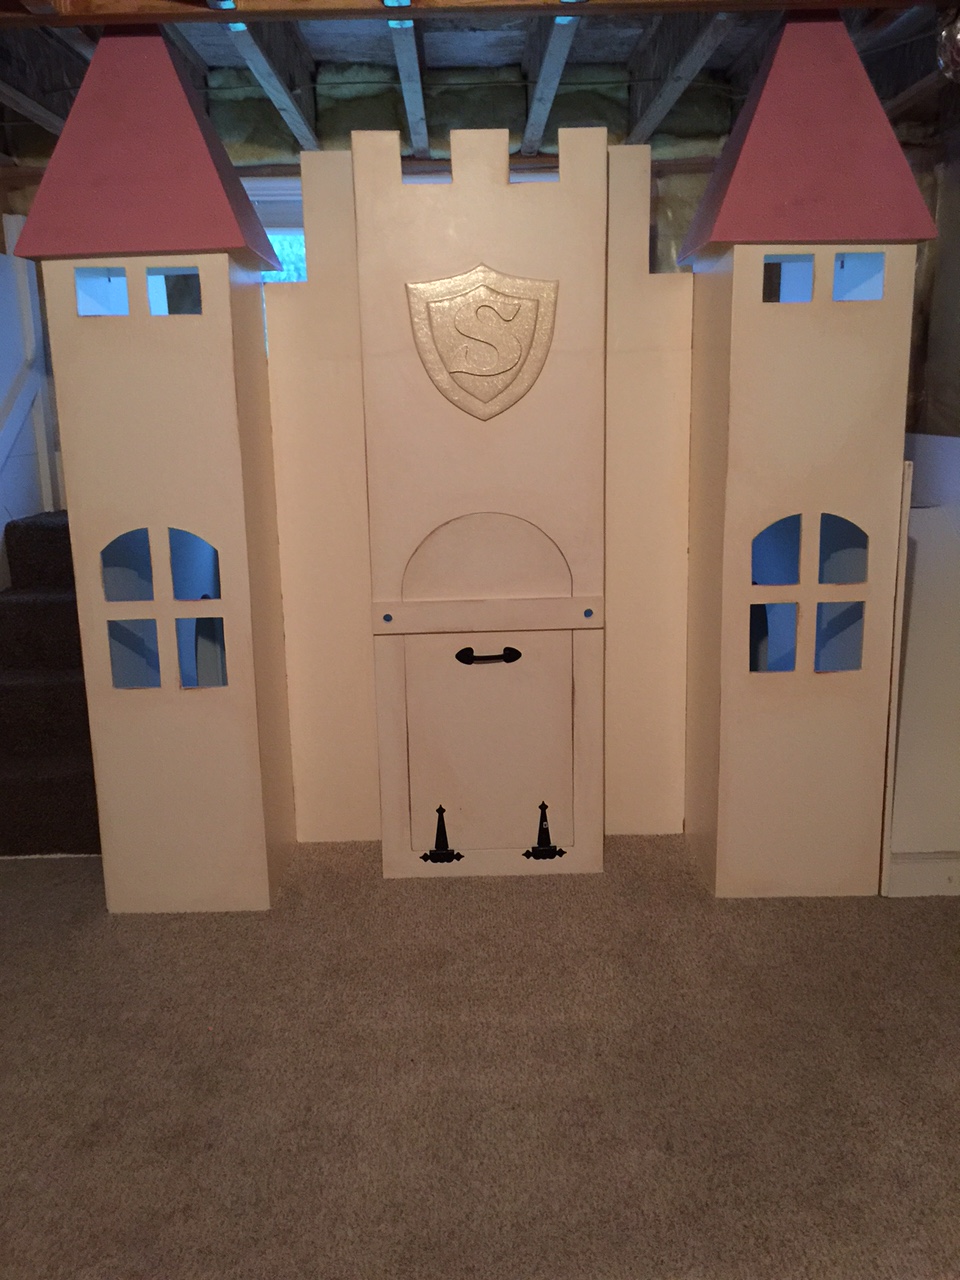
I reviewed several pictures online, and then designed this bed with Sketchup (I LOVE that tool).

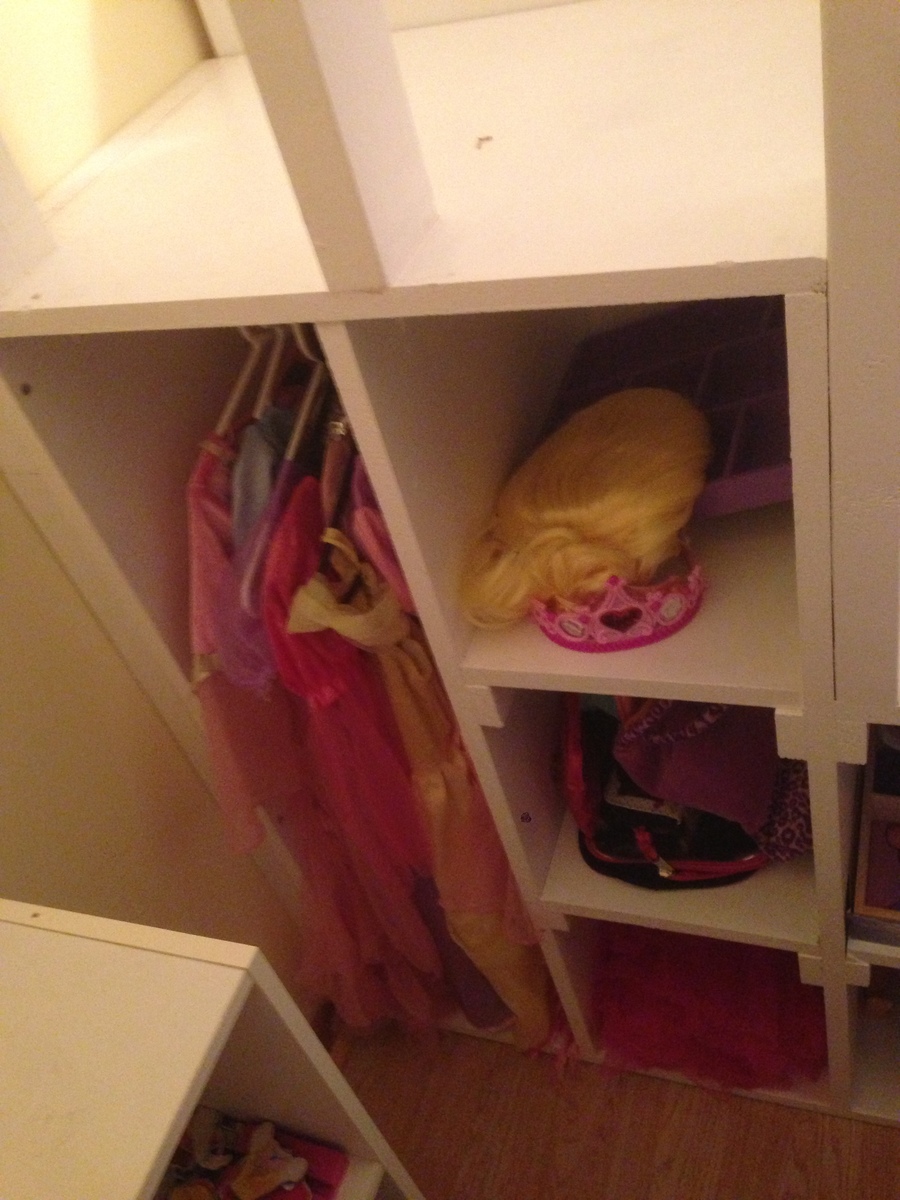
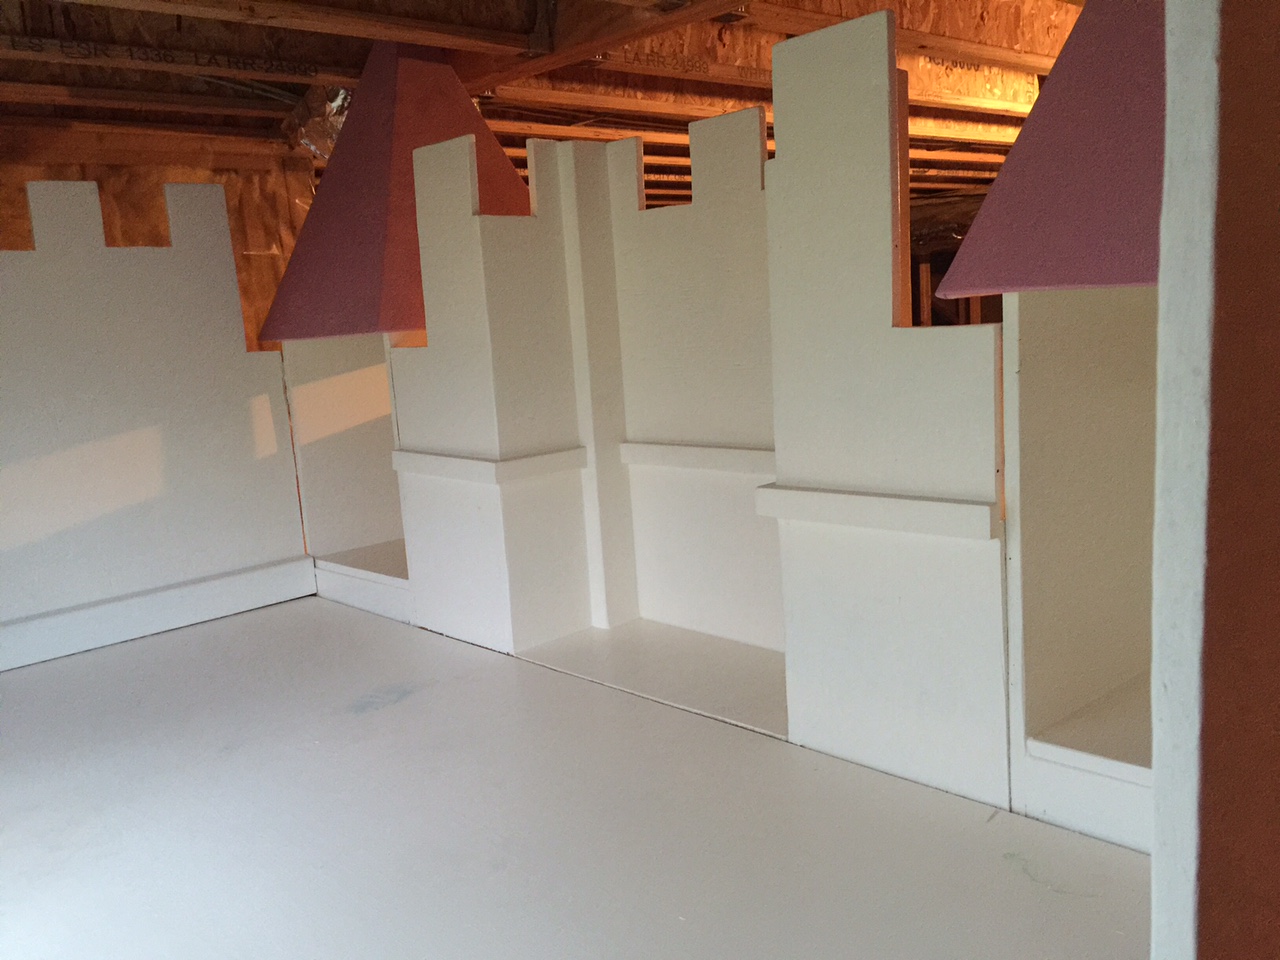
There is storage in the stairs, in the towers on the front down below, and in the back up on top. I also put rope lights inside around the ceiling over her bed for that 'Night light Princess glow."

There is also enough room on top for her bed if she wants to put it up there at some point in the future.

The idea for the decoration came from another poster who simply used the Vinyl Disney princess wall decals.

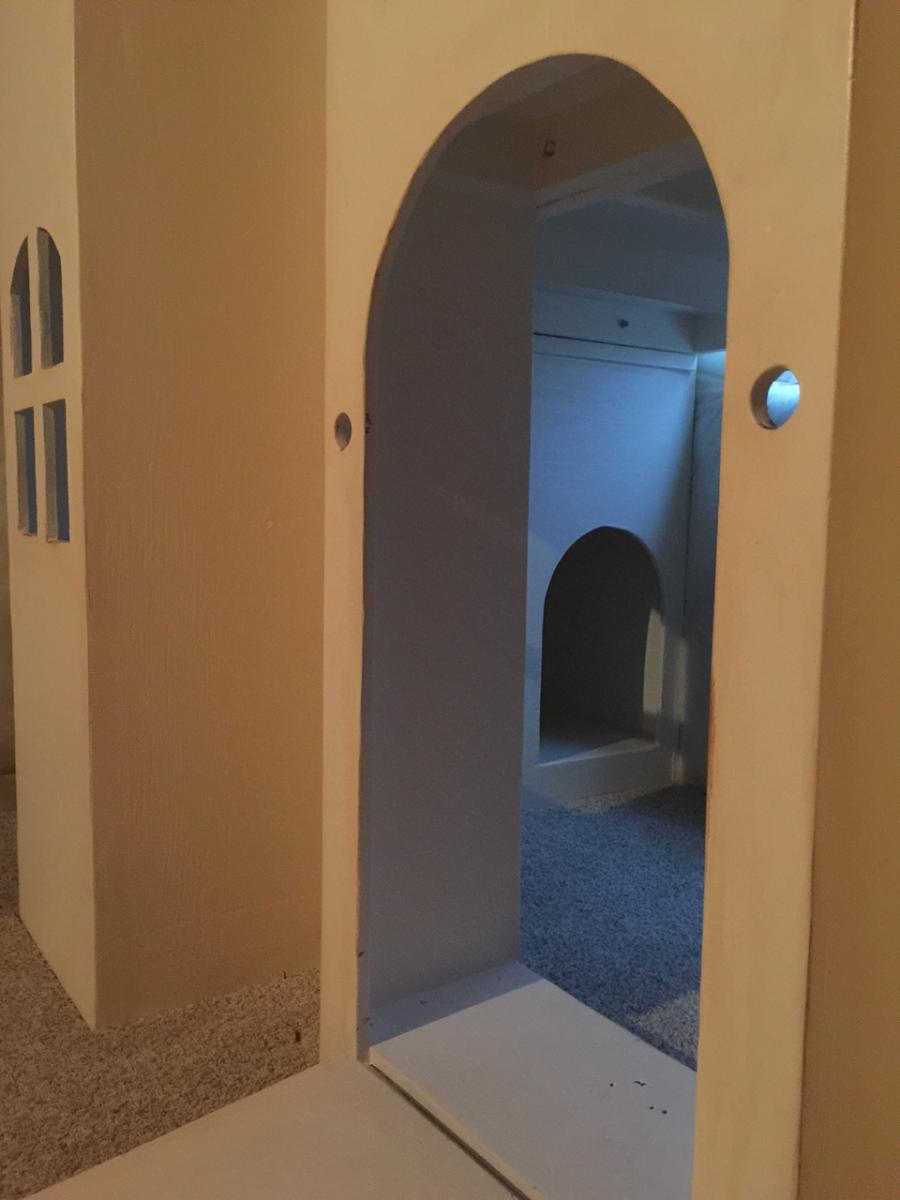
She loves it. Plus its big enough for daddy to read stories to her up in the loft at bedtime!

I've posted the plans on the sketchup warehouse... here is the link...

http://sketchup.google.com/3dwarehouse/details?mid=65f7fb029052c660cb6c…

If you can't find it with that search the sketchup warehouse for 'castle bed.'

Estimated Cost
$150
Estimated Time Investment
Week Long Project (20 Hours or More)
Finish Used
Latex interior paint. Castle top and trim were painted with spray paint.
Recommended Skill Level
Intermediate

Comments

ThaddeusSwarfburnIII

Sat, 07/27/2013 - 16:17

Nice work. We worried about the height for our three year old, and if I were to build another (hah!) I would definitely make it lower. Carpeting the stairs is a good idea, I think I'm going to do the same. You've done well to cram everything into a small footprint. We're house-shopping now, and the tape measure comes with us. Gotta have 2.8m in the kid's room! Decals are great. My daughter went off hers for a while - nothing breaks your heart like a kid saying they want to give away something you worked really hard to build, even if you know they don't mean it. My wife put on some big wall stickers of a tree with squirrels and birds and suddenly she's in love with it again. Princess indeed (eyeroll).

bbcarey

Sat, 07/27/2013 - 20:53

Interesting your commented today :-) I am doing a similar project for my son for his 3rd birthday (this weekend) making a Lightning McQueen garage for his Ligthning McQueen bed...

Thanks for your comments... the castle project was fun. Its been fun to be able to even do these things now that I've visited Ana's site. And yes- I know its going to be a bummer when they no longer want the castle, or the garage (I had my son's bed in his garage tonight and not knowing better he hopped on the bed and jumped and bumped his head bad... now he's scared to have the bed in the garage- AND ITS NOT EVEN DONE YET!)

Thanks again..

Wood Deck Chairs

This was my first solo build project and my first time using a power saw. I was terrified but determined because I've been wanting to make these chairs for years. After failing to convince my husband to make them for me, I decided to make them myself and I am so glad that I did. I am so proud!

I fell in love with the fabric first (Premier Prints' Suzani Chocolate and a striped fabric called Veranda Chocolate for the bottom) and then picked a stain to match. I chose to reinforce the sling by sandwiching the outer fabric with a layer of heavy duck fabric. I also made pillows, which protect your head from that upper wood support.

Also, I ordered some special connecting bolts and nuts made by Rockler that someone else mentioned in their brag post. Unlike the hardware mentioned in the original plan, these bolts are flush with the frame on both the inside and out so the chairs can fold completely flat. Here are the links to them on Amazon:

http://www.amazon.com/Statuary-Bronze-Connector-Bolts-8-Pack/dp/B001DT3…
http://www.amazon.com/Cap-Nuts-Connector-Bolts-pack/dp/B001DT3G9O/ref=p…

The inner frame did need slightly larger holes (3/8 inch, I believe) to accommodate the cap nuts.

Estimated Cost
$100 - I spent a little bit more on wood than others because I bought pre-sanded stock. I also ordered extra fabric to make pillows and chose two different fabrics to make the design reversible. This project can definitely be done more economically if you already have some of the materials and if you find the fabric on sale.
Estimated Time Investment
Weekend Project (10-20 Hours)
Finish Used
Cabot Premium Wood Finish Stain & Sealer (Espresso) - I originally tried a few different stains (one from Minwax and one from Valspar) that we already had but I didn't like the fact that I would have to do multiple coats to get the color opacity that I wanted and then I'd have to do multiple coats of sealer. I'm too impatient for all that so I found an all-in-one product that worked beautifully. I will definitely use this product again!
Recommended Skill Level
Beginner

Comments

Joni

Fri, 05/22/2015 - 09:43

These are just beautiful. Nice job! Thanks for such a nice write-up with all the additional hardware information.

Beavers/San Fransisco giants bunk bed

Submitted by Medickep on Wed, 12/13/2017 - 18:16

I’ve  made several of these bunk beds now and my oldest was wanting a oregon beavers/San Fransisco giants themed one after we donated his during our move.  It’s made out of 2x4’s, 2x6’s and 1x3 pine.  

Estimated Cost
215.00 plus finish
Estimated Time Investment
Weekend Project (10-20 Hours)
Finish Used
I rattle canned all of the orange stuff as painting orange takes forever! The rest of the bed is stained with three coats of no wax ebony to make it look black!
Recommended Skill Level
Beginner

Gingerbread House

Submitted by jgrassjr on Sat, 11/27/2021 - 14:34

My take on the farmhouse indoor playhouse. Added to my Christmas lawn display. Plan on adding some lights, cutouts for the inside, and candy decorations. Followed the plans as written. No problems. Great plans.

Built from Plan(s)

Comments

Favorite Bookshelf

Submitted by ke263565 on Sun, 04/10/2011 - 05:06

Favorite Bookshelf - 2nd project  - slowly replacing all of my furniture - took about a day - all day - sprayed about 3 coats of spray paint on there - came out pretty good - hardest thing is to screw in shelves level -  but overall not too bad

Built from Plan(s)
Estimated Cost
40 - 50 bucks
Estimated Time Investment
Day Project (6-9 Hours)
Finish Used
moss green spraypaint - saw another user that used color so i stole it - sorry
Recommended Skill Level
Beginner

Children's Castle Bed

Submitted by Yodannos on Sun, 05/24/2015 - 20:39

This was a project I took on for my two daughters (5 and 2). I was pretty intense as I used the castle loft bed as my starting point. The drawbridge is fully functional, but I had to remove the black ropes as my kids were running around and tripping (safety hazard). I made the top large enough to house two small mattresses for the kids to sleep on. I made use of the space under the stairs and the slide by cutting out doors. This is a very large structure and is modular (front, towers (2x), stairs, slide, platform). They are all joined with some significant lag bolts and is sturdy enough to have my wife and I and both children up top. I have also mounted LED lights under the platform wired to a switch so that they can see at night. Overall, it has been a hit for my daughters and their friends. Thanks for the plans!

Estimated Cost
Approximately $400
Estimated Time Investment
Week Long Project (20 Hours or More)
Finish Used
Body - Cotton Whisper (Behr)
Tower Peaks - Mixture of leftover red and white paint (gold sparkle paint over the top)
Antiqued the body by sanding on edges, and applying a walnut stain lightly
Recommended Skill Level
Intermediate

Comments

AmberI65

Sun, 04/19/2020 - 18:25

could you possibly give me a rundown of what specific changed you made, what extra material I would need, ect. I'm wanting to build the princess bed- but I'm a little ocd and would much appreciate the symmetry of two identical towers. thanks if you can help.

Second Rustic X Console table build

Submitted by mcneece on Mon, 12/18/2017 - 13:55

After being forced to sell my first build by an admirer, I decided to do another and distress it rather than stain it.  Turned out really nicely.

Estimated Time Investment
Weekend Project (10-20 Hours)
Finish Used
Homemade chaulk paint
Recommended Skill Level
Beginner

2x4 Adirondack Chair Plans with a few changes

This was my version of Ana's chair. I made it just like the plans put bit wider for the of 1x6 back. I made it into a shark chair for my Grand Daughter.

Comments

Dollhouse Bookcase

Submitted by mnewton on Mon, 04/11/2011 - 12:52

This was my first build. I was conviced to do this once I saw the Pottery Barn price tag. The plans were so easy to follow.

Built from Plan(s)
Estimated Time Investment
Afternoon Project (3-6 Hours)
Recommended Skill Level
Starter Project

Convertible picnic table

Submitted by ClemTanya on Tue, 06/18/2013 - 19:43

I built this table with the dimensions described in the original plans, but made a slight modification by using my Kreg Jig to add pocket holes for attaching the tabletop and seat boards from below rather than drilling down through the top. I'm never really happy with the way a finish comes out after using wood filler, plus not having to fill holes saves a step in the finishing process (which is the really arduous part of the job for me). I also like the sturdiness of the Kreg joints.
This was my first project using the Kreg Jig in an application that didn't have the location for the pocket holes specified, so for the first bench I followed right along with the plans and just detached the drill guide and clamped it to my project to drill the pocket holes as I went along. For the second bench I was familiar with where all the holes should be drilled, so I was able to quickly mark off the location and pre-drill all the pieces assembly line fashion. The second one practically flew together.
If you want to use this method, you will be drilling your pocket holes in the boards labeled "seat support" and "tabletop support" (there are 2 of each of these pieces for each bench/half table). You can mark the position of the tabletop boards on the tabletop supports and drill your pair of pocket holes to correspond roughly to the center of where each board will be (so 6 holes in each of the 2 pieces labeled tabletop support for each bench). Nearly the same process for the seat supports, but remember that the holes to attach the outermost seat board won't be centered because of the location of the front leg. I chose to add a couple of pocket holes through the front leg board as well for extra sturdiness in case it gets picked up by that outermost seat board when the bench/table is getting moved. I have included a picture of the pre-drilled pocket holes to help clarify the above directions.
The build itself can definitely be classified as a beginner project and easily manageable by one lady (although it would be really nice to have a buddy to help move the finished bench...I had to take the tabletop back off mine to move it from my "workshop" (carport) around to my patio). In terms of time, the build for both benches could easily be completed in an afternoon; I ranked it as a weekend project because of the finish. The tabletop and seat boards each have 4 coats of an exterior semigloss paint and I custom blended the colors so that each board gets progressively darker as you go down the bench. I was inspired by the ocean, with the water getting darker as you go deeper and deeper. As you can see from my photos, I rushed headlong into the first bench and put it together unfinished (I was more concerned about figuring out the placement of the pocket holes than the finish.) For the second one I pre-drilled my pocket holes, then put on 2 coats of base coat and 1 coat of color (on seat and tabletop boards) before assembly, saving only the finish coat on the colored boards and touchups on the white boards for after assembly. I definitely recommend the second method.
I worked on the project over a couple of weekends and evenings because of weather and time constraints, but under the right conditions it could be completed in a weekend or even maybe a long day (especially with a second painter and in good paint drying weather). I'm really happy with the final product and I've already been enjoying the comfy bench seat for reading.

Estimated Cost
$100 (including finish)
Estimated Time Investment
Weekend Project (10-20 Hours)
Finish Used
Exterior semigloss paint: 2 coats of self priming base coat (Valspar Duramax) and an additional 2 coats of color that I custom mixed into 6 shades on the bench seats and tabletops. The darkest shade on the outermost seat board is called Monterrey Bay Teal from Valspar. I mixed the five additional colors with white in 15% by volume increments. (If you want to get really, really specific, I started with a quart of the teal and made 100 grams of each of the 5 blended colors and this was almost the perfect amount to put 2 thick coats of color on all sides of each of the seat/tabletop boards.)
Recommended Skill Level
Beginner

Comments

Barnwood wall

Dear Ana White: Please stop posting cool - “must do” projects on your website … you’re killing us.

After we saw Ana White’s posting for her pallet wall http://ana-white.com/2015/02/free_plans/pallet-wall-hgtv-saving-alaska , we knew we had to augment our guest bedroom with this concept.

Before we began this project, we really didn’t have any idea how expensive “rustic” was or how complex “random” could be.

Mostly, we used 1 type of reclaimed barn wood and stained it with 3 different colors as well as using the natural un-weathered side to add color contrast. For added variety, we used some leftover reclaimed barn wood from a previous project spattered throughout the design.

This was really a fun project. Barn wood is very forgiving and user – friendly. Each piece of barn wood is unique in itself, very much like a snowflake, from being weathered in the elements.

We finished the room off with closet sans door, picture frame & nightstand.

The GOOD news is that we are now out of reclaimed barn wood and we can’t build anything else.
Thanks, Ana! You have helped us make our guest bedroom a special place for our visitors.

Estimated Cost
$1,000
Estimated Time Investment
Week Long Project (20 Hours or More)
Finish Used
Leftover stains from other projects
Recommended Skill Level
Intermediate

Butcher Block Table

Submitted by Anonymous (not verified) on Sun, 12/19/2021 - 03:56

My own take on this build:
https://www.ana-white.com/community-projects/butcher-block-kitchen-isla…
I used a pre-made butcher block top from Home Depot. I did have to cut it down to 2ft by 3ft
Legs were premade from tablelegs.com. I wanted solid legs and didn't want the hassle of shopping fo 3 inch thick lumber.
Drawer is Tiger Maple with plywood bottom, and the rest of it is Hard Maple.

I made a high speed style build video here-
https://youtu.be/iS5wN_CUrEk

Comments

farmhouse table

Submitted by wolfmawr on Sat, 04/16/2011 - 00:44

All natural table for six. We changed it a little using 4 x 4 for the legs and 2 x 4 for the sides. 

Built from Plan(s)
Estimated Cost
under $100
Estimated Time Investment
Afternoon Project (3-6 Hours)
Finish Used
Raw dark tung oil
Recommended Skill Level
Beginner

Husky Farmhouse Table

This is one of my favorite pieces on Ana's site. I knew the minute I laid eyes on it I had to build it. I hope you guys enjoy it half as much as I do.You can read the full details of the build at my blog here:

http://copycatcarpenter.blogspot.com

Built from Plan(s)
Estimated Time Investment
Week Long Project (20 Hours or More)
Finish Used
Espresso stain, Helsman Spar Urethane, Light Cream Milk Paint
Recommended Skill Level
Intermediate

Comments

JoanneS

Thu, 06/20/2013 - 16:00

Love this! You did a wonderful job, and the finishes are awesome! Also I read your blog post, what a great idea to give a new life to those bedposts and use them for your table legs.

Copycat Carpenter

Fri, 06/21/2013 - 05:14

I'm glad you like it! I've been showing this picture on my phone to everyone recently, like a proud parent, lol! Check back soon, I should have the full blog finished shortly.

spiceylg

Fri, 06/21/2013 - 07:58

Great job. Love the chunky legs and the story behind them! Way to repurpose!

Squared2 Full-size Headboard

Submitted by CSaintD on Sat, 05/30/2015 - 18:20

This is from Ana's Squared2 headboard plans. I made it for my Mom and she loves it. I adjusted the width to fit a full size bed by taking a few inches off each side. I found some right angle clamps at an estate sale that were invaluable in putting all this together. It would be very tricky getting everything just square and lined up with just regular clamps. I was worried about it being a little flimsy with all the small pieces, but it seems pretty sturdy.

Estimated Cost
about $50 as I used poplar for the squares.
Estimated Time Investment
Week Long Project (20 Hours or More)
Finish Used
primed, then painted with gloss white enamel (cabinet paint). This was the worst part of the whole thing. I sanded all the pieces before I put them together, but it still needed some finish sanding before I could prime, then had to sand again after that. I had to do all that sanding by hand as the joins are pretty delicate.
Recommended Skill Level
Intermediate

Bird's Mouth Votive Candle Holder

Submitted by mtairymd on Mon, 12/25/2017 - 04:49

My wife asked for a homemade votive candle holder for the holidays. Searching online, I found that the general design concept is a board with holes in a straight line. Since the desired design is for a holiday centerpiece on a table, I chose an octagon shape. We think it turned out very nice! My kids even gave it a "that's pretty cool" which is an upgrade over their comments on my previous projects :). 

Estimated Cost
$2
Estimated Time Investment
Afternoon Project (3-6 Hours)
Finish Used
Dark Cherry Stain
Recommended Skill Level
Beginner

Bench

Submitted by Anonymous (not verified) on Sun, 12/26/2021 - 12:19

Loved making this instructions were so simple. I love how it shows how much wood and what cuts are needed

Built from Plan(s)

Comments

Lego Table with matching end tables

Submitted by hblackburn on Tue, 04/19/2011 - 18:13

This is the lego table my husband & I made. It was a fun project to build & we liked it so much we had to make some end tables to match. We used the same design just scaled everything down for the end tables. Making them was no problem but painting them was a different story. We started out with a latex primer & paint,  & found out that was a mistake. The latex paint is just too soft for furniture. So we went out & got some oil base paint and sprayed them. With lots of sanding & repainting we finally got them done.

Estimated Cost
$100
Estimated Time Investment
Weekend Project (10-20 Hours)
Finish Used
Oil base paint.
Recommended Skill Level
Beginner

My first DIY project

Submitted by sara1 on Sun, 06/23/2013 - 07:08

I was inspired to try this after reading all the comments and being discouraged by the high price and poor quality of commercial sandboxes. We followed the instructions and it was super easy! I'm a complete novice, so if I can do it, anybody can.

After cutting the wood and sanding it, it only took about three hours to assemble the sand box. I then primed and painted it the next day taking about 3-4 hours. We also attached a landscaping barrier to the bottom with a staple gun to prevent weeds from growing through the sand. We used 10 bags (50 lbs) of play sand, but you could get by with less.

So far, it's been a big hit with my three-year-old son.

Built from Plan(s)
Estimated Cost
$150
Estimated Time Investment
Weekend Project (10-20 Hours)
Finish Used
Valspar primer and pure white, satin finish
Recommended Skill Level
Starter Project